Midjourney is one of the most top neural networks in the world. For about two years now, the platform has been captivating millions of users with its stunning capabilities for creating various visual materials. The results of Midjourney generation can rightfully be called works of digital art.
However, in contrast to its advantages, the neural network is not so easy to learn and can greatly discourage unprepared users with multi-step registration and a complex interface via the Discord server. We have prepared an article for you to help you better understand the use of Midjourney: find out where to start and how to generate images using popular artificial intelligence.
How does the Midjourney neural network work?
It is important to understand that Midjourney is not just a resource for generating images. The platform uses its own diffusion model* , trained to understand even the most complex requests and create high-quality art based on them.
* Diffusion models - programs that have gone through multi-stage training to recognize and further generate various queries and images. Such models, for example, include the equally popular Dalle-2 and Stable Diffusion. A simplified description of the problem of diffusion models will sound like this: the uncontrolled transformation of information noise into a distinguishable, representative result.
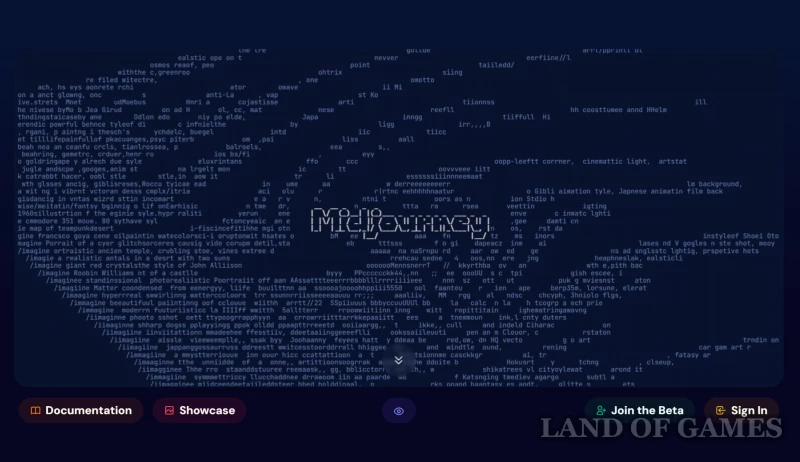
Those wishing to get acquainted with Midjourney have probably encountered many “obstacles”:
- Midjourney does not have its own platform, so the neural network works through Discord;
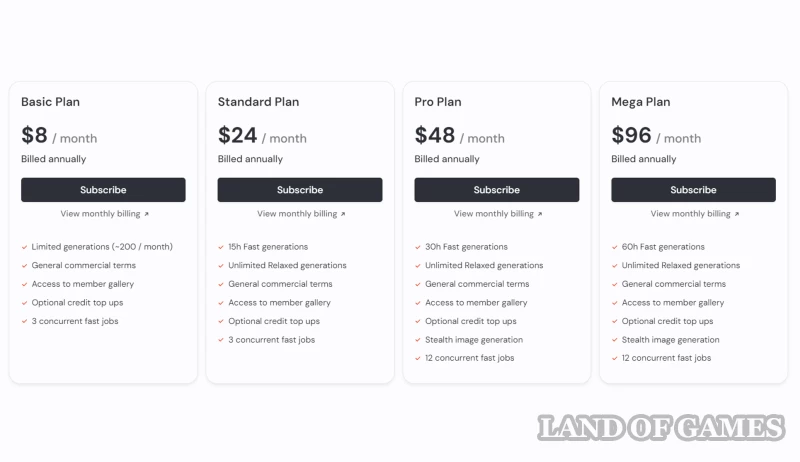
- The resource has long disabled free functions and requires a subscription, prices for which start from $8-10;
- Midjourney has closed access for sanctioned countries, which forces some users to additionally connect a VPN;
- After activation, the user must join one of the channels: in most cases, generation is carried out on a “live queue” in the general chat;
- To use a neural network, you will have to adapt to a complex interface and editor that works through special commands;
- Interacting with finished results also requires some preparation;
Despite the fact that Midjourney has a high barrier to entry, millions of users prefer this particular neural network every day. Below we will take a step-by-step look at all the steps you need to go through to use Midjourney artificial intelligence.
Step 1: Login to Discord
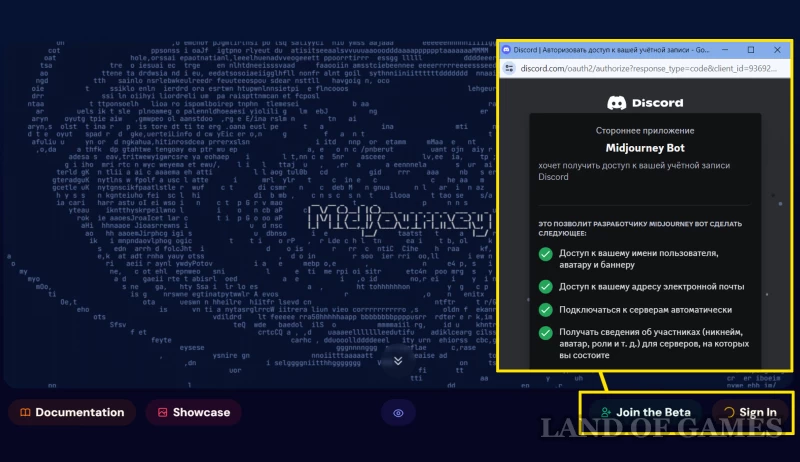
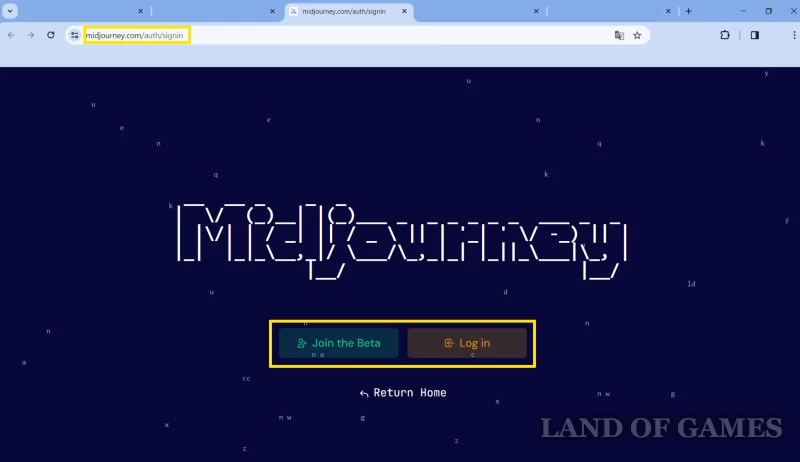
On the Midjourney home page you can to come in to an existing account, or join to the Discord server (i.e. register from scratch). In any case, you will be transferred to the information channel in Discord.
Step 2: Buy a Midjourney Subscription
As mentioned earlier, to use Midjourney subscription required : Log in to your account page (first screenshot above), and then select the plan that suits you in your personal account.
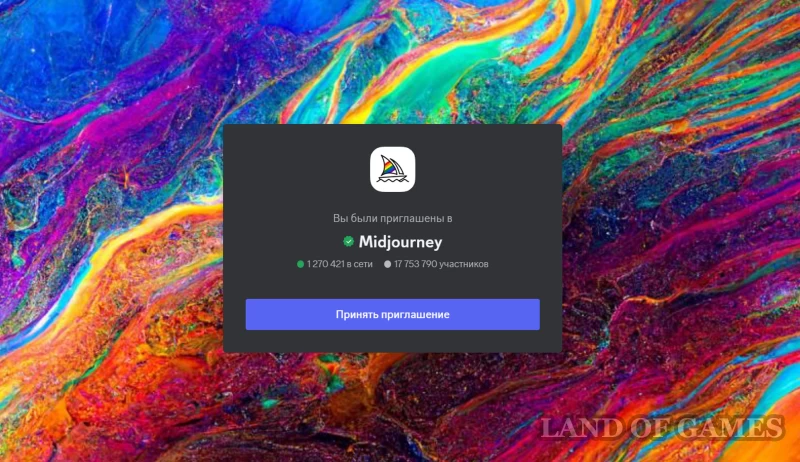
Step 3: Join the Midjourney Discord Server
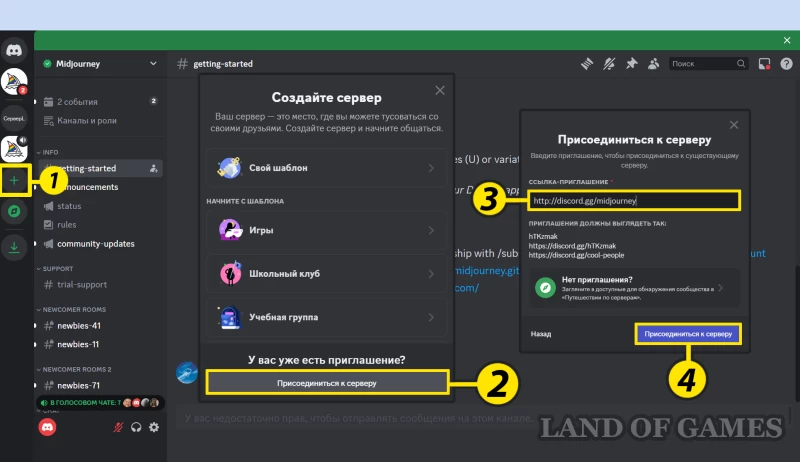
Open Discord and follow the following instructions:
- On the left sidebar, select the “+” icon;
- In the server creation window, select “Join server”;
- In the line with the invitation link, insert http://discord.gg/midjourney;
- Click "Join Server".
Step 4: Select a channel tagged #General or #Newbie
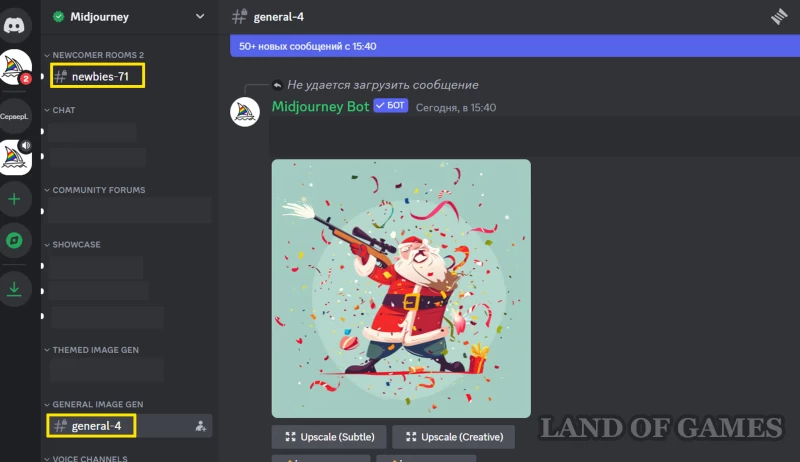
On the left side of the Discord main screen you have access to a list of chats: select one of those that are subscribed #general or #newbie. These channels are designed for those new to Midjourney, so the bot will not generate images on other channels.
you also can create personal servers, to which you can bind the Midjourney bot. But first, it’s better to use open channels where you can see the results of generating and configuring prompts from other users.
Step 5: Use the /imagine command
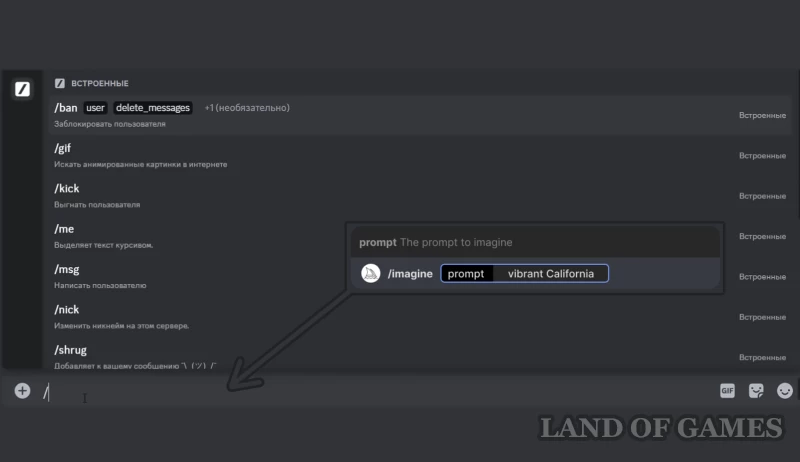
Interact with the Midjourney bot on Discord using teams (words preceded by /). Creating an image starts with a command /imagine, after which you can add your text request (prompt). The sequence of your actions will look like this:
- In the message line, enter “/imagine Prompt:” (other options: 1. click on “+” -> “Use applications”; 2. enter the “/” symbol and find the appropriate command);
- Enter your text request in the line marked “prompt”;
- Send a message so that the bot begins to analyze the request and generate a picture.
Step 6: Accept the terms of service
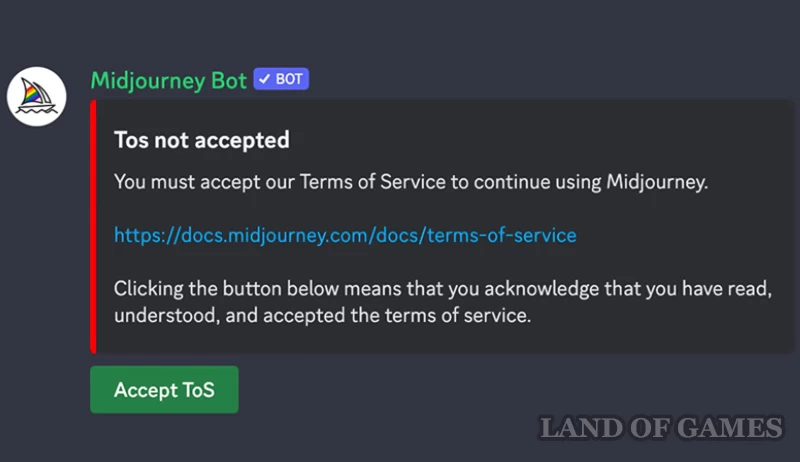
Before continuing with Midjourney, you must accept the terms of service and follow community rules. After you confirm your consent, the neural network will resume creating illustrations.
Step 7: Create an Image
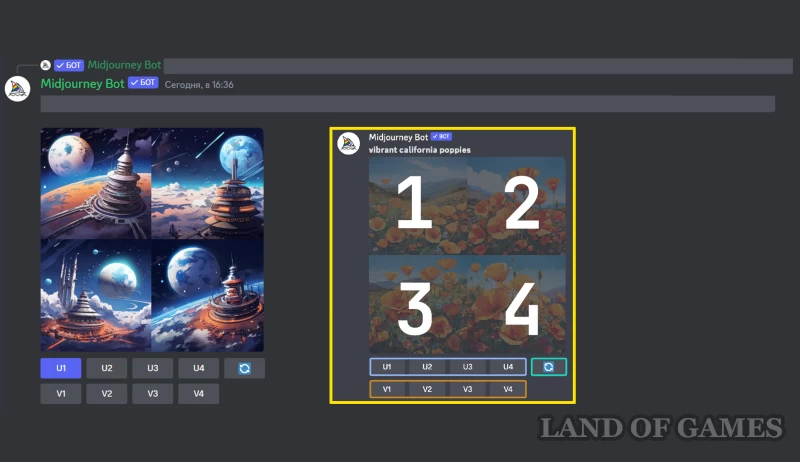
It usually doesn't take longer to create images 1 minutes. After generation is complete, it will appear 4 ready-made variations your prompt, and under them two rows of buttons:
- The letter U allows you to choose one of four options for the finished image (the bot will send it in a separate message), and the number next to it corresponds to the picture number (the order is shown in the screenshot above);
- The button with circular arrows repeats the generation if none of the results suits you;
- The letter V allows you to start creating a variation of one of the received pieces of art. This is useful if you want to see variations of one of the resulting images (the bot will use it as a source, maintaining the overall style and composition).
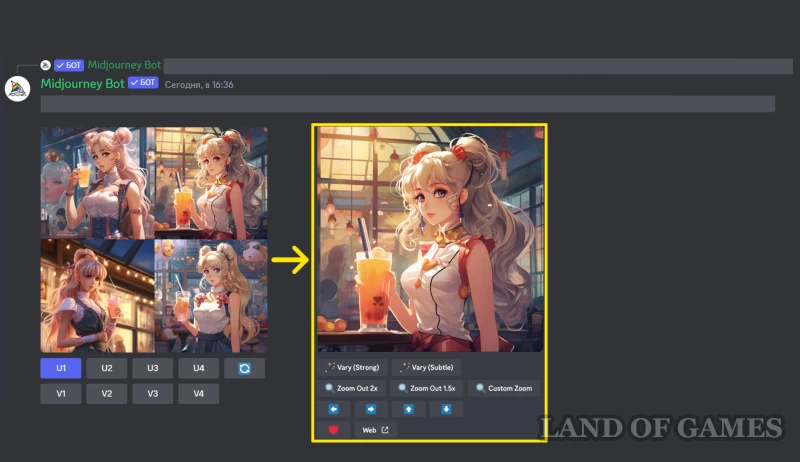
When you decide on an option and select one of the images (U1-4), a new set of buttons with functions will appear image enhancements and changes :
- The “Vary Strong\Subtle” buttons are intended for fine-tuning the art: with their help you can get improved variations of the selected result, but without global edits. A 'Strong' query will make the most improvements, while a 'Subtle' query will make minor changes;
- Buttons marked Zoom allow you to reduce or expand the boundaries of the canvas without changing the contents of the original image.
- Using the arrows (←, →, ↑, ↓) you can select the direction in which you want to expand the image. In the new generation, the image will be supplemented taking into account the content, but without changing the source;
- The ❤ button adds the picture to your favorites, and it can be easily found on the Midjourney website;
- The Web icon allows you to quickly open art in the gallery through your personal account.
New versions of Midjourney also added several additional functions :
- “Vary by Region” is intended to change a specific part of the image;
- “Upscale” - increases the resolution of the art by 2 or 4 times (depending on the selected option).
Finally, click on the final option and save your work via the RMB menu (on your phone, just hold down the picture and select the download icon in the upper right corner of the screen).
Tips for creating quality prompts
If you've ever tried to generate an image using text queries, you've probably encountered very controversial results: the picture didn't look, to put it mildly, the way you imagined.
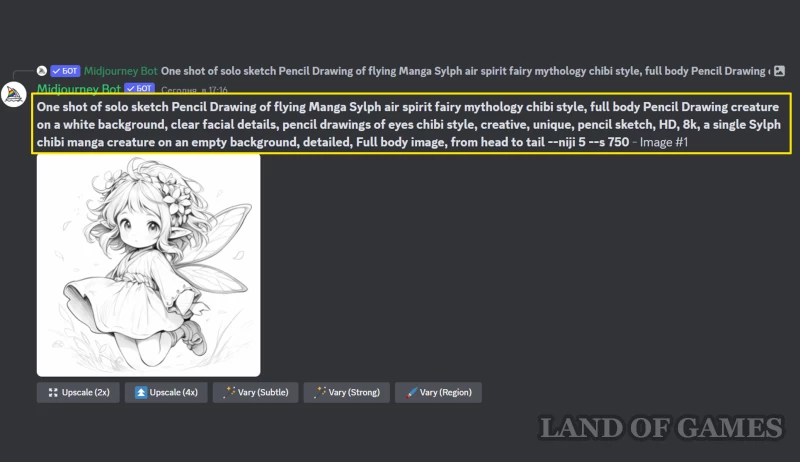
Don’t rush to blame the neural network for a poor-quality model - instead, check did you formulate the prompt correctly? . Make sure that when writing a request to Midjourney, you follow these tips:
- Text request length
Much depends on prompt length, however, this does not mean that you need to write an entire essay. Remember that longer queries will help the neural network analyze more data loaded into it, which it will not find without your clear and detailed instructions.
- Grammar
The Midjourney neural network does not understand the grammar or structure of prompts, and is also case-insensitive - make sure that your input made sense and was not separated by commas, hyphens, or other delimiters.
- Details
How more detailed your request, the better the system interprets it. In your text, pay attention to details related to the object being created, the background, colors, lighting, perspective, weather, time of day, artistic style and mood of the art - all this will significantly improve the accuracy of the results.
All these tips will help you get used to working with Midjourney and master the entire sector of the capabilities of one of the best neural networks in the world.
Comments
You need to login to add comments.
You can login with