
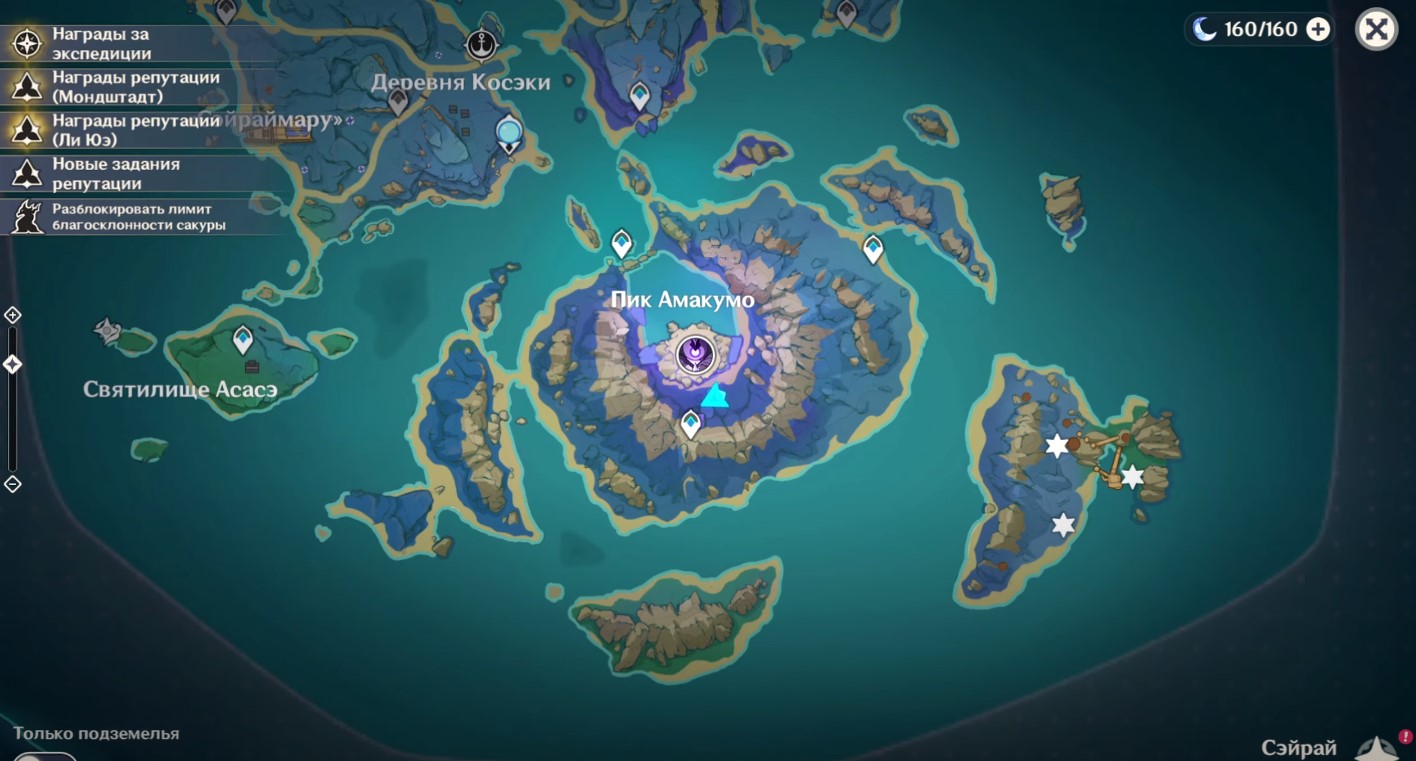
In Genshin Impact puzzles on Amakumo Peak must be solved to lower the water level at the center of Seirai, access treasure chests, and unlock a secret achievement. Before you take on their solution, we advise you to go through the quest chain "Seirai Stormchasers" to get rid of the storm.
How to solve the slab puzzle and remove the water
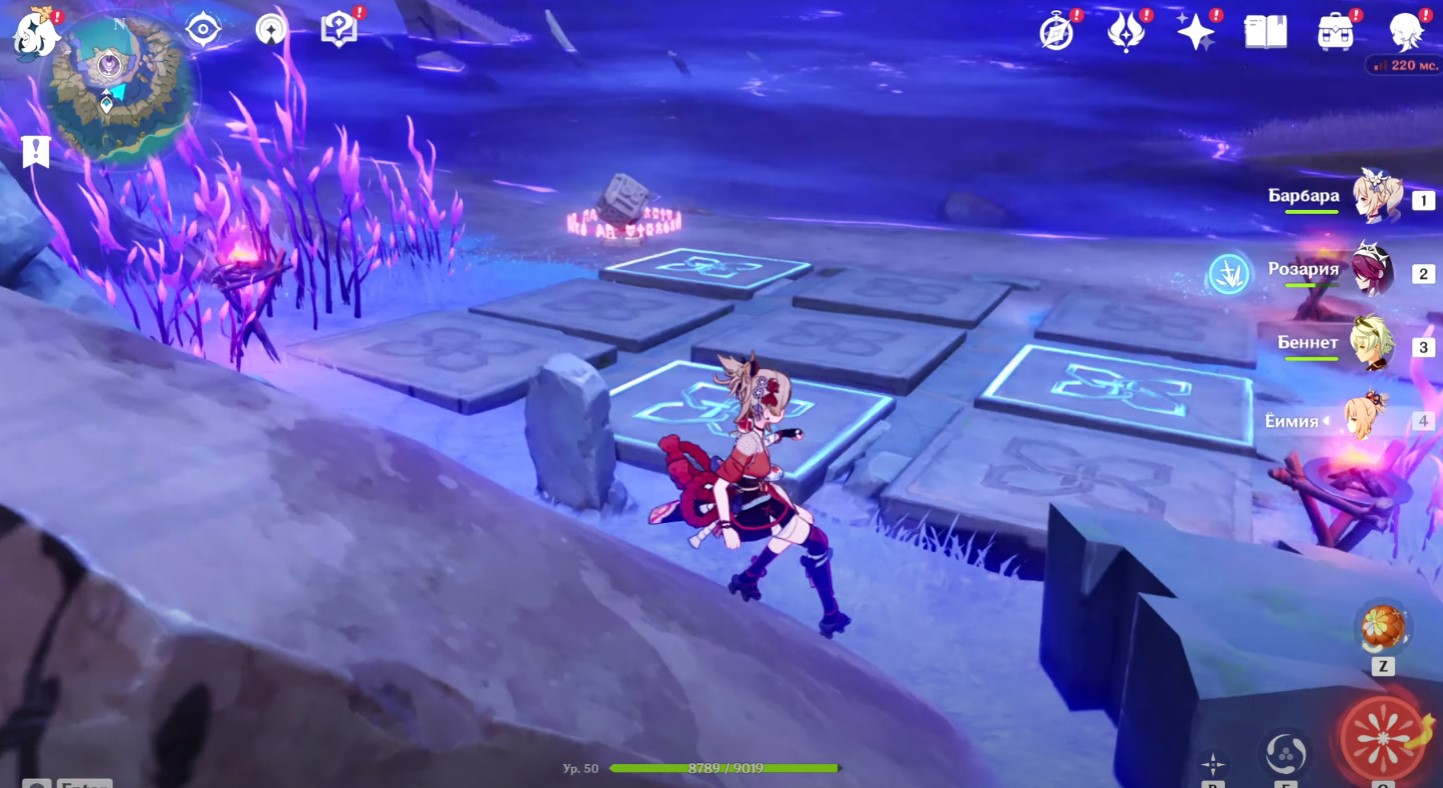
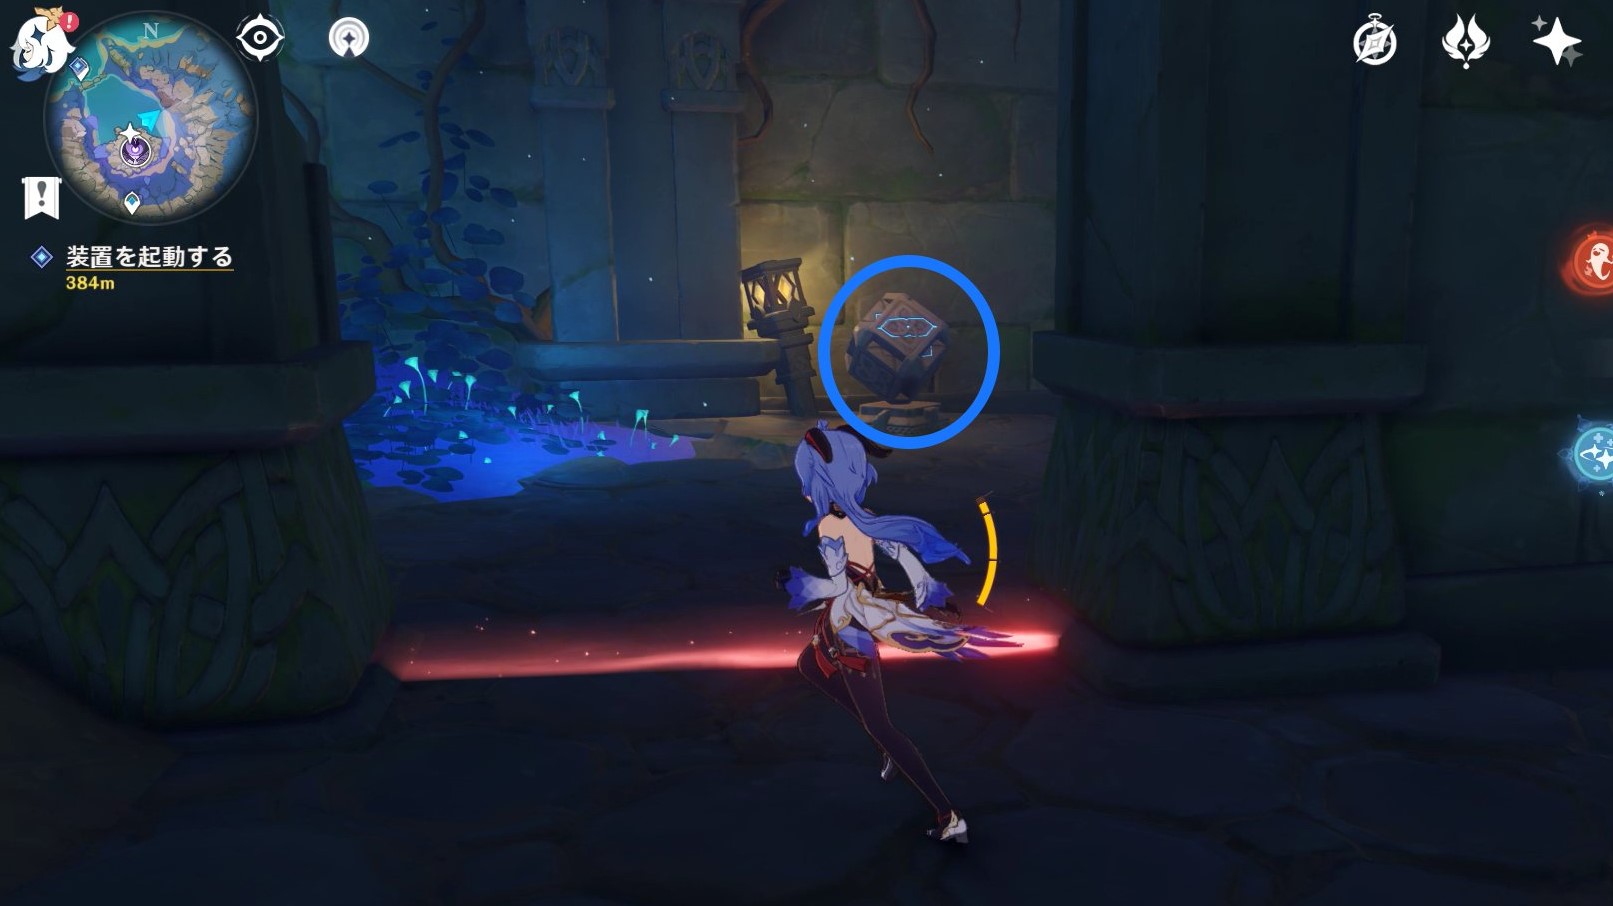
Go to the location indicated in the screenshot below. There you will find a stone tablet and some glowing slabs. Read the inscription on the stele. Then extinguish all active tiles by simply walking over them.
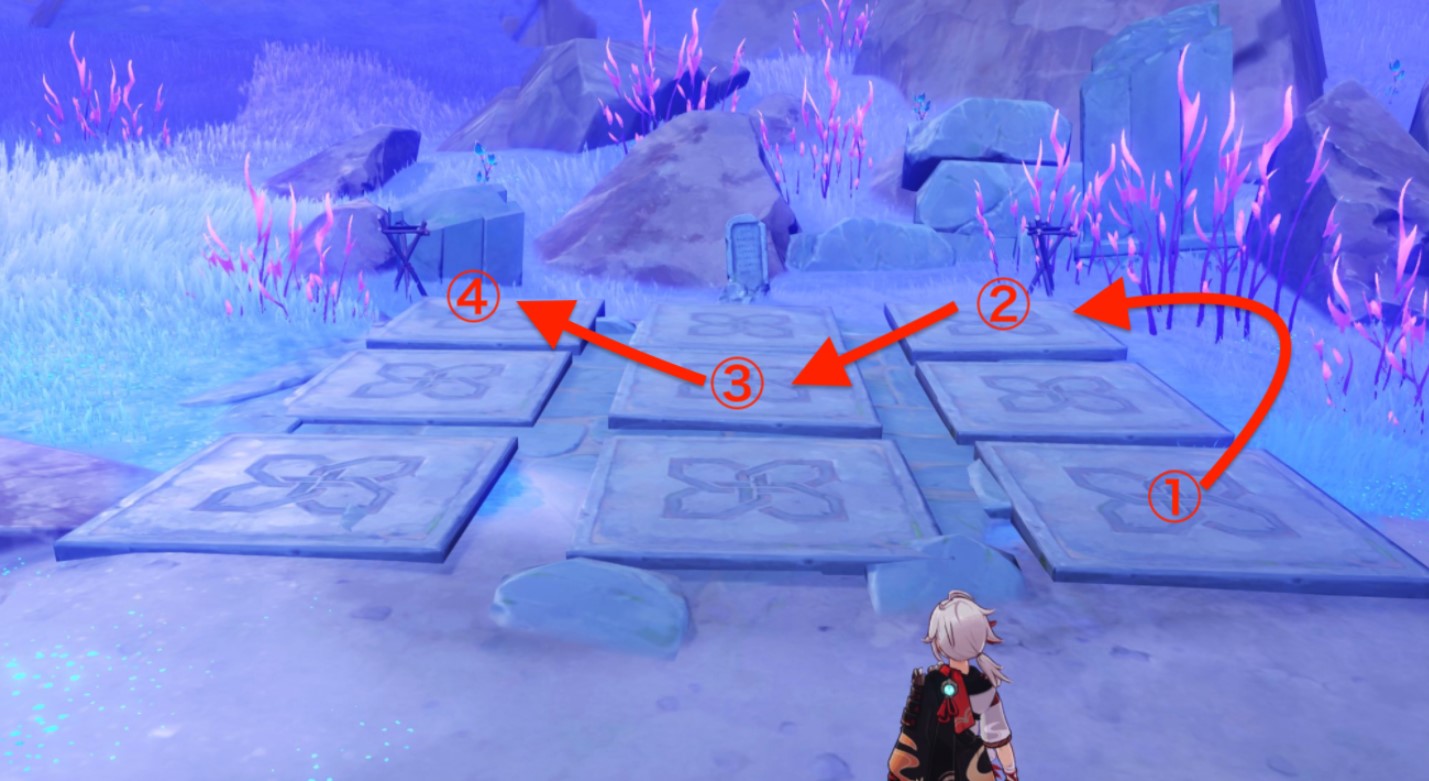
After that, you will need to activate the platforms diagonally and in the upper right corner (in relation to the stone tablet). The screenshot below shows all the slabs you need to walk on. If necessary, you can leave the site to bypass unnecessary tiles.
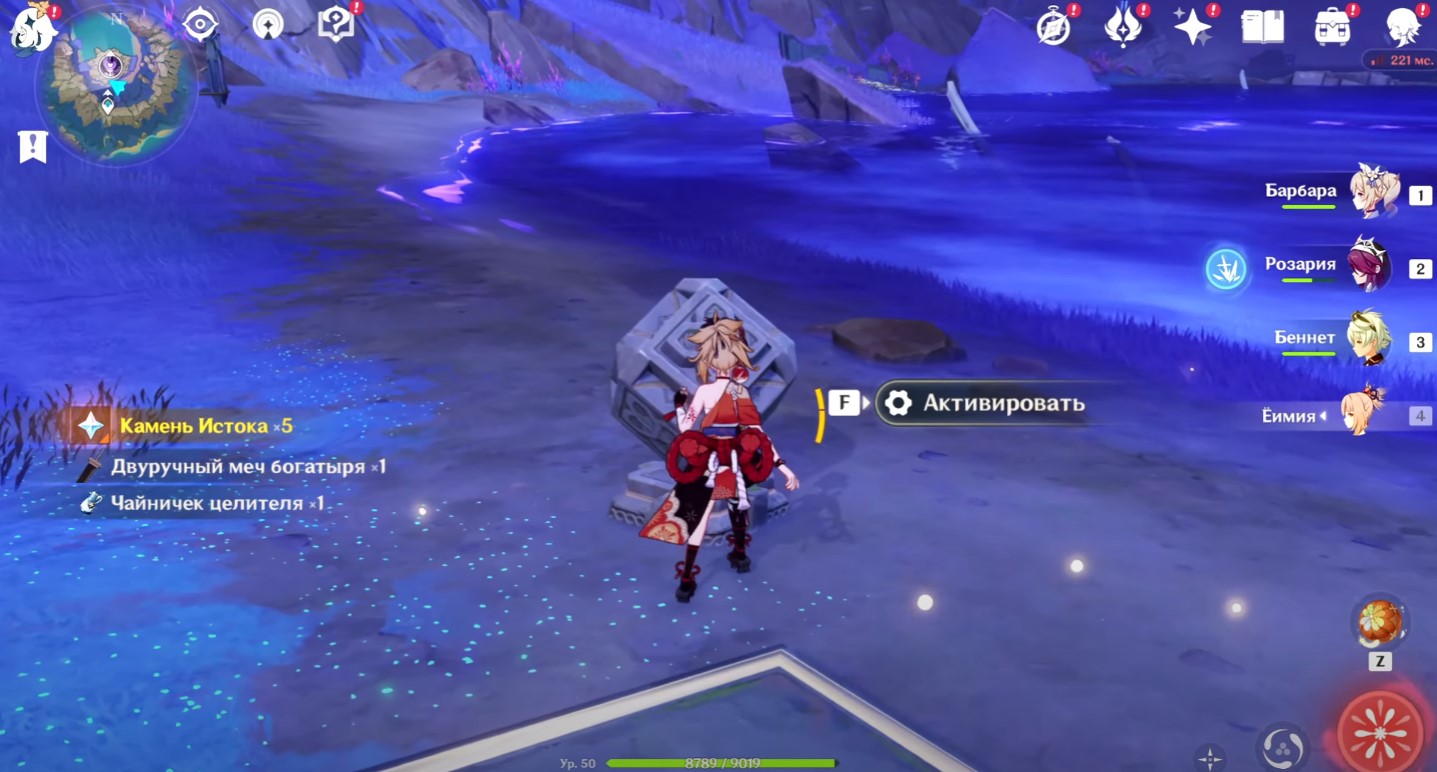
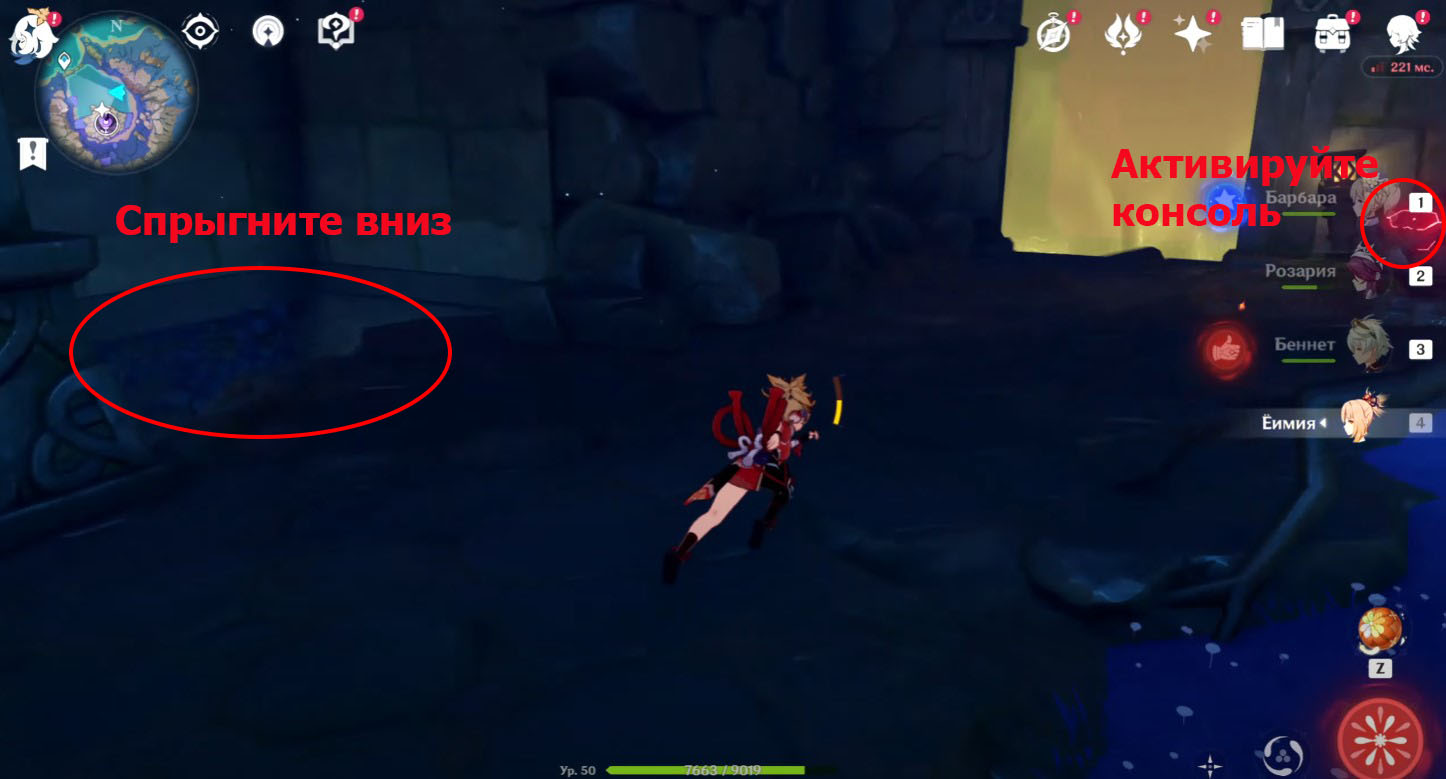
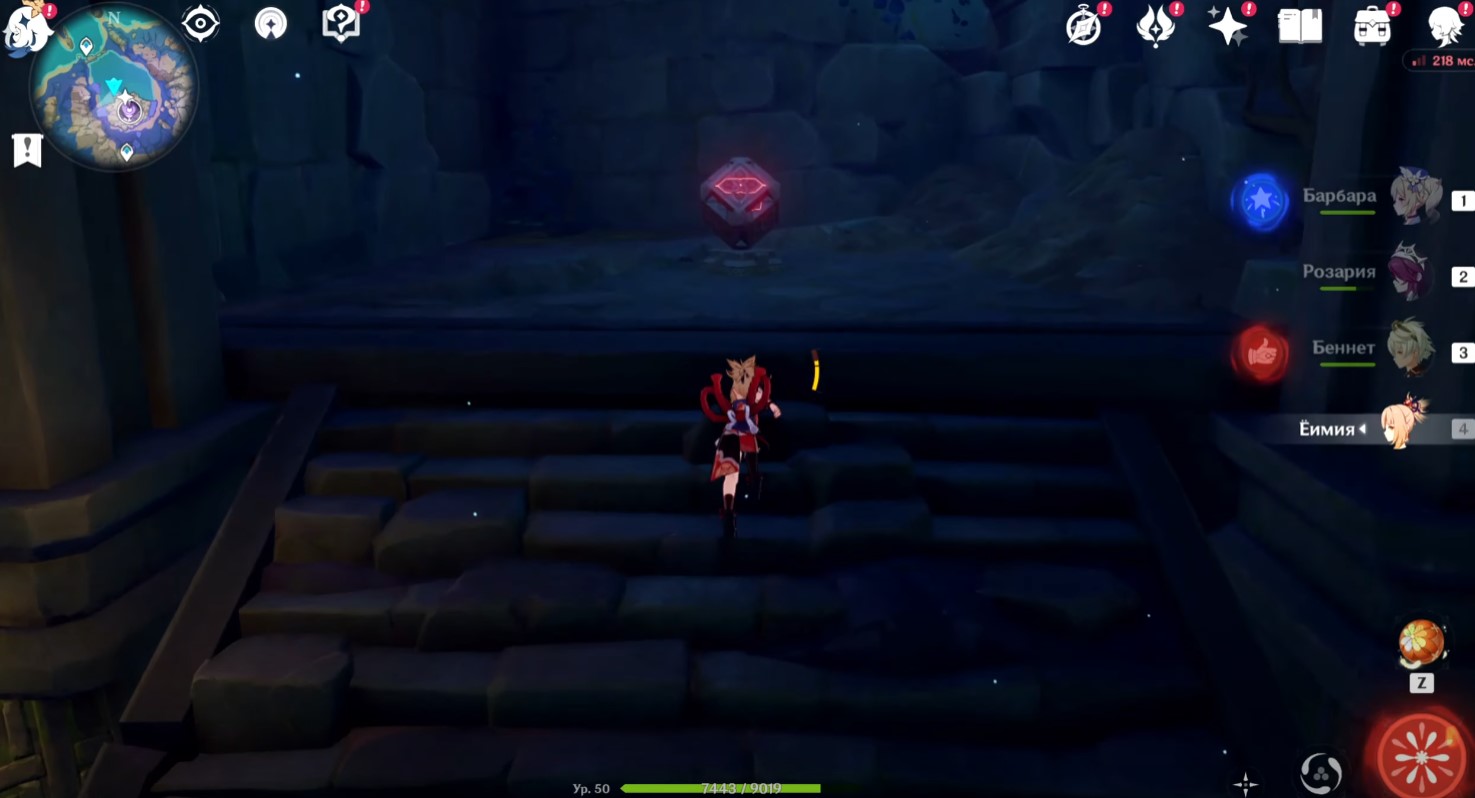
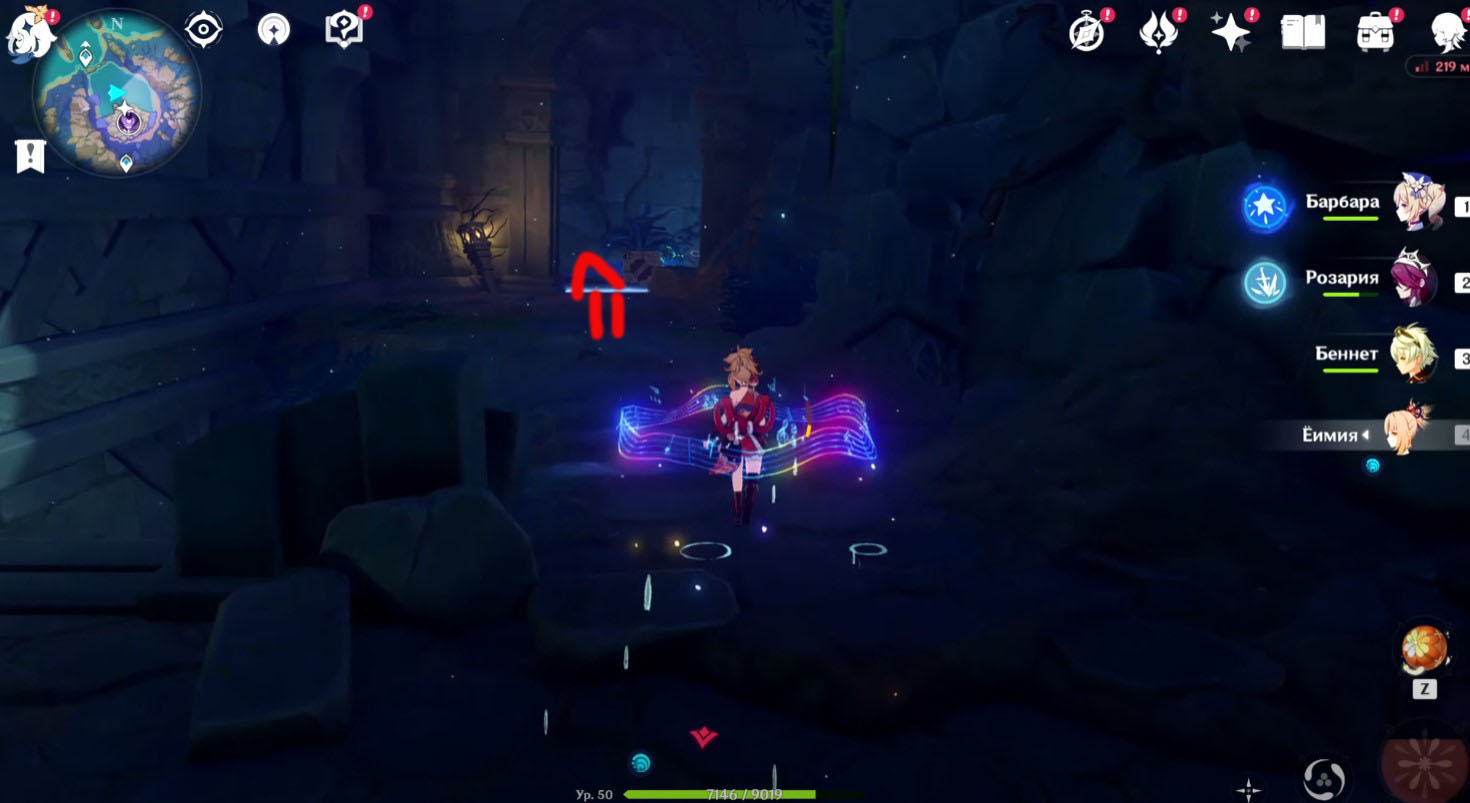
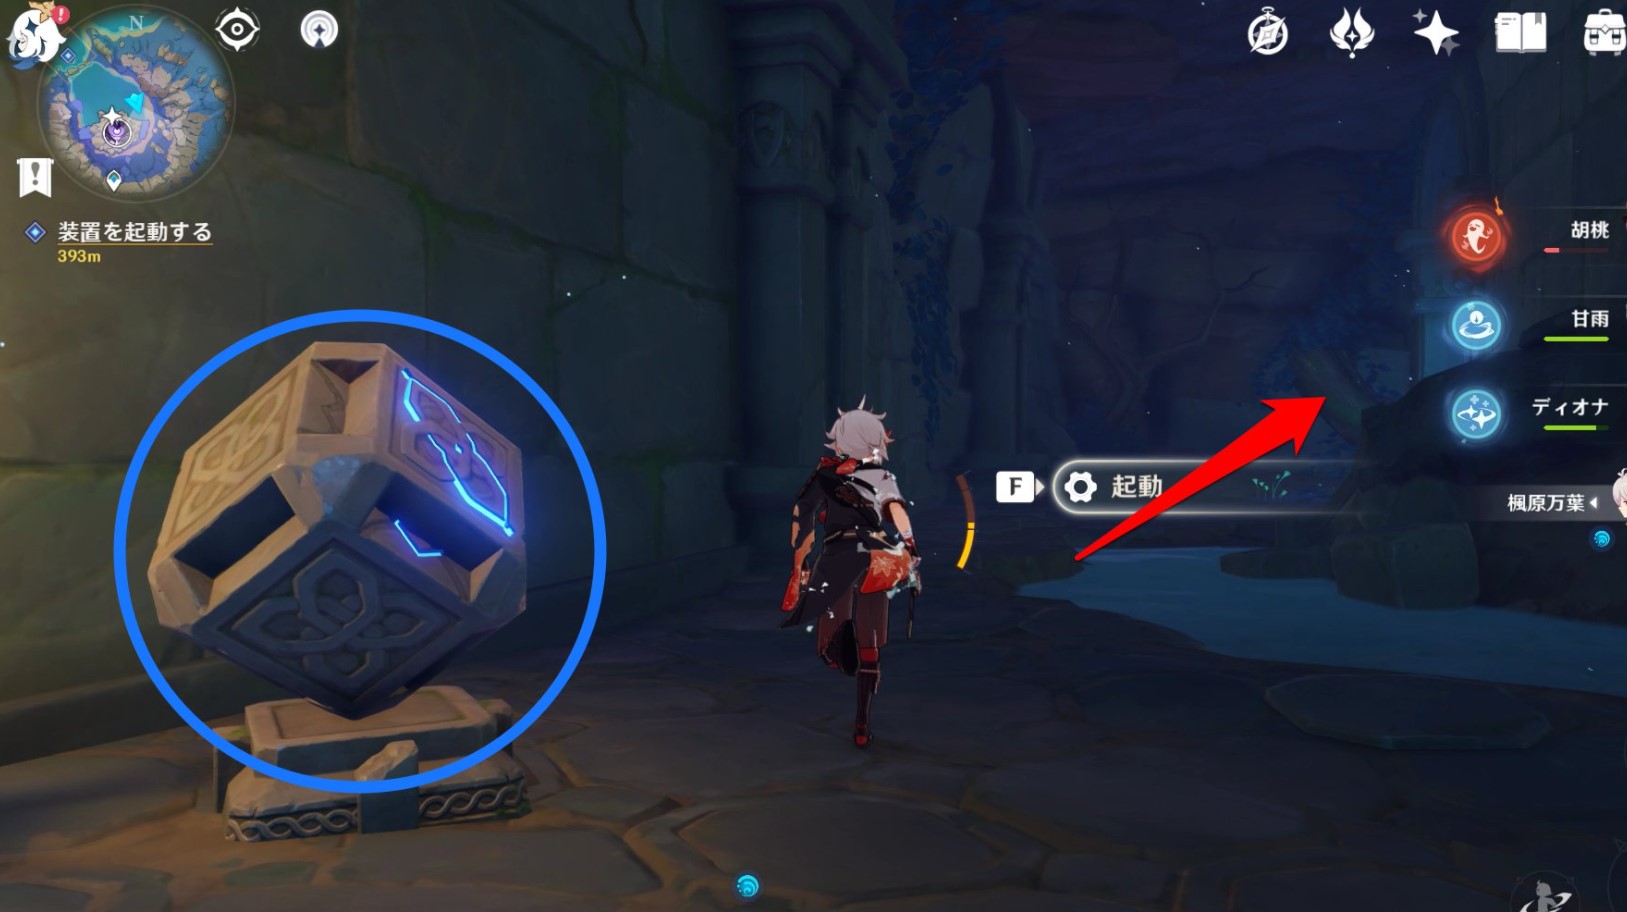
A chest will appear in the center of the platform. Open it, and then interact with the unlocked console in the form of a cube. As a result, the water in the lake will disappear and you will see a large hole in the ground where you can jump down. Before doing this, pay attention to Electroculus, hanging above the hole (you can pick it up a little later).
Puzzles with red, blue and yellow barriers
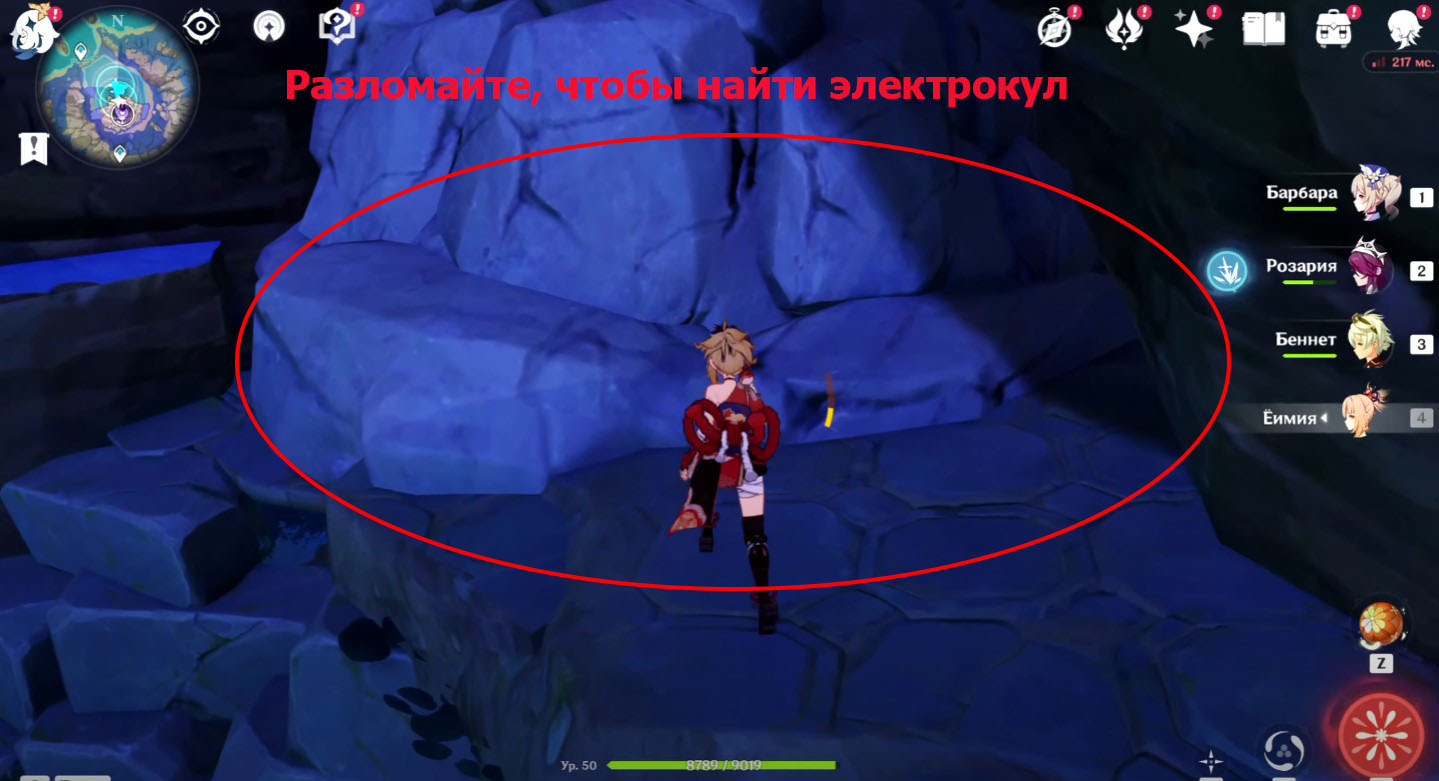
Do not rush to immediately fall into the water. Drop down to the ledge first and break through the pile of boulders to find another one Electroculus.
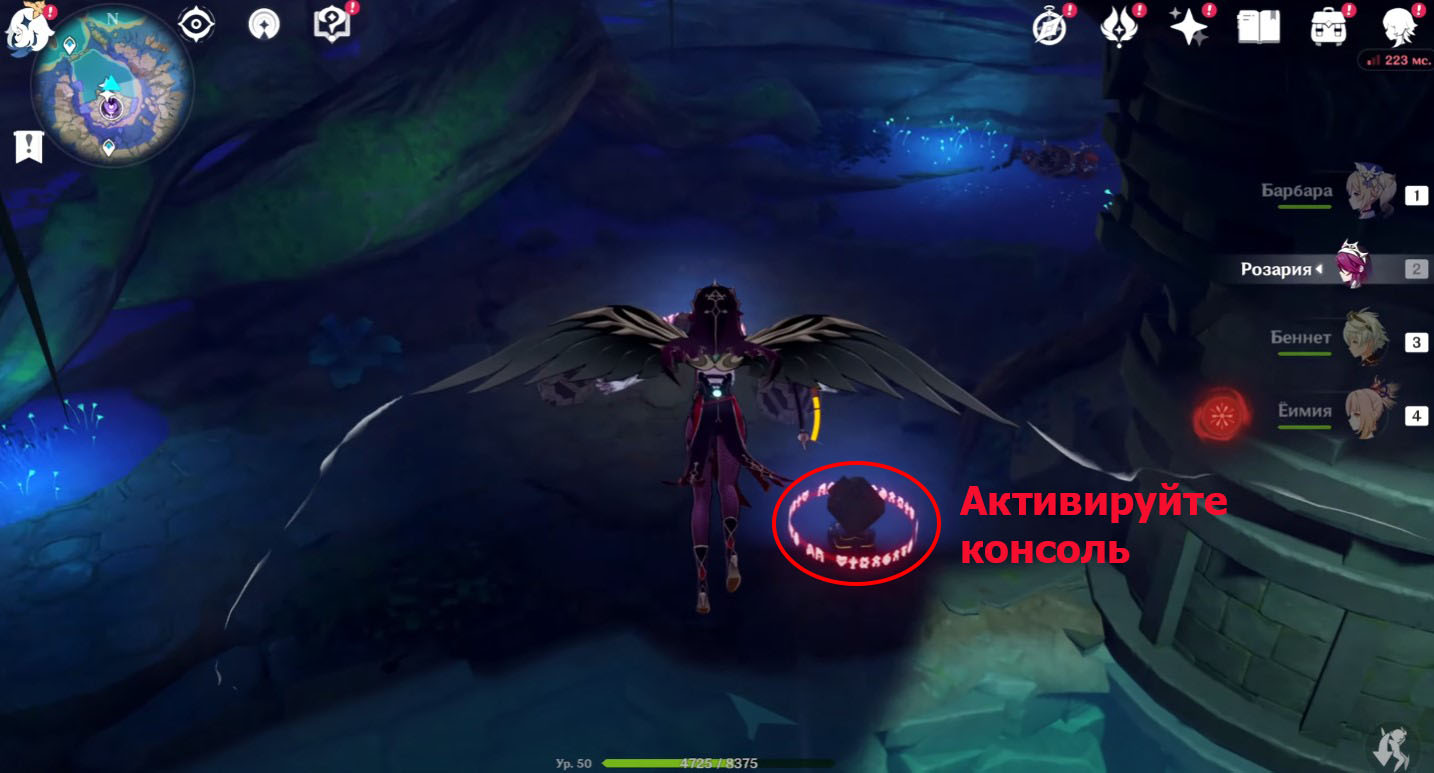
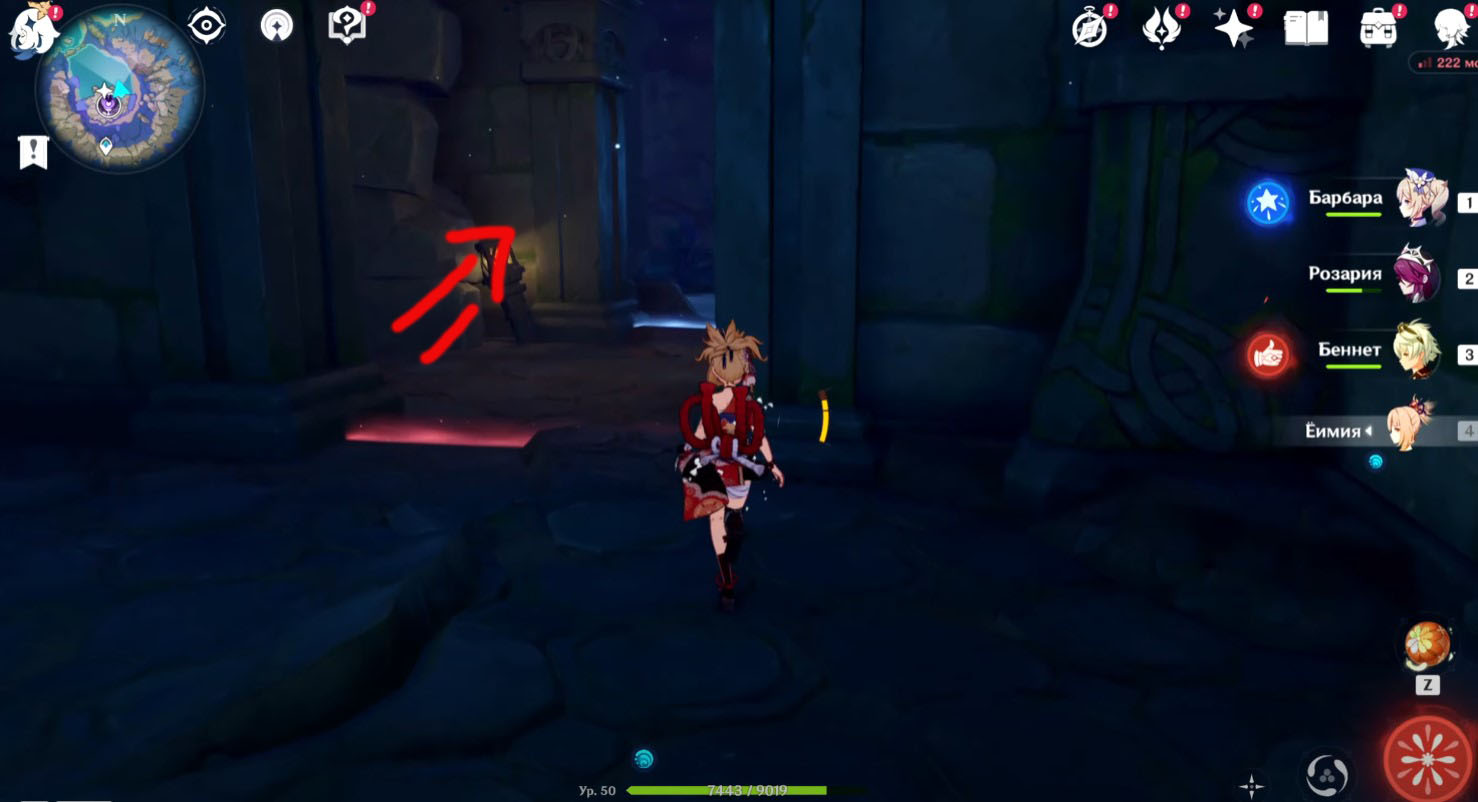
Now glide down to the blocked switch and deal with the sentinel ruins that have spawned here. After that, you can interact with the console to lower the water even lower, and open a rich chest.
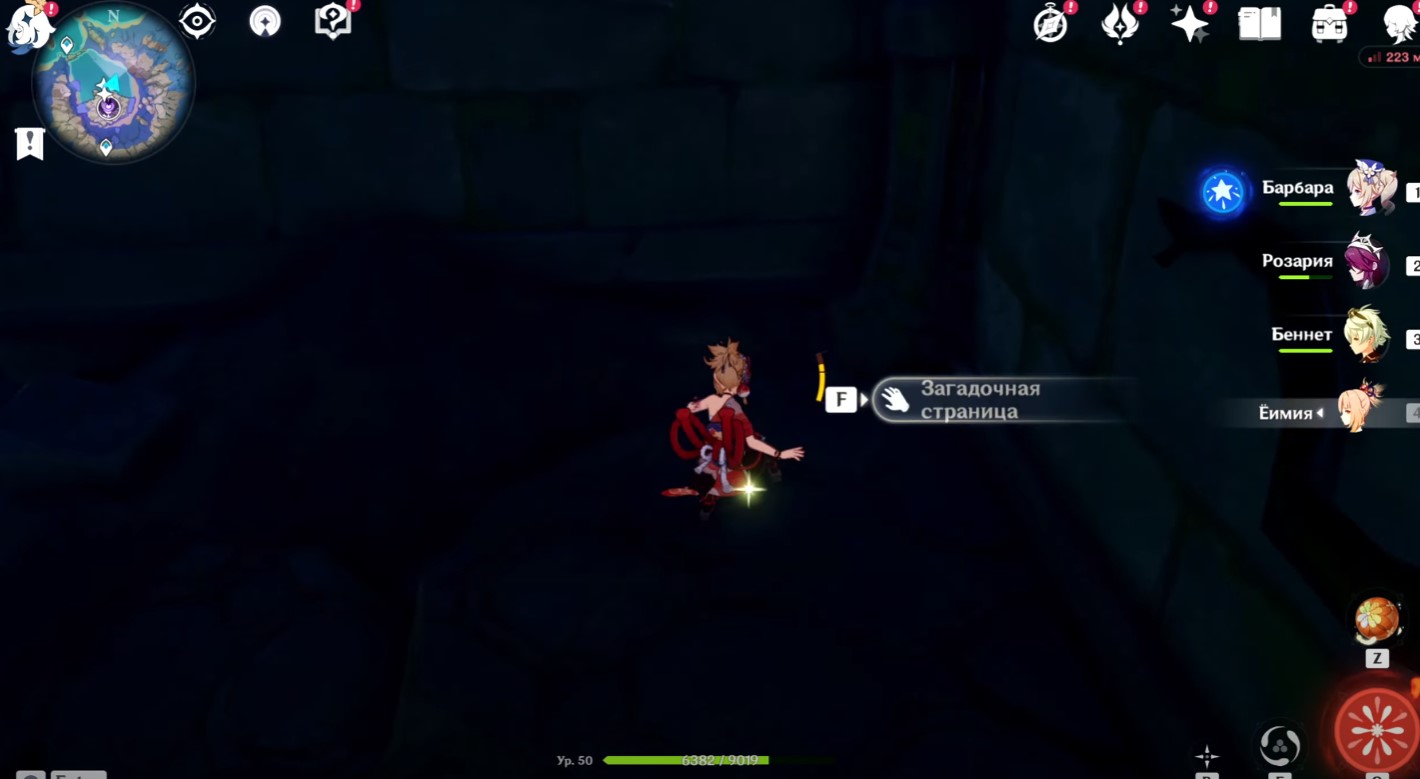
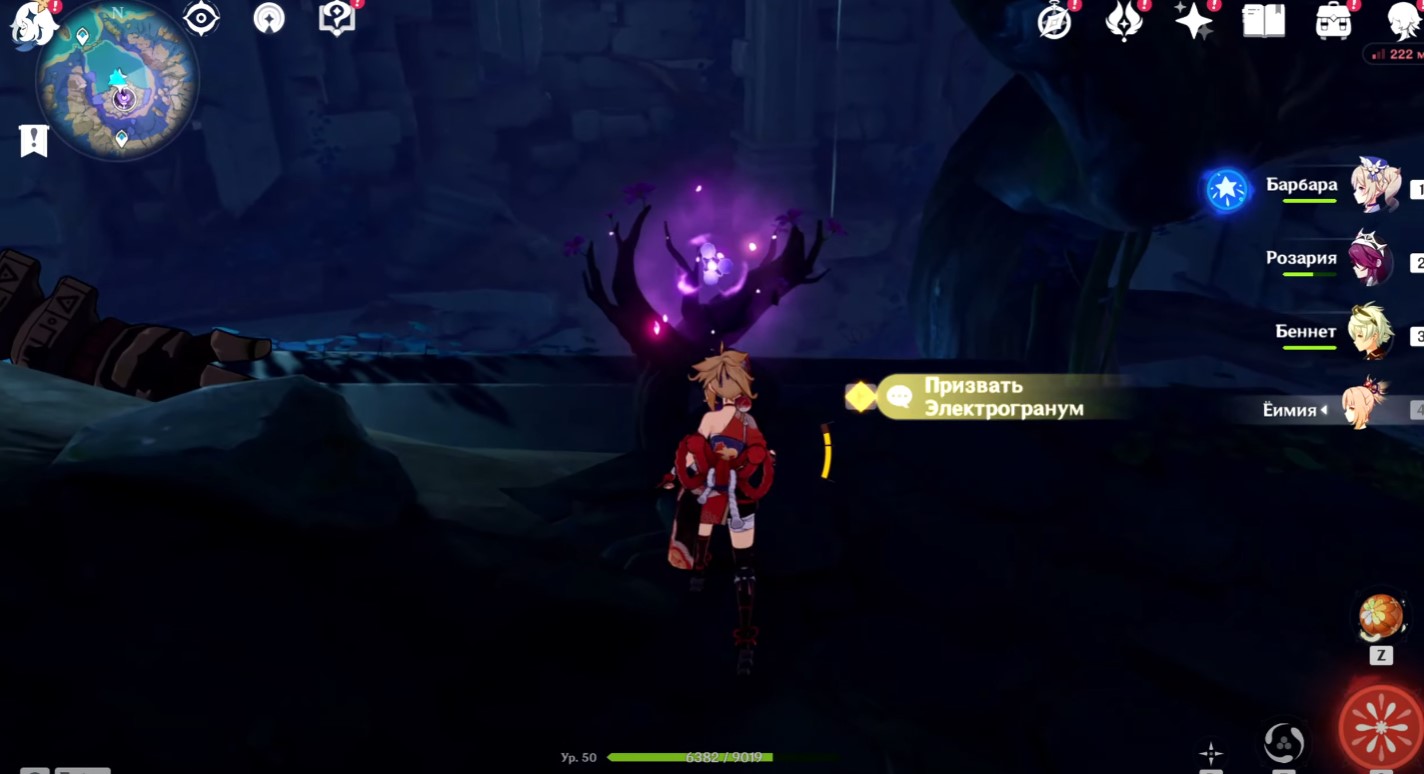
Drop down to the middle ledge and turn right. In the corner you will find a mysterious page ("Toki Alley Tales III"). Drop down even lower and grab the Electrograna from the Thunder Cherry Bough, then soar into the air and pick up the Electroculus you spotted earlier. Go back.
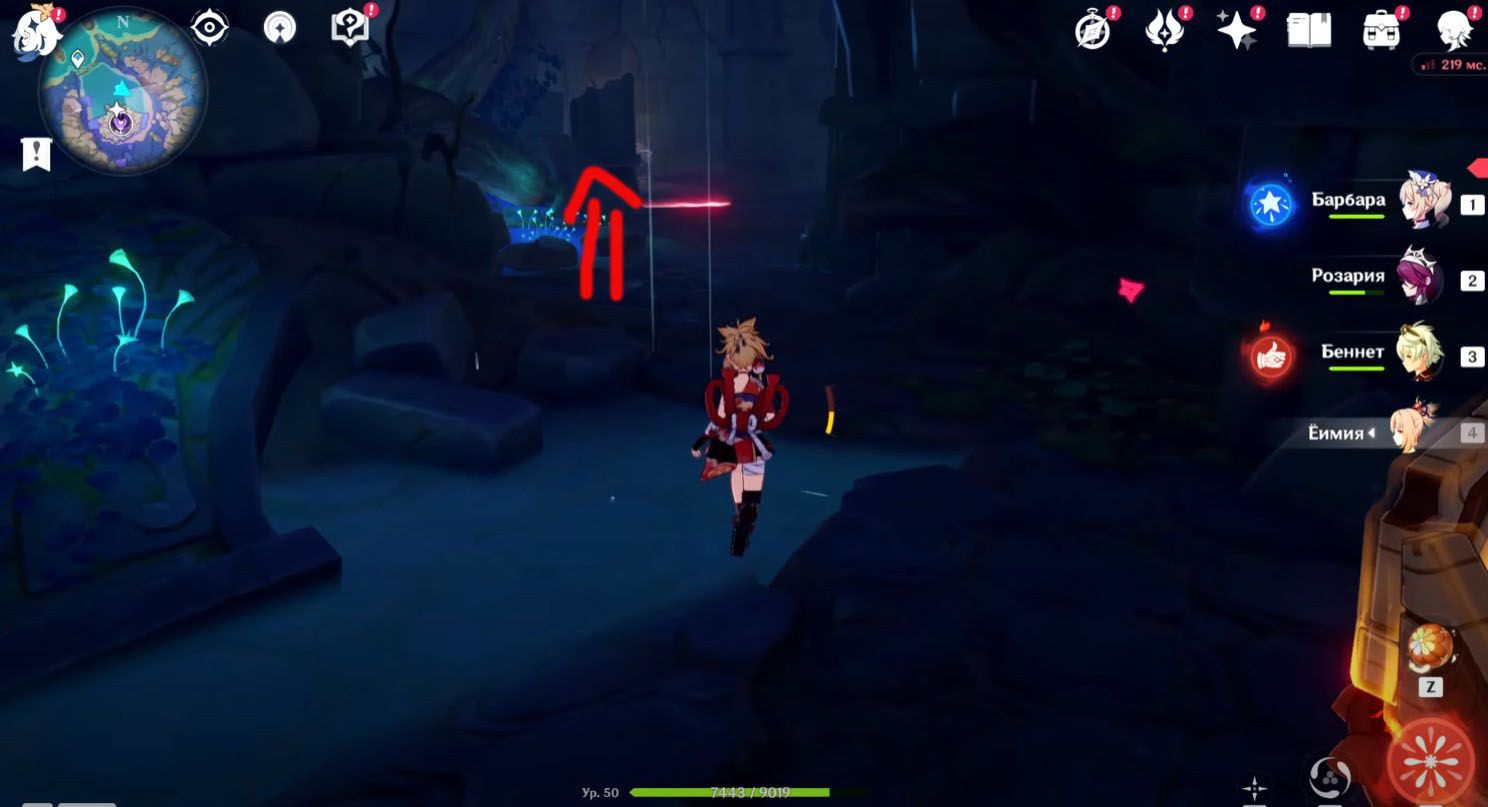
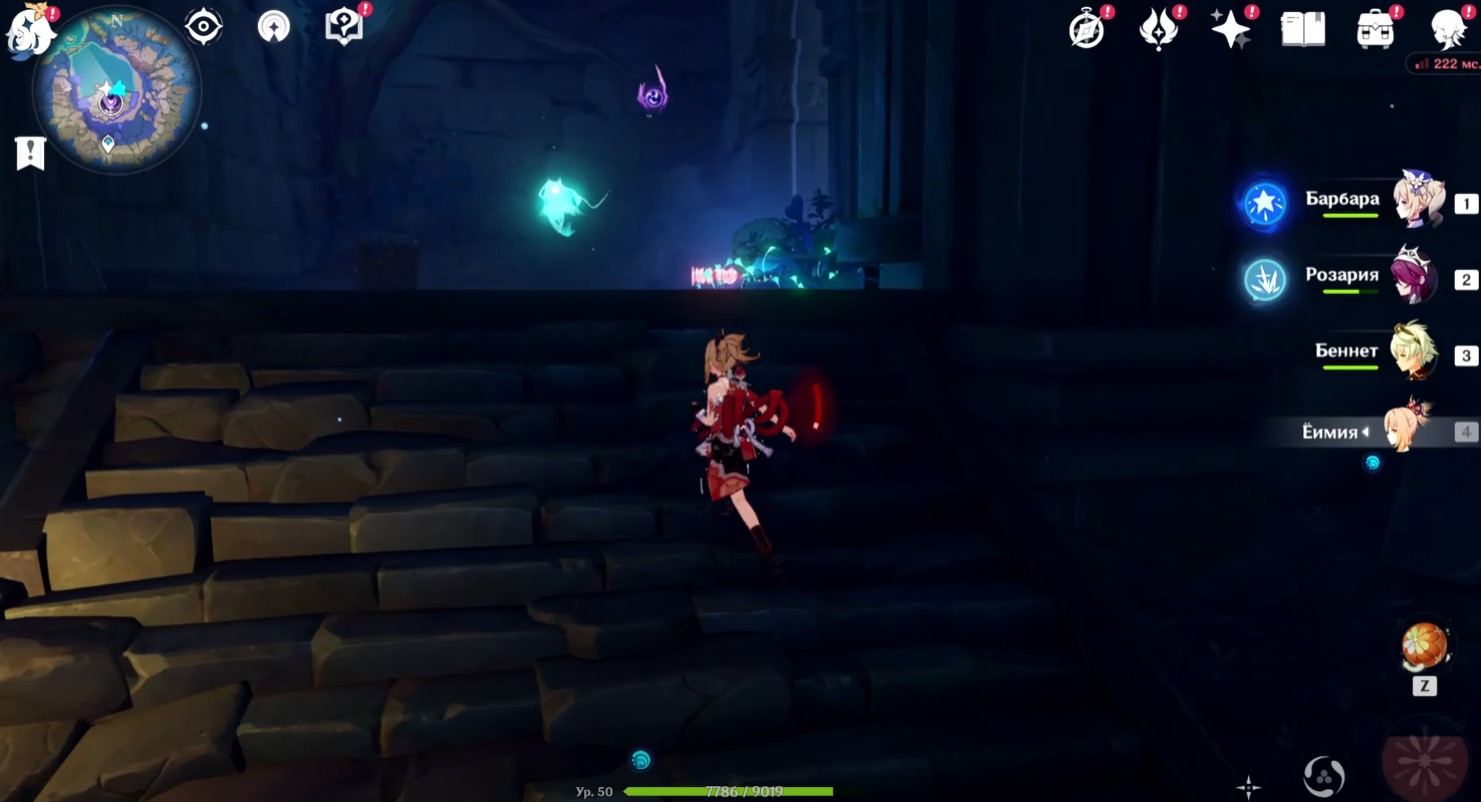
Keep going down. You will see a fairy, a red cube (switch) and a red Hurdle. So, here you have to interact with switches of different colors in order to open and close the corresponding barriers, thereby creating new passages. You will have to click on these mechanisms many times.
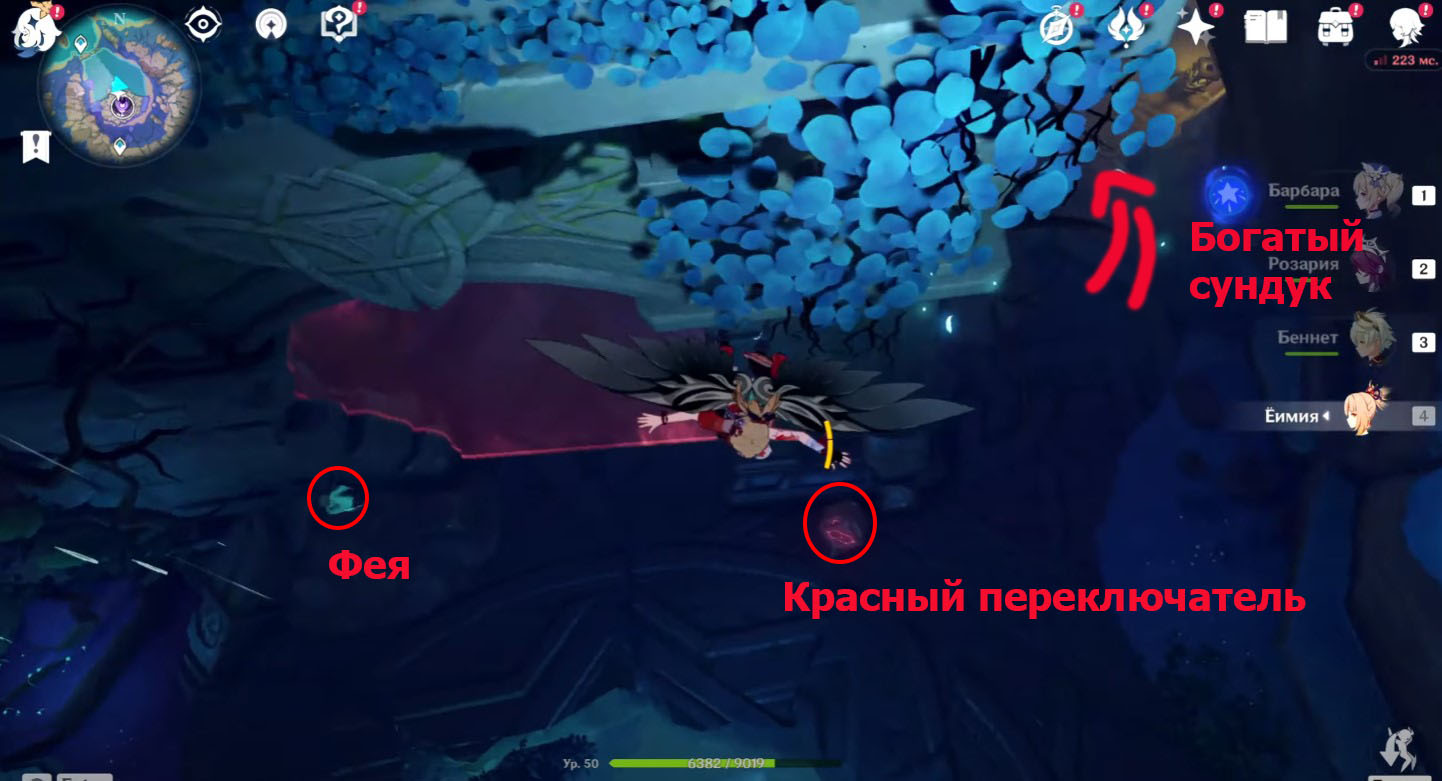
Note: If you go to the right of the red switch, you will see two clock ruins there. Deal with them to unlock a rich chest.
First of all, activate the red cube and go through the resulting passage. You can ignore the fairy flying forward for the time being. Directly ahead on the left side there will be a yellow switch that removes the yellow Hurdle. Interact with him and go inside.
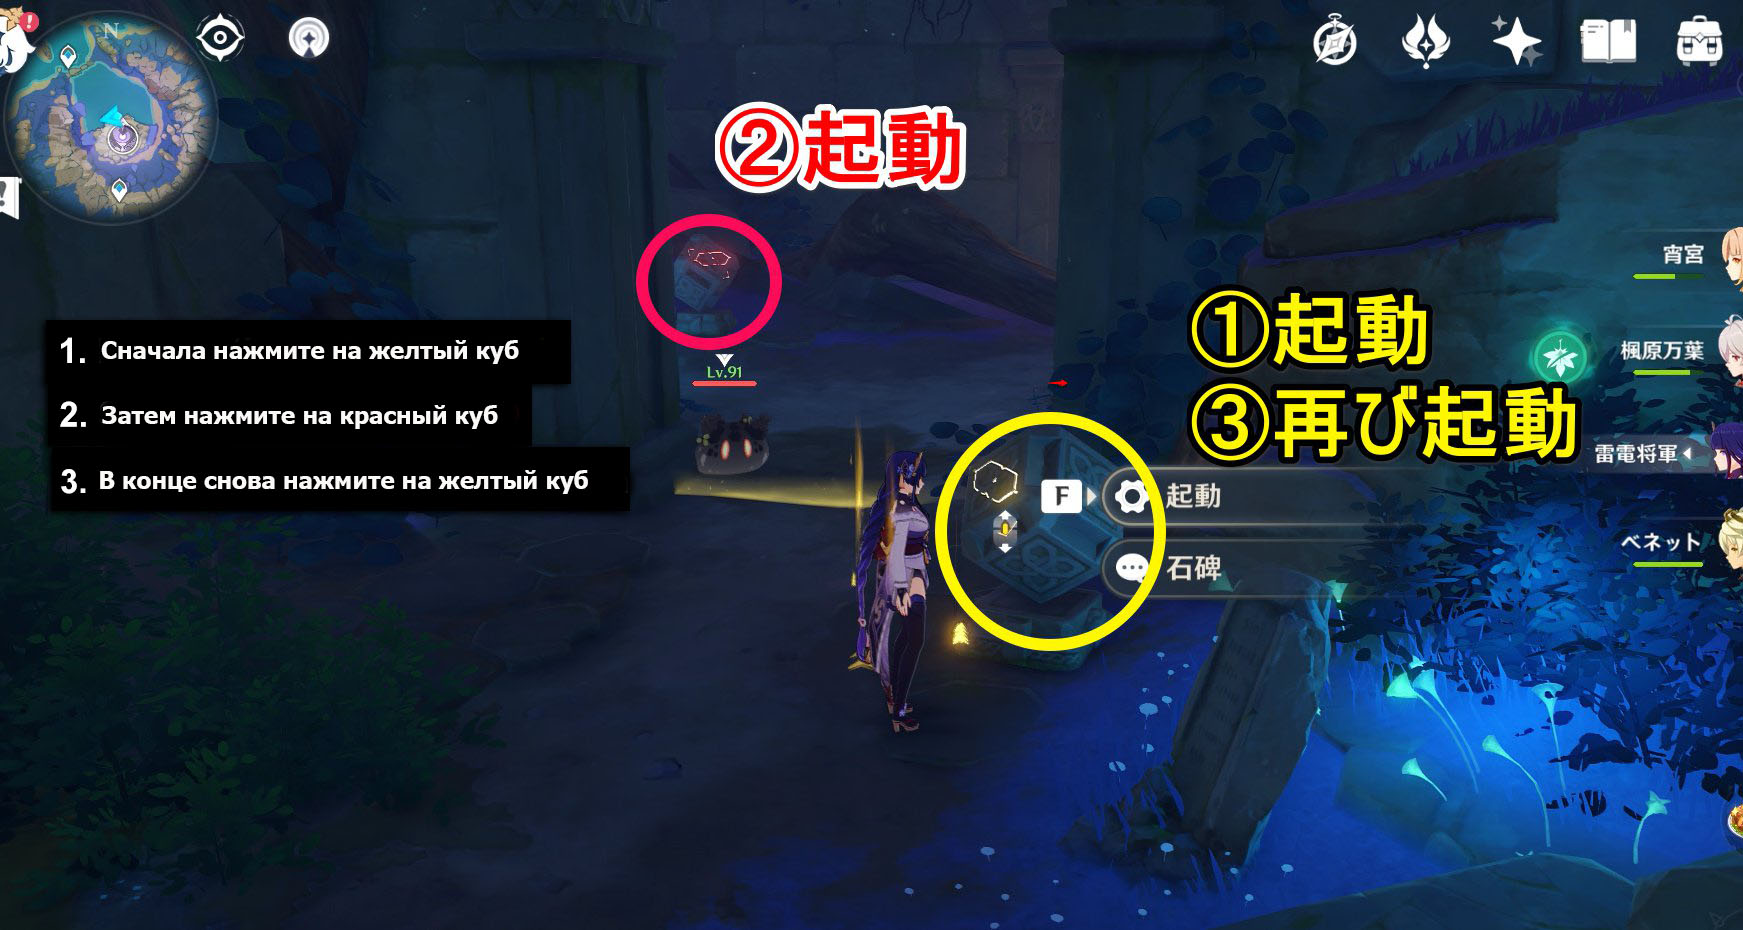
Here you will see another red mechanism. Click on it, and then go back and click on the yellow cube again. (the screenshot above shows the correct order with these two mechanisms). You can now climb the stone stairs while accompanying the fairy. Go through the two opened barriers.
Bring the fairy to the pedestal and inspect the chest. Then start leading the second spirit. Jump down. The fairy will fly past the red Hurdle, so let her go for now. Do not activate the yellow cube yet, but immediately go up the ladder on the right side. At the top, interact with the red mechanism near the yellow barrier, and then jump into the hole on the side to get to the fairy.

Approach the spirit so that it flies up. You will need to return to the yellow switch and now press it. Then go back to where the fairy used to be and climb up. There will be no yellow barrier here, so you can go further. Bring the fairy to the pedestal and inspect the chest.
Start leading the next fairy. As a result, she will fly away behind a large blue Hurdle. Go through the passage with the red and blue stripe on the floor. Go forward along the corridor, up the stairs and activate the red mechanism at the top. Then deal with the slimes.
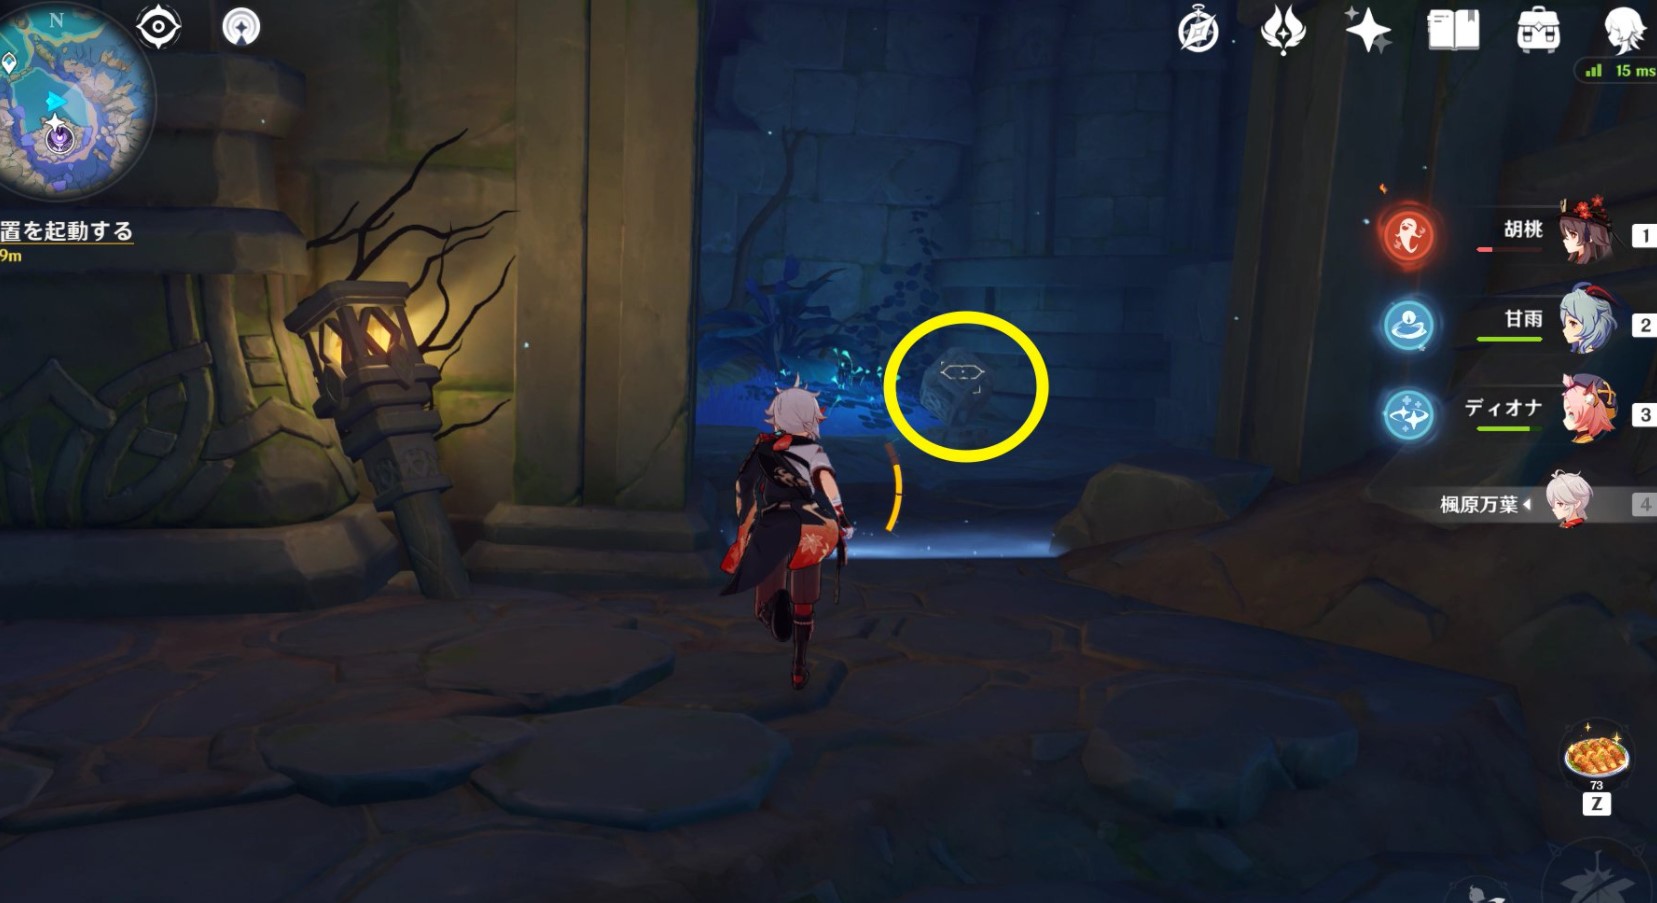
Go back to where the ruin guard was and go through the opened passage. Activate the blue switch there.
Climb the stairs again to the location where you previously clicked on the red cube. There will no longer be a blue barrier here. Deal with the enemy and activate the yellow console.
Return to the blue cube, but do not touch it, but run forward (the desired direction is shown by the red arrow) and go through the opened passage, which previously closed the yellow Hurdle. Now you can safely go into the large opening where the fairy and Electroculus are located.
Once you approach the spirit, you will unlock the Great Amakumo Peak trophy and a deluxe chest. Now just activate the last cube on the right side. A cut-scene will be shown with the water leaving. Jump down and take all the treasures from the chests.
Here you can also collect valuable ore. If you want to get out of the crevasse, then just summon an Electrograna and fly up with the help of thunder spheres.
Comments
You need to login to add comments.
You can login with