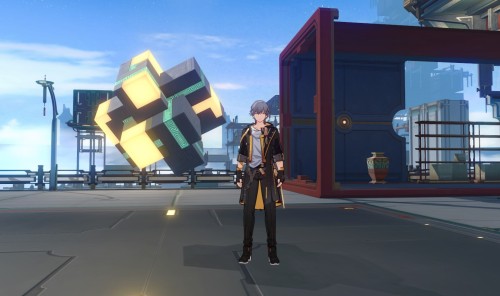
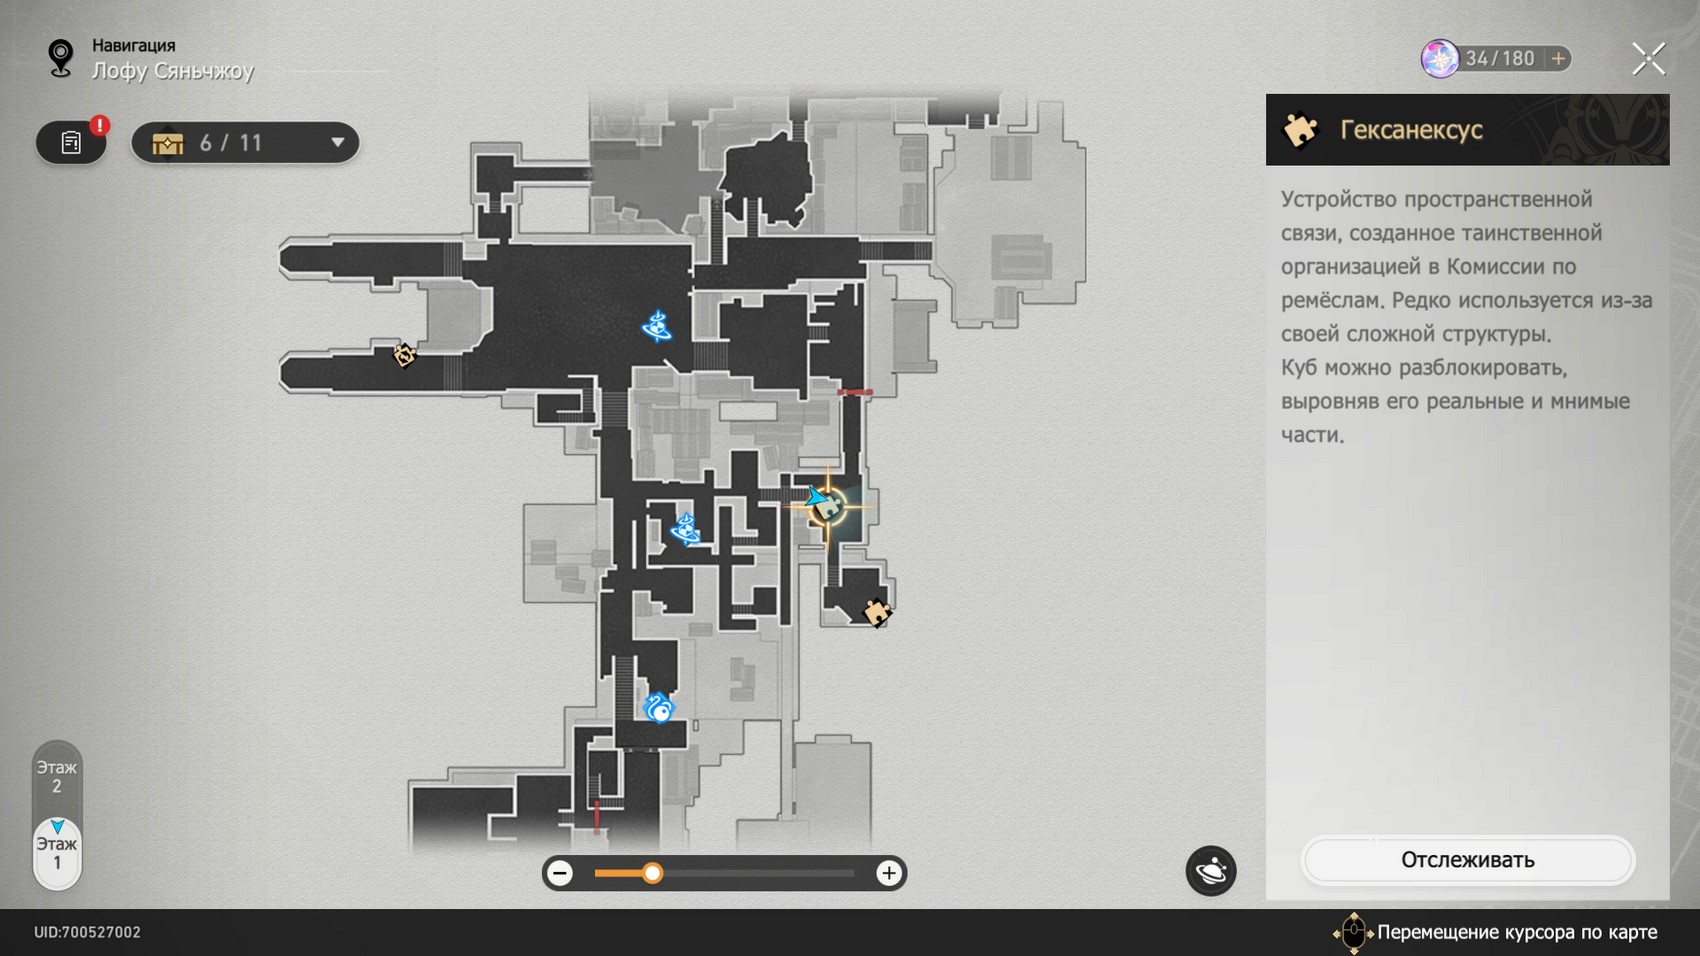
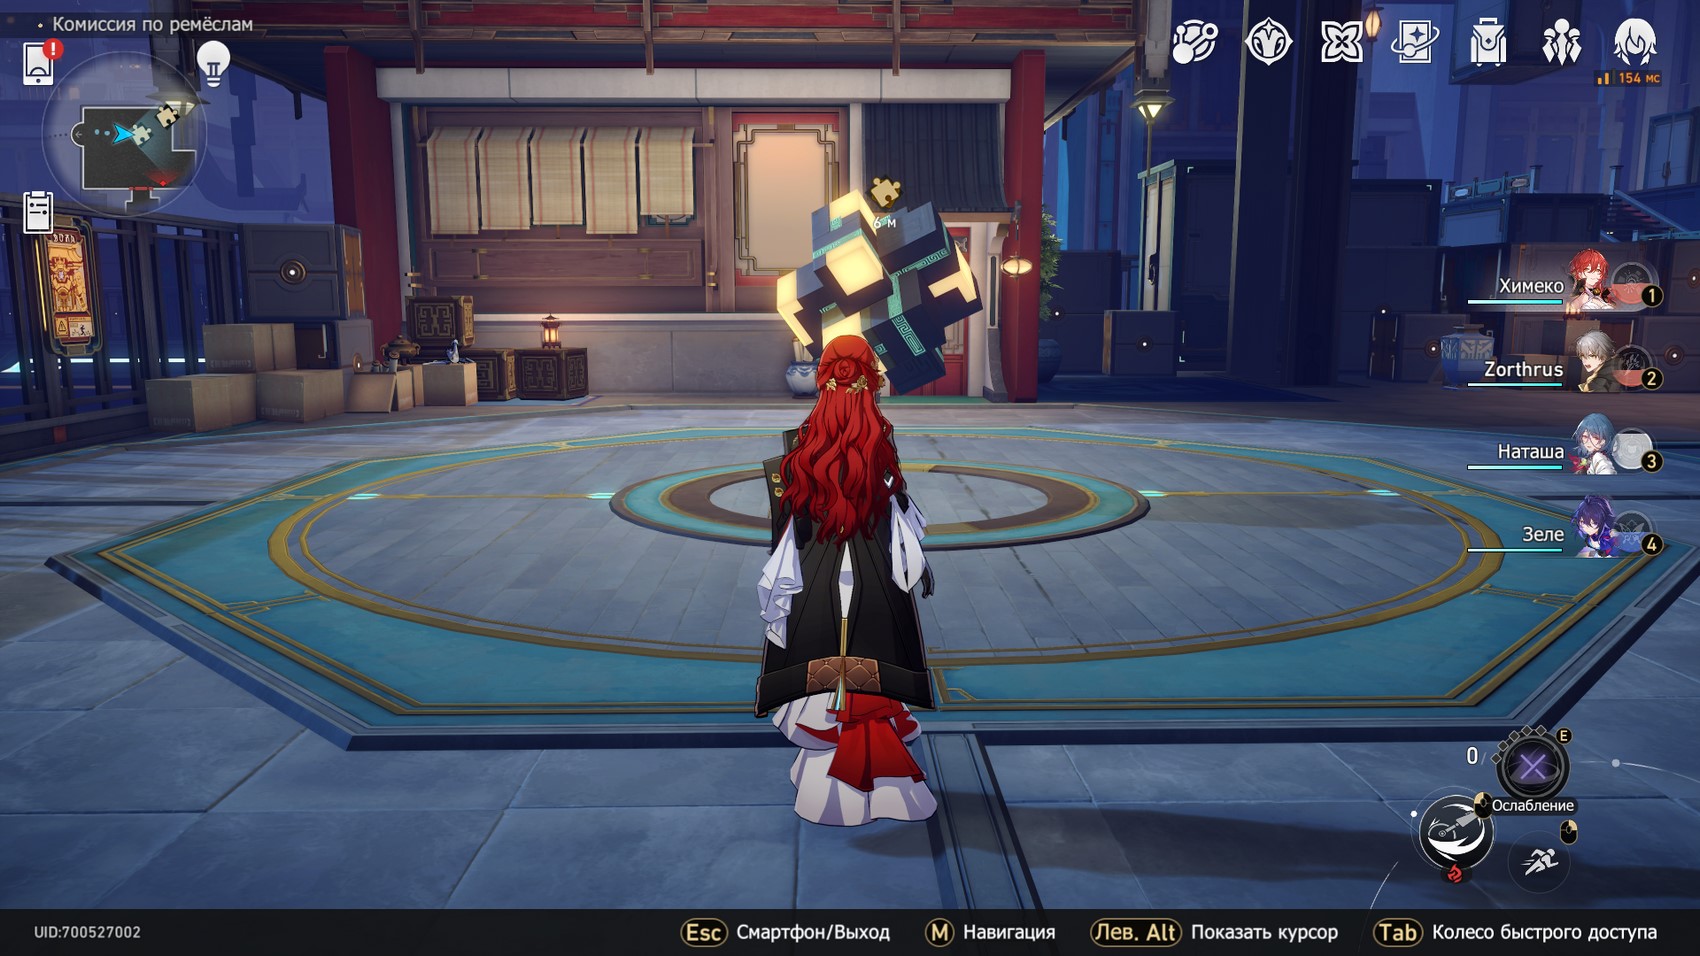
In Honkai: Star Rail, Hexanexus are one of the puzzles in Lofu Xianzhou that will reward you with treasure chests. You will also be able to unlock a secret quest and several achievements. In this guide, we will tell you where to find all these riddles, and exactly how to solve them.
Solving hexanexus puzzles
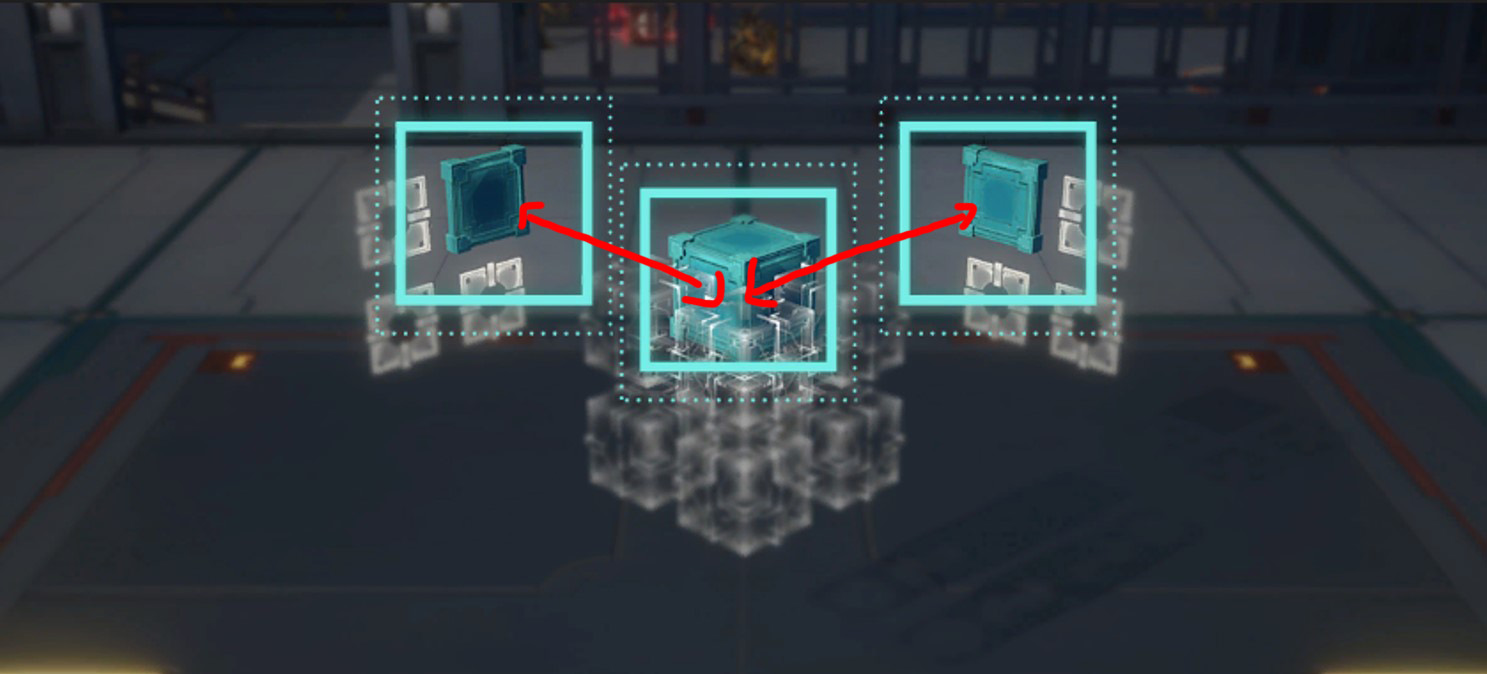
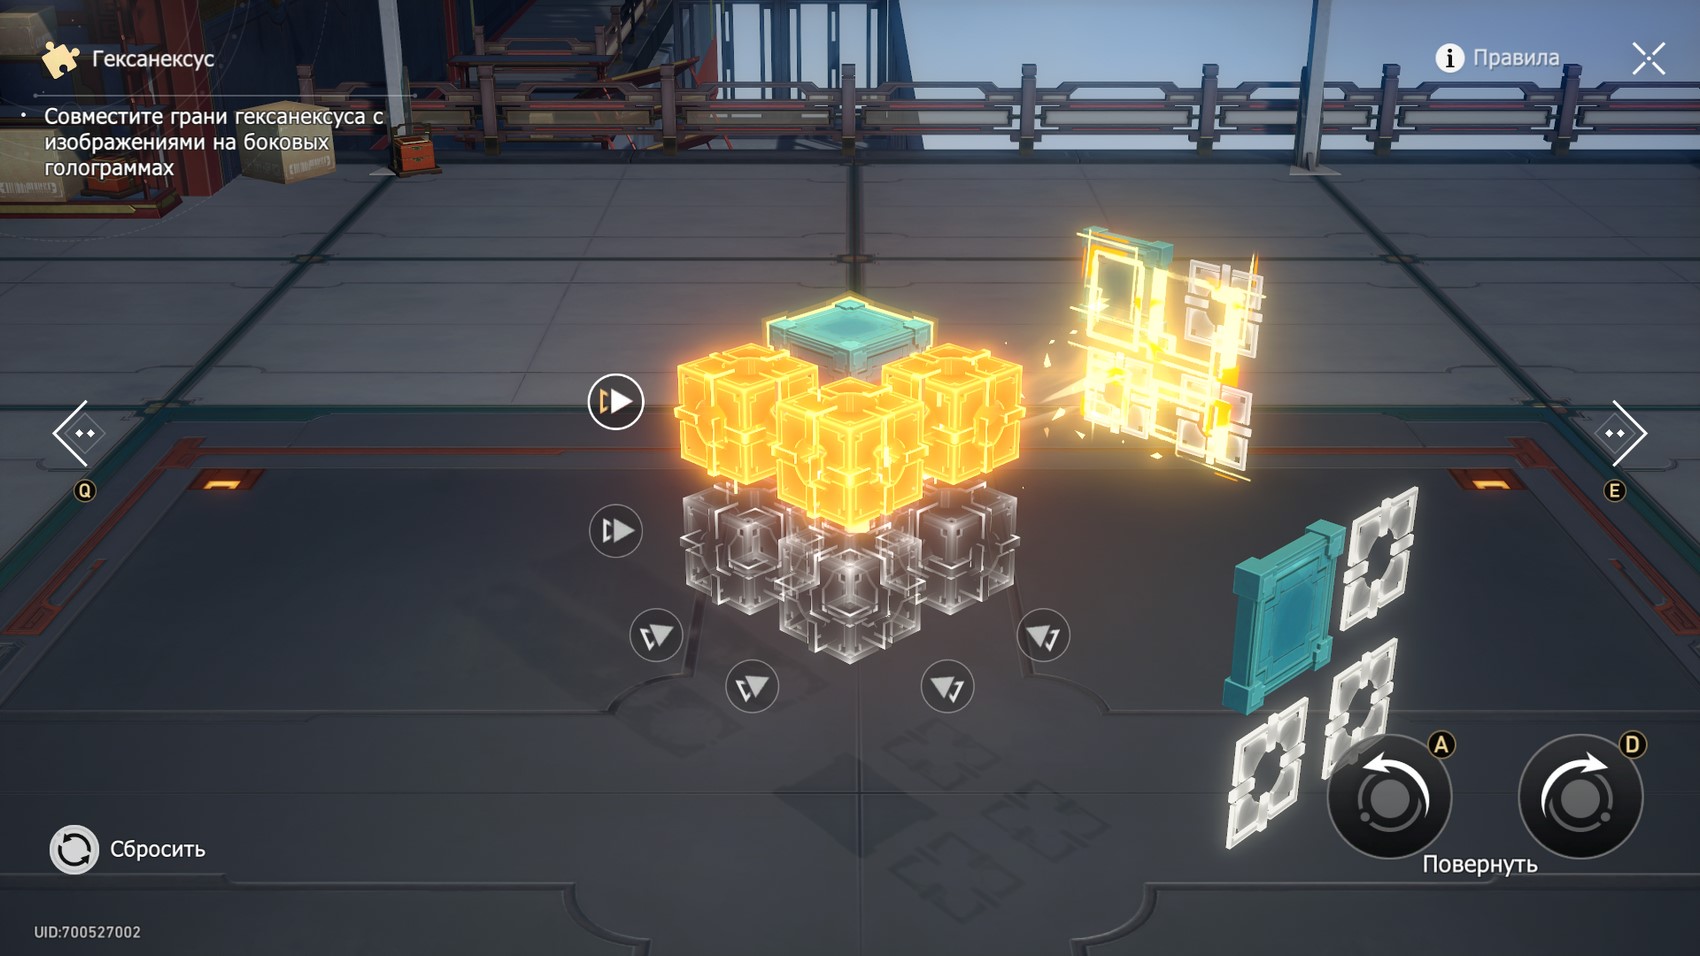
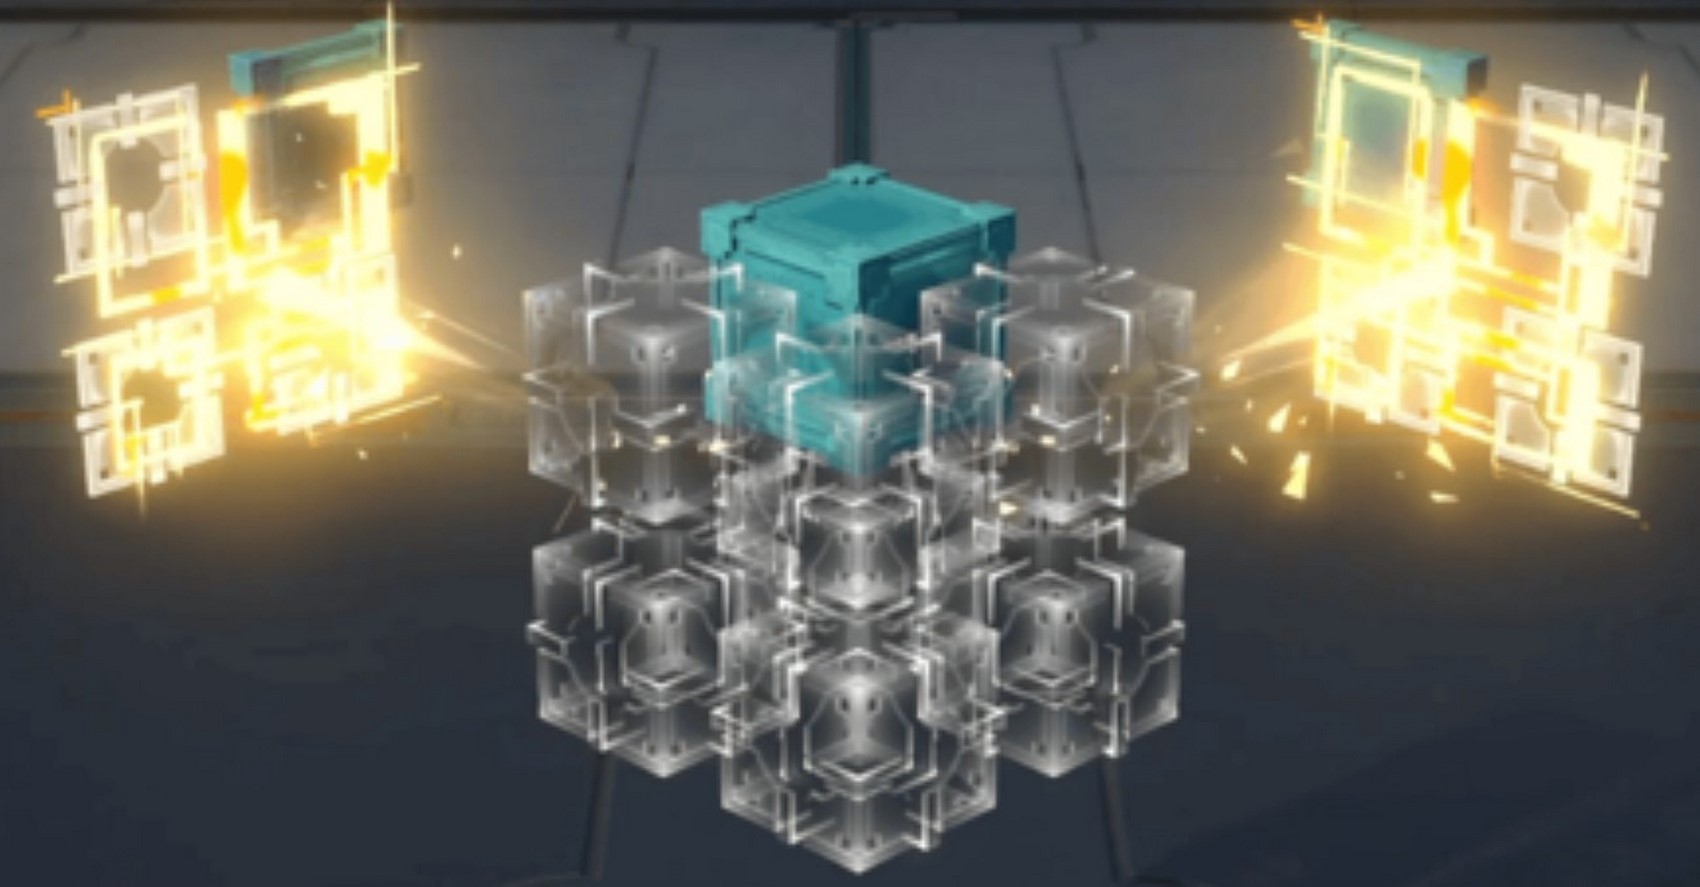
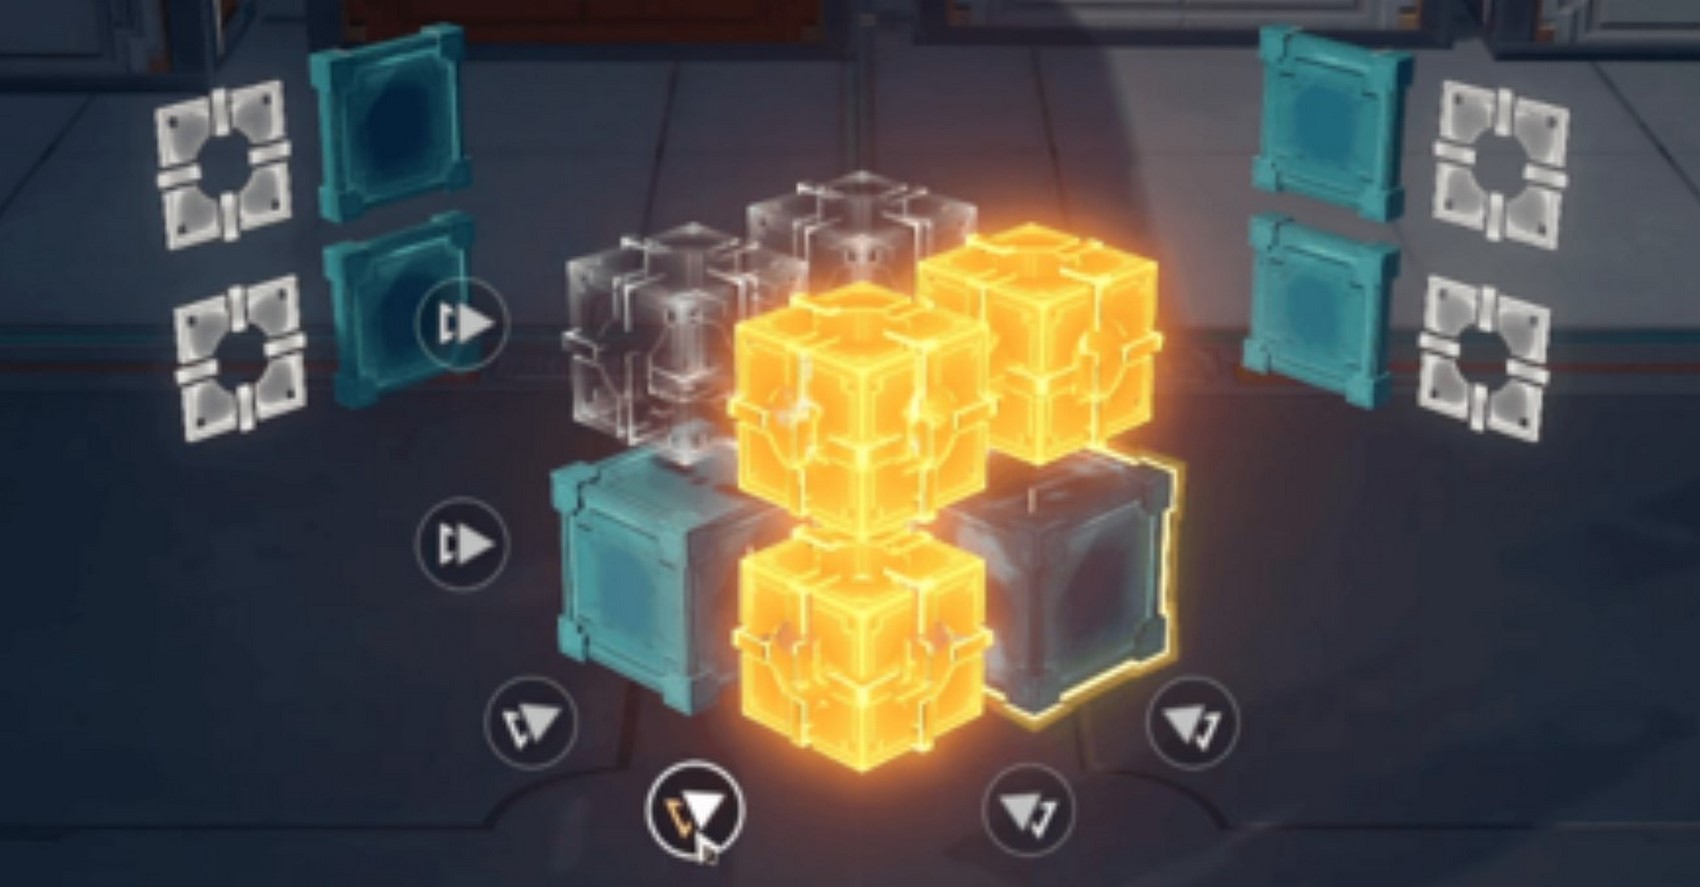
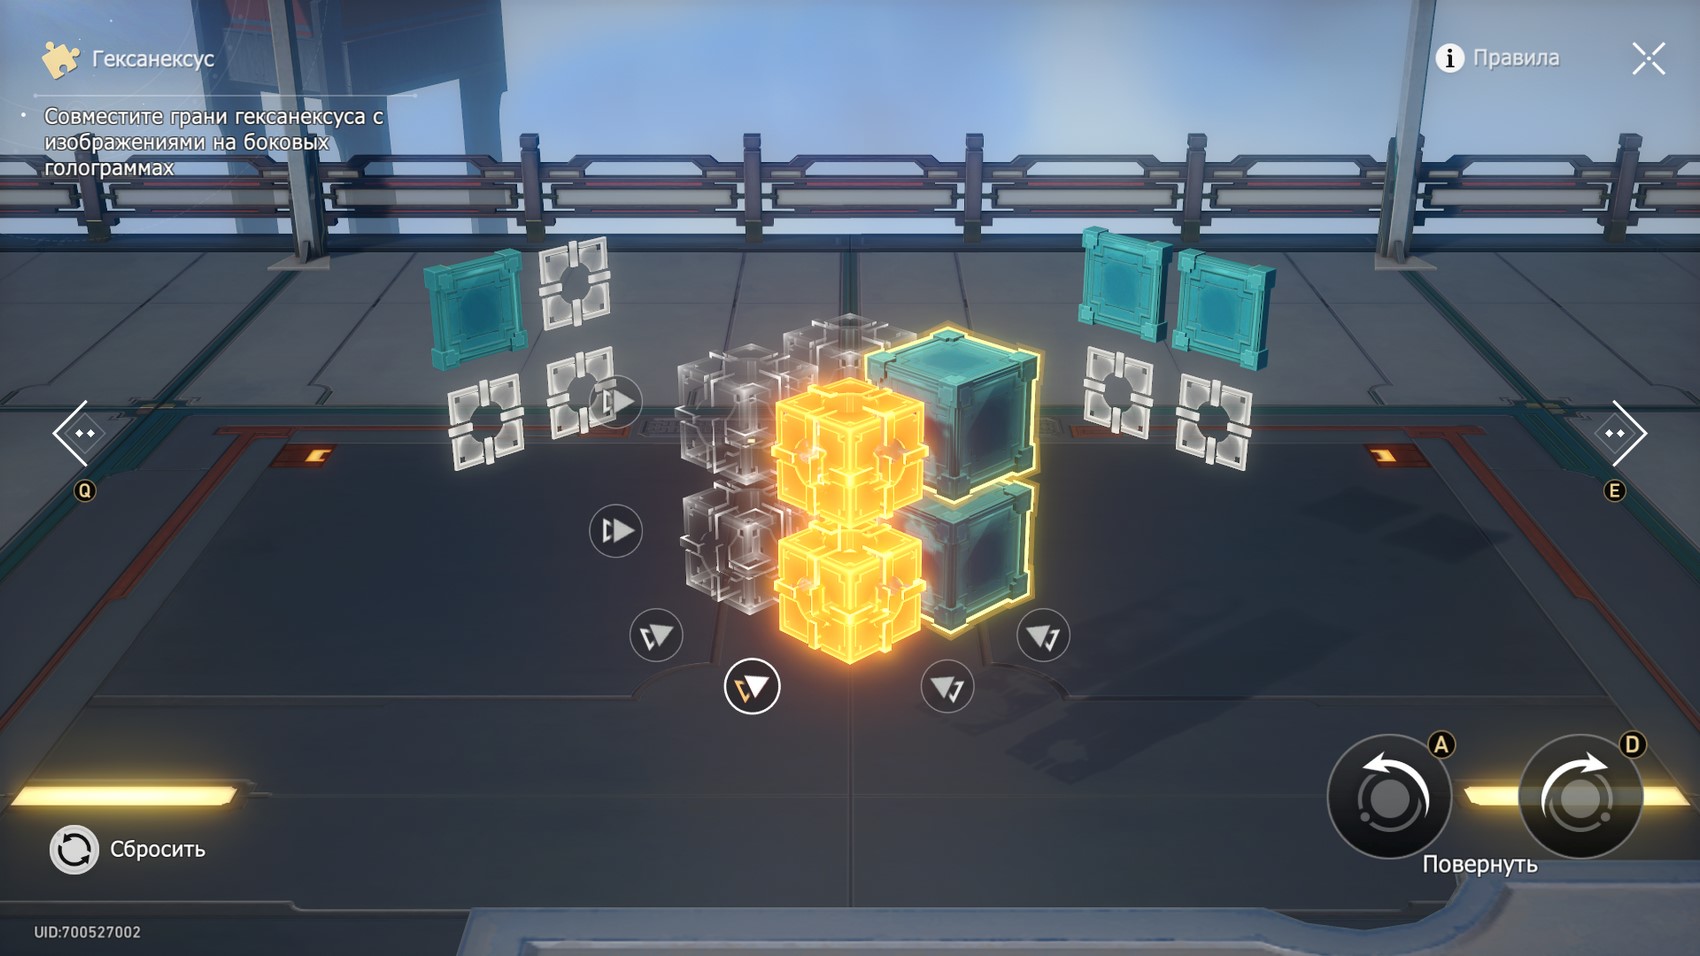
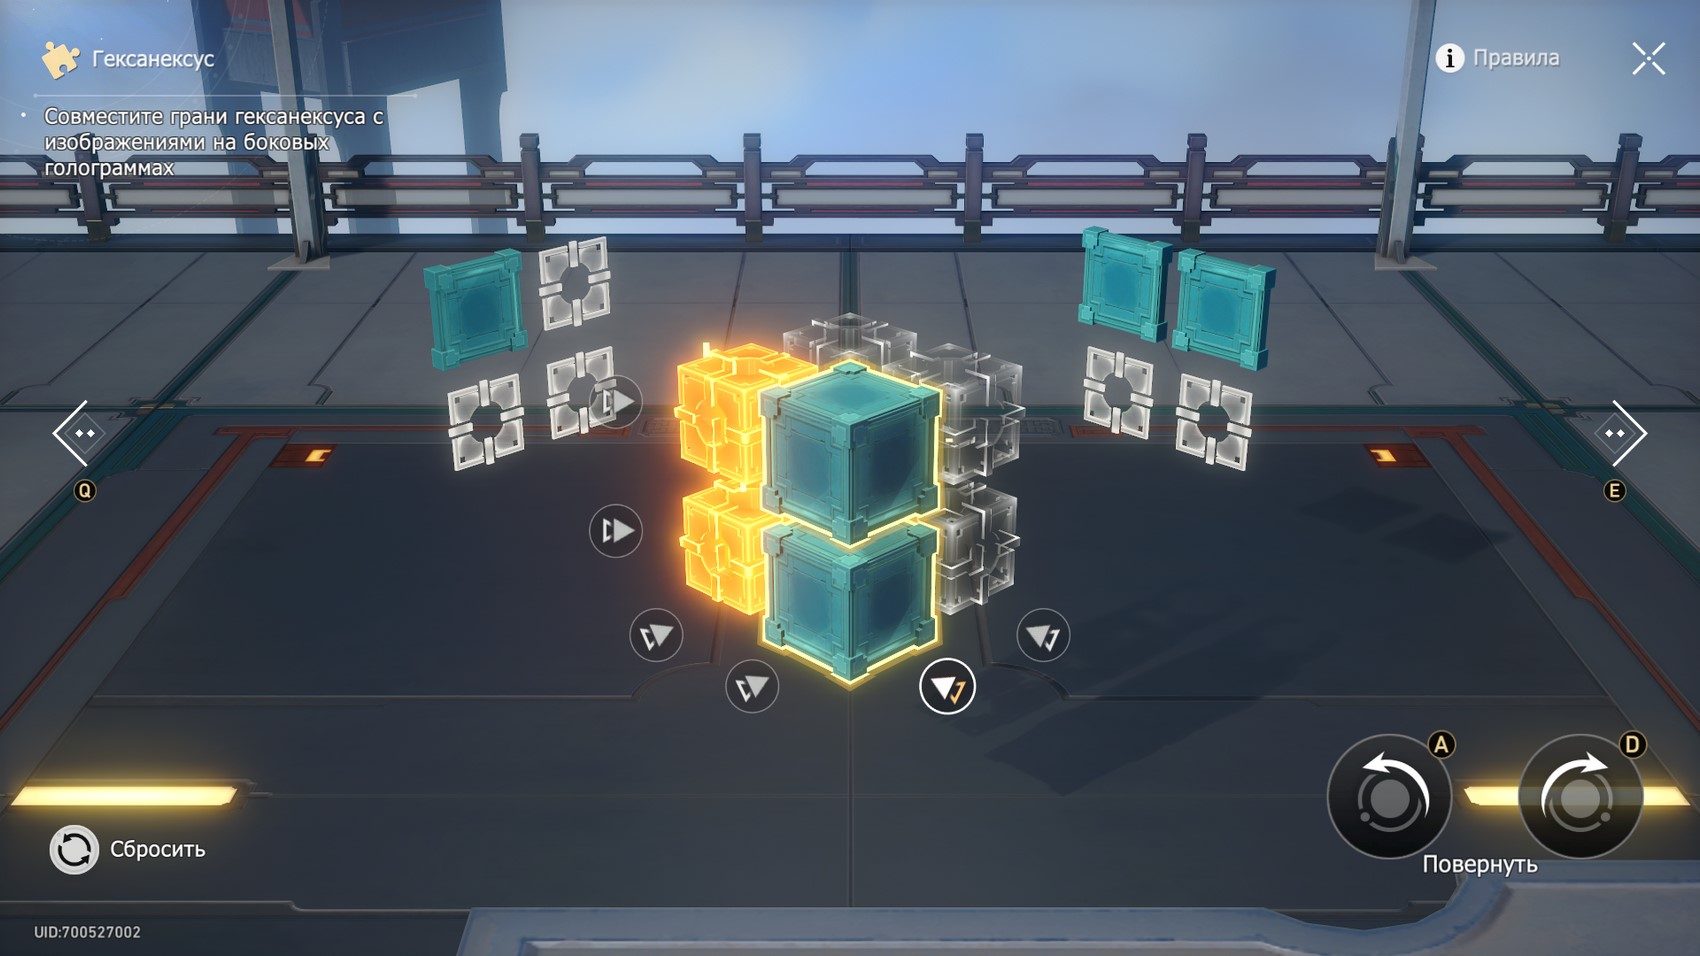
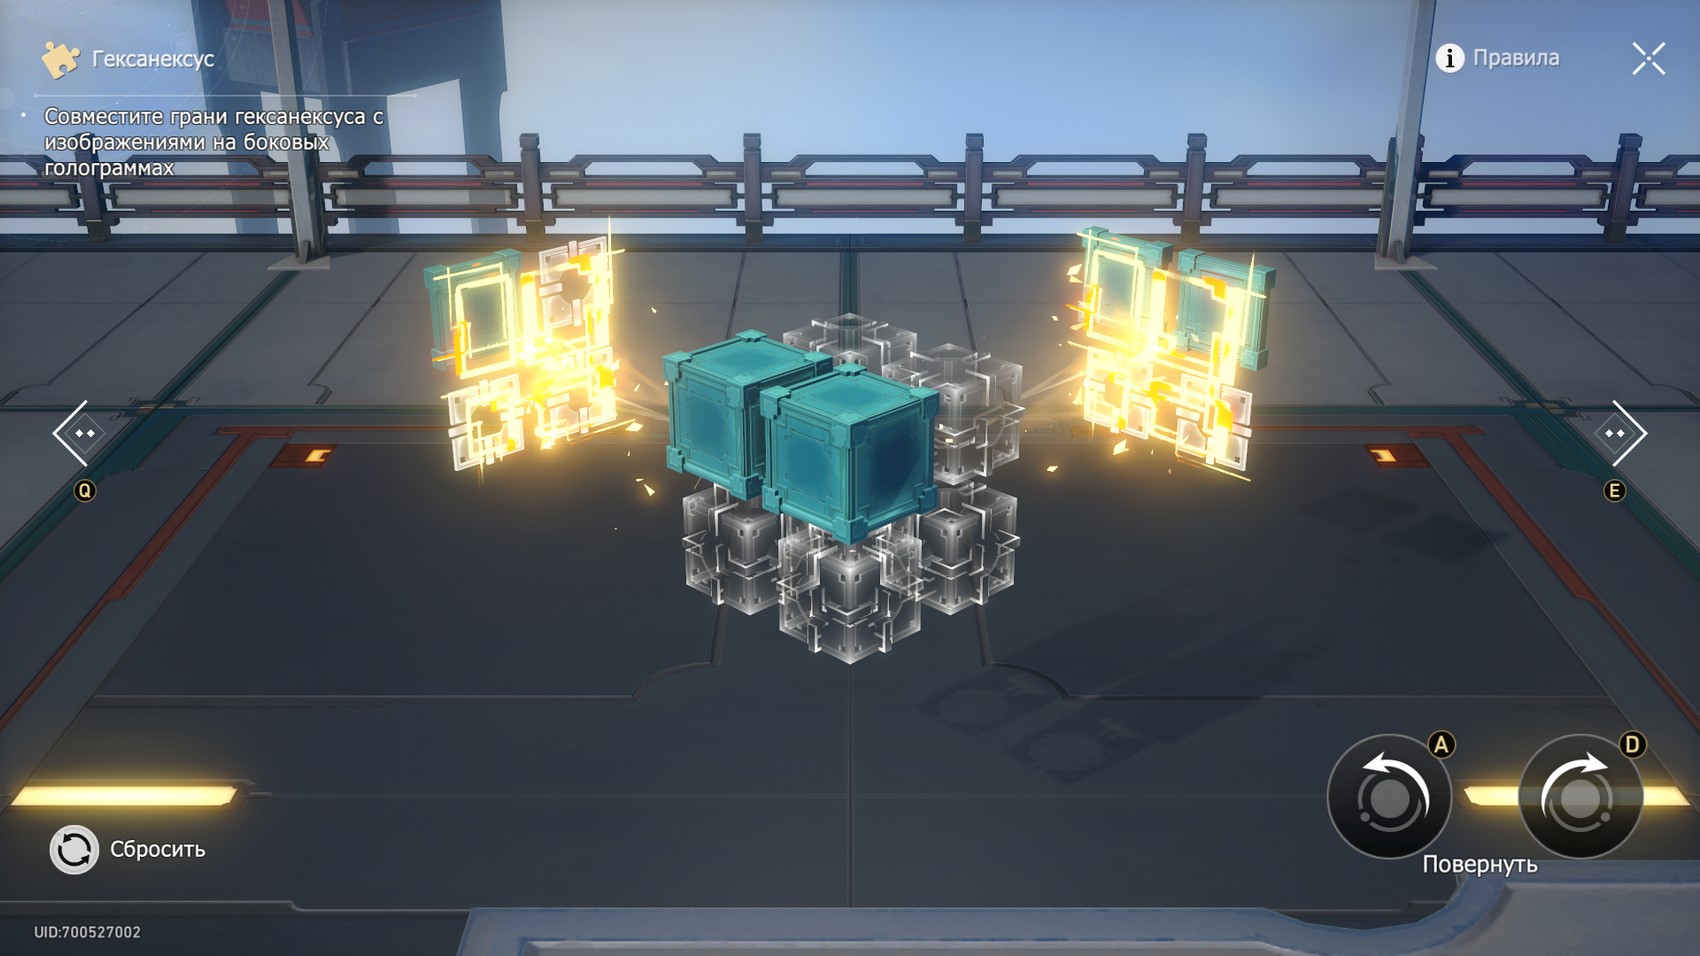
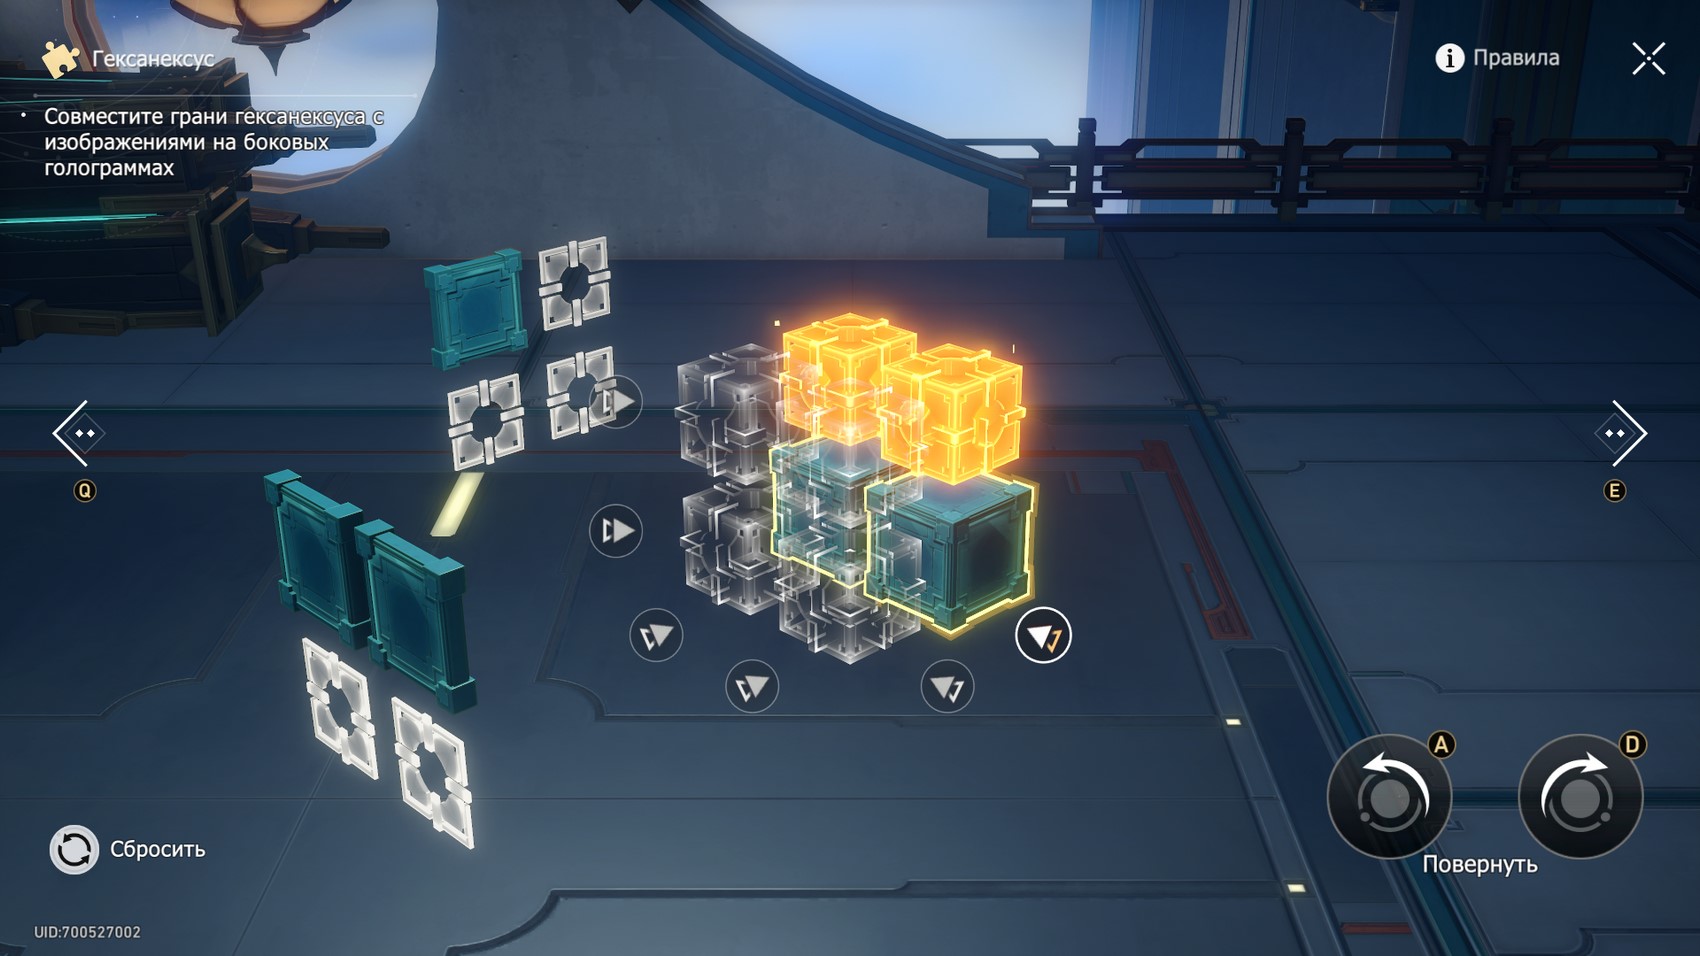
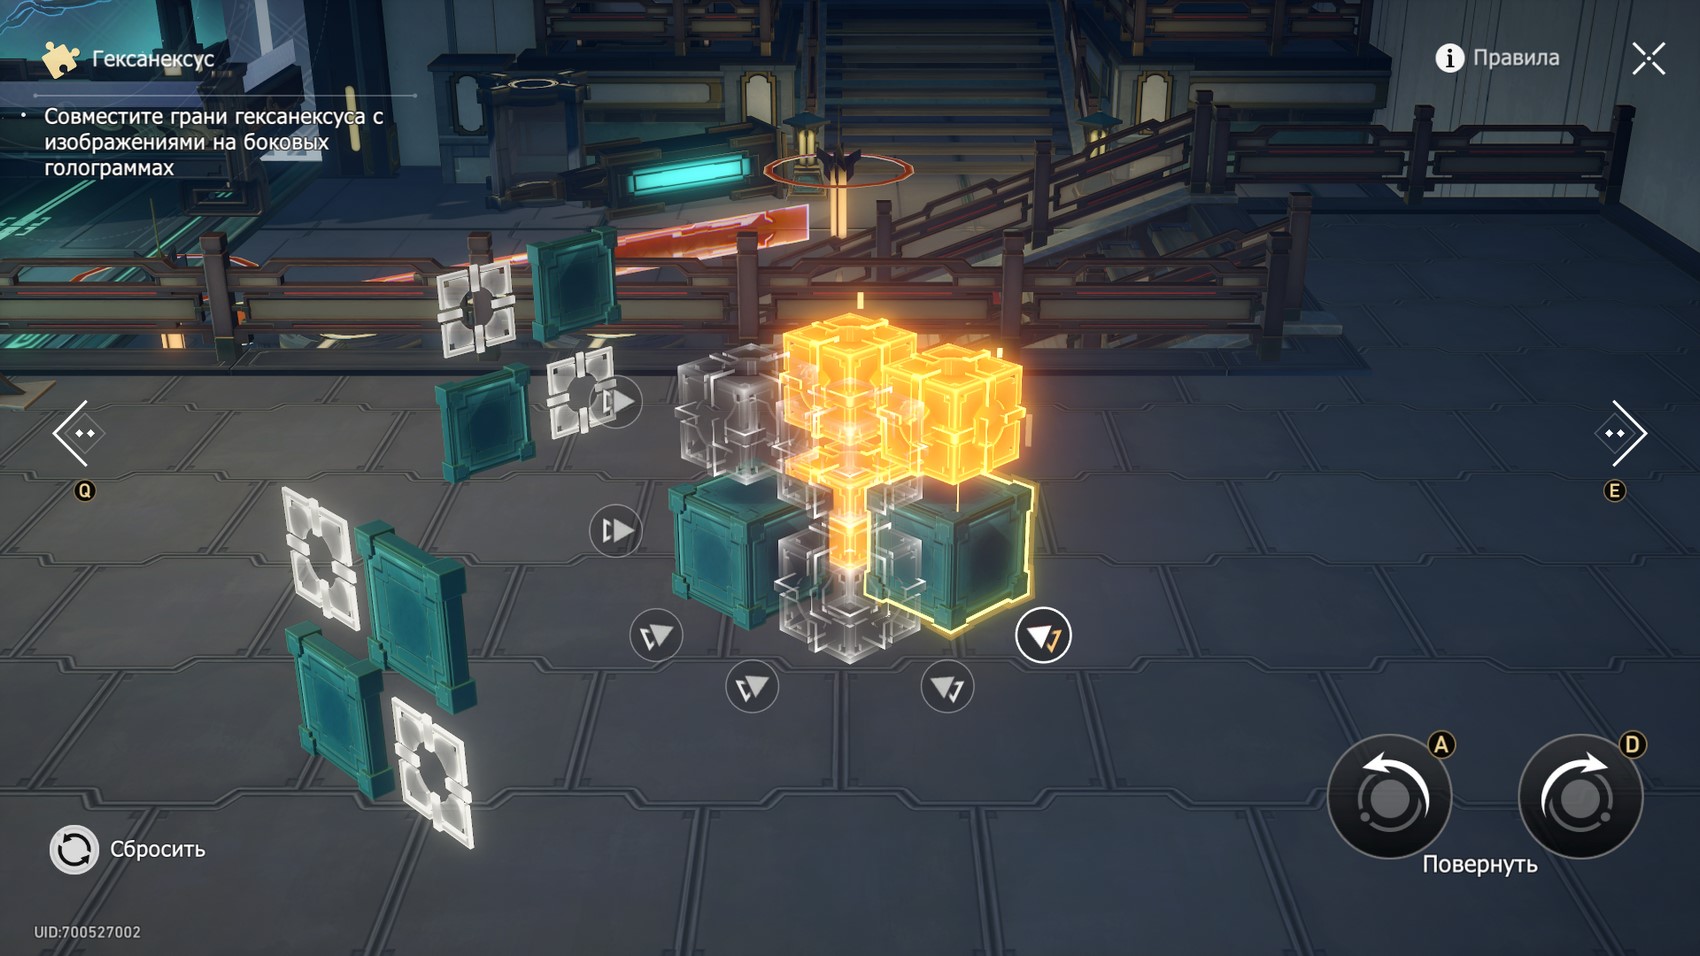
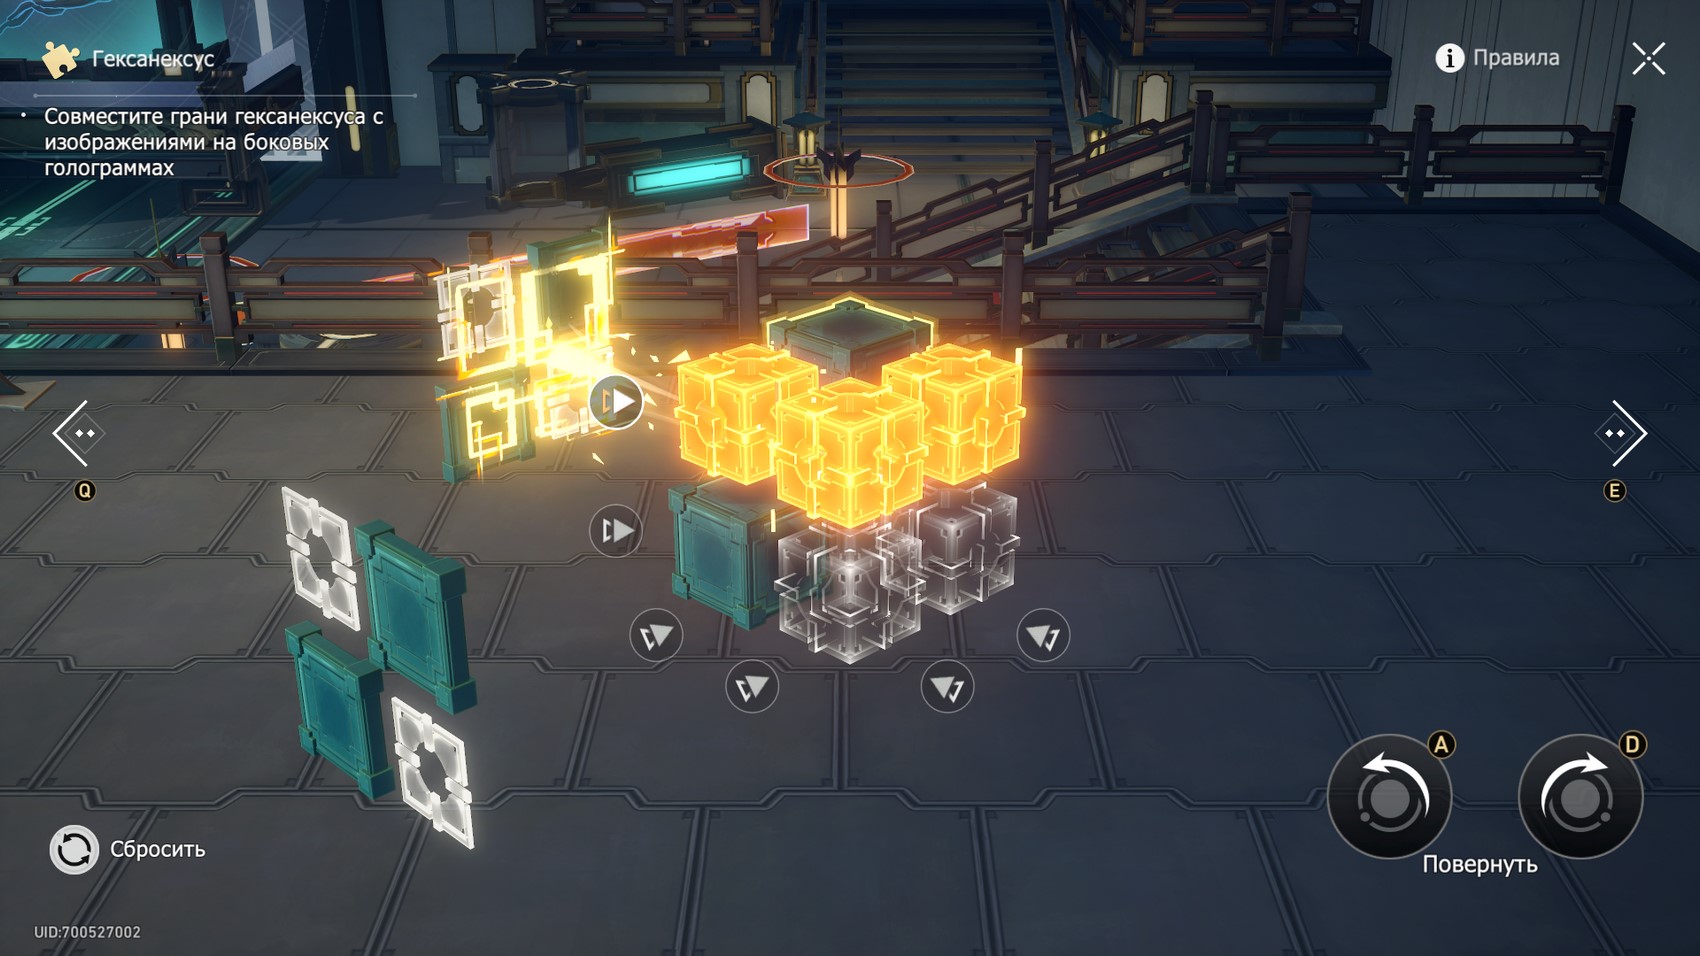
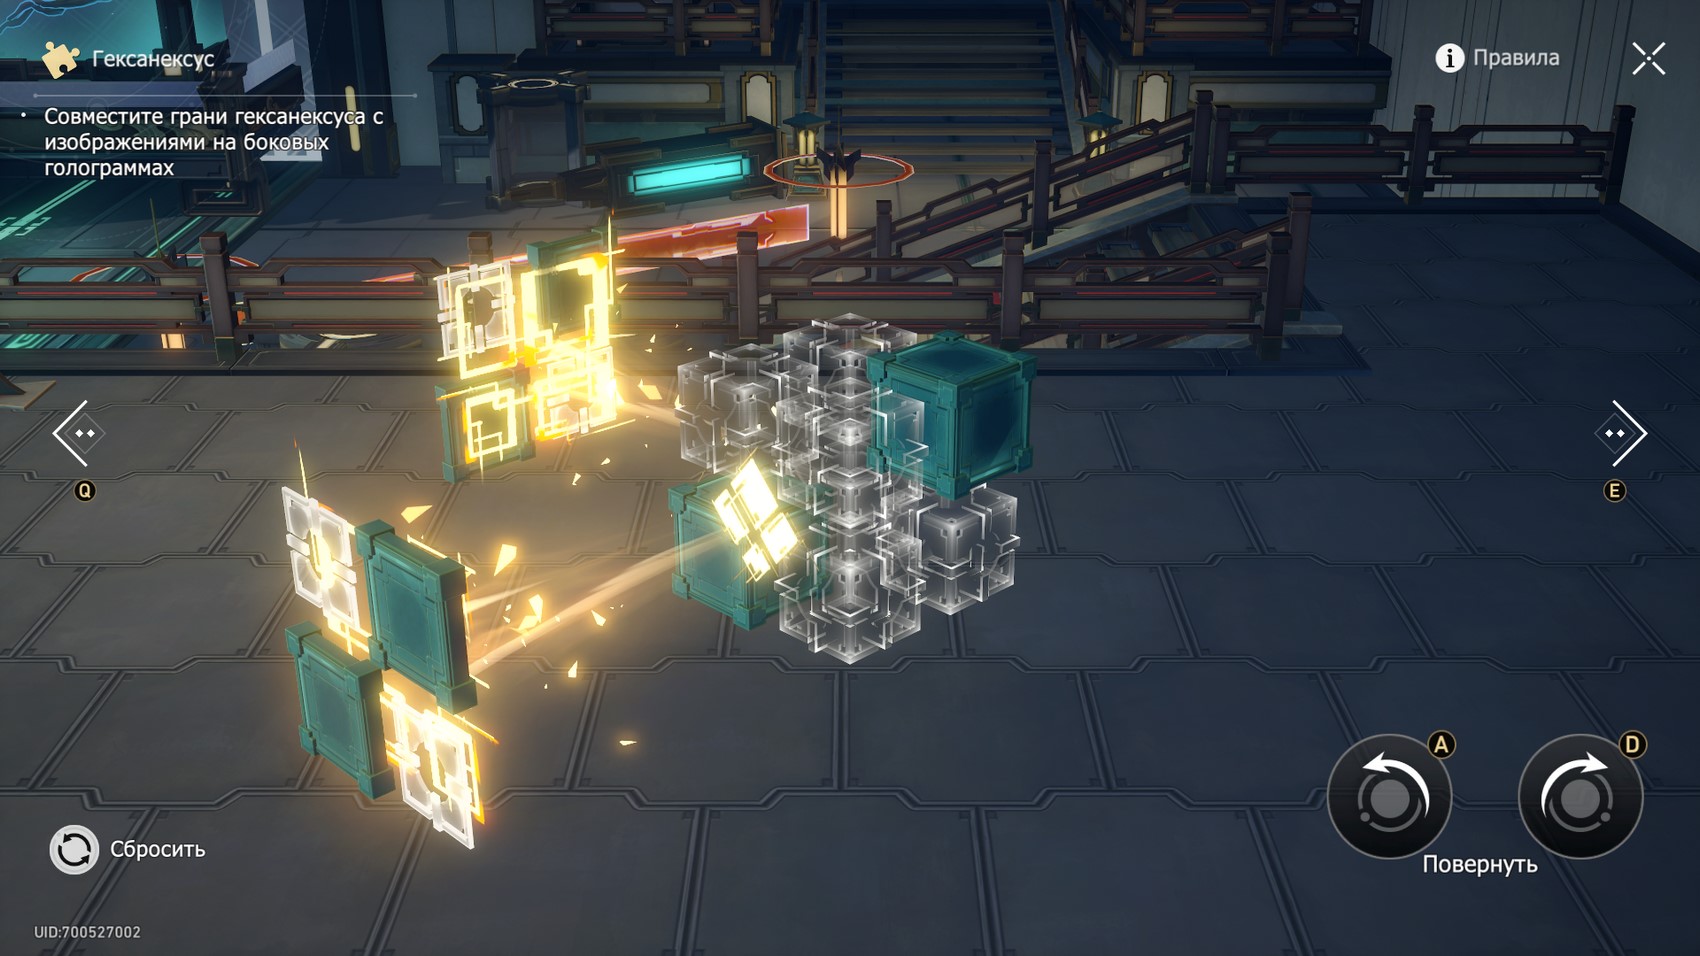
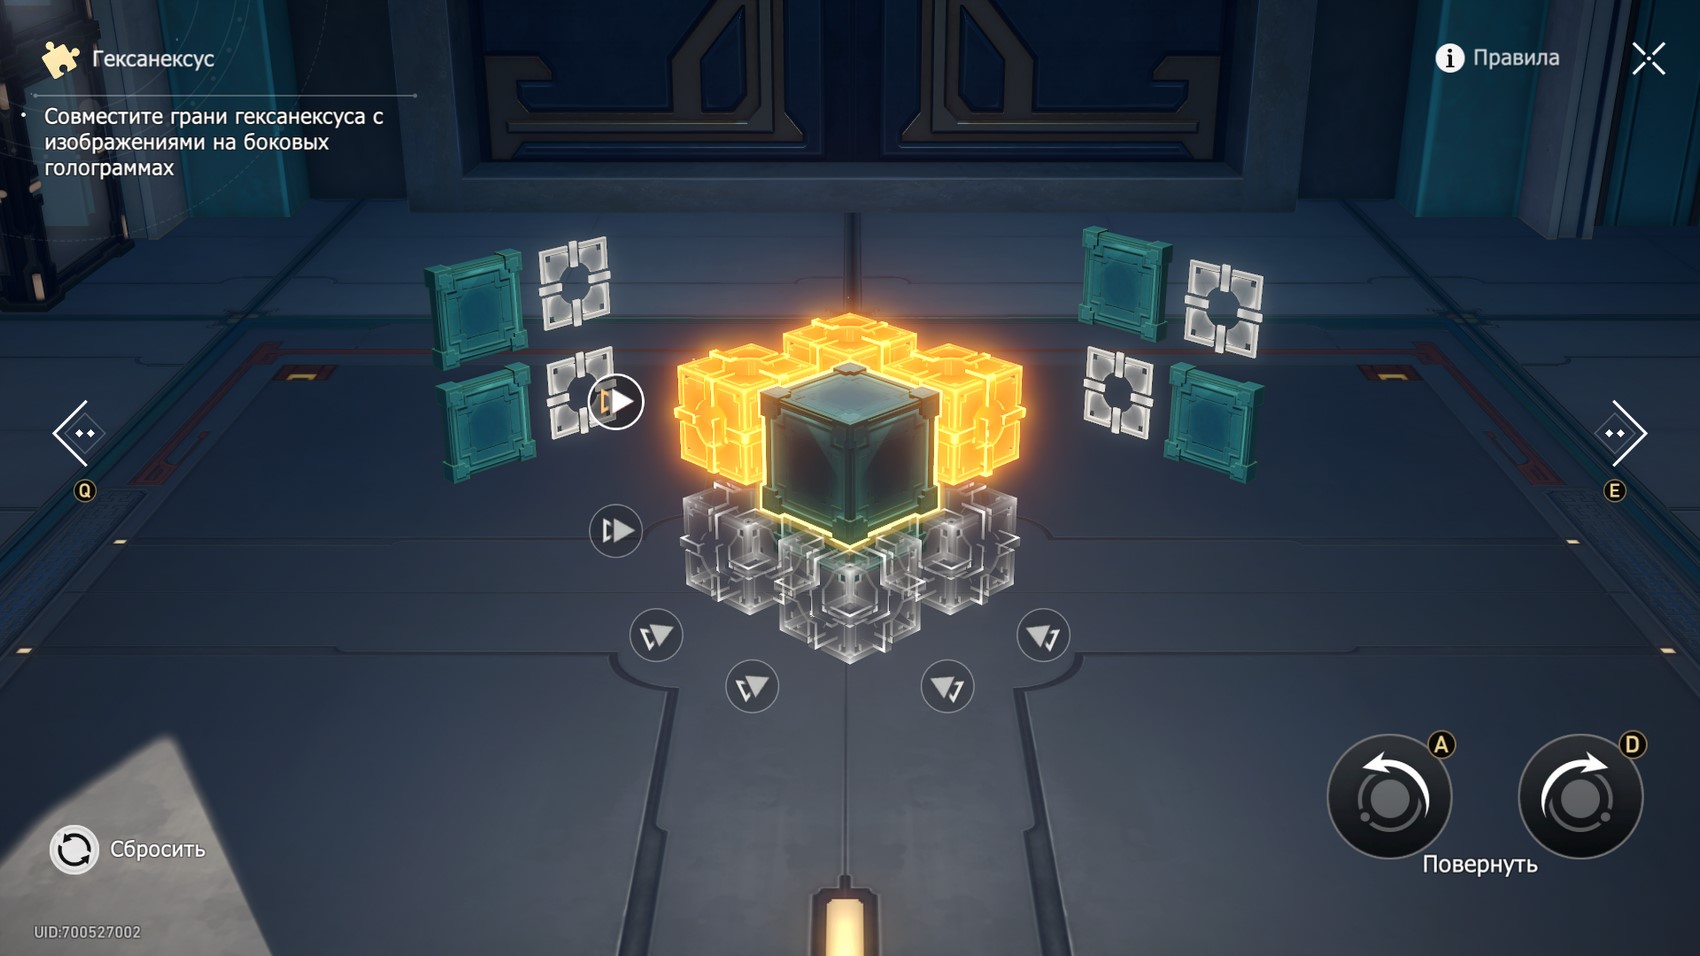
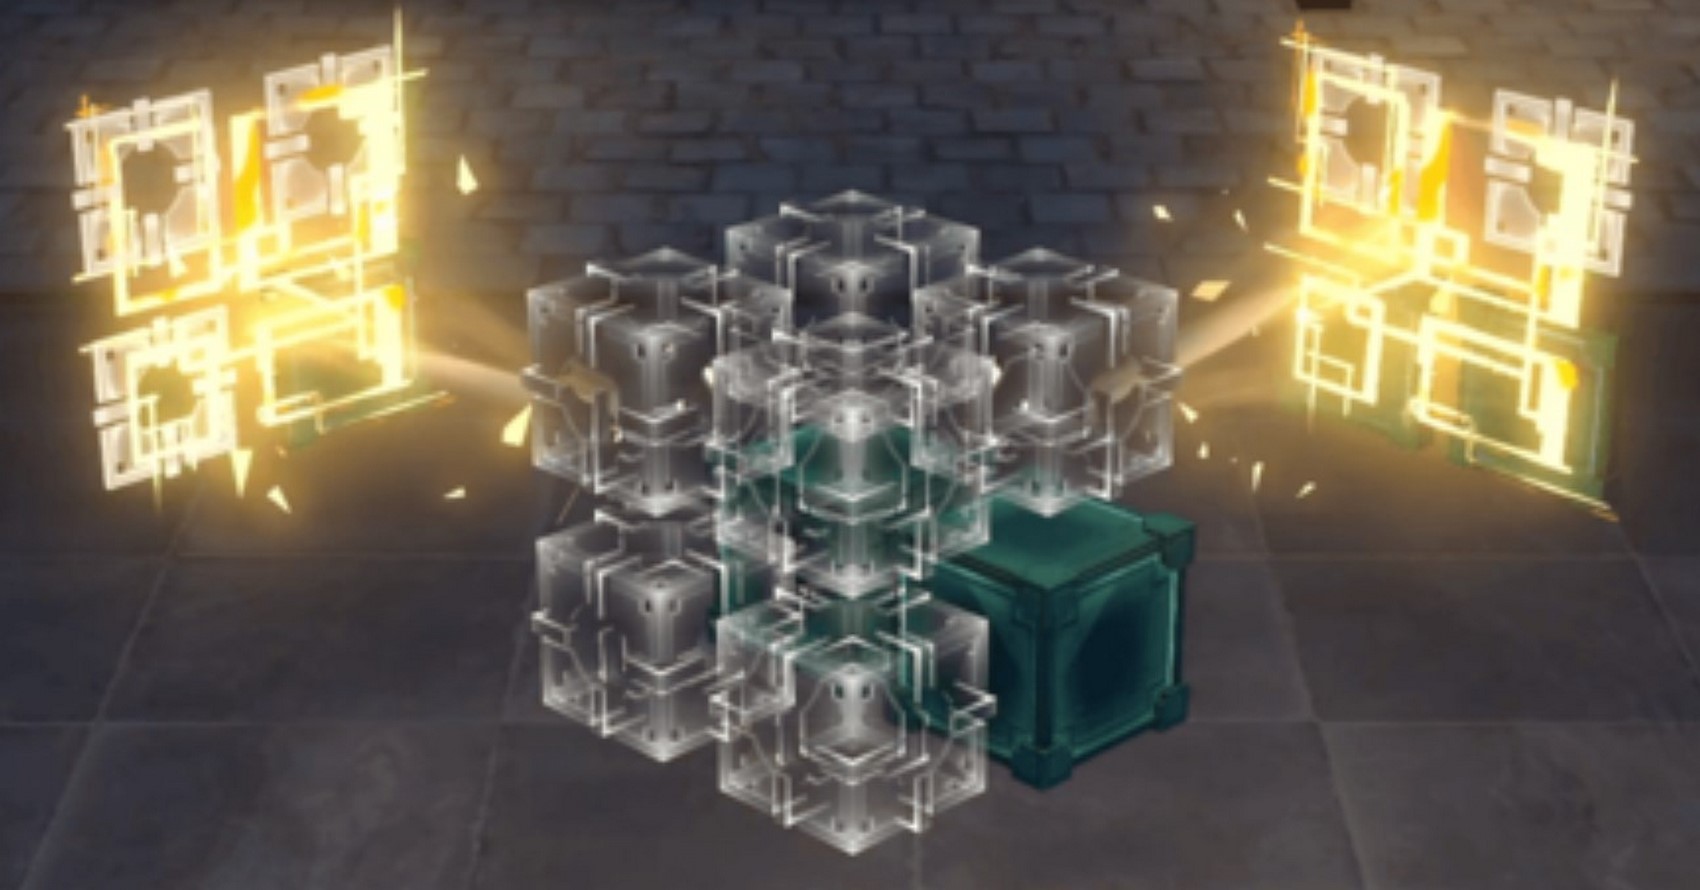
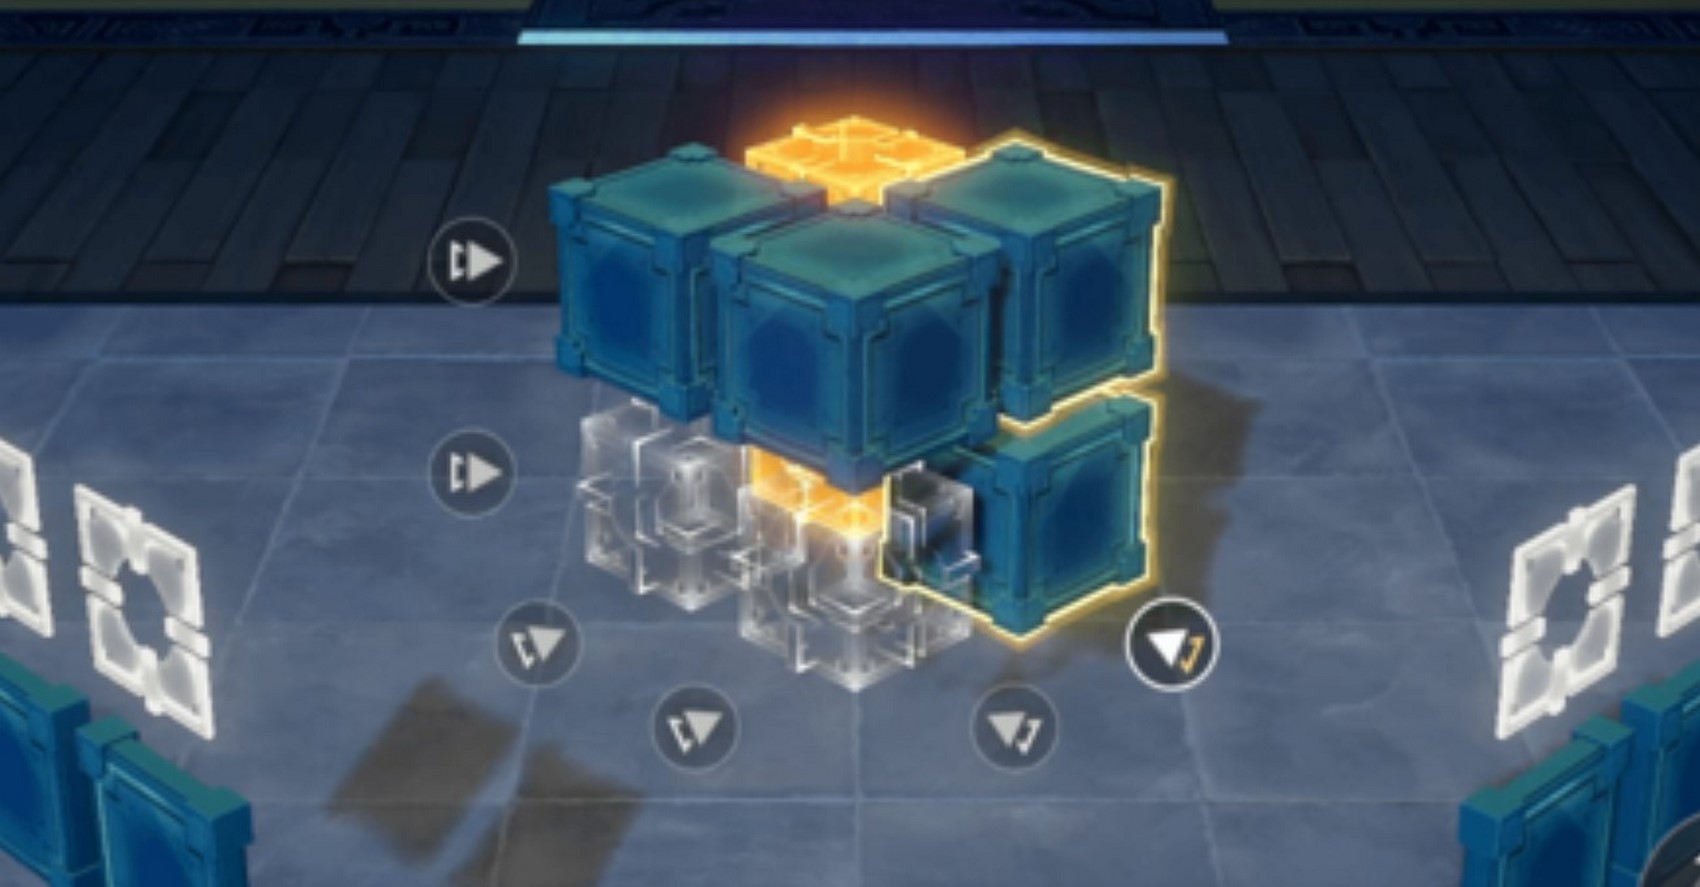
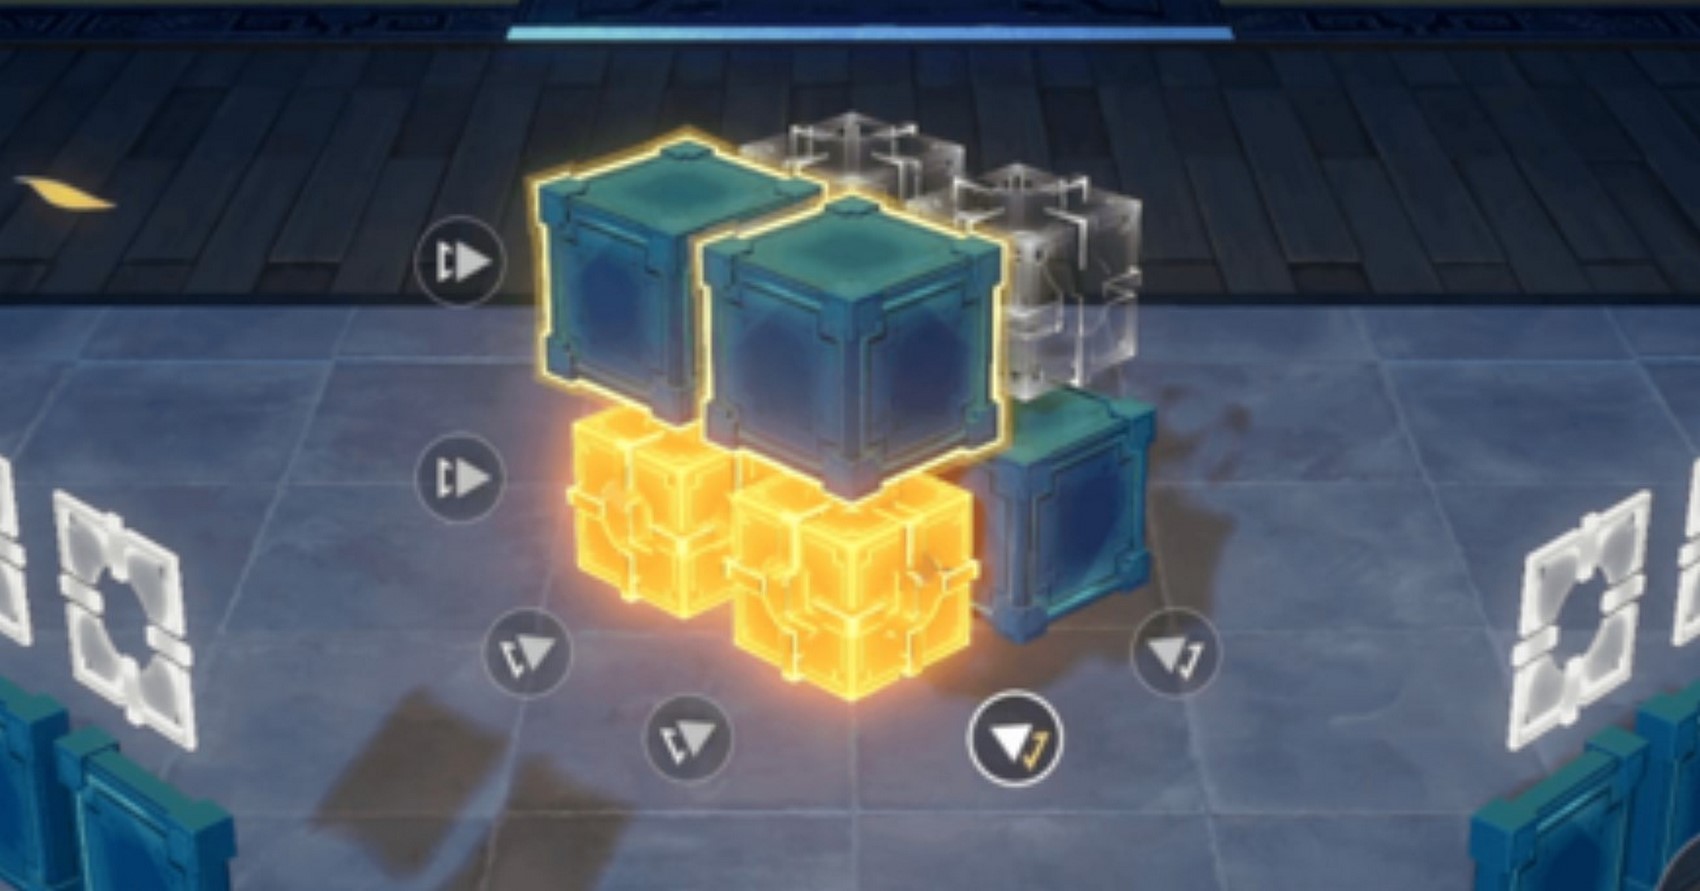
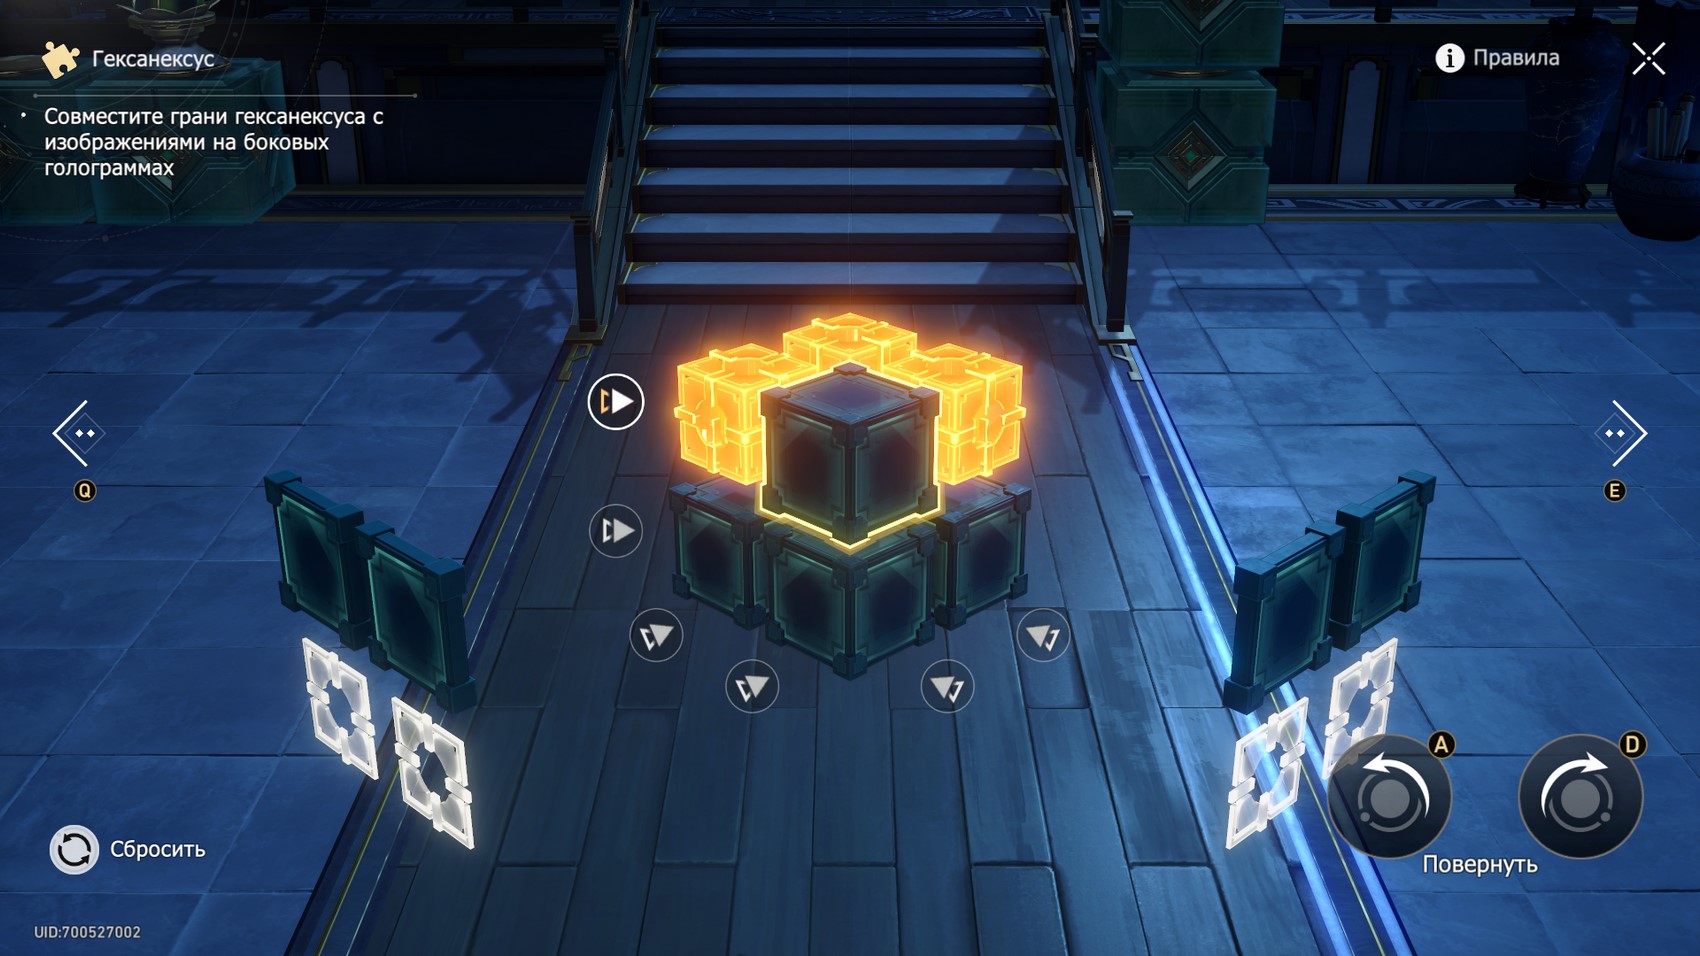
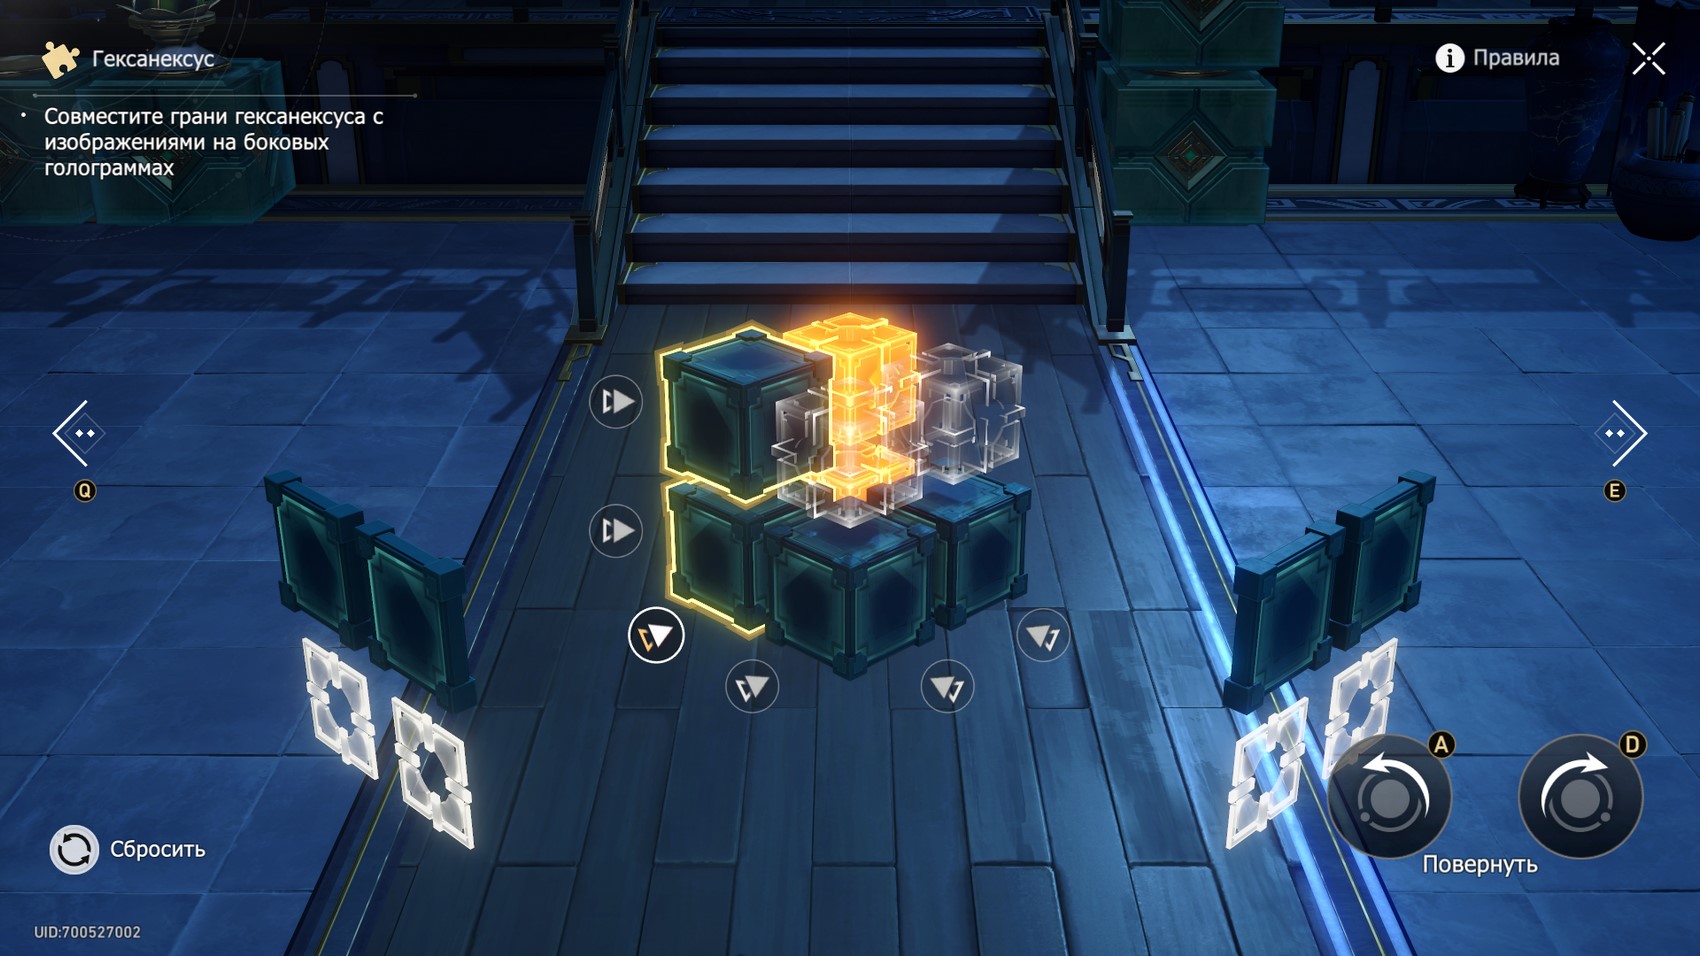
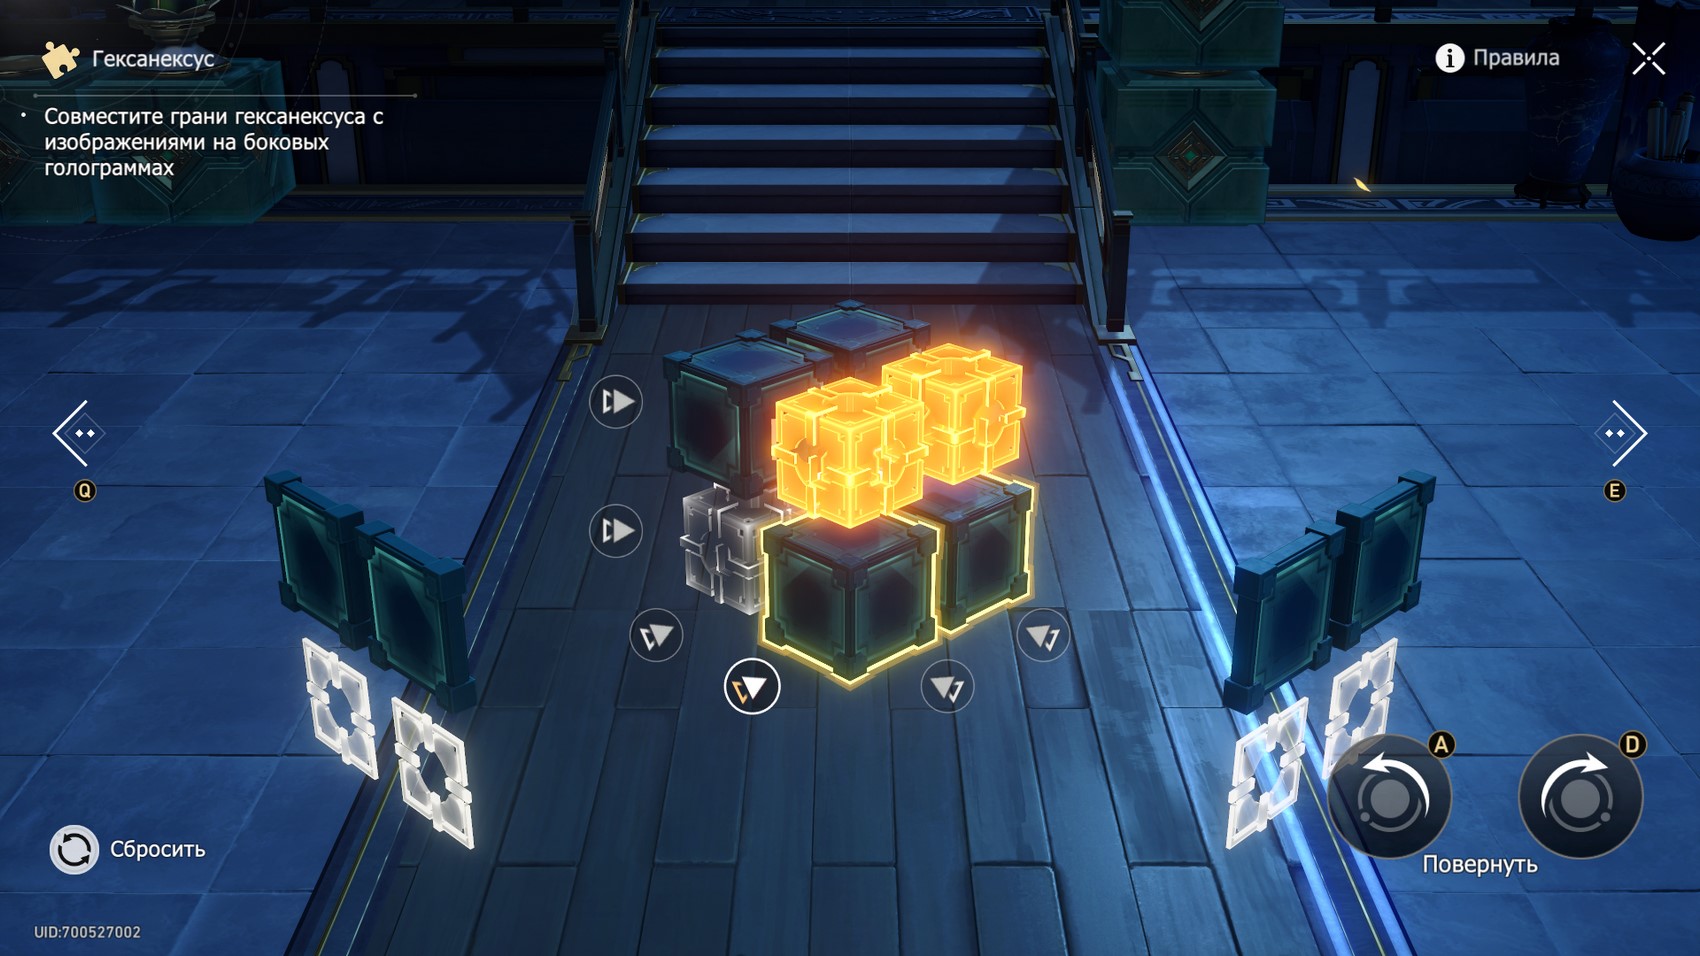
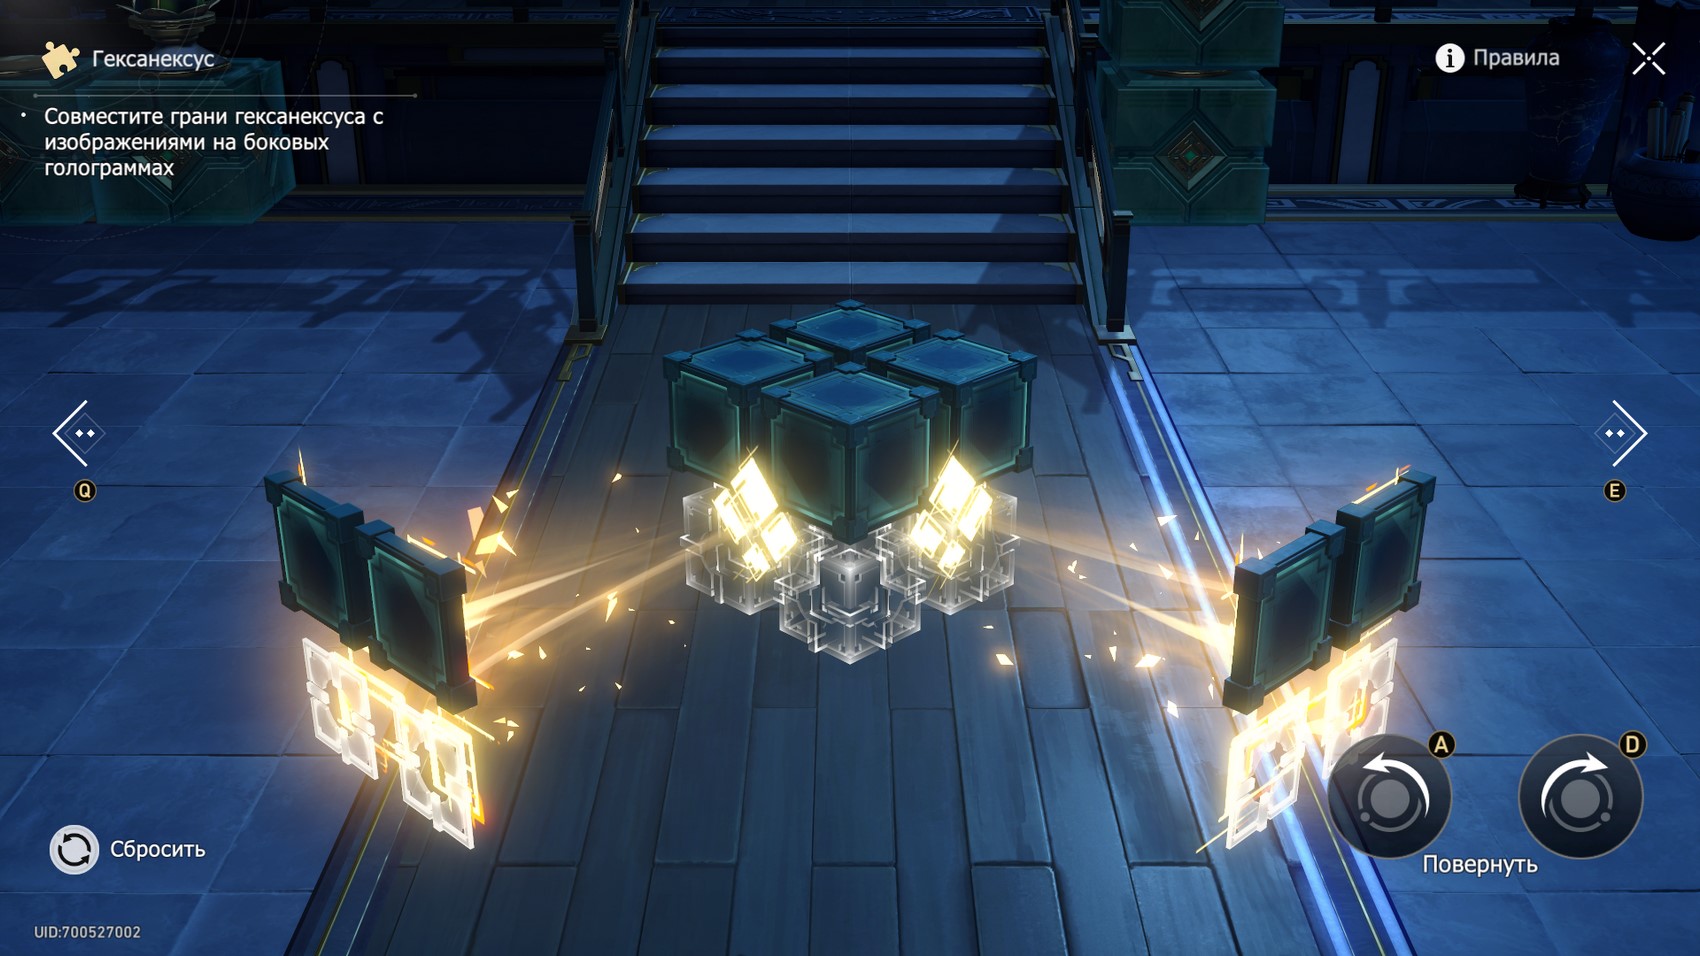
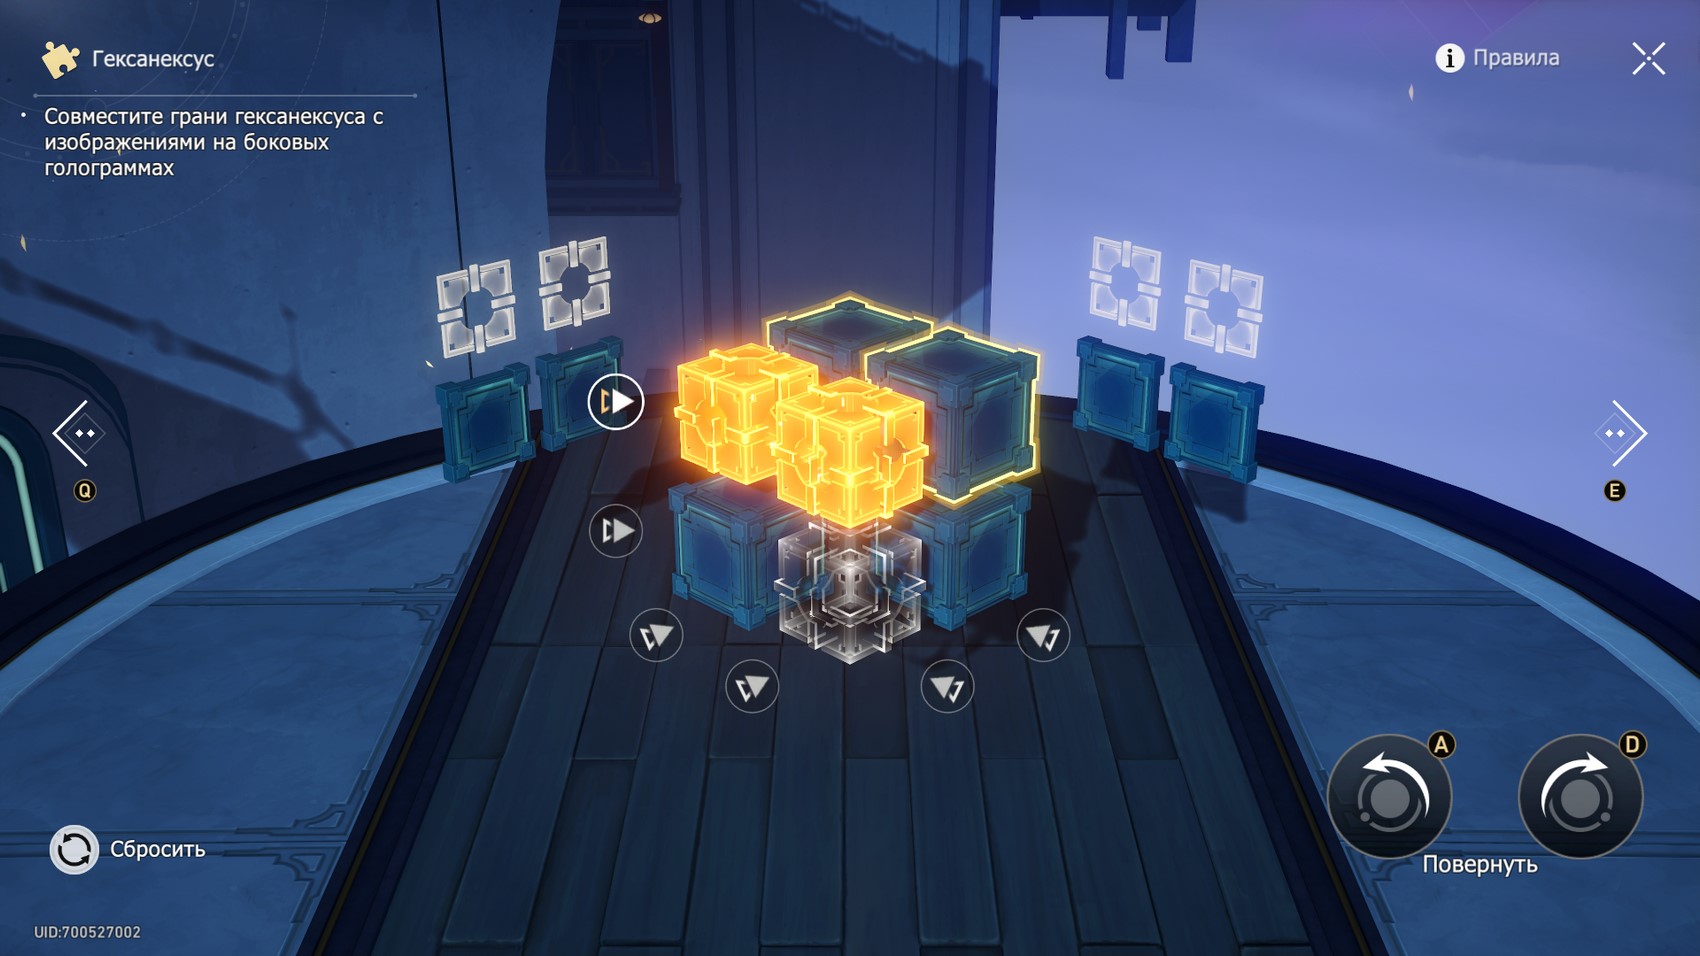
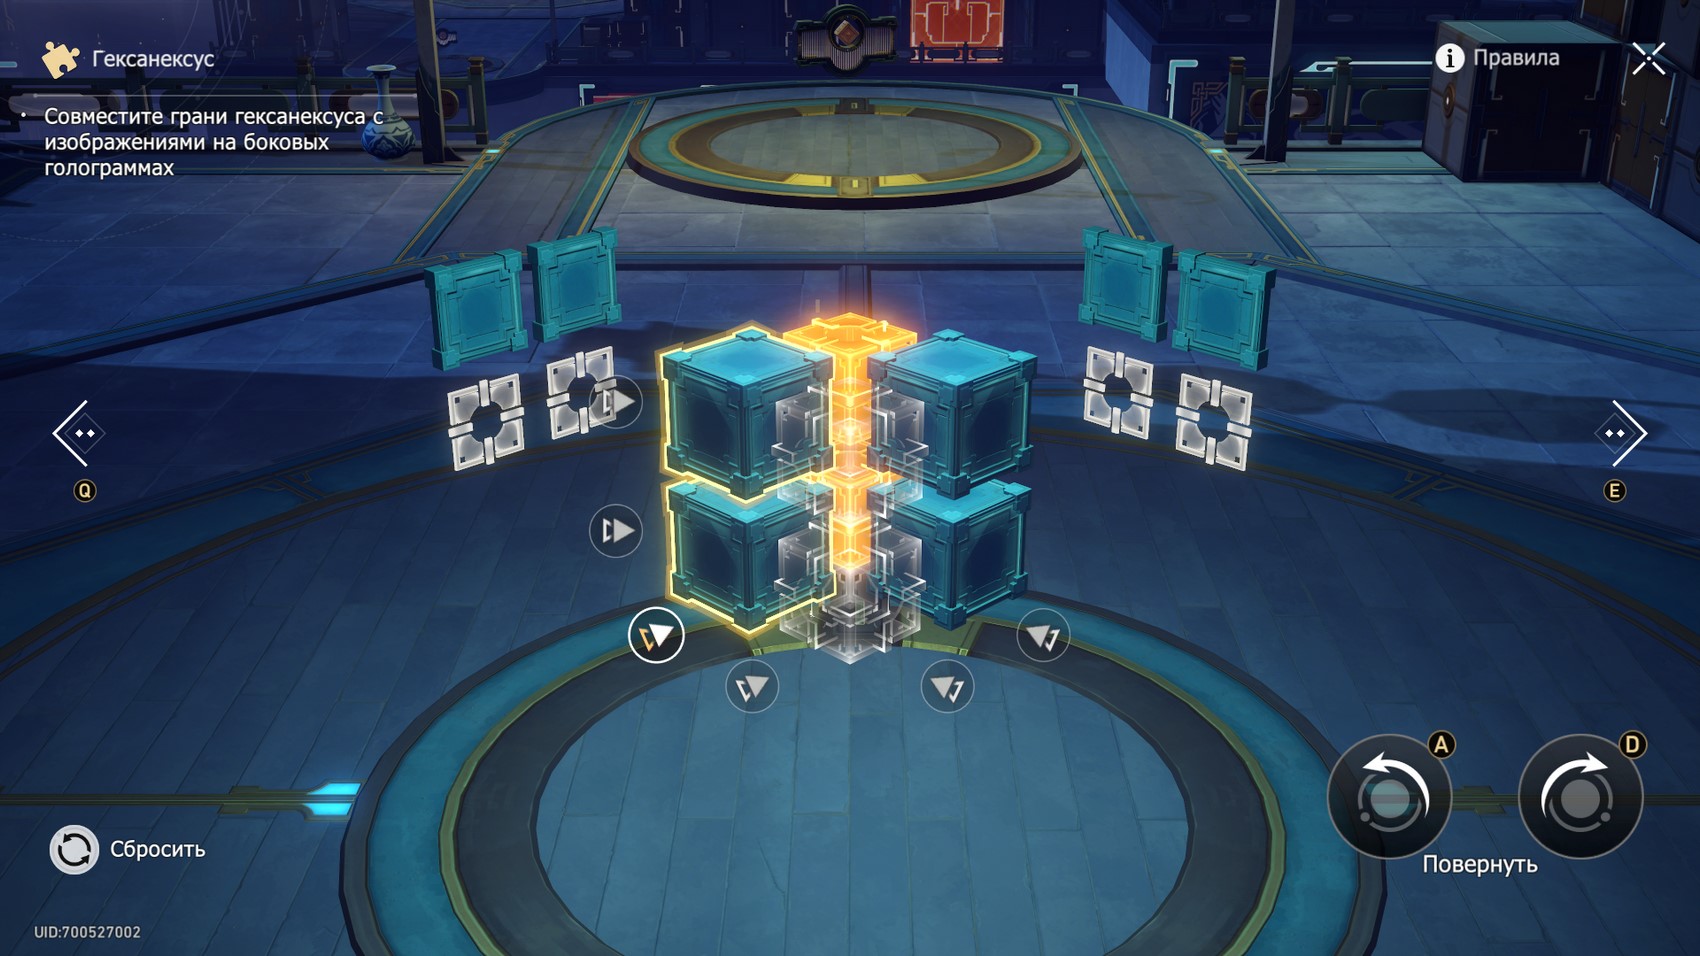
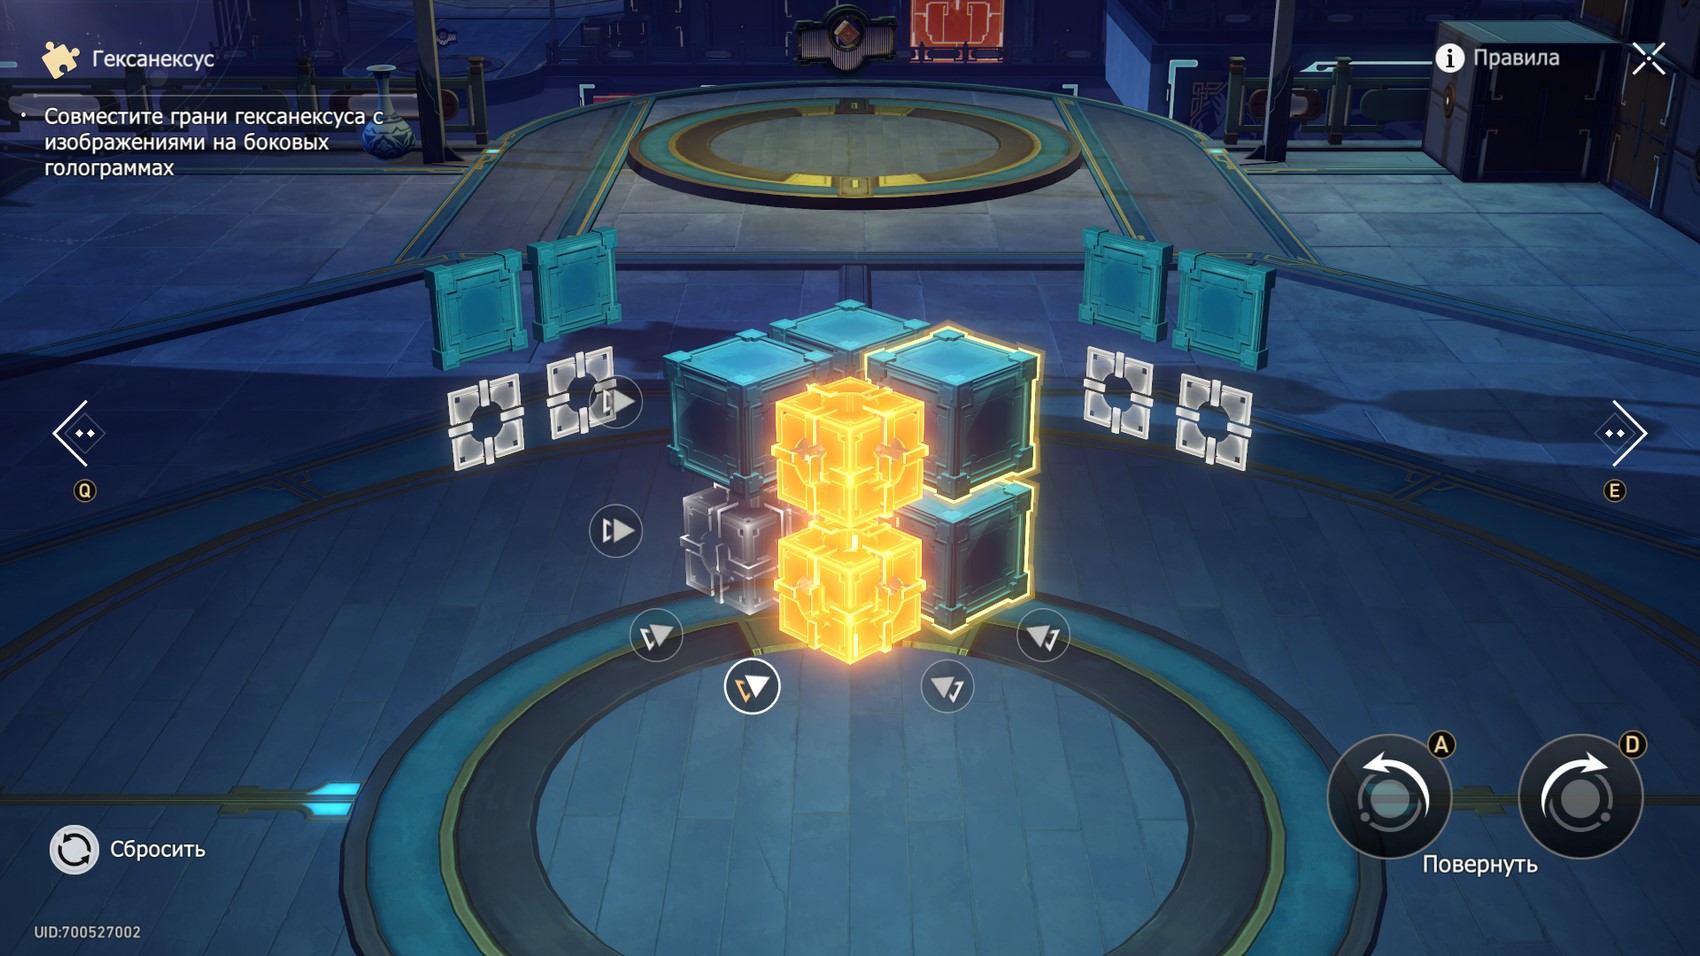
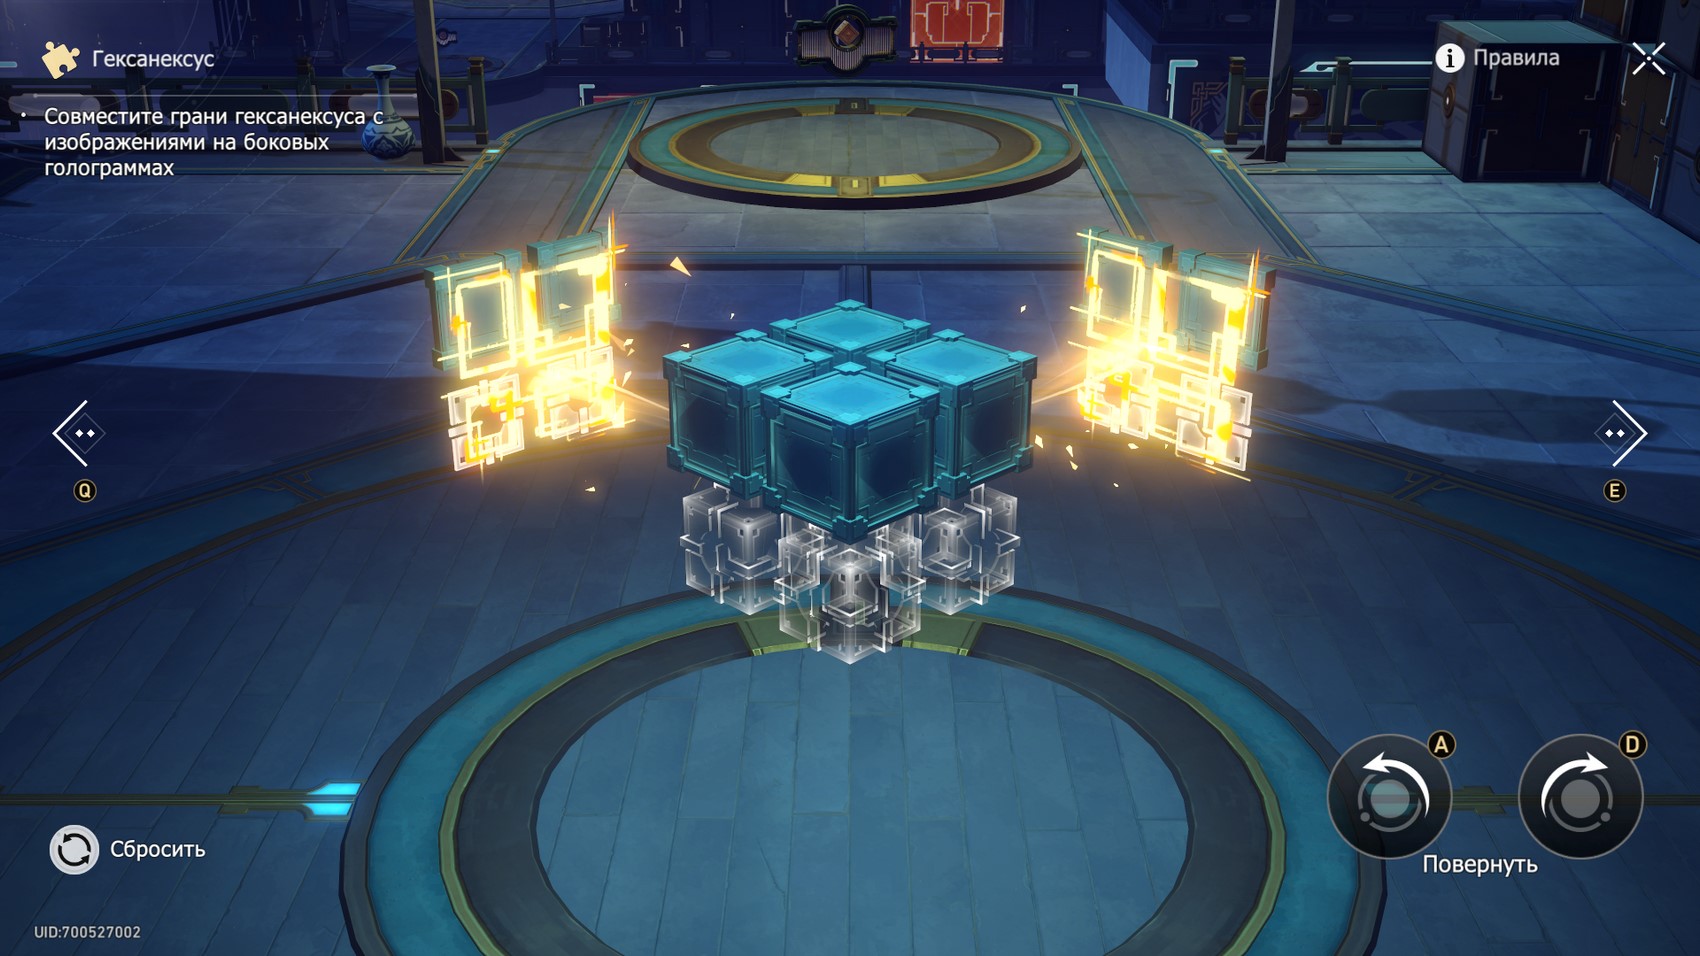
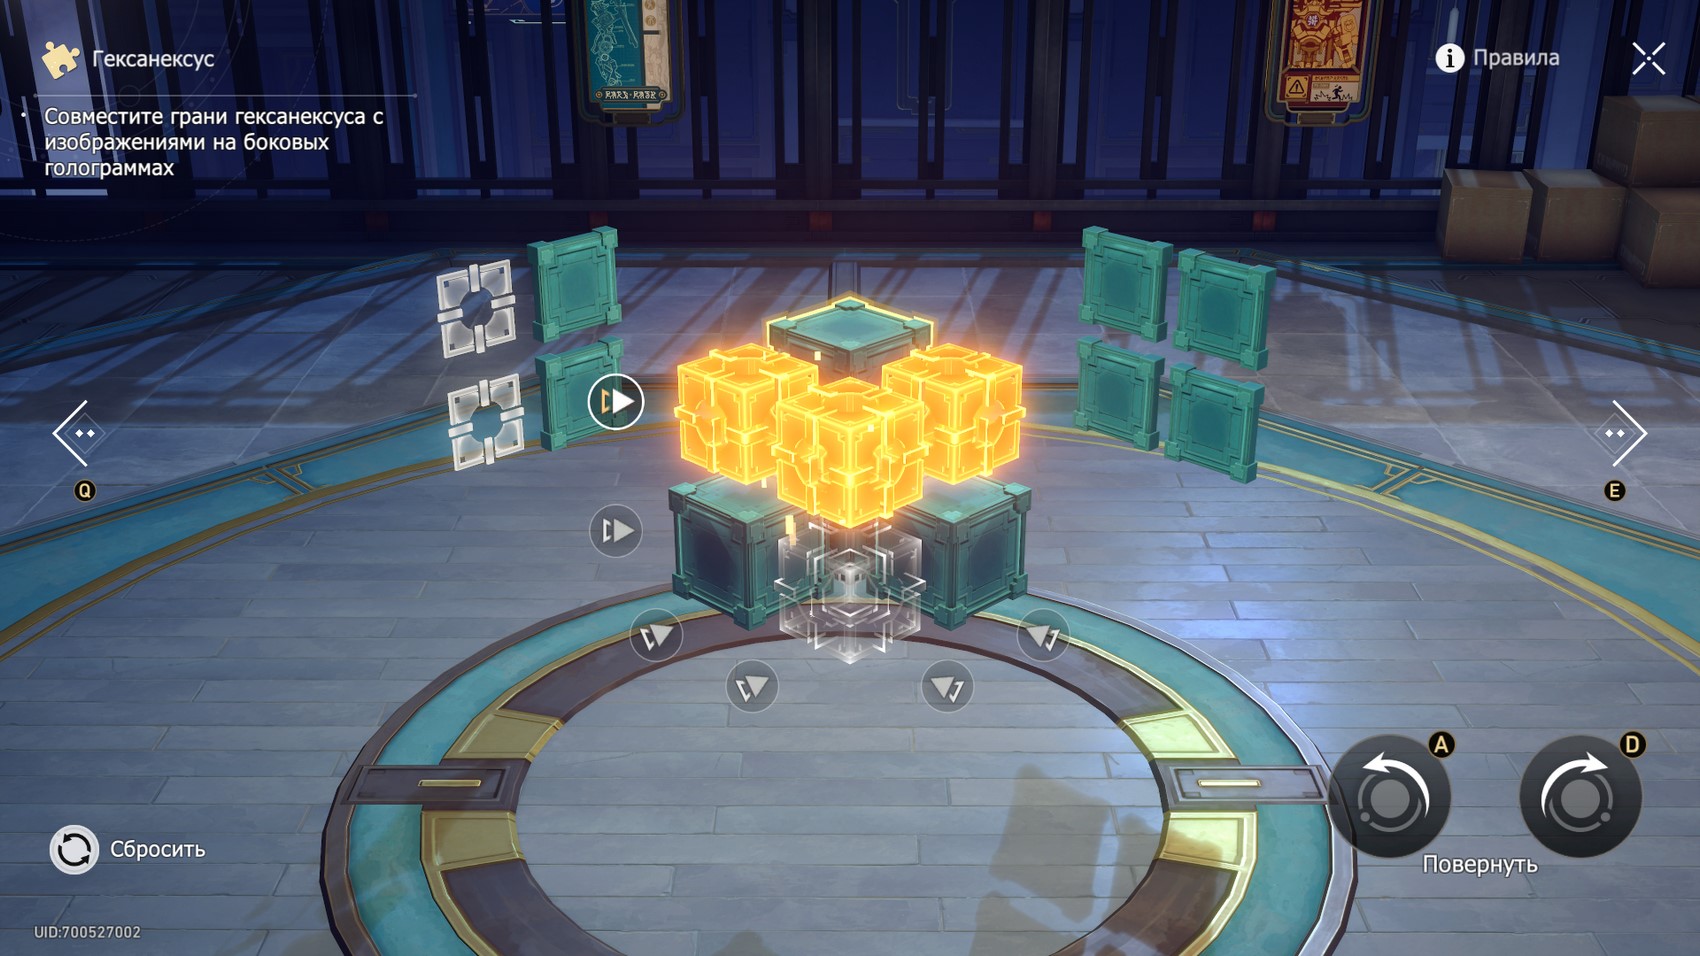
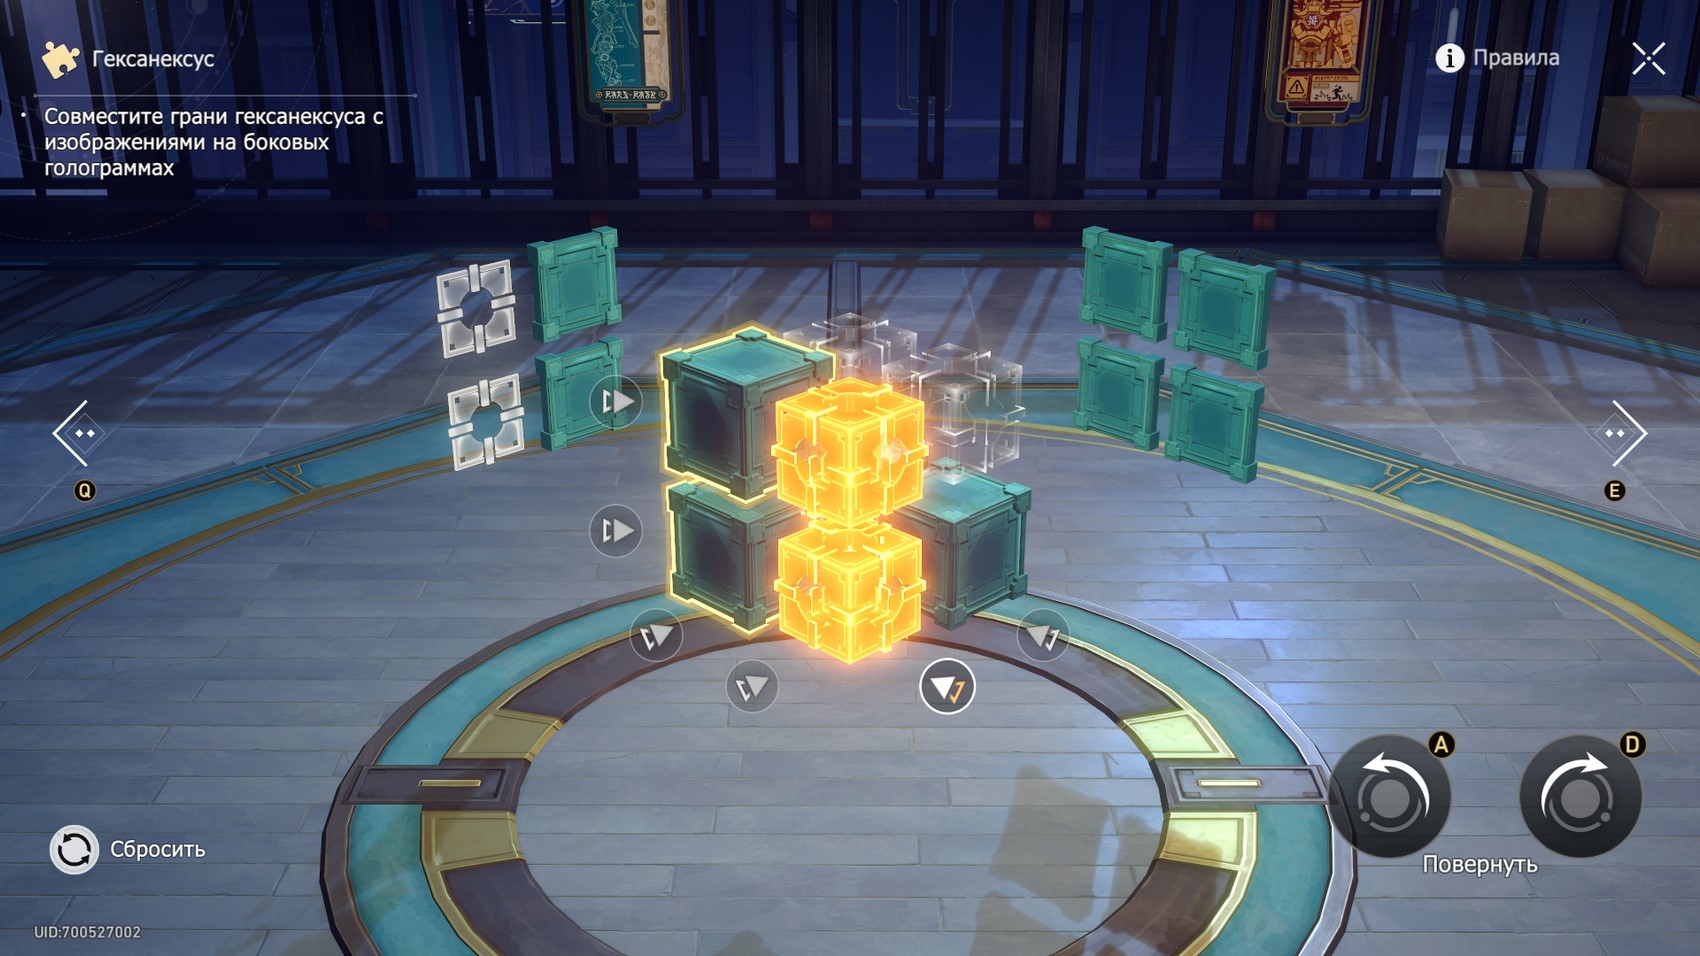
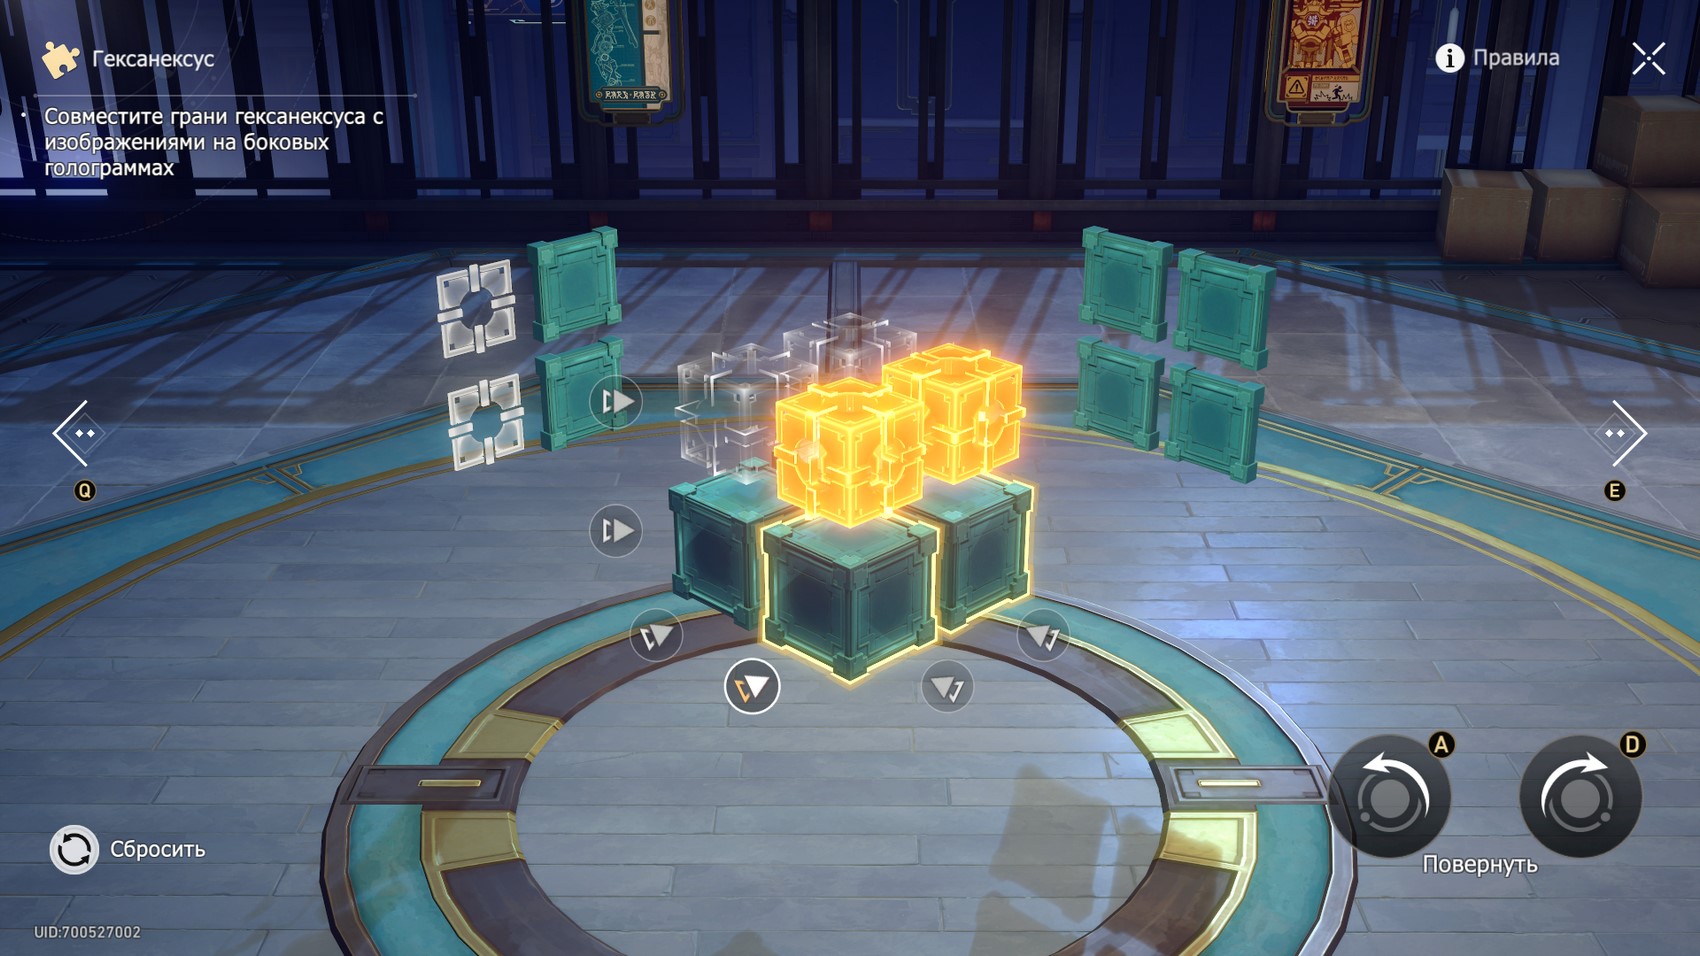
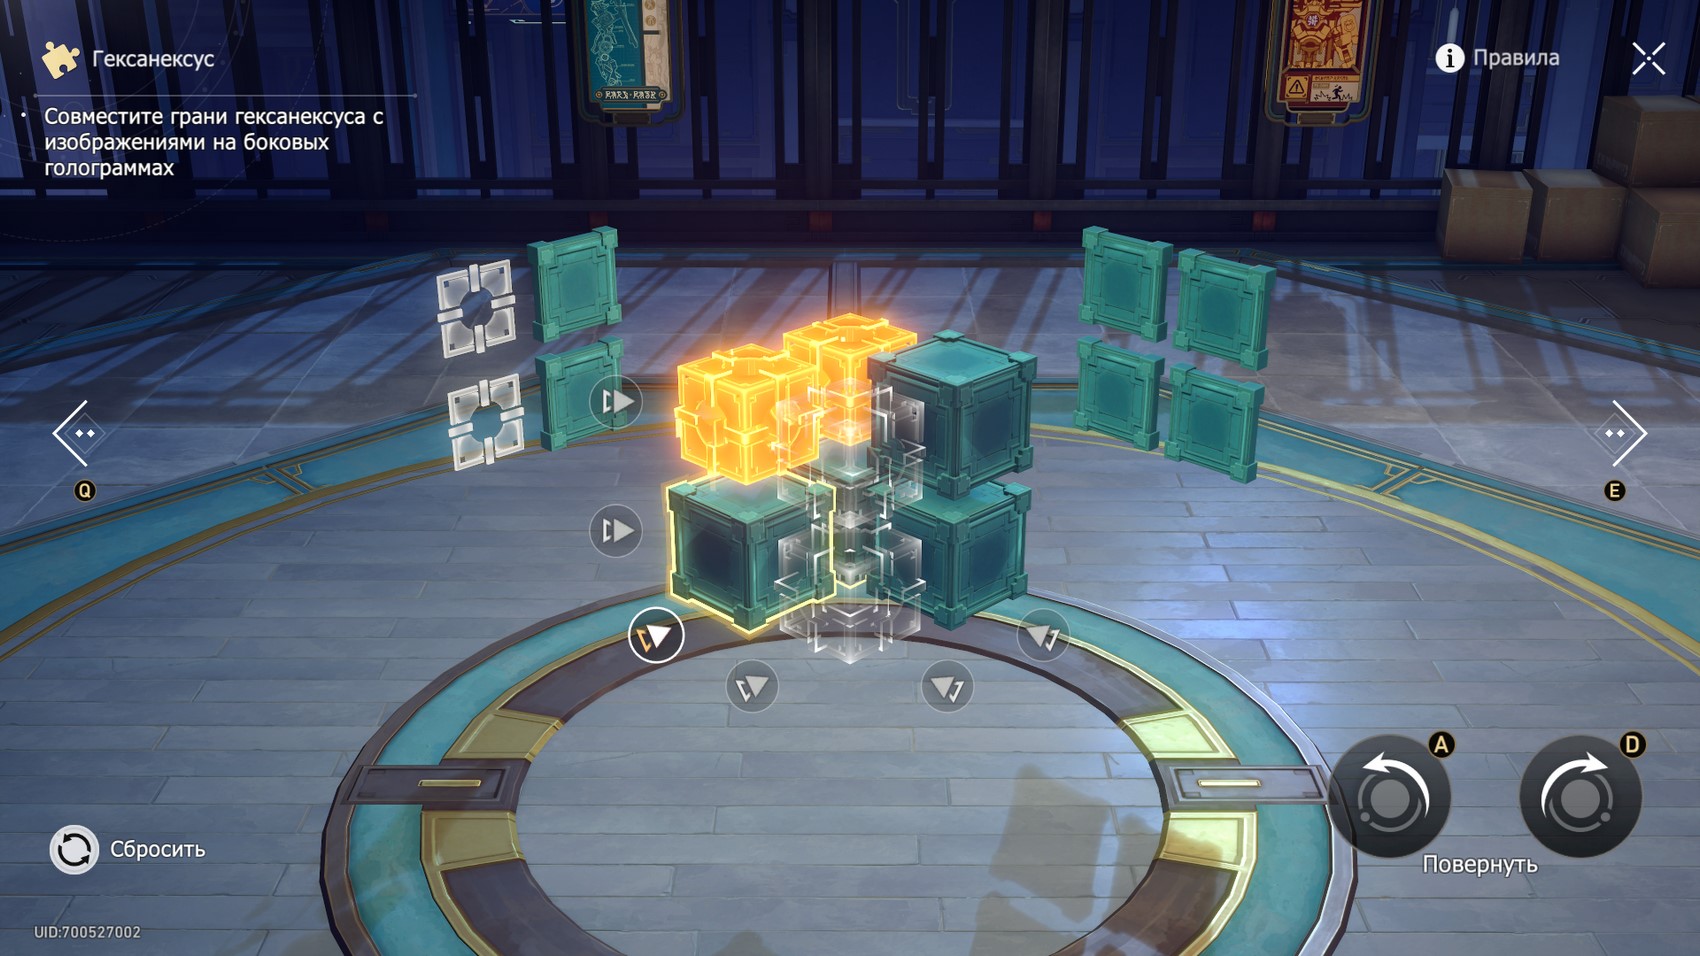
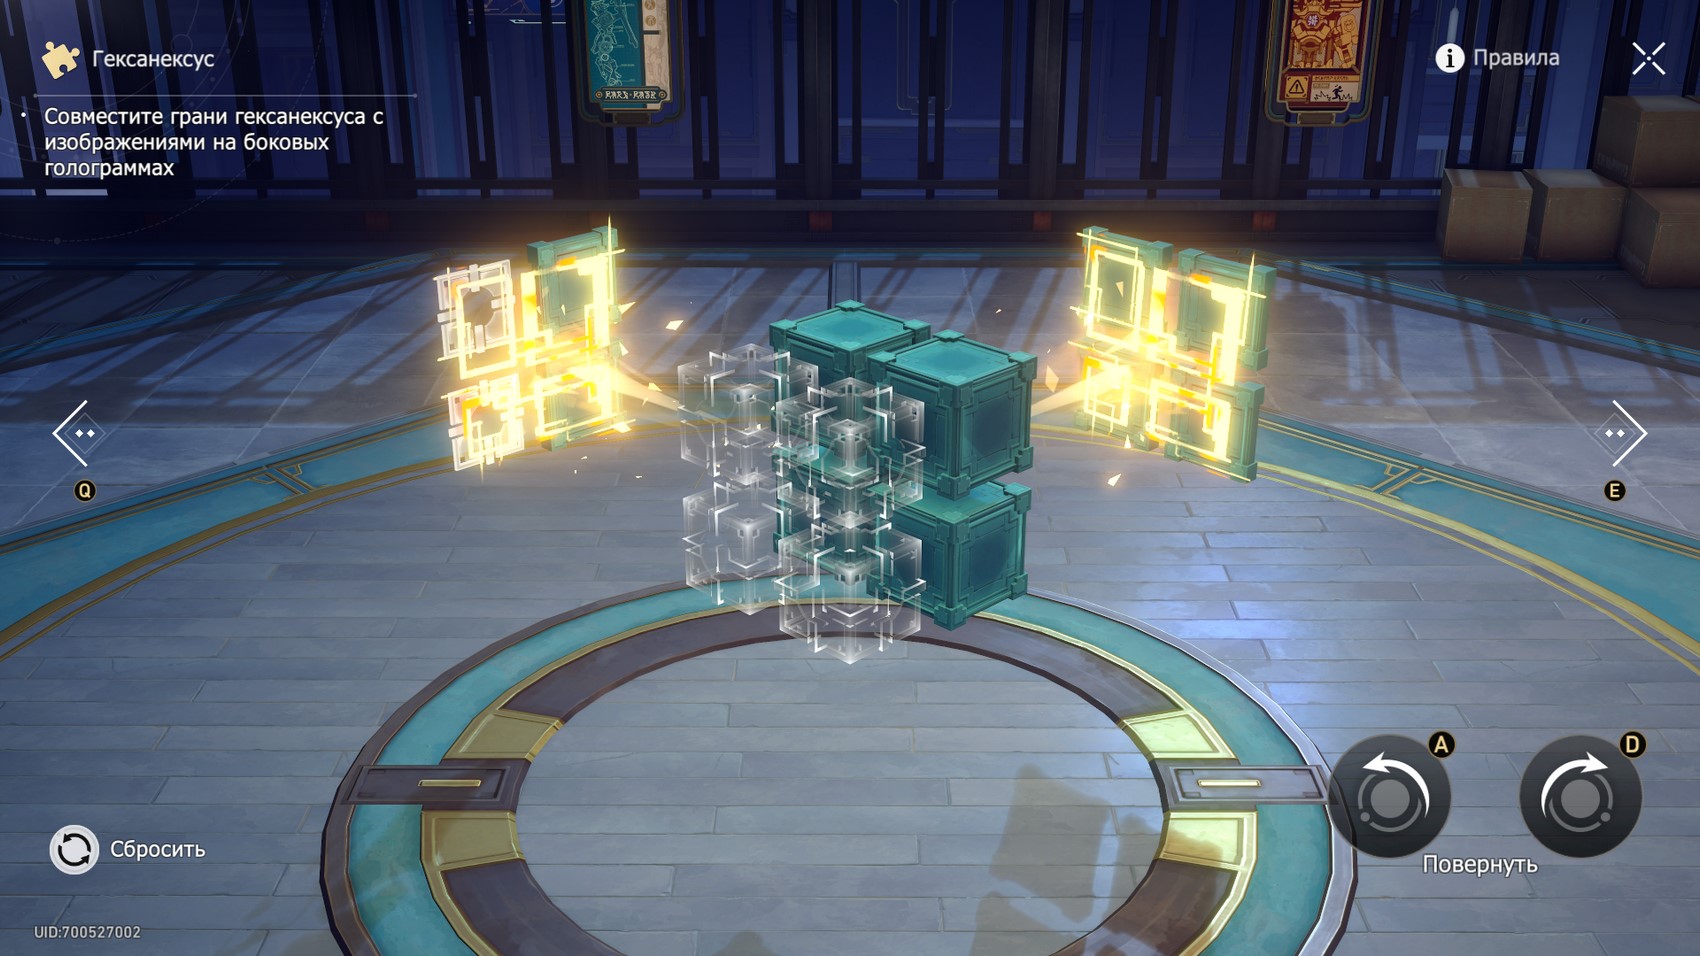
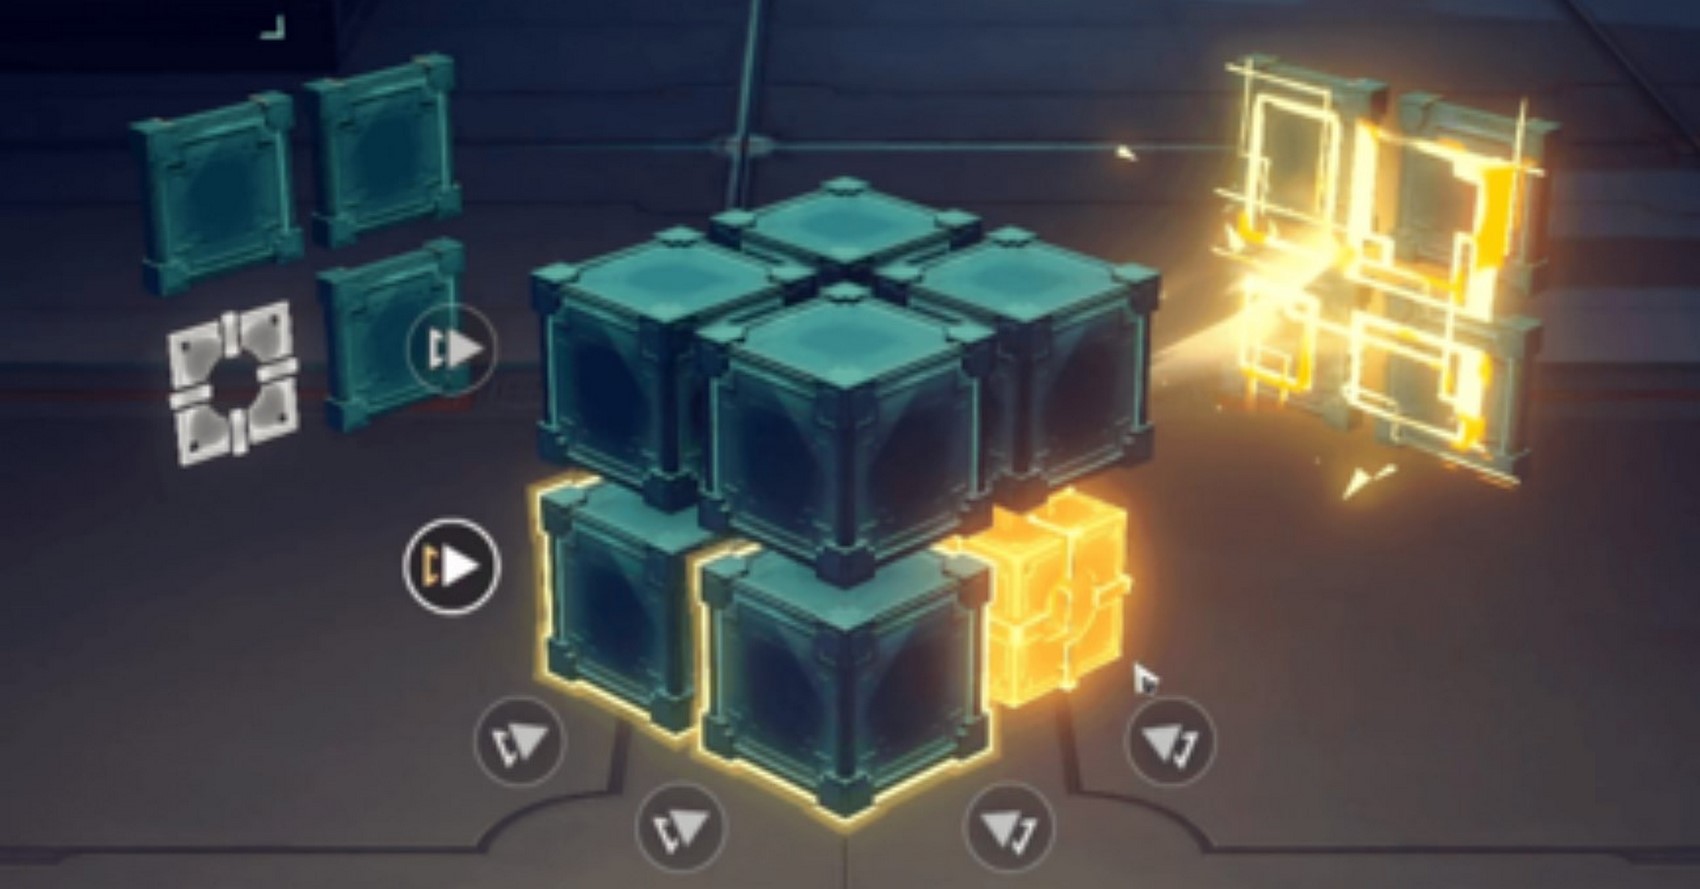
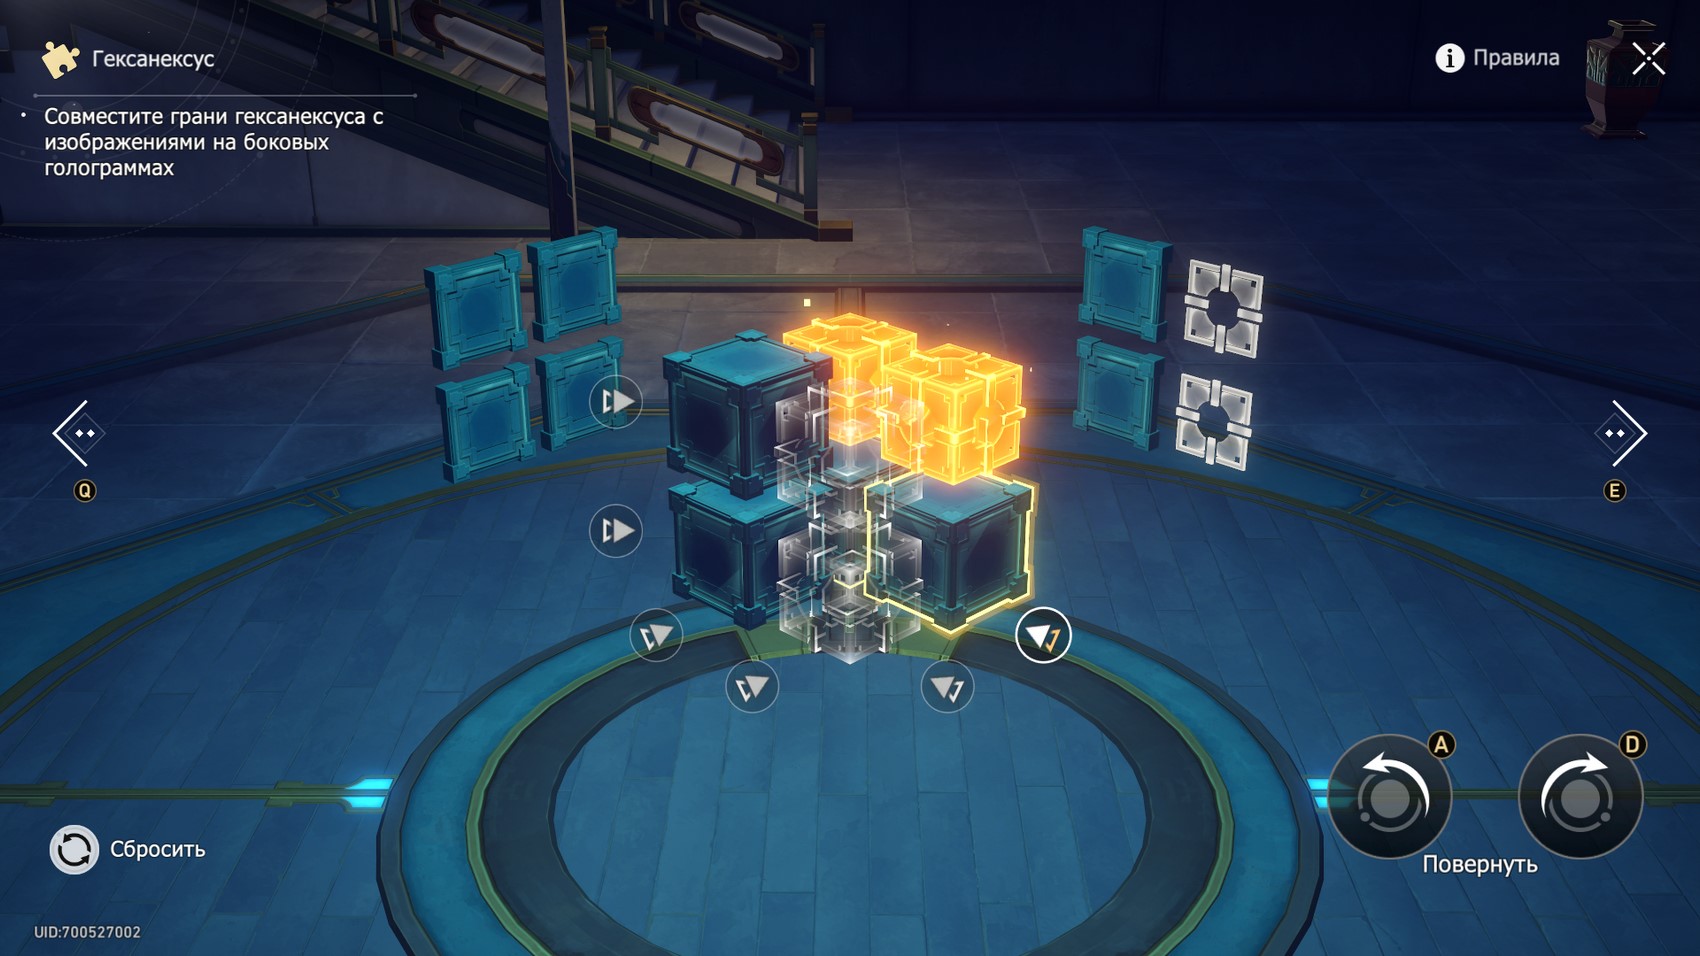
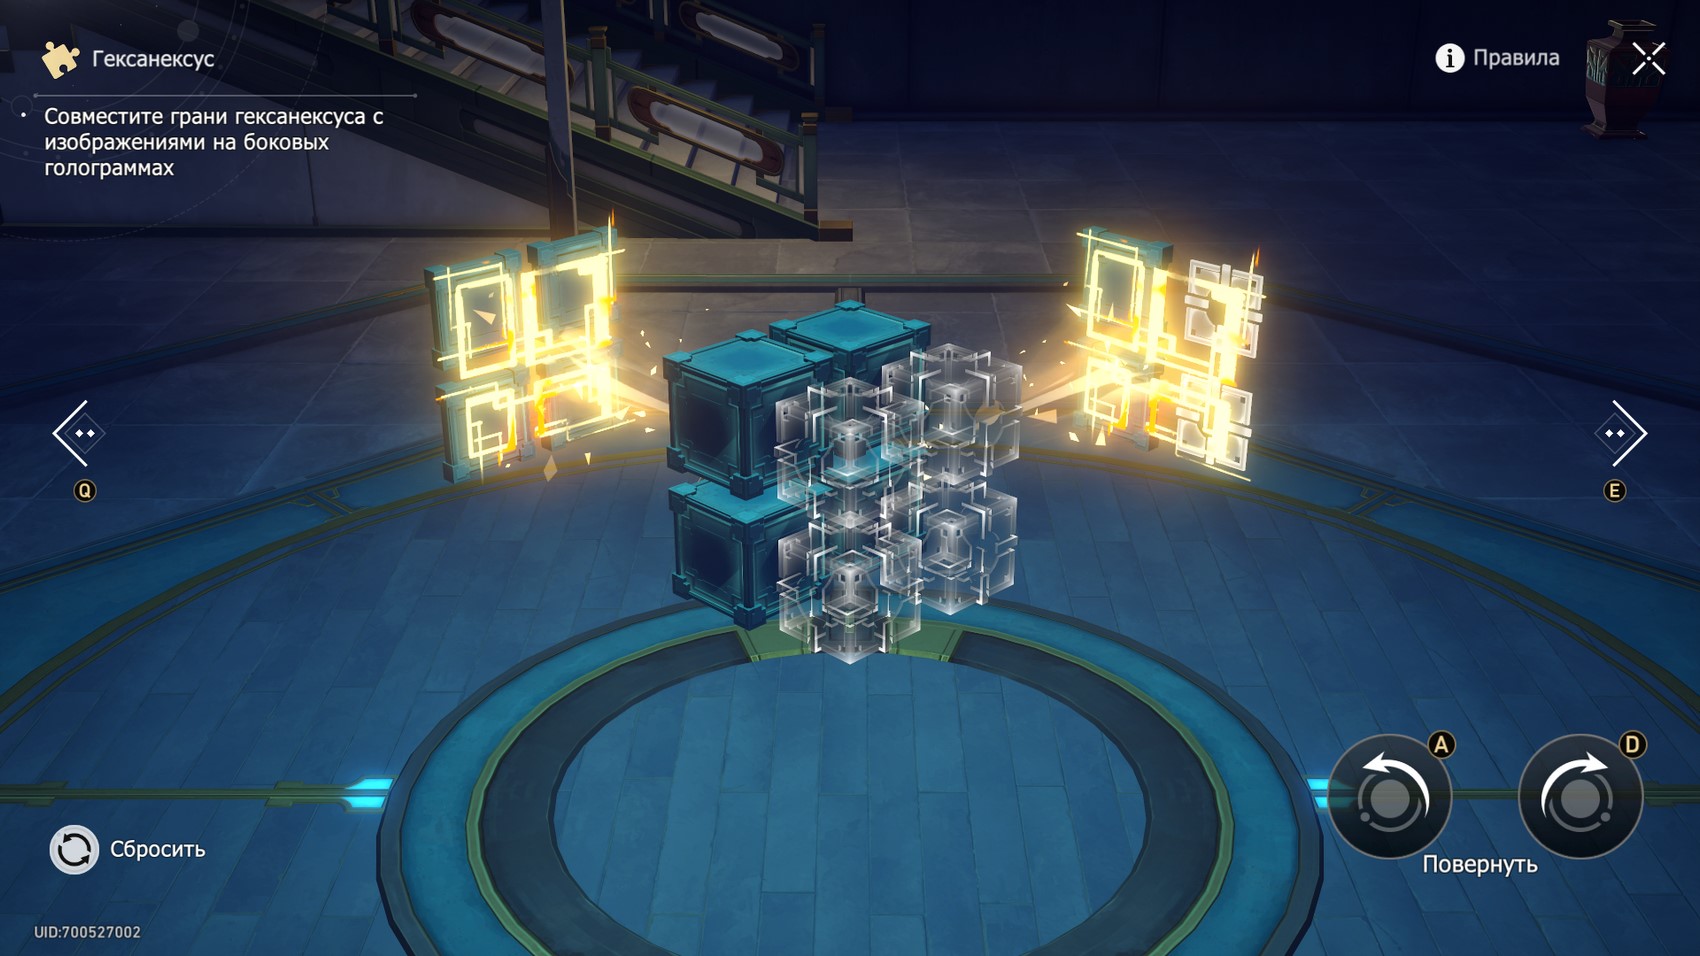
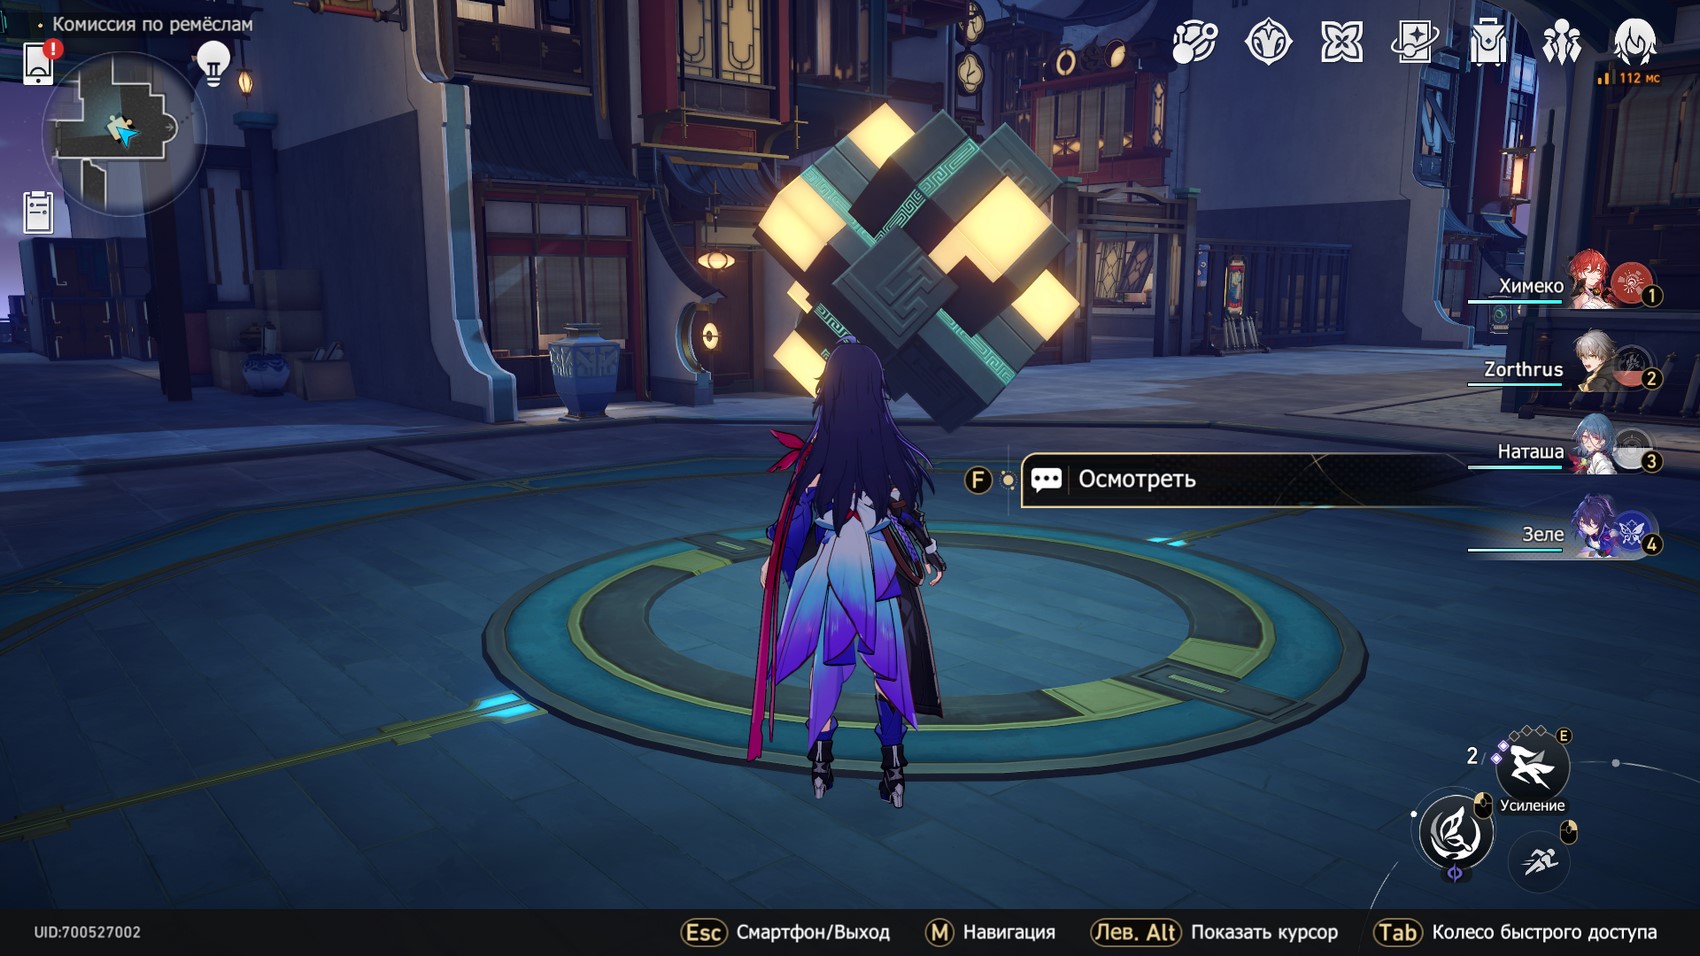
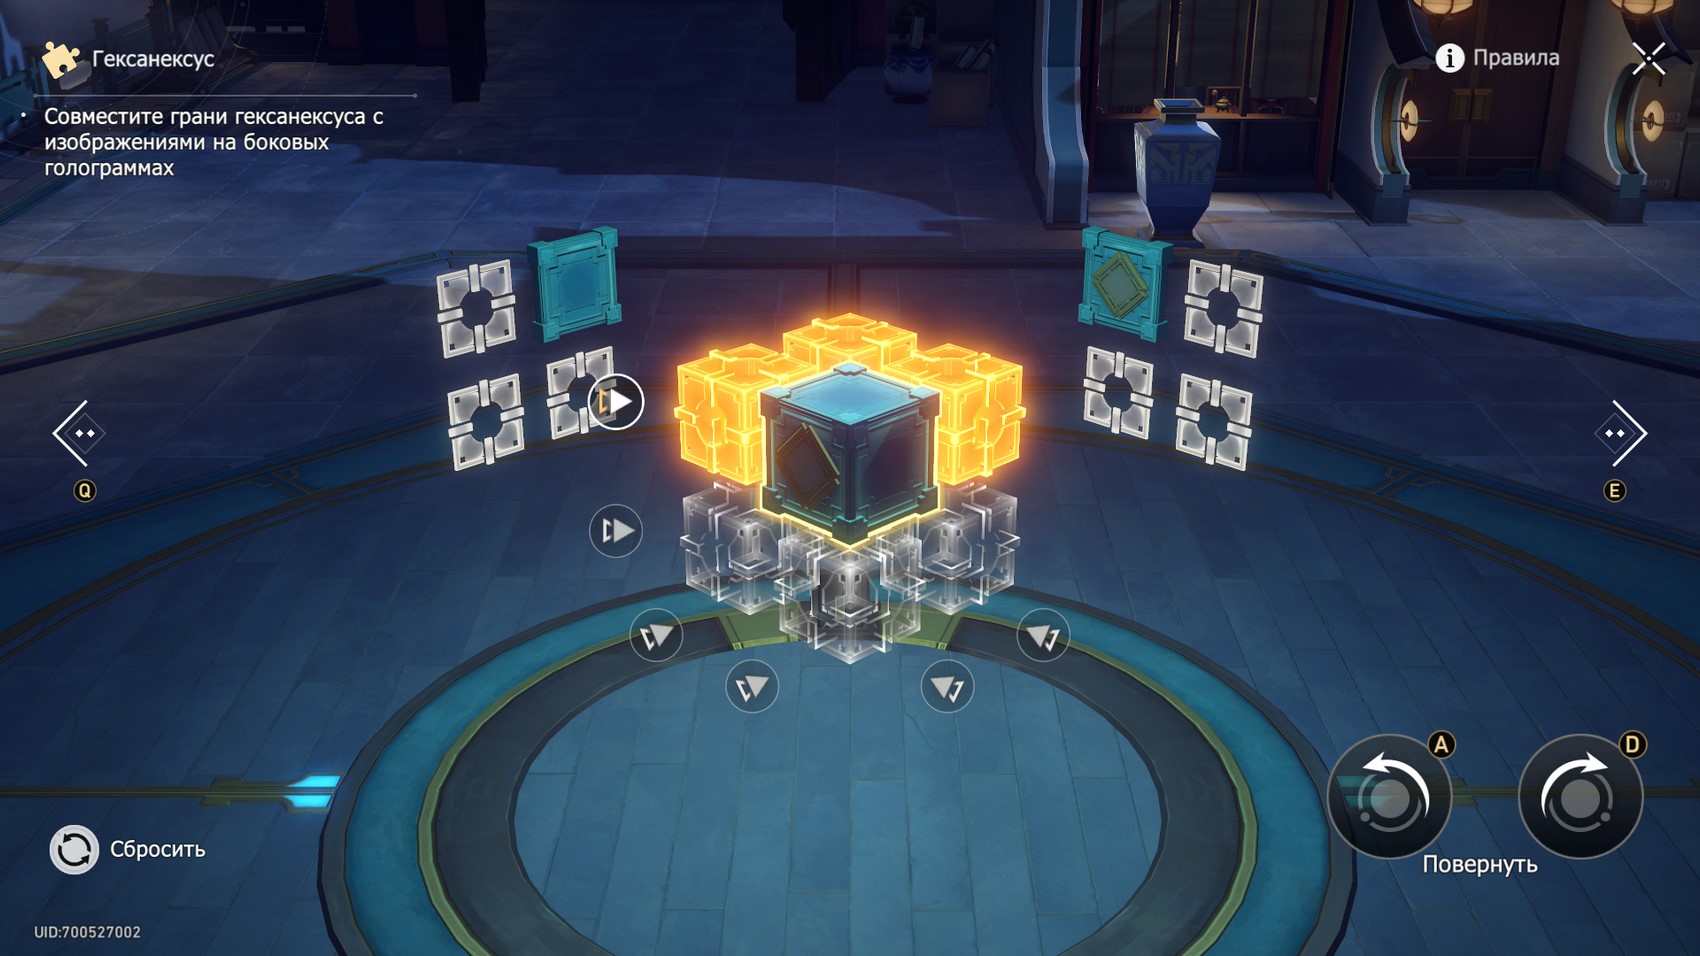
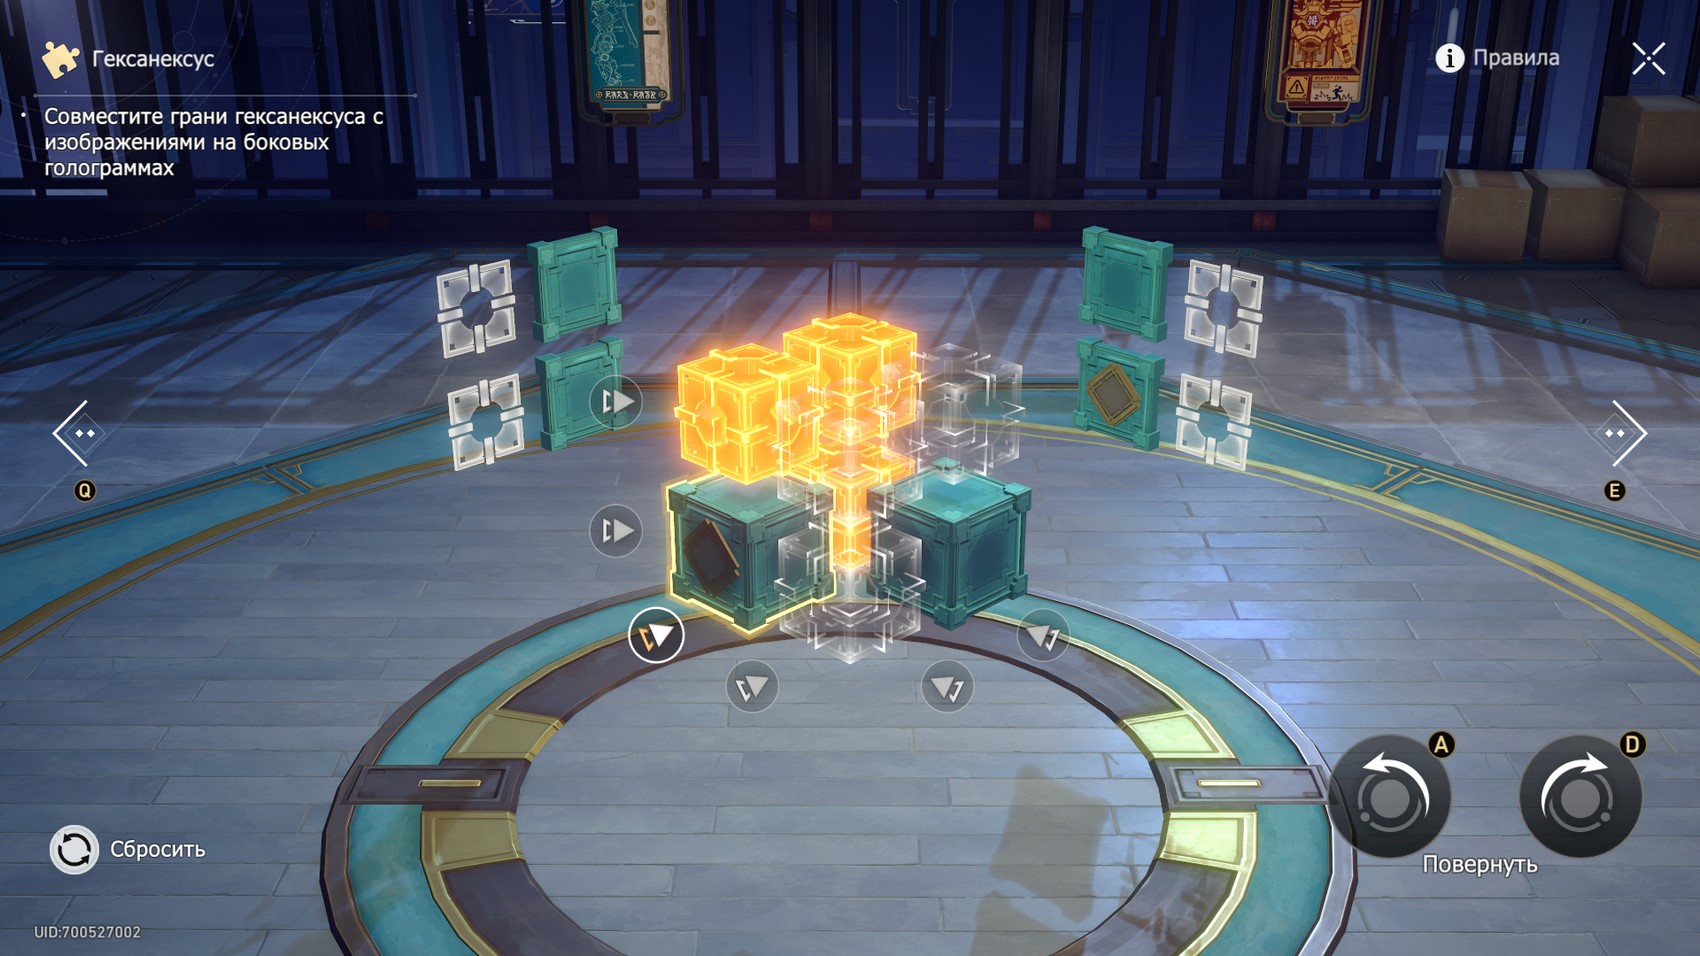
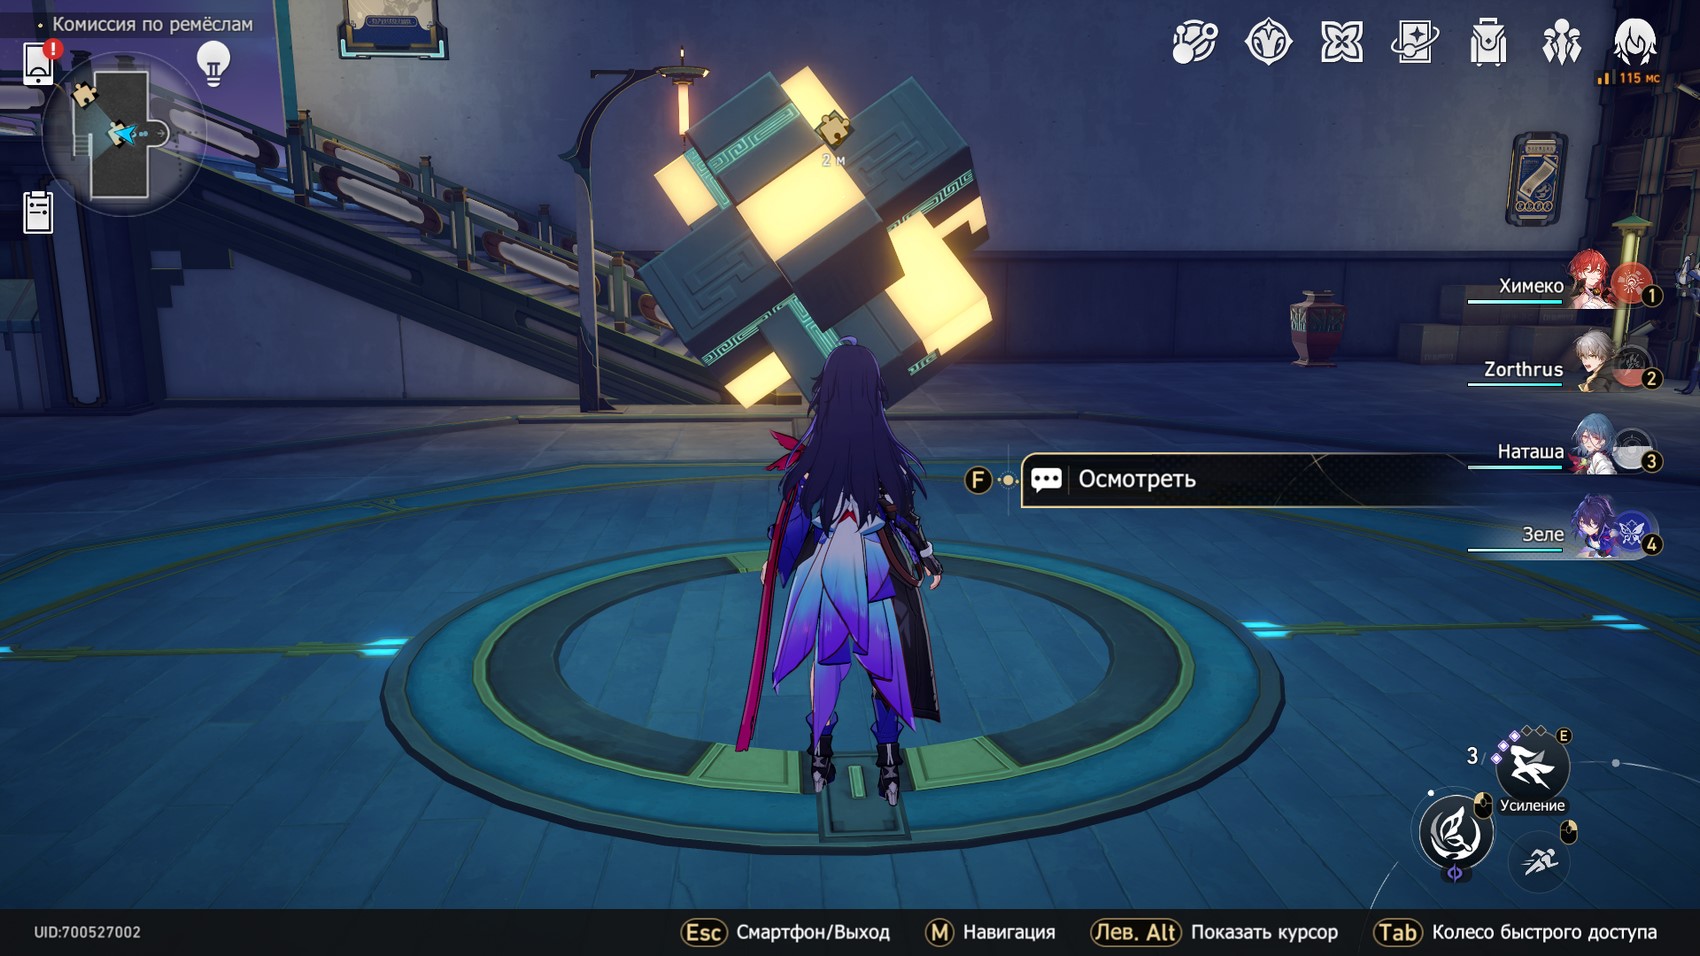
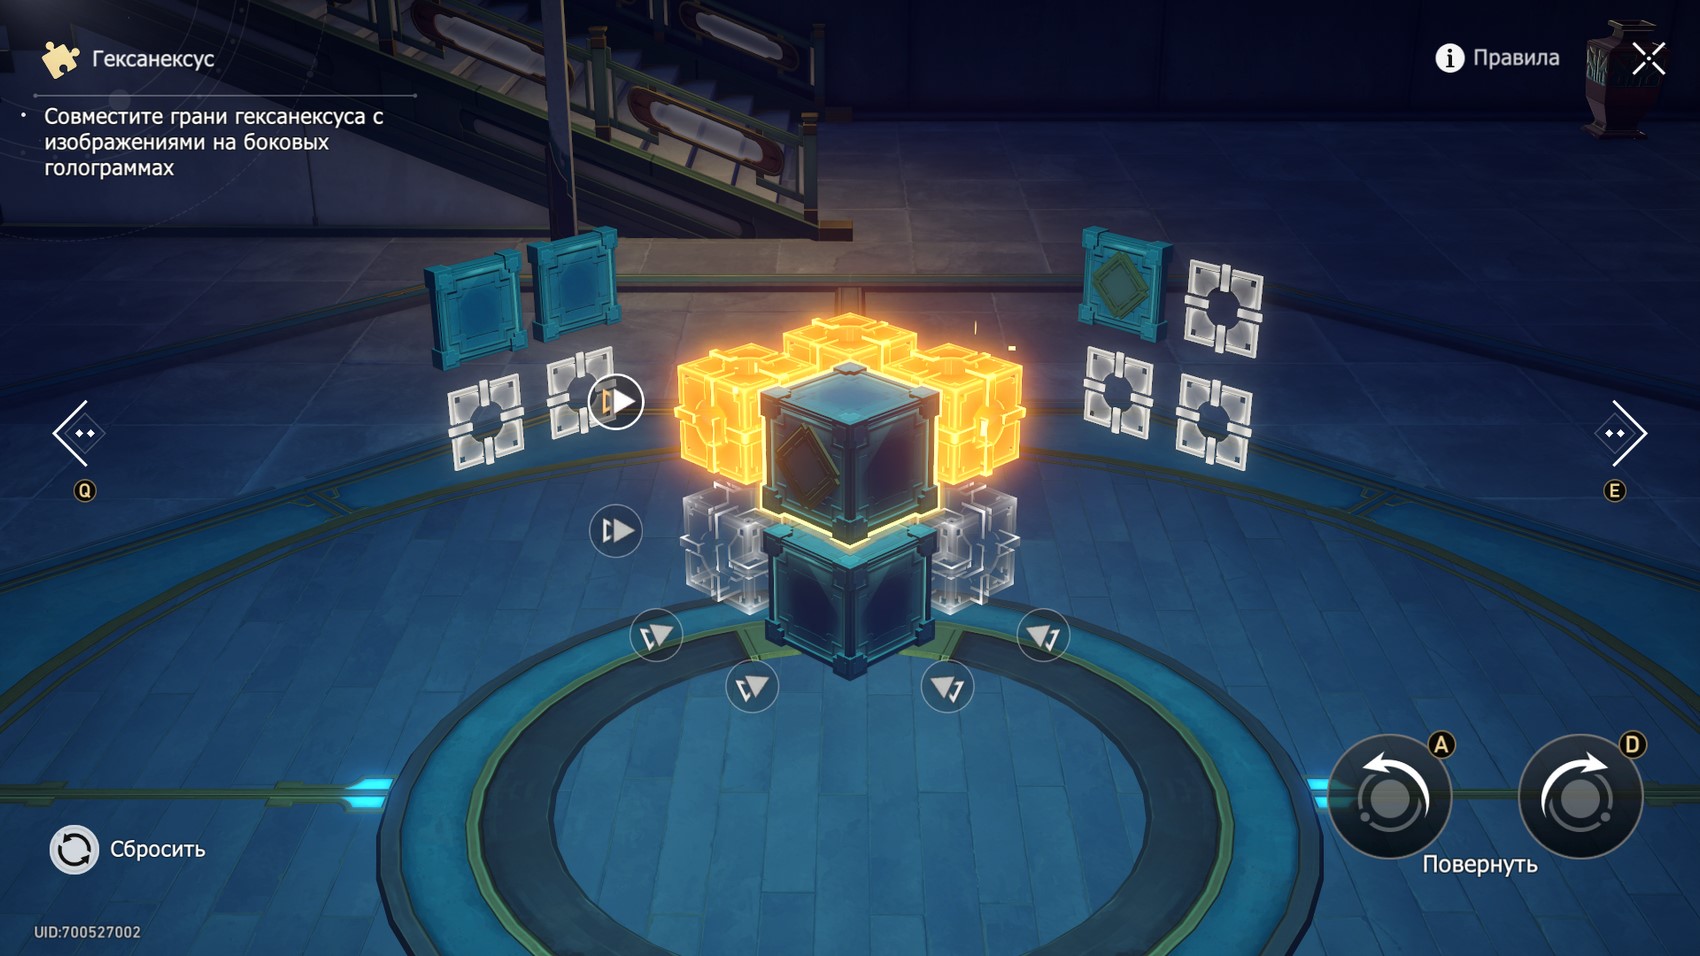
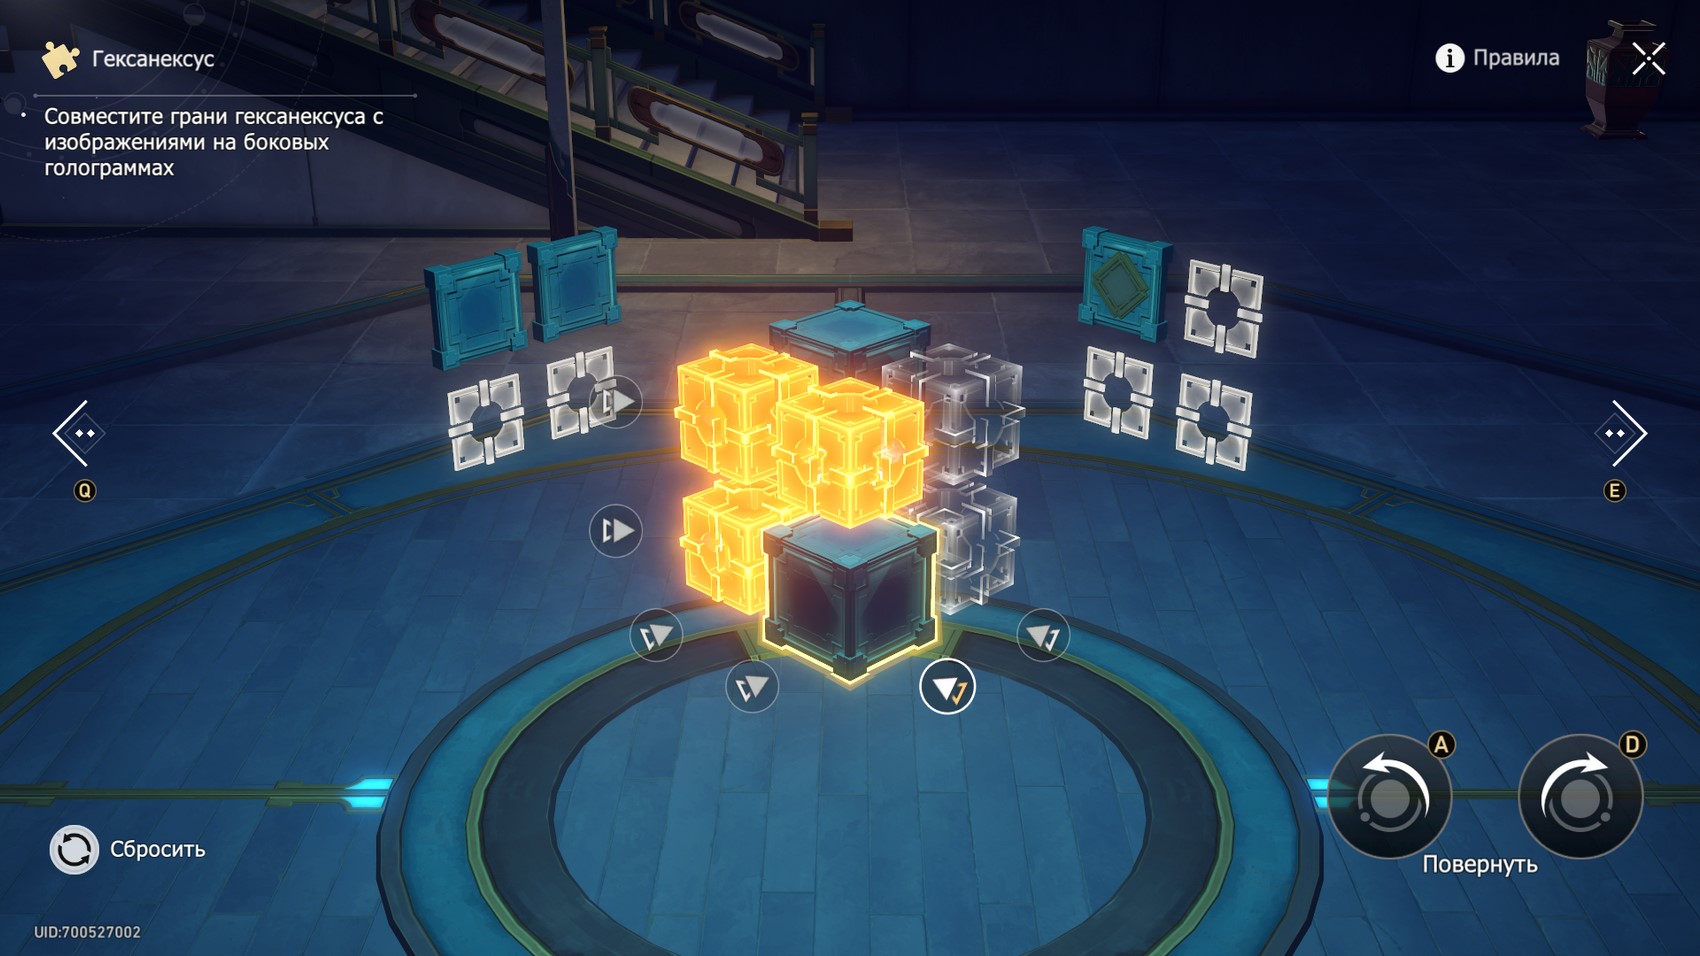
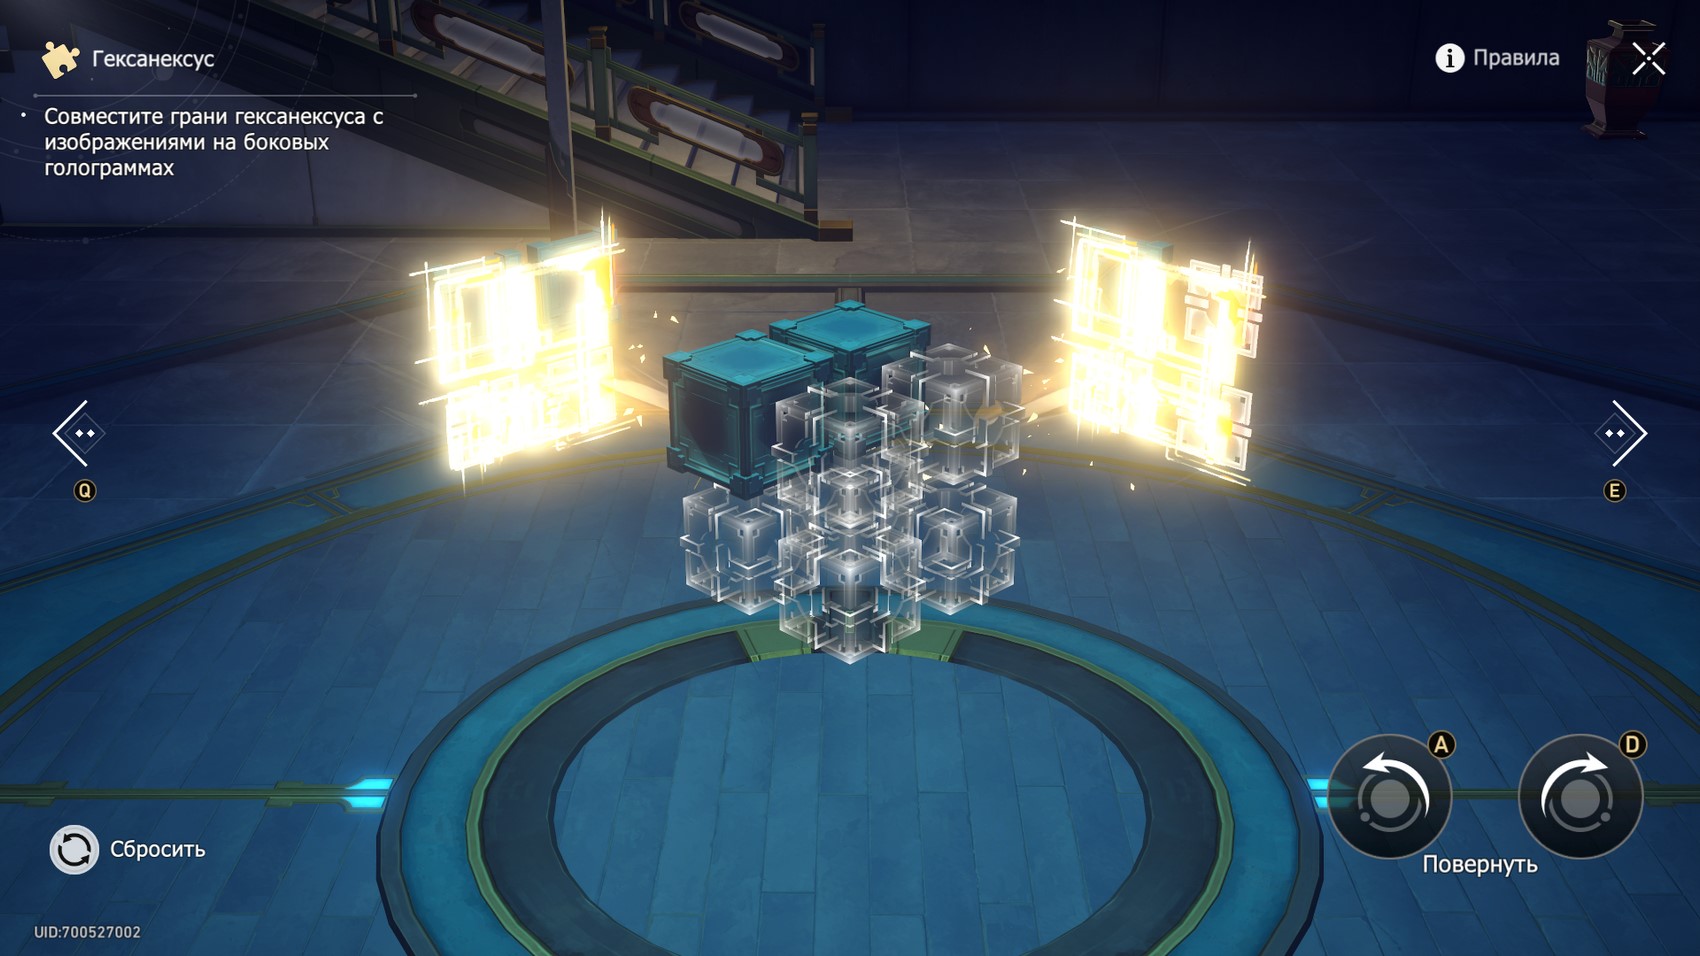
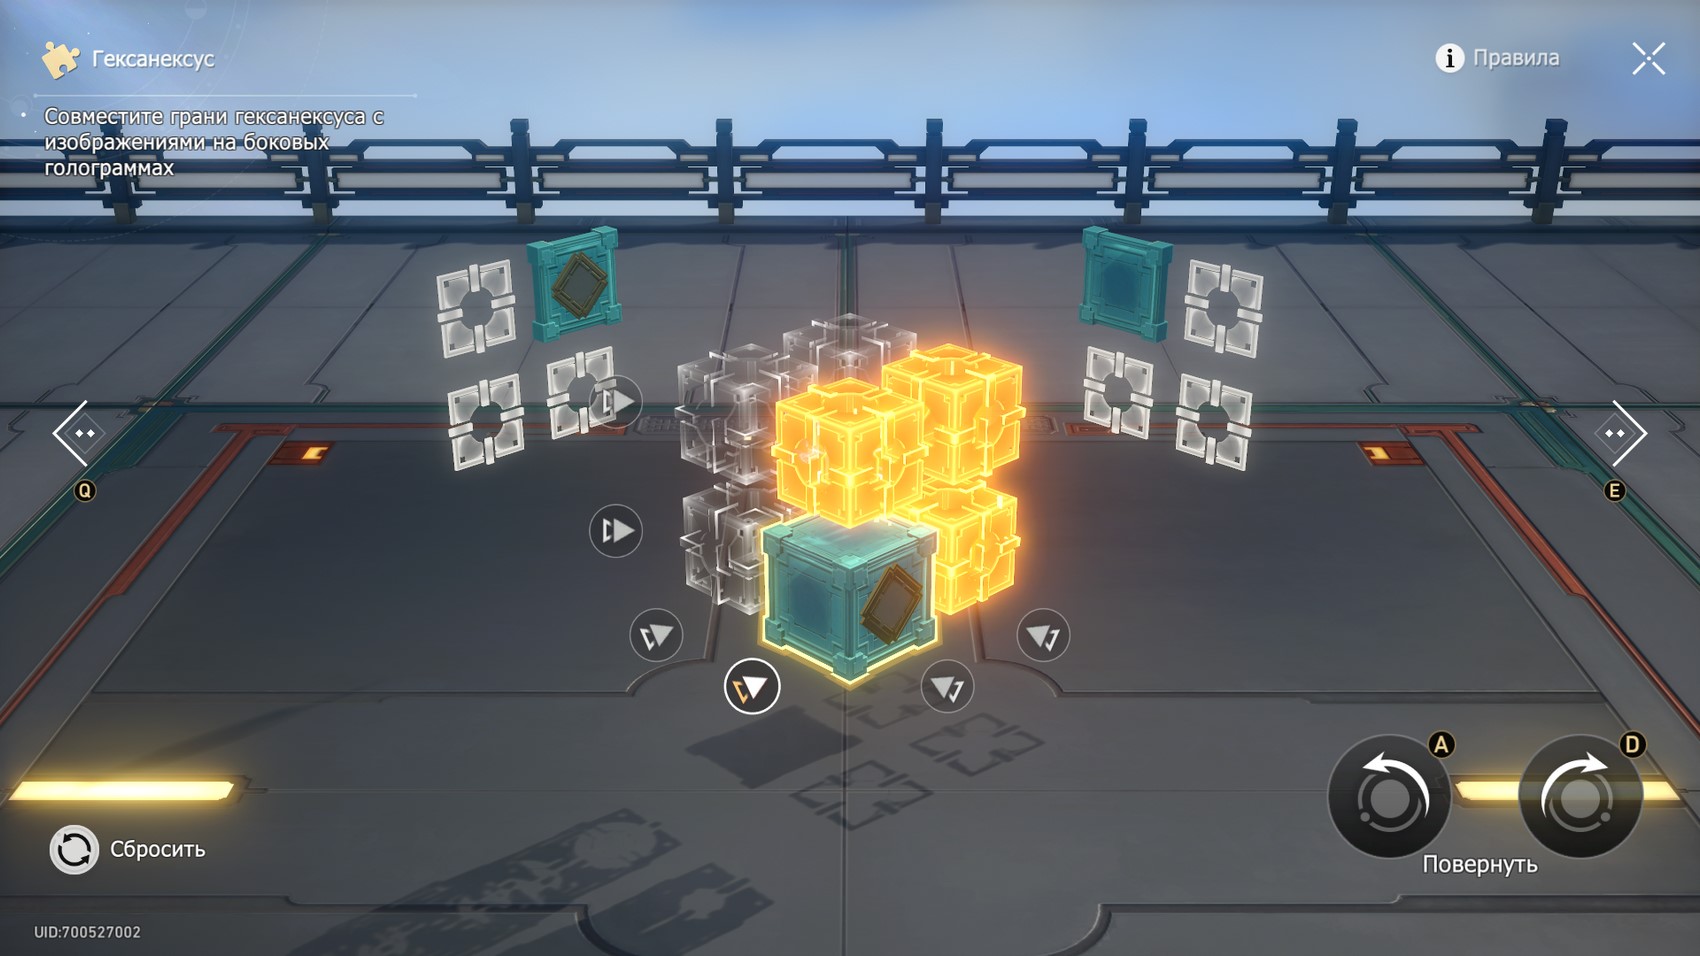
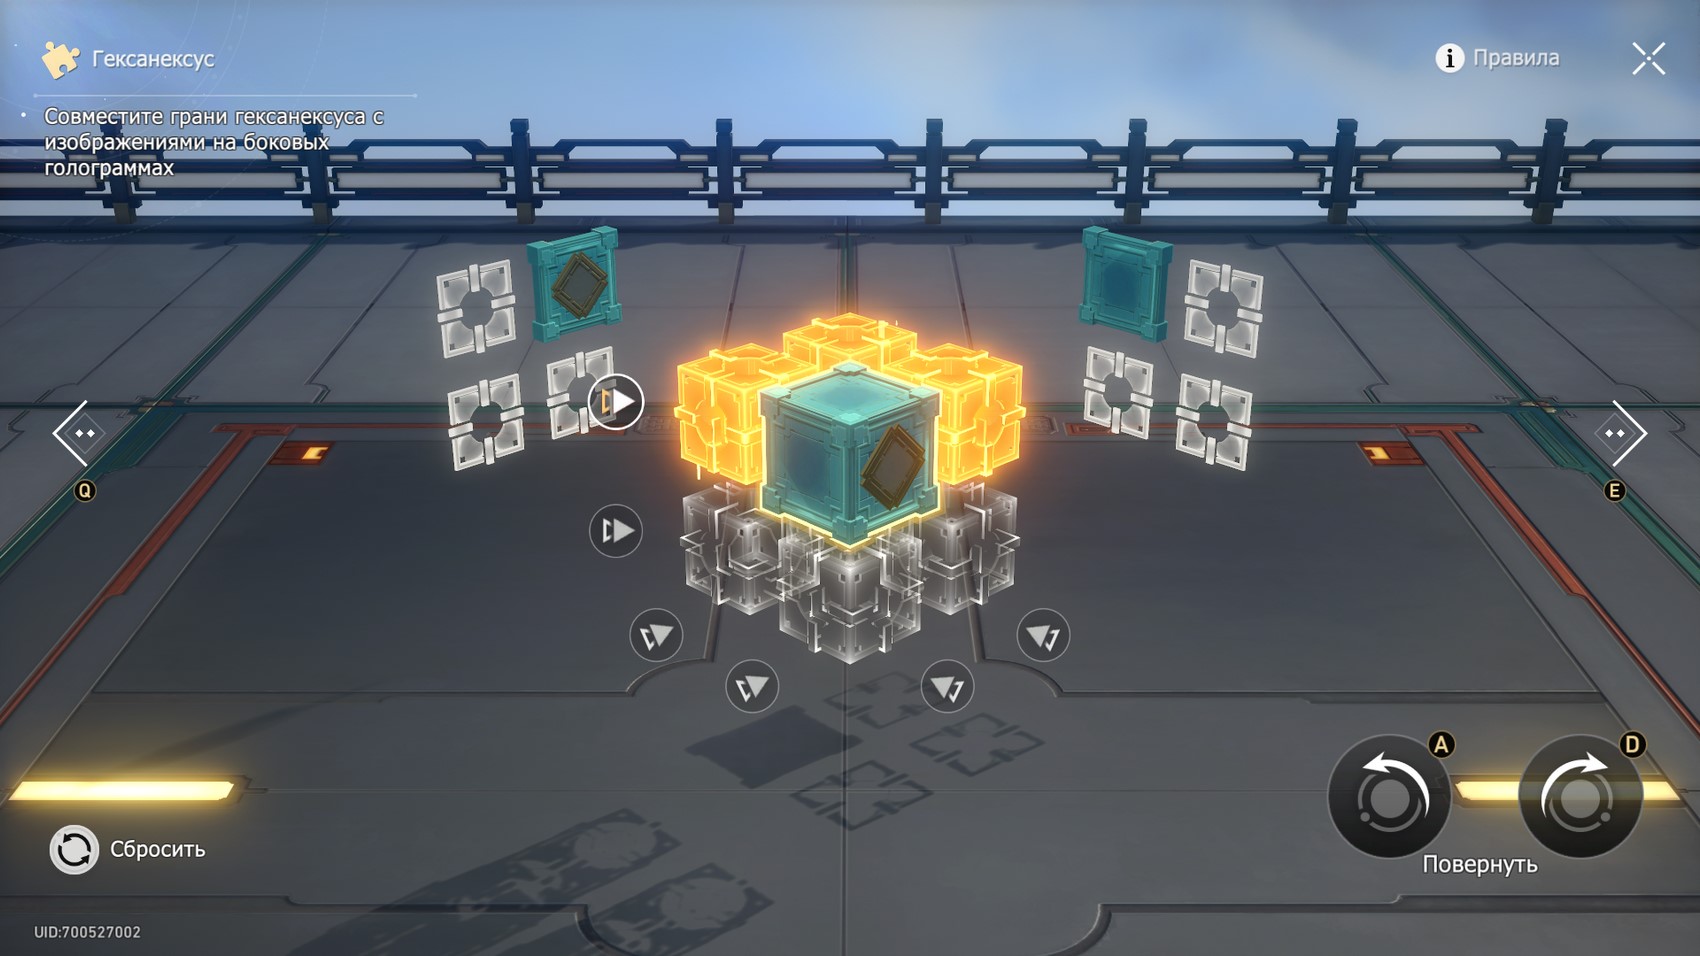
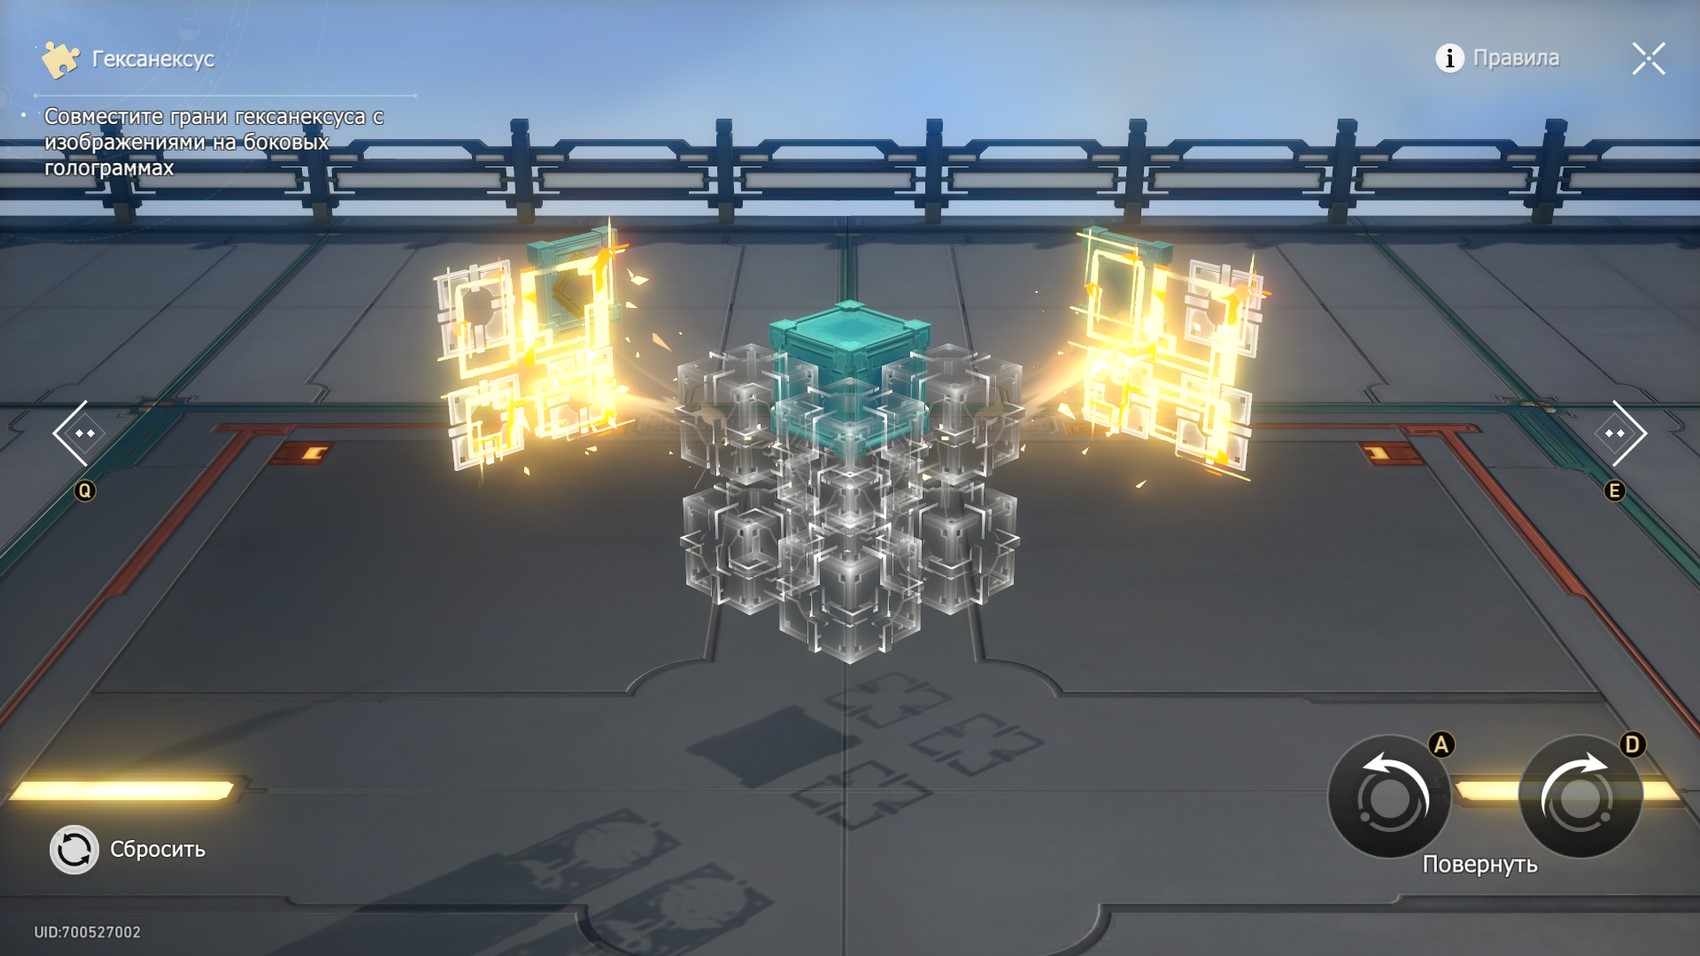
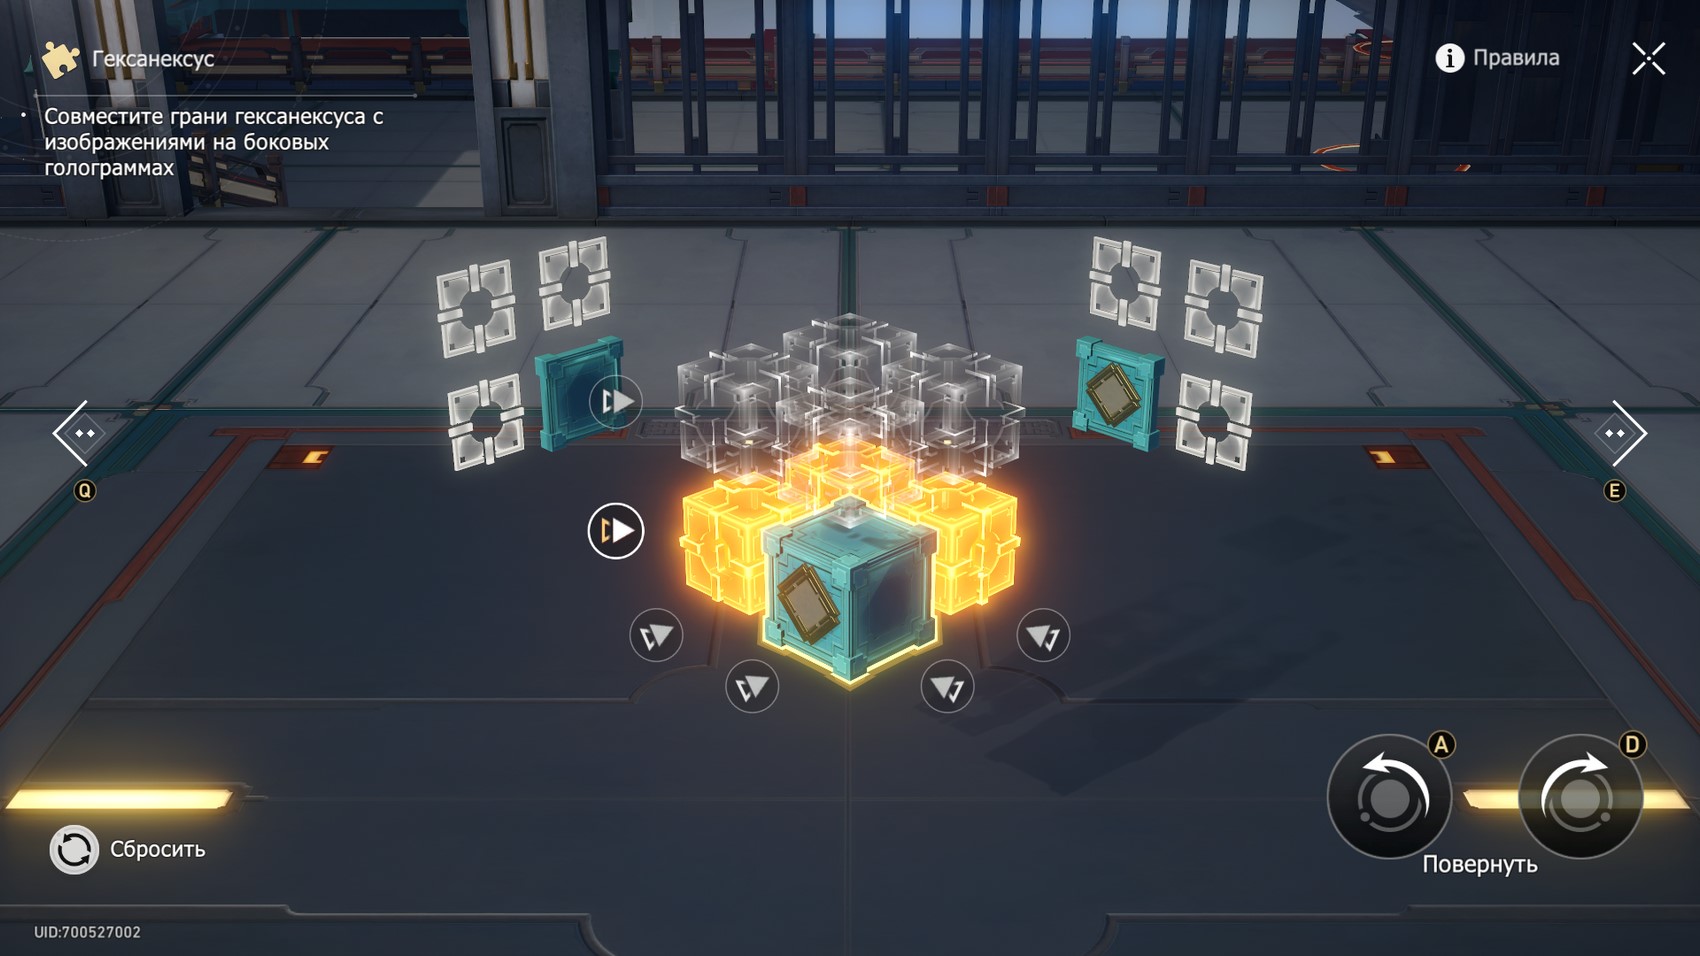
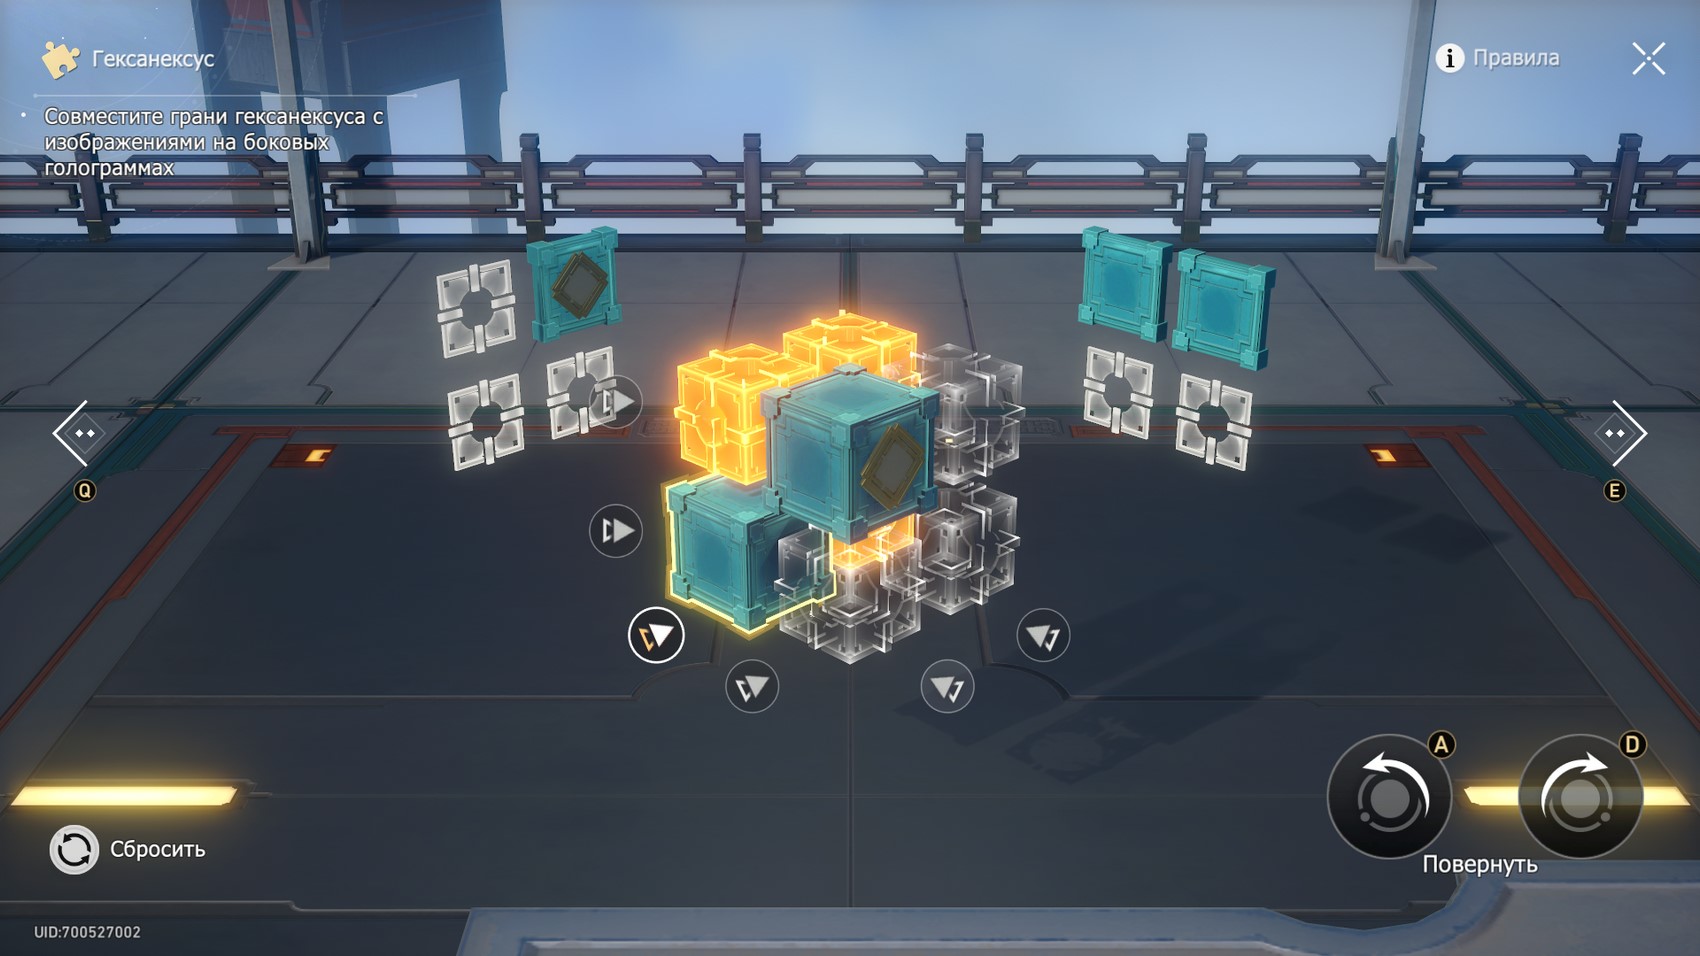
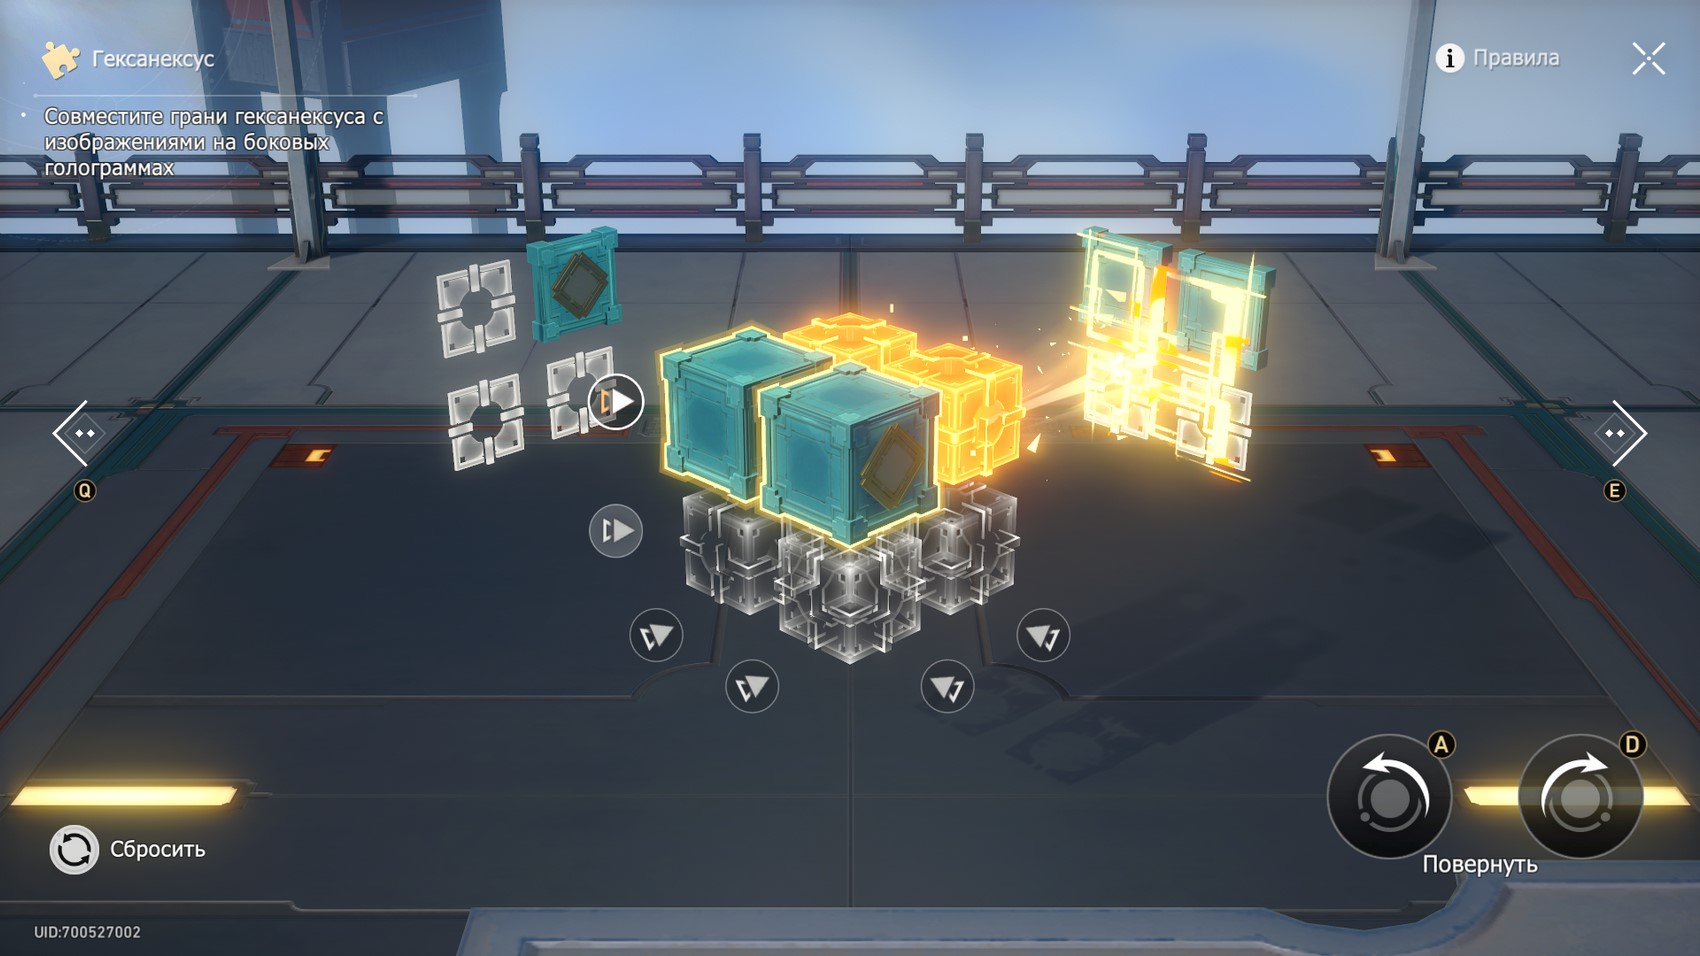
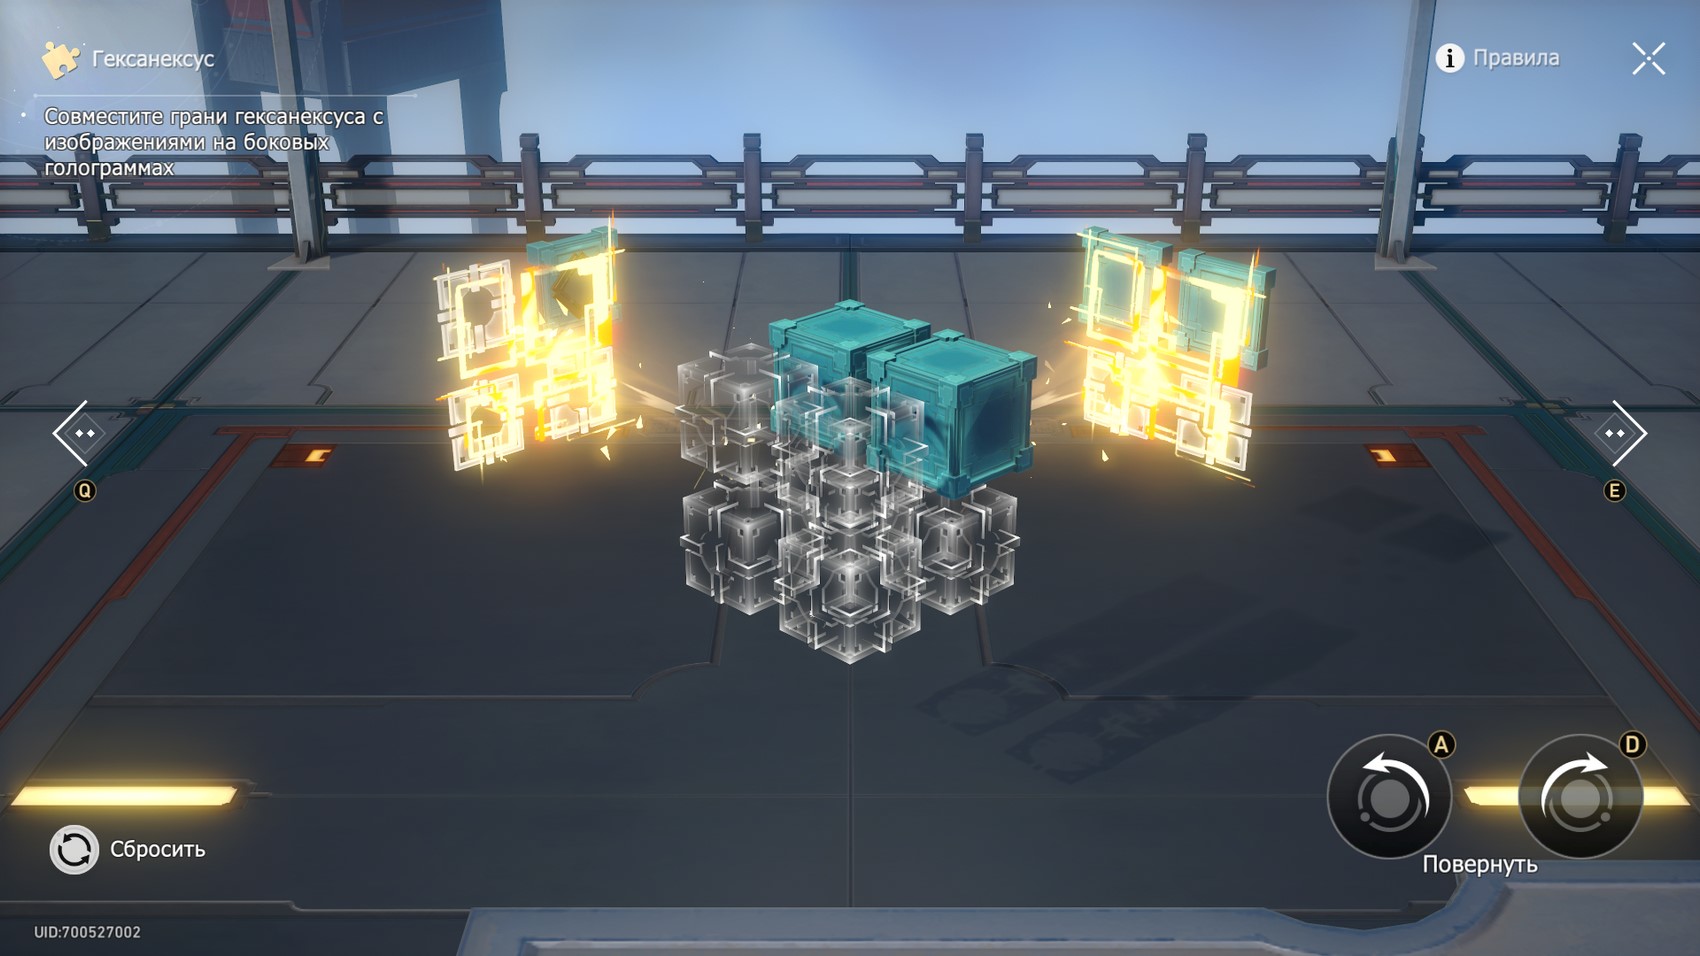
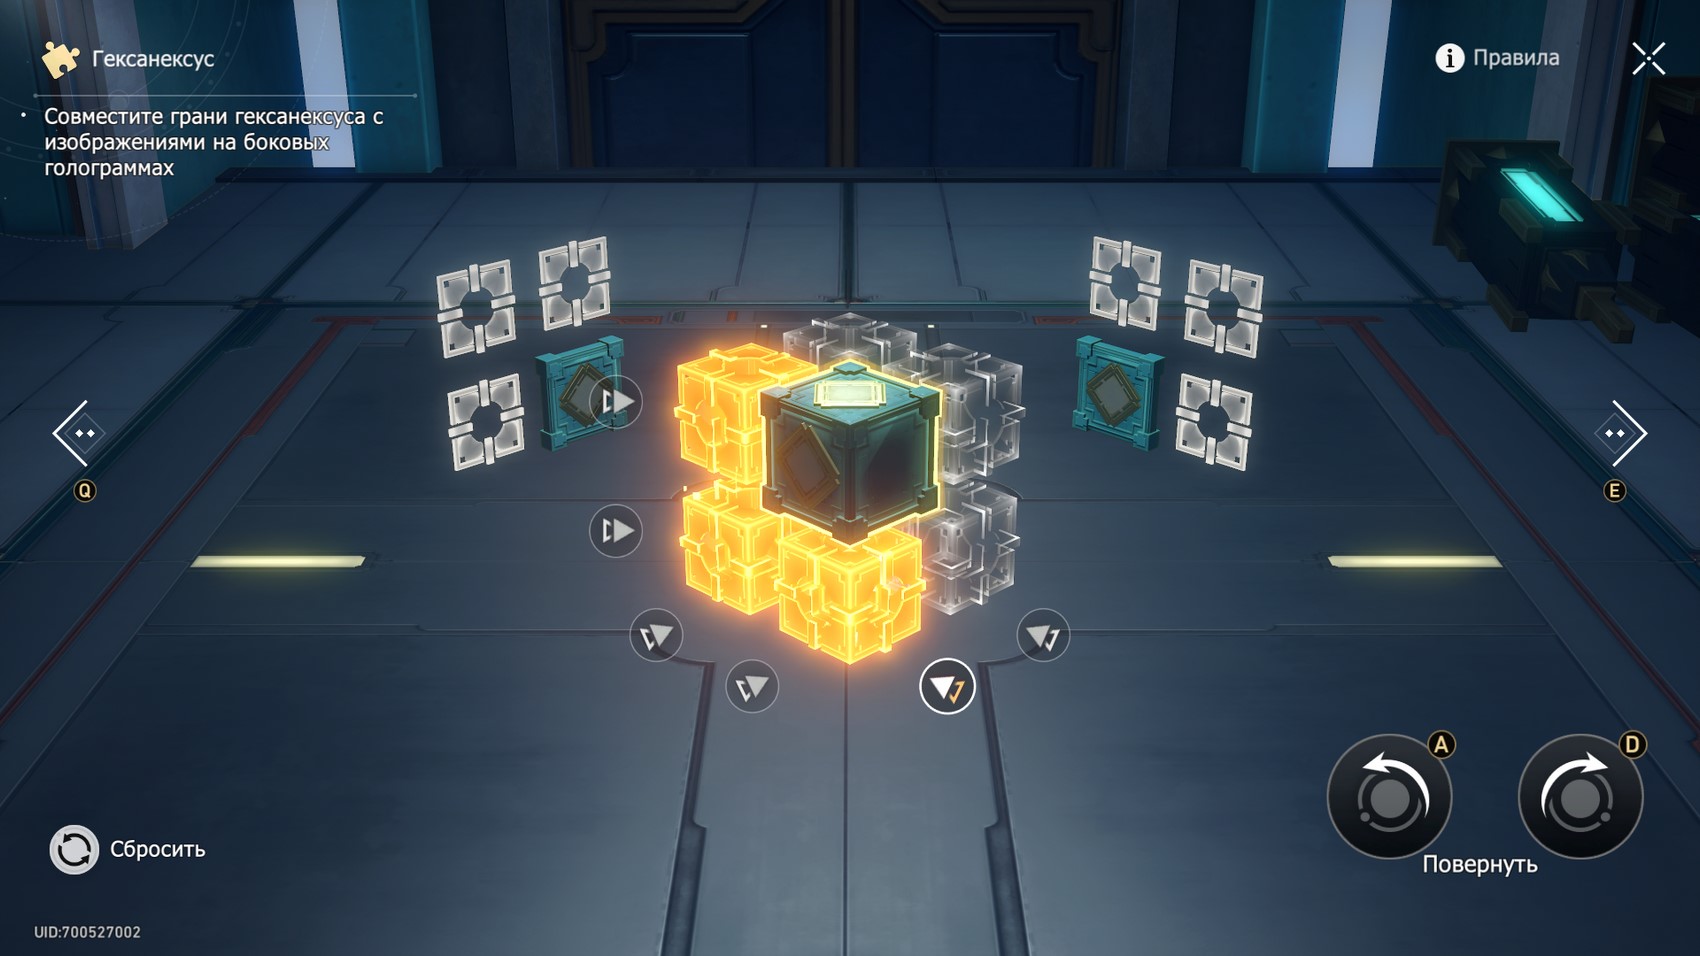
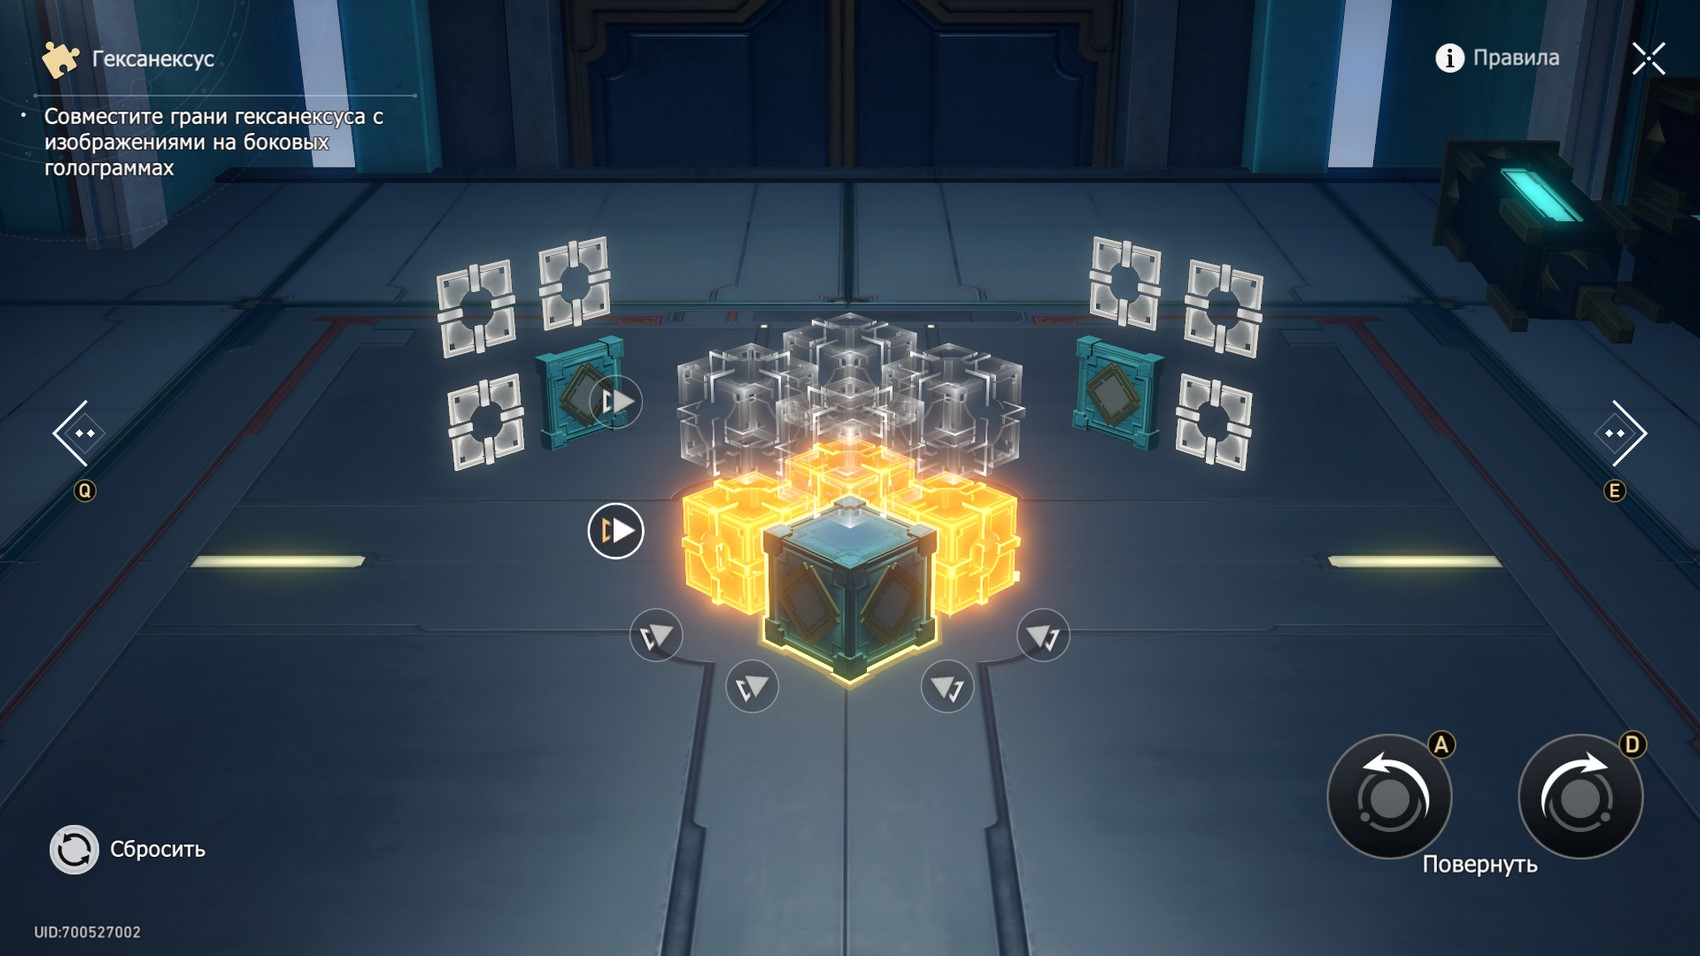
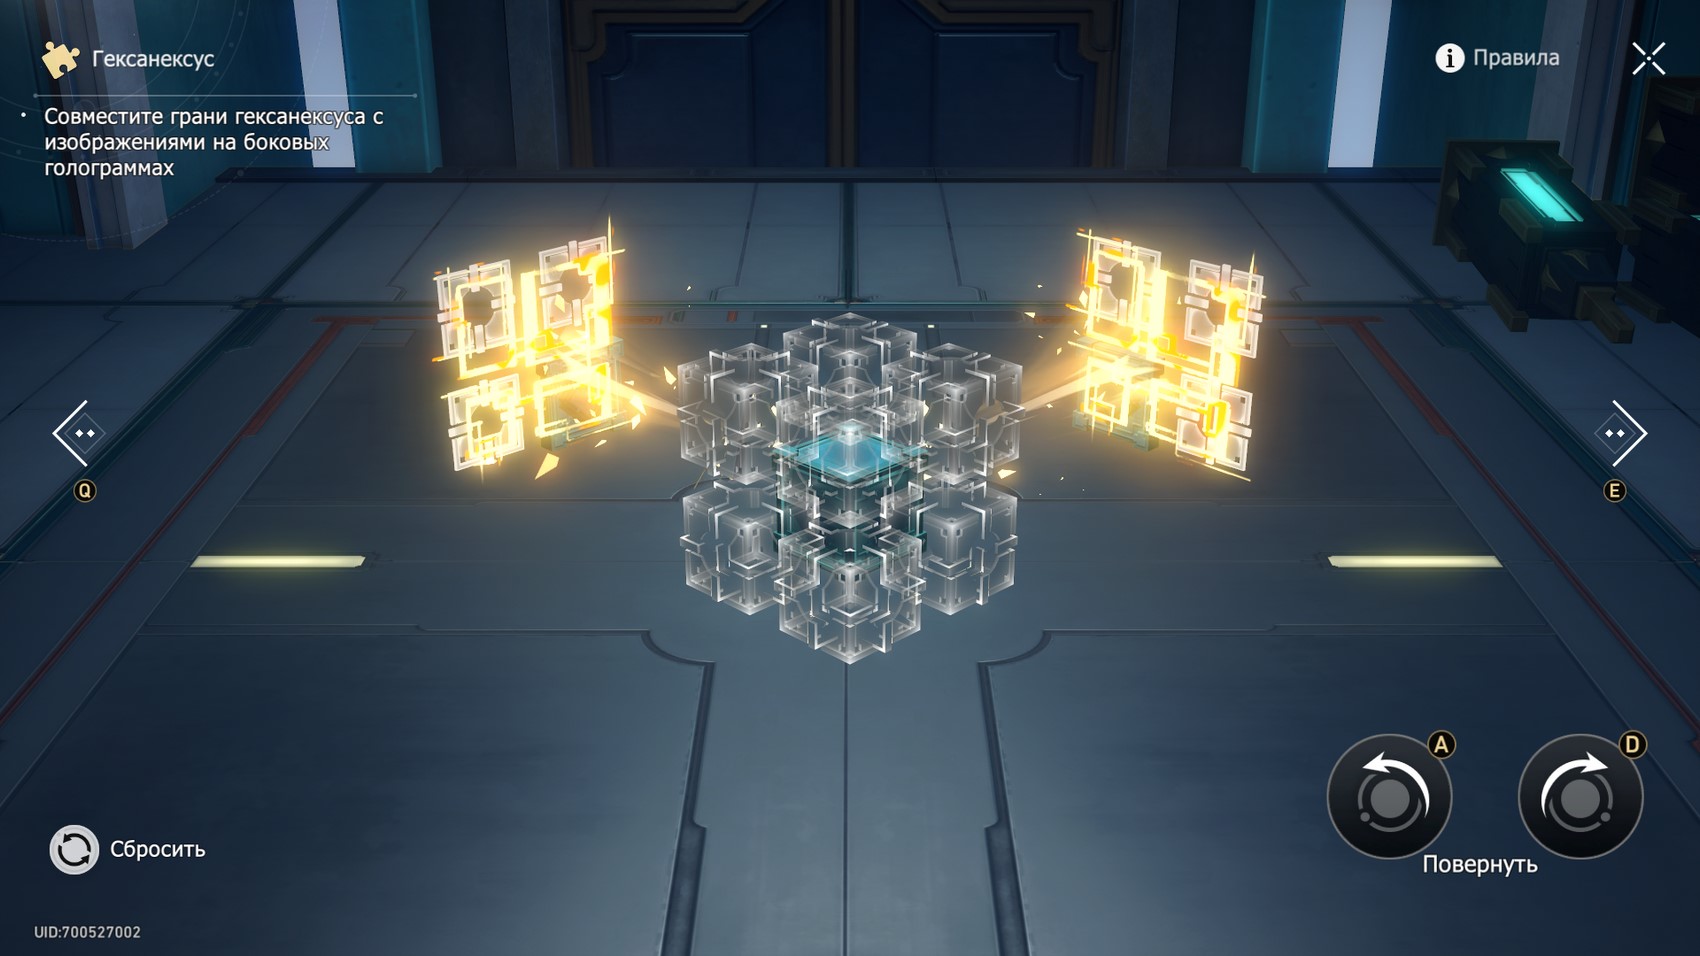
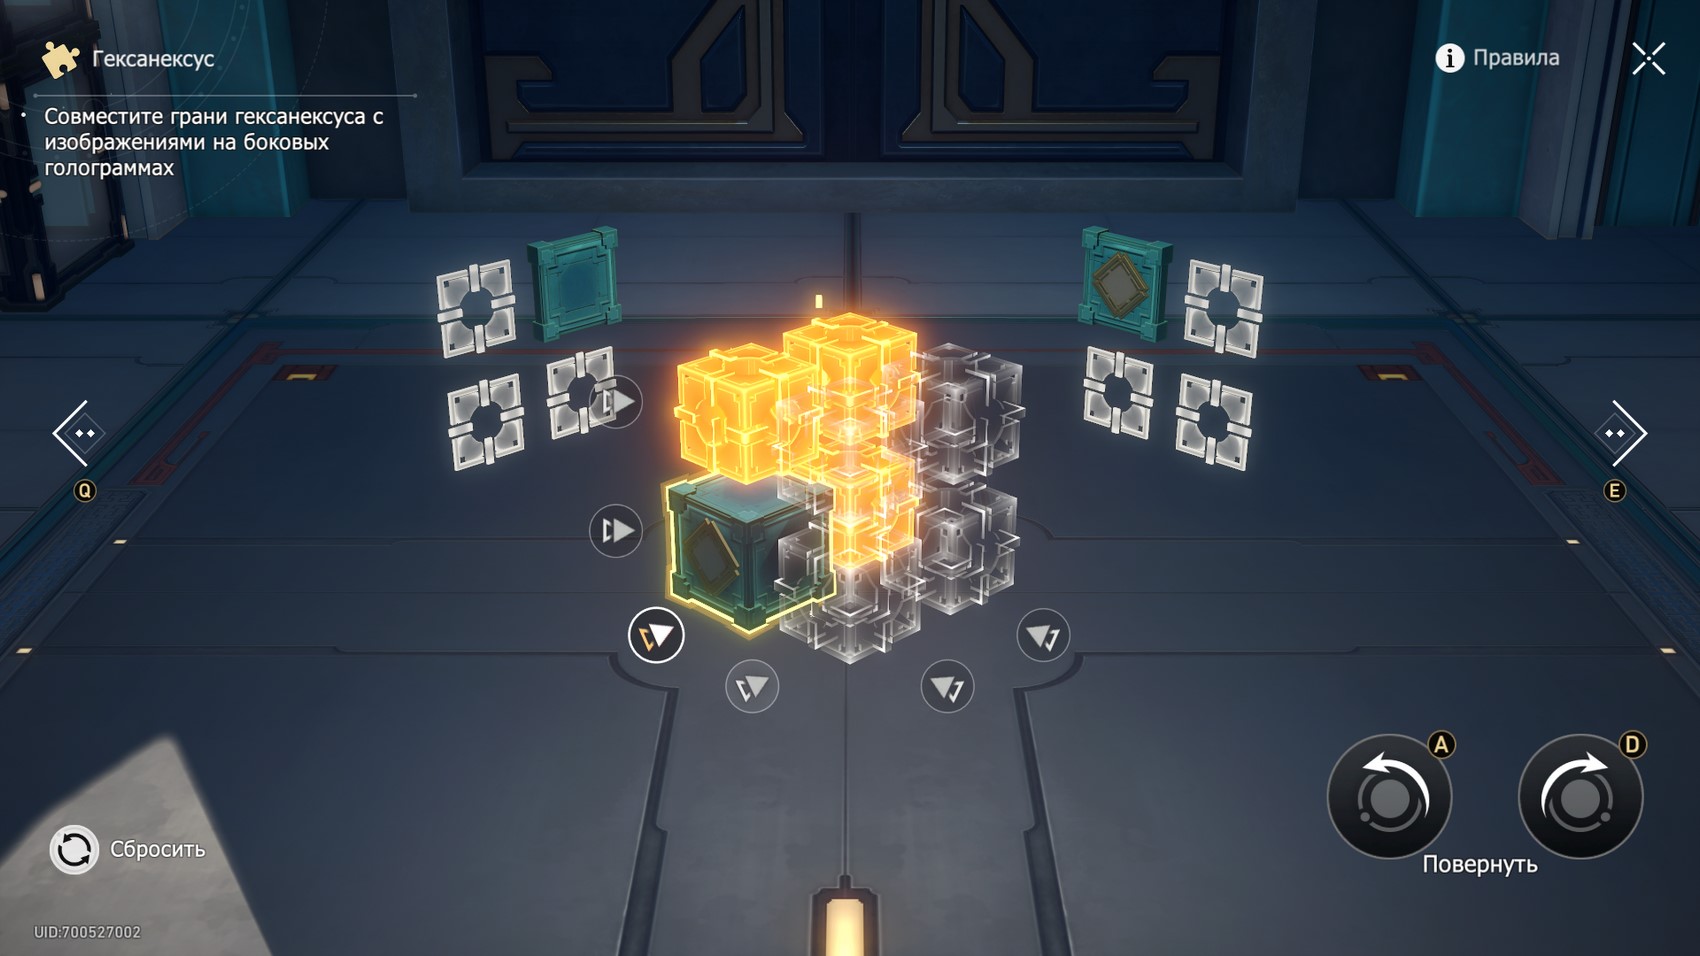
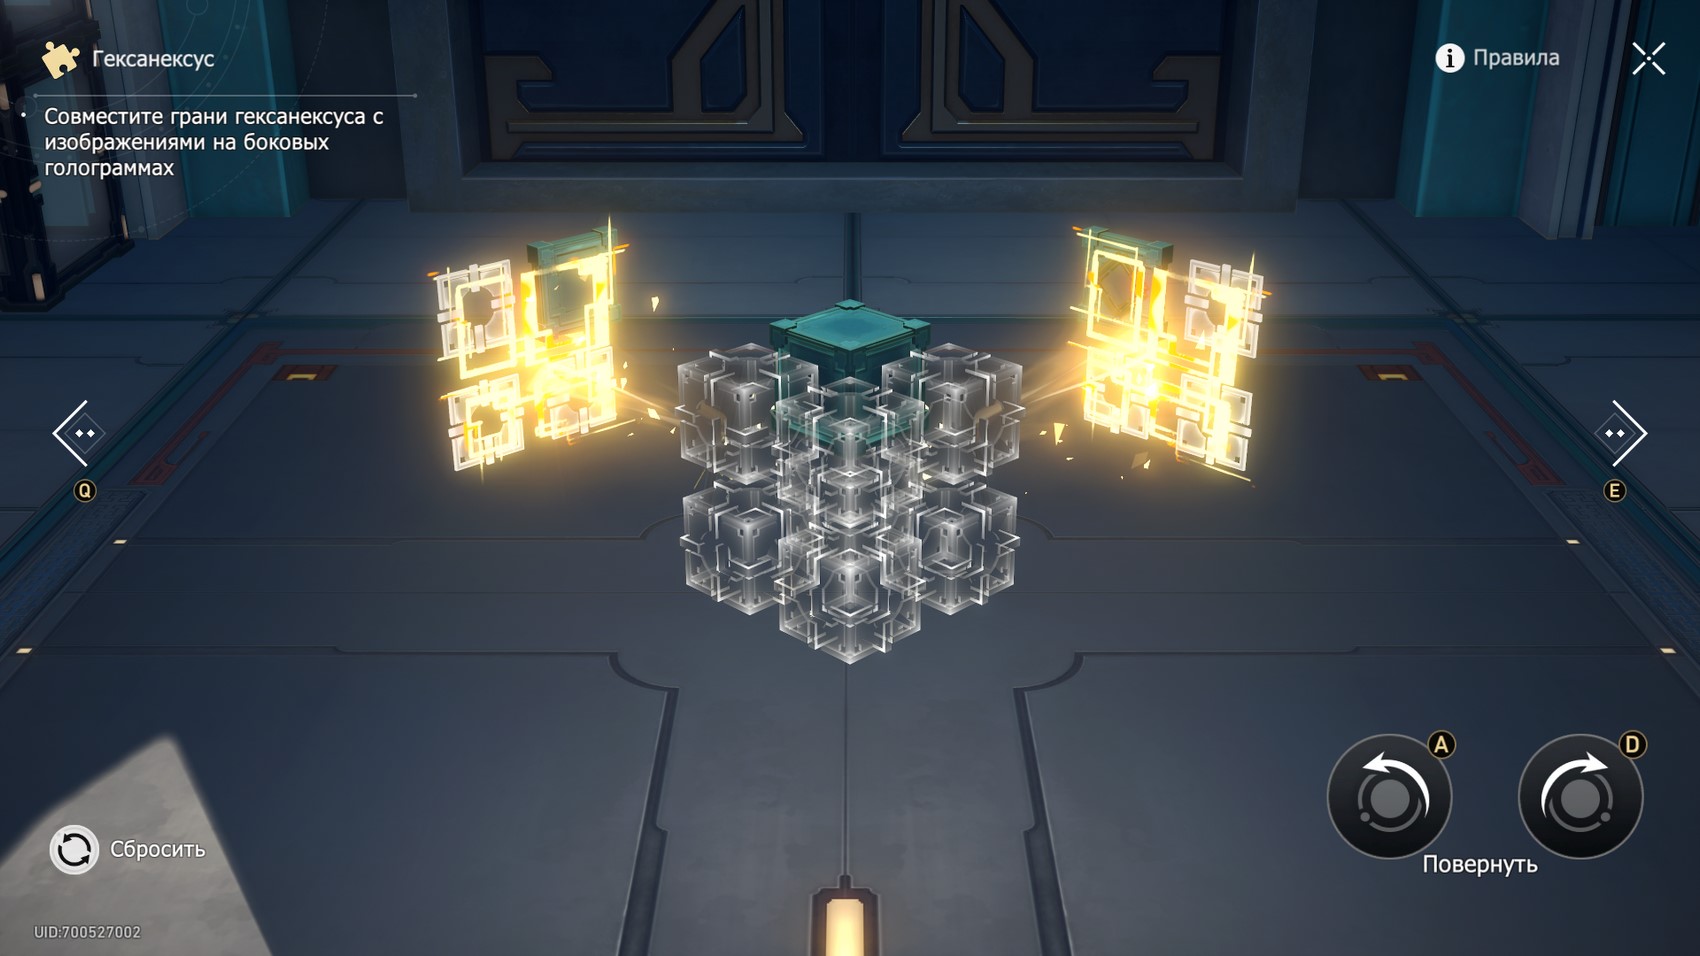
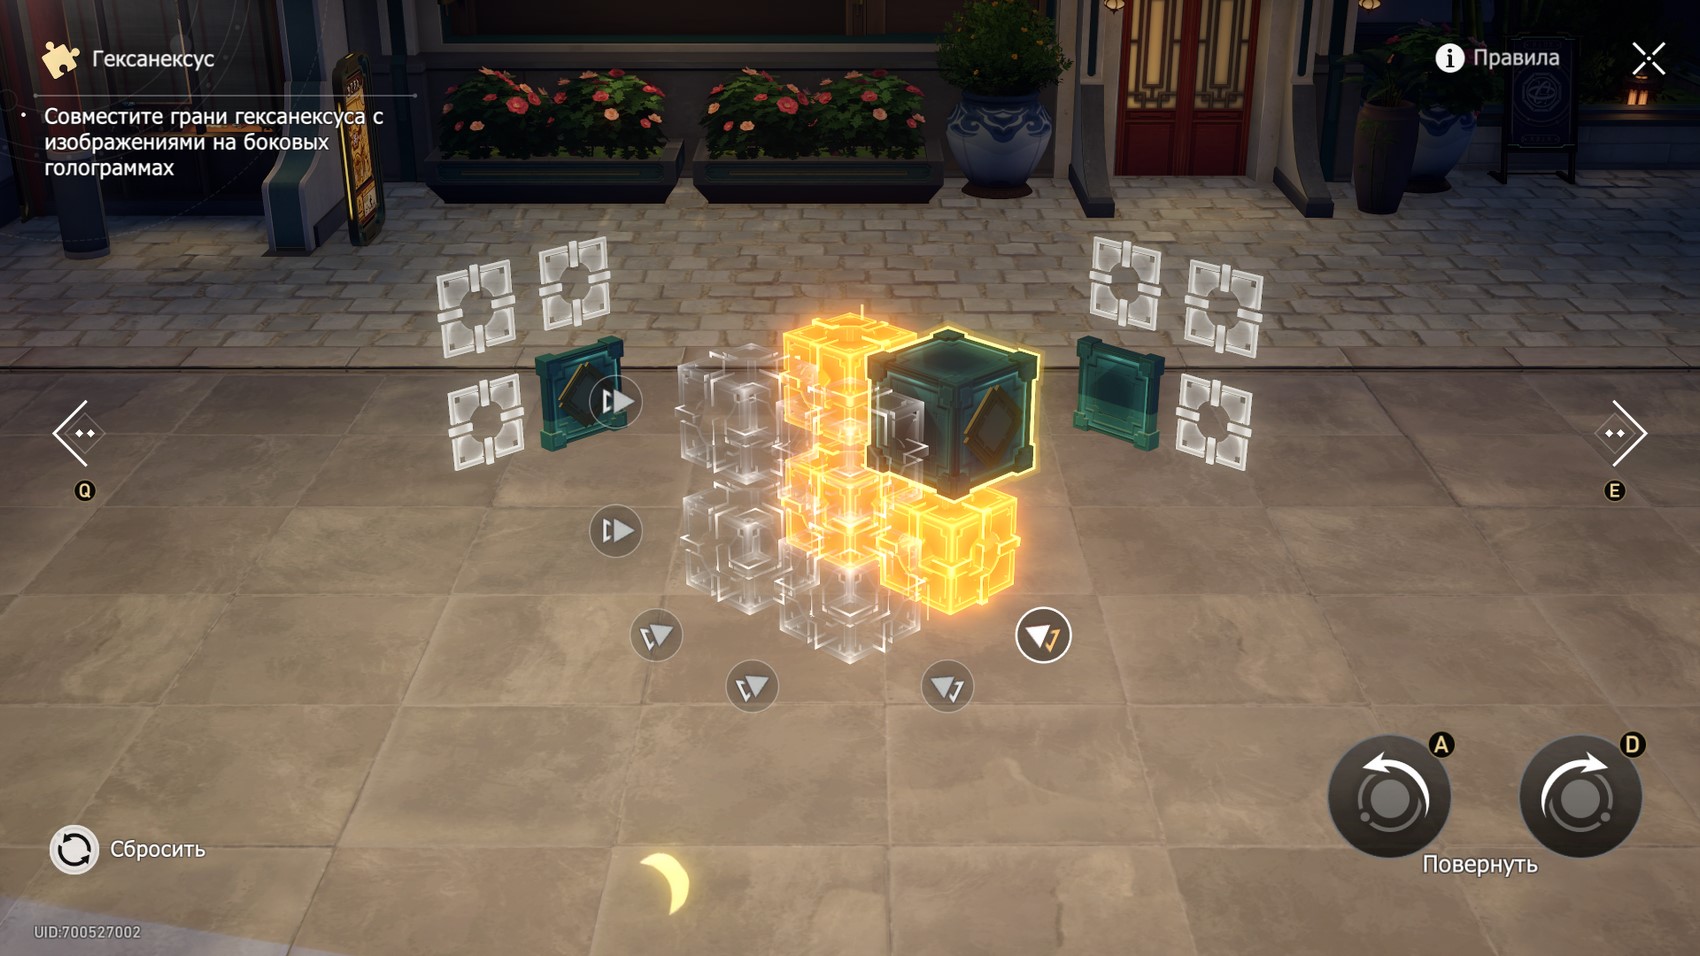
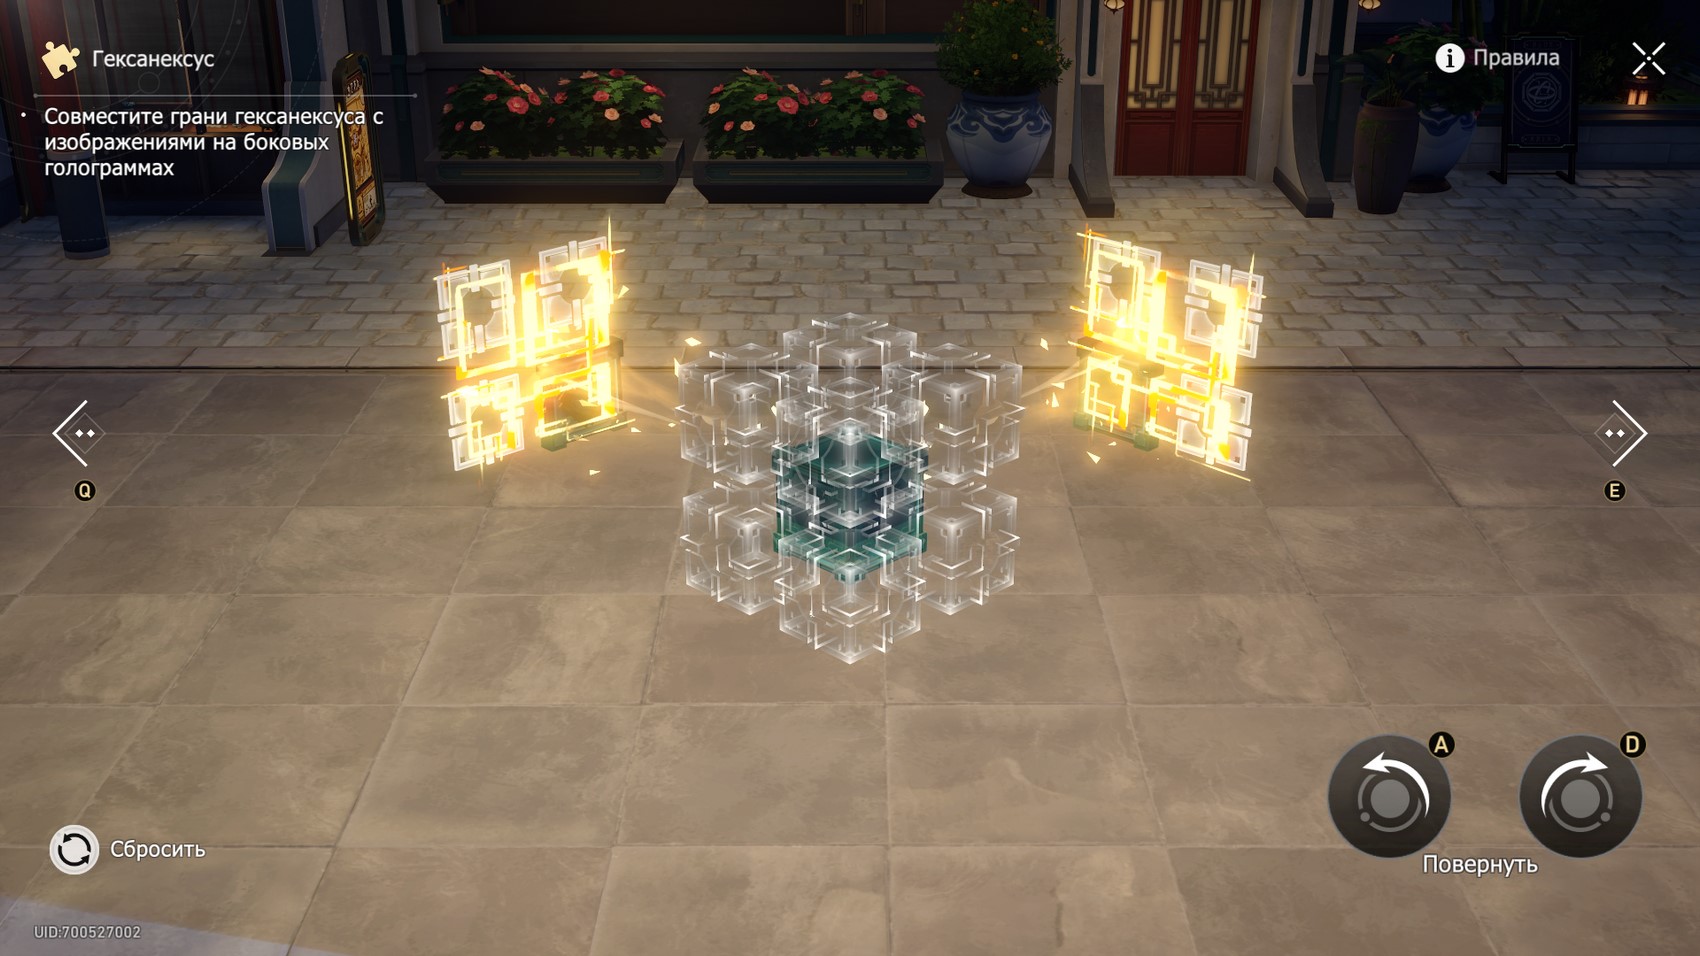
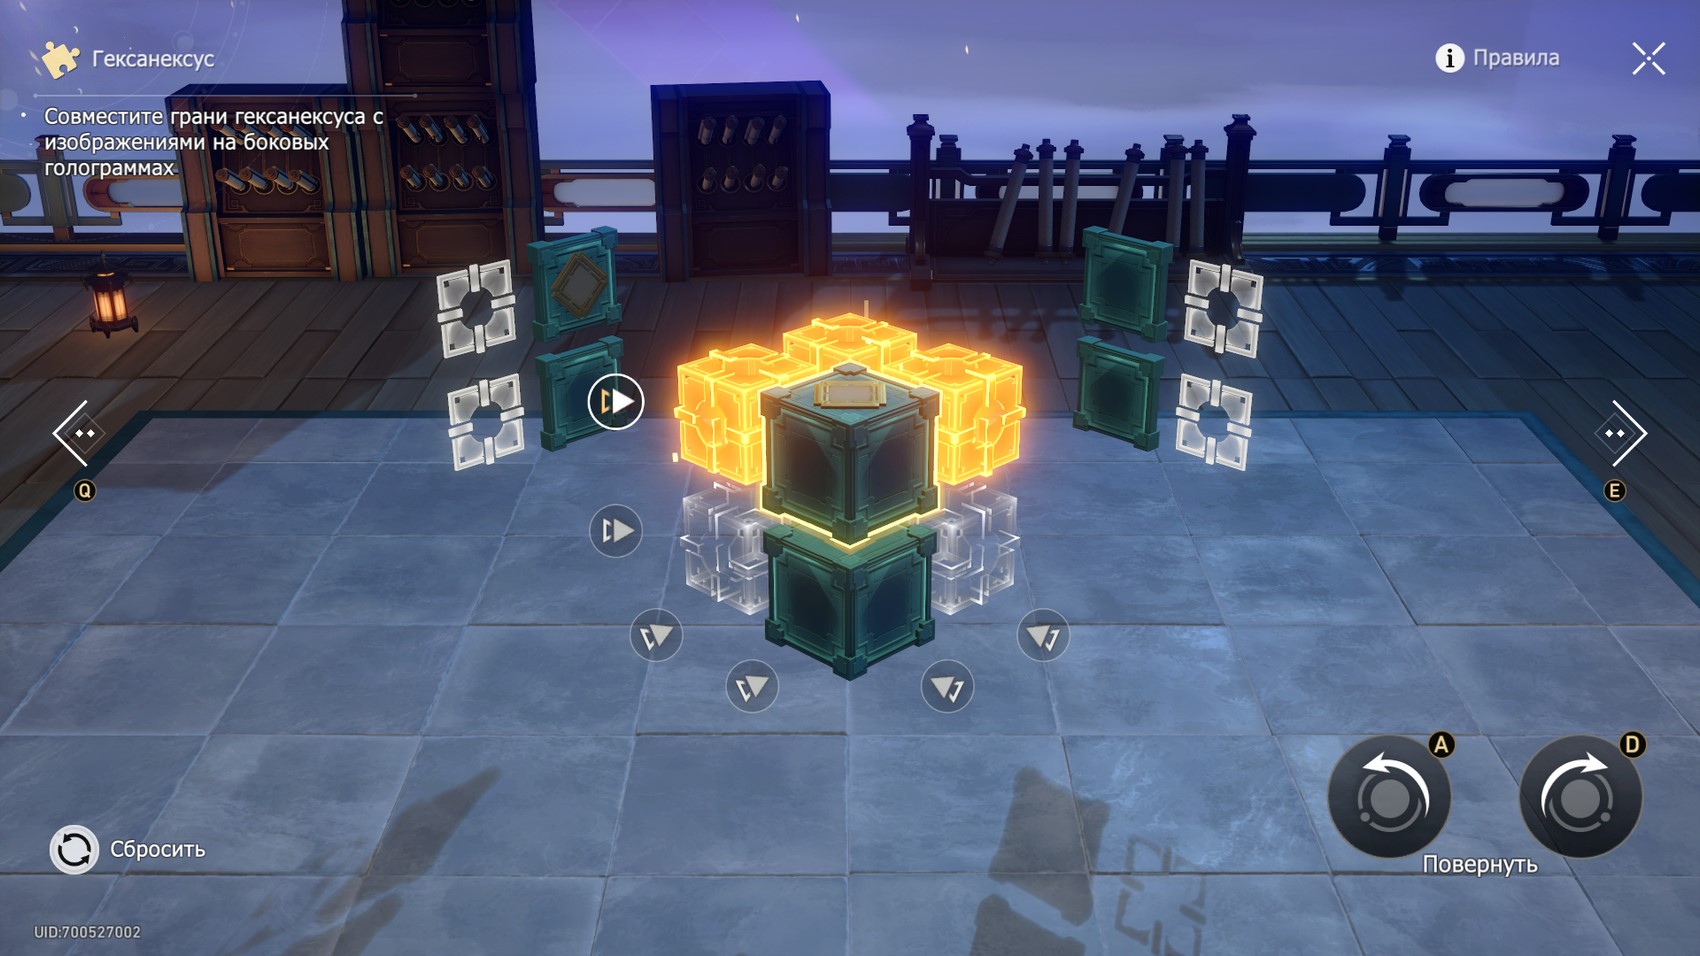
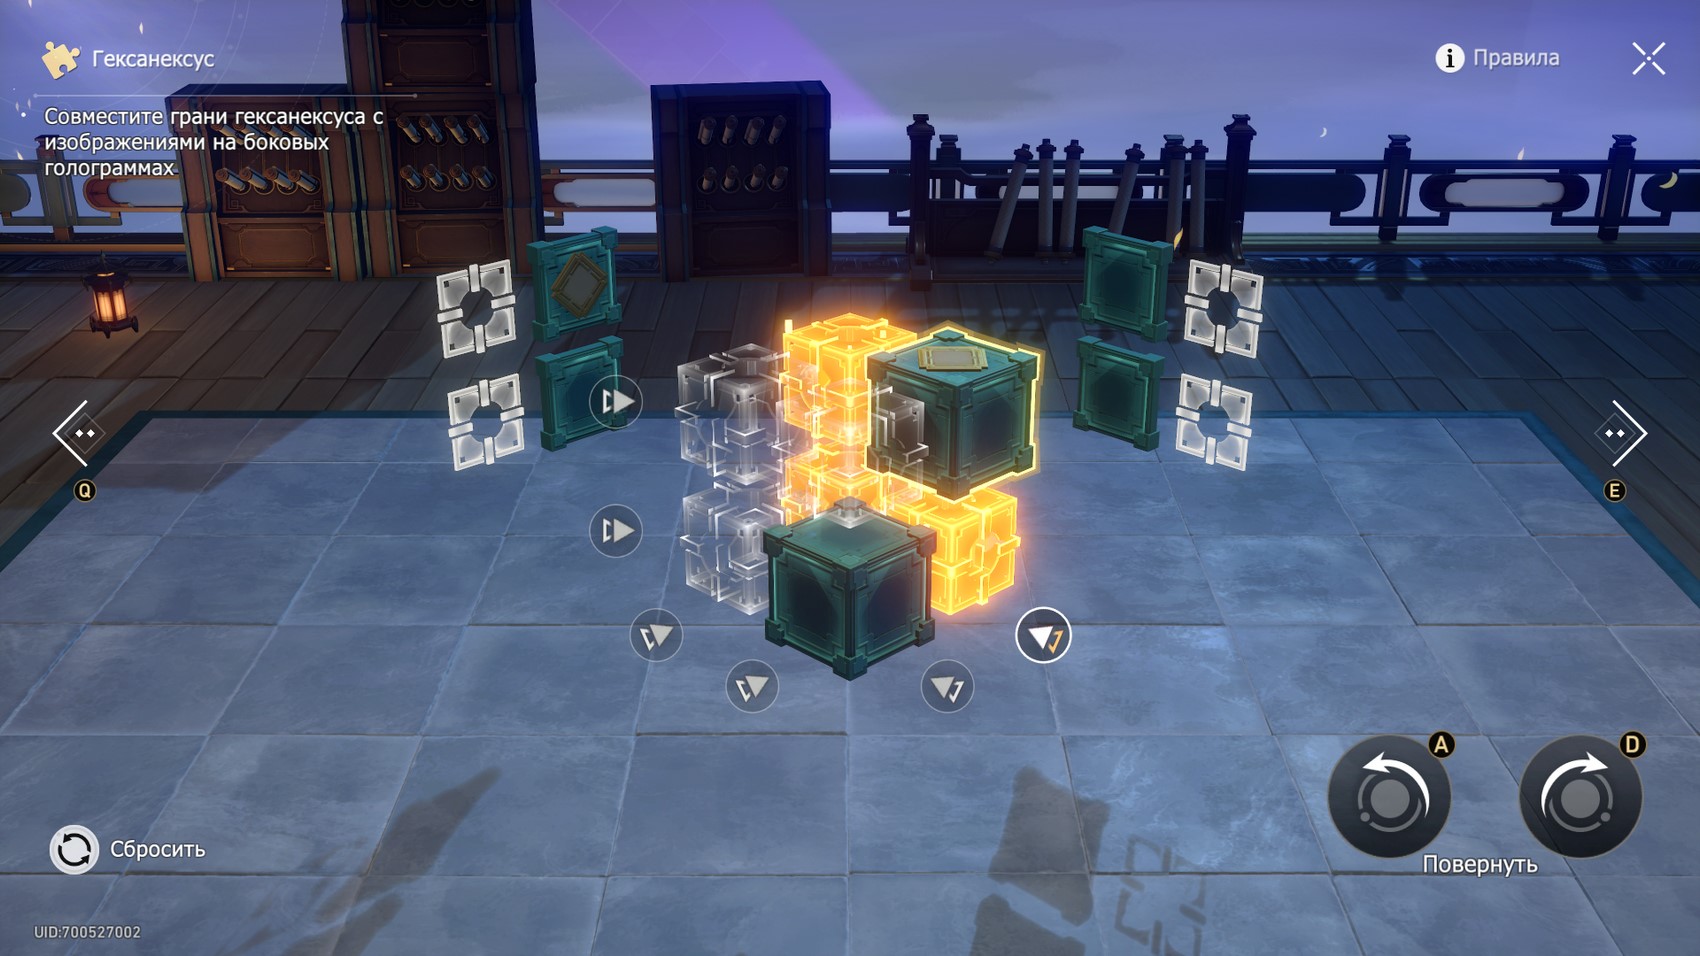
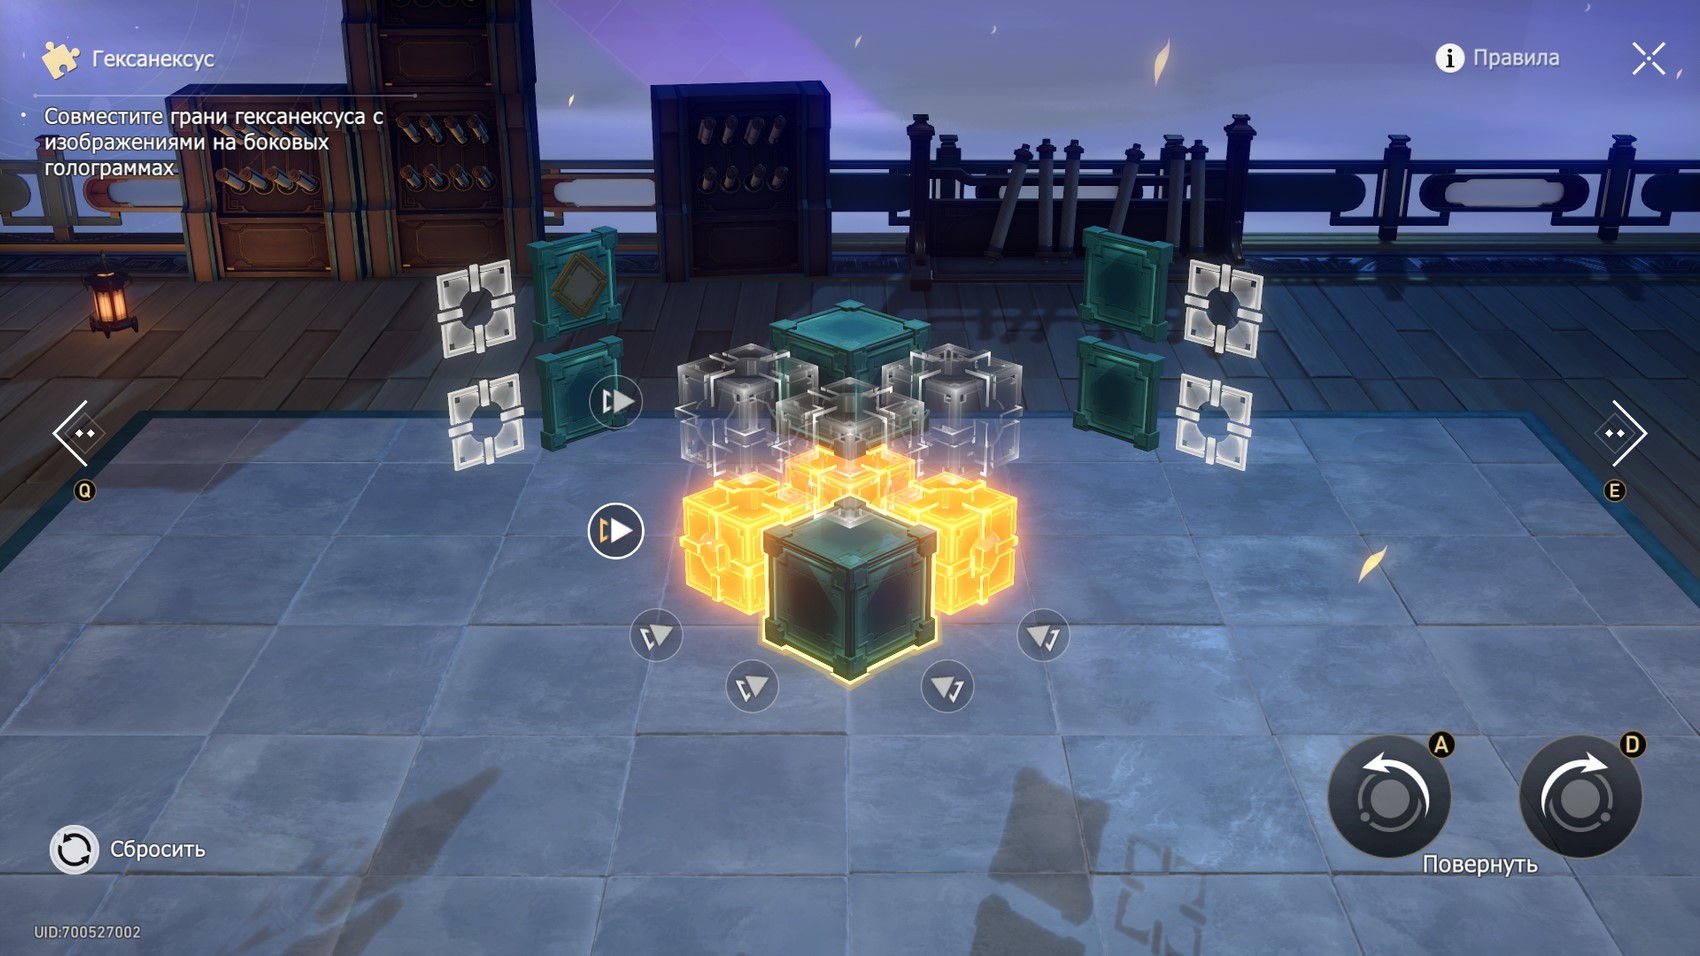
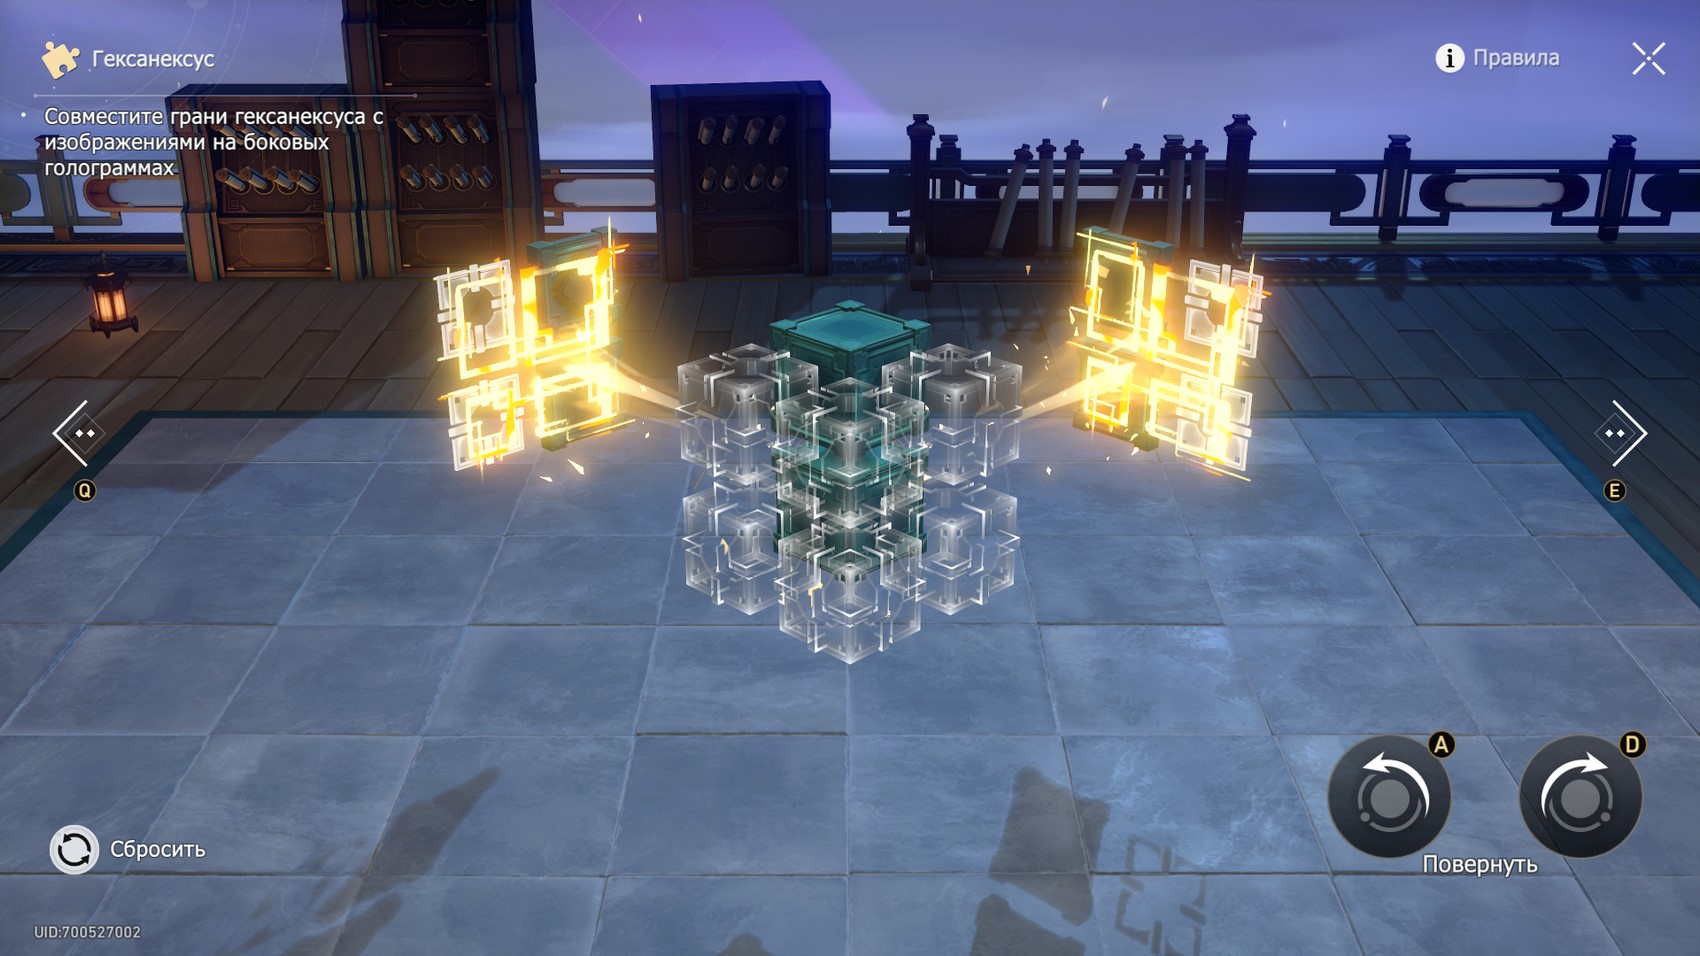
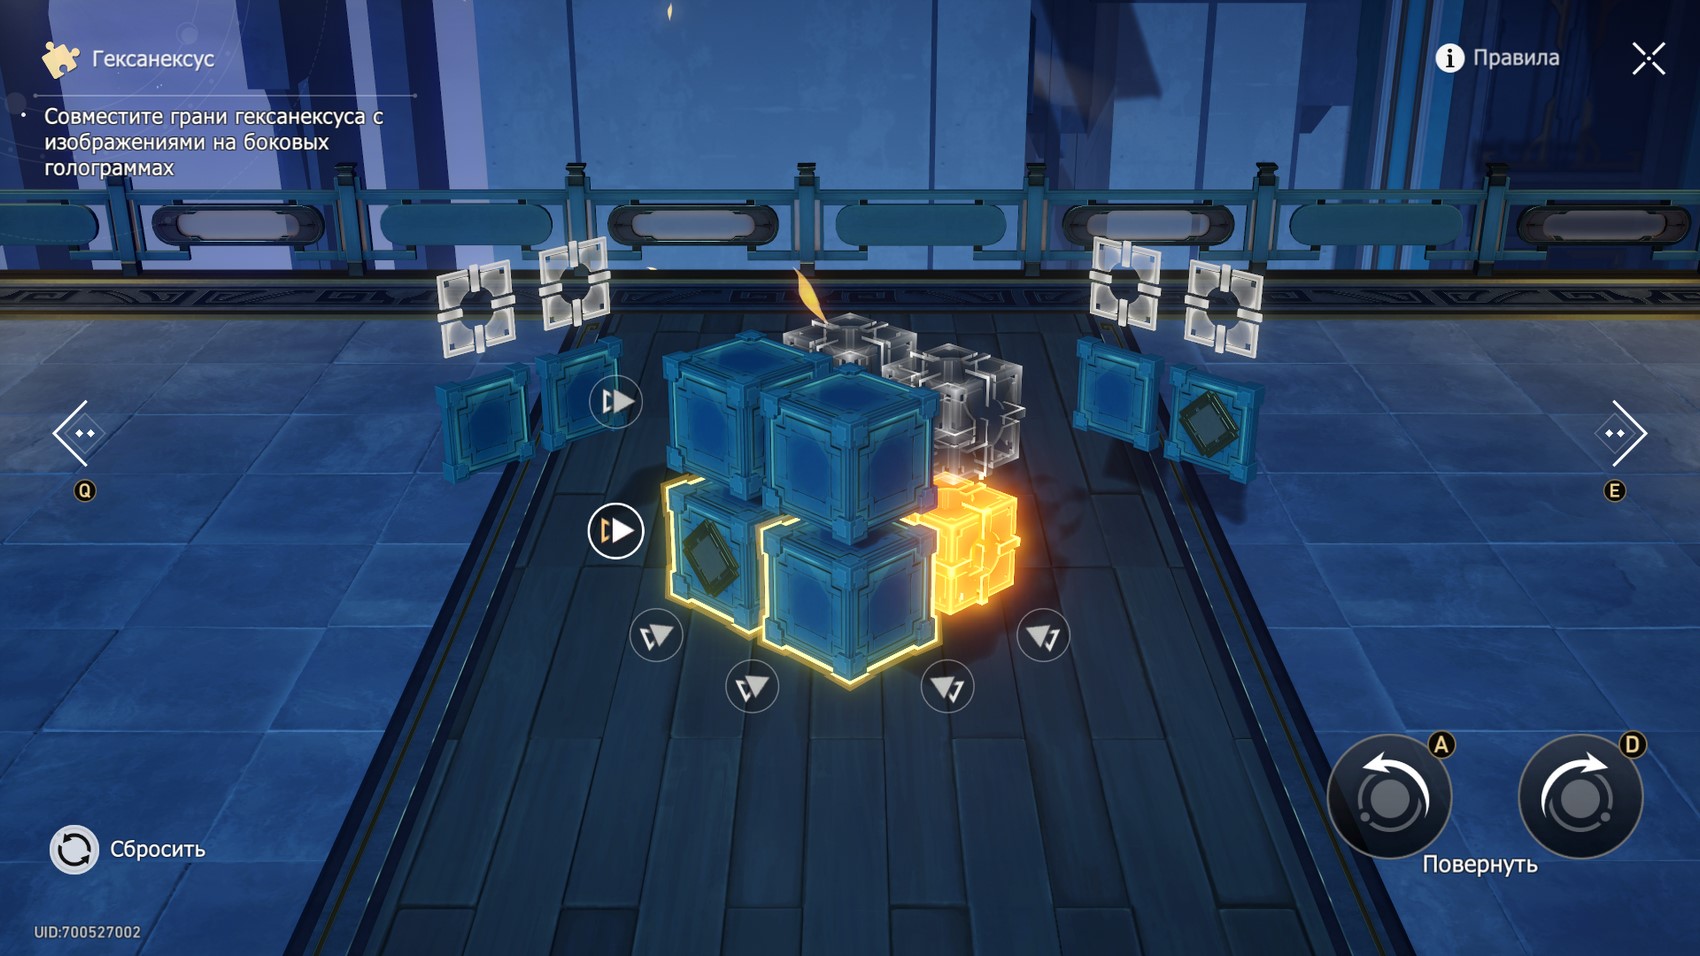
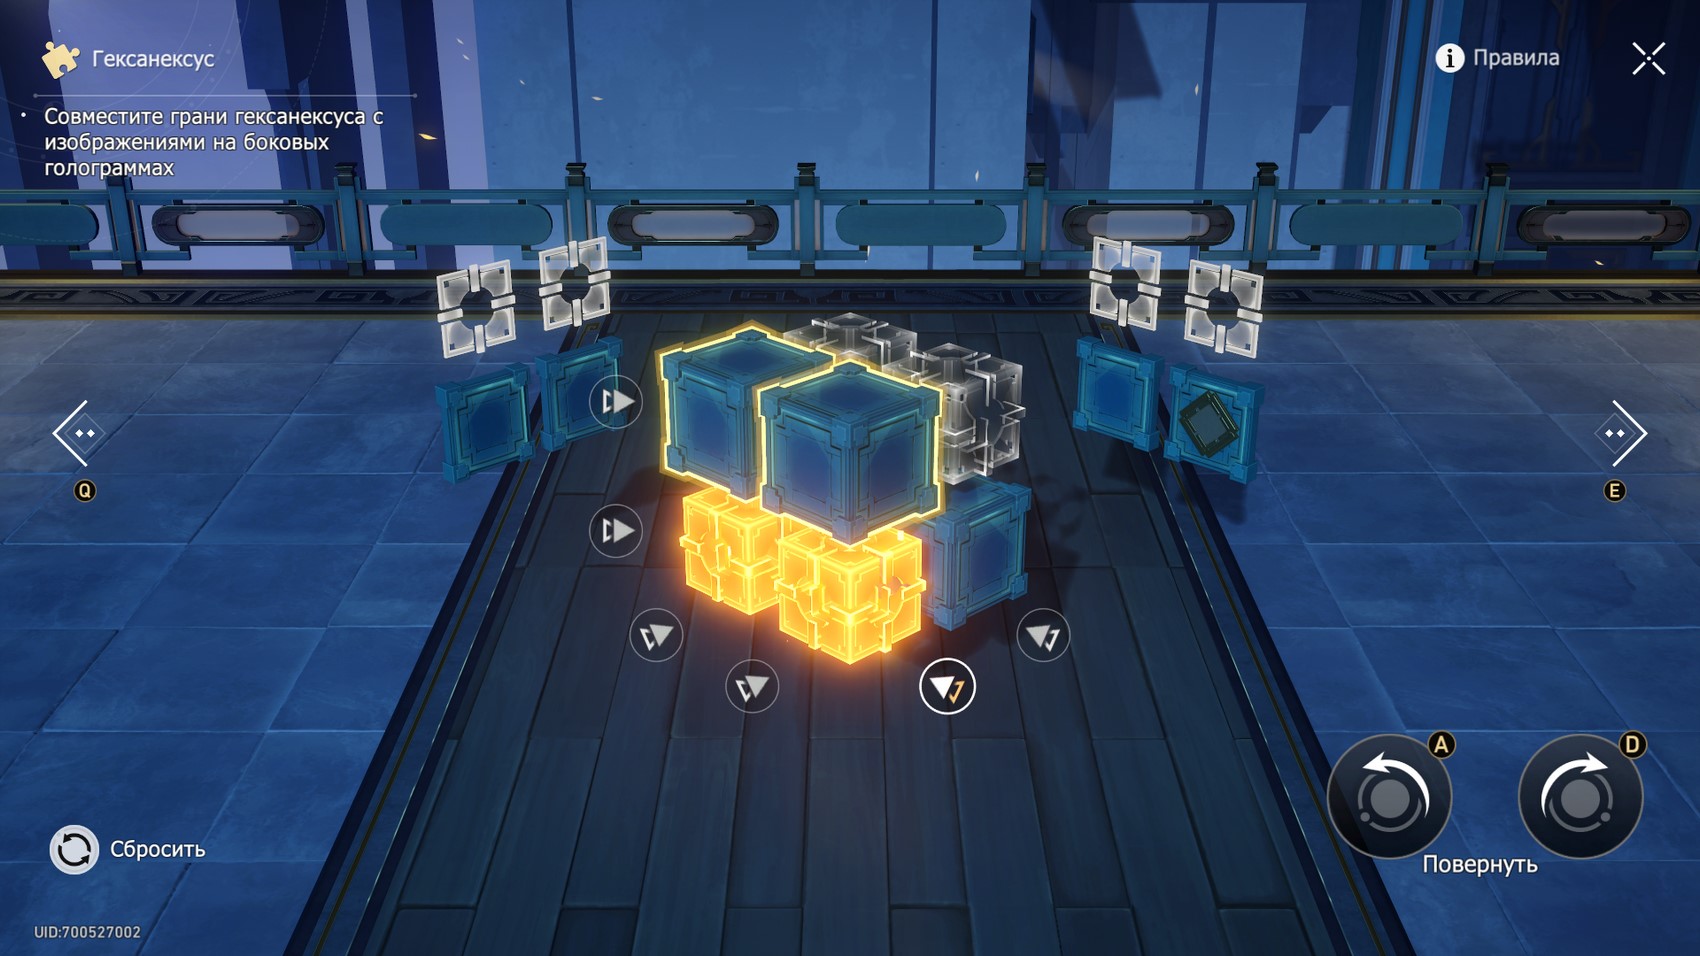
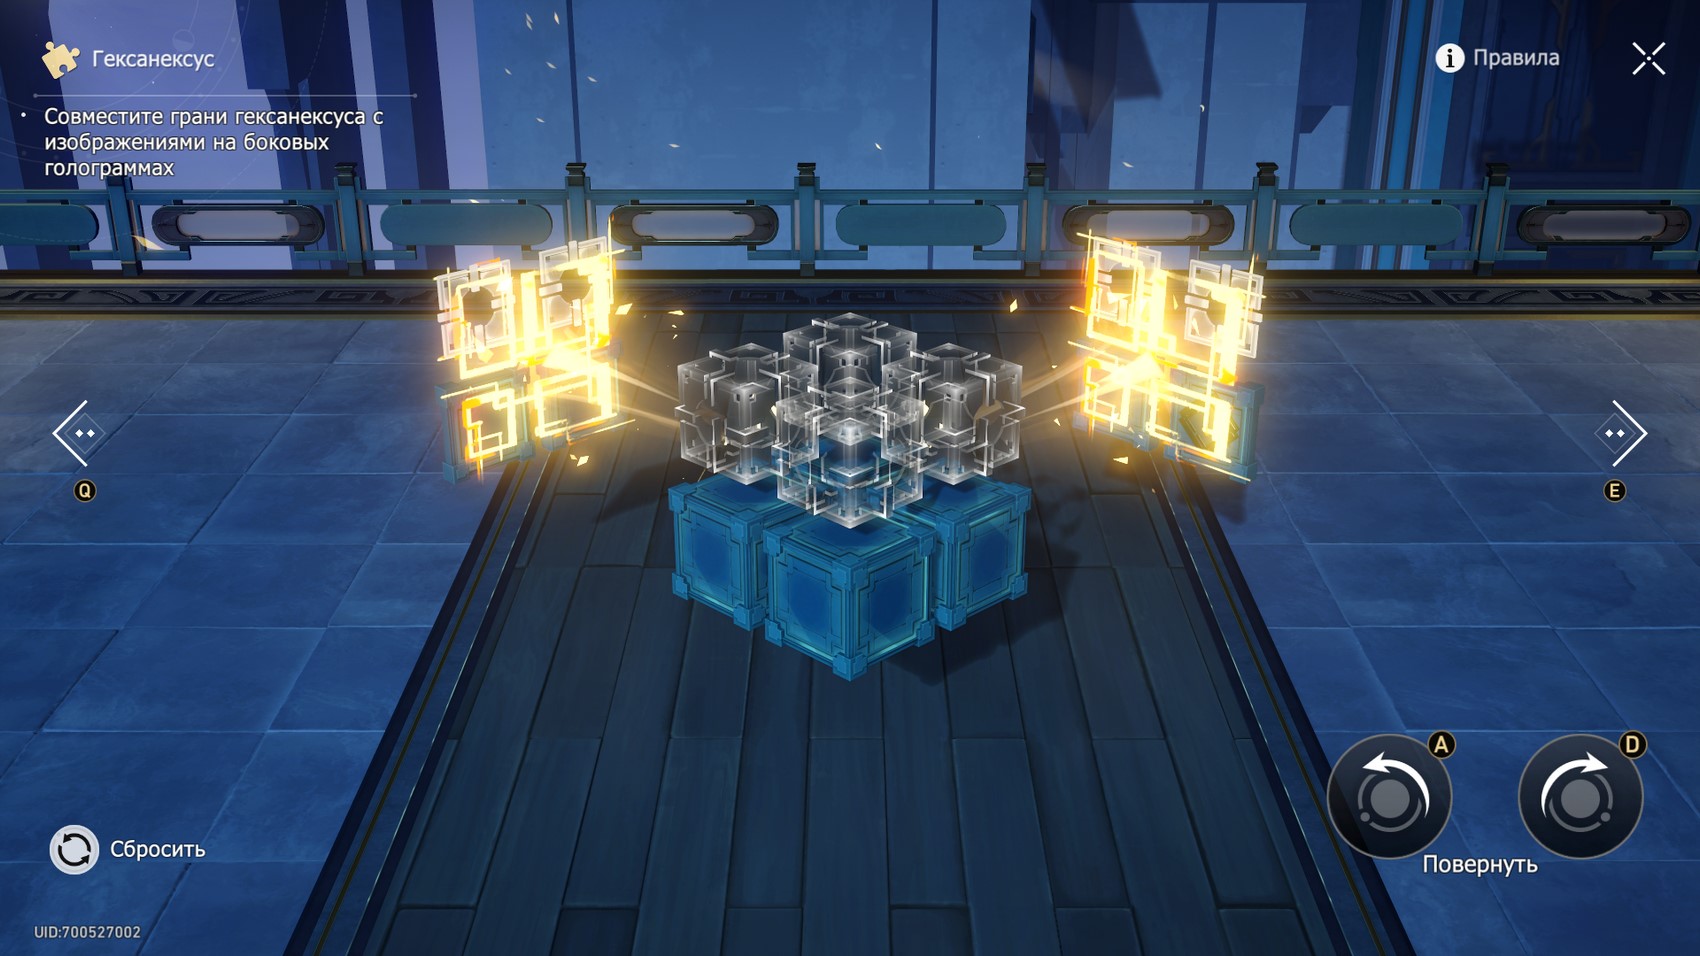
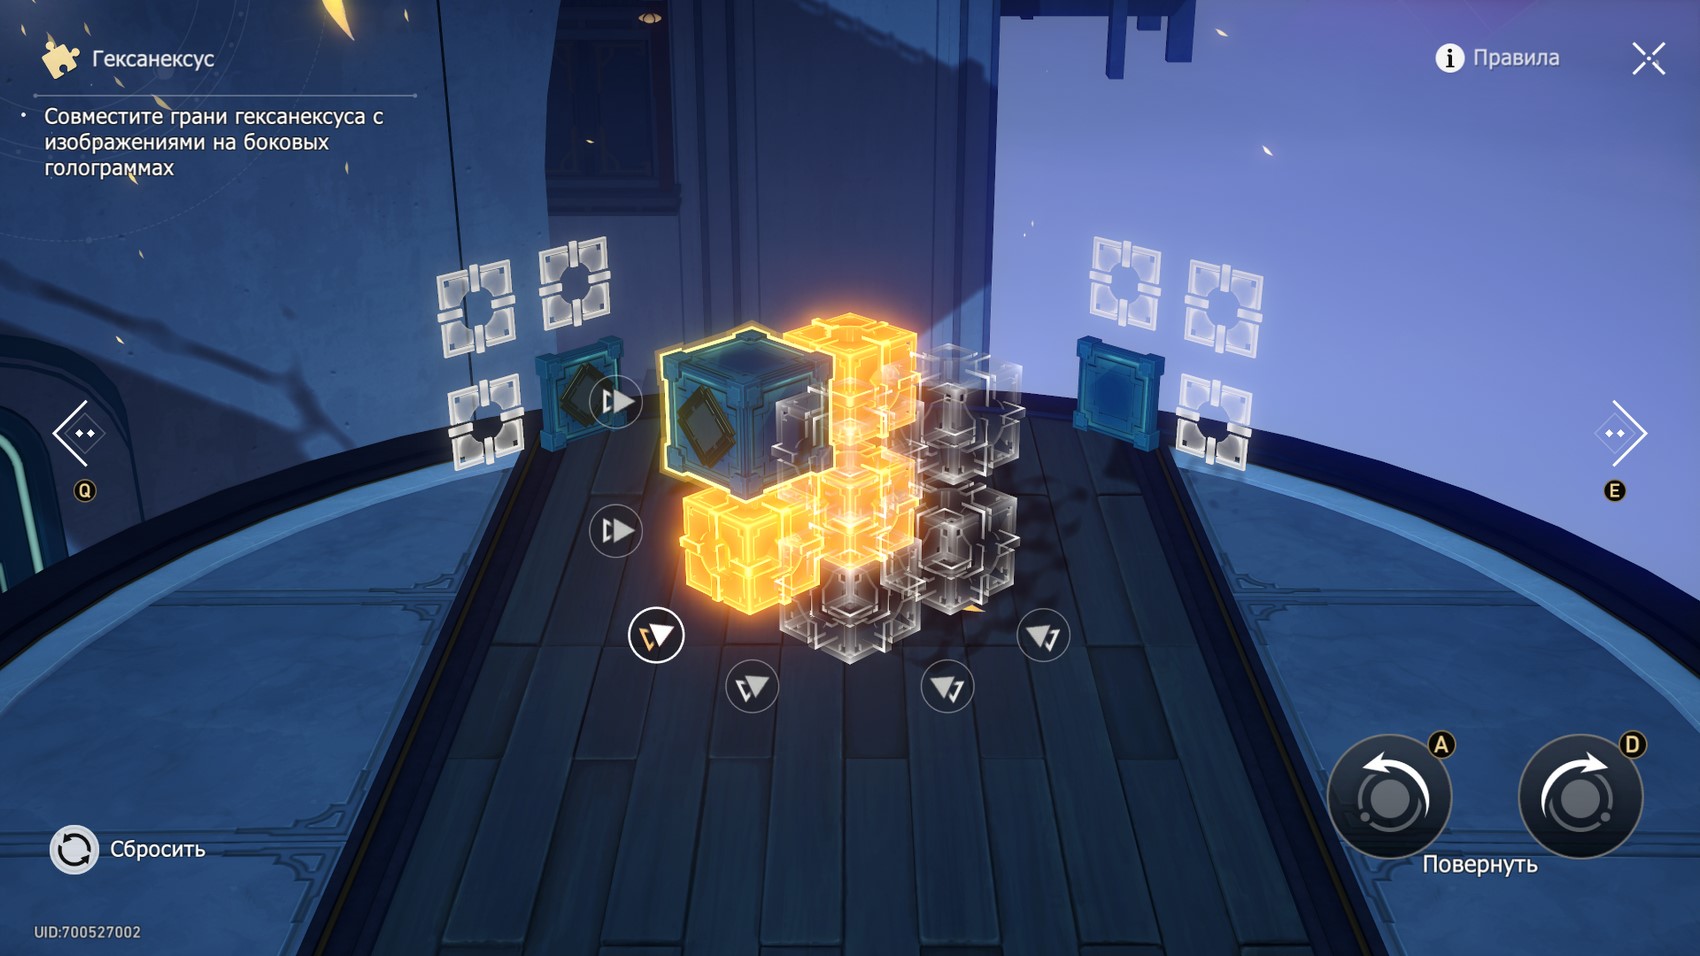
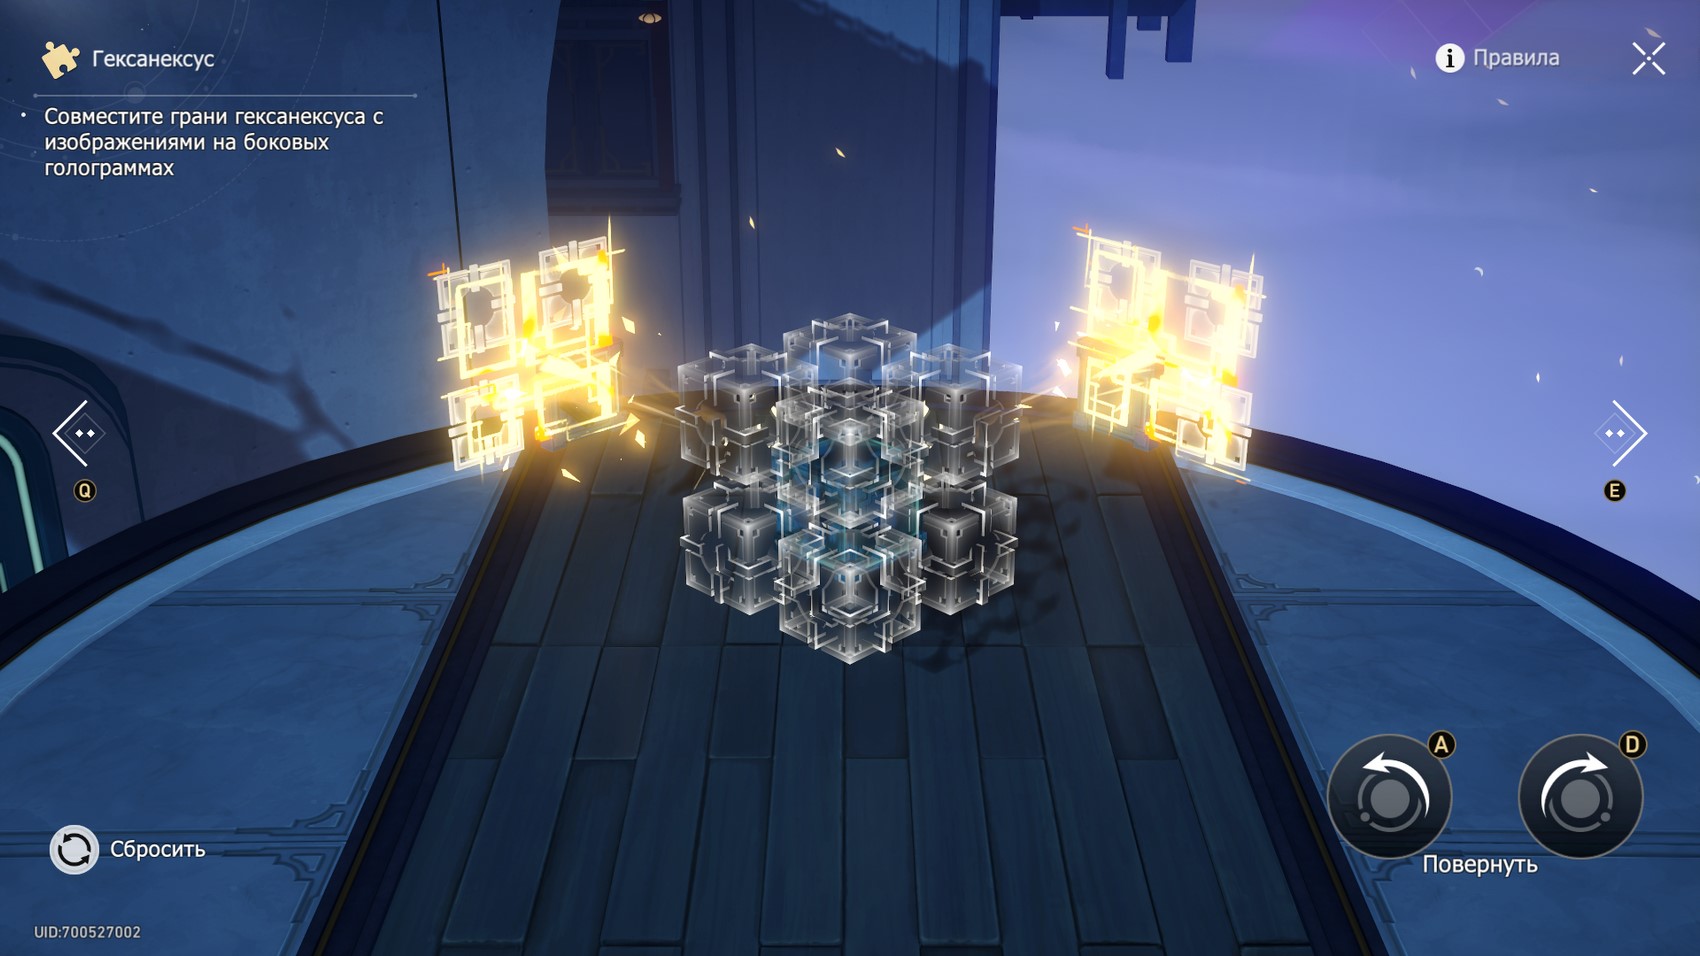
To solve the hexanexus puzzle, you need to rotate its areas so that the physical block of the cube matches the plates hanging on both sides (see the screenshot below for clarity).
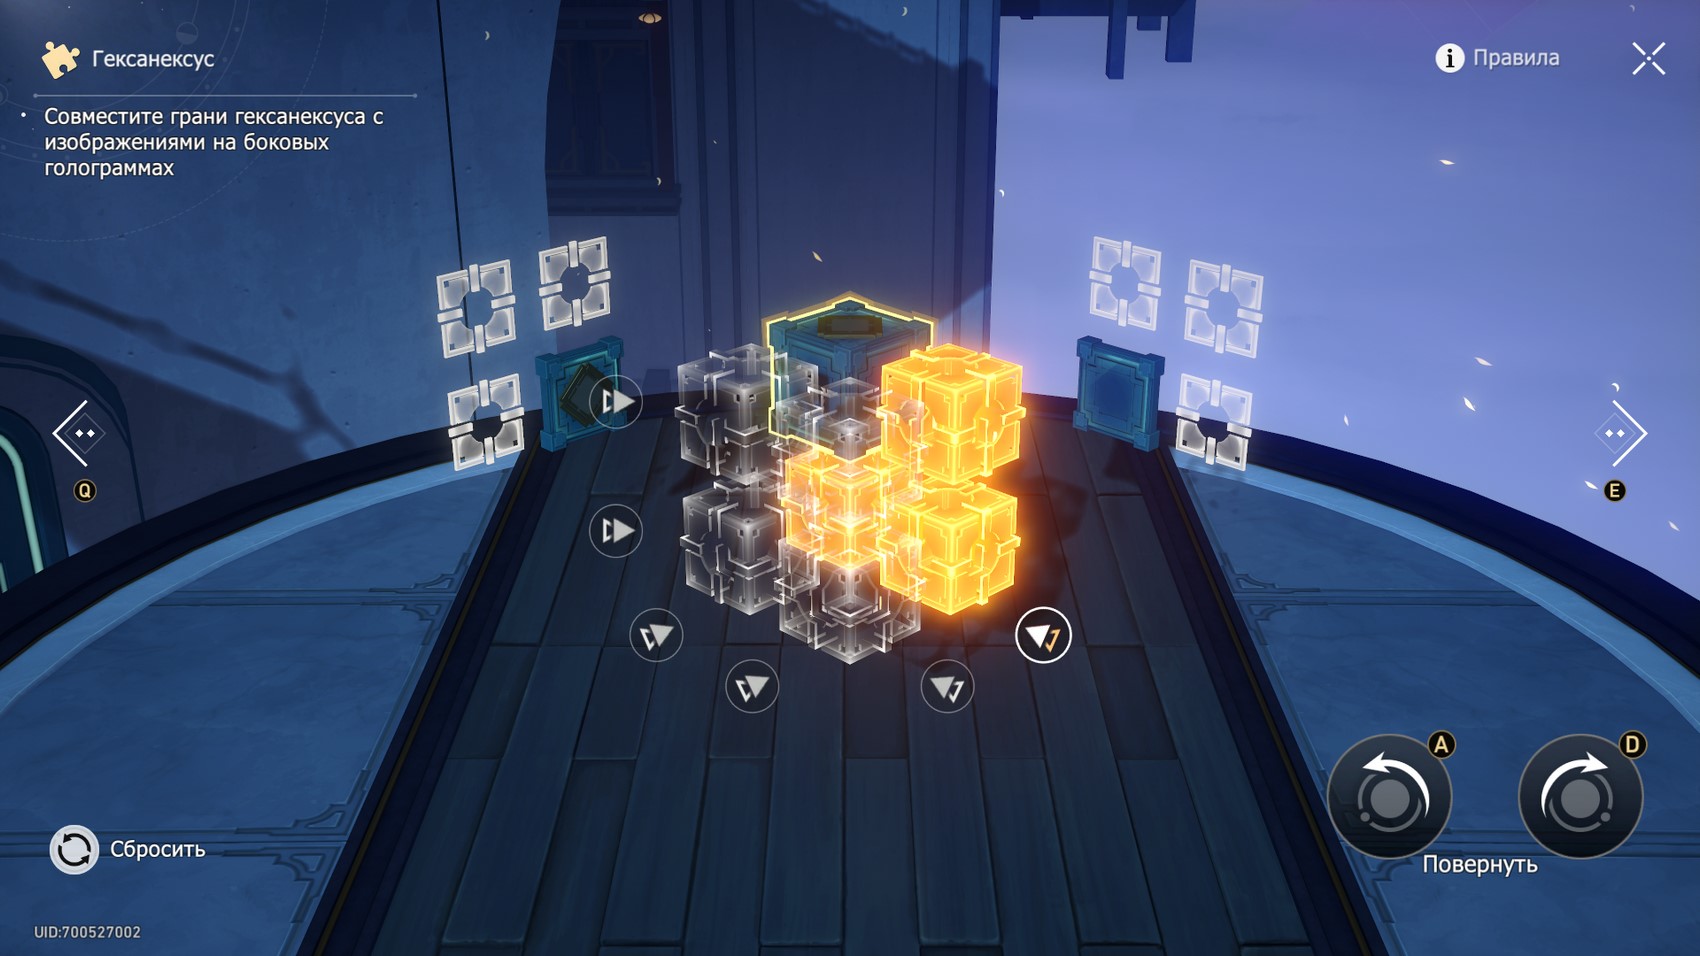
In this case, you can select any side of the cube (click on the icons next to the shape itself), and then rotate them left or right using the arrows in the lower right corner of the screen or the "A" and "D" keys. The side you choose will be highlighted in yellow by the game.
Remember to change the viewing angle to better understand which side to choose and how exactly it needs to be rotated so that the green cubes match the images on the side holograms. We add that after starting a secret quest from a mysterious organization, the riddle will be slightly complicated by the appearance of special patterns on the blocks, which must also match the plates on both sides.
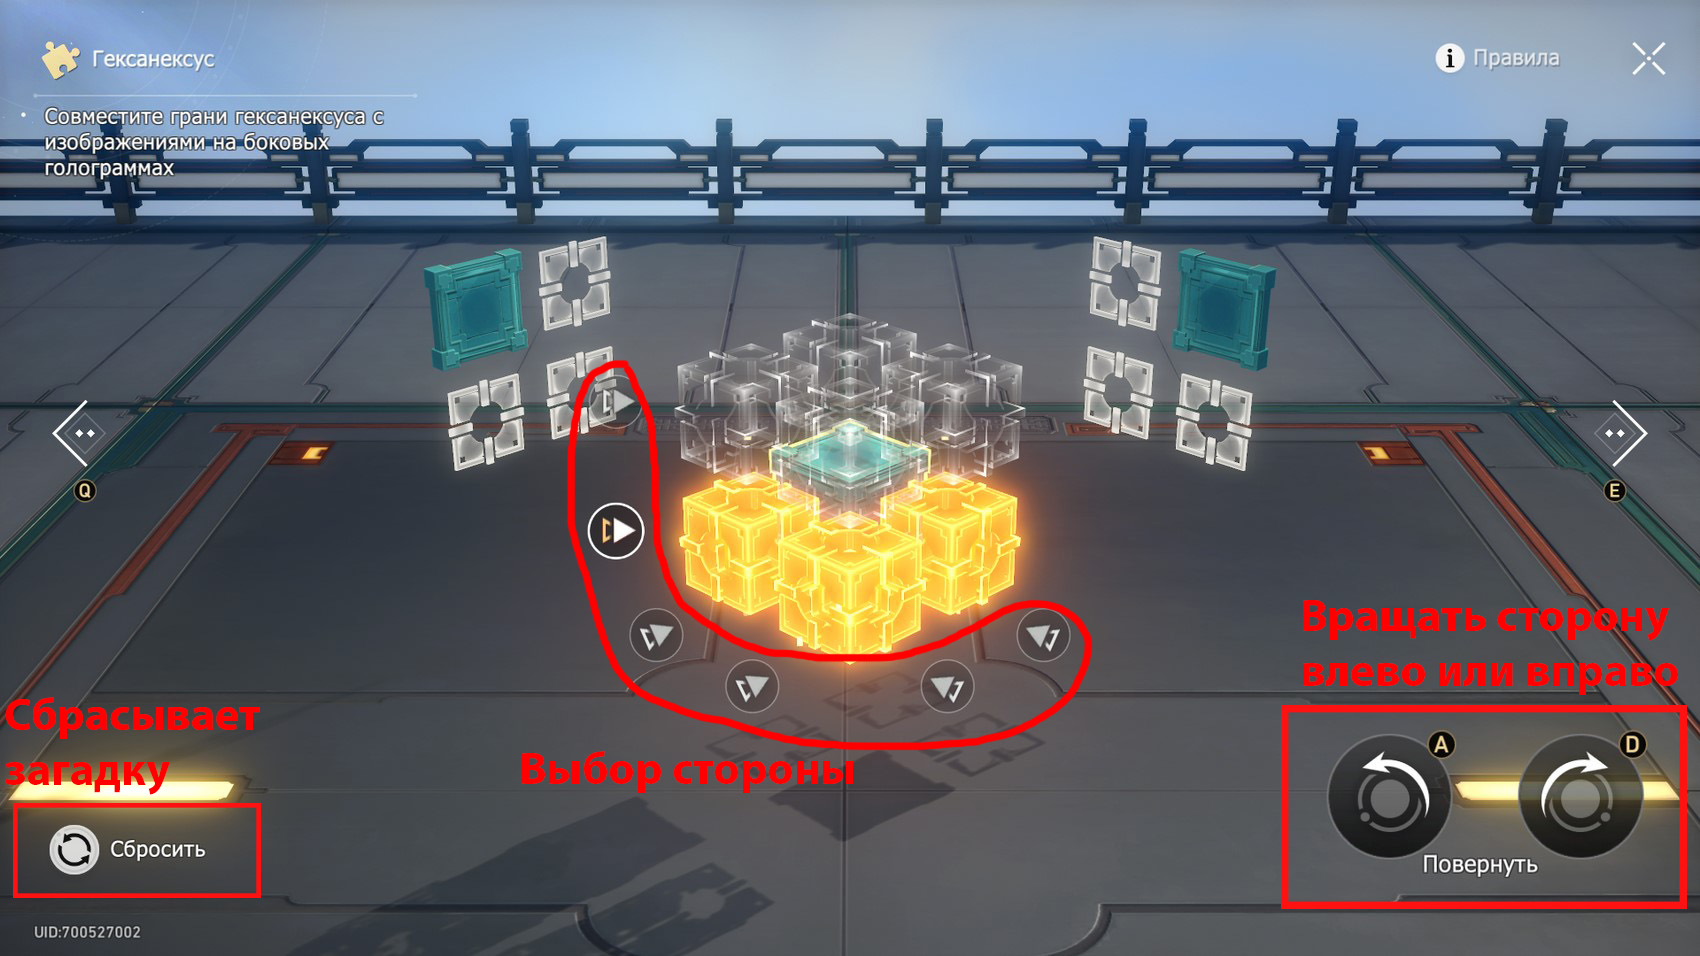
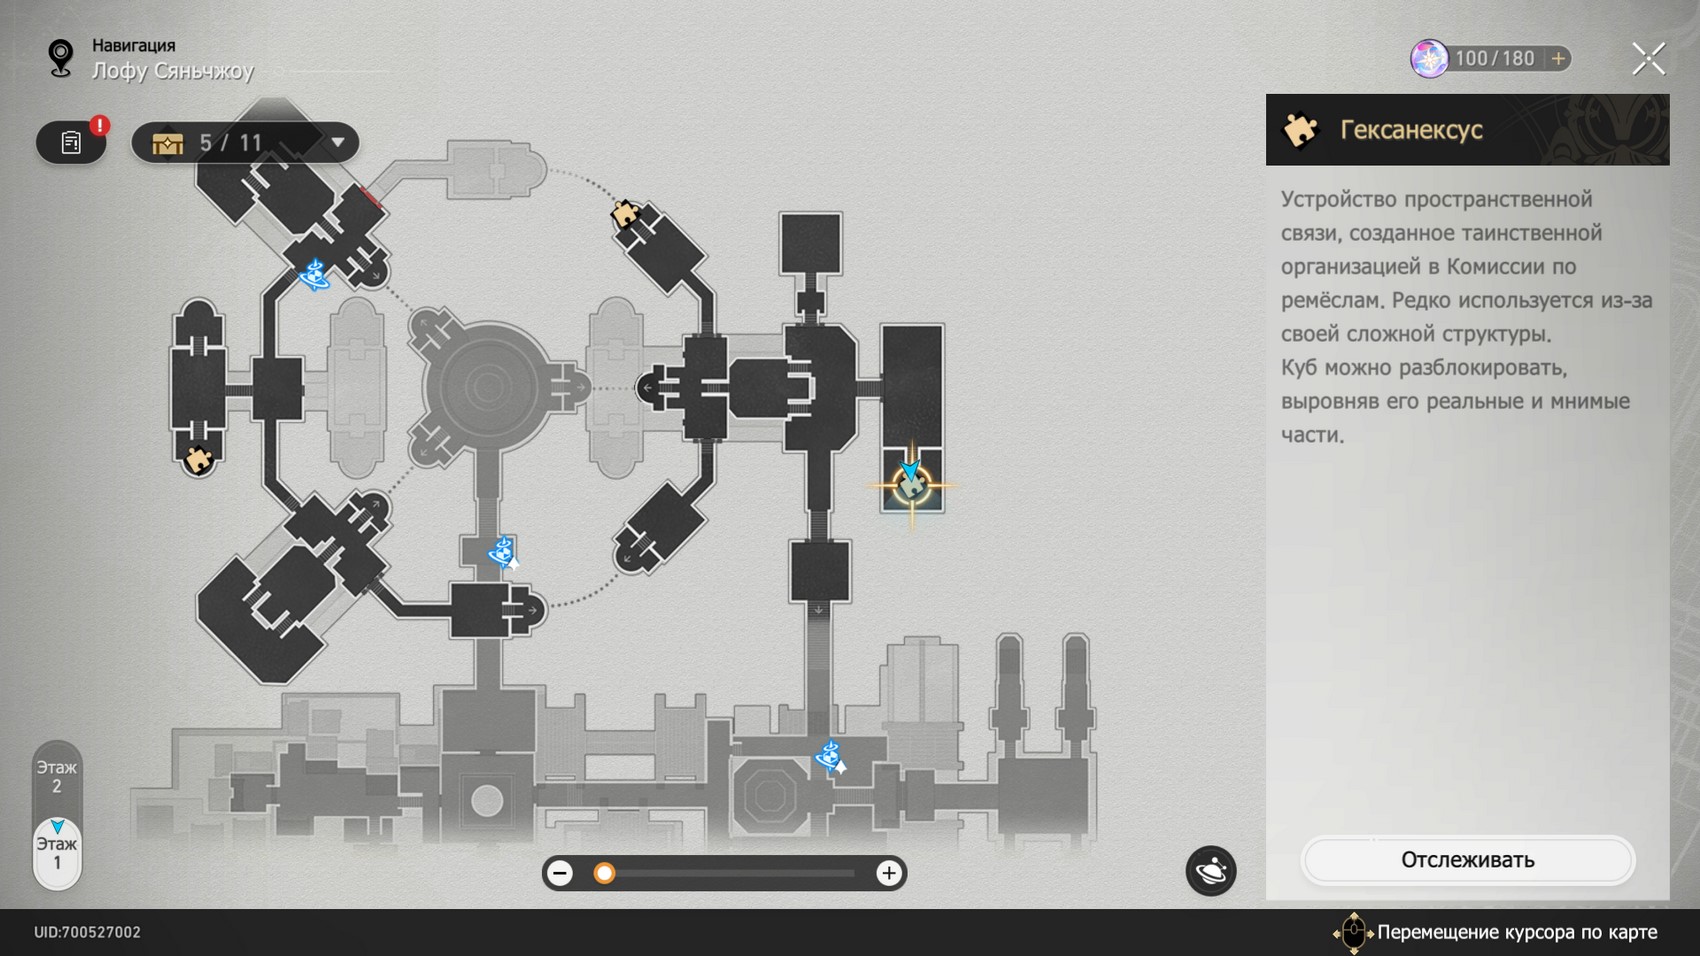
If you are confused and want to return the puzzle to its original state, then click on the button "Reset"
in the lower left corner of the screen. Next, we will look at absolutely all the puzzles with hexanexus, indicating all the steps to solve them. To make it clearer for you, we will also show the whole process on GIFs.
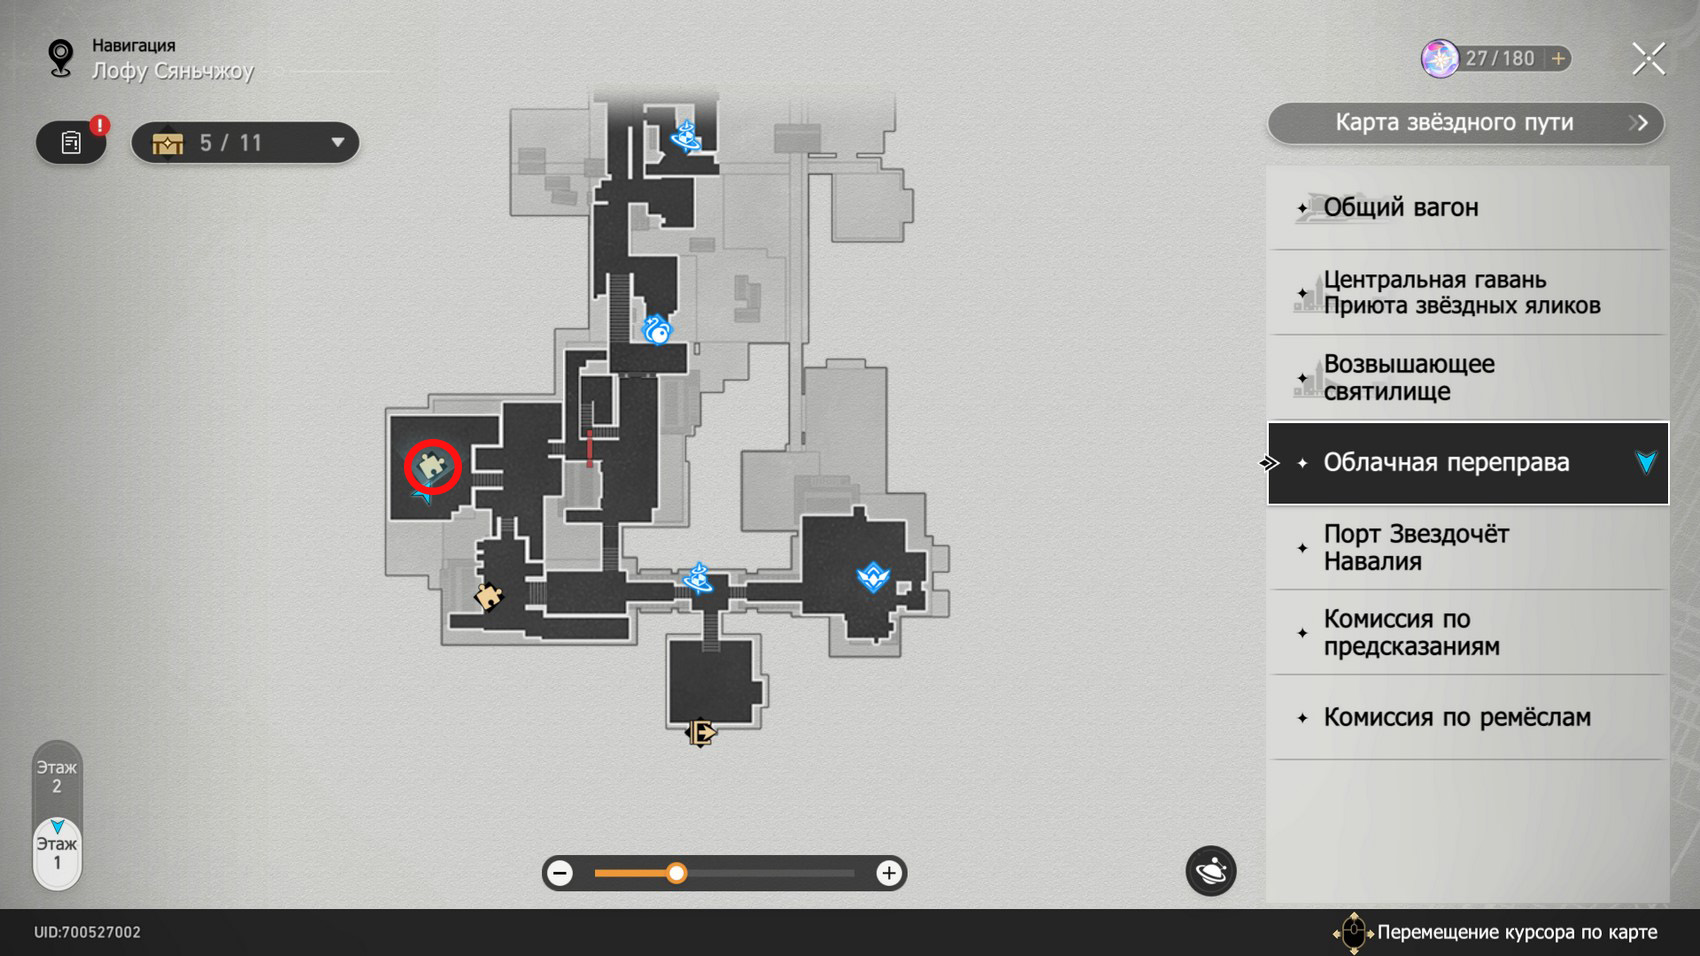
Cloud Ferry (all Hexanexus)
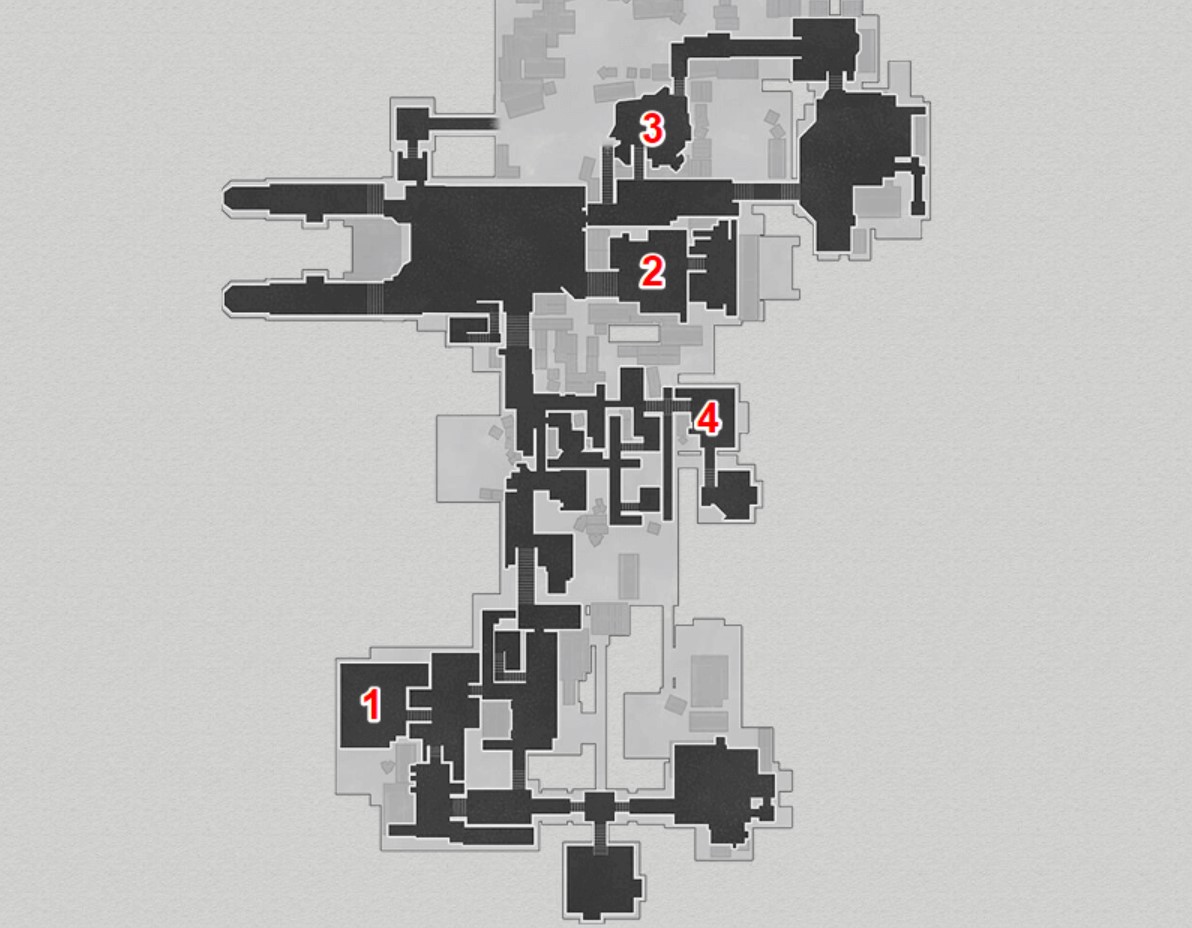
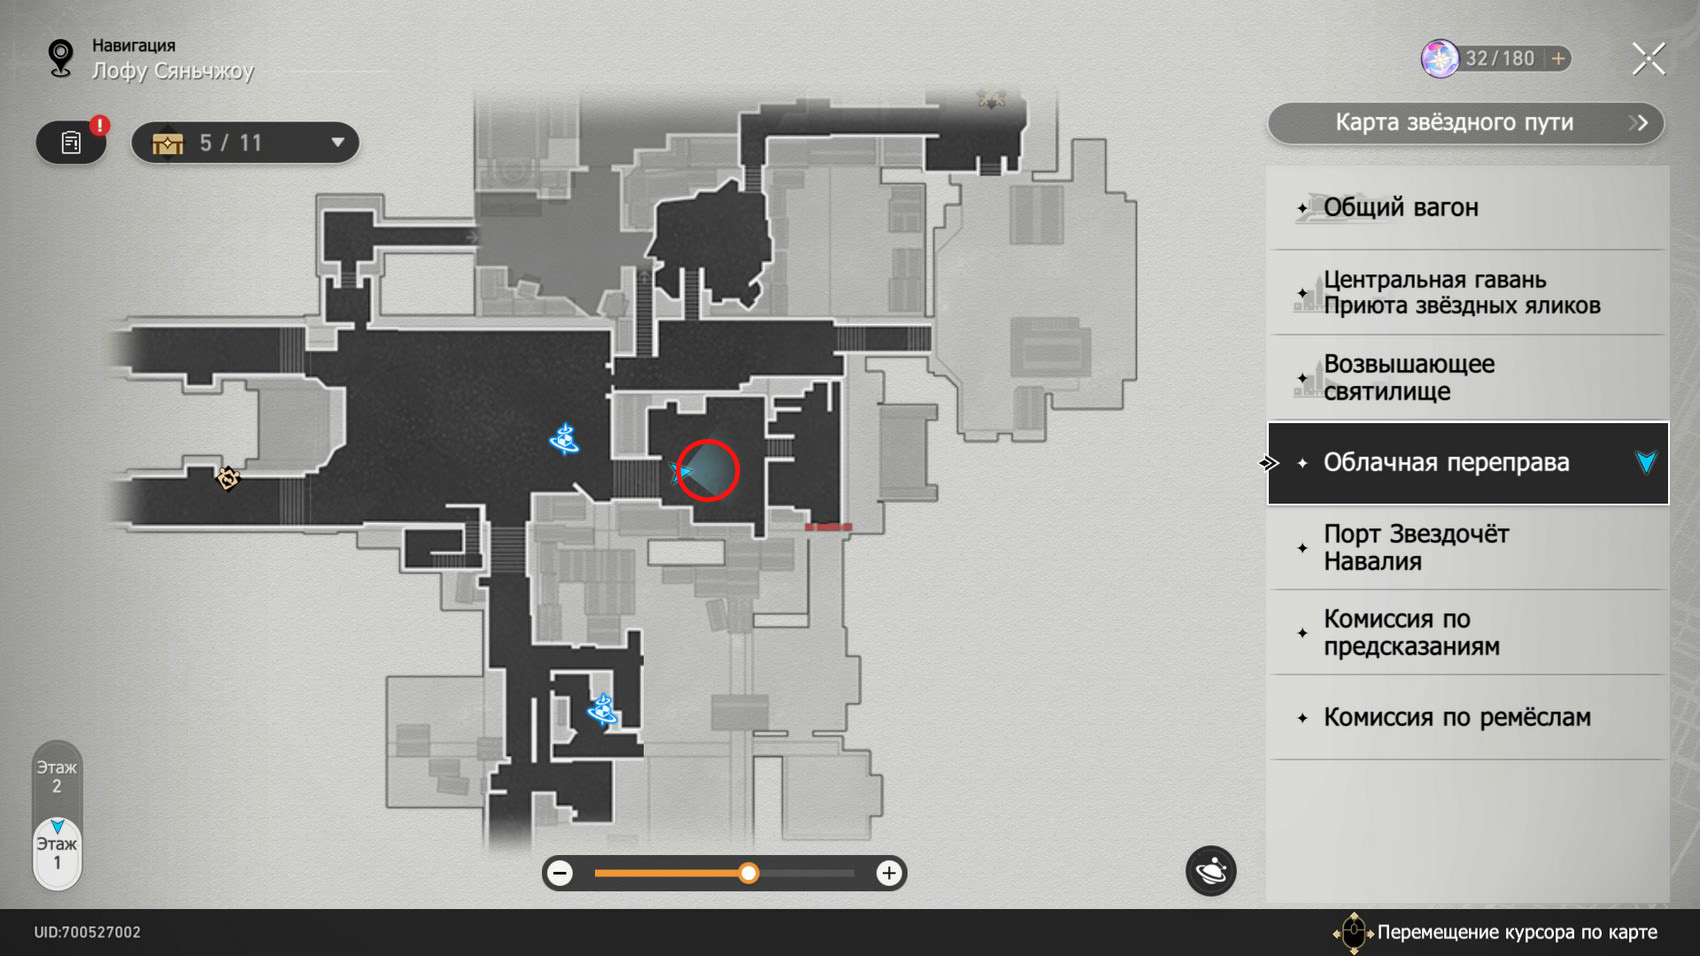
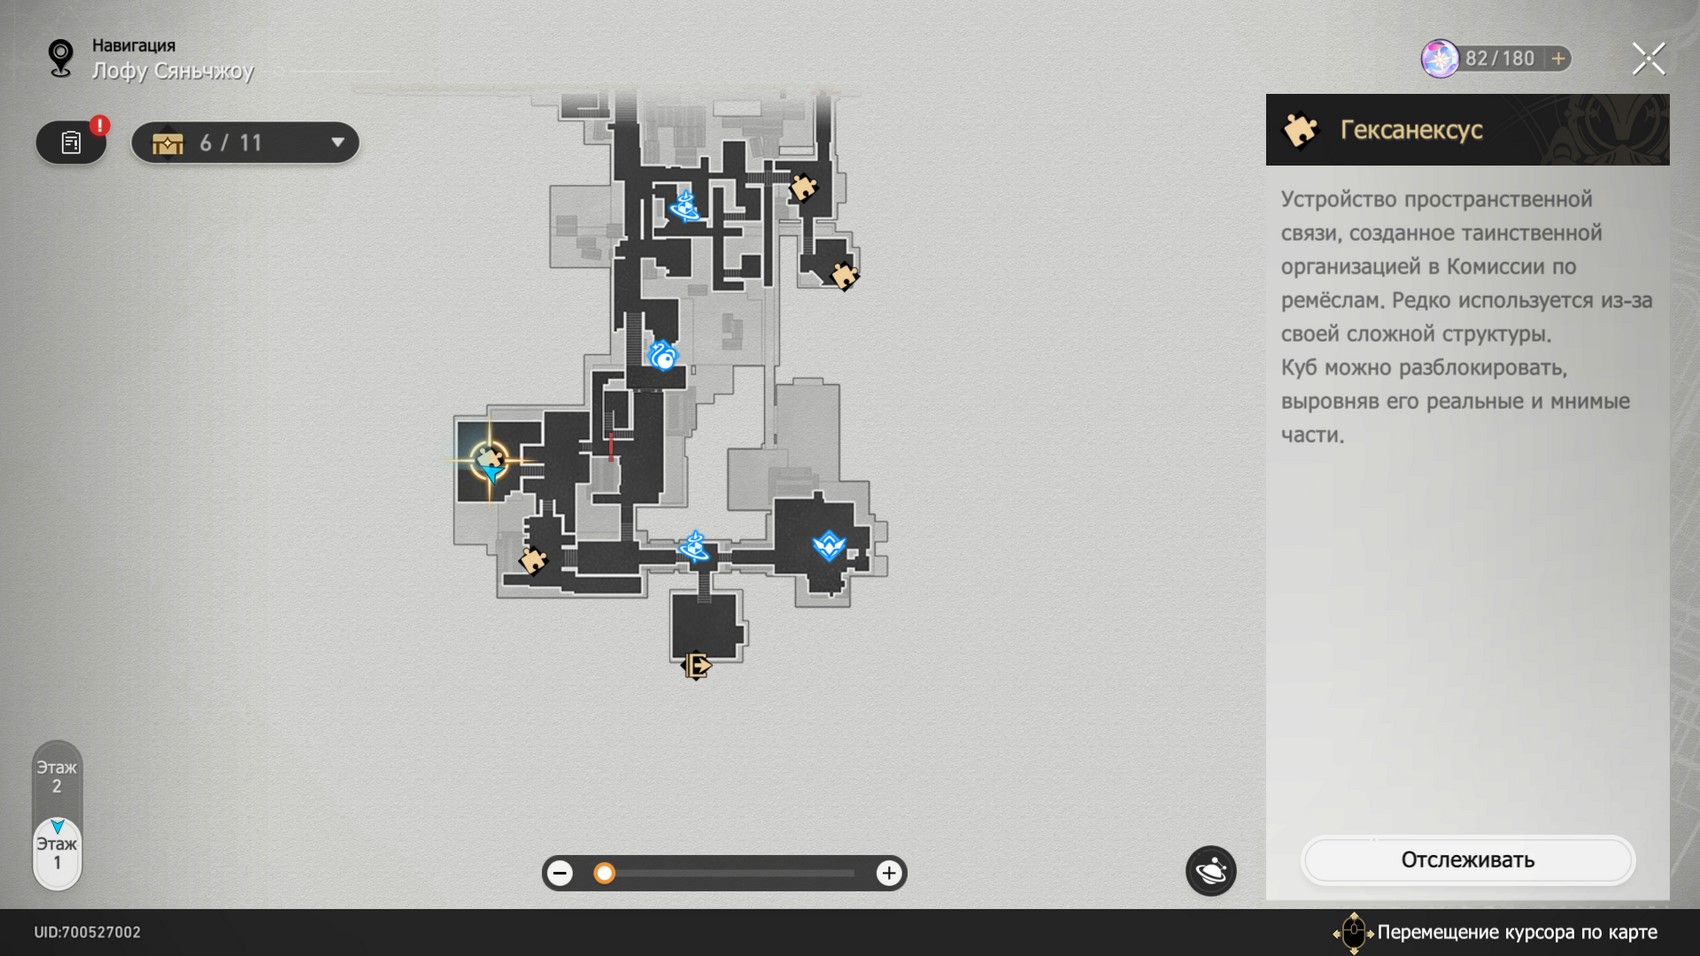
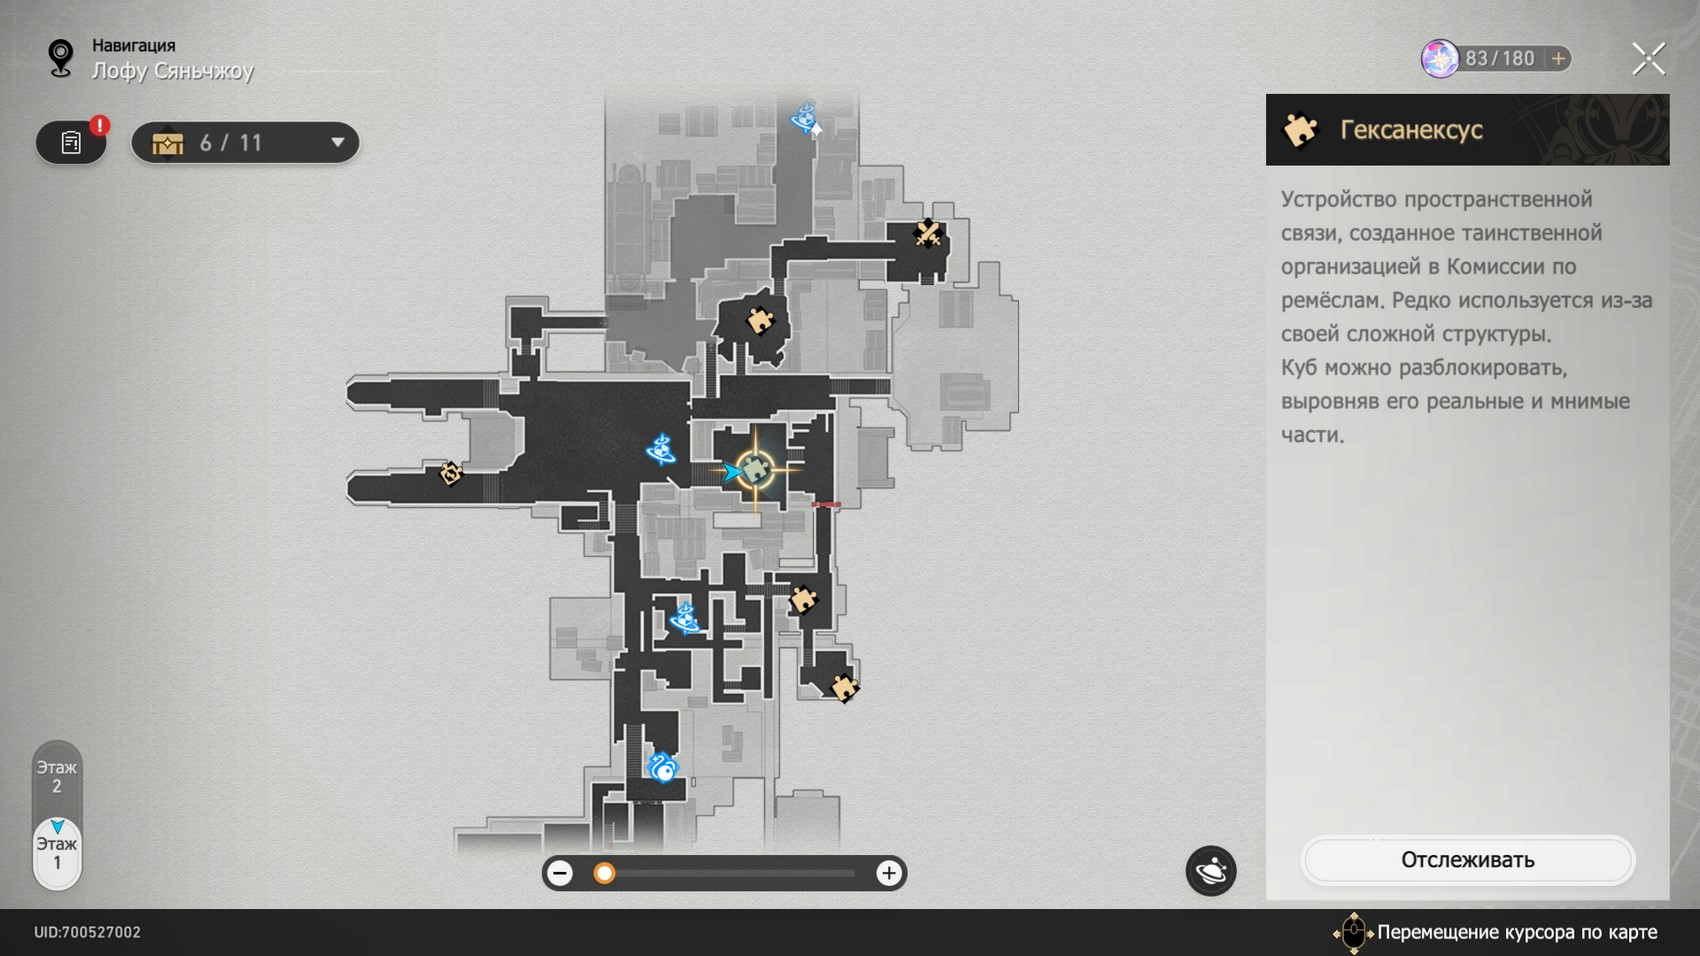
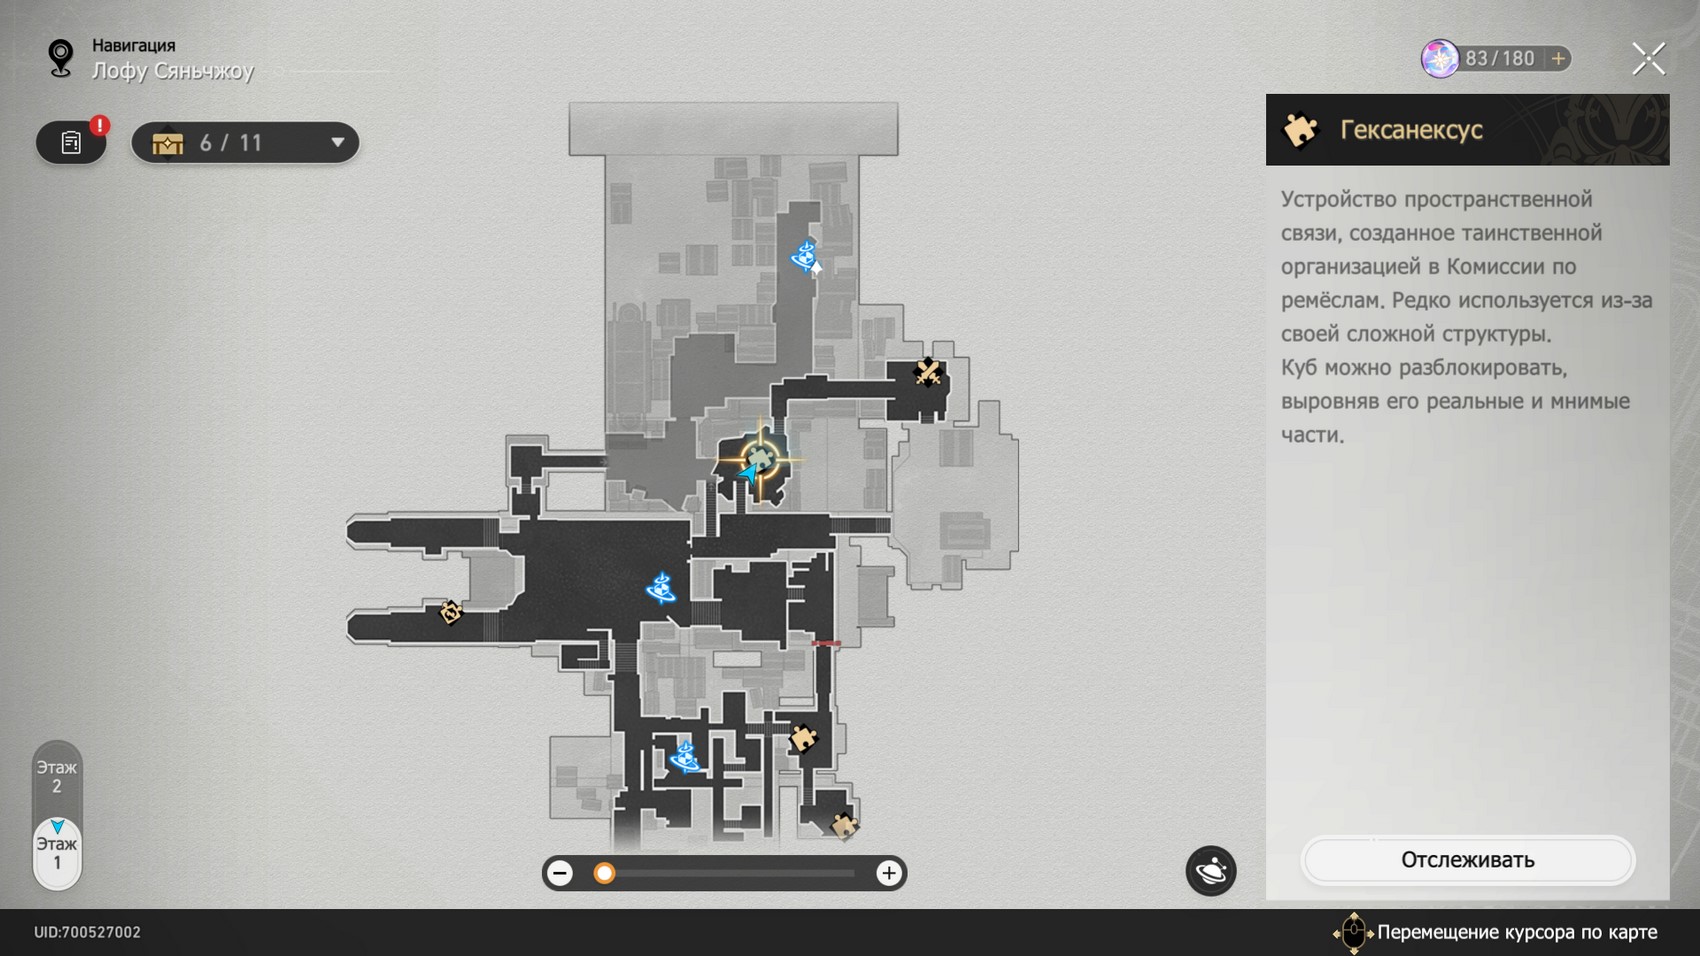
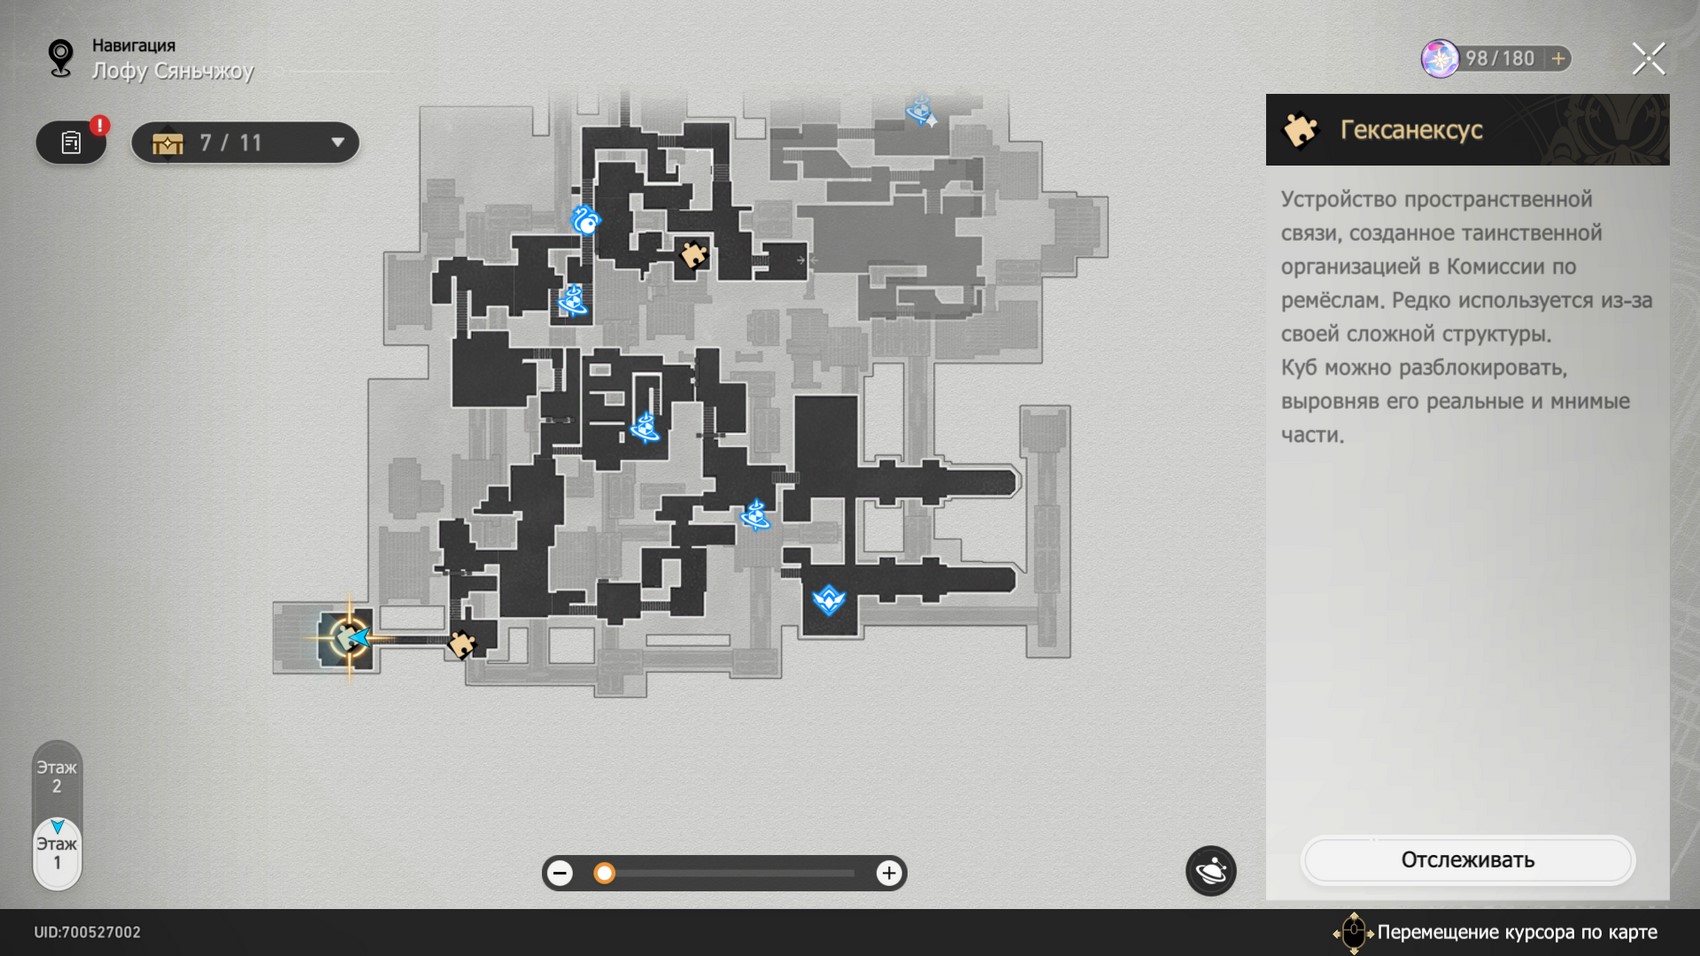
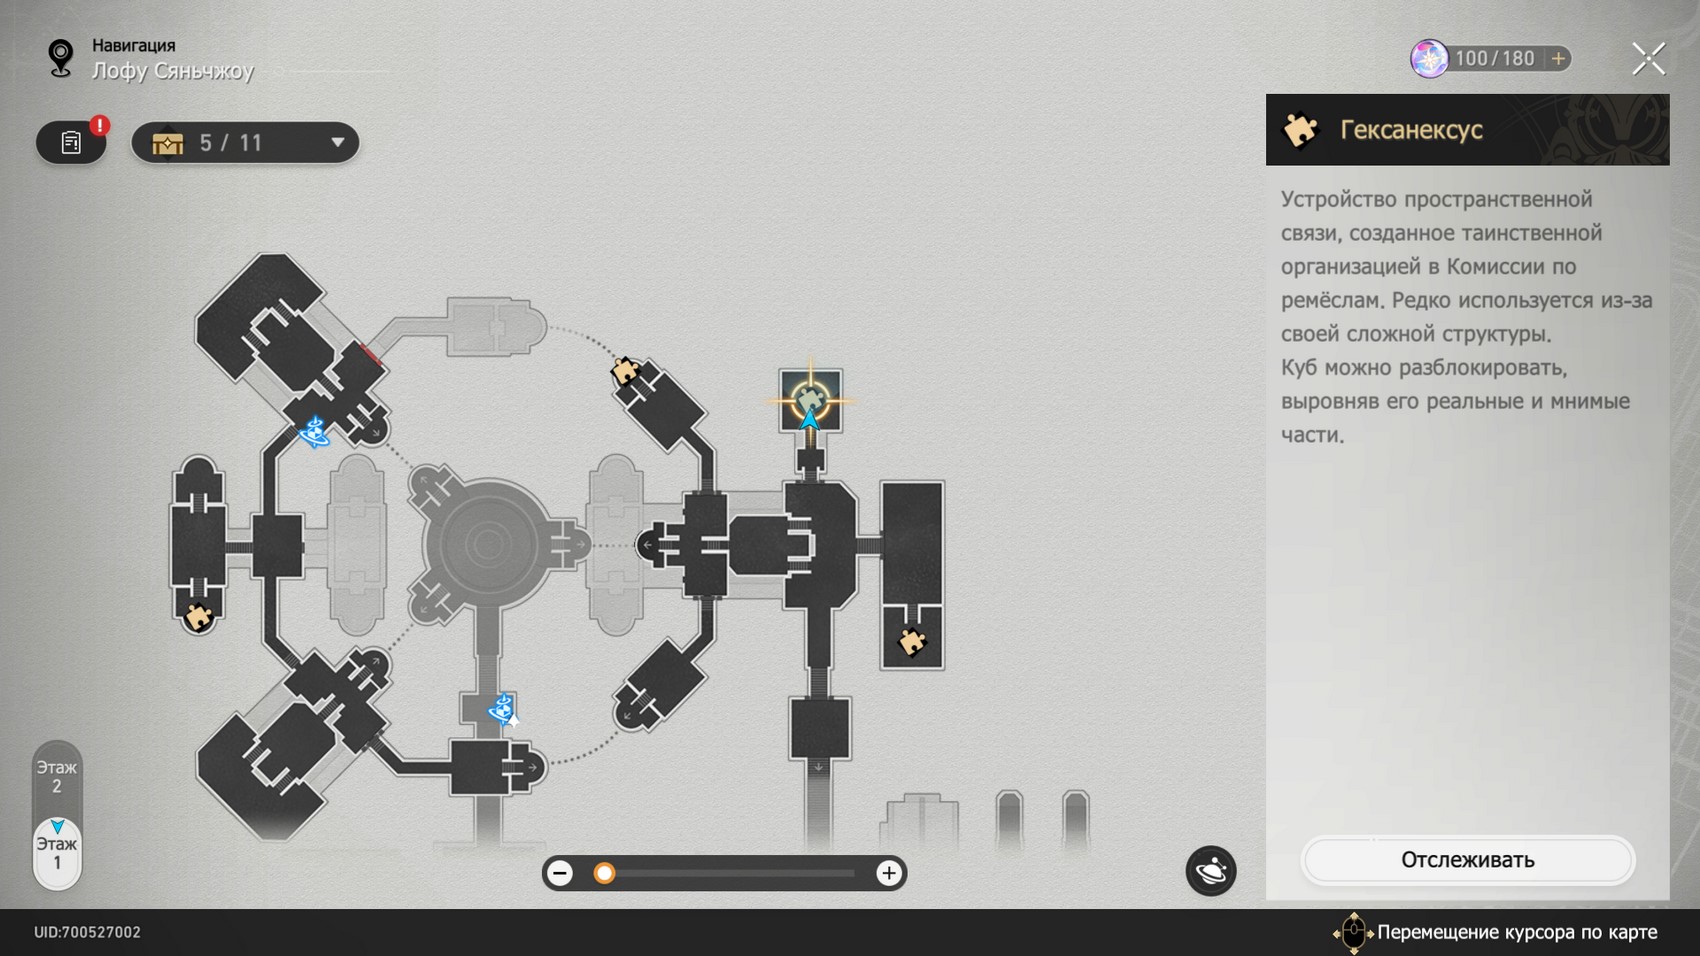
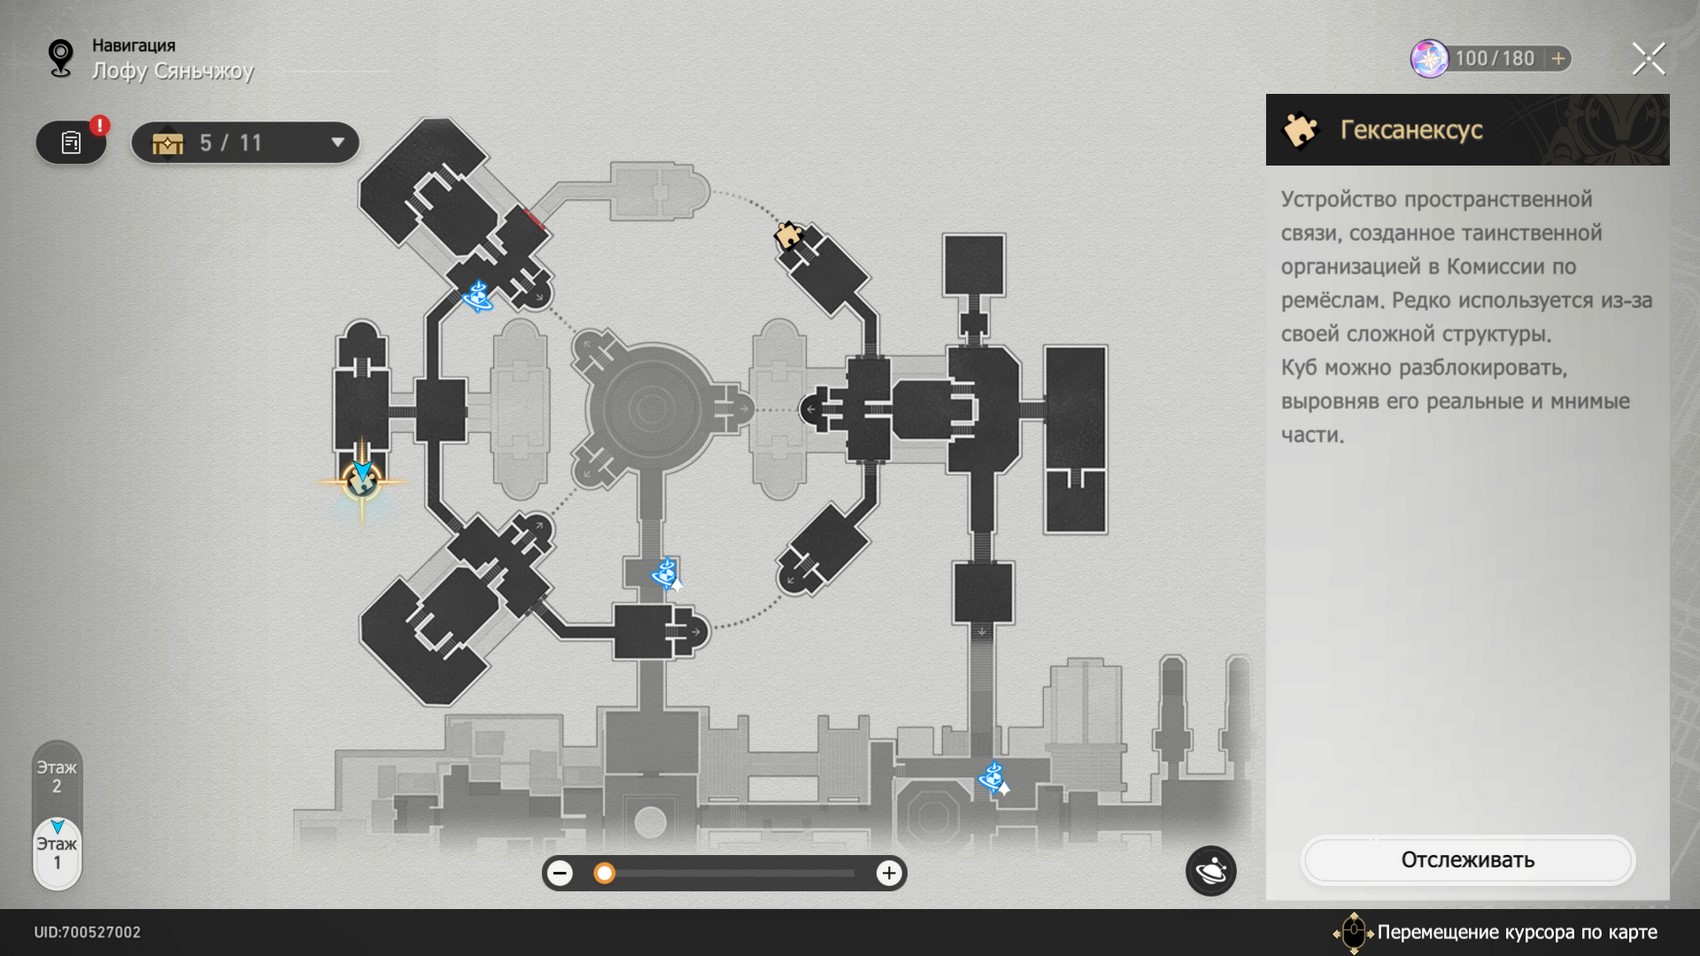
There are four Hexanexus in total in this area. It will be possible to take up finding and solving them after completing the story quest called "Among those struck by Mara." The map below shows the approximate location of the puzzles.
First hexanexus
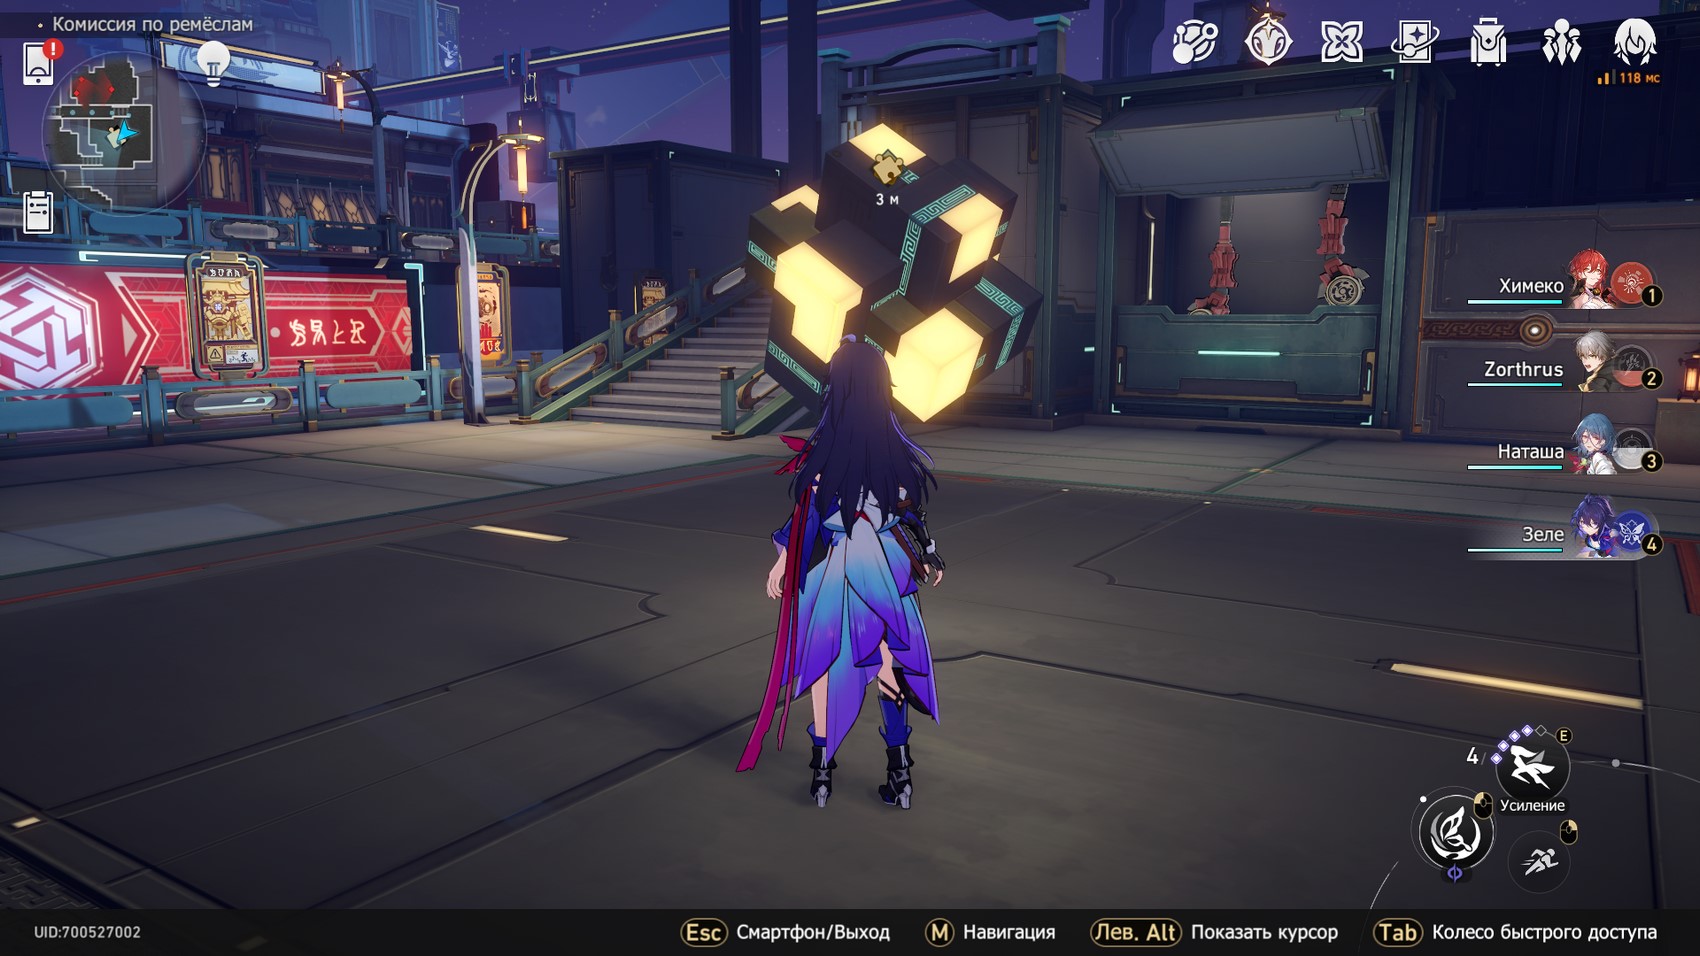
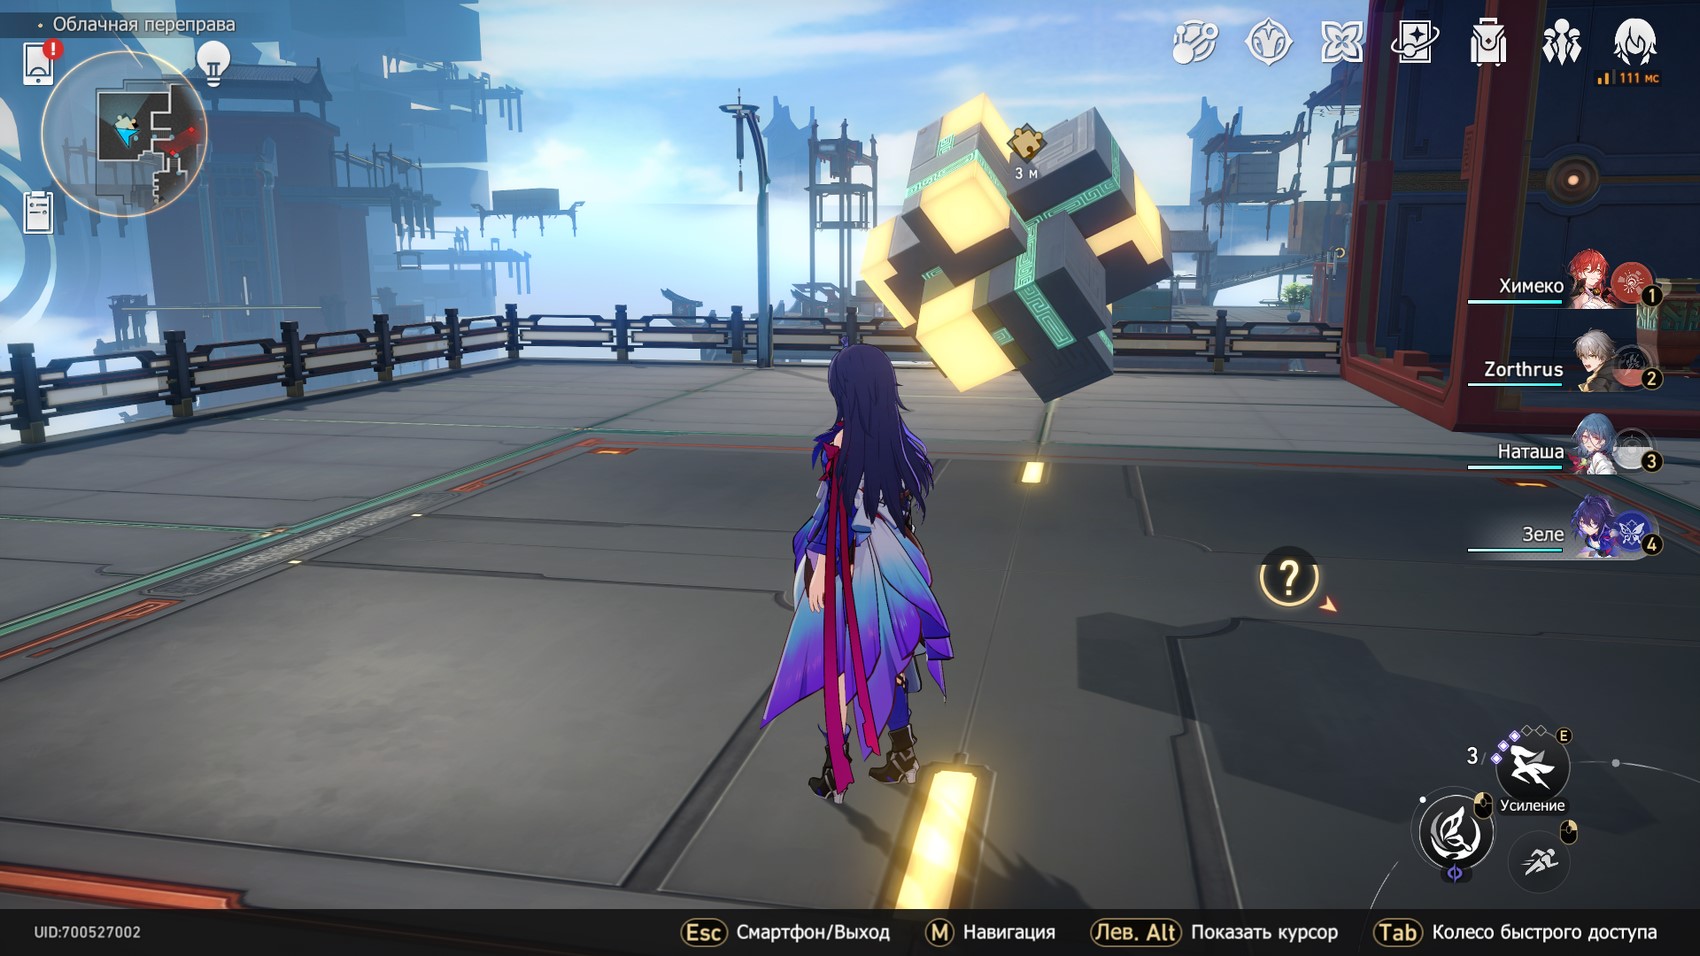
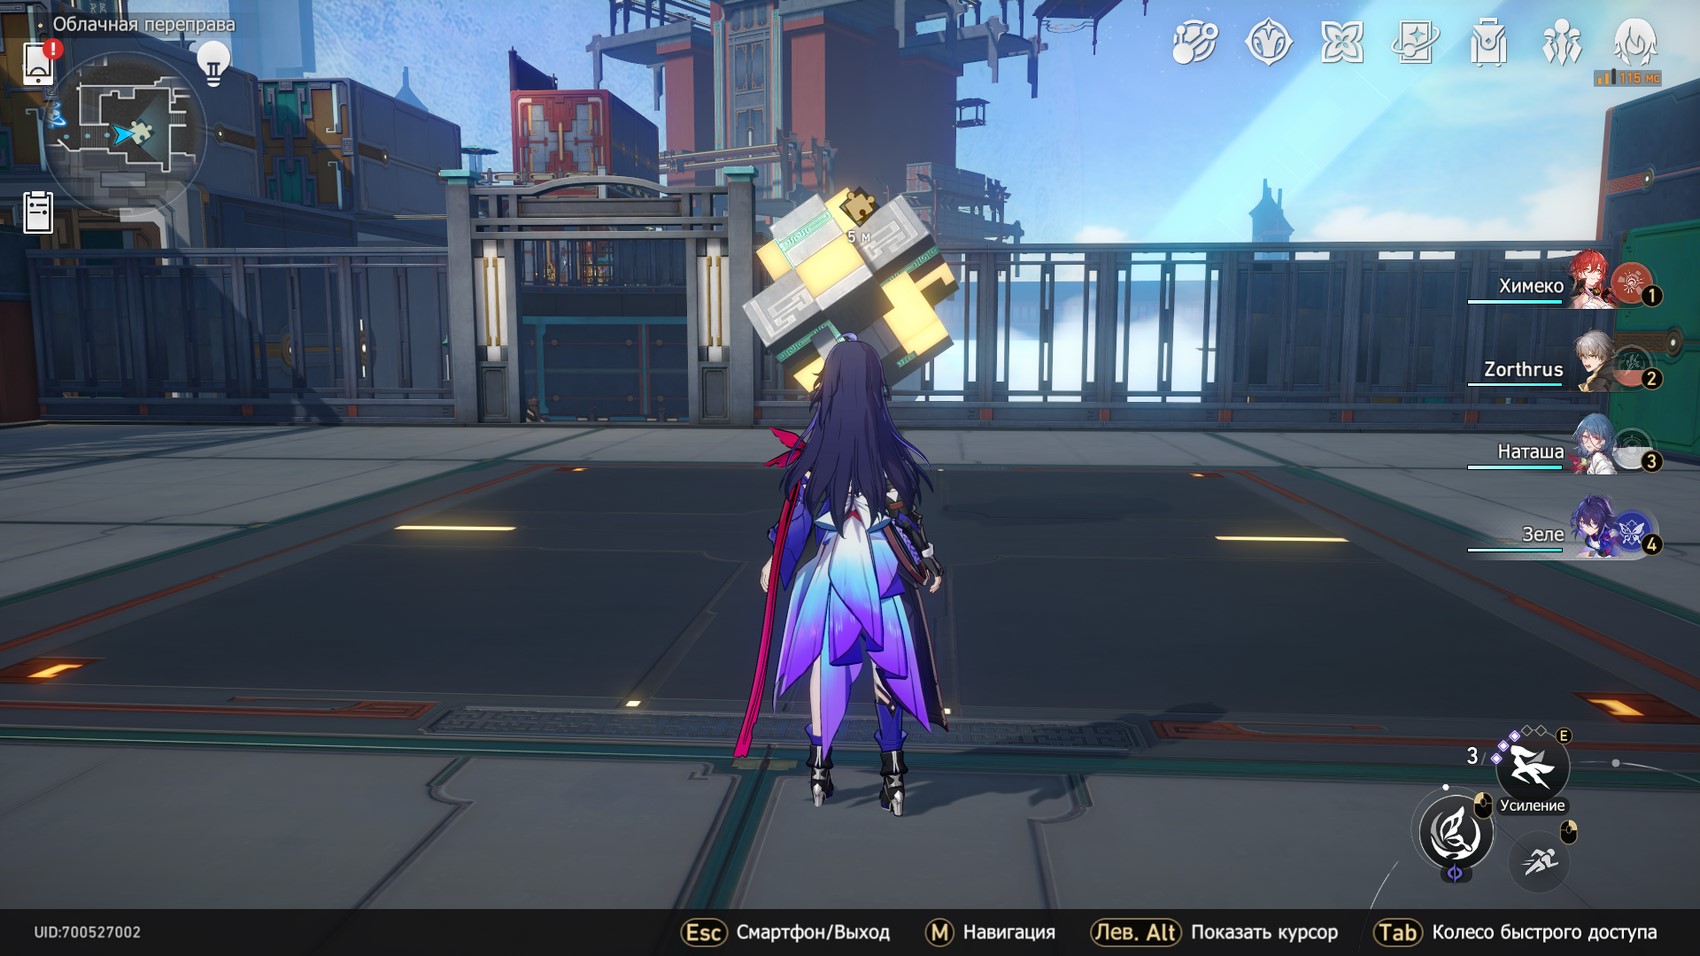
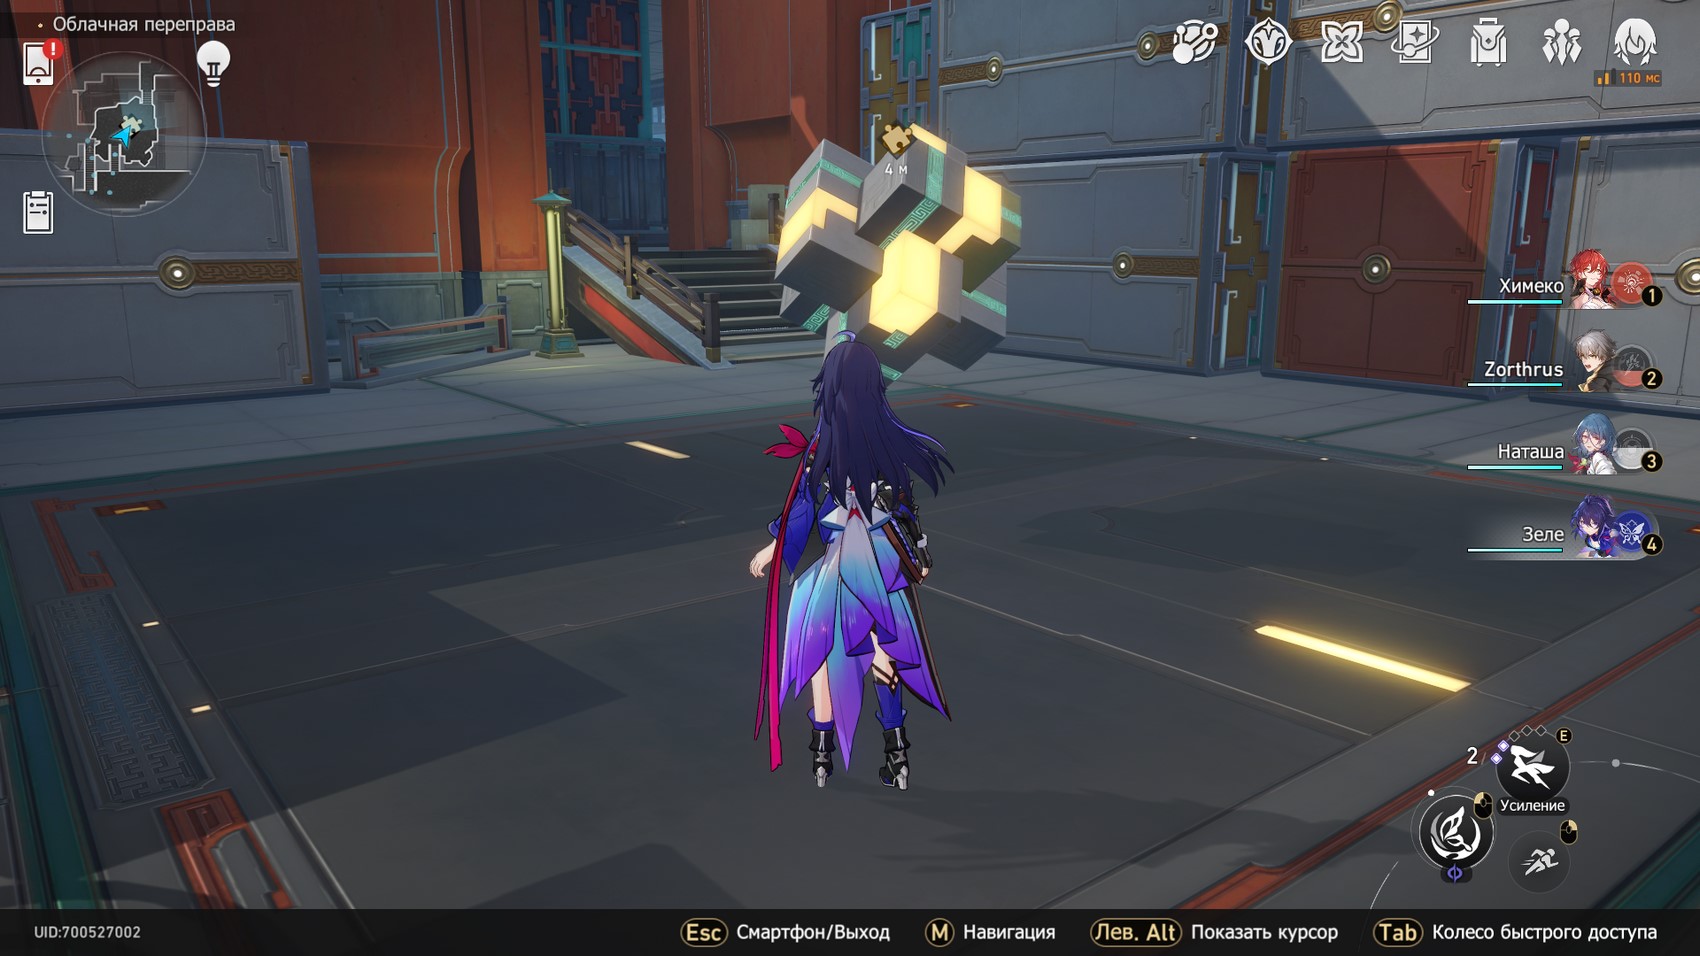
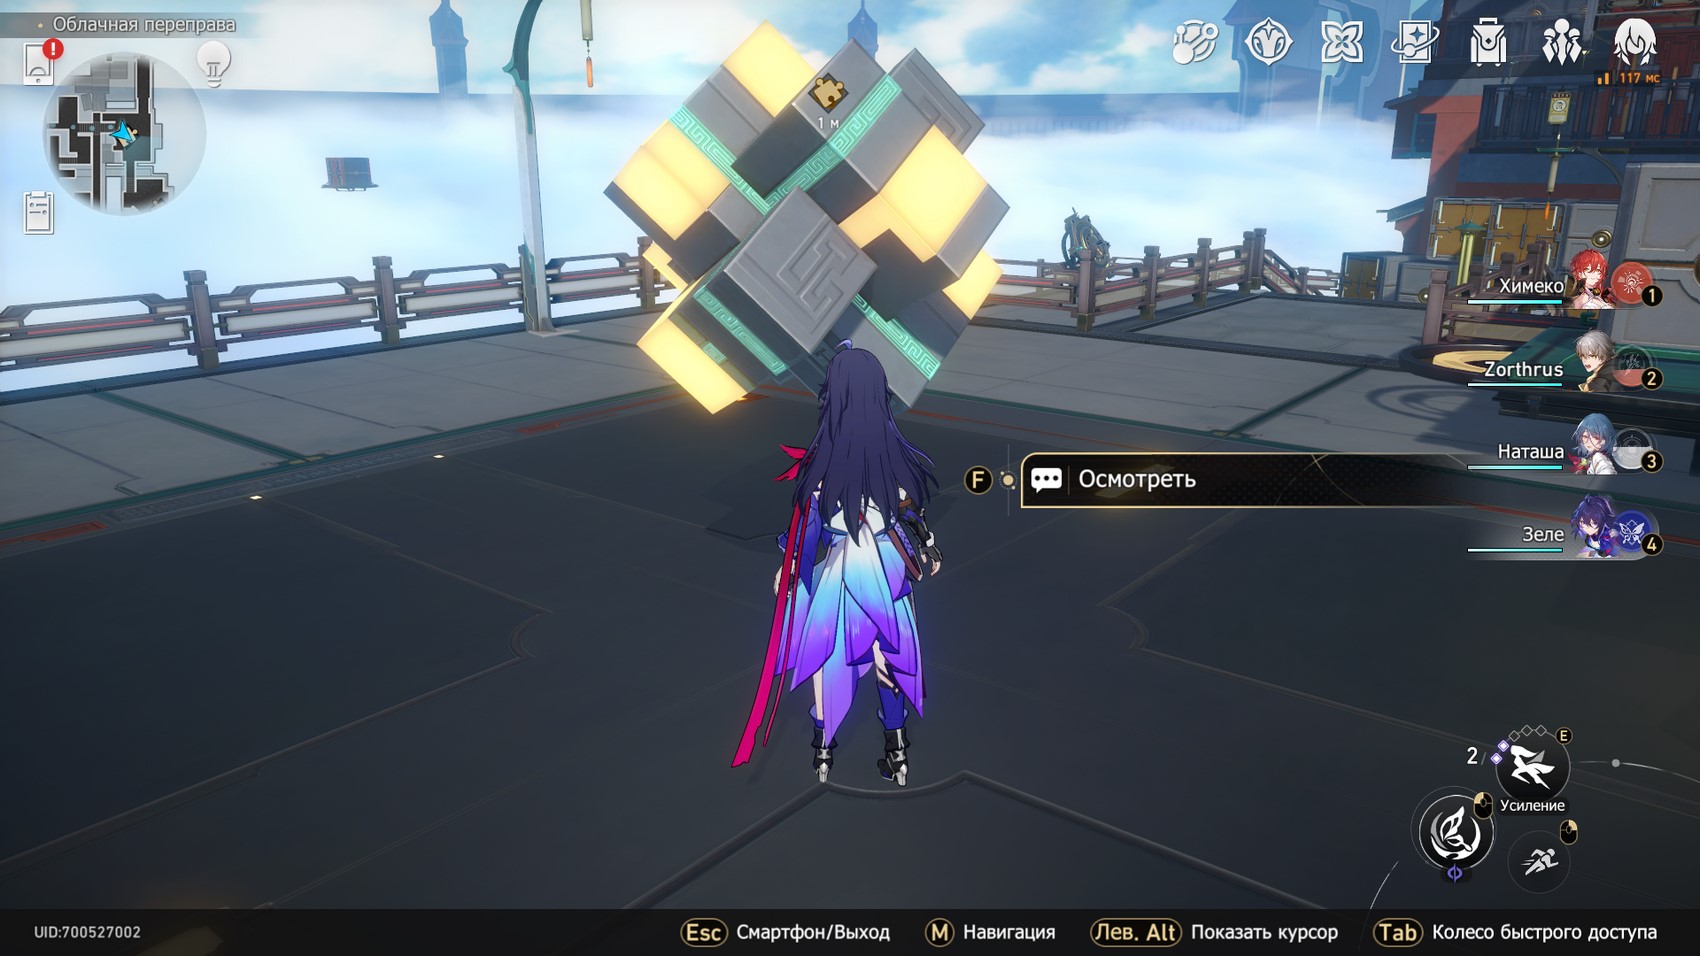
Move to the "Landing Zone" spatial anchor in the southern part of the location, and then go a little to the northwest, and you will find the desired cube in a separate area on the left. The exact location is shown in the screenshots below.
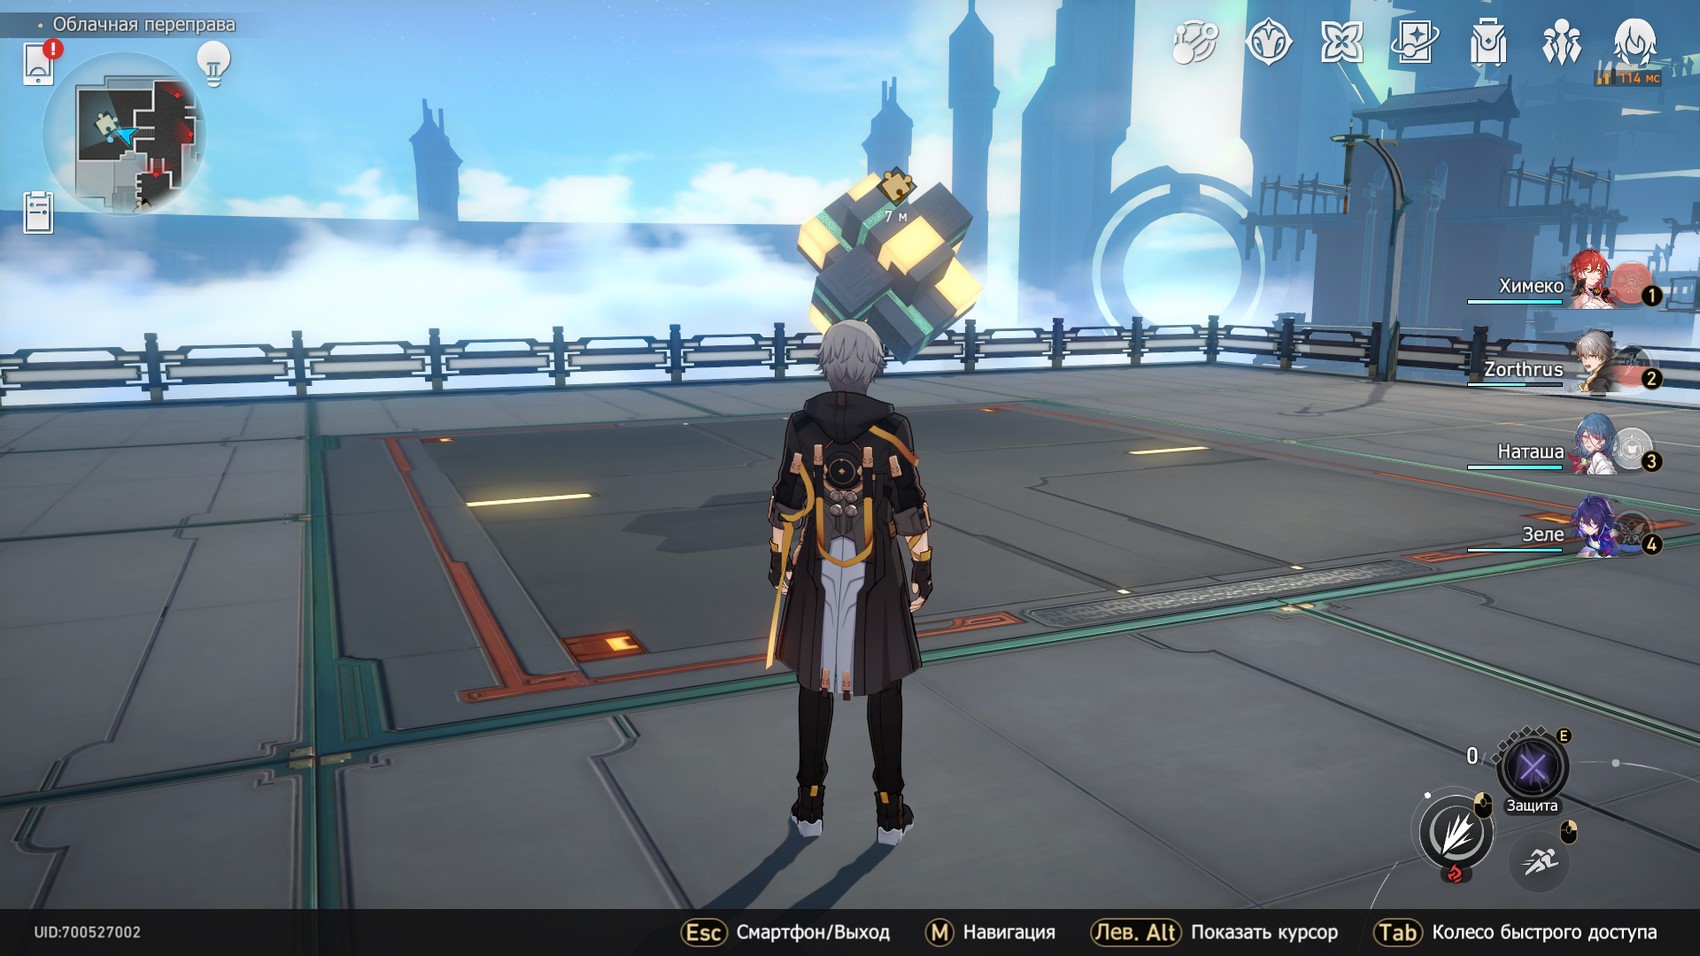
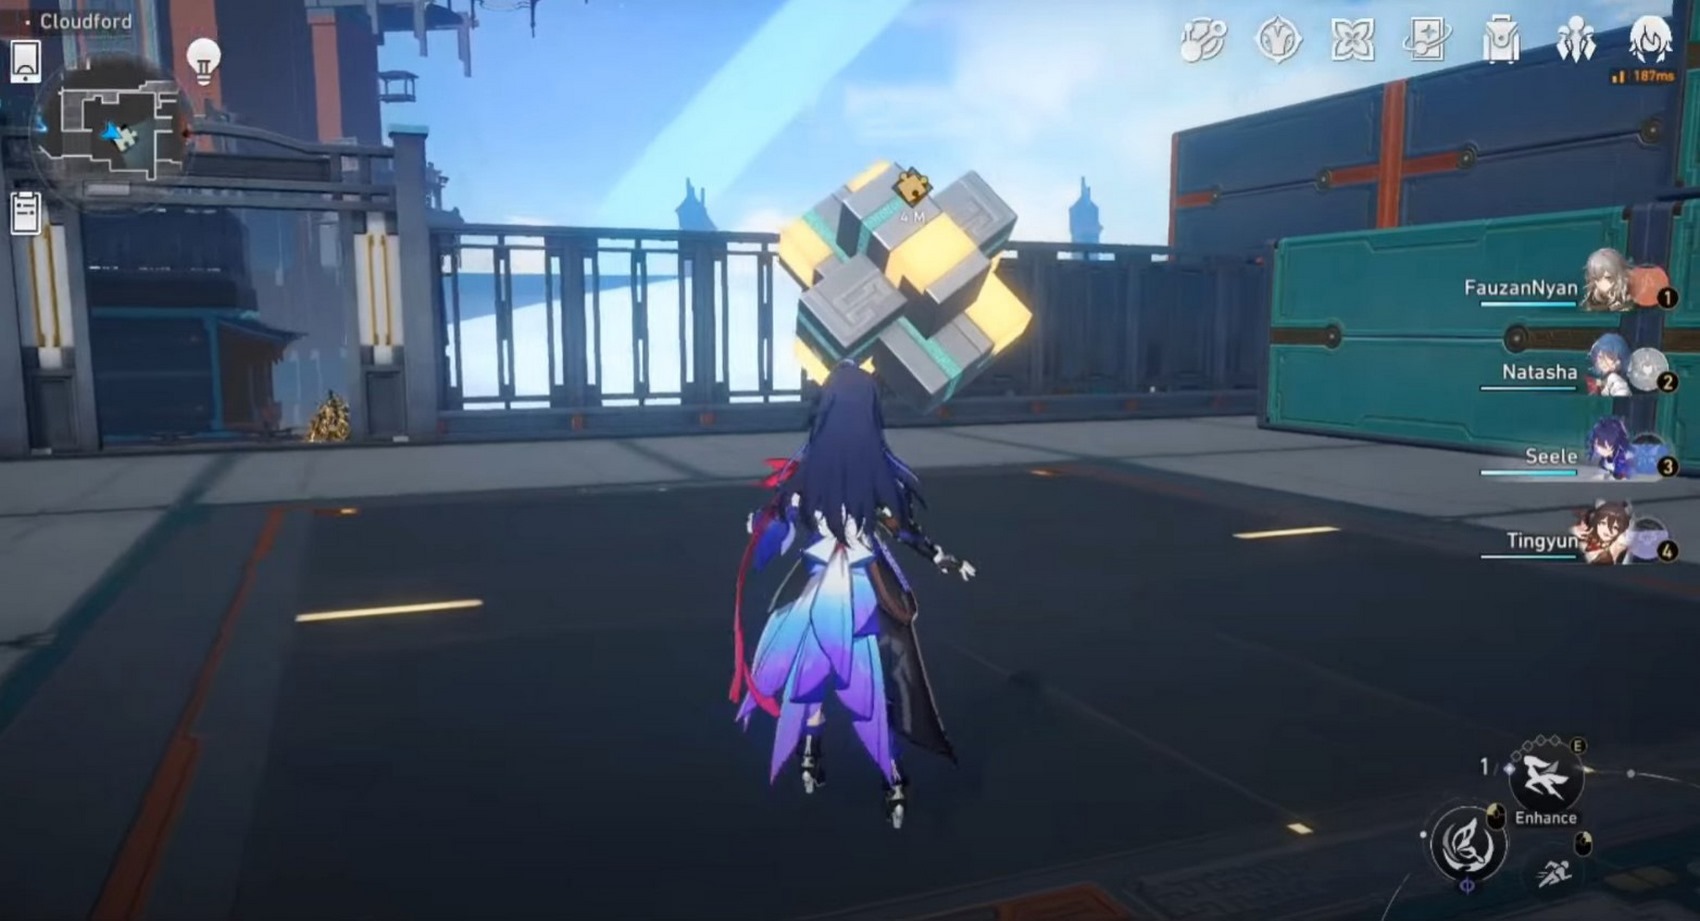
Next, follow these steps to solve this puzzle:
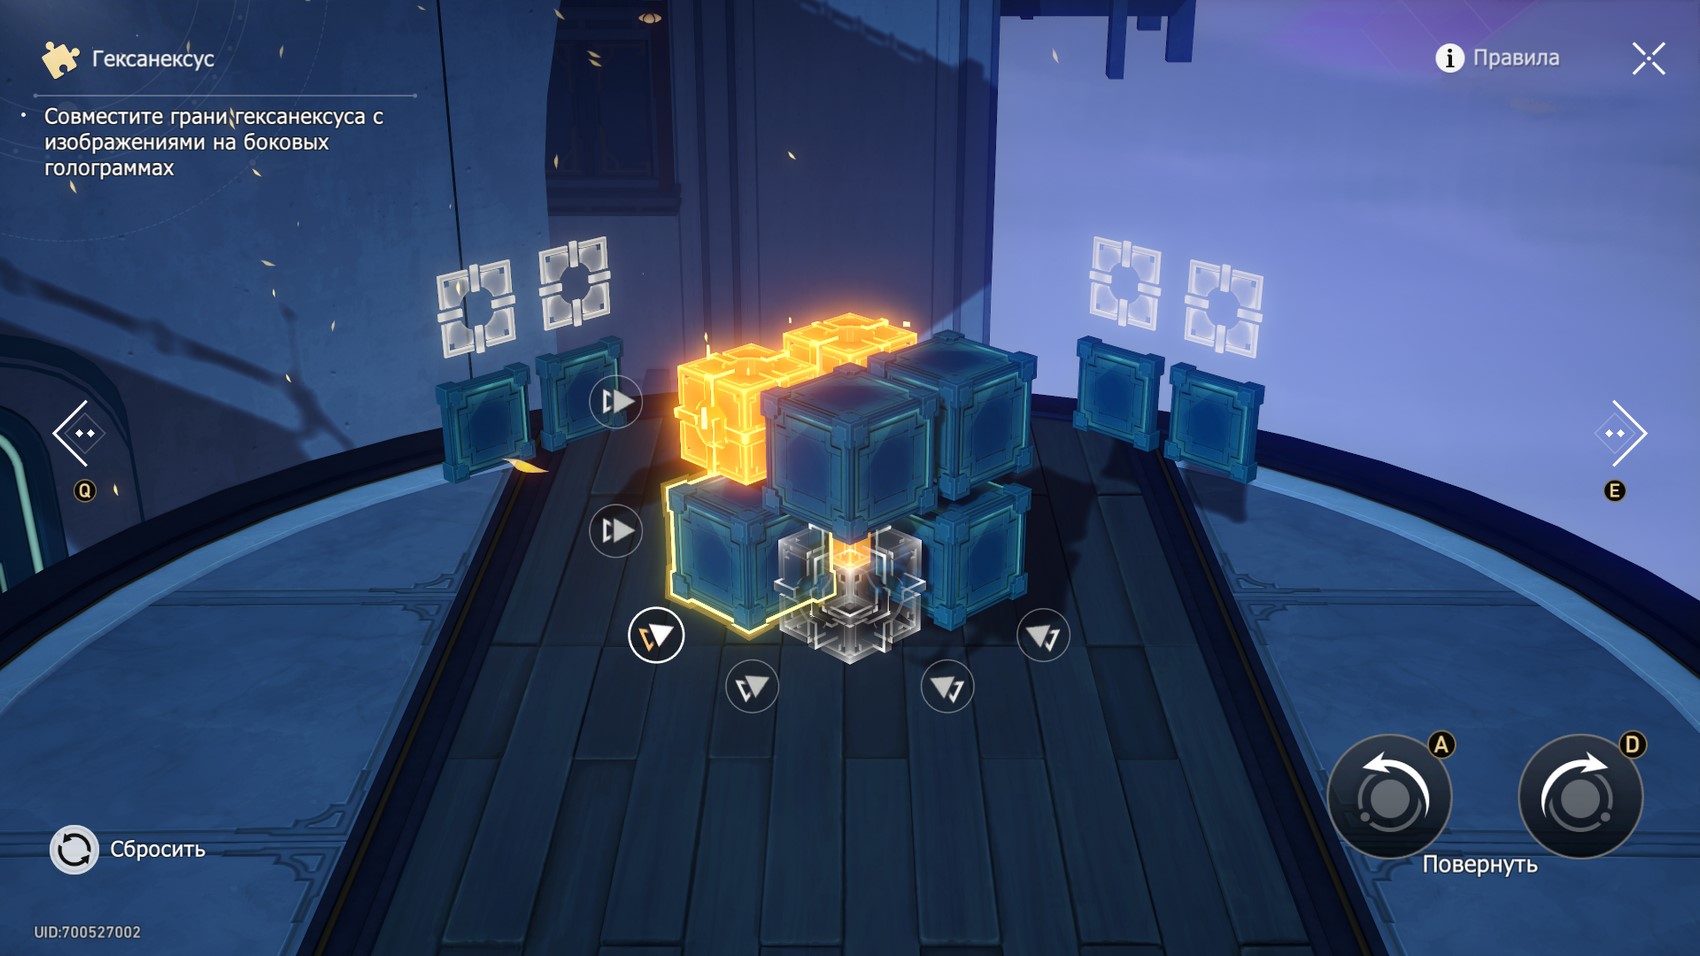
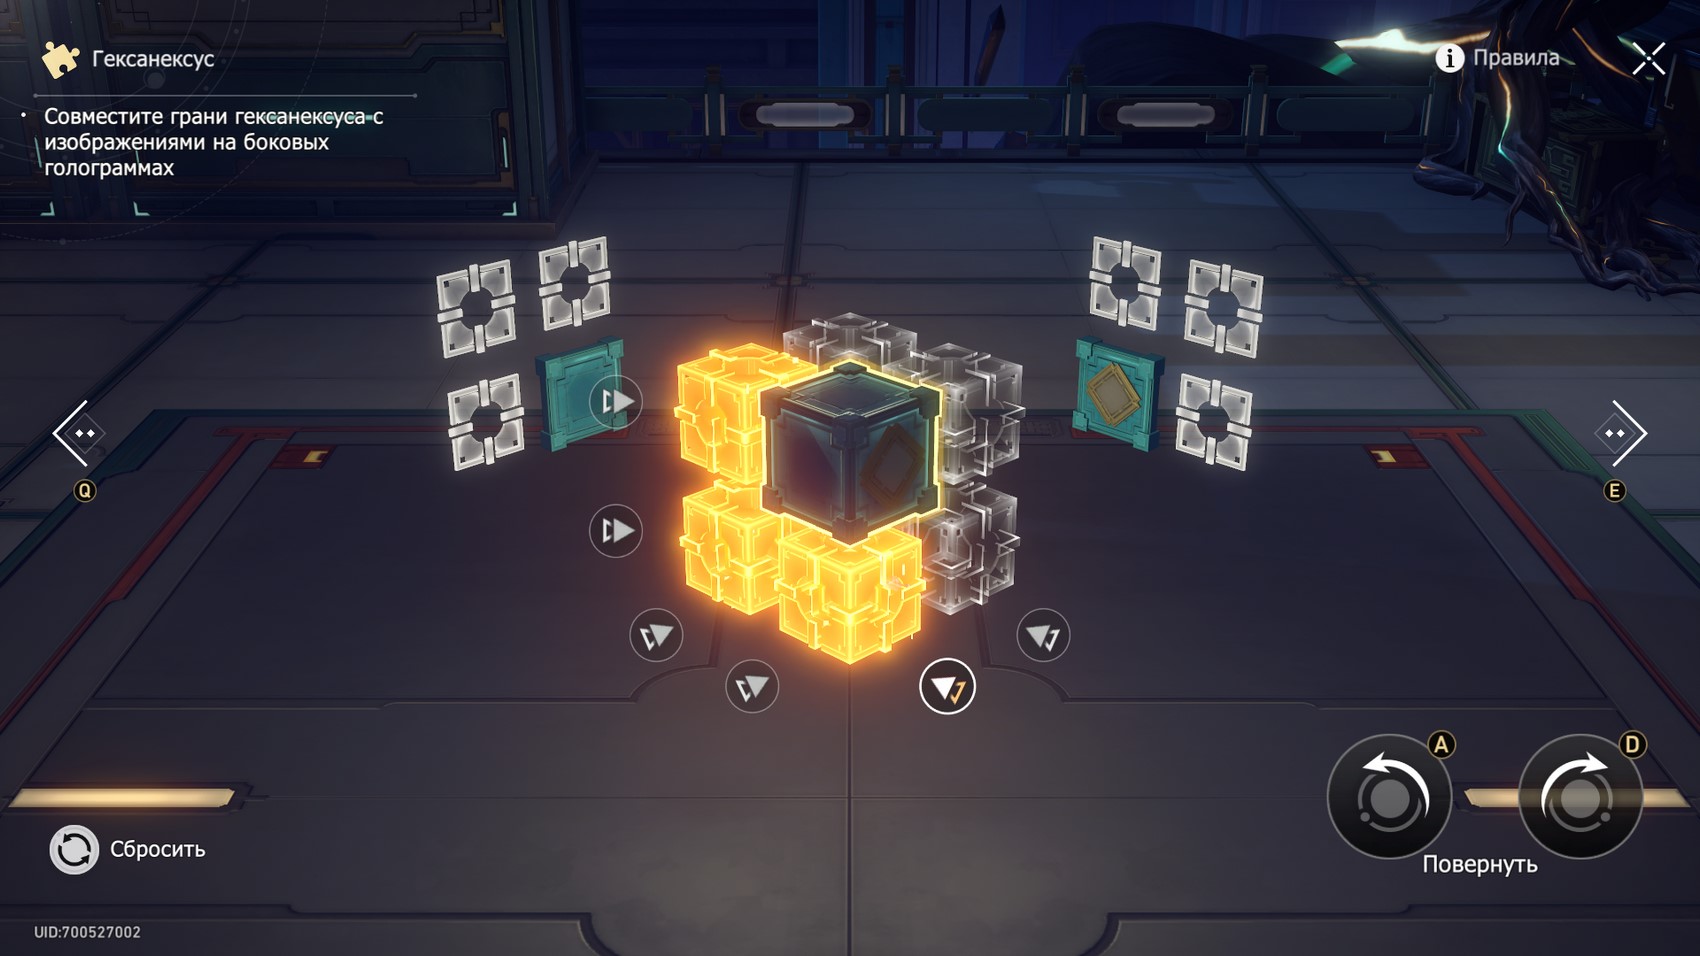
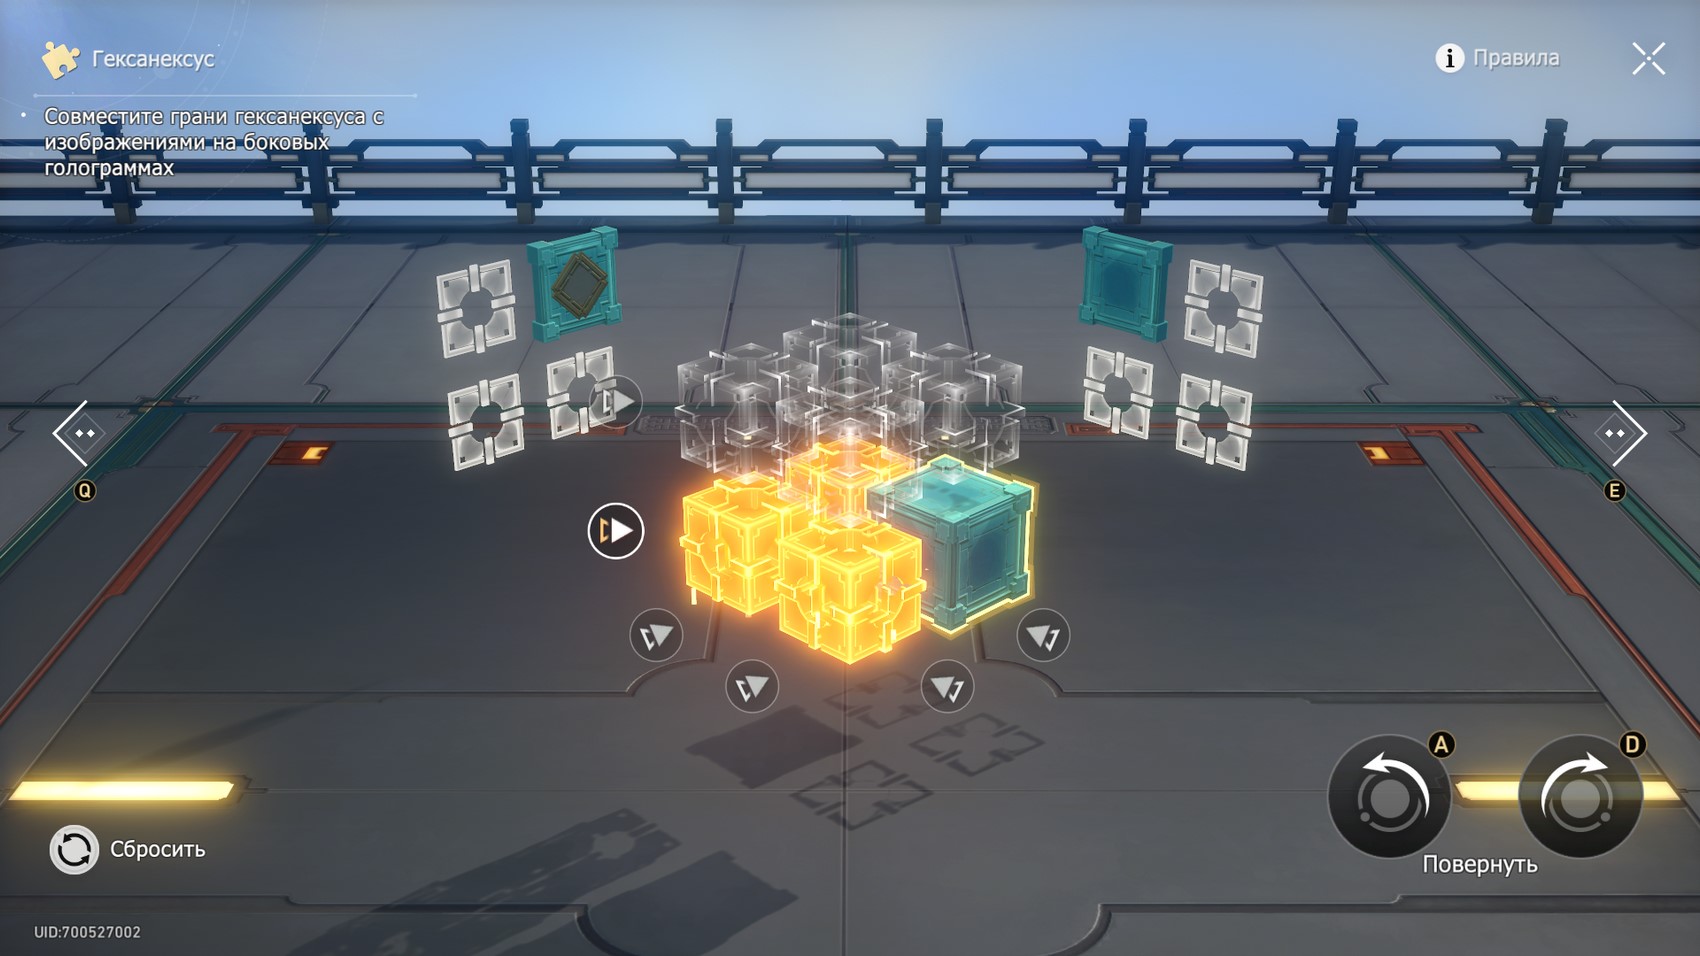
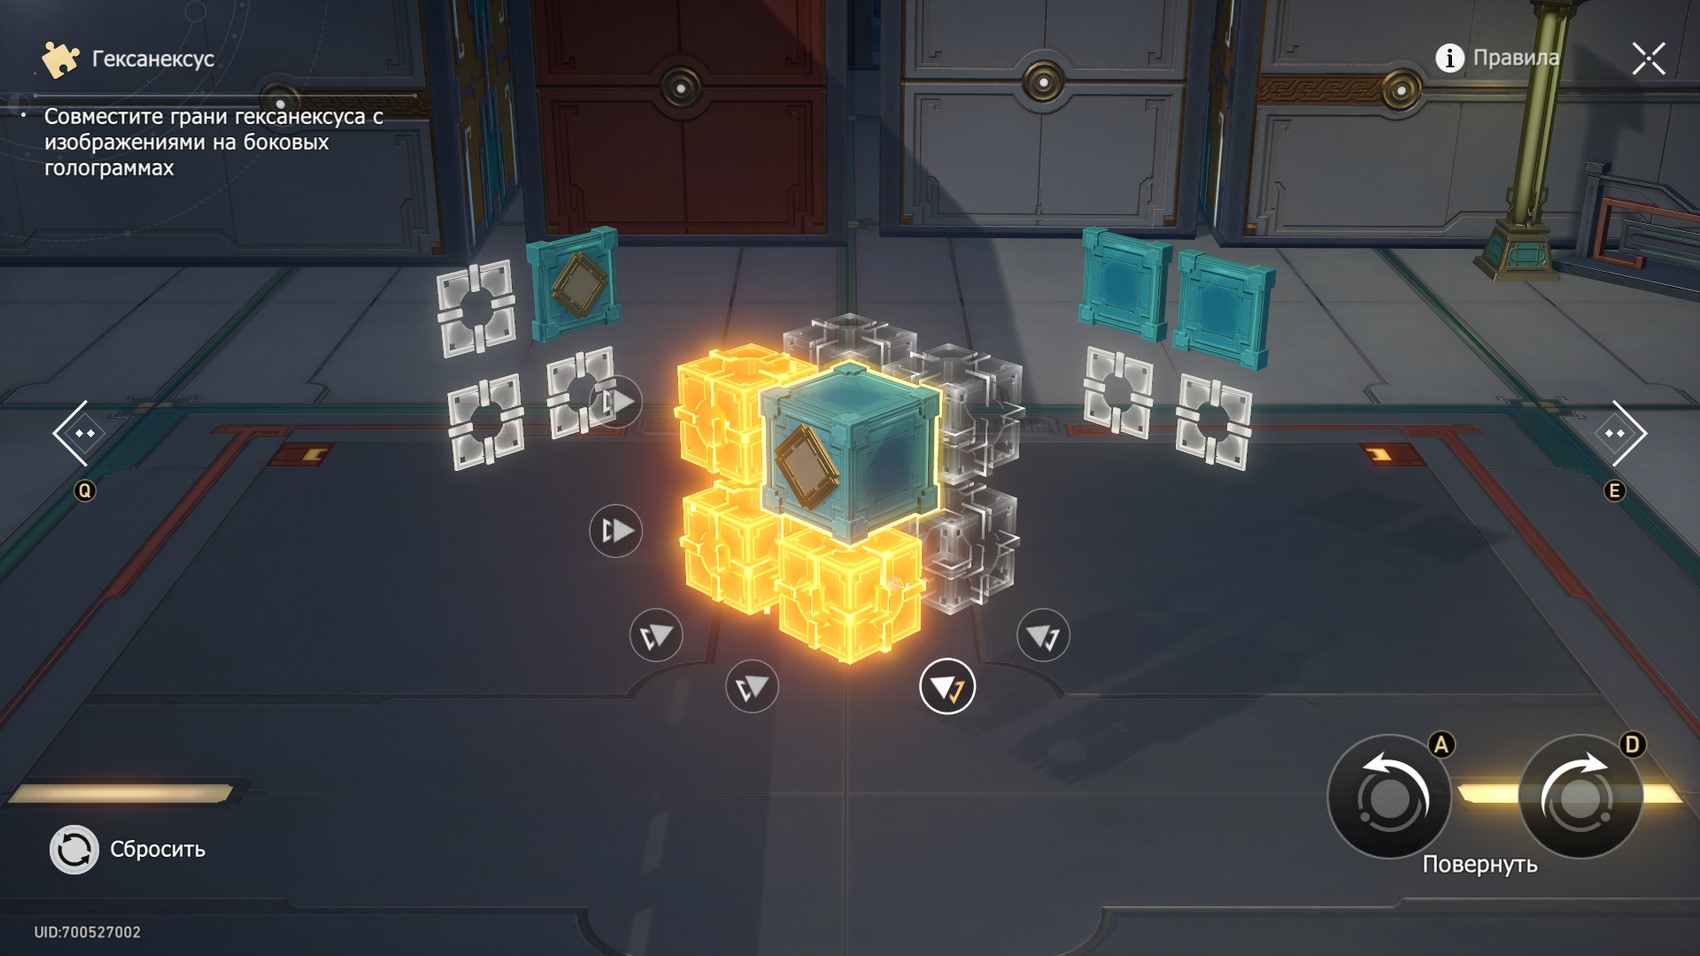
- Rotate the viewing angle as shown in the first screenshot below, and then rotate the selected side clockwise twice.
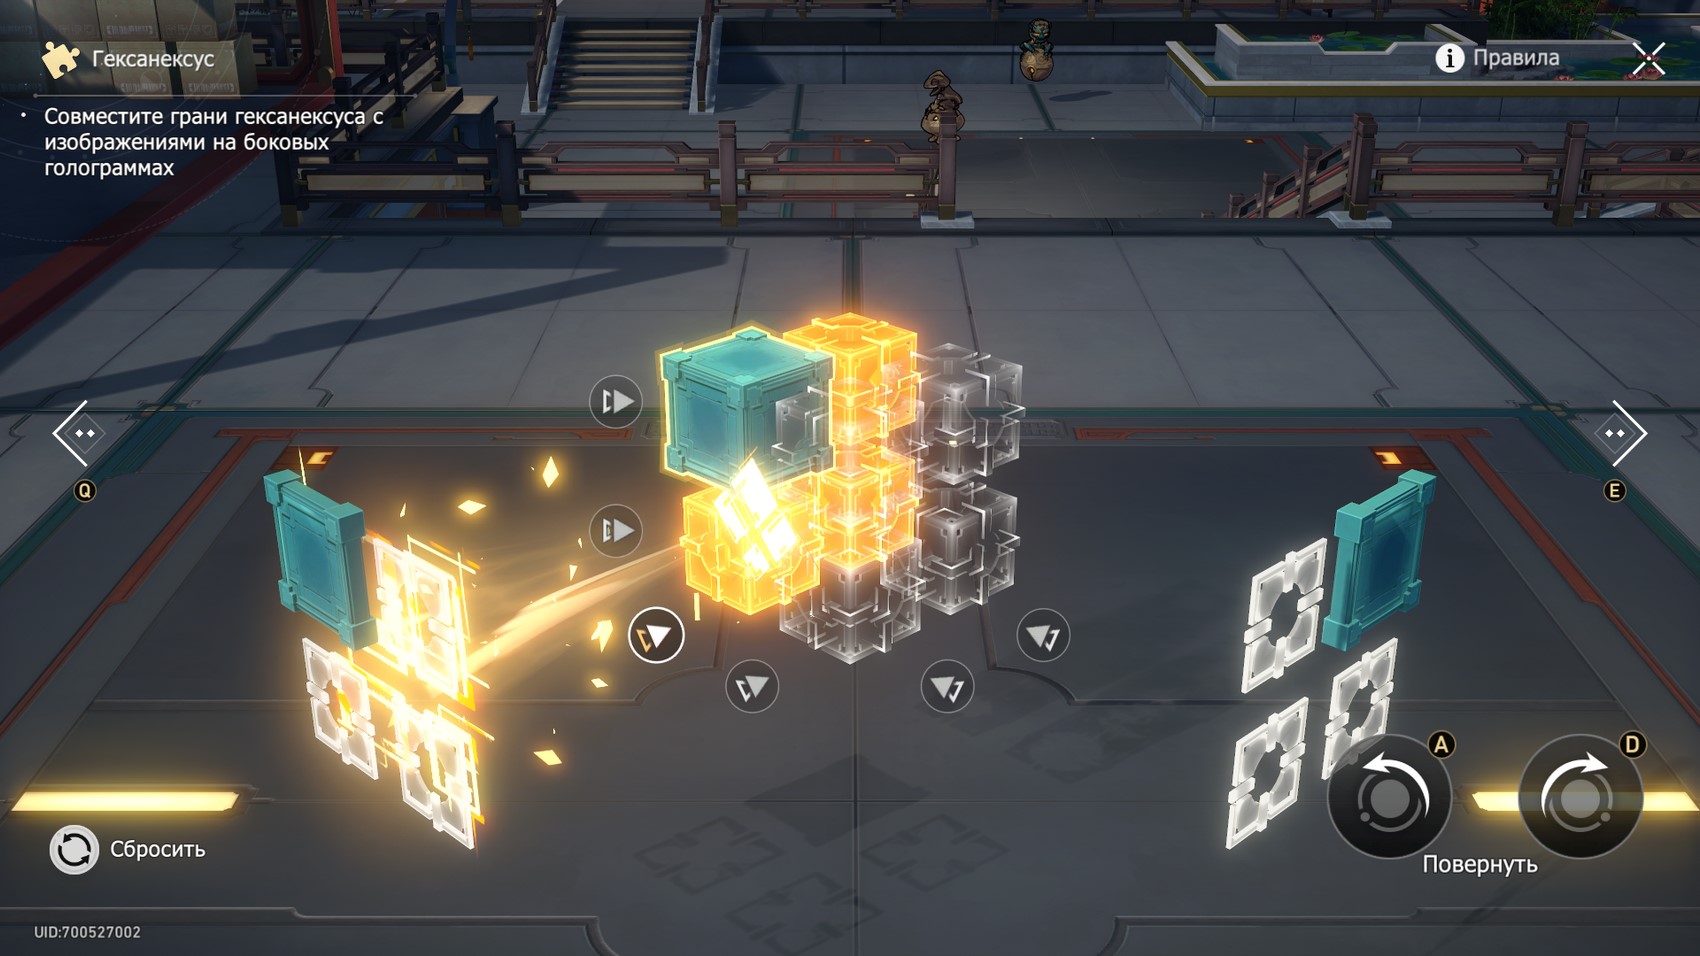
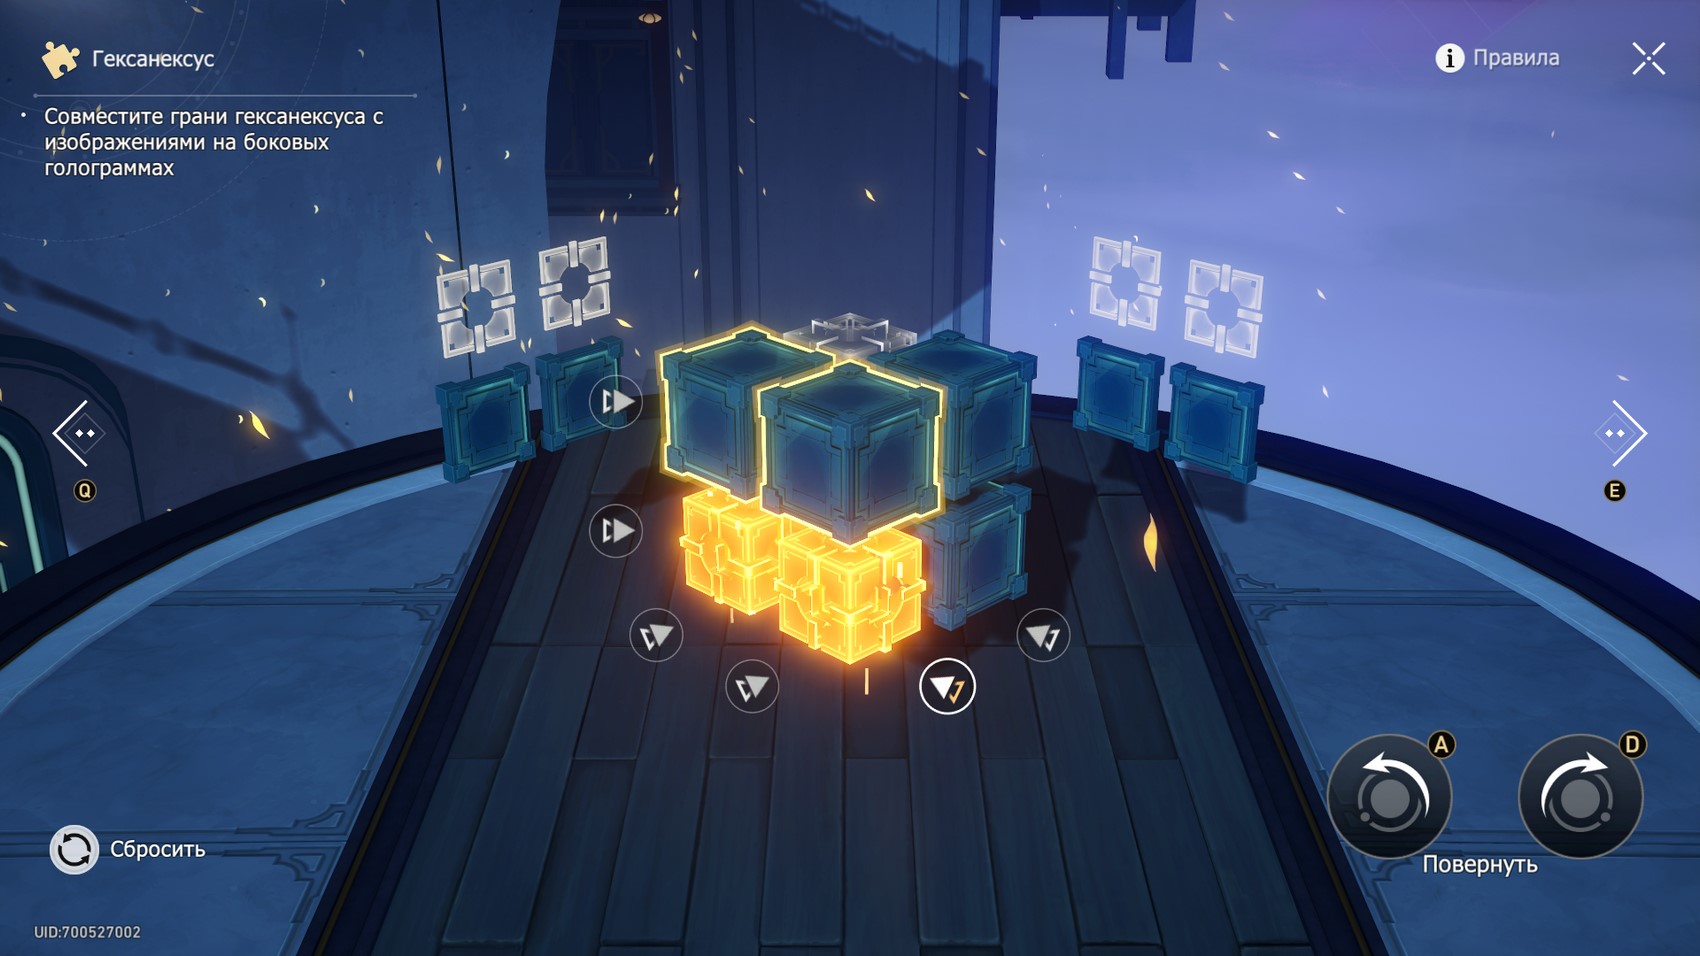
- Select the topmost part of the cube and rotate that side clockwise twice.
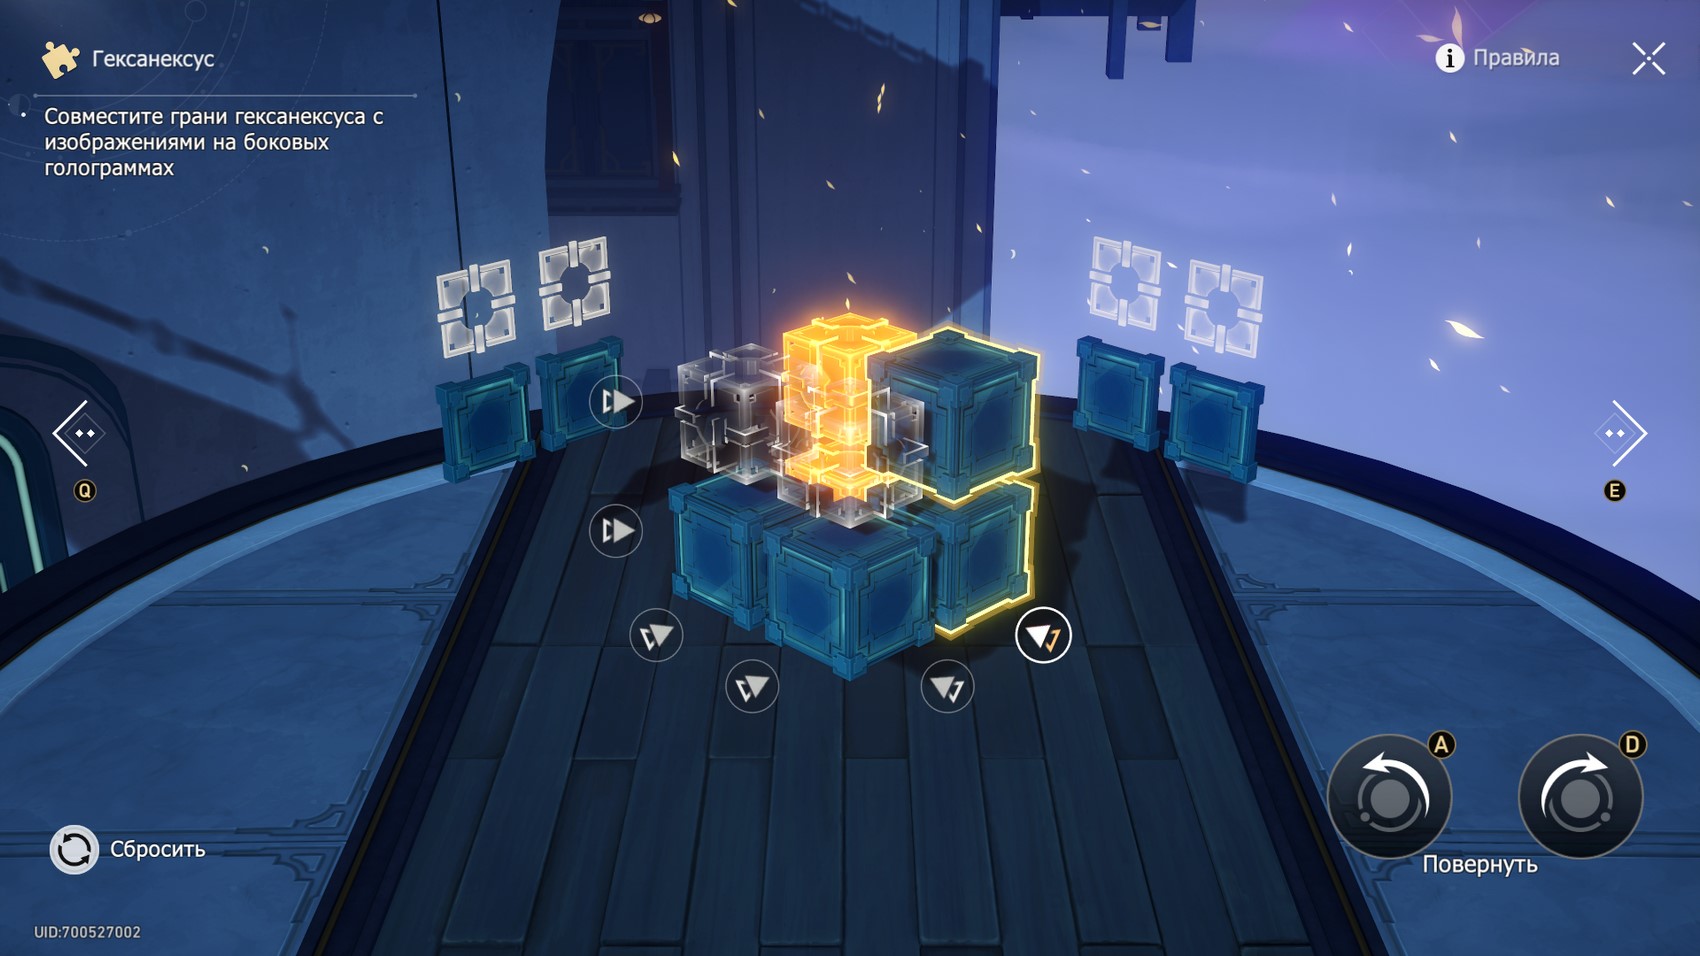
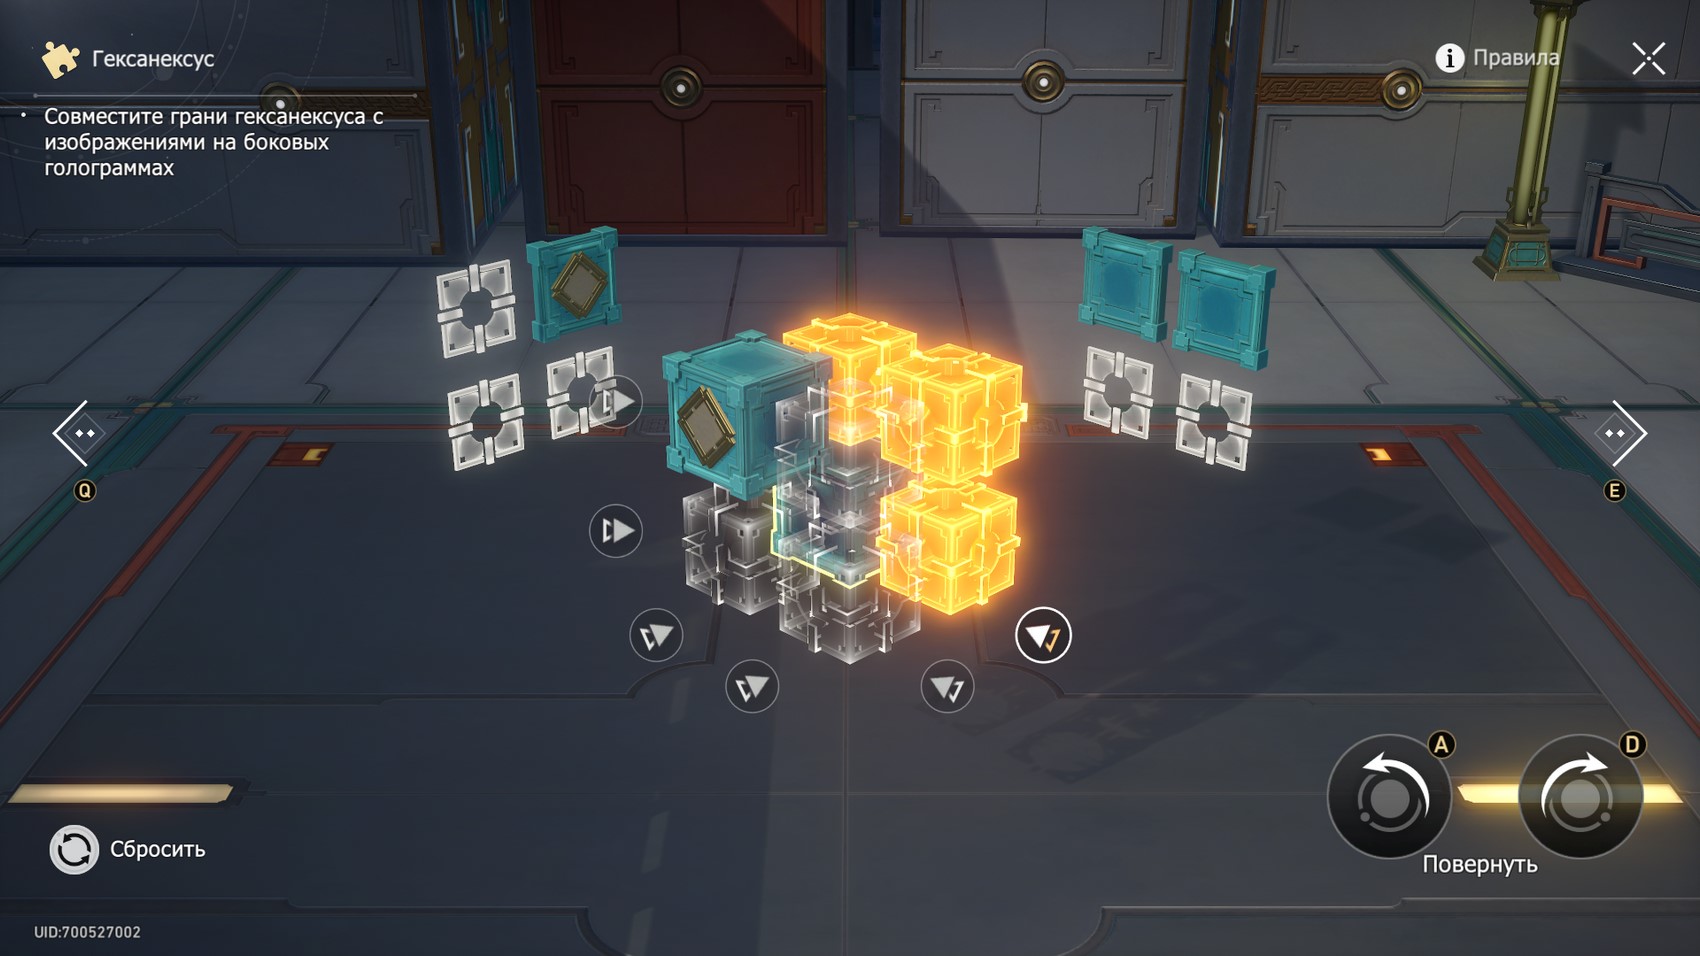
- Rotate the viewing angle as shown in the third screenshot below, and then rotate the highlighted side clockwise once.
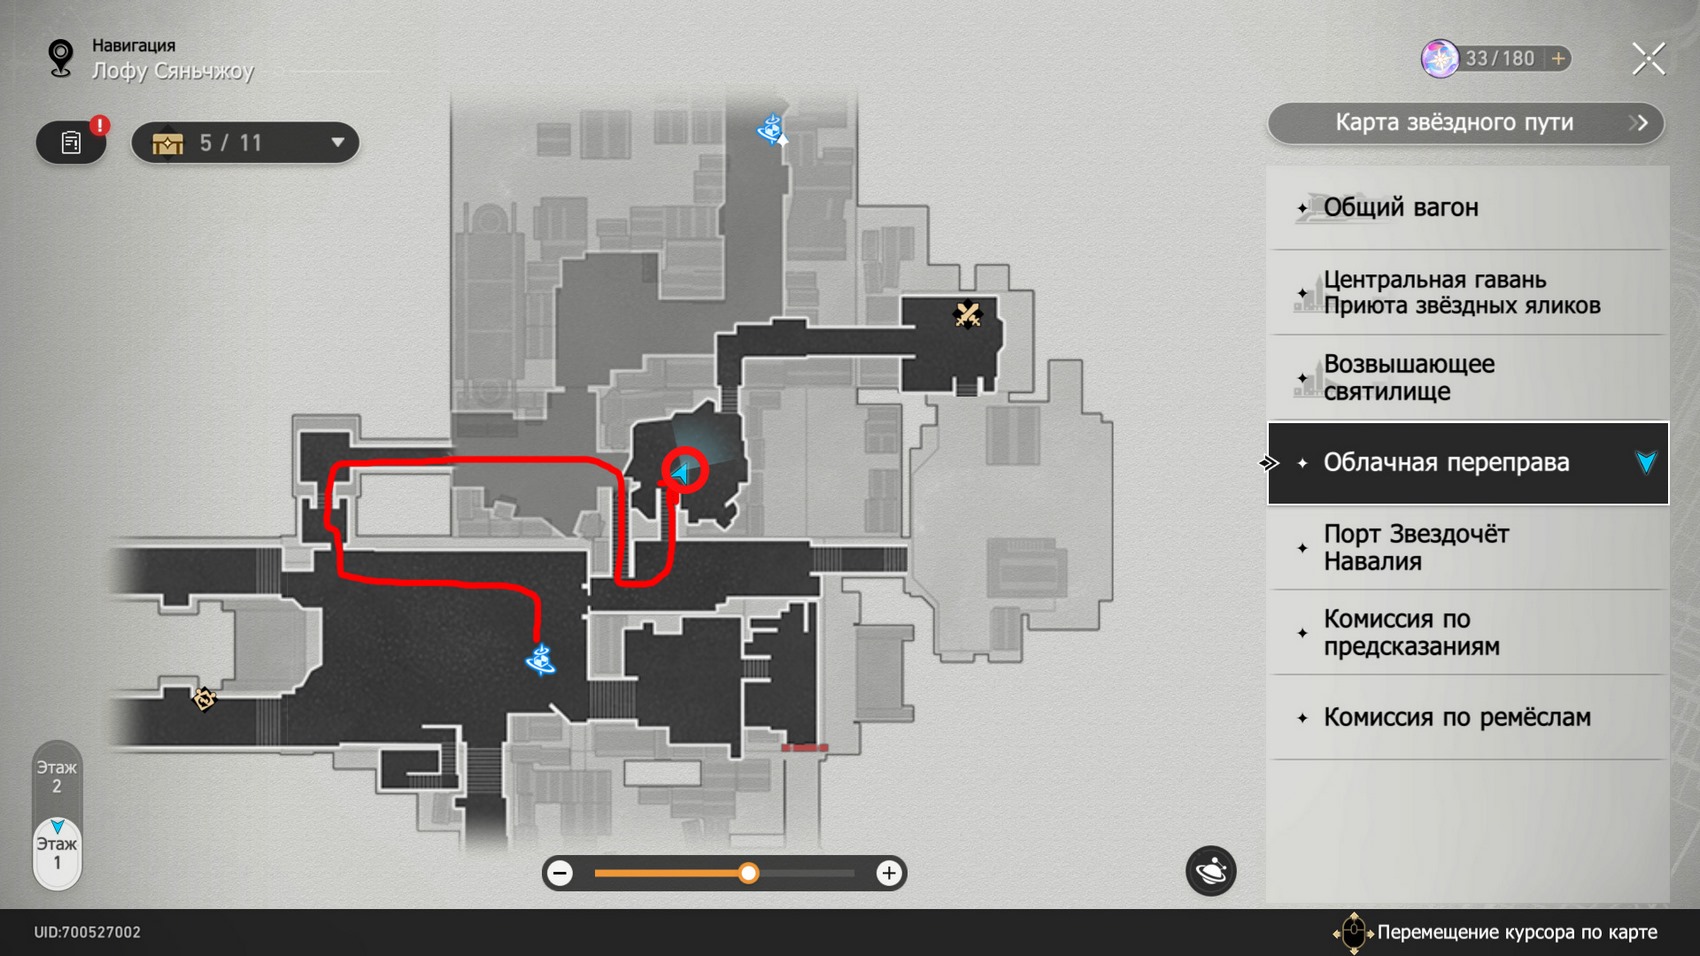
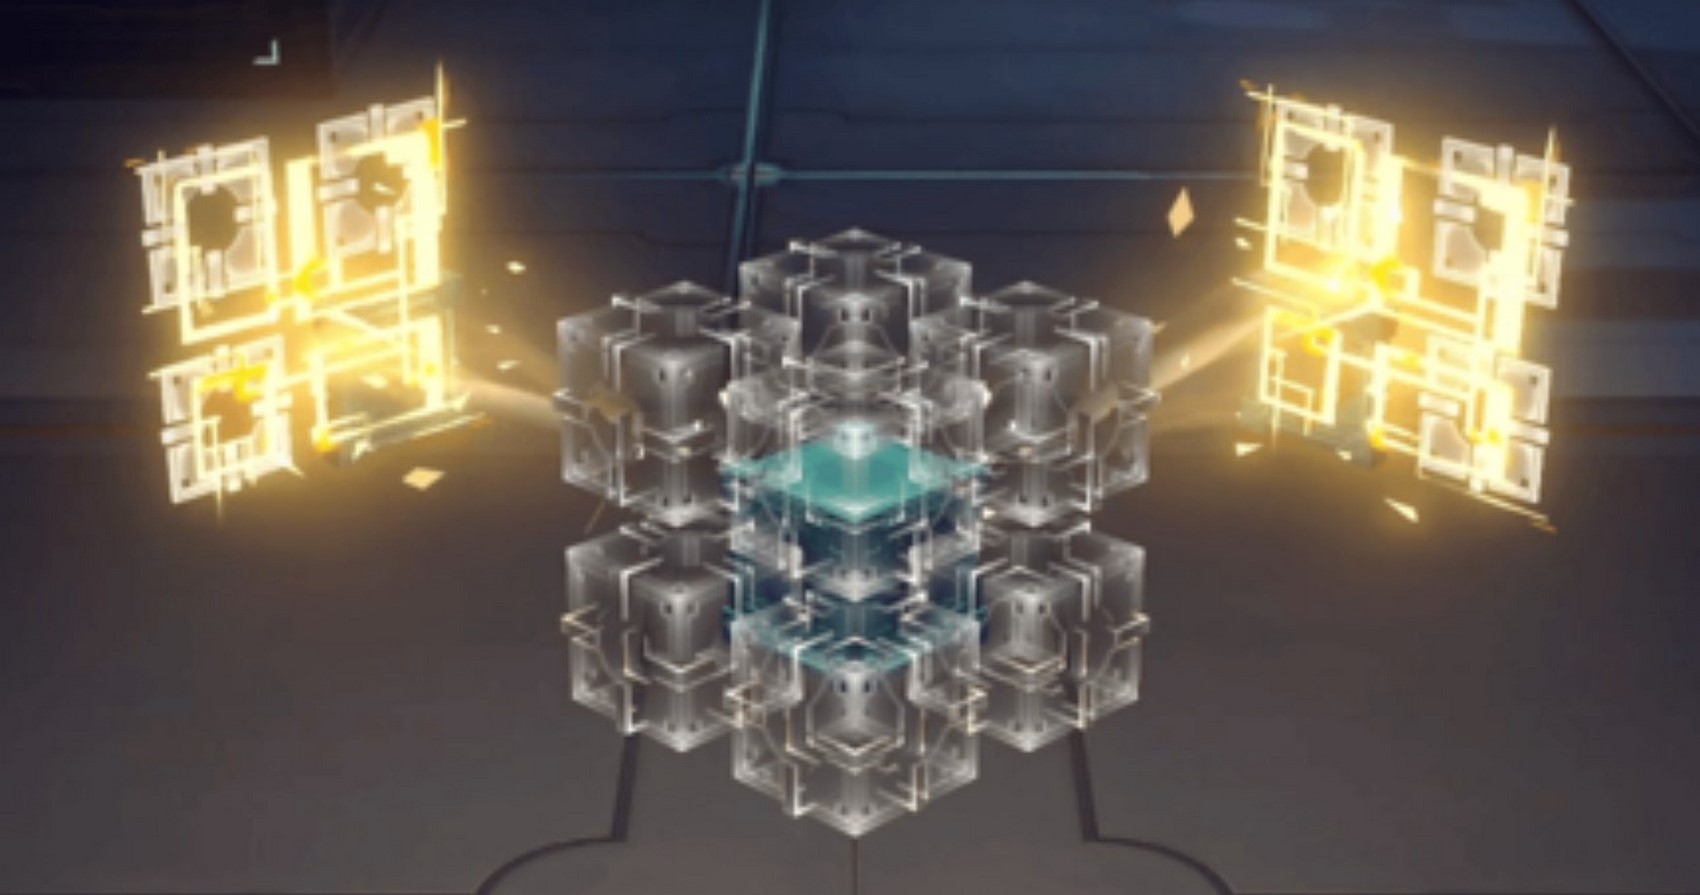
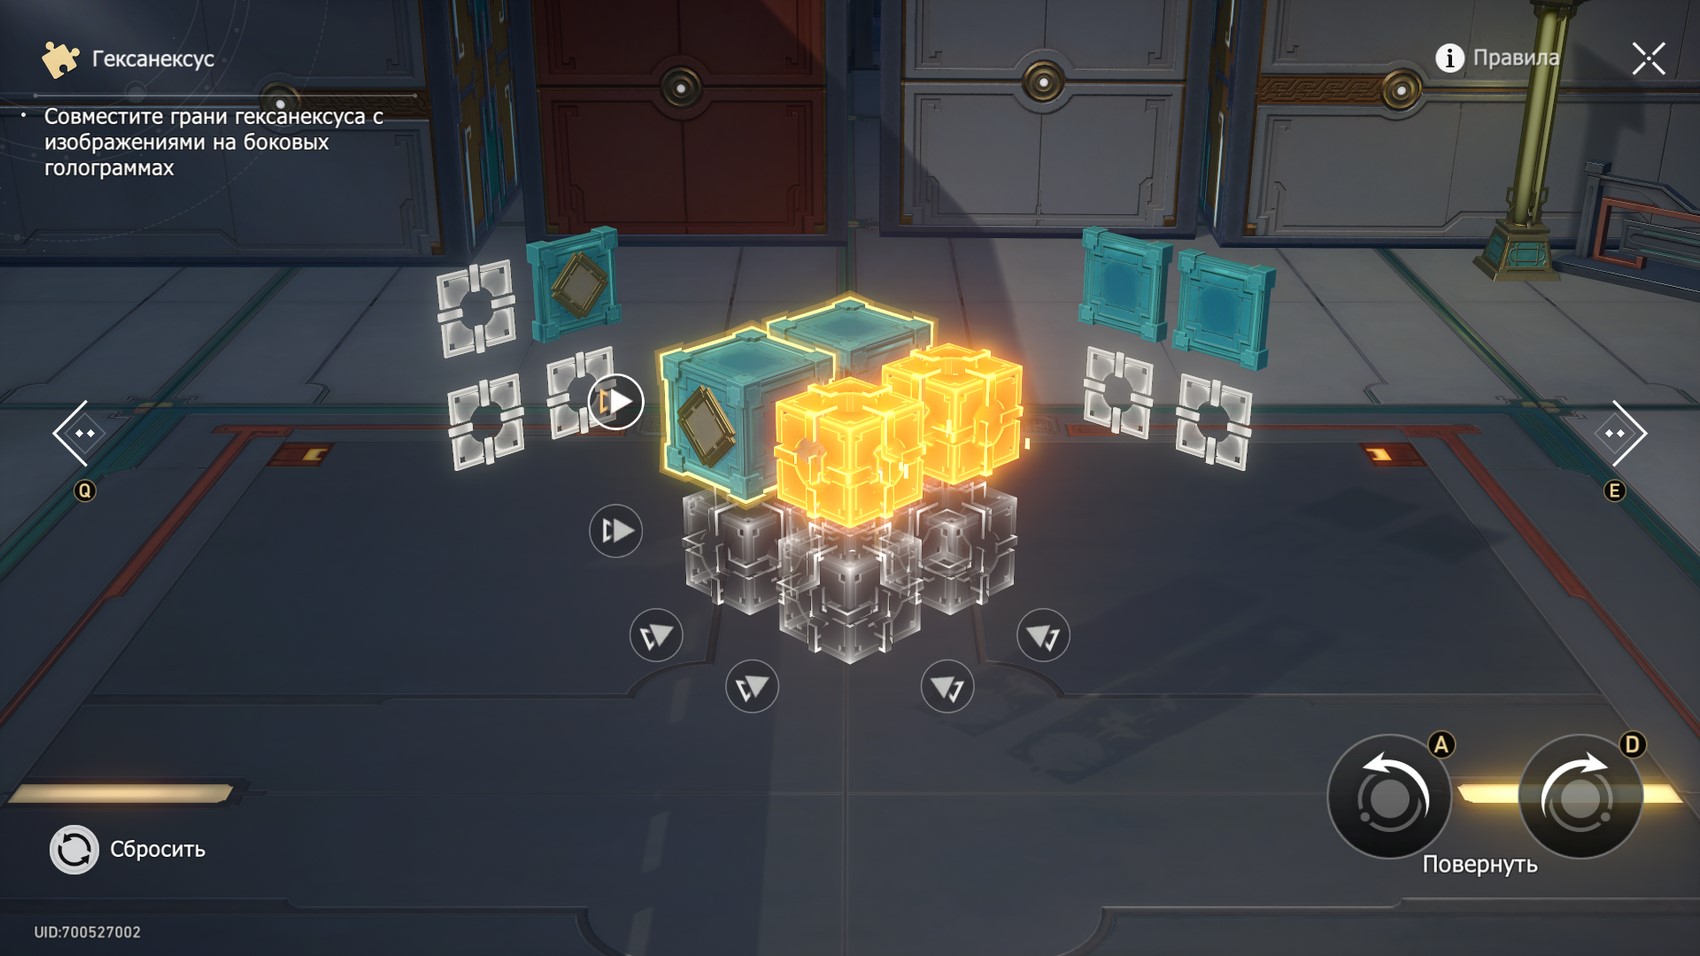
- As a result, you will solve the puzzle (see the fourth screenshot).


If the pictures do not seem clear enough to you, then we advise you to look at the gif below. It shows the whole process of solving the riddle.
Second hexanexus
Teleport to the Well of Green space anchor, and then just head east and go down the stairs. On a small platform, you will find the next Rubik's Cube.
Next, follow these steps to solve this puzzle:
- Select the top side of the shape as shown in the first screenshot below and then rotate it clockwise twice.
- As a result, you will solve the puzzle (see the second screenshot).

If the pictures do not seem clear enough to you, then we advise you to look at the gif below. It shows the whole process of solving the riddle.
Third hexanexus
Travel back to the Well of Greenery, and then go northwest and follow the path below to reach the bottom platform with the next cube.

Next, follow these steps to solve this puzzle:
- Select the highlighted side (first screenshot) and then rotate it clockwise once.
- Select the highlighted side (second screenshot) and then rotate it clockwise once.
- Select the highlighted side (third screenshot), and then rotate it clockwise twice.
- As a result, you will solve the puzzle (last screenshot).


If the pictures do not seem clear enough to you, then we advise you to look at the gif below. It shows the whole process of solving the riddle.
Fourth hexanexus
Move to the Well of Greenery: South Wing anchor and then start heading east. To unlock the path, interact with the controller located on the platform on the right.

Next, follow these steps to solve this puzzle:
- Select the highlighted side (first screenshot) and then rotate it counterclockwise twice.
- Select the highlighted side (second screenshot), and then turn it counterclockwise once.
- As a result, you will solve the puzzle (last screenshot).
If the pictures do not seem clear enough to you, then we advise you to look at the gif below. It shows the whole process of solving the riddle.
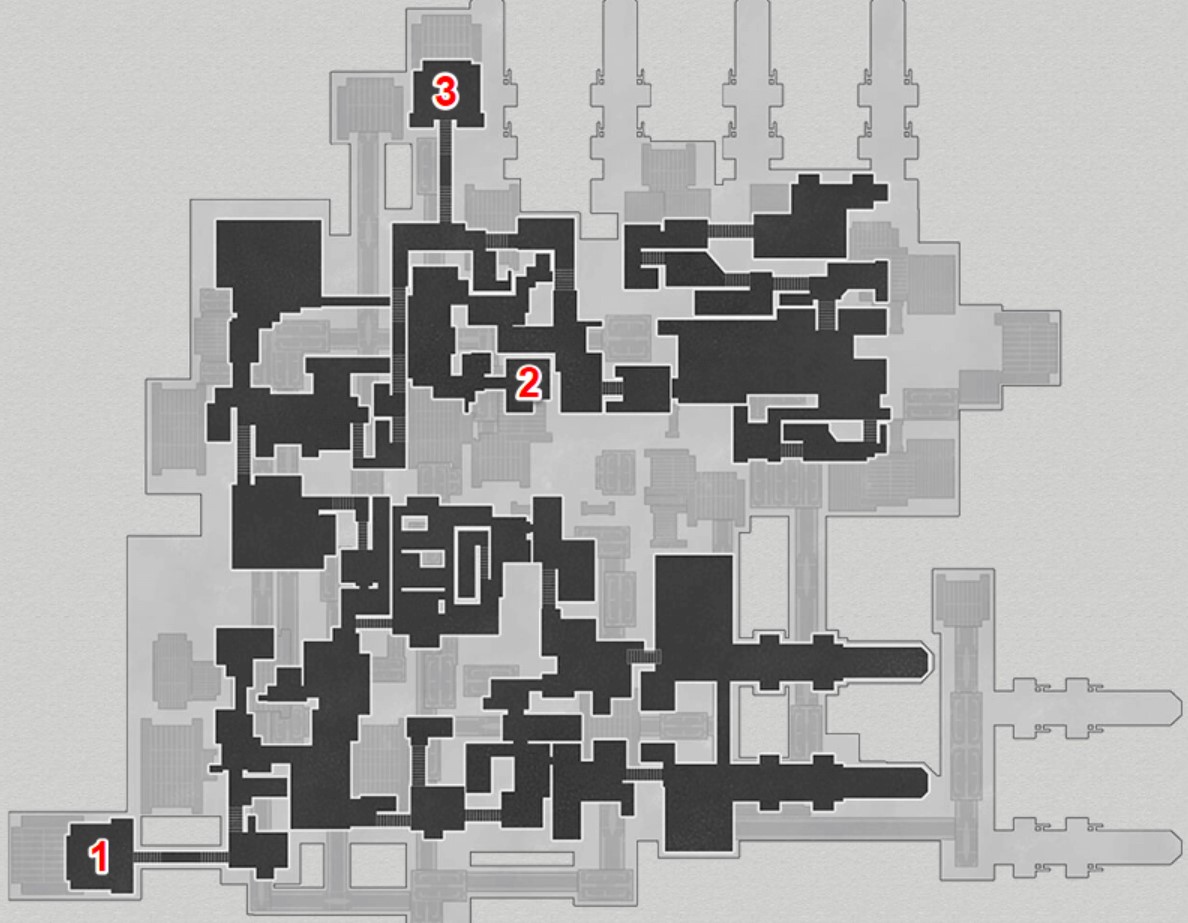
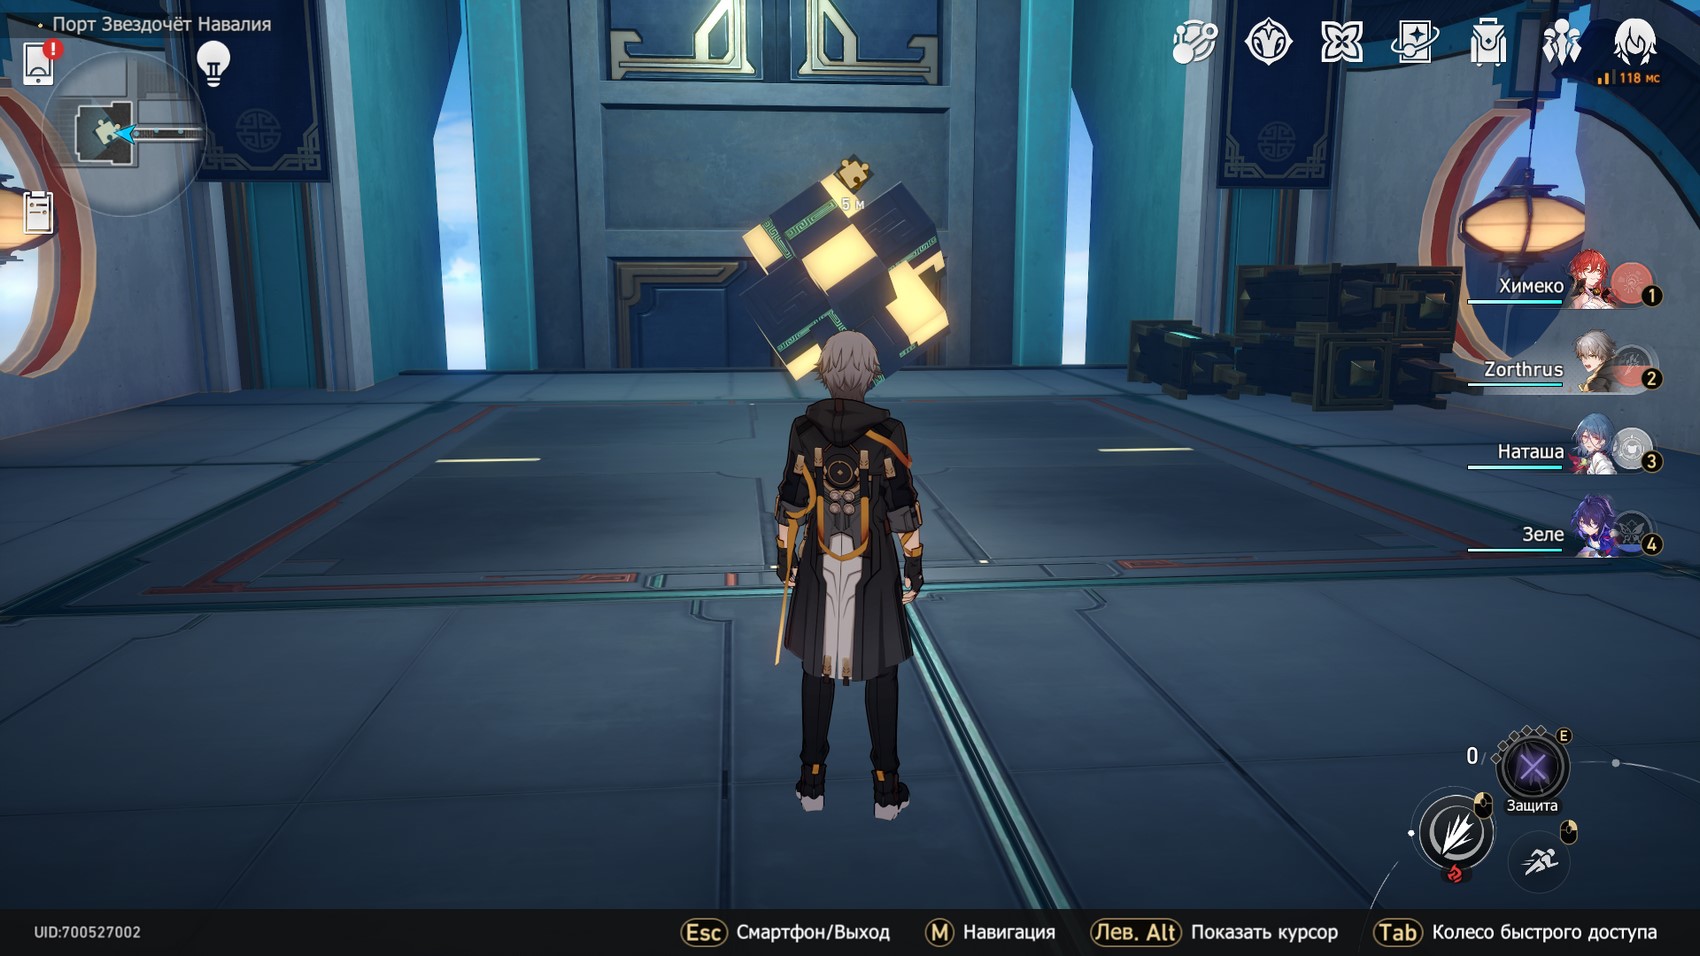
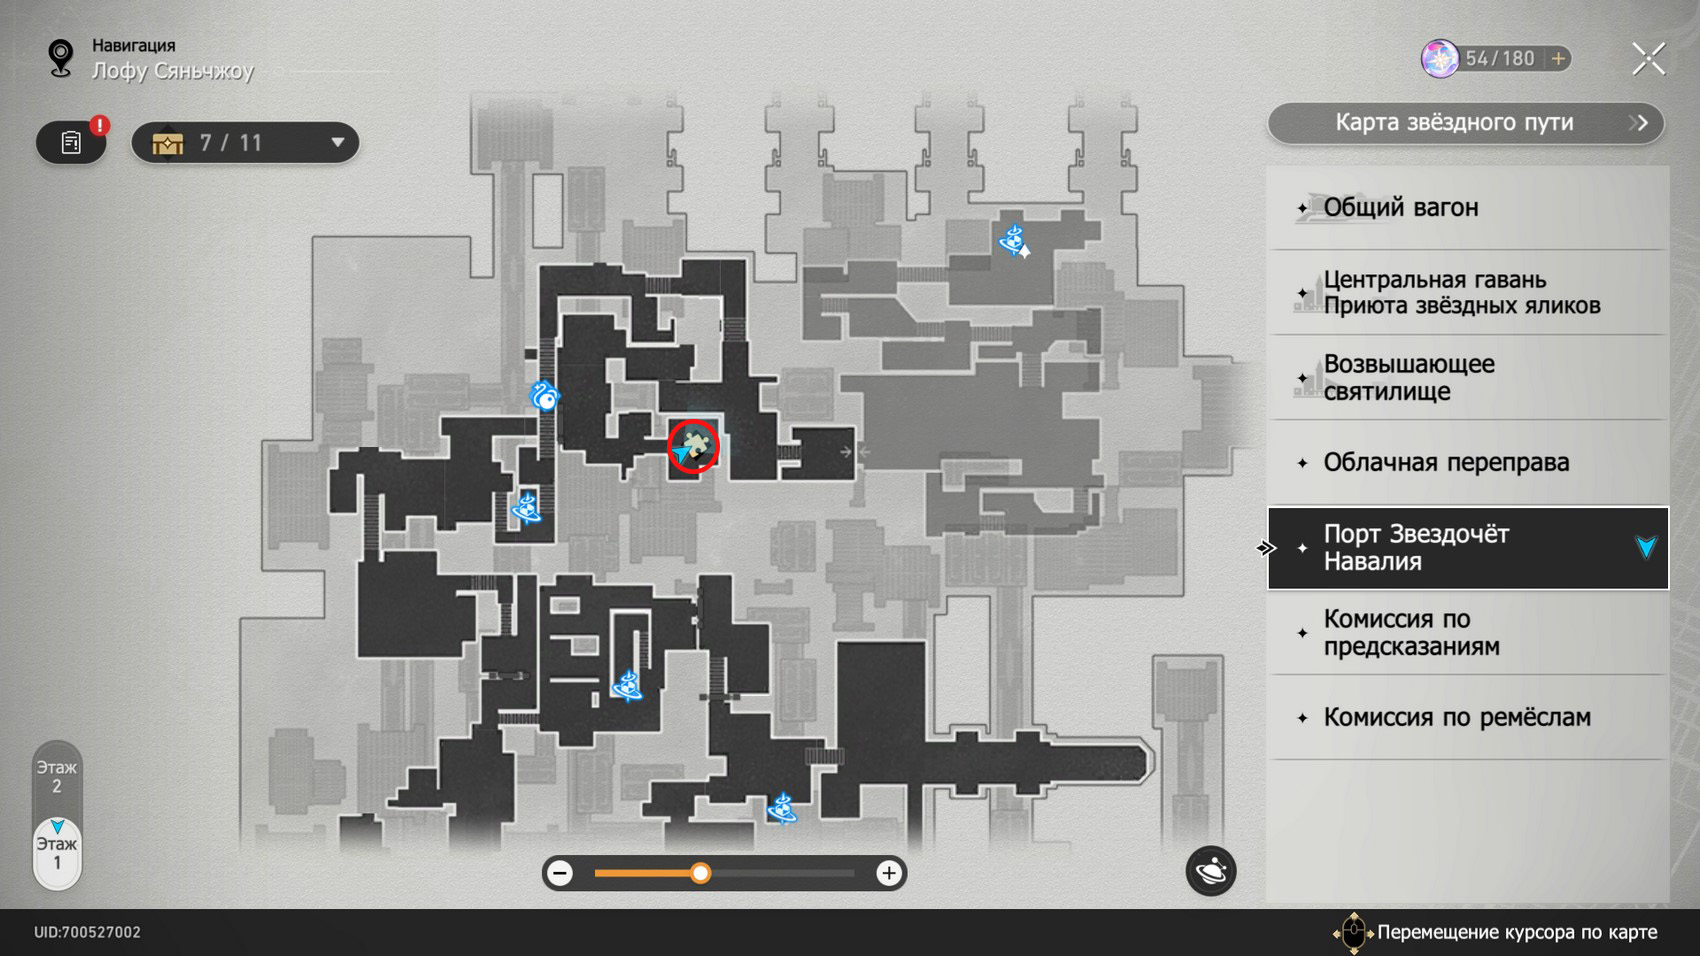
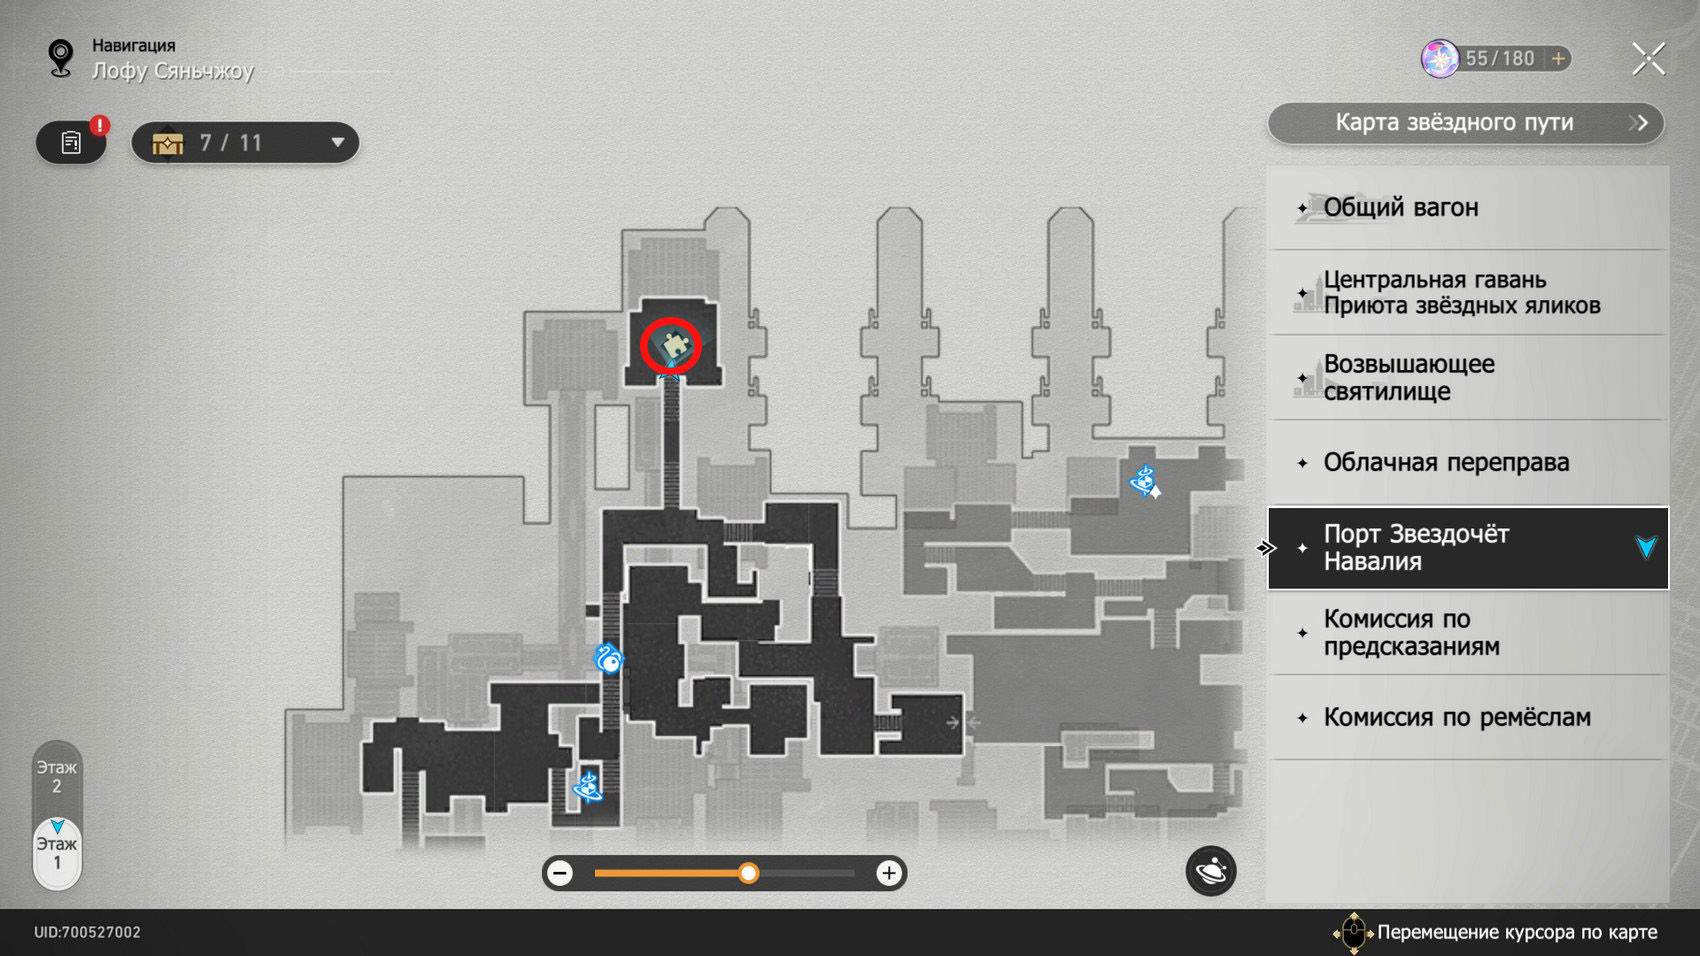
Port Stargazer Navalia (all hexanexuses)
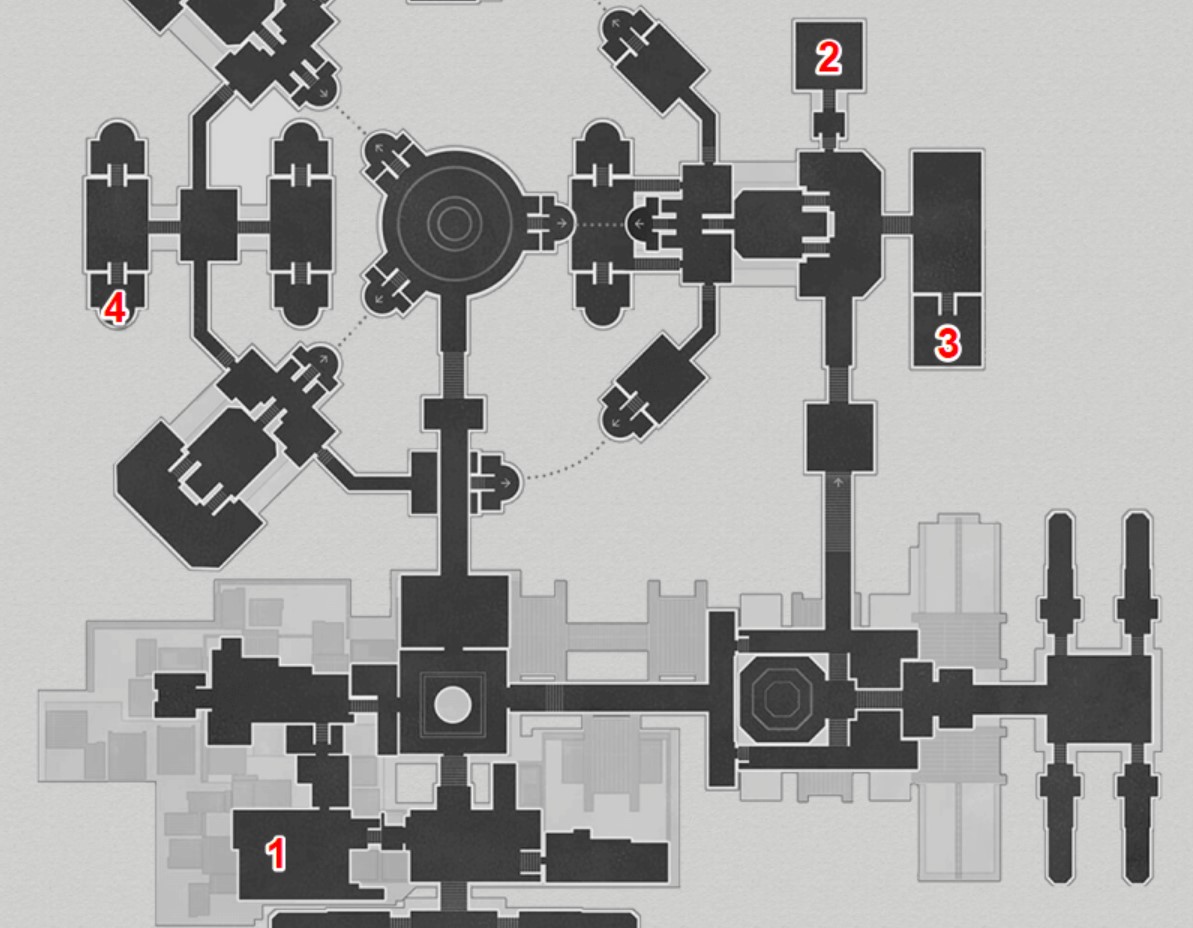
There are three Hexanexus in total in this area. It will be possible to take up finding and solving them after completing the story quest called "The whirlpool of stars, insight is coming." The map below shows the approximate location of the puzzles.
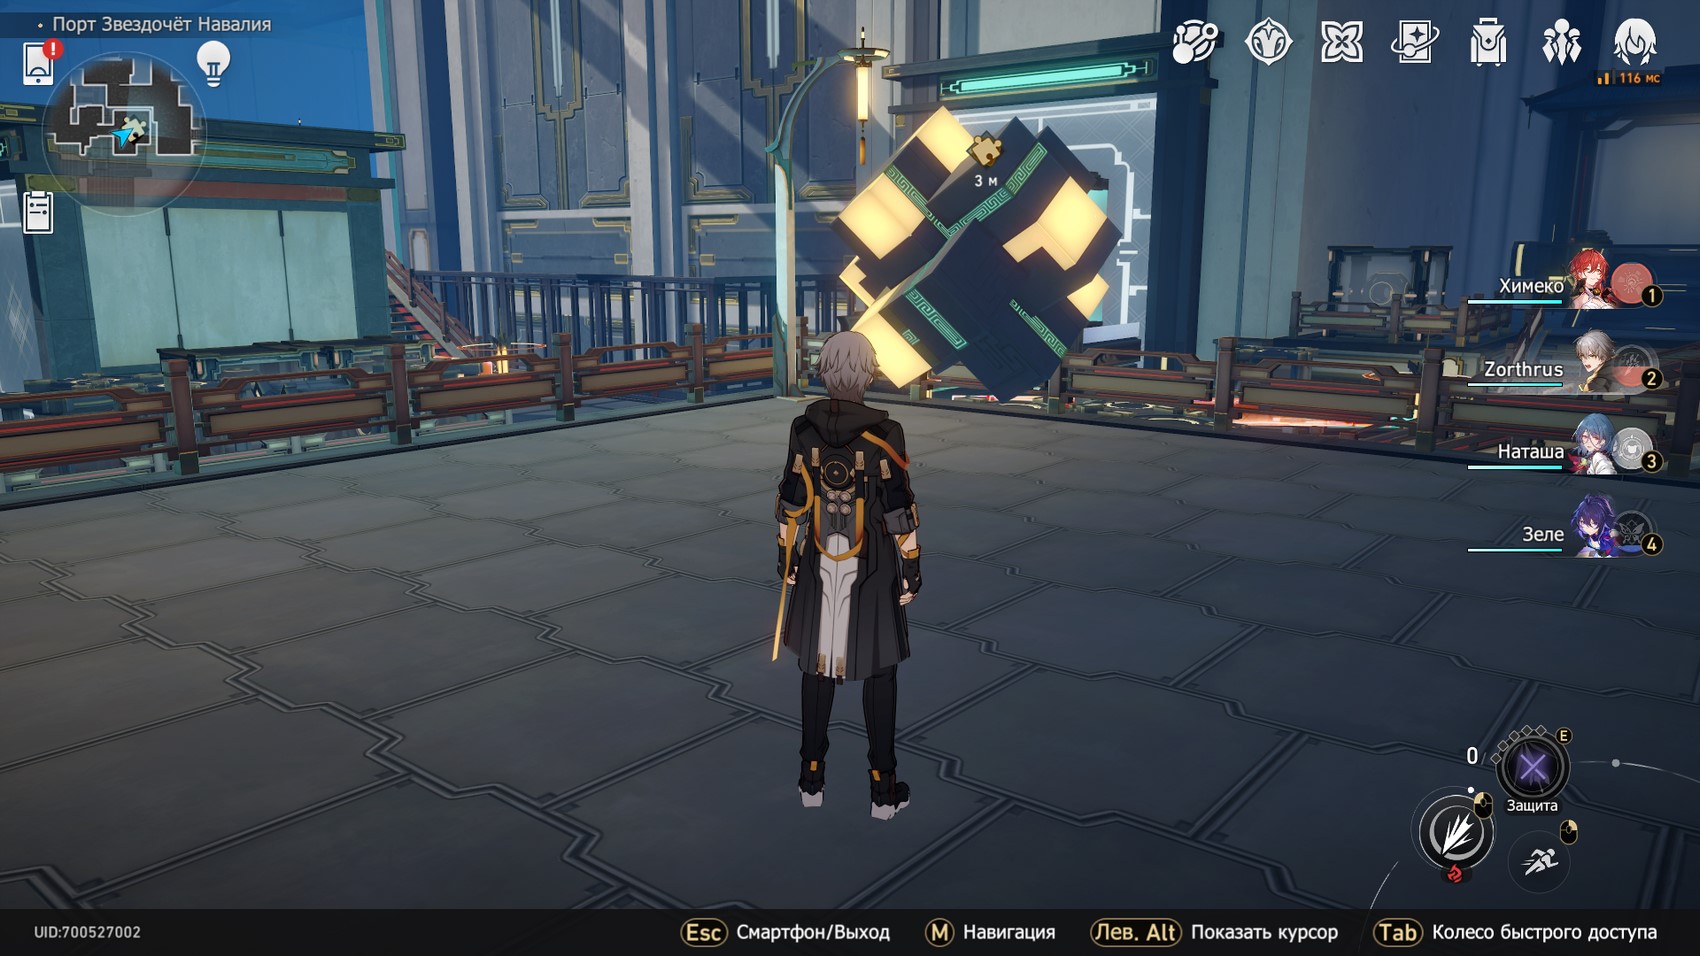
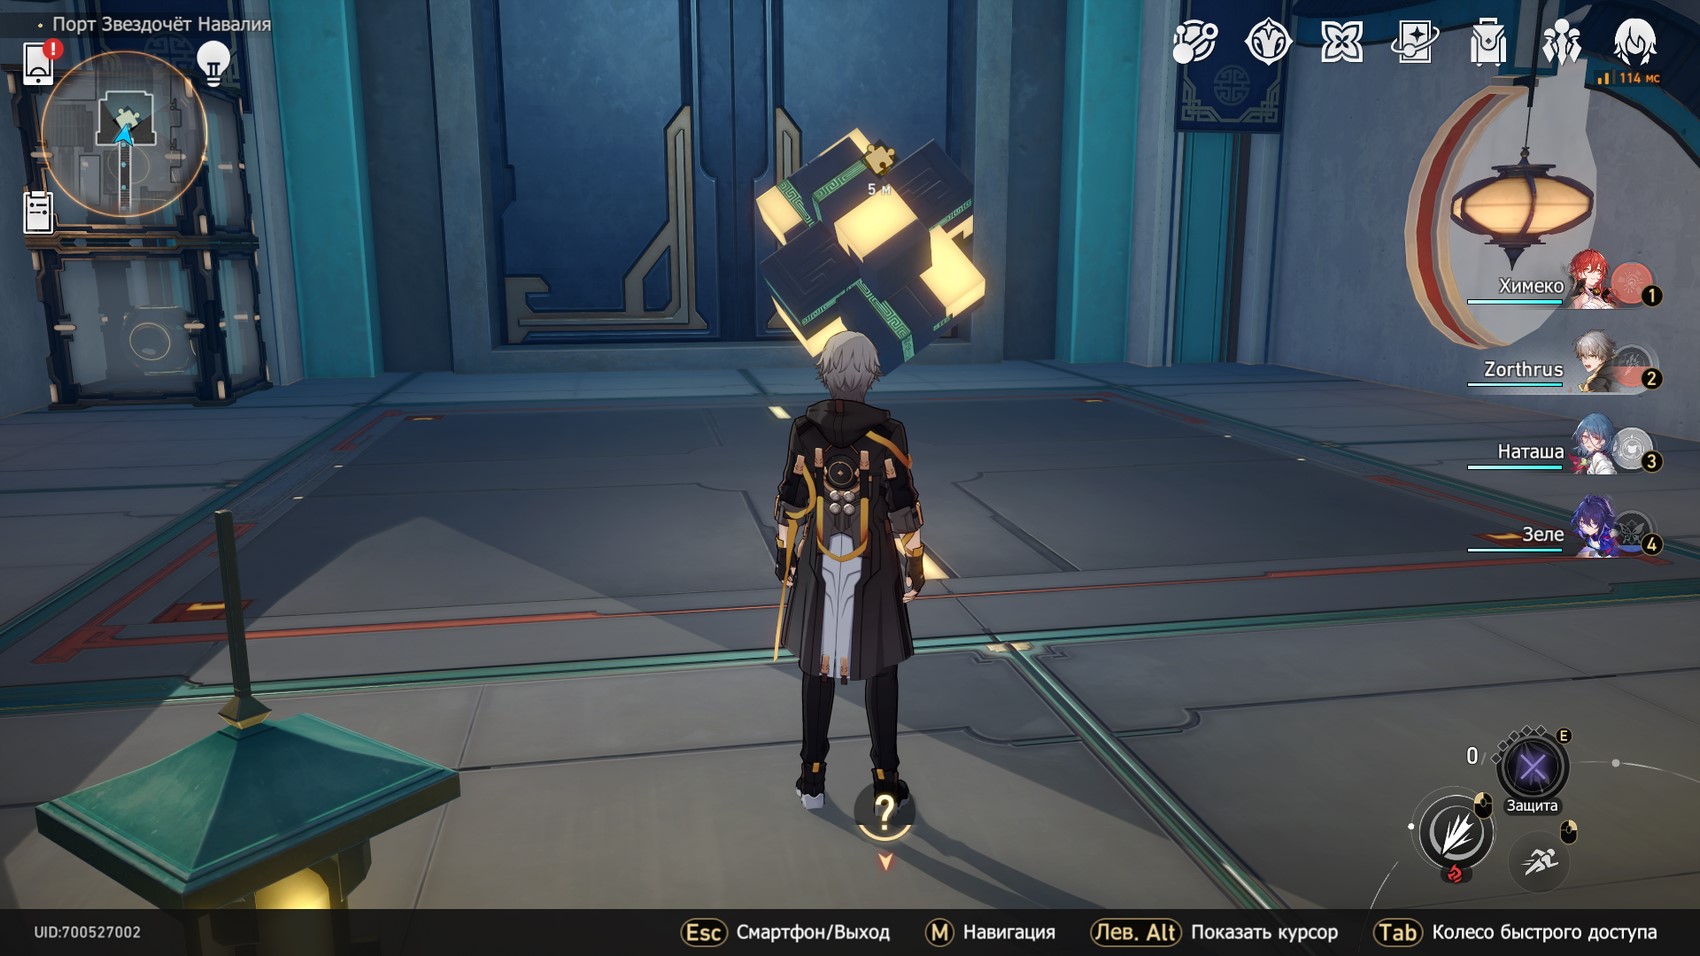
First hexanexus
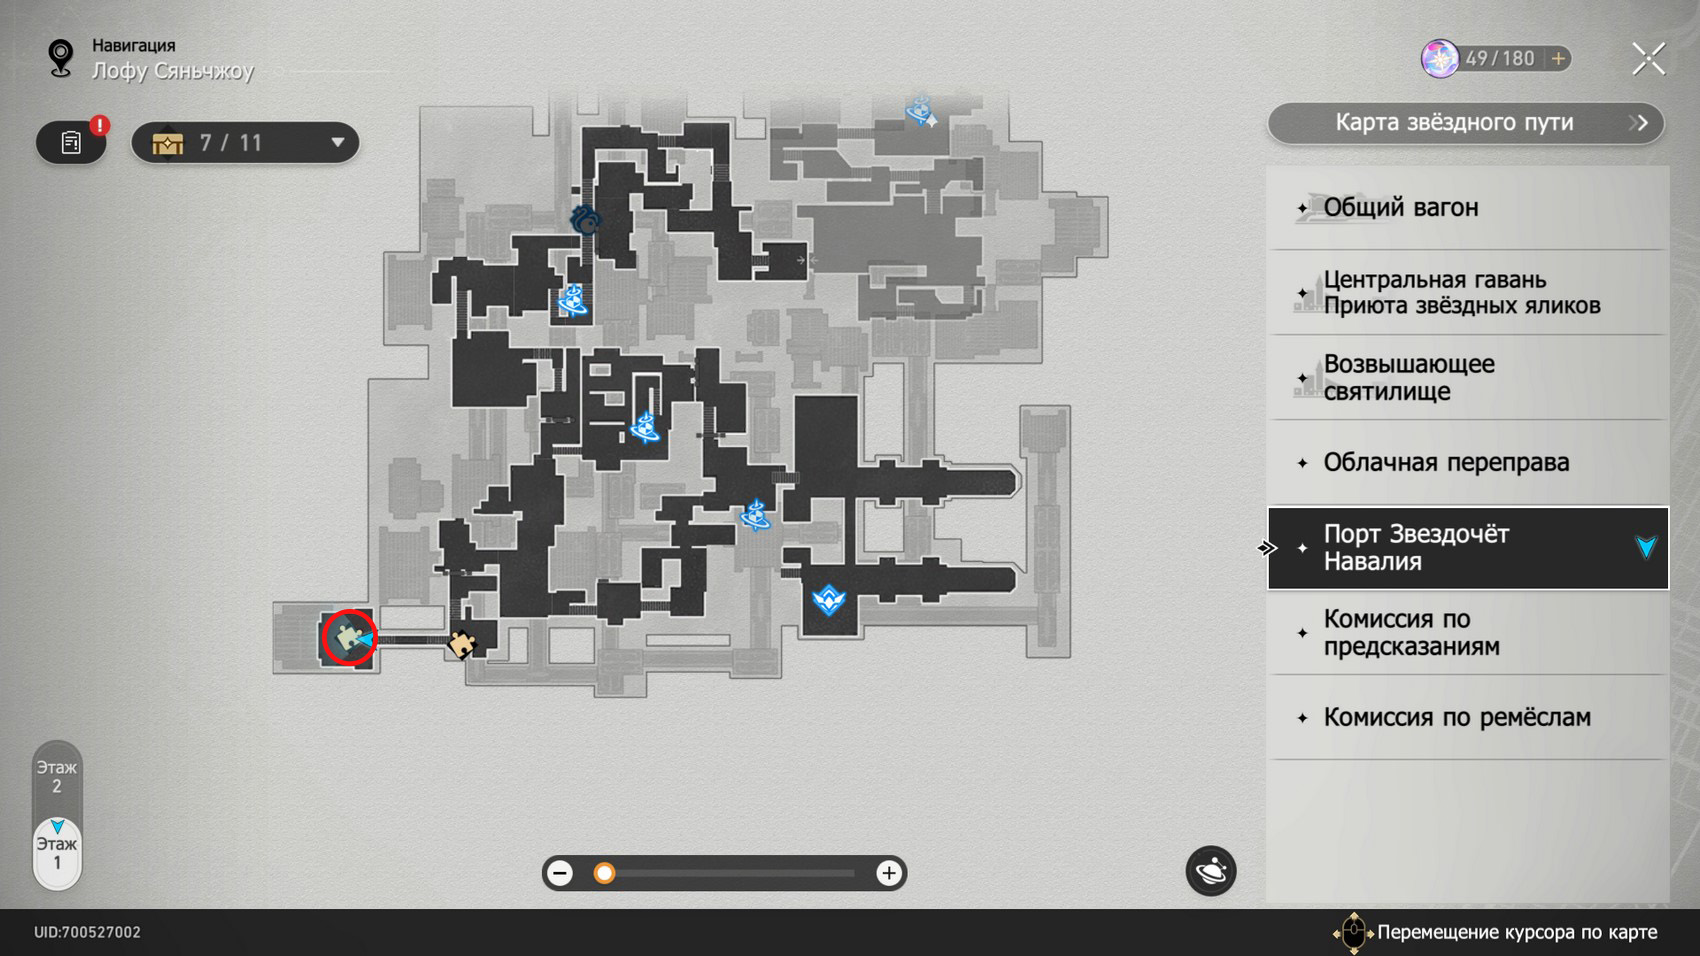
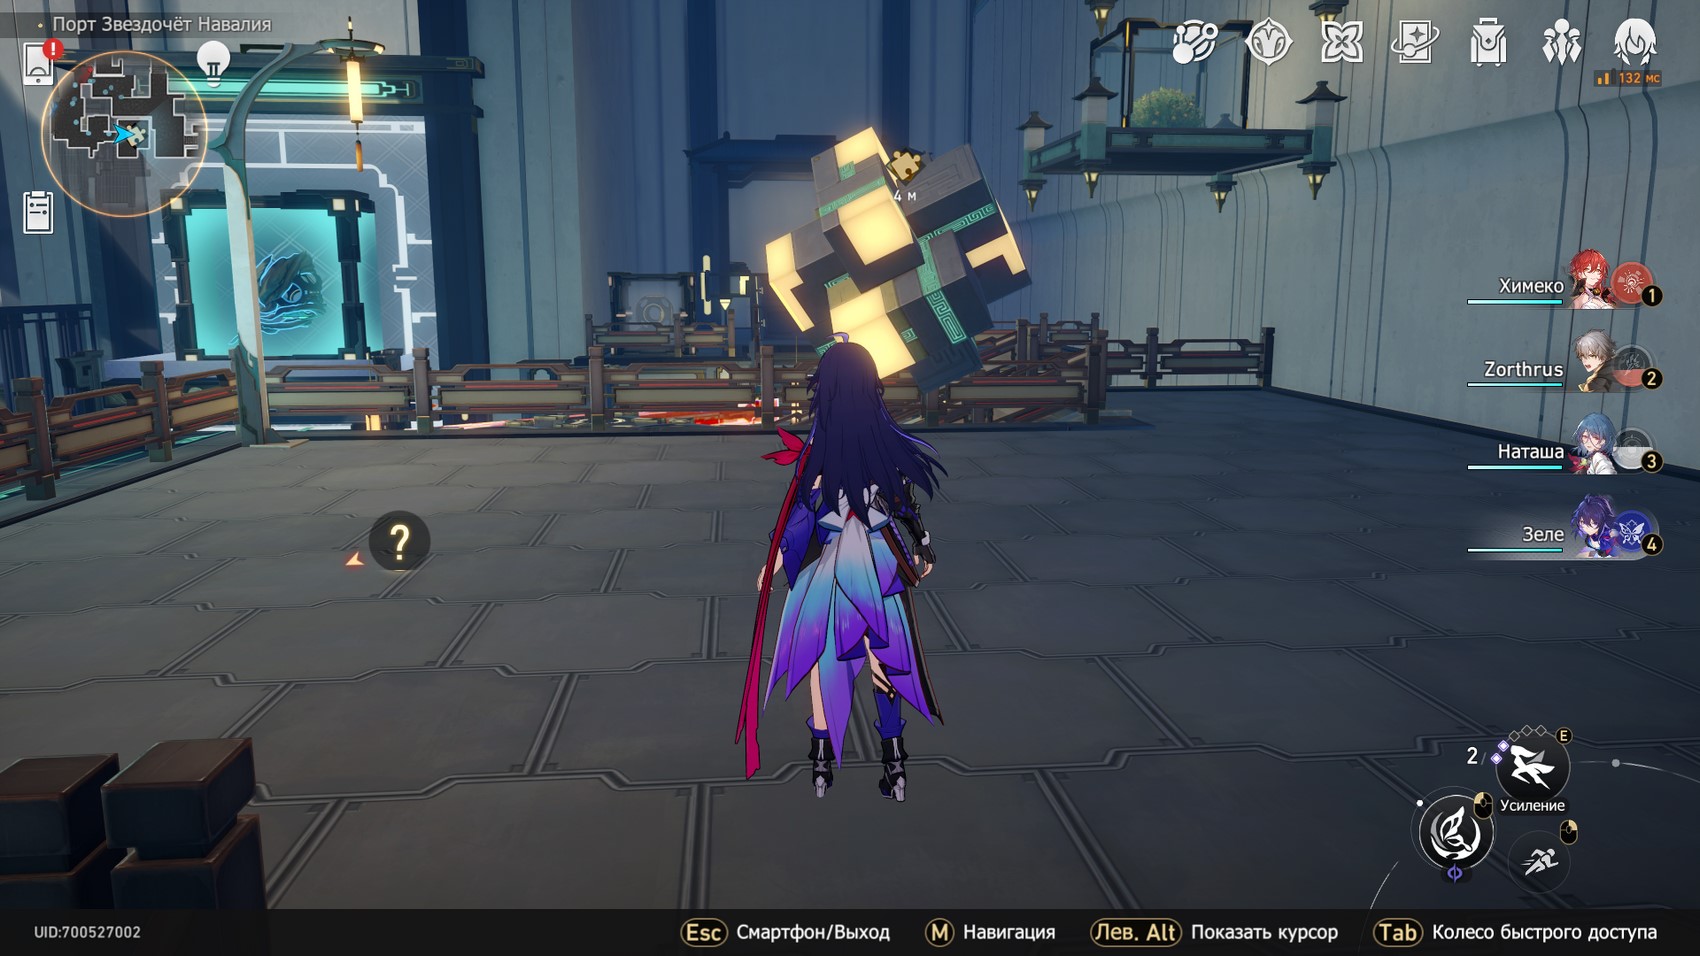
Travel to the dimensional anchor "Wharf" and then start moving east, going up and down the stairs, and bypassing all the opponents. The cube is located on a separate area at the very end of the location.
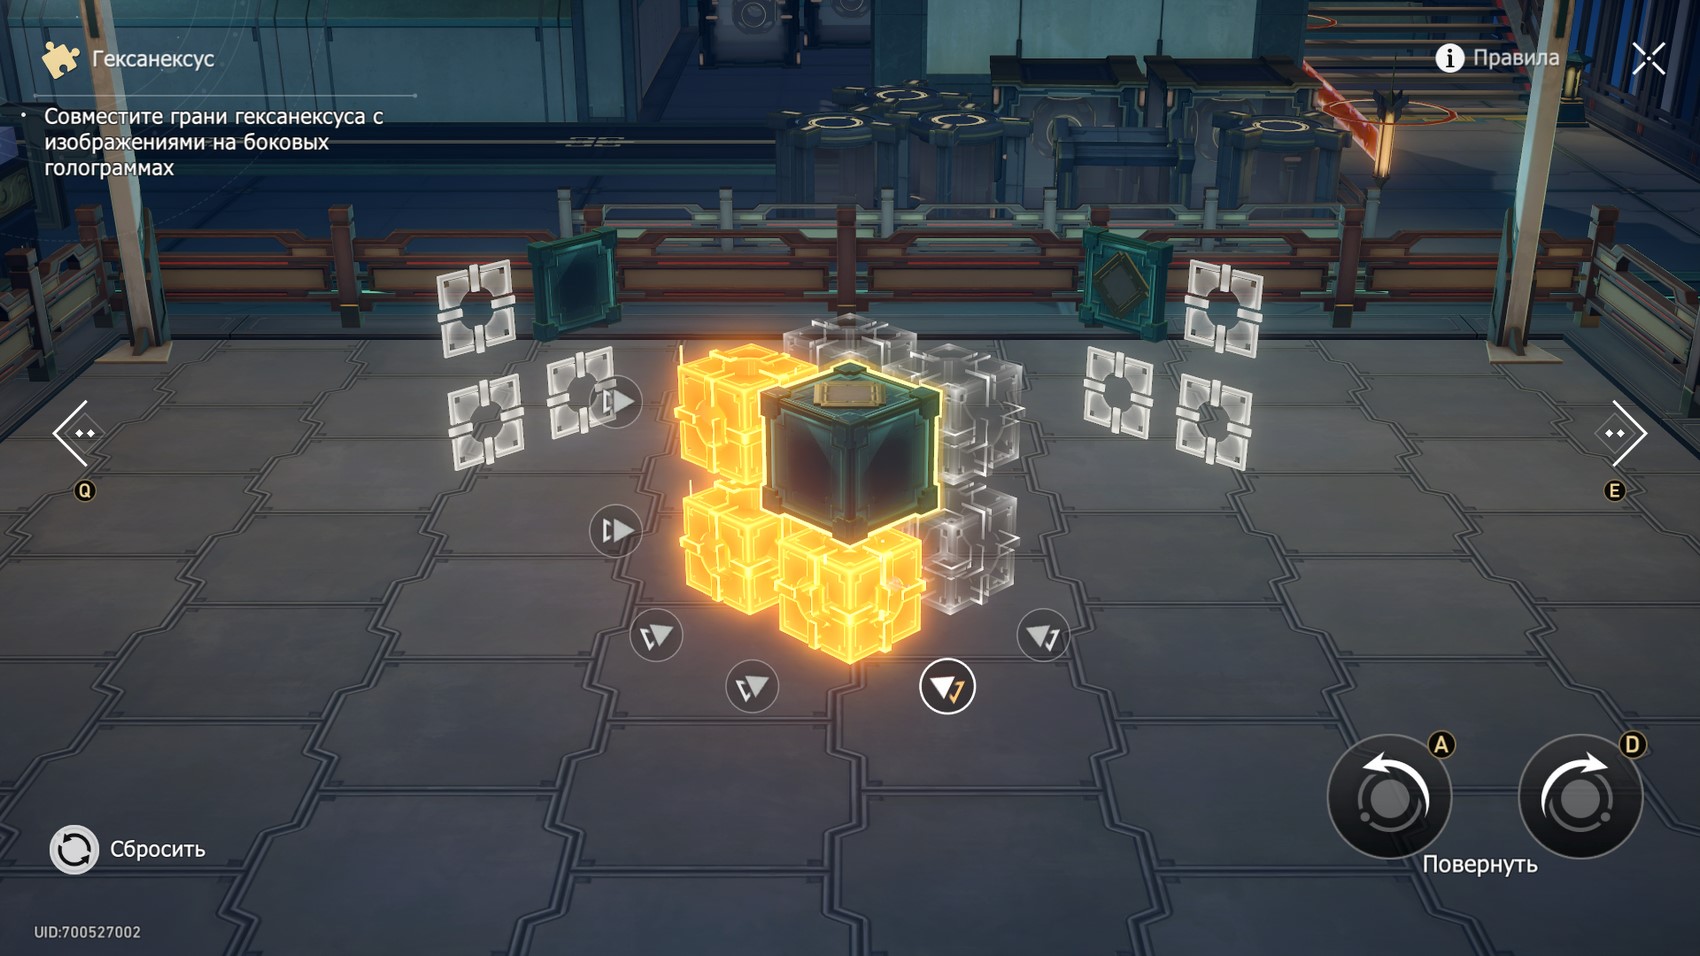
Next, follow these steps to solve this puzzle:
- Rotate the viewing angle as shown in the first screenshot below. Then rotate the selected side two times clockwise.
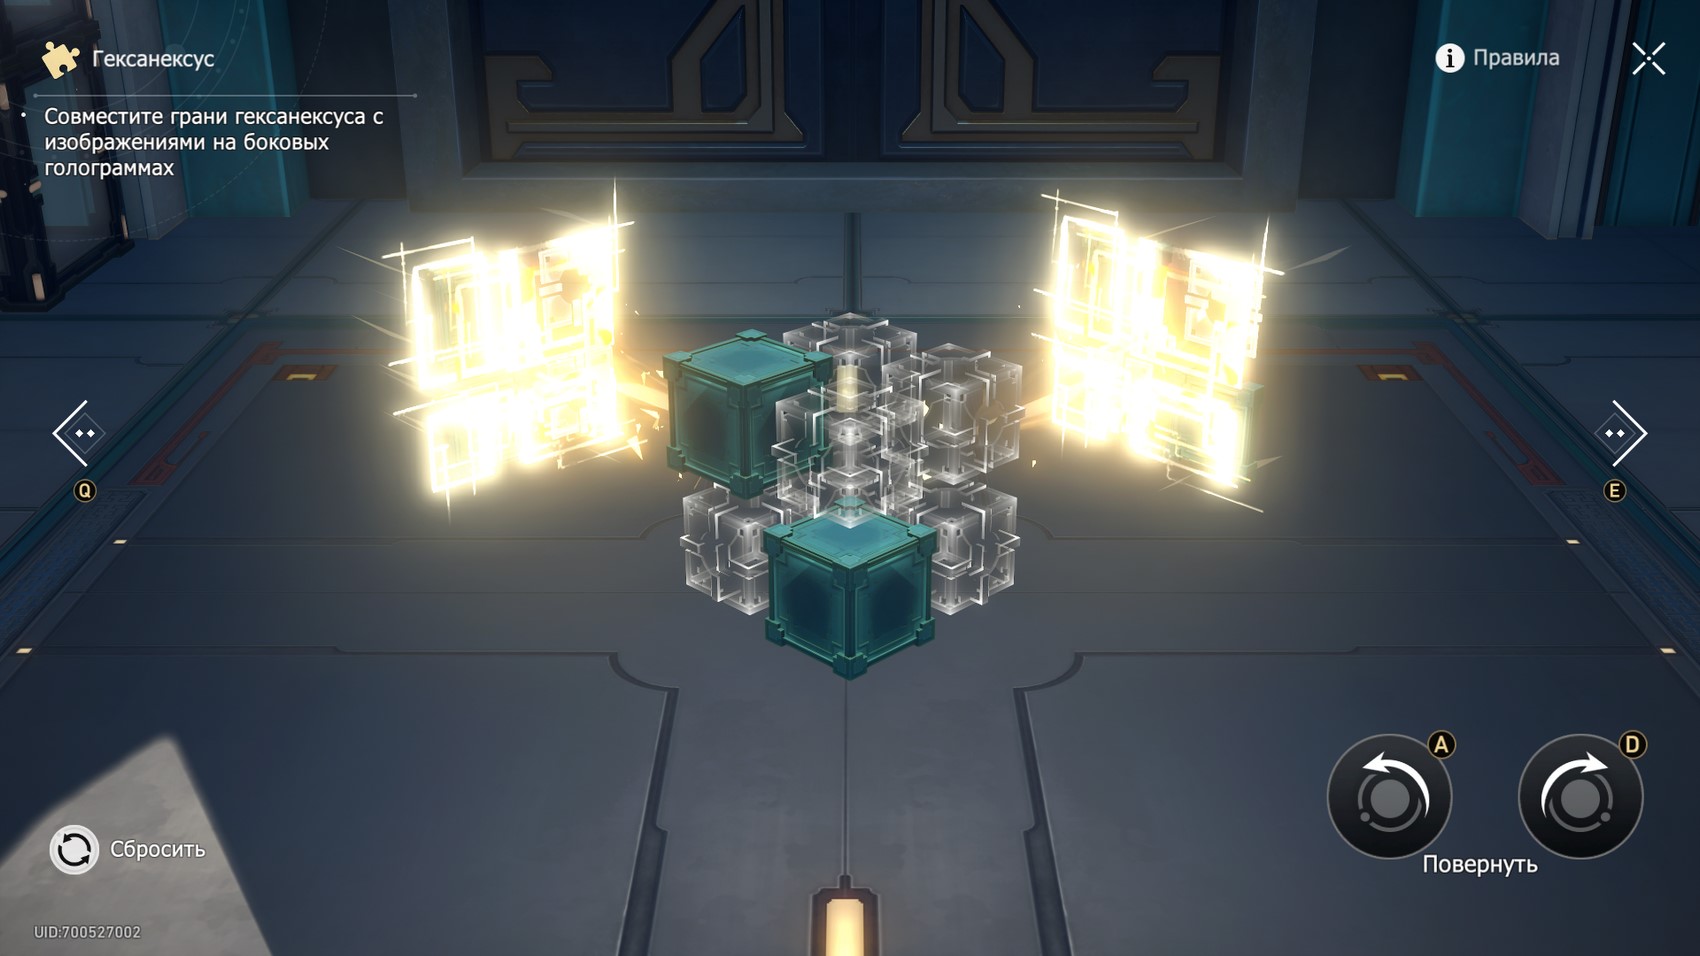
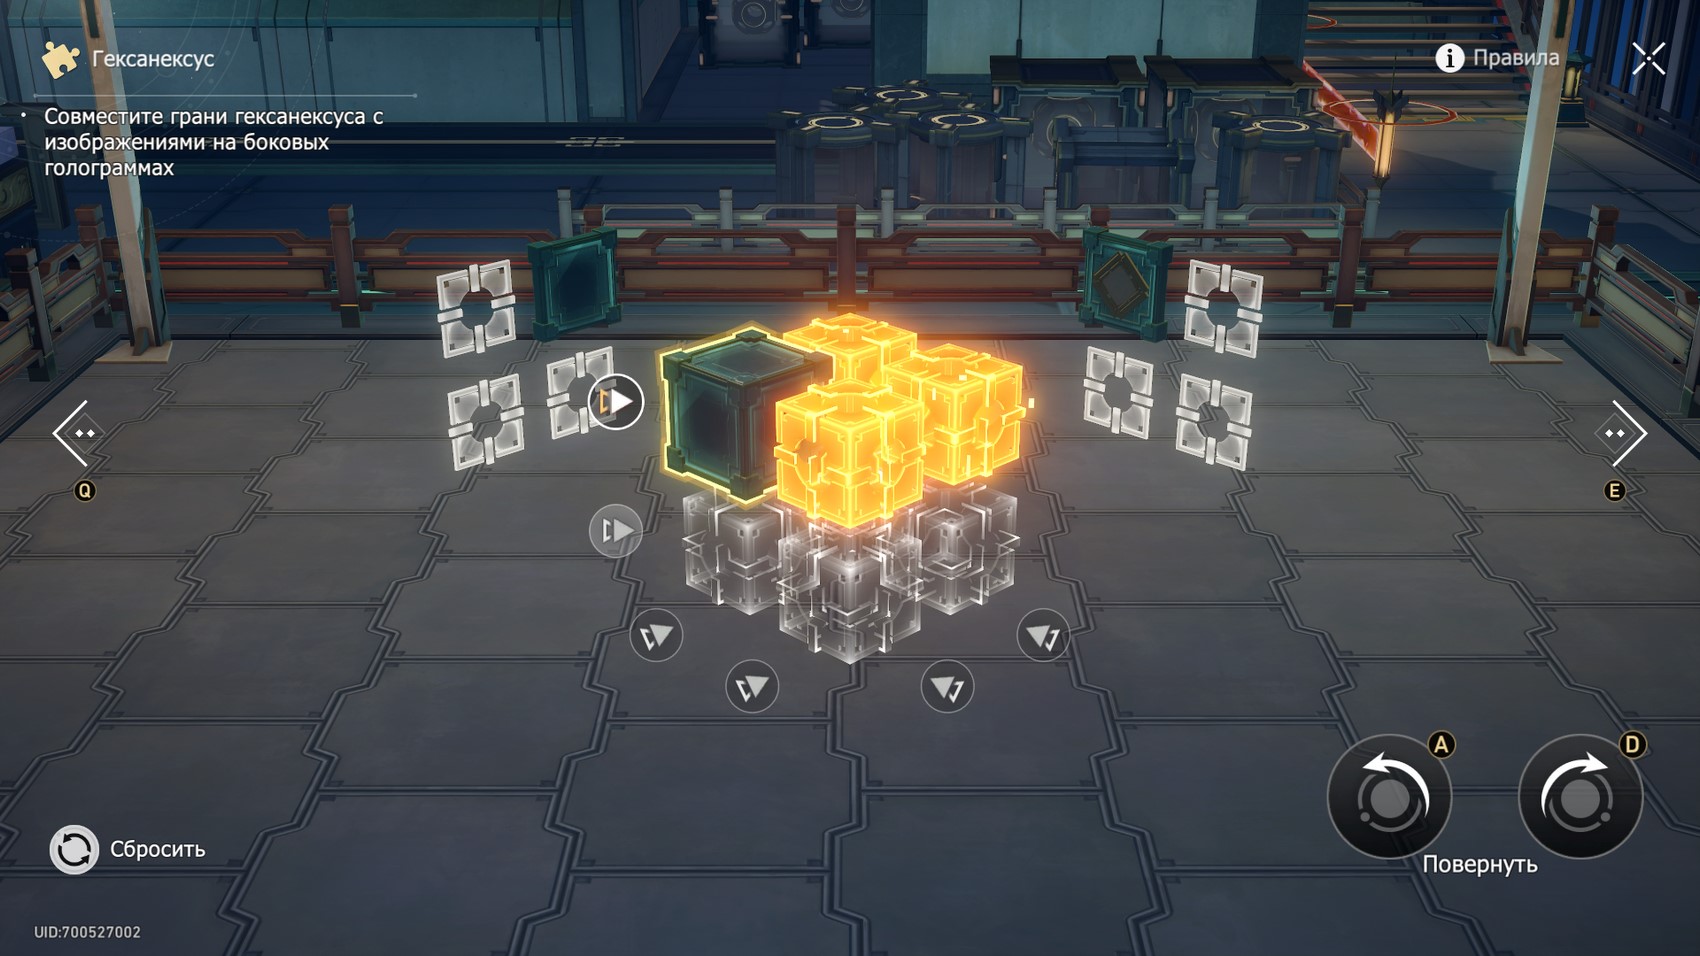
- Select the highlighted side (second screenshot) and rotate it counterclockwise twice.
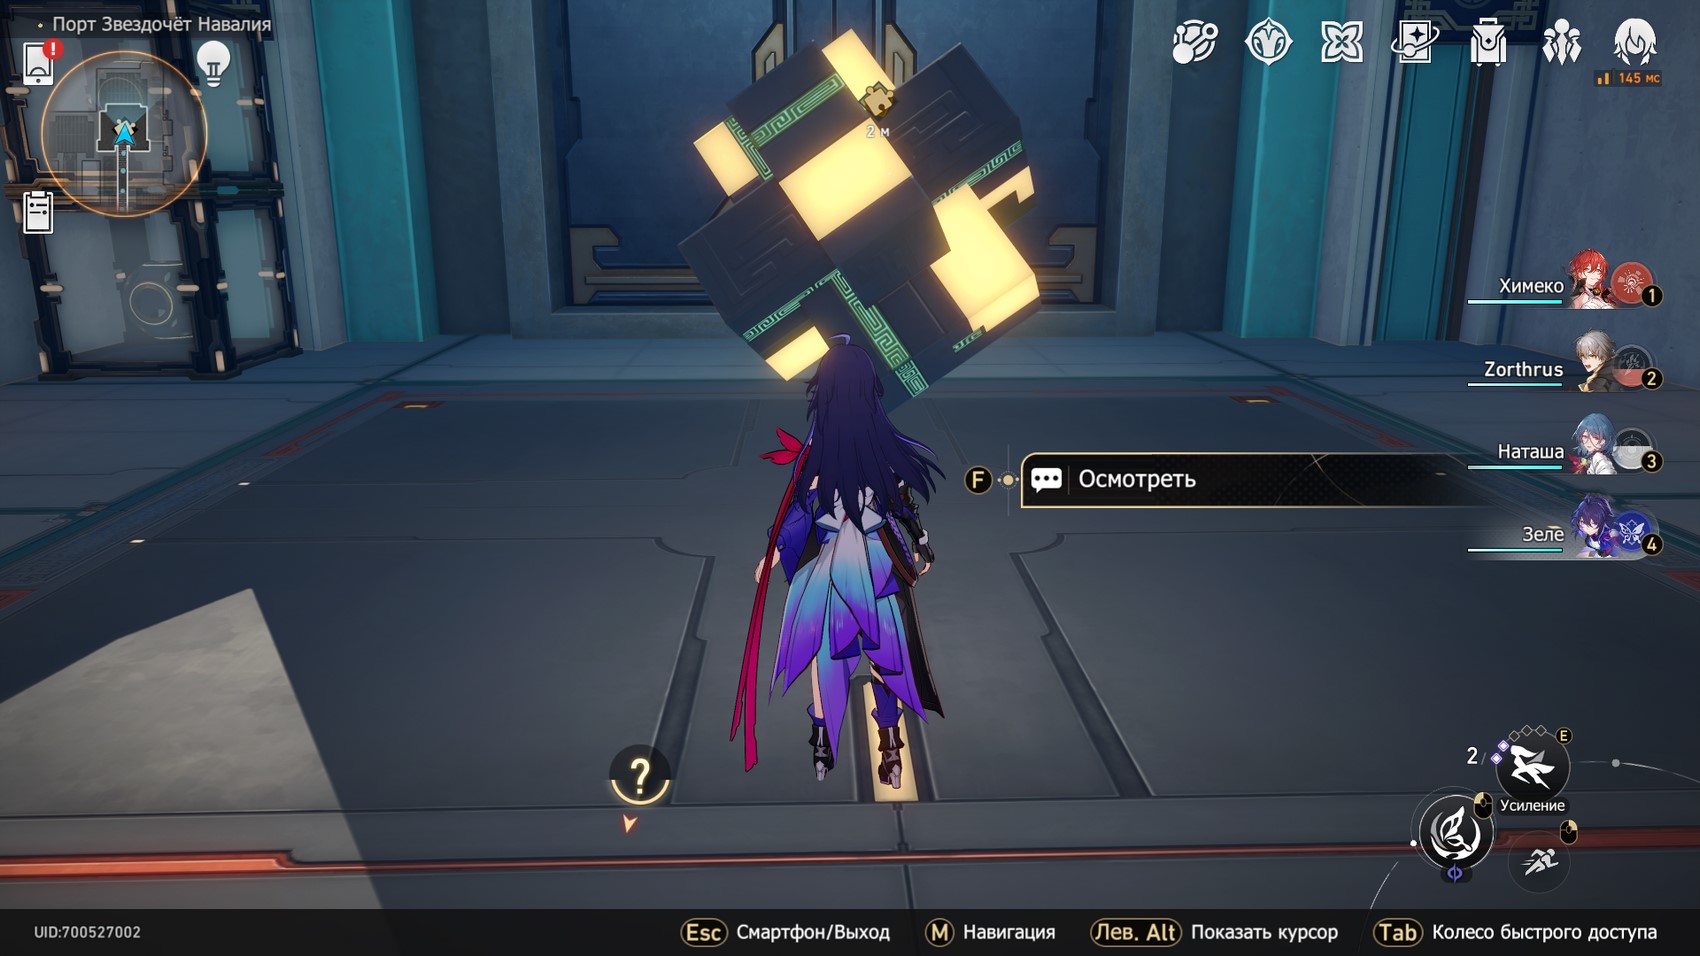
- As a result, you will solve the puzzle (last screenshot).


If the pictures do not seem clear enough to you, then we advise you to look at the gif below. It shows the whole process of solving the riddle.
Second hexanexus
Teleport to the Raging Flame Path of Corrosion Cave, and then head east a little and you will find the cube you need on the site.
Next, follow these steps to solve this puzzle:
- Rotate the viewing angle as shown in the first screenshot below. Then rotate the selected side two times clockwise.
- Select the highlighted side (second screenshot) and rotate it once clockwise.
- As a result, you will solve the puzzle (last screenshot).
If the pictures do not seem clear enough to you, then we advise you to look at the gif below. It shows the whole process of solving the riddle.
Third hexanexus
Move to the anchor "Ship Incubator - Rostock", and then run north up. Go across the bridge to a small area where the cube you need is located.
Next, follow these steps to solve this puzzle:
- Select the highlighted side (first screenshot) and rotate it clockwise once.
- Select the highlighted side (second screenshot) and rotate it two times clockwise.
- As a result, you will solve the puzzle (last screenshot).

If the pictures do not seem clear enough to you, then we advise you to look at the gif below. It shows the whole process of solving the riddle.
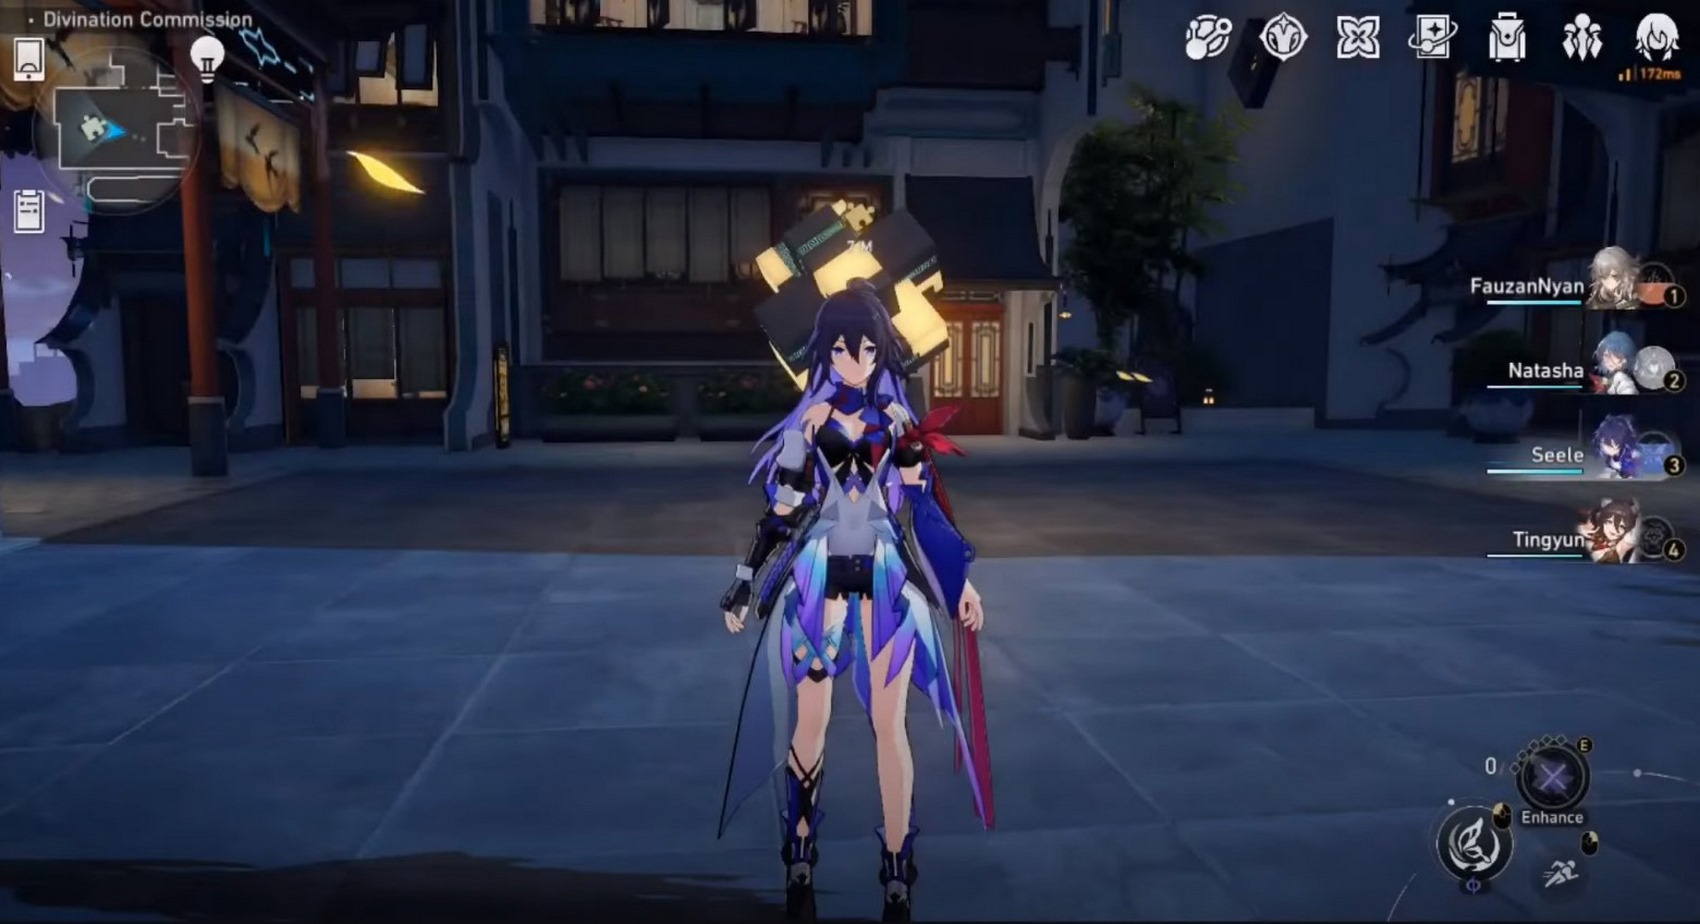
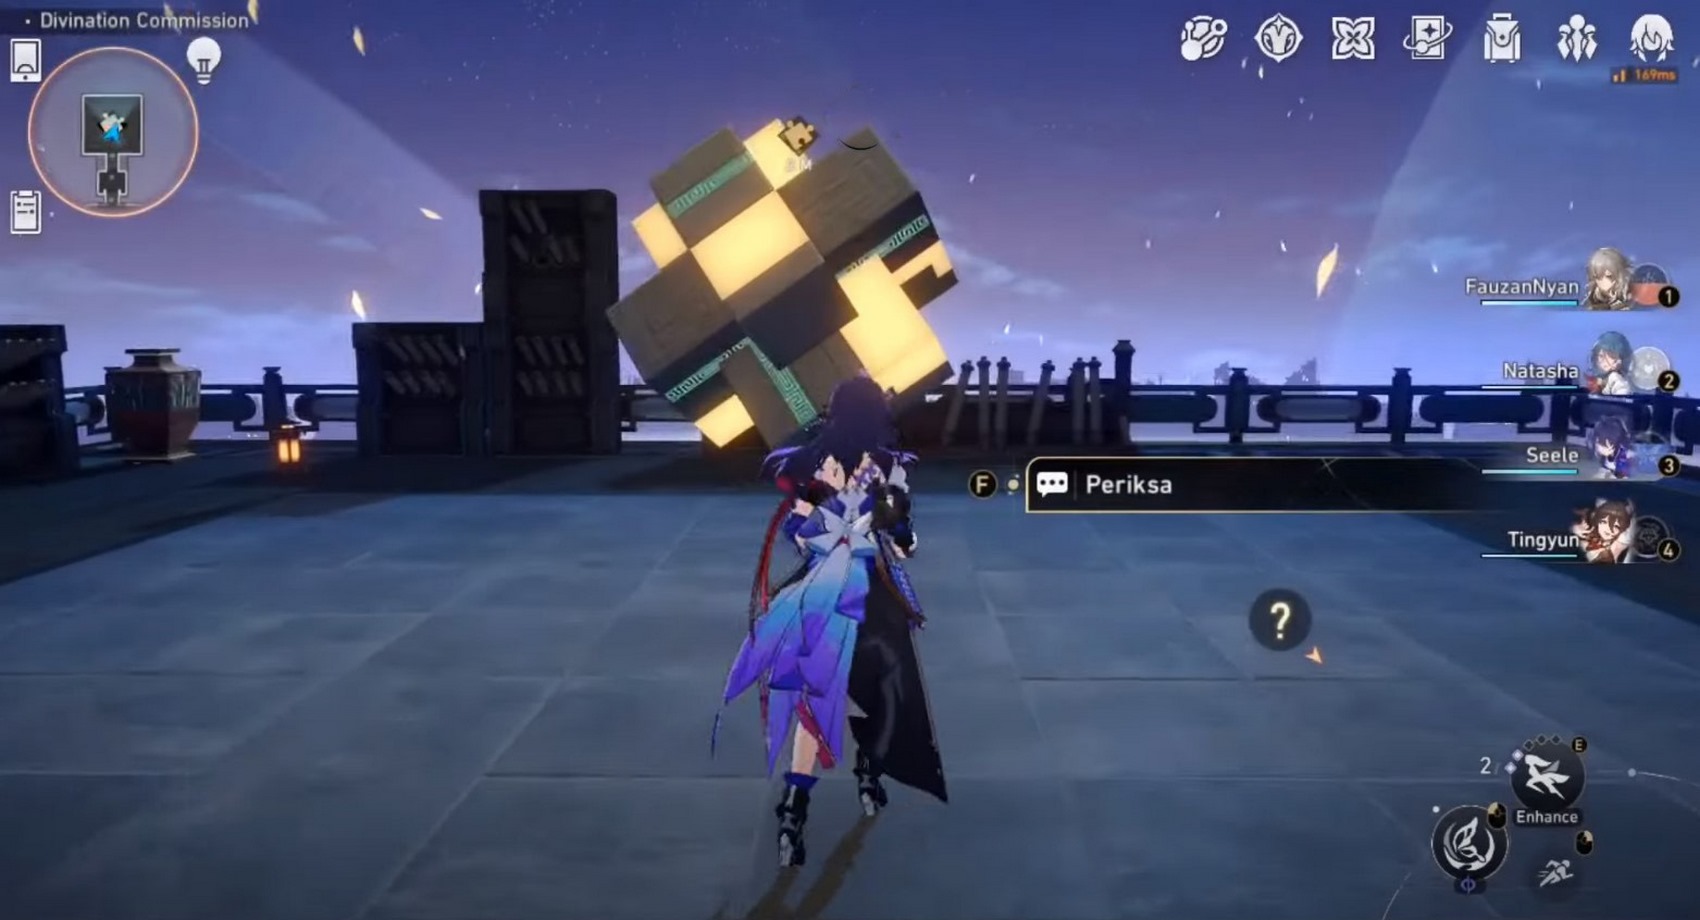
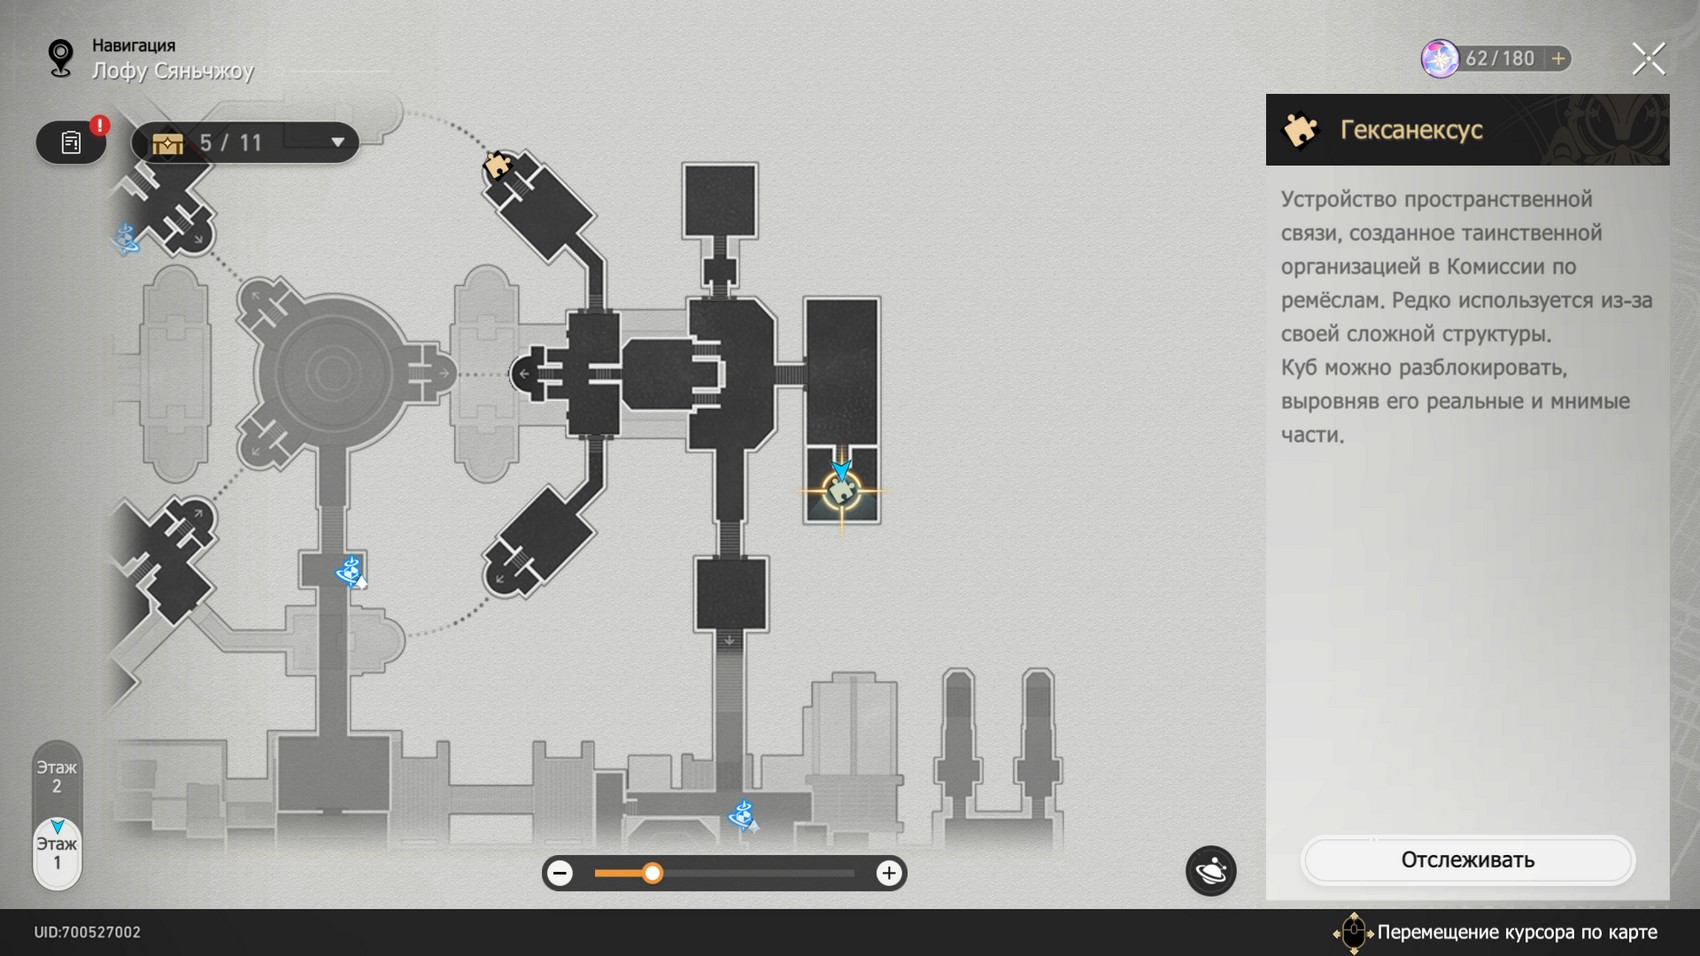
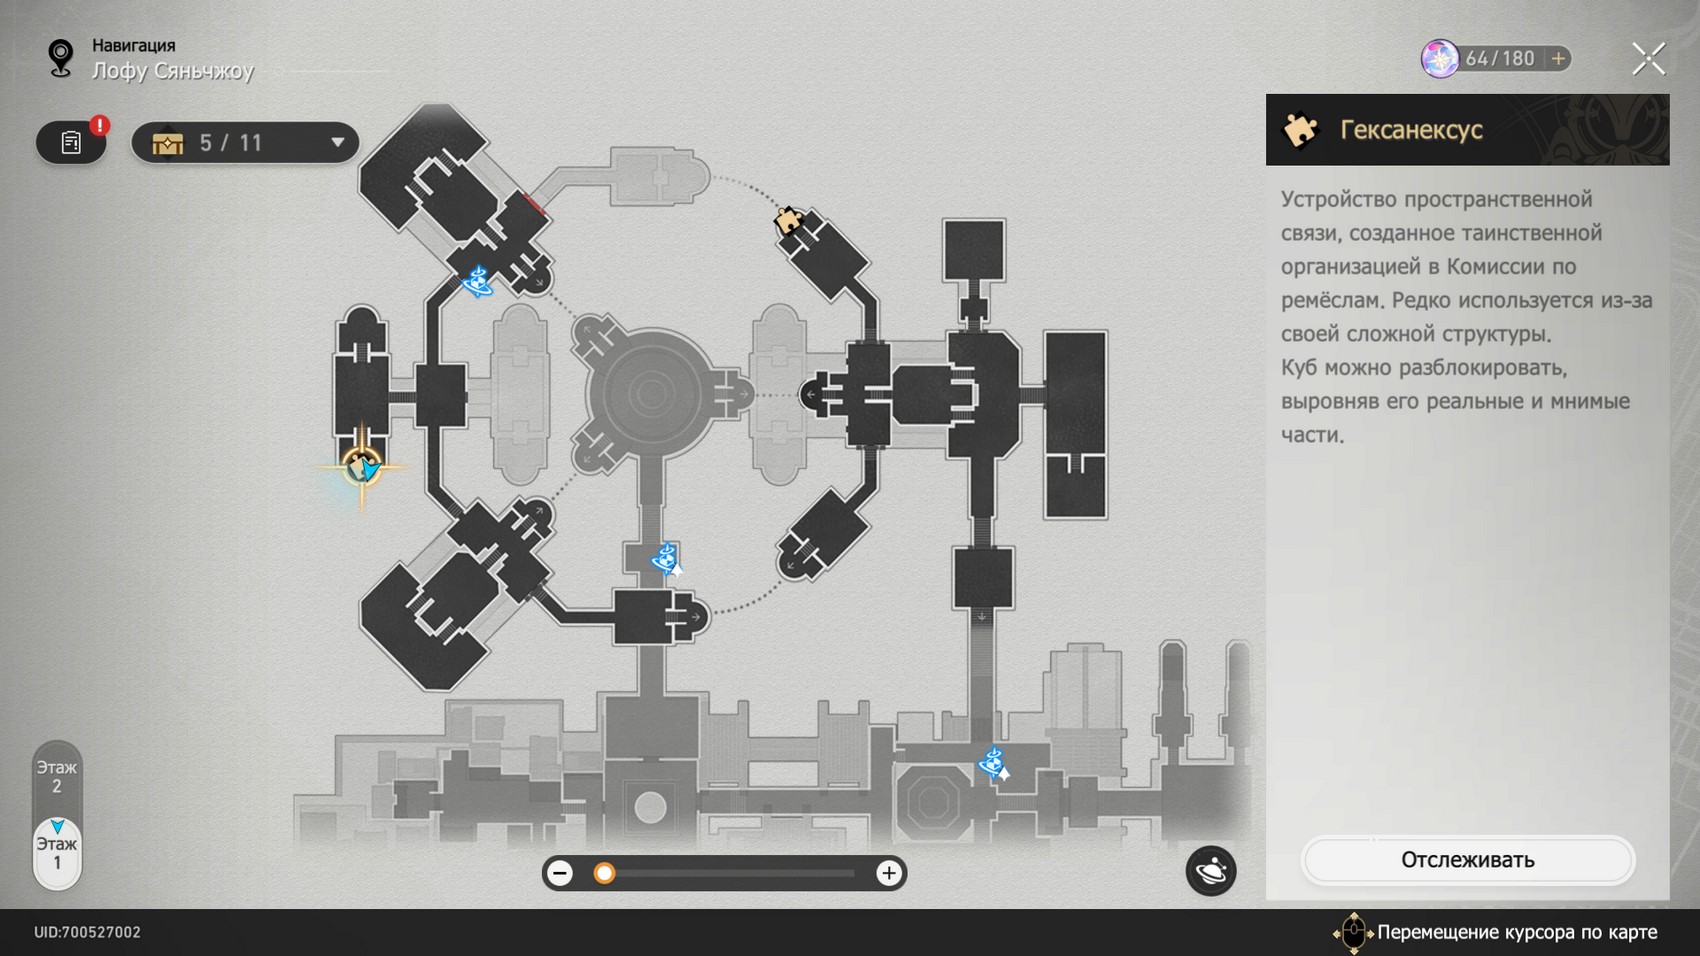
Divination Commission (all hexanexuses)
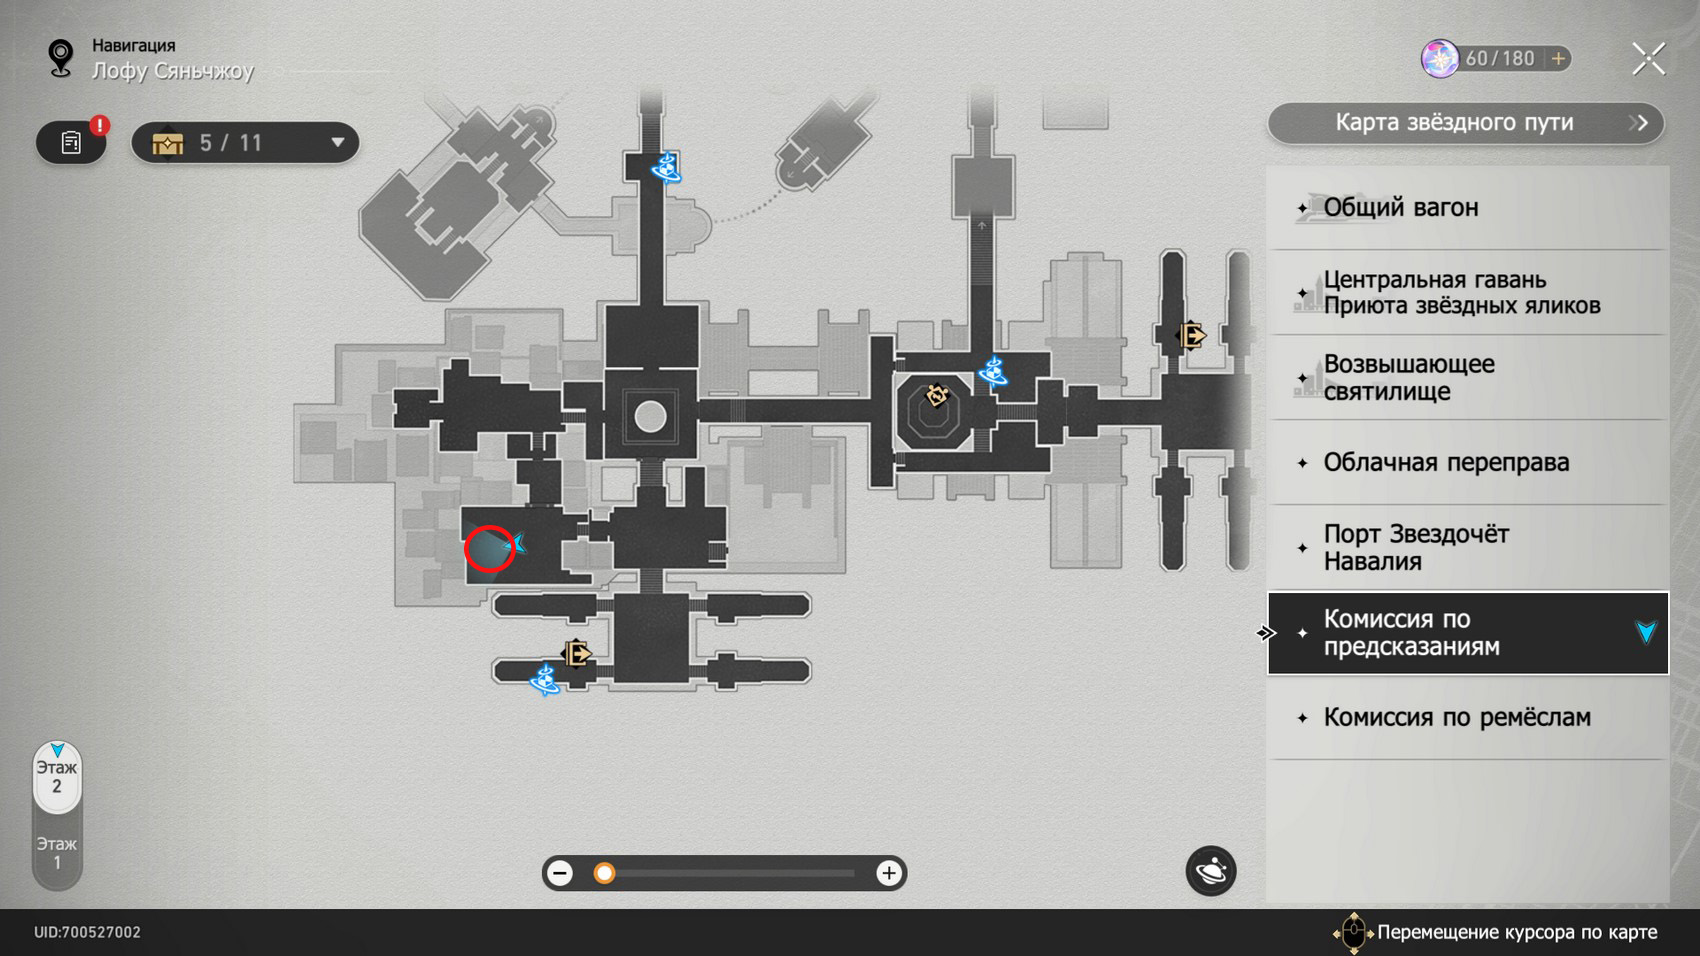
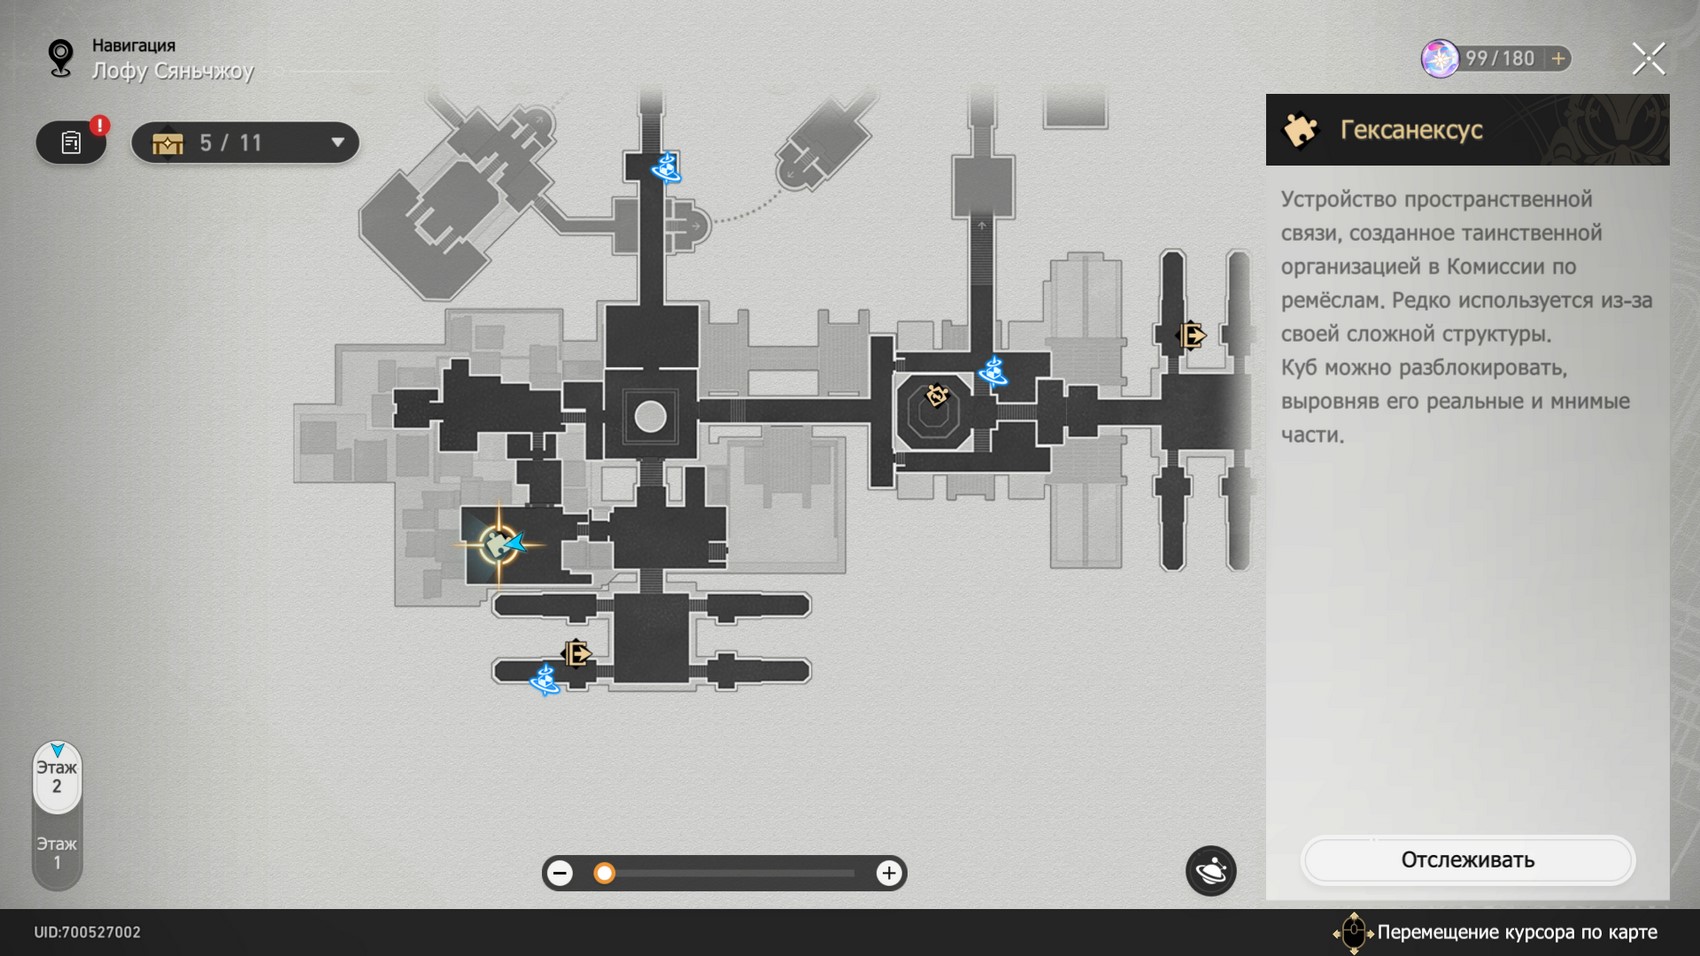
There are four Hexanexus in total on two different levels in this area. It will be possible to take up finding and solving them after completing the story quest called "New Friends - New Joys". The map below shows the approximate location of the puzzles.
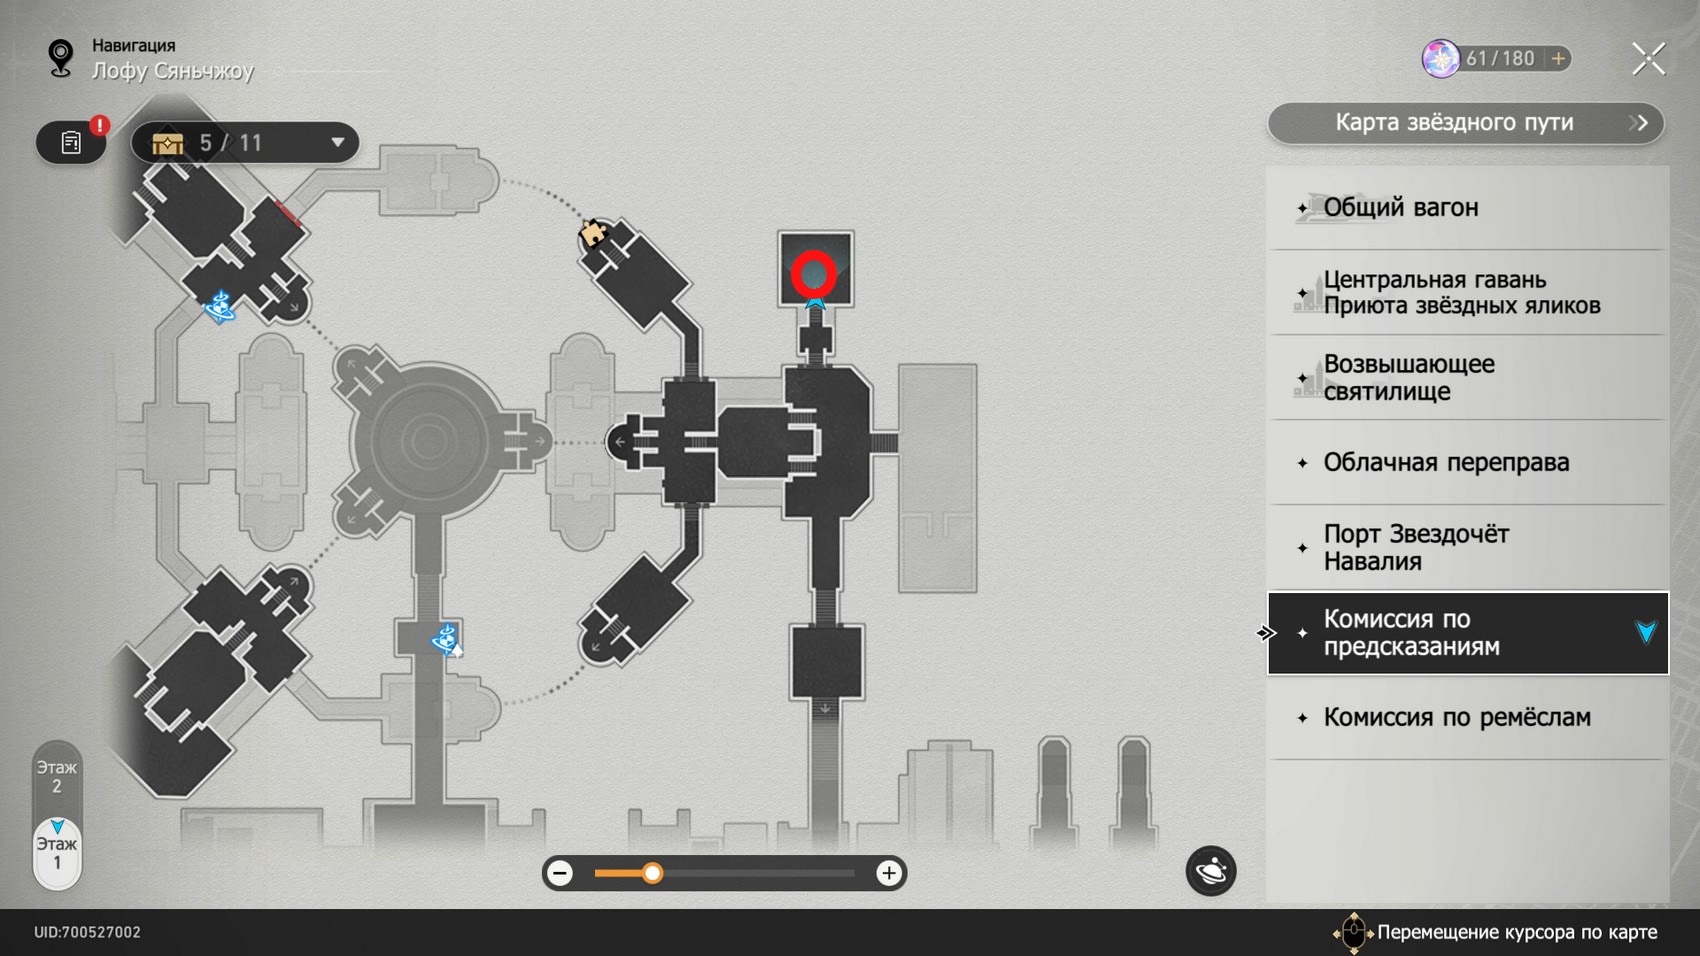
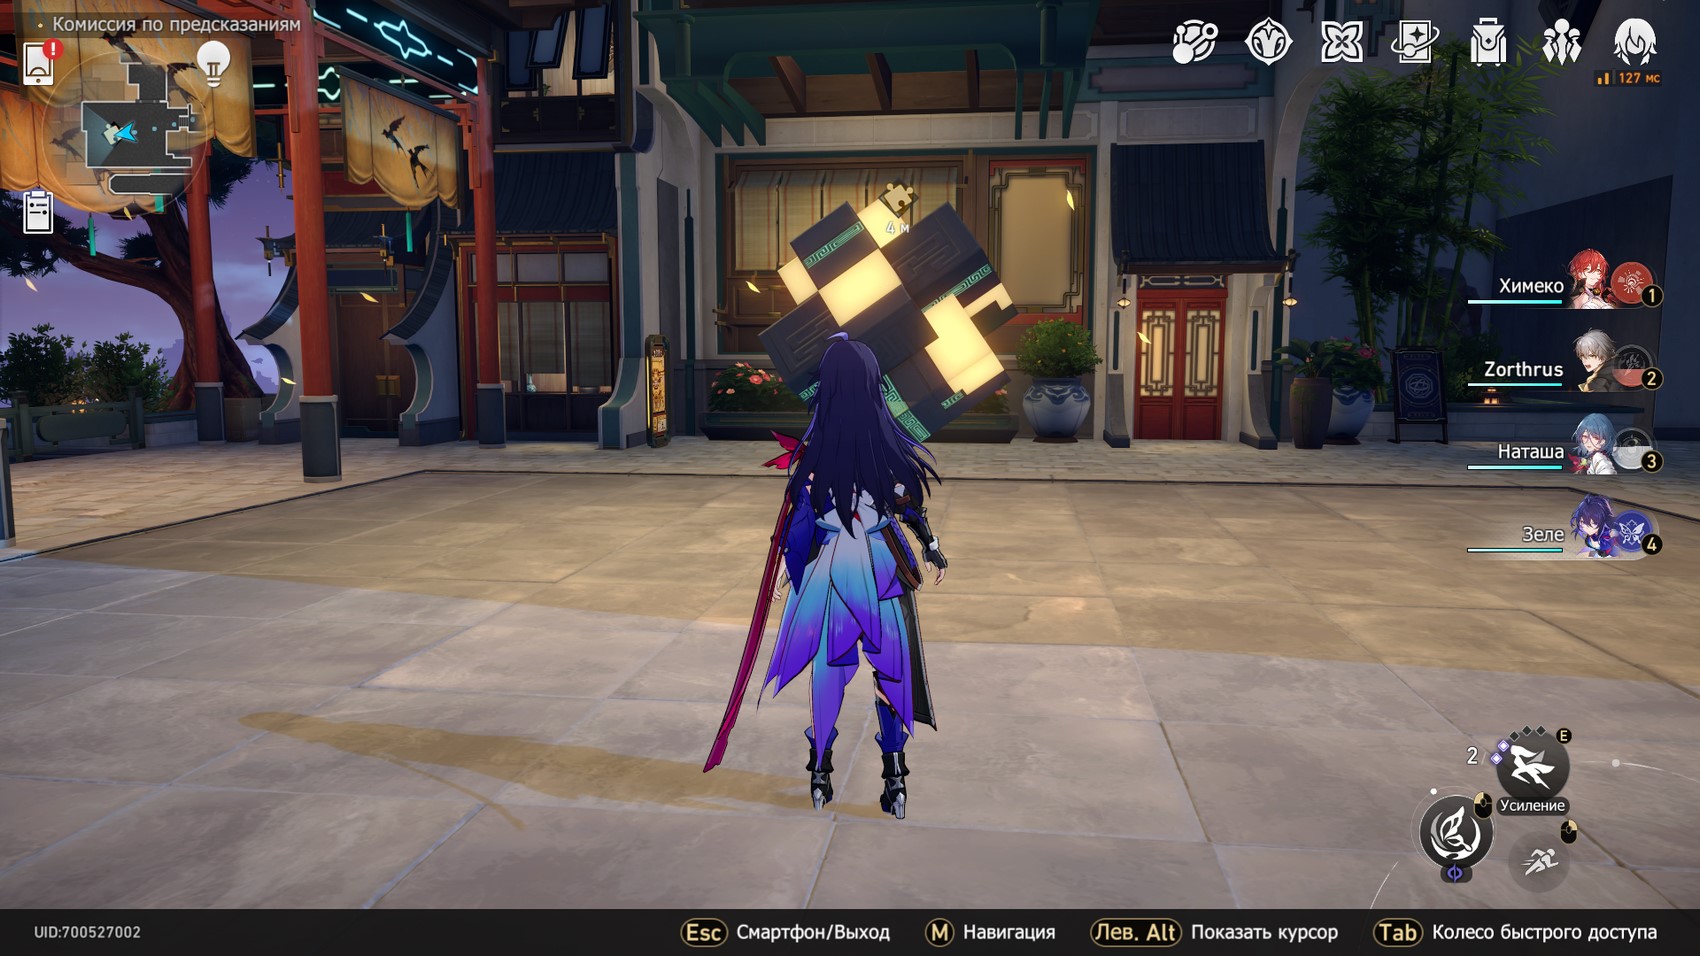
First hexanexus
Travel to the South Anchor of the Fortune Divination Platform and then head north, go up the stairs and turn left. On a large platform you will find the cube you need.
Next, follow these steps to solve this puzzle:
- Select the highlighted side (first screenshot) and rotate it clockwise twice.
- As a result, you will solve the puzzle (last screenshot).

If the pictures do not seem clear enough to you, then we advise you to look at the gif below. It shows the whole process of solving the riddle.
Second hexanexus
Teleport to the Supreme Prescience Matrix and use its eastern teleport screen to get to the platform on the right. There, go north to a small area, where you will find a cube.
Next, follow these steps to solve this puzzle:
- Rotate the viewing angle as shown in the first screenshot below. Then rotate the highlighted side counterclockwise once.
- Select the highlighted side (second screenshot) and rotate it once clockwise.
- Select the highlighted side (third screenshot) and rotate it two times clockwise.
- As a result, you will solve the puzzle (last screenshot).

If the pictures do not seem clear enough to you, then we advise you to look at the gif below. It shows the whole process of solving the riddle.
Third hexanexus
From the previous lip, go down a little to the southeast, and you will find the cube you need on a small area.

Next, follow these steps to solve this puzzle:
- Rotate the viewing angle as shown in the first screenshot below. Then rotate the selected side once clockwise.
- Select the highlighted side (second screenshot) and rotate it once clockwise.
- Select the highlighted side (third screenshot) and rotate it two times clockwise.
- As a result, you will solve the puzzle (last screenshot).
If the pictures do not seem clear enough to you, then we advise you to look at the gif below. It shows the whole process of solving the riddle.
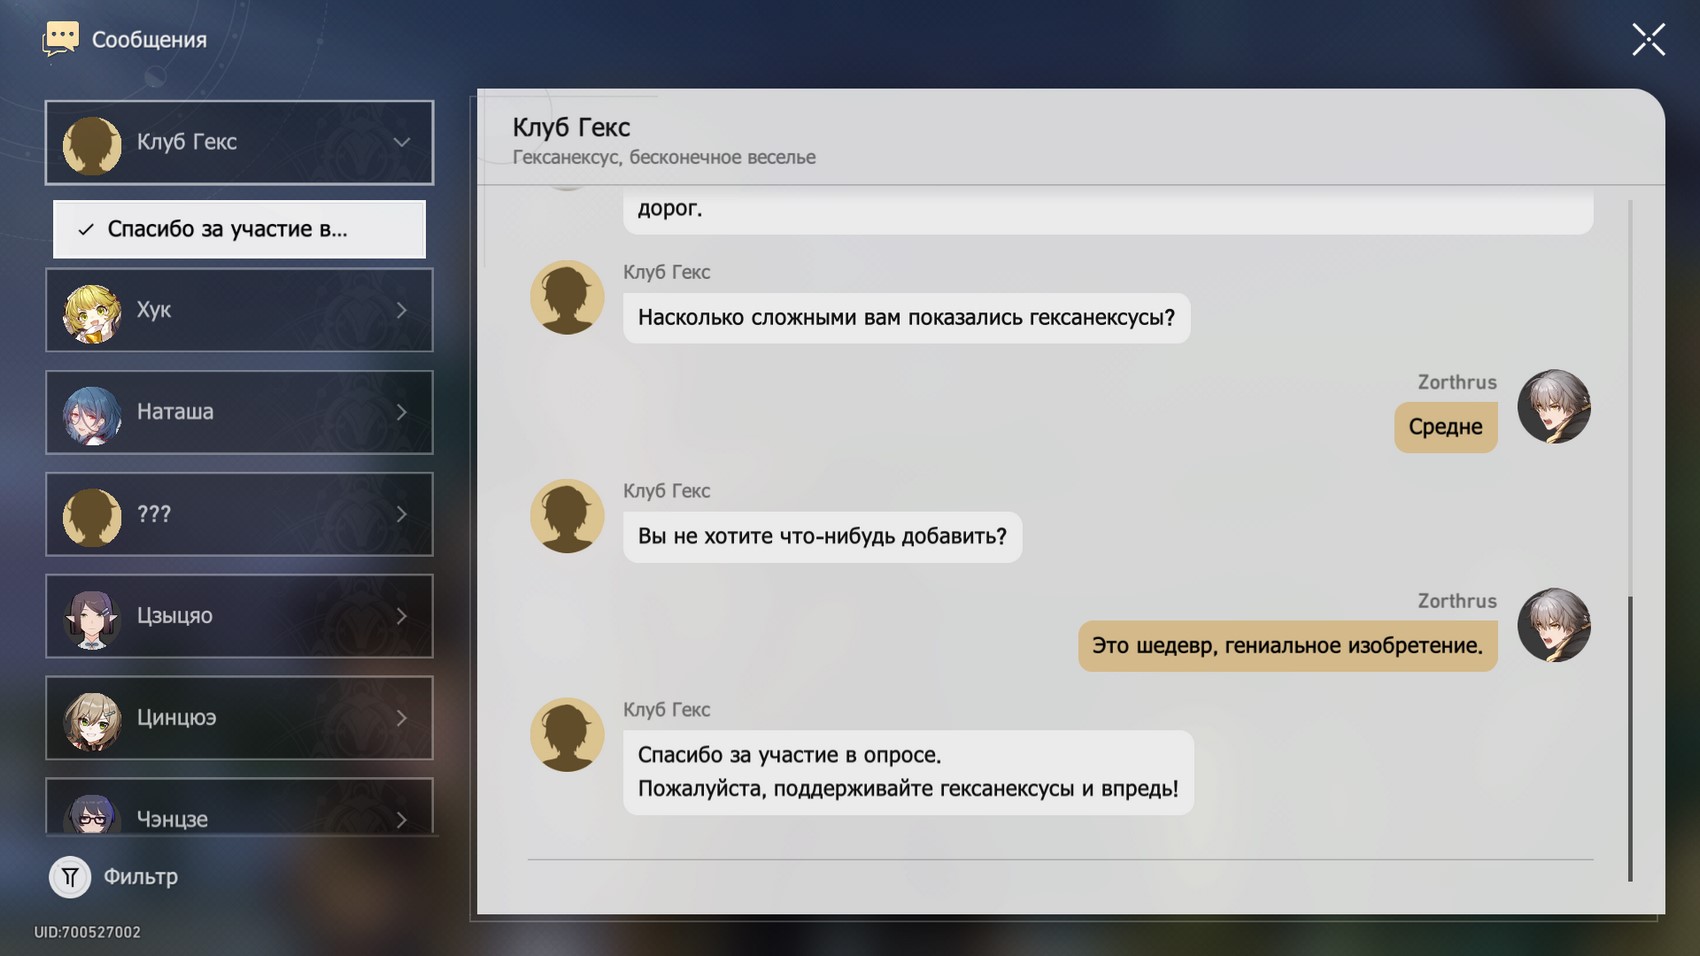
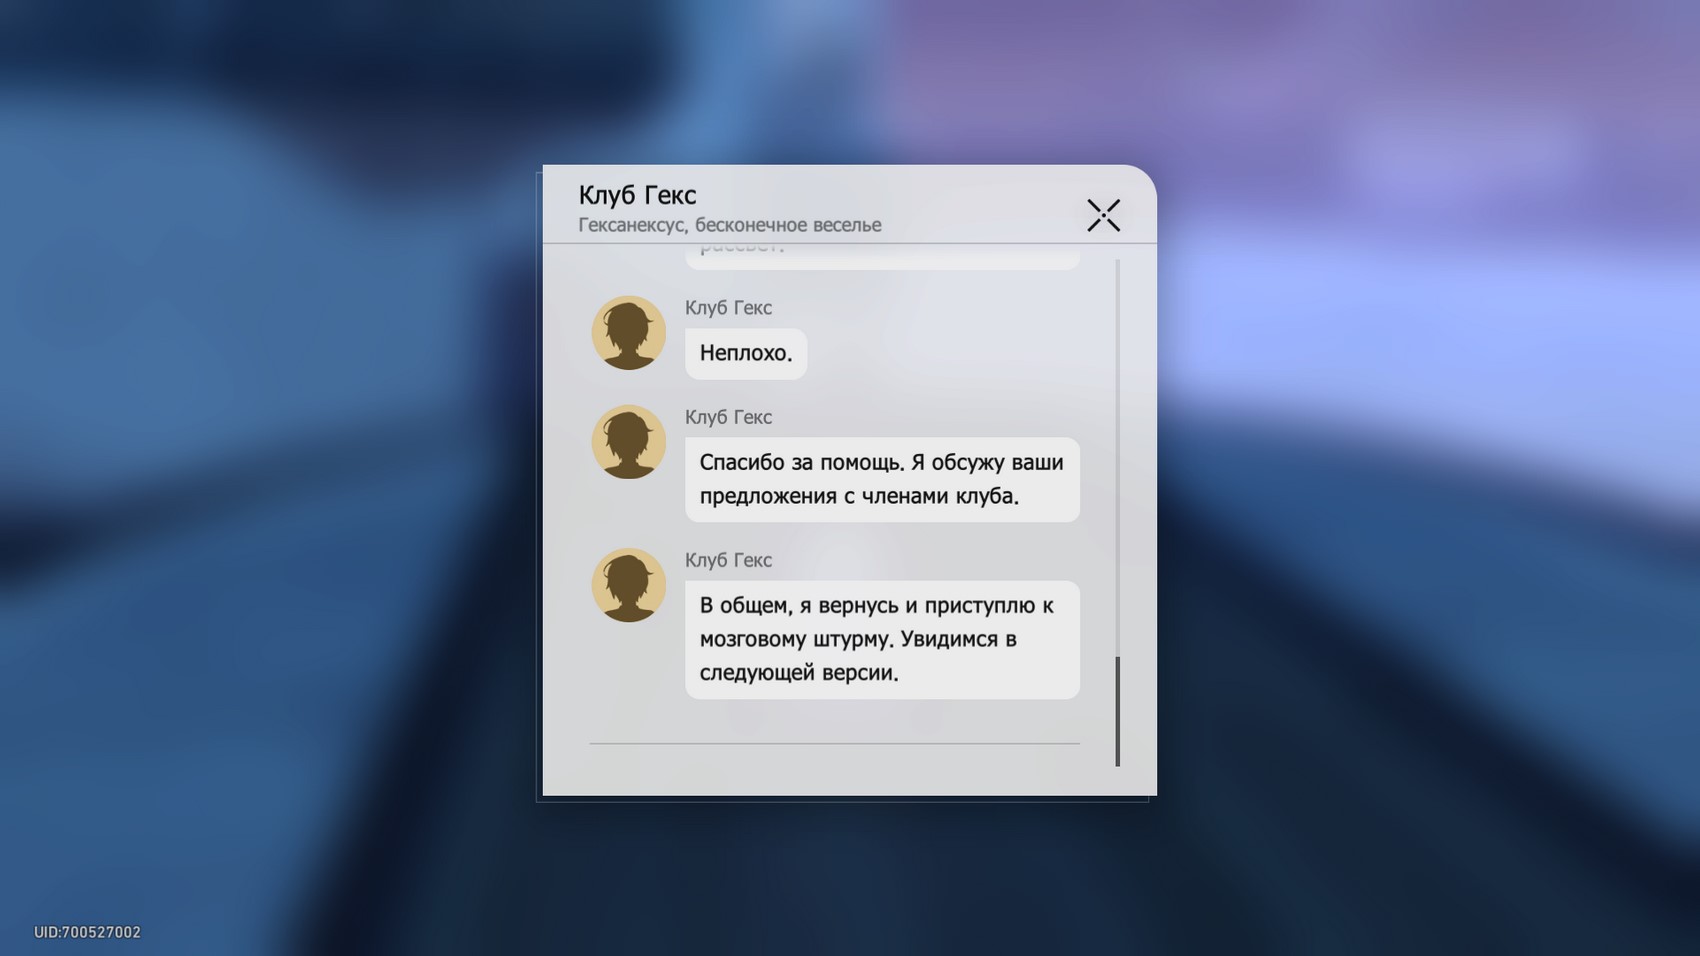
In addition, after solving 10 Hexanexus puzzles, you will receive a message from the Hex Club, in which you will be asked to answer a few questions. You can choose any answers, as this will not affect the opening of the secret quest.
Fourth hexanexus
Go back to the very beginning of the platform and go to its southwestern part to use the teleportation screen and move to another area. You can also simply teleport to the western base terminals from the Supreme Foresight Matrix.
Next, follow these steps to solve this puzzle:
- Select the highlighted side (first screenshot) and rotate it clockwise once.
- Select the highlighted side (second screenshot) and rotate it once clockwise.
- Select the highlighted side (third screenshot) and rotate it two times clockwise.
- Select the highlighted side (fourth screenshot) and rotate it clockwise once.
- As a result, you will solve the puzzle (last screenshot).

If the pictures do not seem clear enough to you, then we advise you to look at the gif below. It shows the whole process of solving the riddle.
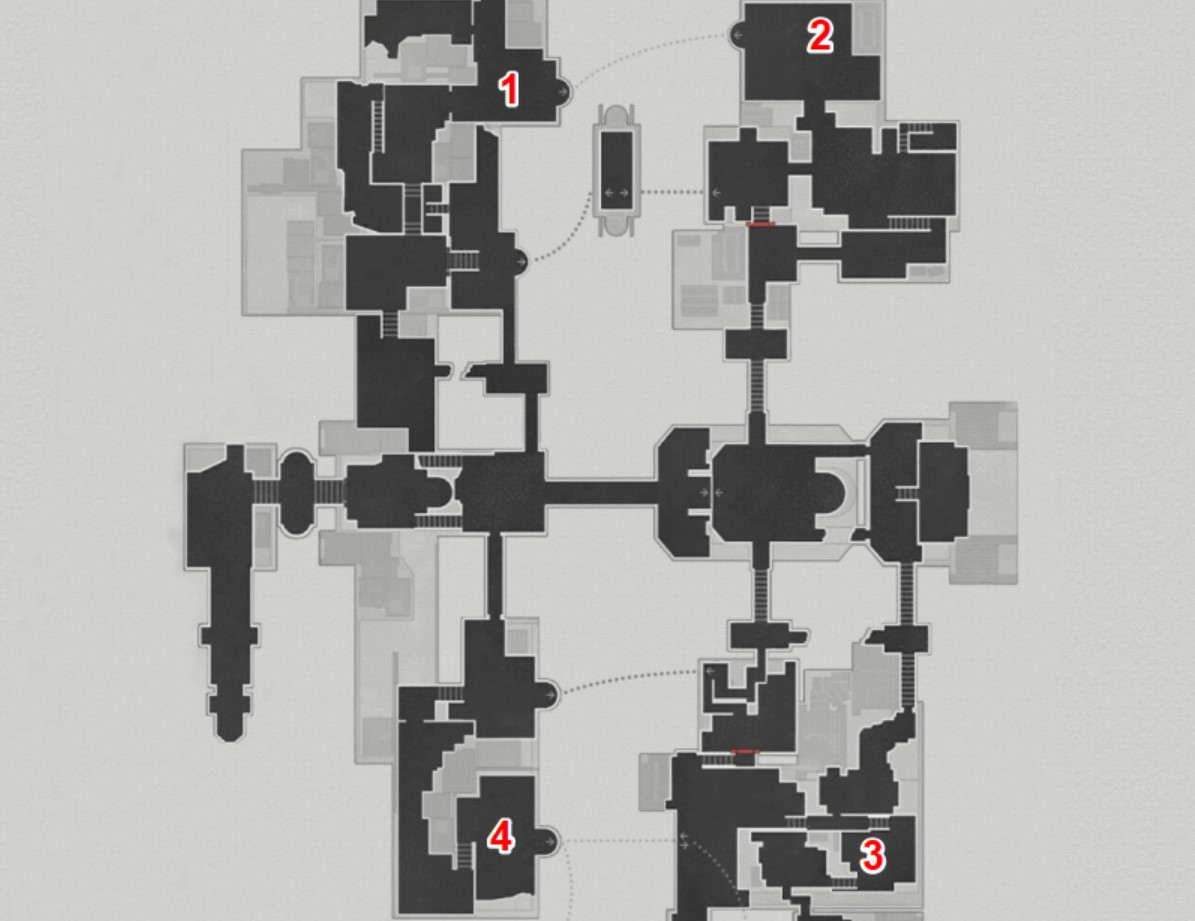
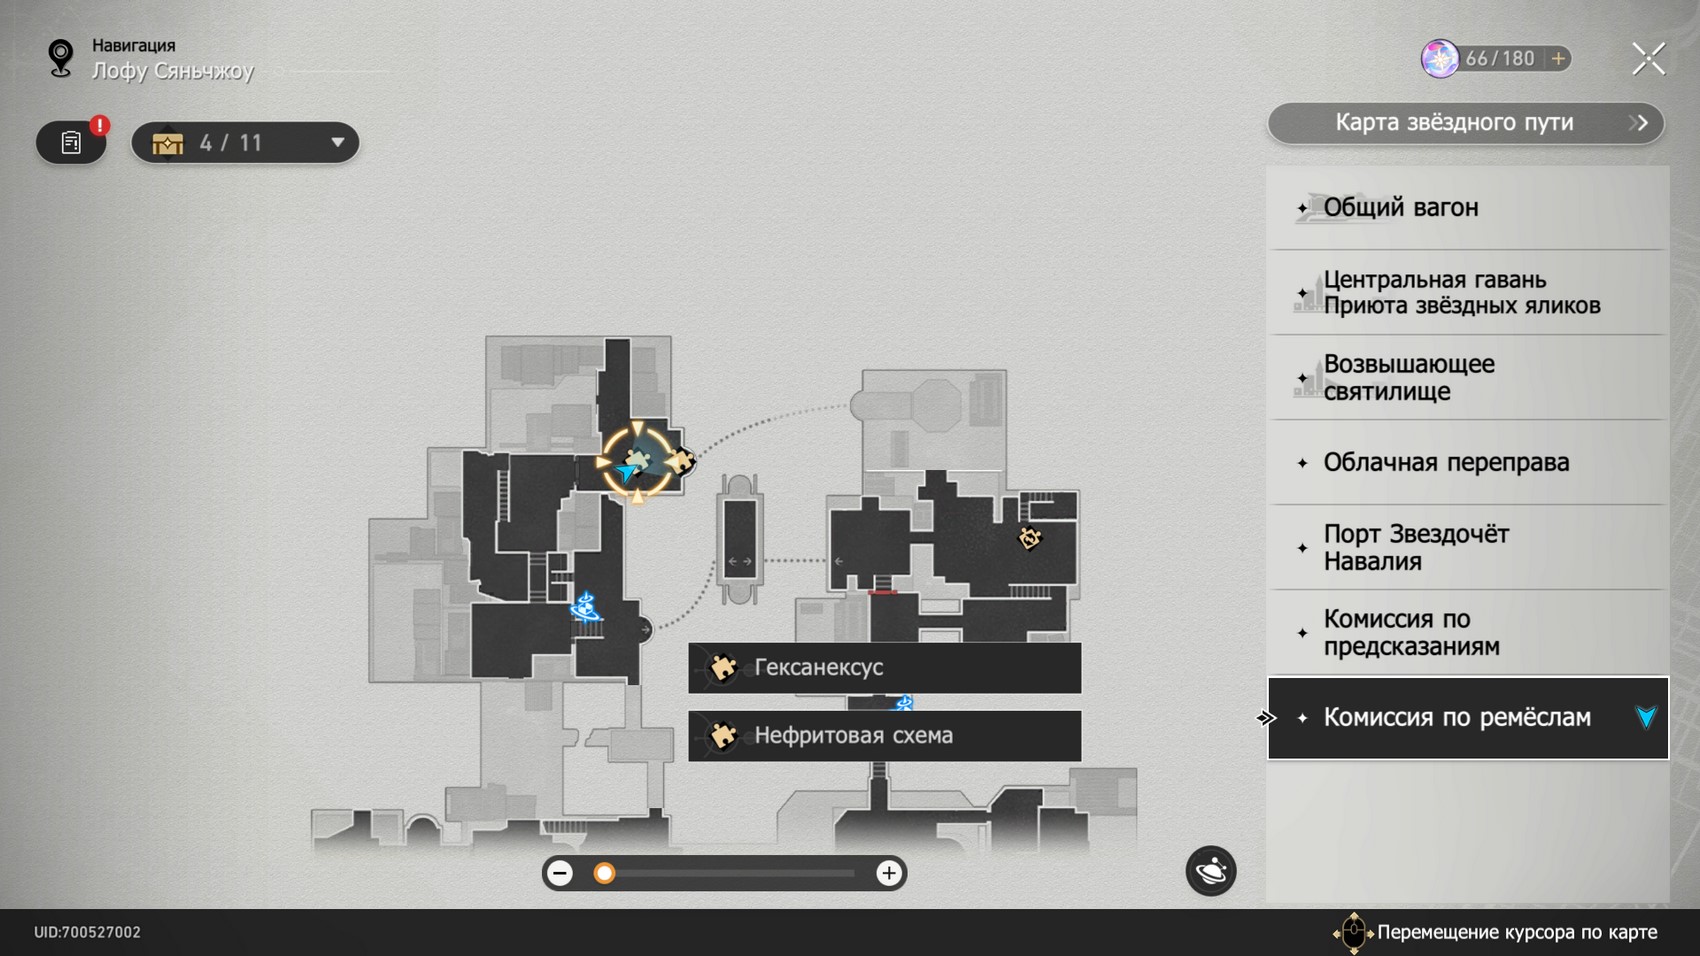
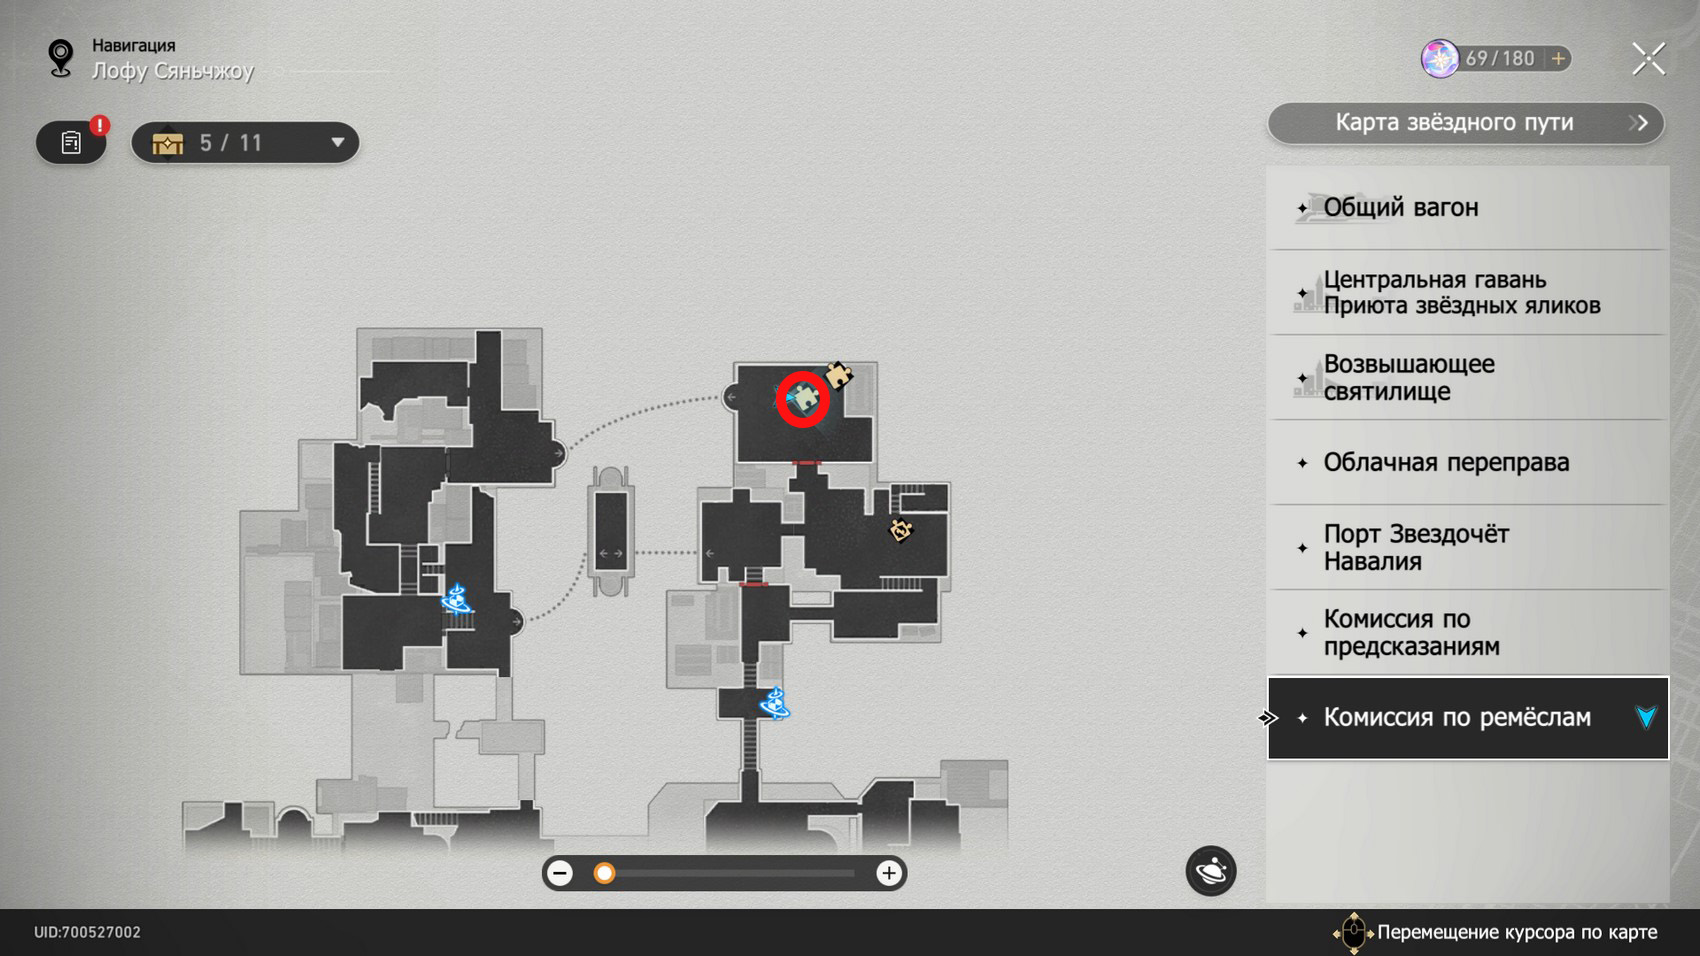
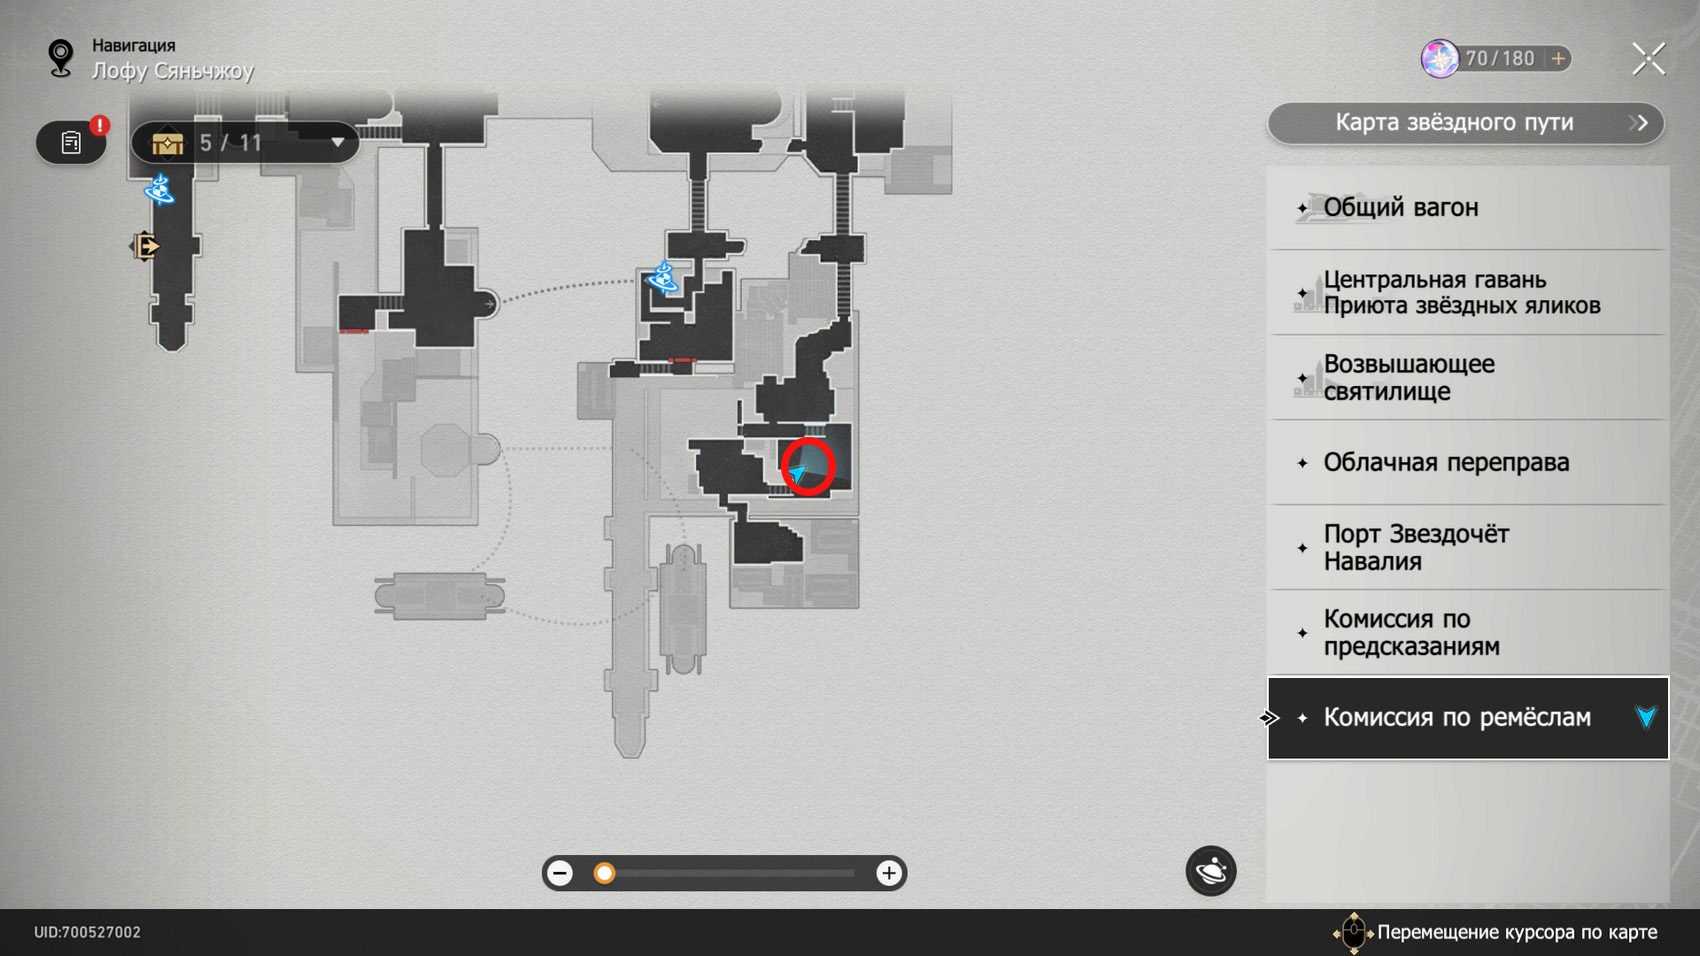
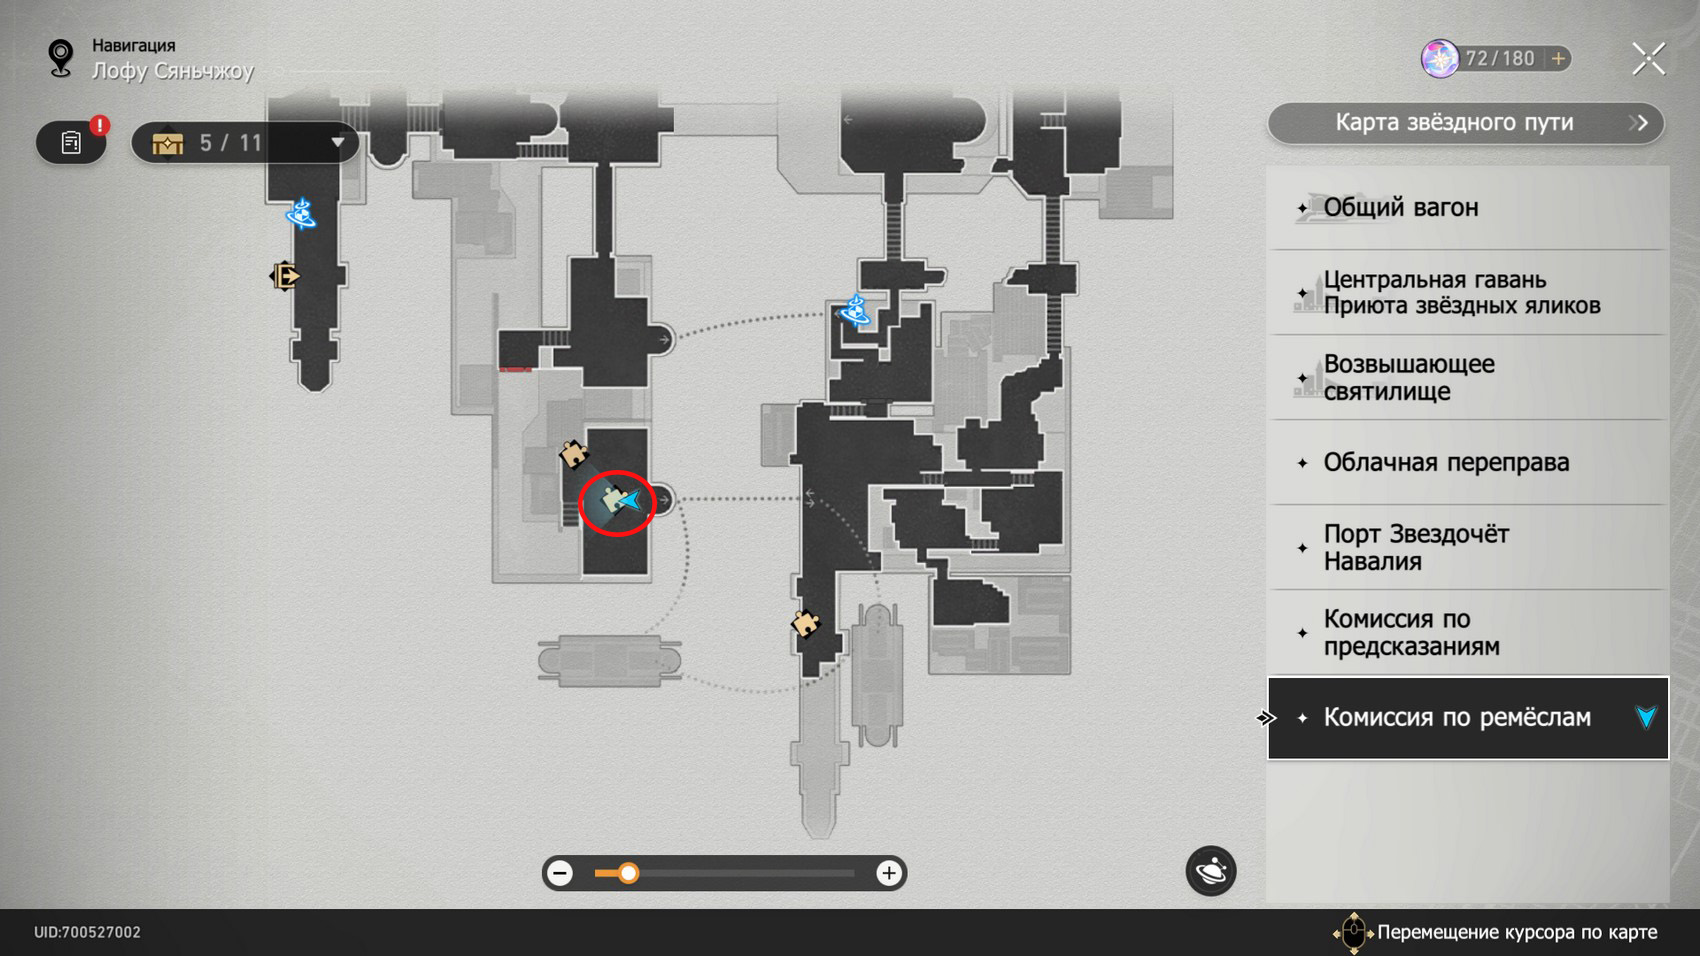
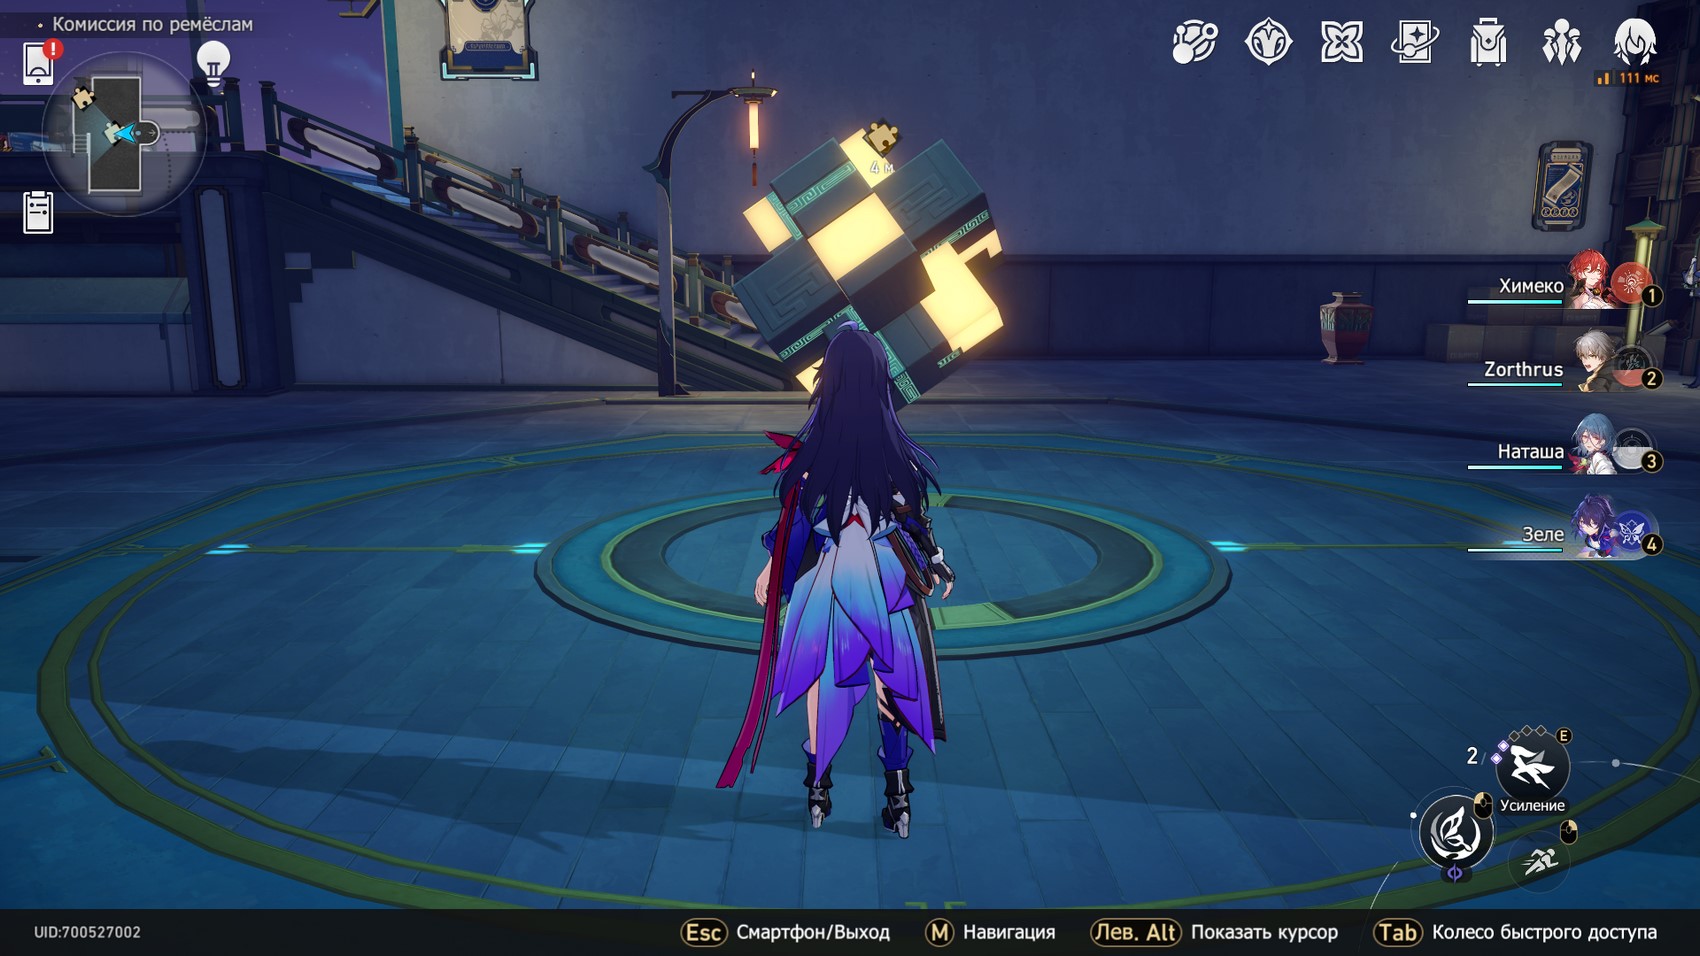
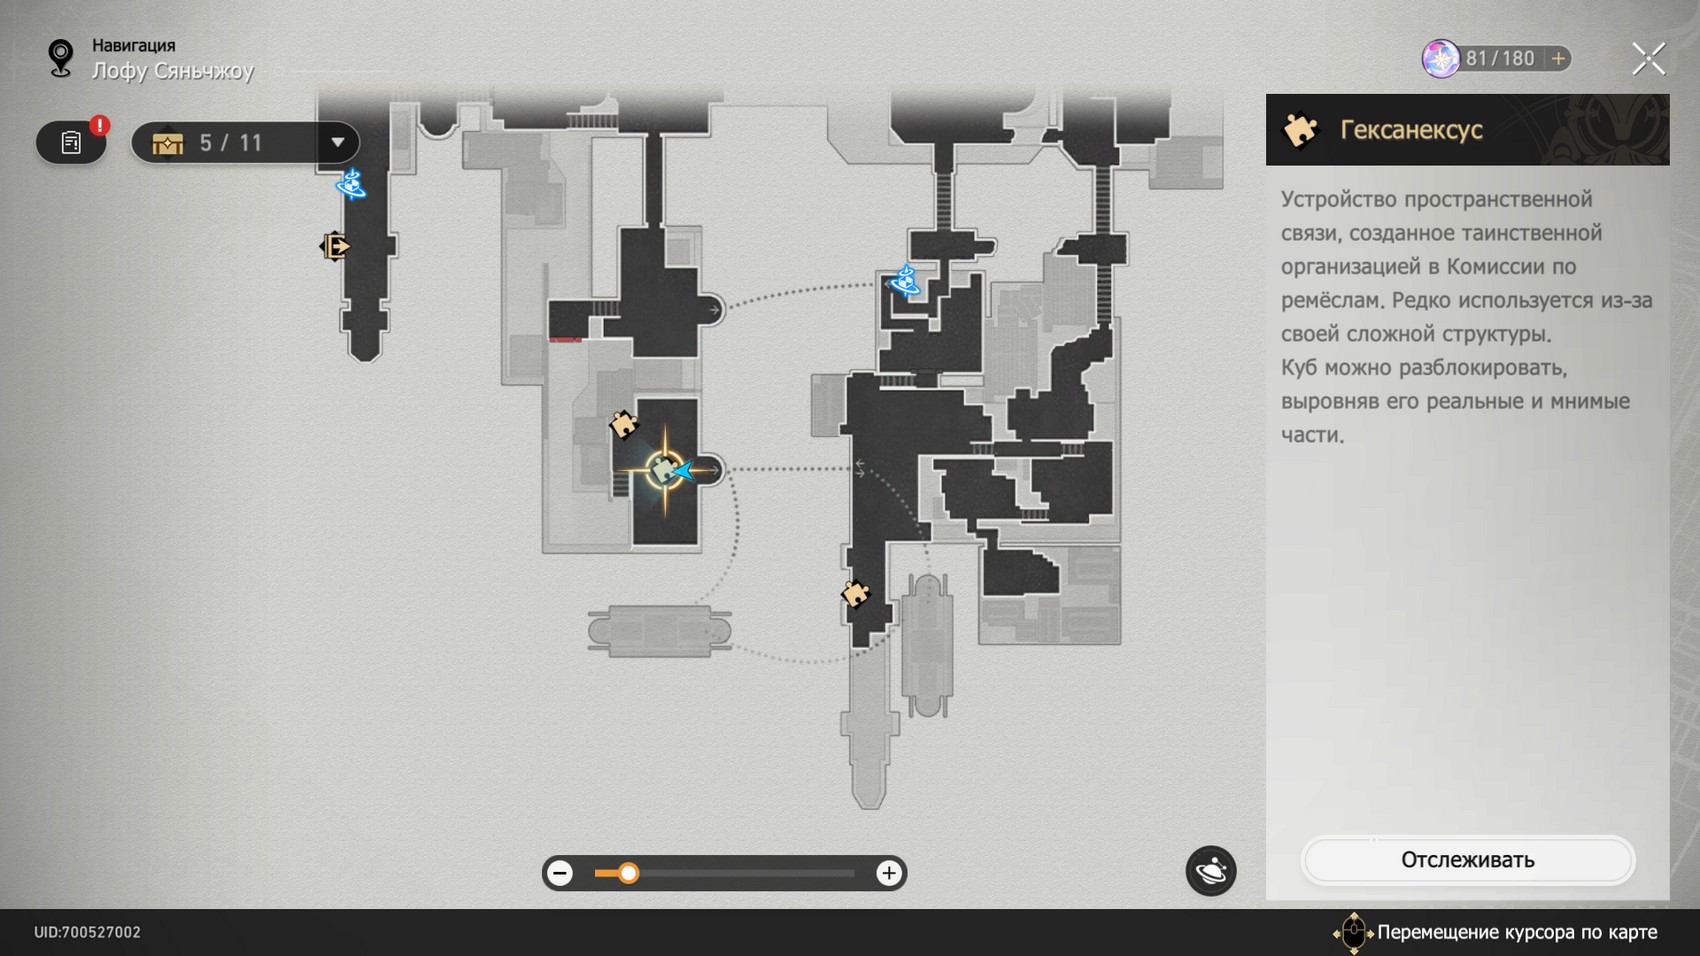
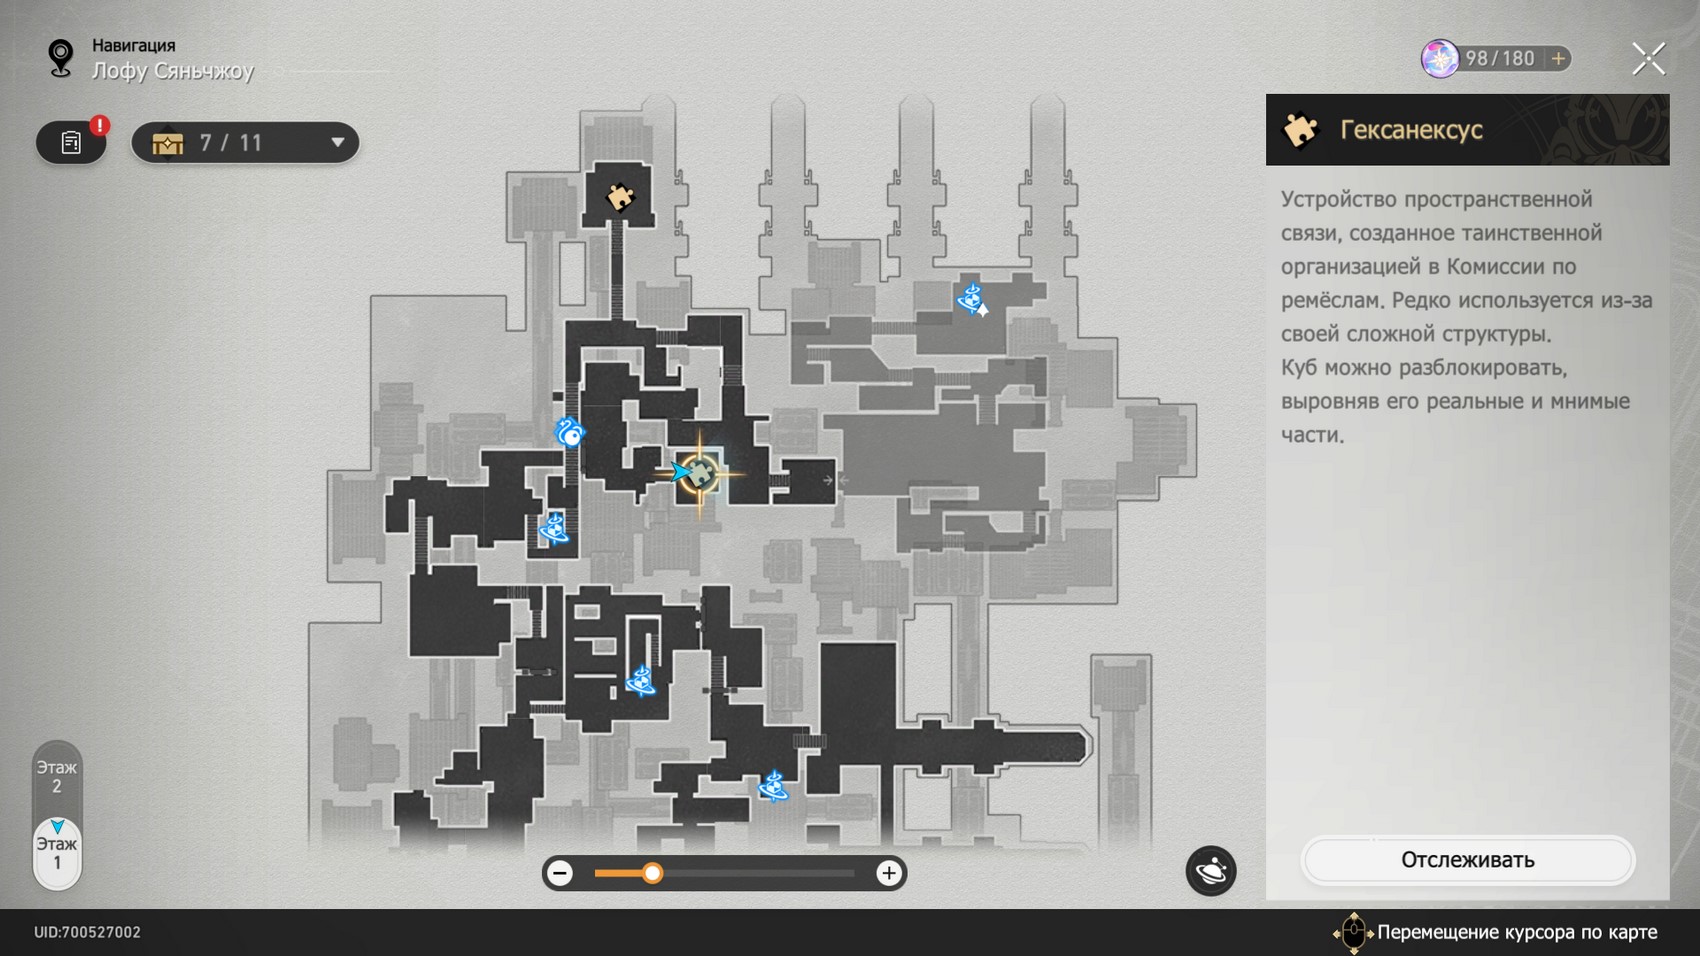
Crafts Commission (all hexanexuses)
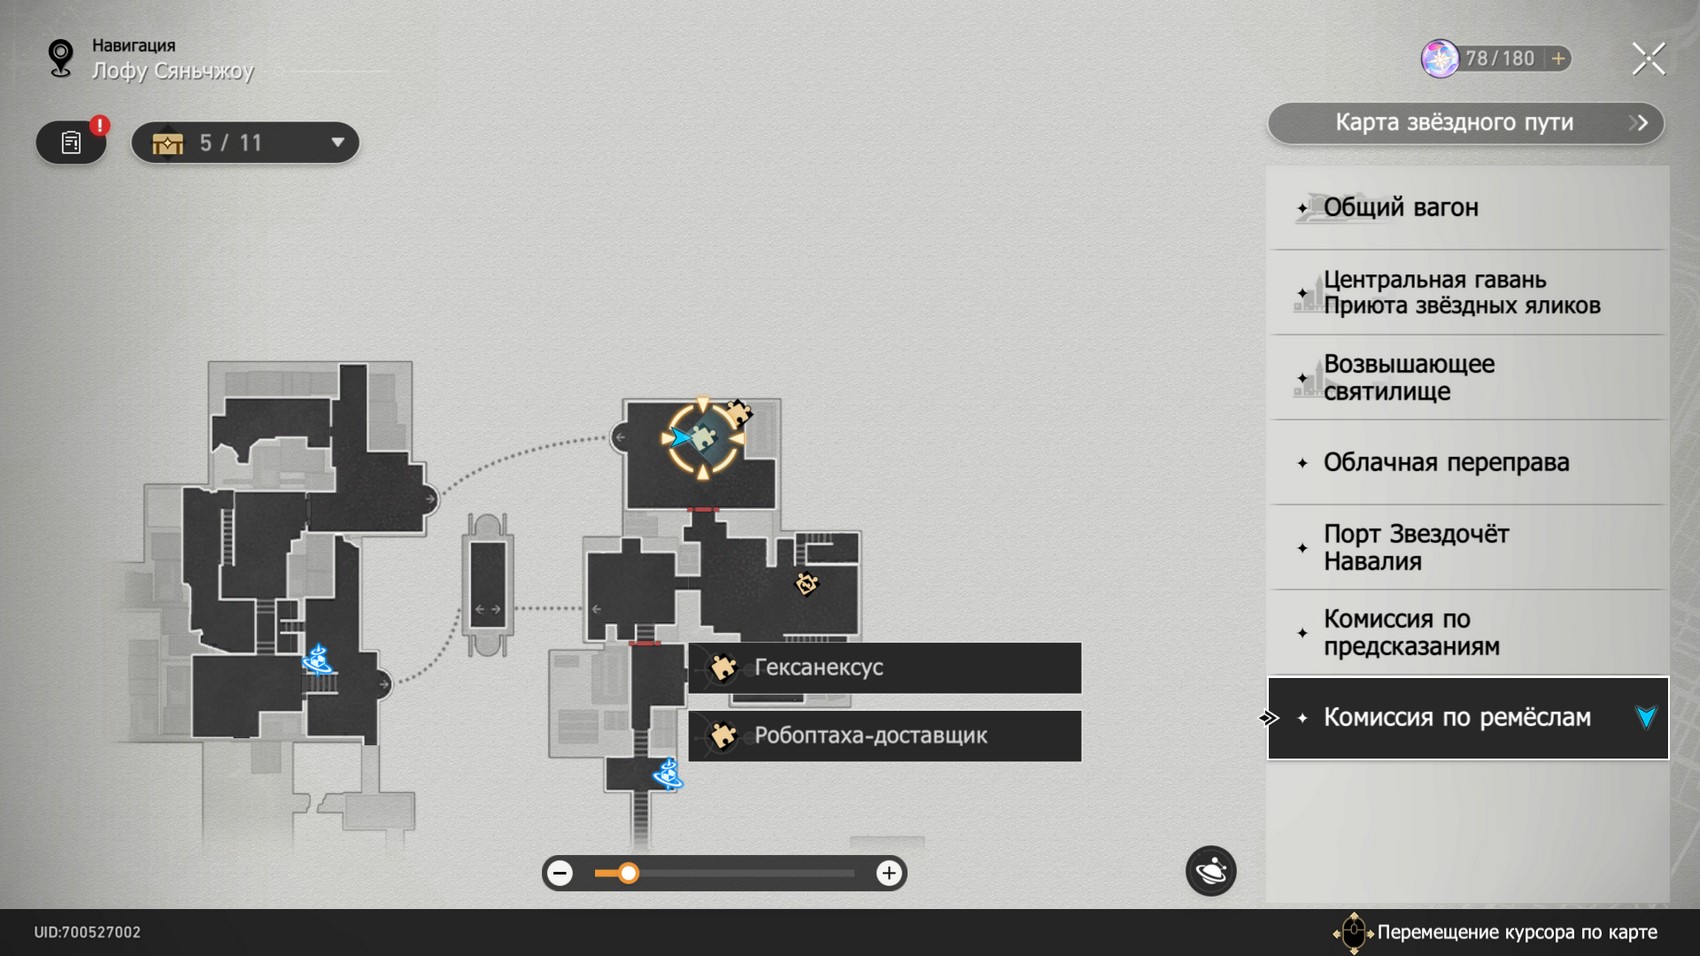
There are four Hexanexus in total in this area. It will be possible to take up finding and solving them after completing the story quest called "Branching Horns and Tangled Roots." The map below shows the approximate location of the puzzles.
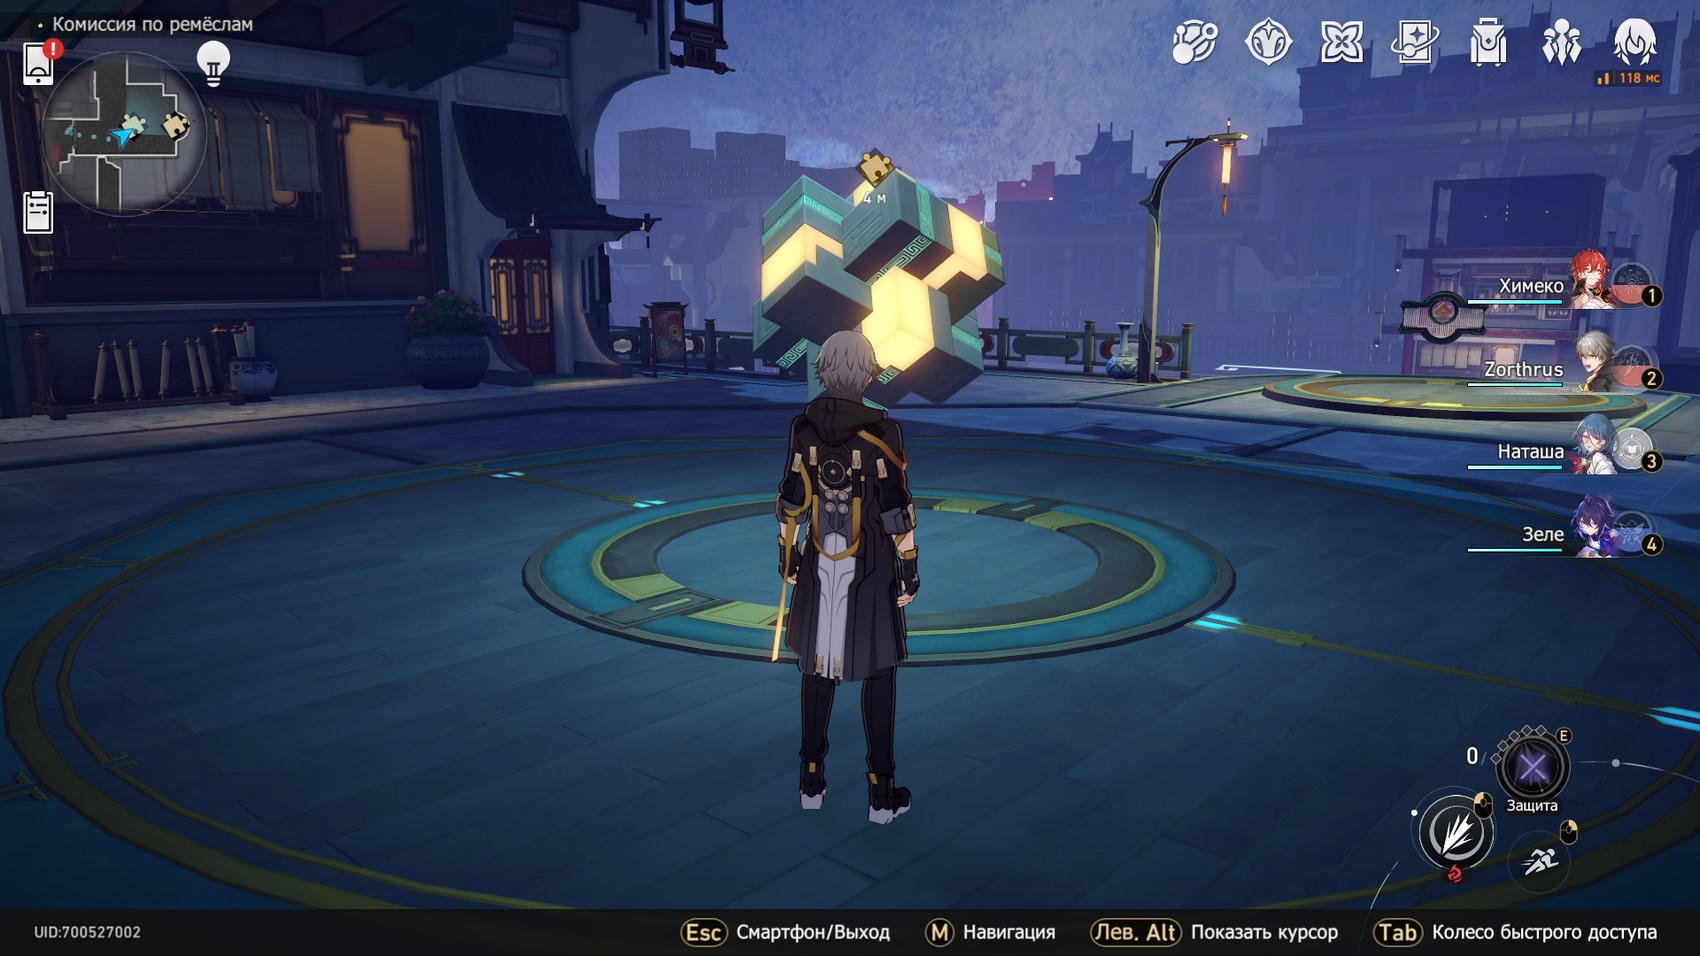
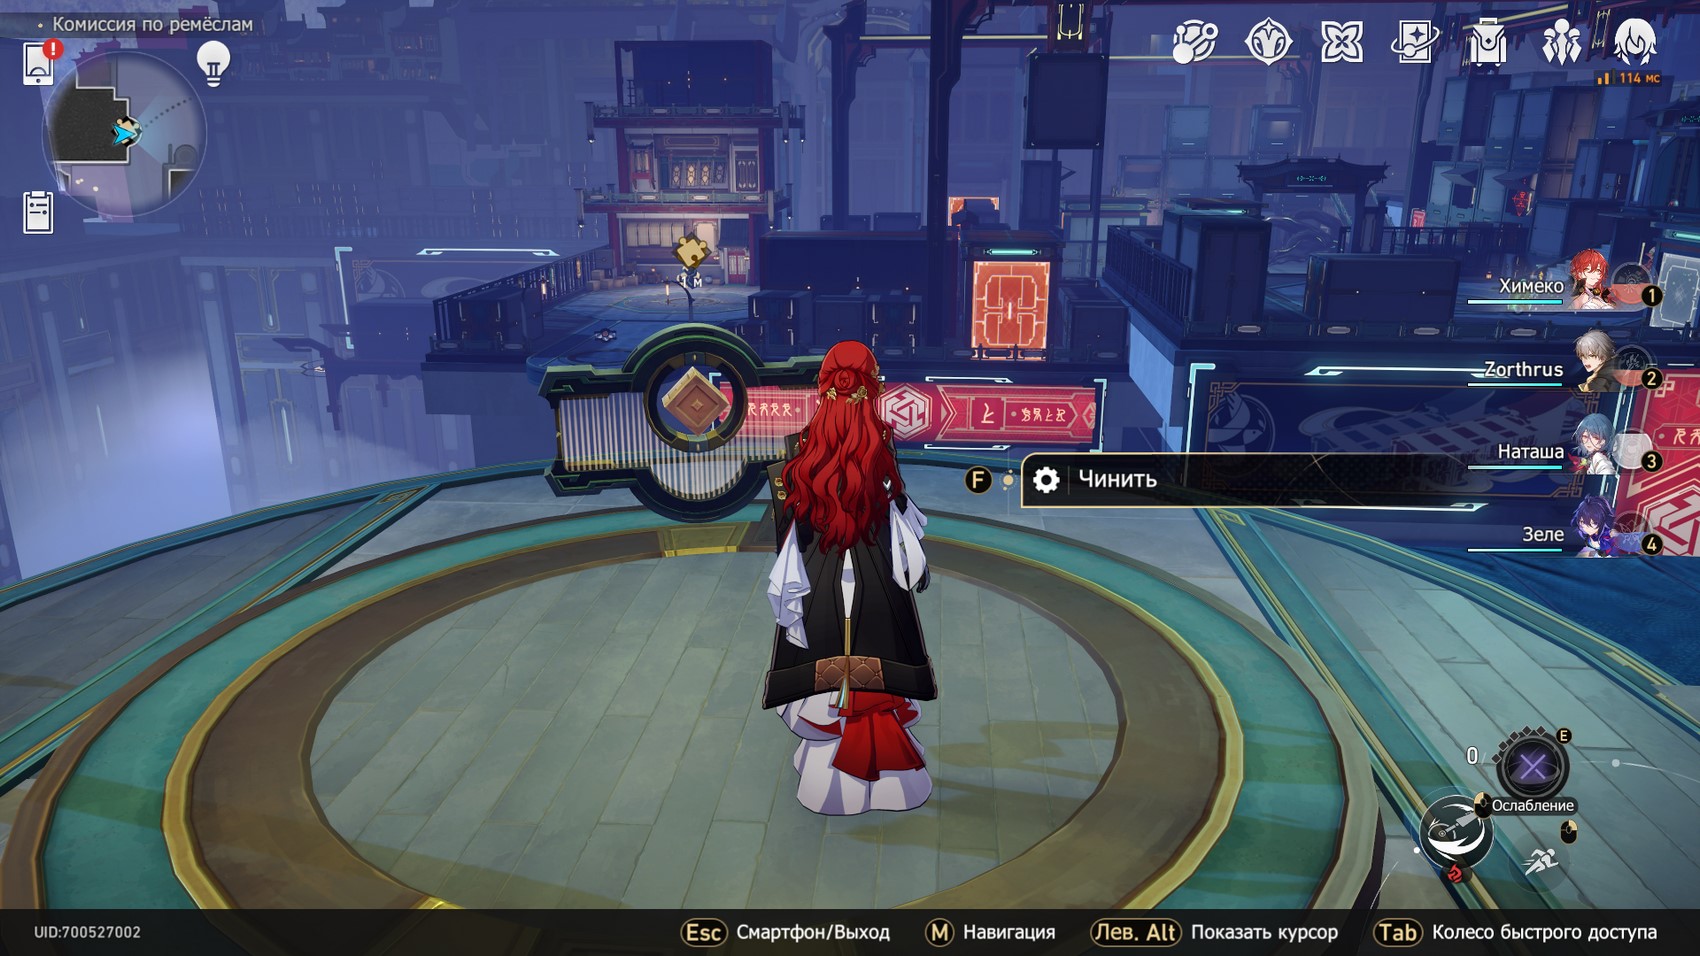
First hexanexus
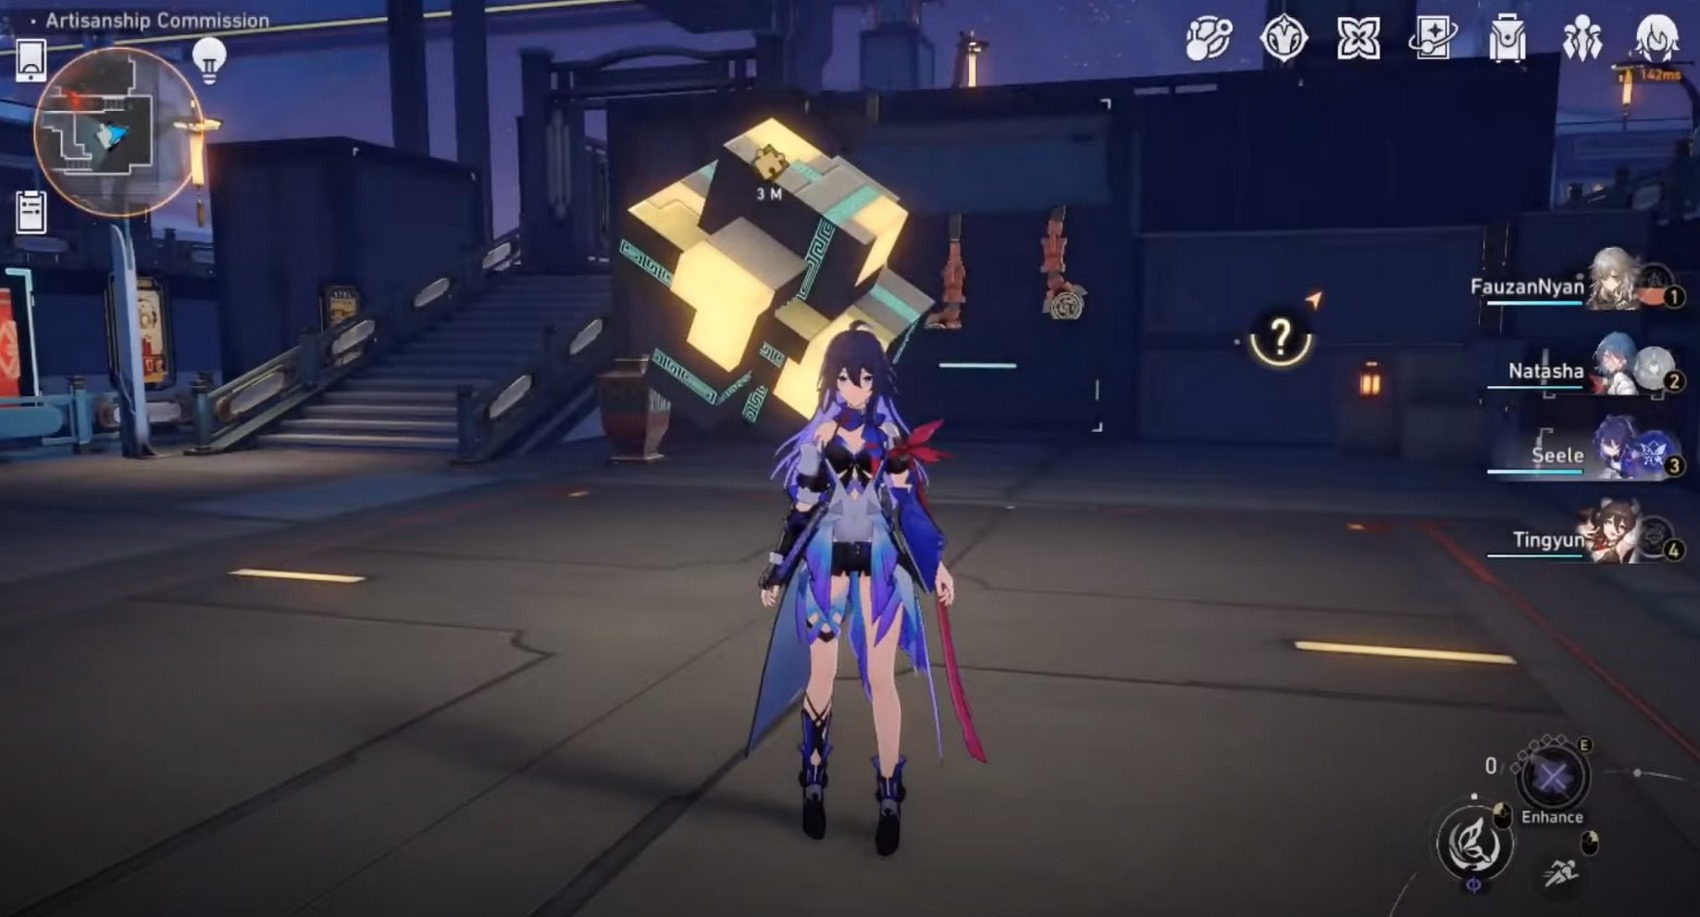
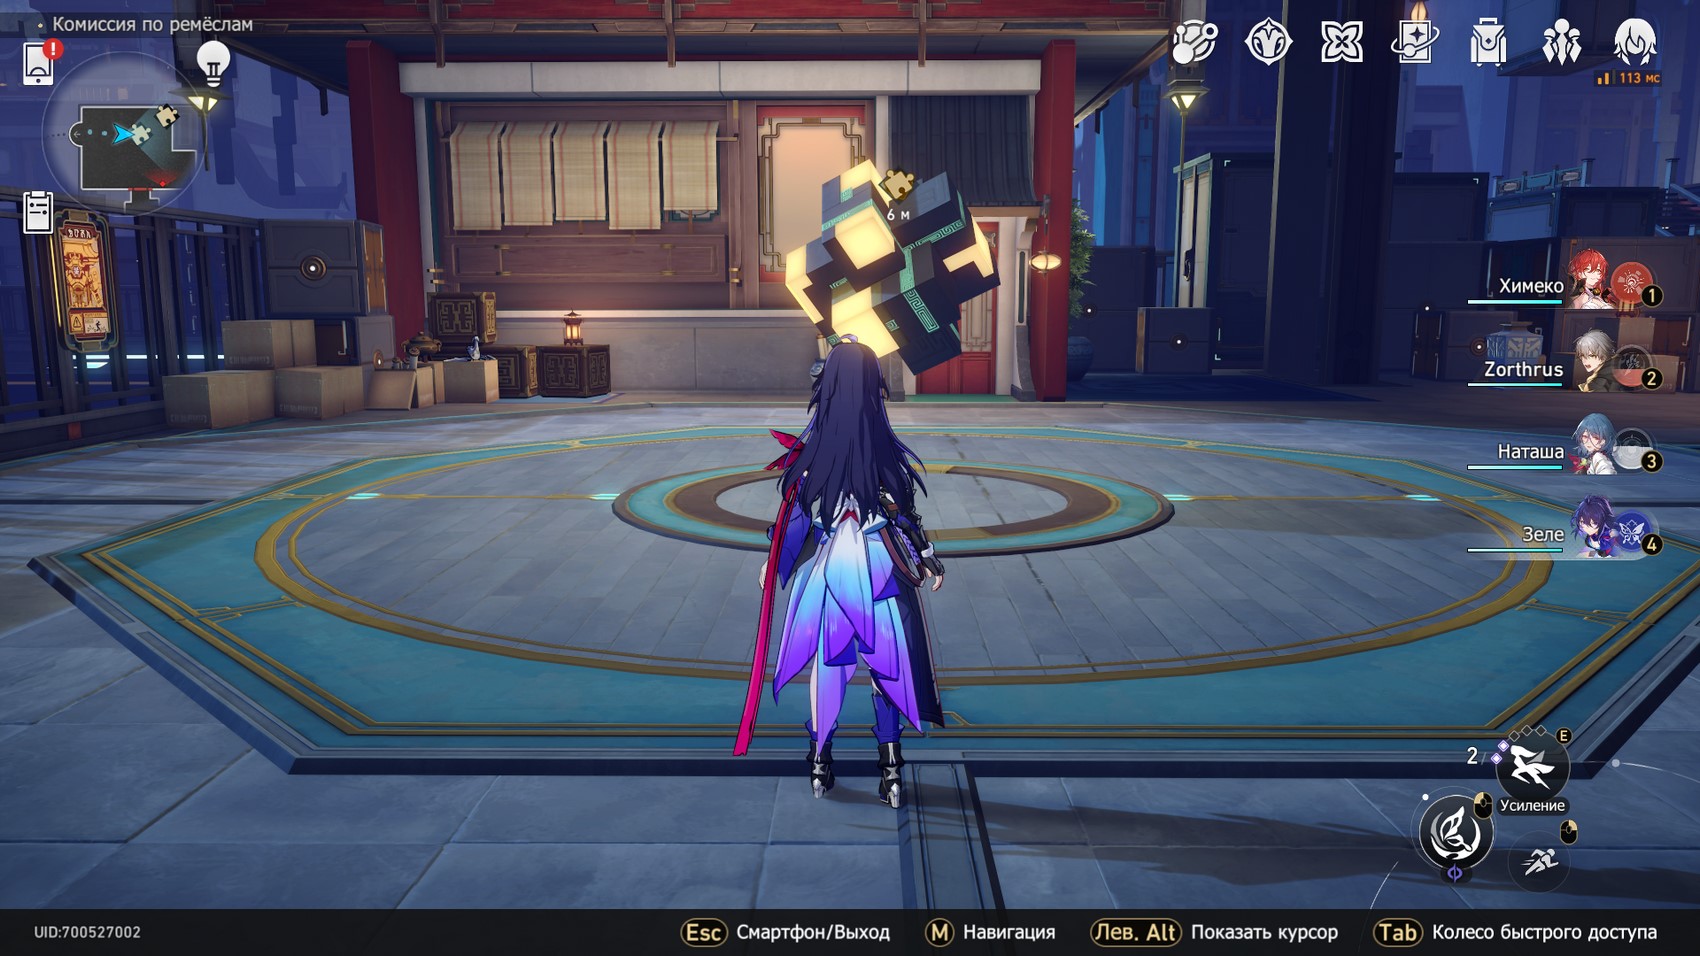
Teleport to the Mastery Academy Passage anchor and then head south up the various stairs. On a small platform you will find the cube you need.
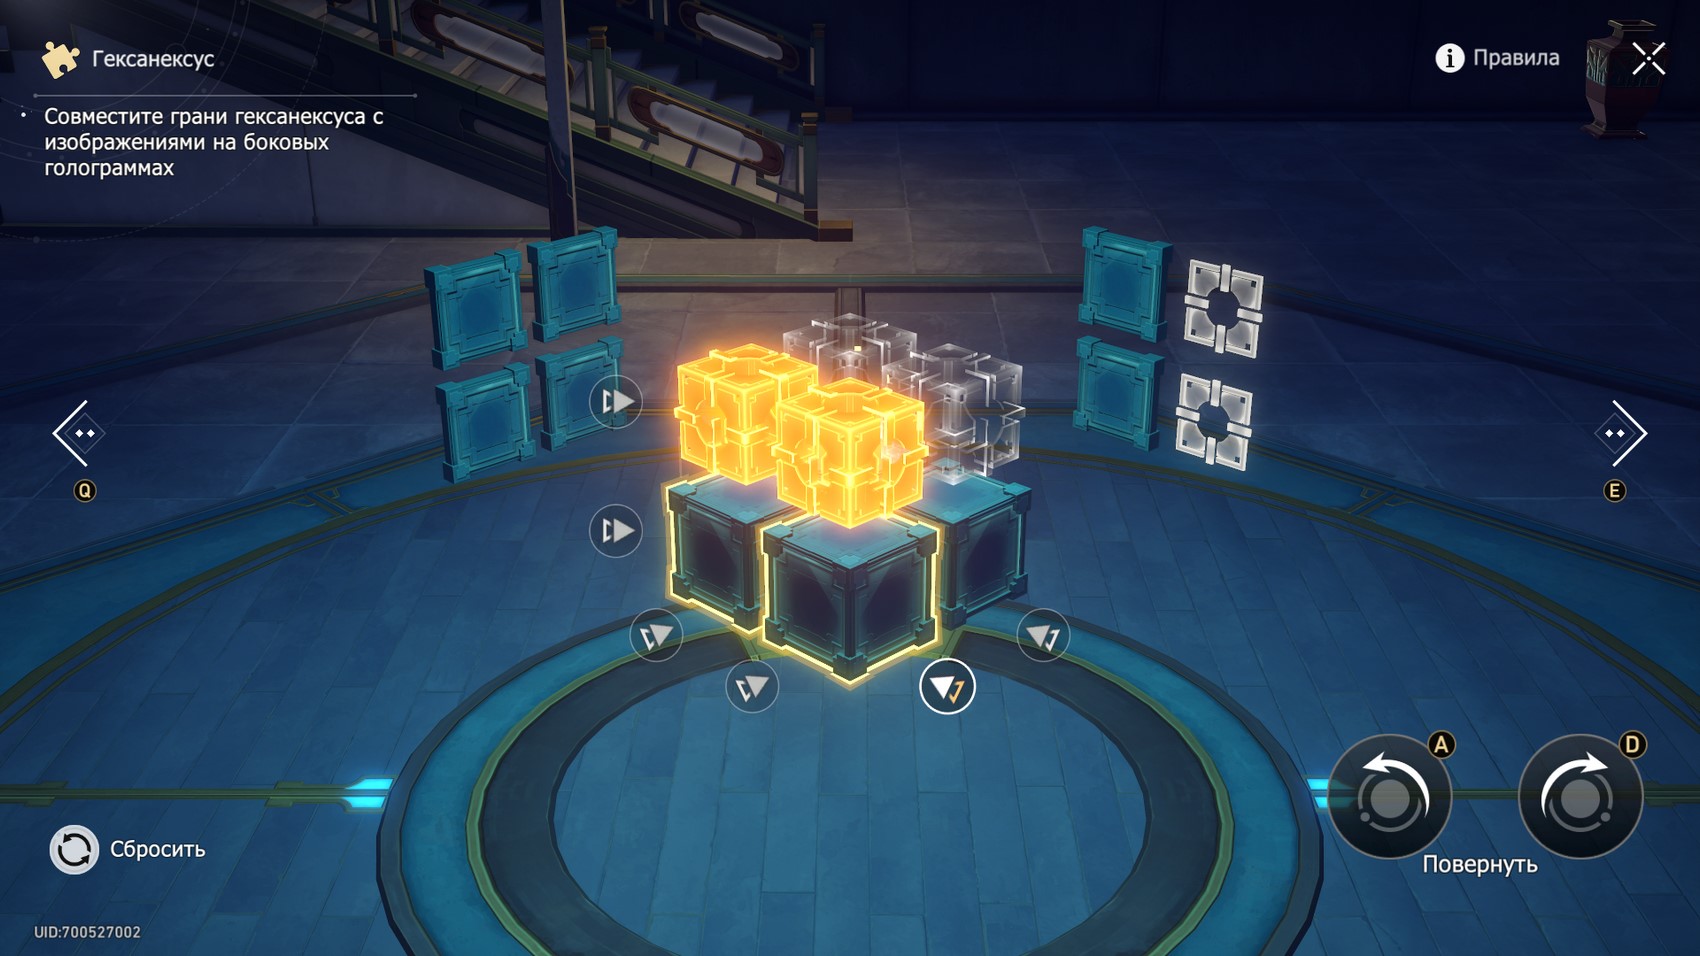
Next, follow these steps to solve this puzzle:
- Select the highlighted side (first screenshot) and rotate it clockwise once.
- Select the highlighted side (second screenshot) and rotate it counterclockwise once.
- As a result, you will solve the puzzle (last screenshot).
If the pictures do not seem clear enough to you, then we advise you to look at the gif below. It shows the whole process of solving the riddle.
Second hexanexus
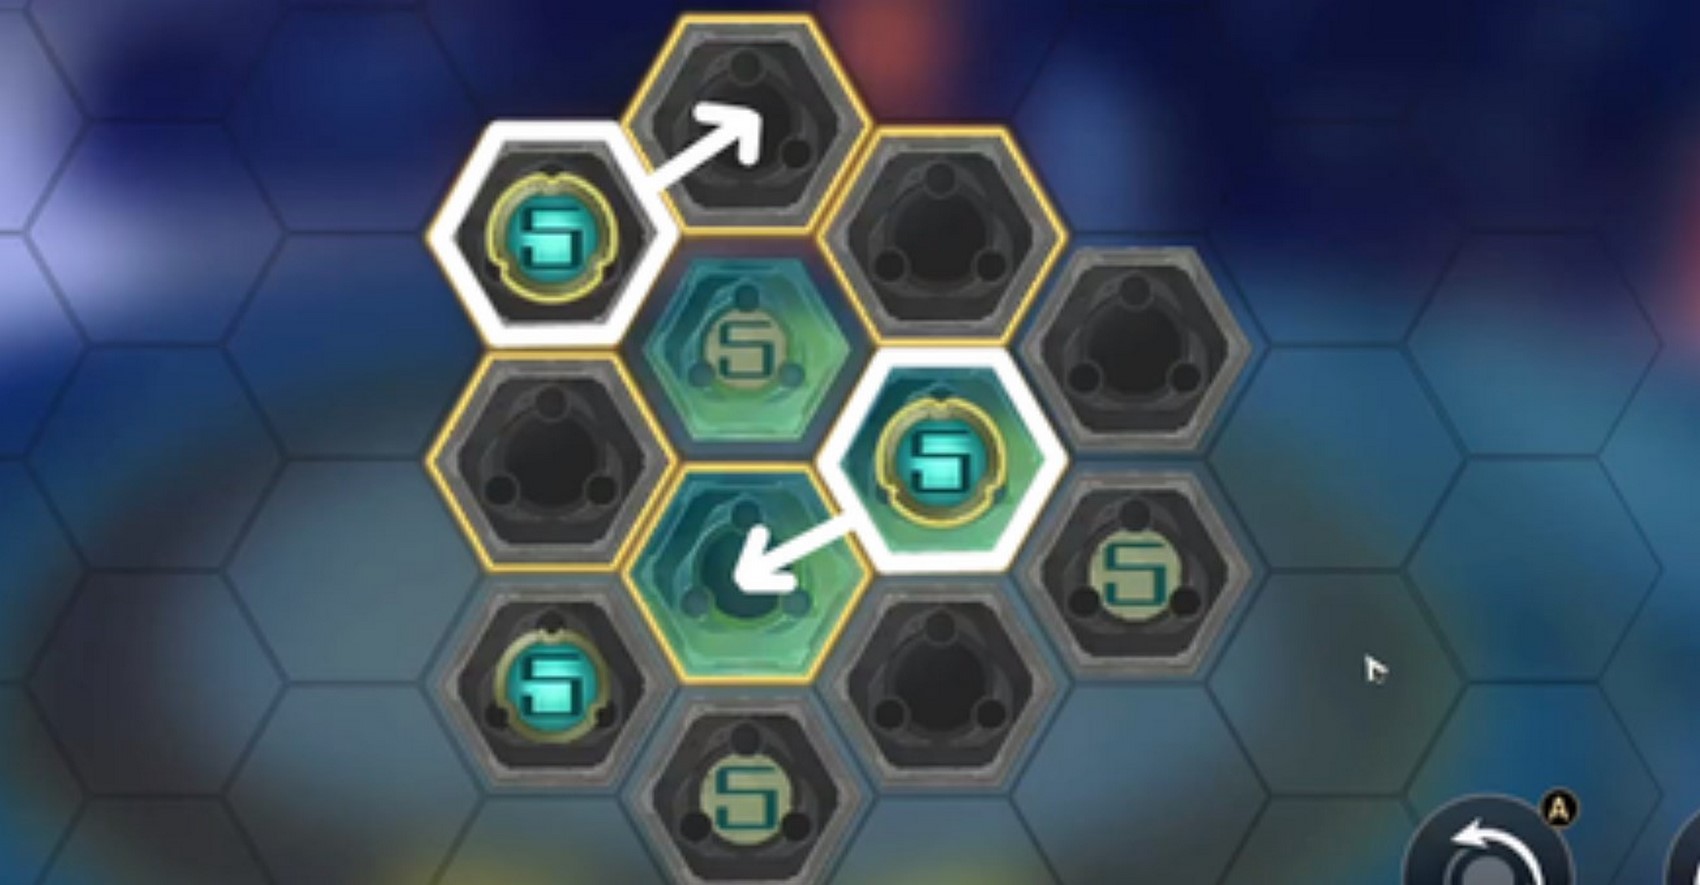
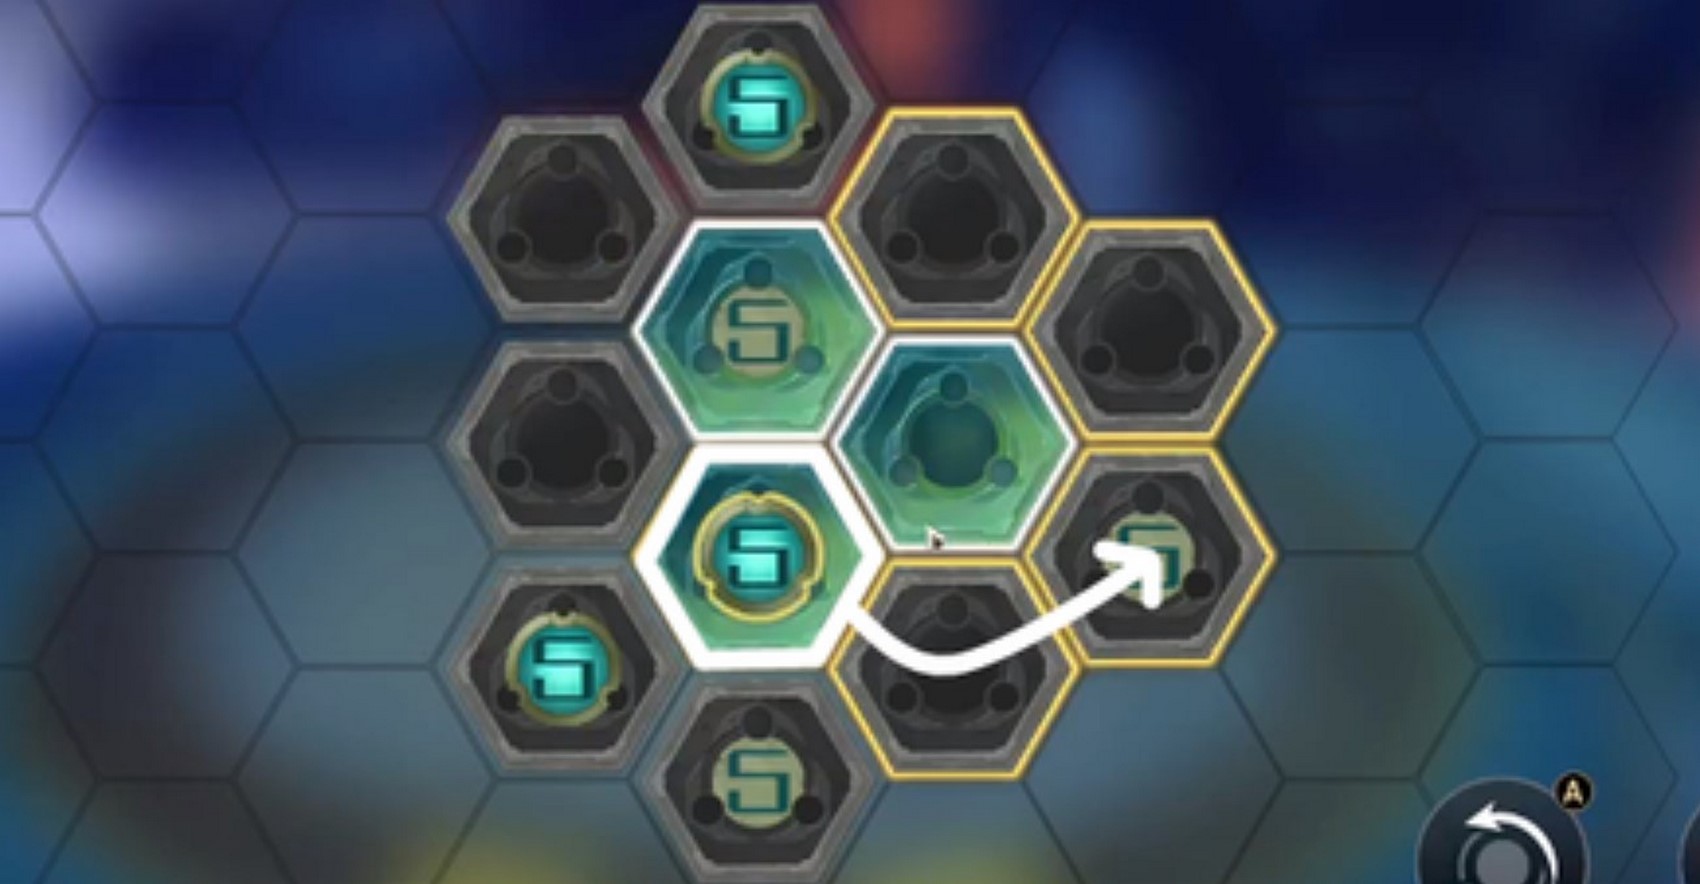
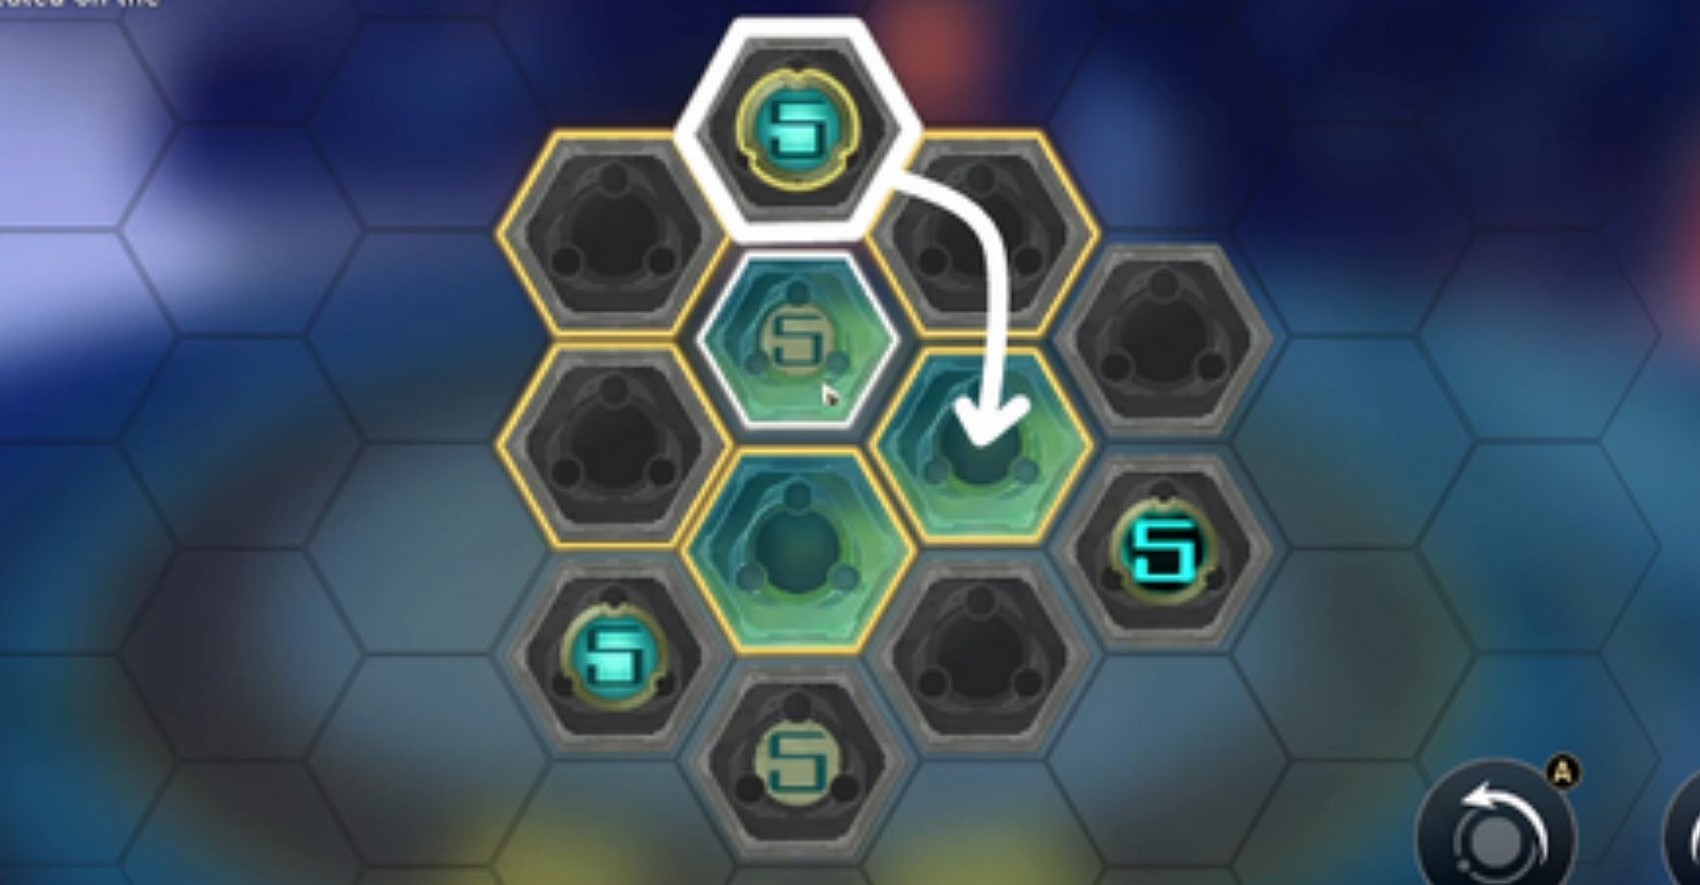
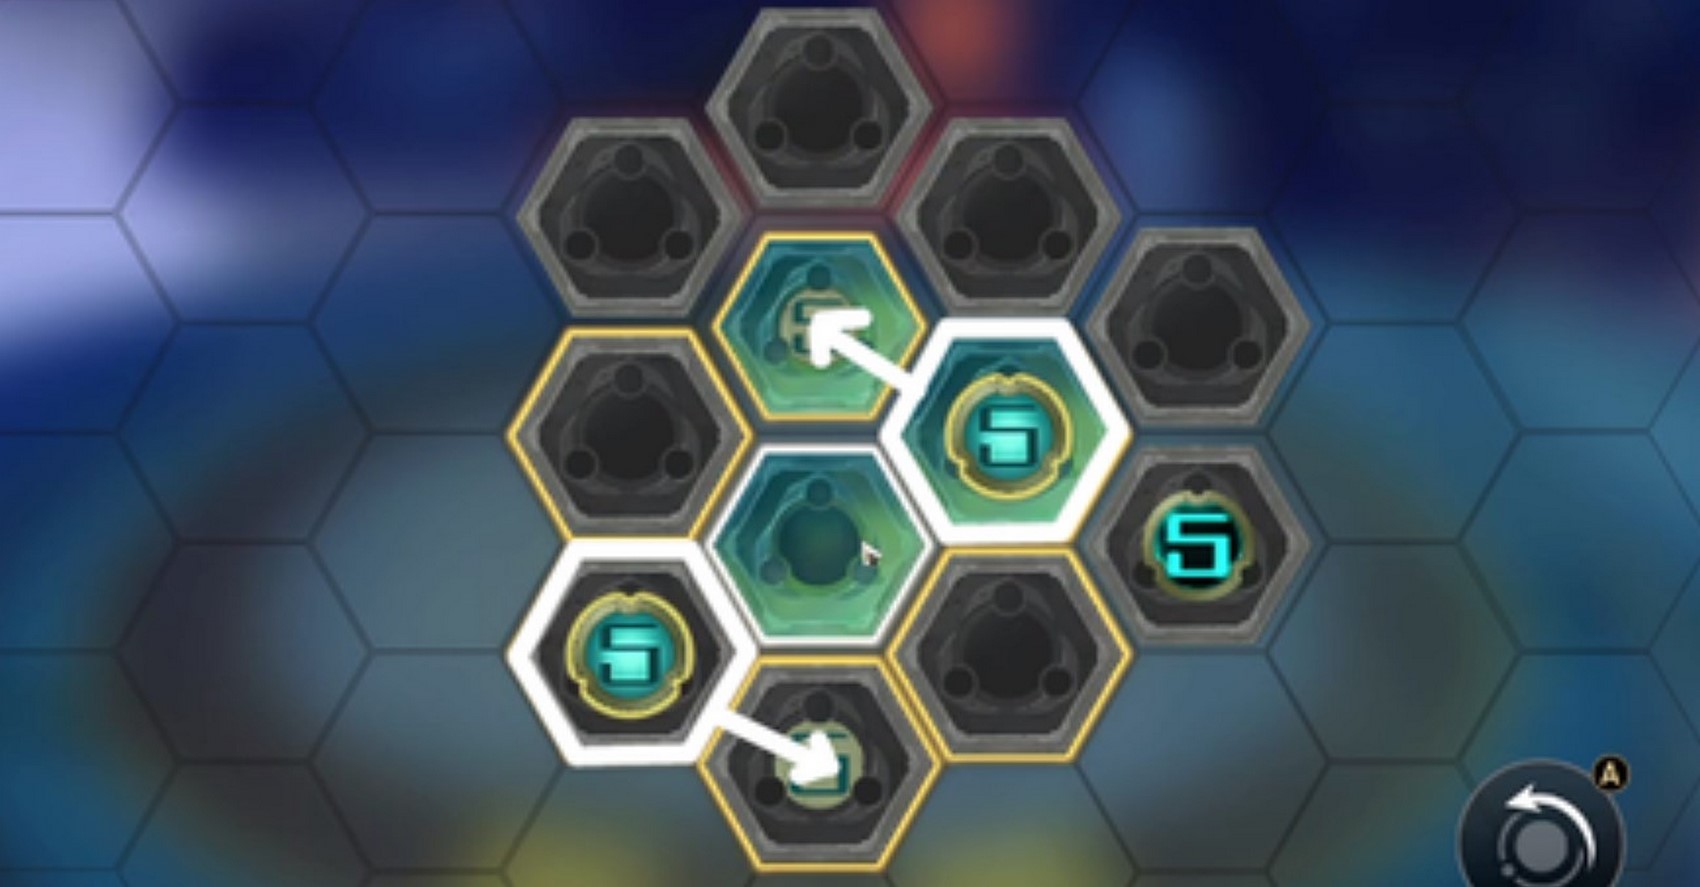
From the place where you solved the last puzzle, go forward a little and interact with the teleportation screen. You may have to solve the jade diagram puzzle to activate the teleporter:
- Select the topmost hexagon and rotate it clockwise once.
- Select the right hexagon and rotate it until the "5" icon reaches the bottom right base.
- Select the topmost hexagon again and rotate it clockwise two times.
- Select the bottommost hexagon and rotate it counterclockwise so that both symbol icons are in the right places.
Now use the screen, and you can get over to the eastern platform, where you will find the cube you need.
Next, follow these steps to solve this puzzle:
- Select the highlighted side (first screenshot) and rotate it counterclockwise once.
- Select the highlighted side (second screenshot) and rotate it counterclockwise once.
- Select the highlighted side (third screenshot) and rotate it counterclockwise once.
- Select the highlighted side (fourth screenshot) and rotate it counterclockwise once.
- As a result, you will solve the puzzle (last screenshot).
If the pictures do not seem clear enough to you, then we advise you to look at the gif below. It shows the whole process of solving the riddle.
Third hexanexus
Travel to the Creation Furnace and then just head down south if you have the door open here. Otherwise, you will have to go around. The exact location of the cube is shown in the pictures below.
Next, follow these steps to solve this puzzle:
- Select the highlighted side (first screenshot) and rotate it counterclockwise twice.
- As a result, you will solve the puzzle (last screenshot).

If the pictures do not seem clear enough to you, then we advise you to look at the gif below. It shows the whole process of solving the riddle.
Fourth hexanexus
From where you solved the previous puzzle, go west and use the screen here to move to the western platform. Here you will immediately find the cube you need.

Next, follow these steps to solve this puzzle:
- Select the highlighted side (first screenshot) and rotate it clockwise once.
- Select the highlighted side (second screenshot) and rotate it once clockwise.
- As a result, you will solve the puzzle (last screenshot).
If the pictures do not seem clear enough to you, then we advise you to look at the gif below. It shows the whole process of solving the riddle.
Secret quest with hexanexuses
As soon as you solve the 15th Hexanexus puzzle and open a valuable chest, you will be contacted again by a representative of the Hex Club. You can choose any answers, since a member of this secret organization will want to meet with you anyway.


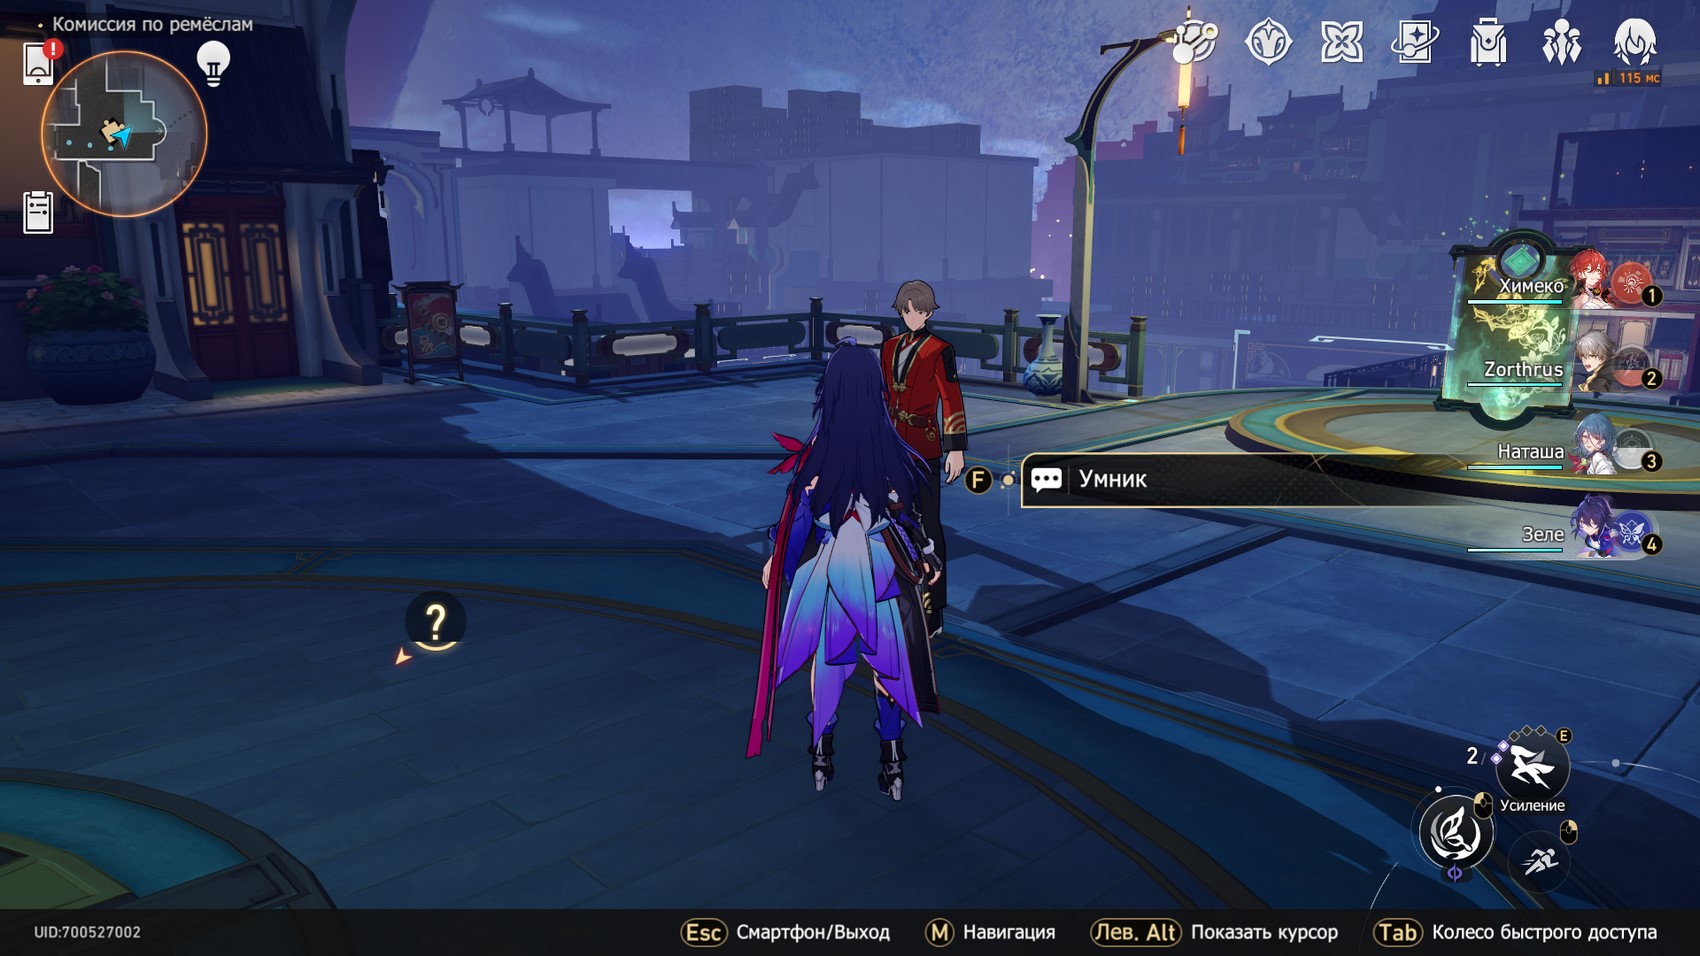
Travel to the Mastery Academy Pass anchor and then head north to find a club member named Egghead. Chat with him. Next, you will need to solve a puzzle with a modified hexanexus located near you (the solution is presented below).
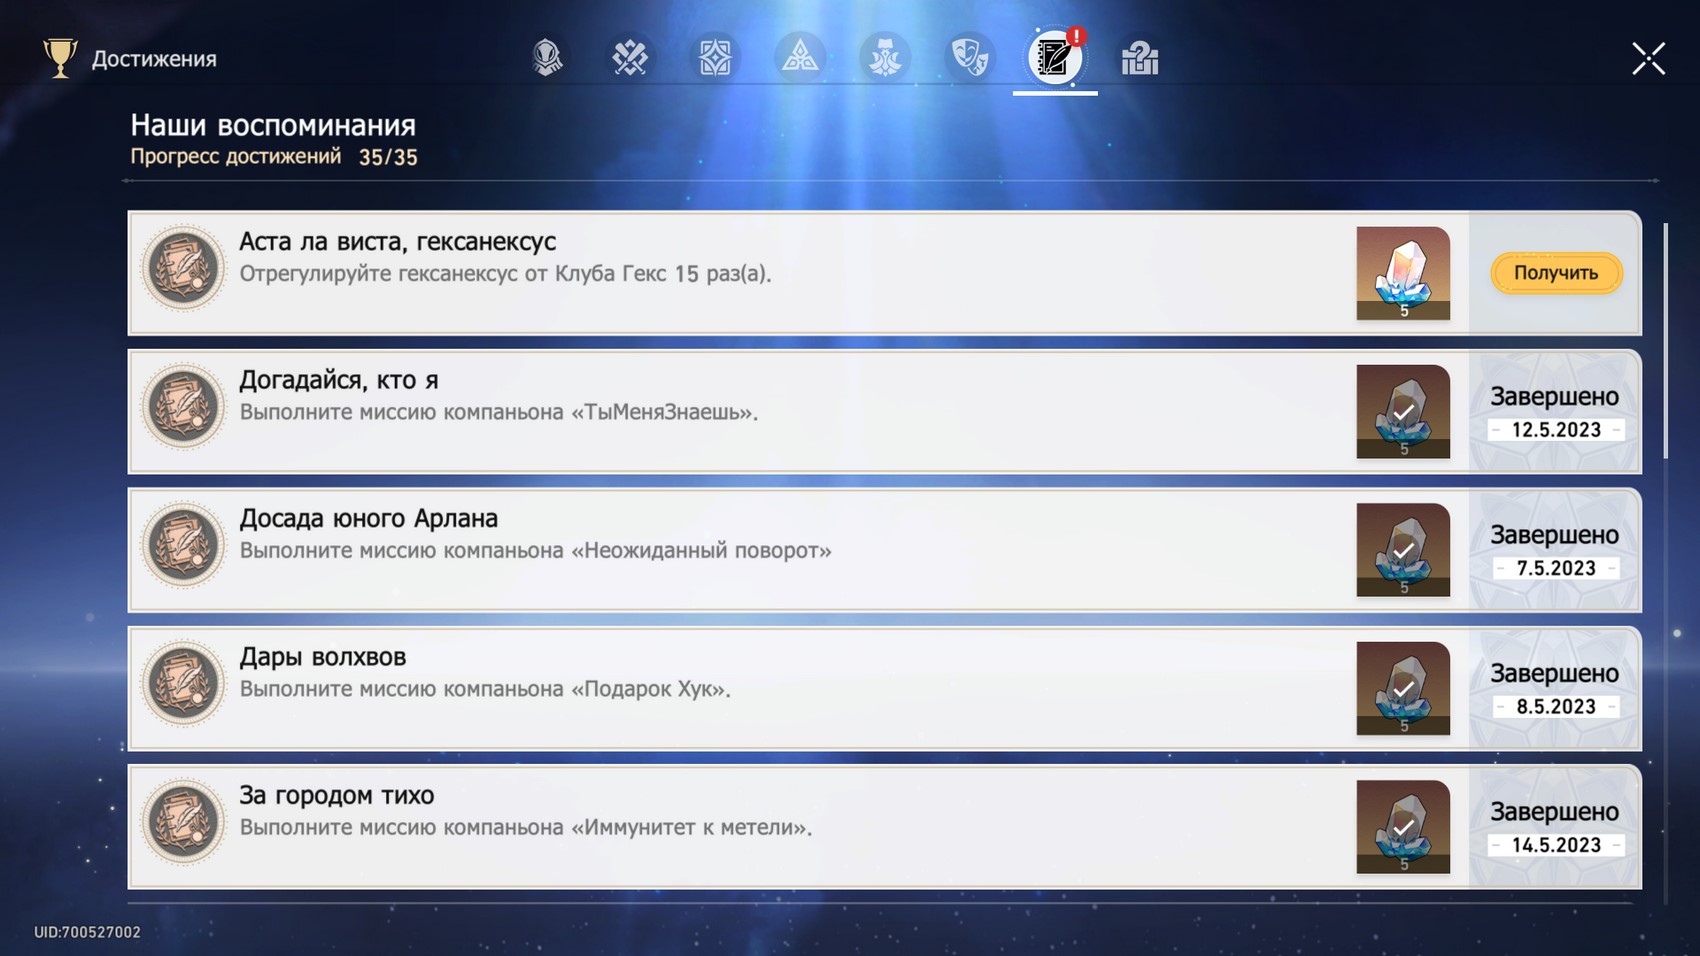
Open the chest and talk to Unimok again. He will tell you that improved versions have appeared in place of the previous cubes. You will receive 10 arrows and one condensed ether from him. Plus, you will unlock the Asta La Vista Hexanexus trophy.
Craft Commission (Hexanexus 2.0)
A total of four Altered Hexanexus can be found in this area. They are located in the same places as the previous ones, so we will not indicate their location on the map again.
First Hexanexus 2.0
It is located in the same place where you will first meet Egghead. This cube will be the first upgraded Hexanexus you will encounter in the quest.
Next, follow these steps to solve this puzzle:
- Select the highlighted side (first screenshot) and rotate it counterclockwise twice.
- As a result, you will solve the puzzle (last screenshot).

If the pictures do not seem clear enough to you, then we advise you to look at the gif below. It shows the whole process of solving the riddle.
Second hexanexus 2.0
Its location is shown in the screenshots above. Next, follow these steps to solve this puzzle:
- Select the highlighted side (first screenshot) and rotate it clockwise once.
- Select the highlighted side (second screenshot) and rotate it counterclockwise once.
- Select the highlighted side (third screenshot) and rotate it counterclockwise twice.
- Select the highlighted side (fourth screenshot) and rotate it clockwise once.
- As a result, you will solve the puzzle (last screenshot).


If the pictures do not seem clear enough to you, then we advise you to look at the gif below. It shows the whole process of solving the riddle.
Third hexanexus 2.0

Its location is shown in the screenshots above. Next, follow these steps to solve this puzzle:
- Select the highlighted side (first screenshot) and rotate it counterclockwise twice.
- Select the highlighted side (second screenshot) and rotate it once clockwise.
- As a result, you will solve the puzzle (last screenshot).

If the pictures do not seem clear enough to you, then we advise you to look at the gif below. It shows the whole process of solving the riddle.
Fourth hexanexus 2.0
Its location is shown in the screenshots above. Next, follow these steps to solve this puzzle:
- Select the highlighted side (first screenshot) and rotate it counterclockwise twice.
- Select the highlighted side (second screenshot) and rotate it counterclockwise twice.
- As a result, you will solve the puzzle (last screenshot).
If the pictures do not seem clear enough to you, then we advise you to look at the gif below. It shows the whole process of solving the riddle.
Cloud Ferry (Hexanexus 2.0)
A total of four Altered Hexanexus can be found in this area. They are located in the same places as the previous ones, so we will not indicate their location on the map again.
First Hexanexus 2.0
Its location is shown in the screenshots above. Next, follow these steps to solve this puzzle:
- Select the highlighted side (first screenshot) and rotate it clockwise once.
- Select the highlighted side (second screenshot) and rotate it once clockwise.
- Select the highlighted side (third screenshot) and rotate it counterclockwise twice.
- As a result, you will solve the puzzle (last screenshot).
If the pictures do not seem clear enough to you, then we advise you to look at the gif below. It shows the whole process of solving the riddle.
Second hexanexus 2.0
Its location is shown in the screenshots above. Next, follow these steps to solve this puzzle:
- Select the highlighted side (first screenshot) and rotate it two times clockwise.
- As a result, you will solve the puzzle (last screenshot).

If the pictures do not seem clear enough to you, then we advise you to look at the gif below. It shows the whole process of solving the riddle.
Third hexanexus 2.0
Its location is shown in the screenshots above. Next, follow these steps to solve this puzzle:
- Select the highlighted side (first screenshot) and rotate it counterclockwise once.
- Select the highlighted side (second screenshot) and rotate it once clockwise.
- Select the highlighted side (third screenshot) and rotate it clockwise once.
- As a result, you will solve the puzzle (last screenshot).

If the pictures do not seem clear enough to you, then we advise you to look at the gif below. It shows the whole process of solving the riddle.
Fourth hexanexus 2.0

Its location is shown in the screenshots above. Next, follow these steps to solve this puzzle:
- Select the highlighted side (first screenshot) and rotate it clockwise once.
- Select the highlighted side (second screenshot) and rotate it two times clockwise.
- As a result, you will solve the puzzle (last screenshot).
If the pictures do not seem clear enough to you, then we advise you to look at the gif below. It shows the whole process of solving the riddle.
Port Stargazer Navalia (Hexanexus 2.0)
A total of three Altered Hexanexus can be found in this area. They are located in the same places as the previous ones, so we will not indicate their location on the map again.
First Hexanexus 2.0

Its location is shown in the screenshots above. Next, follow these steps to solve this puzzle:
- Select the highlighted side (first screenshot) and rotate it clockwise once.
- Select the highlighted side (second screenshot) and rotate it two times clockwise.
- As a result, you will solve the puzzle (last screenshot).
If the pictures do not seem clear enough to you, then we advise you to look at the gif below. It shows the whole process of solving the riddle.
Second hexanexus 2.0
Its location is shown in the screenshots above. Next, follow these steps to solve this puzzle:
- Select the highlighted side (first screenshot) and rotate it counterclockwise once.
- Select the highlighted side (second screenshot) and rotate it once clockwise.
- As a result, you will solve the puzzle (last screenshot).

If the pictures do not seem clear enough to you, then we advise you to look at the gif below. It shows the whole process of solving the riddle.
Third hexanexus 2.0

Its location is shown in the screenshots above. Next, follow these steps to solve this puzzle:
- Select the highlighted side (first screenshot) and rotate it two times clockwise.
- As a result, you will solve the puzzle (last screenshot).
If the pictures do not seem clear enough to you, then we advise you to look at the gif below. It shows the whole process of solving the riddle.
Prediction Commission (Hexanexus 2.0)
A total of four Altered Hexanexus can be found in this area. They are located in the same places as the previous ones, so we will not indicate their location on the map again.
First Hexanexus 2.0
Its location is shown in the screenshots above. Next, follow these steps to solve this puzzle:
- Select the highlighted side (first screenshot) and rotate it two times clockwise.
- As a result, you will solve the puzzle (last screenshot).
If the pictures do not seem clear enough to you, then we advise you to look at the gif below. It shows the whole process of solving the riddle.
Second hexanexus 2.0

Its location is shown in the screenshots above. Next, follow these steps to solve this puzzle:
- Select the highlighted side (first screenshot) and rotate it counterclockwise once.
- Select the highlighted side (second screenshot) and rotate it counterclockwise once.
- Select the highlighted side (third screenshot) and rotate it counterclockwise twice.
- As a result, you will solve the puzzle (last screenshot).
If the pictures do not seem clear enough to you, then we advise you to look at the gif below. It shows the whole process of solving the riddle.
Third hexanexus 2.0

Its location is shown in the screenshots above. Next, follow these steps to solve this puzzle:
- Select the highlighted side (first screenshot) and rotate it counterclockwise twice.
- Select the highlighted side (second screenshot) and rotate it counterclockwise twice.
- As a result, you will solve the puzzle (last screenshot).
If the pictures do not seem clear enough to you, then we advise you to look at the gif below. It shows the whole process of solving the riddle.
Fourth hexanexus 2.0

Its location is shown in the screenshots above. Next, follow these steps to solve this puzzle:
- Select the highlighted side (first screenshot) and rotate it clockwise once.
- Select the highlighted side (second screenshot) and rotate it counterclockwise once.
- As a result, you will solve the puzzle (last screenshot).
If the pictures do not seem clear enough to you, then we advise you to look at the gif below. It shows the whole process of solving the riddle.
After solving all the updated hexanexuses, a representative of the Hex Club will contact you again. You can choose any answer options, as they, apparently, do not affect anything. You will also unlock two new trophies: "The Myth of the Cave" and "Rubik's Torment".

These are all the Hexanexus puzzles in Honkai: Star Rail. We hope that this information will help you find and solve all the puzzles with cubes in Lofu Xianzhou.
Comments
You need to login to add comments.
You can login with