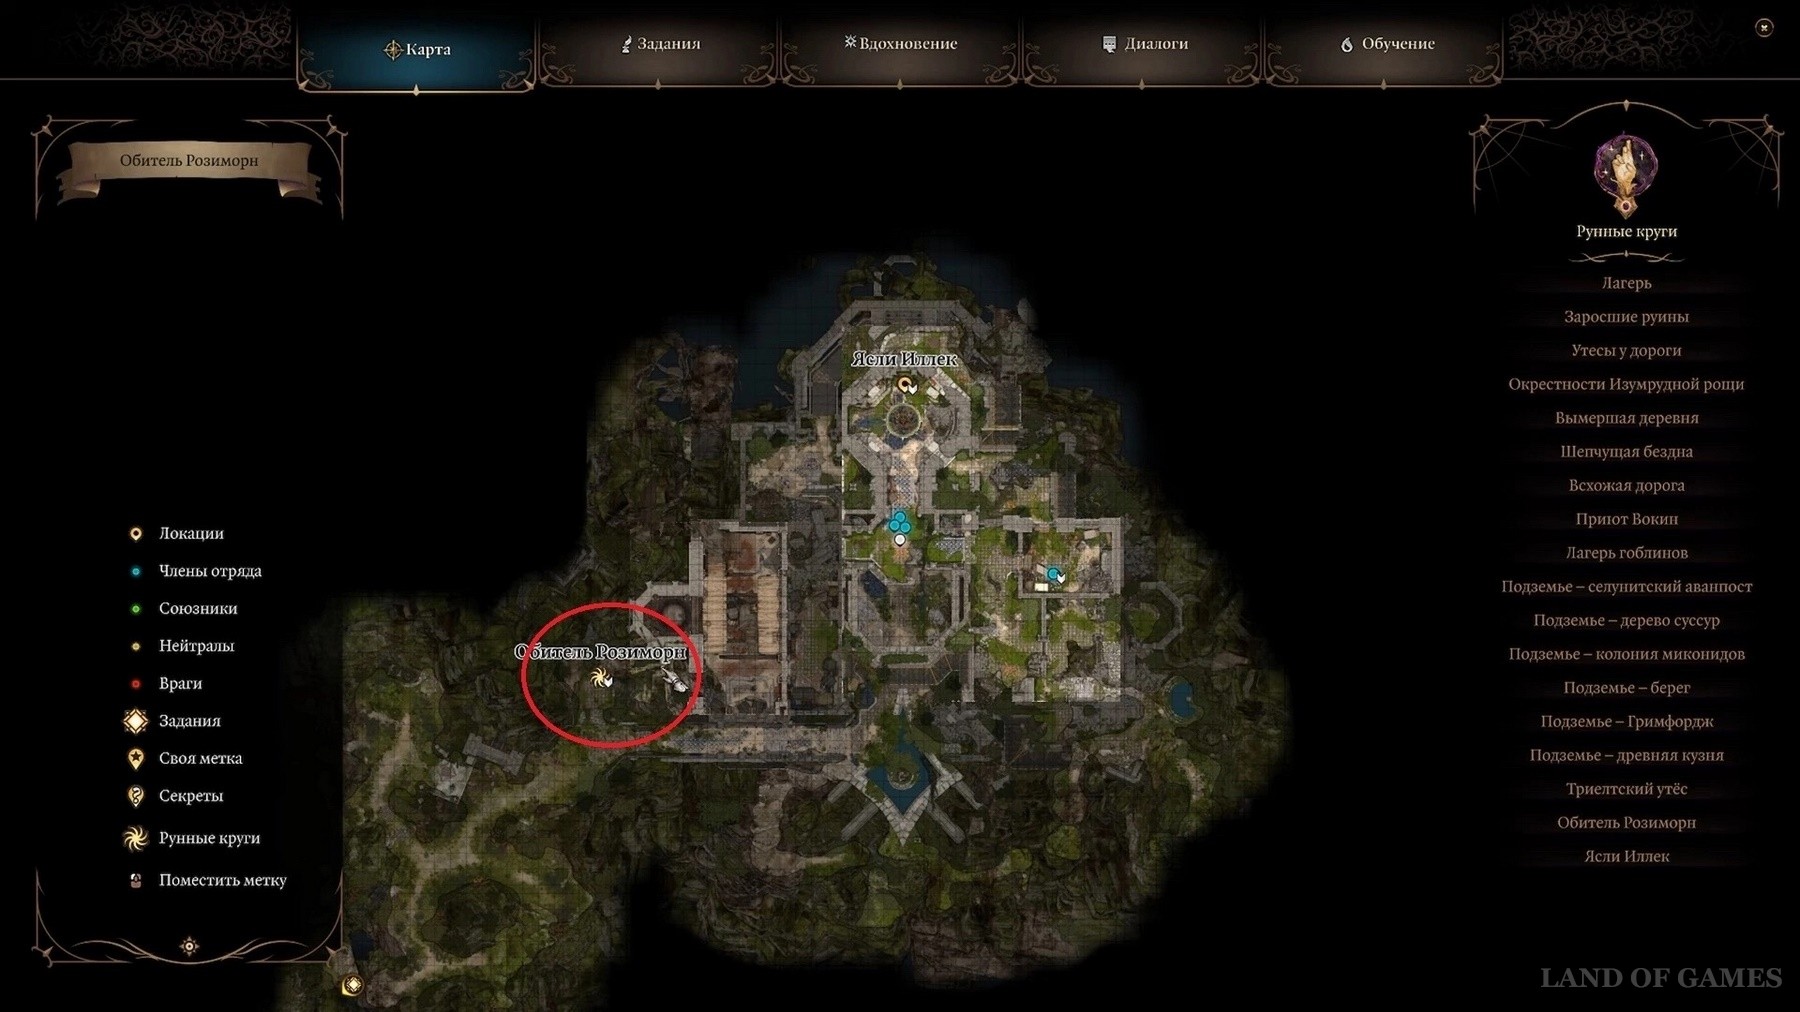
A game Baldur's Gate 3 offers many puzzles and exciting places to explore in its vast world. One of these locations is the Rosymorn Monastery, which is not easy to pass through, especially since many paths are blocked in it.
In this guide, we'll show you how to get to Rosimorn's Retreat in Acts 1 and 2 of Baldur's Gate 3 and solve all the puzzles to retrieve the powerful shrine hidden under Githyanki's manger. It's worth it because the Blood of Lathander is an incredibly powerful weapon, especially considering how early it appears in this game.
How to get to the Rosymorn Monastery
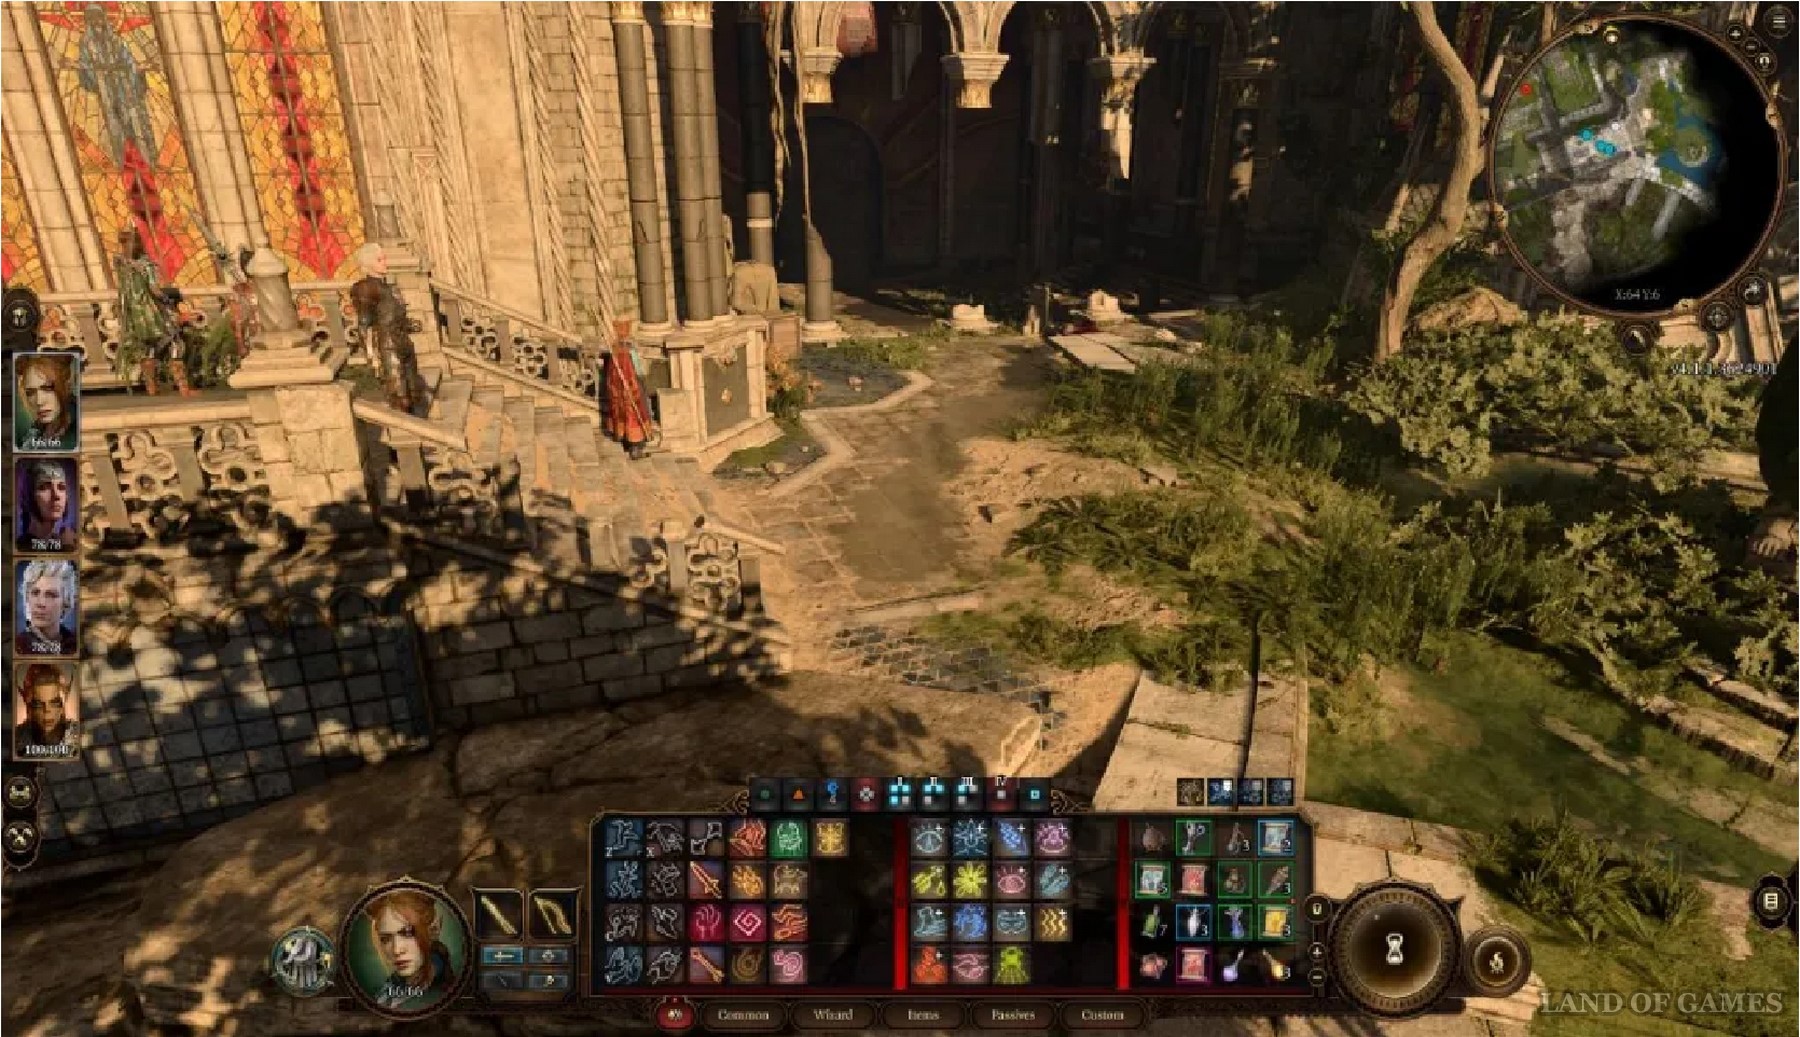
Rosimorn's Retreat is a magnificent but dilapidated place that can be seen northeast of the mountain pass (X: 18, Y: 22). Upon reaching the end of Act 1 in Baldur'sGate 3, players are given a choice of route to reach the Act 2 area: either head through the Mountain Pass or go through the Deepholm. Those who decide to go through the Mountain Pass will be able to notice the old and overgrown monastery and will have the opportunity to approach it.
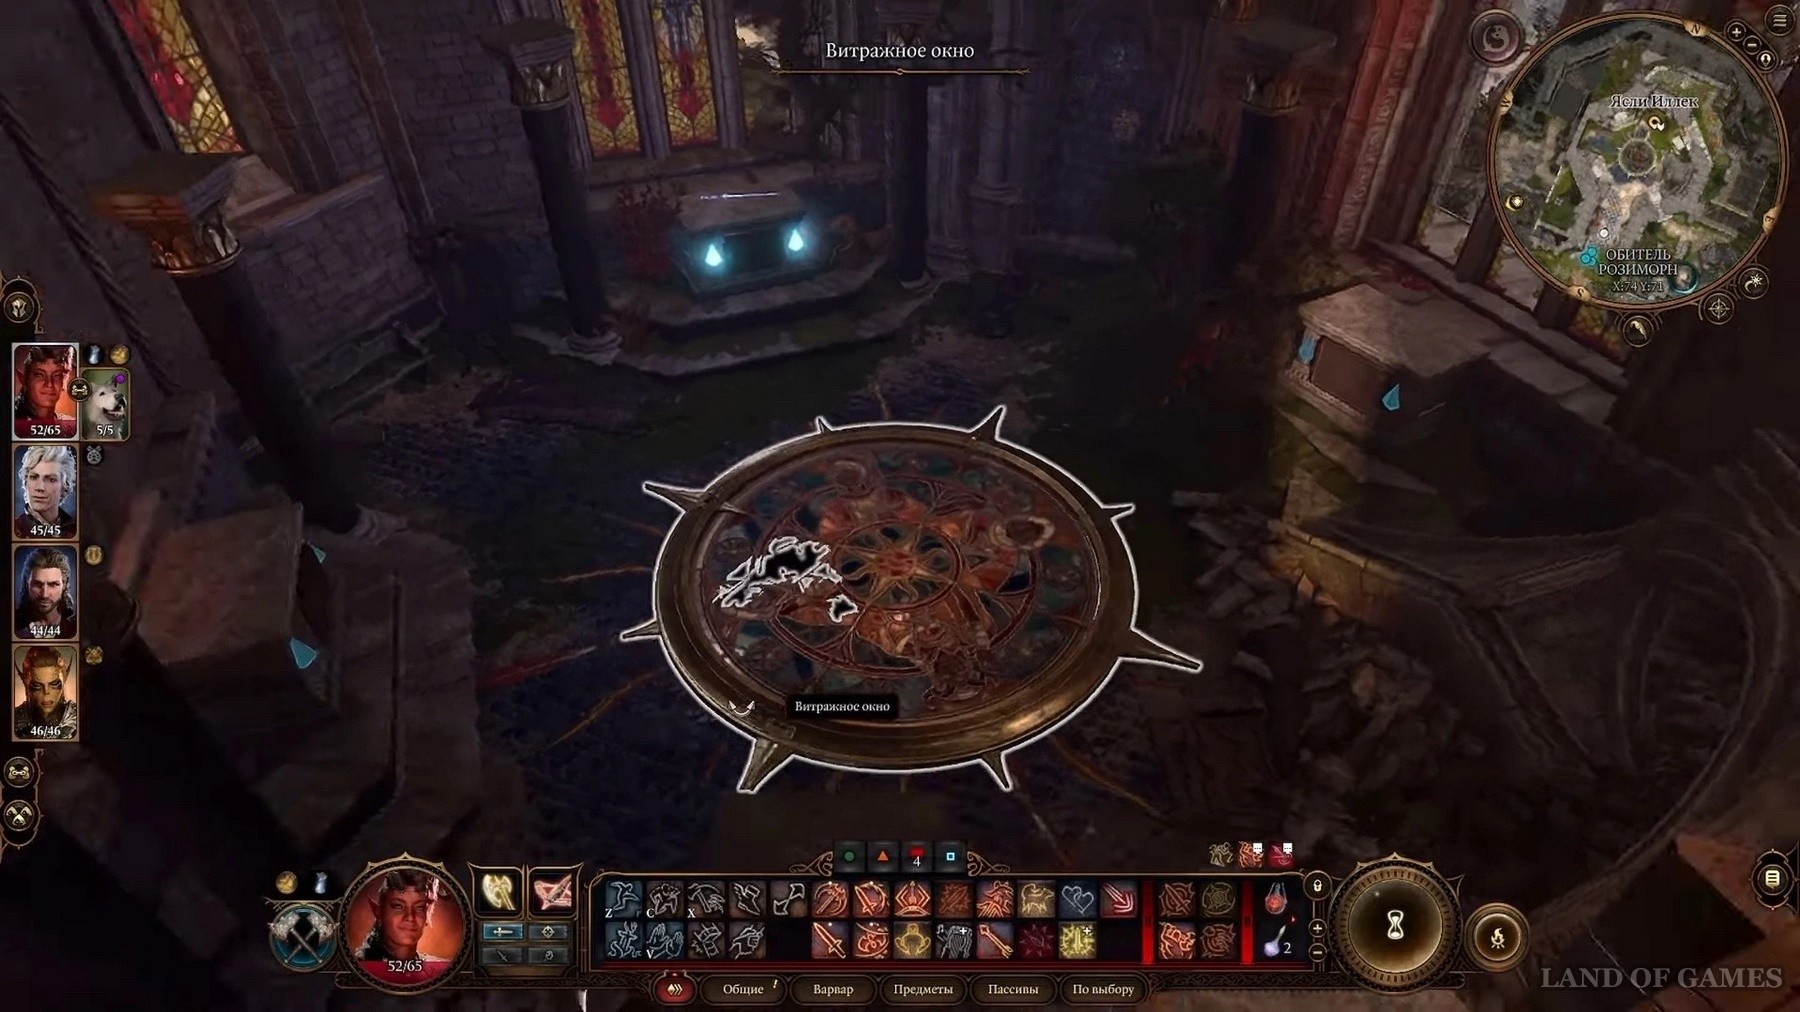
There is a puzzle on the middle floor of the monastery. It is presented in a room with colored glasses. Around the stained glass window are 4 pedestals, 1 of which already has a weapon, the Ceremonial Longsword. It is necessary to get the remaining 3 items and place them on empty pedestals.
Solving the puzzle in Rosemorne's Retreat
Ceremonial War Mace
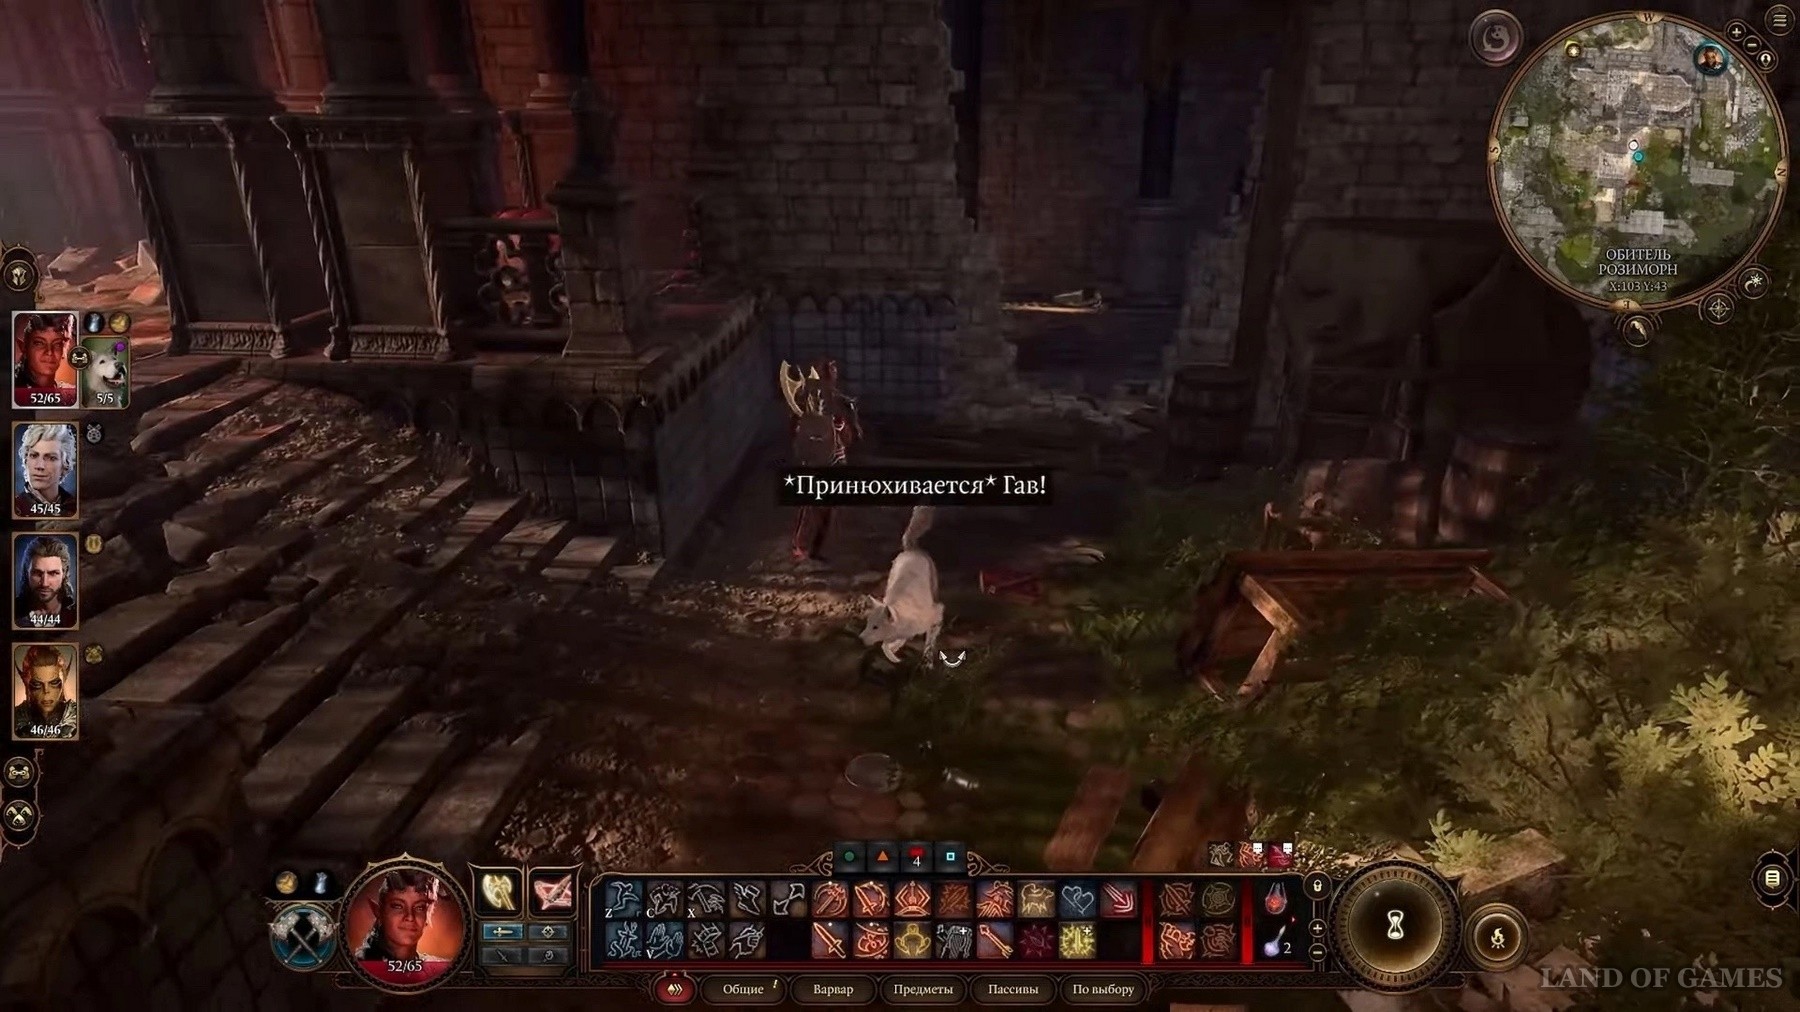
Starting at the Waypoint of Rosemorne's Citadel, move to the right, passing the stained glass windows of the monastery.
Enter the building through the broken window and you will quickly find a room full of drunken kobolds. Getting rid of them will not be difficult, as they have low health and do not deal much damage, but be careful with their alchemical fire elixirs.
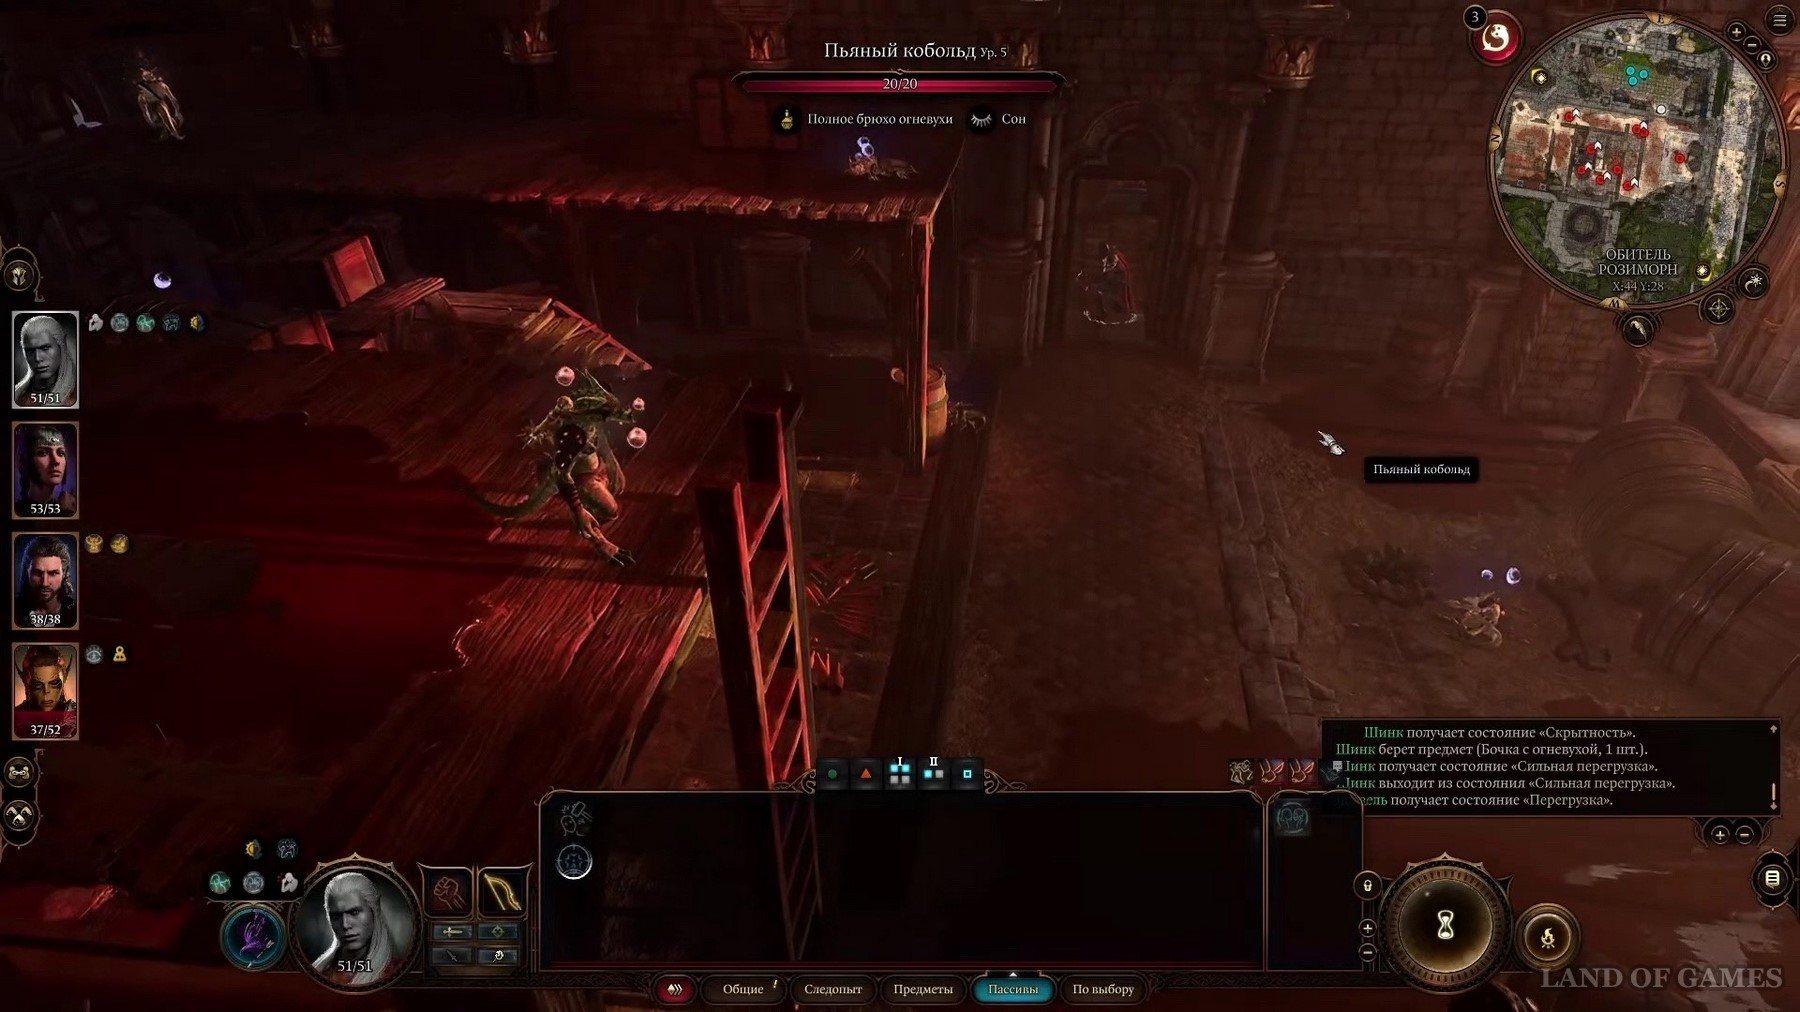
At the end of the battle, search the bodies, among them you will find an enemy with a Ceremonial Mace. It will be useful for solving the next puzzle, but keep in mind that it is only possible to get it in the second act.
Rusty mace (optional)
In addition to the Ceremonial Mace, you can use the Rusted Mace replacement item to solve the puzzle, which will take even less time to find. At the exit from the hall with a stained-glass window, turn left.
Then we turn right and left again, go out the door.
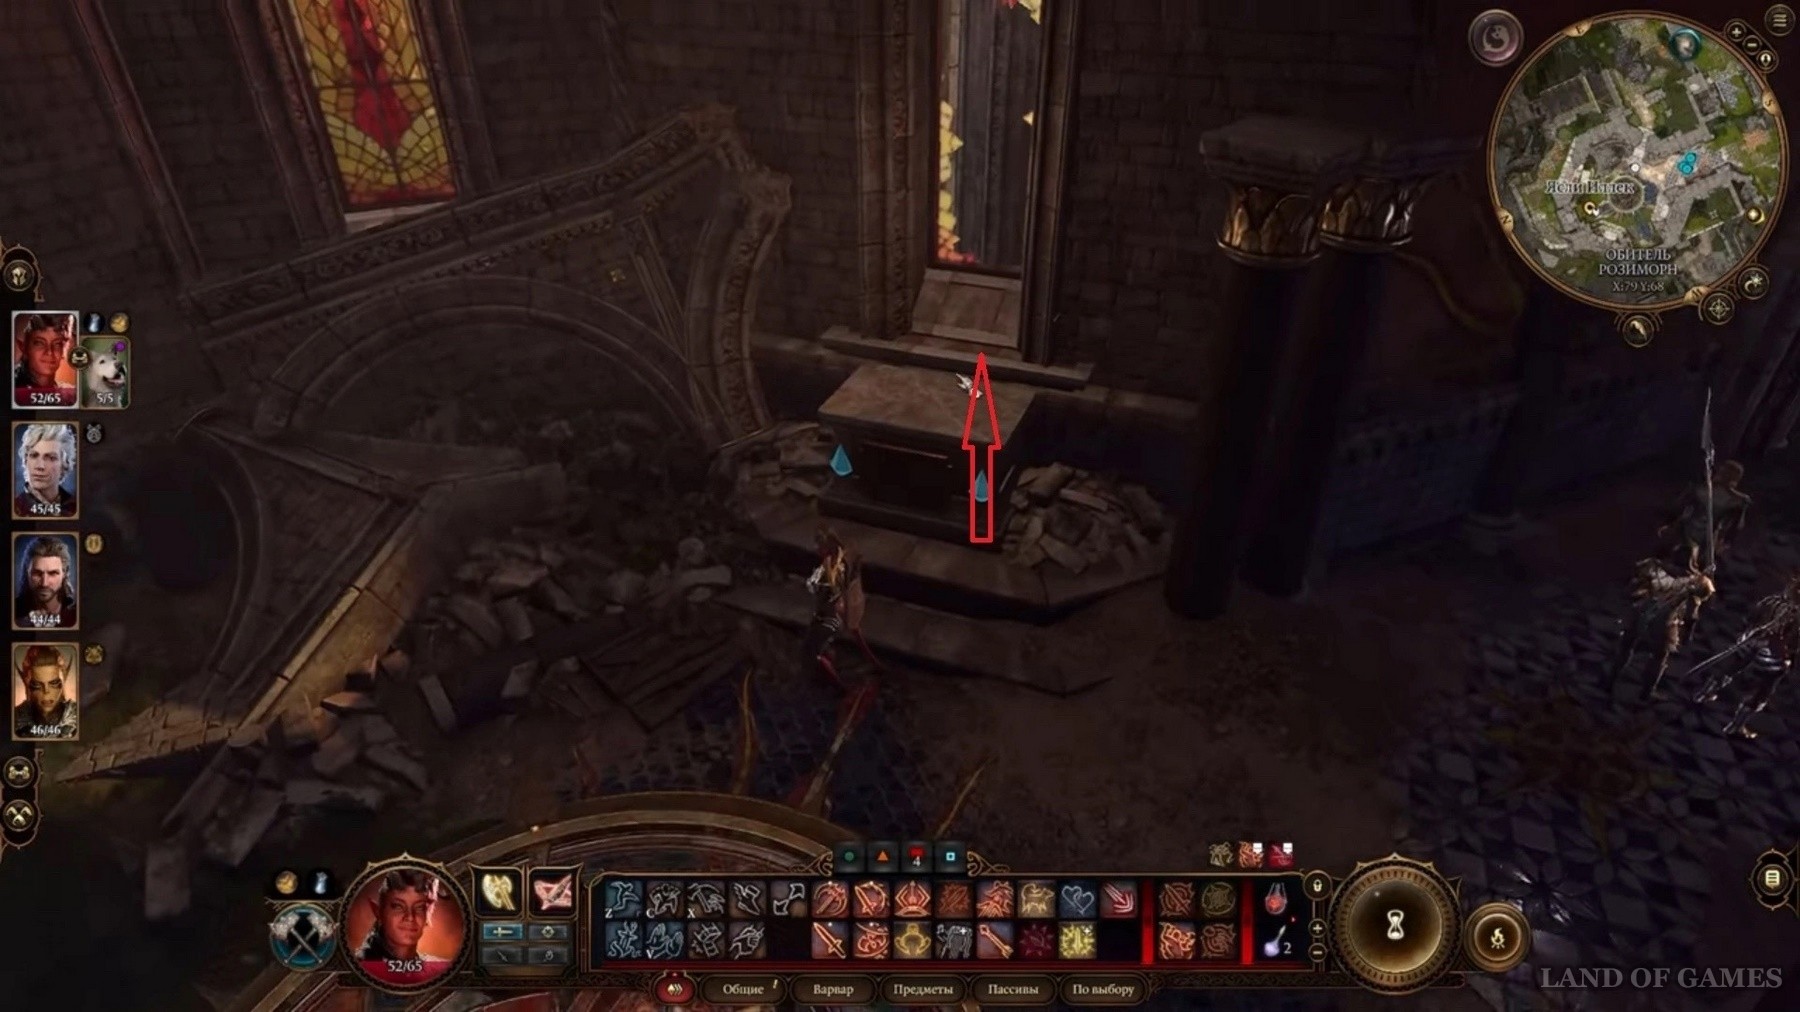
We go down the collapsed stairs and on the left we find a passage in the wall.
Here we make another turn to the left along the stairs, use the backlight and find the Rusty Mace lying on the floor (X: 88, Y: 34).
Ceremonial warhammer
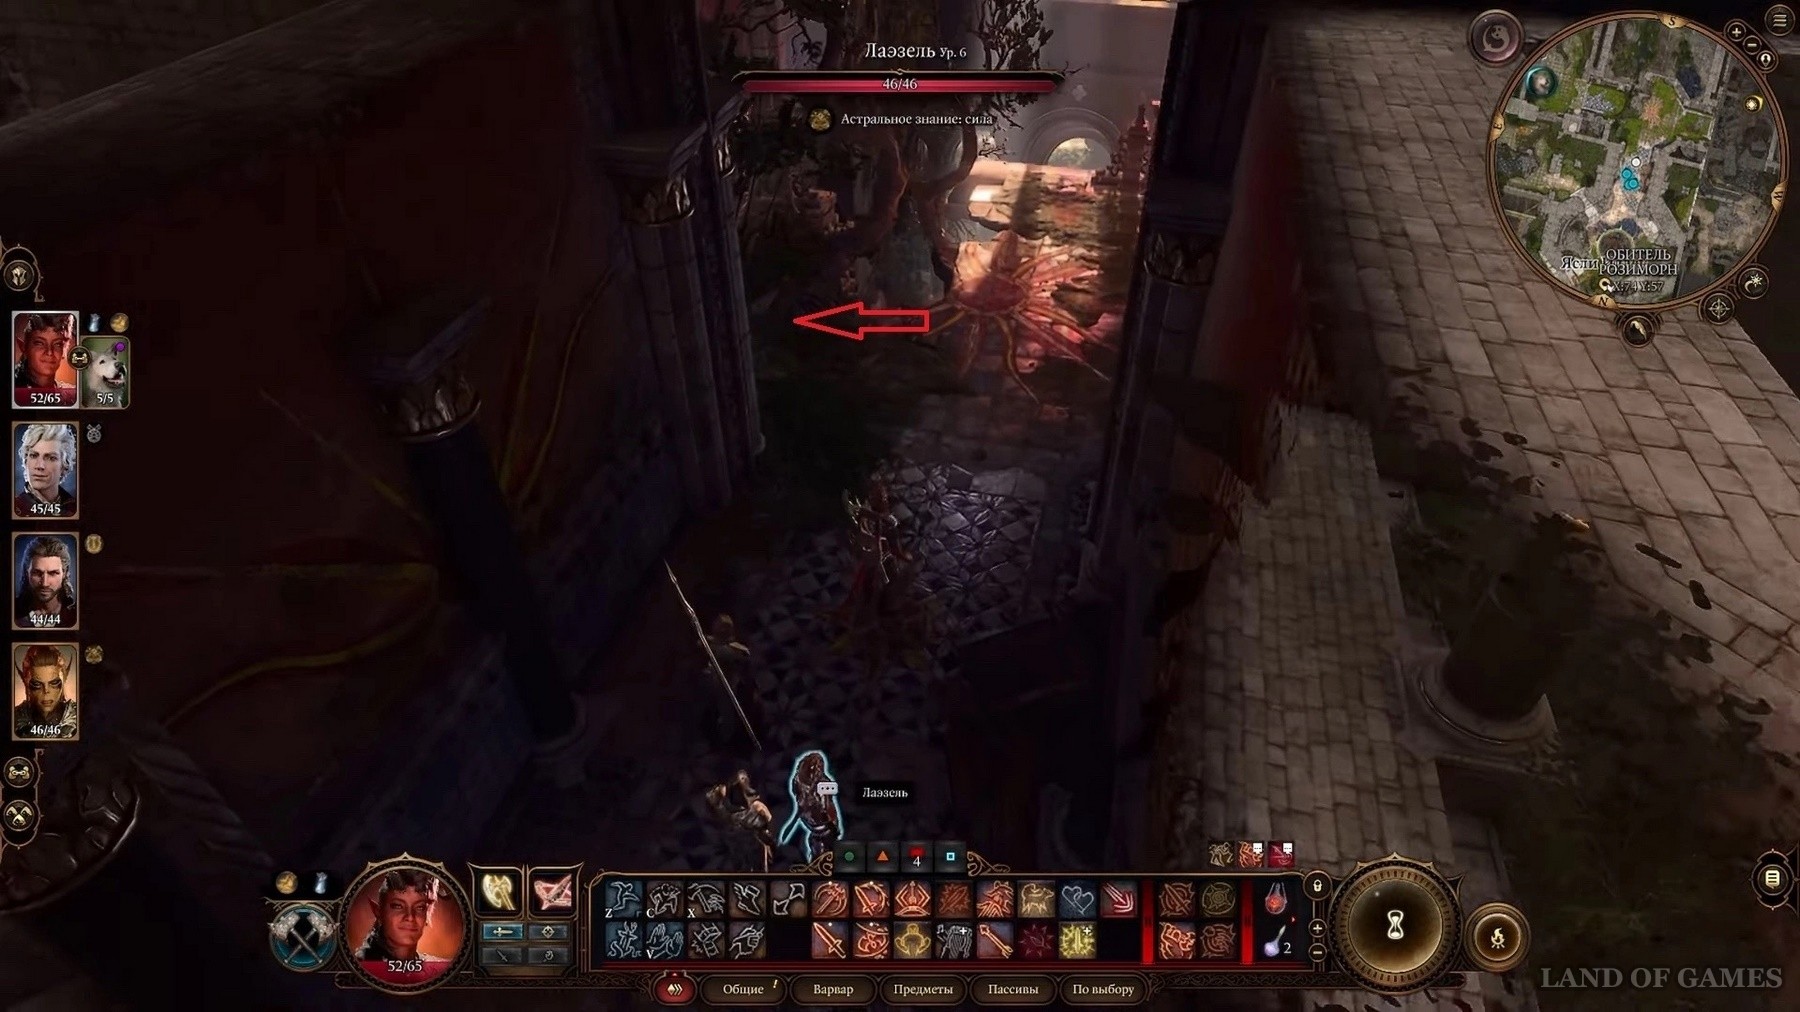
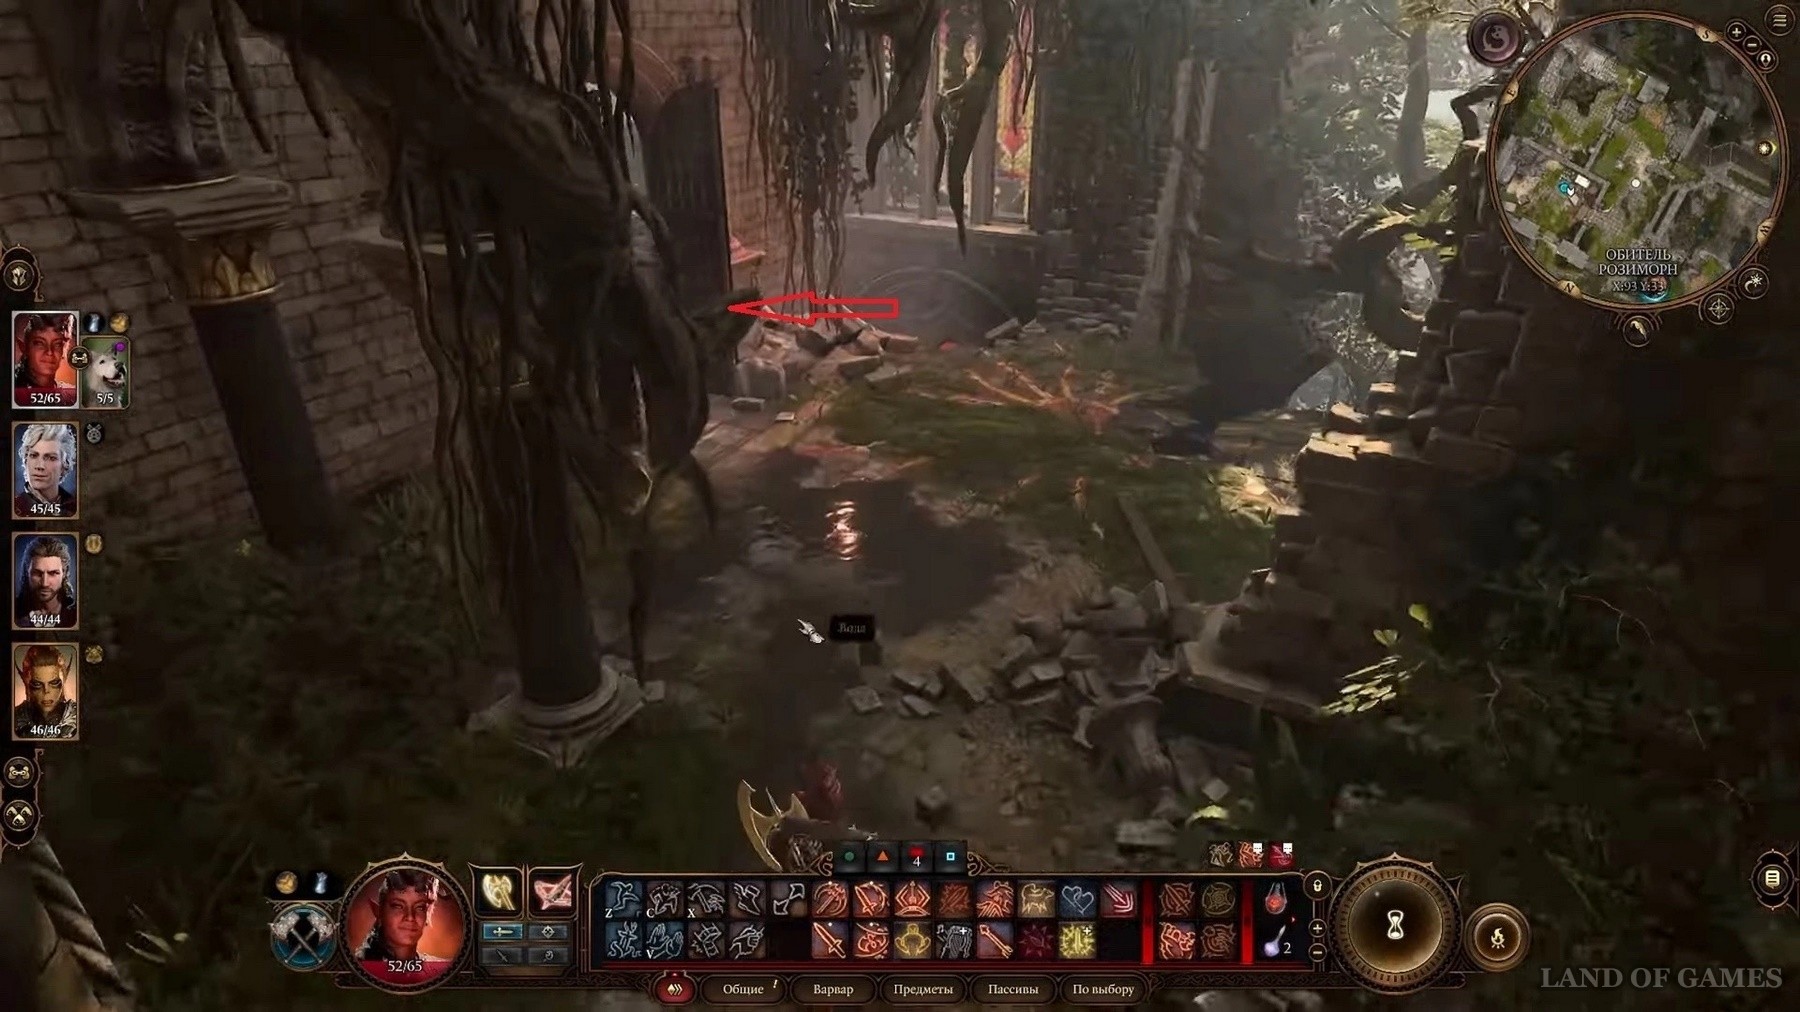
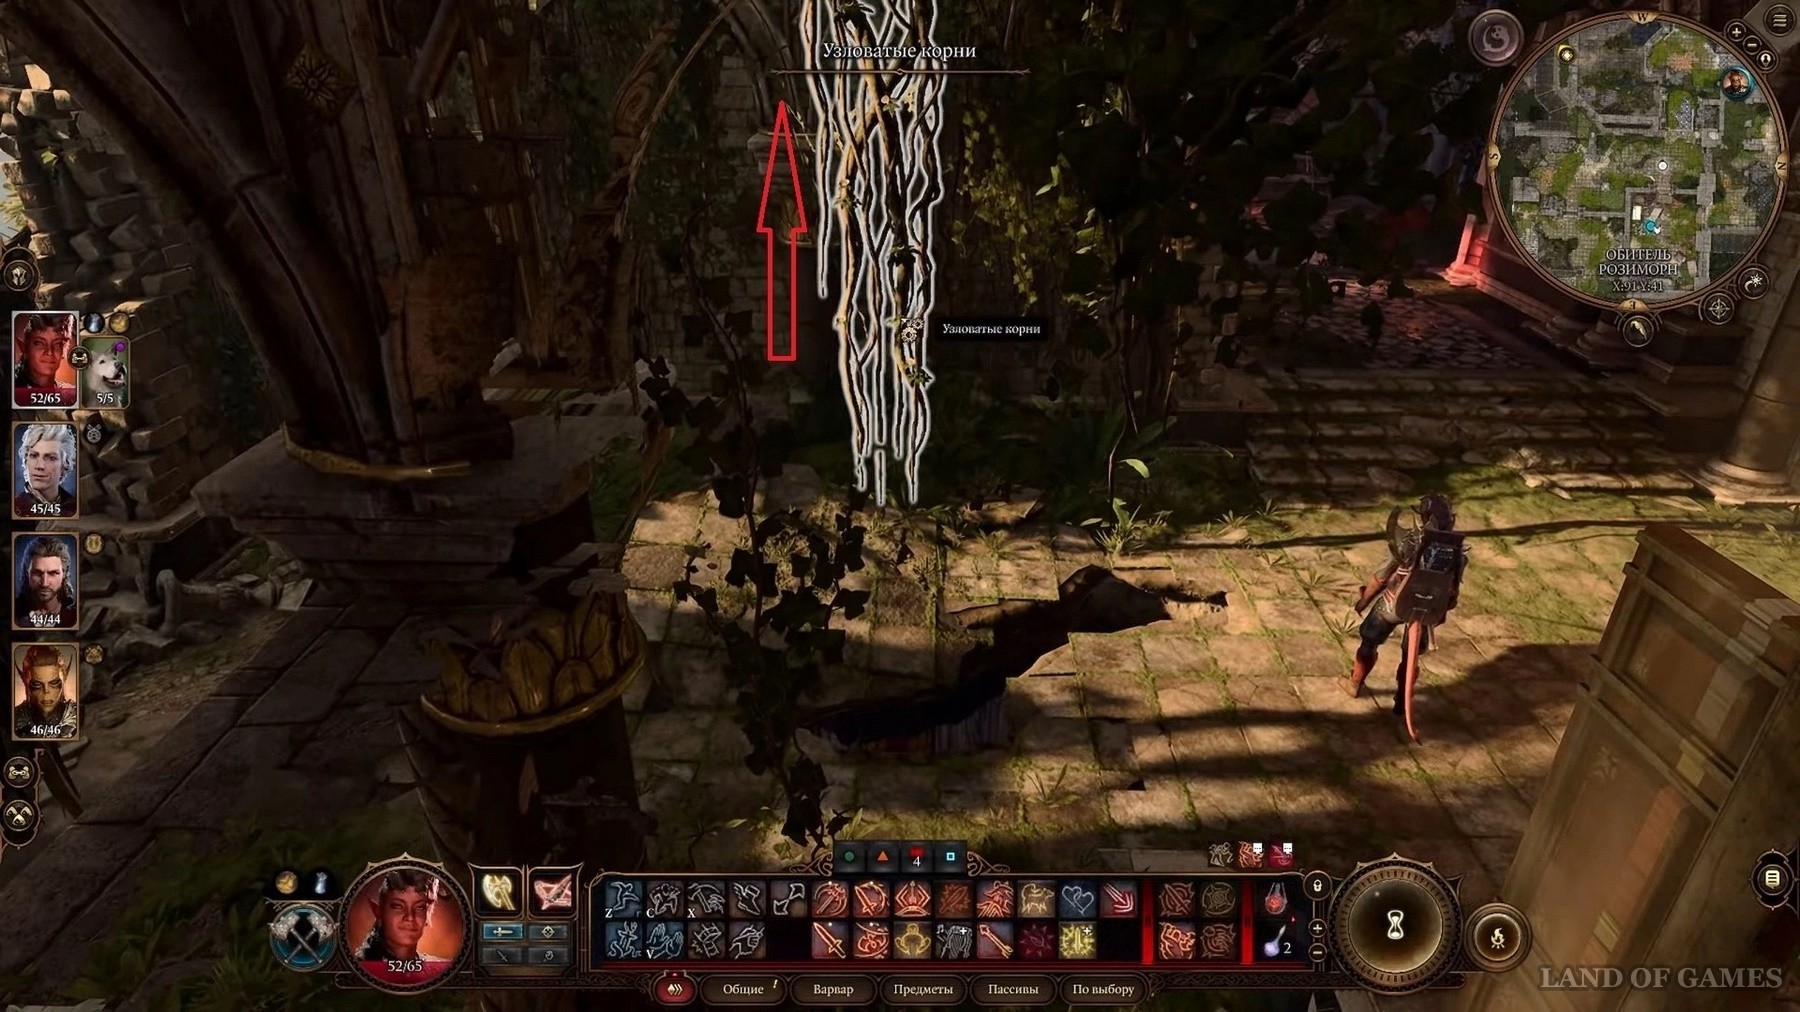
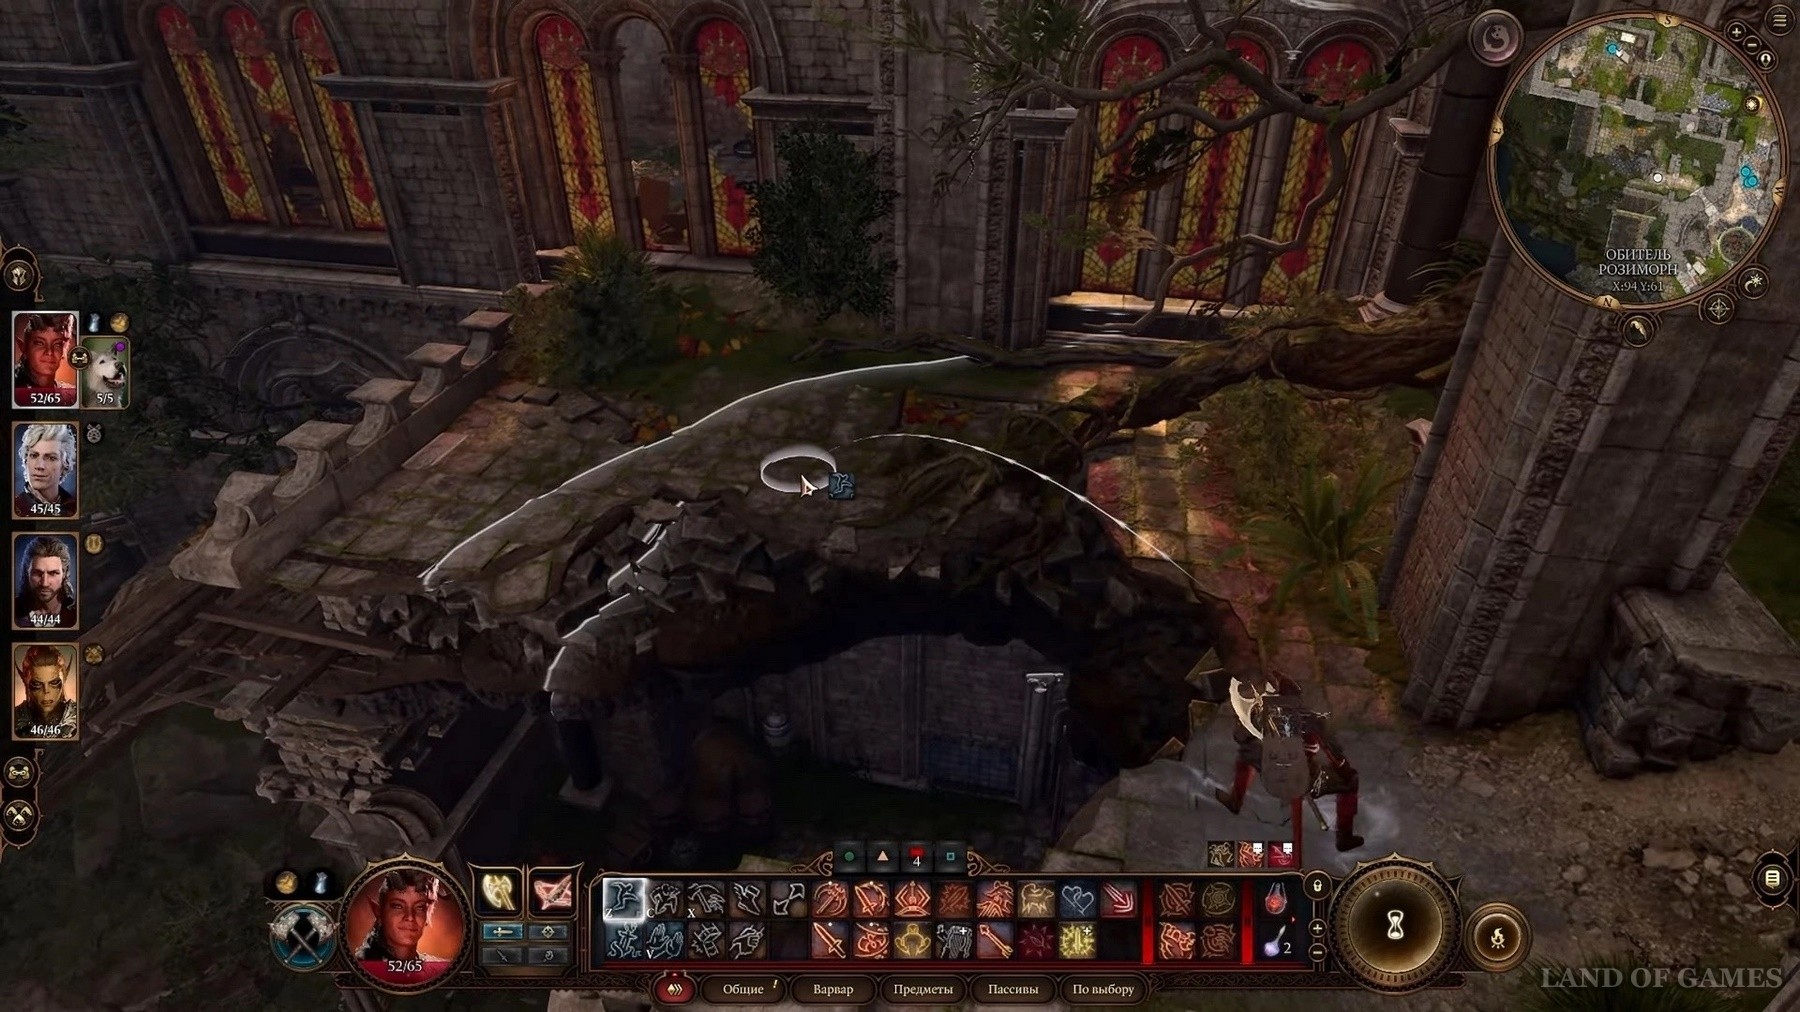
We return back, we rise along the collapsed stairs already passed. On the wall we see vines, we climb on them to the roof (X: 91, Y: 41).
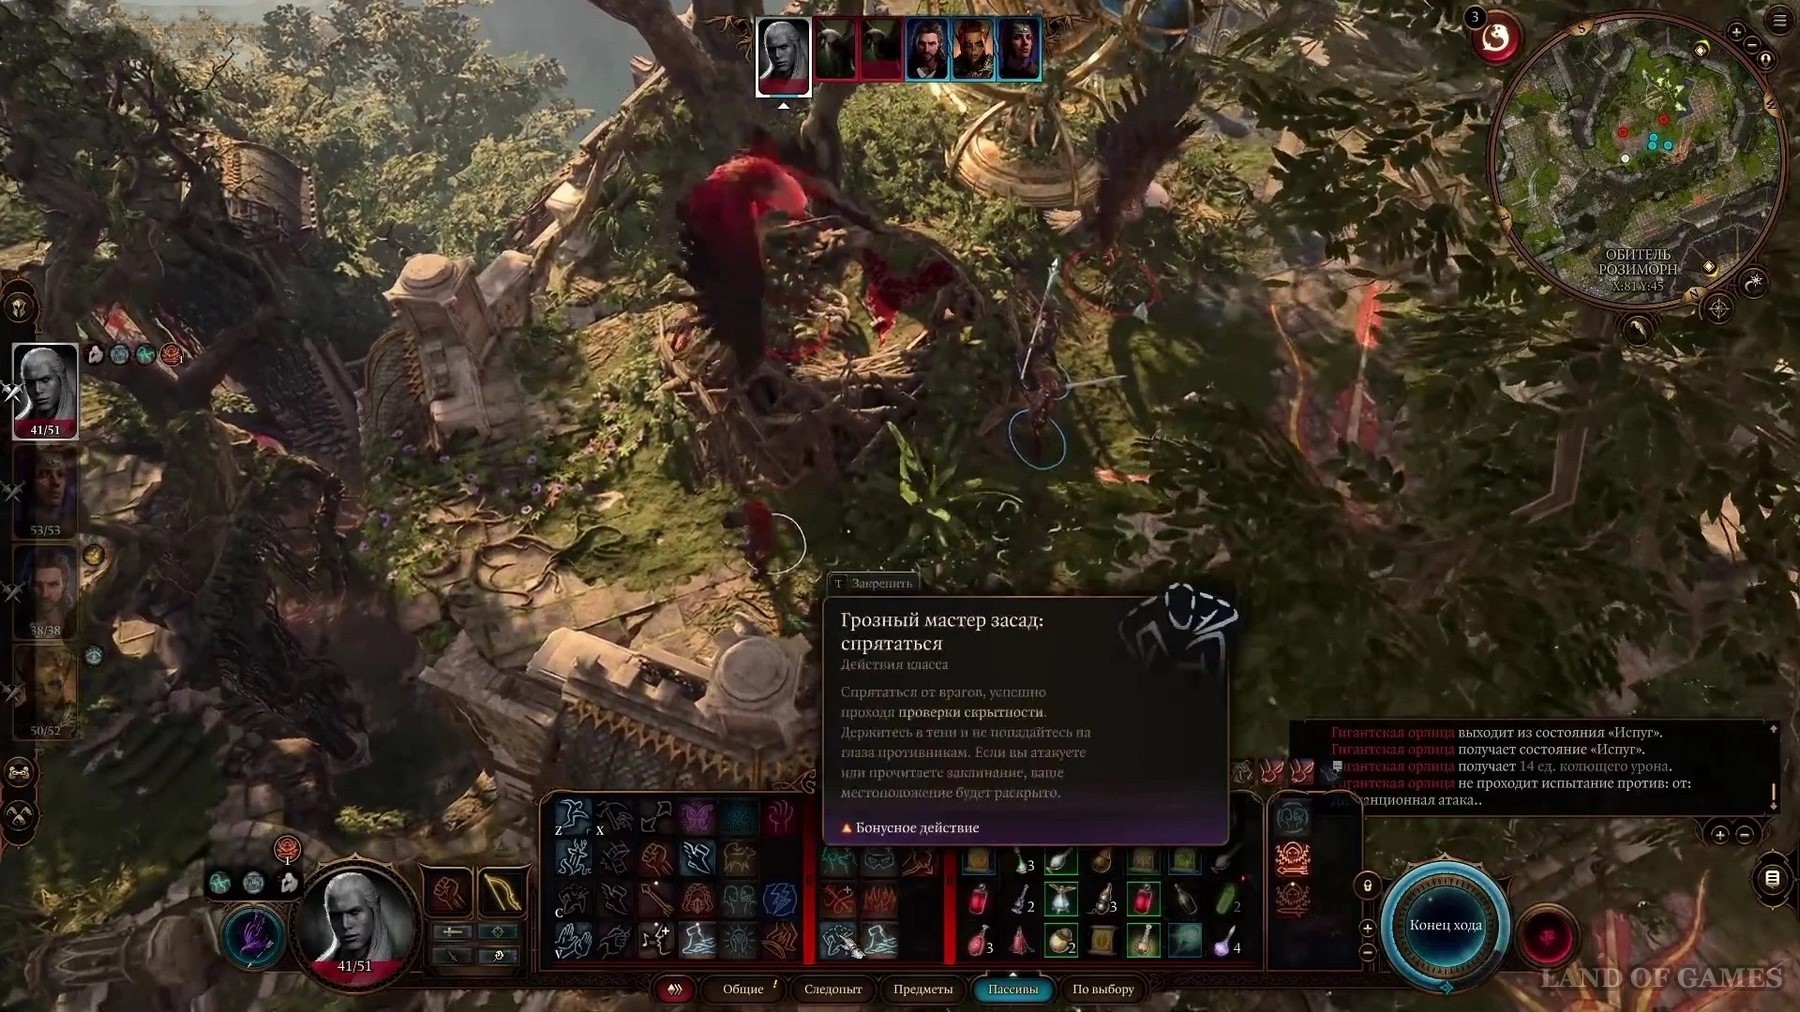
Here, on the highest point of the monastery, you will meet eagles guarding their nest, they will attack you. You can try to speak them, but most likely you will have to fight. Be careful, as they can easily throw you off the edge of the building.
After dealing with the birds, you can take the Ceremonial War Hammer from the nest, which will also come in handy when solving the puzzle. We go in search of the last weapon.
Ceremonial Battle Ax
After destroying the eagles, we go to the far side of the building, where we find vines leading down. On the opposite side is a locked room that can be opened by rolling dice.
However, this method may not work for your squad. There is an alternative:
- We return to the room with the stained glass window.
- On the right we notice a broken window and go through it.
- At the cliff we jump over to the opposite side.
Again we find a littered broken window, jump over it and find ourselves in that same locked room.
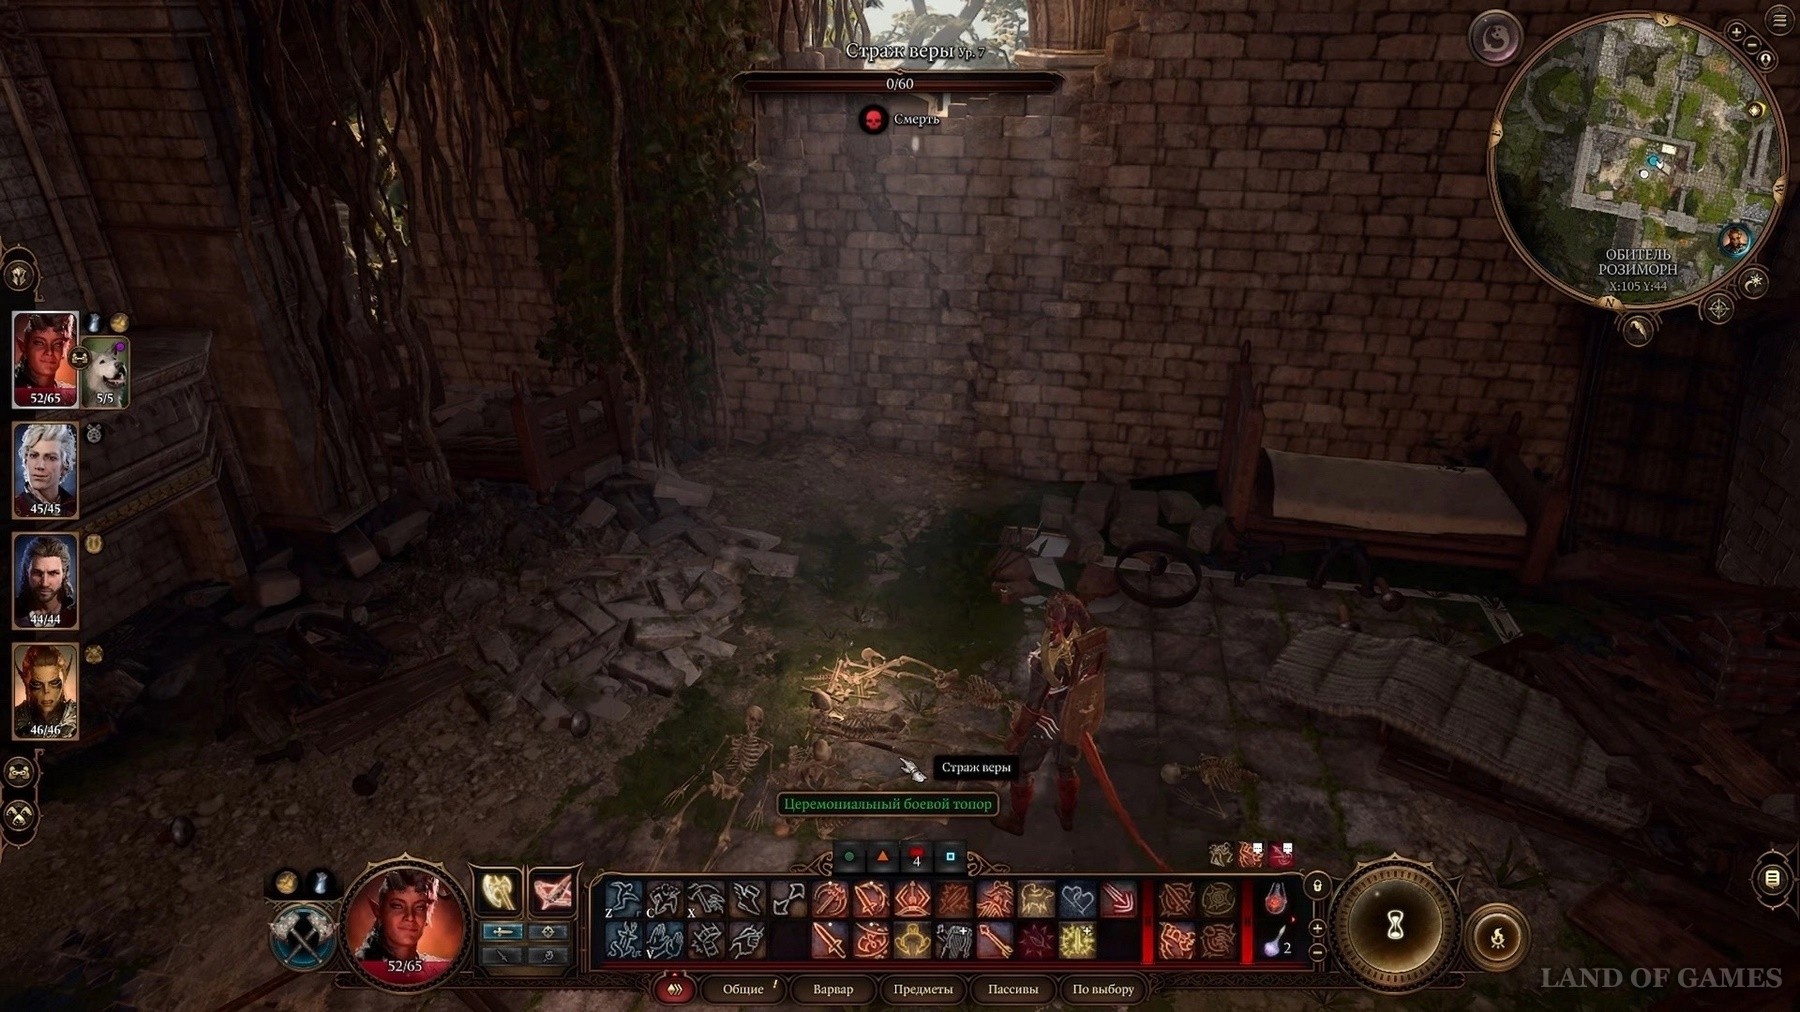
The Guard of Faith awaits you inside, but he is not hostile until you attack him. If you try to pick up the Ceremonial Ax lying at his feet, the fight will also begin. Please note that he has a pretty high defense, so it will be most successful to use ranged attacks while outside of his circle. Once the Guardian is defeated, you will be able to pick up the necessary weapons.
How to place weapons on pedestals
Now that you have all the necessary weapons, you can return to the room with the riddle and finally arrange the items found. If you look at the stained glass window, you will notice that each quarter of the circle depicts a guardian with a weapon in his hands. Position the weapon as follows:
- Hammer - right
- The sword is on top (it is already in its place)
- Ax - left
- Mace - bottom
To place a weapon, stand on the desired pedestal and throw it out of your inventory, or use the "Throw" command to throw the item to the desired place.

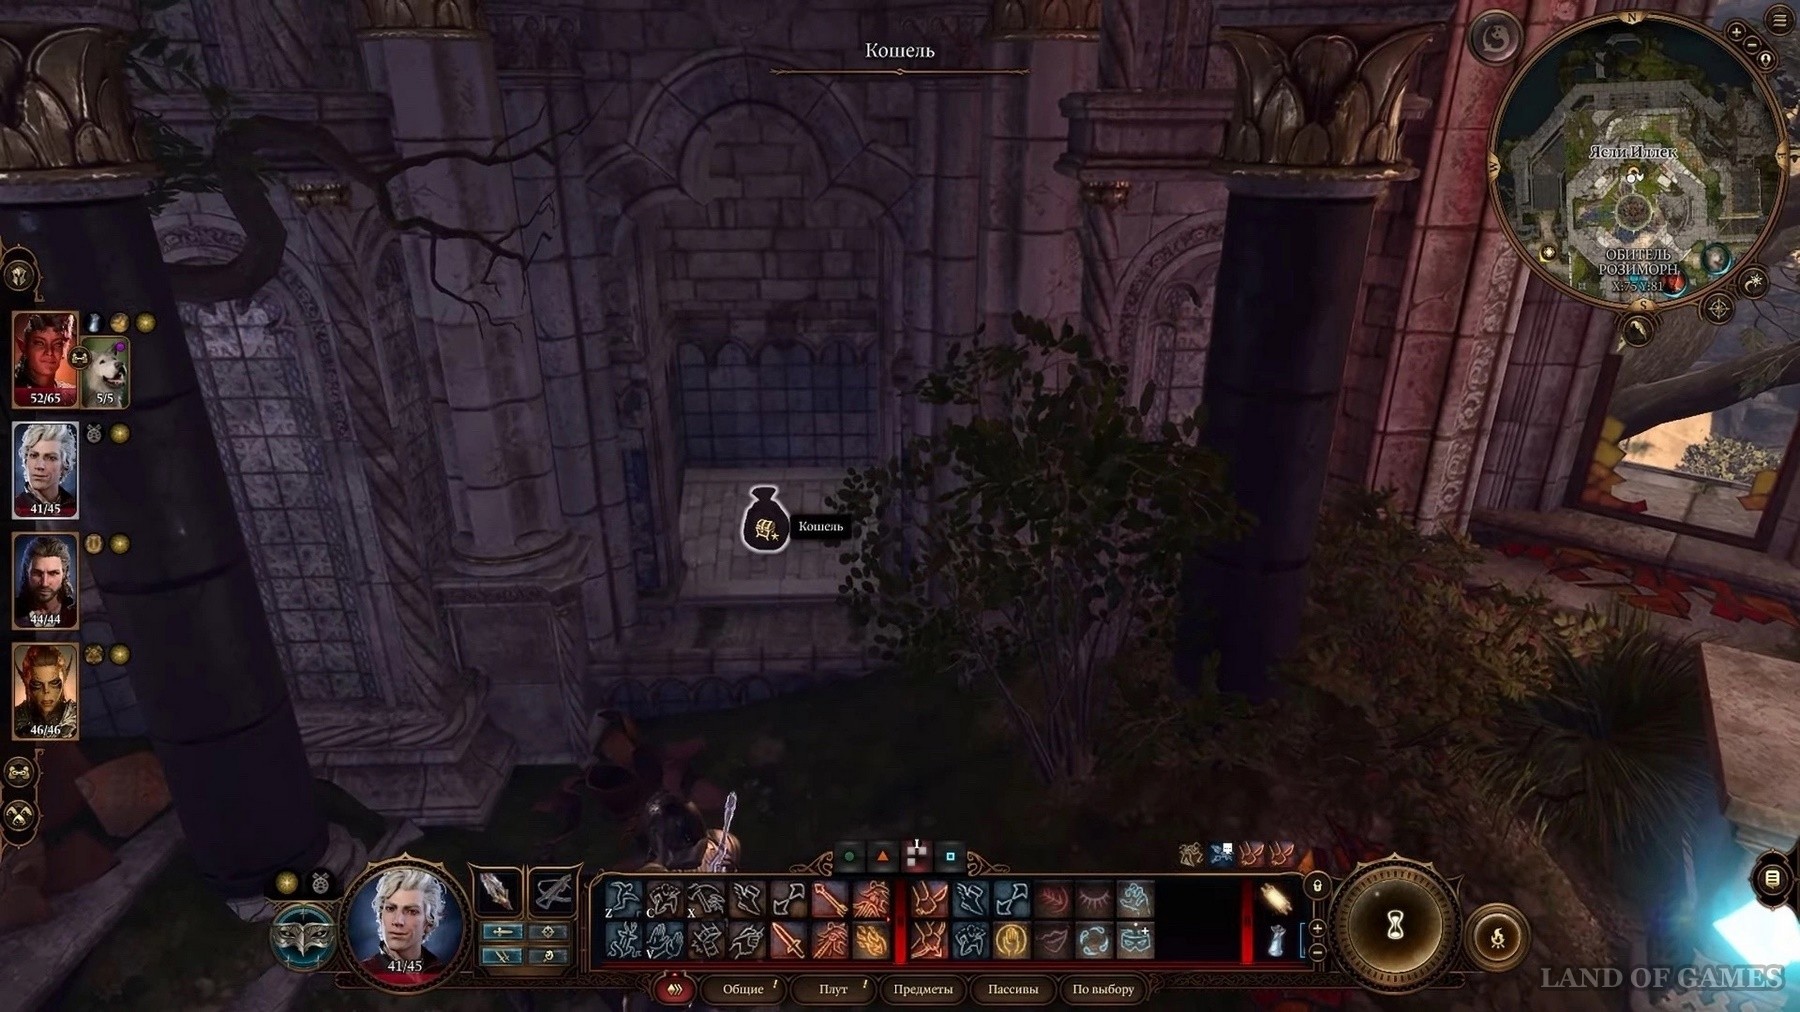
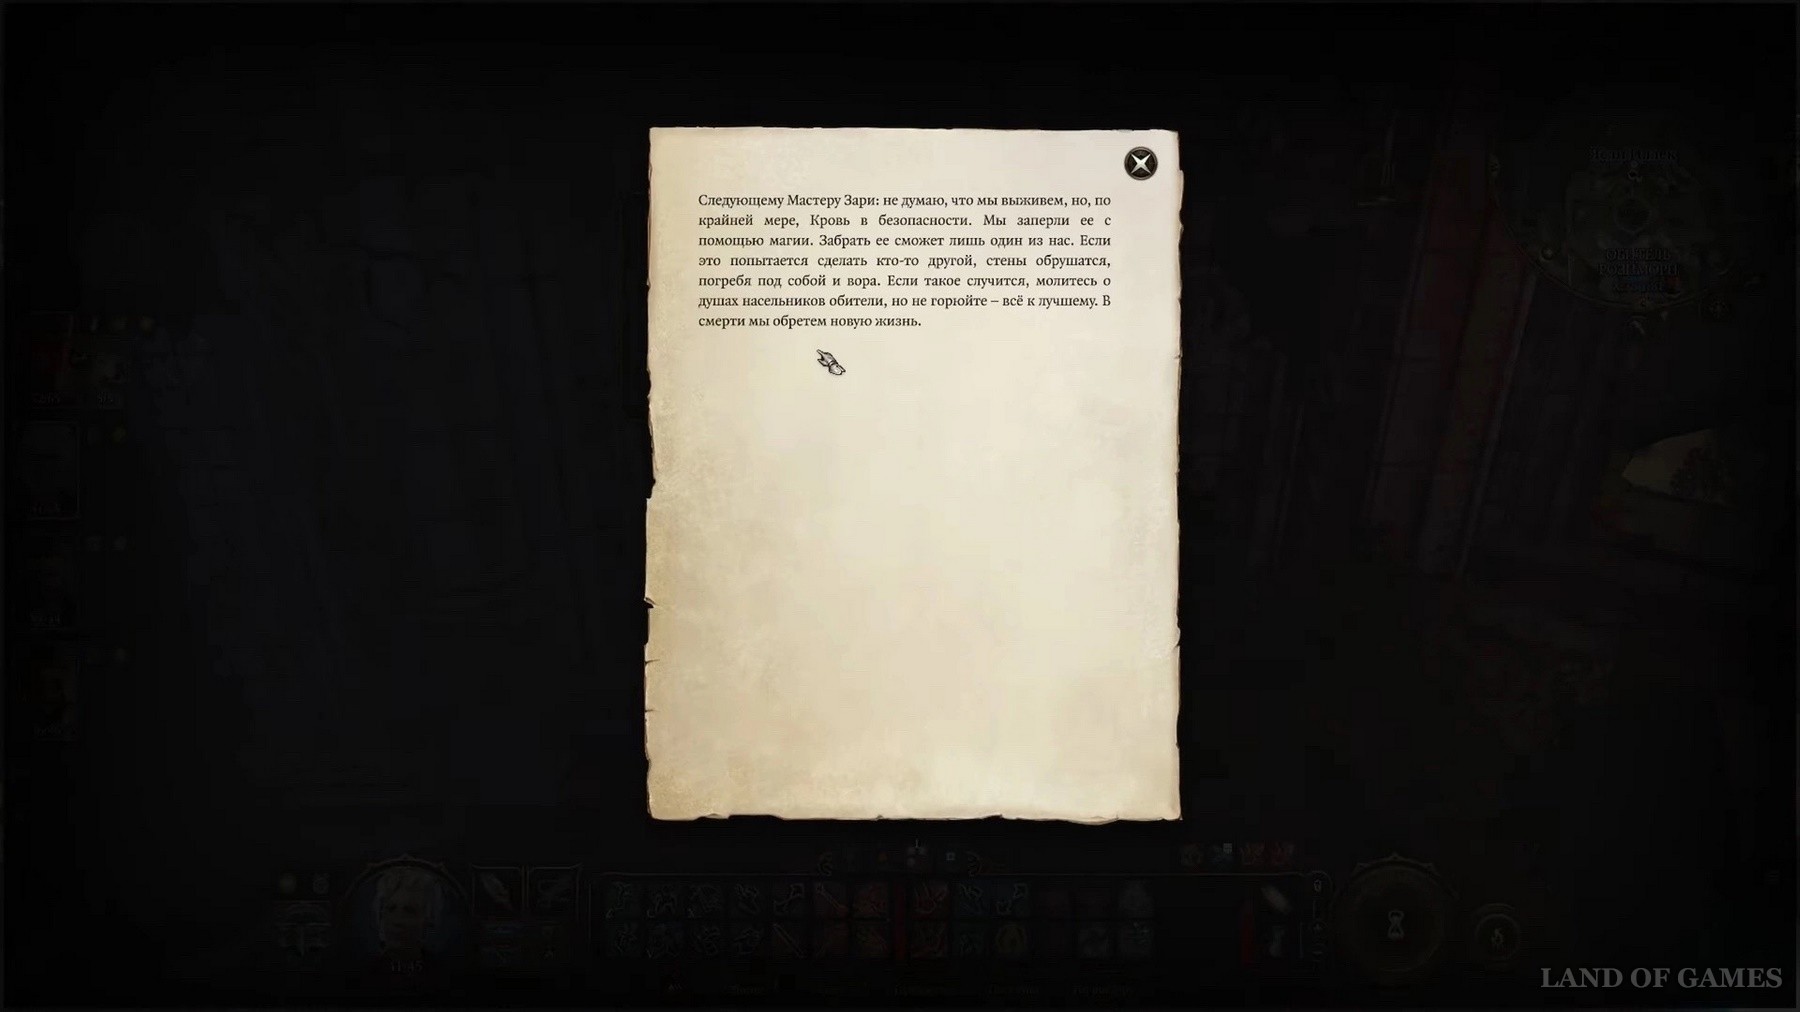
Once on the correct pedestal, it is highlighted, if you are wrong, you are damaged. Having correctly arranged the materials, we notice how the passage opens, behind which the Purse is hidden. Among its contents are the Crest of the Dawn Master and a Note for the next Dawn Master, after reading which the character gains Experience, and the quest diary is updated.
The quest is completed, if you wish, you can take the weapon with you.
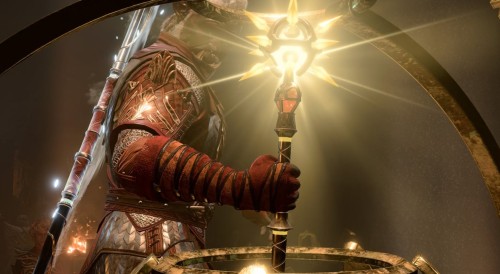
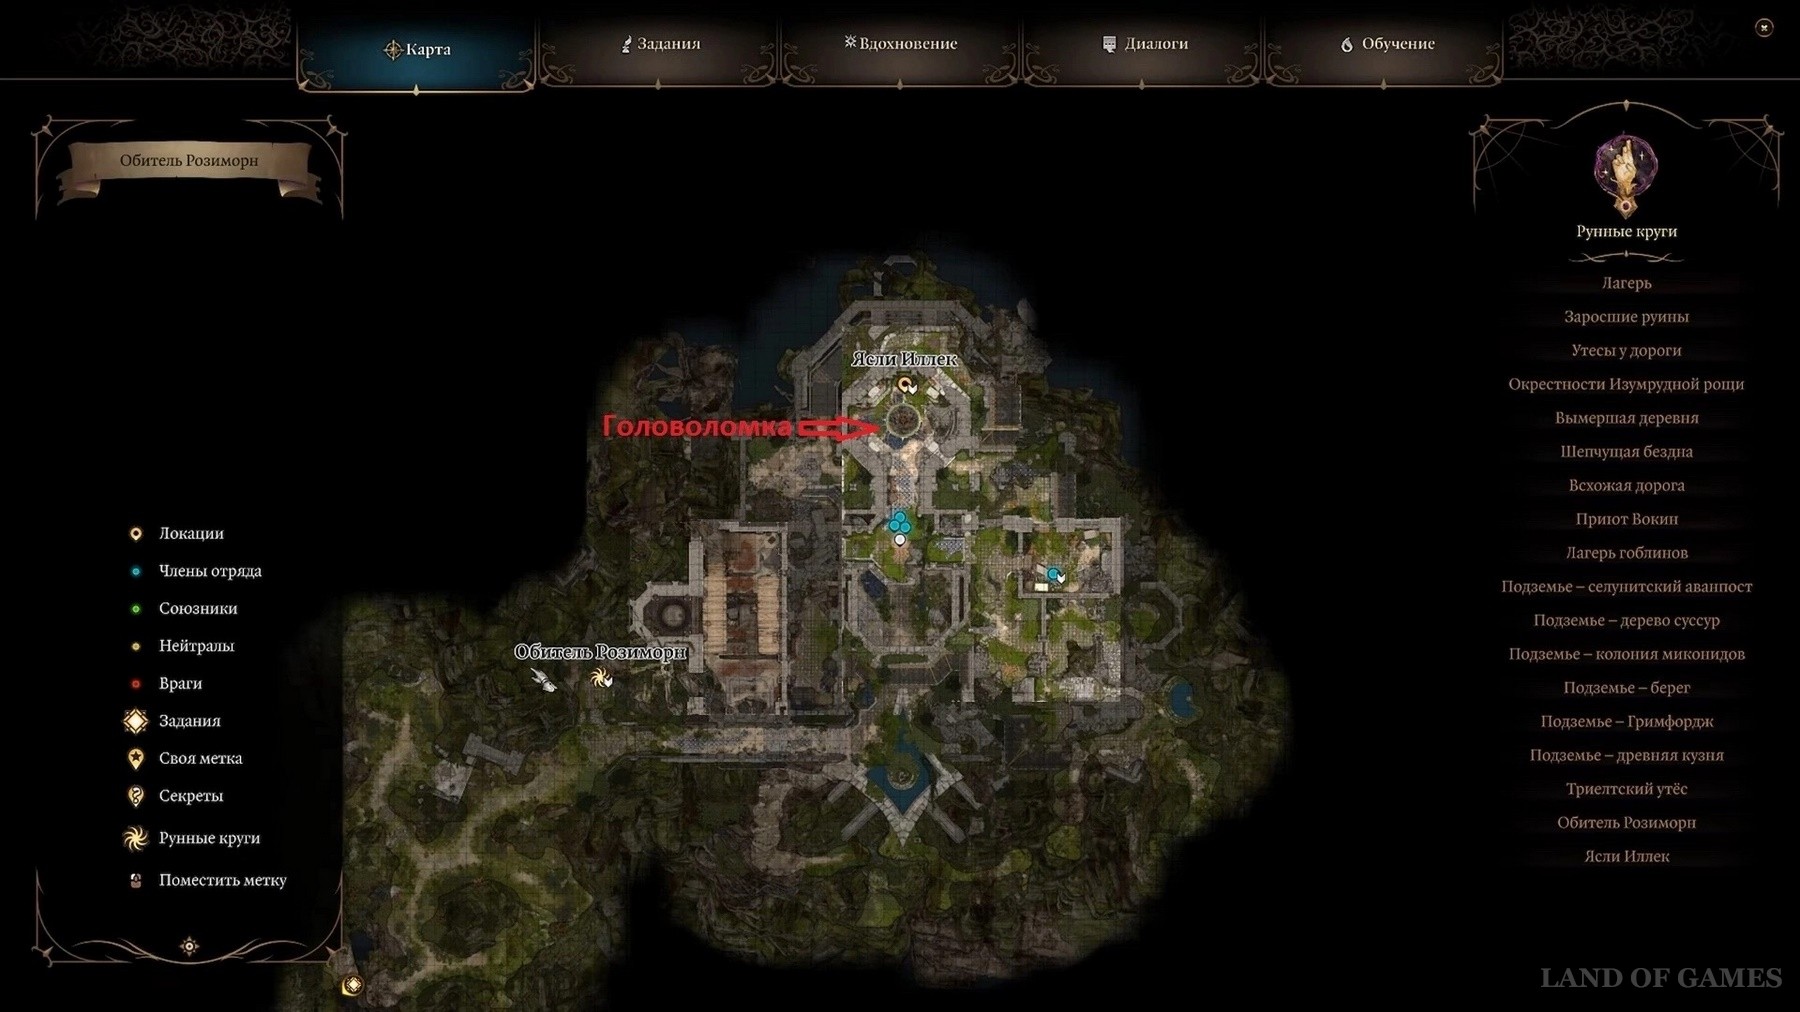
How to find Blood of Lathander
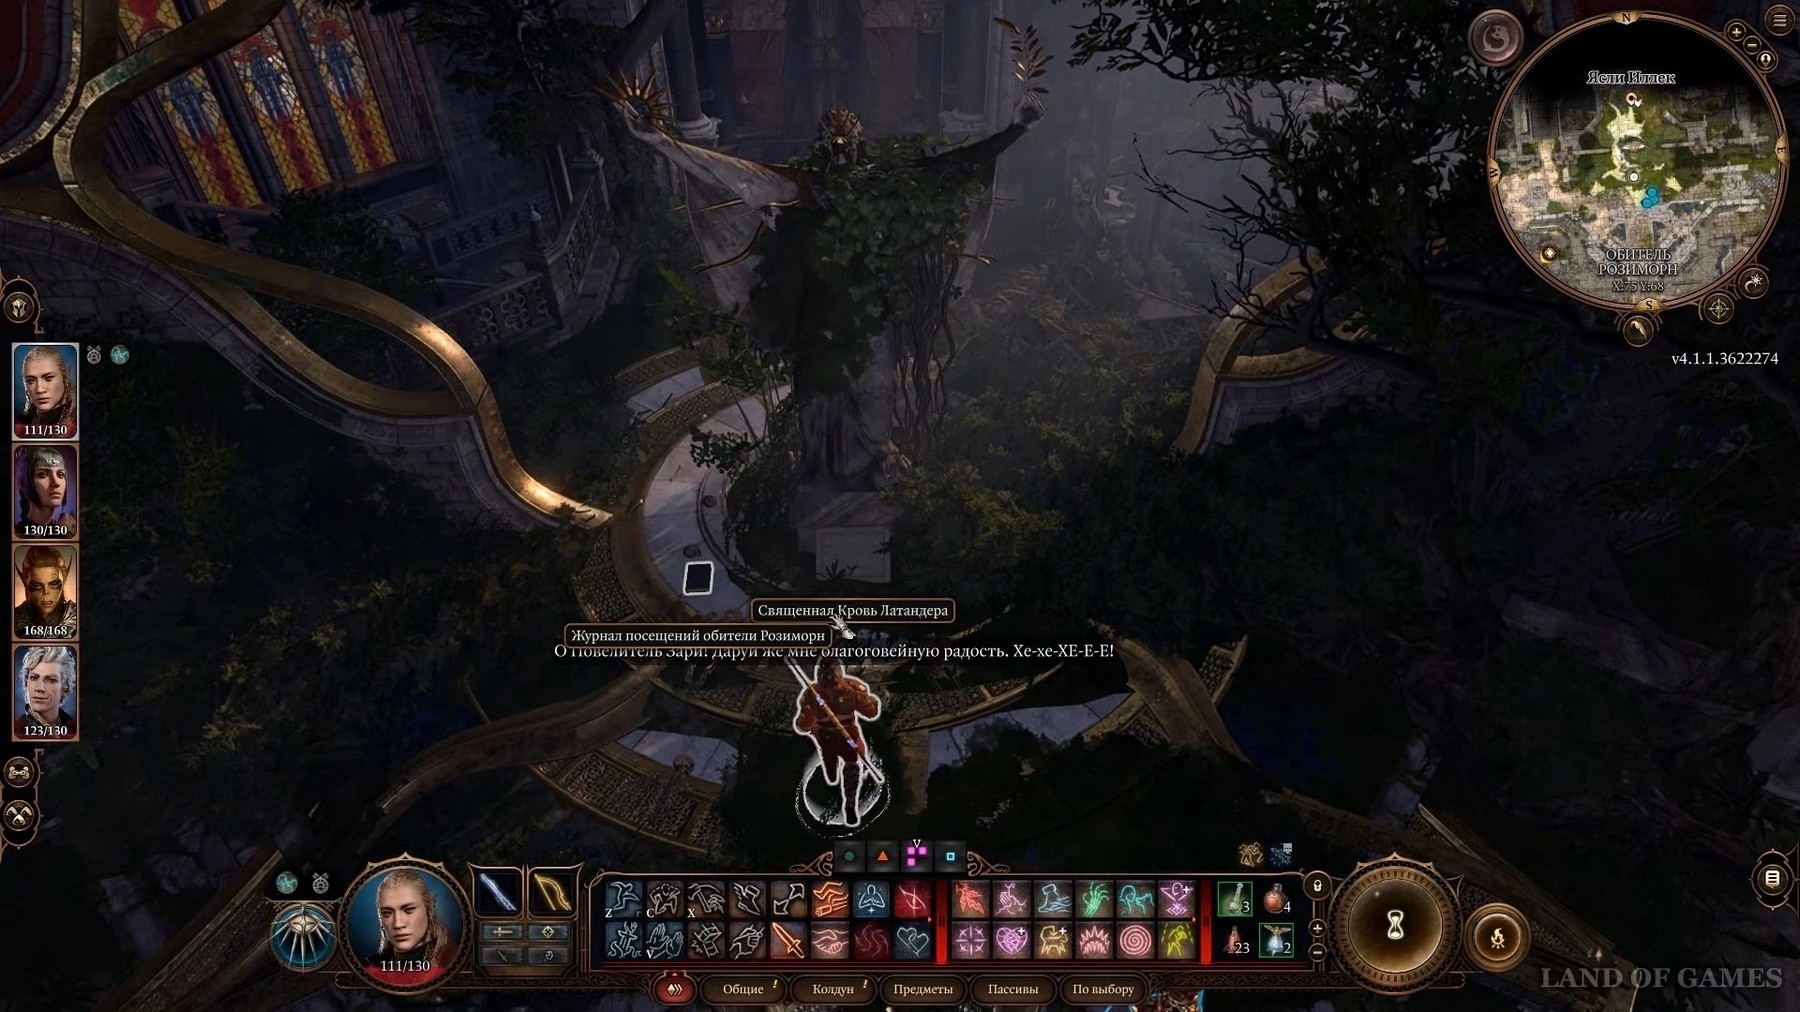
After successfully completing the puzzle and obtaining the crest of the Dawnmaster, you have the opportunity to loot the Legendary weapon, the Mace of Lathander. The assignment is issued at the entrance to the Githyanka nursery after the start of Act 2.
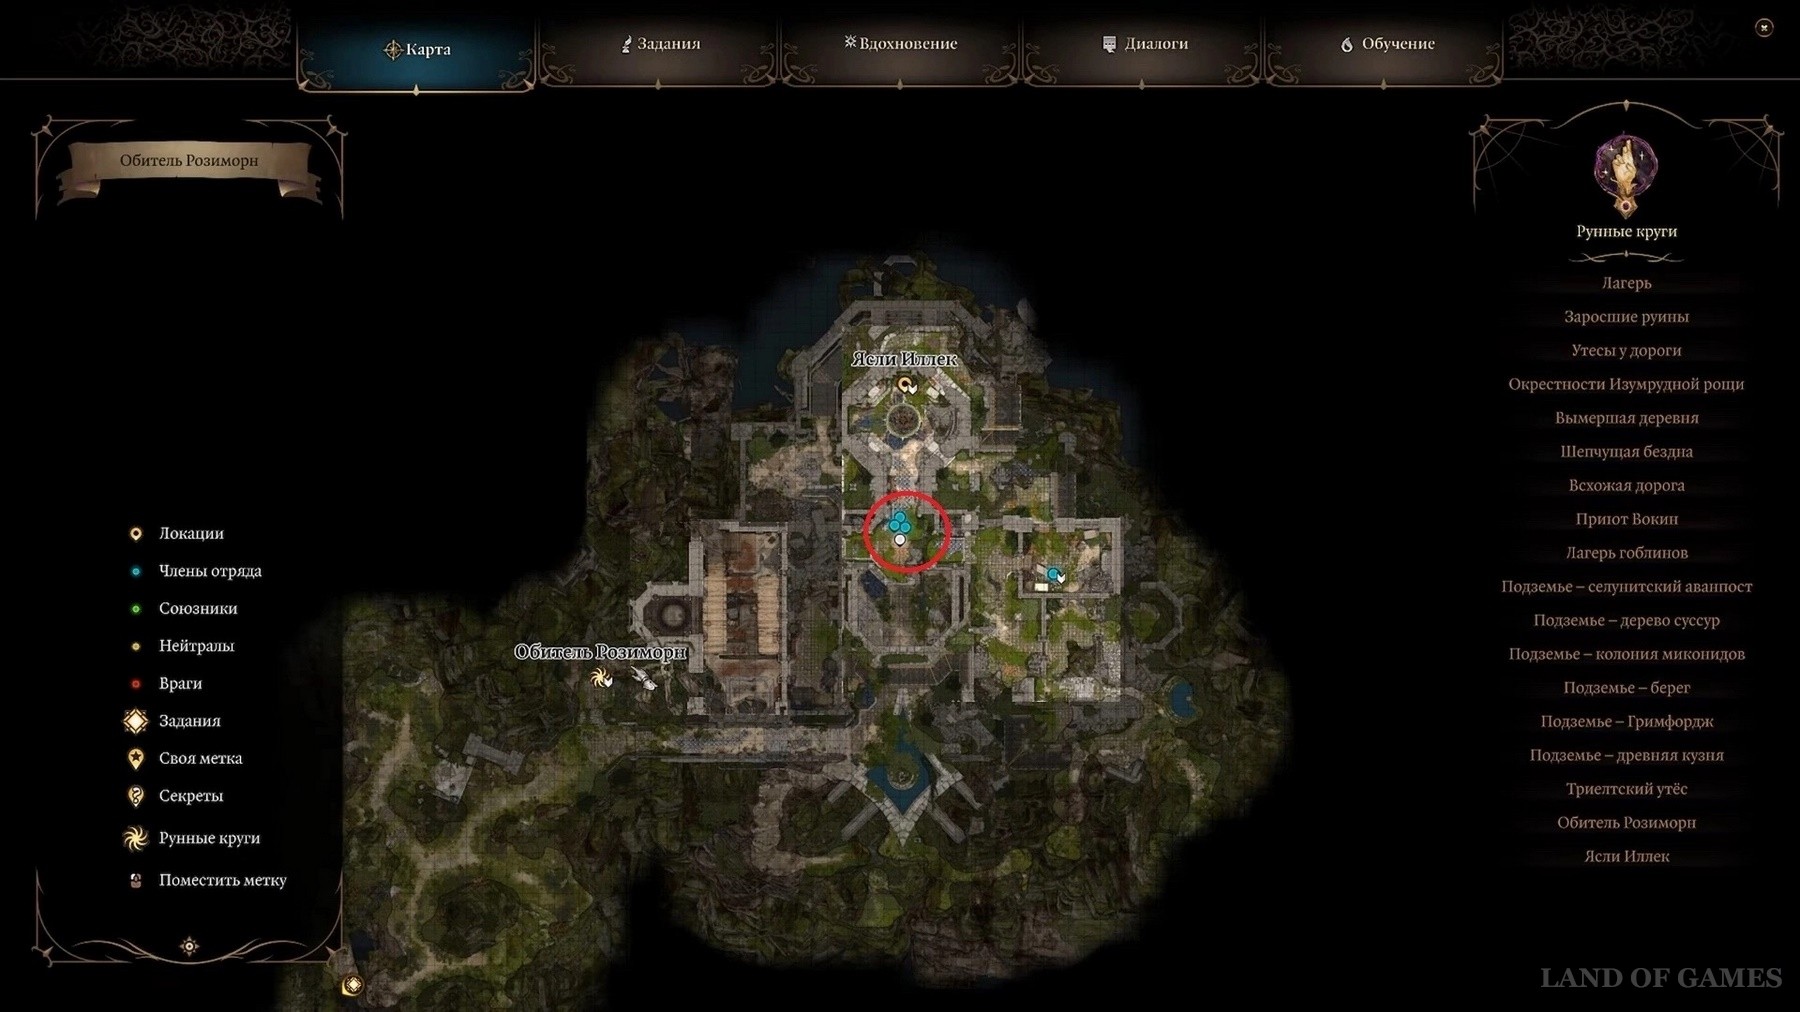
Before entering, you need to check the sign next to the statue to start the "Find the Blood of Lathander" quest.
We turn left, go down and get into the cellar of the monastery.
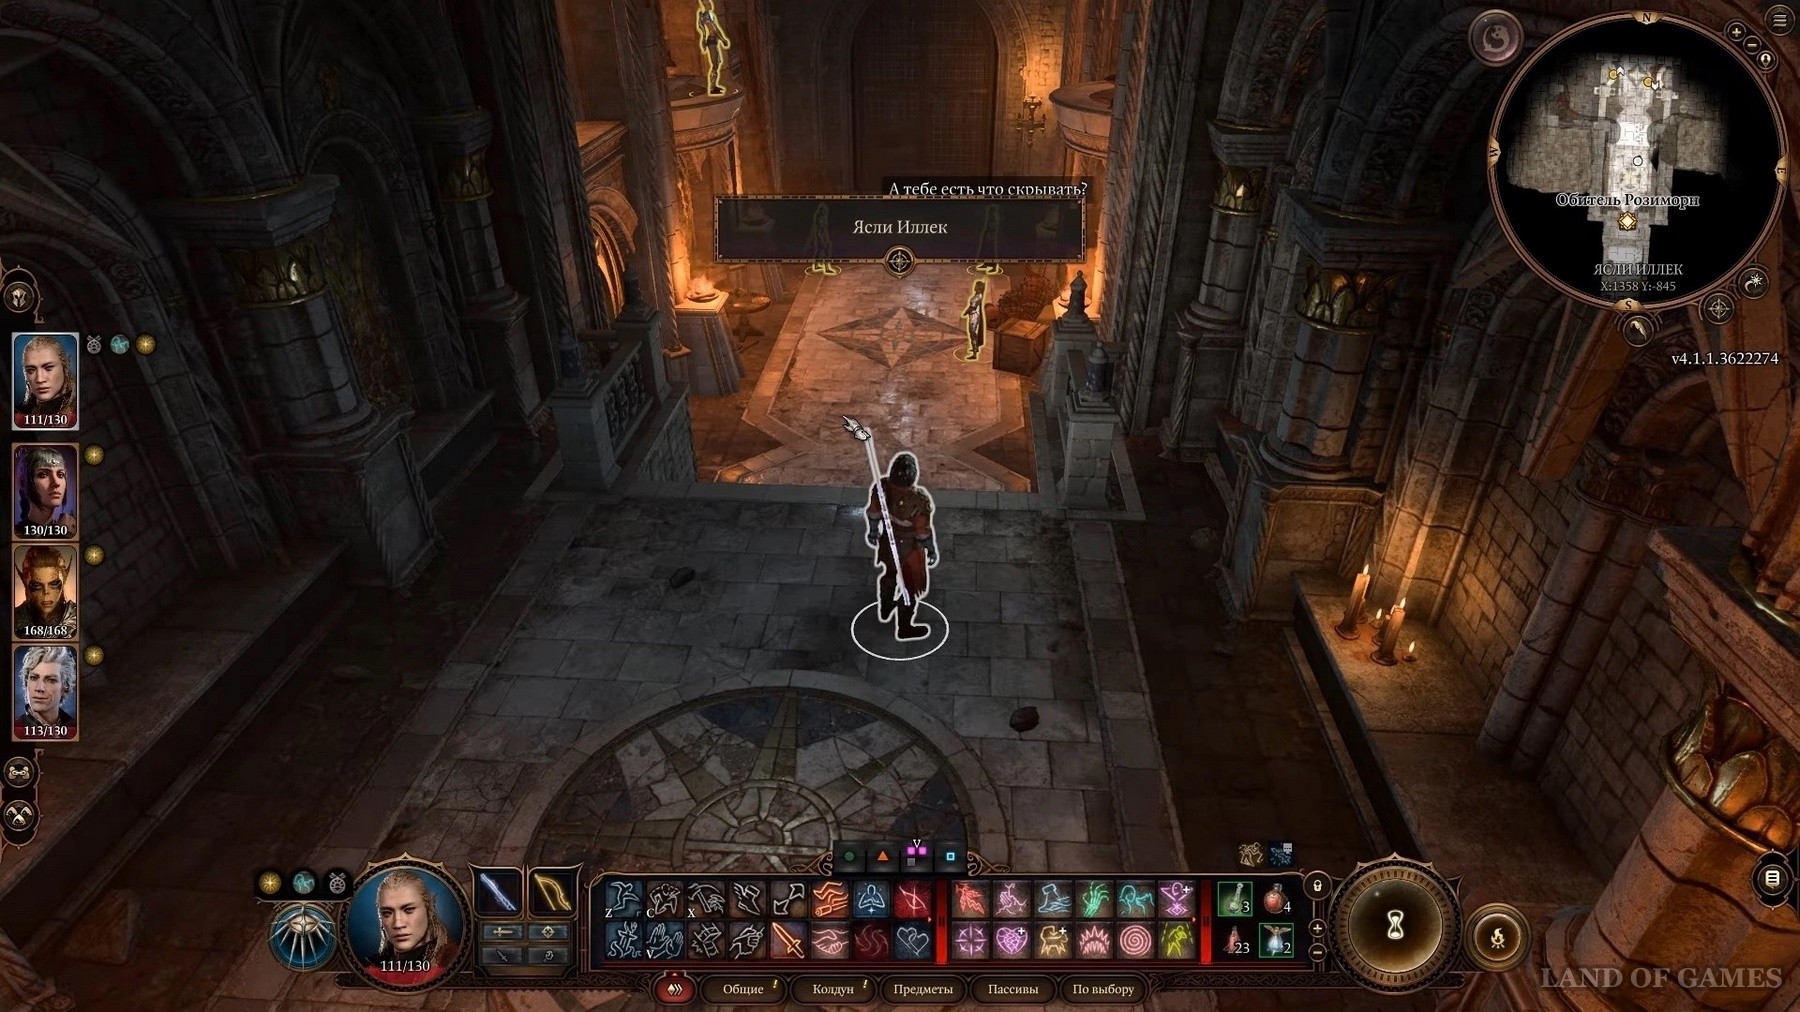
When you first enter this location, you can pass a charisma check or fight an NPC. We pass through the security to the Captain's Room.
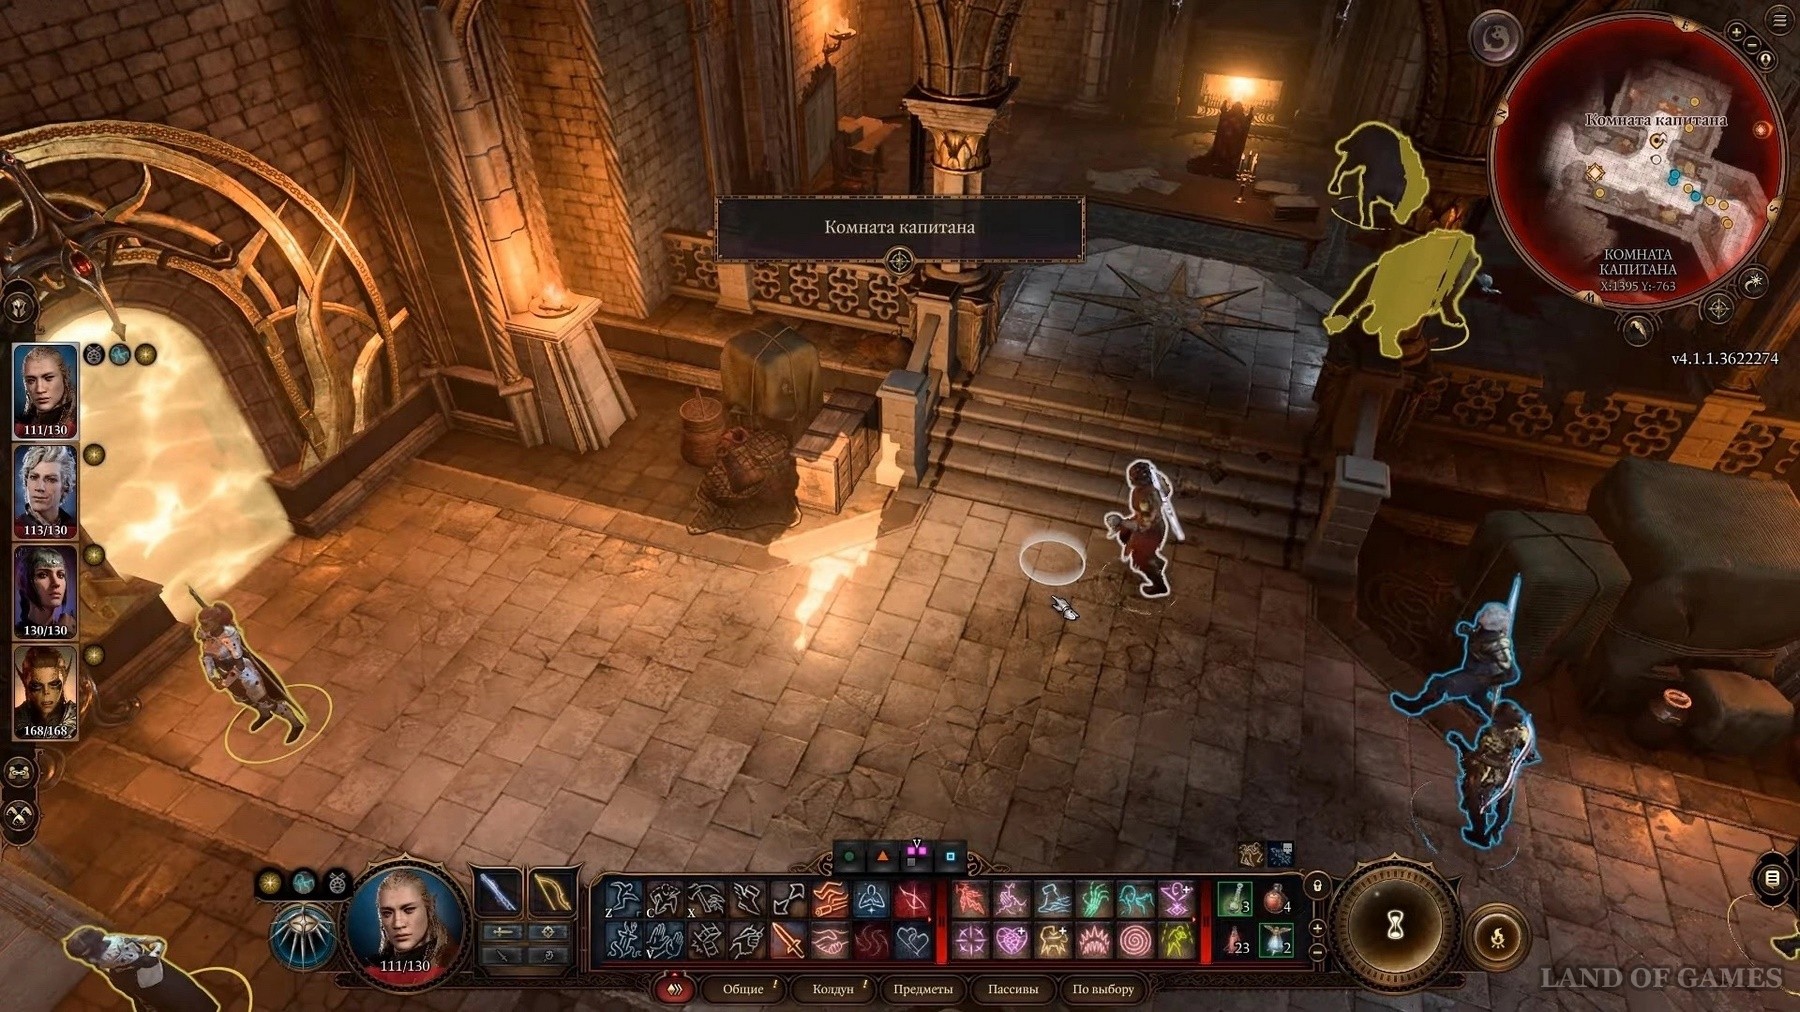
Turn on the Githyanki Barrier Breaker here. When you get to the Inquisitor's room (X:1330, Y:-663), he will invite you to his place, which will lead to an unpleasant situation that can end in a fight. We move on and find two statues.
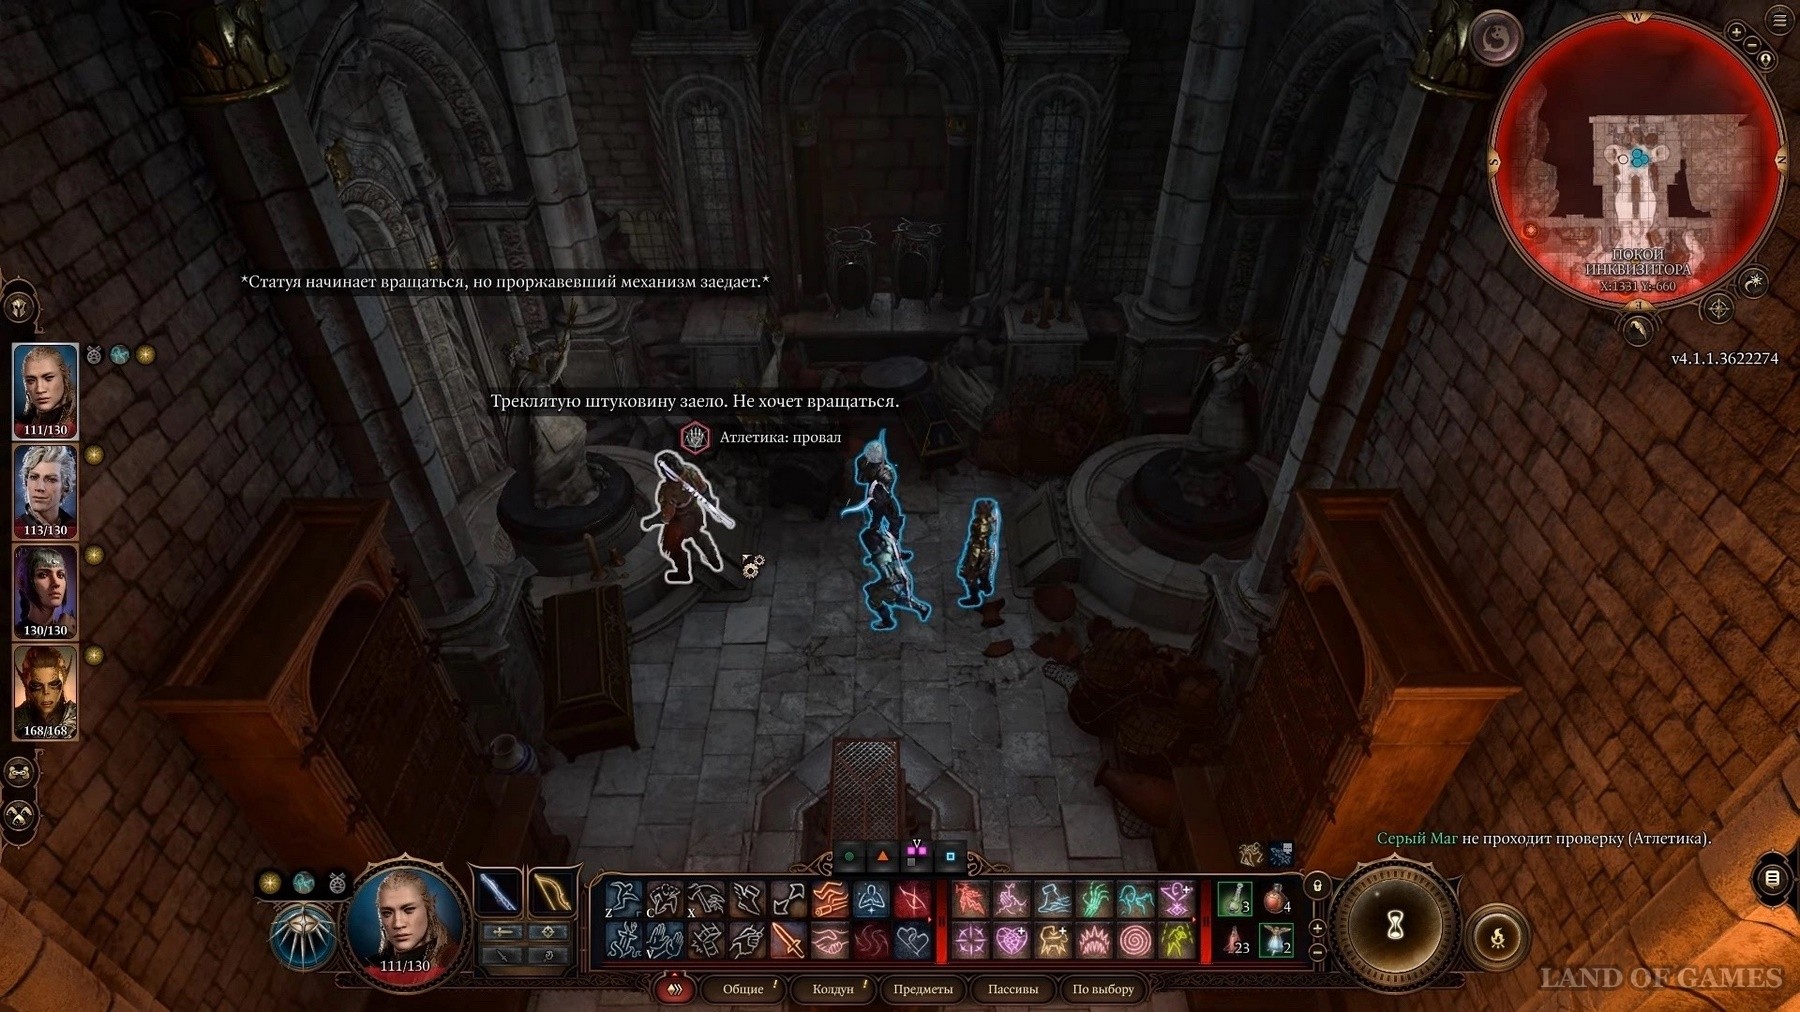
On the left figure you can read the inscription "Latander lovingly says goodbye to the setting sun", and on the right - "Latander blesses the rising sun, the source of all blessings." You need to rotate the statues so that they look towards the sunrise and sunset, but one of the statues is stuck:
- To move the left statue, hit it for at least 10 damage (or pass an Athletics check).
- Rotate the left statue so that it faces west - towards the sunset.
- Rotate the right statue so that it faces east - towards the sunrise.
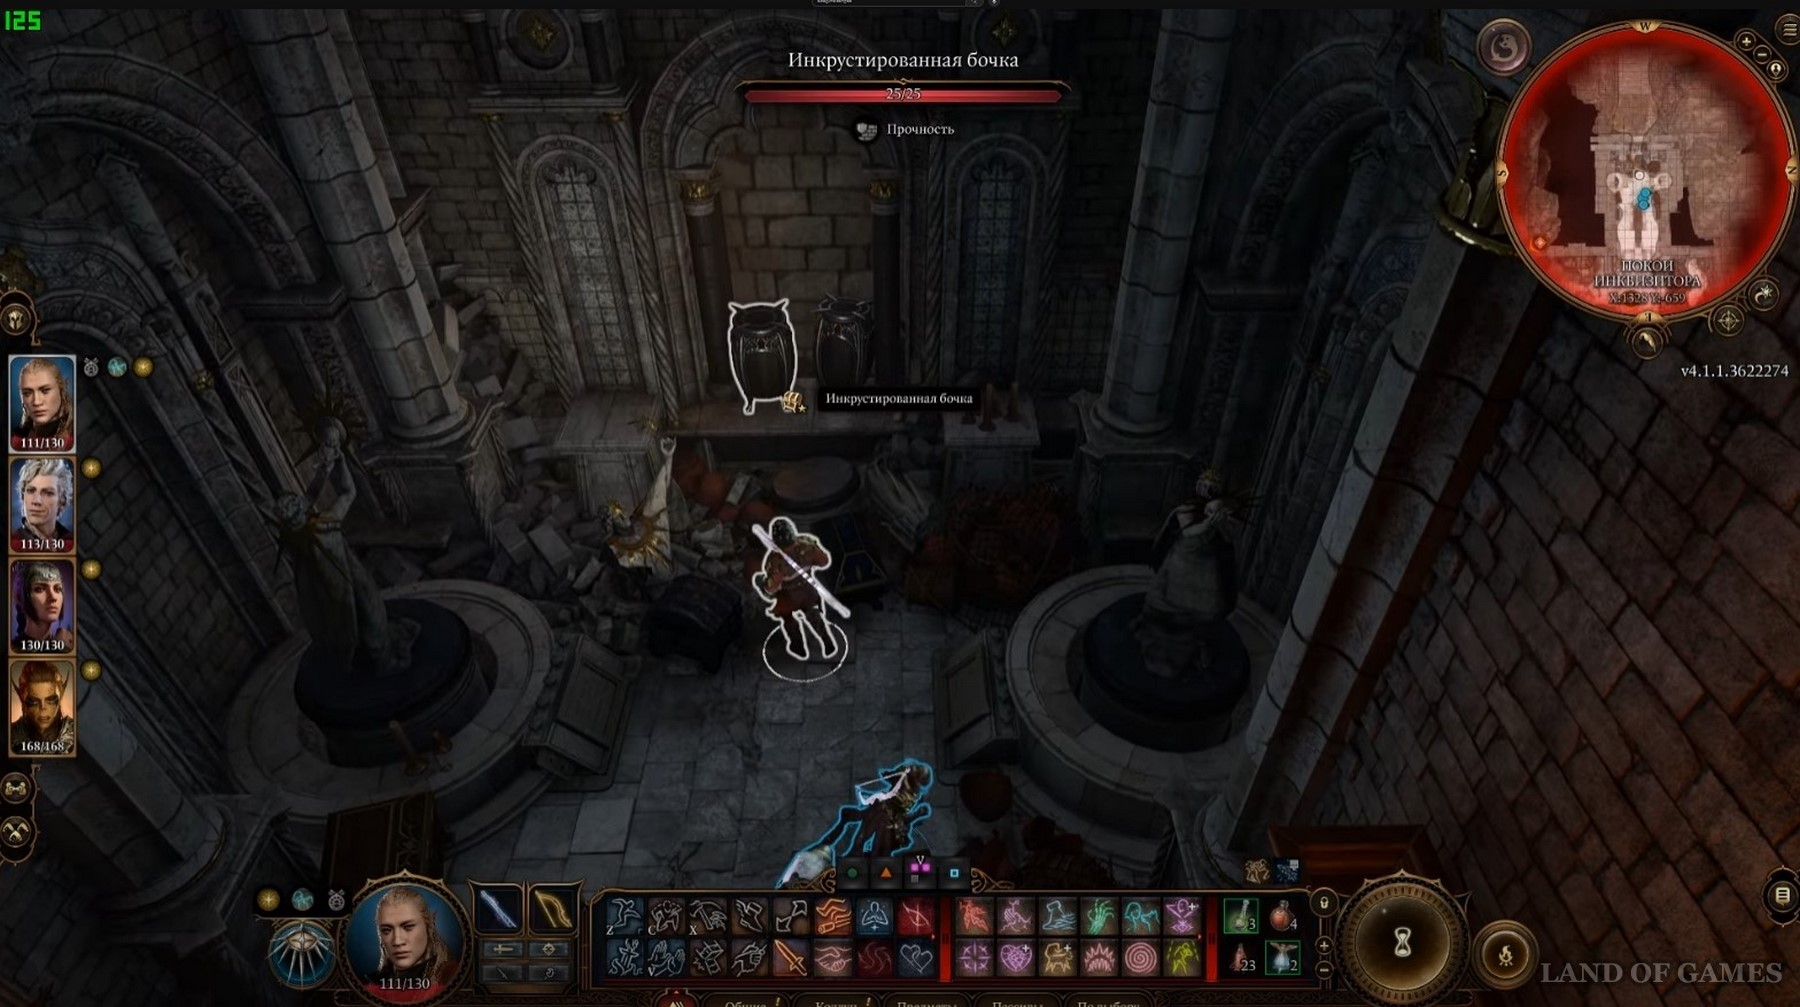
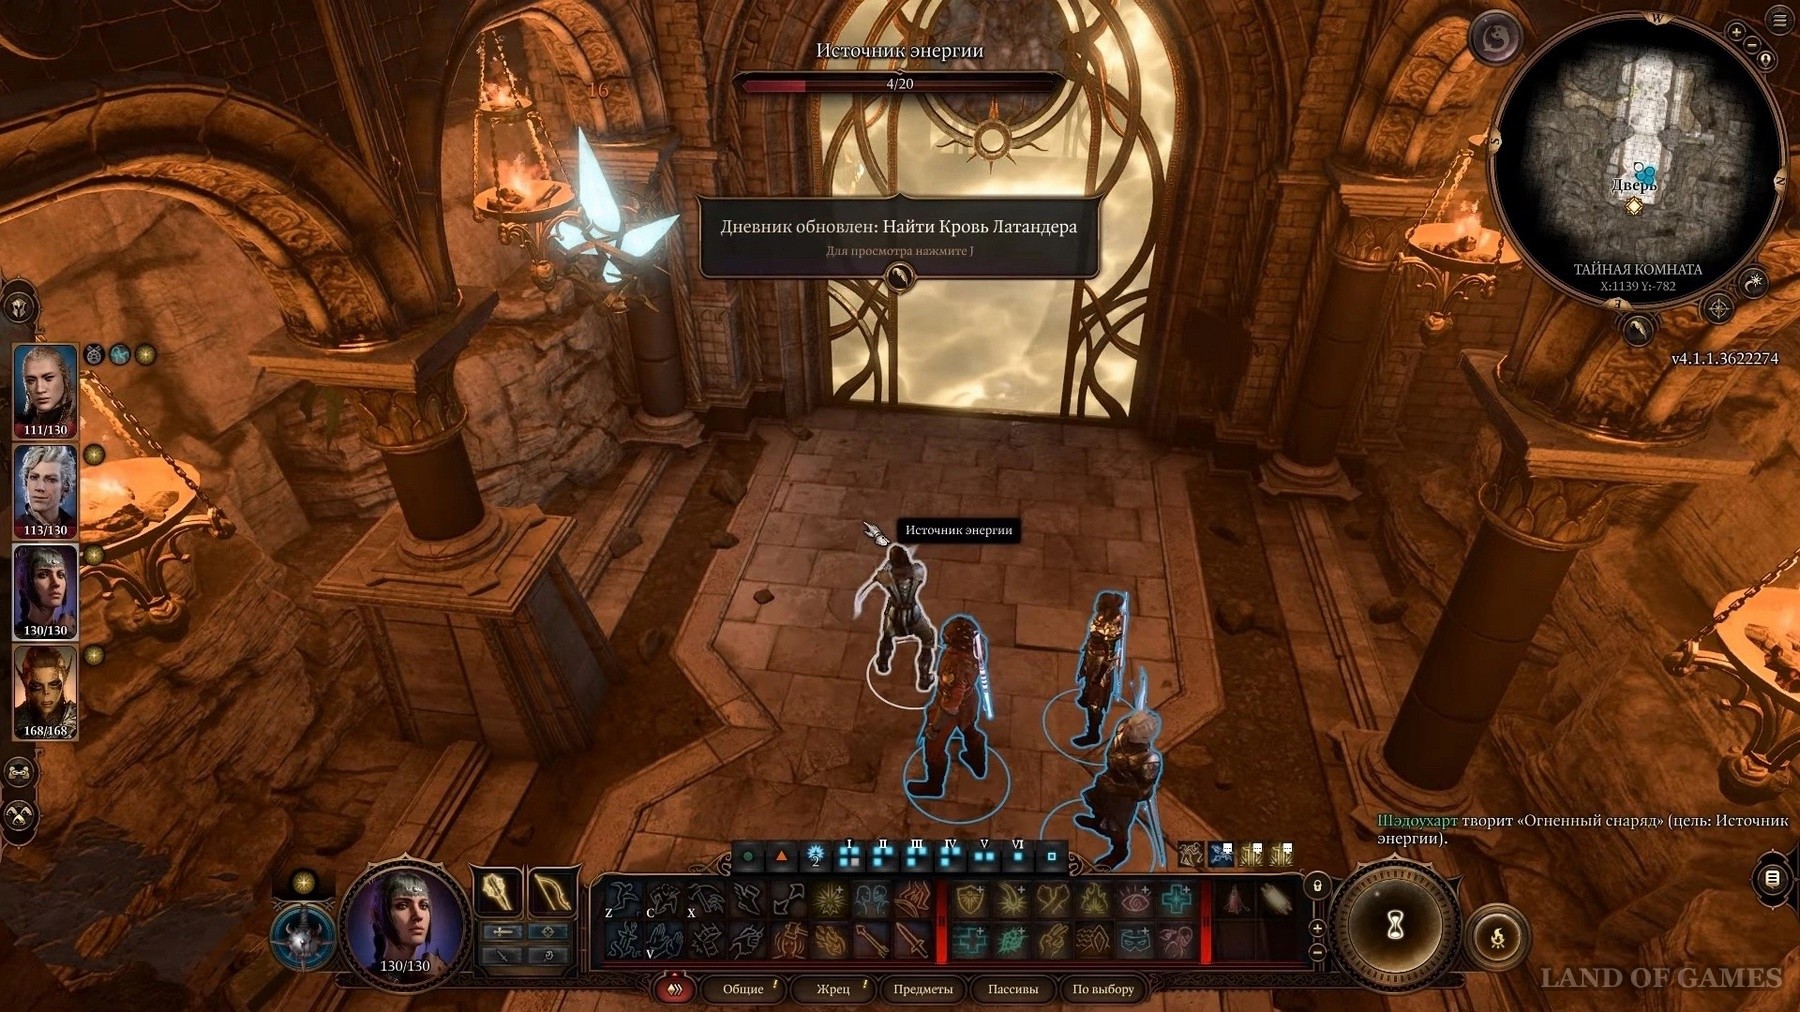
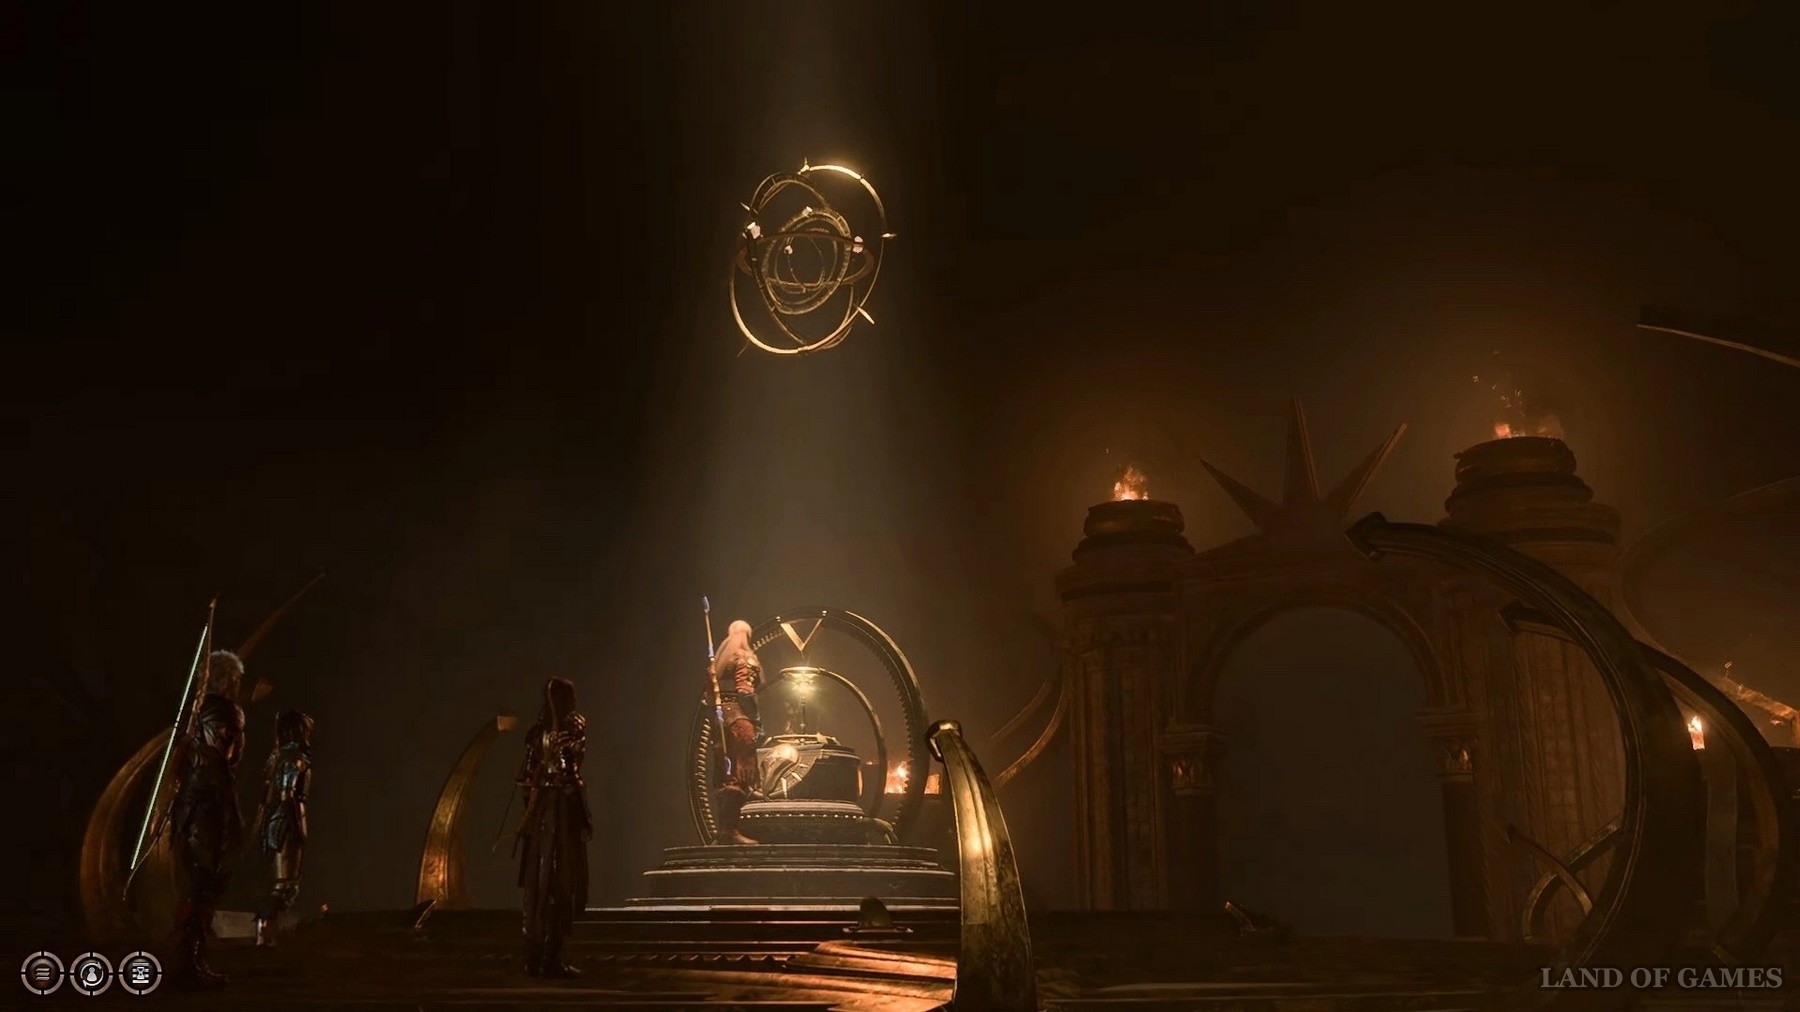
As a result, a secret passage will open. We head to the Chamber of Secrets through the Gate of Dawn.
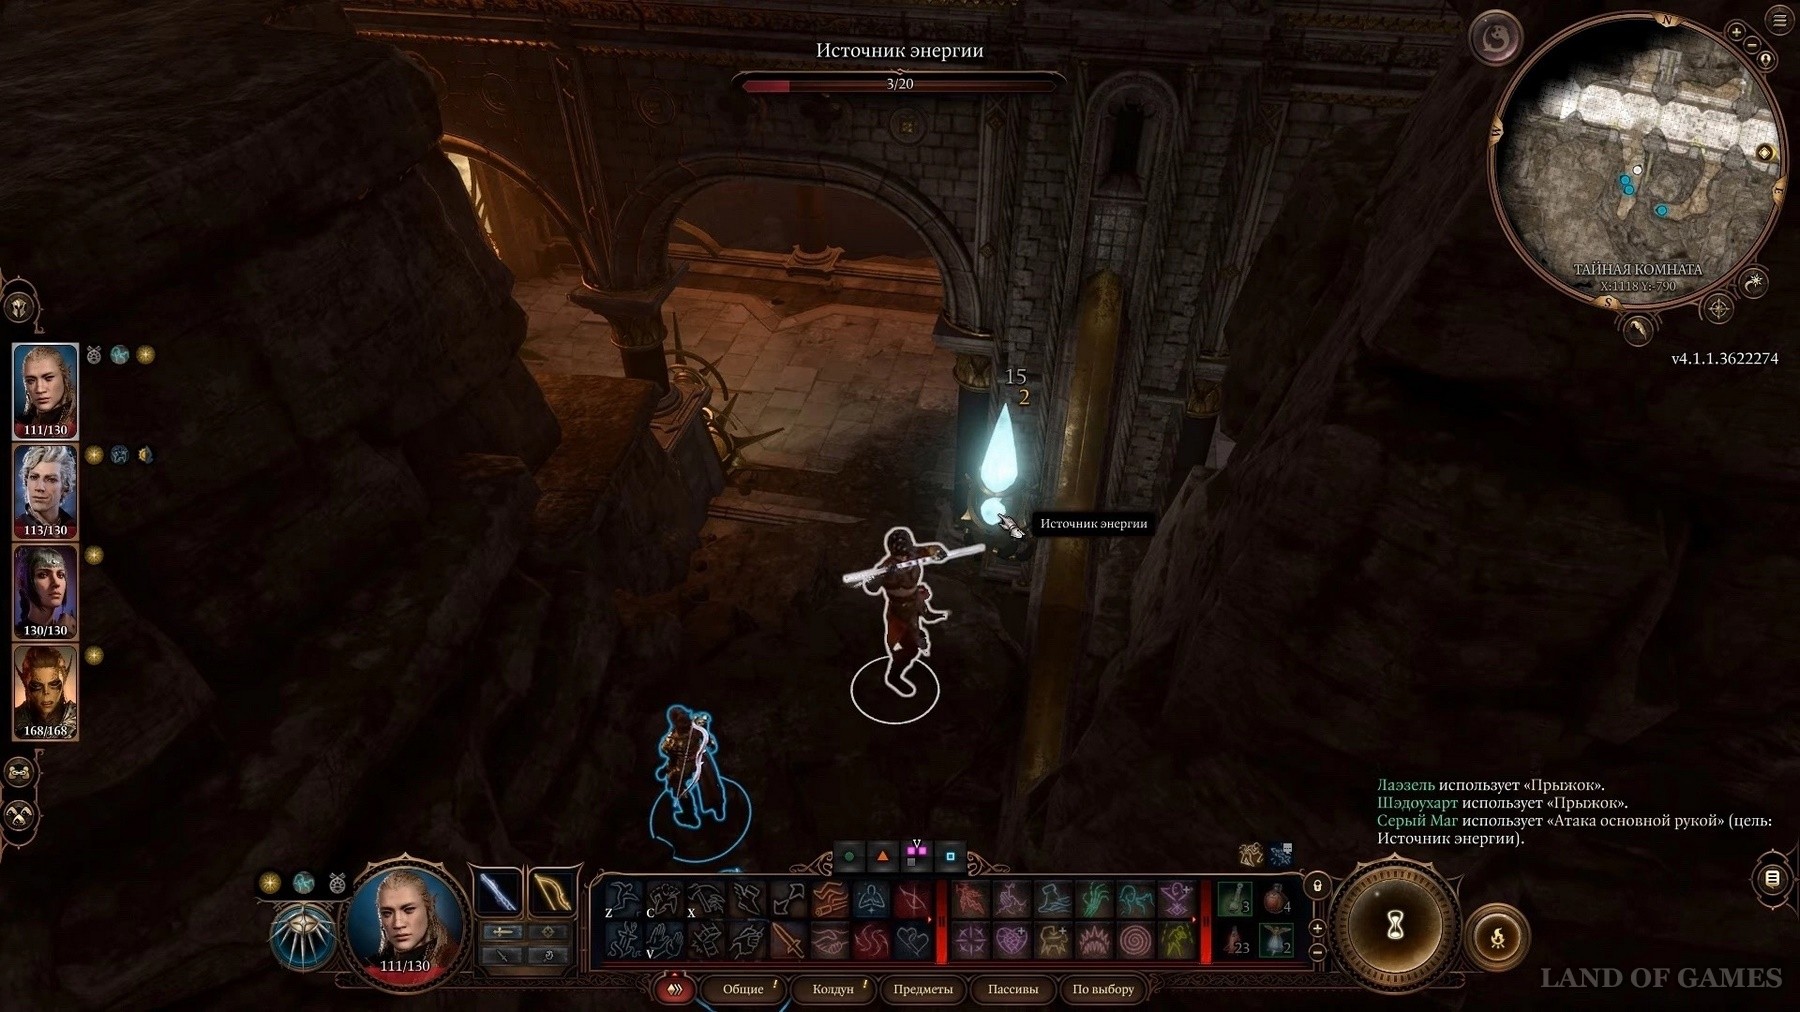
Your task is to overcome the three obstacles by eliminating the active crystals holding them without falling into the traps placed between them. Next, consider all your next steps.
Hit 1 source until it is destroyed.
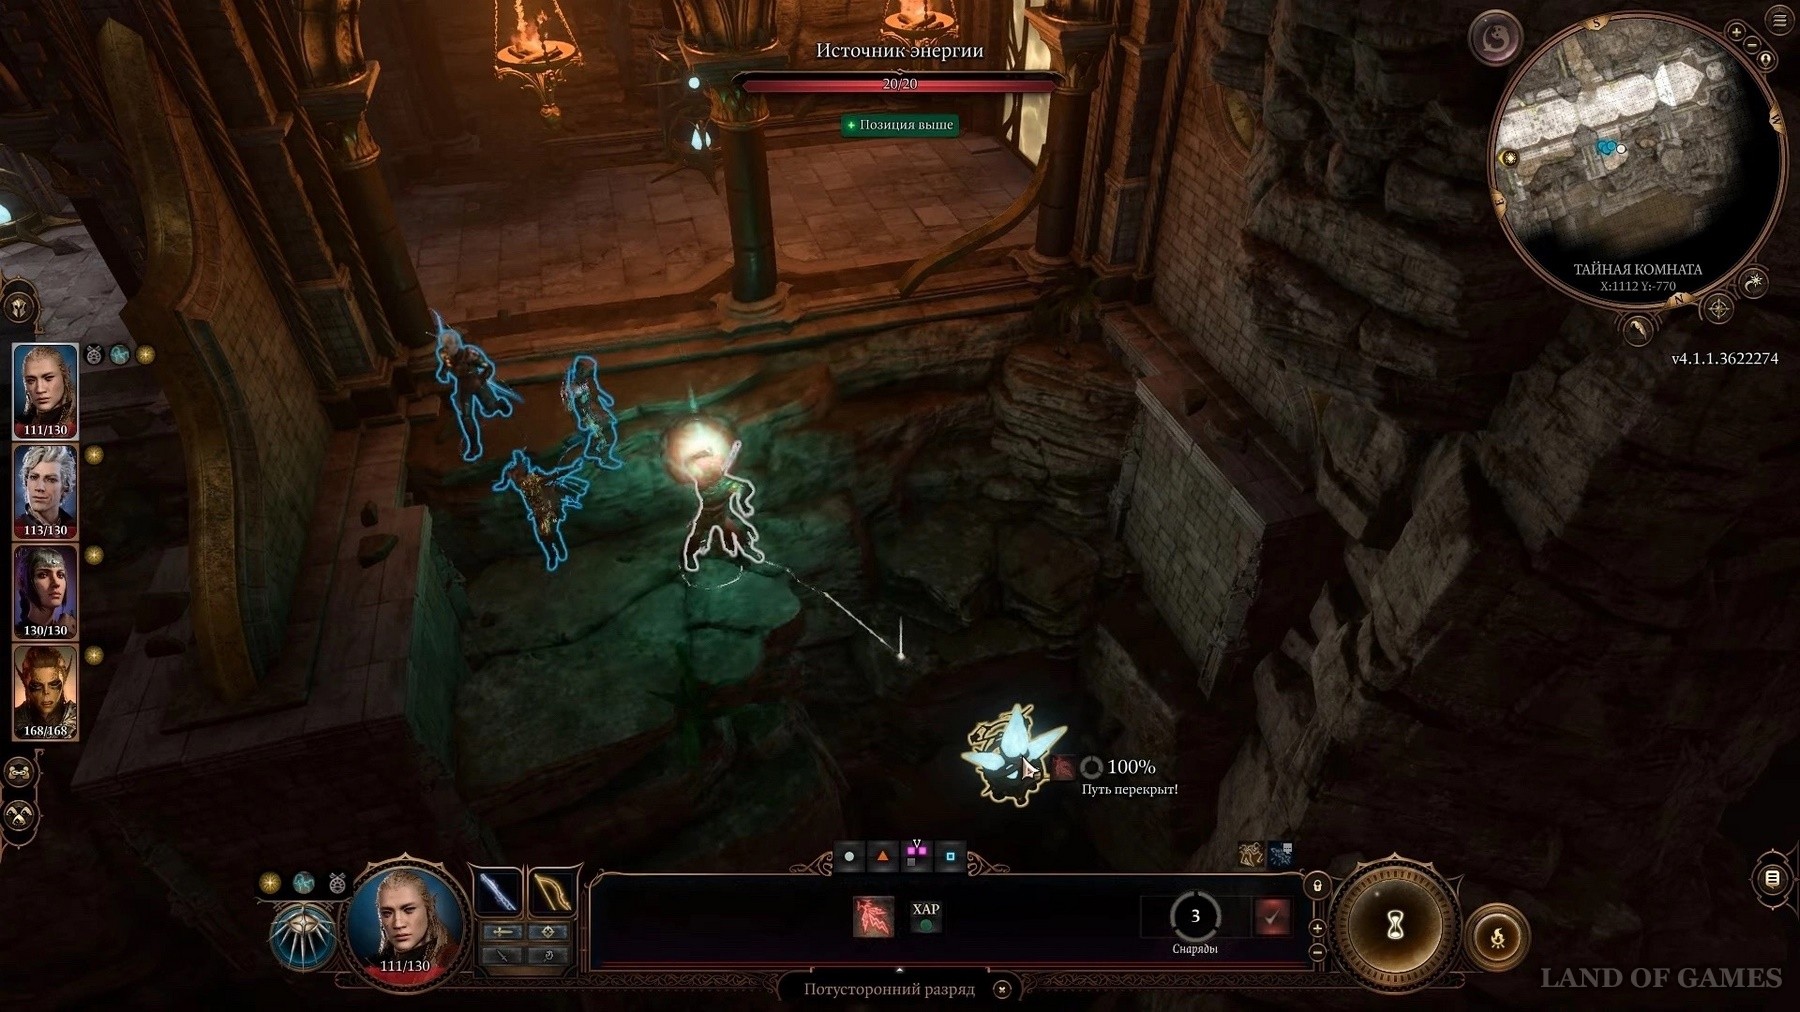
In the next room, you need to be ready for 2 trials. The first task is to disable the Dawn Trap with a Sleight of Hand check. Approach her carefully as she has the ability to destroy your entire escort group.
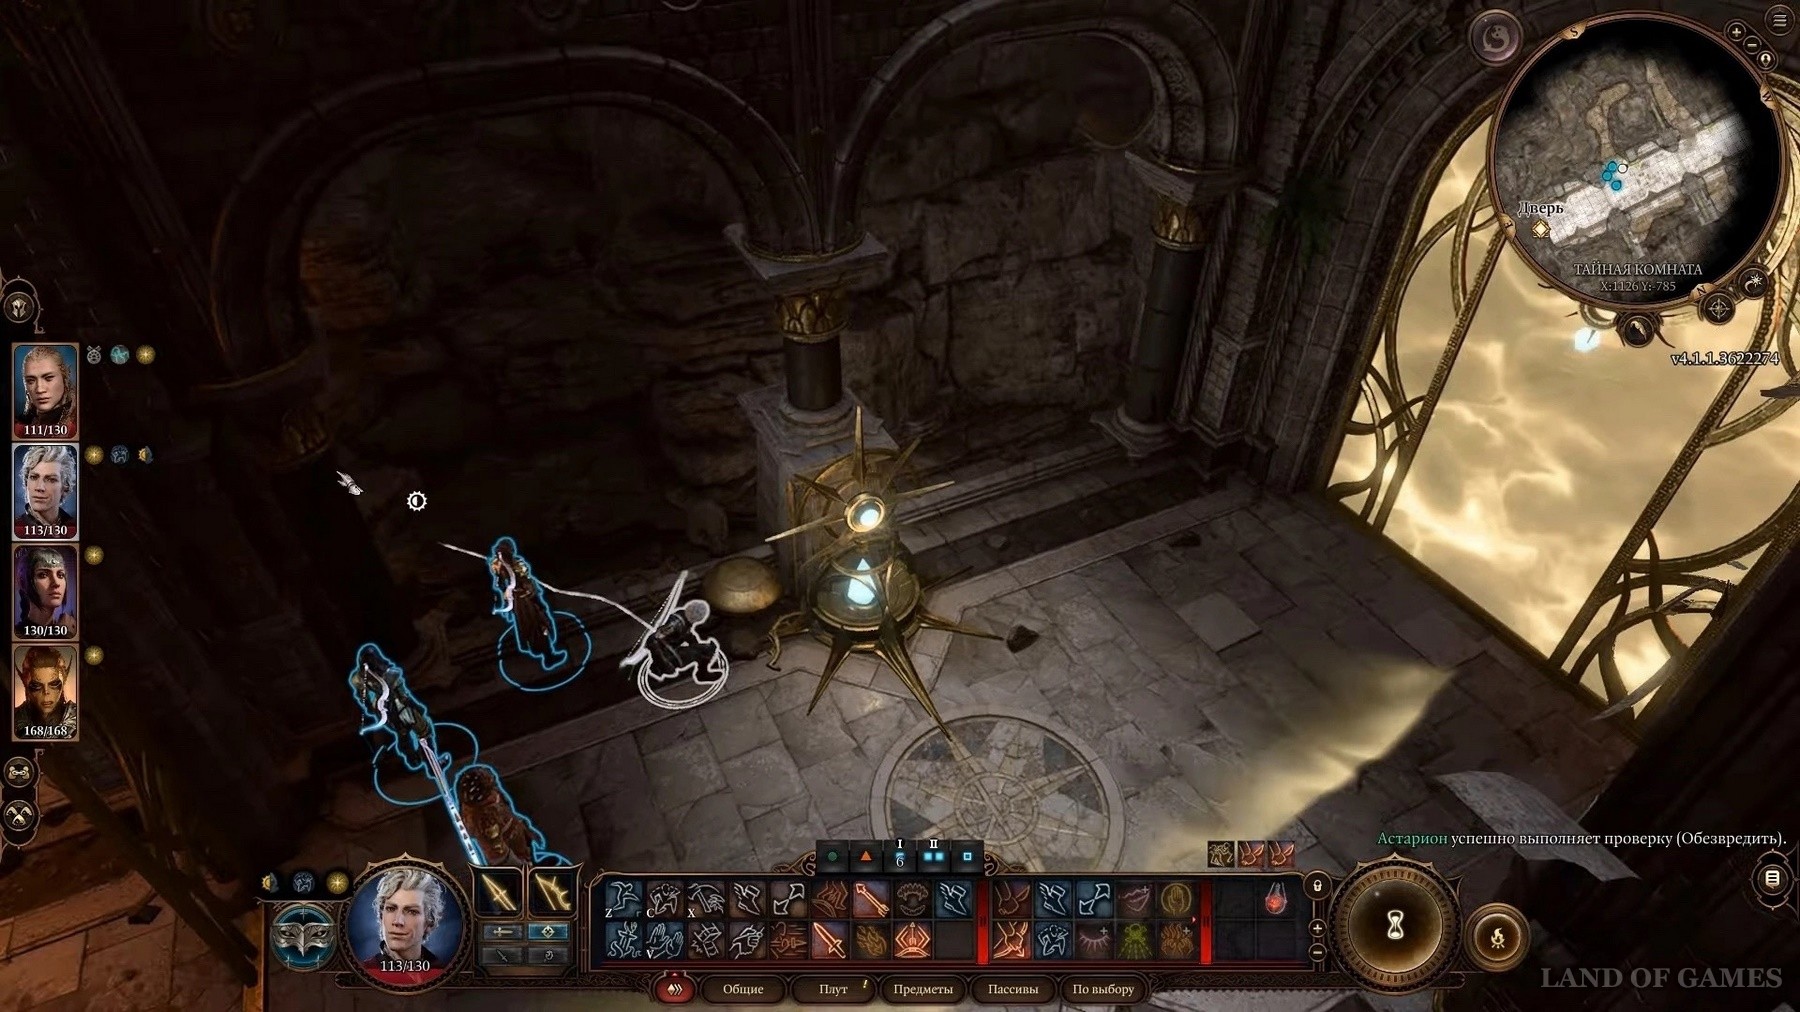
After pay attention to the left side of the hall, here you can go around the trap and be at the next barrier. Here we destroy 2 crystals.
Perform the Sleight of Hand check again. On the right, on the edge of the cliff, we find the last crystal and get rid of it.
A passage opens, and you find yourself in a hall with a panel where you need to put the Comb of the Dawn Master found earlier
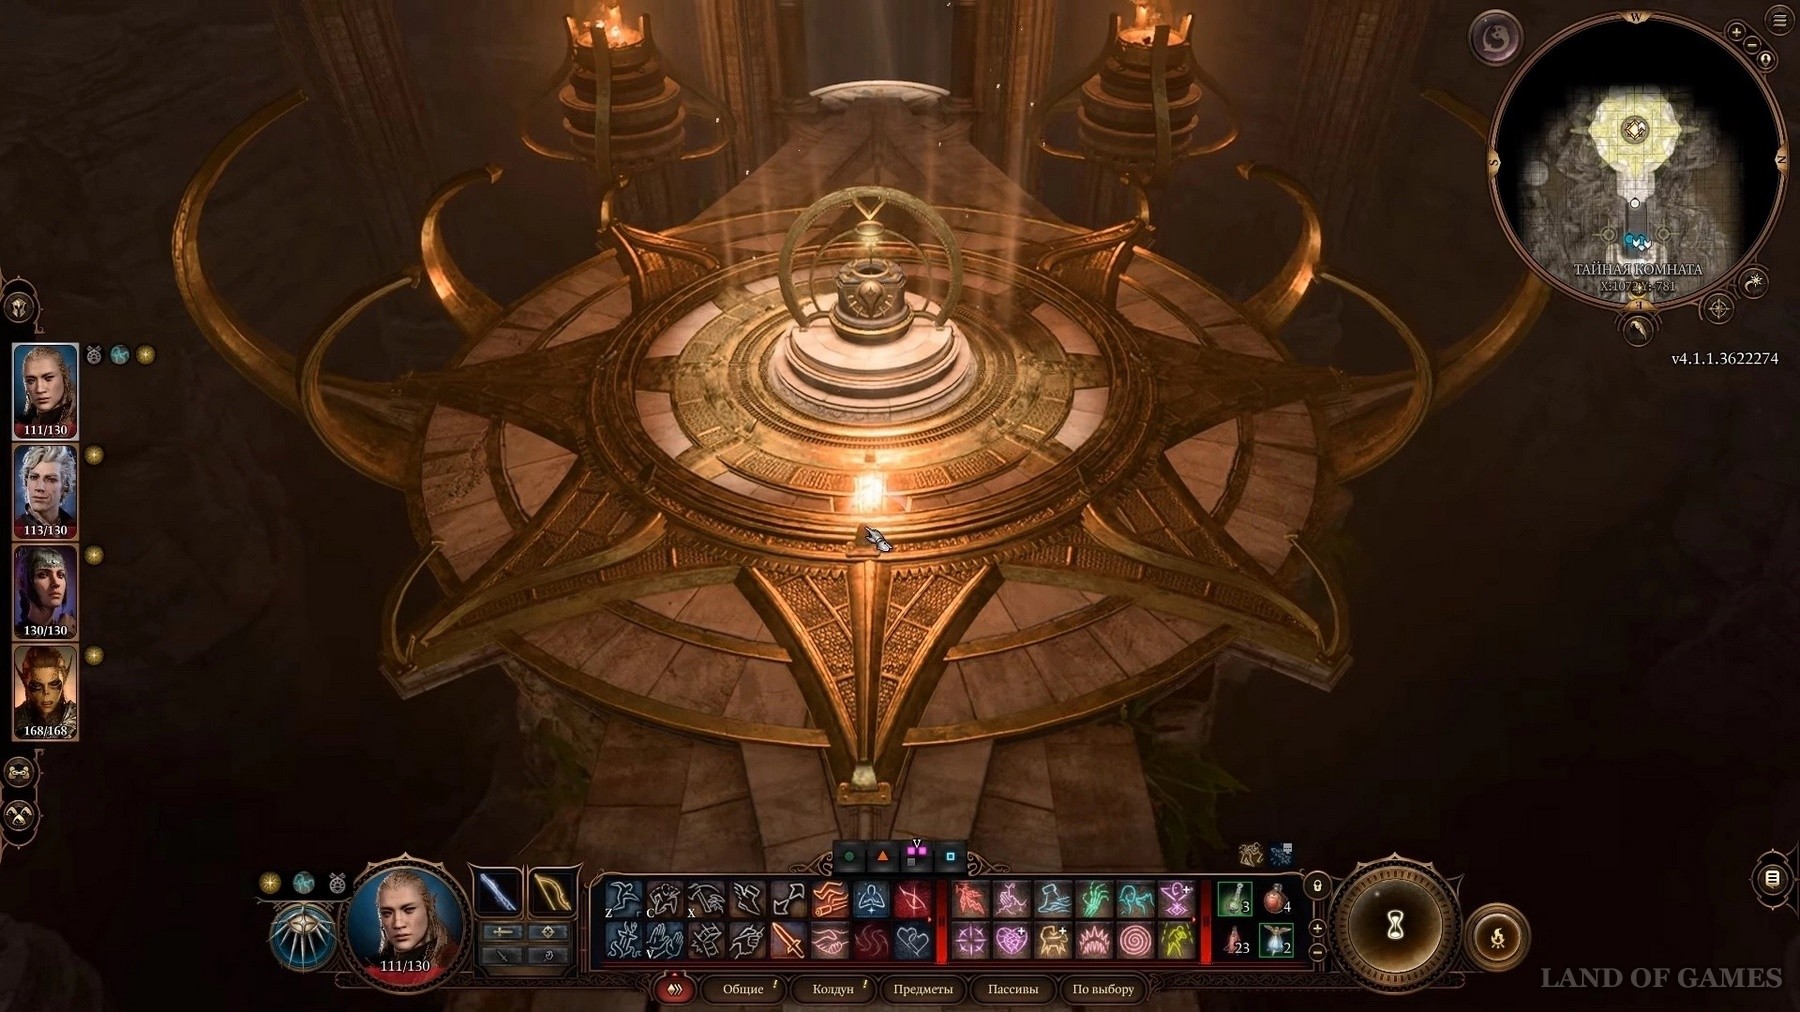
After a short cut-scene, the Legendary Mace "Blood of Lathander" appears on the panel with the following characteristics:
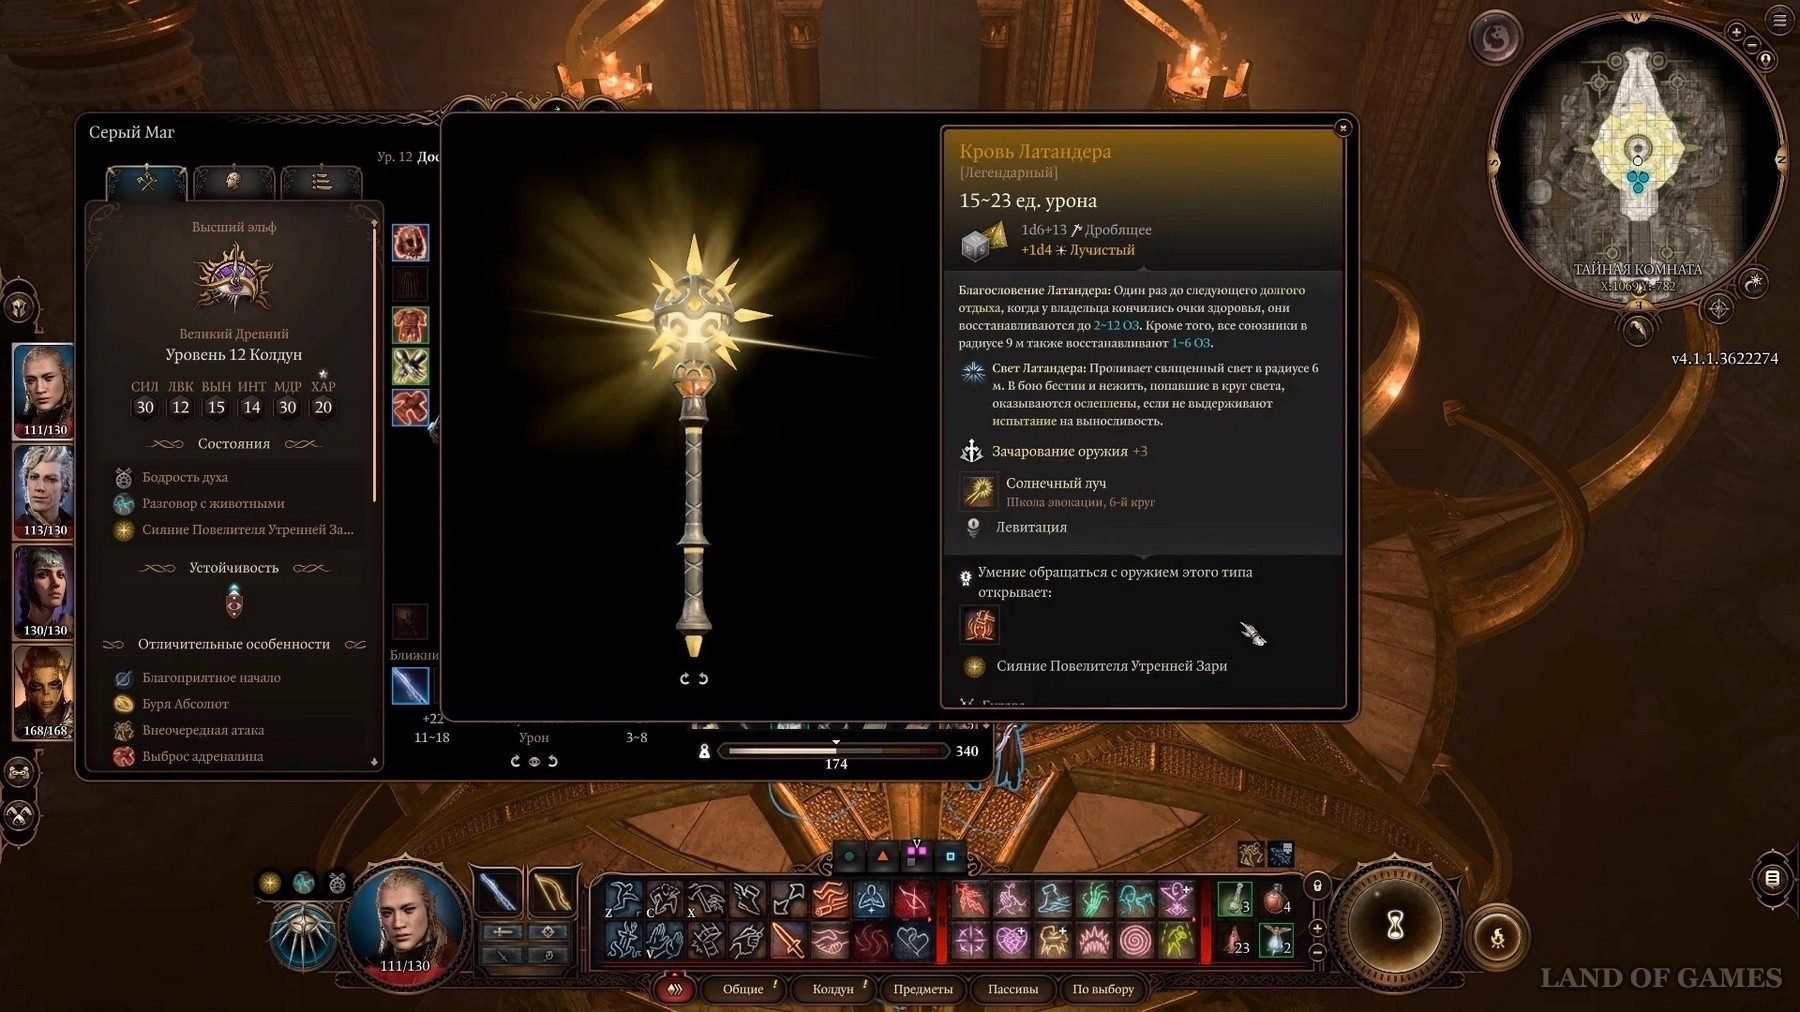
You successfully complete the "Blood of Lathander" quest and receive the Legendary Weapon.
We hope you found our guide helpful in finding the items you need and solving the puzzle in Rosymorne's Retreat!
Comments
You need to login to add comments.
You can login with