
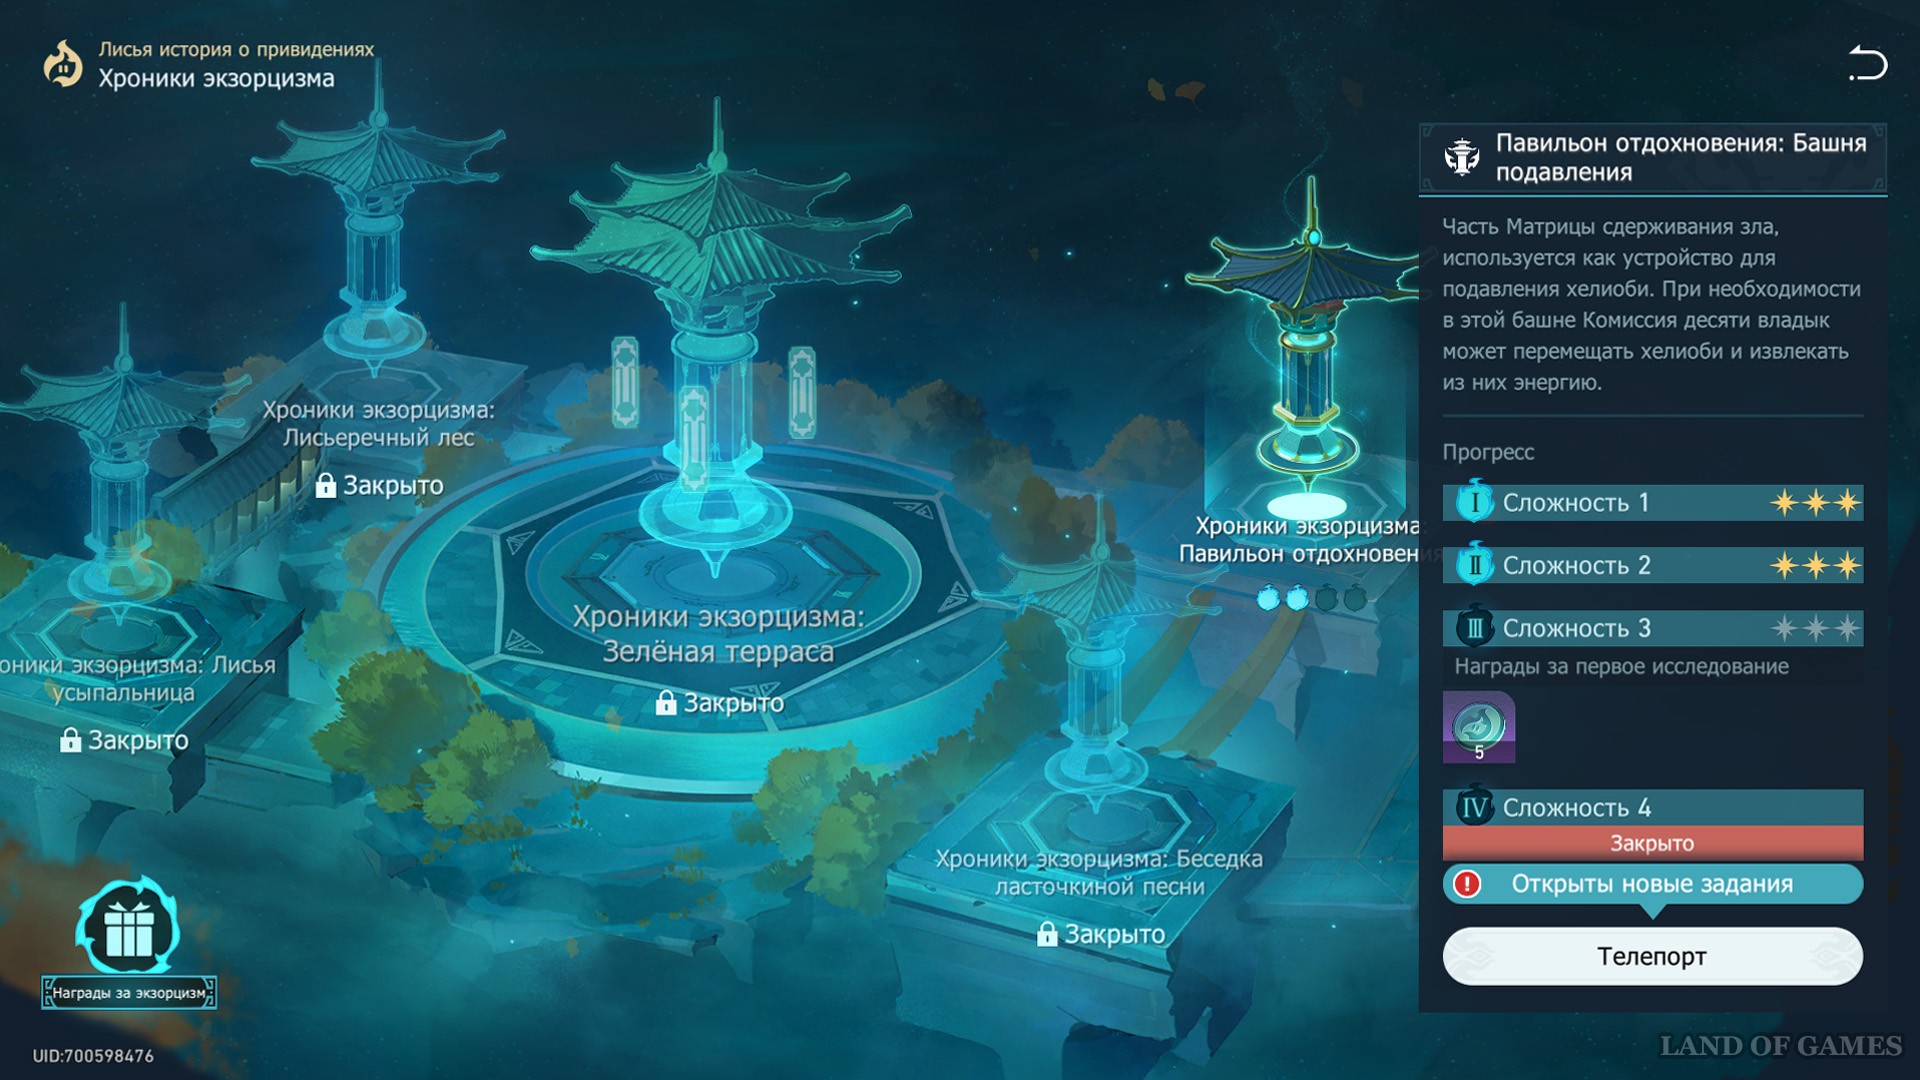
In Honkai: Star Rail "Chronicles of Exorcism: Pavillion of Cessation" is adventure mission and the test on Lofu Xianzhou, taking place as part of a large series of quests “ The Fox's Ghost Story " Take part in 4 combat levels of the Tower of Suppression, which serves as a sealing mechanism for heliobi energy in the northeast Garden of Serenity and receive rewards for exorcism. Our guide will help you through the passage, selecting a squad and successfully using the Demon Flame.
Completing the "Chronicles of Exorcism: Pavilion of Rest" challenge
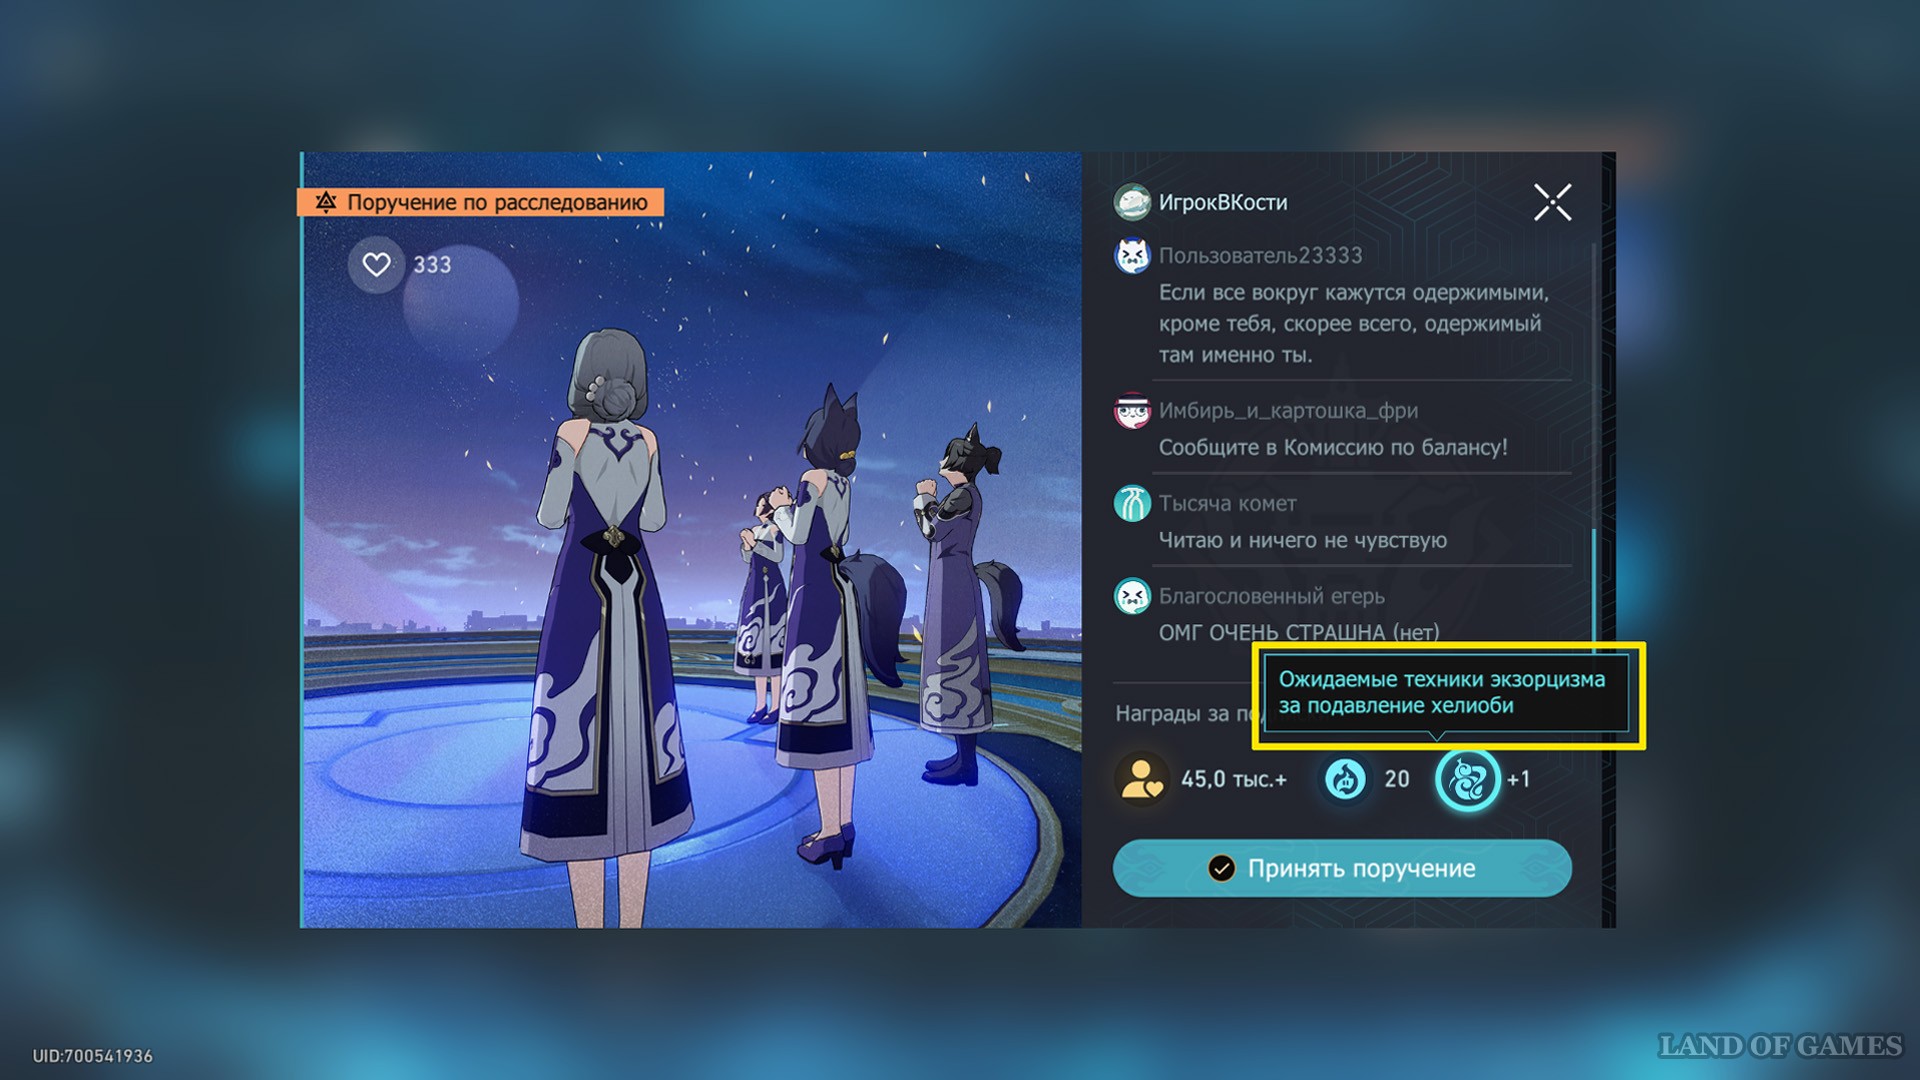
How to start an assignment
As mentioned above, this activity takes place as part of the Mastery mission " The Fox's Ghost Story » and will become available after a number of the following requirements:
- Complete tasks: " A walk in the garden and an interrupted dream " And " Twins ";
- Investigate Urban legends of Lofu : " A skiff piercing the moon " or " Chess ghost "
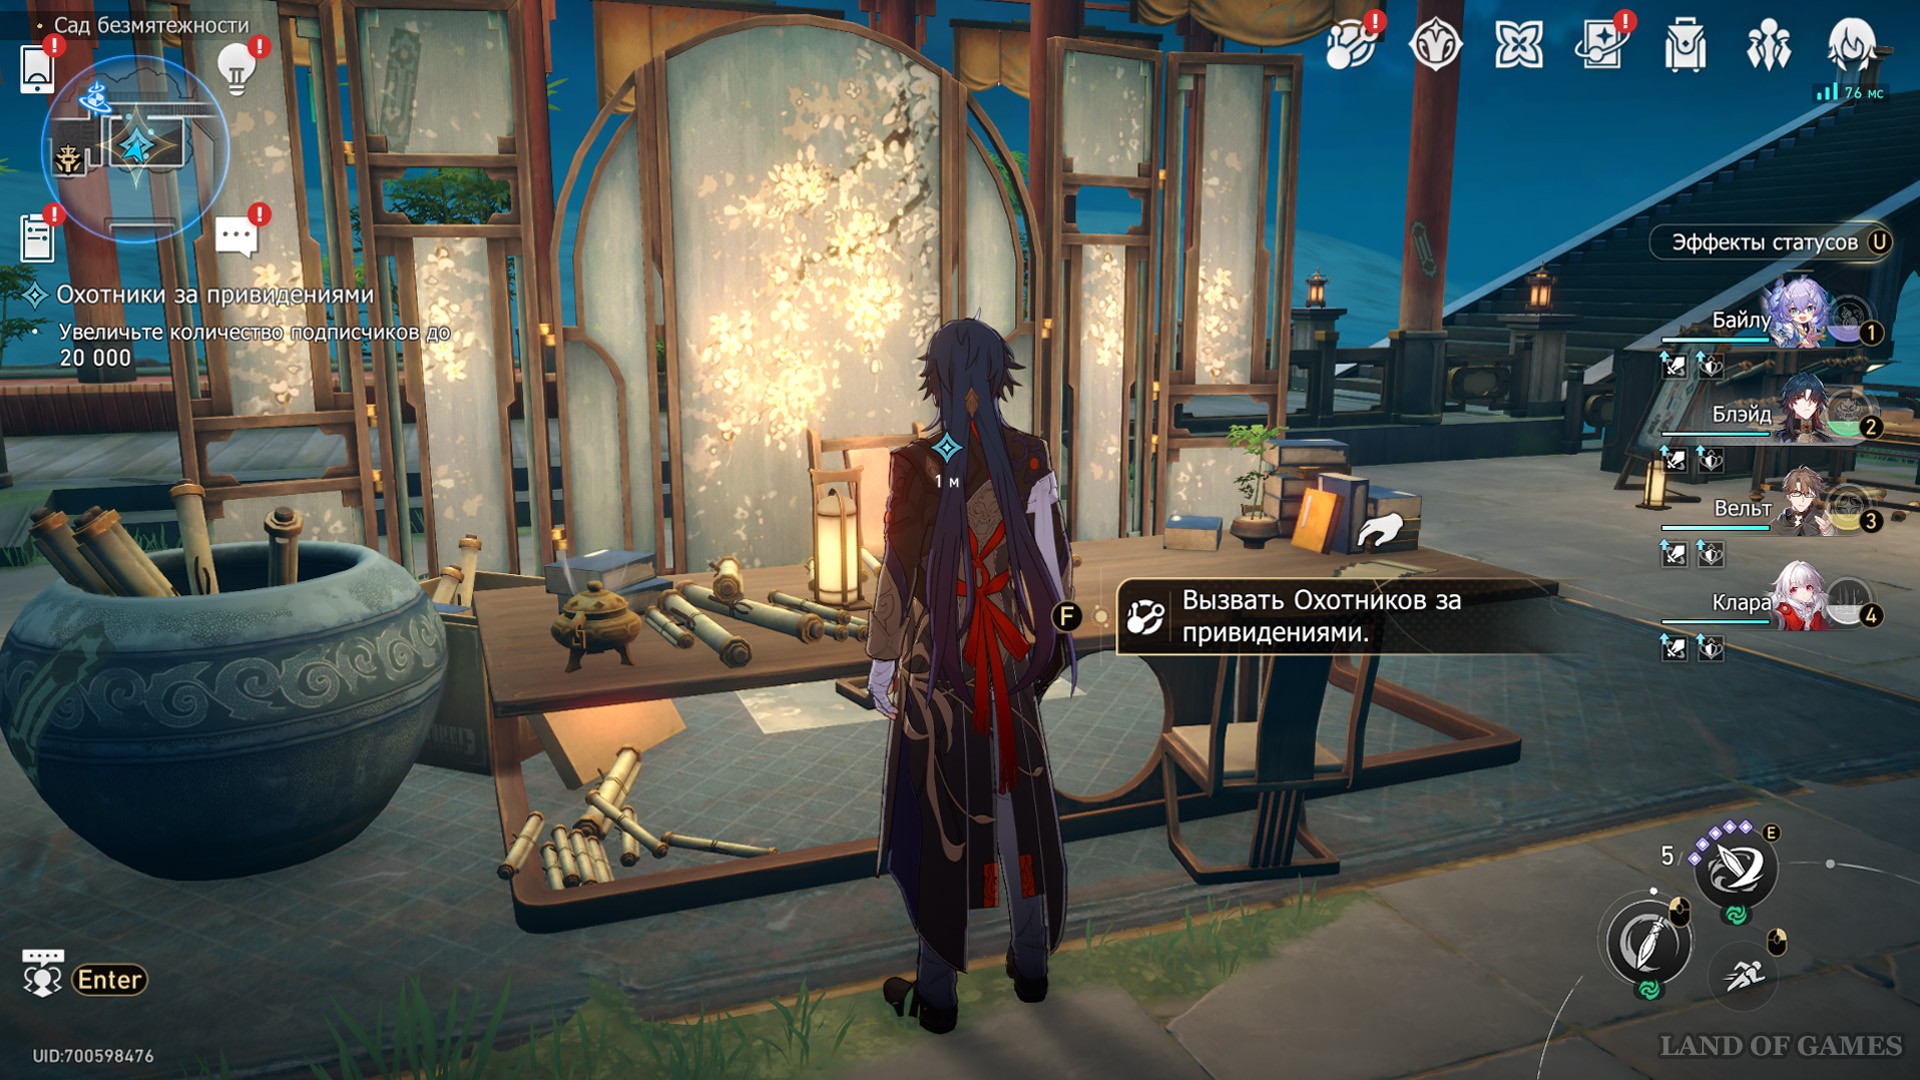
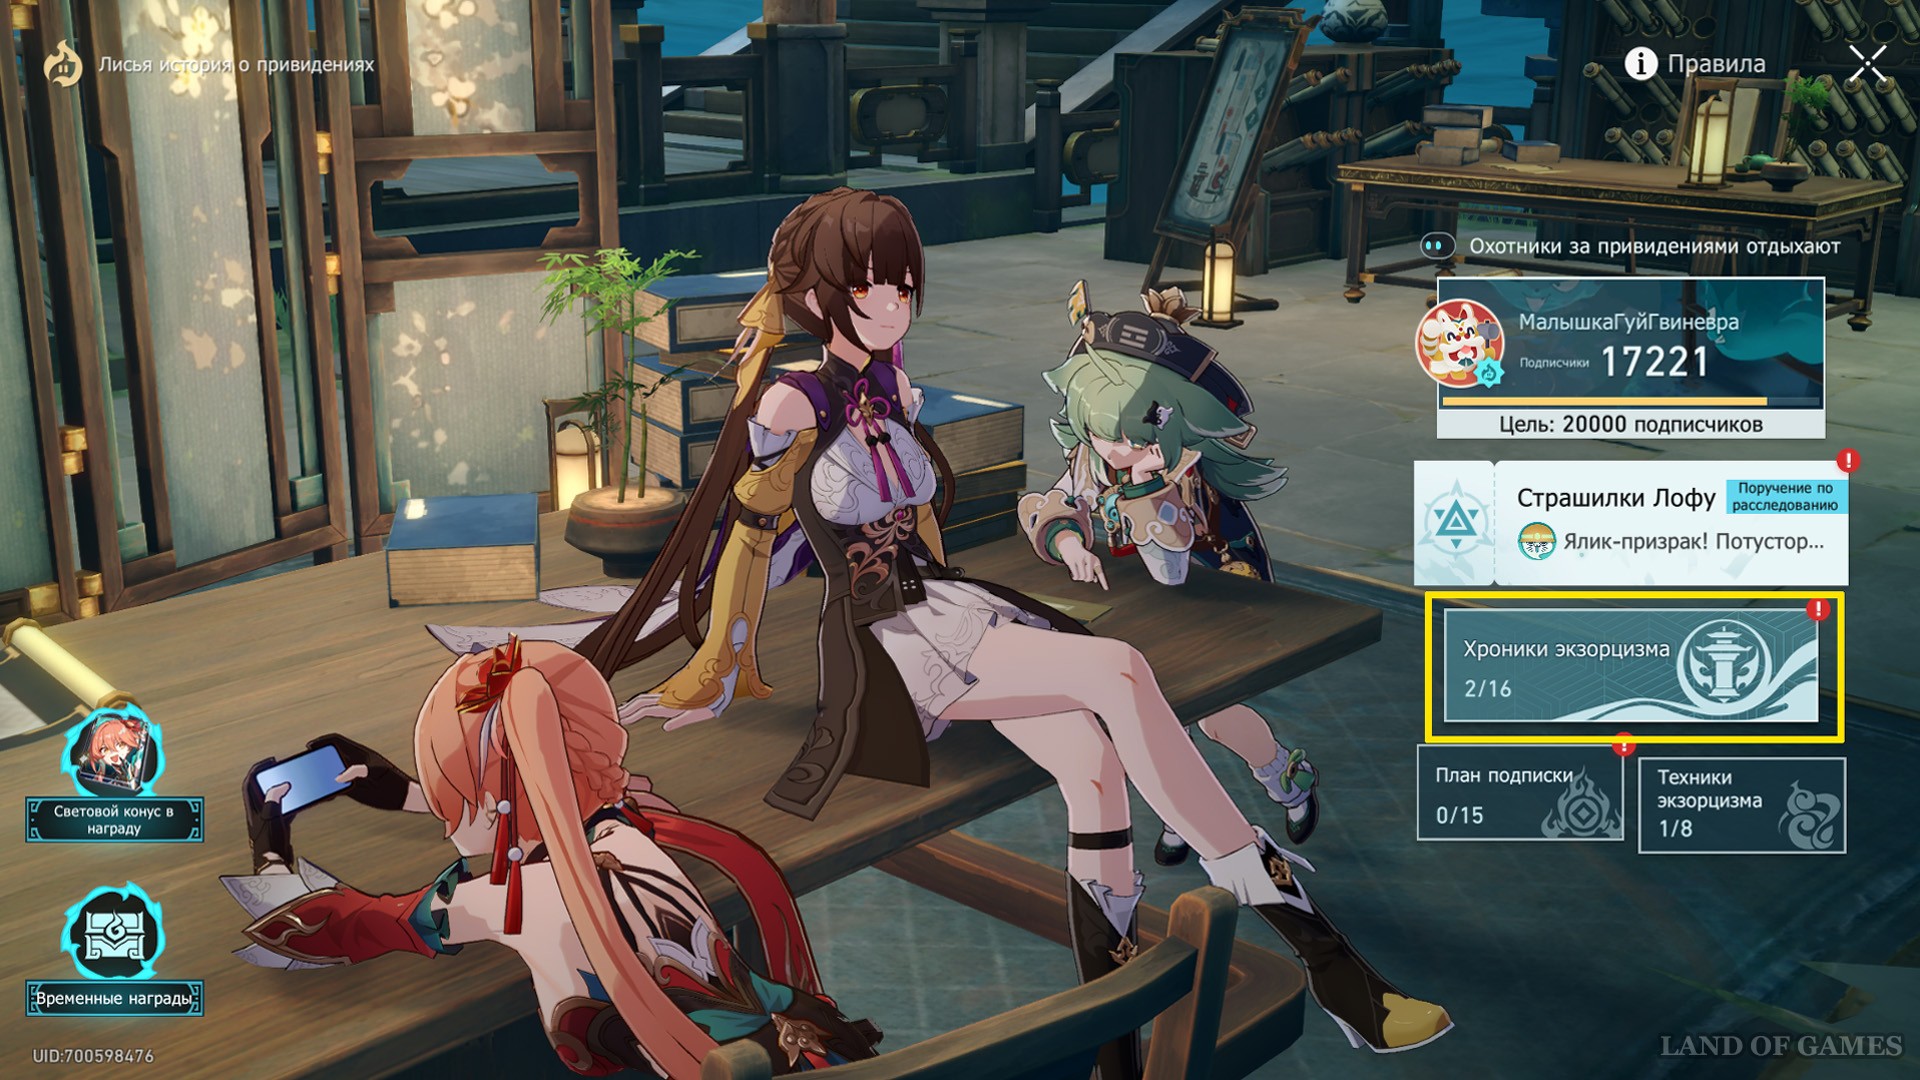
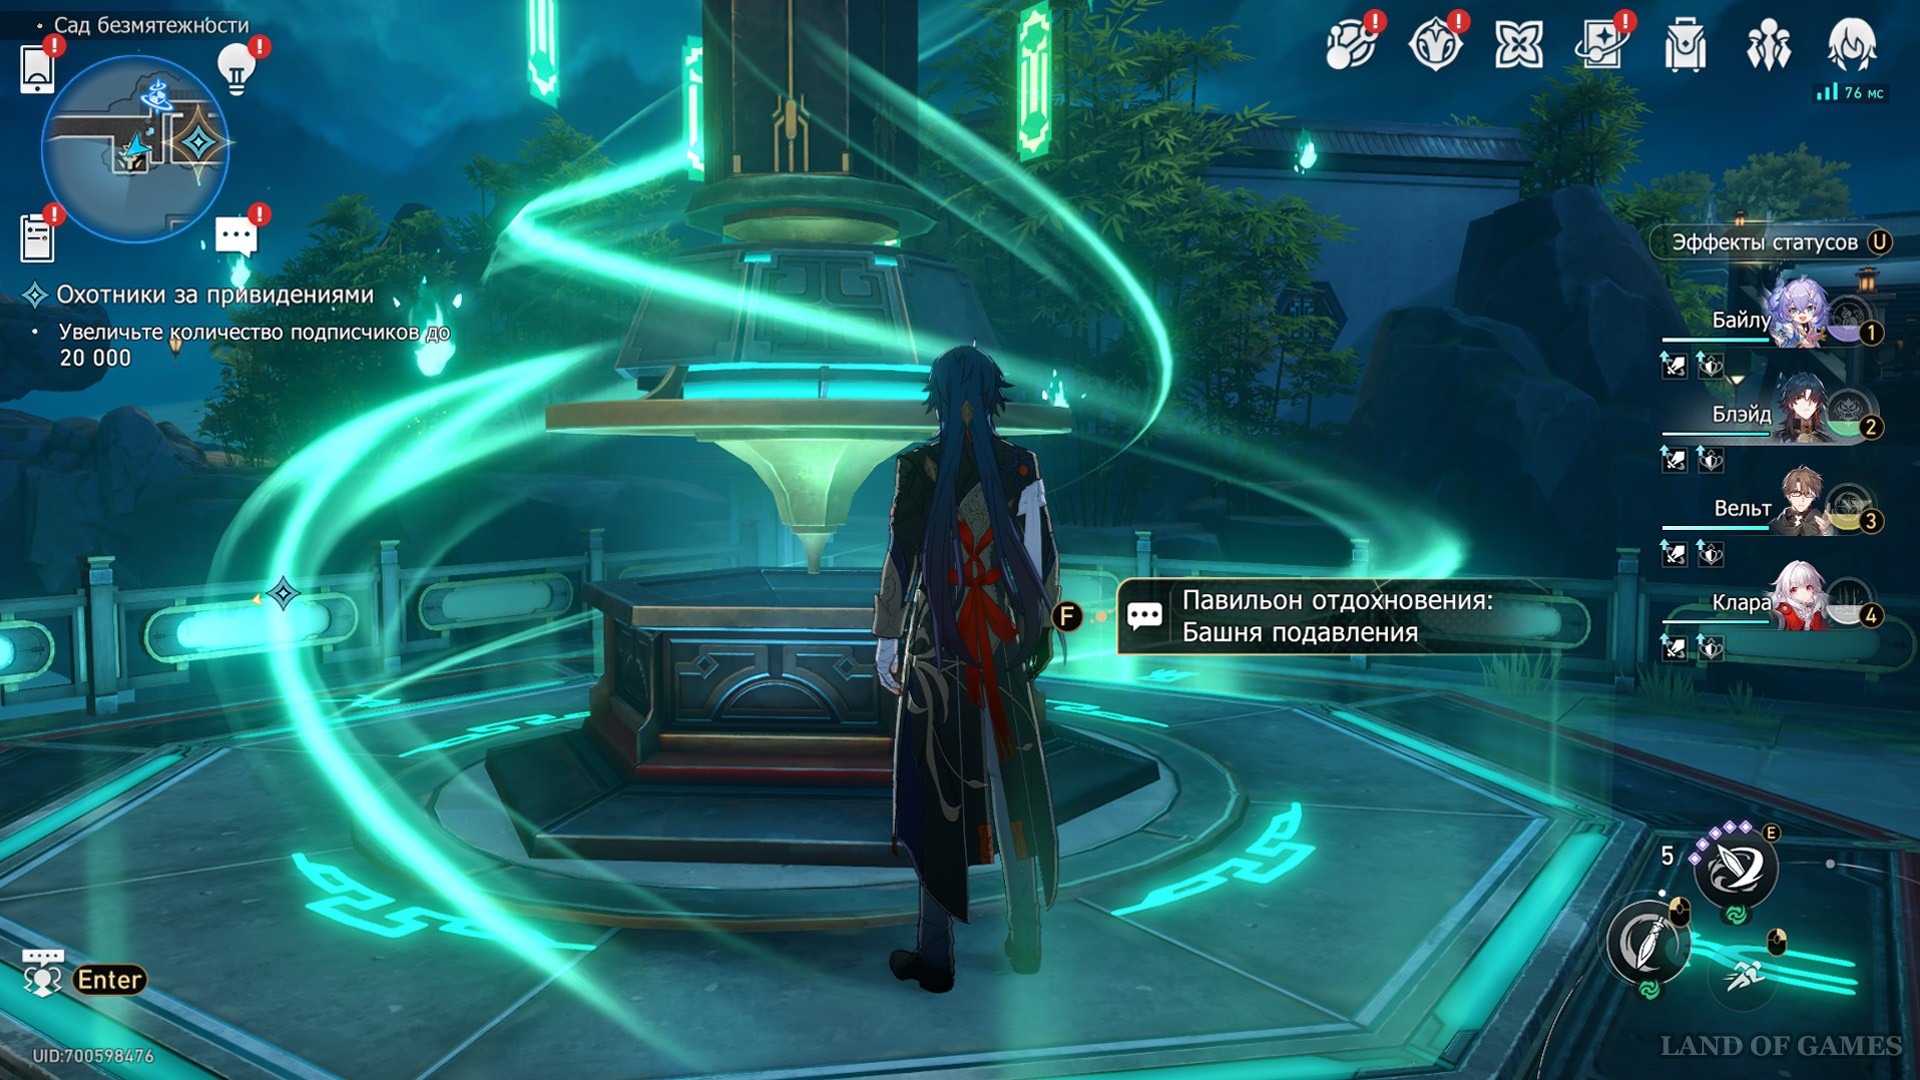
After this, you can start the task through the order log, and Ghostbusters summoning stand a new accessible tab will appear - click on “Teleport” through the event tab, or go to the quest marker in the Garden of Serenity (anchor “Gallery of the Pavilion of Relaxation”) and interact with the structure shrouded in turquoise glow.
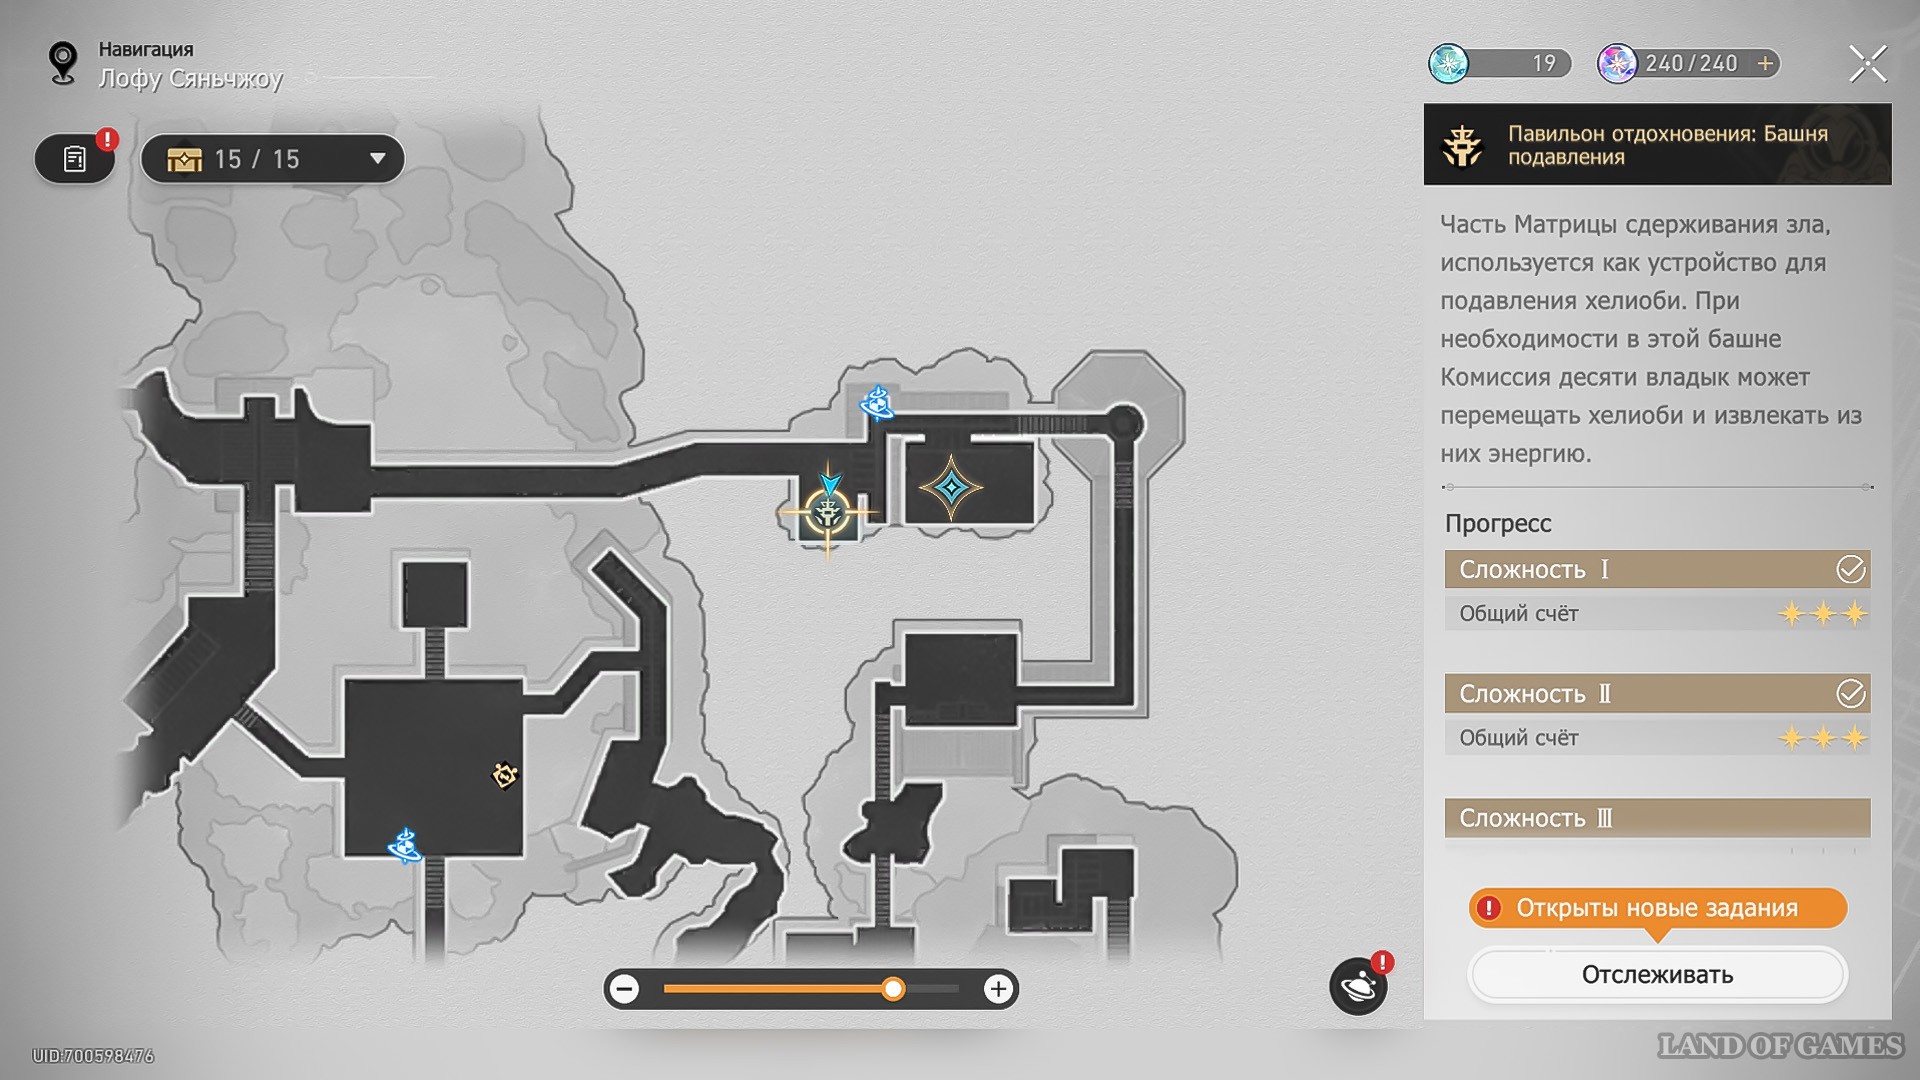
How to pass all difficulty levels
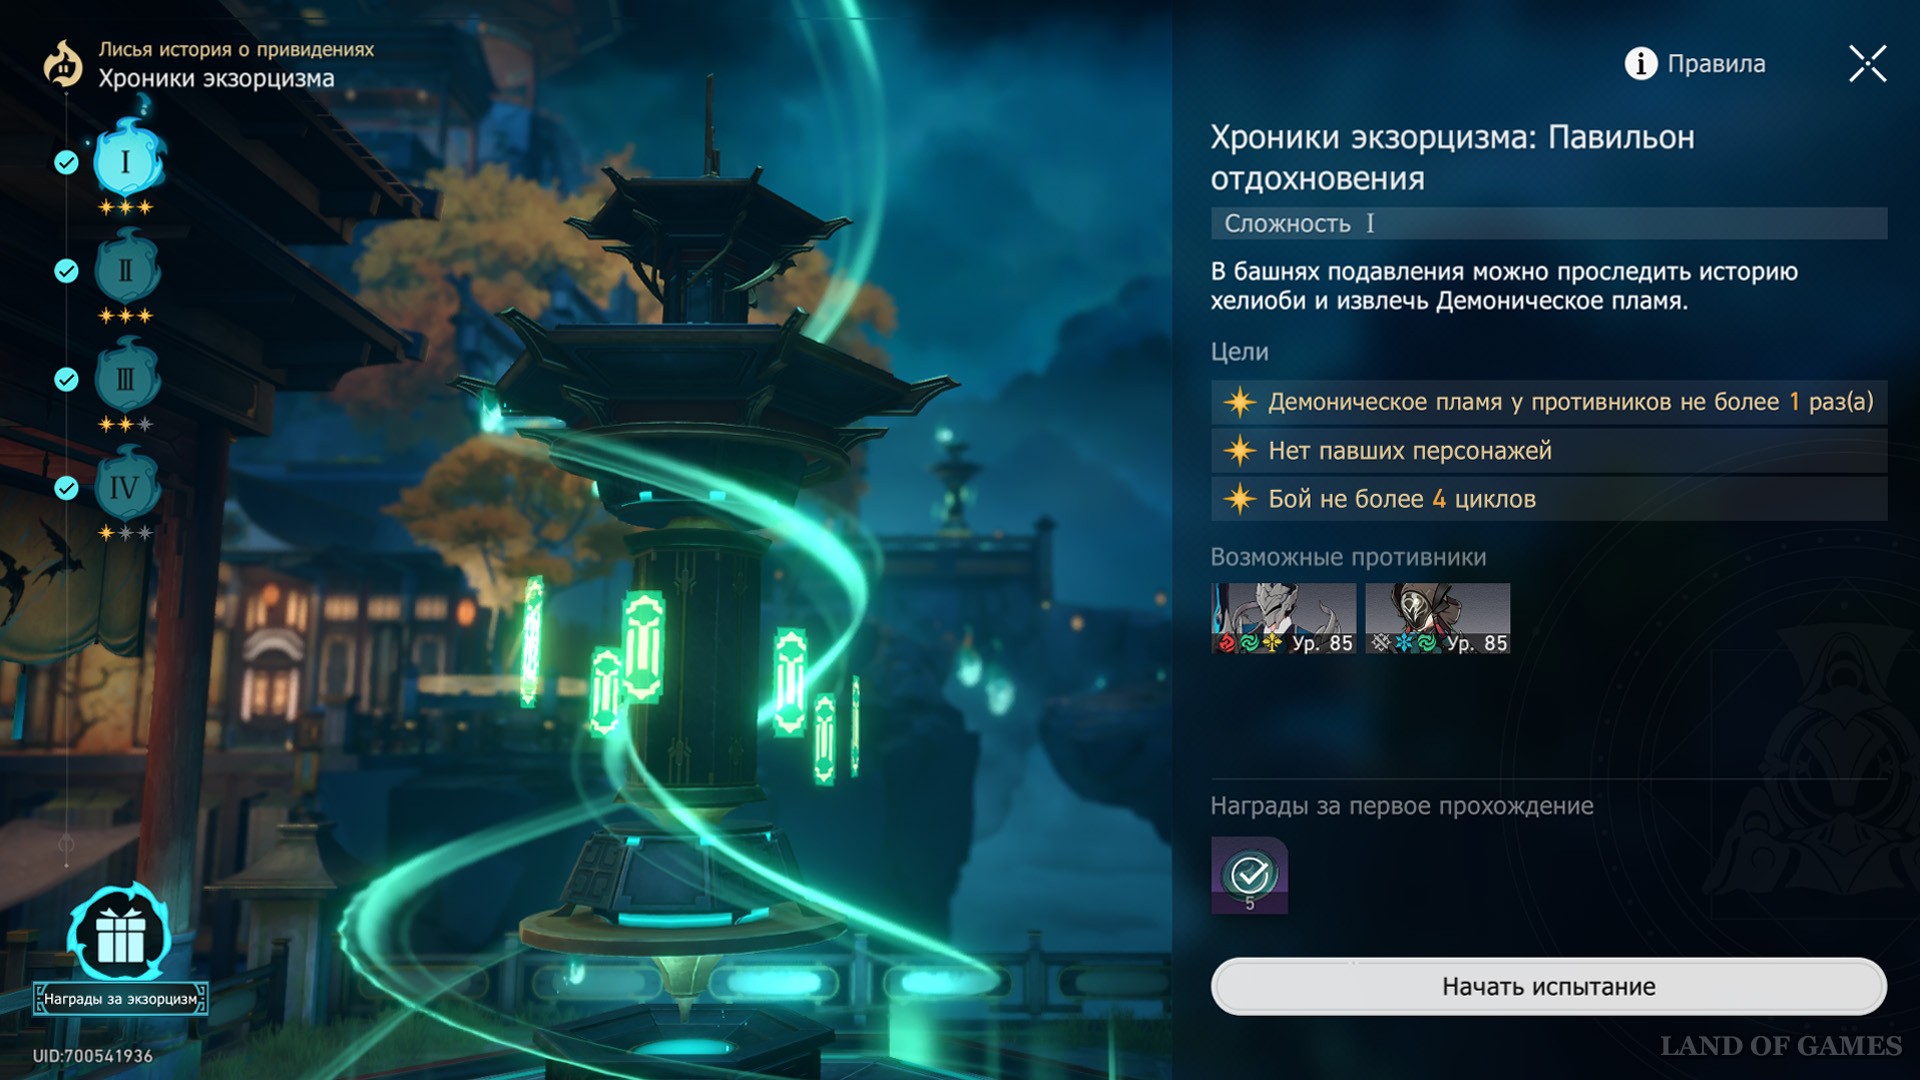
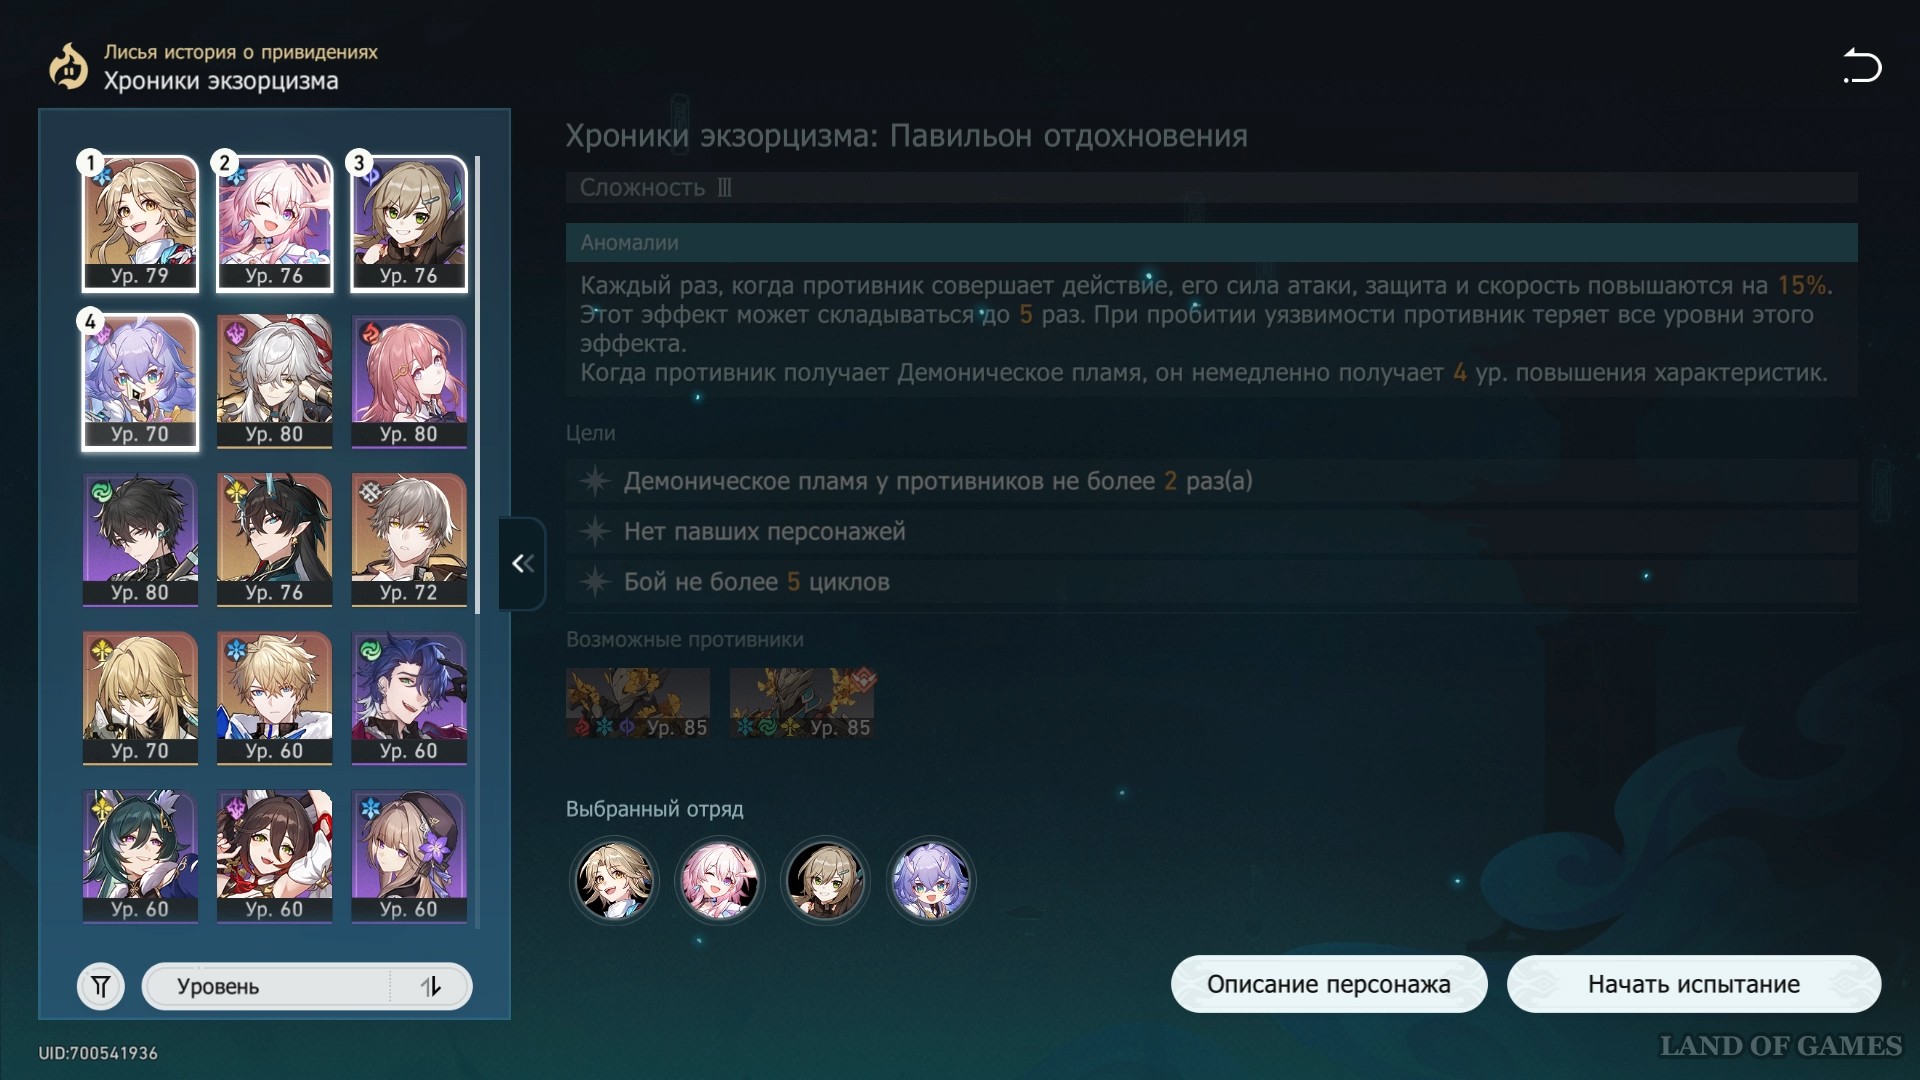
The test is divided into 4 levels, each of which has increasing difficulty. The passage converges to achieve three main goals:
- Prevent opponents from activating Demonic Flame more than 1-2 times;
- Complete the battle without losses in the squad;
- Defeat enemies without exceeding the limit of 4-5 cycles.
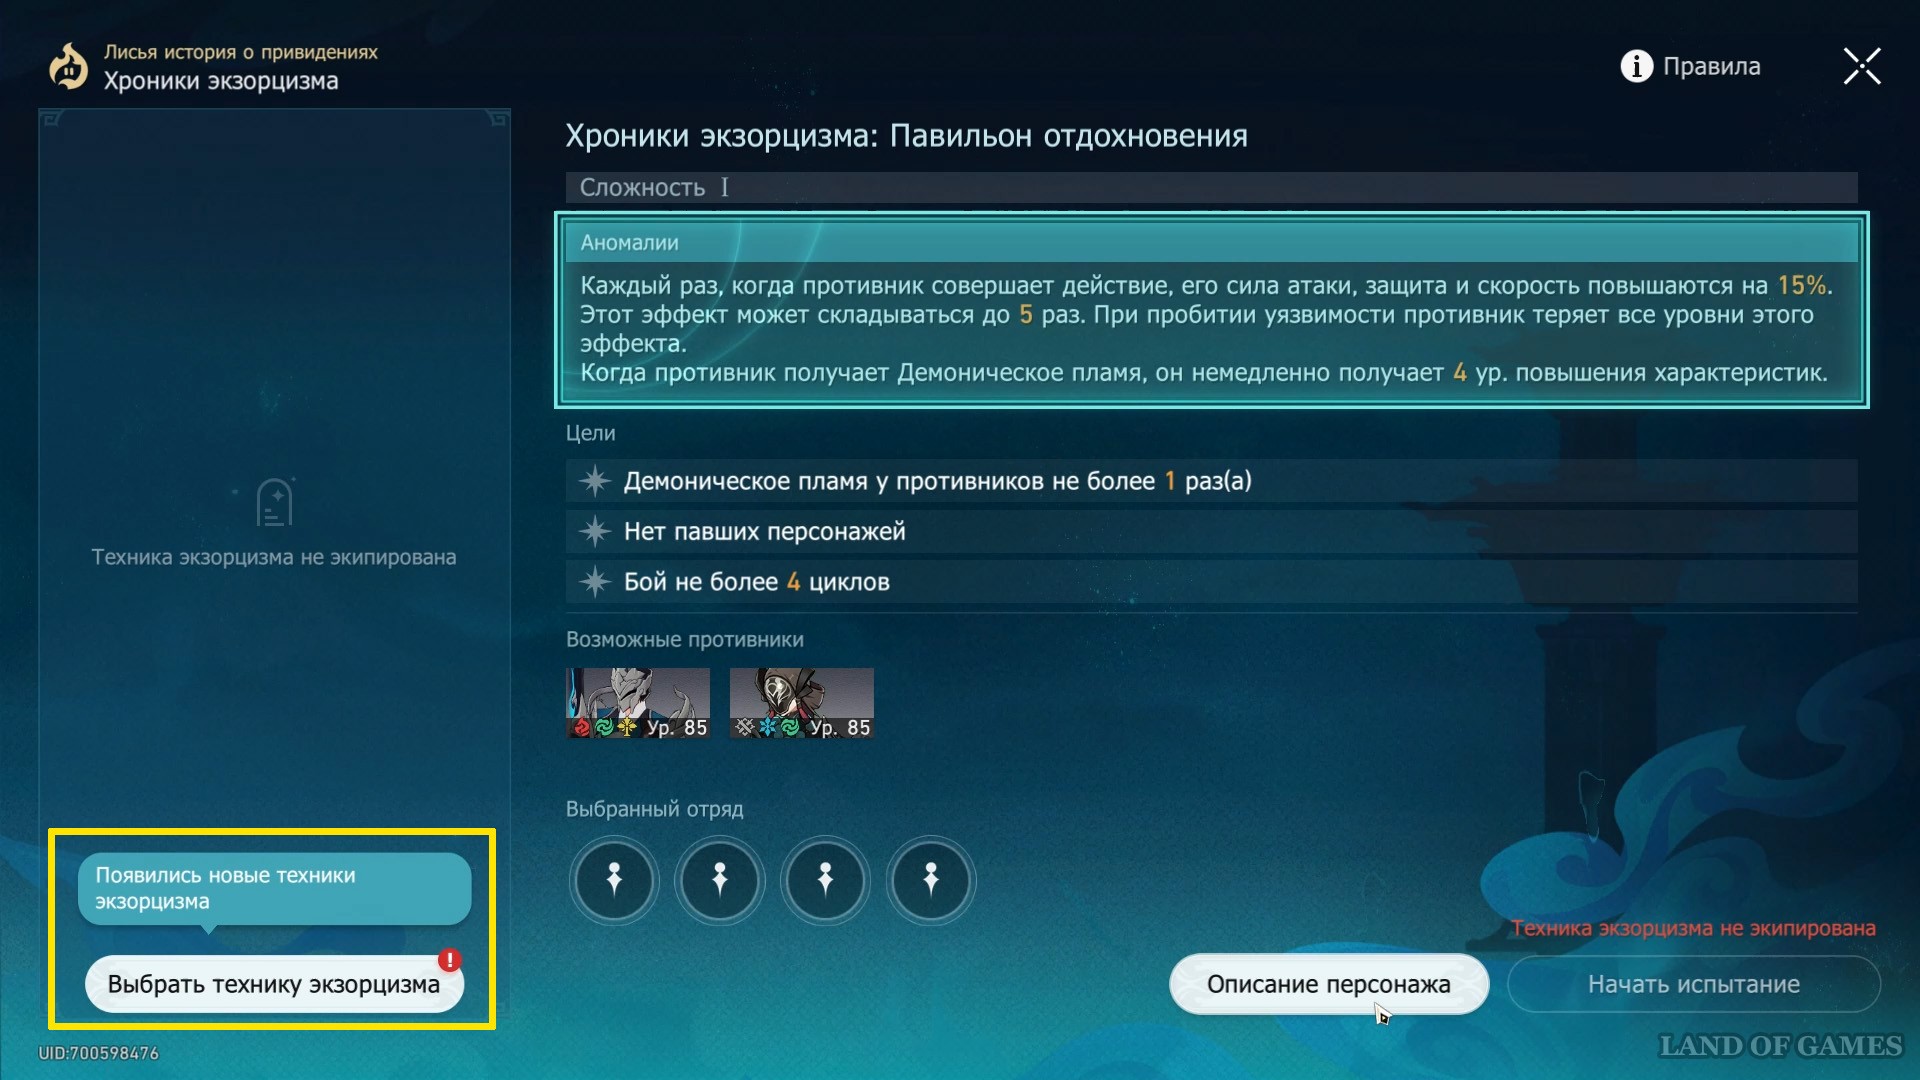
Initially, enemies are equipped with a standard boost for all difficulty levels, called anomalies : they receive a 15% buff to ATK, speed and defense (the boost can add up to 5 stacks), and by activating Demonic Flame, these indicators will increase by lvl 4. This can be prevented if the heroes of your squad are timely reduce the resistance of enemy units to zero.
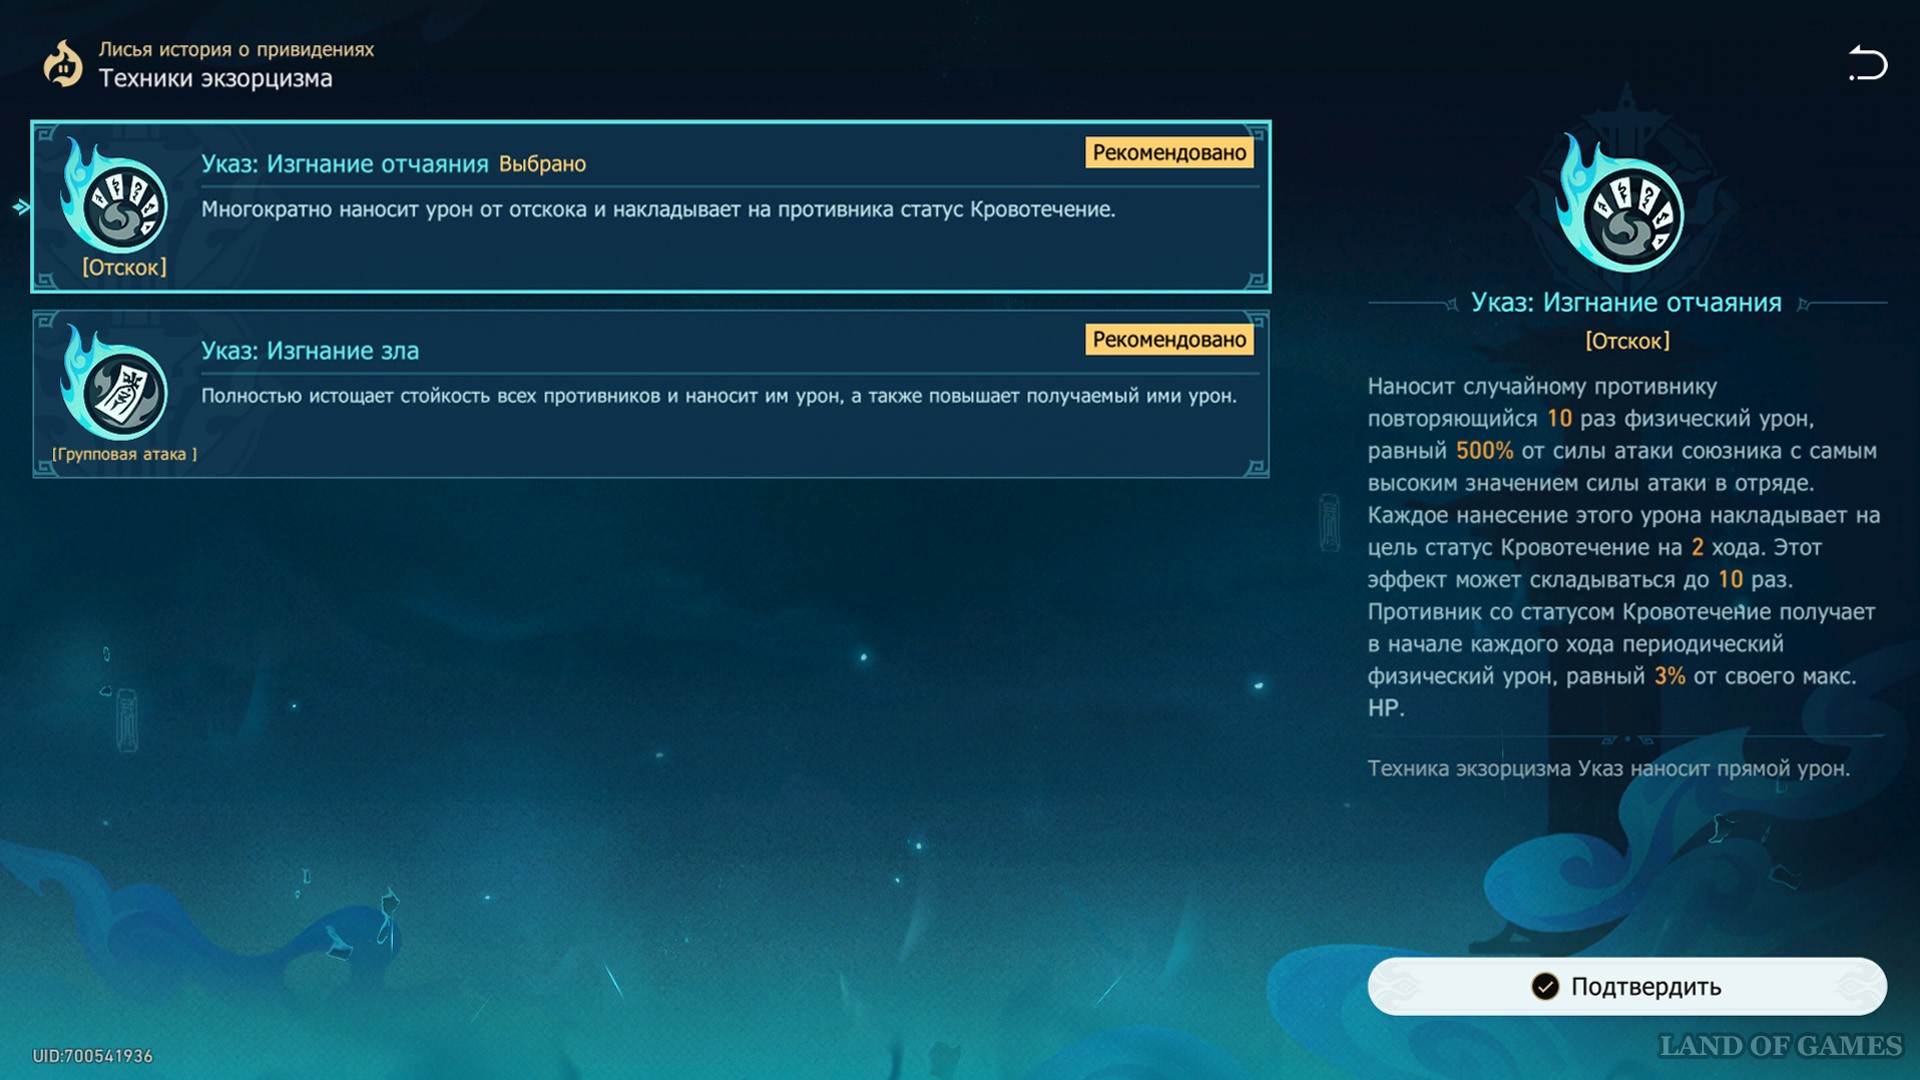
Your team is left to rely on their own skills and characteristics, as well as Exorcism technique, which activates when your squad accumulates Demonic Flame during combat. Before the start of each test, you need to add it to the slot to the left of the squad selection windows. At the start, only one technique is available to you: “Decree: Banish Evil,” which is especially effective with the presence of Quantum damage type heroes in the pack.
However, if completing the levels comes to a dead end, try get other techniques : Complete urban legend investigations that may reward you with new Demonflame buffs for combat challenges in the Towers.
Basic battle tactics
Before selecting a squad, you need to identify several important stages of the battle:
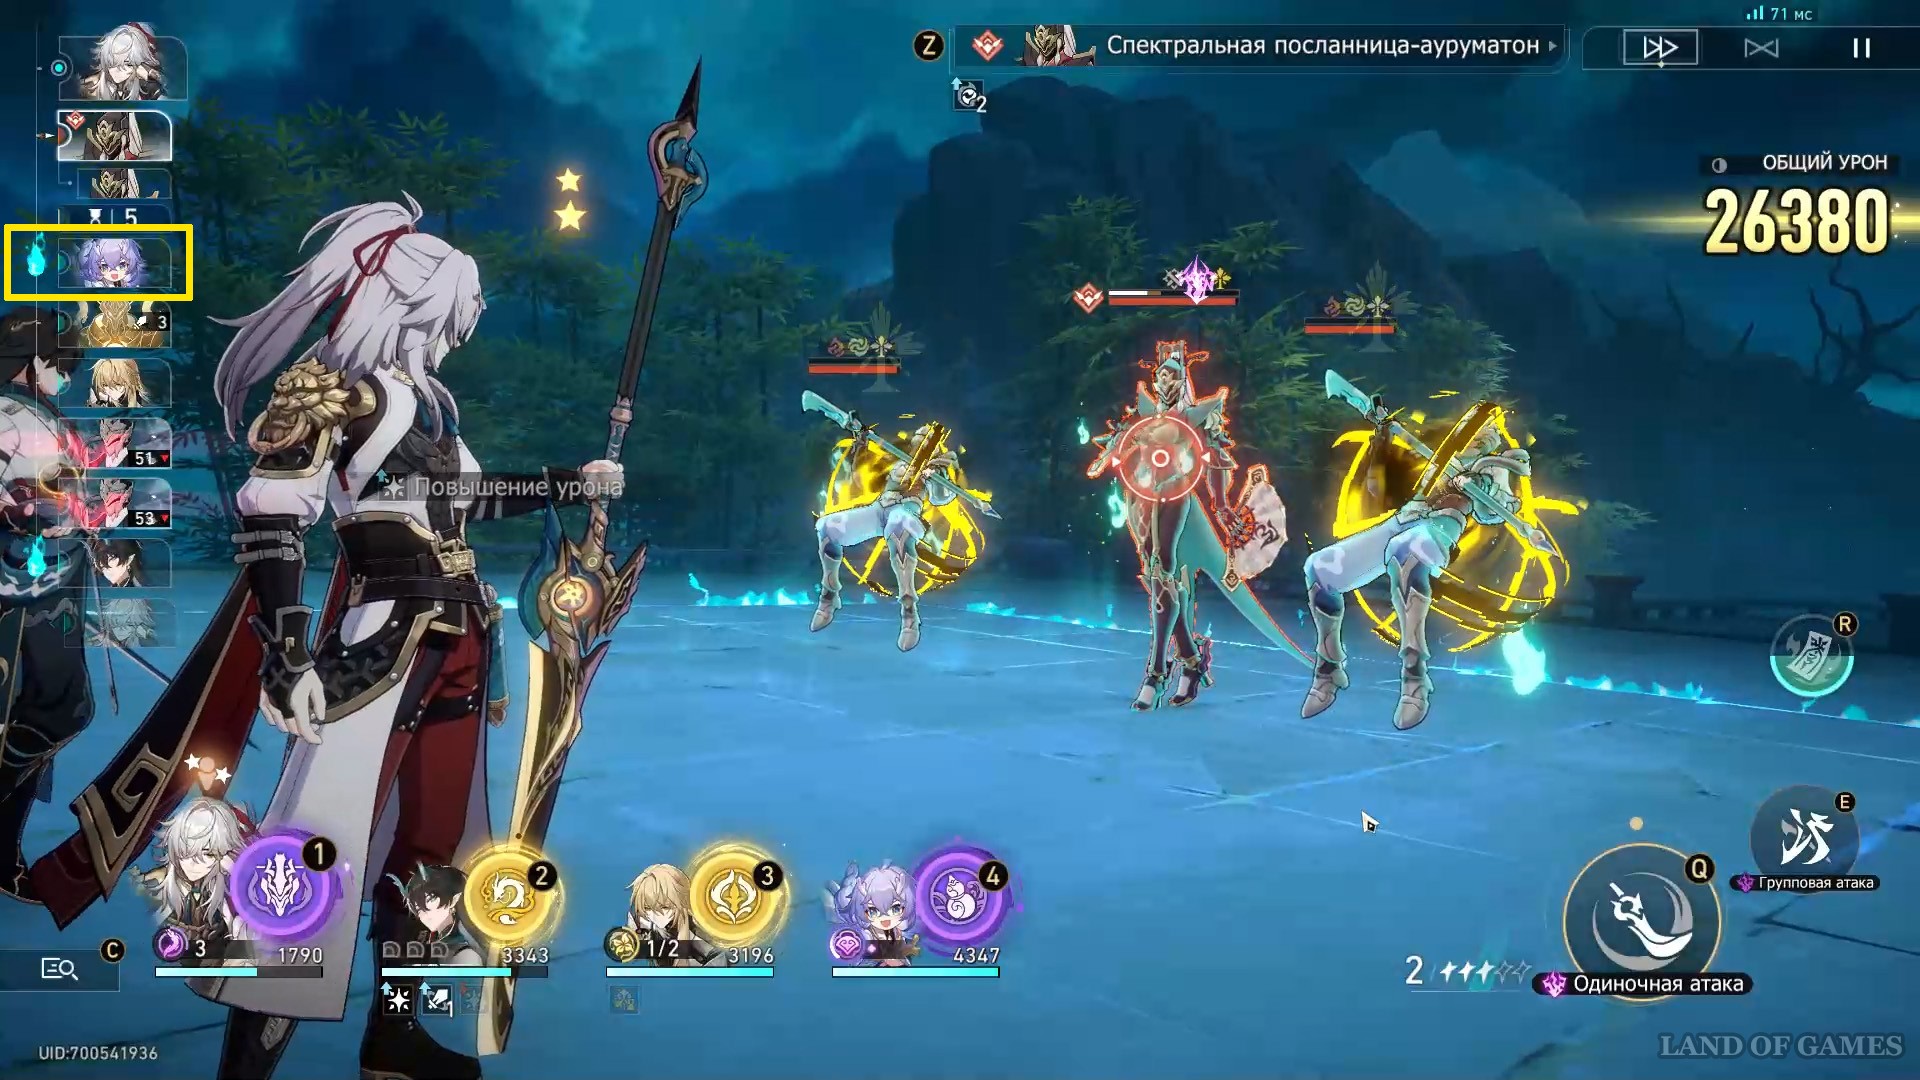
- Intercepting Demon Flame.

From the very beginning of the battle on the moves panel (left side of the screen) you can notice Demon Flame lights of two colors : scarlet and turquoise. The former are given to enemy units, and the latter to members of our squad. The main goal of each test requires us to control these same lights from our enemies.
- A well-timed superpower tap.
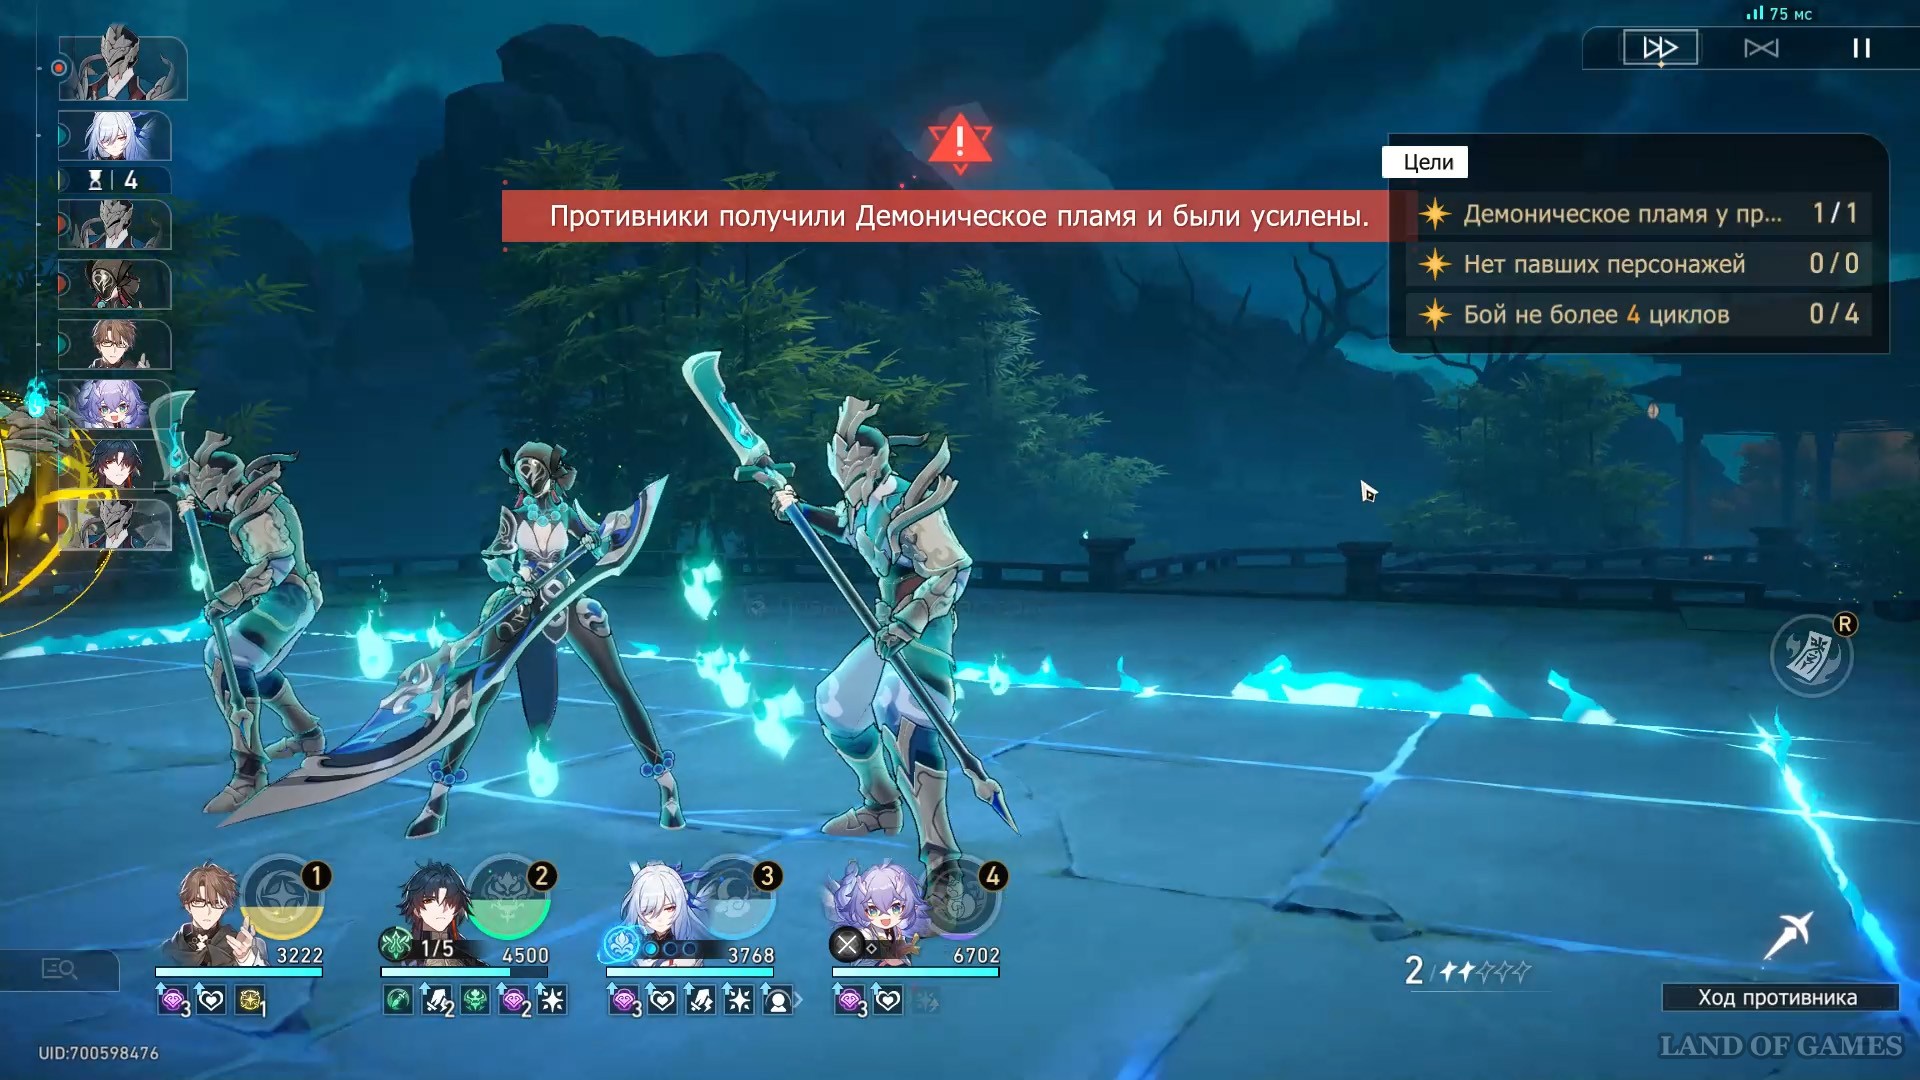
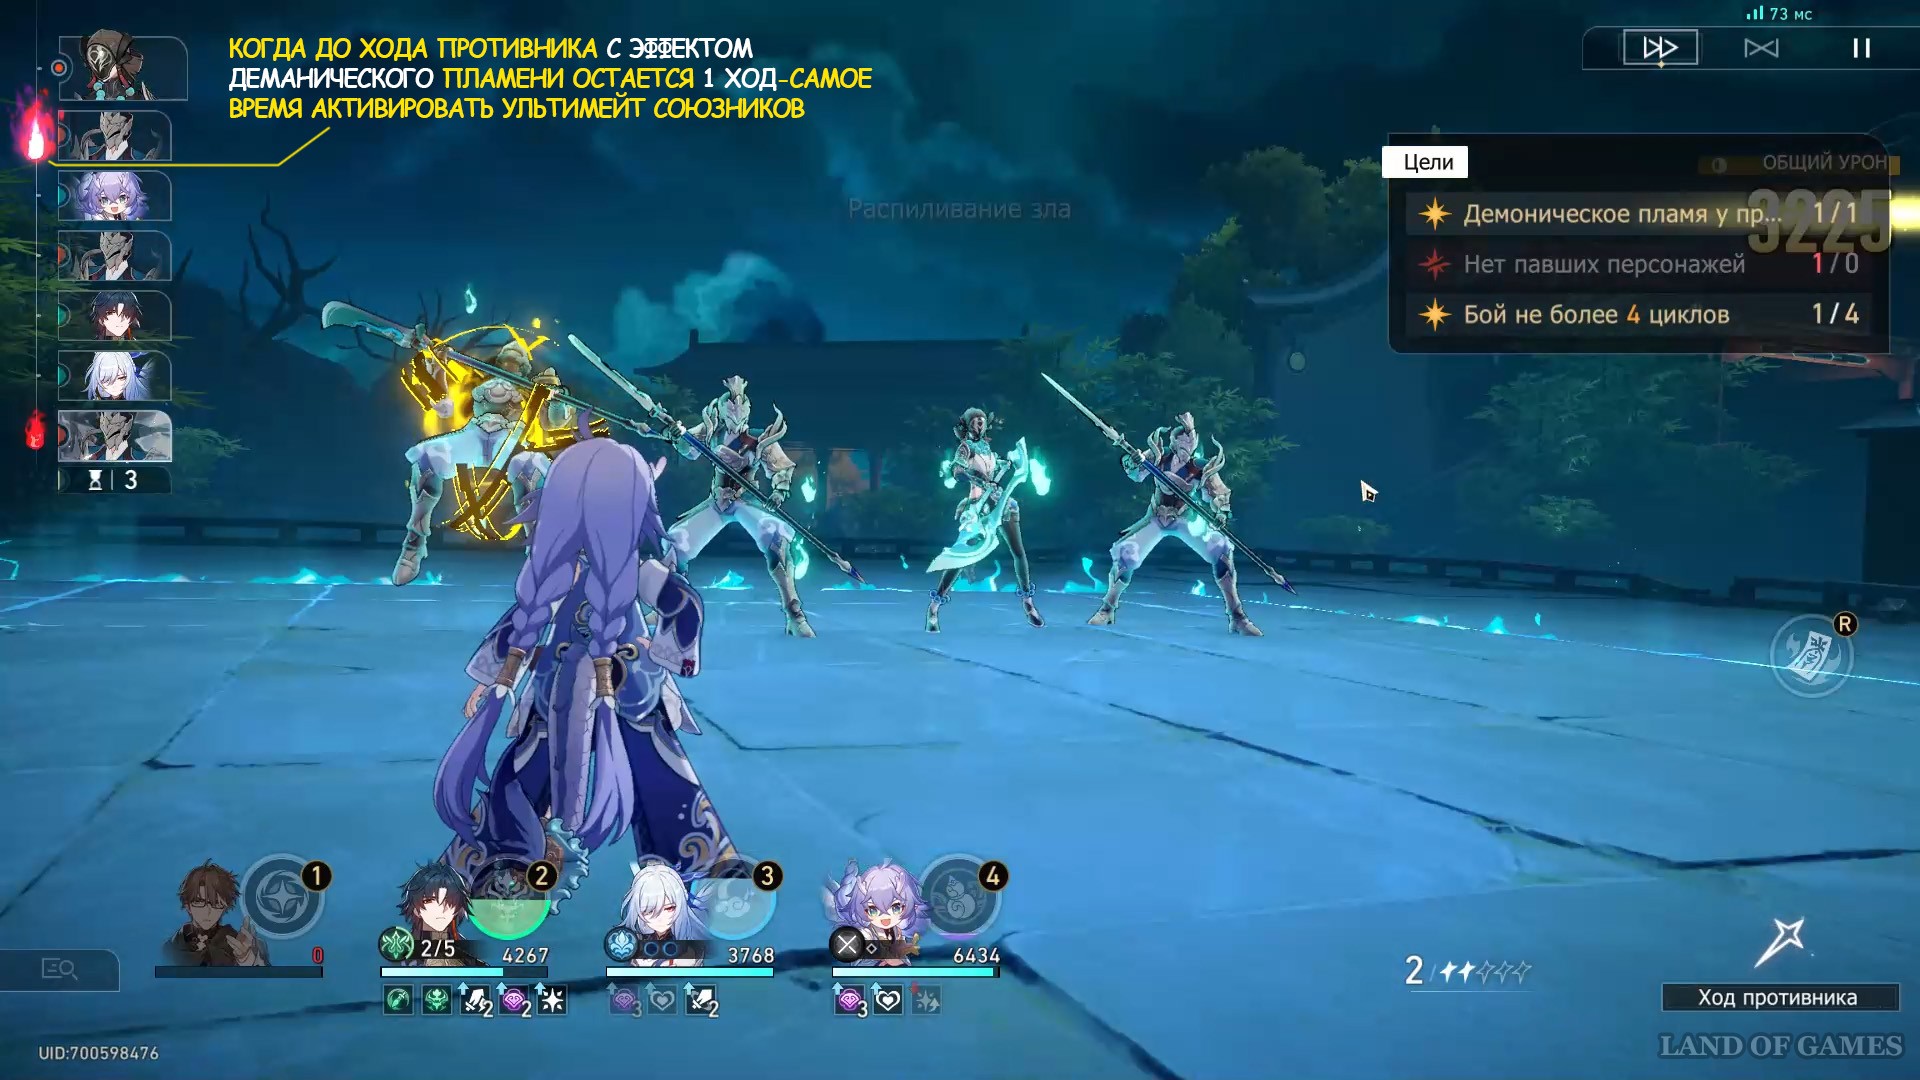
You can completely prevent enemies from using this buff, but to do this you need activate your ult in a timely manner any of your units (even if it is a healer, like Bailu). The extreme moment is before the move of a mob with a flame effect point - you will see how this flame flares up even stronger.
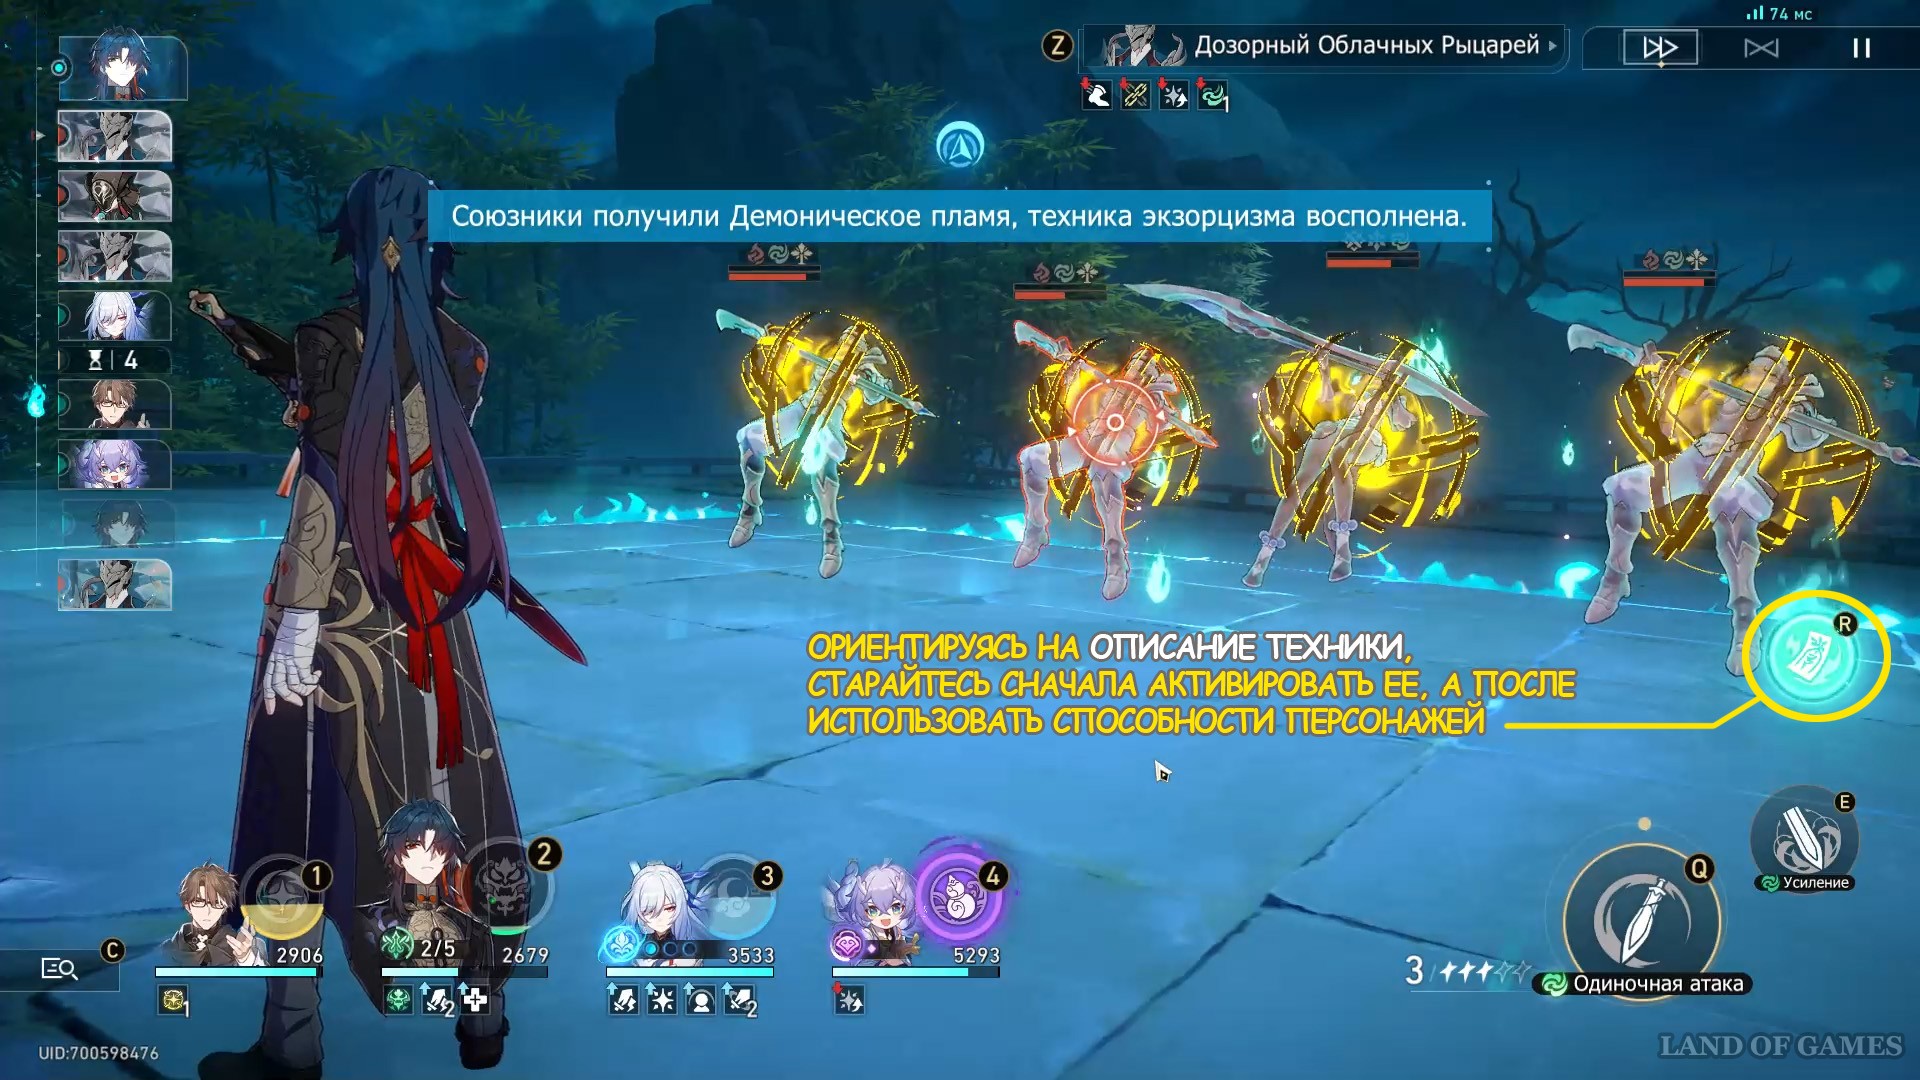
In order to accumulate the flame effect for your squad, you need Intercept the light from opponents 2 times. This ability also gains 1 stack after one of your allies, near whom there is a turquoise light, gets a turn.
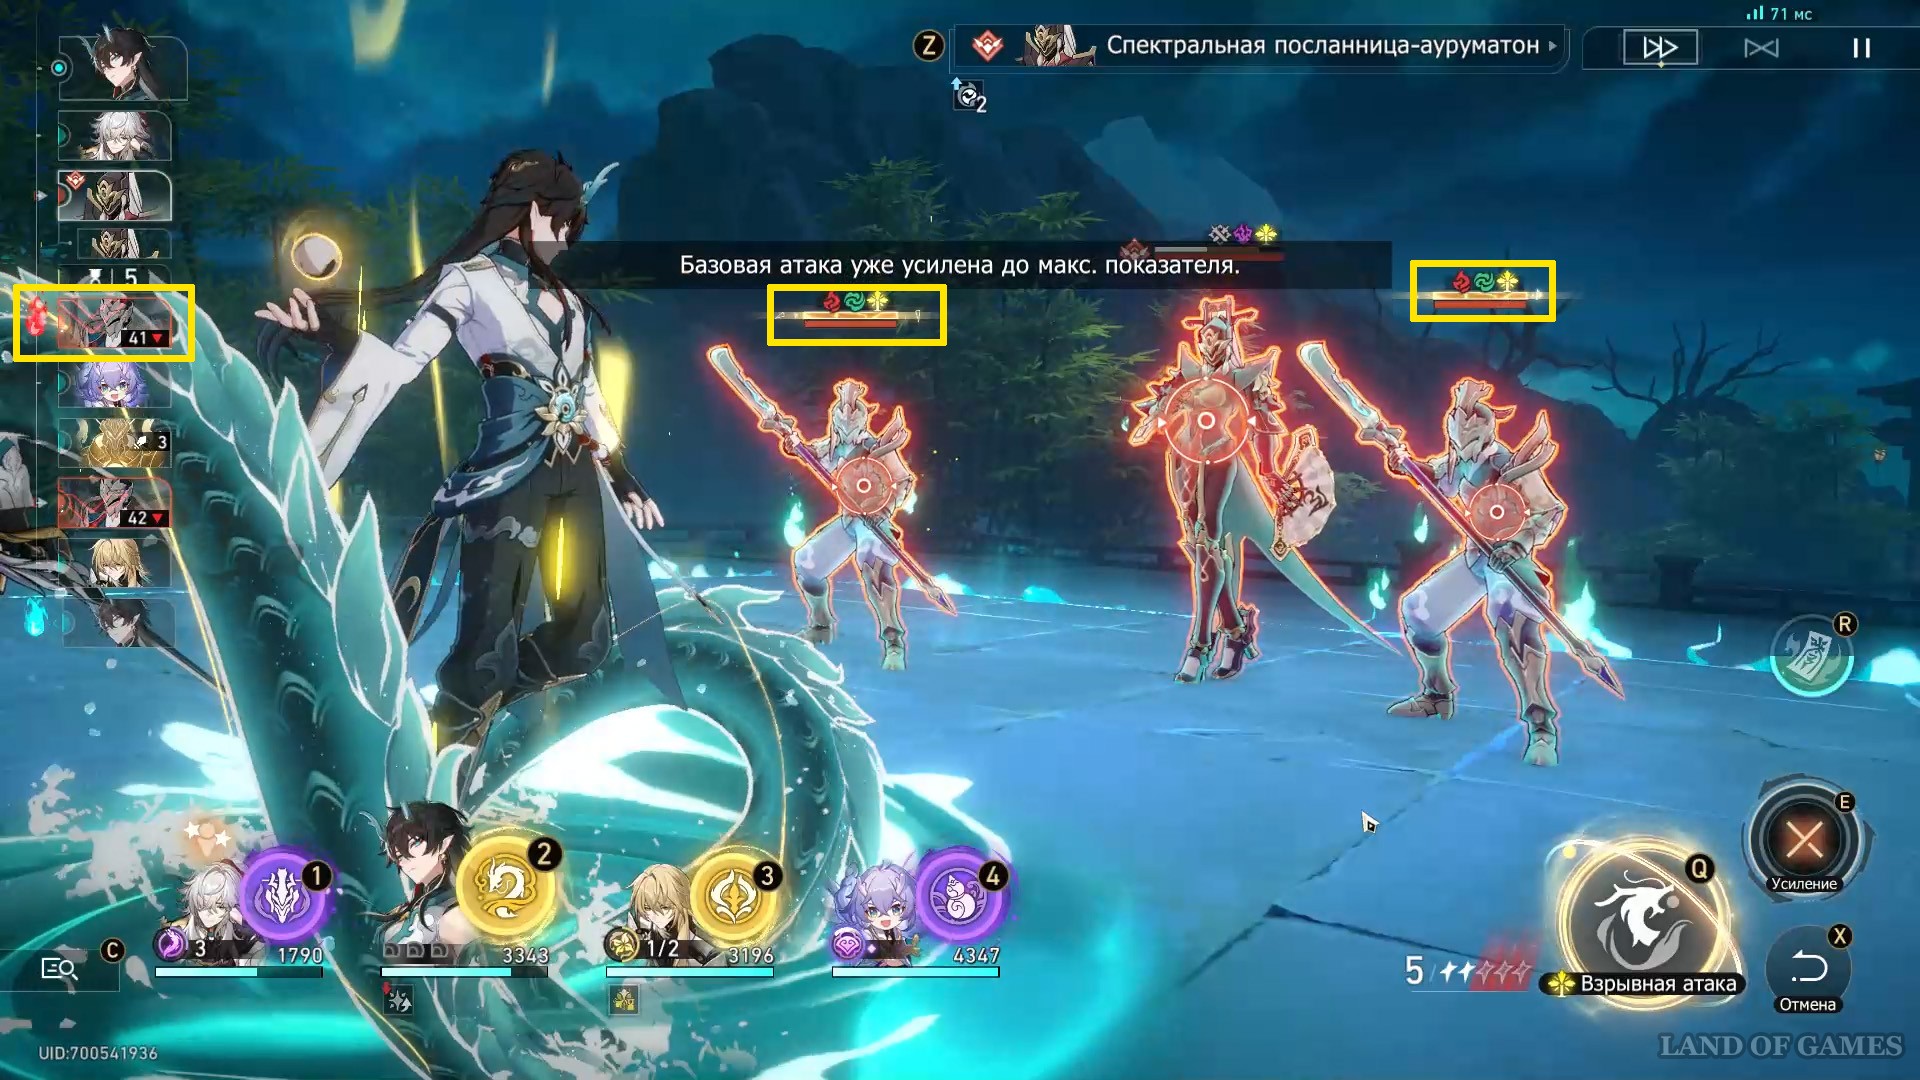
There is another small life hack that can help you when the turn of the enemy with the scarlet light is approaching, and you do not have an ult: try bring down the durability of a mob that has a vehicle point on it, and even better, those who follow him in line. Once you get a full charge of Demonic Flame, try to squeeze it (R key on PC) before the damage dealer's turn.
Another tip: if you haven’t accumulated ultimates, and the enemy’s turn with the scarlet light is approaching, but at the same time you equipment is charged, then it is better to use it as much as possible before the actions of opponents. Since this ability completely knocks down shields, it can be used to move the wisp lower in the queue.
Units
Before selecting a squad, let's look at the main rules and tips that should not be ignored:
- In Tower fights, the advantage is on the side of those heroes who are able to replenish ult energy - this is the main trump card that is more likely to bring you victory;
- Never ignore characters who remove debuffs. Especially on the 3rd and 4th difficulties: when fighting with an aurumaton envoy or a soldier affected by Mara, it will be very difficult for you without the help of March 7, Lochee or xoxo ;
- These challenges are a great opportunity to start leveling up your heroes' tracks, relics, and cones. Opponents at almost all levels have a decent amount of HP and are very difficult to break through even with the shield removed. Be sure to check if your squad is sufficiently developed, especially the damage dealers.
Level 1
At the starting stage, you will find enemies vulnerable to Wind, Fire, Ice, Imaginary and Physical types. We advise you to give preference to the following combinations of packs:
- Dan Heng / Natasha / GG of the path of Destruction / Yukun. Balanced free pack. Here it is worth paying attention to the fact that the enemies have a common vulnerability - wind damage, which means that the best option would be damage control of this type. The rest of the heroes will be able to support the damage dealer, providing healing and shield;
- Blade/ Armor (Asta)/ Locha/ Sang (Tingyun). A more expensive version of the first pack. Blade has an advantage over Dan Heng, because it deals area damage rather than a solo target, therefore it will wound more enemies in one turn. Armor will allow DD to move up in the action queue and give a damage buff, while the rest will give healing and filling energy/weakening mobs.
Also suitable as a DD are the Moon Eater, physical. GG, Welt, Hertha or Qingque. Take Silver Wolf for support if she is on your account, and Bayla for the role of heal.
Level 2
Vulnerabilities at this level are: Fire, Ice, Quantum, Wind, Physical and Electric. But the most basic of them is Ice, since all opponents have it. Based on this, try the following pack options:
- Yanqing (Jingliu)/Tingyun/March 7/ Bailu. The advantages of this unit are in proper balance: the sword master in the DD position will not only penetrate shields well on his turn, but also due to subsequent bonus attacks (Jingliu standing in his place will simply speed up the process due to higher damage and attacks on a group of enemies ). The Fox will help him replenish his ult faster, and March 7 will provide him with a shield, counterattack and additional damage. damage from mass superpowers;
- Zele / Armor / GG Path of Destruction / Lynx (Fu Xuan). This squad consists of two representatives of the Quantum type at once: if you give the support hero a new set of decorations “Dreamland of Penaconia”, you can get additional. Increased damage to Zele. Armor will also speed up the advancement of allies, delaying the move of enemies, and the Fire-type GG will provide a shield and additionally break through the vulnerability of the ultimate throughout the entire group of mobs.
You can also take Hertha as a cheaper damage dealer, and Sap. dd - Qingque.
Level 3
A common vulnerability for the third difficulty is also the Ice type. In addition to it, enemies are susceptible to Fire, Imaginary, Wind and Quantum types. Also keep in mind that there is a Mara-affected soldier in the level that gives a nasty debuff. Here are some options for effective packs:
- Tribute to Hen/Gerta/Natasha/GG of the path of Destruction. F2P squad, whose survivability has good potential thanks to a combination of healing and shield, and the damage is additionally increased by Gerta’s bonus attacks;
- Moon Eater/ Armor/ Sang (Tingyun)/ Locha. The combination of Devourer and Locha is very strong in itself - Elder Vidyadhara has high damage rates and hits a group of opponents at once, and Locha, in addition to healing, can remove negative effects in time. The rest of the support will help the squad stay ahead of enemy actions and knock down their shields faster.
You can try to take Topaz, Jing Yuan or Himeko into the squad with Gerta in order to have more damage from bonus attacks (this also includes any heroes who play from bonus actions). In place of Locha (but not as a healer), take March 7, which is suitable for its damage type and ability to remove weakening.
Level 4
The most recent difficulty level requires the squad to primarily have heroes of Imaginary, and then Wind, Physical, Fire and Electric damage types. Consider running the following commands:
- Tribute to Hen / Natasha / Serval / GG of the path of Destruction (March 7). A free squad in which there are no imaginary heroes, but there are two damage dealers and support through Natasha’s treatment and shields from the Fiery GG - with high leveling and control of the Demonic Flame, this squad is suitable for closing the difficulty.
- Moon Eater/ Yukun/ Tingyun/ Locha. The best option for the last test, in which all squad members work to strengthen the already considerable damage of the Devourer. Locha in the squad also performs a very important function of removing weakenings, which are inflicted in large numbers by the Spectral Envoy-Aurumaton.
Awards
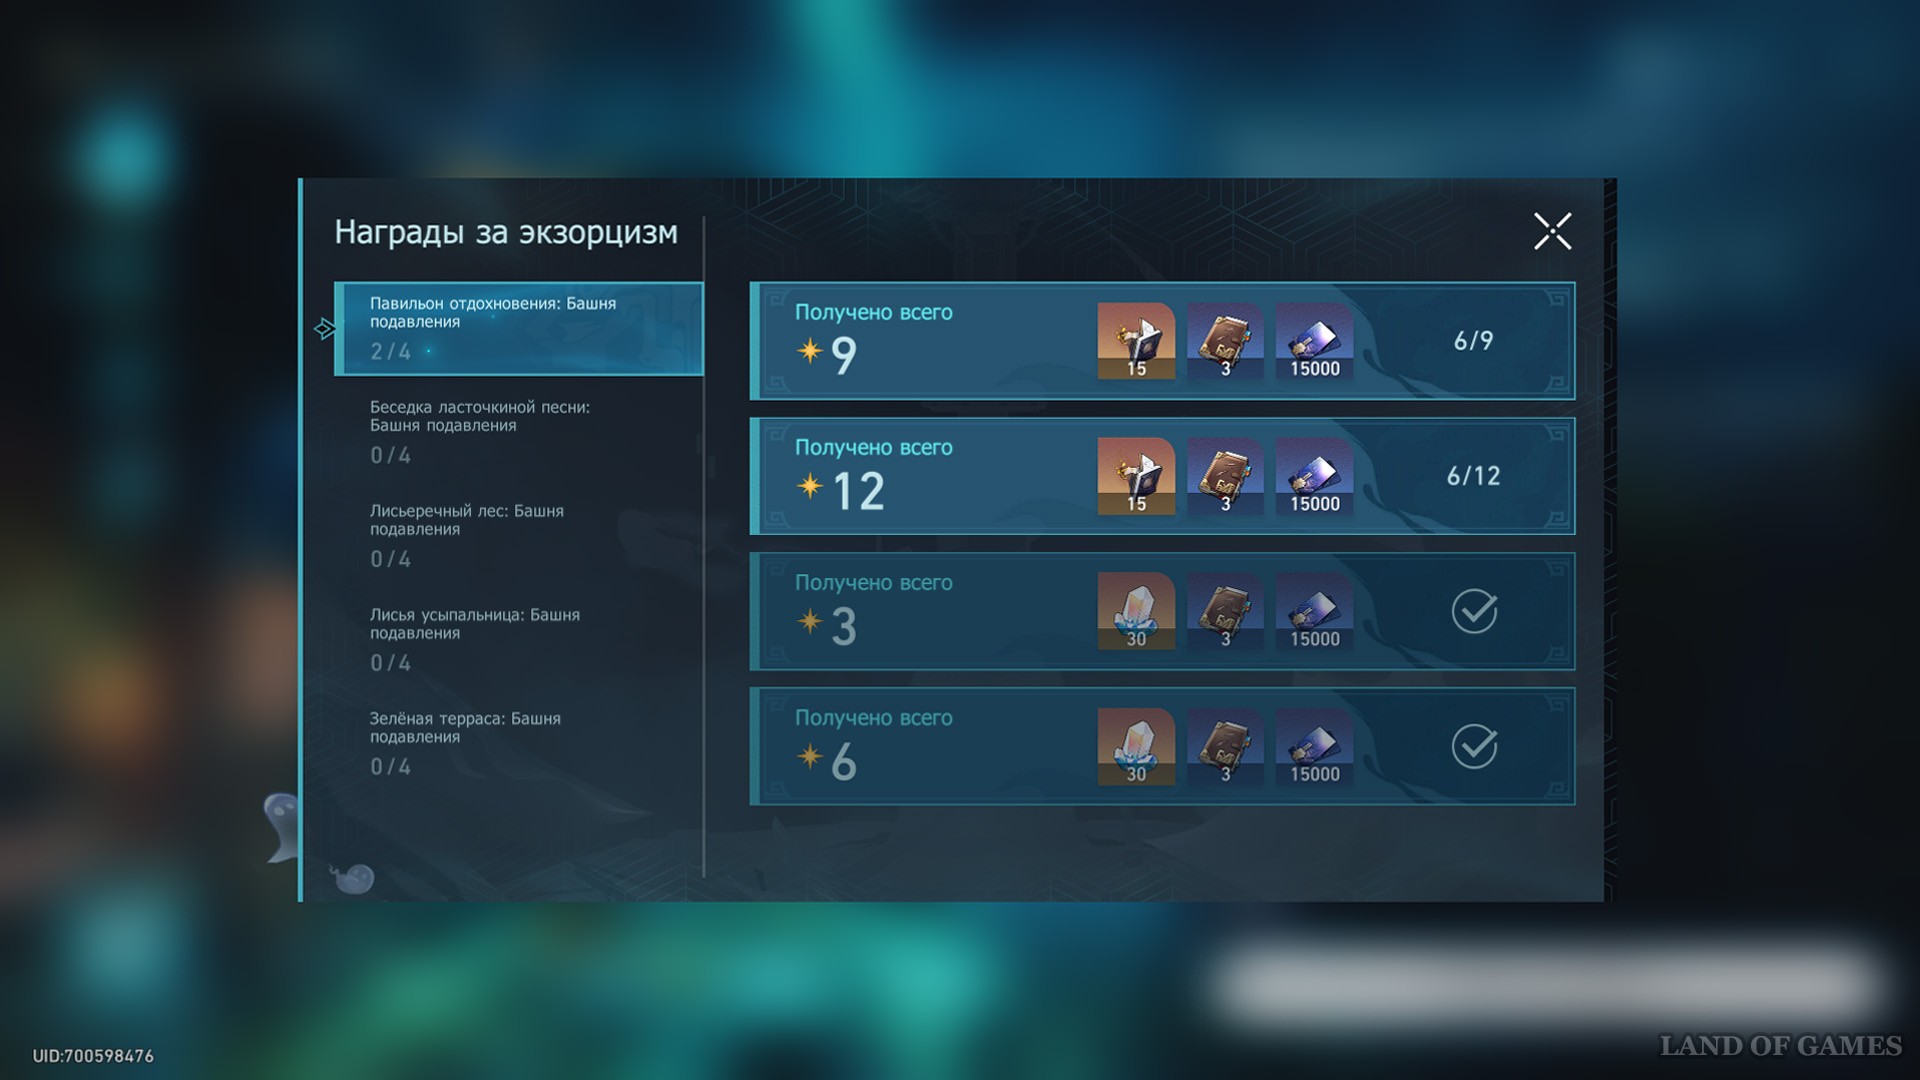
Upon completing all levels with the maximum number of stars, you will be given the following rewards:
- 60 star jade;
- 30 Relic Fragments;
- 12 experience logs;
- 60 thousand credits.
Finally, it’s worth mentioning that to get star jade you only need to complete the challenge with 6 stars, and these are the first two difficulty levels. The remaining rewards do not carry as much value, but they prove the high level of your combat skill.
Comments
You need to login to add comments.
You can login with