
In Palworld a dedicated server is a private gaming platform that the player himself can create and invite his friends there. You can open it yourself on your own computer or rent it from a specialized service.
Such servers, as a rule, are more stable and can be used for various purposes, from organizing various tournaments to conducting various experiments by radically changing the world settings. In this guide, we will look at the main options for opening a dedicated server.
How to rent a Palworld dedicated server
Renting a dedicated server is the easiest and best way to get your own platform in Palworld. It has several important advantages:
- Availability of uninterrupted access to the server, that is, you or your friends will be able to access it at any time.
- Protection against hacking, DDoS attacks and cheaters. Of course, it will not be 100 percent, but much higher than that of your own server.
- Relatively stable operation with a large number of players (up to 32).
- Quickly create and customize the world without having to study tons of technical manuals.

The only huge disadvantage of this method is that it PAID, and the rental cost is quite high (at least 1000 rubles per month). On the other hand, if you are going to play with several friends, then you can divide this amount and then you will have to pay 200-400 rubles. Next, we’ll look at a couple of services where you can rent a server.
Rent a server on Shockbyte and XGamingServer
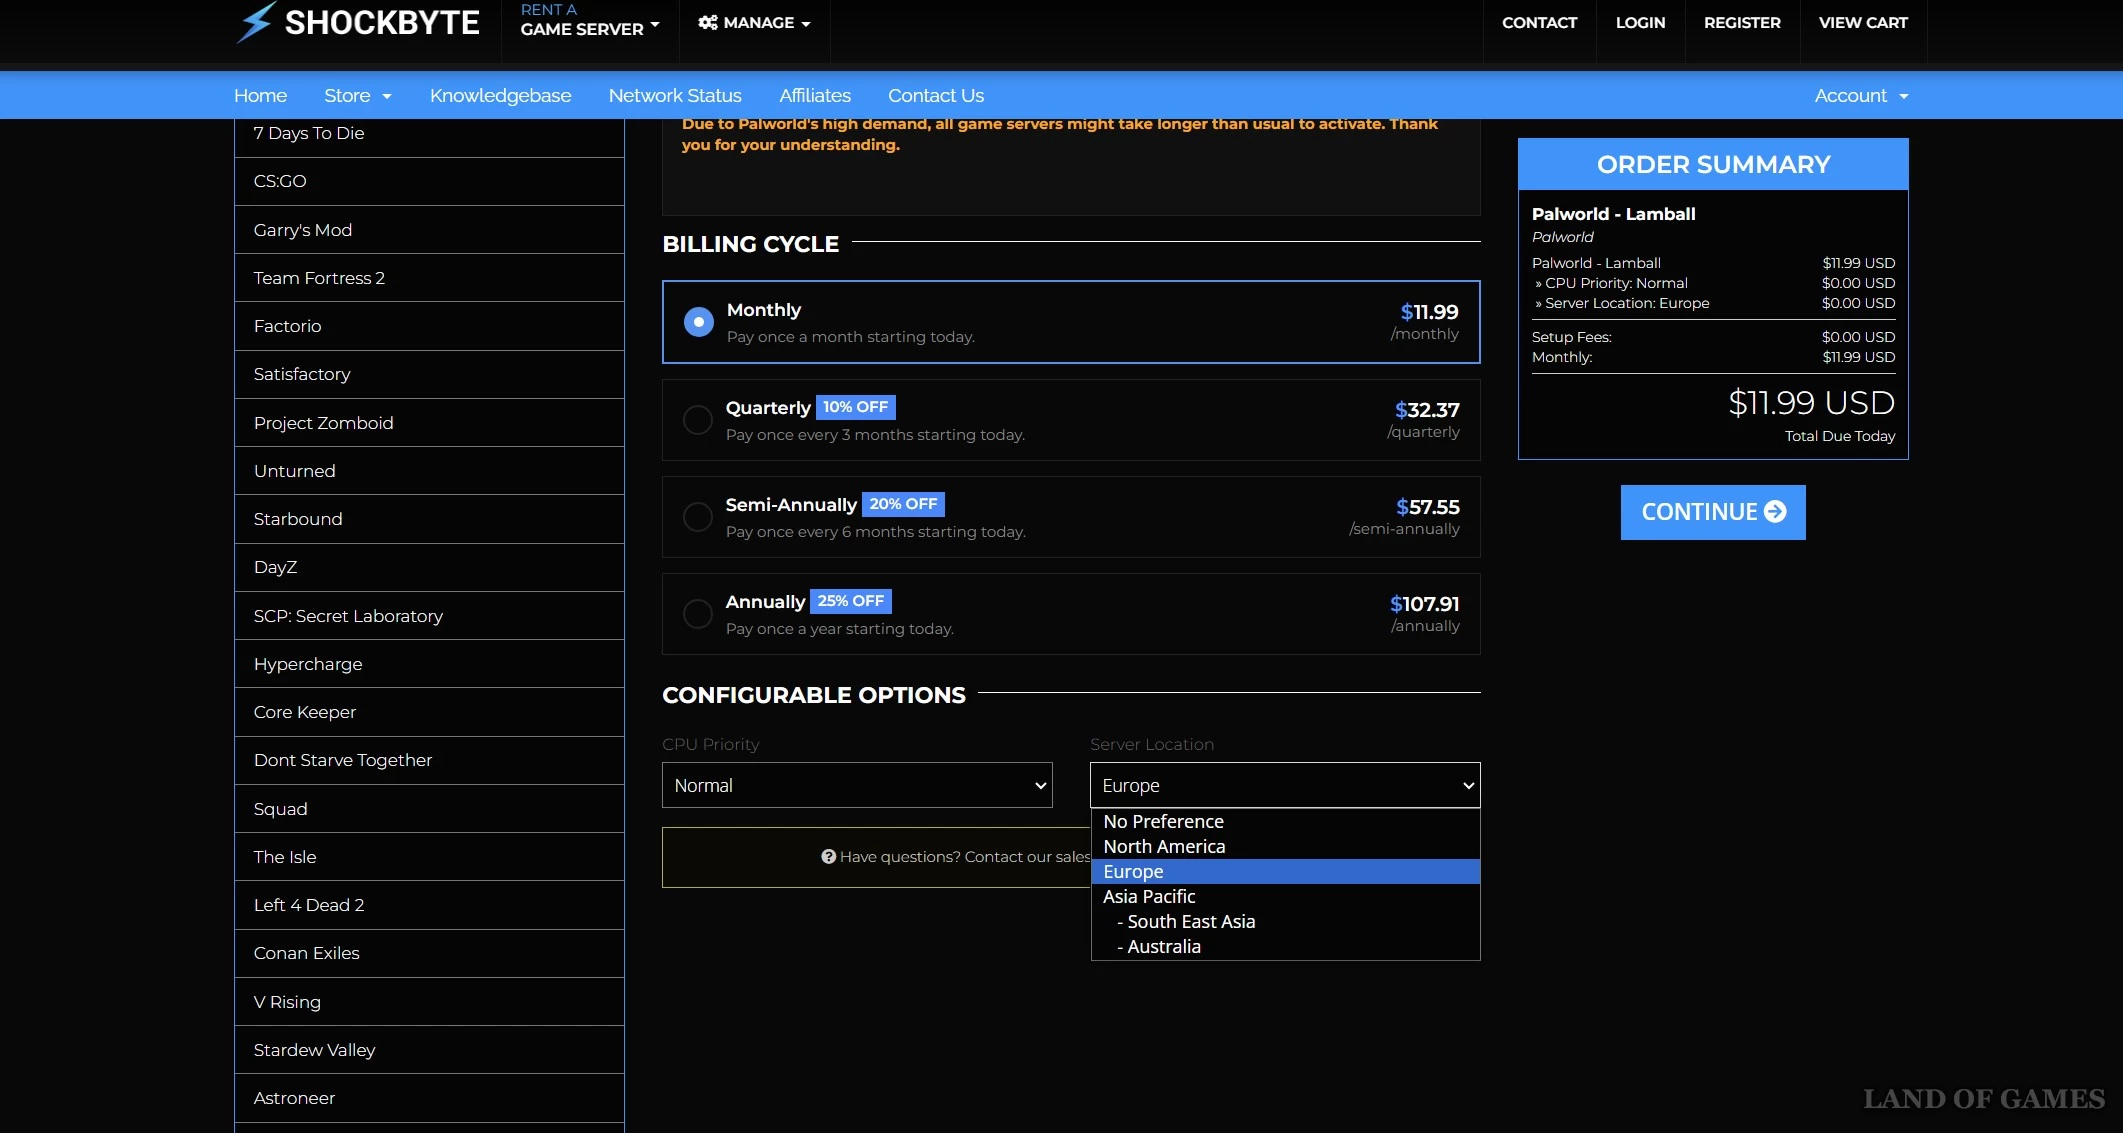
Let's start with Shockbyte, which is a fairly popular foreign server rental service. Here you can order the Lamball ($12) plan for 12 people or the Grizzbolt ($20) plan with 32 player slots. Whatever the option, you will find a server with good protection, automatic updates, deep world settings, technical support working around the clock, and instant installation.

The main thing is, when purchasing a server, do not forget to select "Europe" so that you have a higher ping. After making a purchase (payment is made only in dollars, so users from the Russian Federation may have problems with crediting money), go to the “Home” section and you will find the purchased server in the “Active” tab.
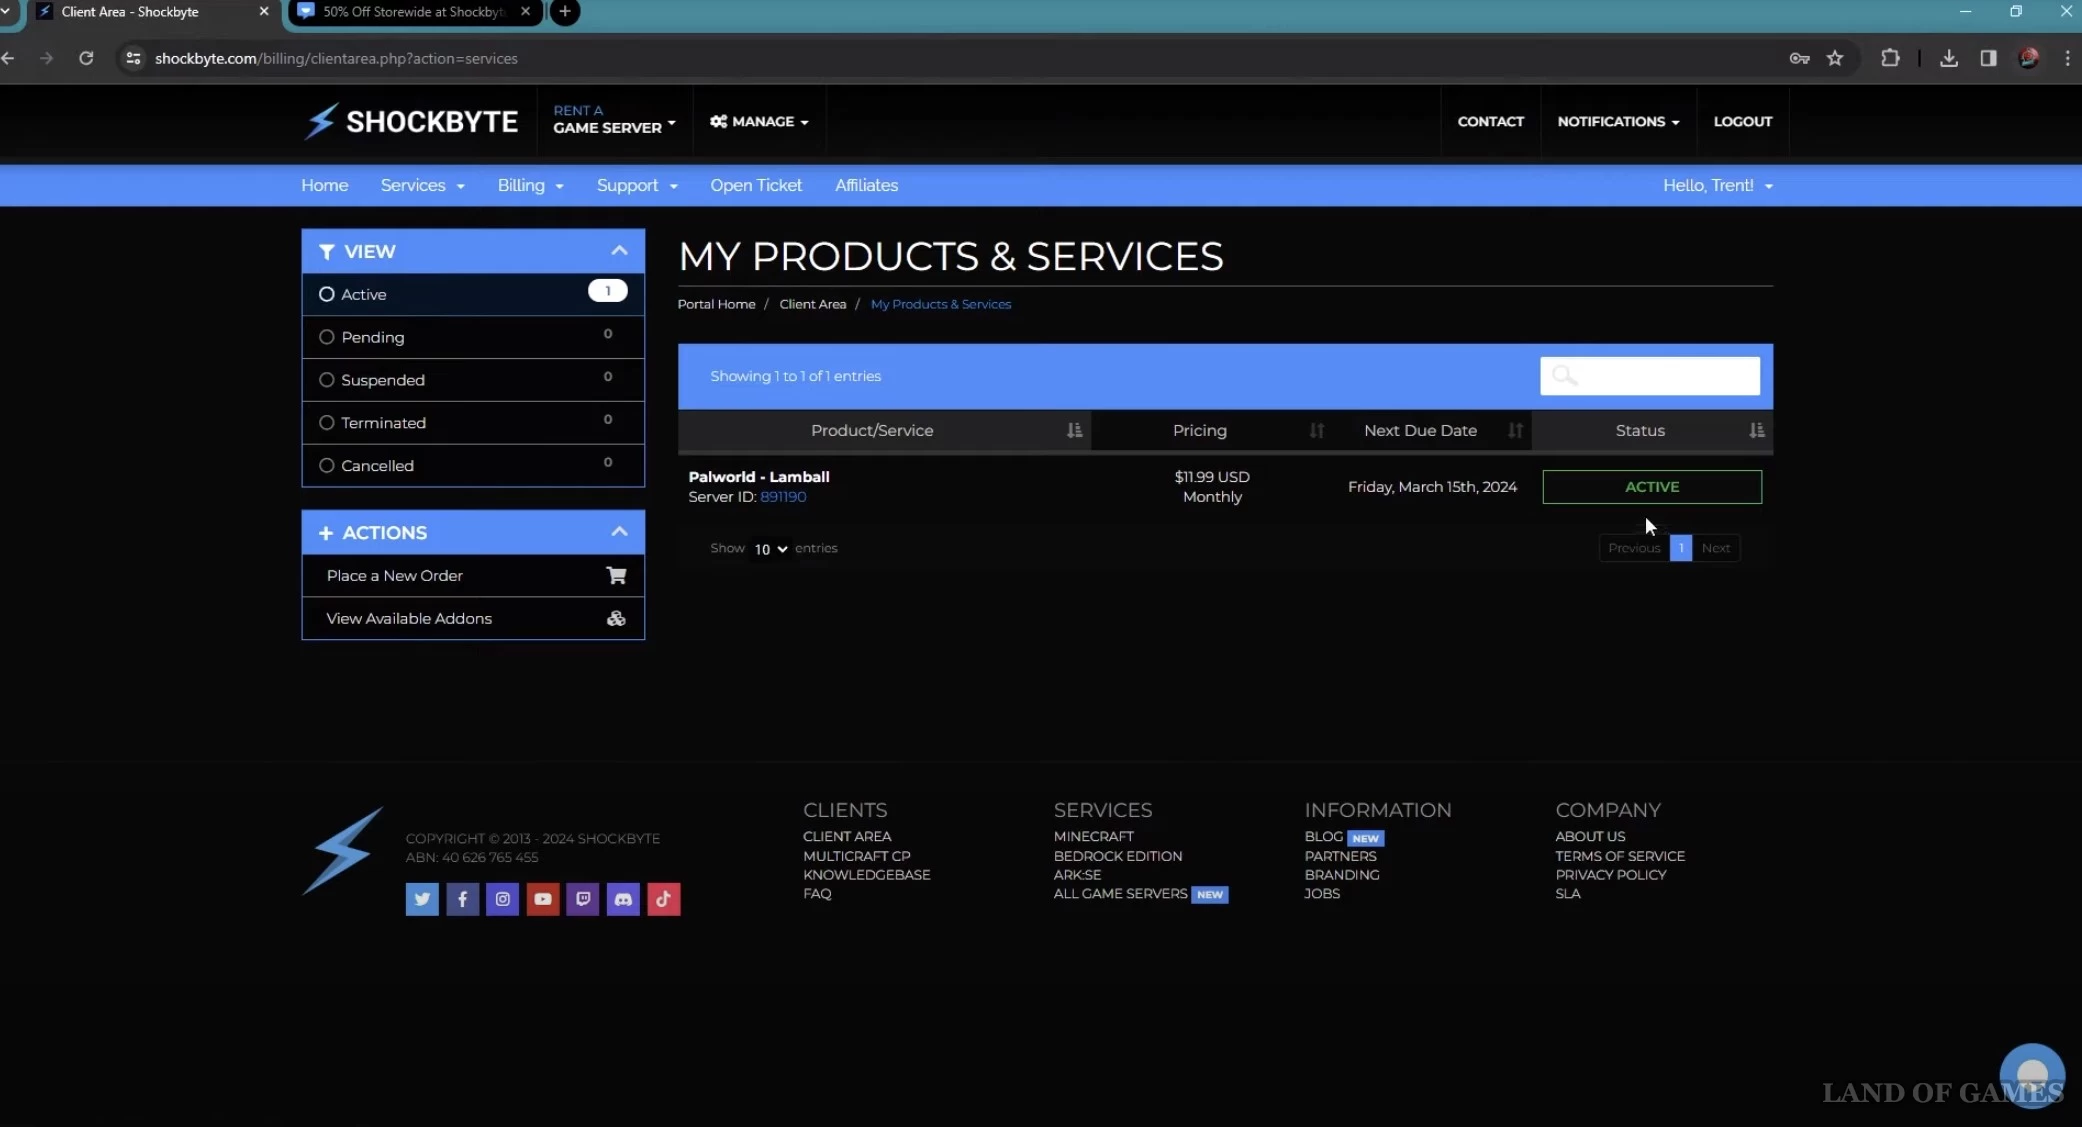
Click on it to open the server page. Here you can find its IP address at the bottom of the screen (see first screenshot below) - copy these numbers. Now log into Palworld, click on “Join Co-op Game” and at the bottom you will see a line where you need to paste the copied IP. Next, just click on the “Connect” button and you will immediately join your server.
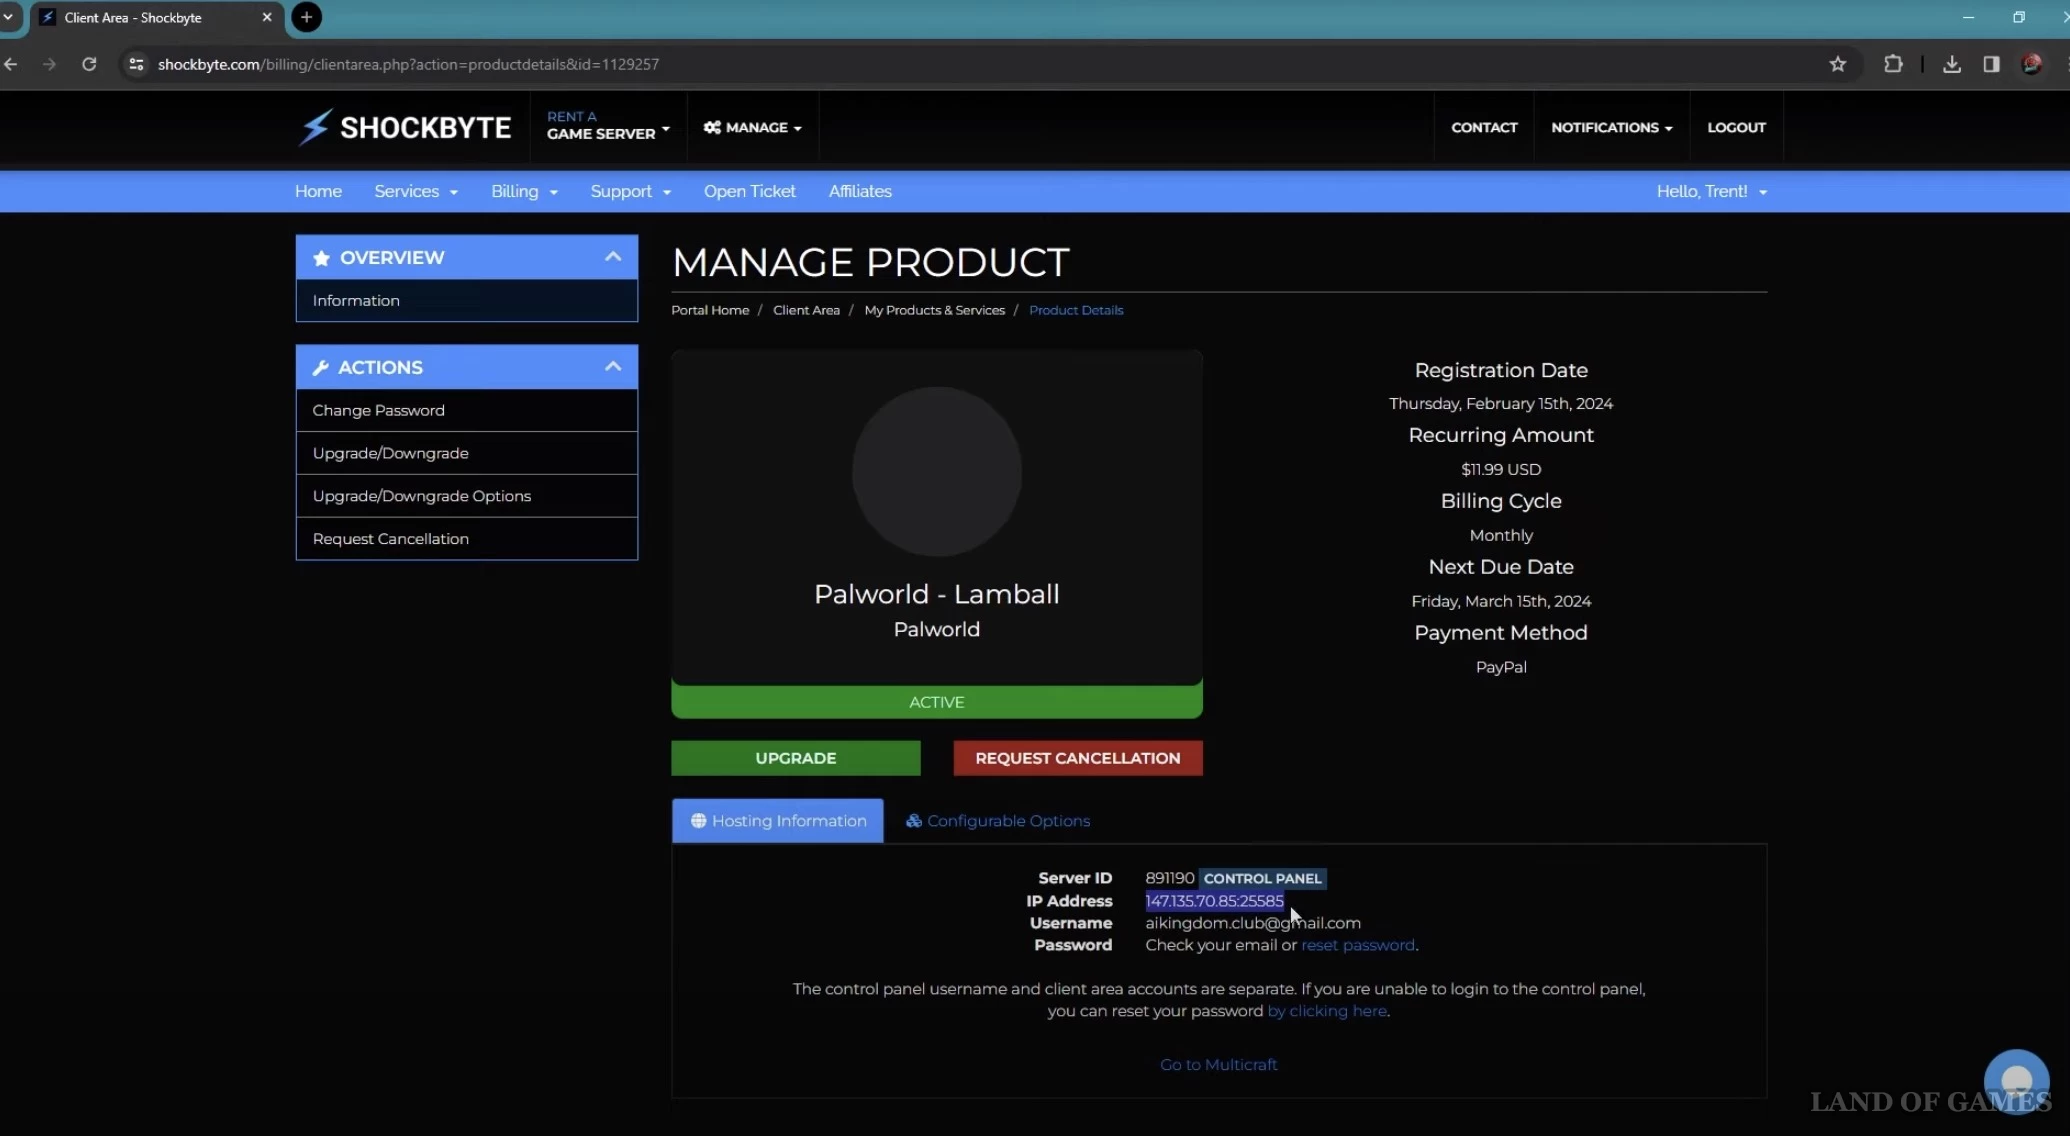
In order for your friends to be able to access it, you only need to give them the server’s IP address. If you have set a password, you must check the box next to “Enter your password.”
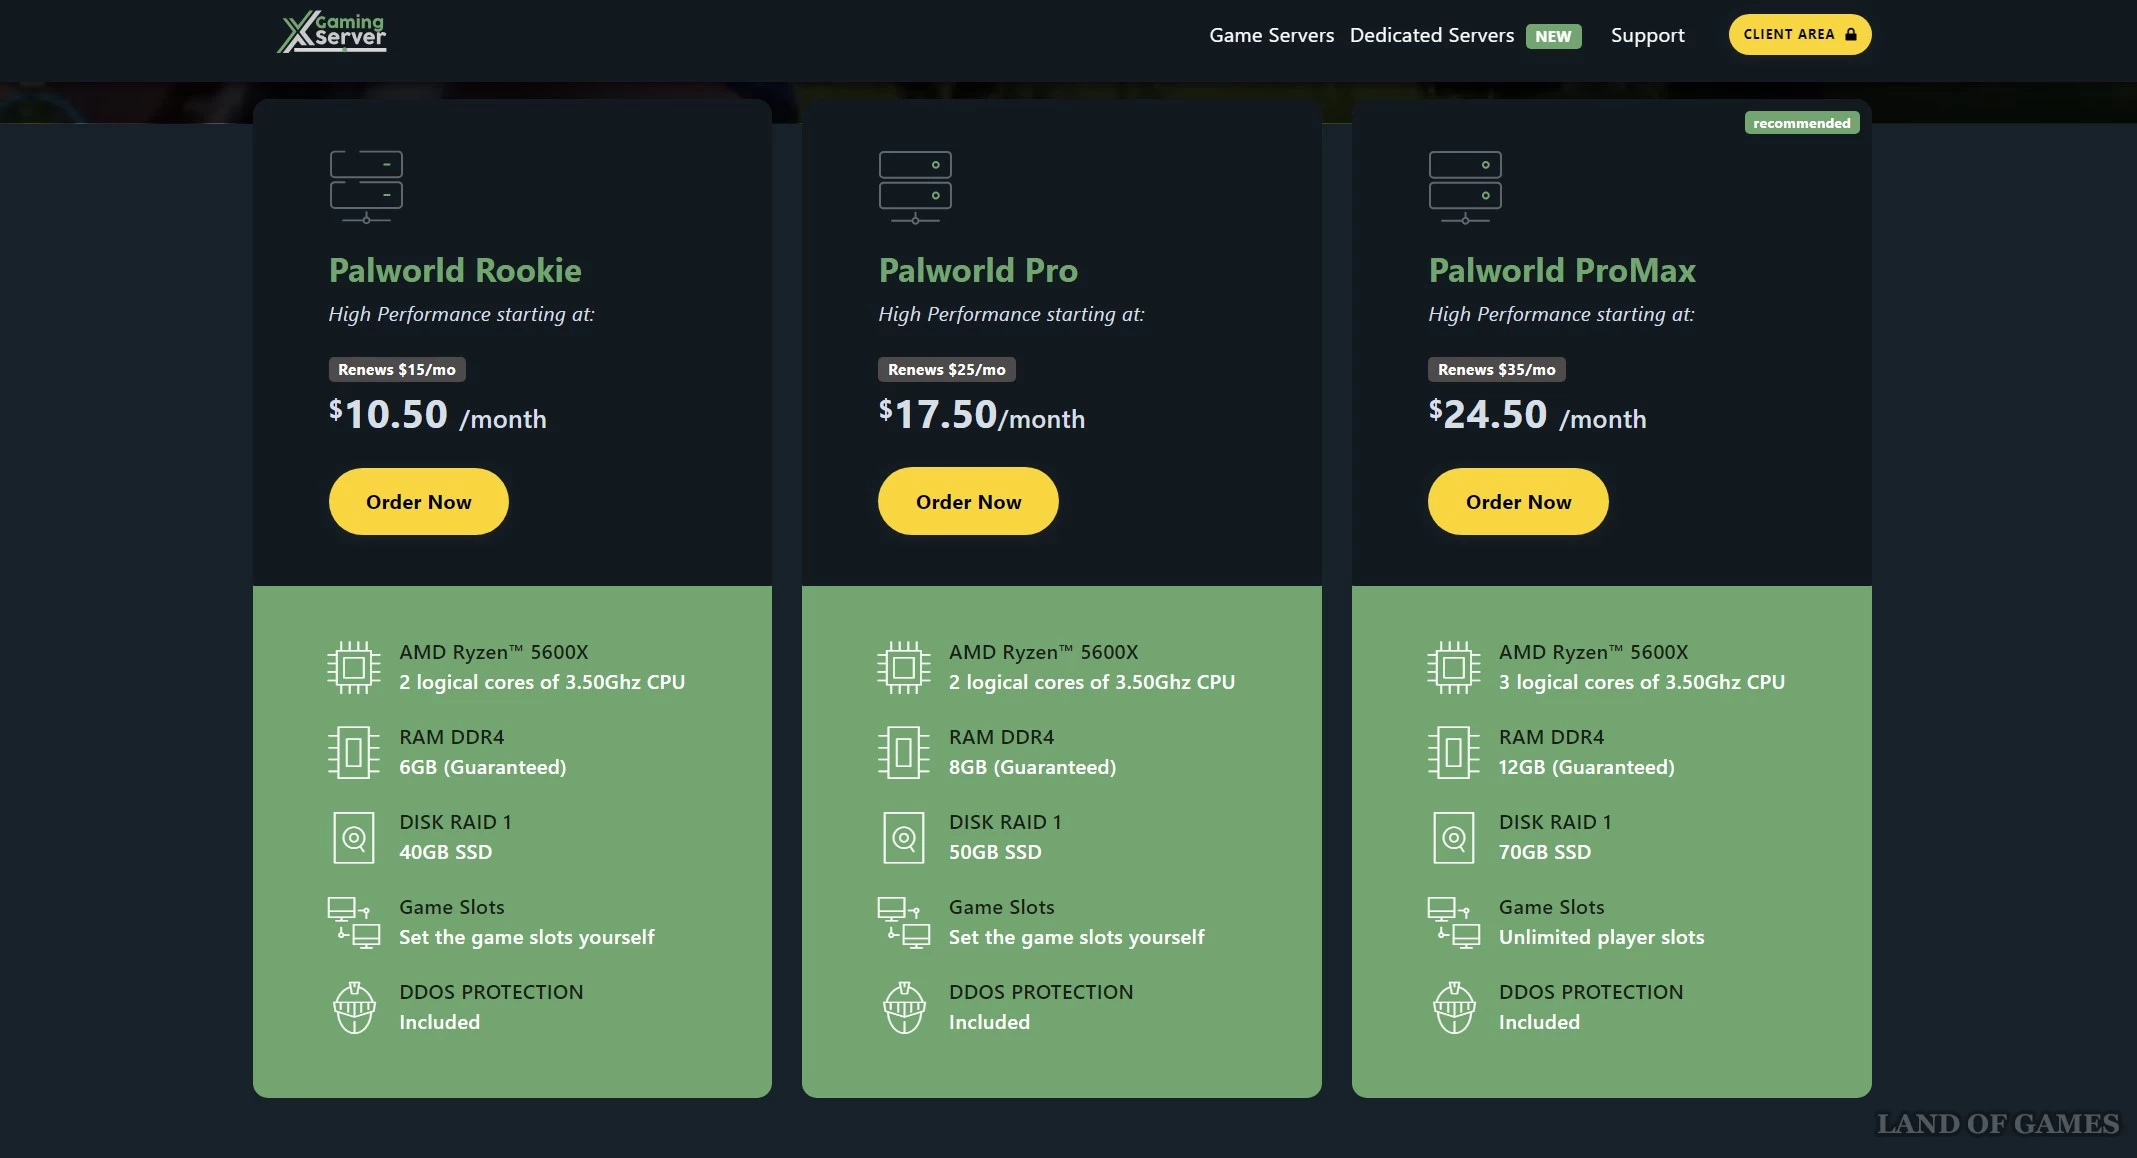
Concerning XGamingServer, then in terms of functionality it is not much different from the previous service, but it offers much more tariffs, which allows you to save money. For example, if you only plan to play with two or three players, then you can simply take the cheapest option, “Palworld Rookie,” which costs $10.5 per month, and enjoy stable gaming. In terms of setting up and logging into the server, it is similar to Shockbyte.
Server rental in Russia
If you have problems paying for a server in the above services, then you can choose any Russian site, since most of them offer similar conditions. However, in terms of stability and technical support, they are often worse than foreign ones, and sometimes even more expensive.

How to create your own dedicated server in Palworld
If you decide to open your own server in the game, then you should first familiarize yourself with the following features of its operation:
- You will need a very powerful computer system for stable operation of the server. The main load will go to the processor and RAM, so it is highly desirable to have 32 gigabytes of RAM and a modern 6- or 8-core CPU.
- You need high-speed Internet – preferably at least 1 Gbit/sec. Naturally, the connection should be as stable as possible.
- The computer must be running all the time if you want access to the server around the clock.
- Your own dedicated server has virtually no protection against DDoS attacks and hackers, so it is quite easy to hack. Fighting cheaters will also be difficult.
However, if you are planning to create a server for yourself and 1-3 friends, then most problems will bypass you (especially if we are talking about a local network), so this method may be the best option for you, especially considering that it is absolutely free. Below are detailed instructions for installing a dedicated server.
Instructions for creating a dedicated server in Palworld
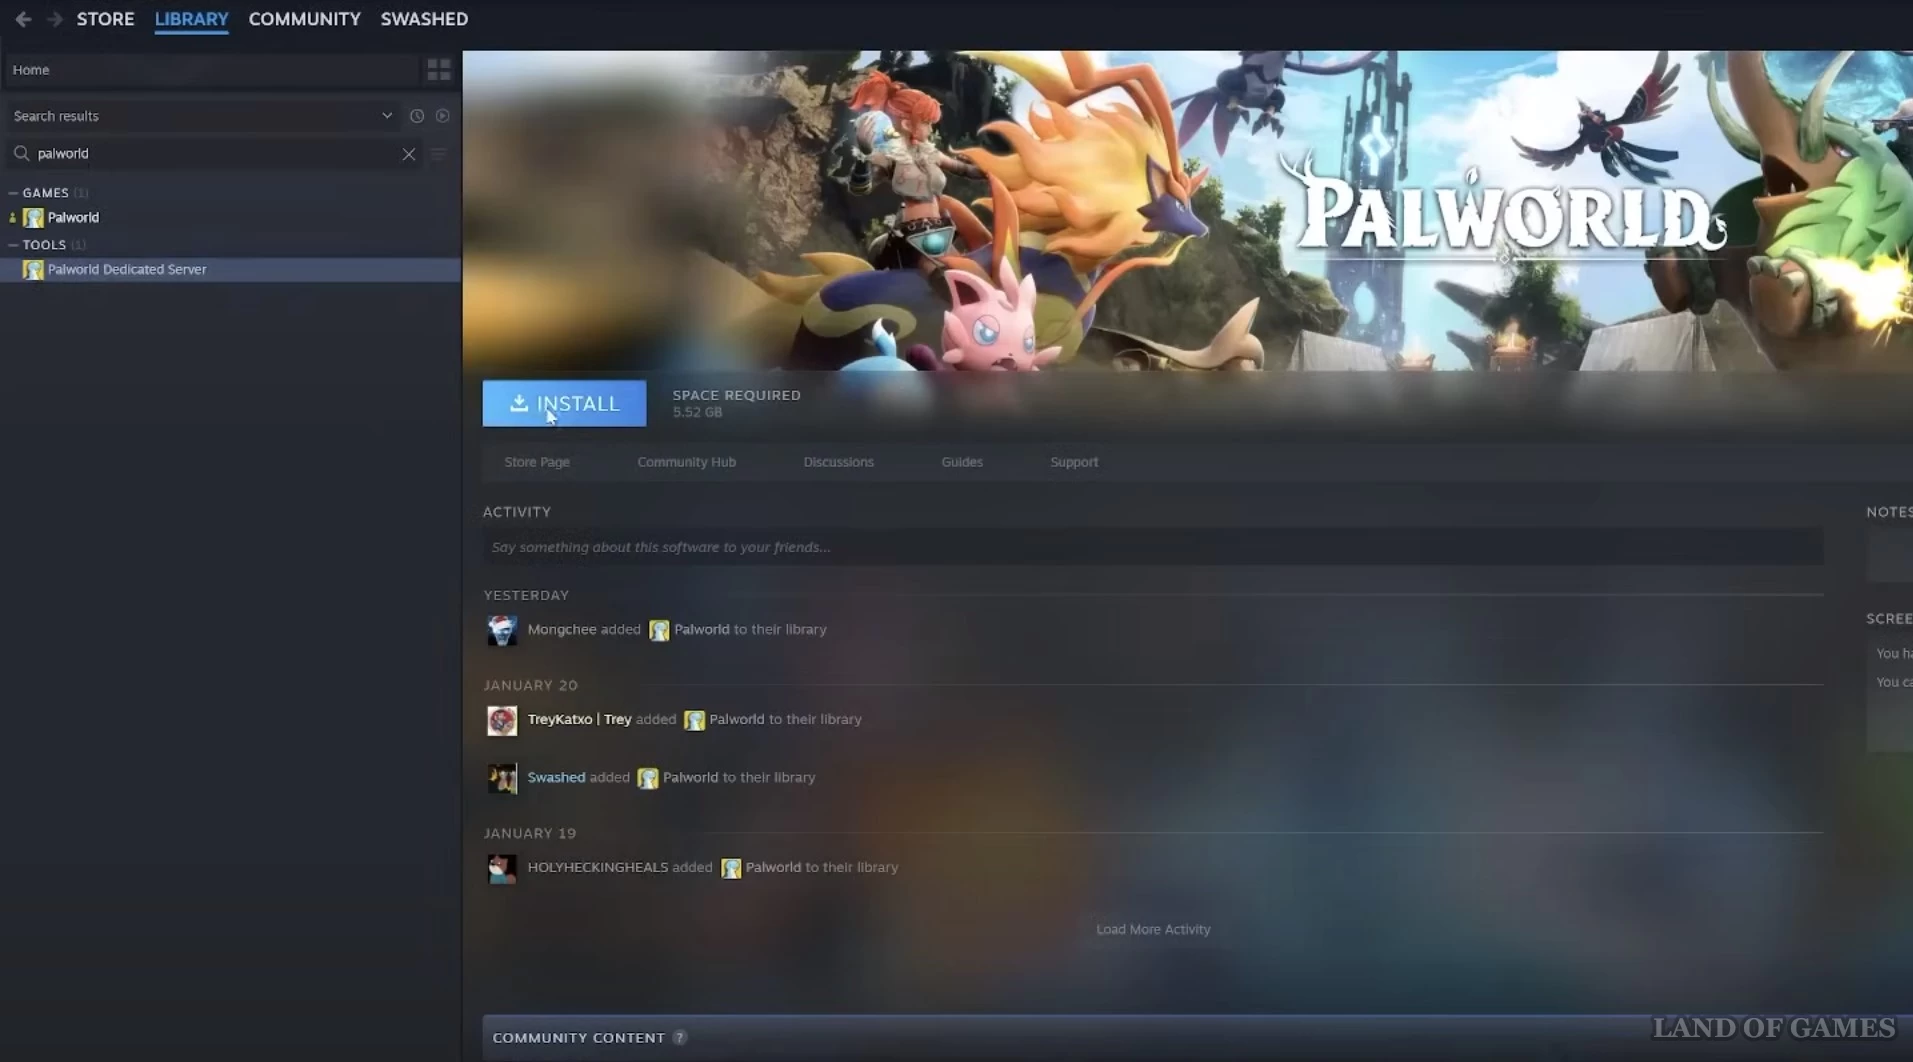
If you have the Steam version of the game, then first go to “Steam”, go to the Library and type “Palworld” into the search bar, and in the search criteria you need to check the box next to “Tools”. You should see the Palworld Dedicated Server program. Click on it, and then click on the blue “Install” button.
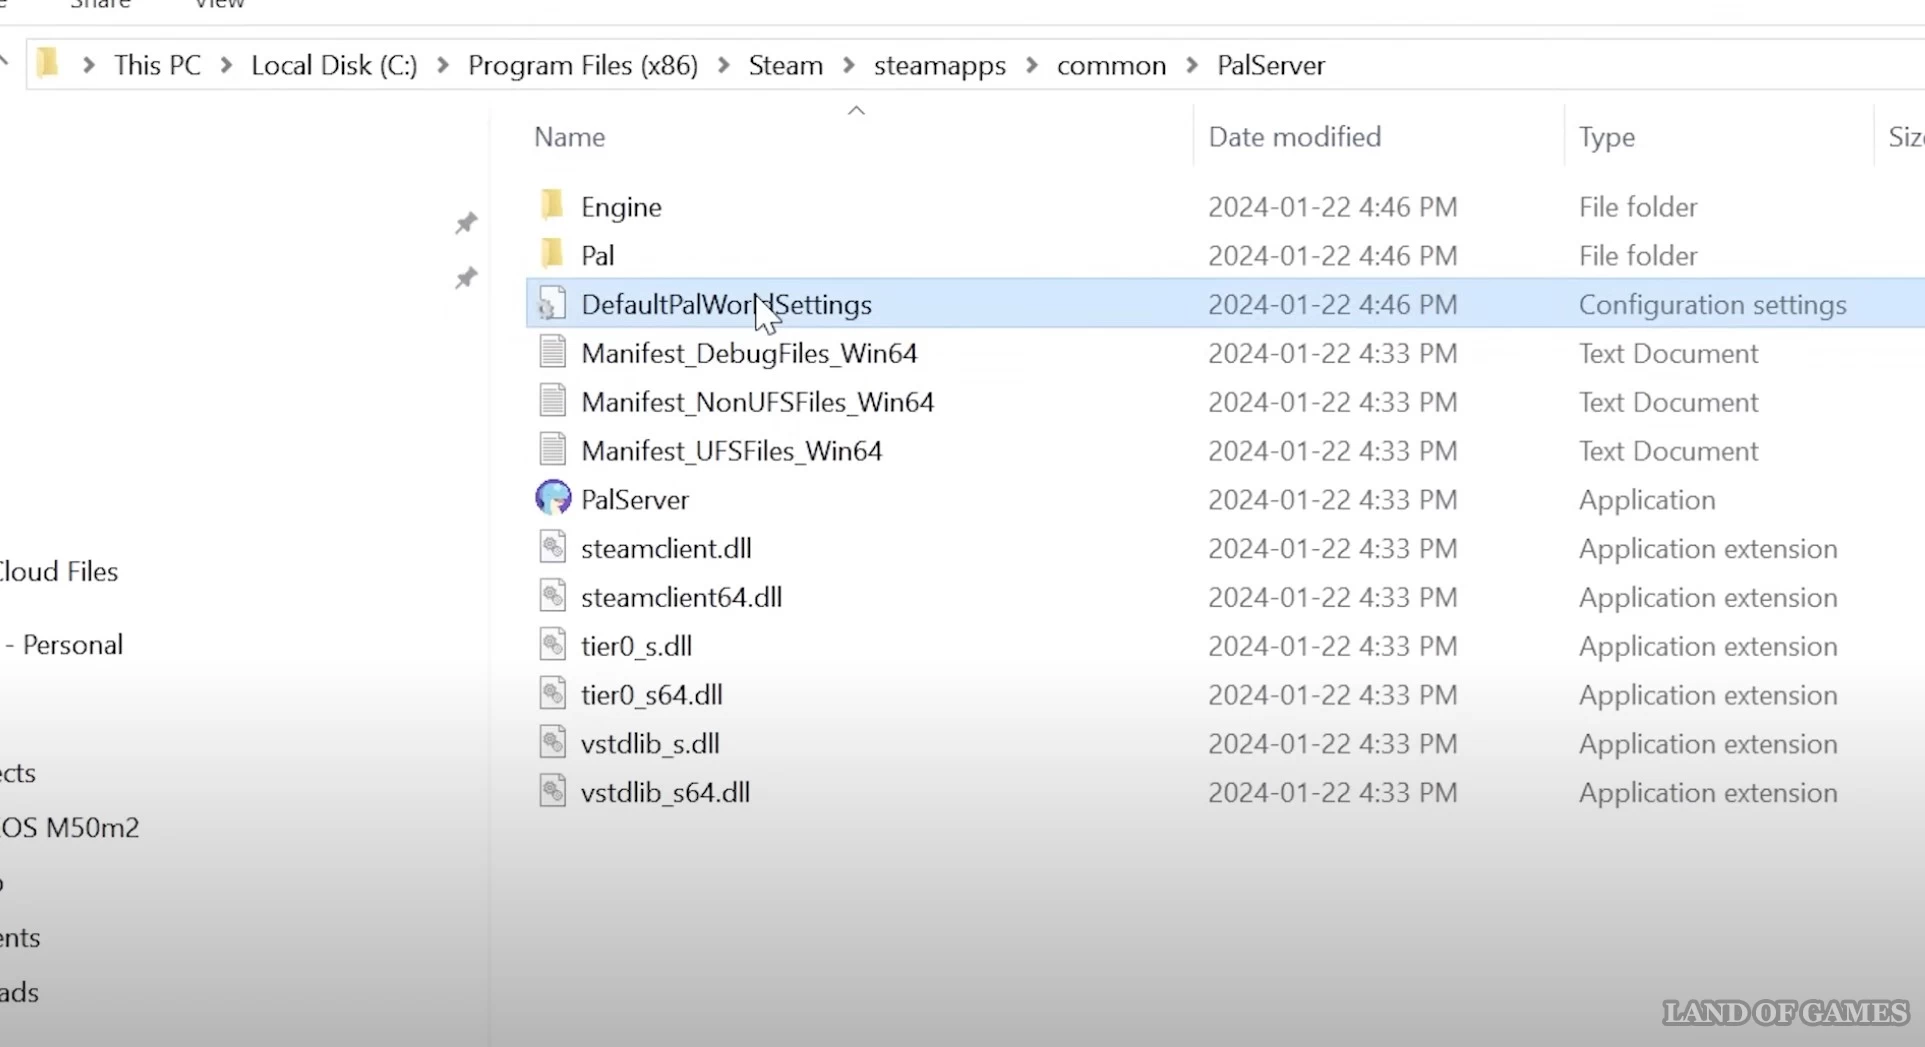
After installation, go to the game folder: C:\Program Files (x86)\Steam\steamapps\common\PalServer. Run PalServer.exe. Wait until the black window opens, and then close it. Now find the DefaultPalWorldSettings.ini file here and open it with any text editor, for example Notepad. Copy all settings specified here.
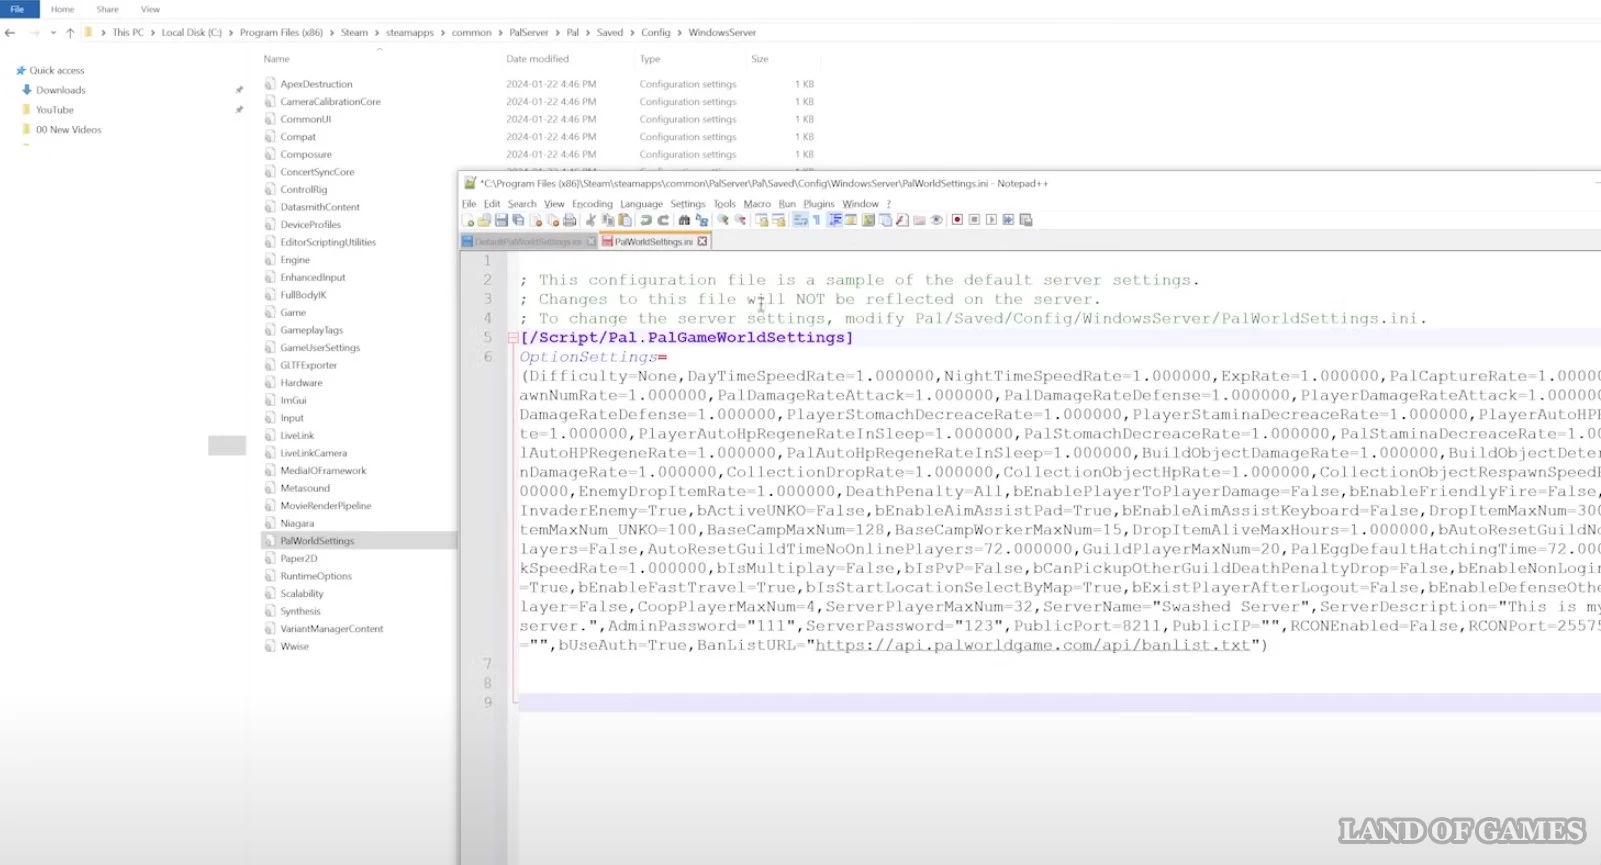
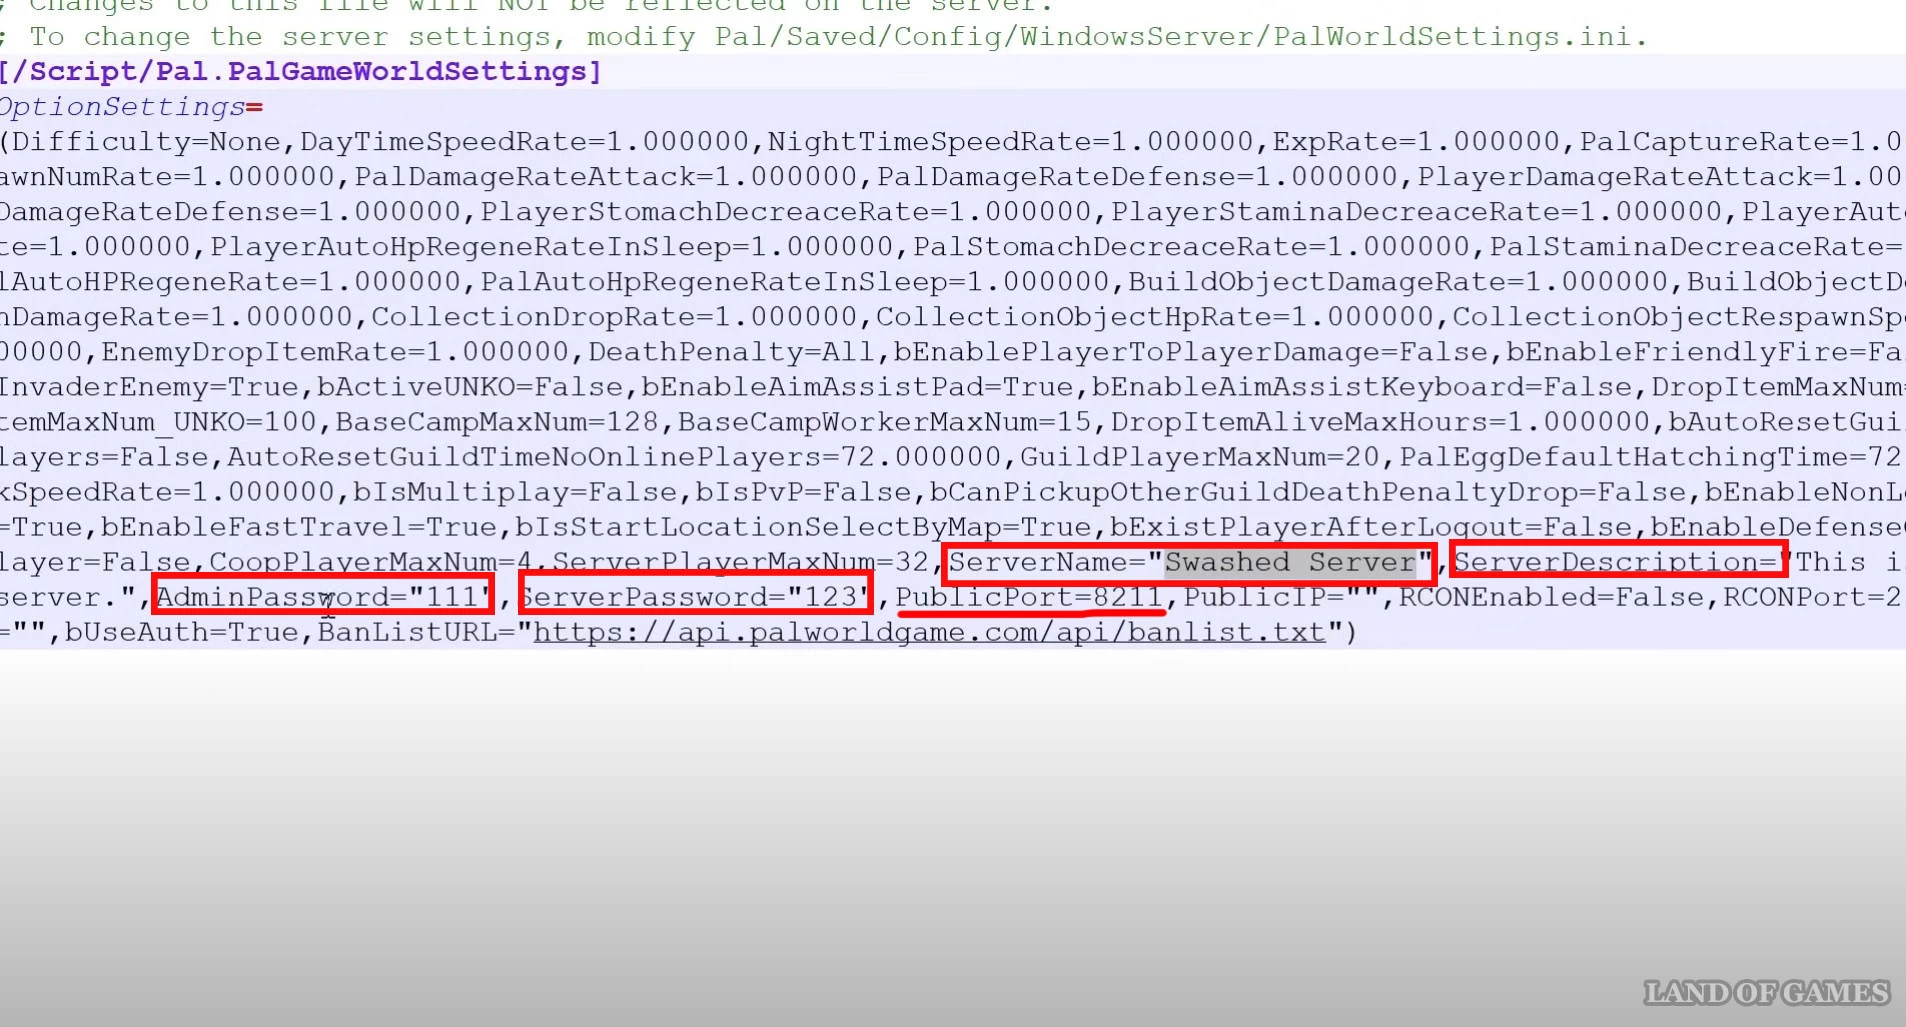
Then go to the folder C:\Program Files (x86)\Steam\steamapps\common\PalServer\Pal\Saves\Config\WindowsServer and find the PalWorldSetting.ini file here. Open it with Notepad, and then paste the previously copied text here. These are the default settings for your server. Here you will need to change the server name, its description, passwords to the administrator console and to the server (they are highlighted in the picture below). Remember also the numbers of the public port: 8211.
Save your changes to the file and close it. Now start your server again by clicking on PalServer.exe. Enter the game, click on the “Join Co-op Game” sign and immediately click on the “Contact” button at the bottom. This will log you into your server. However, at this point in time, you will not be able to invite friends to it.
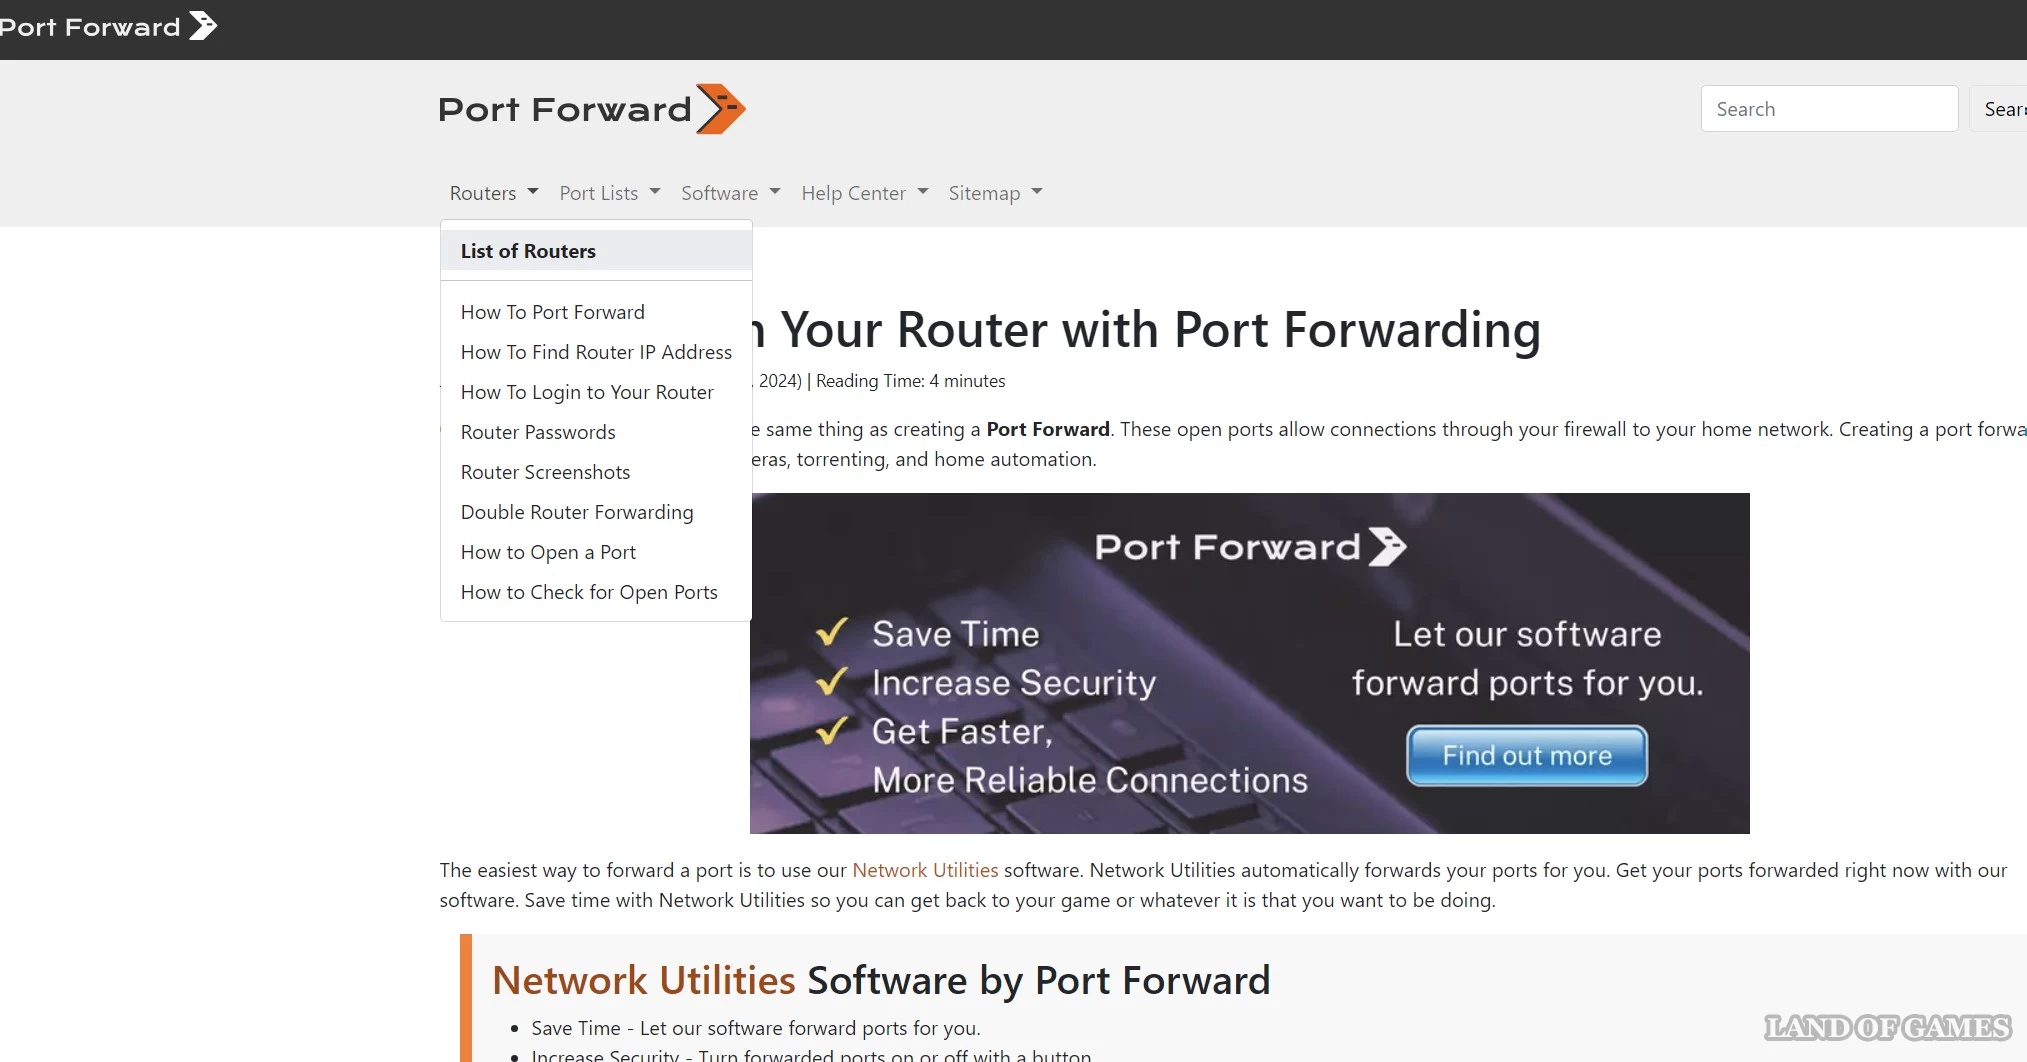
To open access to other players, you will need to configure port forwarding. Log in to the control panel of your router. Open your browser and enter the address 192.168.2.1 into the search bar. If nothing happens, then go to portforward.com, click on “Routers” in the upper left corner, find the model of your router, scroll down the page a little, and you will see the address you need.
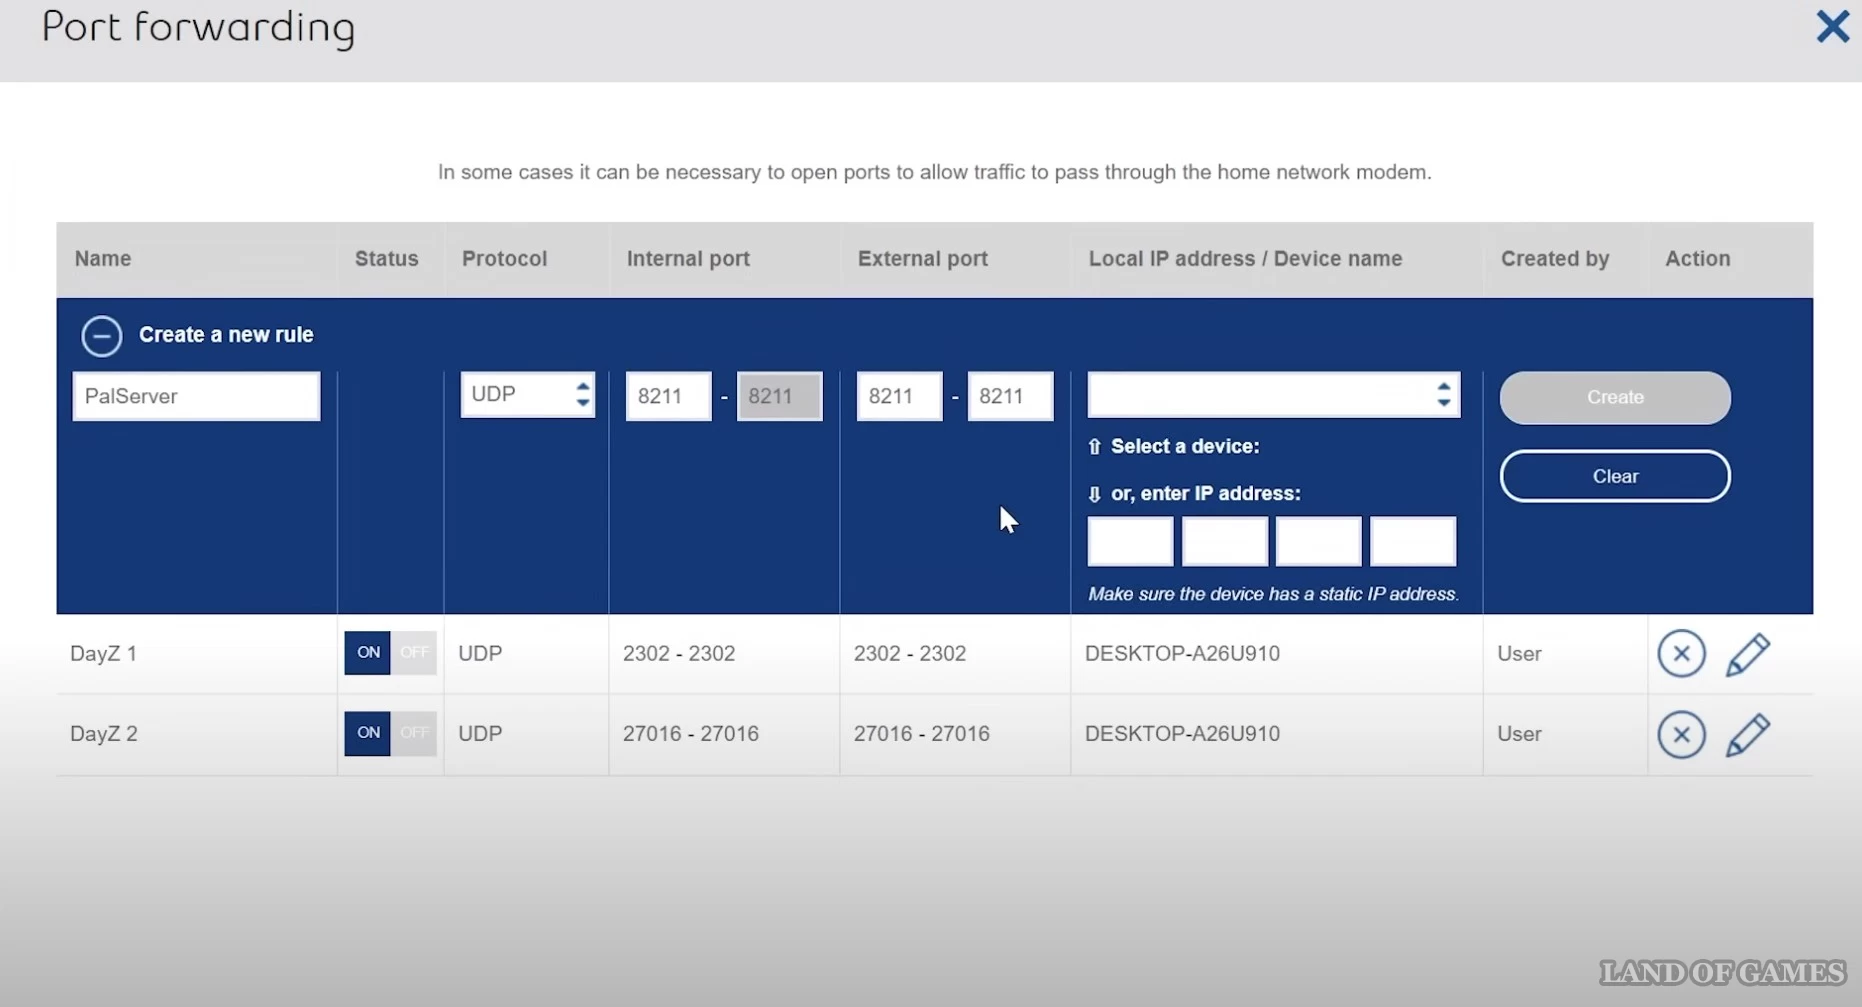
After logging into the control panel of your router, go to “Advanced functions (settings)”, click on “Port forwarding” (if you are using an Honor router, then this function is located in Security -> NAT Services), and then click on “Create a new rule” "or just "+". Next, specify the following parameters:
- Service name: PalServer
- Protocol: UDP
- Internal port: 8211
- External port: 8211
- Host IP Address: Enter your IP address (just Google “my IP address” to find it).
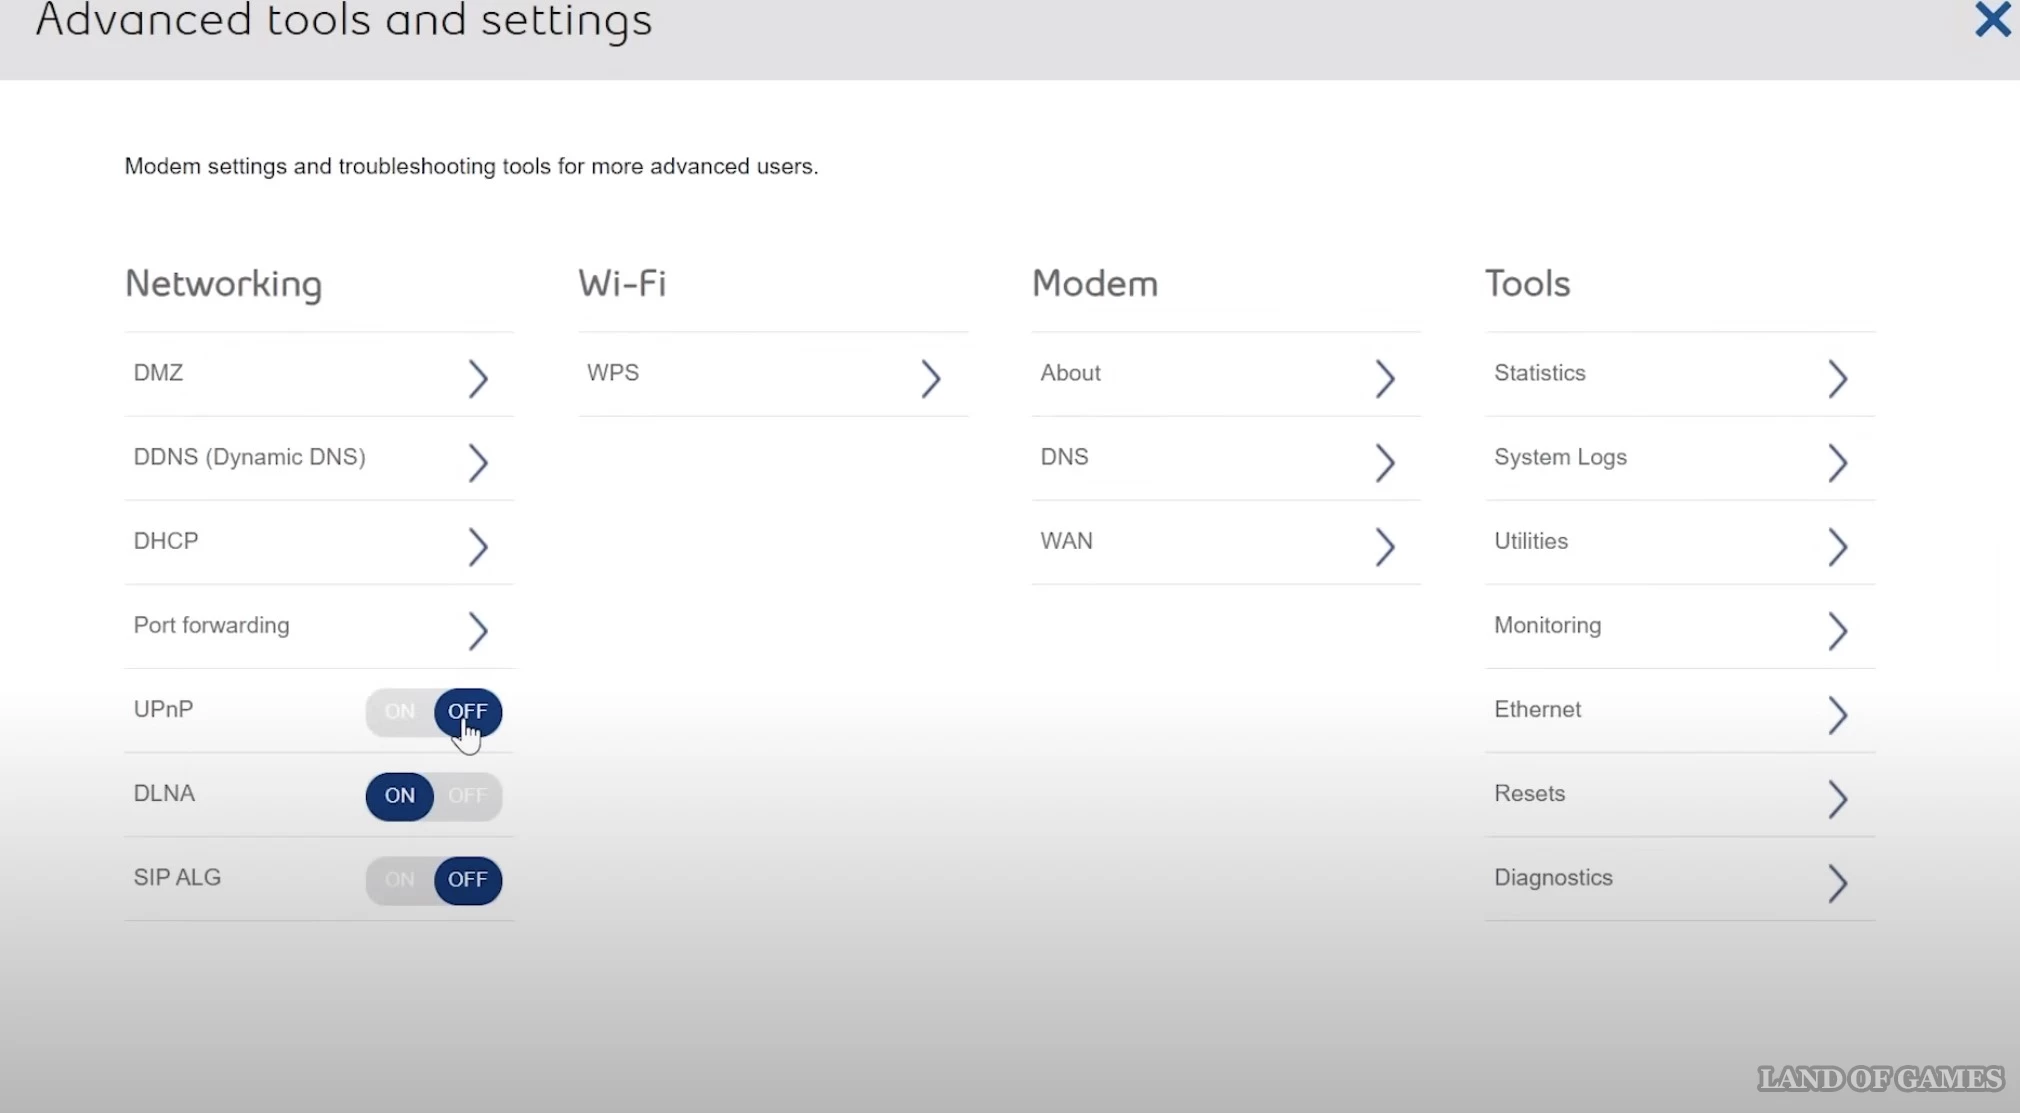
Now other players will be able to join your server. Next, find the UPnP option in the Network Settings section and turn it off.
Then you will need to deactivate Windows protection. Click on start, write “Firewall” and select “Firewall and network security”. Click on “Advanced options”, click on “Rules for incoming connections” and select the “Create rule...” option.

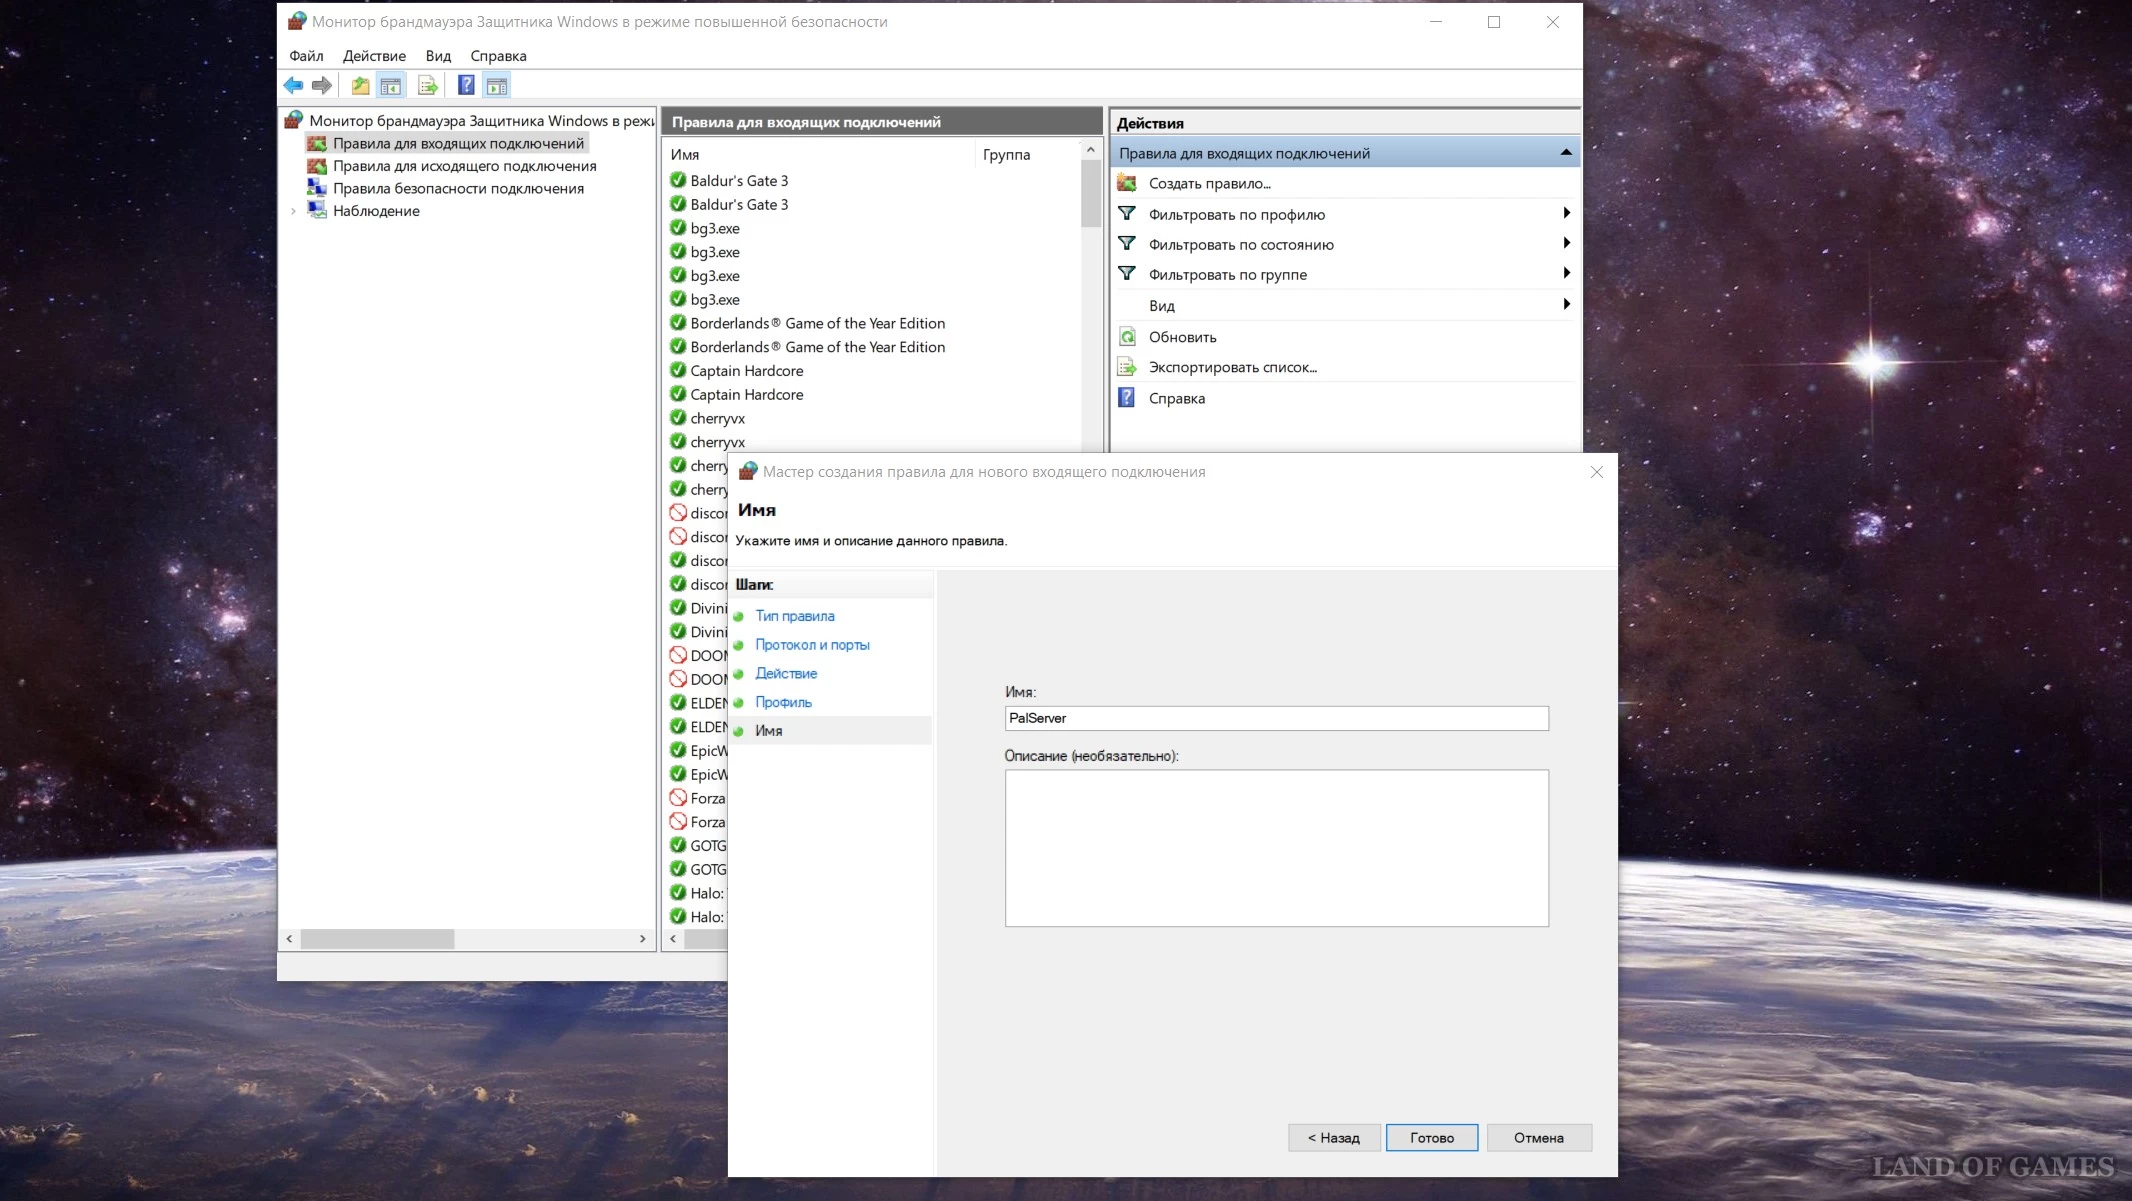
In the window that opens, select “For port”. Then "Next", select "UDP Protocol" and write "8211" in the blank line. Click “Next” again, agreeing with everything twice, and at the end, in the “Name” line, write “PalServer” and click “Done.” As a result, you will open access to your server in Windows.
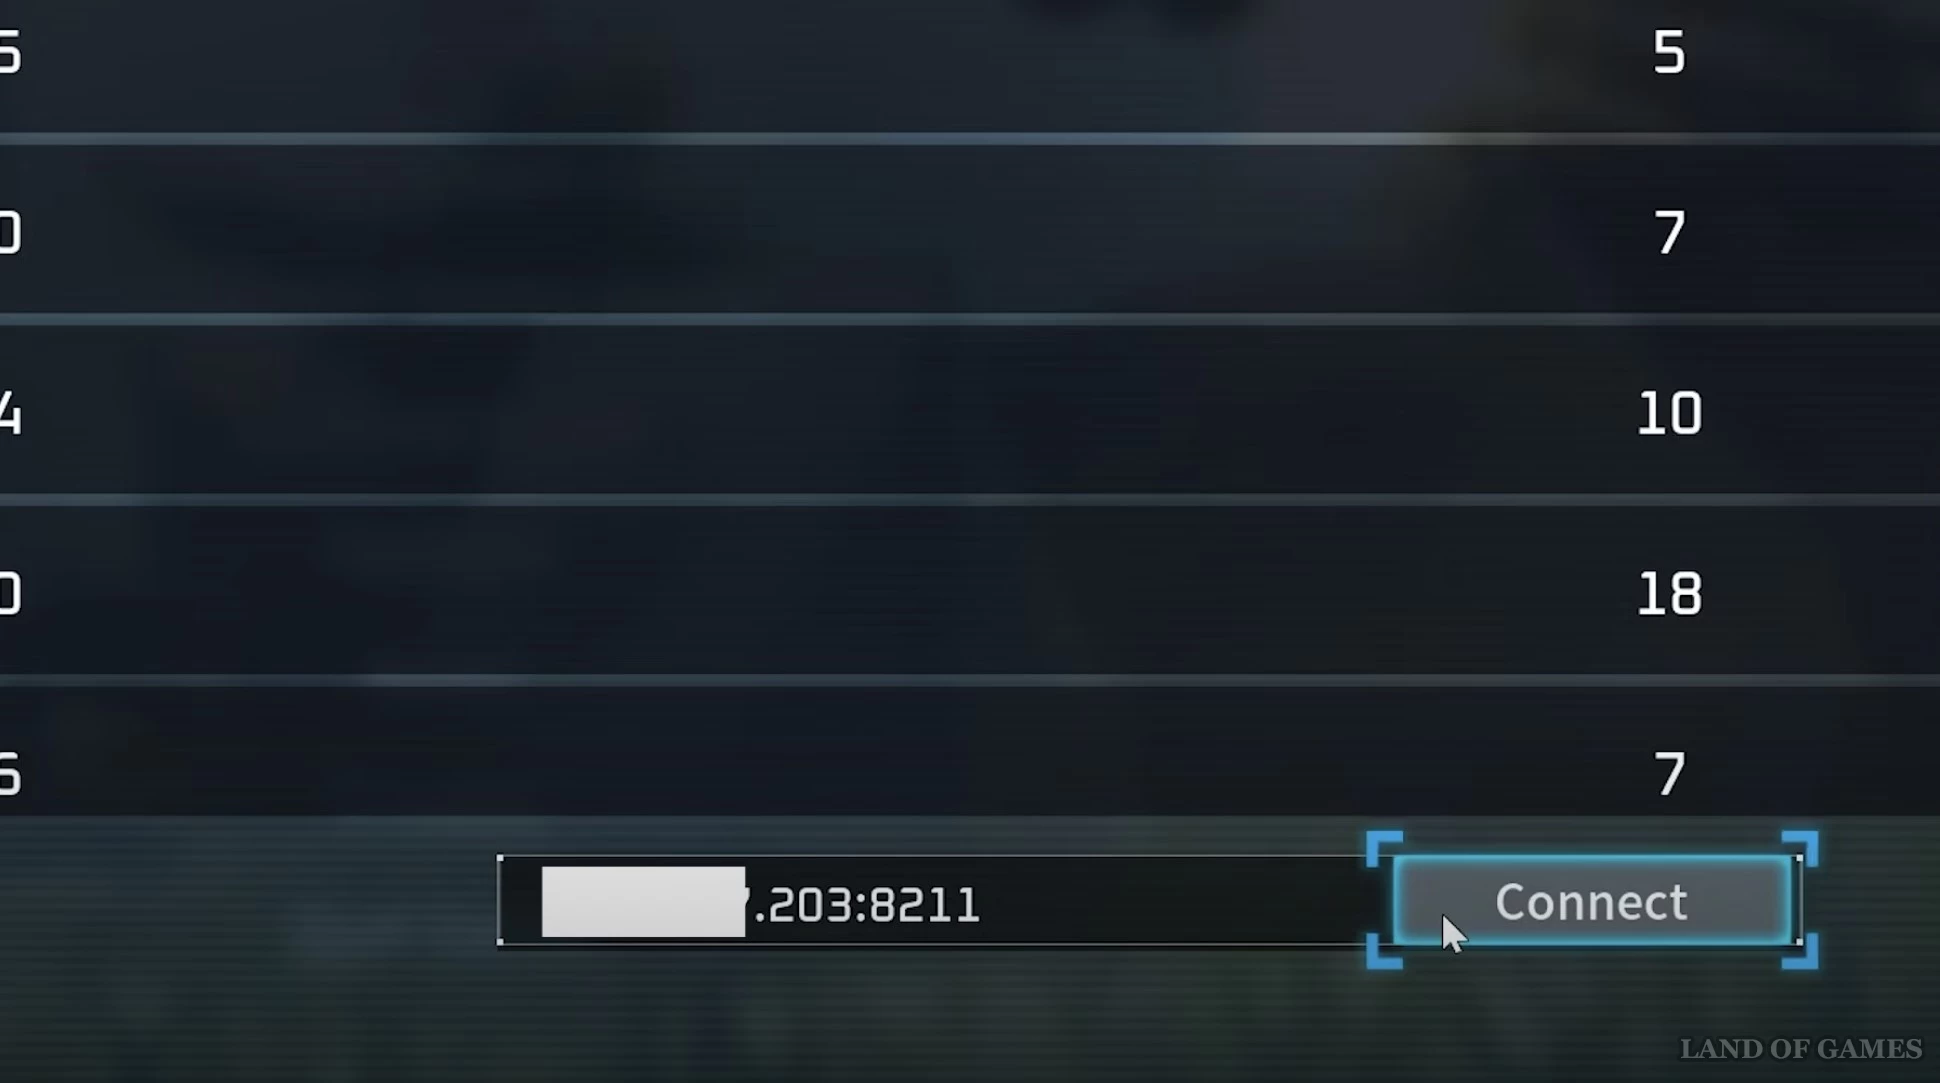
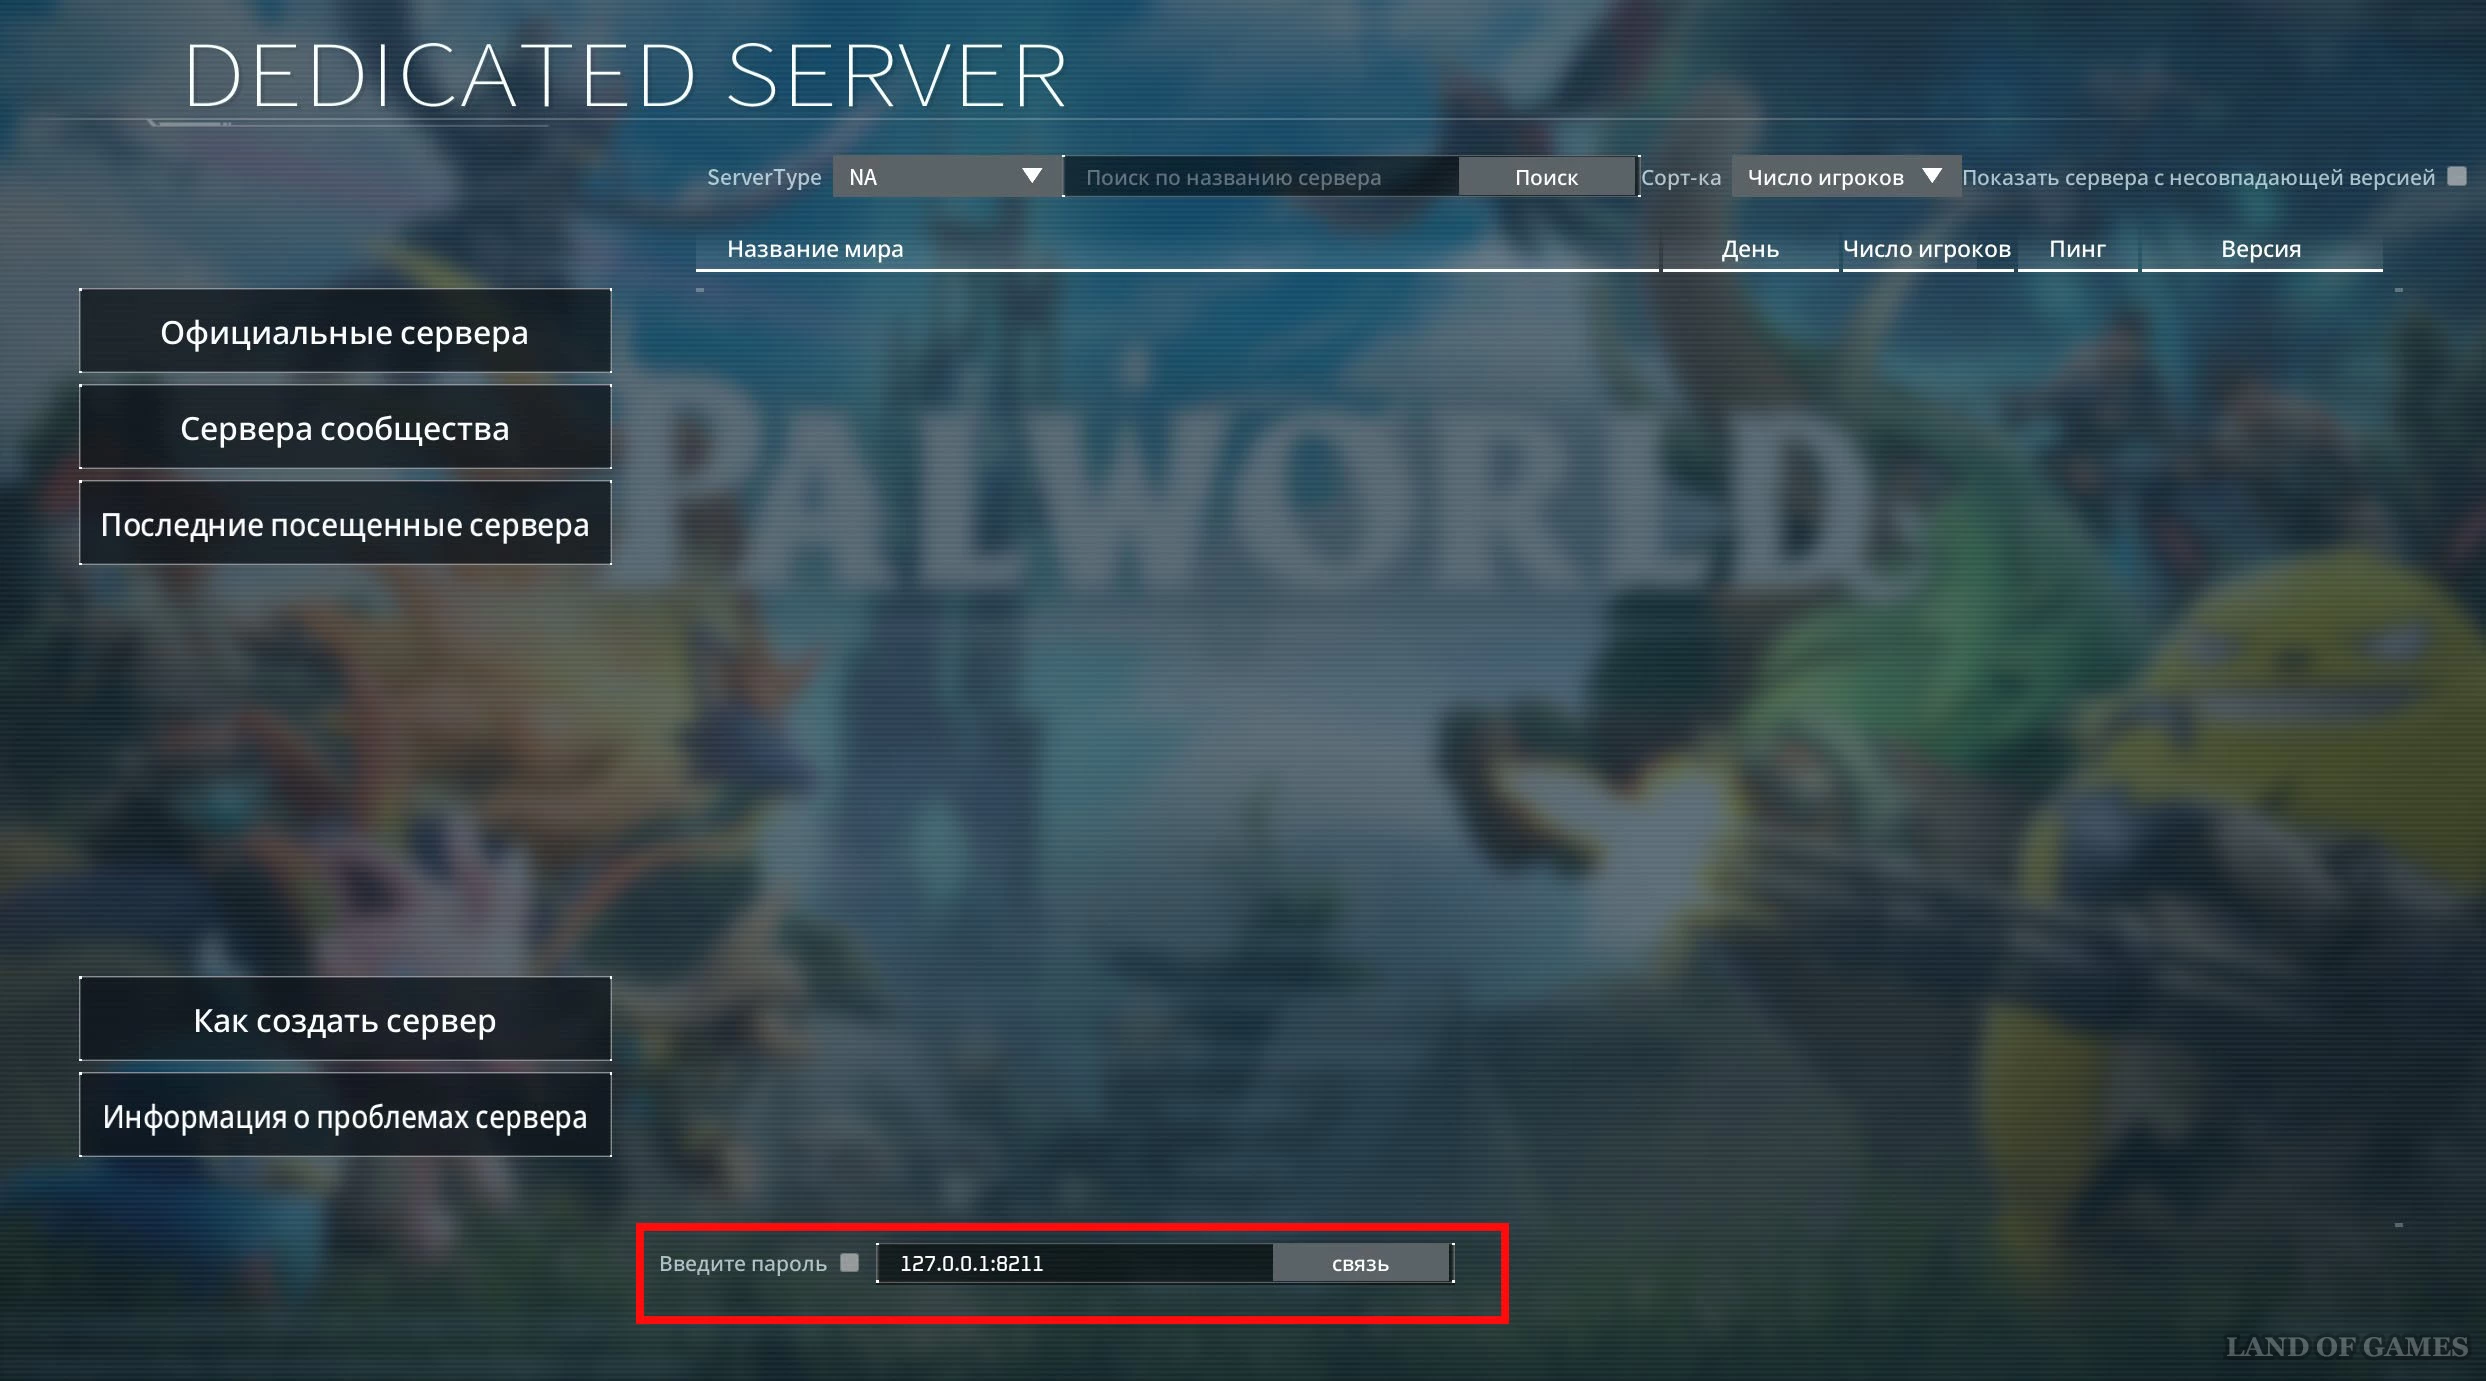
All you have to do is share your IP address with your friends, and after the colon they must write 8211, as shown in the picture below. If the server has a password, then it will also need to be sent to the players.
Error with inability to enter password
Sometimes a bug occurs in the game that prevents you from connecting to the server, since the password entry system does not work. In this case, you need to do the following:
- Go to the "Join Co-Op" section in the main menu.
- Specify only “Community Servers” for the search and select the site with the blocking sign.
- In the password entry line, enter the combination from your own server. Click on “Ok”, and then on the inscription “No” when you are asked to connect.
- Enter the IP address and port again in the bottom line and log into your server without any problems.
How to save and close a dedicated server
To properly close the server and save all progress on it, we advise you to use the following instructions:
- While on the server, turn on chat and enter the /AdminPassword command in it.
- Click on "Space" and enter the administrator password that you previously specified in the settings. Click the Enter key to confirm your credentials.
- Now enter the /Save command in the chat line to save your progress. To shut down the server, you need to enter the word /Shutdown.
If you are interested in all the console commands available in the game, then we advise you to read our guide to cheats in Palworld. We hope that this article will help you create, rent and configure your own dedicated server.
Comments
You need to login to add comments.
You can login with