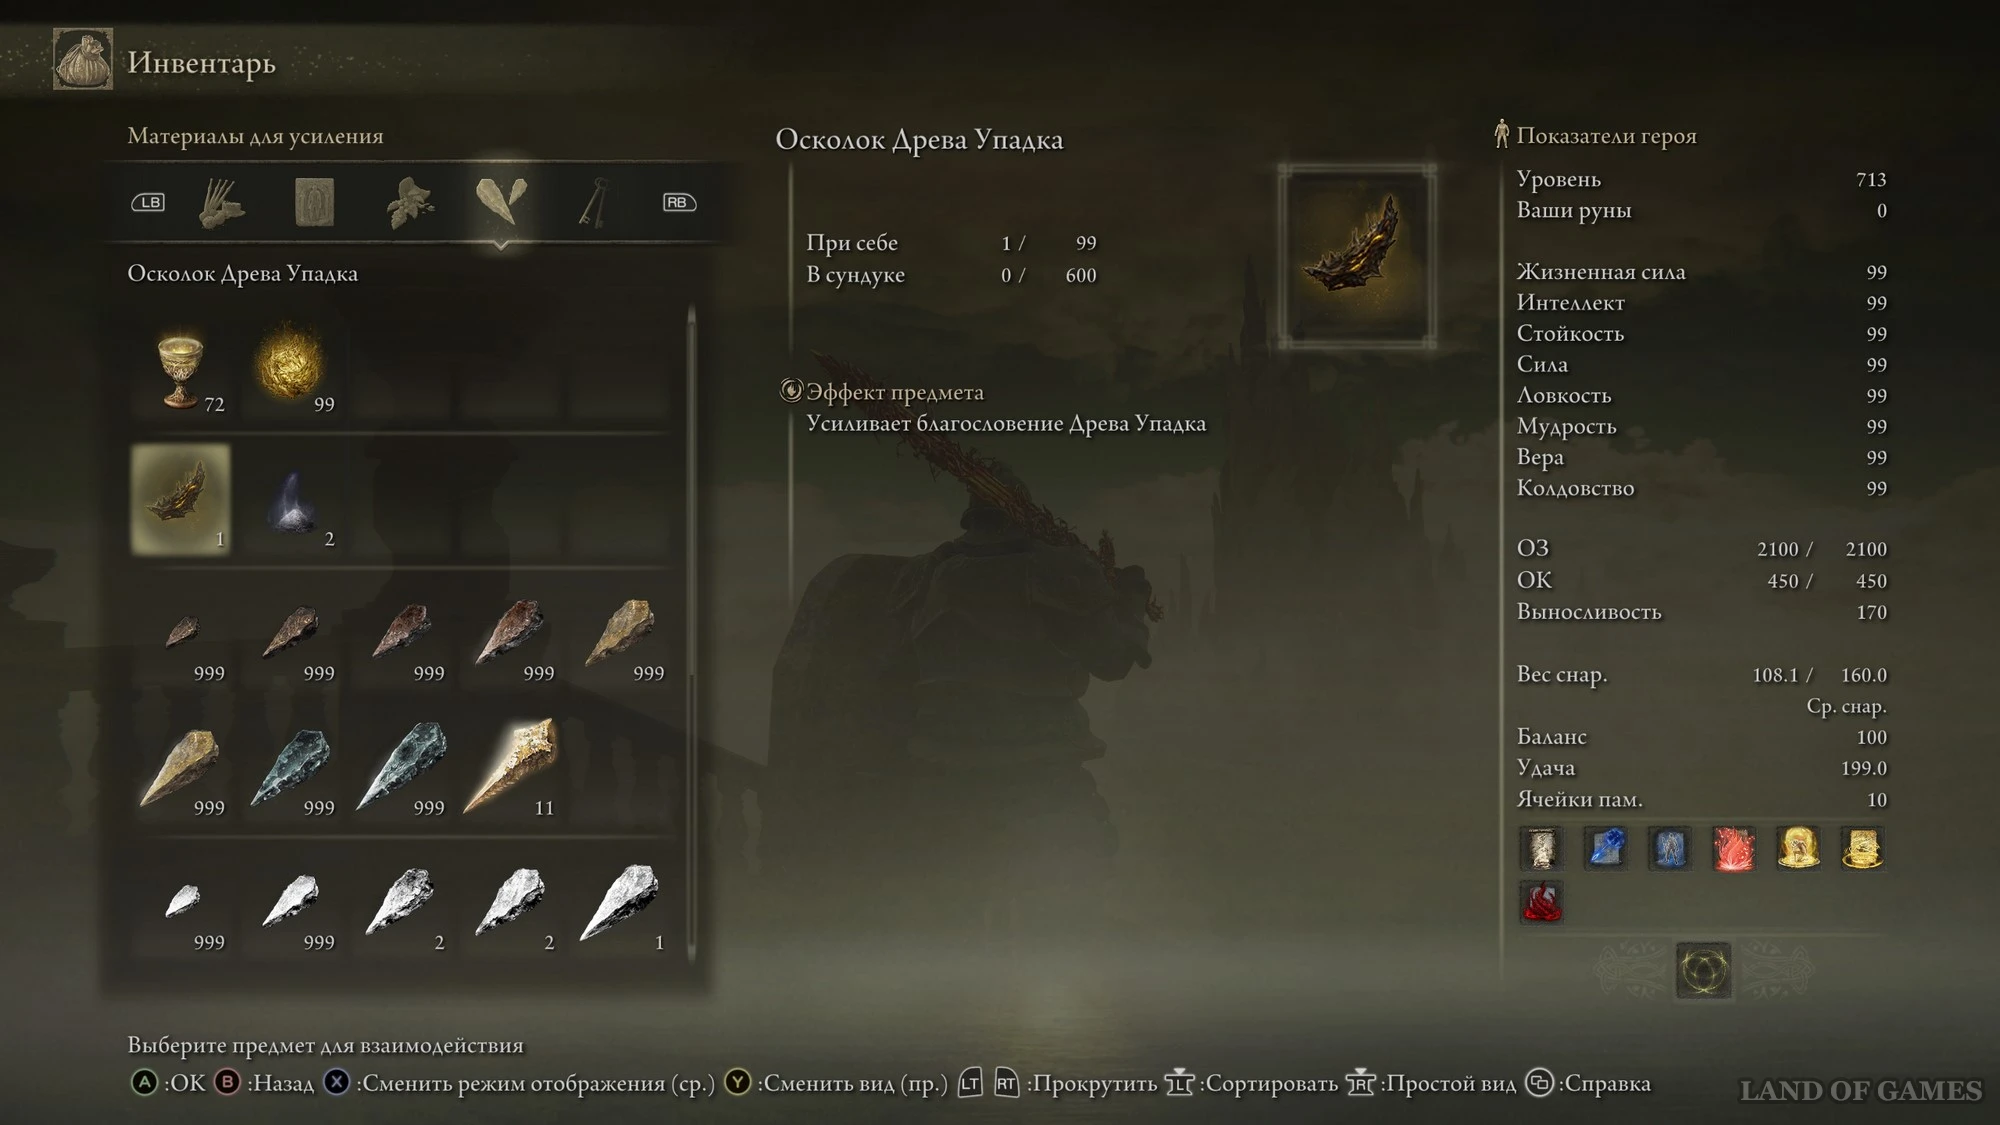
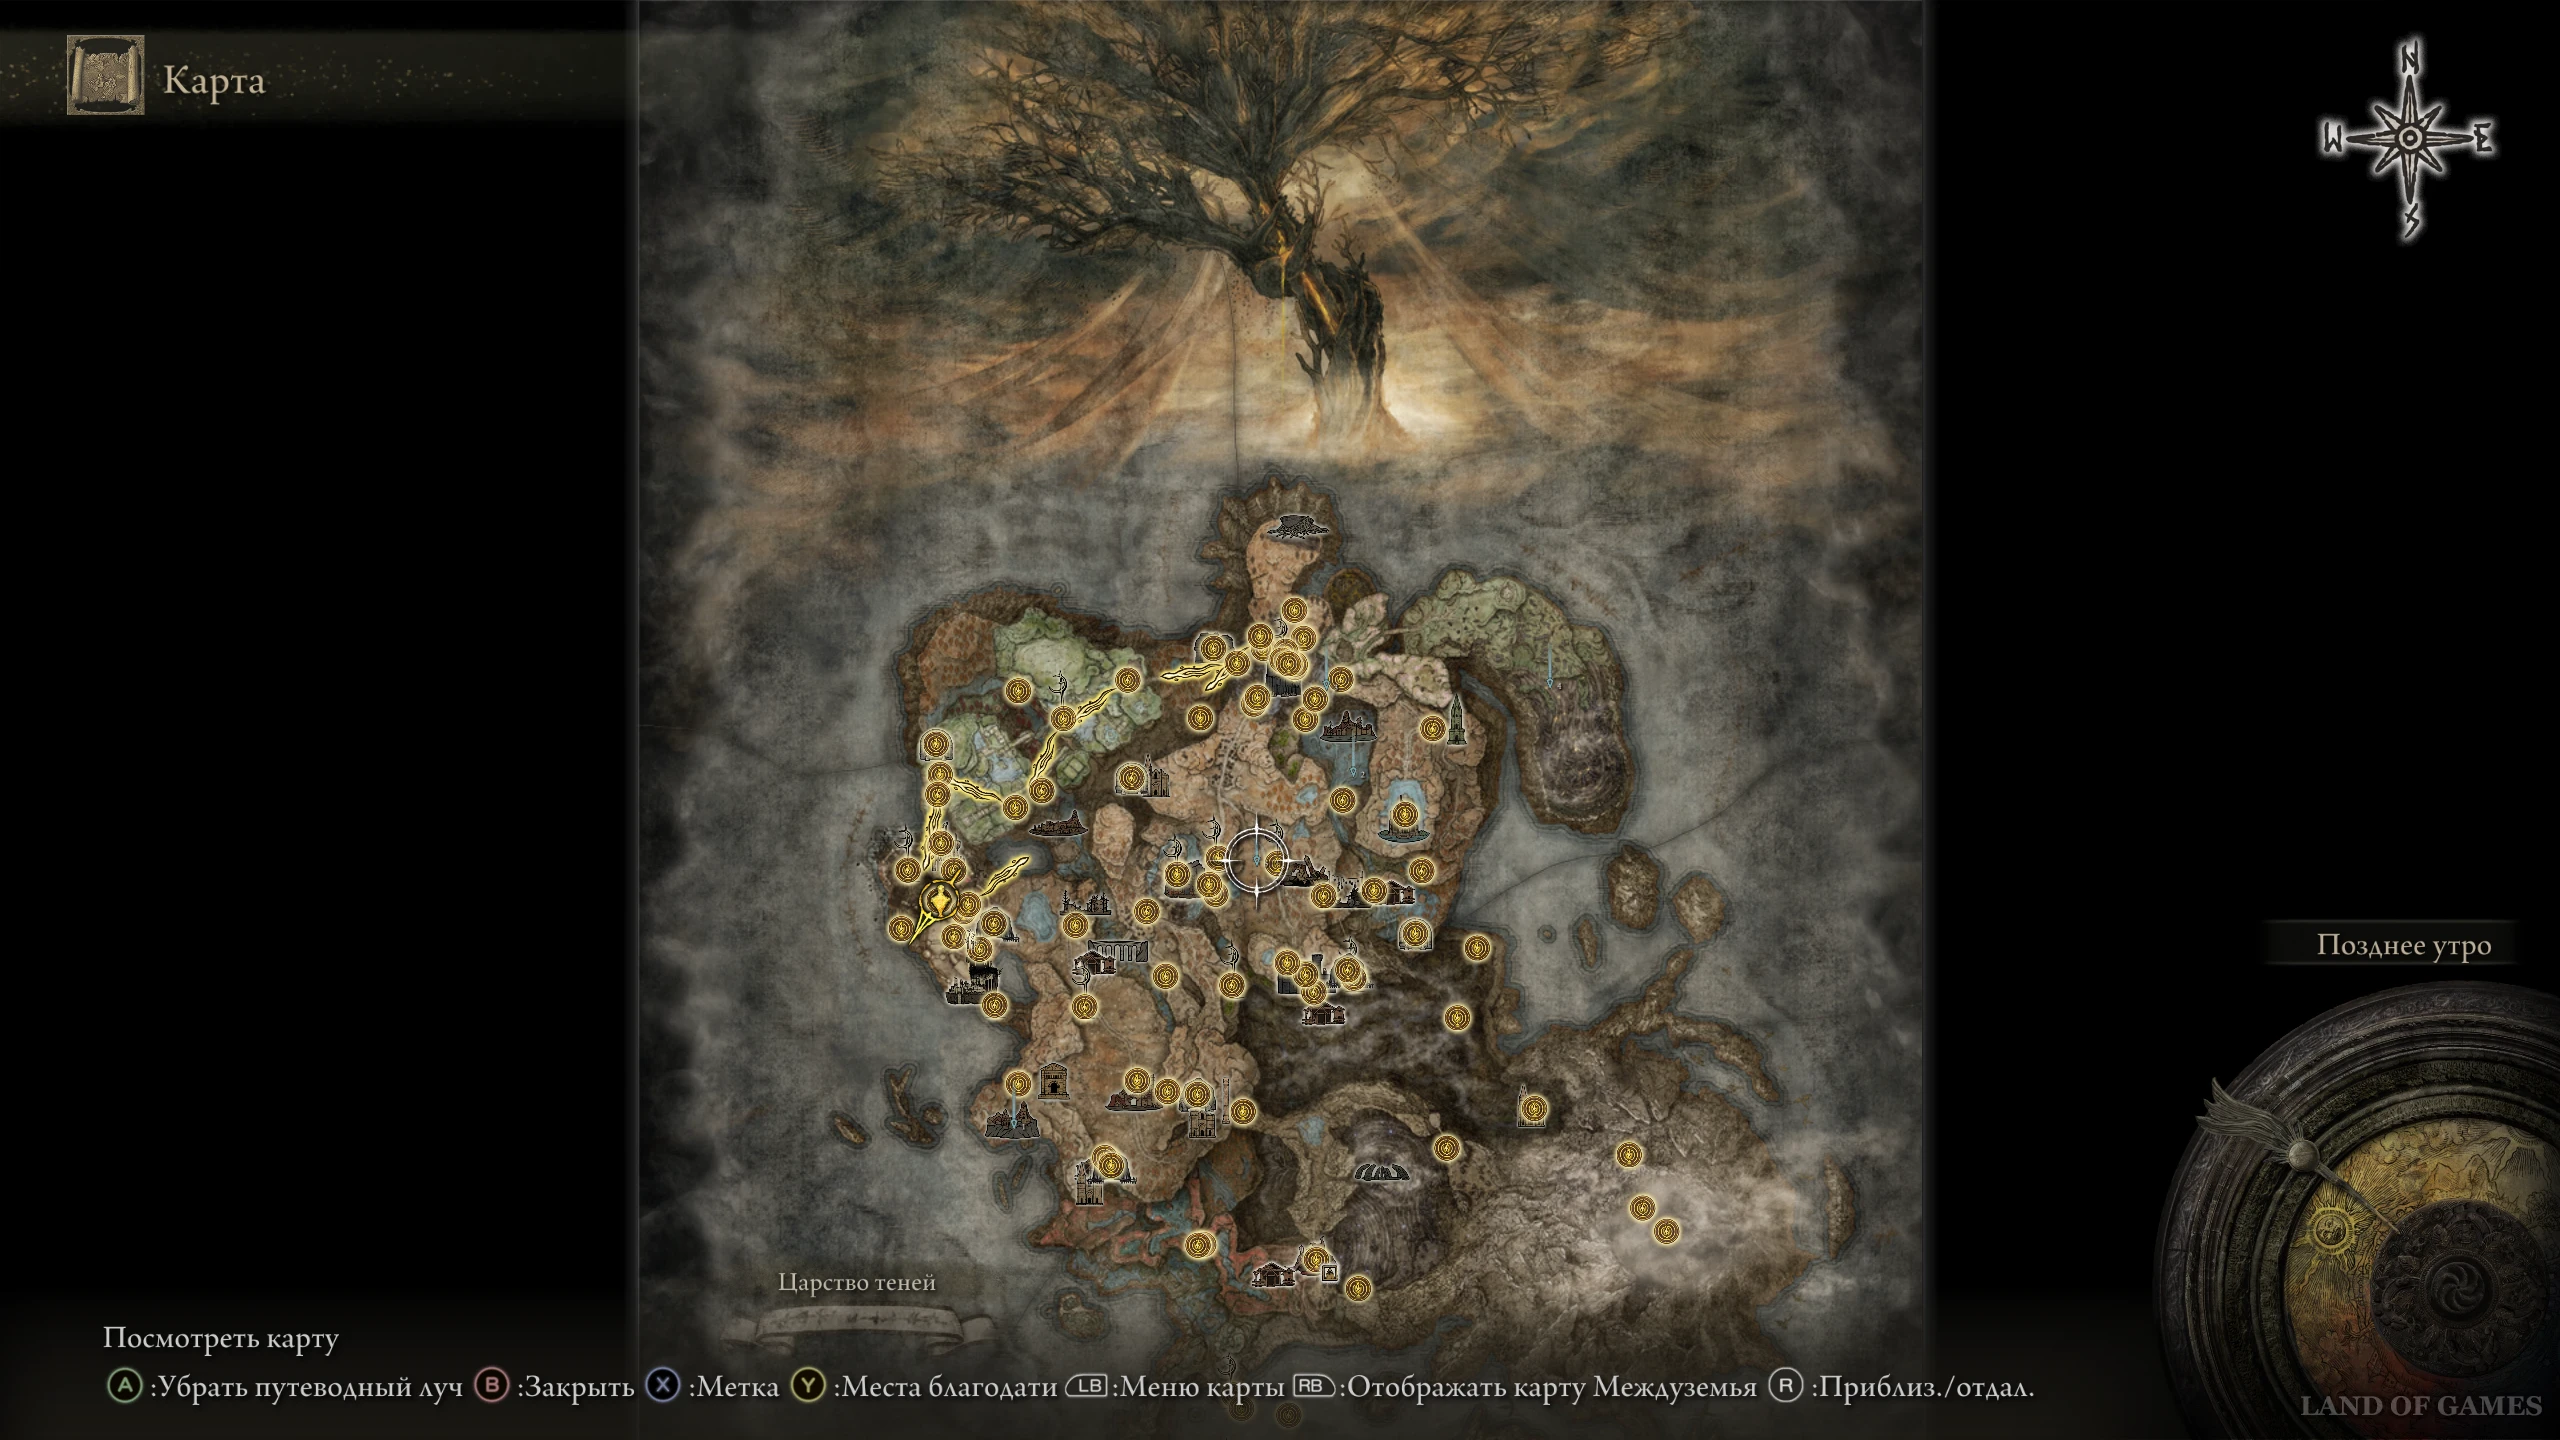
В Elden Ring Shadow of the Erdtree Осколки древа упадка являются расходными материалами, способными перманентно усилить главного героя, что заметно облегчает прохождение Царства Теней. Некоторые из них находятся на открытой местности, а другие спрятаны внутри подземелий и тайных локаций. В этом руководстве мы расскажем вам, как отыскать все эти предметы, чтобы по максимуму прокачать своего персонажа.
Как использовать Осколки древа упадка в Shadow of the Erdtree
Благодаря данным материалам вы сможете повышать уровень благословения Древа упадка, причем каждый новый левел будет давать вам два крайне полезных бонуса:
- Повышать весь урон, наносимый врагам.
- Увеличивать сопротивление героя ко всем видам урона.
Учитывая, что противники в дополнении намного сильнее, чем в оригинале, мы крайне рекомендуем вам постараться собрать все осколки. Добавим, что вышеуказанные баффы действуют только в пределах Царства Теней, то есть в Междуземье их эффекты тут же пропадут.
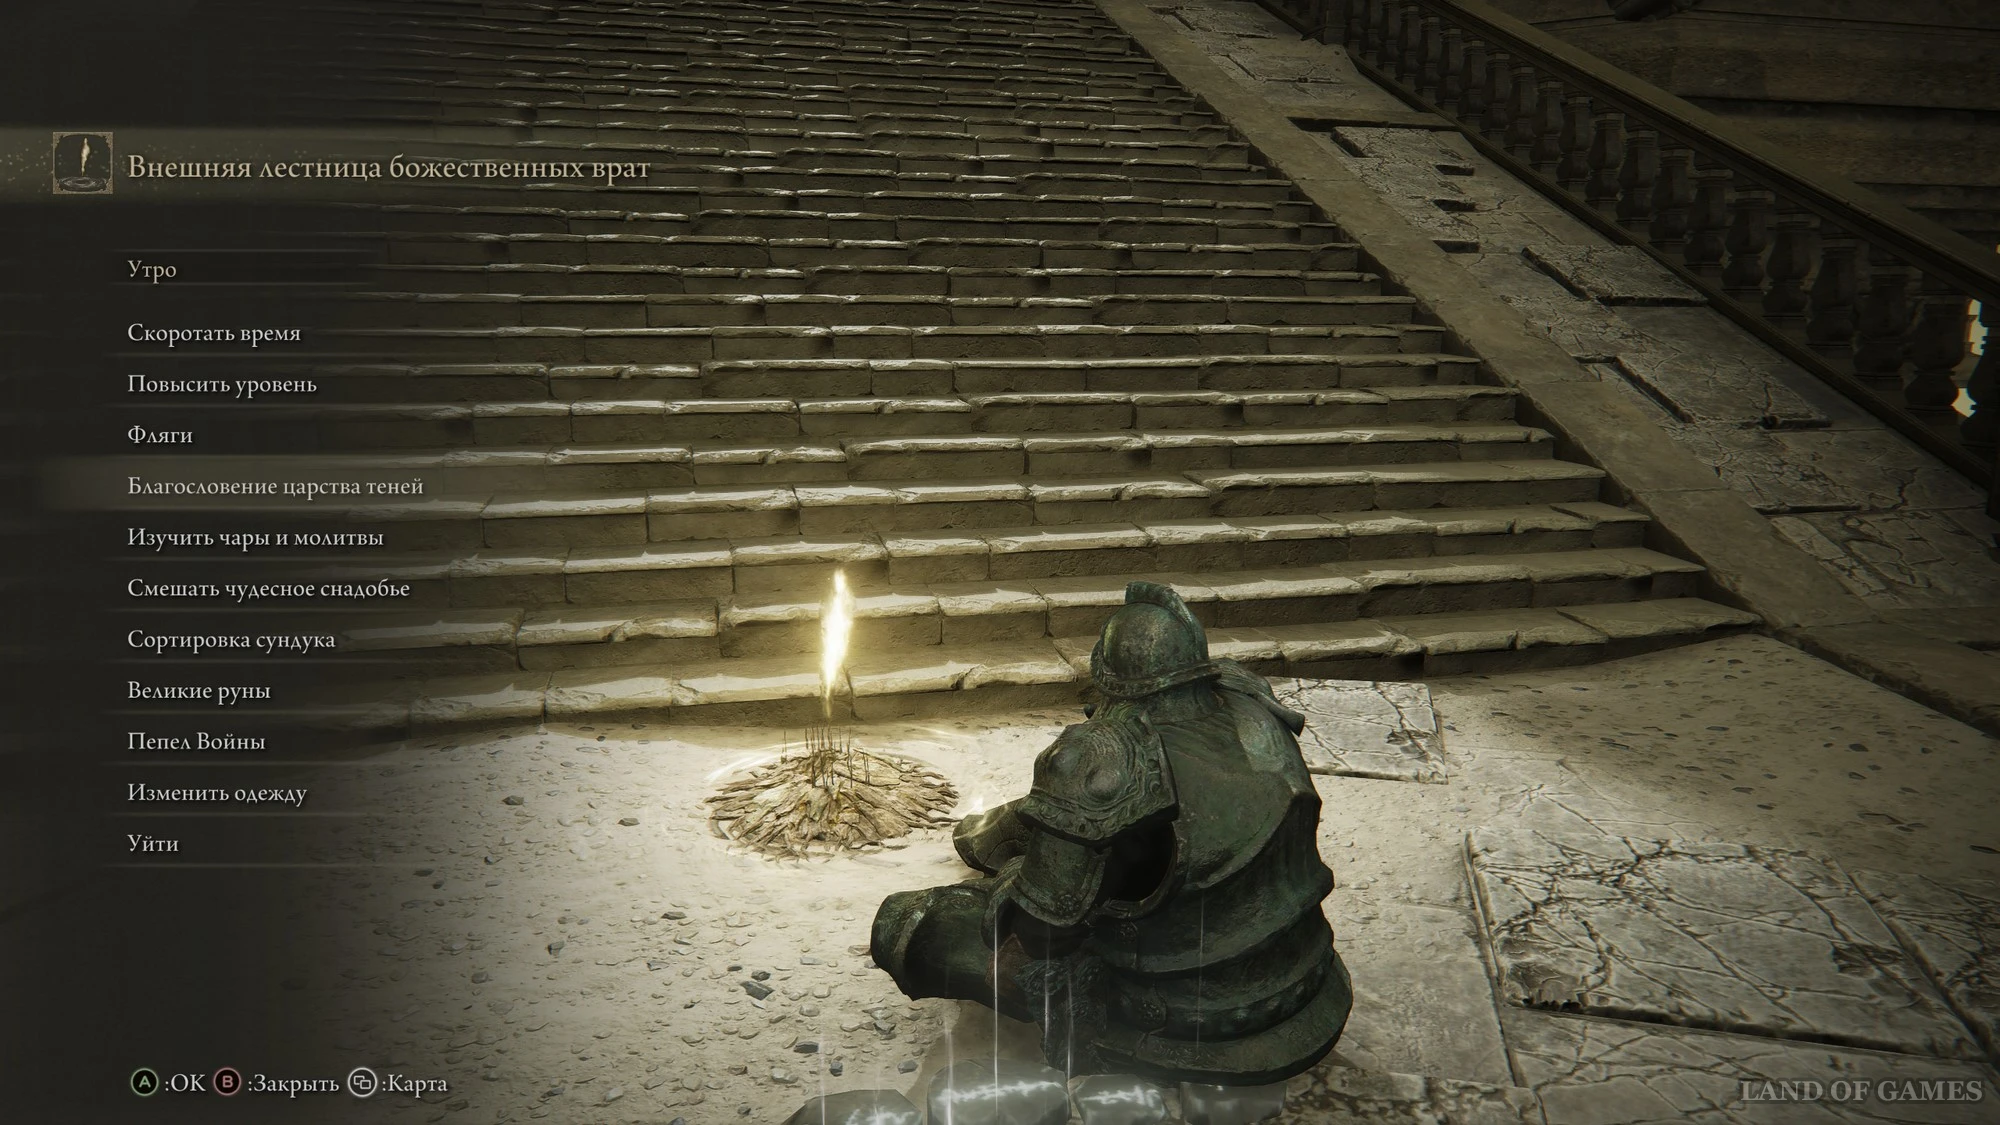
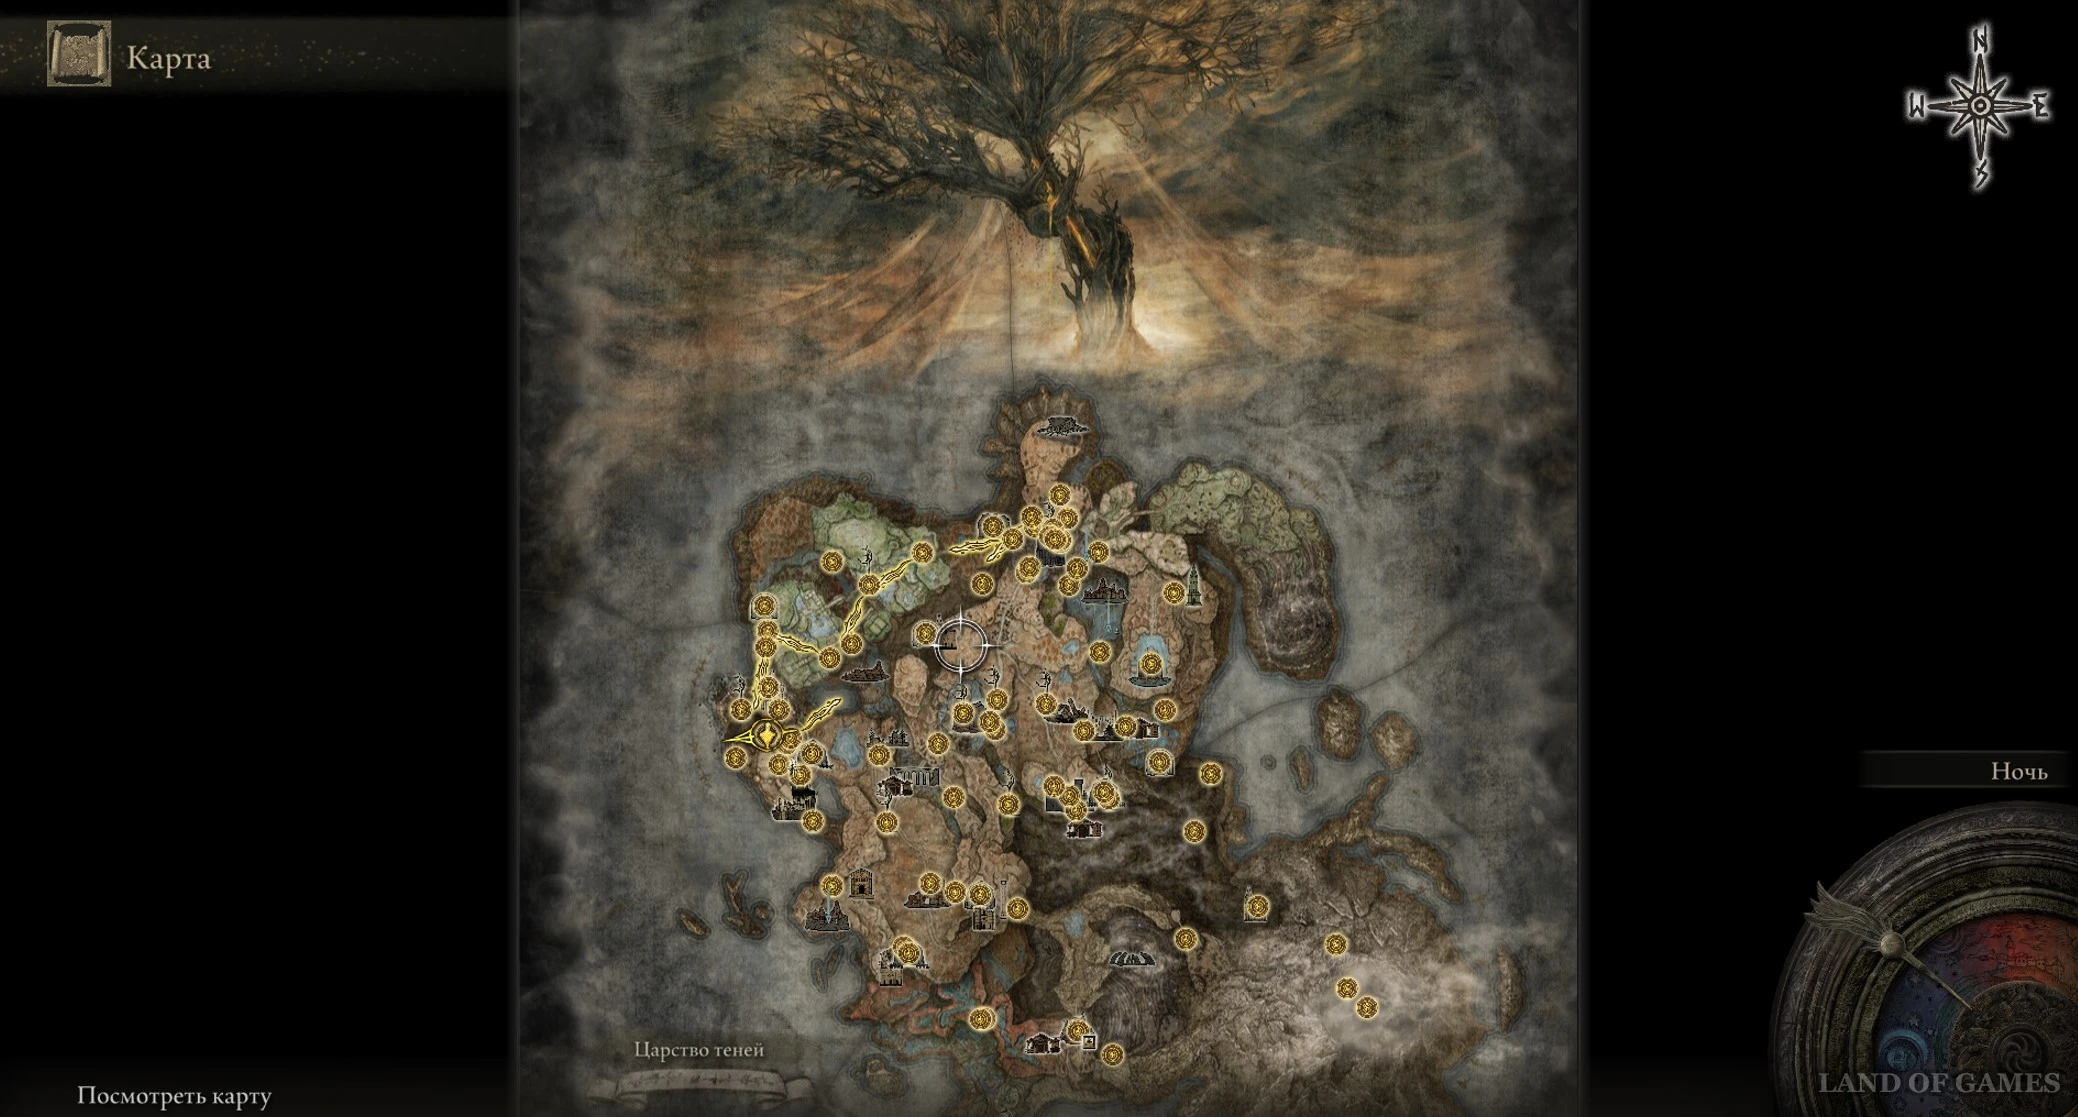
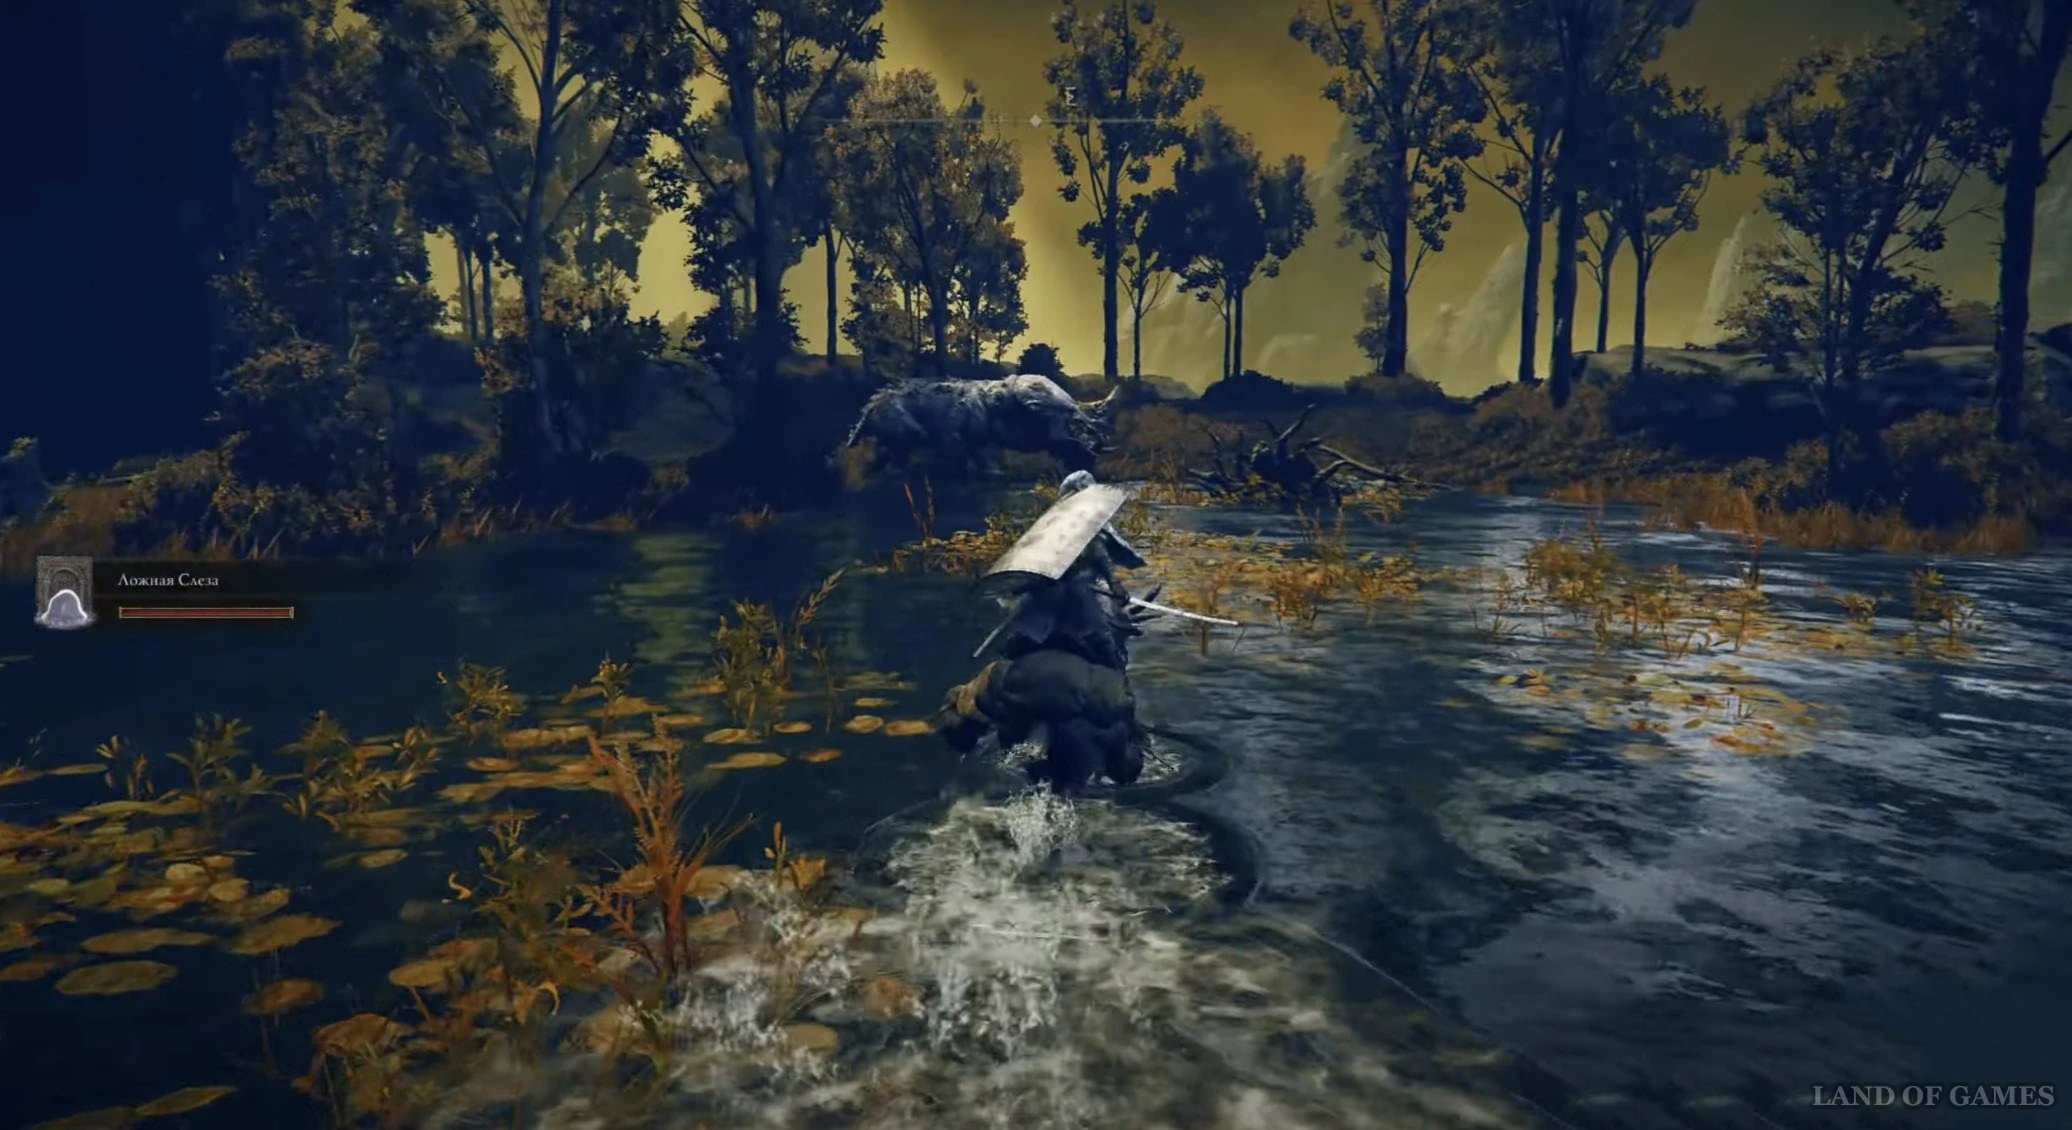
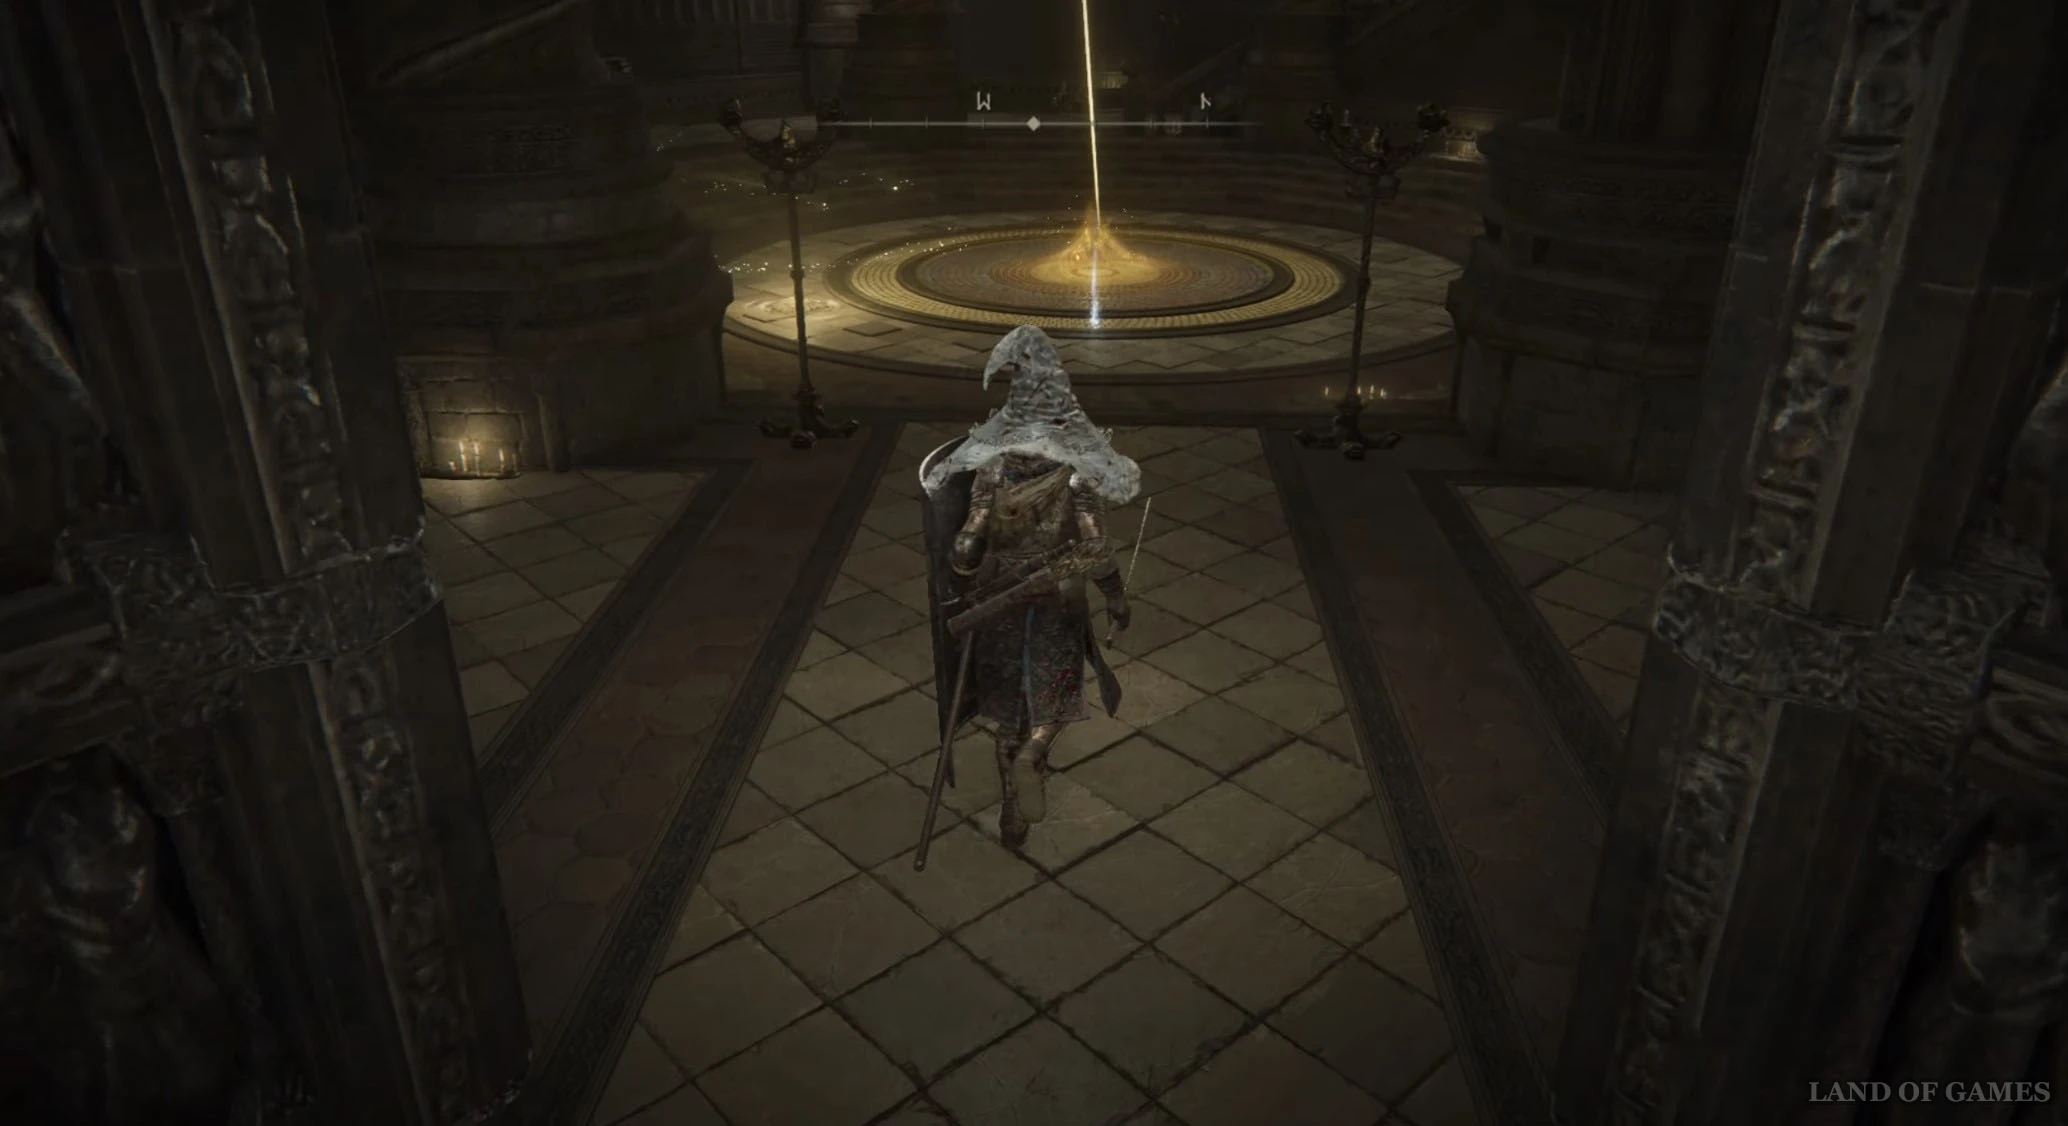
Если же говорить о применении осколков, то тут все довольно просто. Отыщите ближайшее место благодати и воспользуйтесь им. Затем нажмите на раздел «Благословение царства теней»
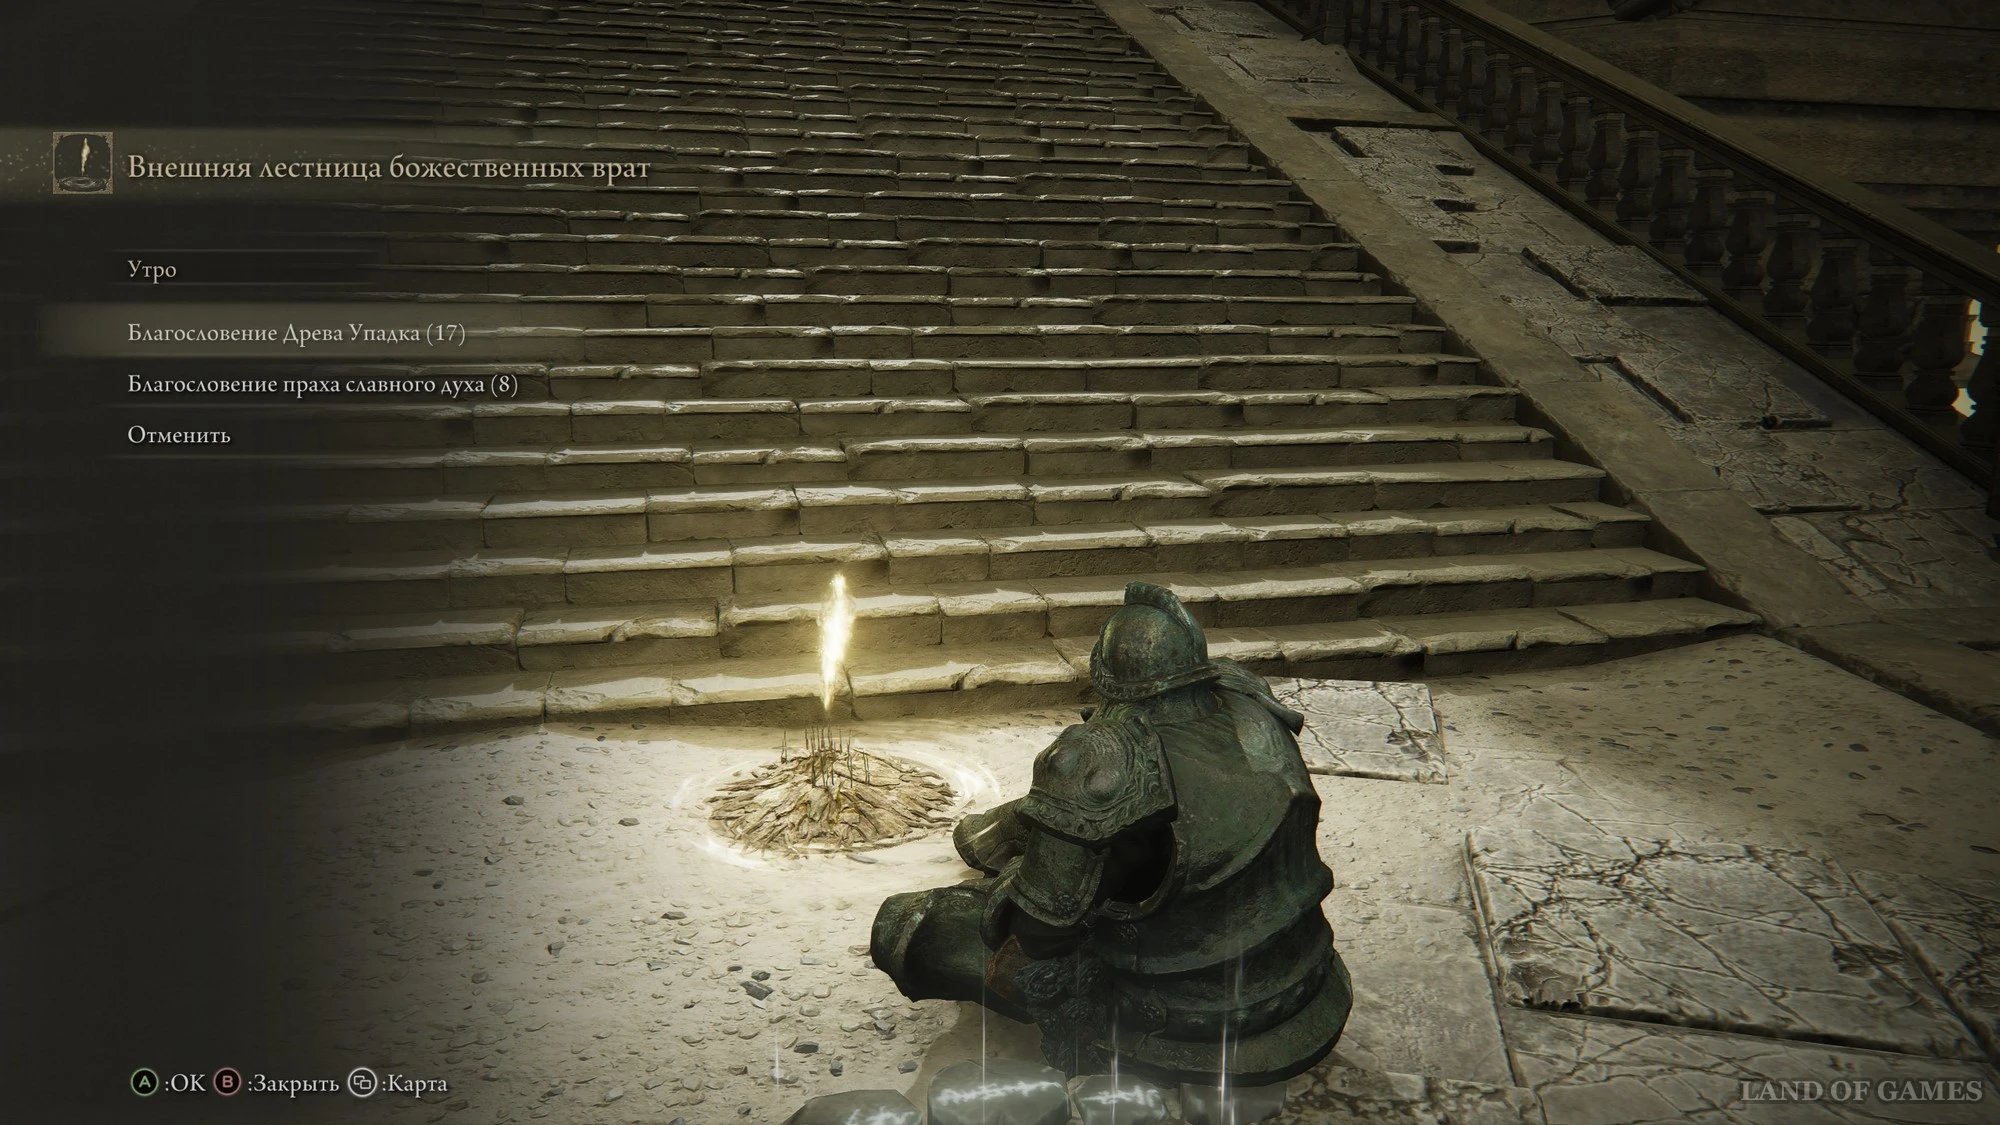
и выберите в нем функцию «Благословение Древа Упадка»
. В скобках будет указан ваш текущий уровень.
Всего вы сможете прокачать данный параметр до 20-го левела, потратив на это 50 осколков древа упадка. Если поначалу на поднятие одного уровня будет требоваться 1 осколок, то в конце вам придется тратить уже 3 материала.
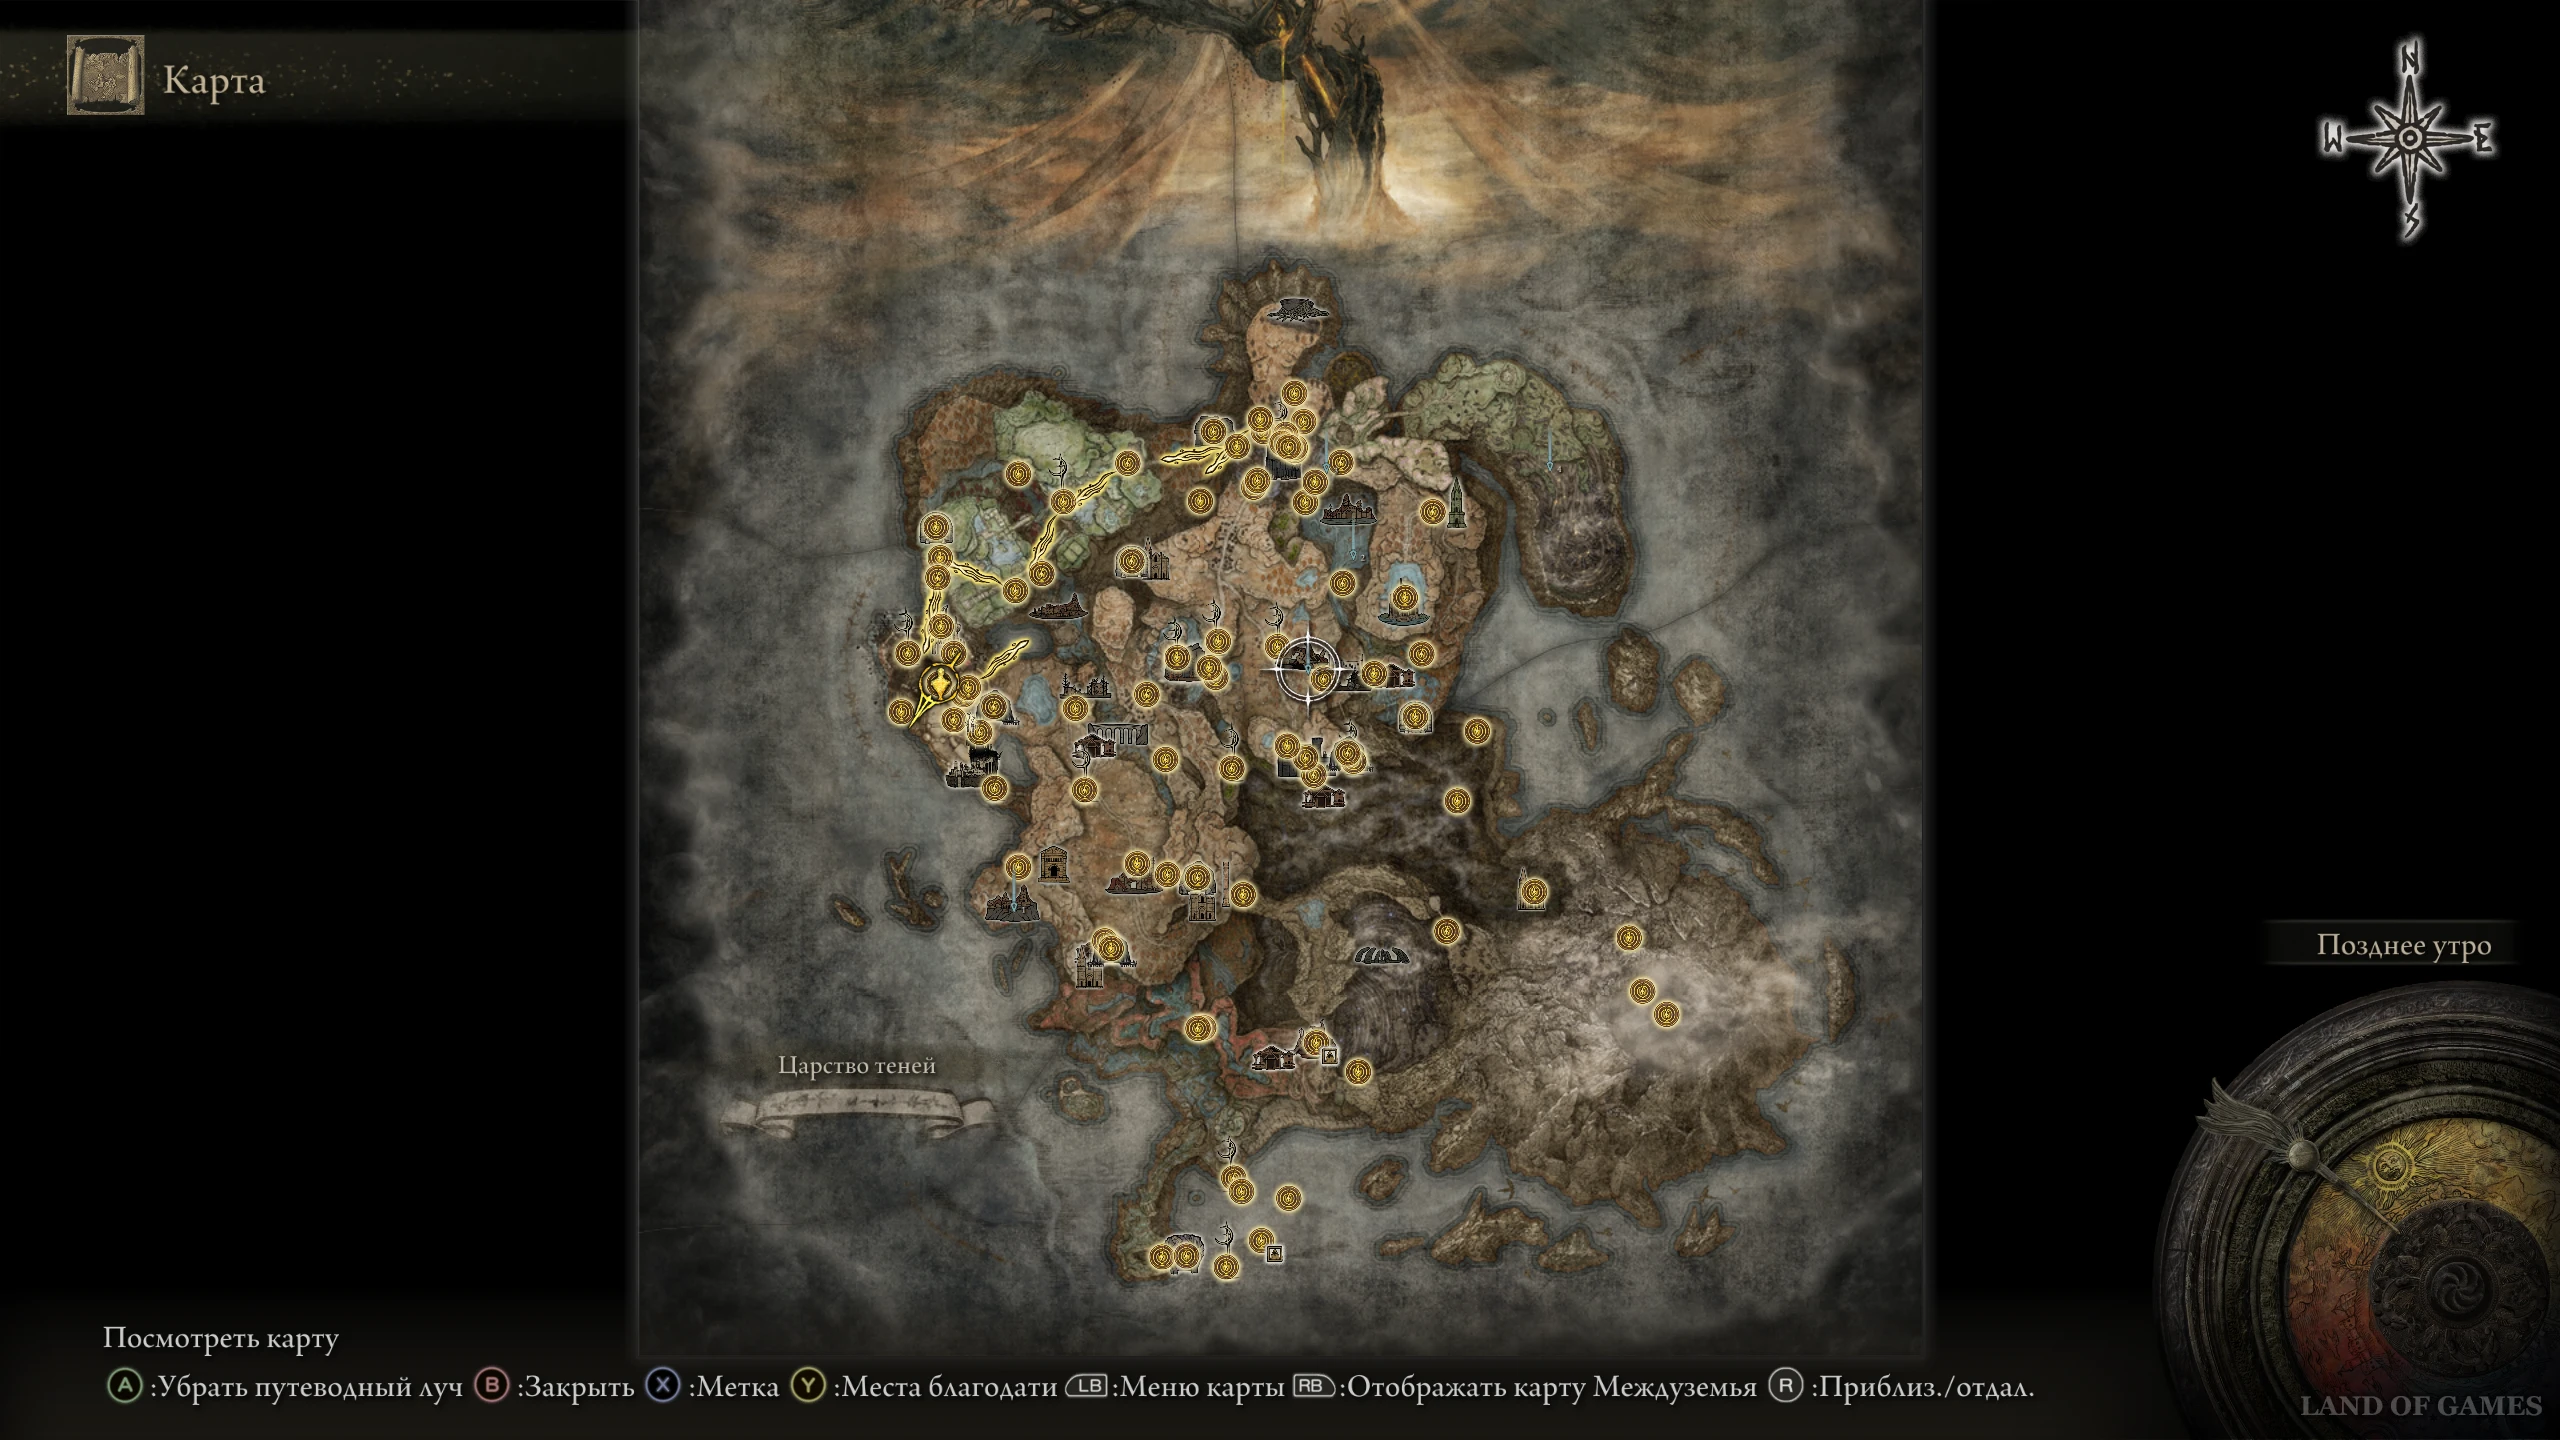
Где найти Осколки древа упадка в Shadow of the Erdtree
Осколки древа упадка 1 и 2
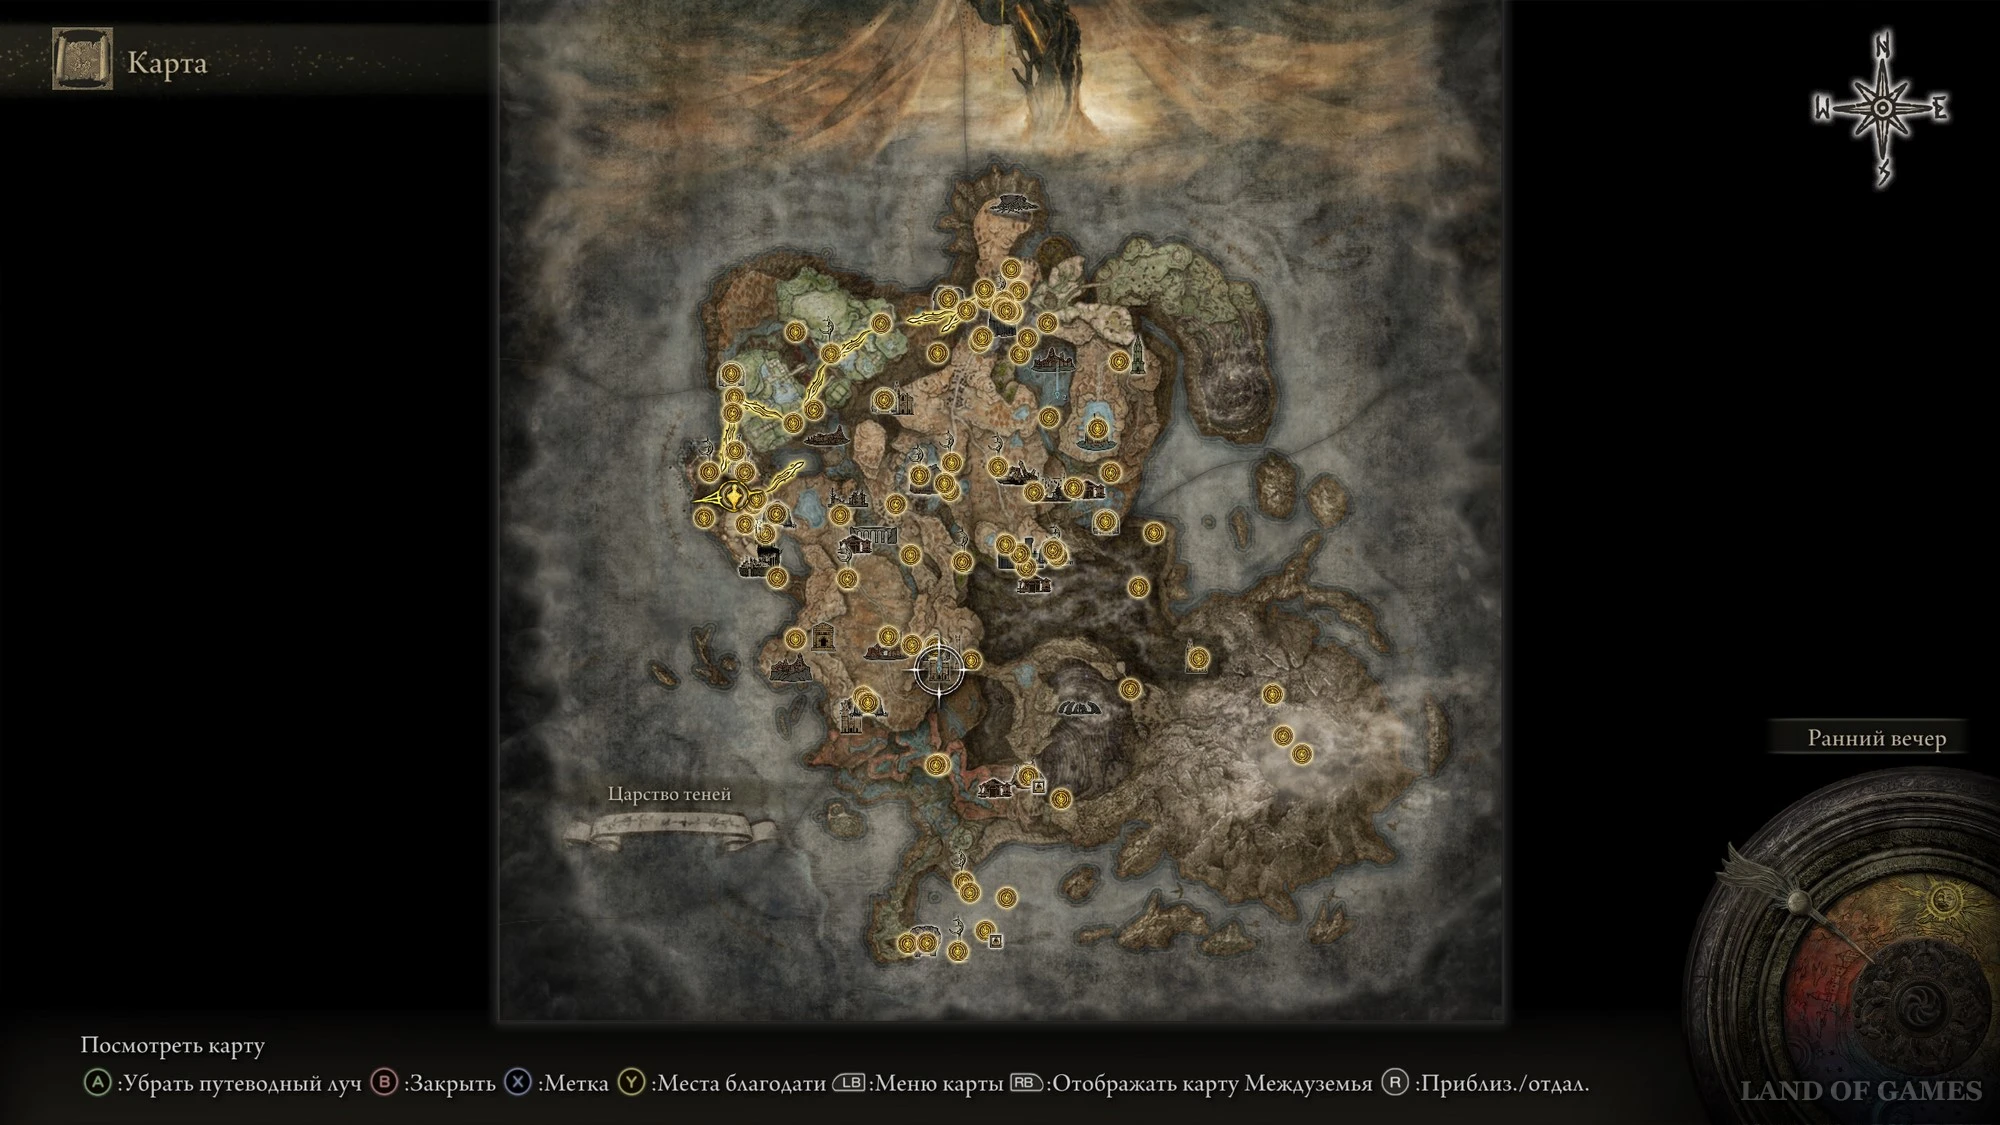
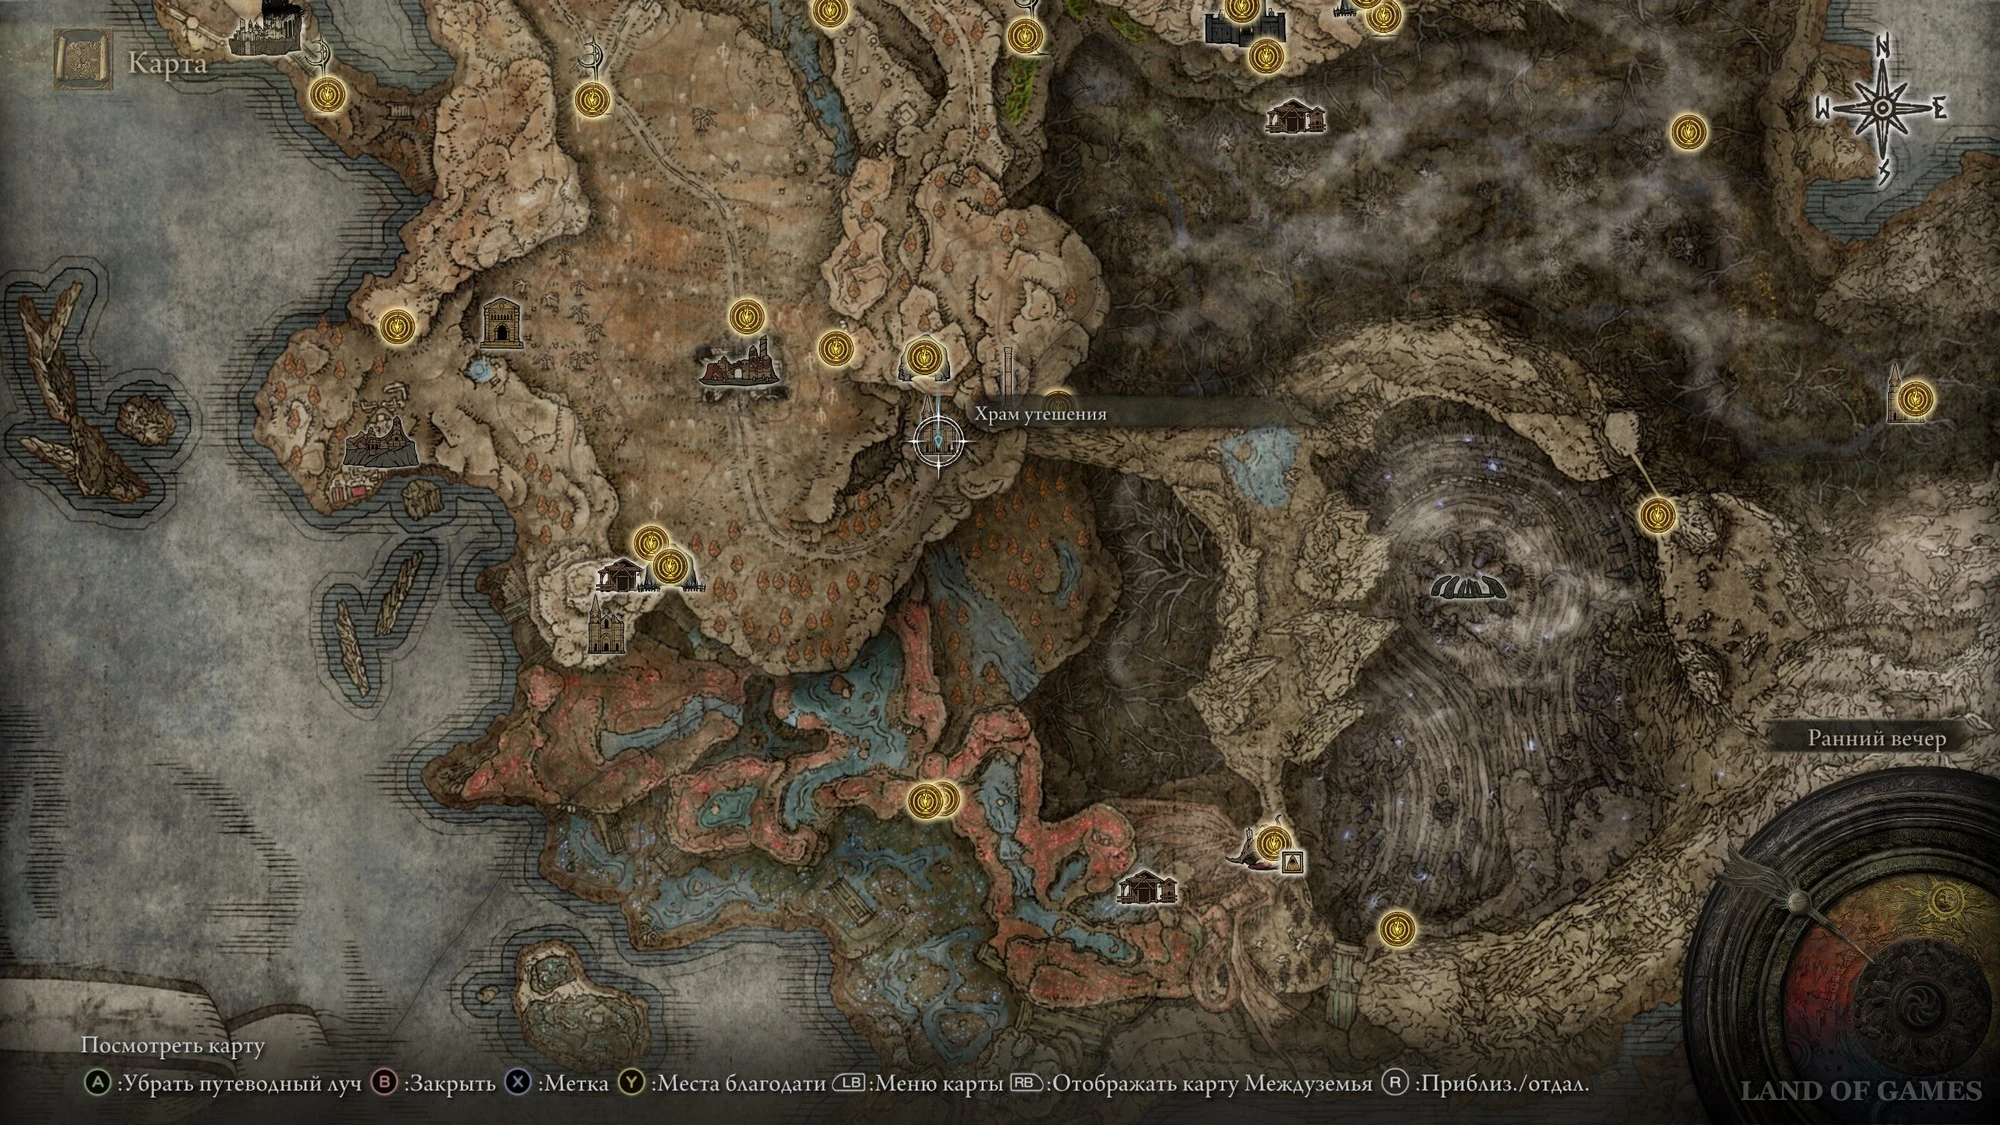
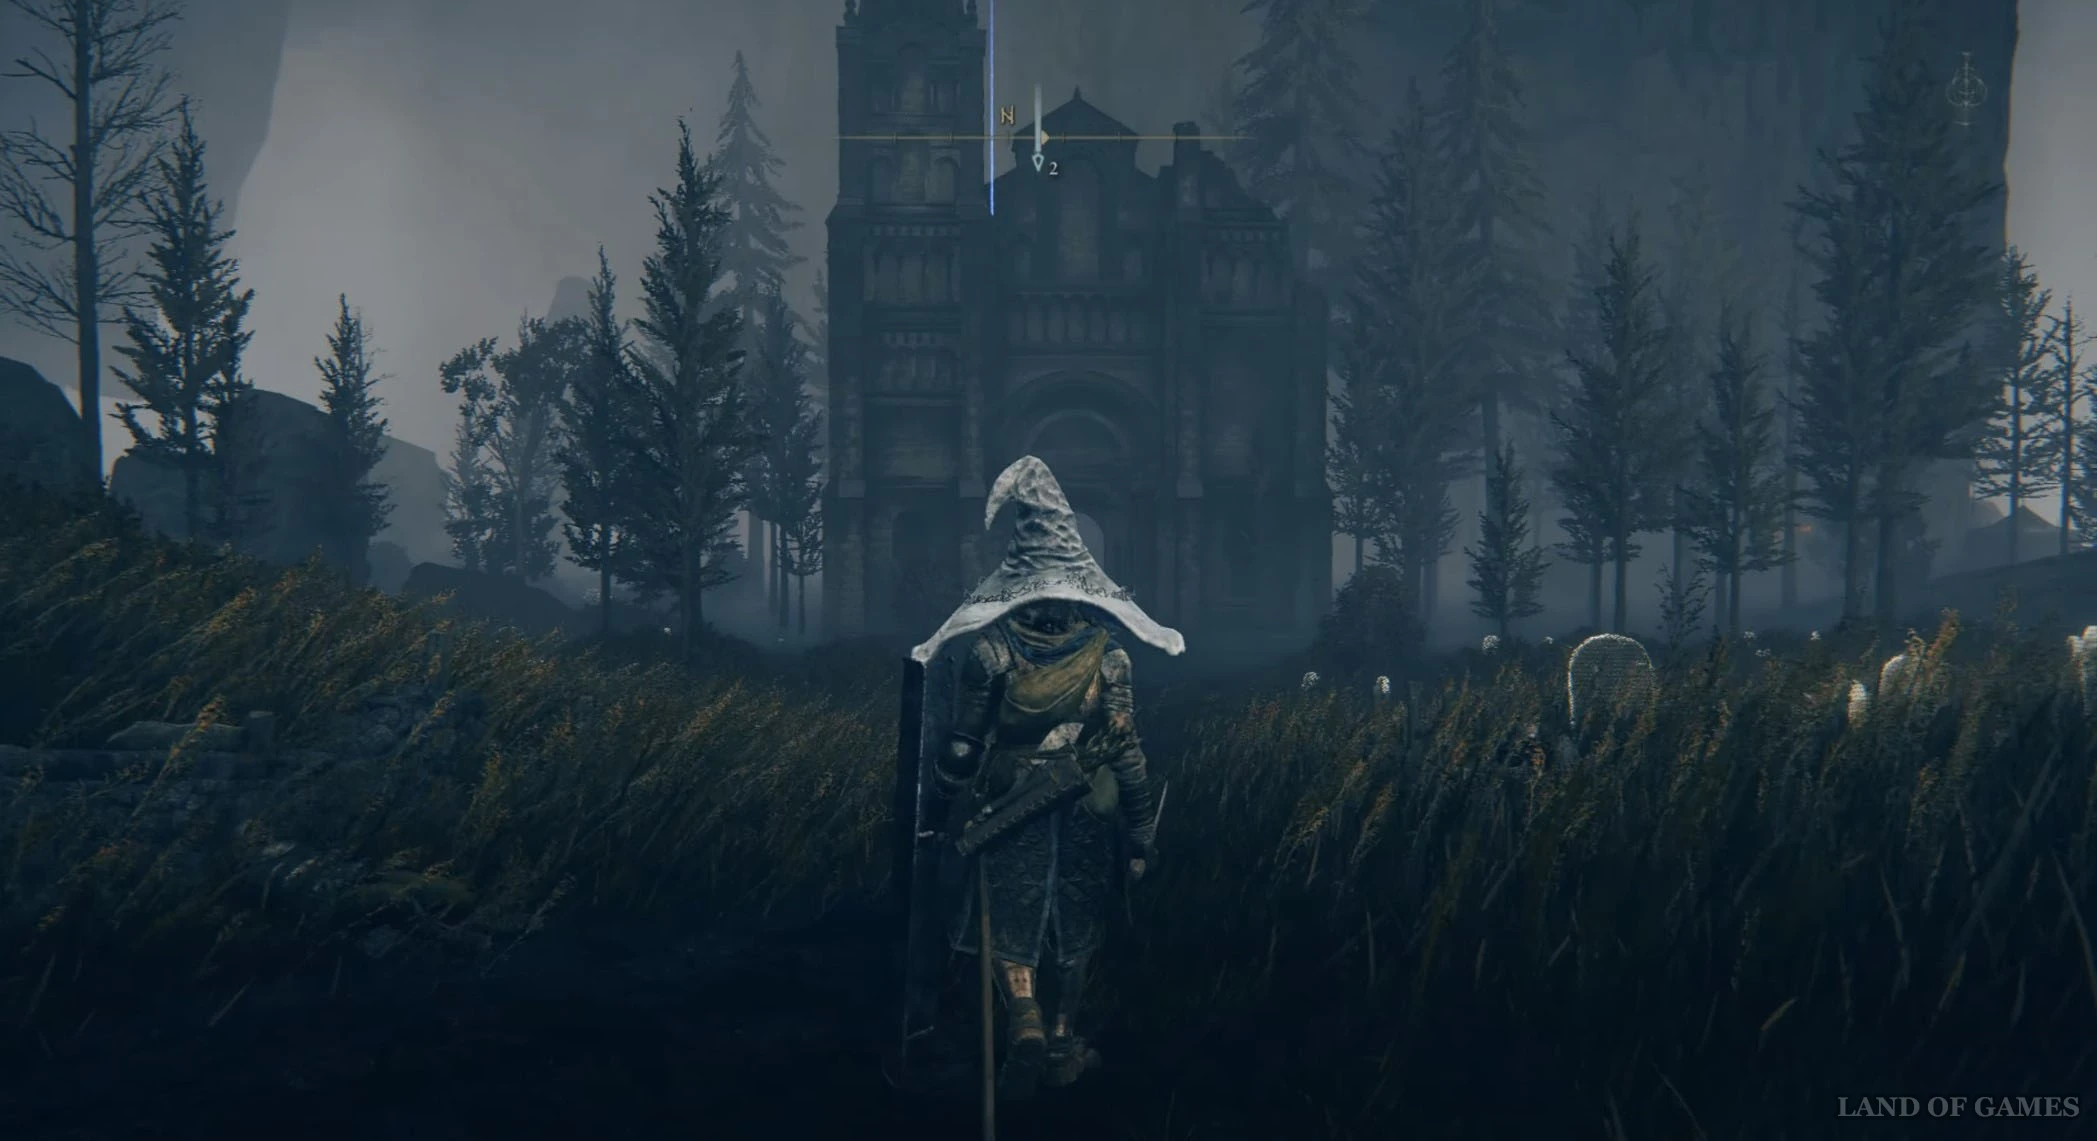
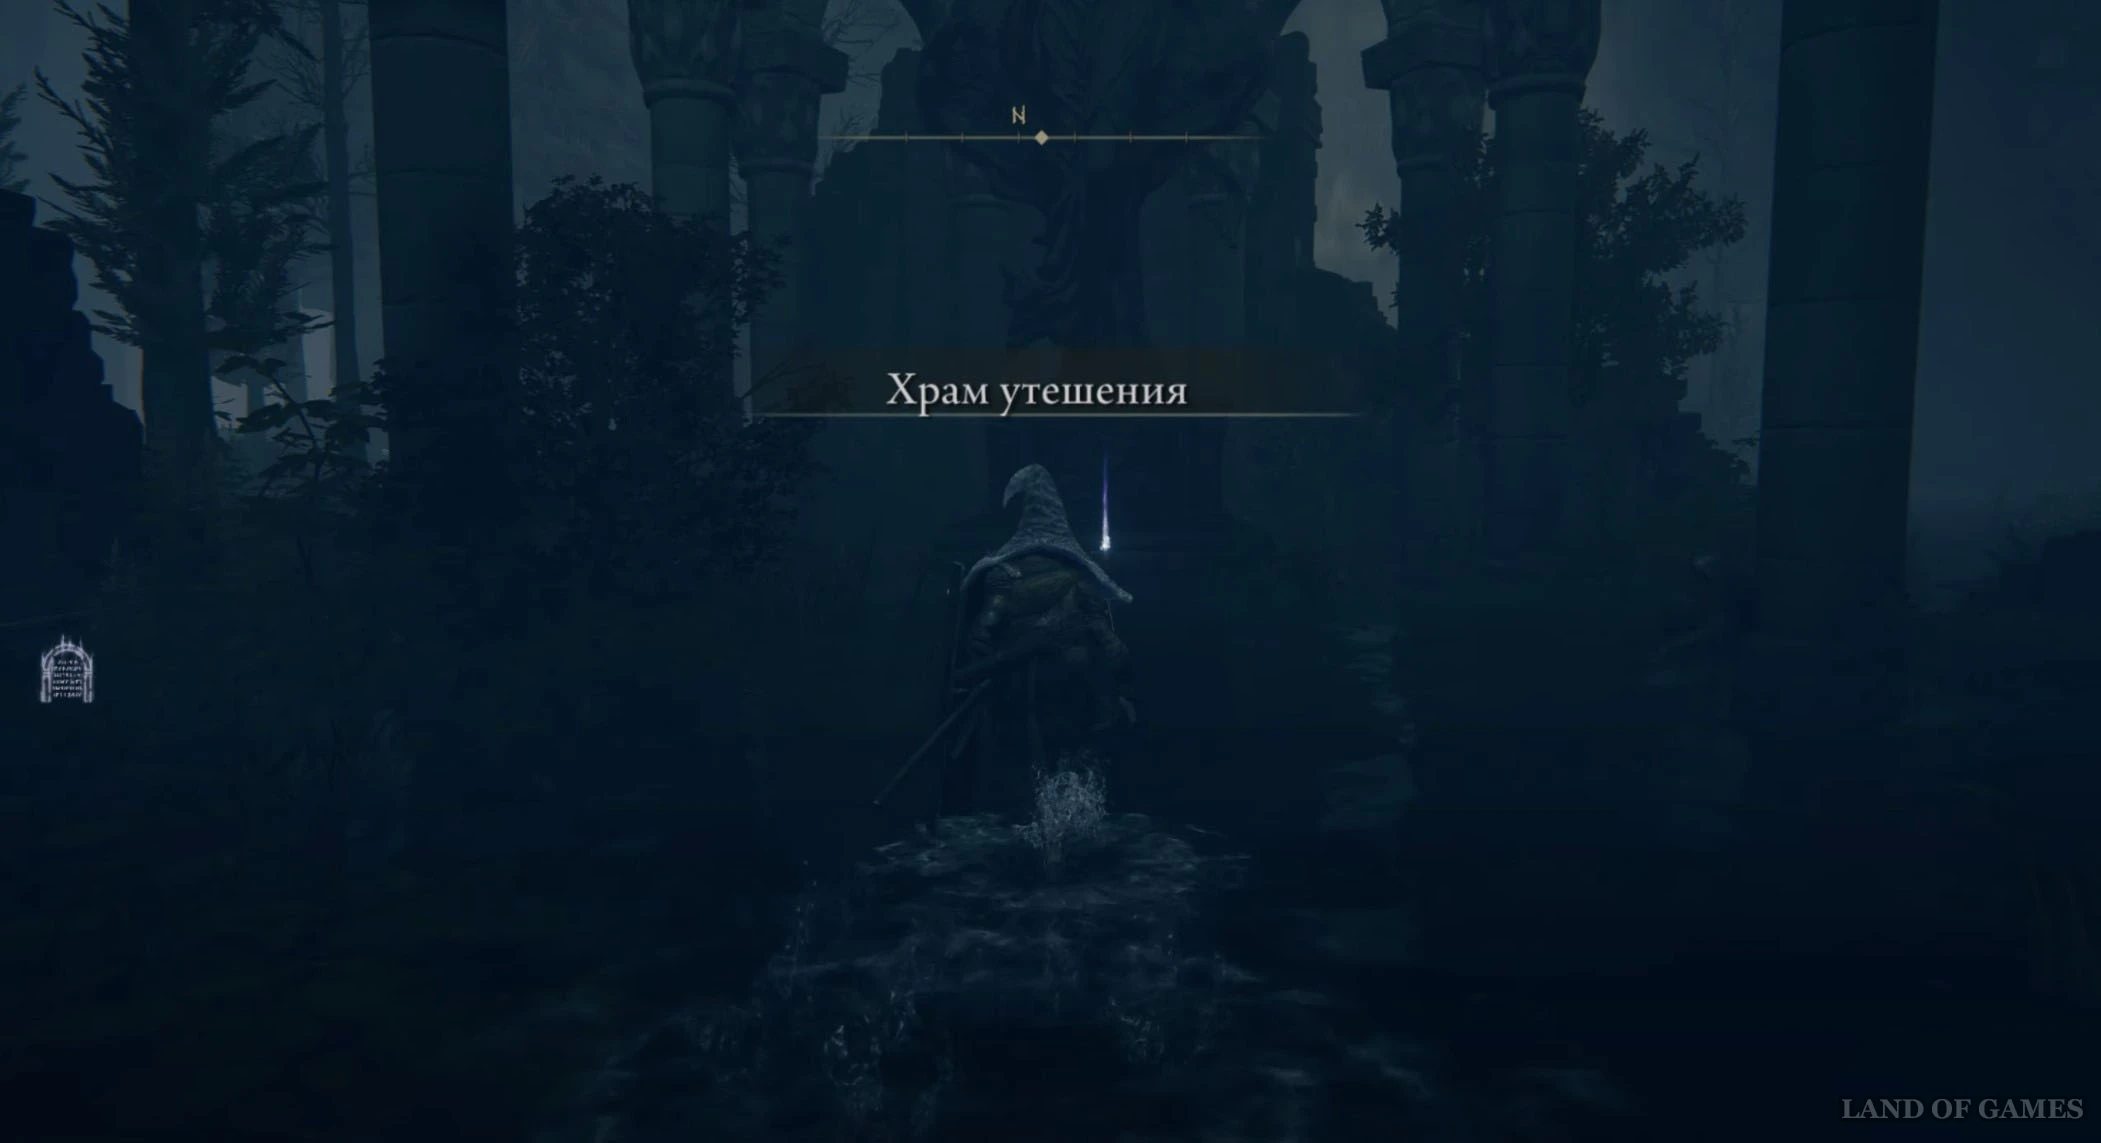
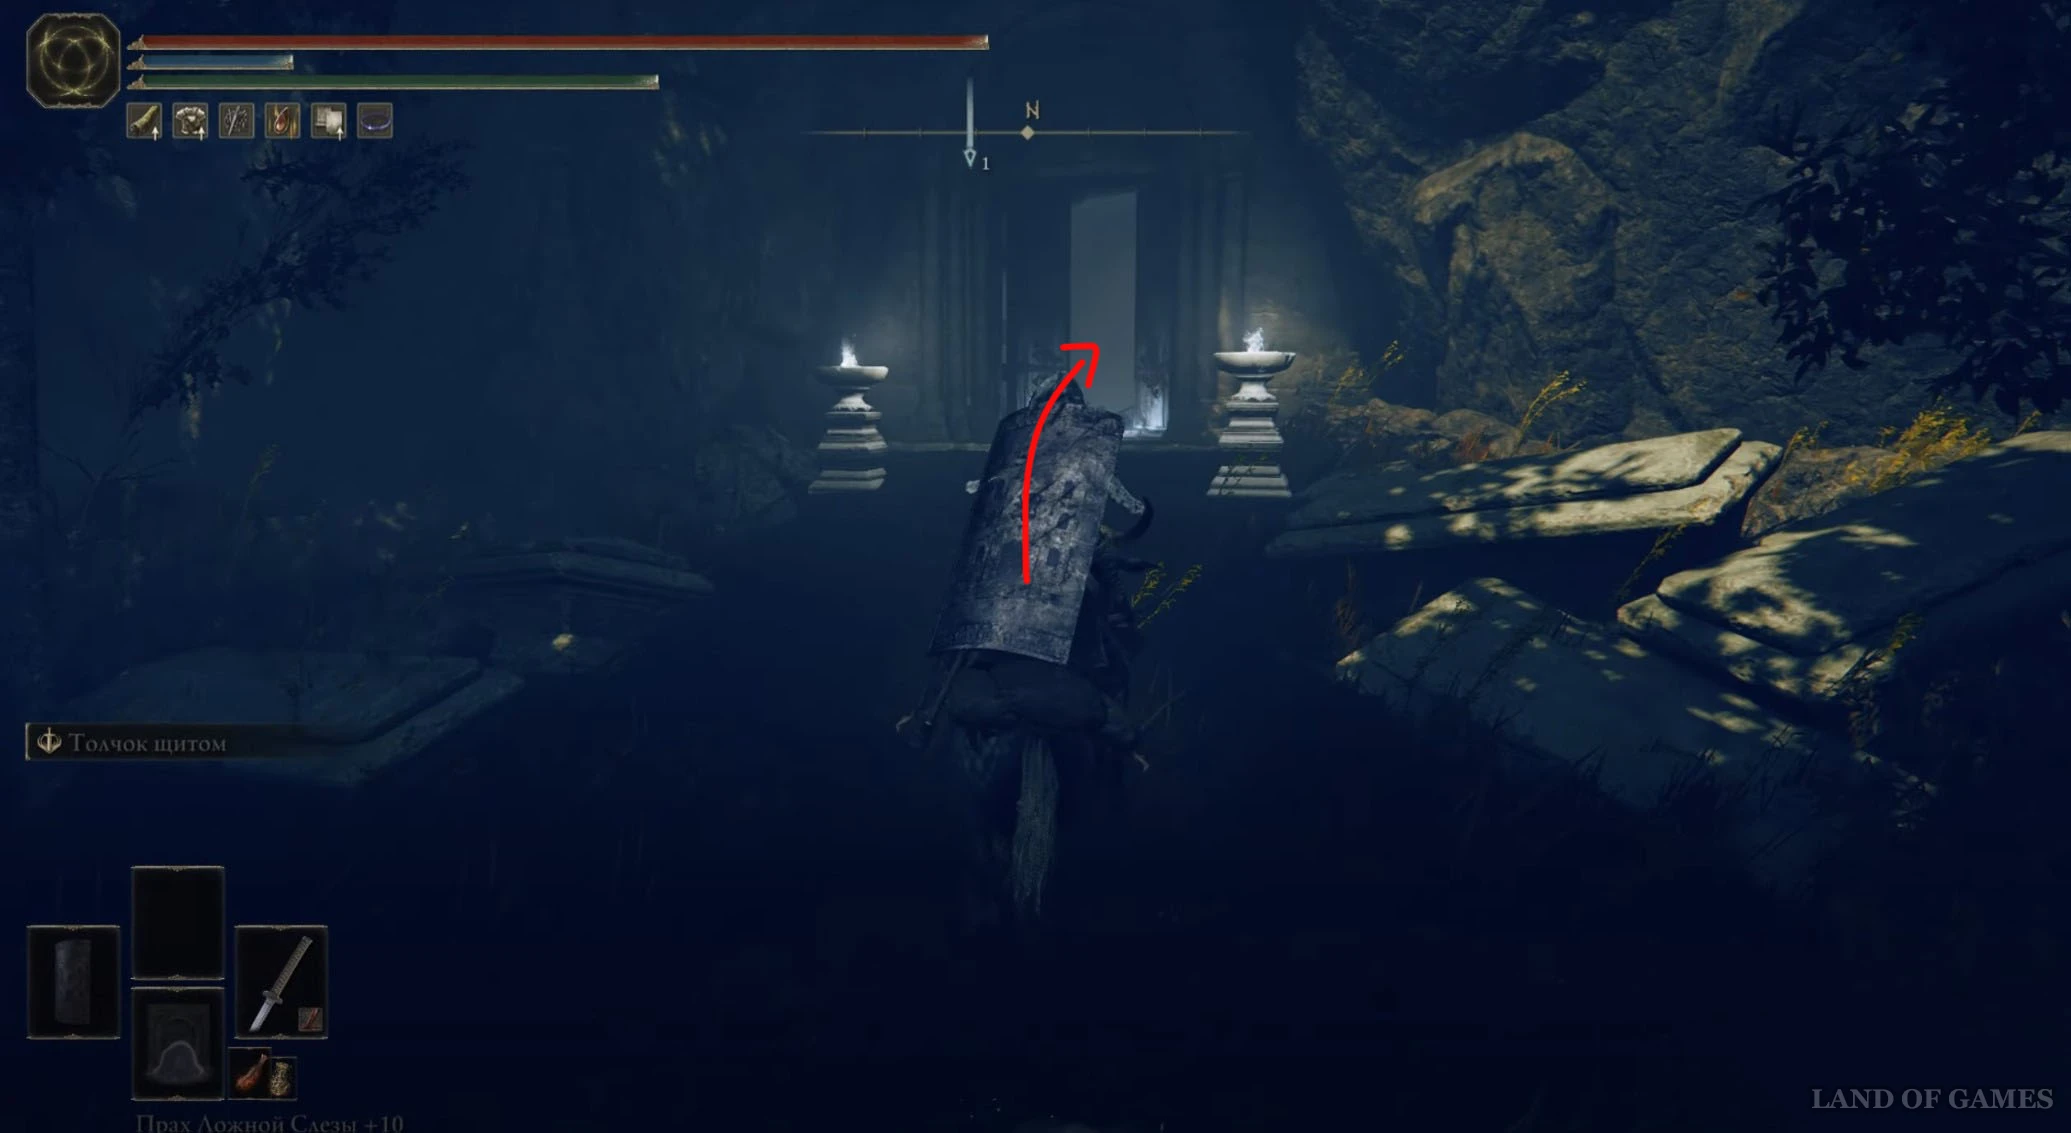
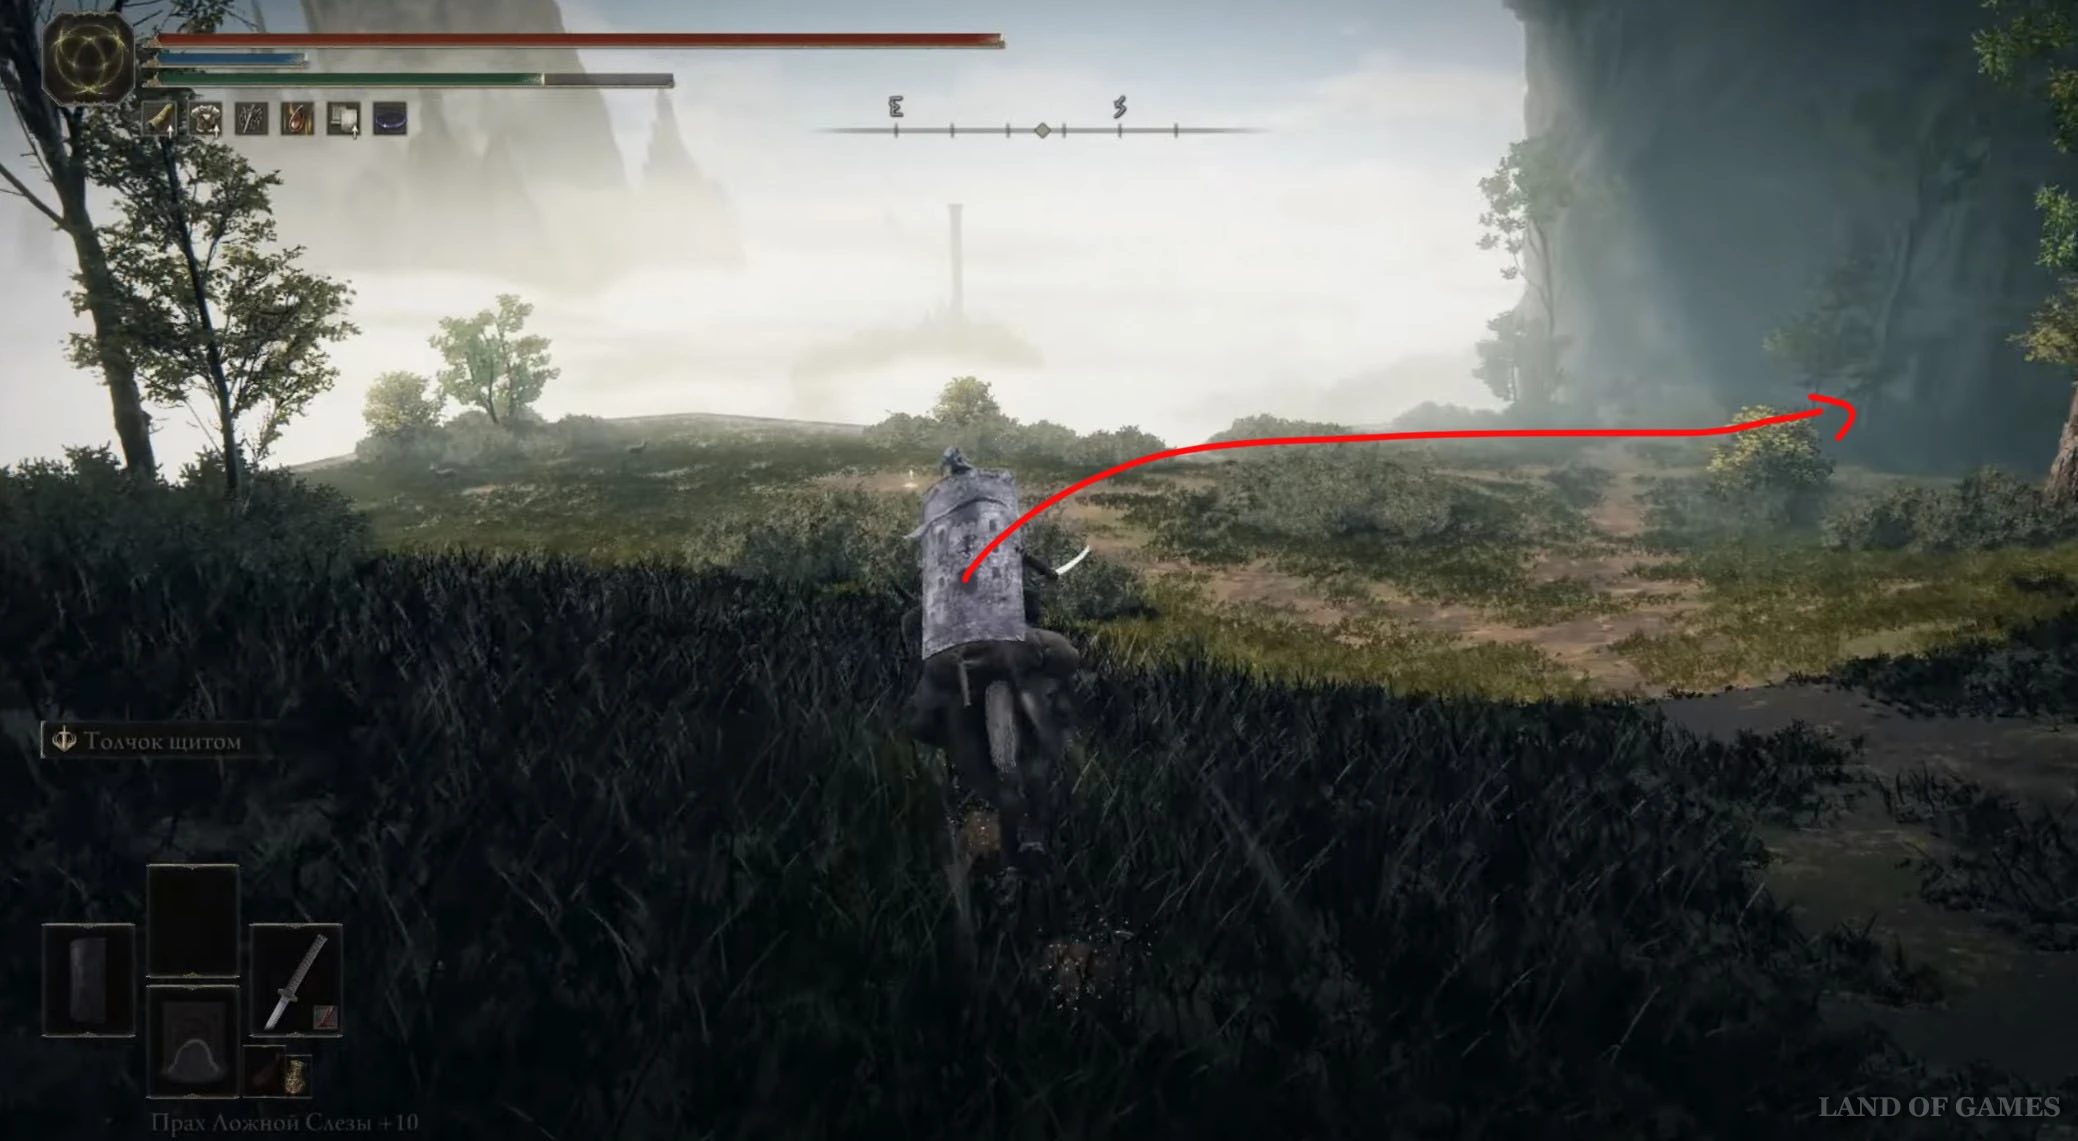
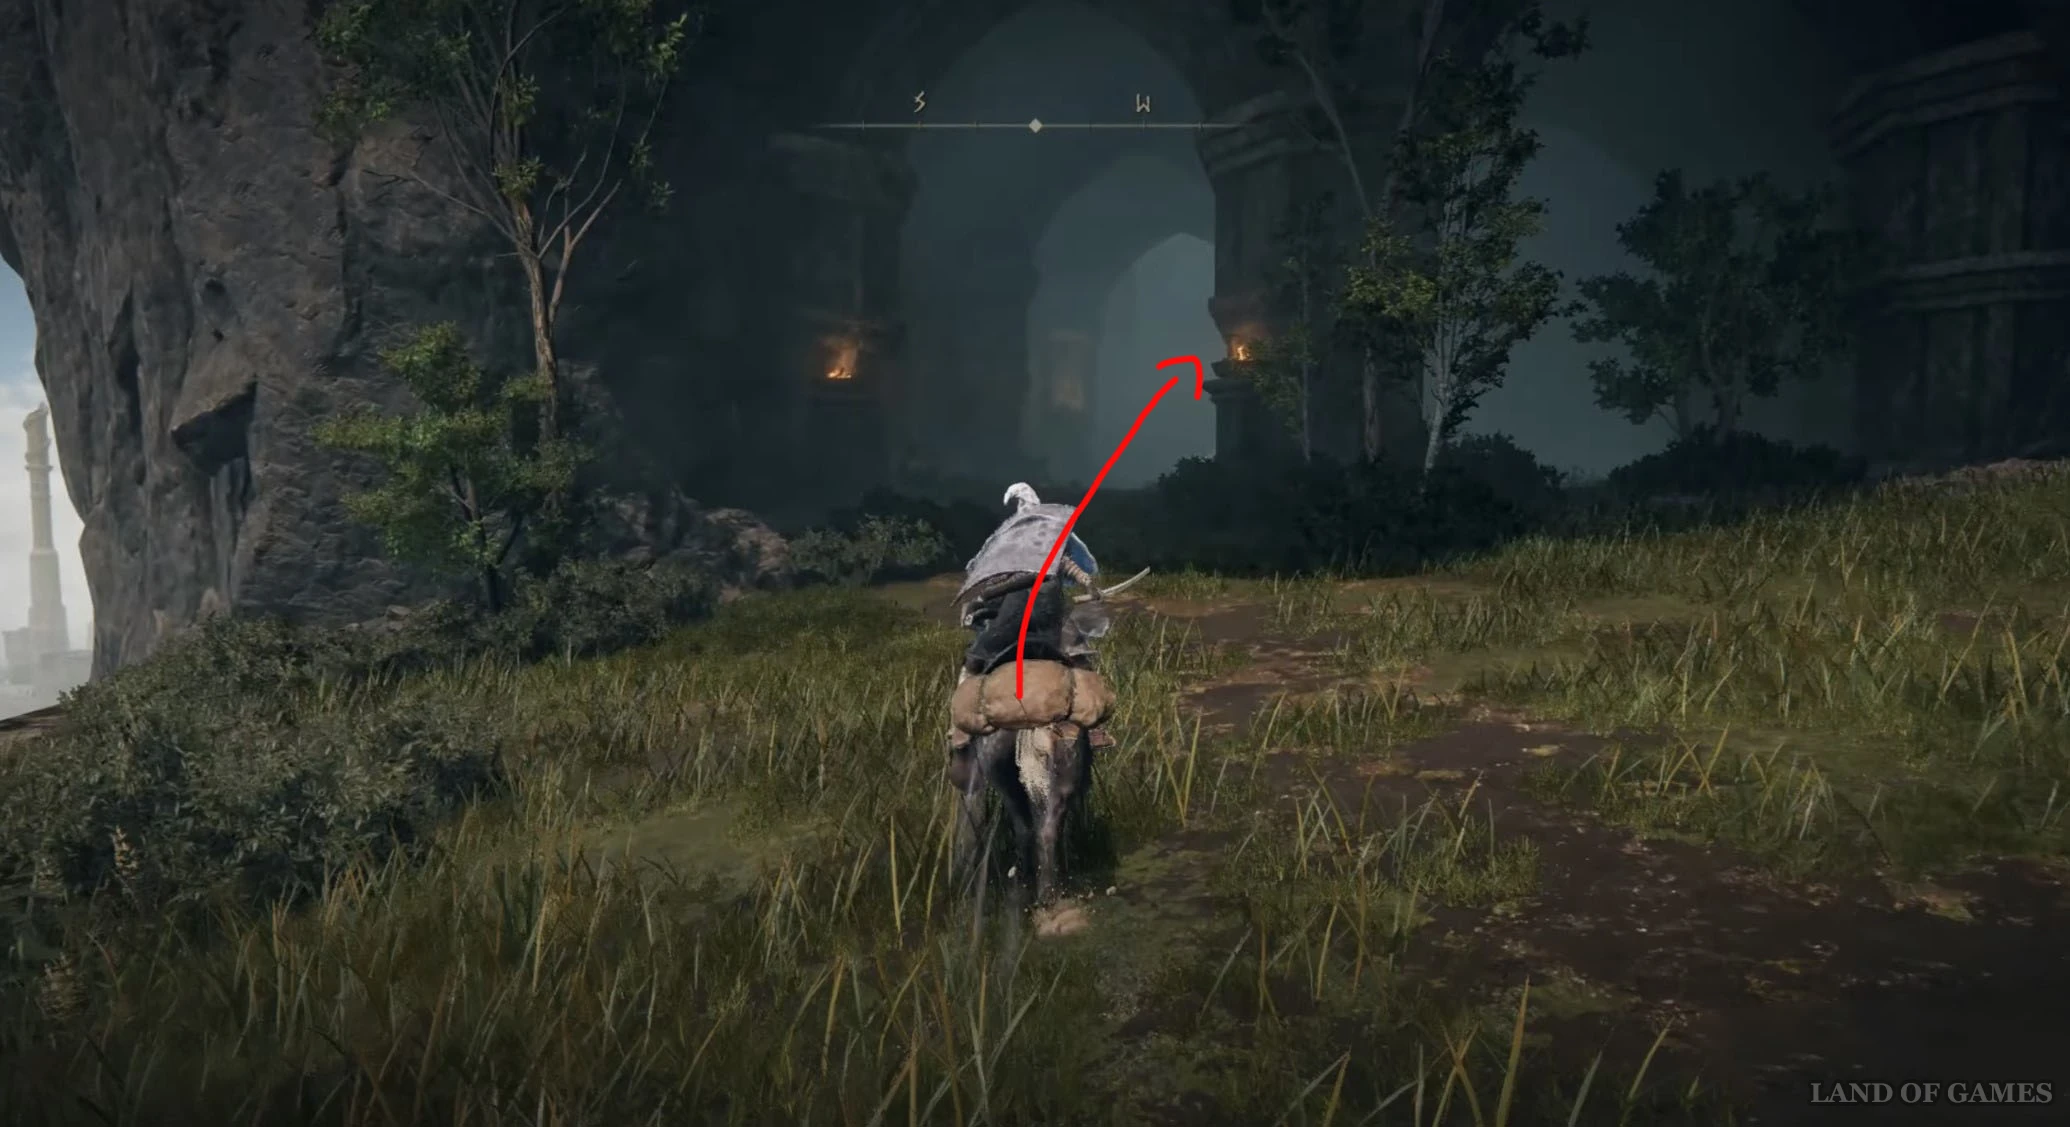
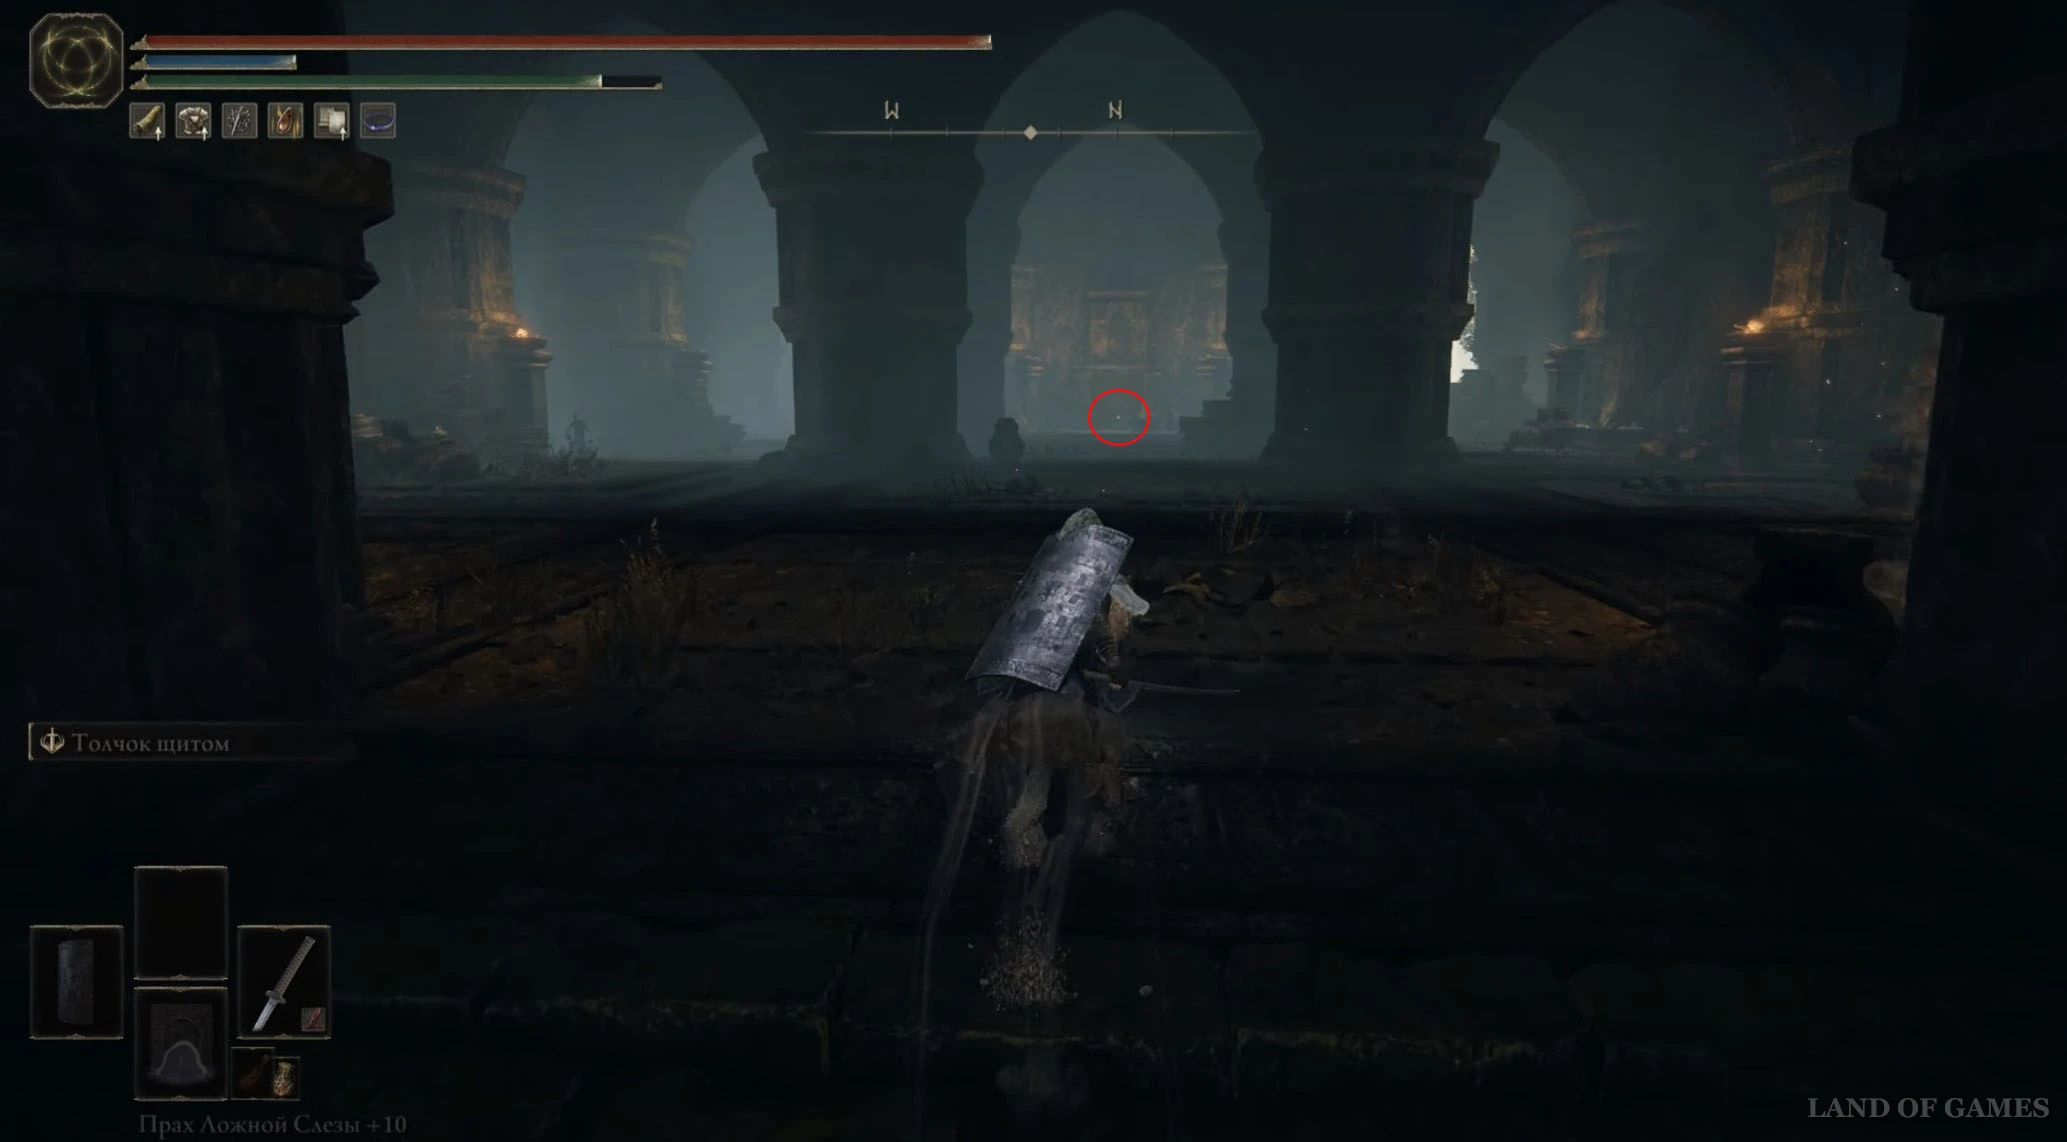
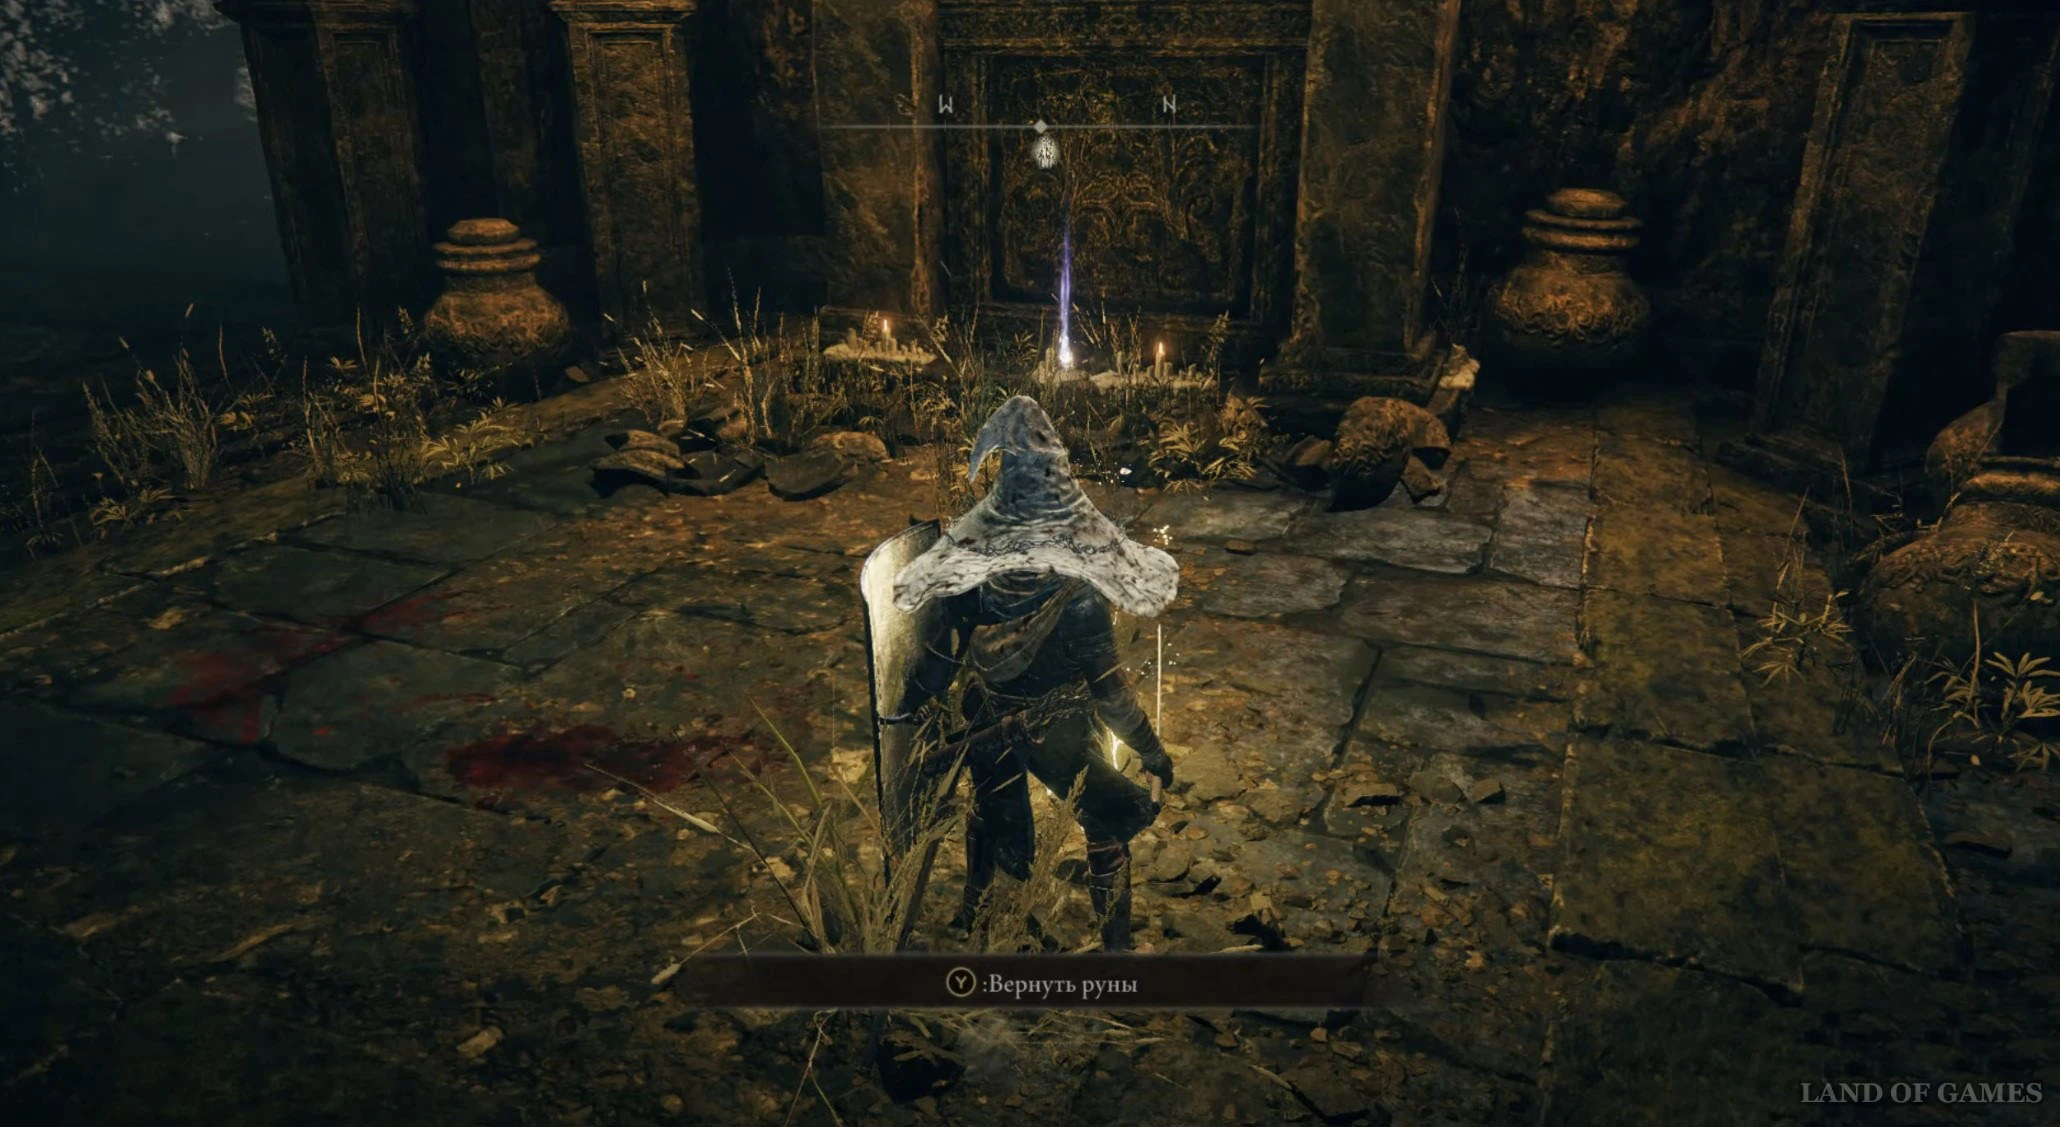
От места благодати «Равнина Надгробий», которое вы активируете практически в самом начале дополнения, двигайтесь на восток и доберитесь до Храма утешения на возвышенности. Войдите внутрь и разберитесь с несколькими противниками, а затем подойдите к статуе Марики и подберите сразу два предмета.
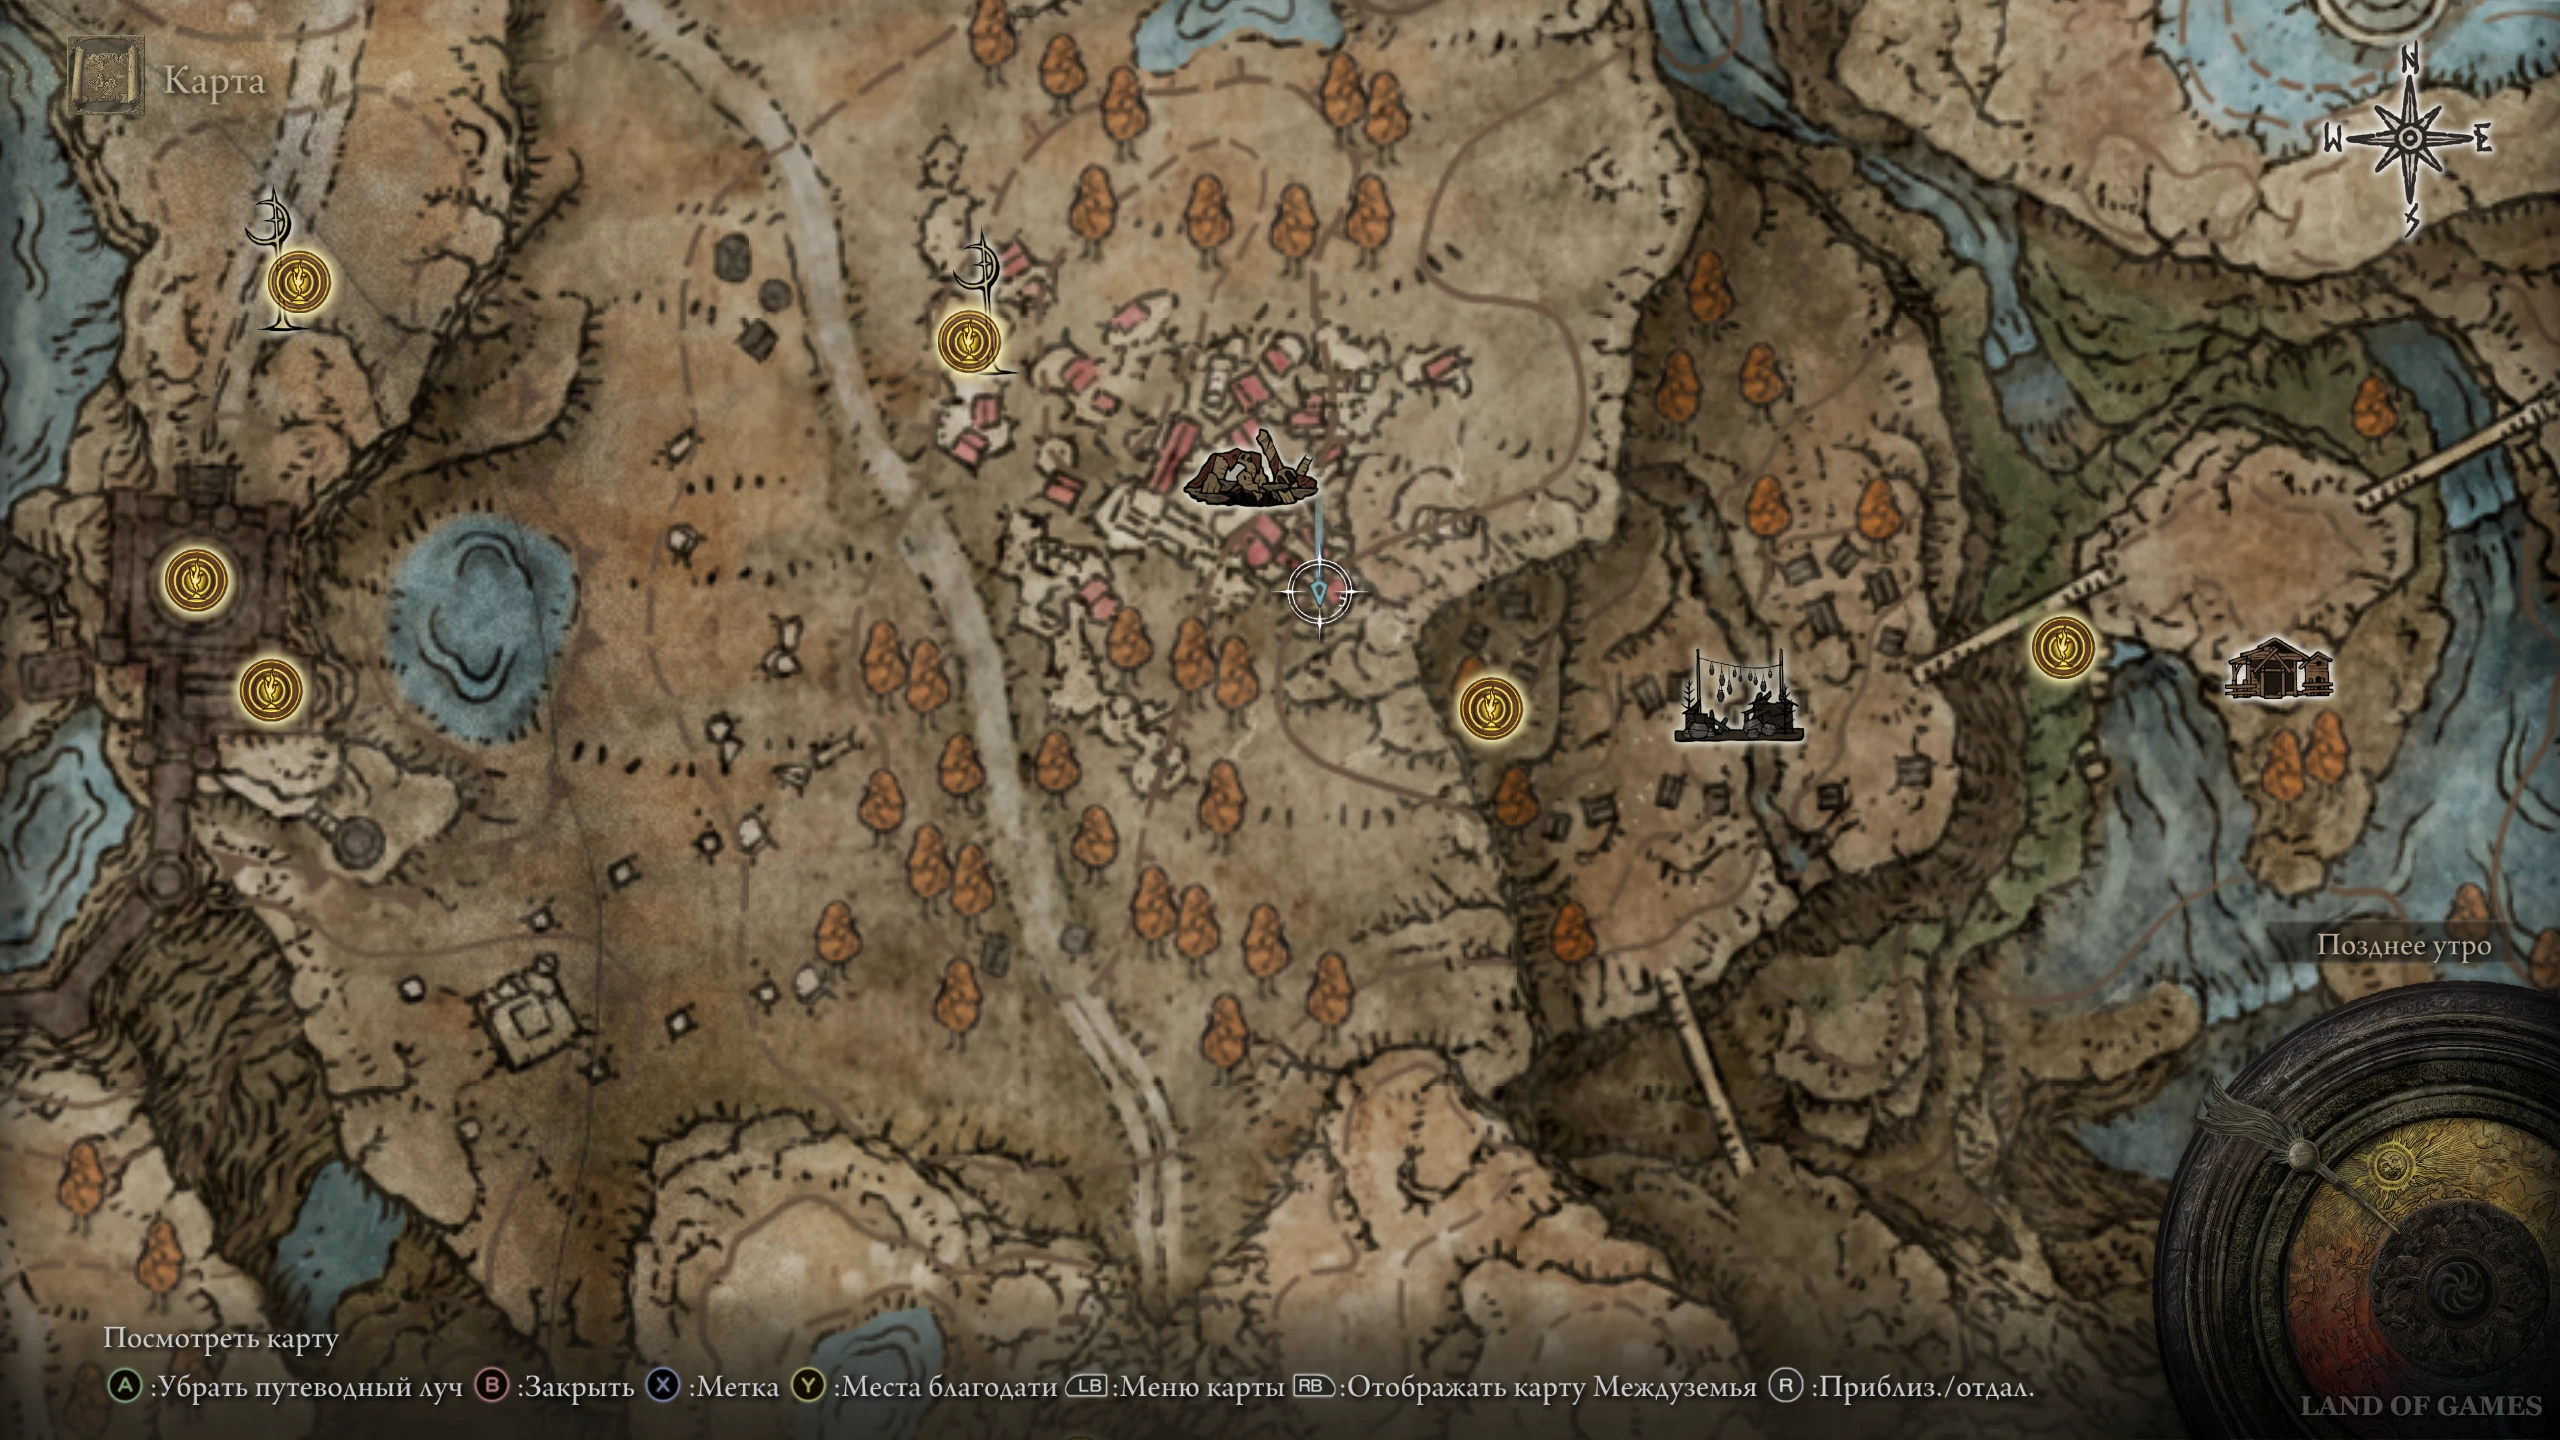
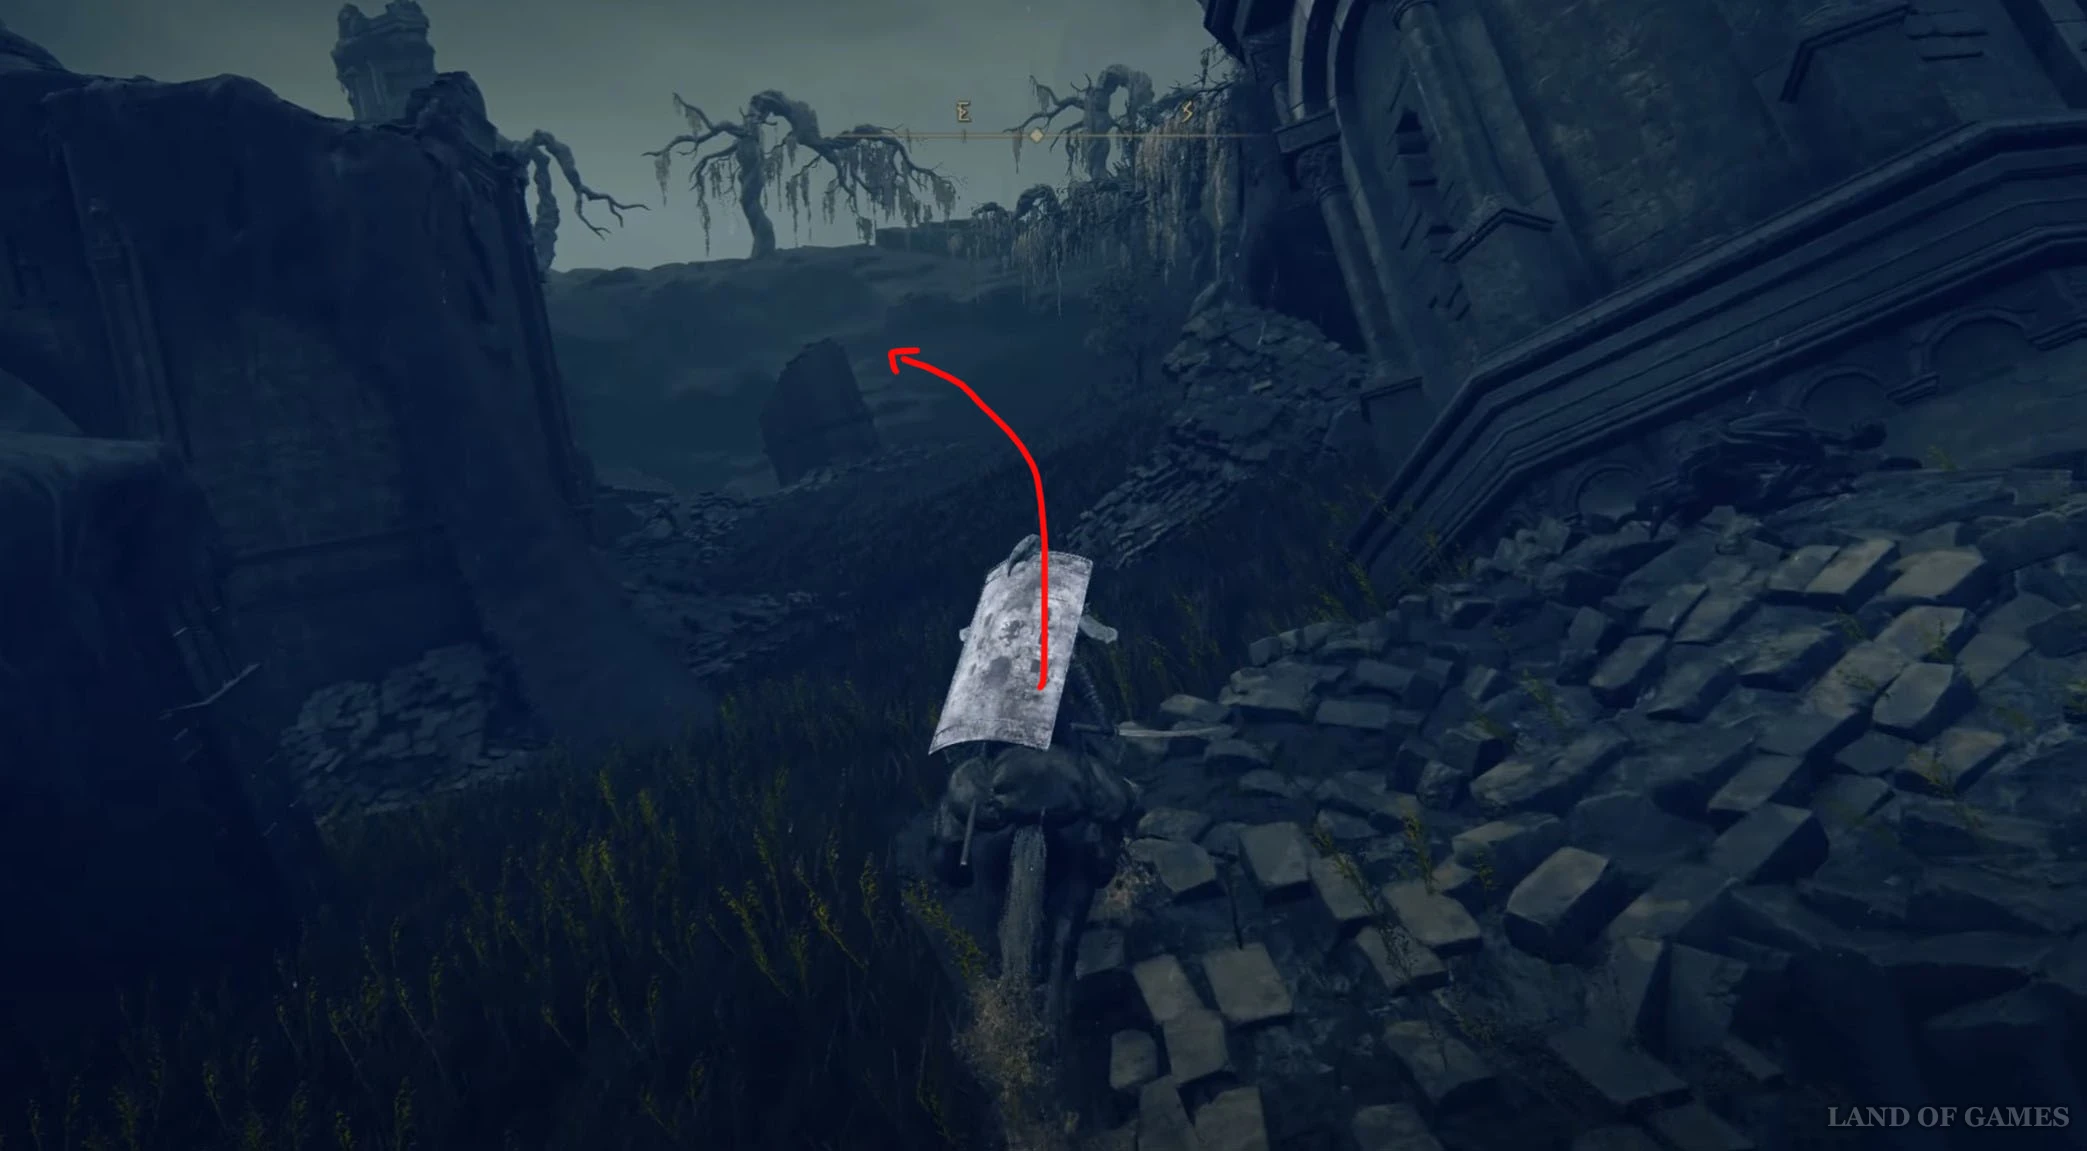
Осколок древа упадка 3
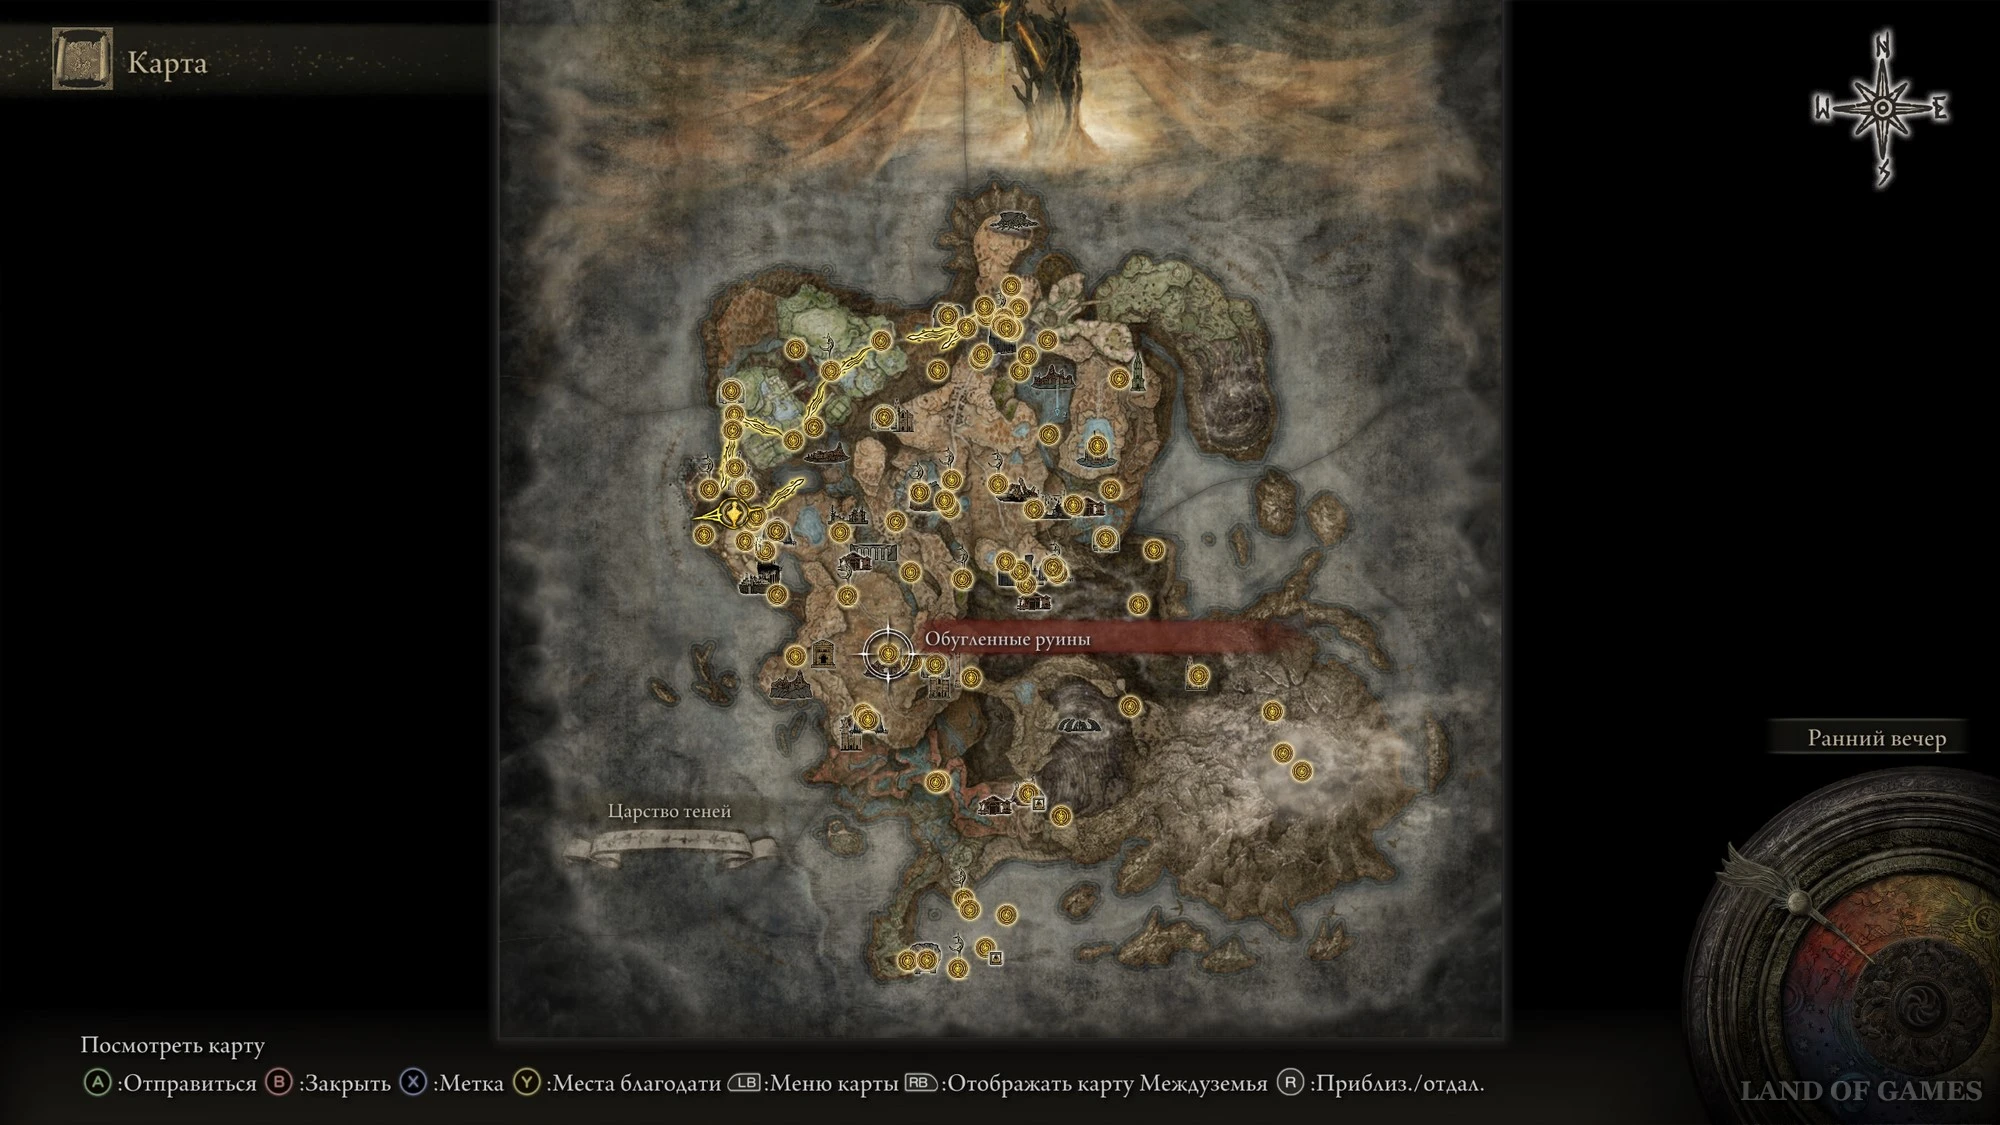
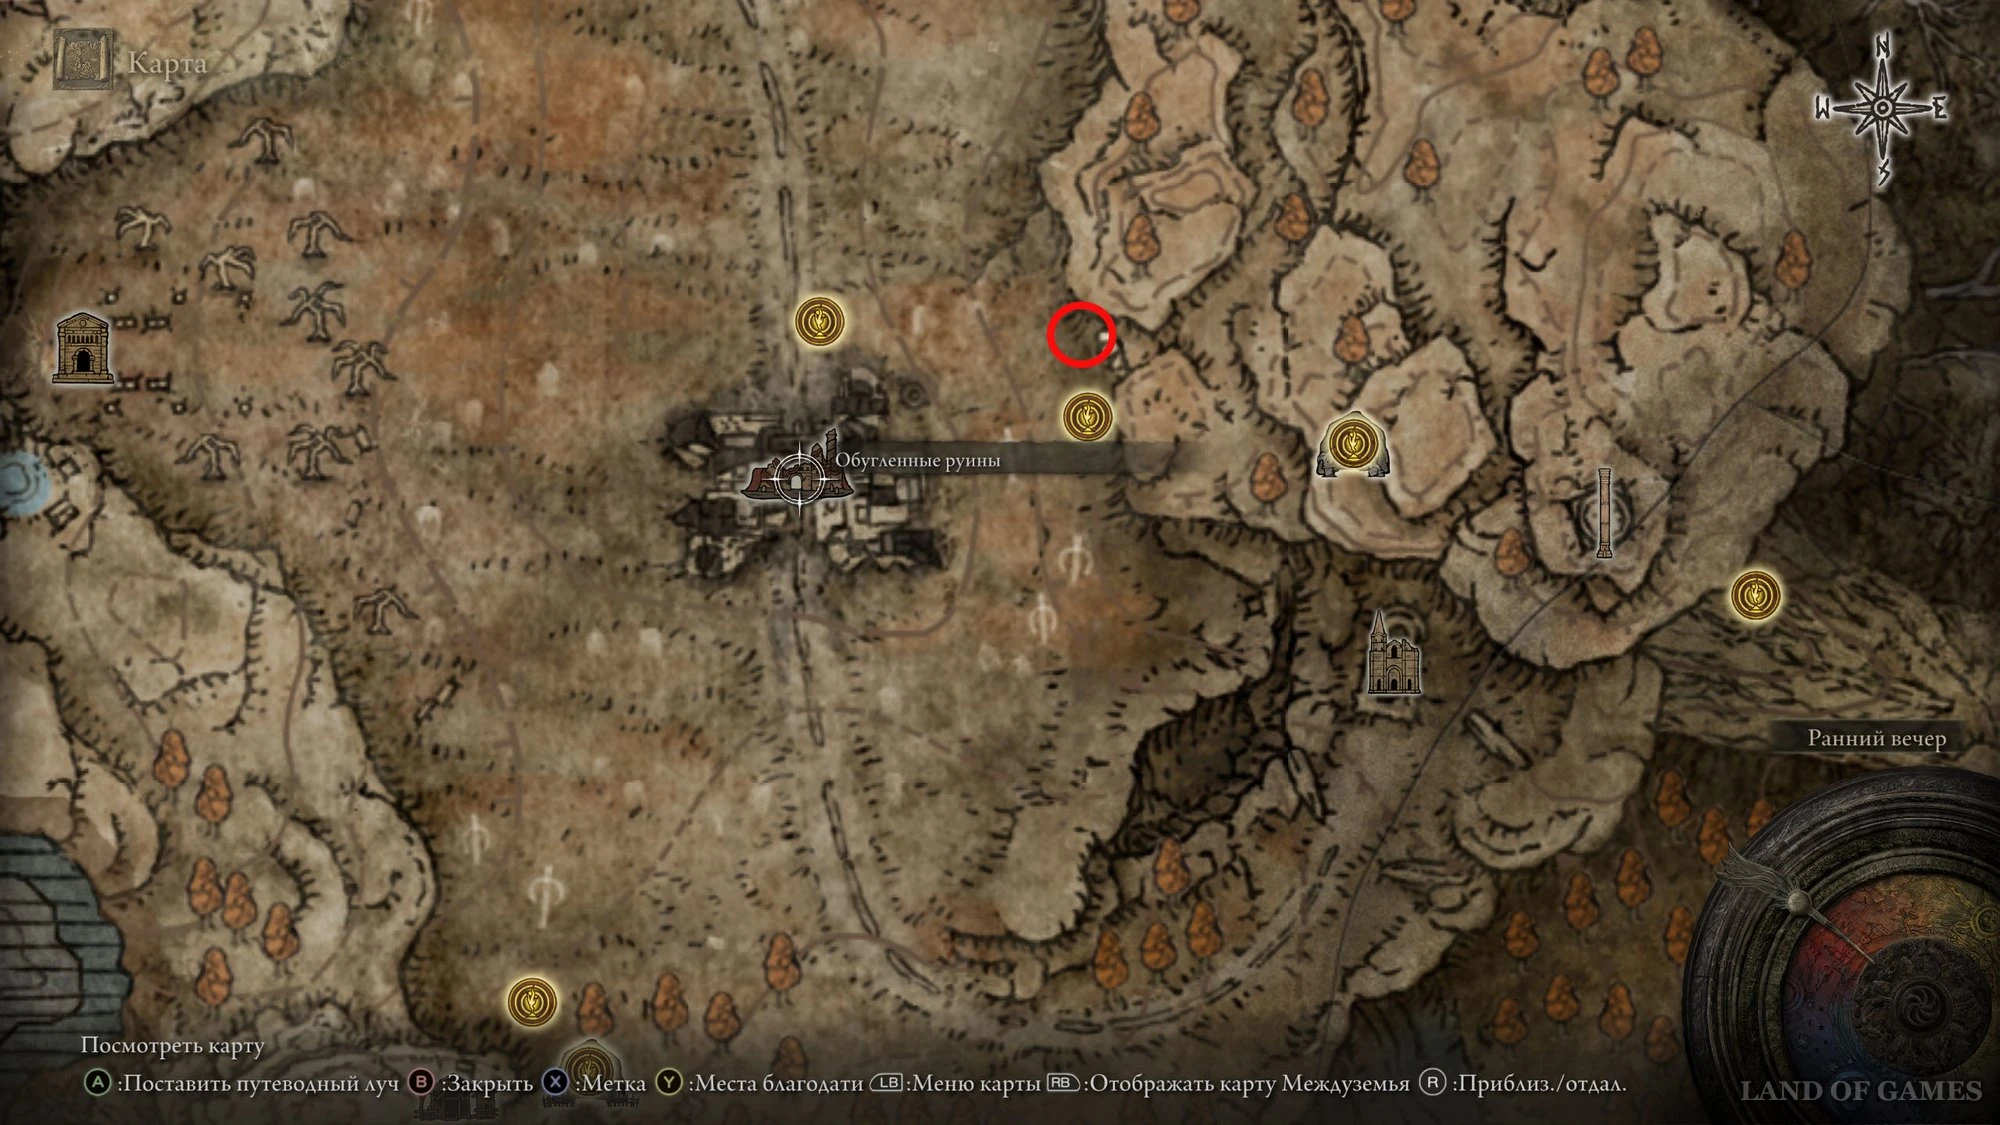
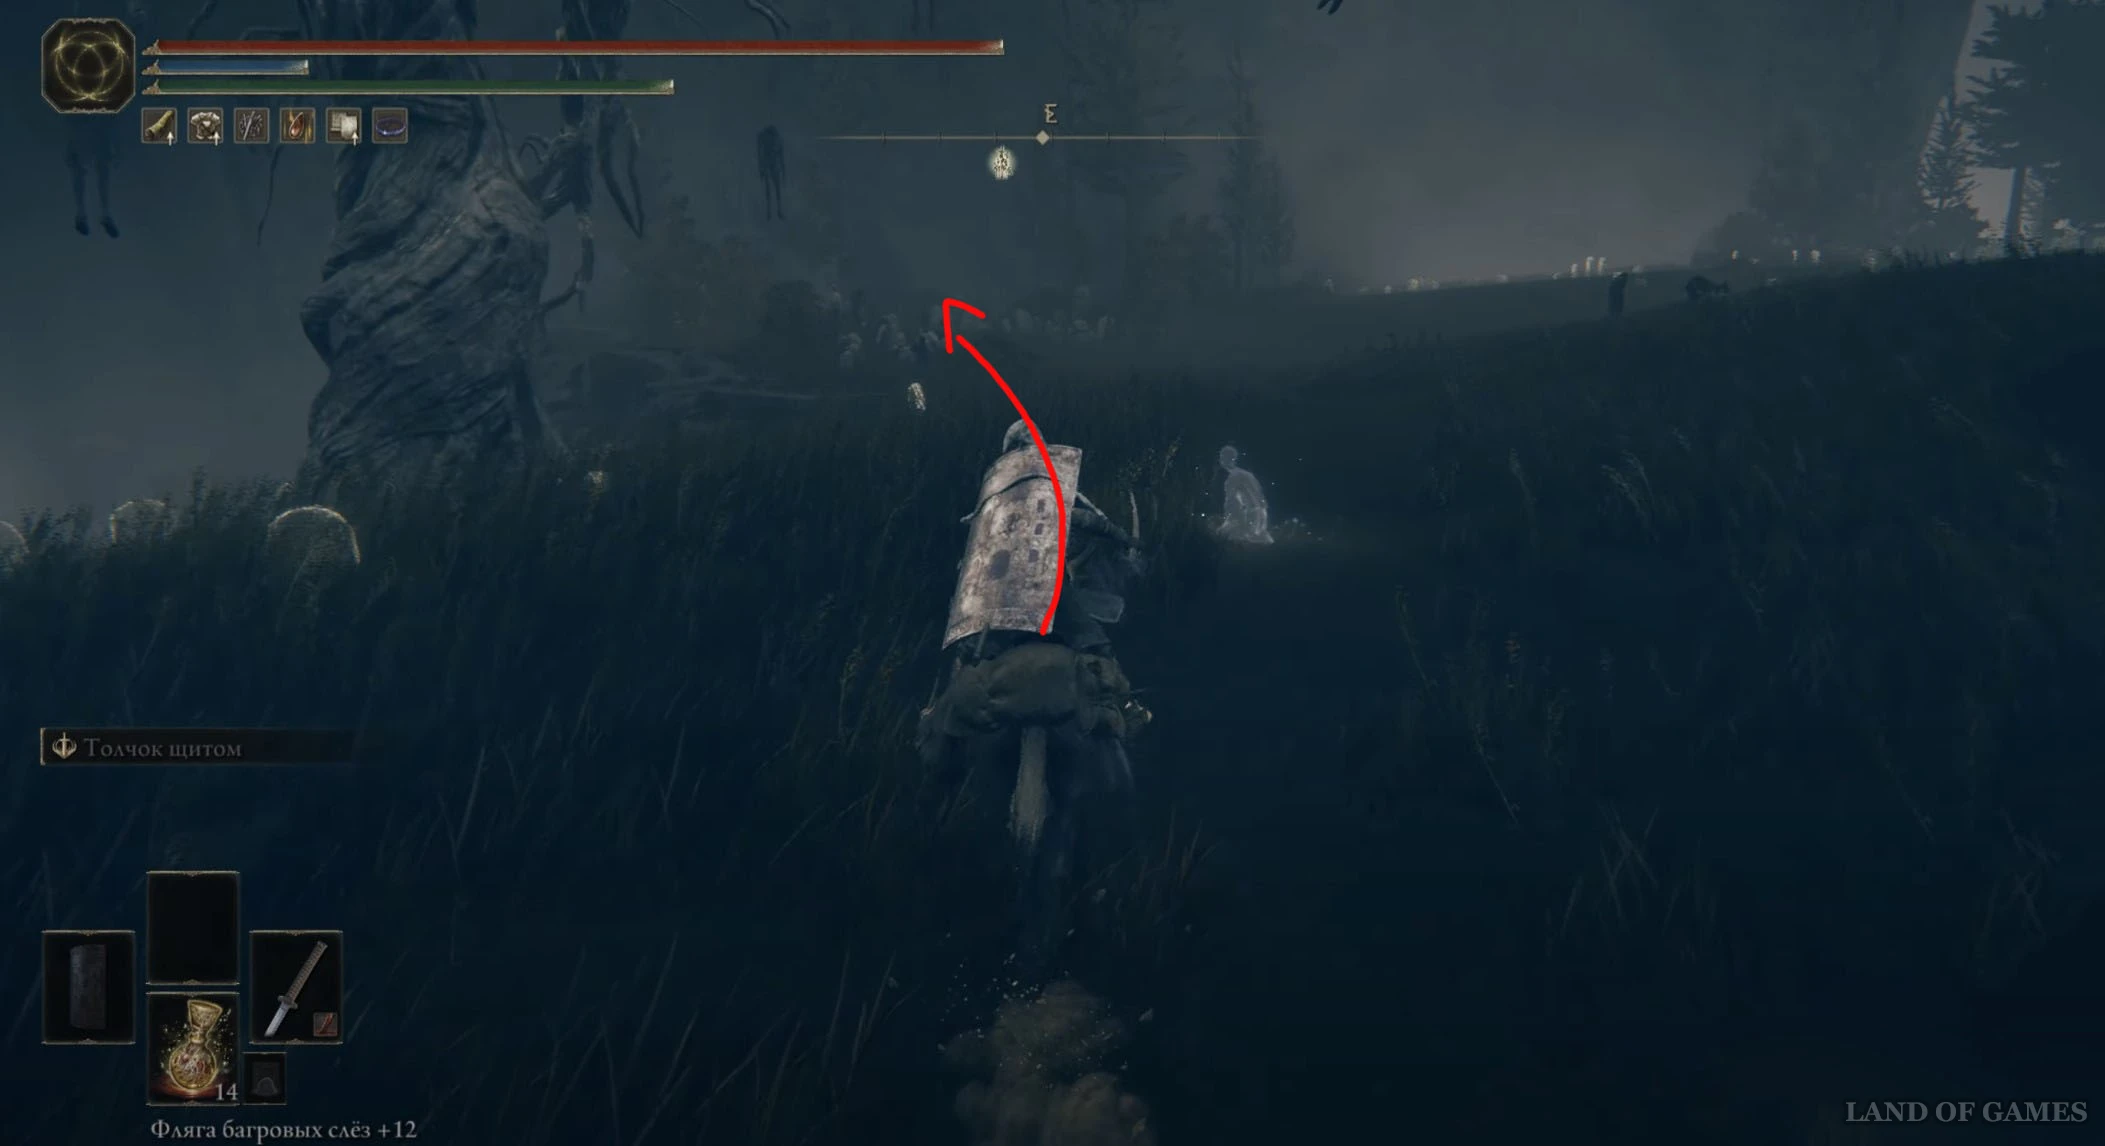
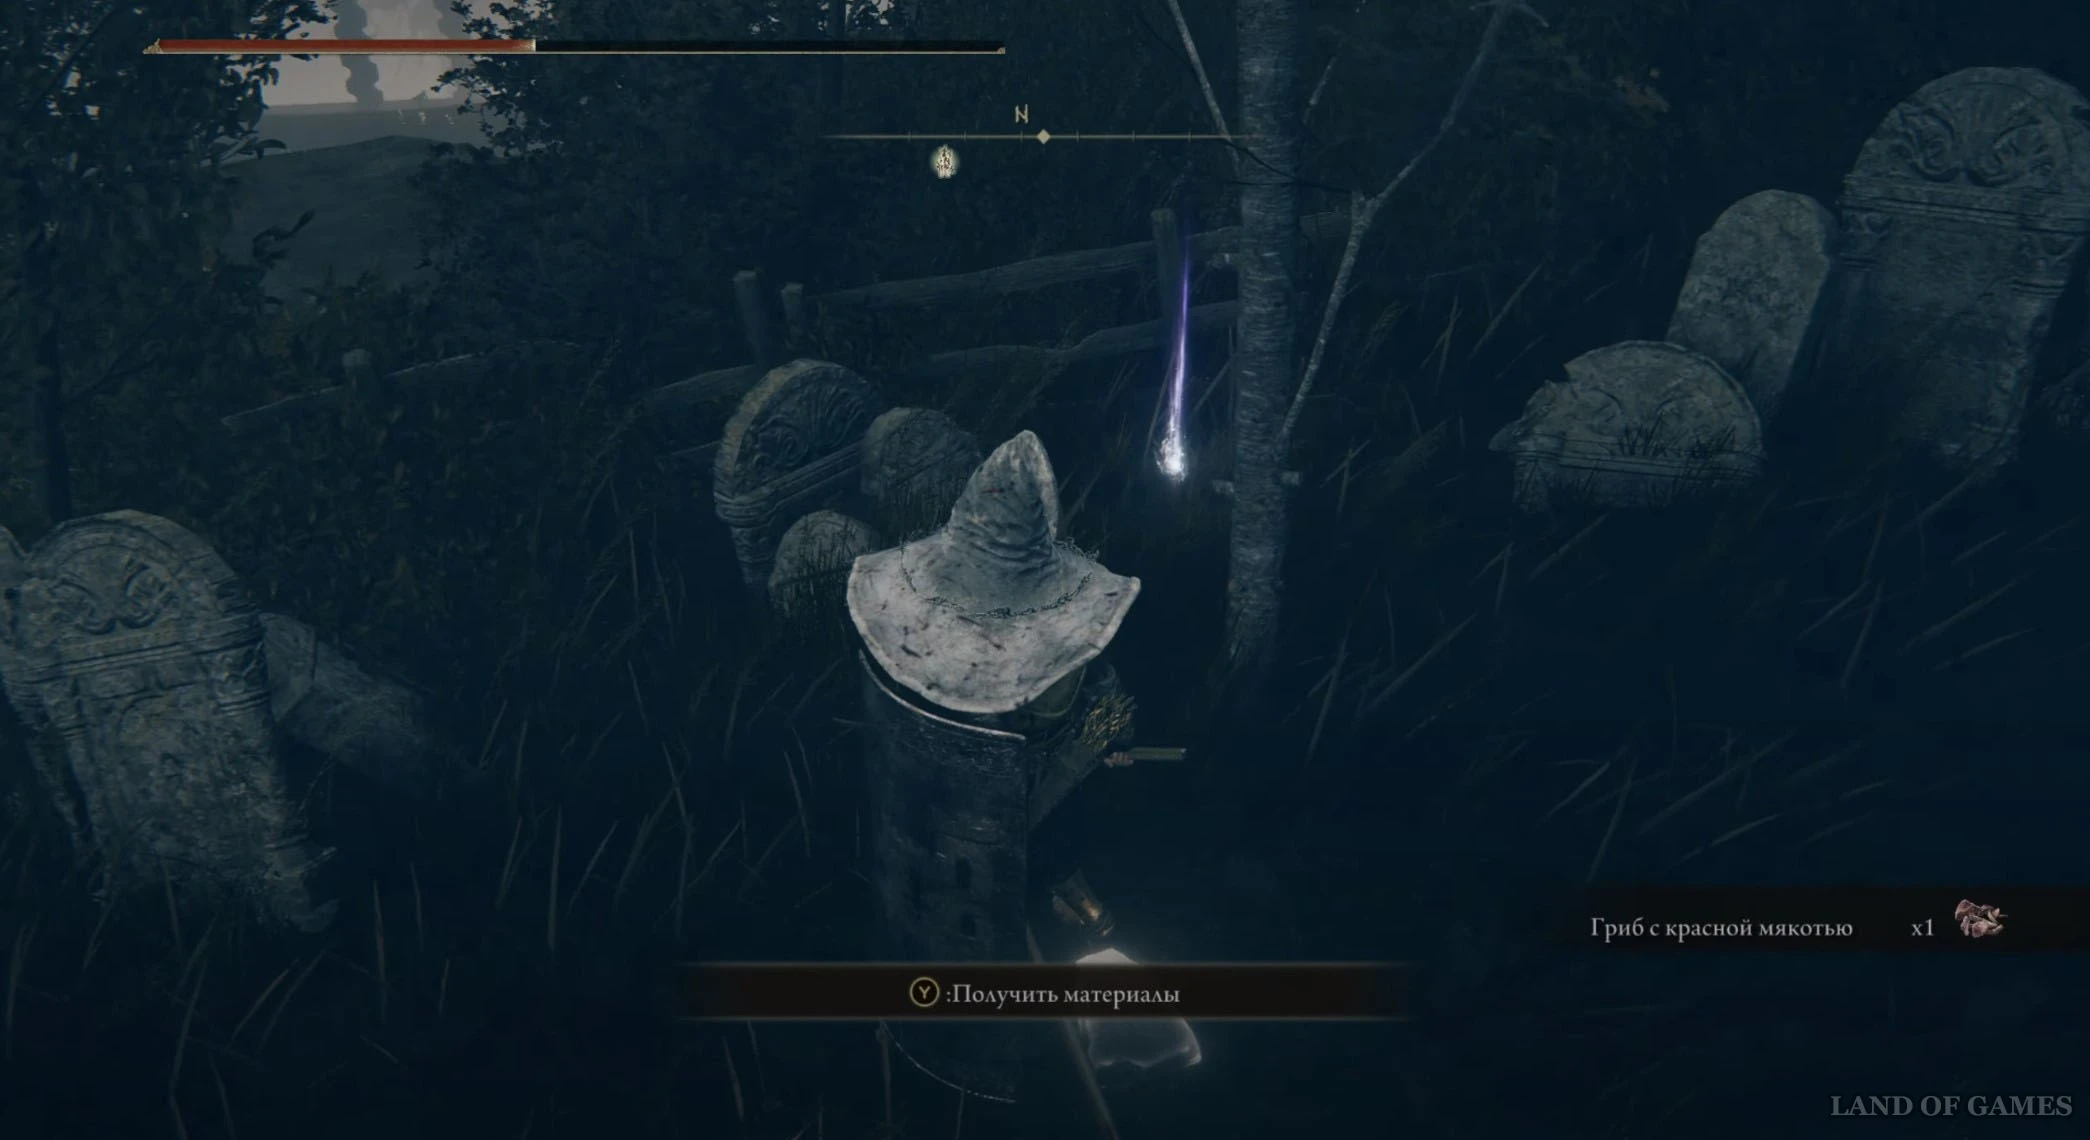
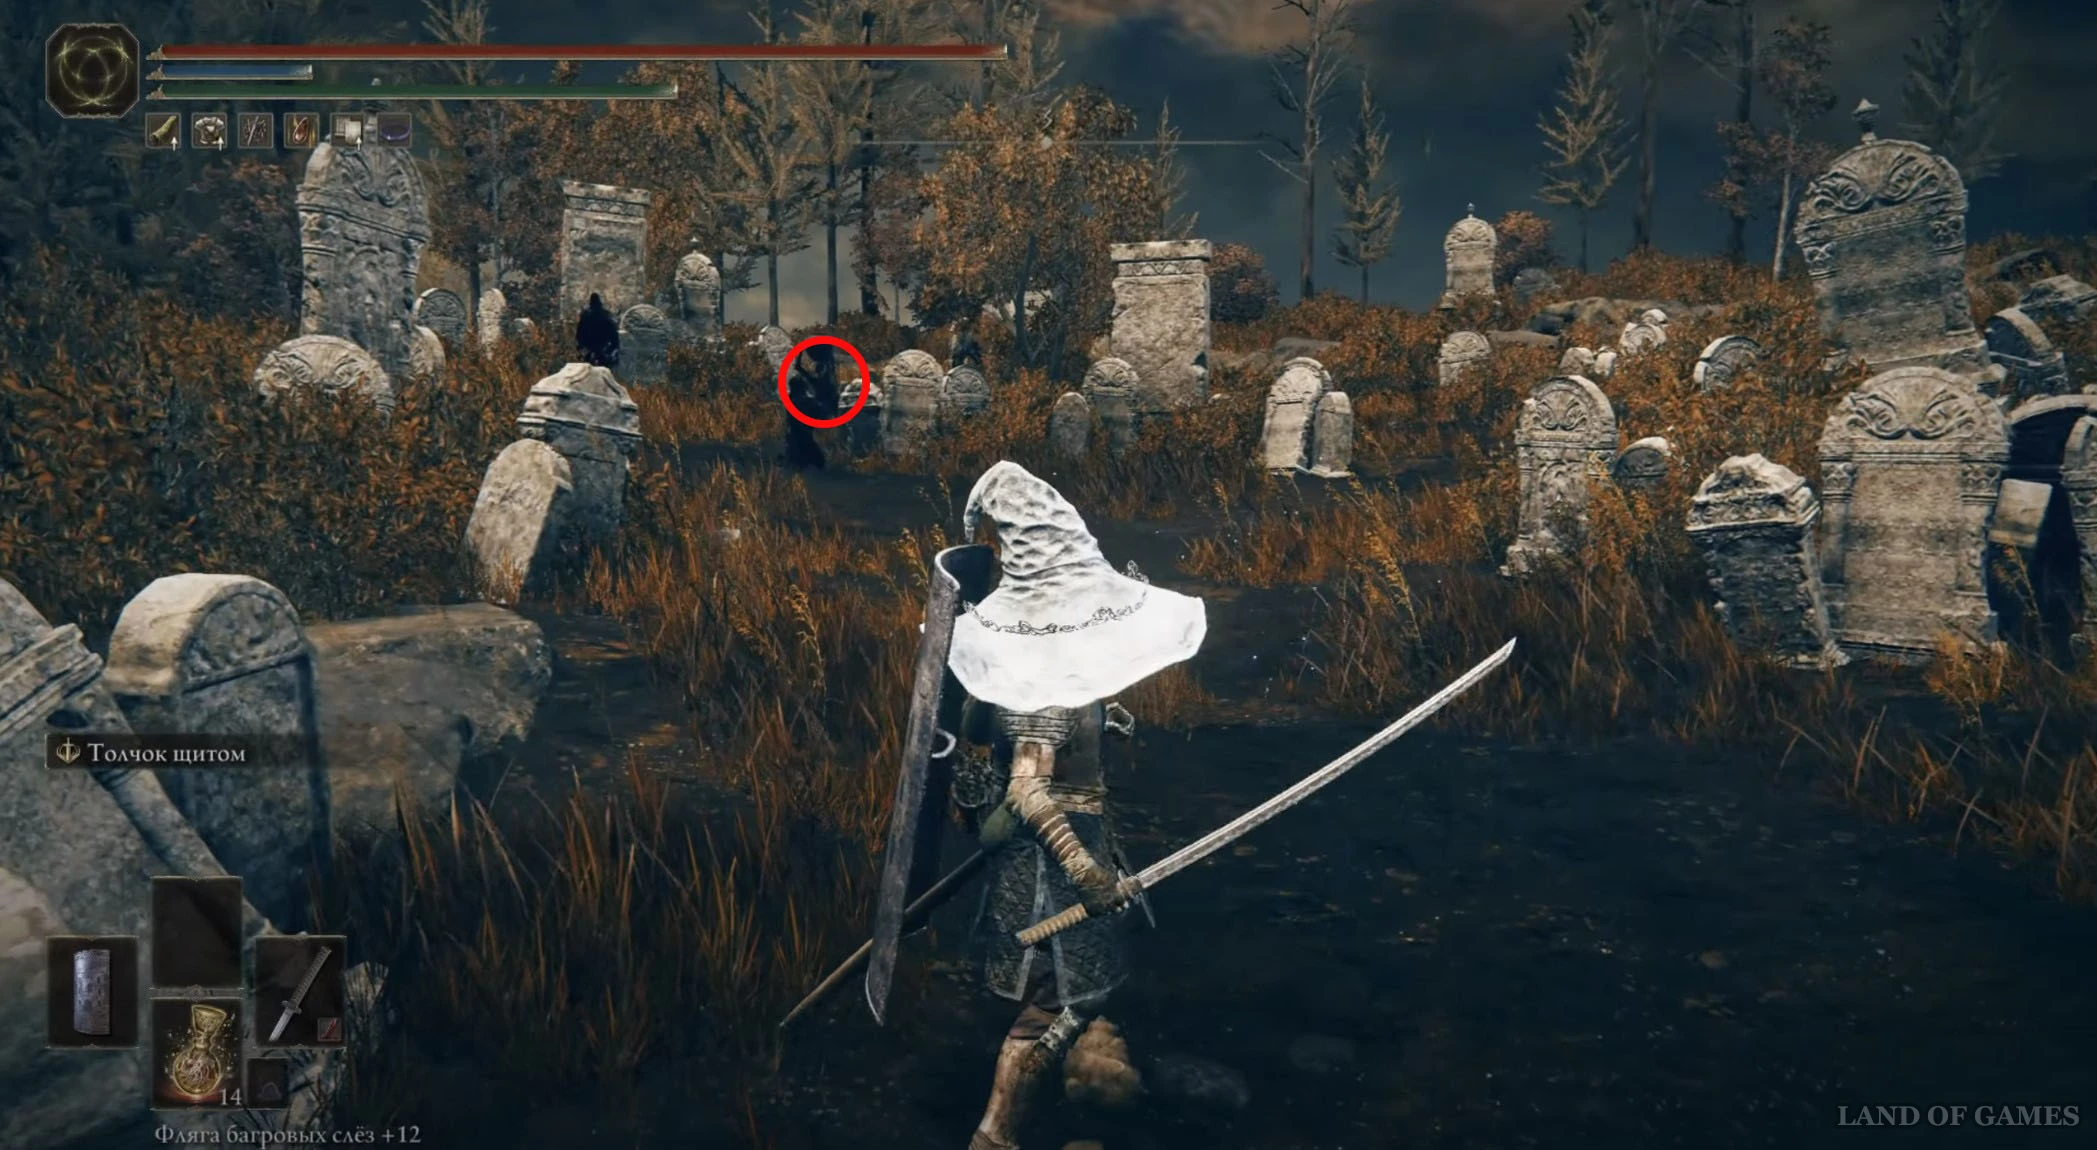
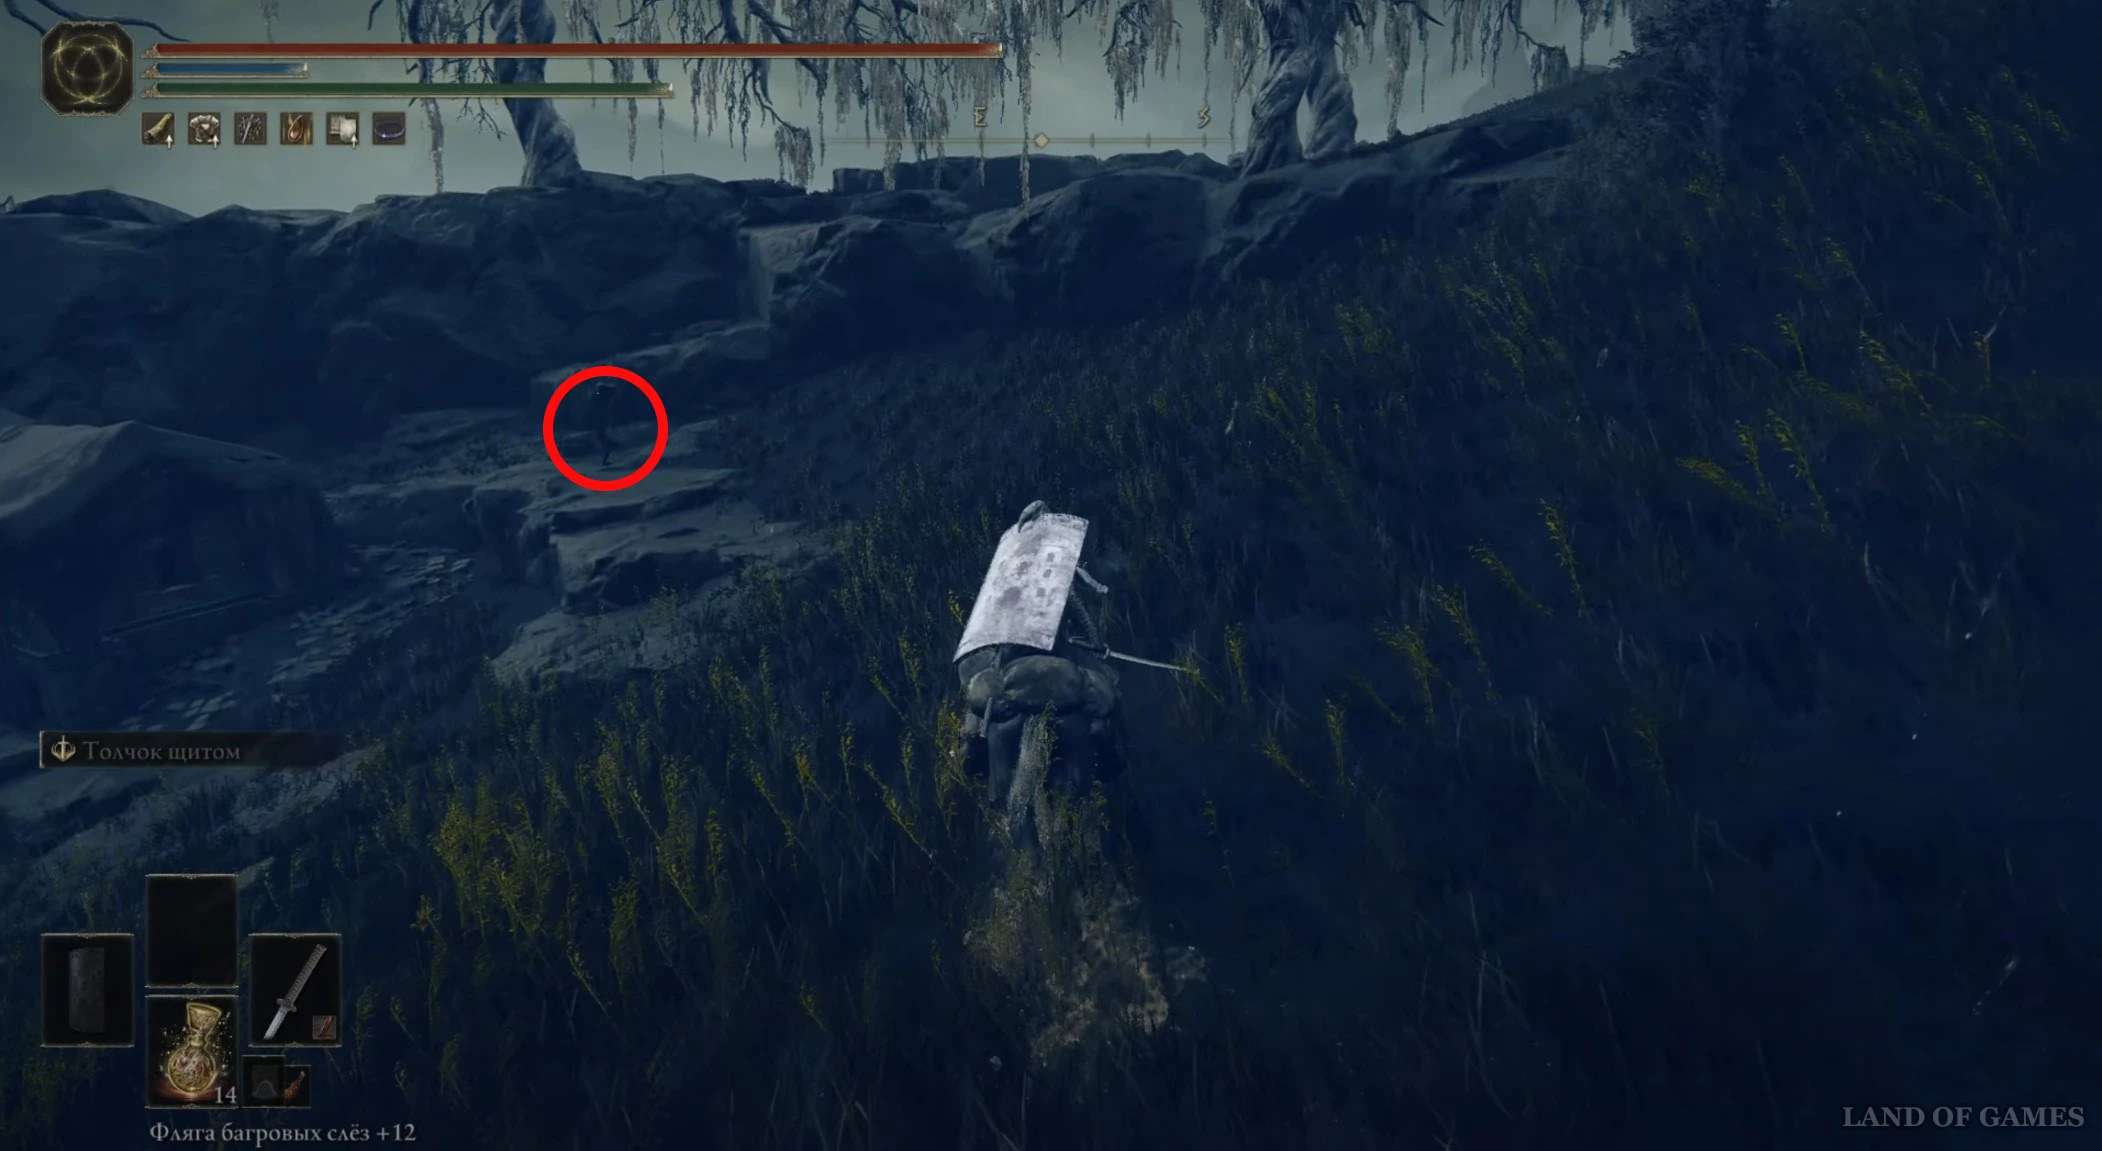
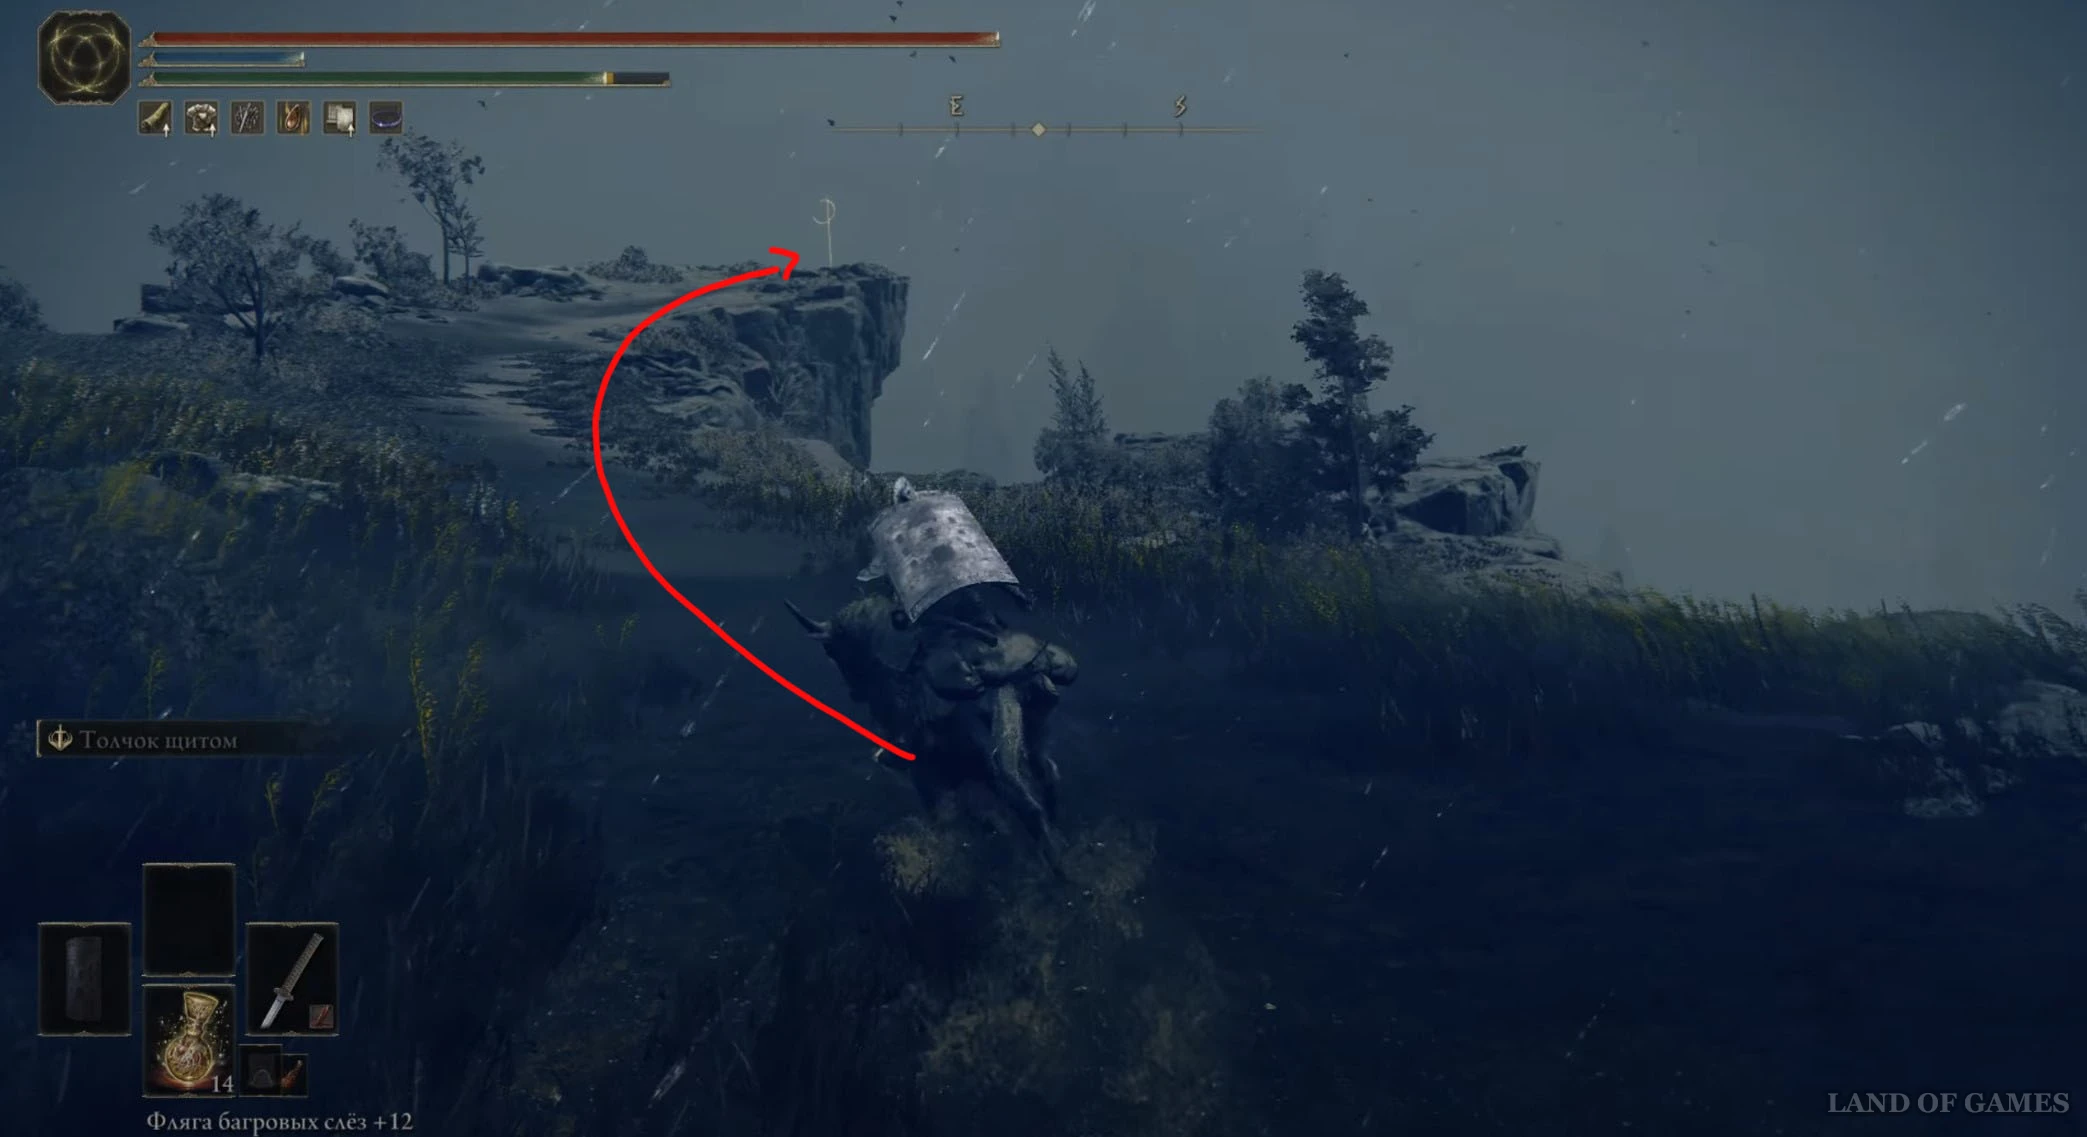
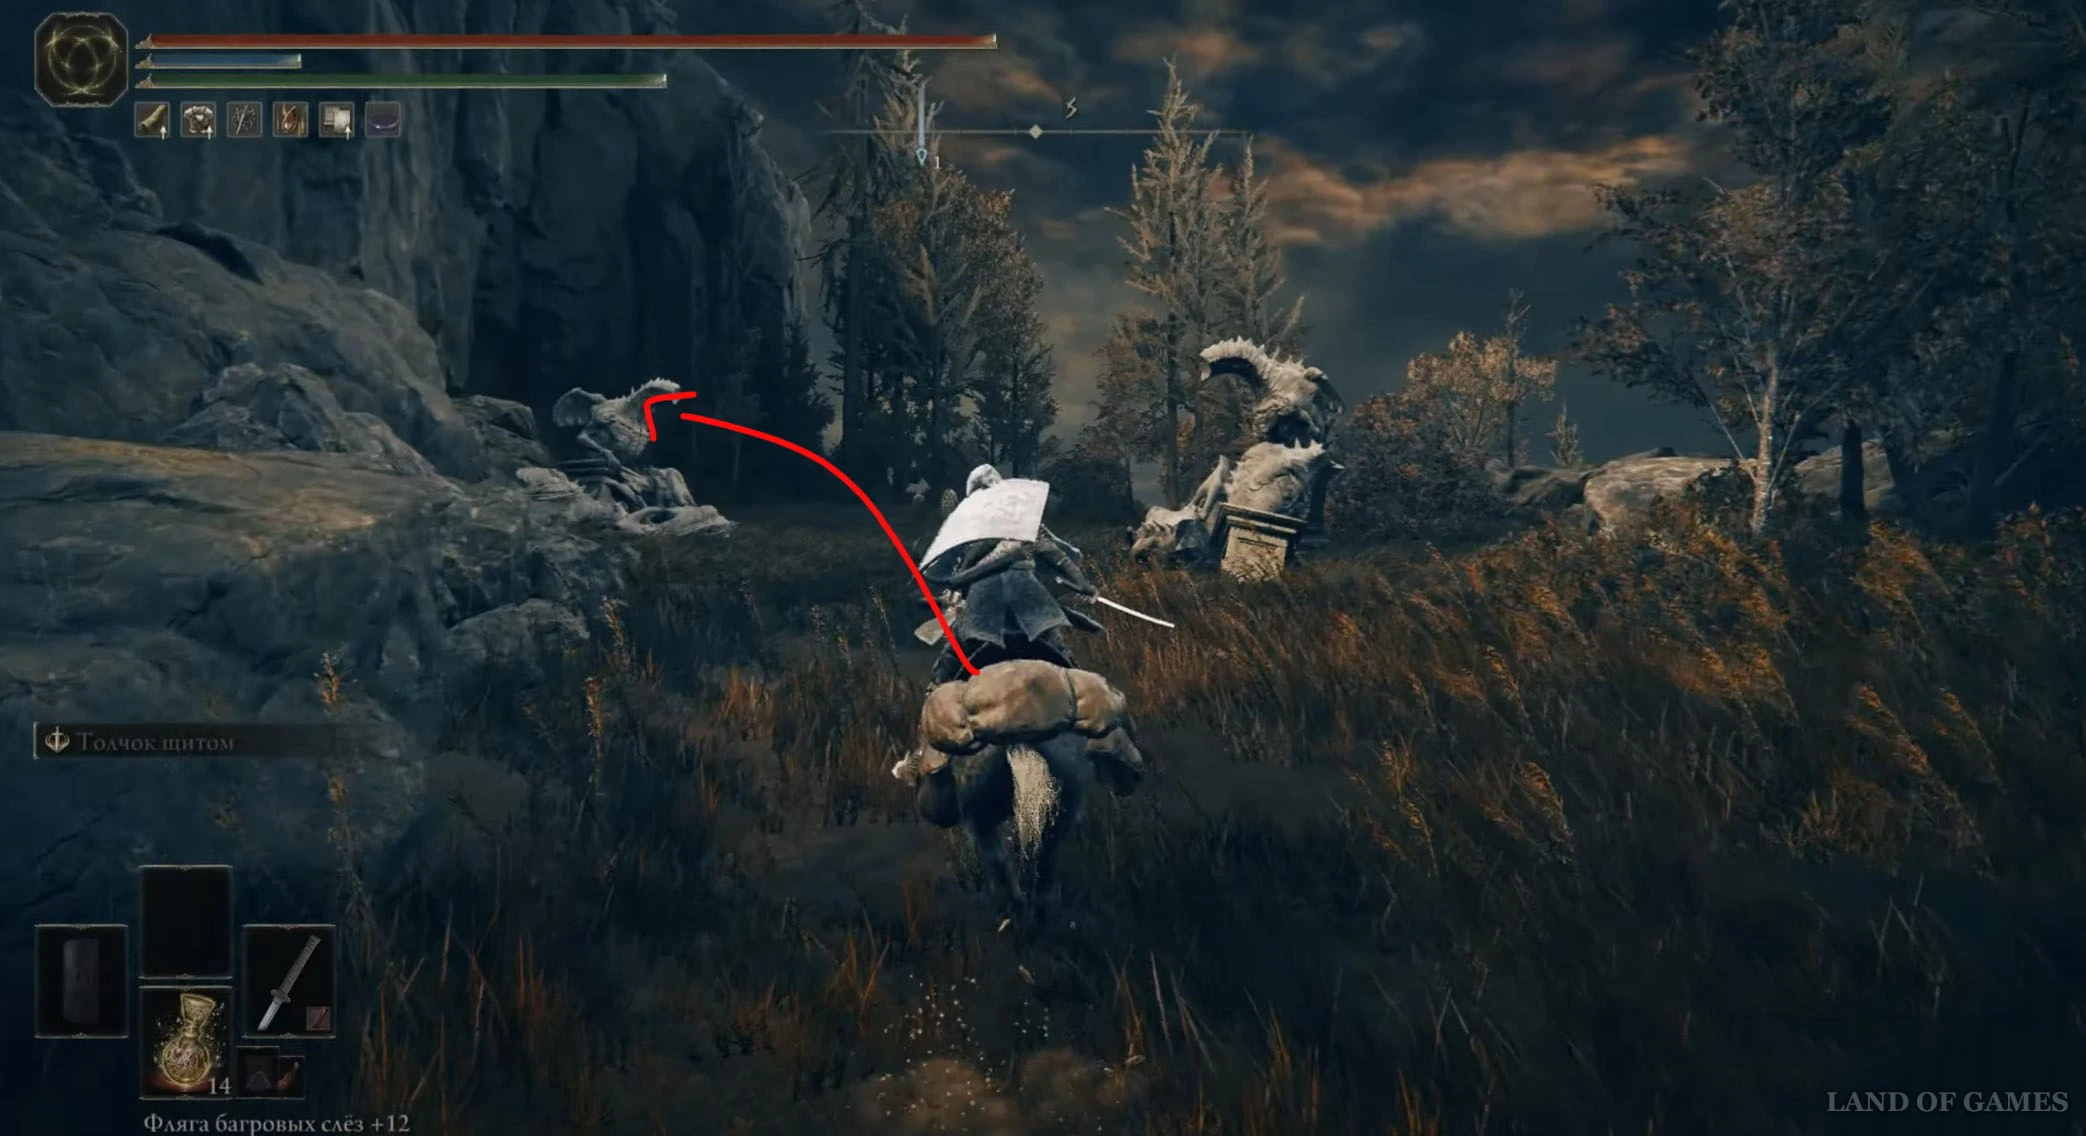
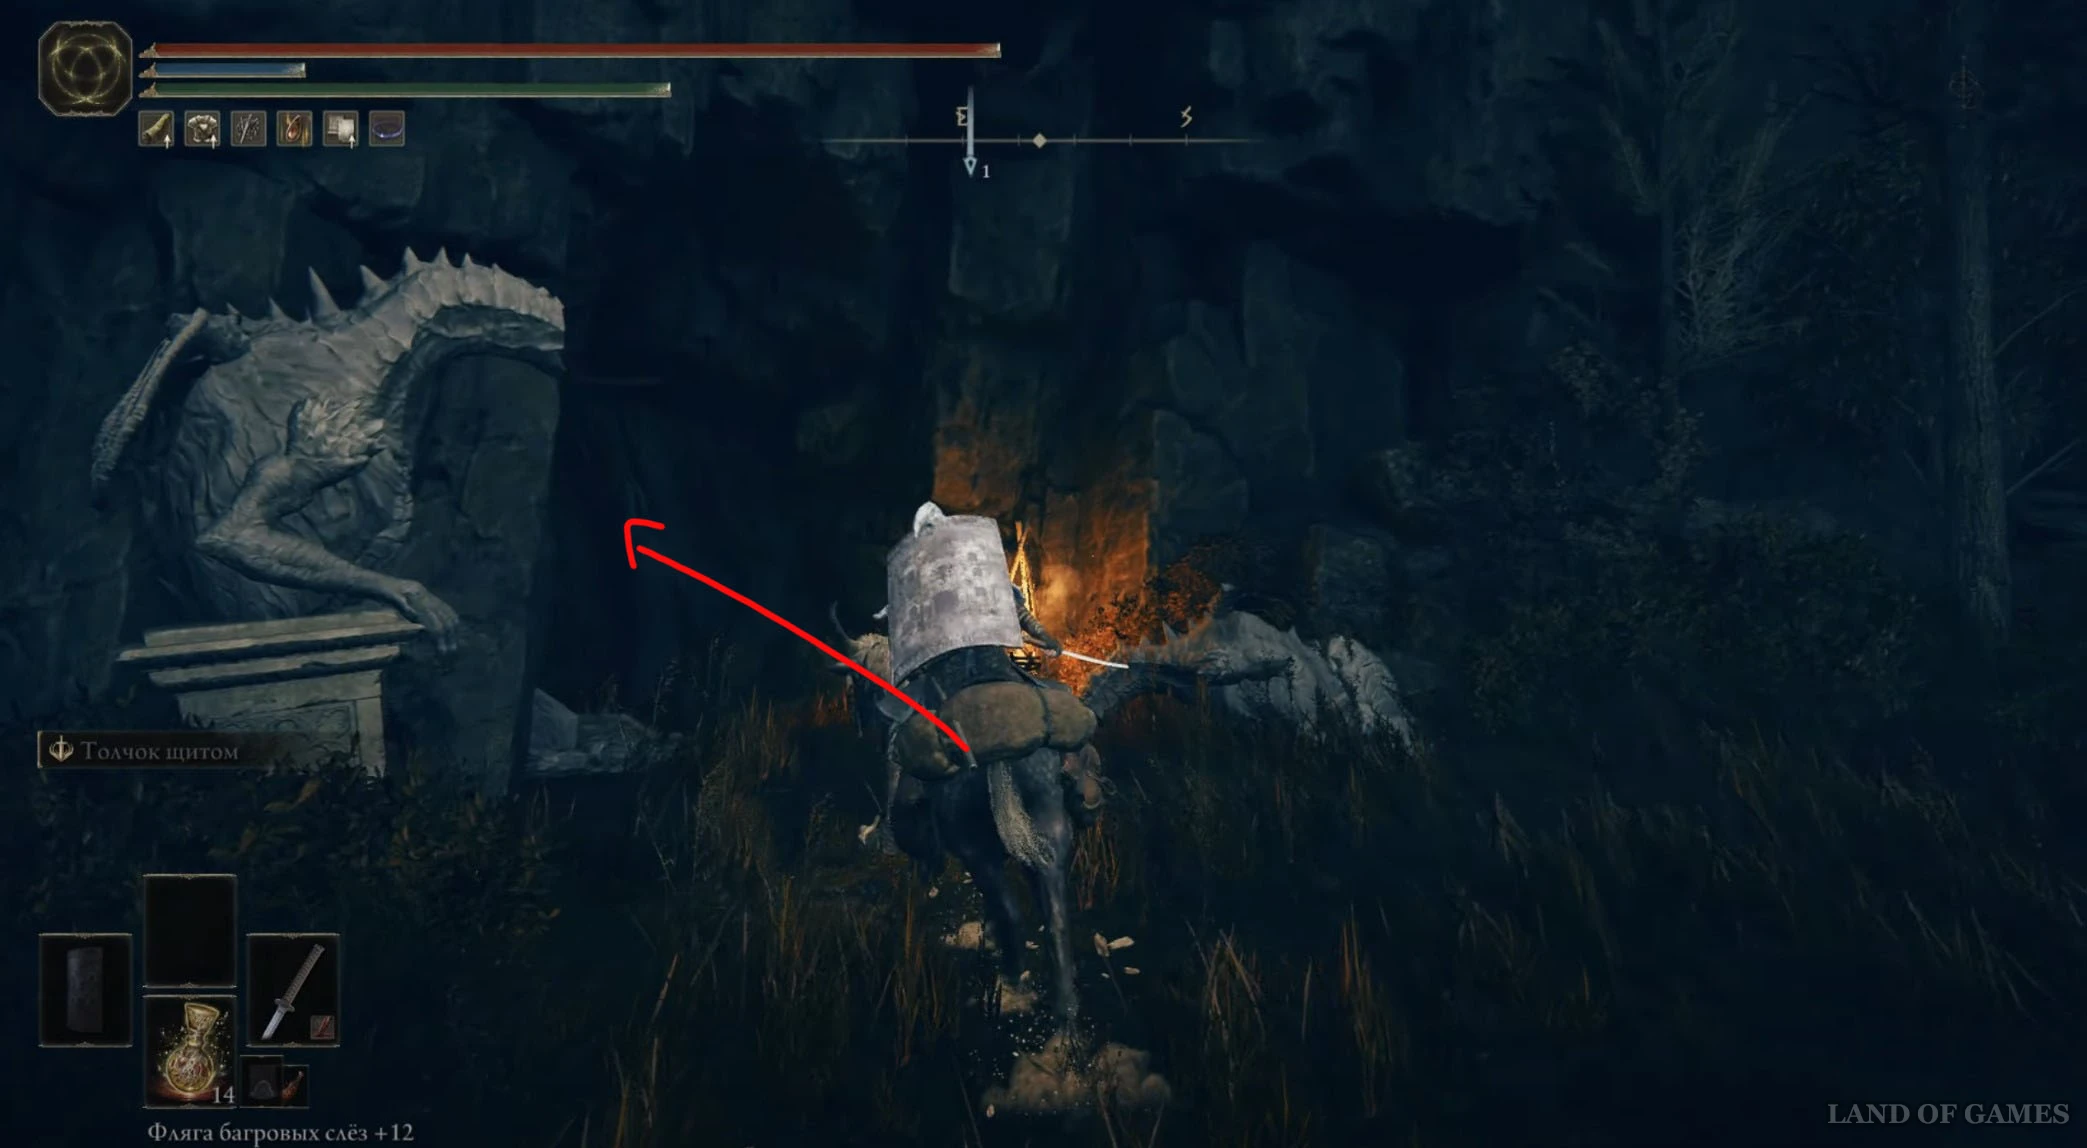
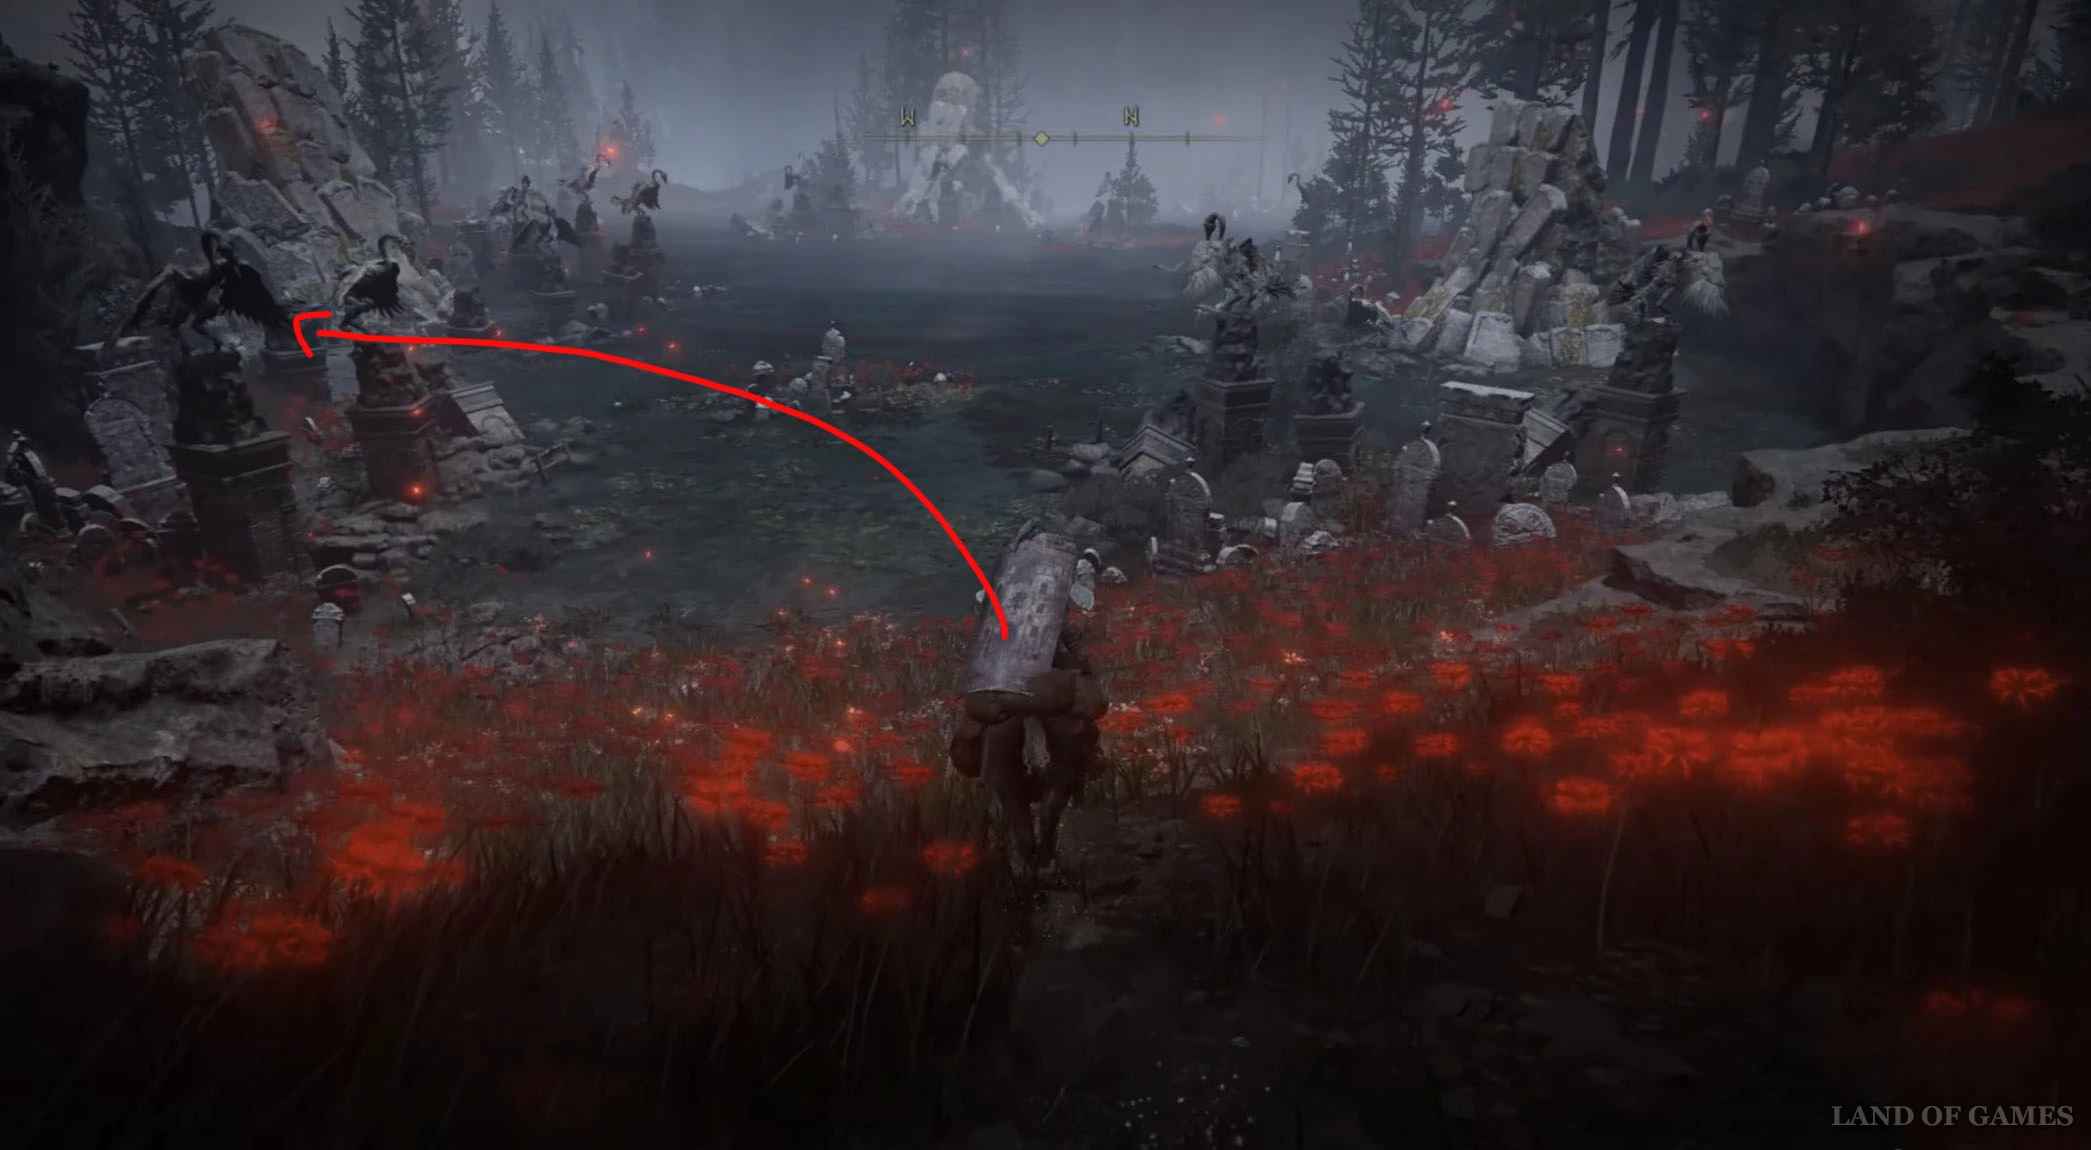
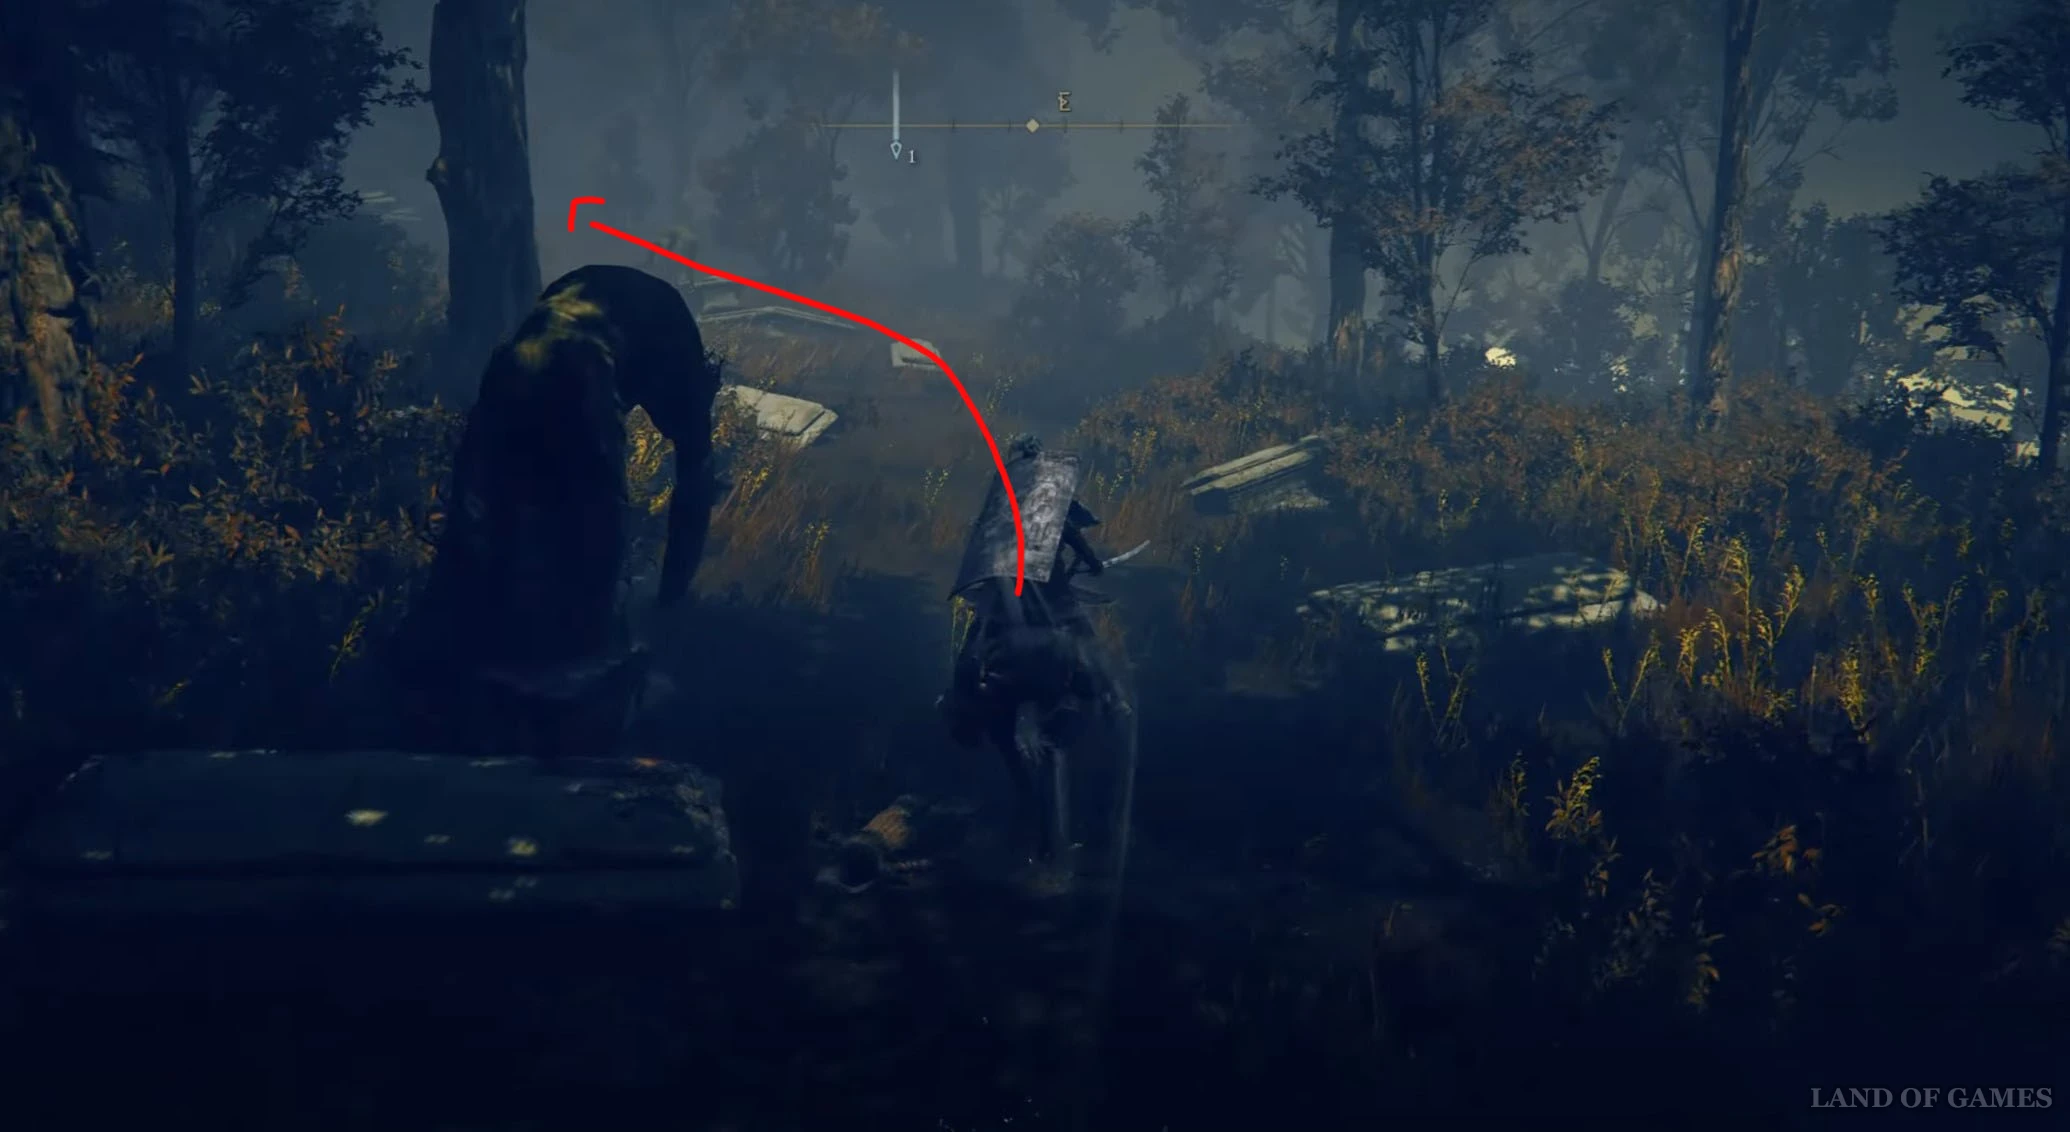
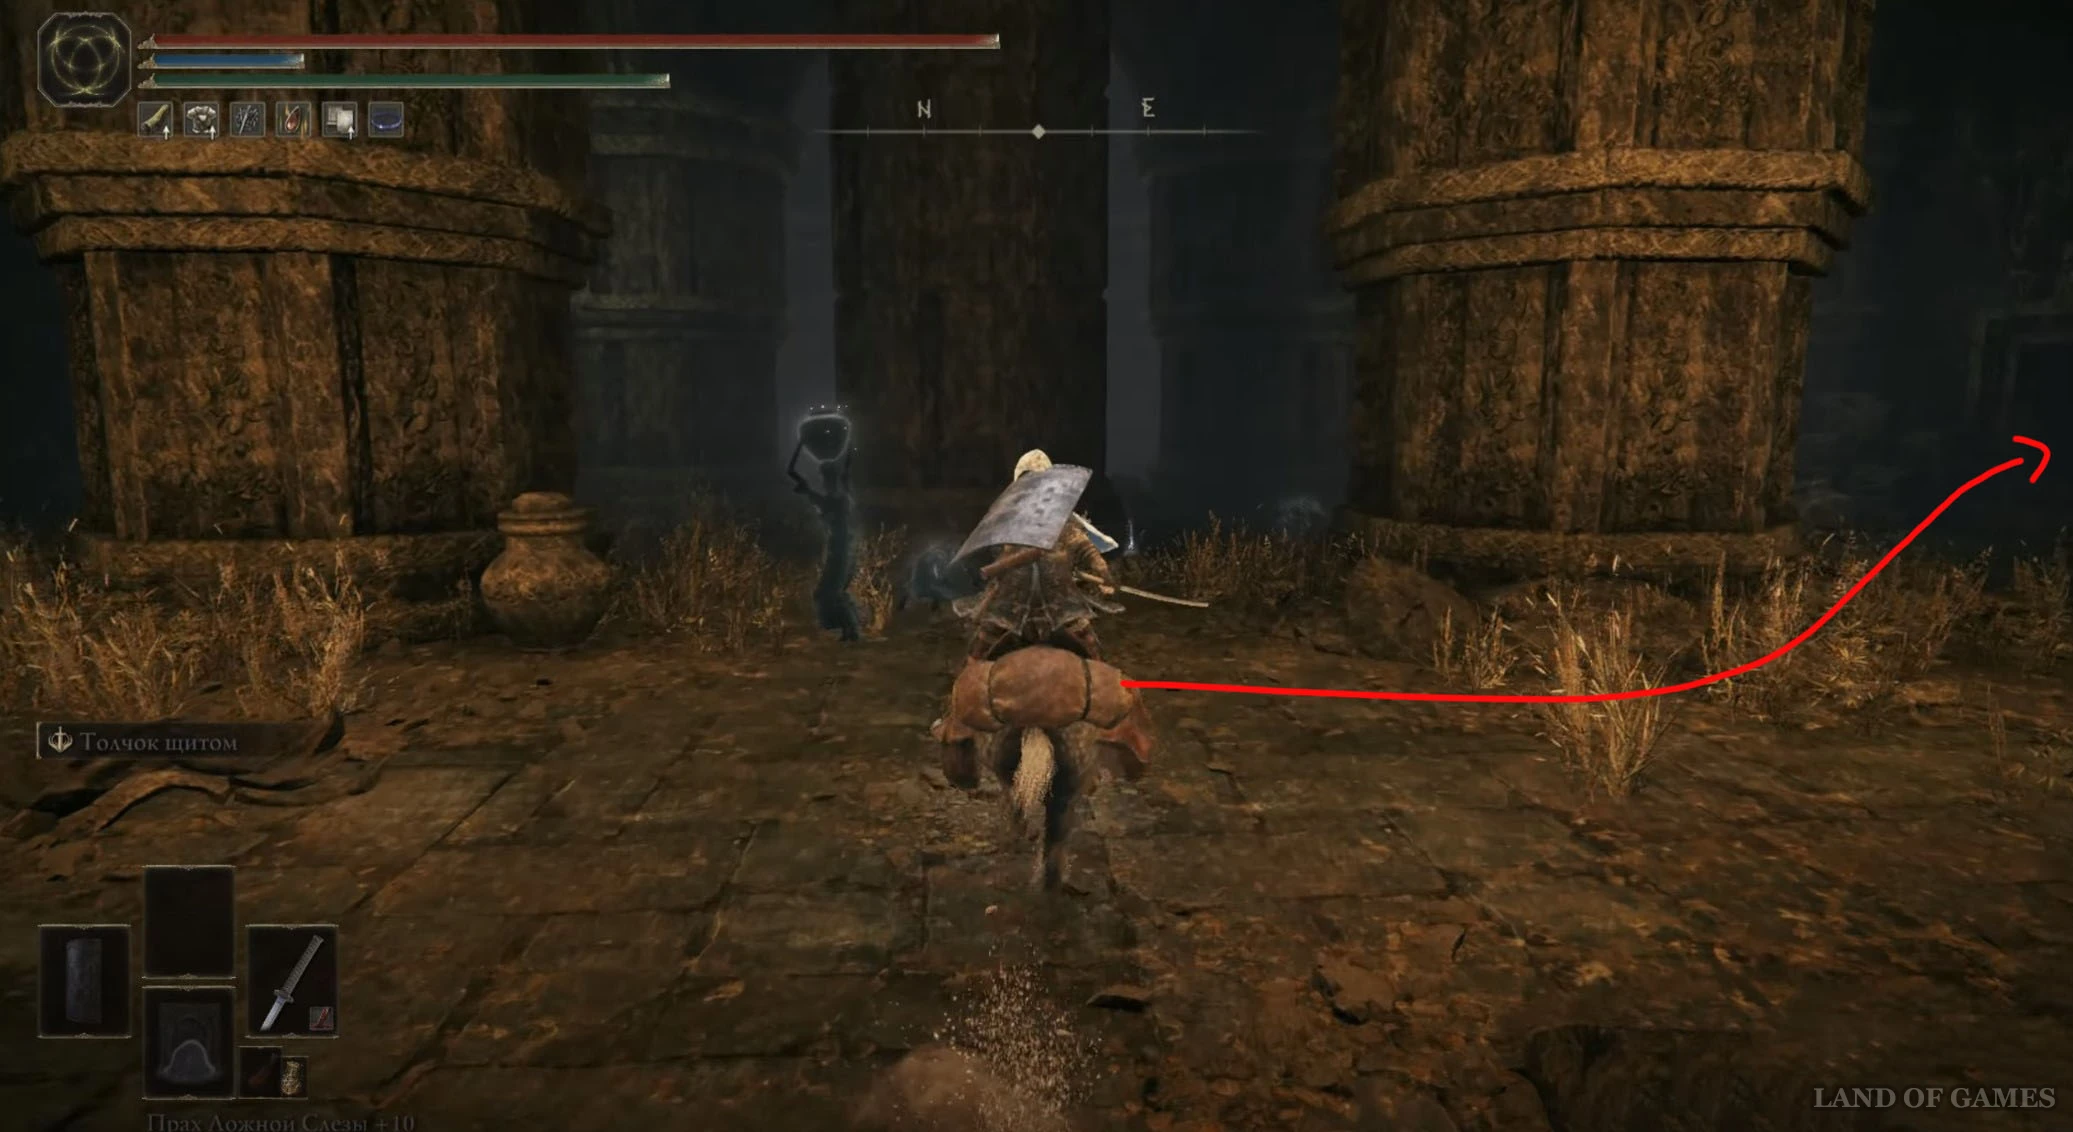
Доберитесь или переместитесь к месту благодати «Обугленные руины», а затем скачите на восток к надгробиям возле скалы. Слева вы обнаружите тень, несущую горшок на голове, – вам необходимо убить ее до того, как она пропадет. С нее и выпадет нужная вам вещица.

Осколок древа упадка 4
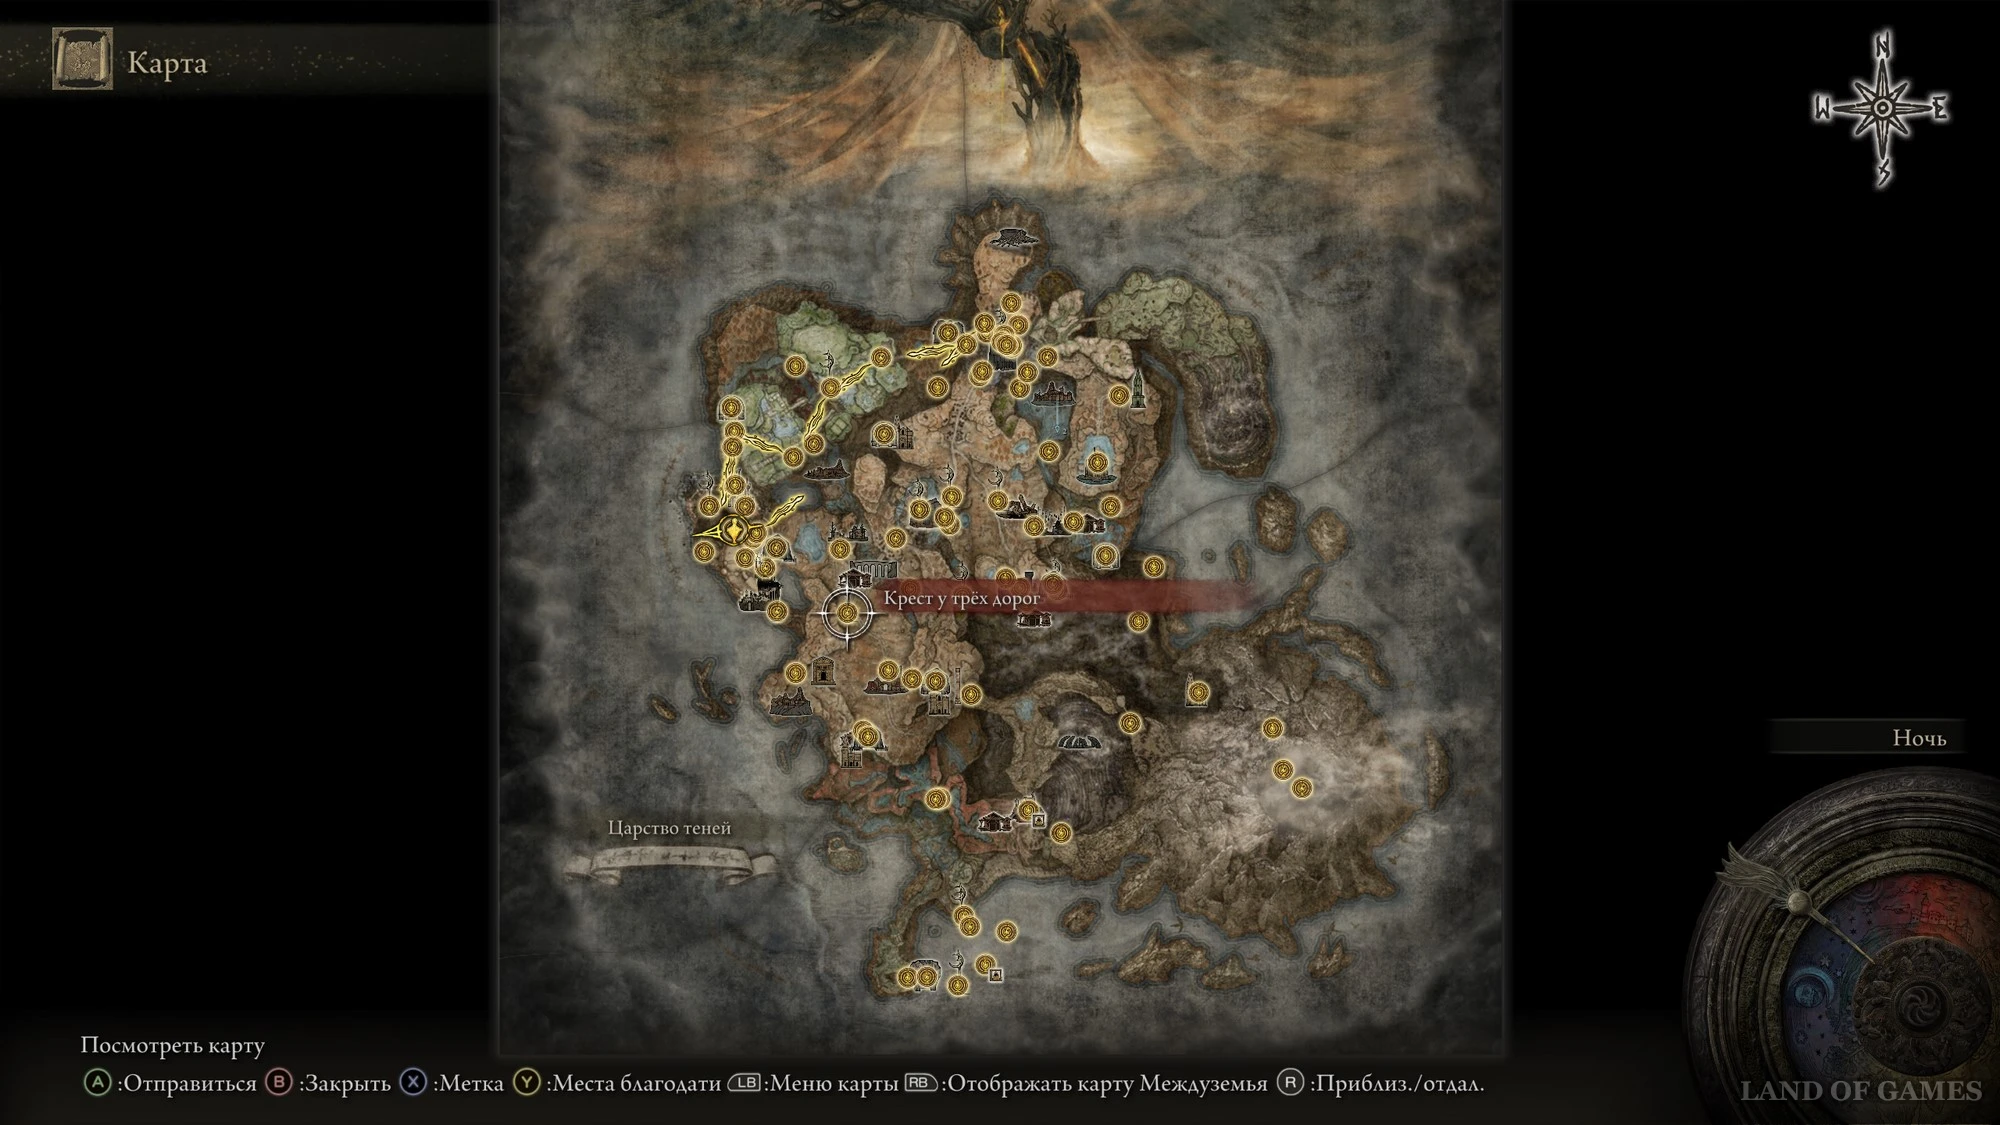
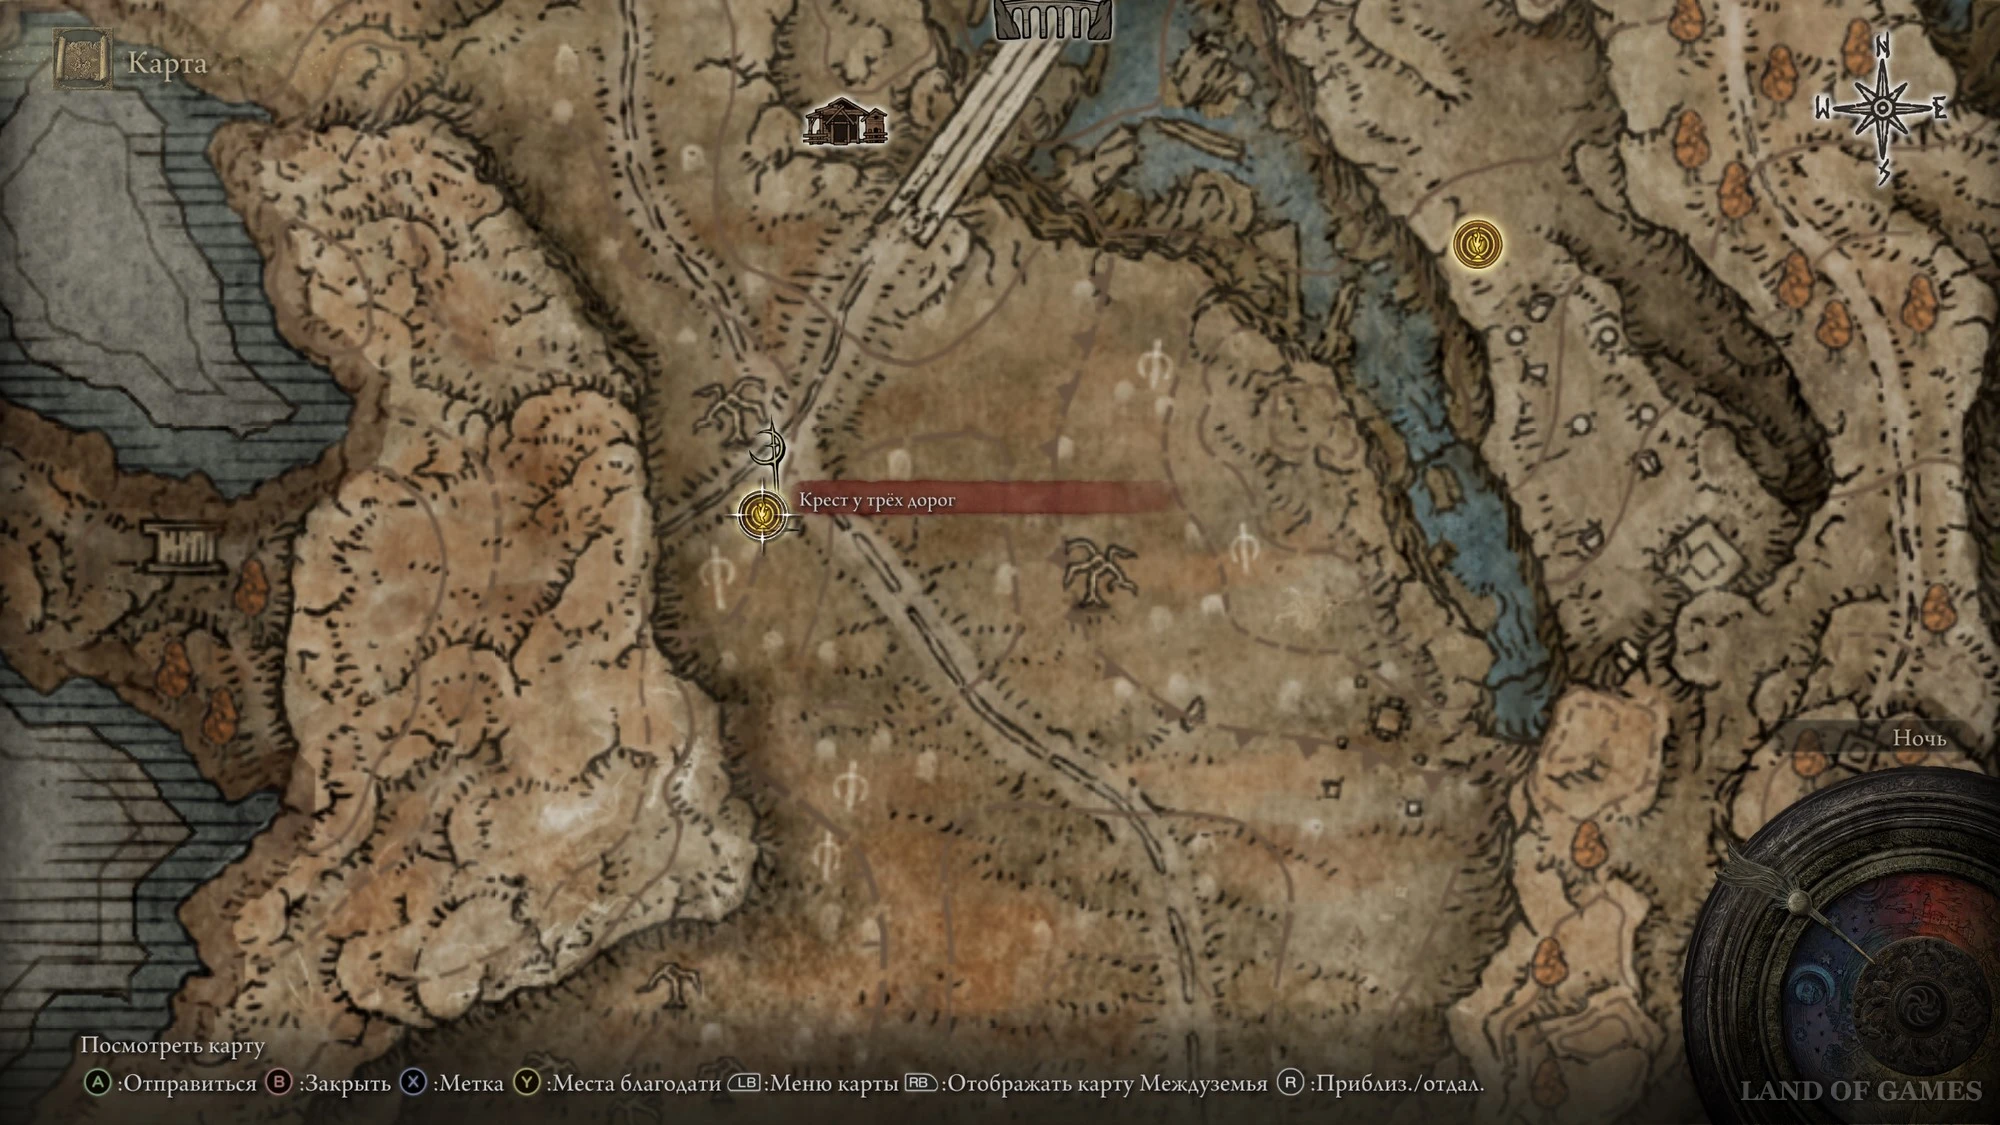
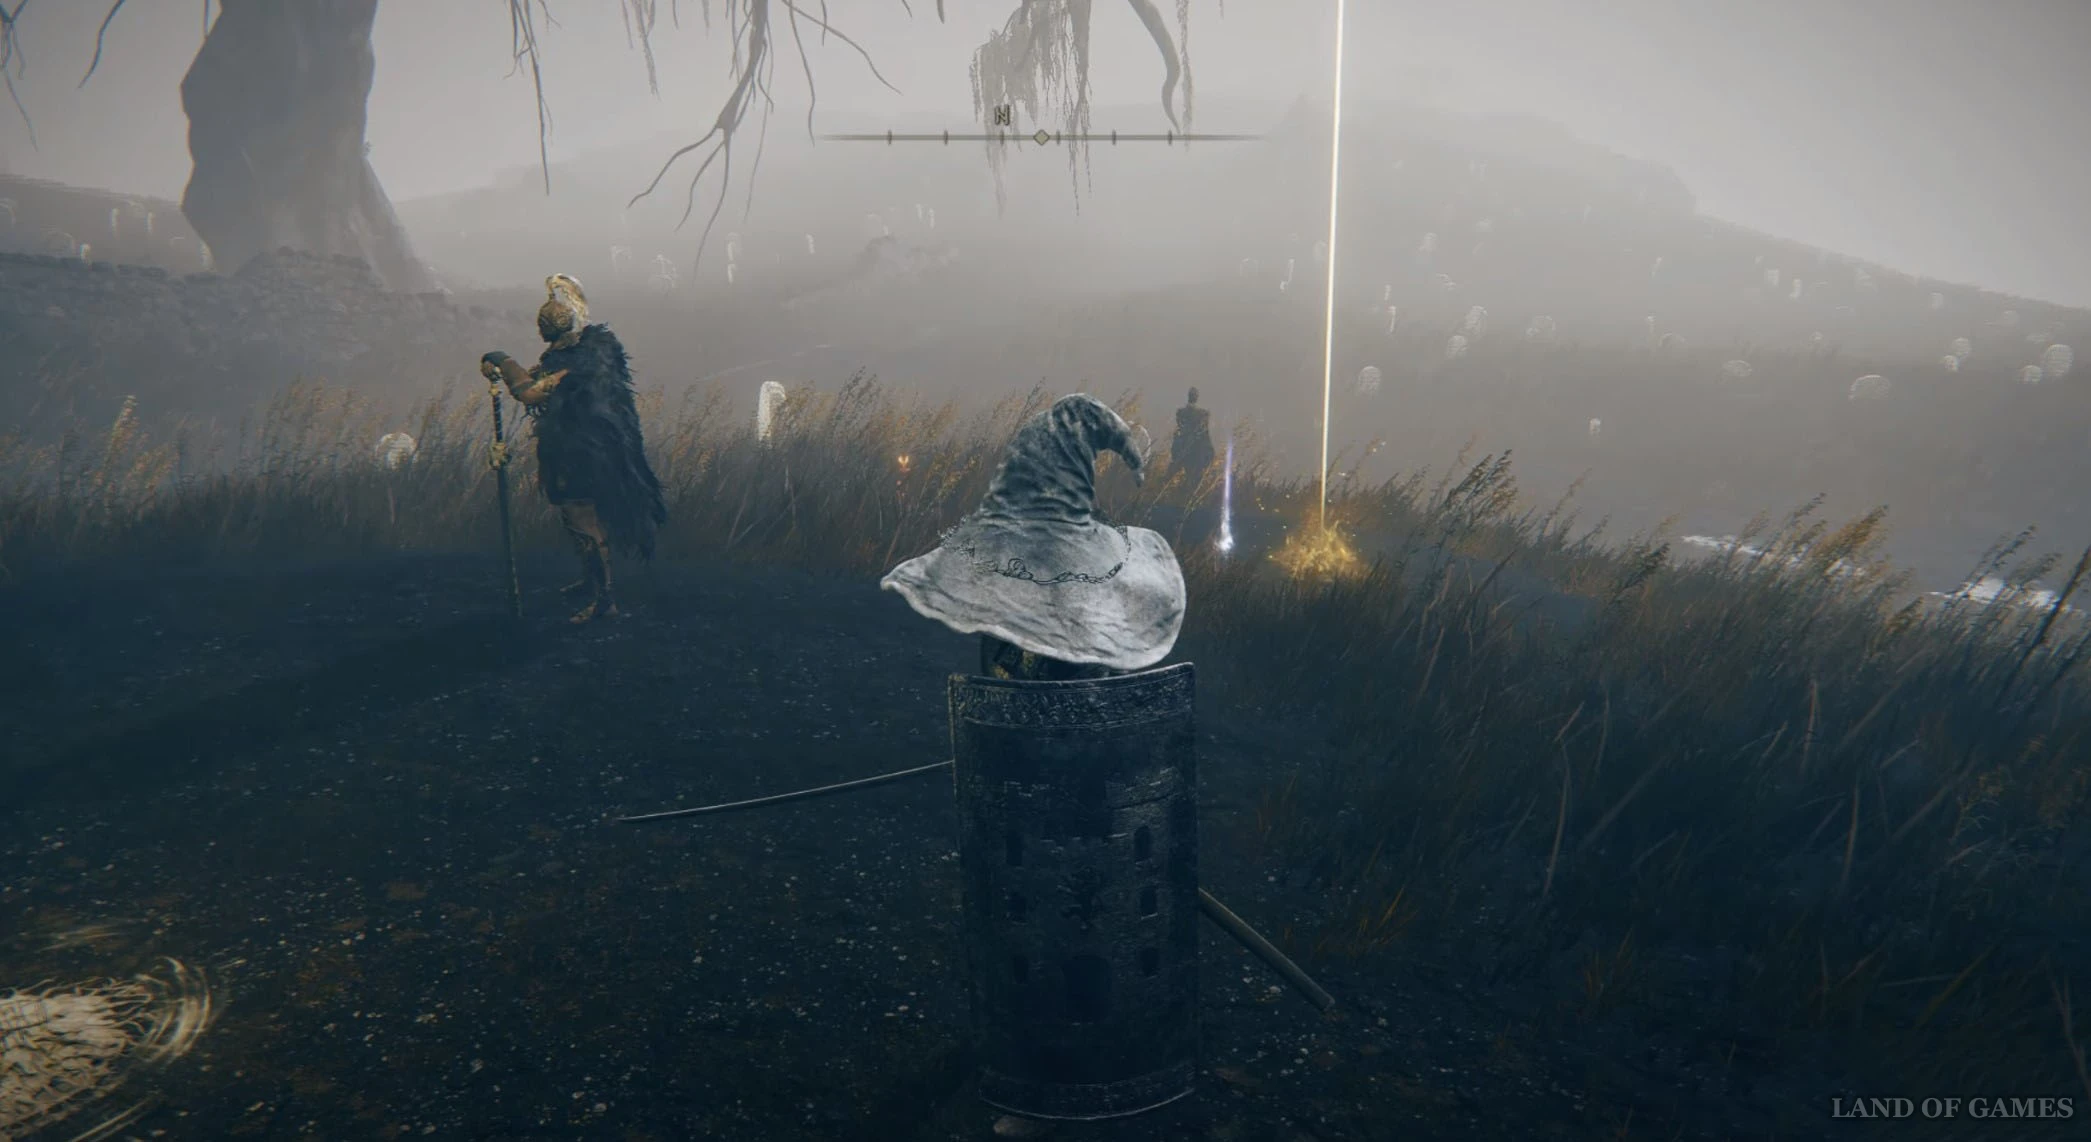
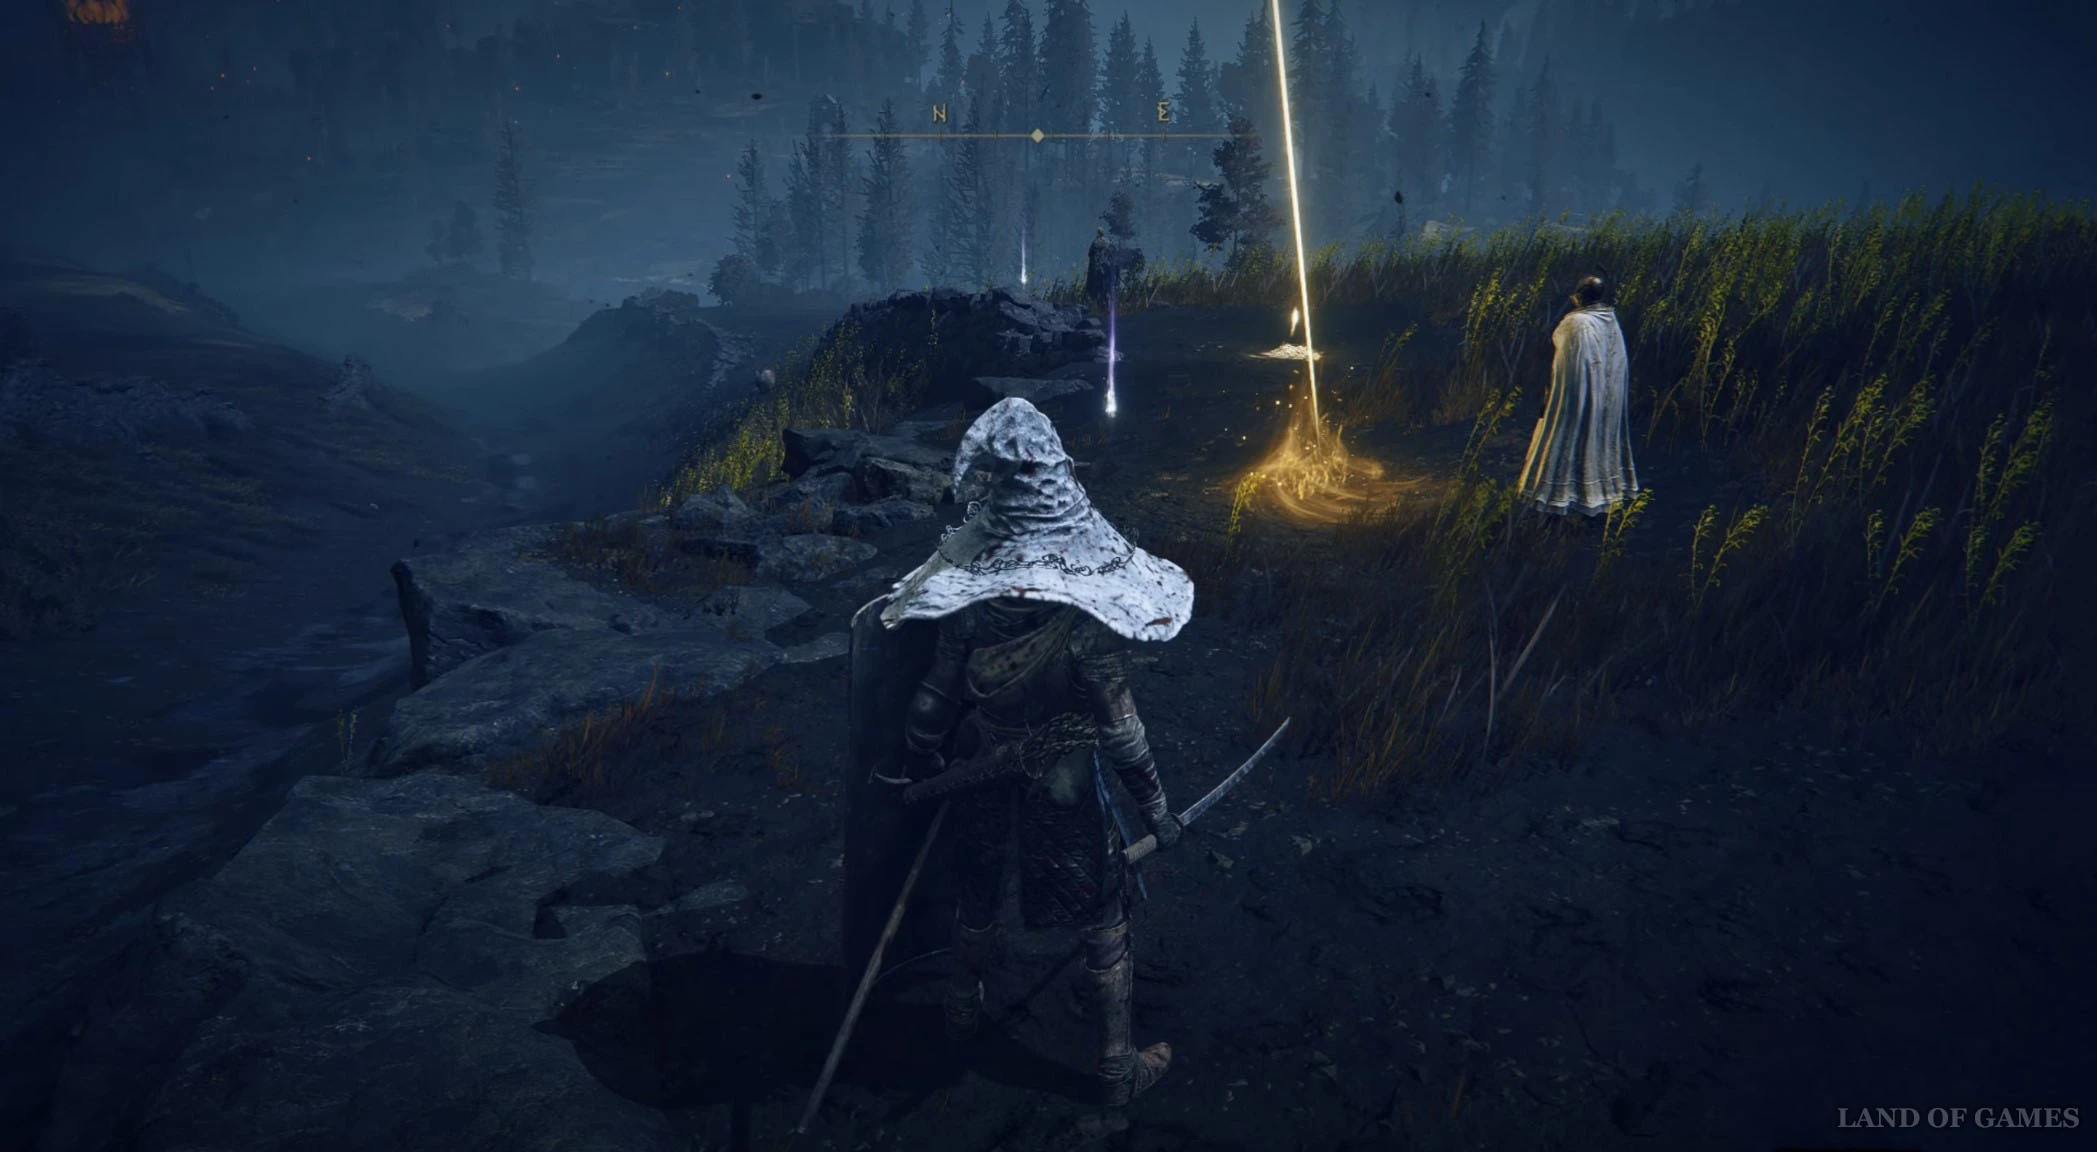
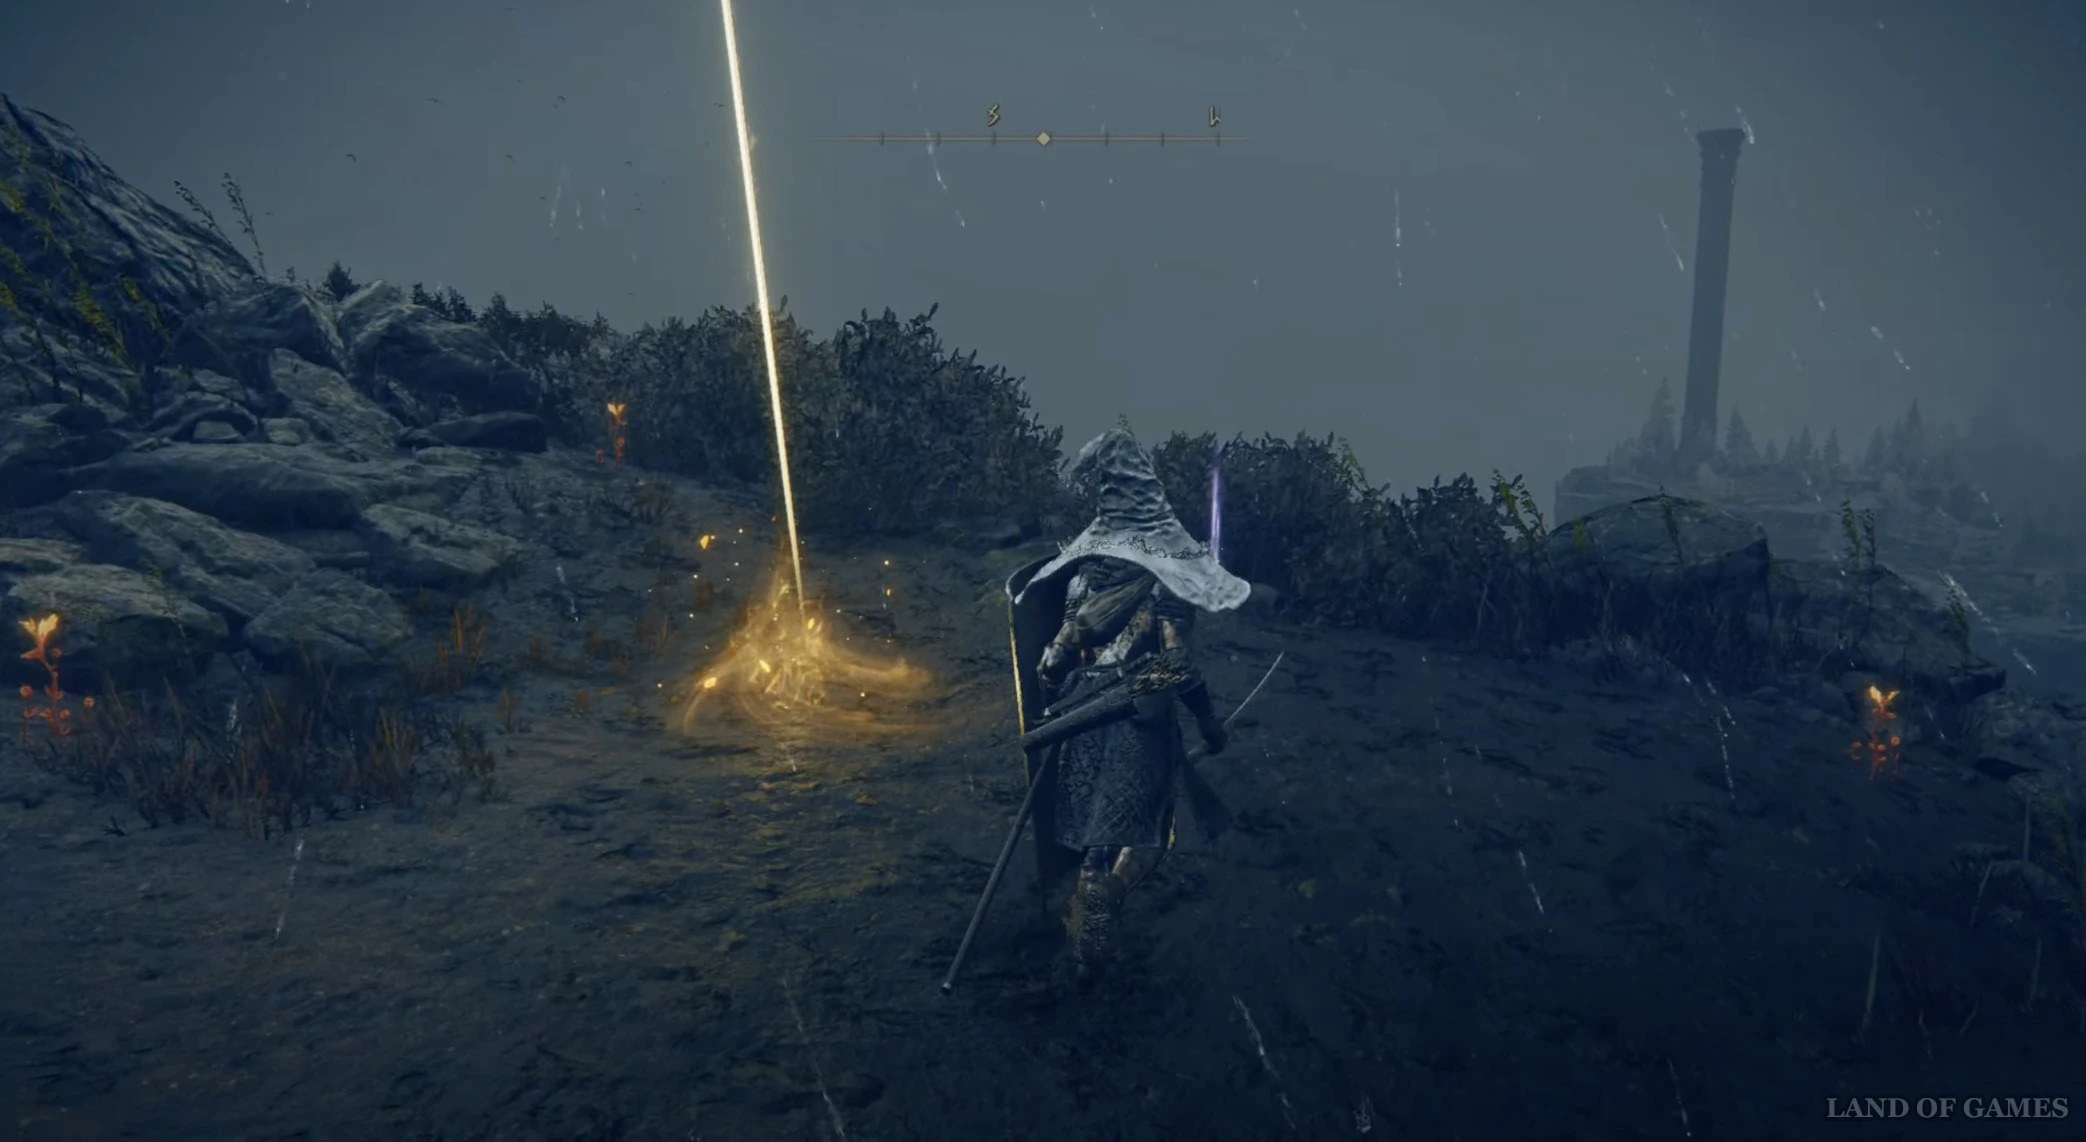
Доберитесь или переместитесь к месту благодати «Крест у трех дорог», расположенный на севере Равнины Надгробий, а затем развернитесь, и вы увидите возле креста Микеллы необходимый вам предмет. Здесь также можно будет побеседовать с Фрейей и другими персонажами.
Осколок древа упадка 5
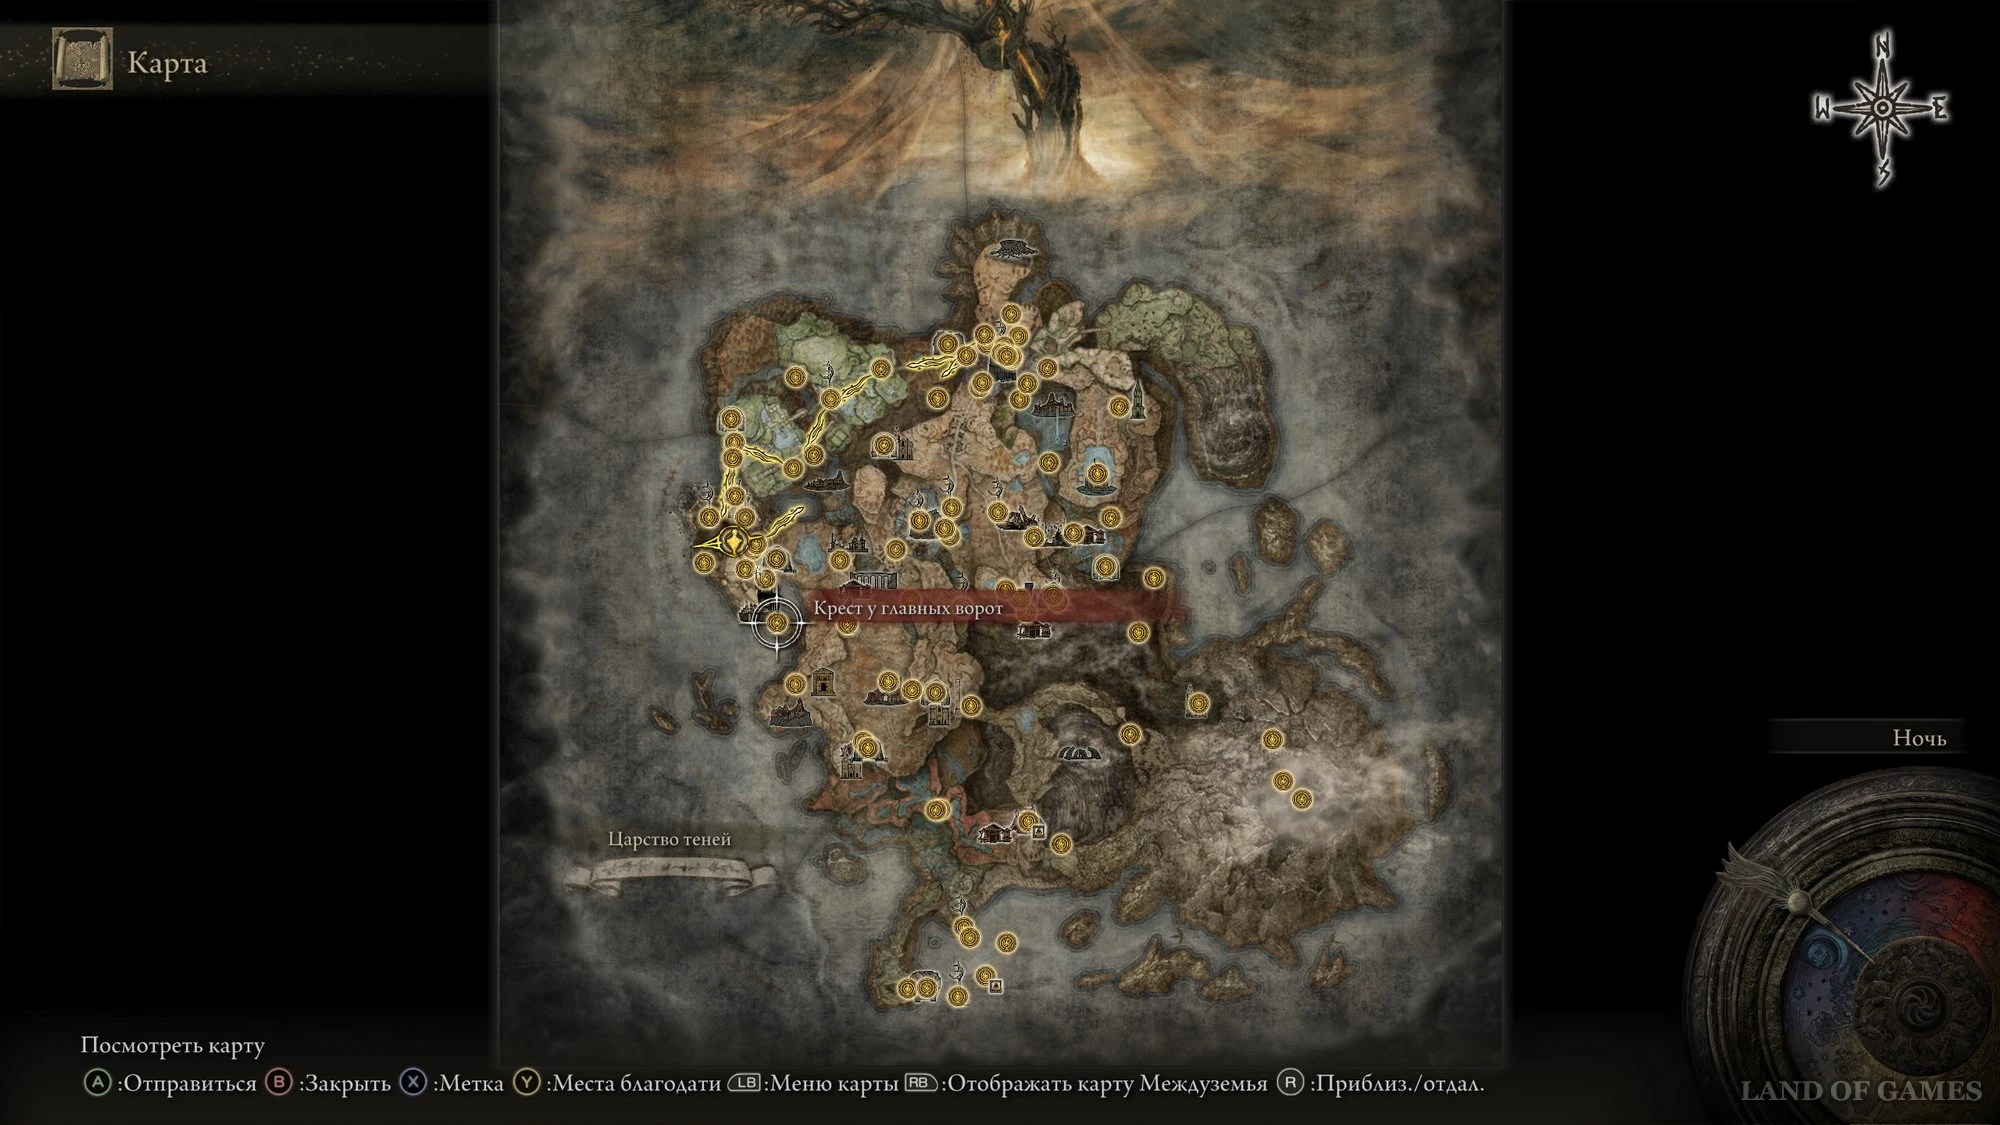
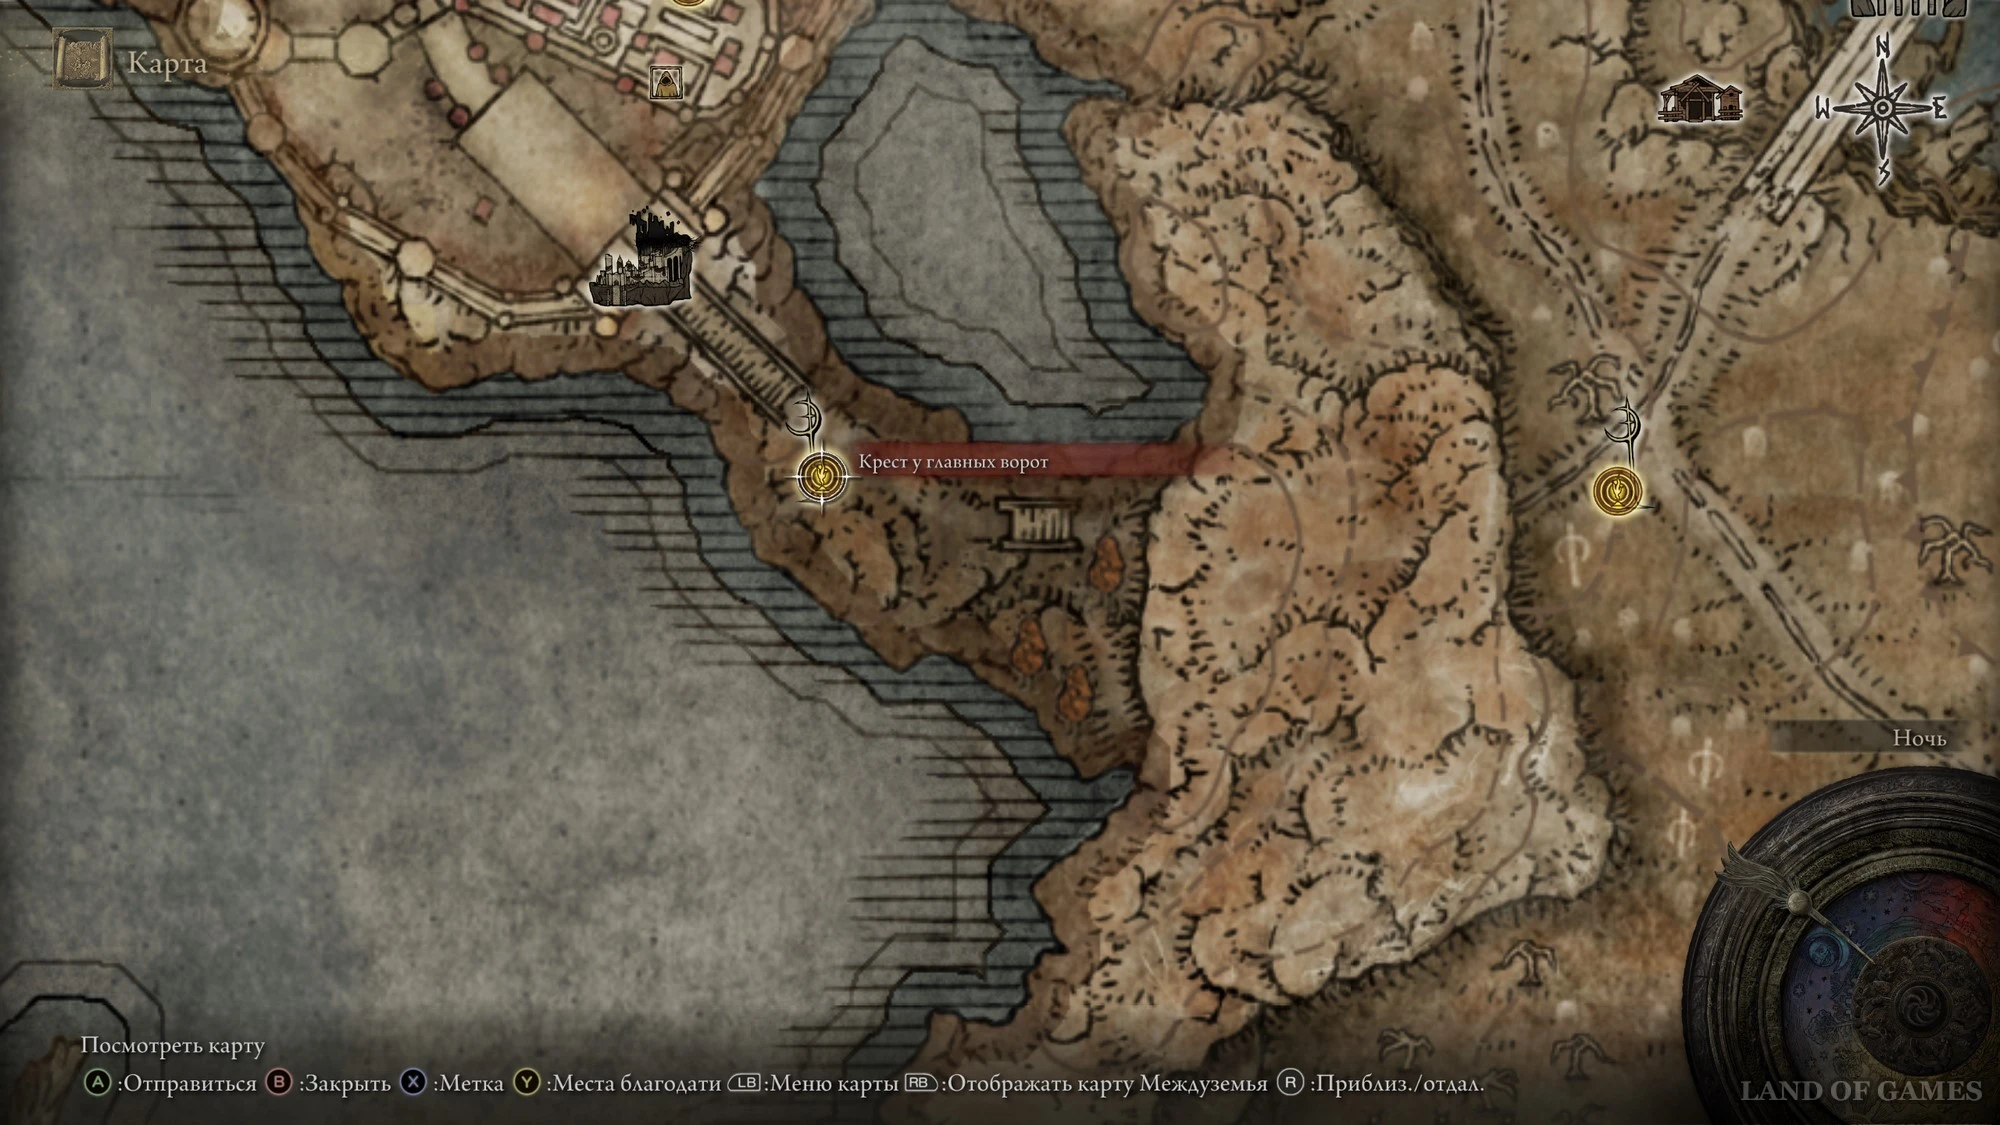
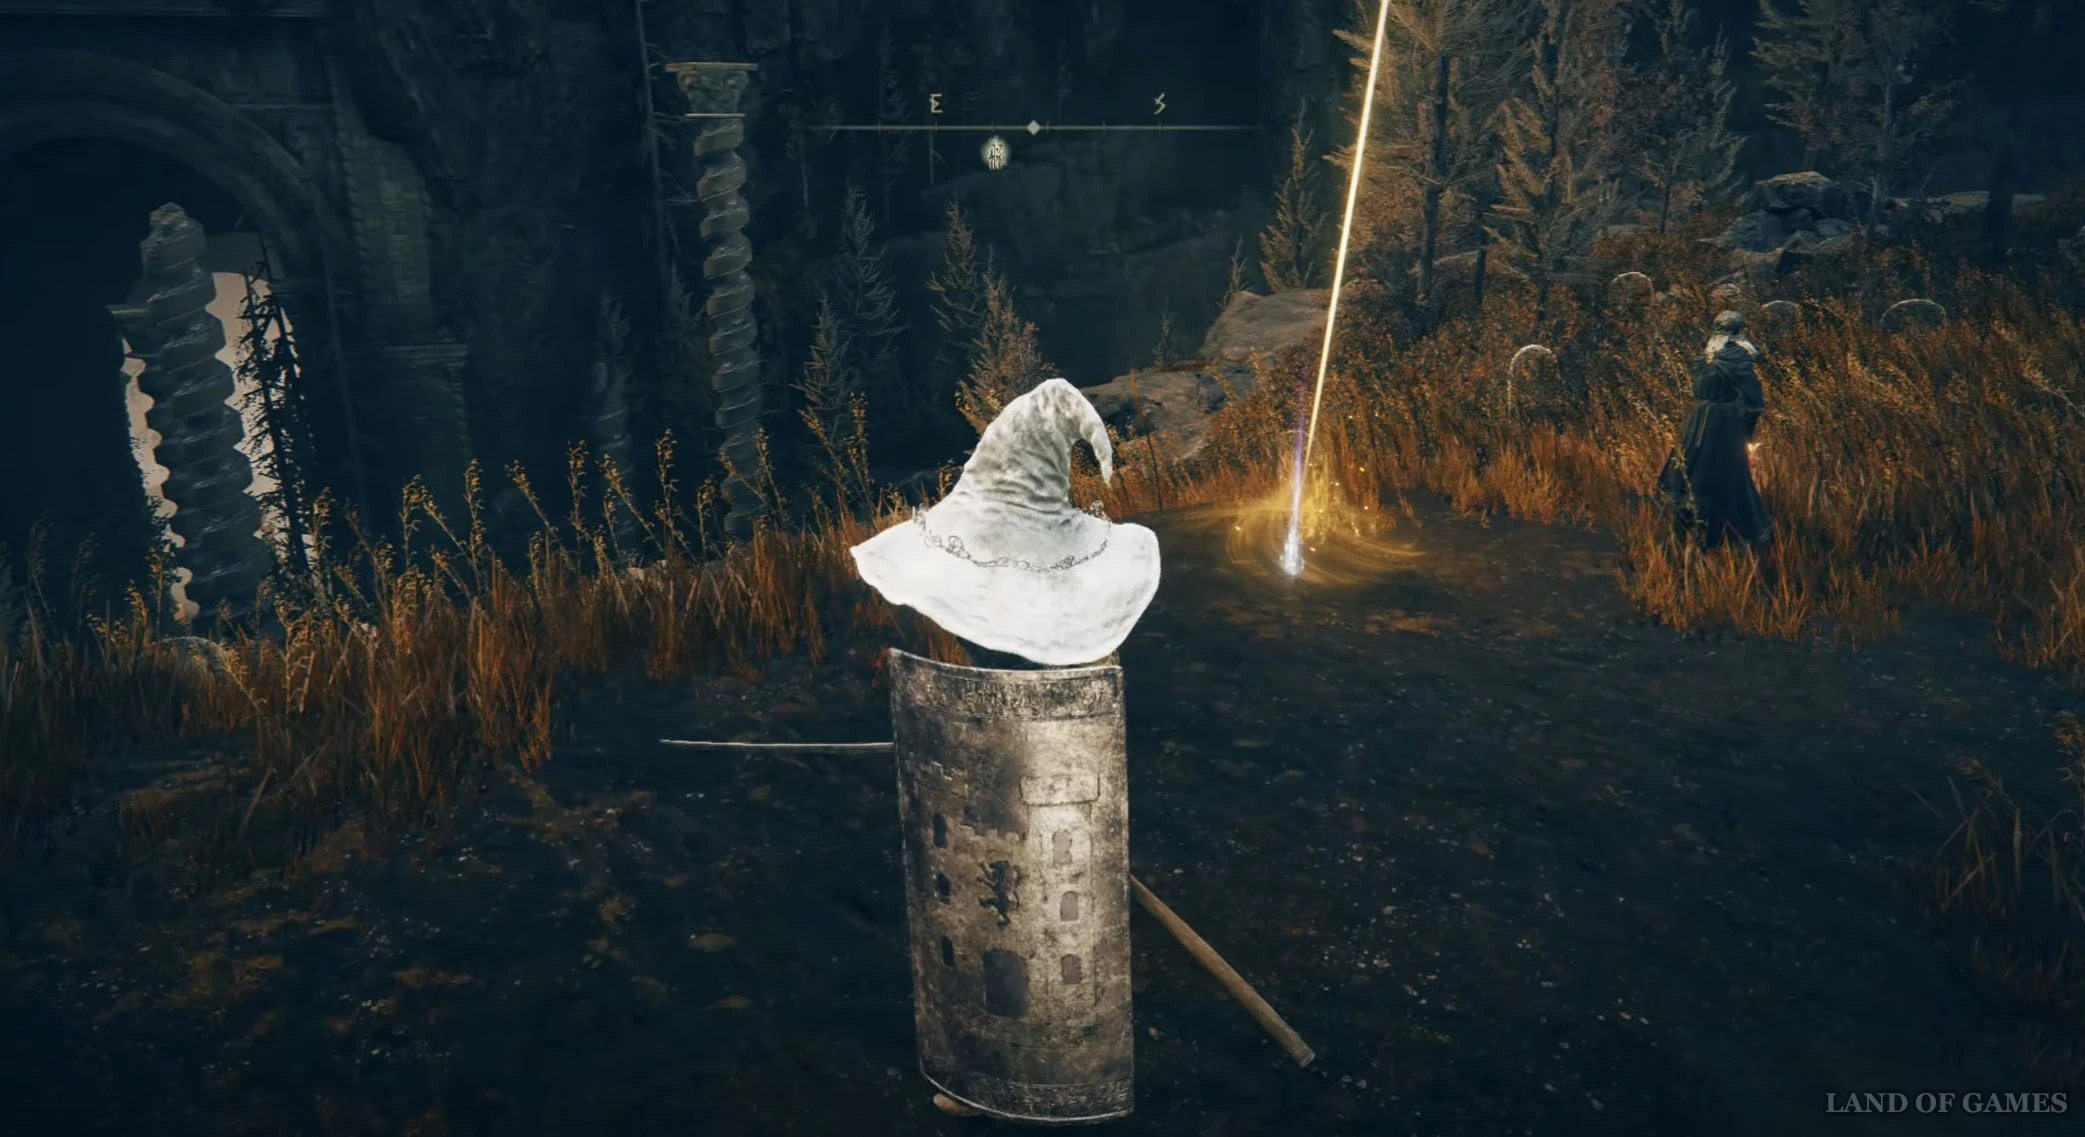
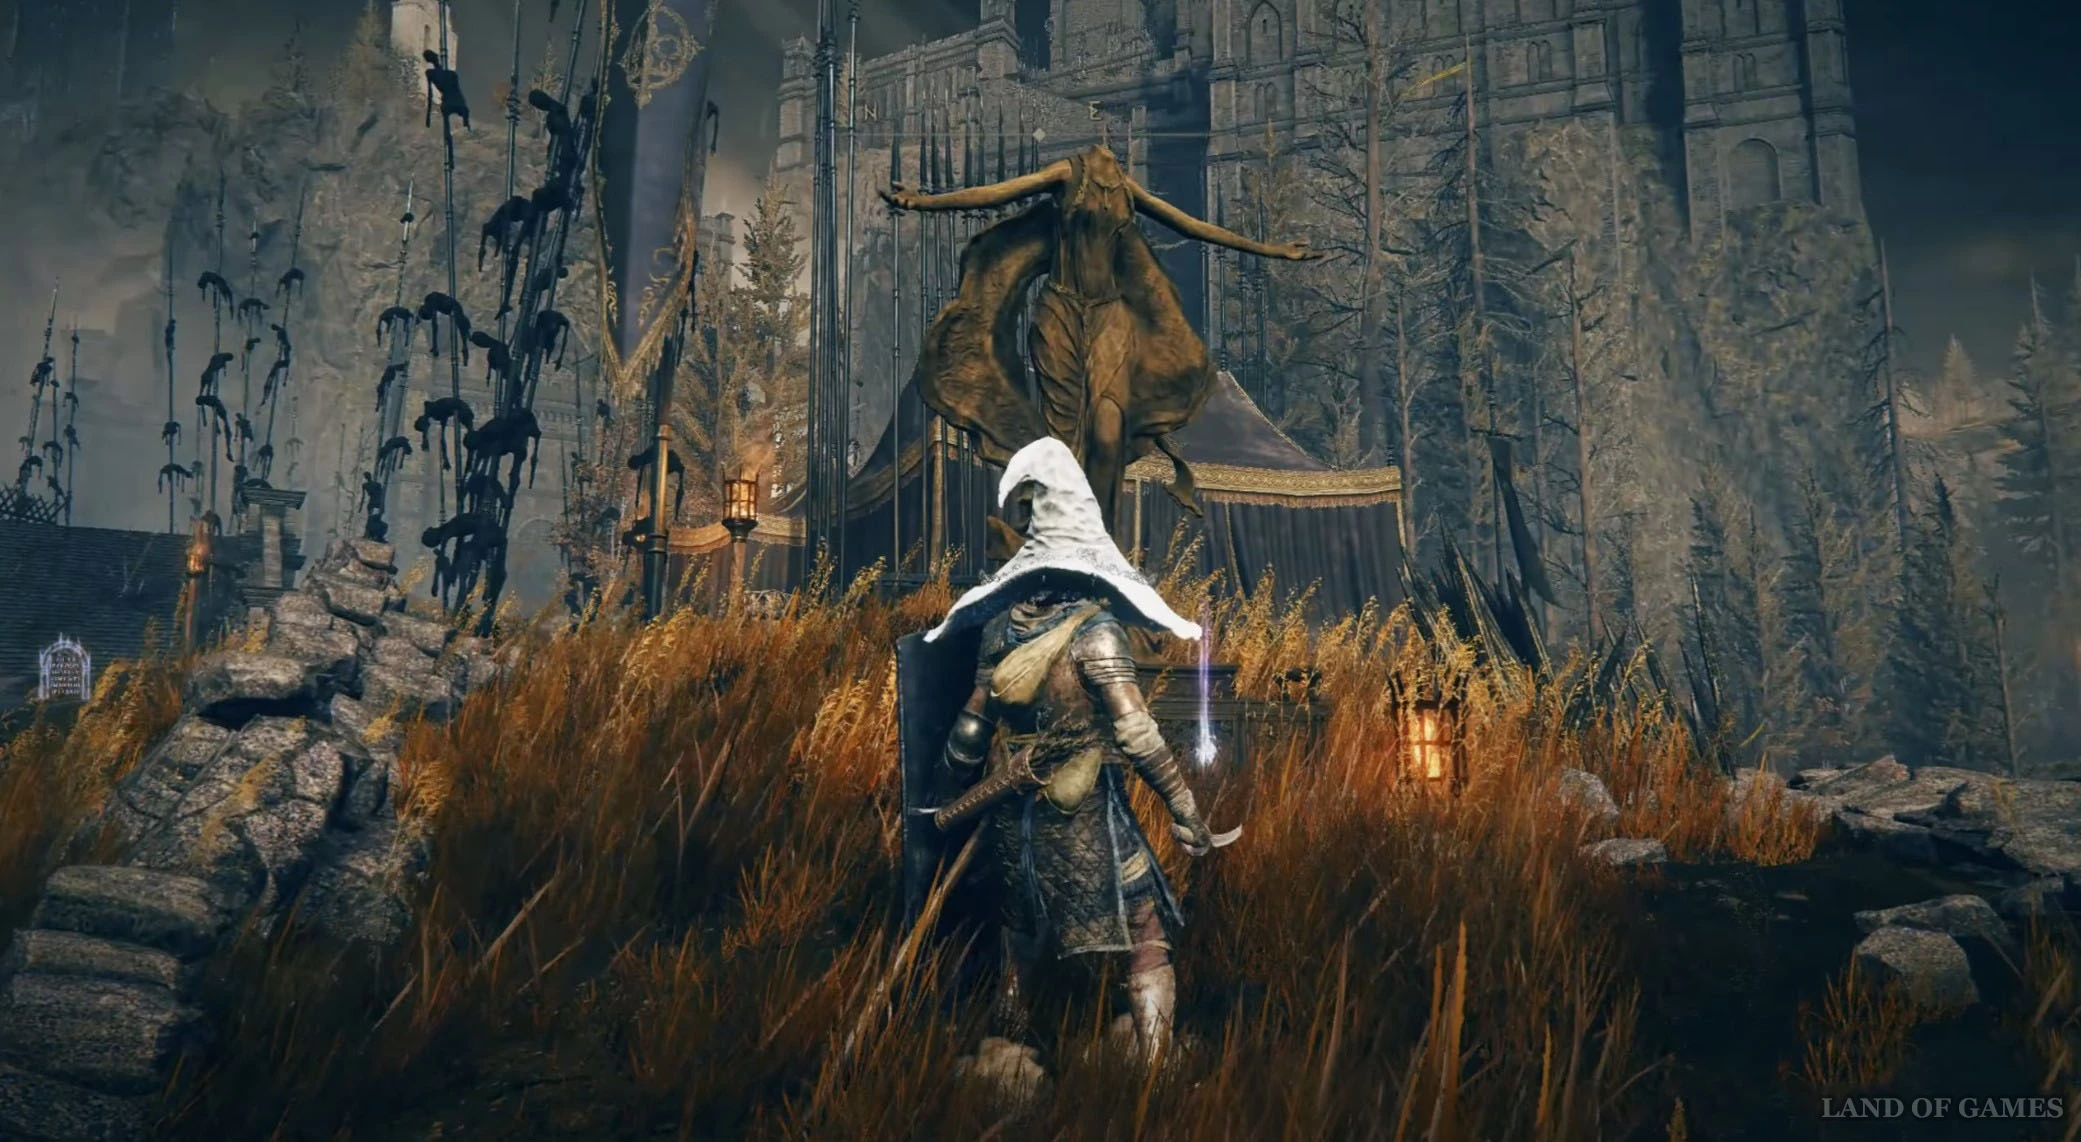
Доберитесь или переместитесь к месту благодати «Крест у главных ворот», находящемуся прямо перед входом в Белурат, поселение у башни. Как обычно, развернитесь и отыщите вещицу возле креста Микеллы. Тут можно будет также обнаружить господина Ансбаха и торговца Мура.
Осколок древа упадка 6
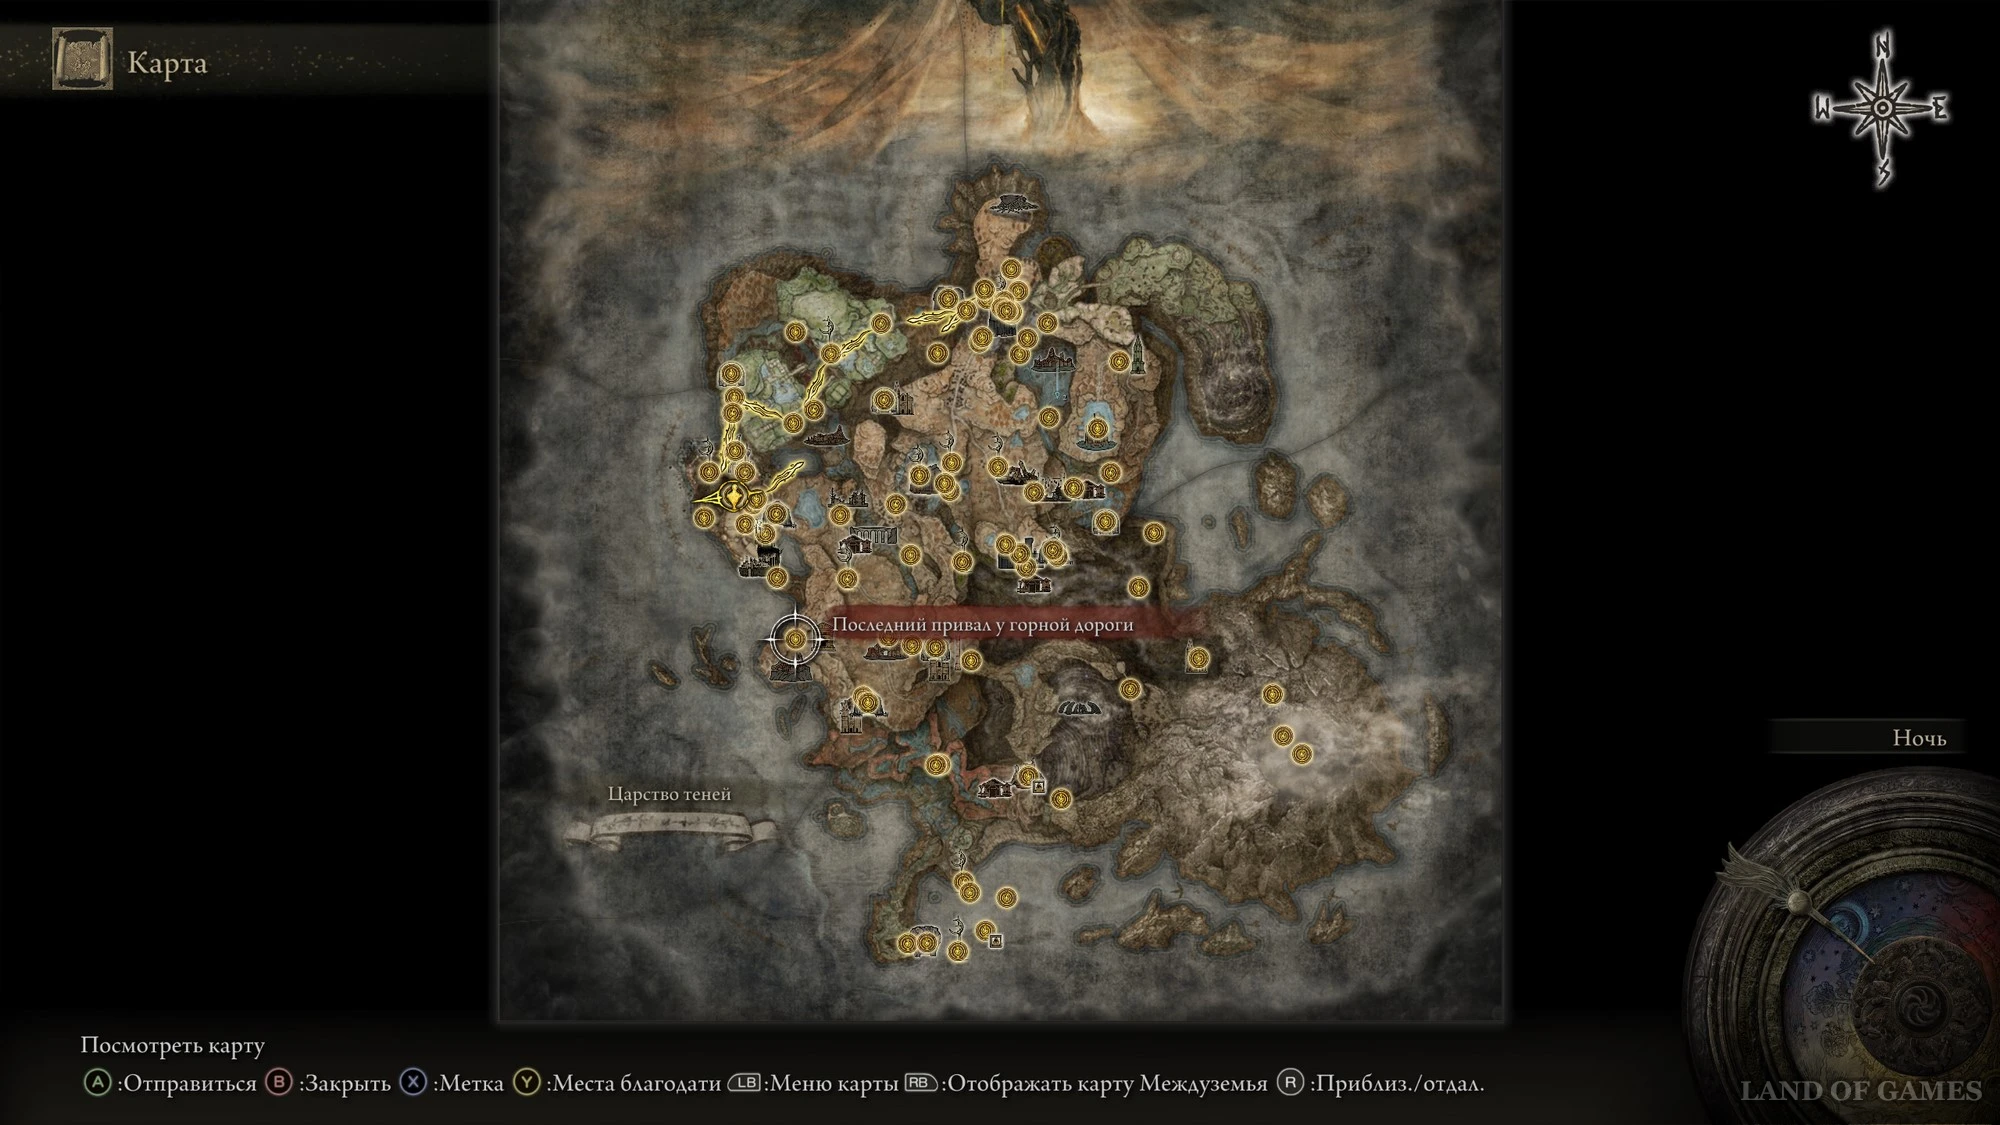
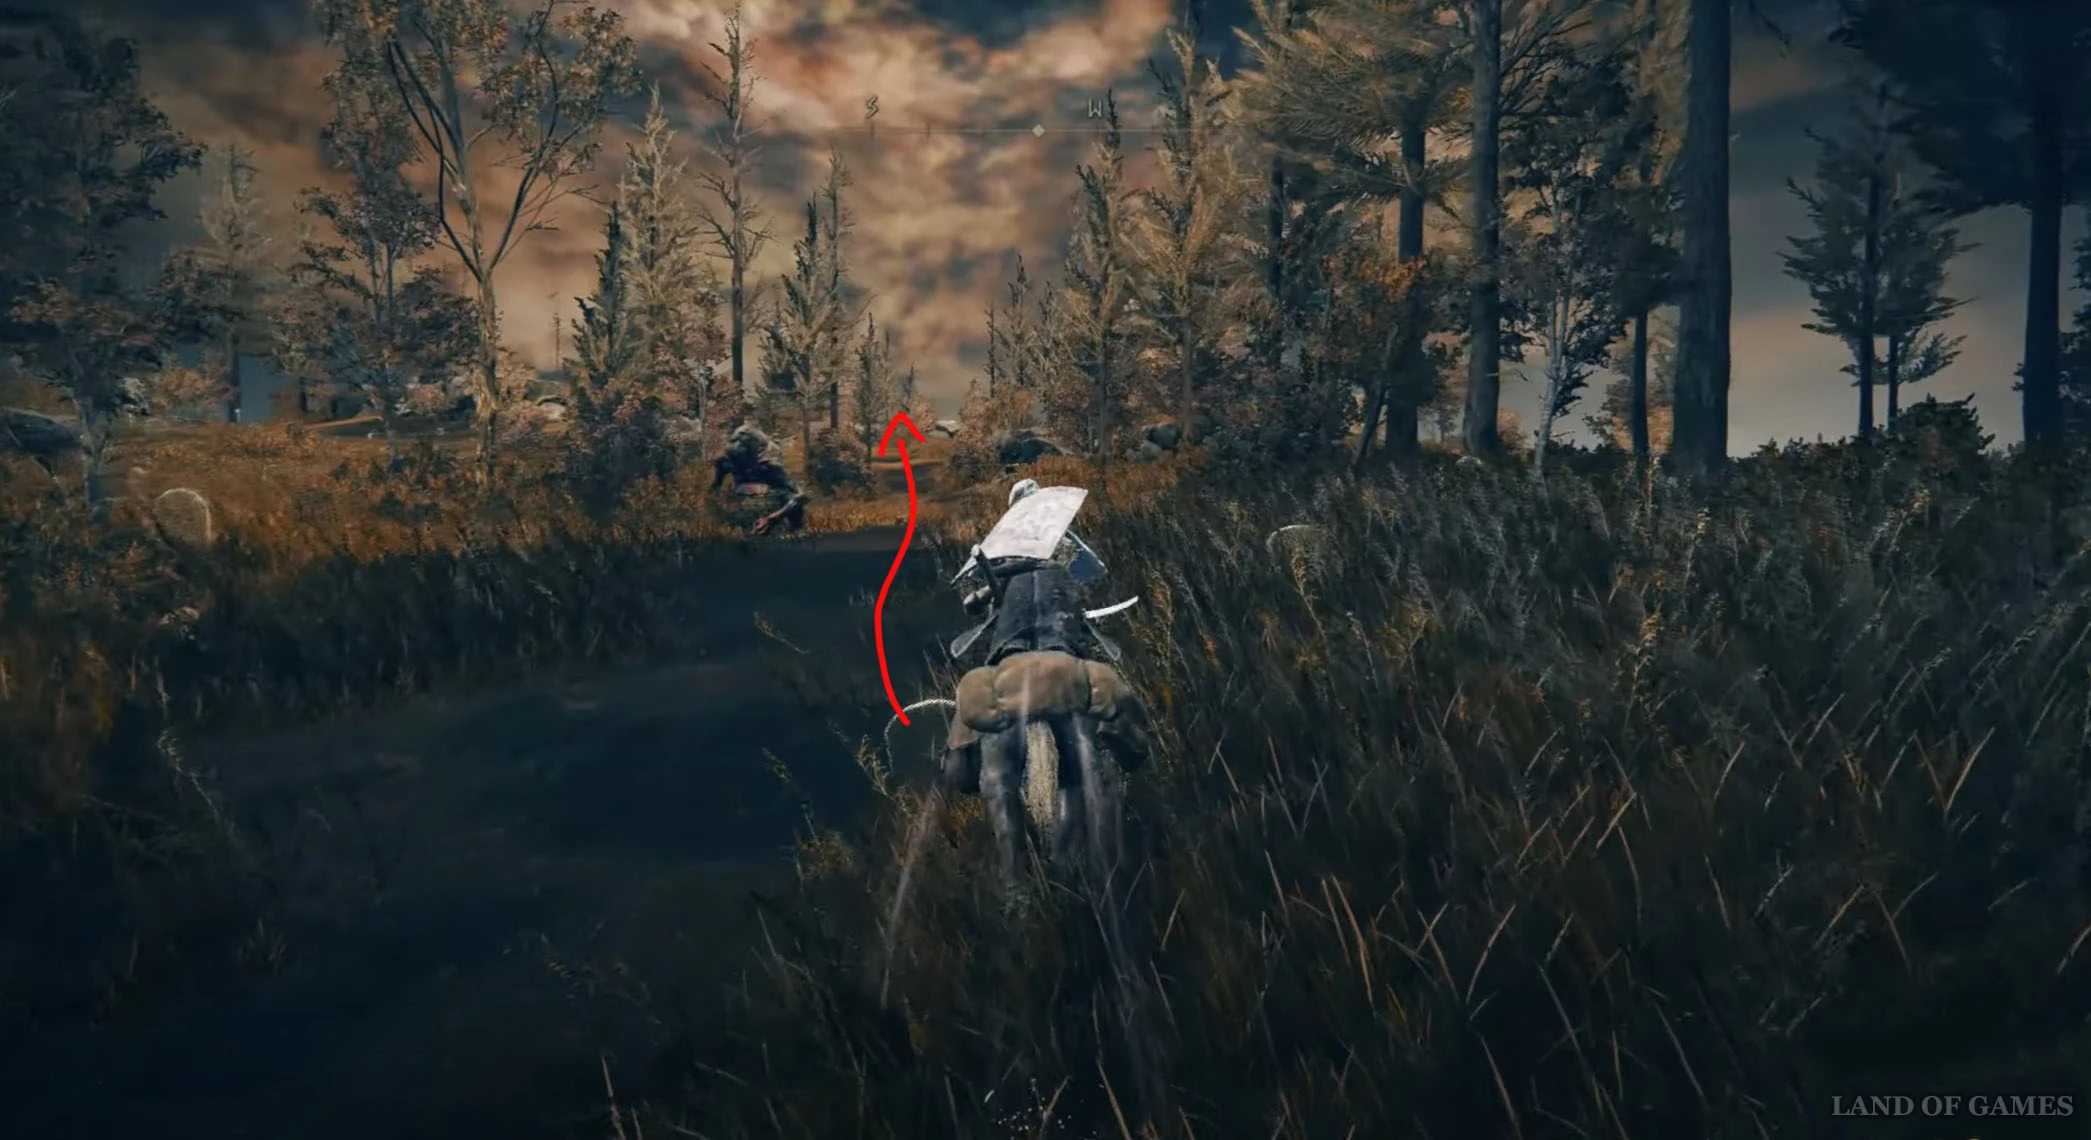
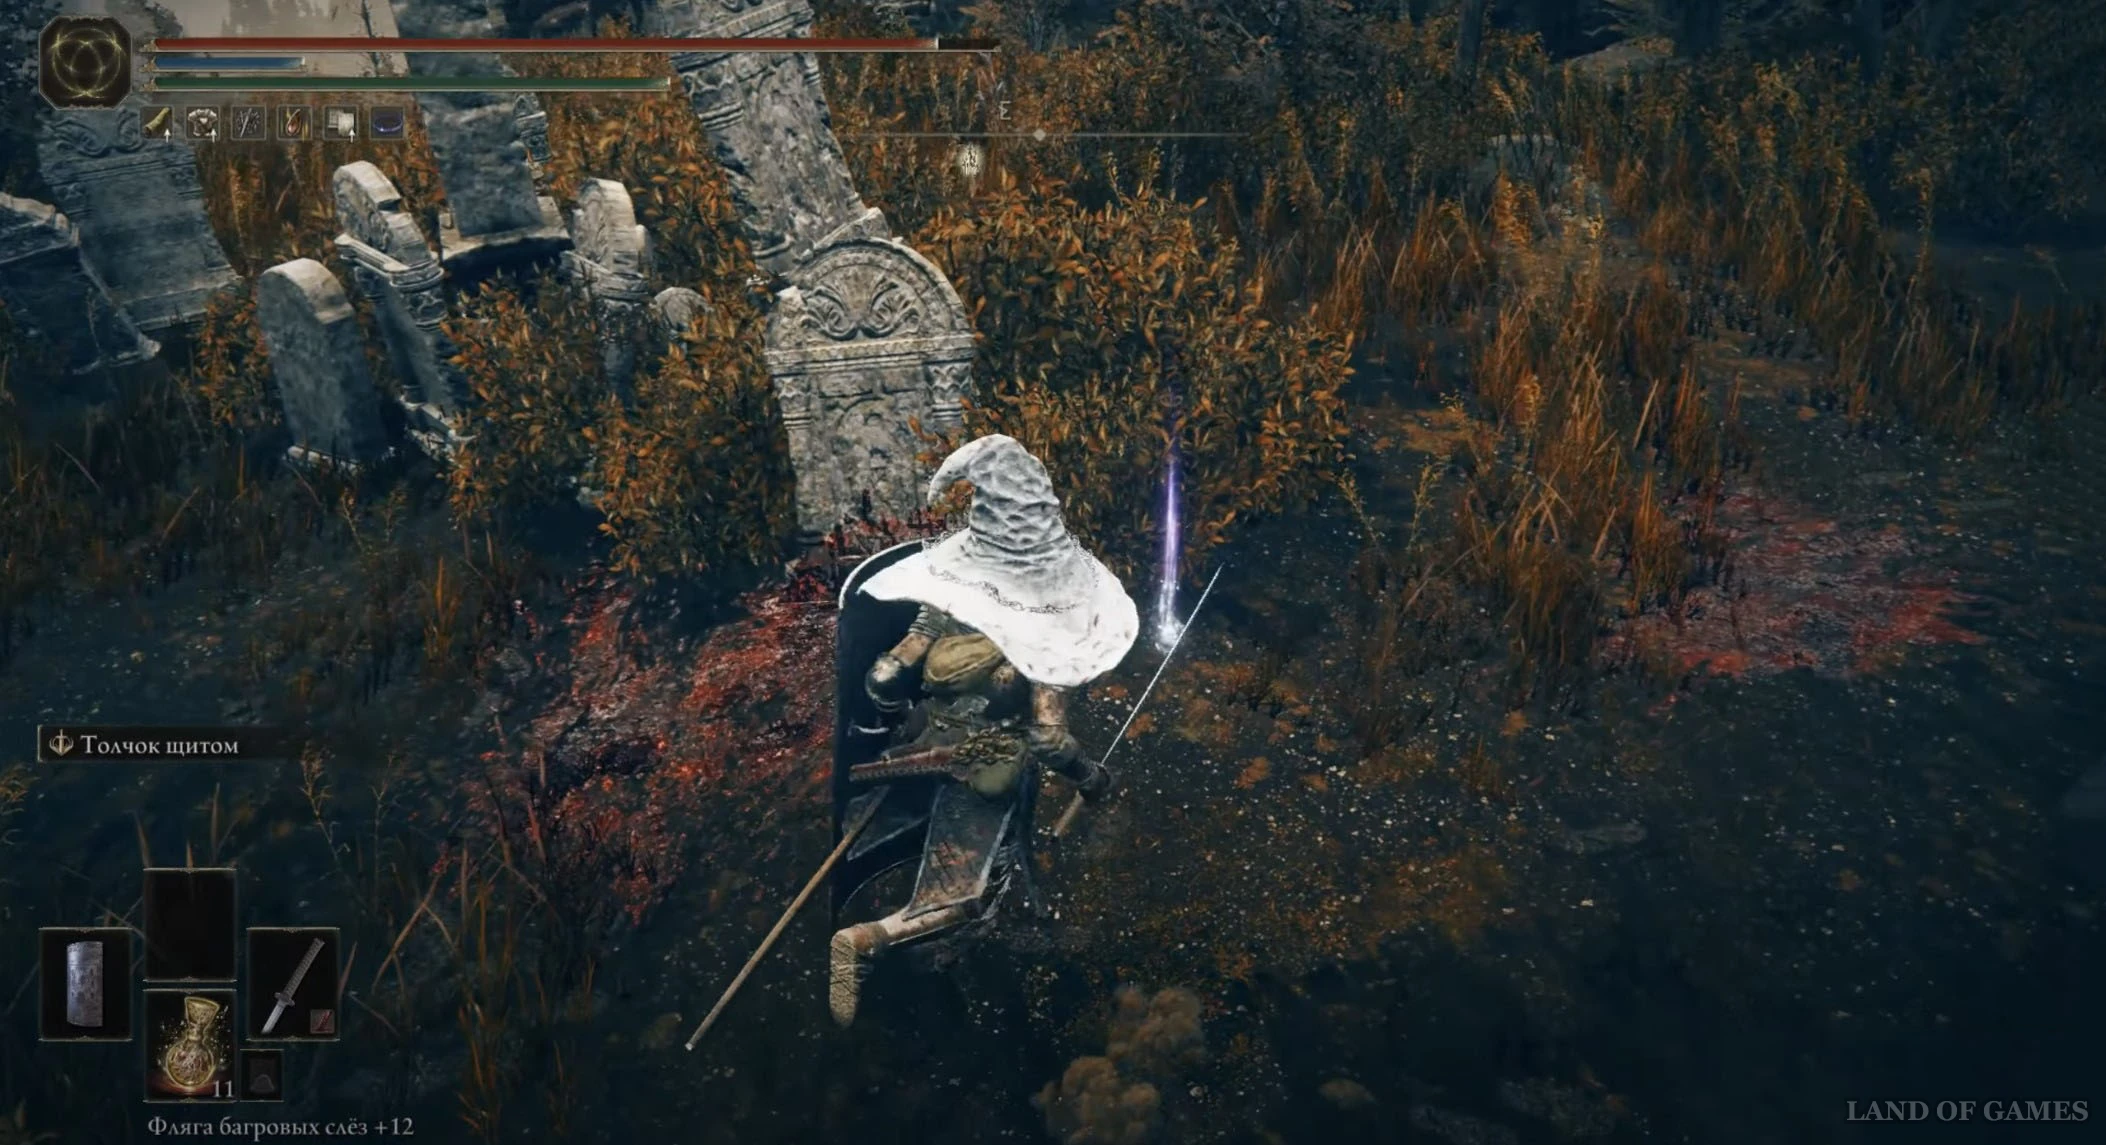
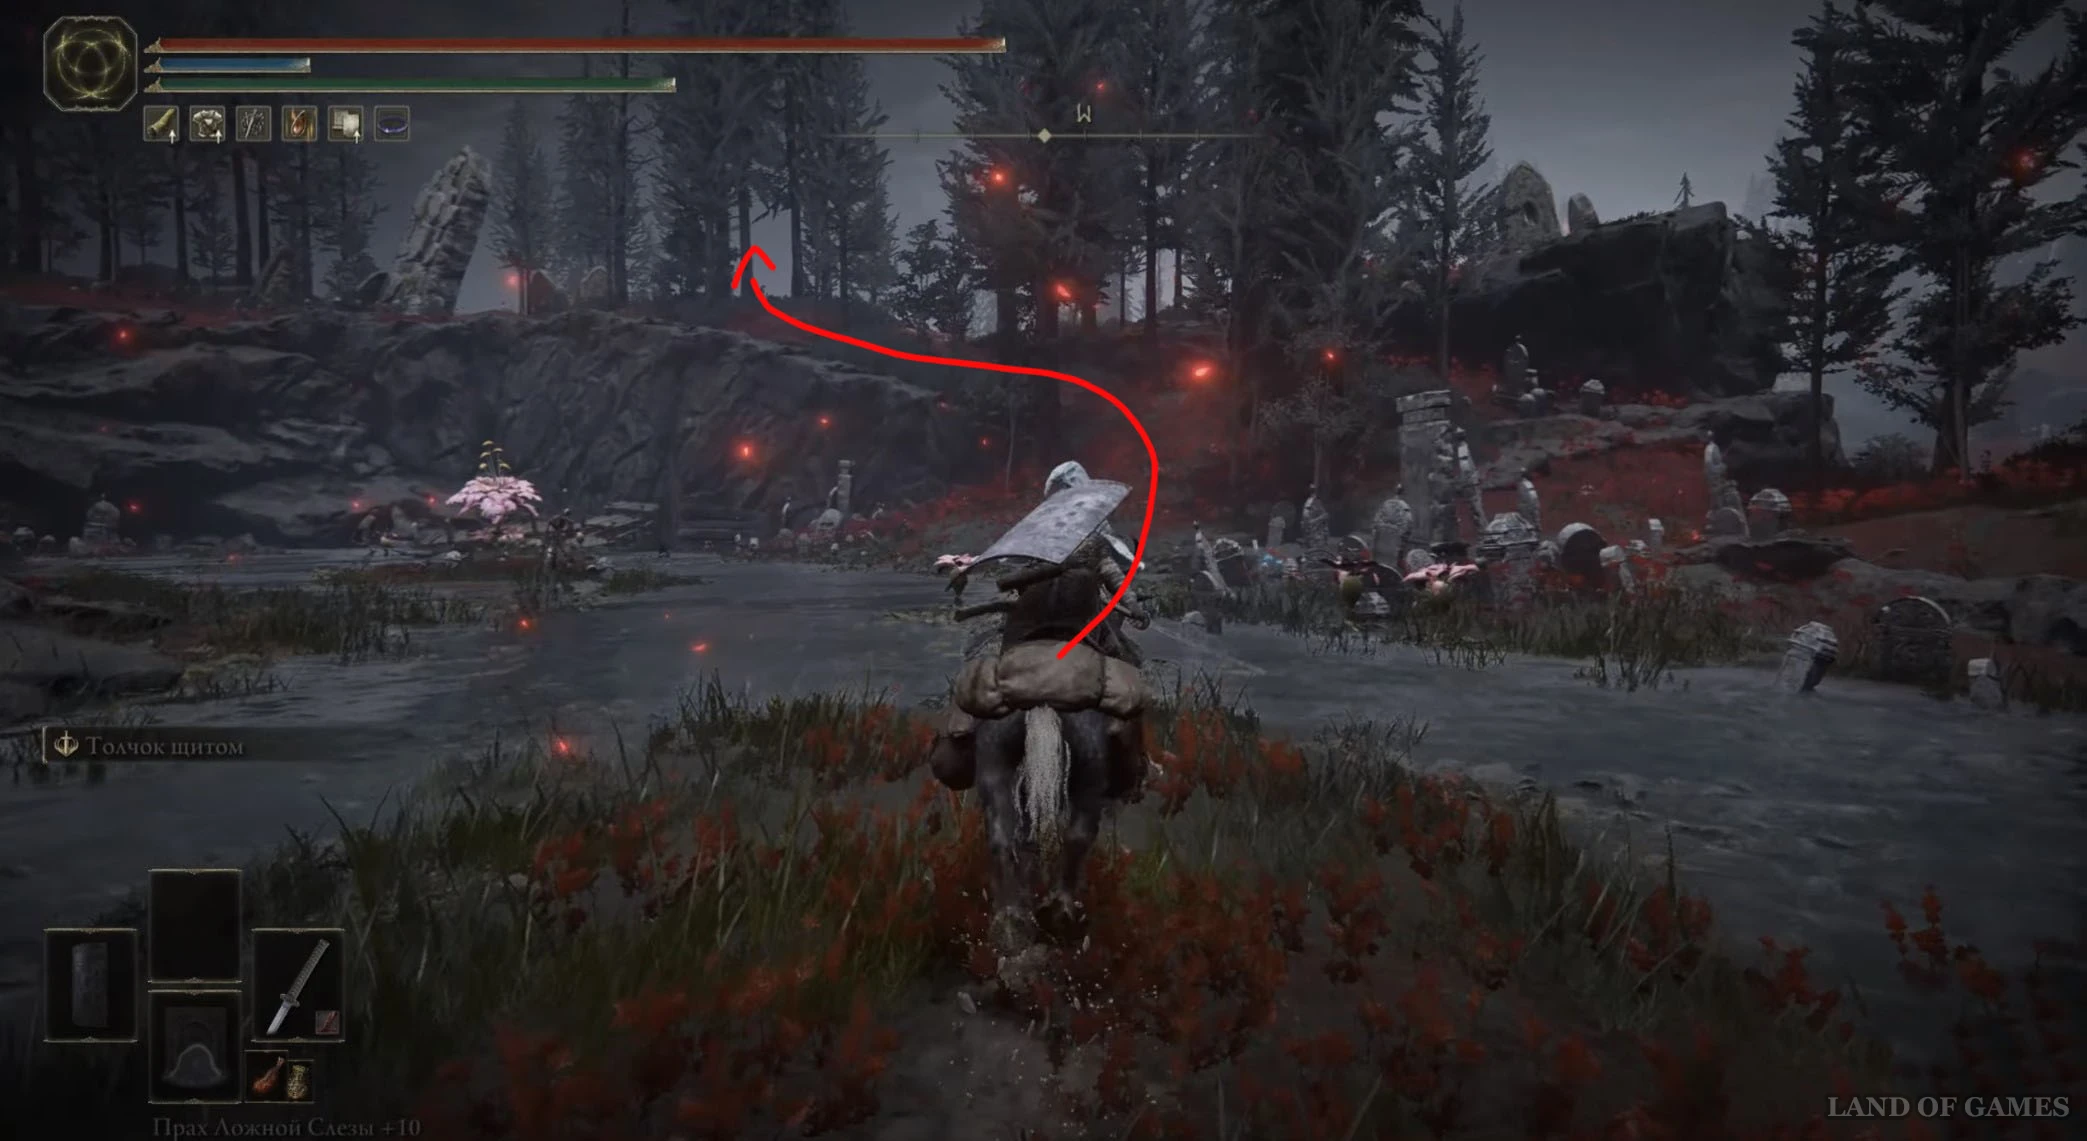
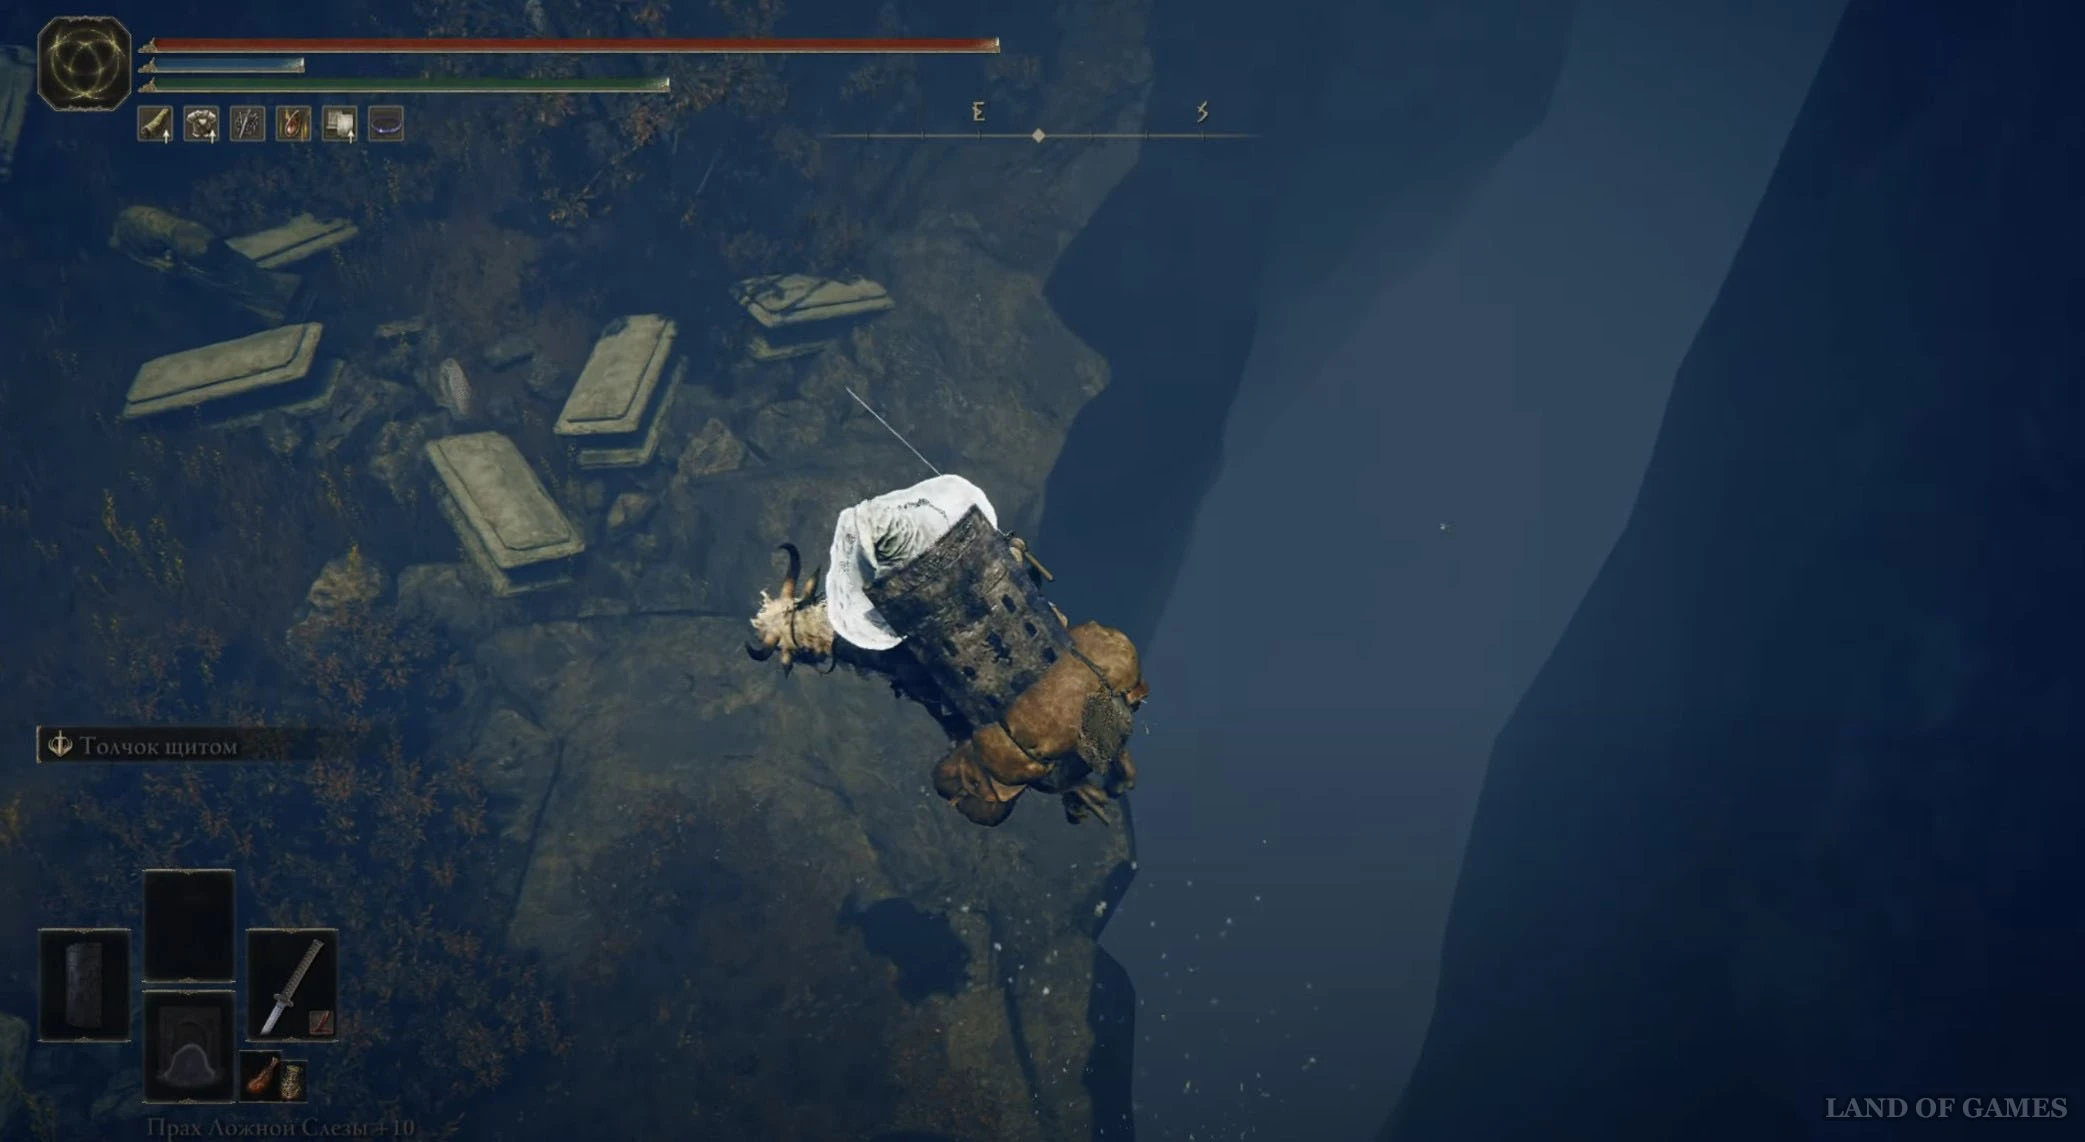
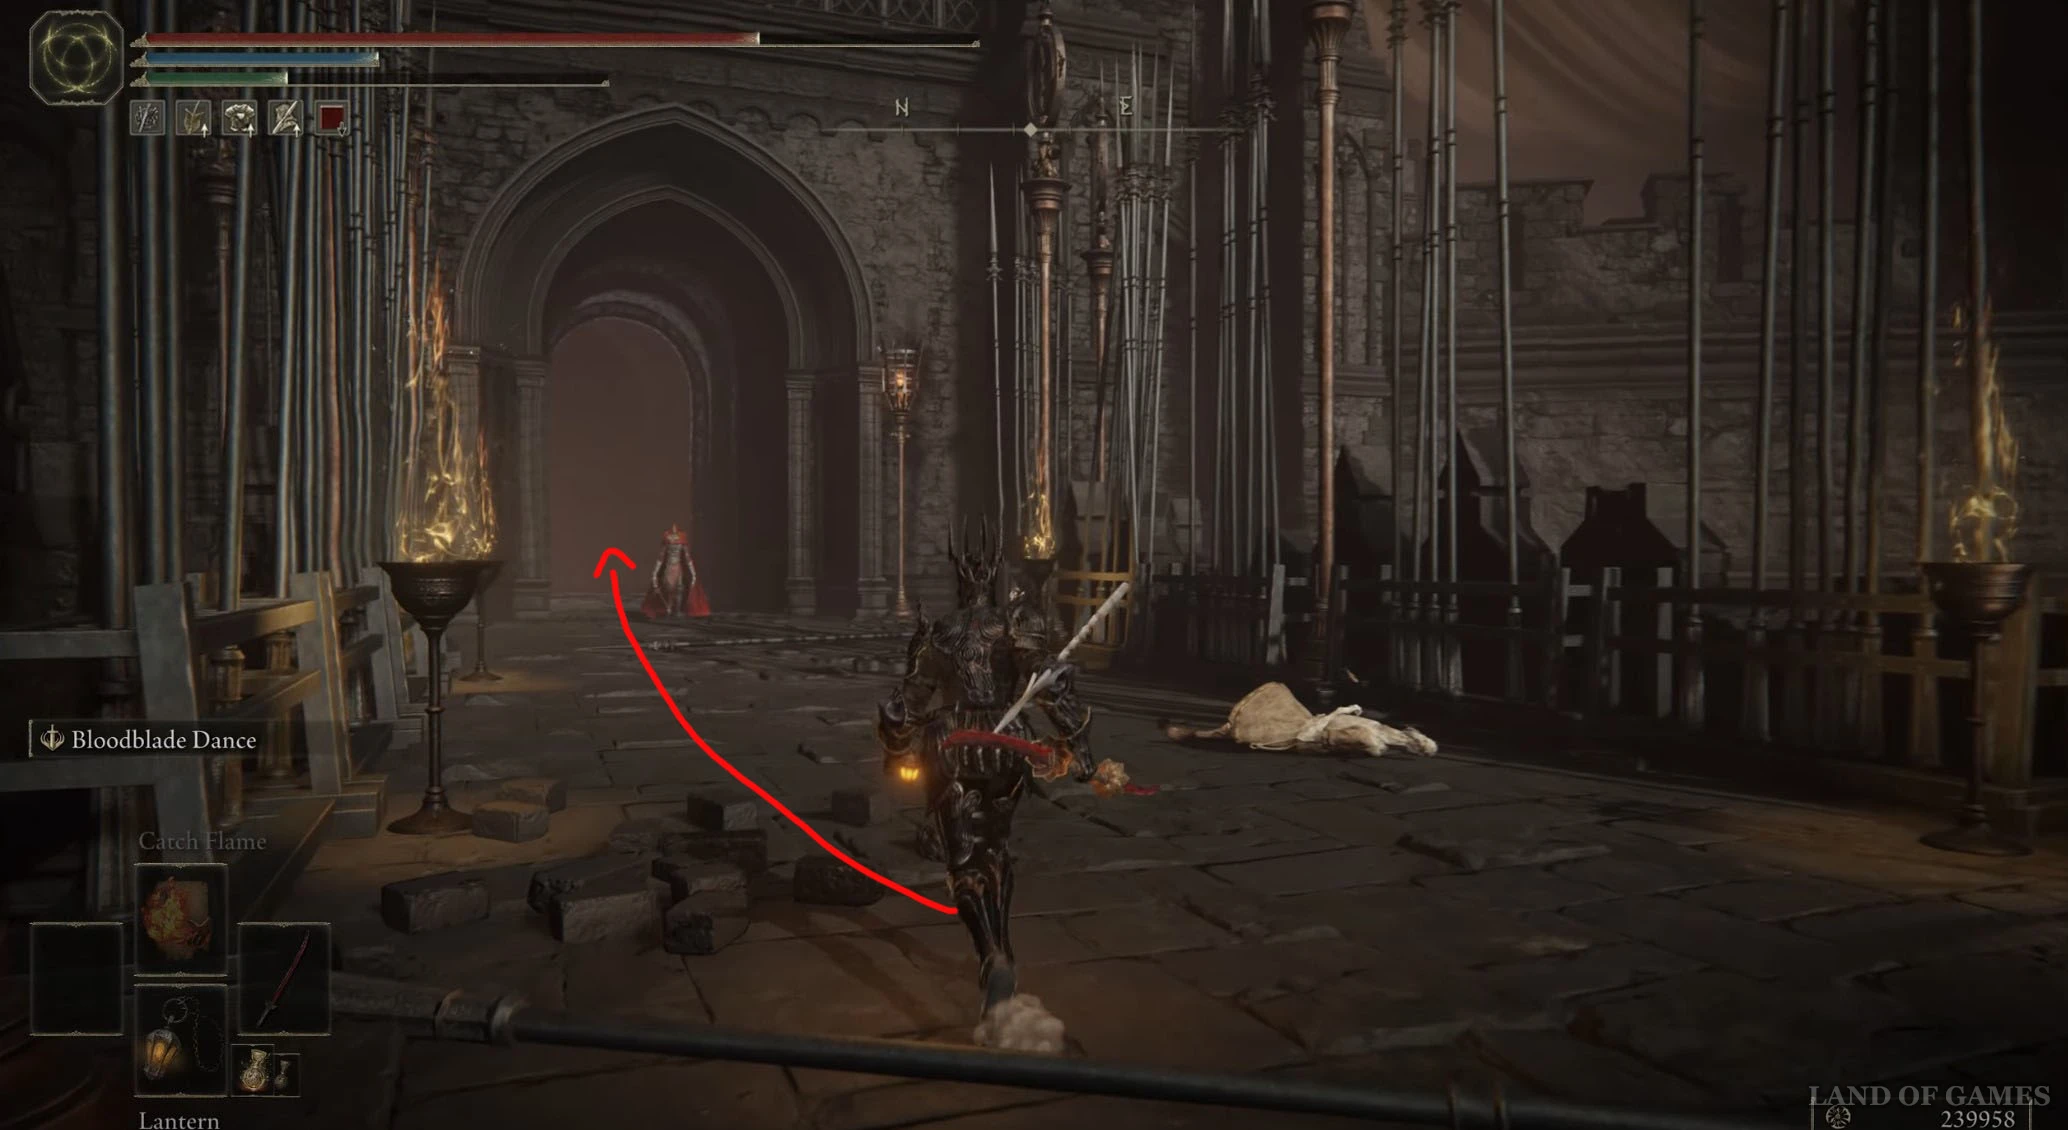
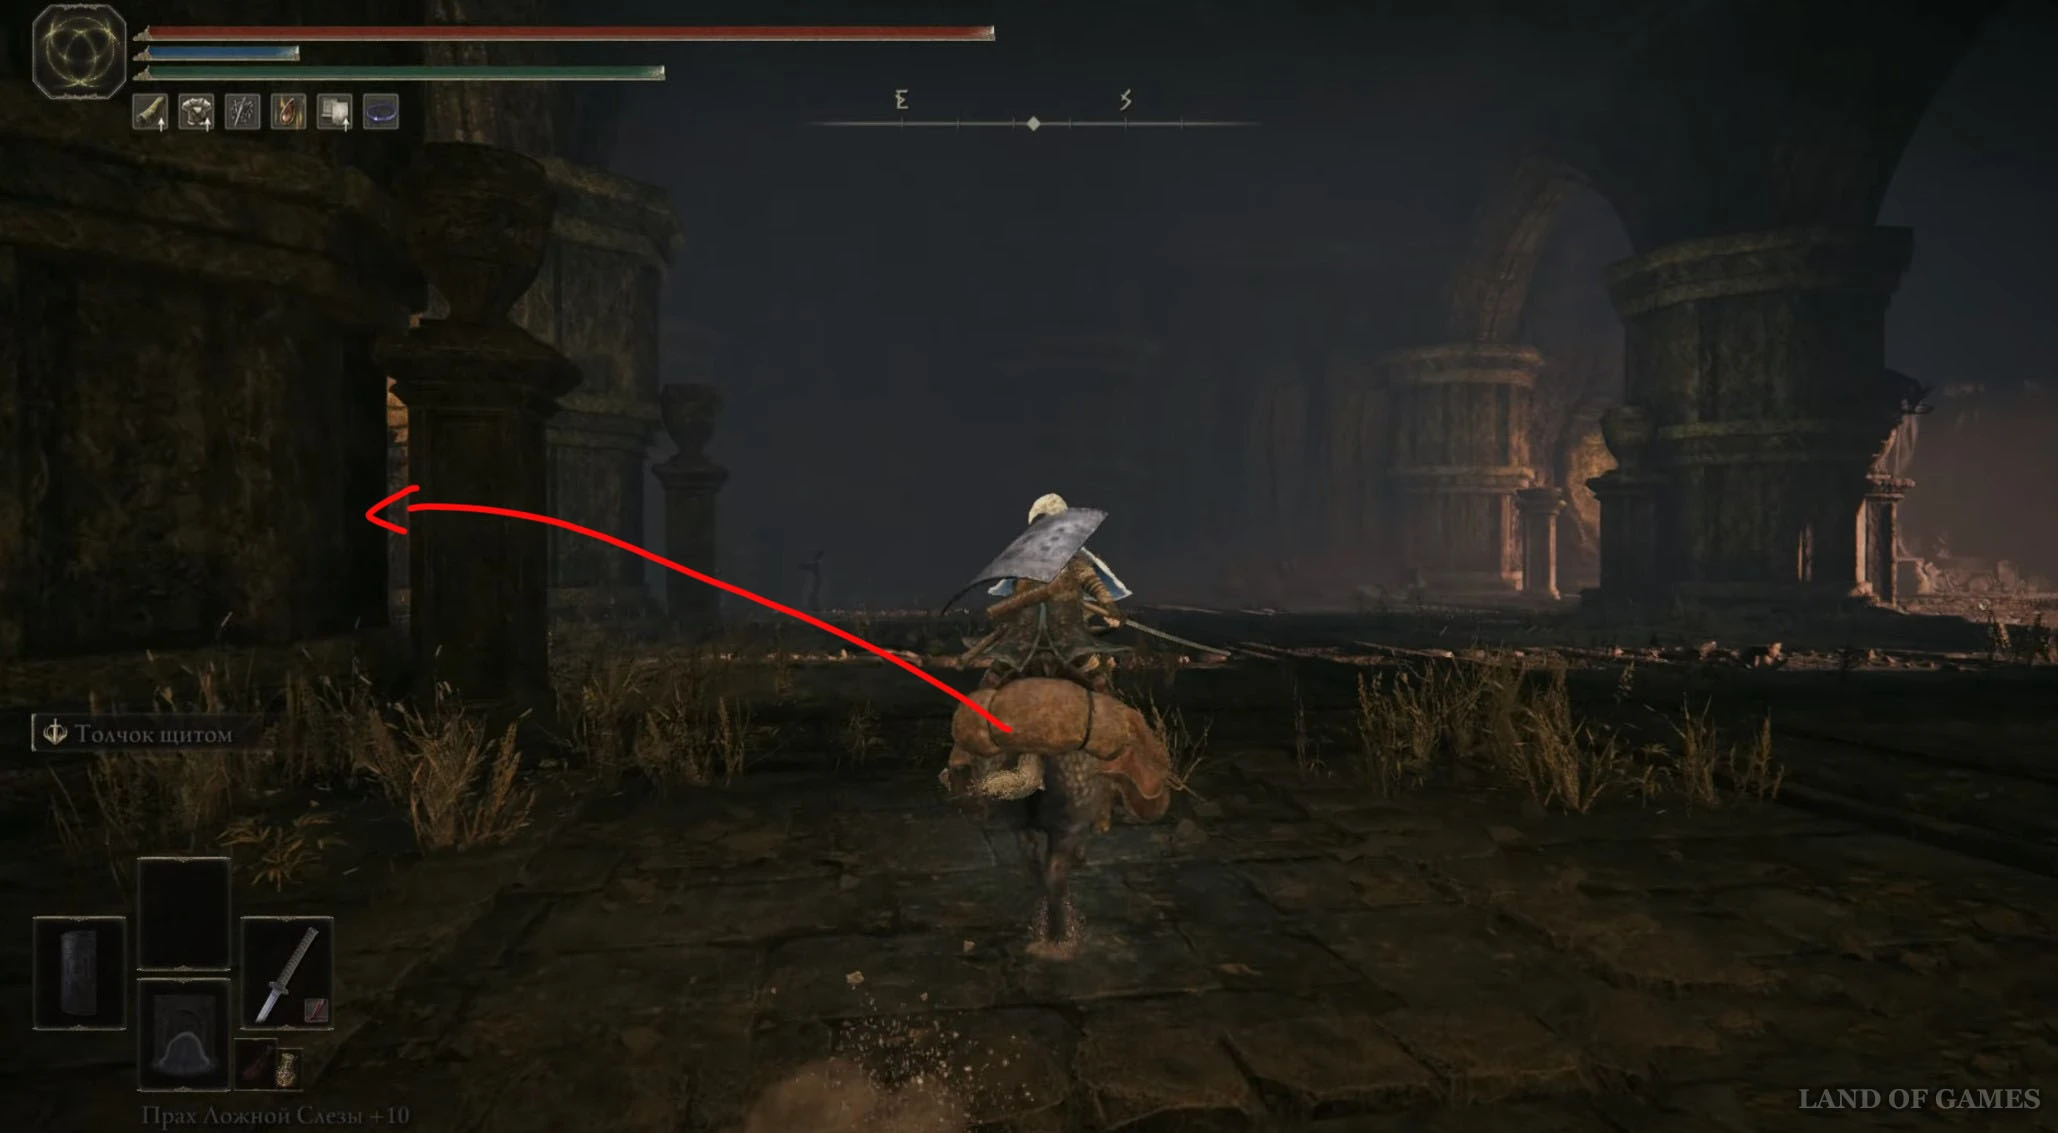
Доберитесь или переместитесь к месту благодати «Последний привал у горной дороги», расположенному к юго-востоку от Белурата. Затем начните бежать на юго-запад по дорожке. Вскоре вы доберетесь до кладбища, где опять же будет тень с кувшином на голове, – поскорее разберитесь с ней, пока она не исчезла, а затем подберите выпавшую с нее вещицу.

Осколок древа упадка 7
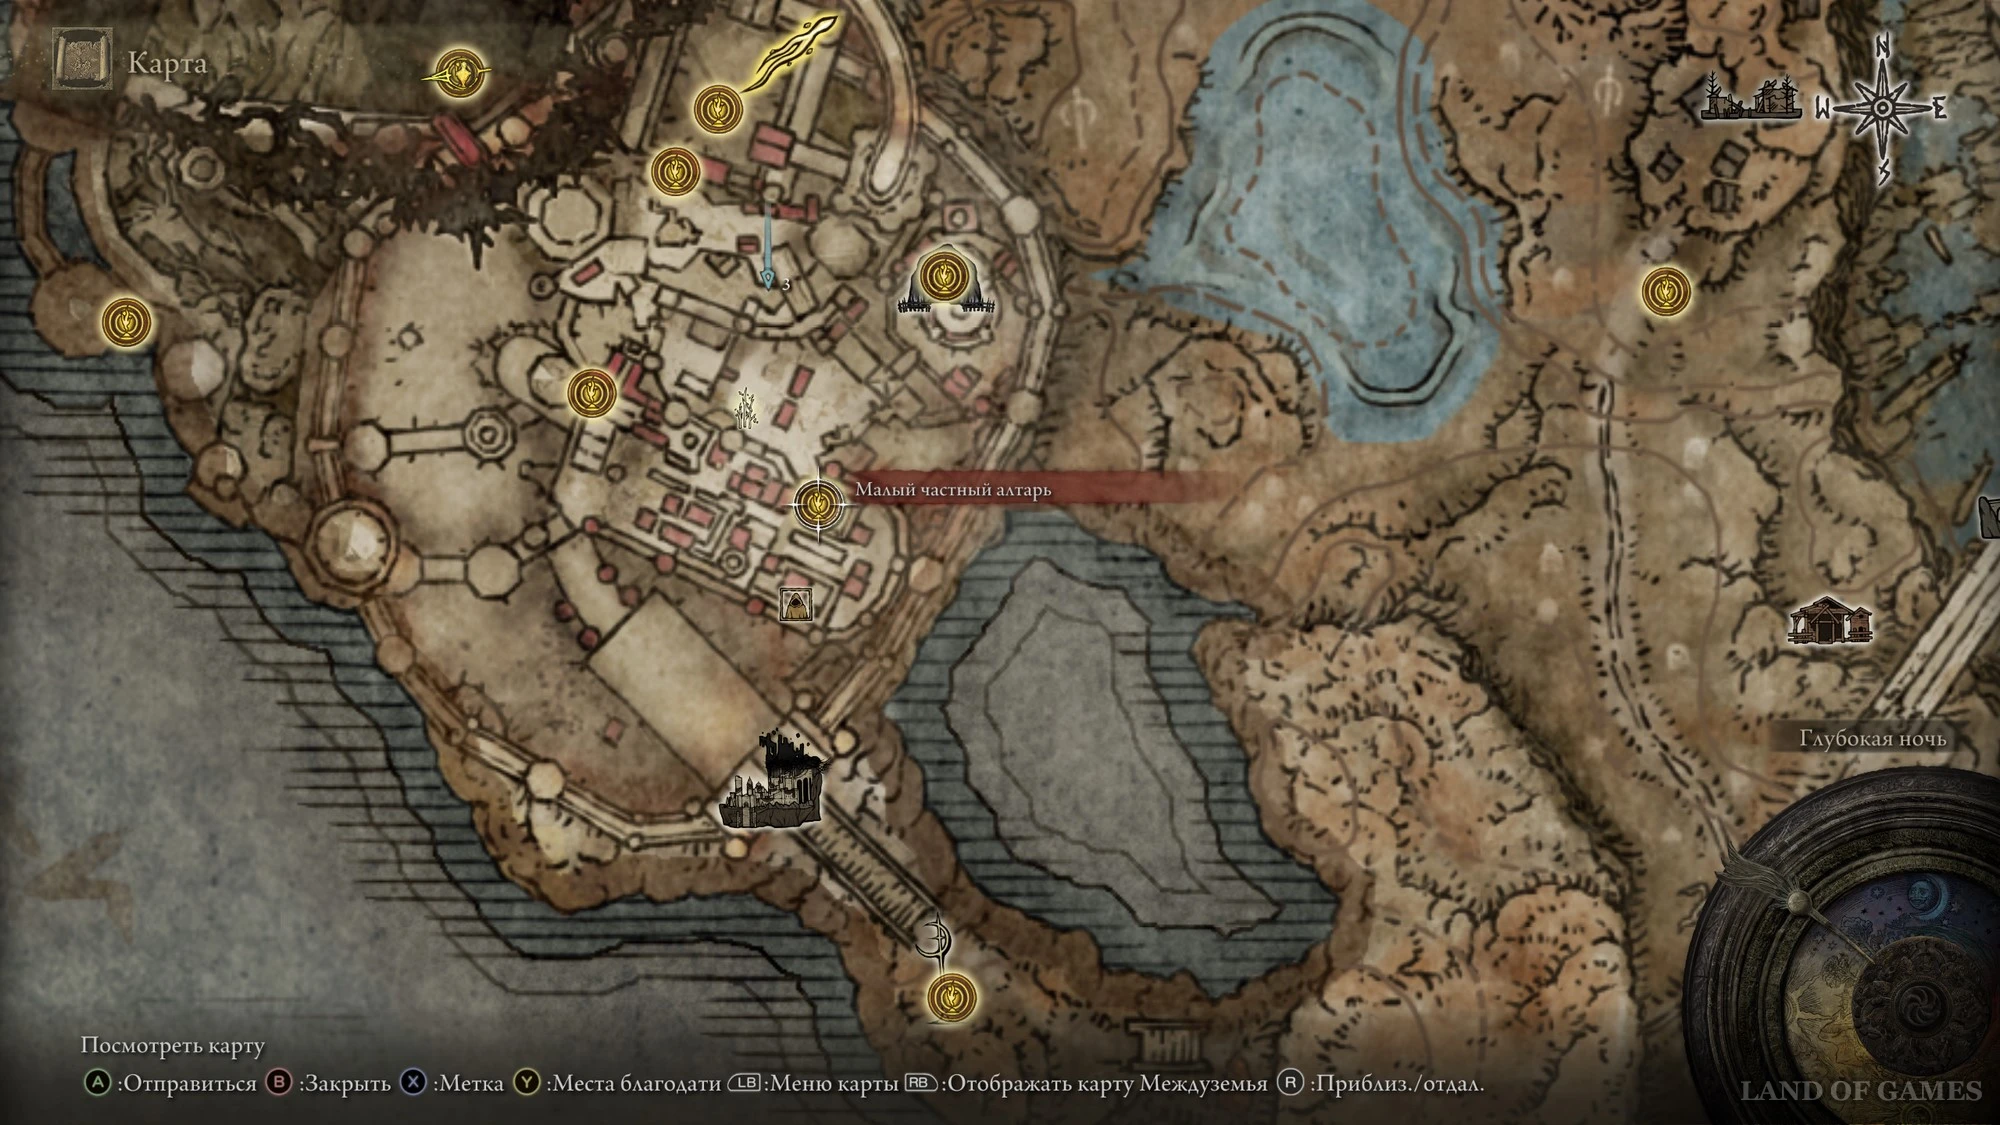
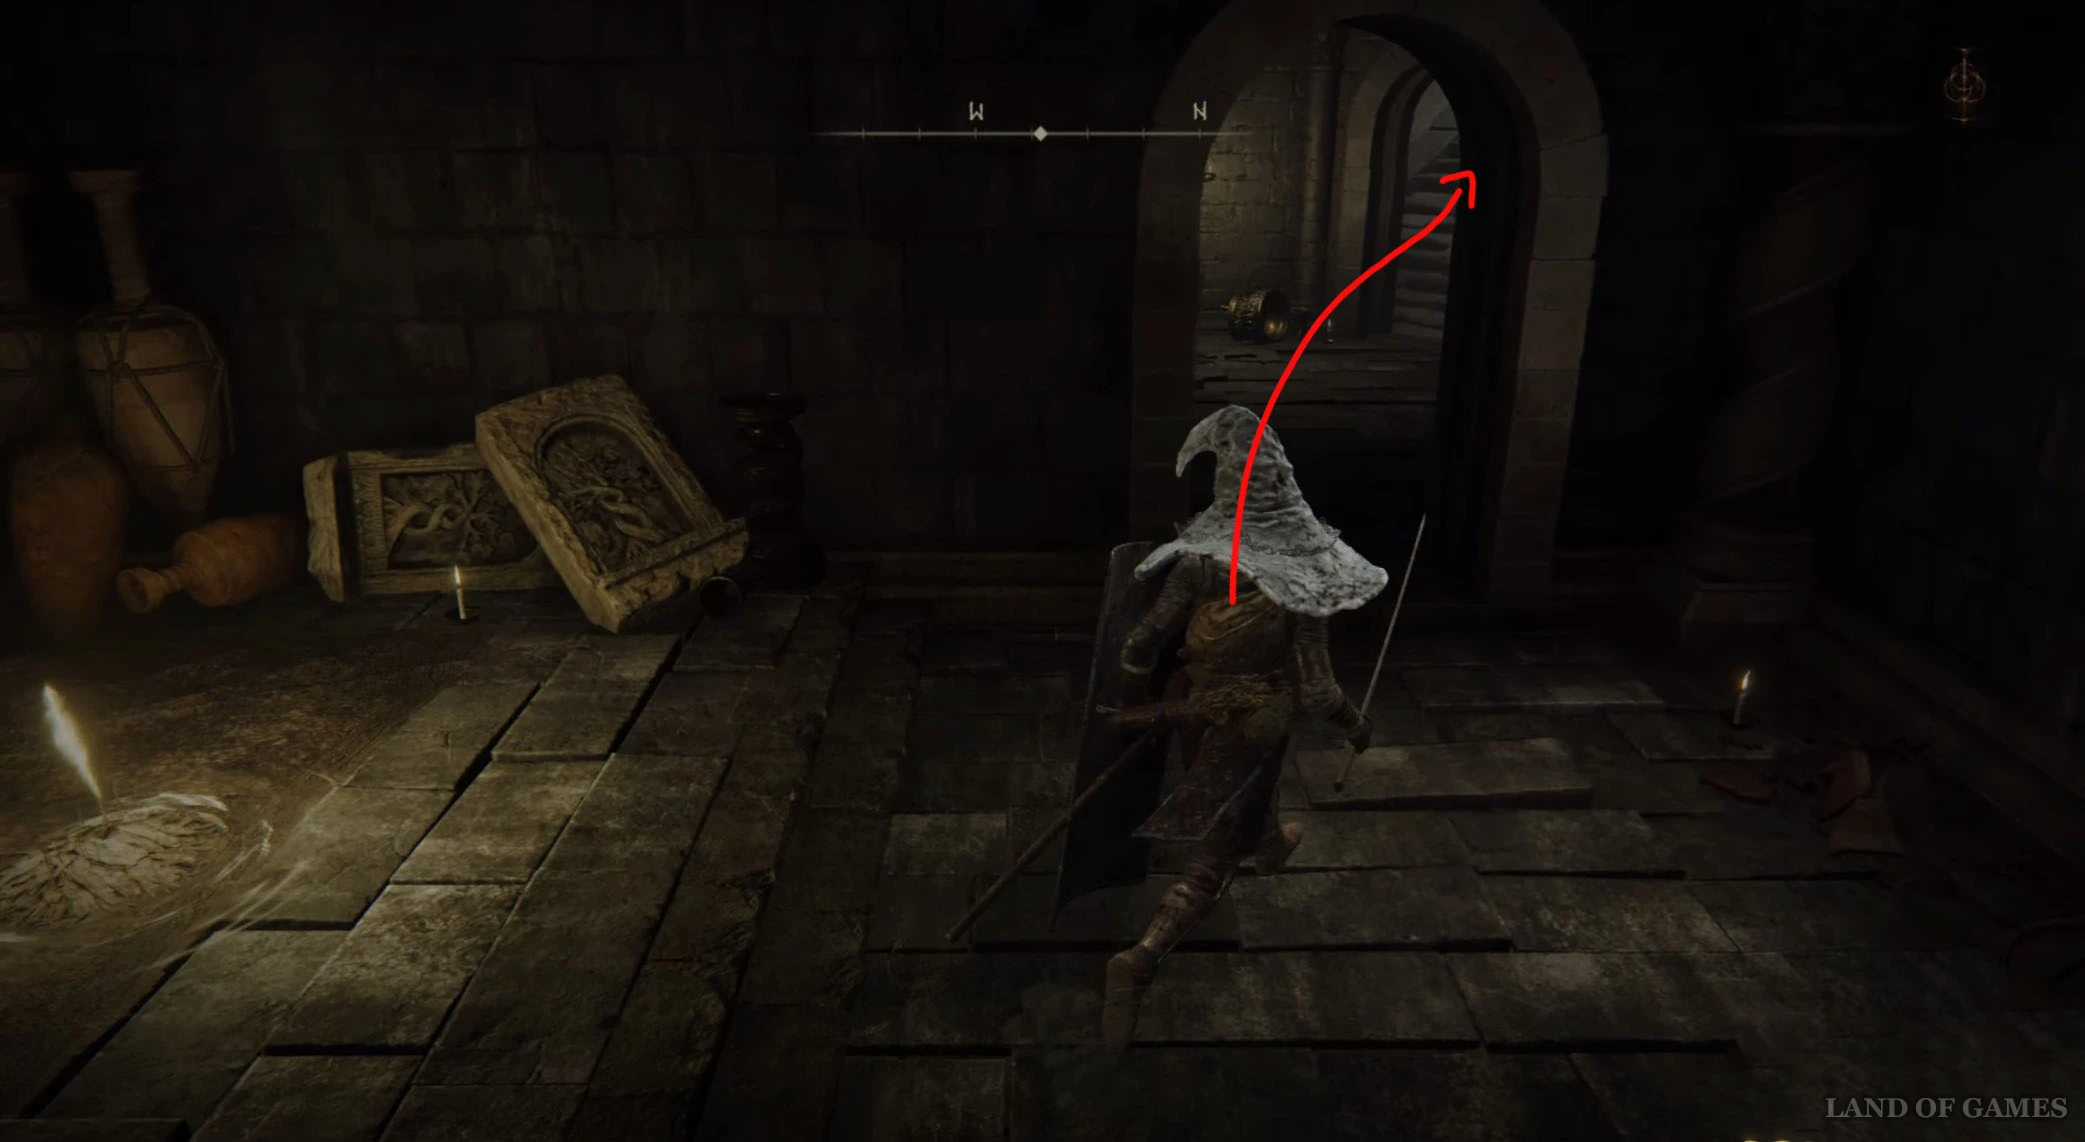
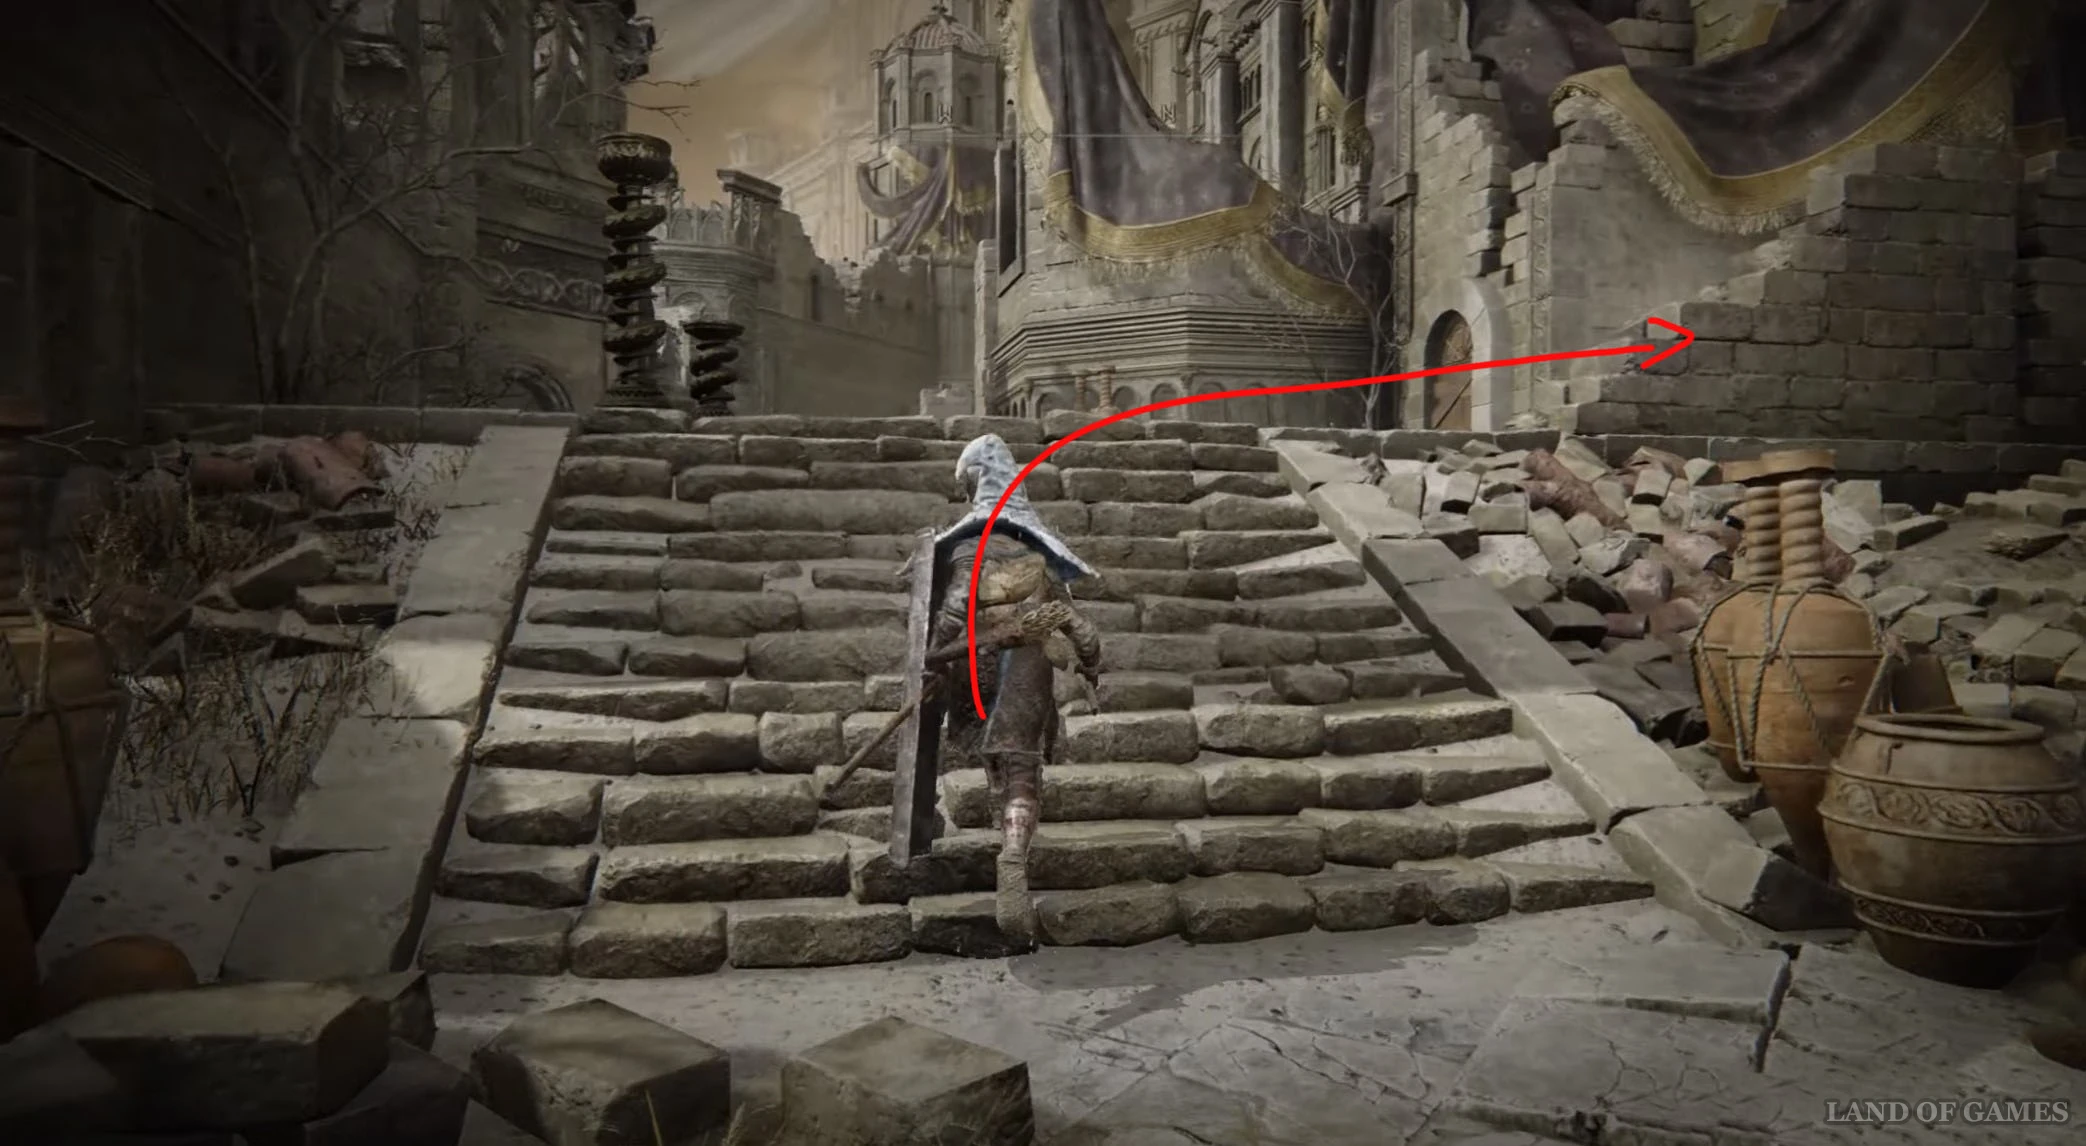
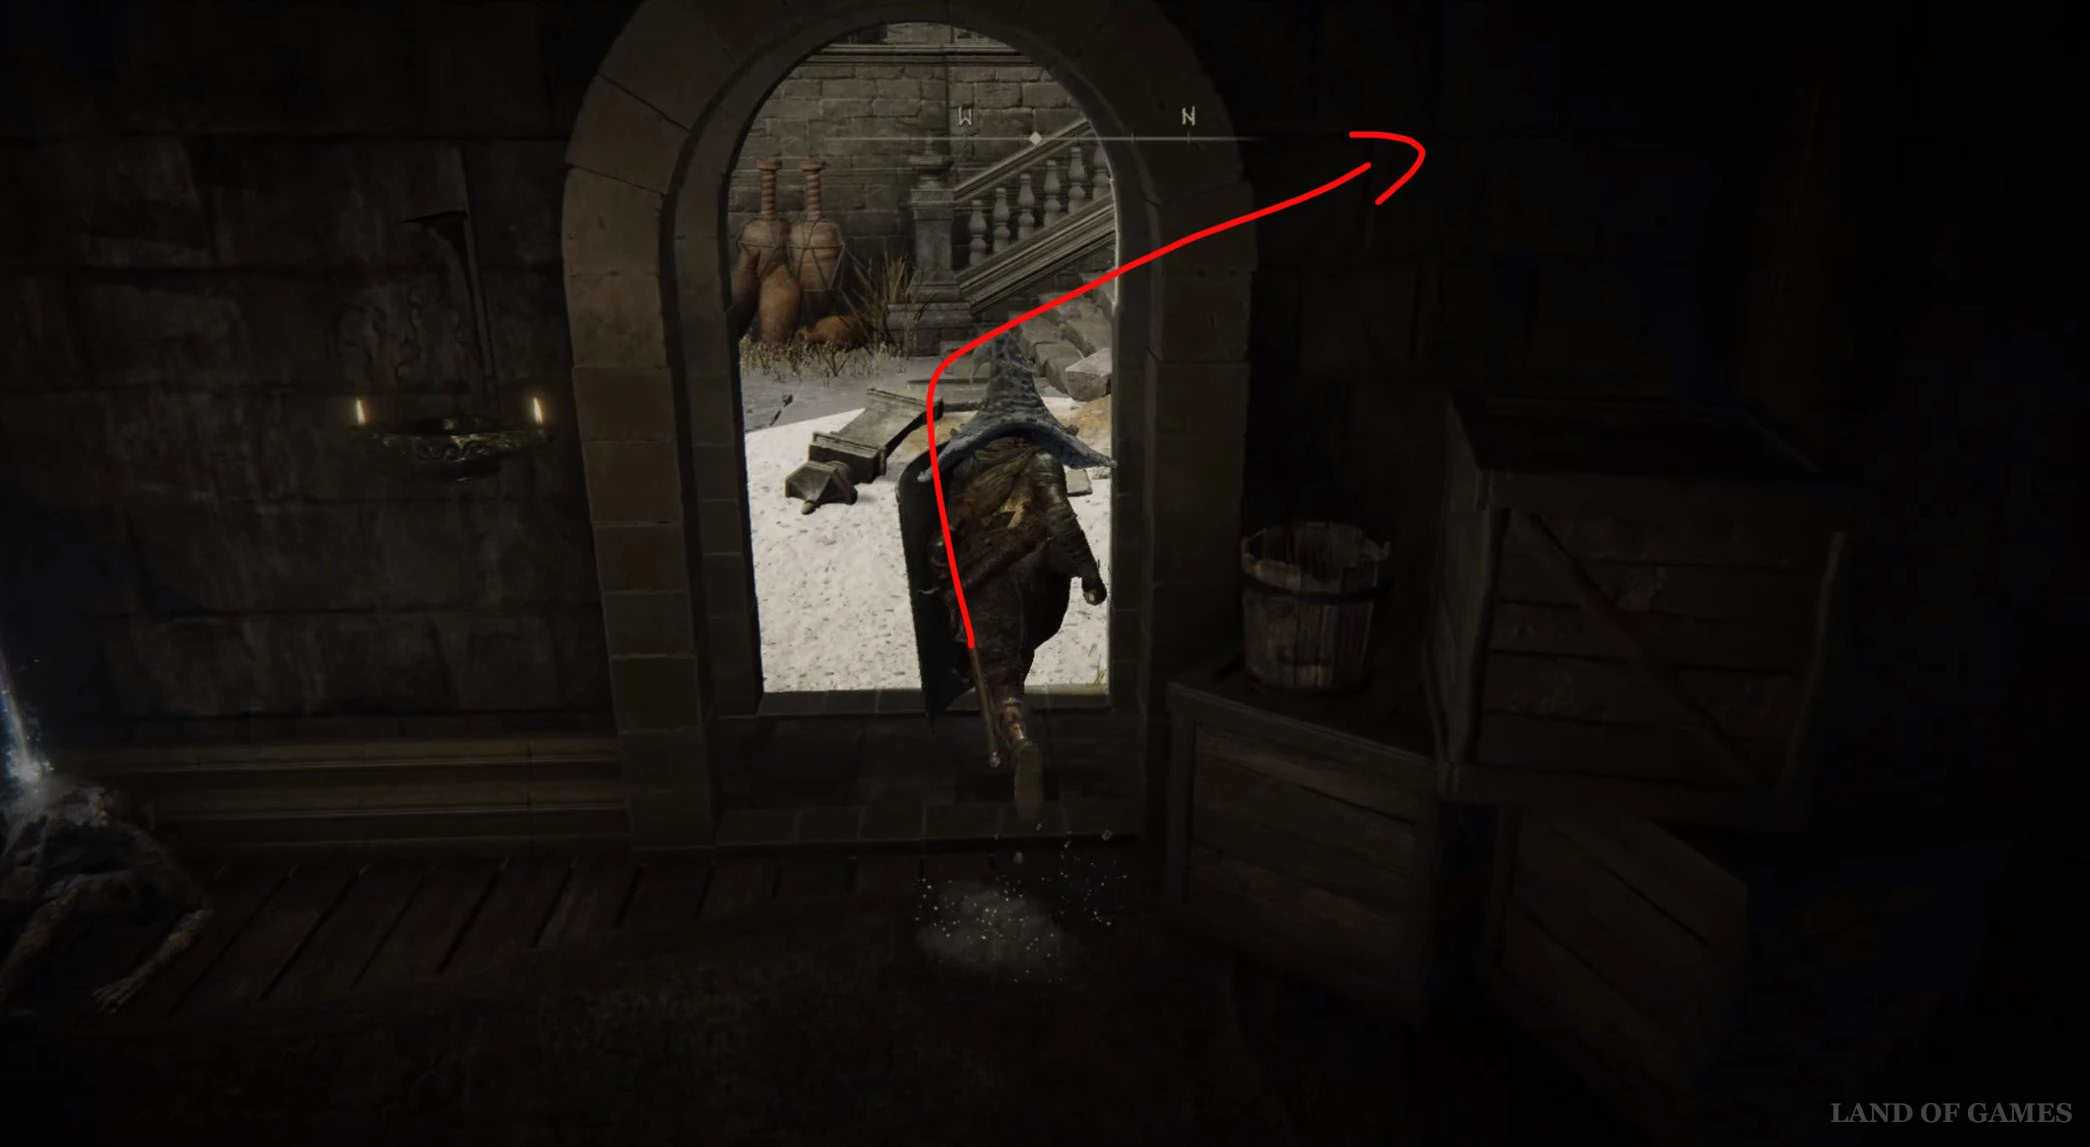
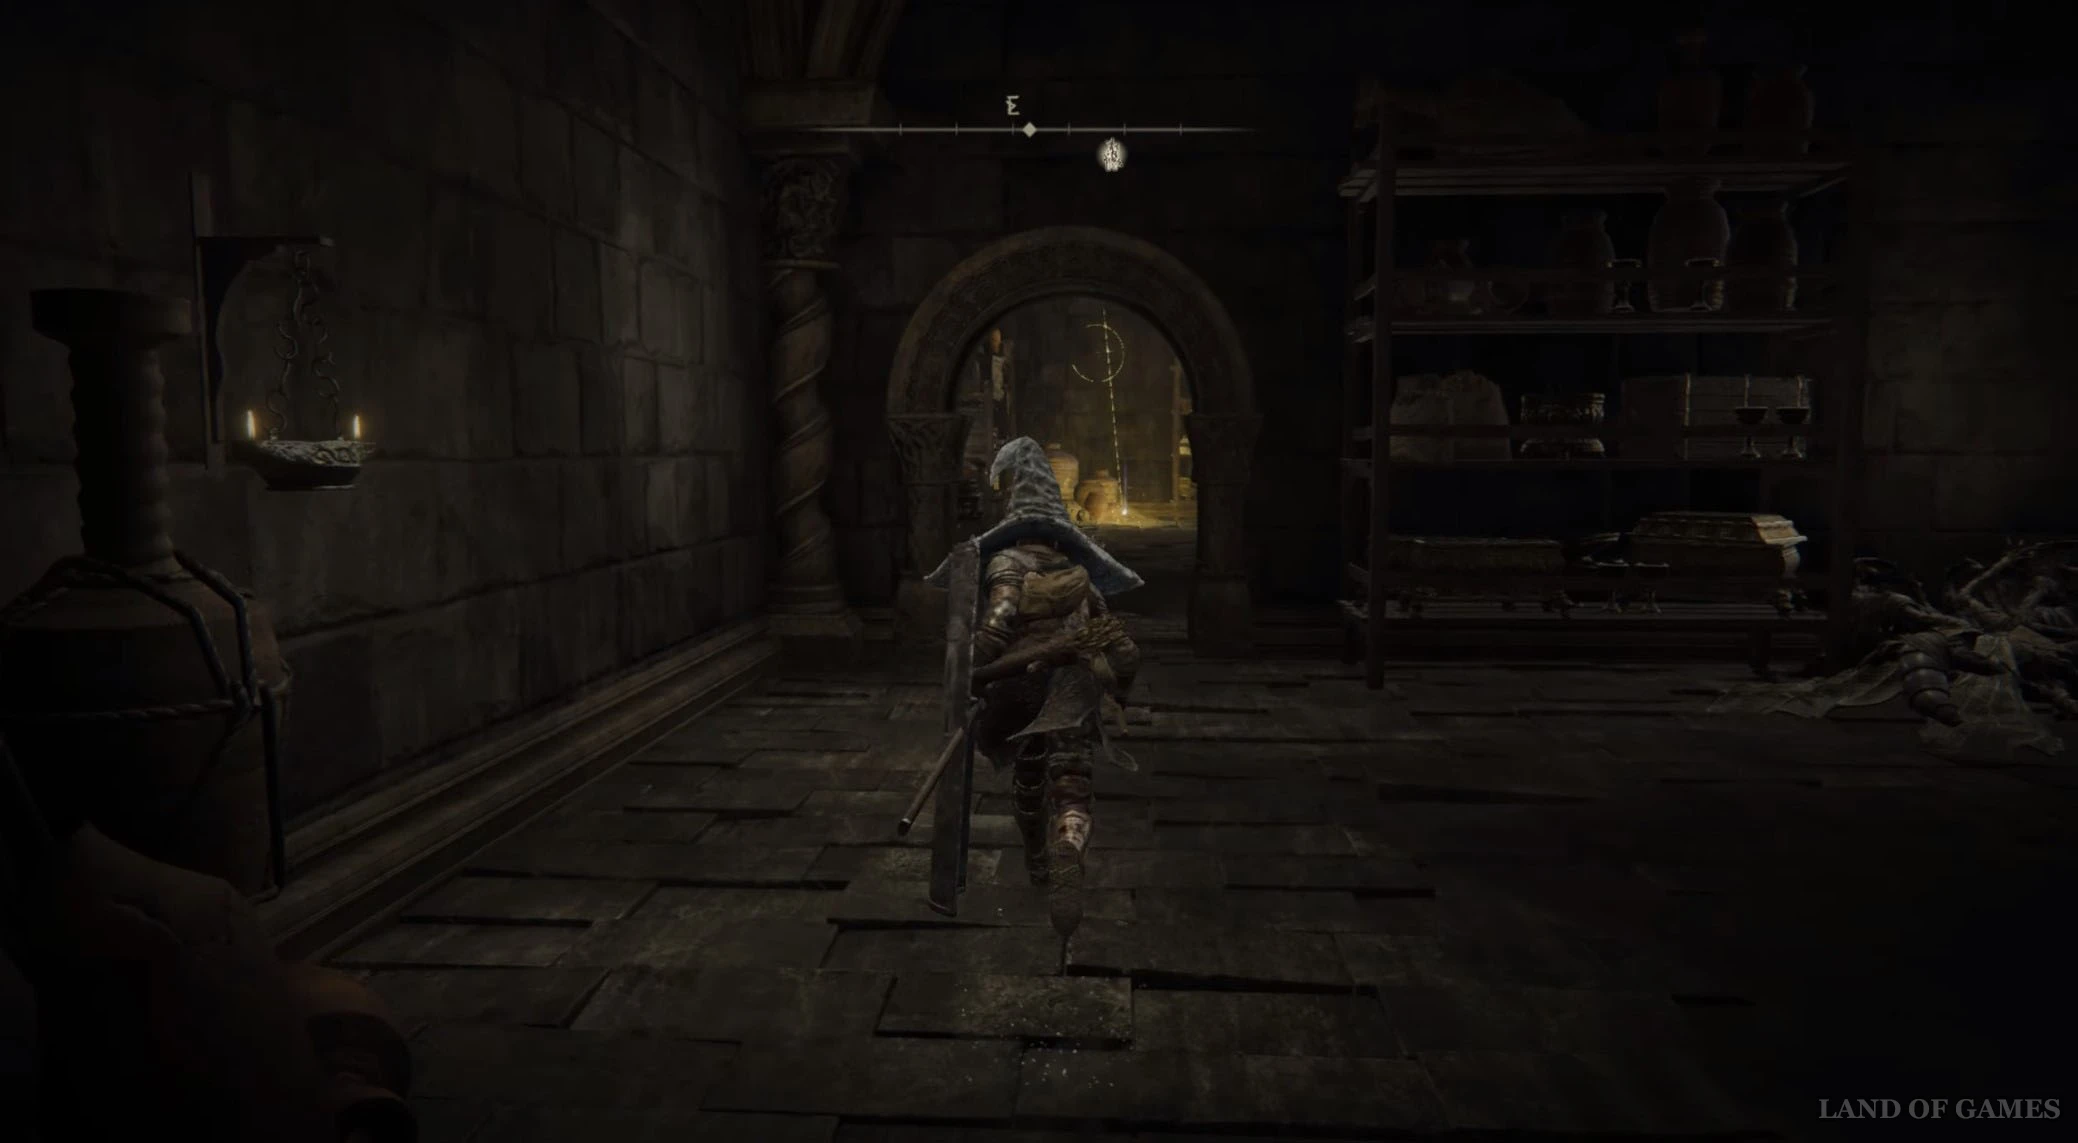
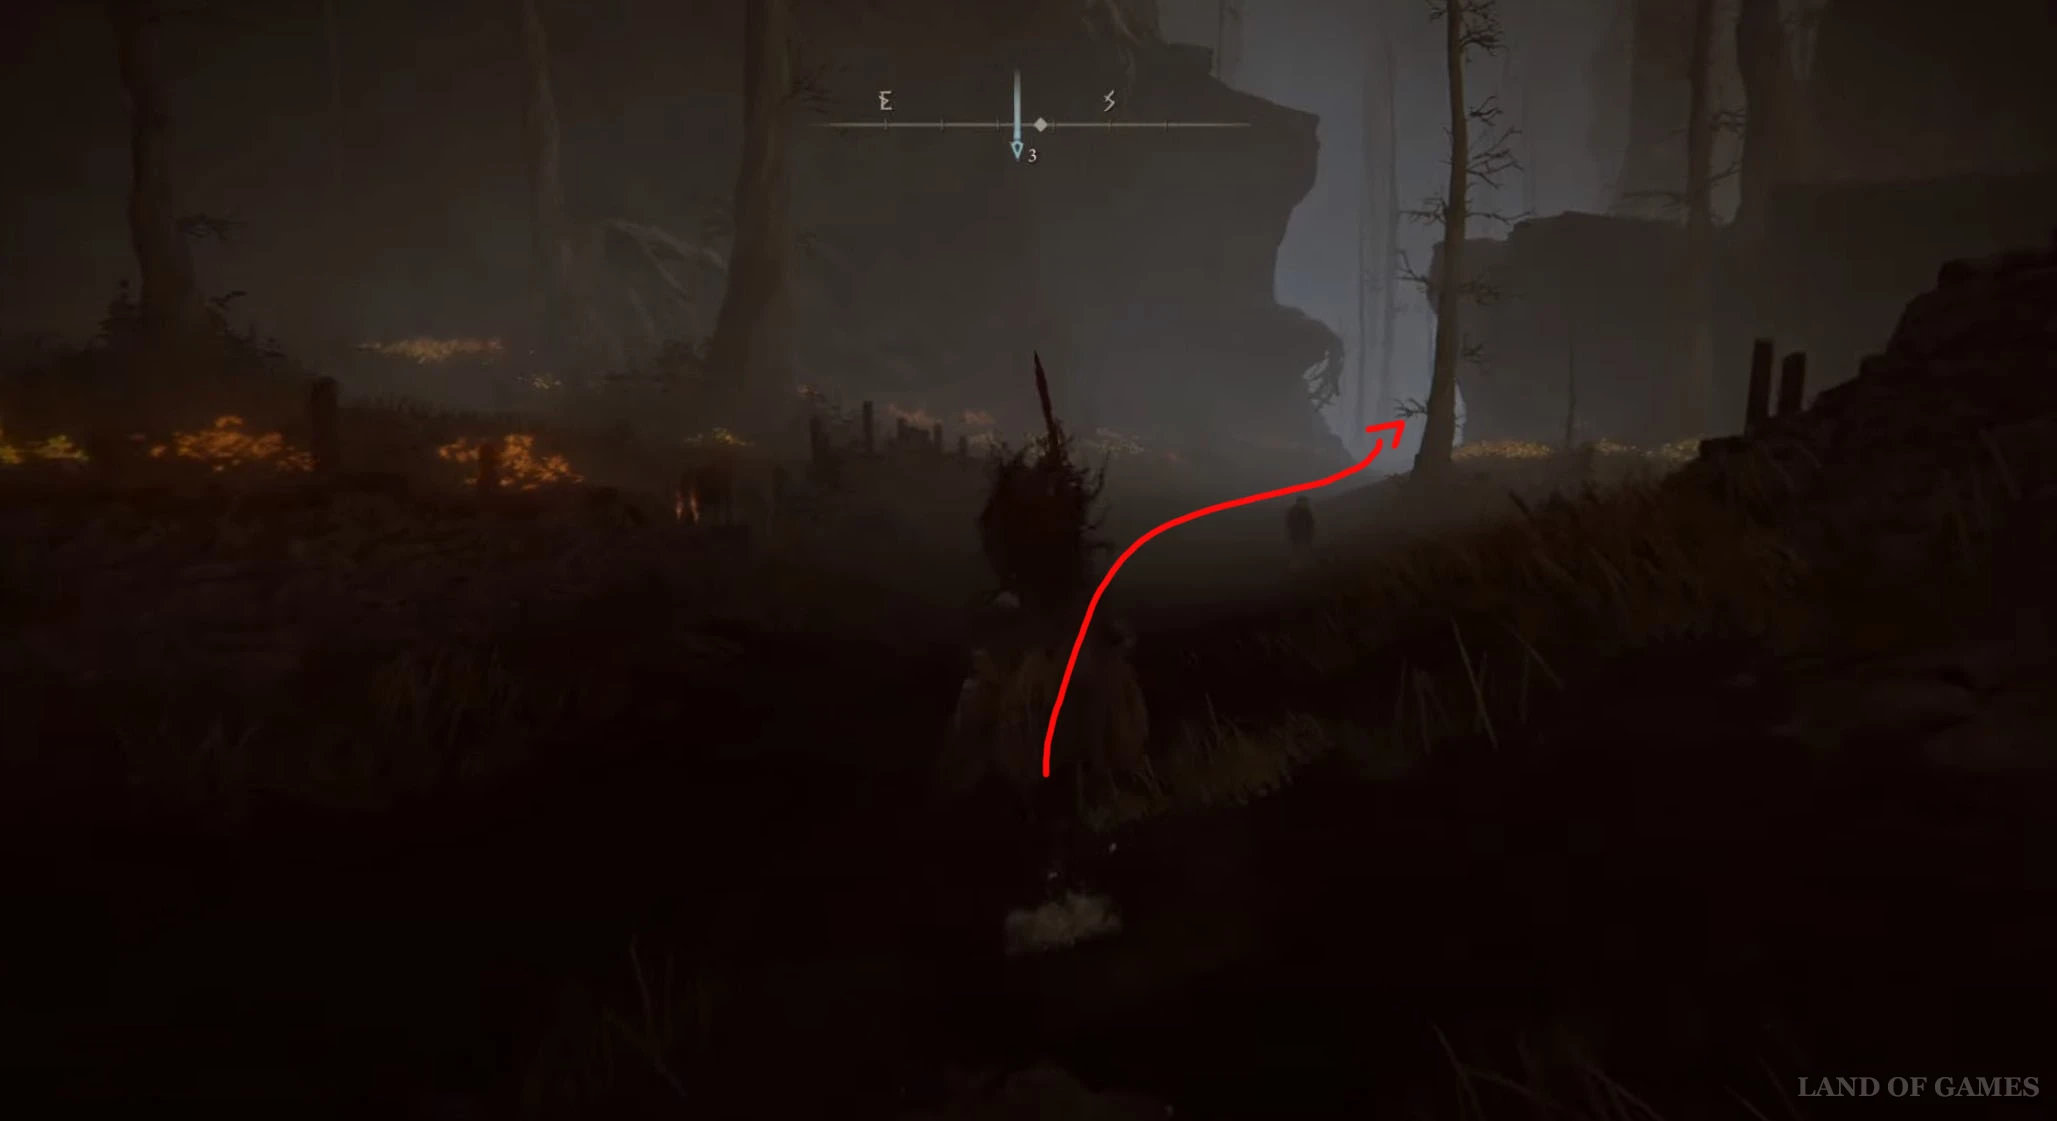
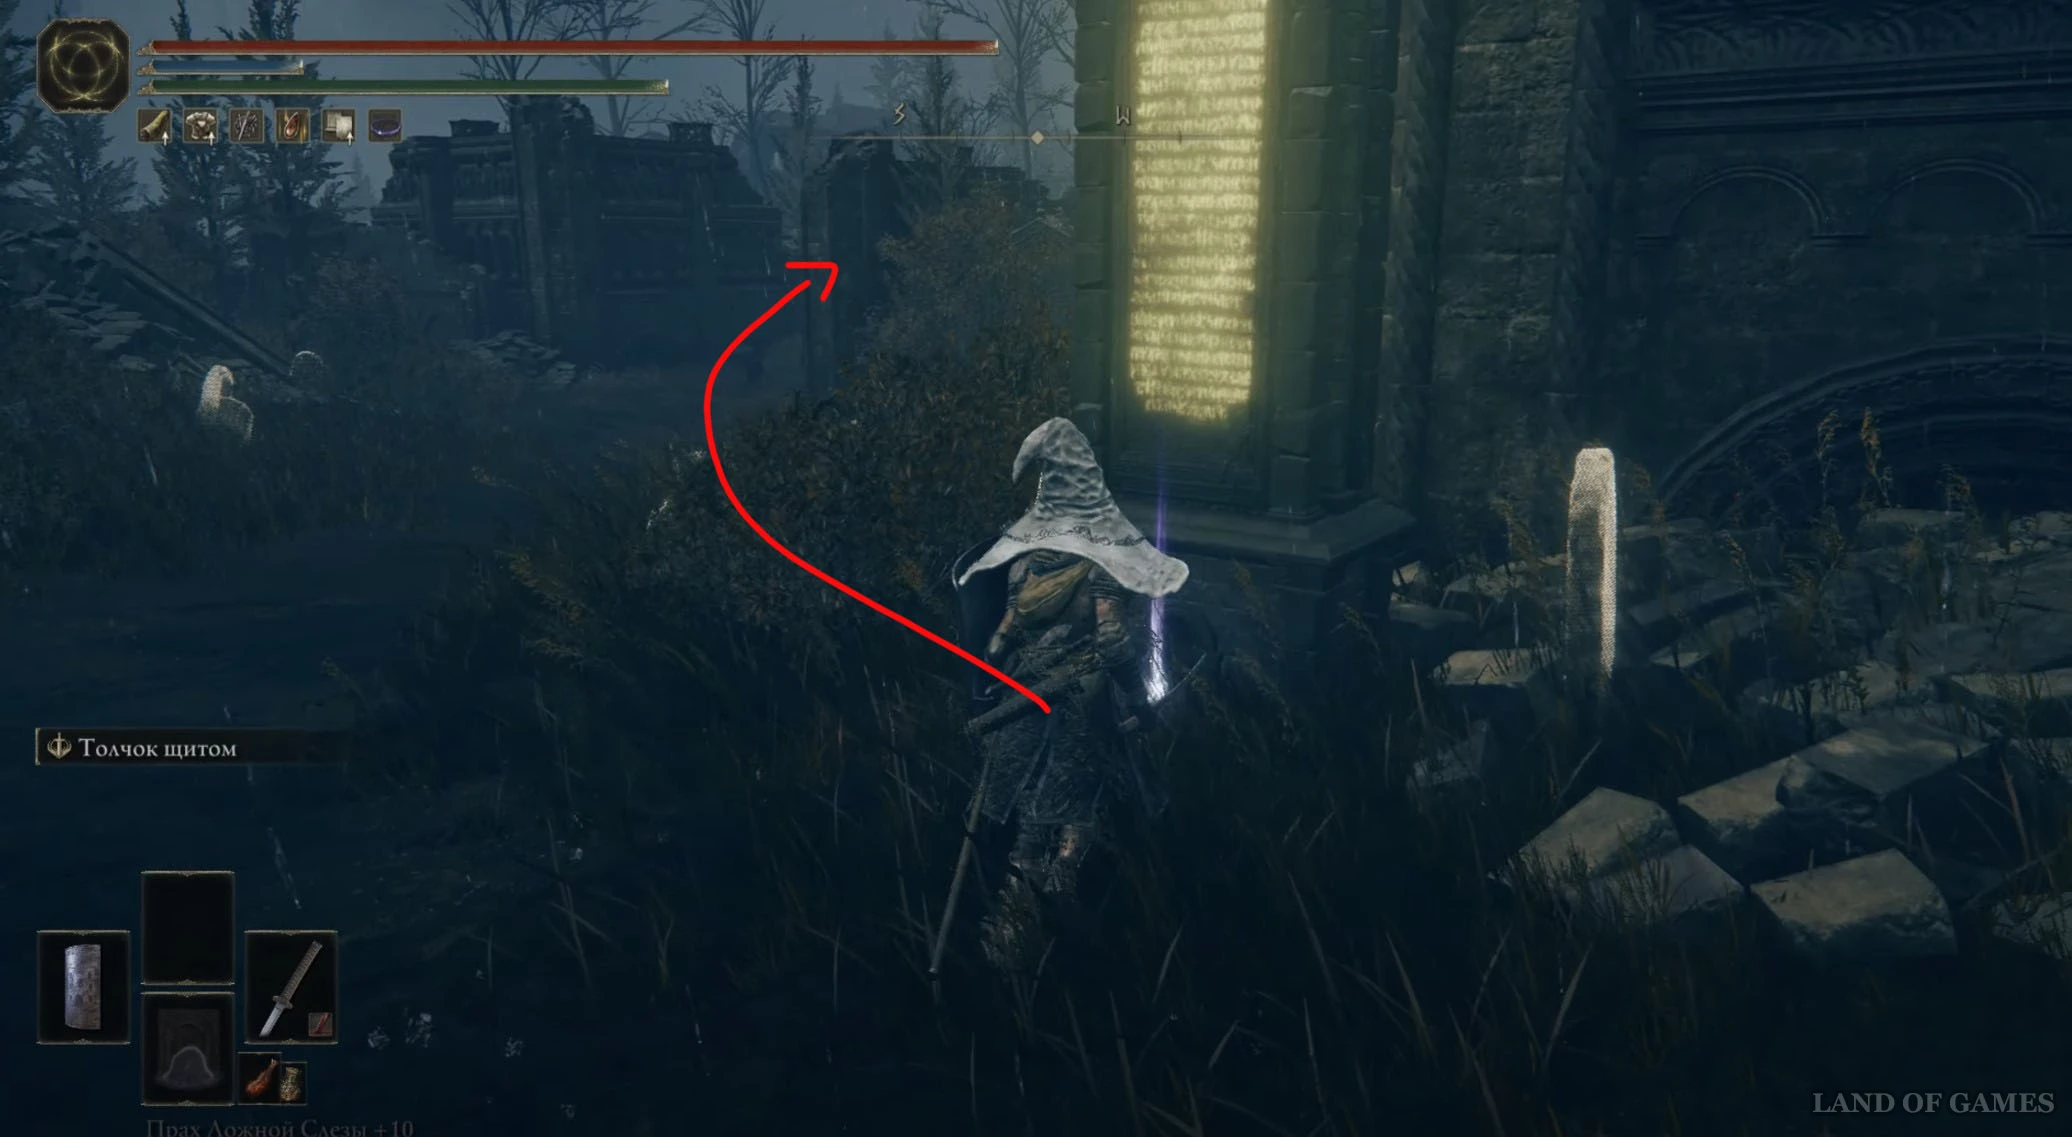
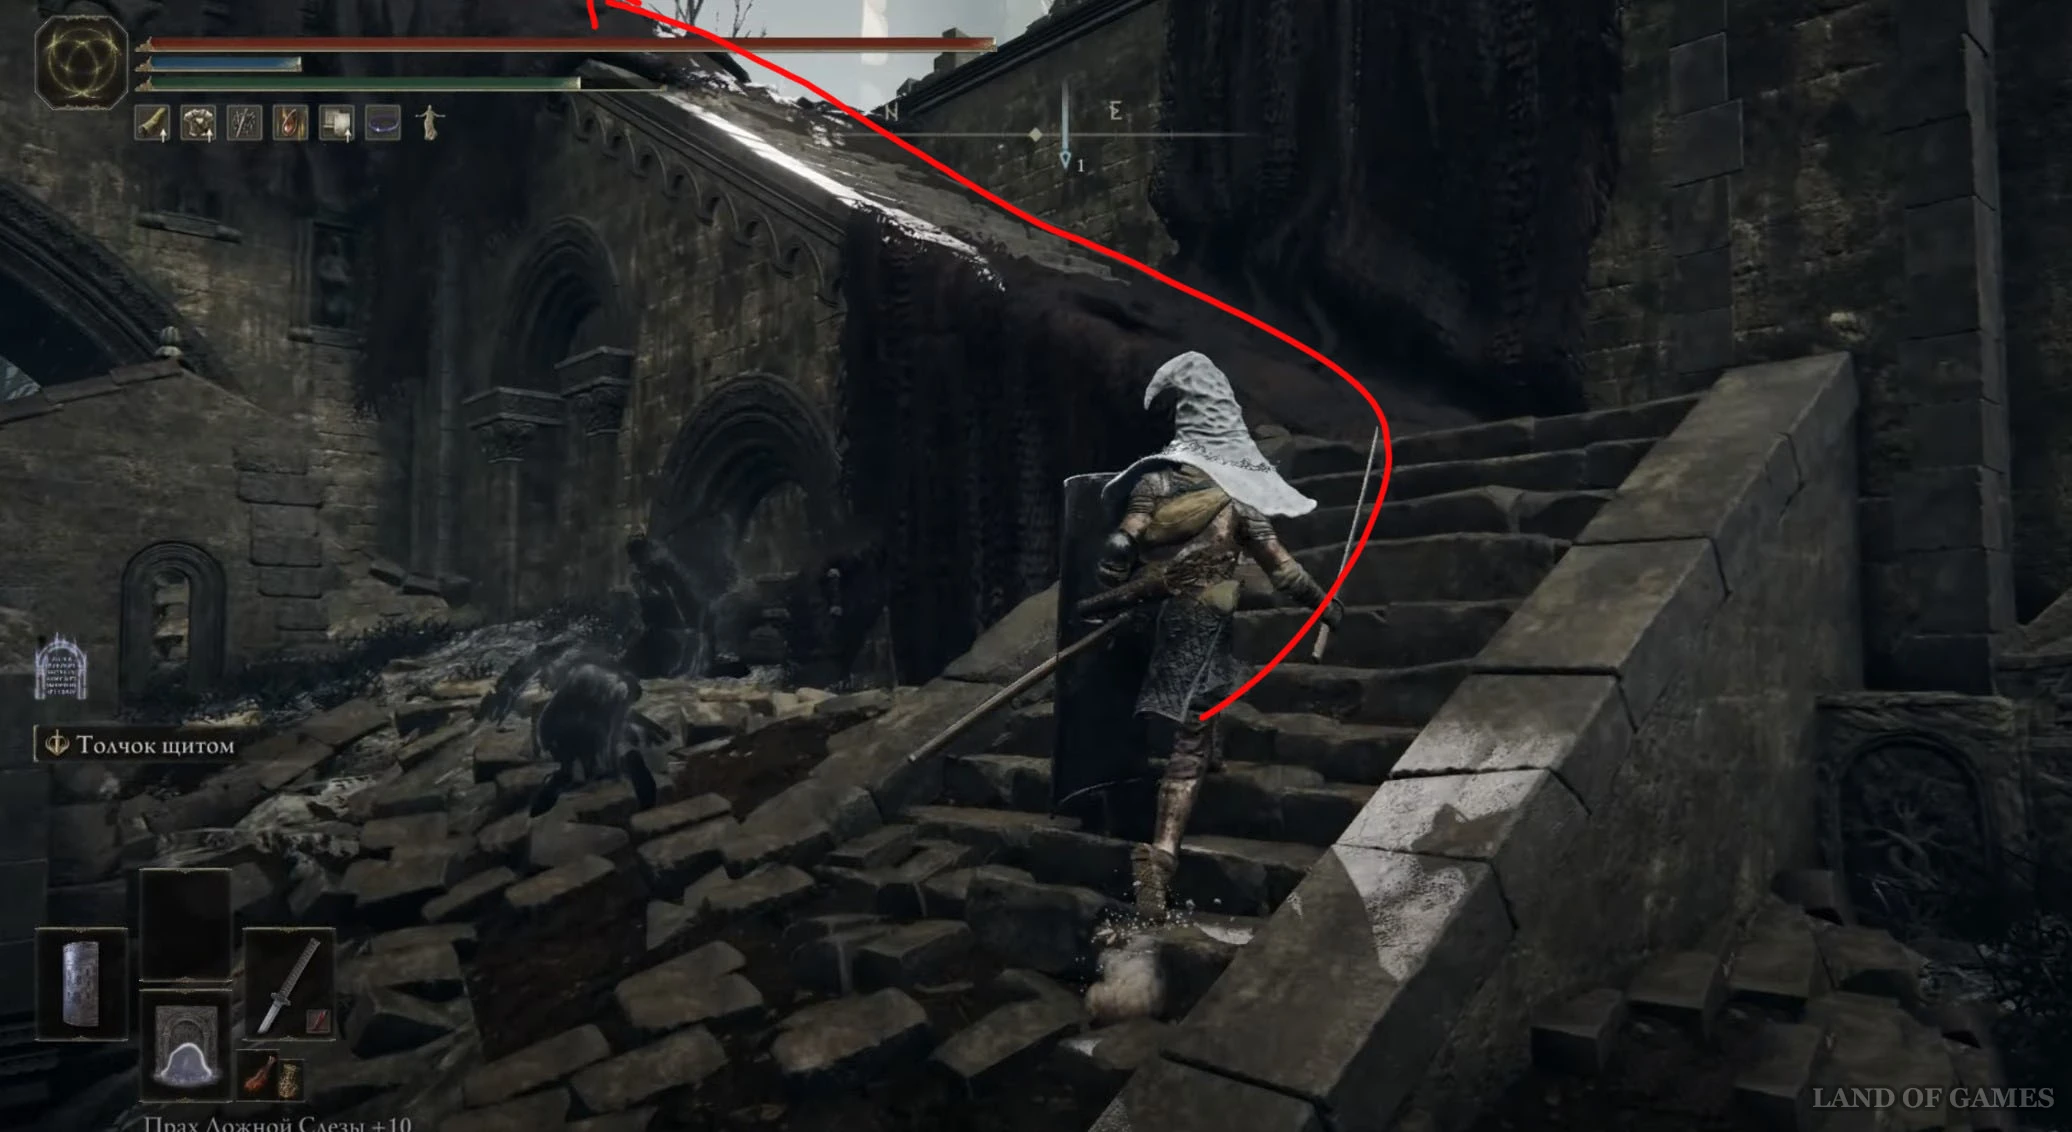
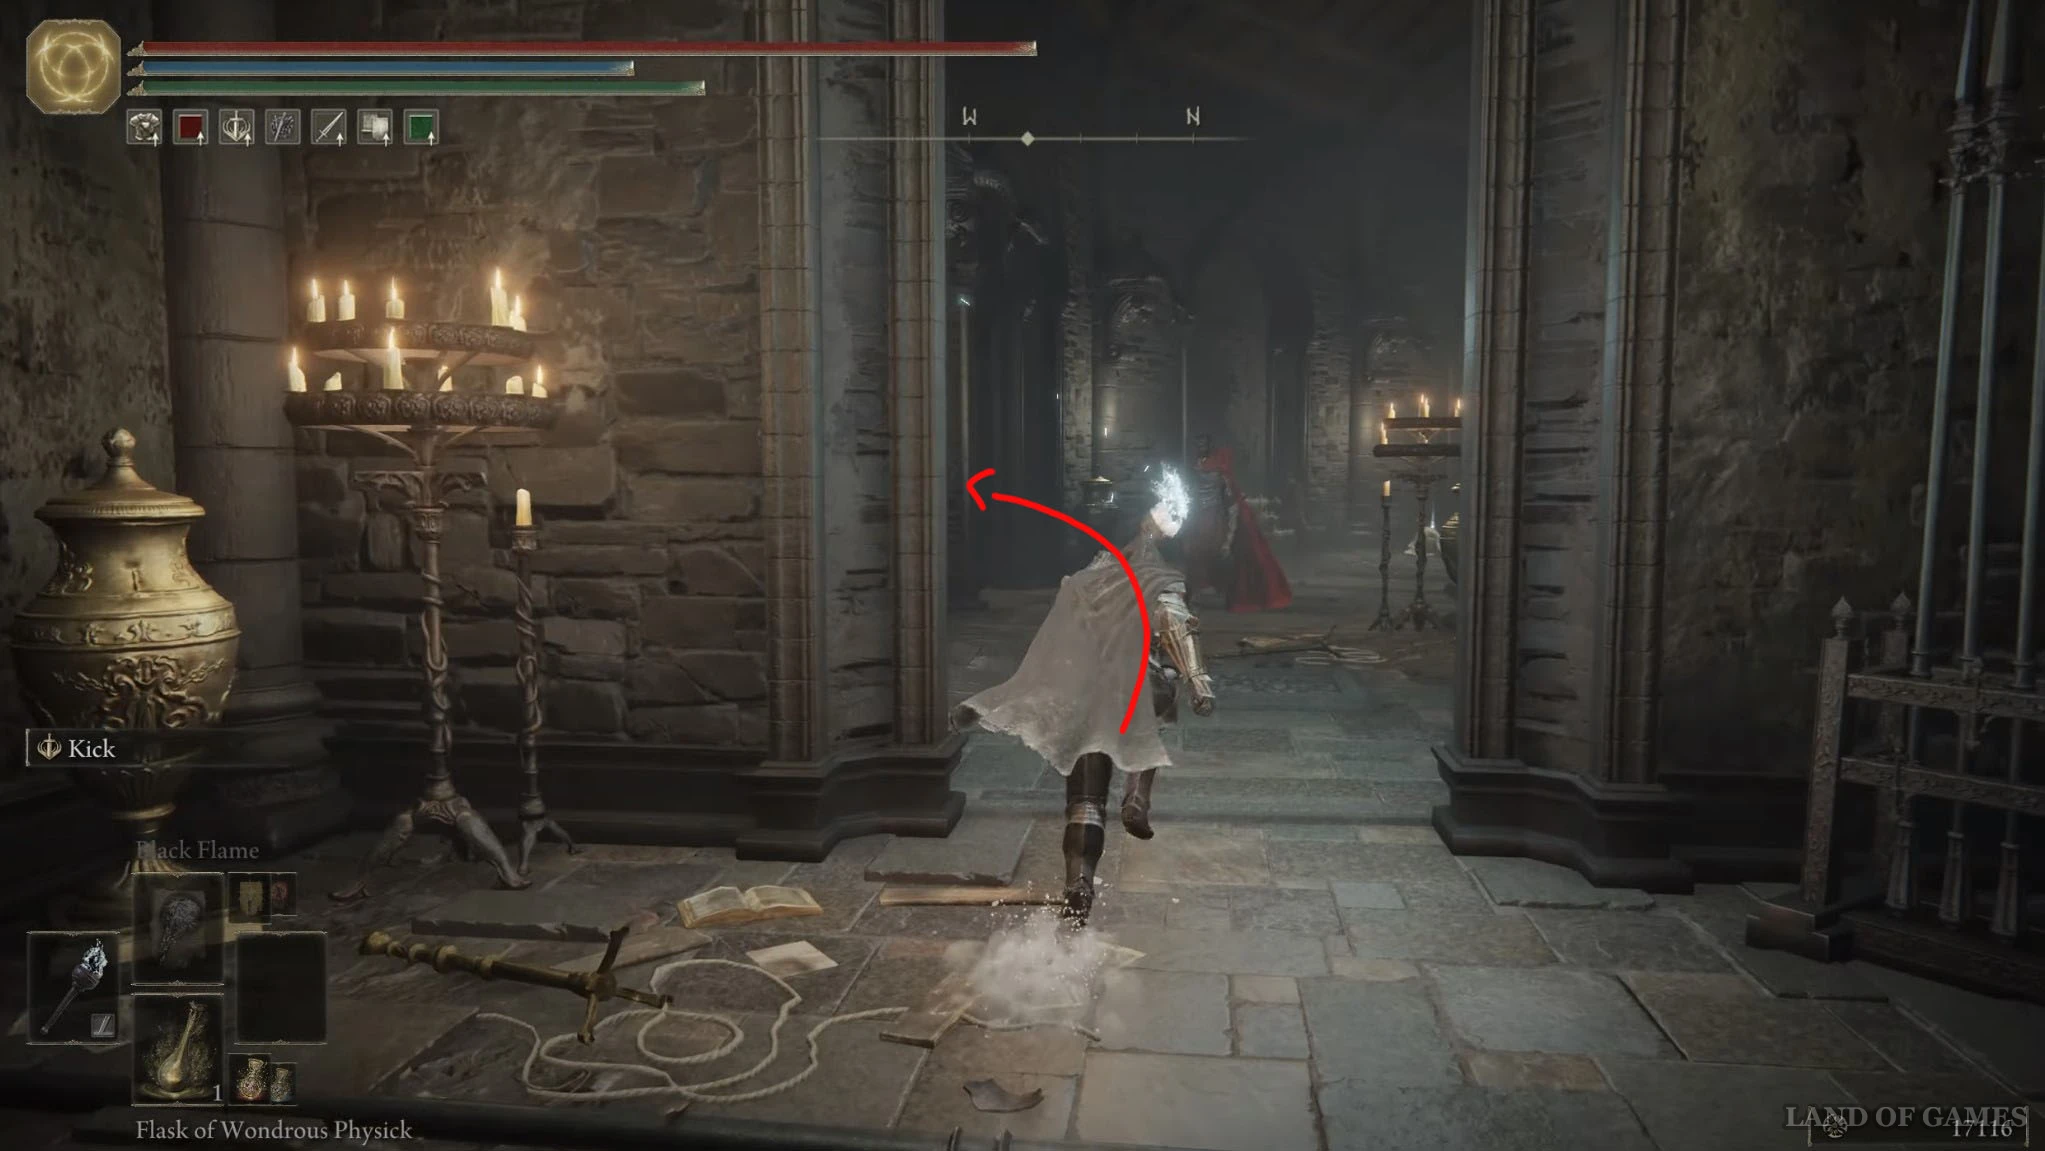
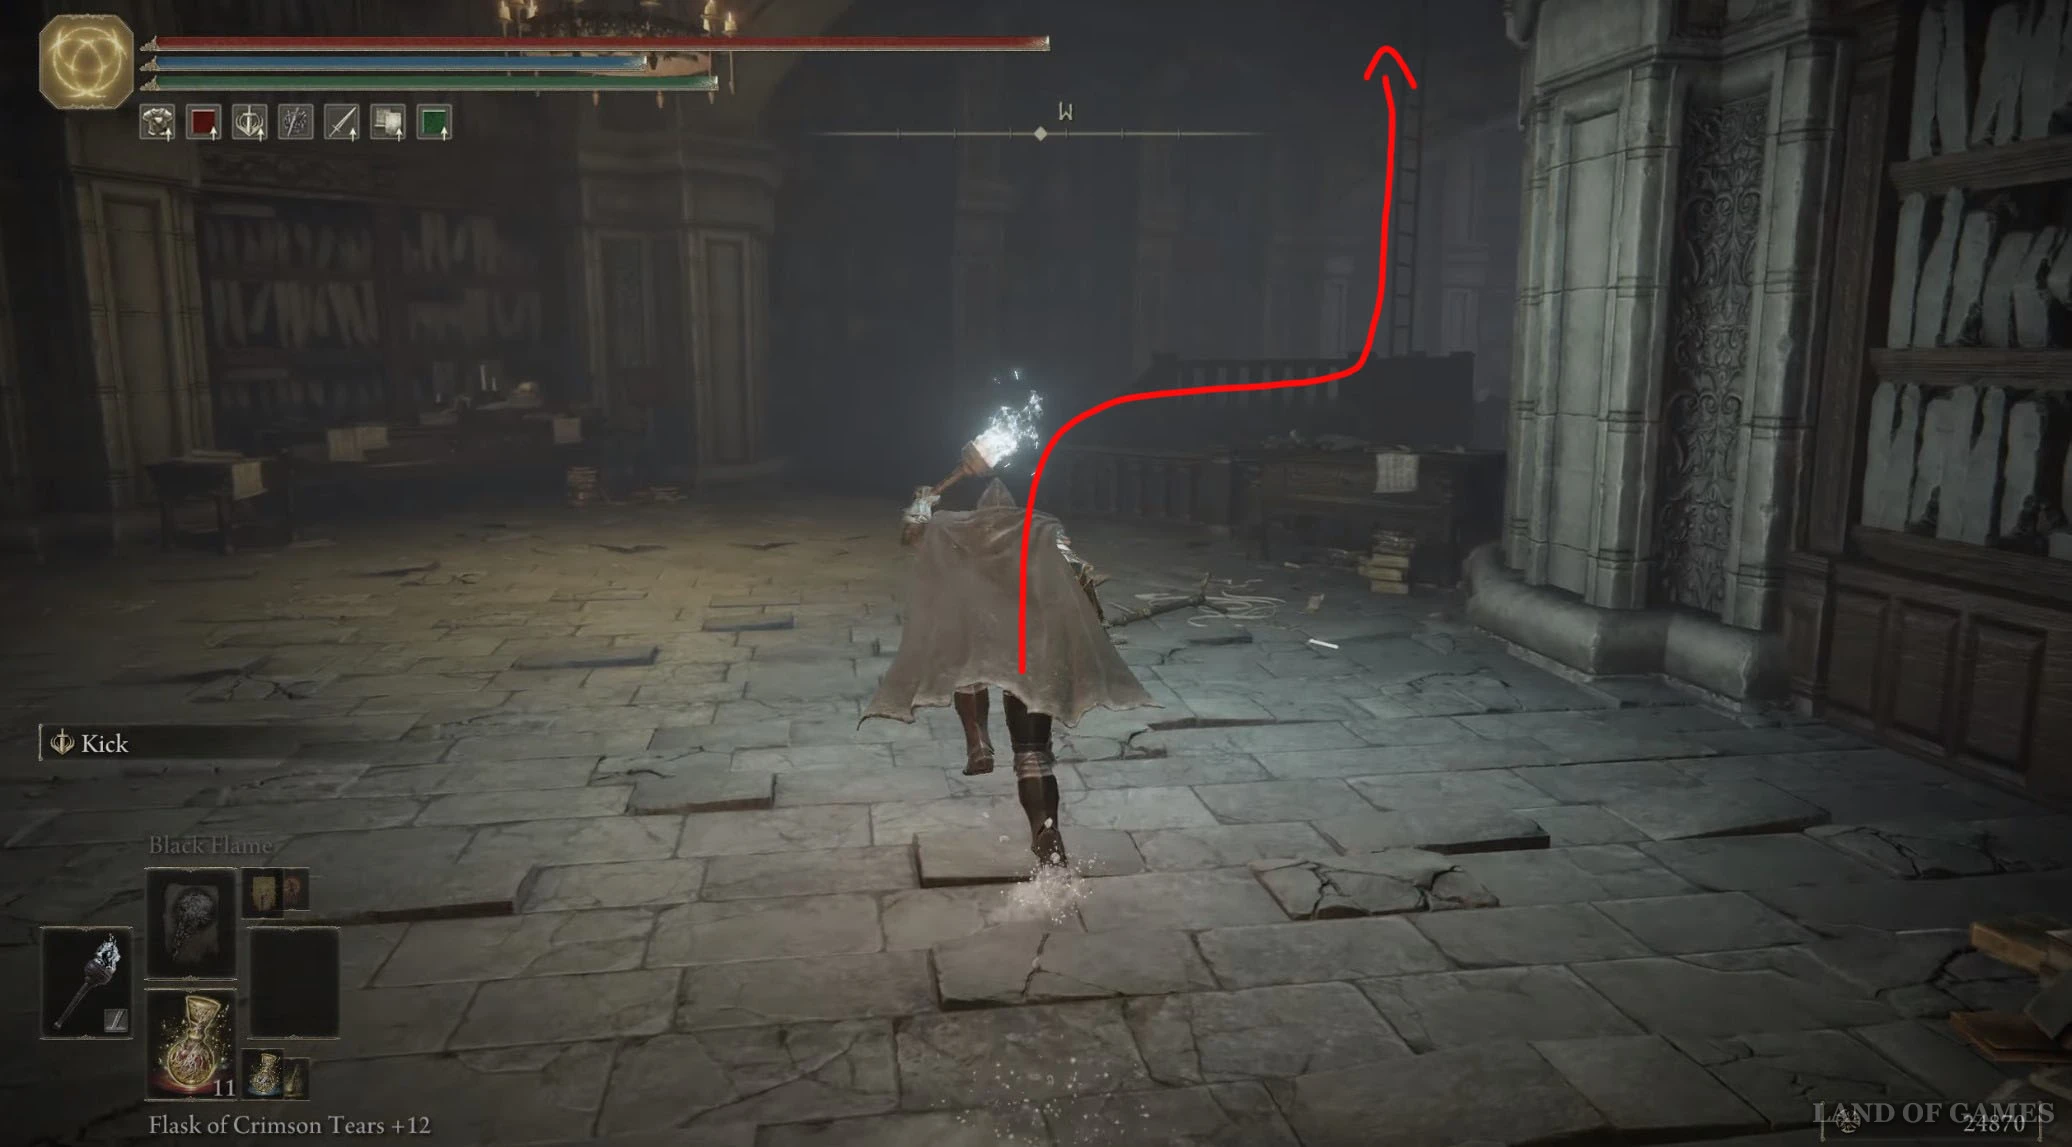
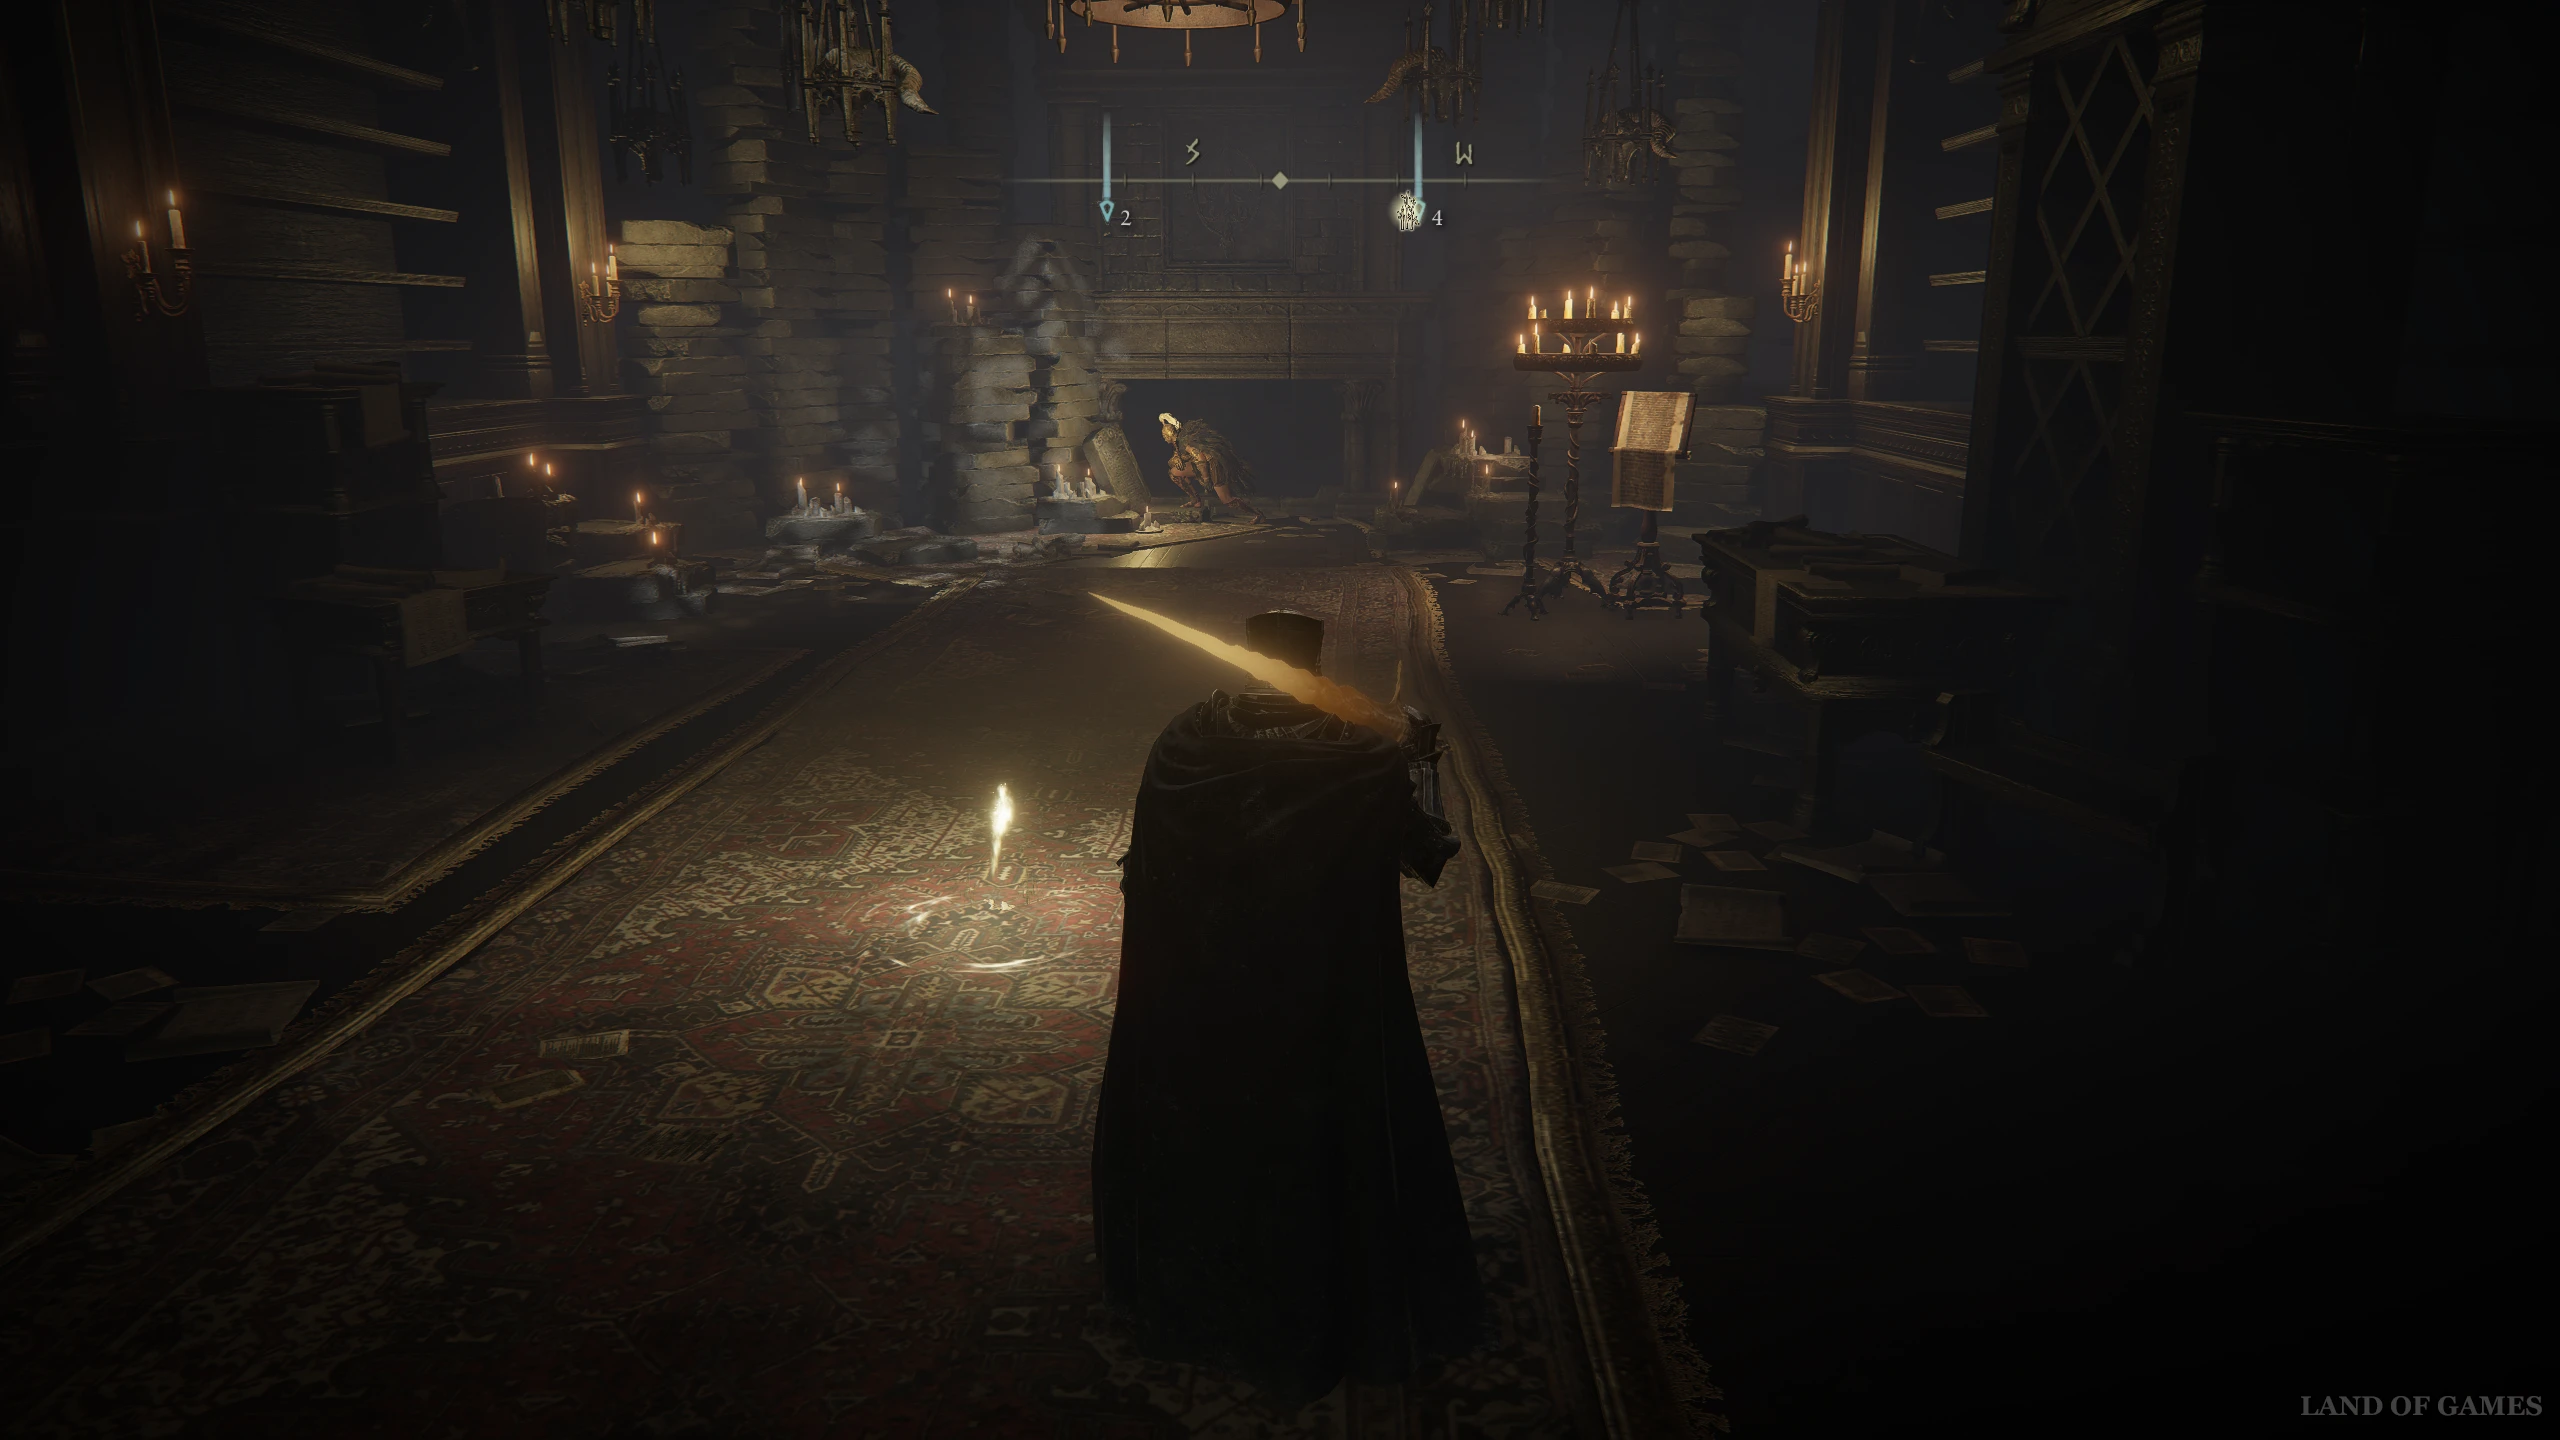
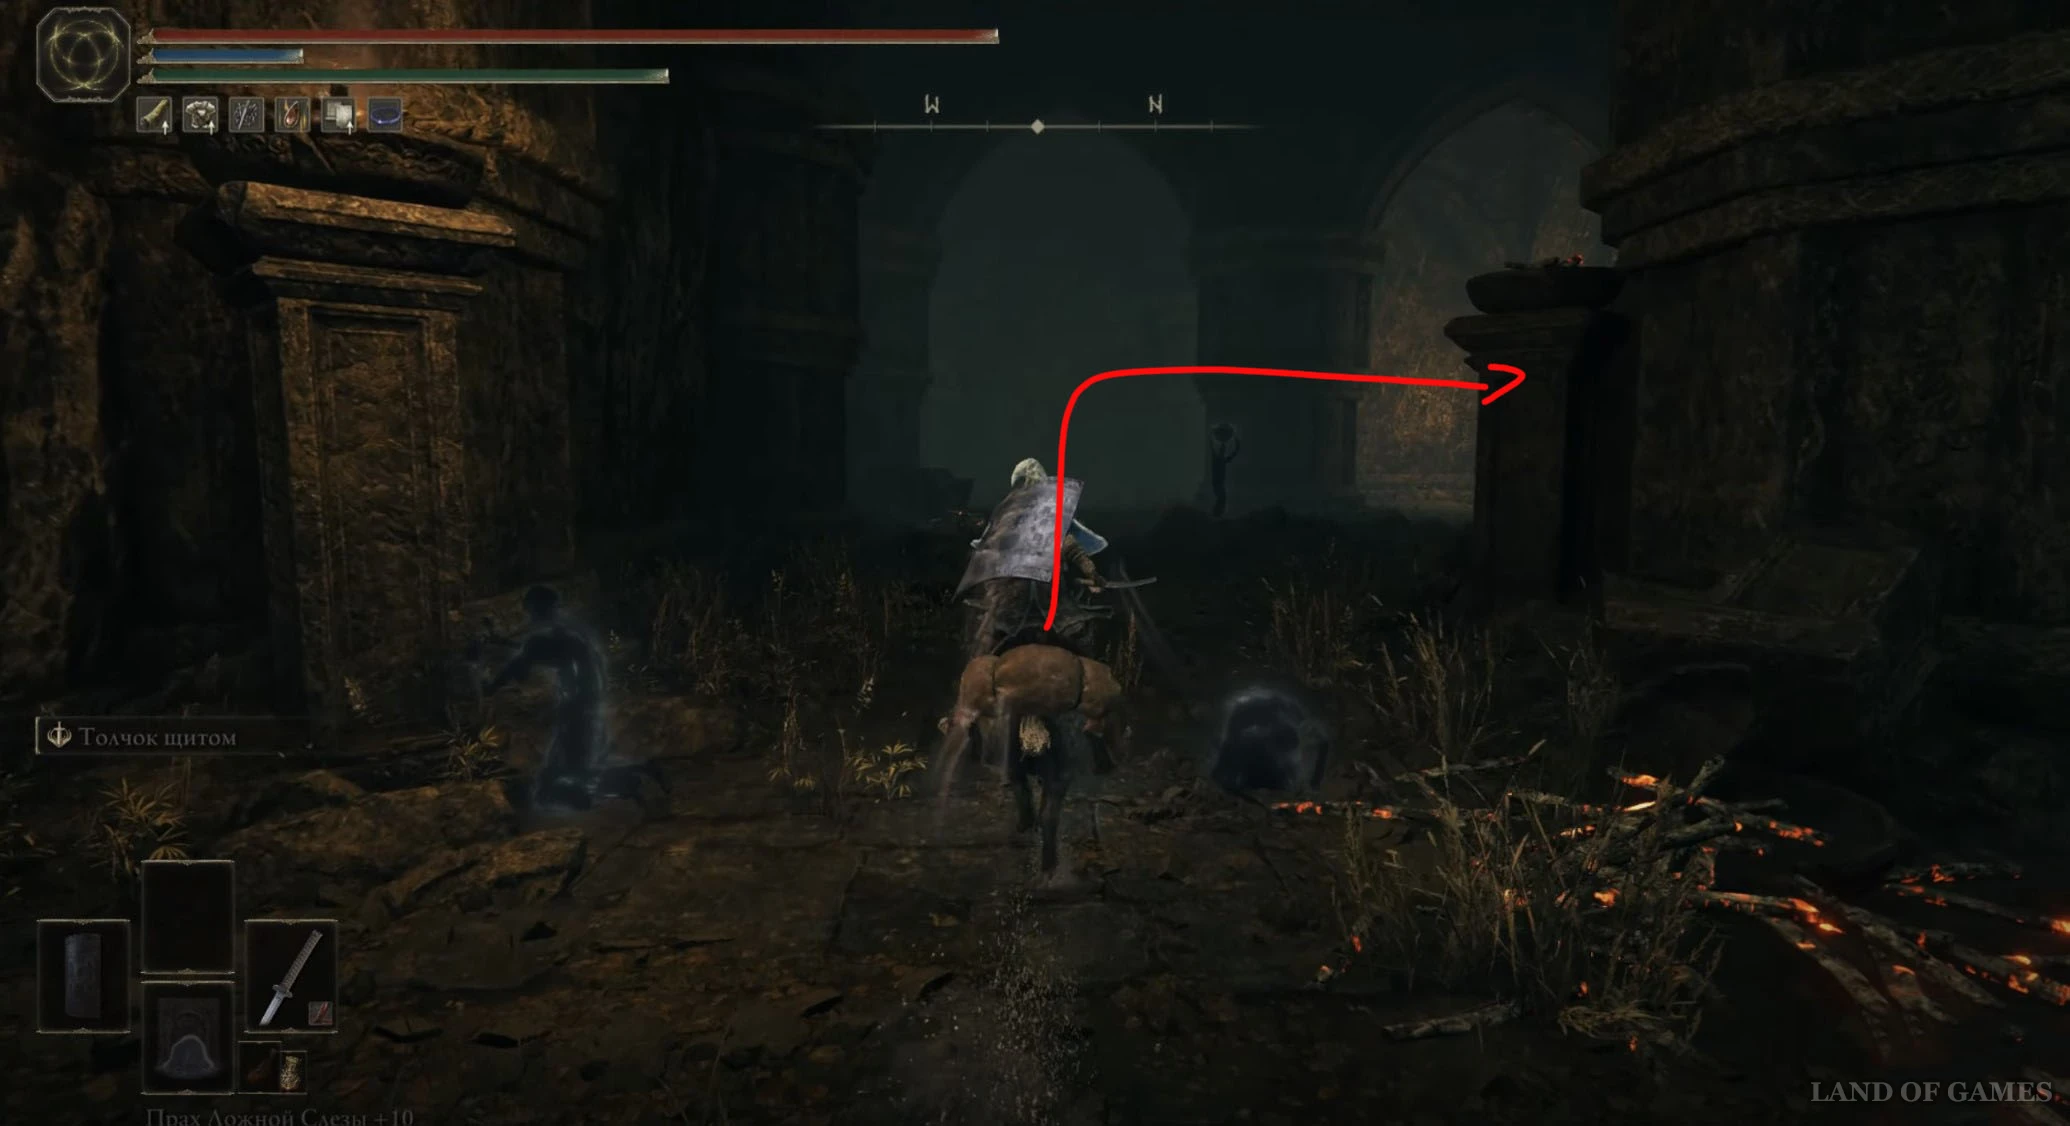
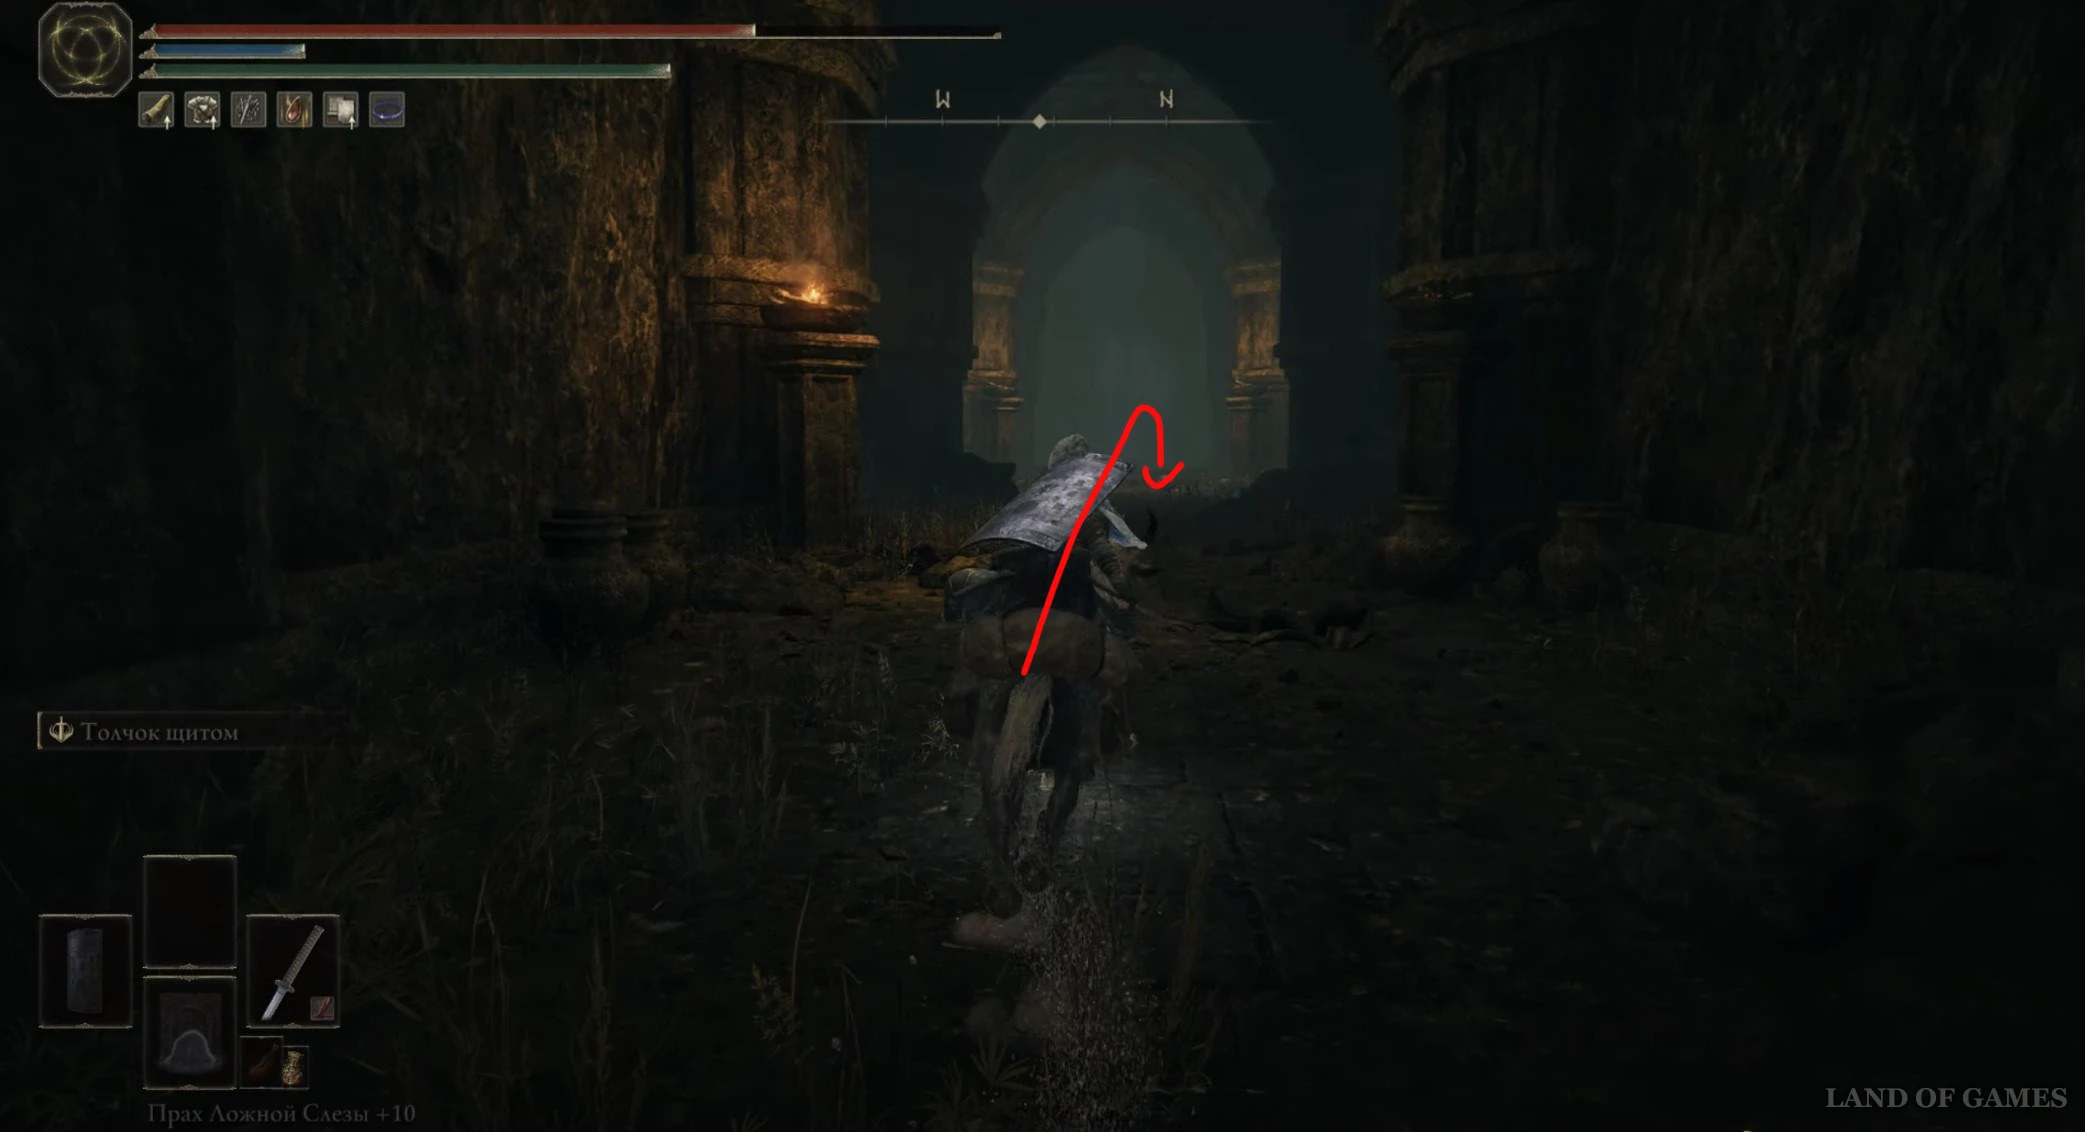
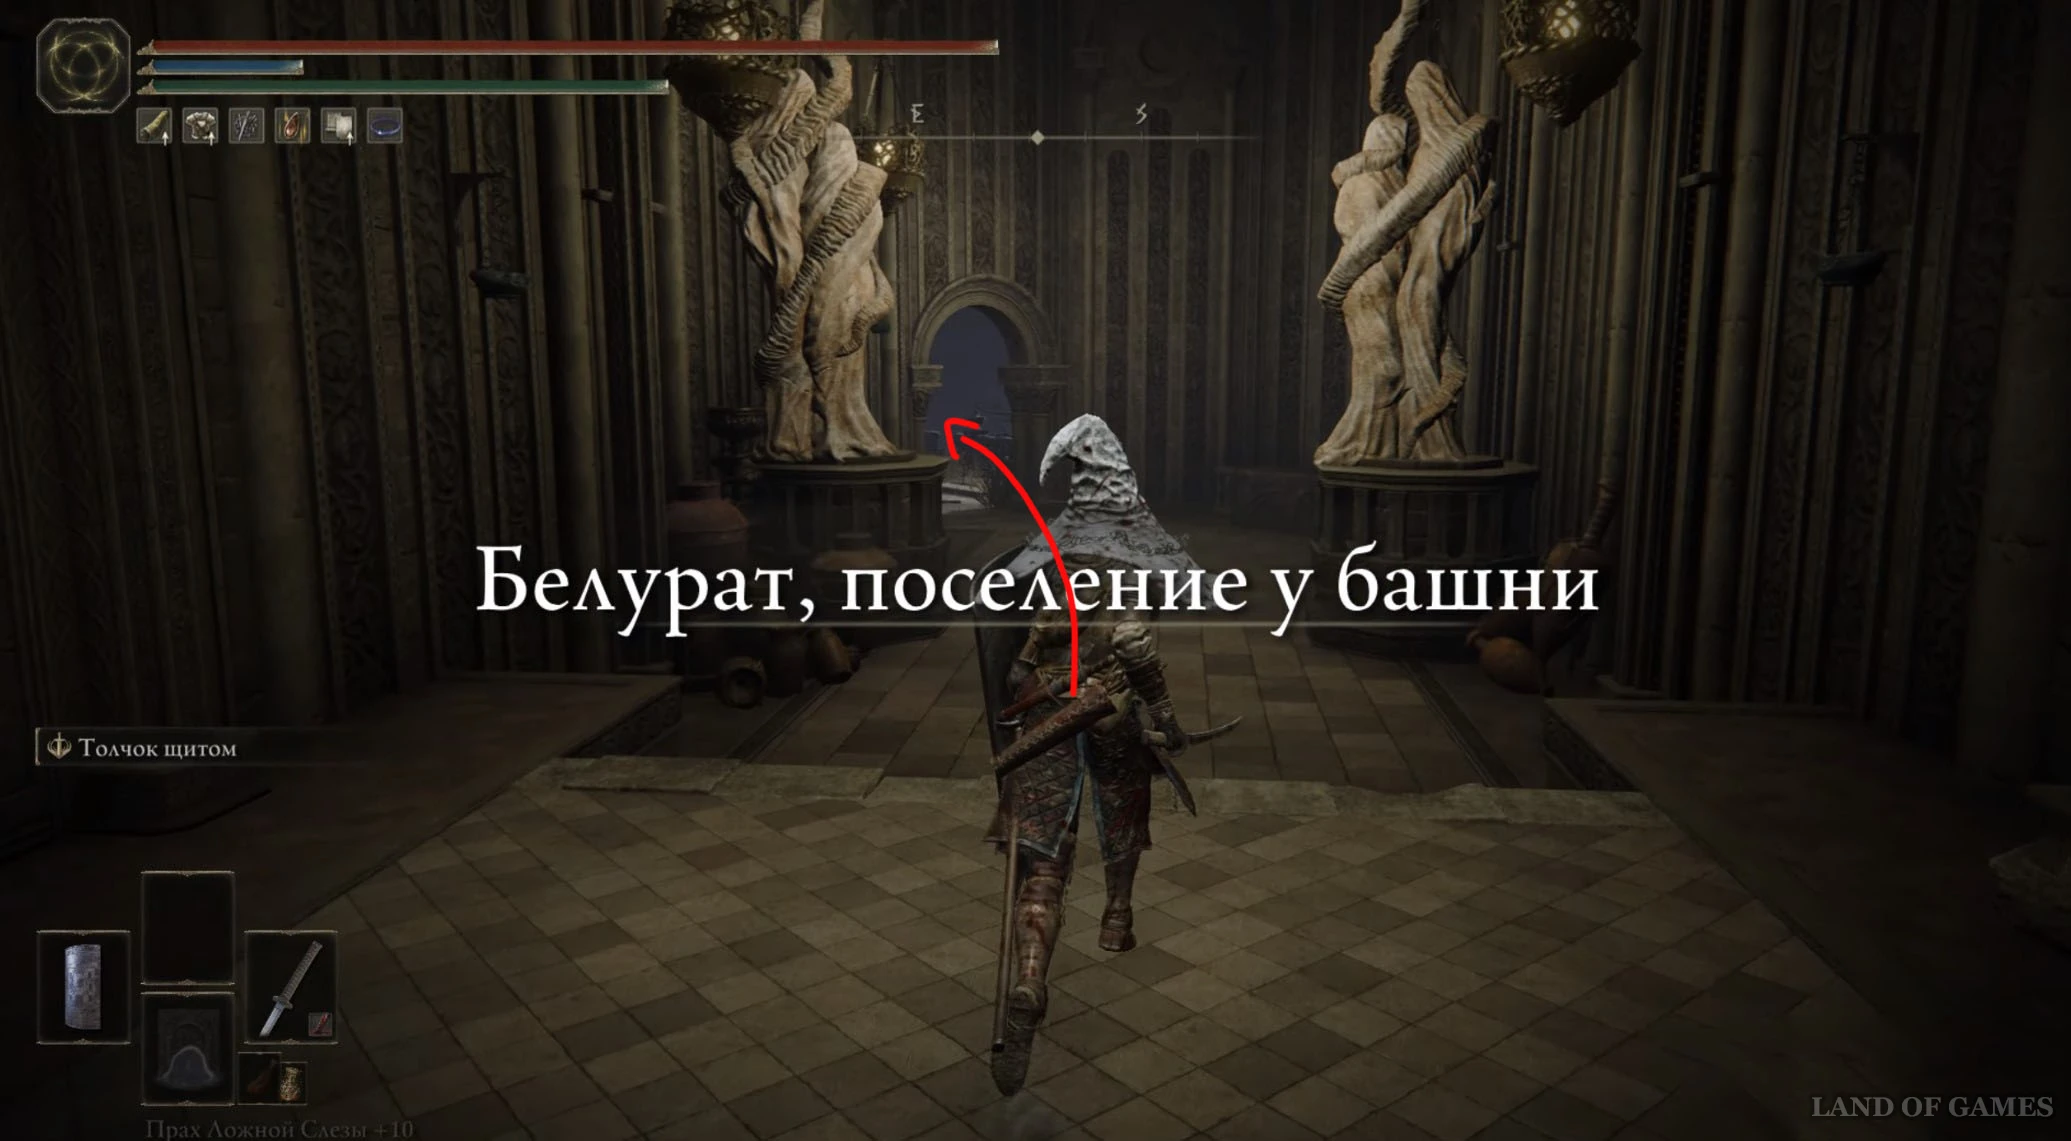
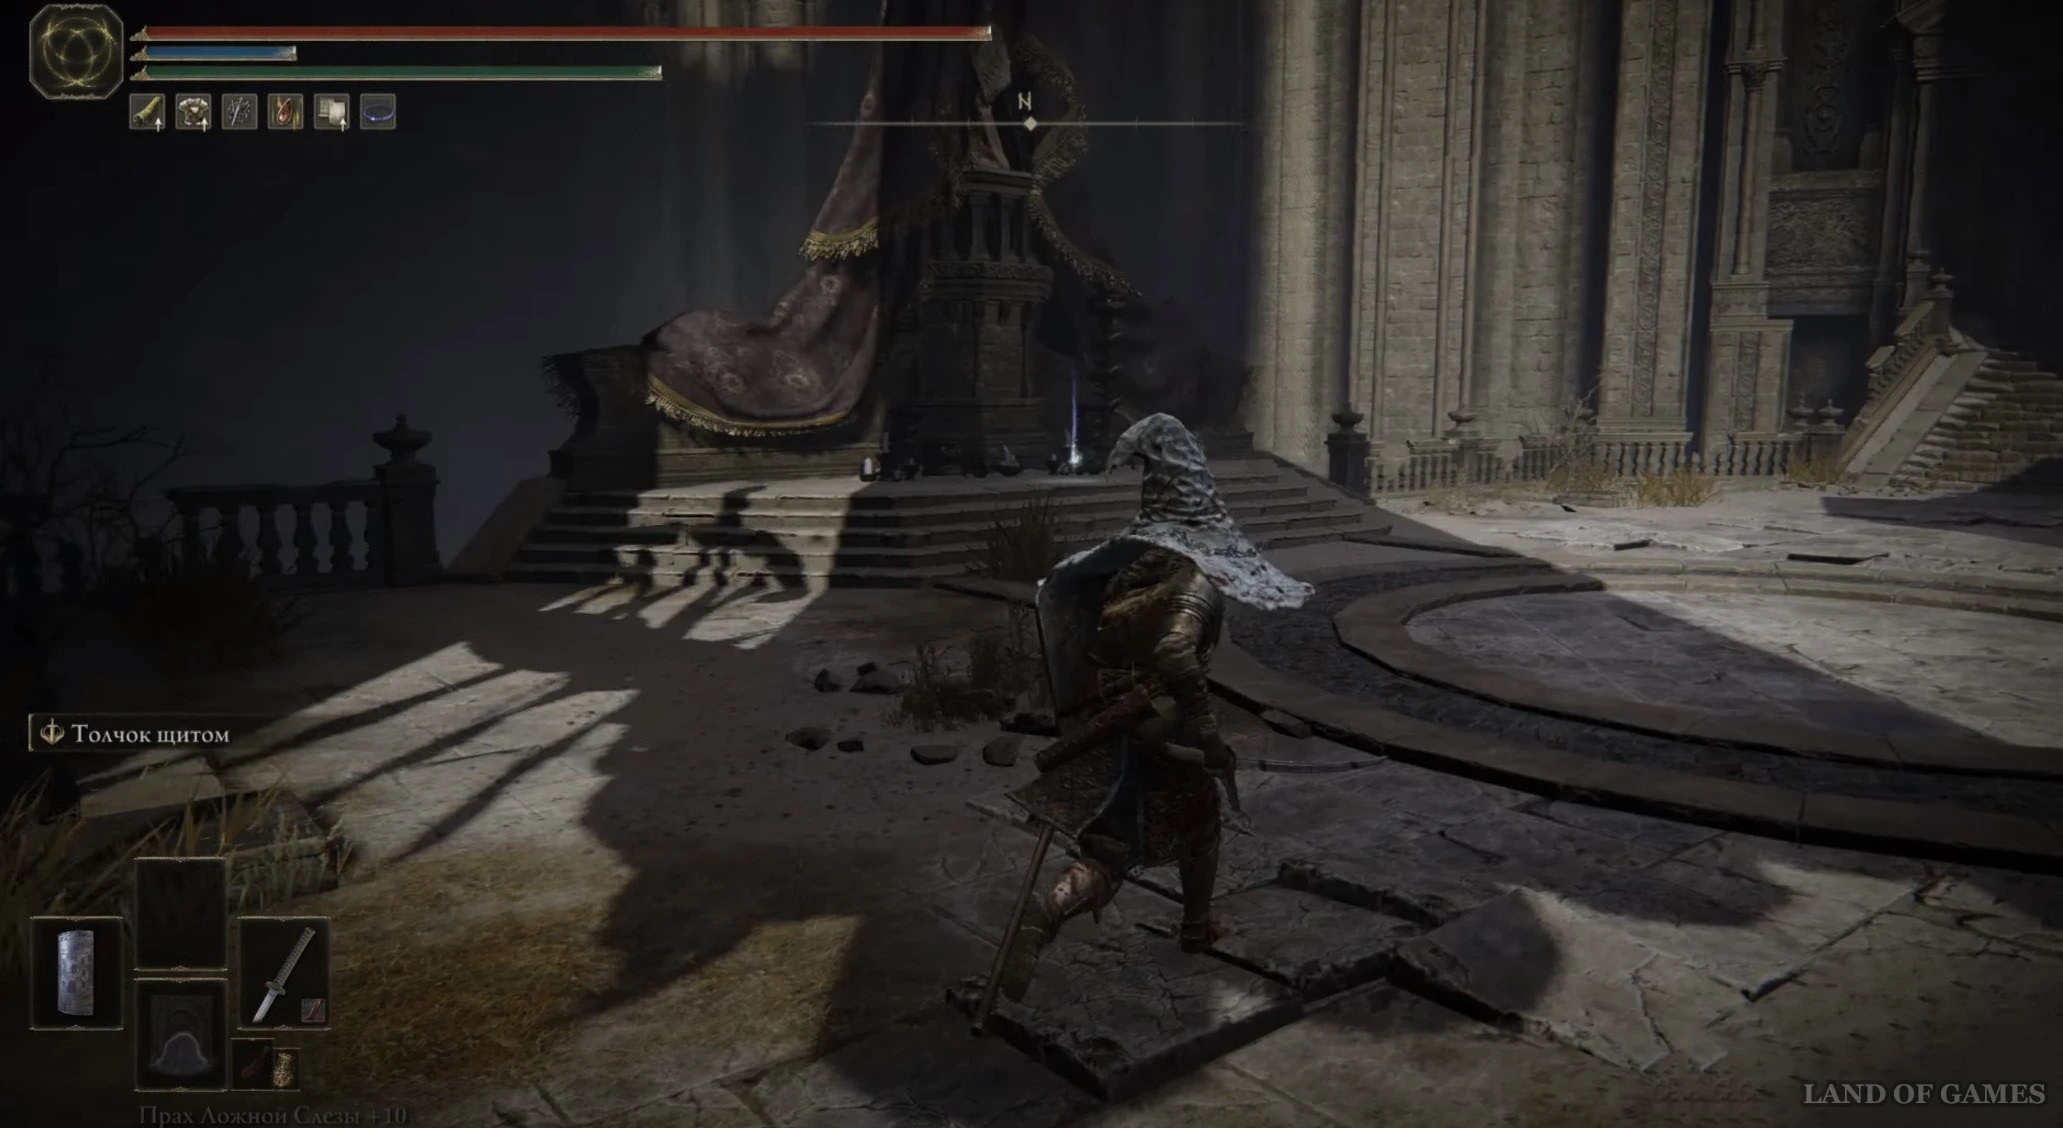
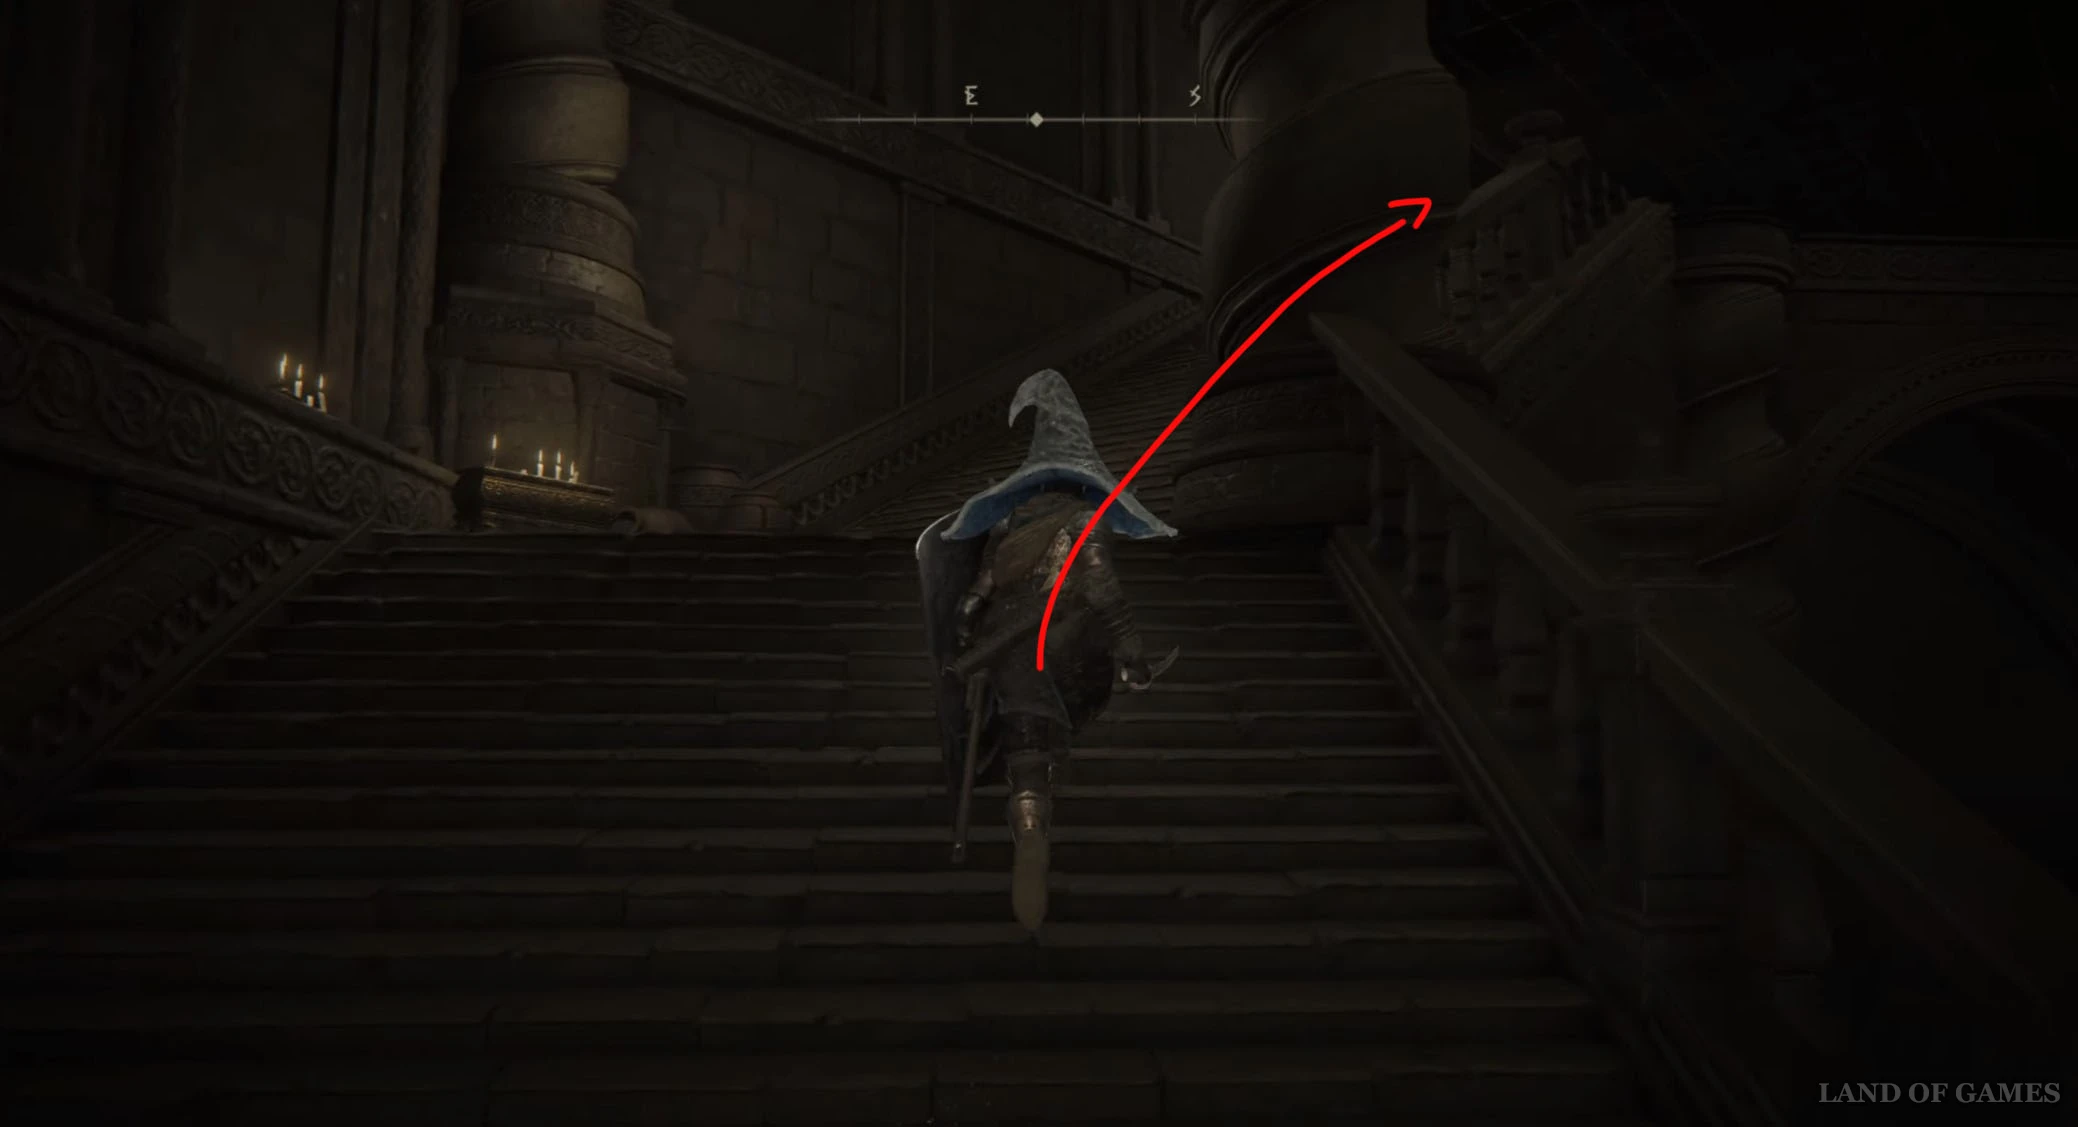
Доберитесь или переместитесь к месту благодати «Малый частный алтарь», находящемуся в Белурате, а затем пройдите через западный проход и поднимитесь по ступенькам наверх. Повернитесь налево, поднявшись по еще одной лестнице, а потом сразу же сверните вправо. Дойдя до тупика, снова поверните влево.

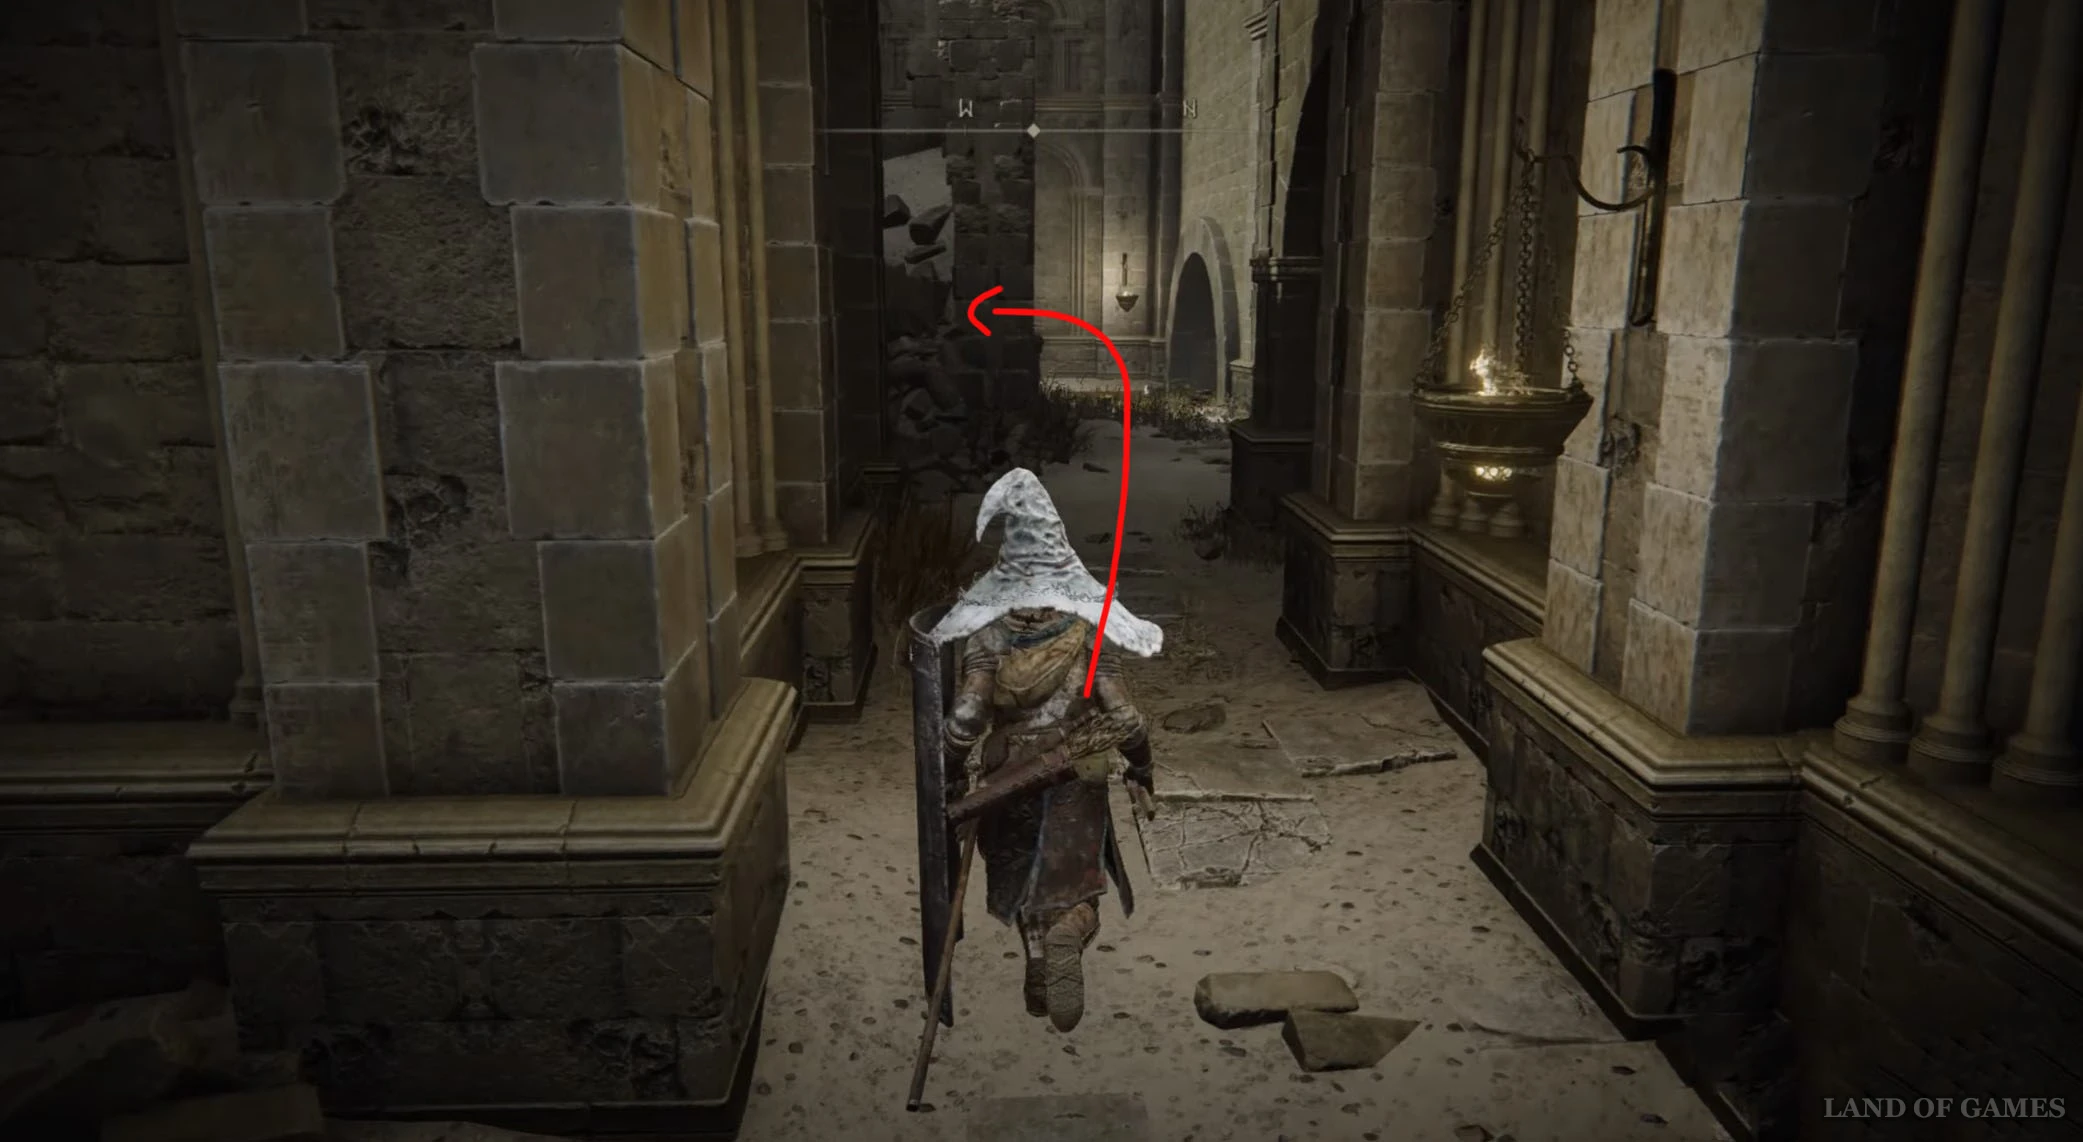
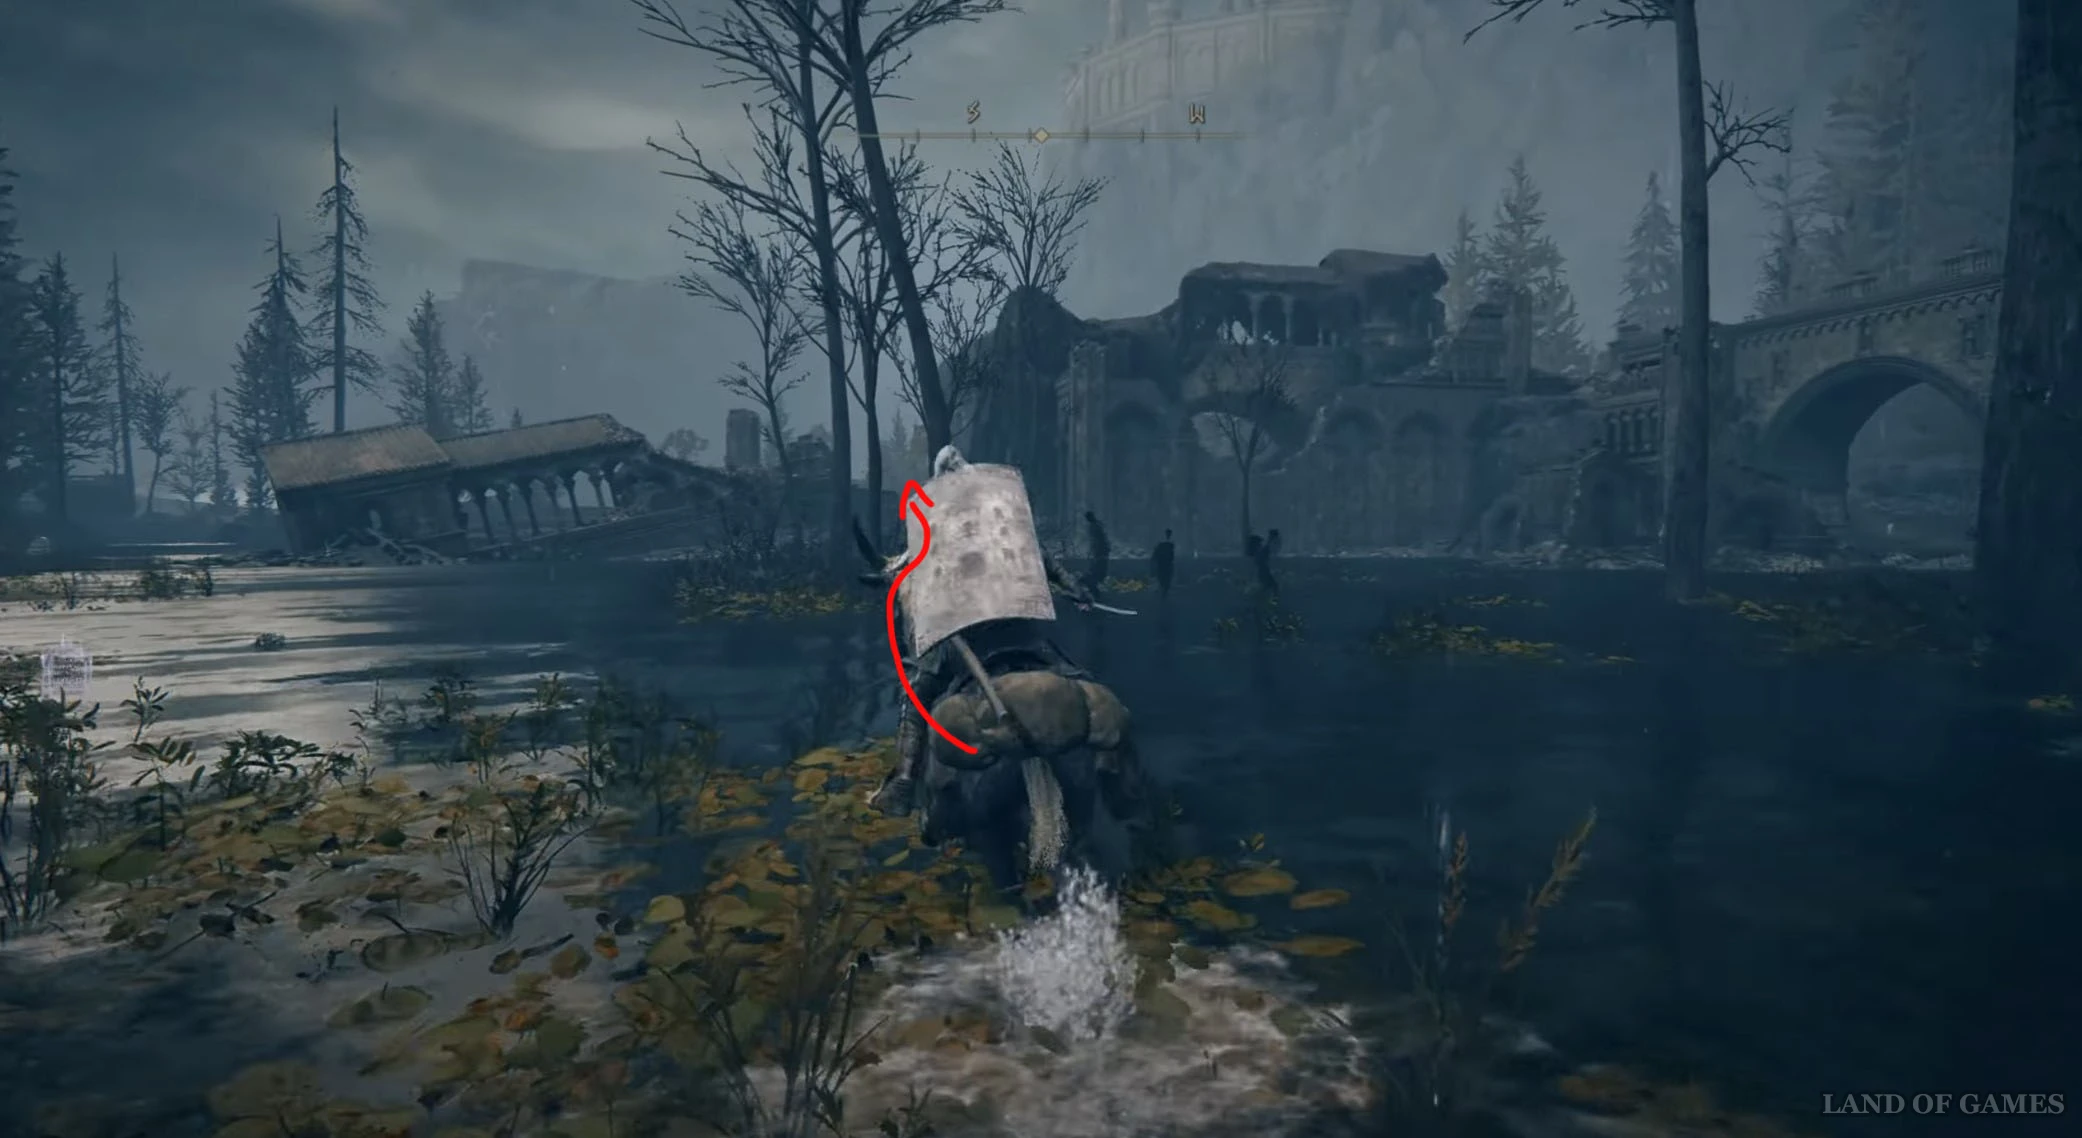
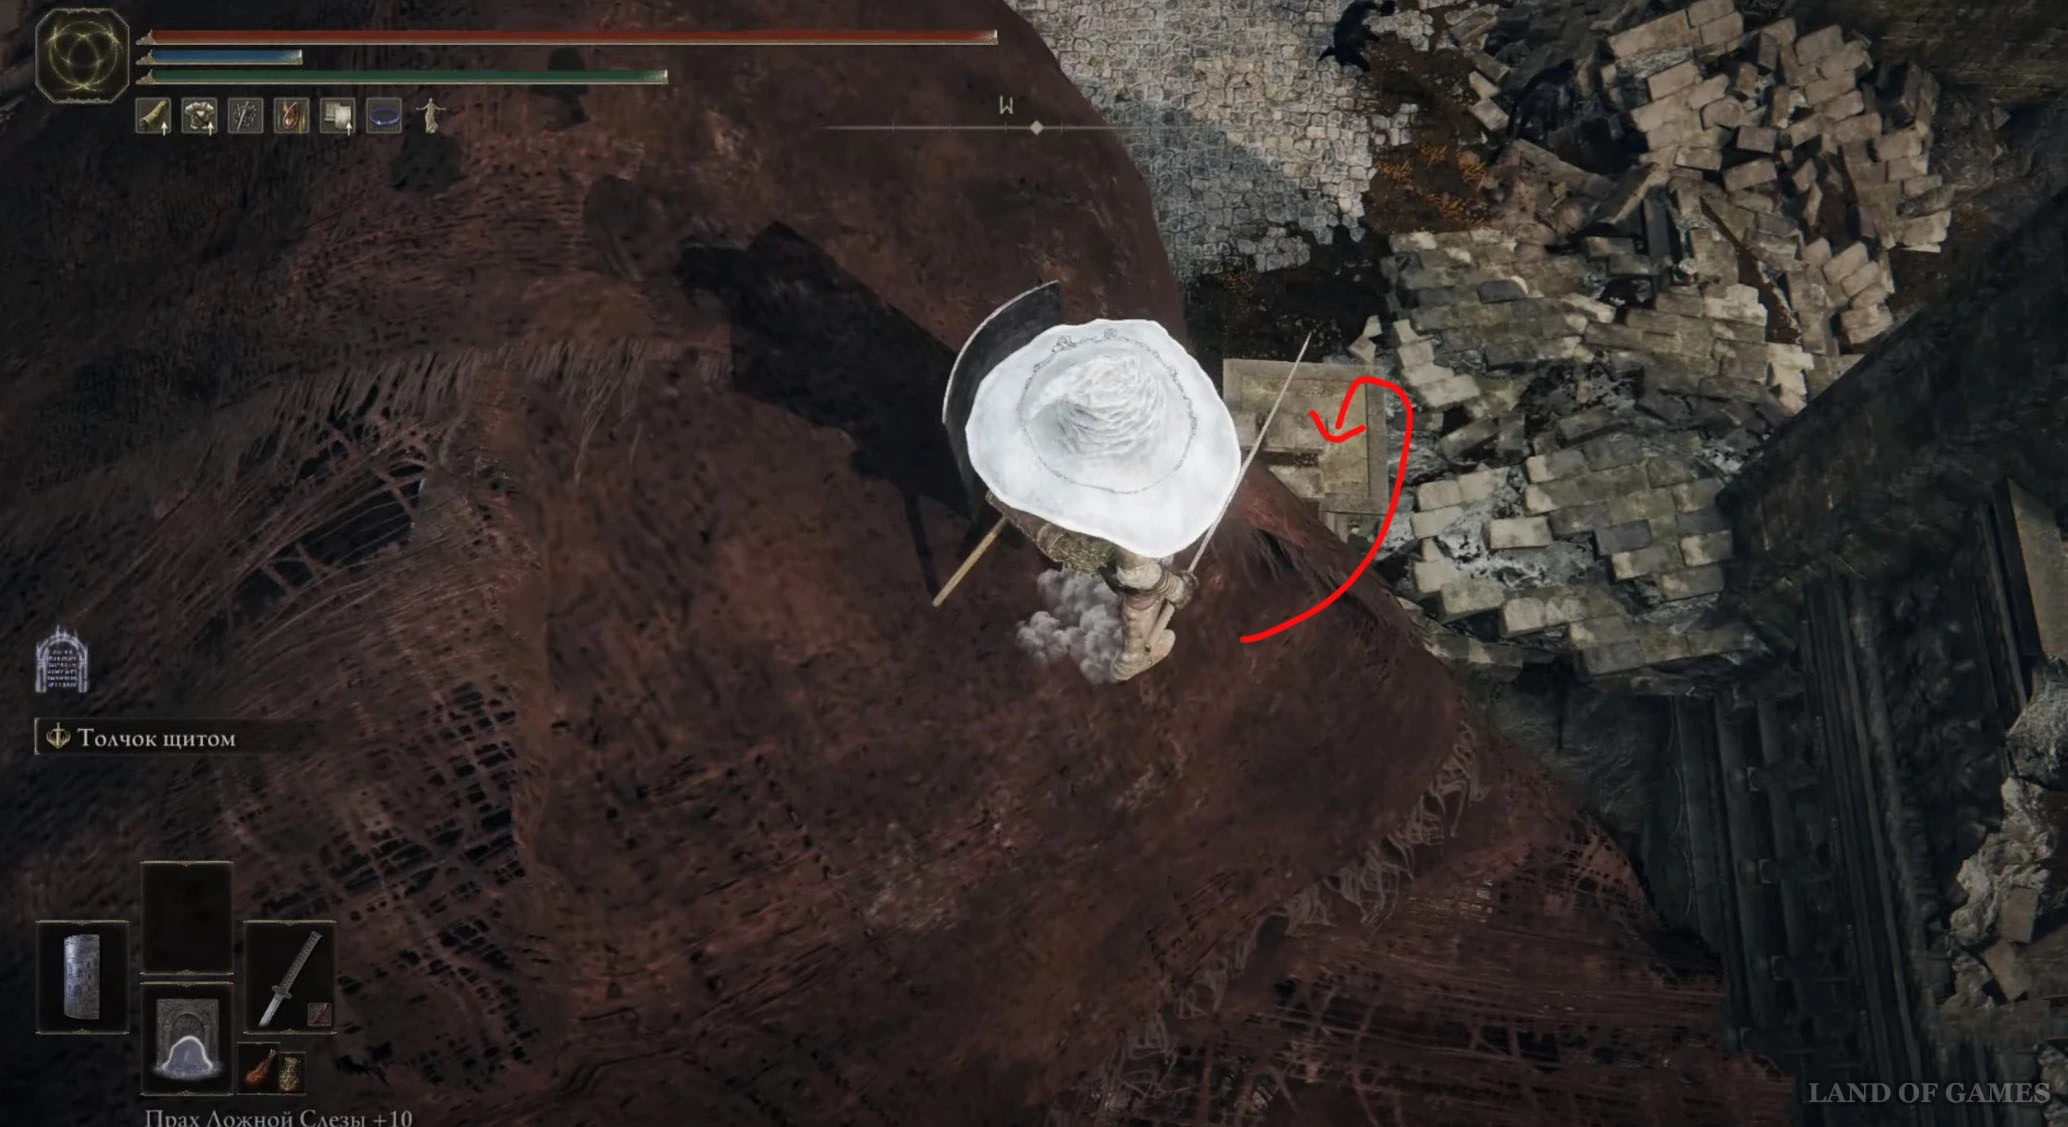
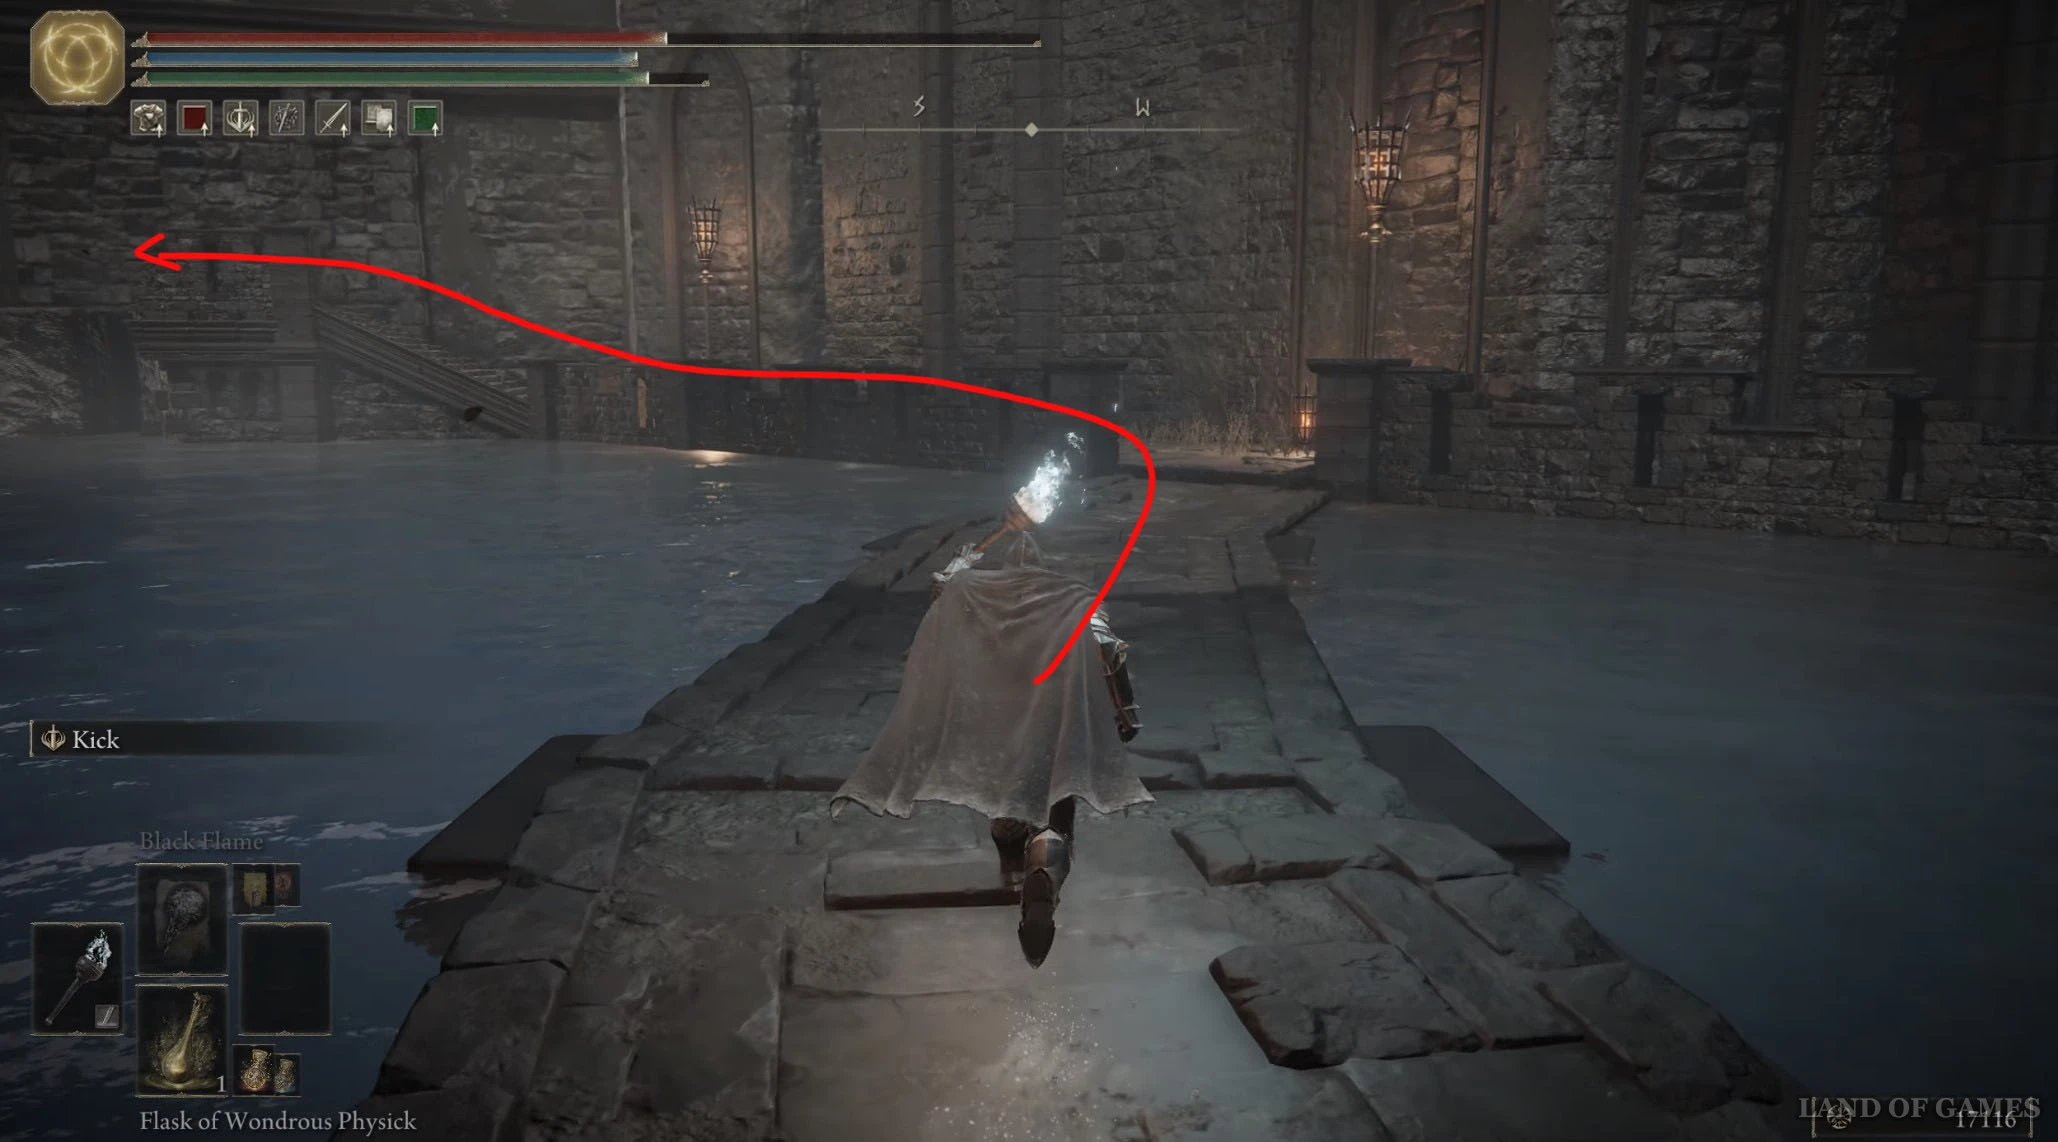
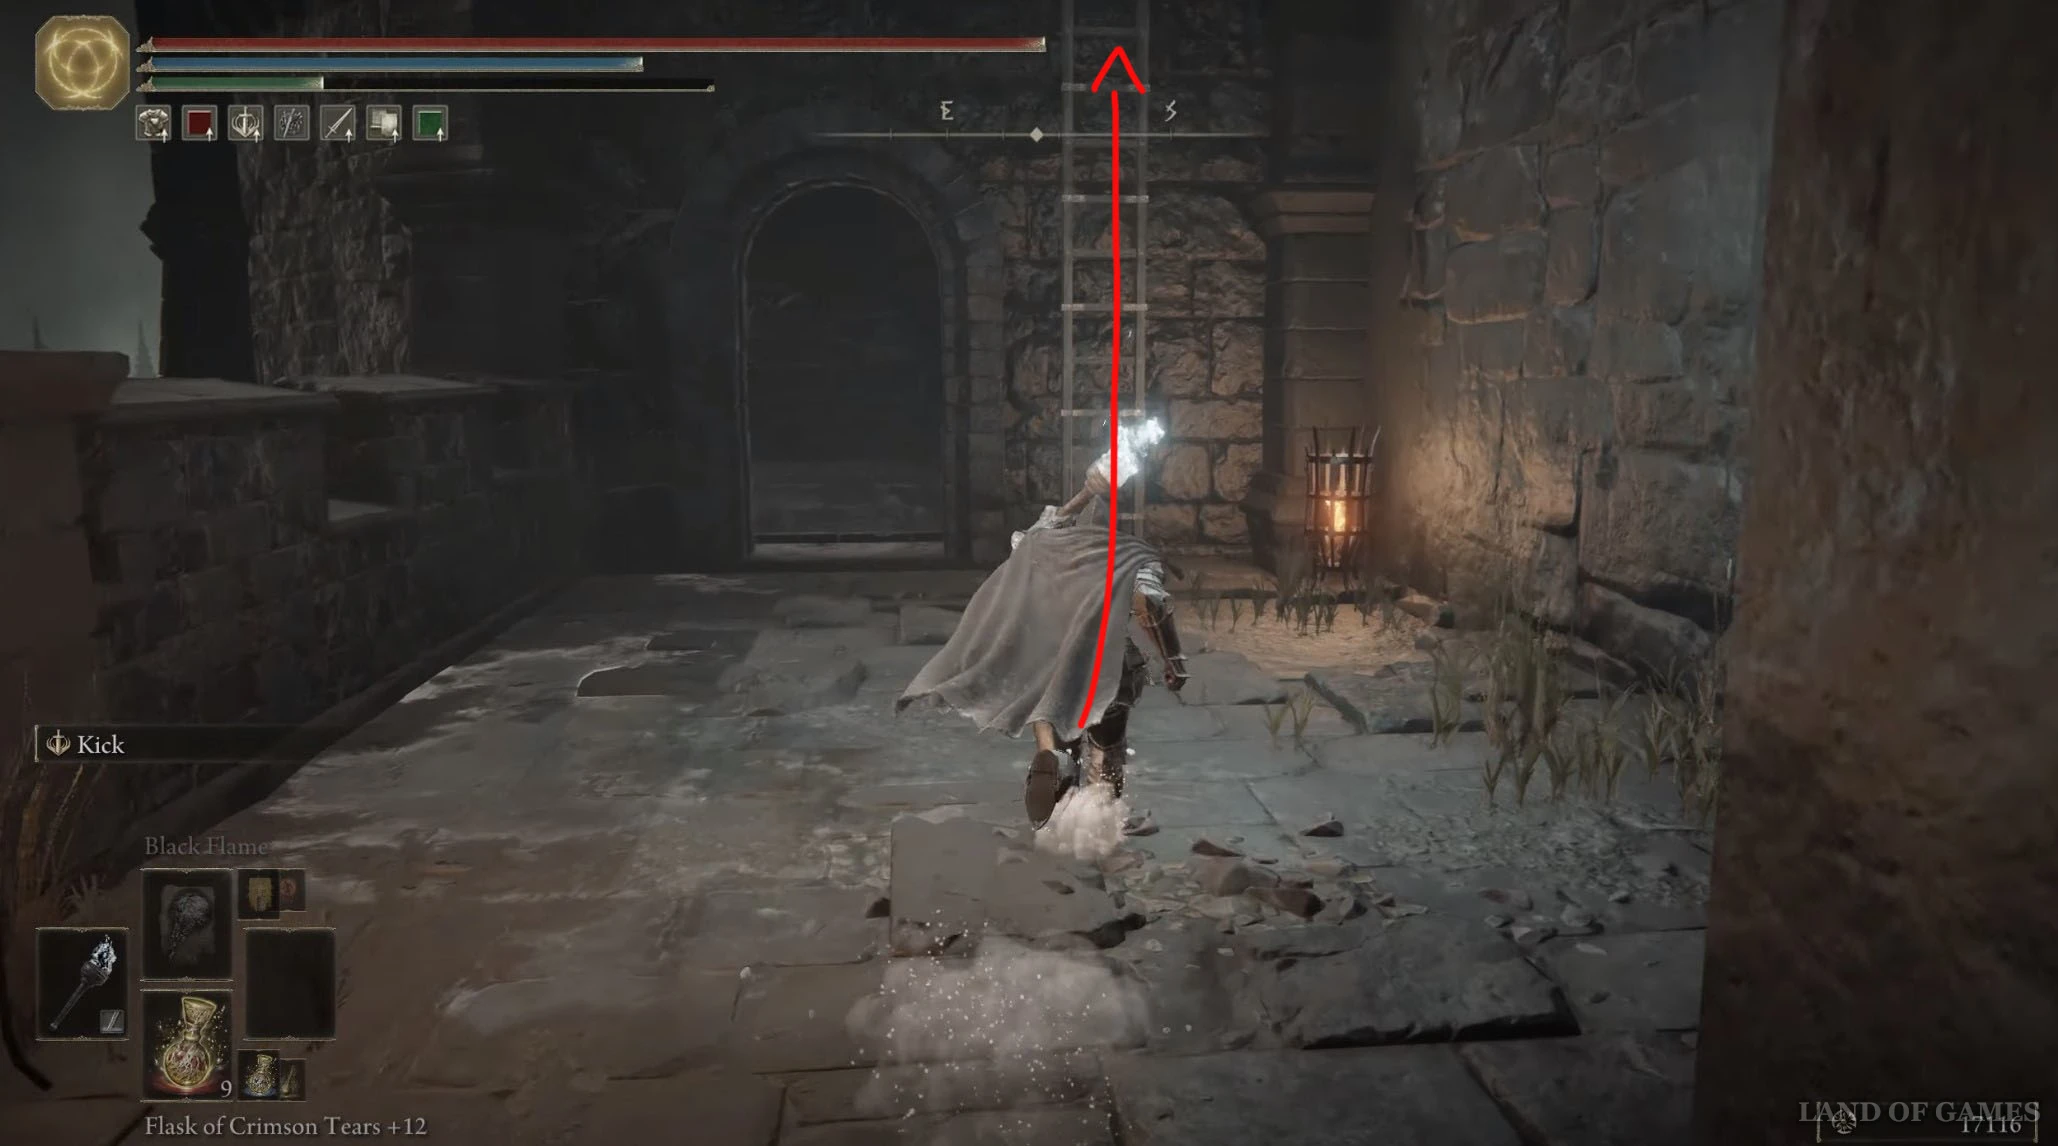
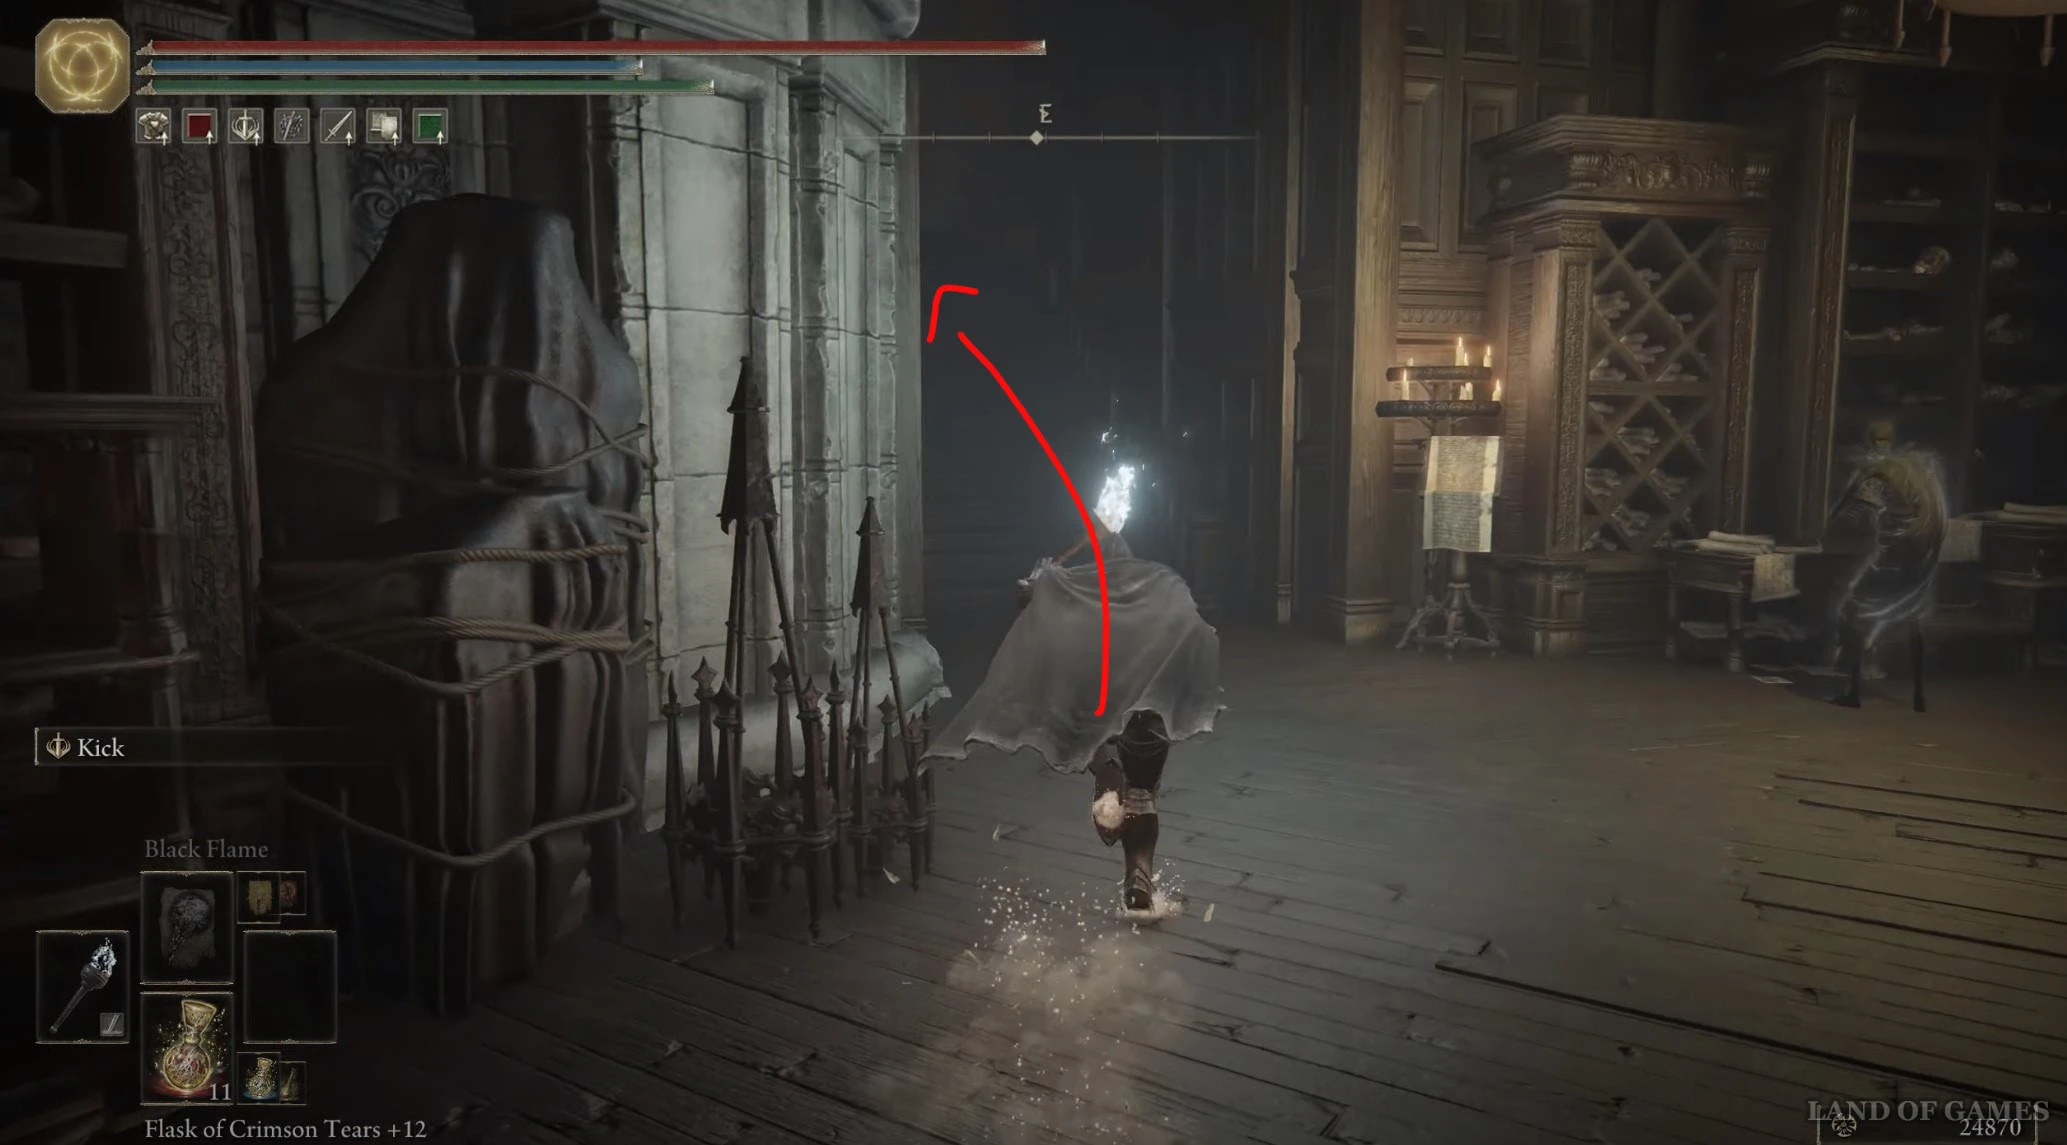
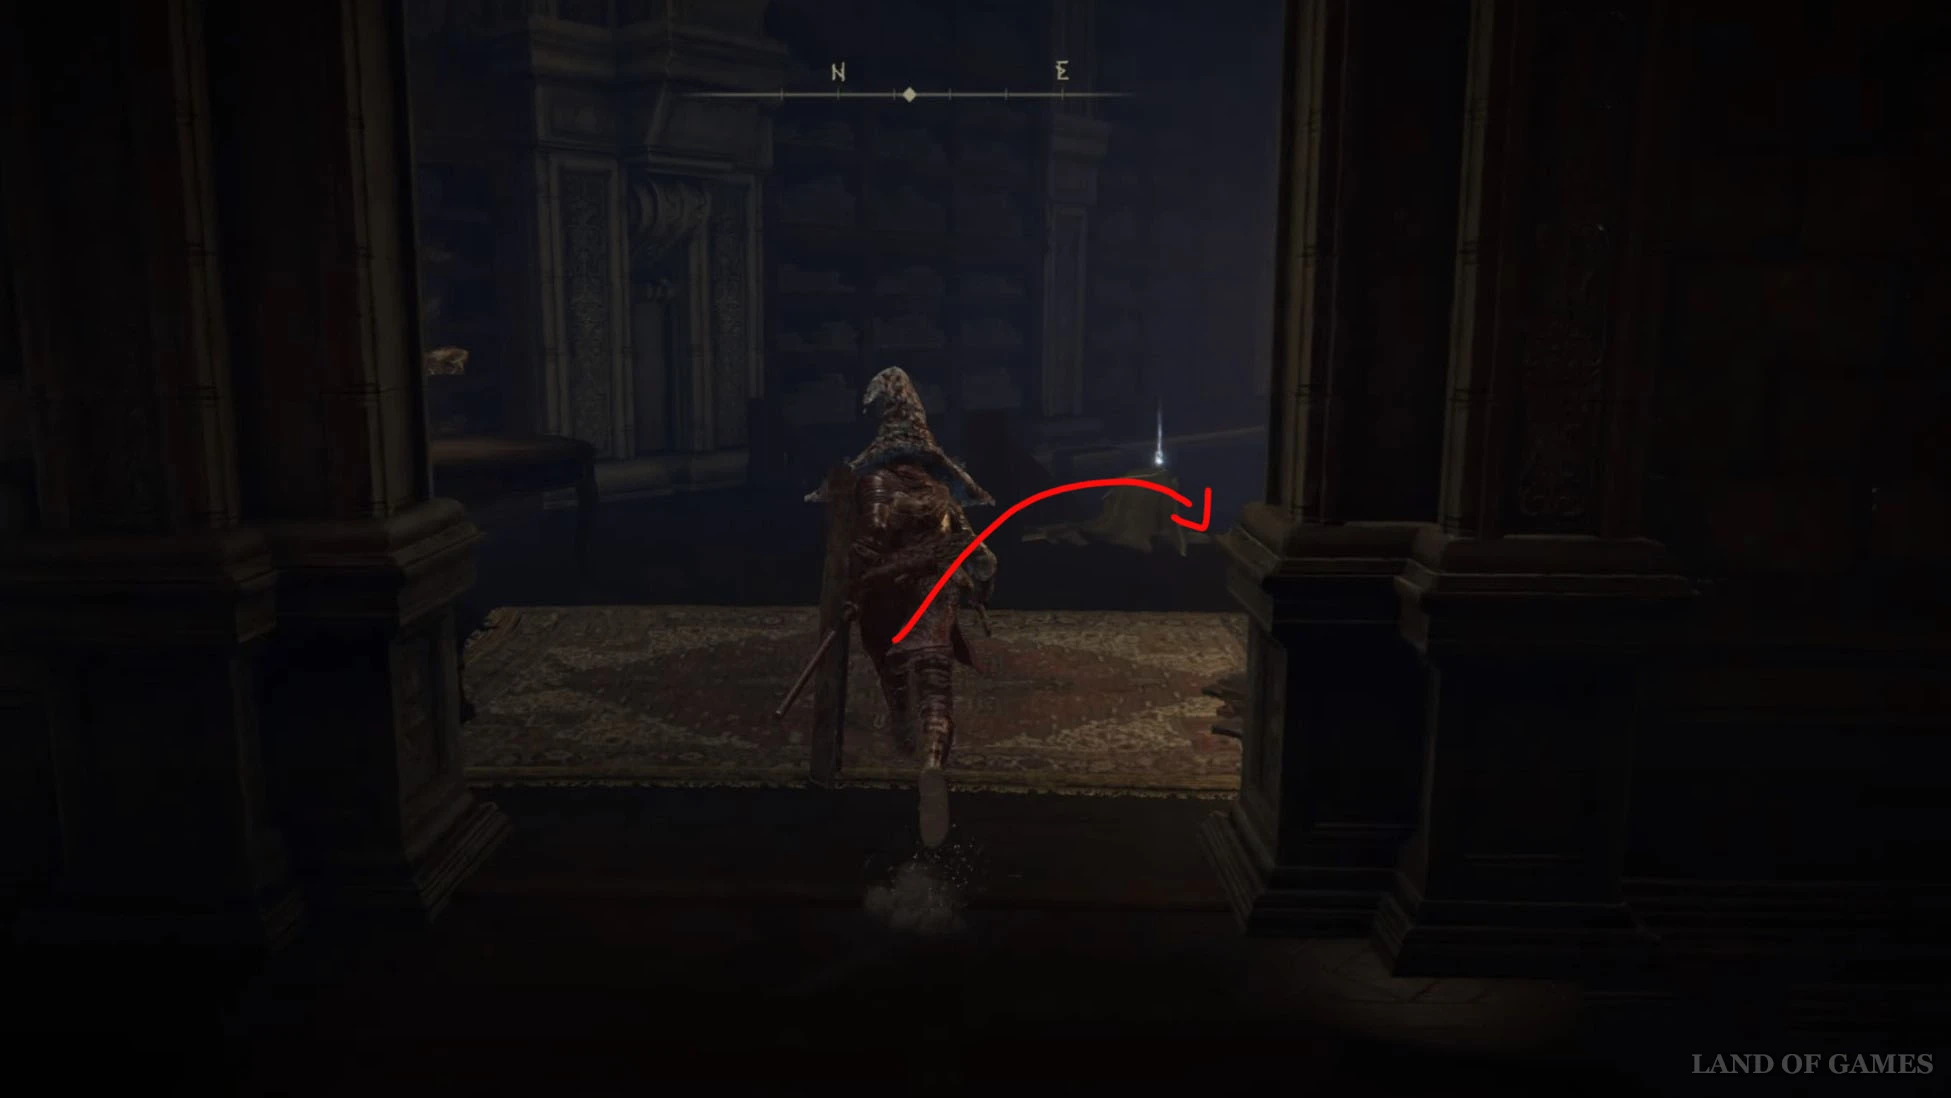
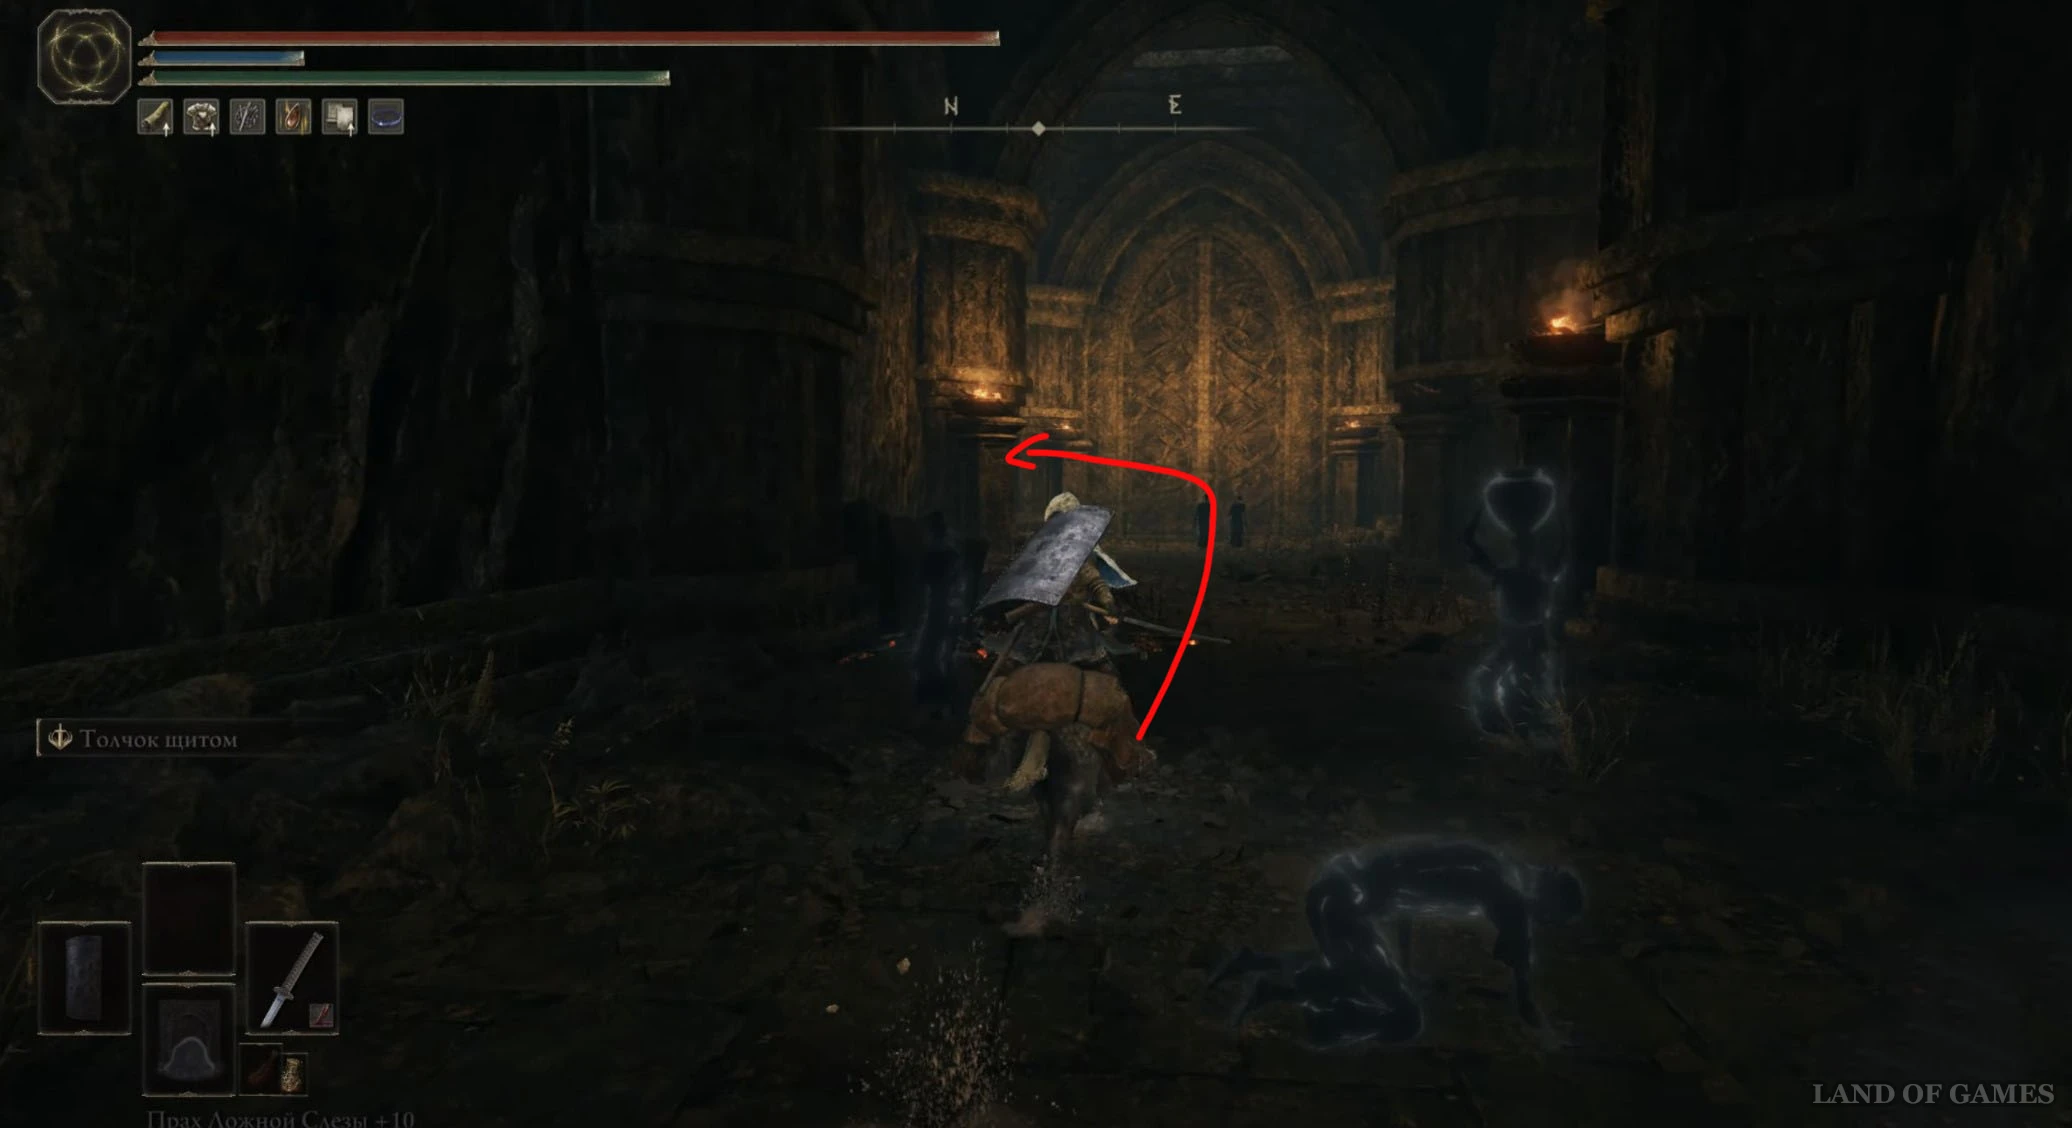
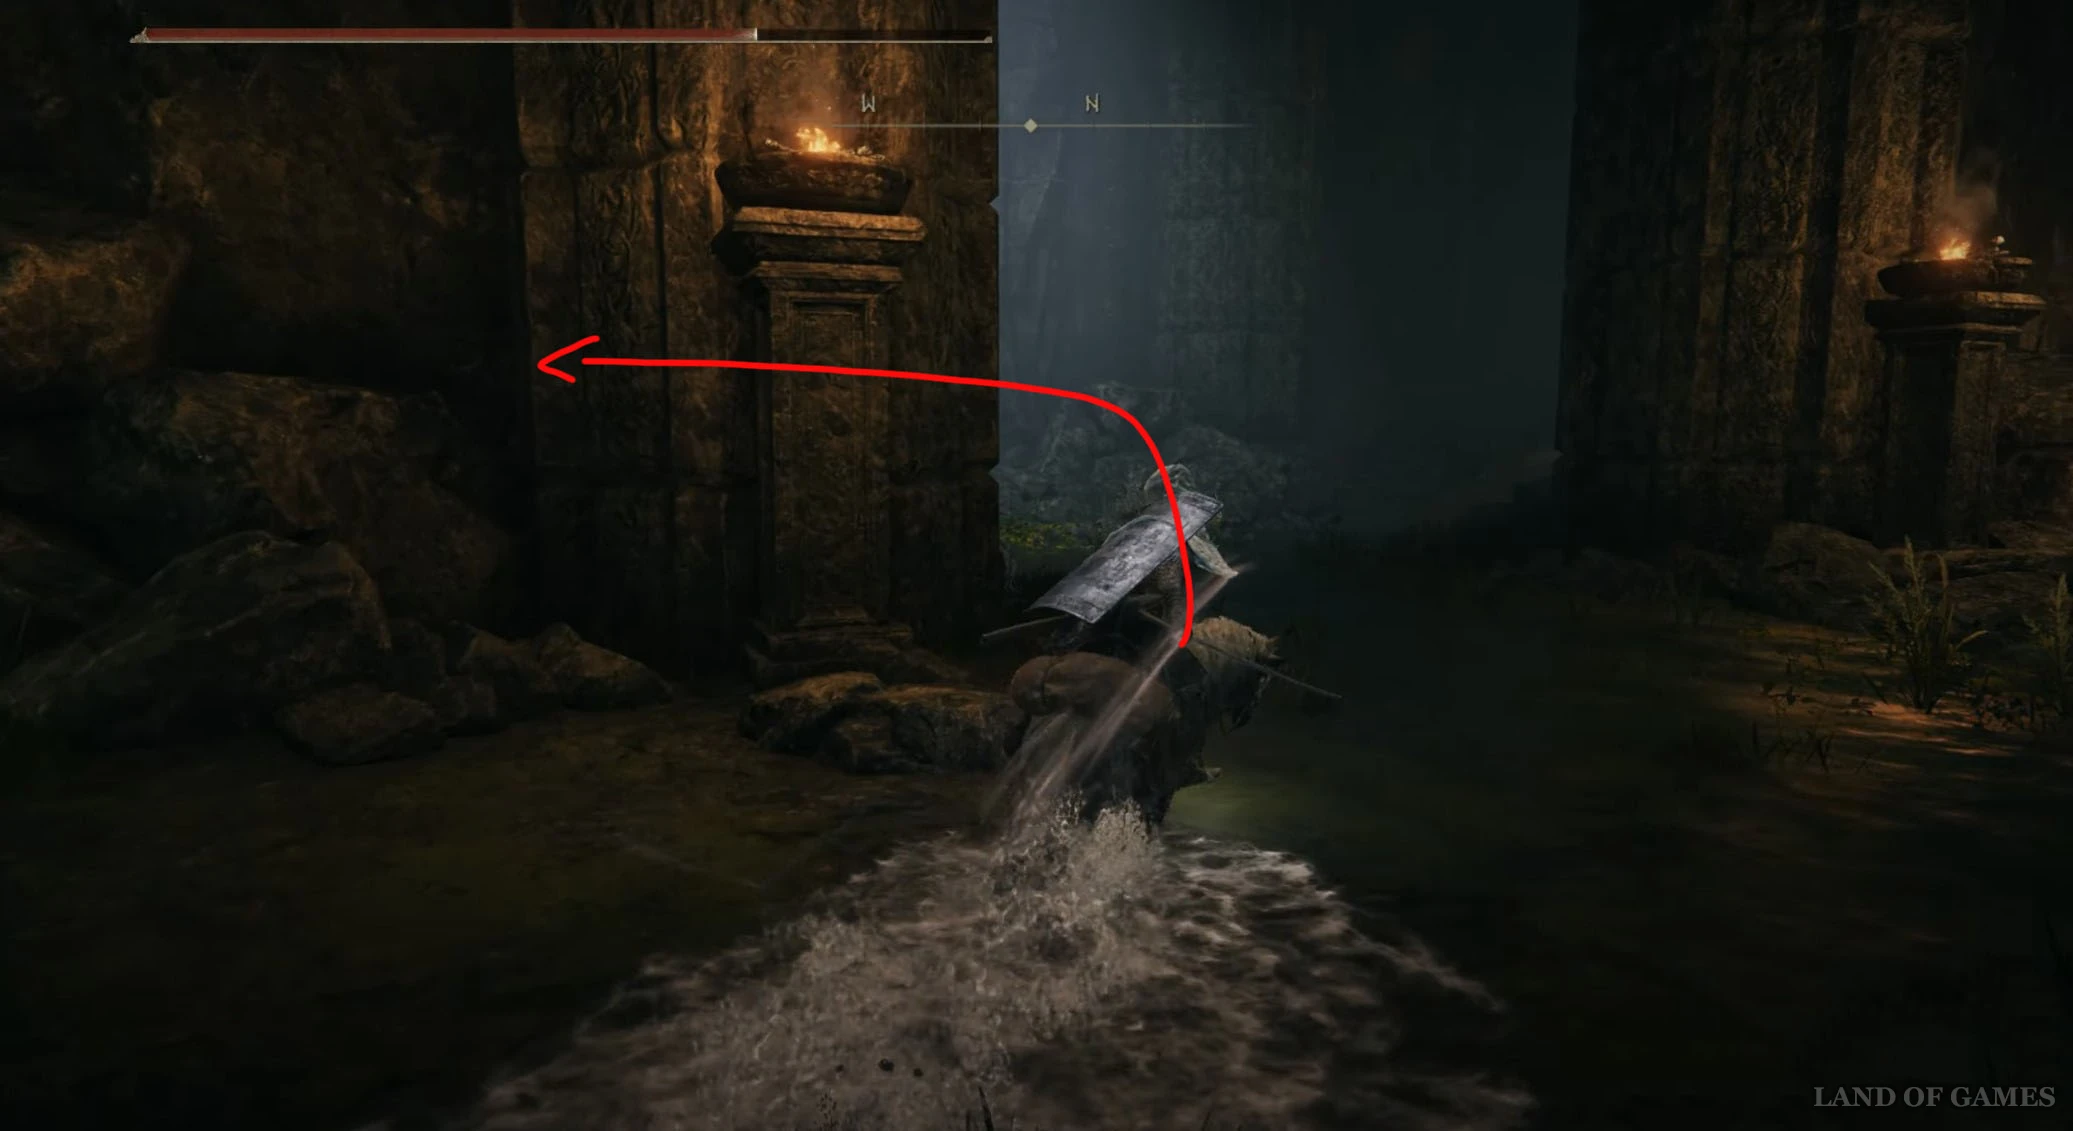
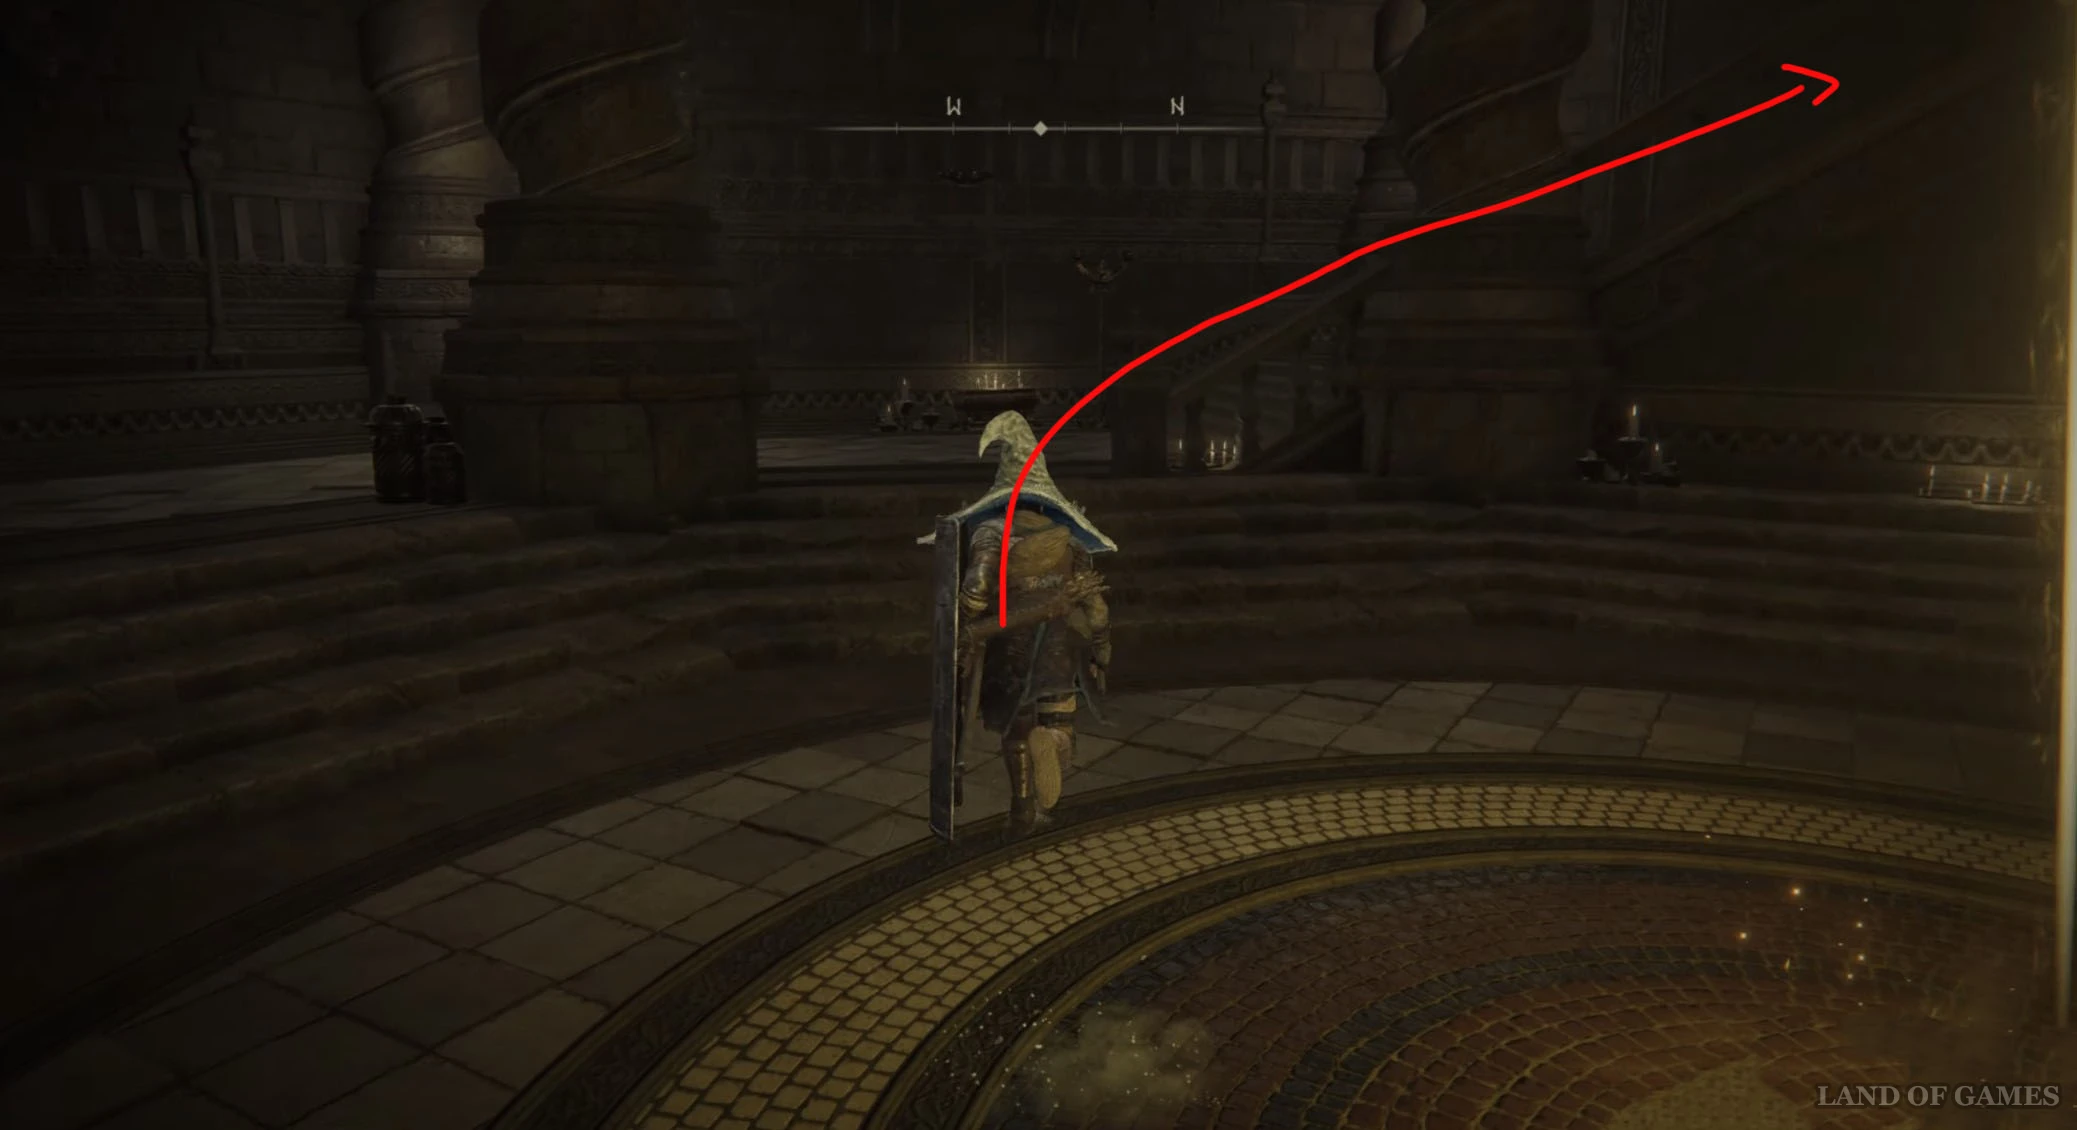
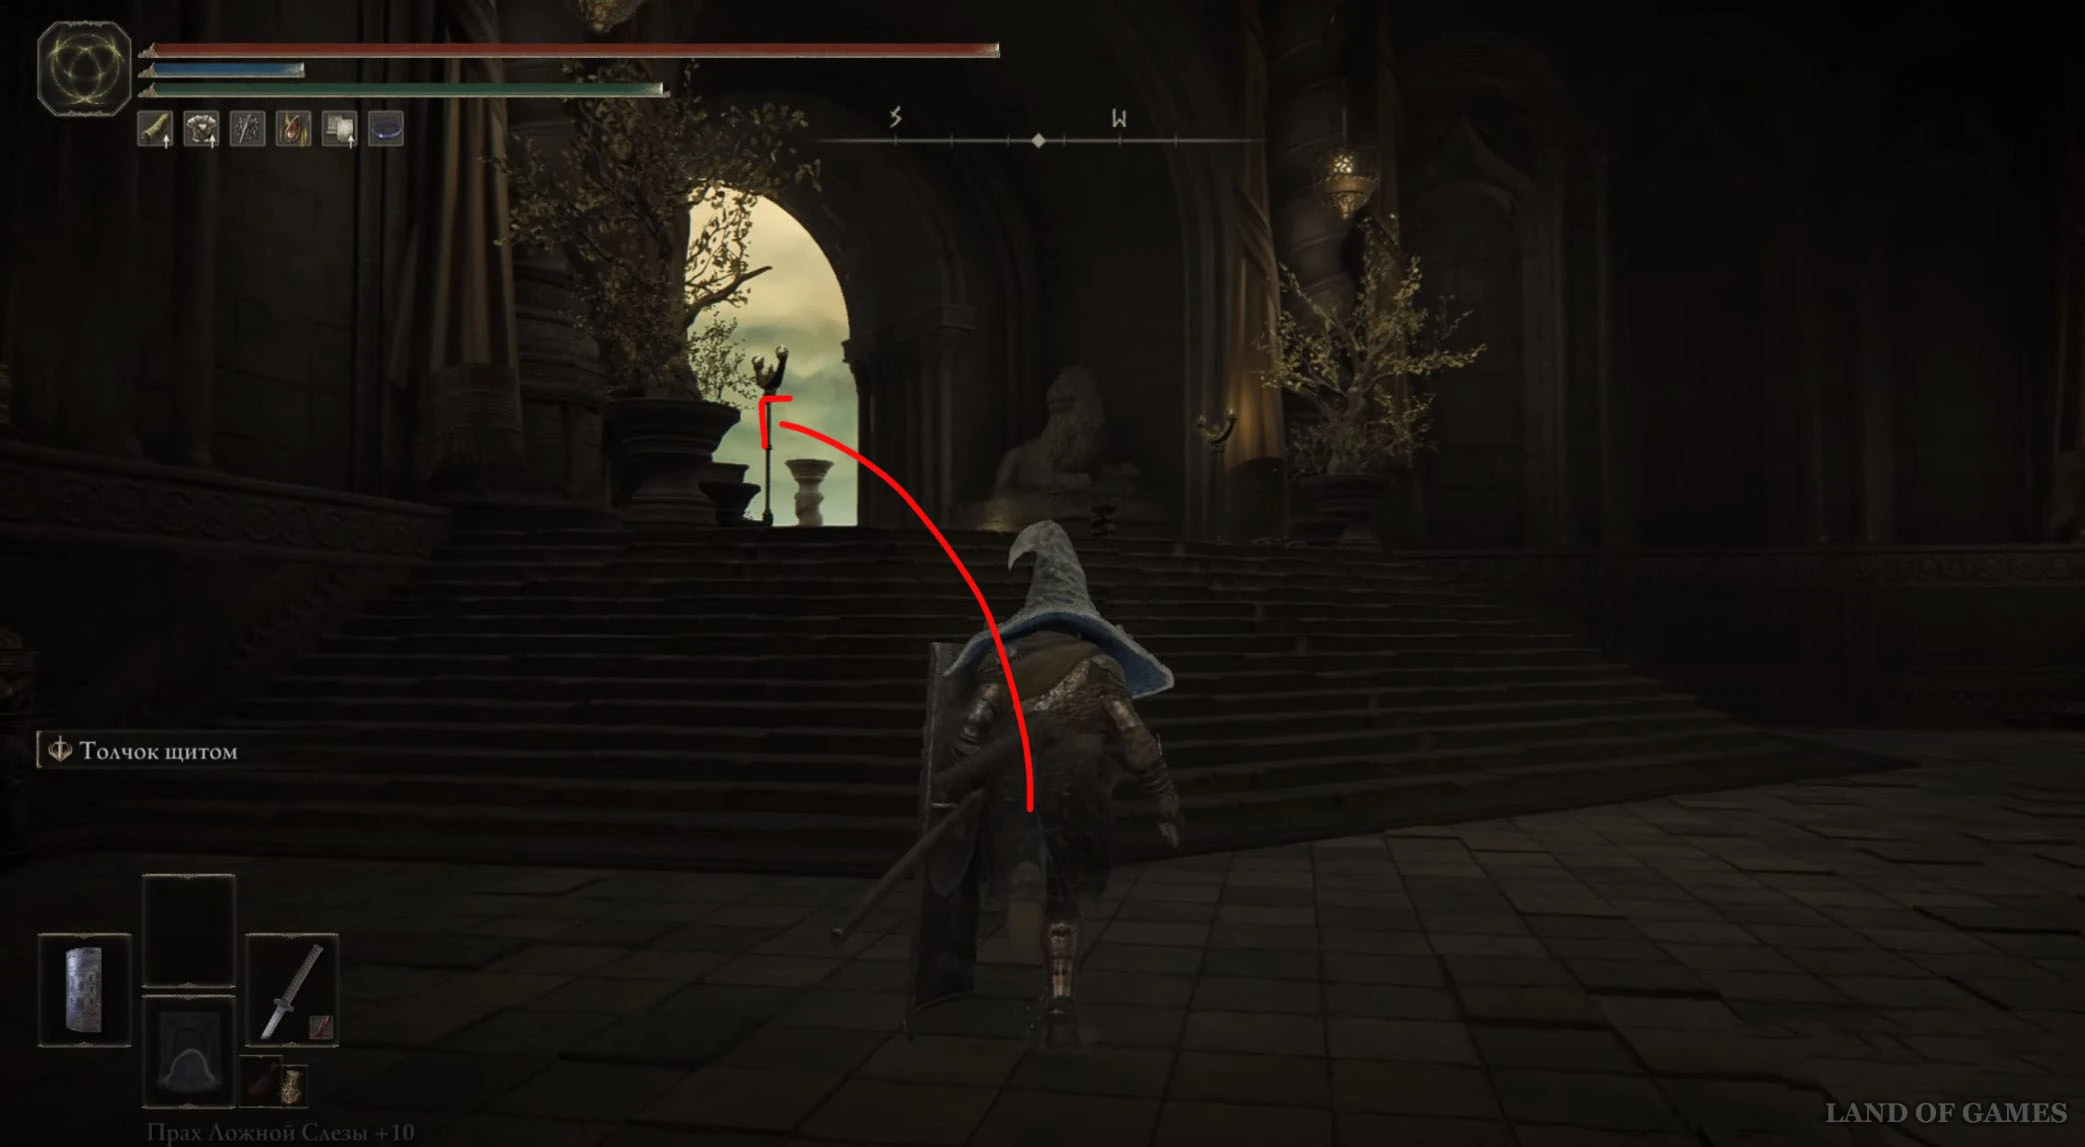
Двигайтесь вперед, а на развилке сверните влево. Бегите дальше к водопаду, но, не доходя до него, поверните направо и войдите в здание, а потом поднимитесь по деревянной лесенке наверх и выйдите из дома. Тут же поверните вправо и поднимитесь по ступенькам наверх.
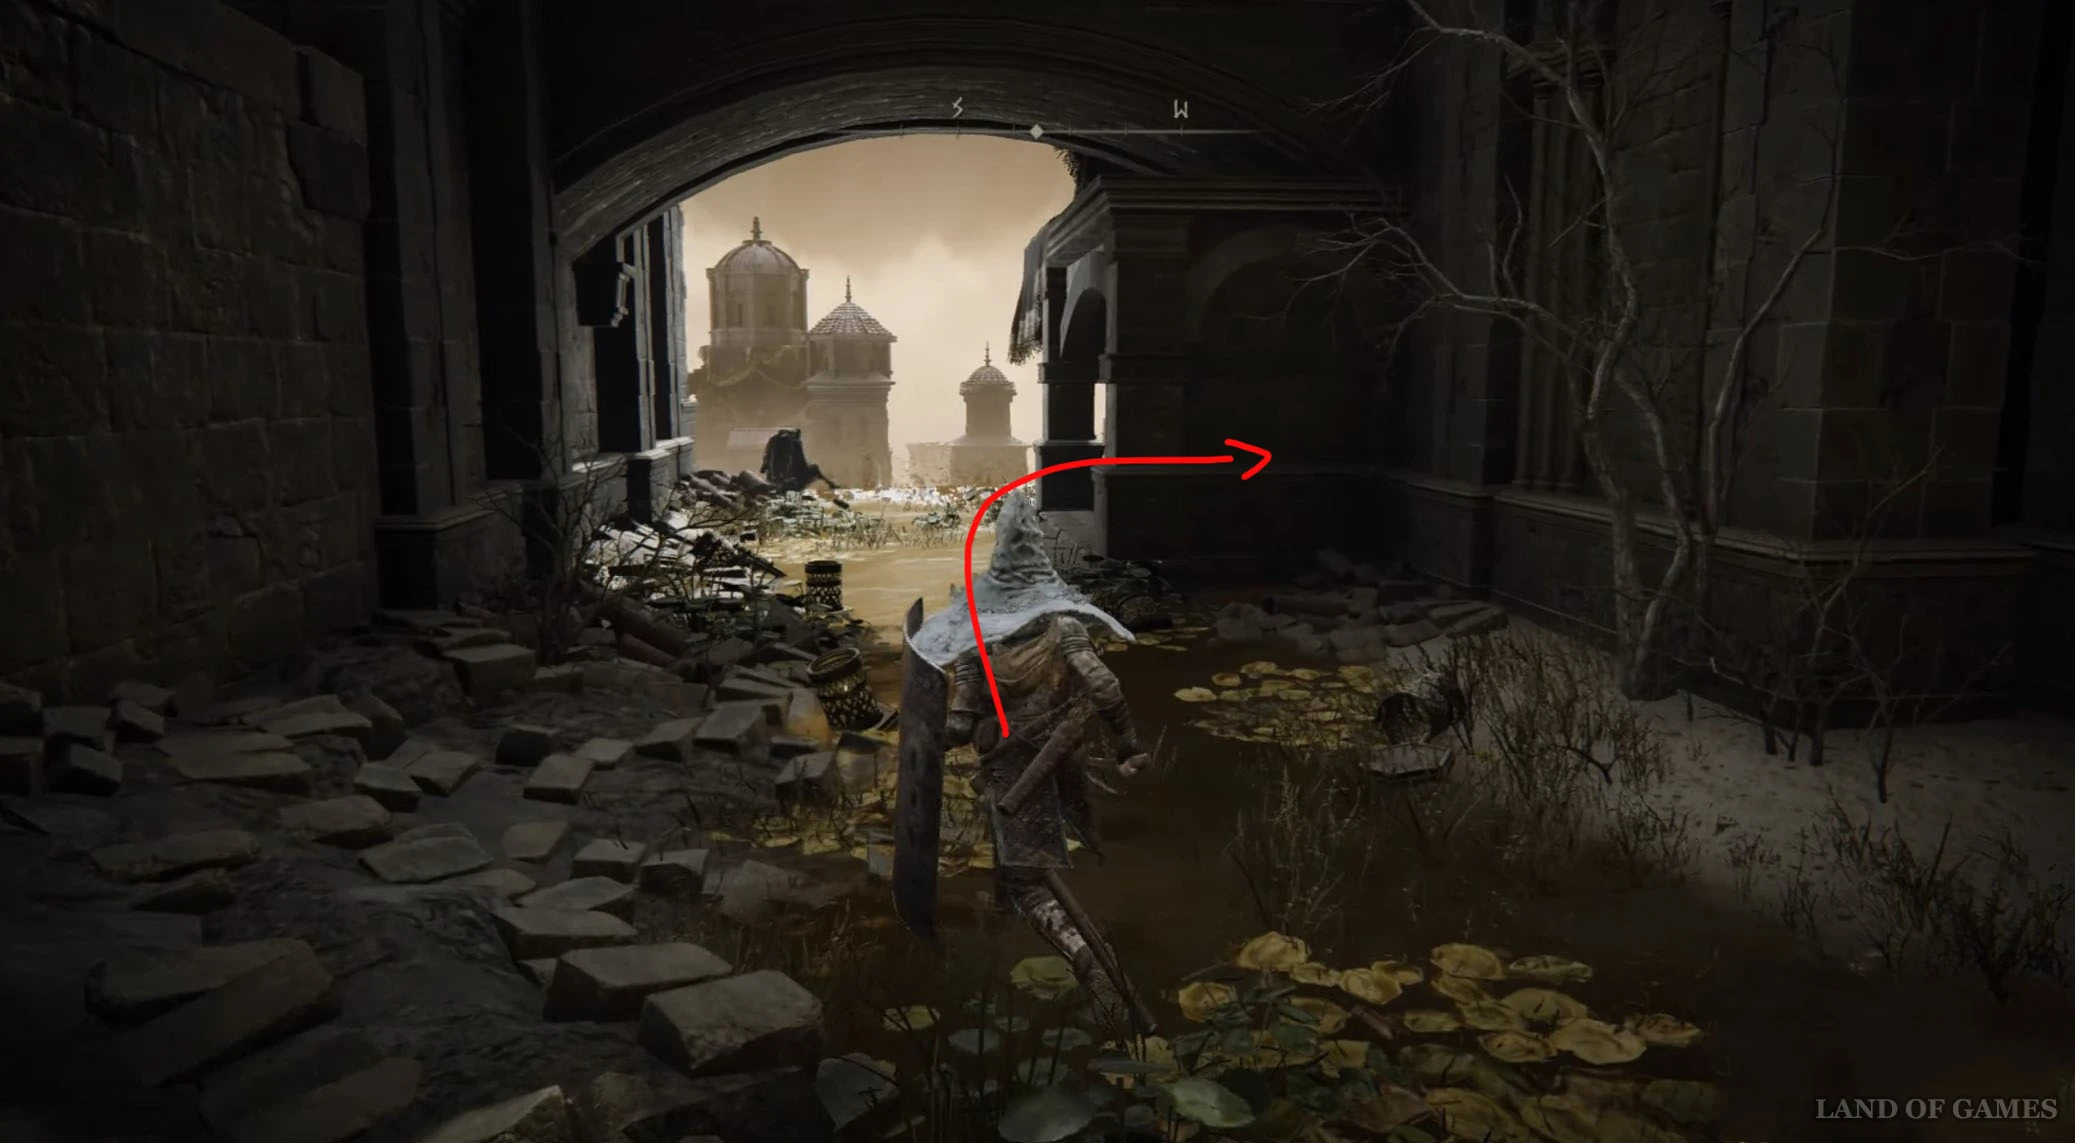
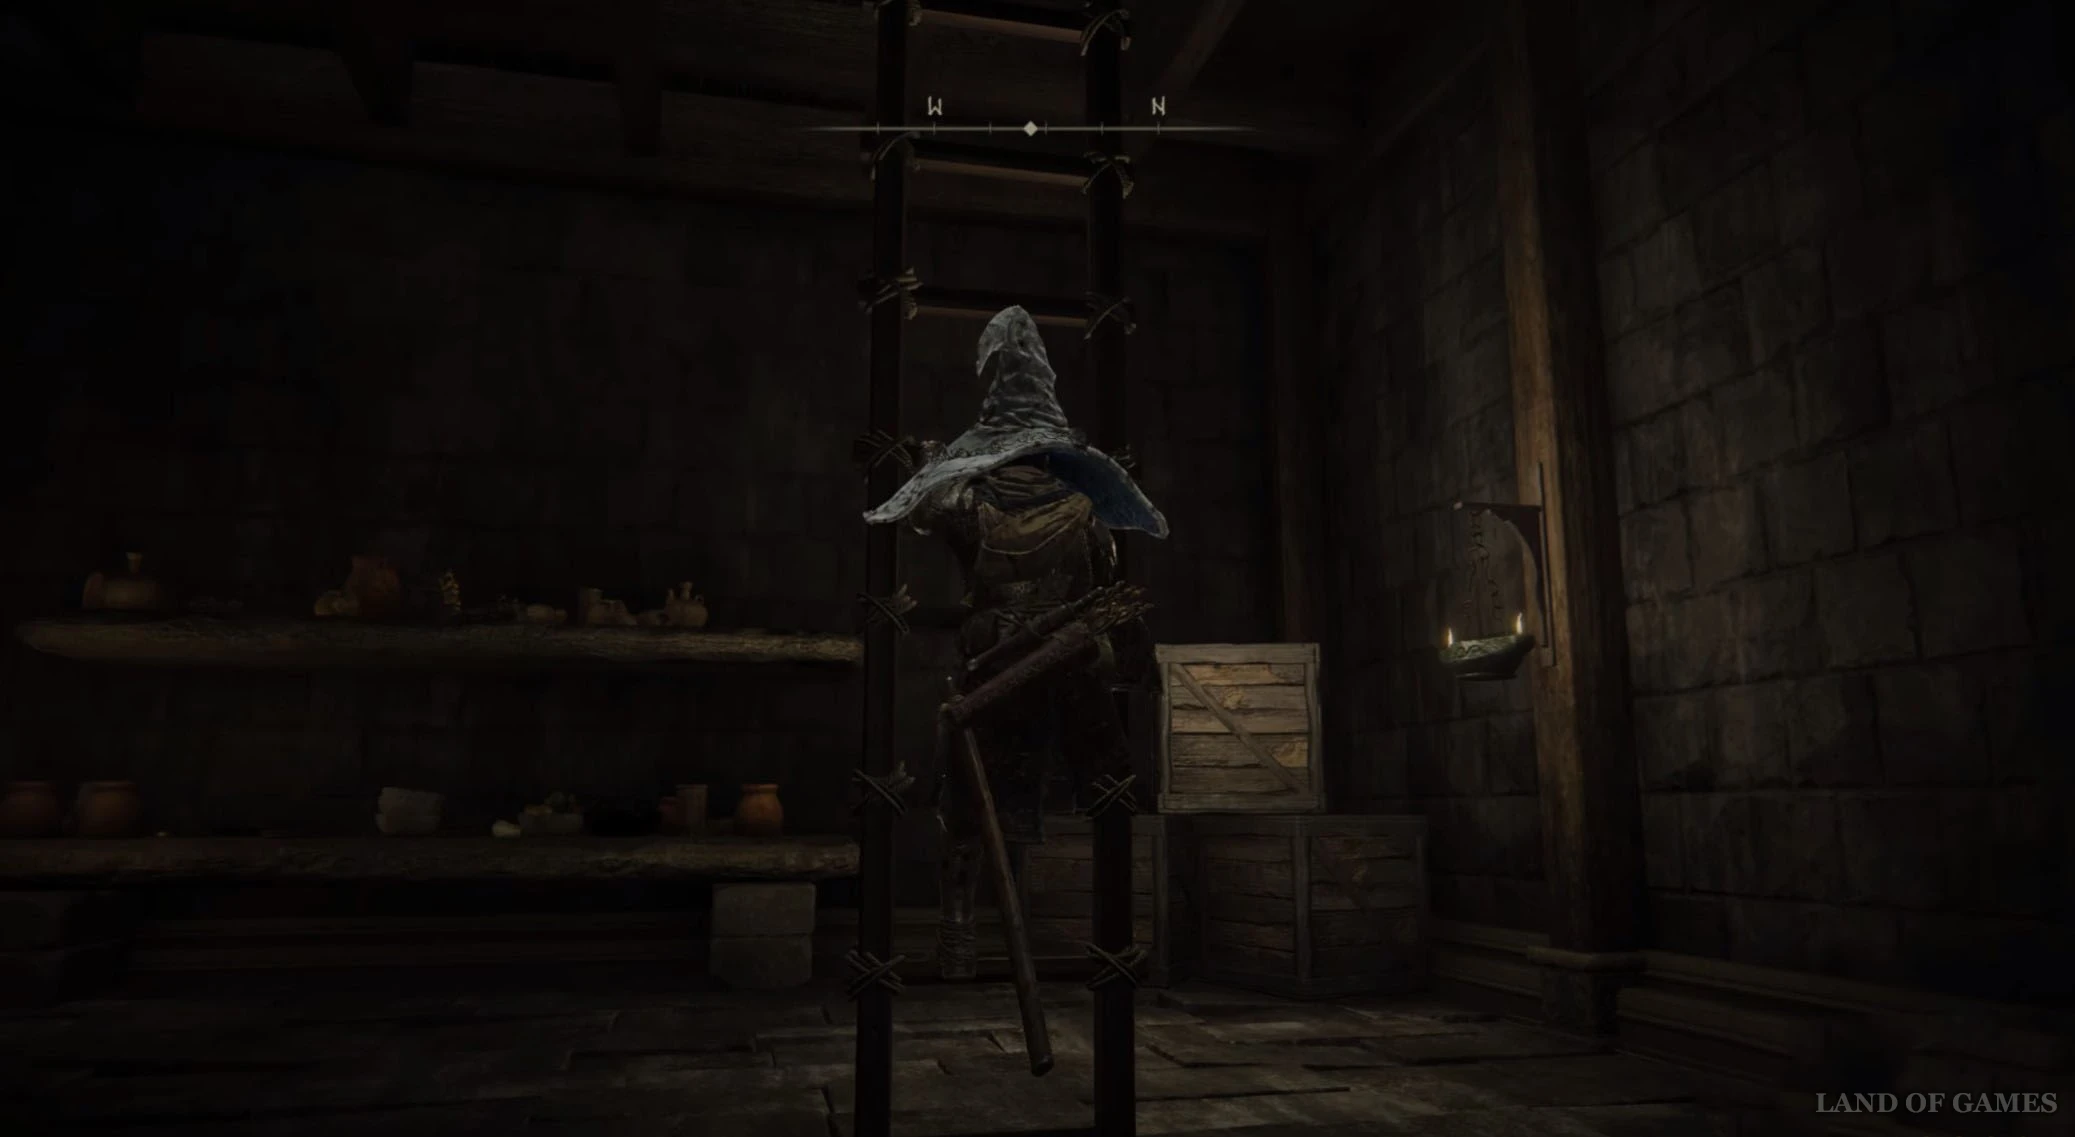
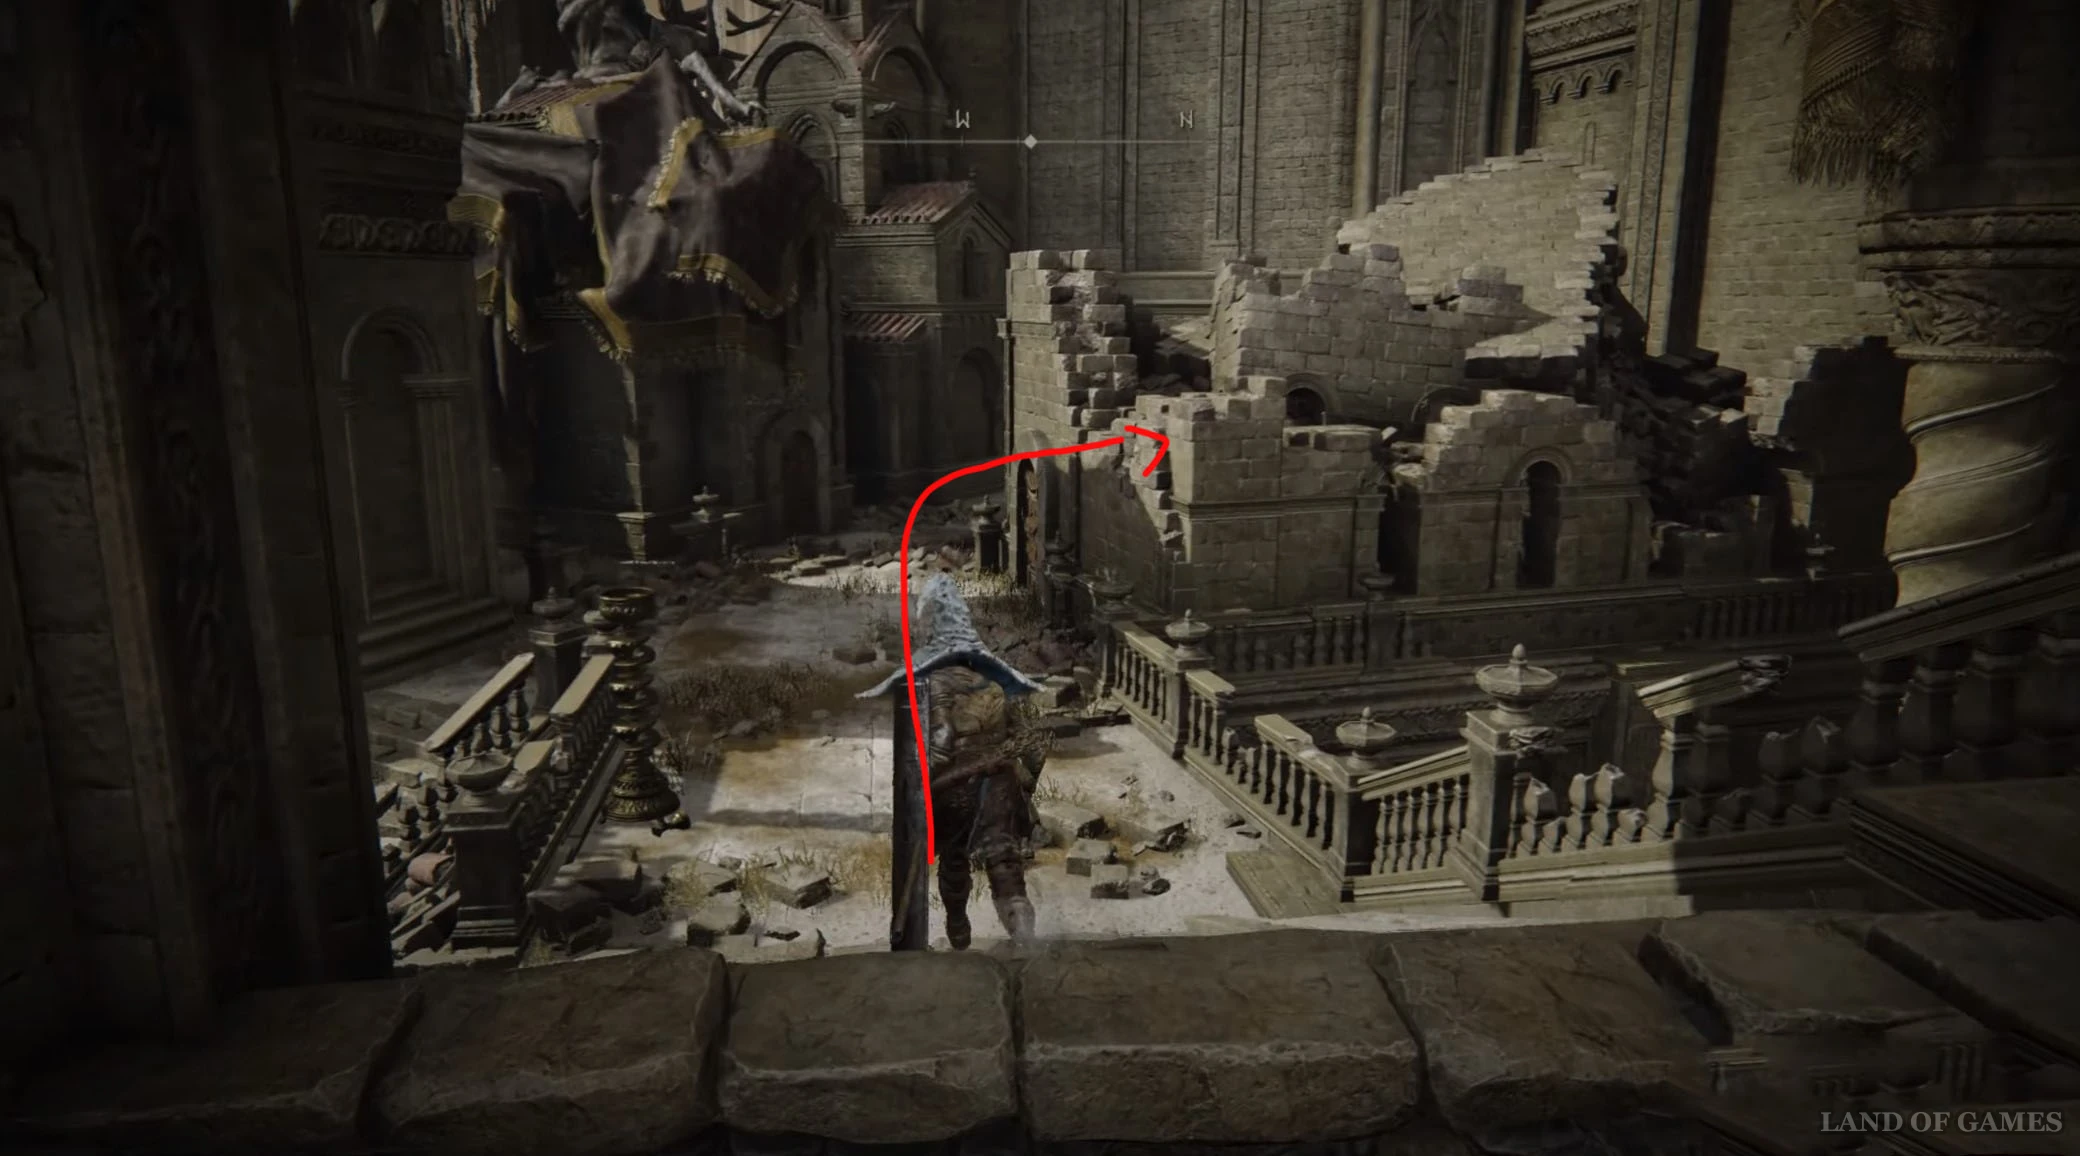
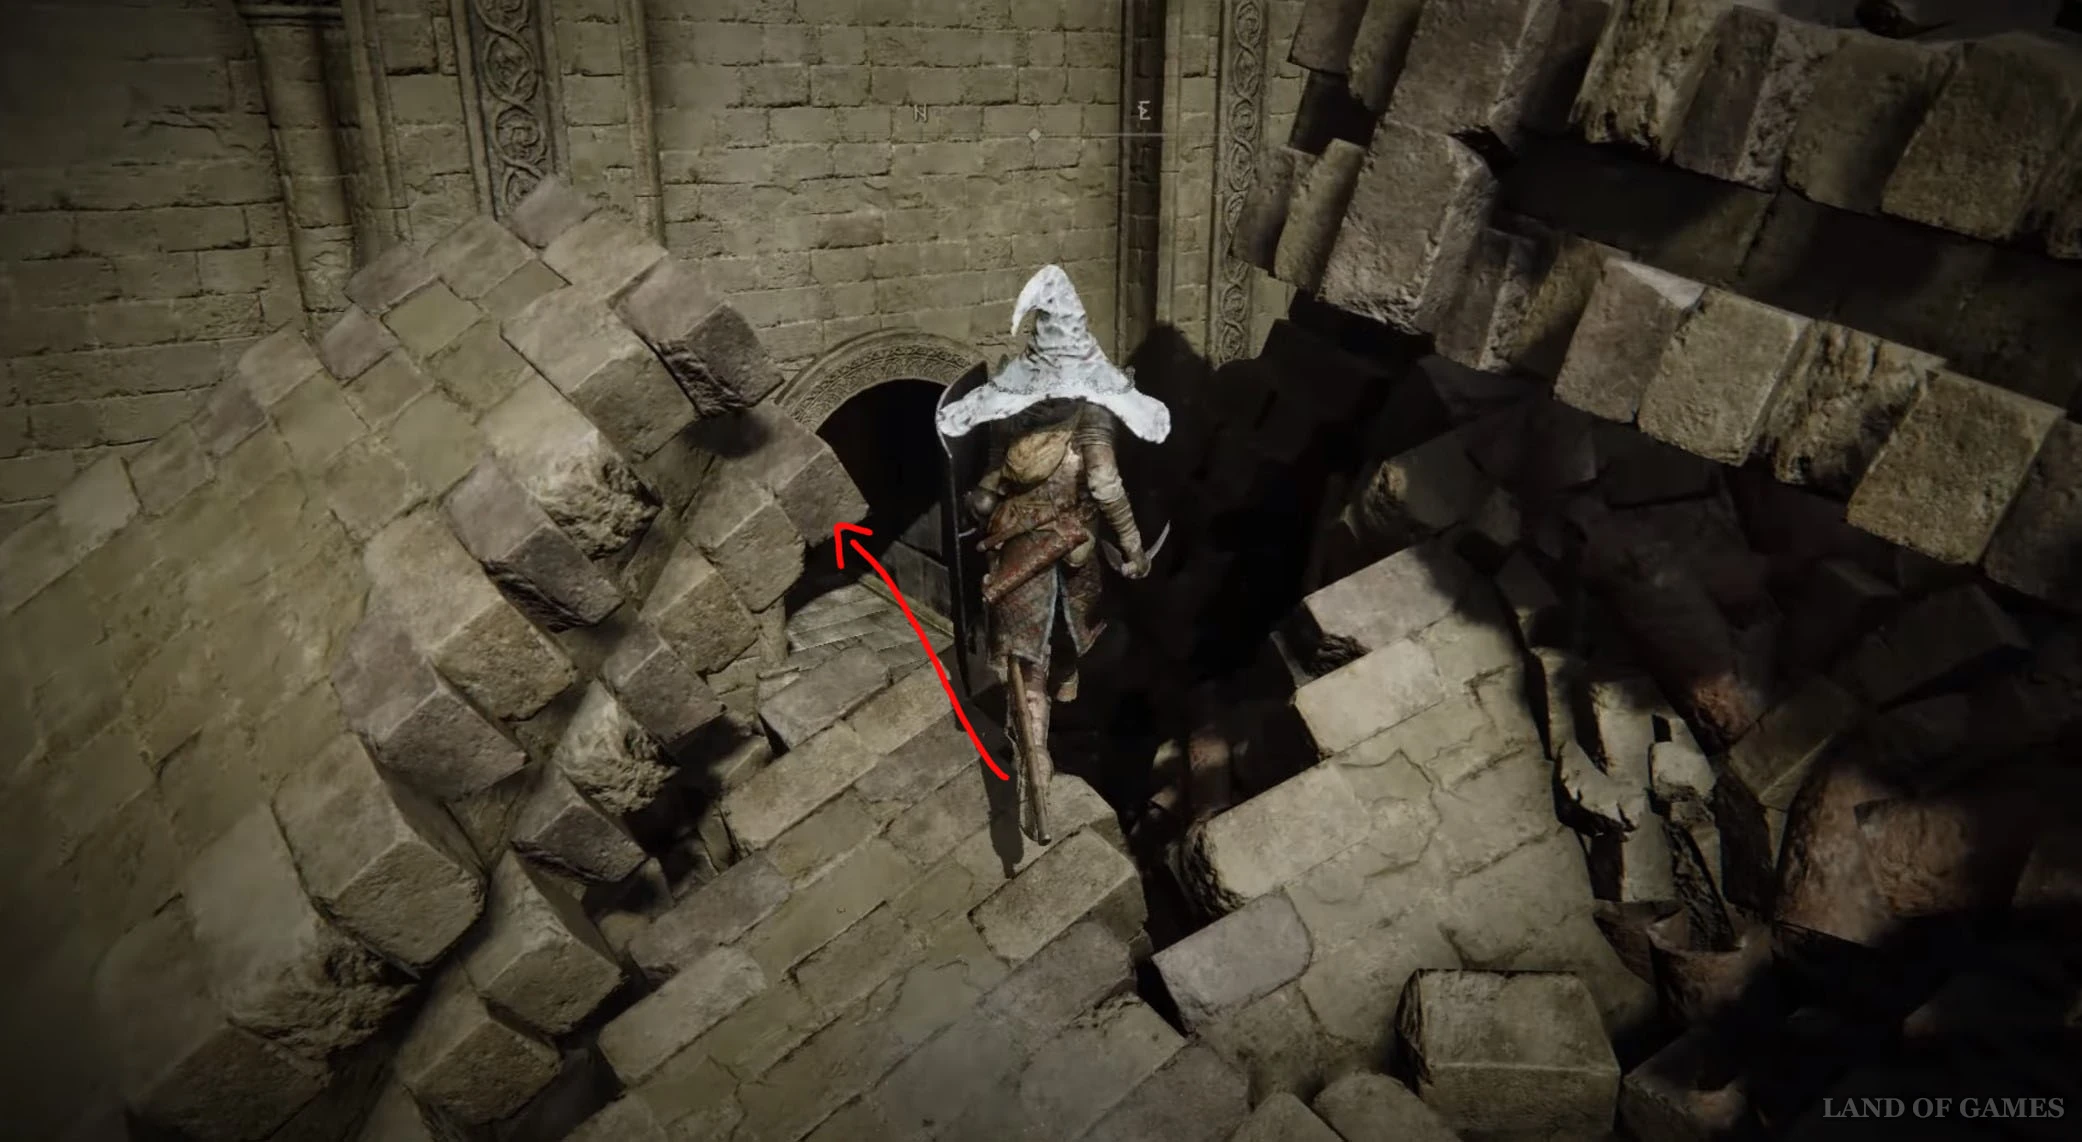
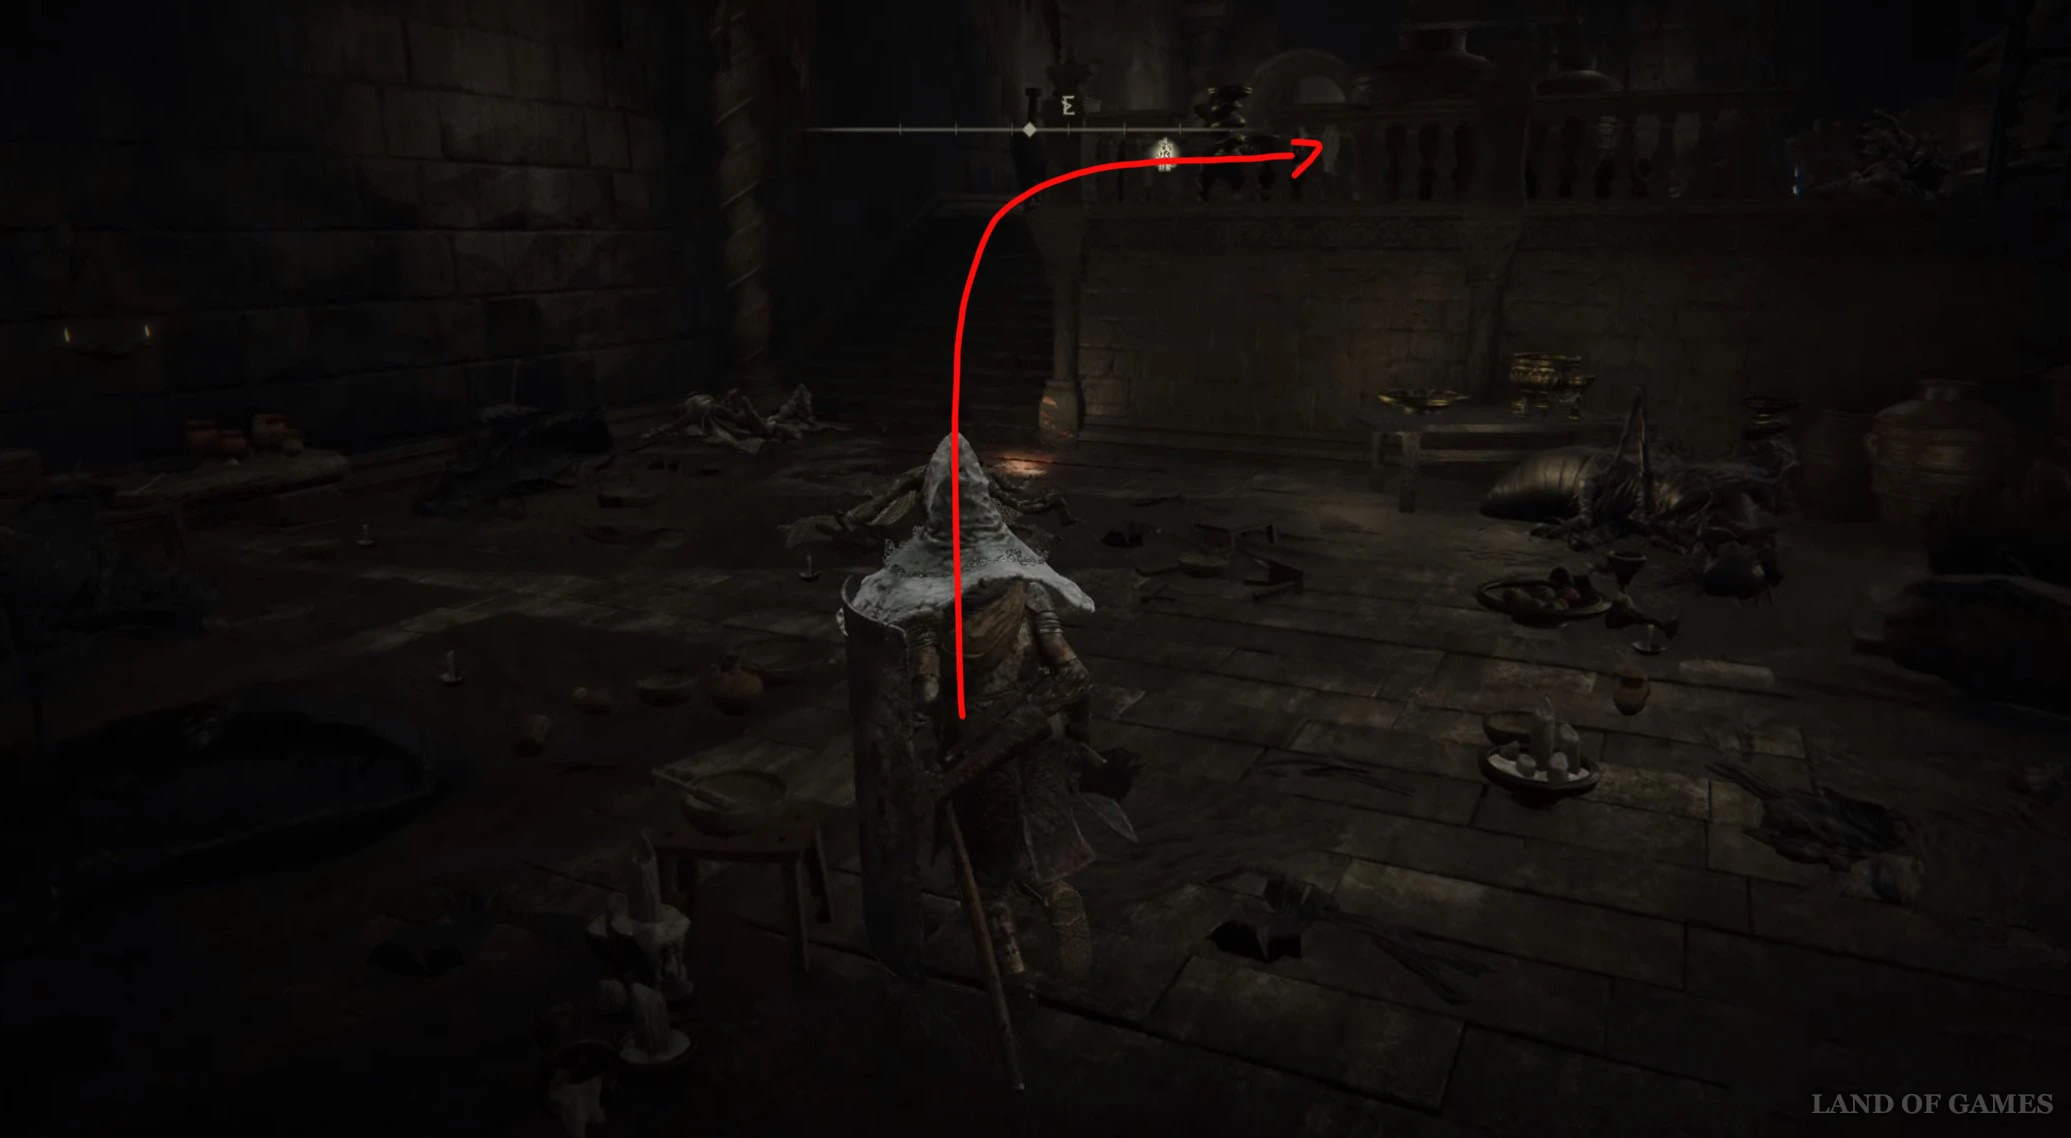
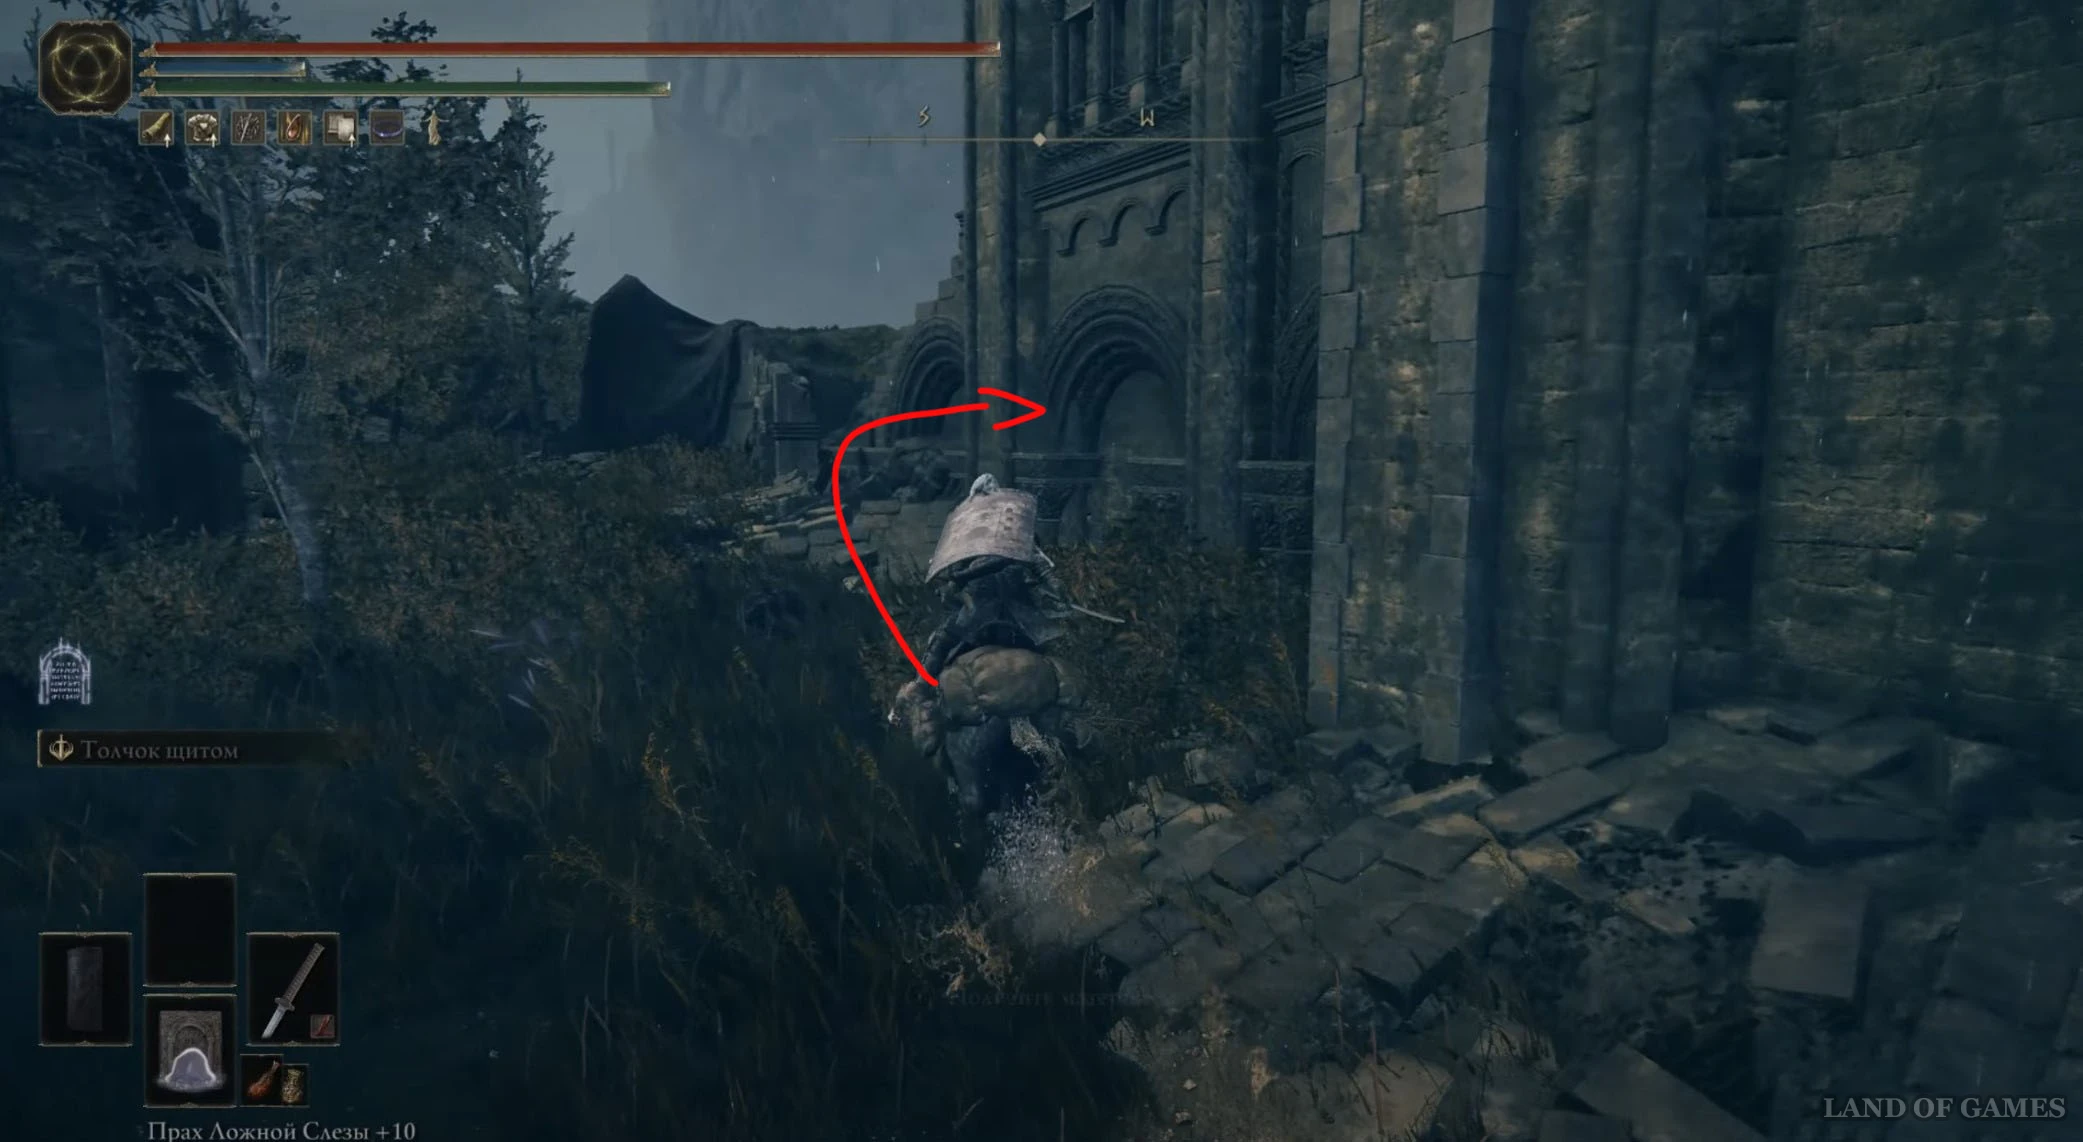
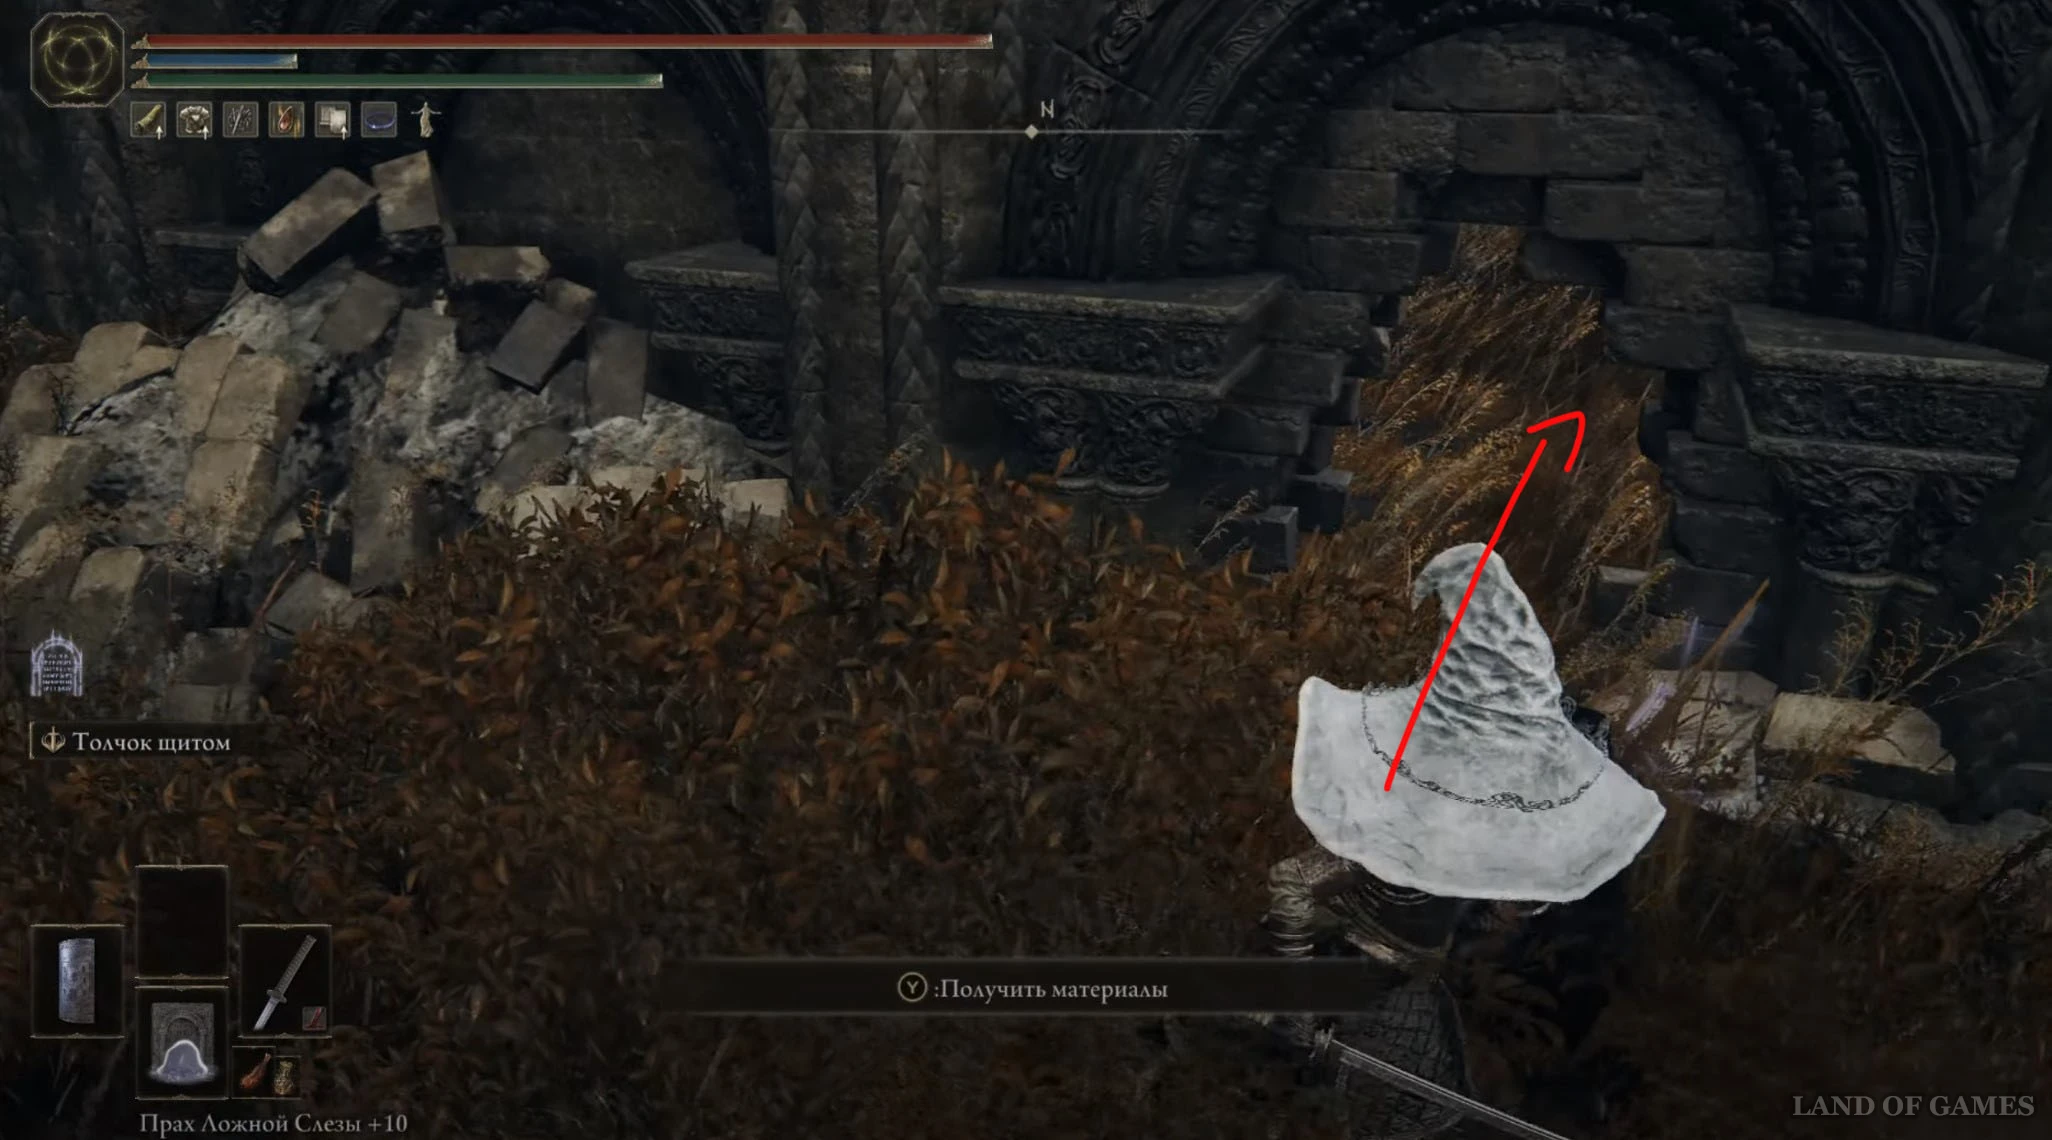
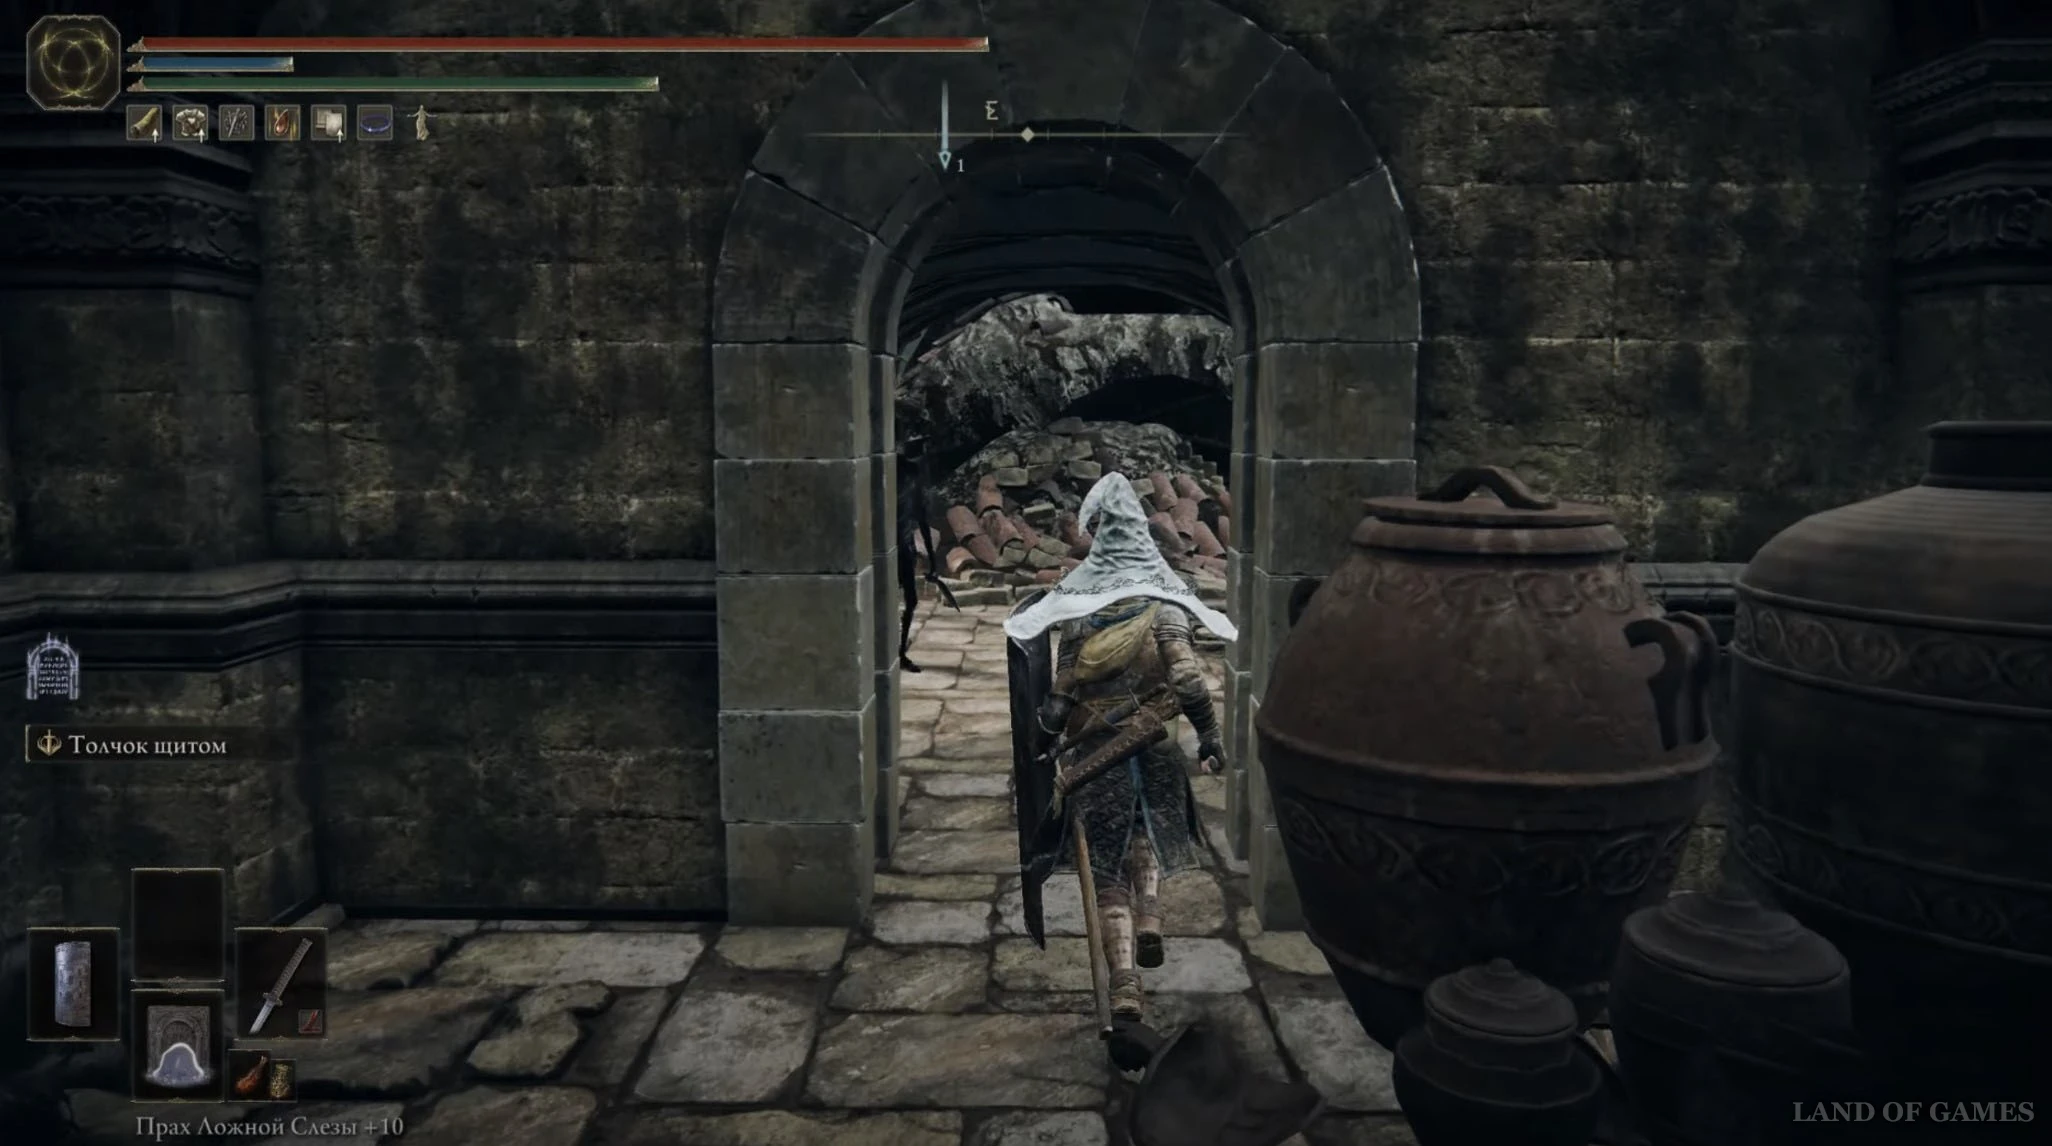
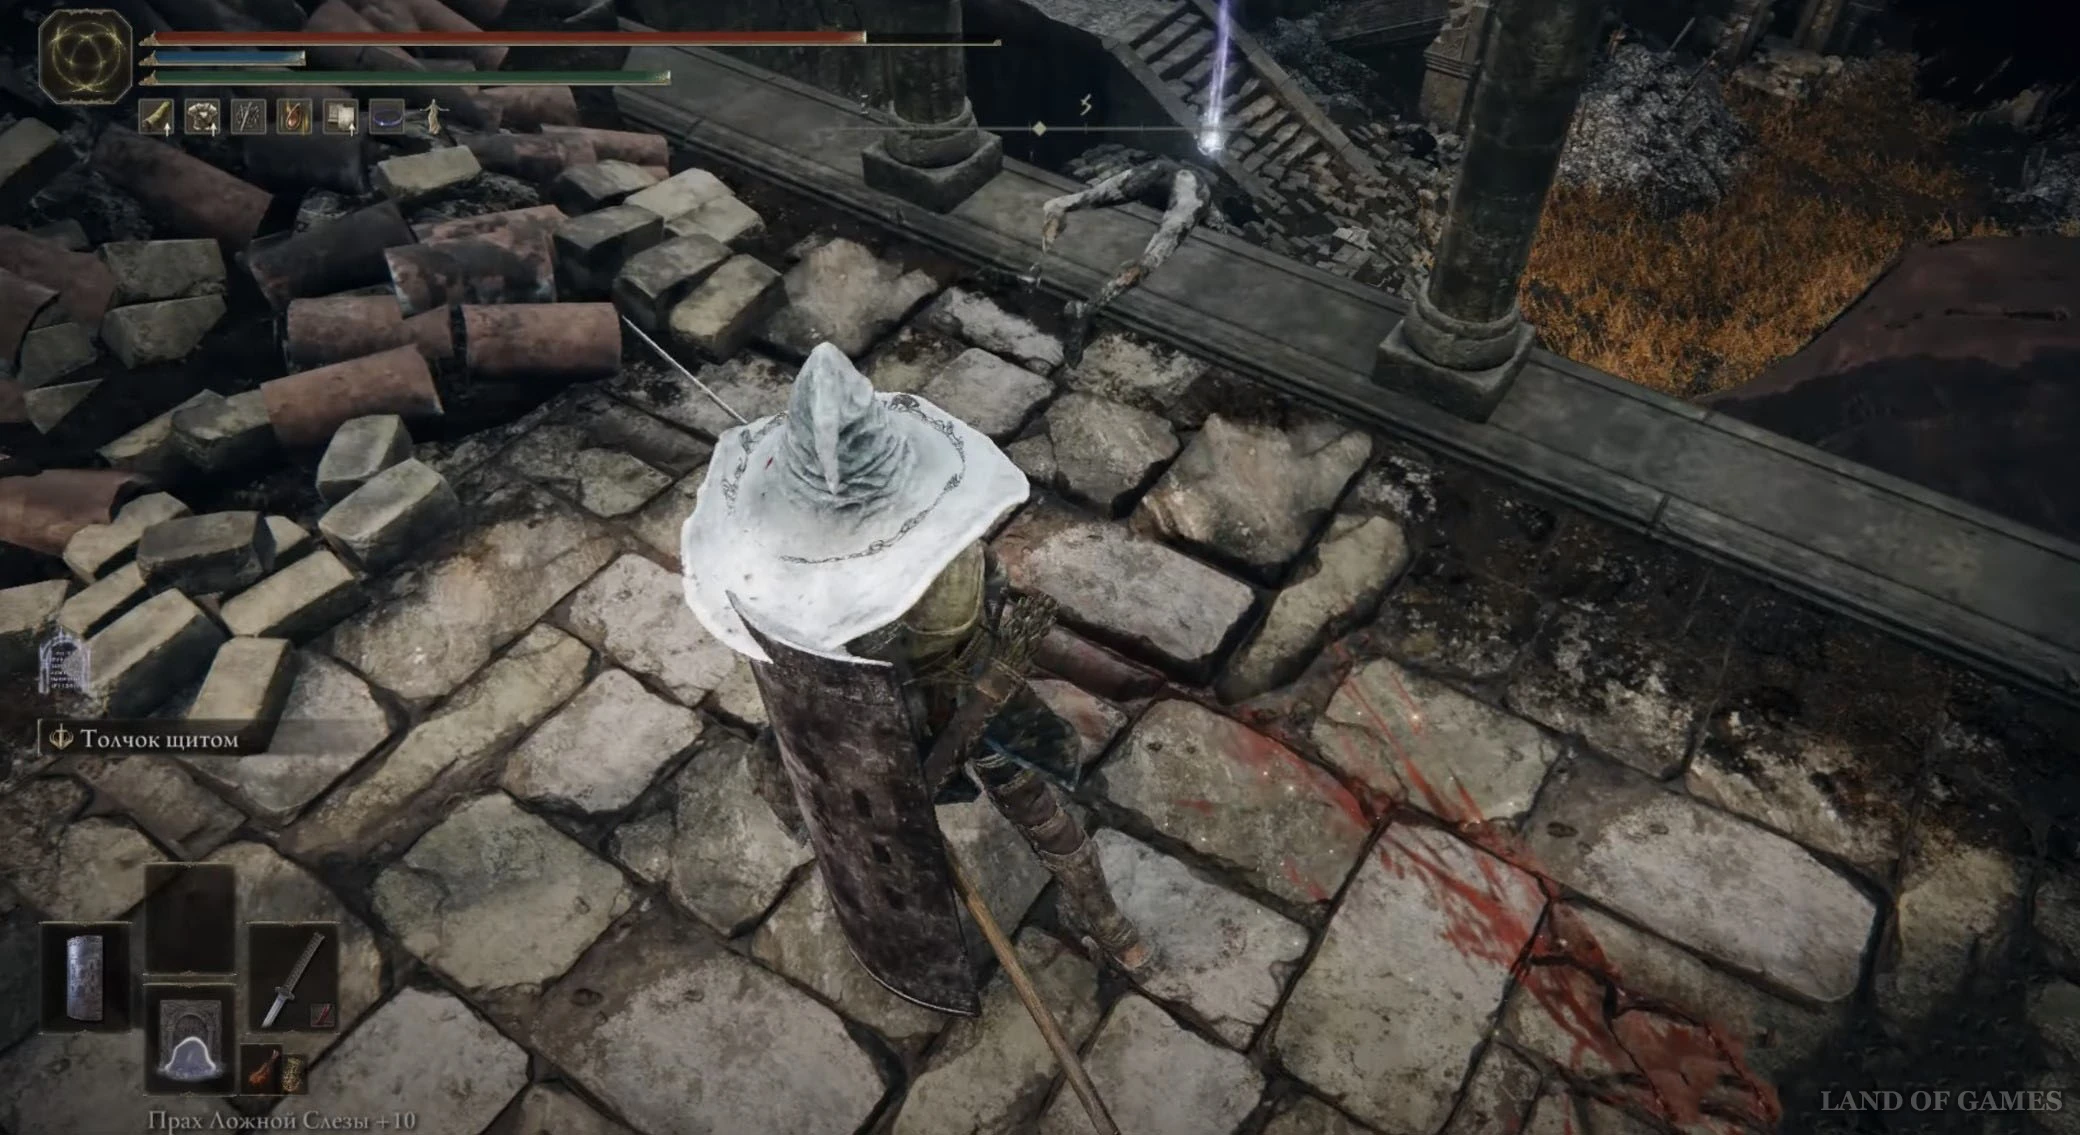
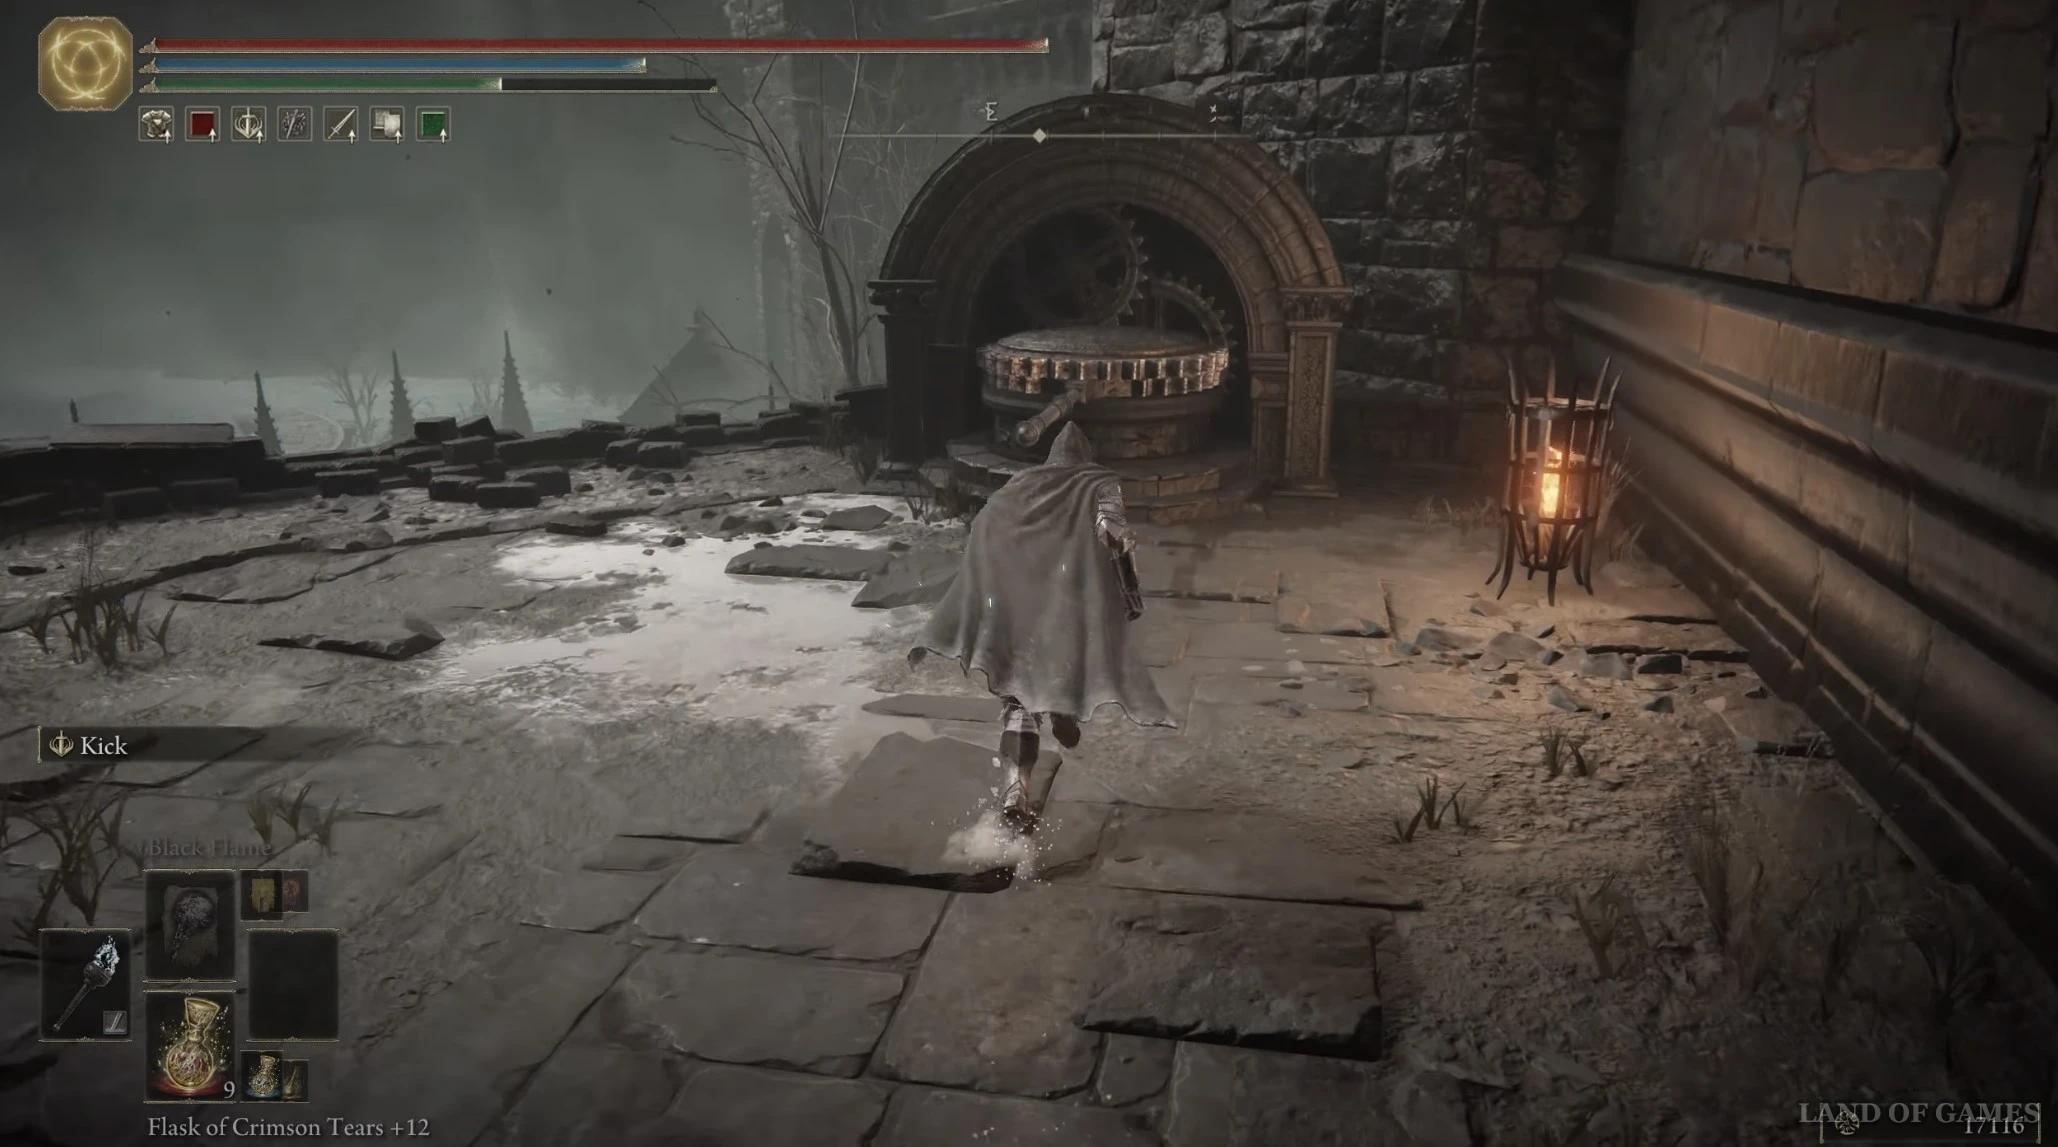
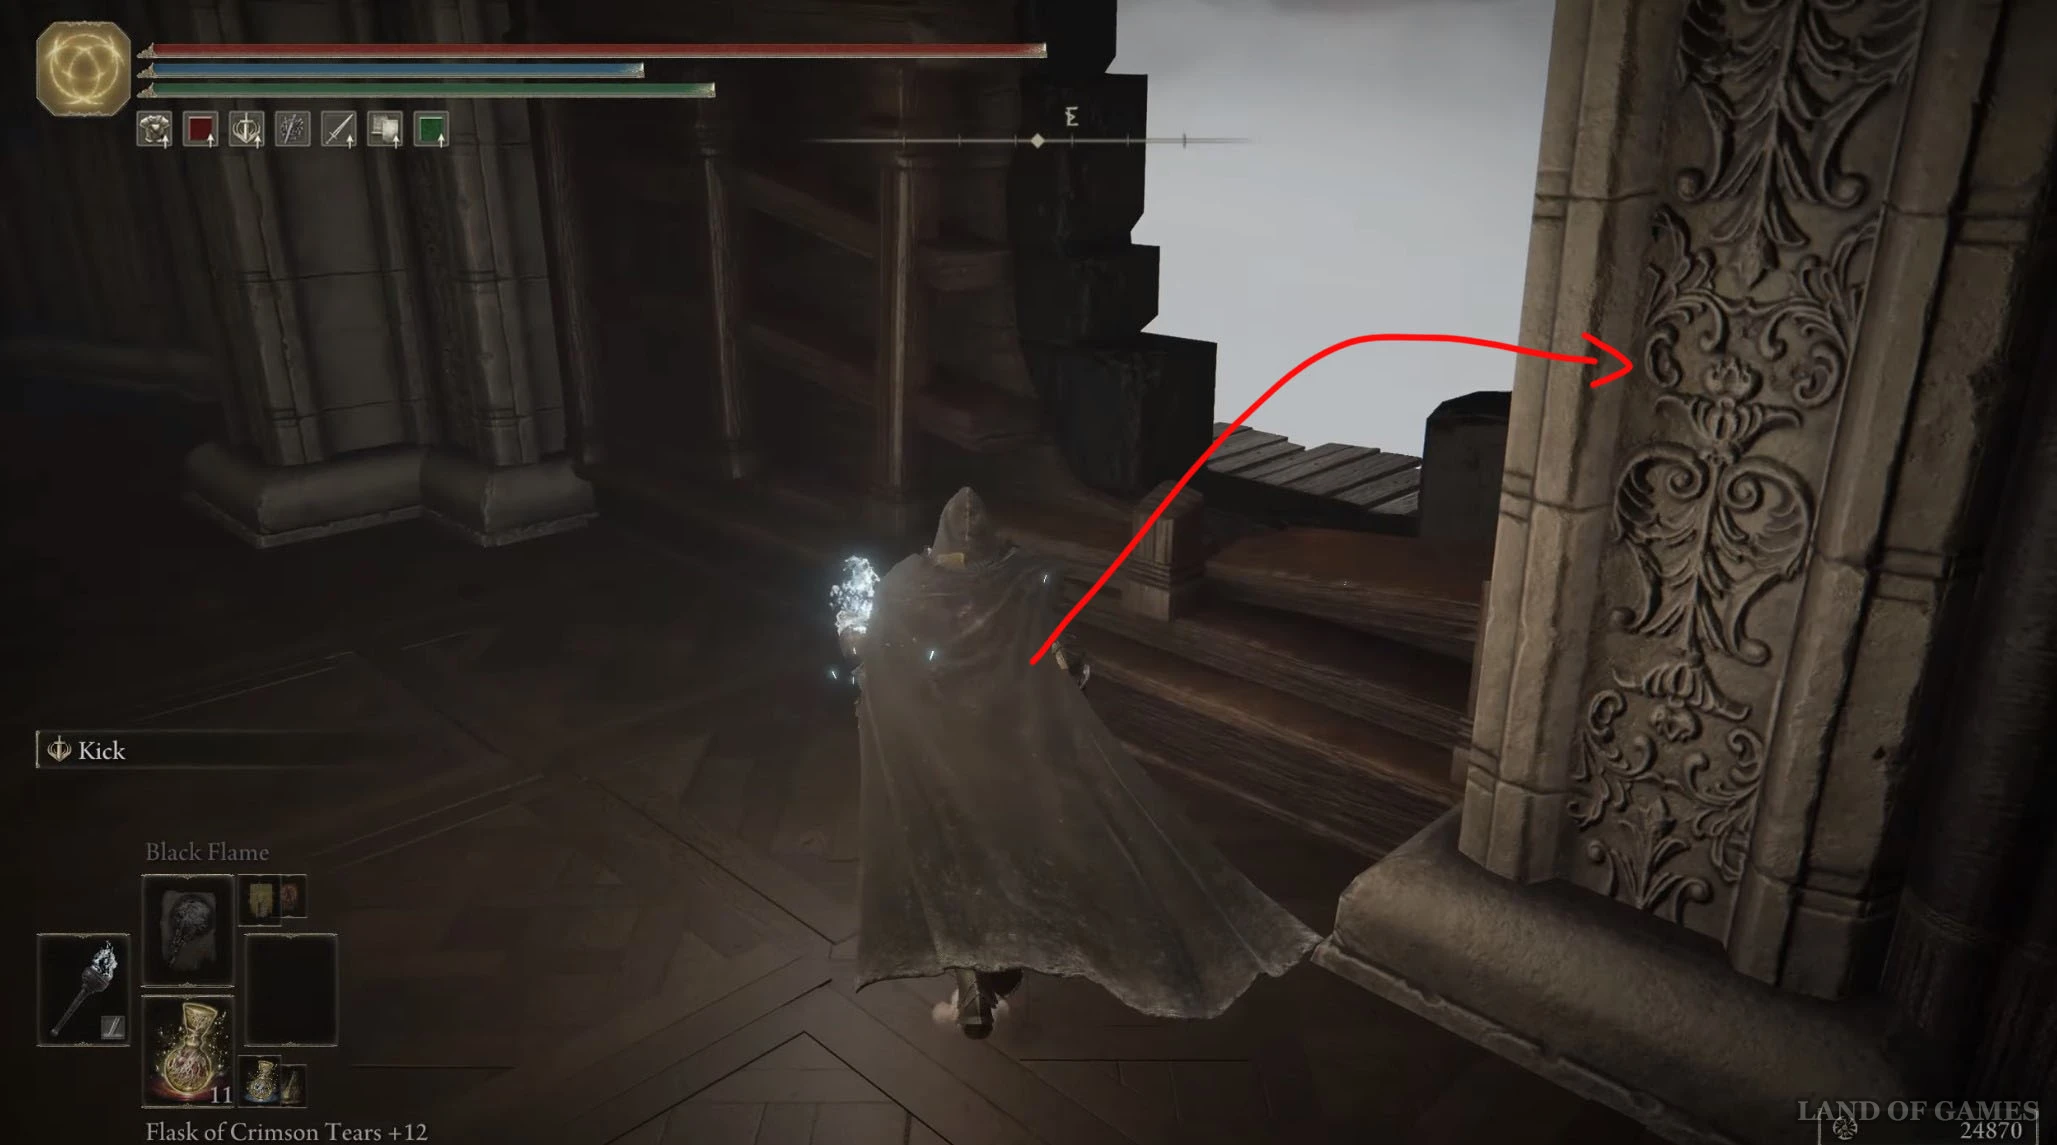
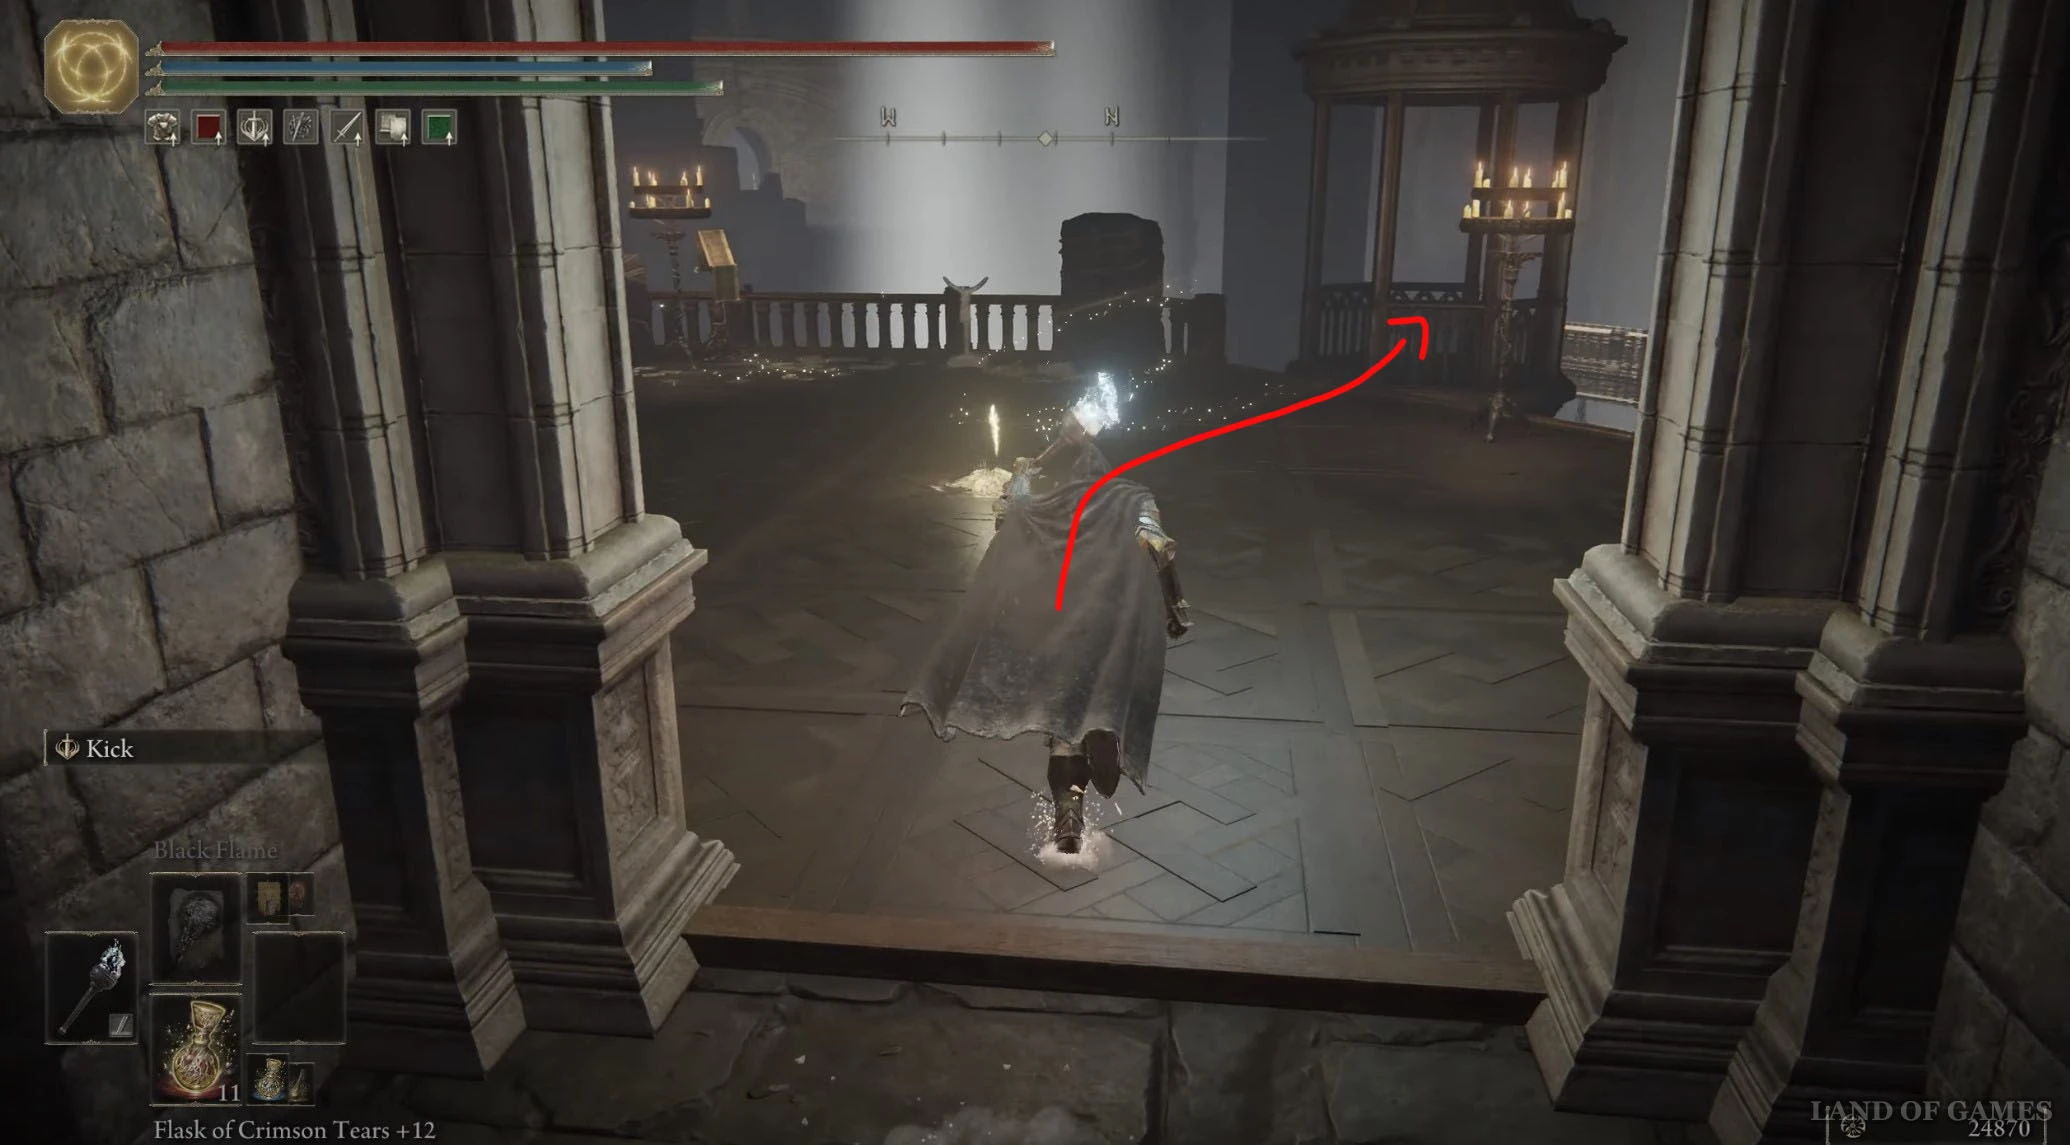
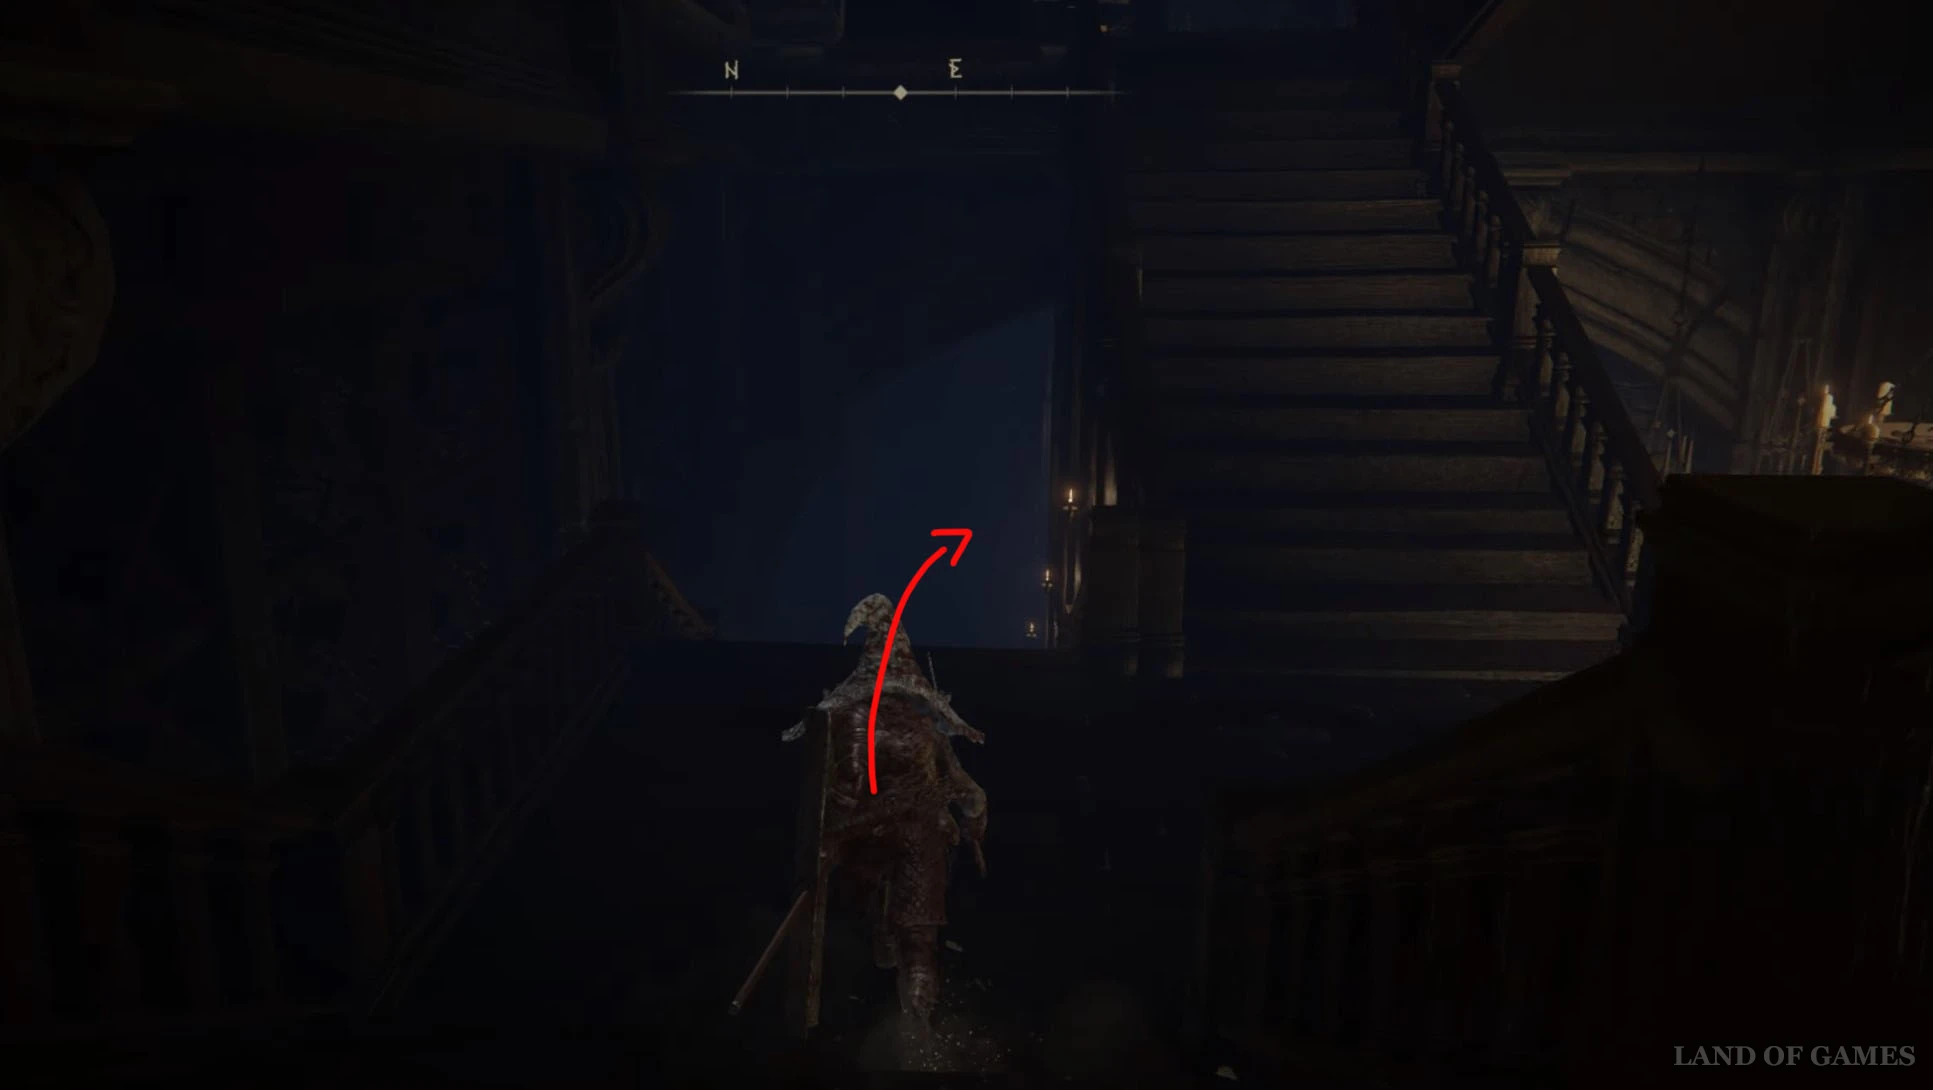
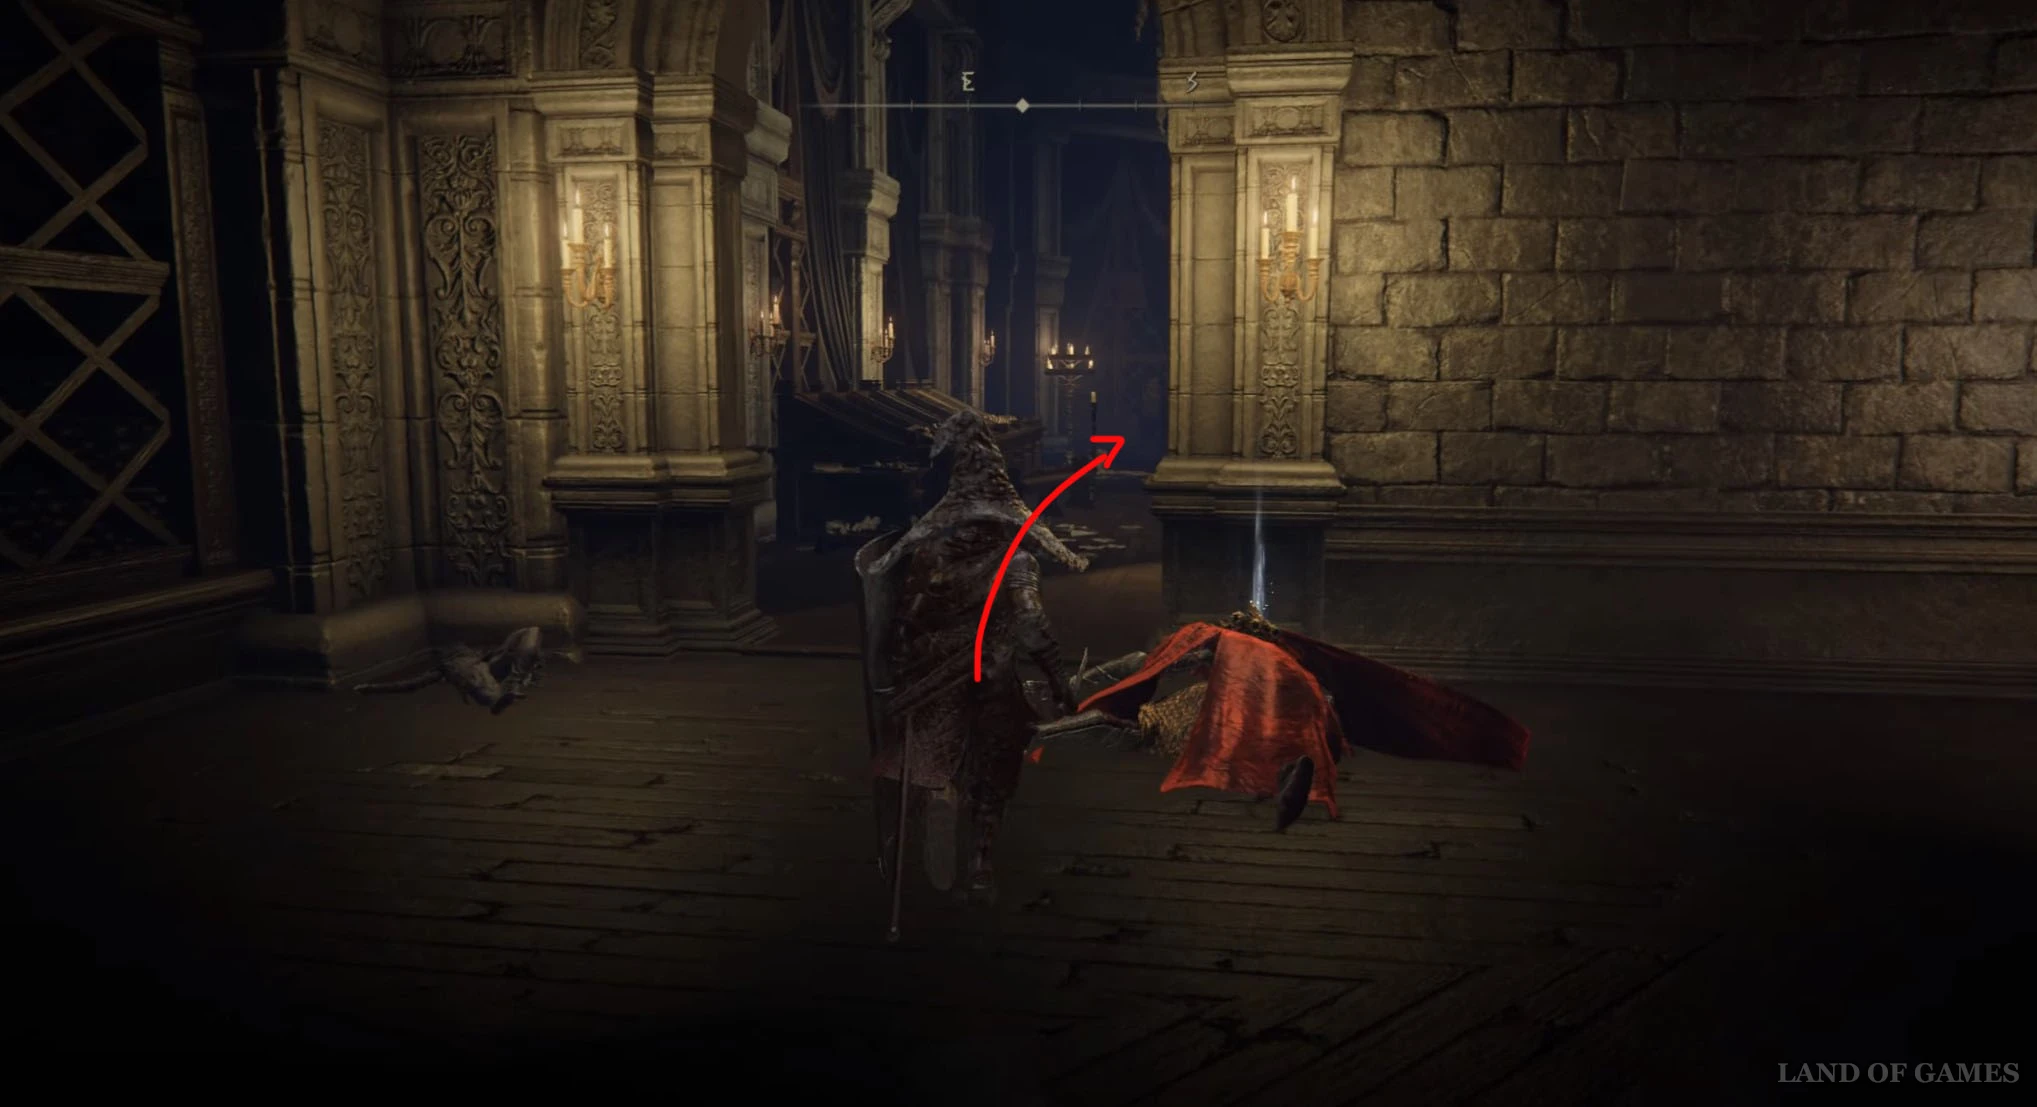
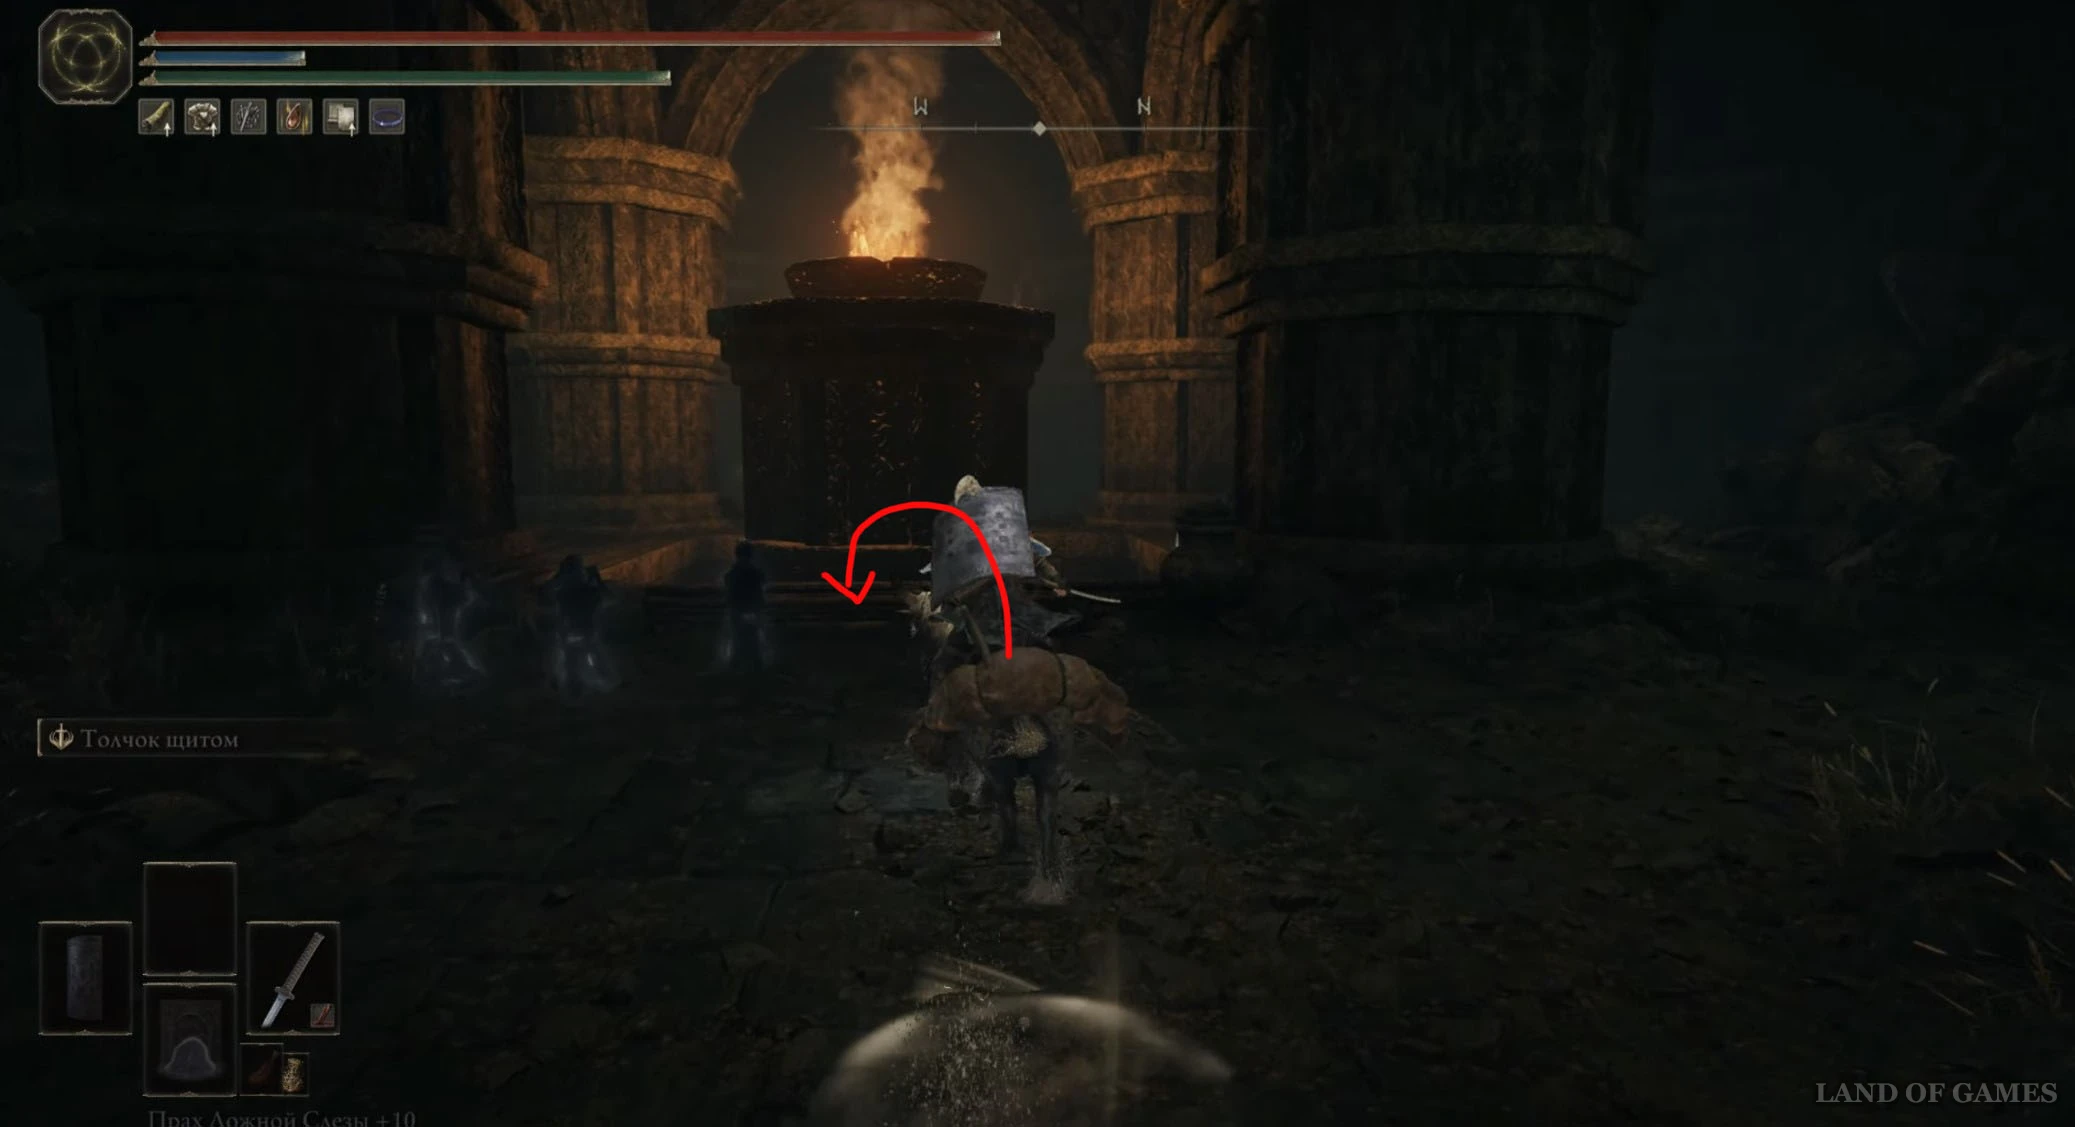
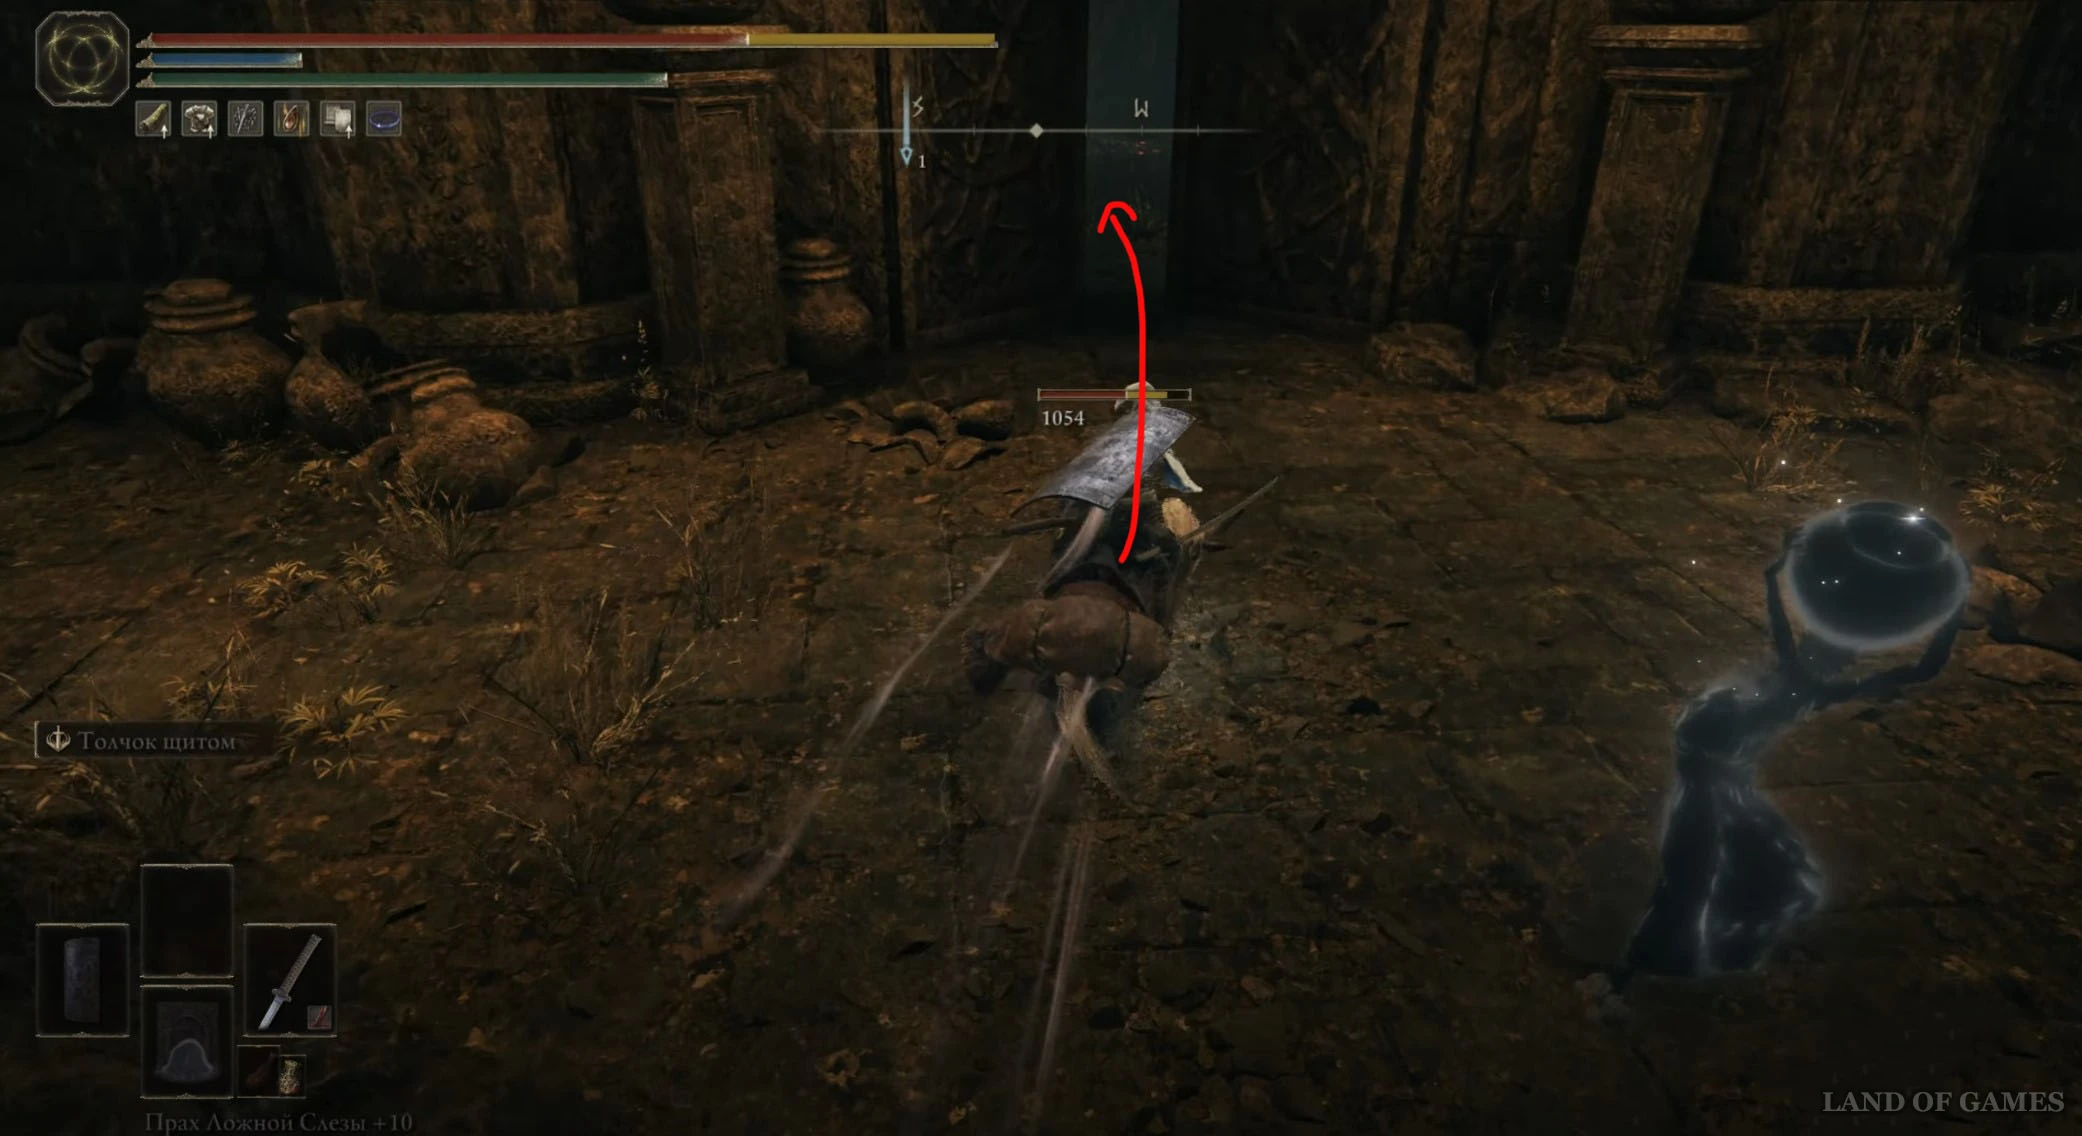
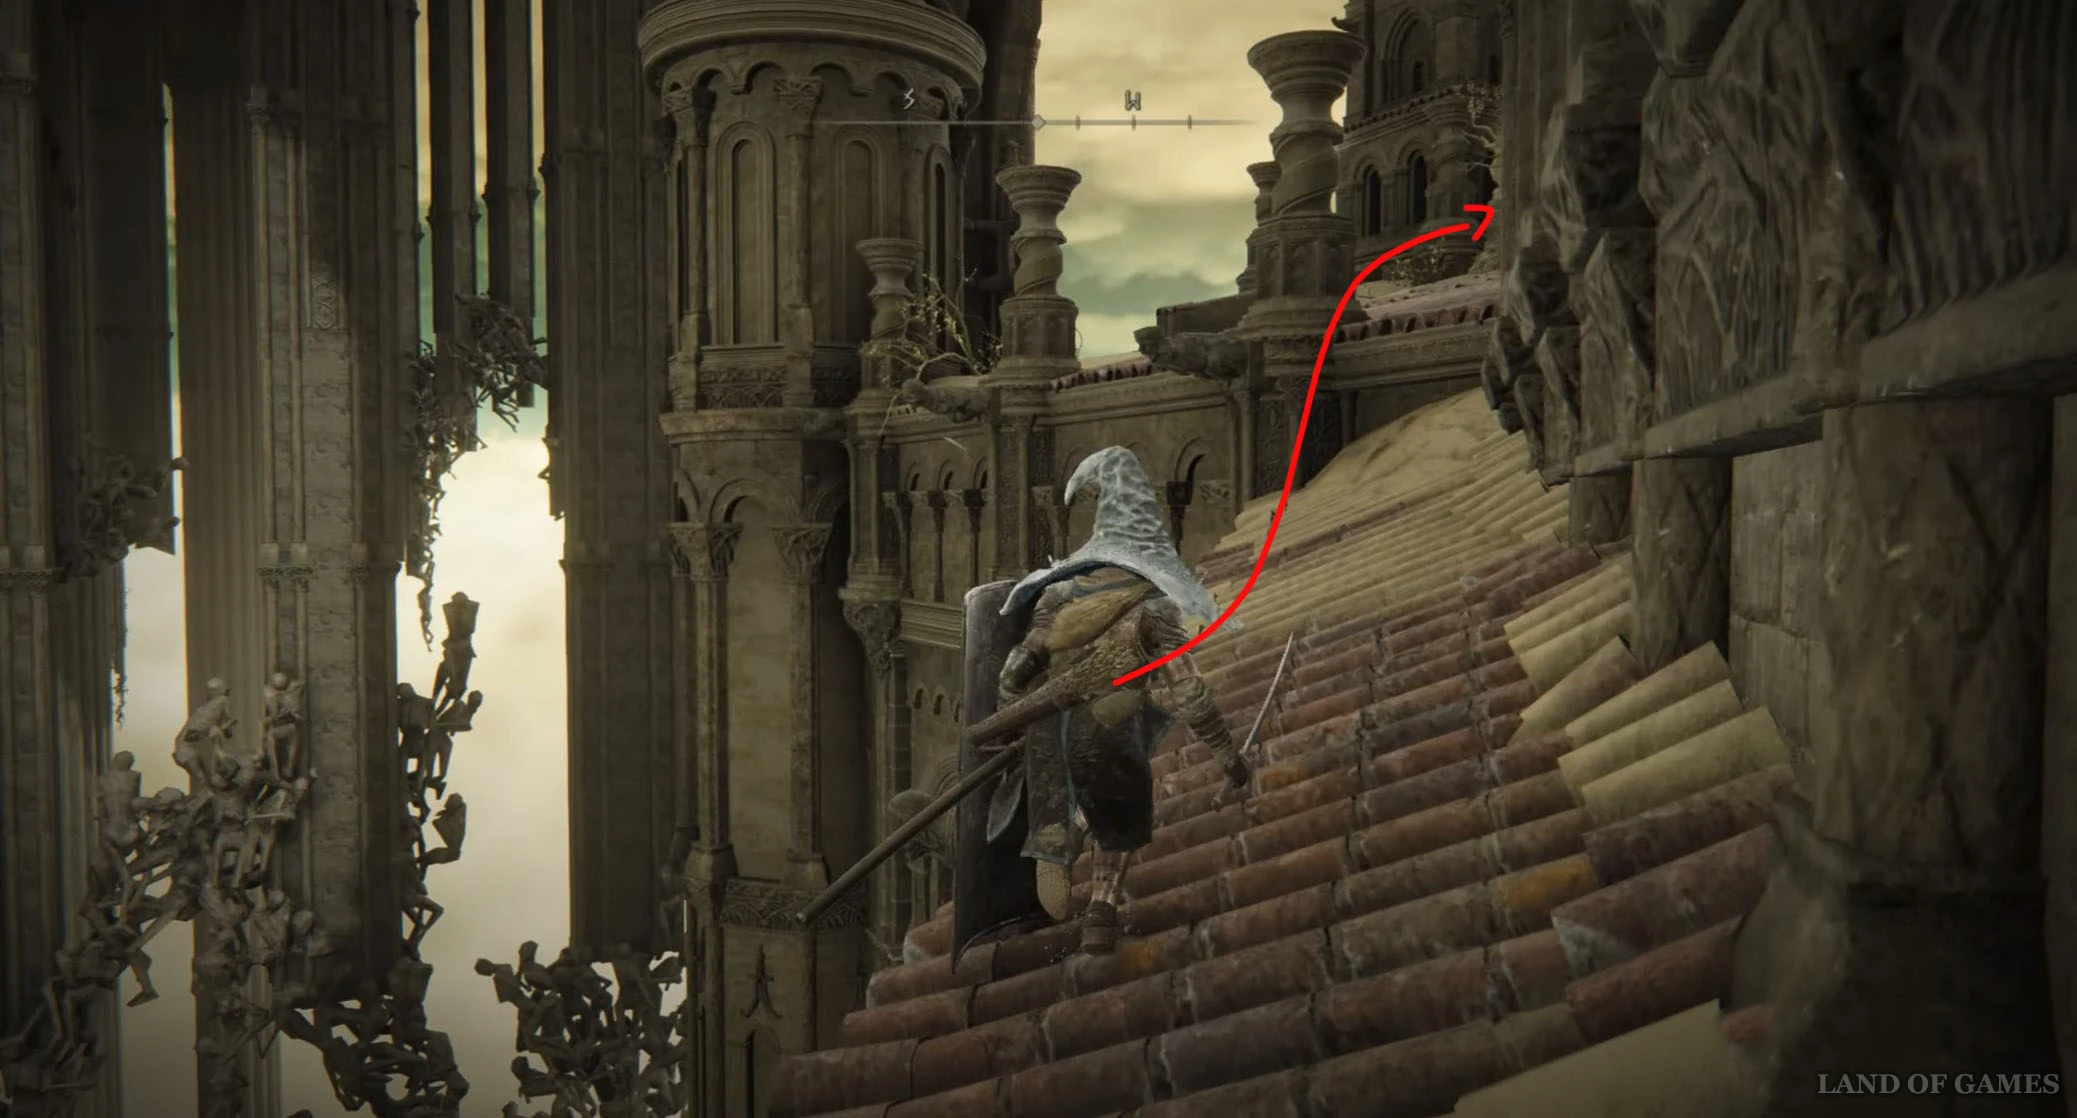
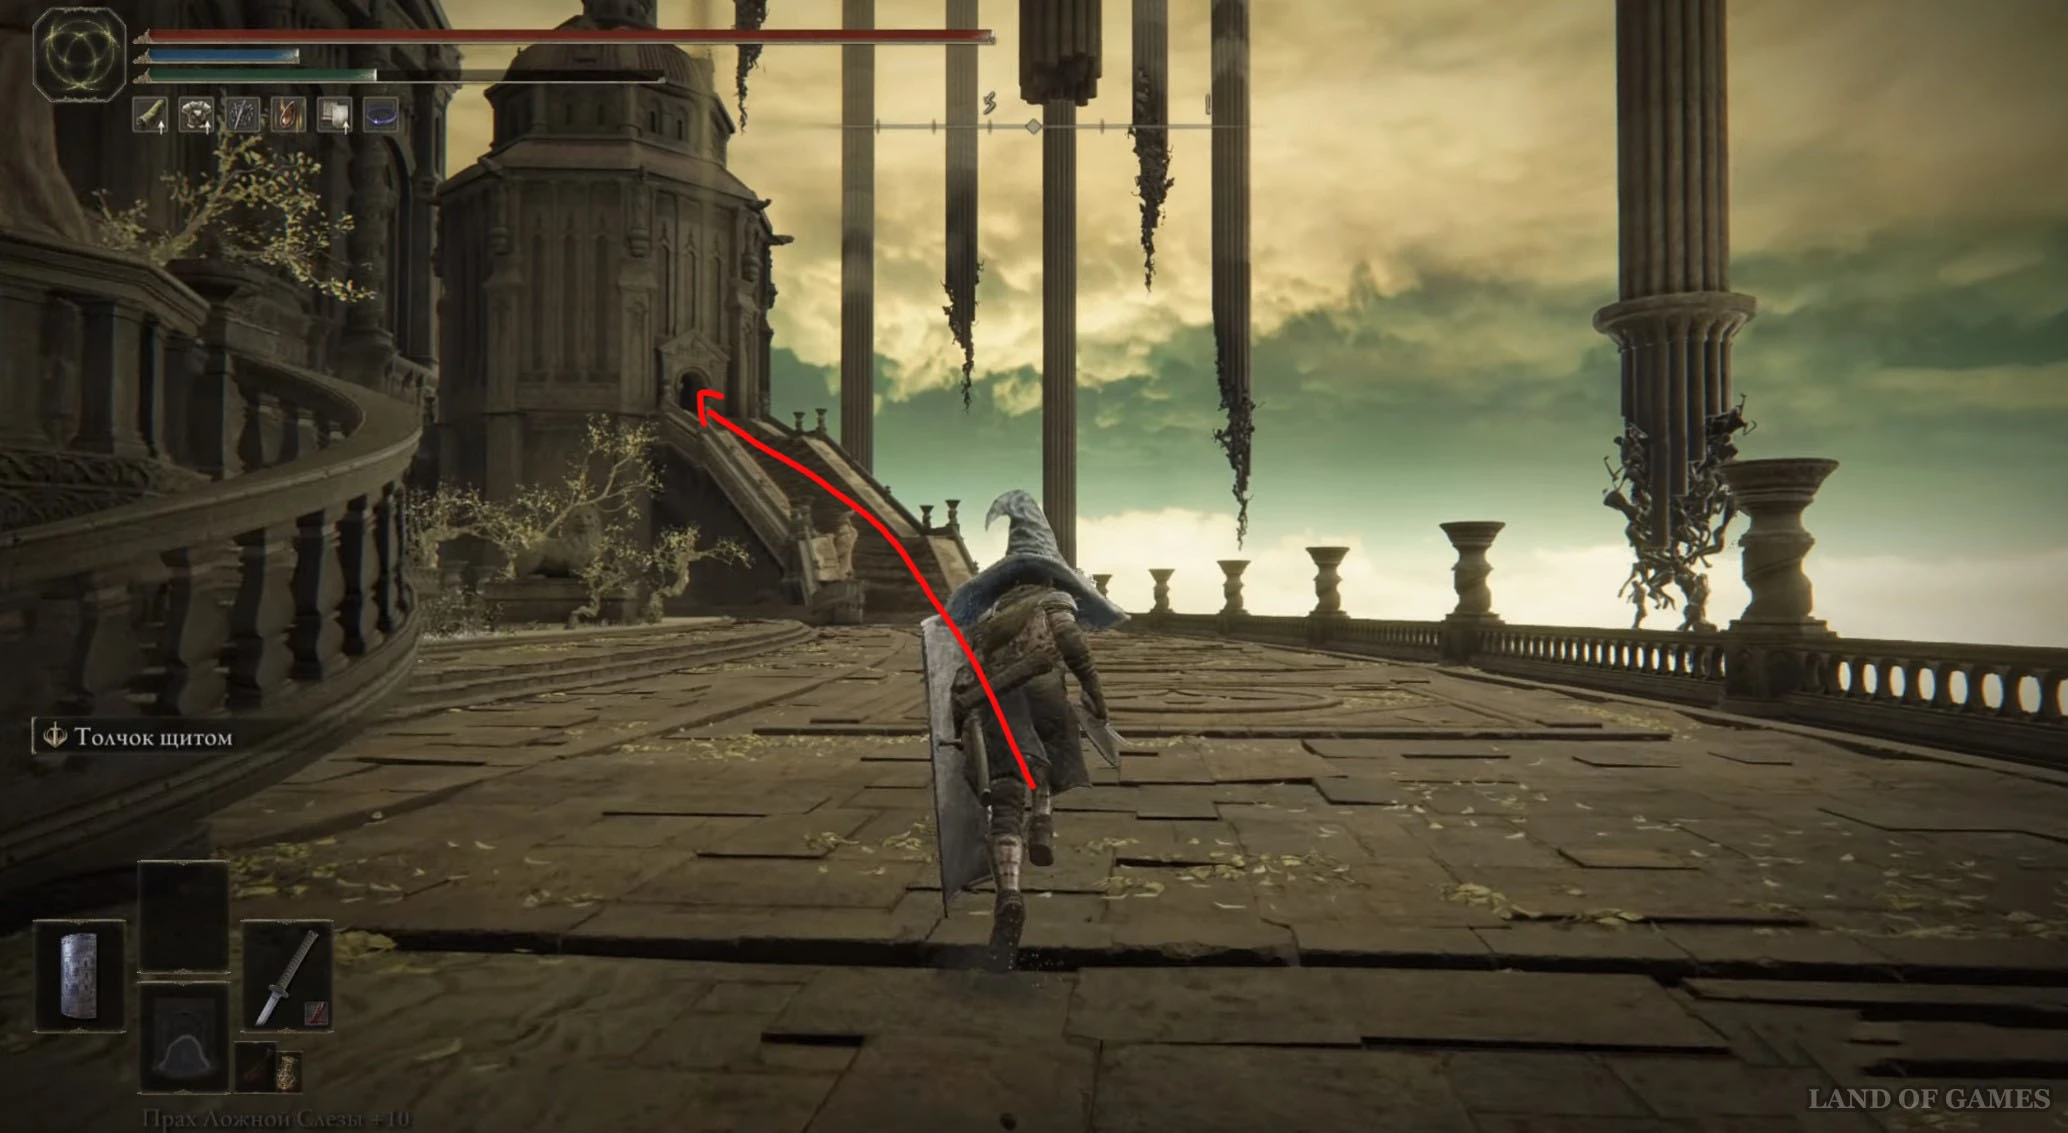
Оказавшись наверху, поверните влево и спуститесь вниз, а потом пройдите в переулок вперед и вновь сверните вправо к развалинам здания. Проберитесь через них к проходу внизу и войдите в него, чтобы попасть в здание. Внутри сверните вправо, поднимитесь по ступенькам и двигайтесь вперед до самого конца, пока не увидите крест Микеллы, рядом с которым и лежит нужная вам вещица.
Осколок древа упадка 8
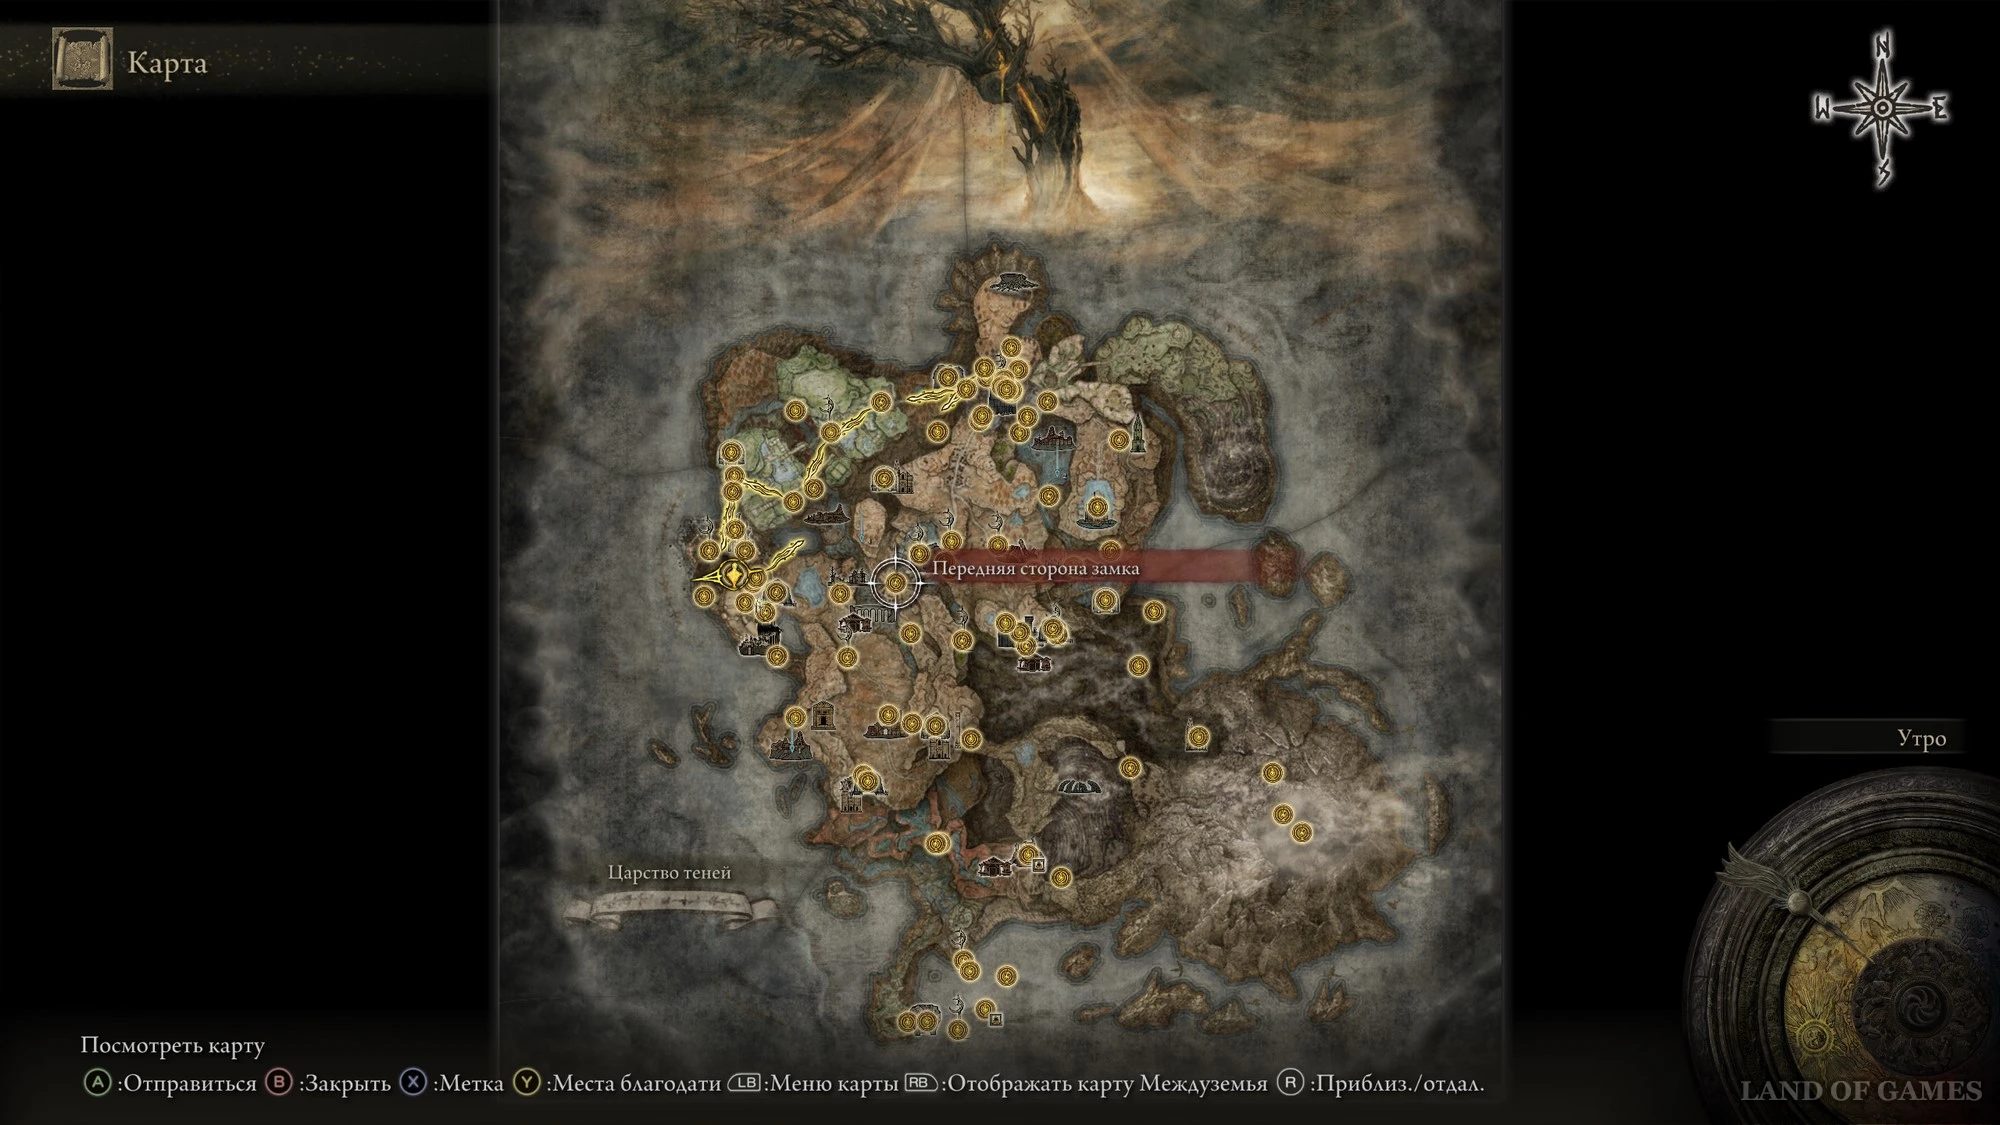
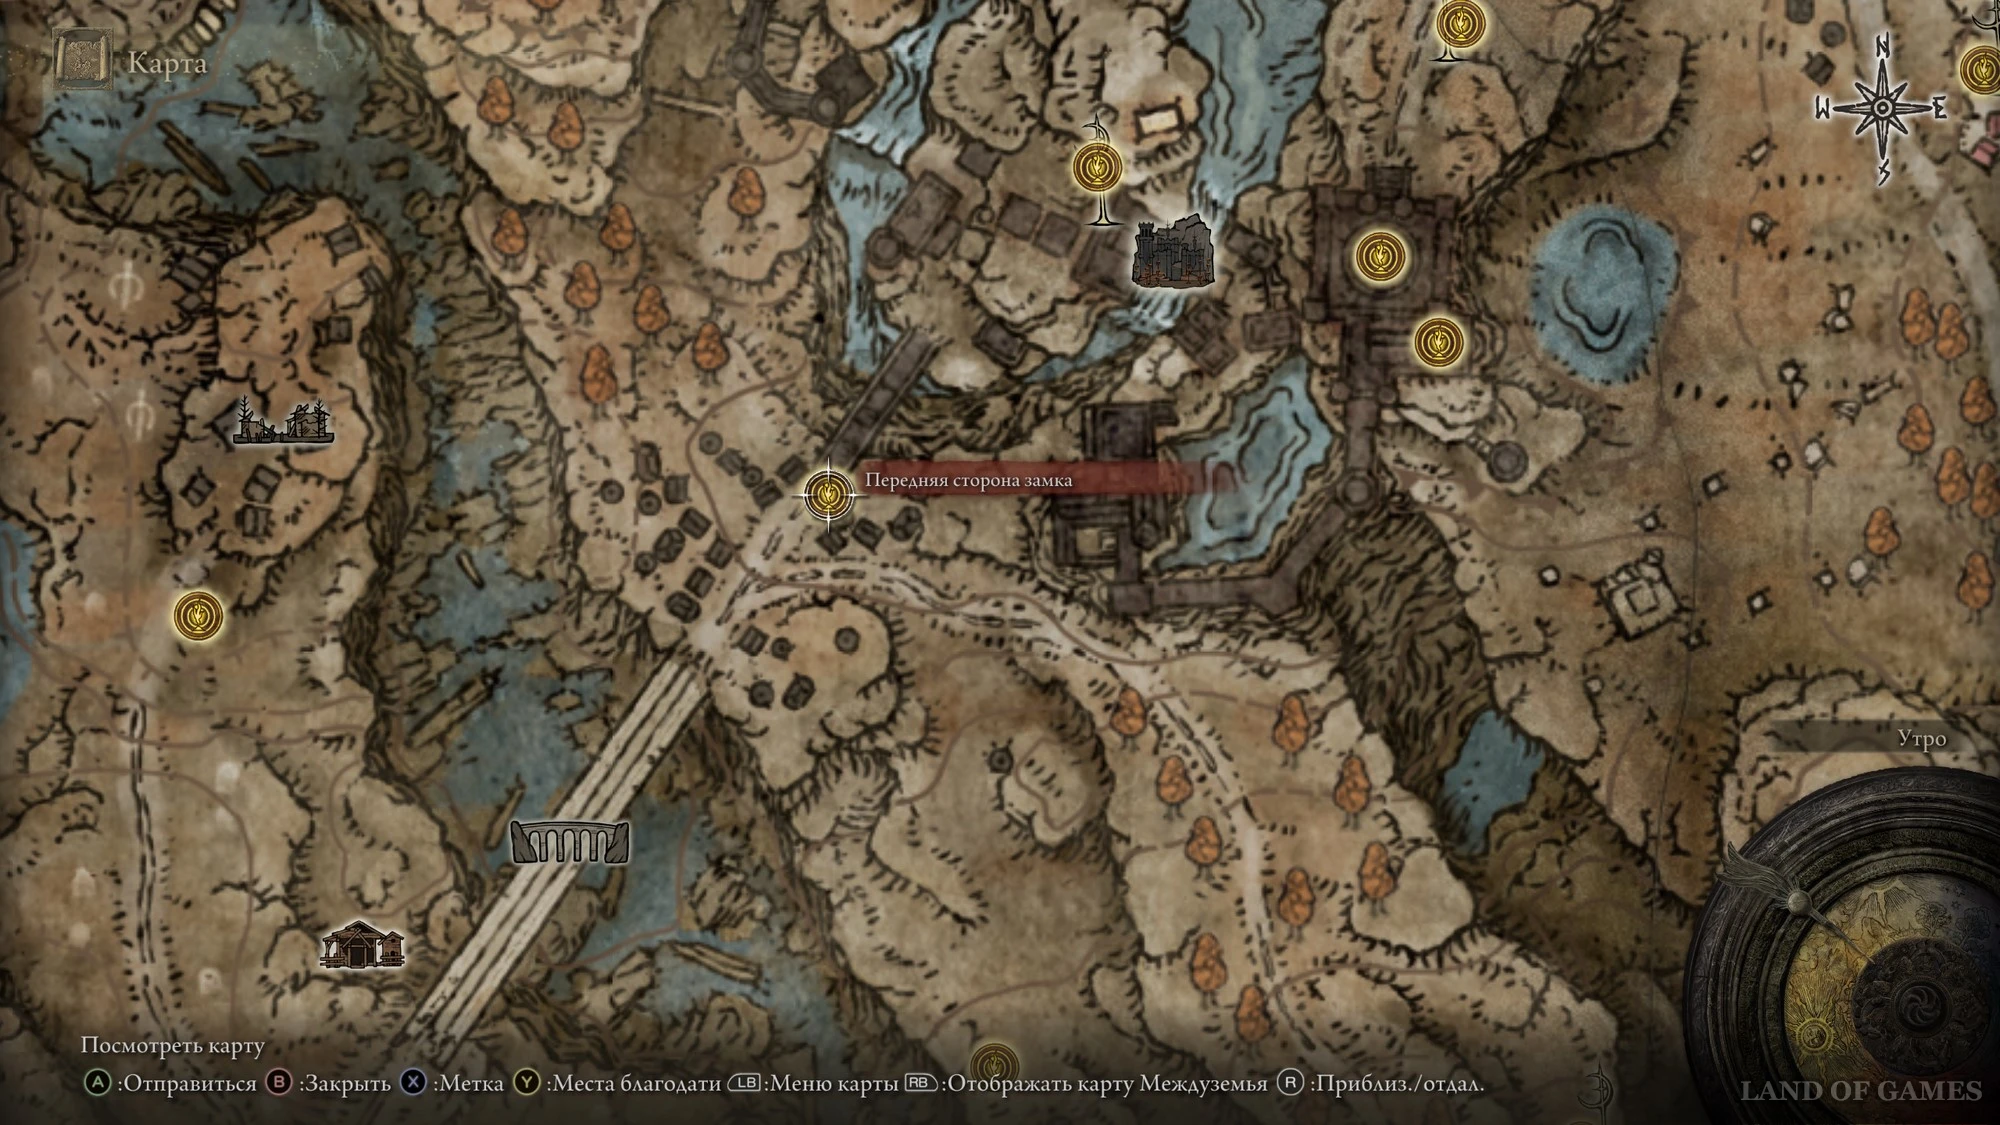
Доберитесь или переместитесь к месту благодати «Передняя сторона замка», расположенному неподалеку от прохода в замок Энсис. Затем начните двигаться на юго-запад и вскоре вы увидите статую Марики, у подножья которой и будет лежать необходимый вам предмет.
Осколок древа упадка 9
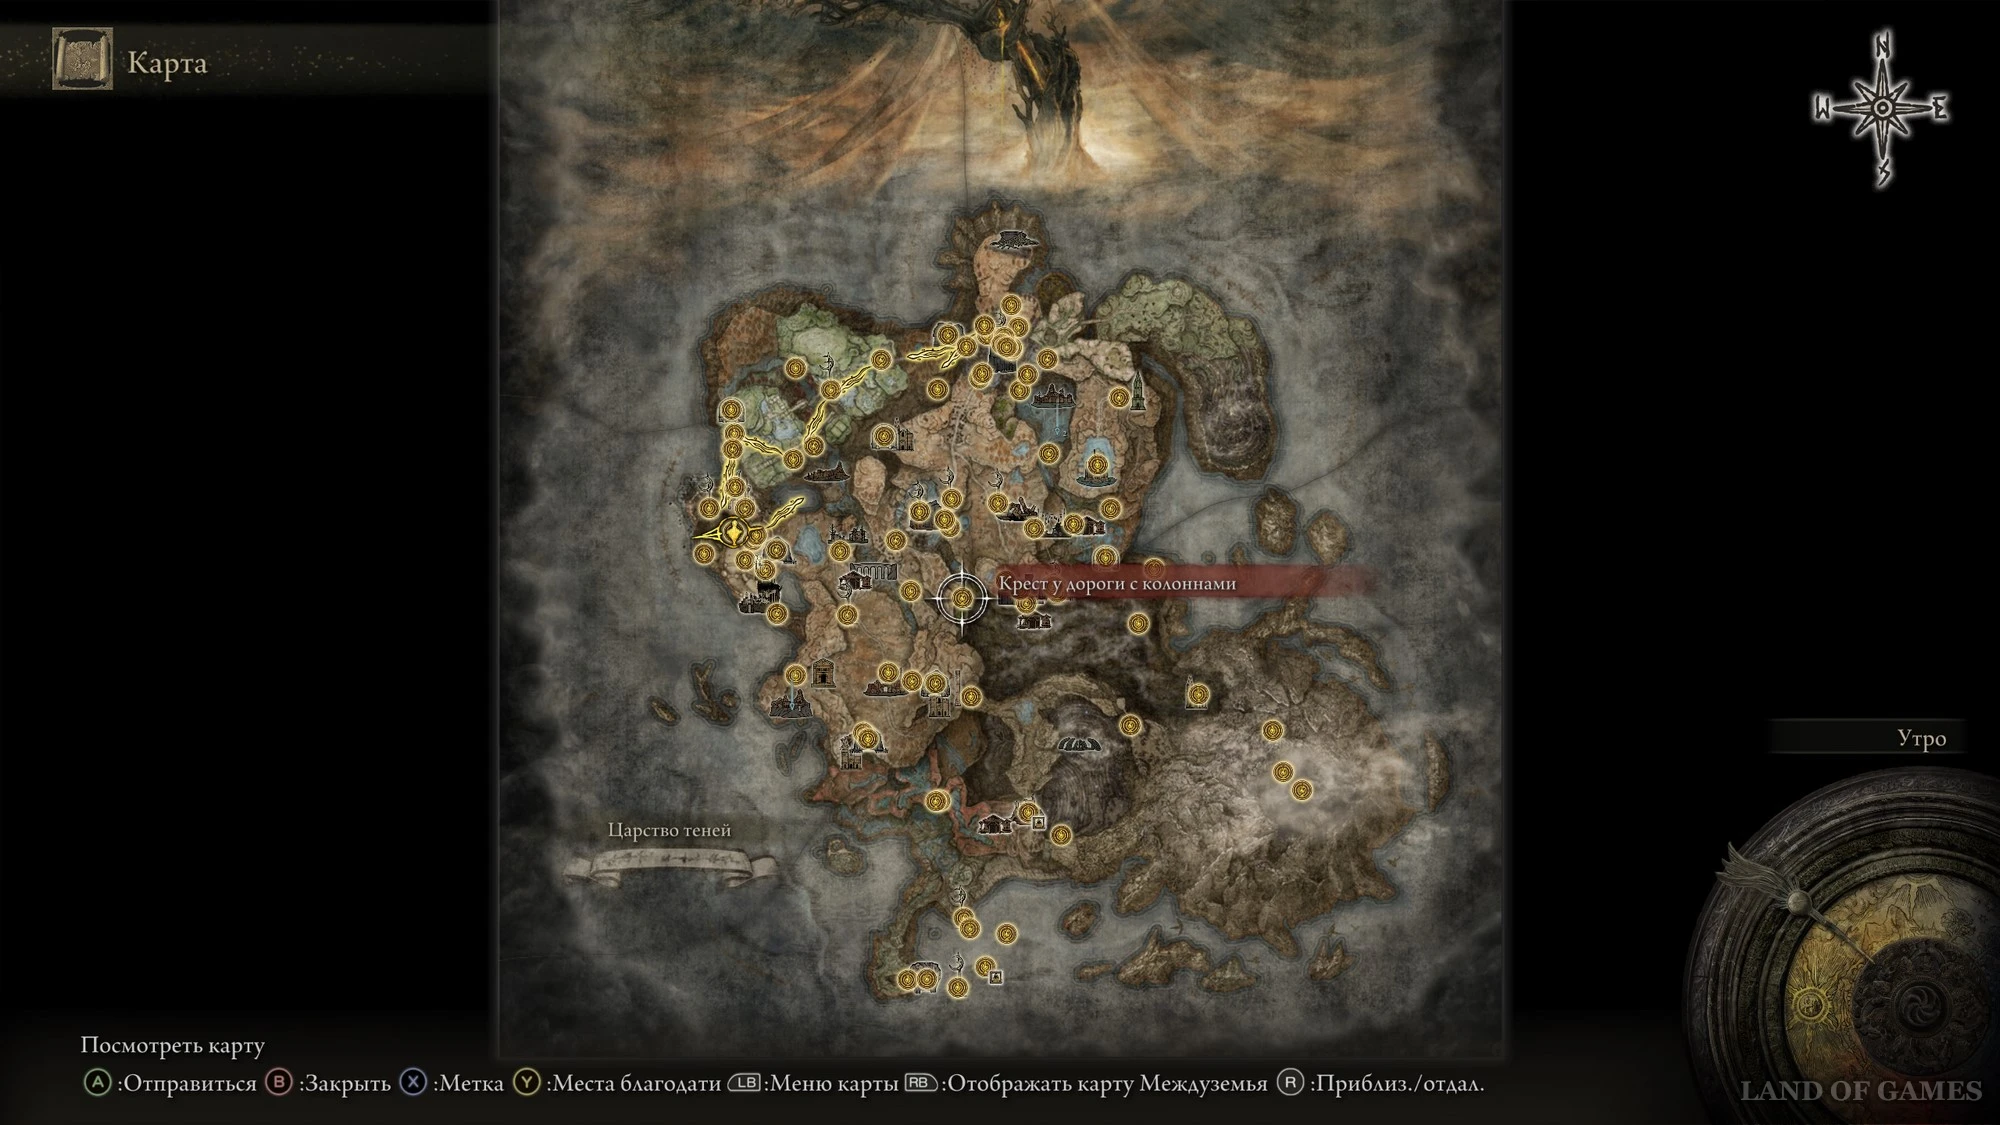
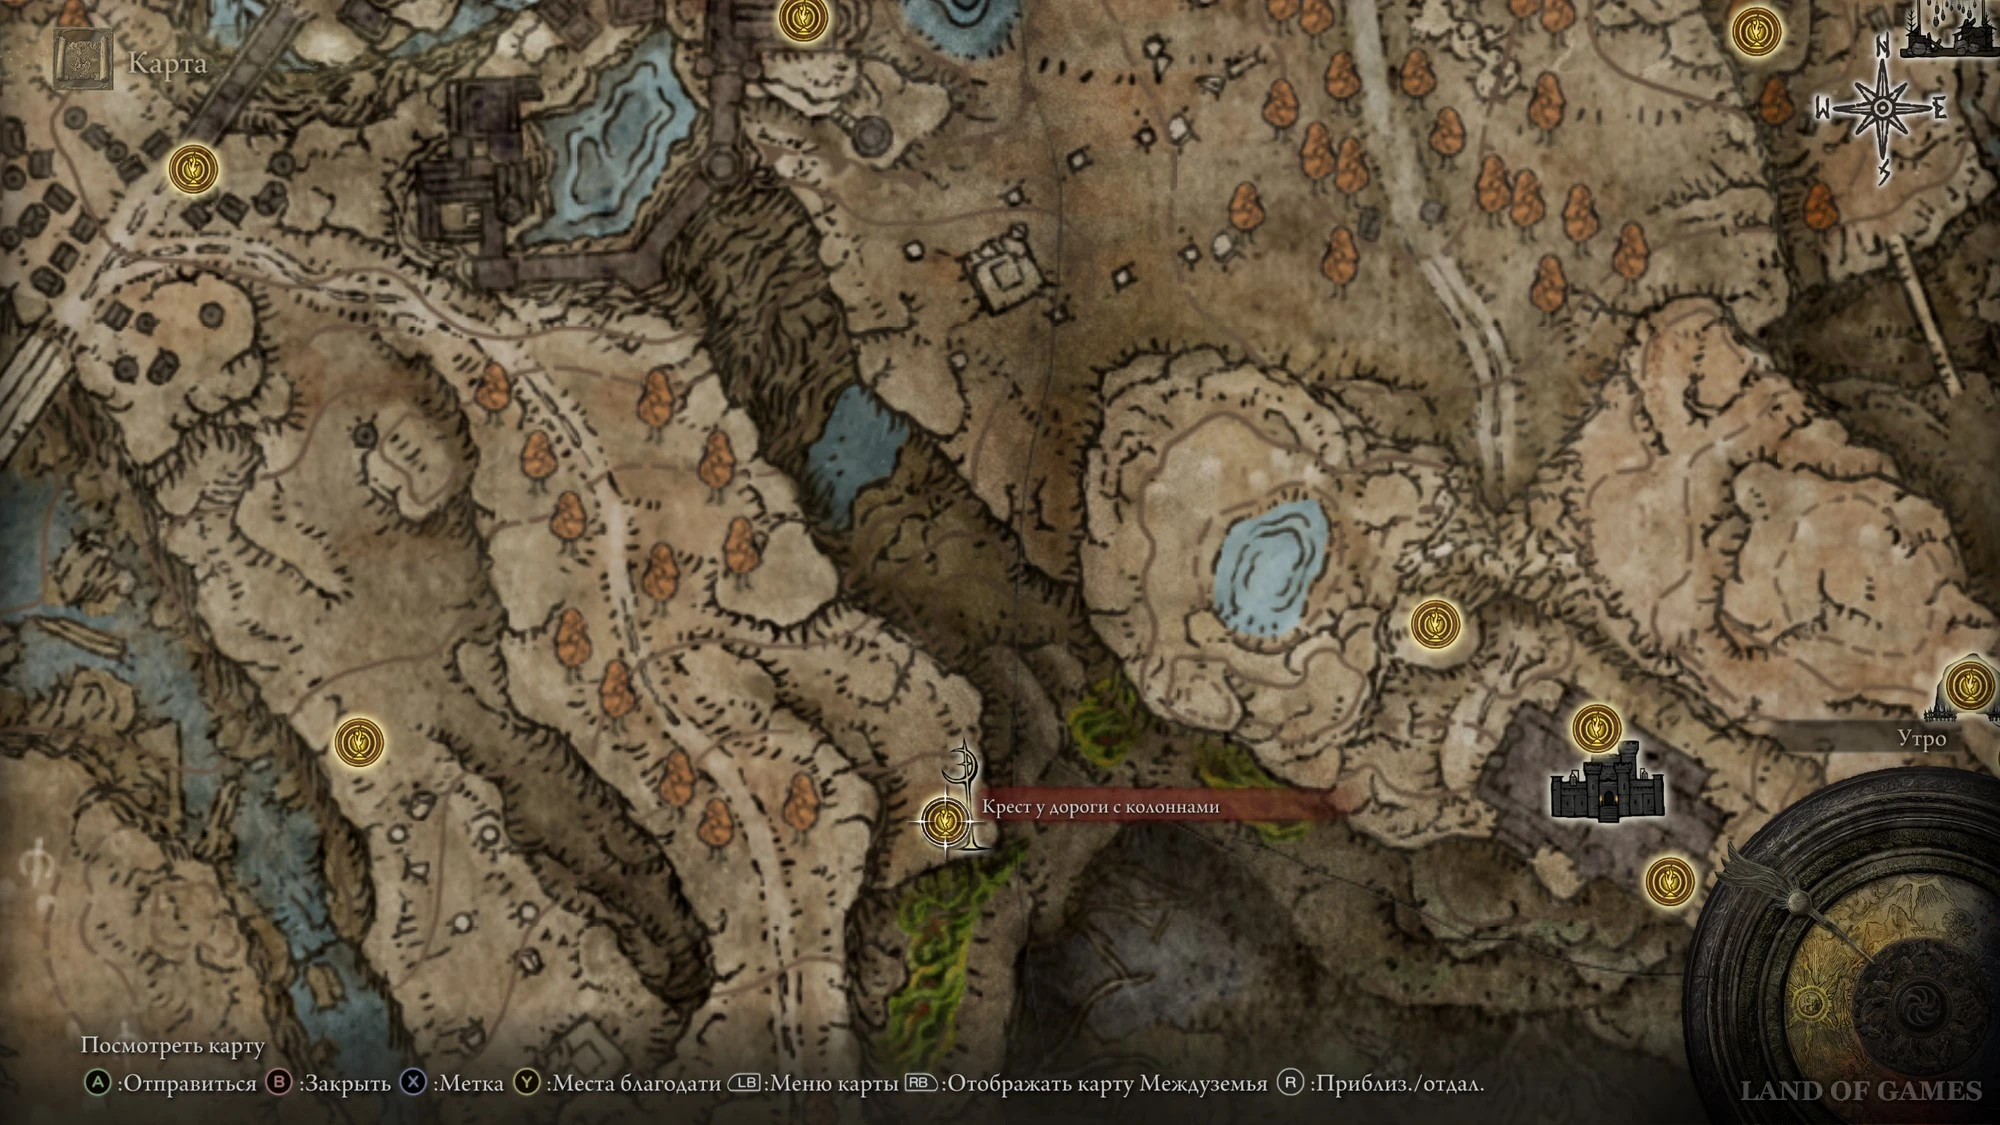
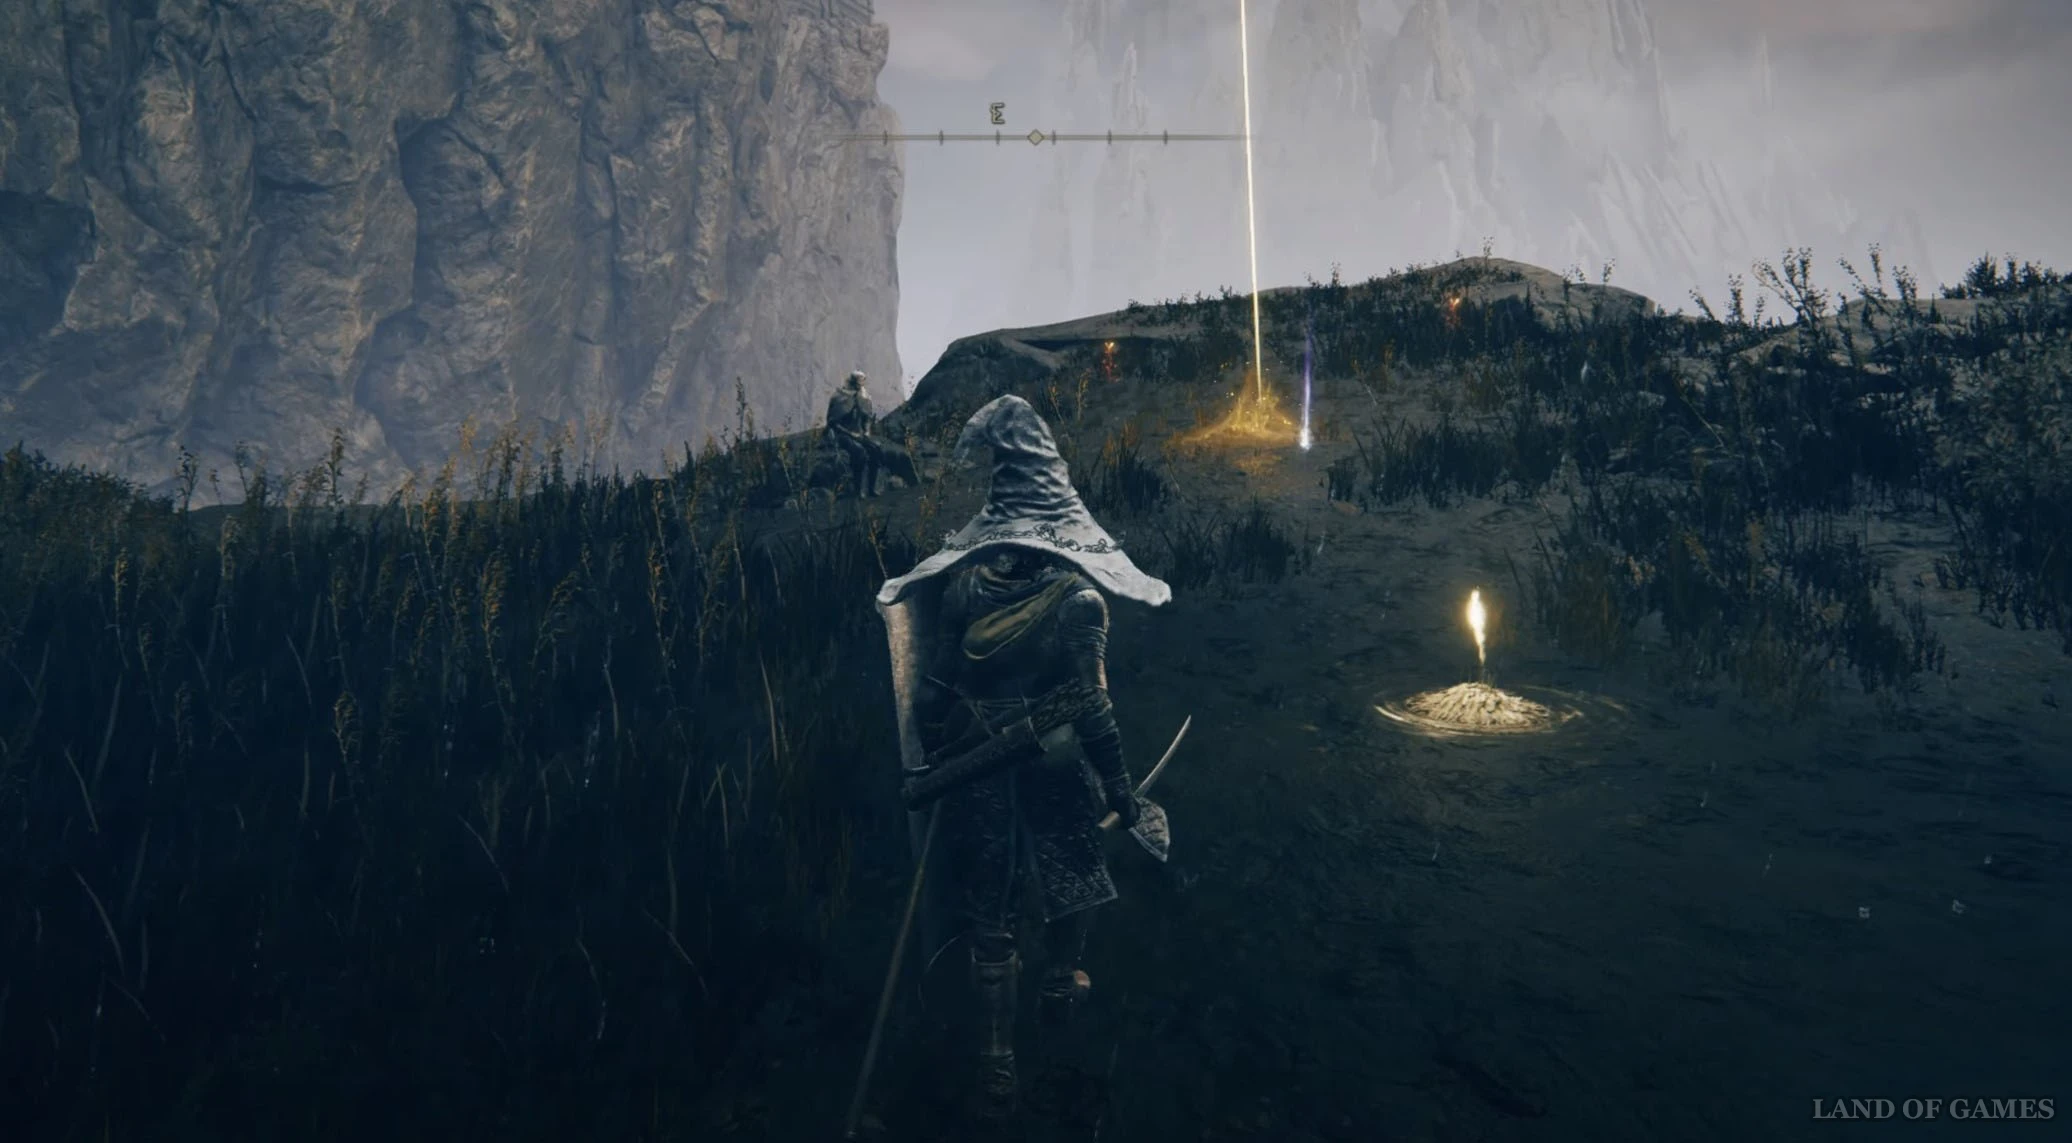
Доберитесь или переместитесь к месту благодати «Крест у дороги с колоннами», находящемуся юго-восточнее предыдущего «костра» (вы можете без проблем добраться до него на Потоке). Здесь вы обнаружите крест Микеллы, рядом с которым и находится нужный вам предмет.
Осколок древа упадка 10
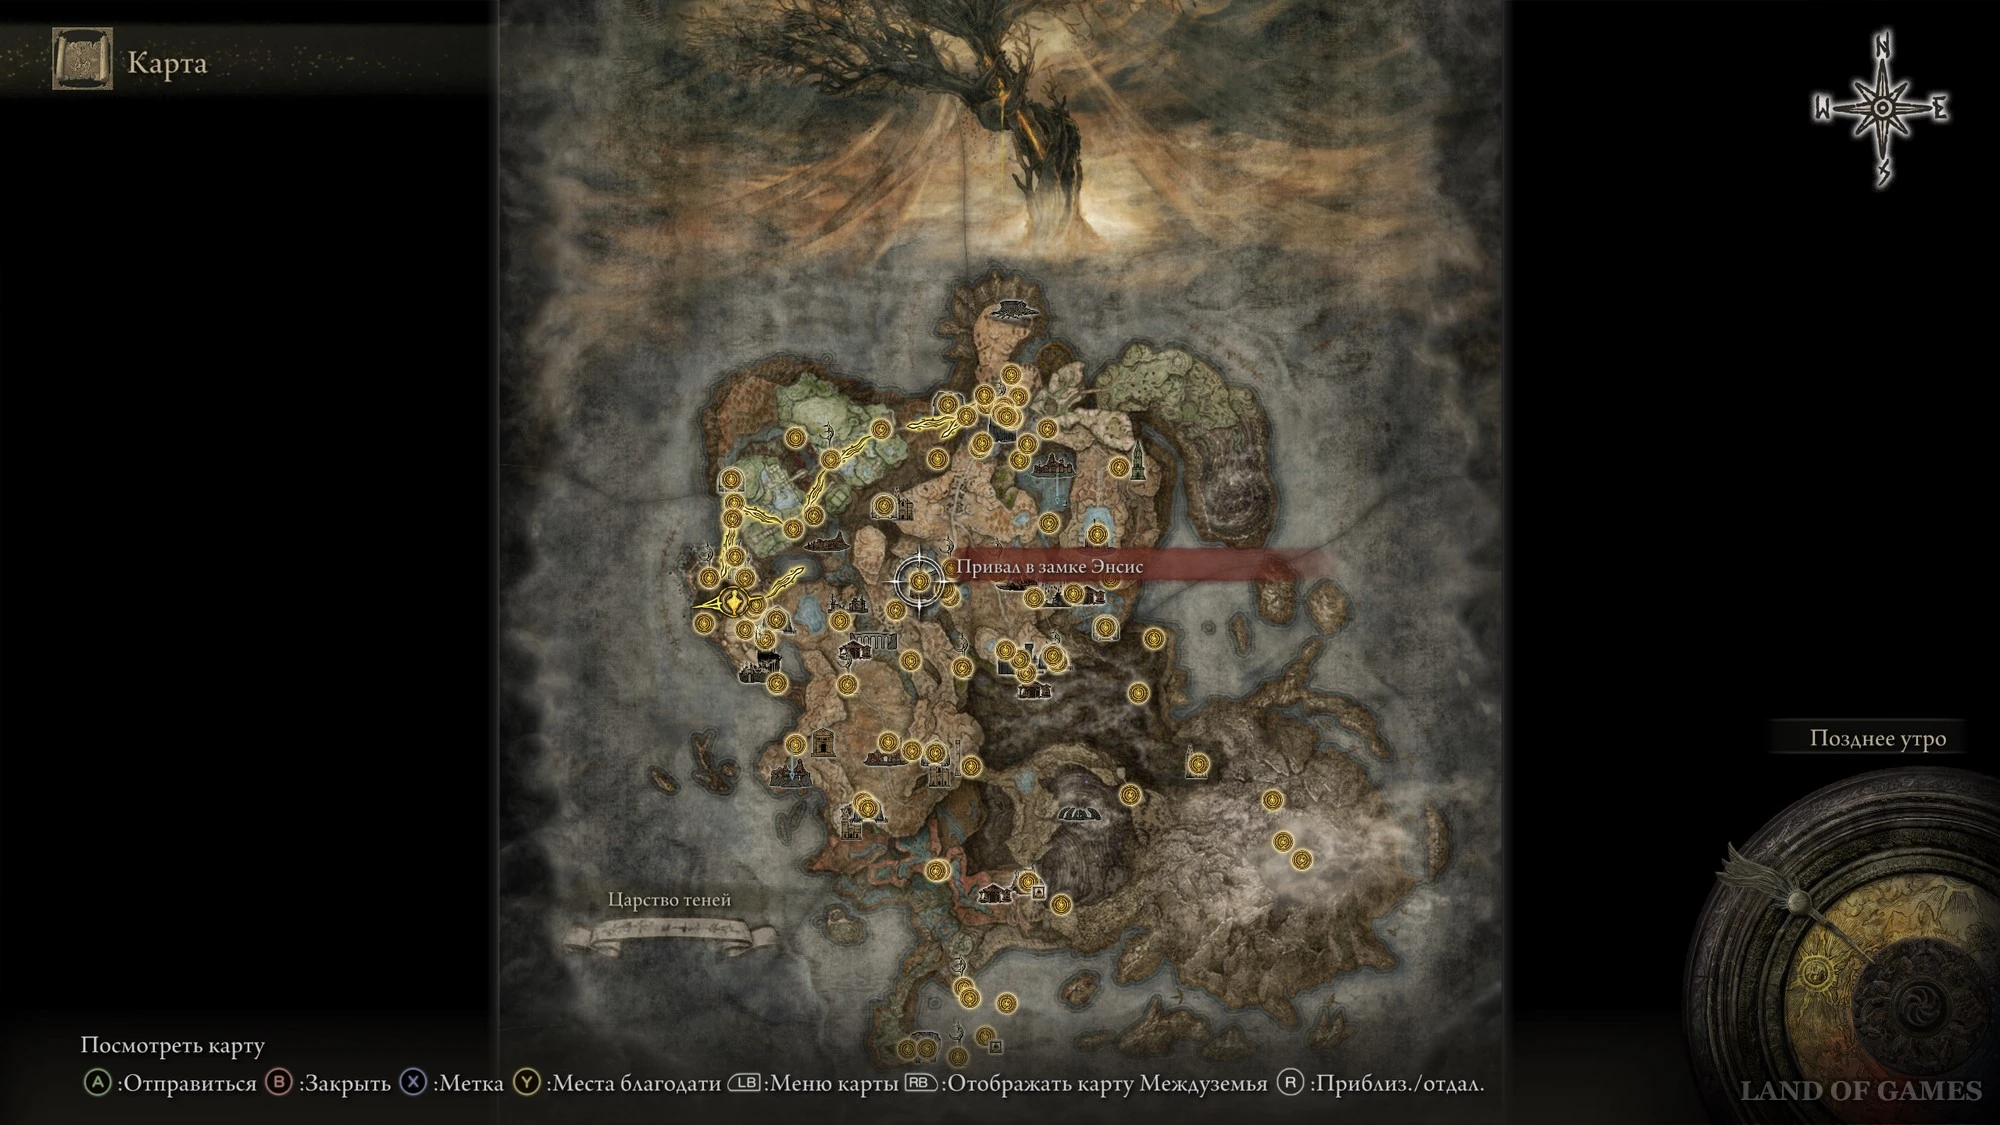
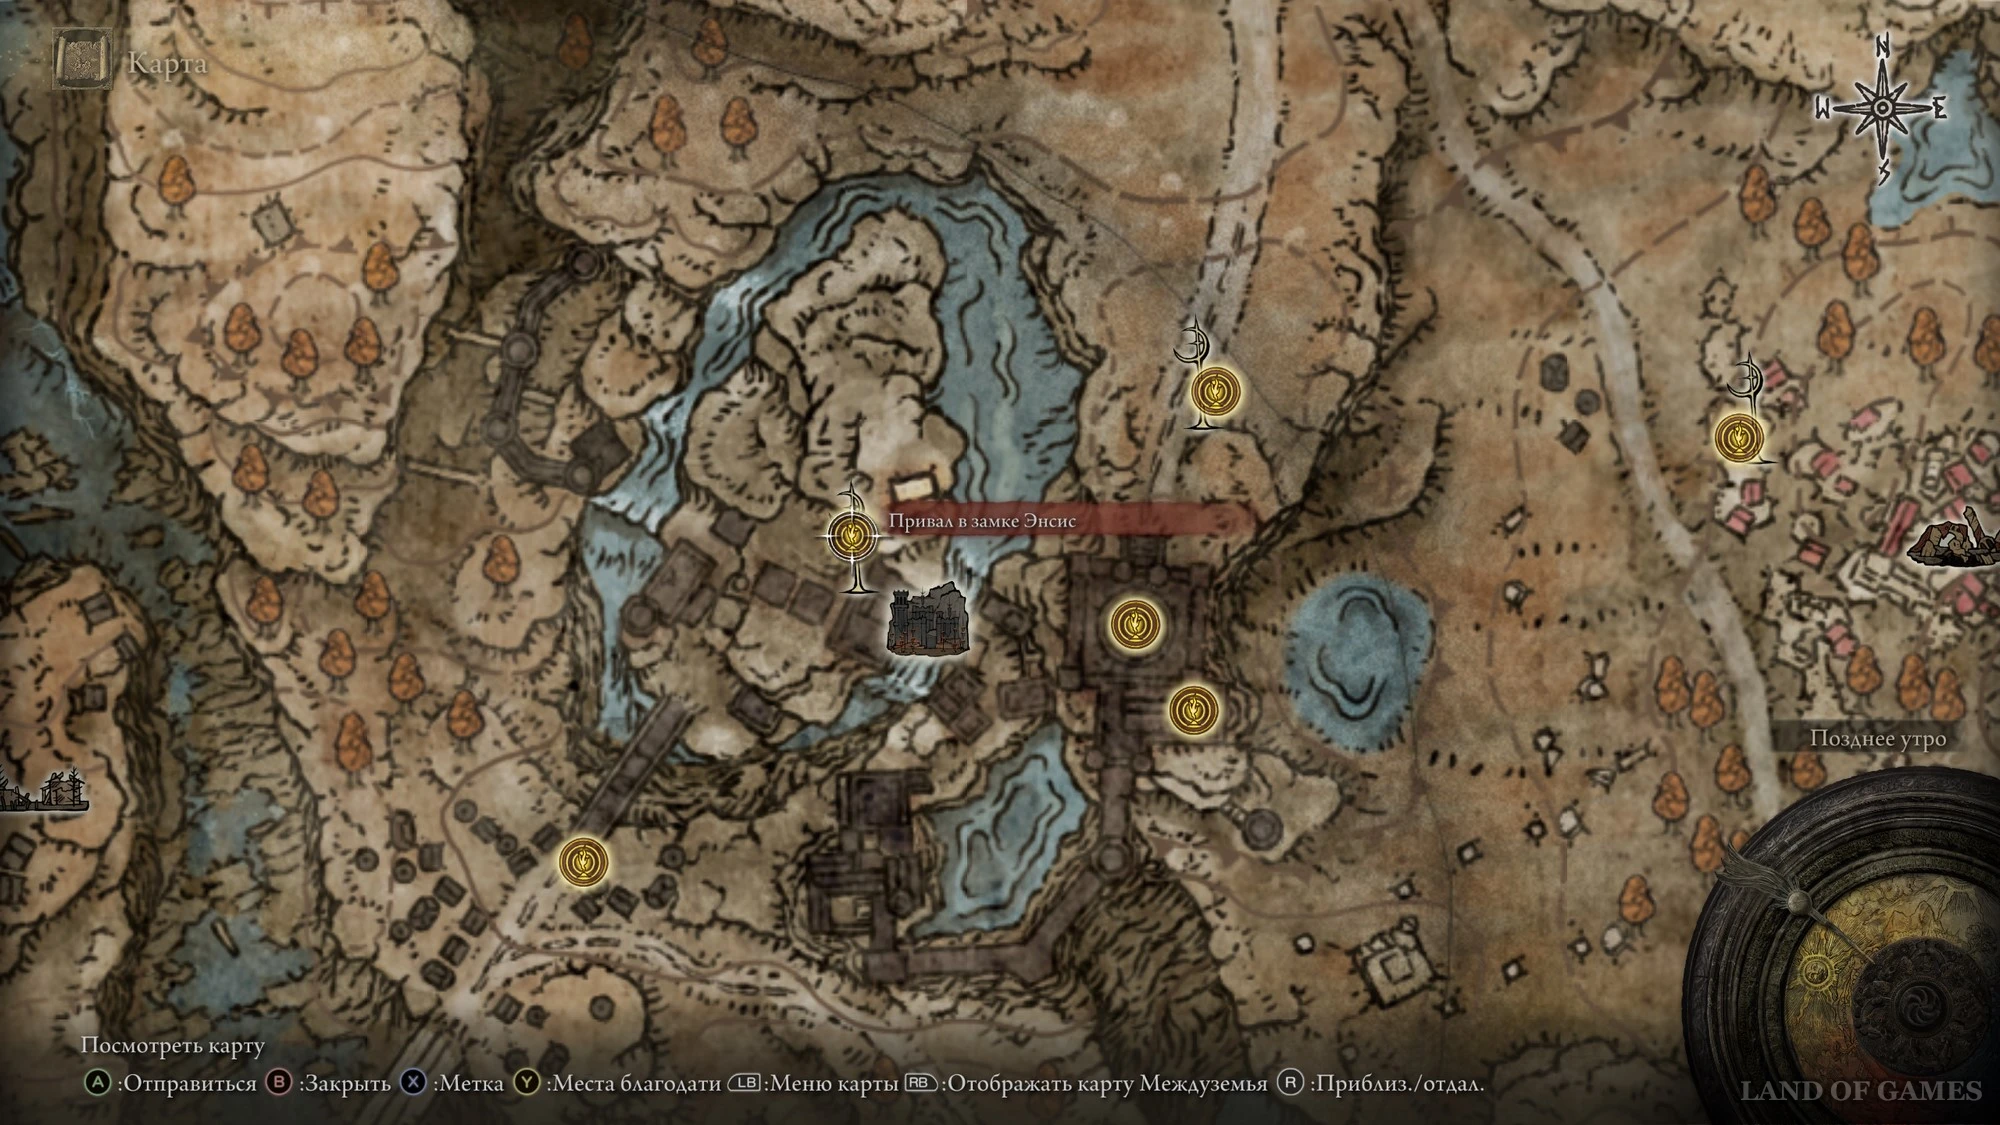
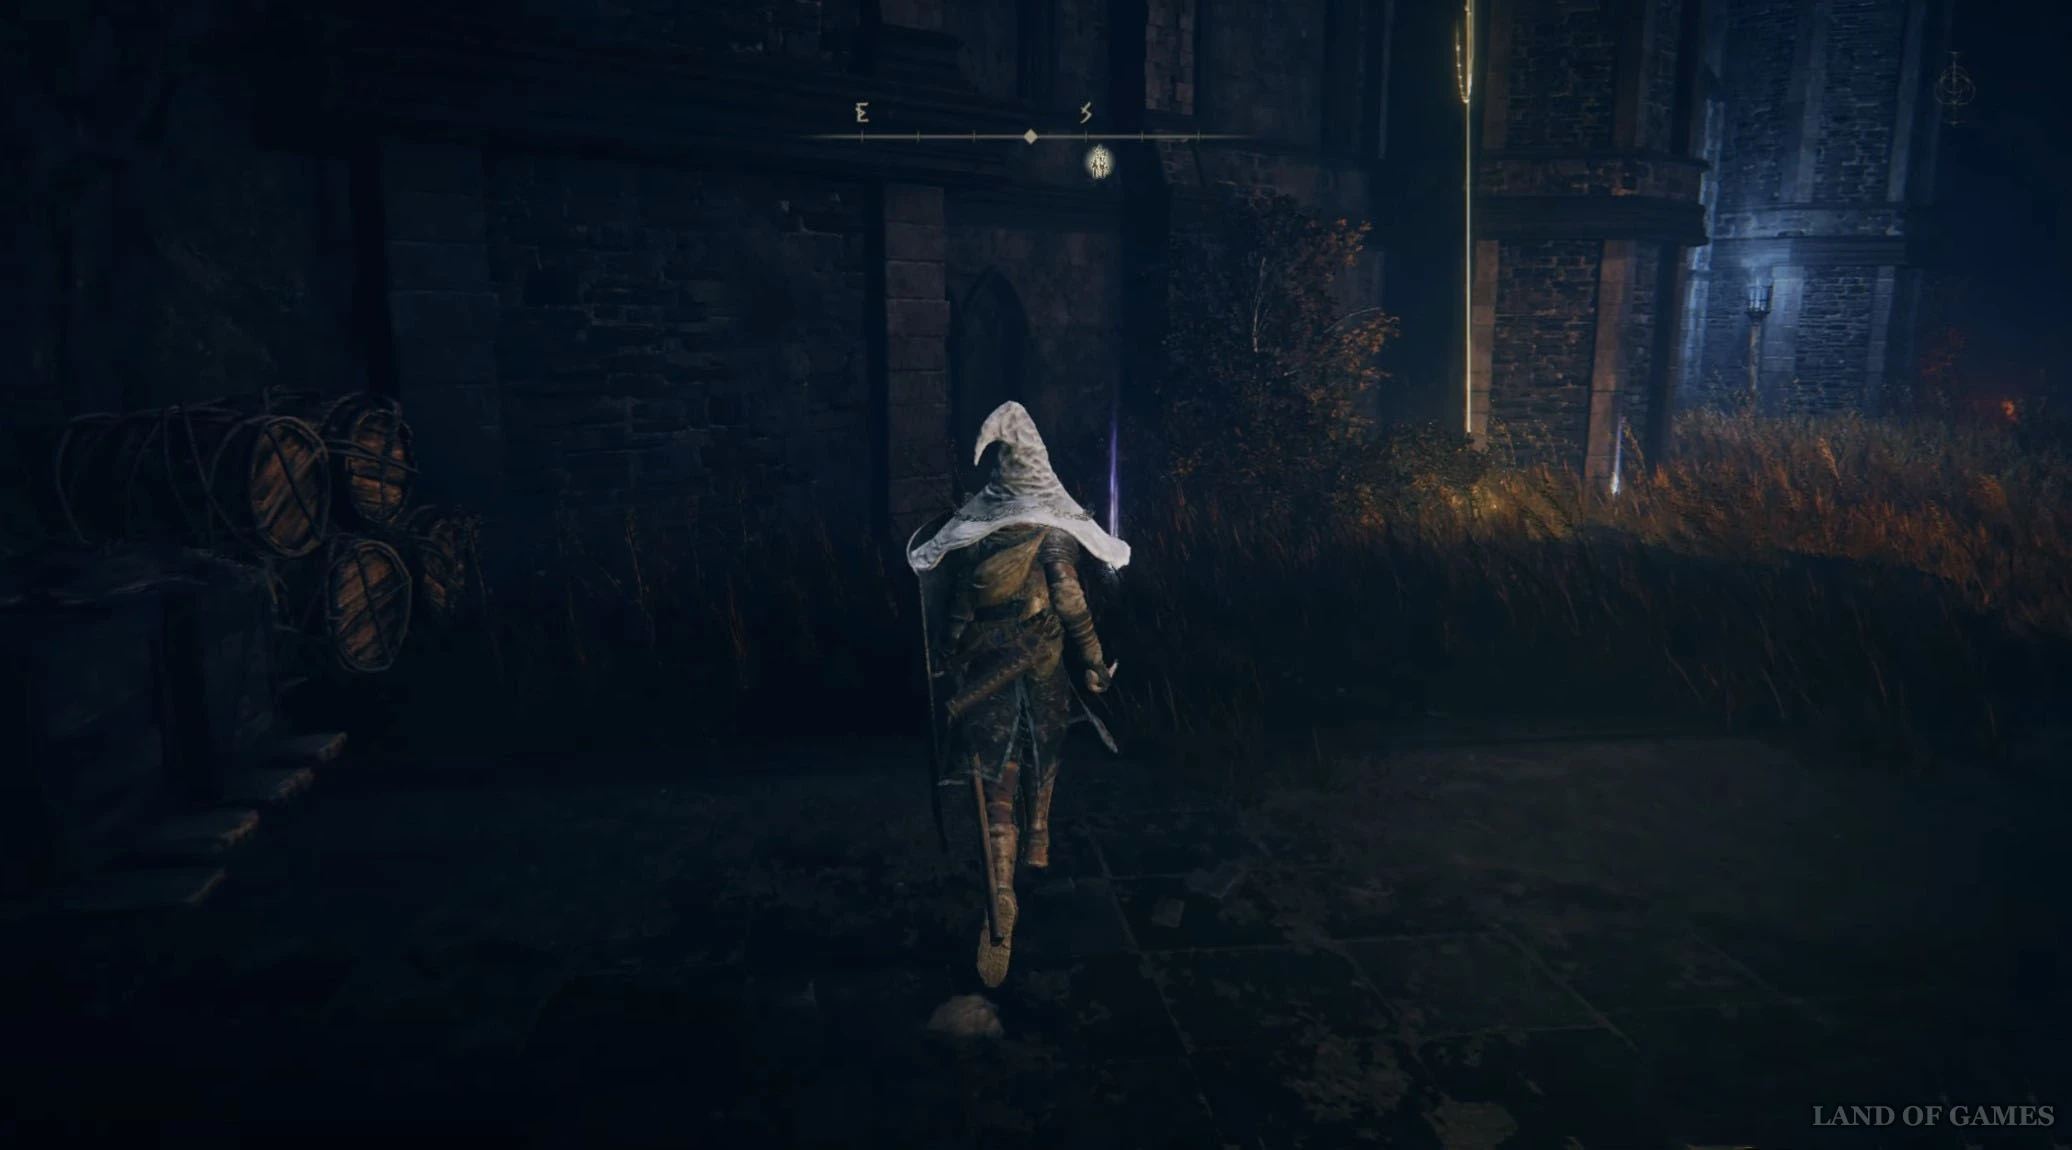
Доберитесь или переместитесь к месту благодати «Привал в замке Энсис», расположенному внутри крепости. Тут вы найдете еще один крест, рядом с которым лежит нужная вам вещица.
Осколок древа упадка 11
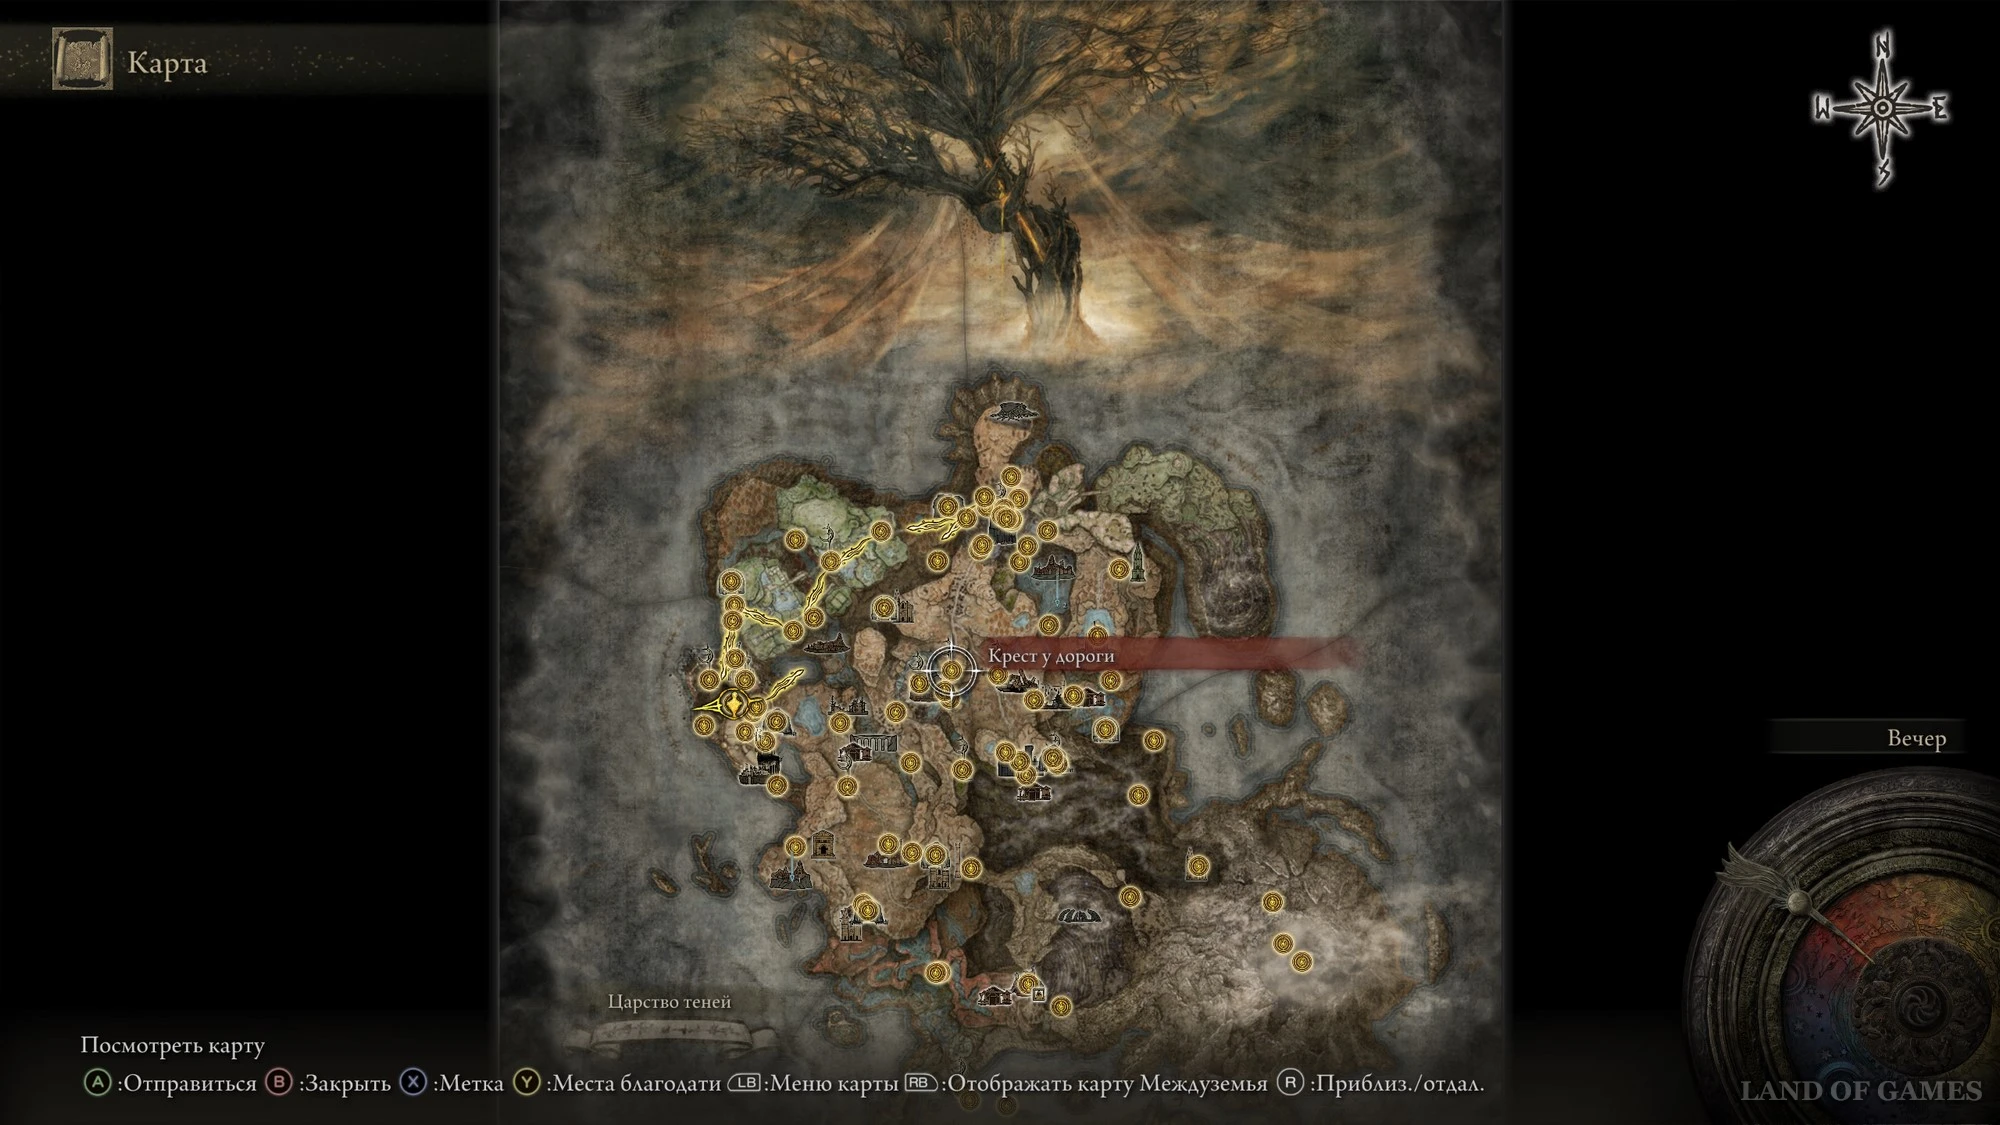
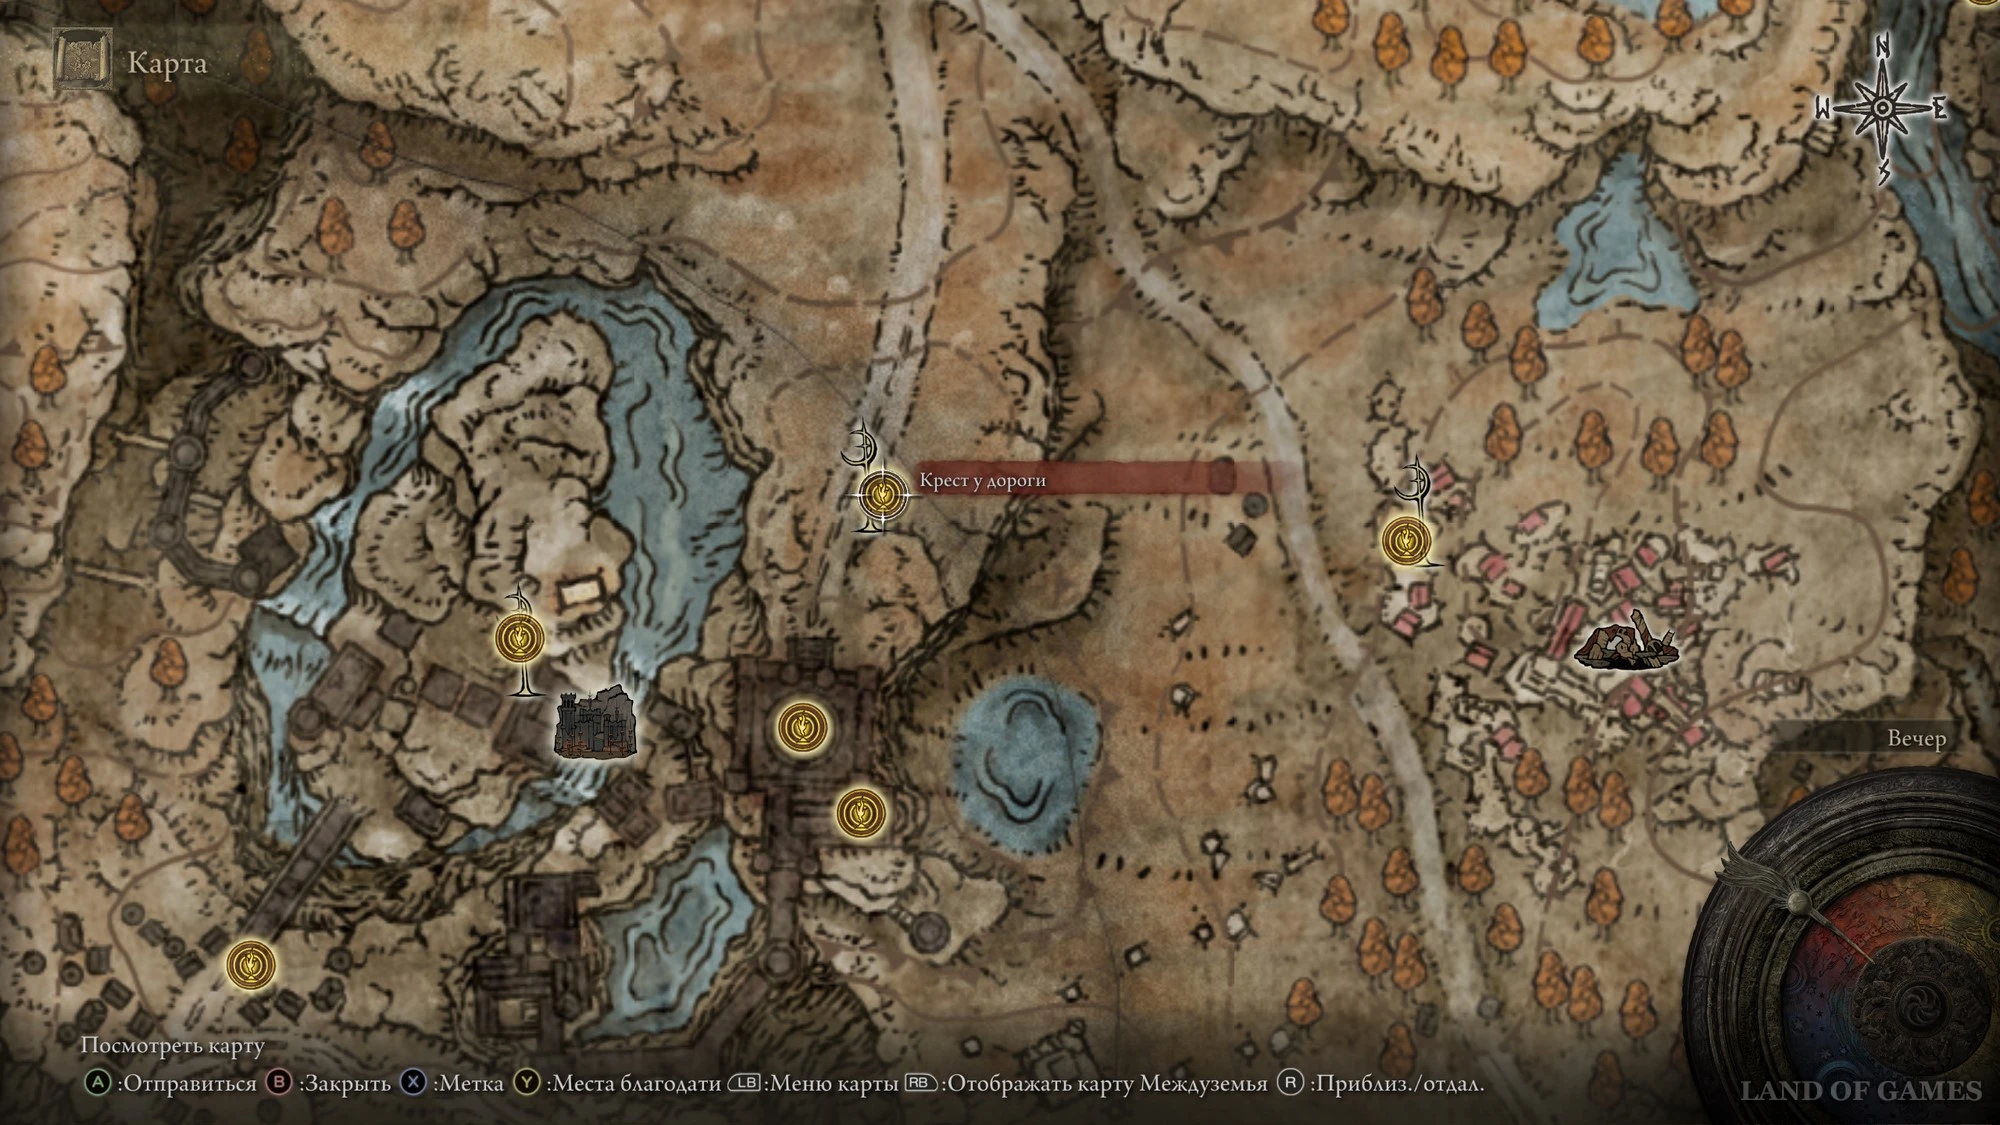
Доберитесь или переместитесь к месту благодати «Крест у дороги» после зачистки замка Энсис. Как обычно, вы обнаружите тут крест Микеллы, рядом с которым и находится фрагмент. Тут можно также встретить Роговеста и Леду.
Осколок древа упадка 12
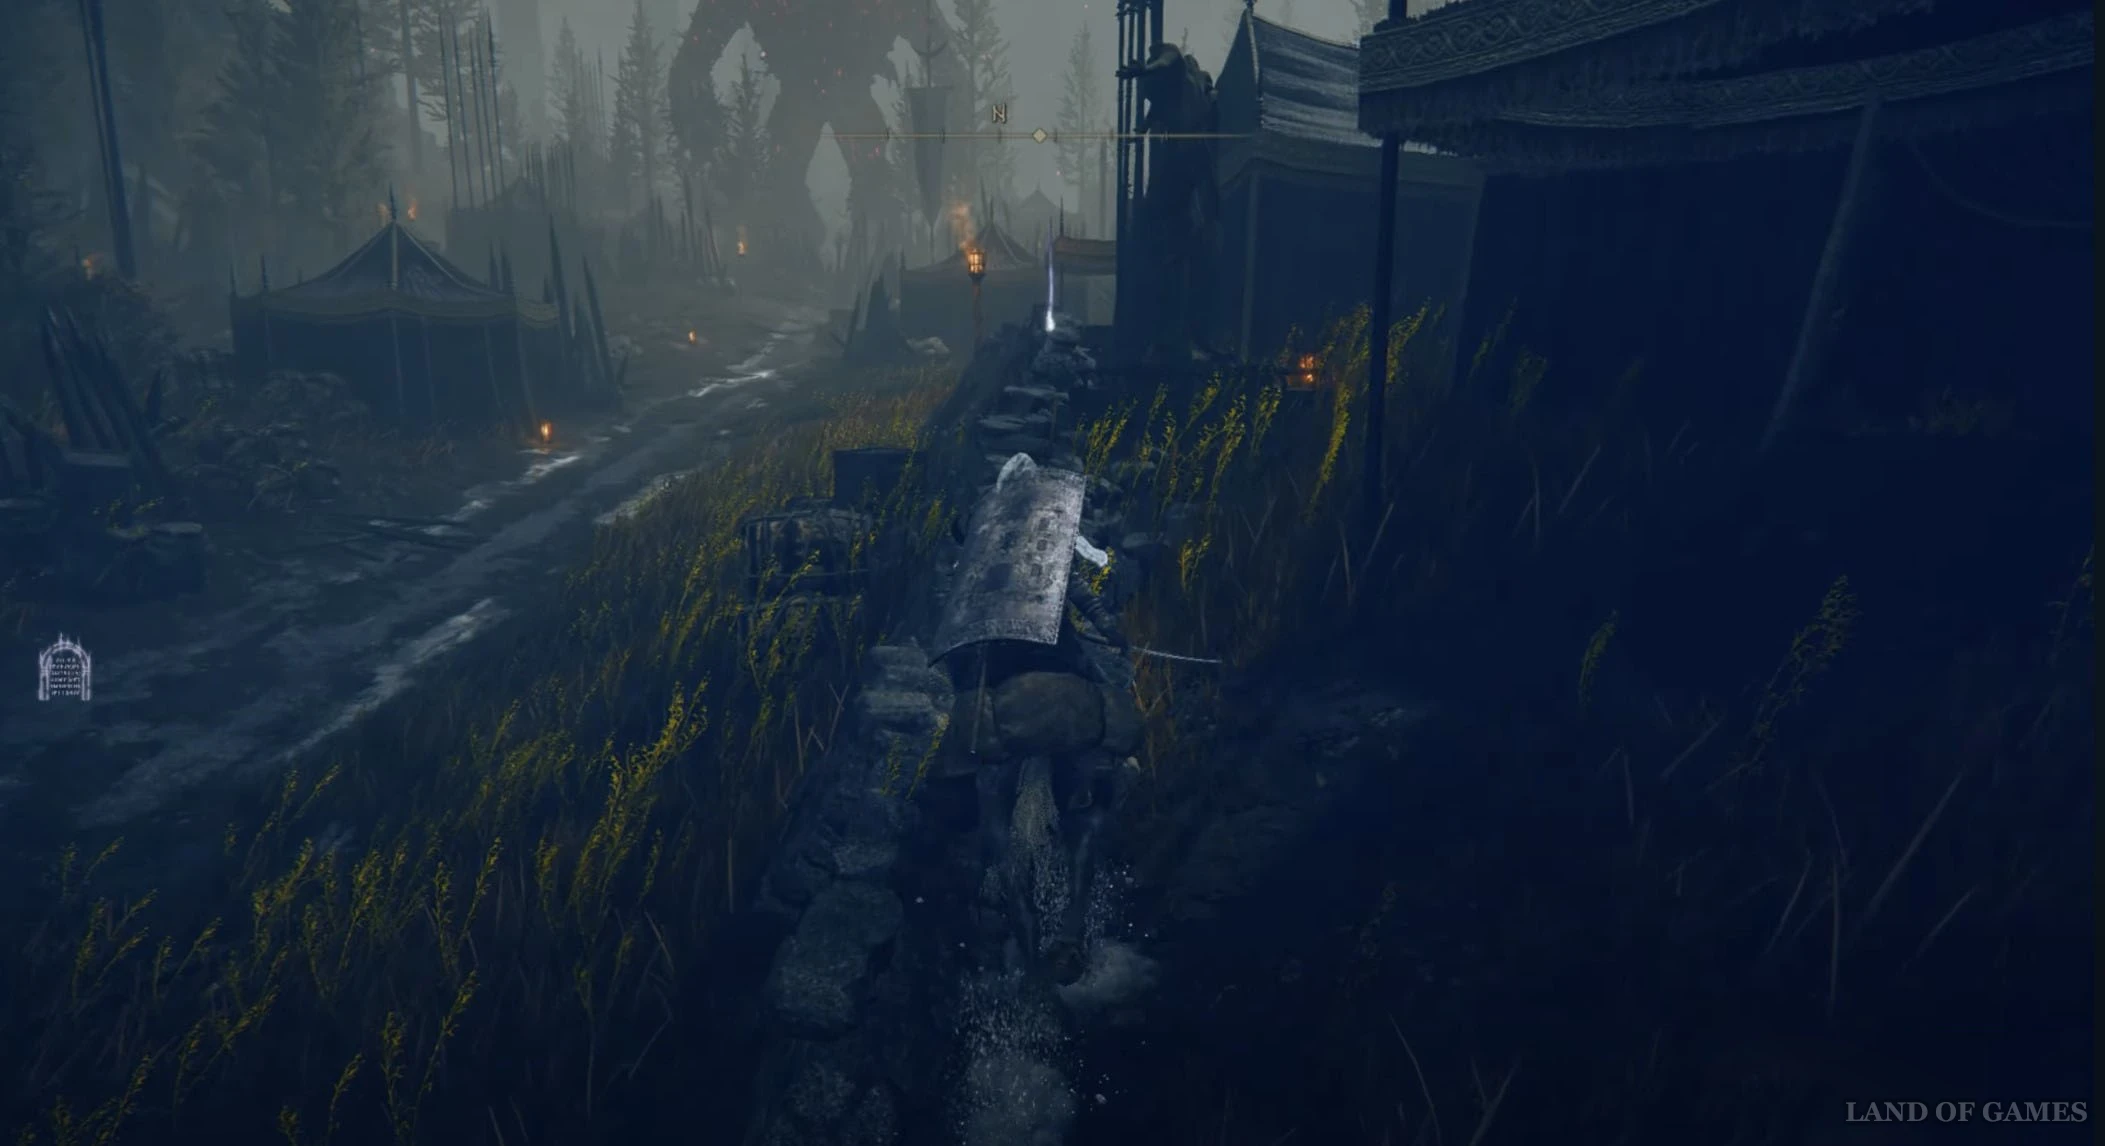
От предыдущего «костра» скачите на север по дороге, пока не доберетесь до вражеского лагеря. Здесь возле разрушенной стены вы найдете статую Марики, у подножья которой лежит требуемая вам вещица. Будьте осторожны, так как рядом бродит огненный голем.

Осколки древа упадка 13 и 14
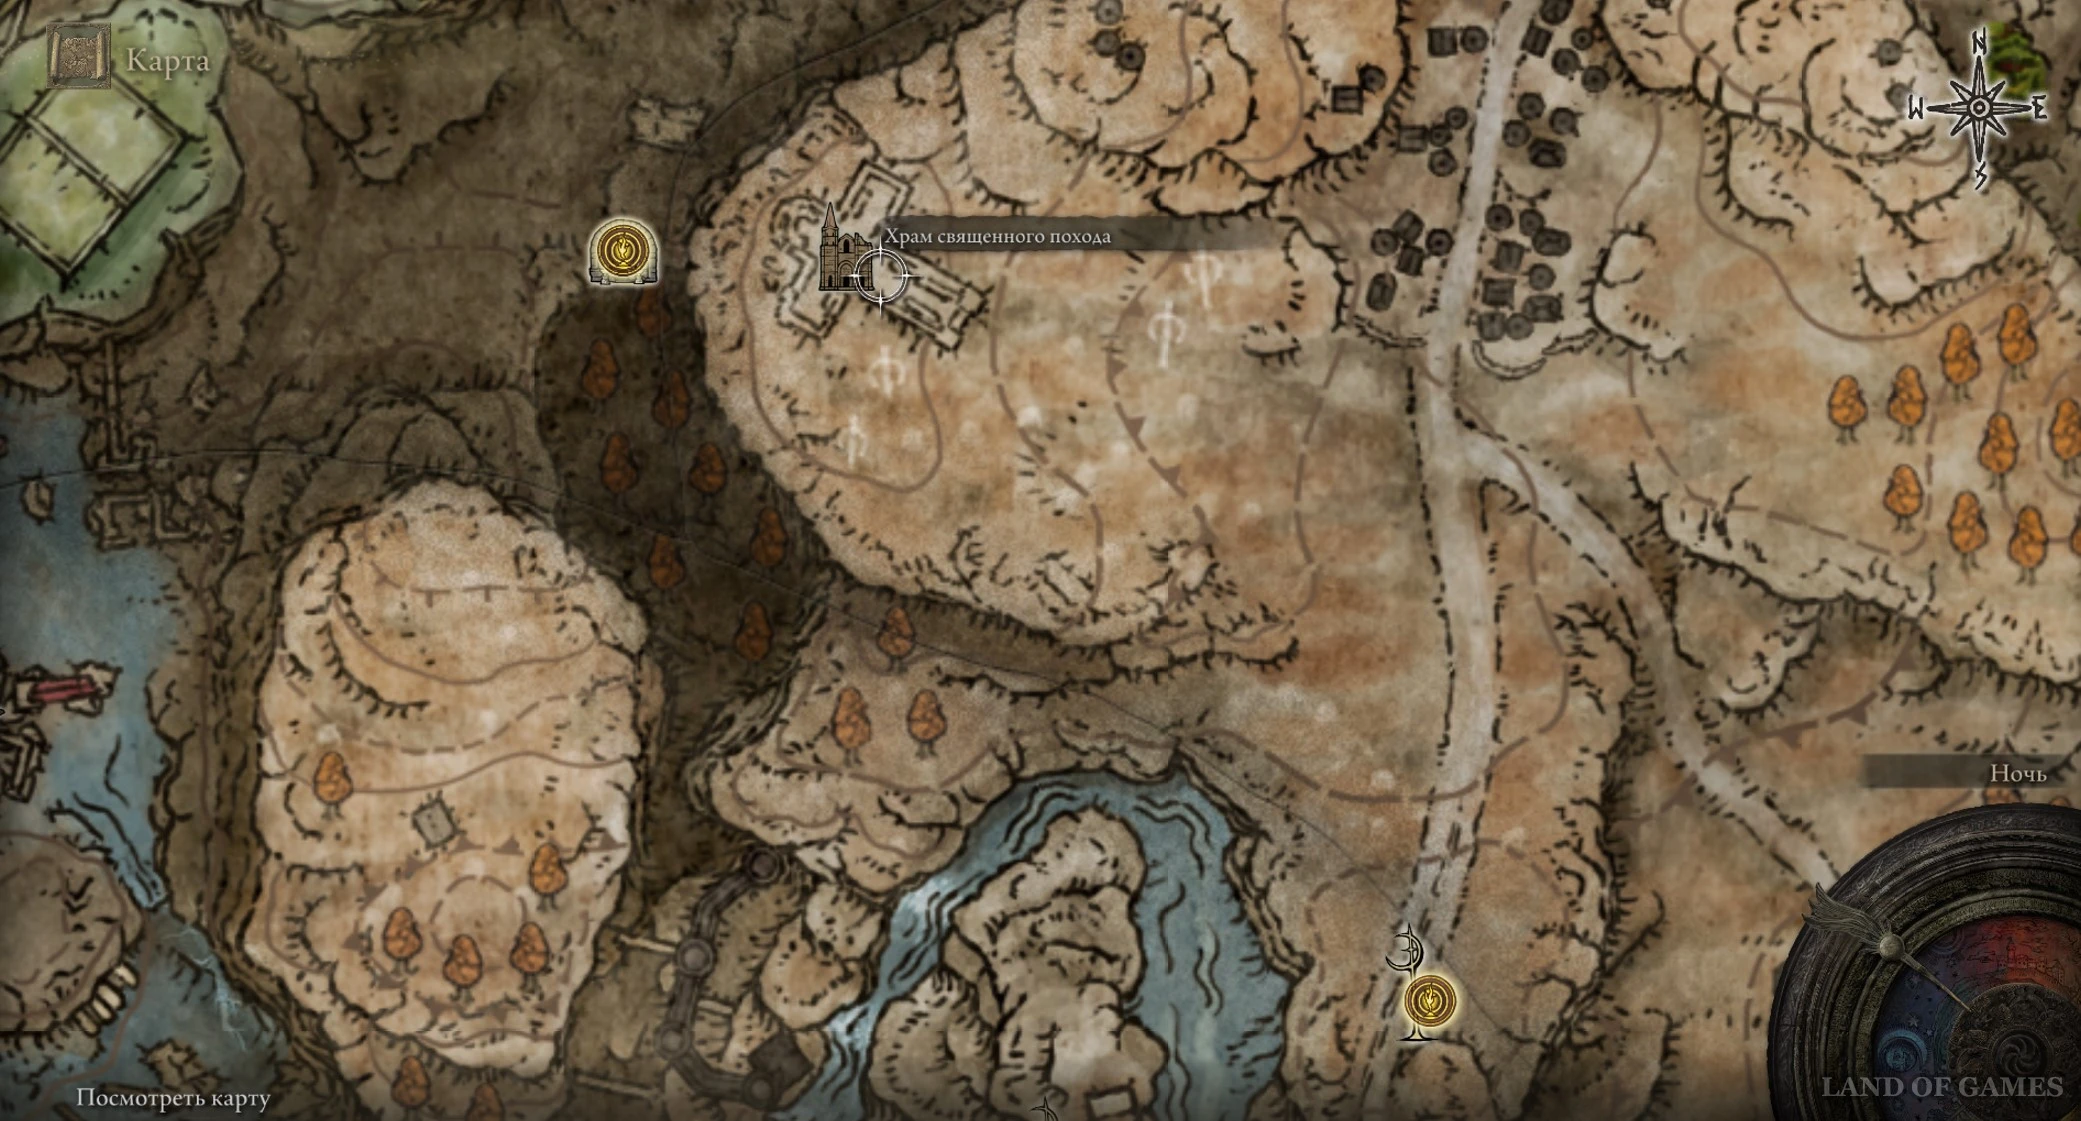
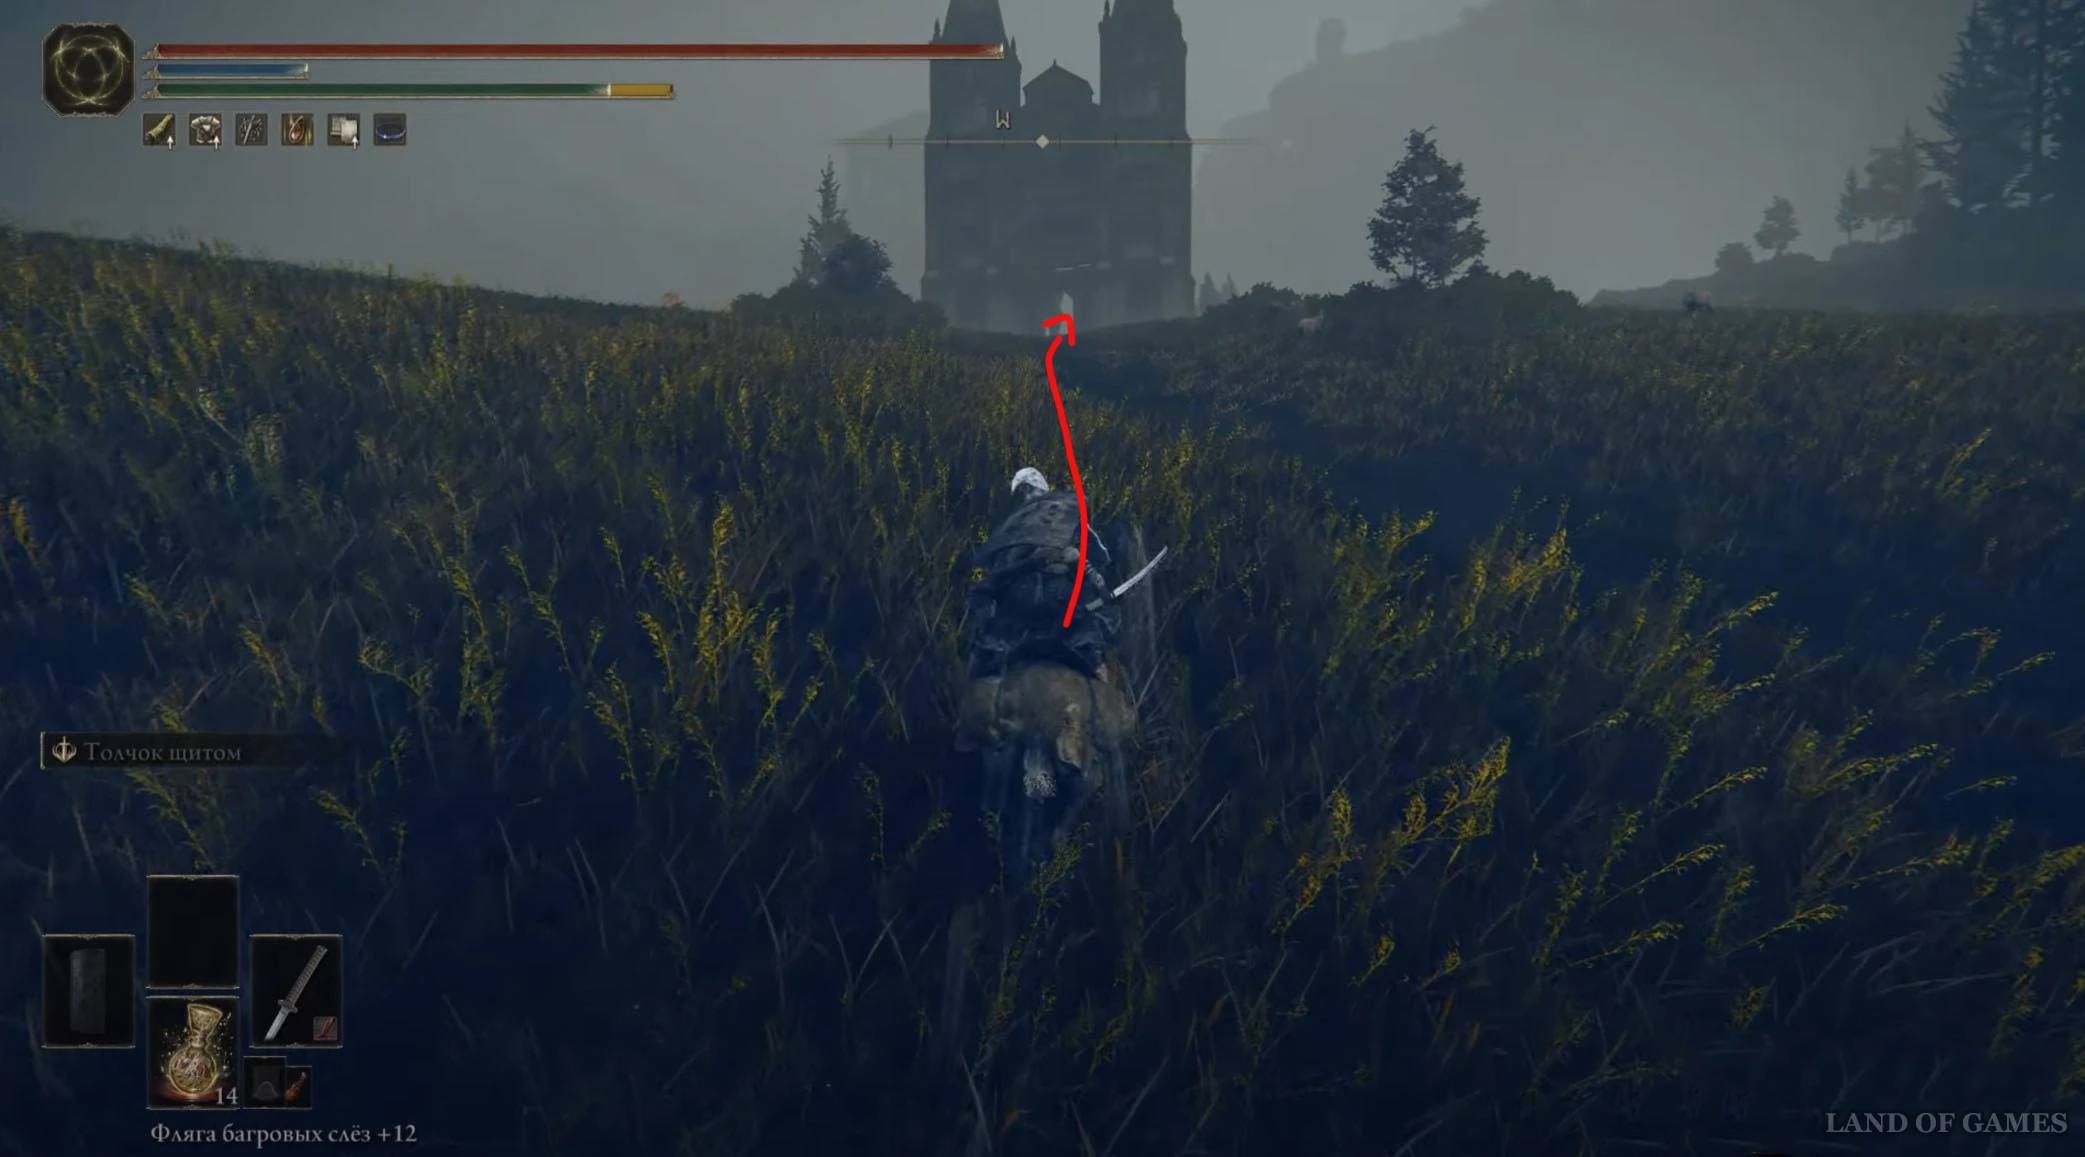
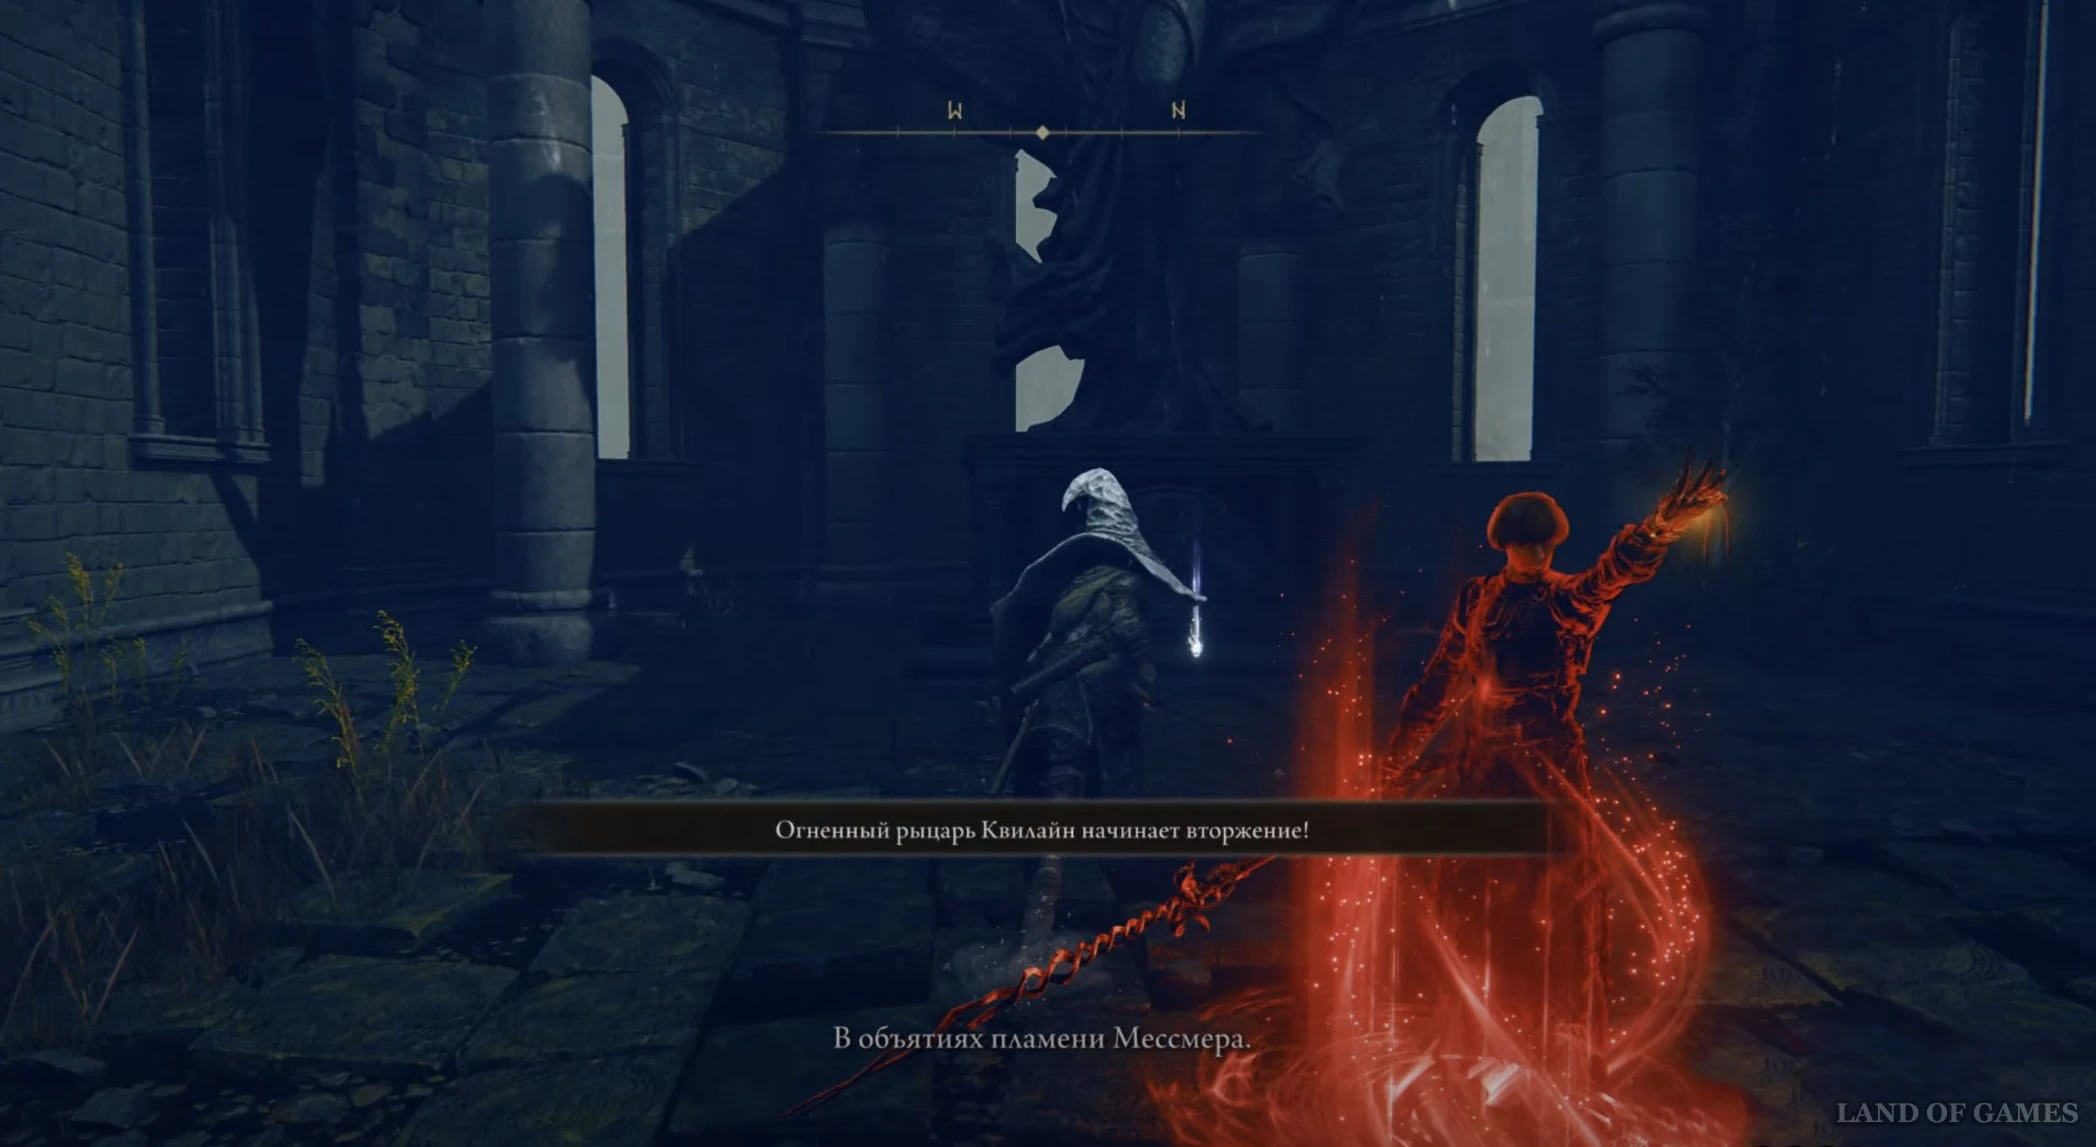
От прошлого осколка начните бежать на запад к Храму священного похода. Войдите внутрь и разберитесь с огненным рыцарем Квилайном, который вторгнется в ваш мир, а затем подберите два фрагмента, которые лежат рядом со статуей.
Осколок древа упадка 15
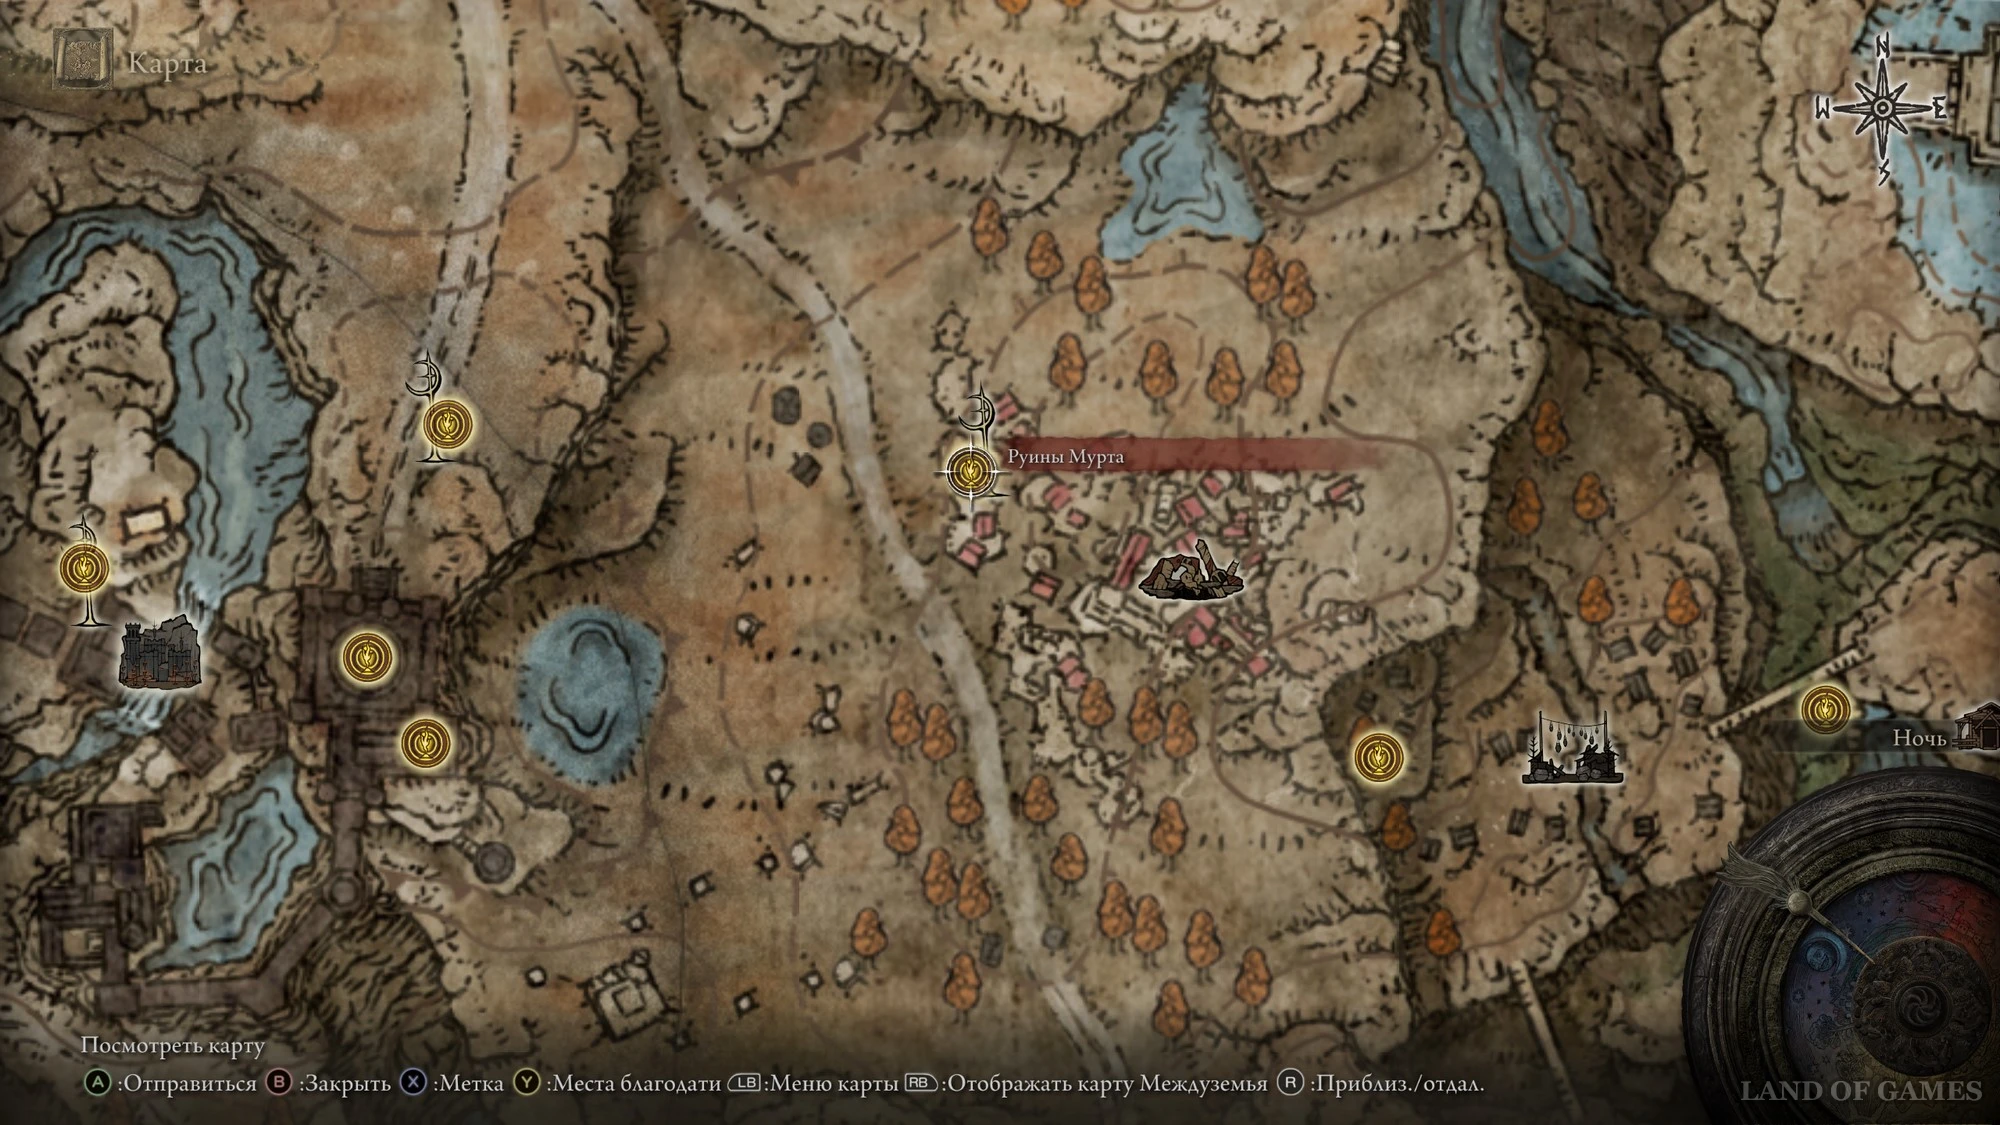
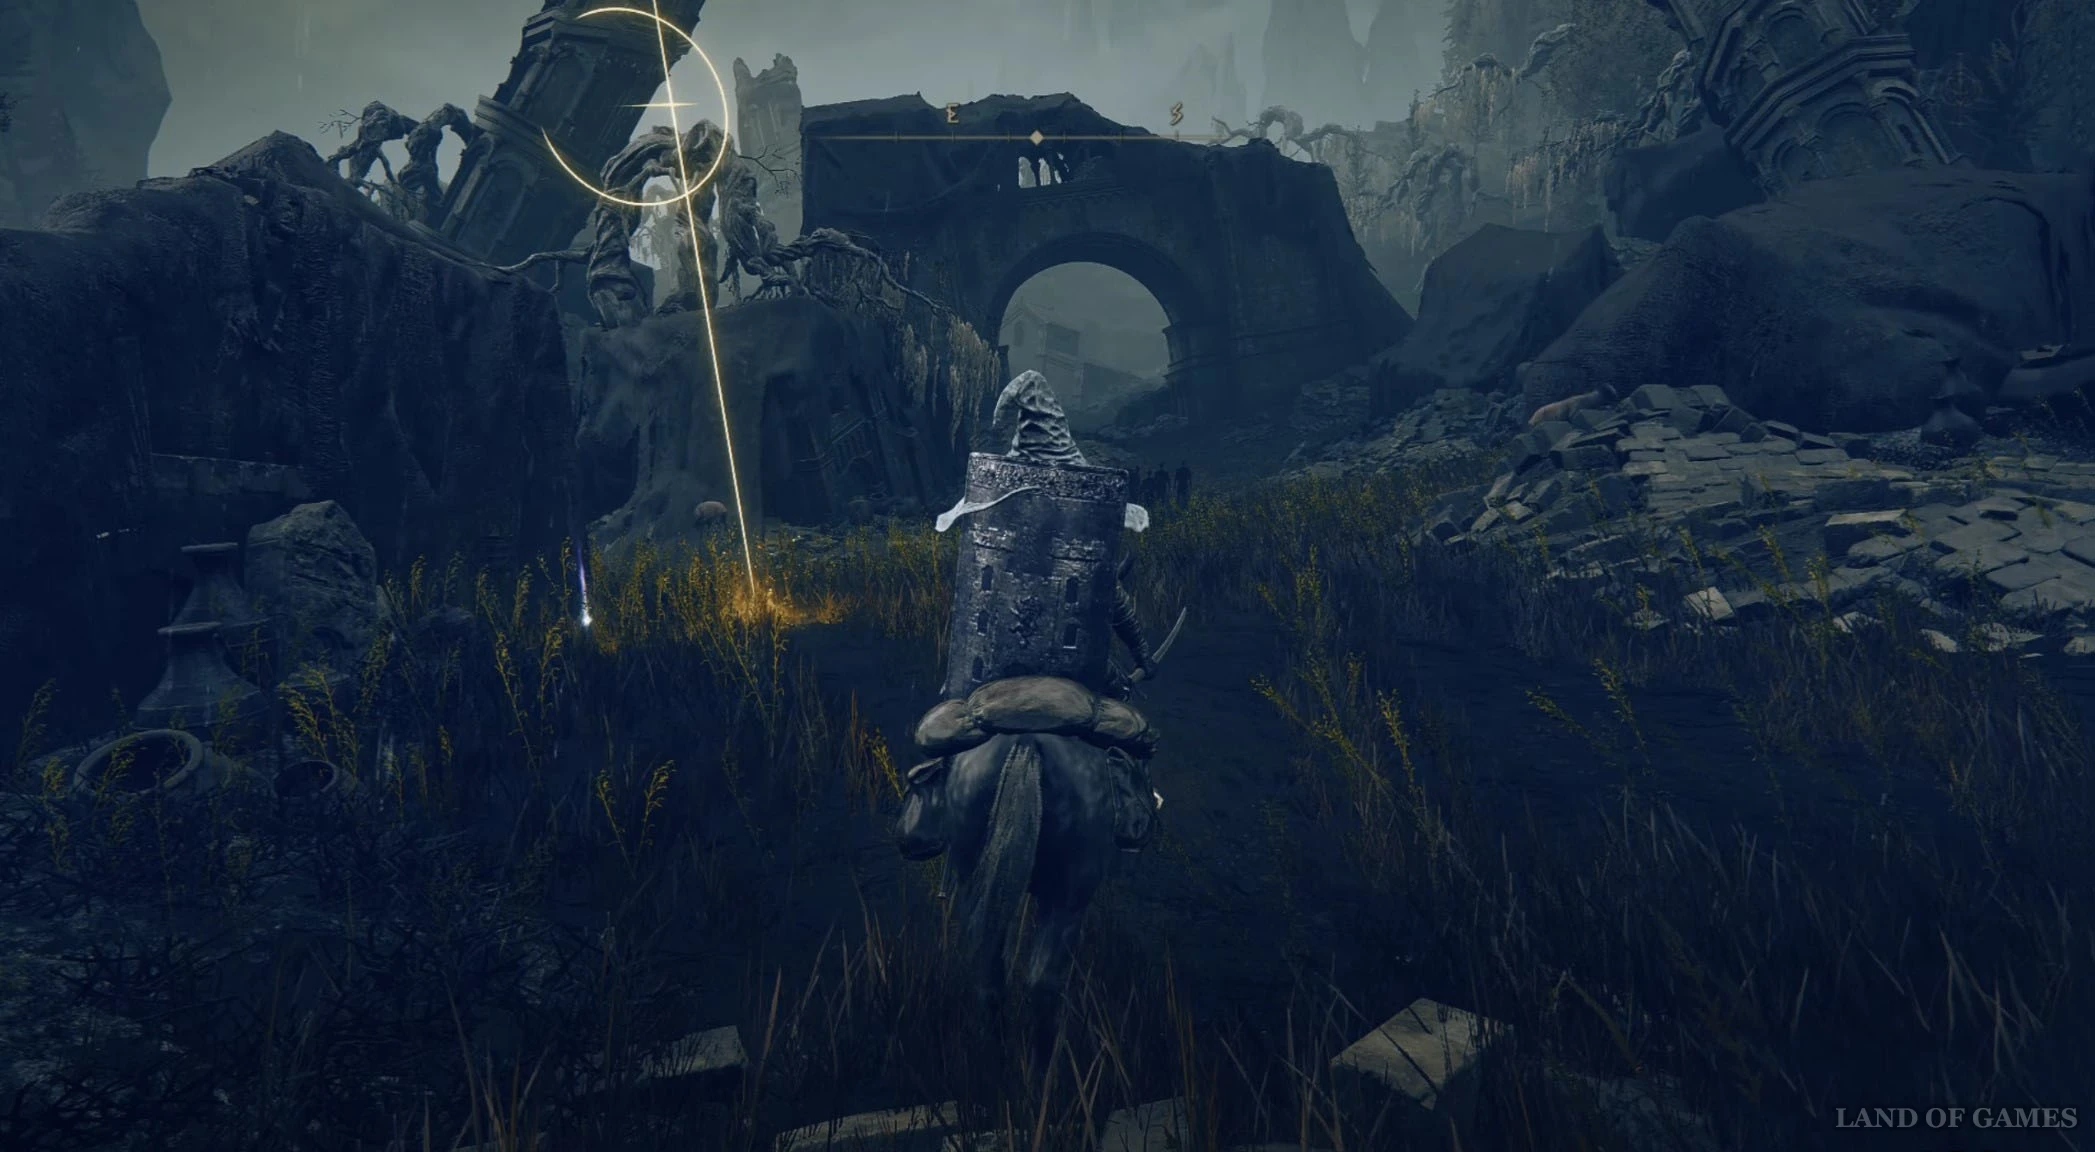
Доберитесь или переместитесь к месту благодати «Руины Мурта», находящемуся к востоку от замка Энсис. Тут находится крест, рядом с которым и лежит требуемый вам фрагмент. Здесь вы также можете повстречать Дэйна.
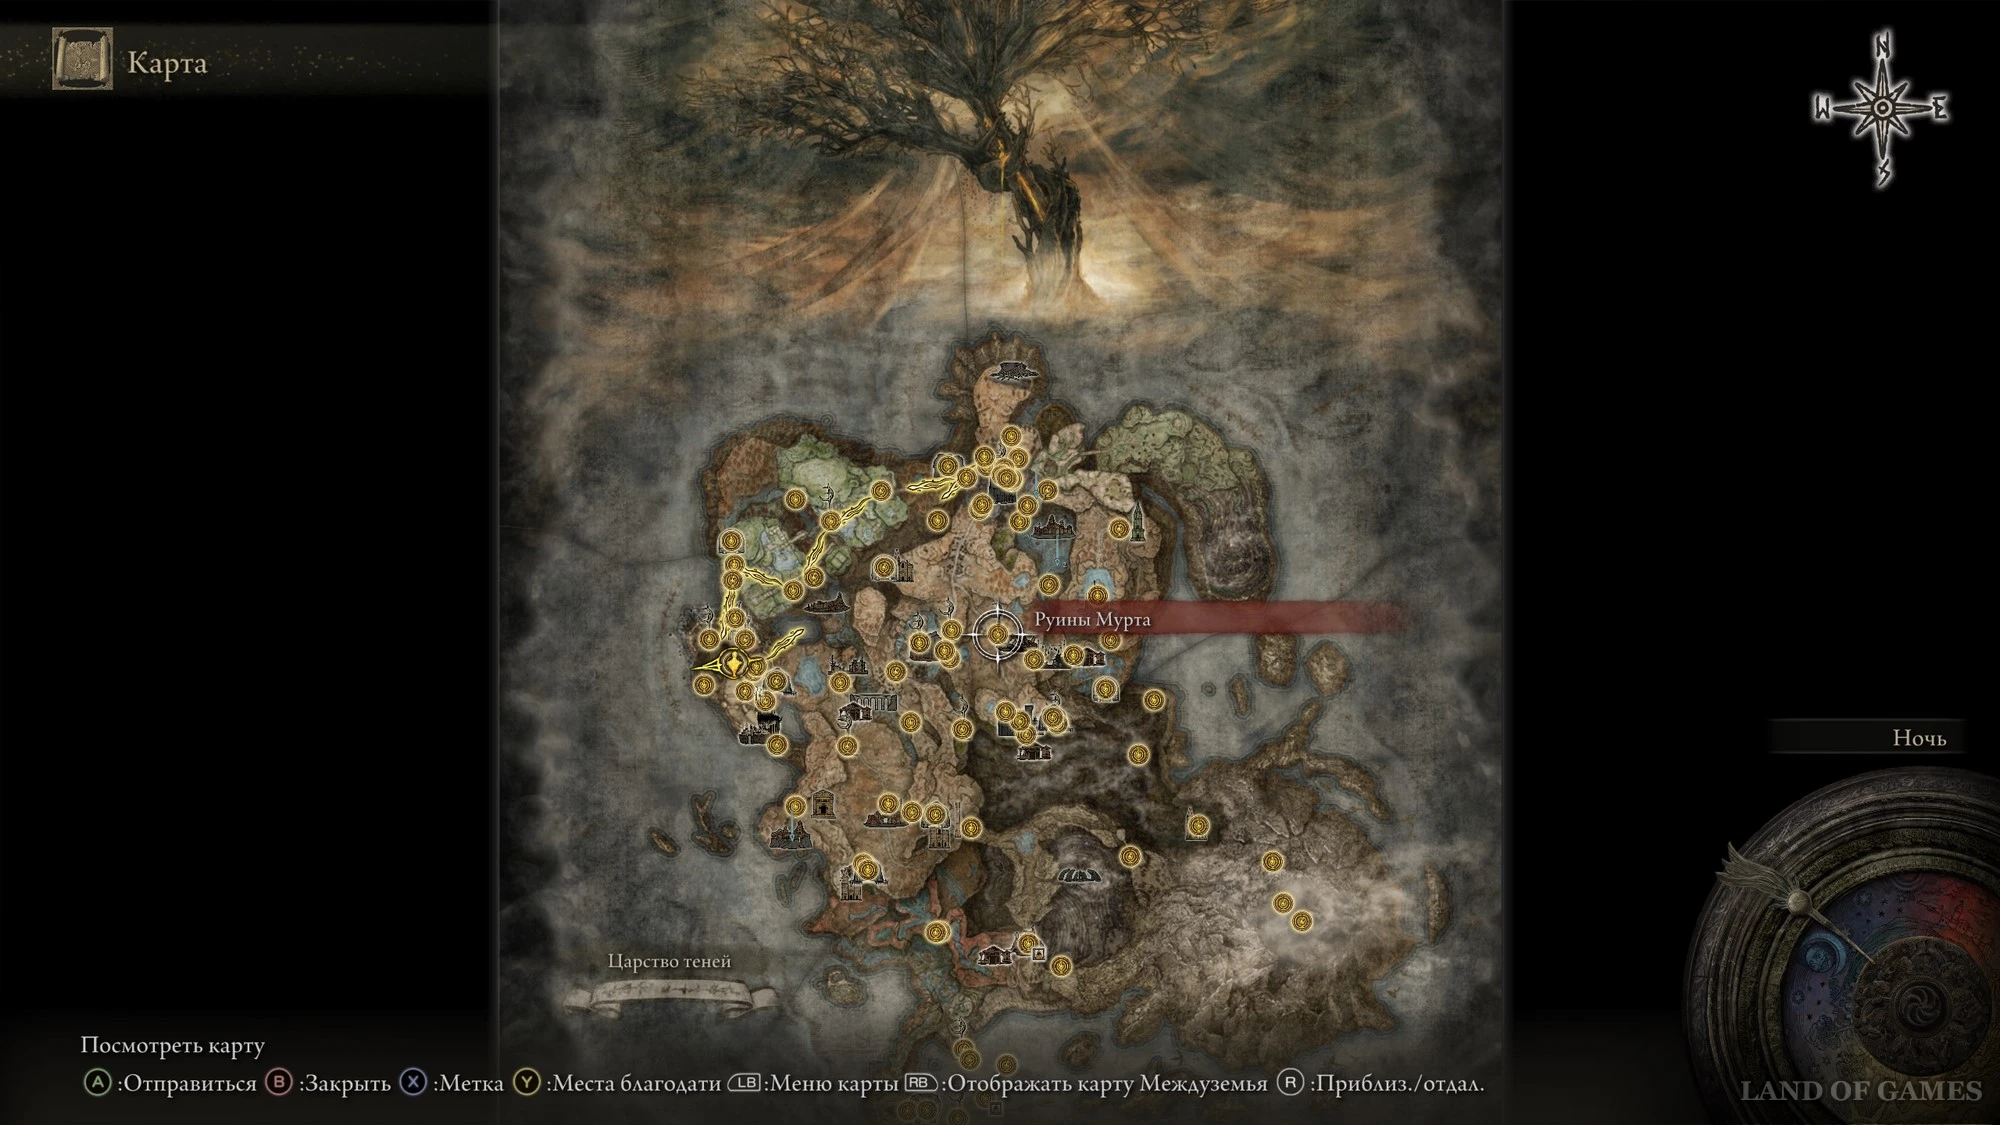
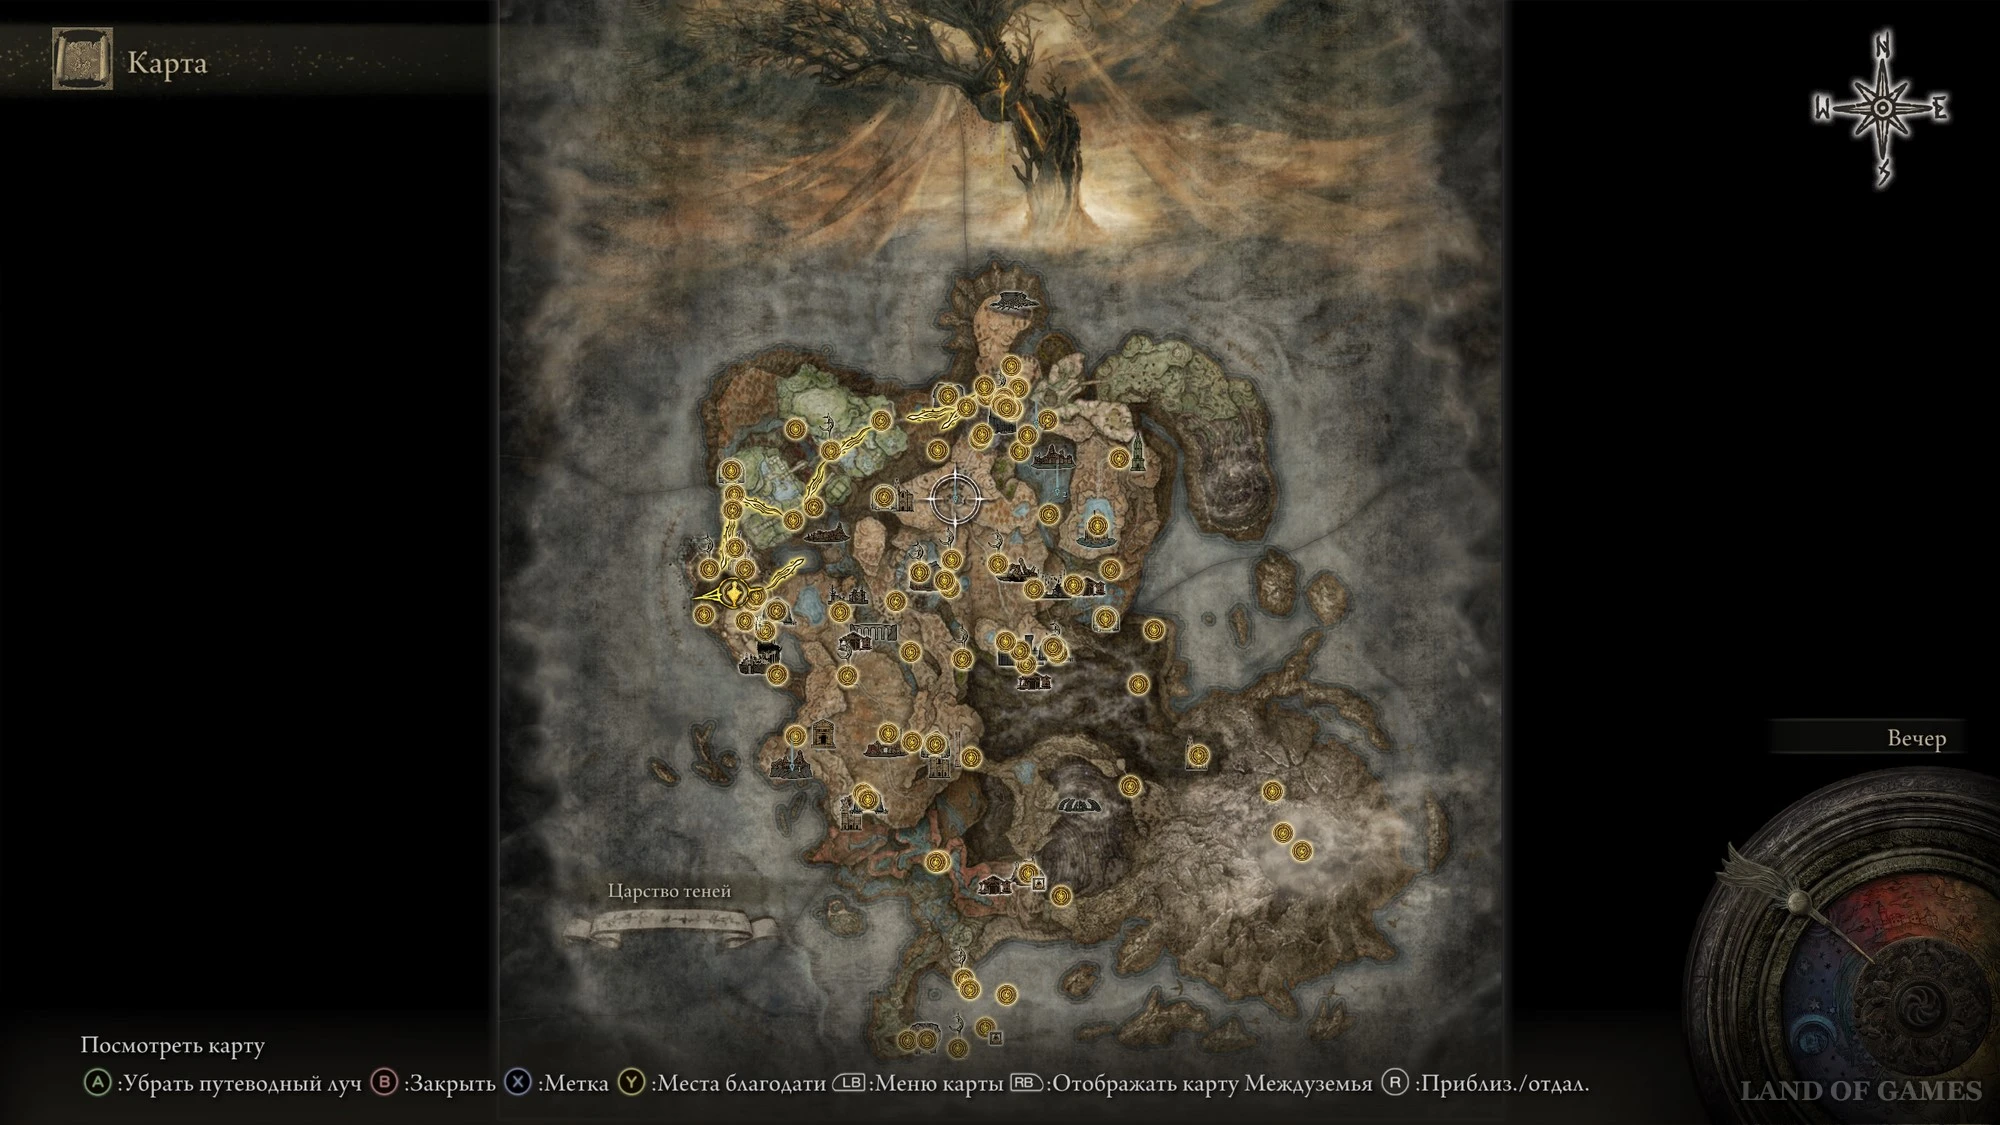
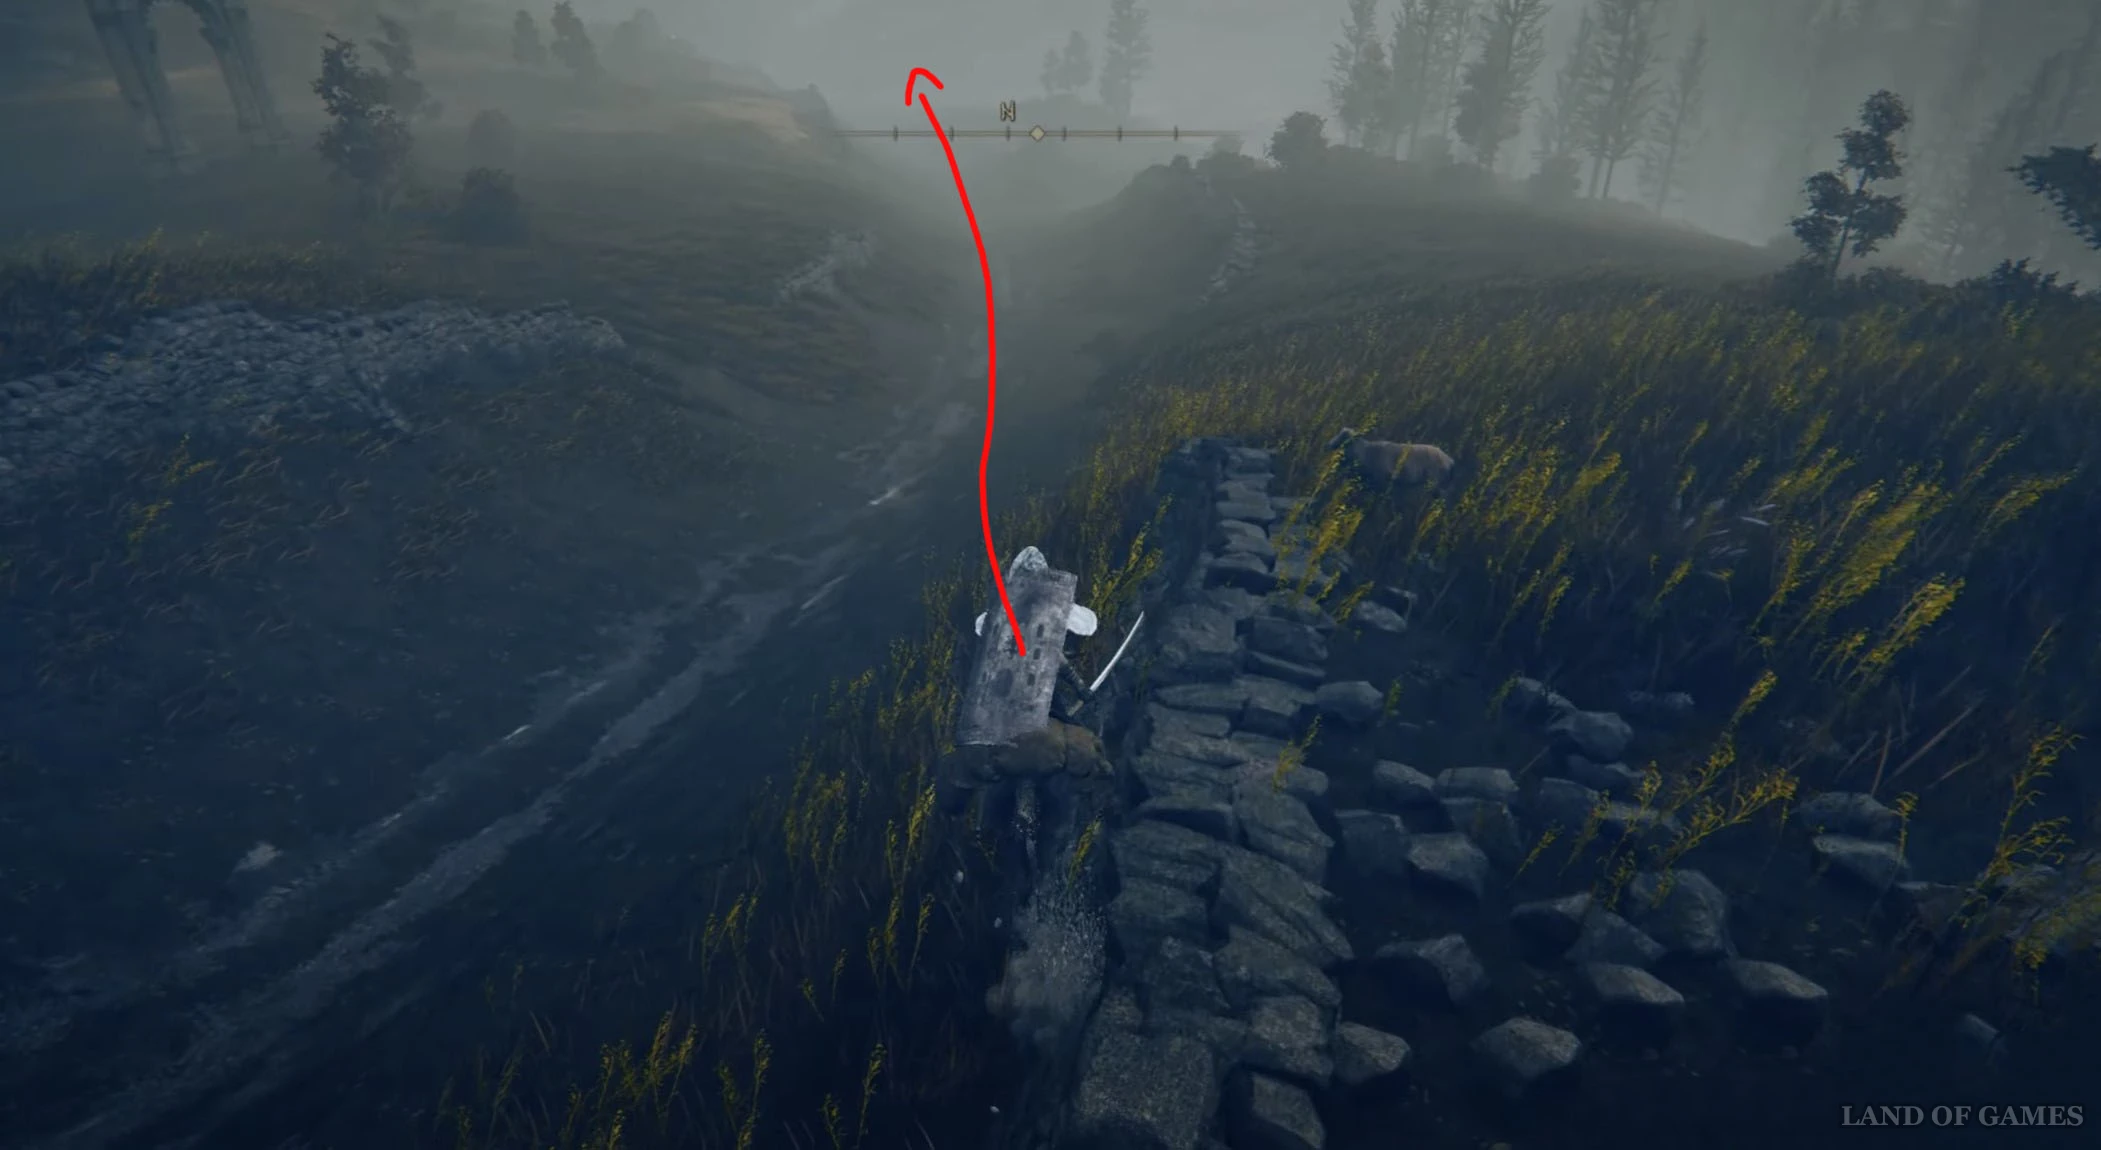
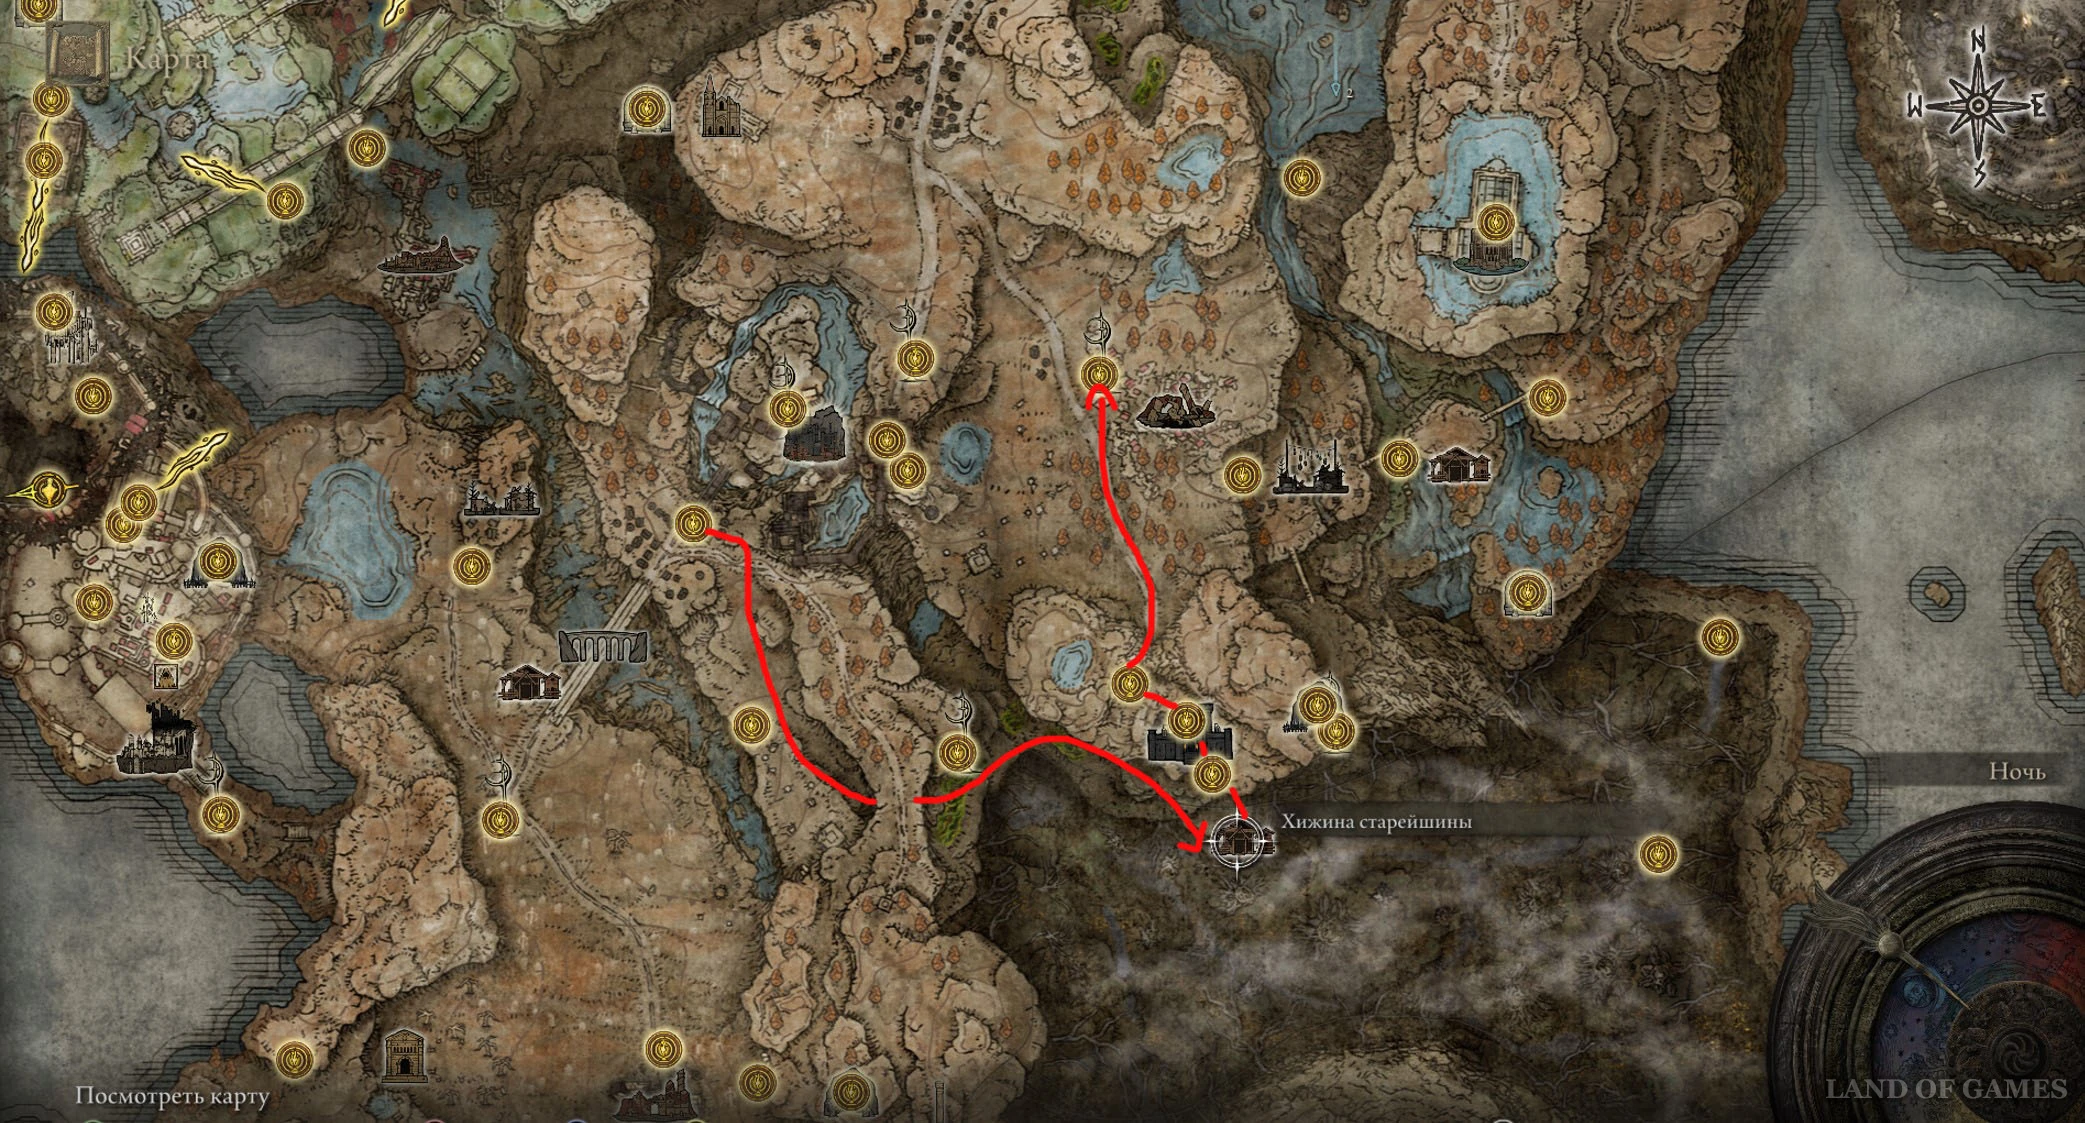
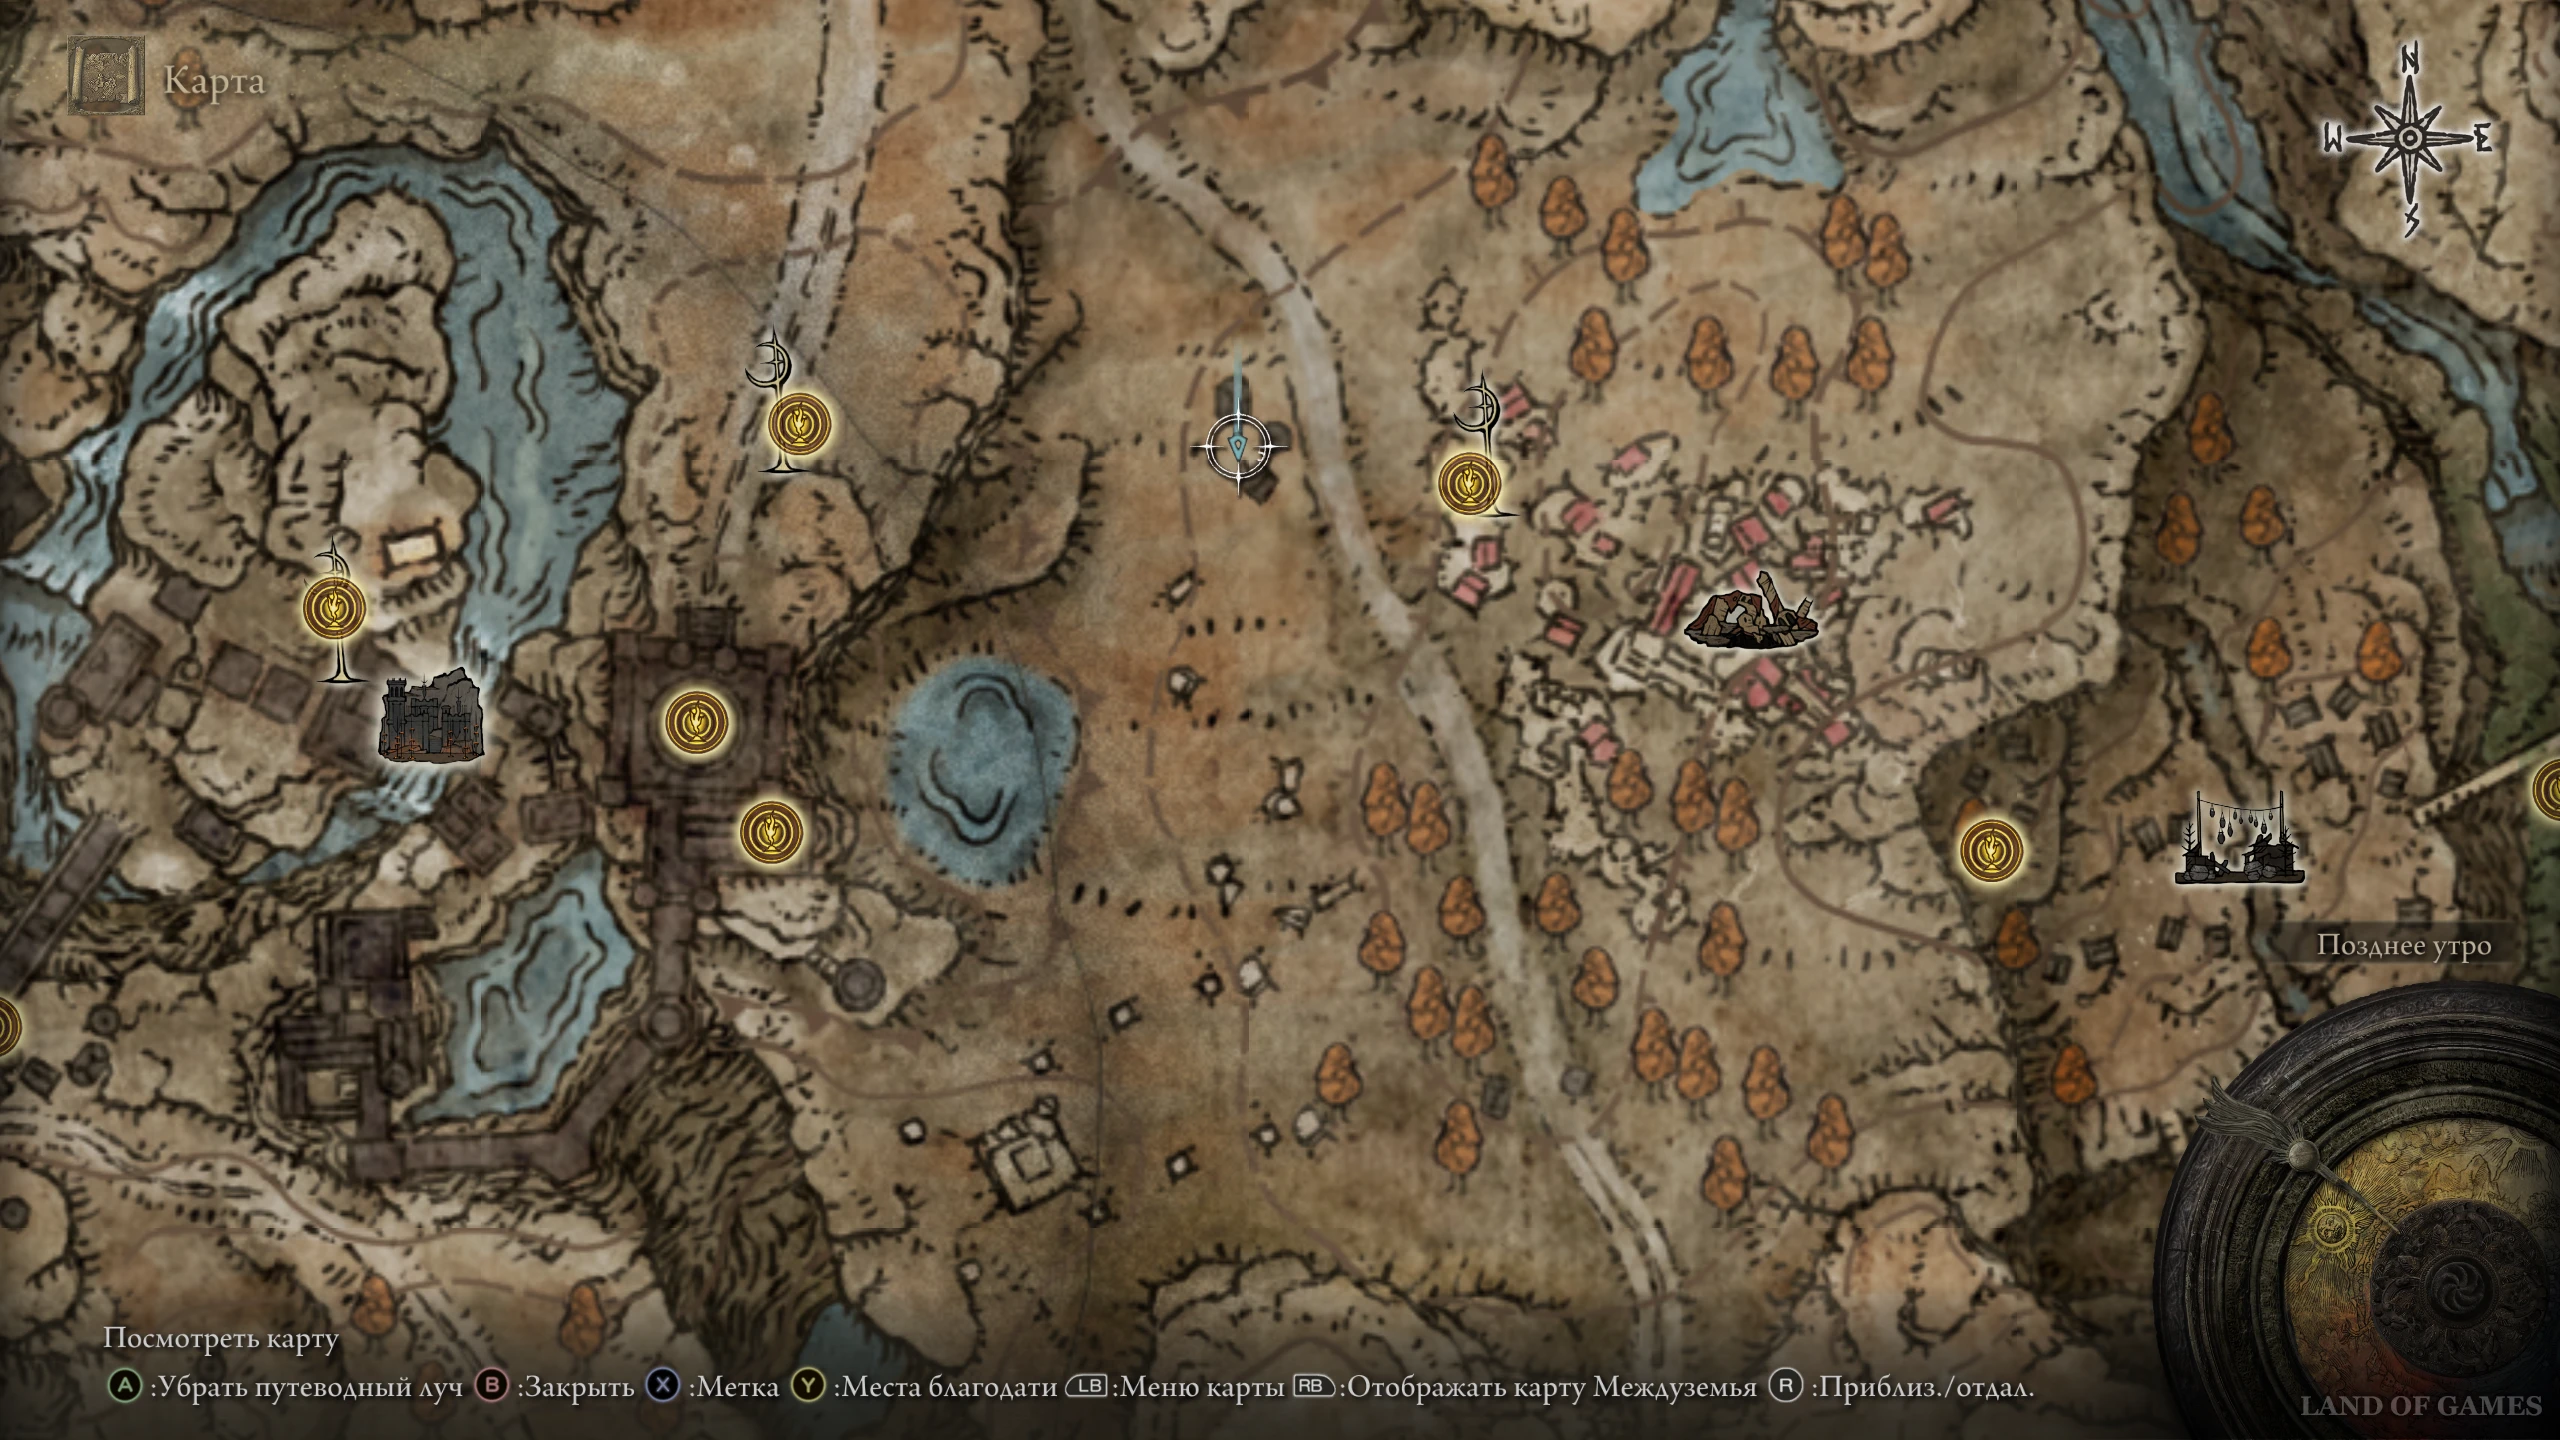
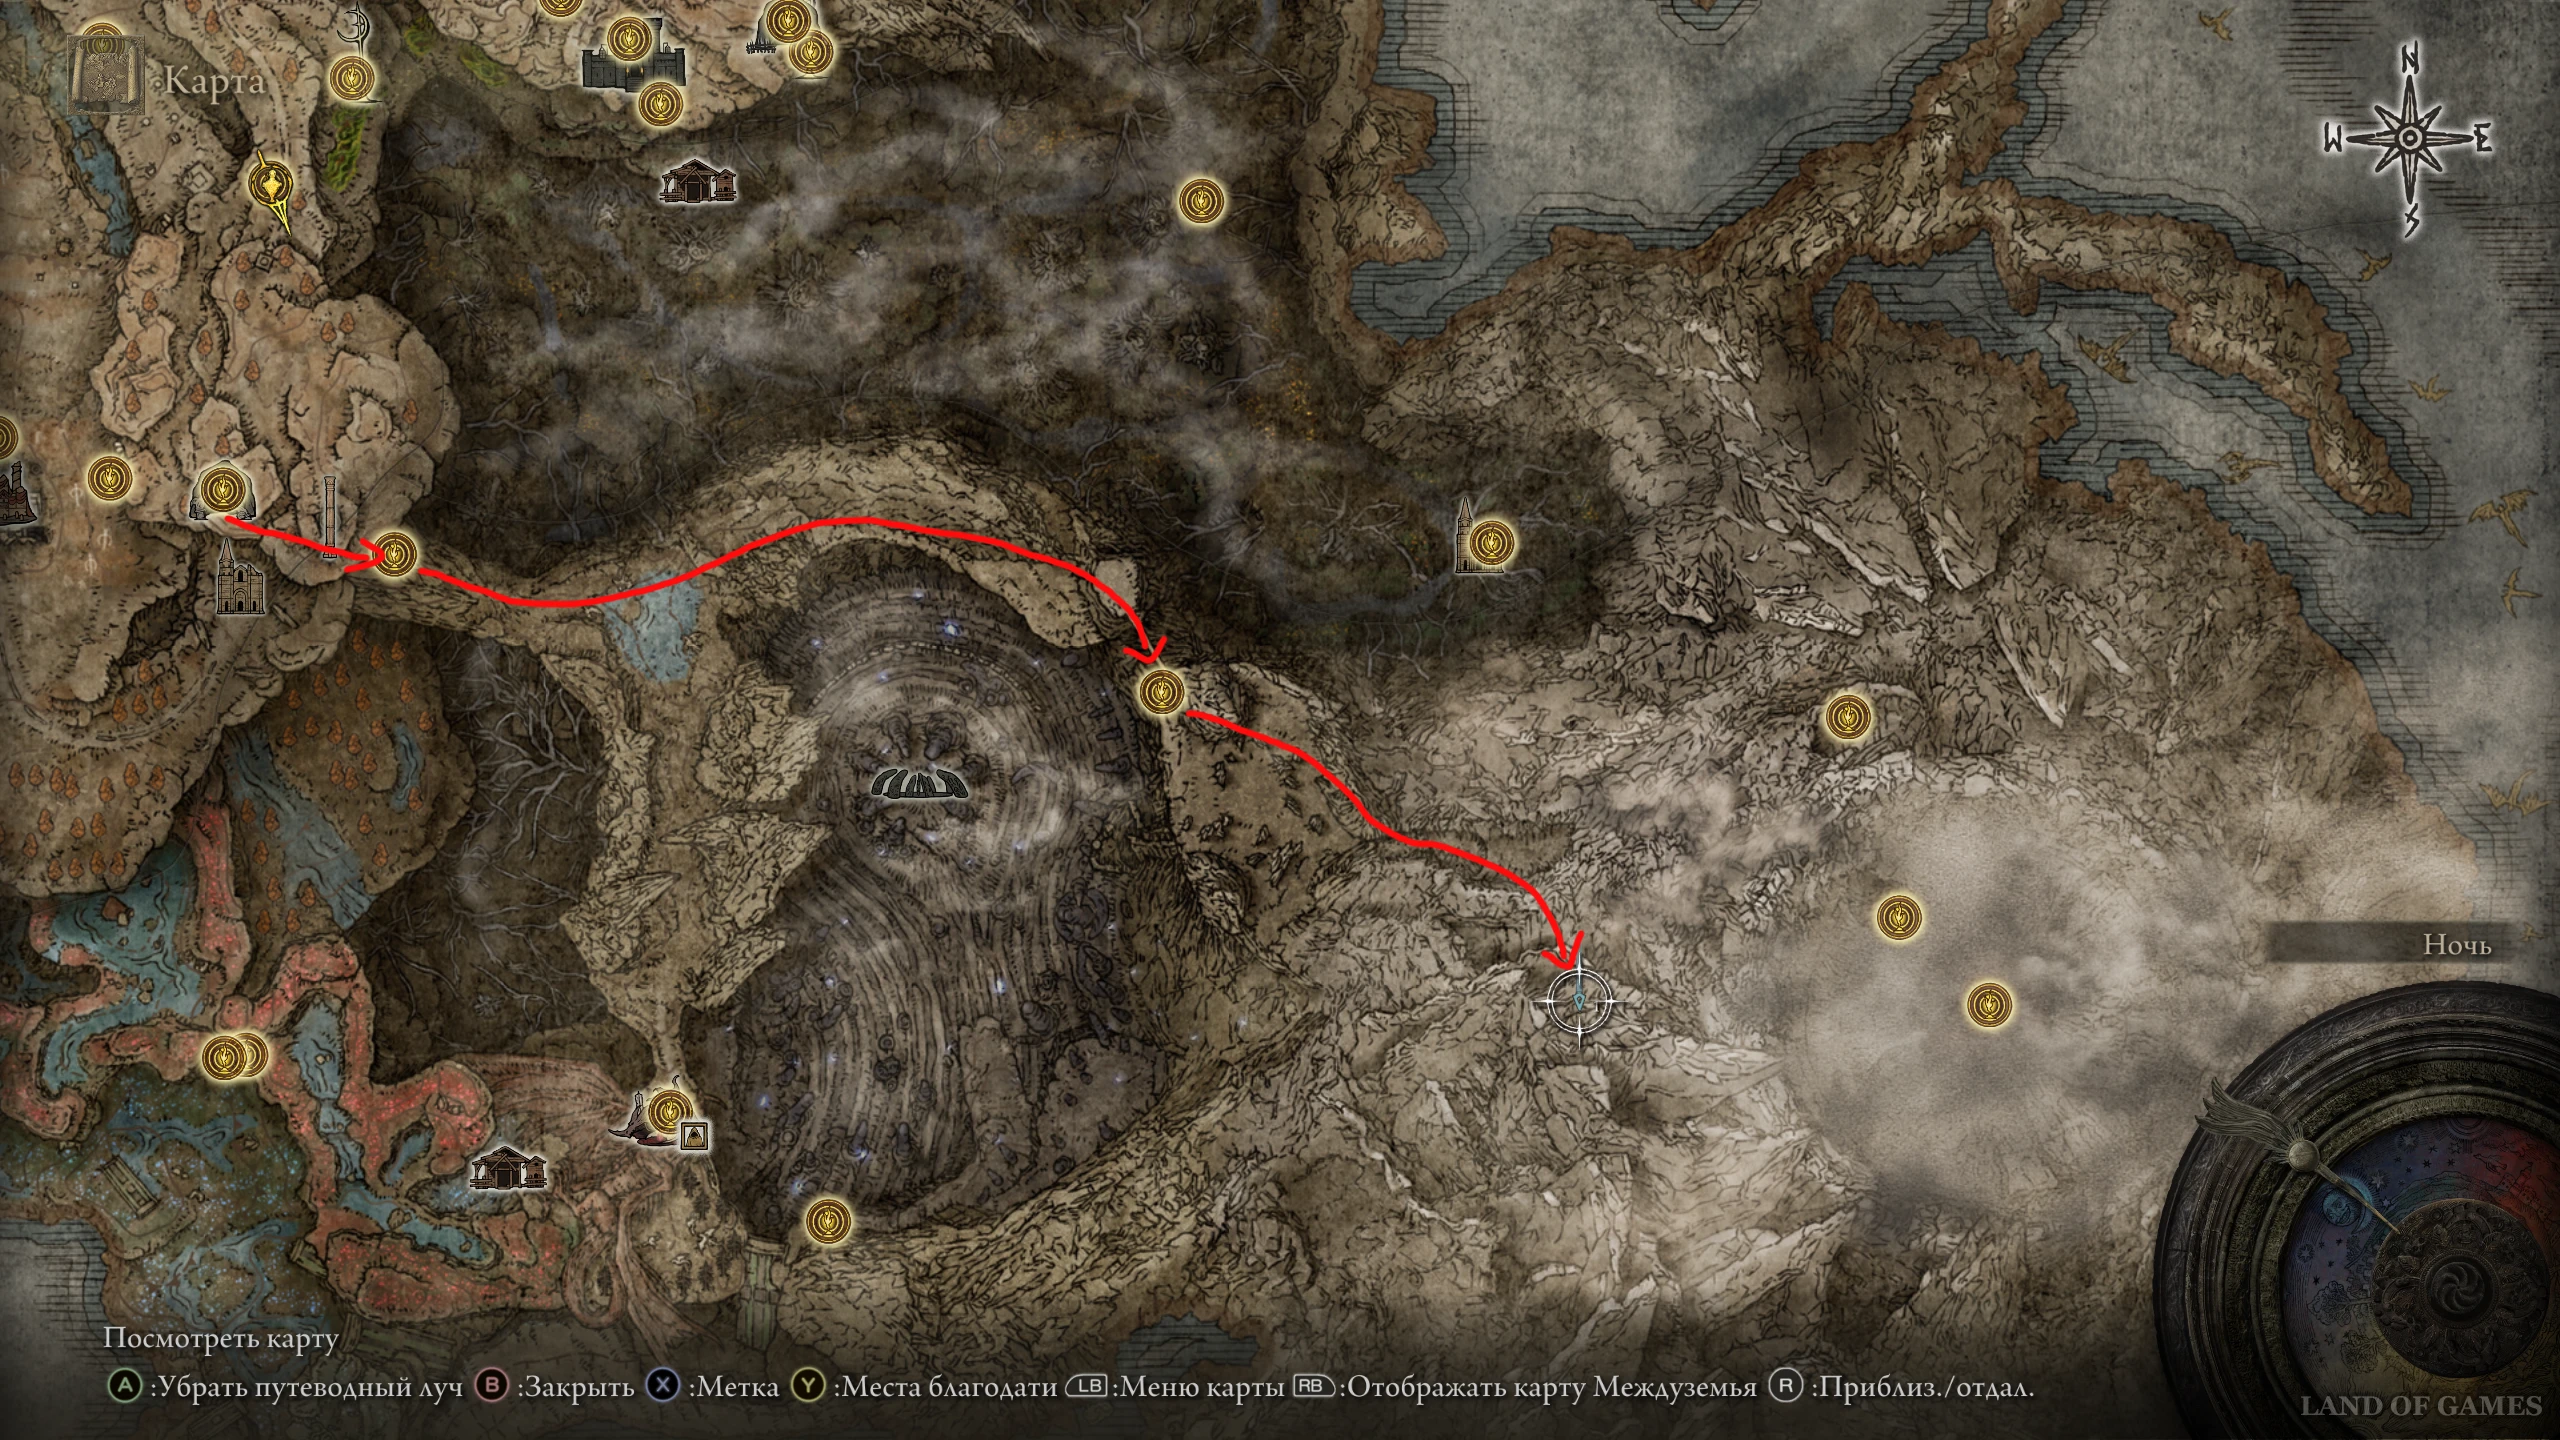
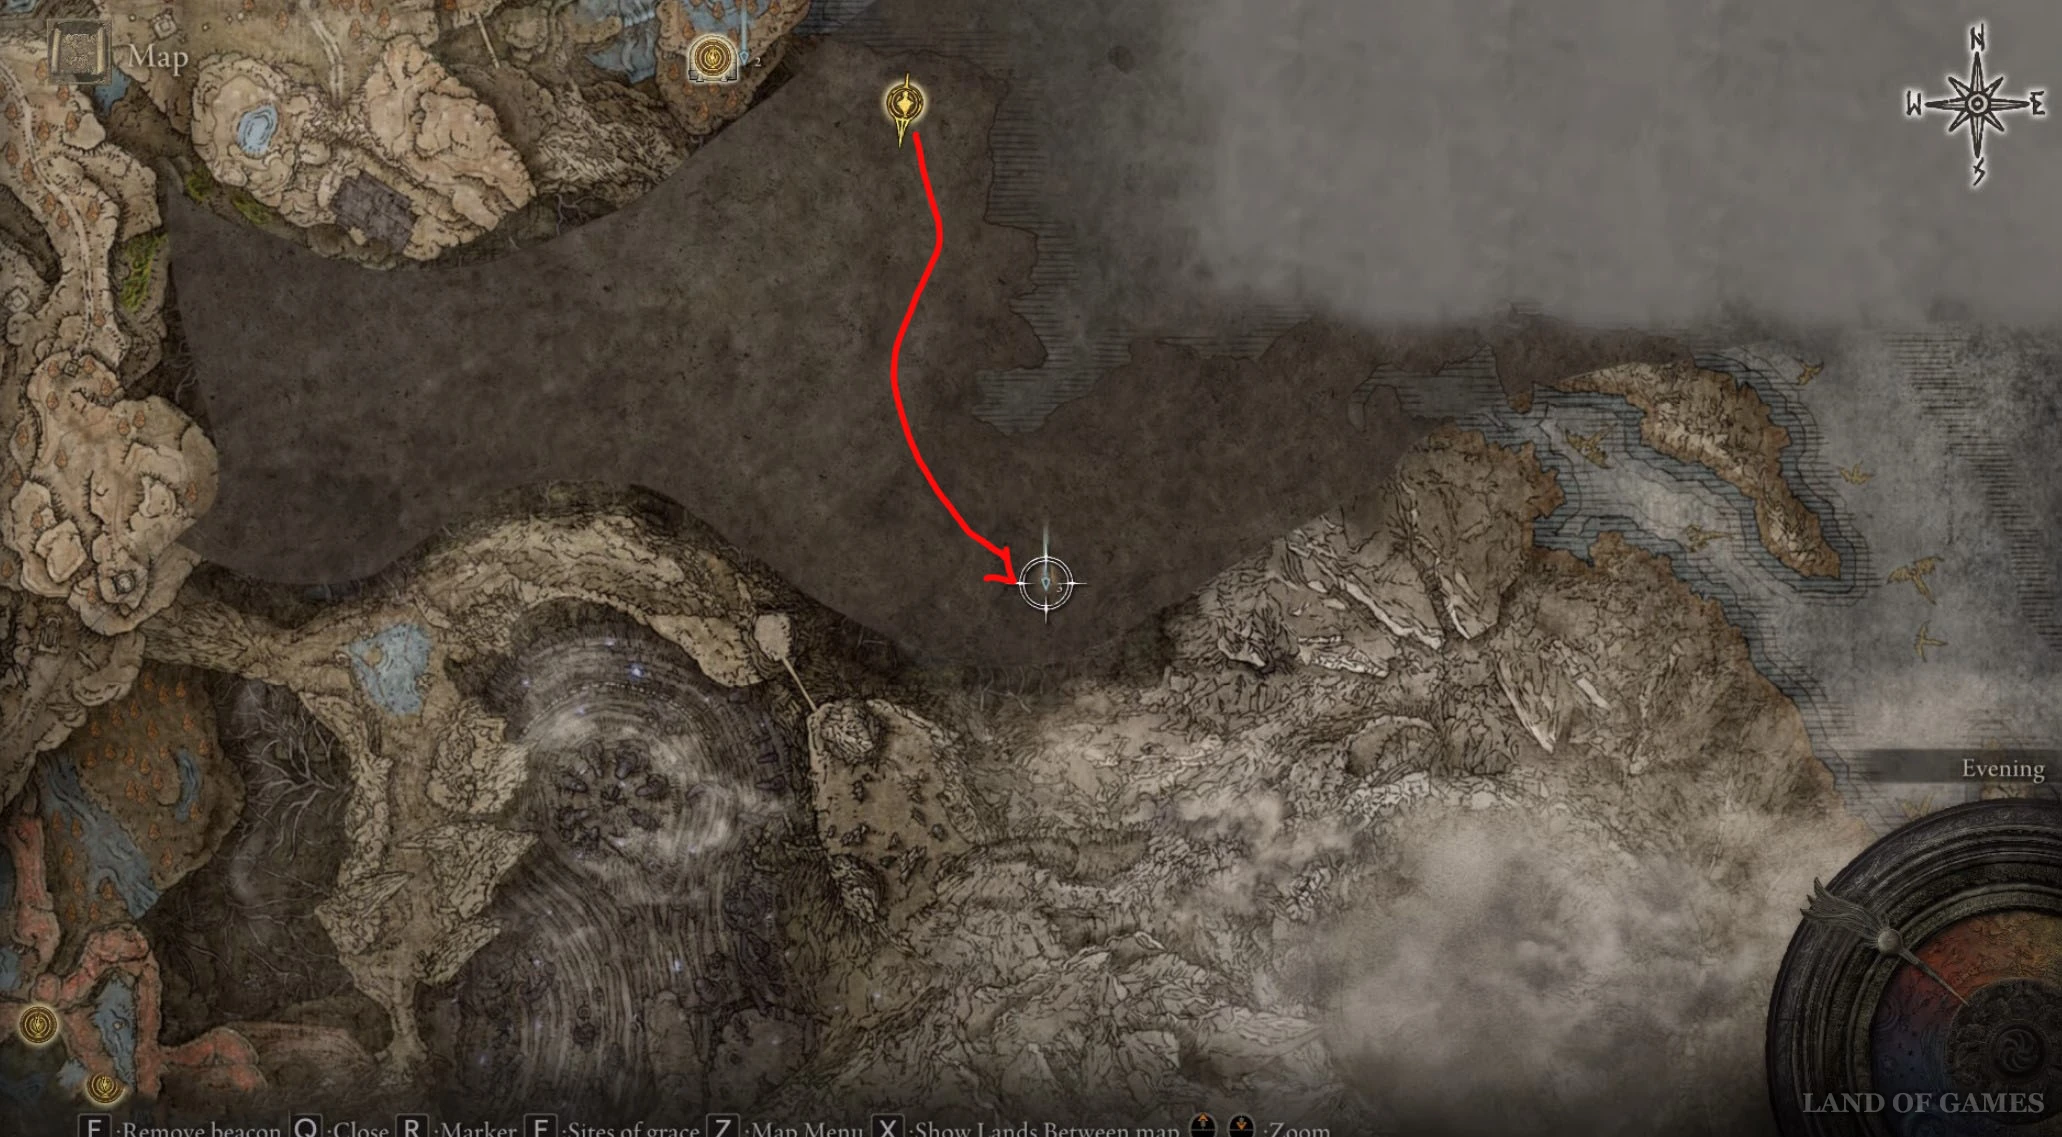
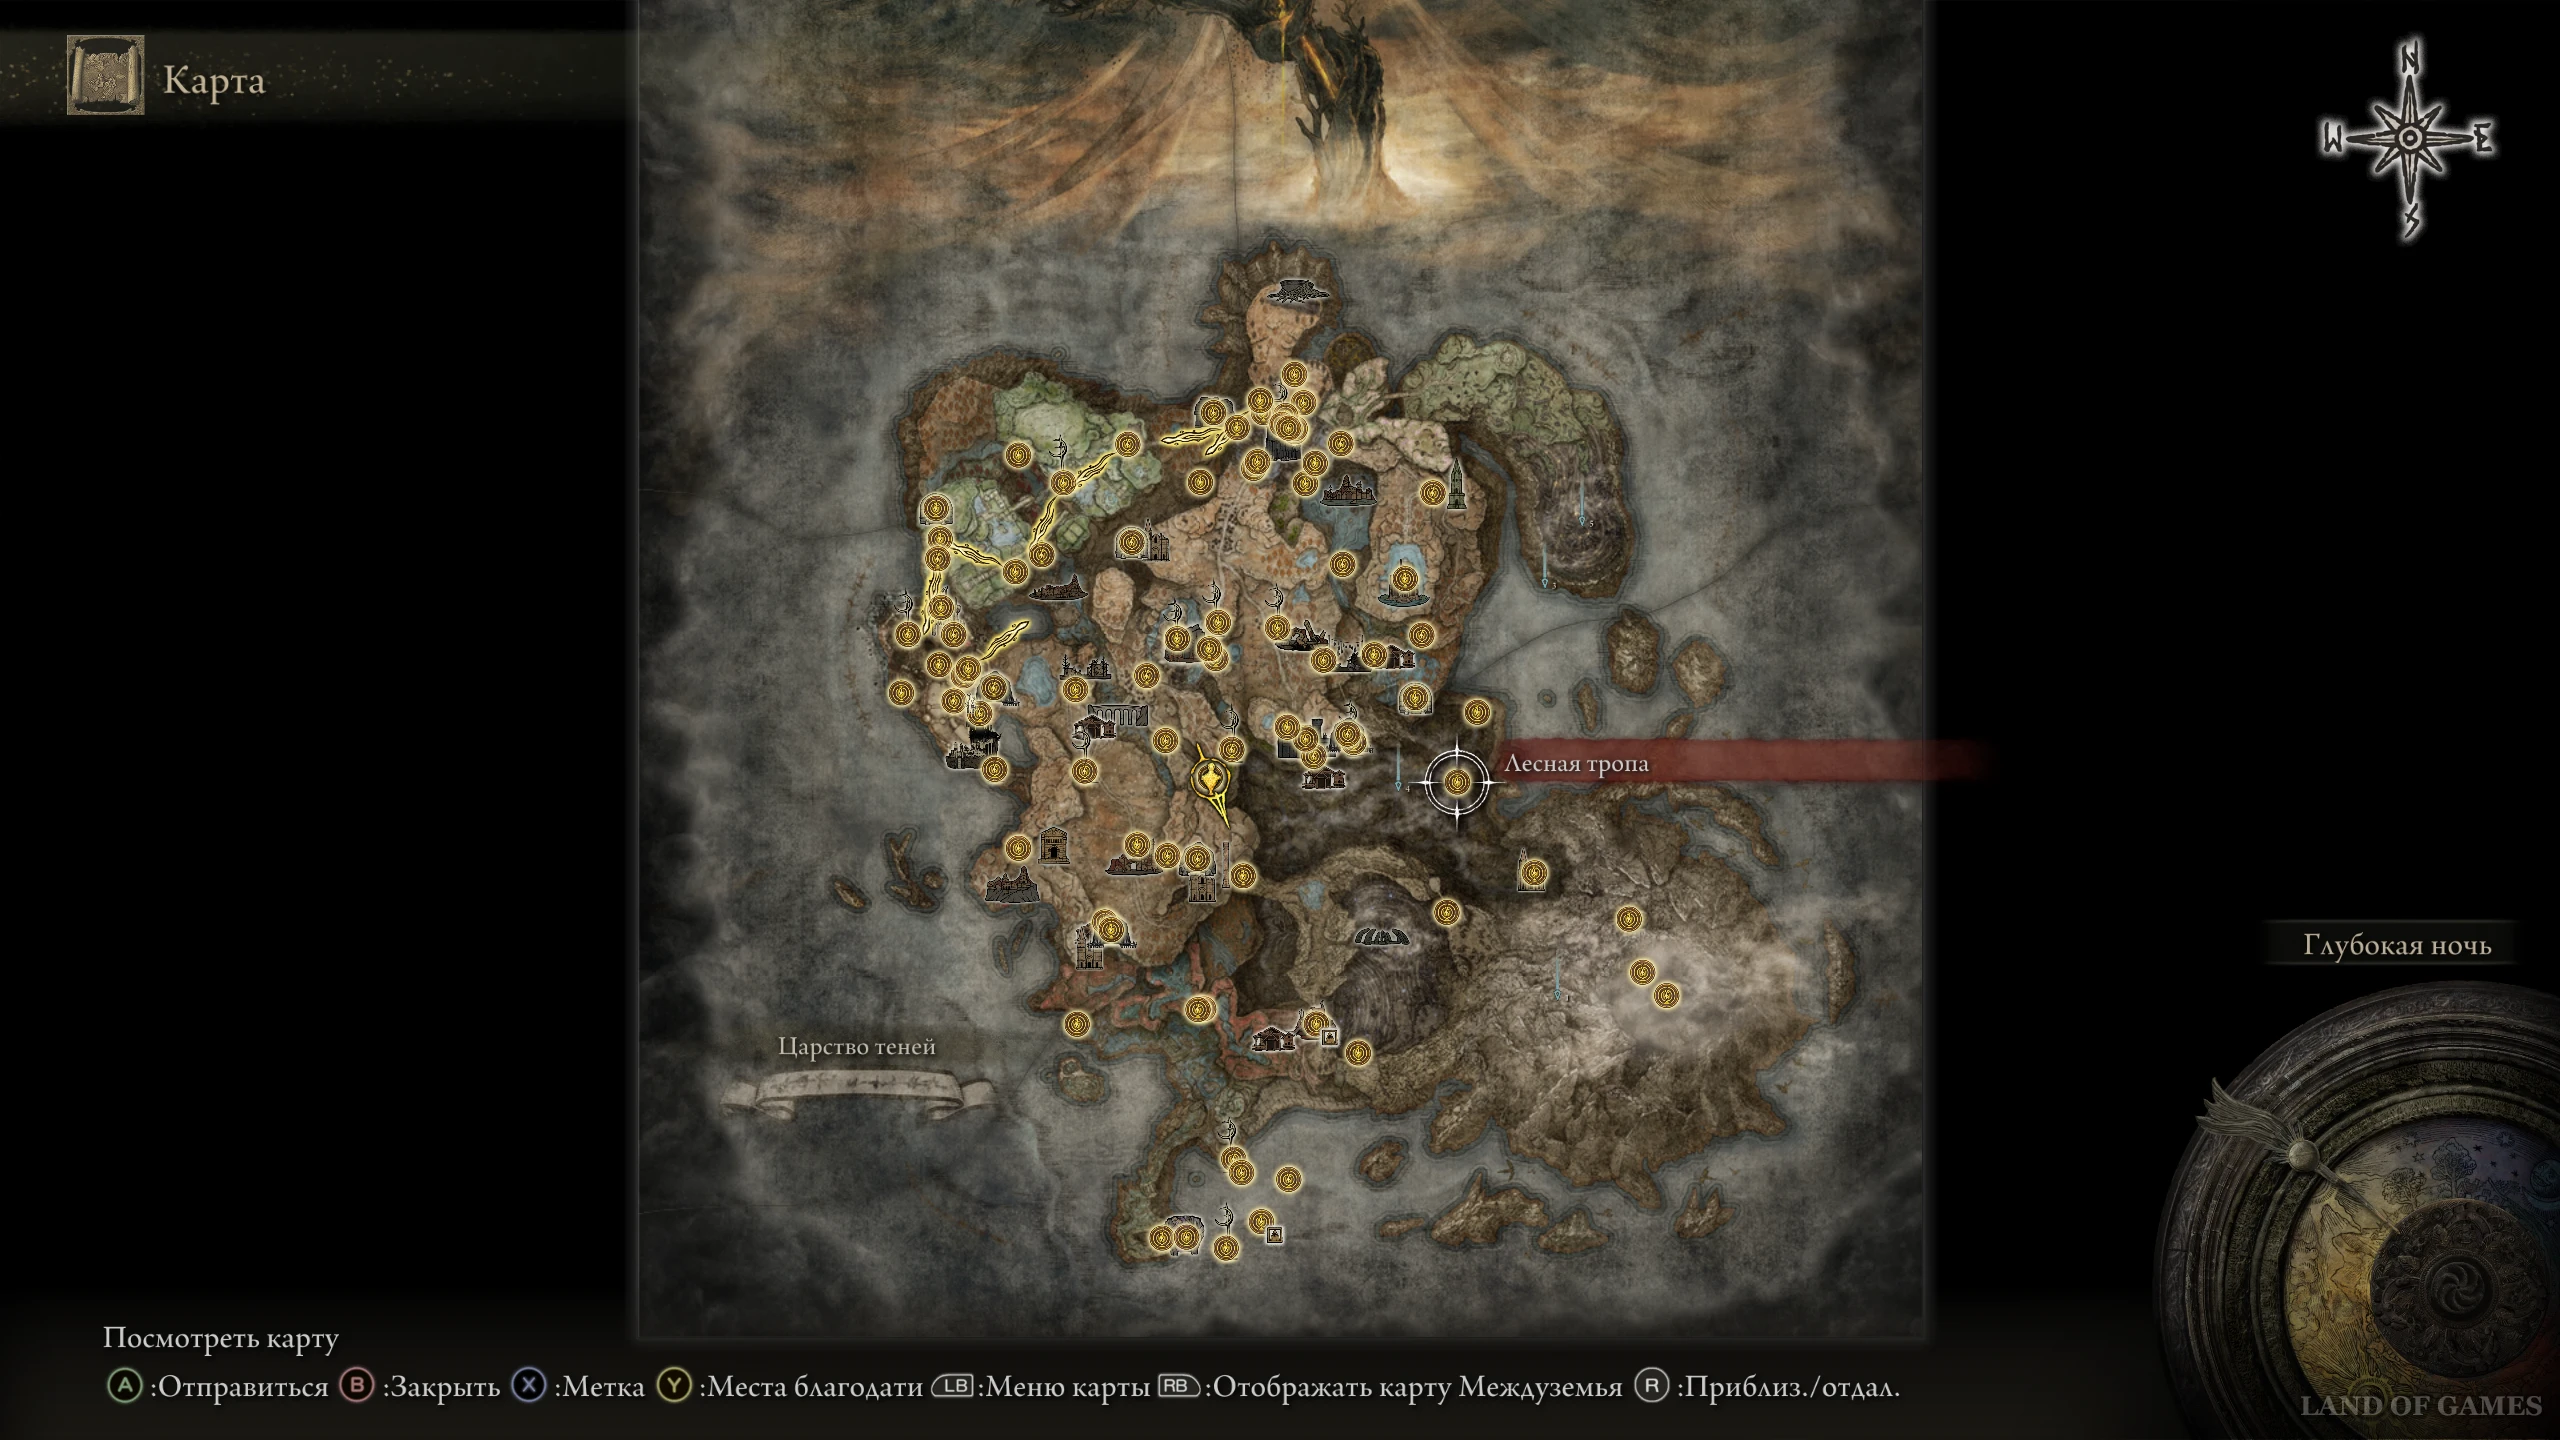
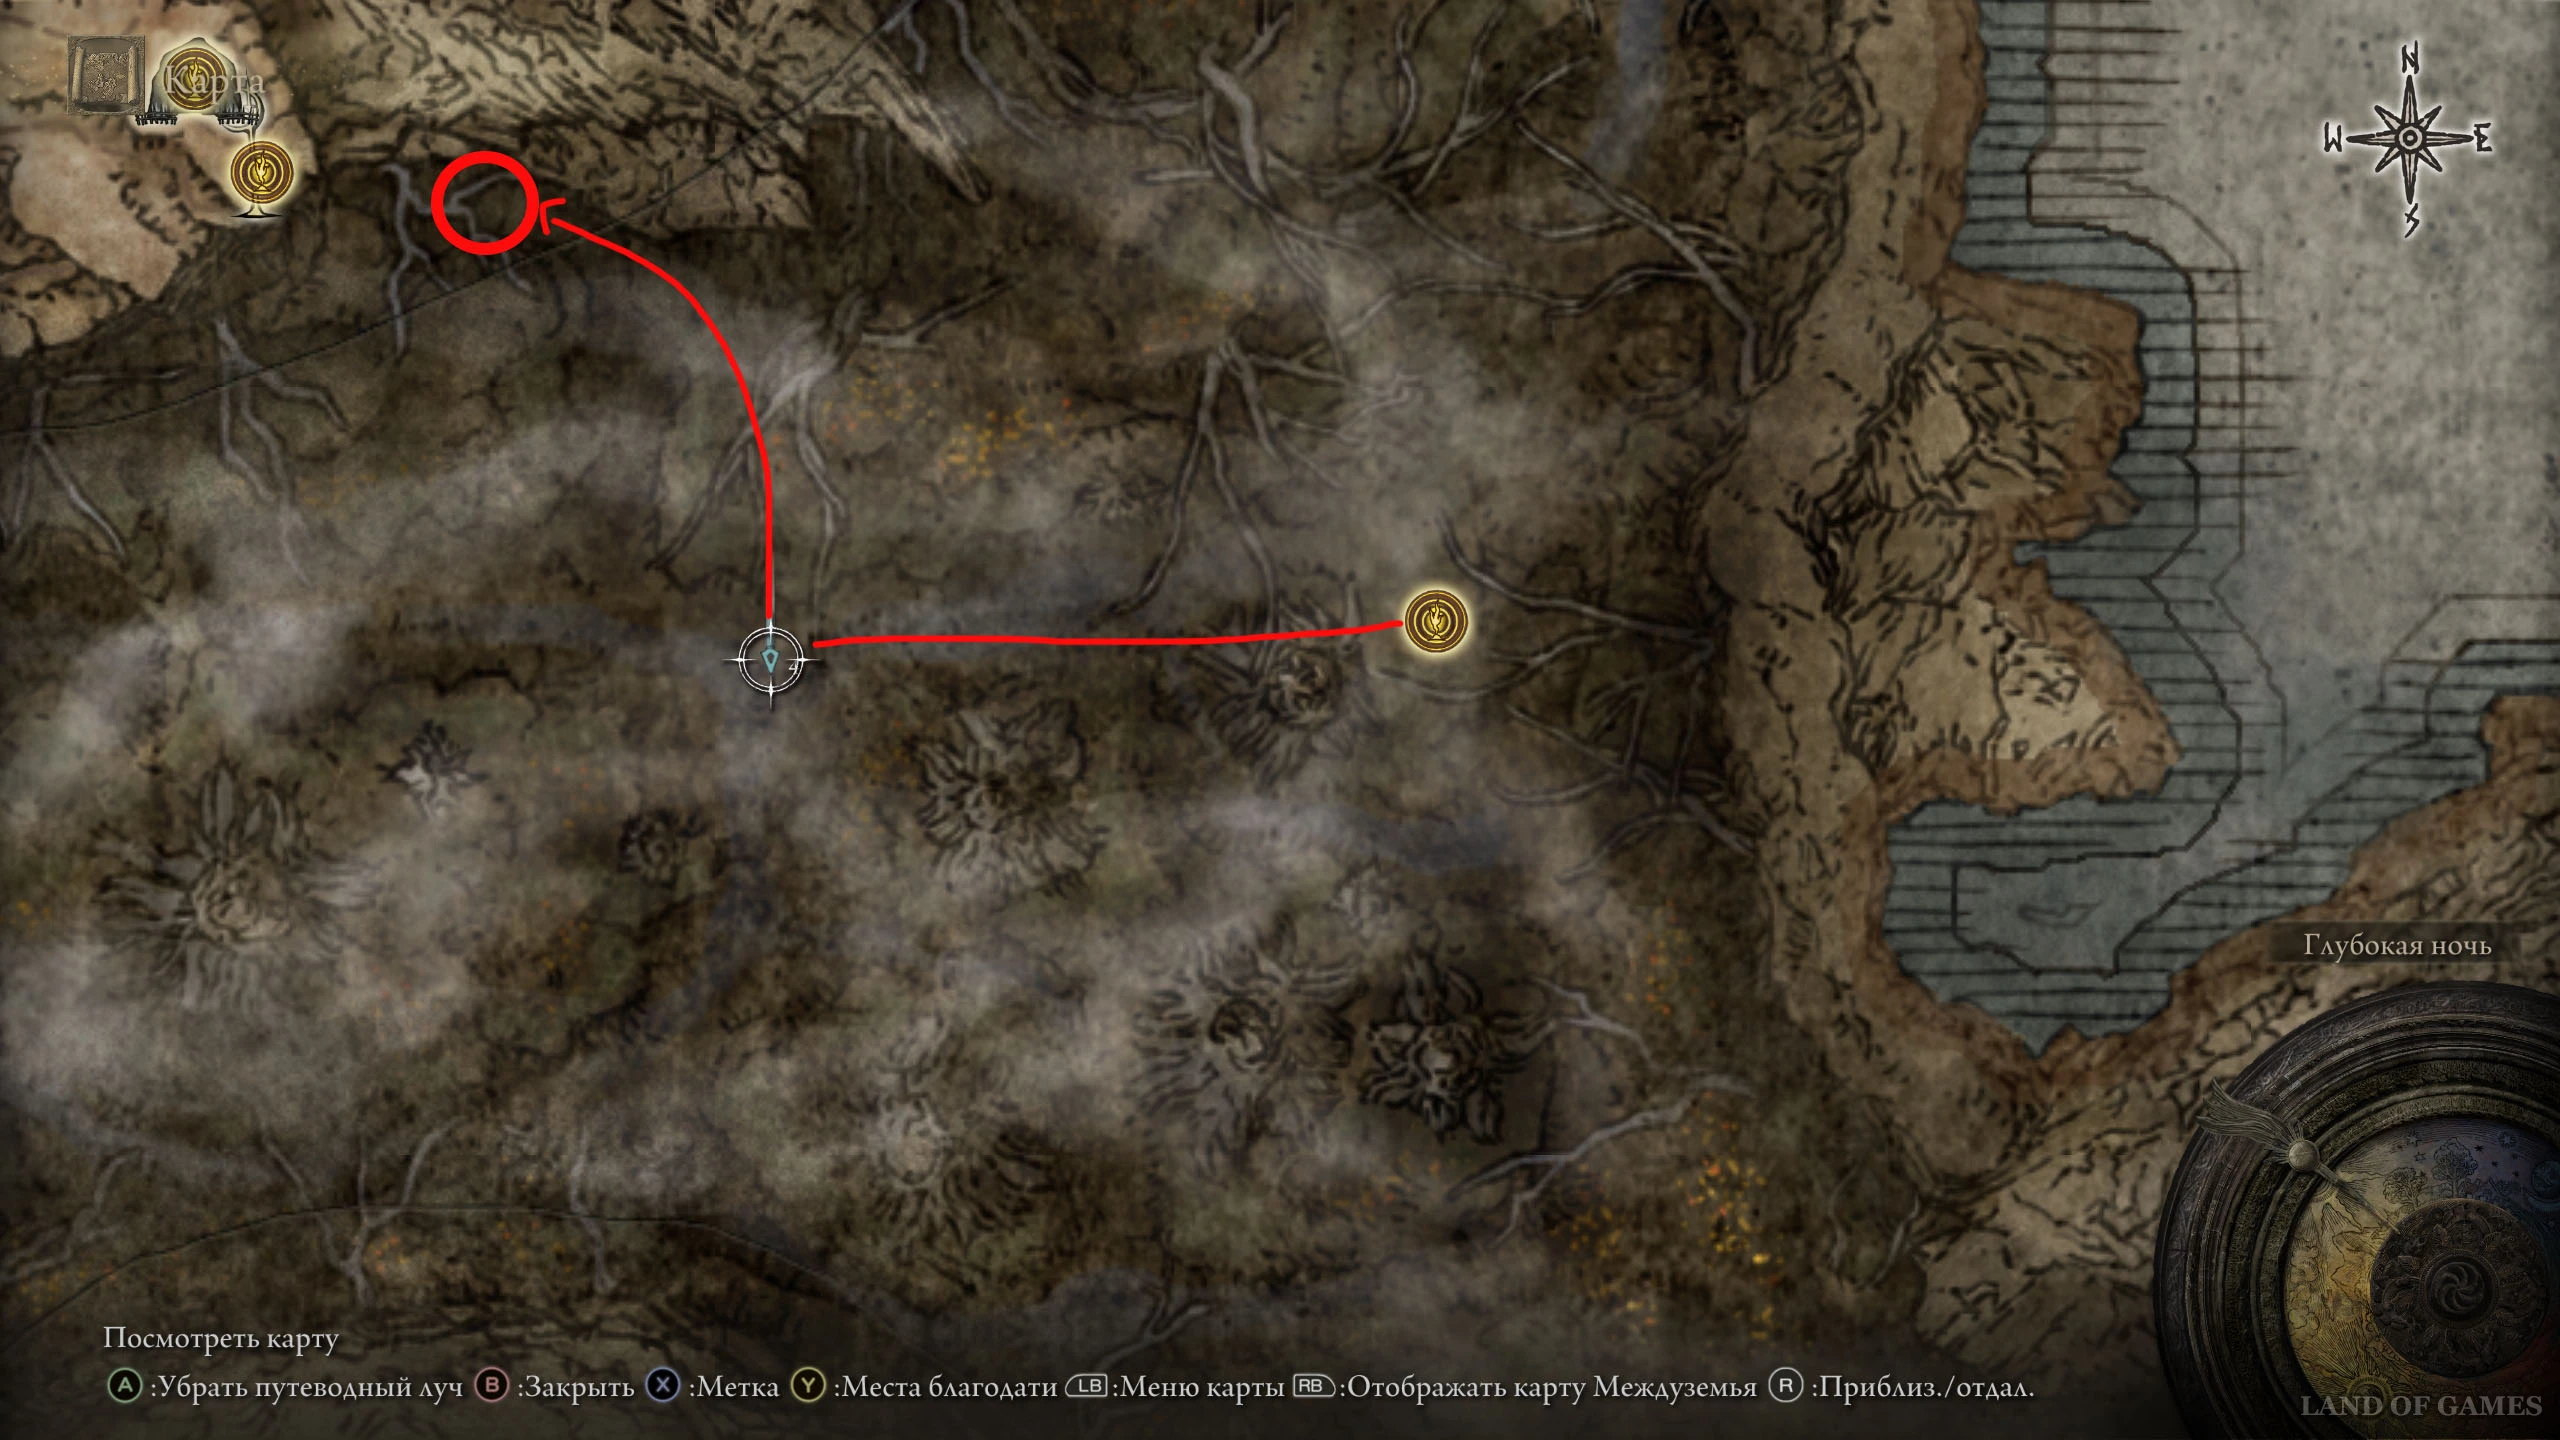
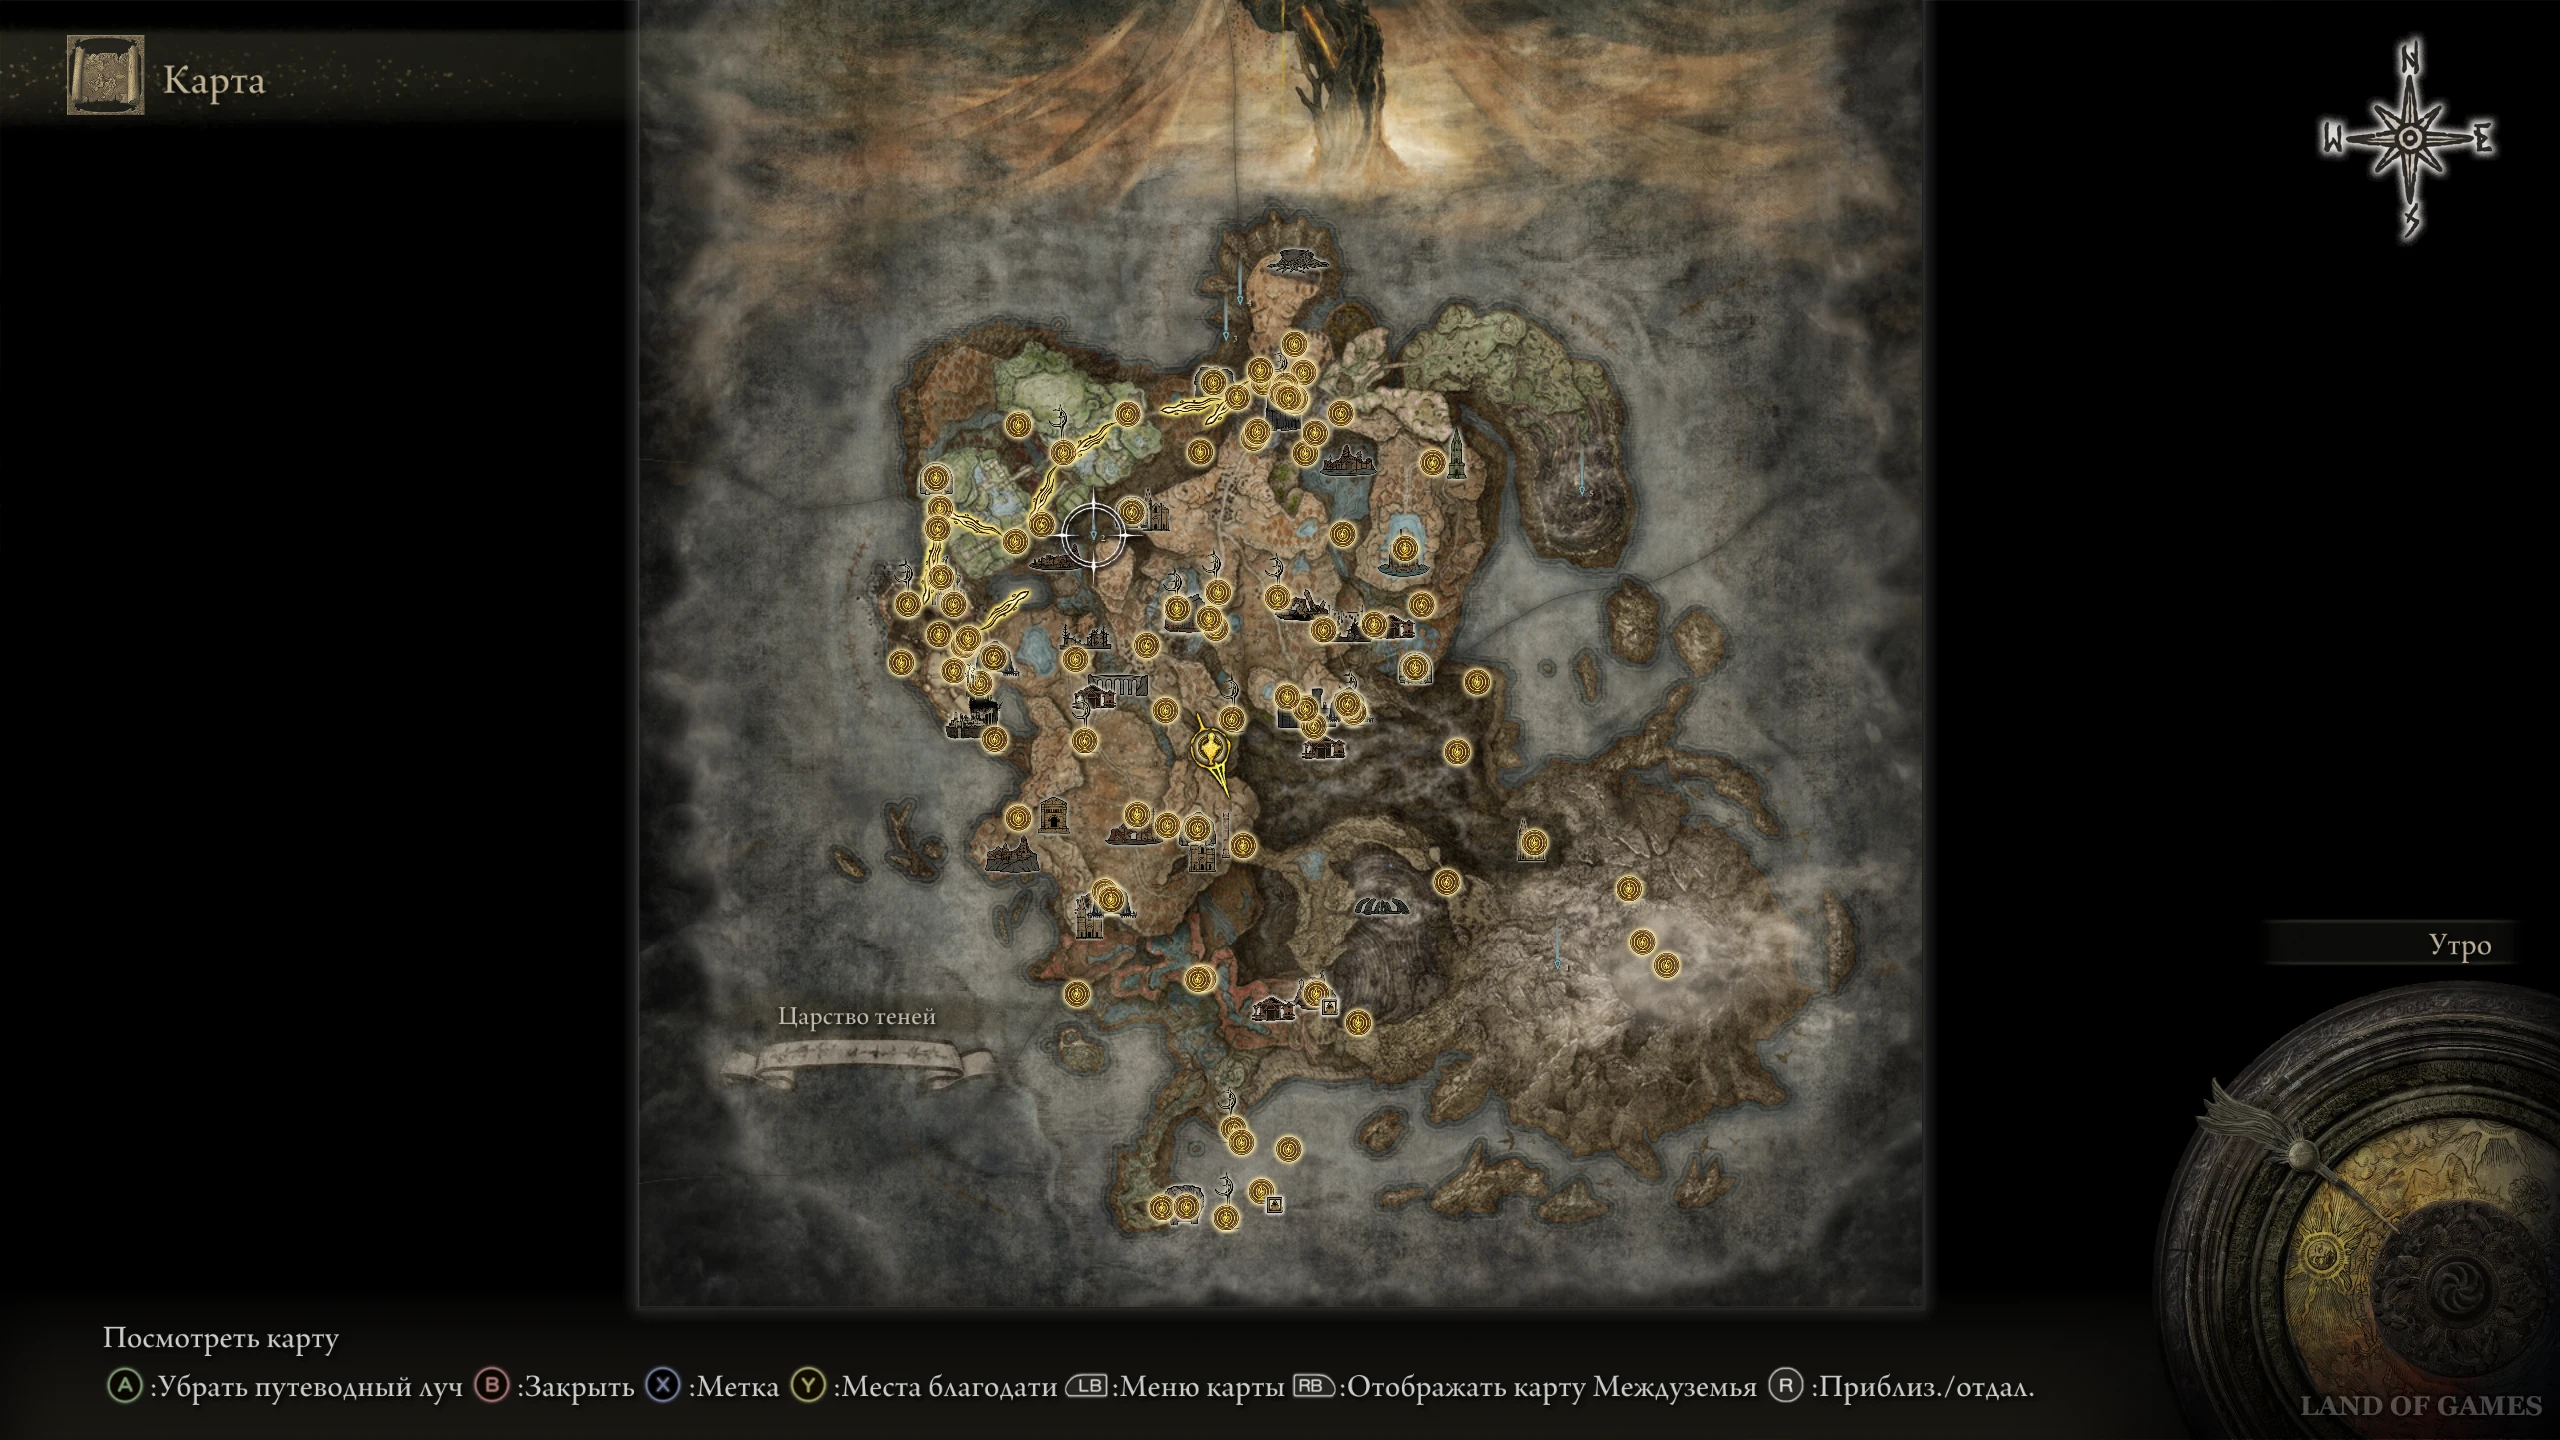
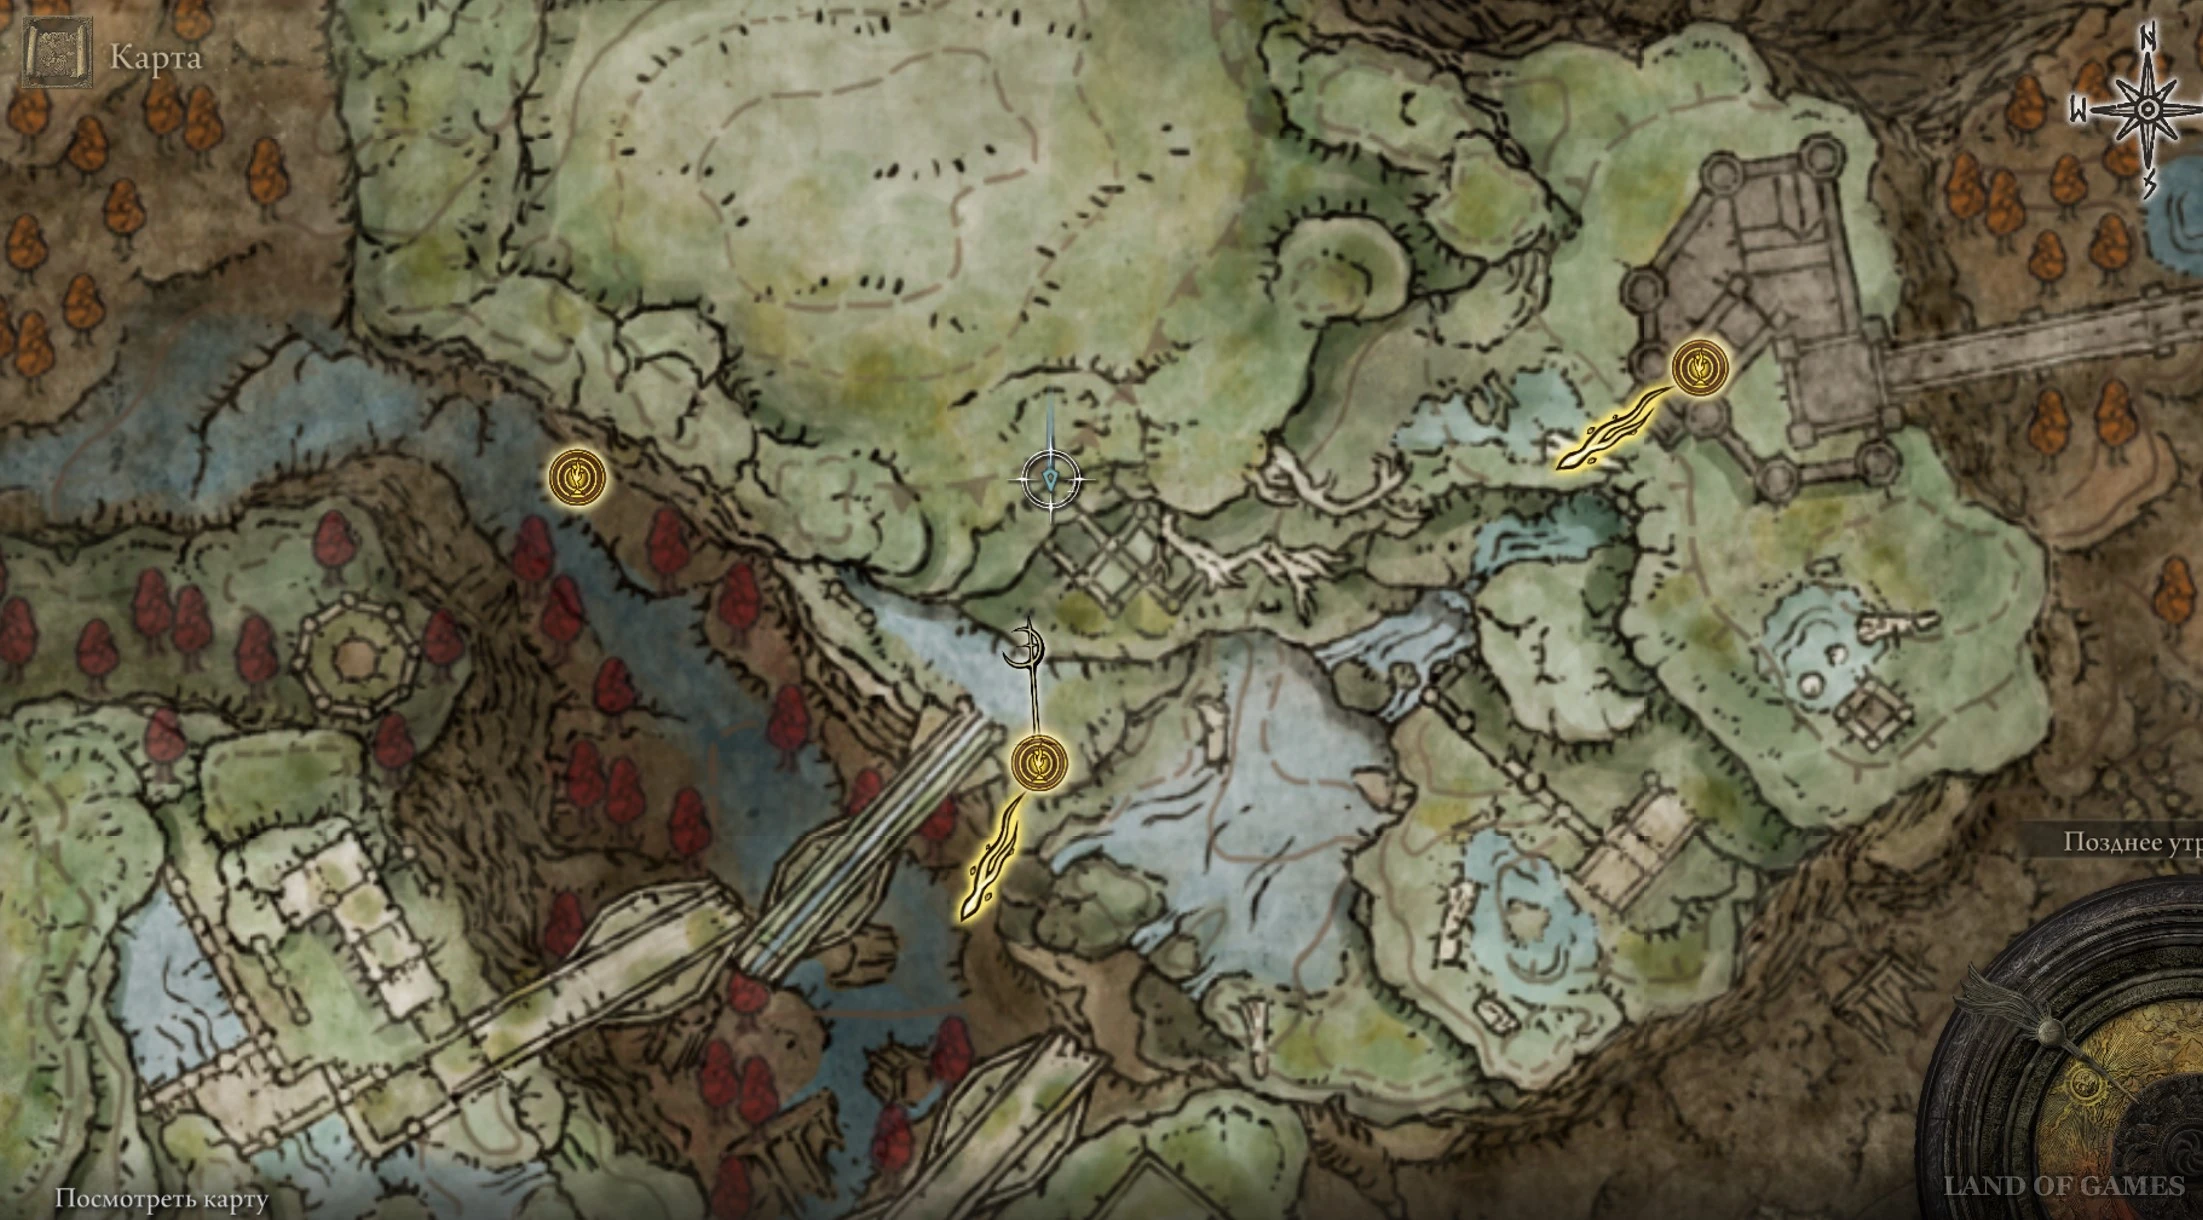
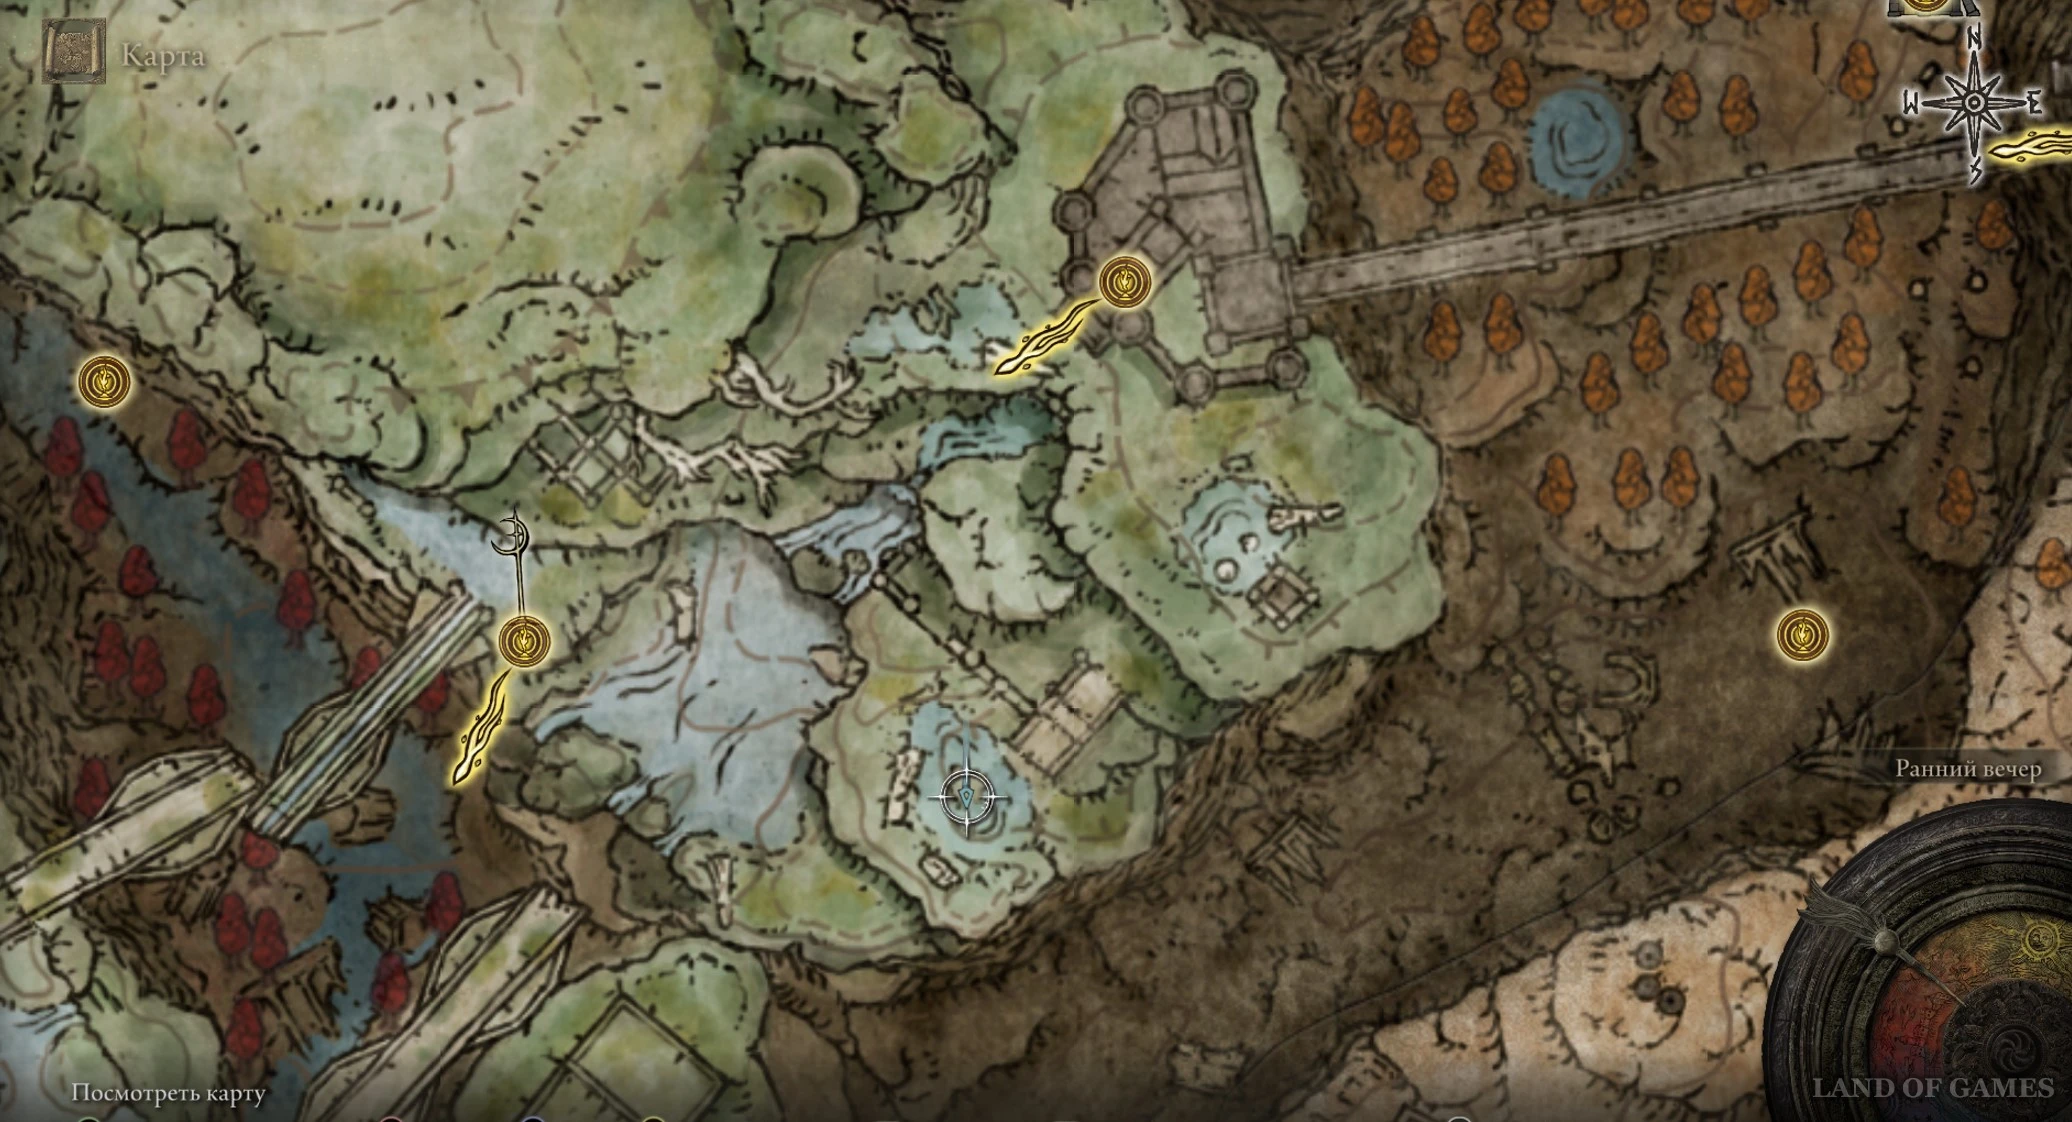
Примечание: Вам вовсе необязательно проводить зачистку замка Энсис, чтобы попасть в этот район. Дело в том, что рядом с Хижиной старейшины на юге находится духовный источник, благодаря которому вы сможете совершить высокий прыжок на Потоке и попасть к Форту порицания, а от него уже доскакать до необходимого «костра». Весь маршрут продемонстрирован на скриншоте ниже.
Осколок древа упадка 16
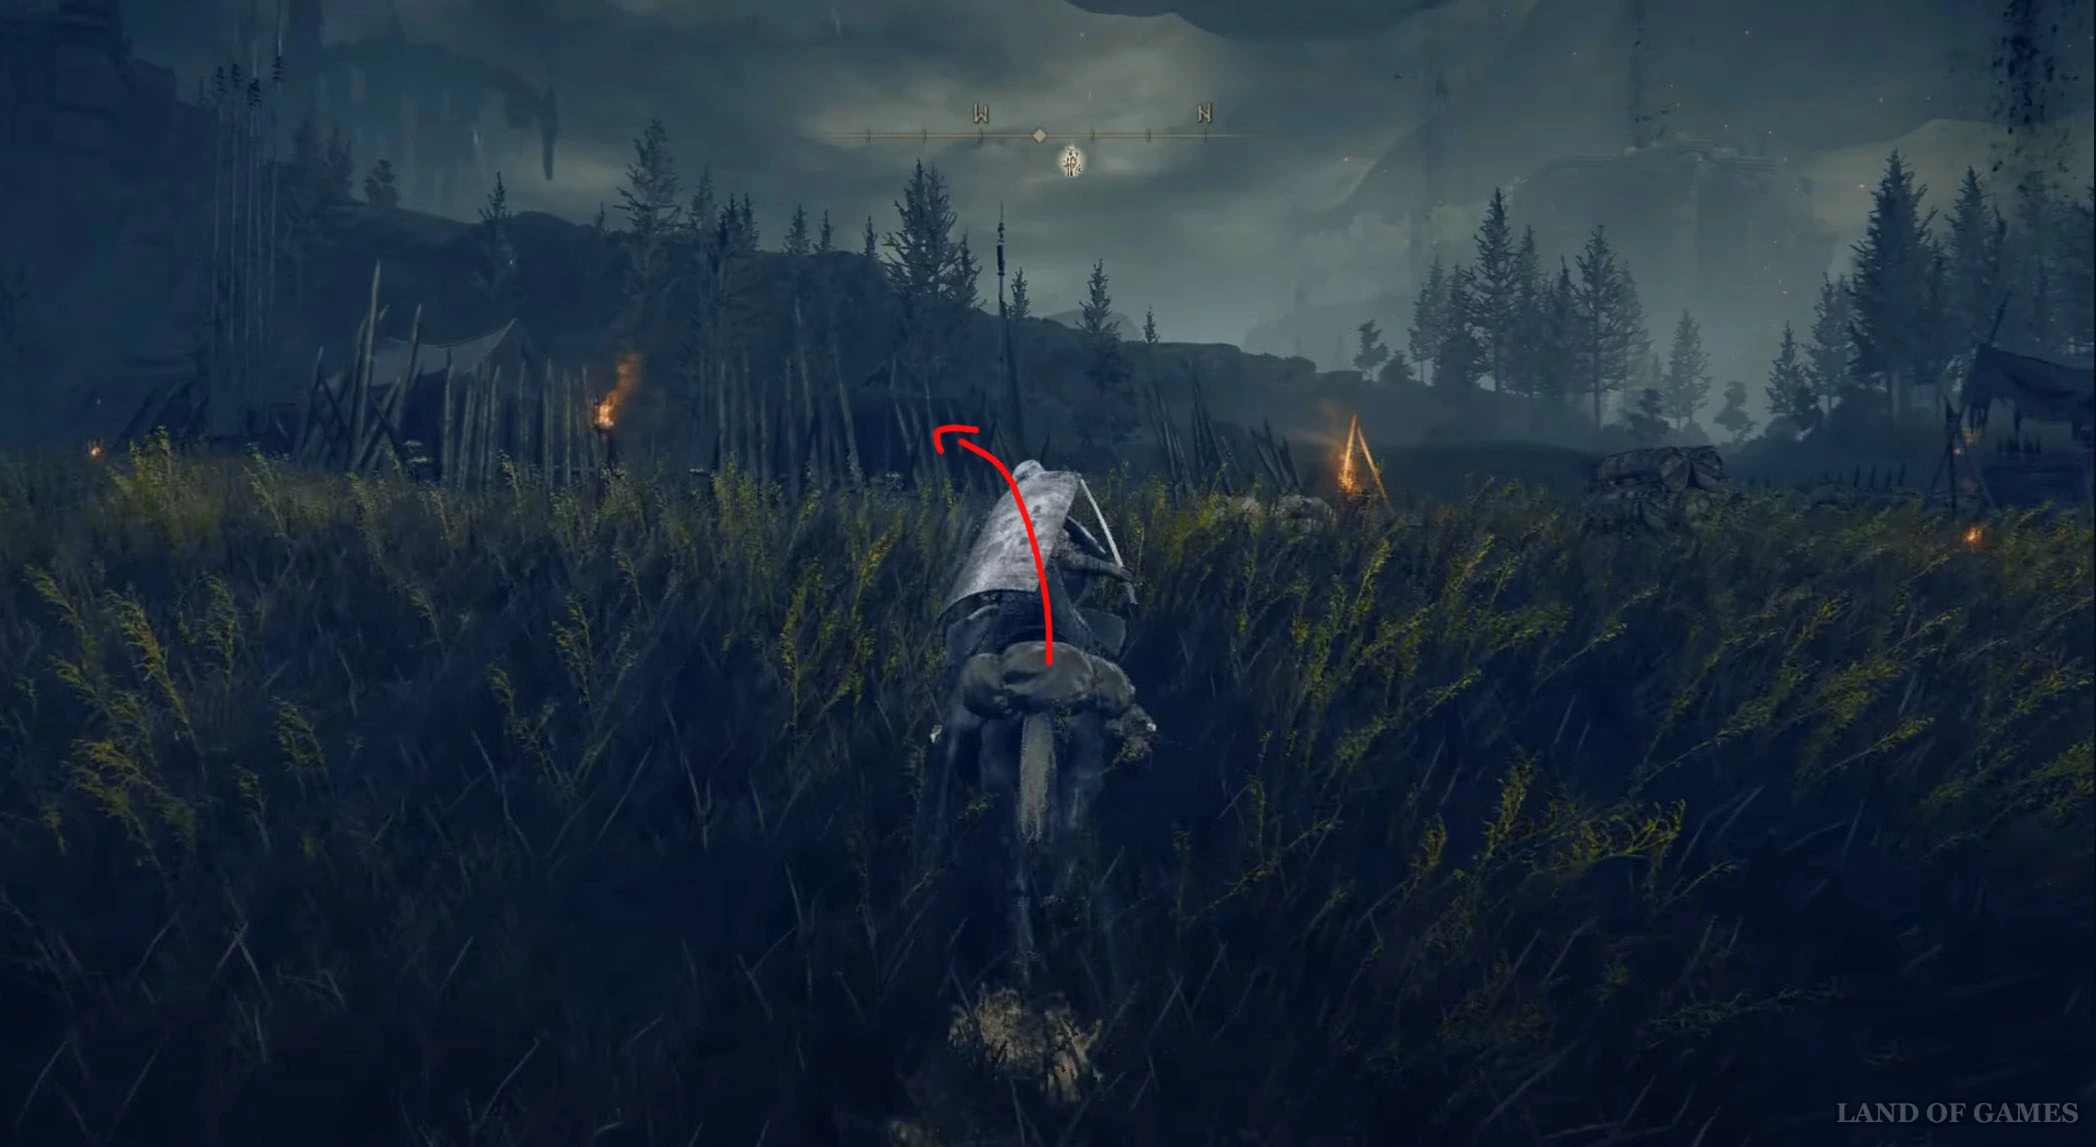
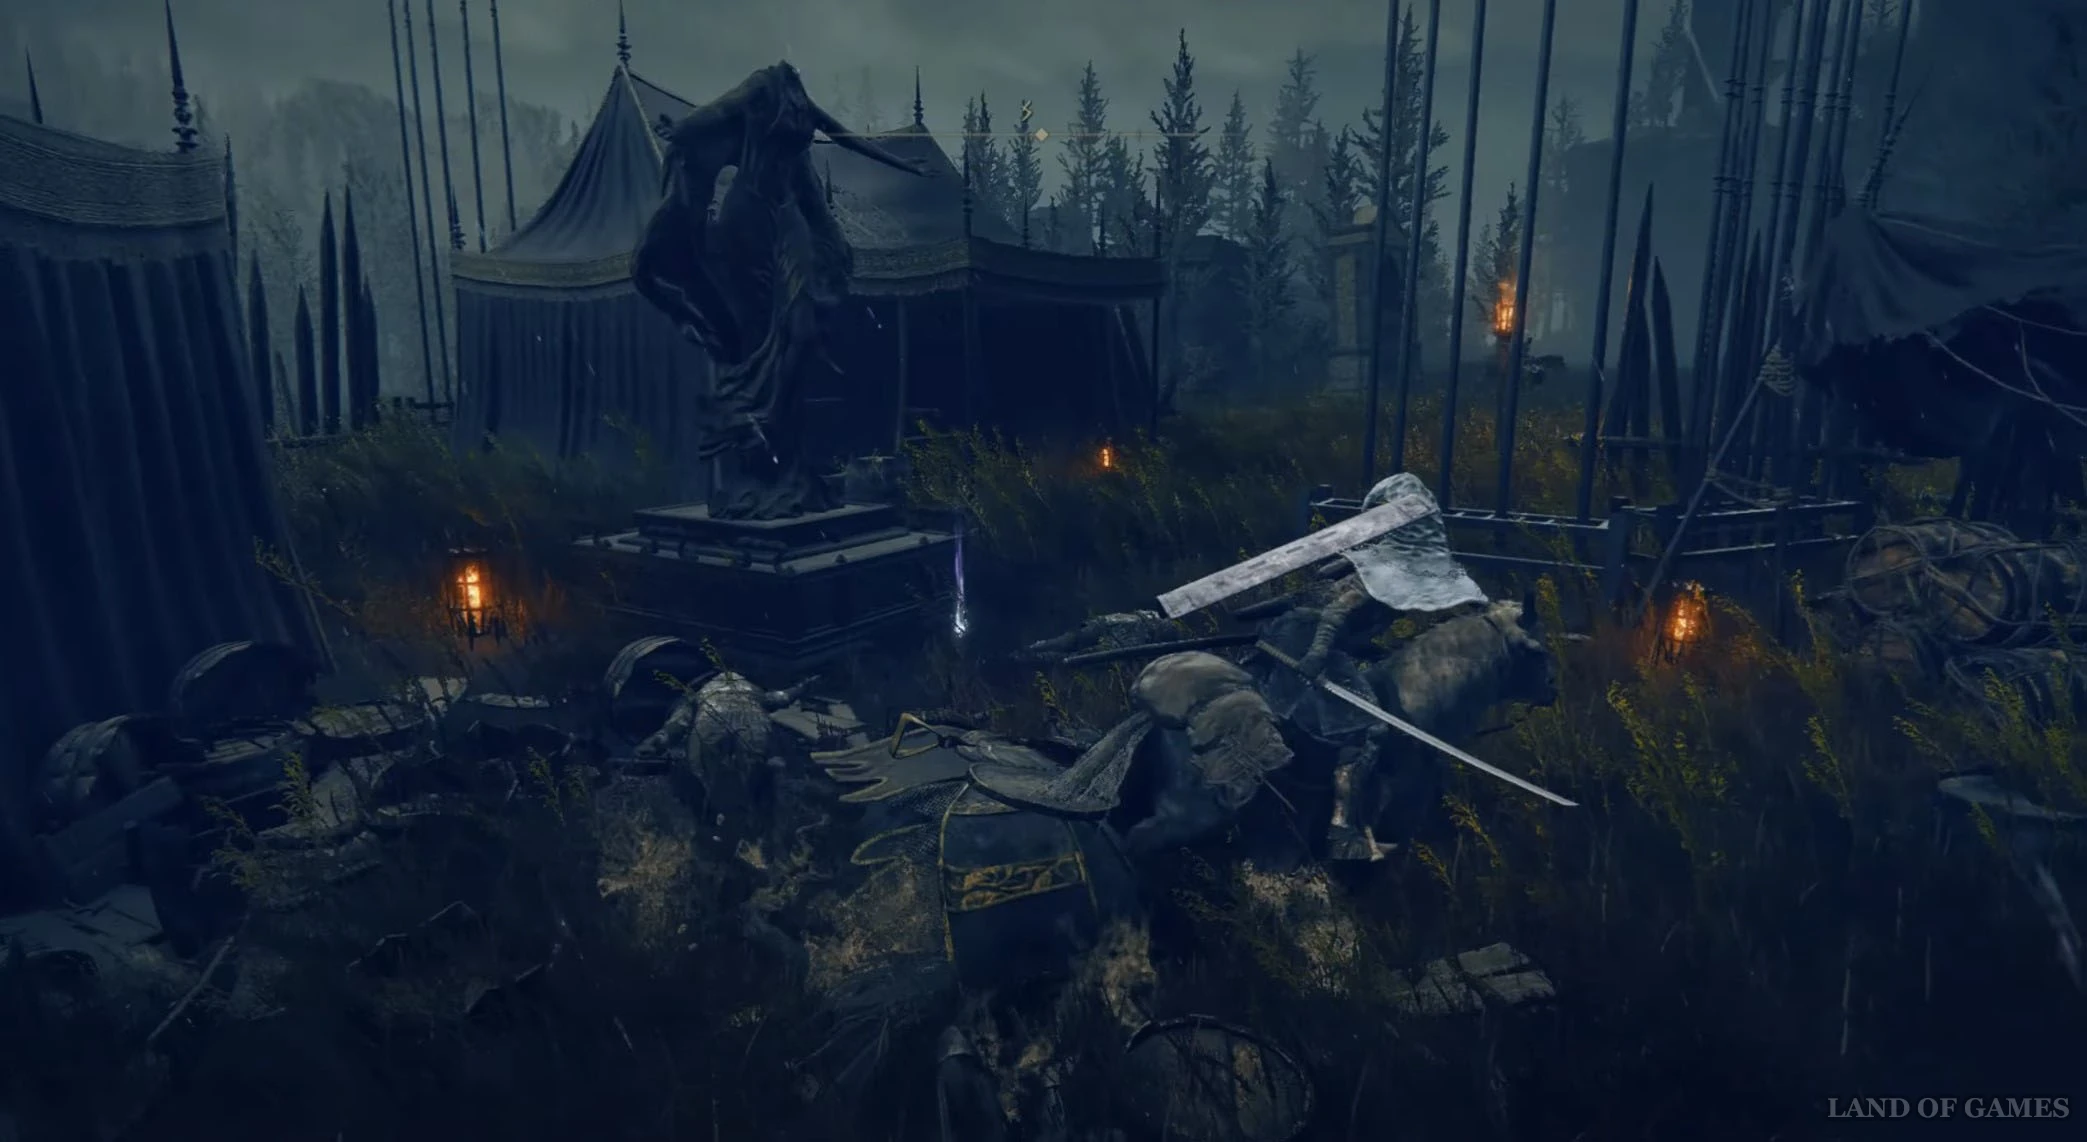
Снова переместитесь к предыдущему «костру», а затем скачите на северо-запад к вражескому лагерю. В центре него отыщите статую Марики, у подножья которой будет лежать нужный вам фрагмент.
Осколок древа упадка 17
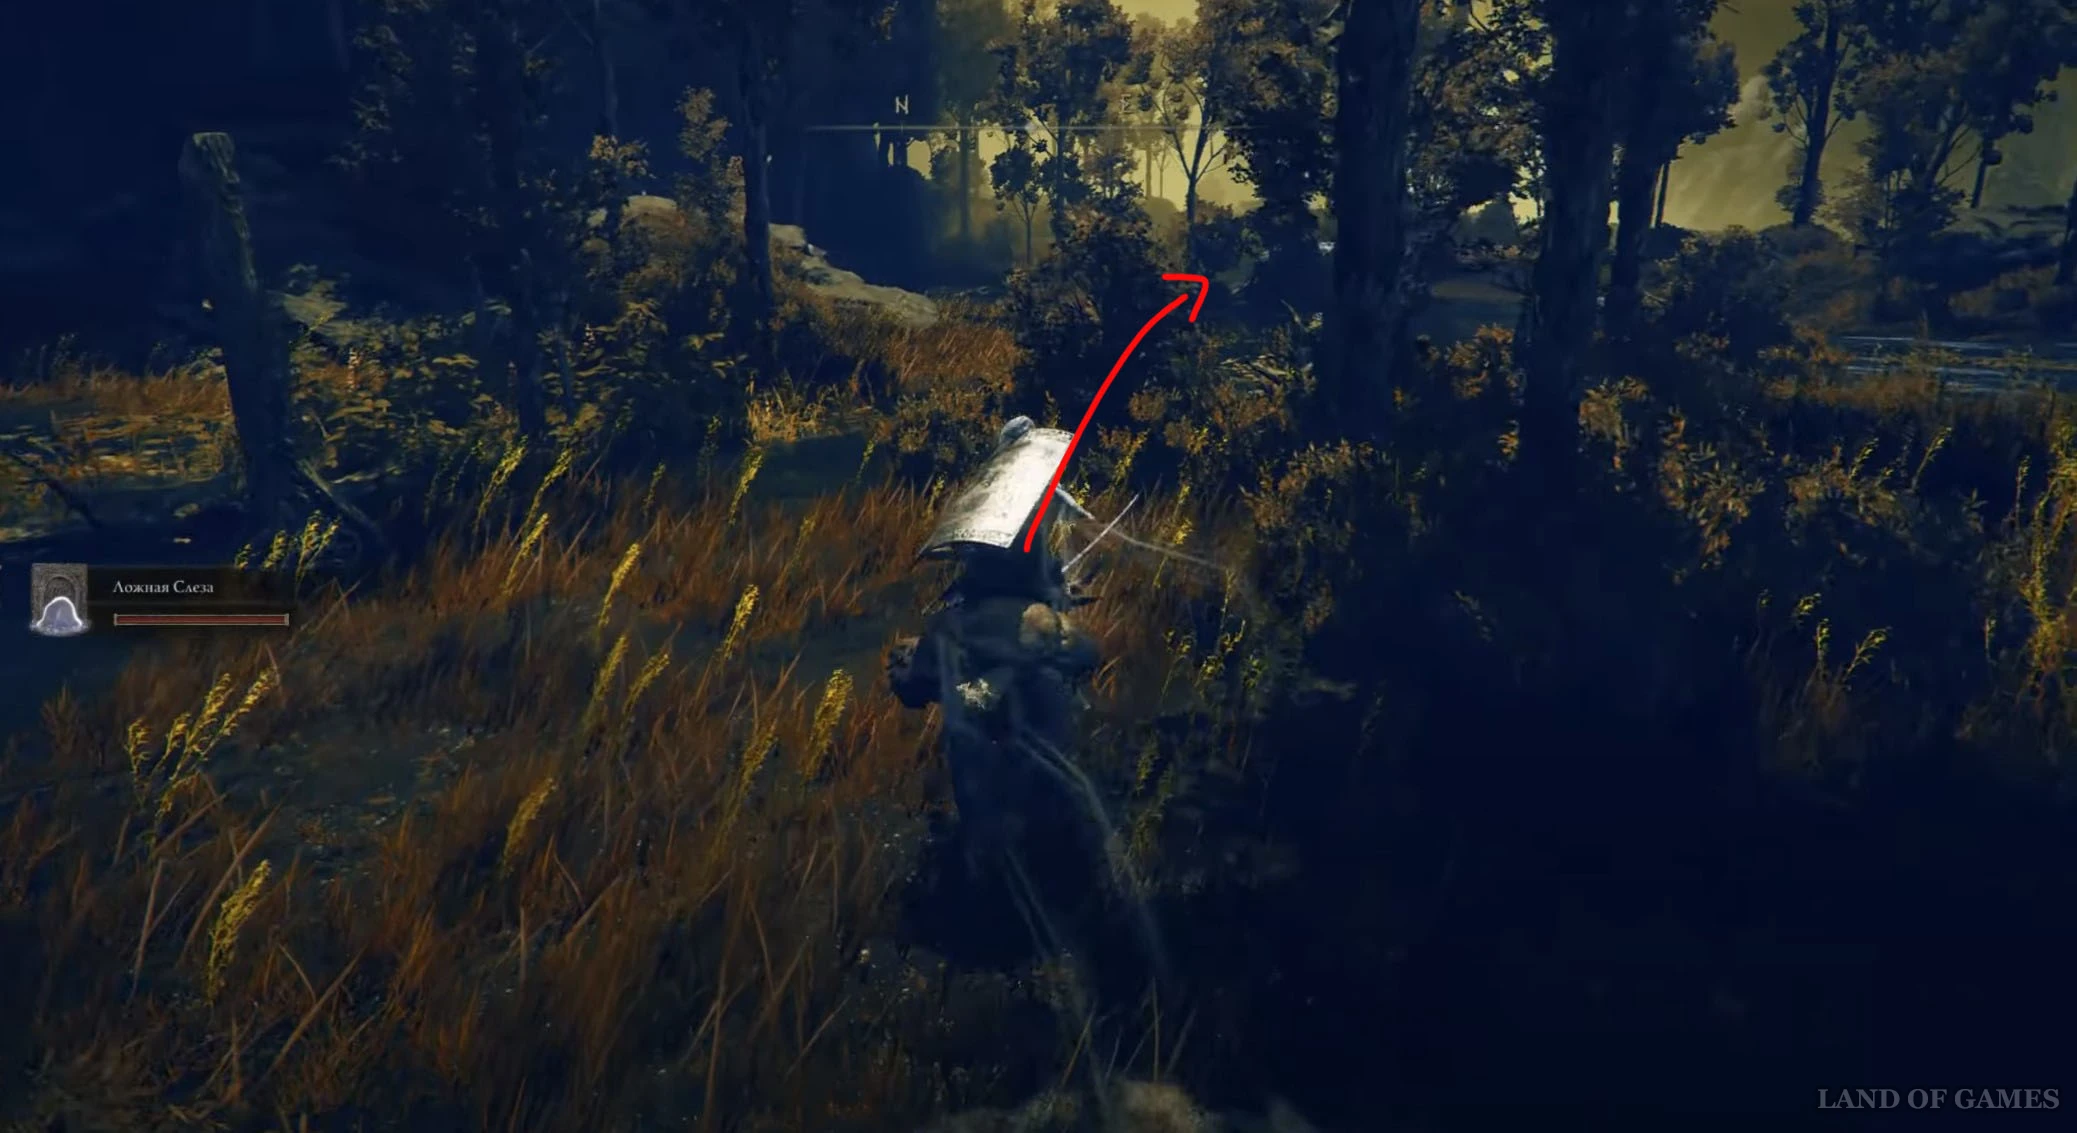
Вновь возвратитесь к предыдущему «костру», а затем скачите на юго-восток мимо руин и возле выступа отыщите очередную тень, держащую кувшин над головой. Расправьтесь с ней как можно скорее, пока она не исчезла. Будьте осторожны, так как рядом с этим мобов бродит опасный противник с двумя дисками.
Осколок древа упадка 18
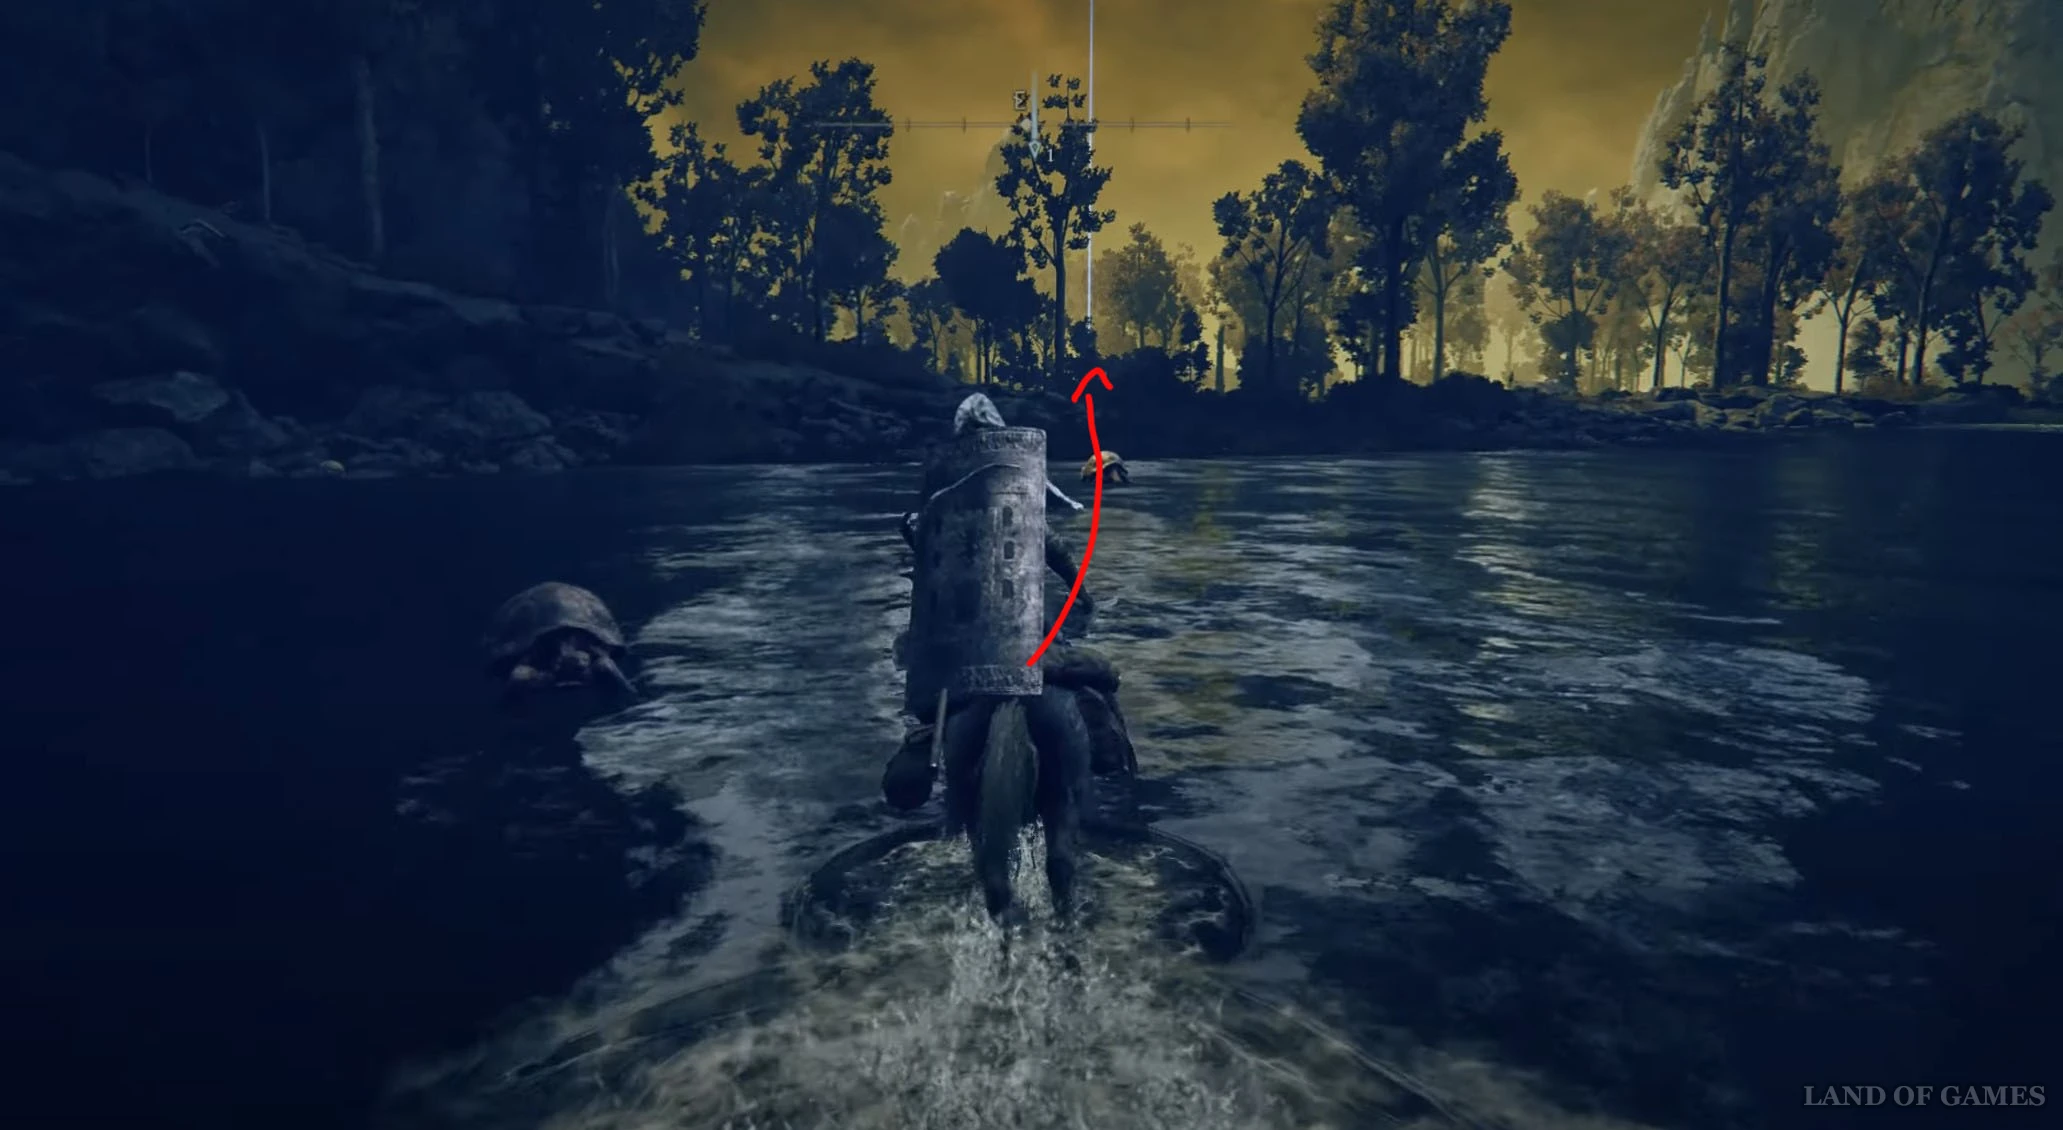
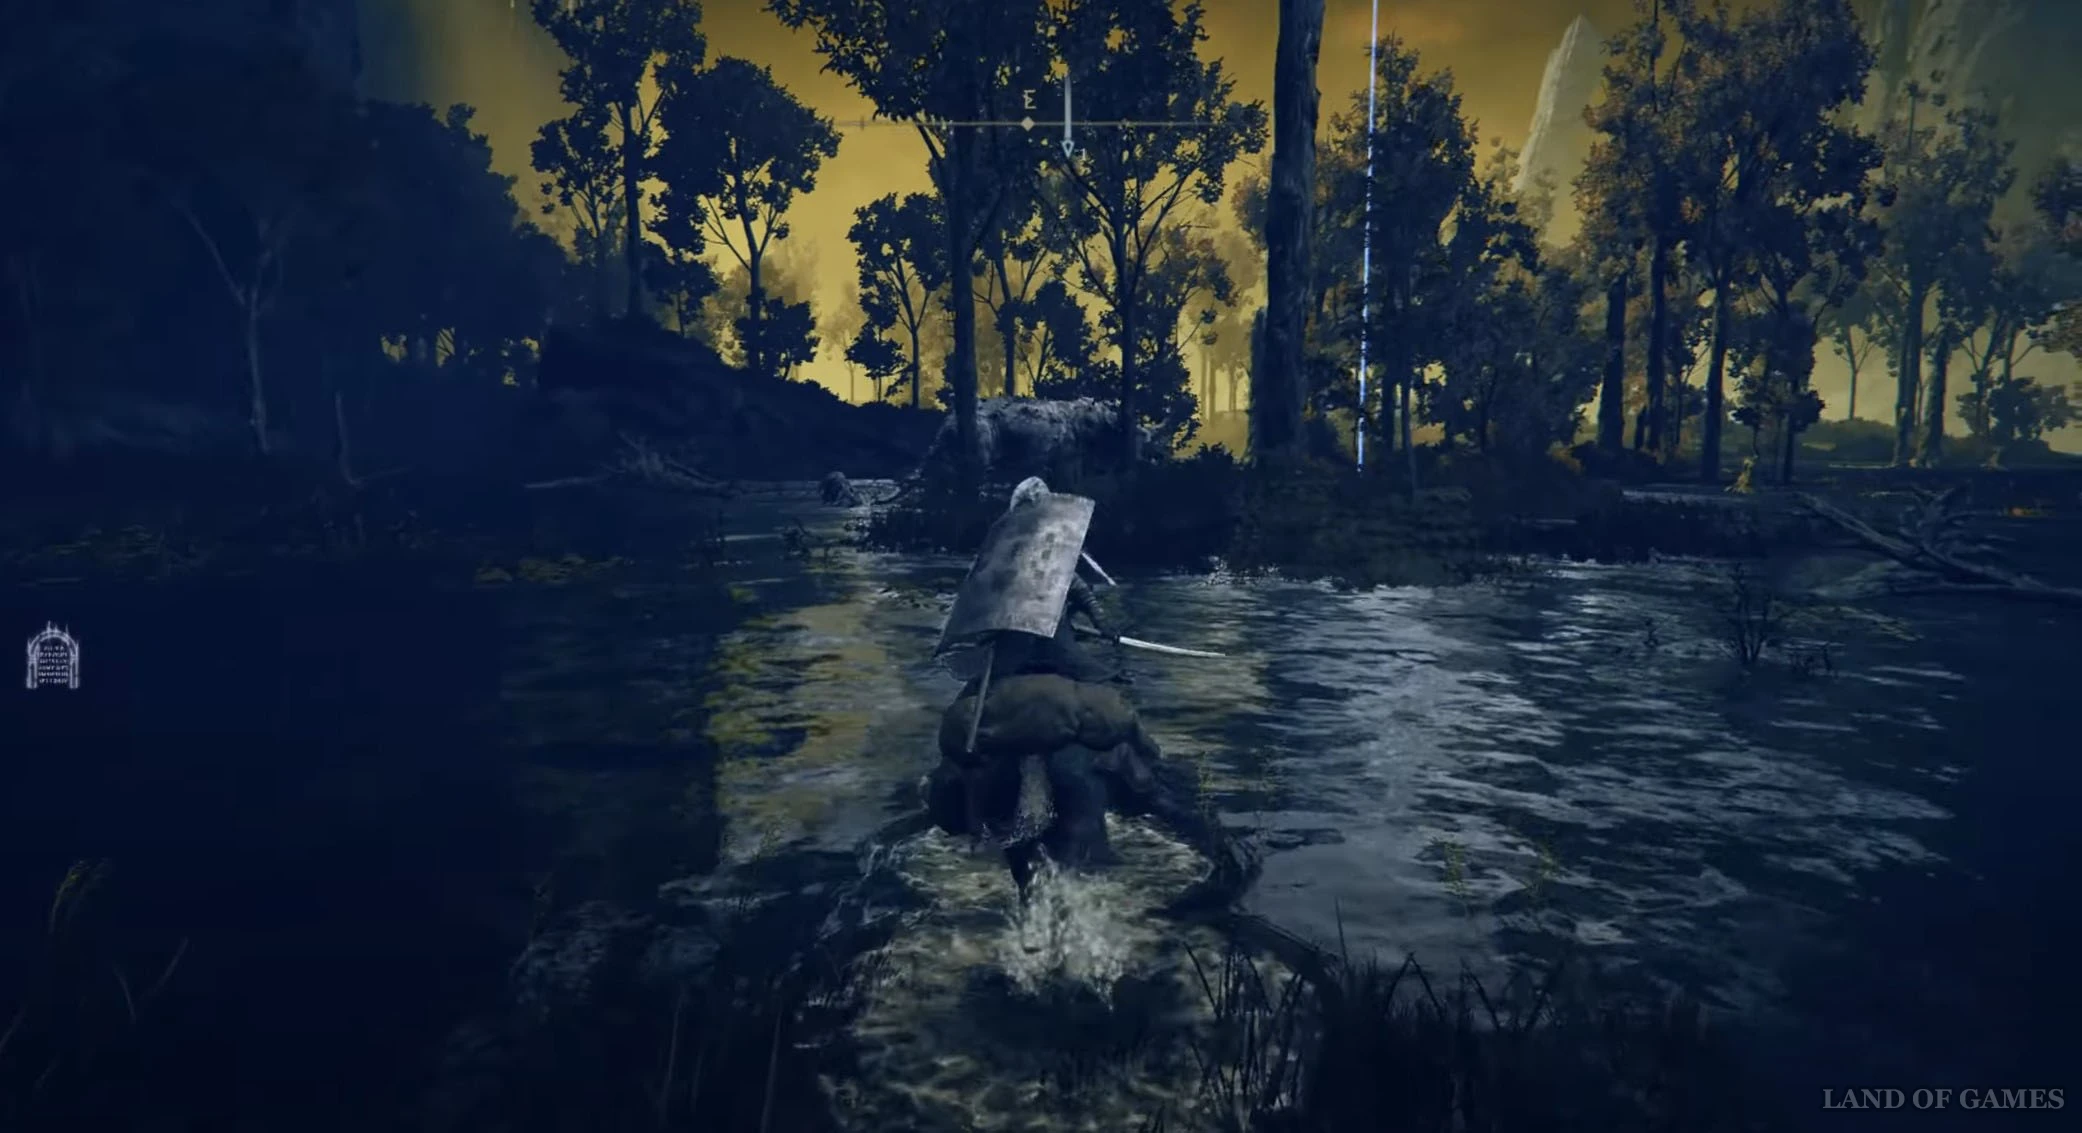
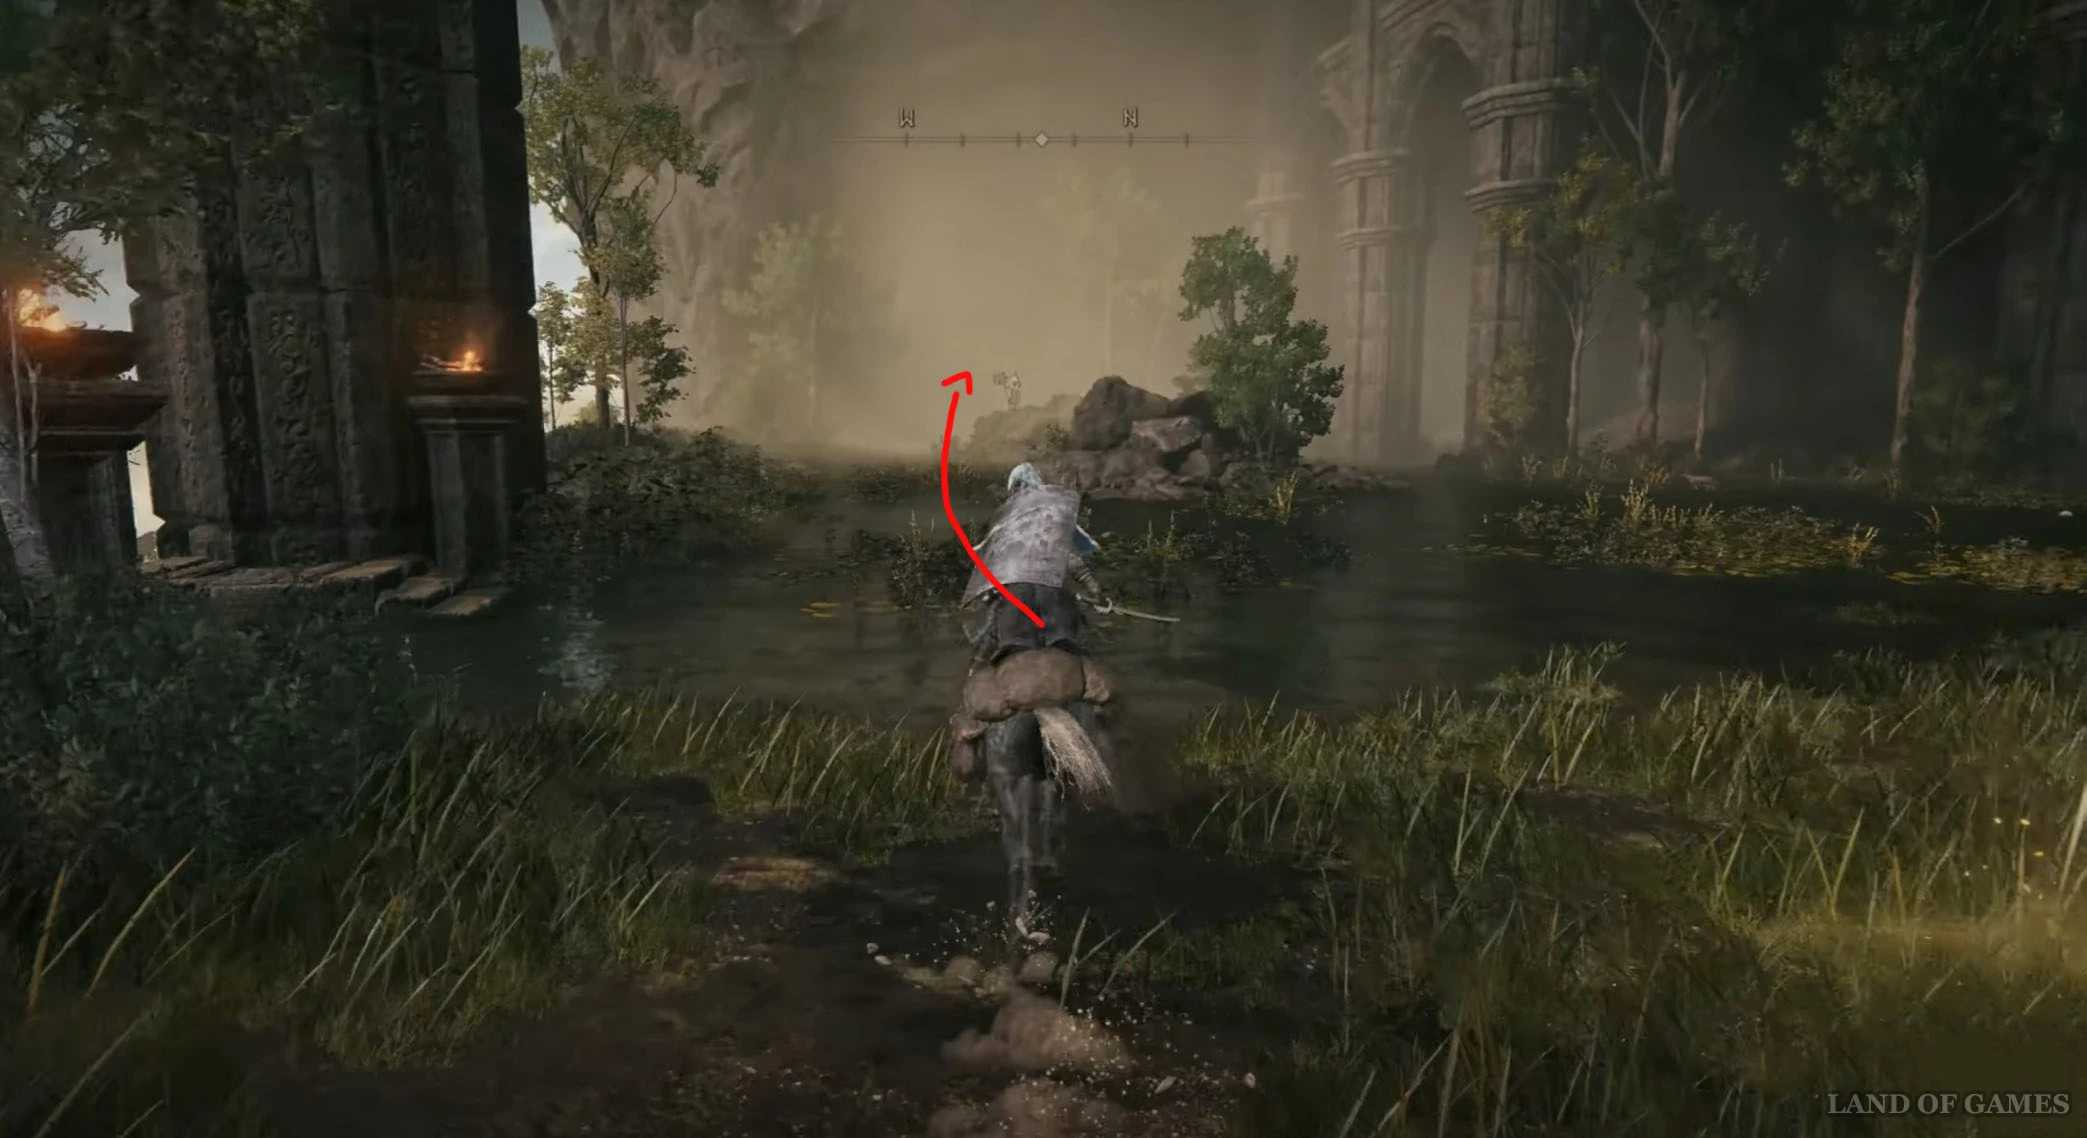
Опять вернитесь к прошлому «костру», но на этот раз двигайтесь на северо-восток в лесную чащу. Добегите до водоема с фантомными червями и приблизьтесь к скале. Здесь вы обнаружите вход в пещеру, возле которого стоит статуя, – у ее подножья лежит нужная вам вещица.

Осколок древа упадка 19
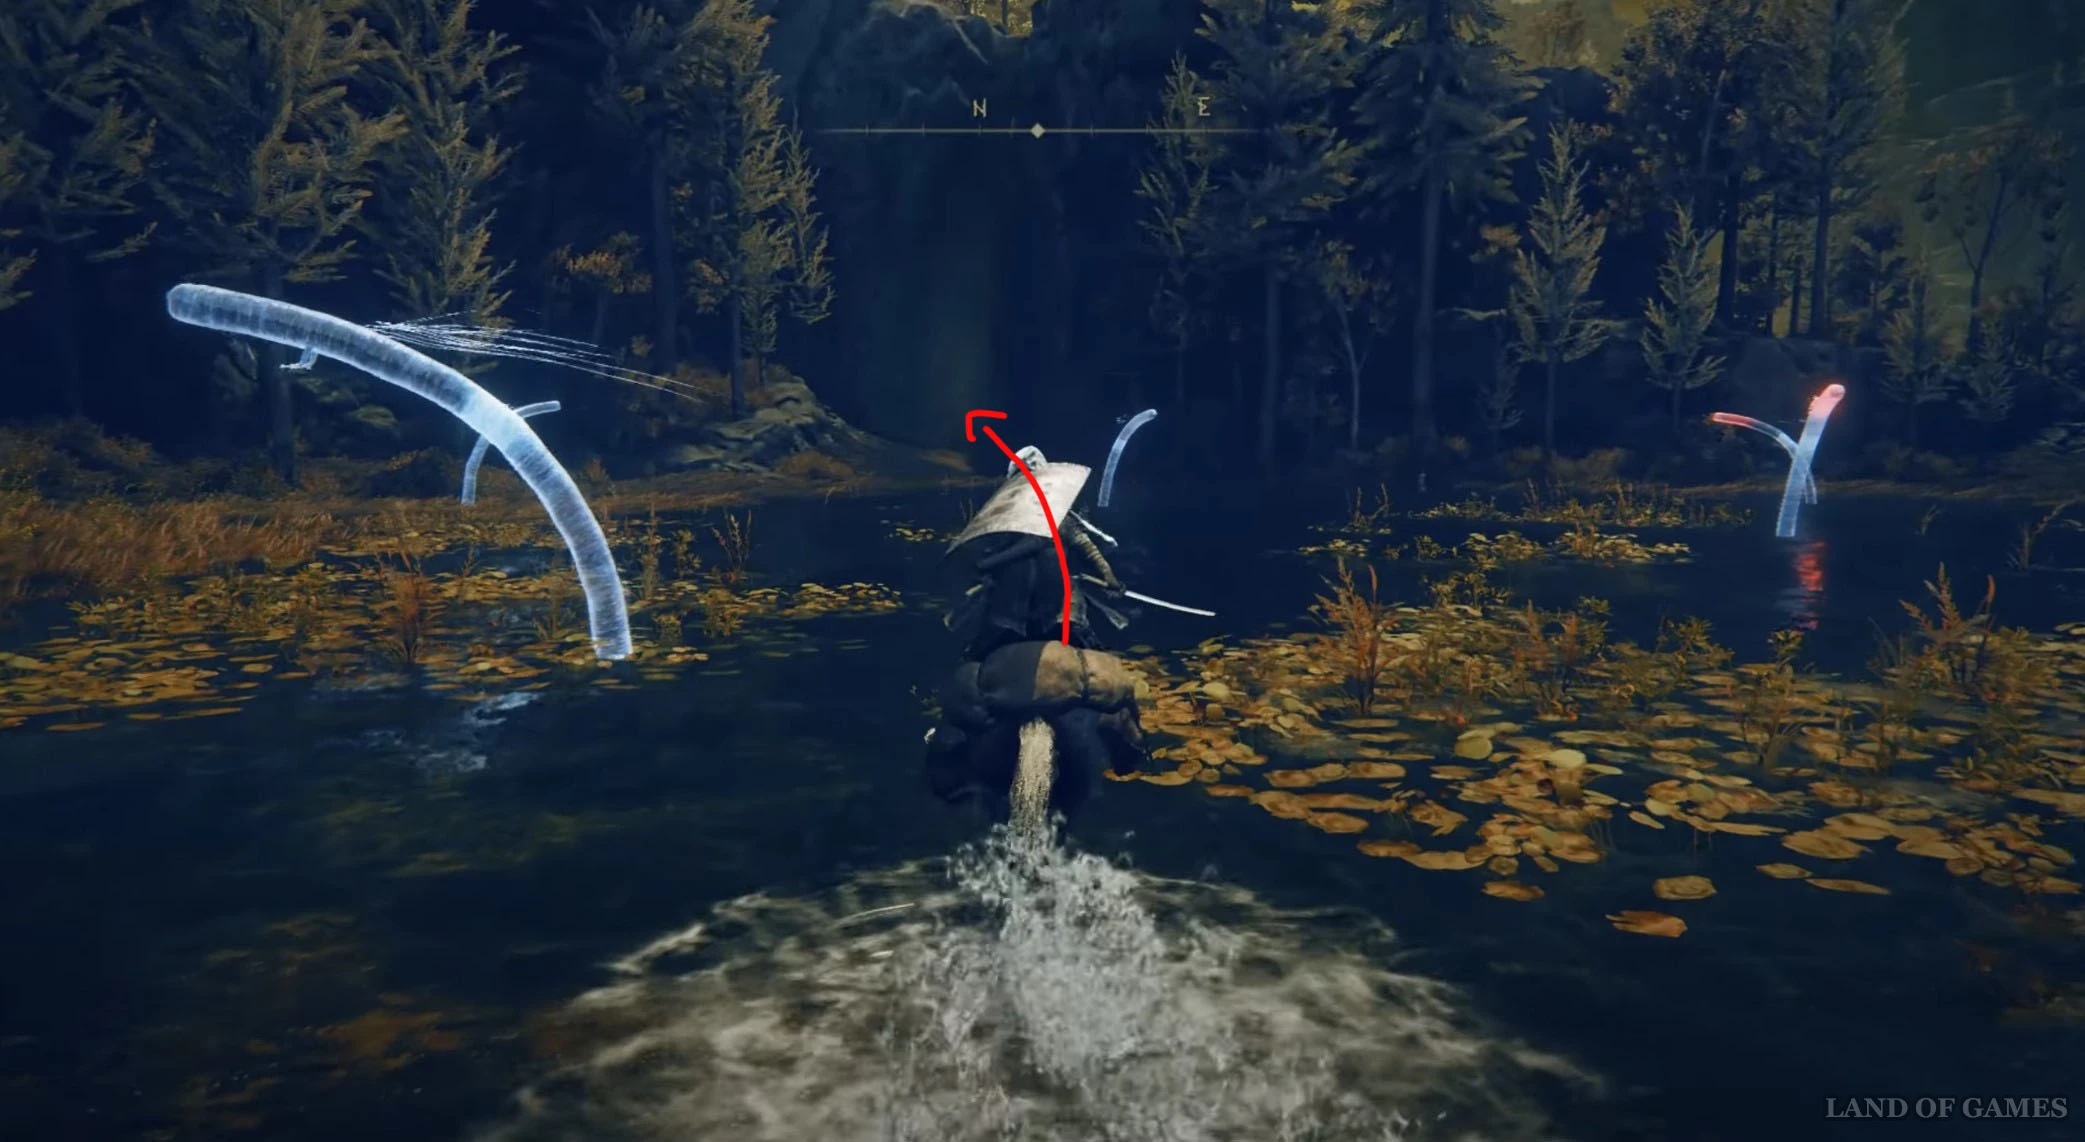
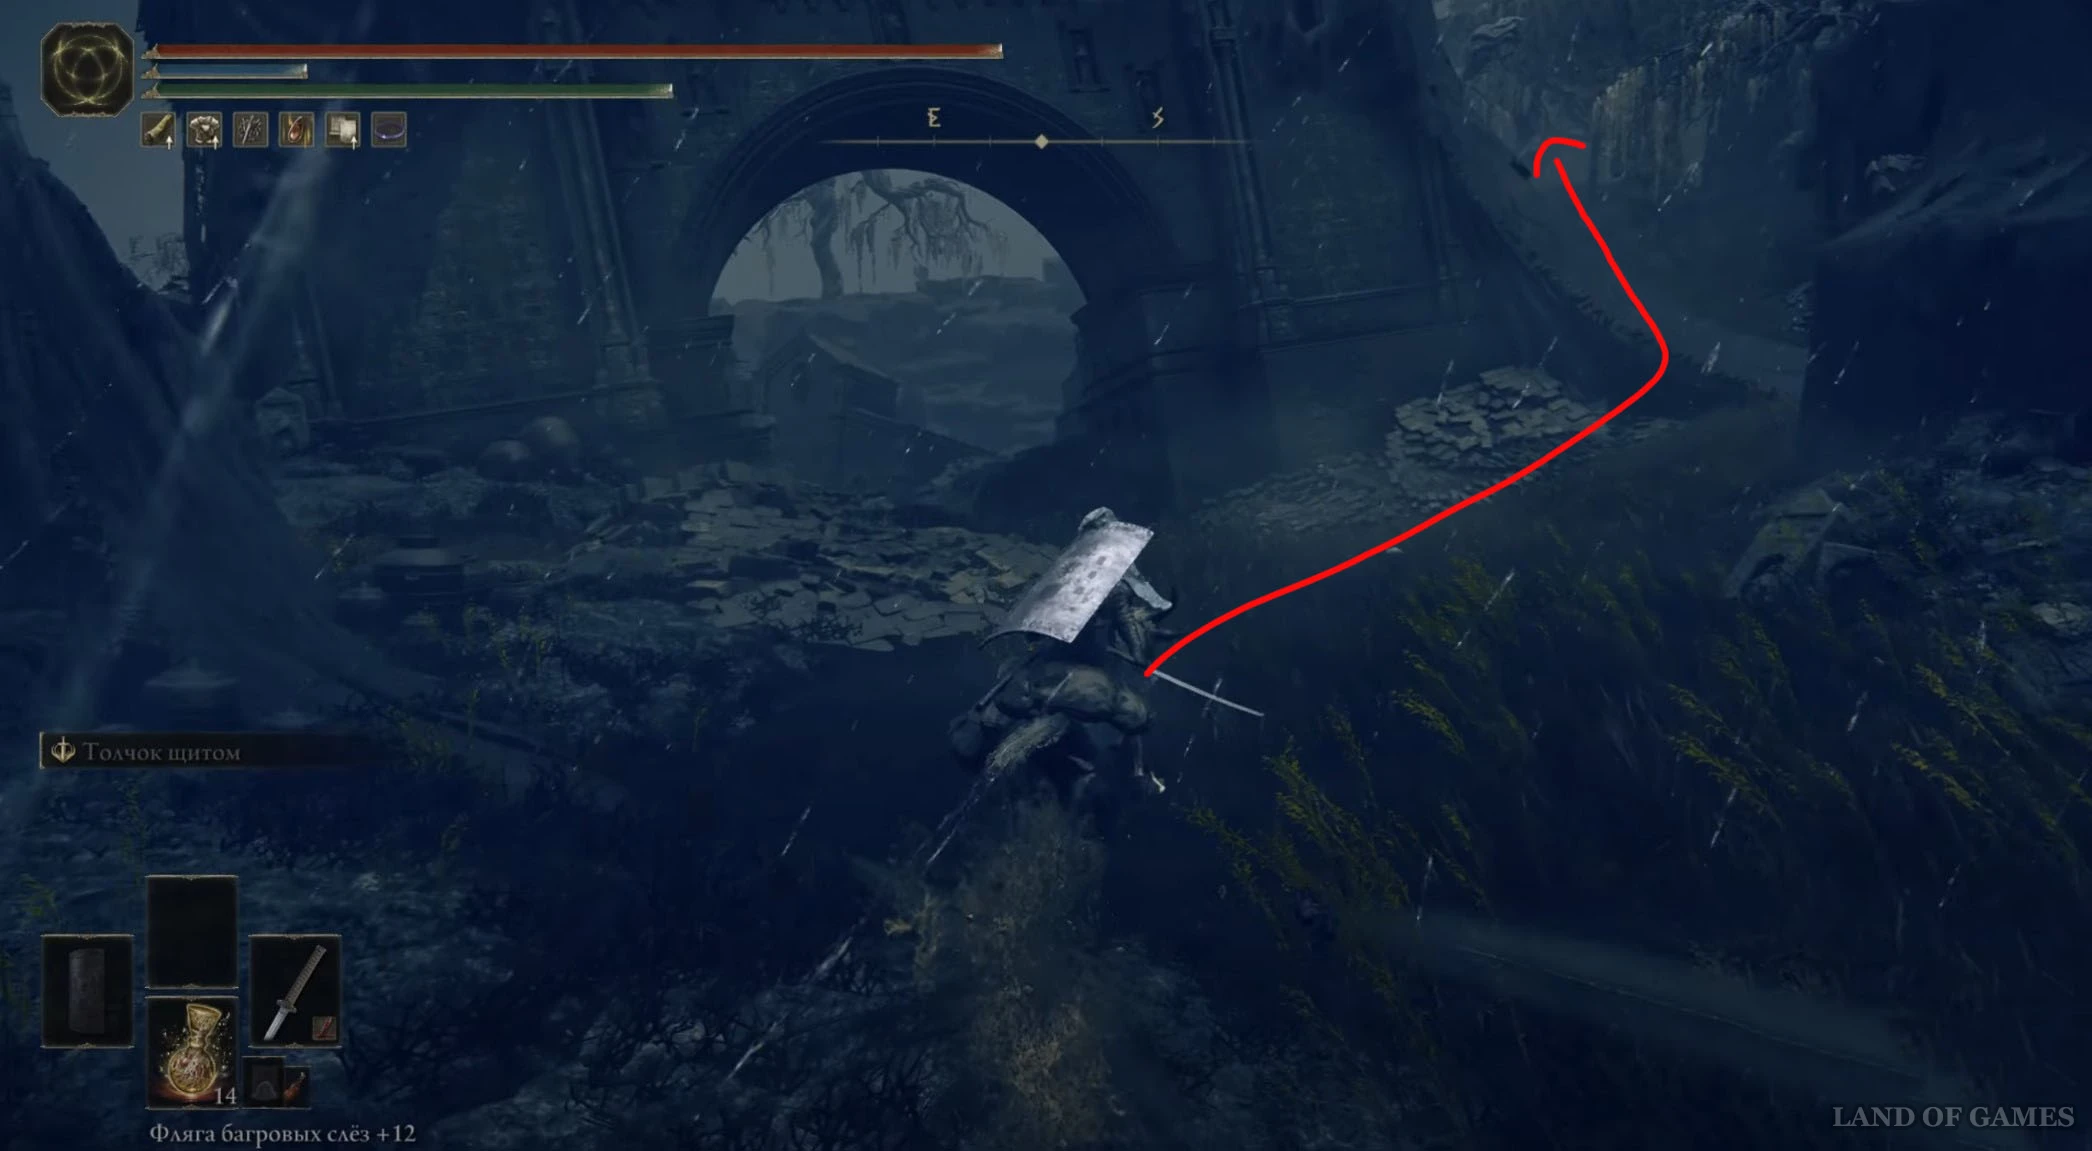
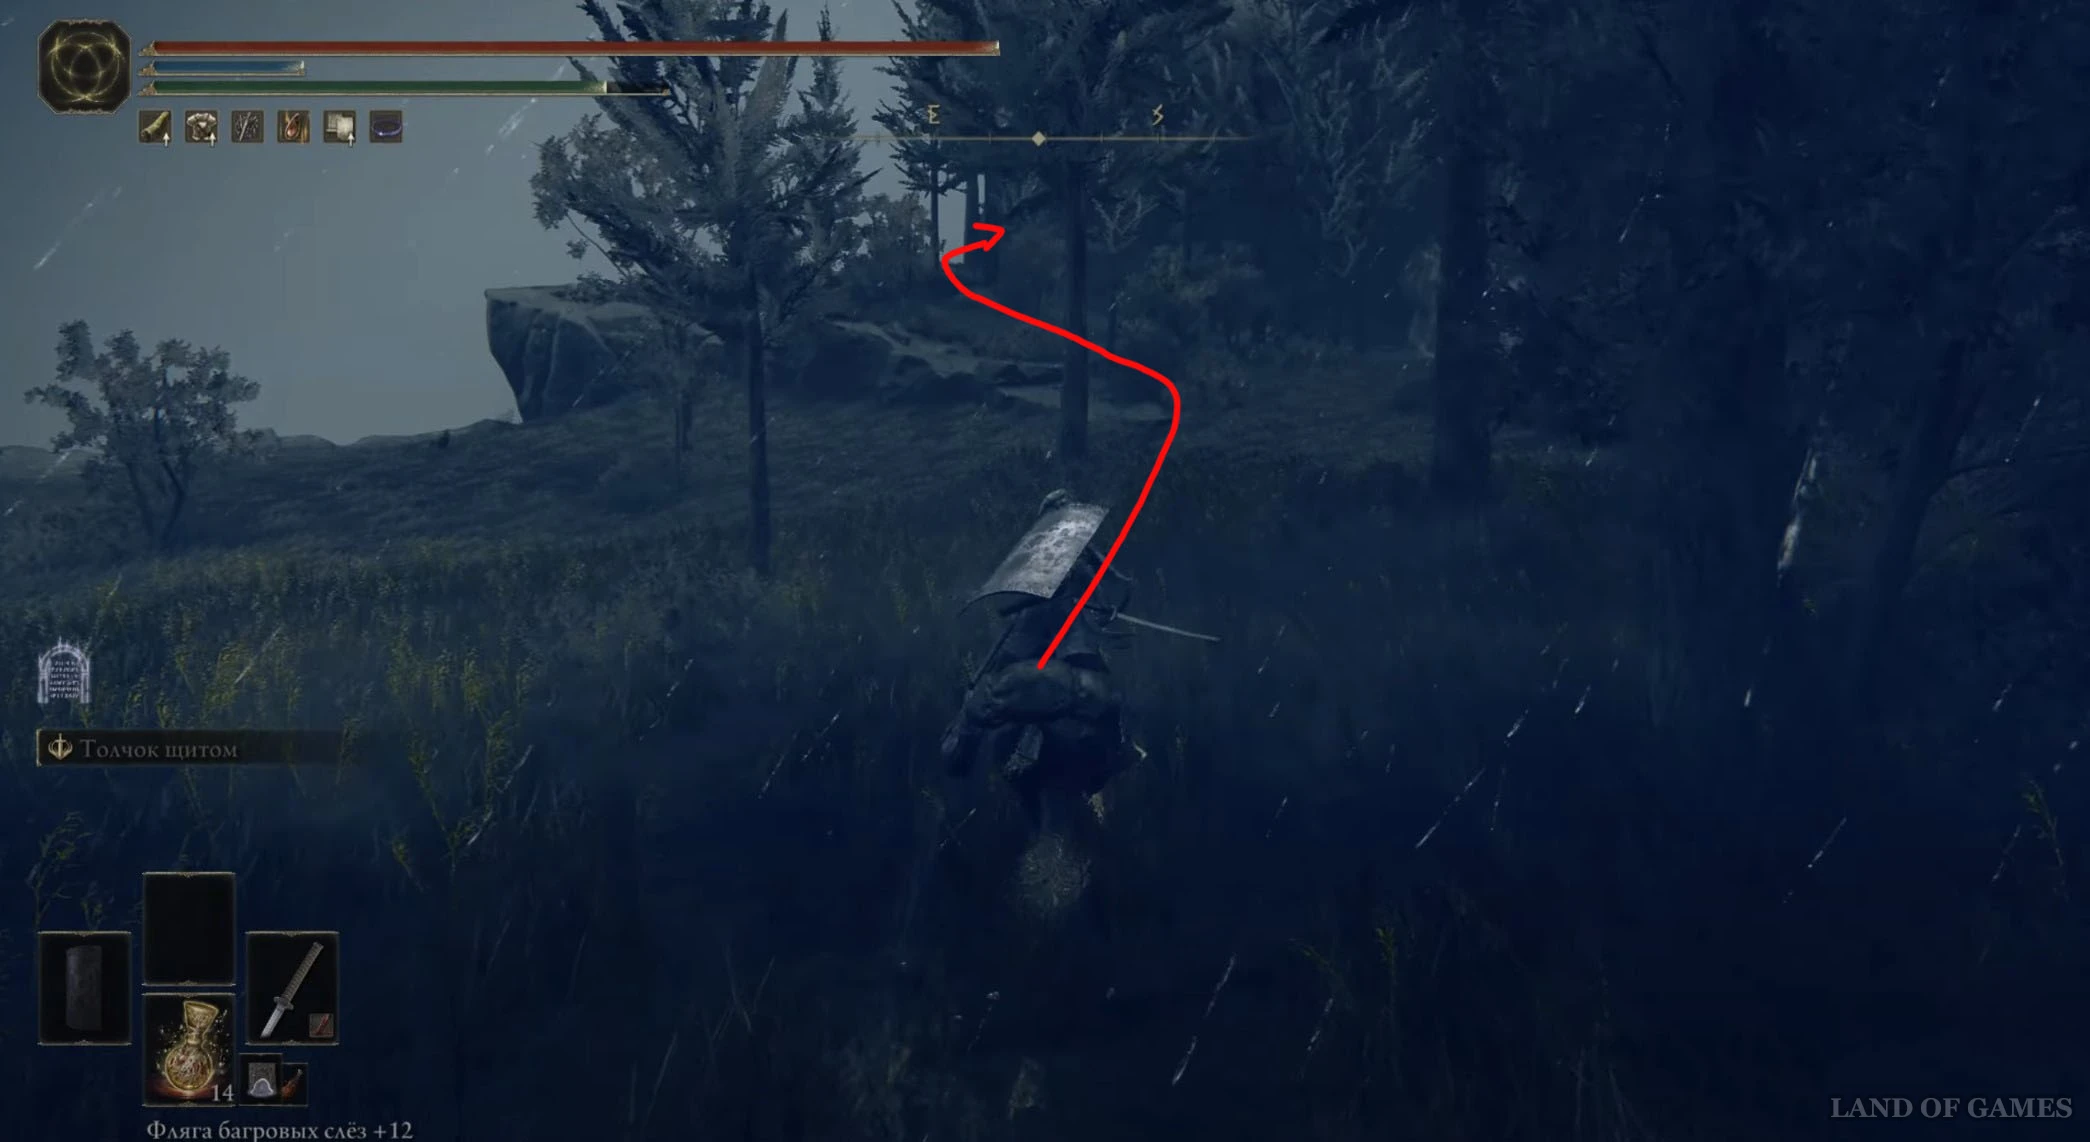
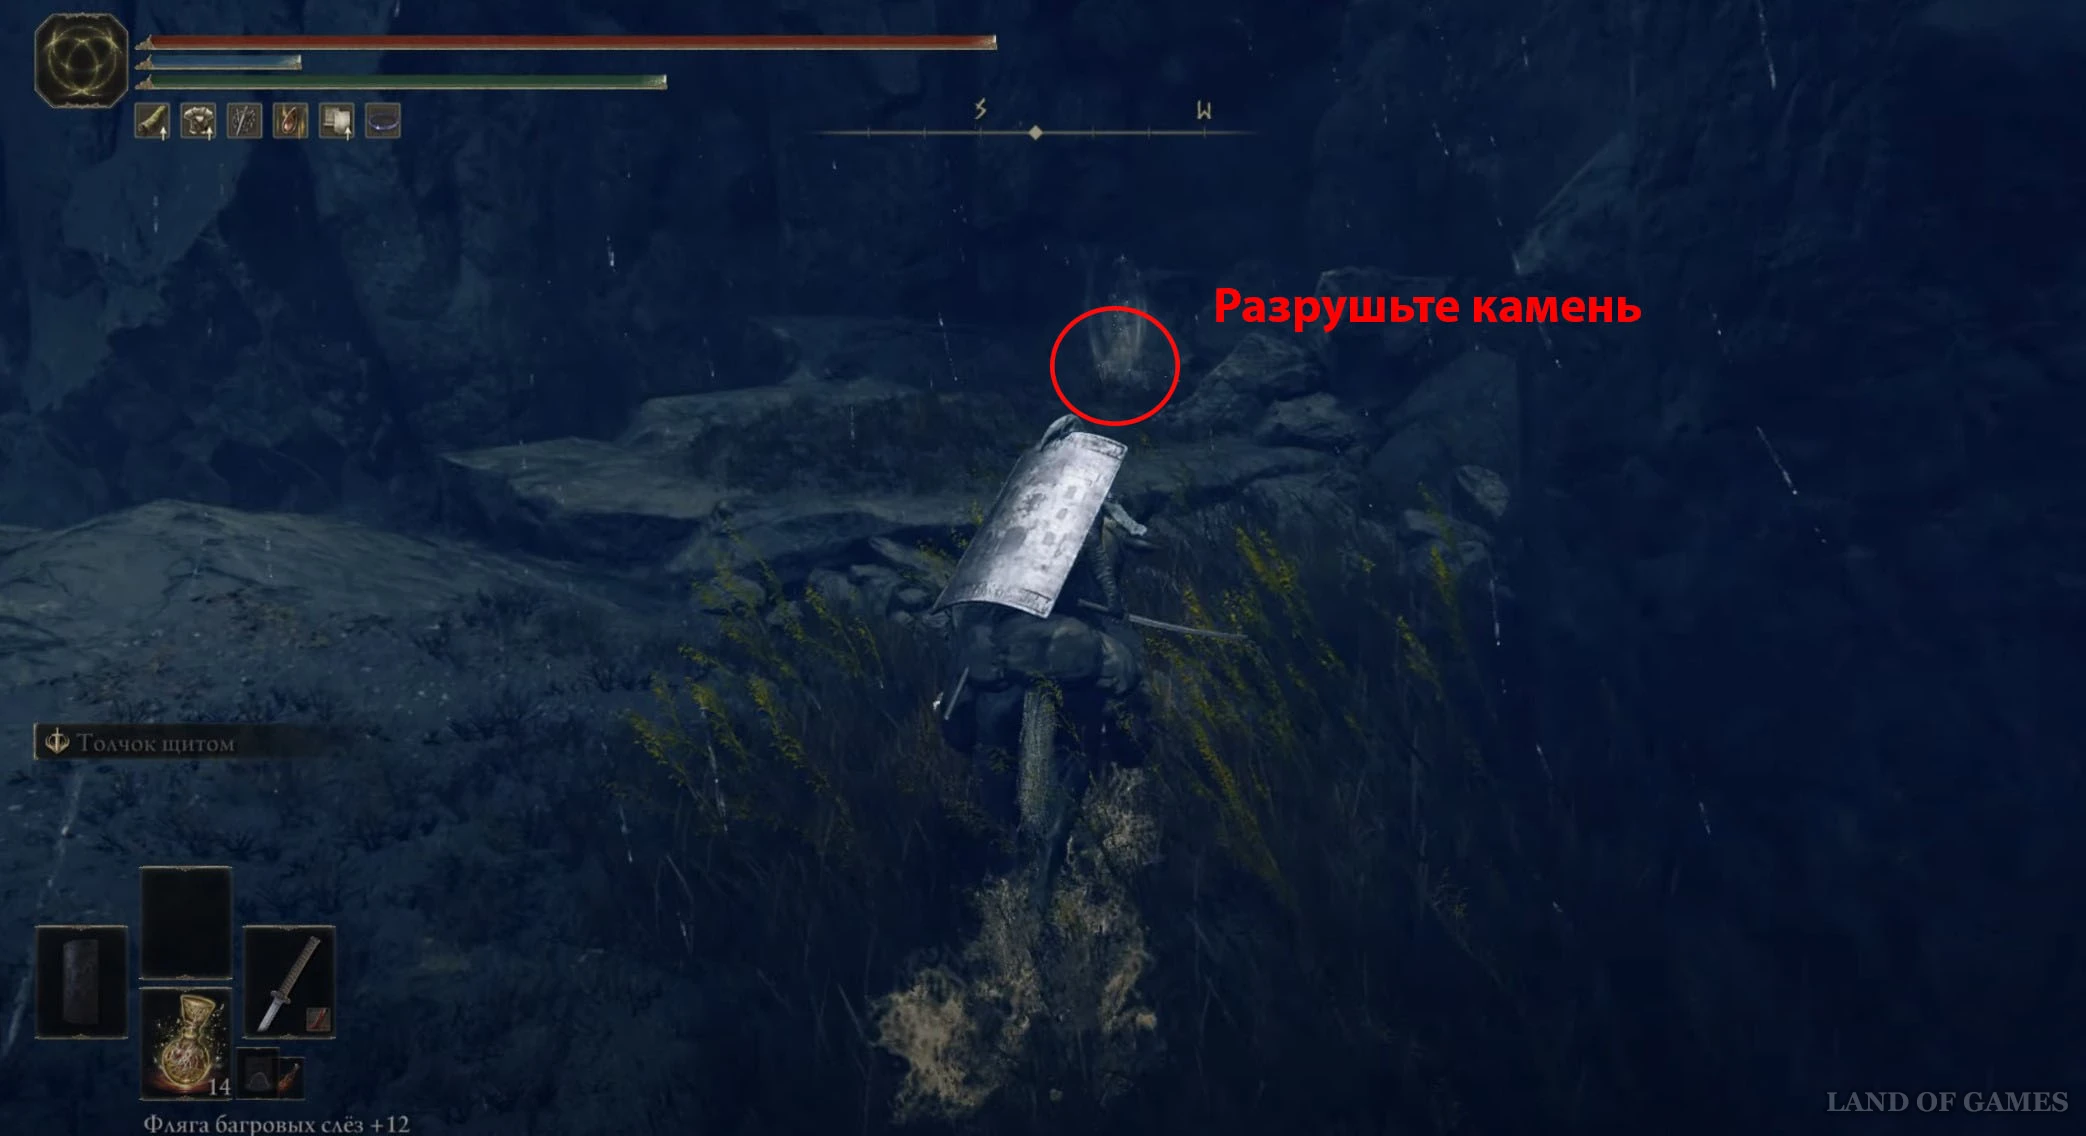
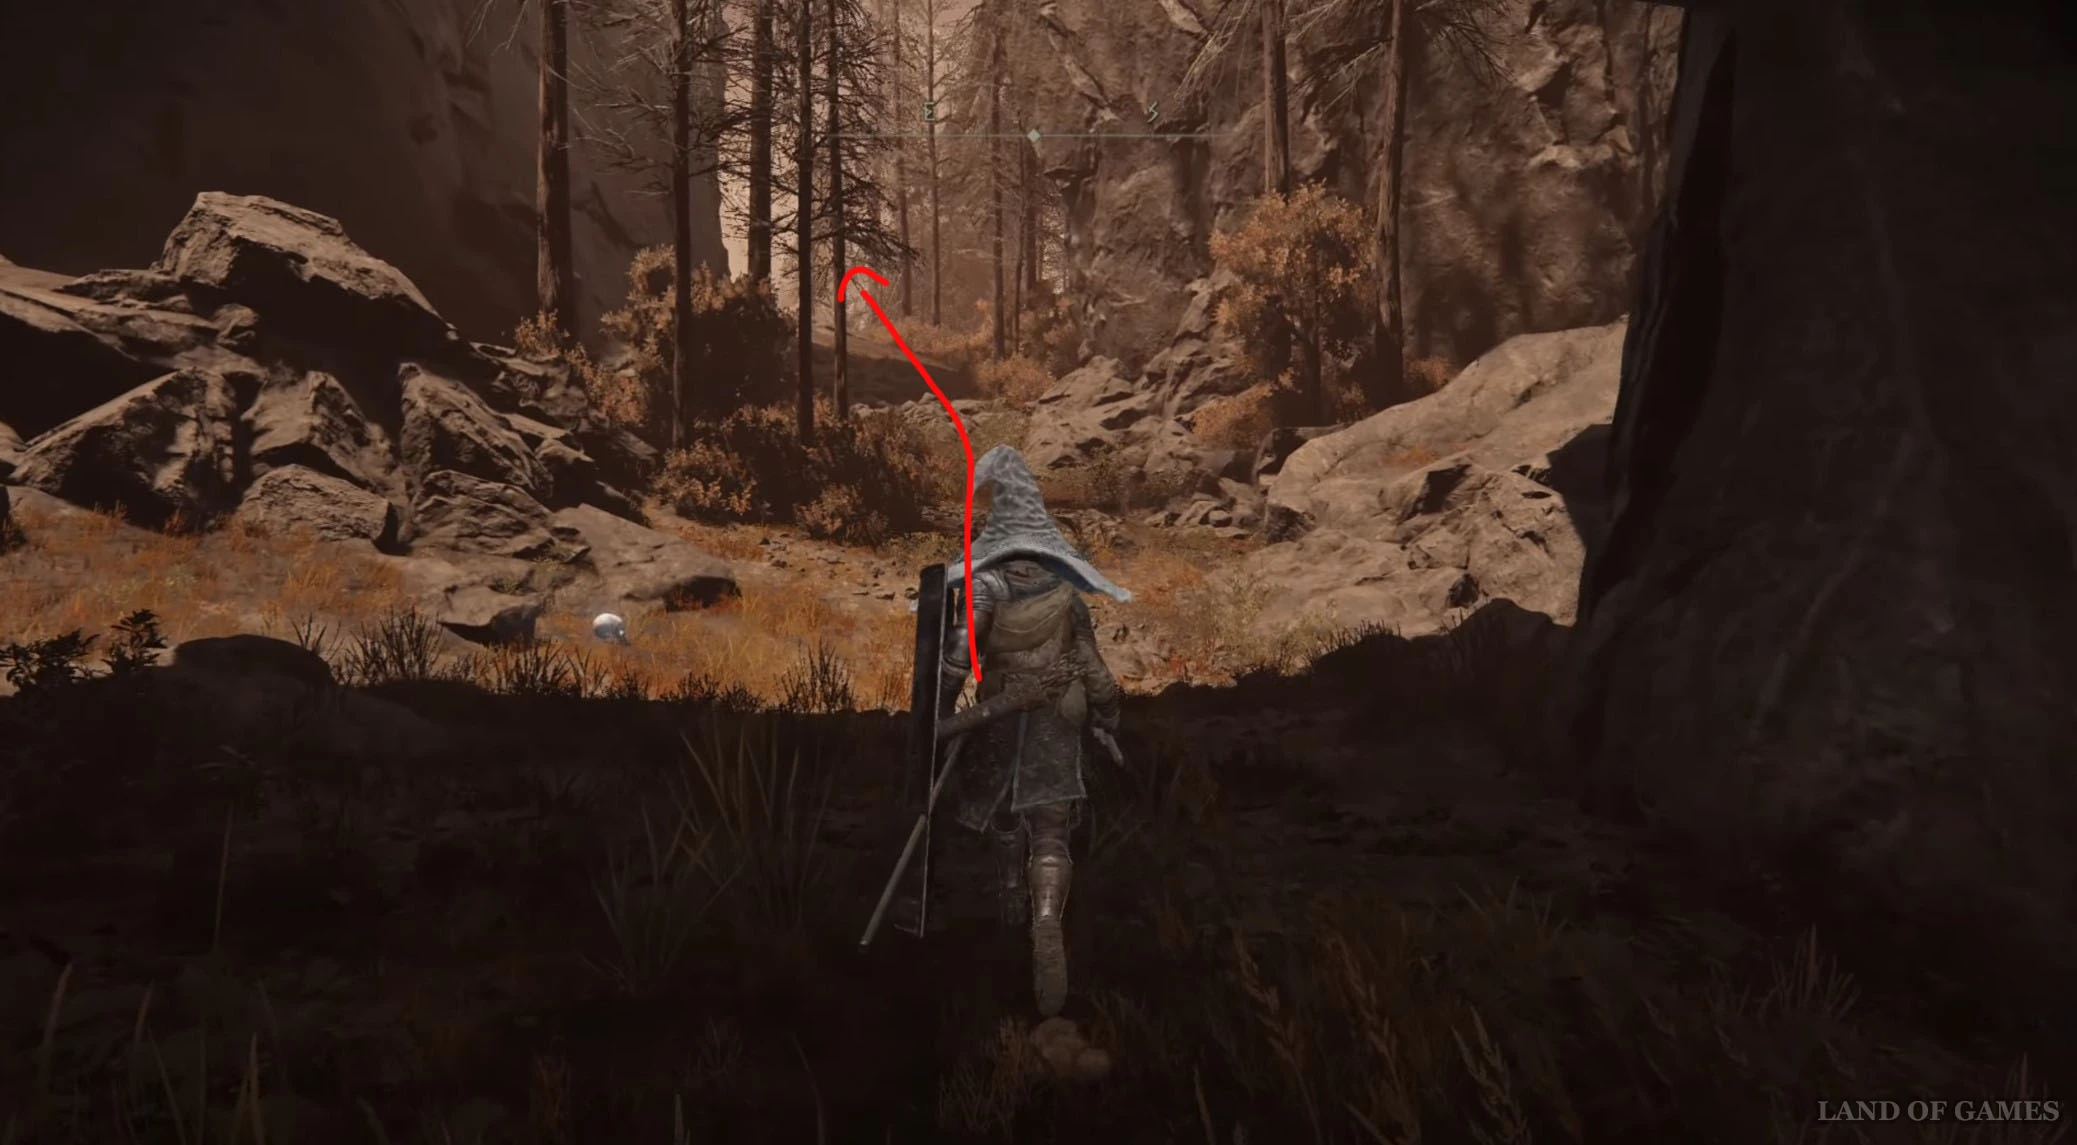
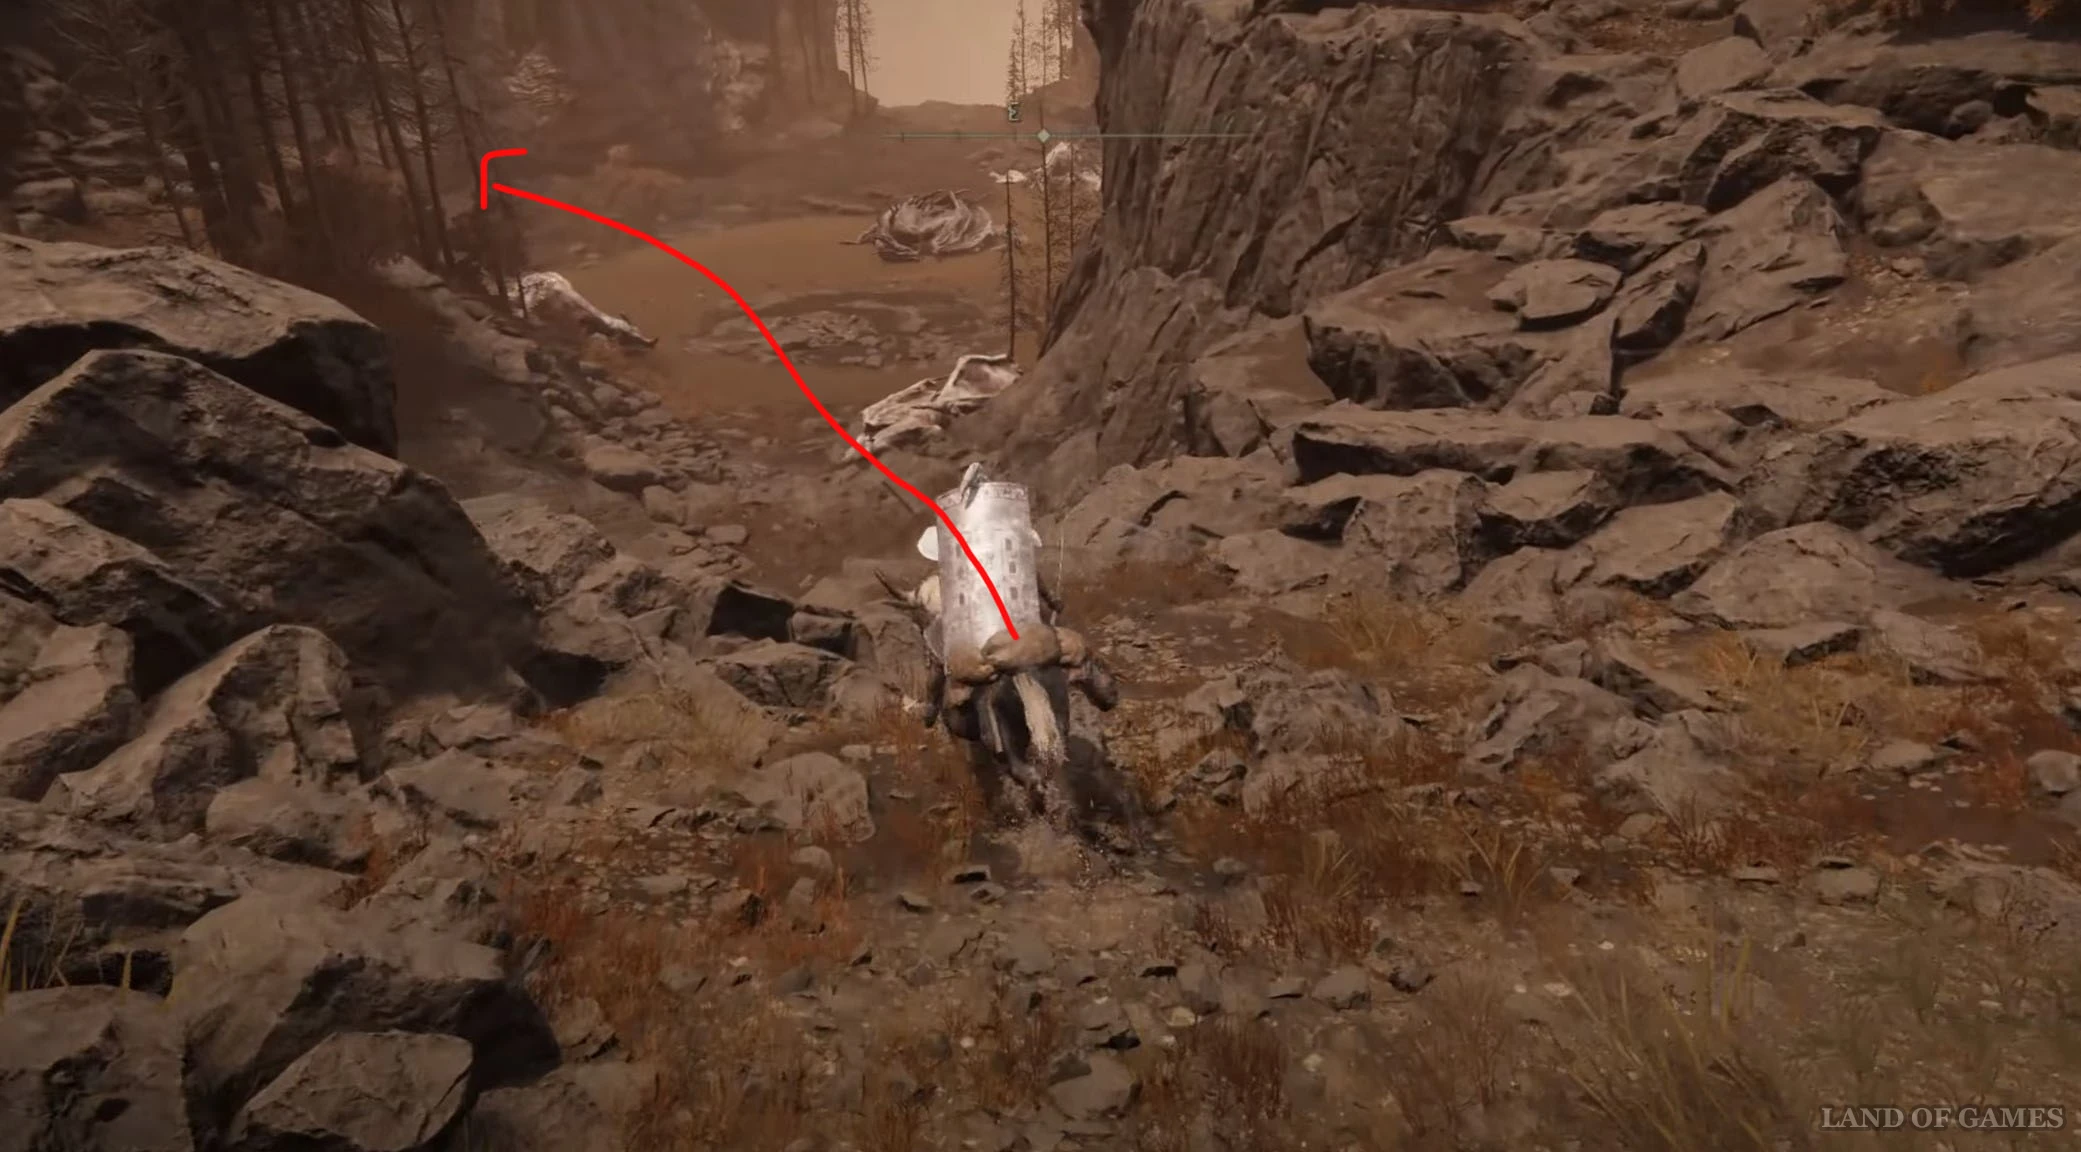
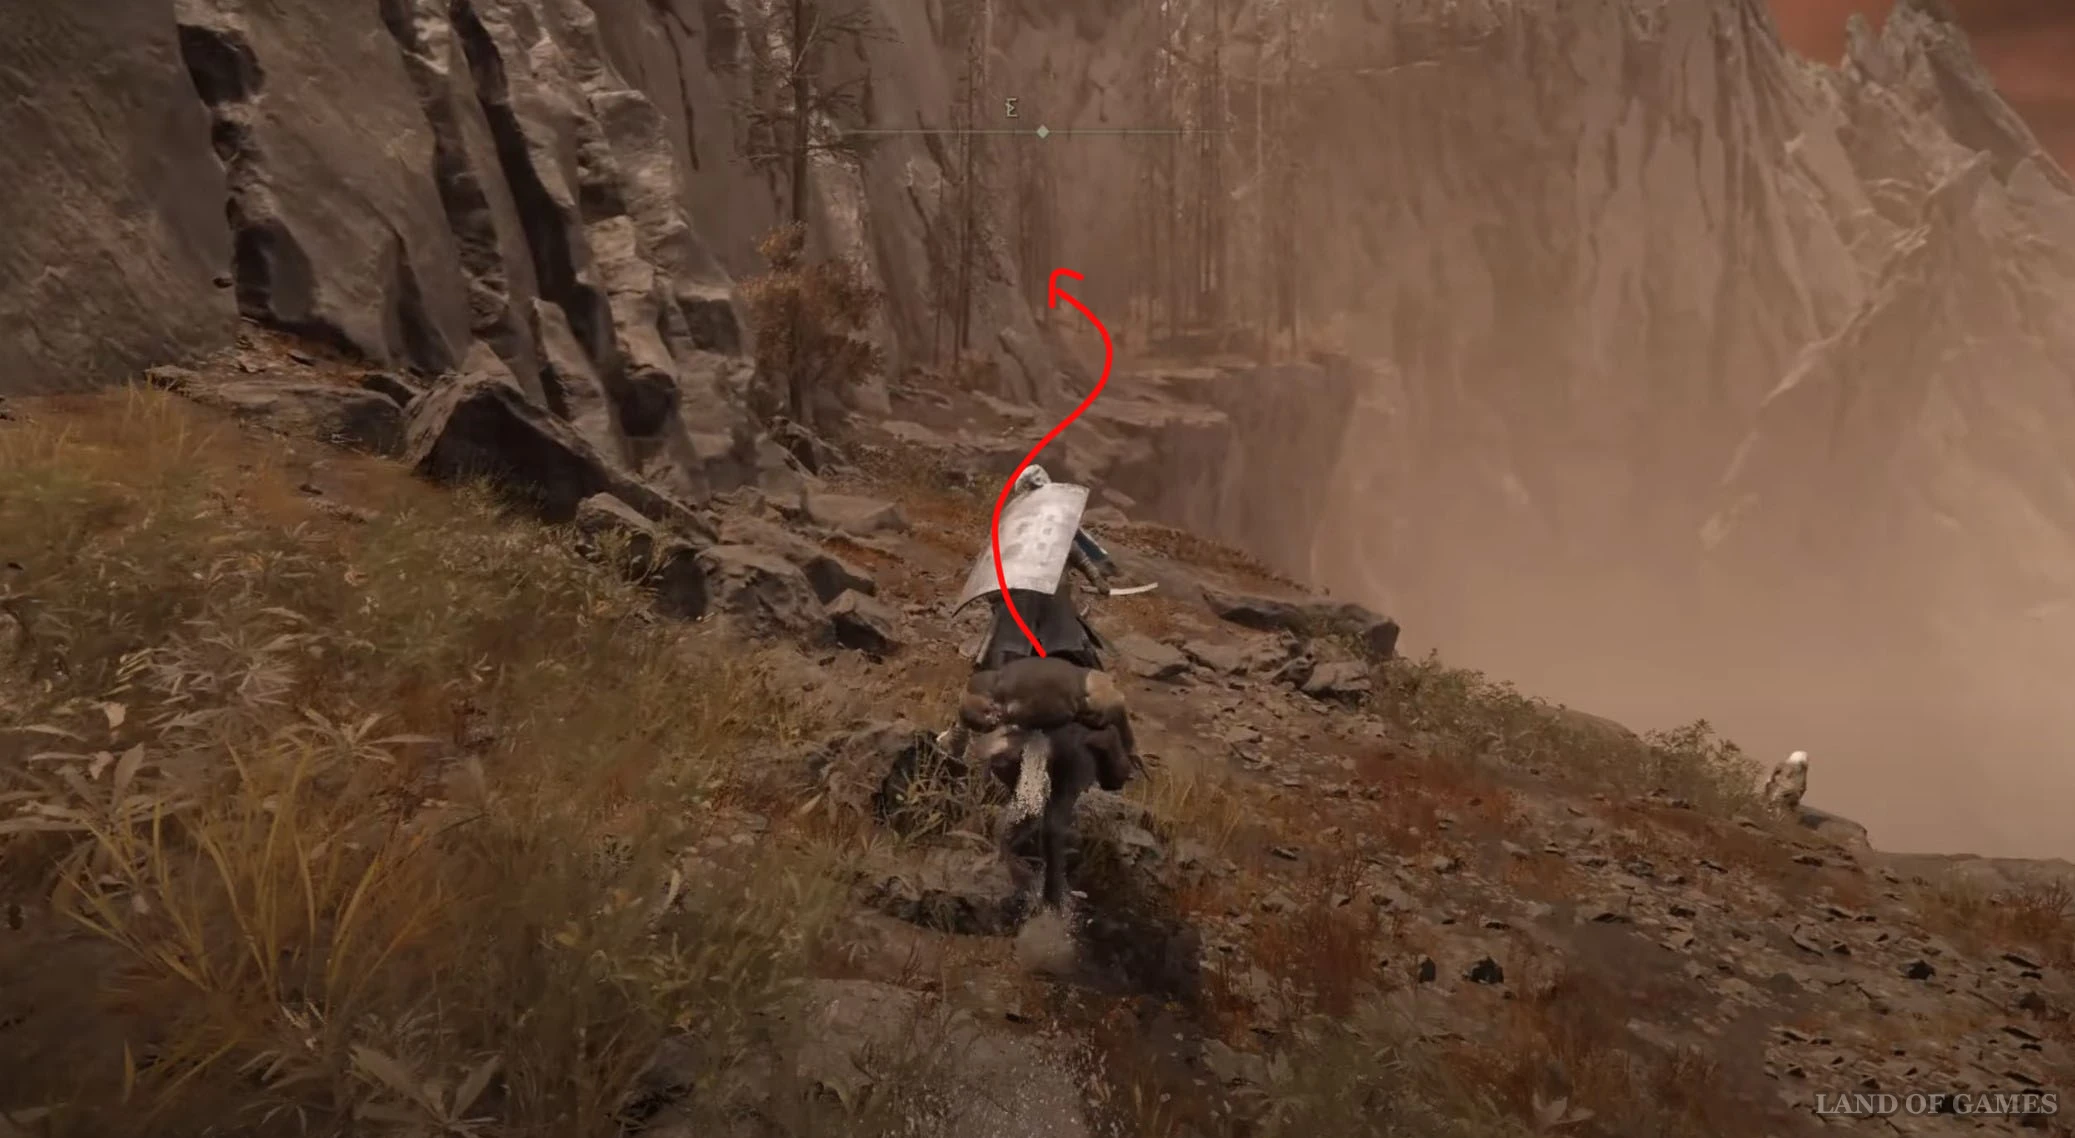
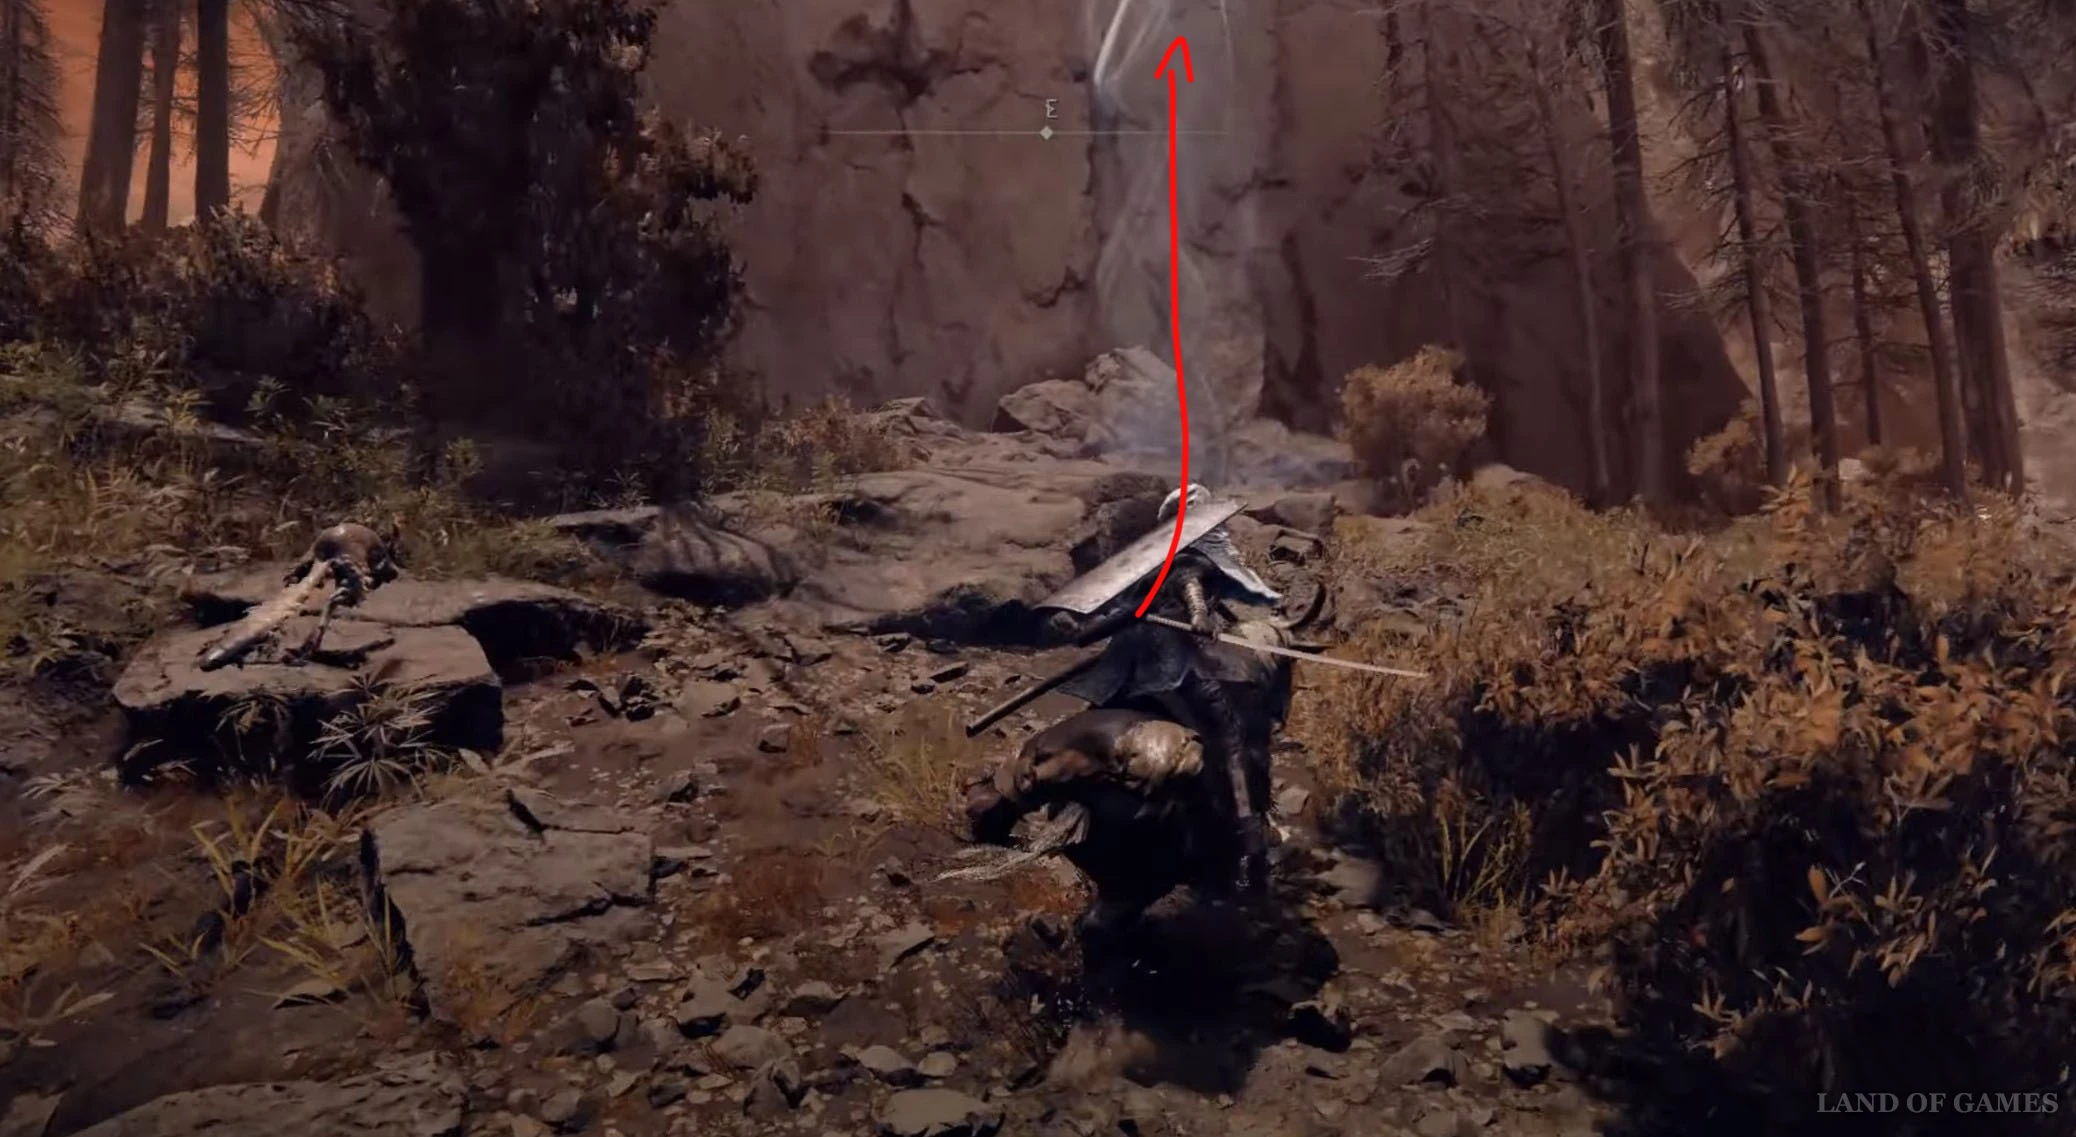
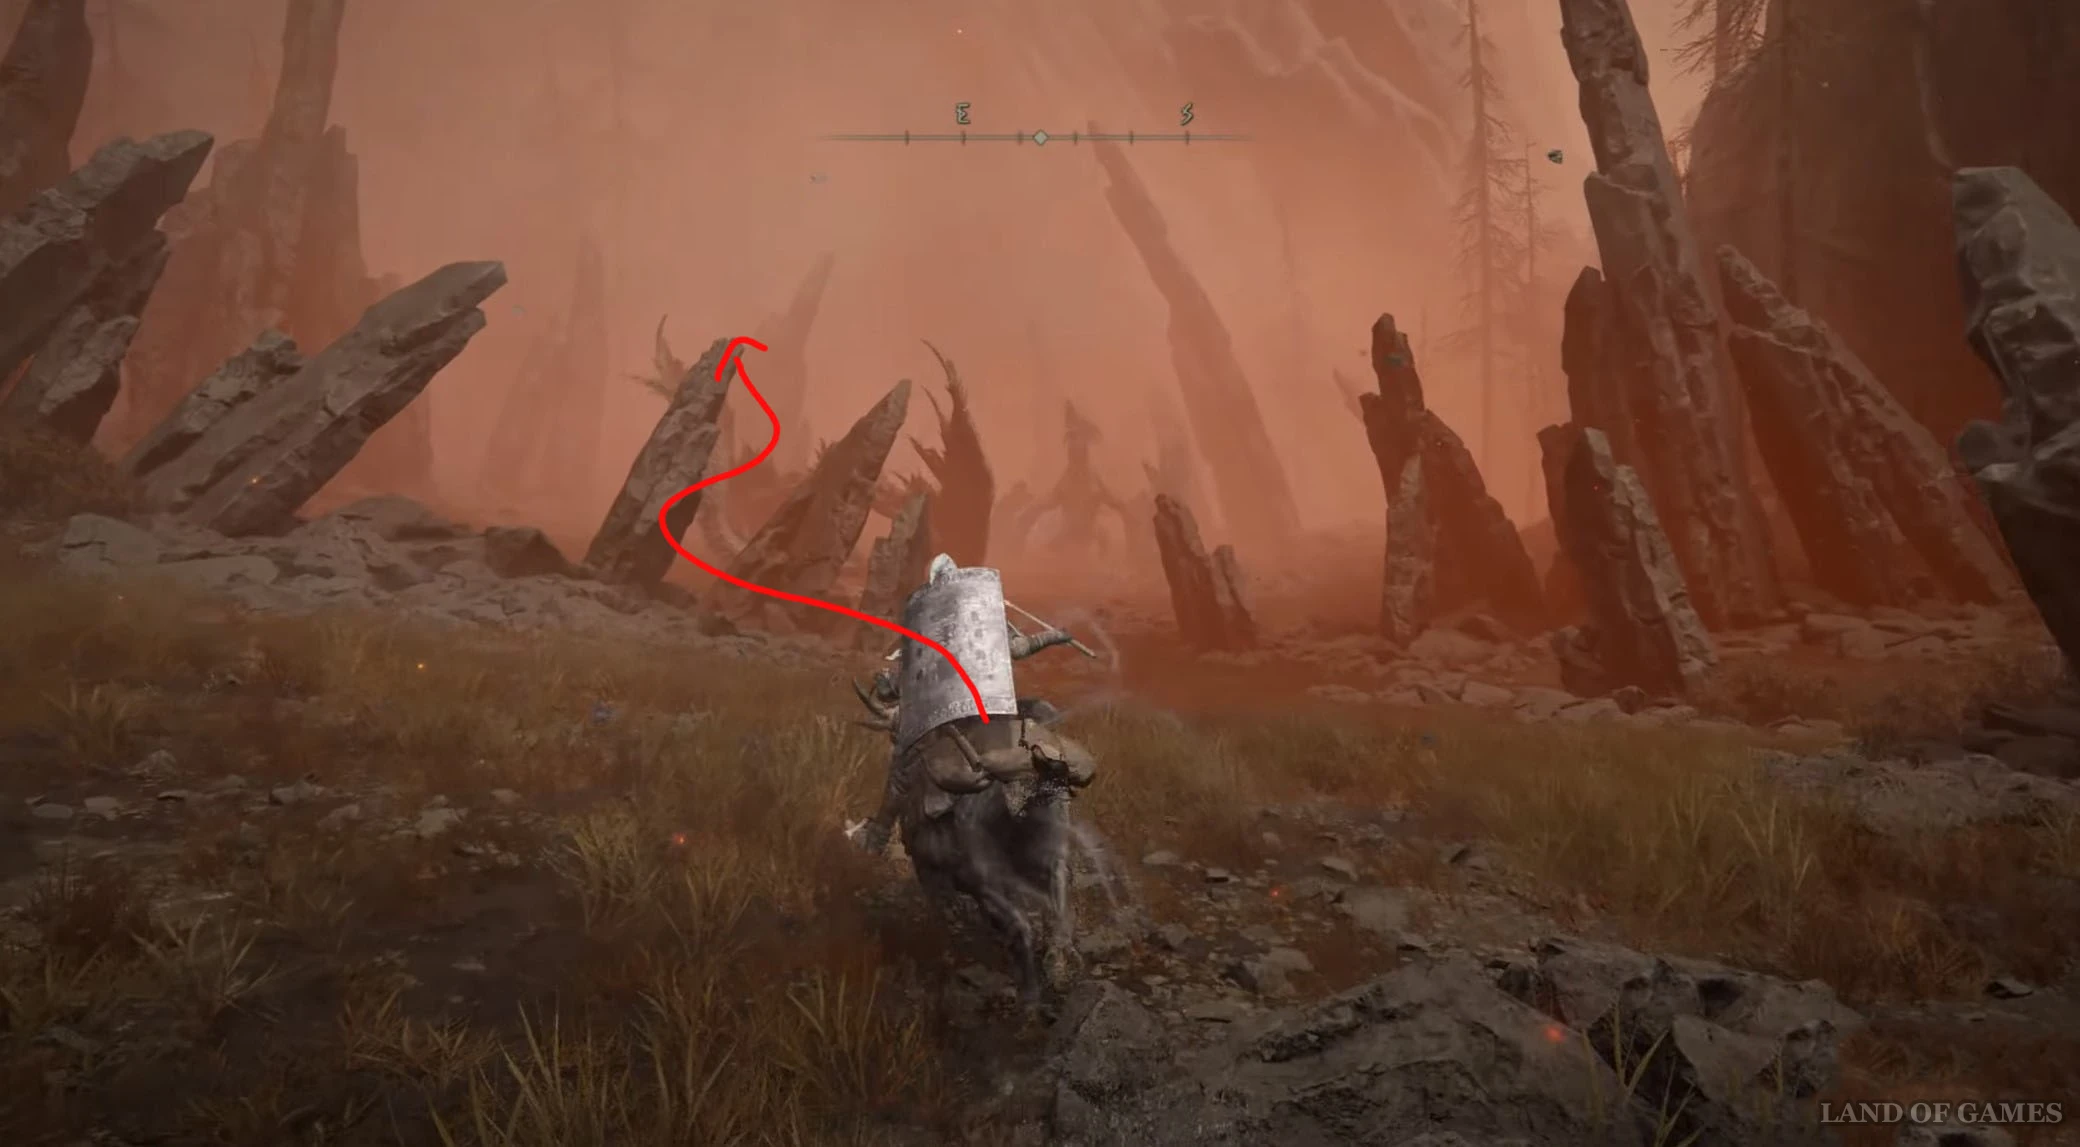
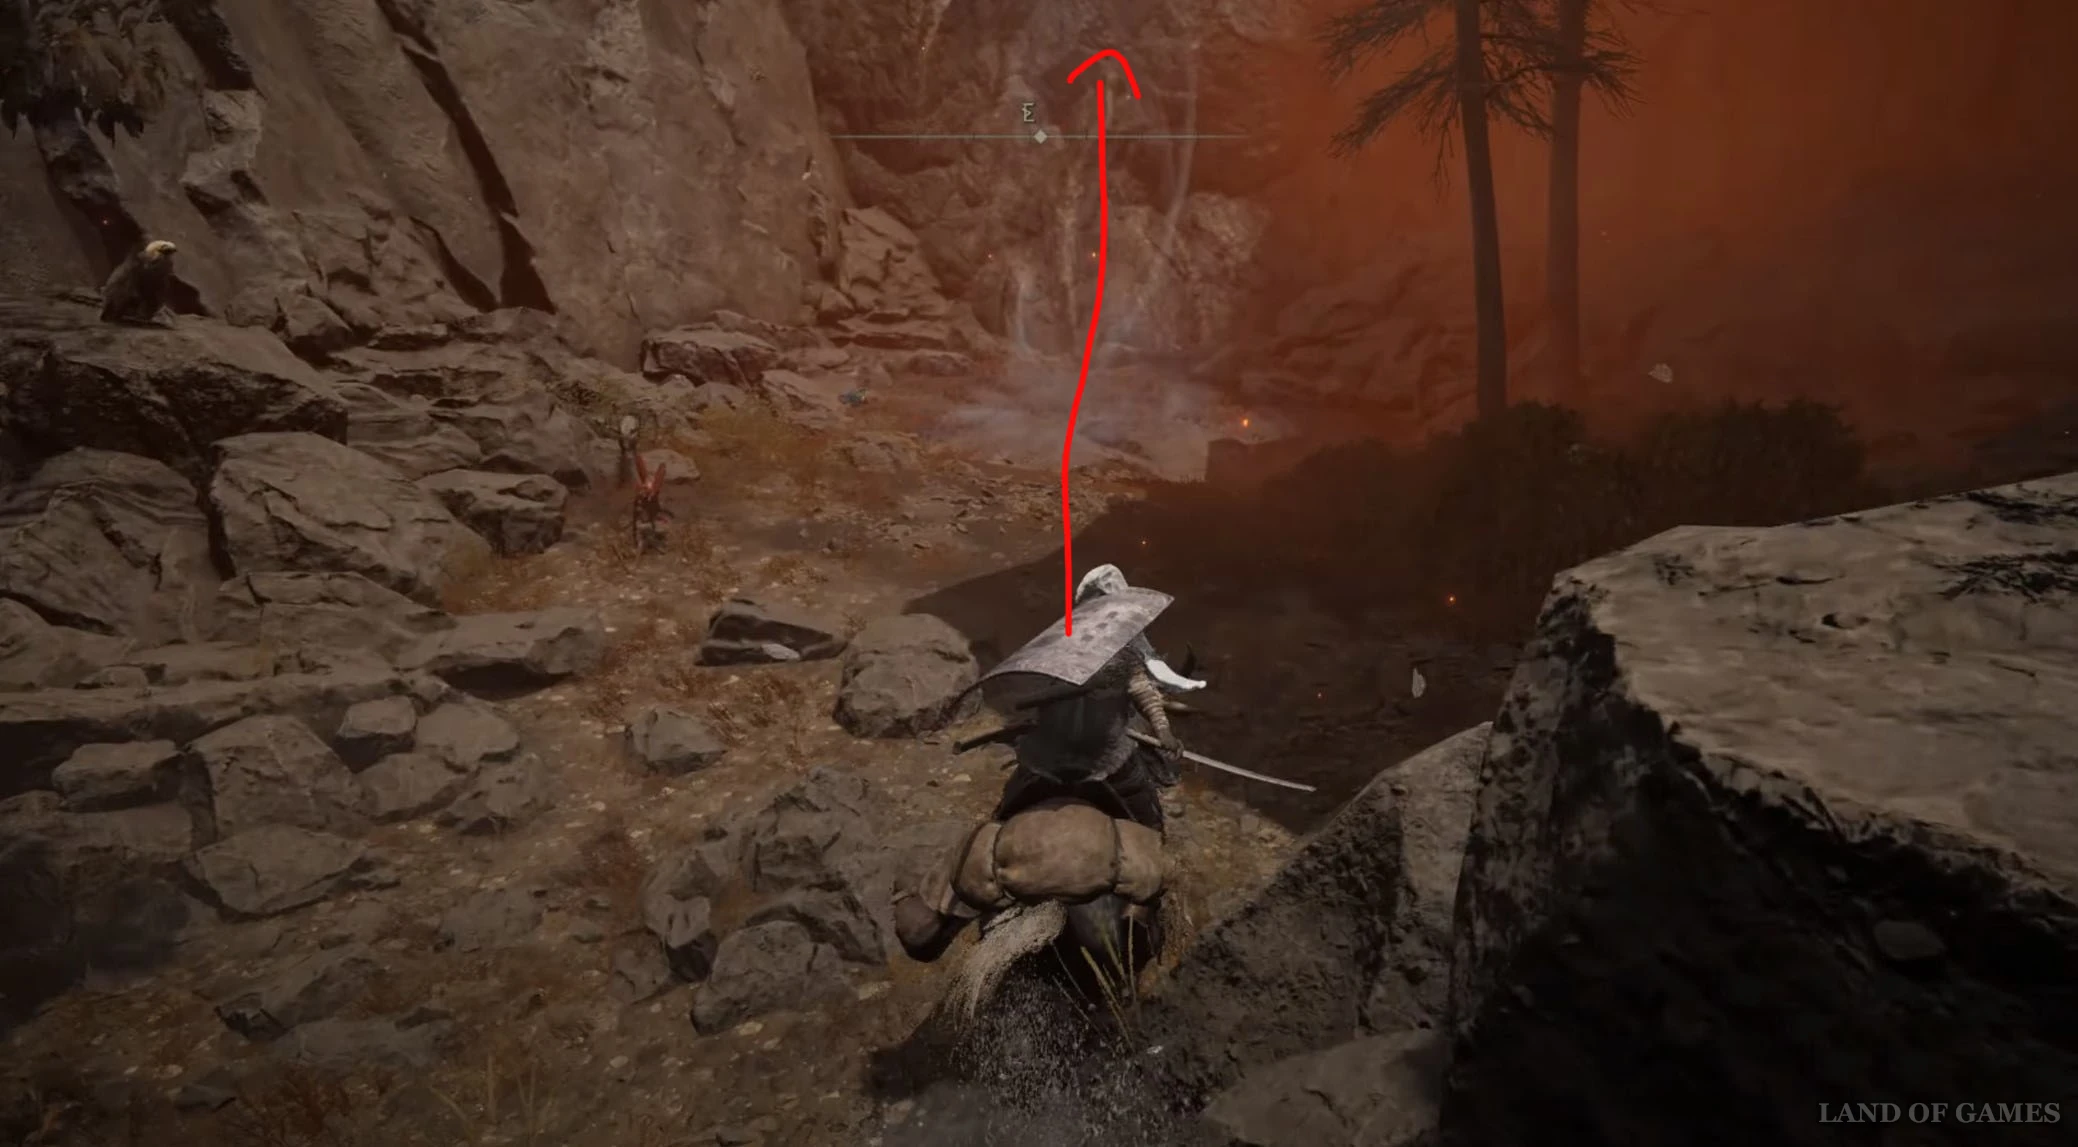
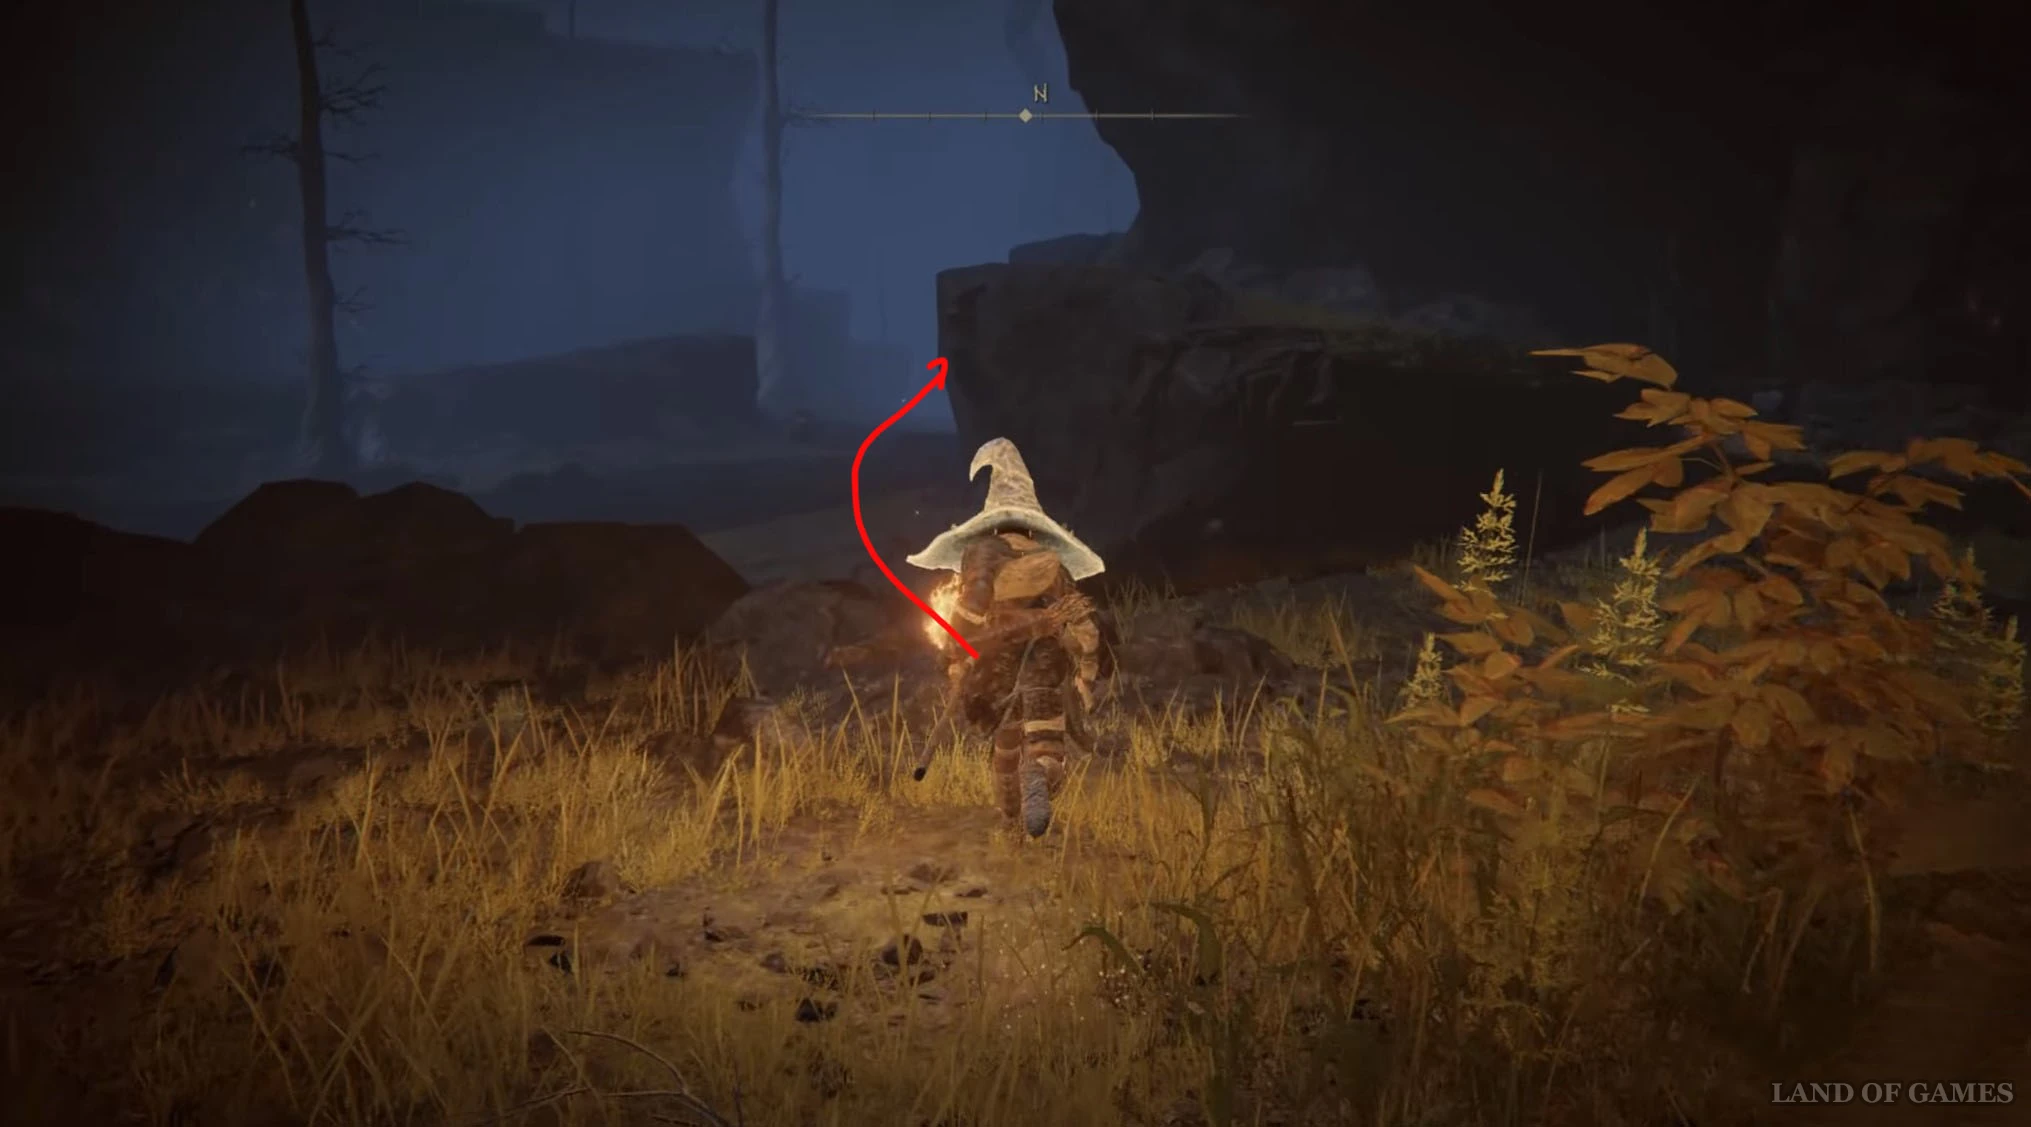
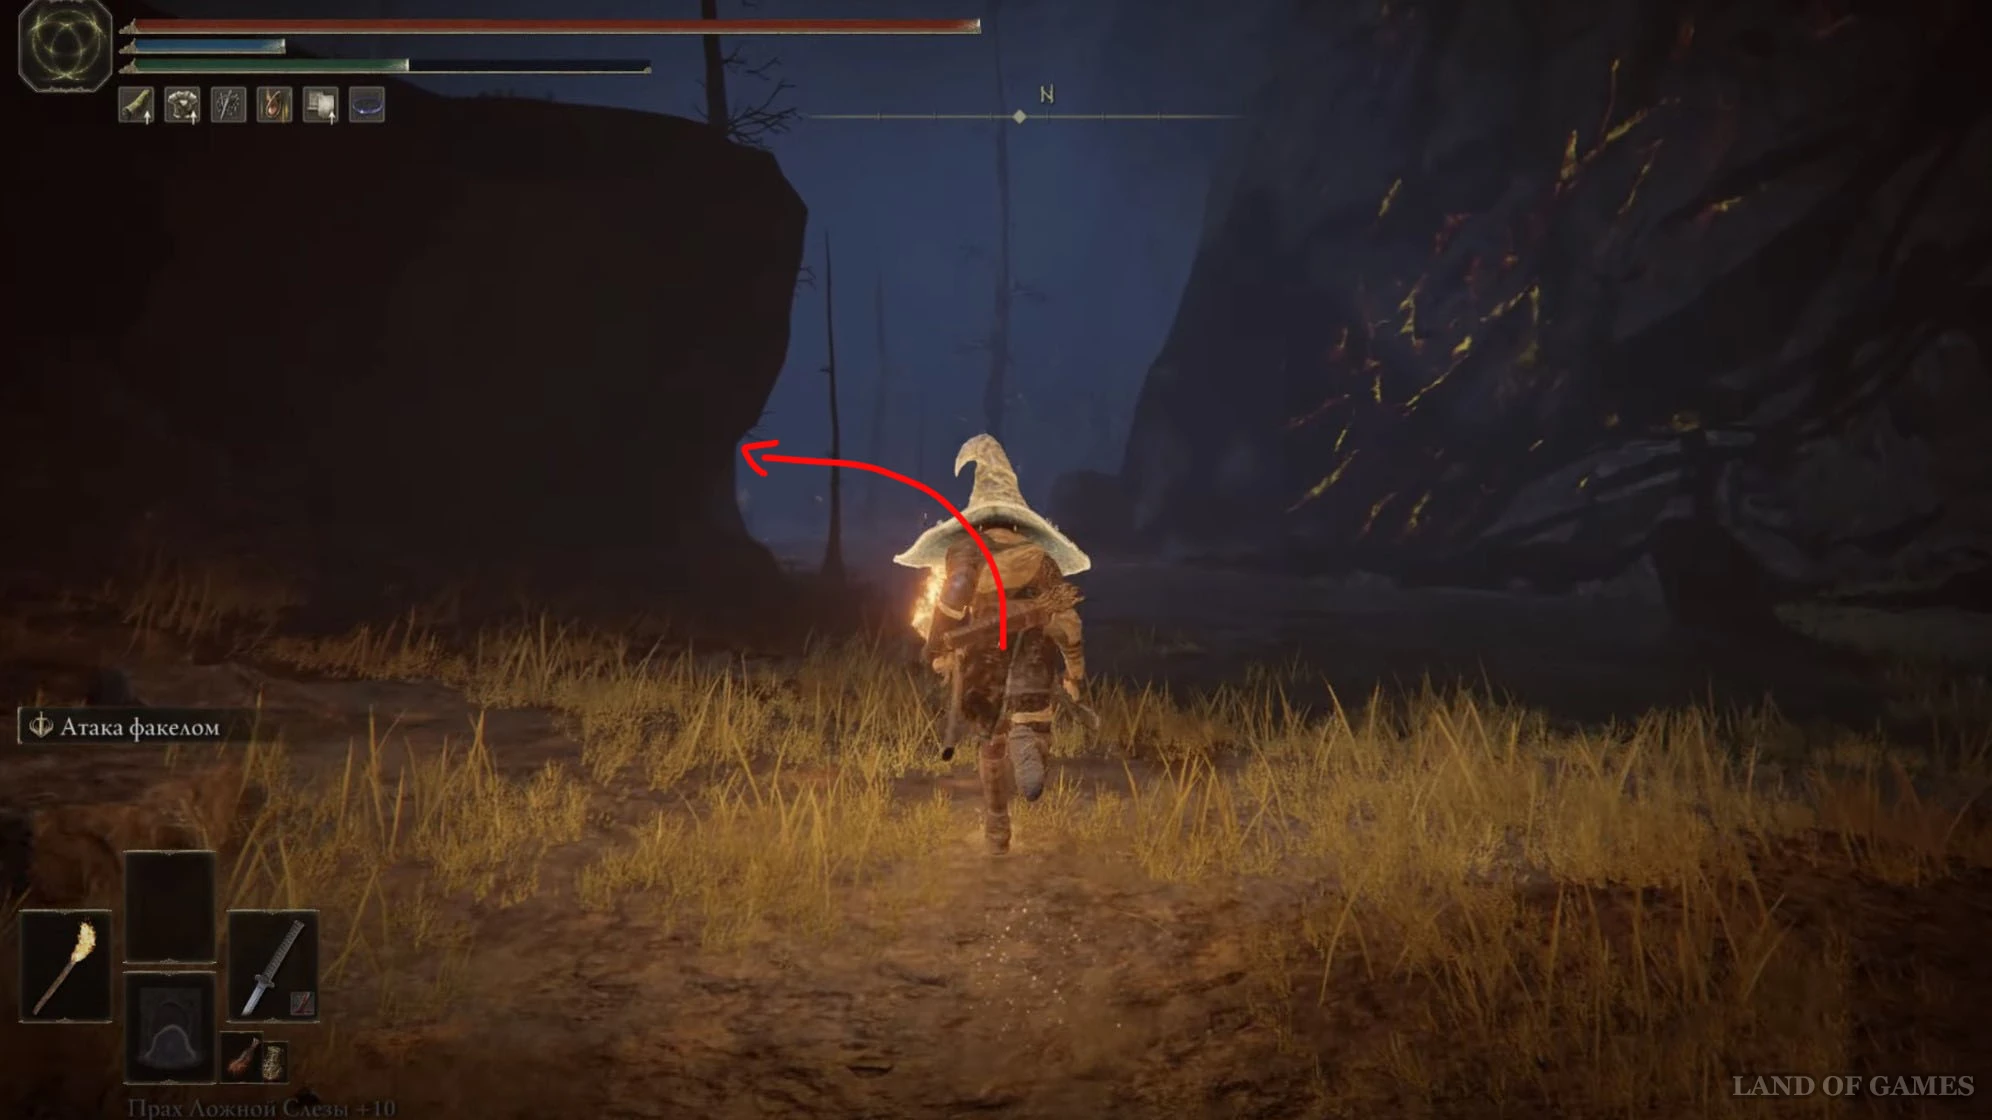
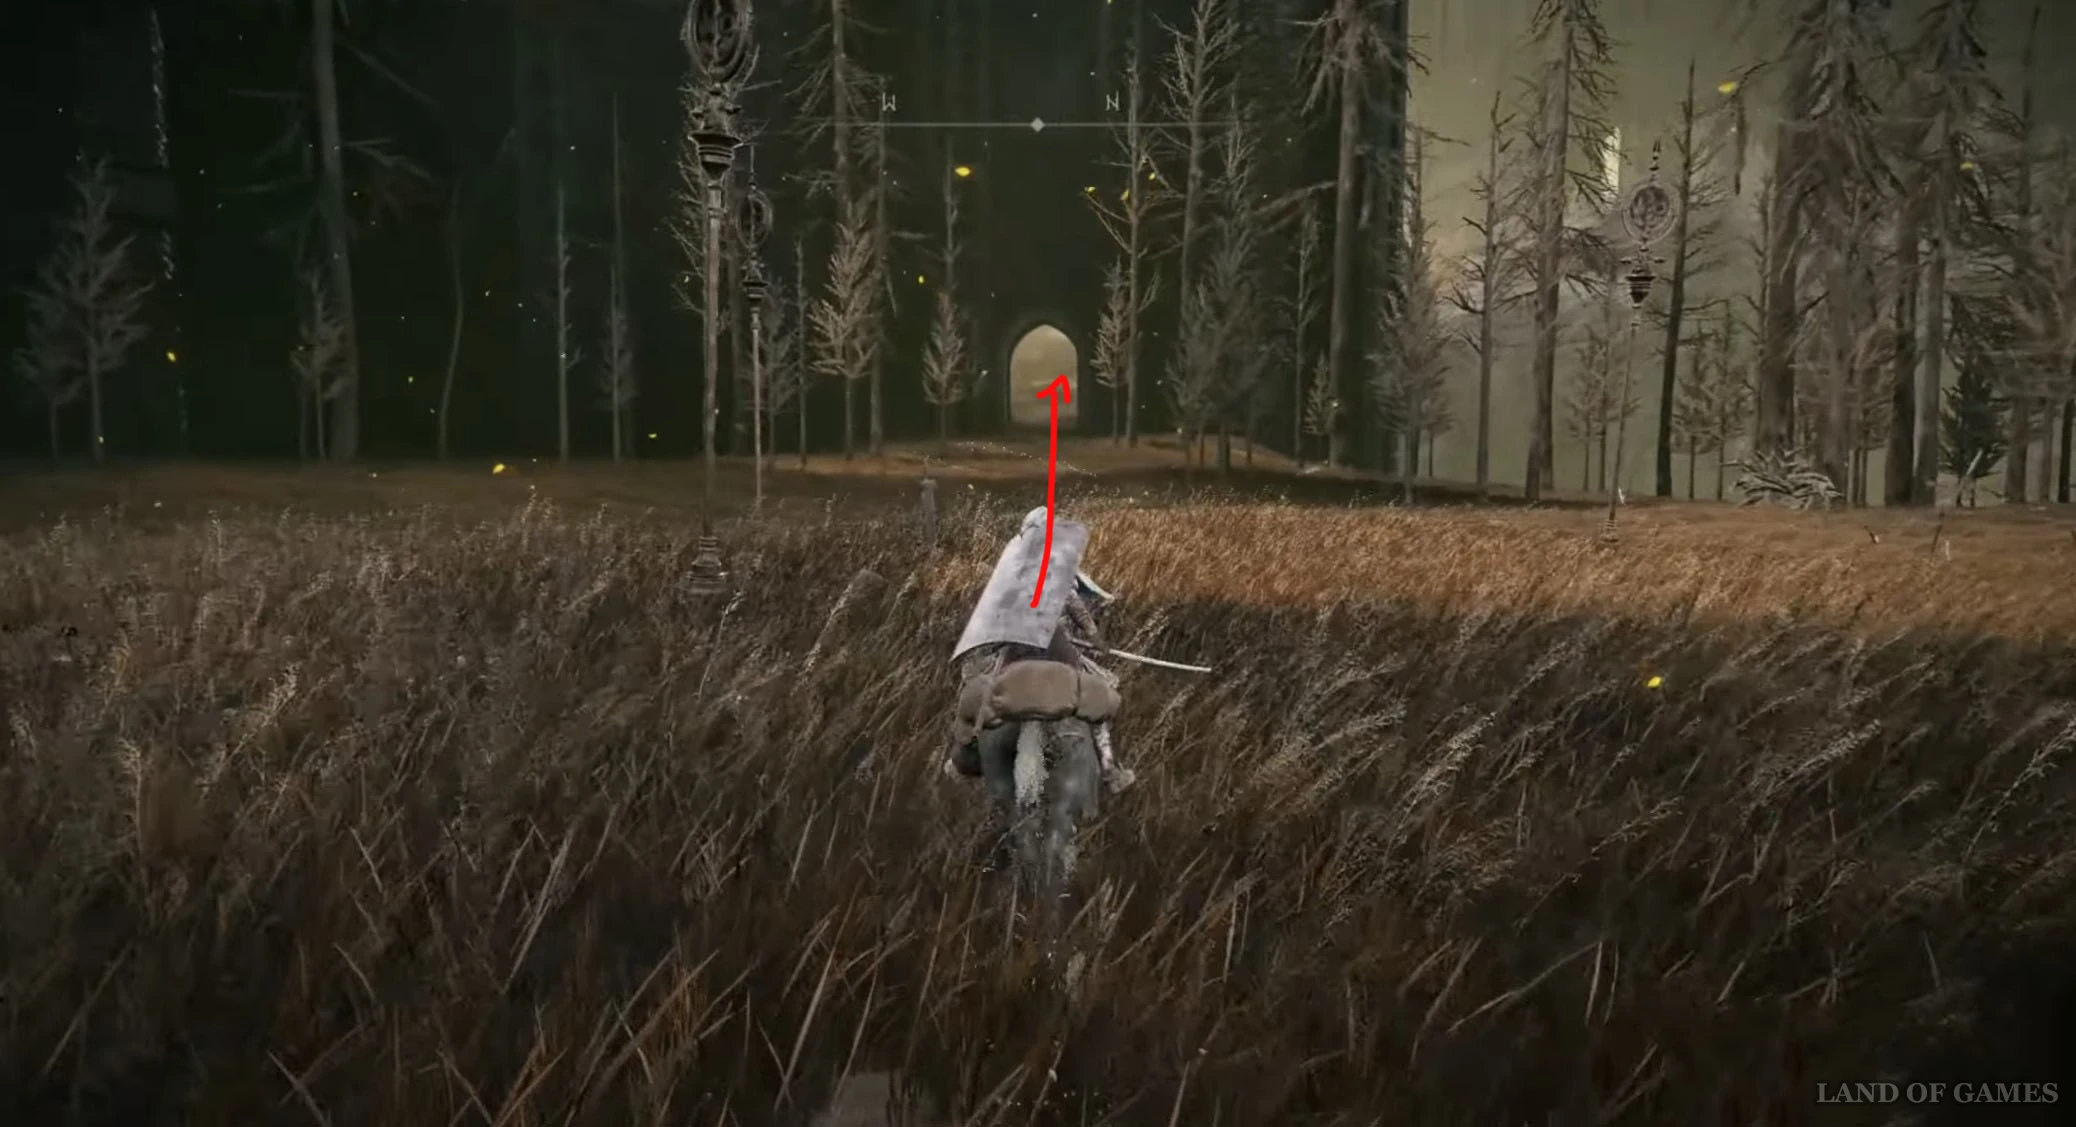
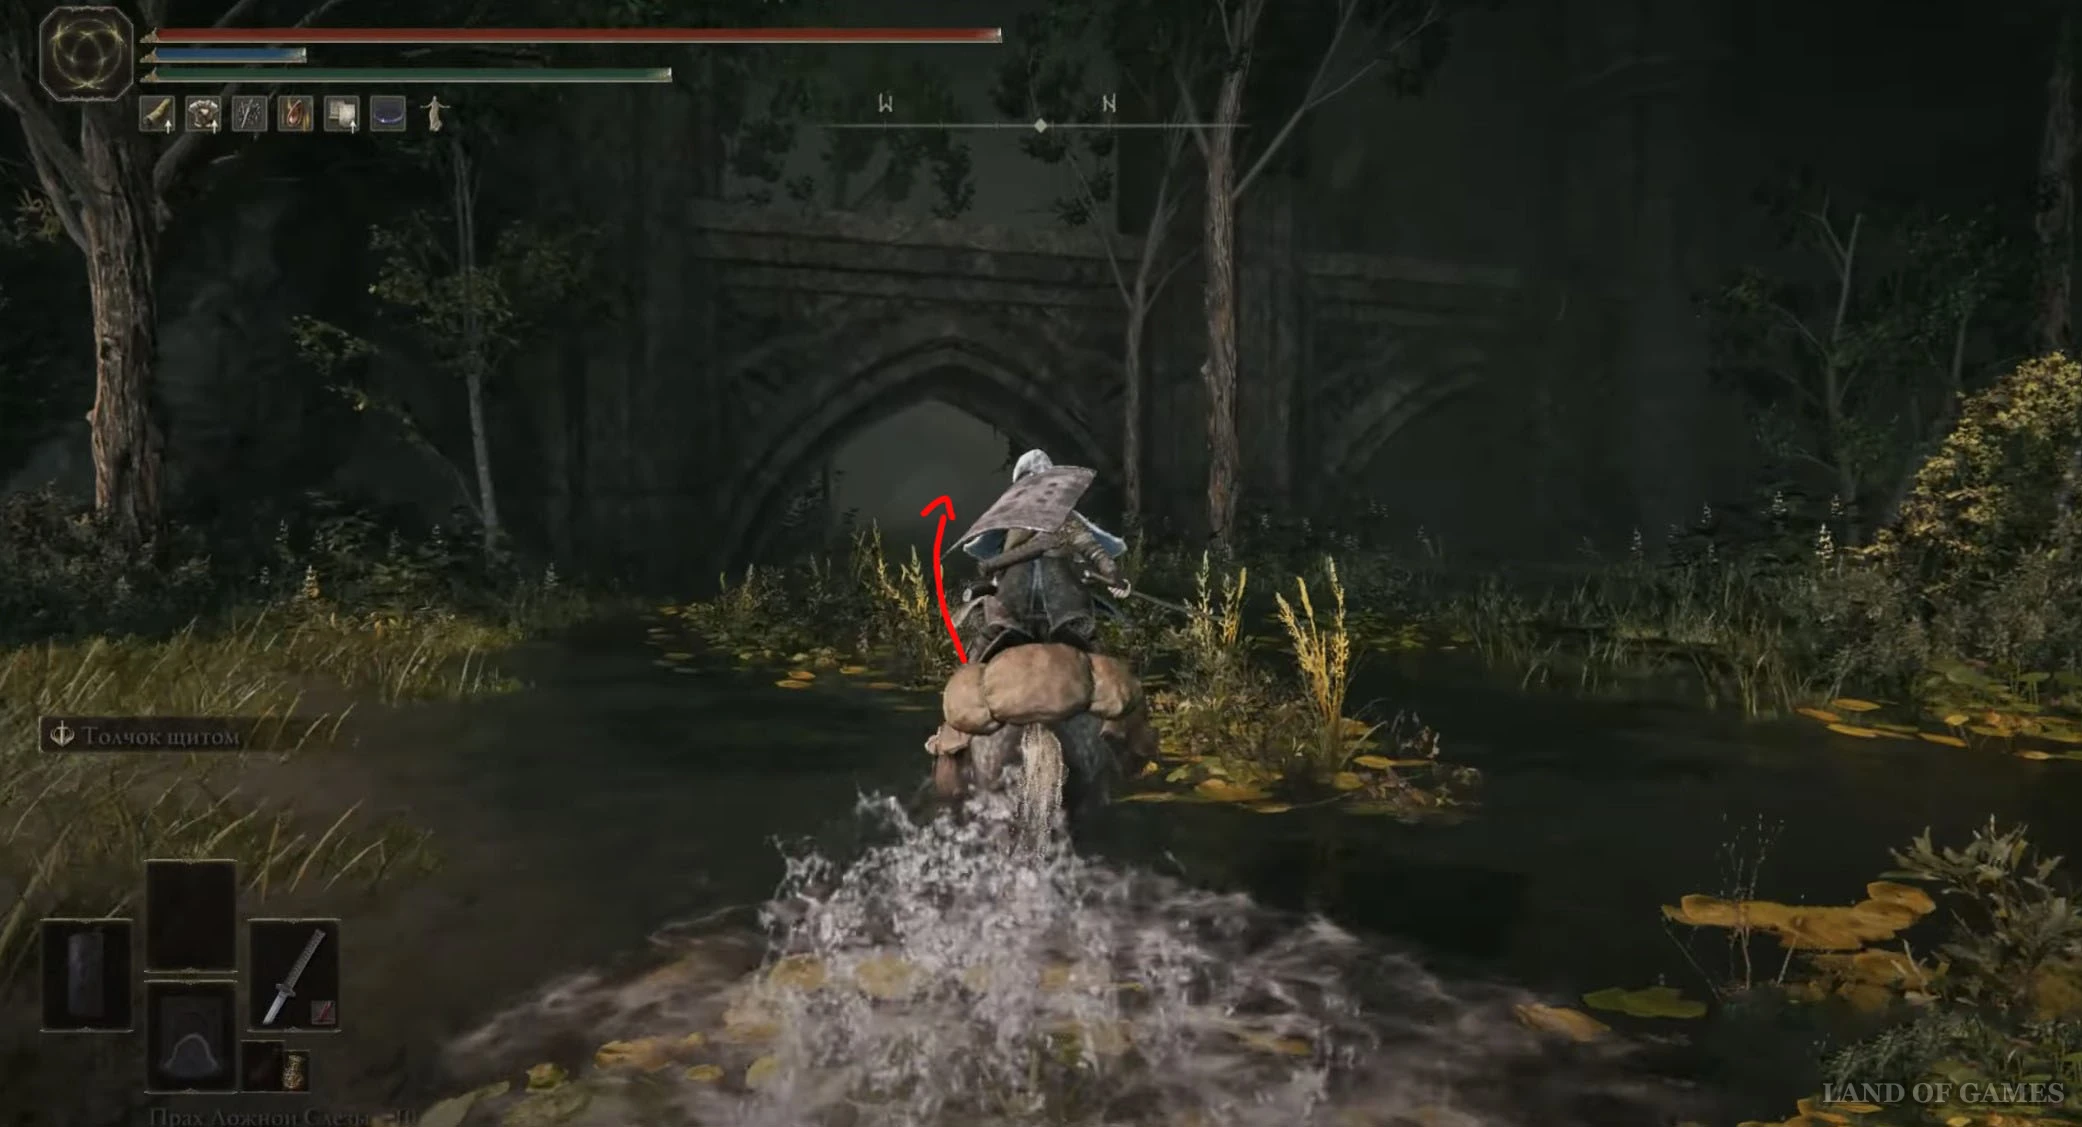
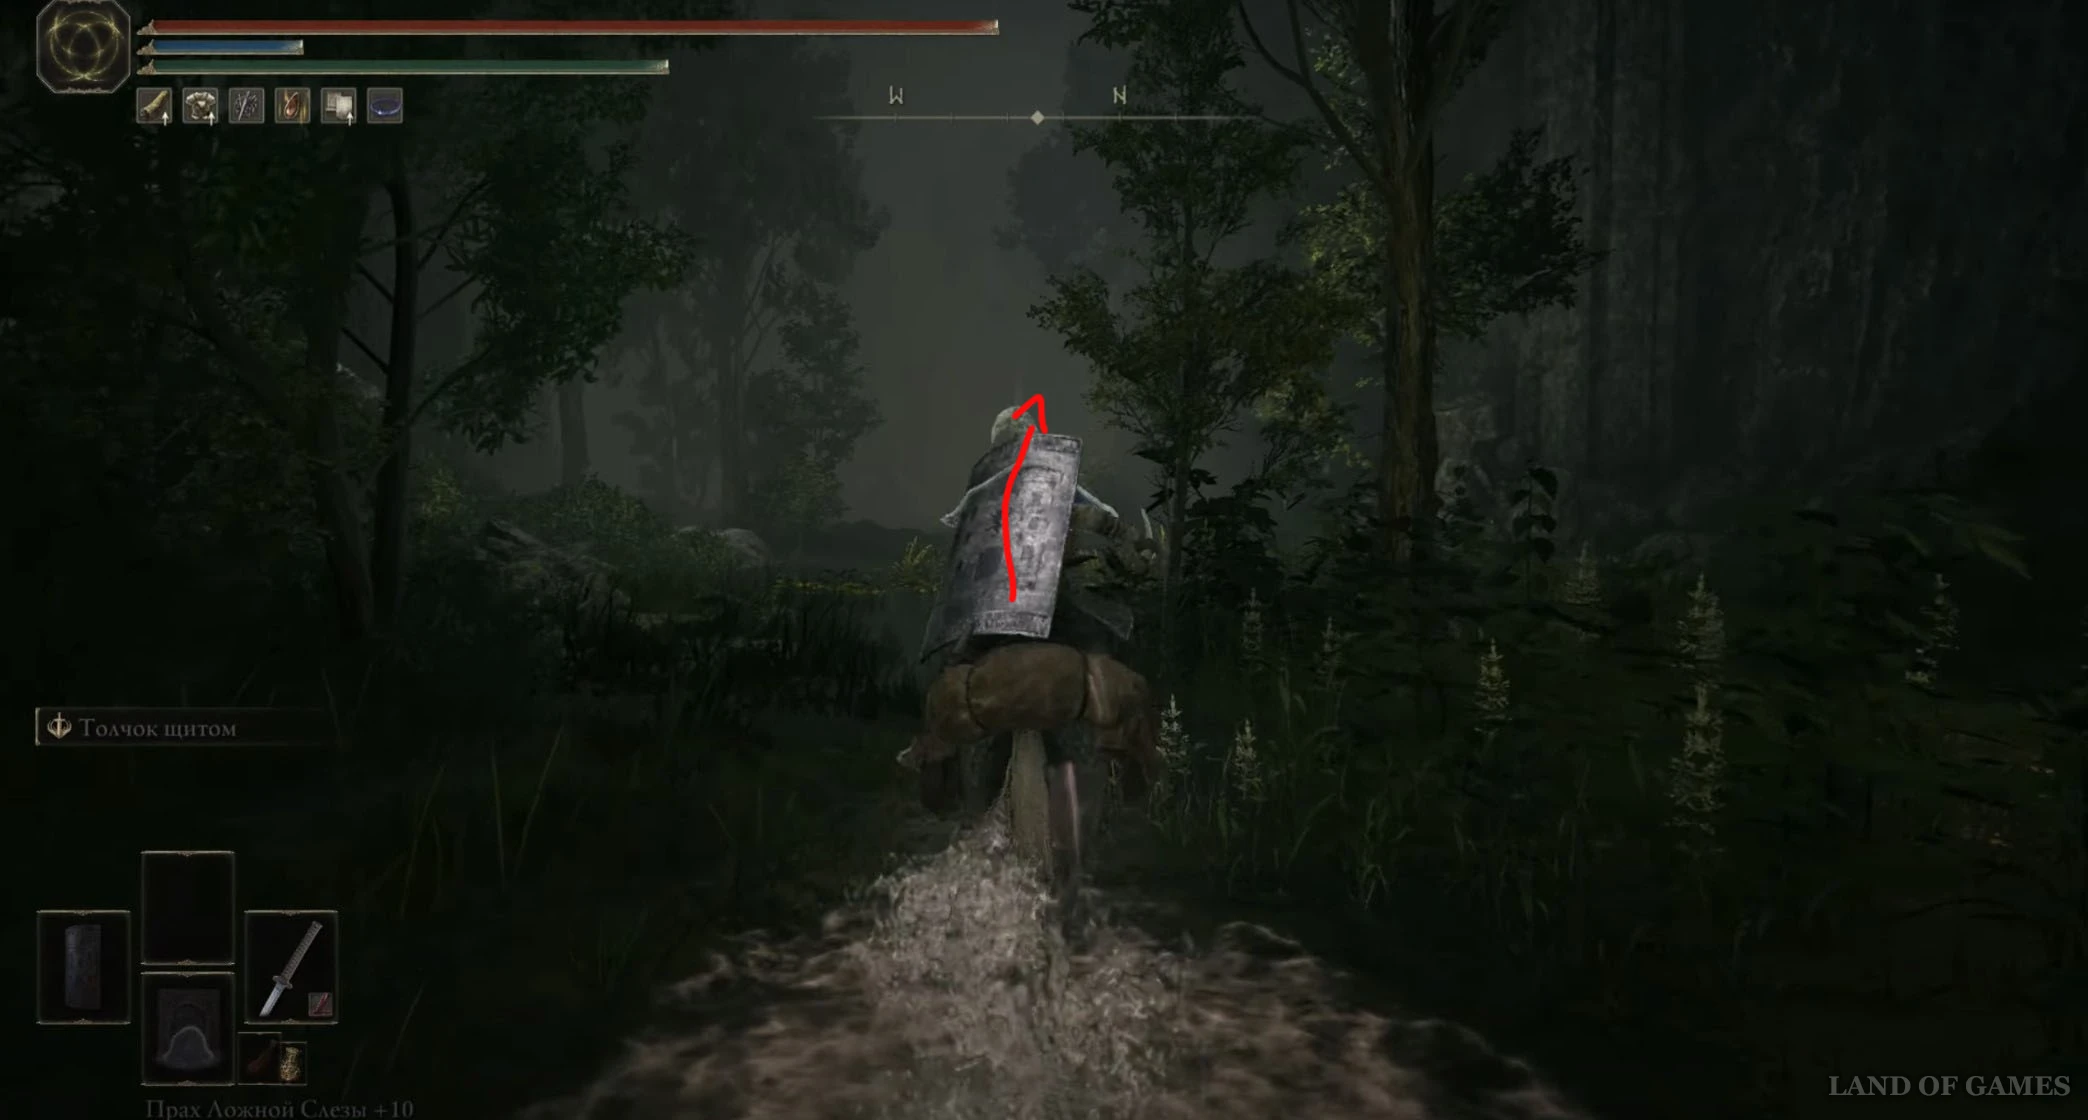
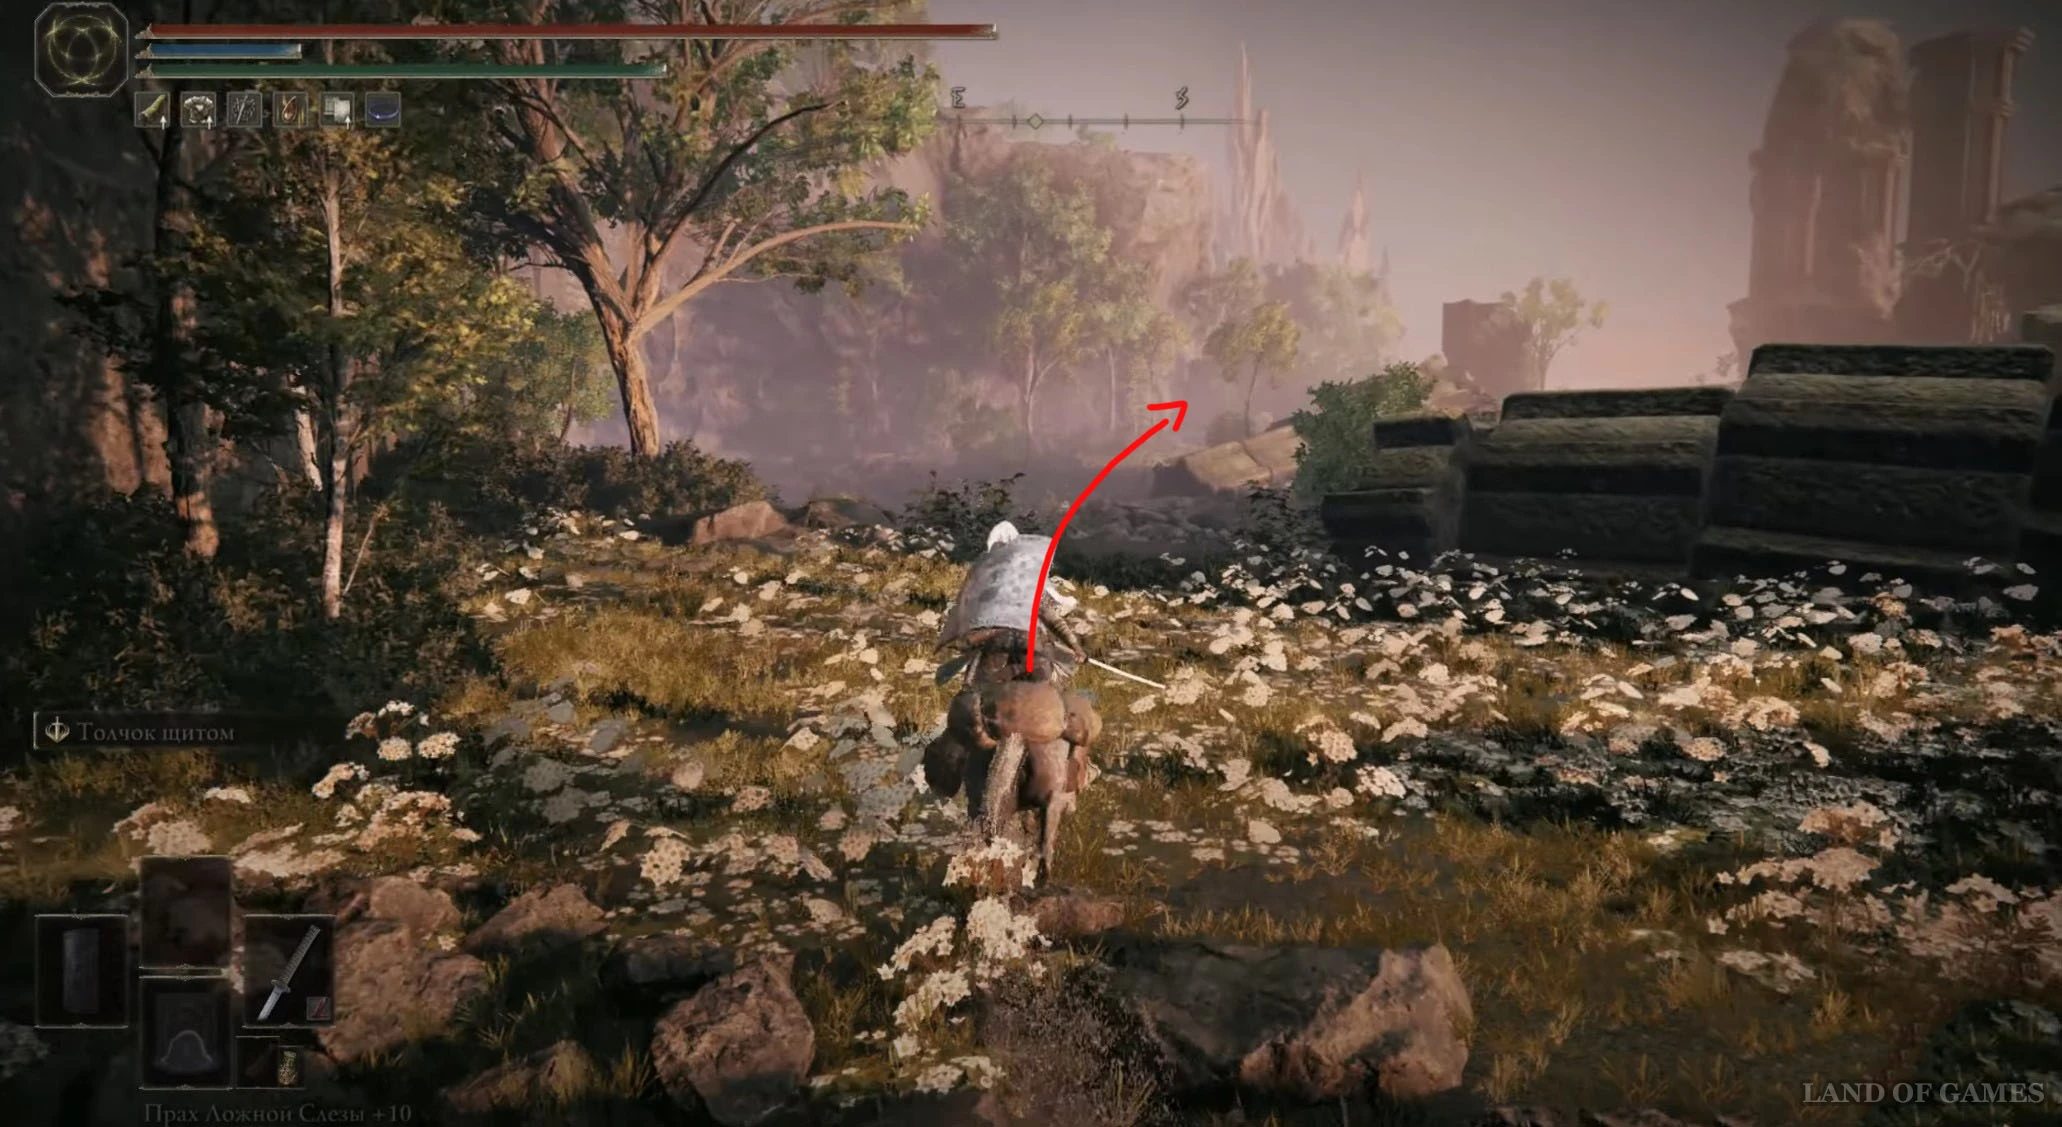
Снова возвратитесь к «Руинам Мурта», а потом бегите на юго-восток, пробежав мимо каменной арки. Двигайтесь к скрюченным деревьям на холме и продолжайте идти в юго-восточном направлении, пока не приблизитесь к скале. Затем идите вдоль нее налево и обойдите гору. В тупике вы обнаружите камень, от которого исходит воздушный поток, – разломайте его, чтобы открыть духовный источник позади.
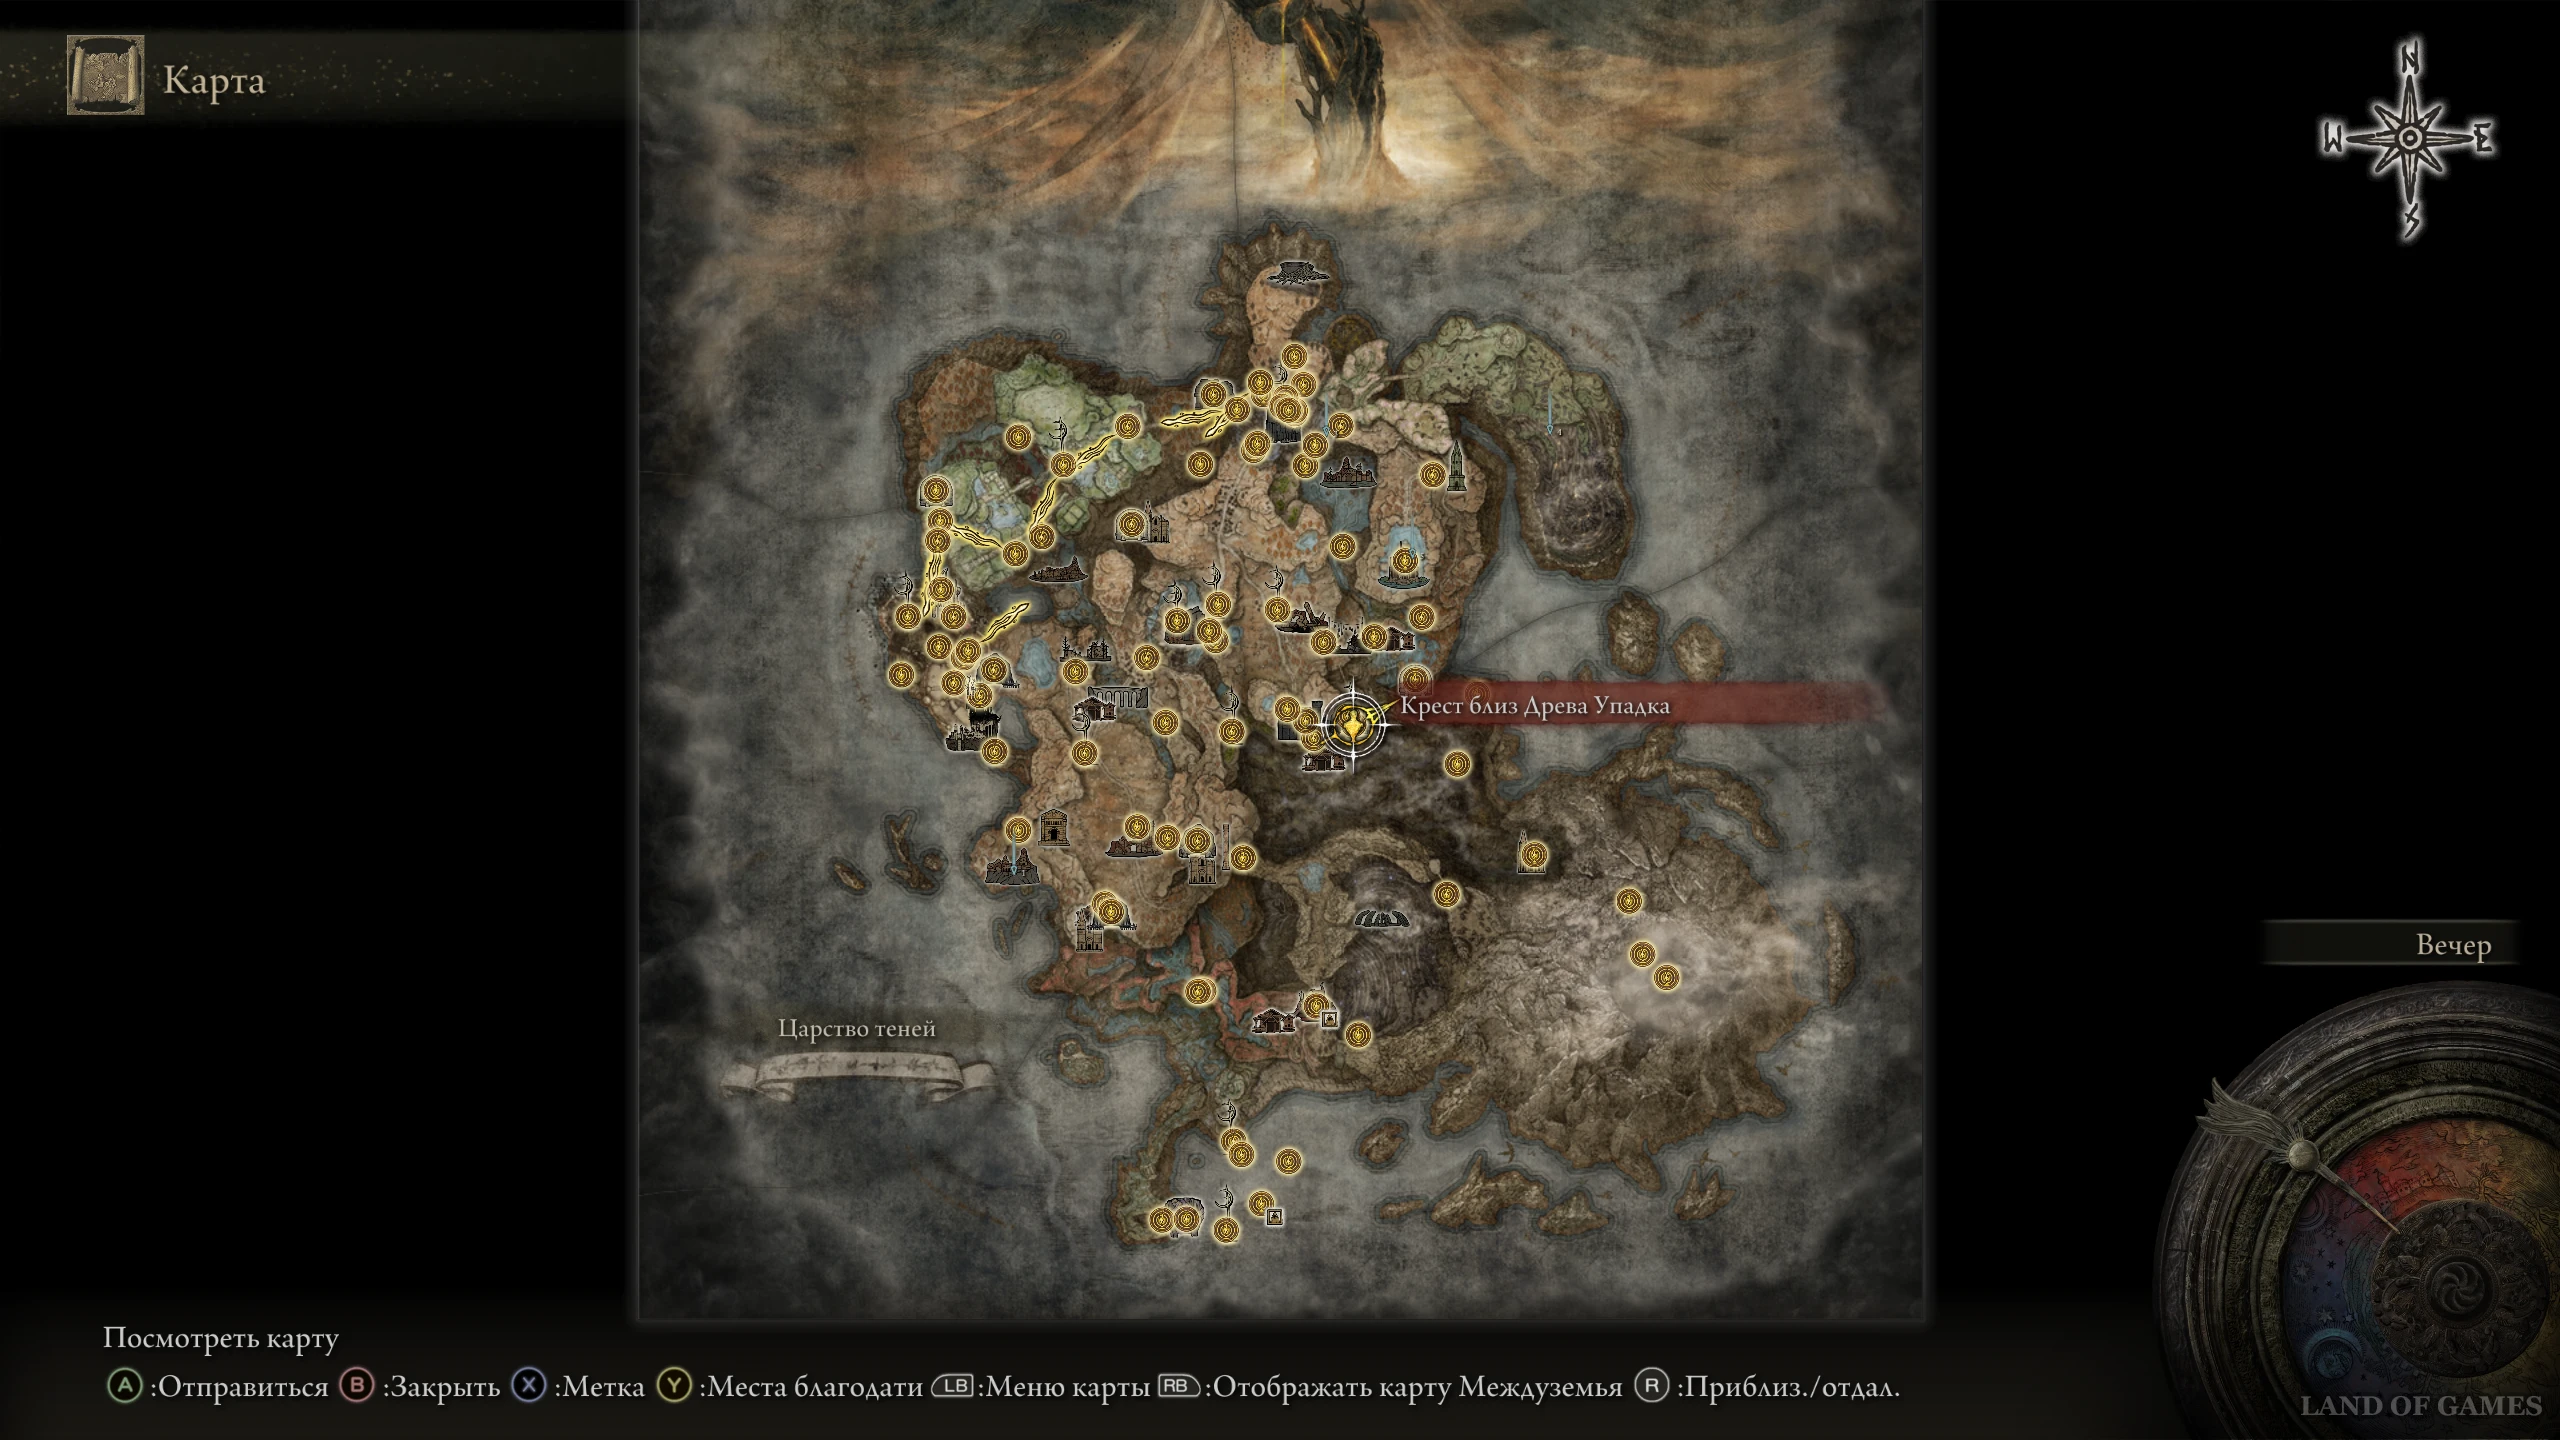
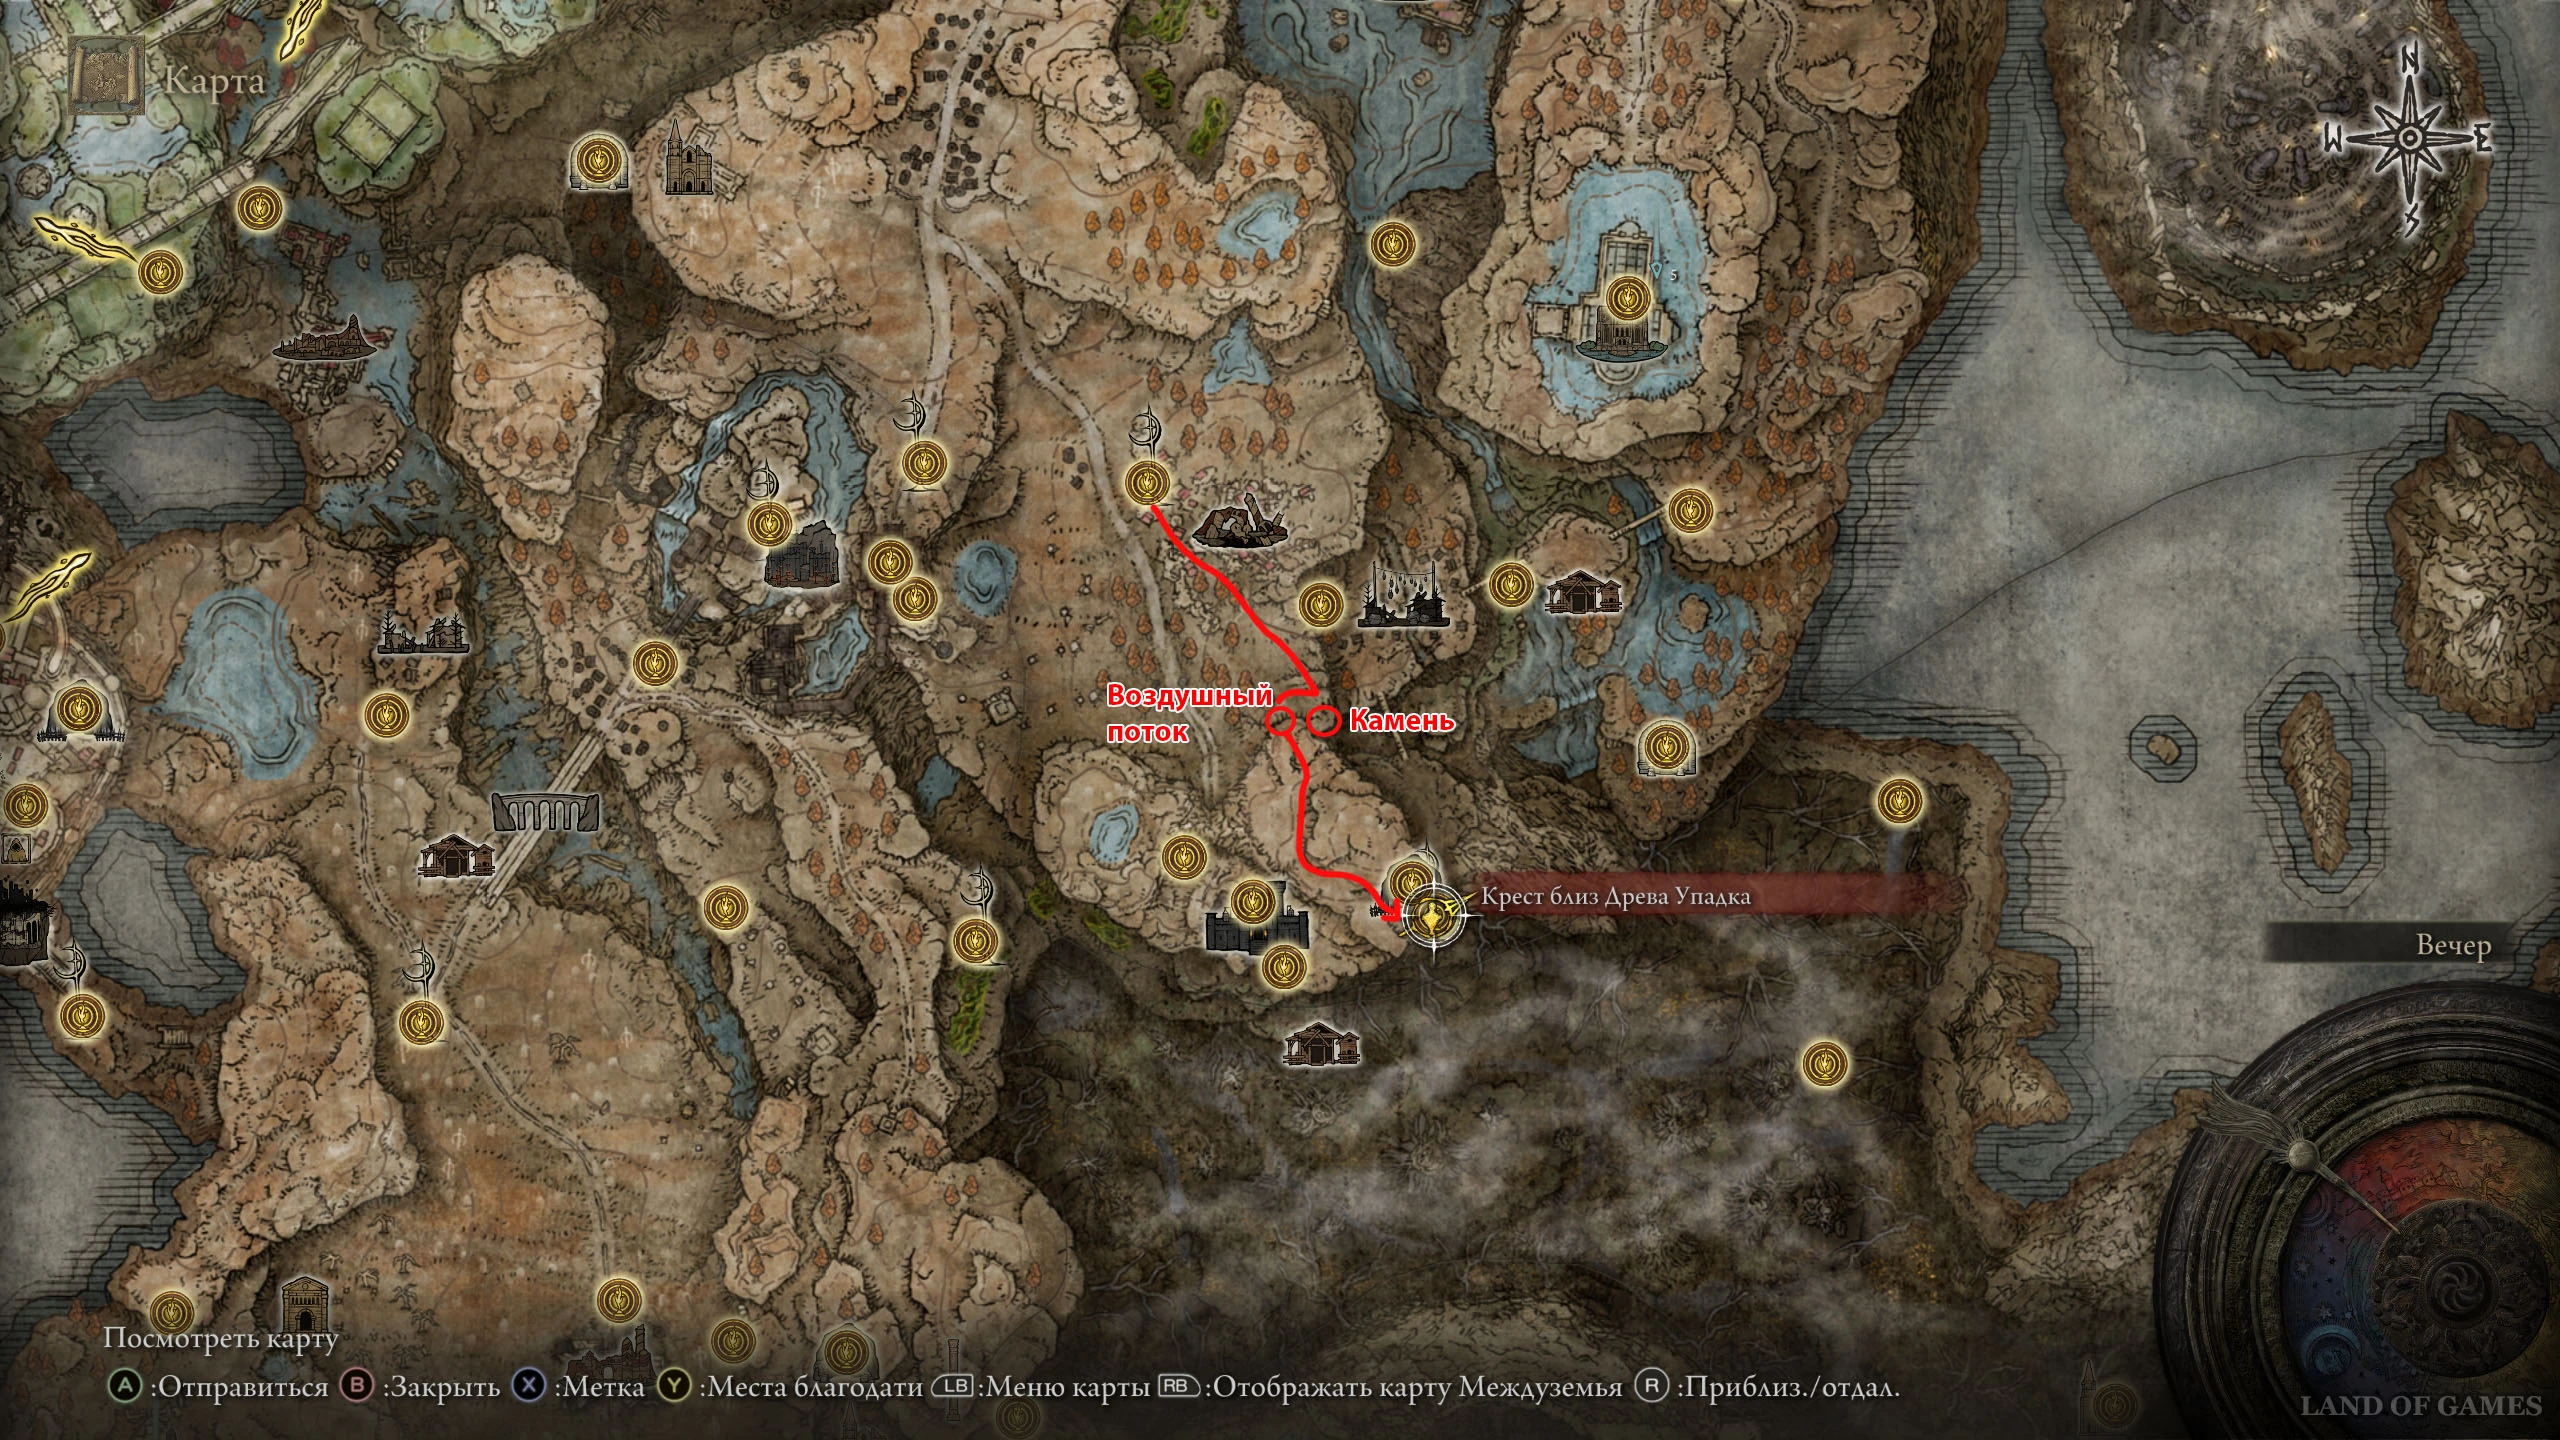
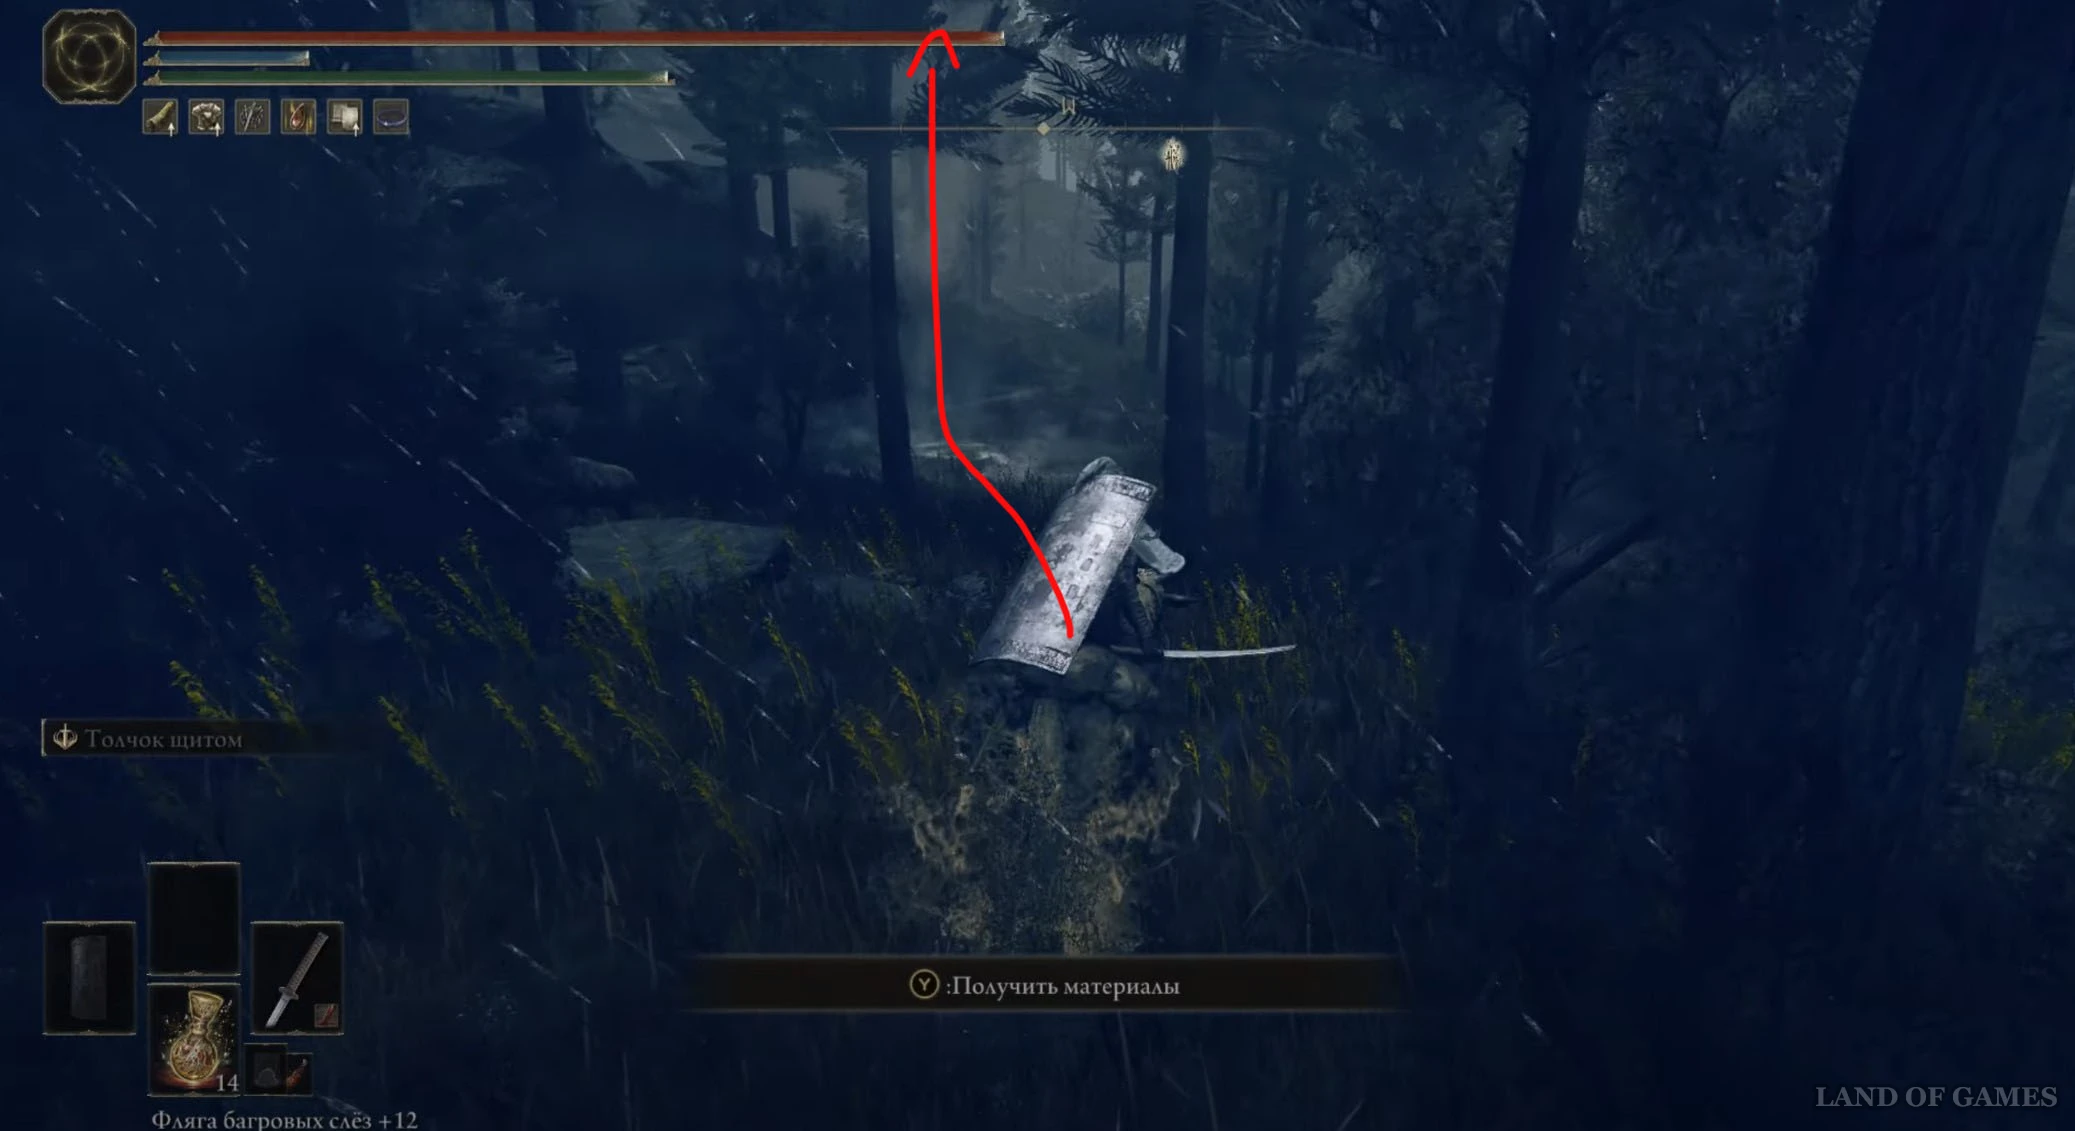
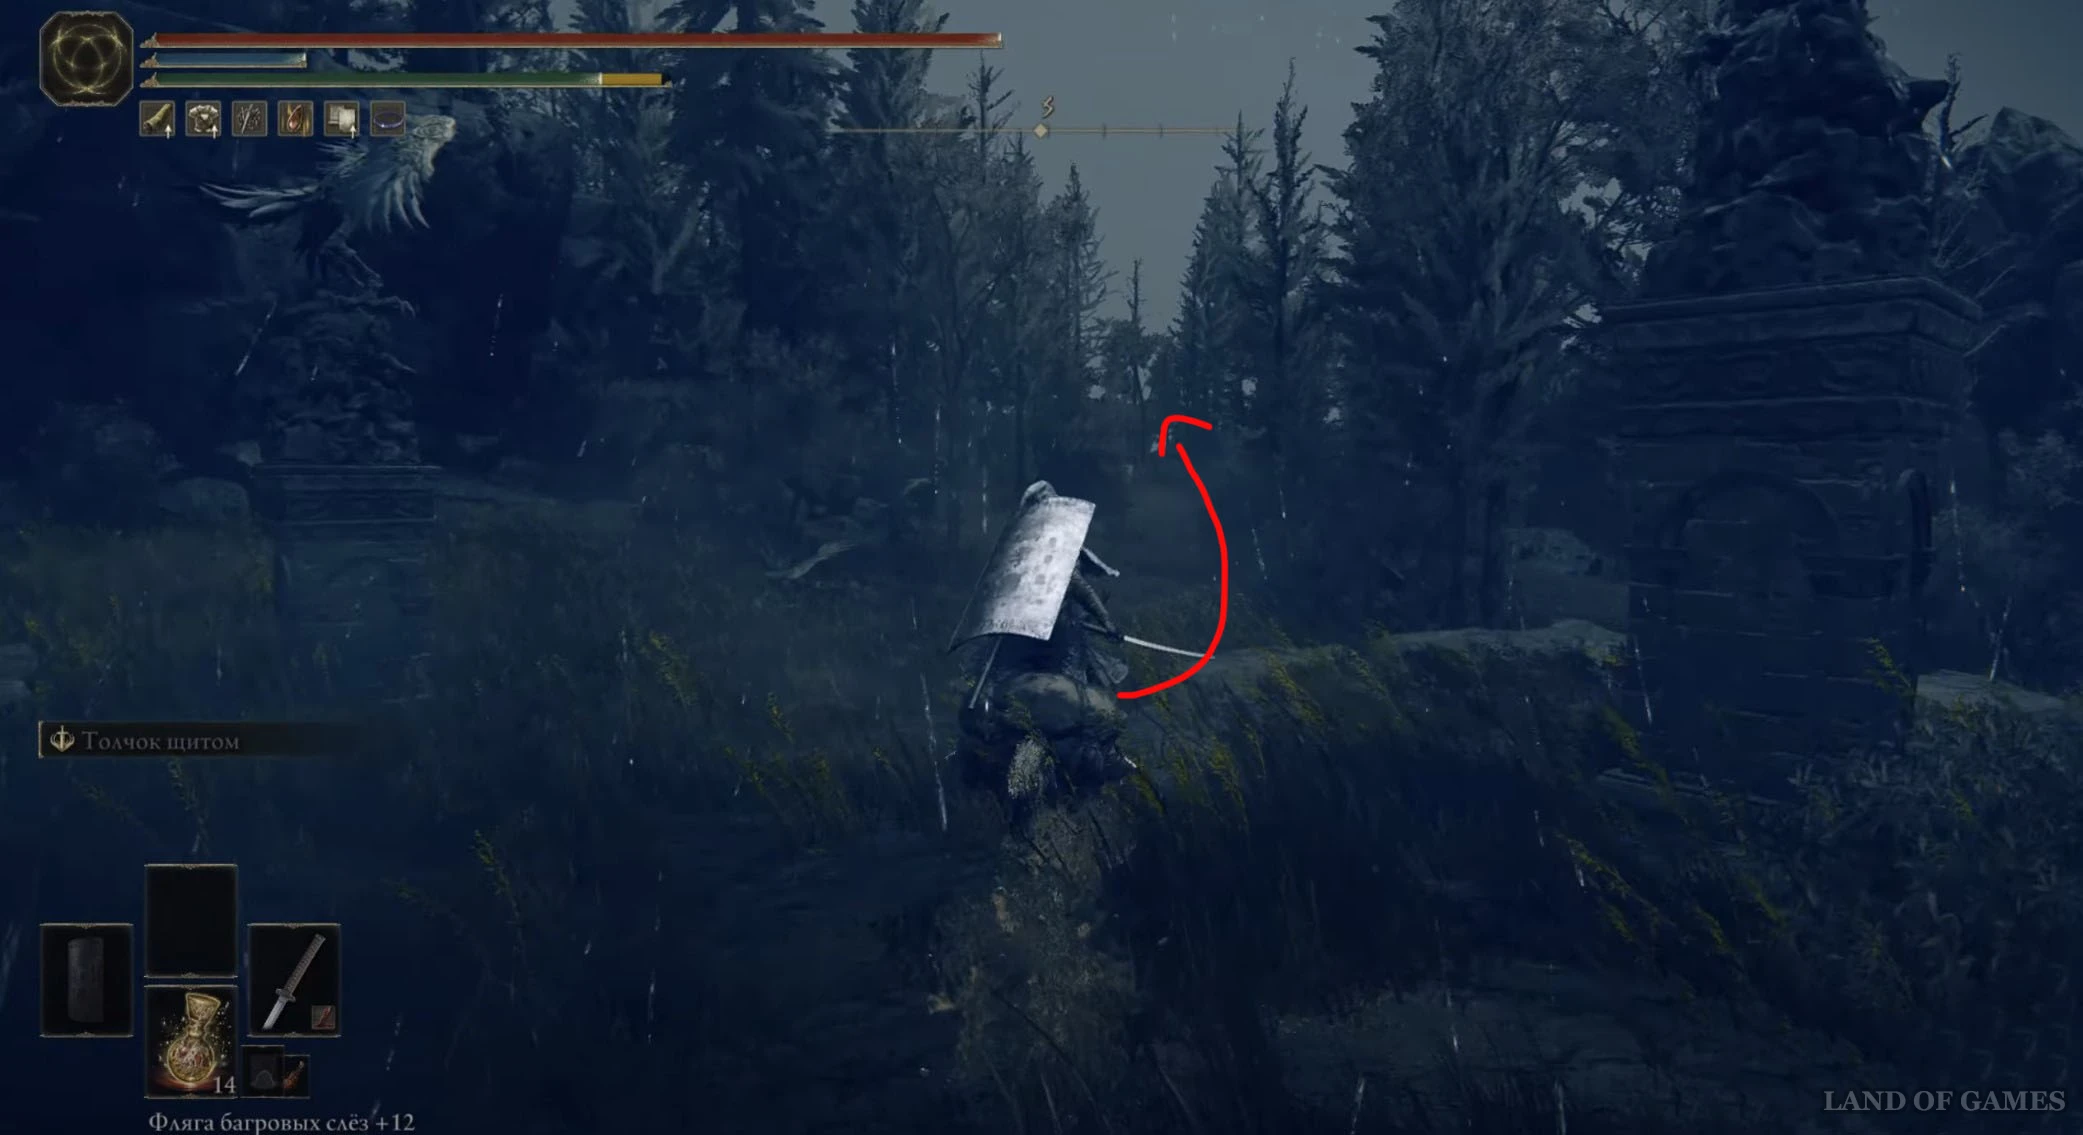
Возвратитесь к скале, и вы увидите здесь воздушный поток, с помощью которого сможете теперь взобраться на верхнее плато. Далее скачите на юг по дорожке и заберитесь на утес, где вы обнаружите очередной крест Марики, место благодати «Крест близ Древа Упадка» и нужный вам фрагмент.
Осколки древа упадка 20 и 21
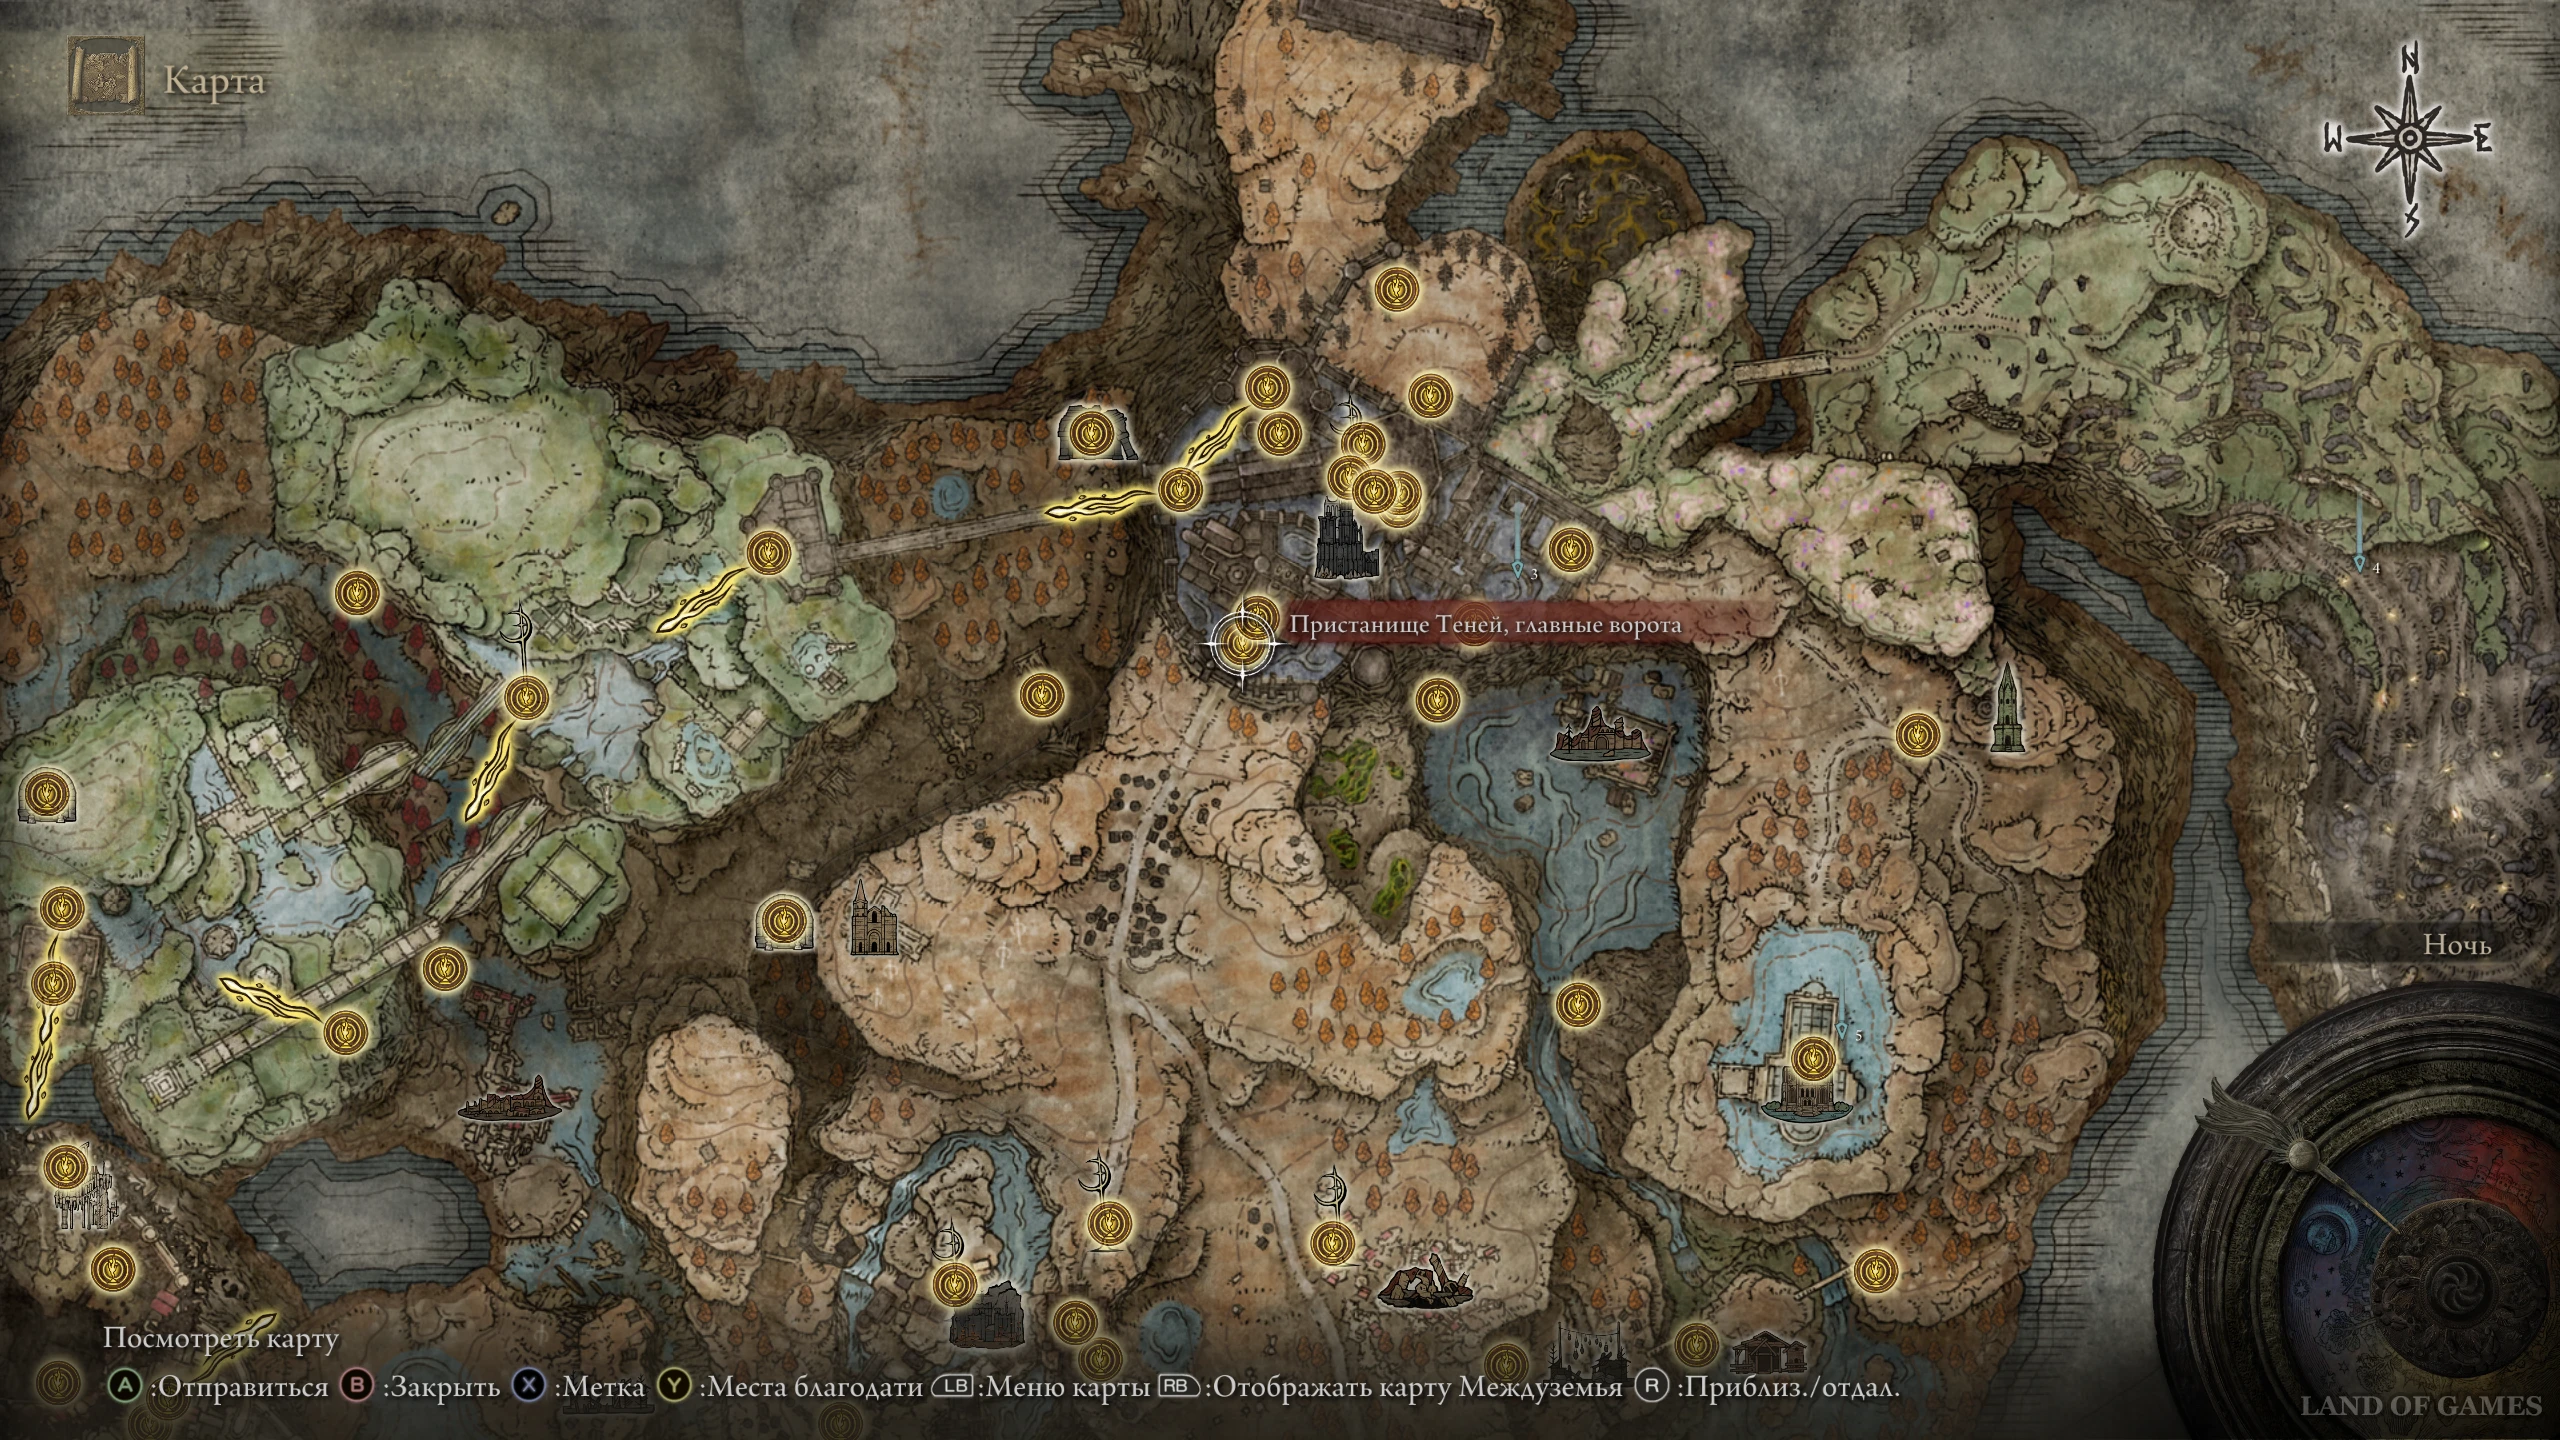
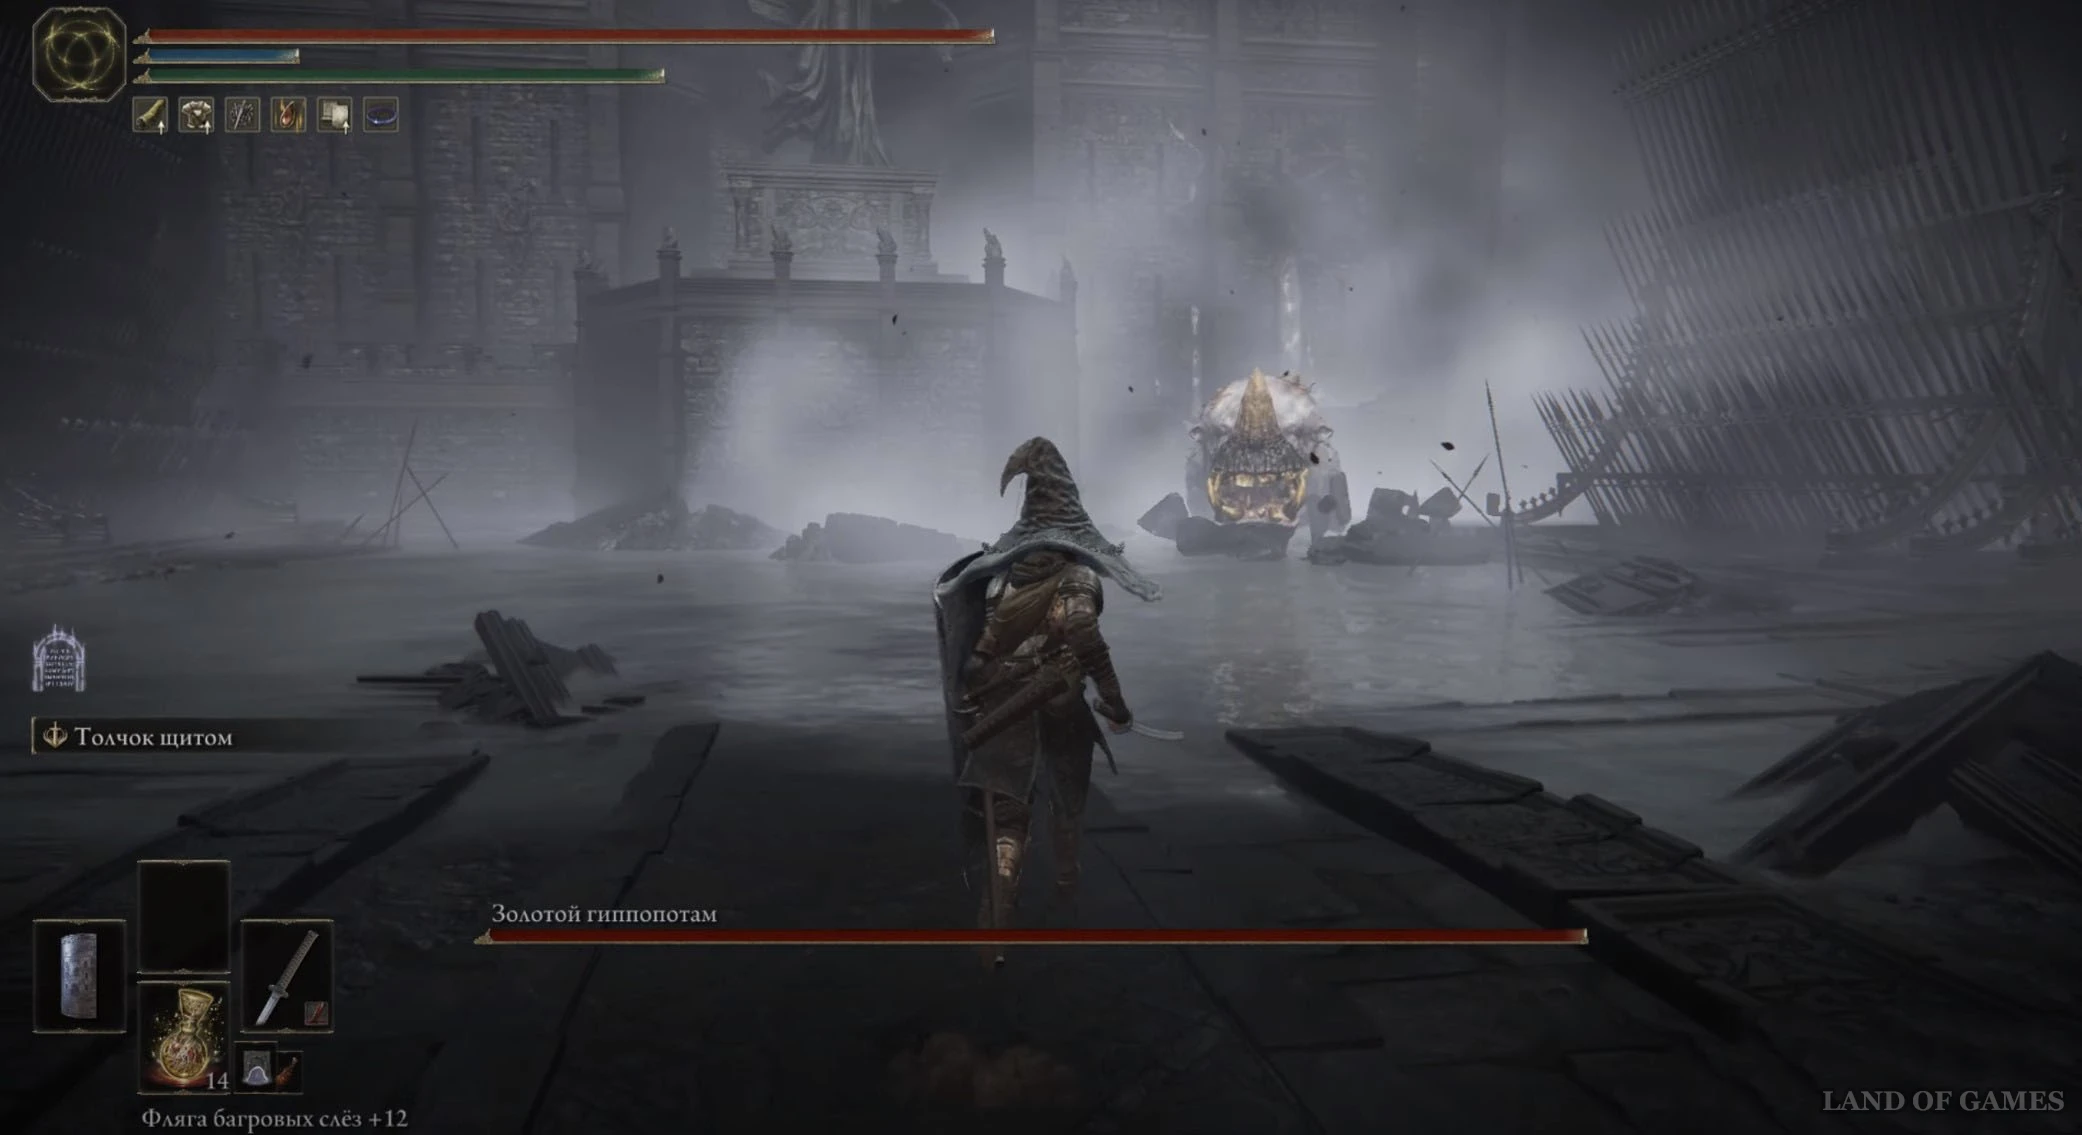
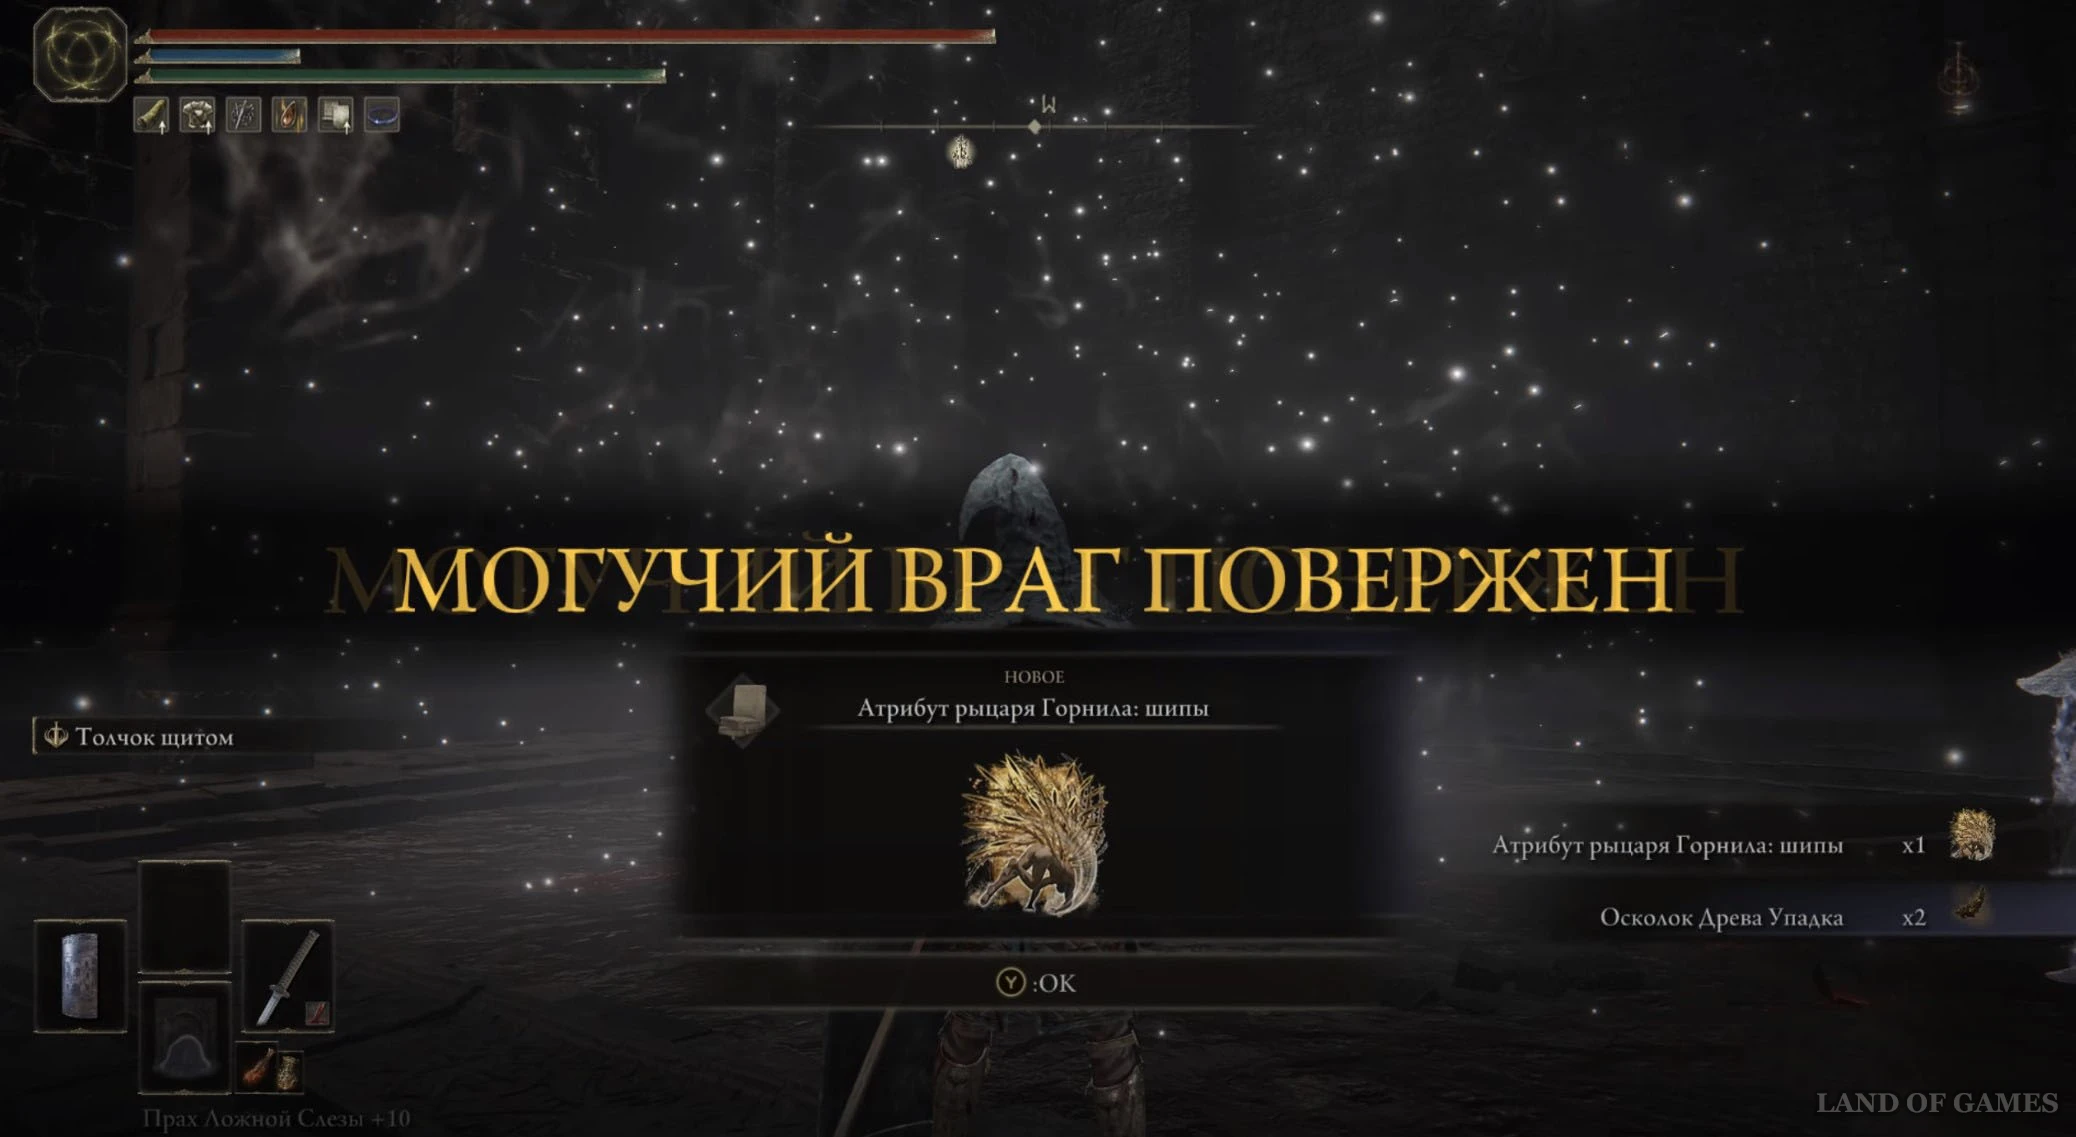
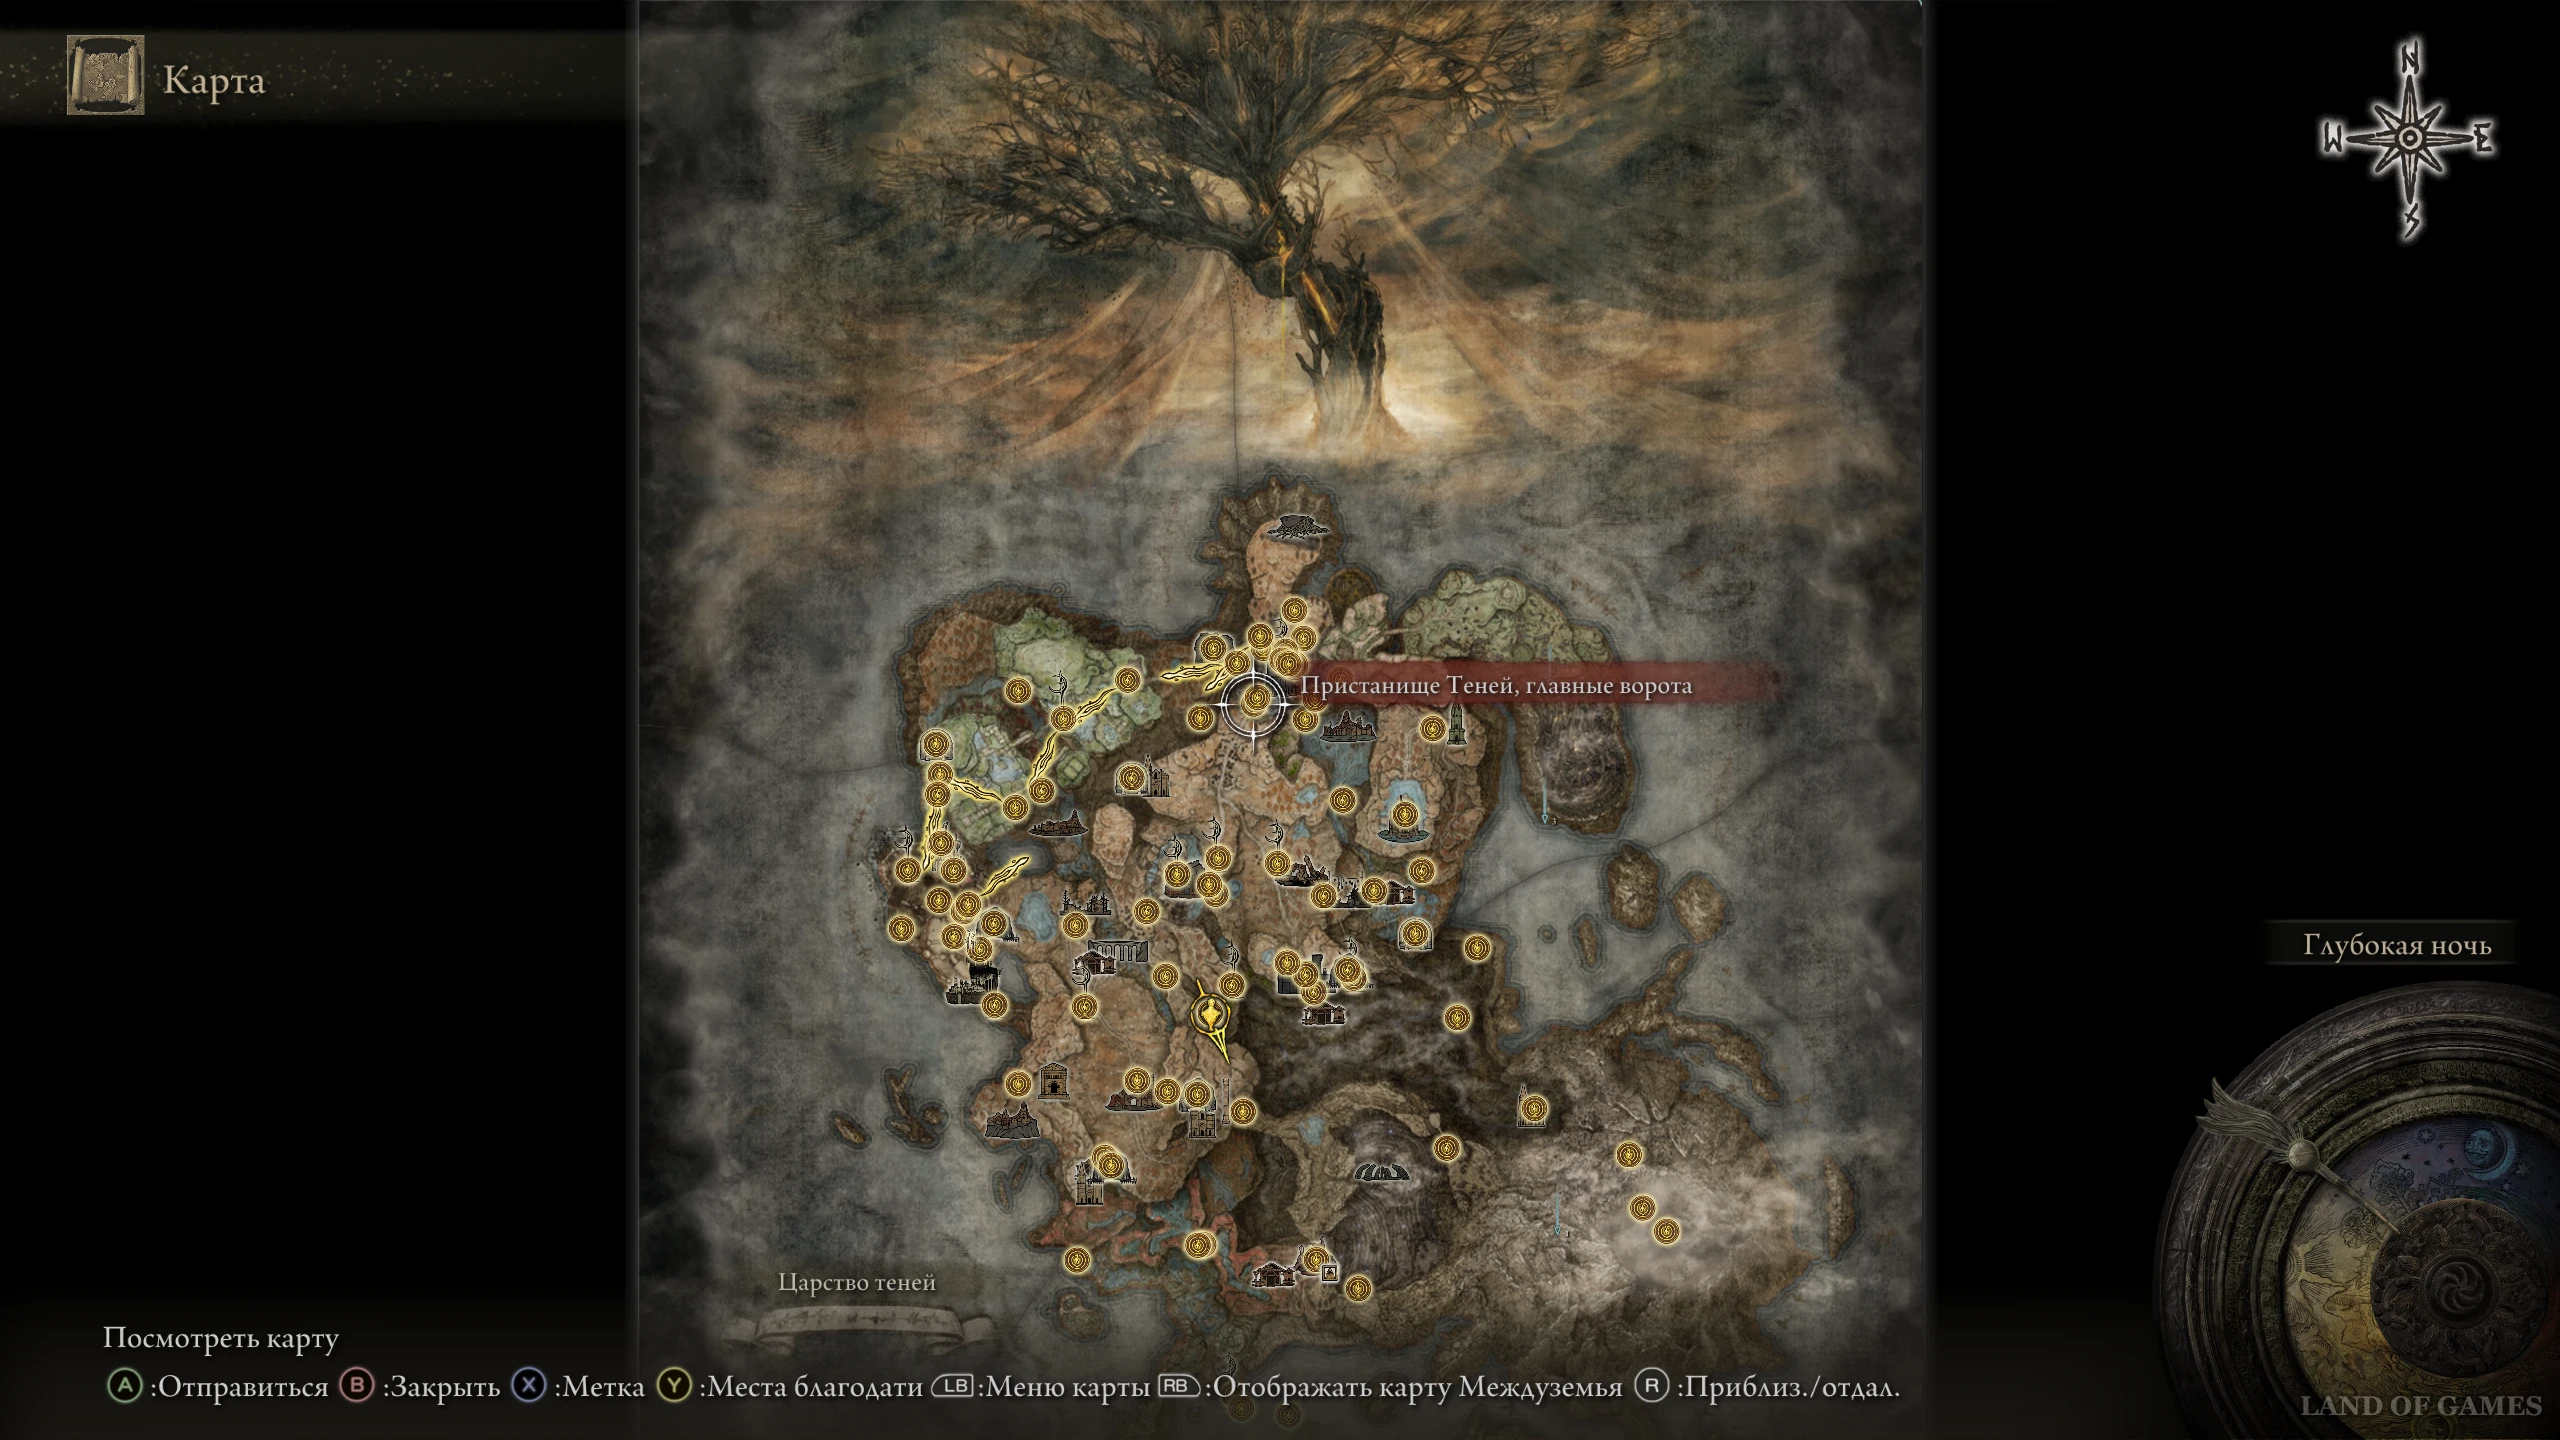
Переместитесь или доберитесь до места благодати «Пристанище Теней, главные ворота», а затем пройдите внутрь крепости и вступите в бой с Золотым гиппопотамом. Разберитесь с данным противником, чтобы получить с него сразу два фрагмента.

Осколок древа упадка 22
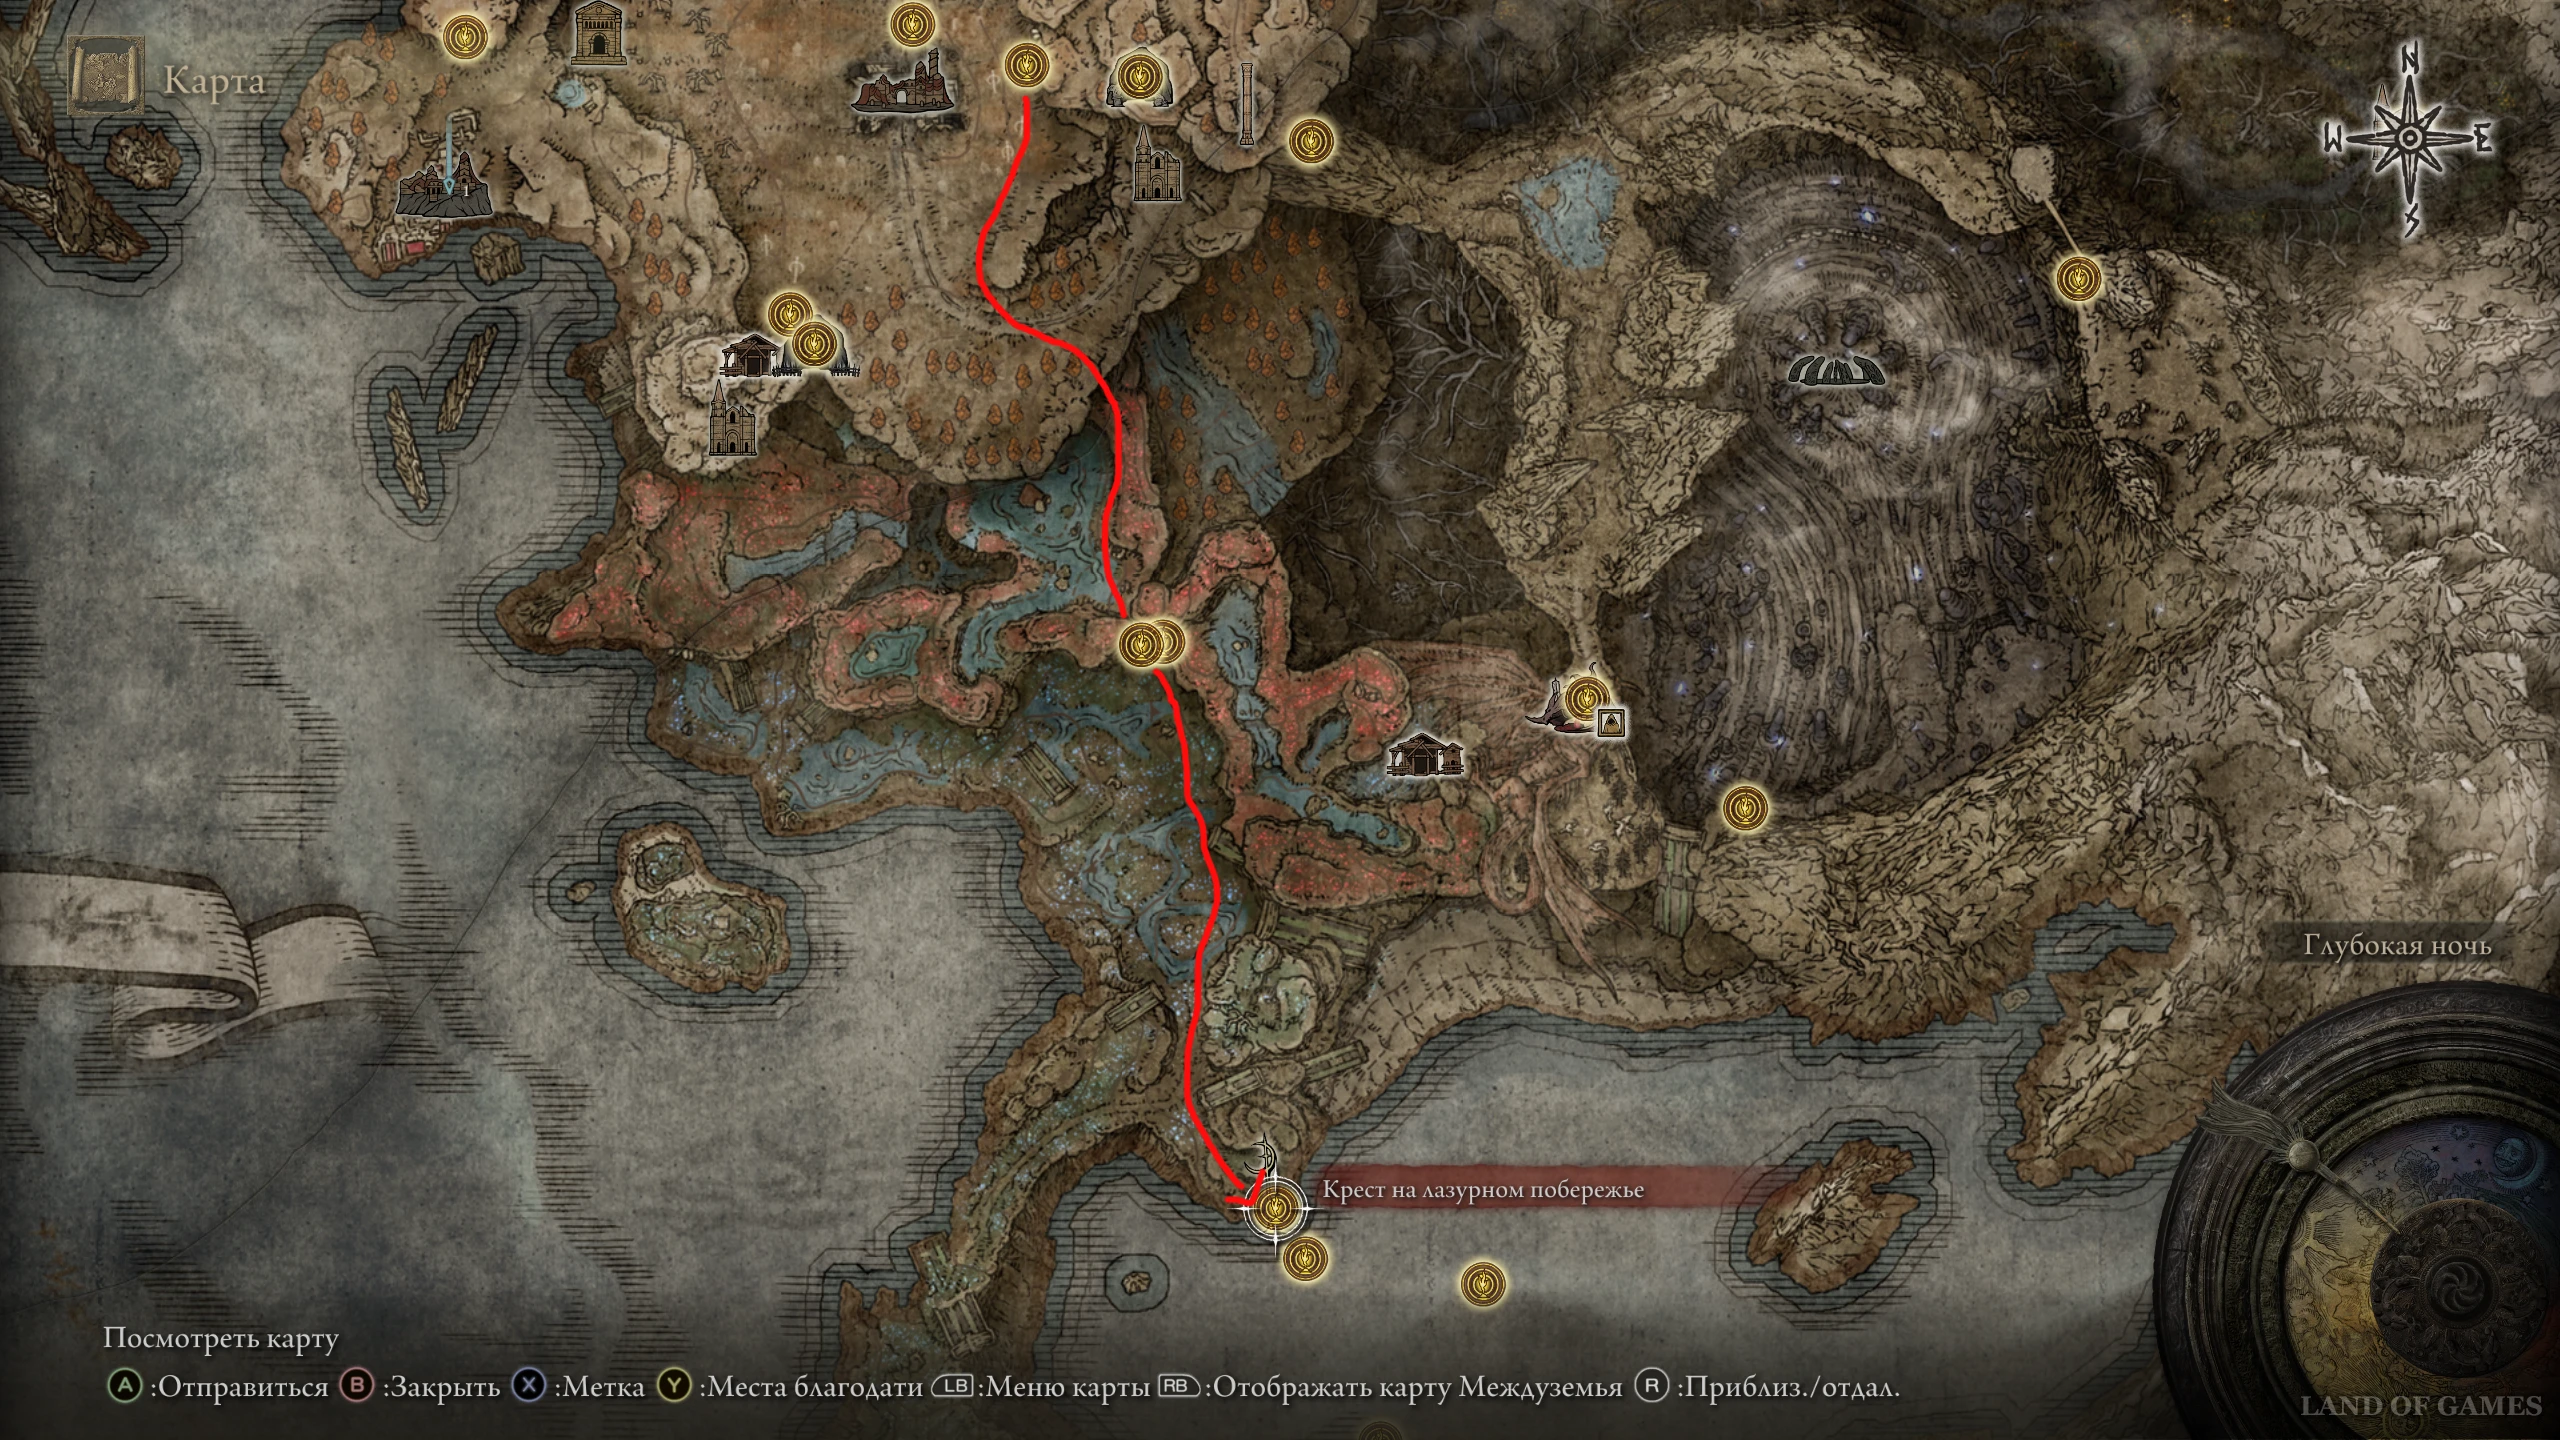
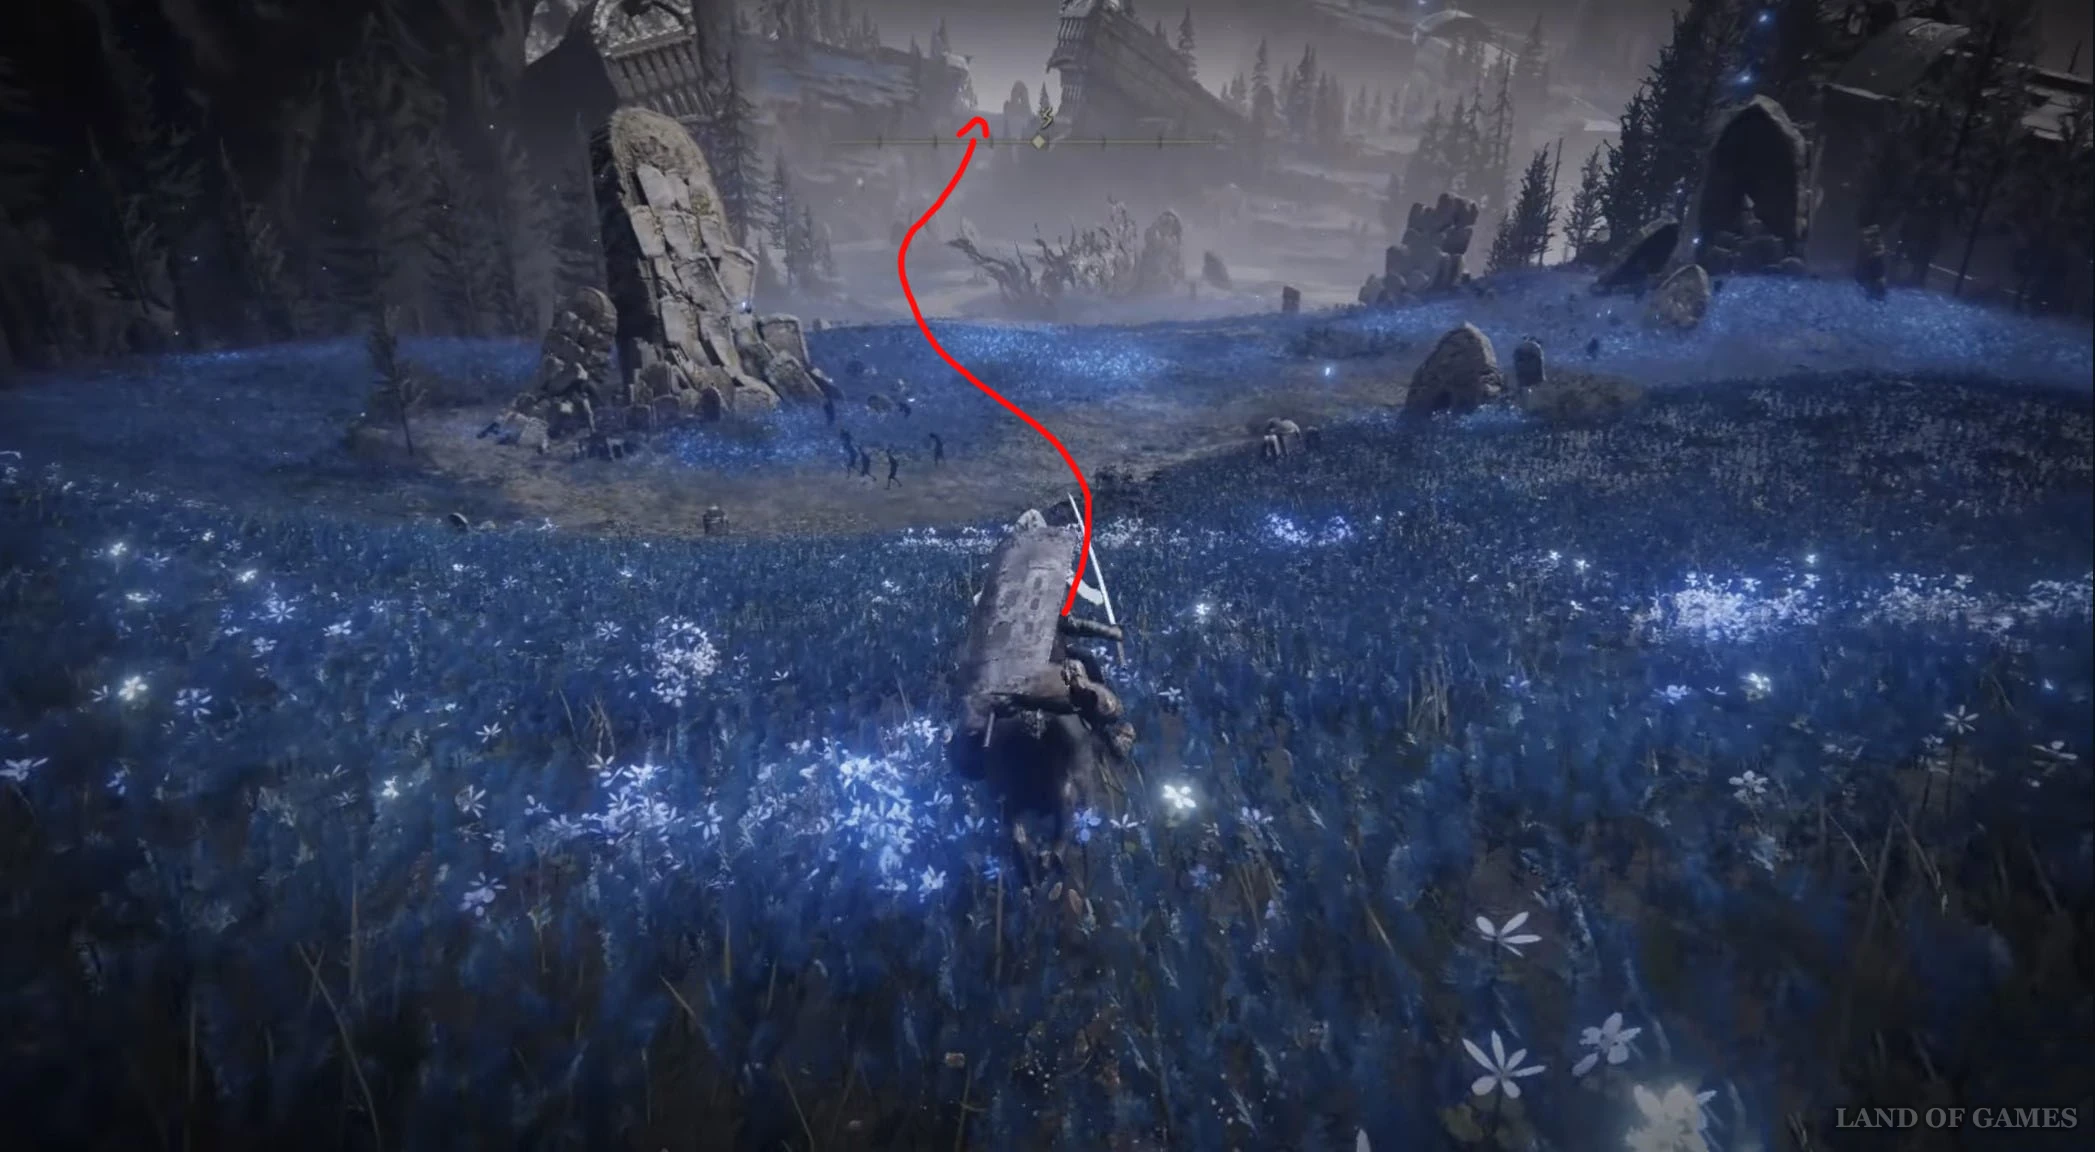
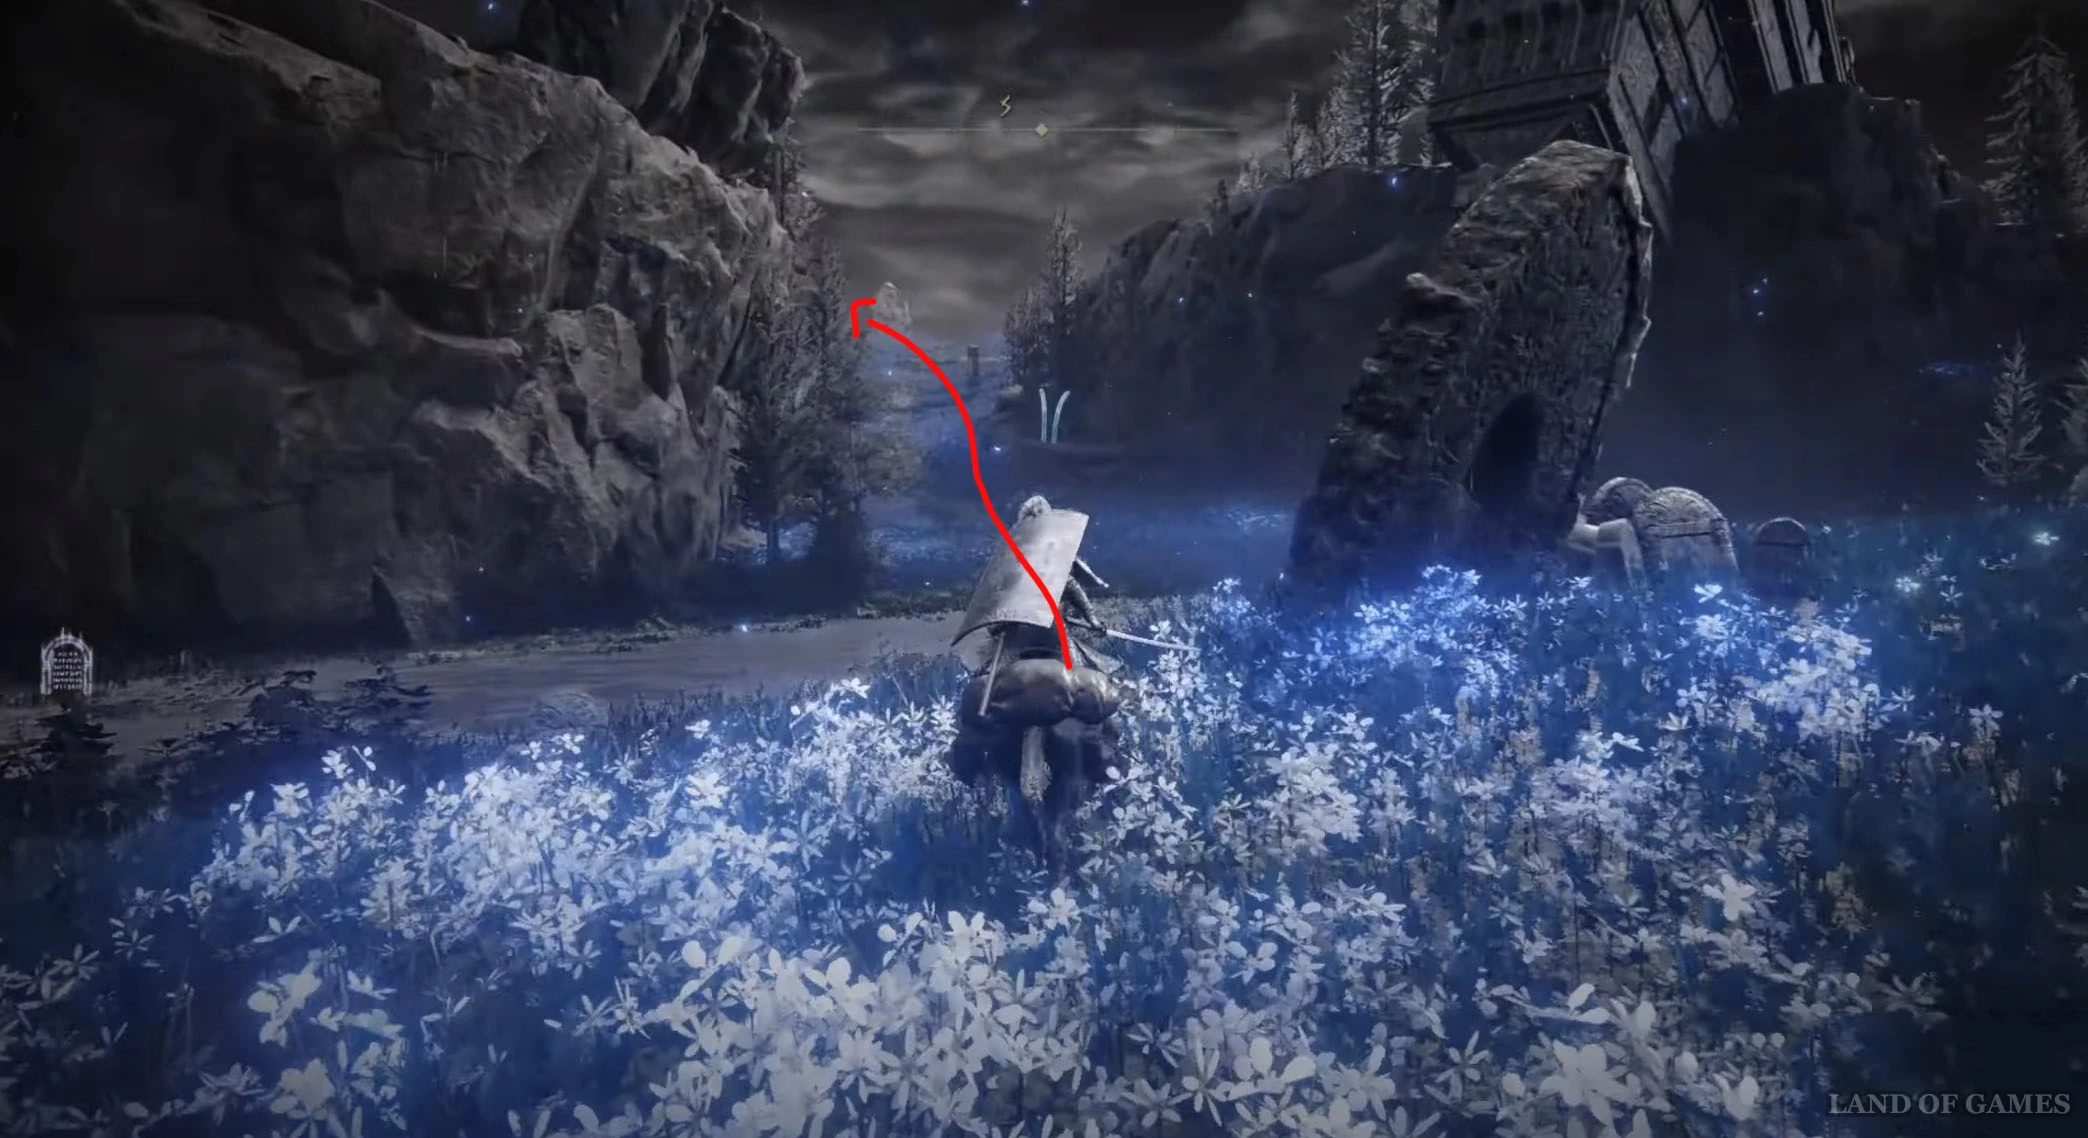
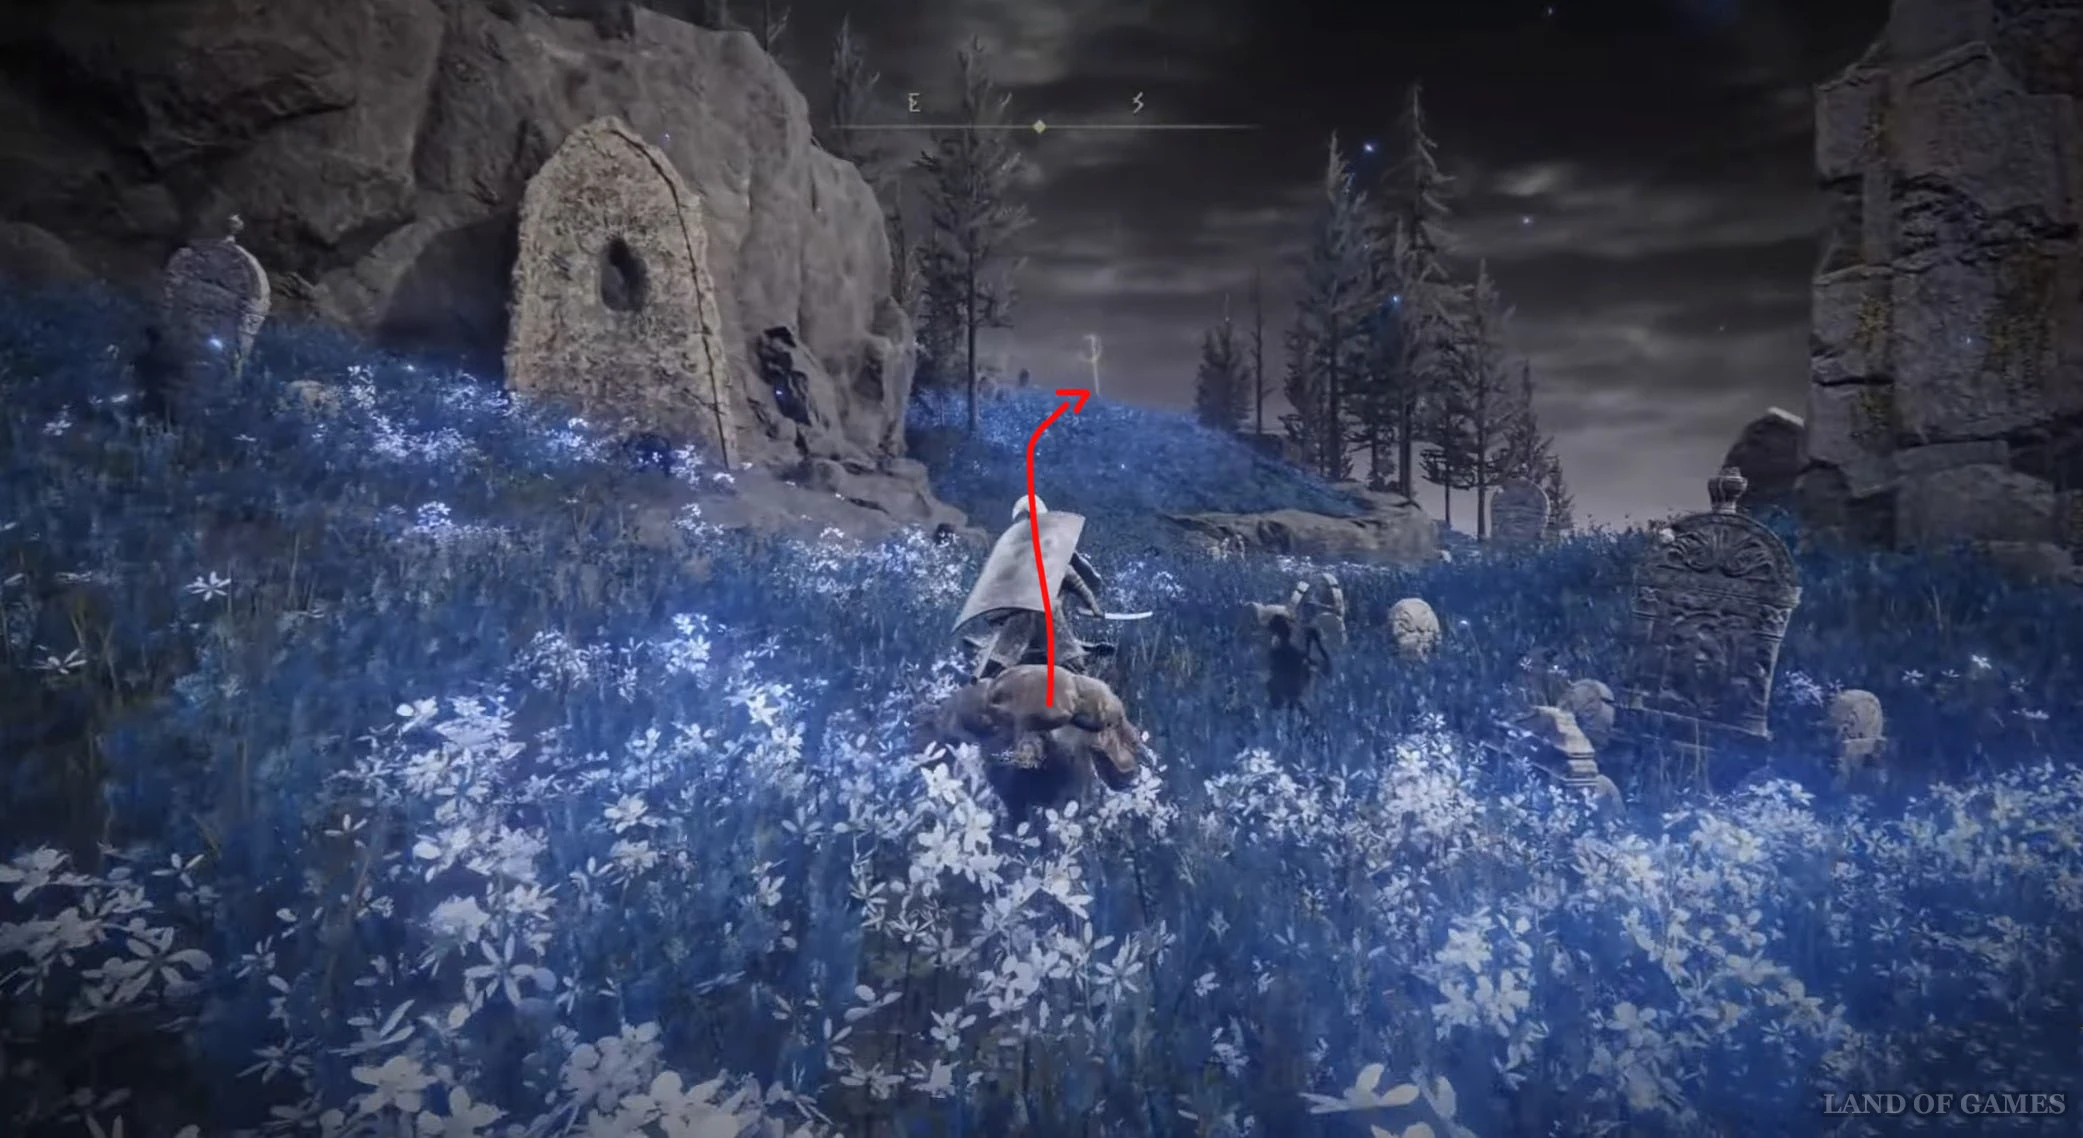
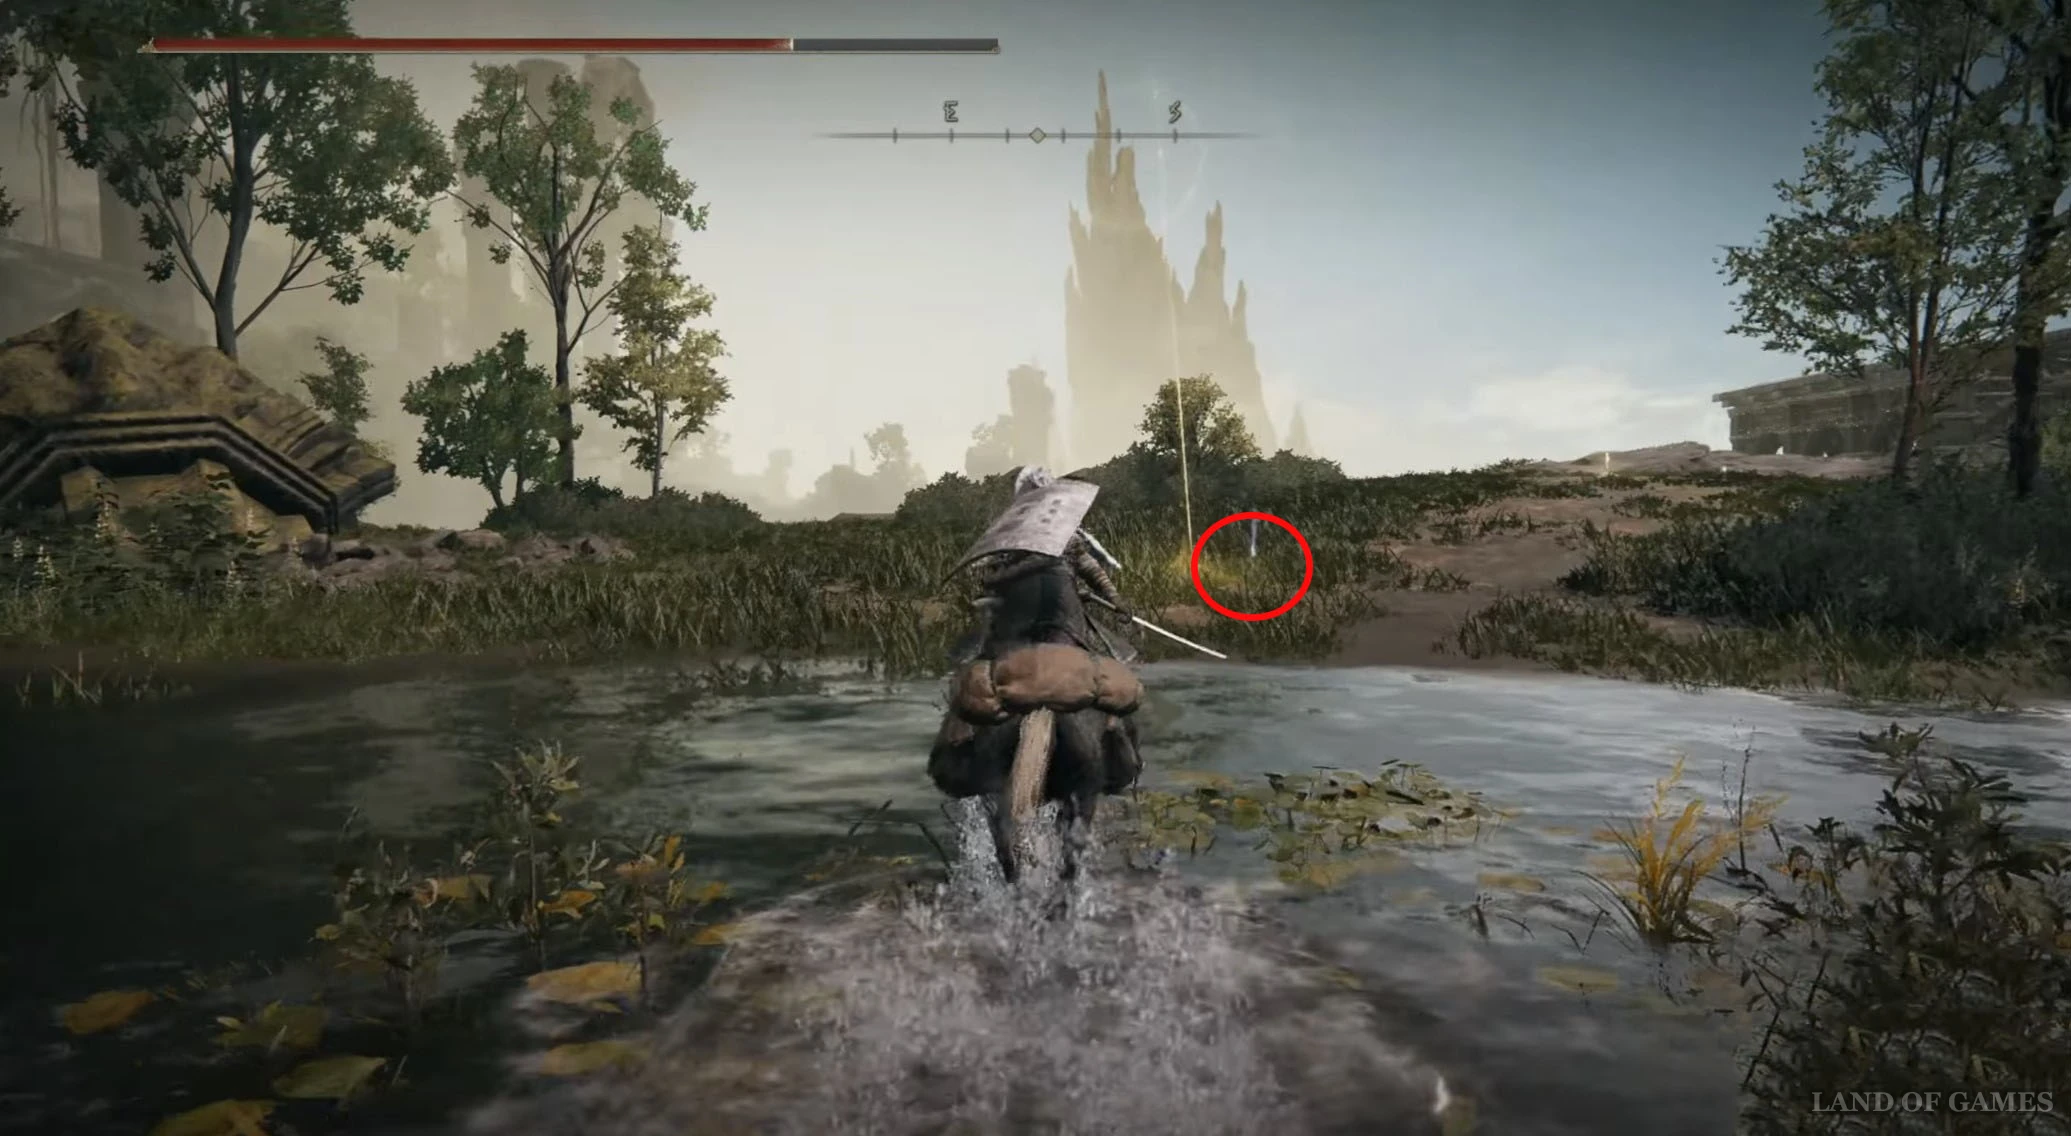
Переместитесь или доберитесь до места благодати «Лазурное побережье» (мы в деталях показали, как это сделать в гайде по поиску карт локаций), а затем начните двигаться на юг, пройдя мимо дракона. Поднимитесь по склону наверх, пробежав рядом с Путеводной стелой, а потом сверните на юго-восток и скачите к кресту Микеллы, виднеющемуся впереди. Здесь вы обнаружите место благодати «Крест на лазурном побережье» и необходимый вам фрагмент.

Осколок древа упадка 23
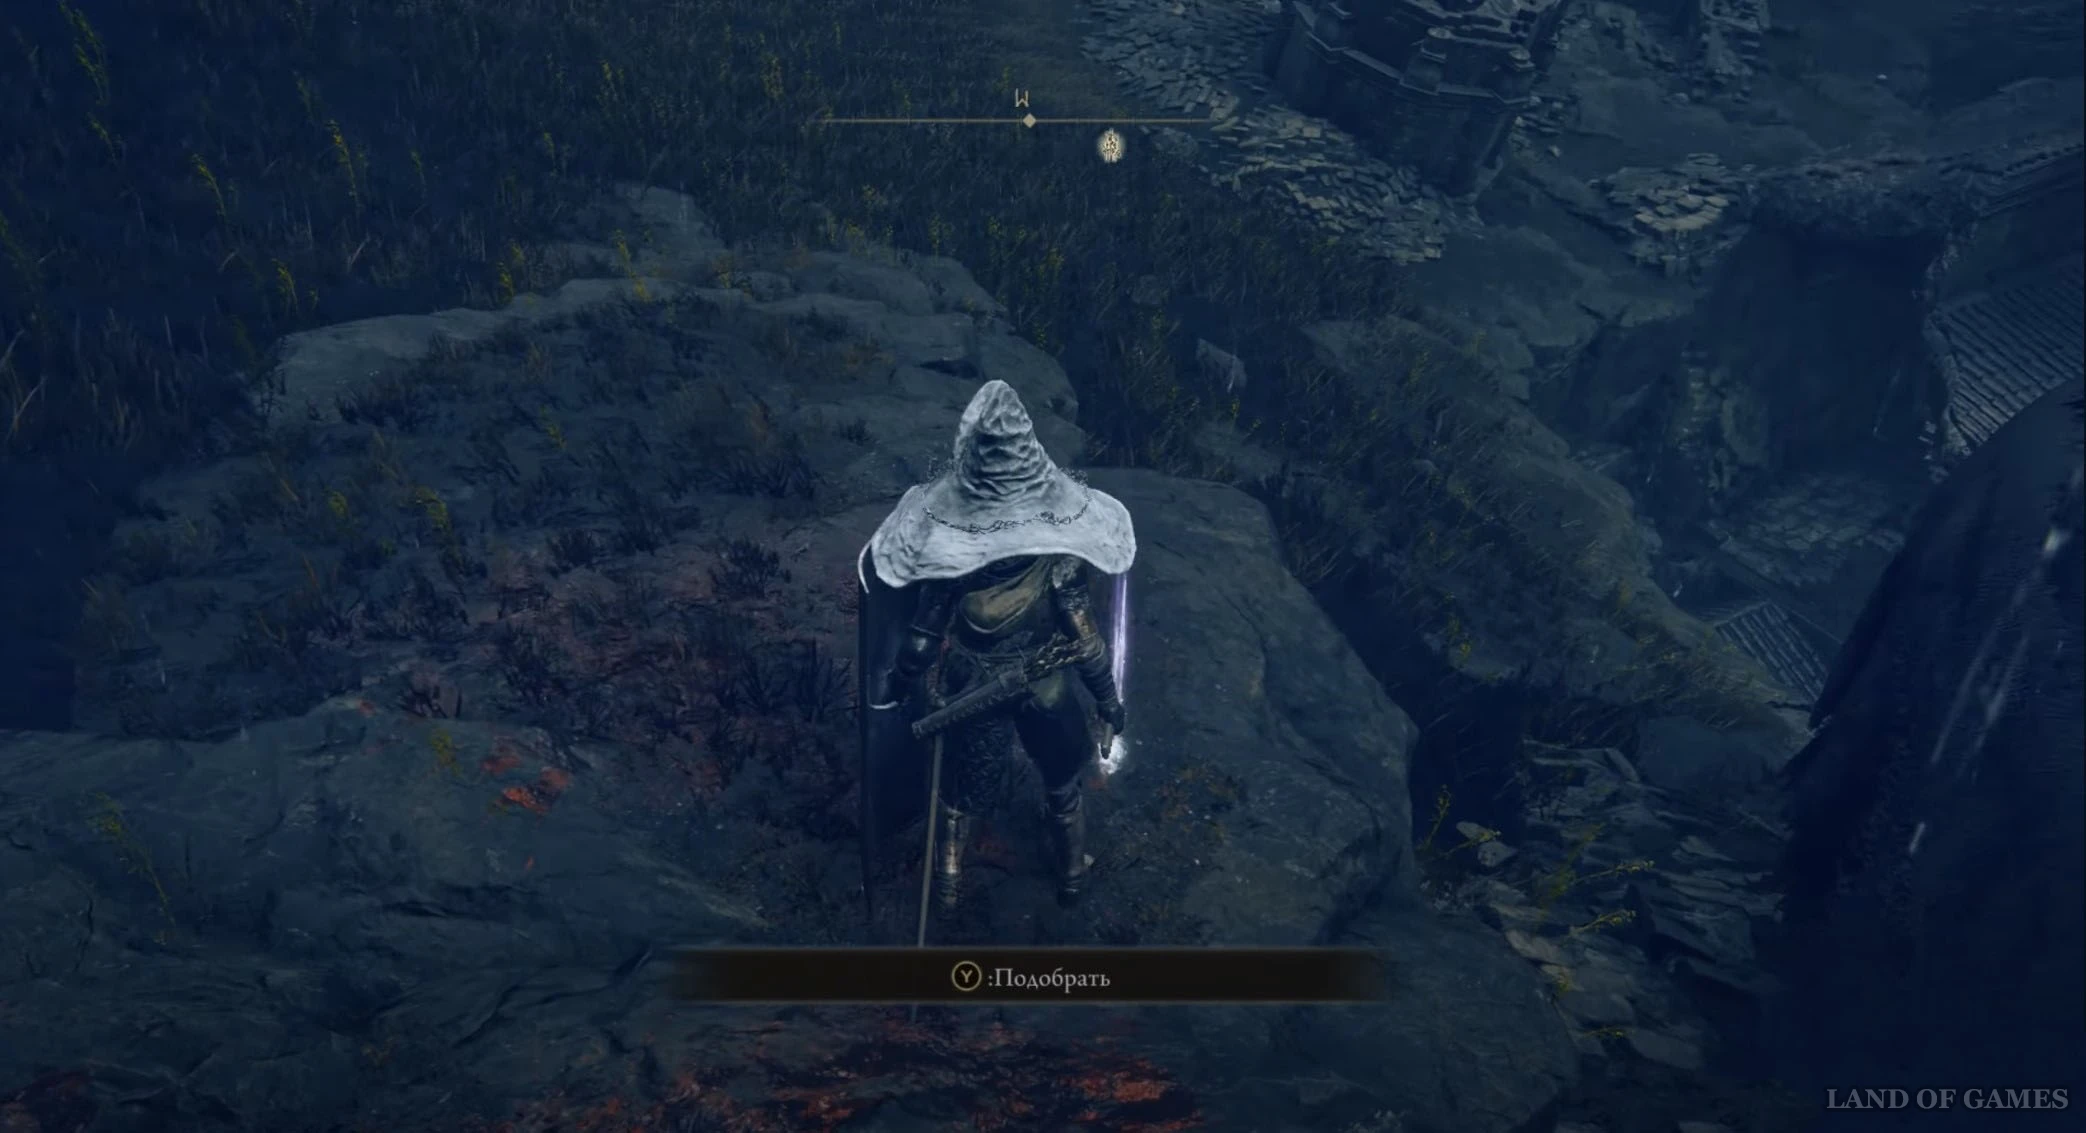
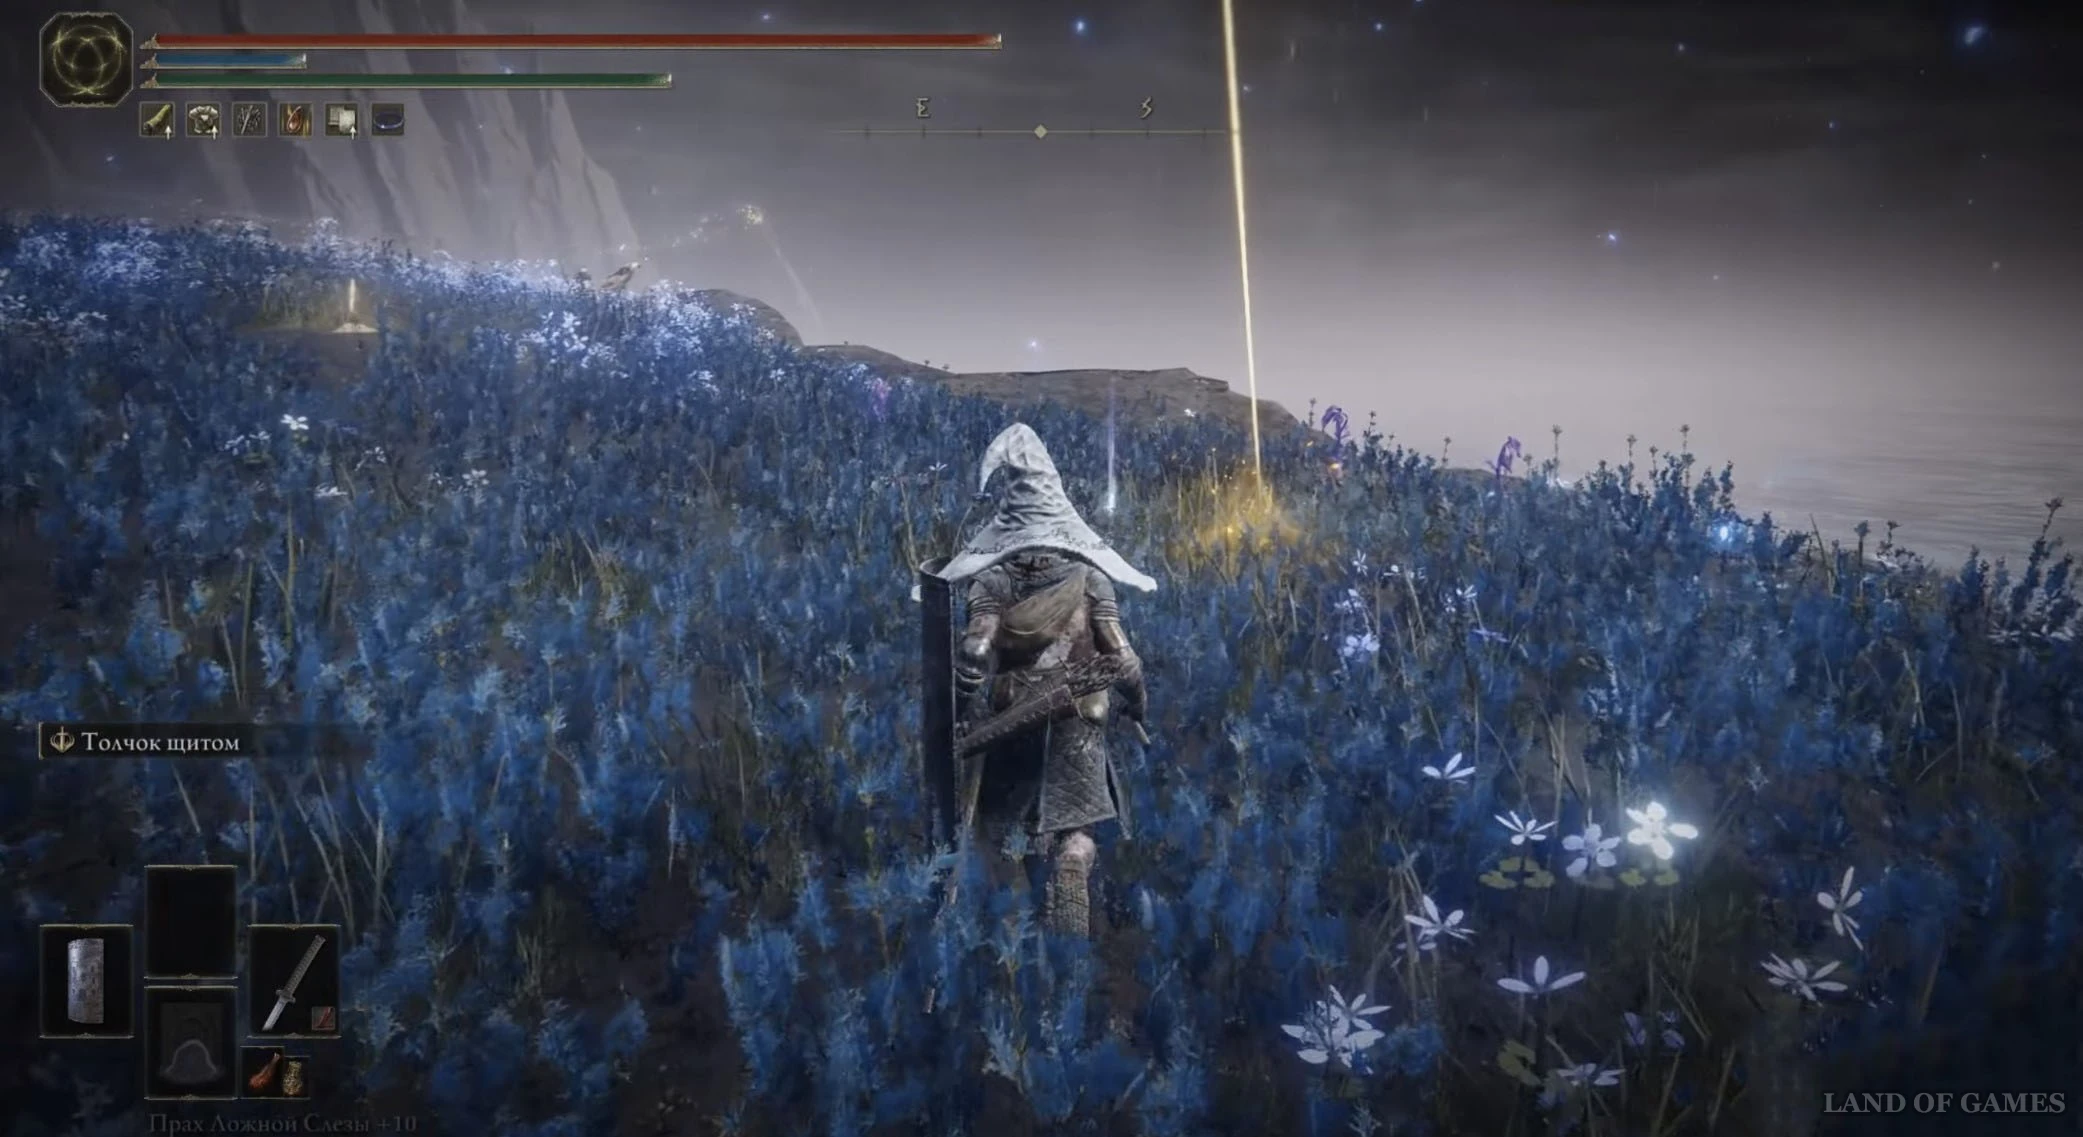
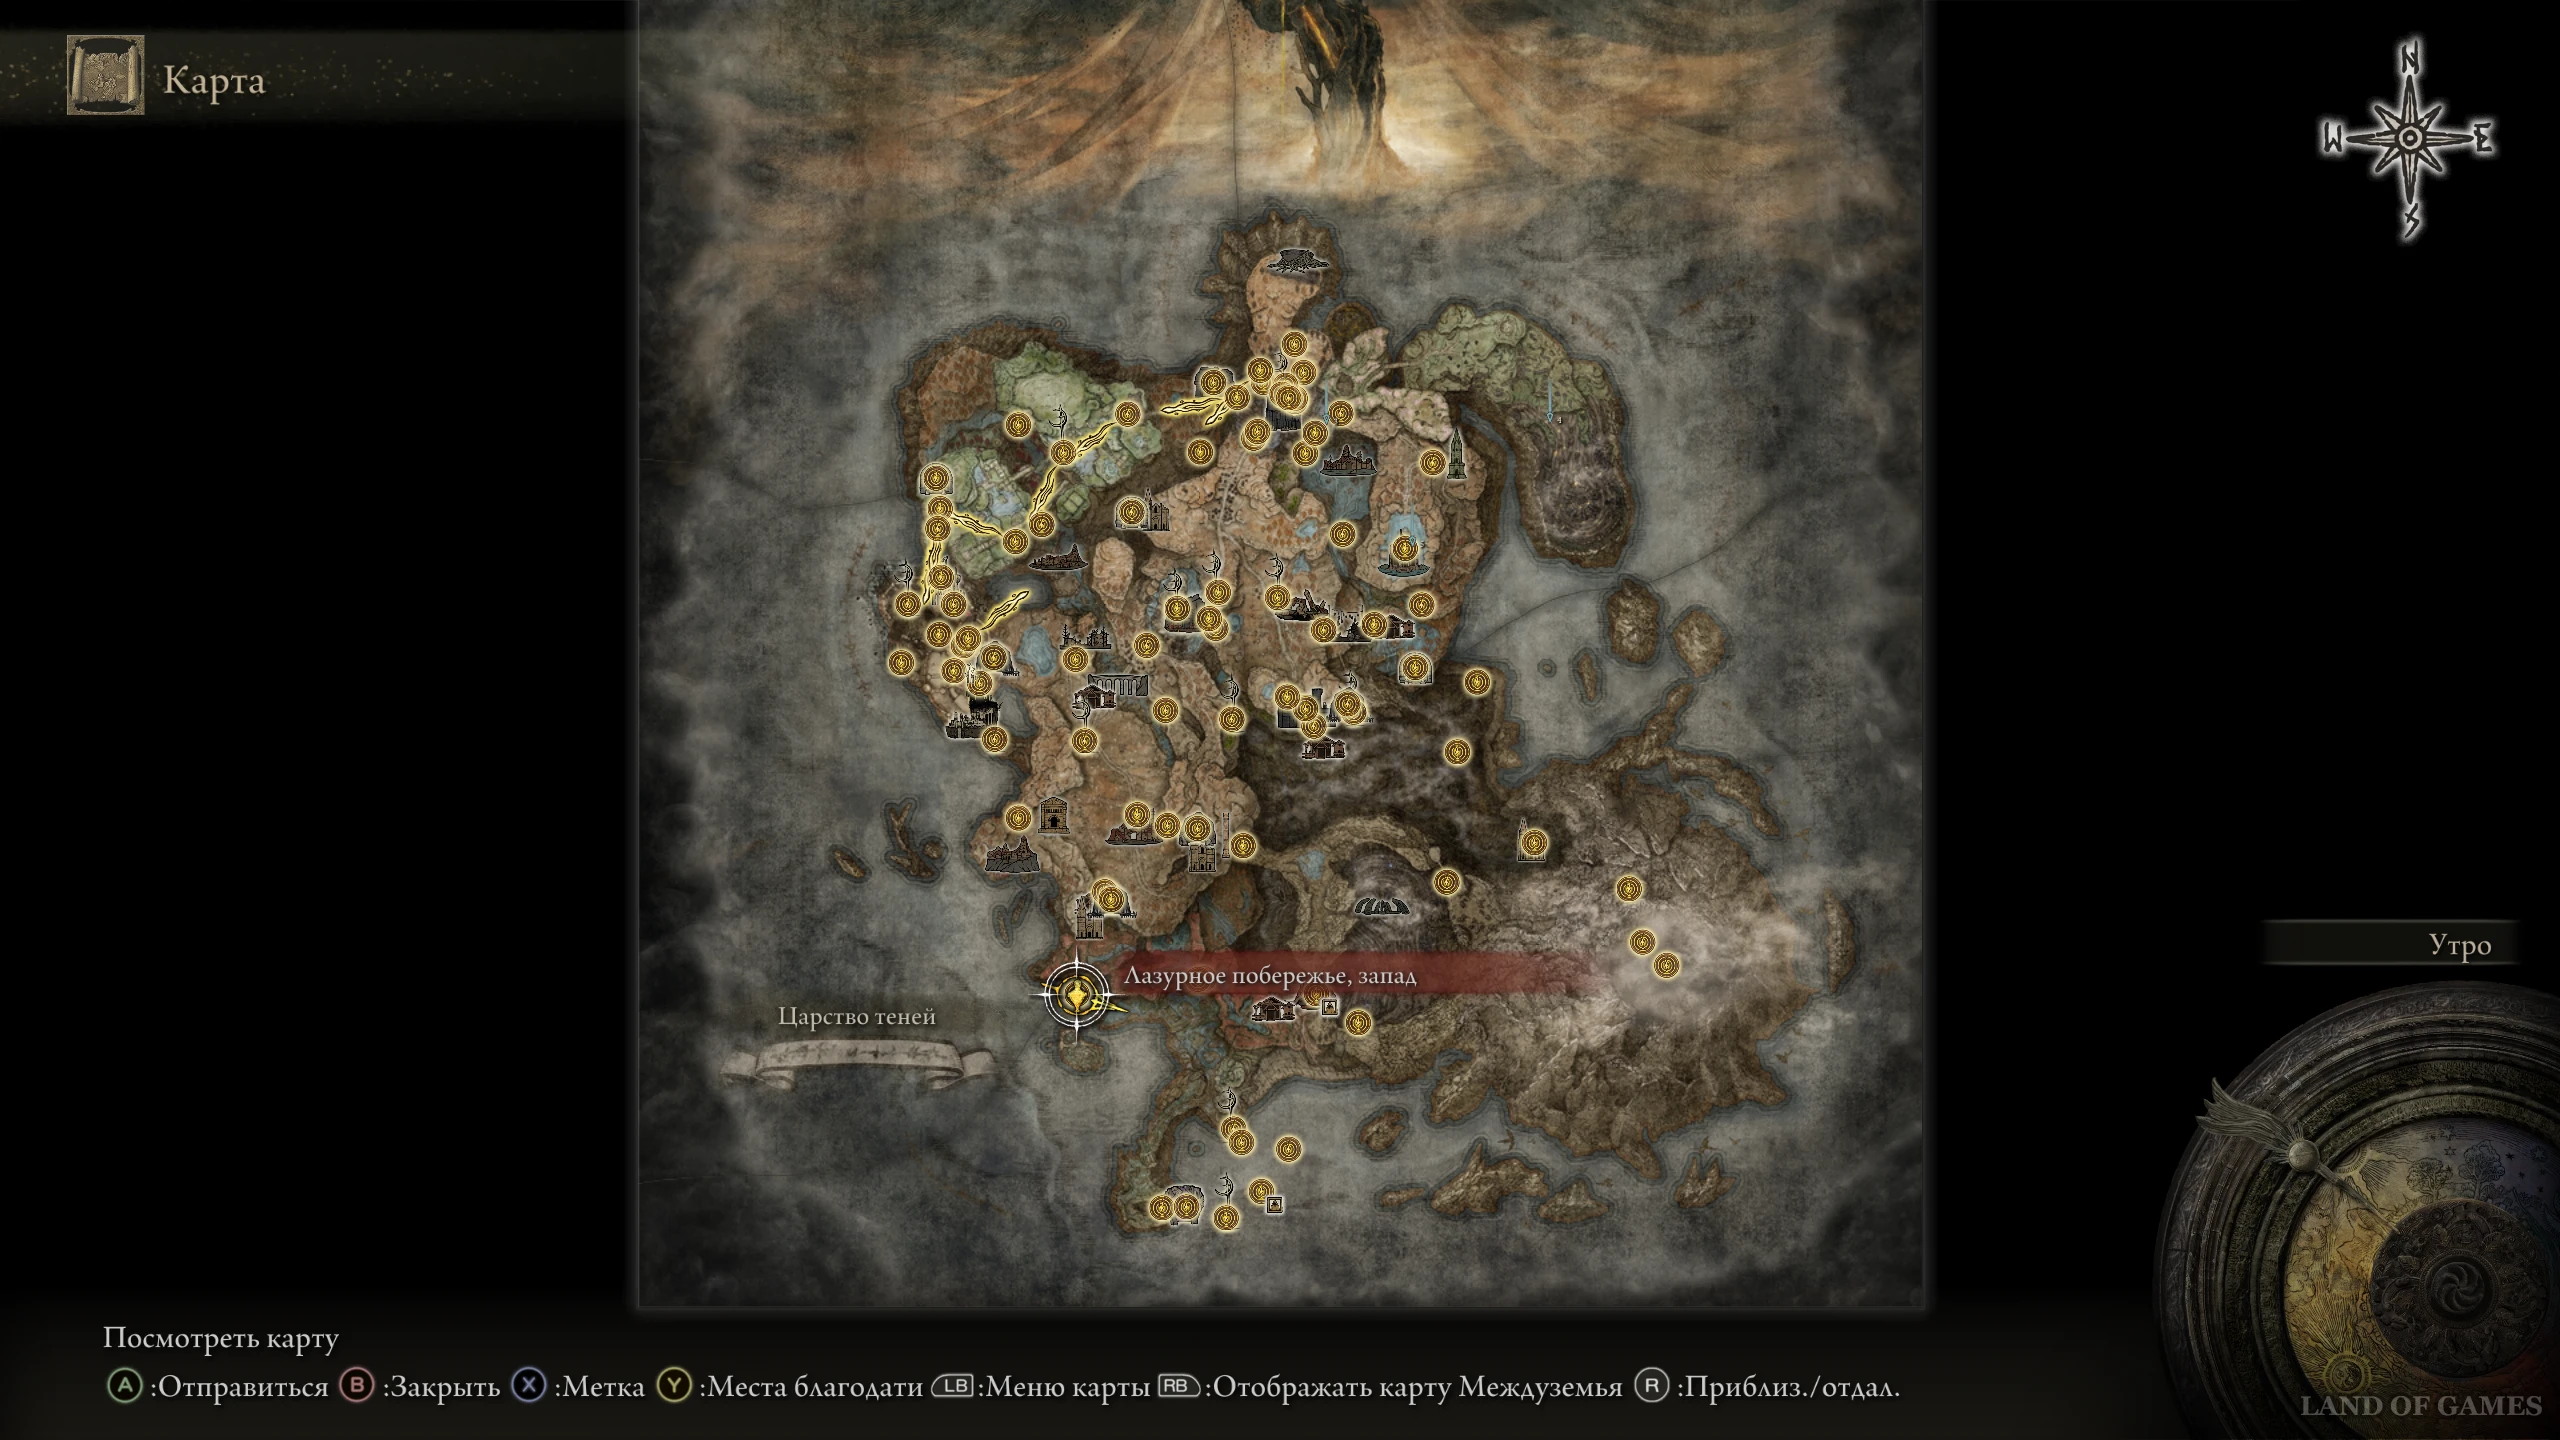
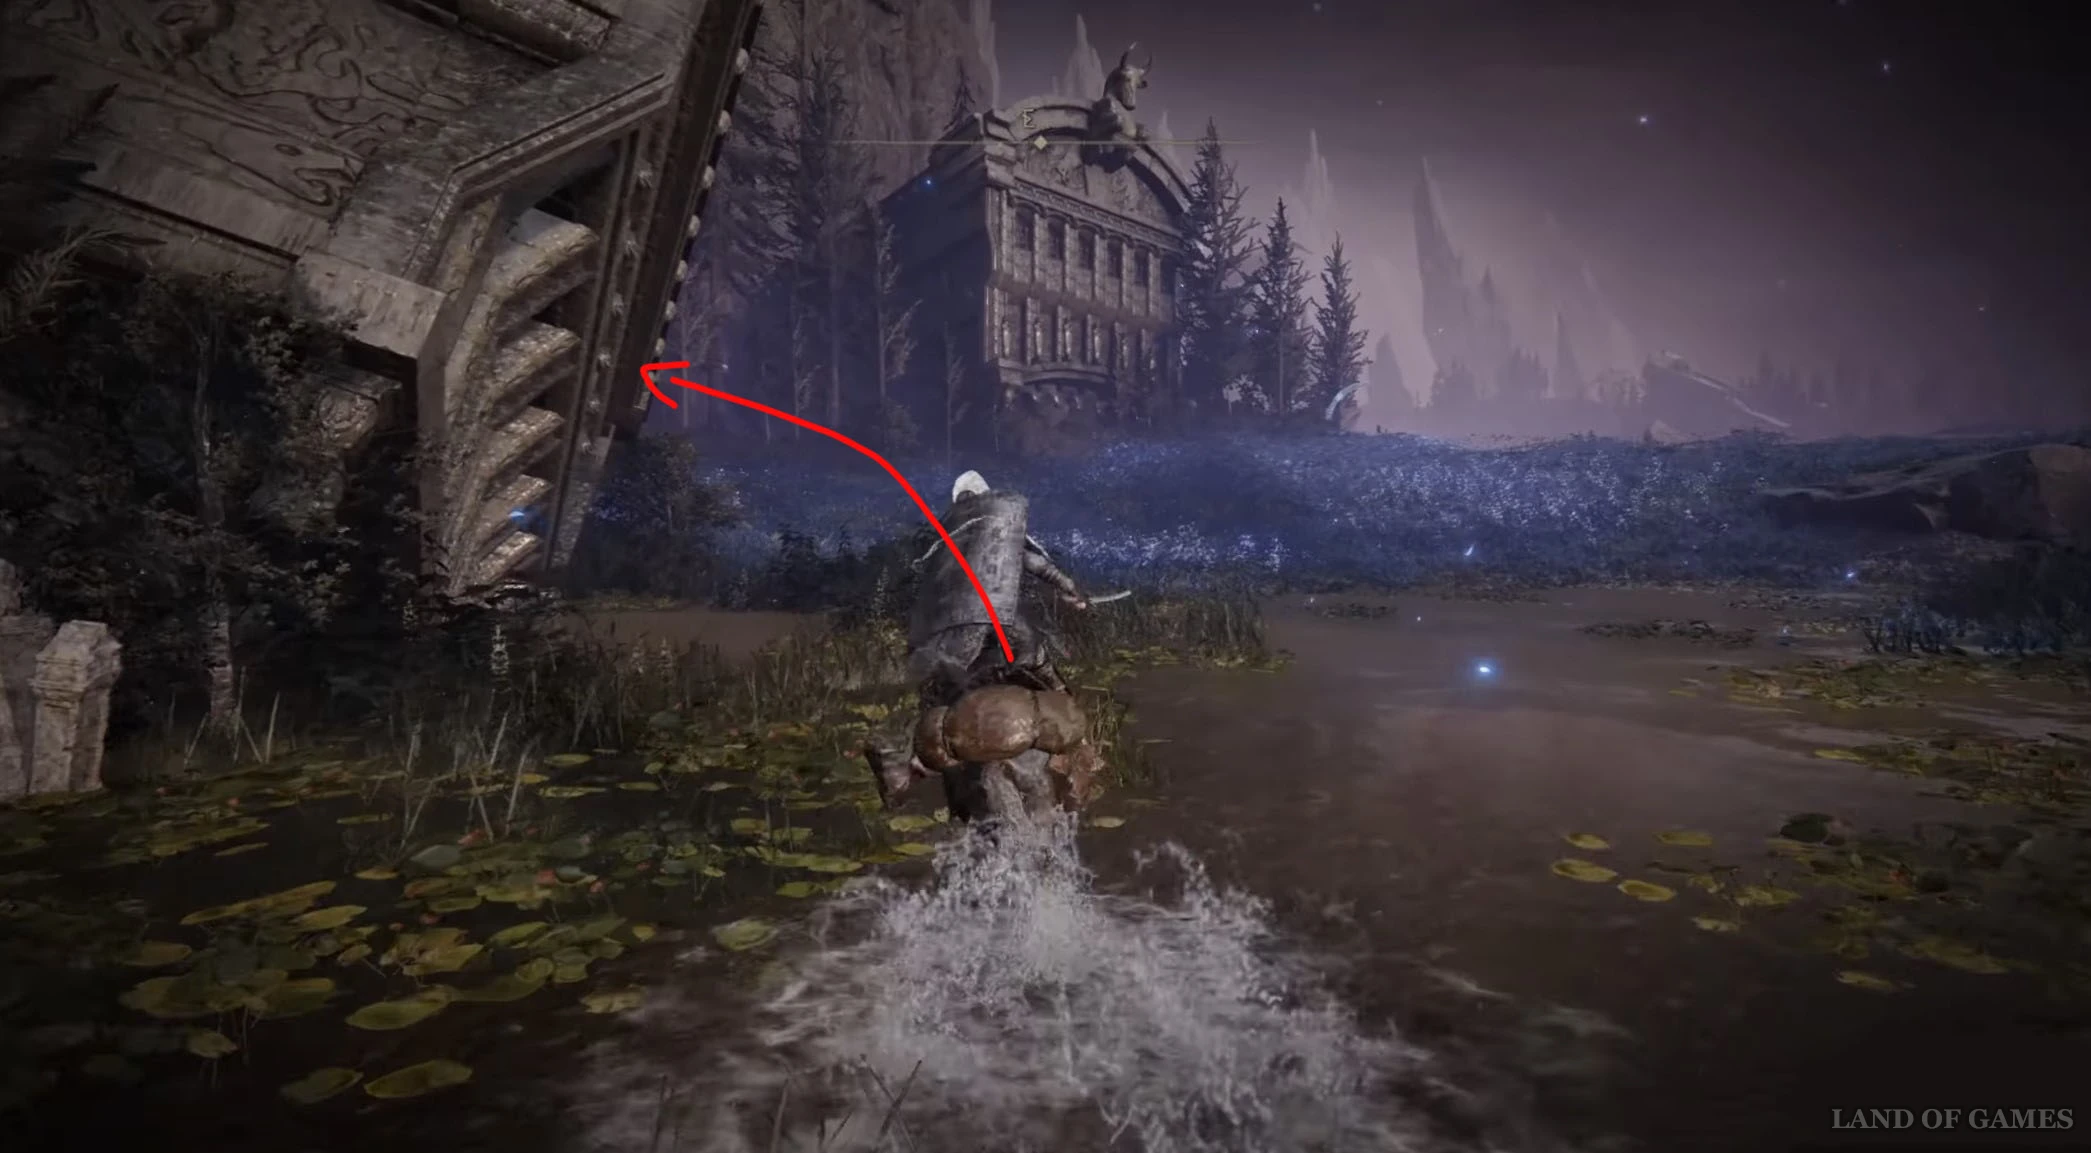
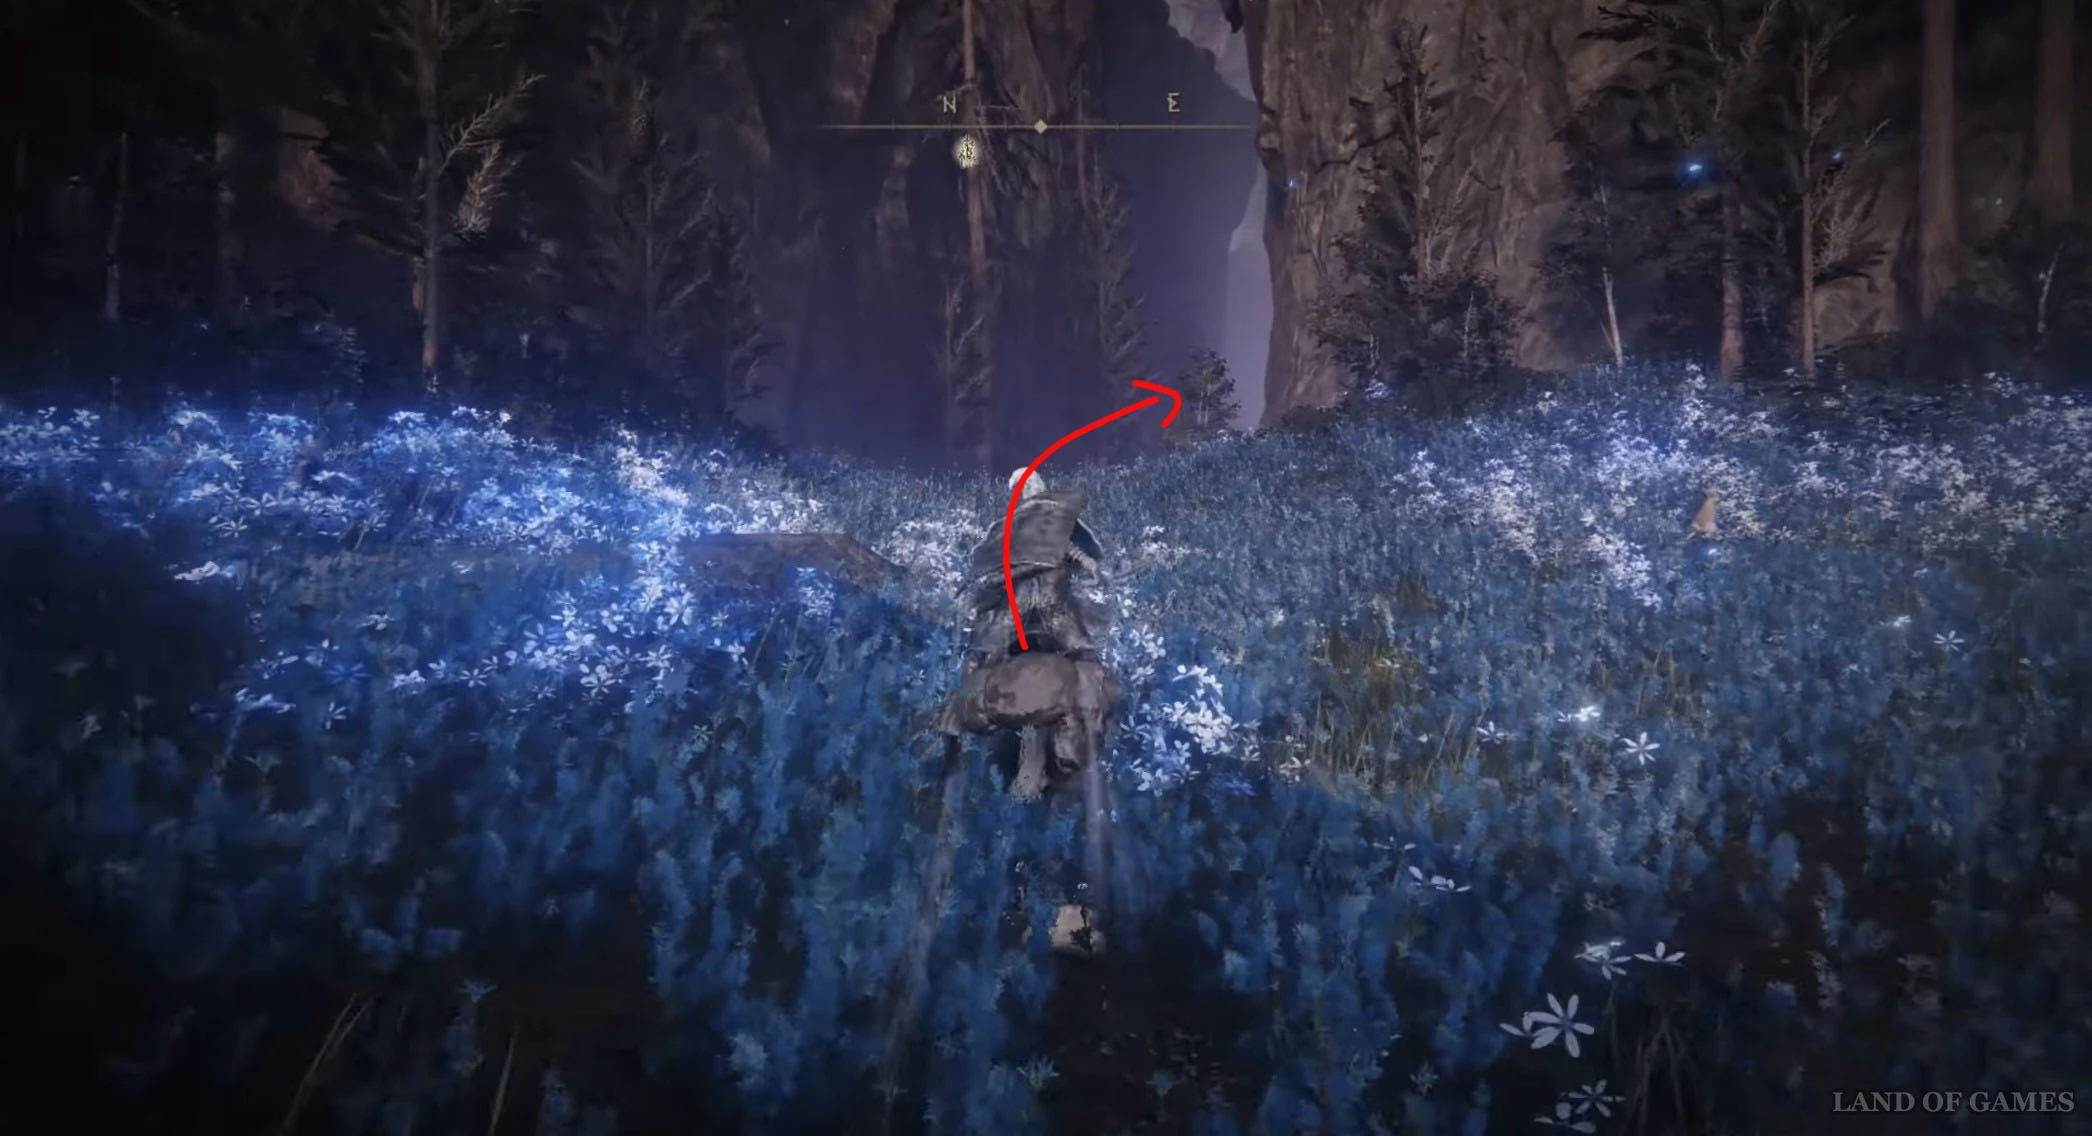
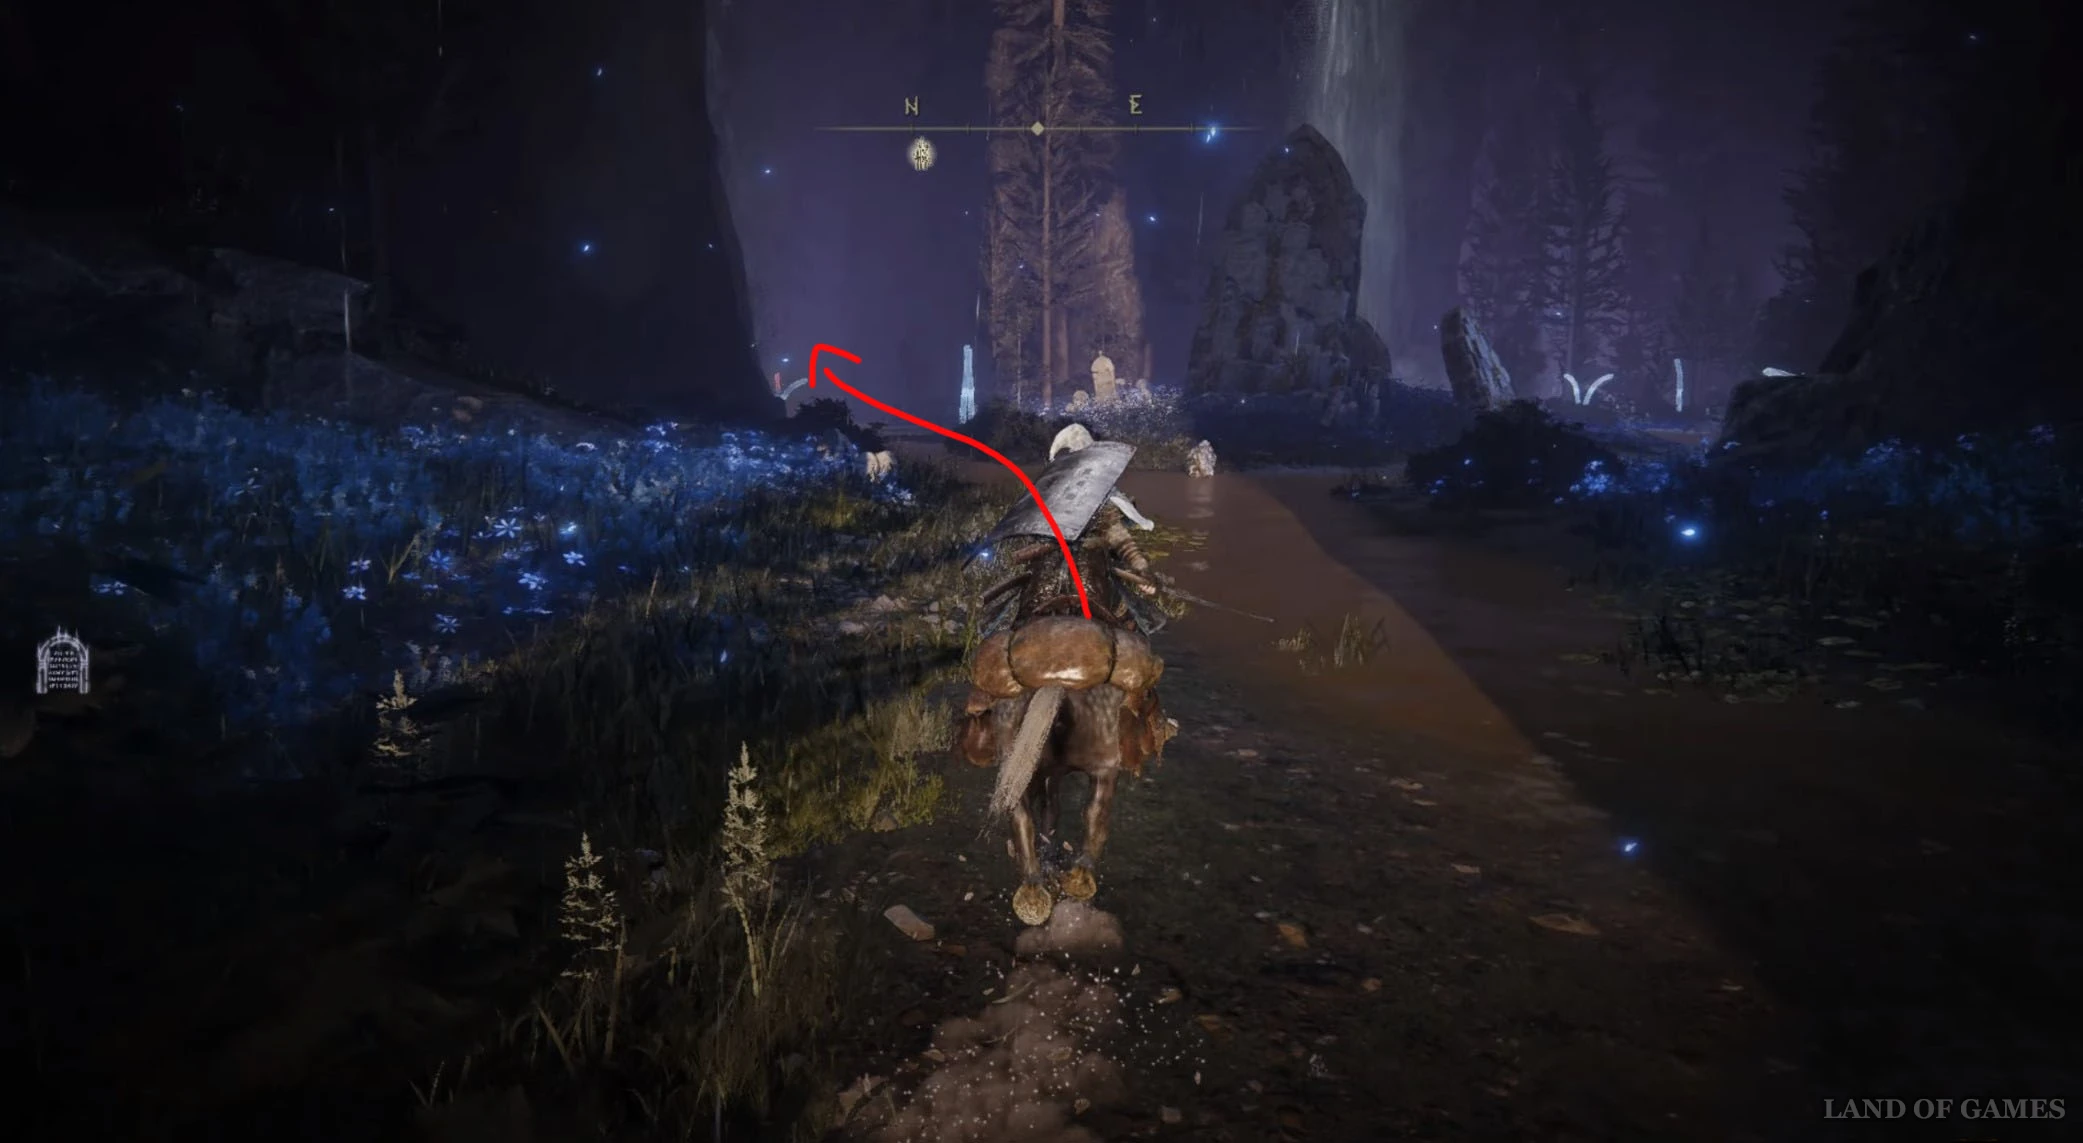
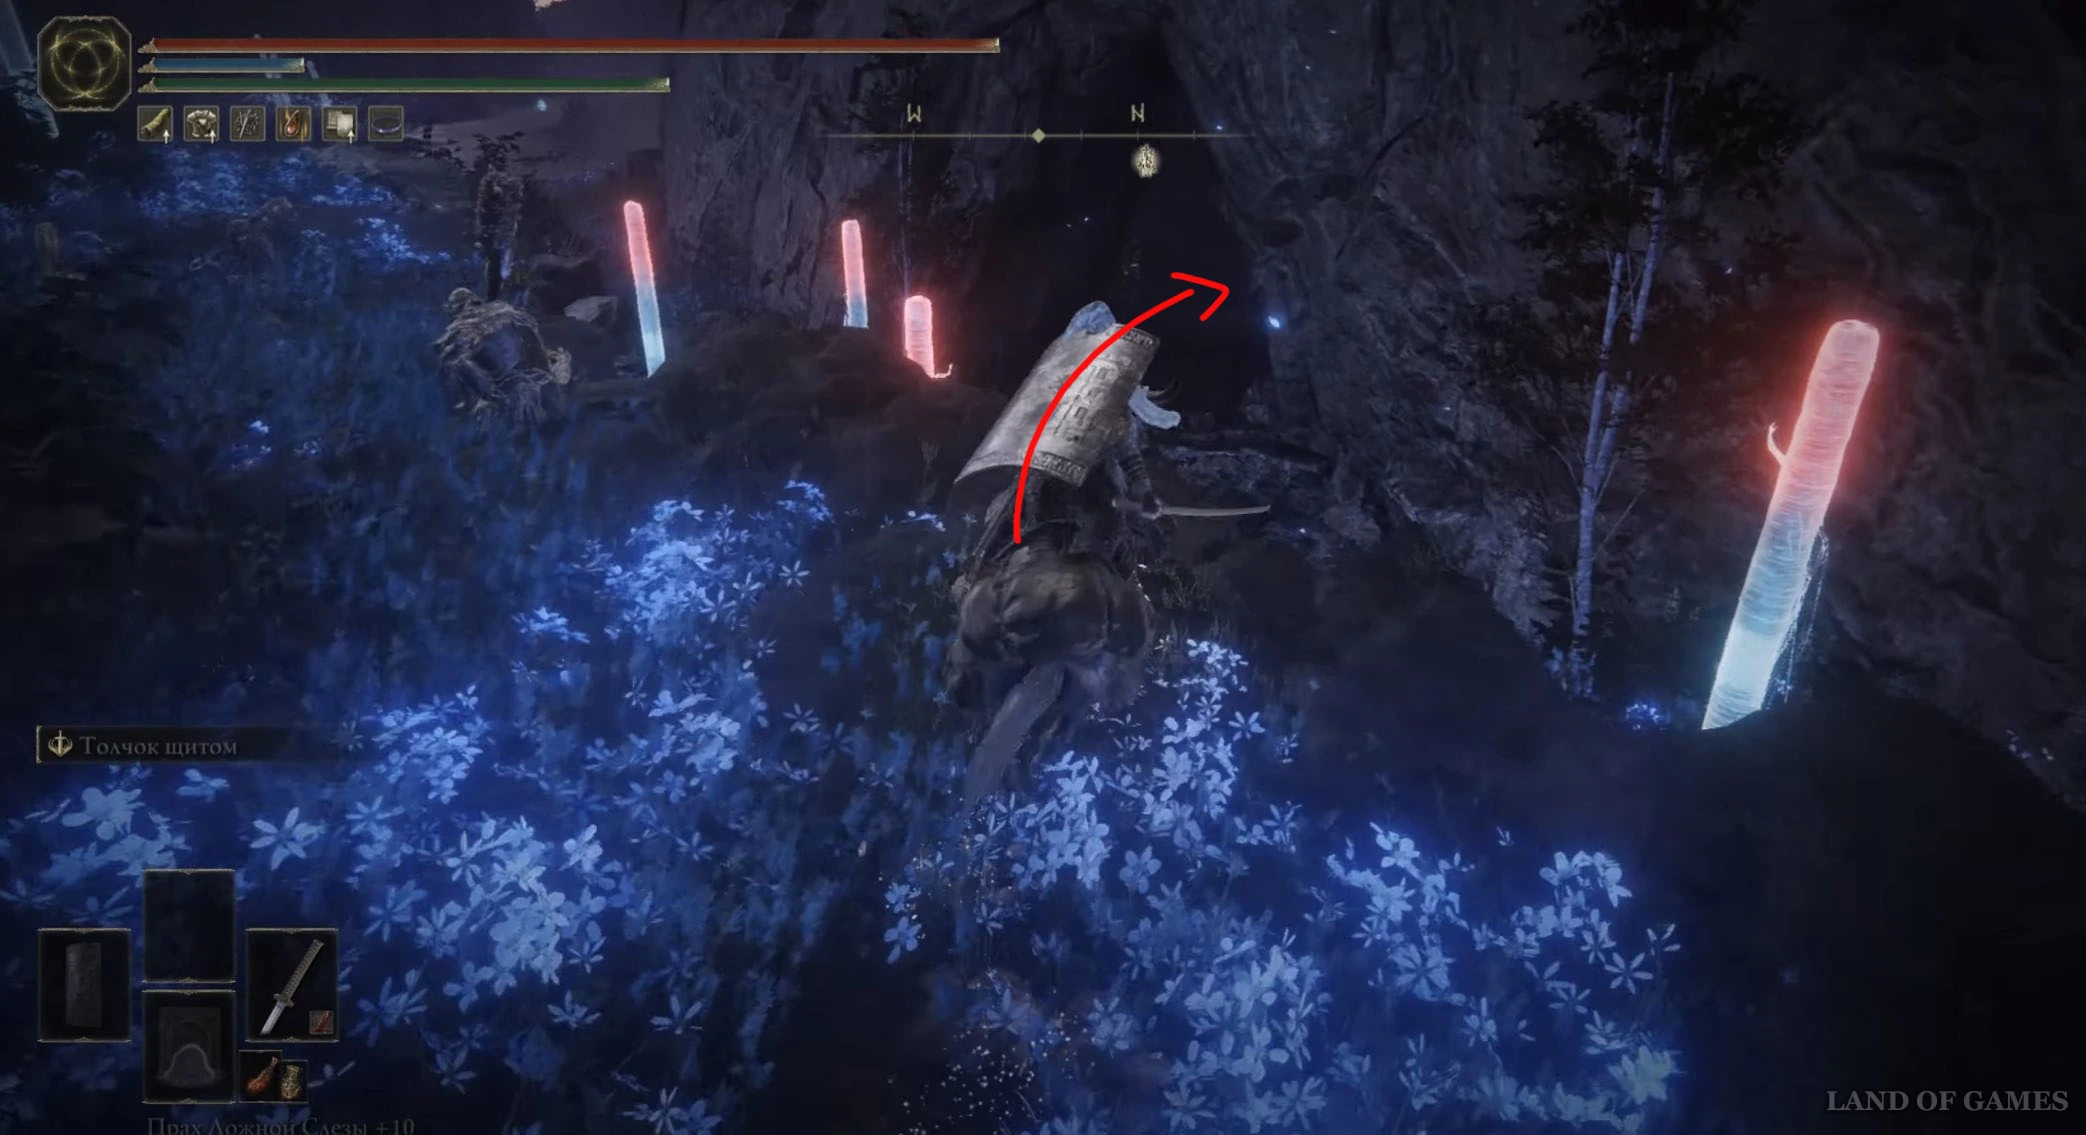
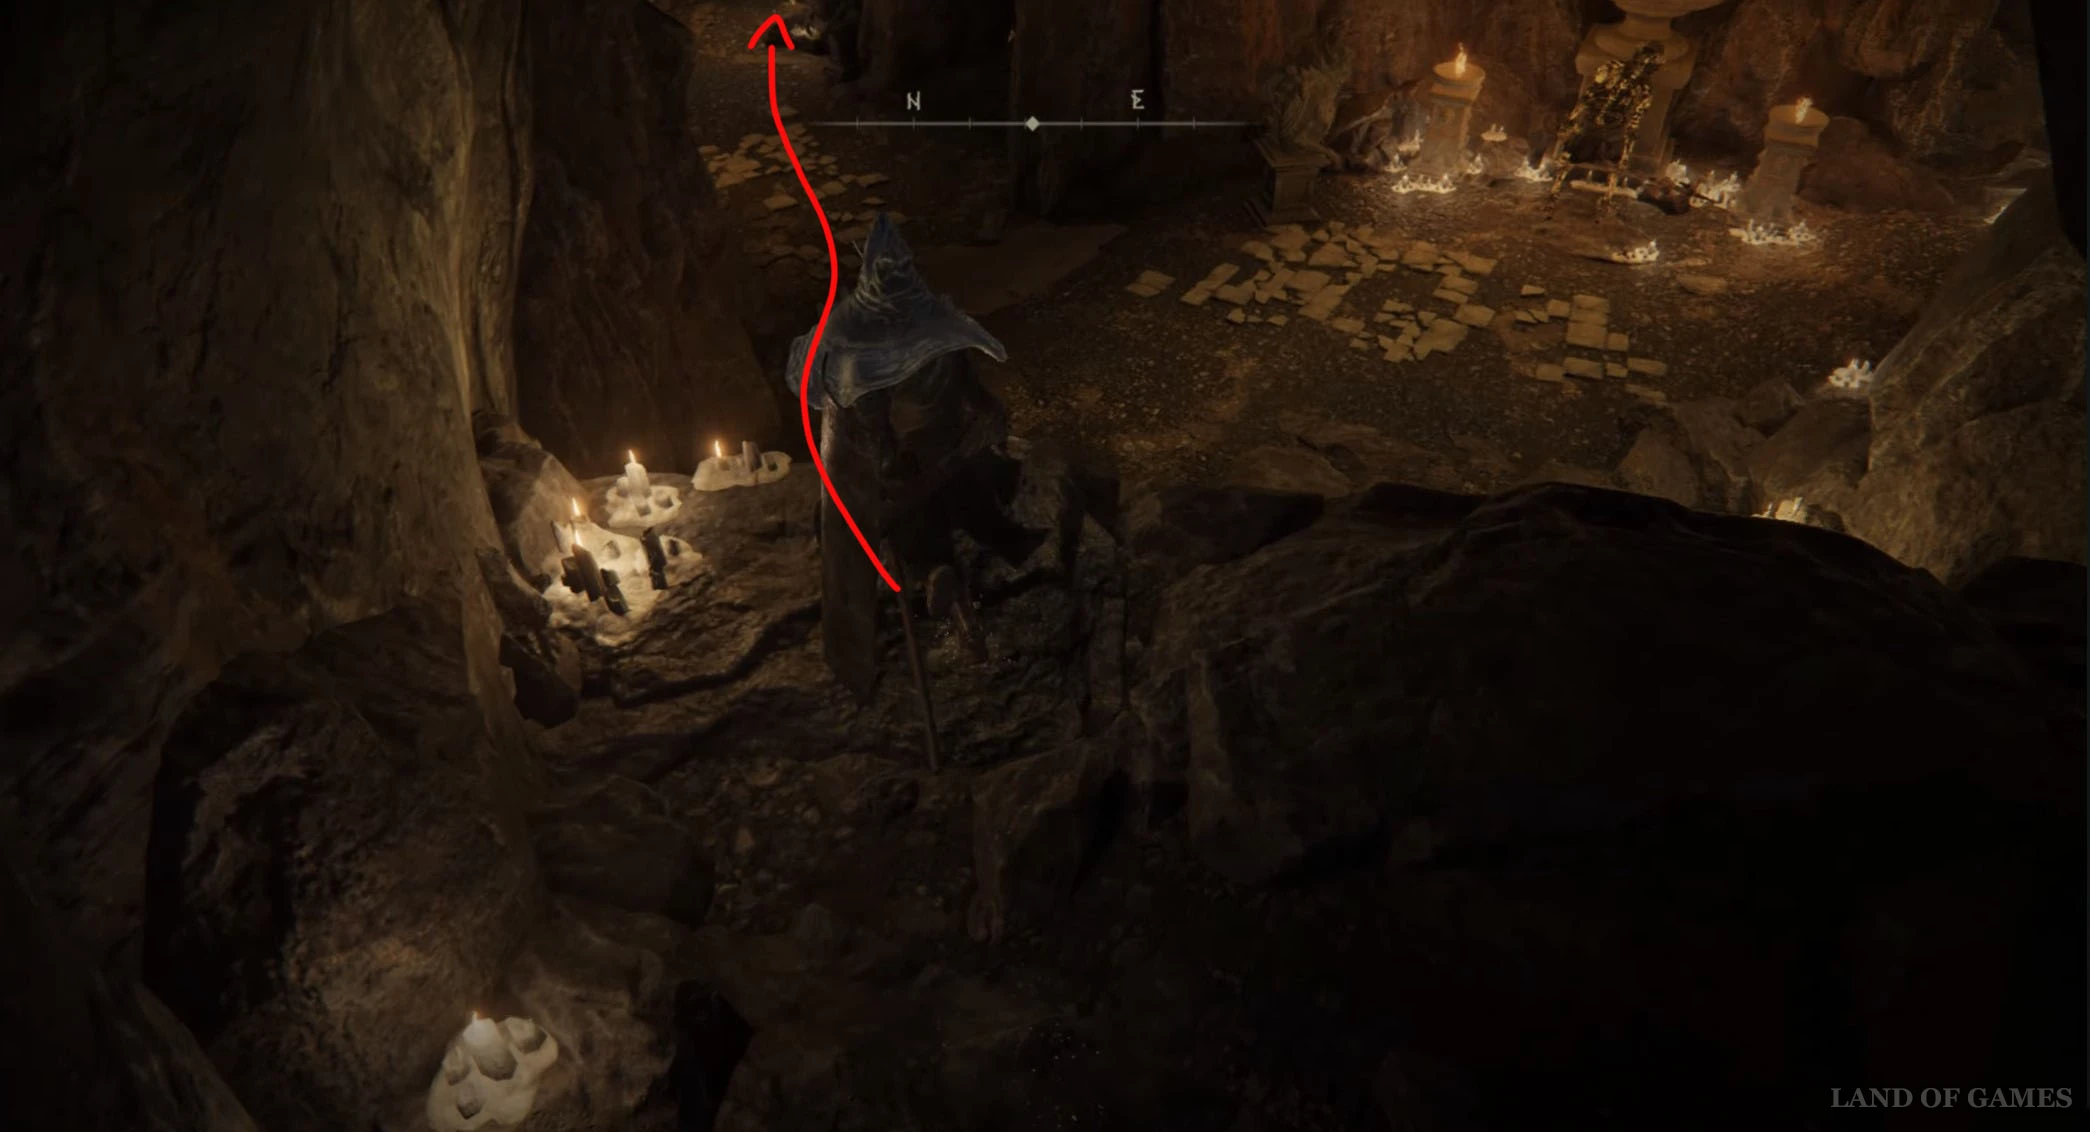
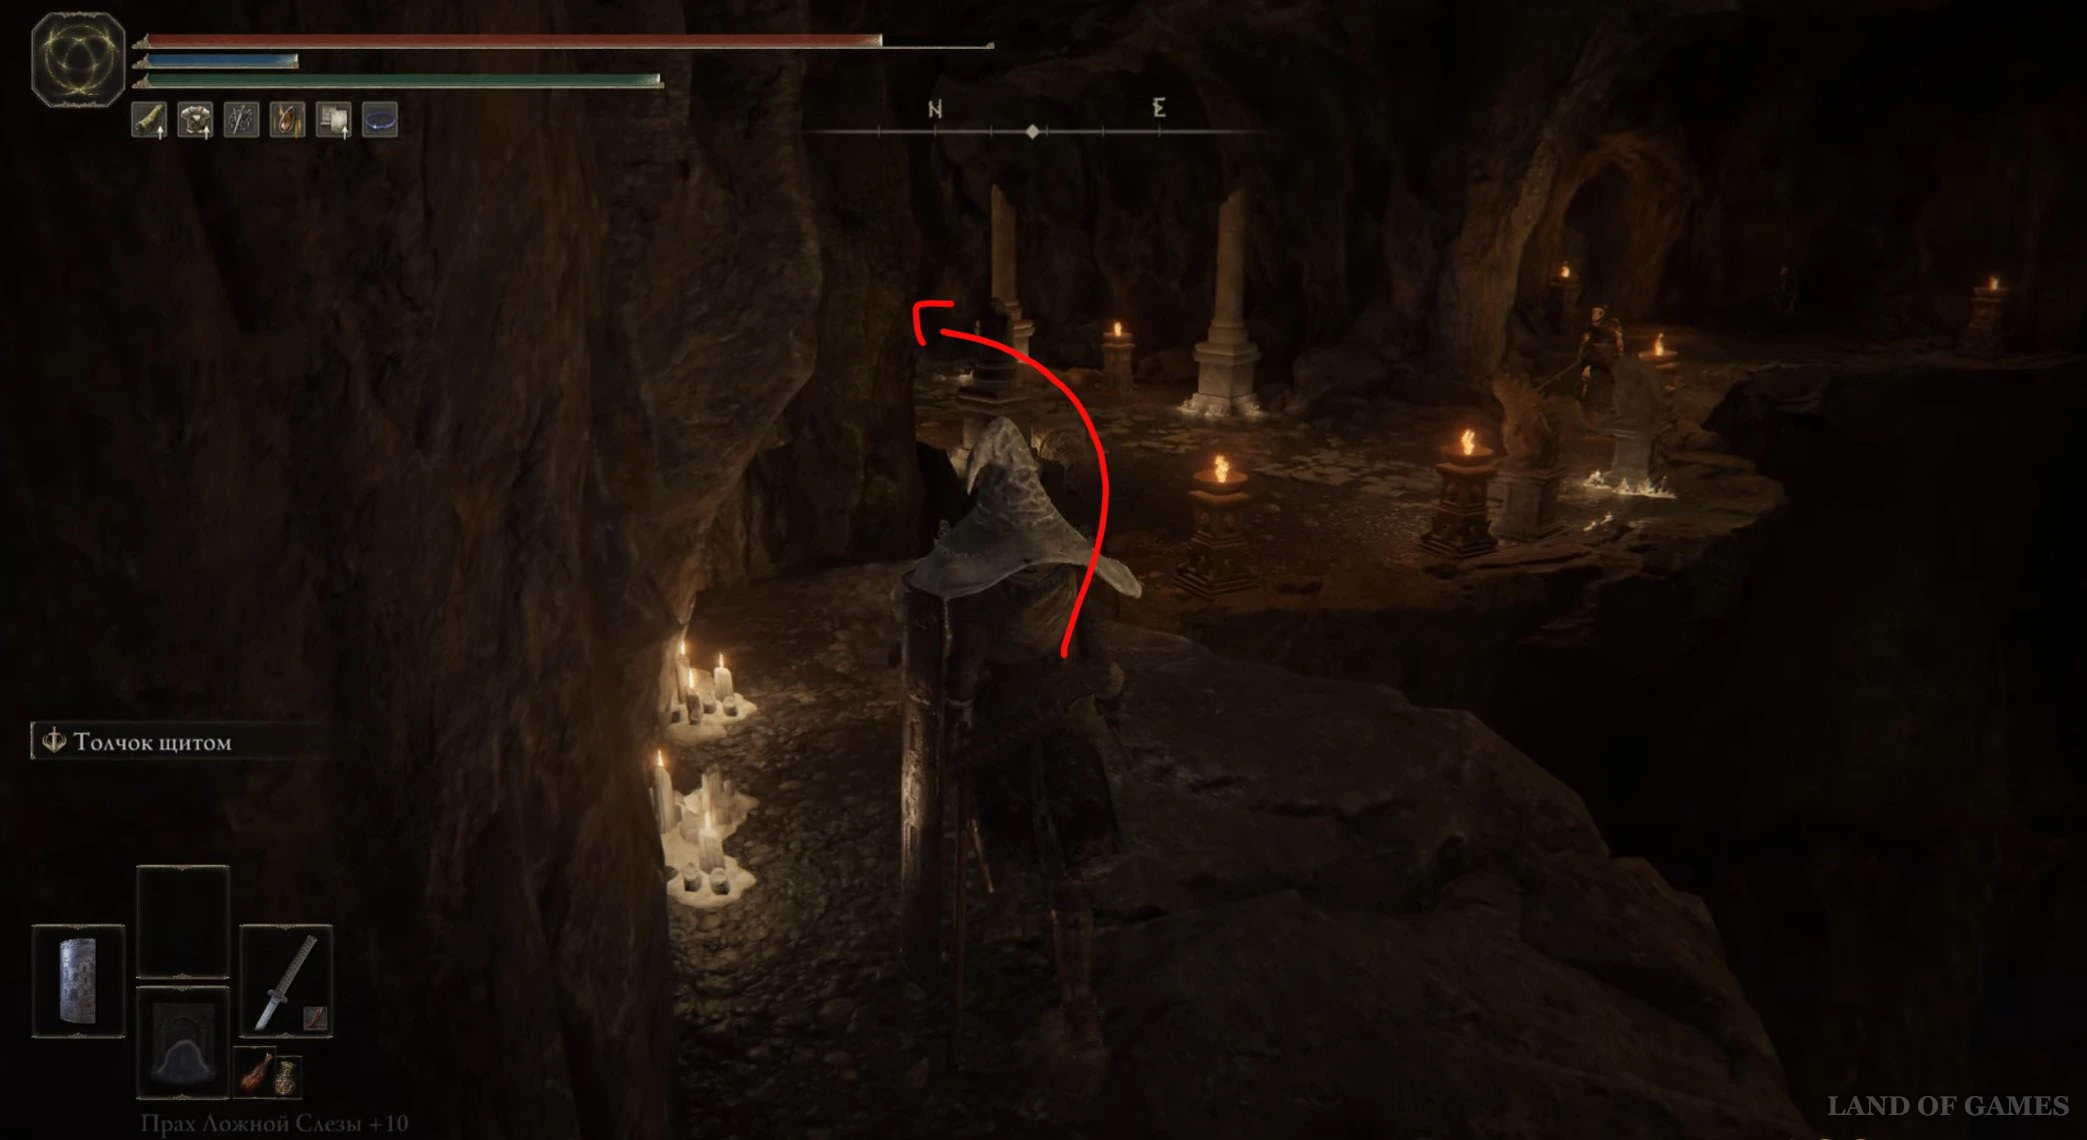
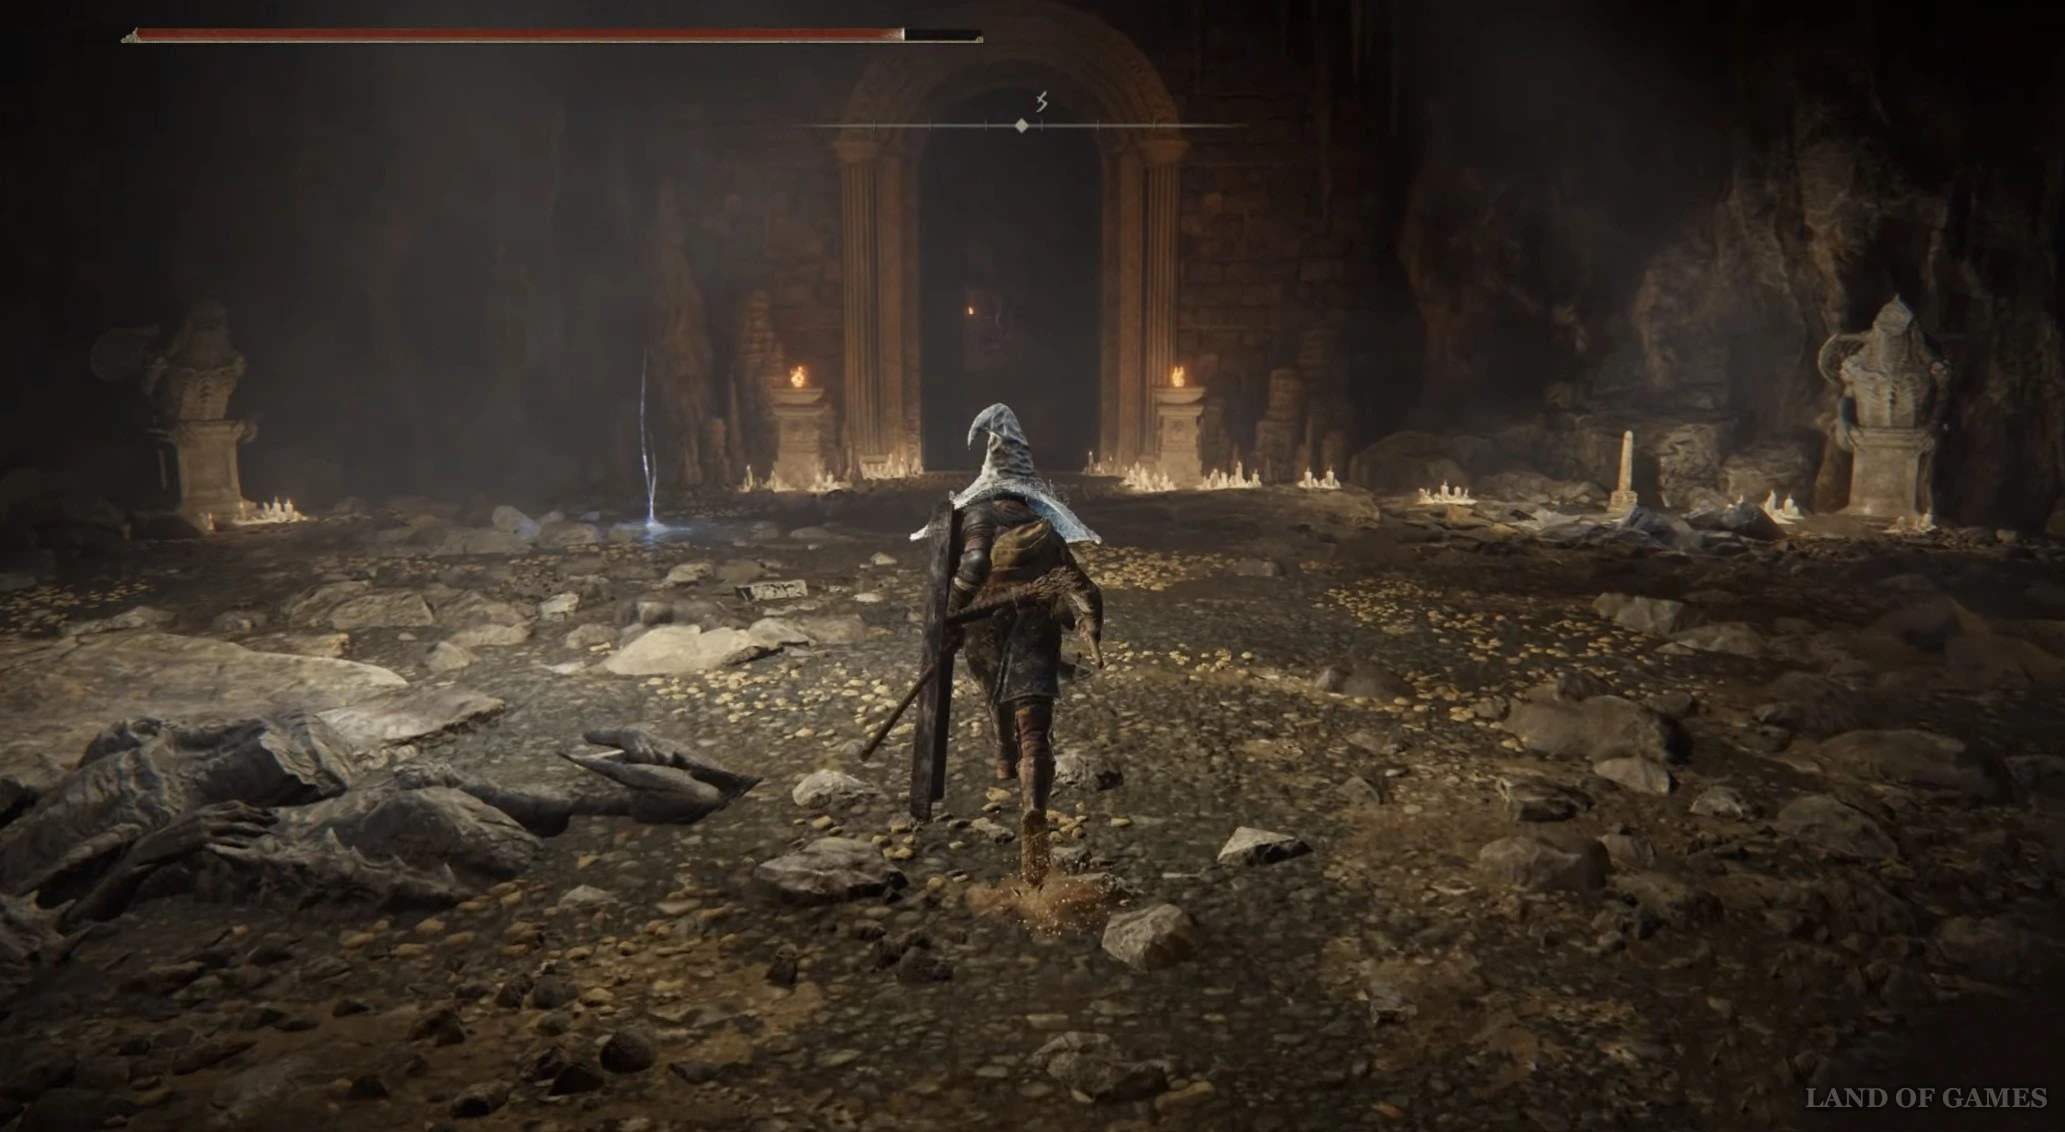
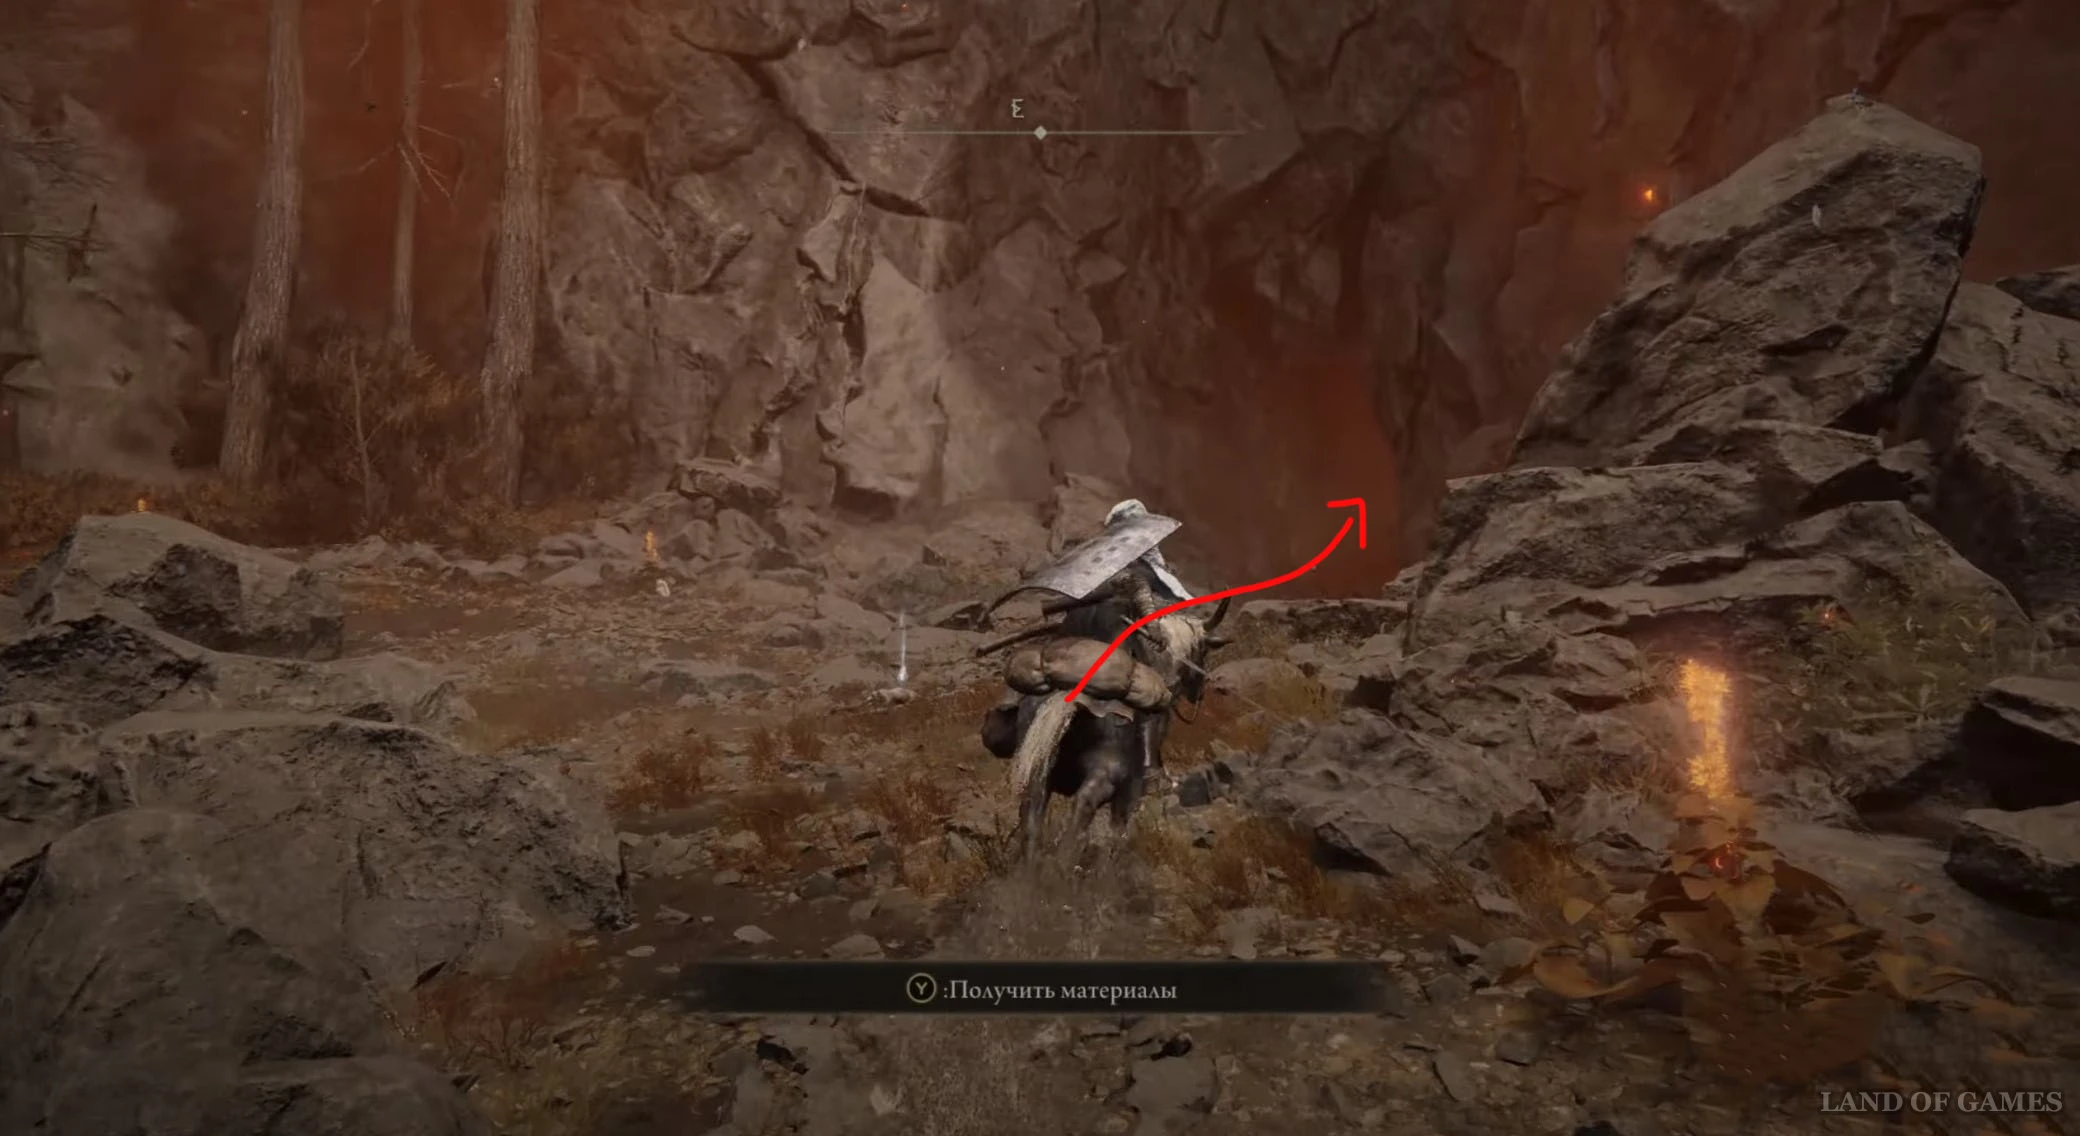
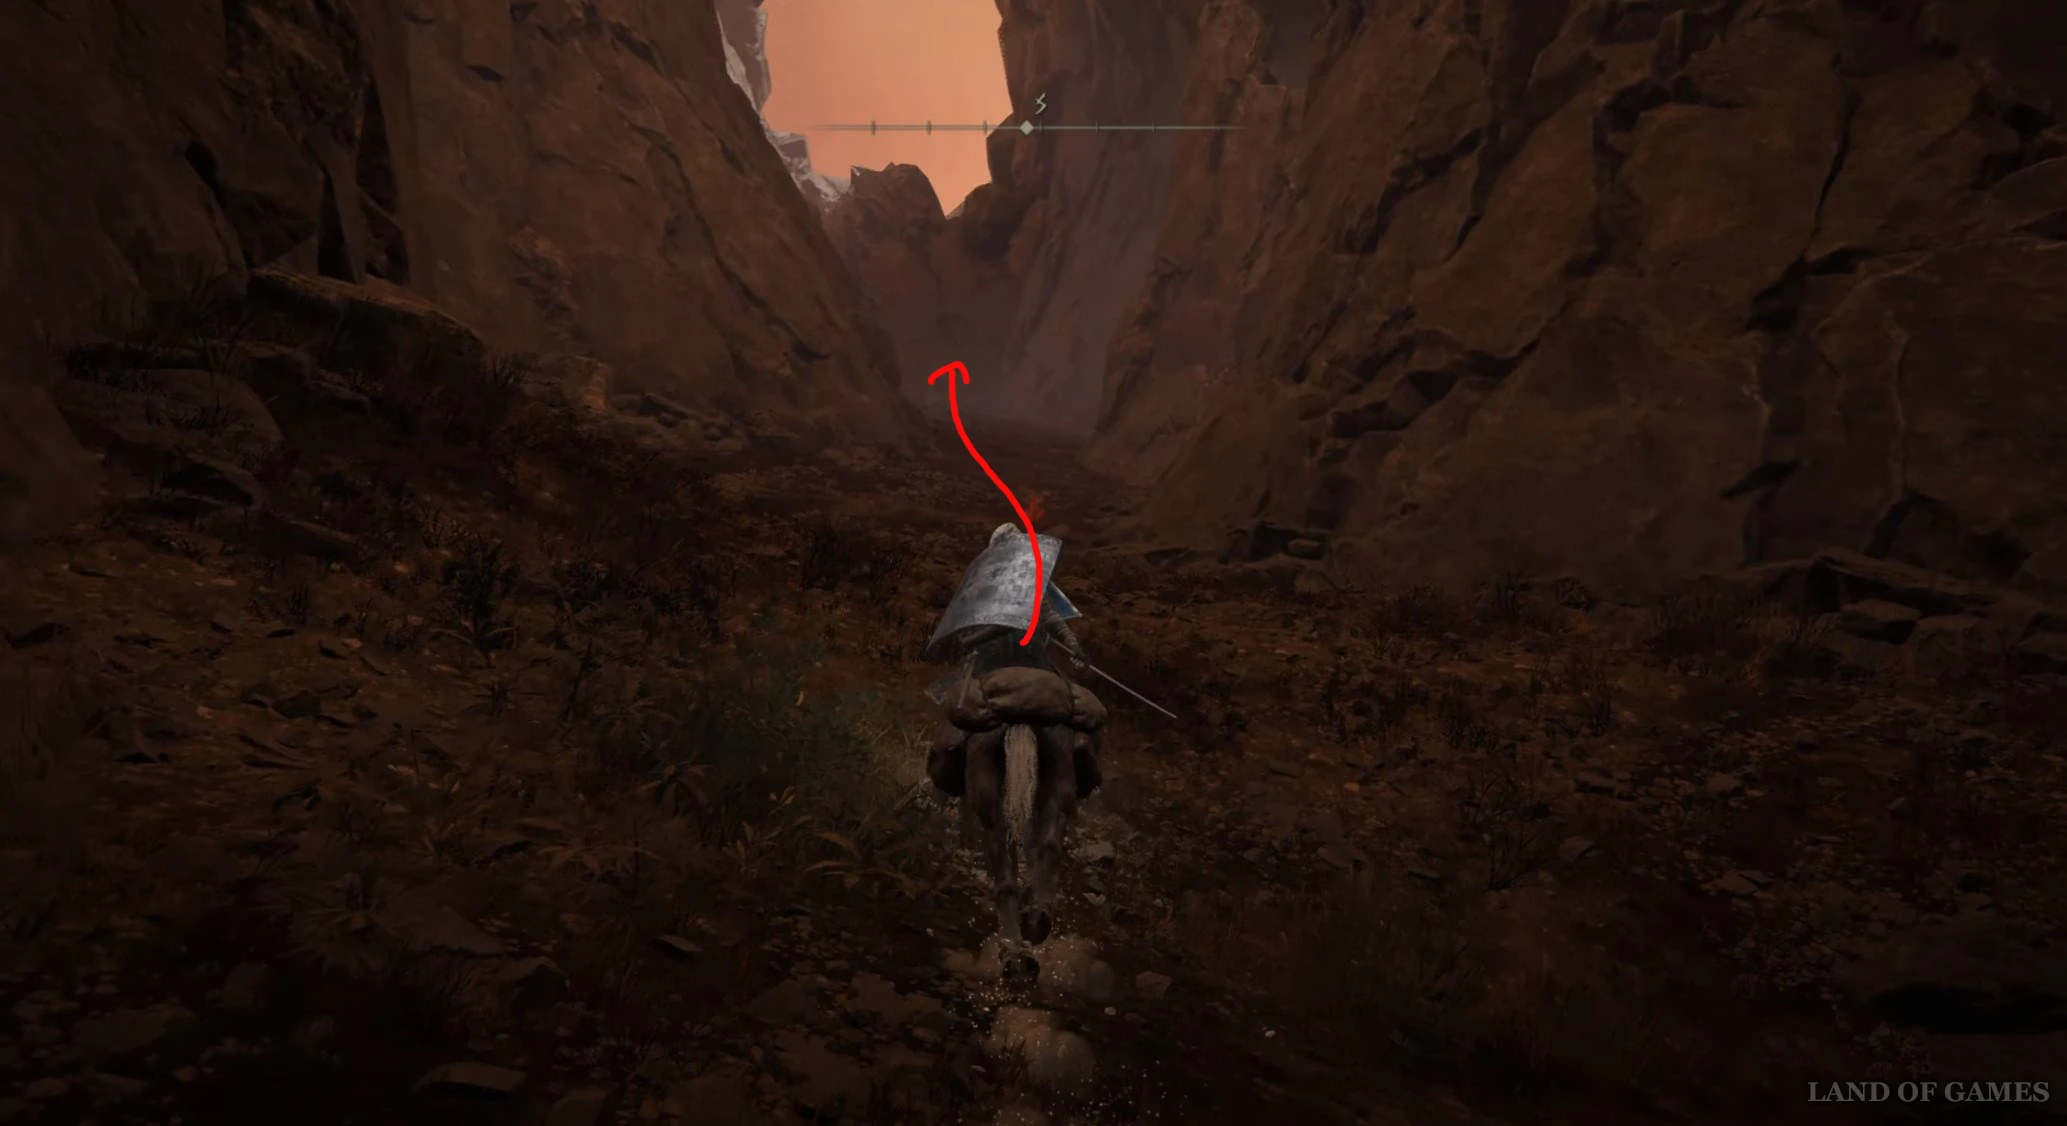
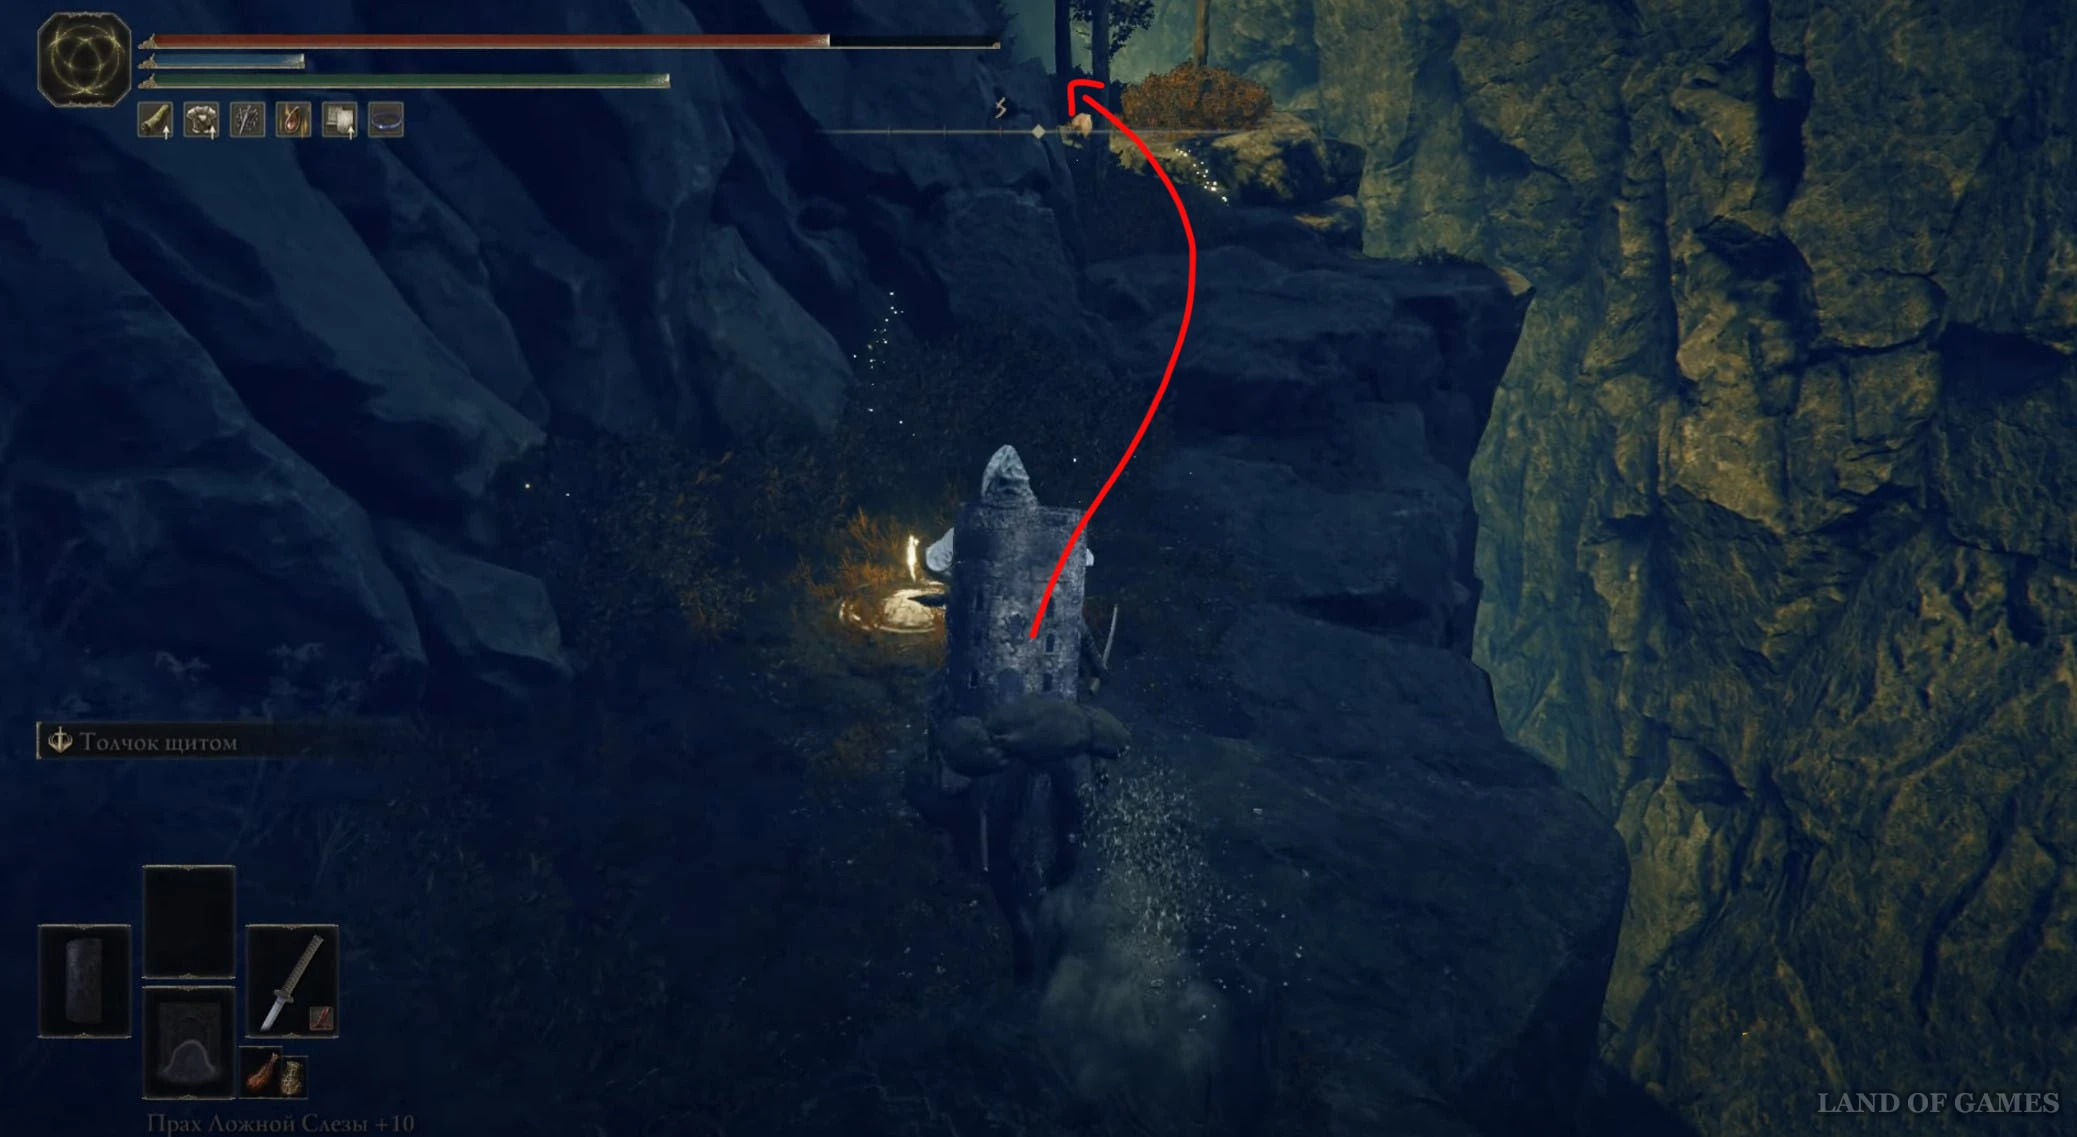
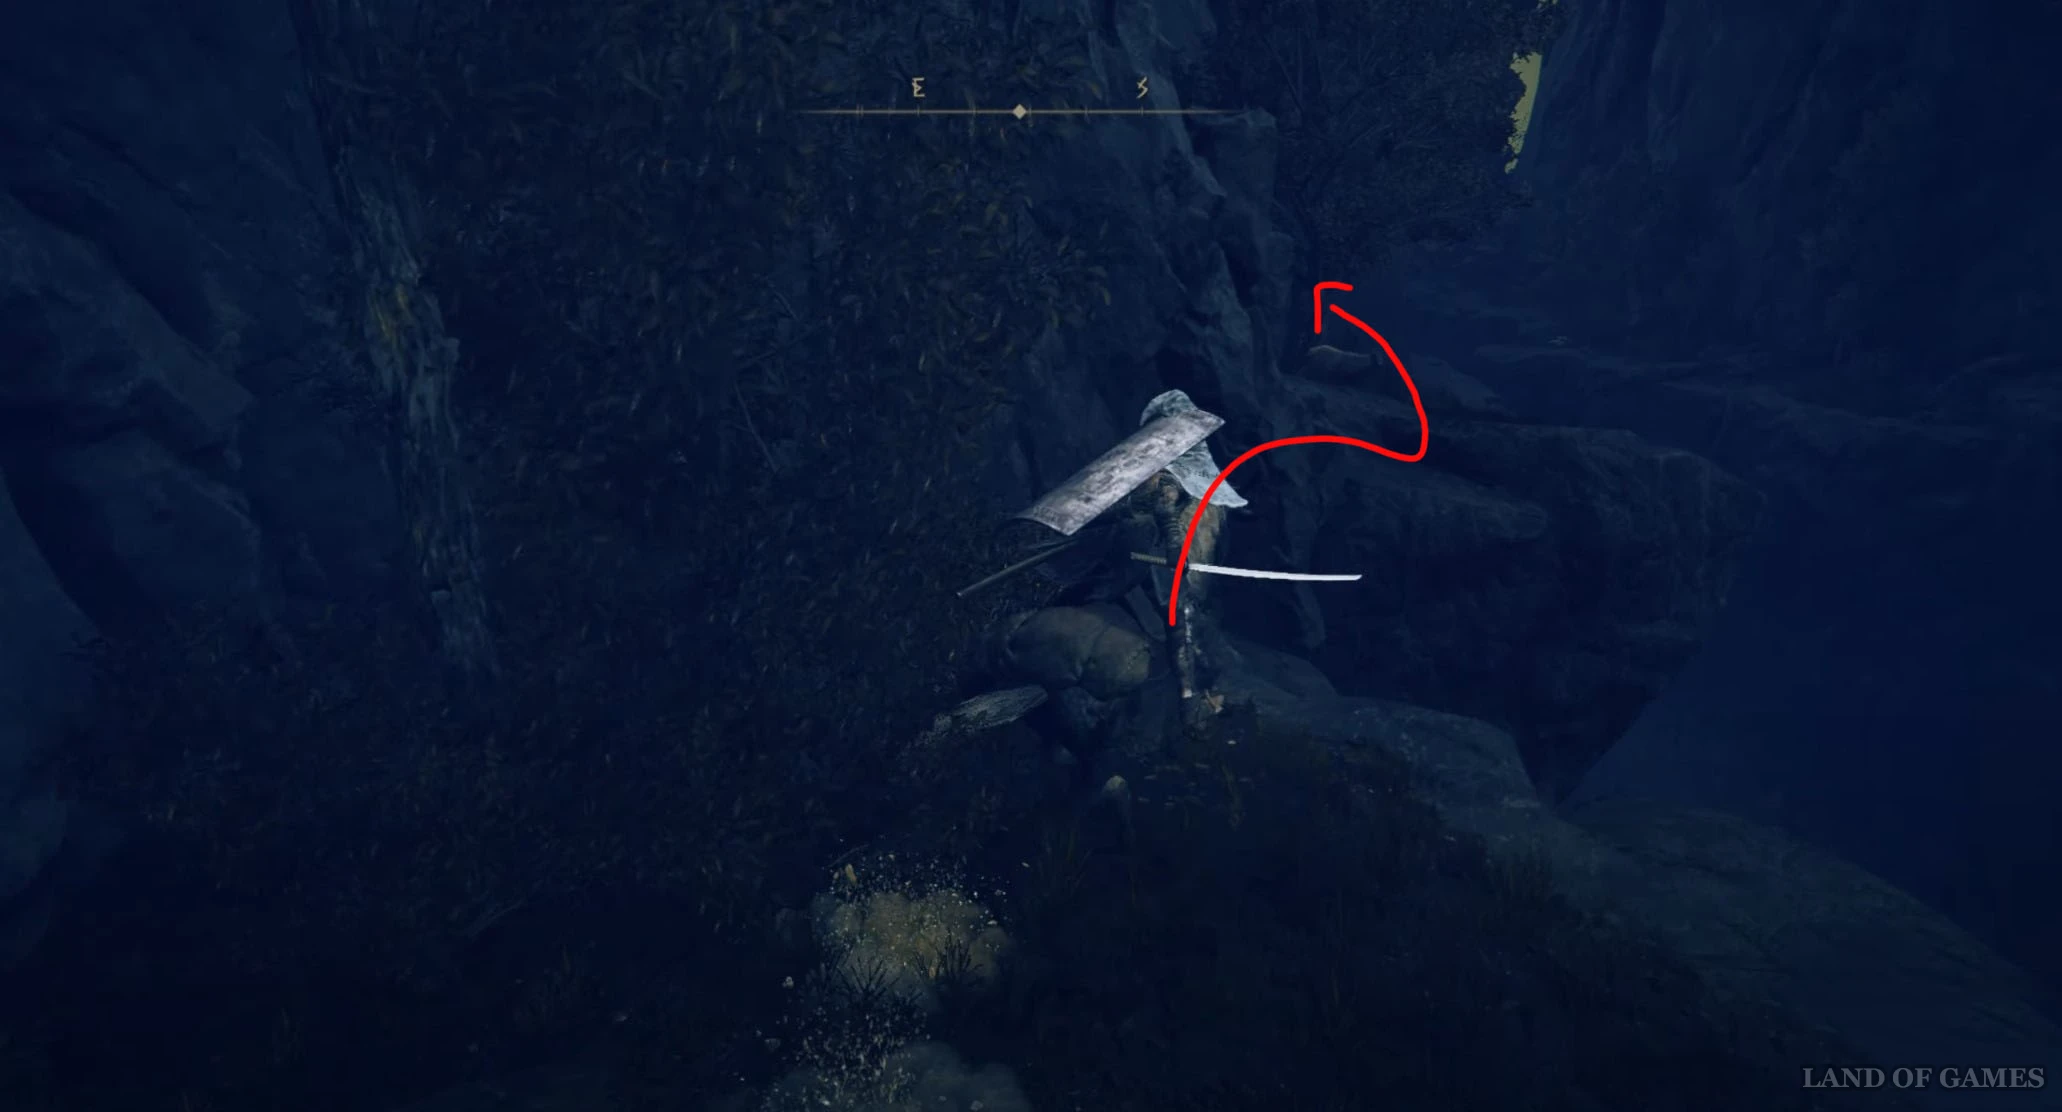
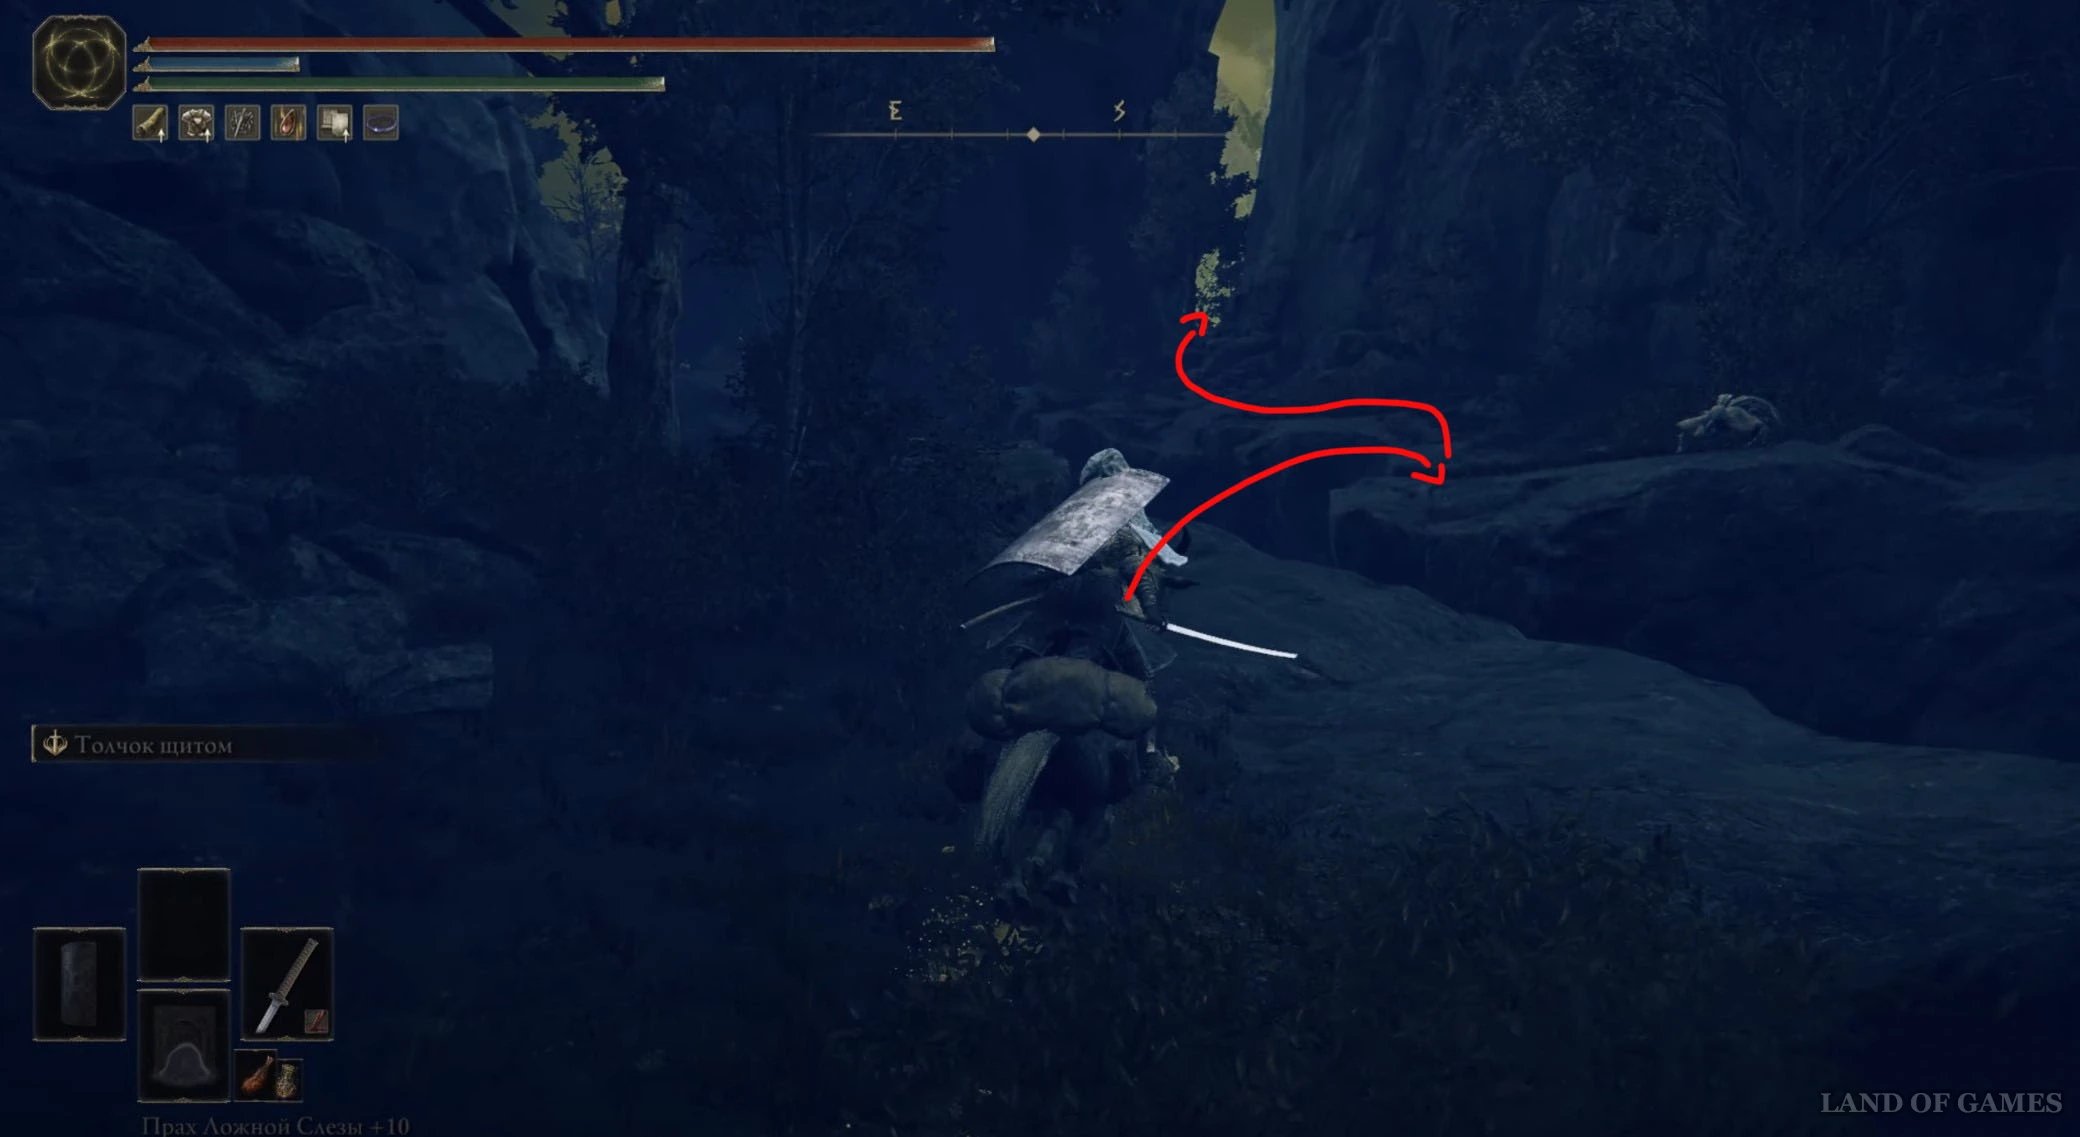
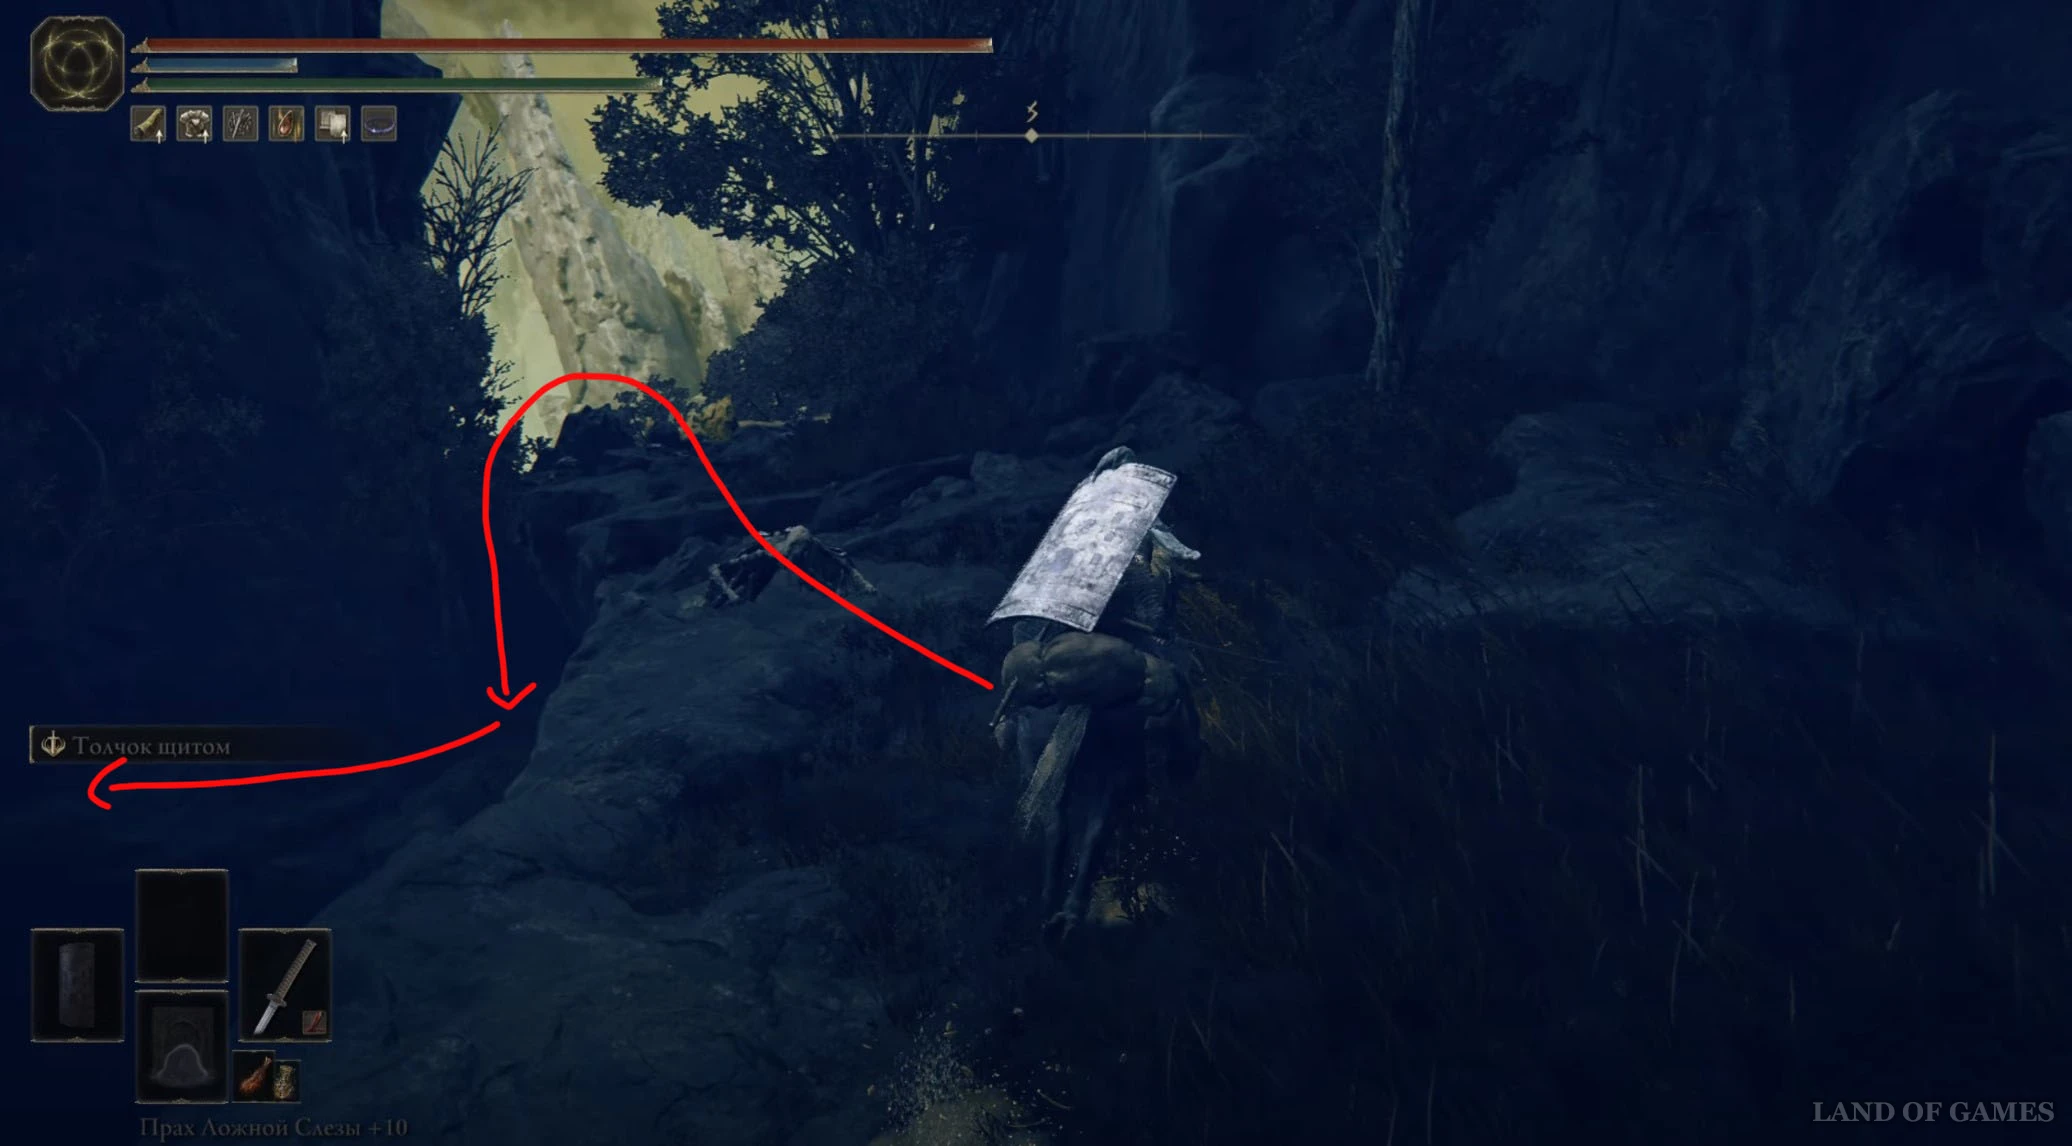
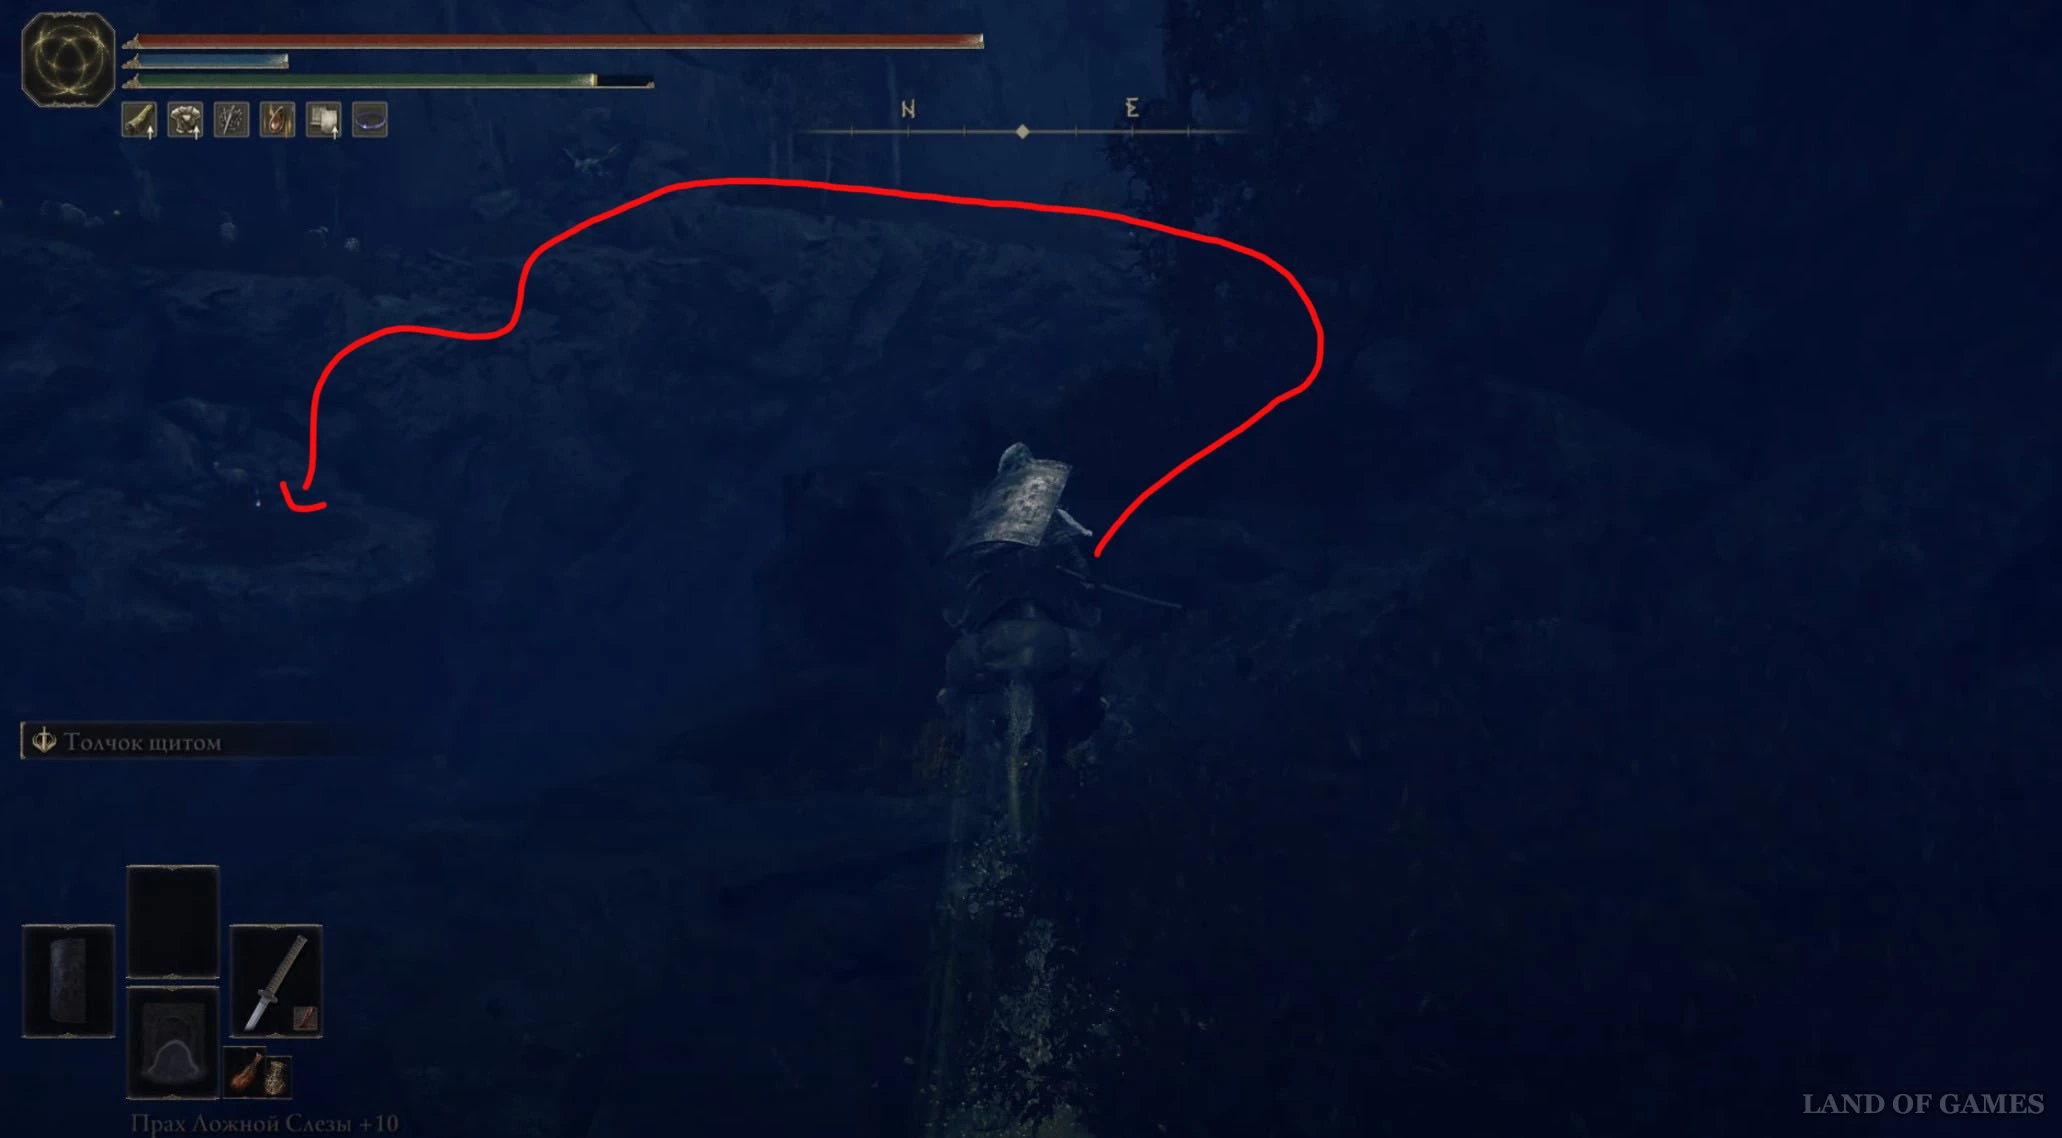
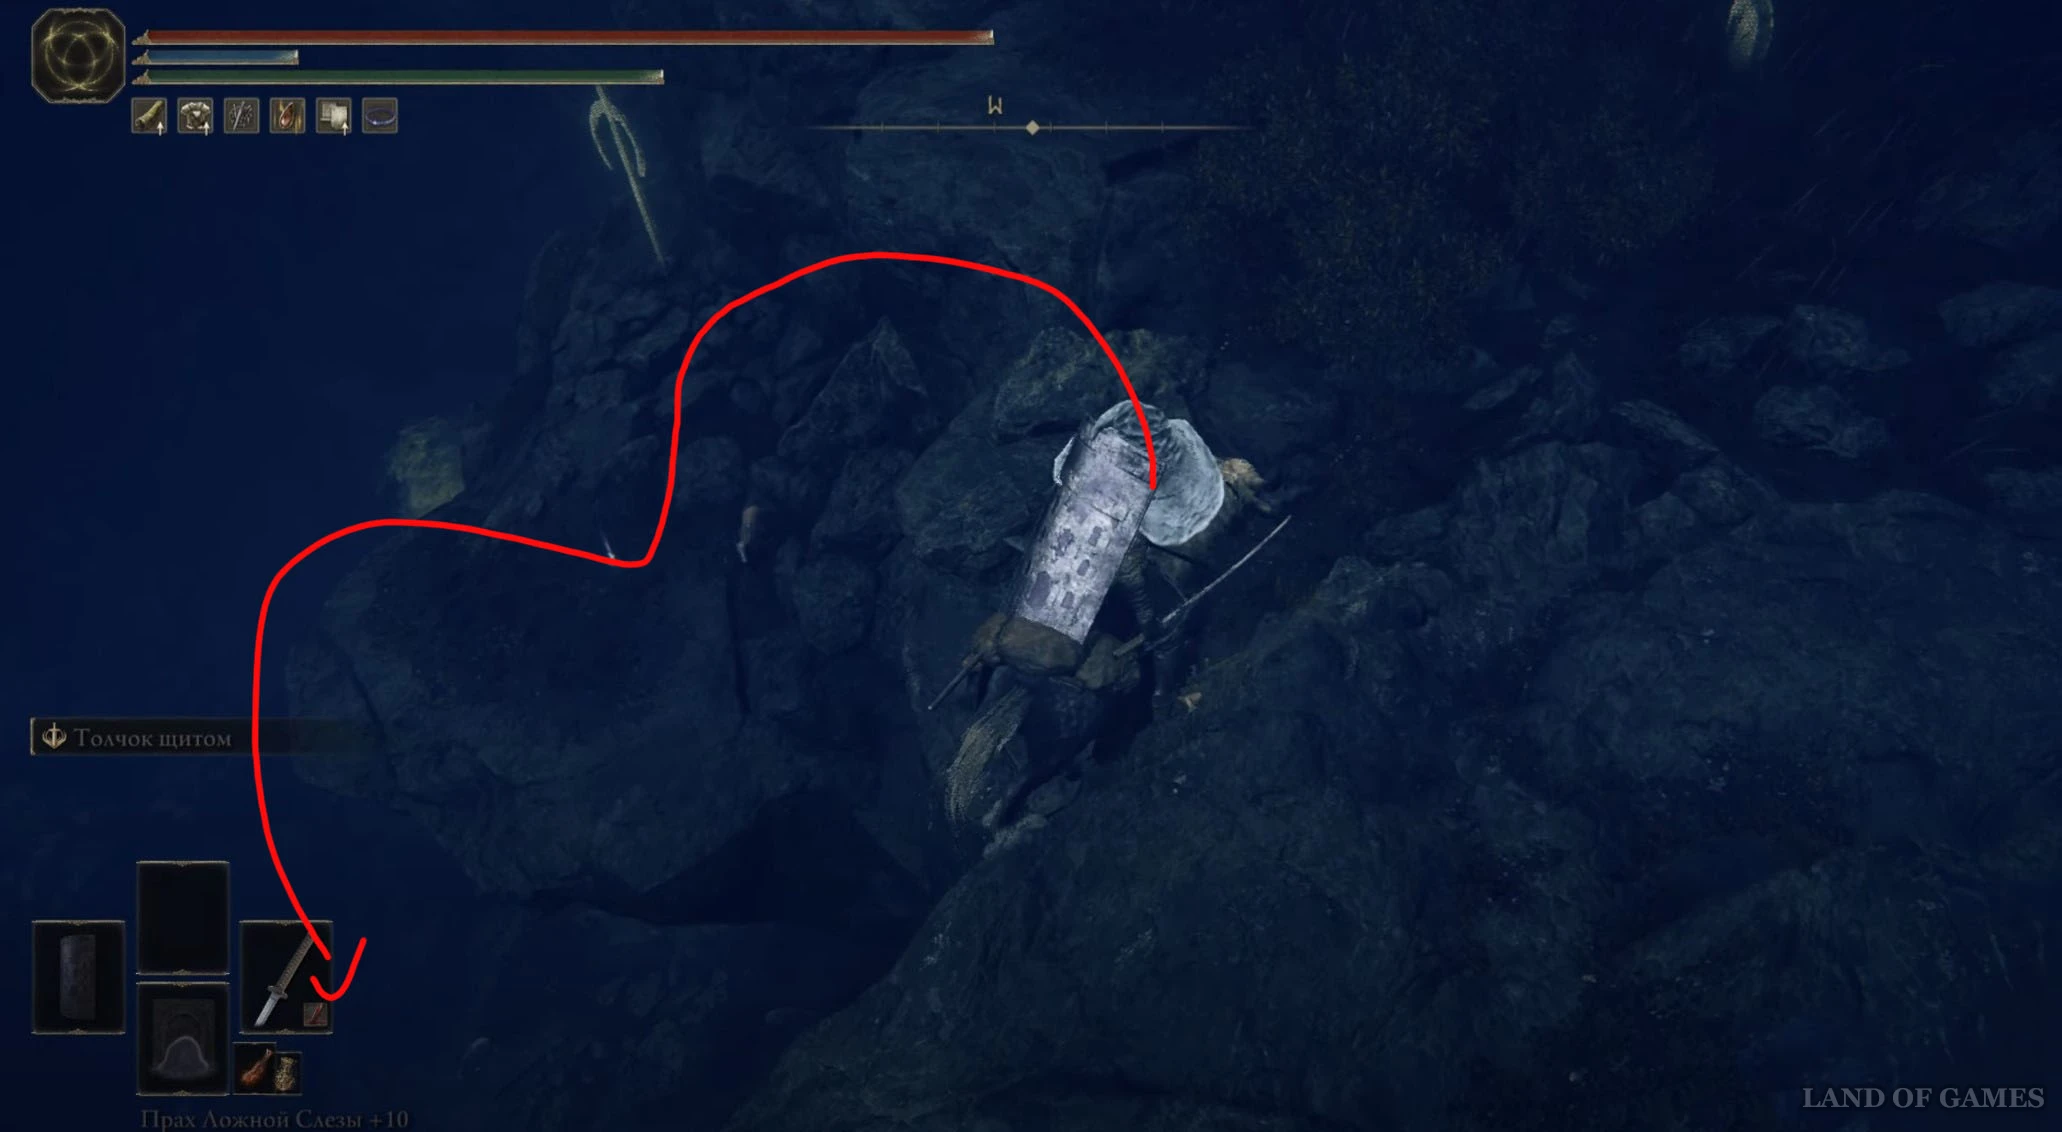
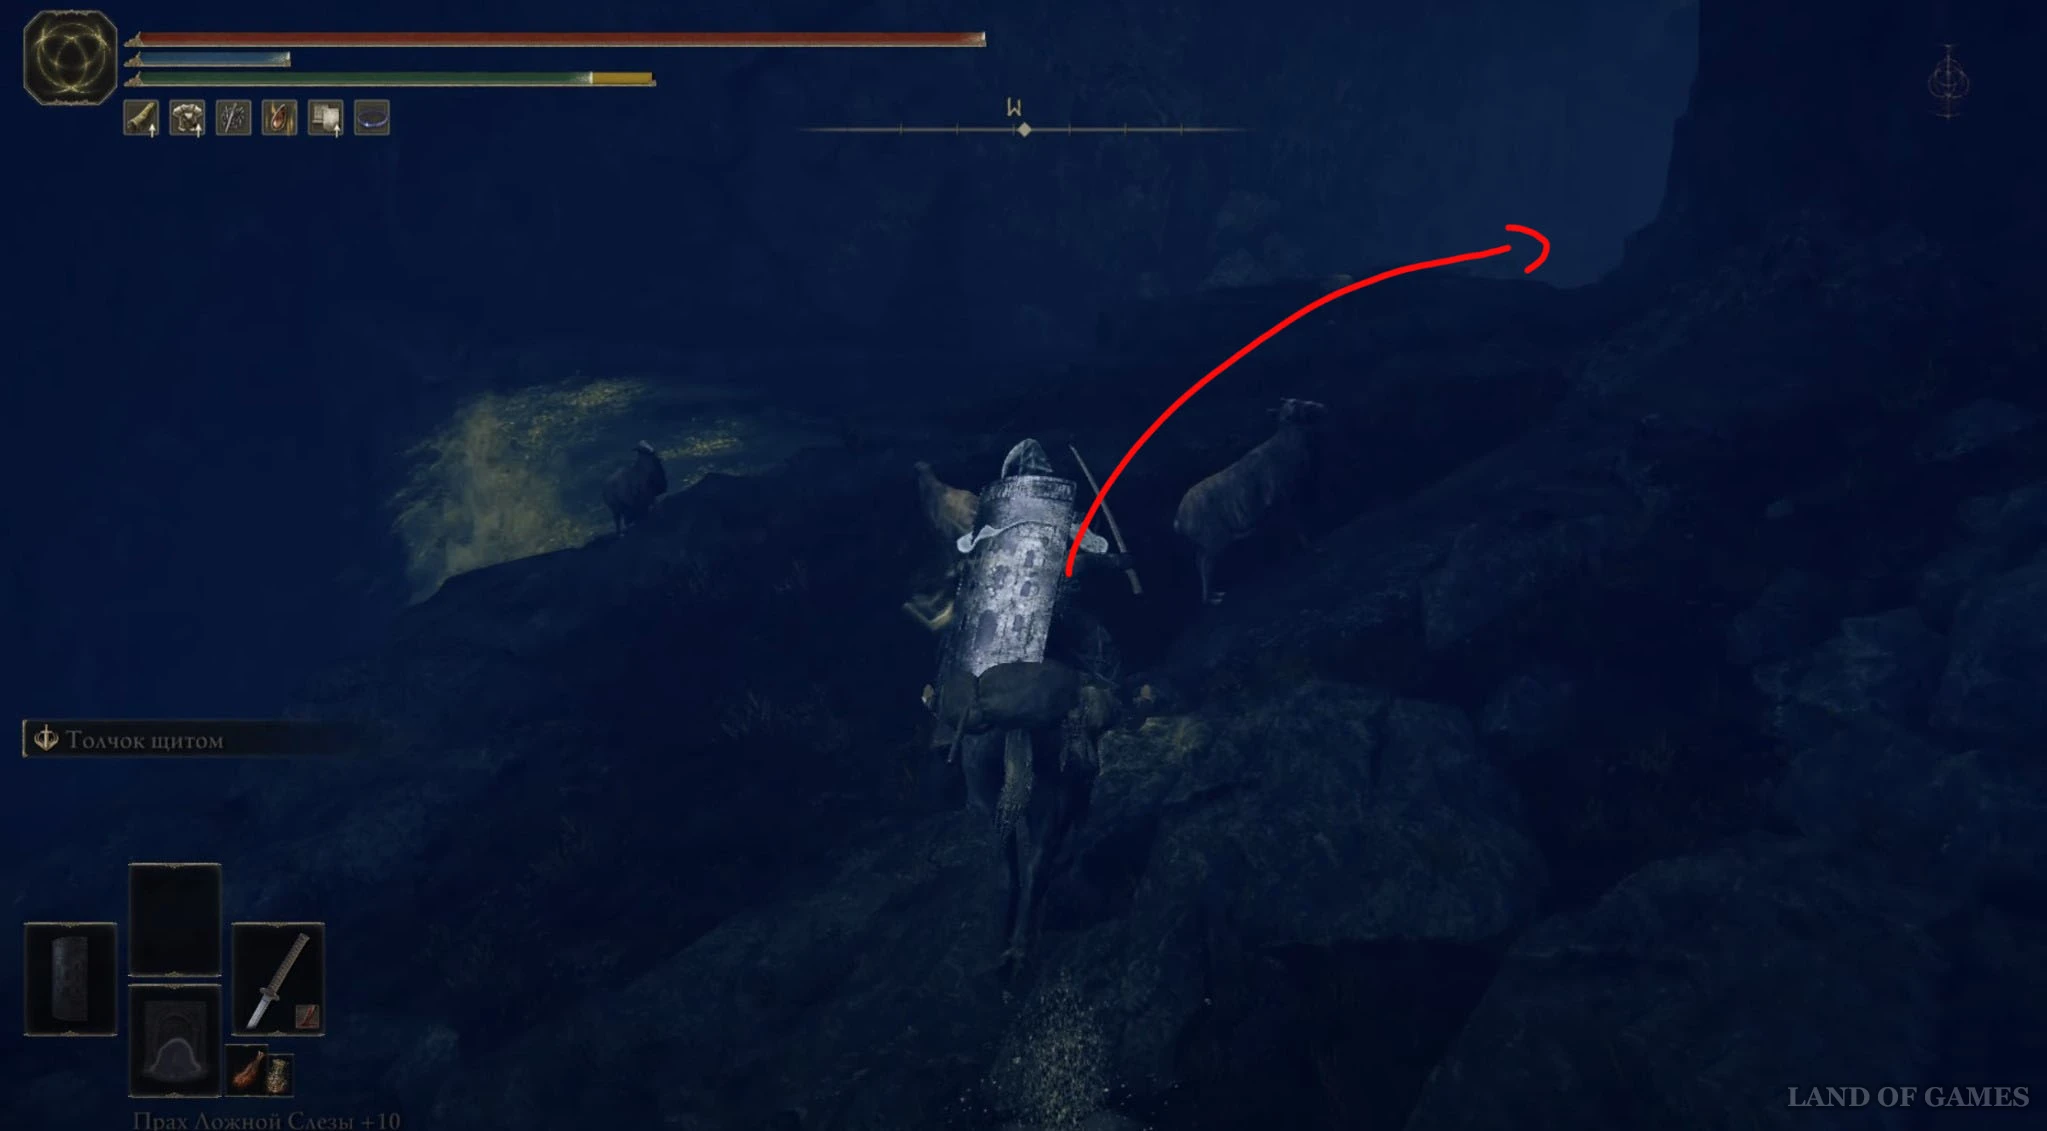
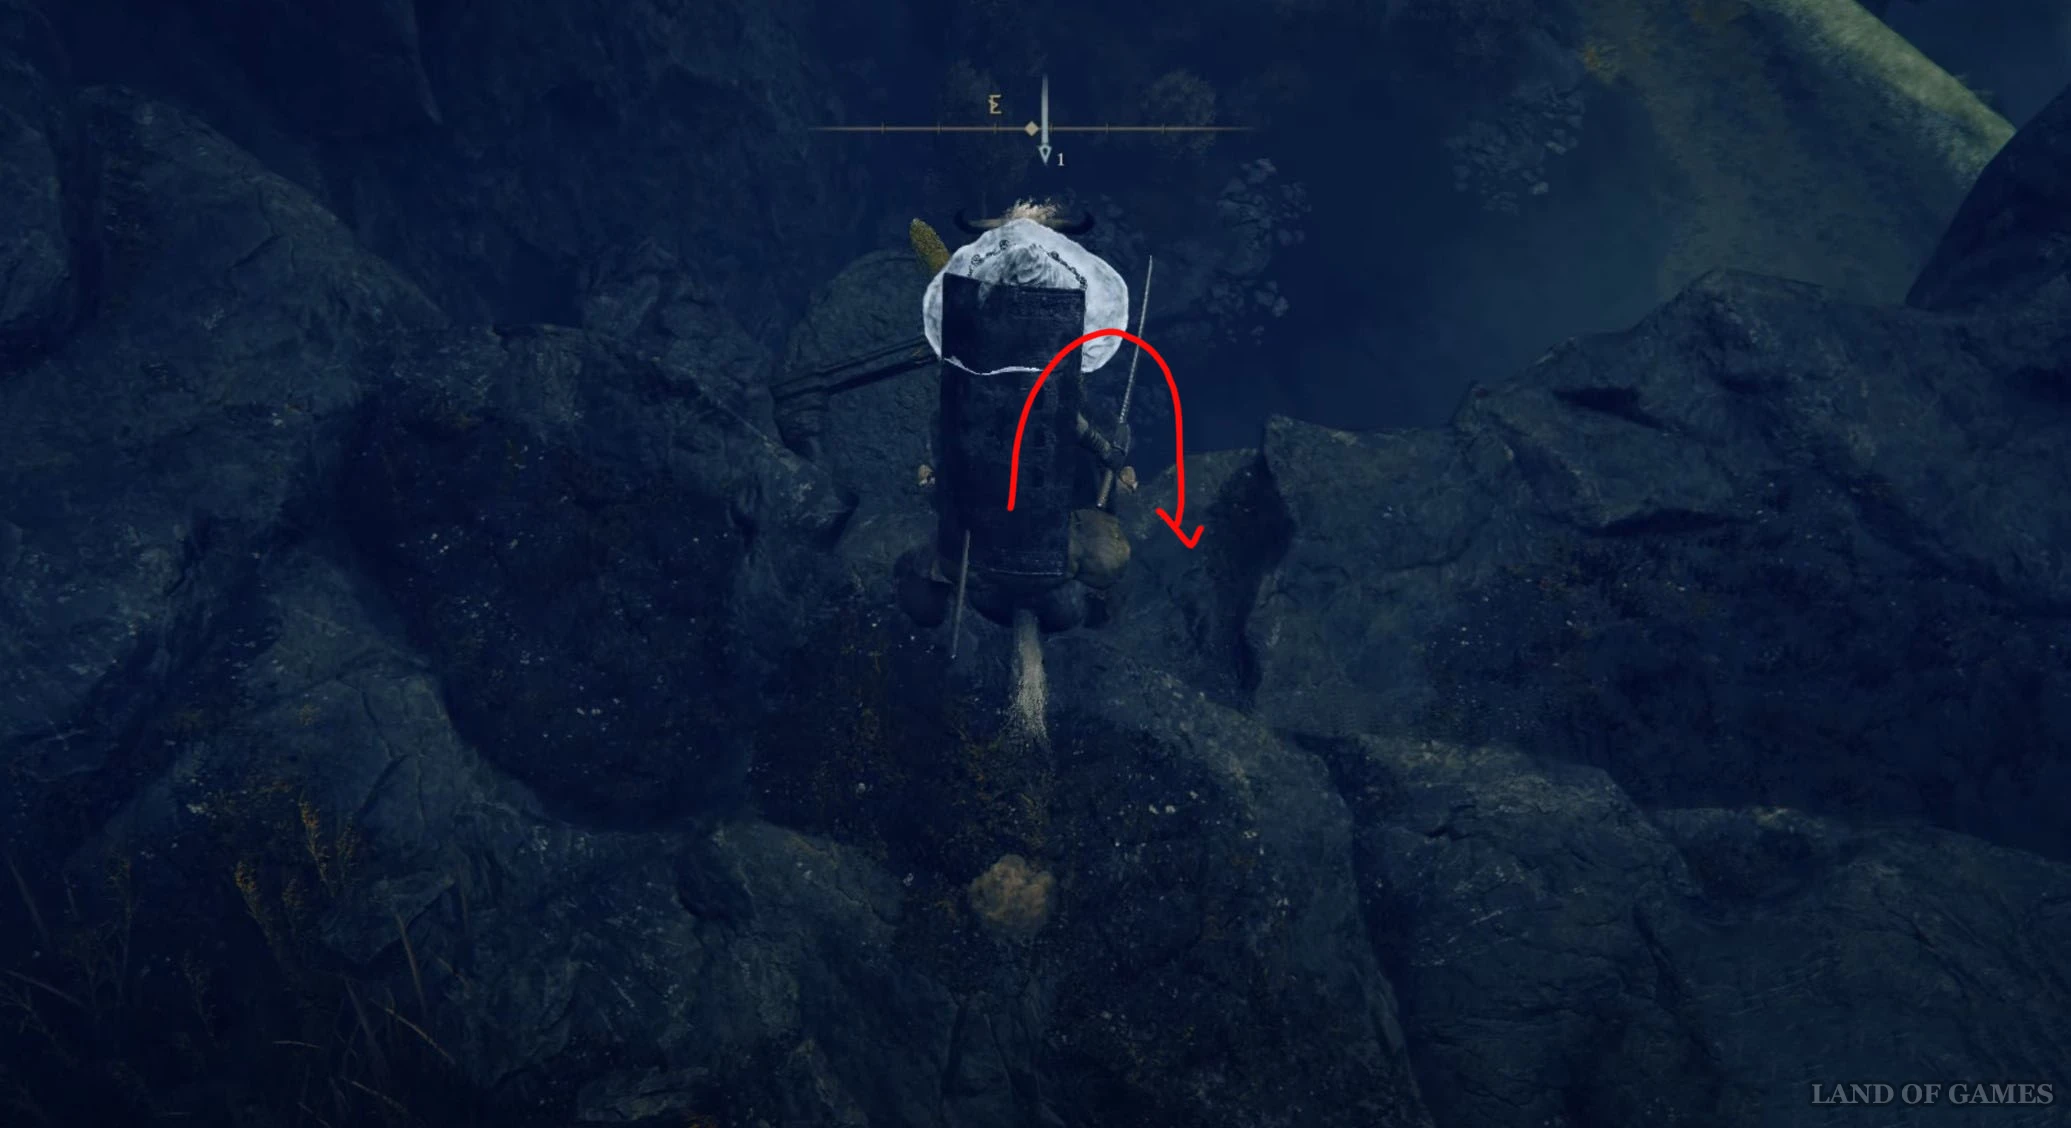
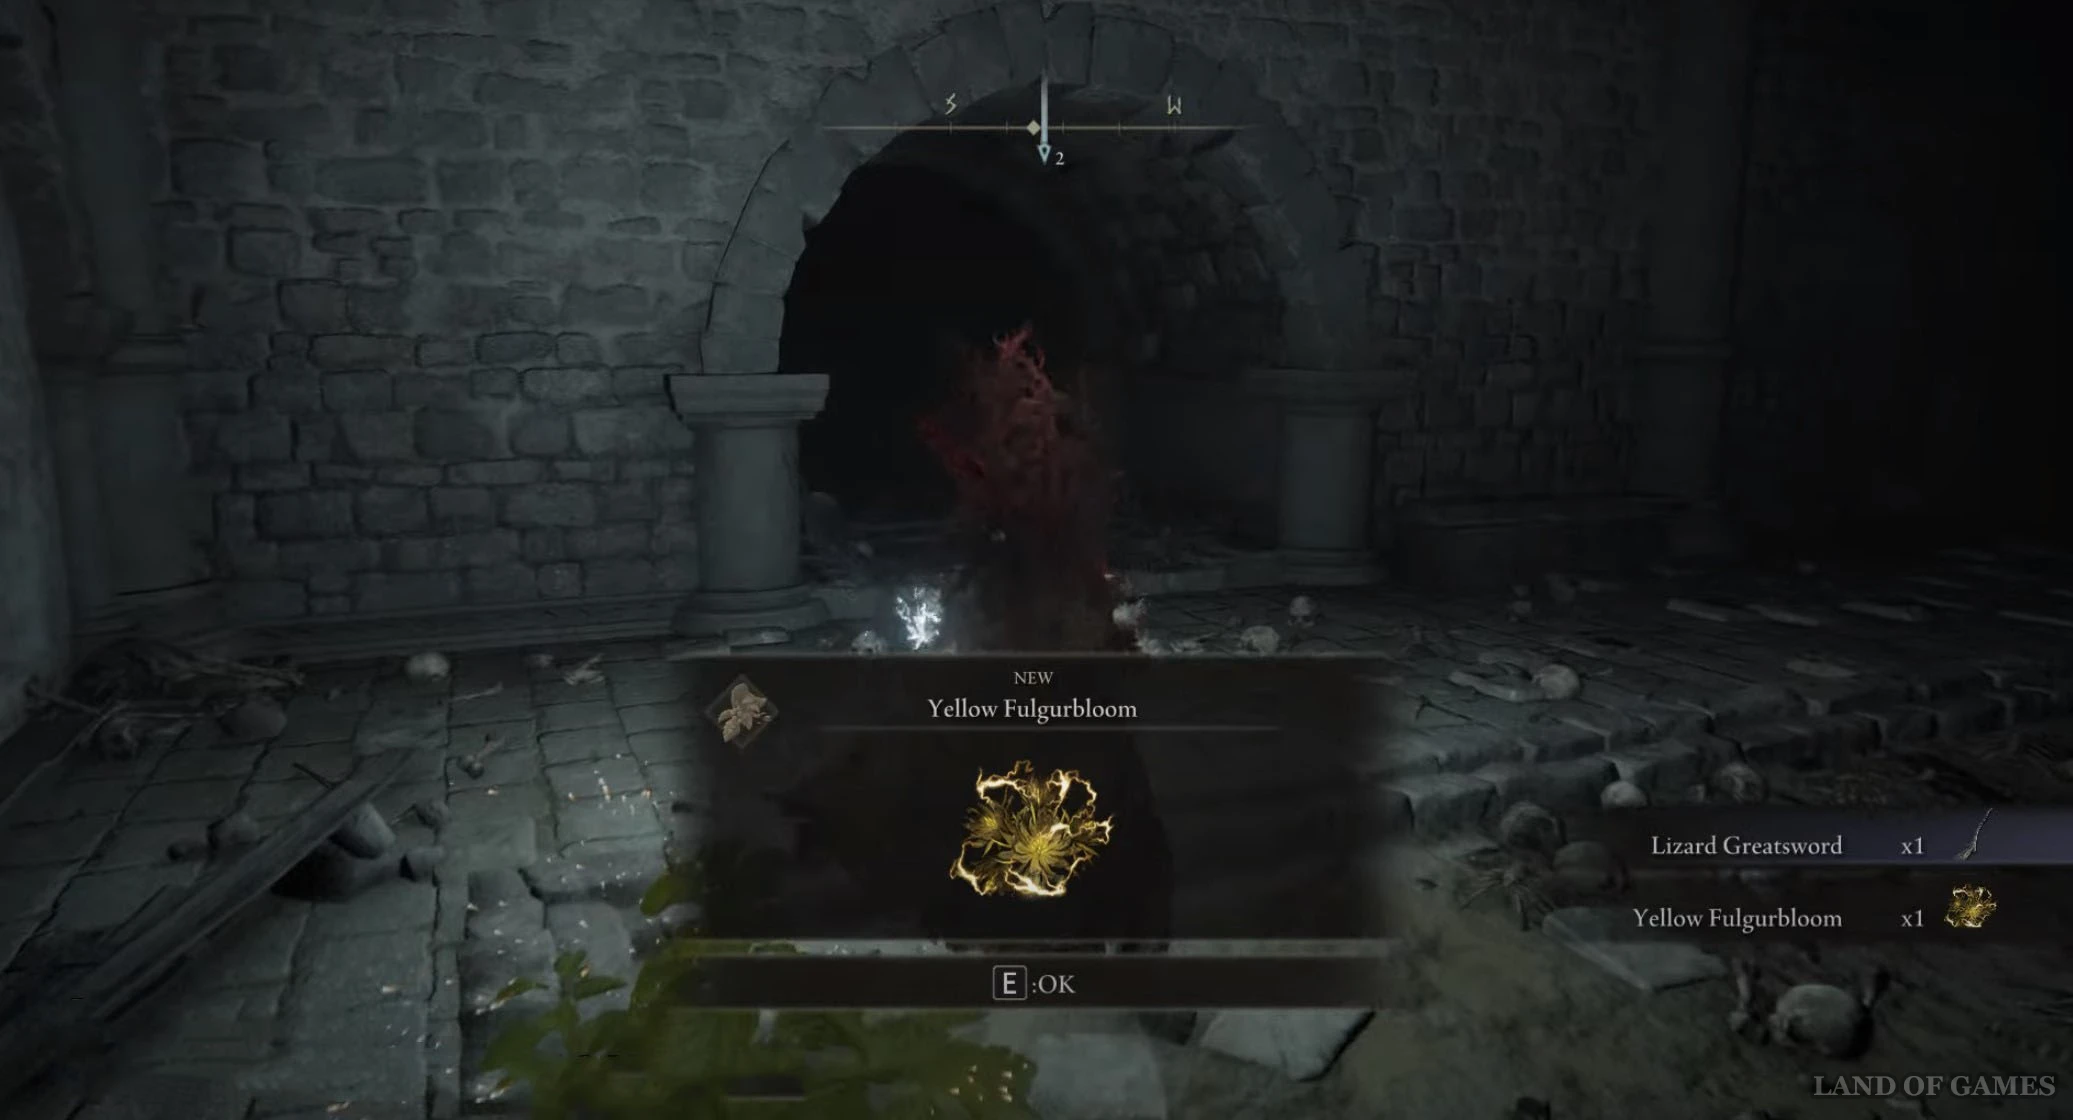
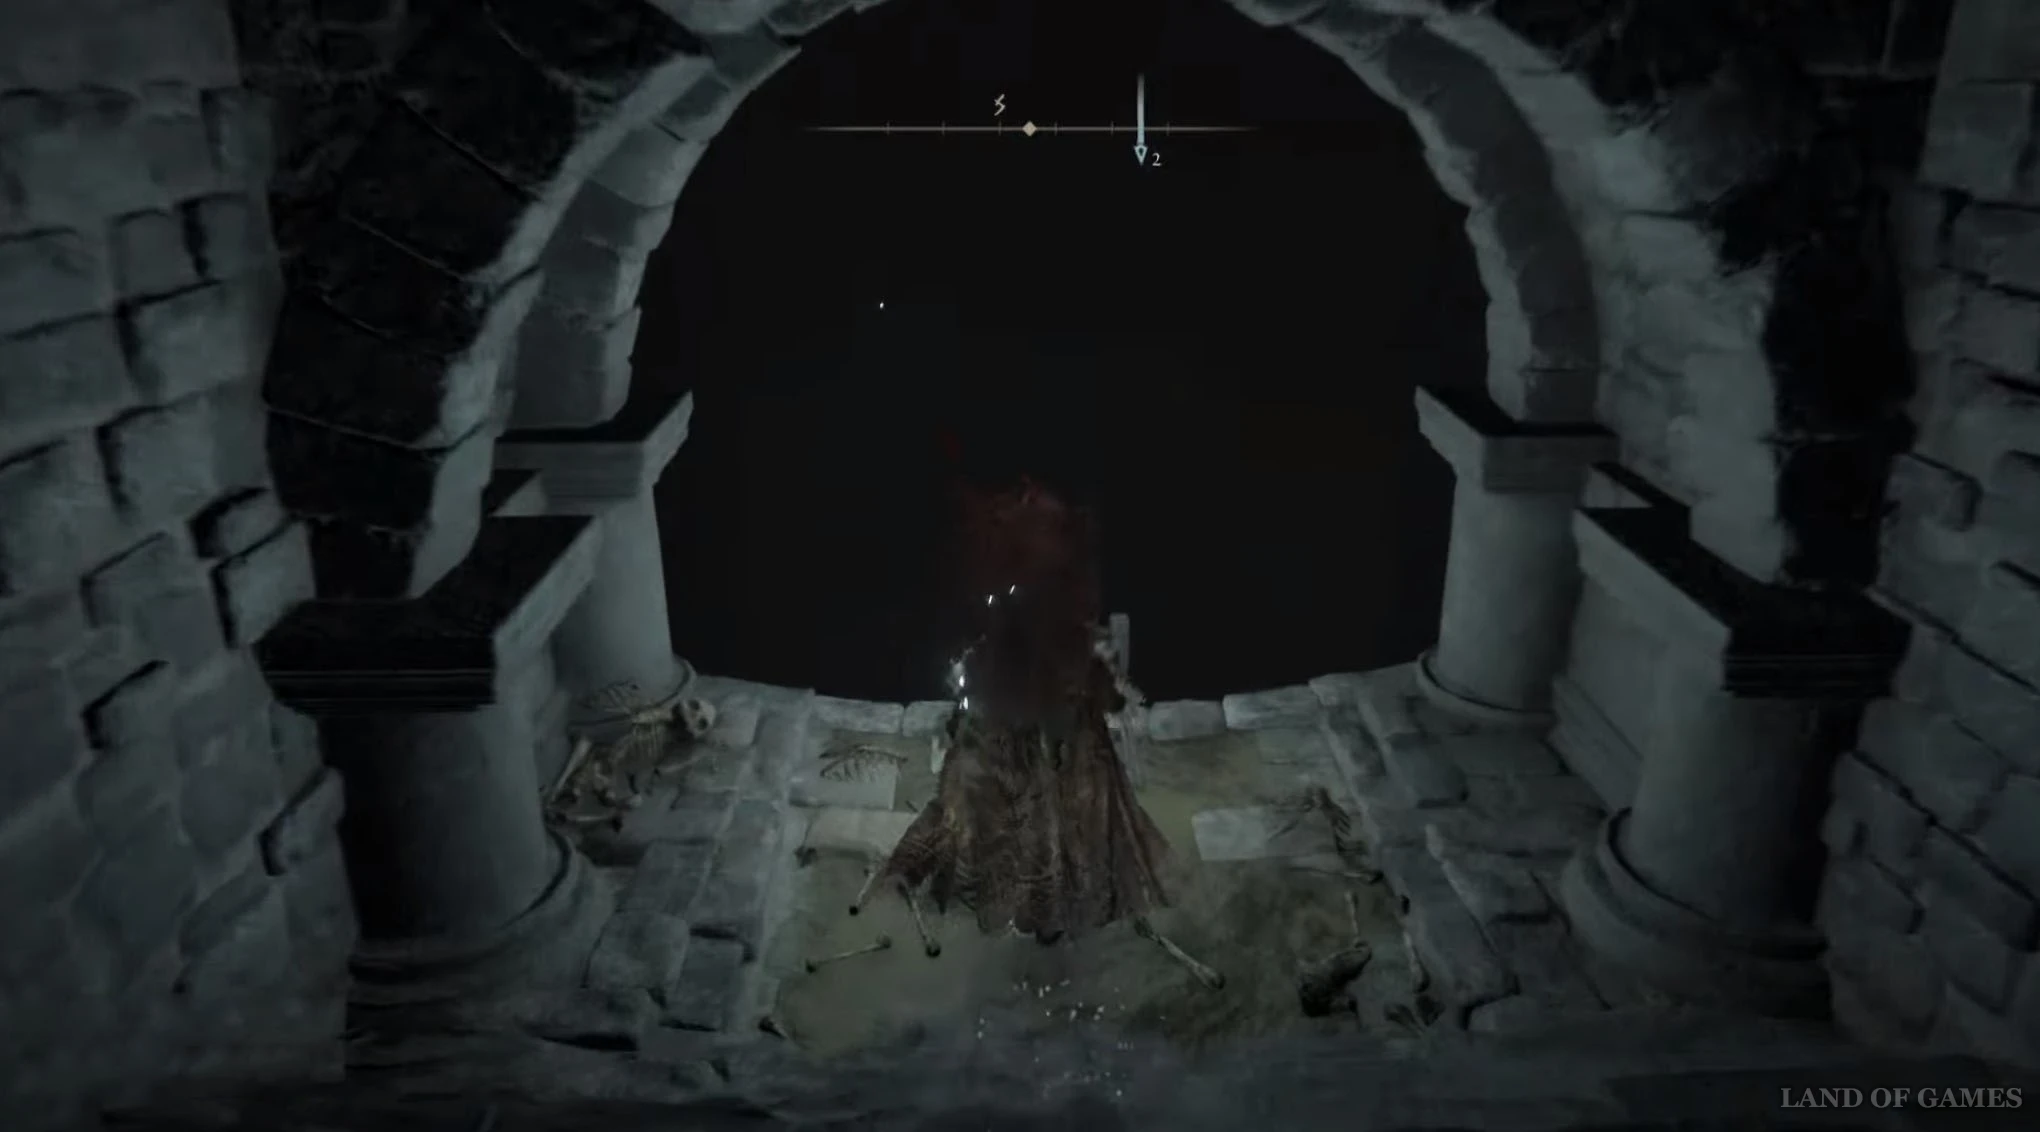
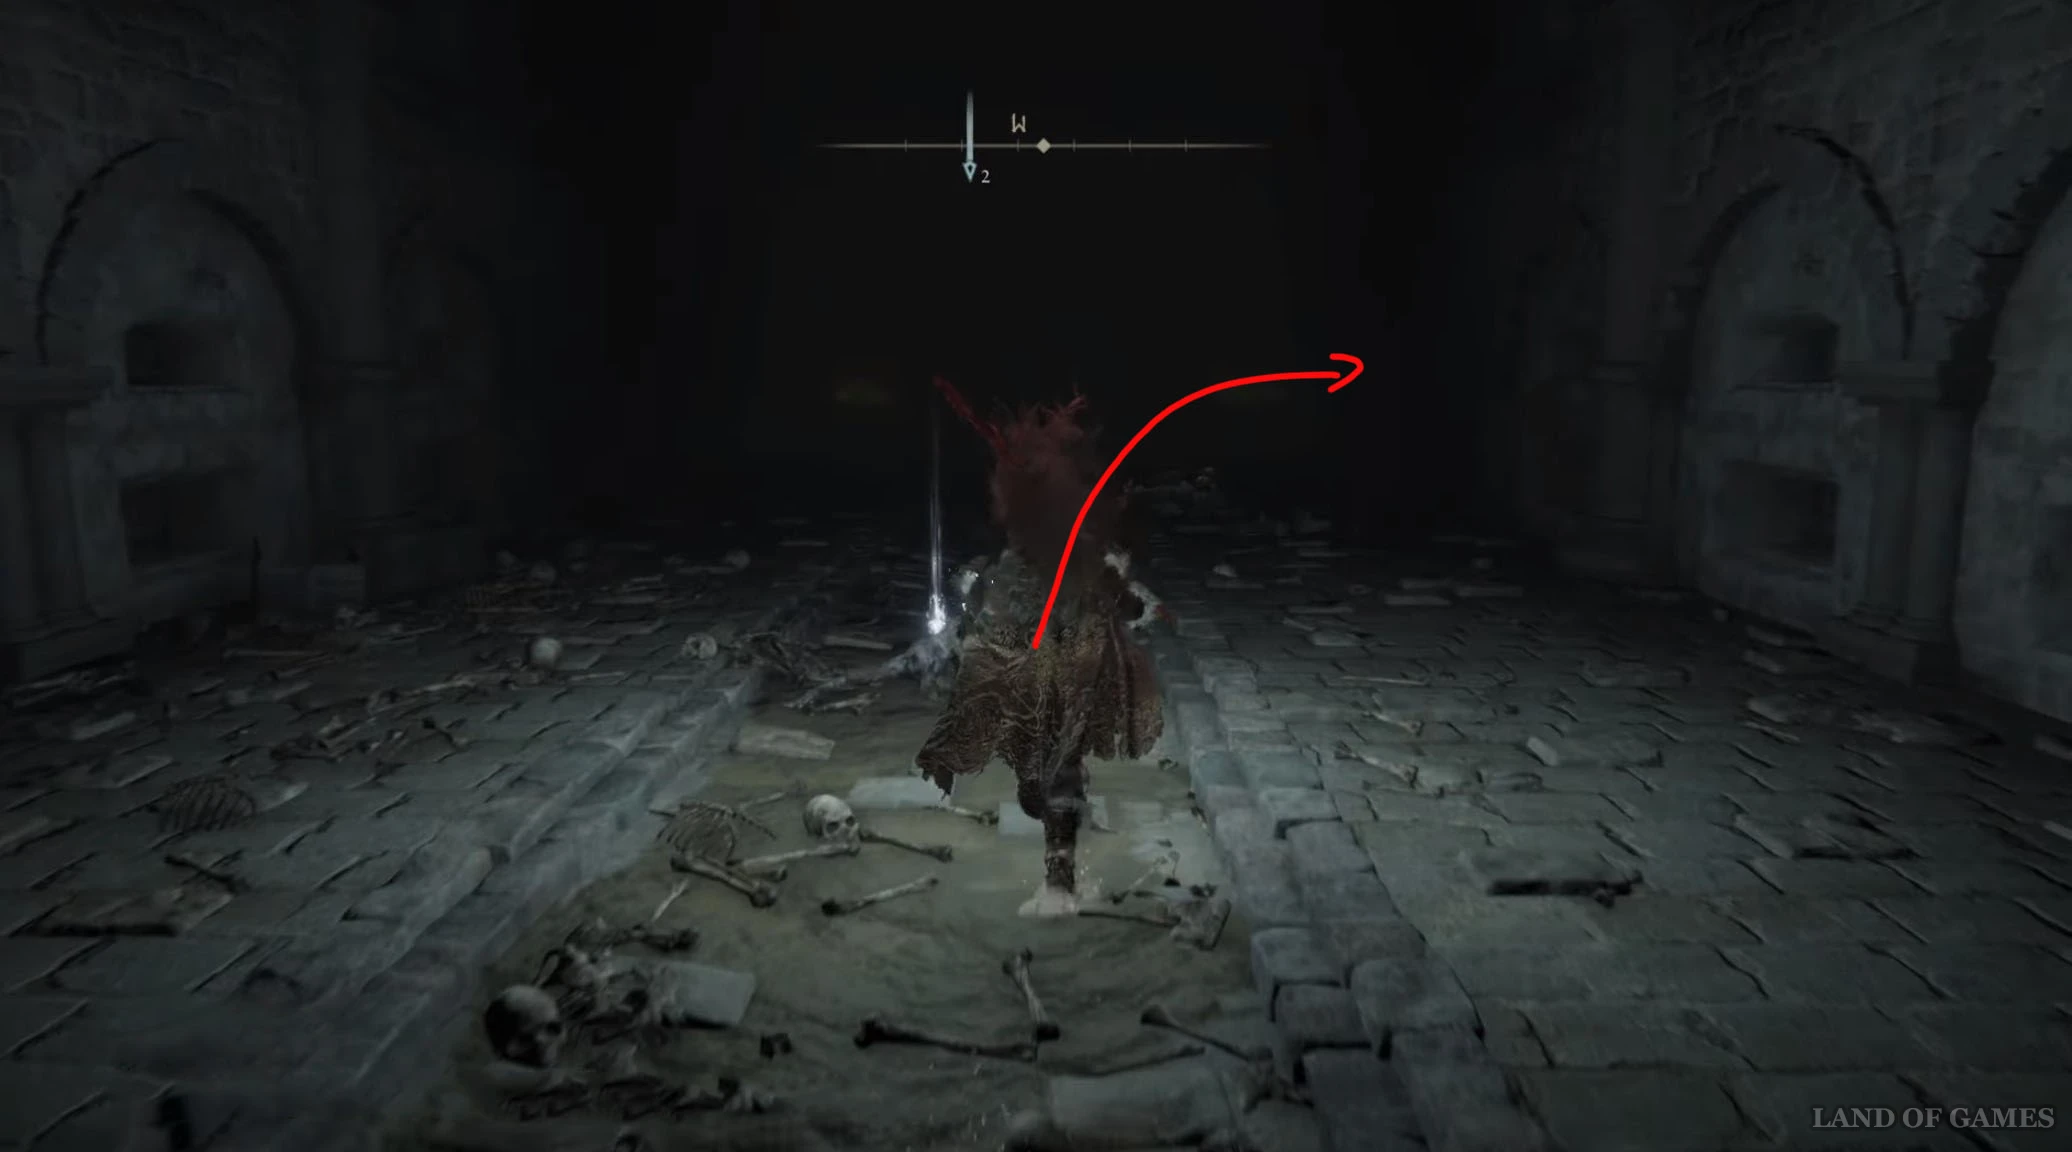
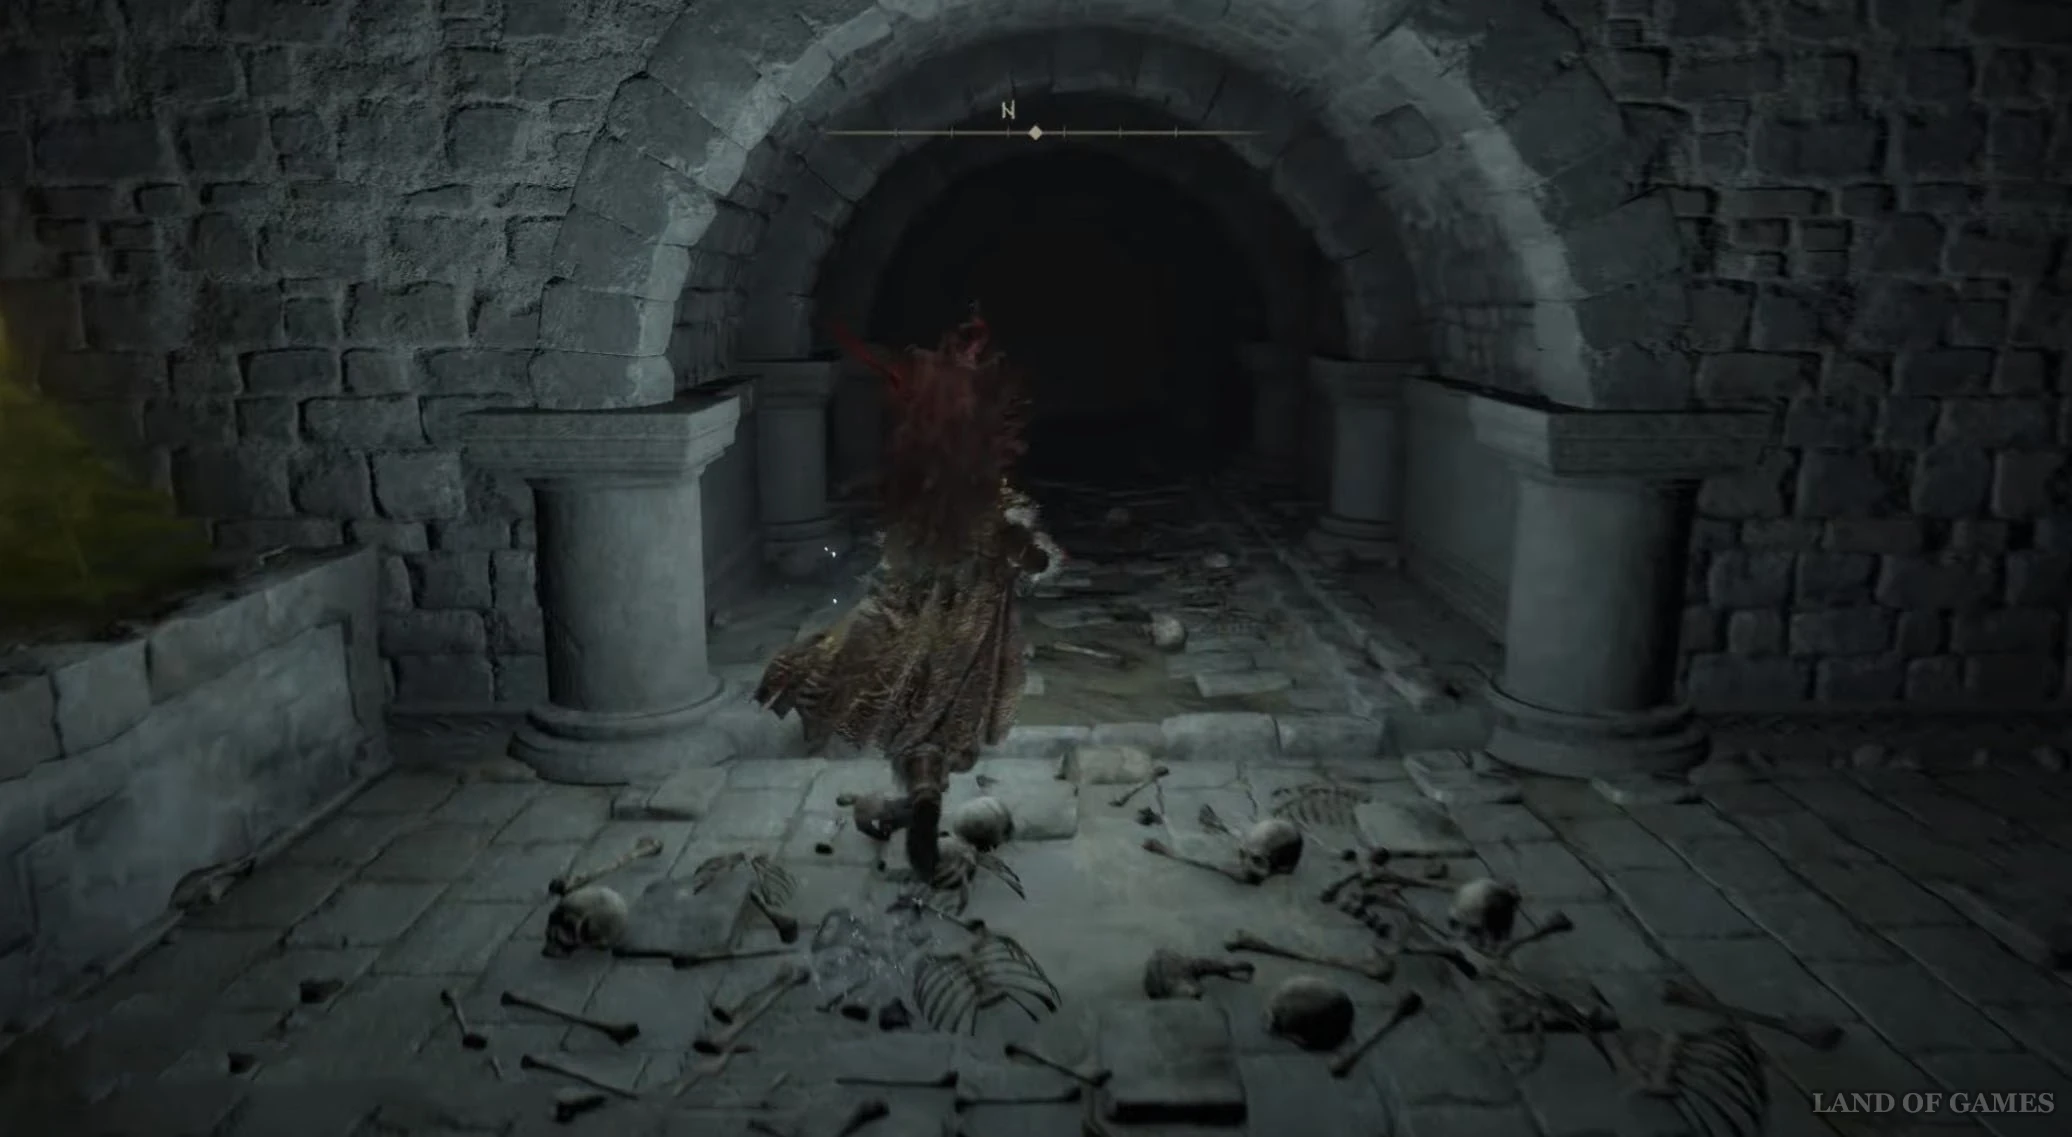
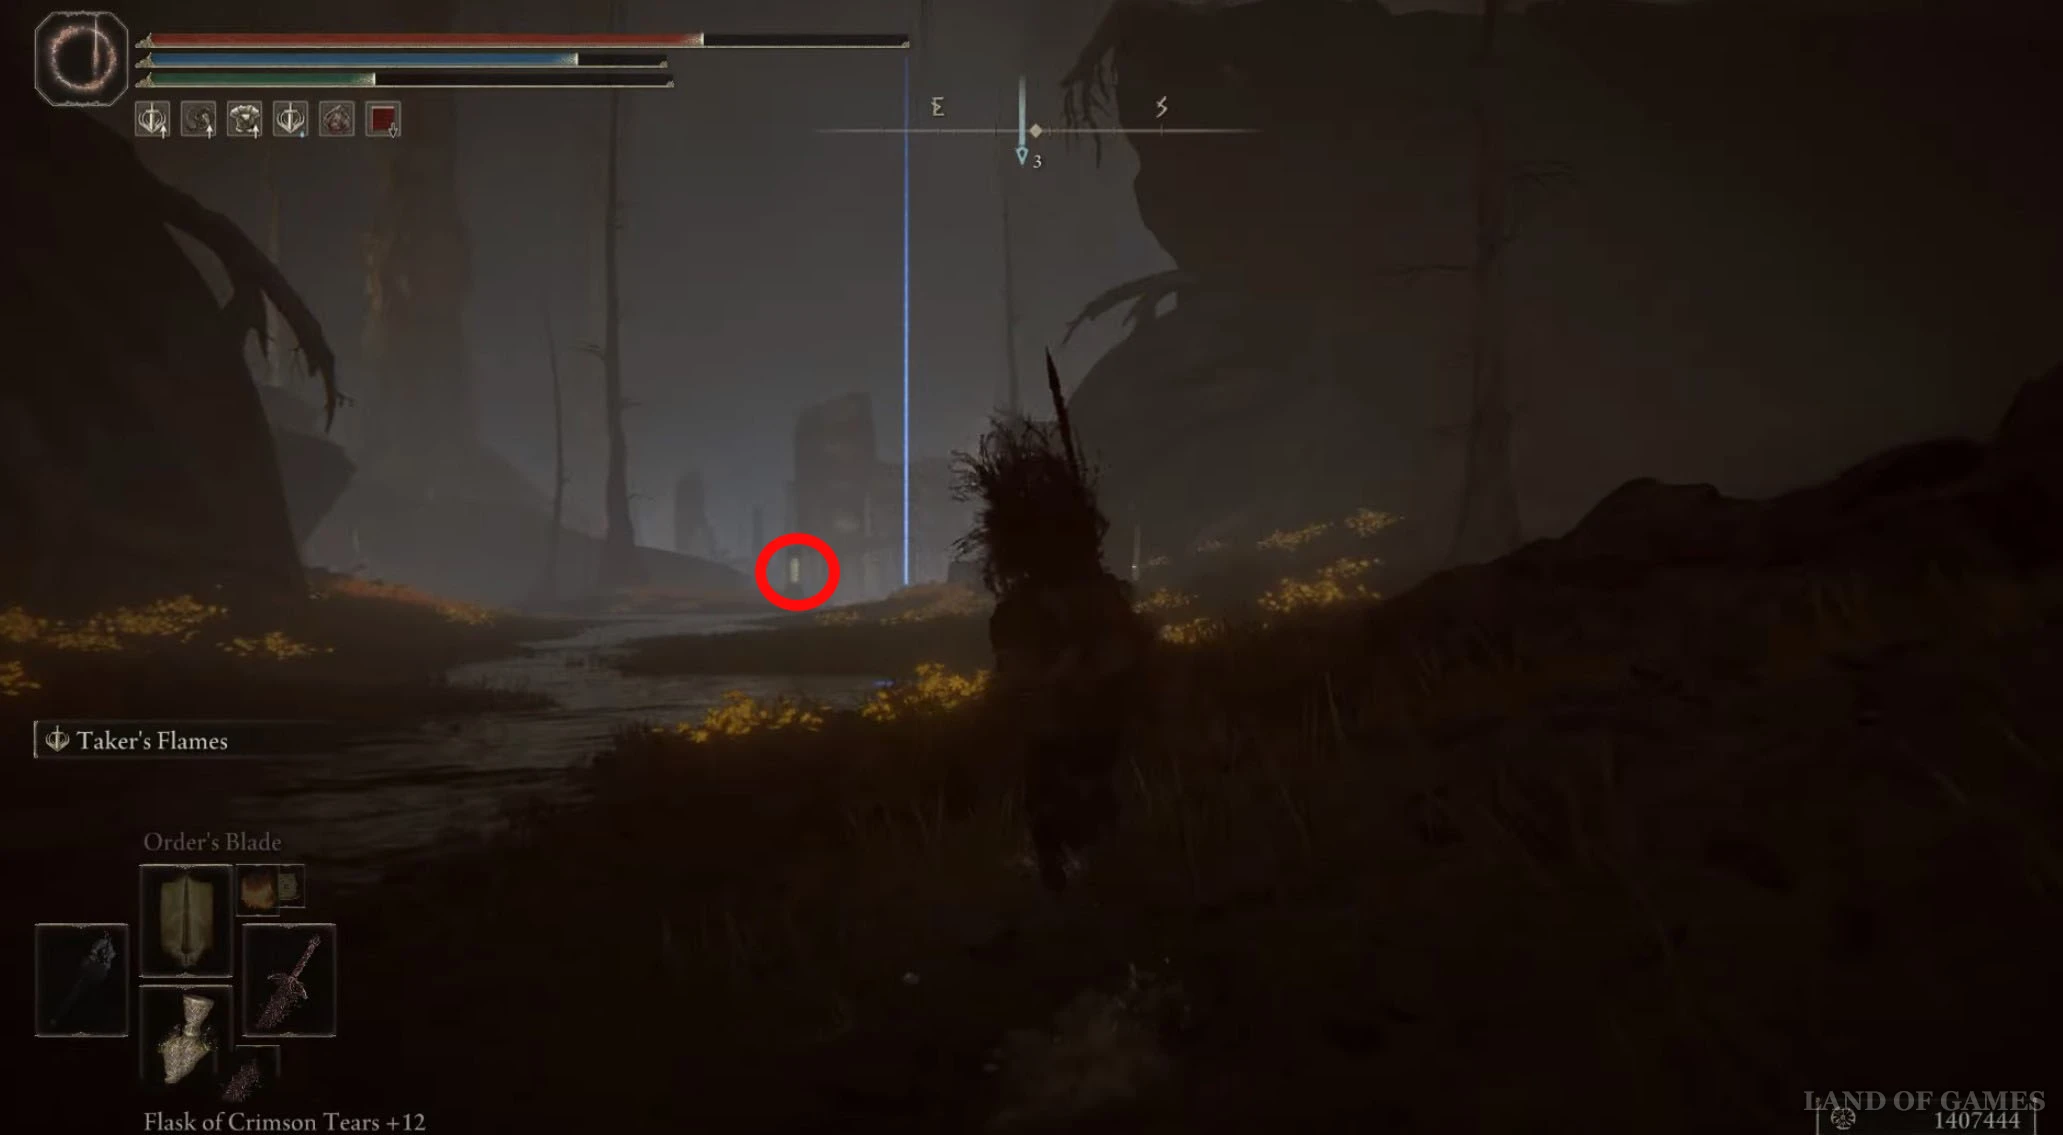
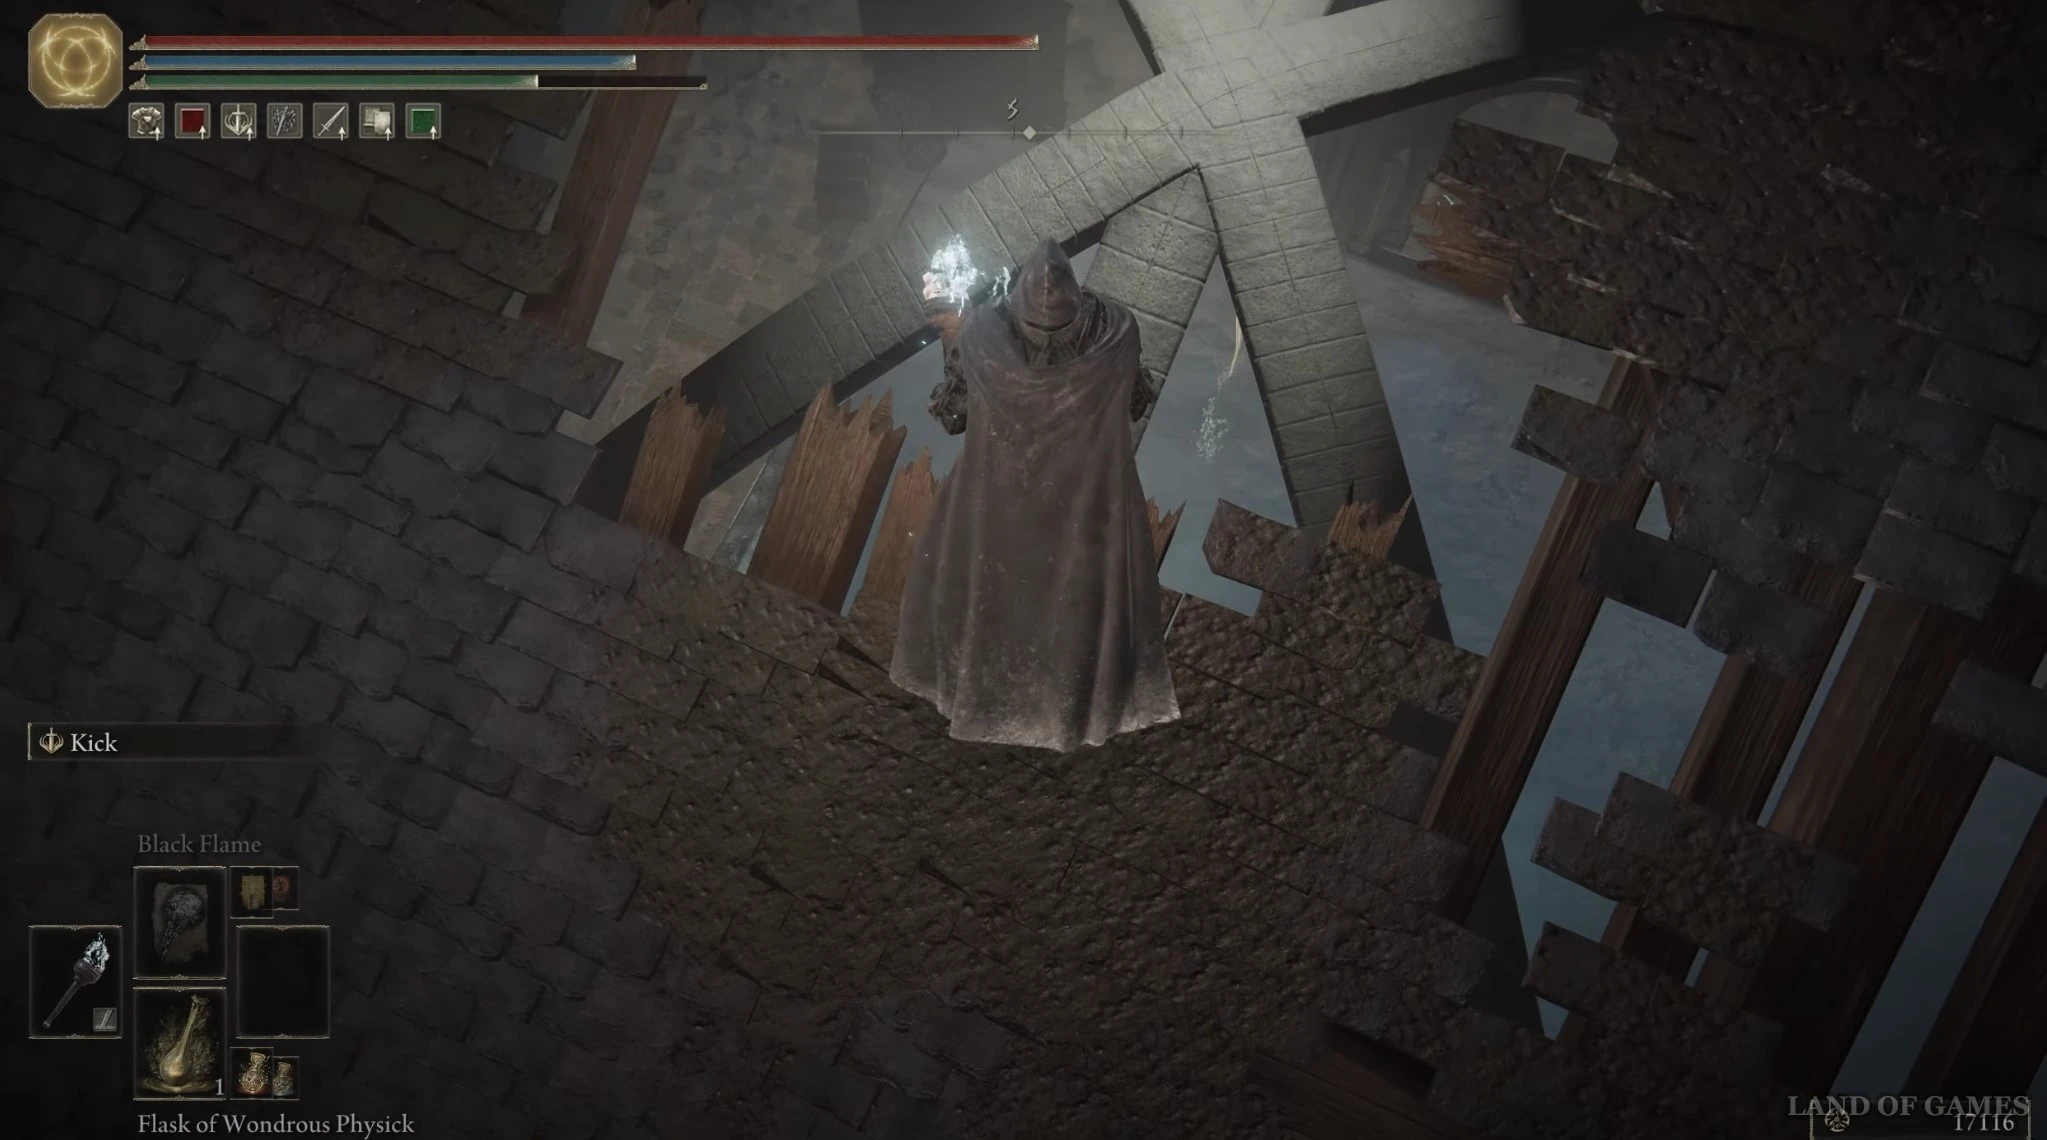
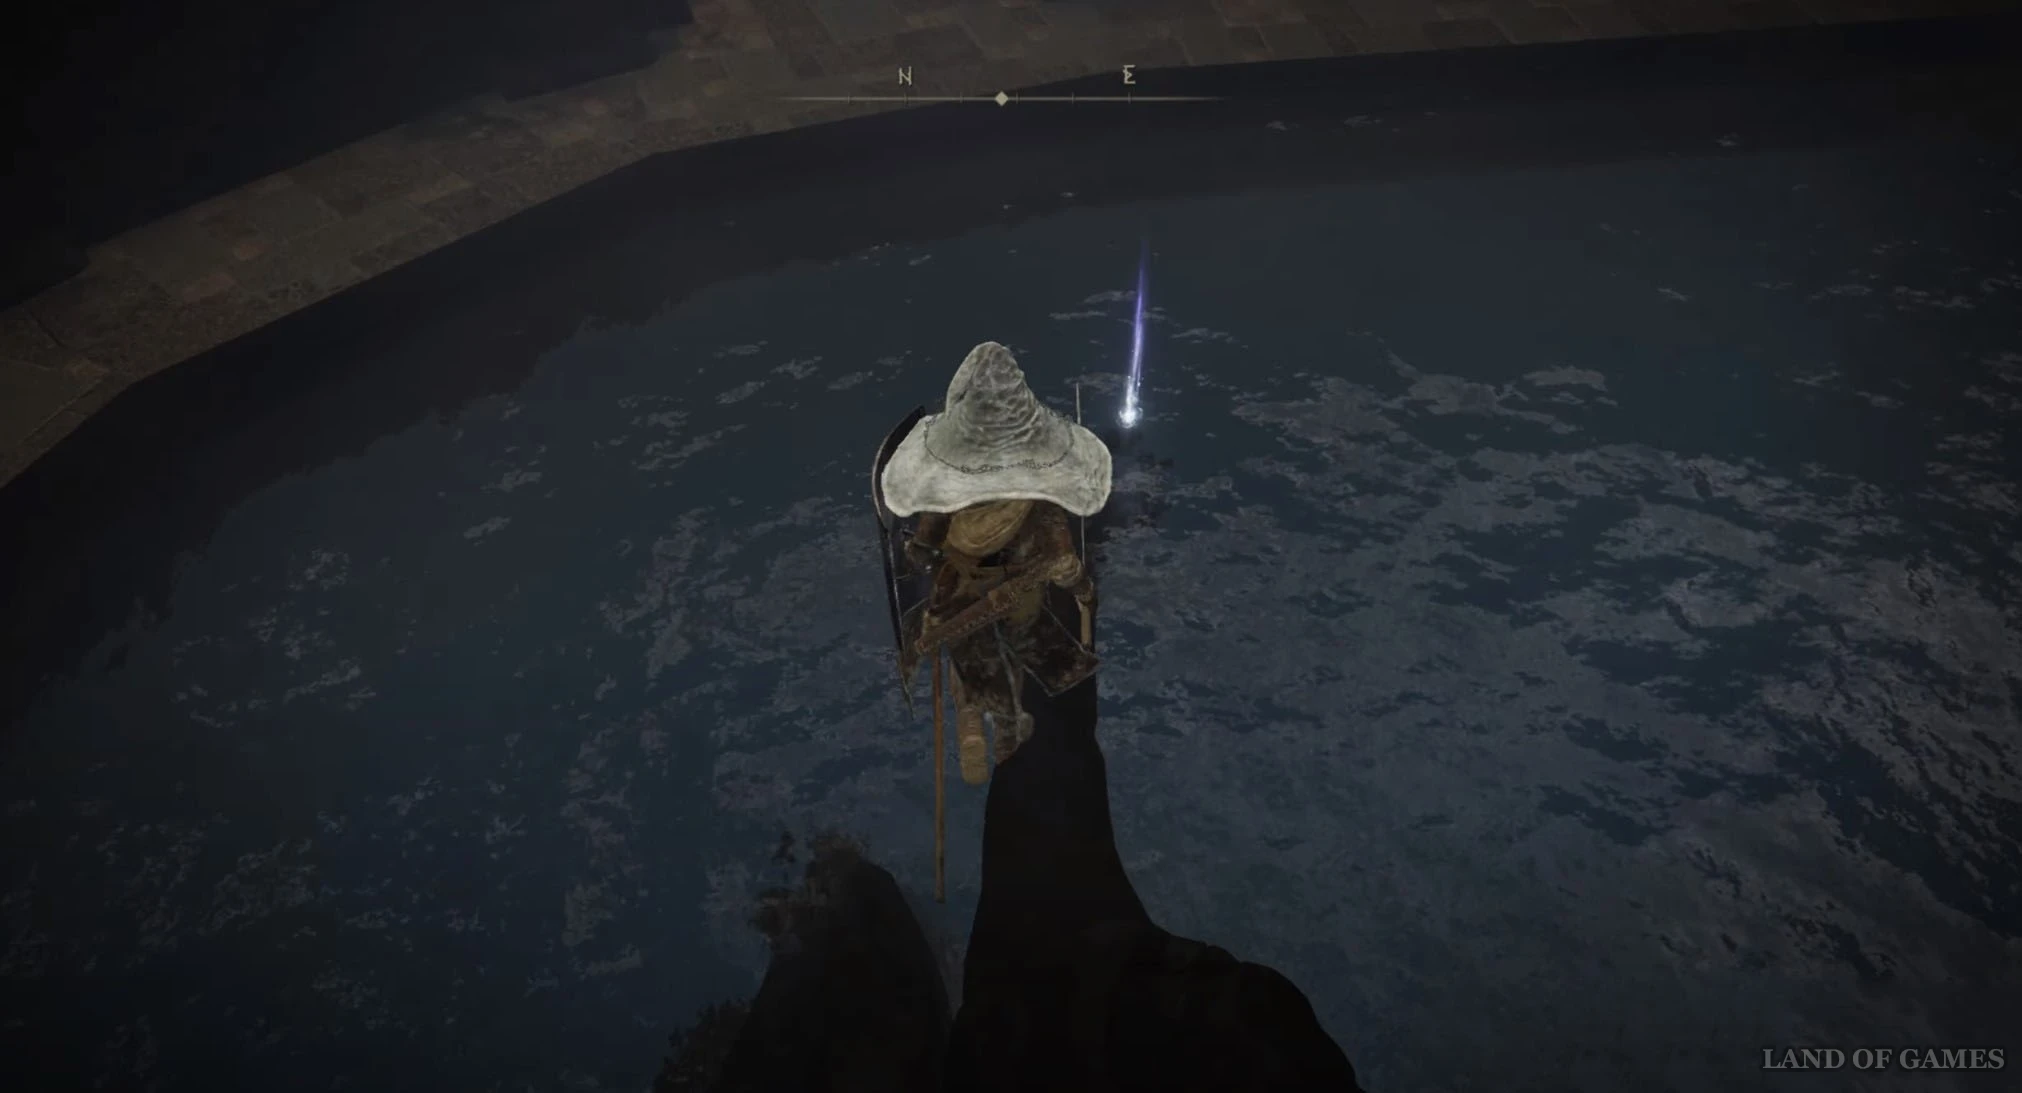
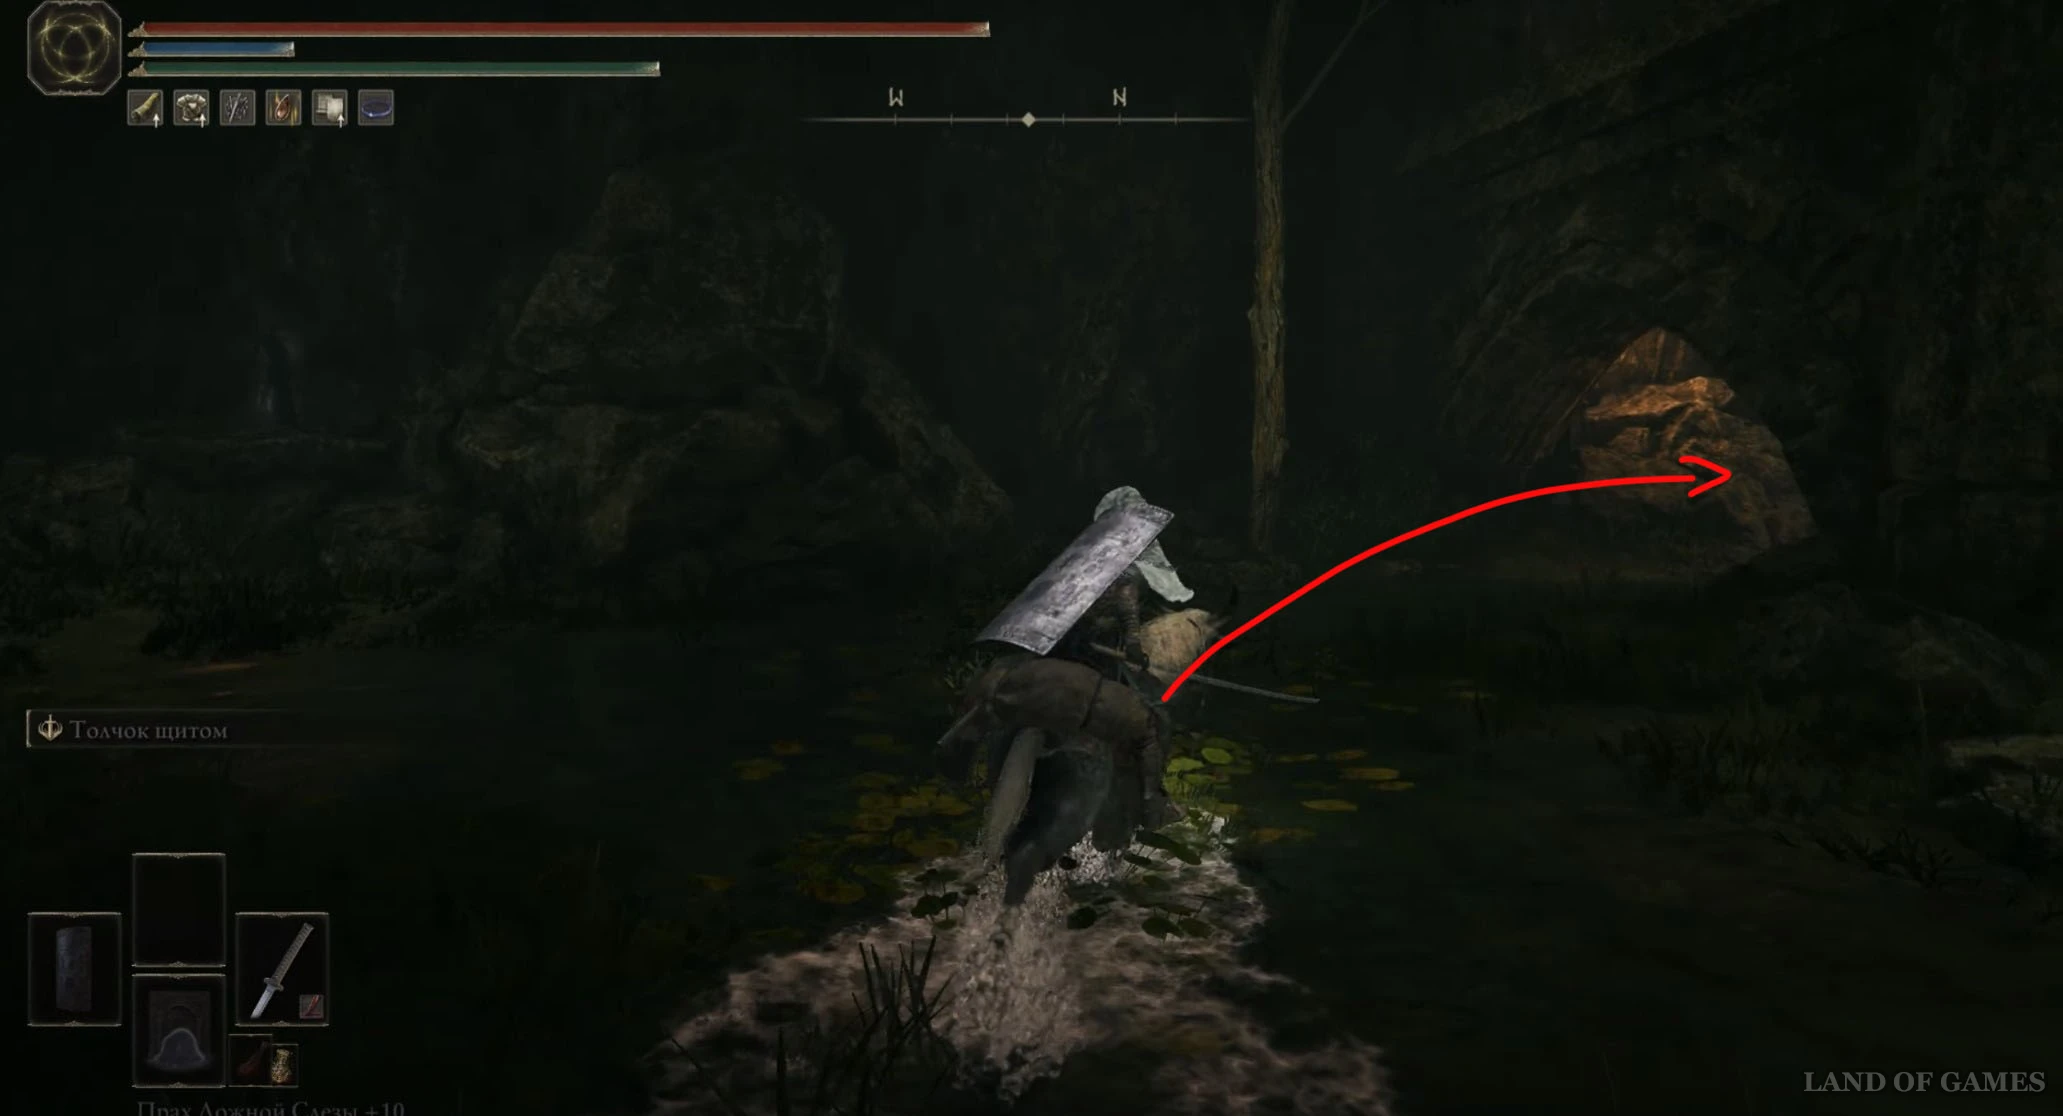
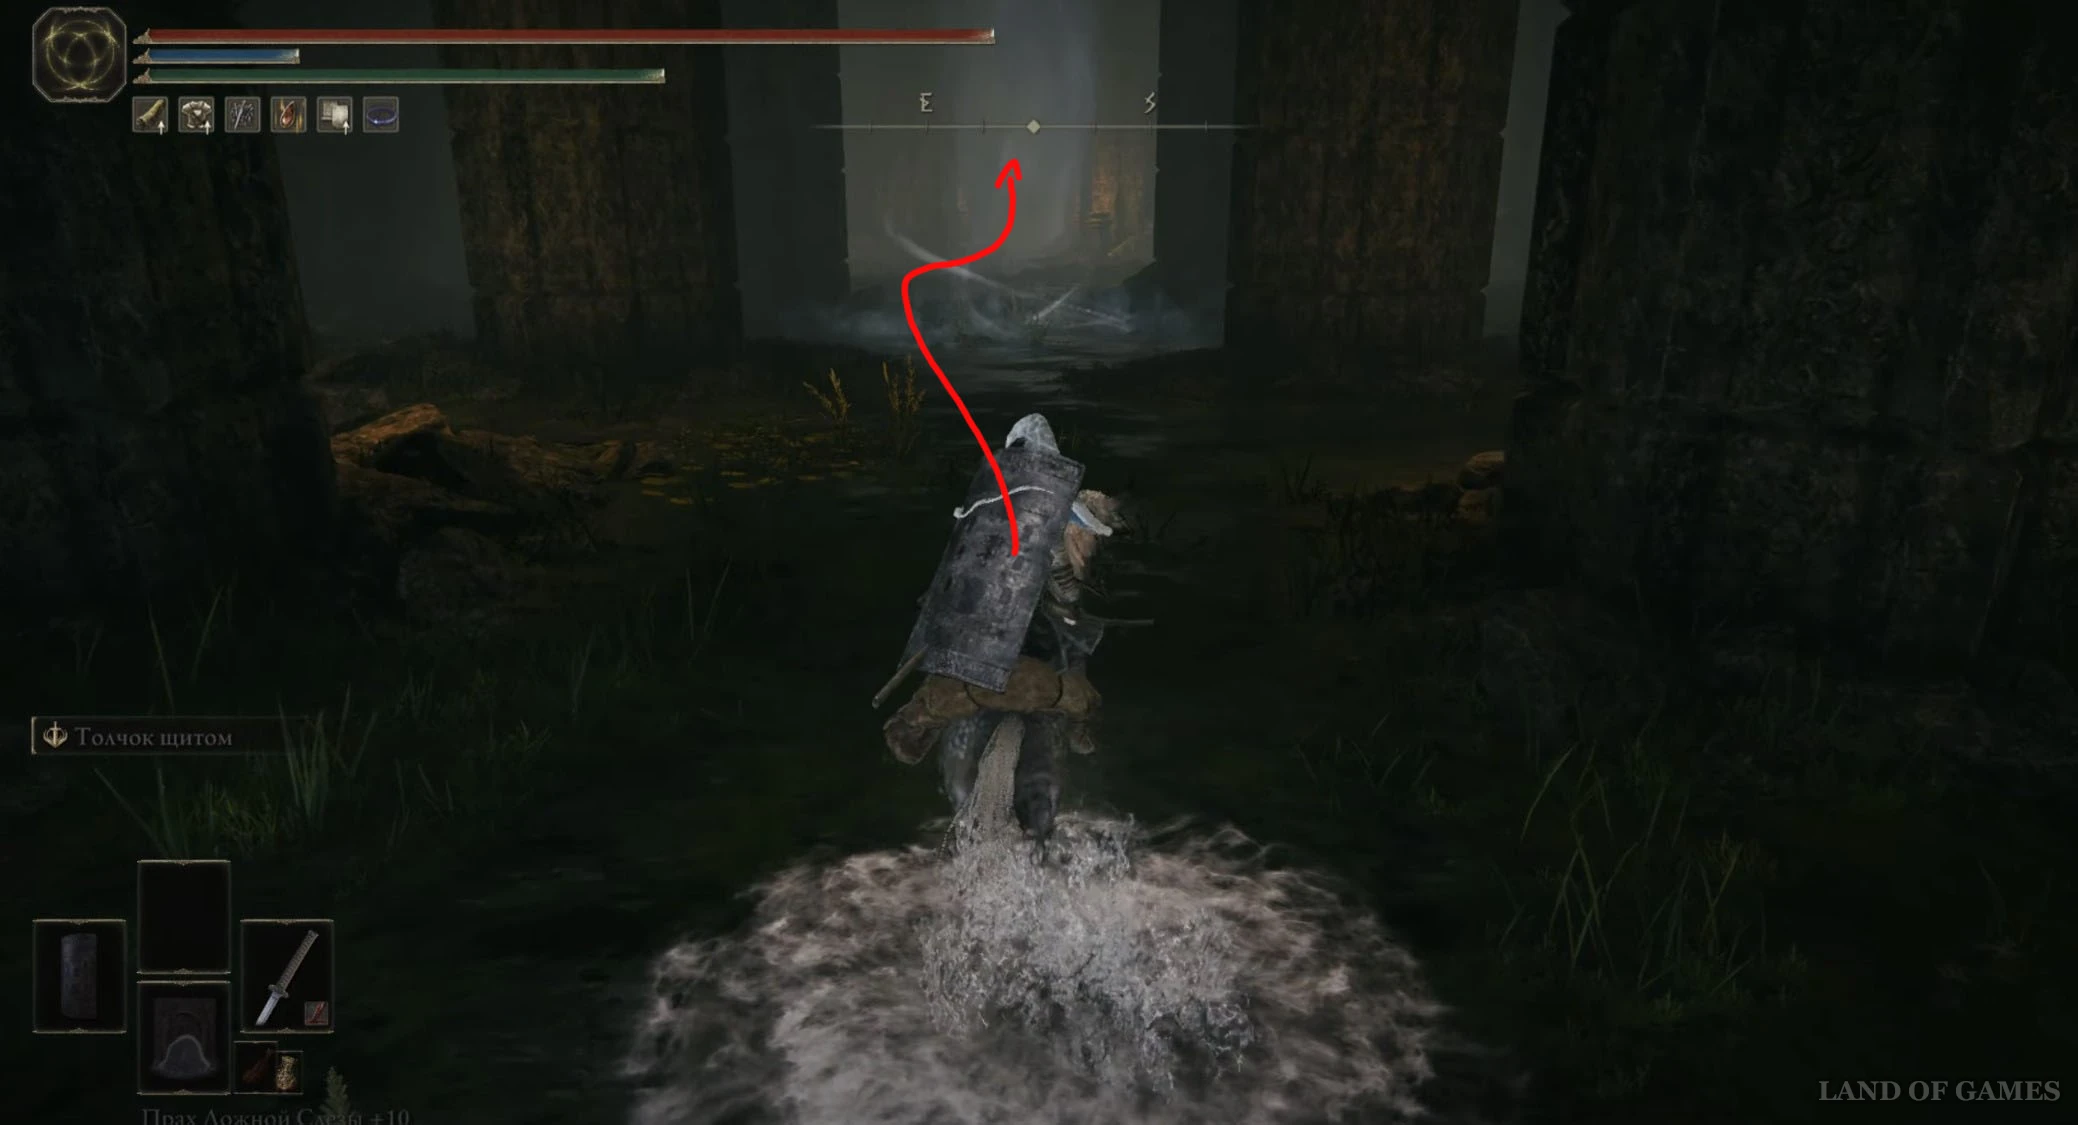
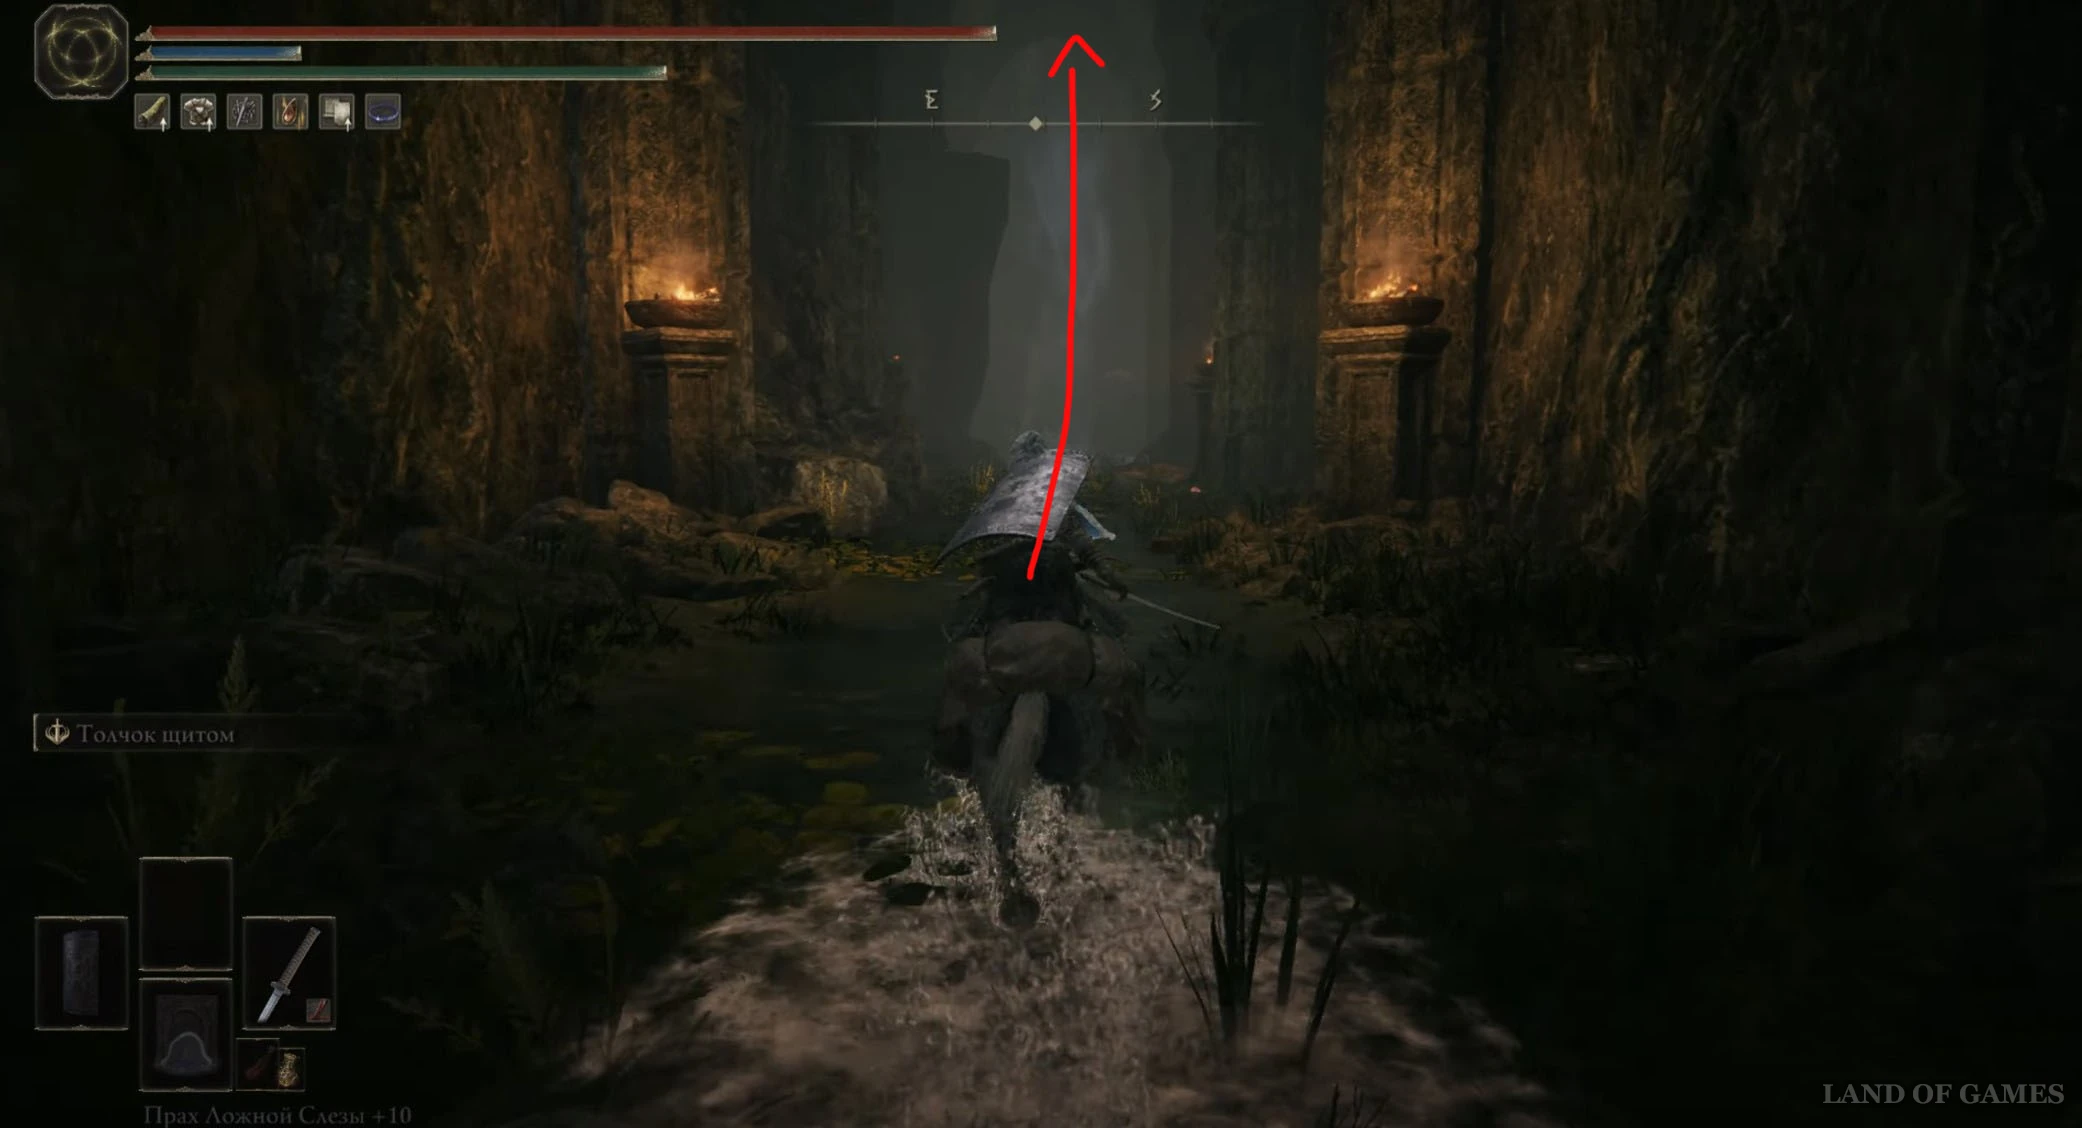
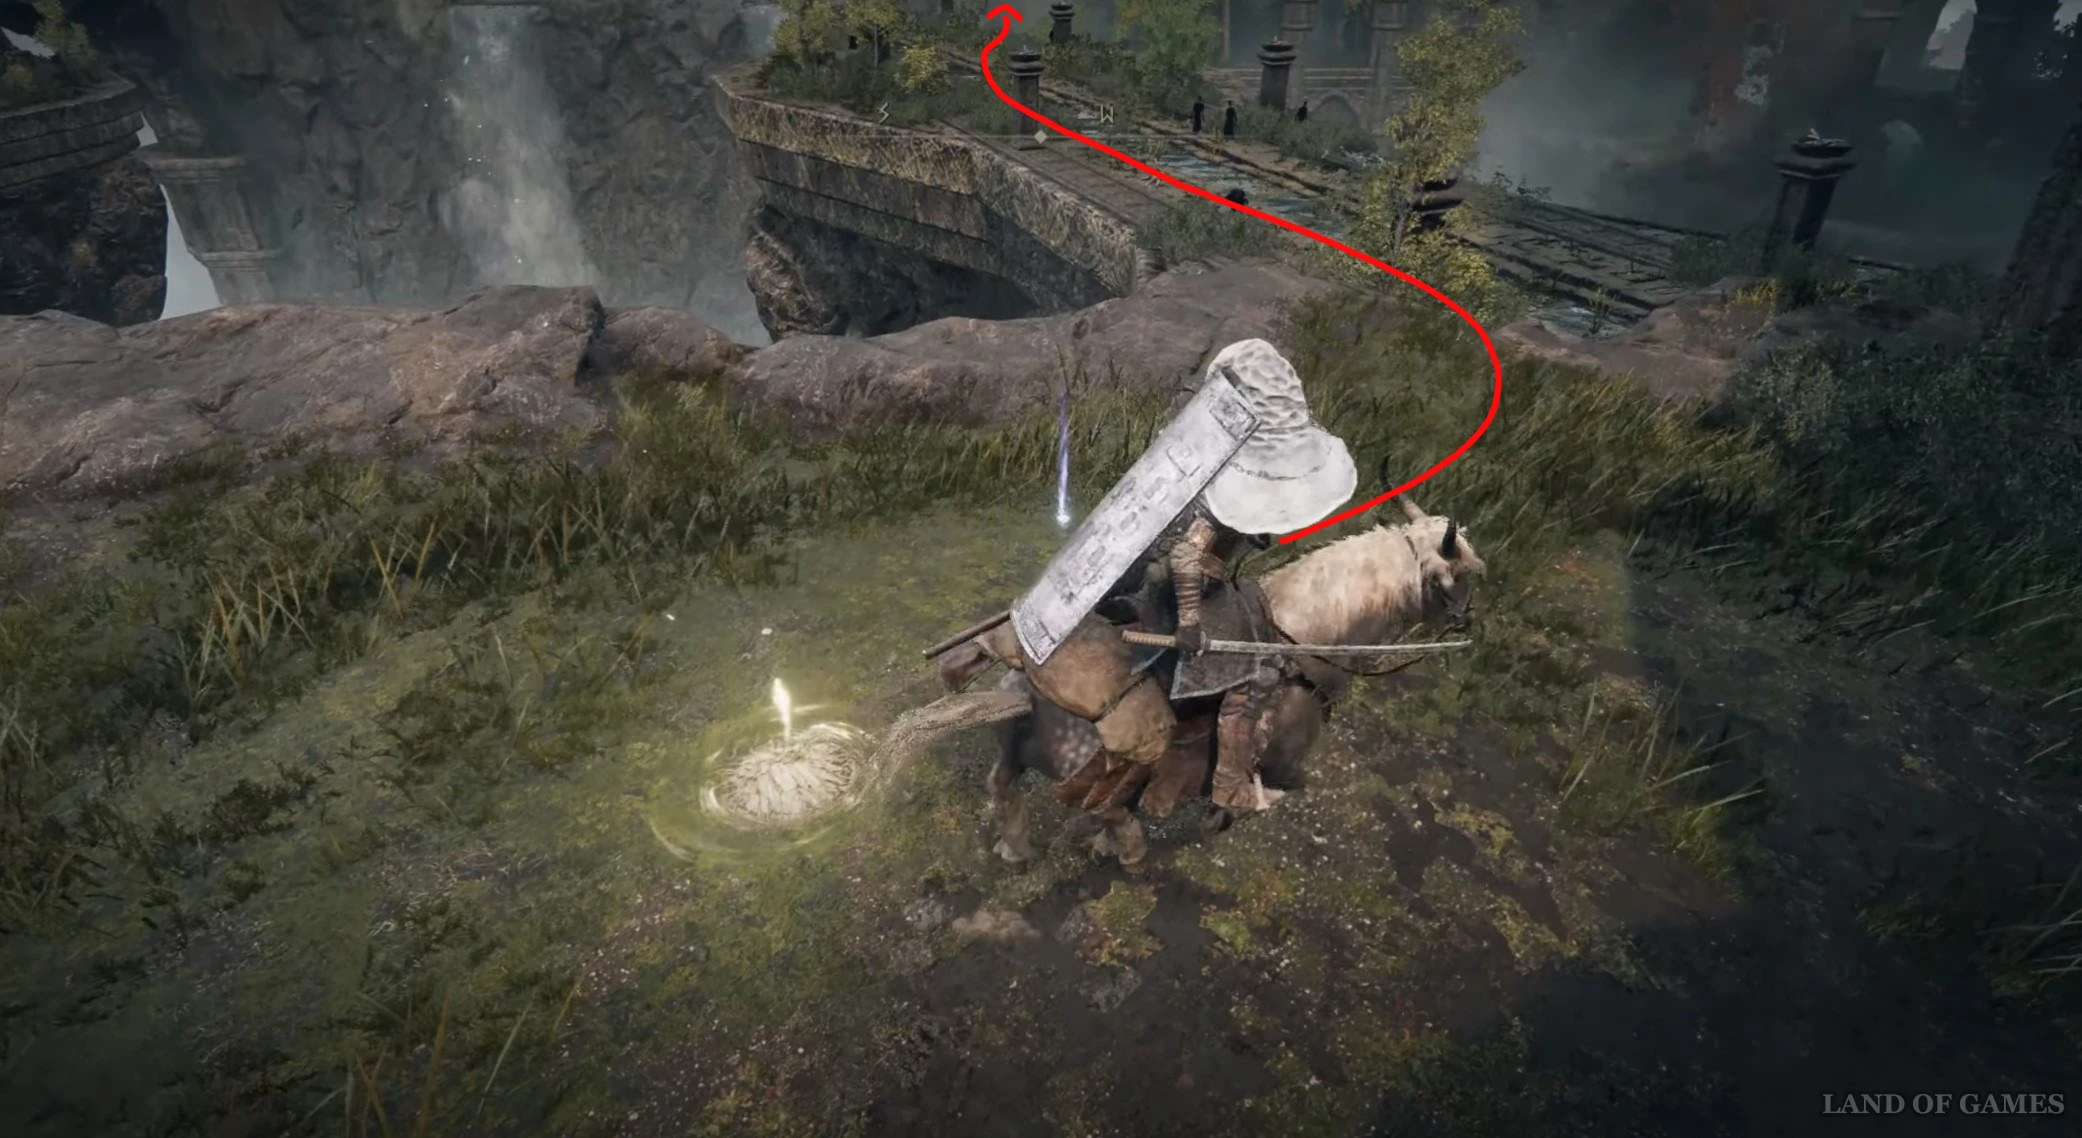
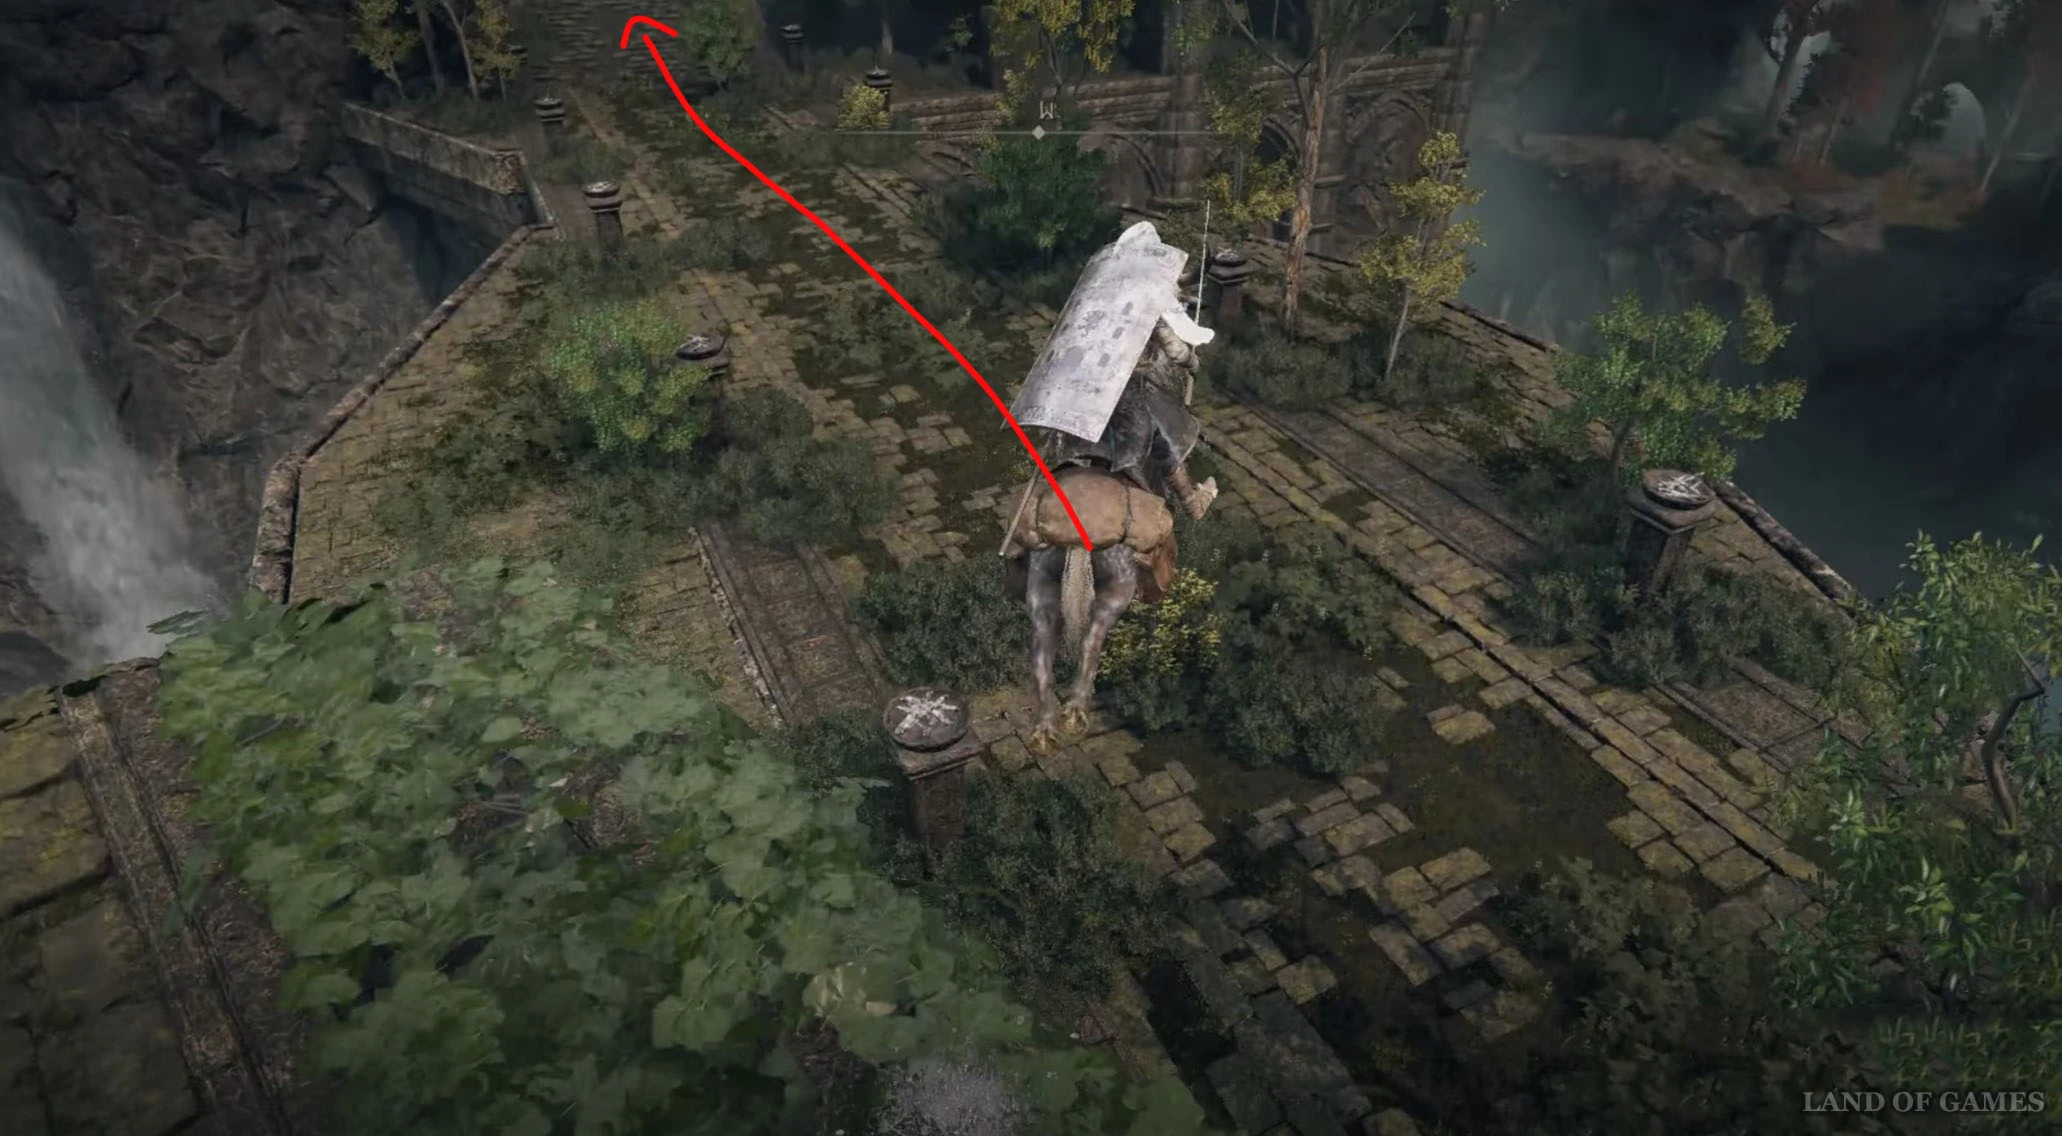
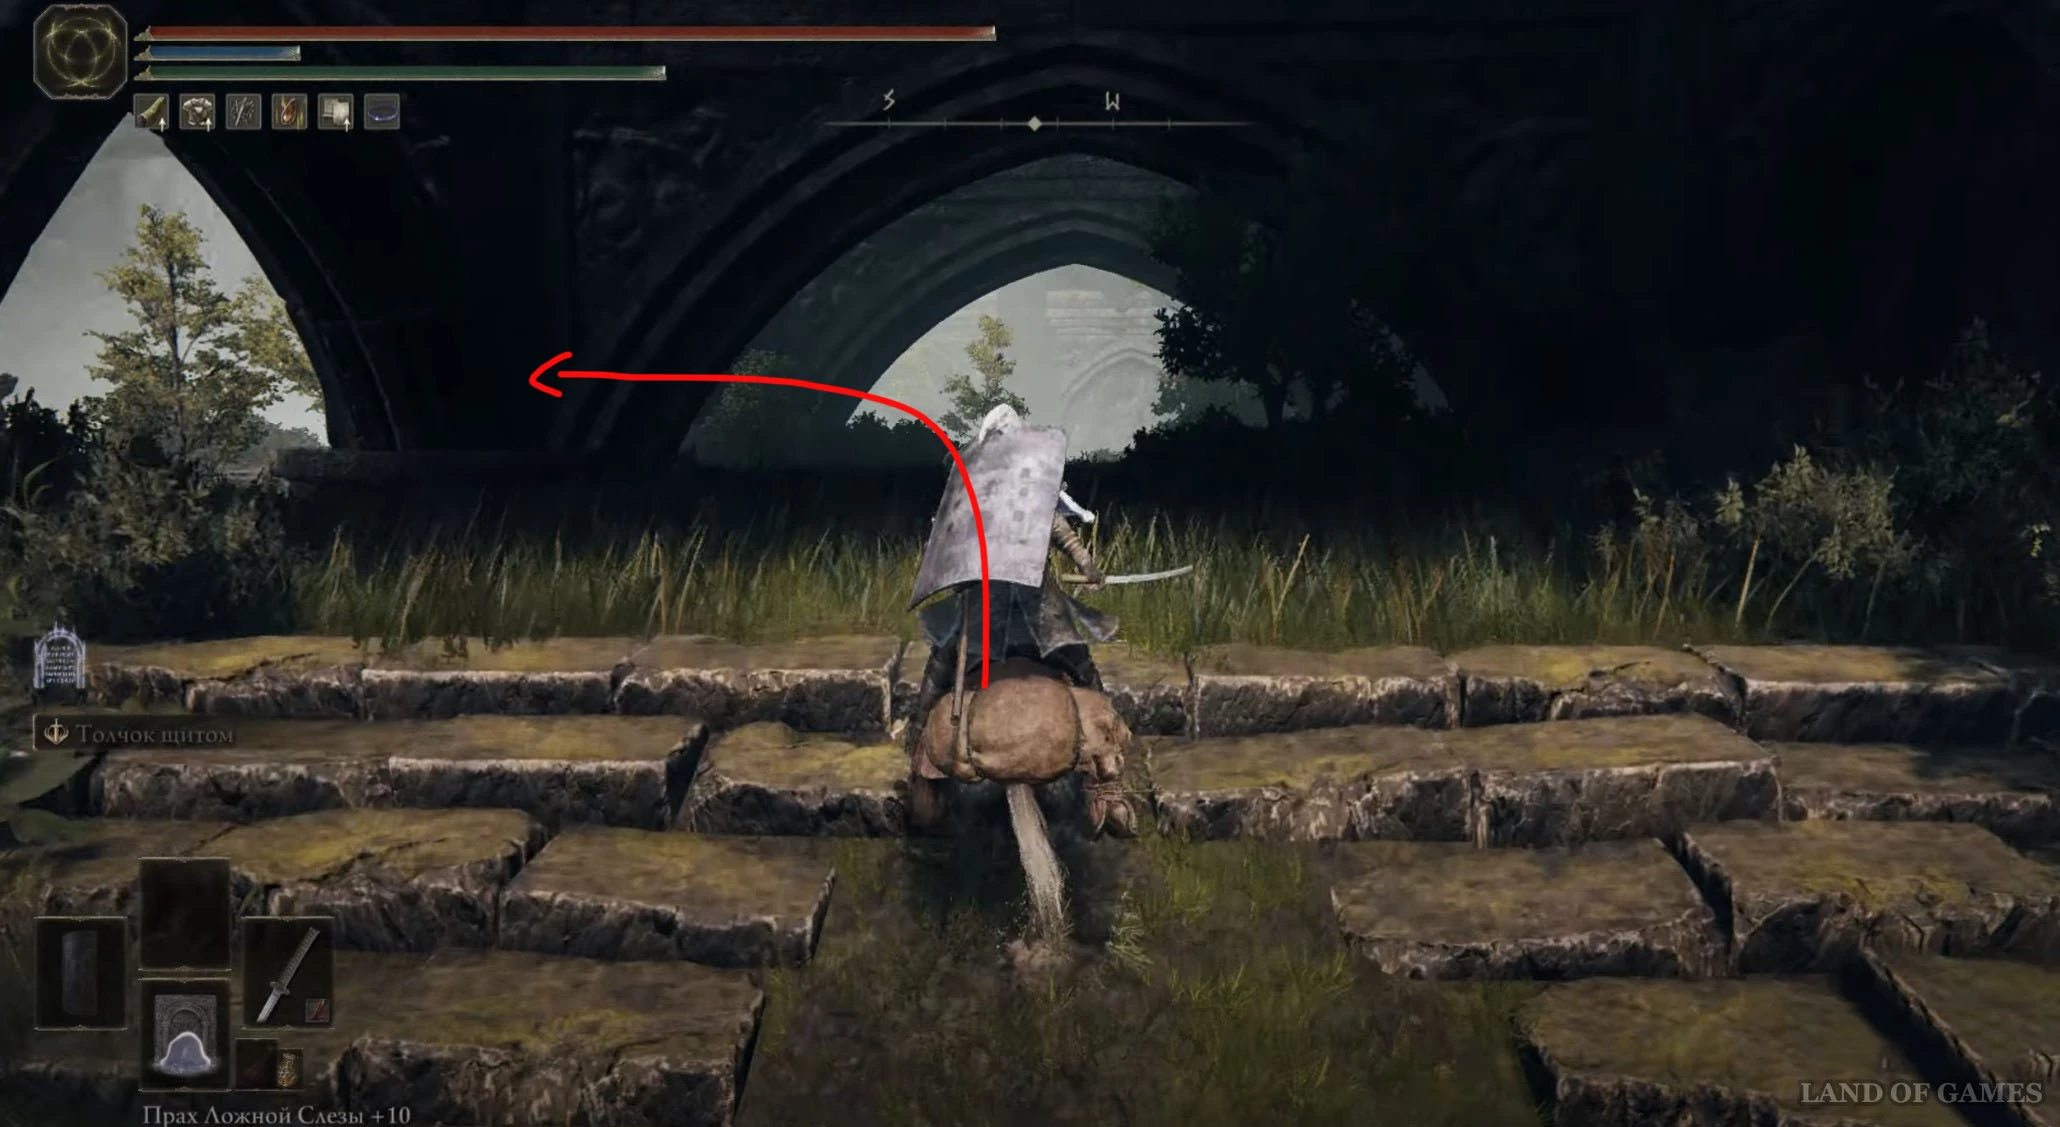
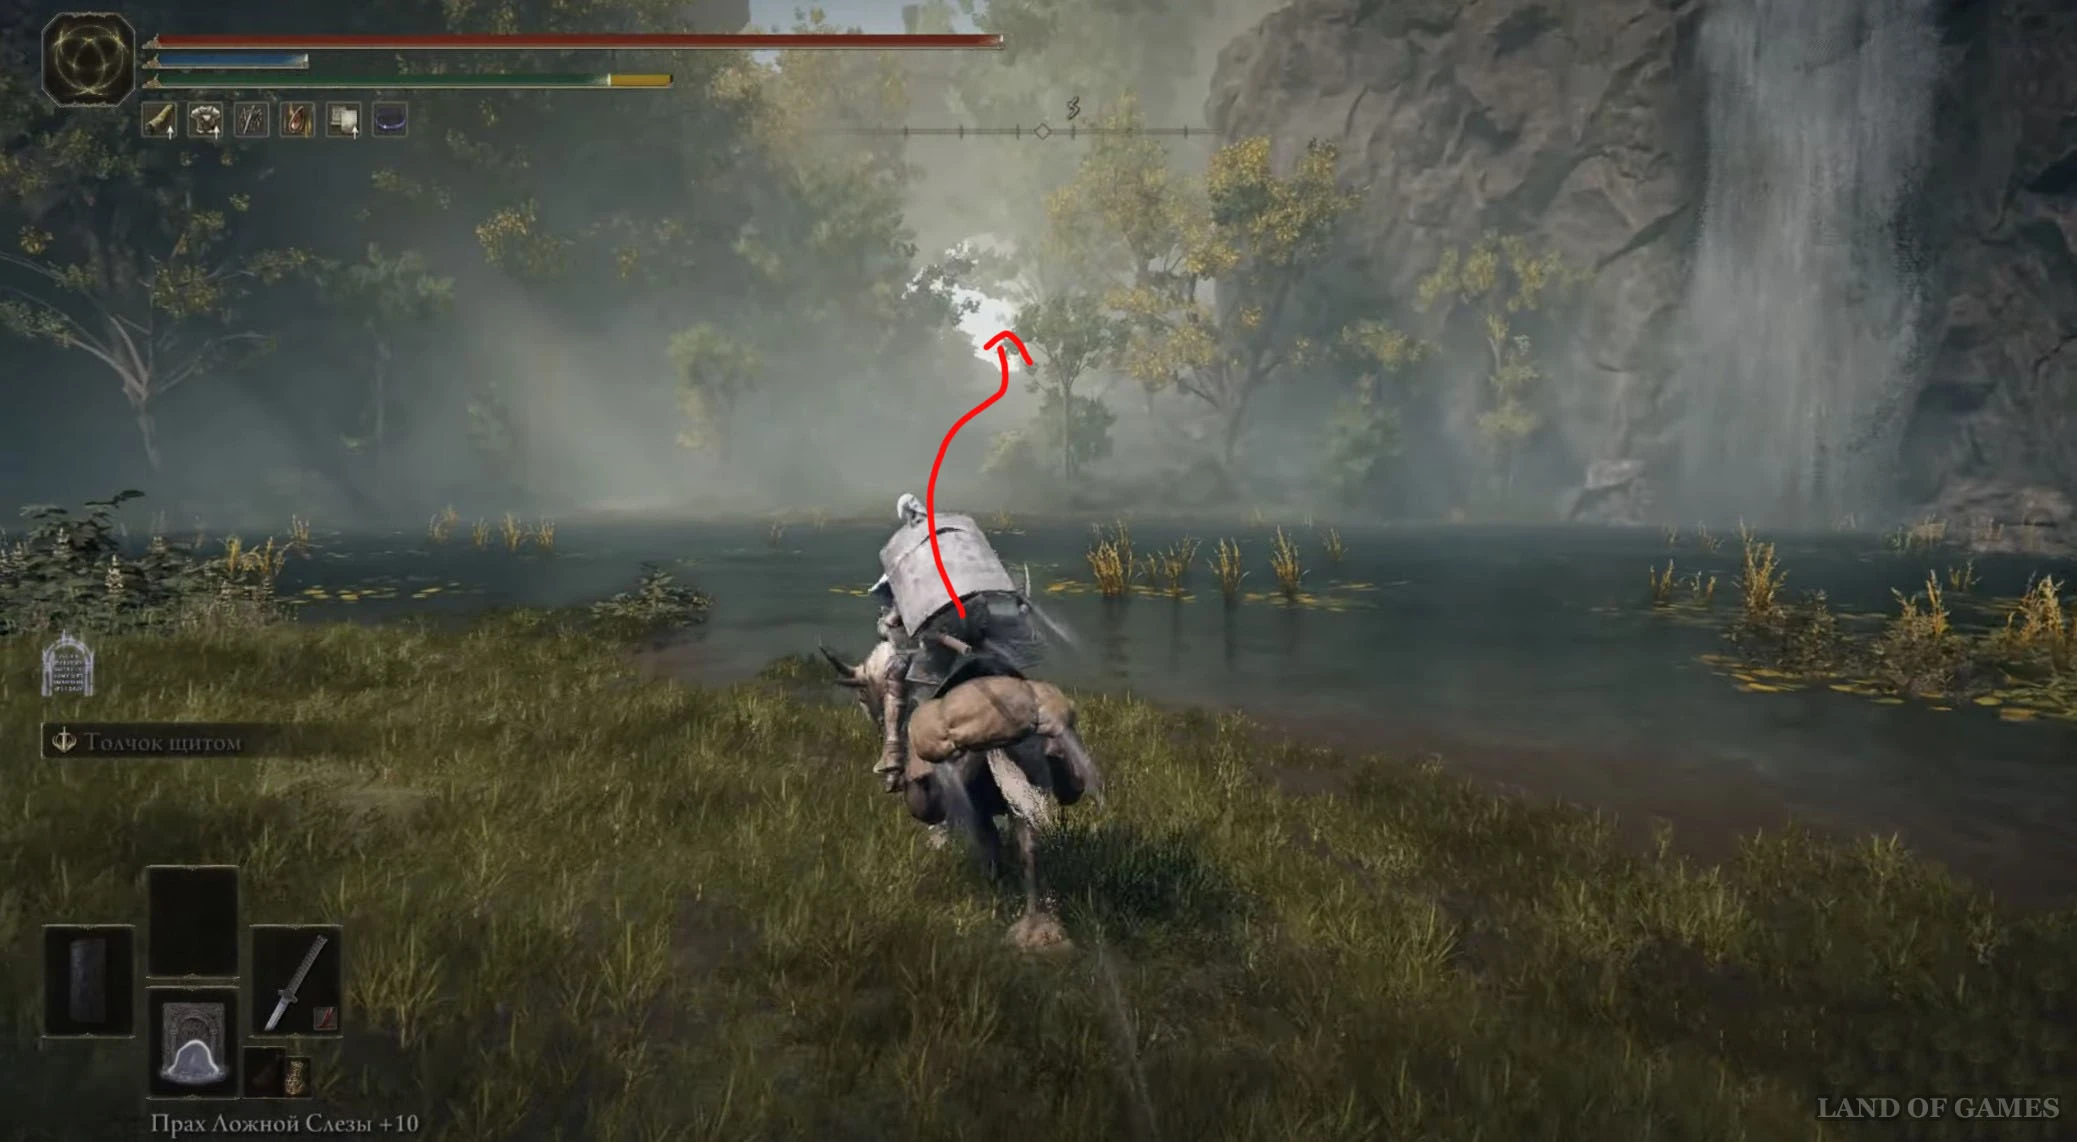
Переместитесь или доберитесь до места благодати «Лазурное побережье, запад», а потом скачите на север в ущелье. Войдя в него, начните двигаться в северо-восточном направлении к водопадам. Пройдите мимо призрачных червей и сверните в проход слева. Затем спрыгните с выступа и войдите в пещеру.

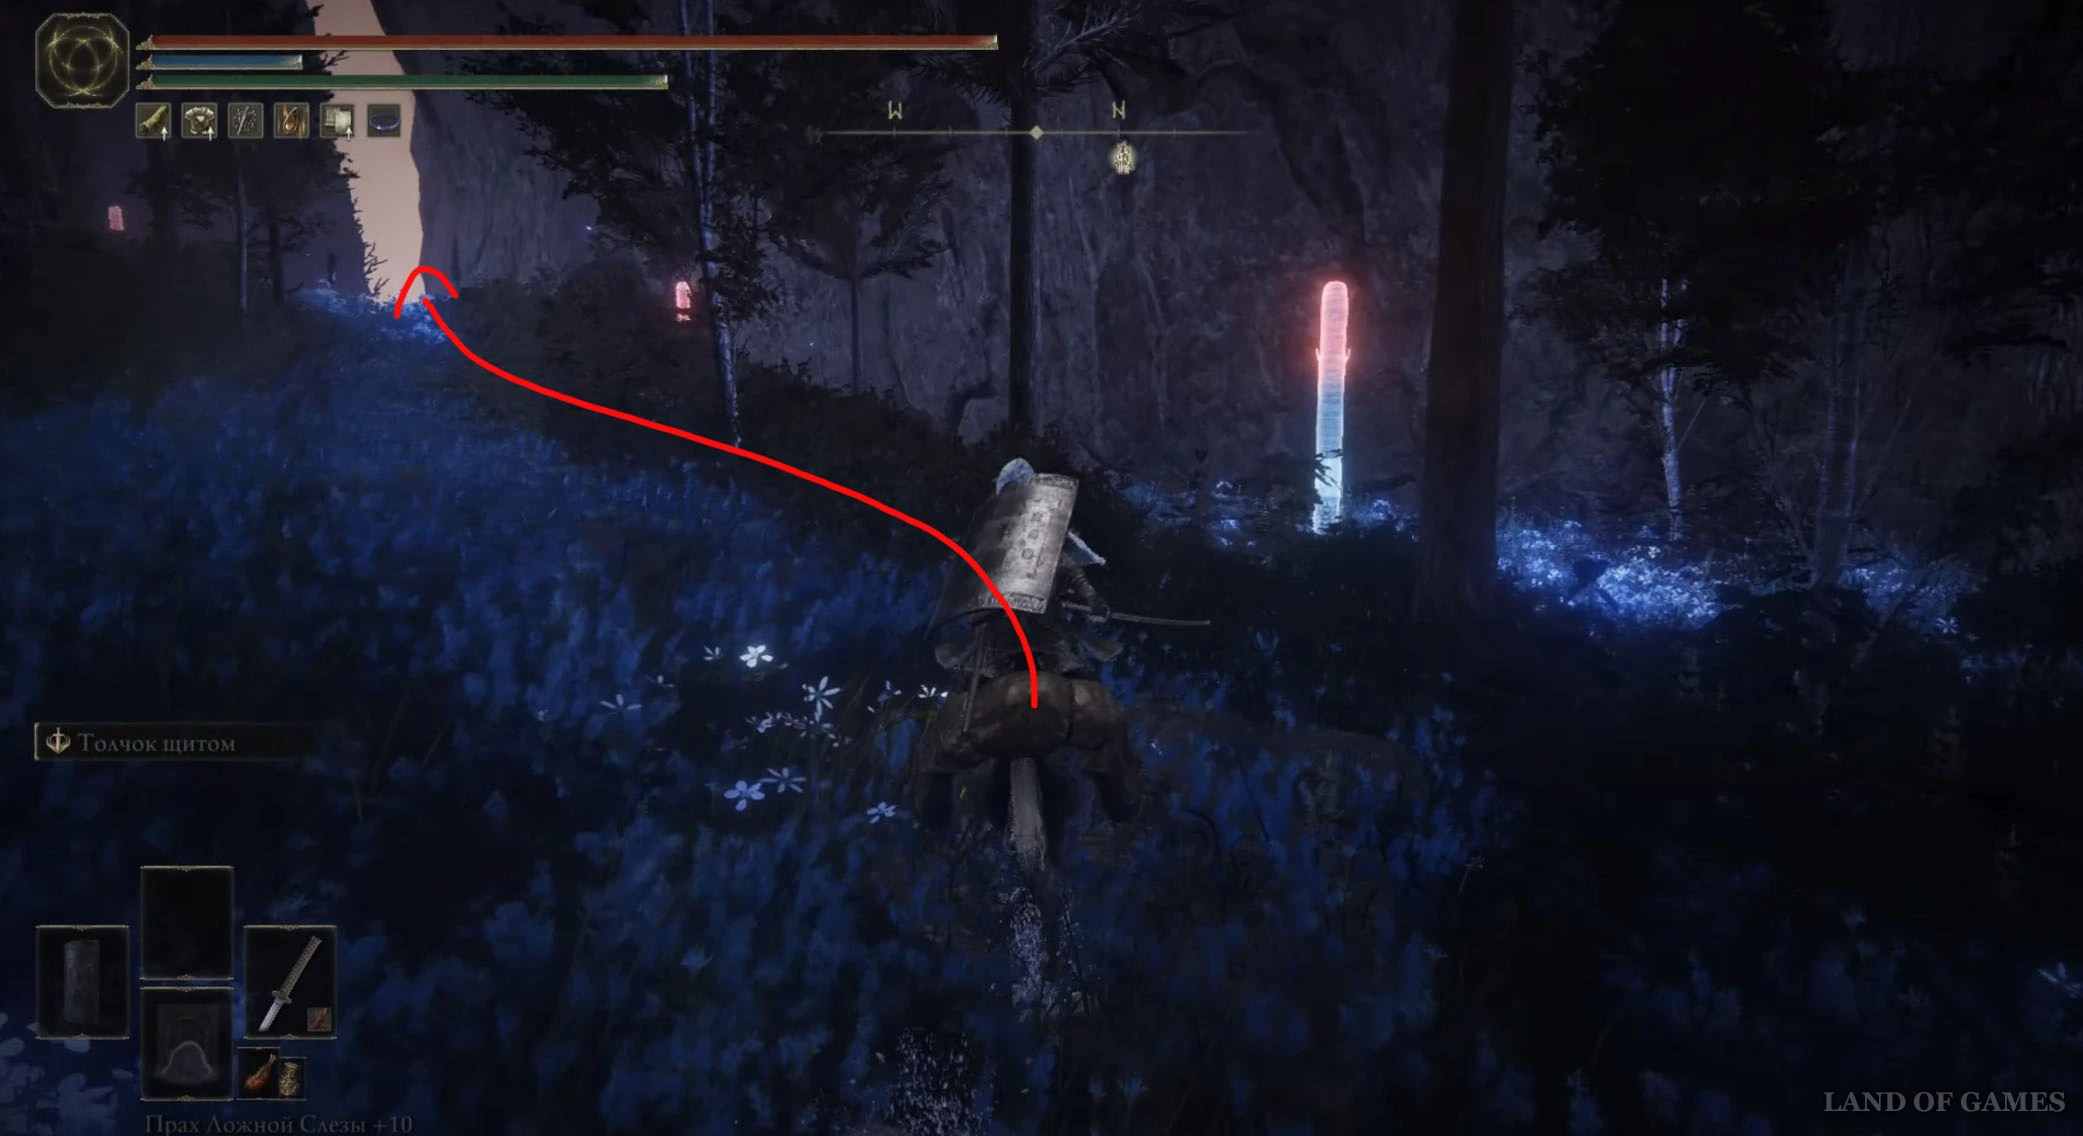
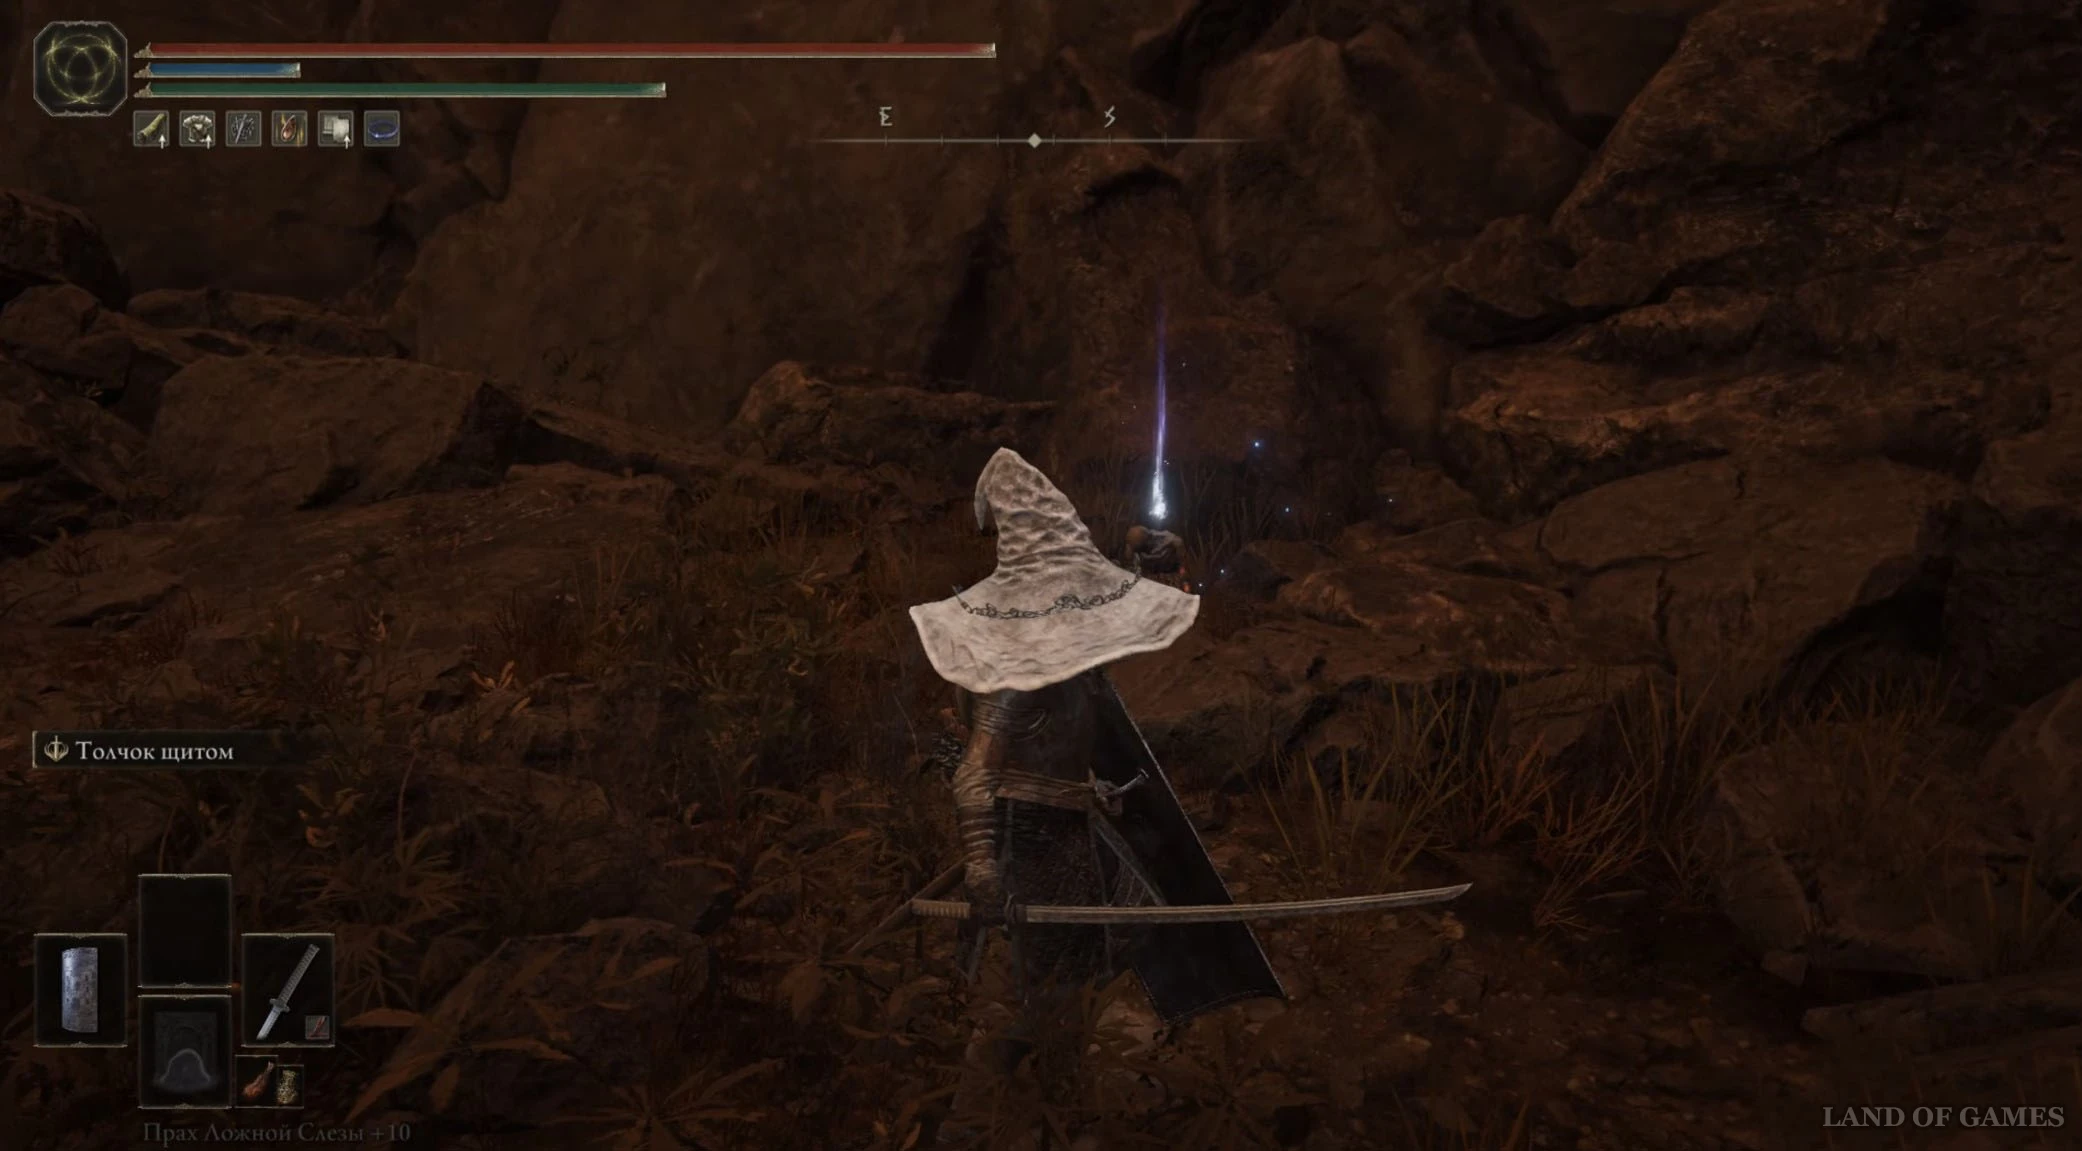
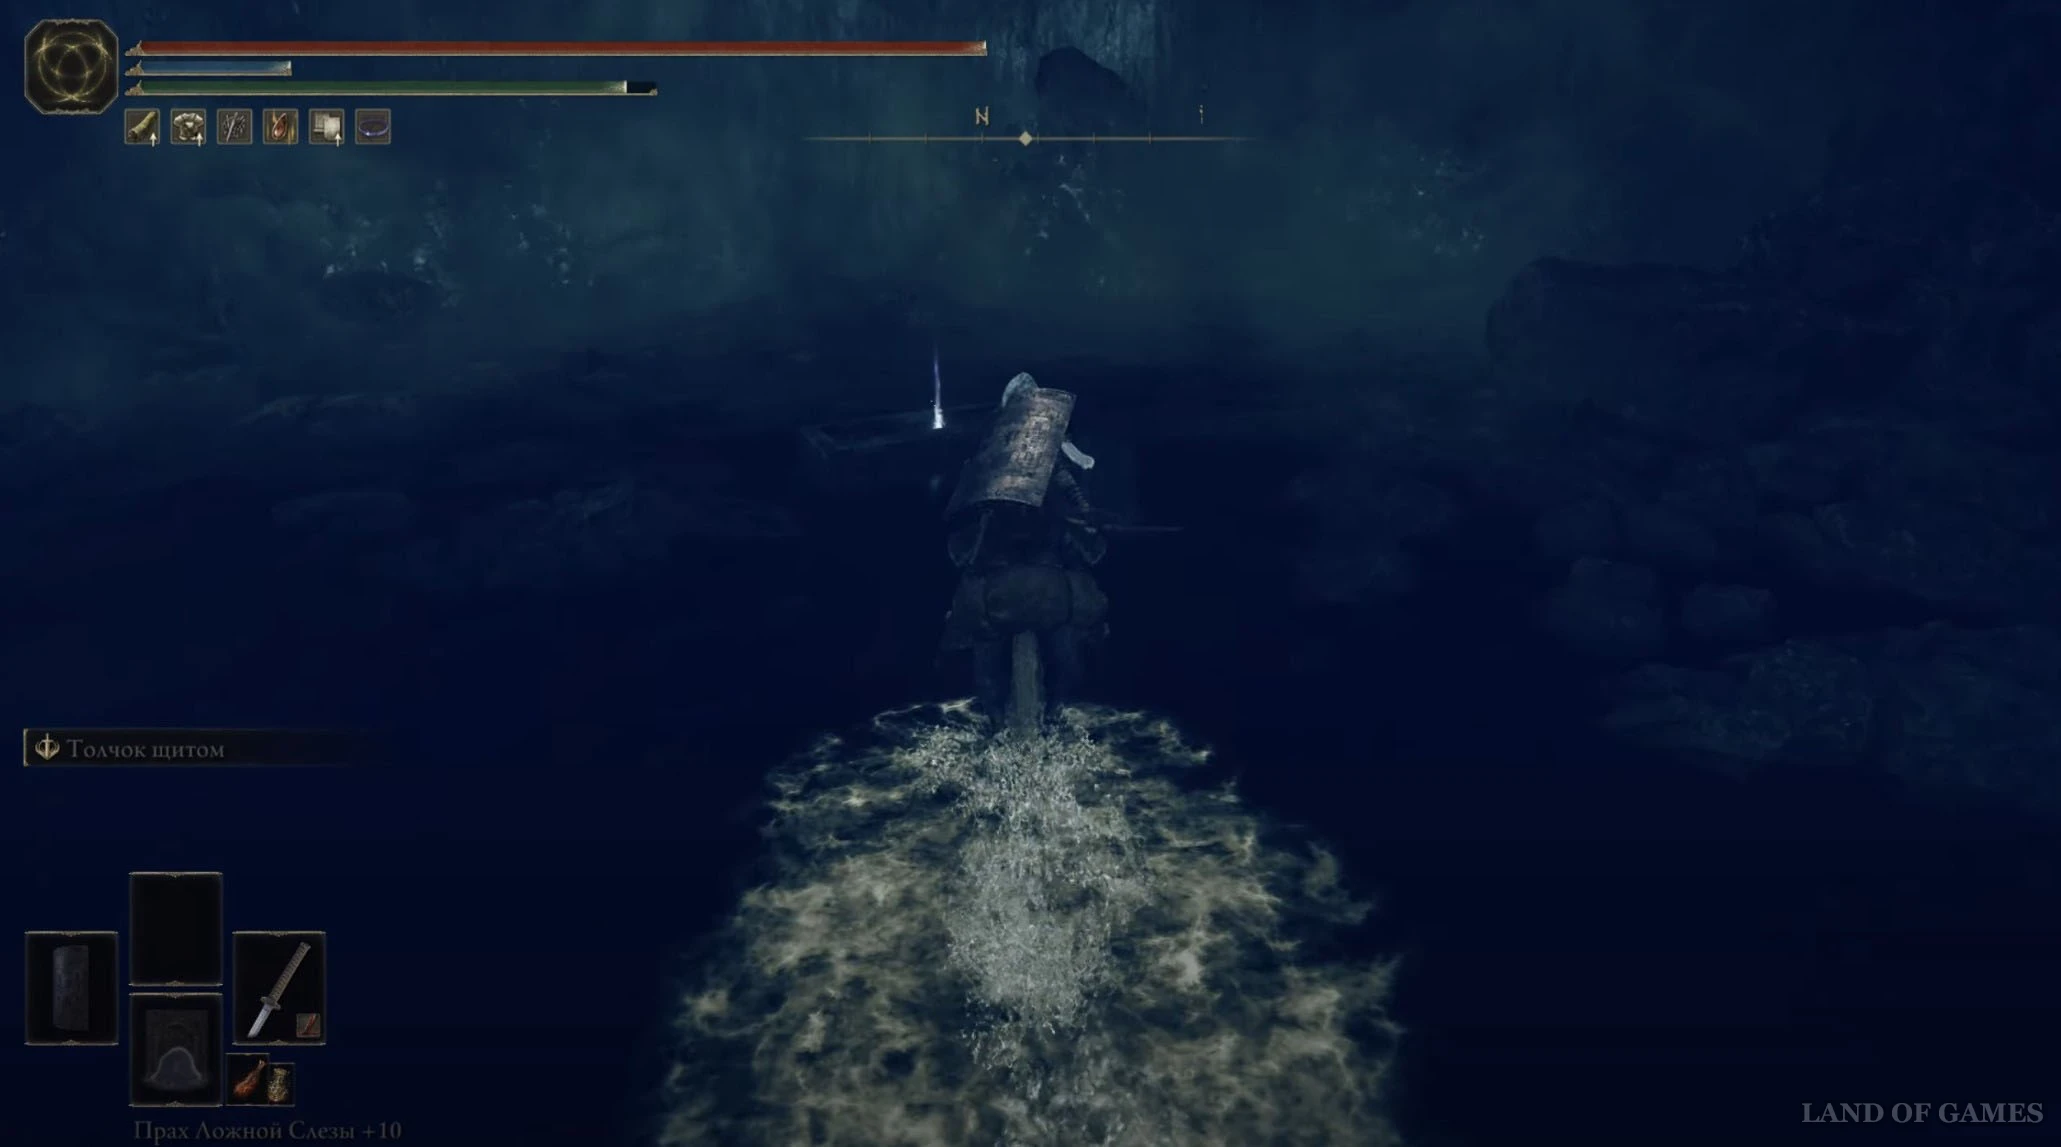
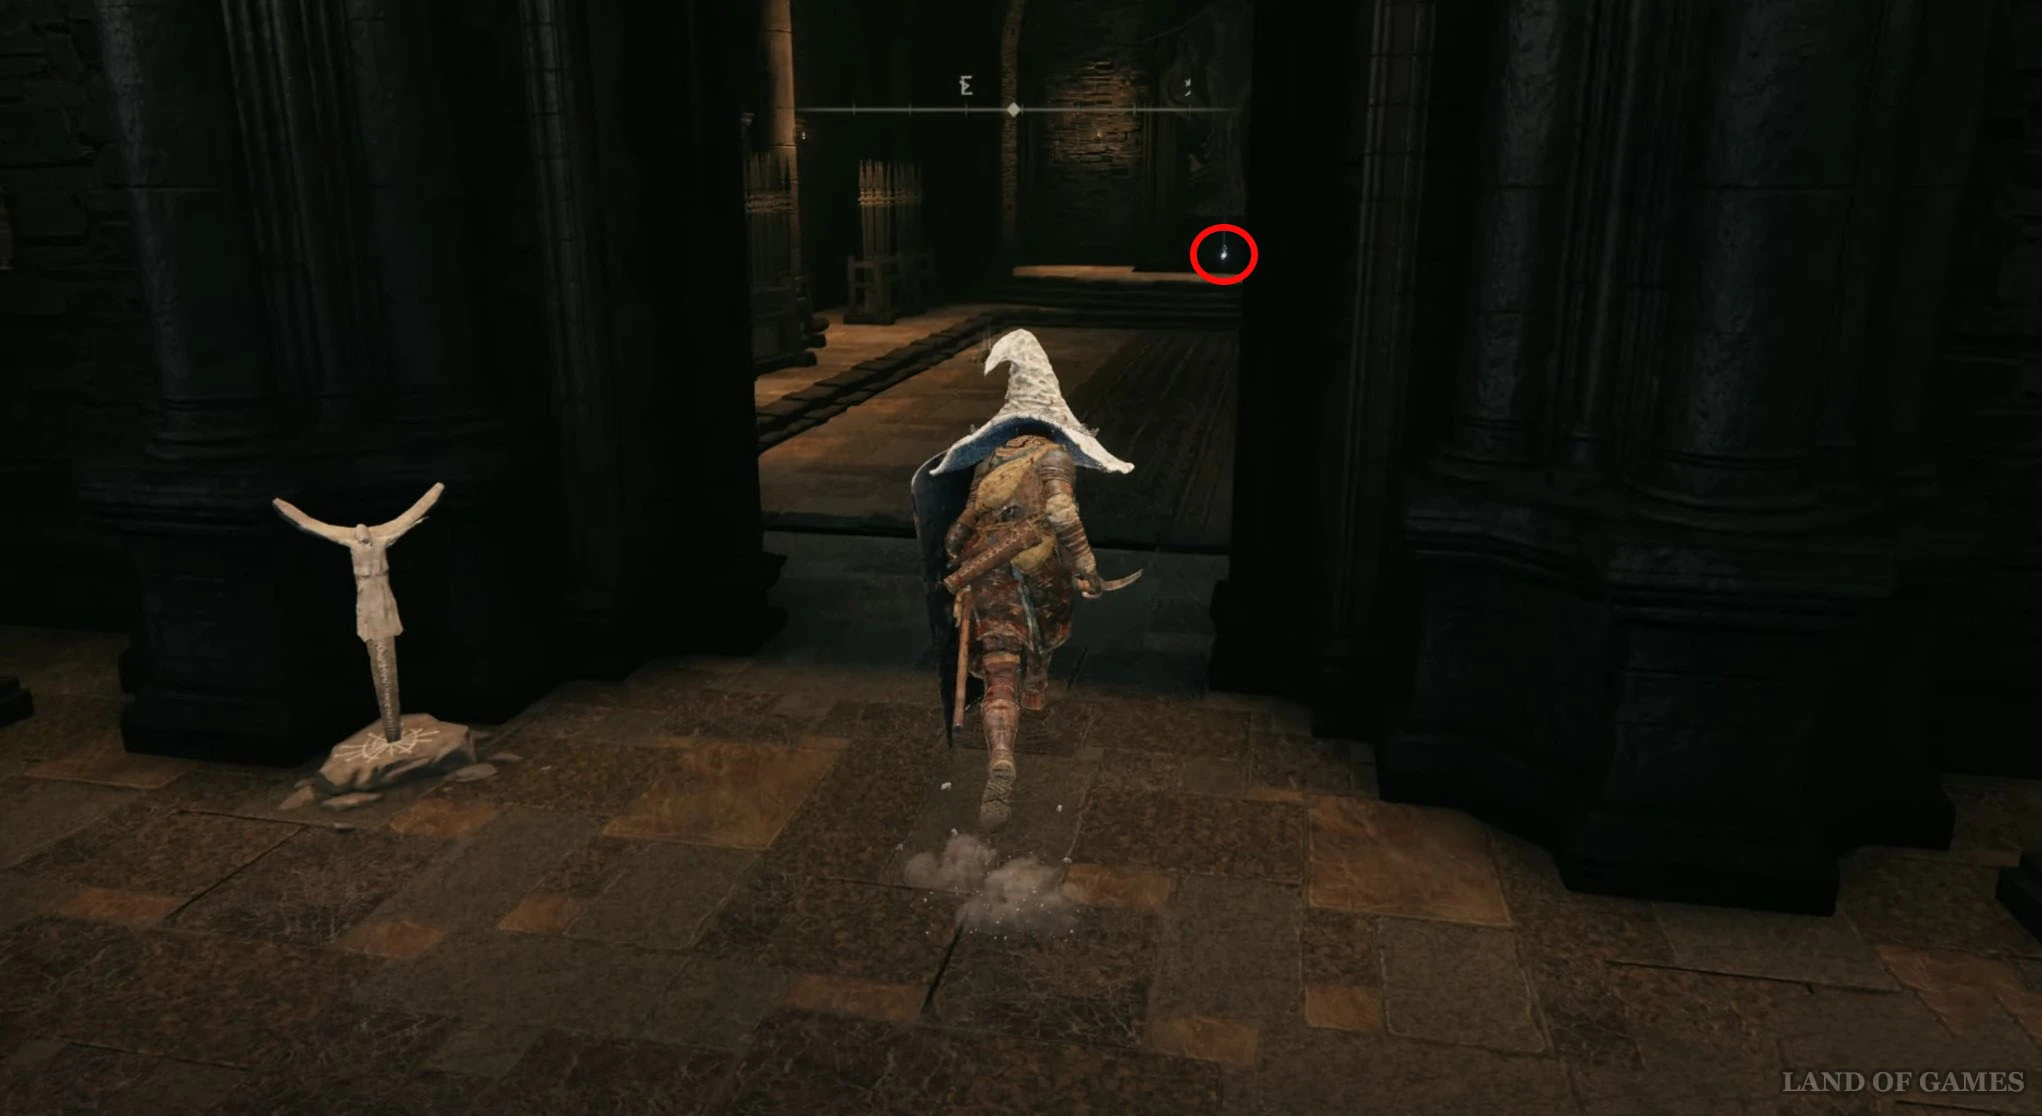
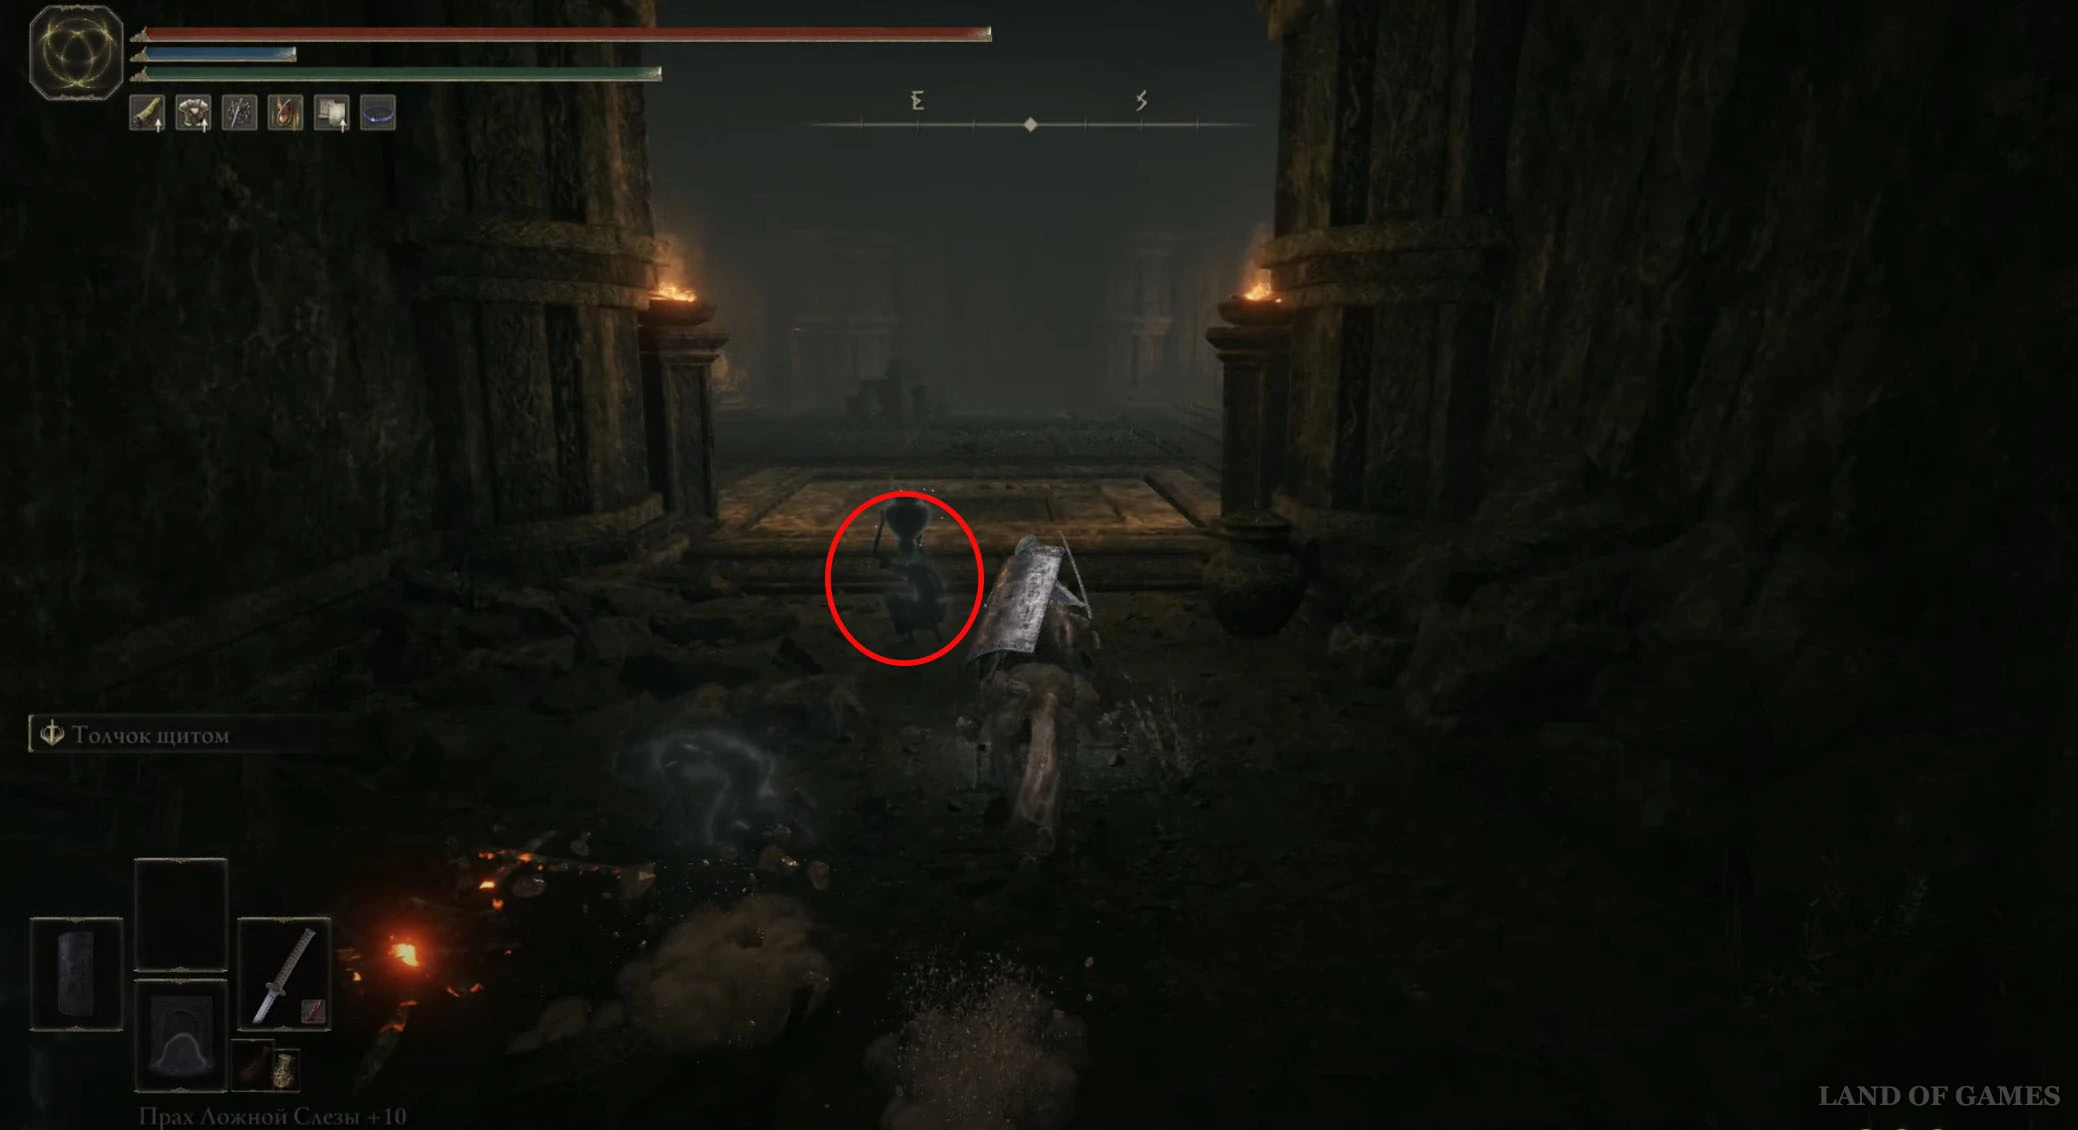
Разберитесь с противником, находящимся внутри, а затем подберите белый огонек с трупа, чтобы получить нужный вам фрагмент.
Осколок древа упадка 24
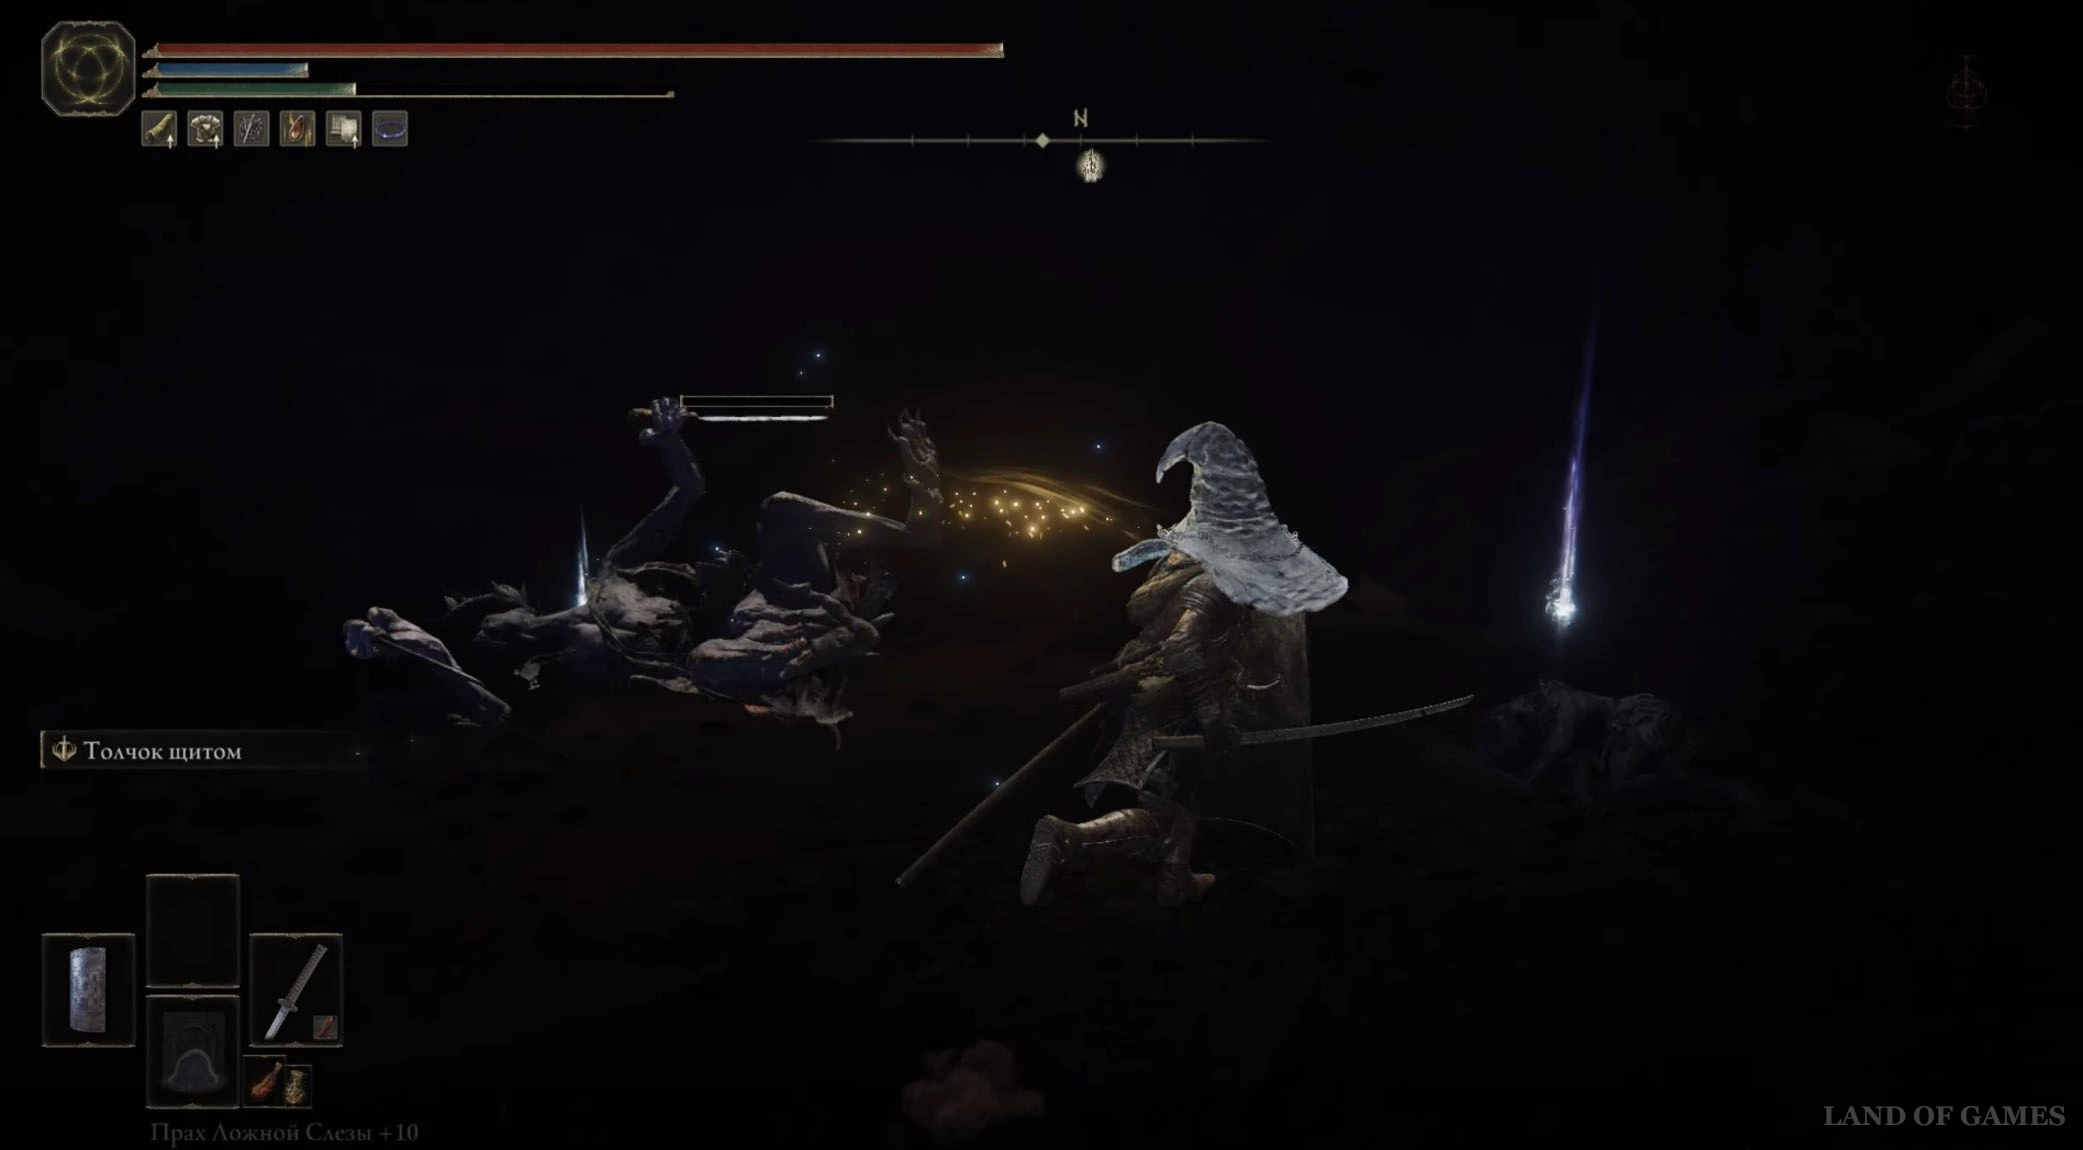
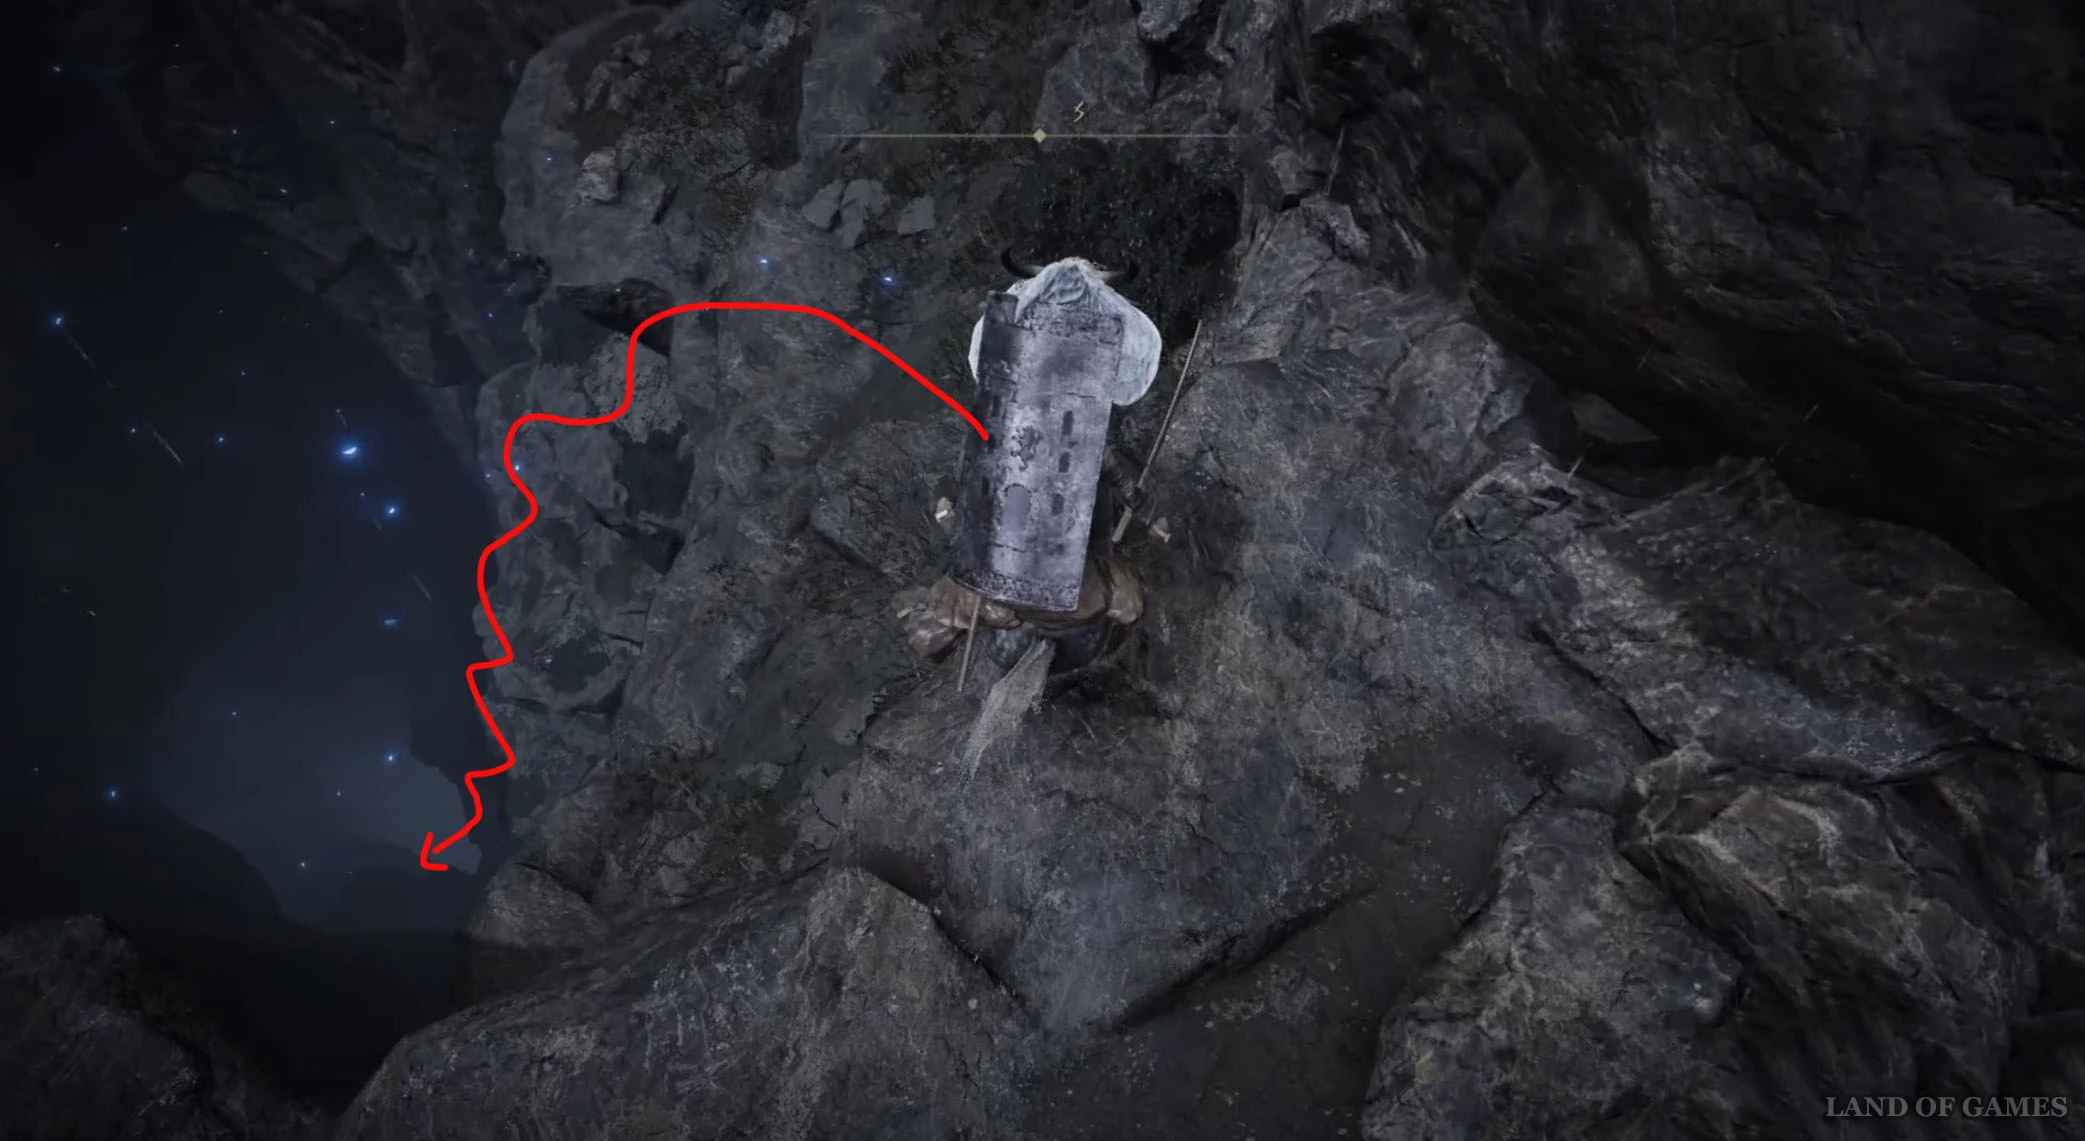
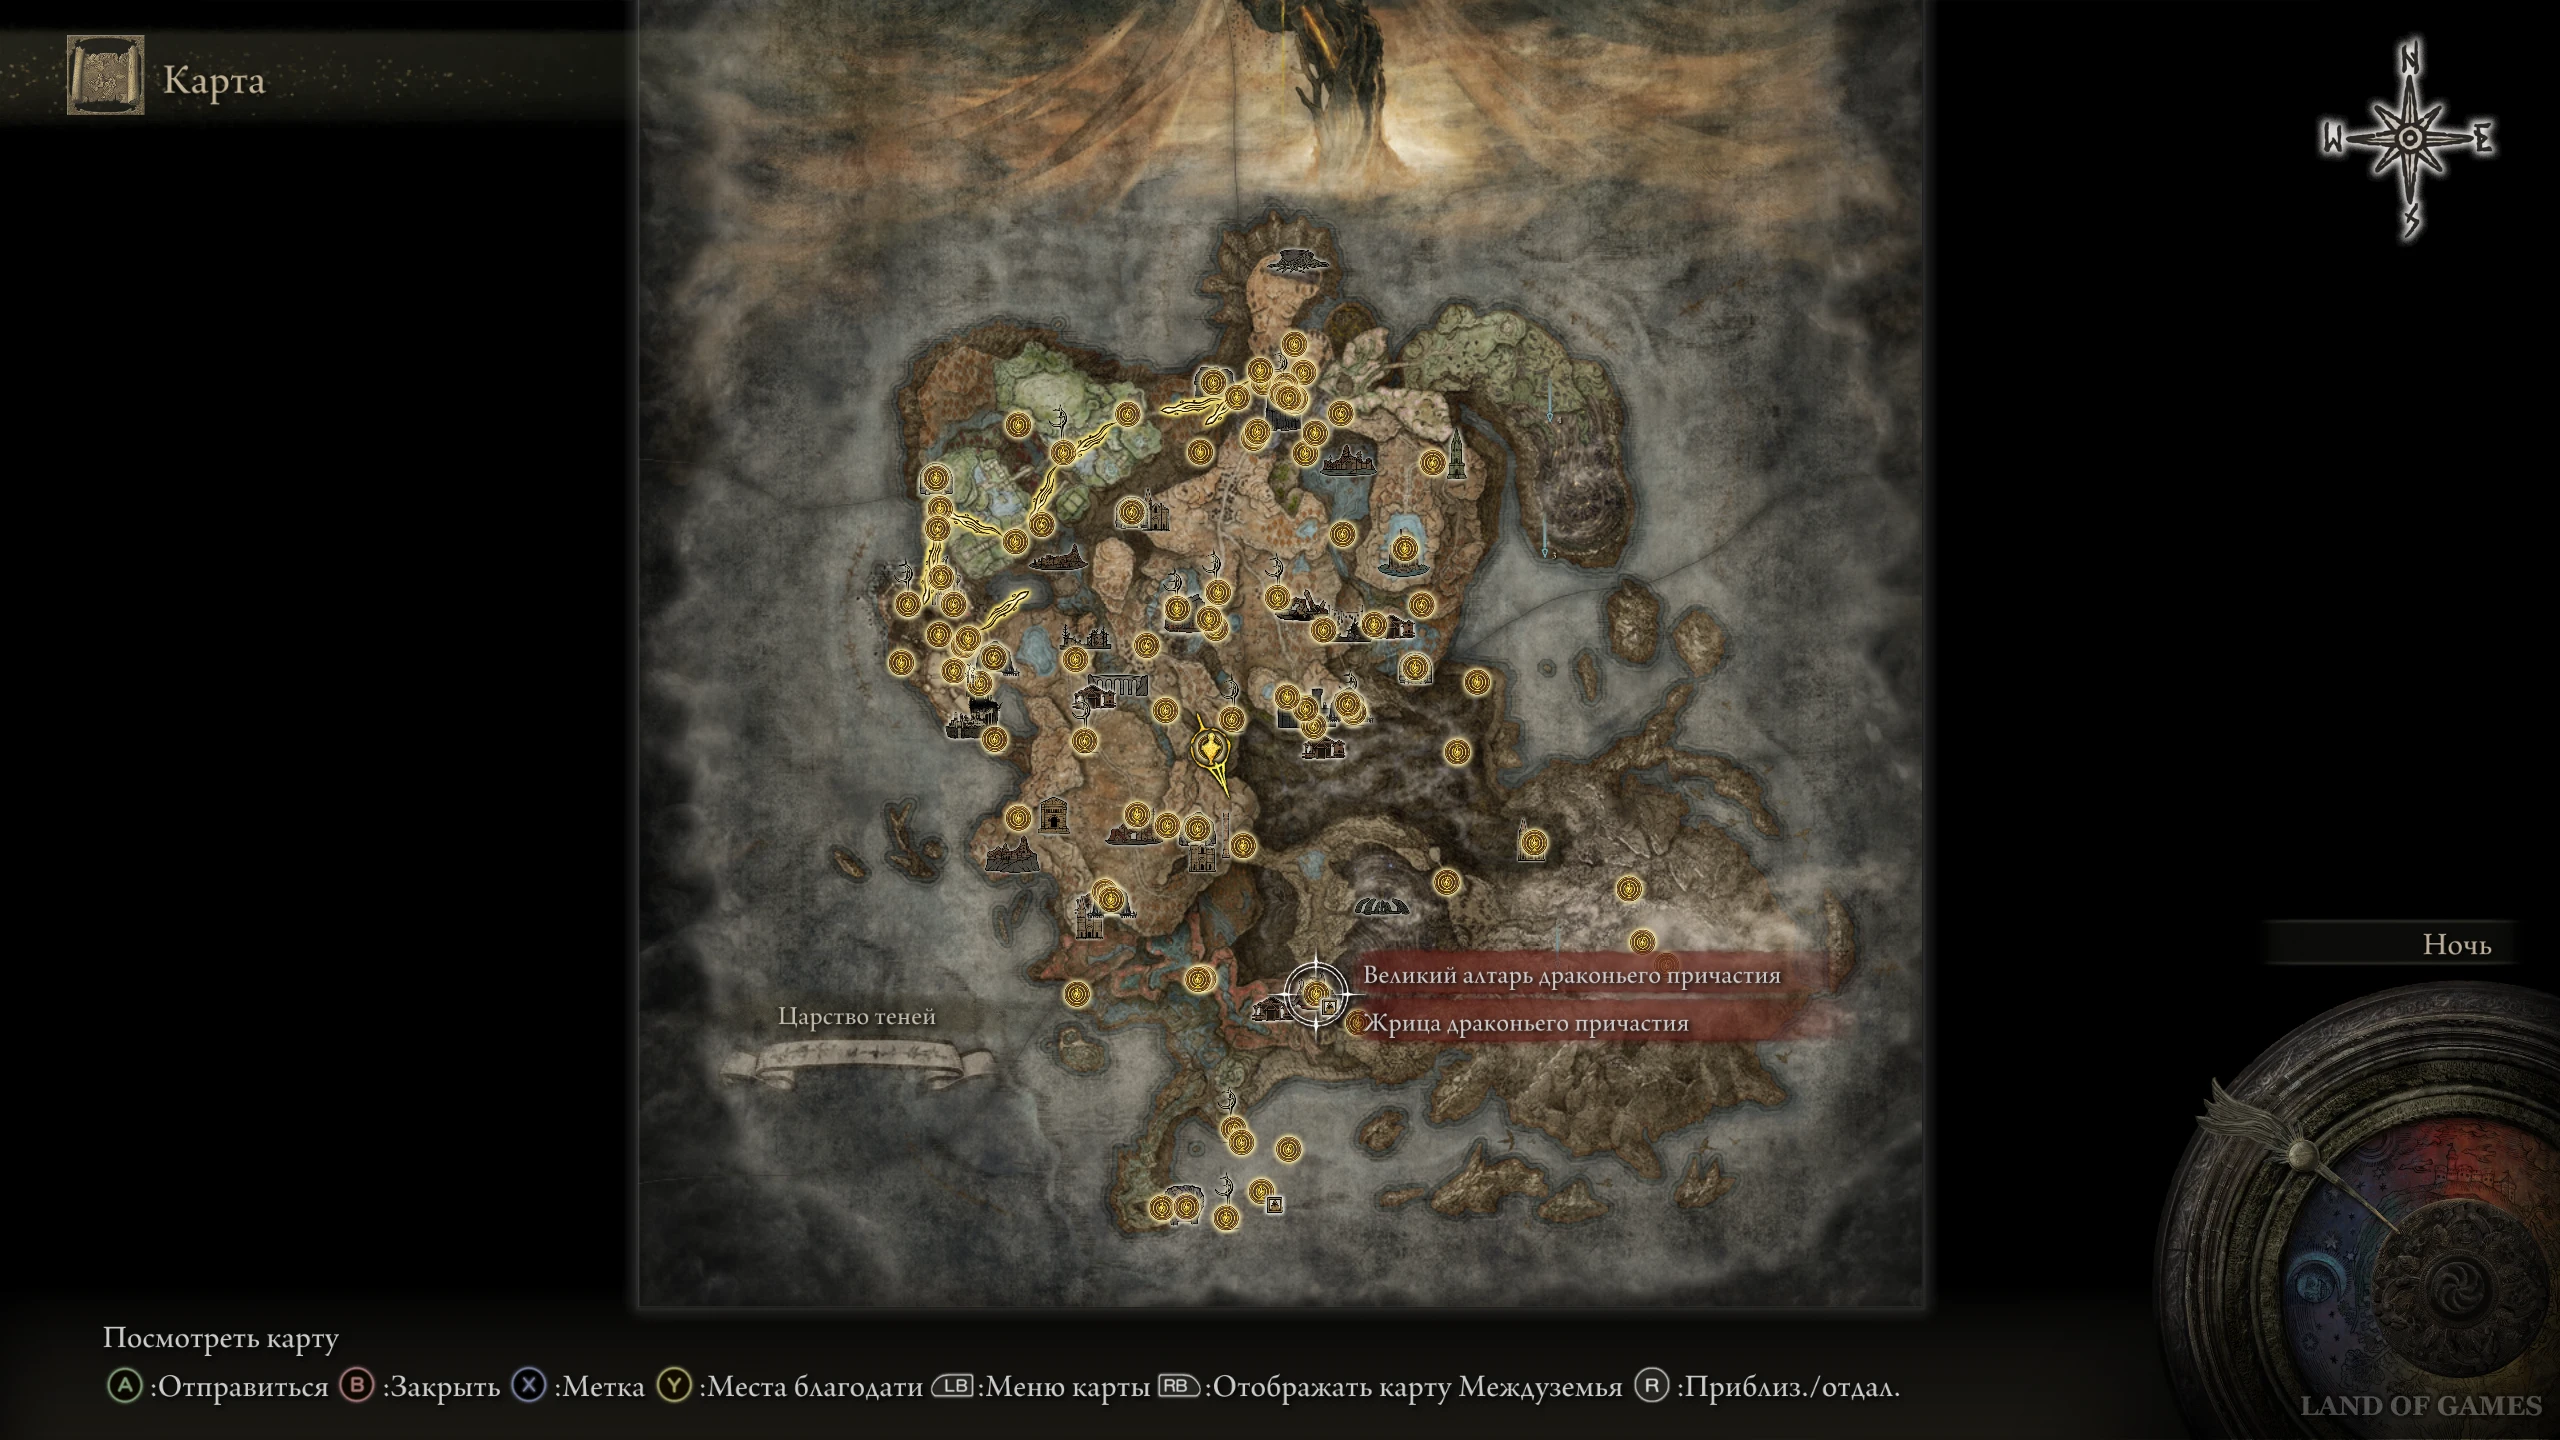
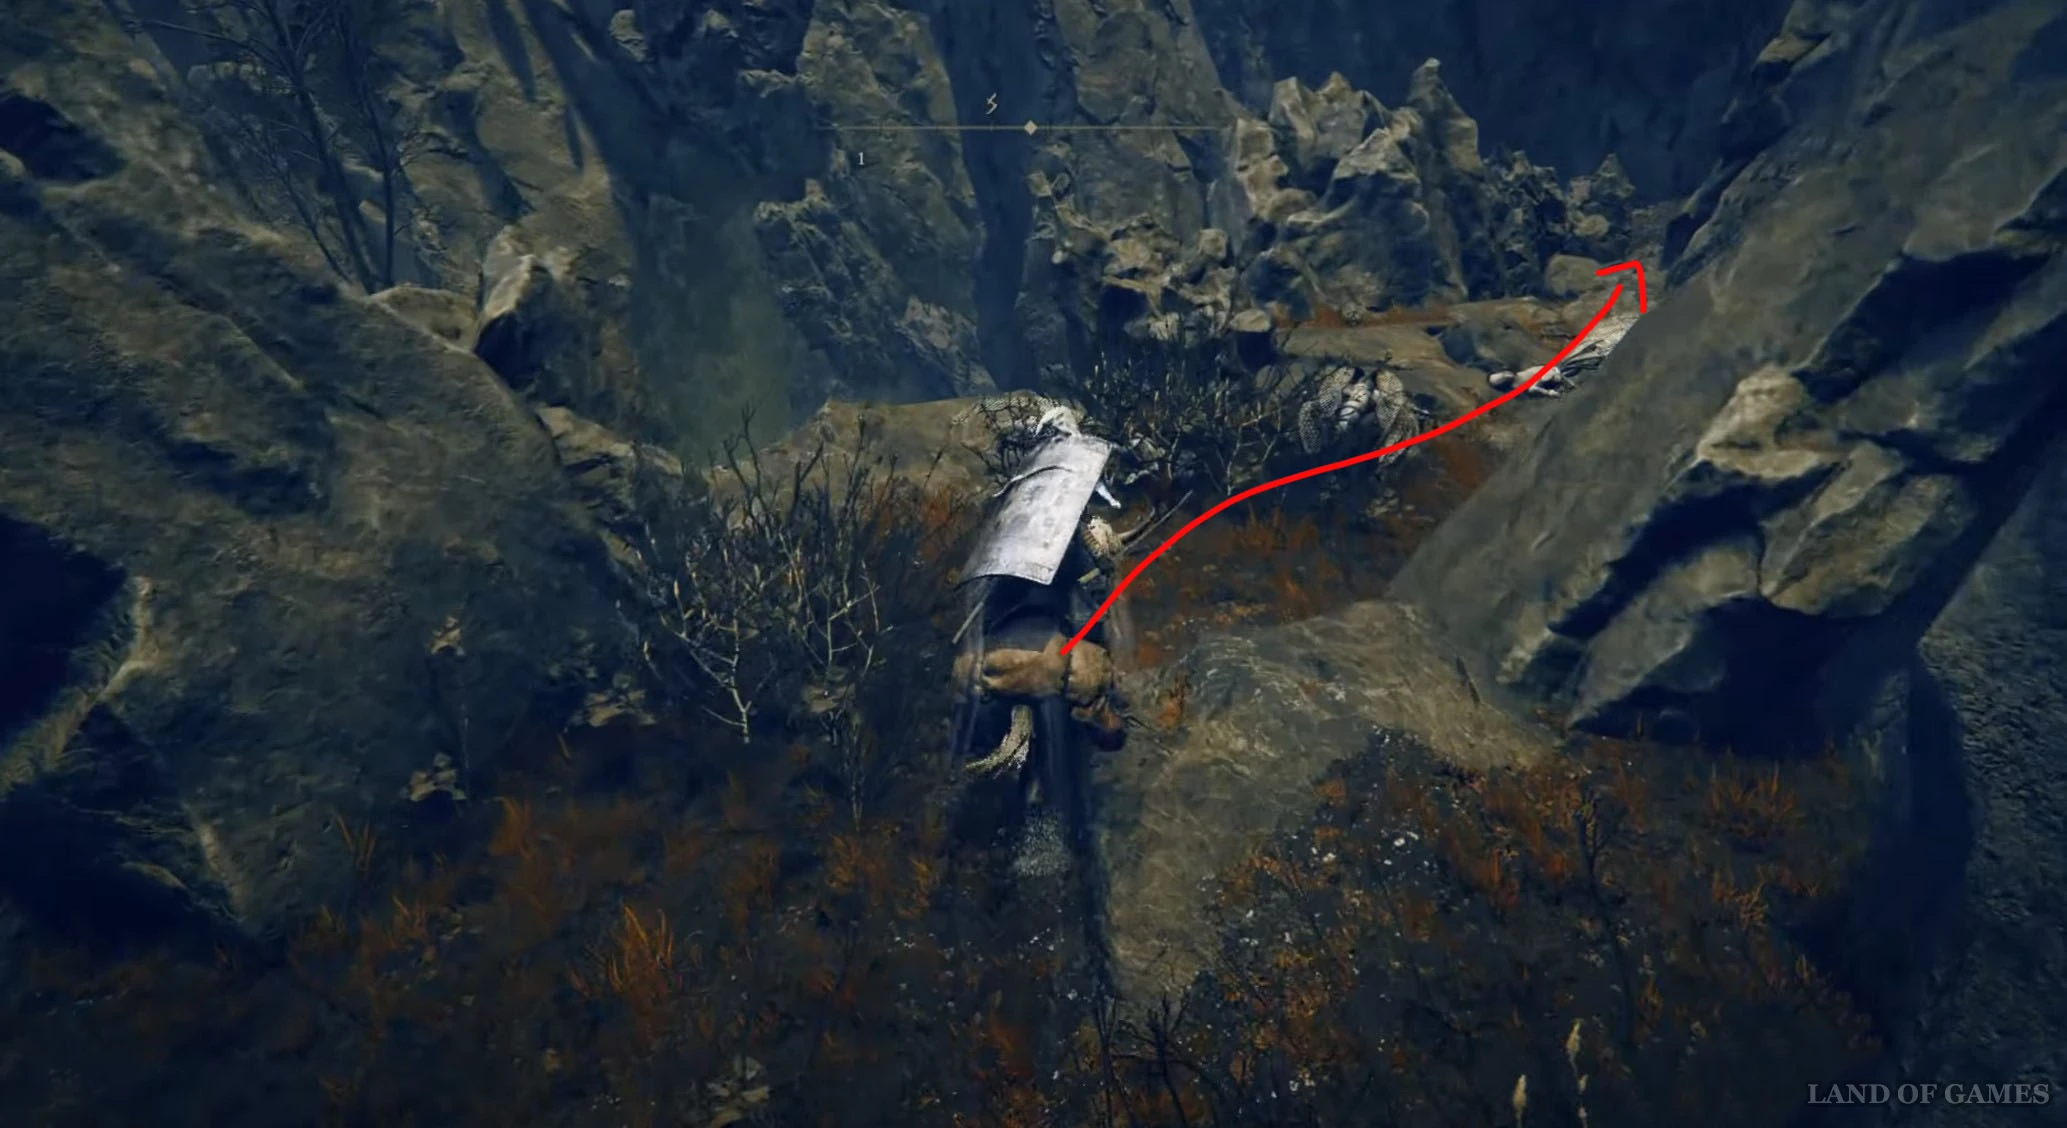
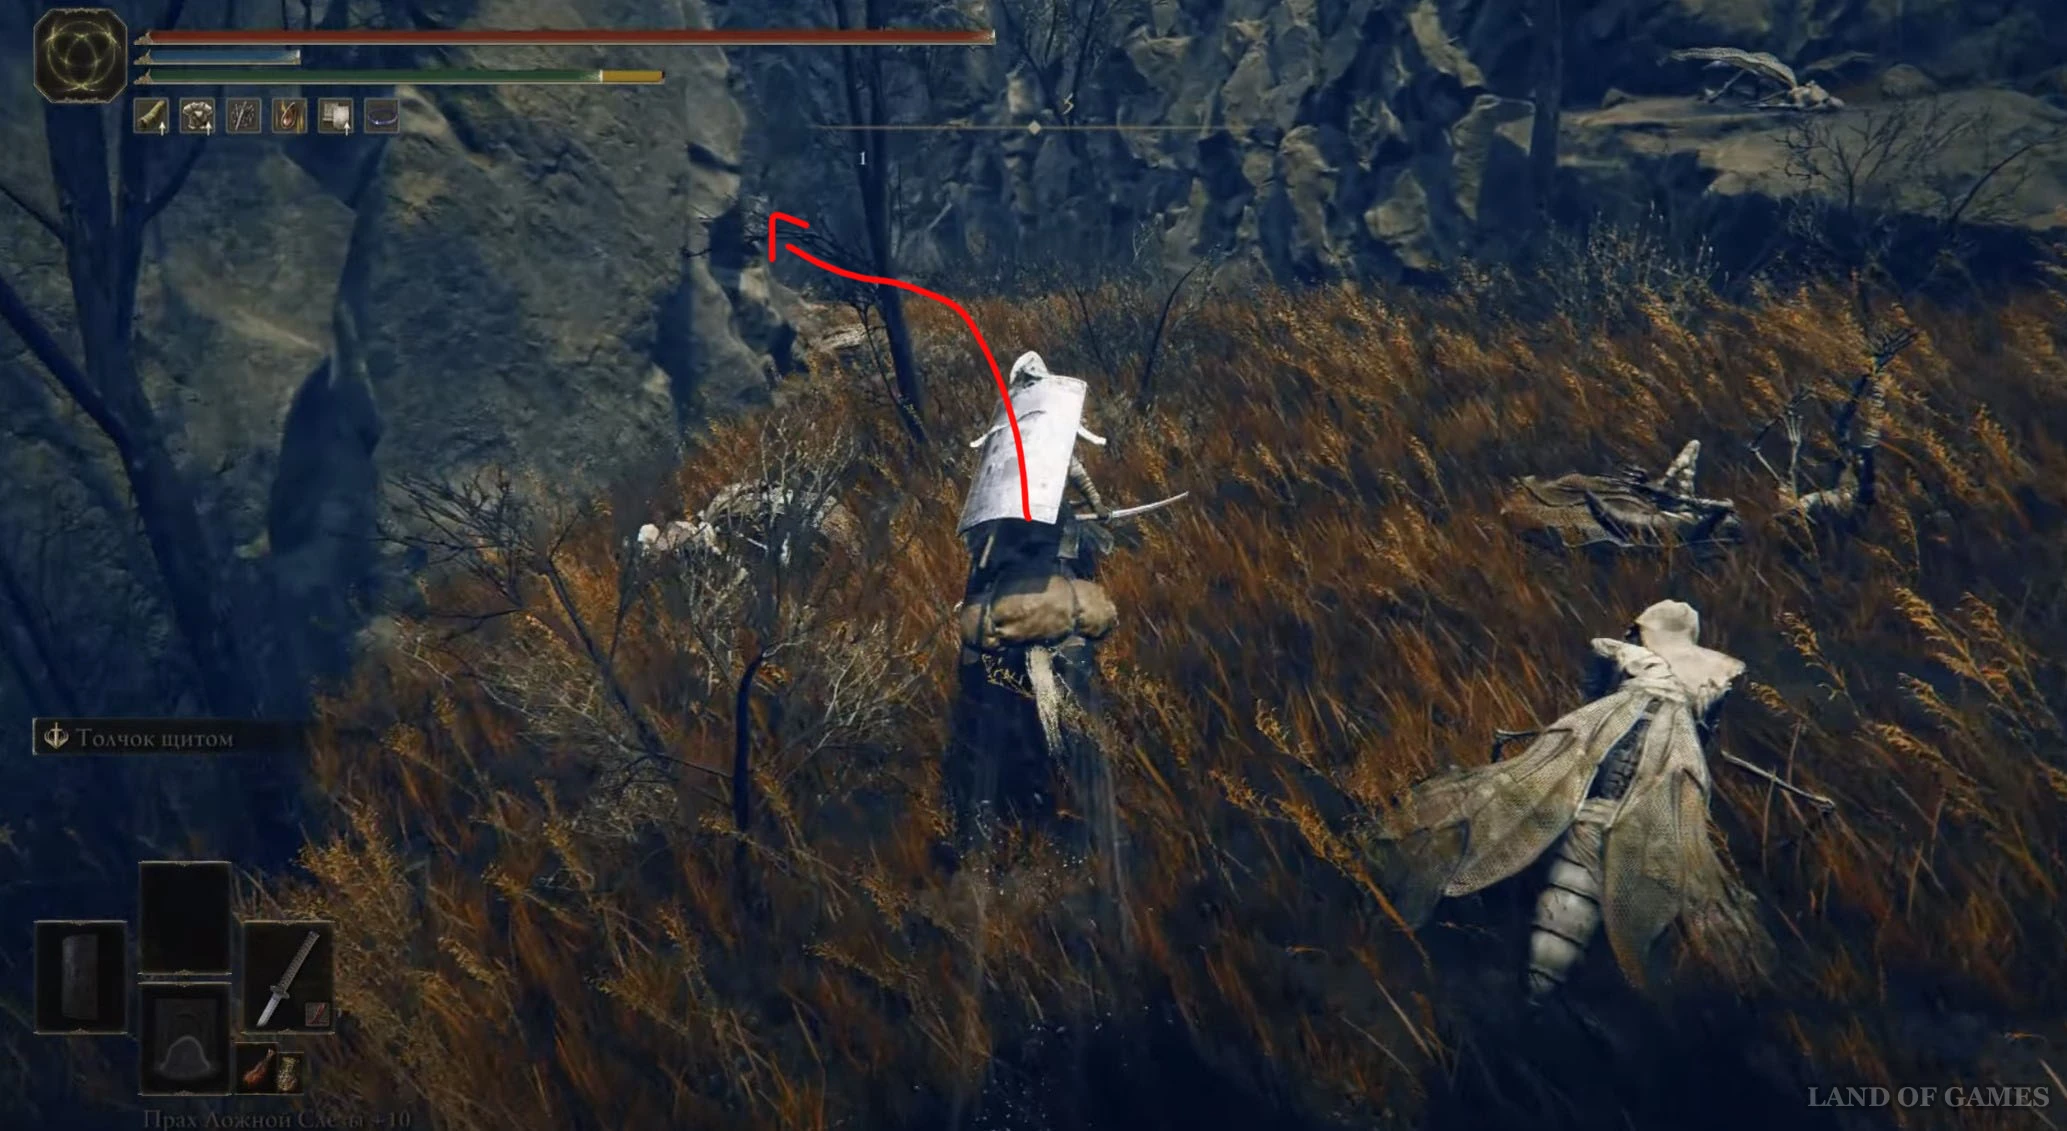
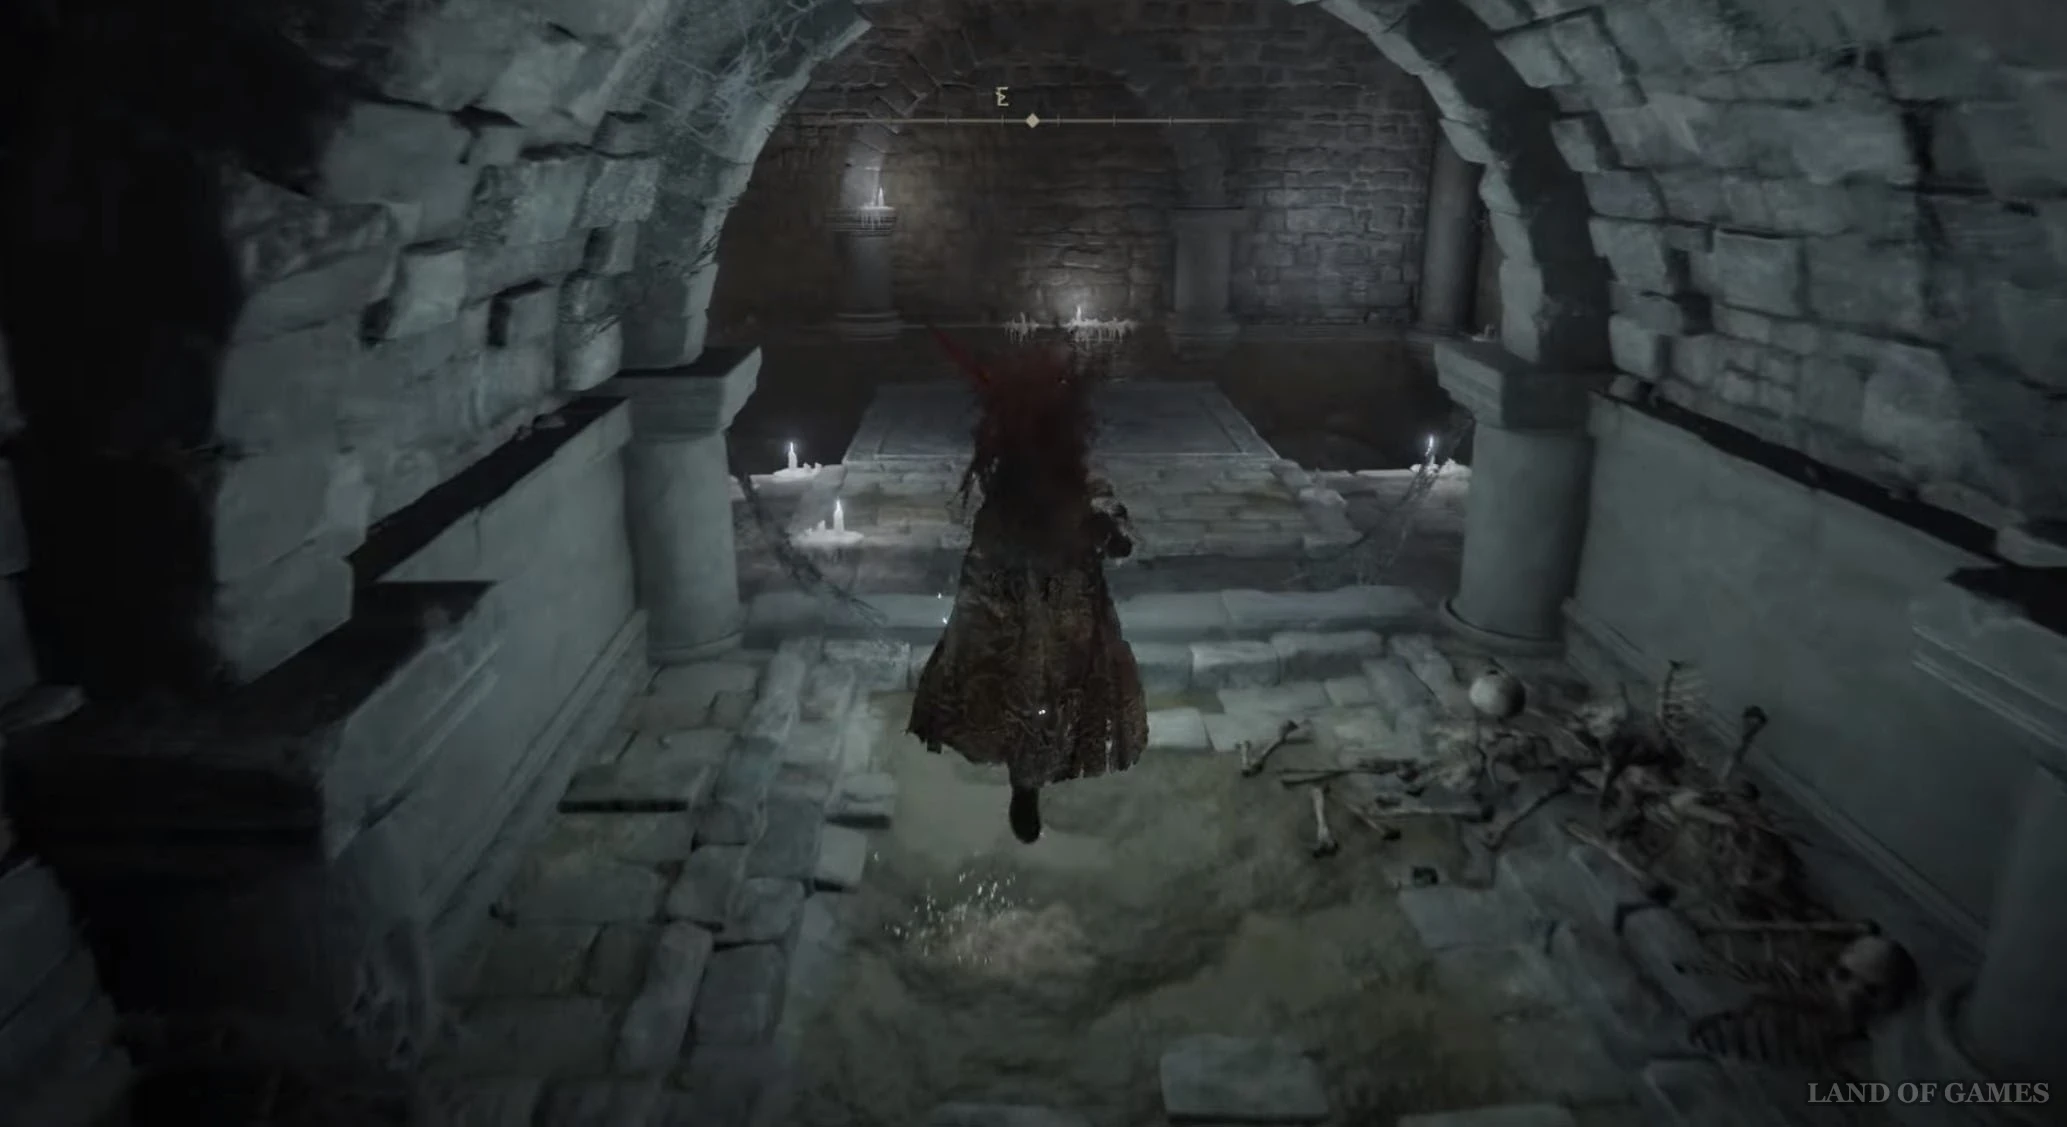
От места благодати «Крест на лазурном побережье» скачите на юго-запад, чтобы добраться до центра небольшого полуострова. Здесь вы обнаружите большую расщелину, в которую вам необходимо будет спуститься по каменным выступам. Спуститесь на самое дно ущелья, пока не доберетесь до «Разлома».
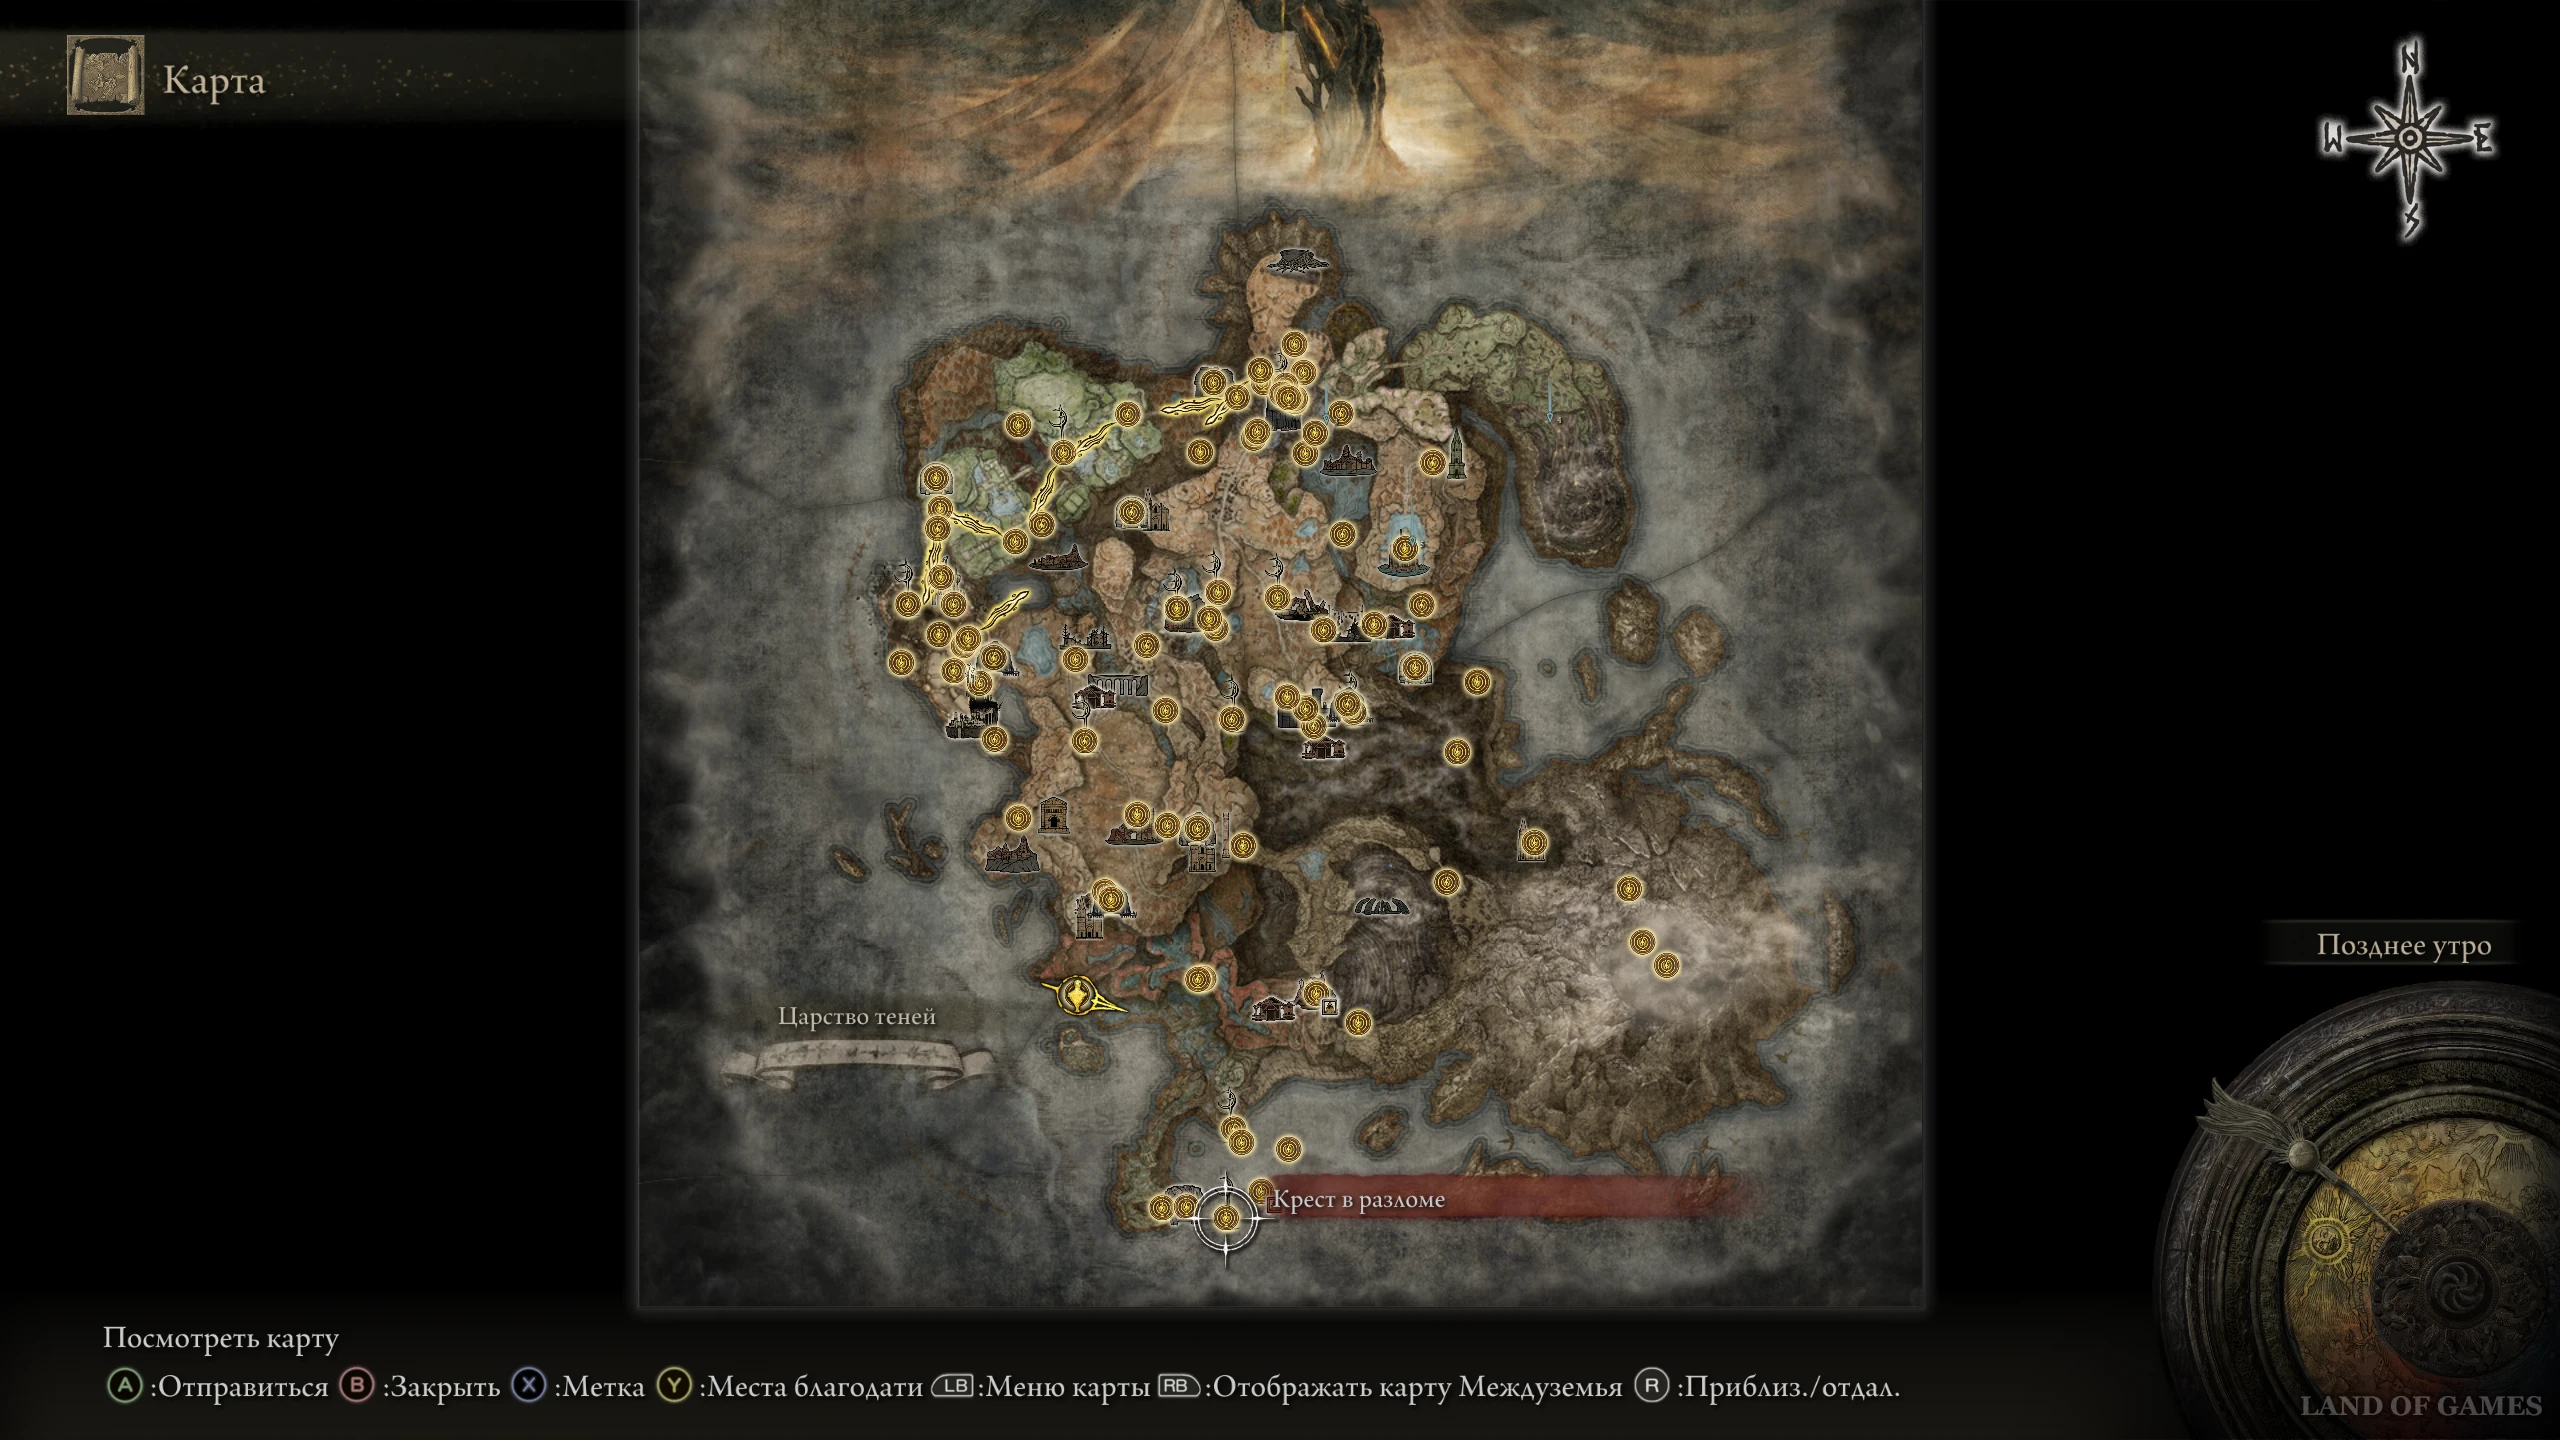
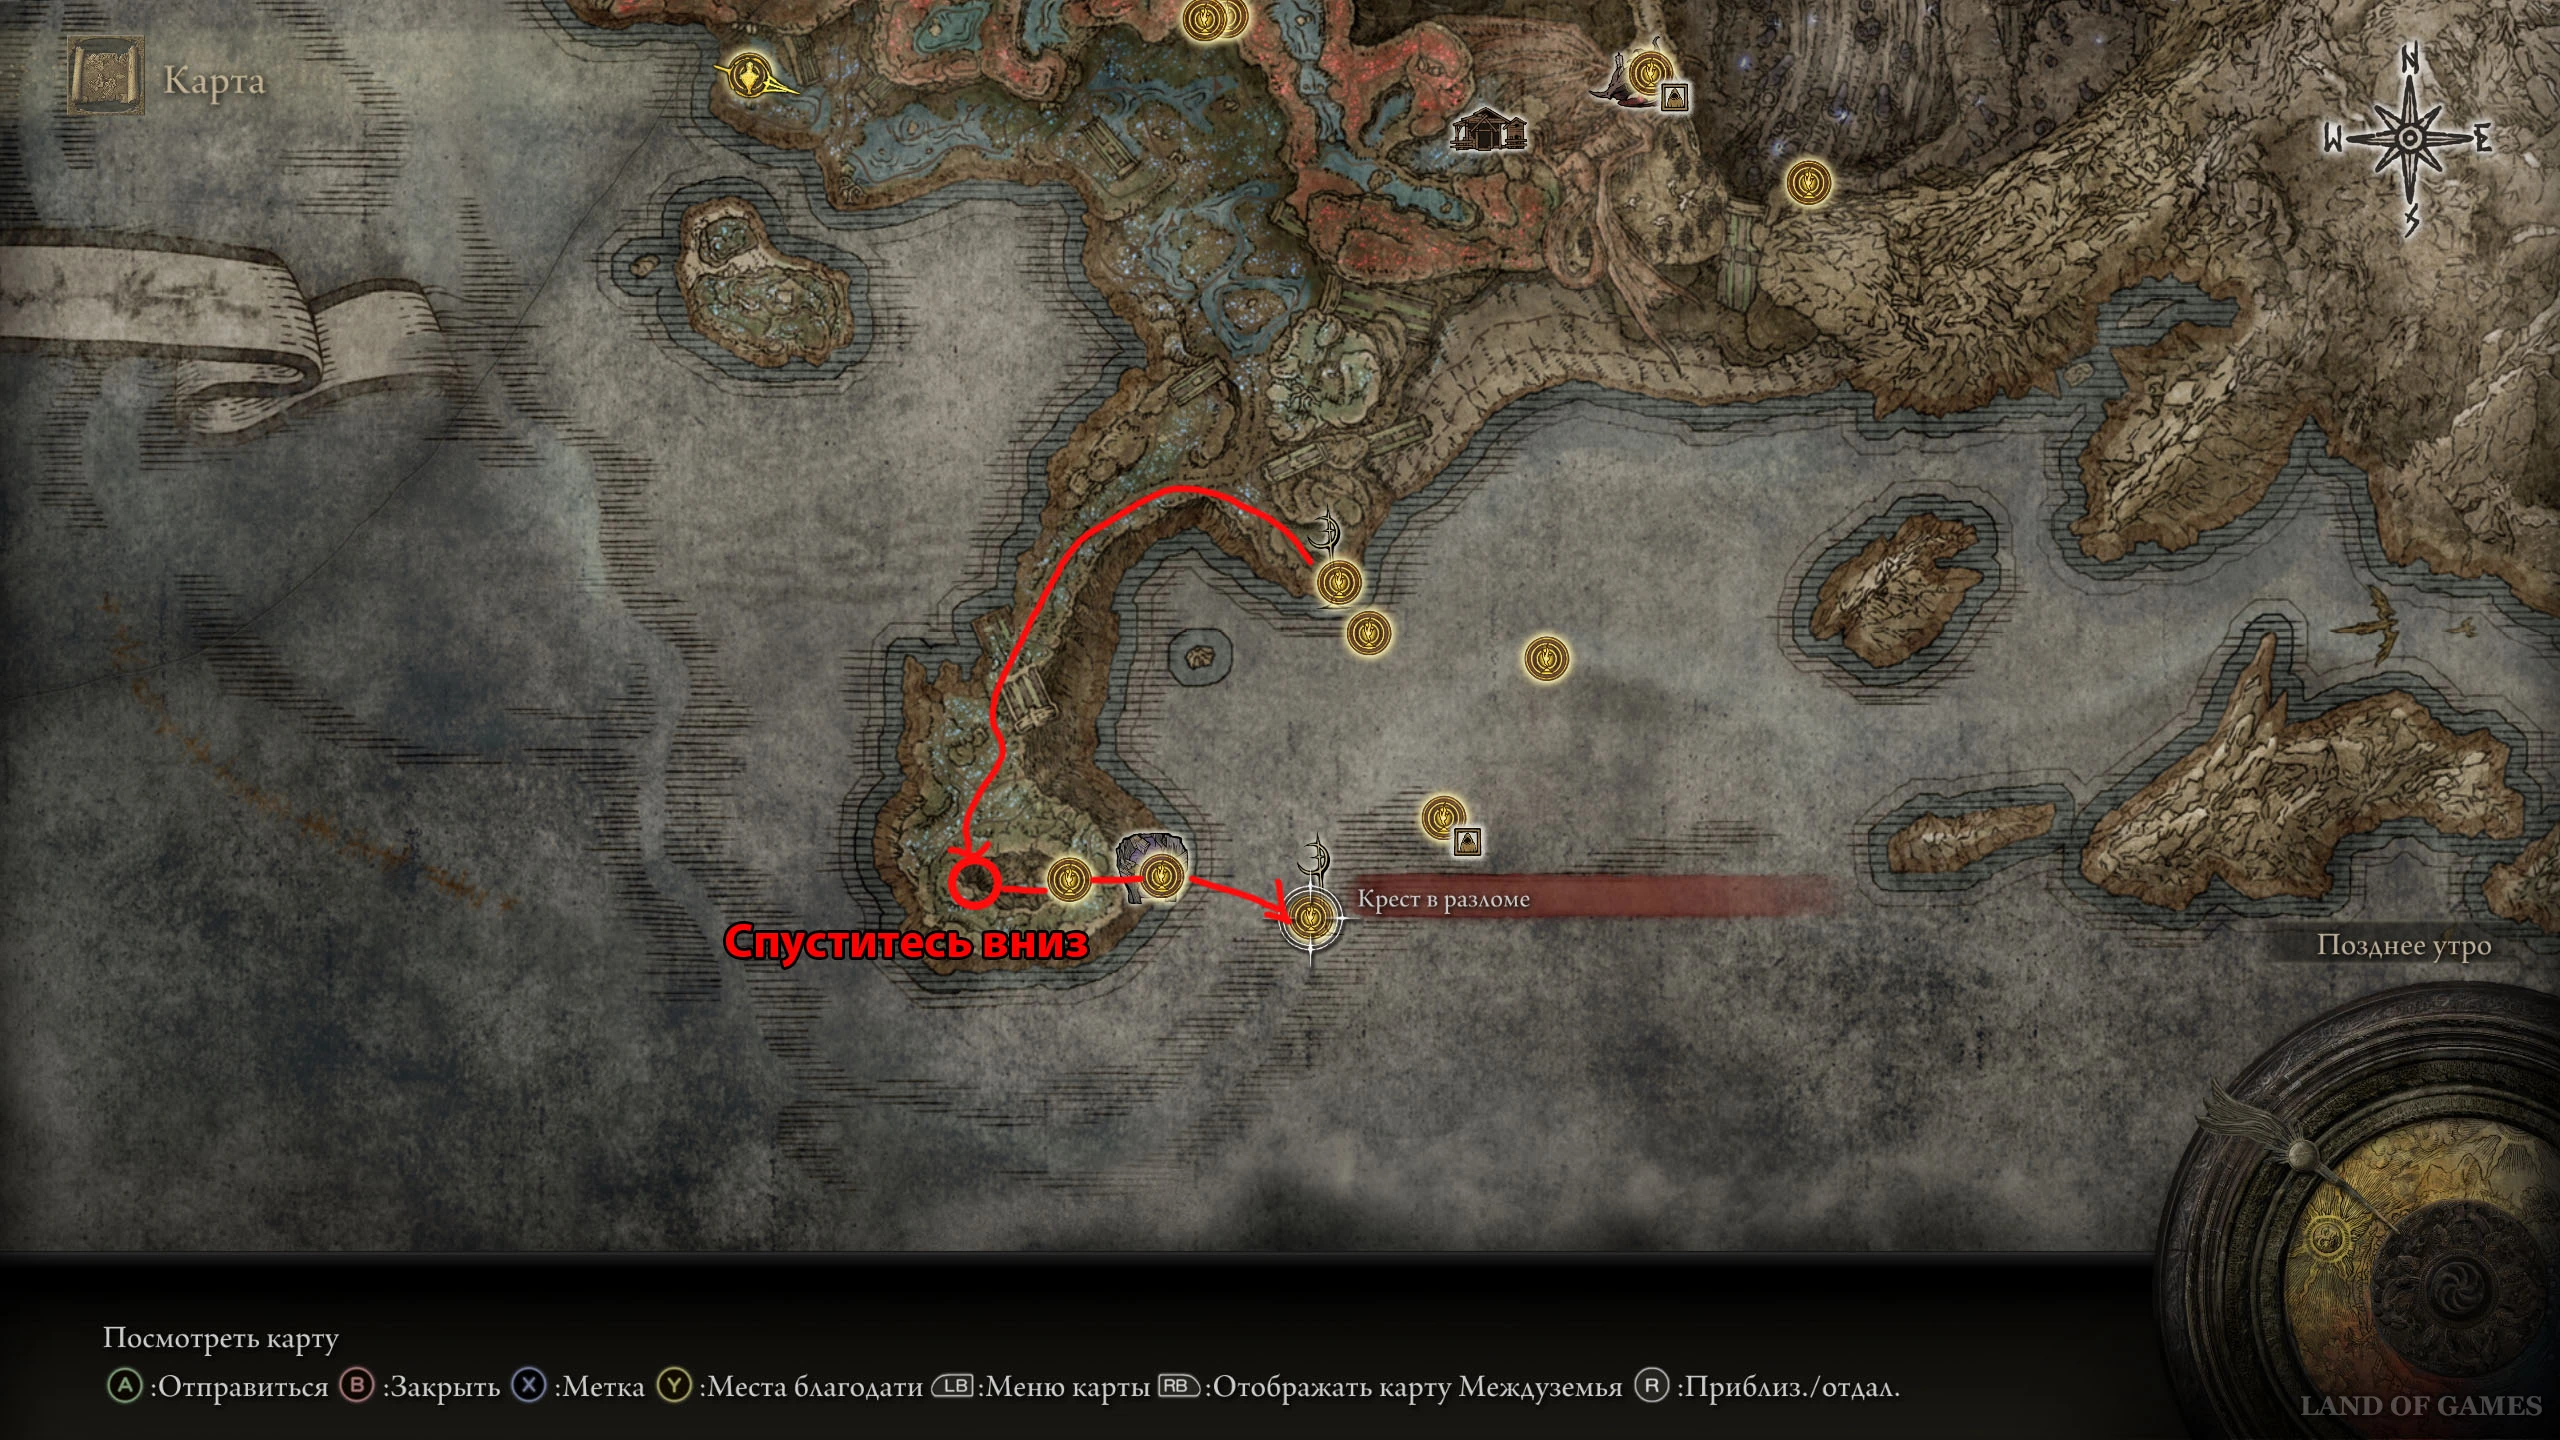
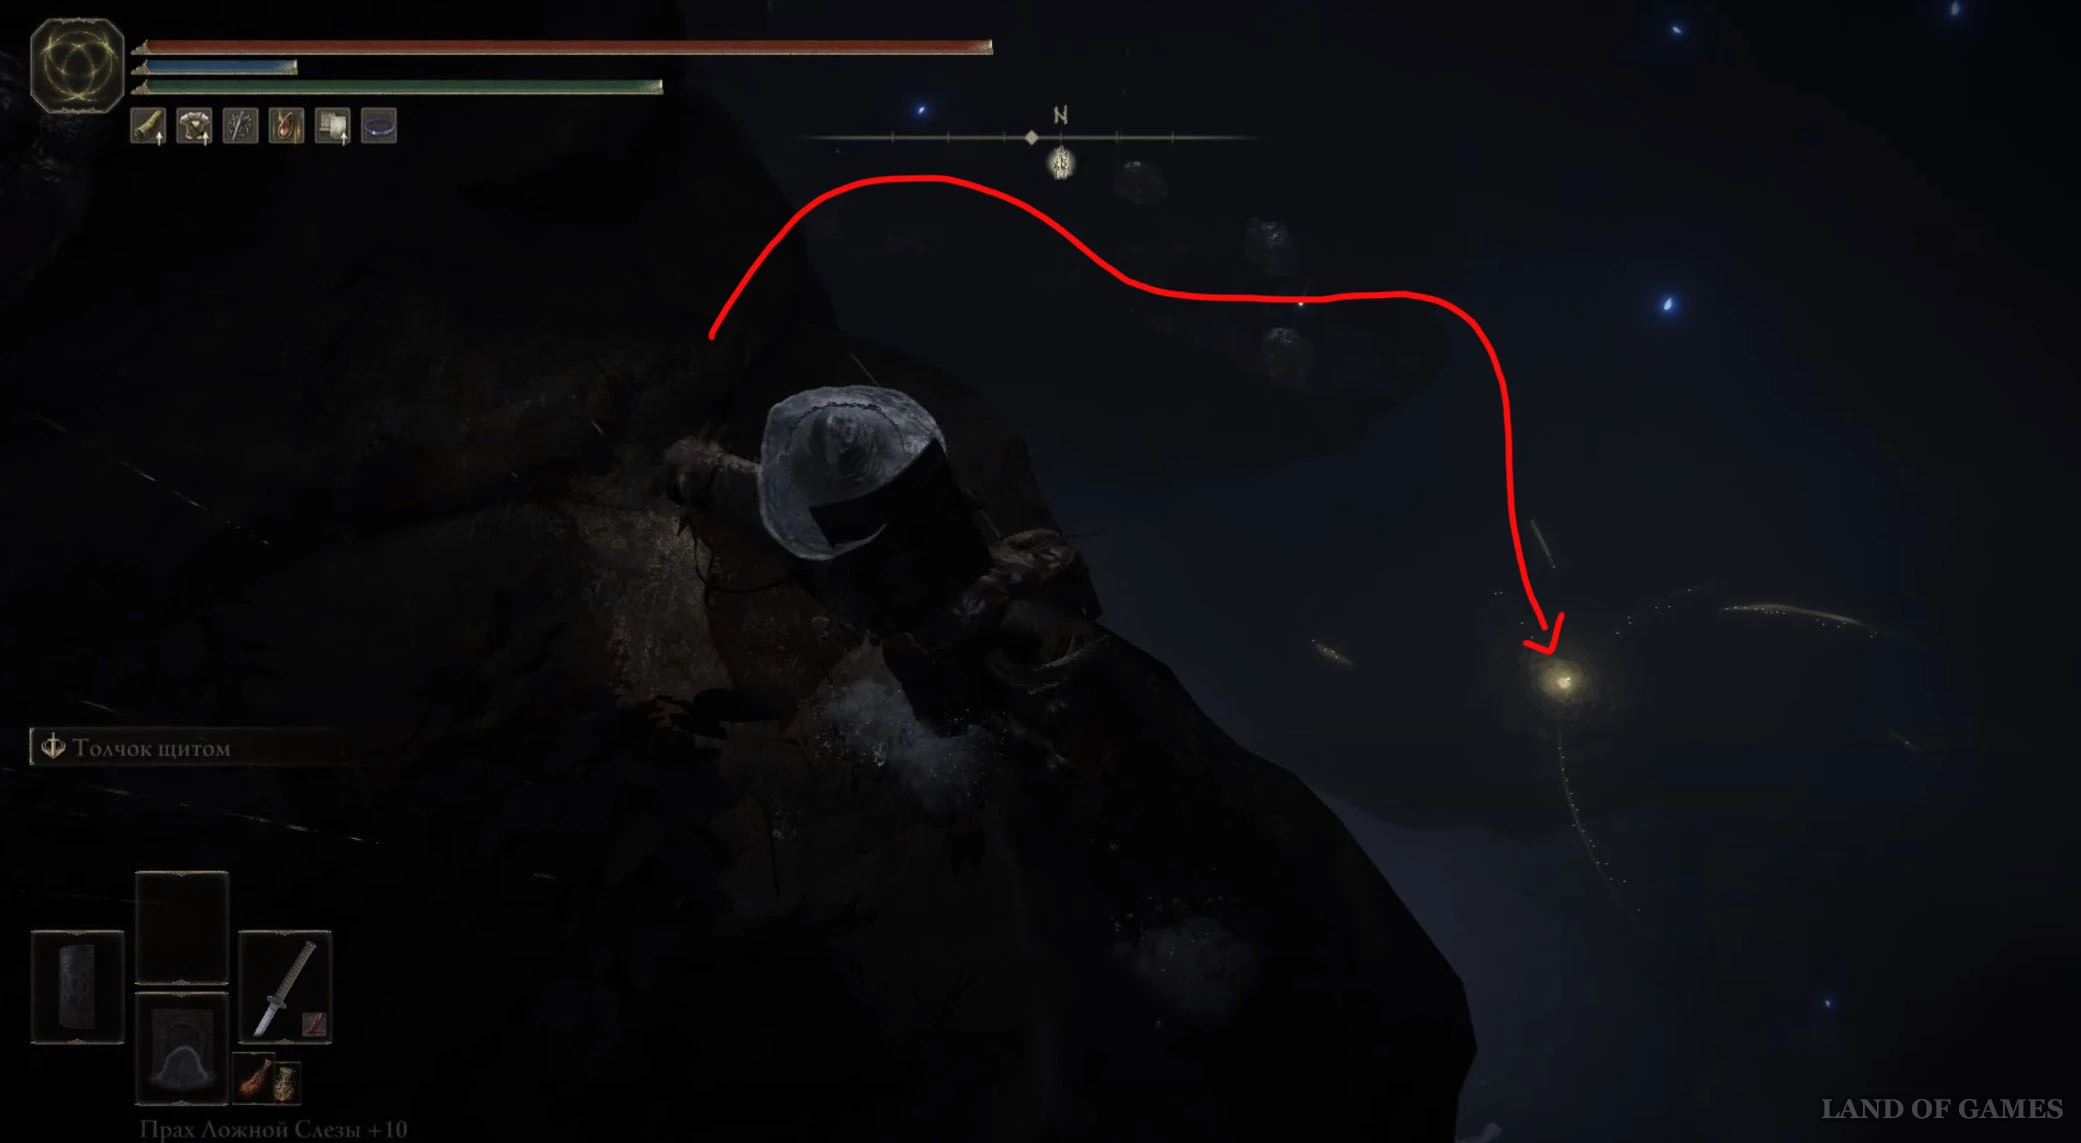
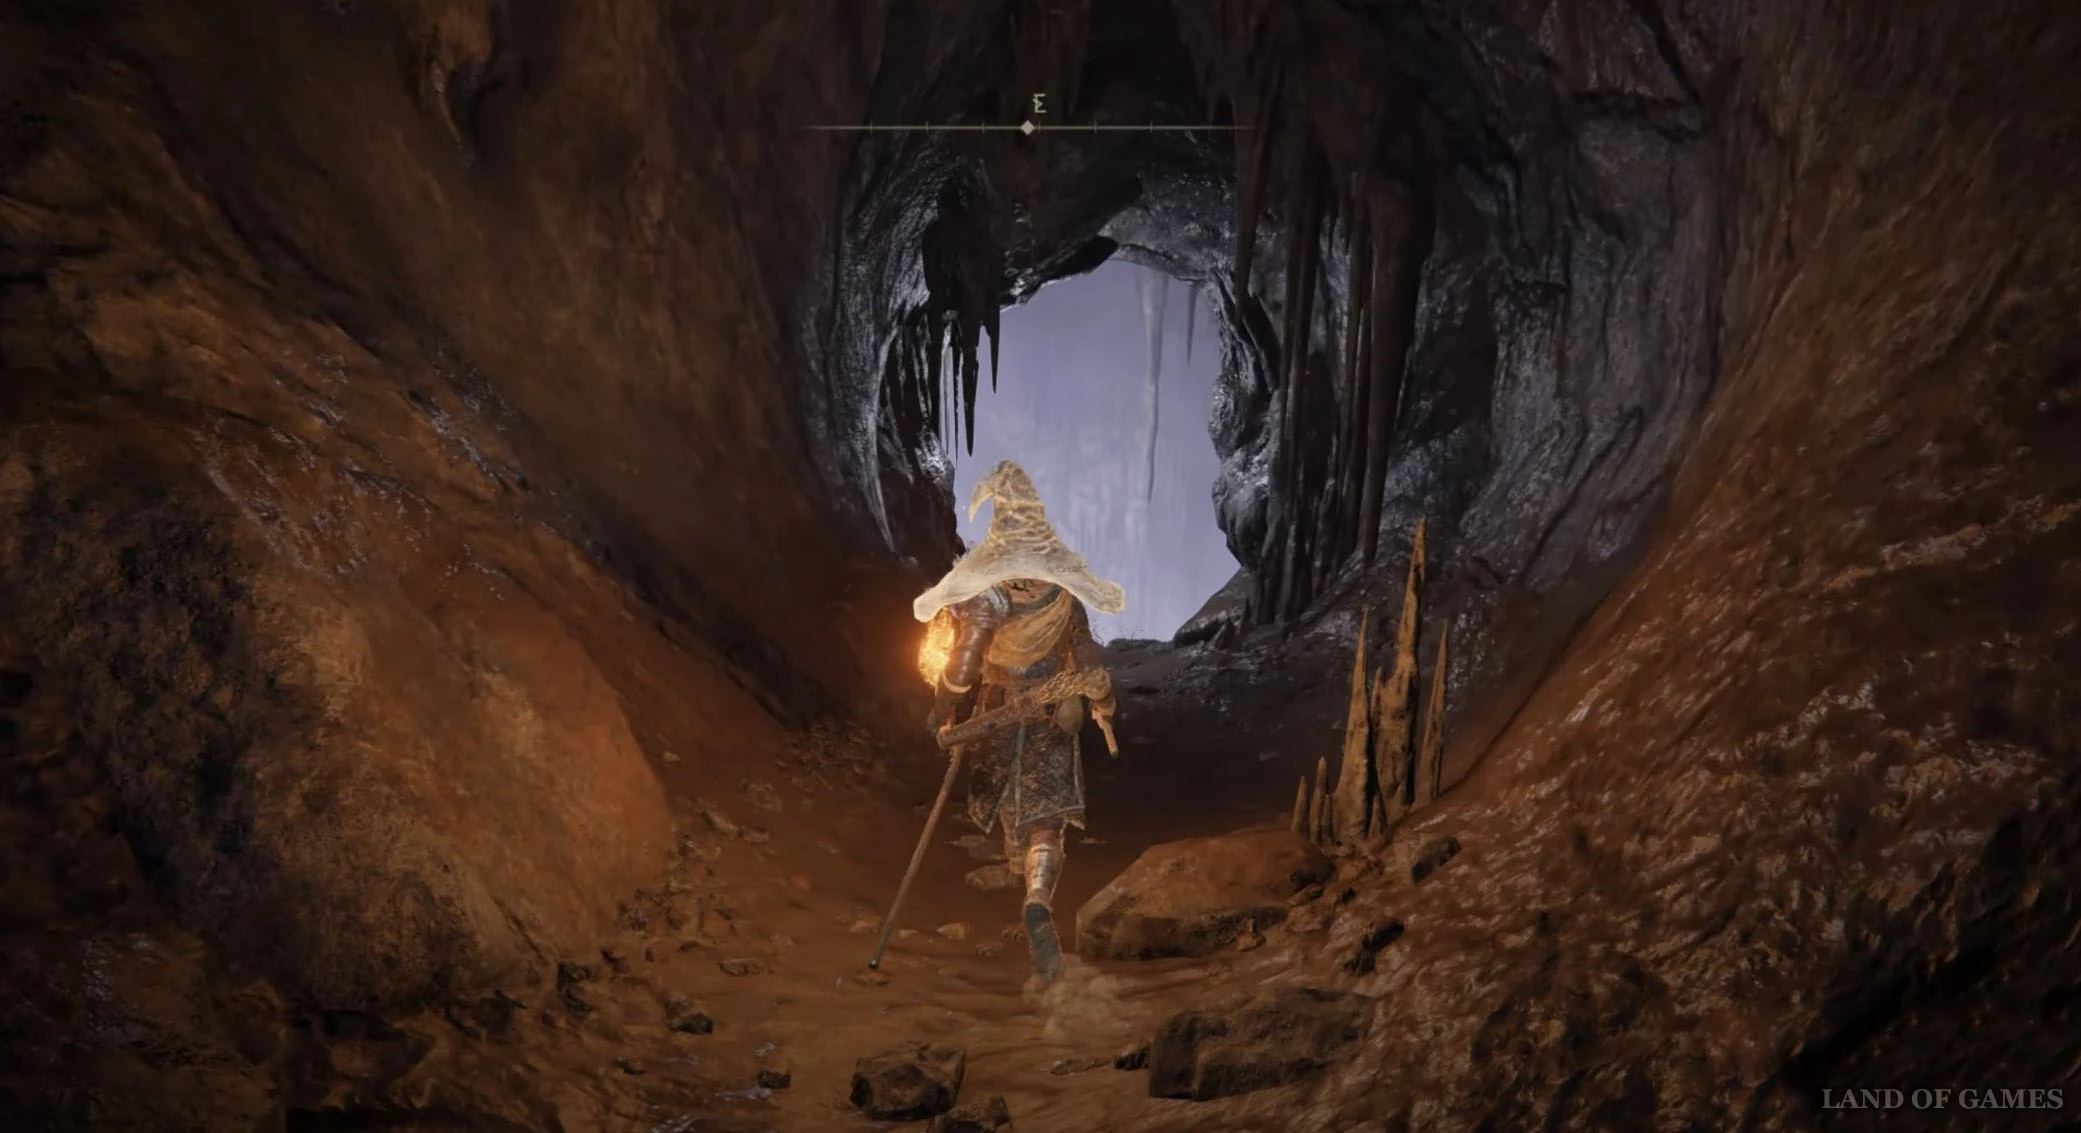
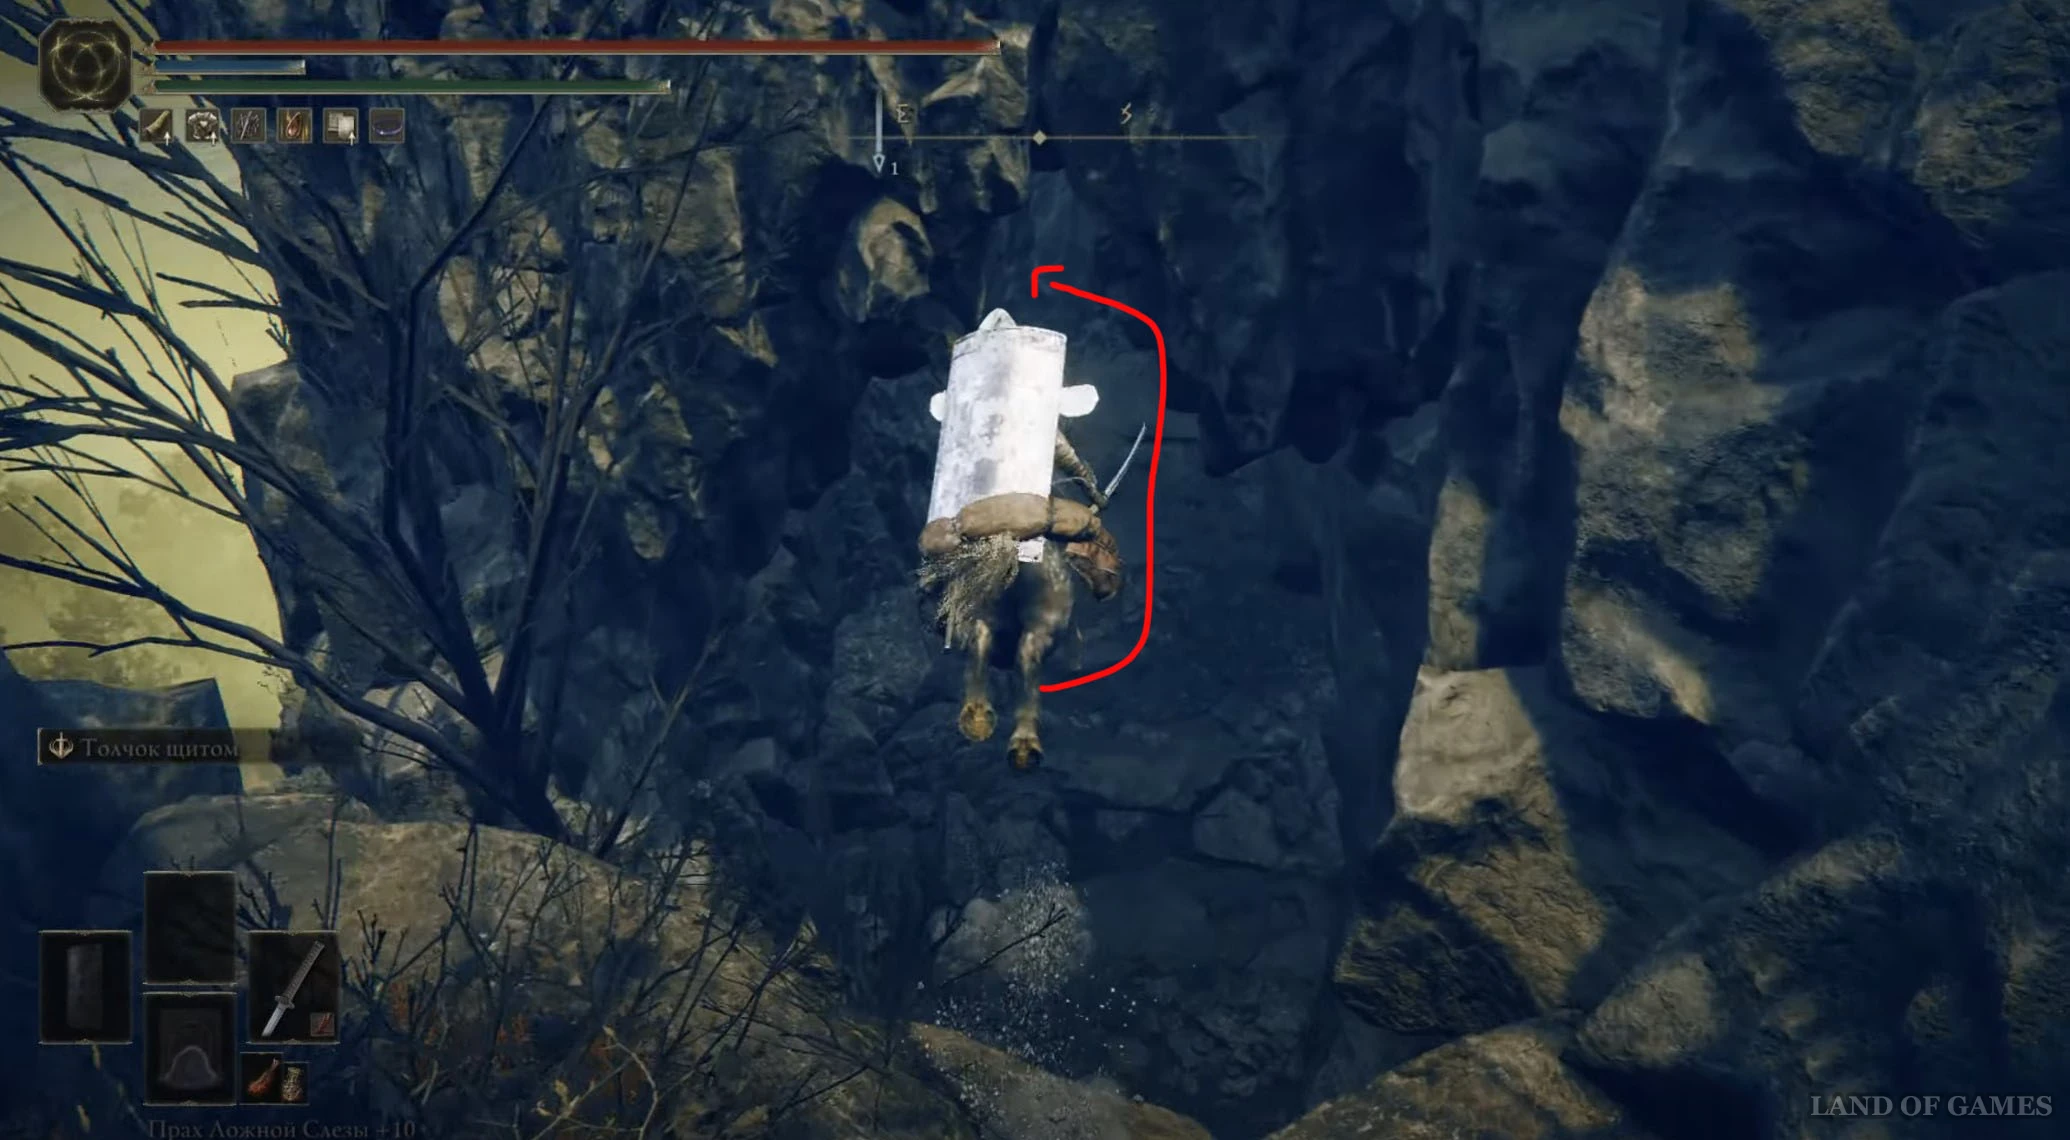
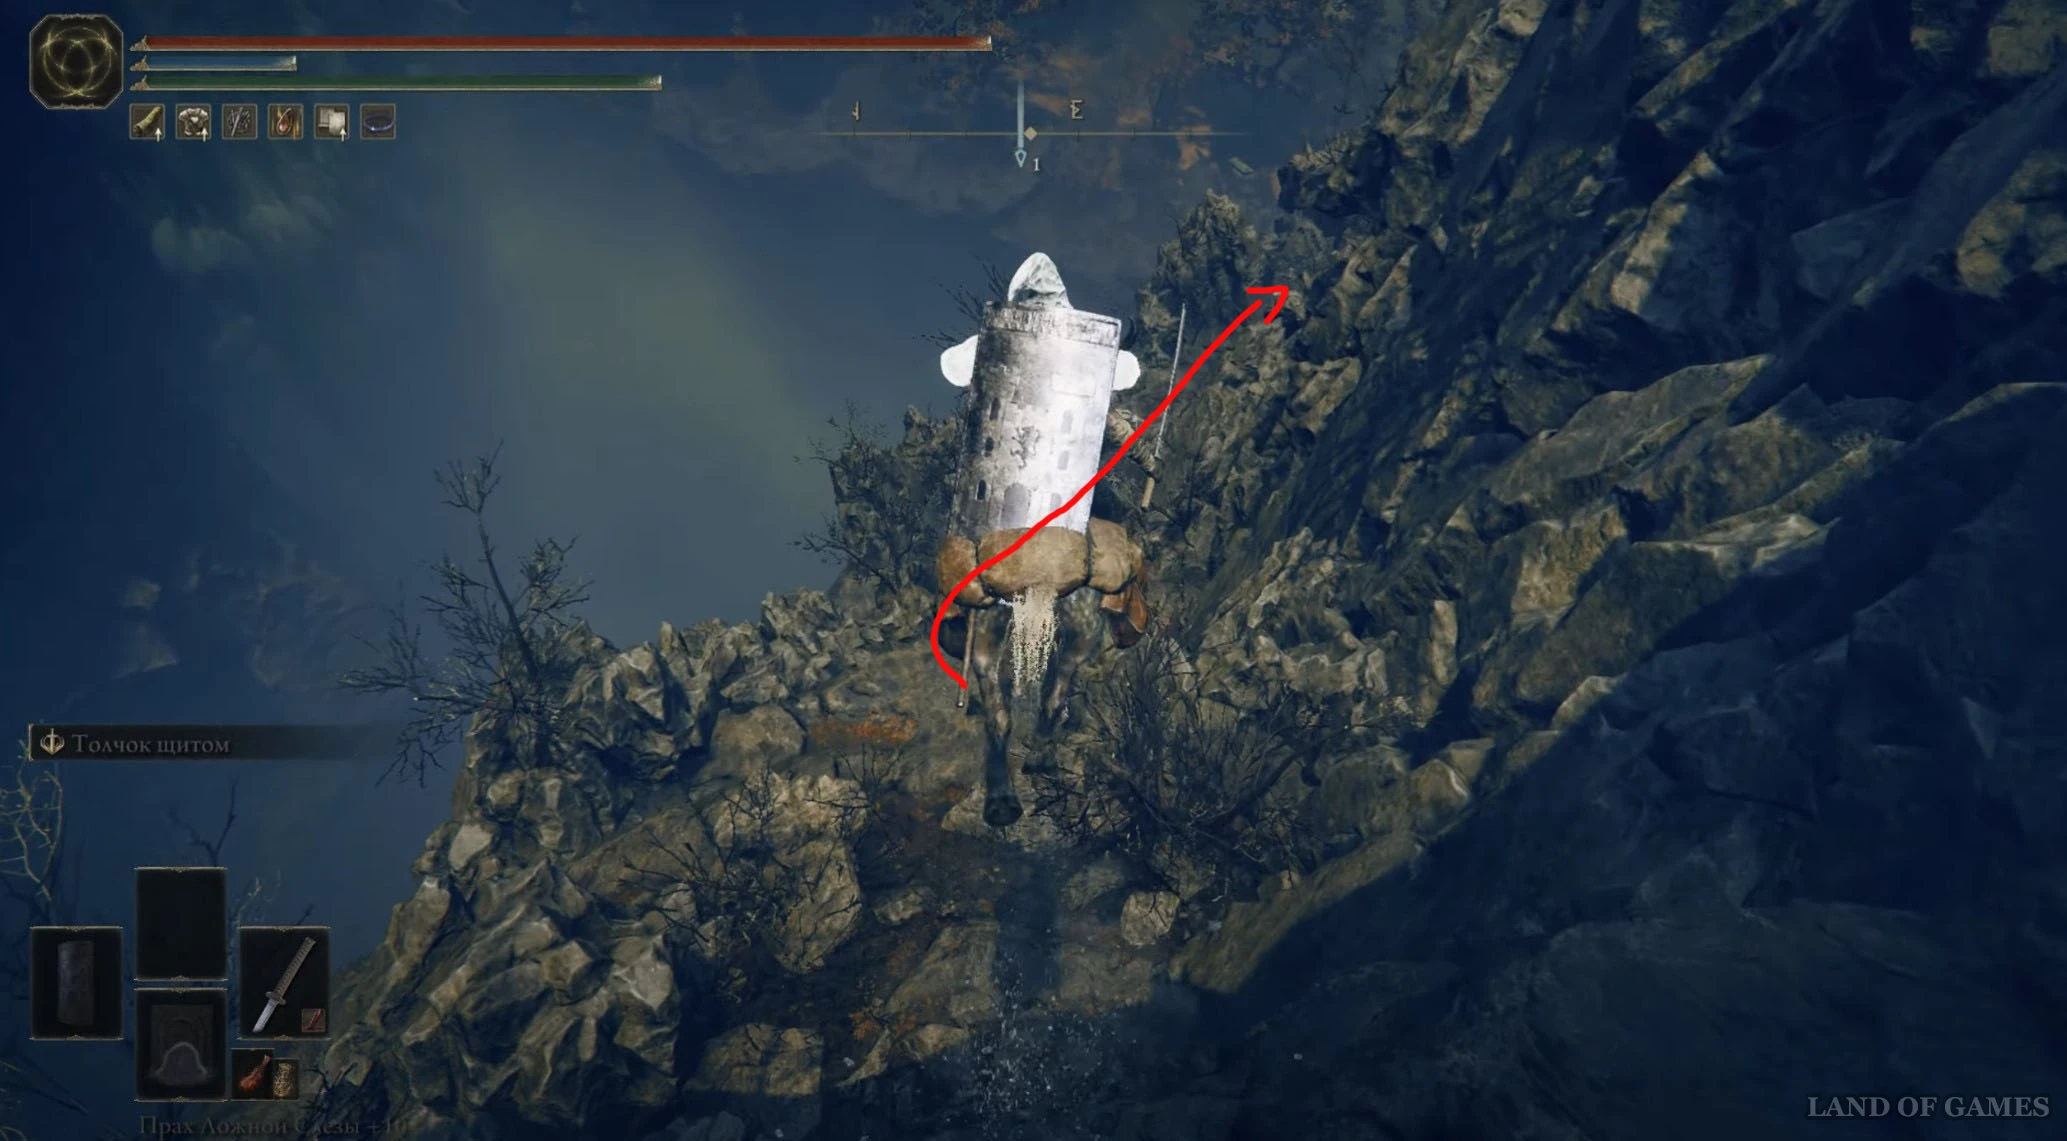
Далее начните двигаться на восток по темному туннелю, и вскоре вы окажитесь в просторной пещере «Разлом в каменном саркофаге» и найдите одноименное место благодати. От него начните спускаться вниз по выступам и руинам, продолжая двигаться в восточном направлении. Встаньте на краю утеса, чтобы свалиться в самый низ (не бойтесь, вы не умрете от падения).
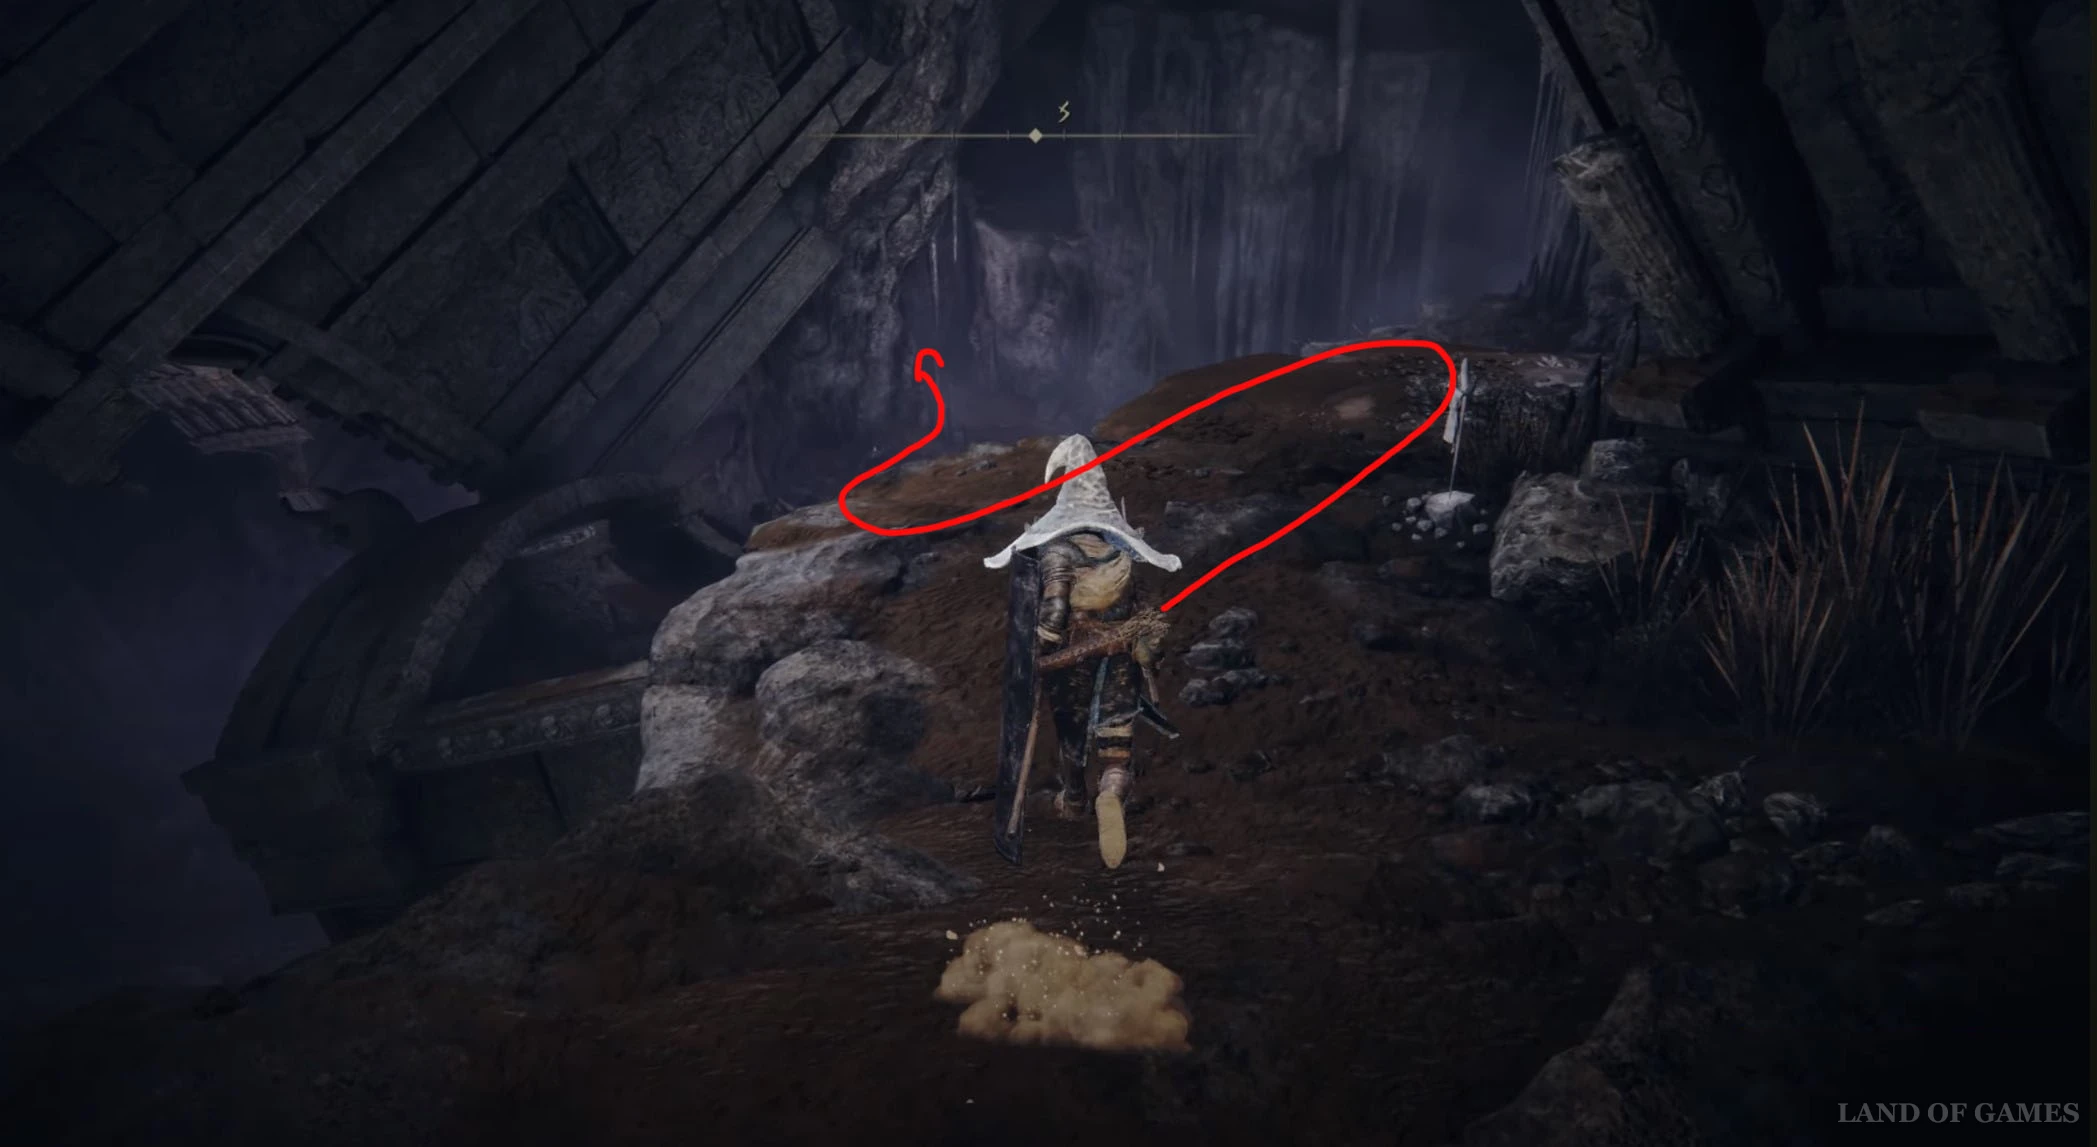
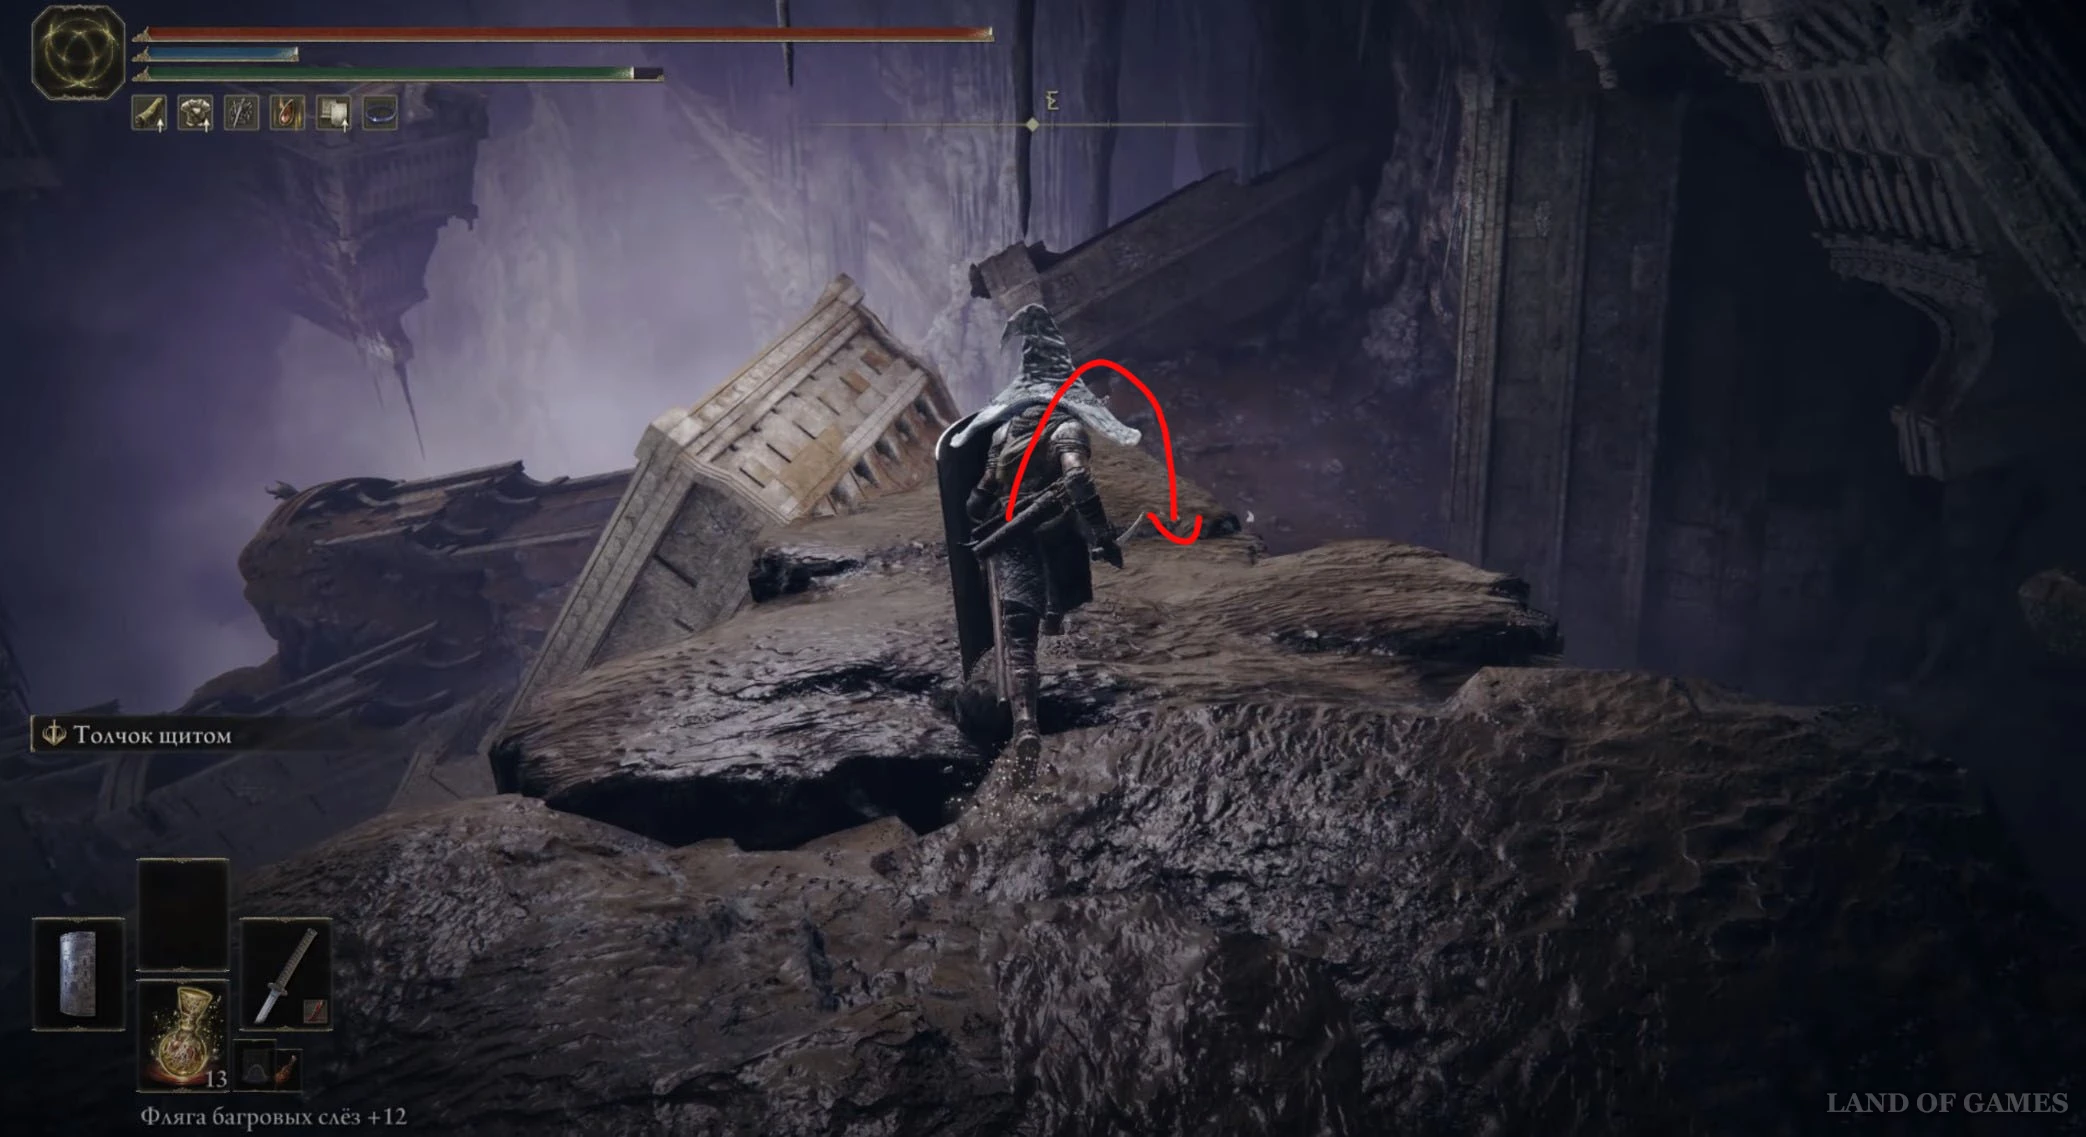
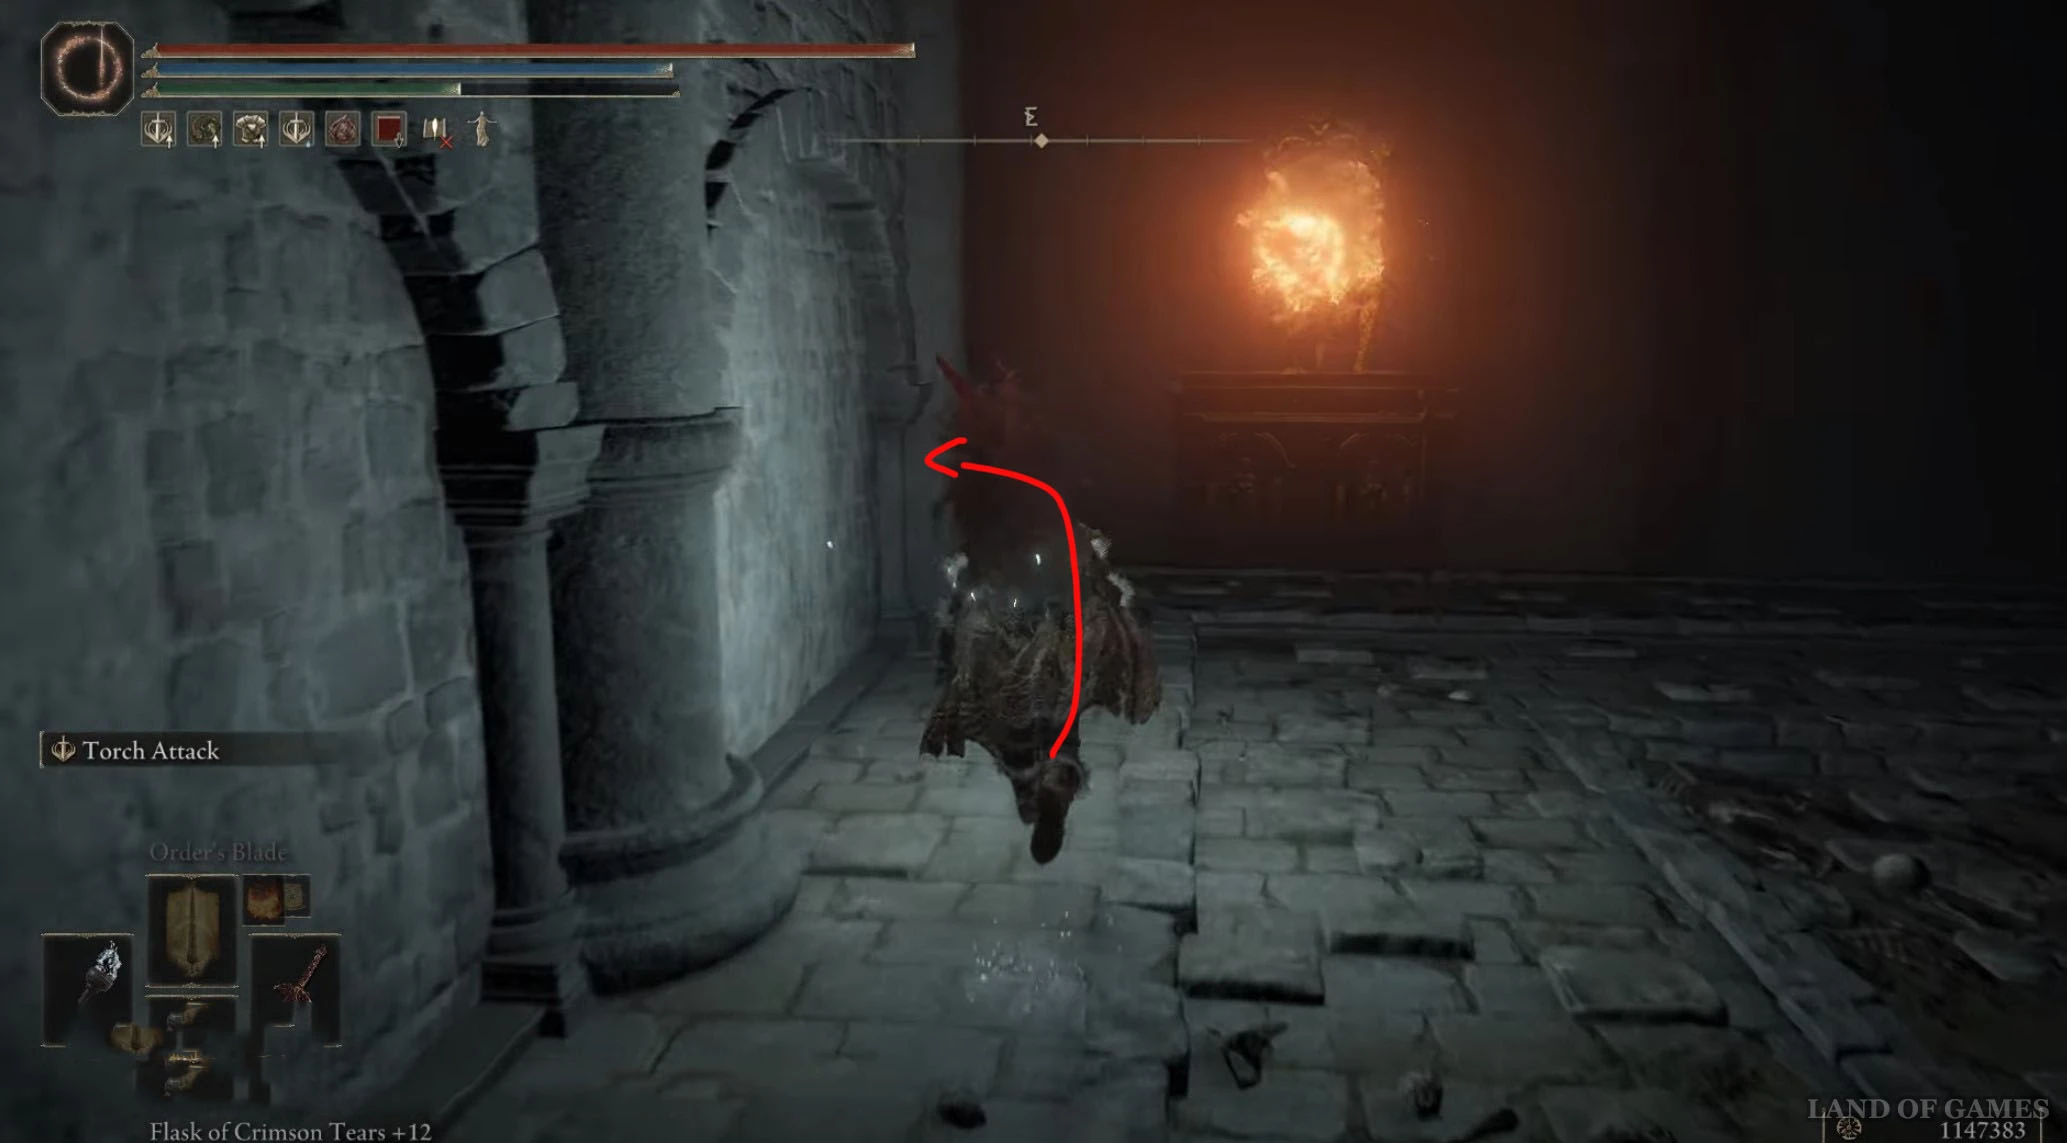
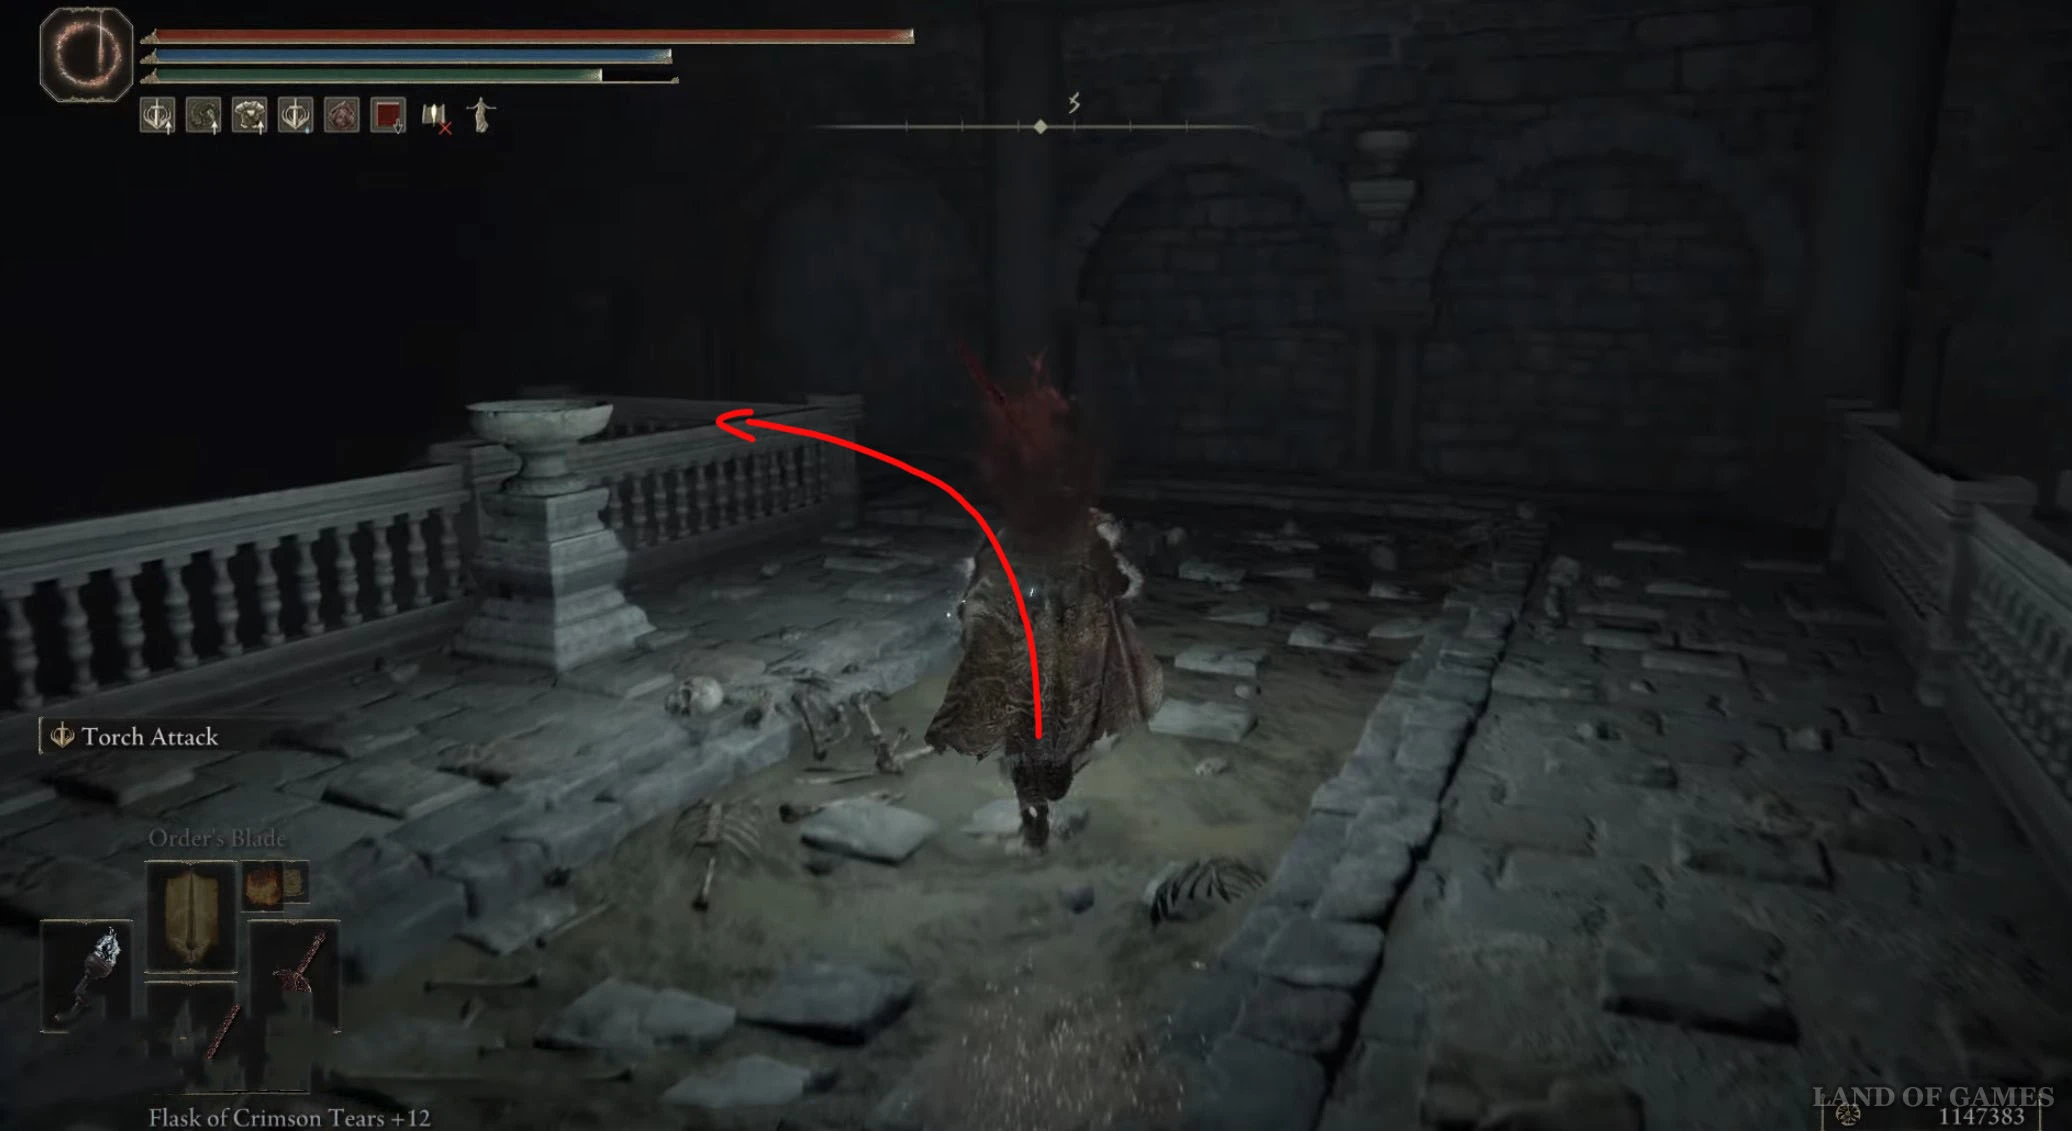
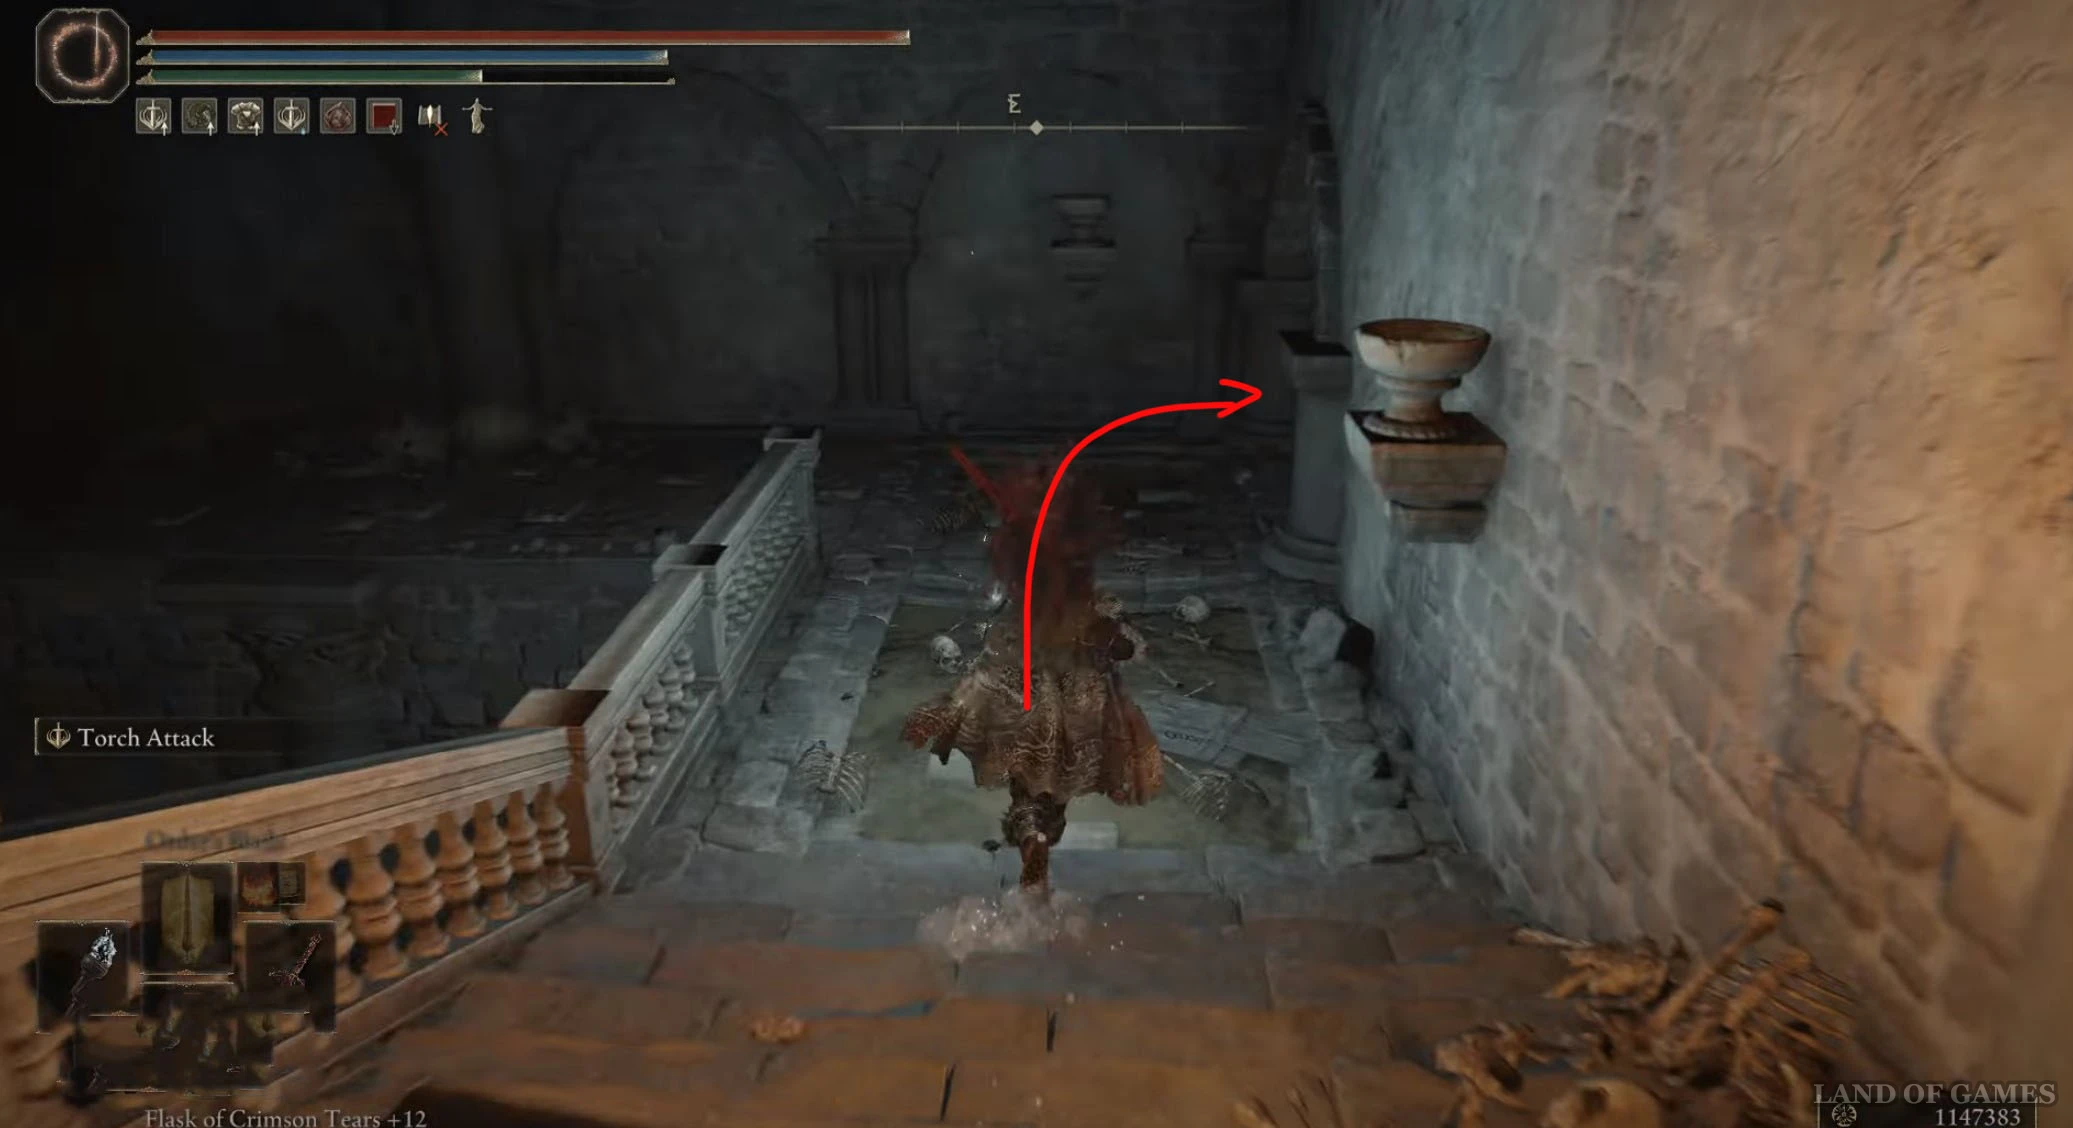
Бегите еще дальше на восток, и совсем скоро вы увидите впереди крест Микеллы. Рядом с ним будет лежать нужный вам фрагмент. Здесь вы также сможете активировать место благодати «Крест в разломе».
Осколок древа упадка 25
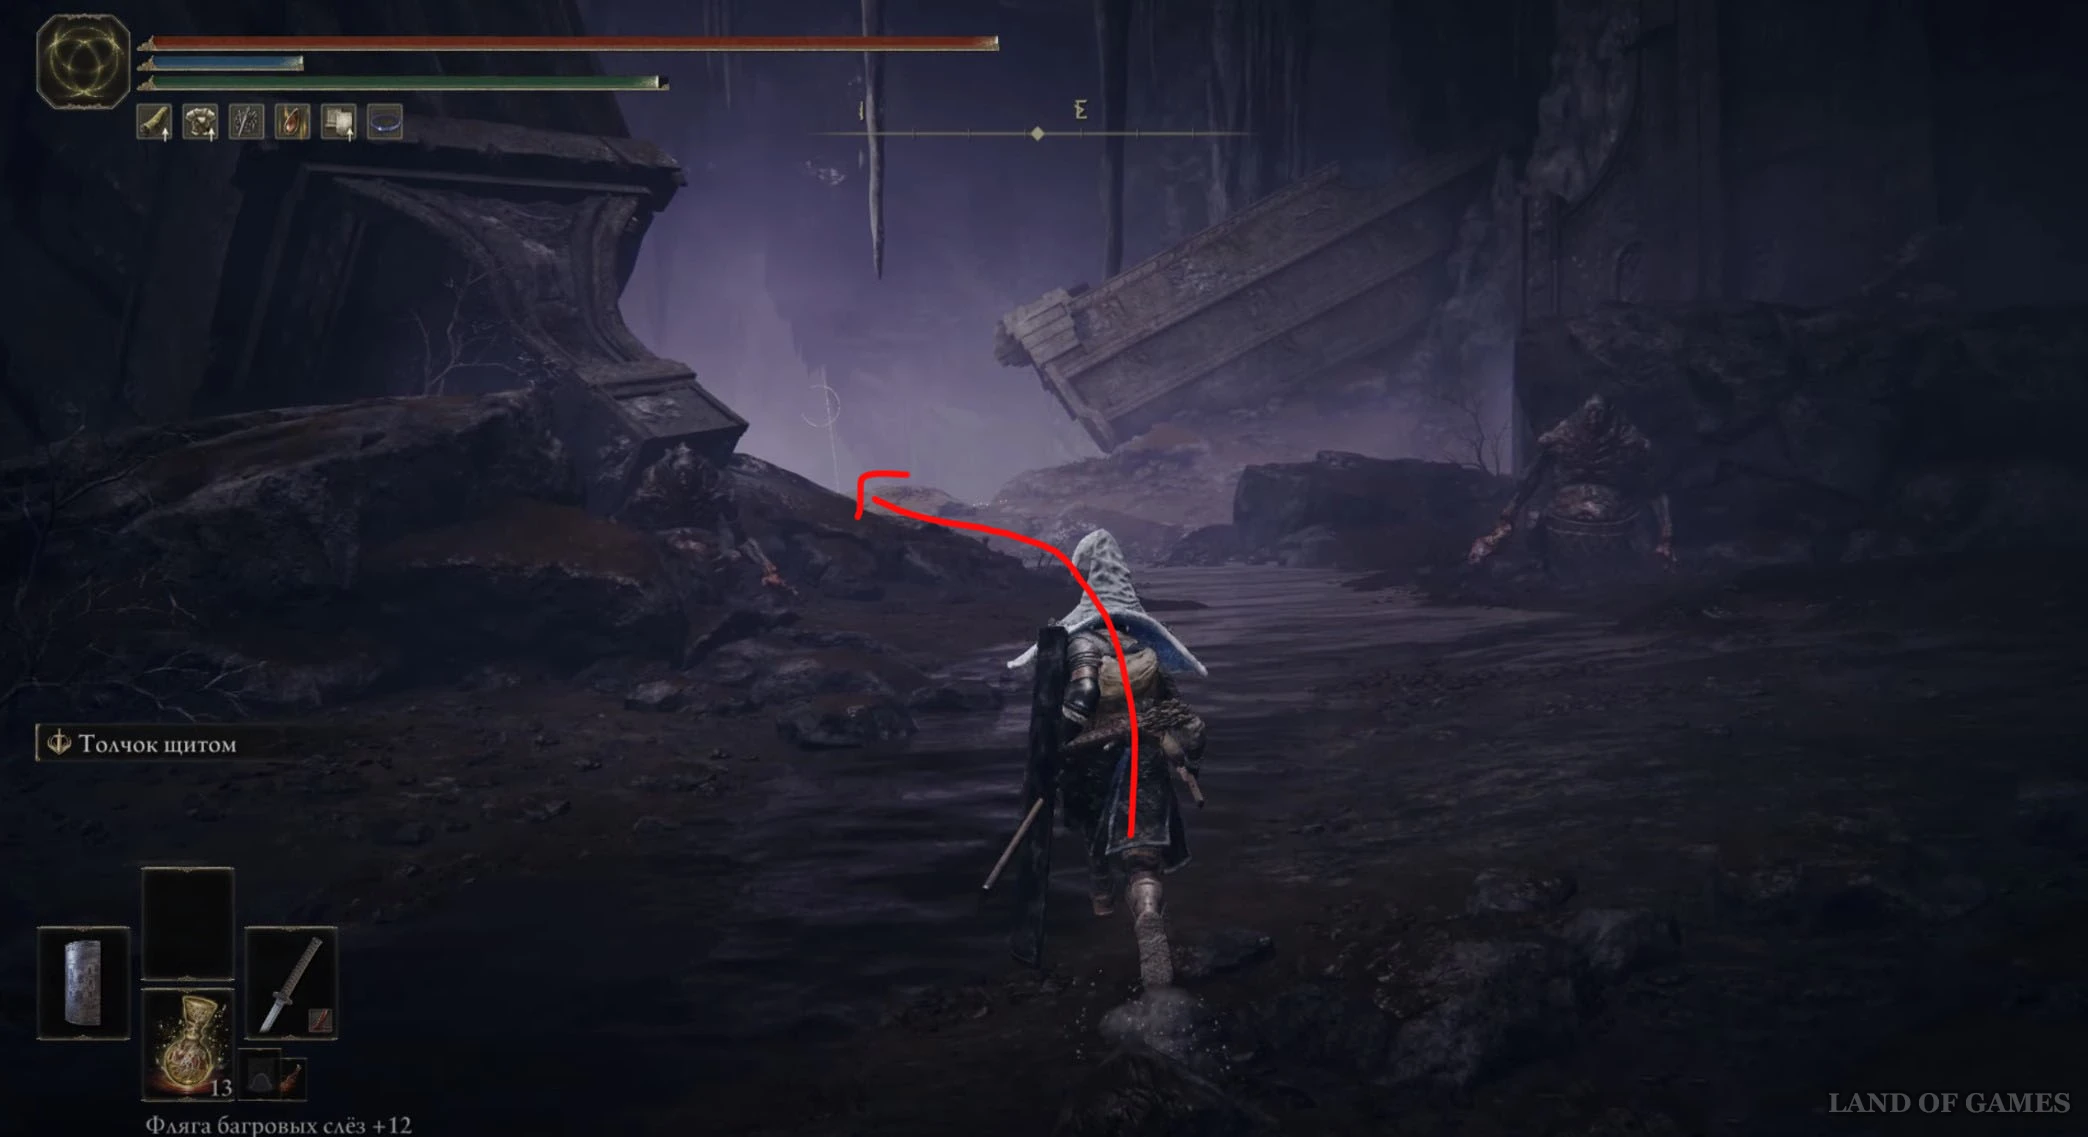
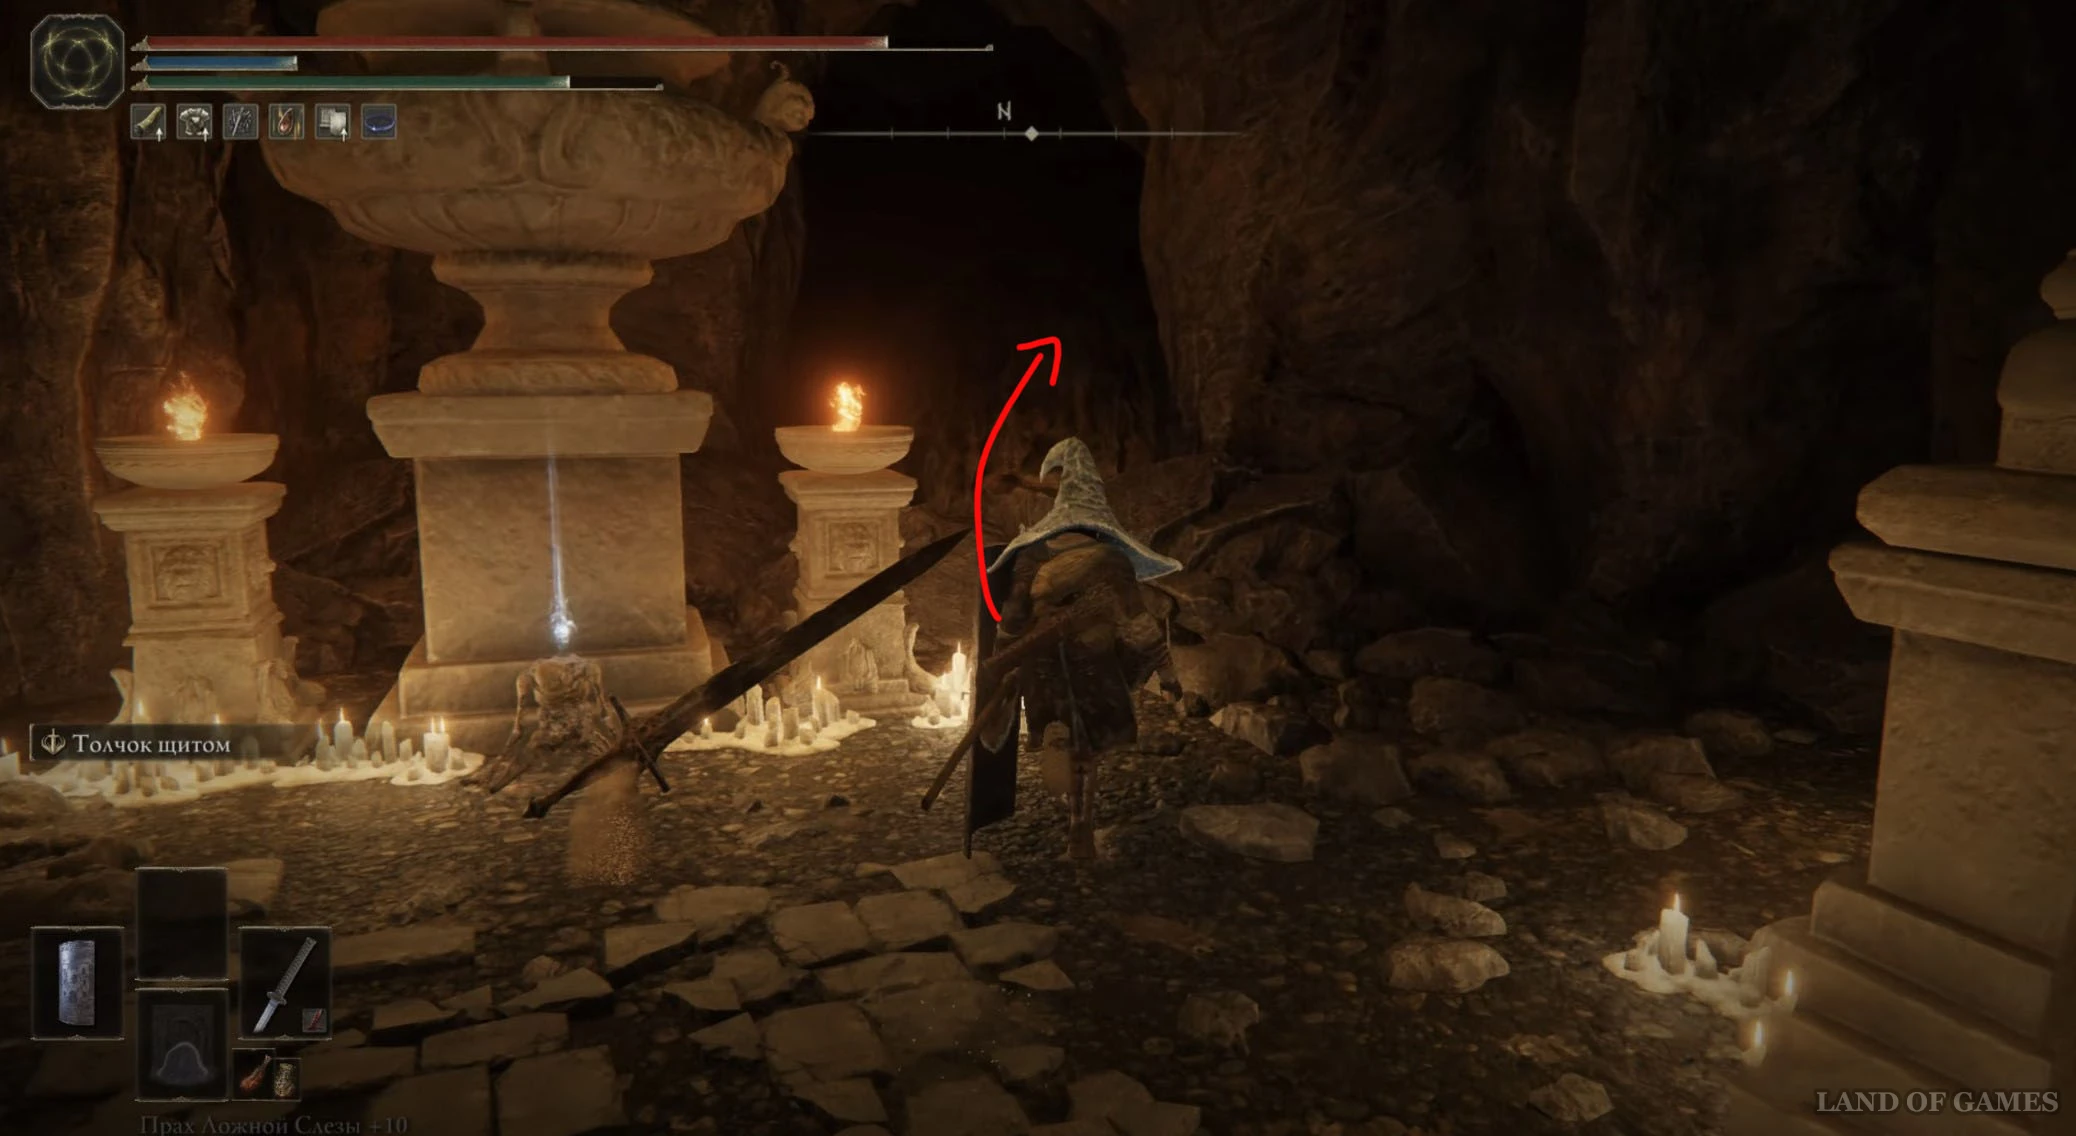
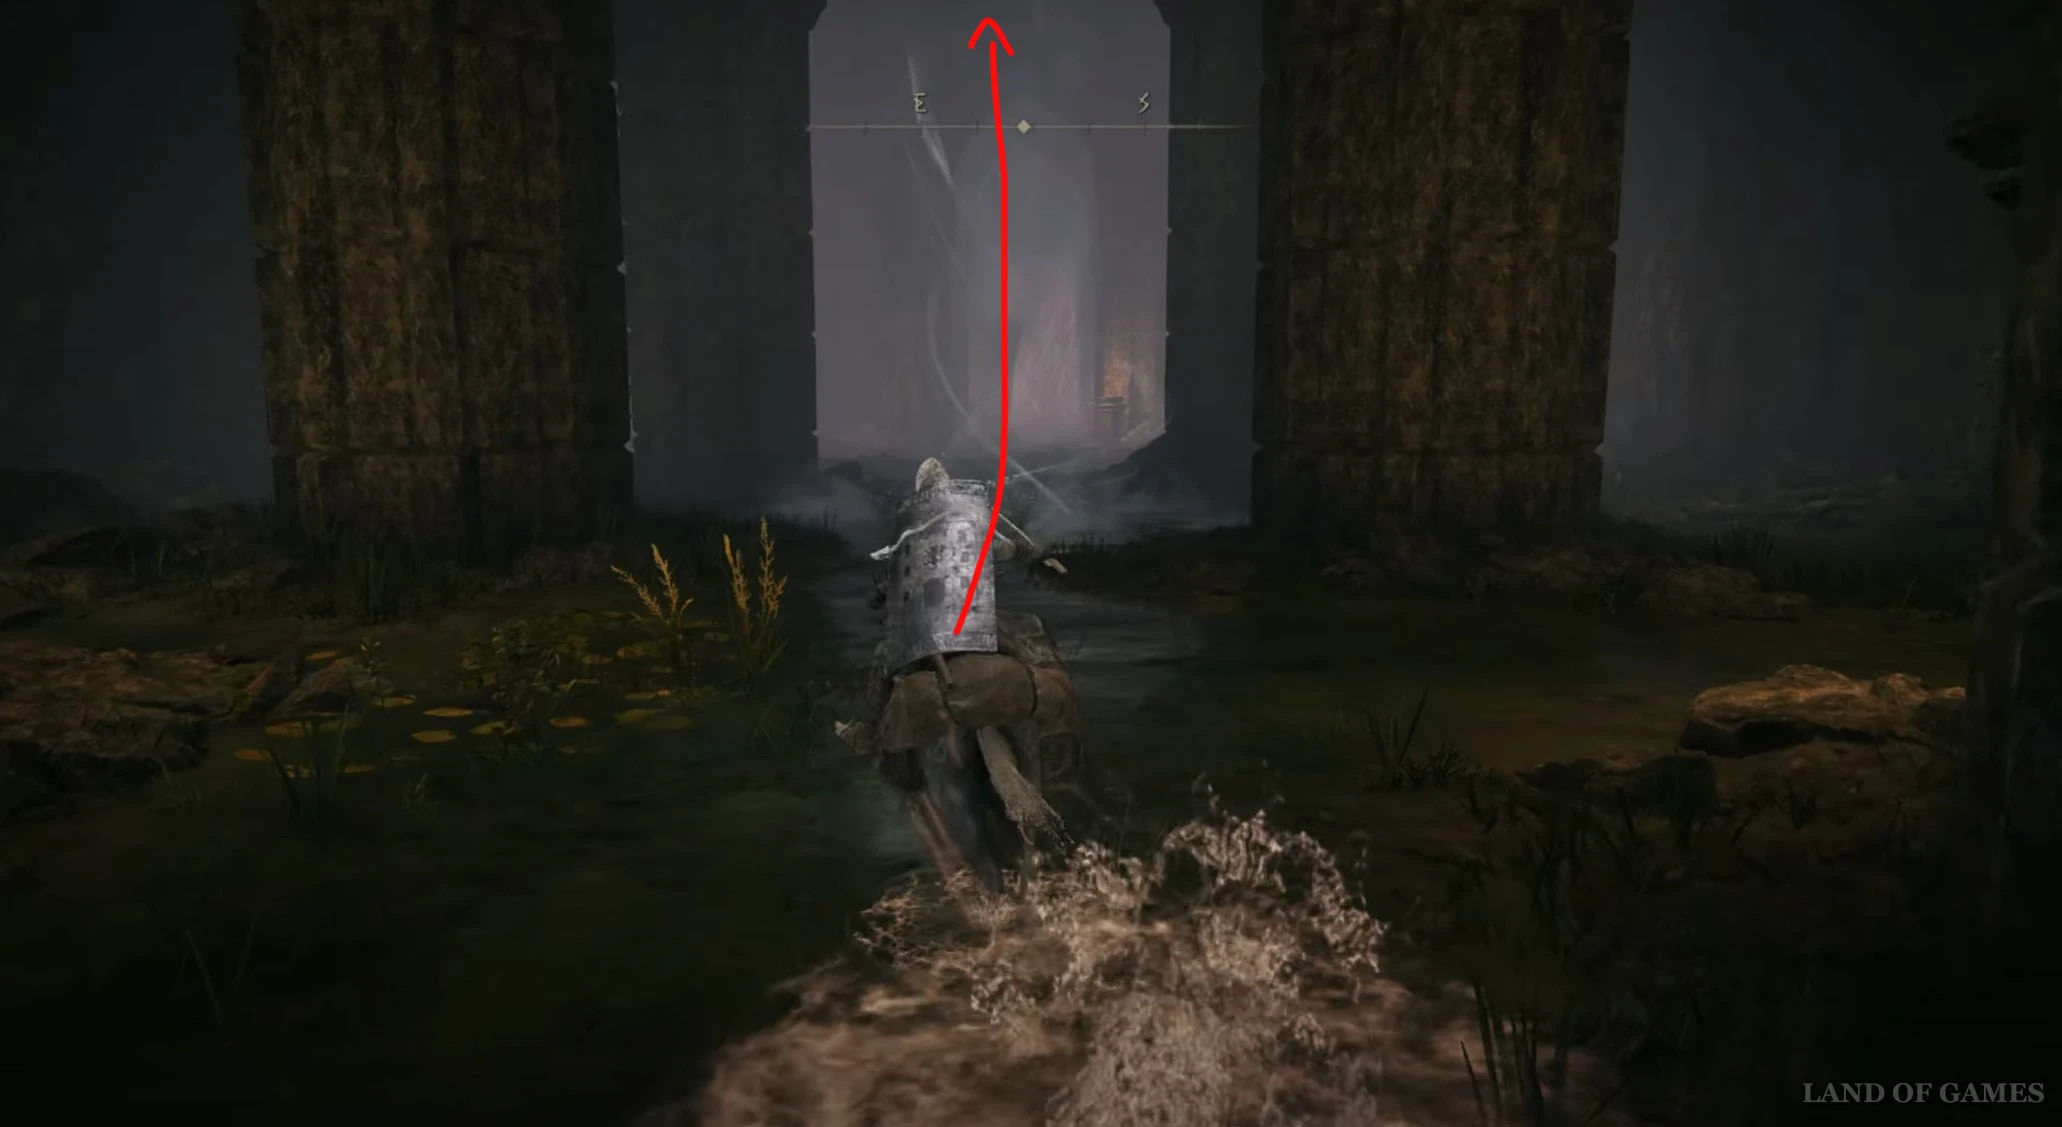
Переместитесь или доберитесь до места благодати «Привал у дороги с колоннами», а затем скачите на юг по дороге, держась рядом со скалой слева. Вскоре вы увидите в ней проход в пещеру. Войдите внутрь, чтобы попасть в «Драконью яму».

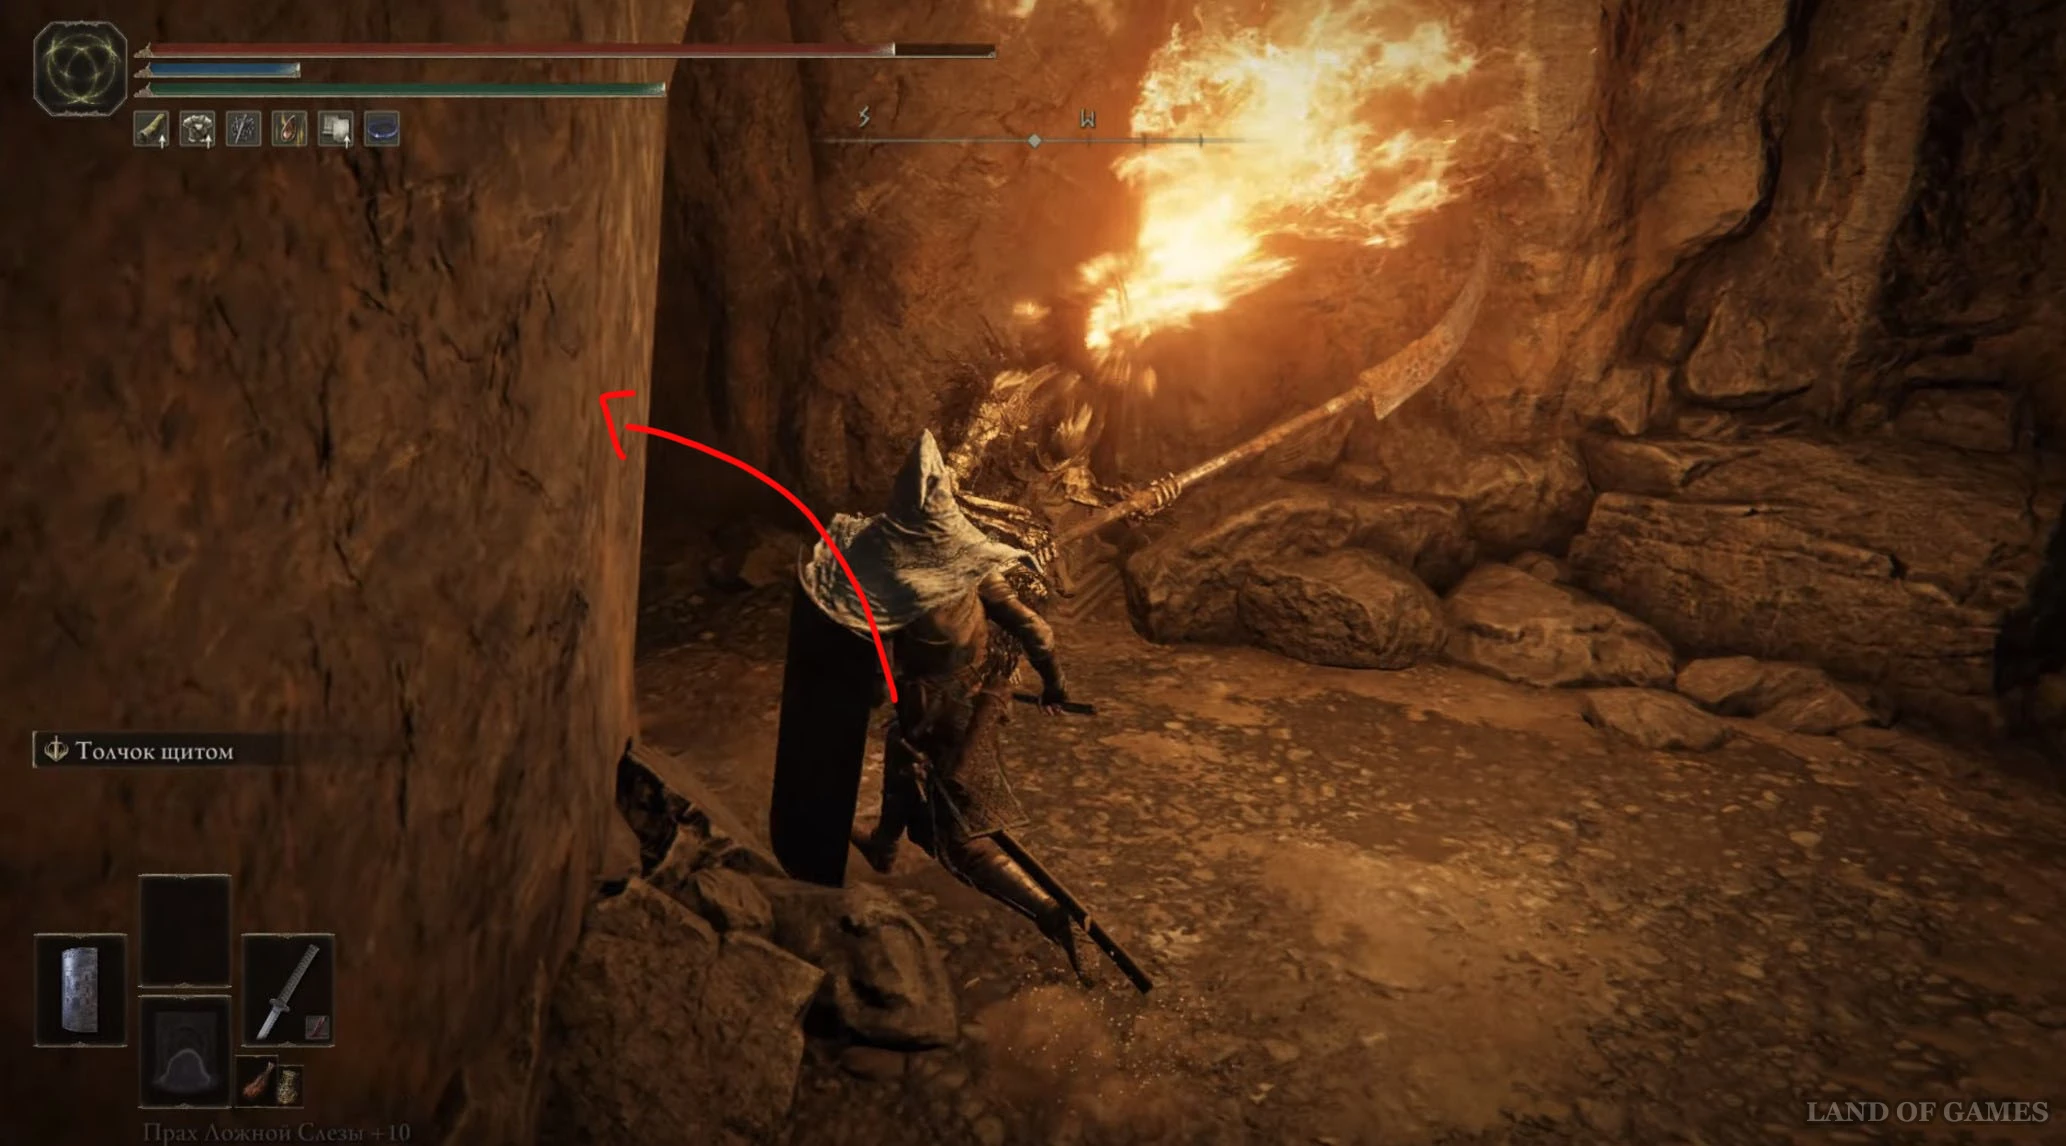
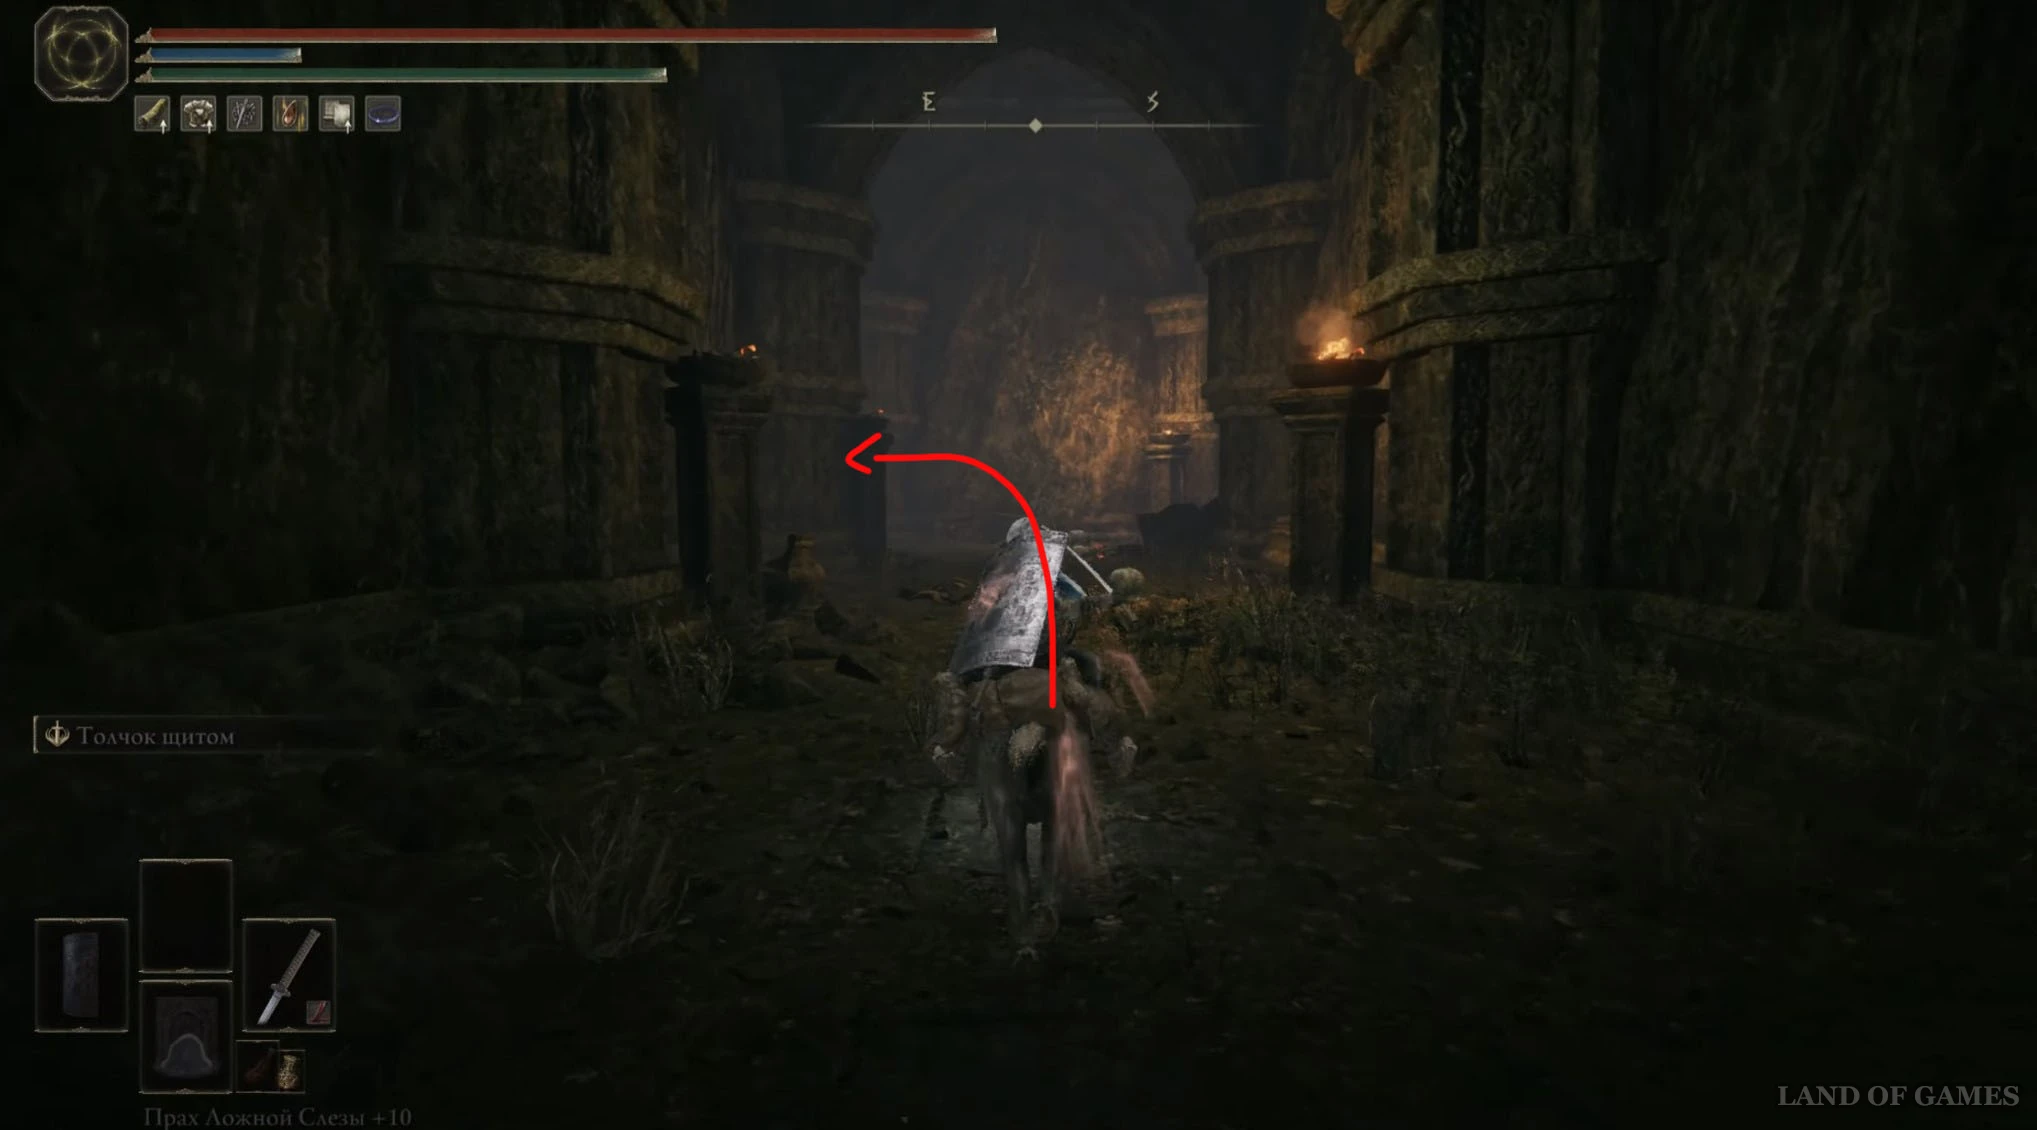
Активировав «костер», начните спускаться вниз, пока не попадете в более просторную область. Здесь сверните в левый туннель. Бегите вперед по единственному пути, выбравшись в очередной зал пещеры, где вам нужно будет выпрыгнуть через отверстие в стене слева.
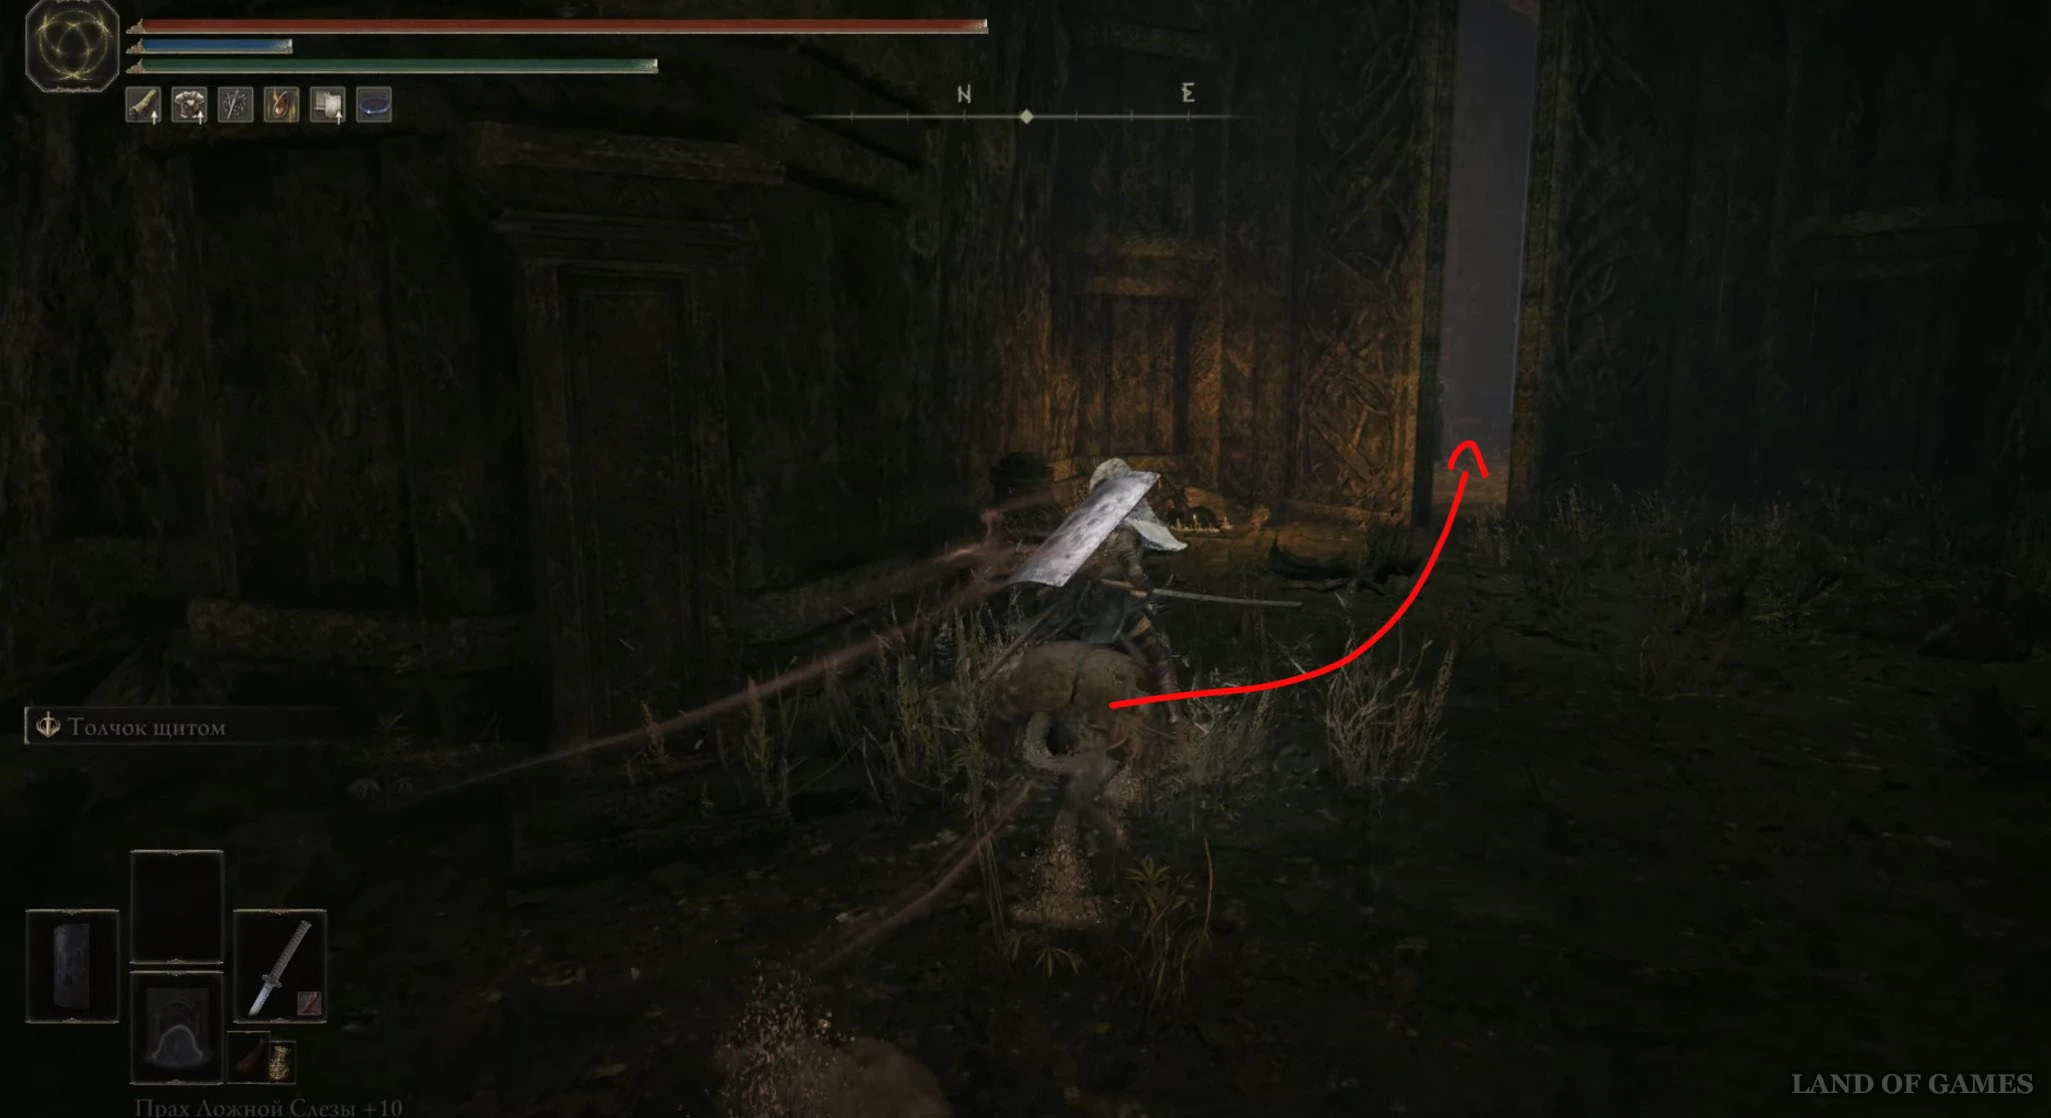
Приземлившись, сразу же развернитесь и войдите в проход справа от себя. Вы попадете в просторную пещеру. Идите вперед до края площадки, а потом спрыгните в расщелину внизу. Не бойтесь – несмотря на затяжной прыжок, вы не умрете от падения с высоты. Упав, двигайтесь вперед по единственному пути.
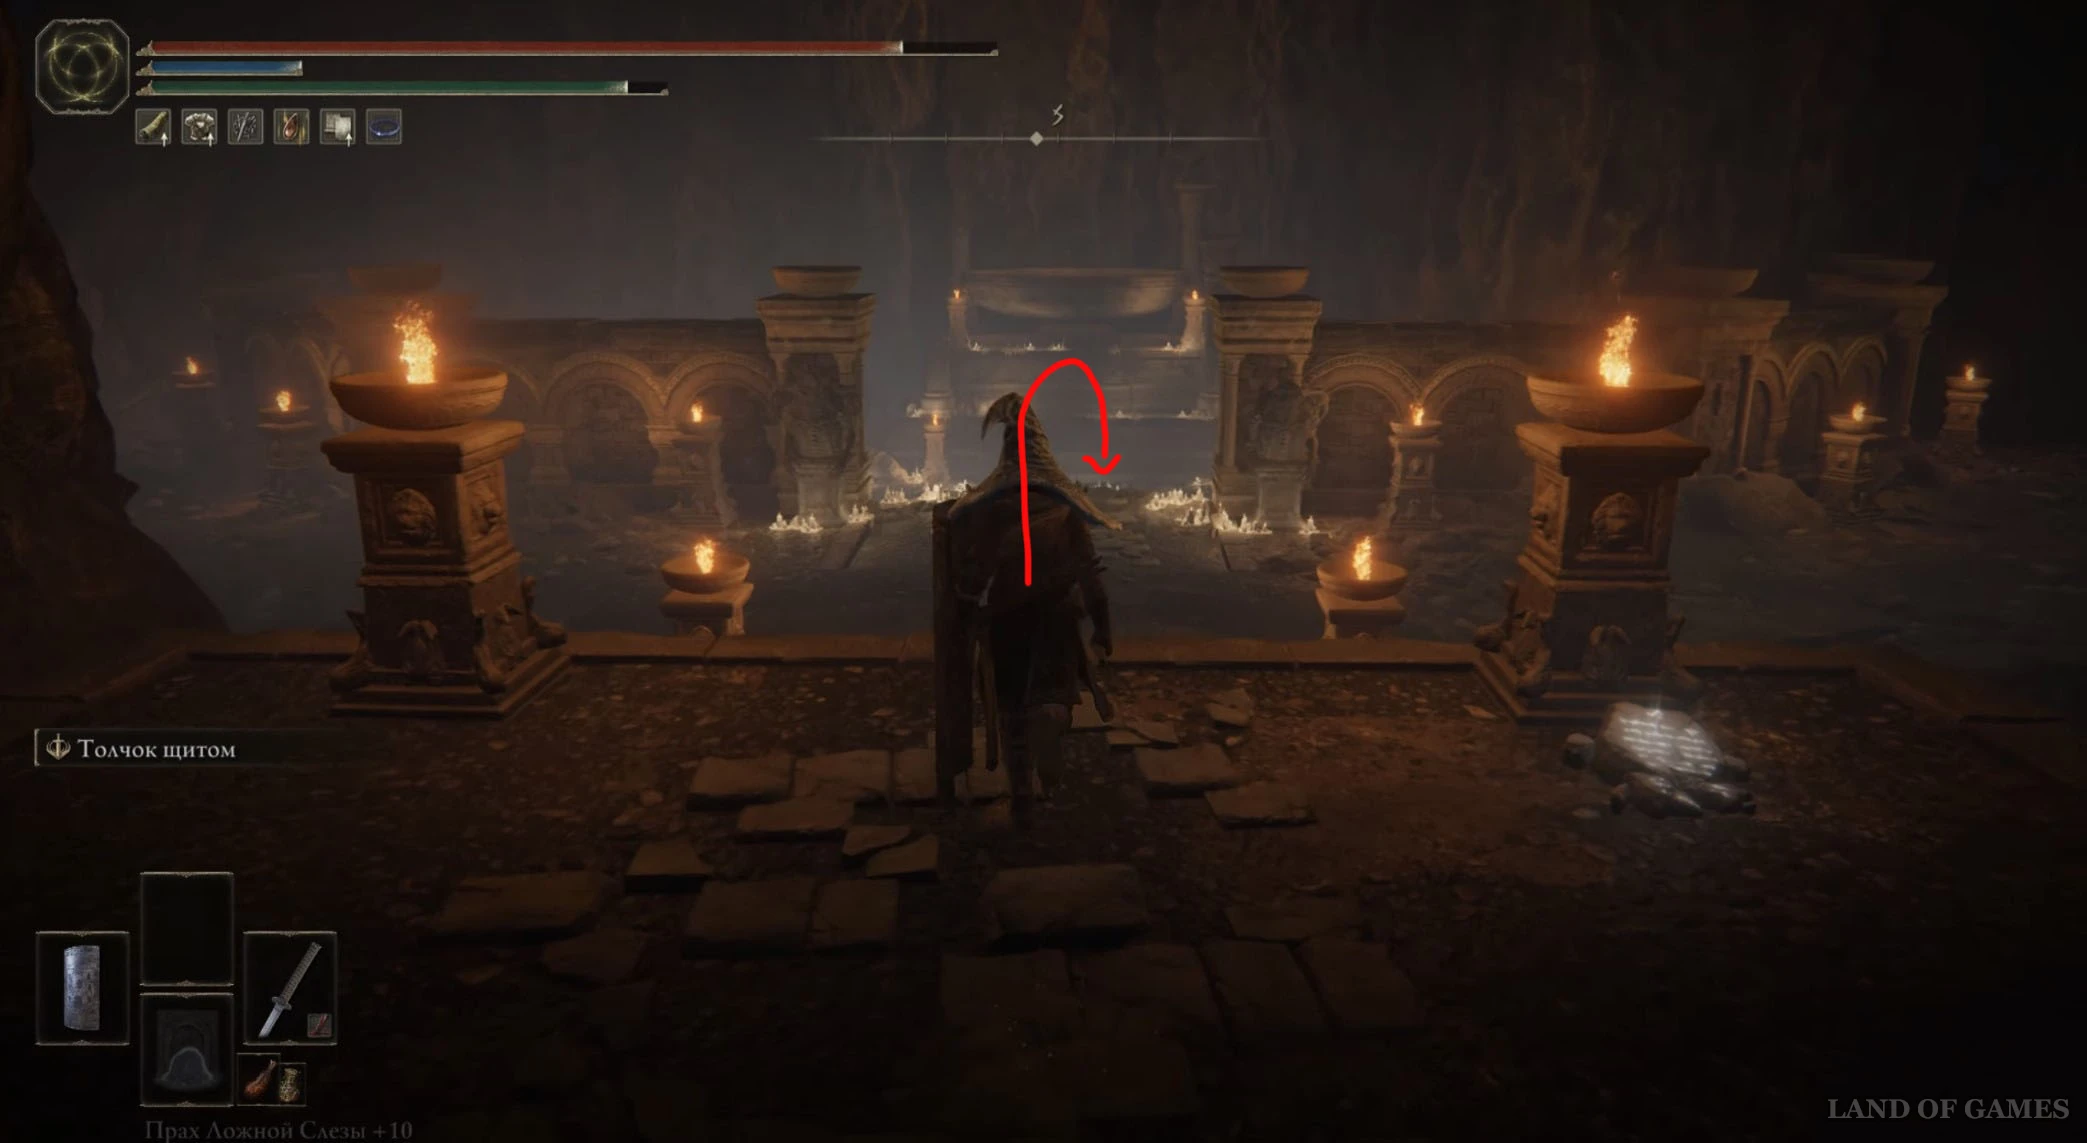
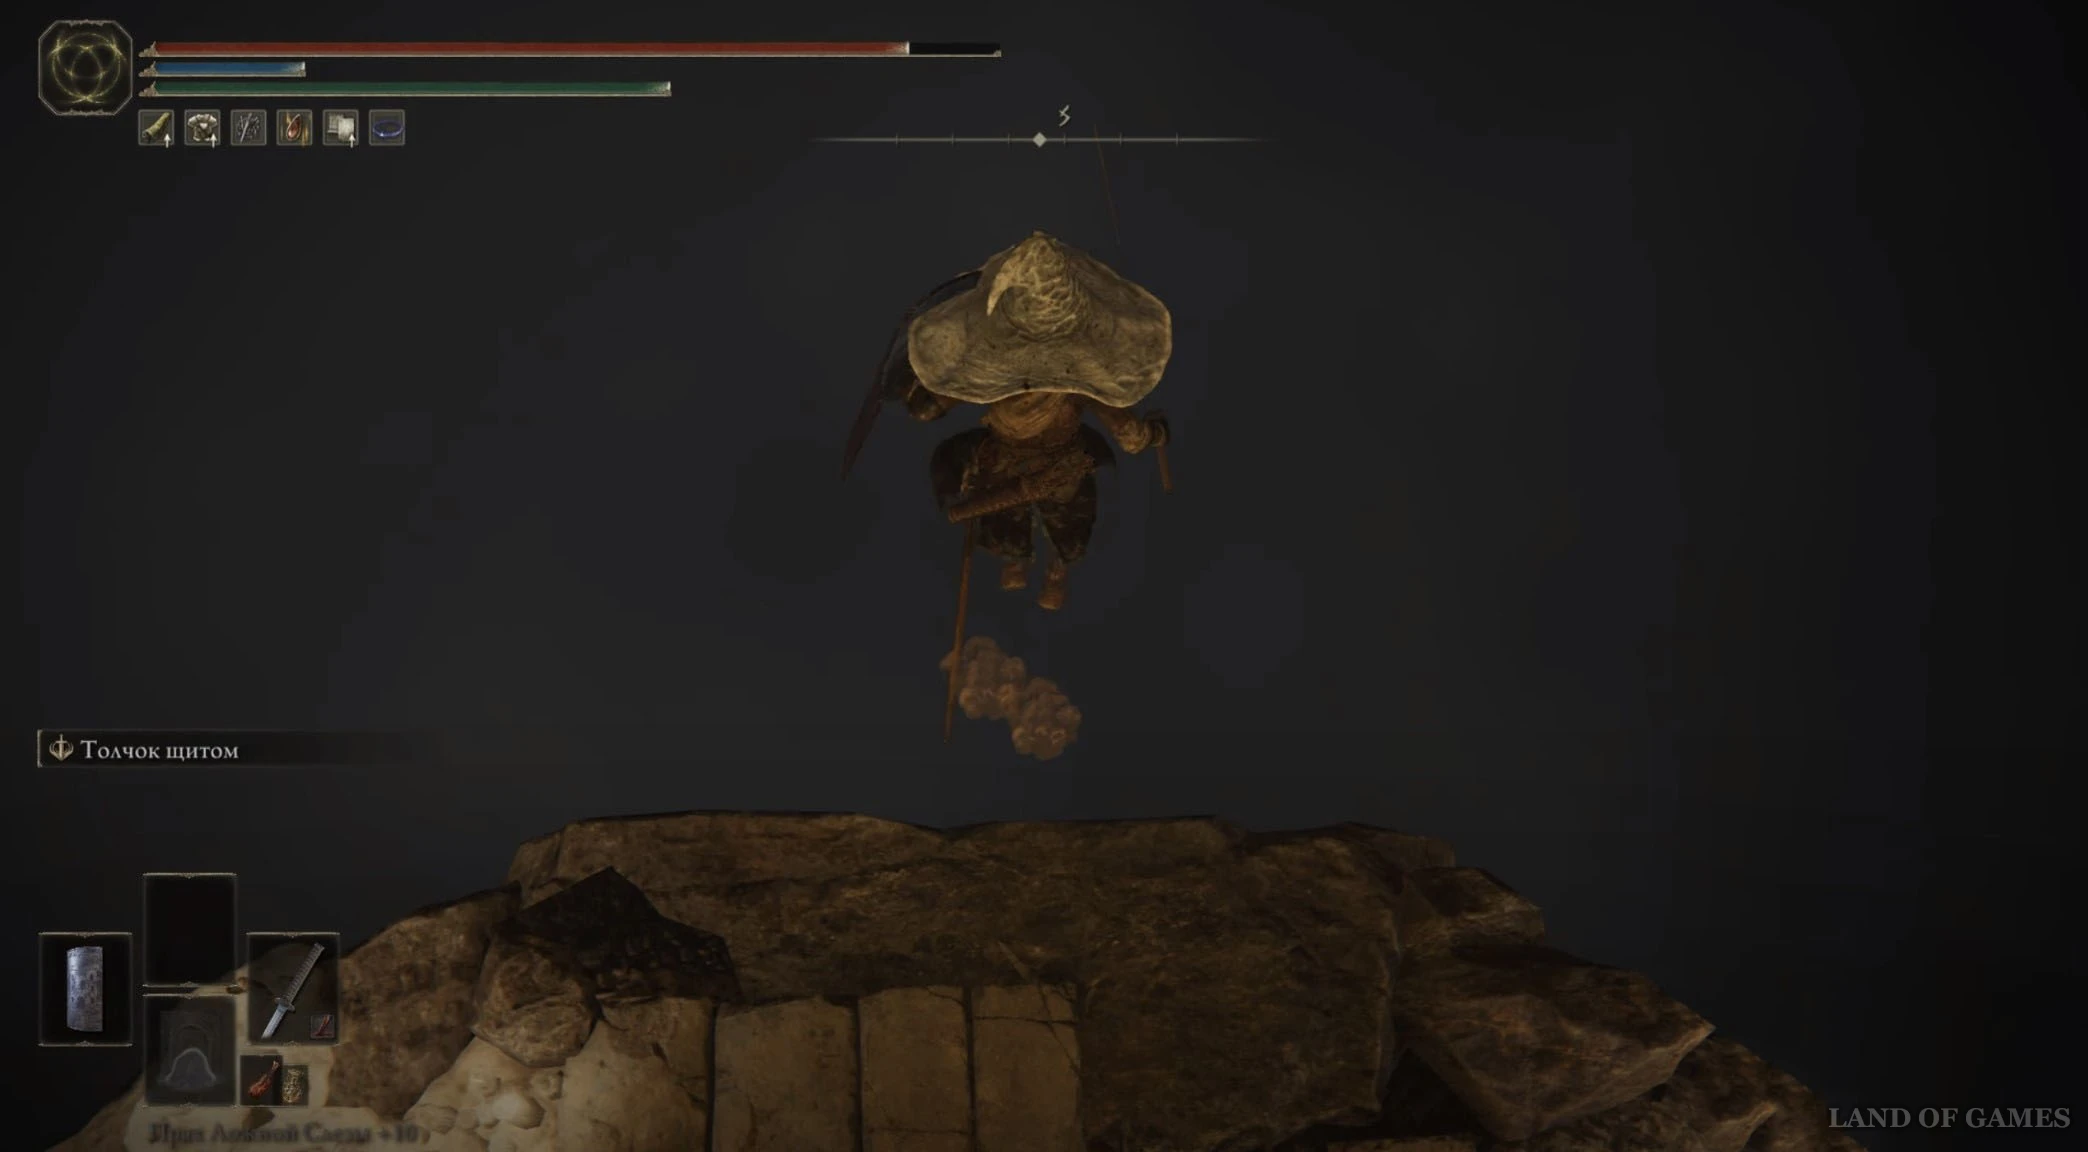
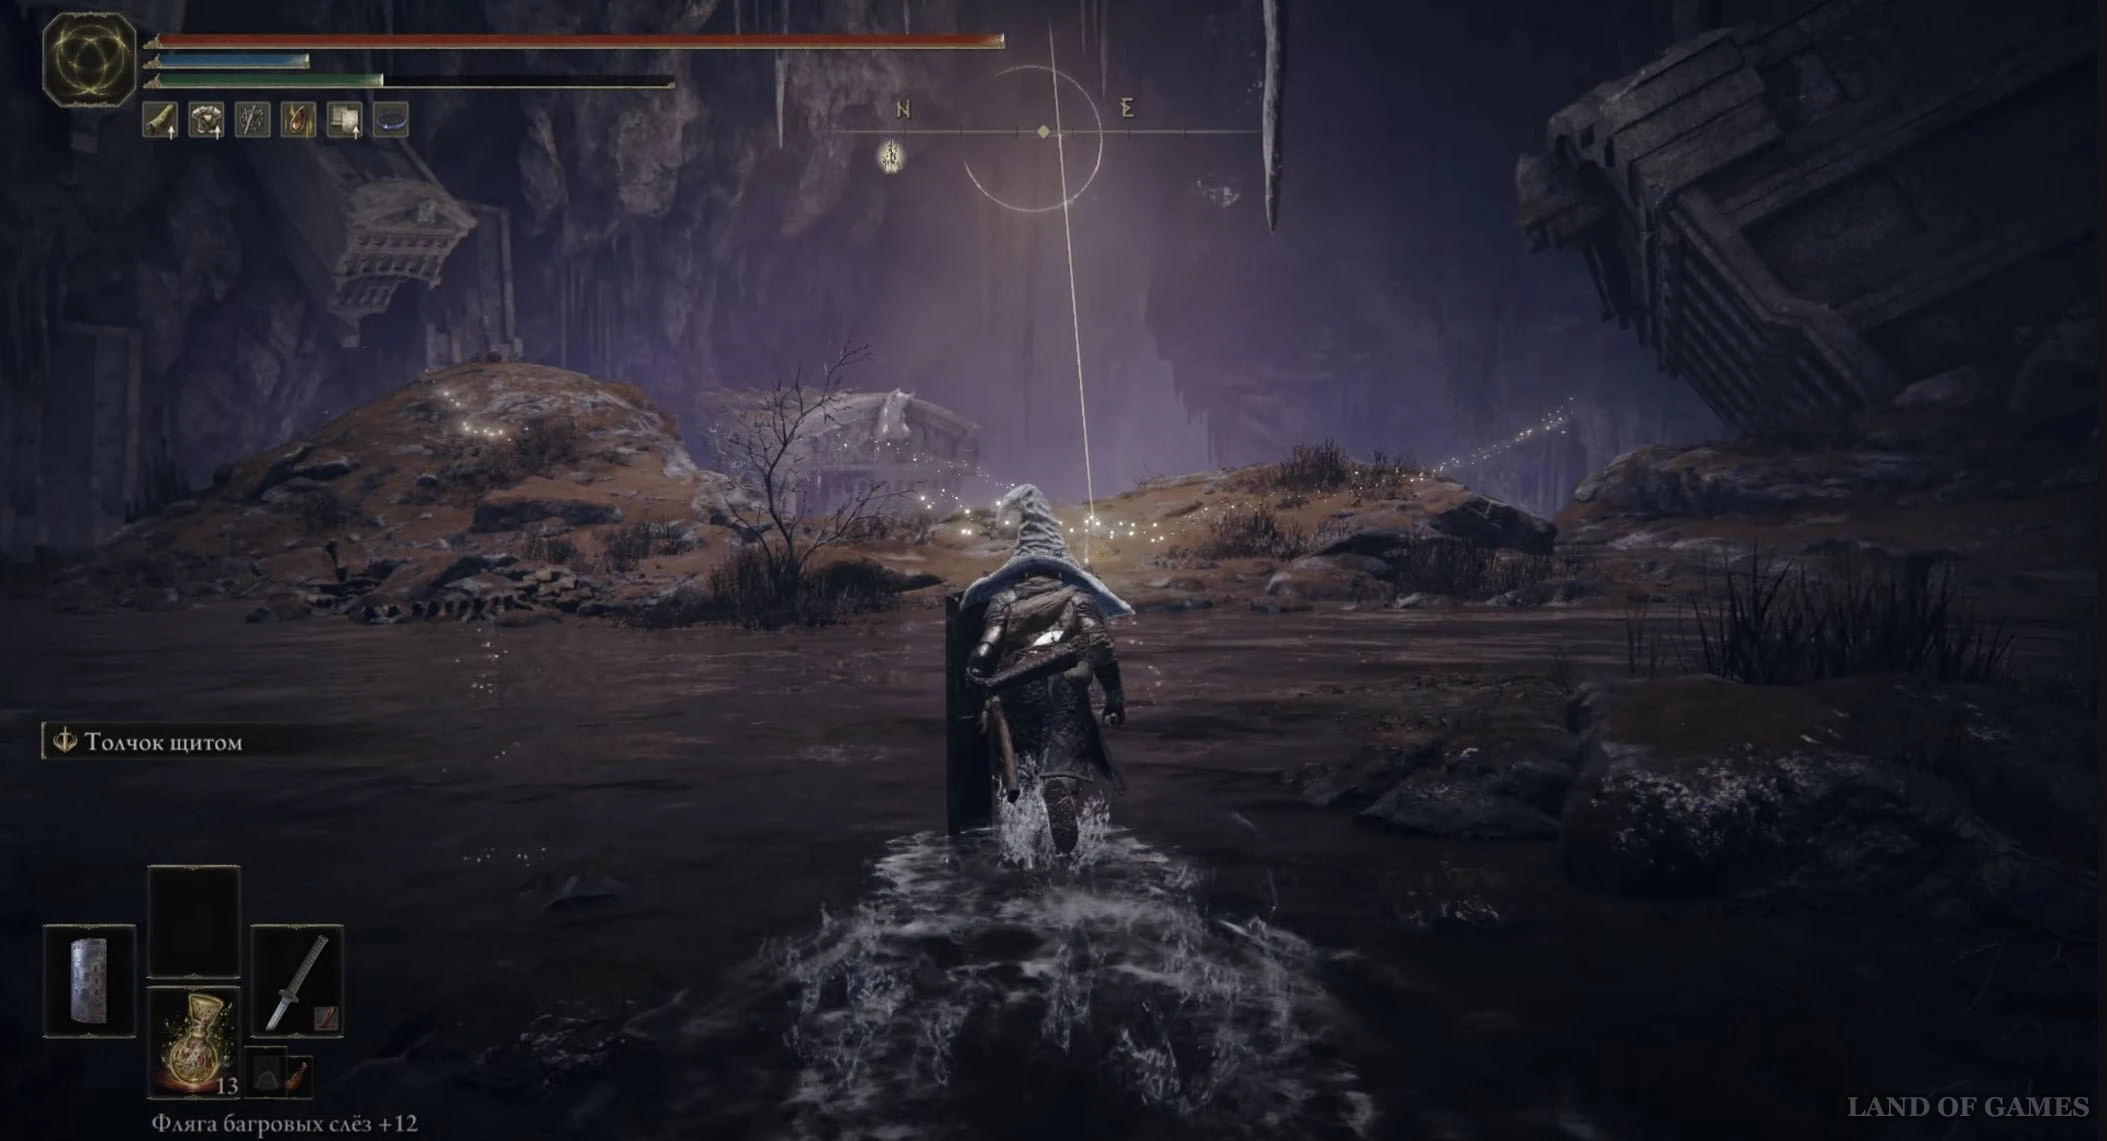
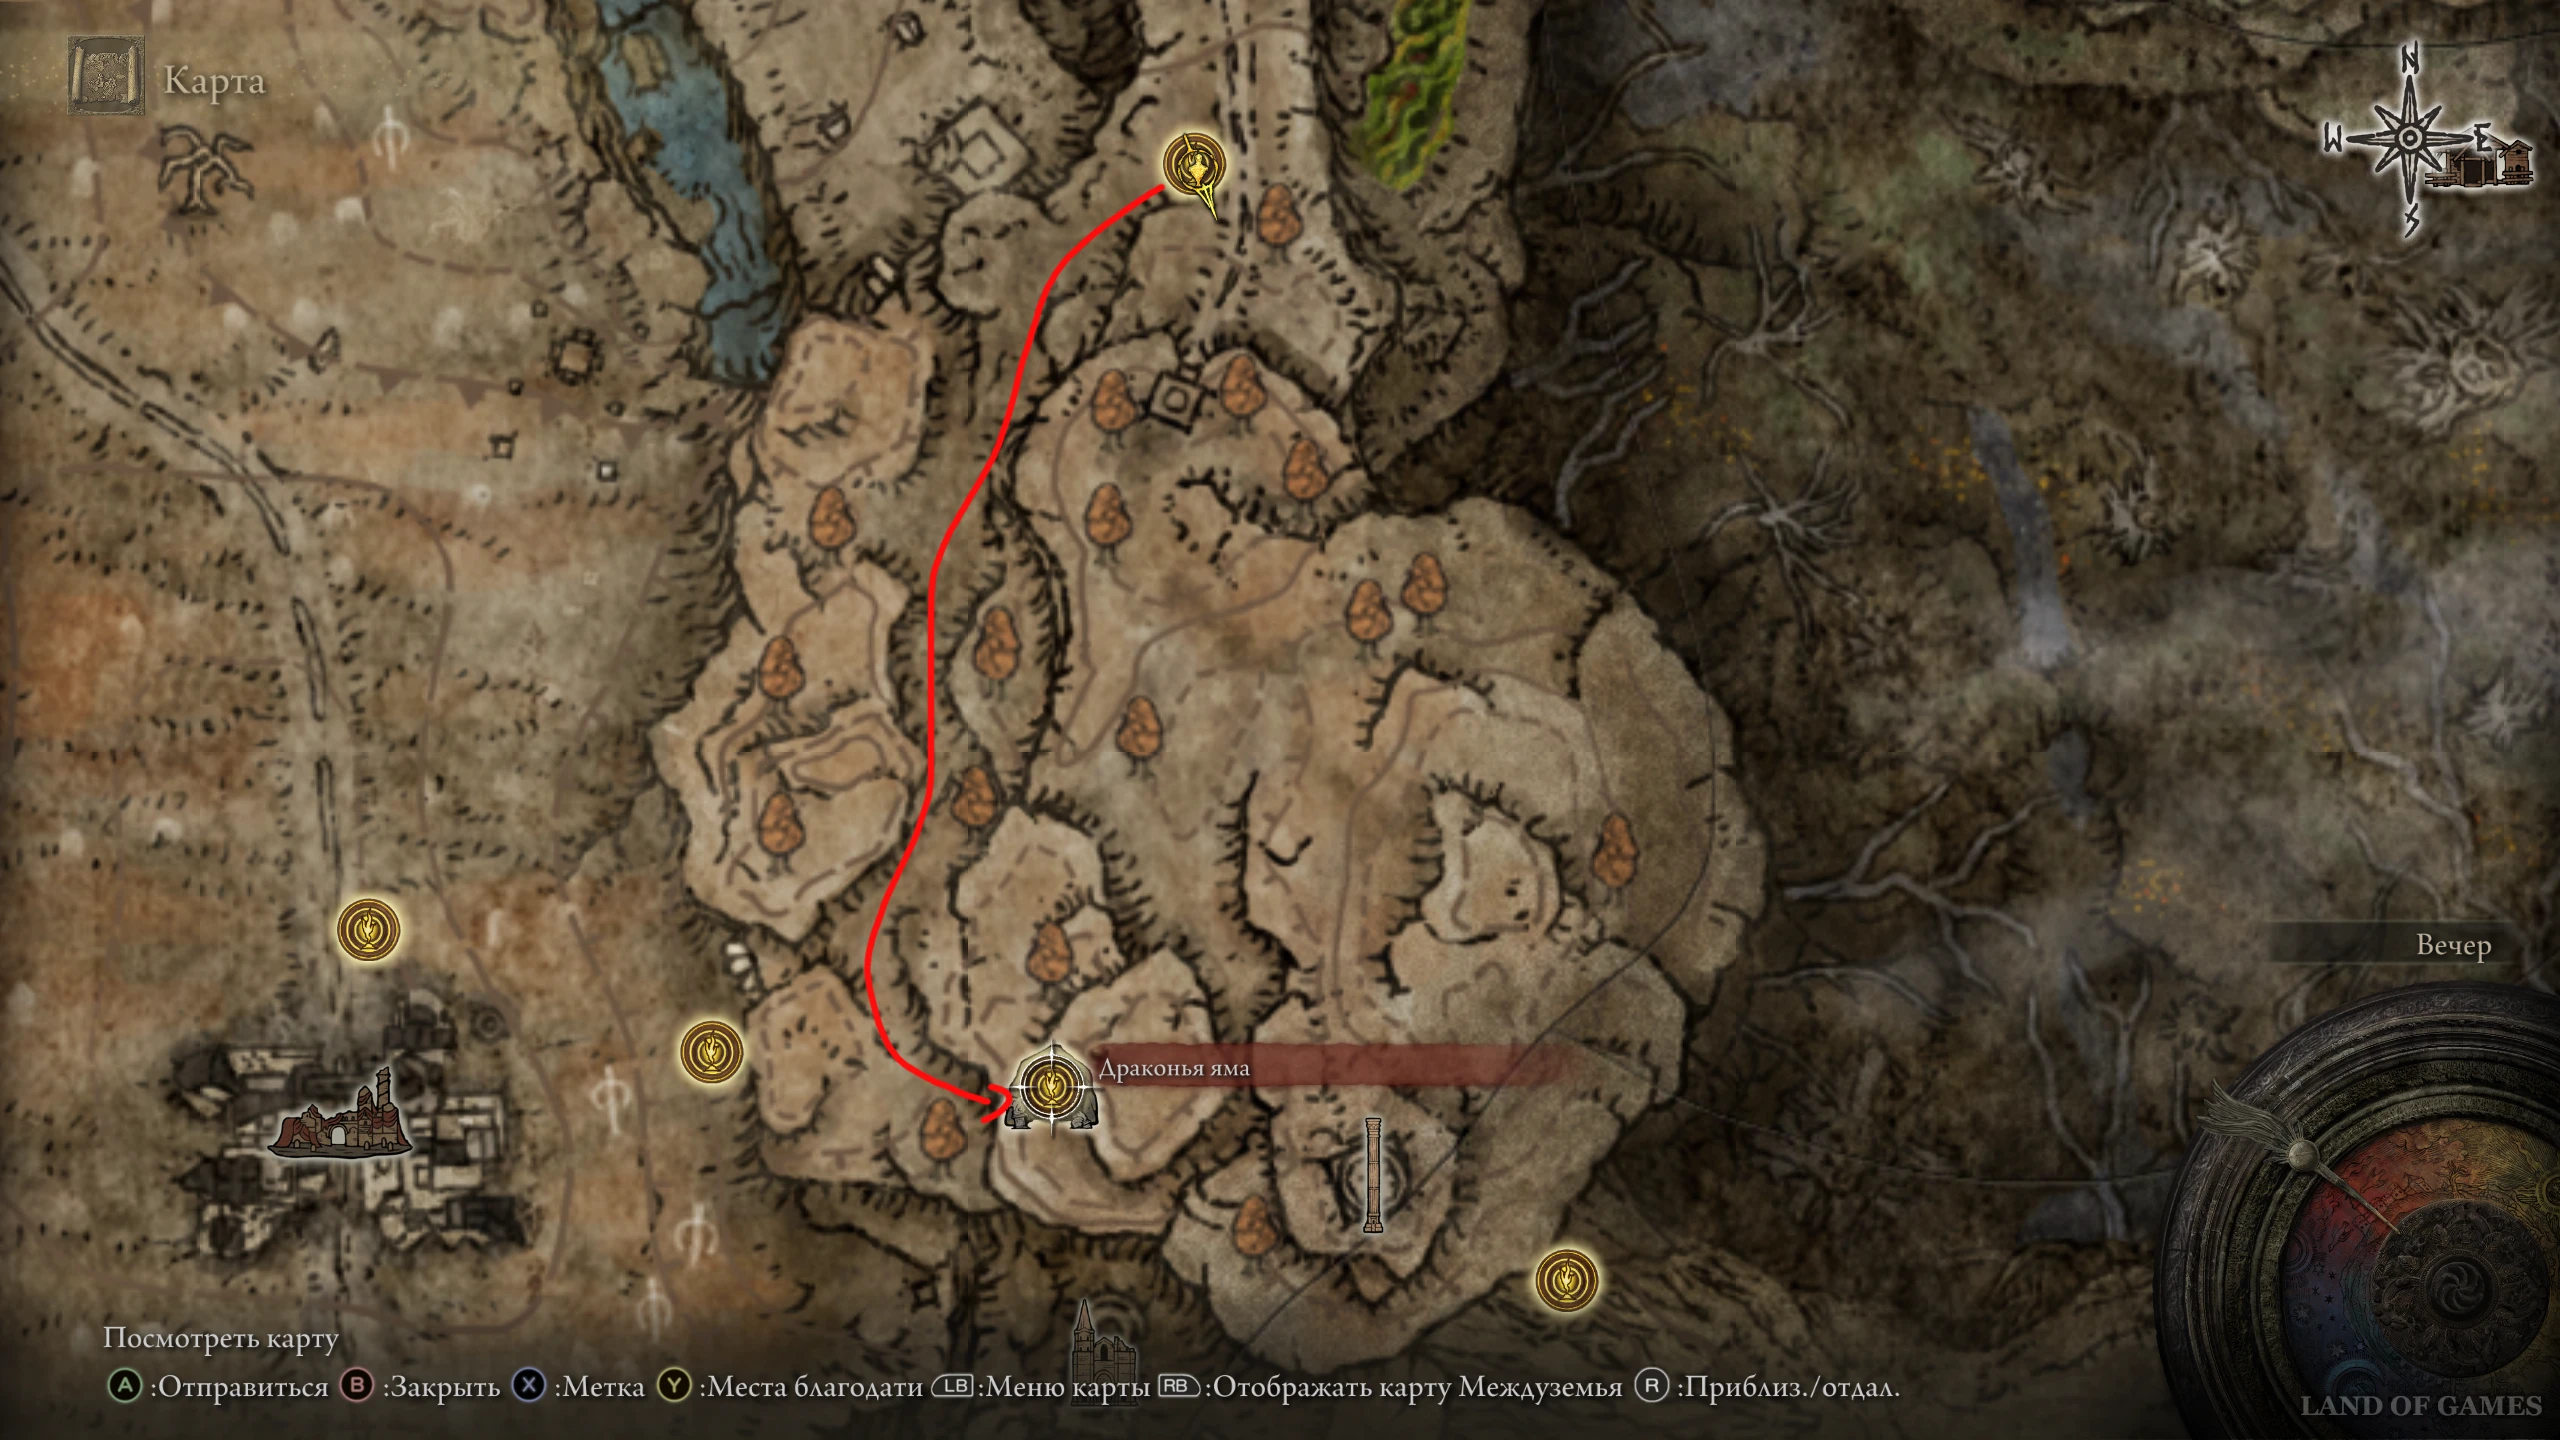
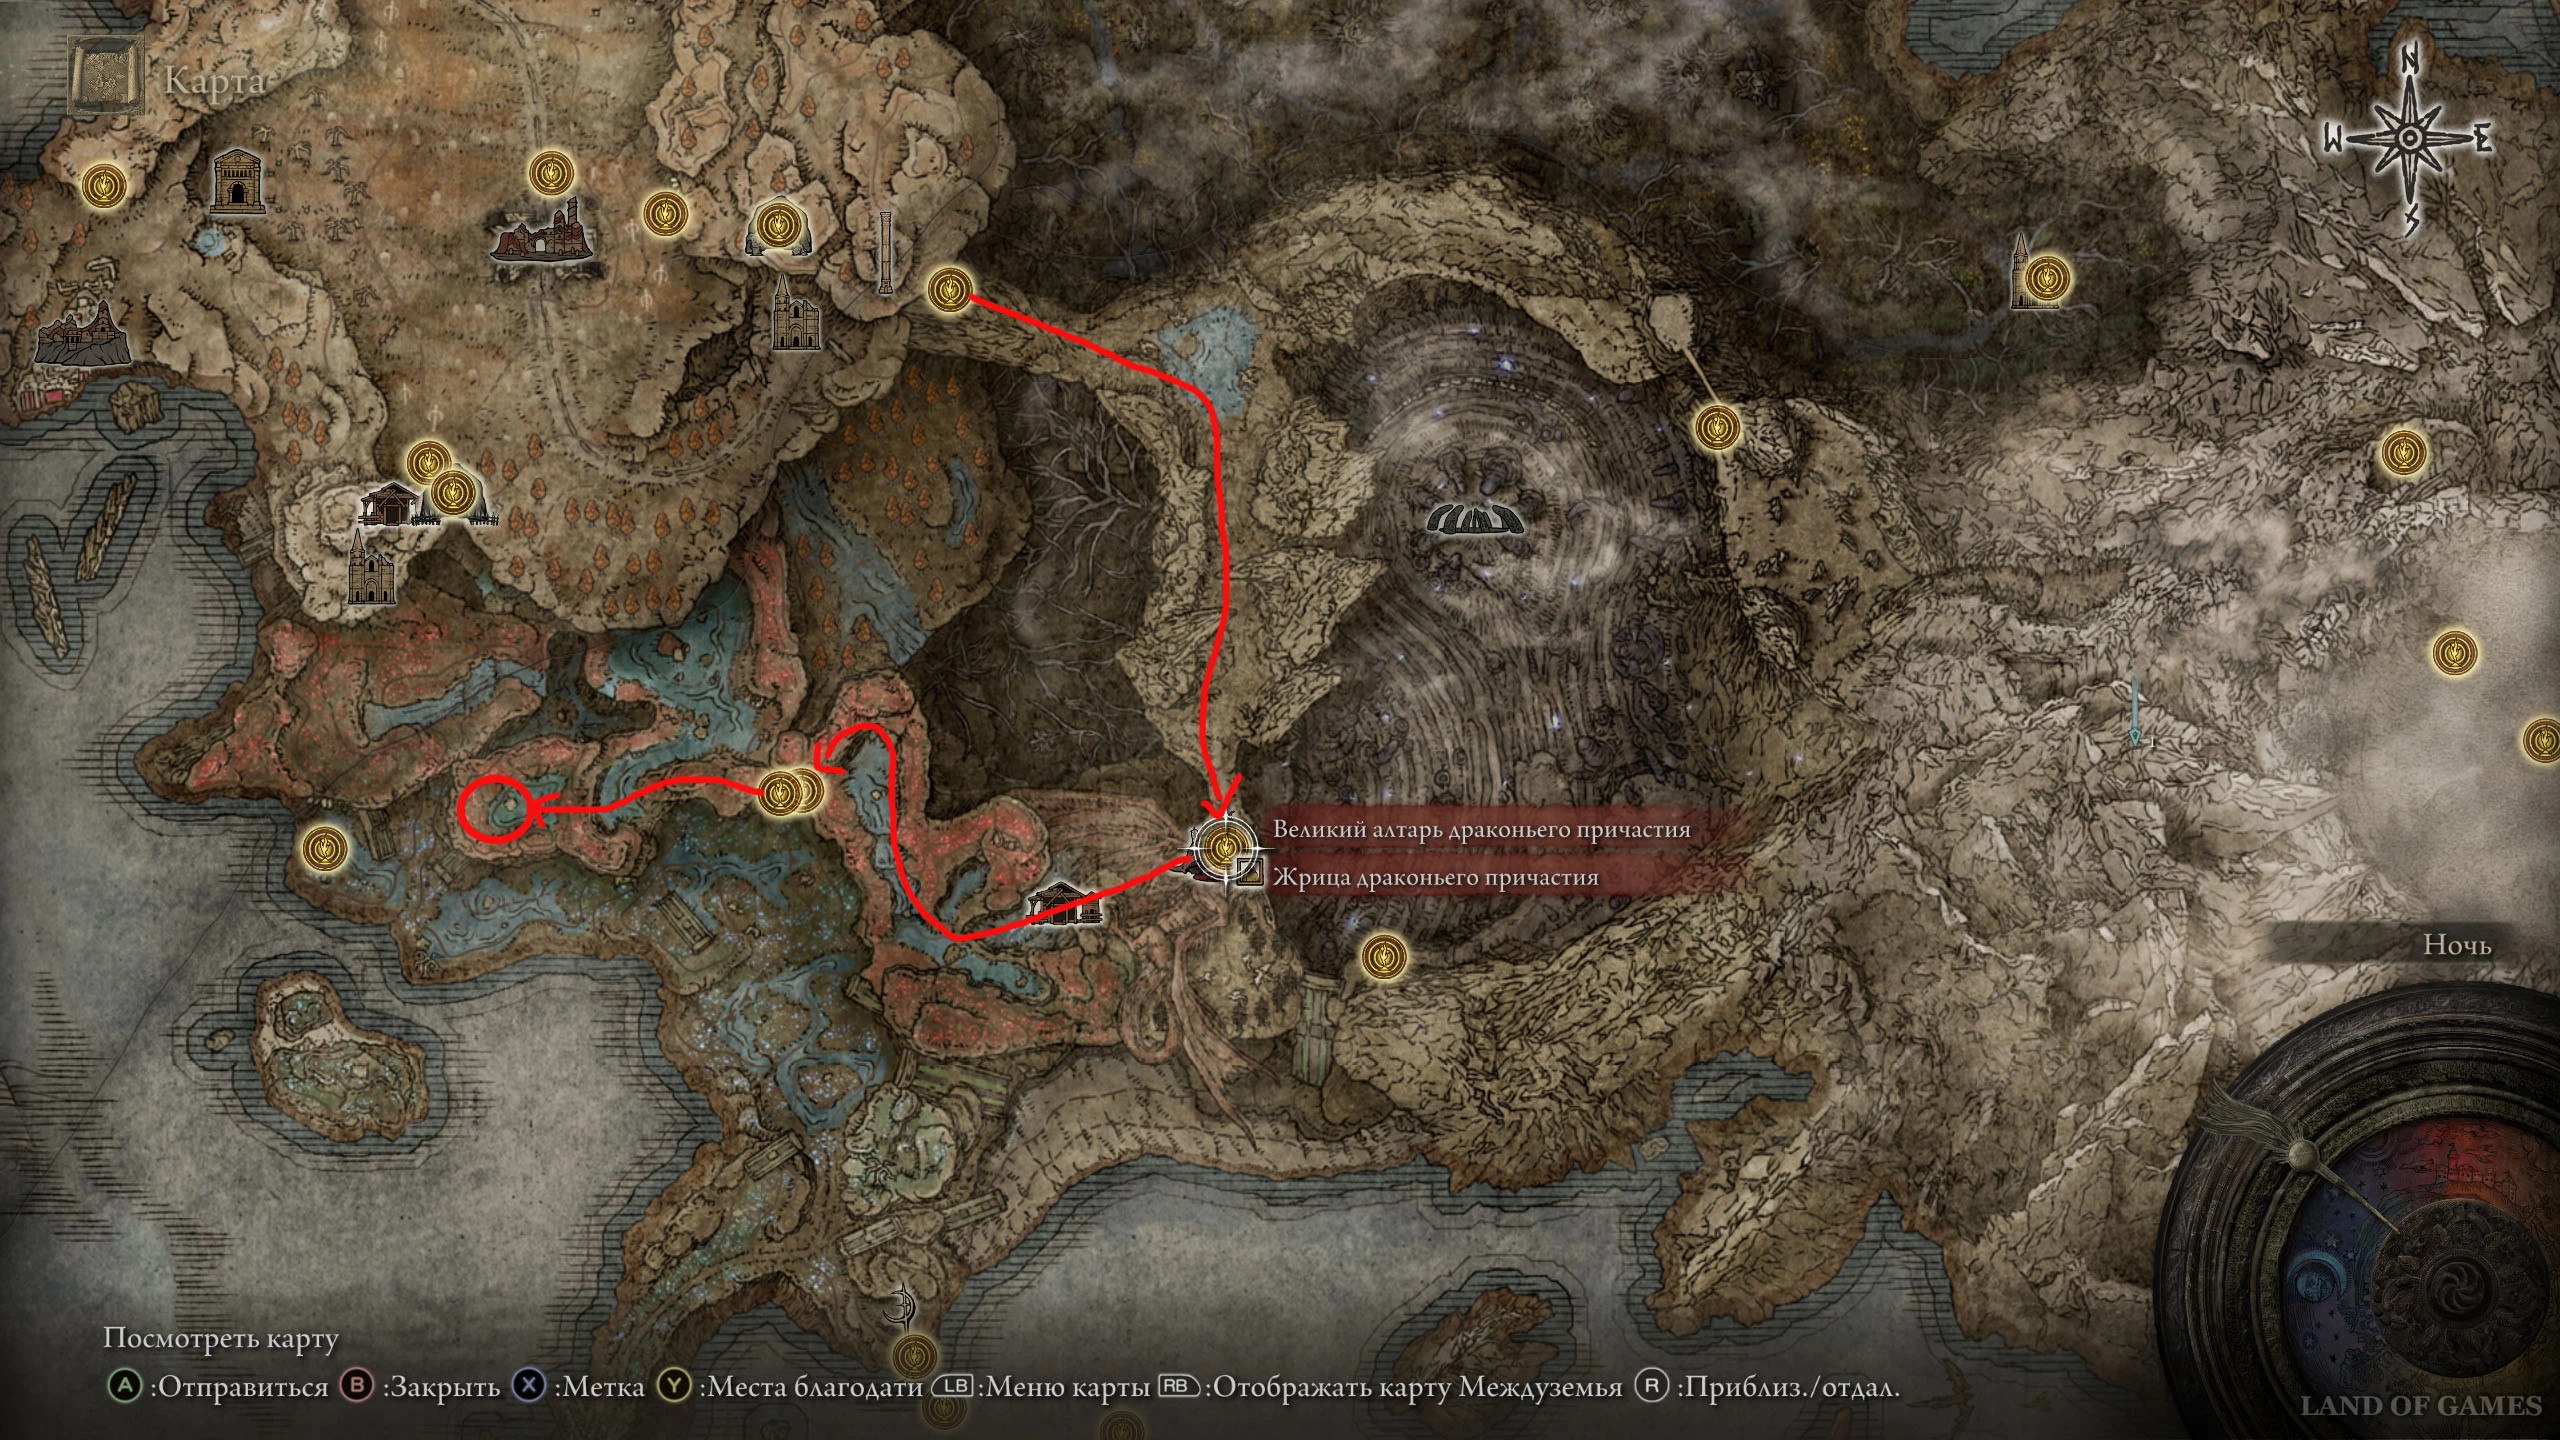
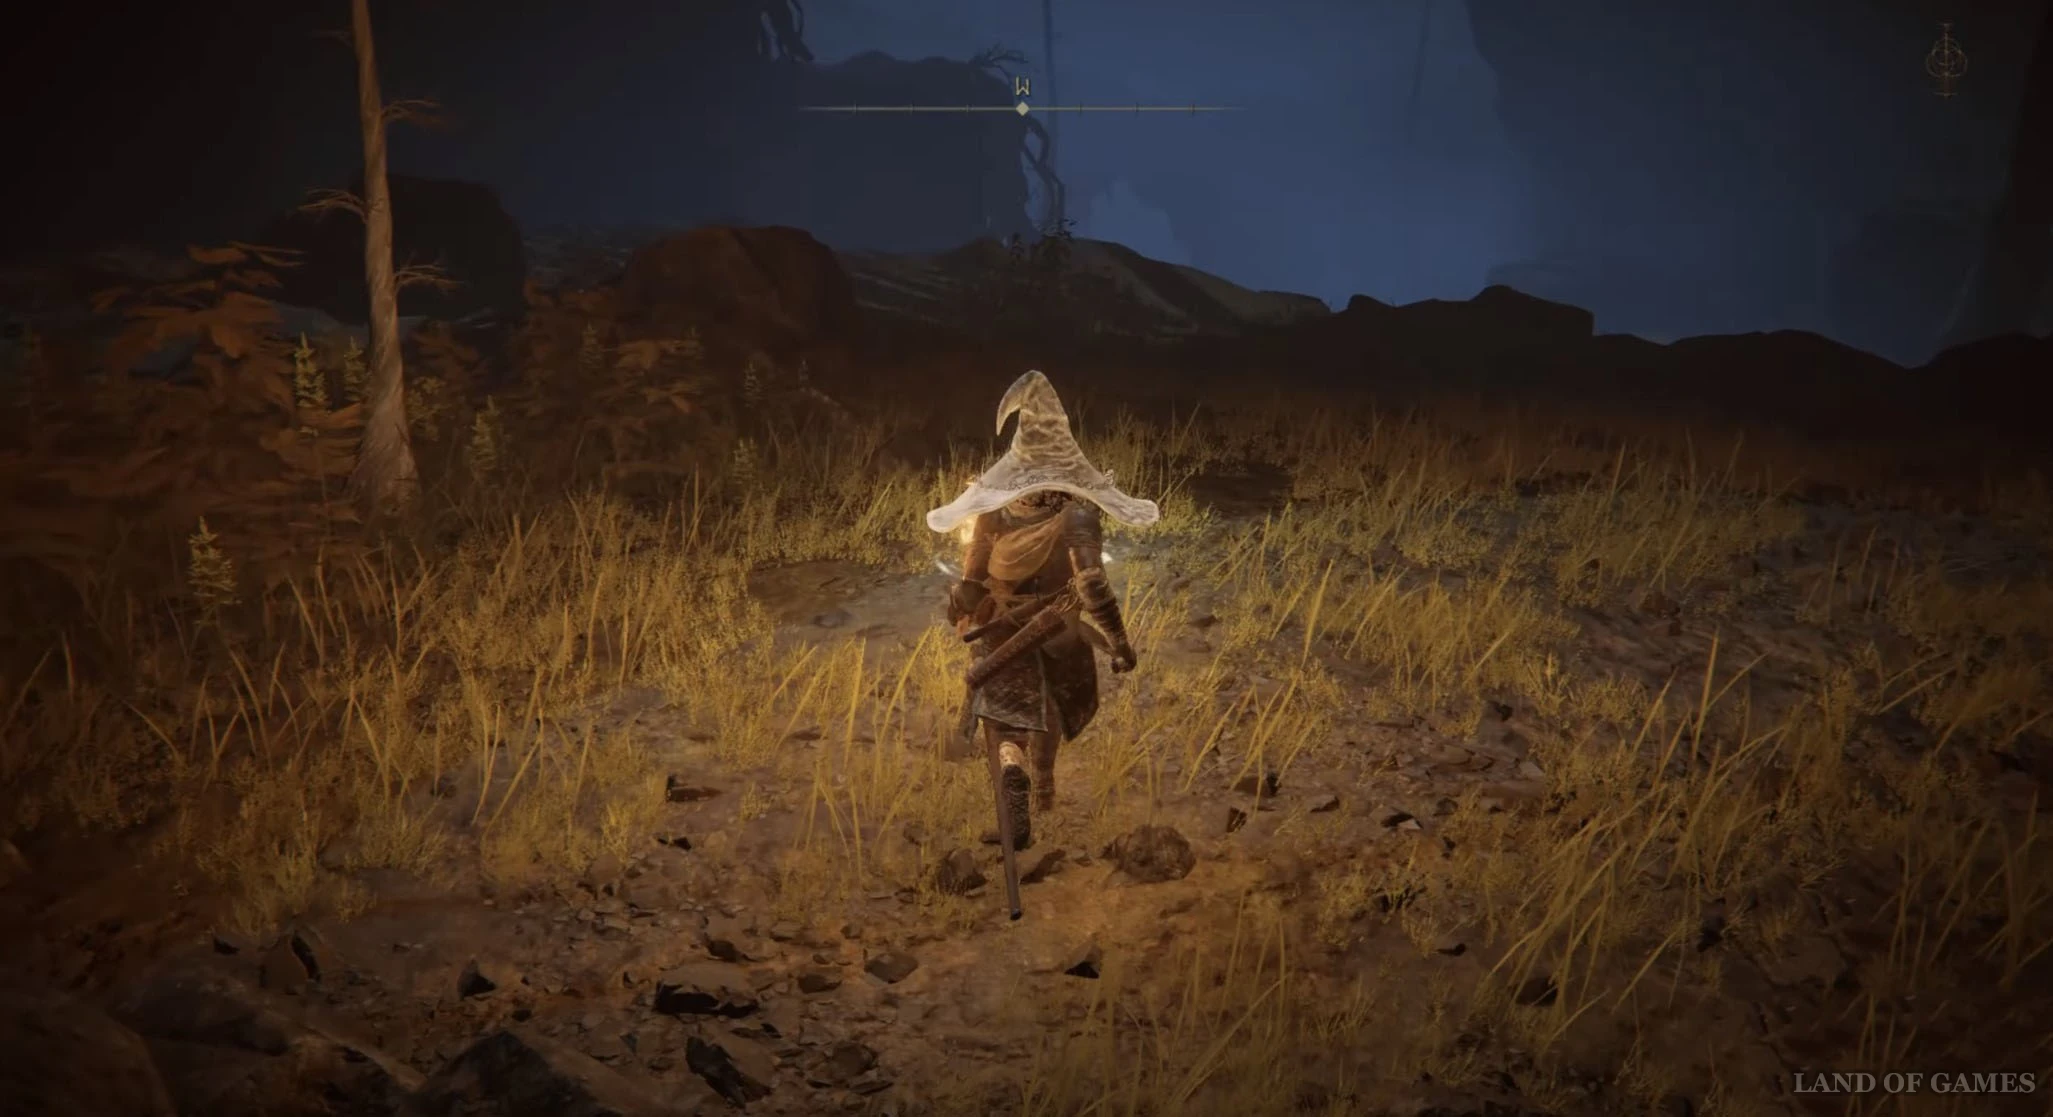
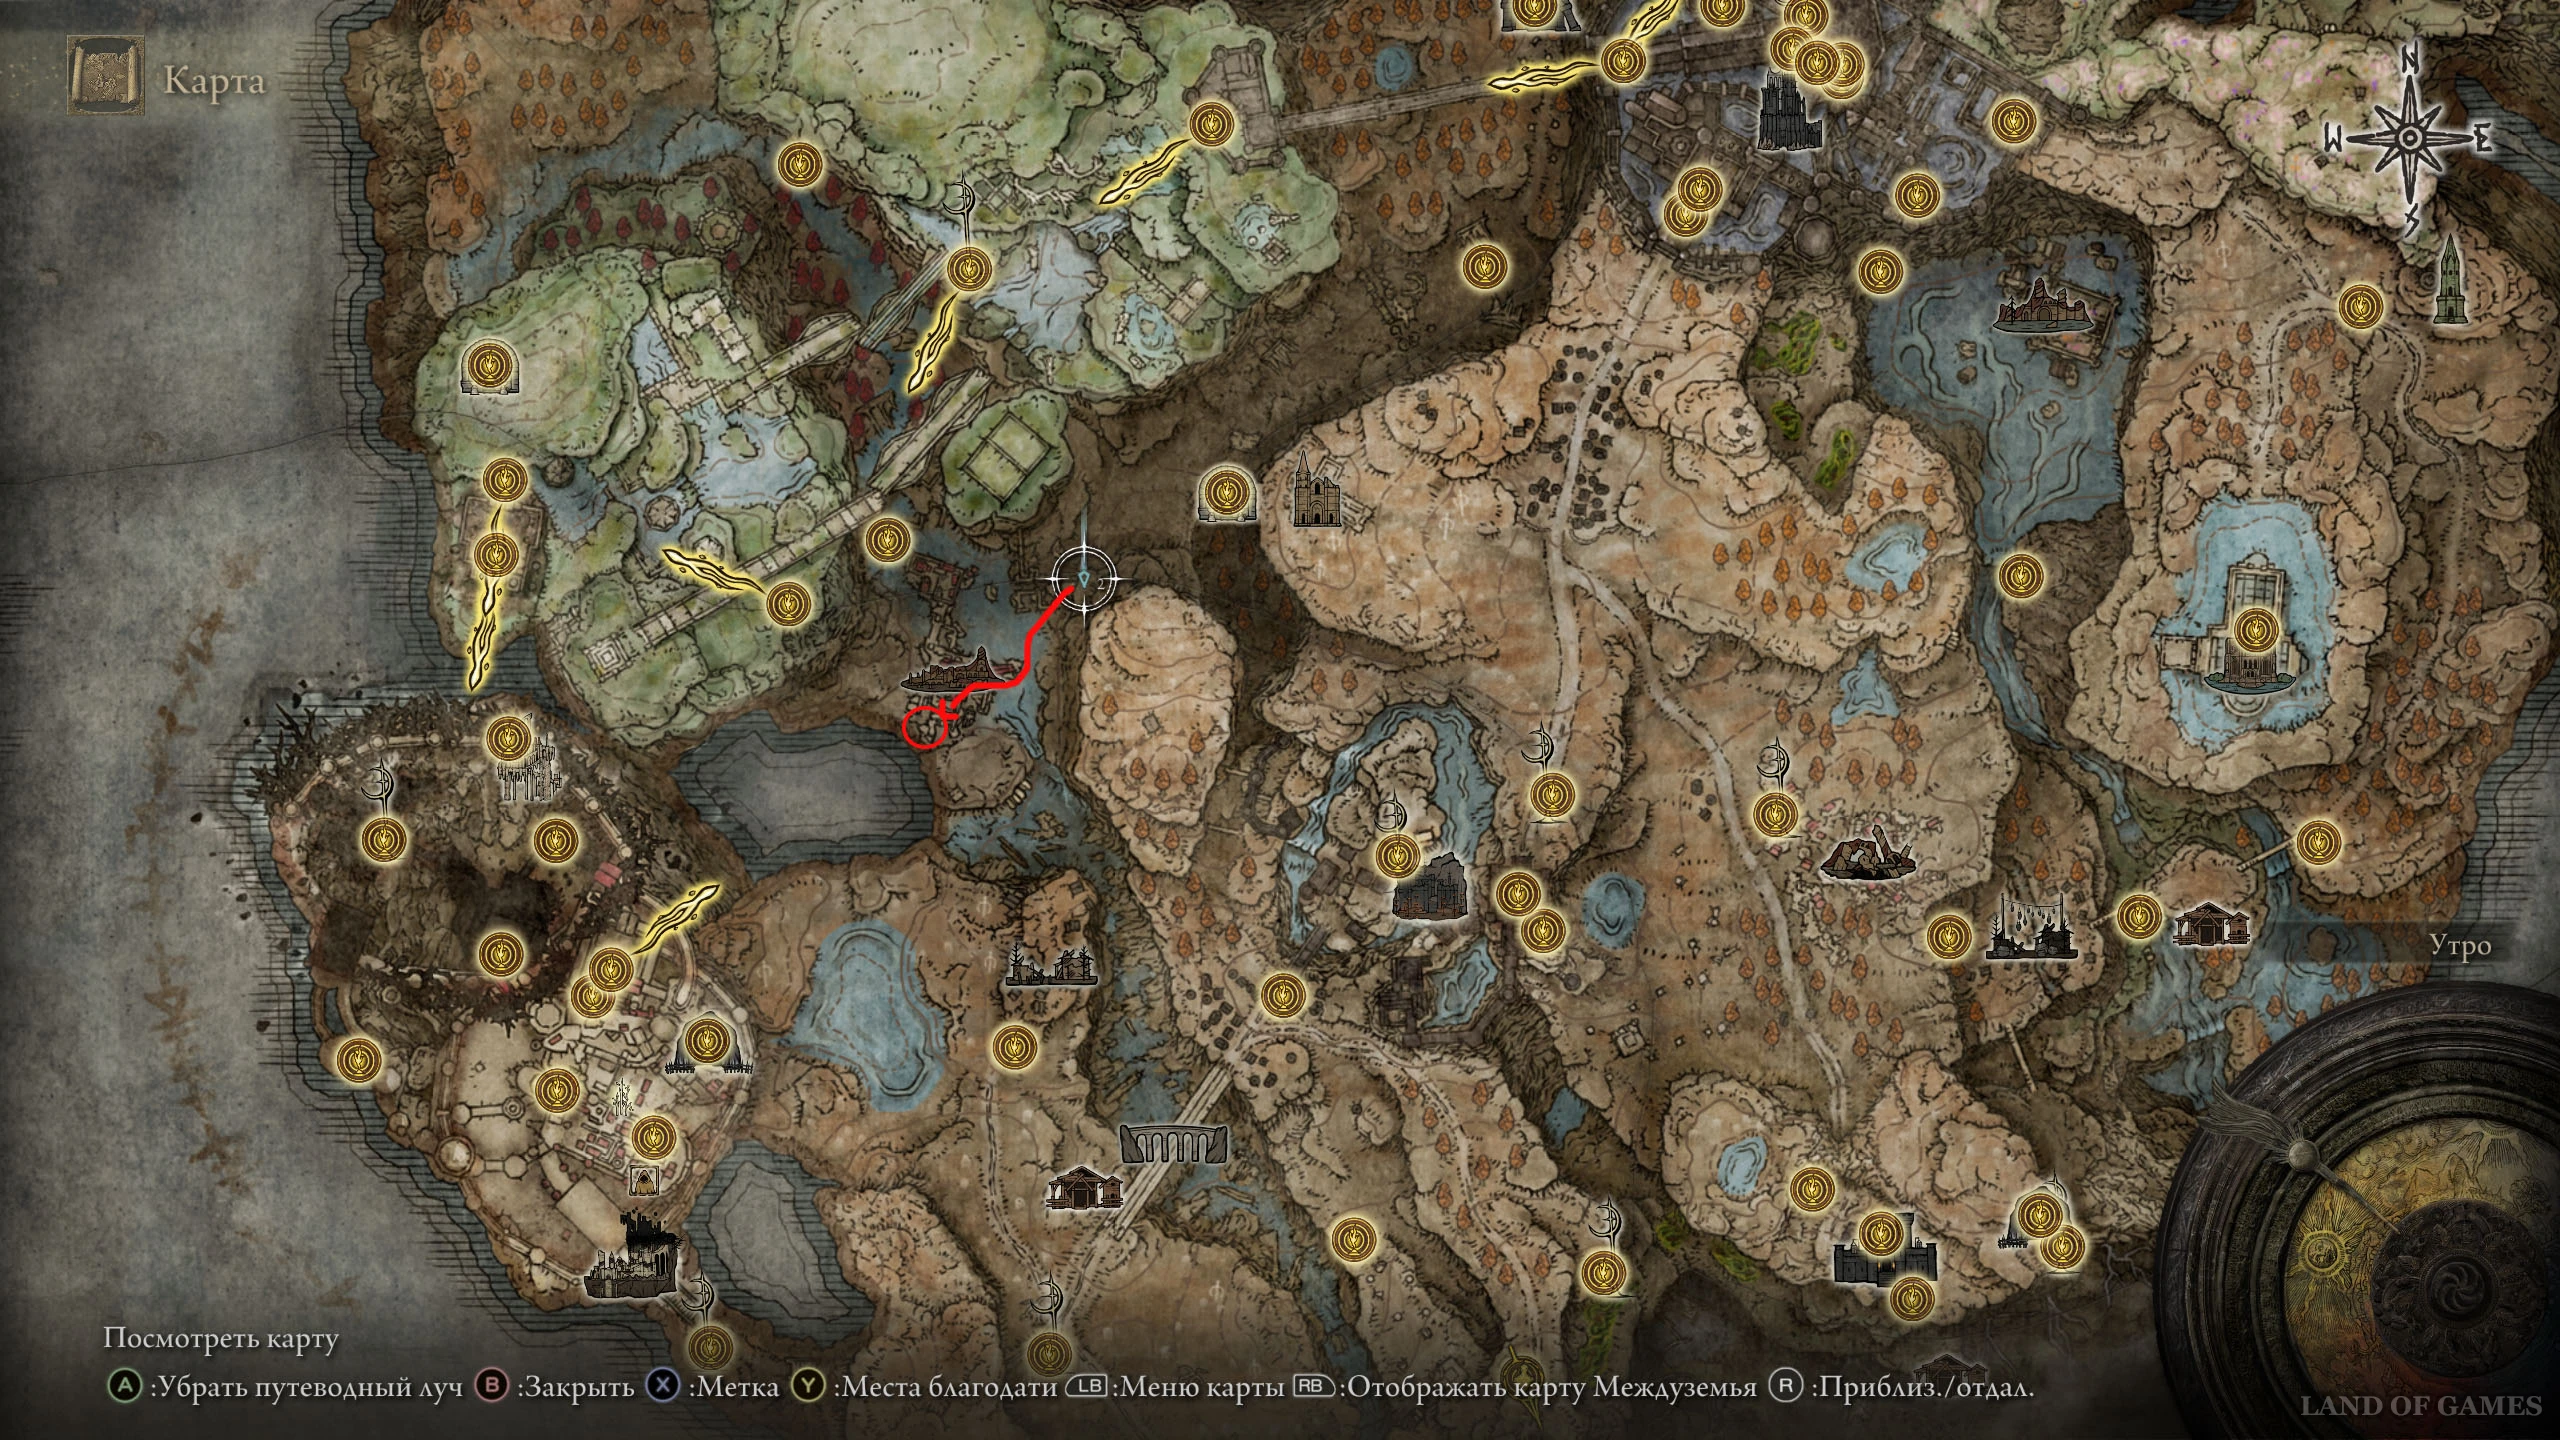
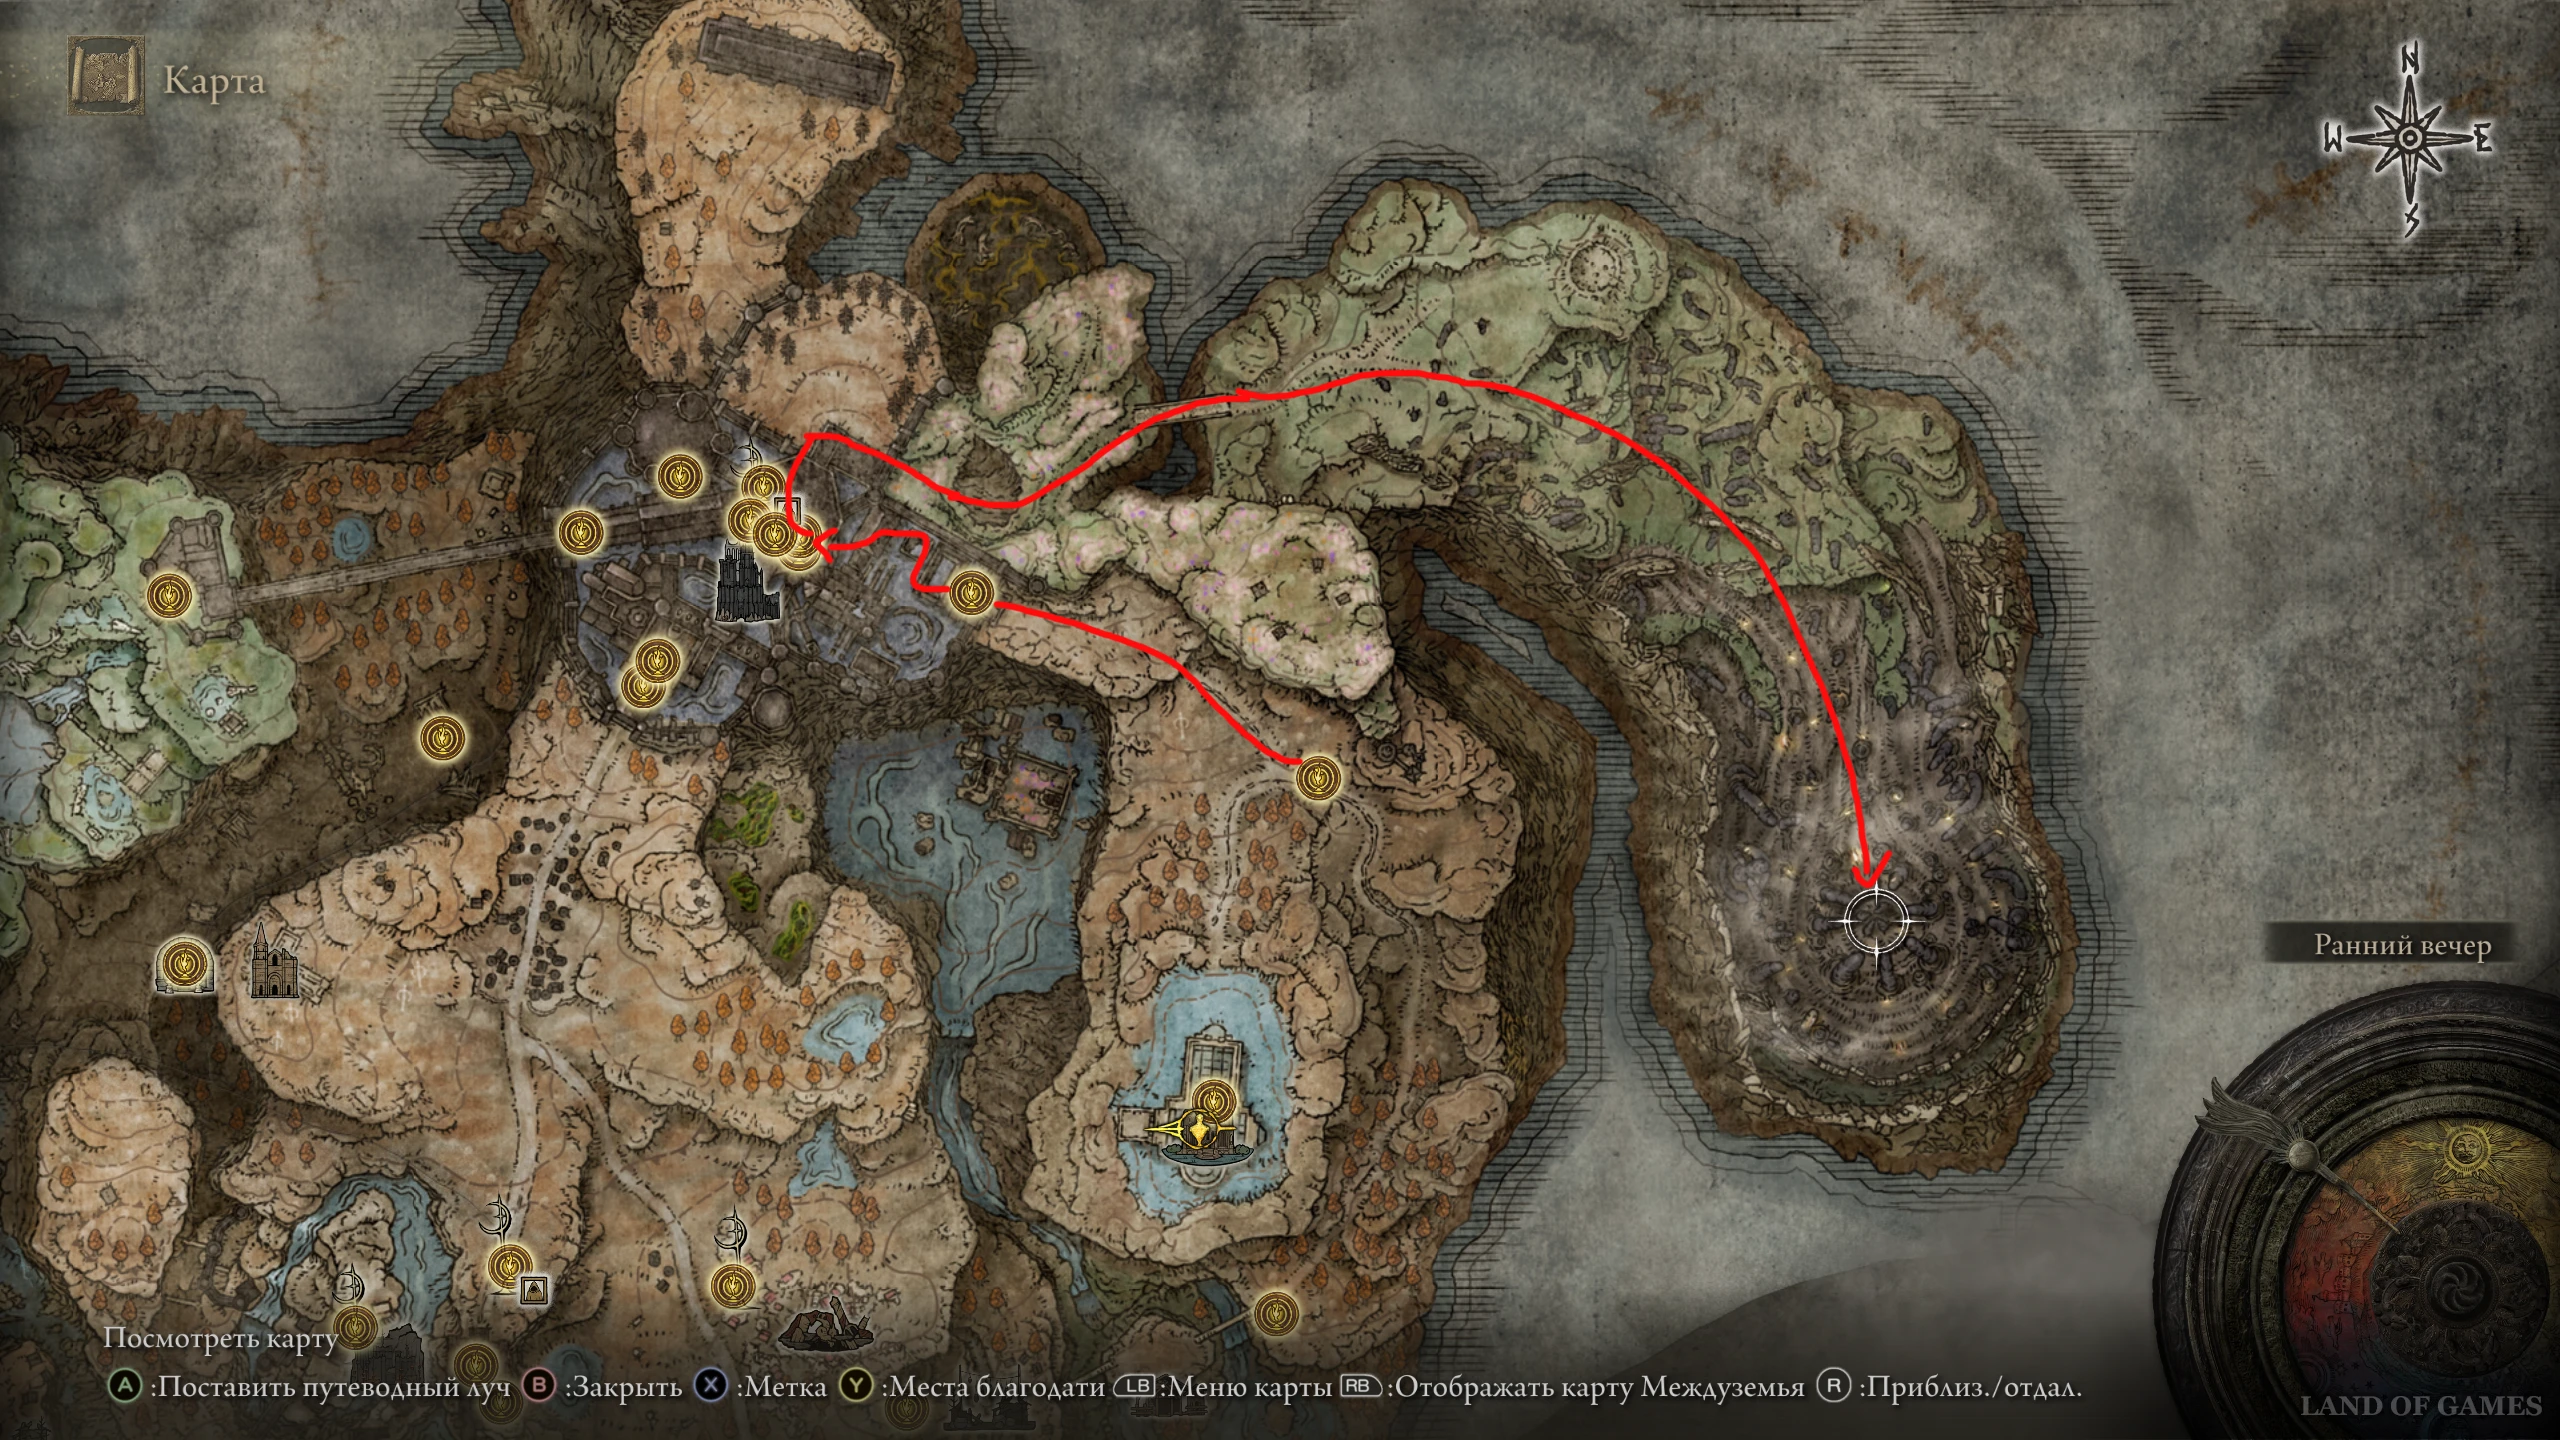
Разобравшись с боссом, пройдите через открытую дверь и активируйте место благодати «Последний привал в Драконьей яме». Выйдя из пещеры, вы окажитесь у Подножья зубатой горы. Начните двигаться на восток, пока не доберетесь до воздушного потока, который позволит вам попасть на верхнее плато. На карте ниже показан весь маршрут до нужной вам локации.
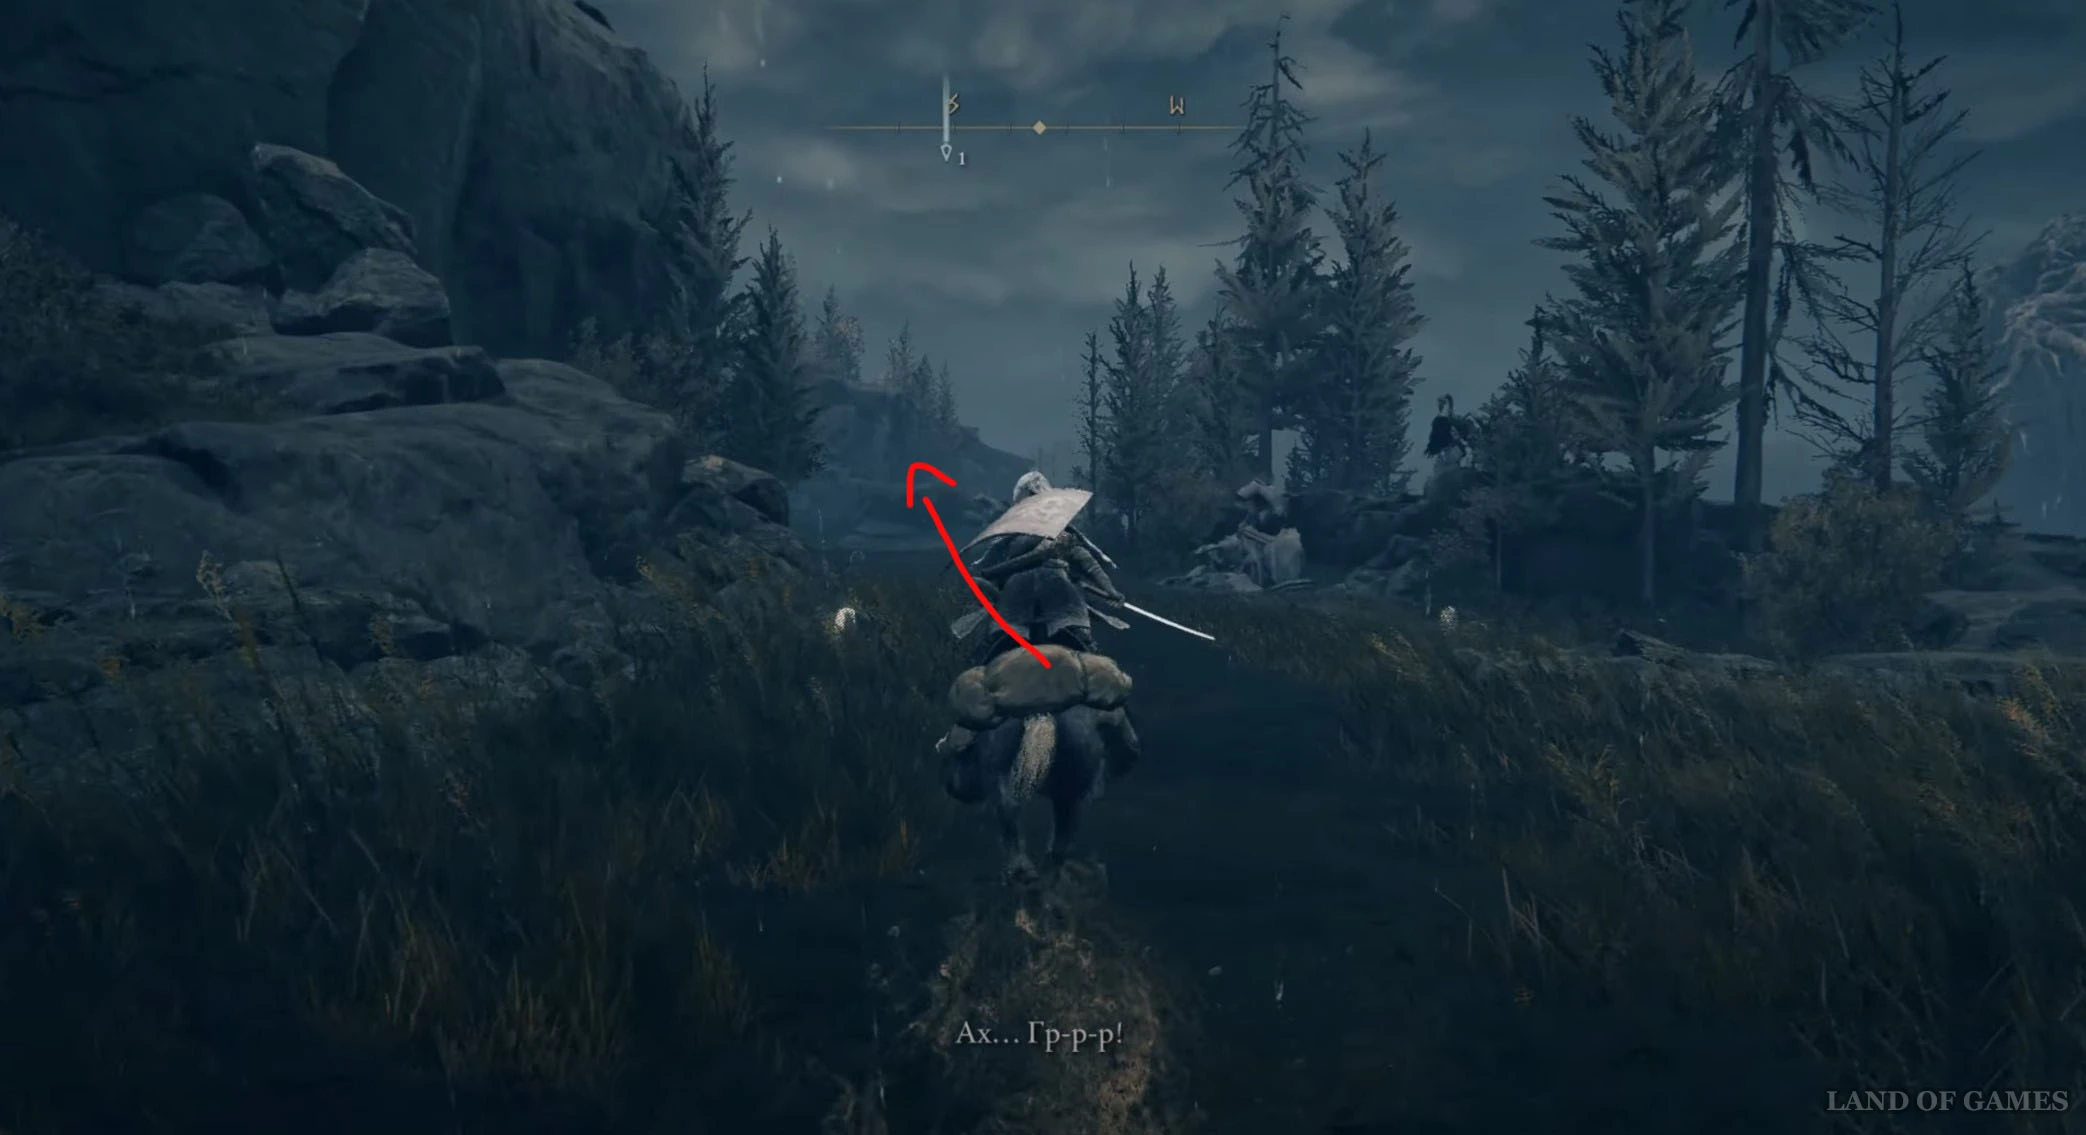
Поднявшись наверх, пересеките веревочный мост, двигаясь в юго-восточном направлении, и активируйте место благодати «Подножие зубатой горы». Поднявшись по горной тропке наверх, начните бежать на юго-восток, обойдя Дракона зубатой горы. Затем войдите в ущелье и воспользуйтесь еще двумя воздушными потоками.


Оказавшись еще выше, продолжайте двигаться на юго-восток и войдите в пещеру. Пересеките ее (остерегайтесь падающих булыжников), чтобы добраться до другой стороны. Возле скалы вы обнаружите труп, взаимодействовав с которым вам удастся получить новый фрагмент.
Осколок древа упадка 26
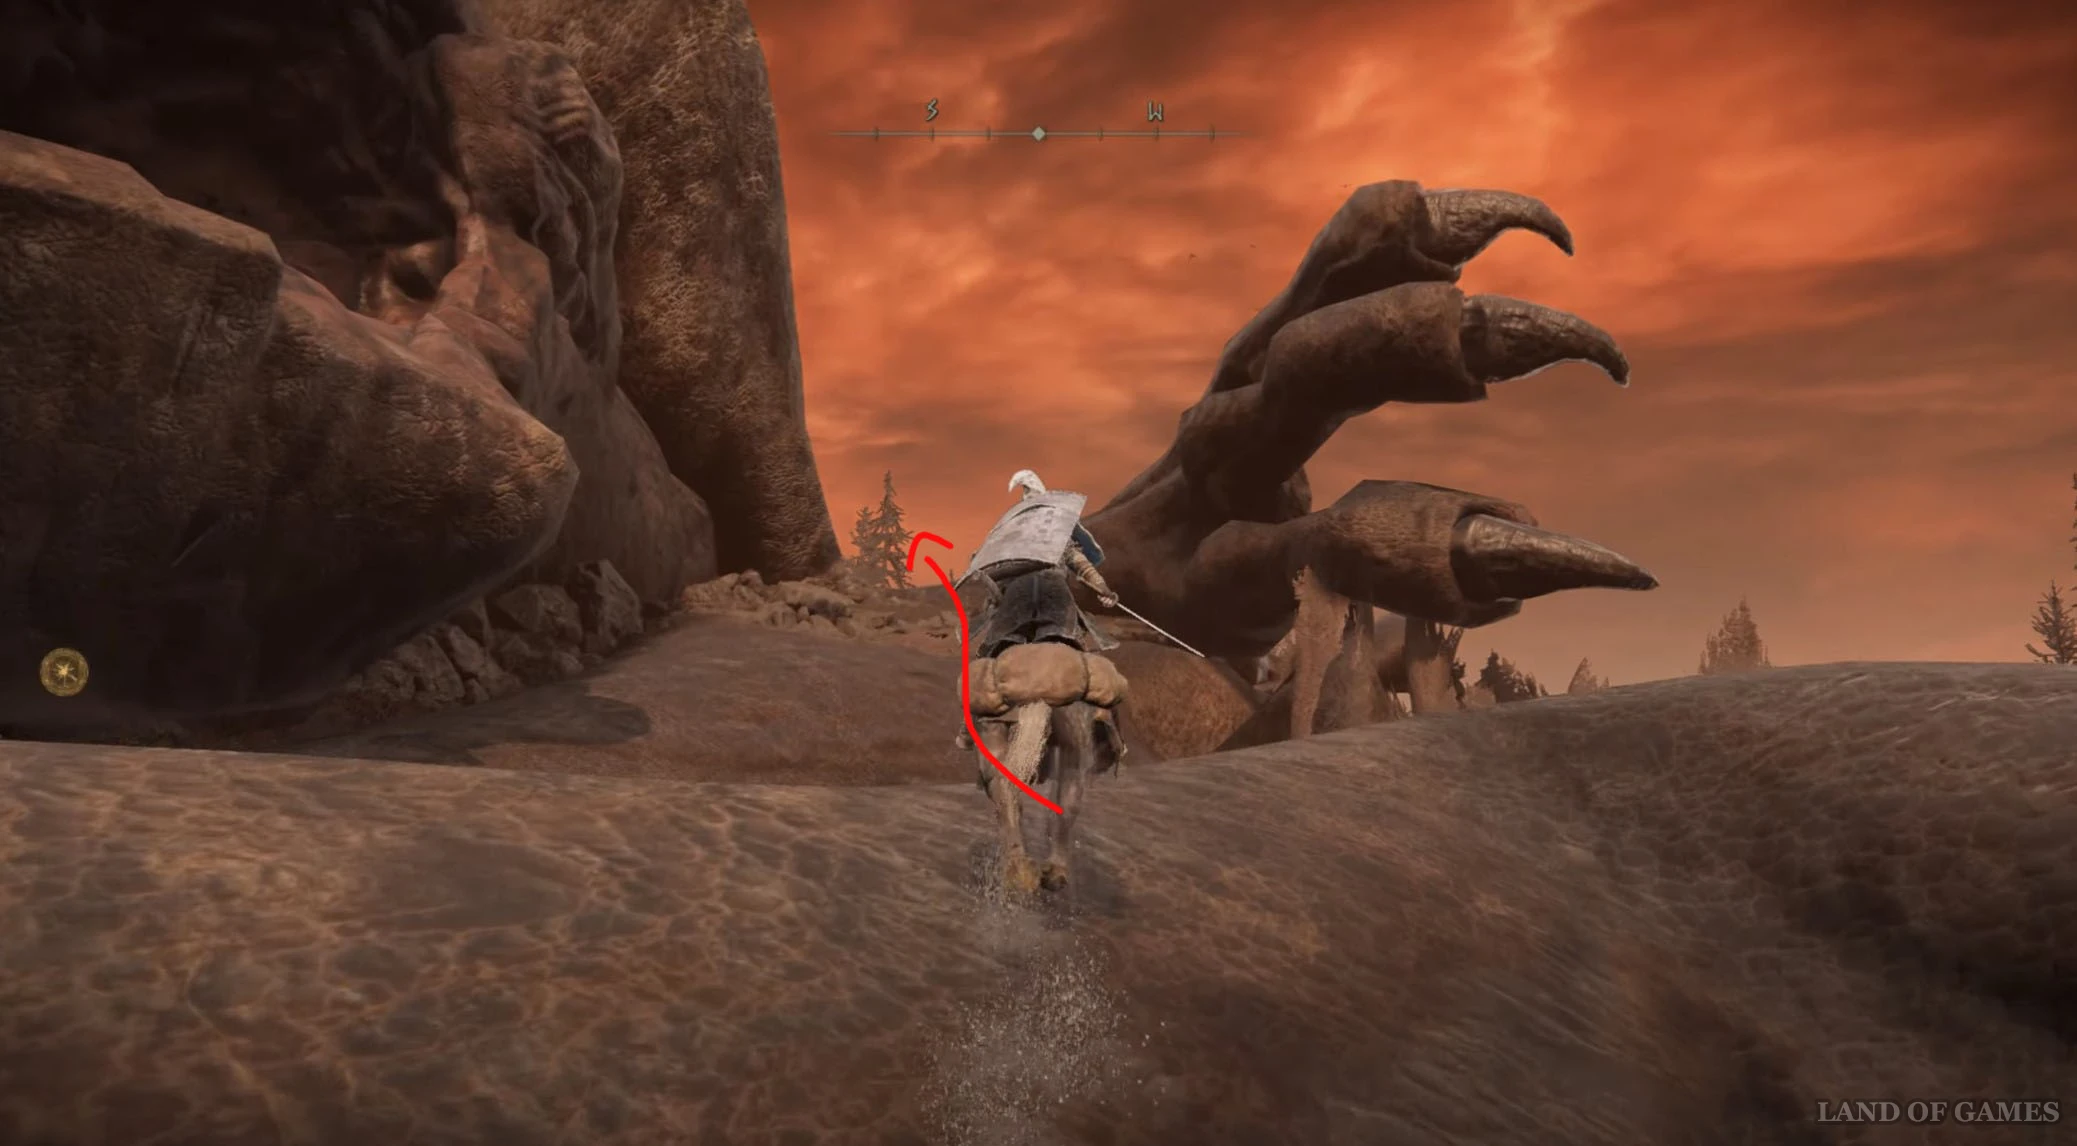
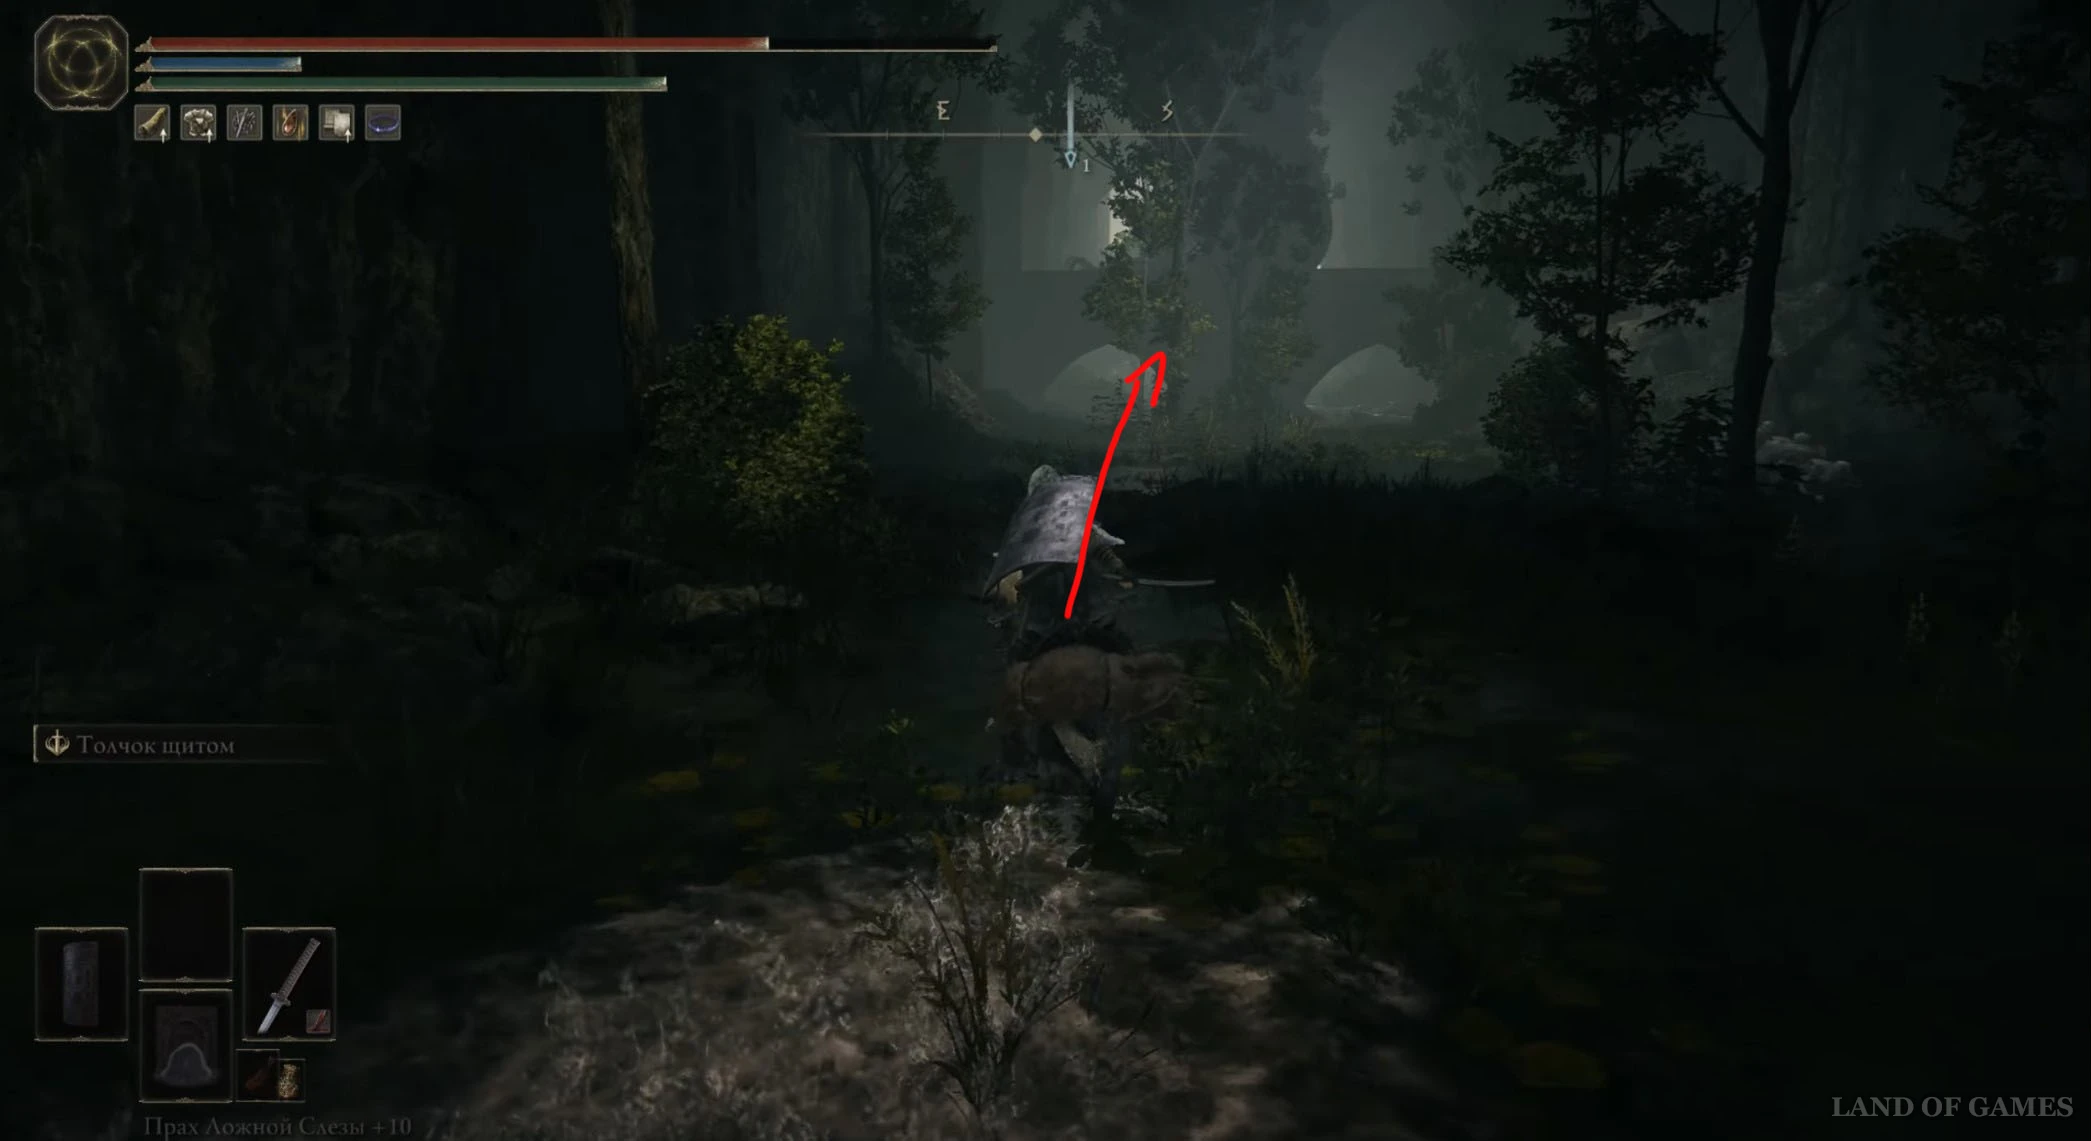
Вернитесь к «Последнему привалу в Драконьей яме», а затем вместо того чтобы скакать на восток, двигайтесь на юг, пока не доберетесь до «Великого алтаря драконьего причастия», показанного на скриншотах ниже. Затем начните идти на юго-запад, войдите в лесную чащу и сверните на запад, чтобы попасть в Тайную могилу Харо.
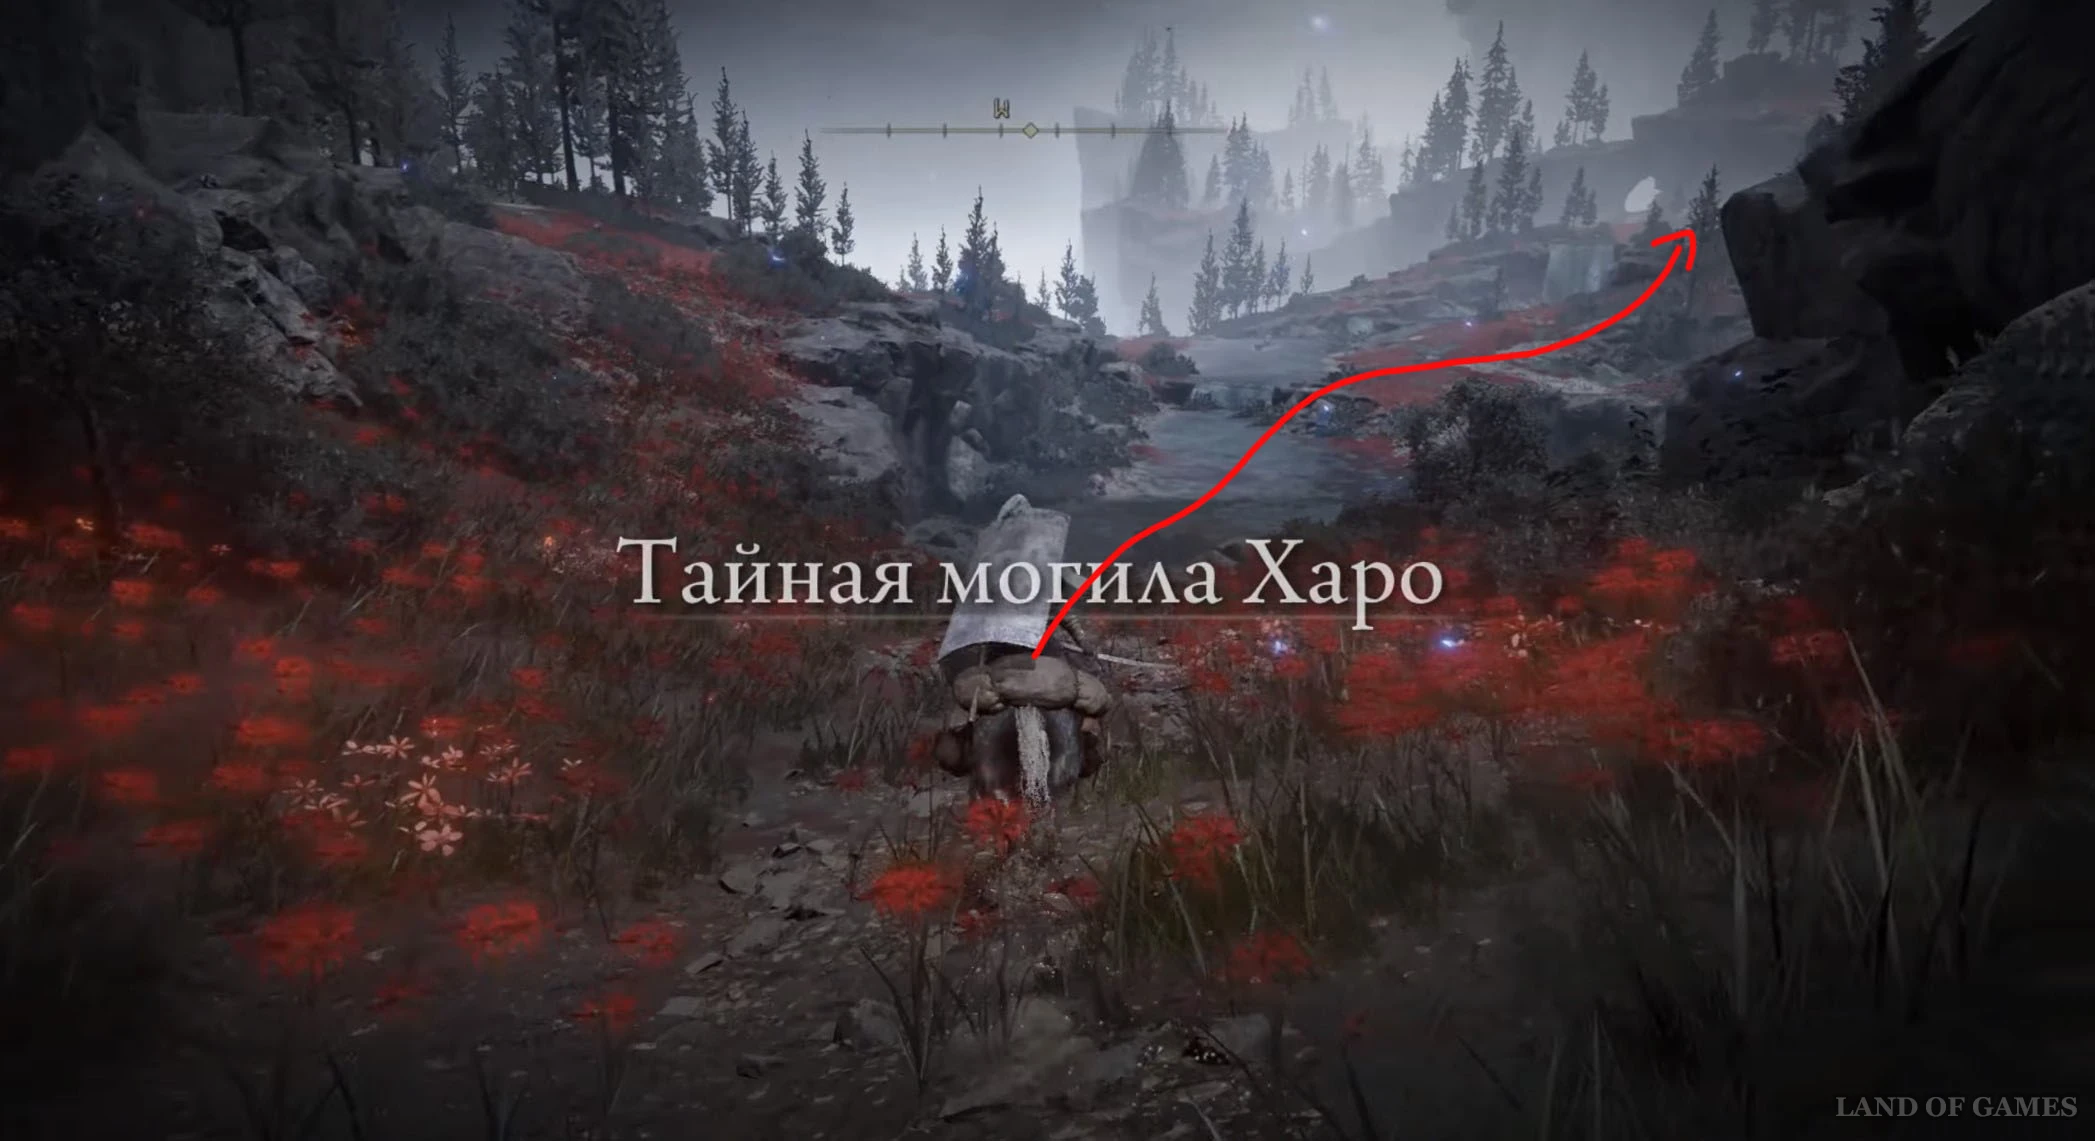
Спуститесь к водоему, а затем бегите вдоль водопадов, поднявшись по склону в северо-западном направлении. Оказавшись на красном цветочном поле, бегите к каменной арке впереди и активируйте по пути место благодати «Тайная могила Харо».
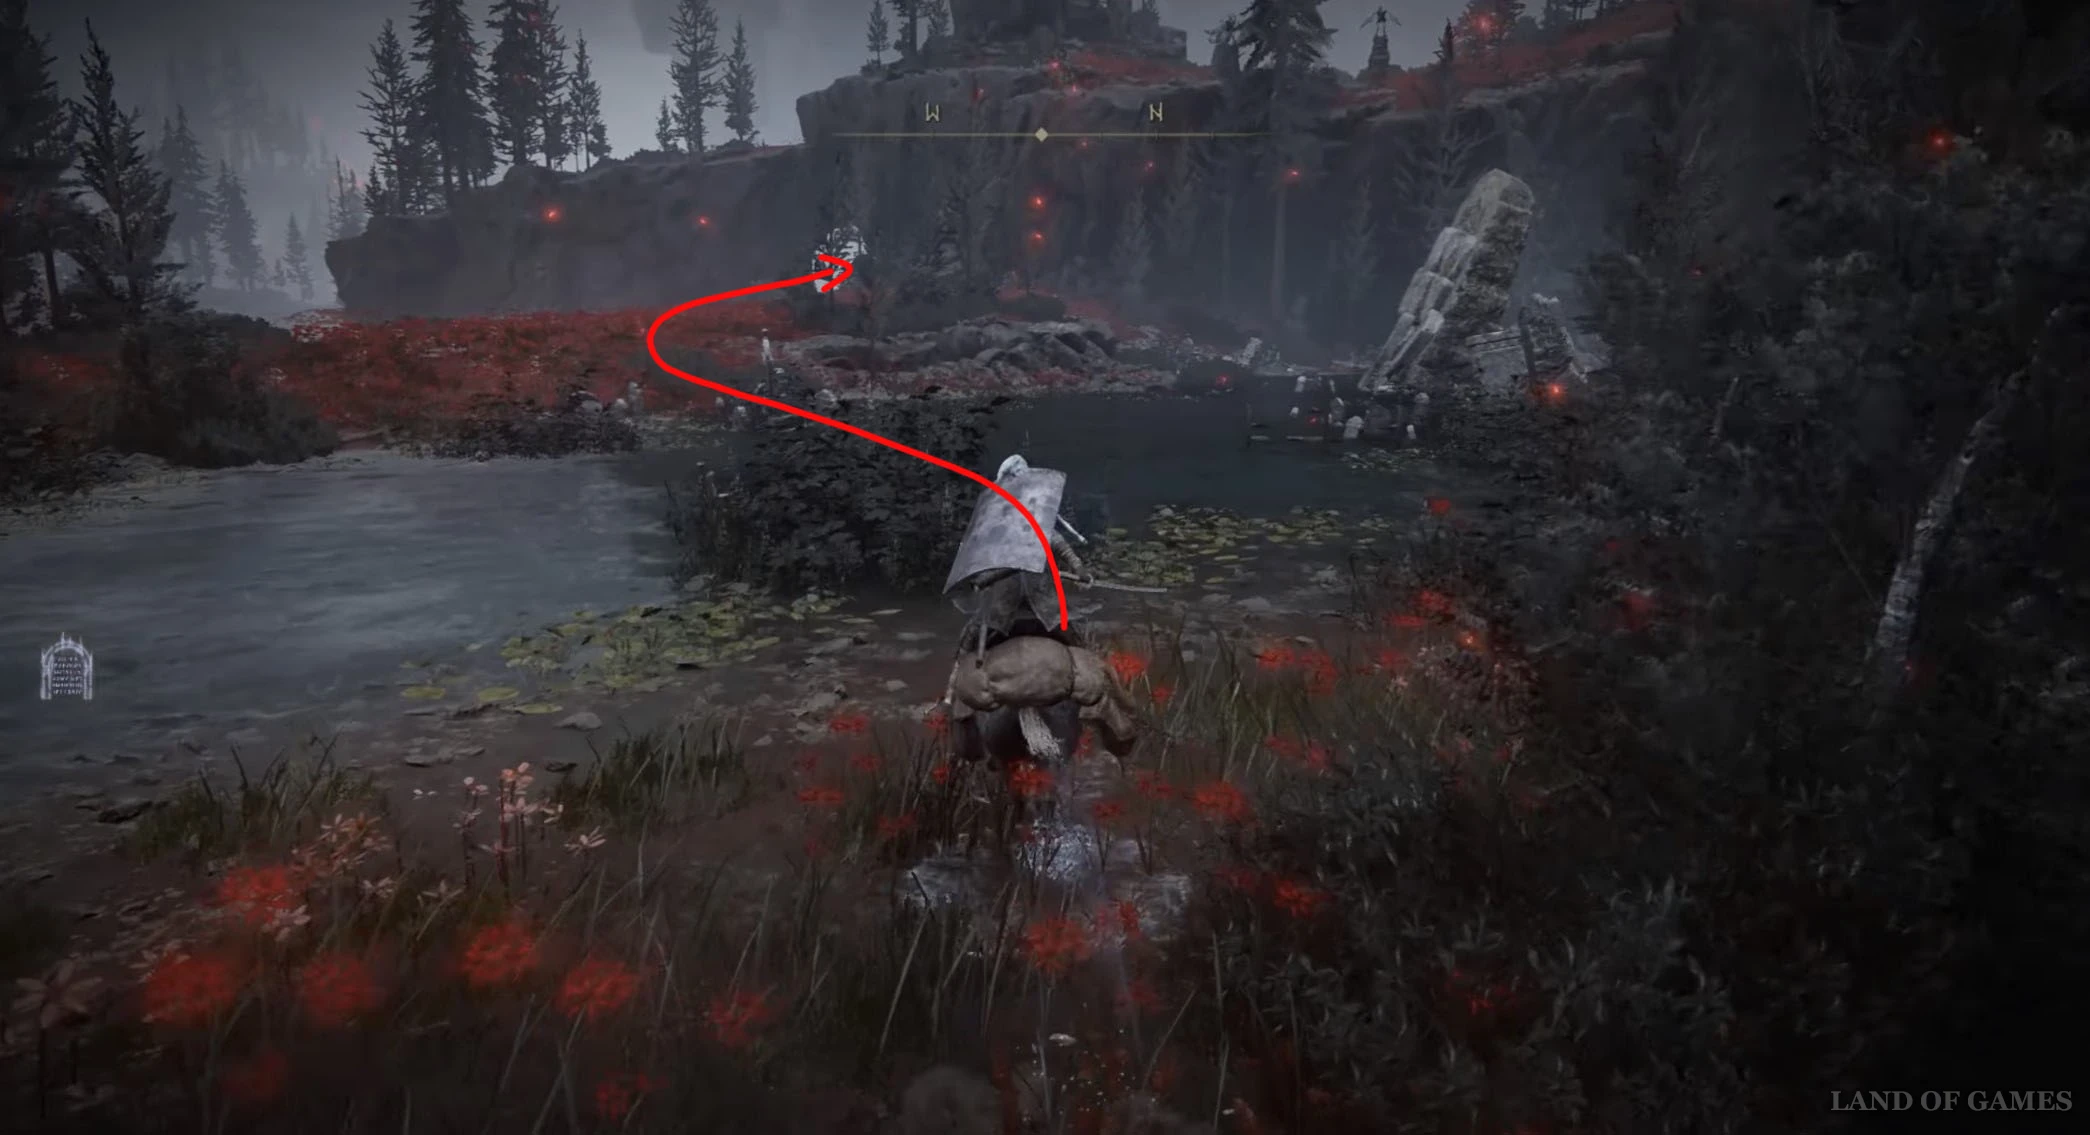
Пройдите через каменную арку, спуститесь к воде, а потом сверните влево, начав двигаться на юго-запад. Поднимитесь по цветочному склону наверх и пройдите к водоему, на котором вы столкнетесь с золотым гиппопотамом. Расправьтесь с ним для получения нового фрагмента.
Осколок древа упадка 27
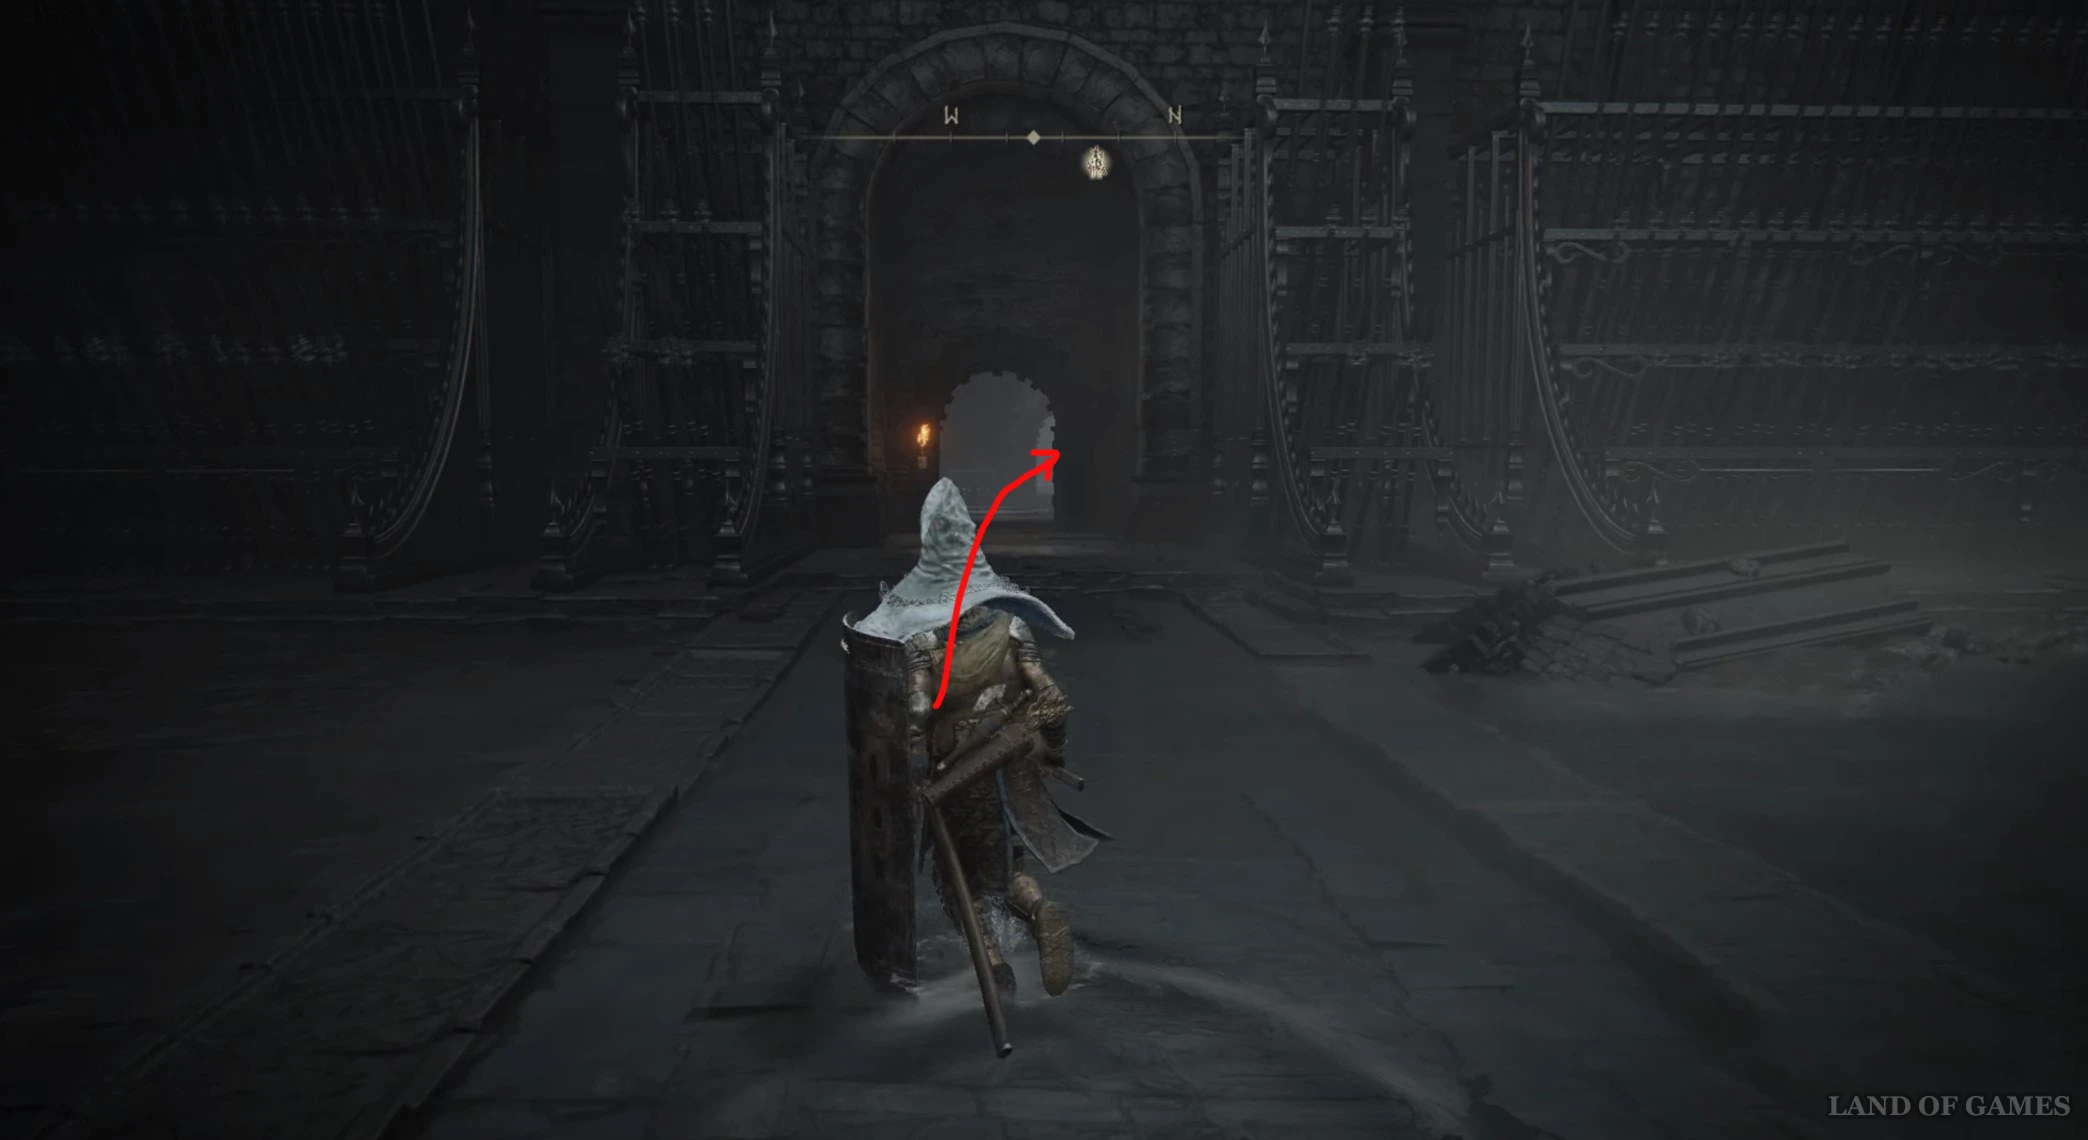
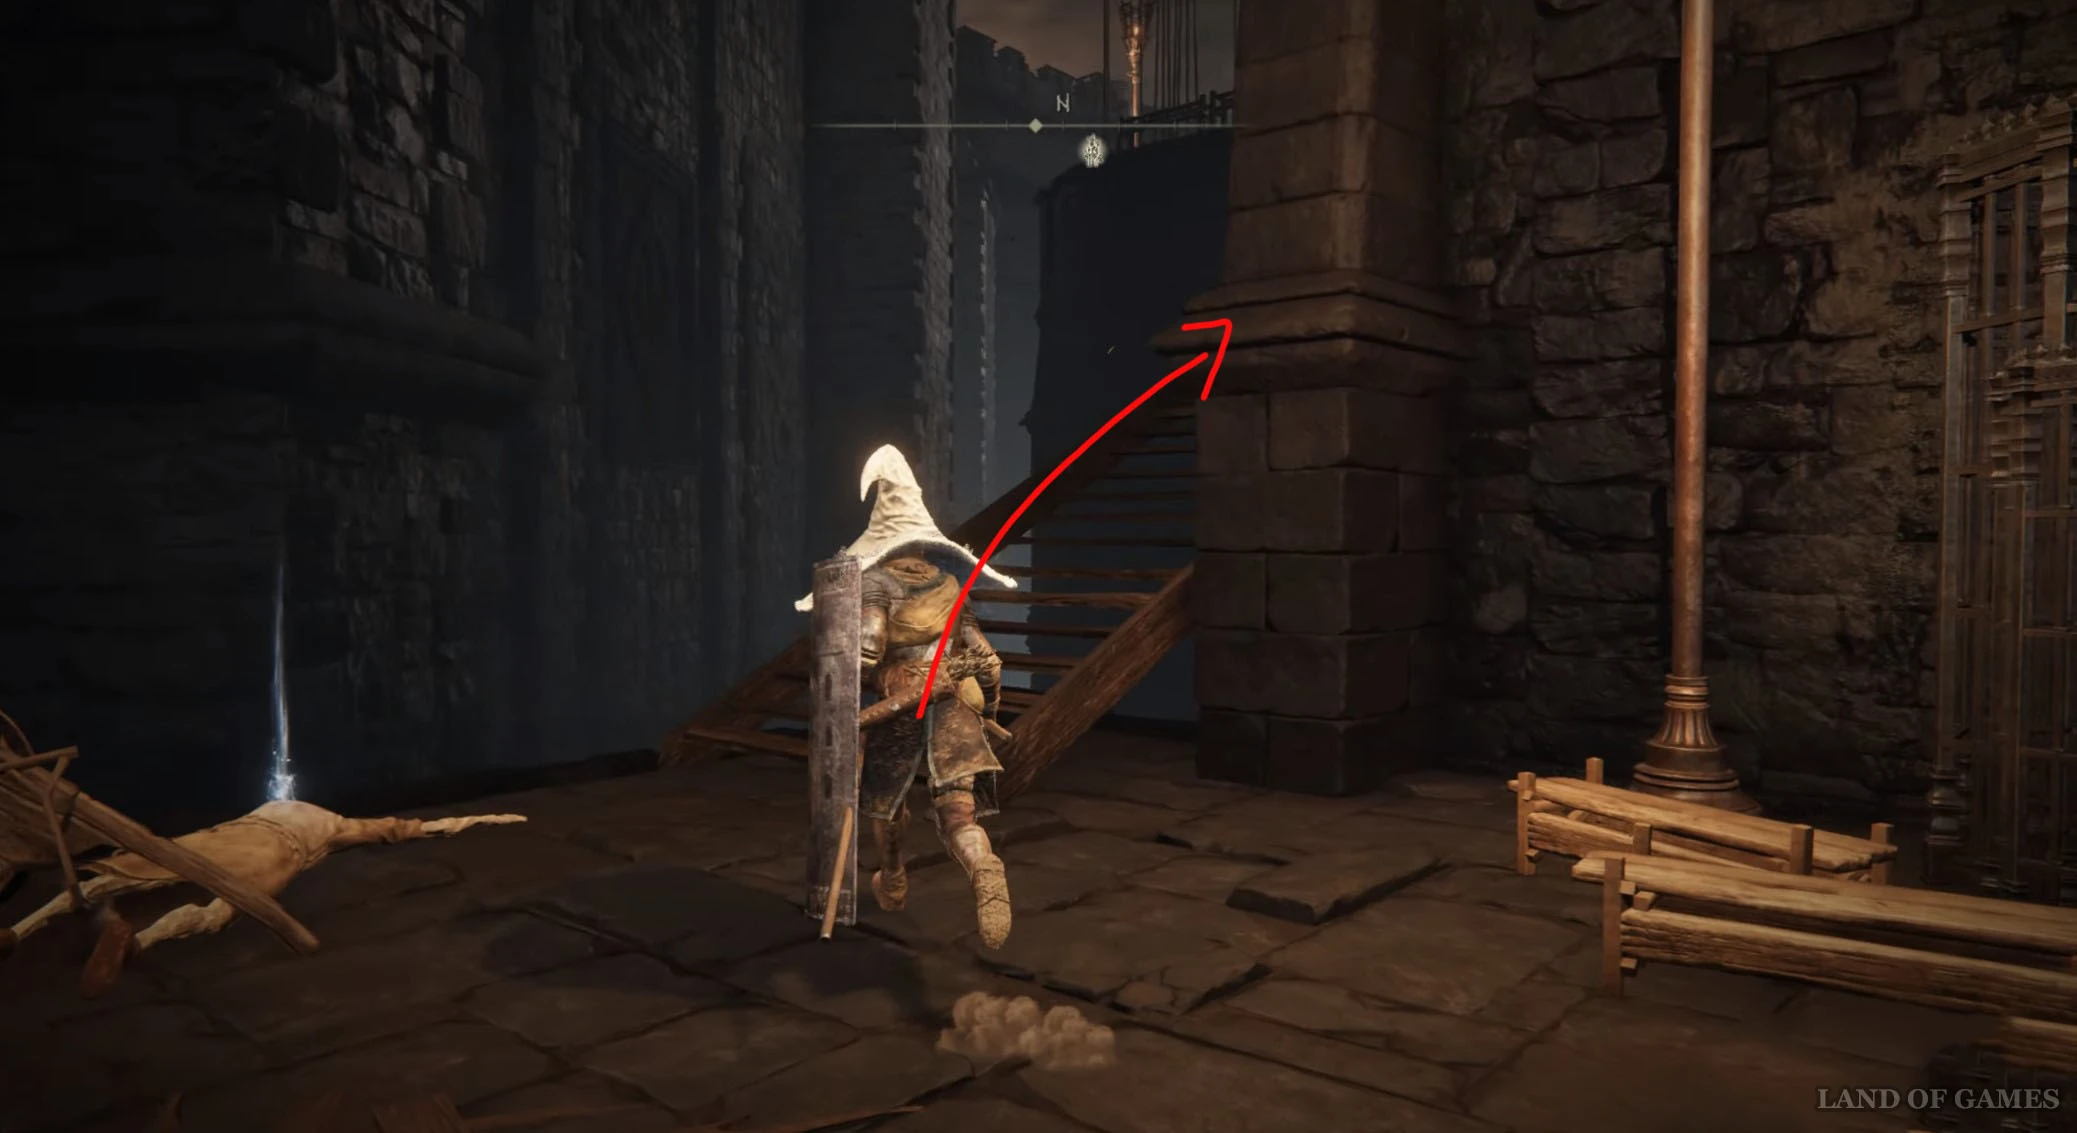
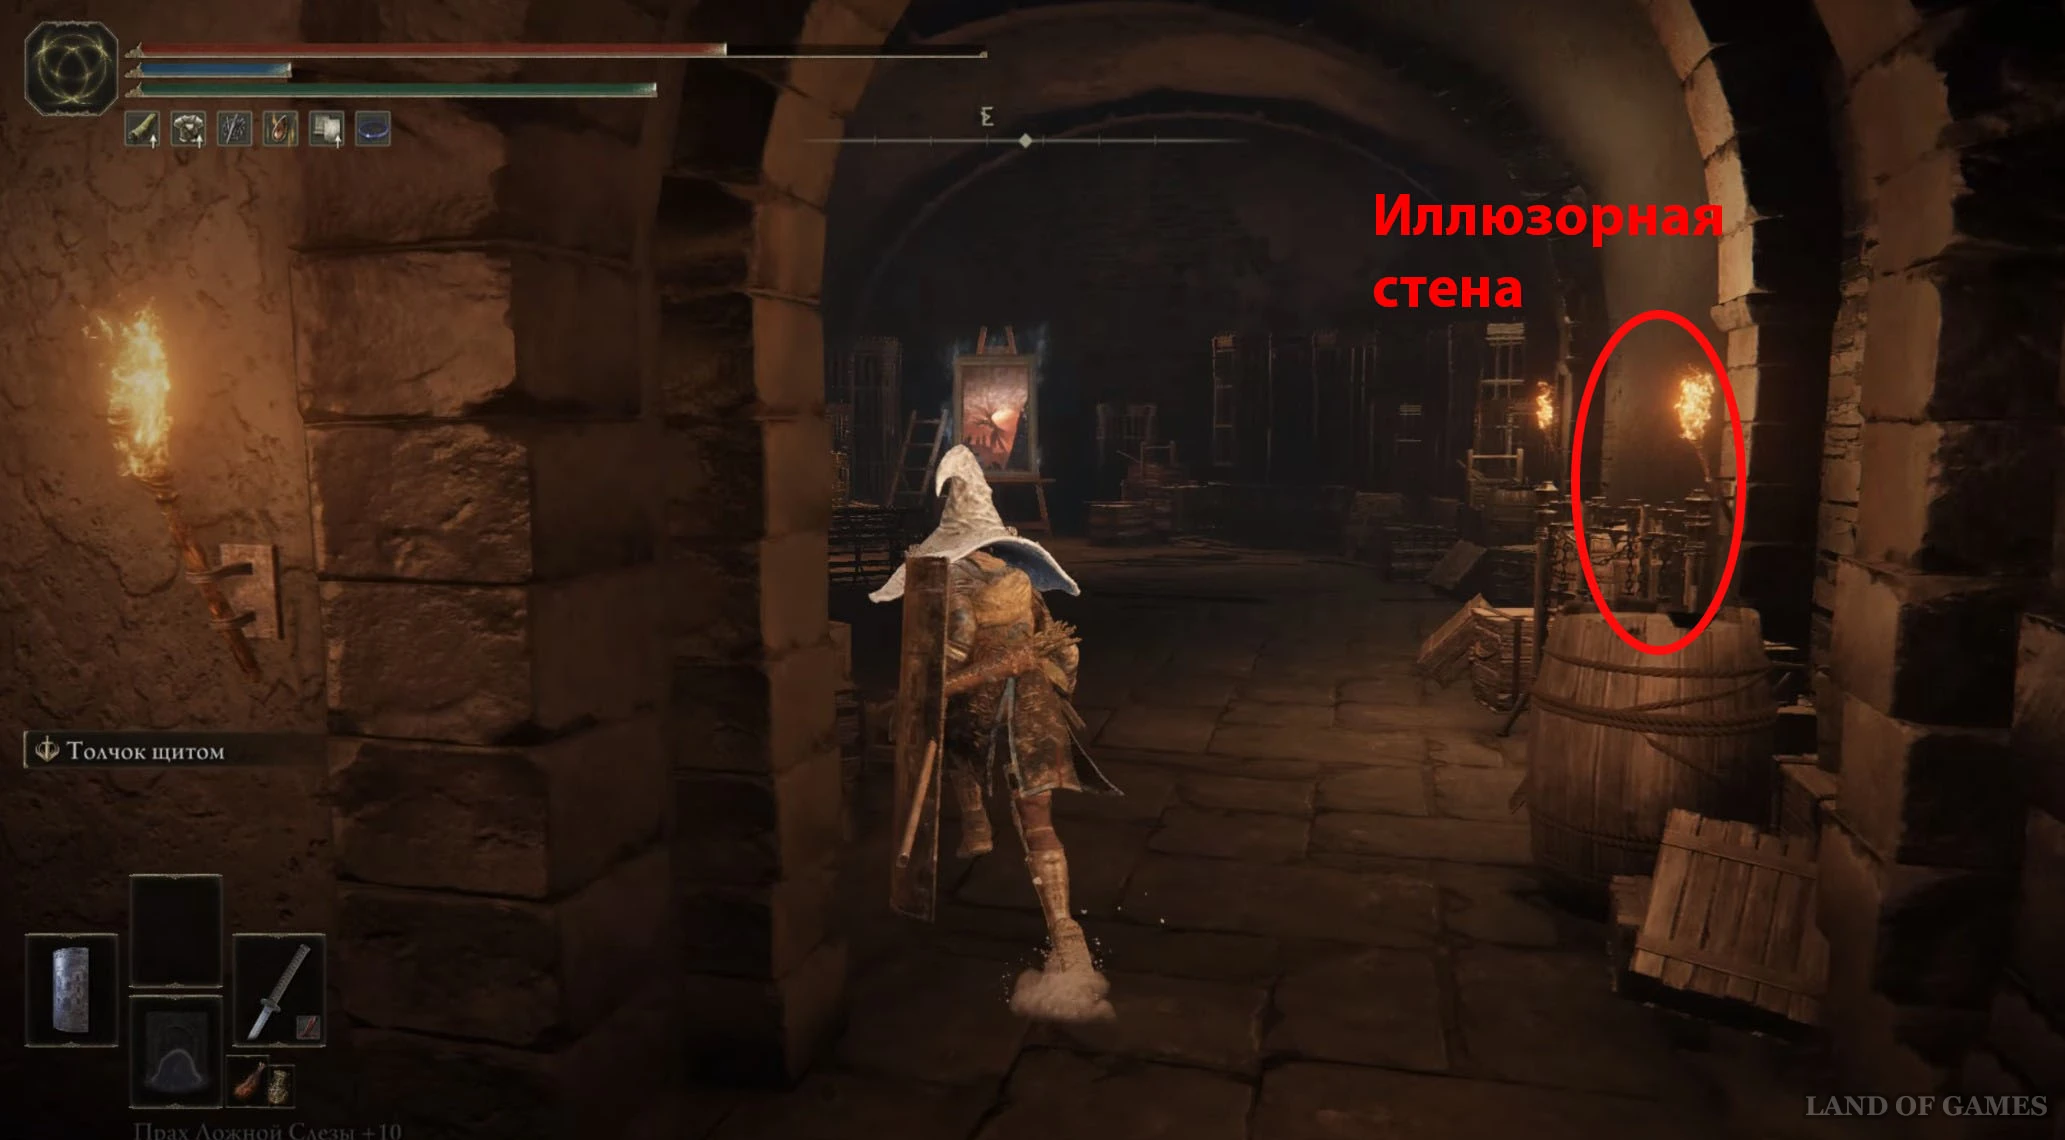
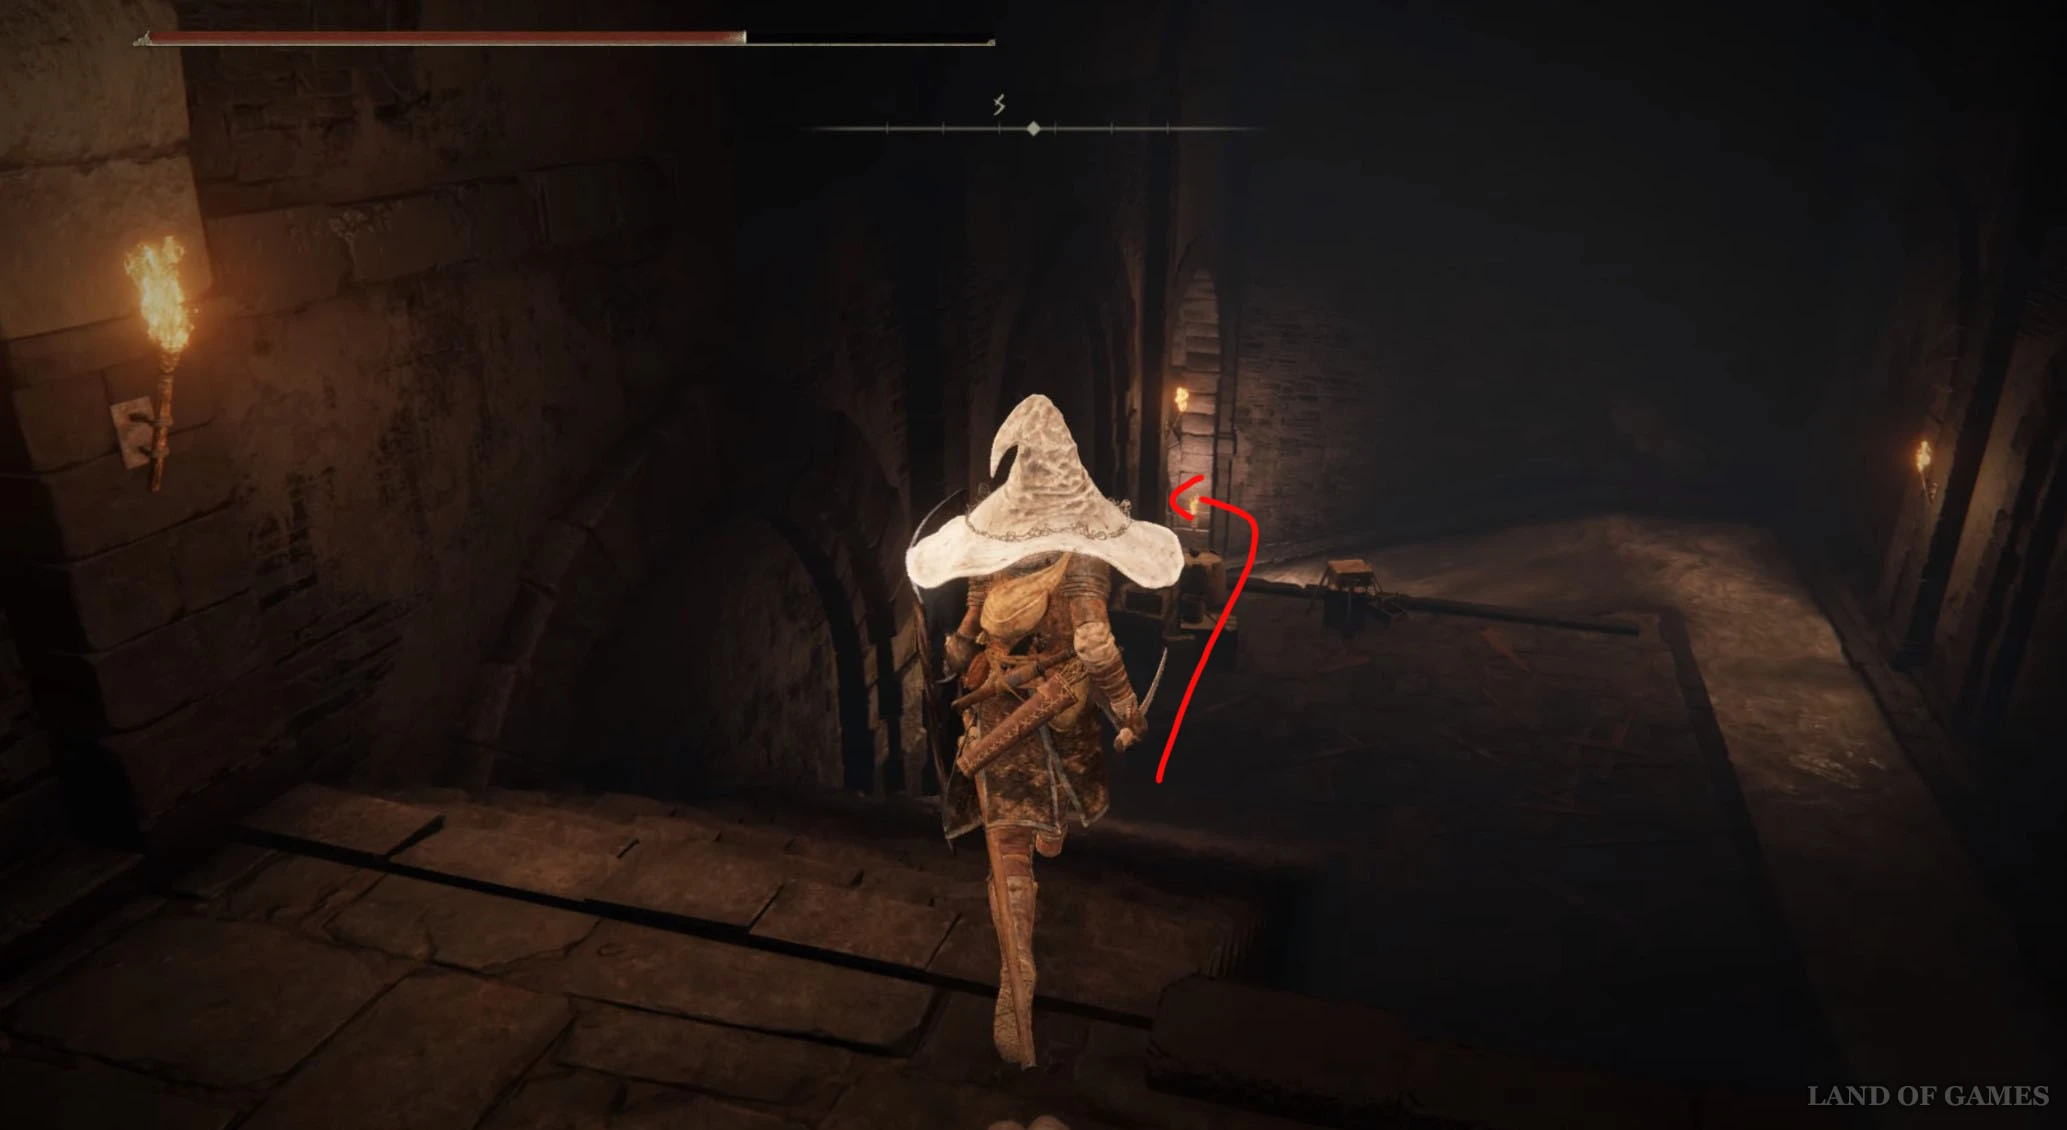
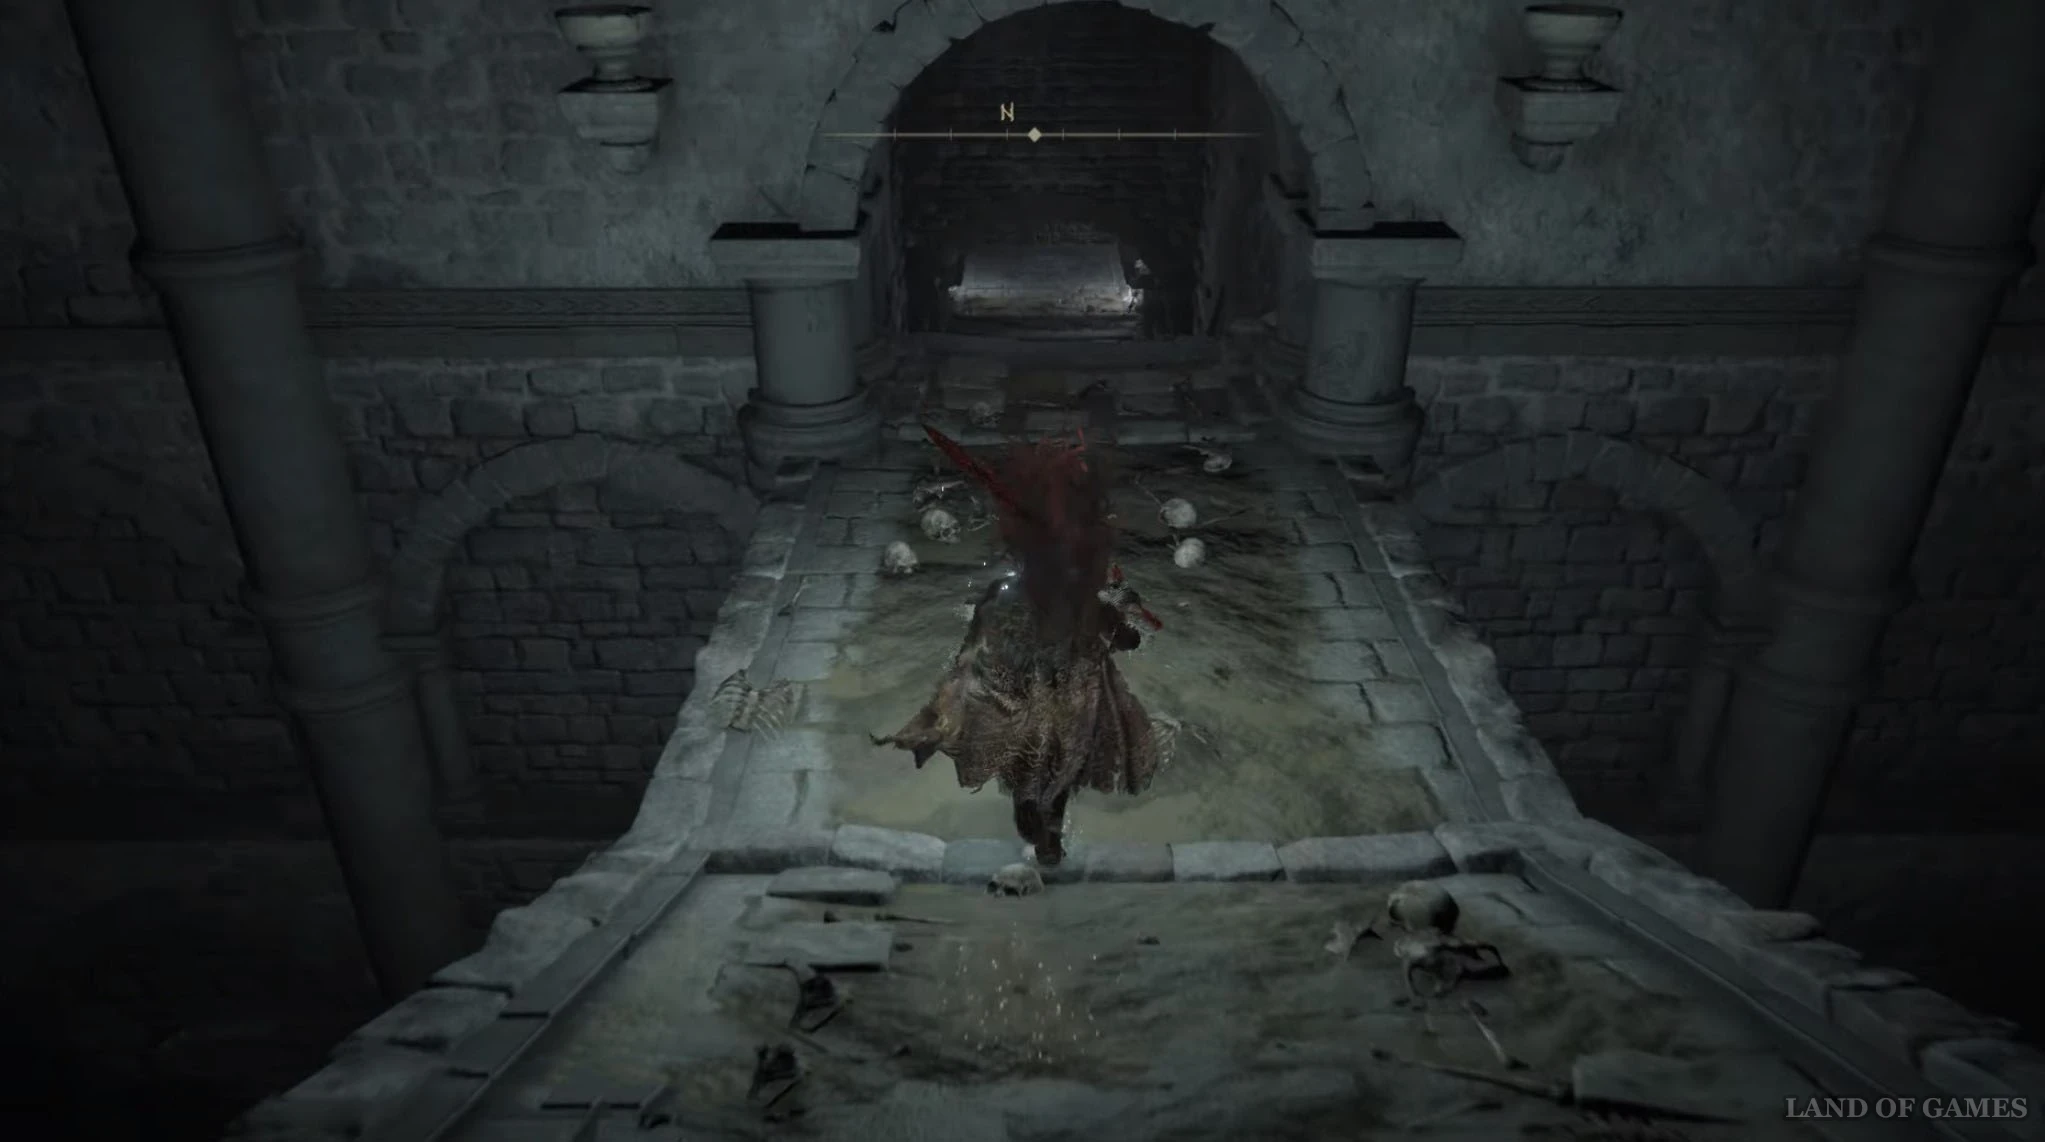
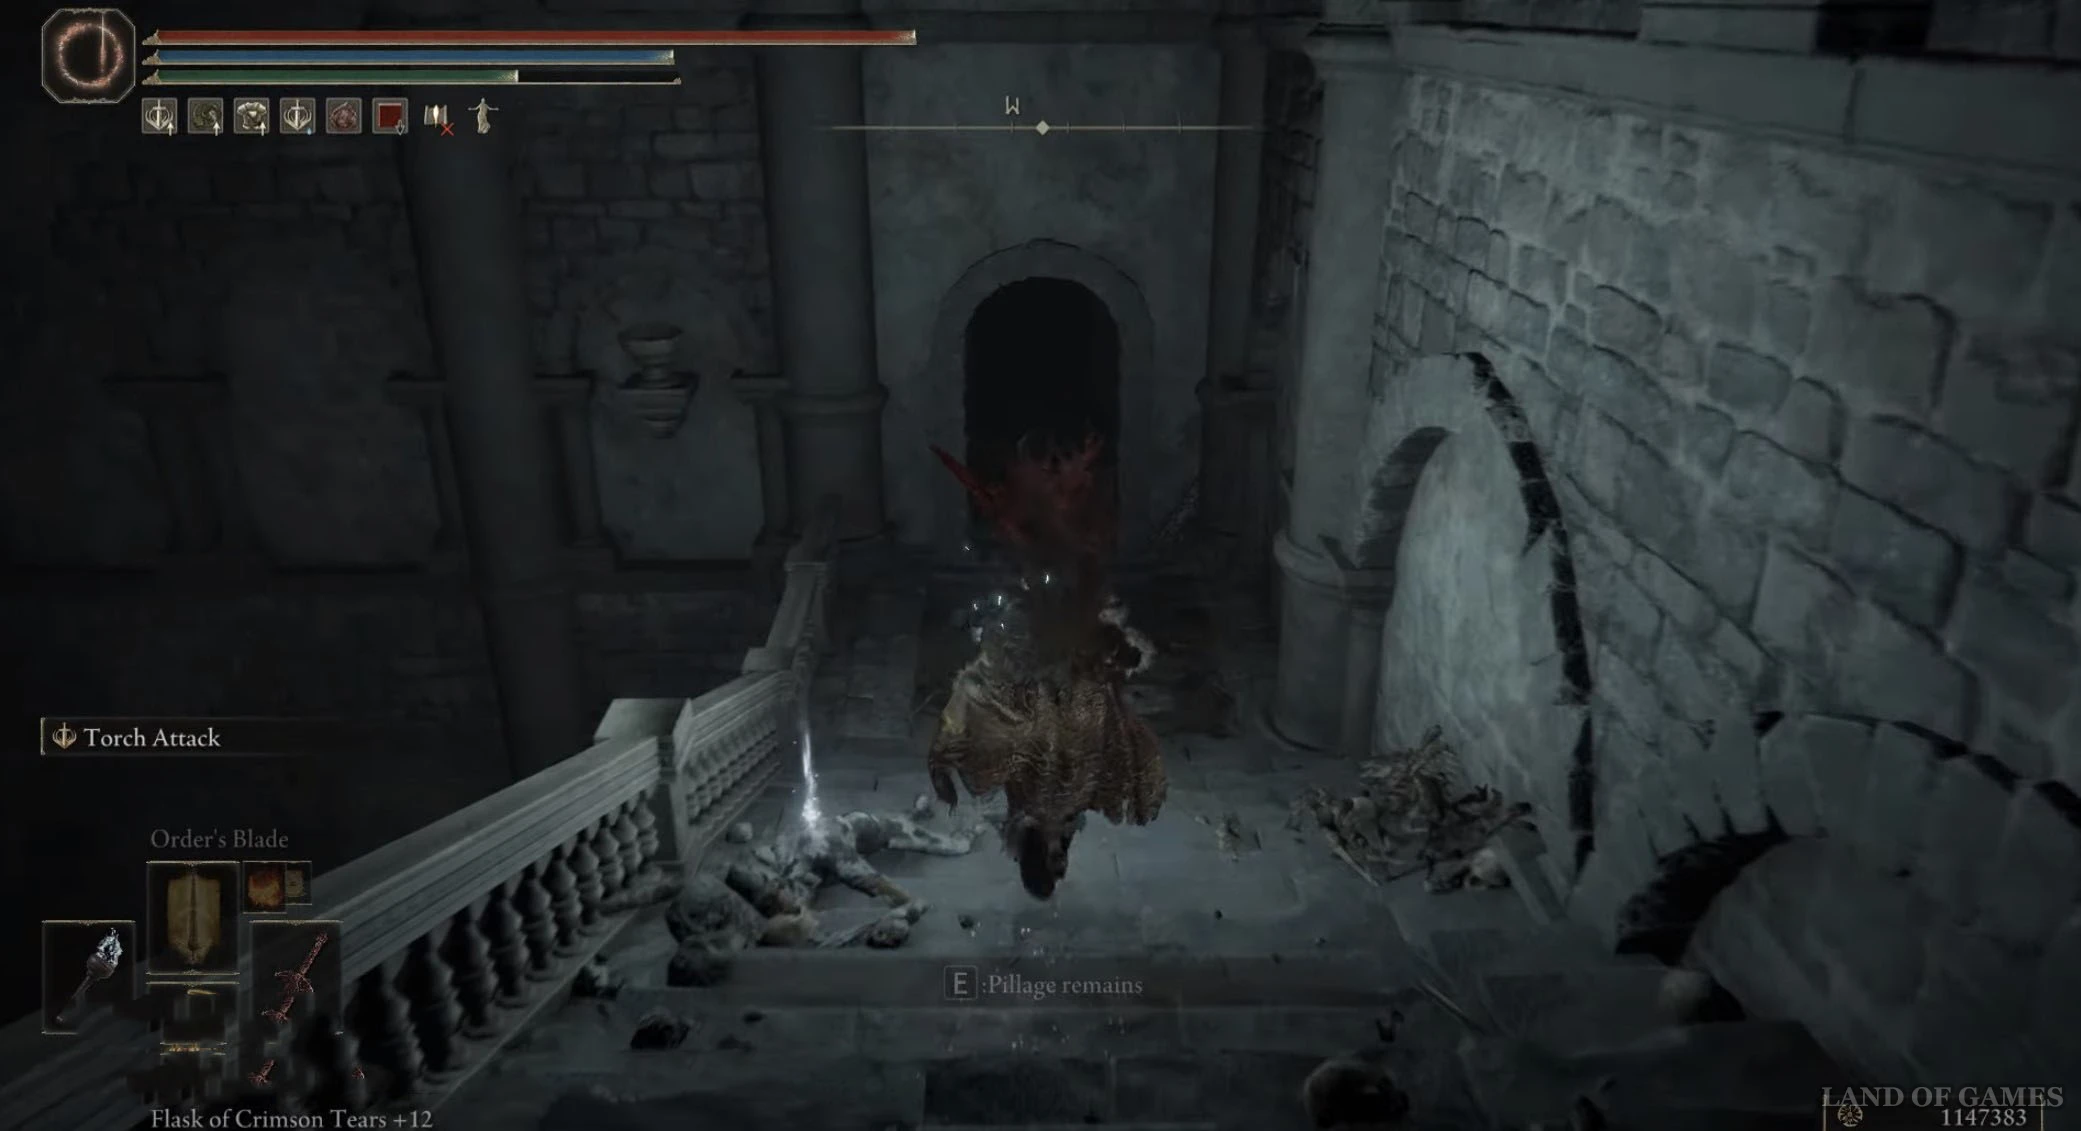
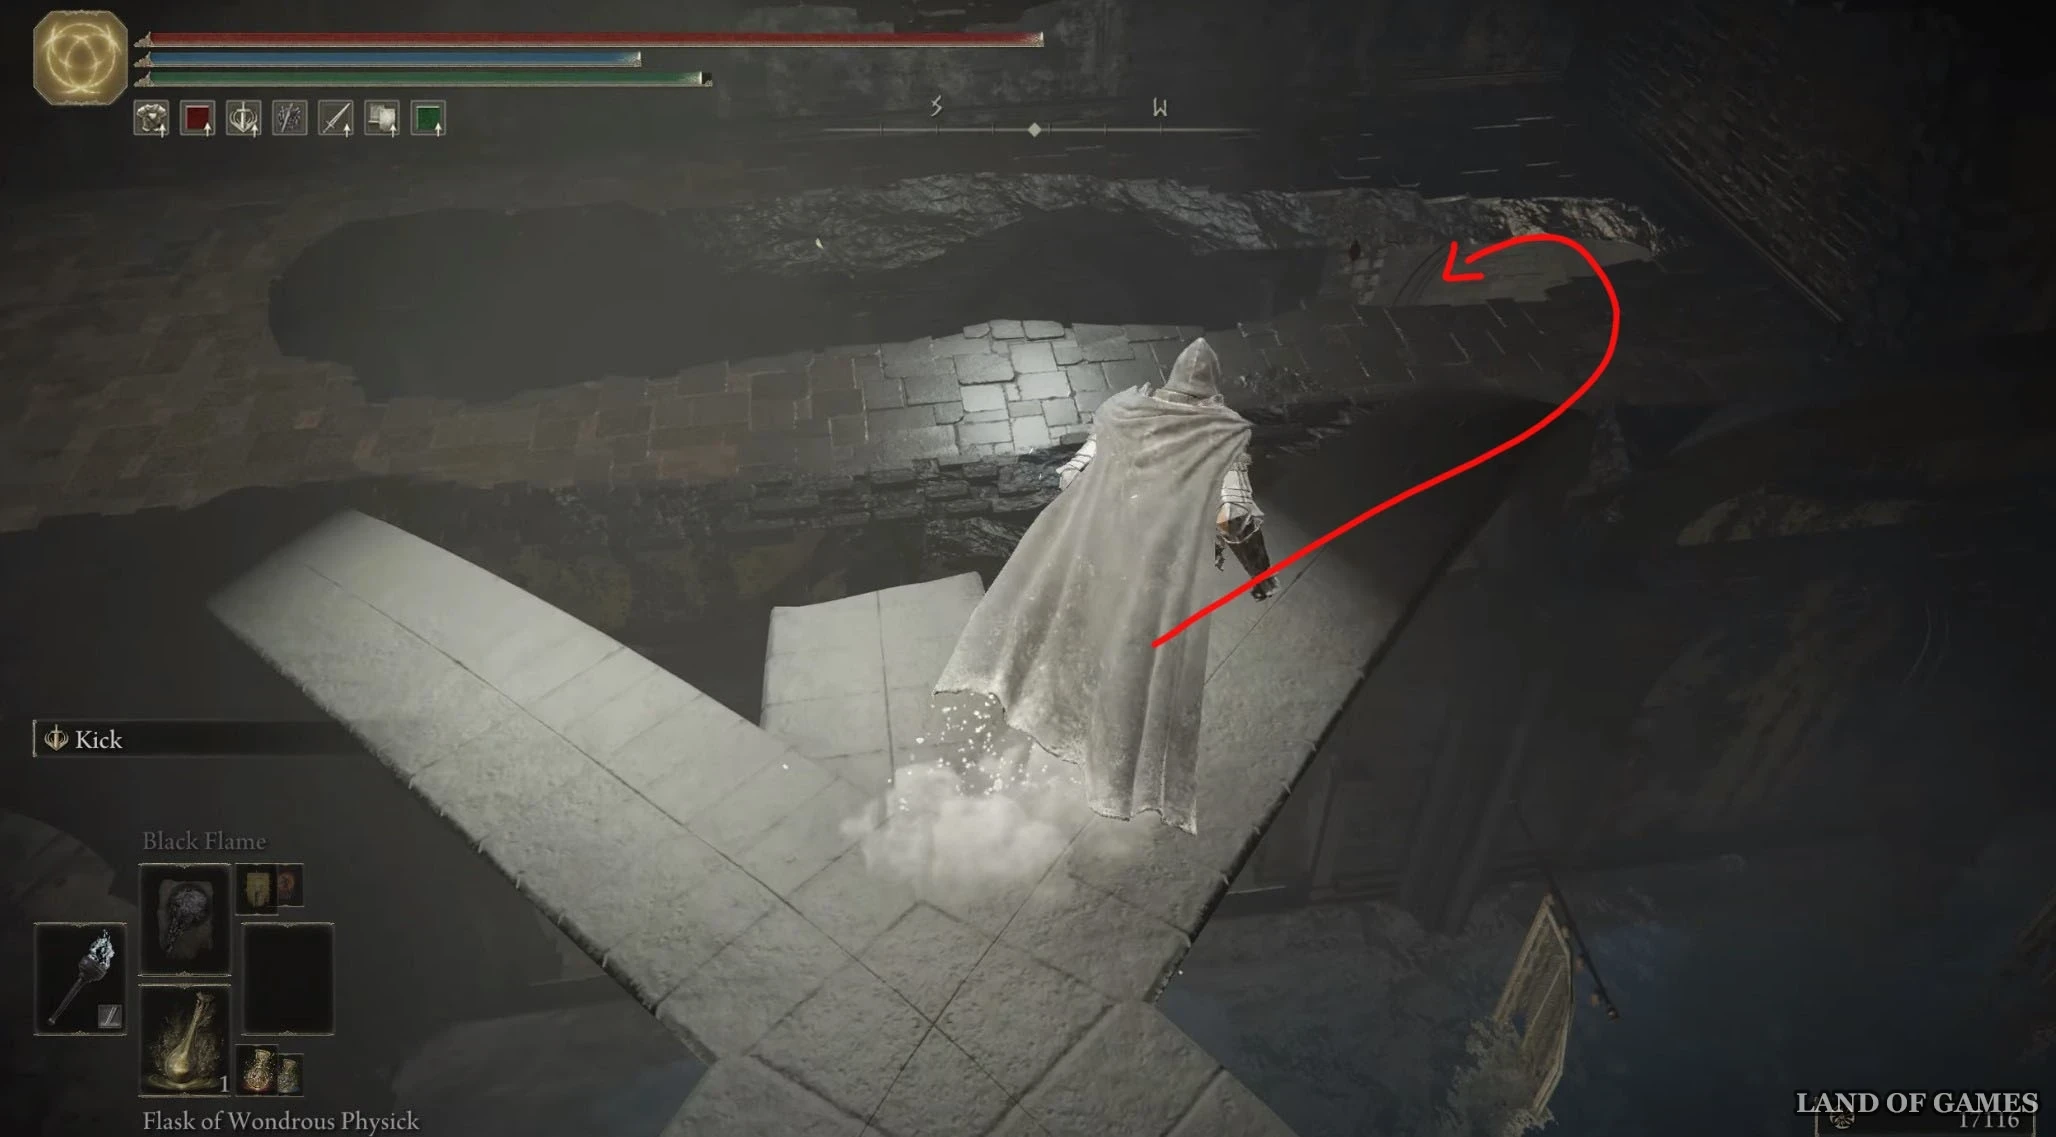
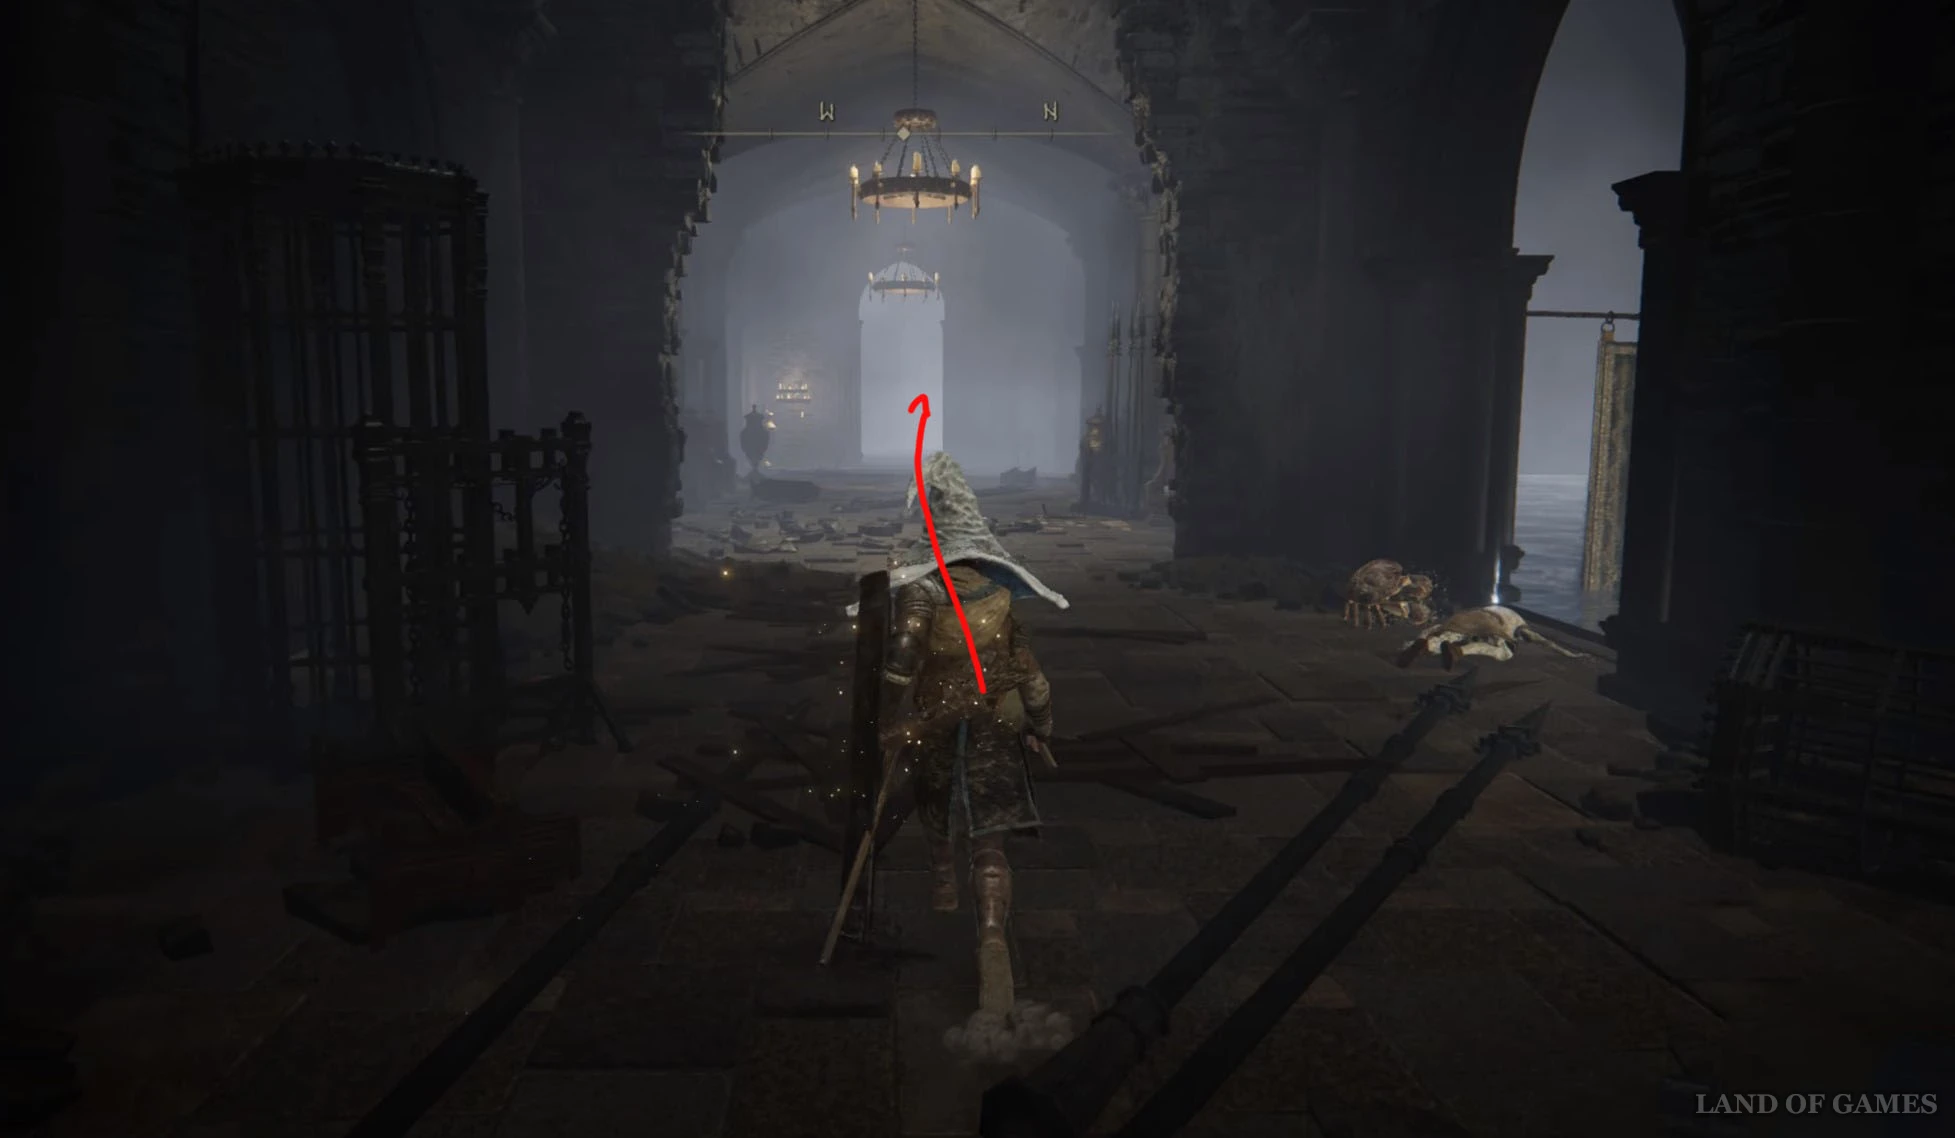
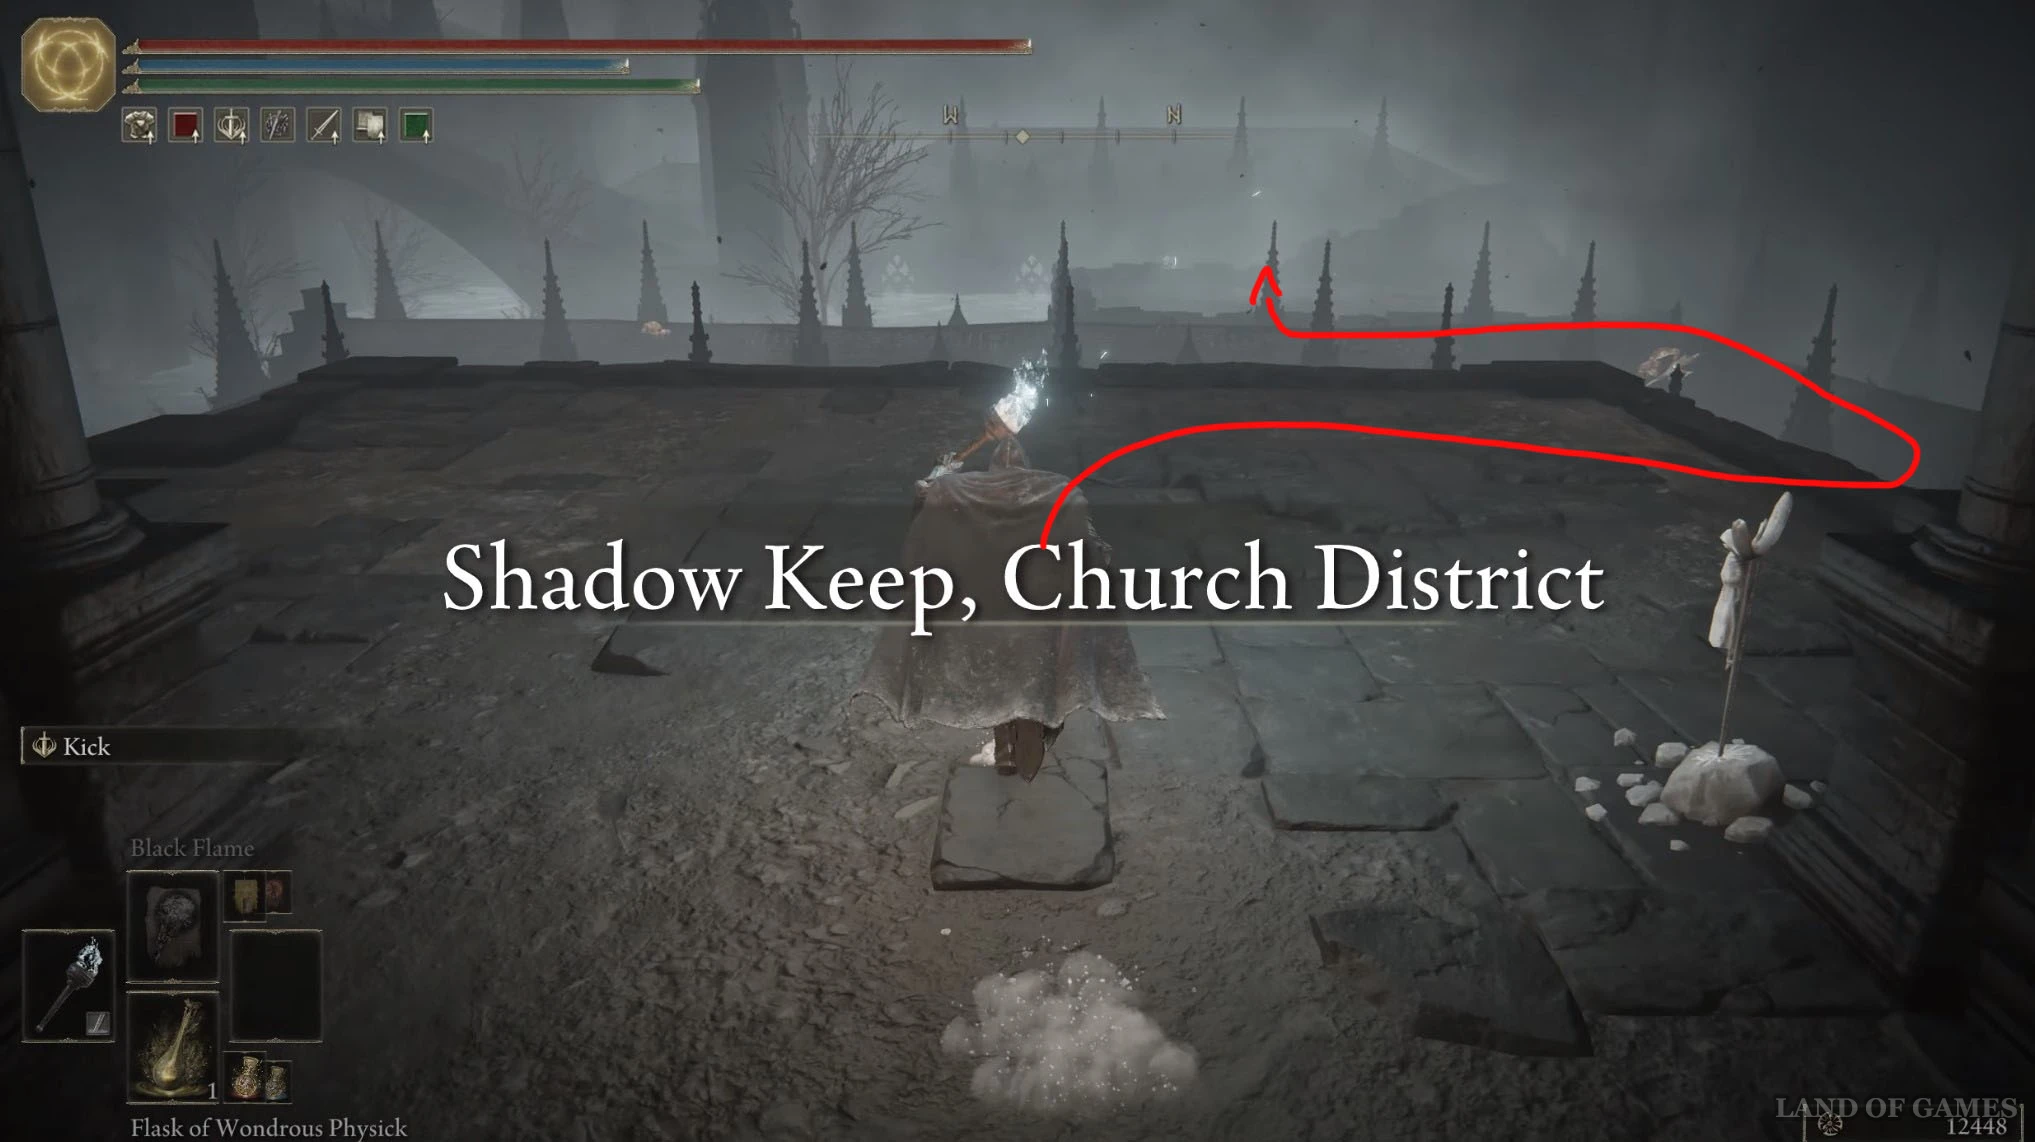
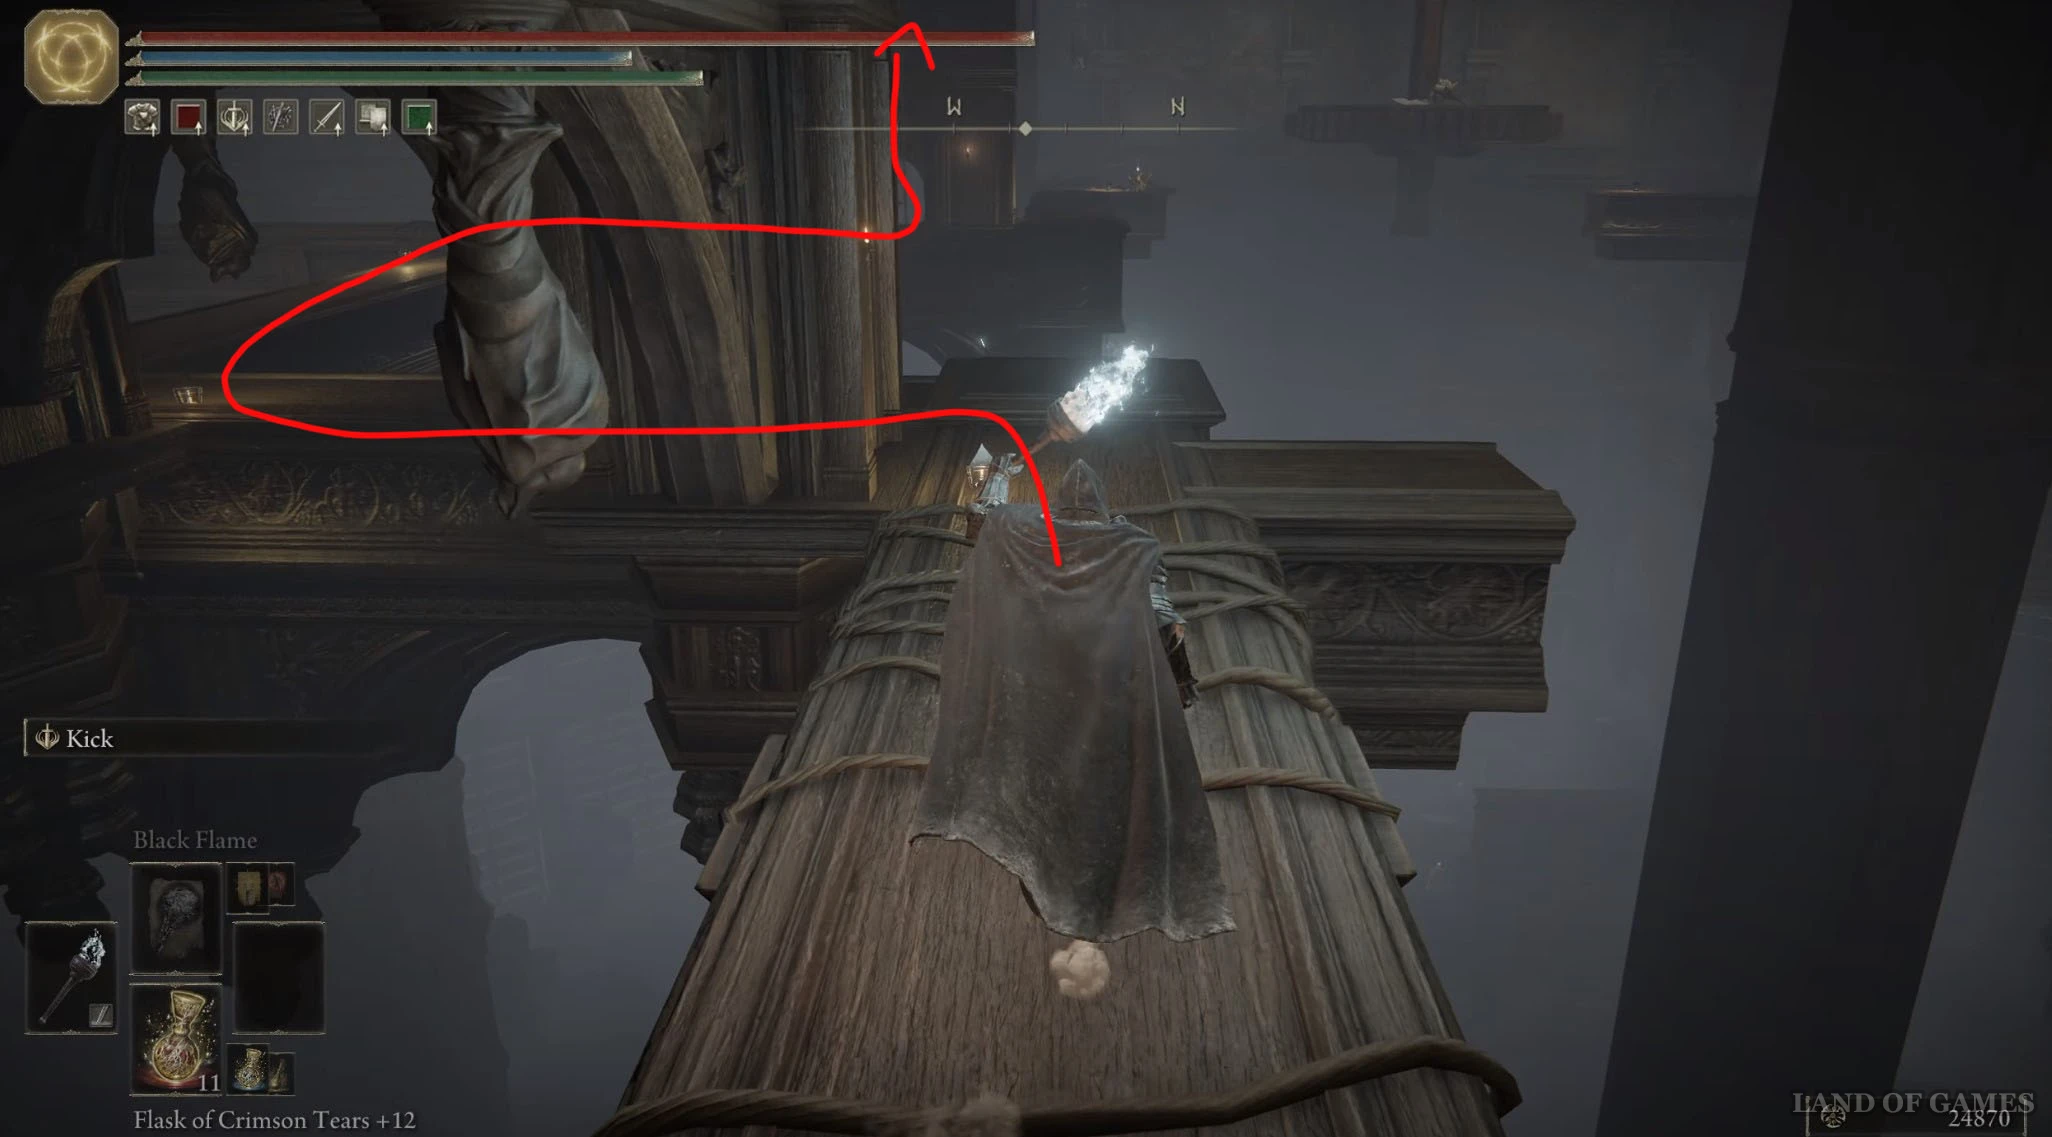
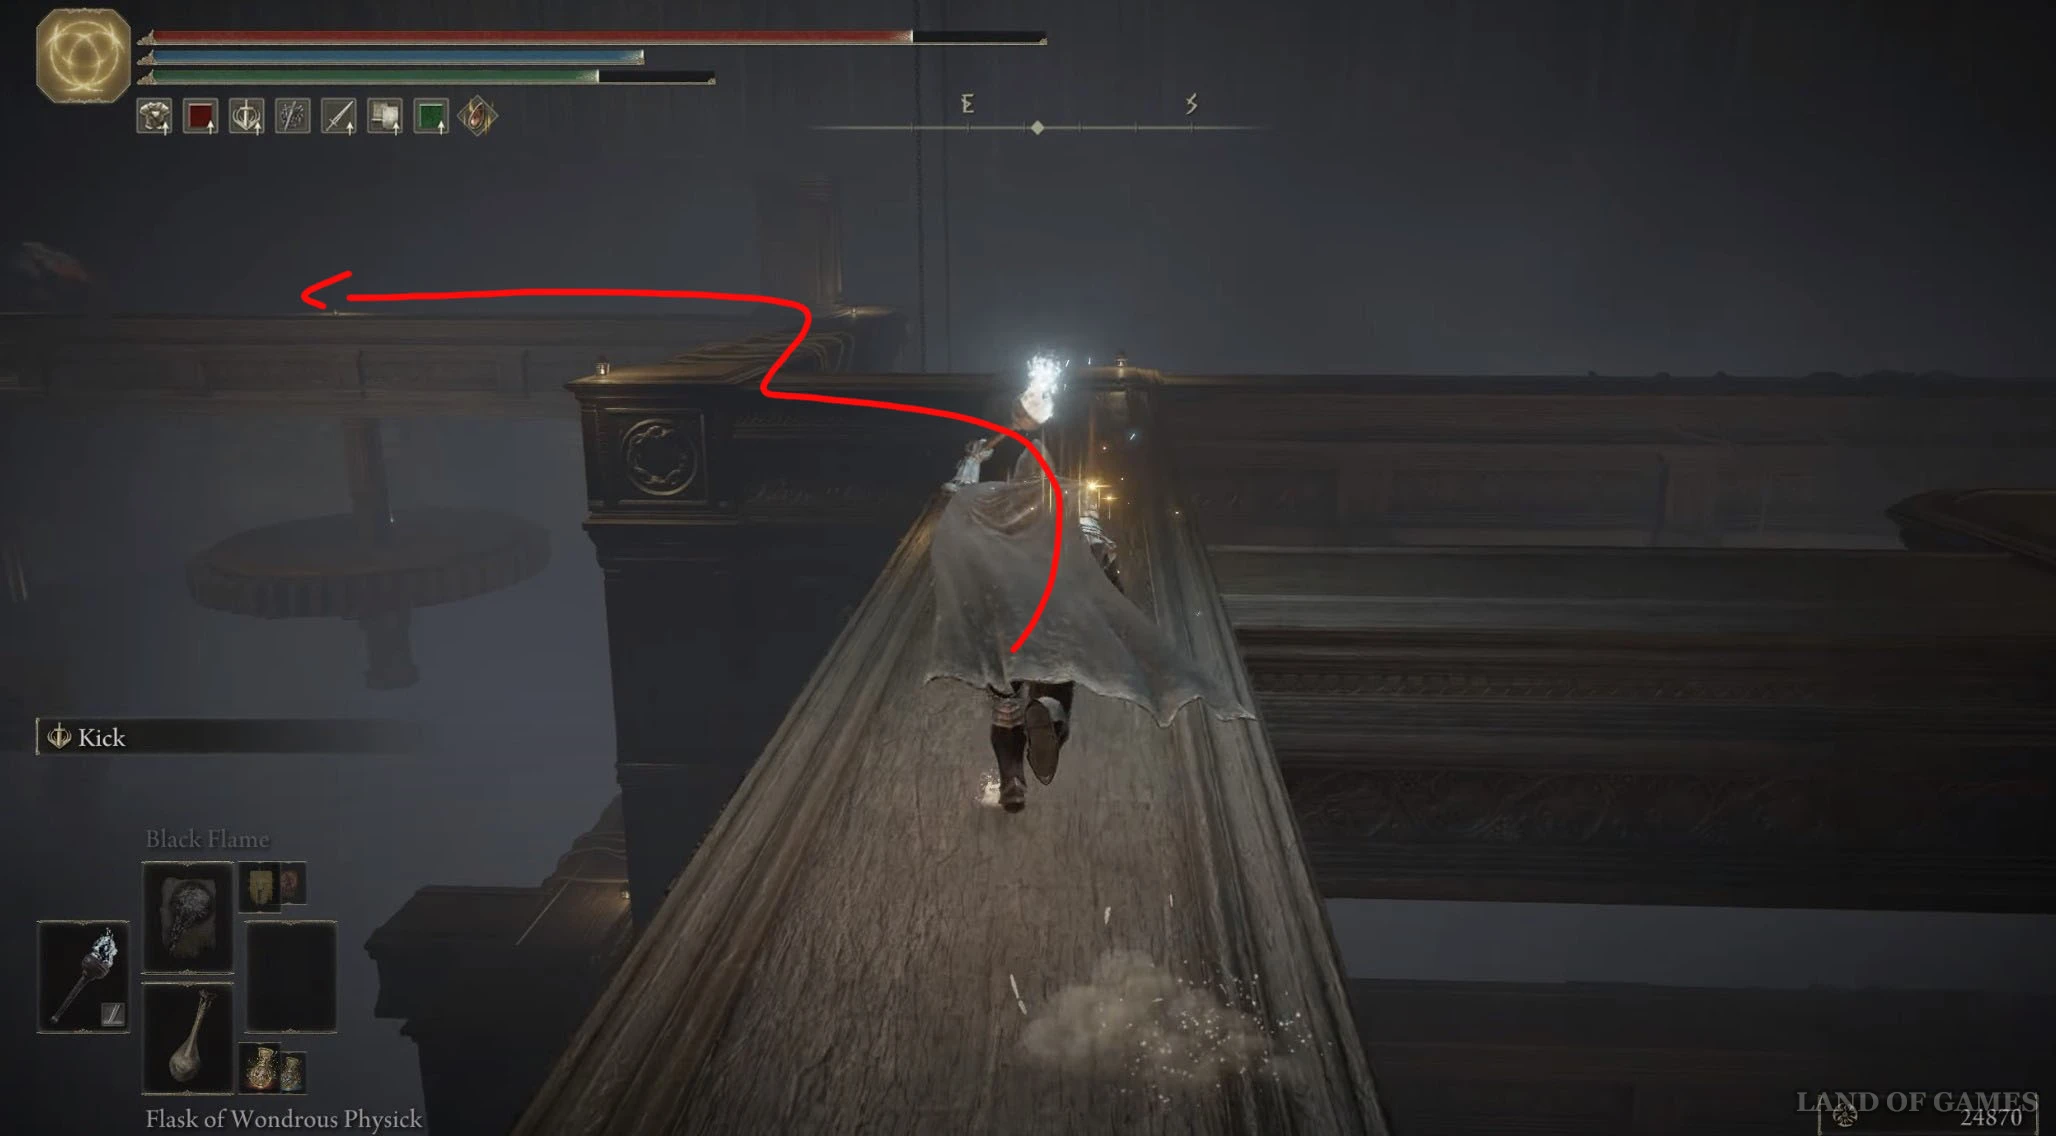
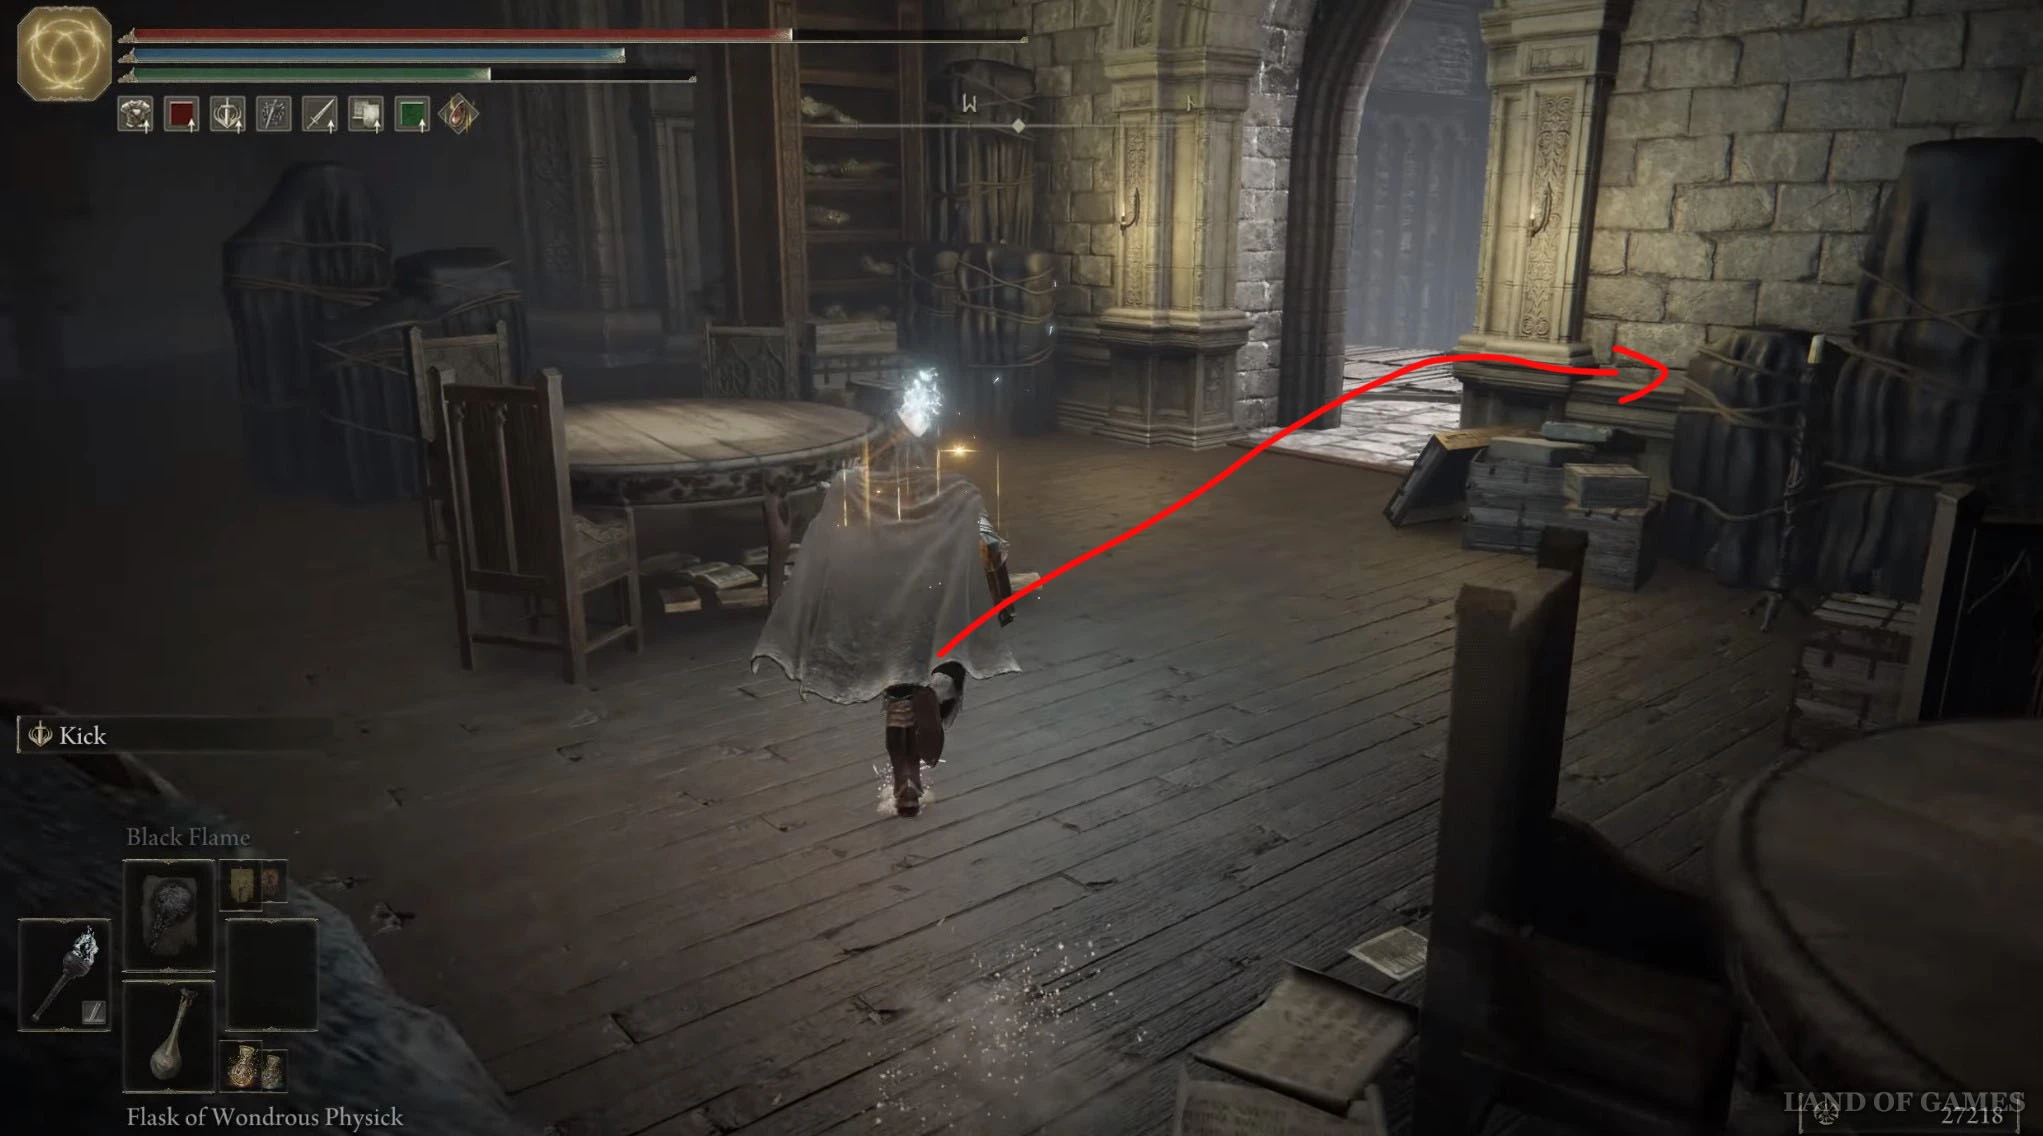
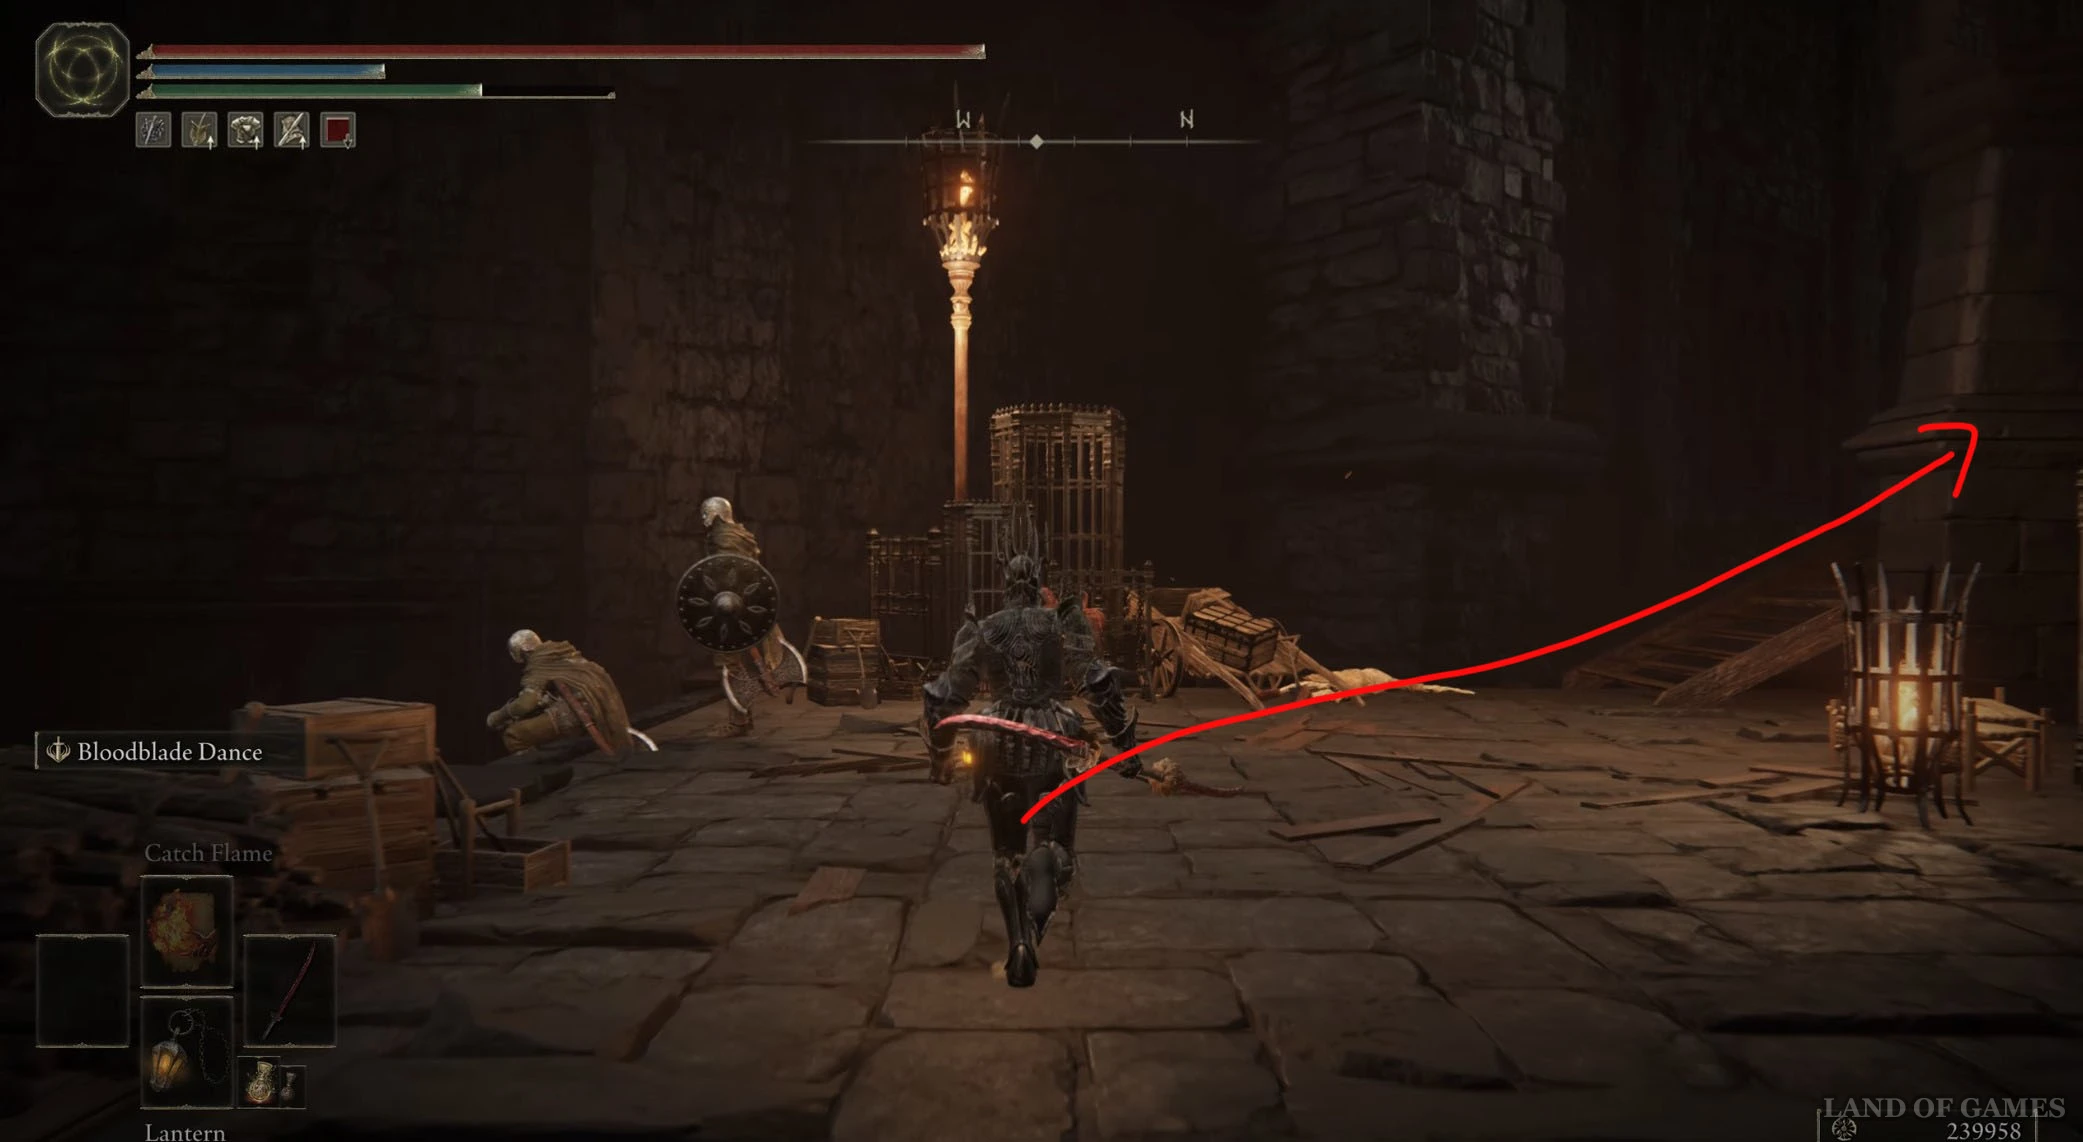
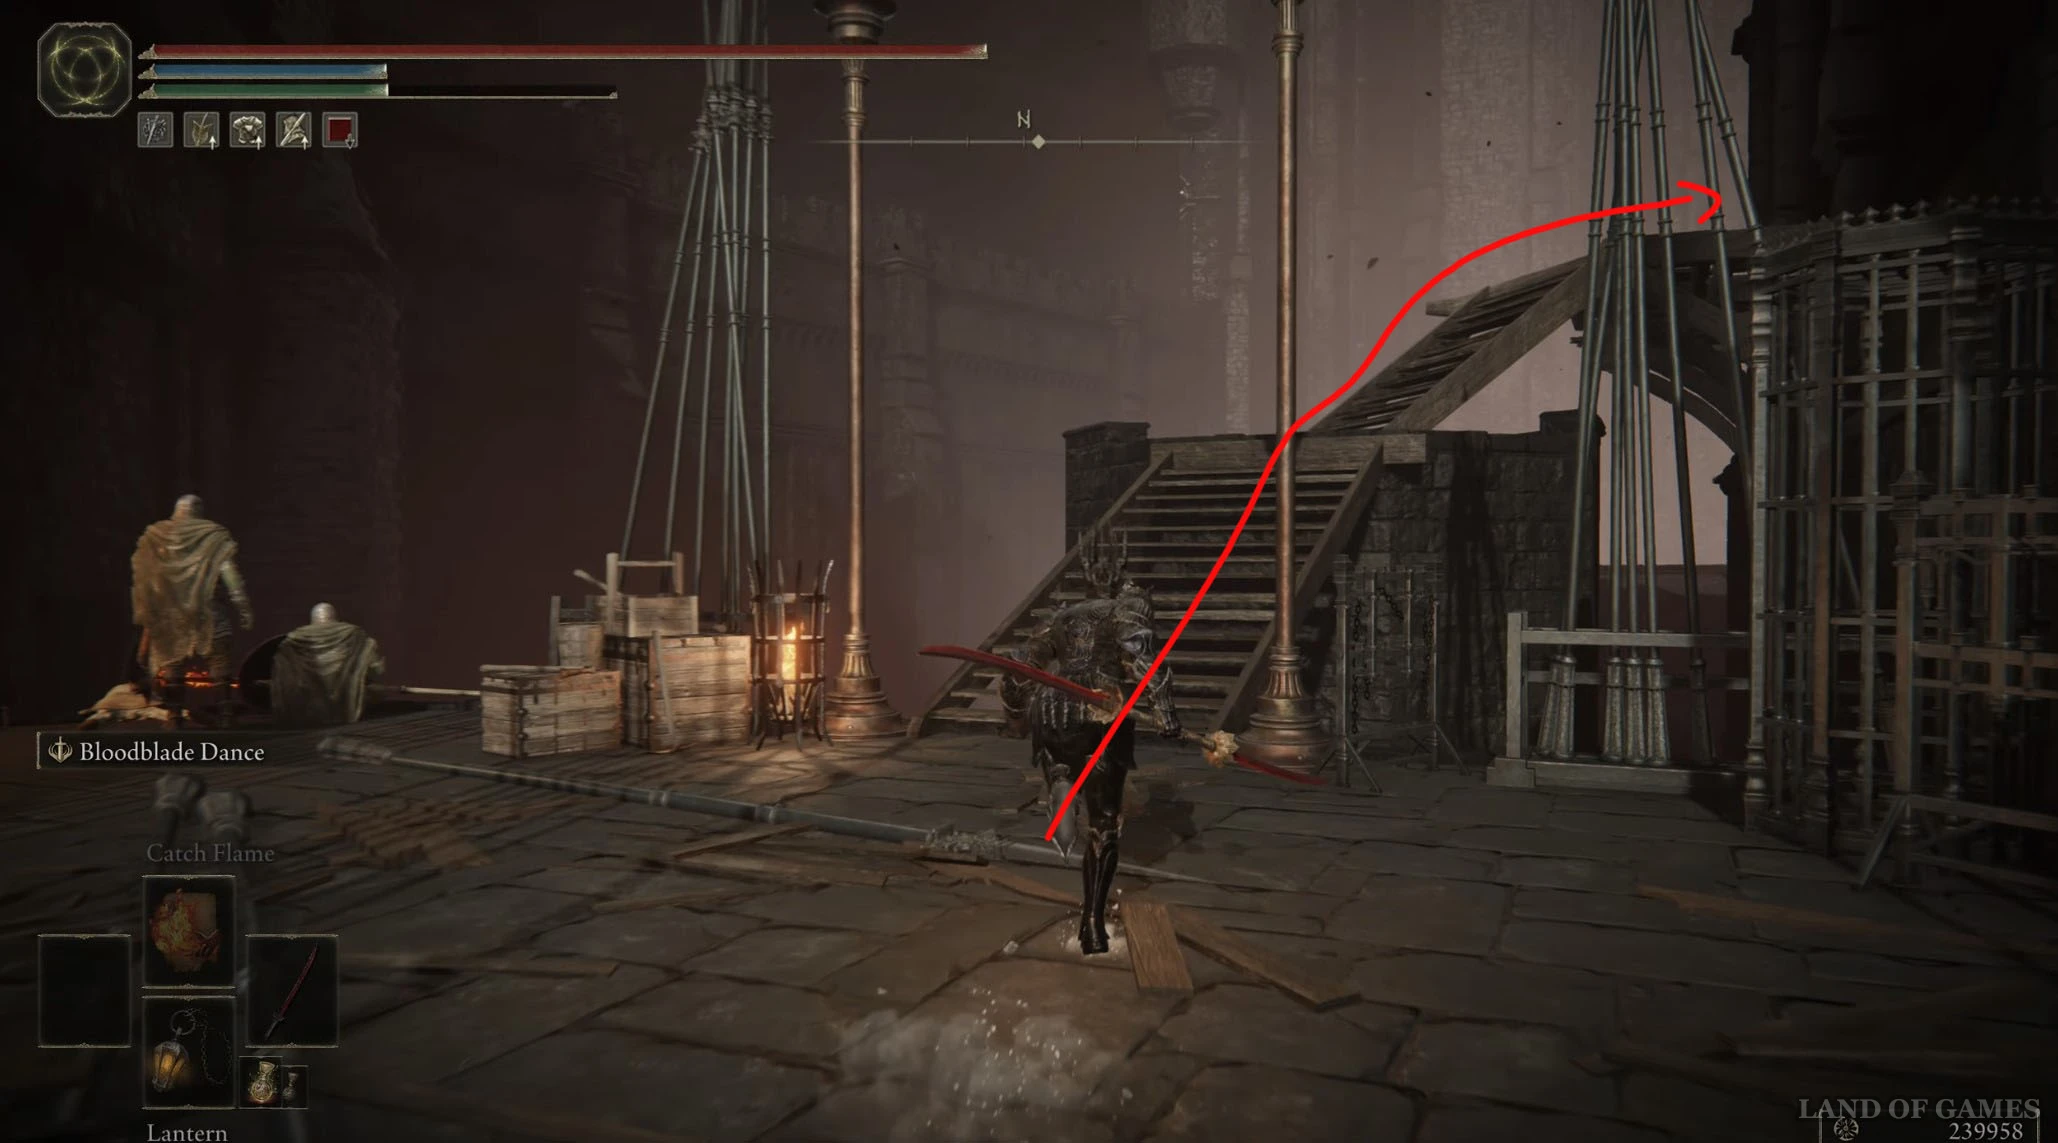
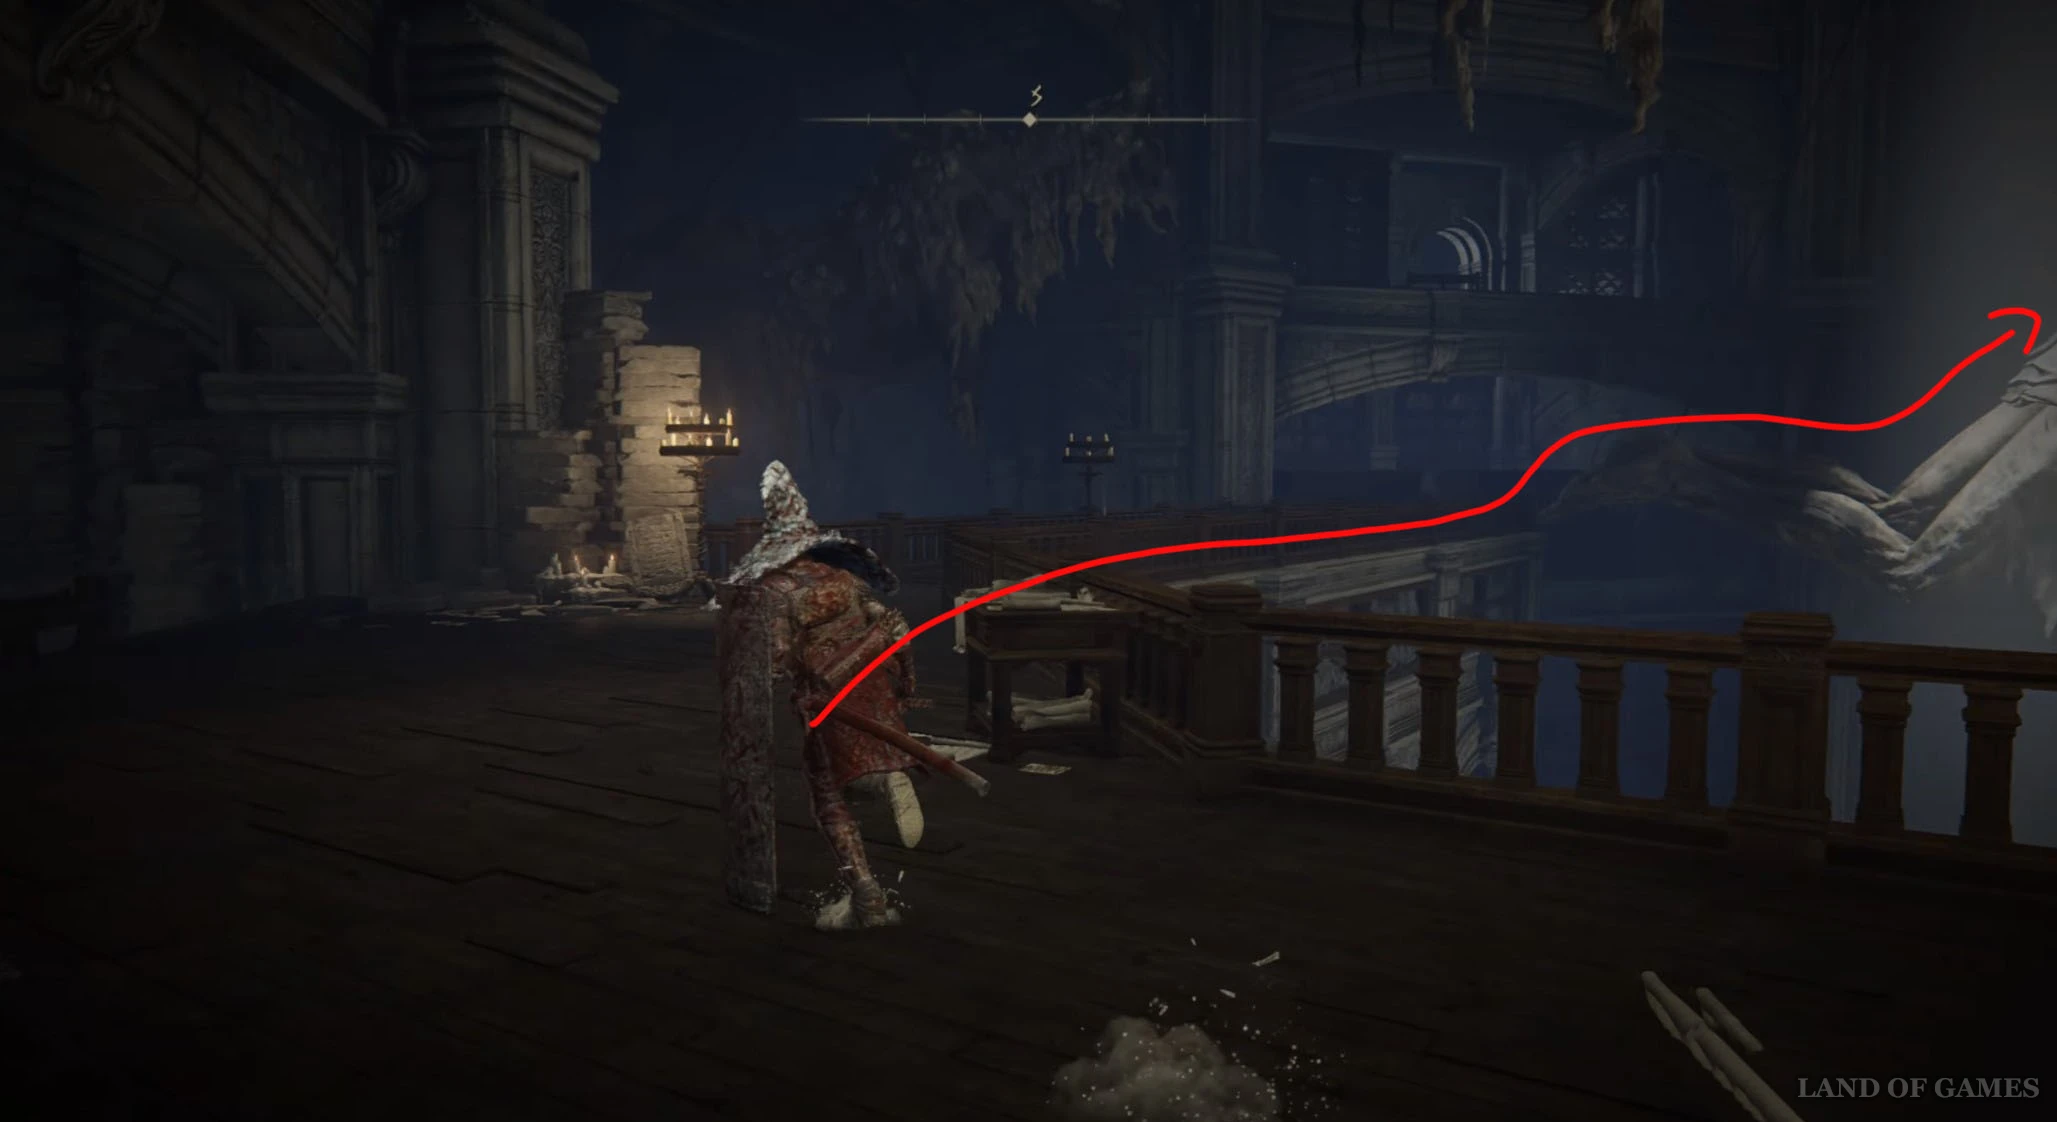
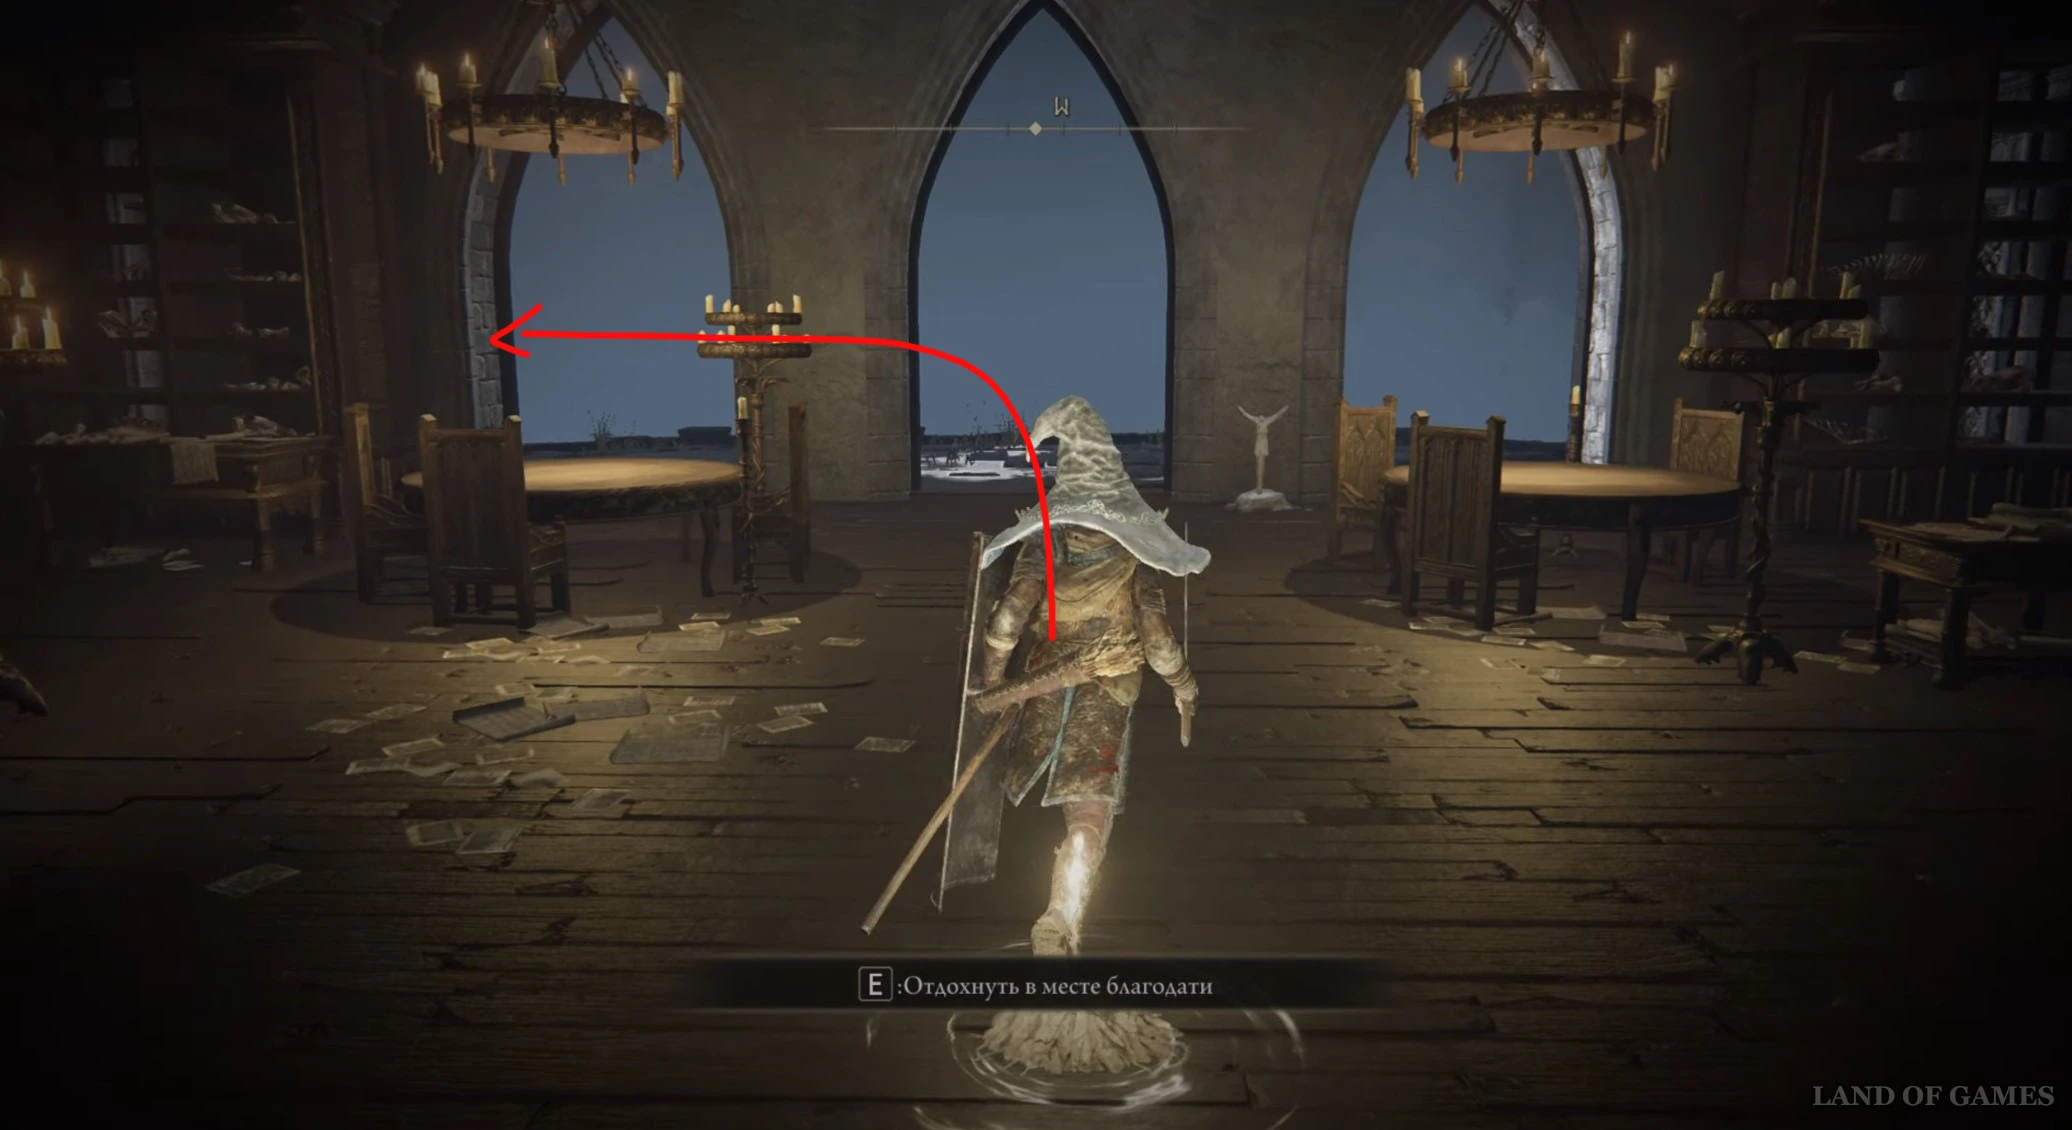
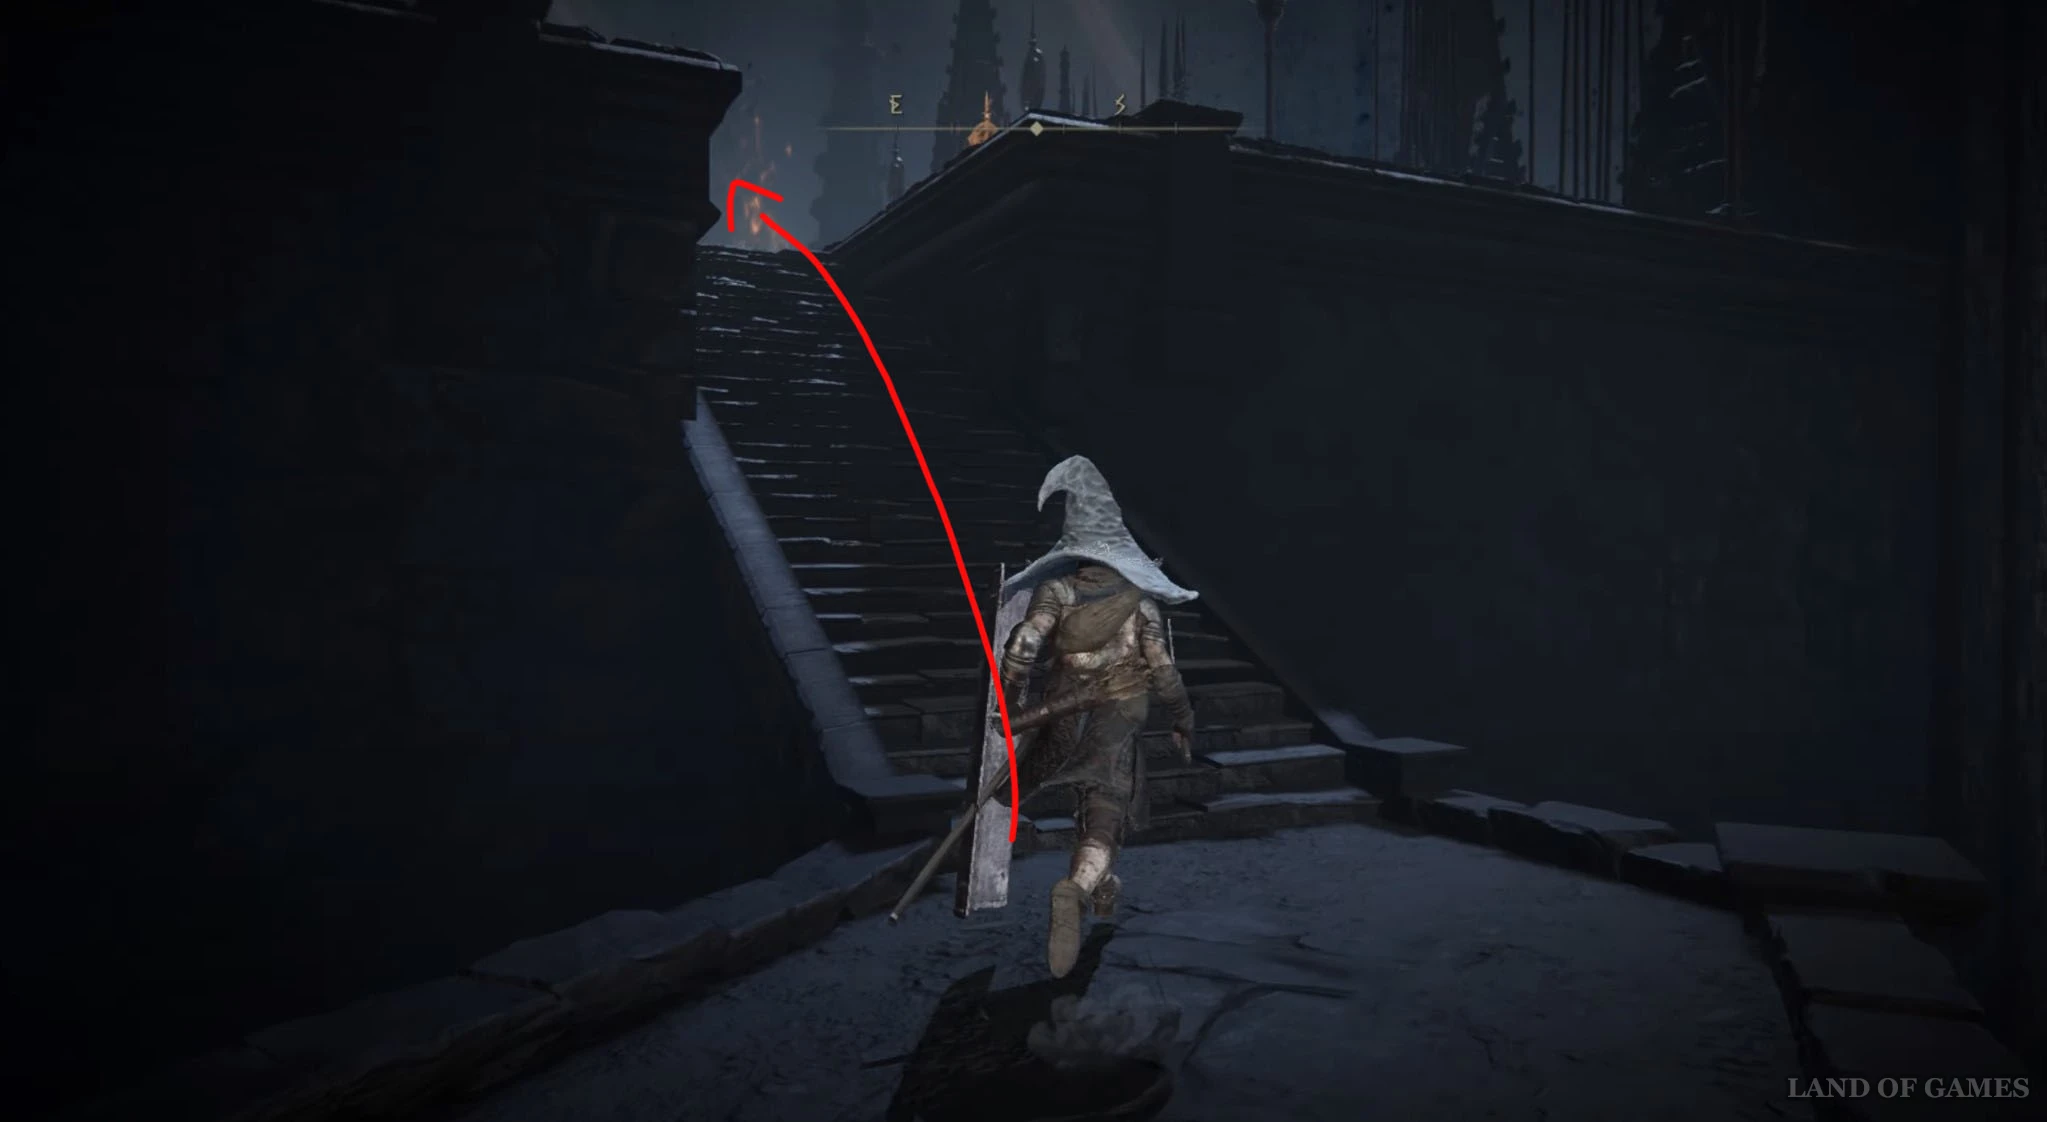
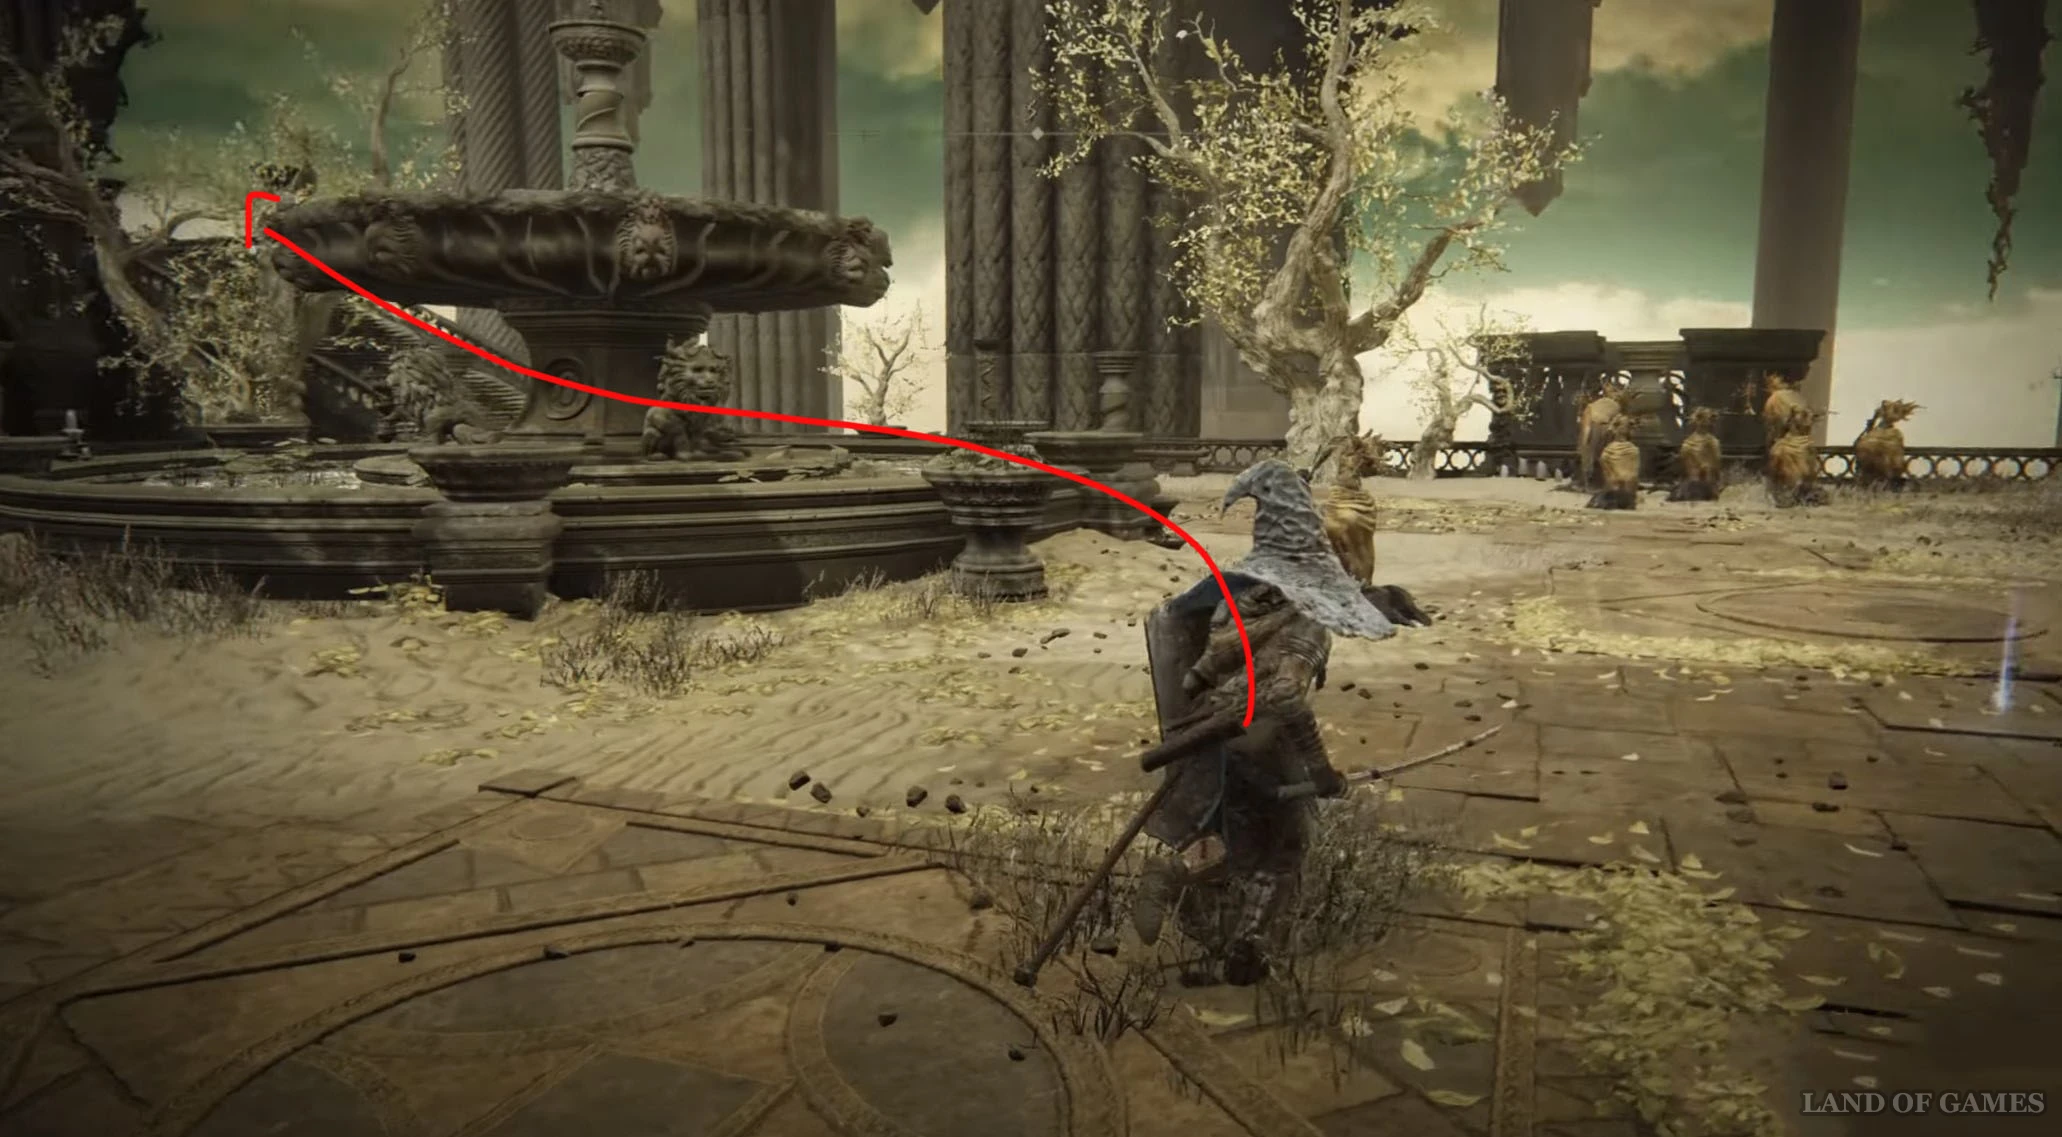
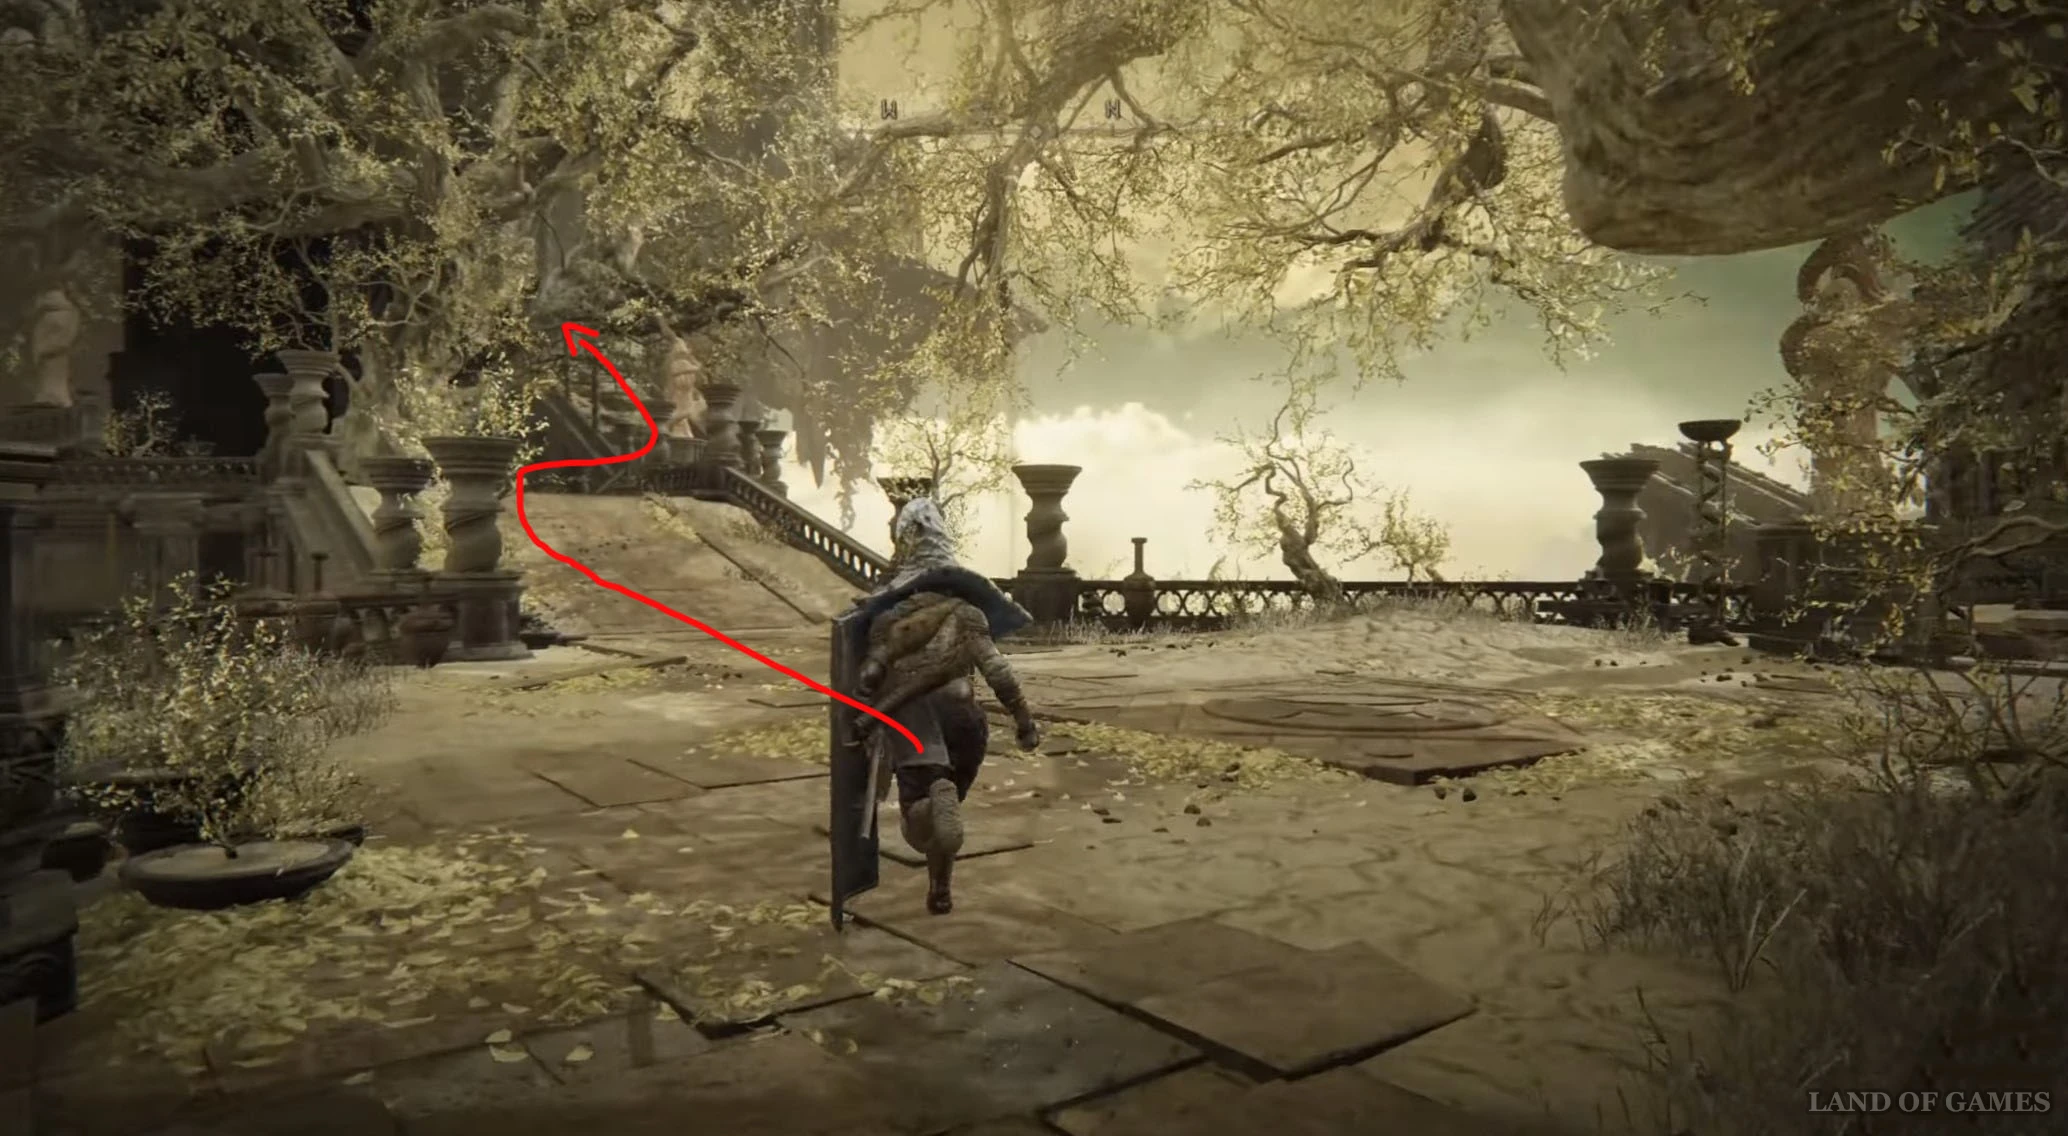
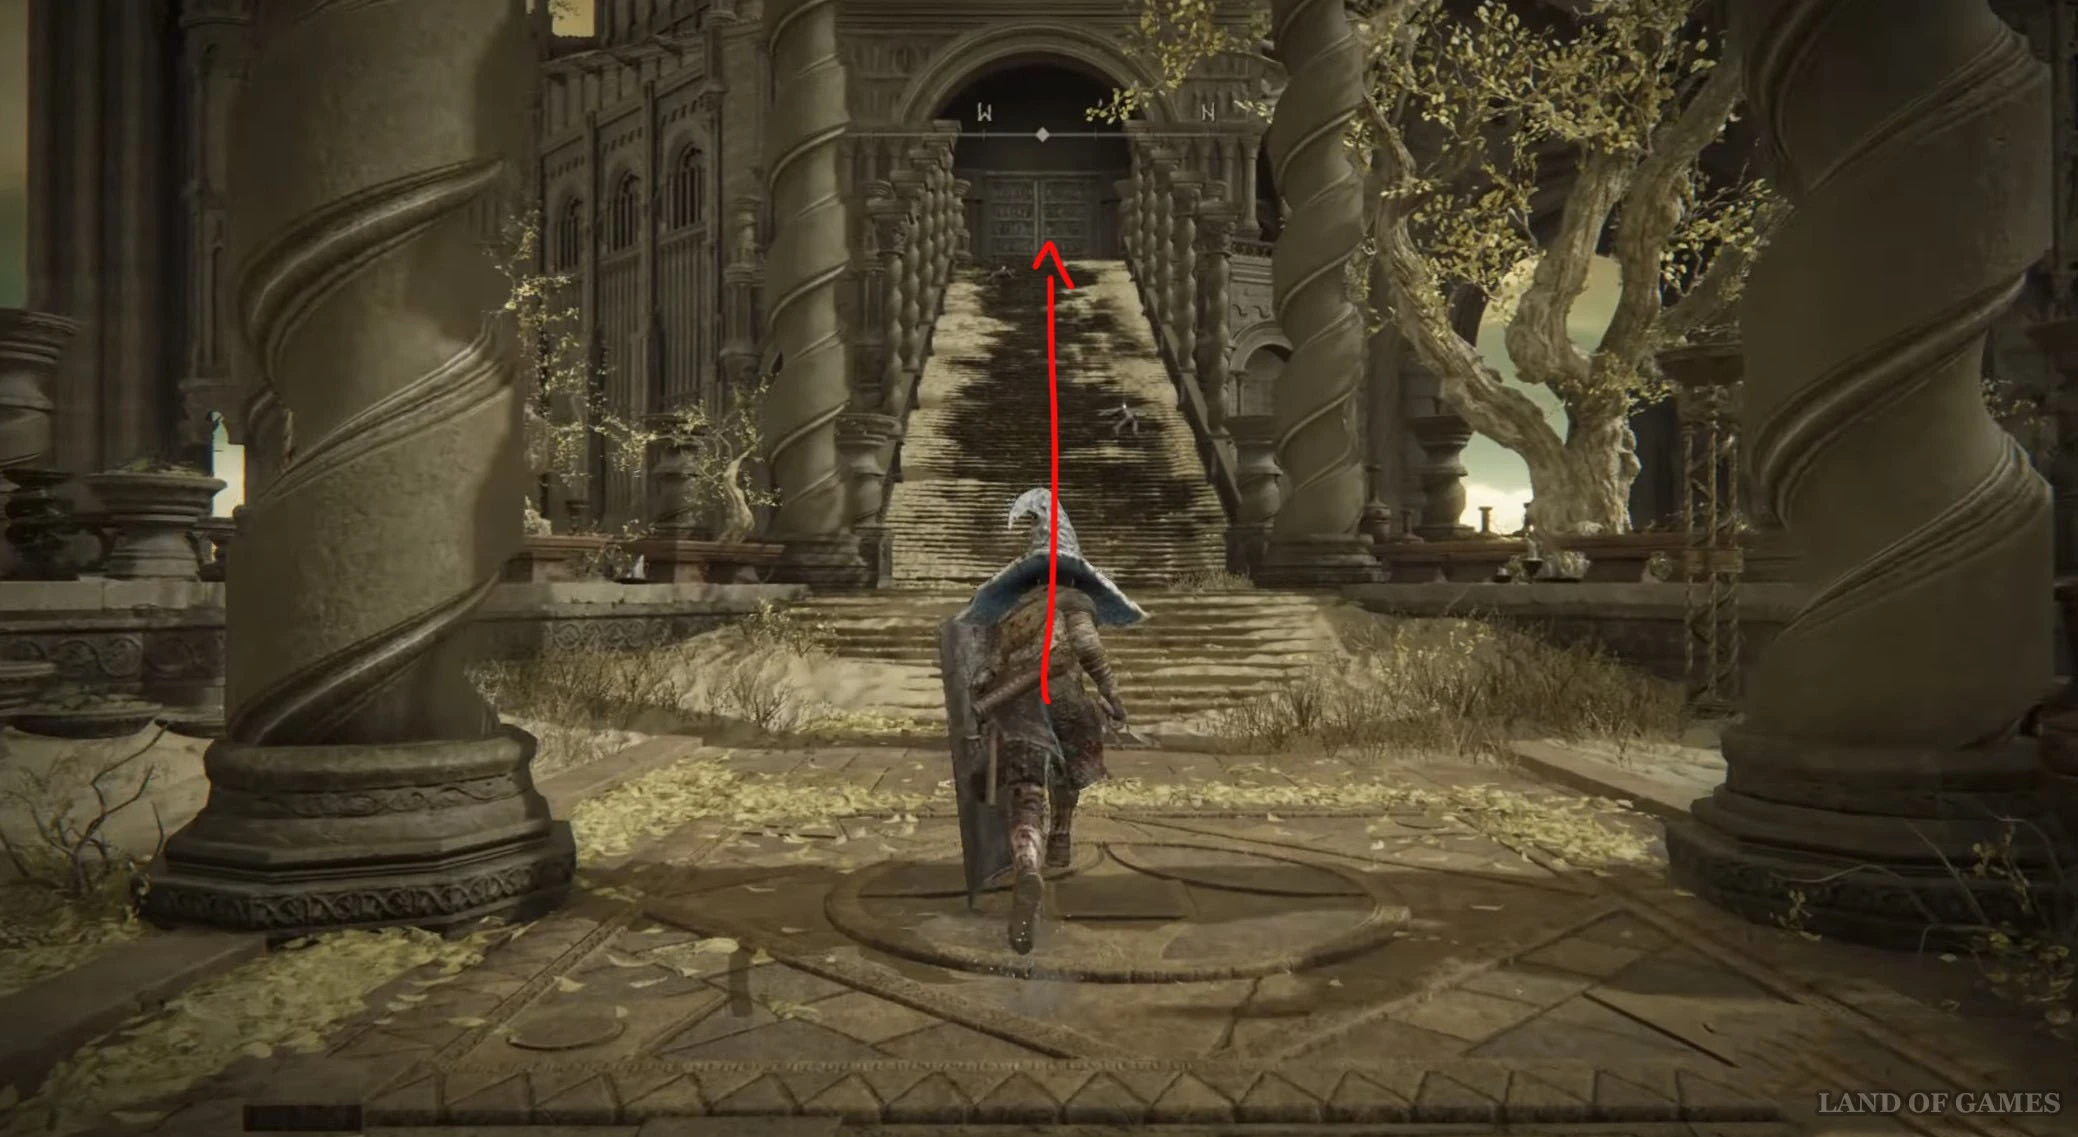
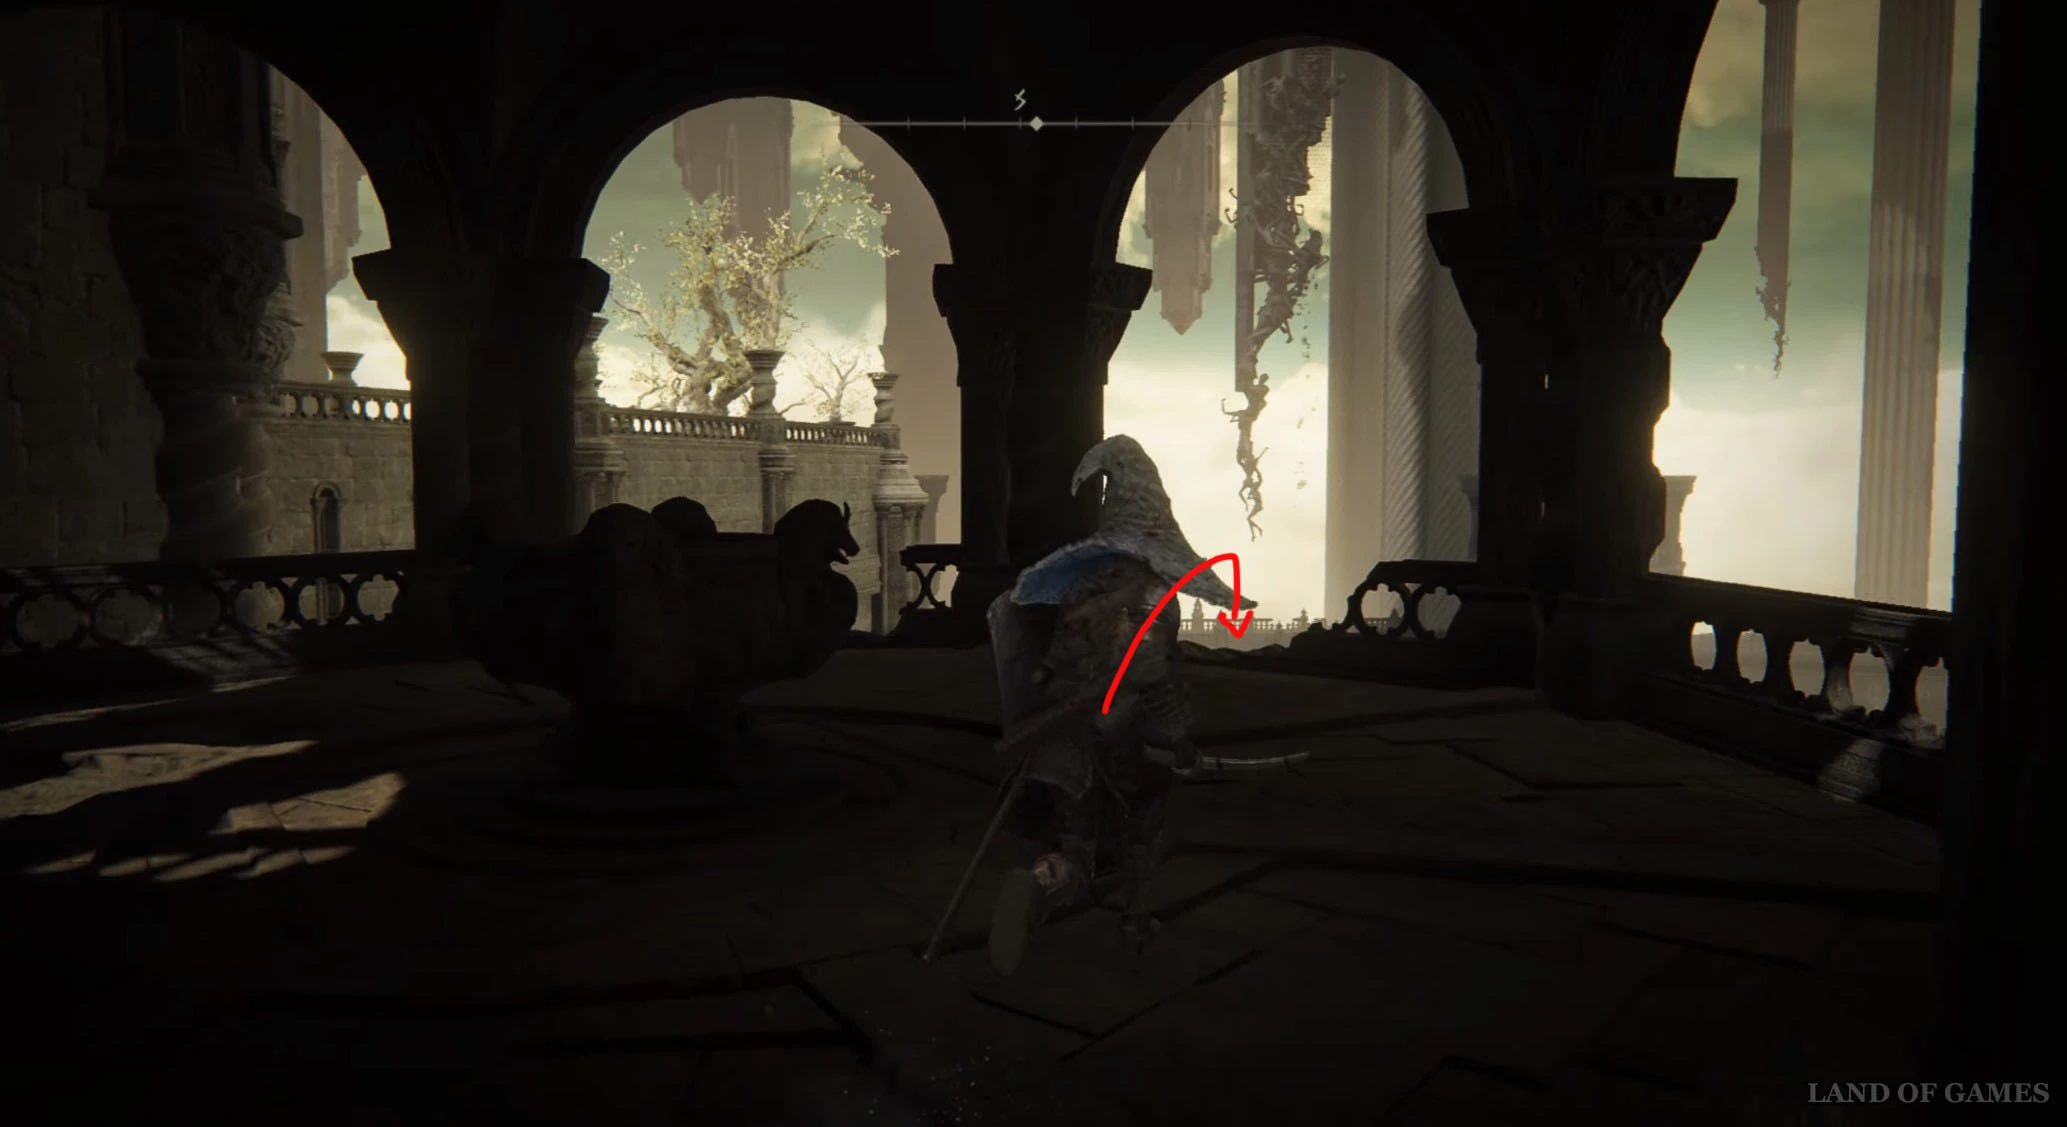
Переместитесь или доберитесь до «Площади перед главными воротами» в Пристанище Теней, а затем пройдите в проход на северо-западе и поднимитесь по лесенке наверх. Продолжайте подниматься по деревянным ступенькам, пока не войдете в здание. Затем выйдите из него через выход на юго-востоке. Тем самым вы окажитесь на открытой площадке.
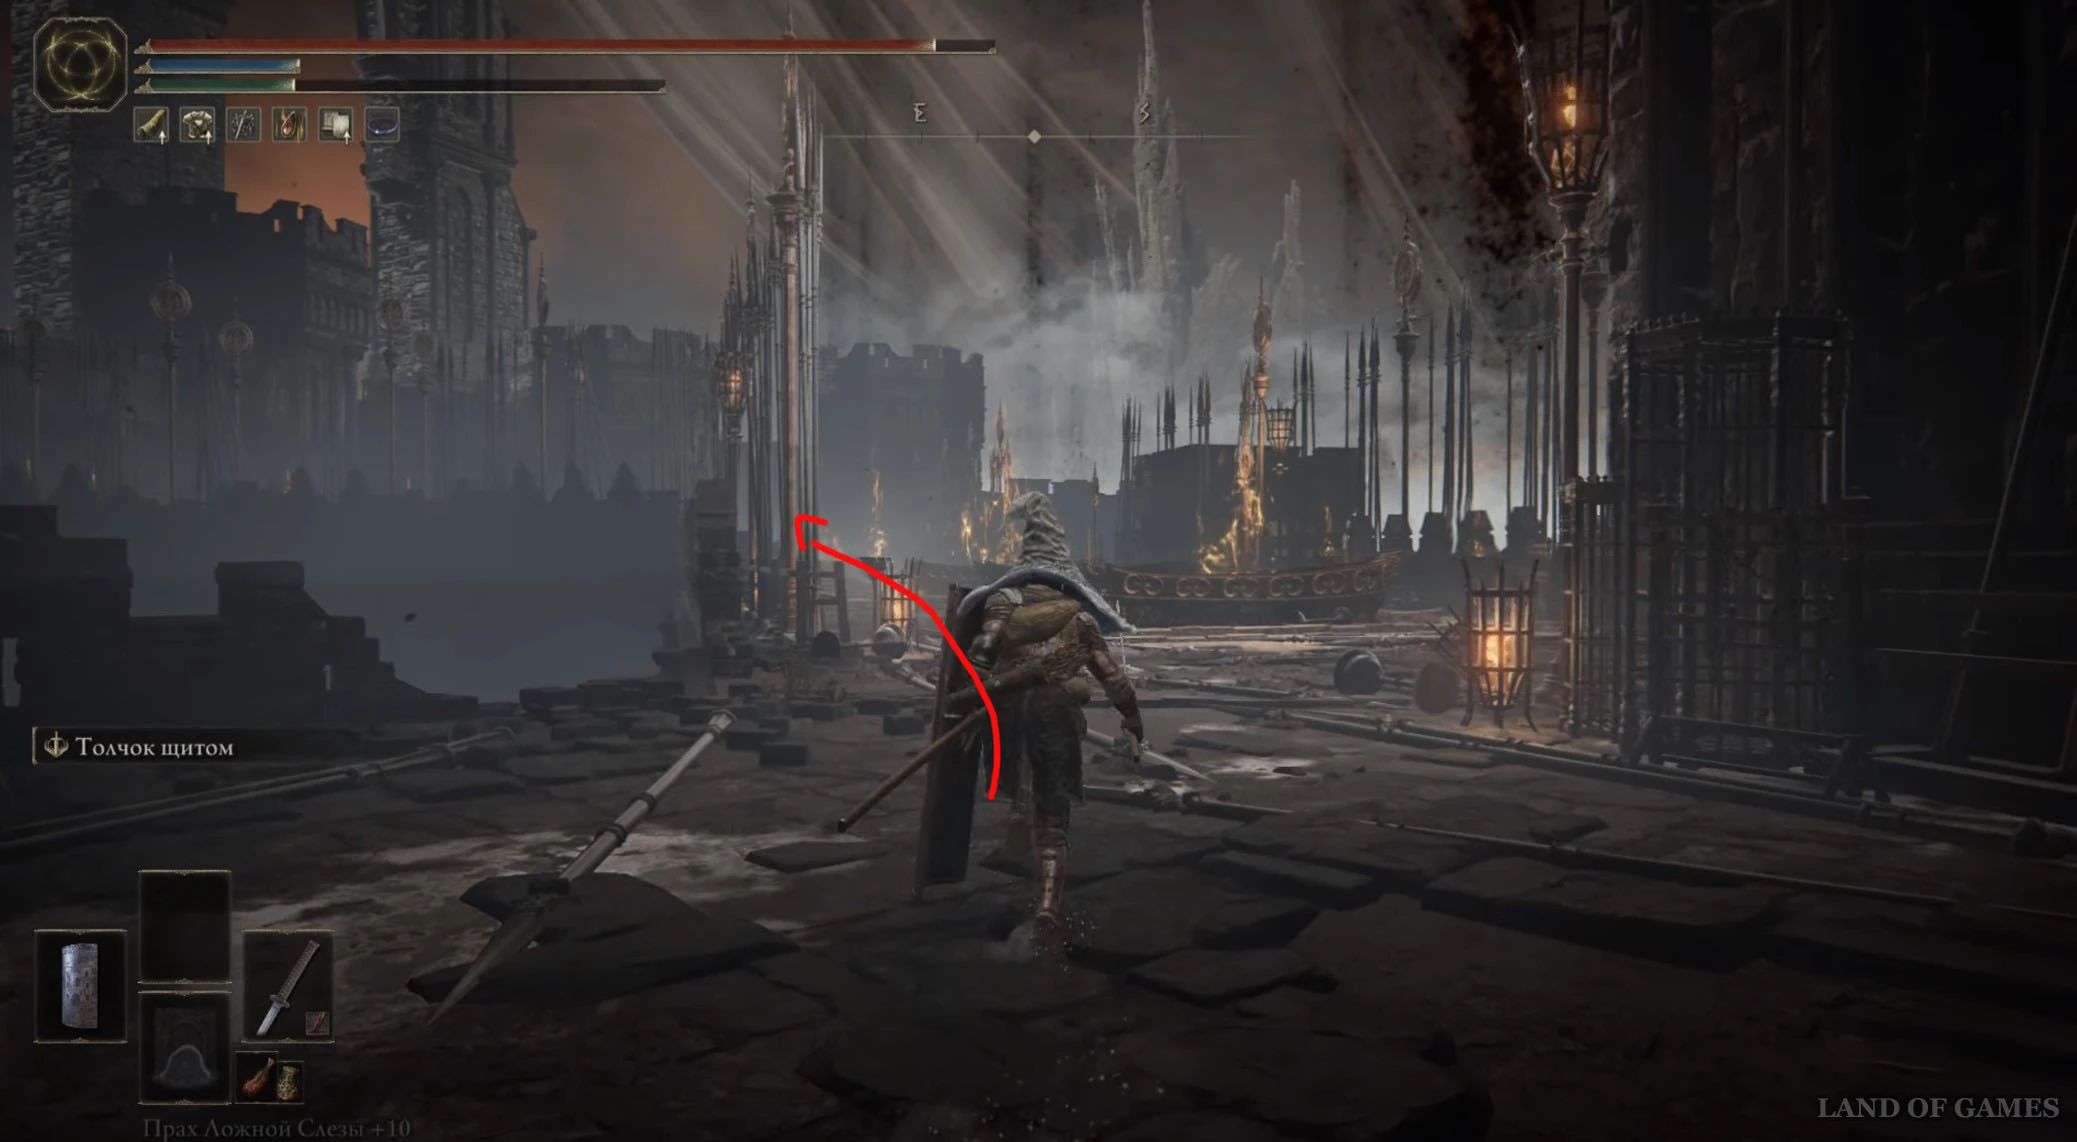
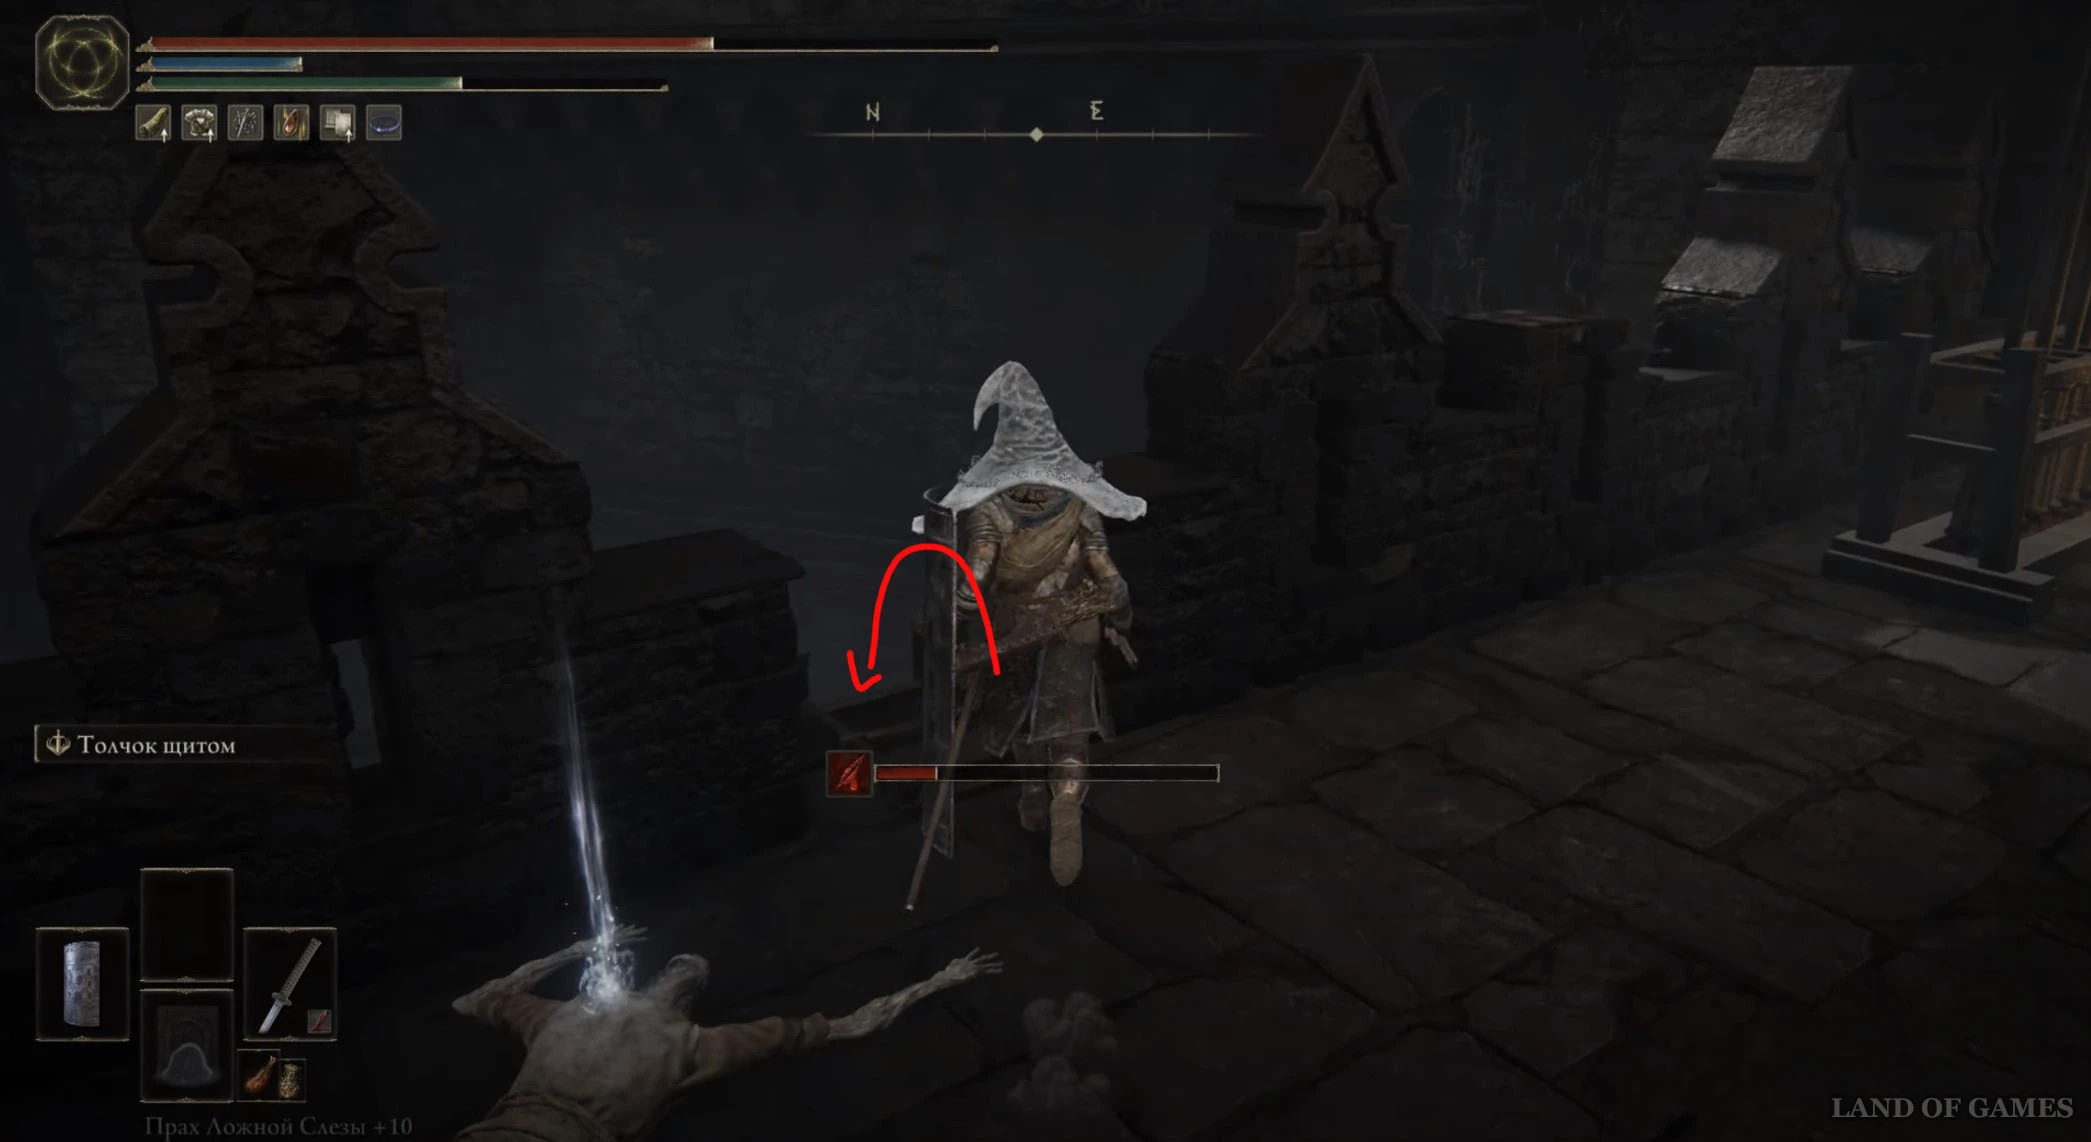
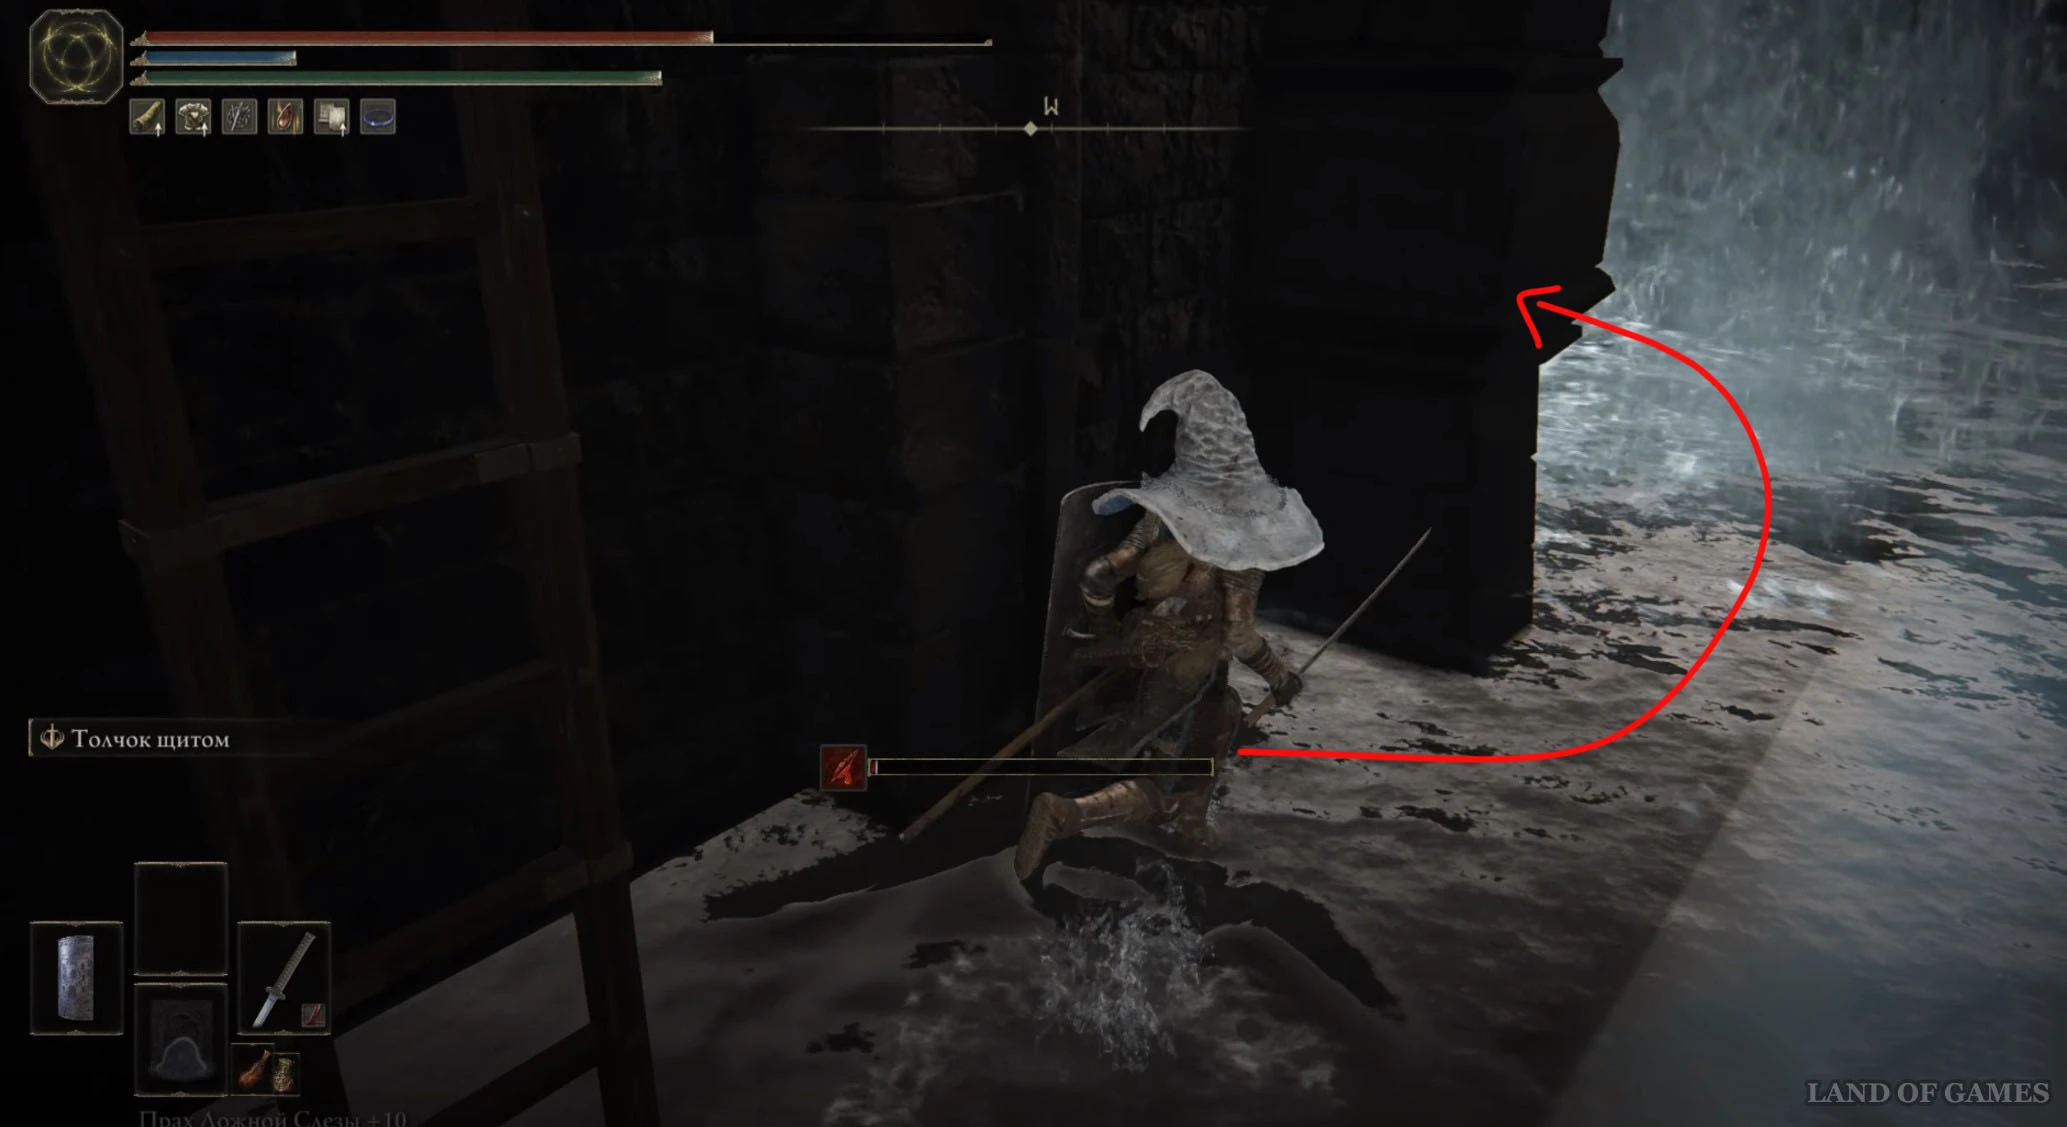
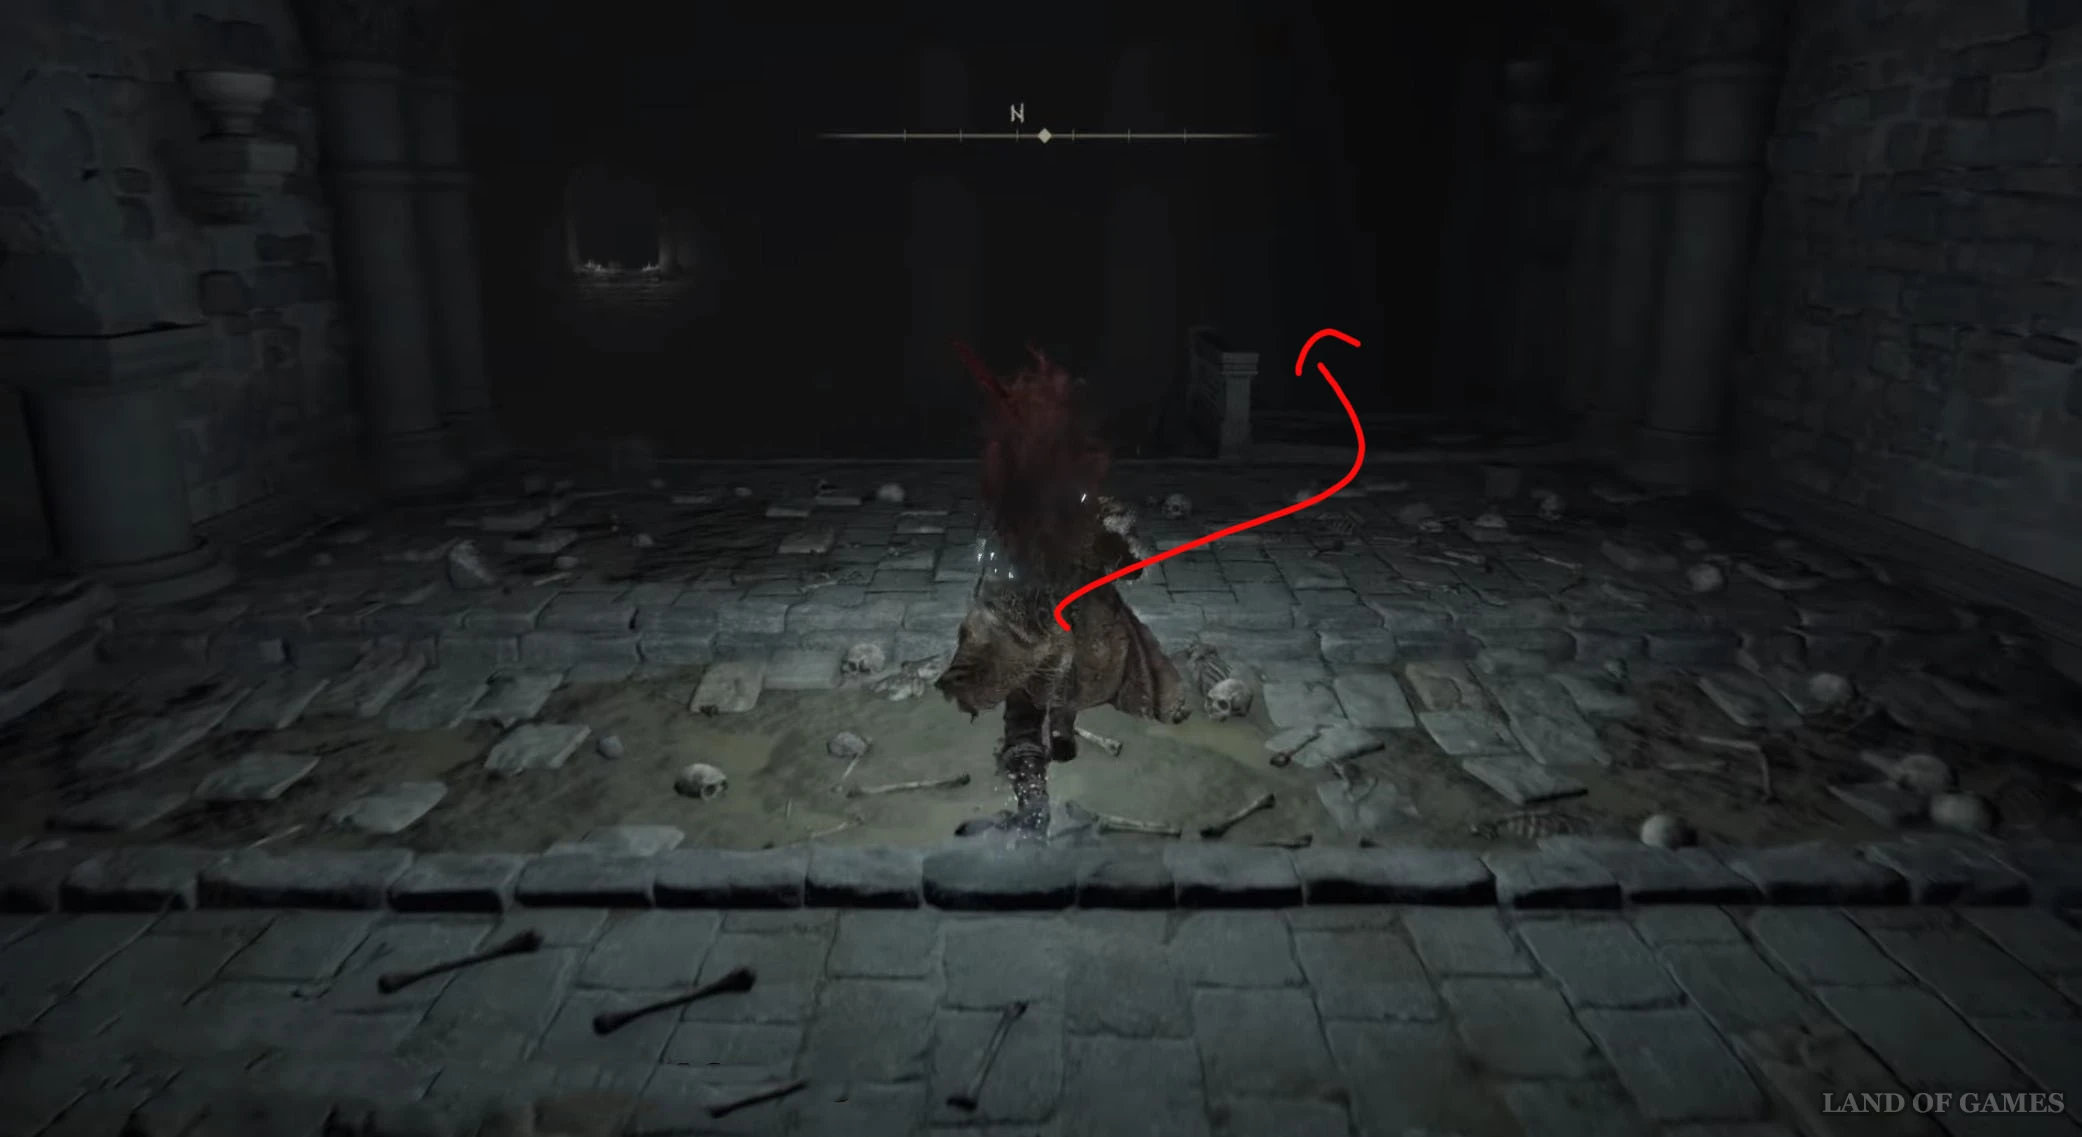
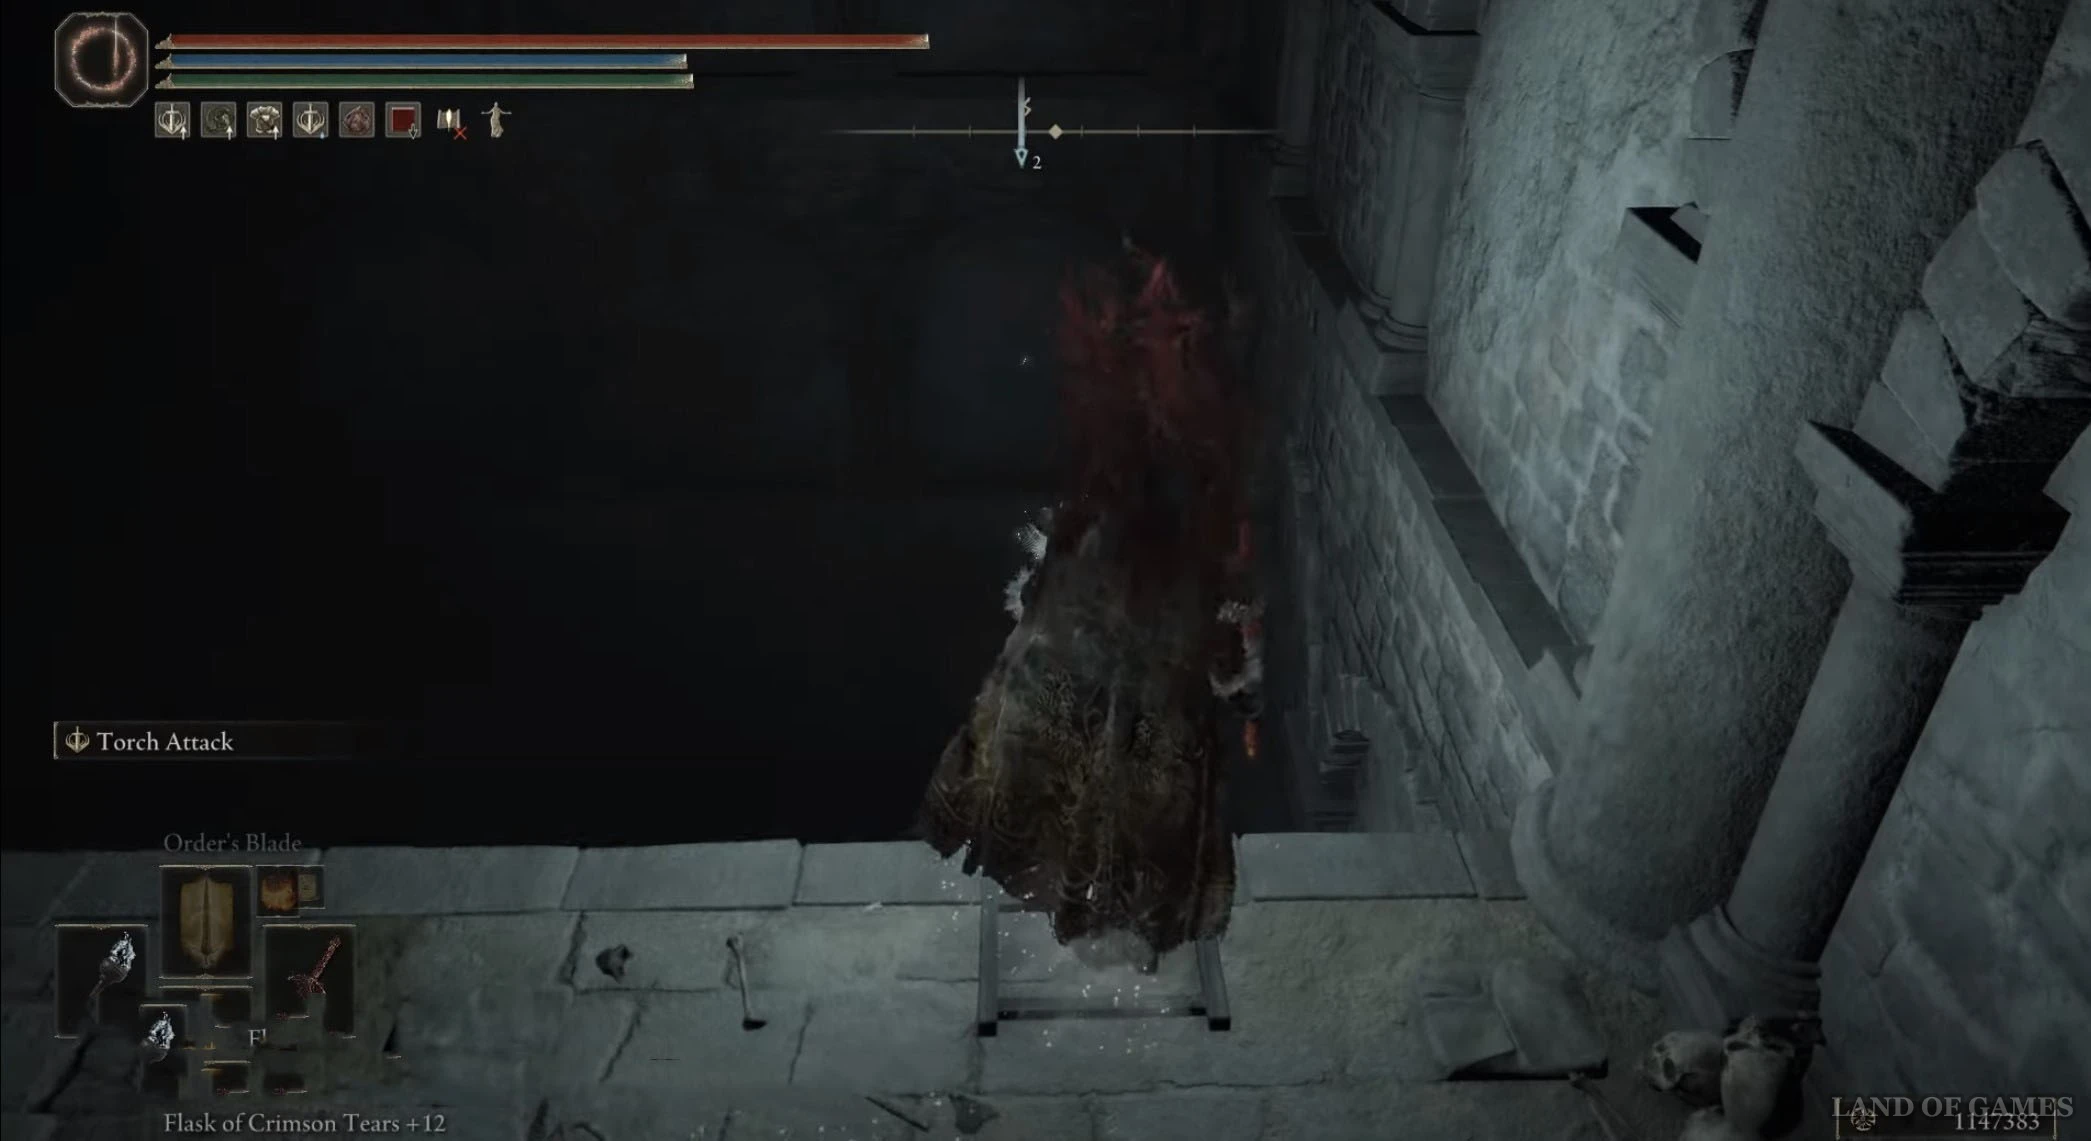
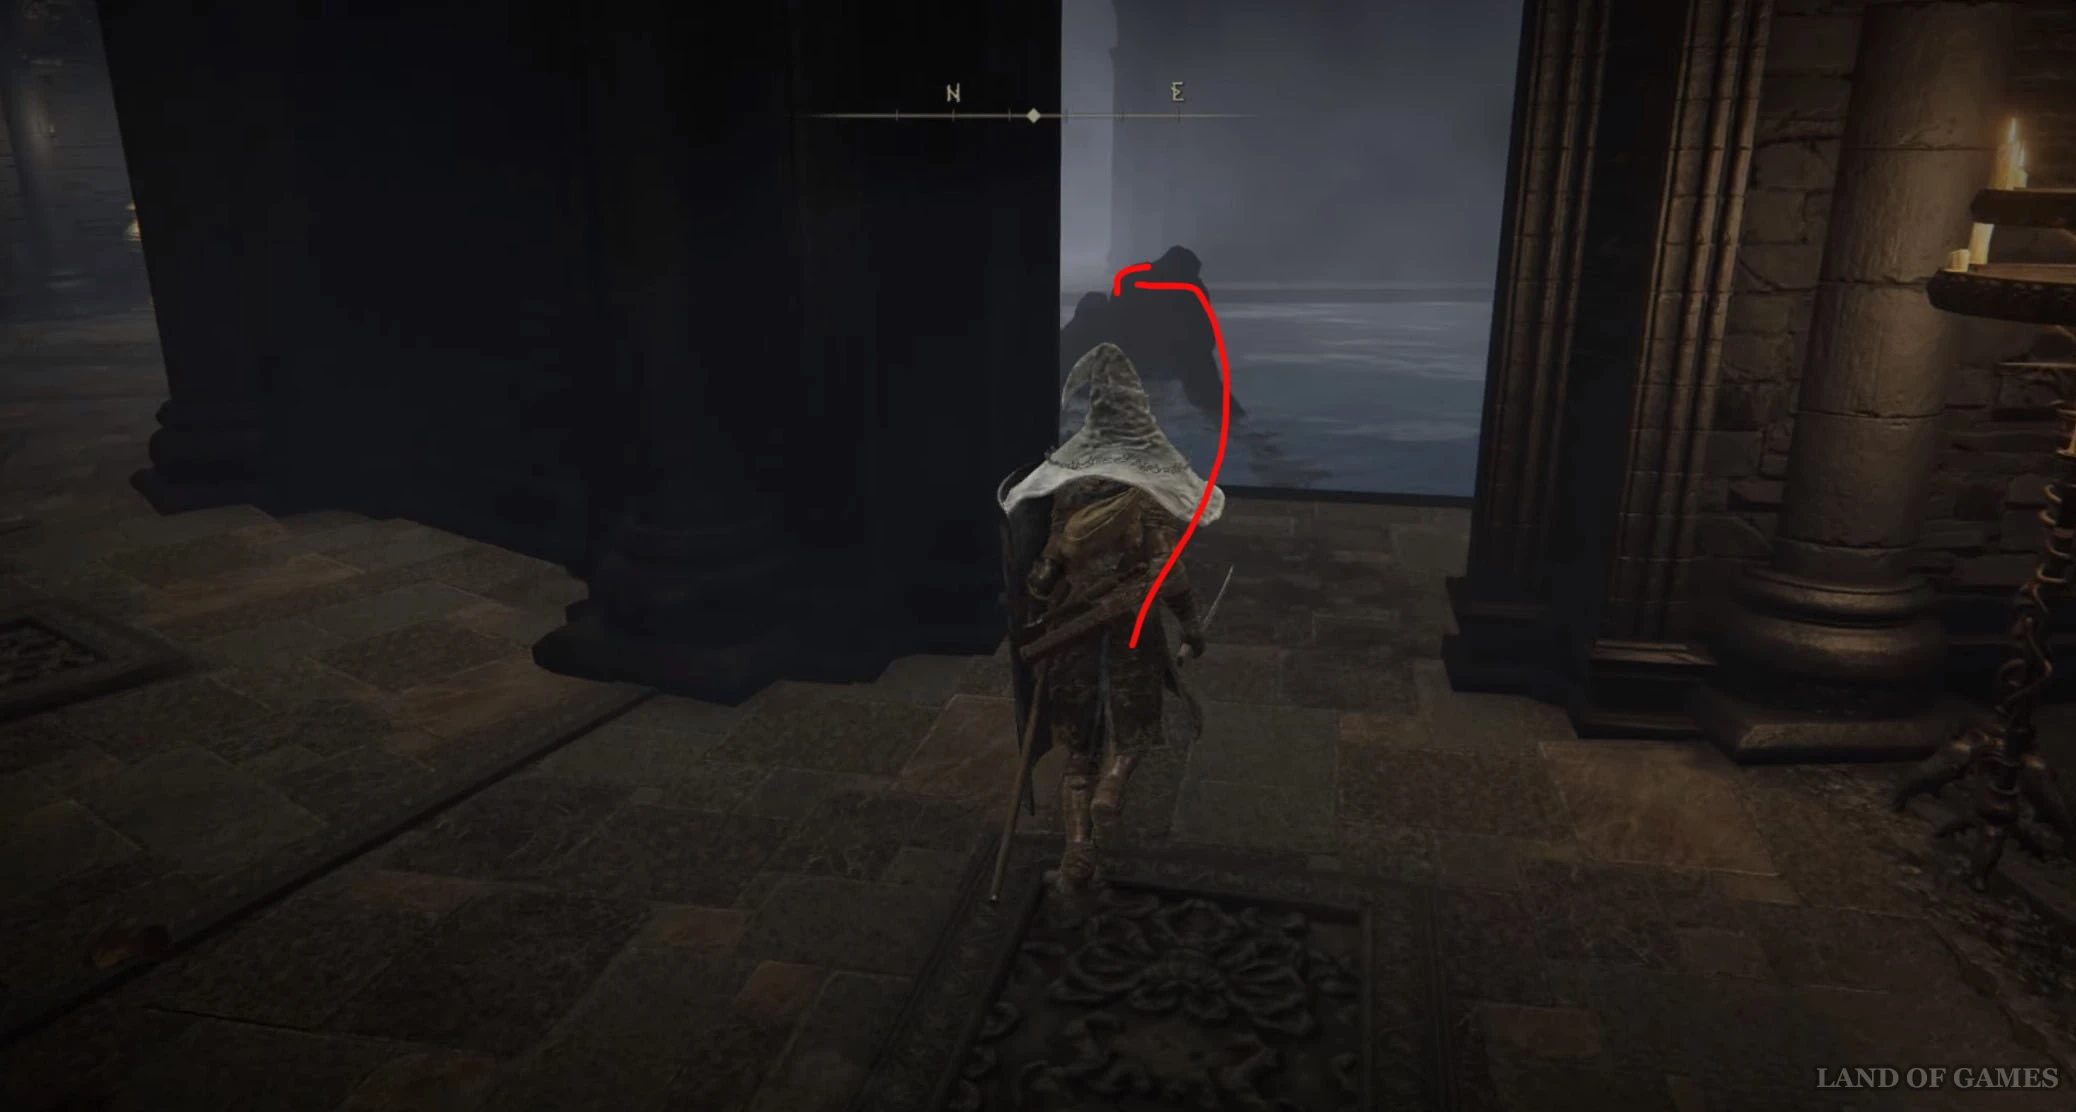
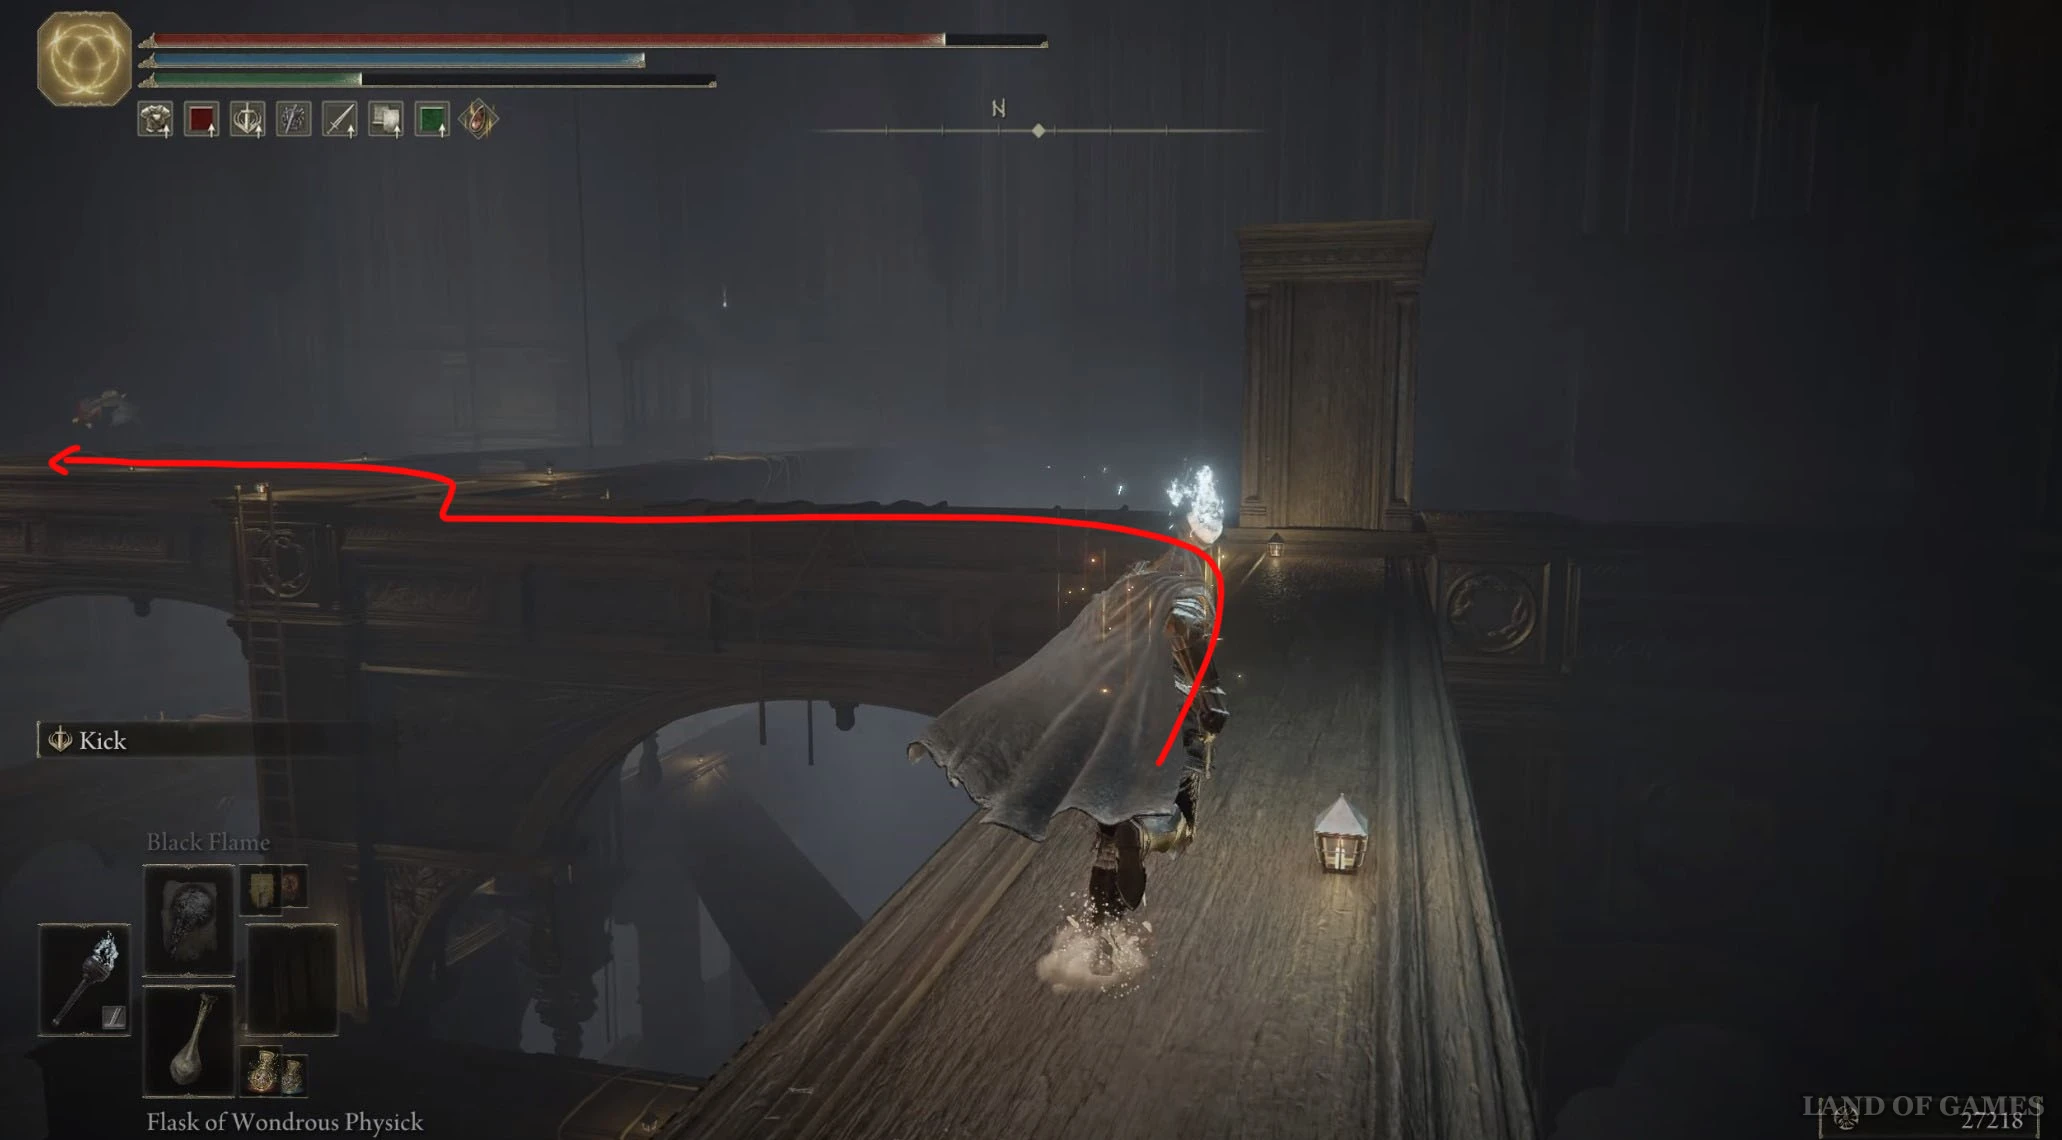
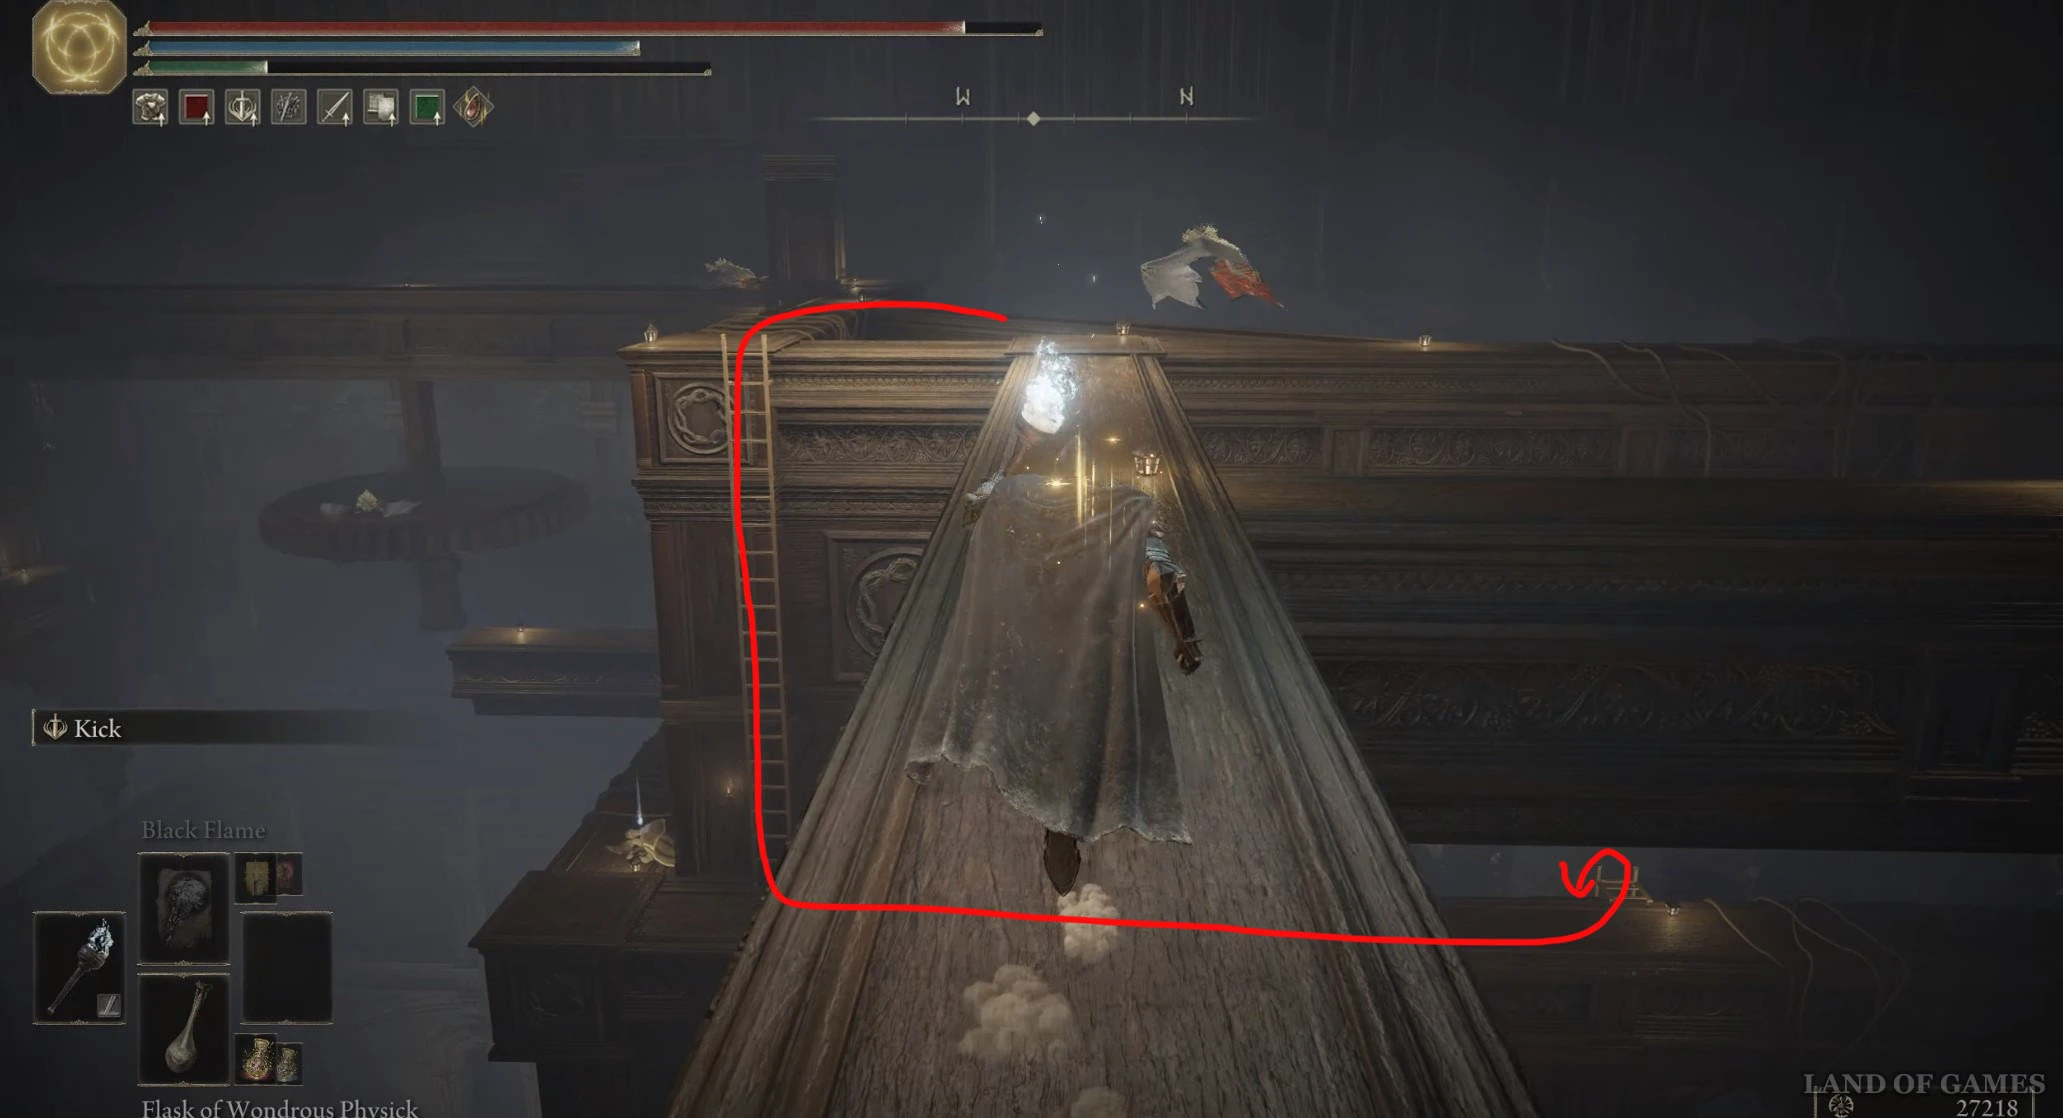
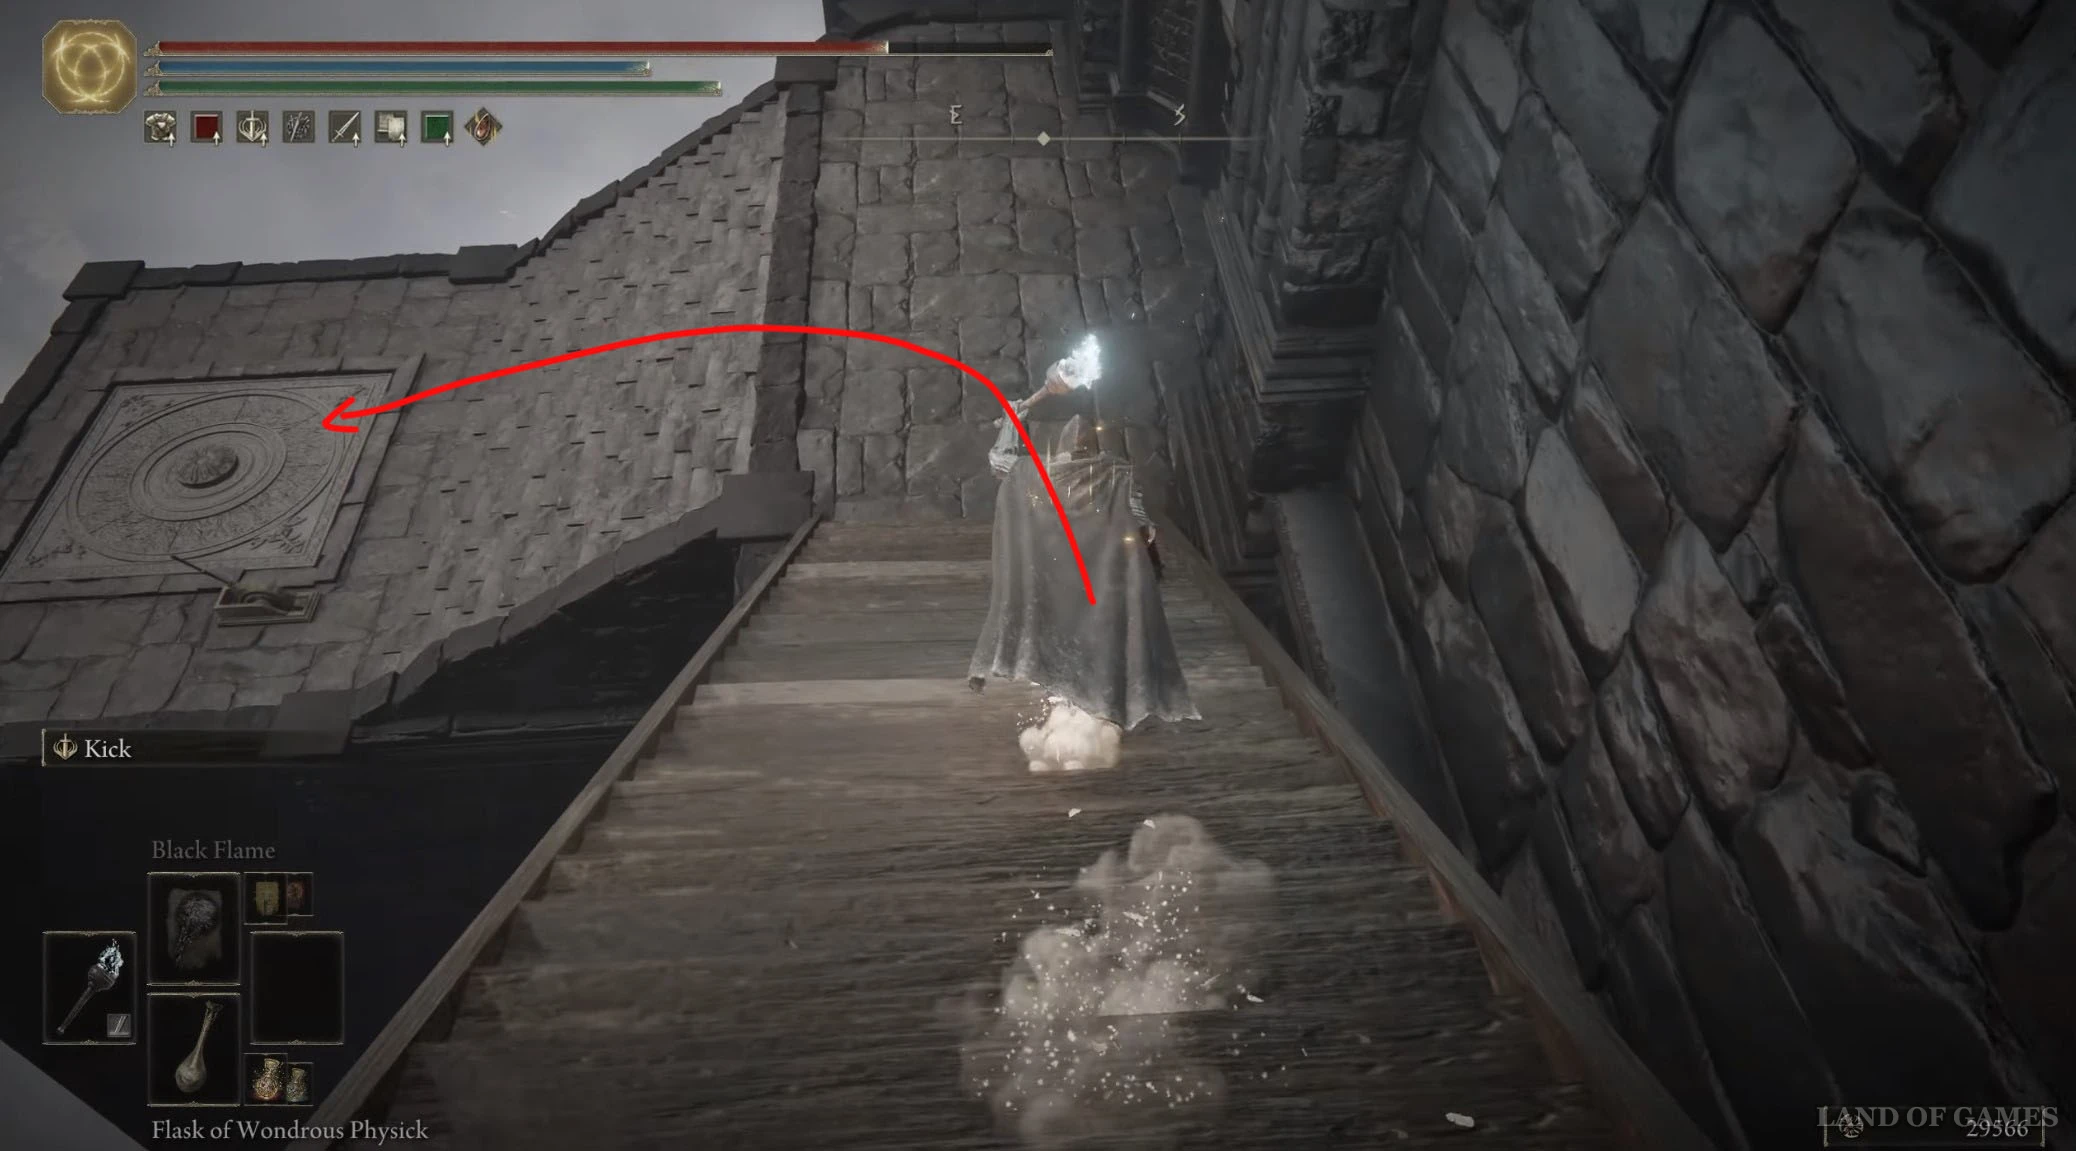
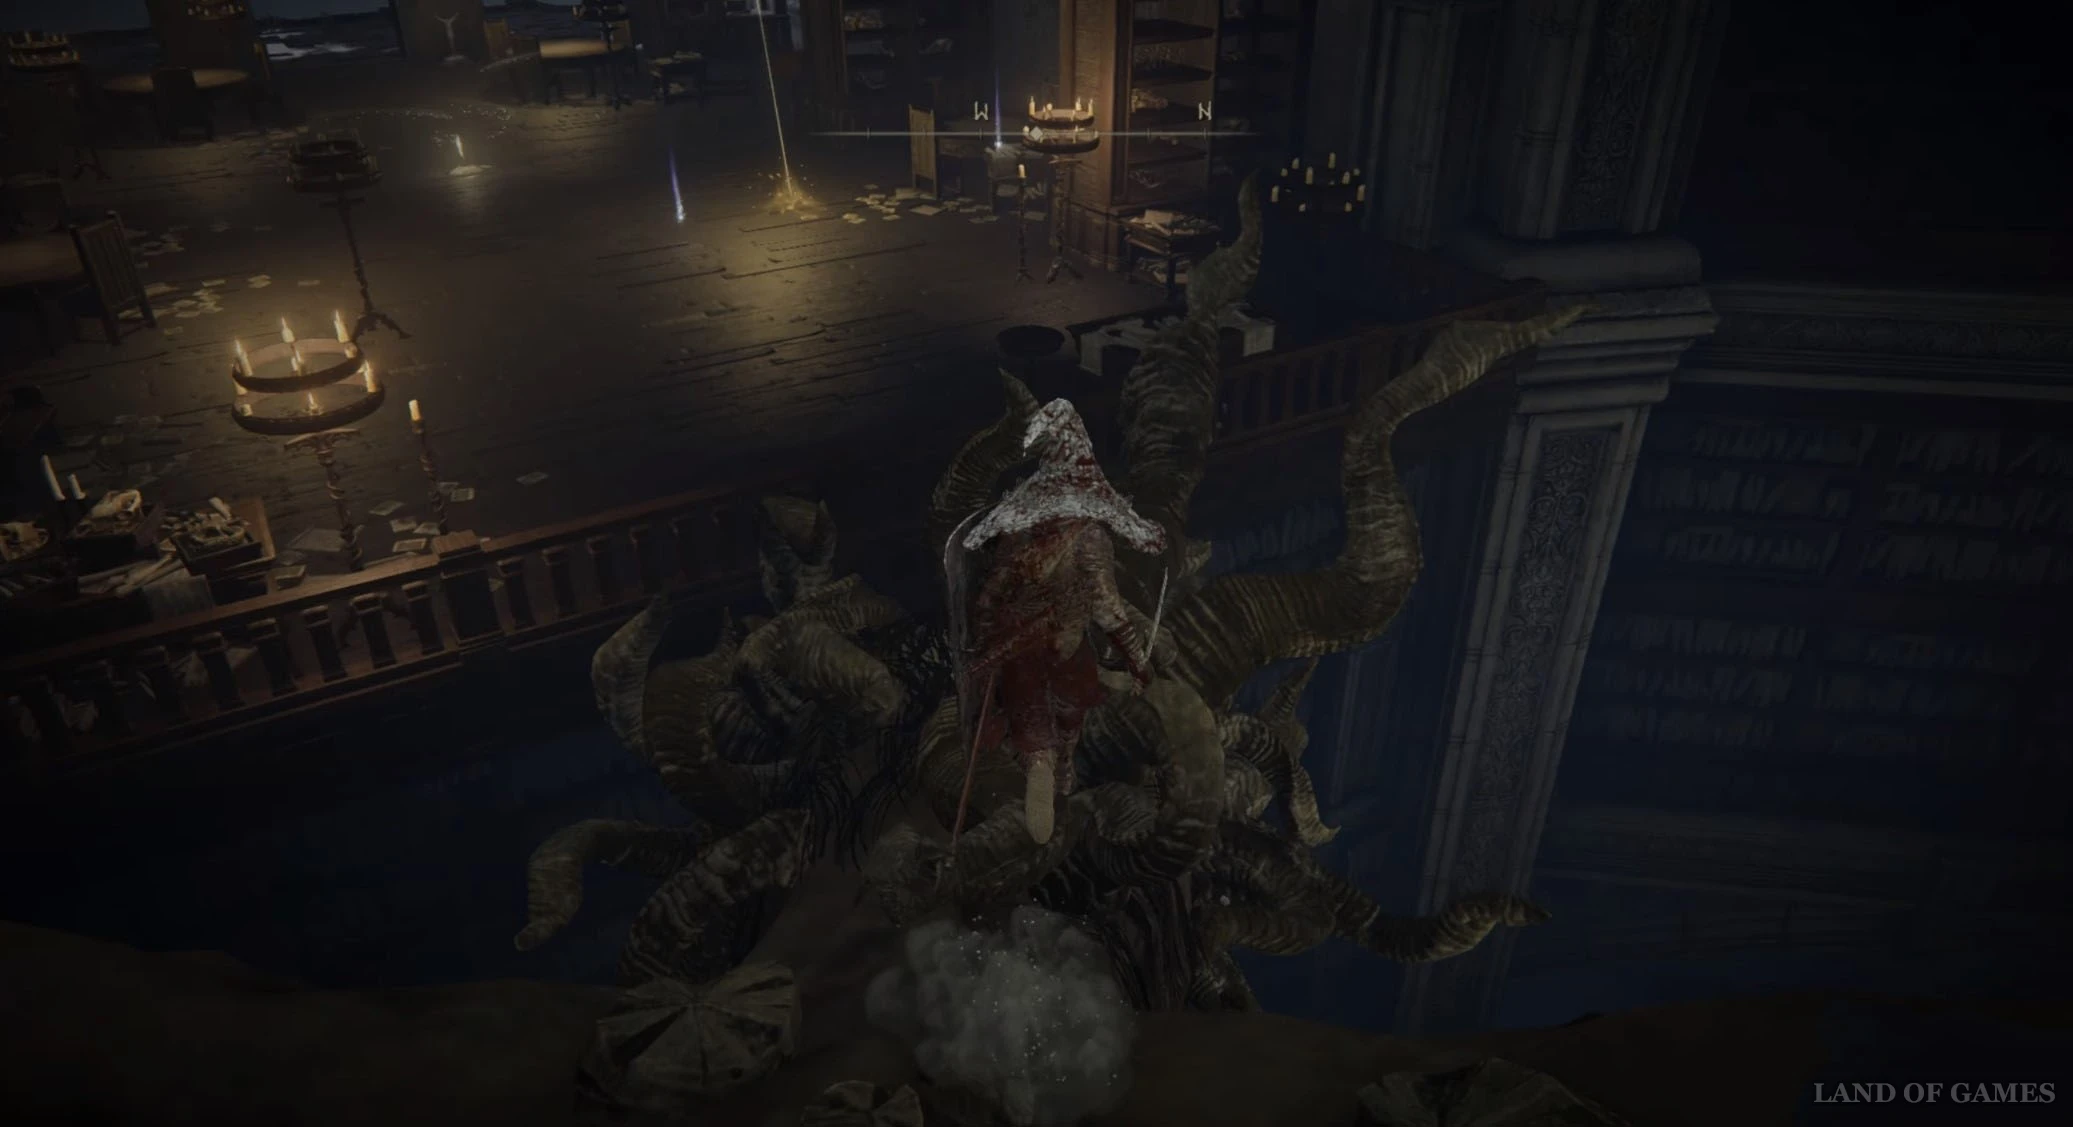
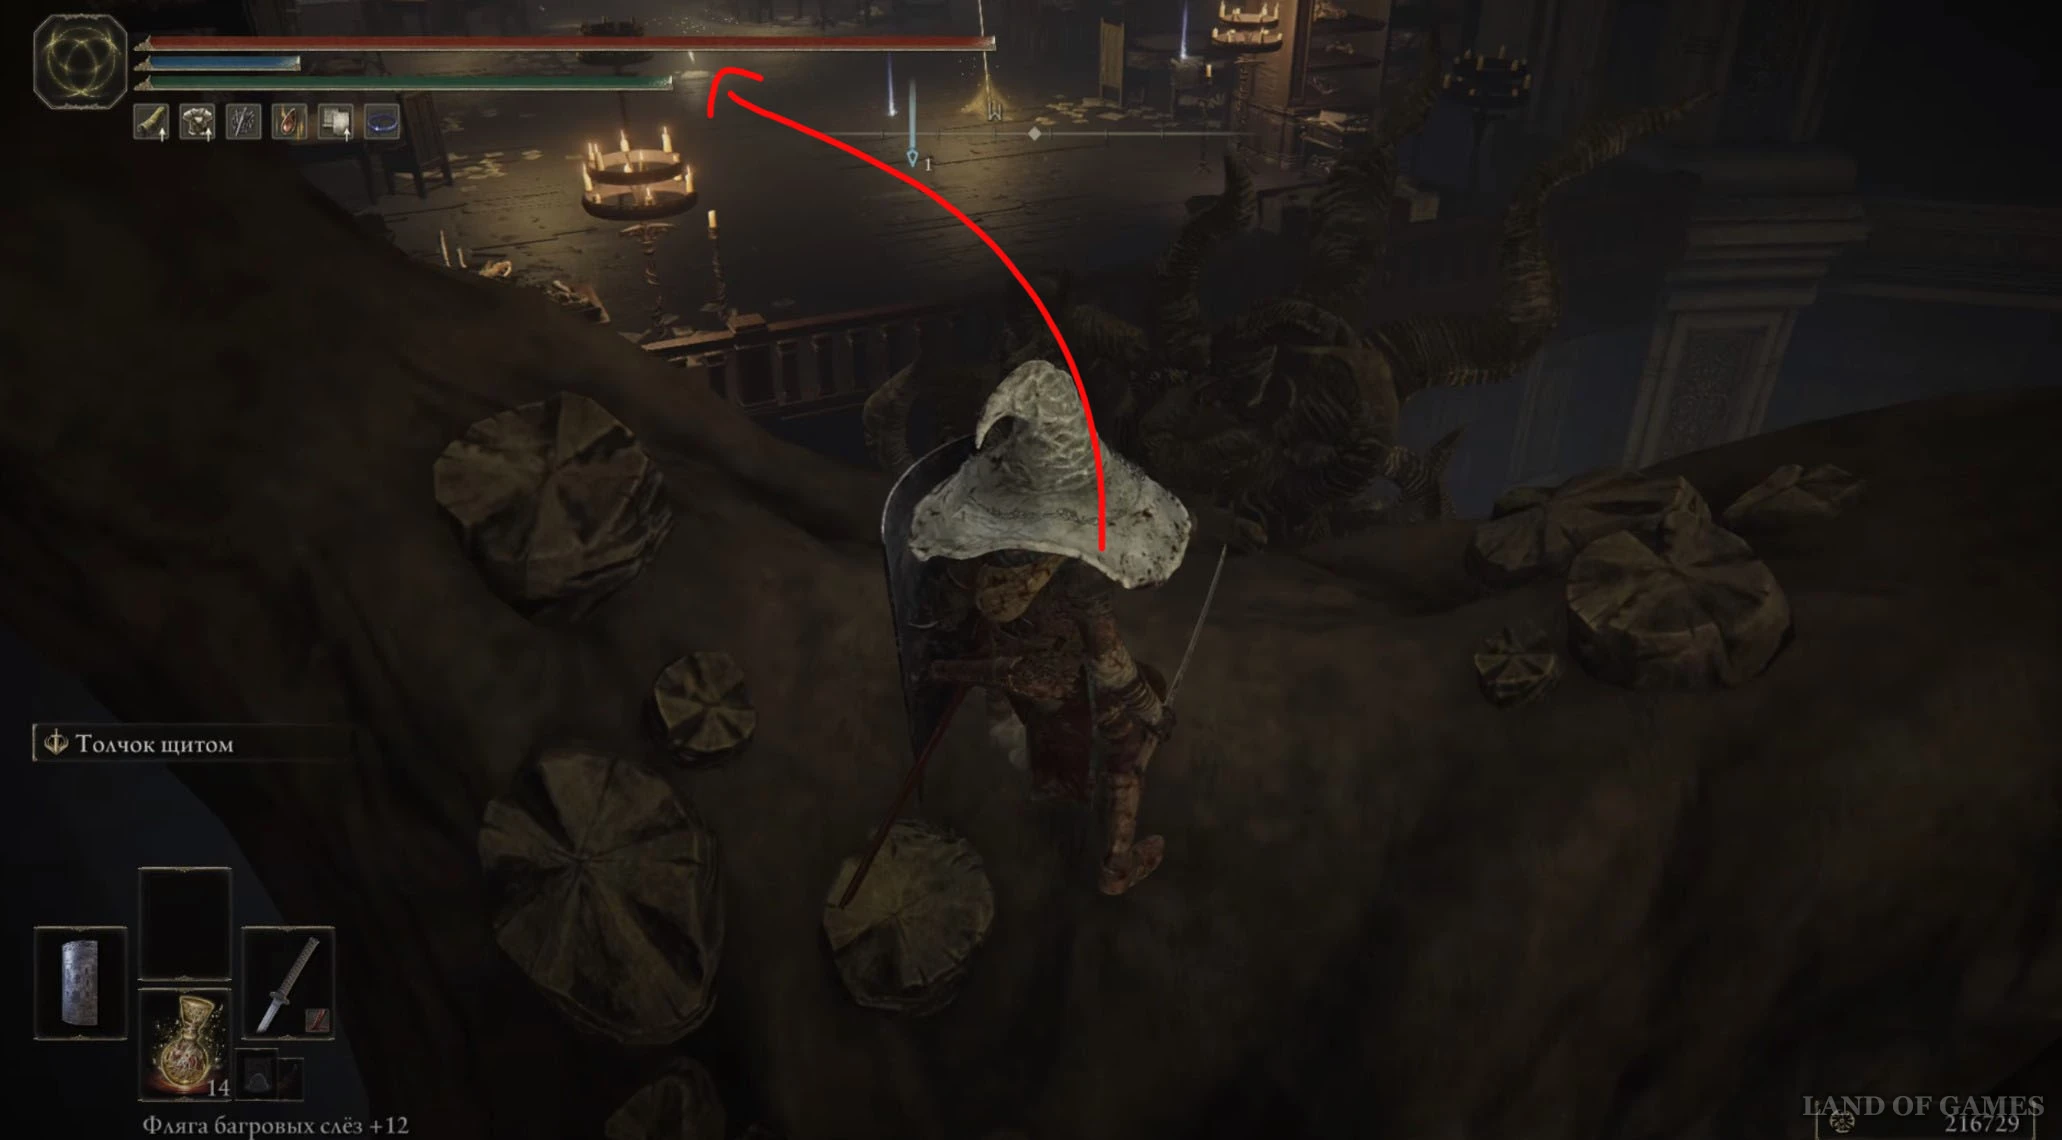
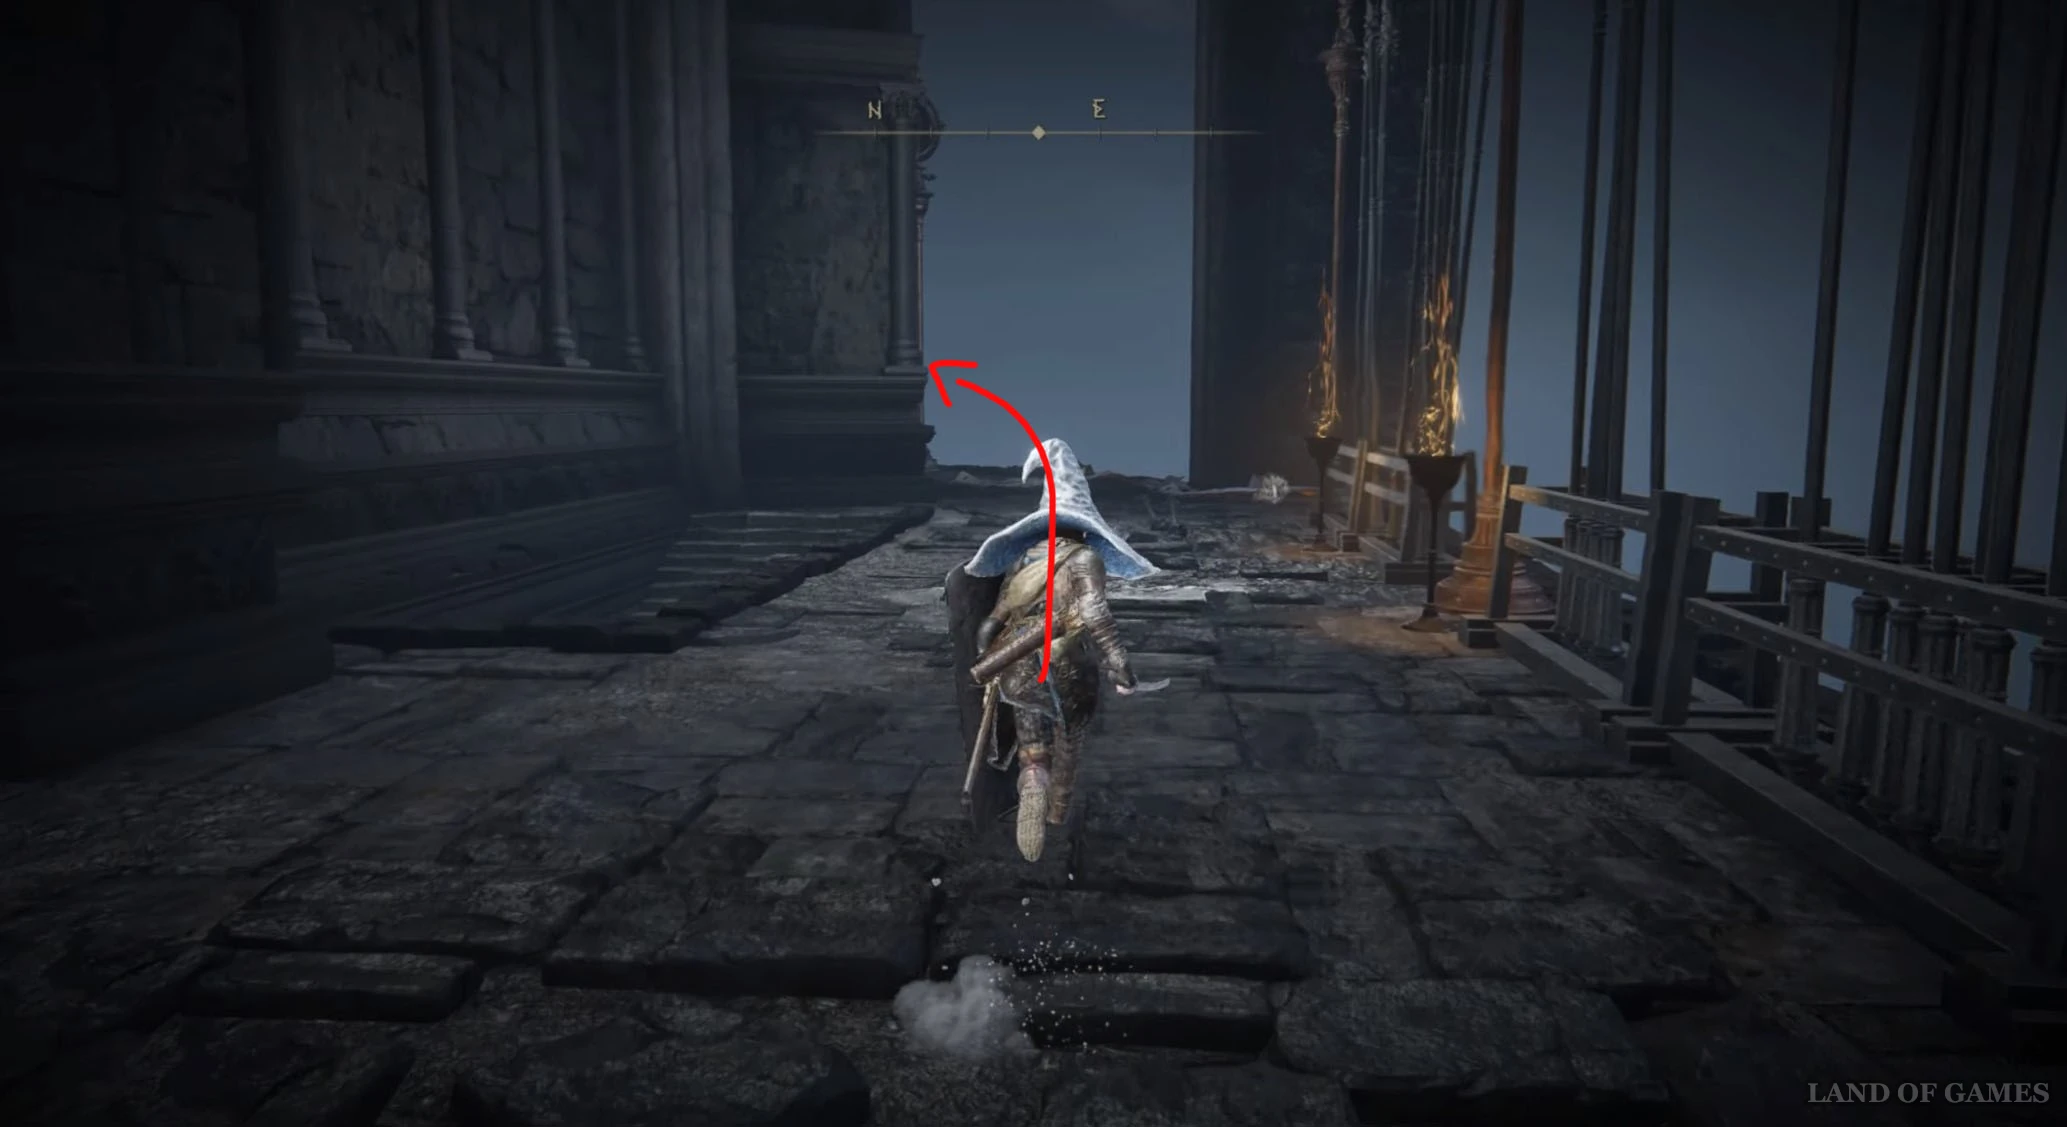
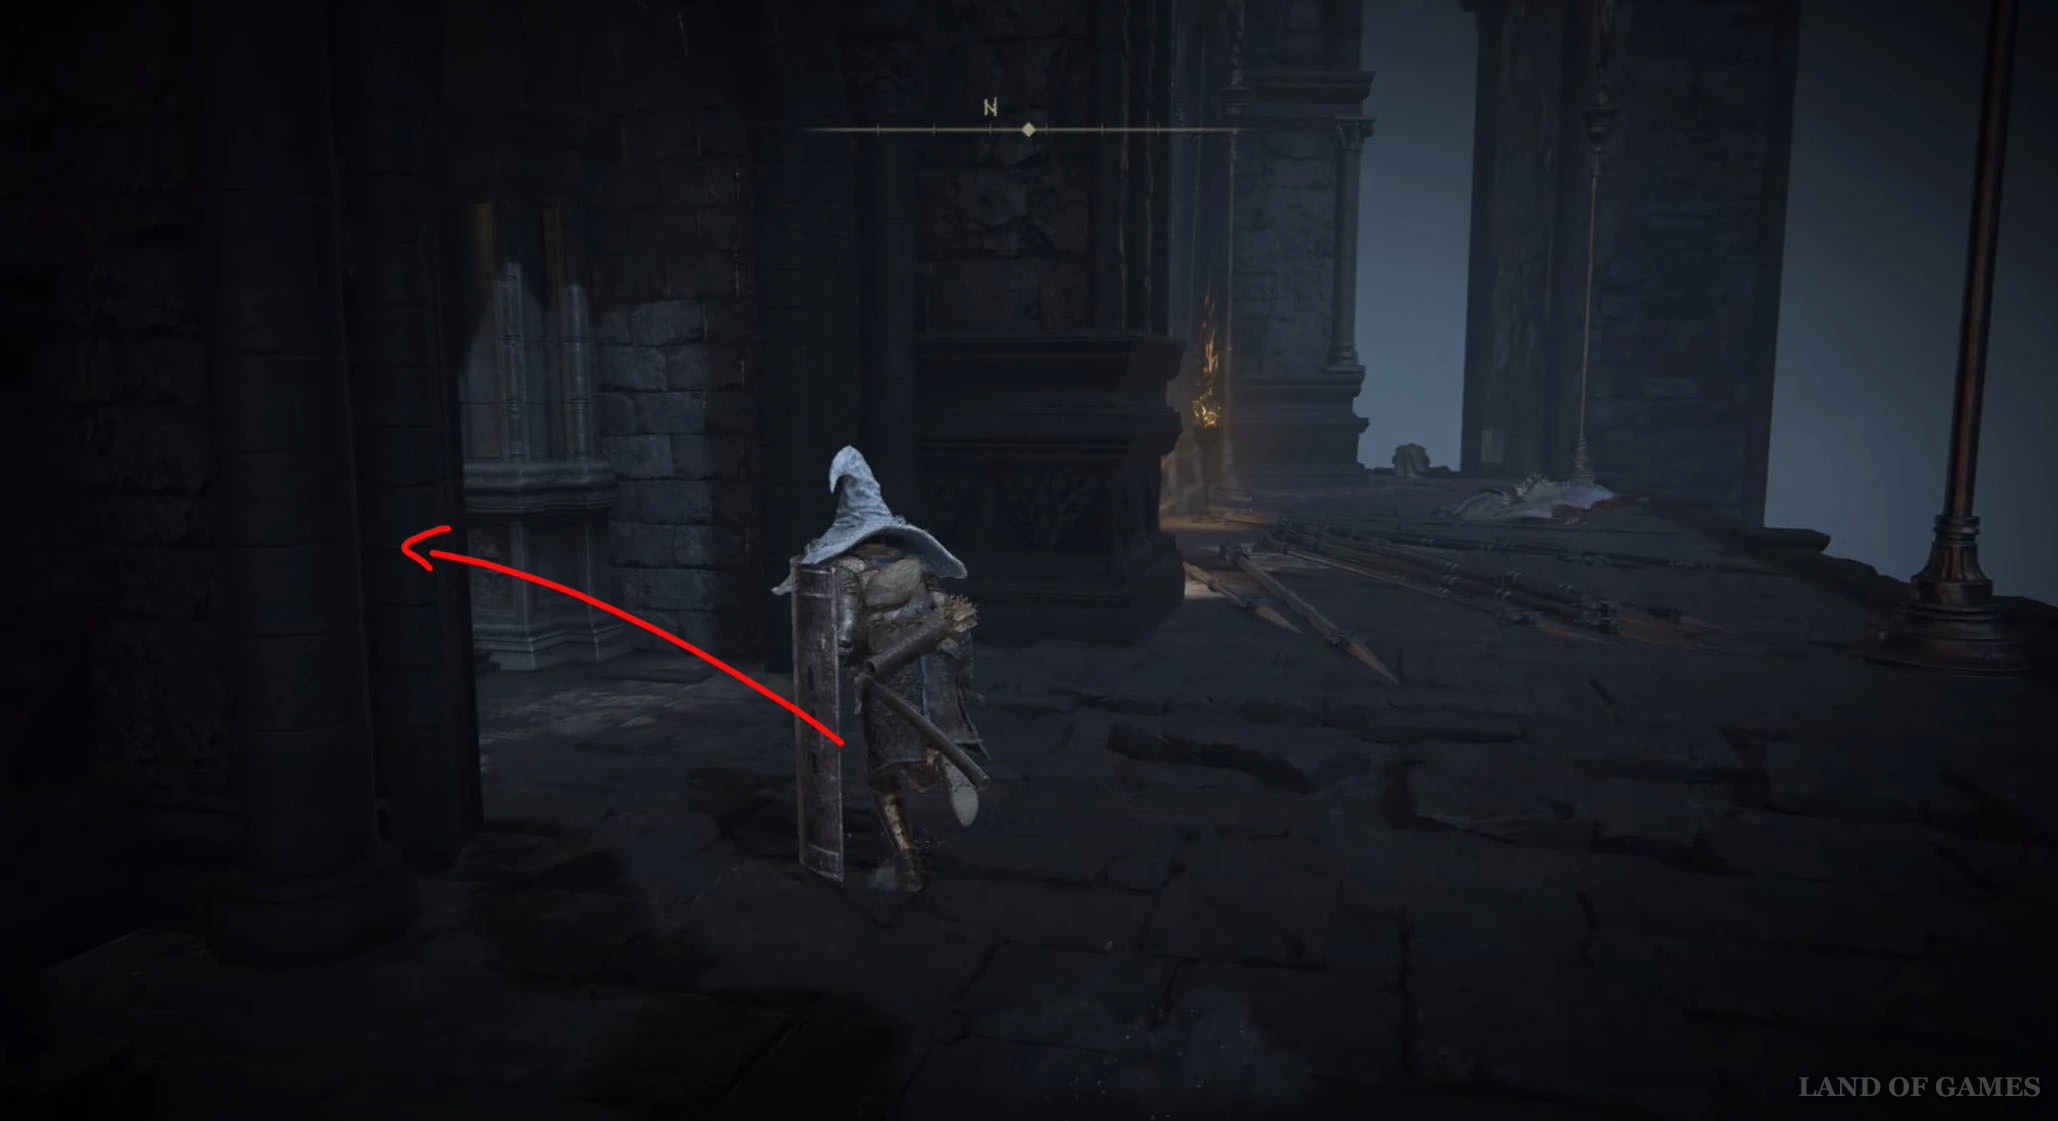
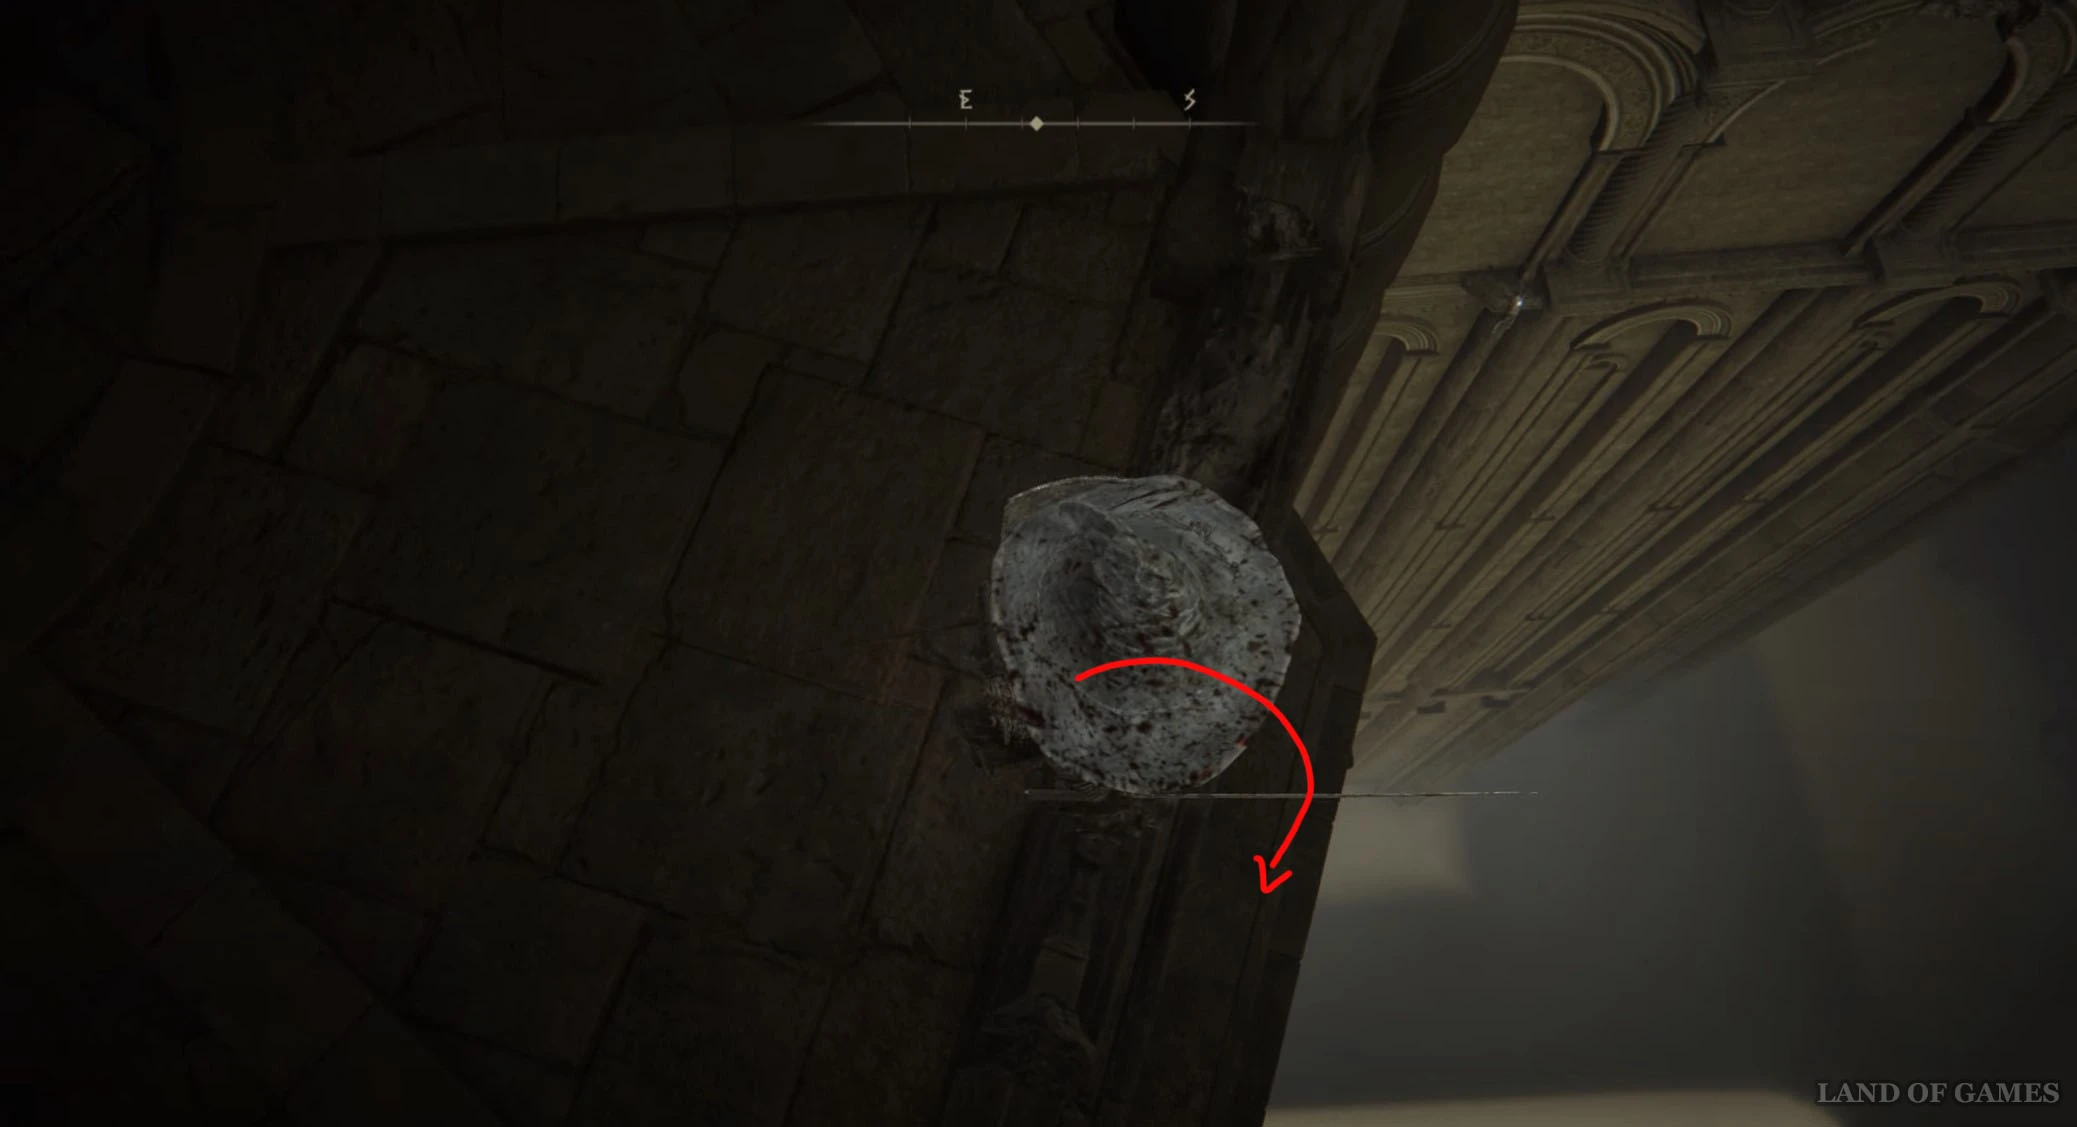
Поверните направо и пройдите мимо лодок с огоньками, продолжая идти на юго-восток. Затем сверните влево возле второй лодки впереди, подойдите к краю стены и спуститесь вниз по деревянной лесенке. Далее пройдите через водопад справа и воспользуйтесь второй лесенкой, чтобы спуститься еще ниже.

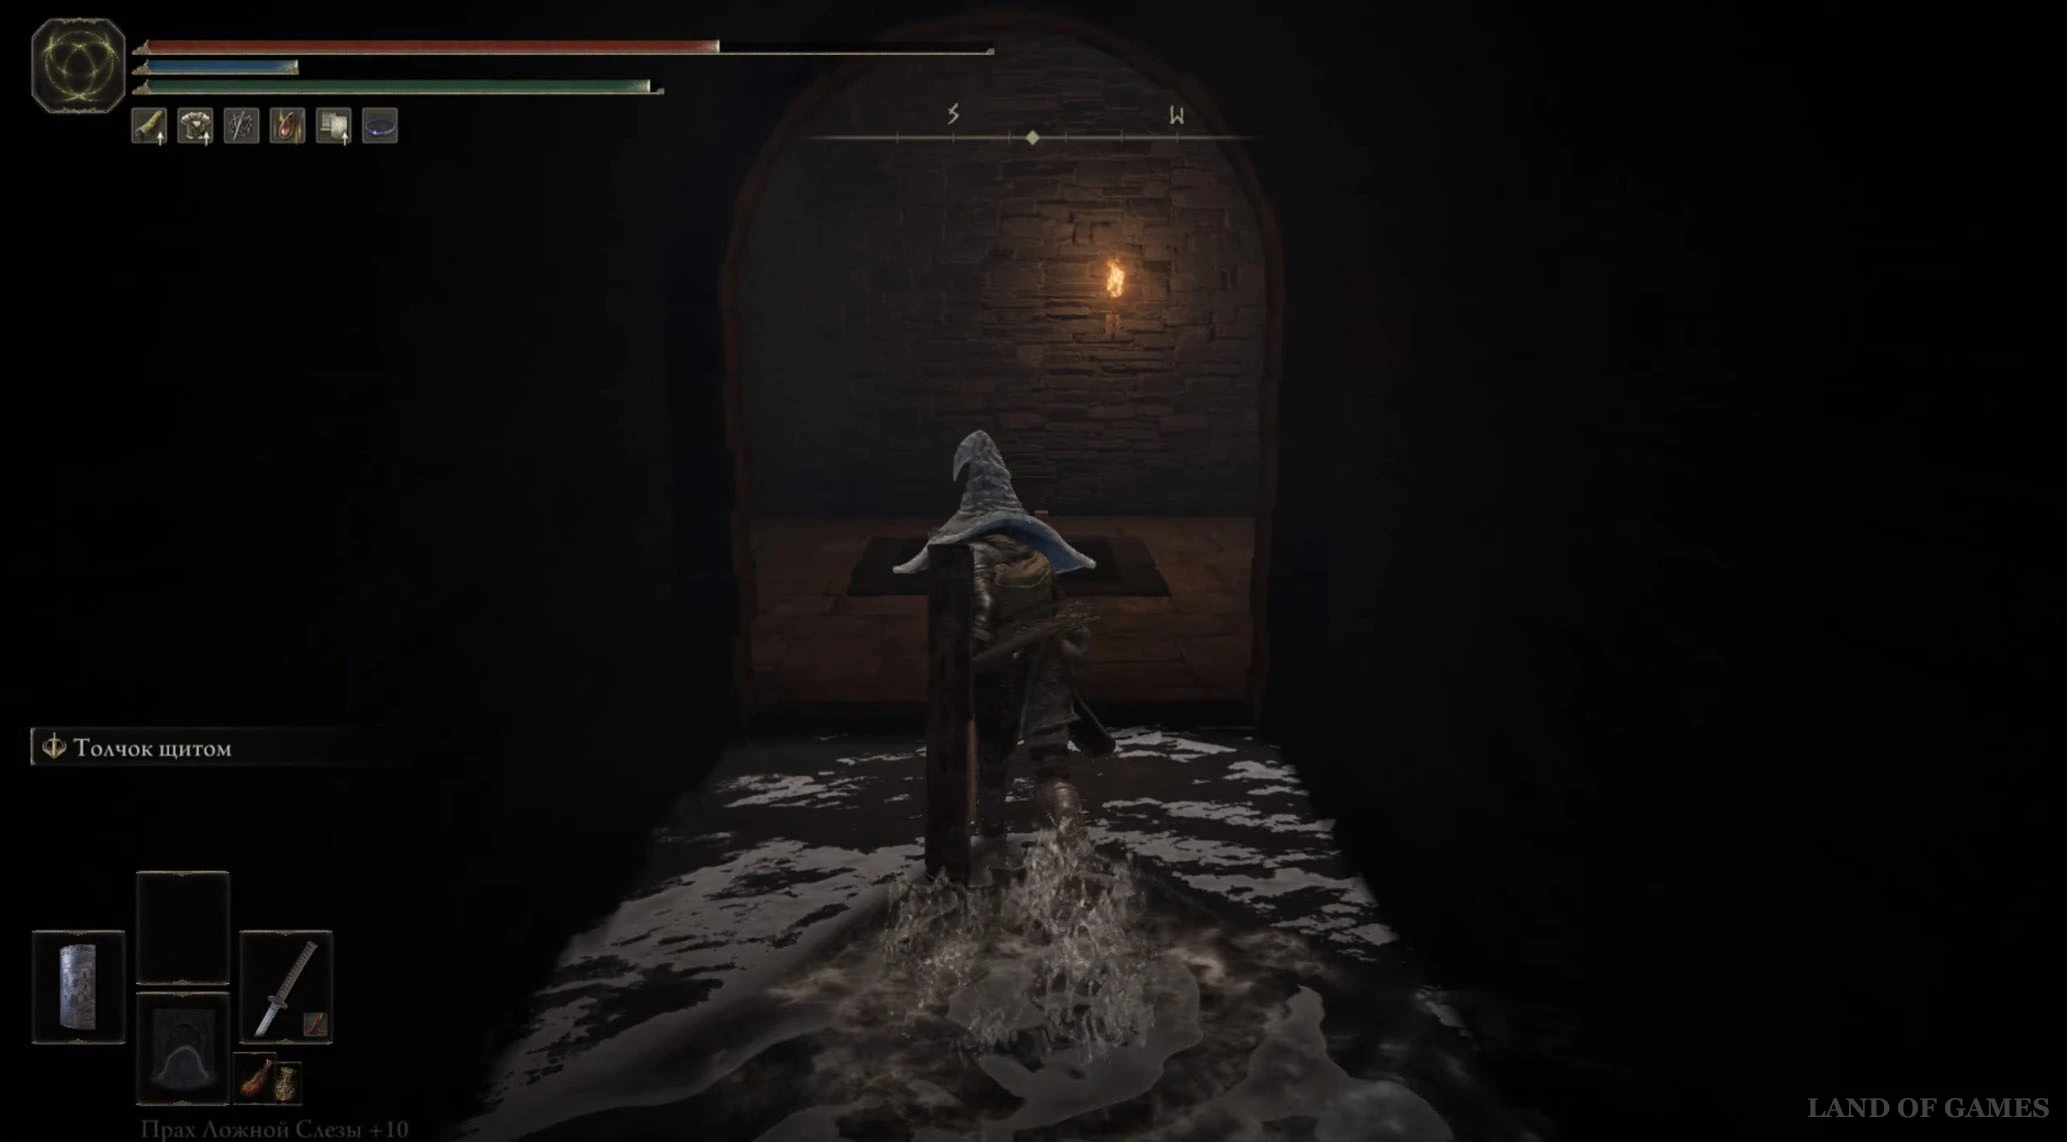
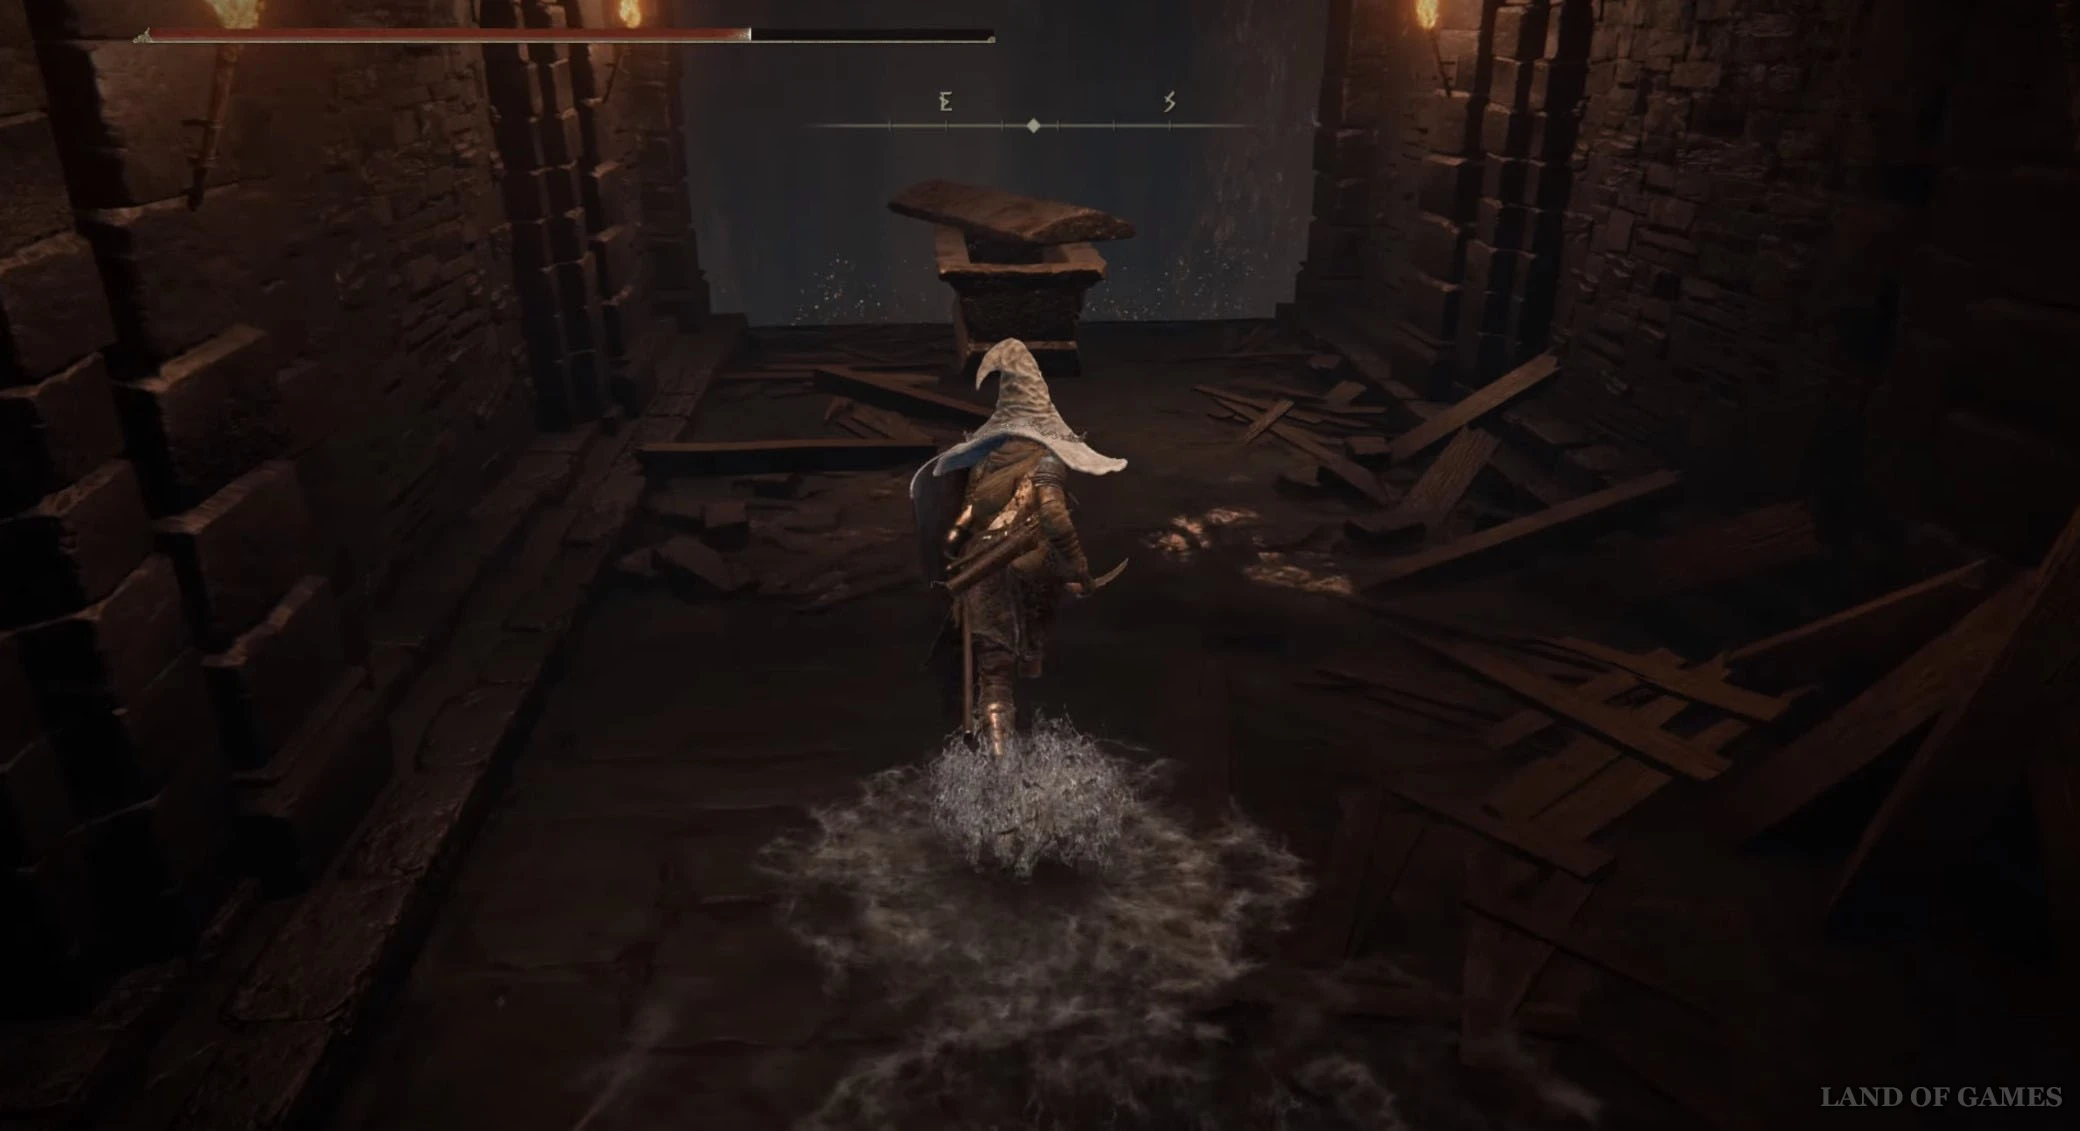
Попав в канализацию, пройдите через юго-восточный проход в комнату с картиной. Справа от рисунка находится иллюзорная стена – стукните по ней для раскрытия секретного пути. Теперь спуститесь вниз и залезьте в открытый каменный гроб для перехода в новую область.
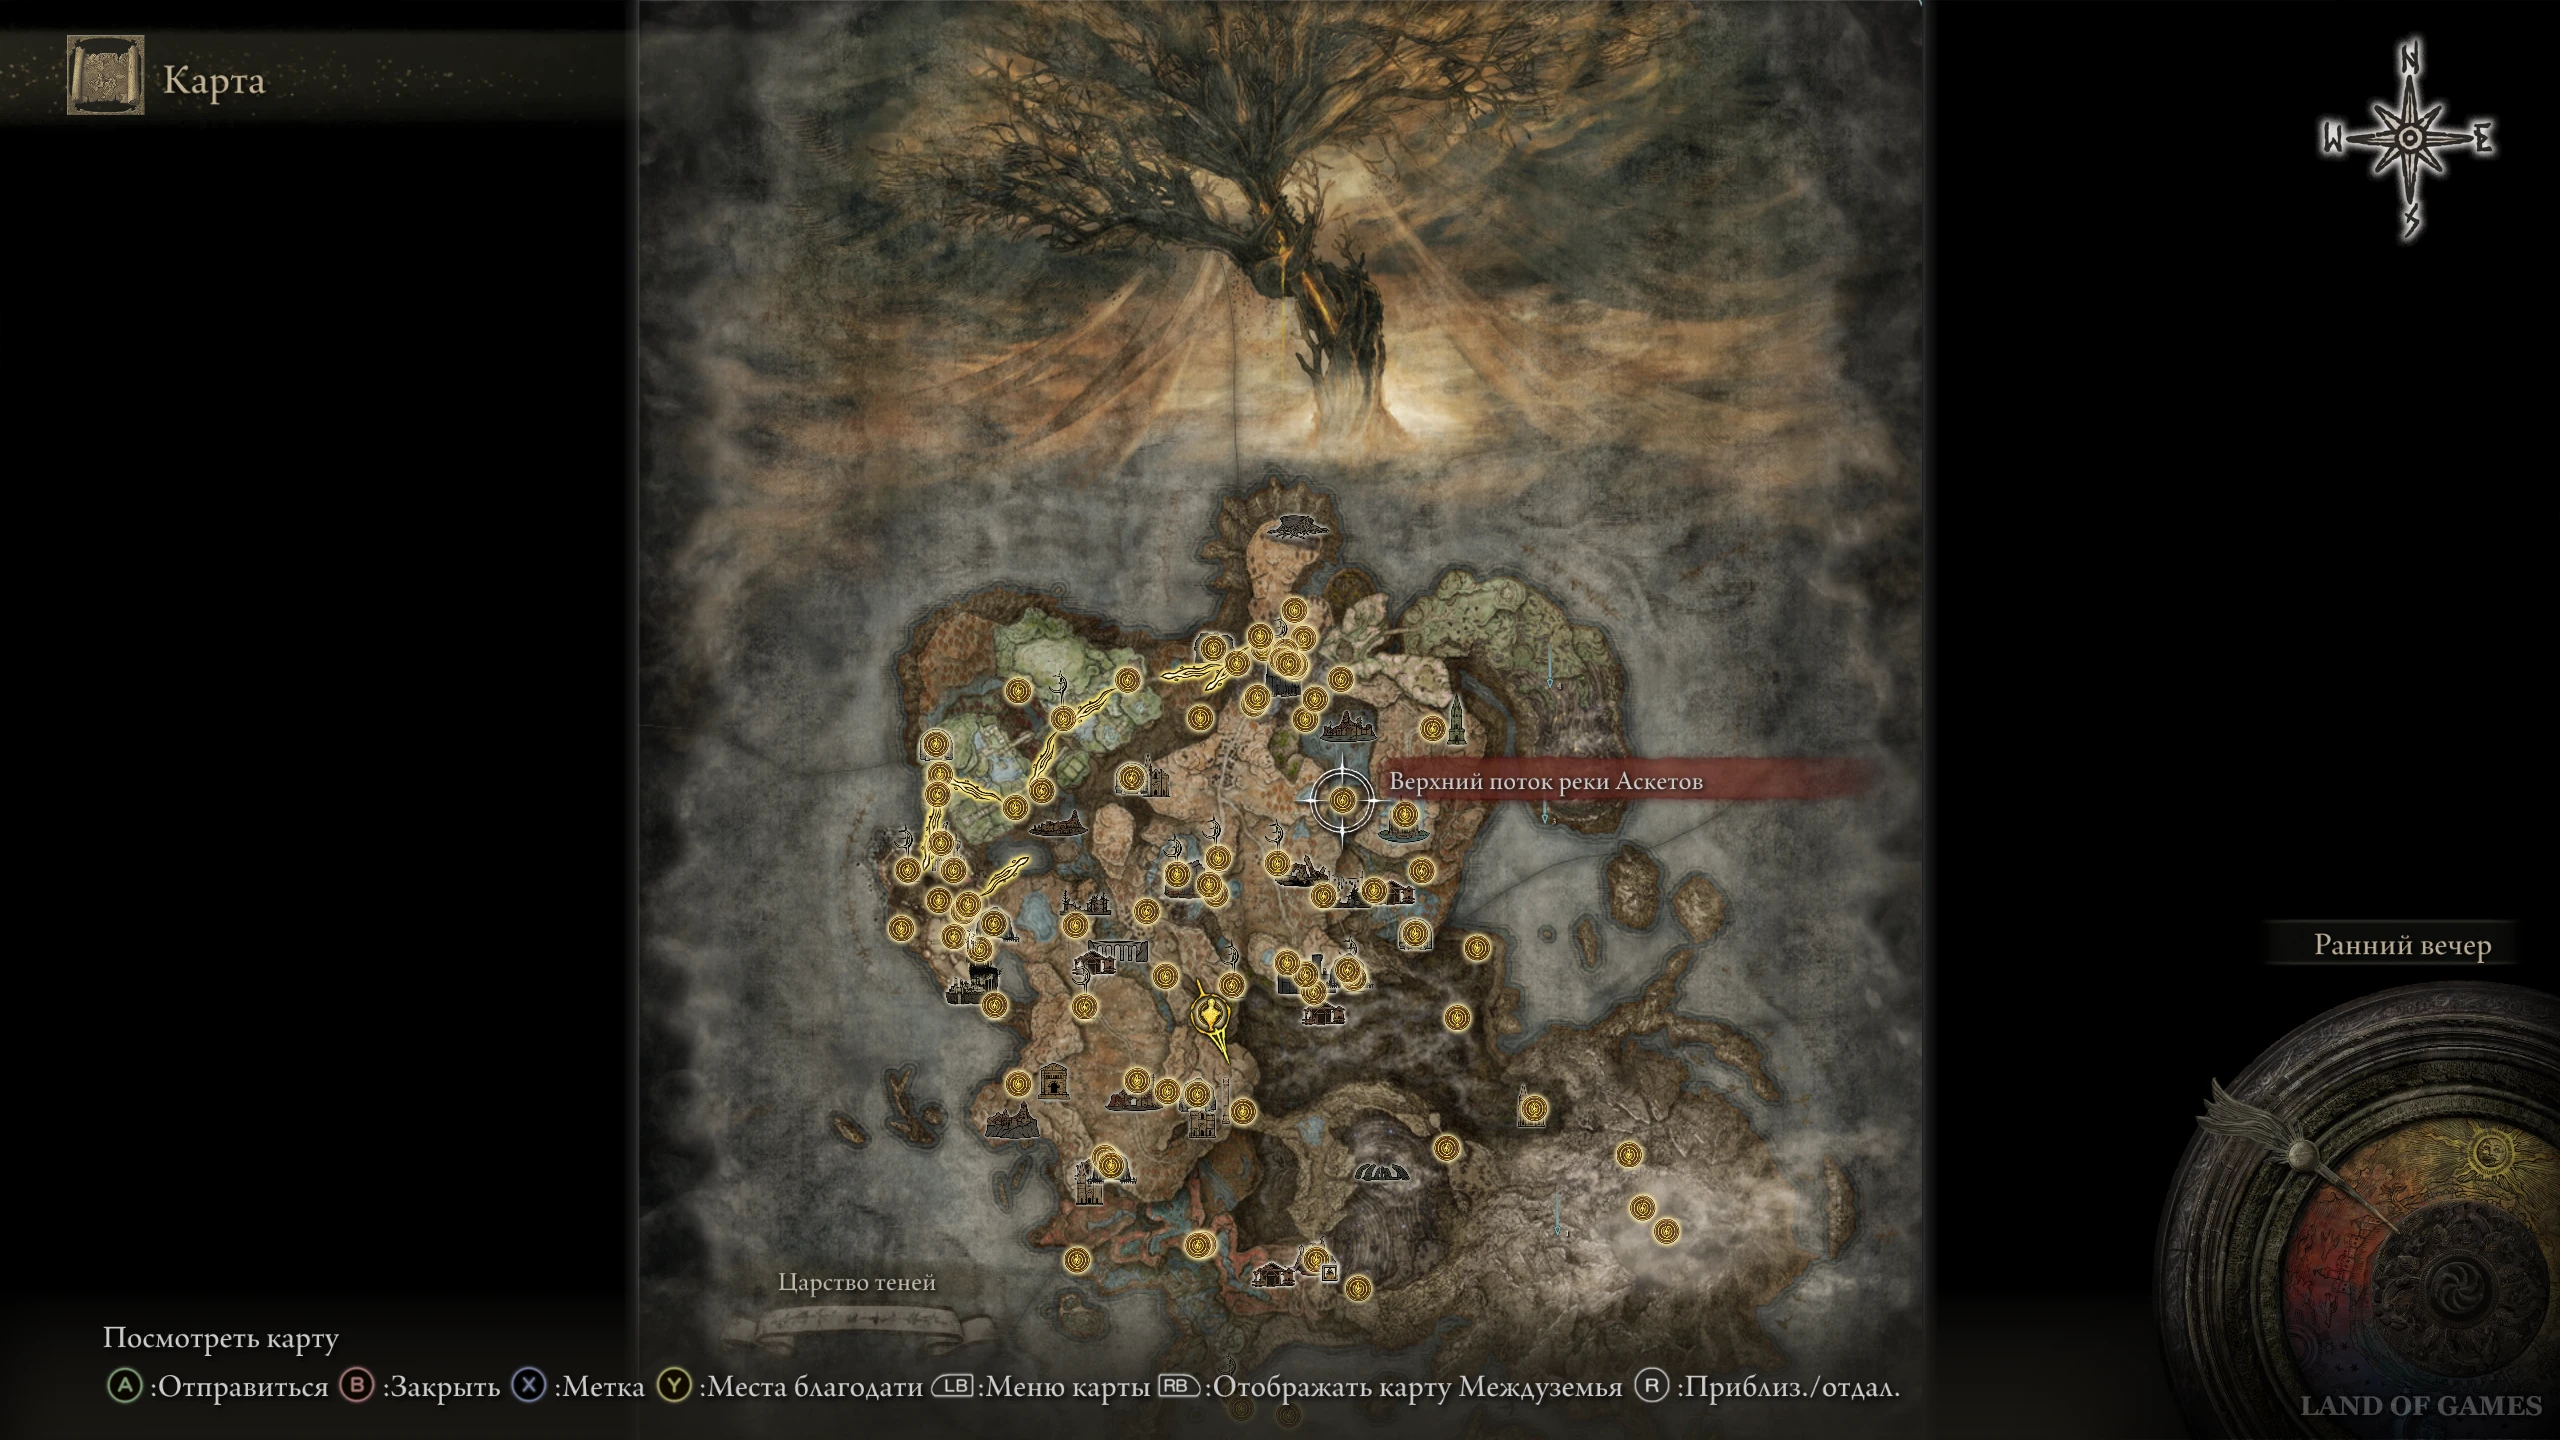
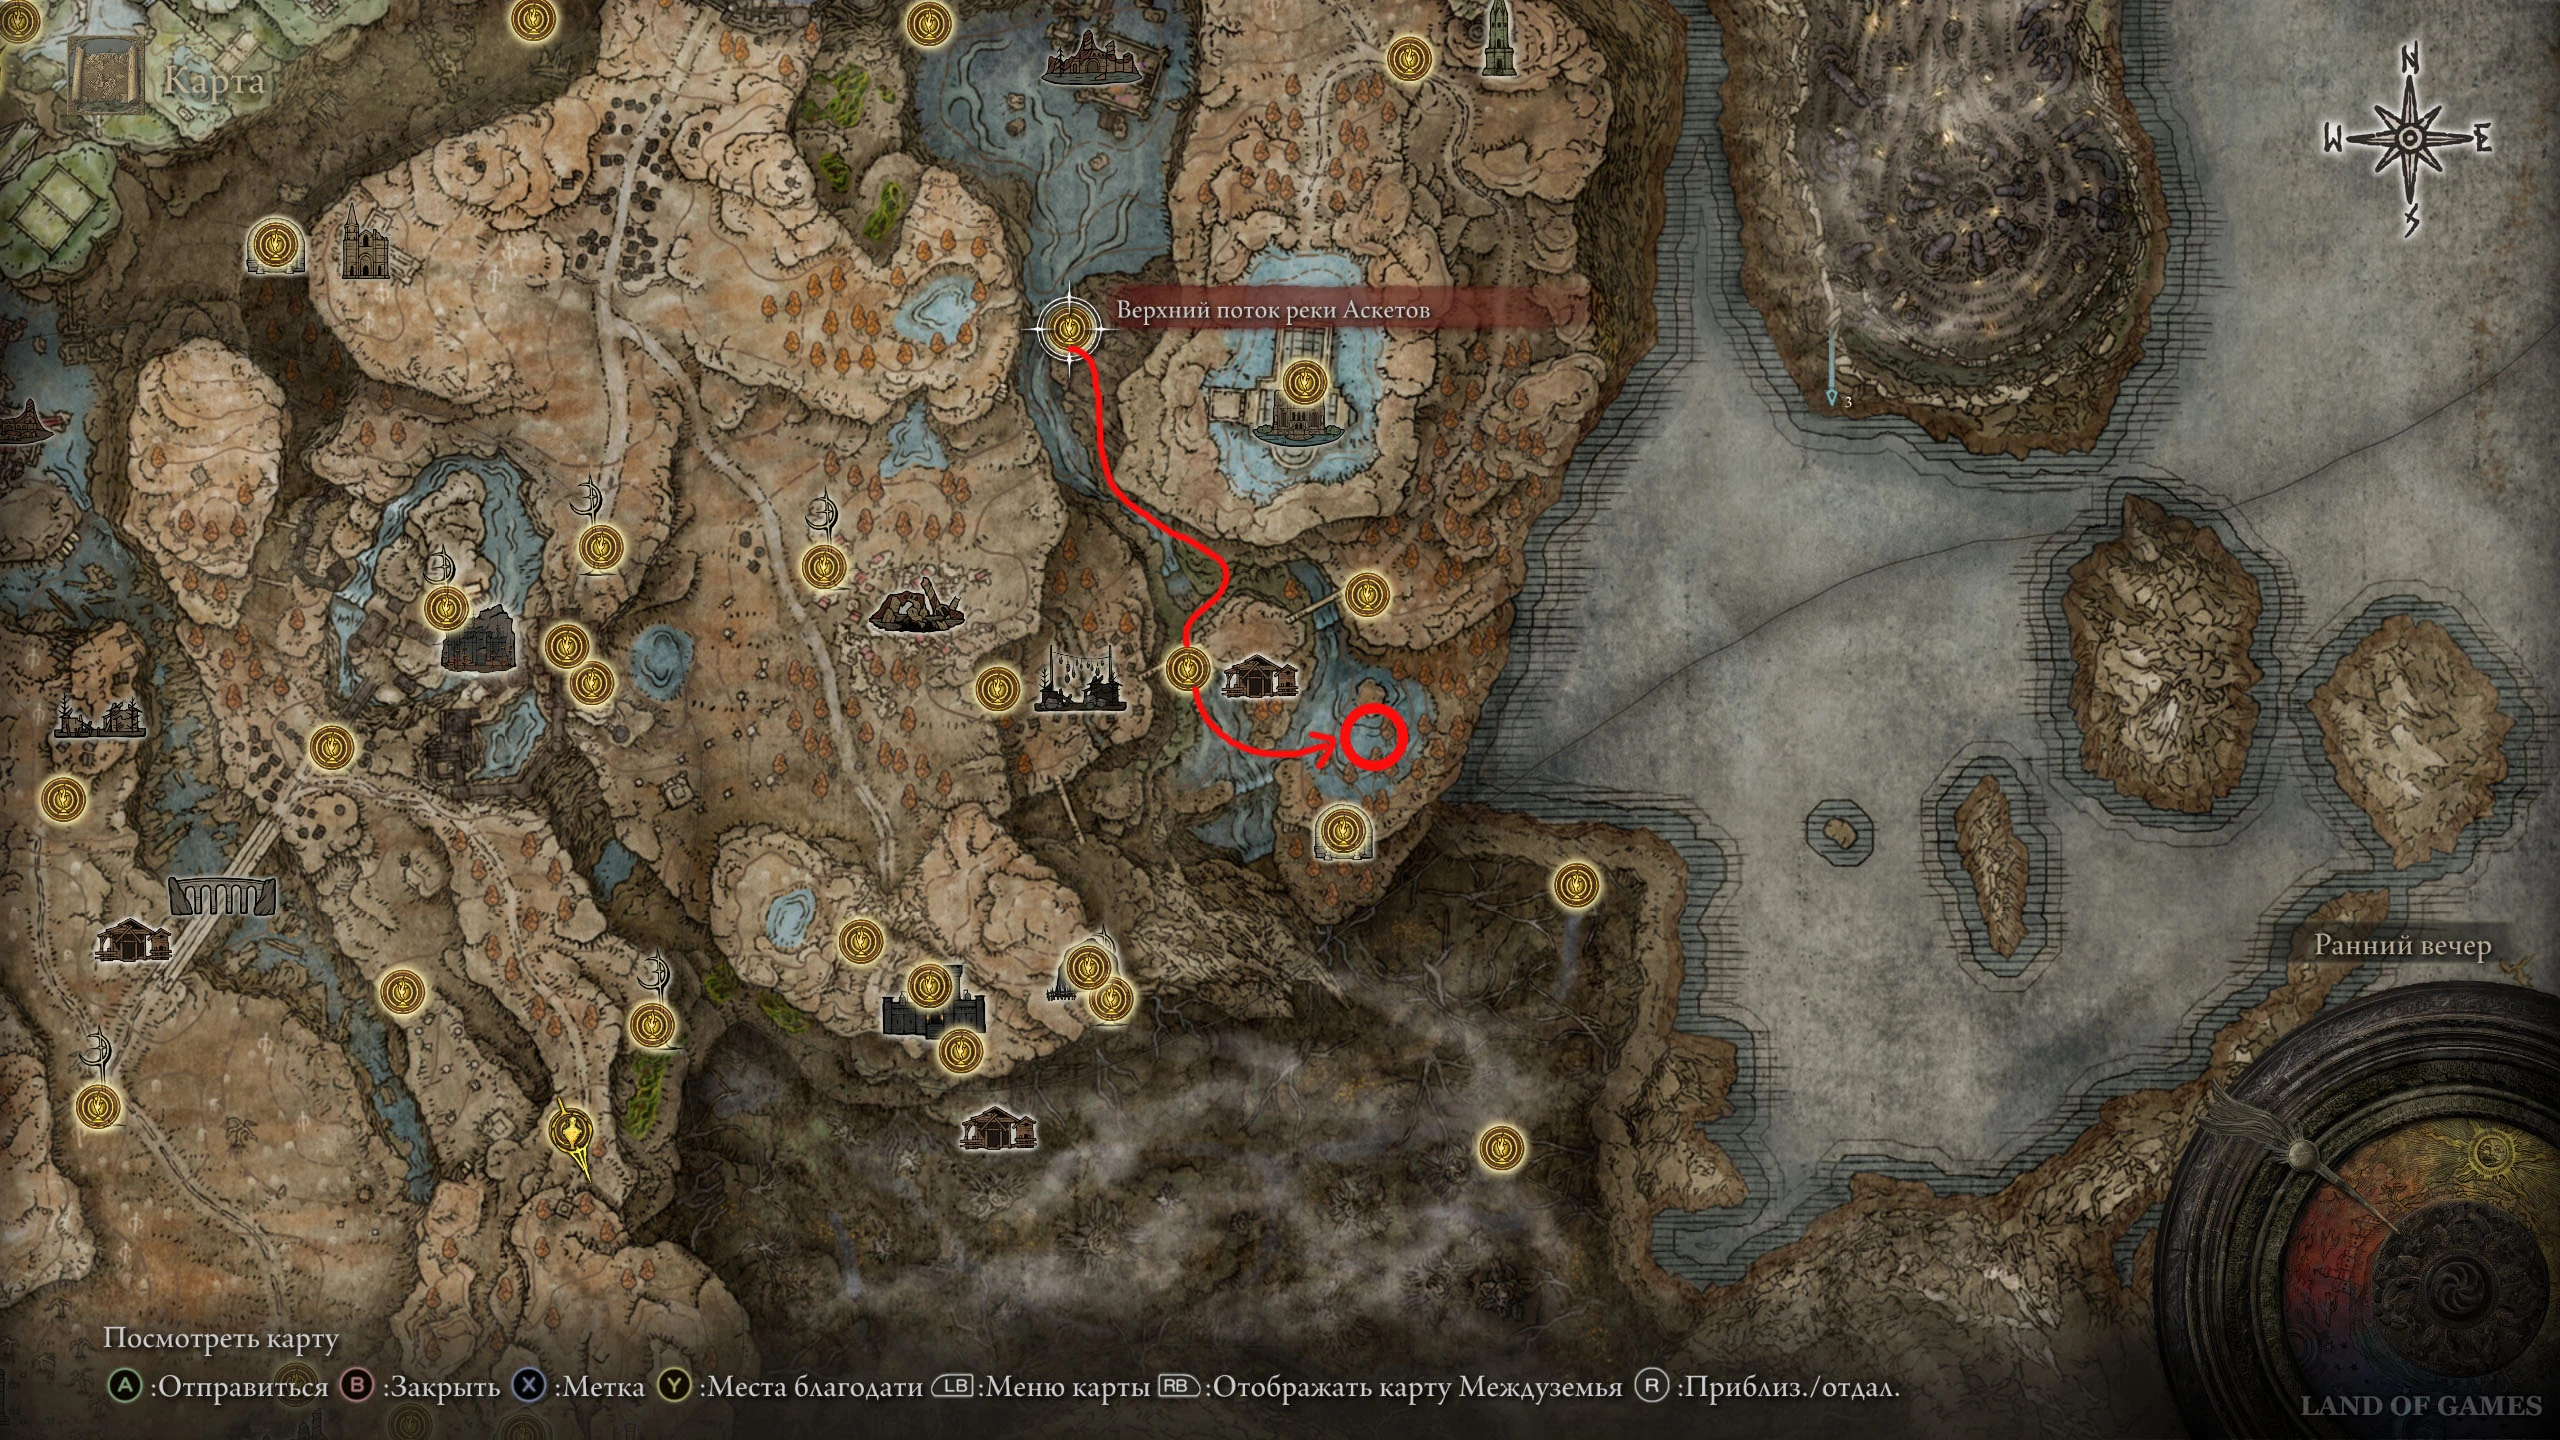
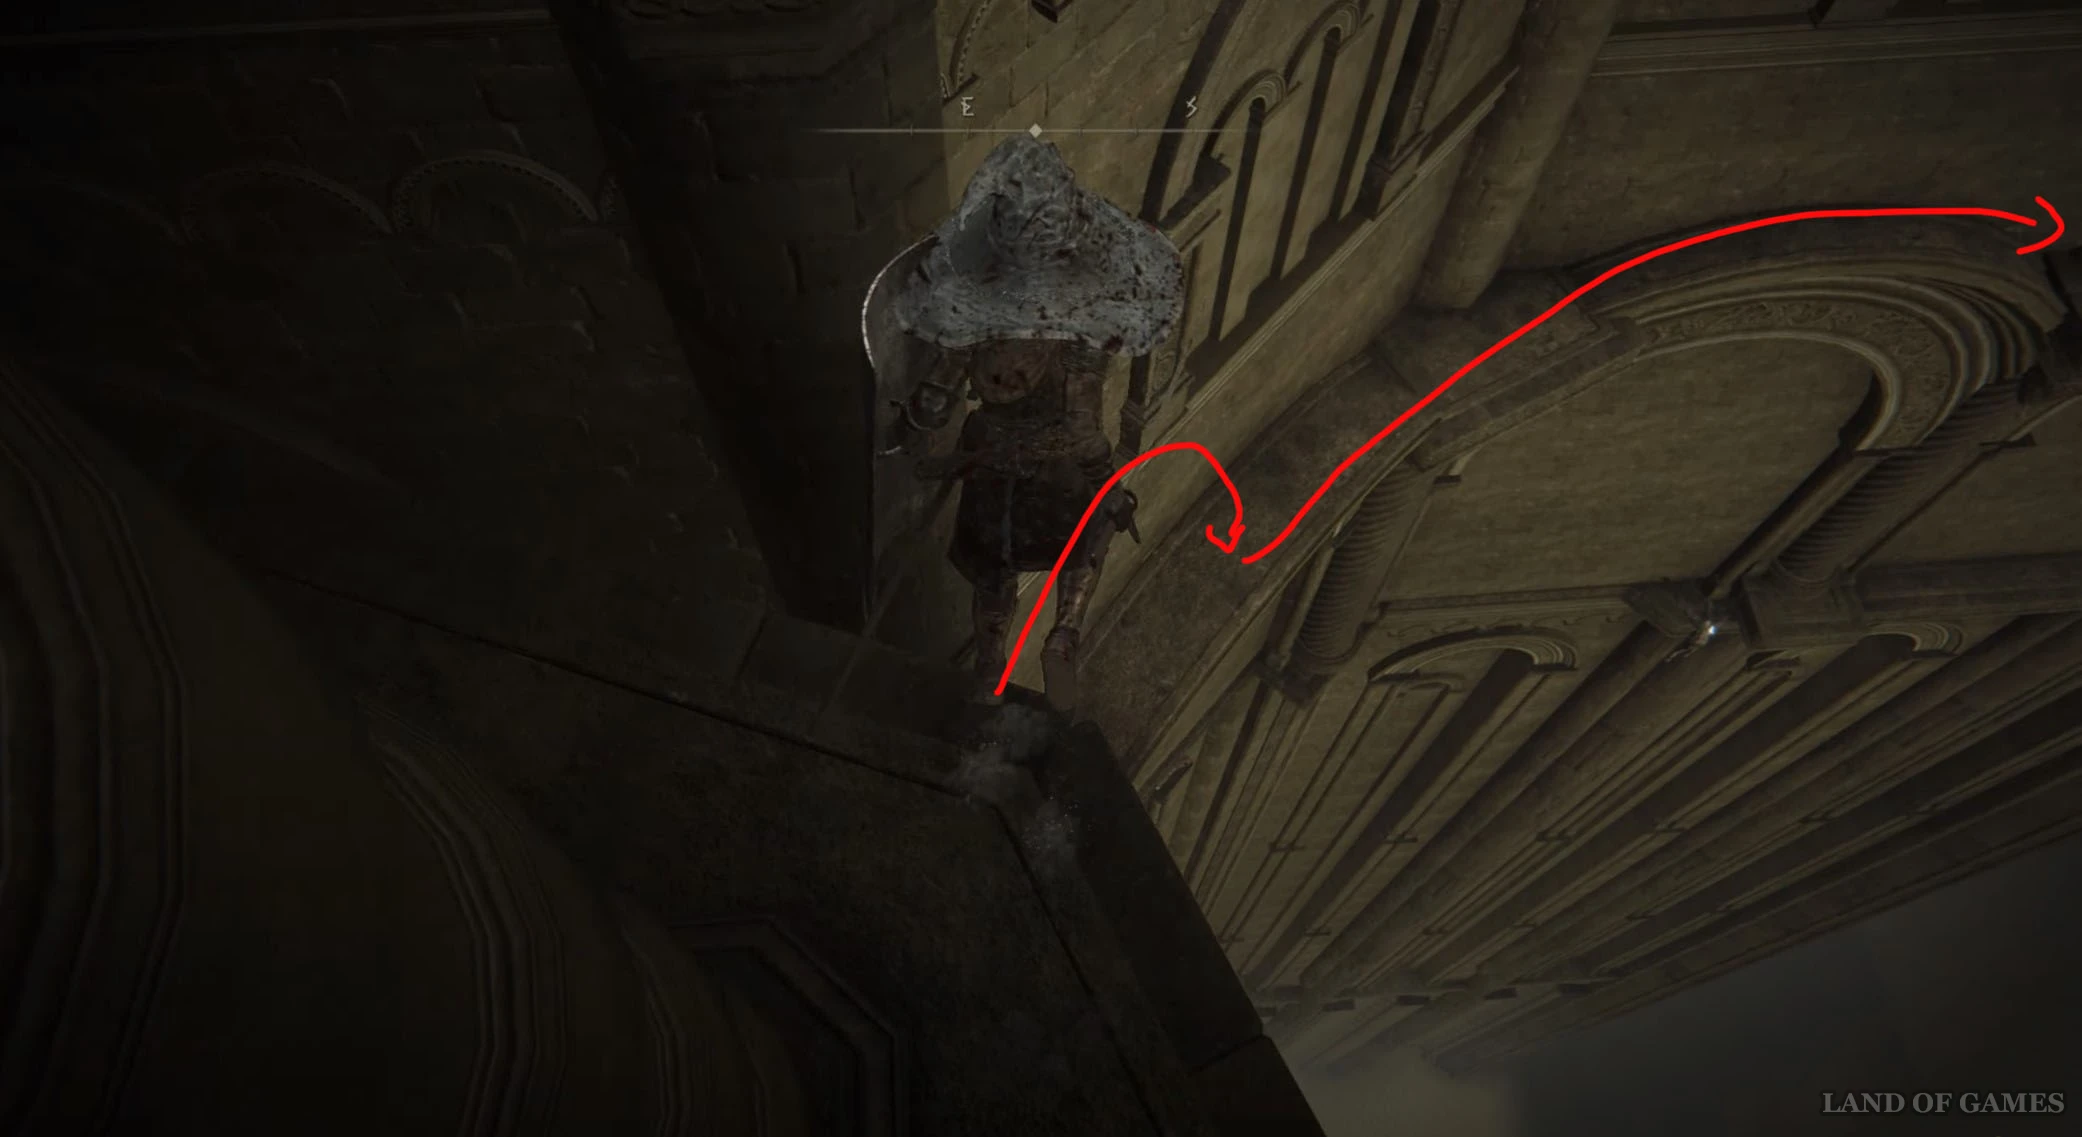
Посмотрев кат-сцену, пройдите через проход впереди и активируйте место благодати «Замковый водопой». Теперь просто скачите на юго-восток, чтобы попасть в Руины Унте и активировать костер «Верхний поток реки Аскетов». Далее бегите вдоль скалы на юг, перепрыгивая расщелины между выступами. Примерно через несколько секунд переберитесь на другую сторону ущелья.
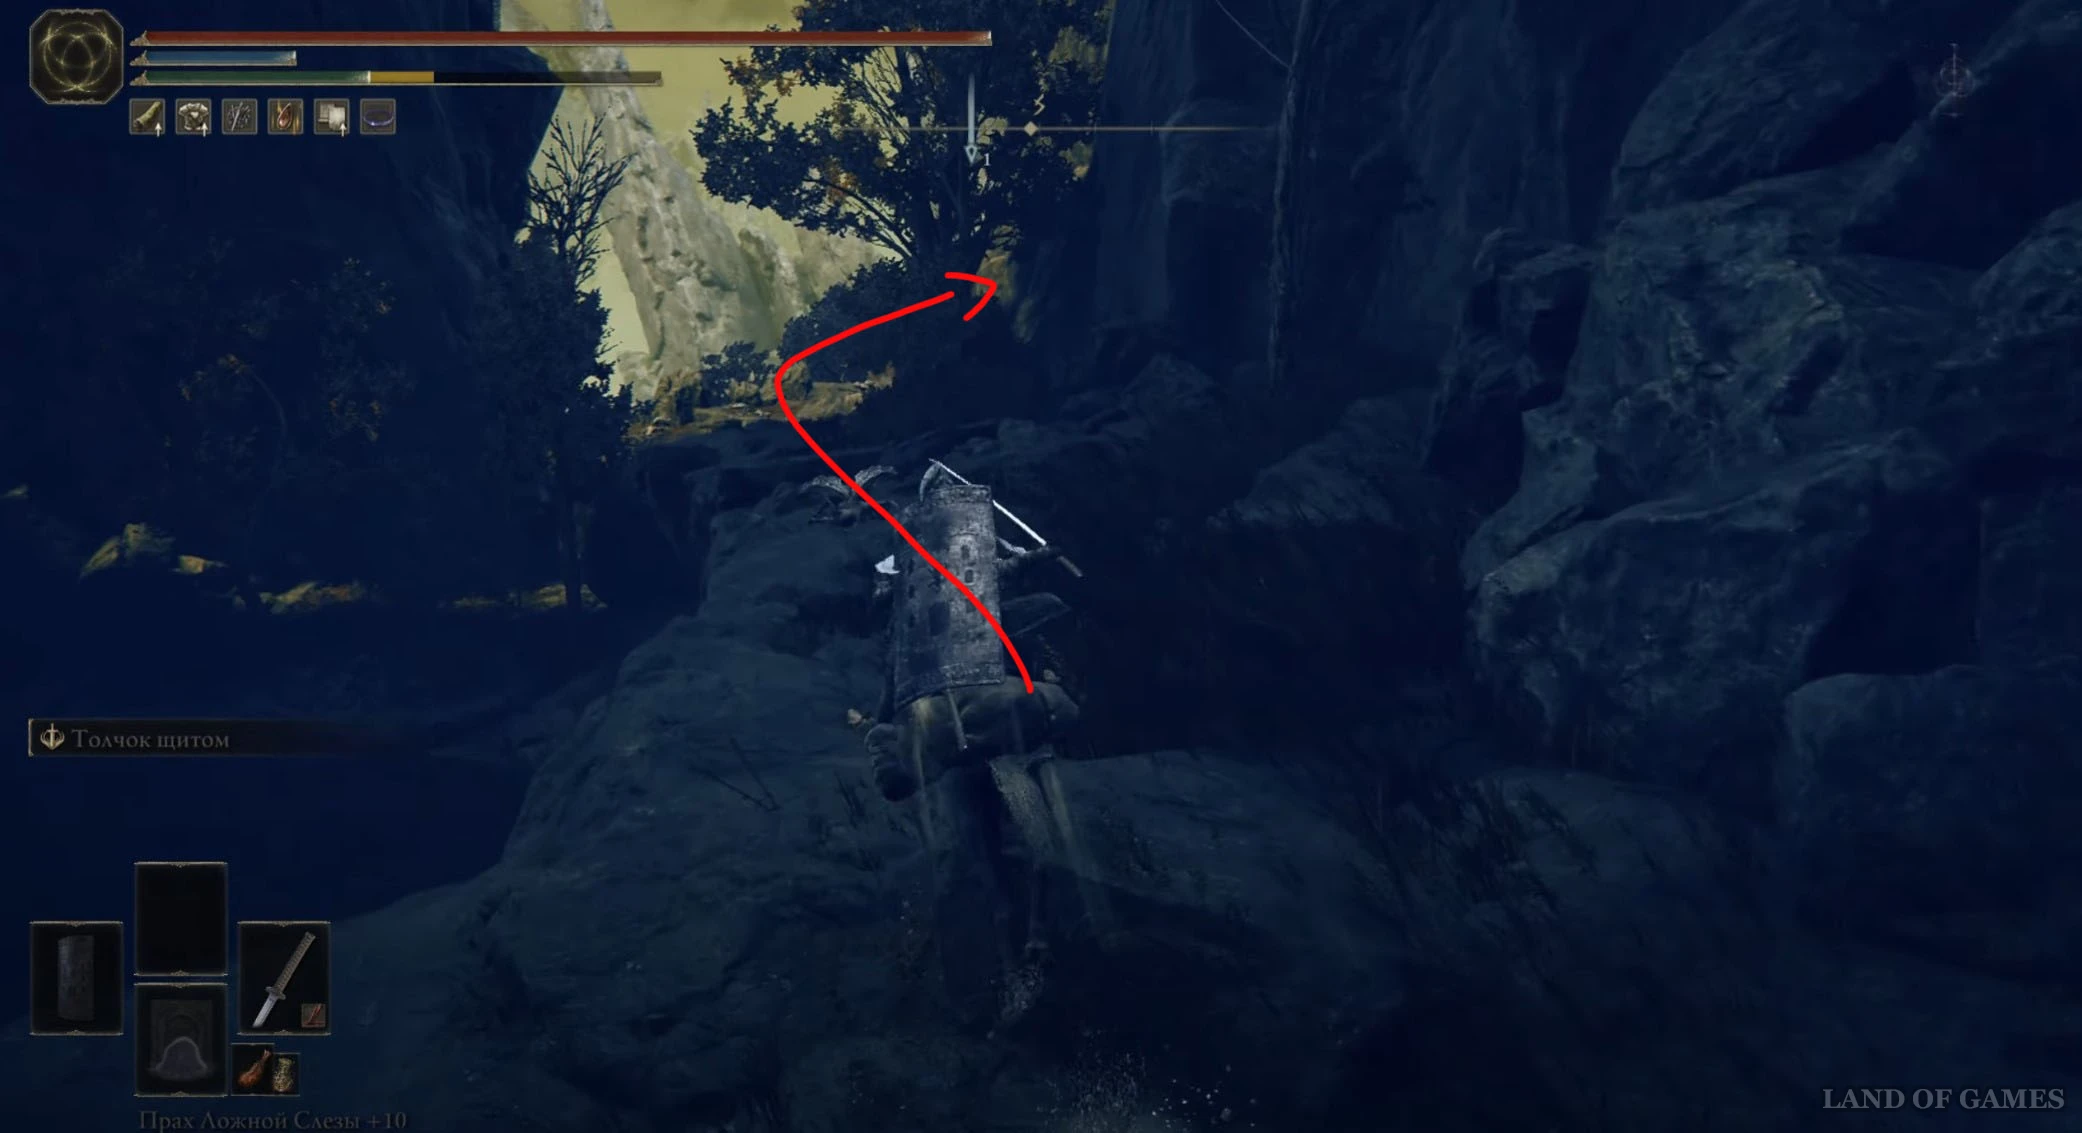
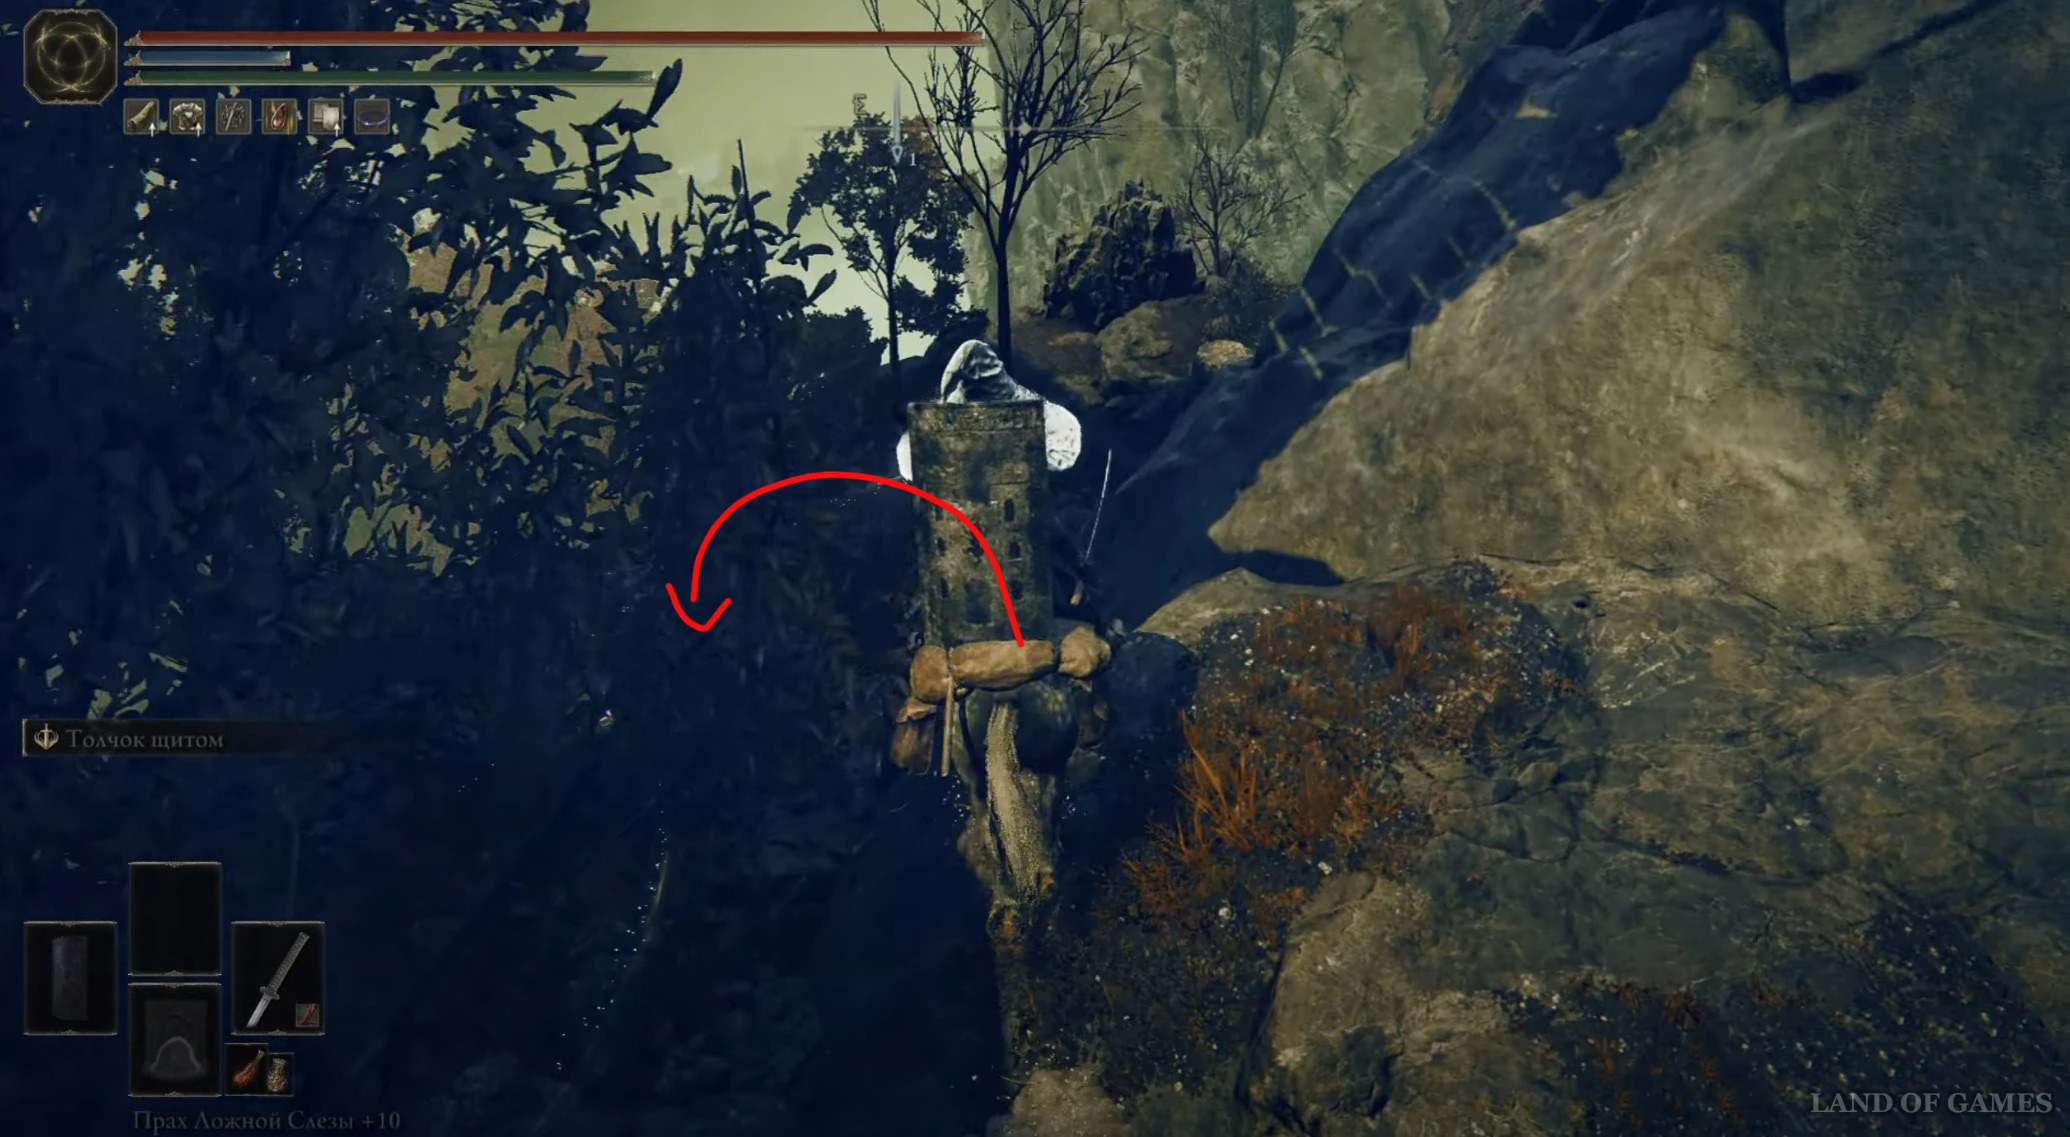
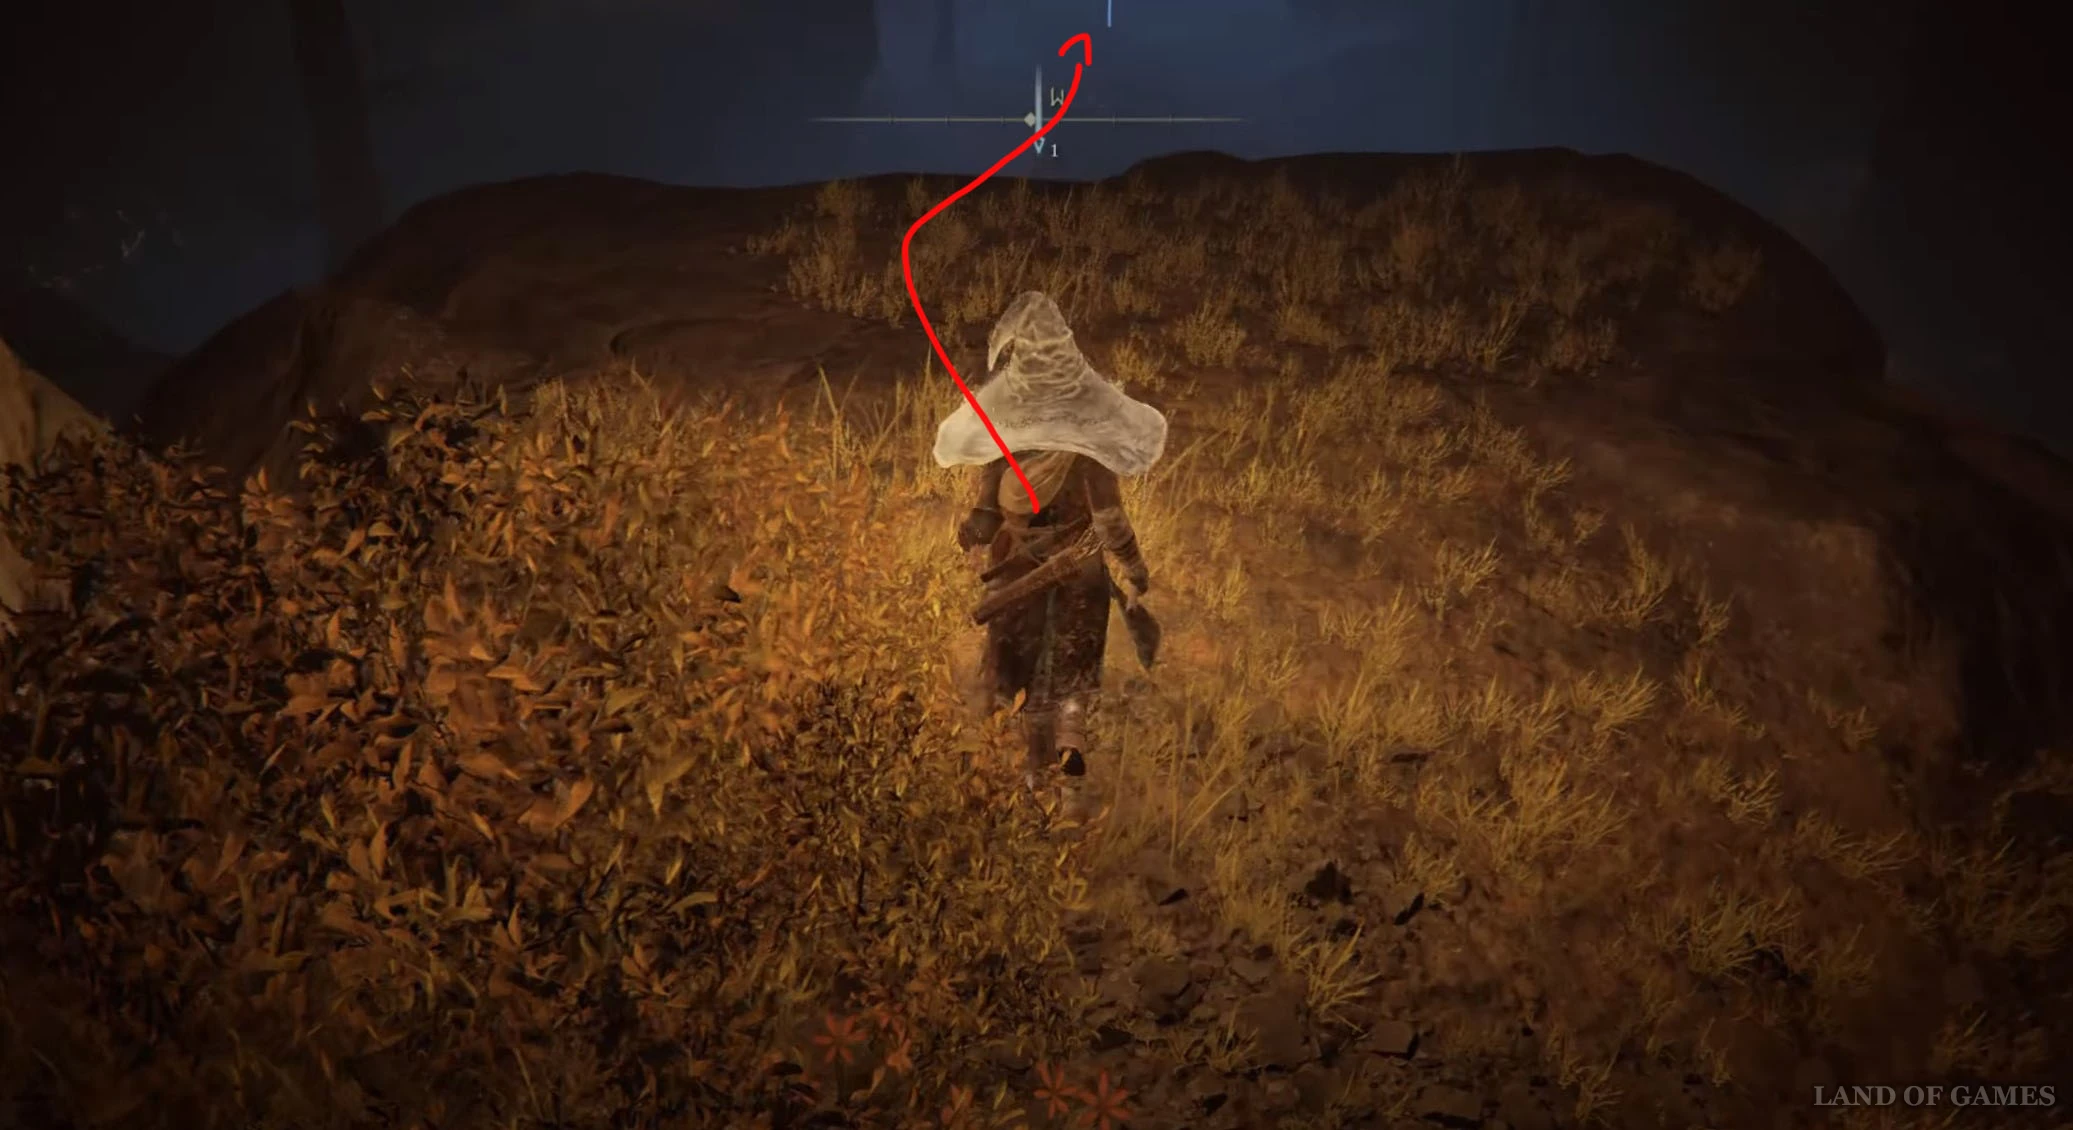
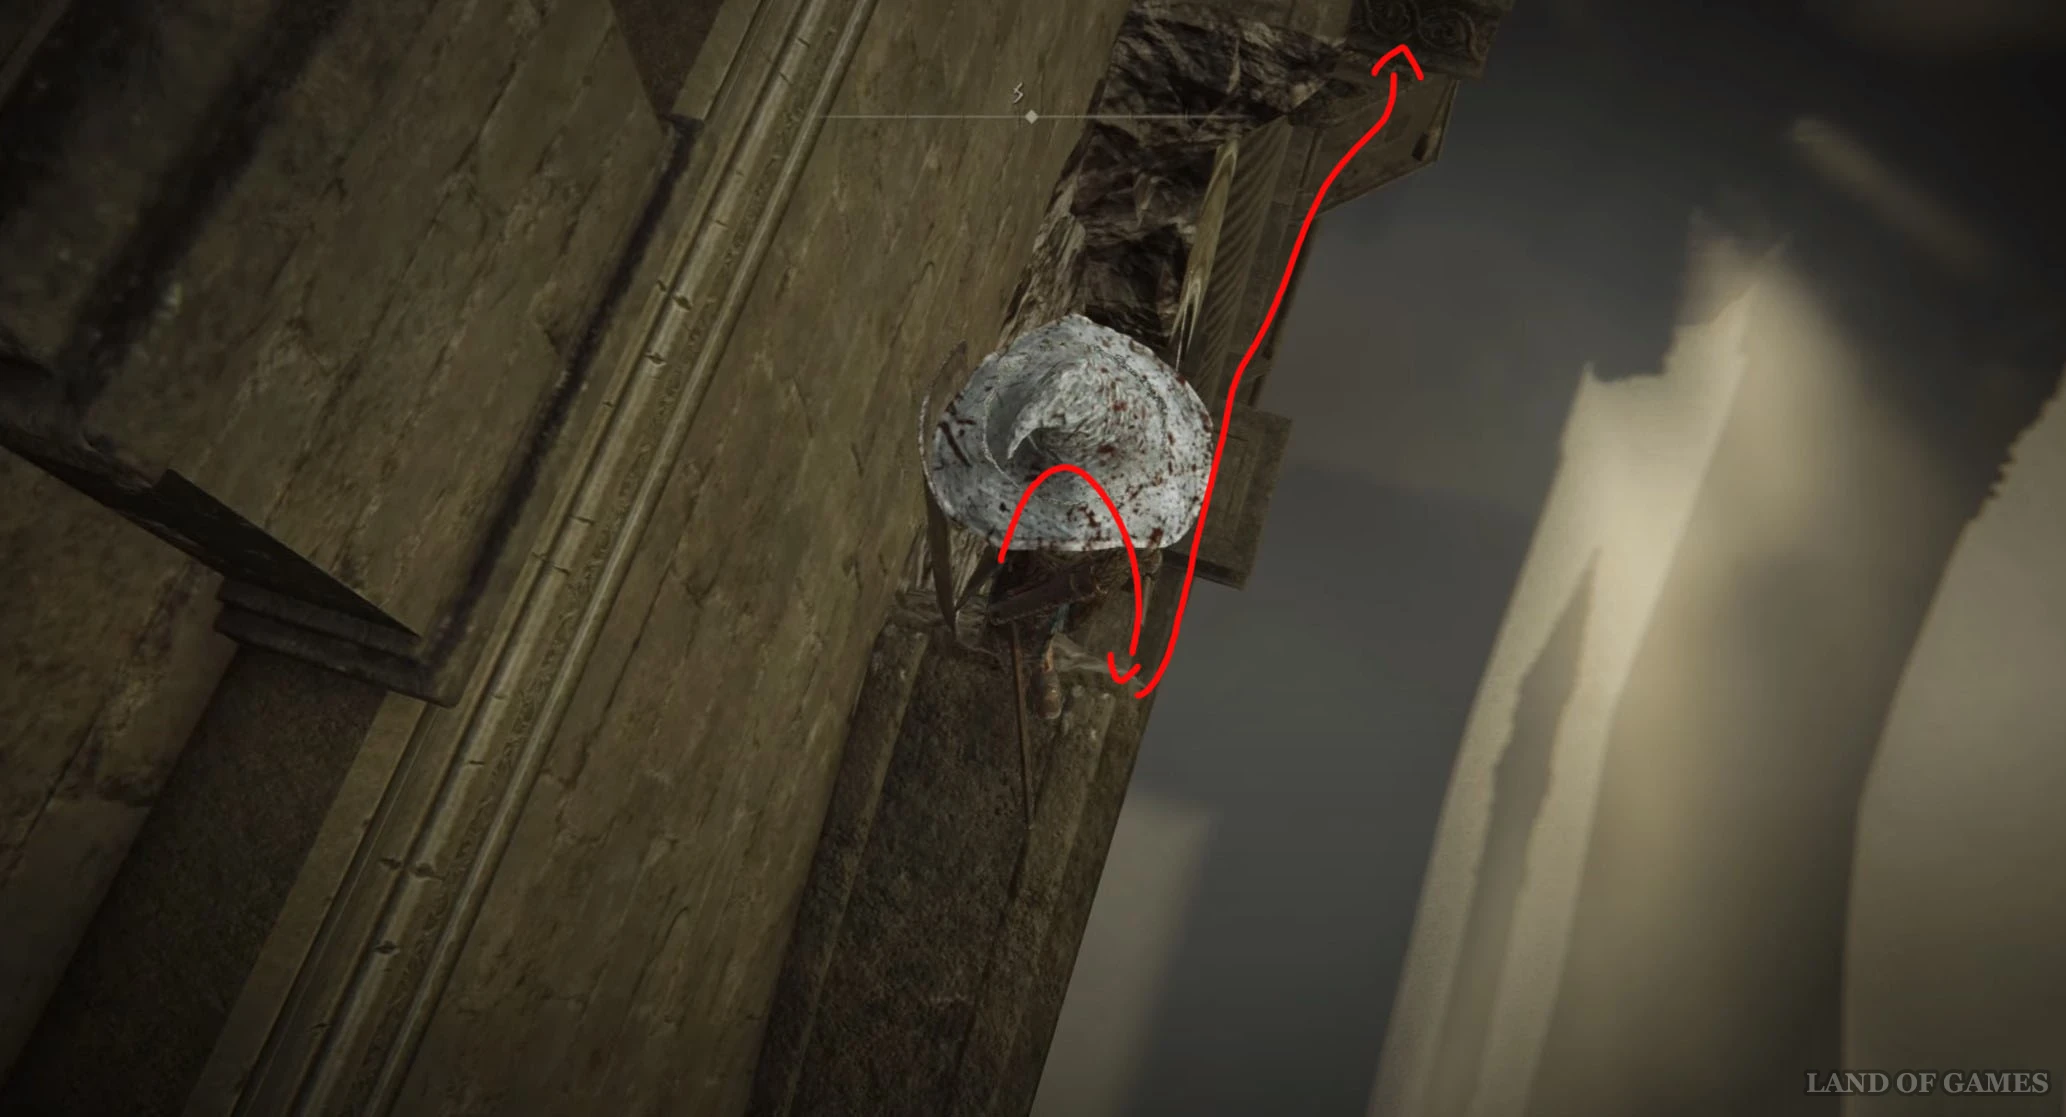
Продолжайте бежать в южном направлении, а затем спрыгните на выступ слева в месте, показанном на скриншоте ниже. Теперь начните идти на северо-восток, перейдите на другую сторону ущелья и начните спускаться вниз, следуя за крестами. Добравшись до водопада, бегите направо по дну ущелья, пока не достигните второго водопада. Здесь отыщите открытый гроб и заберите с трупа фрагмент.

Осколок древа упадка 28
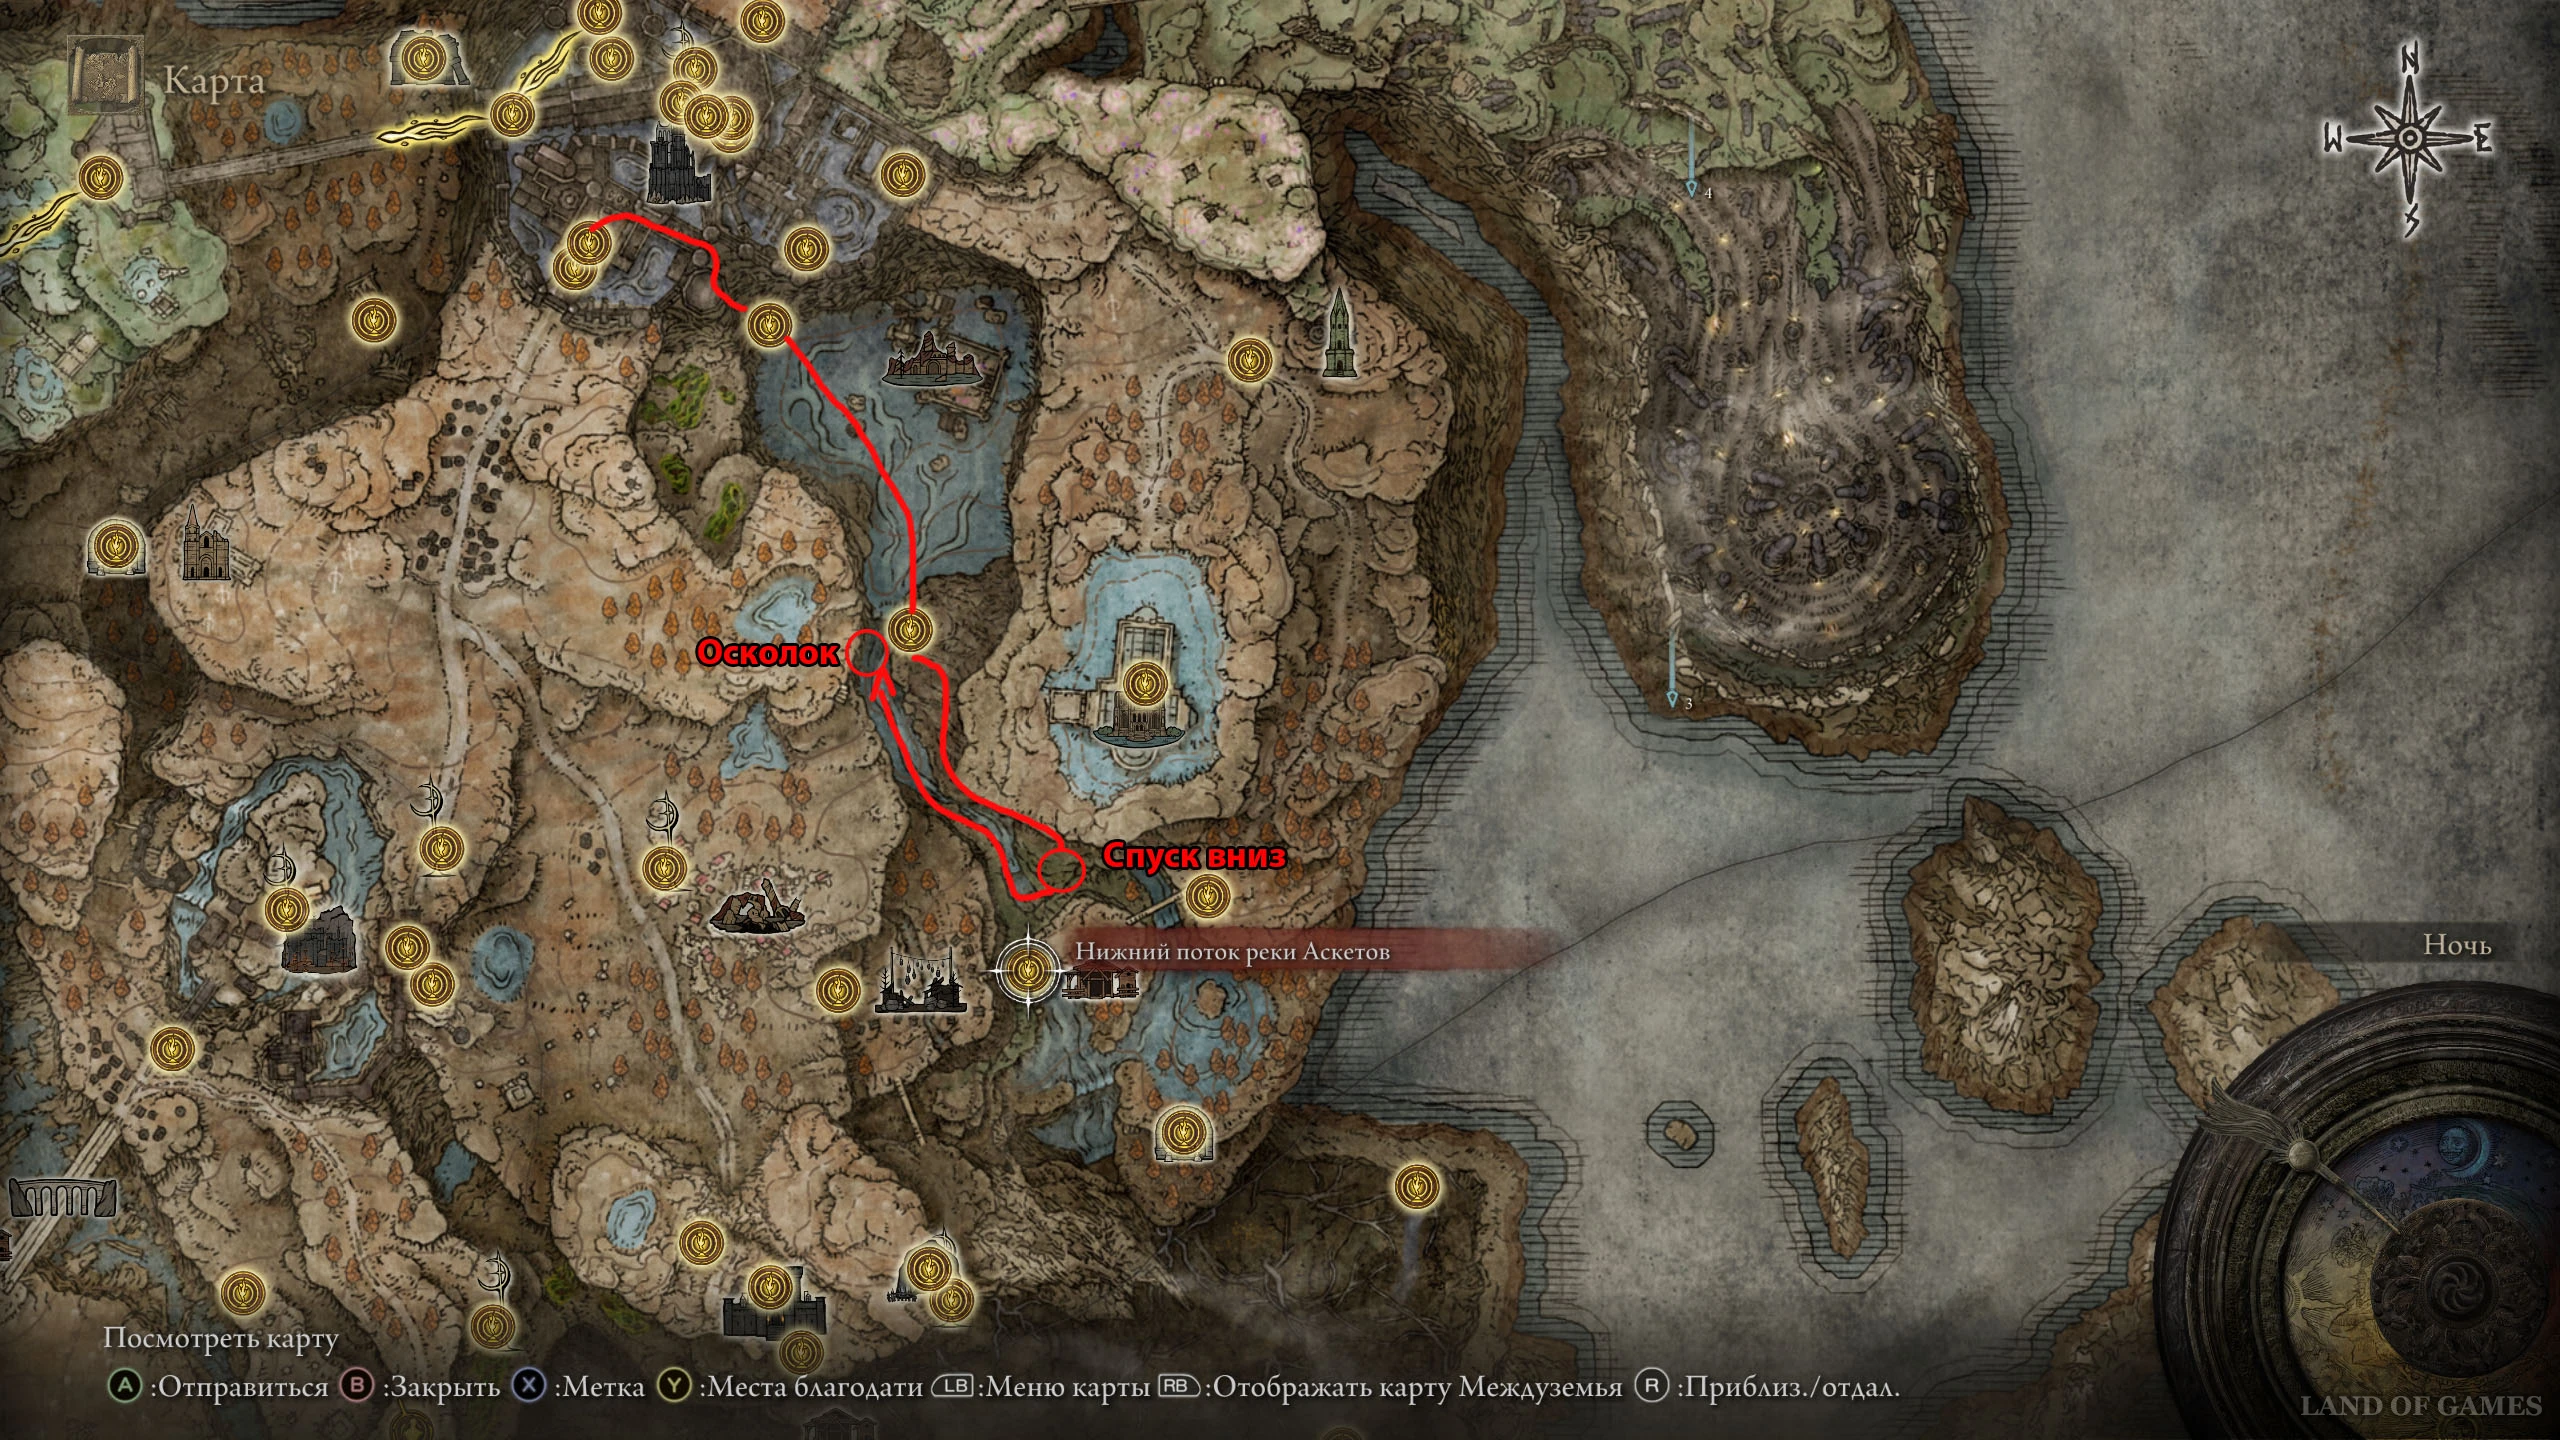
Вернитесь к месту благодати «Верхний поток реки Аскетов», а затем снова скачите на юг по выступам скалы и перейдите на другую сторону, однако на этот раз спускаться с уступа не нужно – продолжайте бежать вперед в южном направлении. Когда же дойдете до самого конца дороги, тогда и можете спрыгнуть вниз к костру «Нижний поток реки Аскетов».
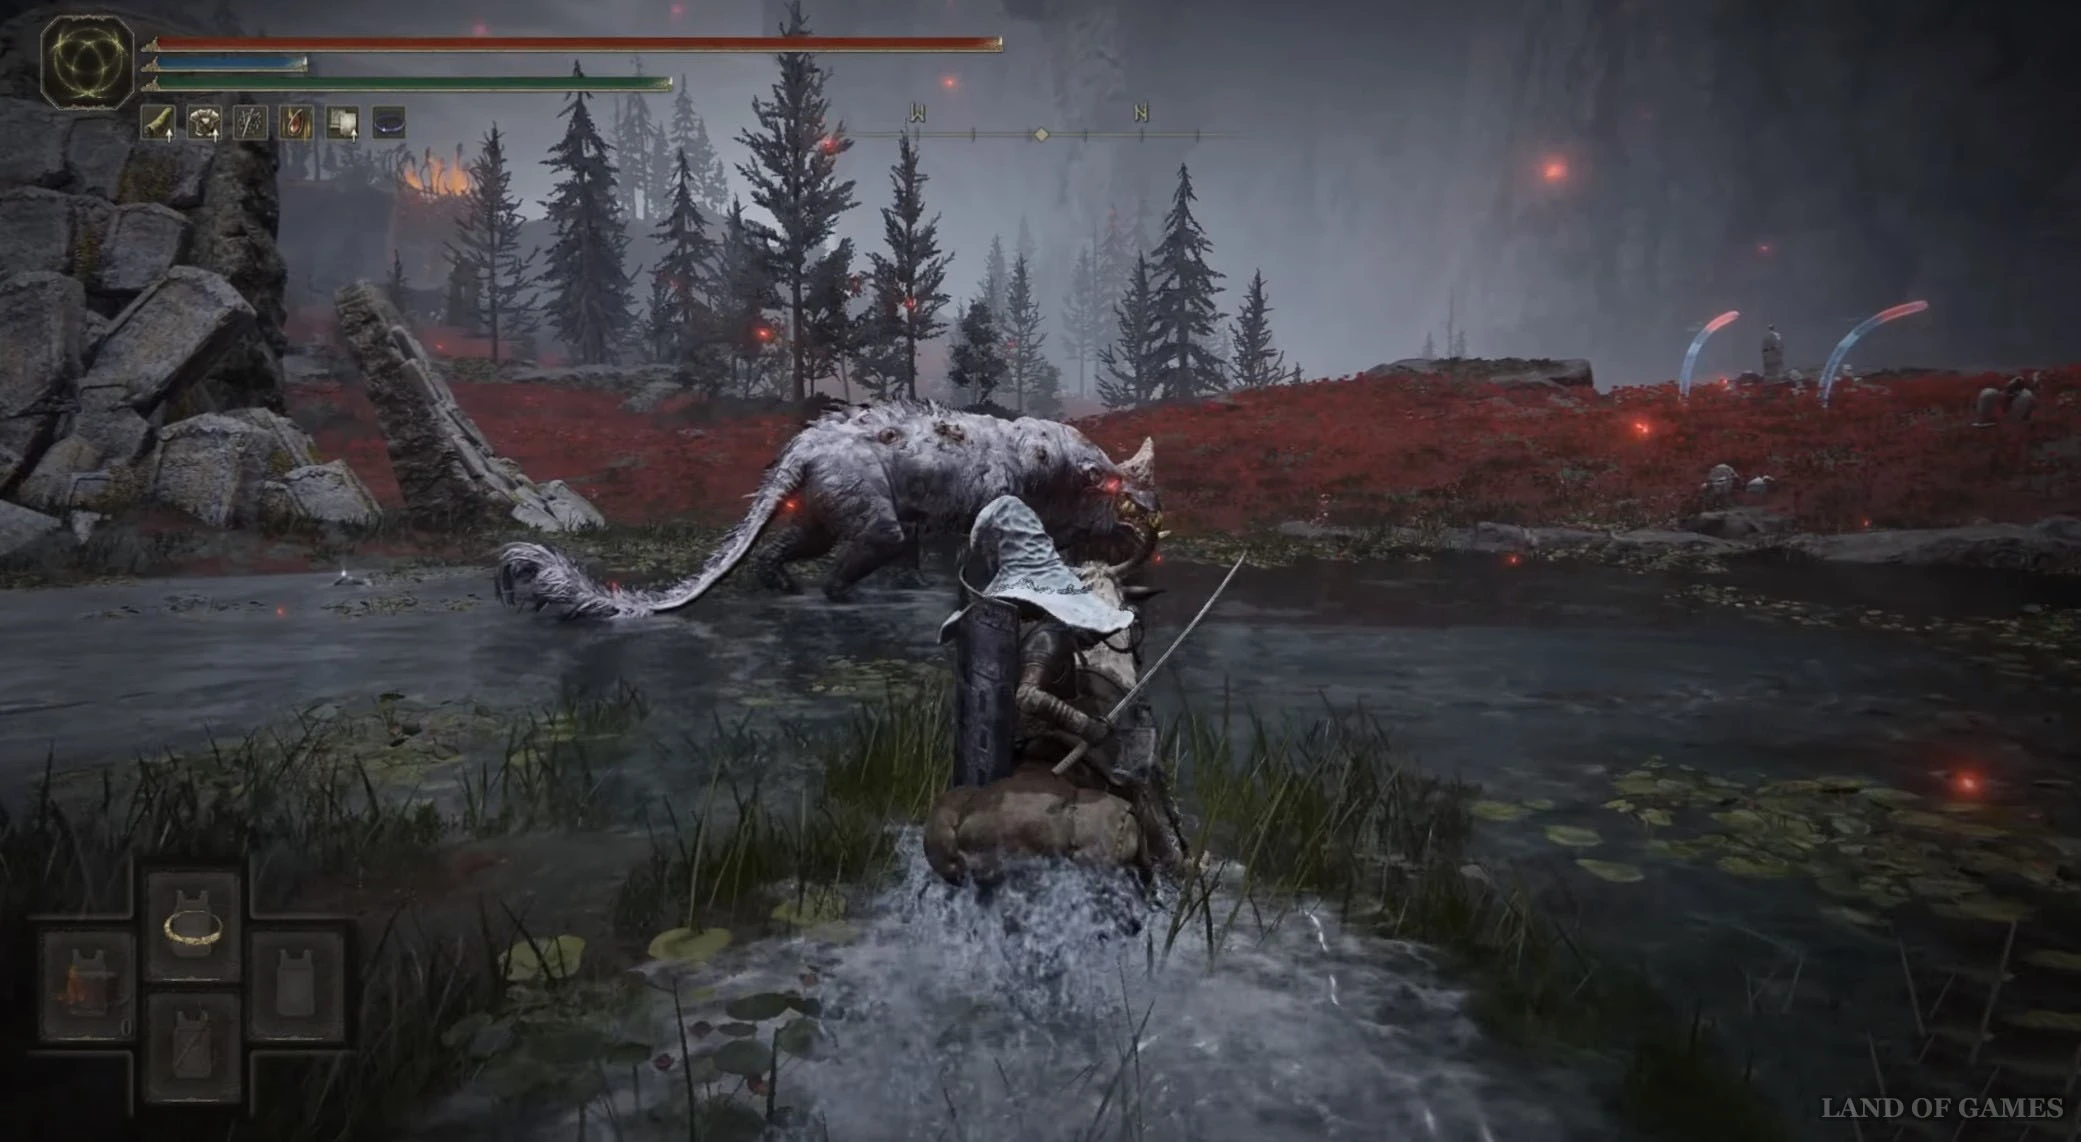
Далее подойдите к краю обрыва на востоке и начните спускаться вниз по надгробным плитам, выступающим из утеса. Спустившись к водоему, двигайтесь в восточном направлении к небольшому пруду. Здесь вы обнаружите золотого гиппопотама – расправьтесь с ним, чтобы получить фрагмент.
Осколок древа упадка 29
От предыдущего гиппопотама пройдите немного на северо-восток ко второму пруду. Здесь вы обнаружите еще одного мини-босса. Разберитесь с ним, чтобы получить очередной фрагмент.
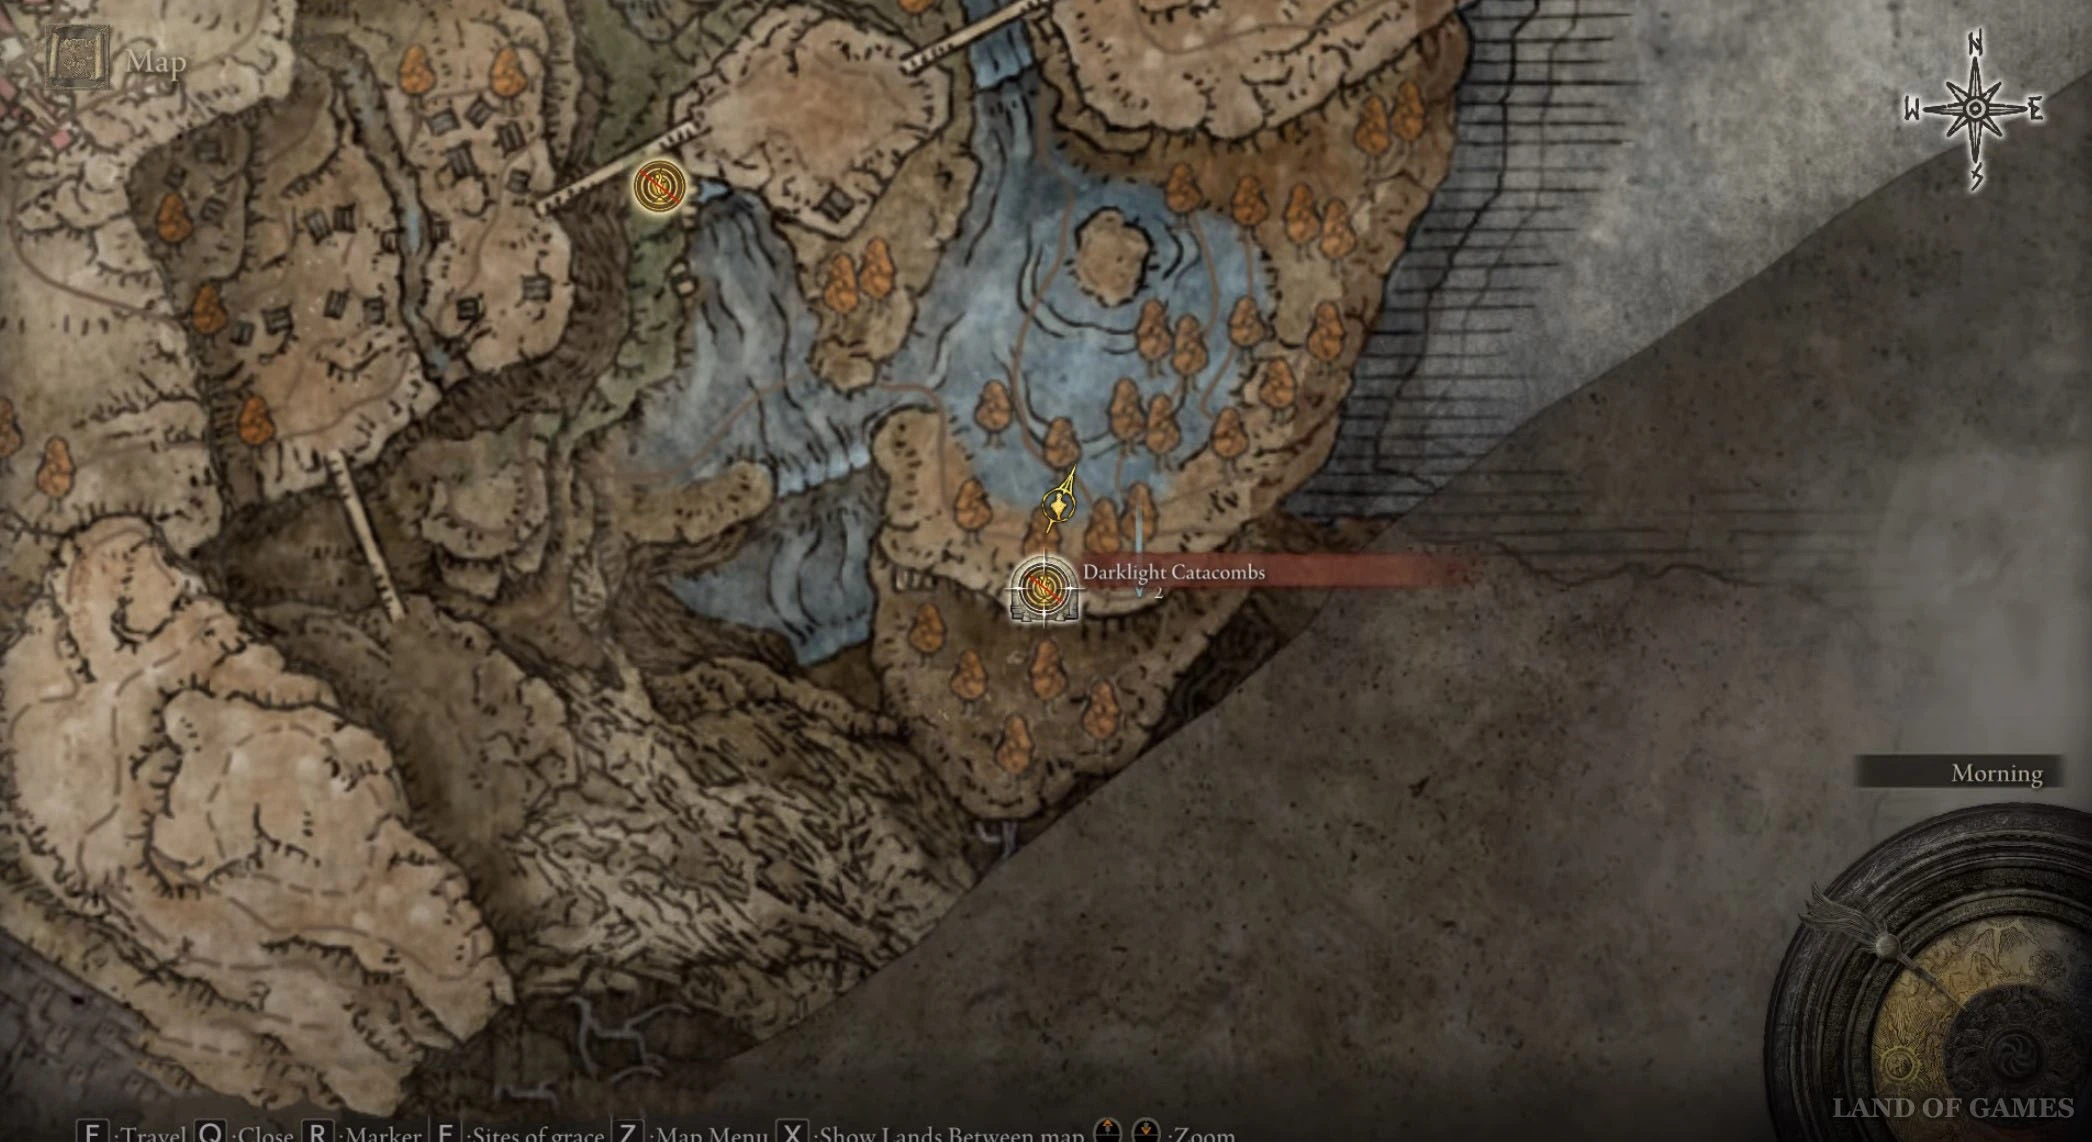
Осколки древа упадка 30 и 31
Вернитесь к месту благодати «Нижний поток реки Аскетов», а затем скачите направо и спрыгните вниз с выступов. Продолжайте спускаться вниз по горной тропке и уступам, двигаясь в основном в южном направлении. Затем спрыгните еще ниже через отверстие в скале. Дойдите до конца дороги, поверните немного вправо и снова начните прыгать с выступов вниз.
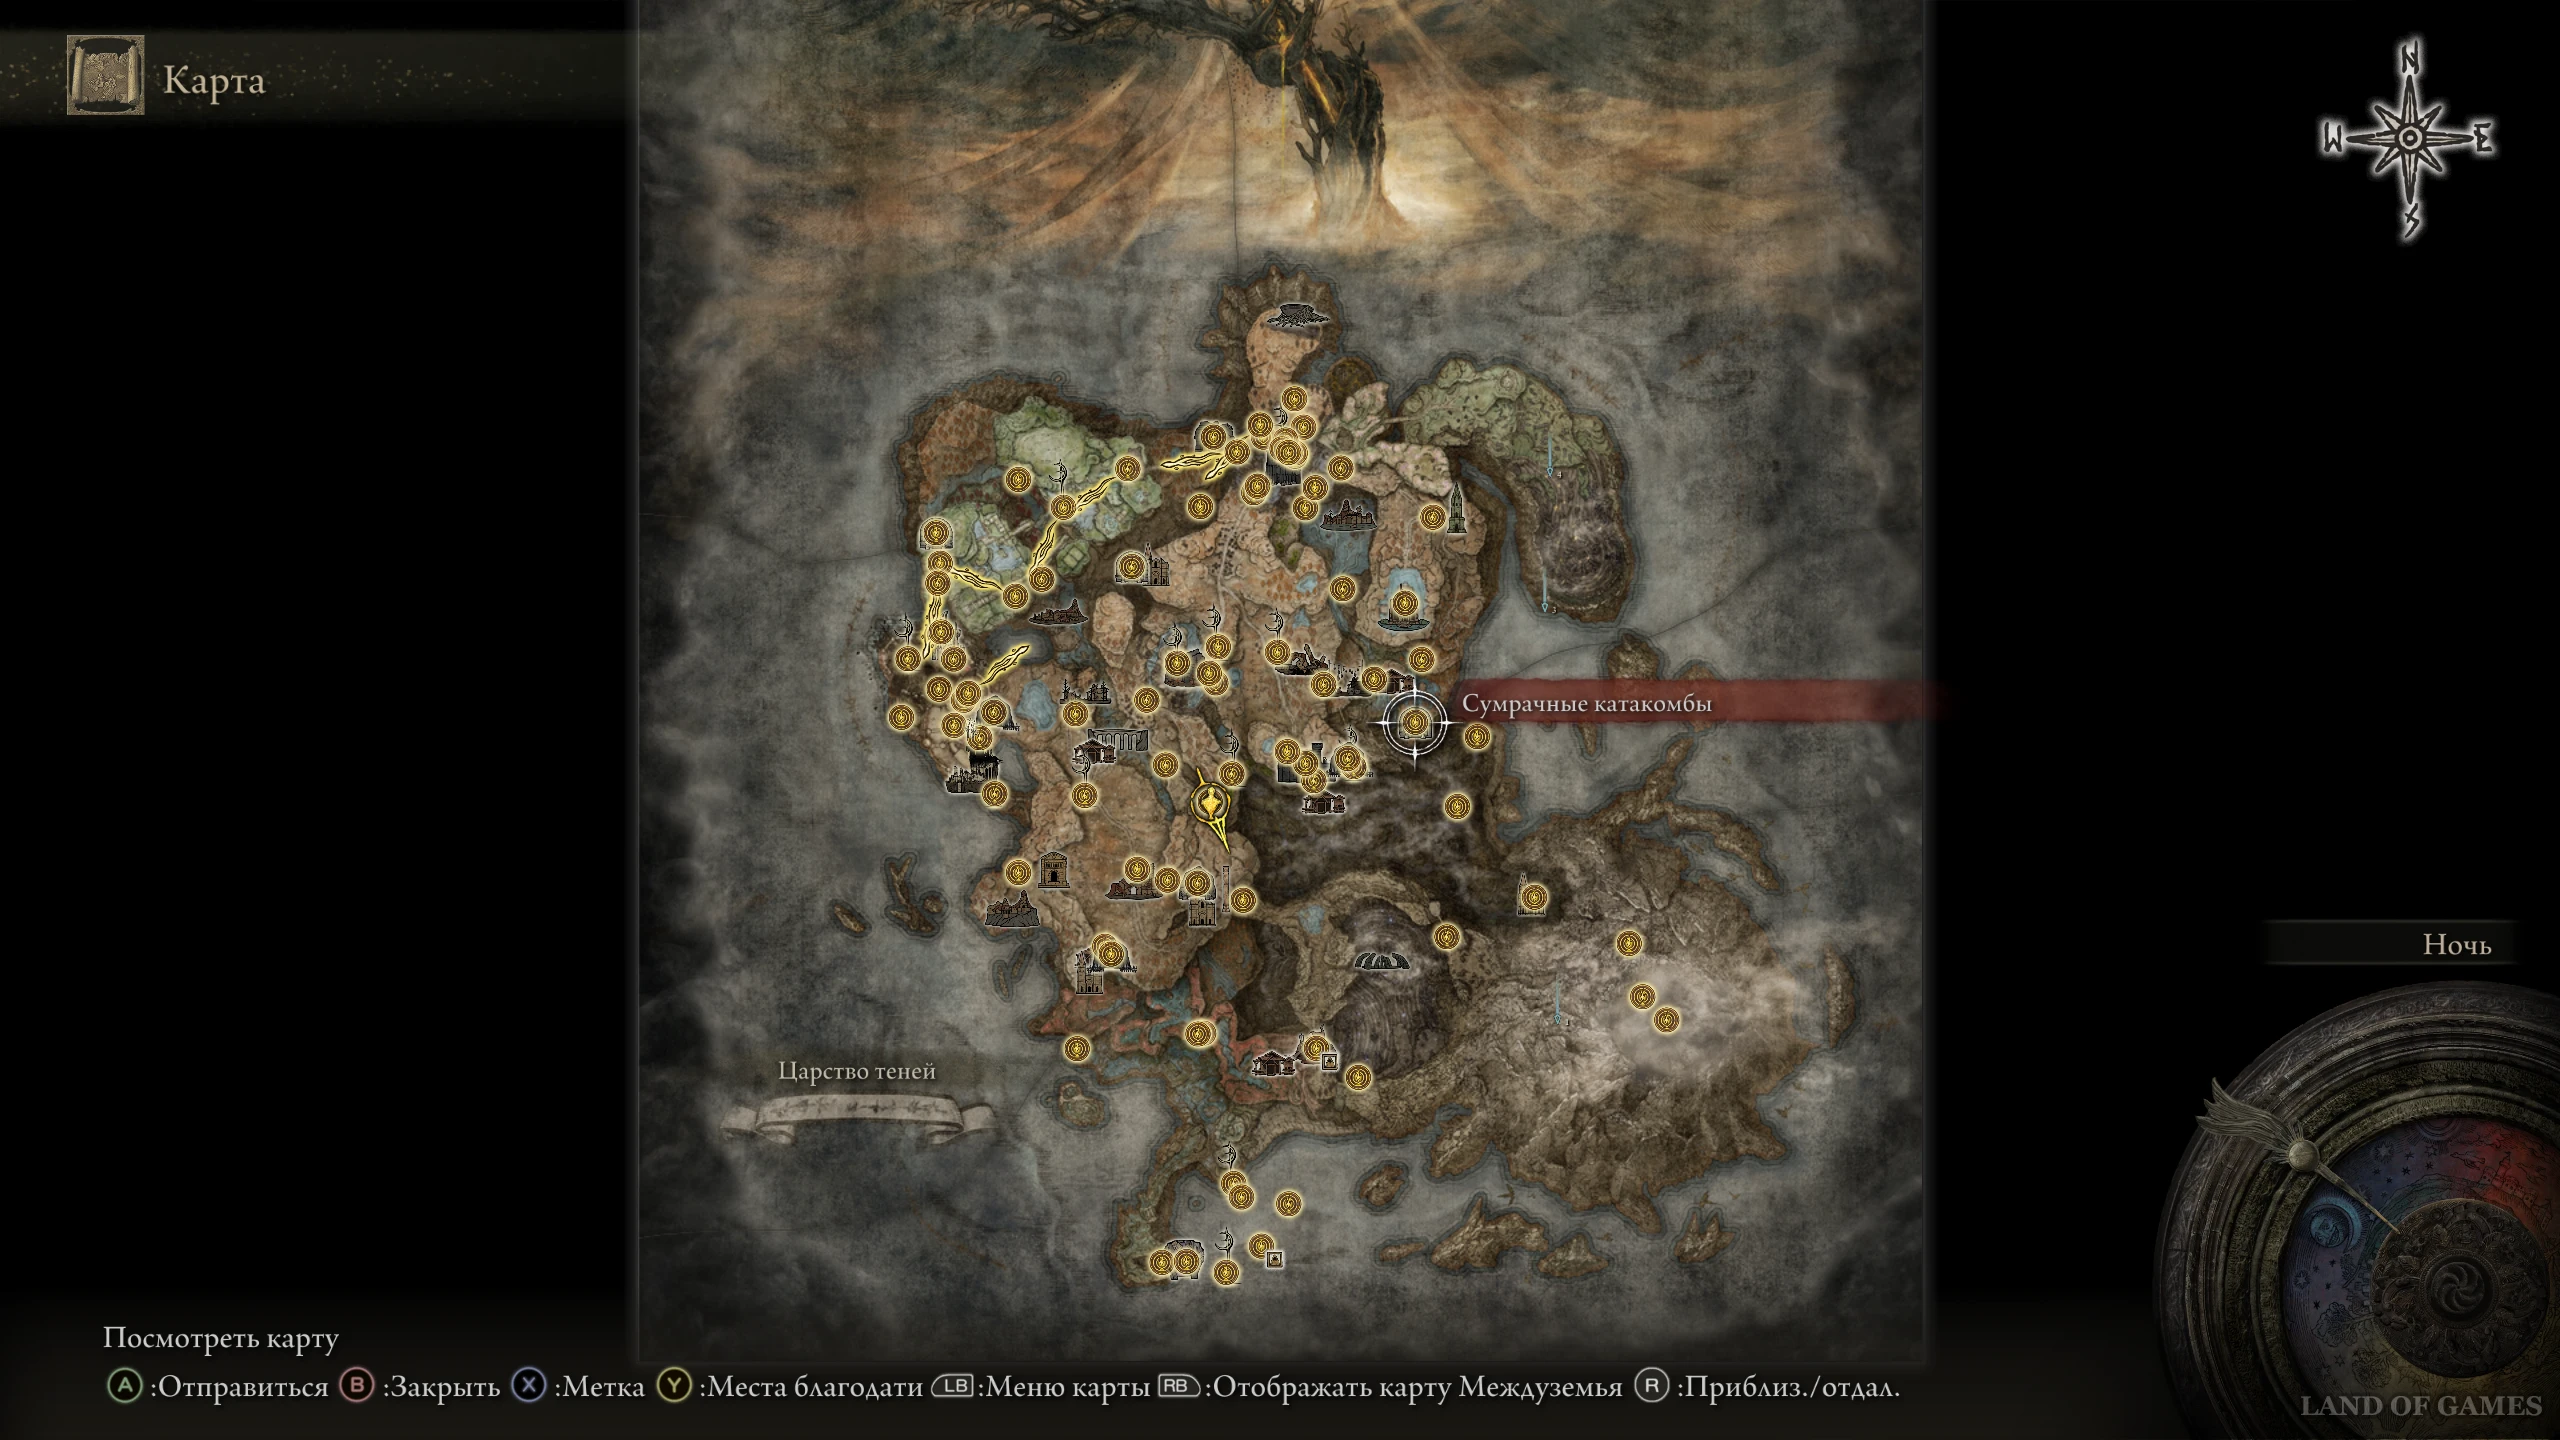
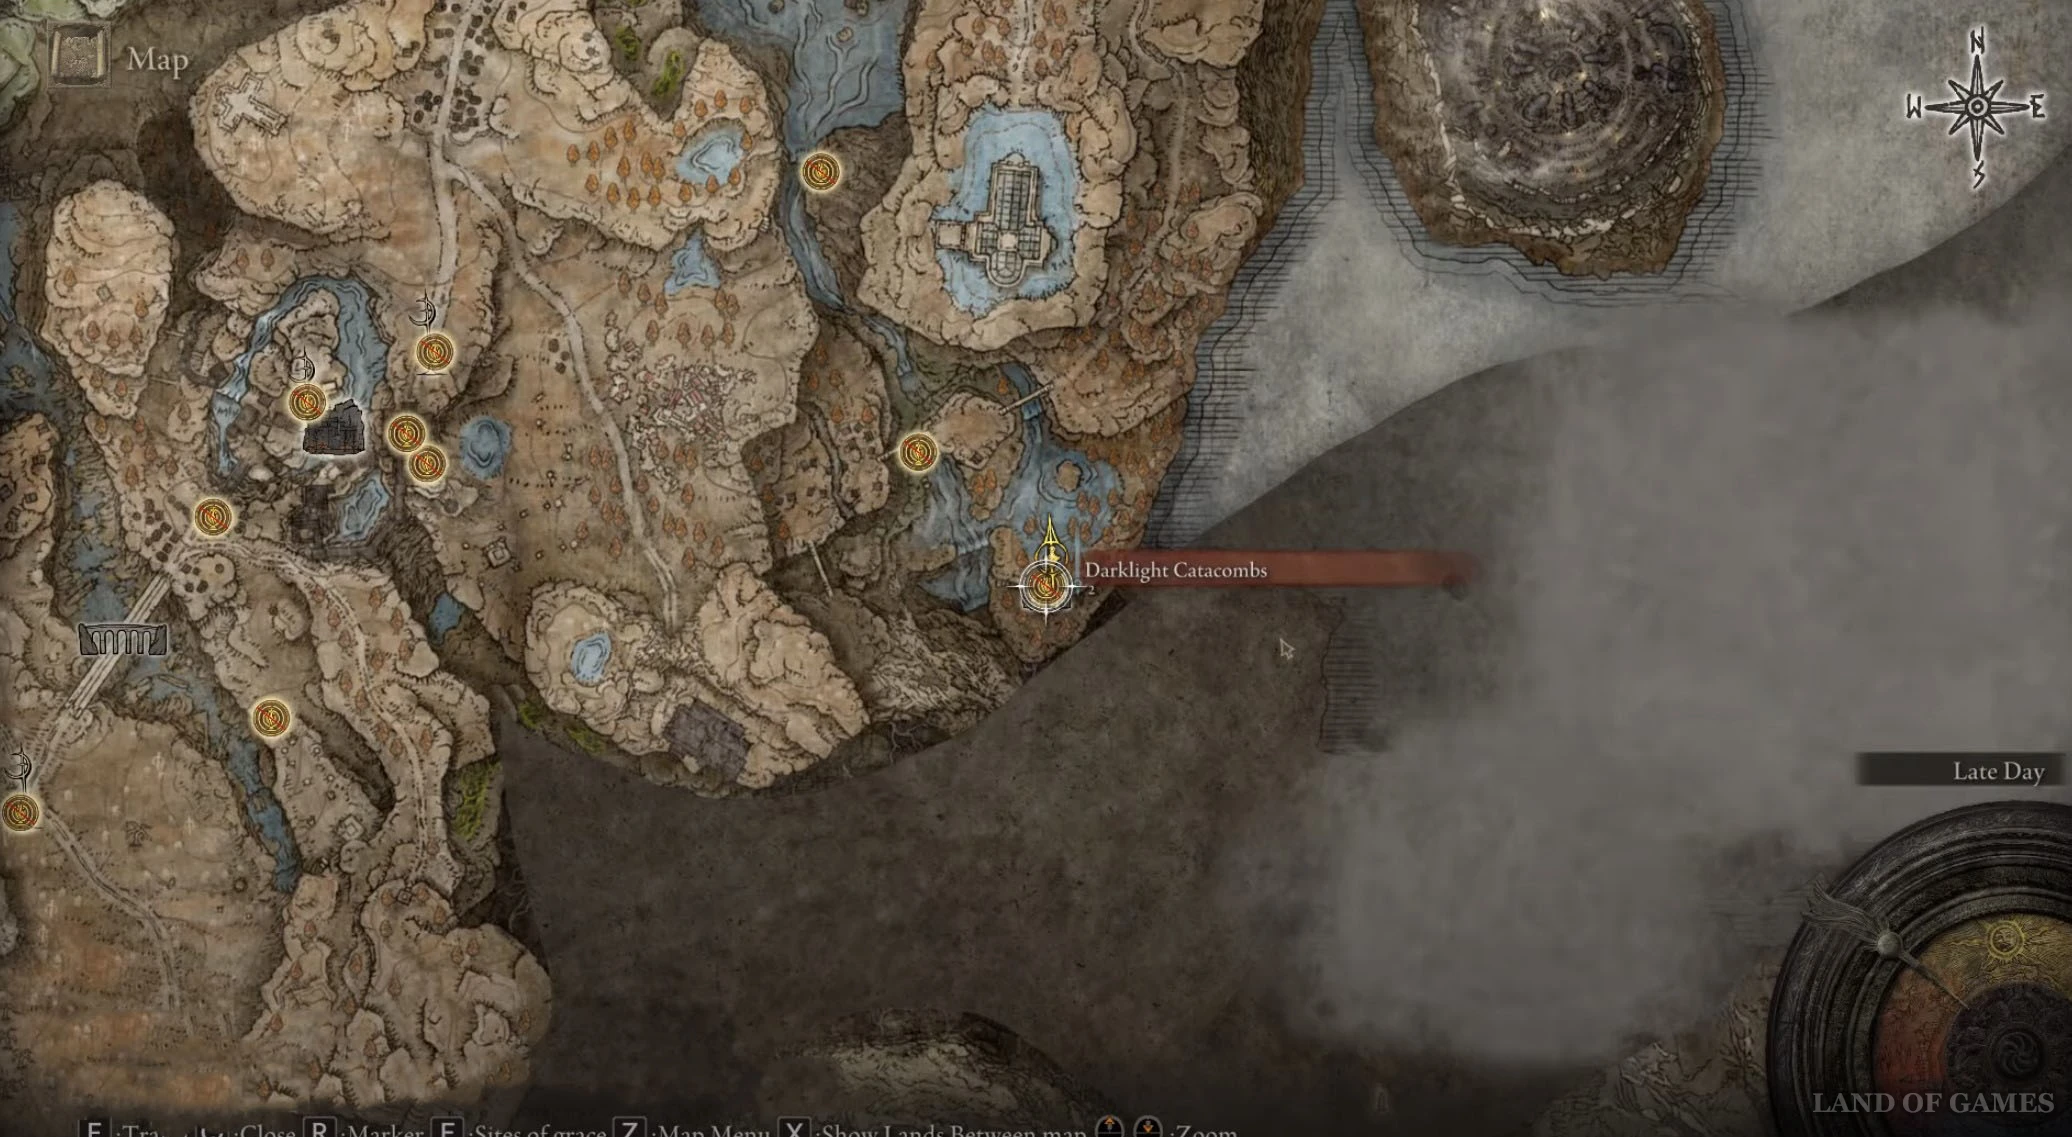
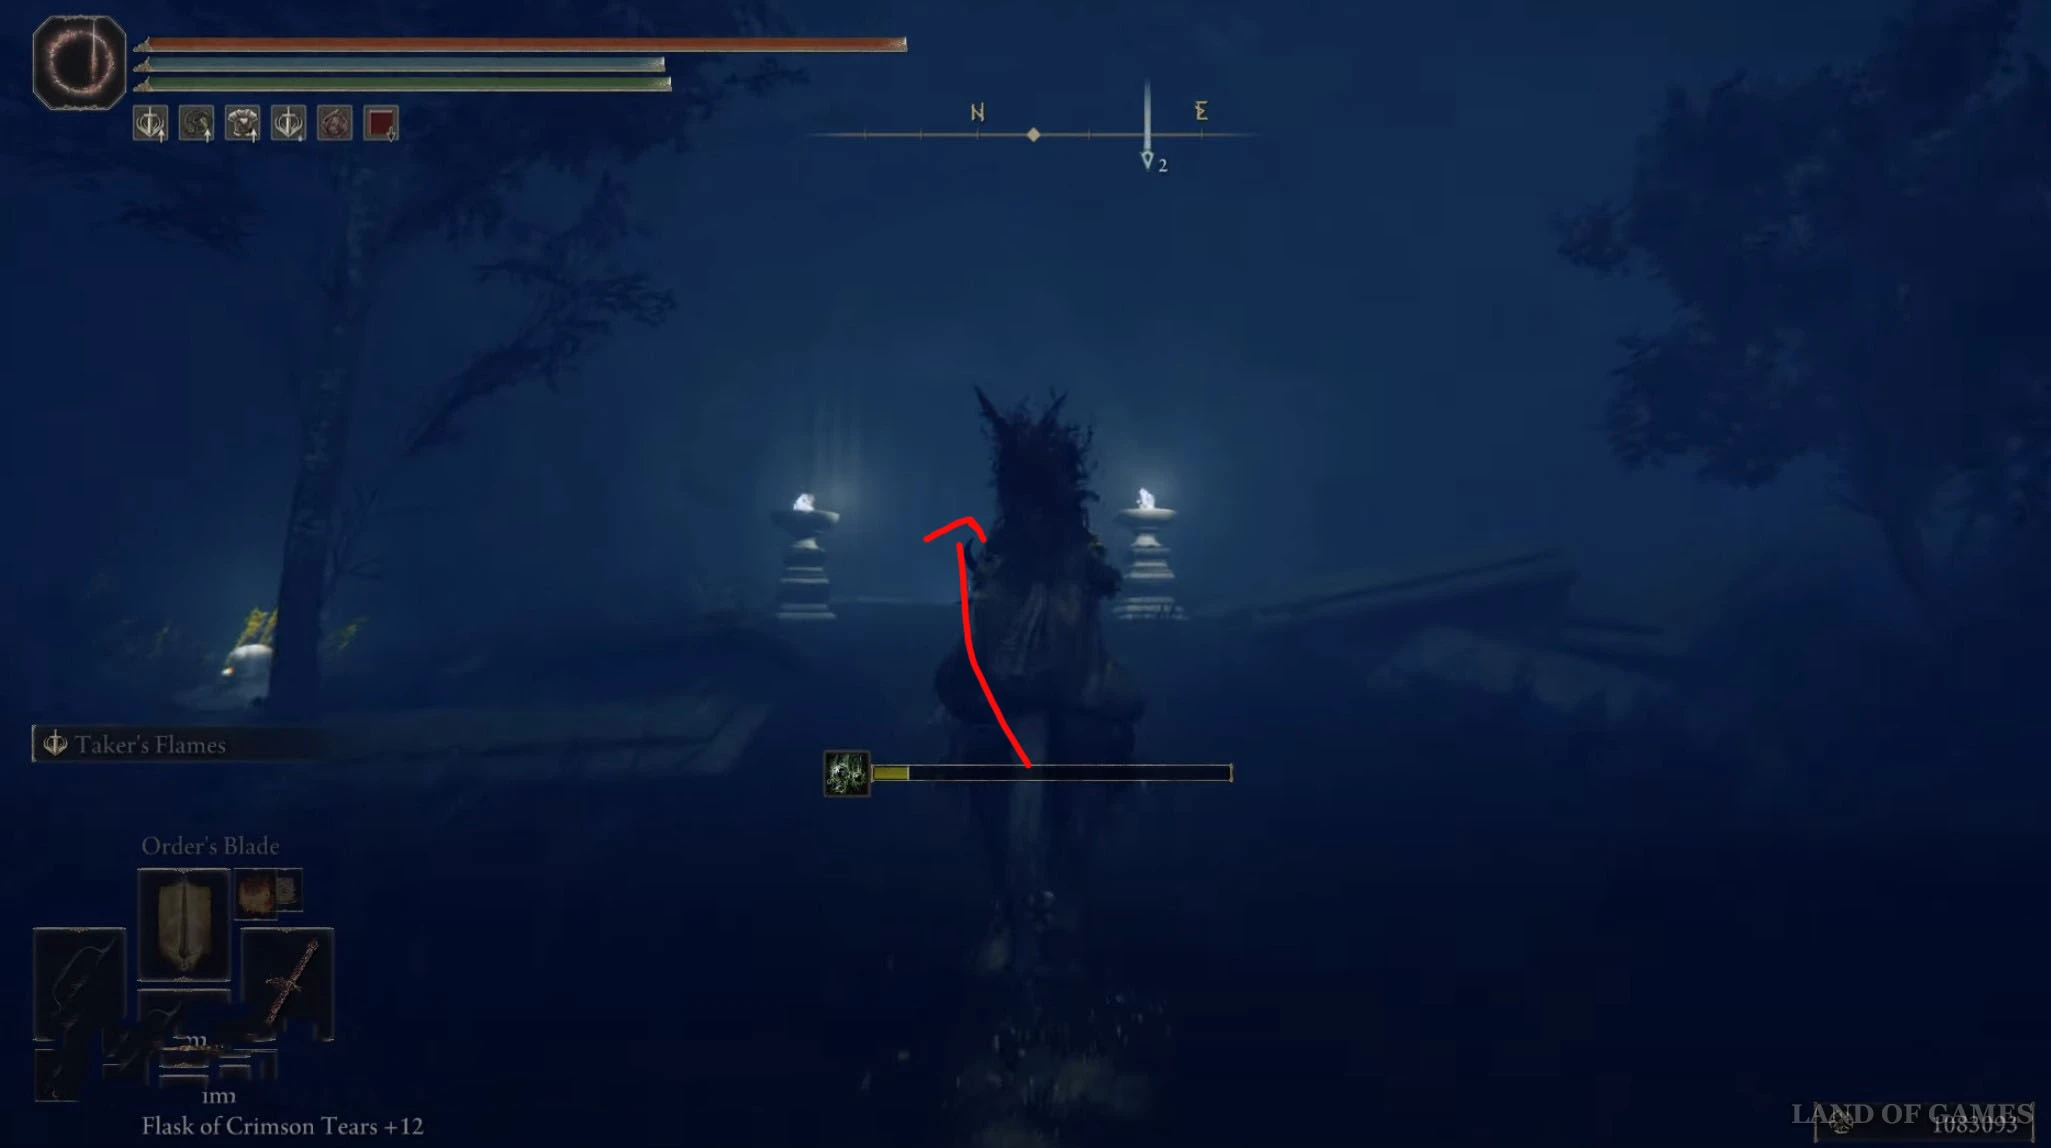
Теперь идите на юго-восток и спрыгните с края обрыва на площадку ниже с надгробиями и каменными гробами. Двигайтесь на север, и вскоре вы обнаружите проход в «Сумрачные катакомбы». Войдите в них и начните их зачистку.


Спустившись вниз и активировав место благодати, бегите через туннель вперед, а затем сверните вправо. Спуститесь еще ниже, а потом поверните влево и продолжайте спускаться по лесенкам.
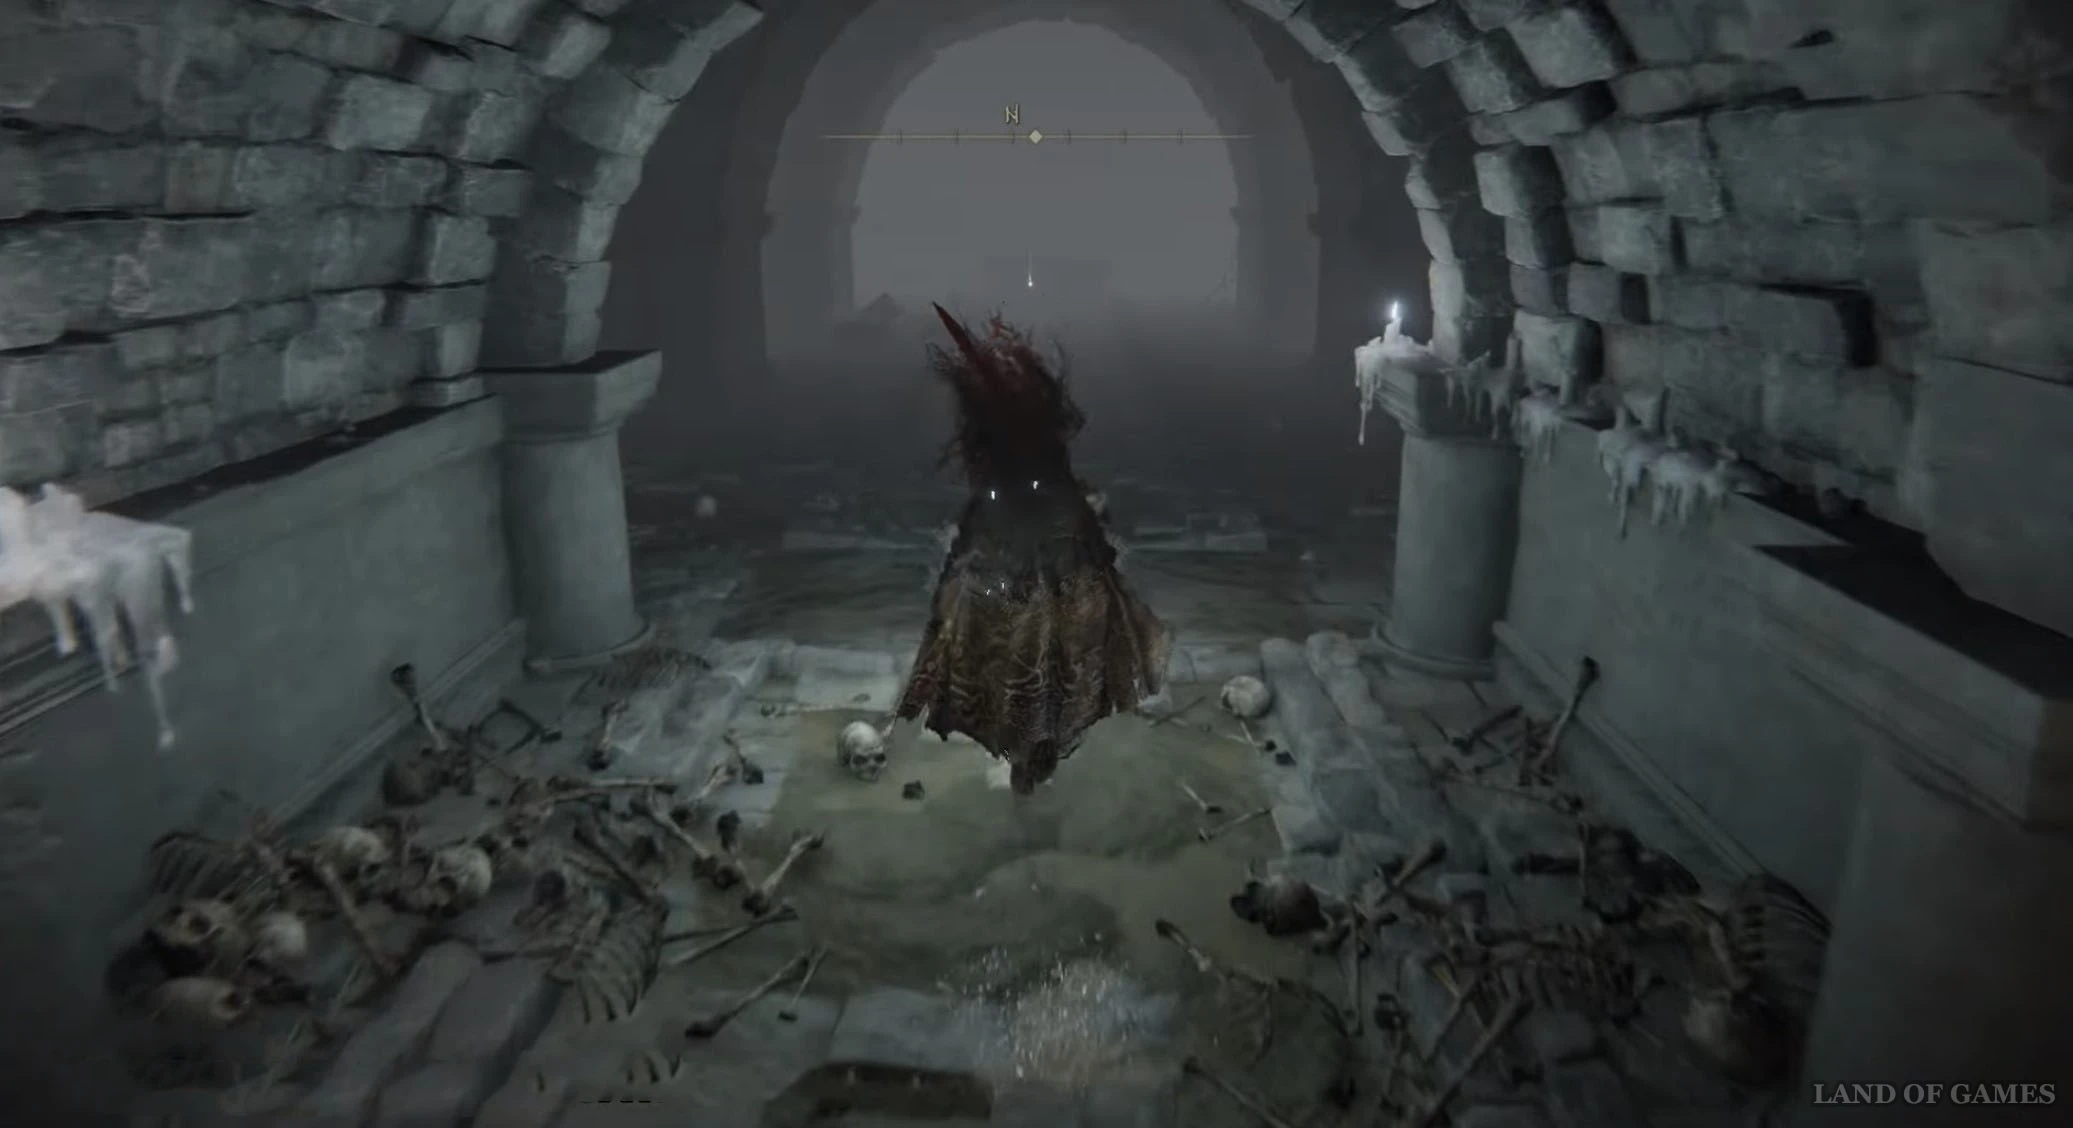
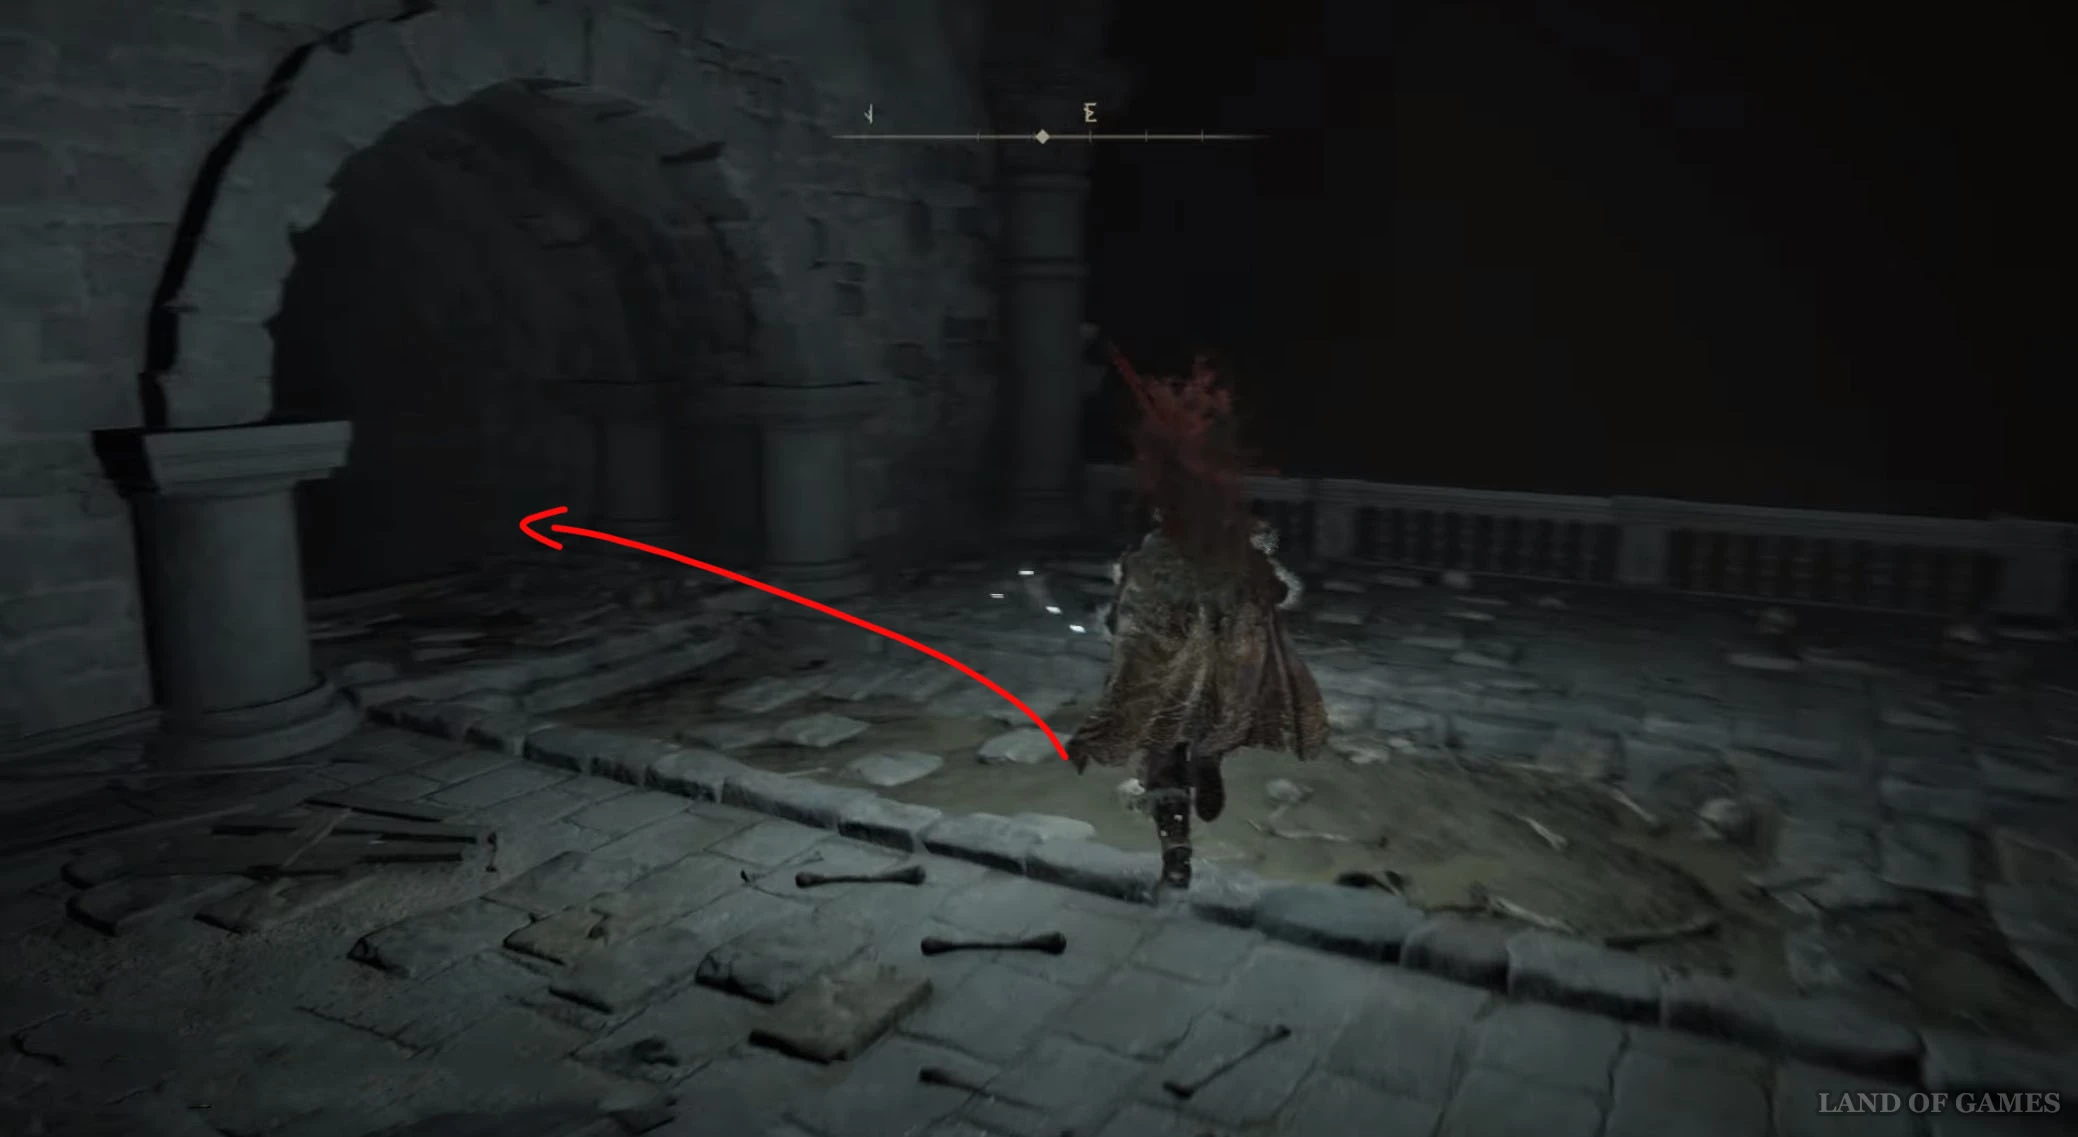
Пройдя вниз по лестнице без перил, сверните в первый проход справа, а потом тут же поверните влево и спуститесь еще ниже по двум деревянным лесенкам. Обязательно возьмите в руки факел, так как здесь очень темно. Спустившись, поверните налево и бегите вперед, а потом сверните вправо.
Спуститесь еще ниже с помощью ступенек и подъемника. Выйдя на открытую площадку, спуститесь по лестнице справа, и продолжайте бежать вниз. Войдите в темный проход и воспользуйтесь слева еще двумя деревянными лесенками. Затем пройдите в туннель слева и двигайтесь вперед, чтобы воспользоваться очередным лифтом, едущим вниз.
Снова бегите вперед, спускаясь все глубже. Будьте осторожны, так как впереди вас ждет огненная турель. Обойдите ее, спустившись по лесенке слева, и бегите на юг. Затем спуститесь по ступенькам еще ниже и сверните в проход справа – воспользуйтесь четвертым подъемником. Далее разберитесь с местным боссом – Йорн, Главный инквизитор.
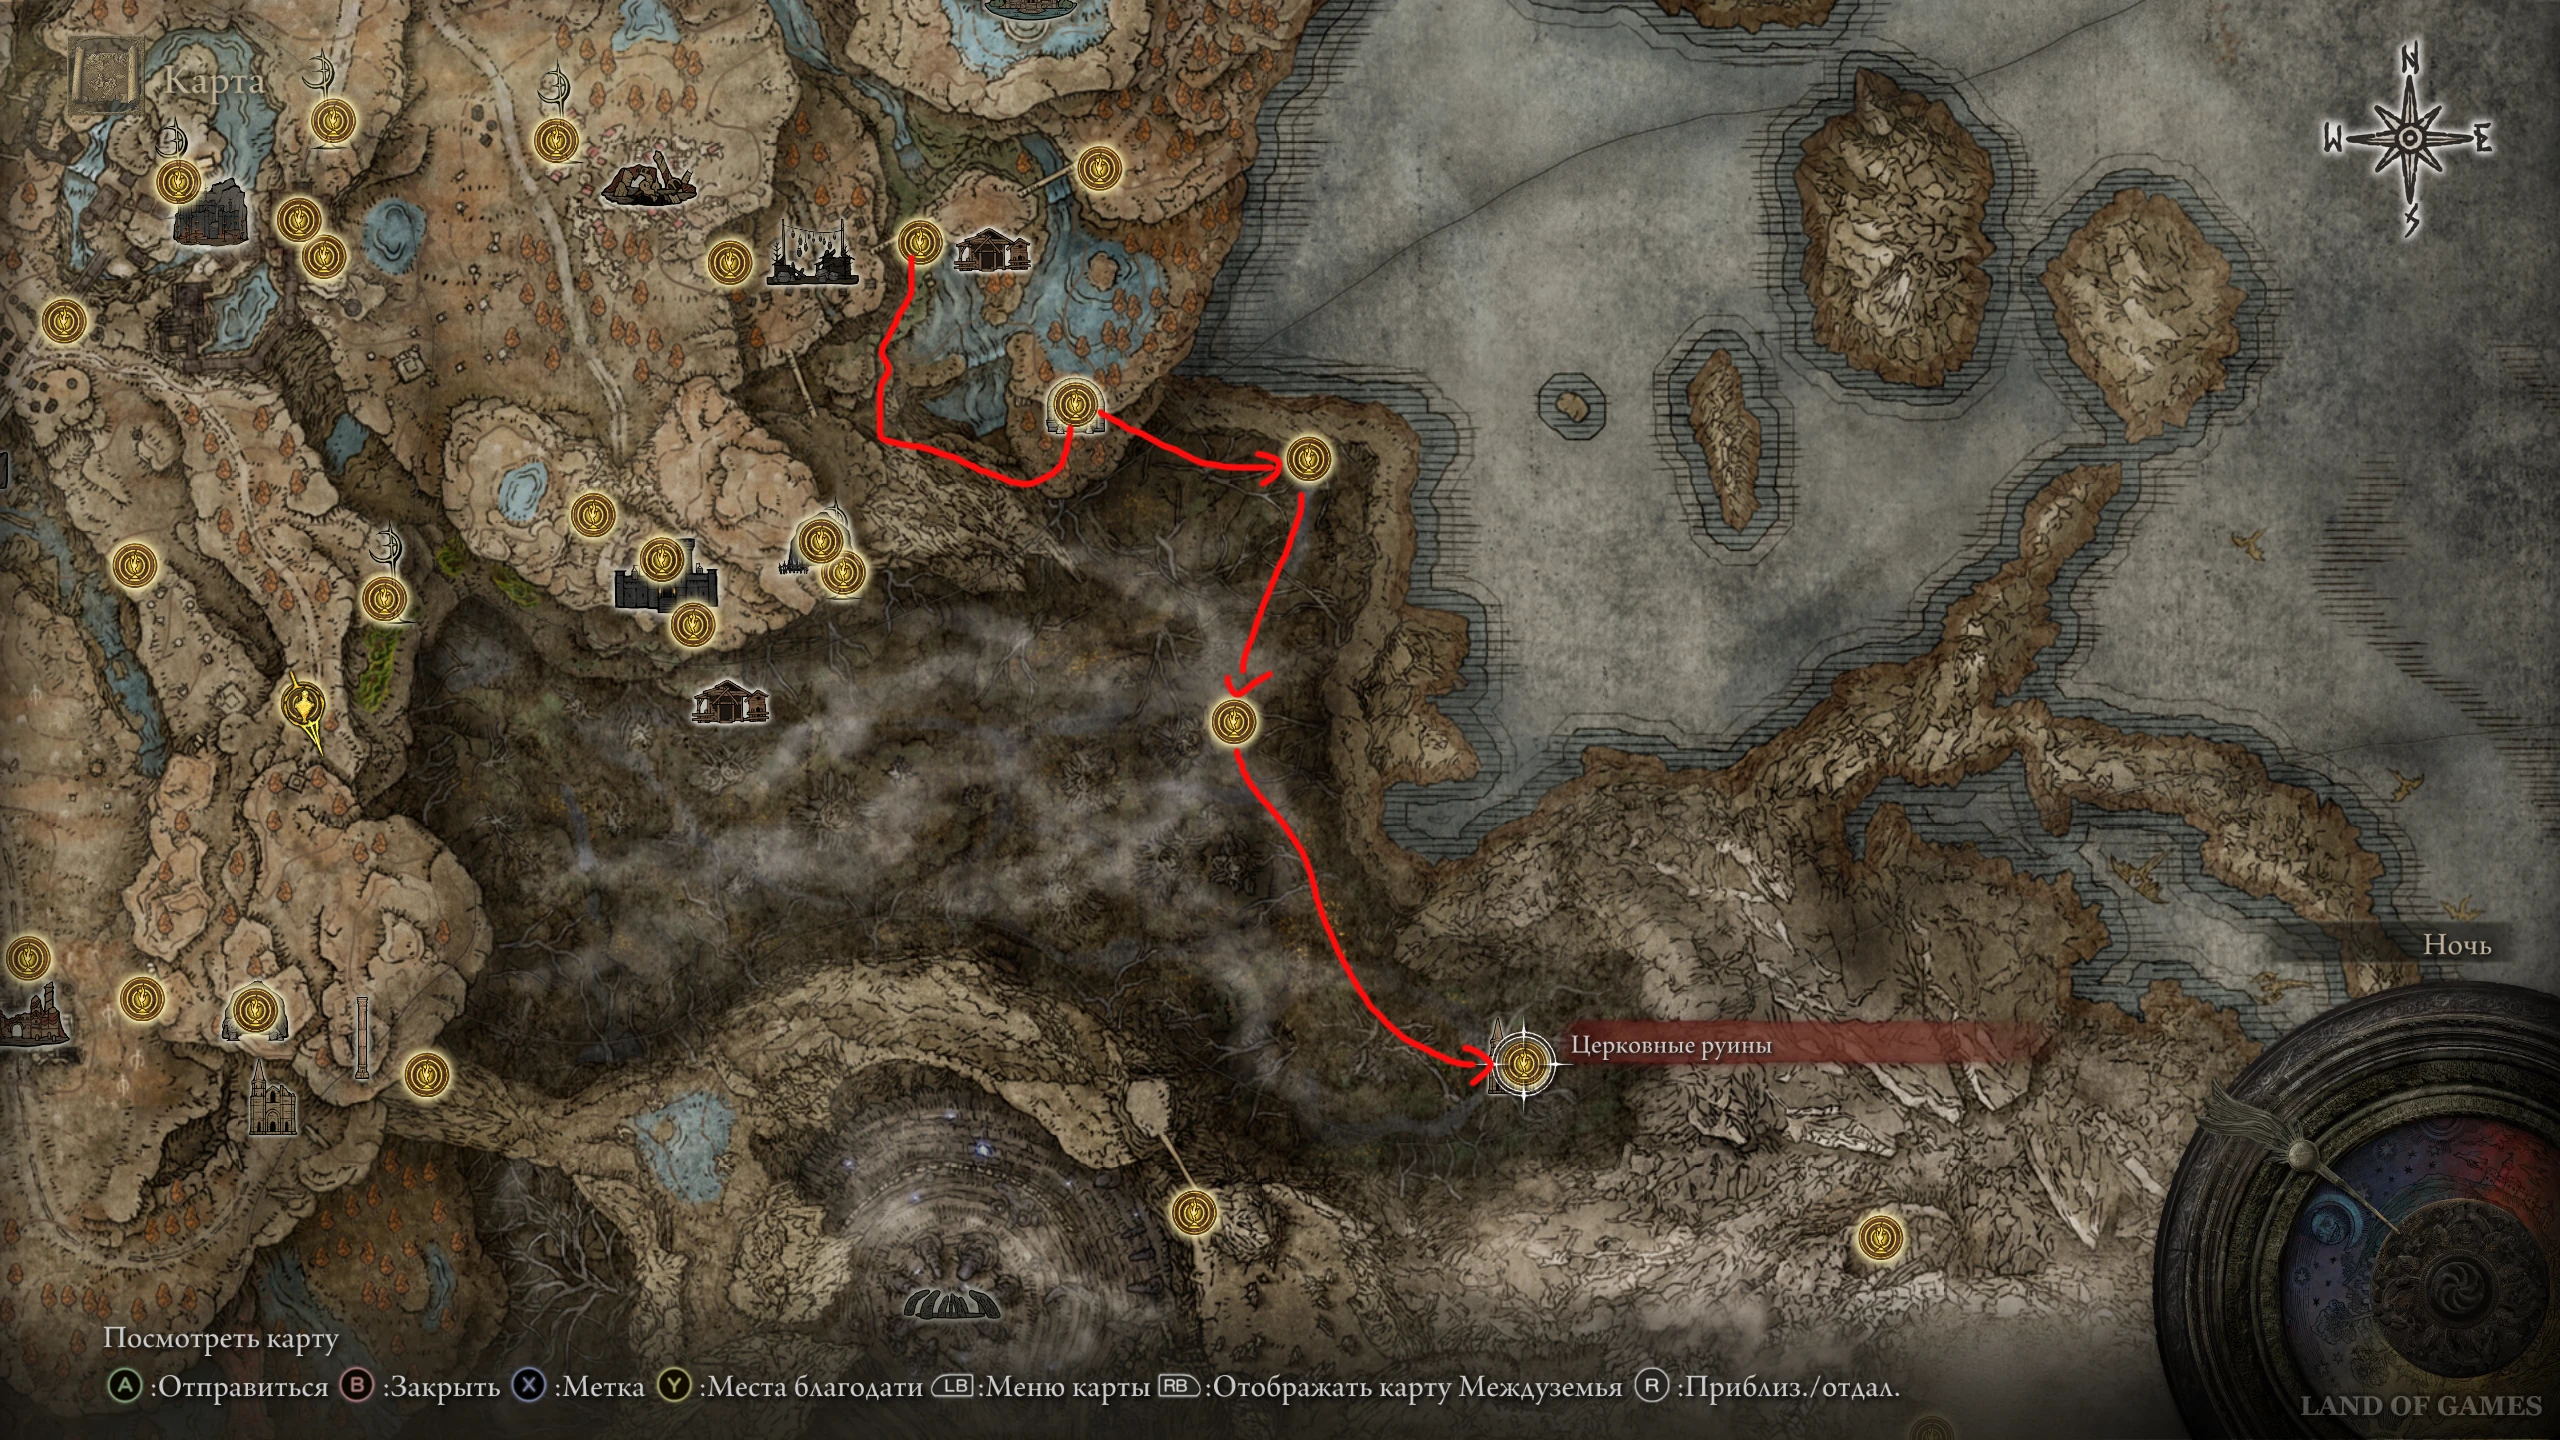
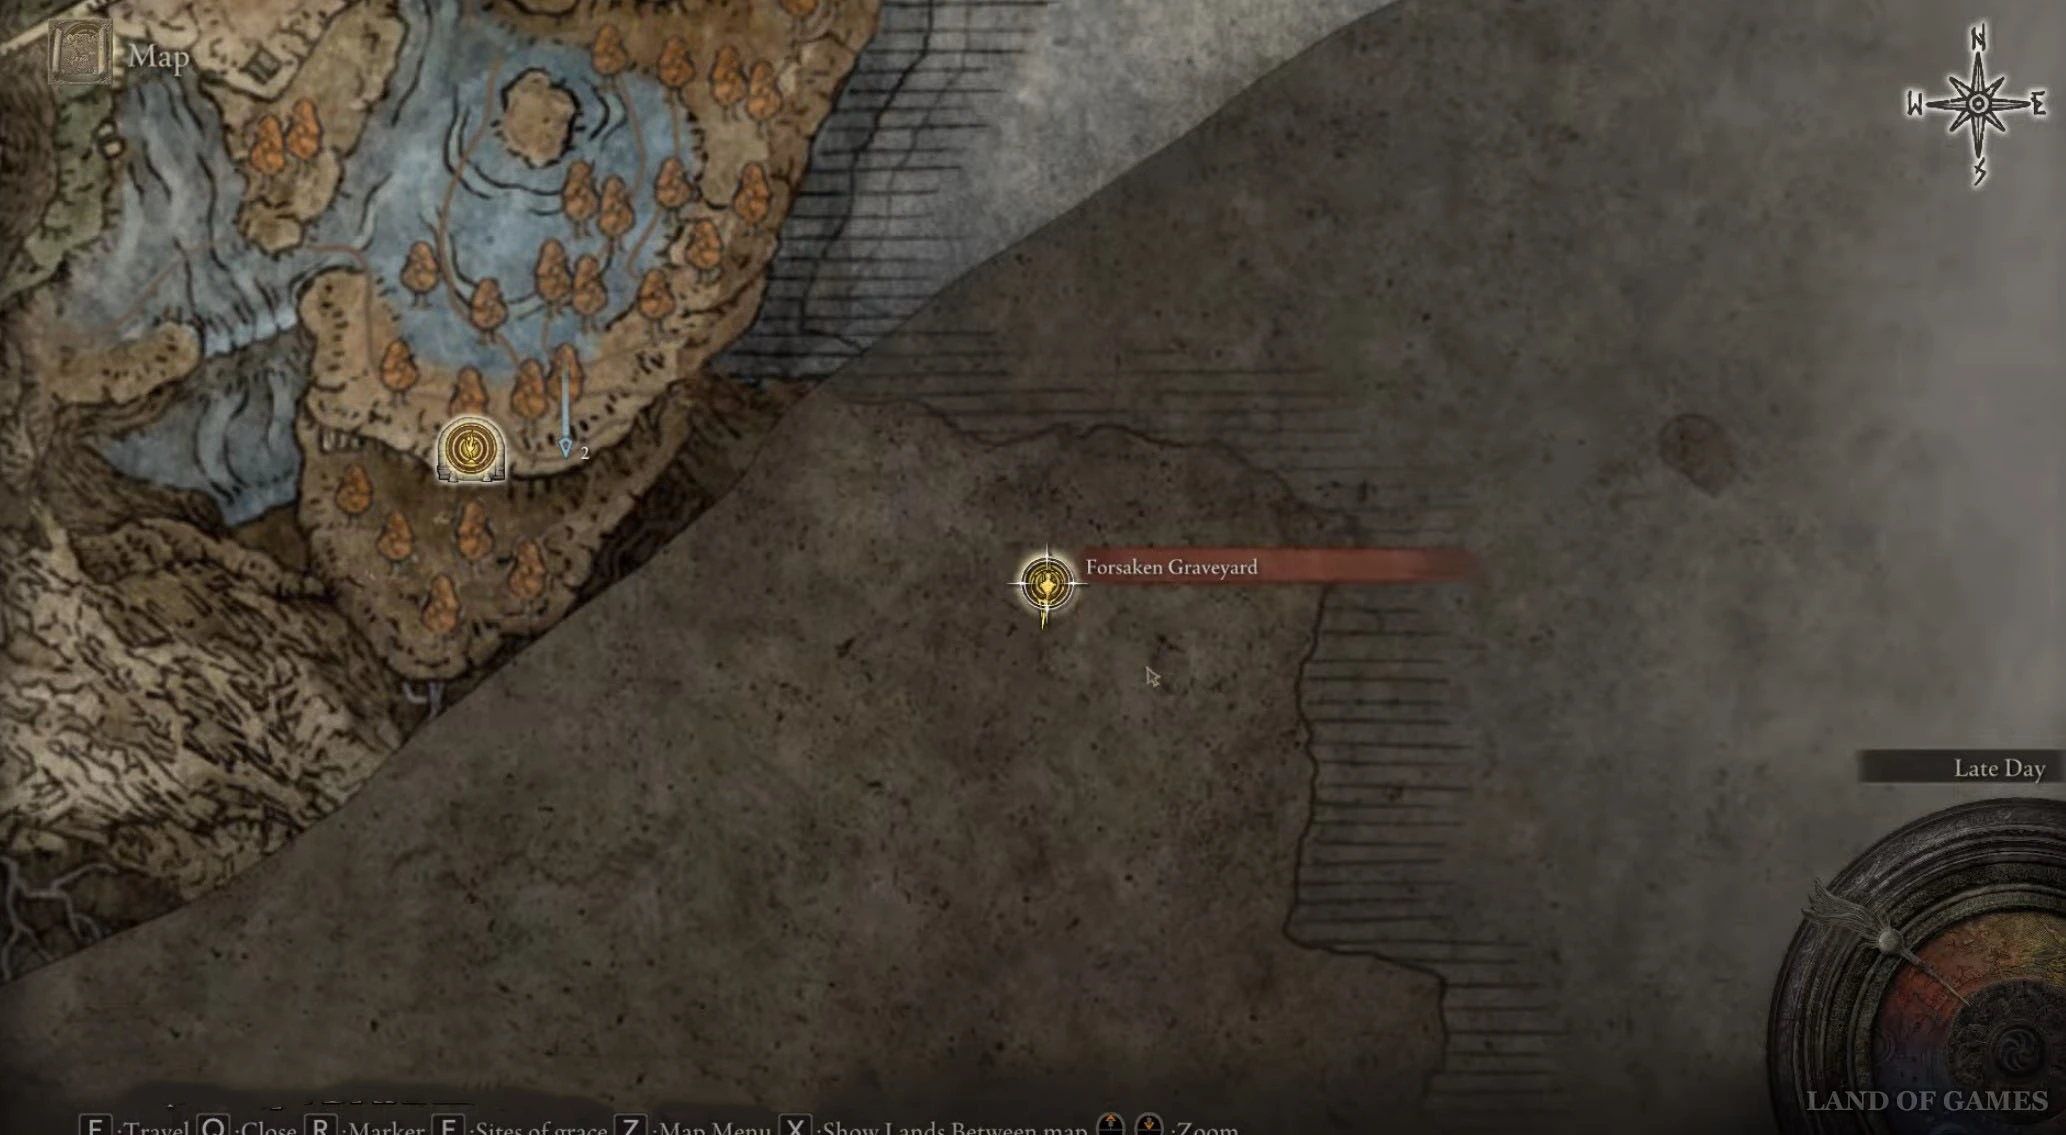
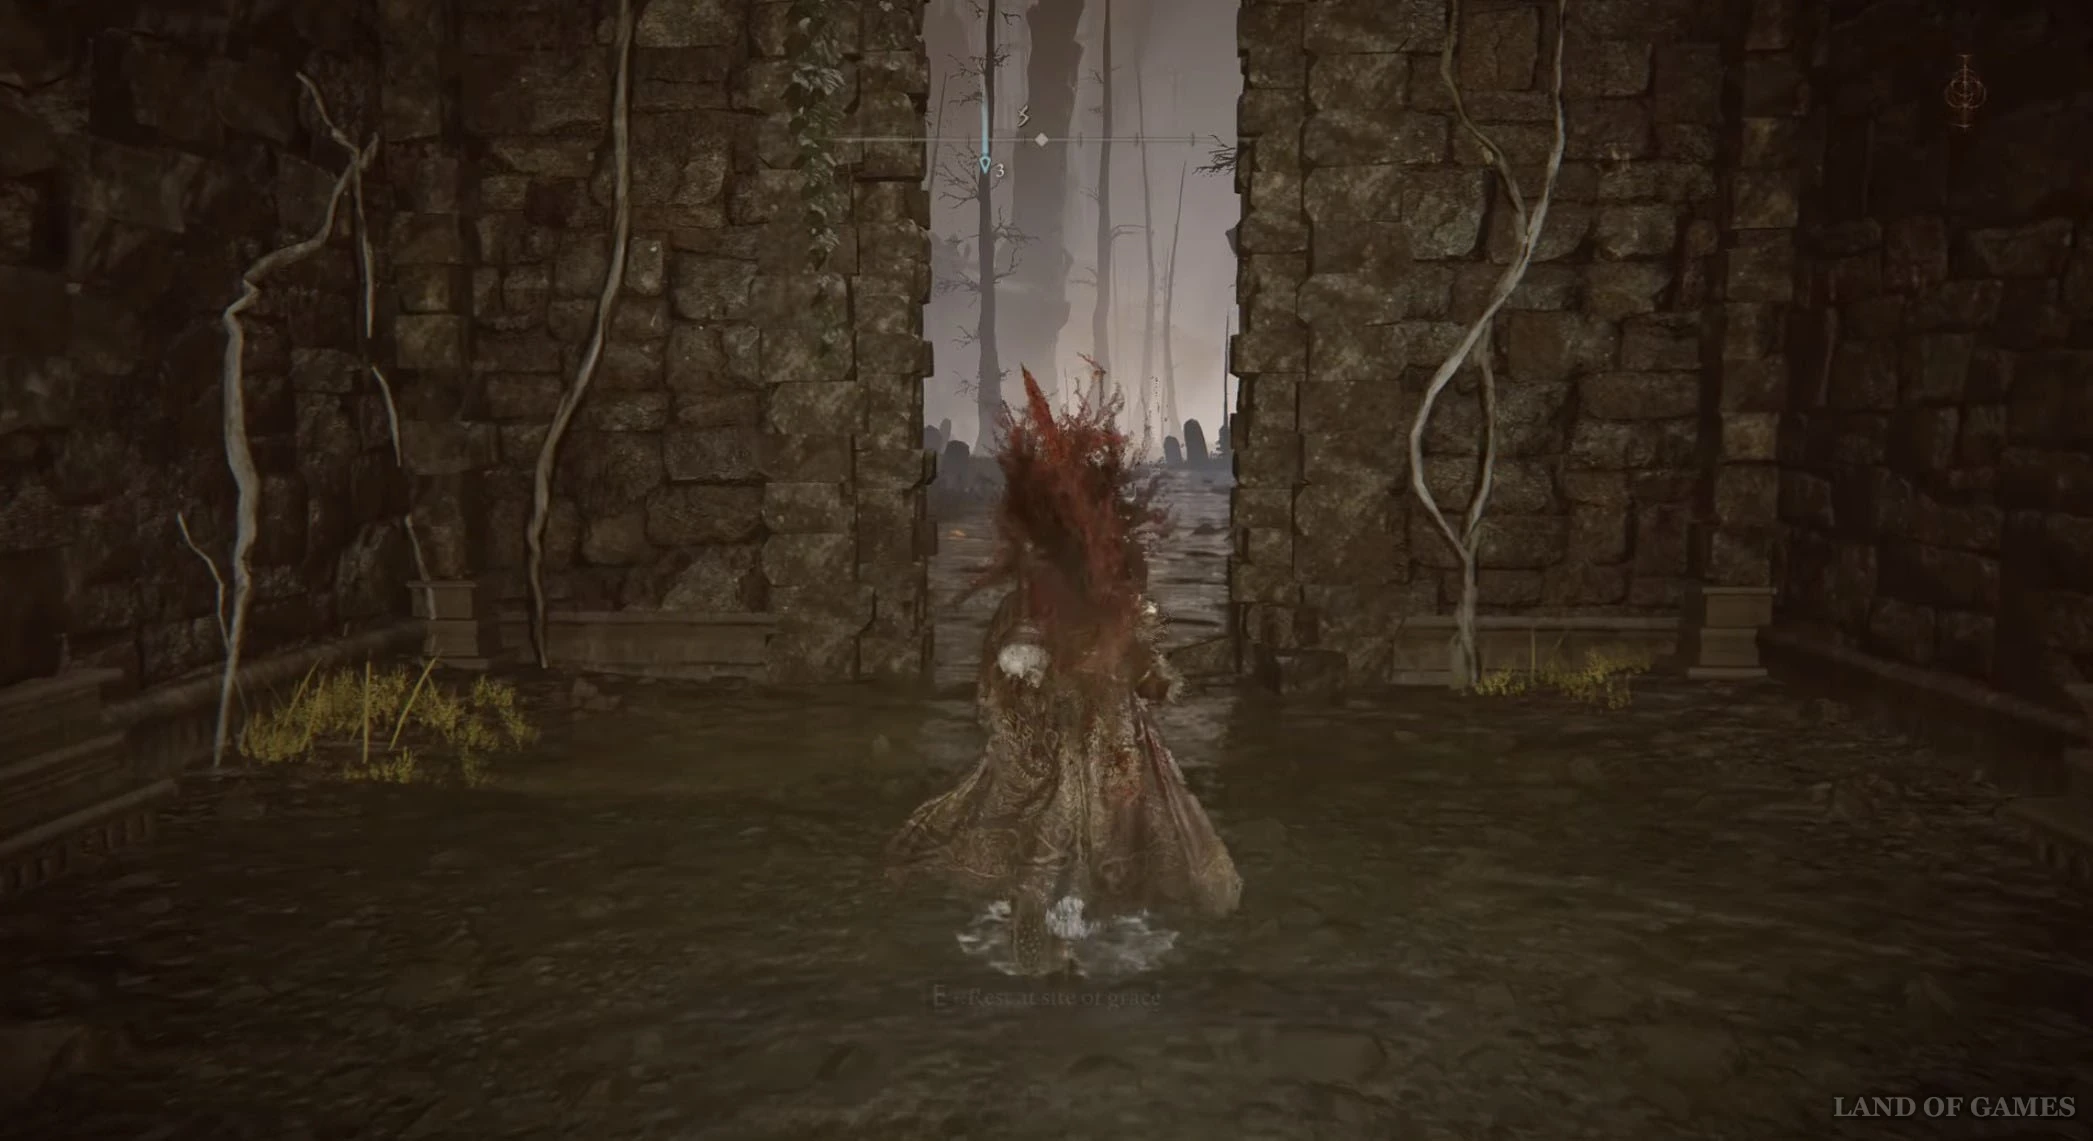
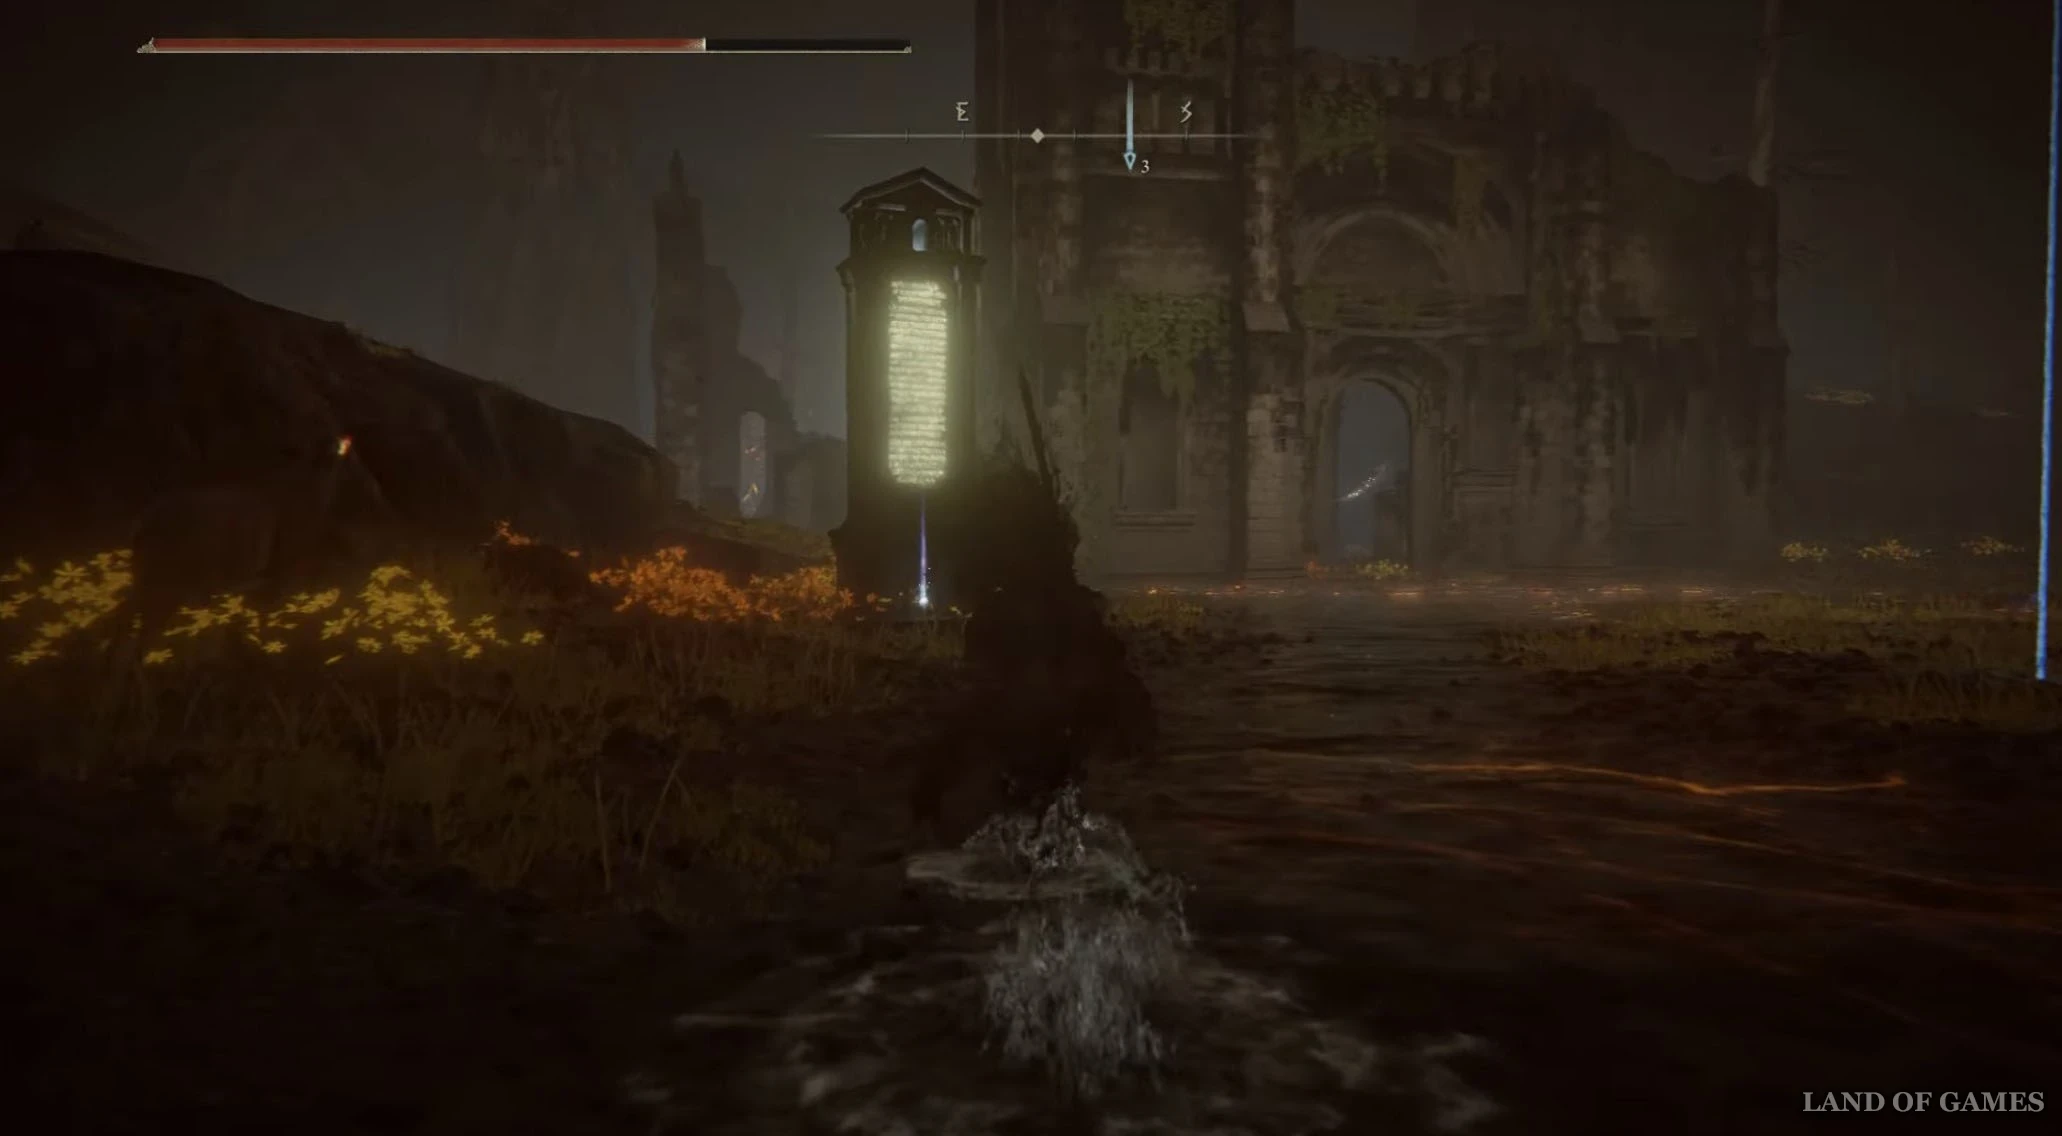
Активируйте место благодати «Забытое кладбище», пройдите через каменную арку и бегите на юг. Спуститесь со склона и отыщите второй «костер» рядом с большим деревом под названием «Лесная тропа». Затем начните идти на юго-восток к ущелью впереди.
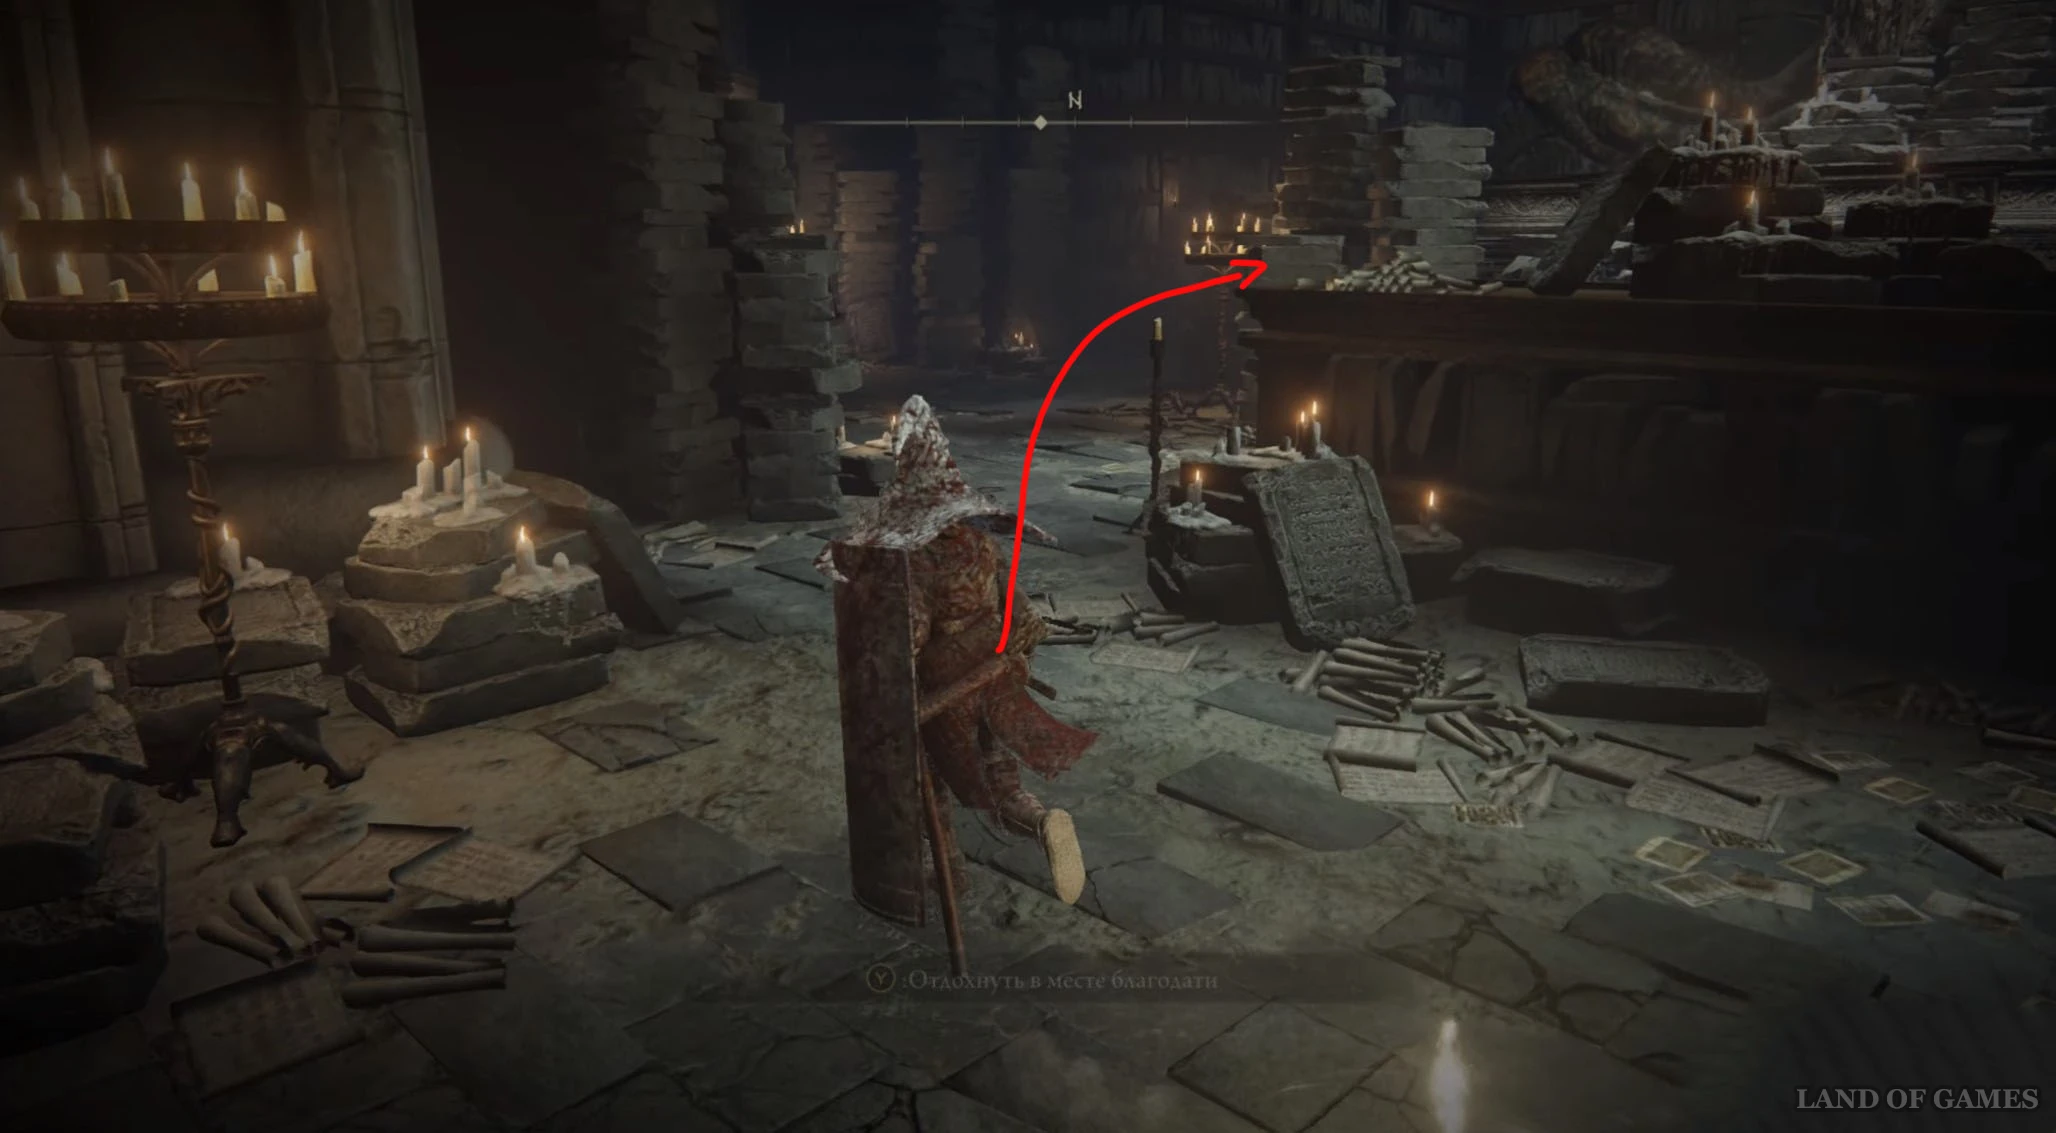
Продолжайте двигаться по тропе в юго-восточном направлении, и вскоре вы обнаружите впереди Путеводную стелу рядом с полуразрушенным зданием. Забрав карту области, войдите внутрь сооружения, активируйте место благодати «Церковные руины» и подберите сразу два фрагмента, лежащих у постамента, где должна была стоять статуя Марики.
Осколок древа упадка 32
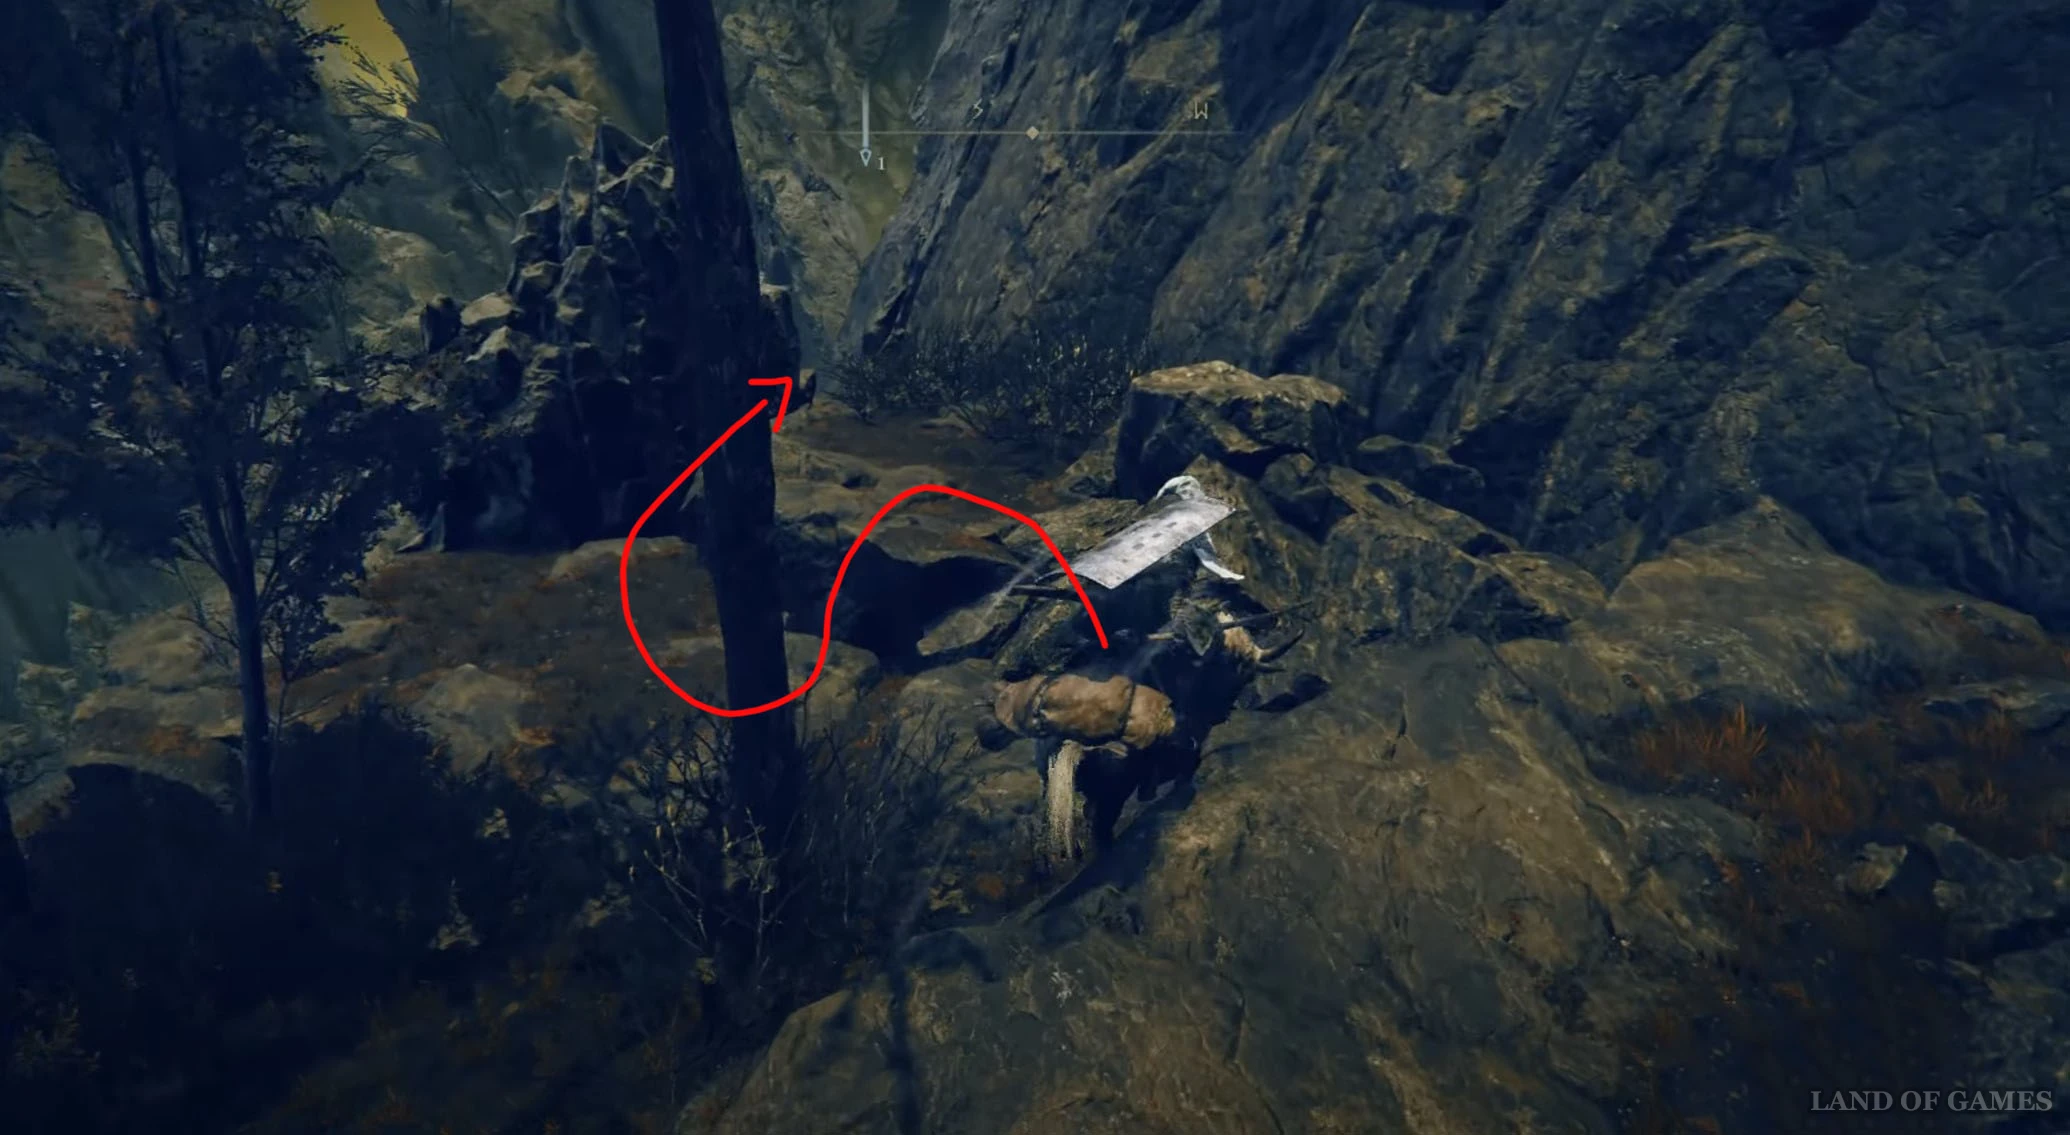
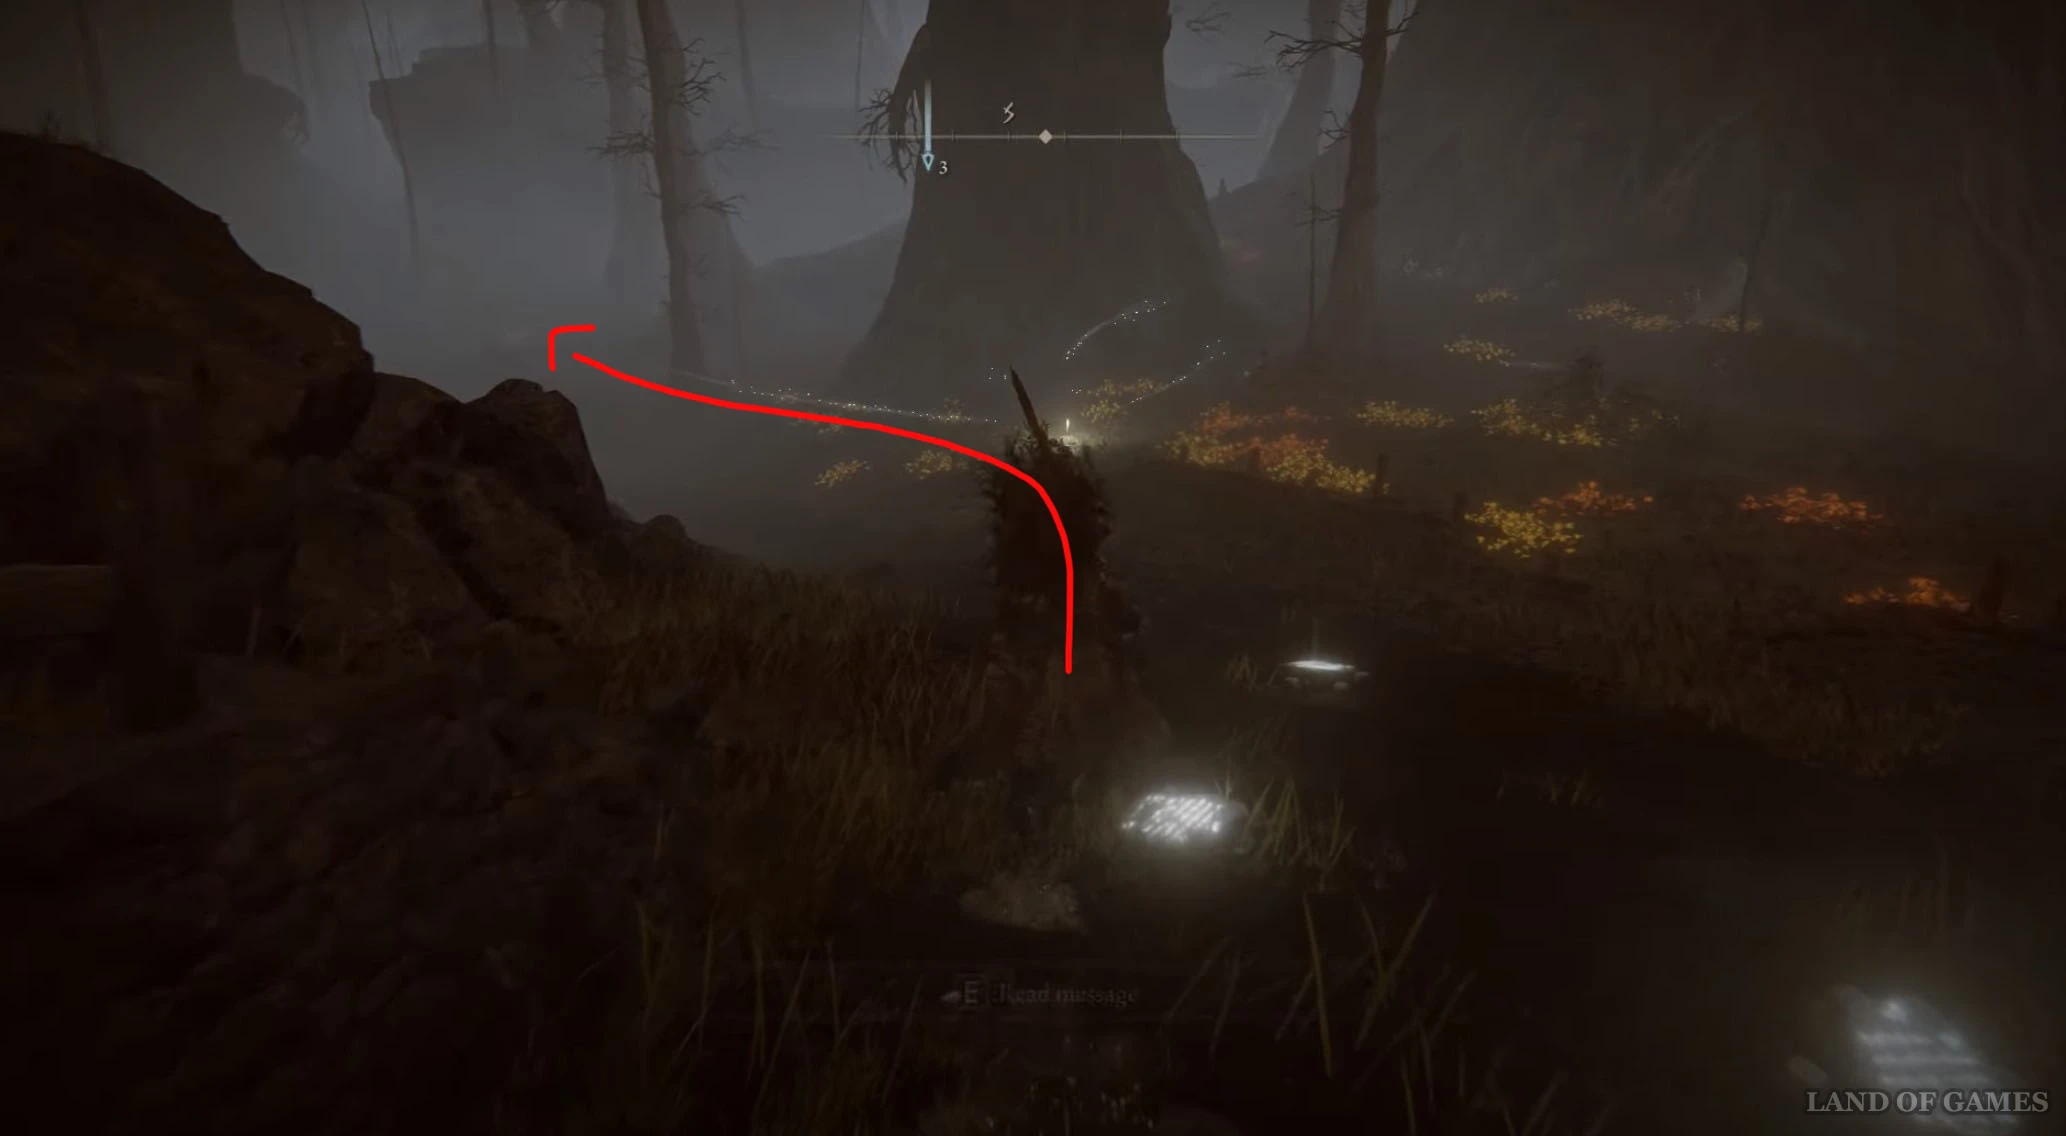
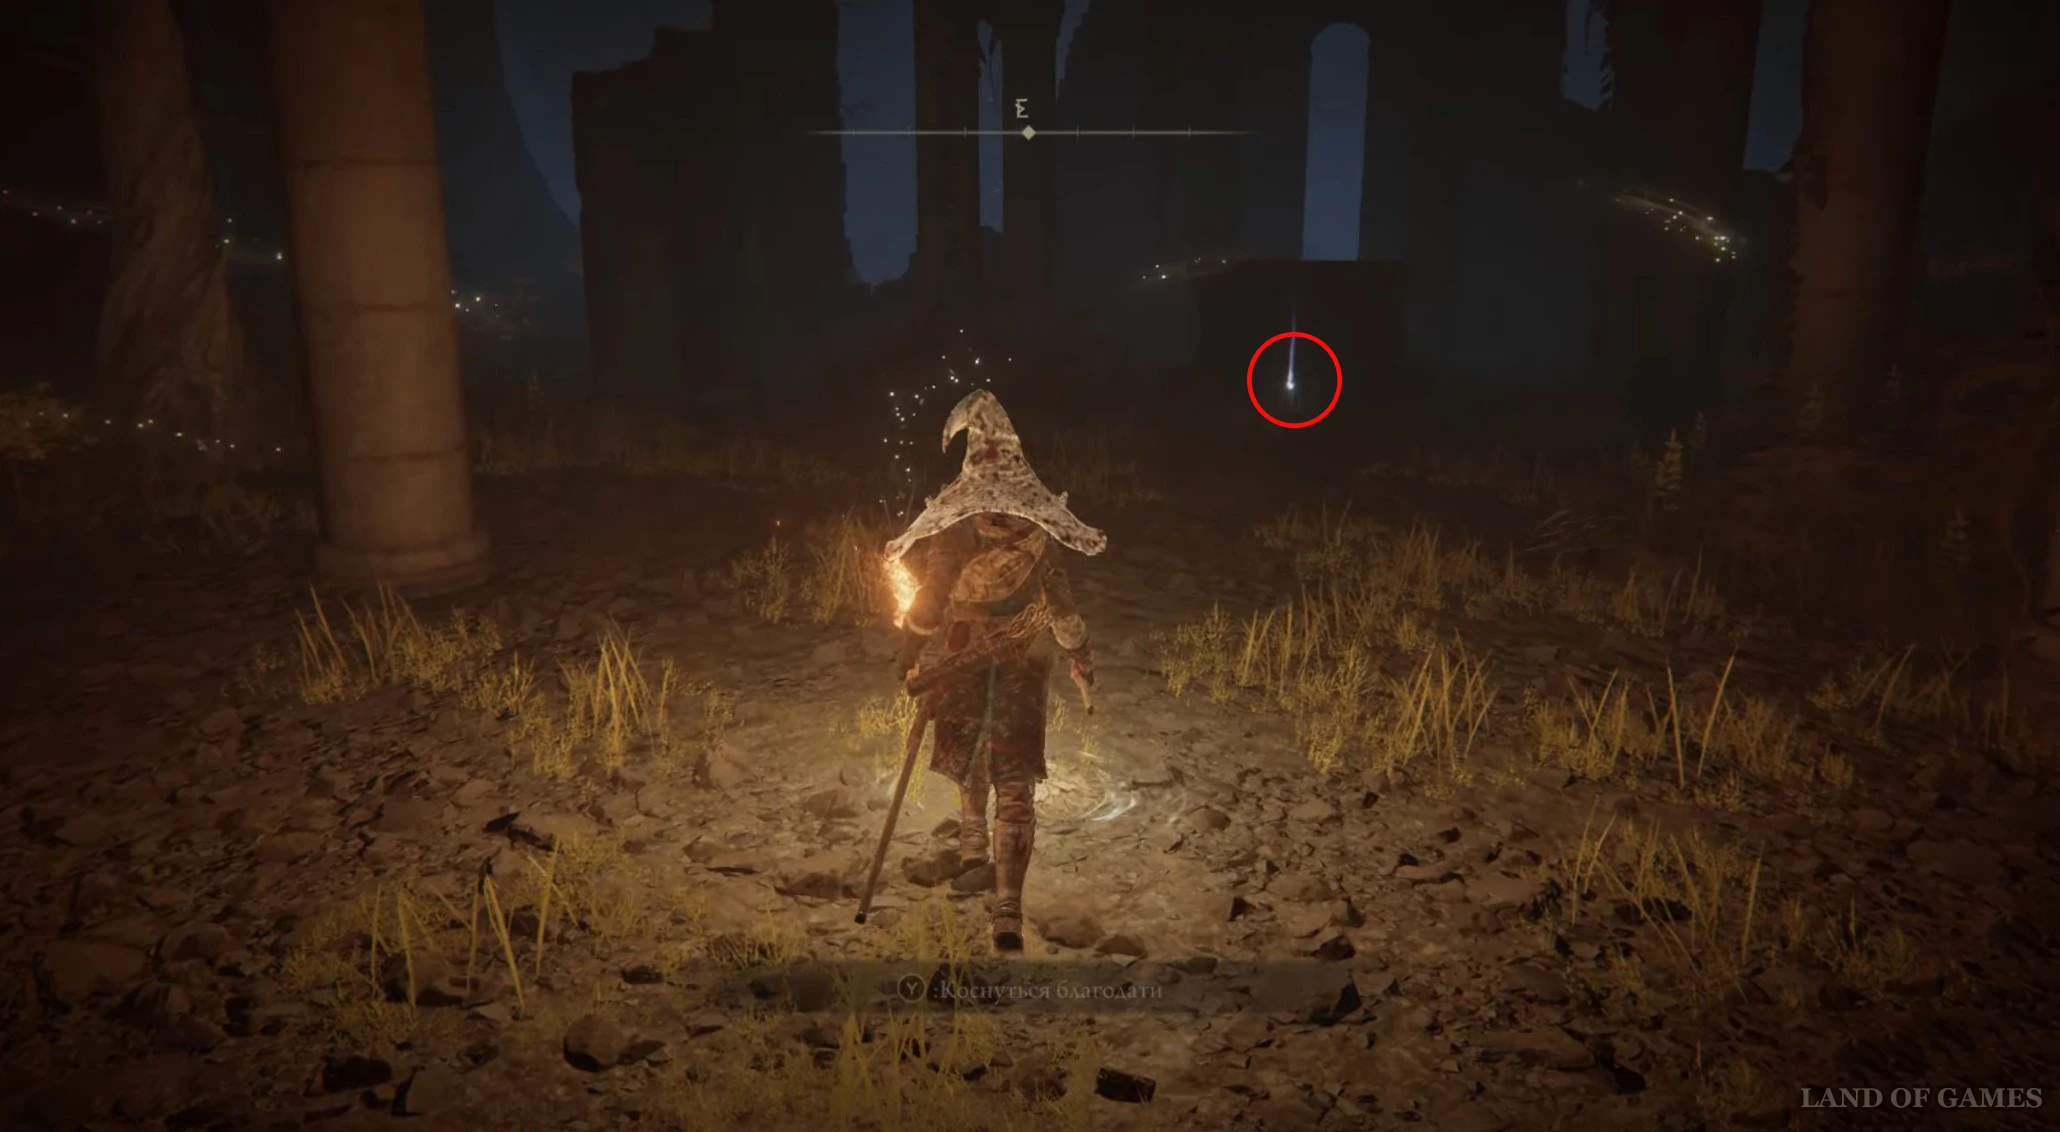
Вернитесь к месту благодати «Лесная тропа», а затем бегите на запад, спрыгнув с выступа вниз. Двигайтесь вперед по воде, пока не доберетесь до костра «Лес бездны». Затем поверните на север и идите вдоль скалы справа. Когда увидите на горе золотые прожилки, сверните влево, обходя бродящих тут монстров.
Двигайтесь на запад, и вскоре вы заметите впереди труп с белым огоньком, прислоненный к большому дереву. Взаимодействуйте с ним для получения нового фрагмента.

Осколок древа упадка 33
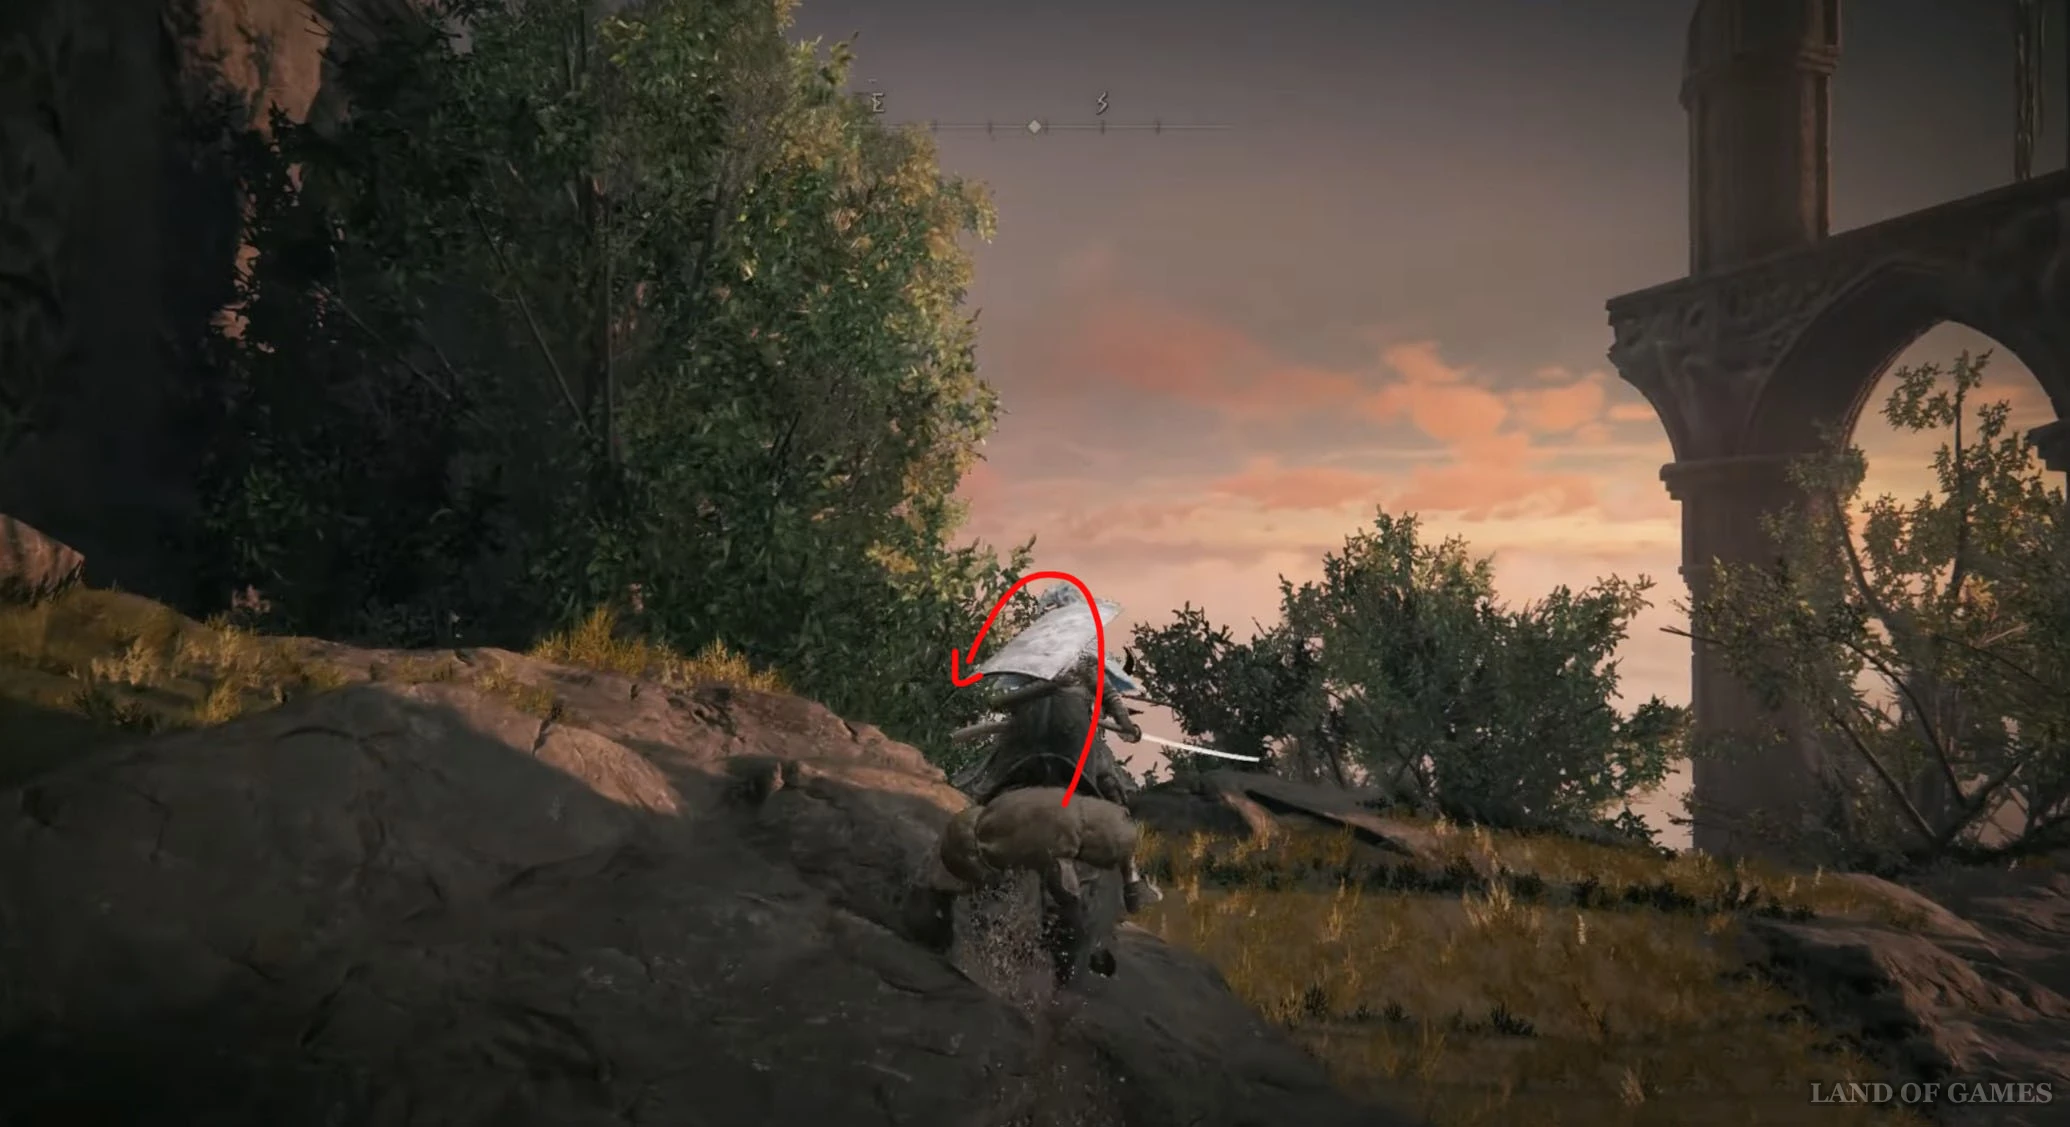
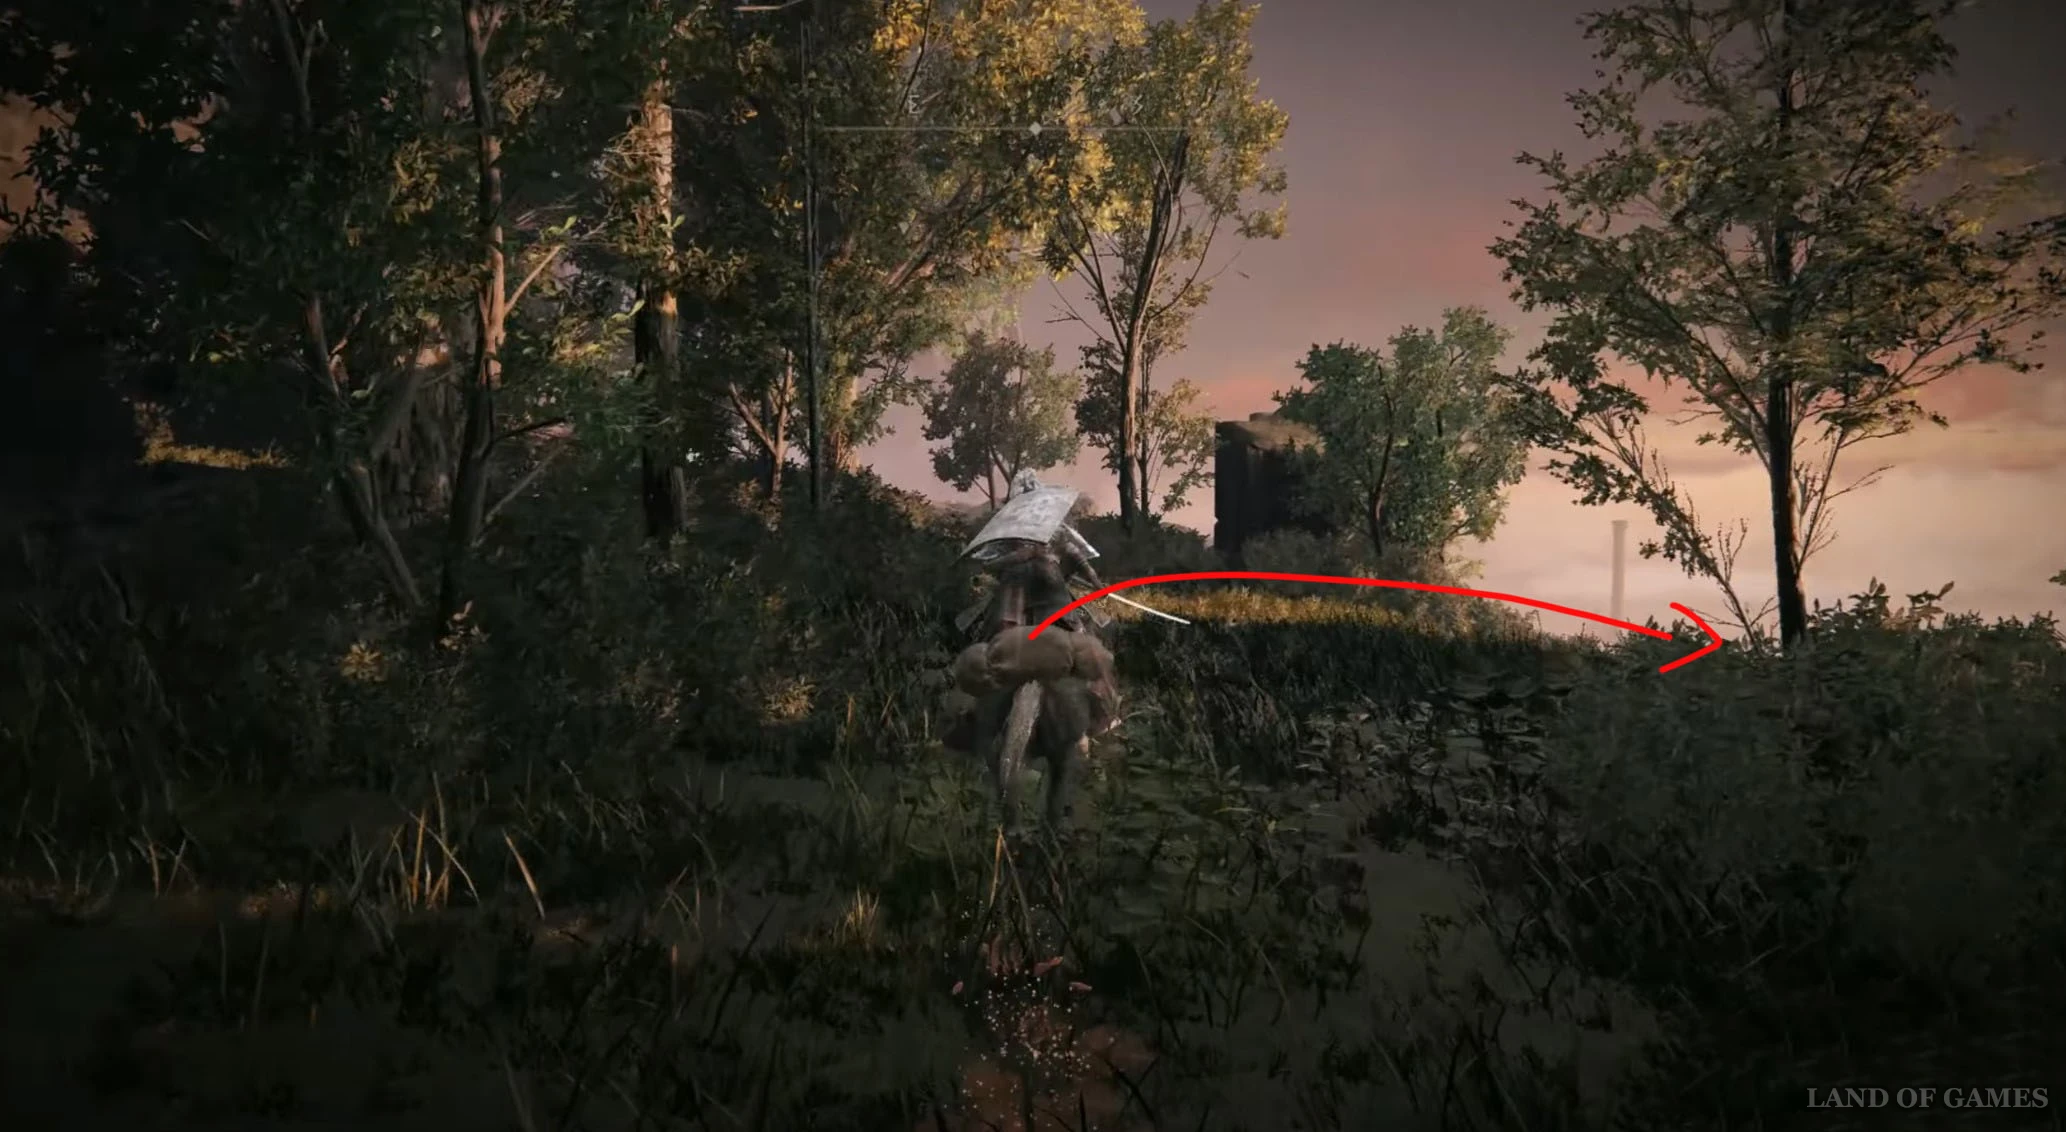
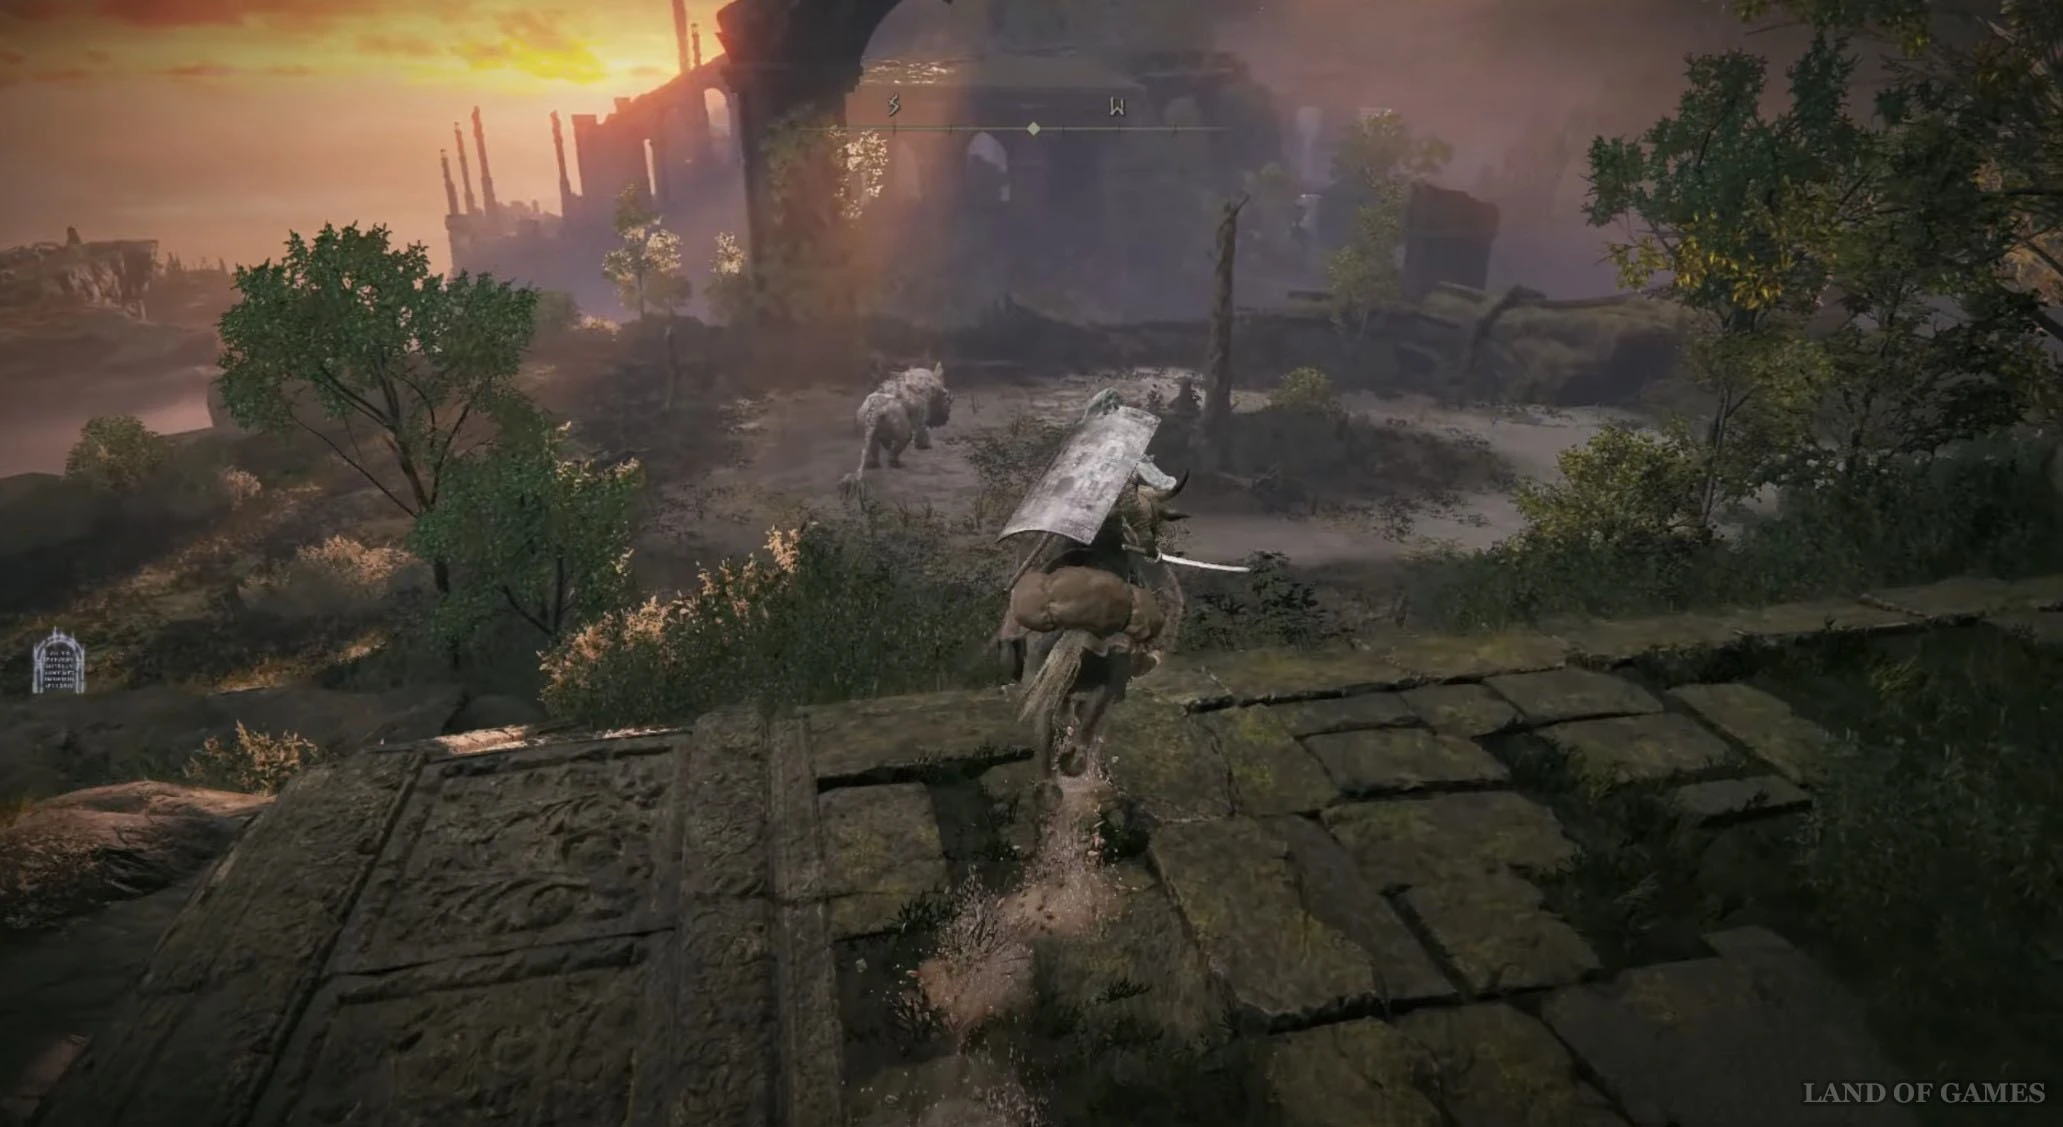
Доберитесь до Путеводной стелы, где находится карта Руин Рауха, а затем направляйтесь на юго-запад, пройдя мимо руин. Бегите по воде к следующим развалинам впереди. Обойдите здание и сверните вправо. Далее войдите в проем в стене и поднимитесь по лестнице наверх. Пройдите по красной ткани и спрыгните на балкончик внизу.
Сразу развернитесь и пройдите в проход, чтобы снова войти в здание. Здесь на краю площадки будет лежать труп – взаимодействуйте с ним для сбора новой вещицы.
Осколок древа упадка 34
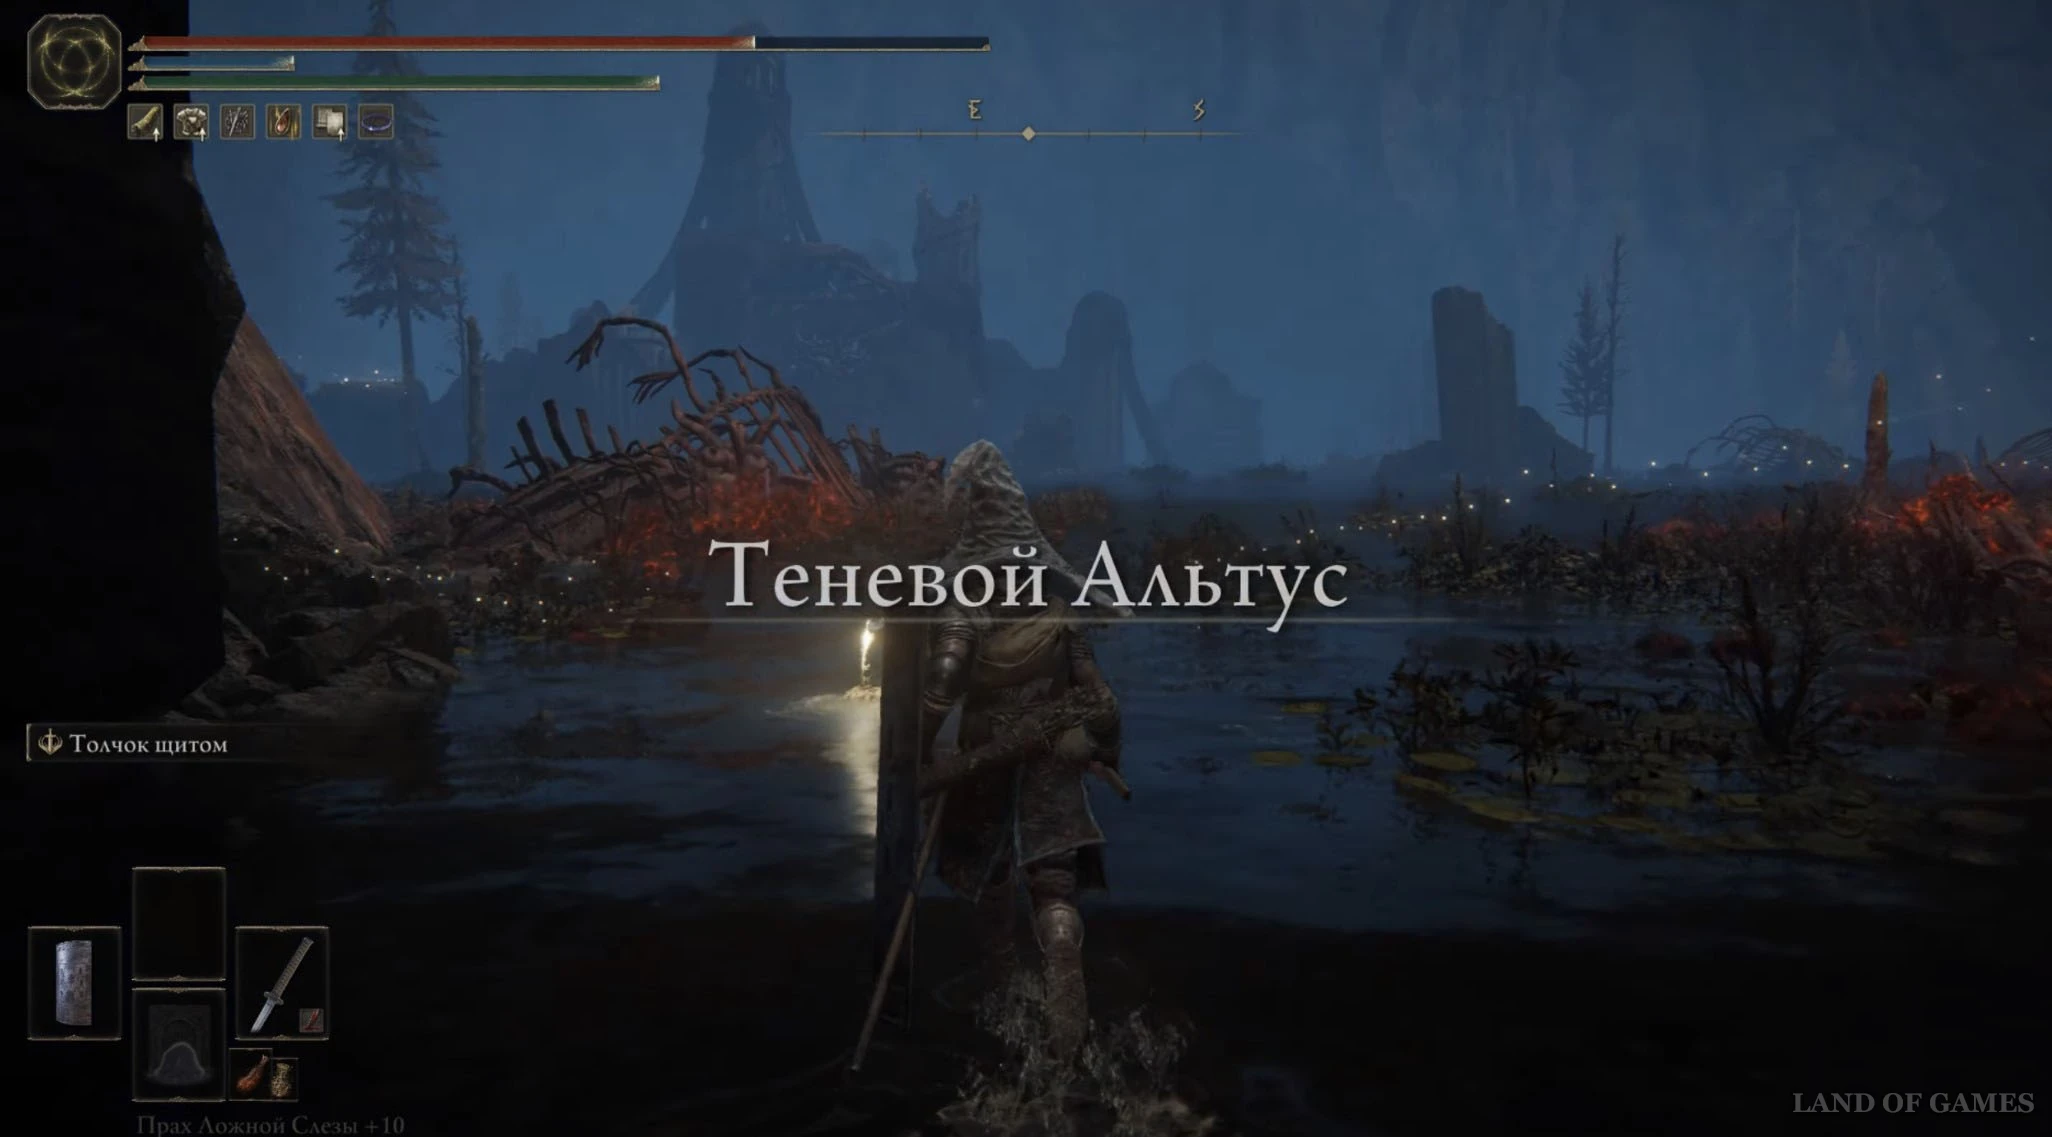
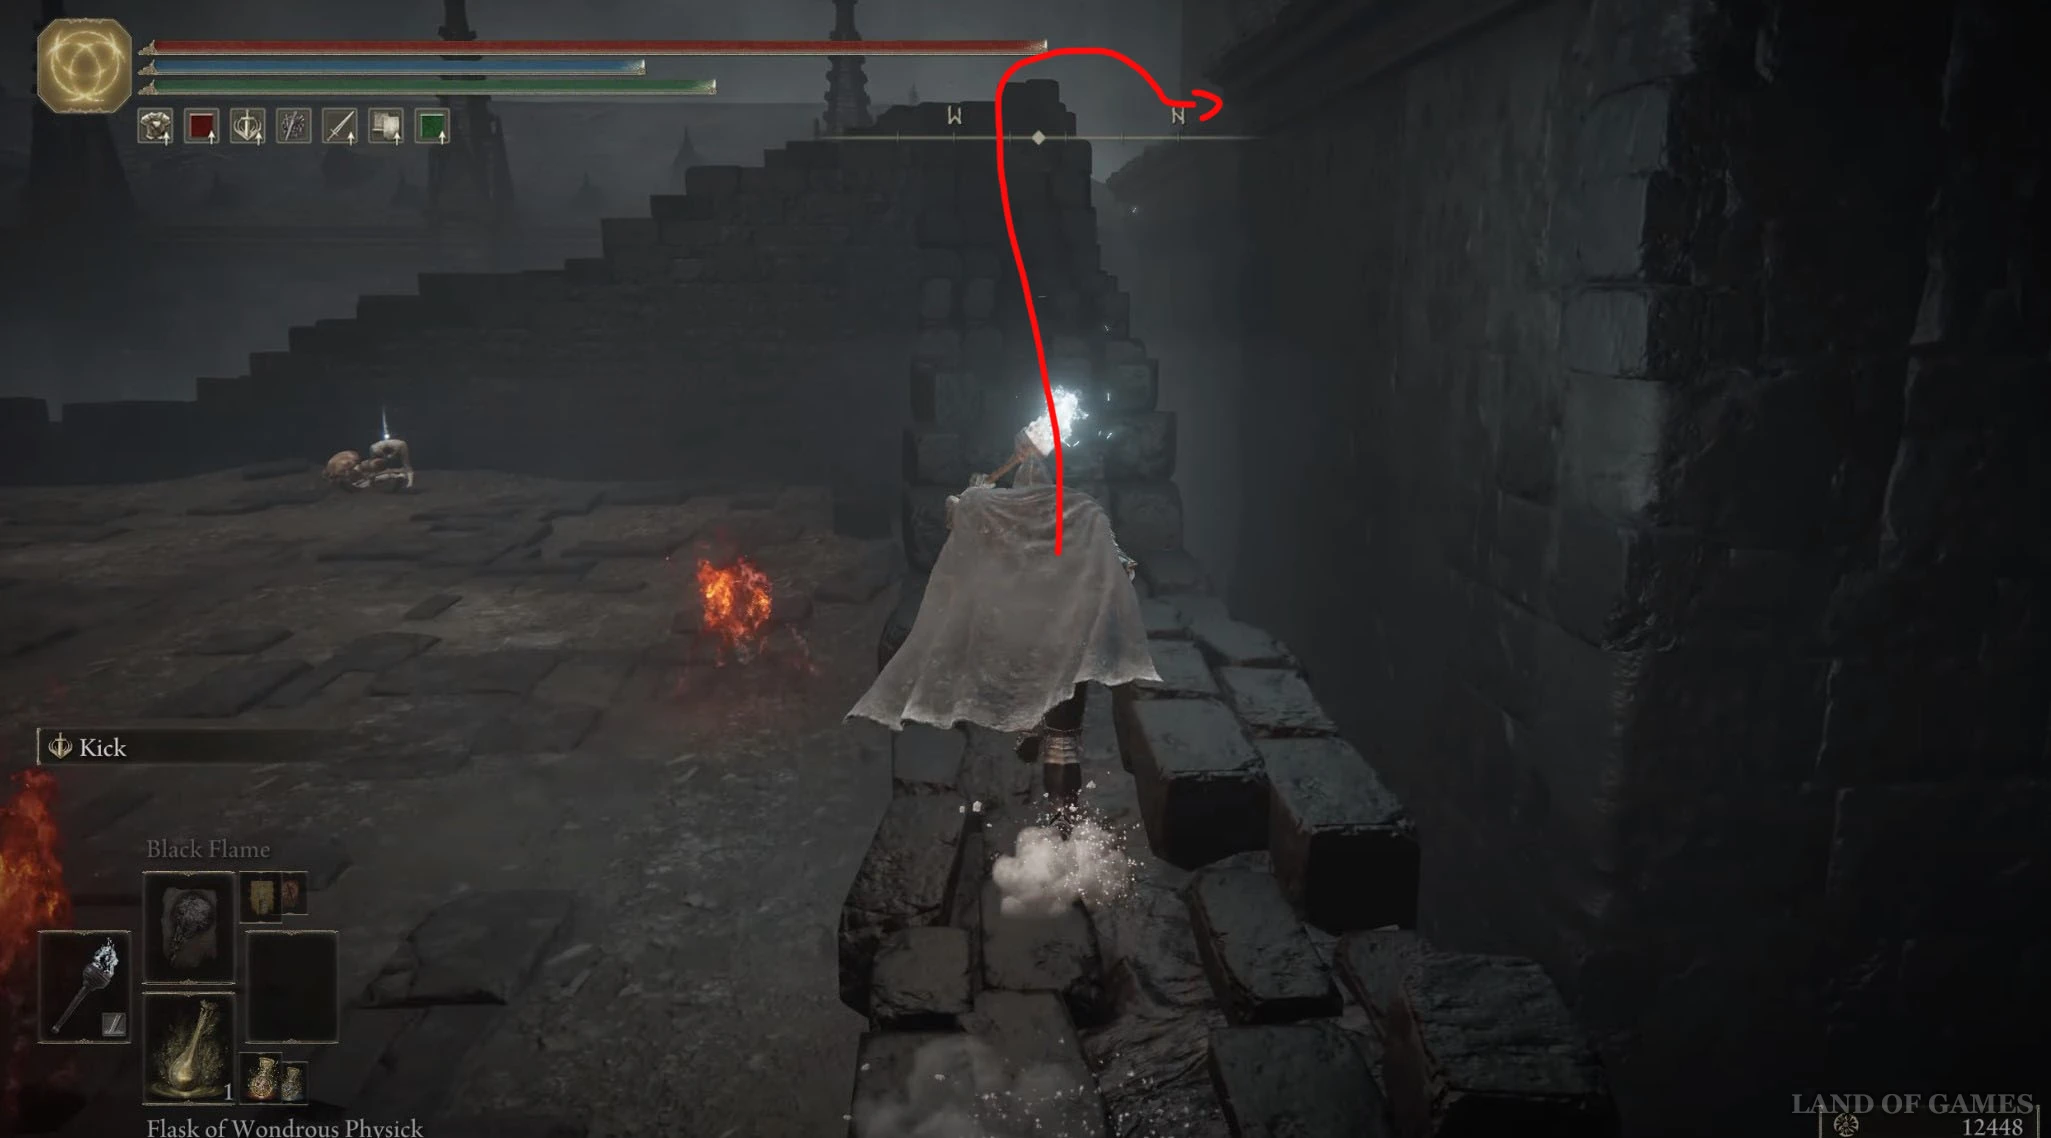
Итак, теперь направляйтесь в Пристанище Теней, расположенное в северной части Теневого Альтуса. Переместитесь к «Тракту церковного круга», а затем двигайтесь на северо-запад и дойдите до места благодати «Проход в церковный круг».
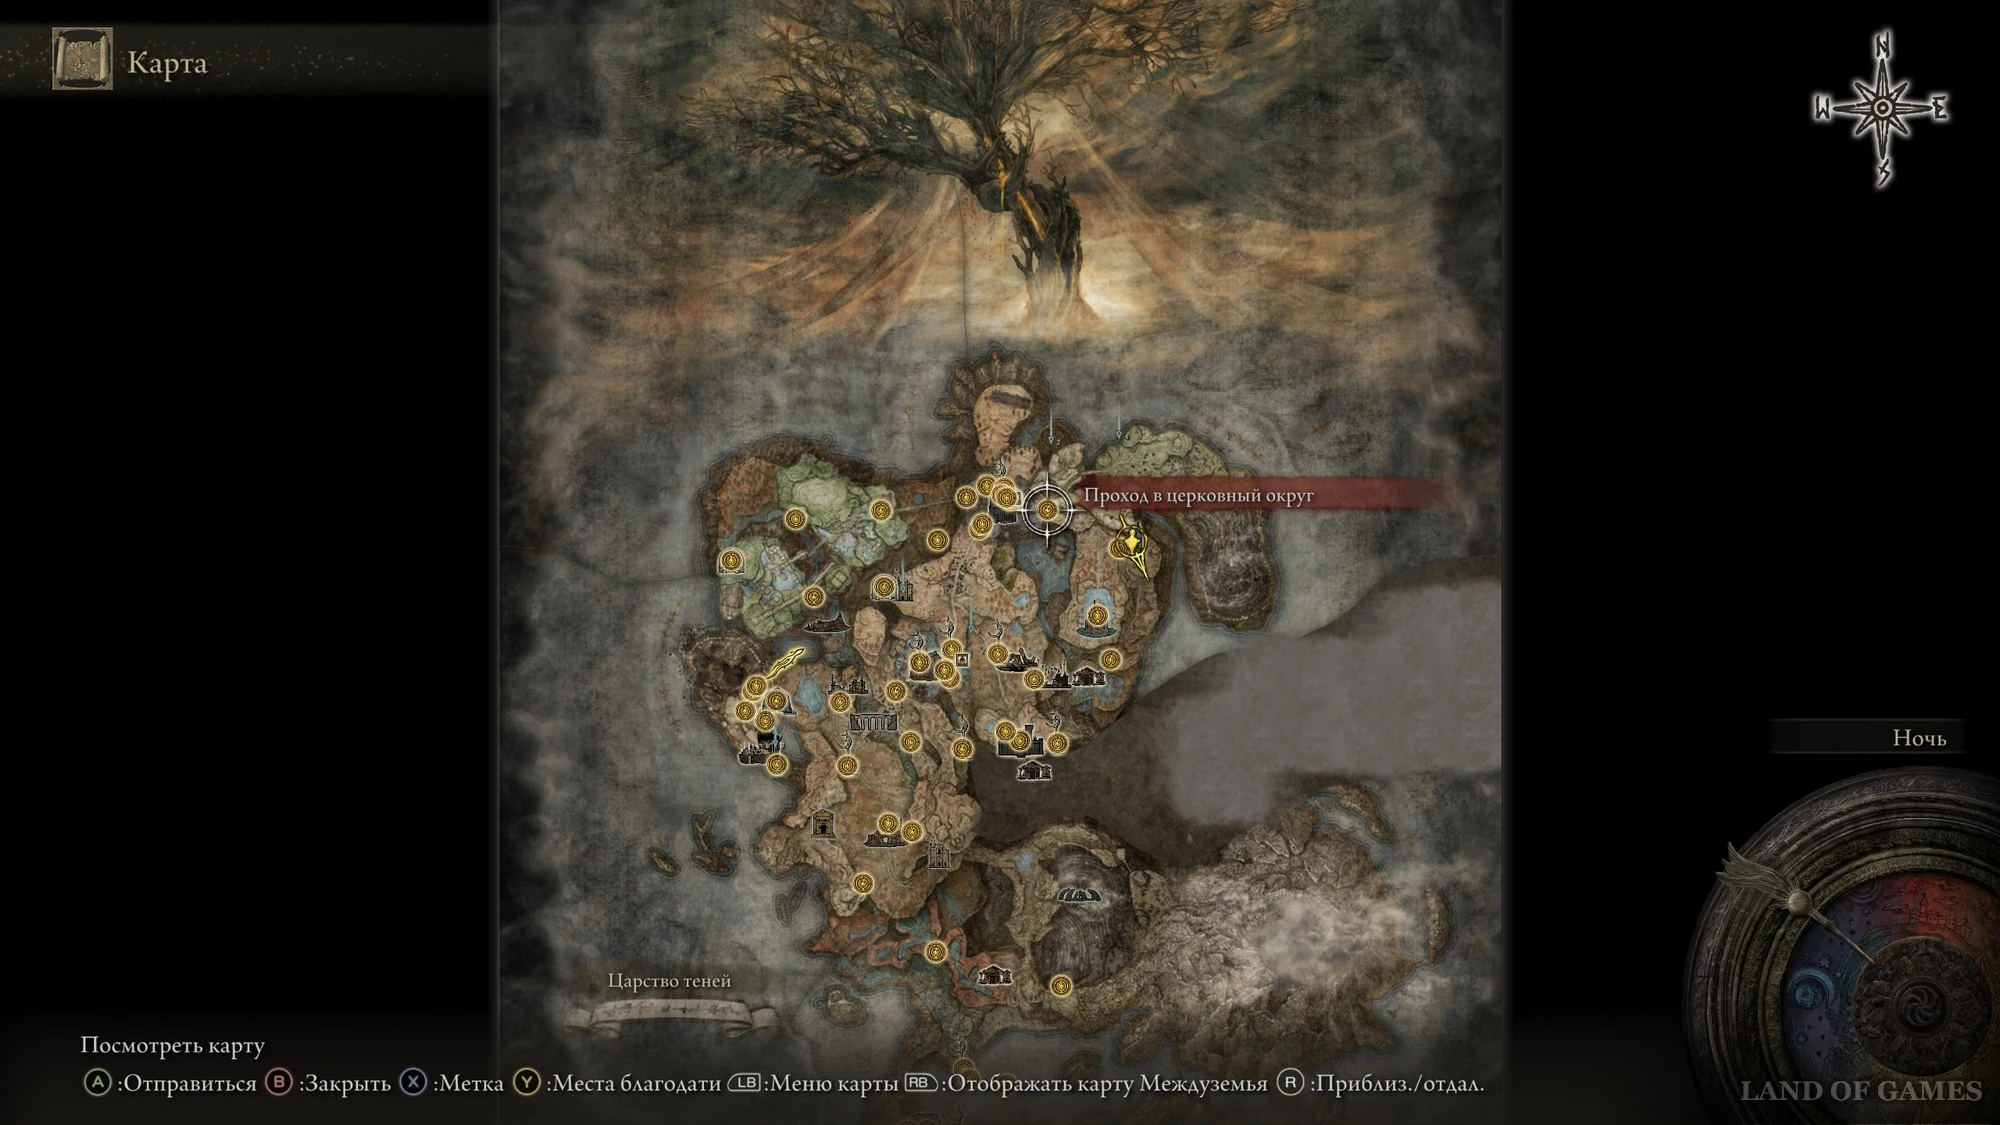
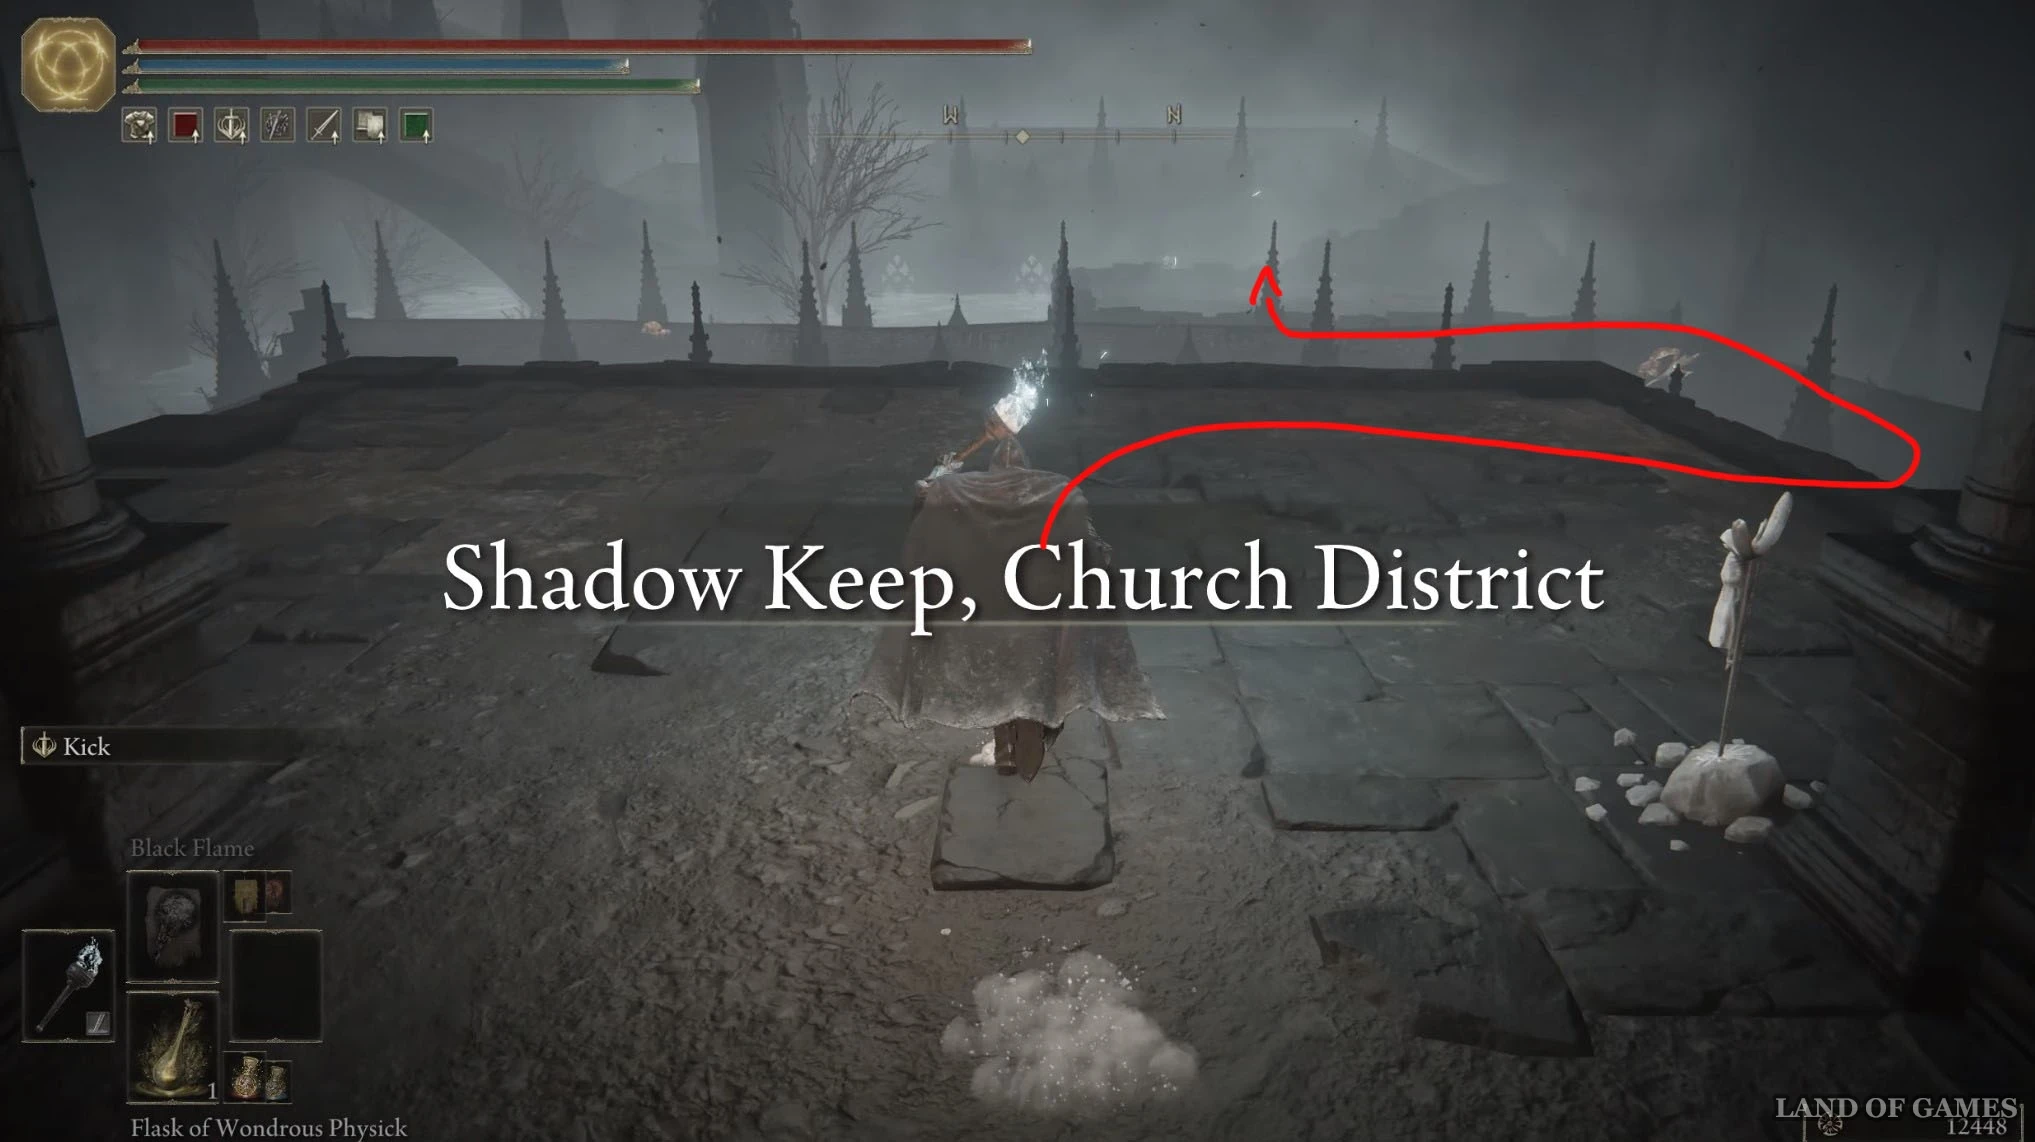
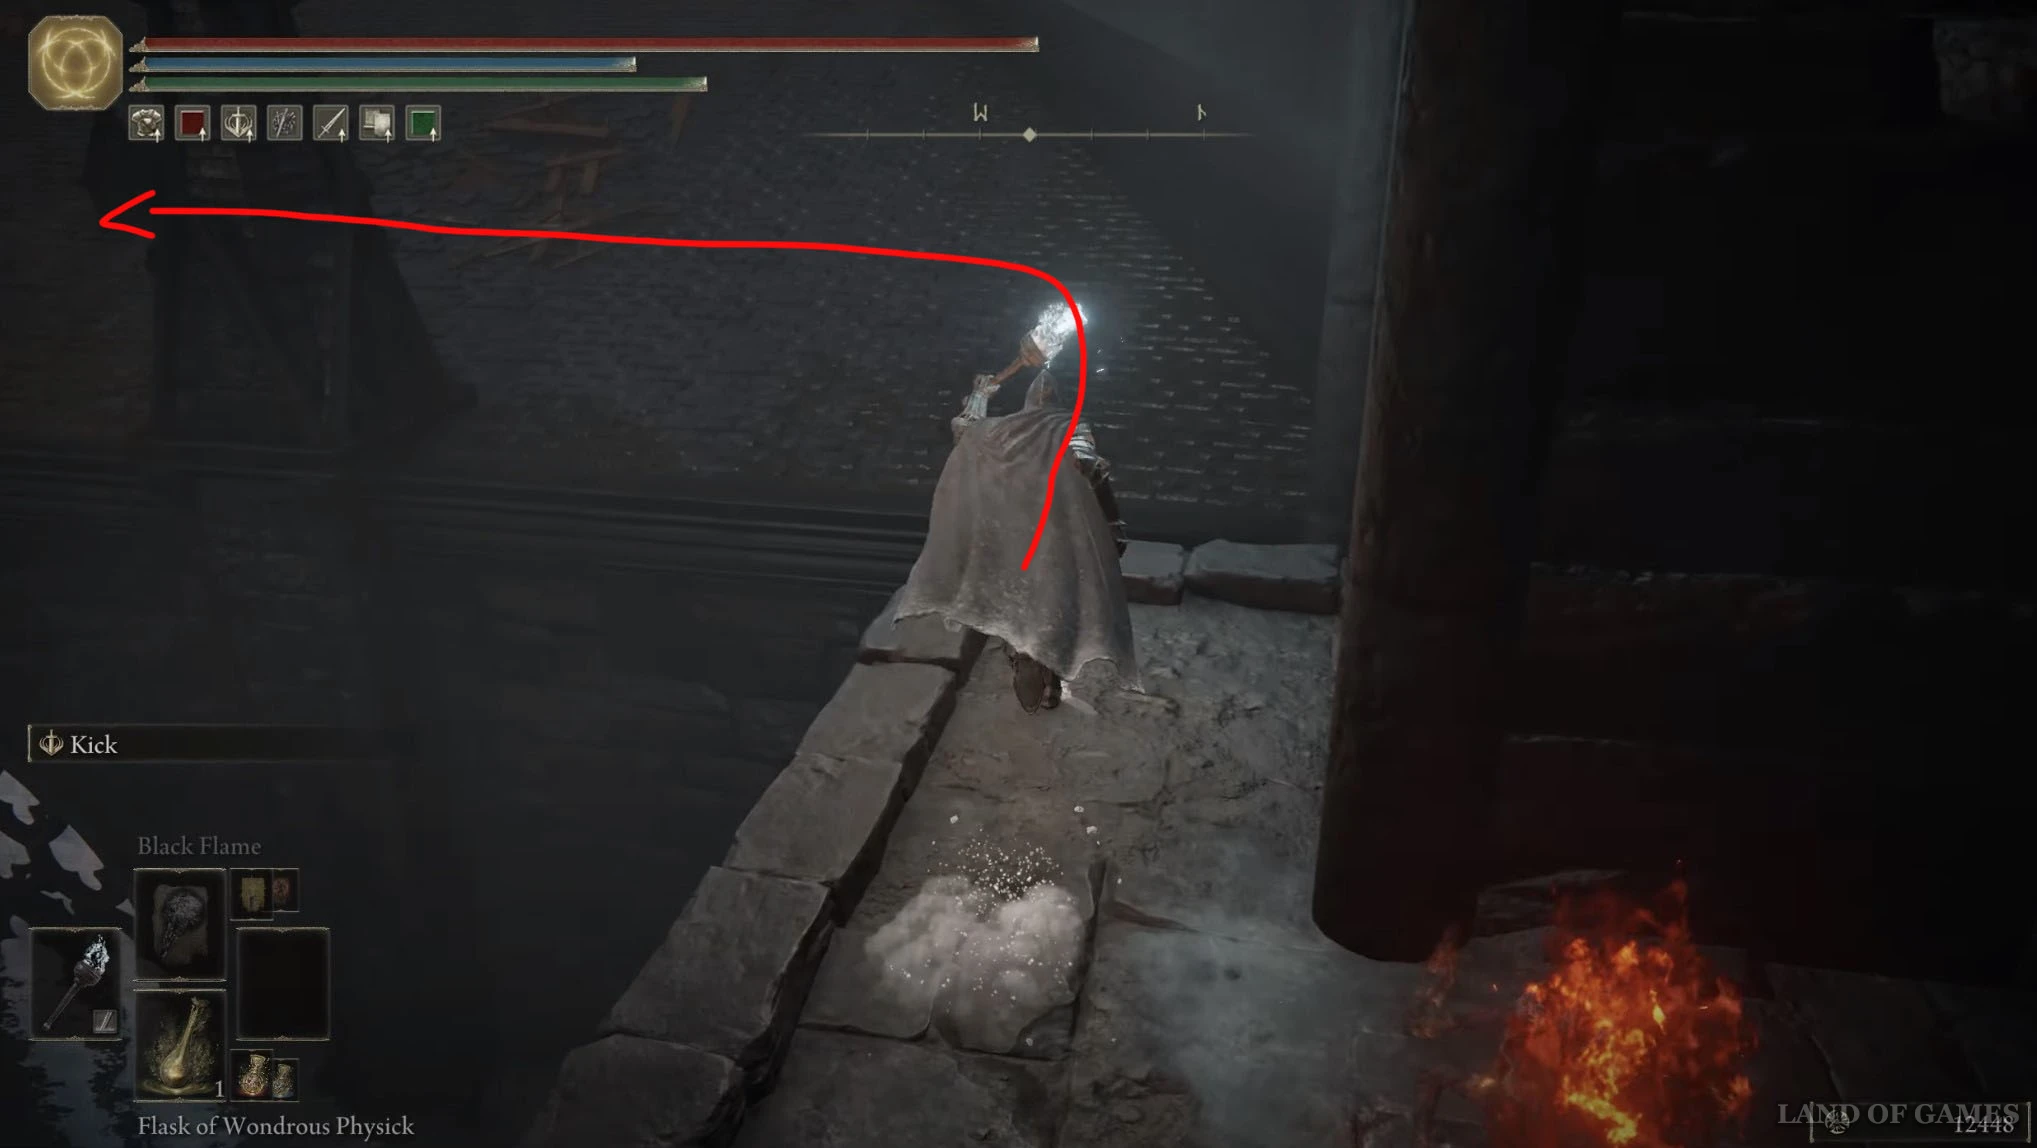
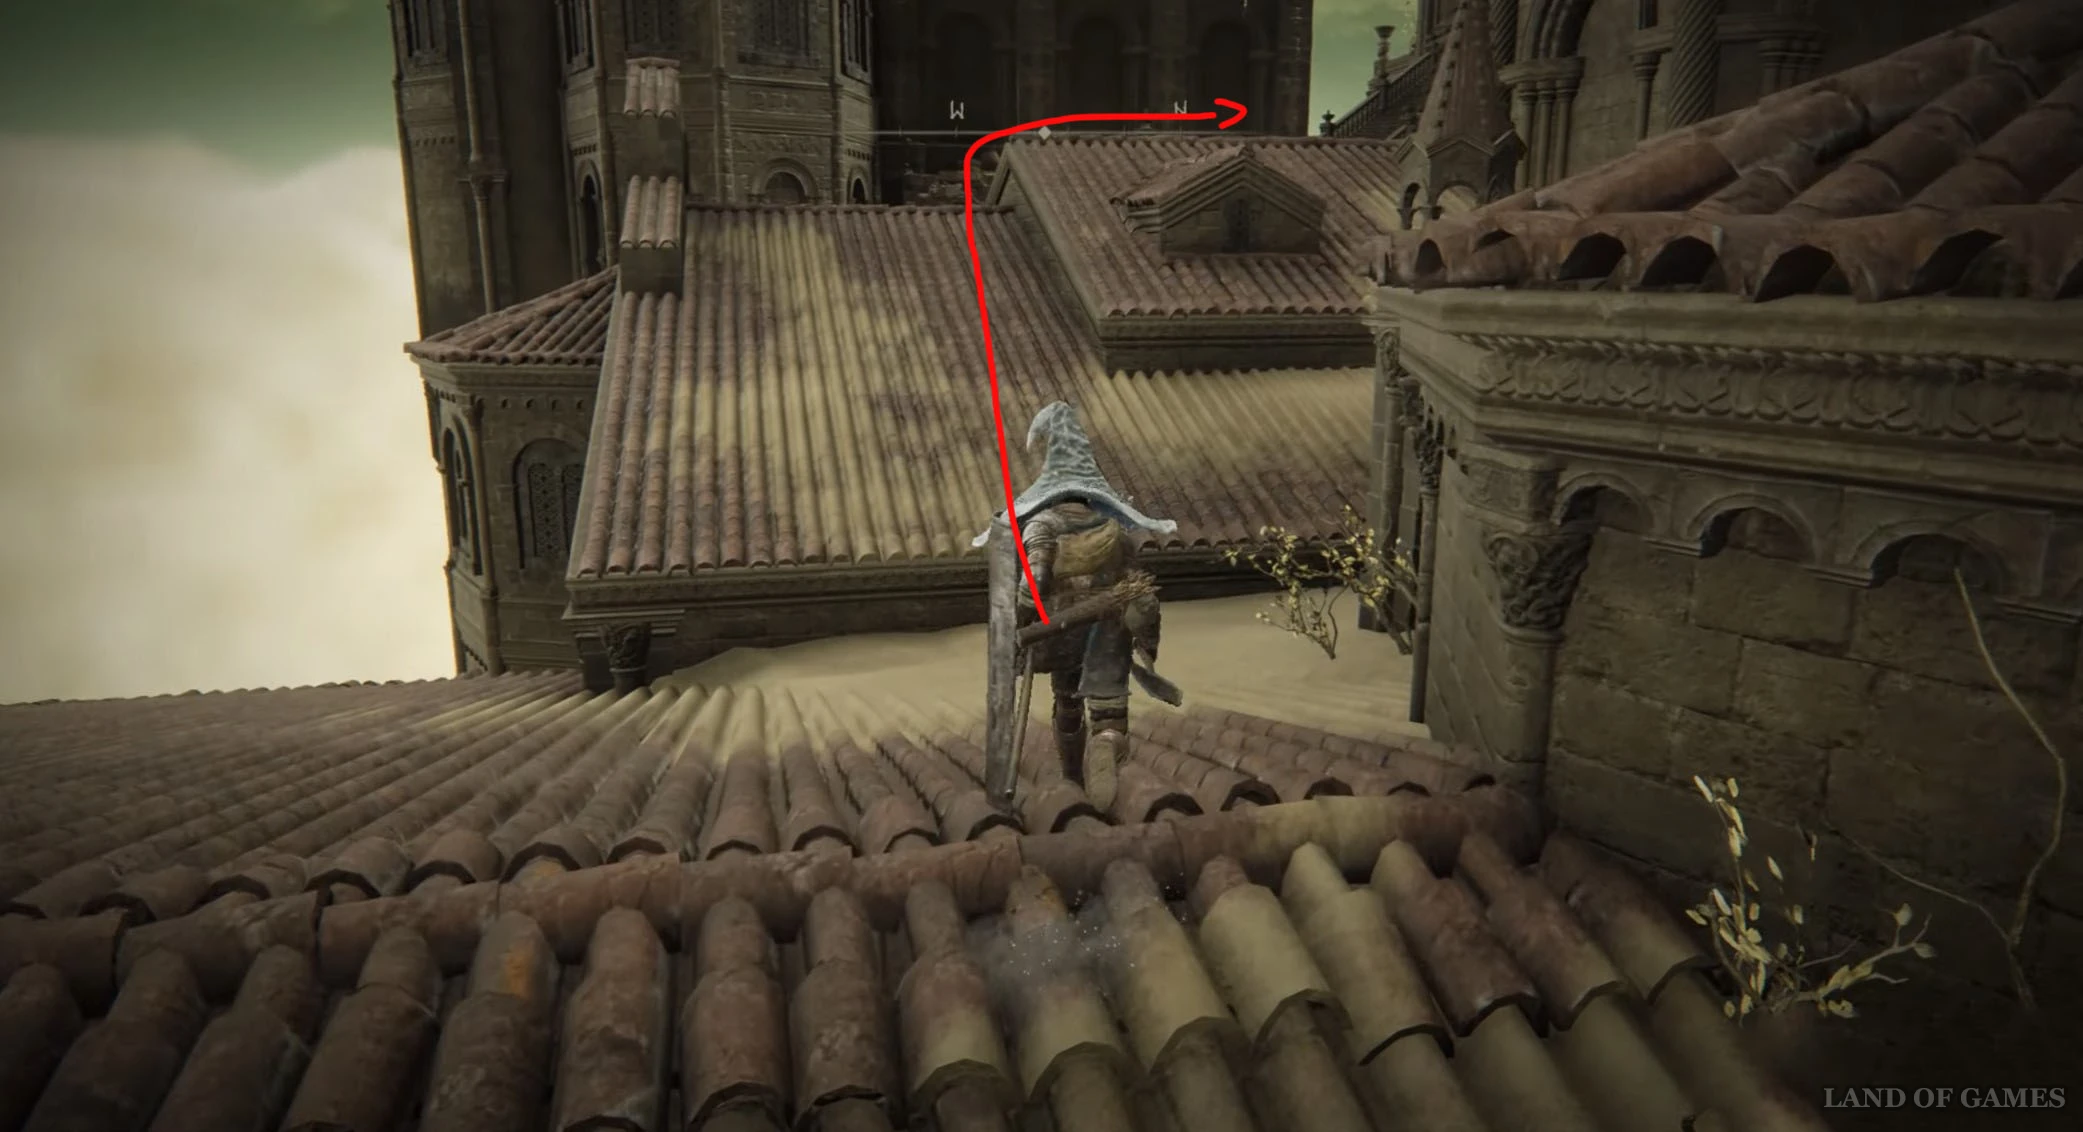
Затем пройдите вперед, спрыгните на крышу затопленного здания и начните двигаться на северо-запад. Вам нужно будет перепрыгнуть на другую крышу, воспользовавшись козырьком и спринтом. Далее поверните направо, заберитесь по полуразрушенной стене наверх и перепрыгните на выступ справа.
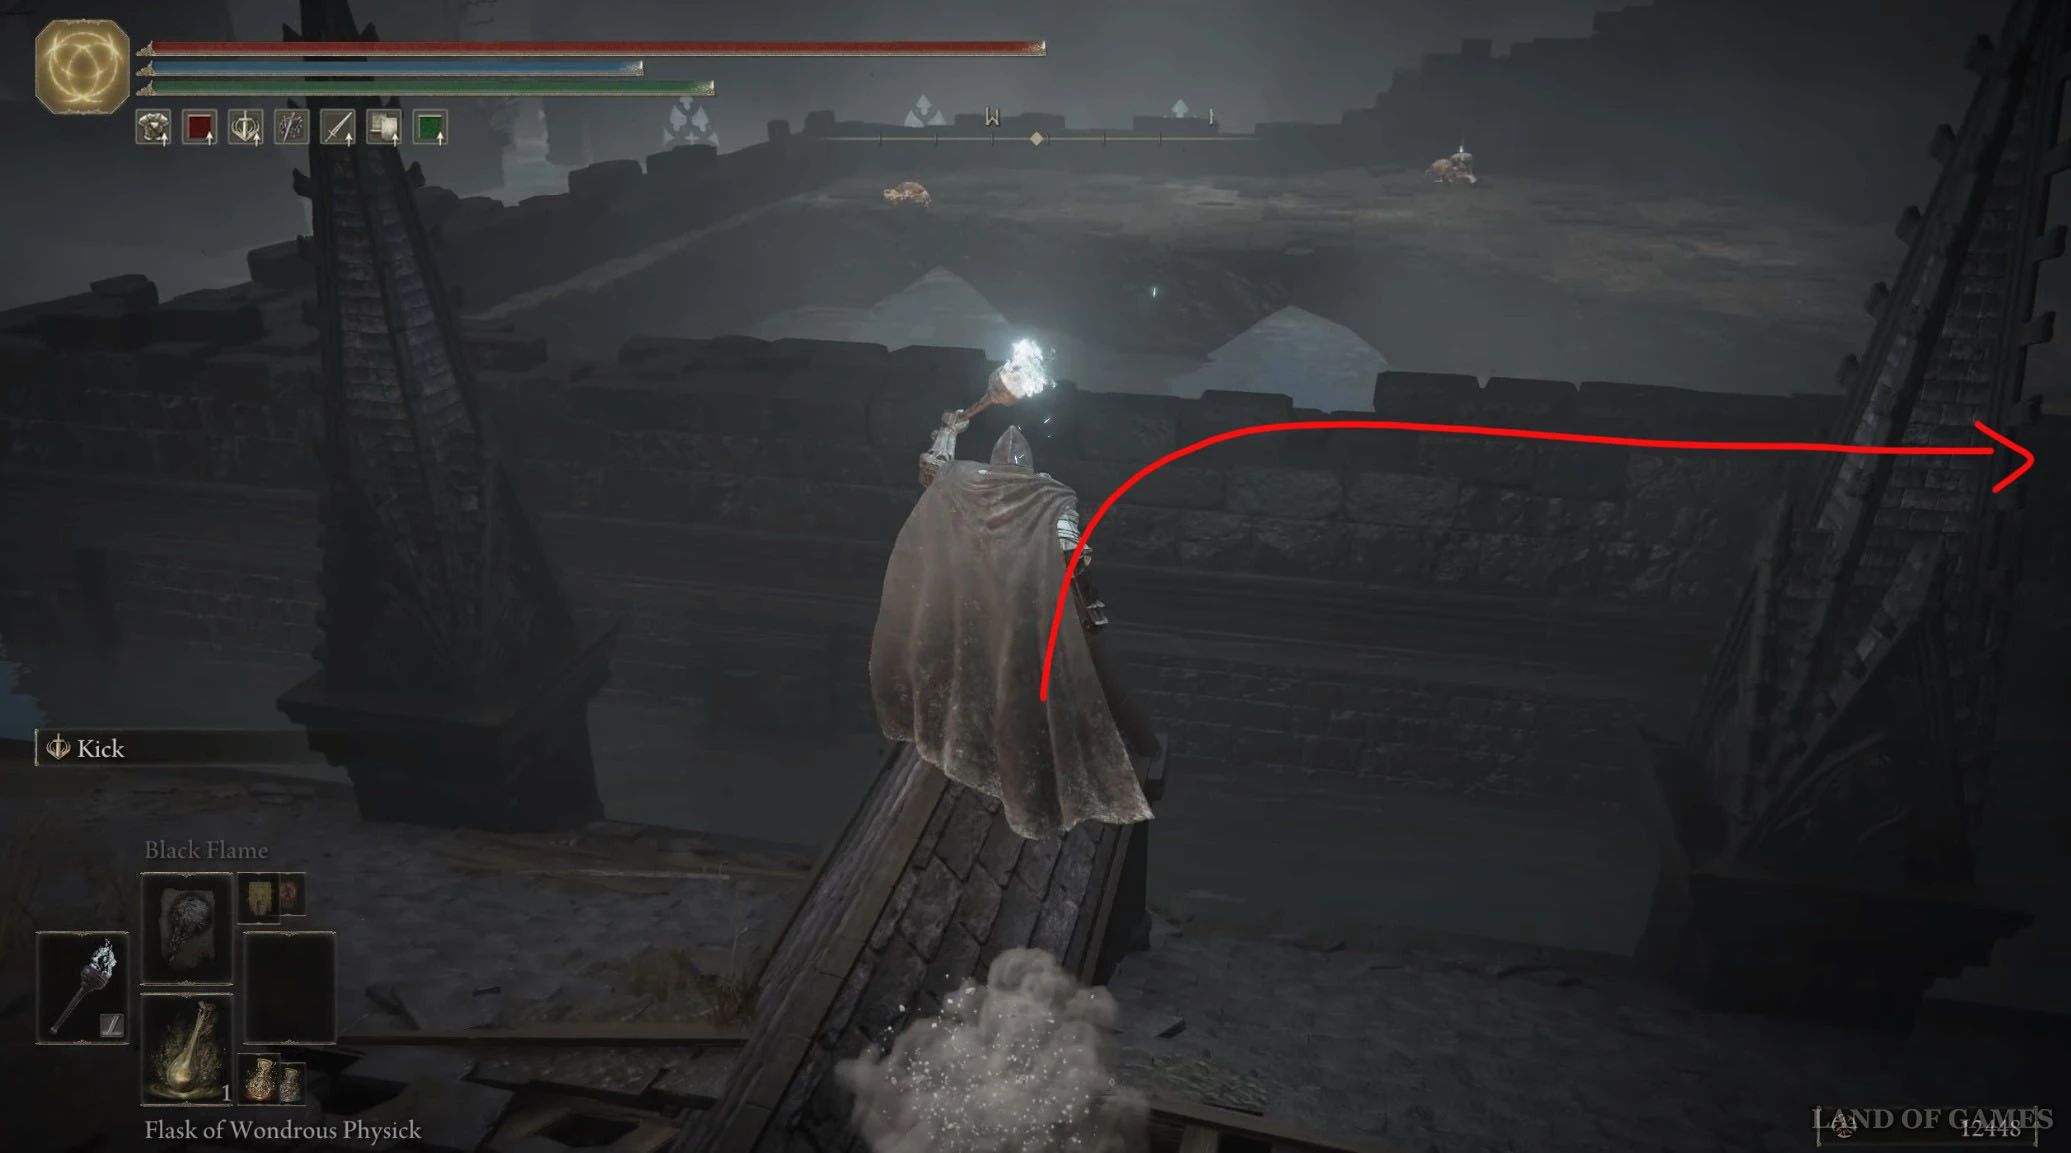
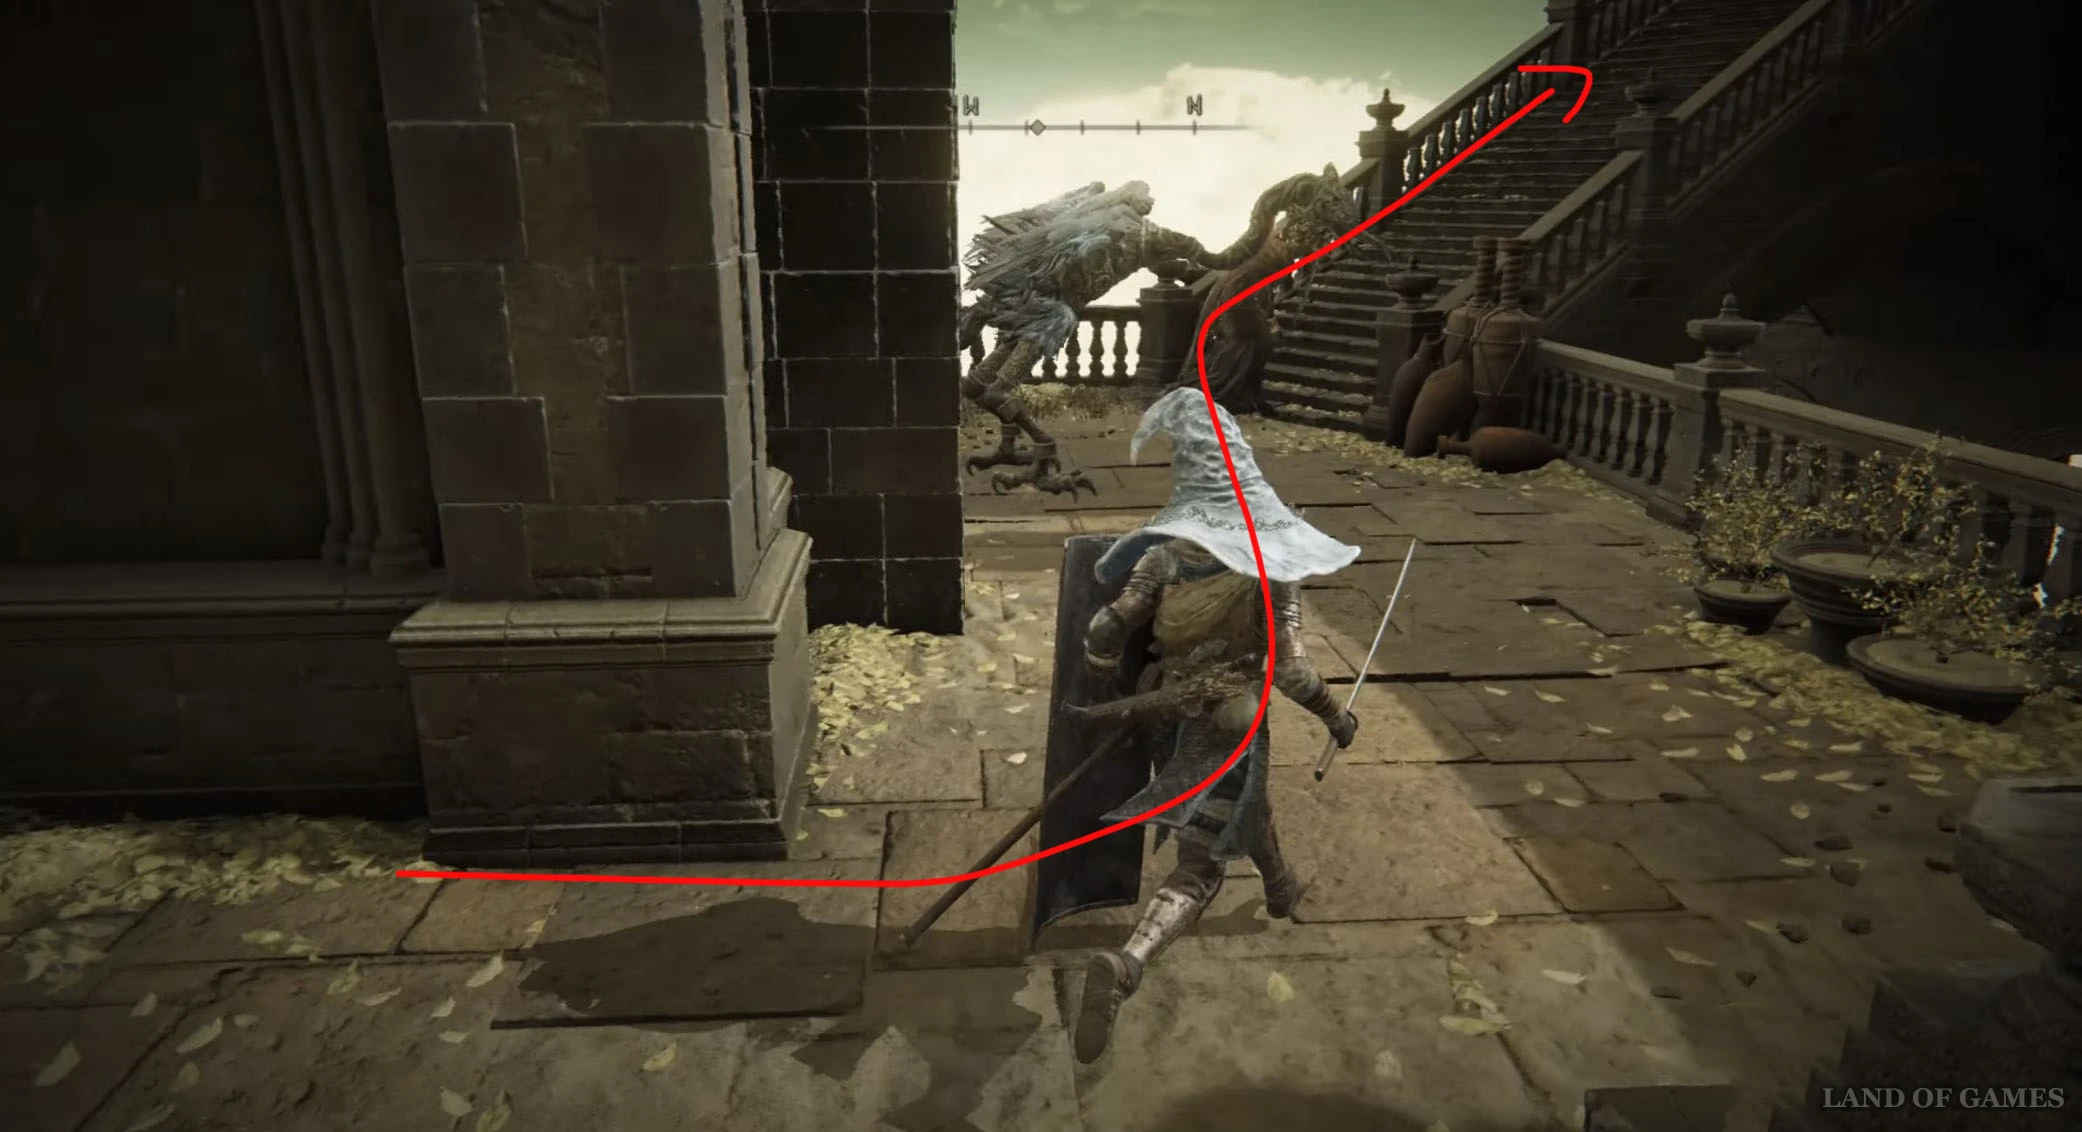
Бегите на запад, перепрыгнув на другую крышу, а потом поверните налево и разберитесь с огненным рыцарем. Подойдите к левому краю более низкой крыши и спрыгните на каменную структуру, прикрепленную к зданию, – по ней поднимитесь на кровлю церкви. Теперь отыщите дыру в крыше и спрыгните на крестообразные мостики внизу.
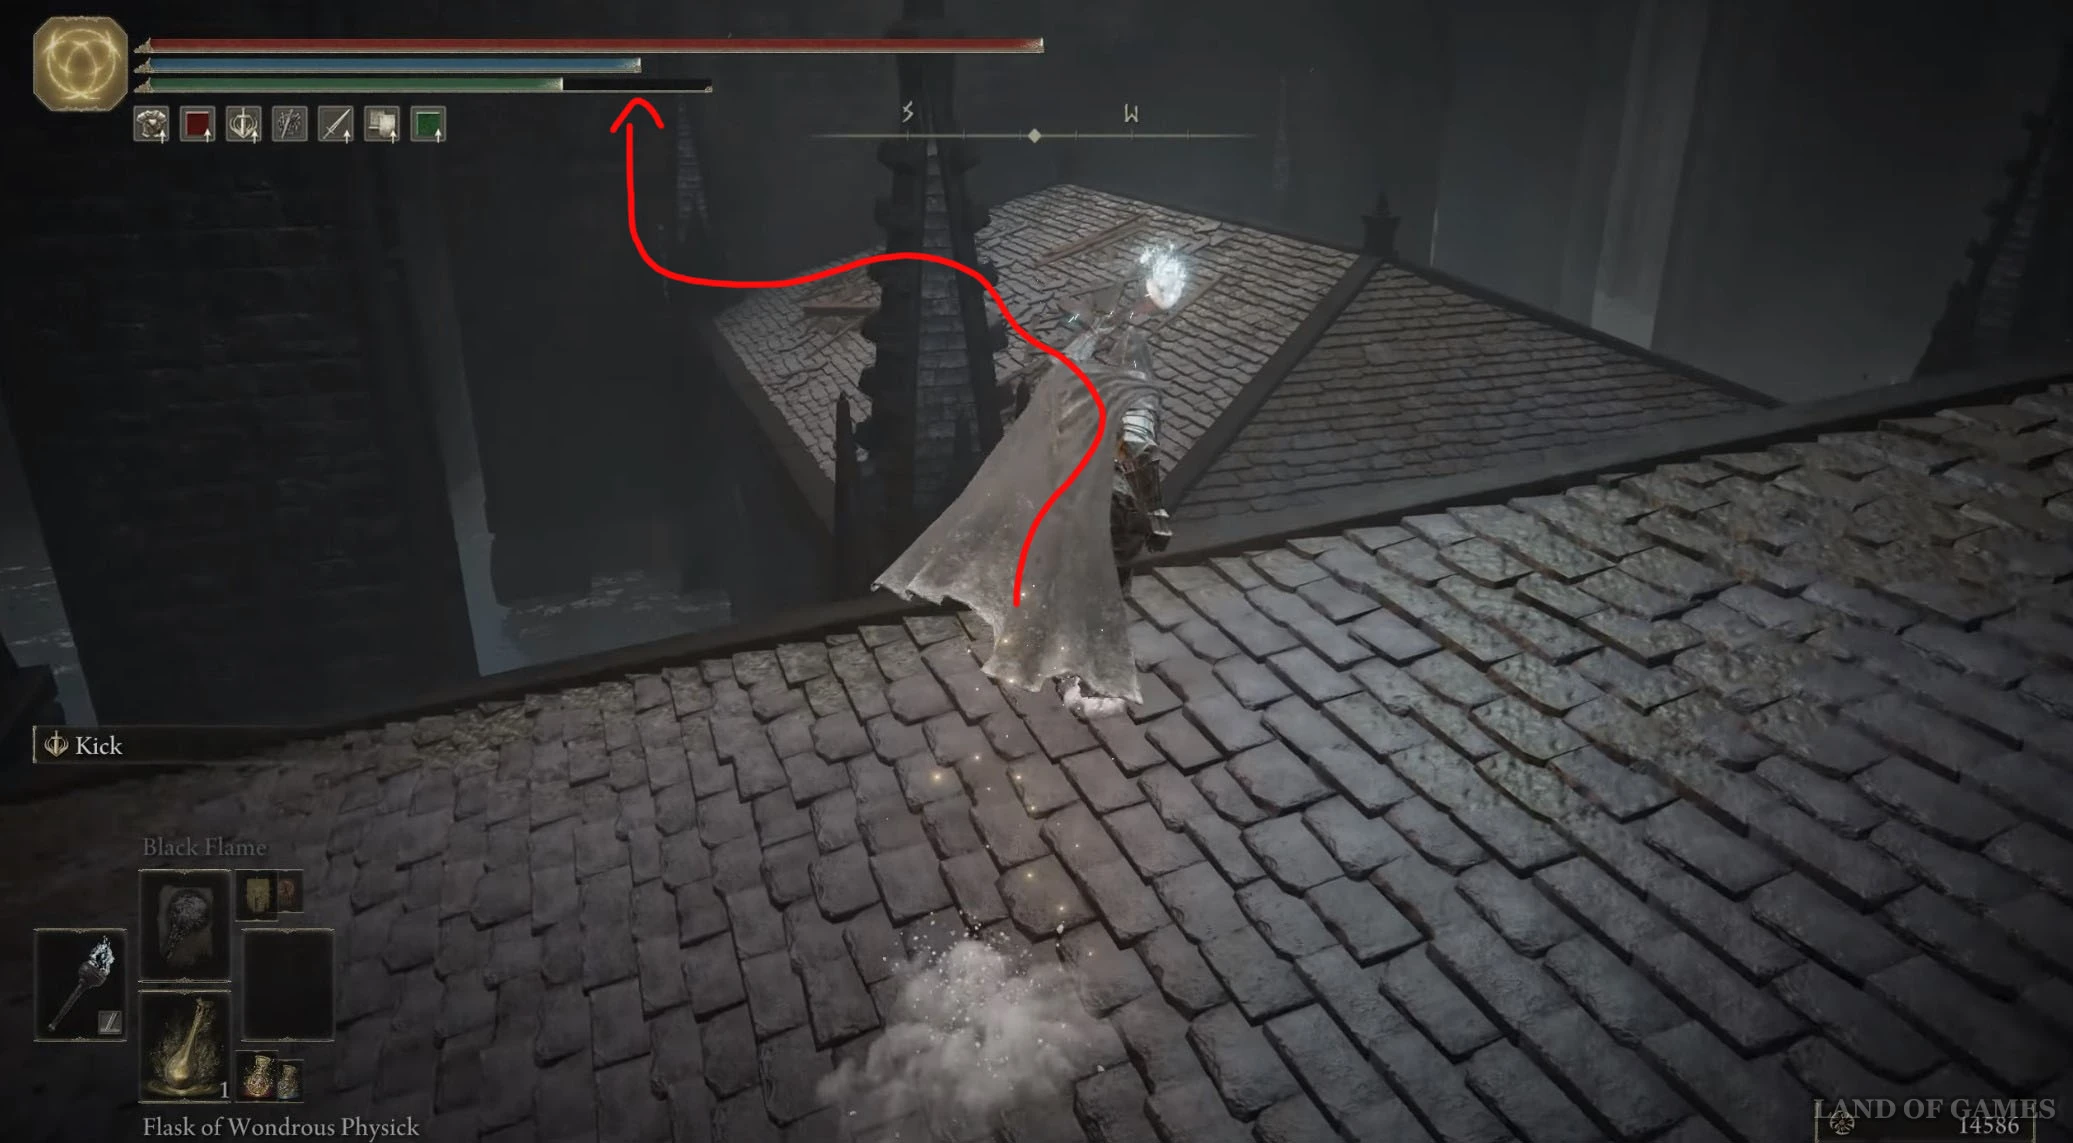
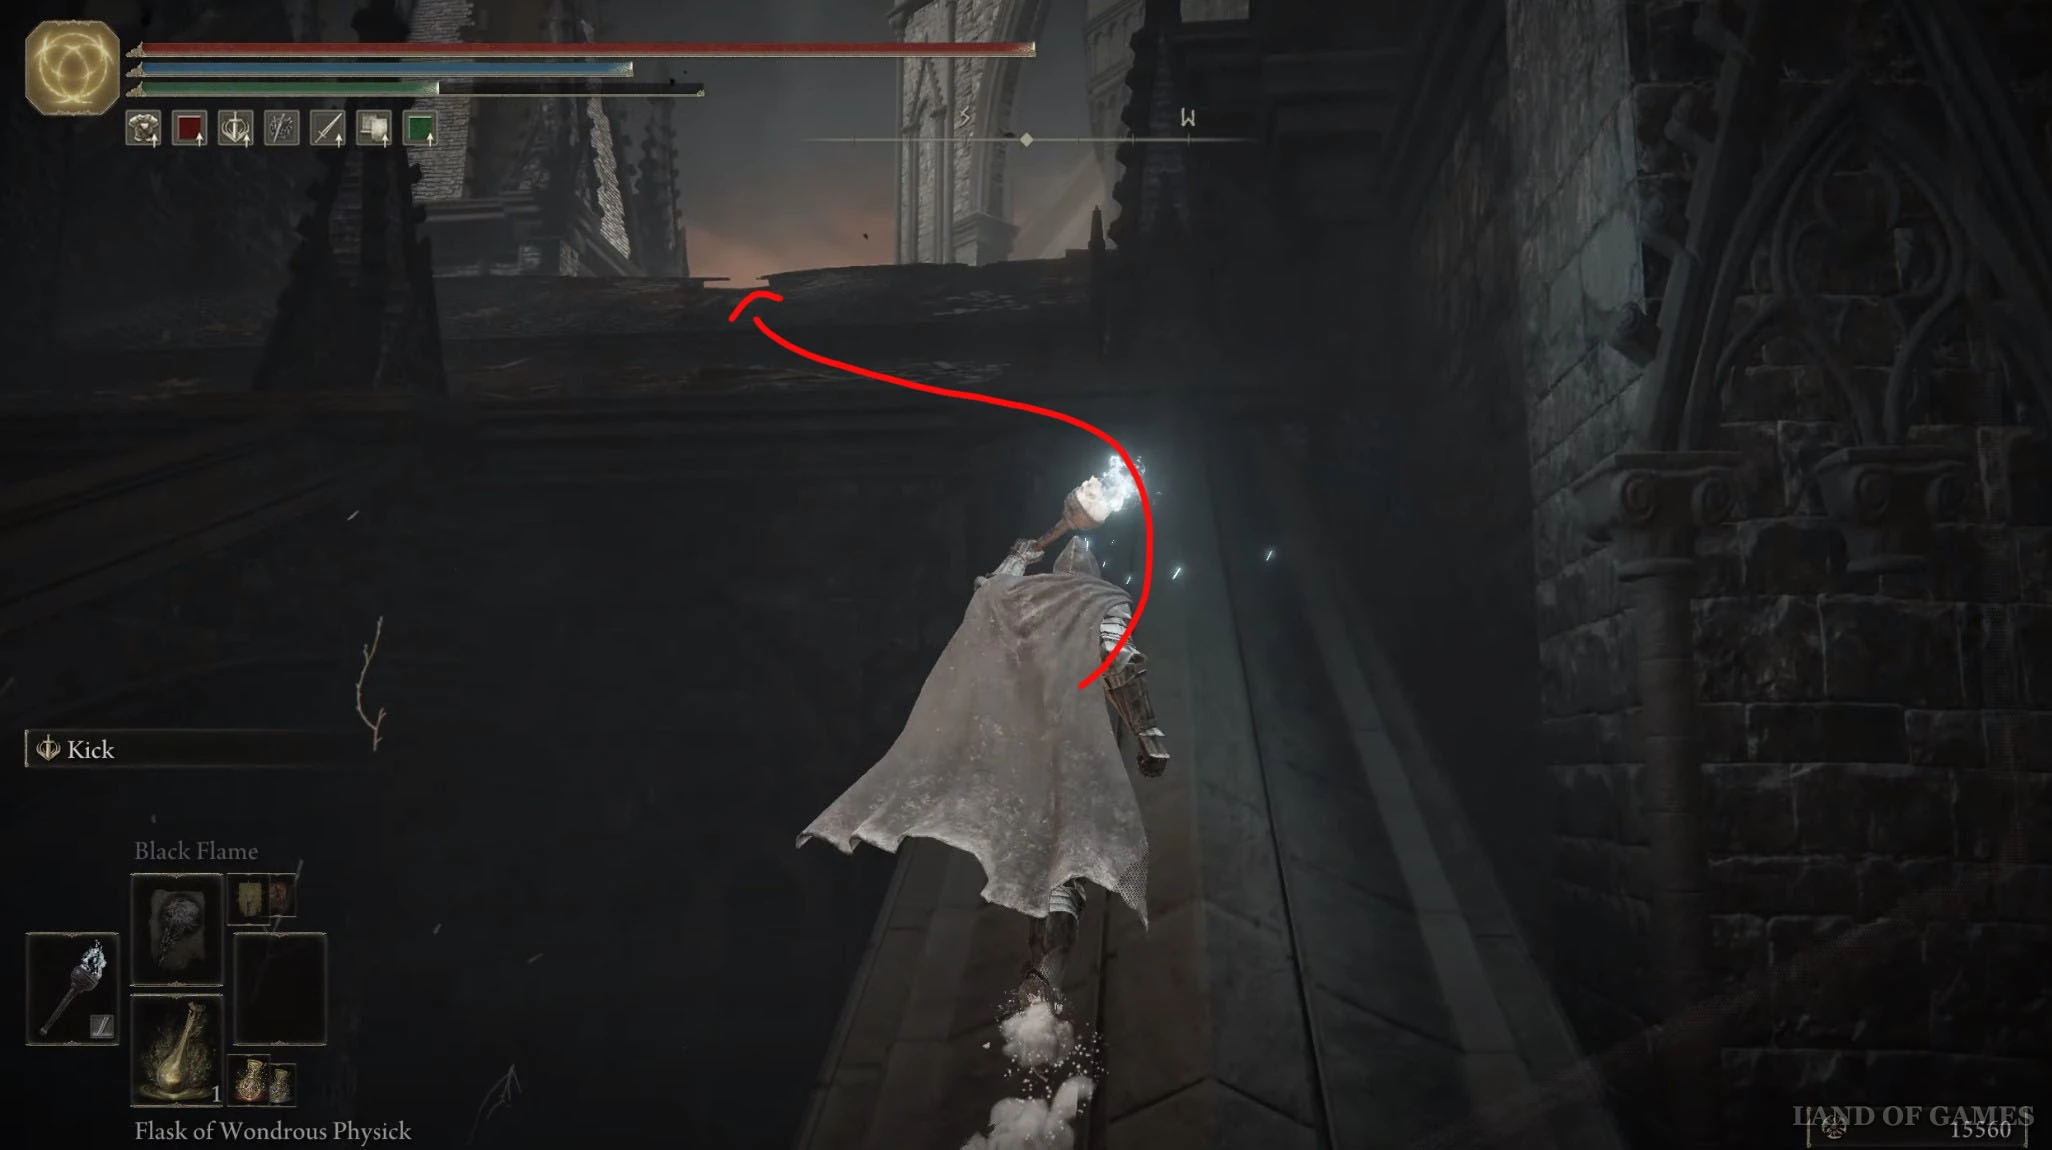
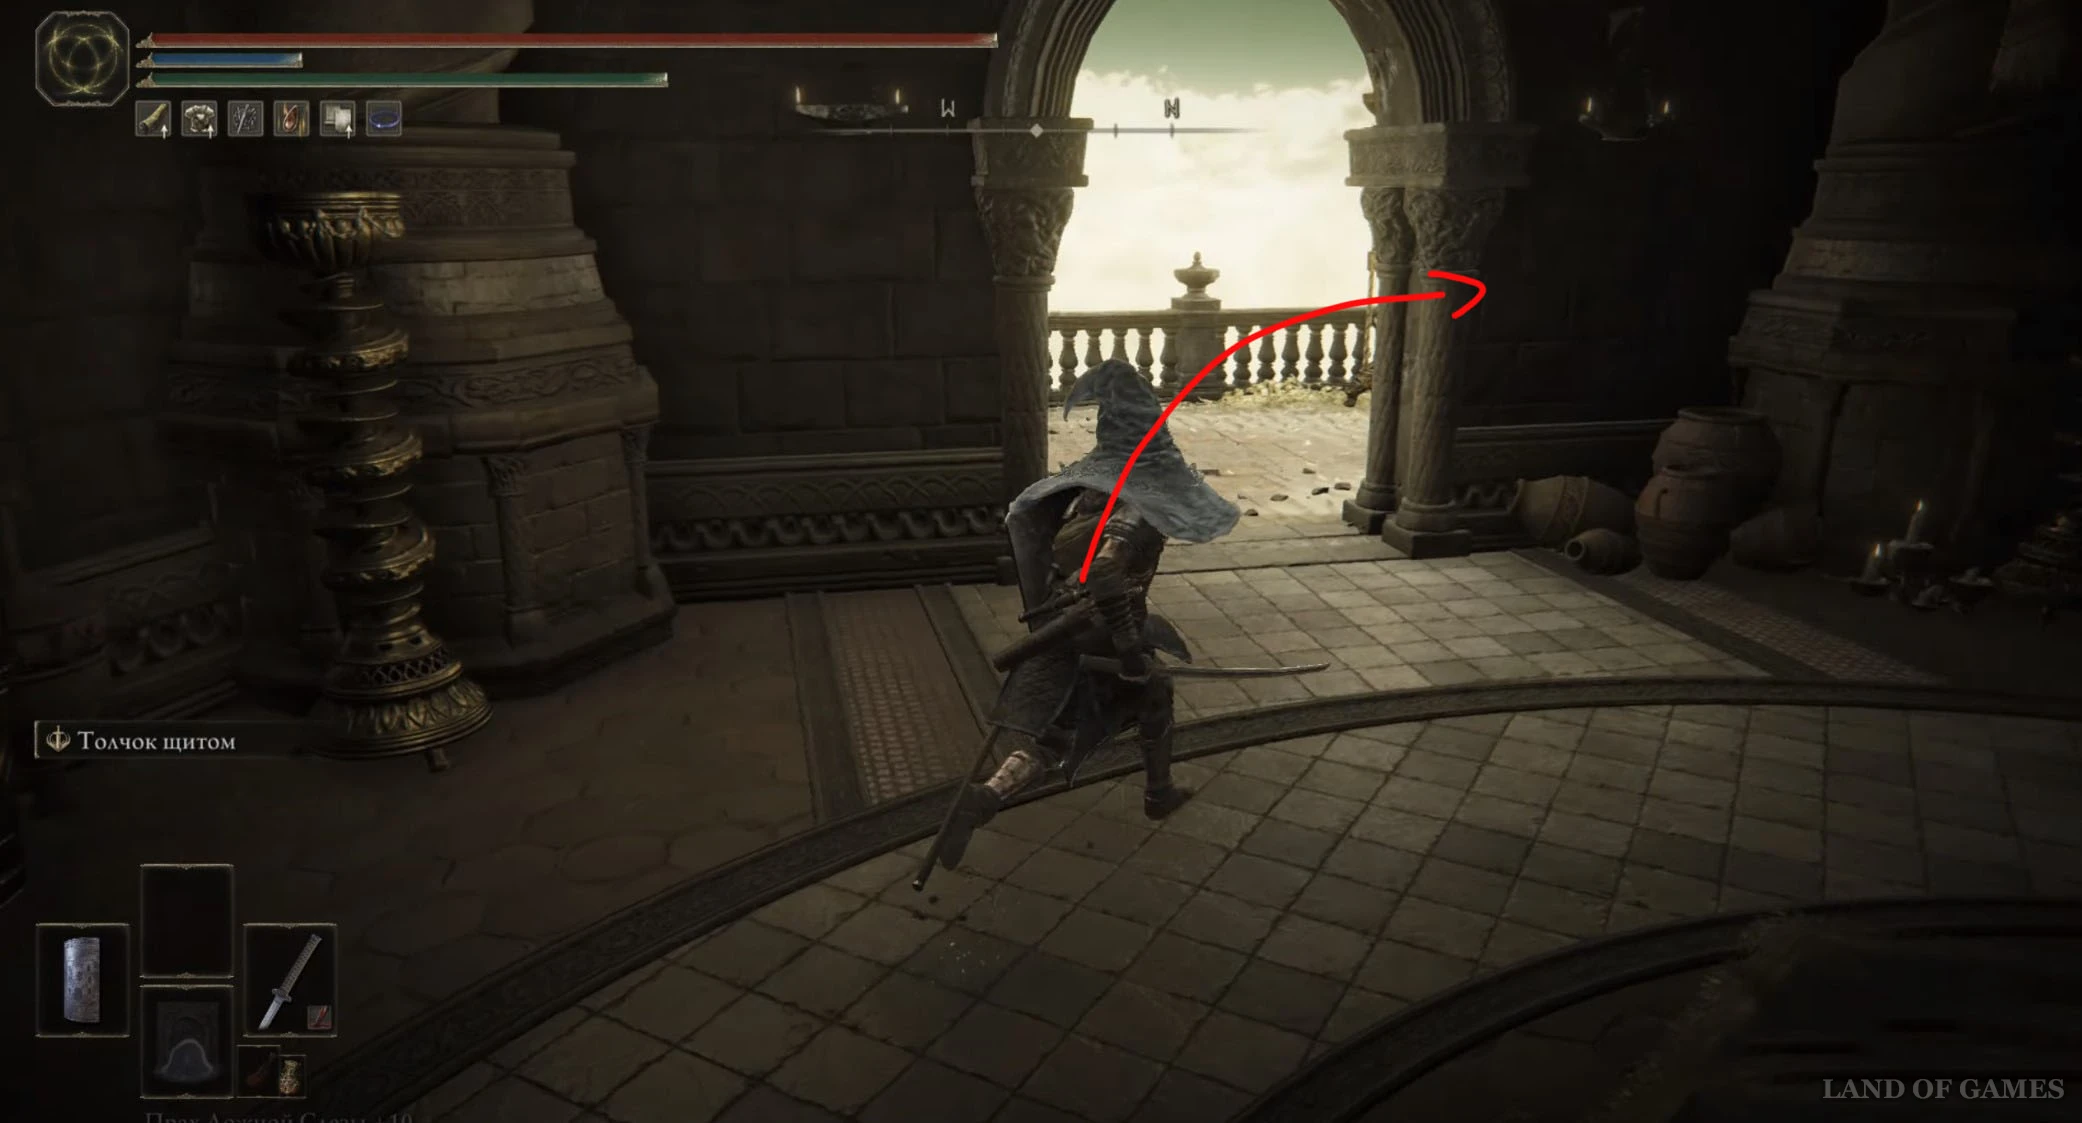
Оказавшись в здании, спрыгните в разлом на полу, чтобы попасть на этаж ниже. Теперь пройдите через проход на северо-западе и разберитесь с огненным рыцарем. Далее сверните вправо и прыгните на статую, торчащую из воды. На ее конце взаимодействуйте с белым огоньком, чтобы поднять еще один фрагмент.
Осколок древа упадка 35
Вернитесь к месту благодати «Проход в церковный круг». Затем пройдите вперед, спрыгните на крышу затопленного здания и начните двигаться на северо-запад. Вам нужно будет перепрыгнуть на другую крышу, воспользовавшись козырьком и спринтом. Далее поверните направо, заберитесь по полуразрушенной стене наверх и перепрыгните на выступ справа.
Бегите на запад, перепрыгнув на другую крышу, а потом поверните налево и разберитесь с огненным рыцарем. Подойдите к левому краю более низкой крыши и спрыгните на каменную структуру, прикрепленную к зданию, – по ней поднимитесь на кровлю церкви. Теперь отыщите дыру в крыше и спрыгните на крестообразные мостики внизу.
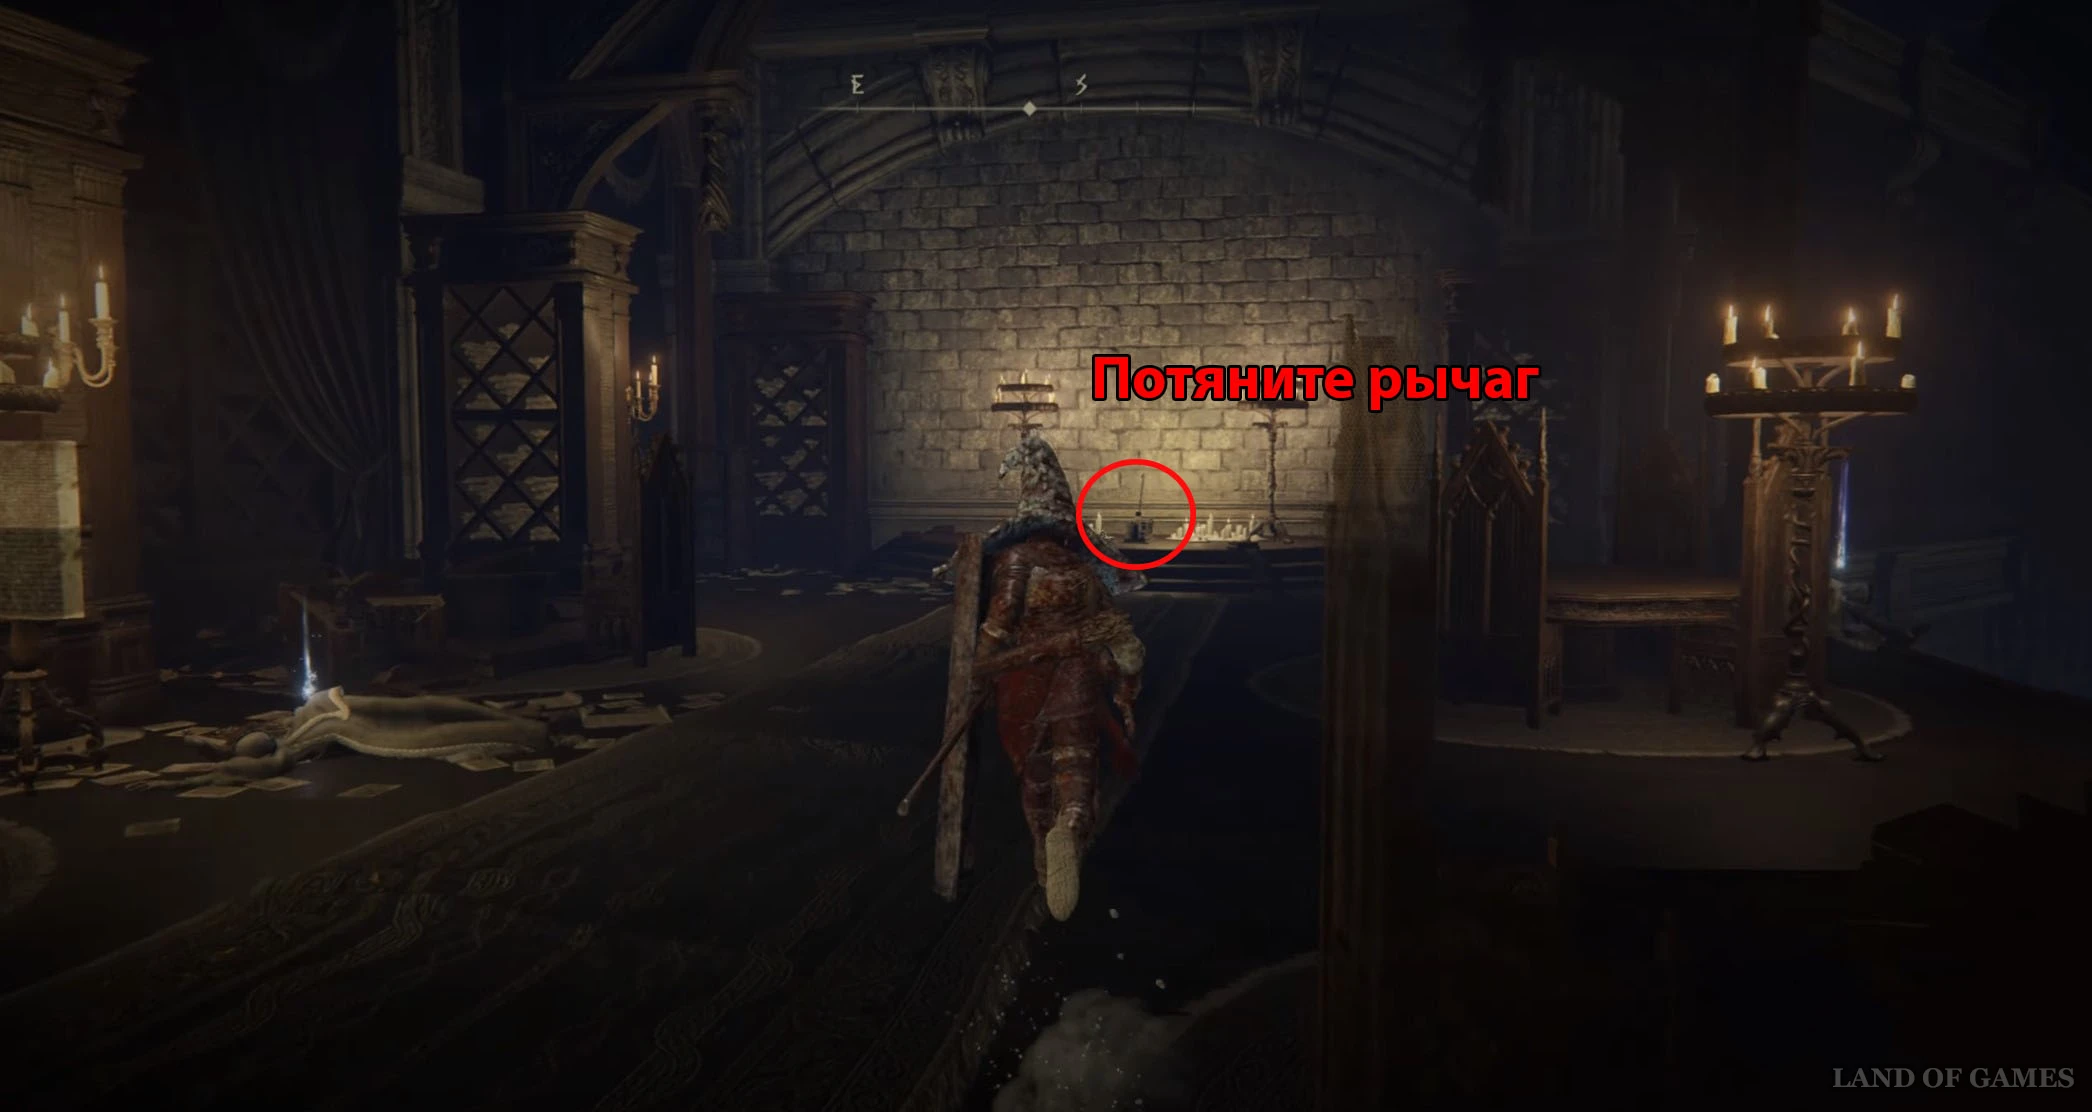
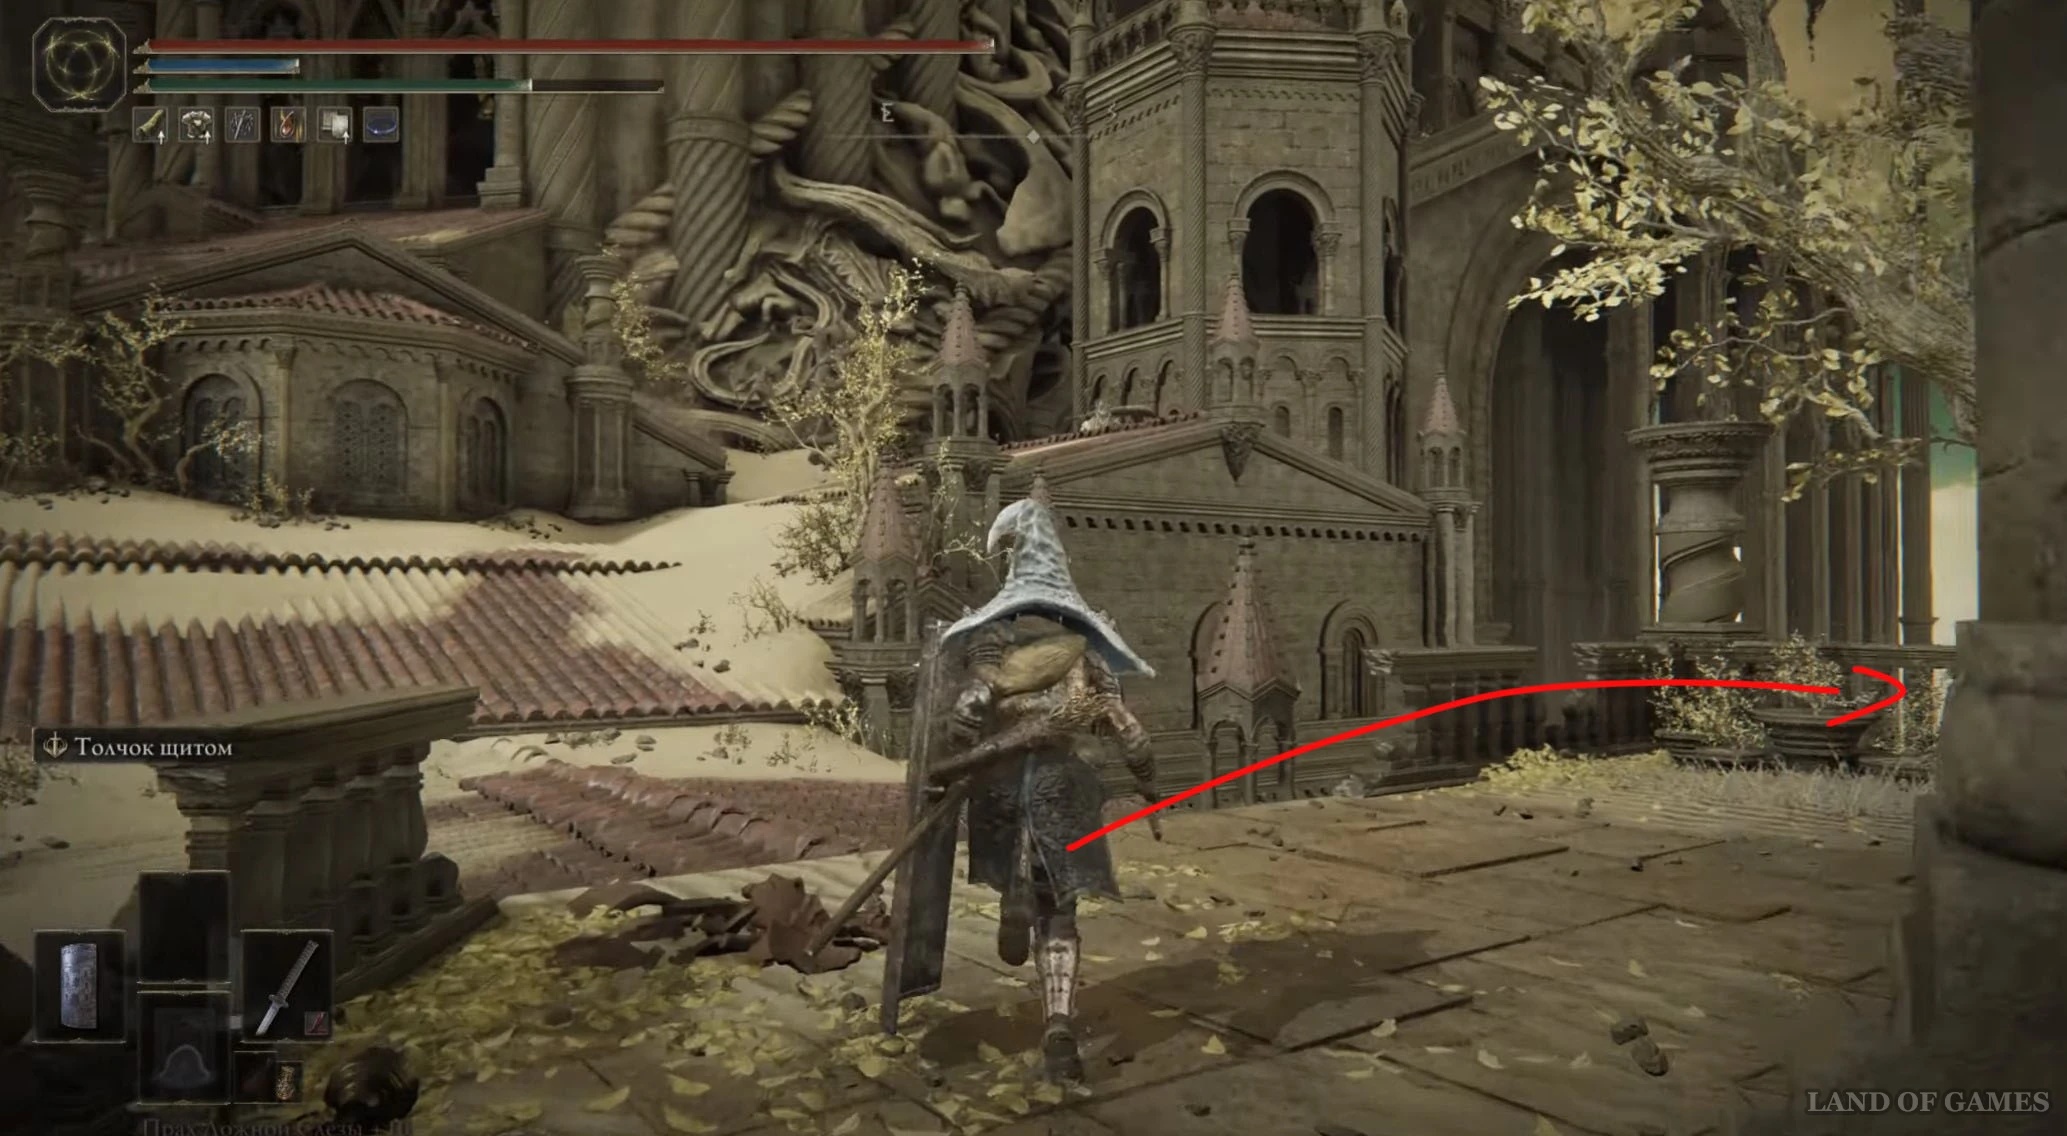
Оказавшись в здании, спрыгните в разлом на полу, чтобы попасть на этаж ниже. Бегите вперед и пройдите через открытый проход, а затем сразу же сверните влево. Выбравшись наружу, снова поверните налево и поднимитесь по ступенькам вверх. Затем воспользуйтесь деревянной лесенкой, чтобы подняться еще выше и взаимодействовать с рычагом, который уберет воду из локации.

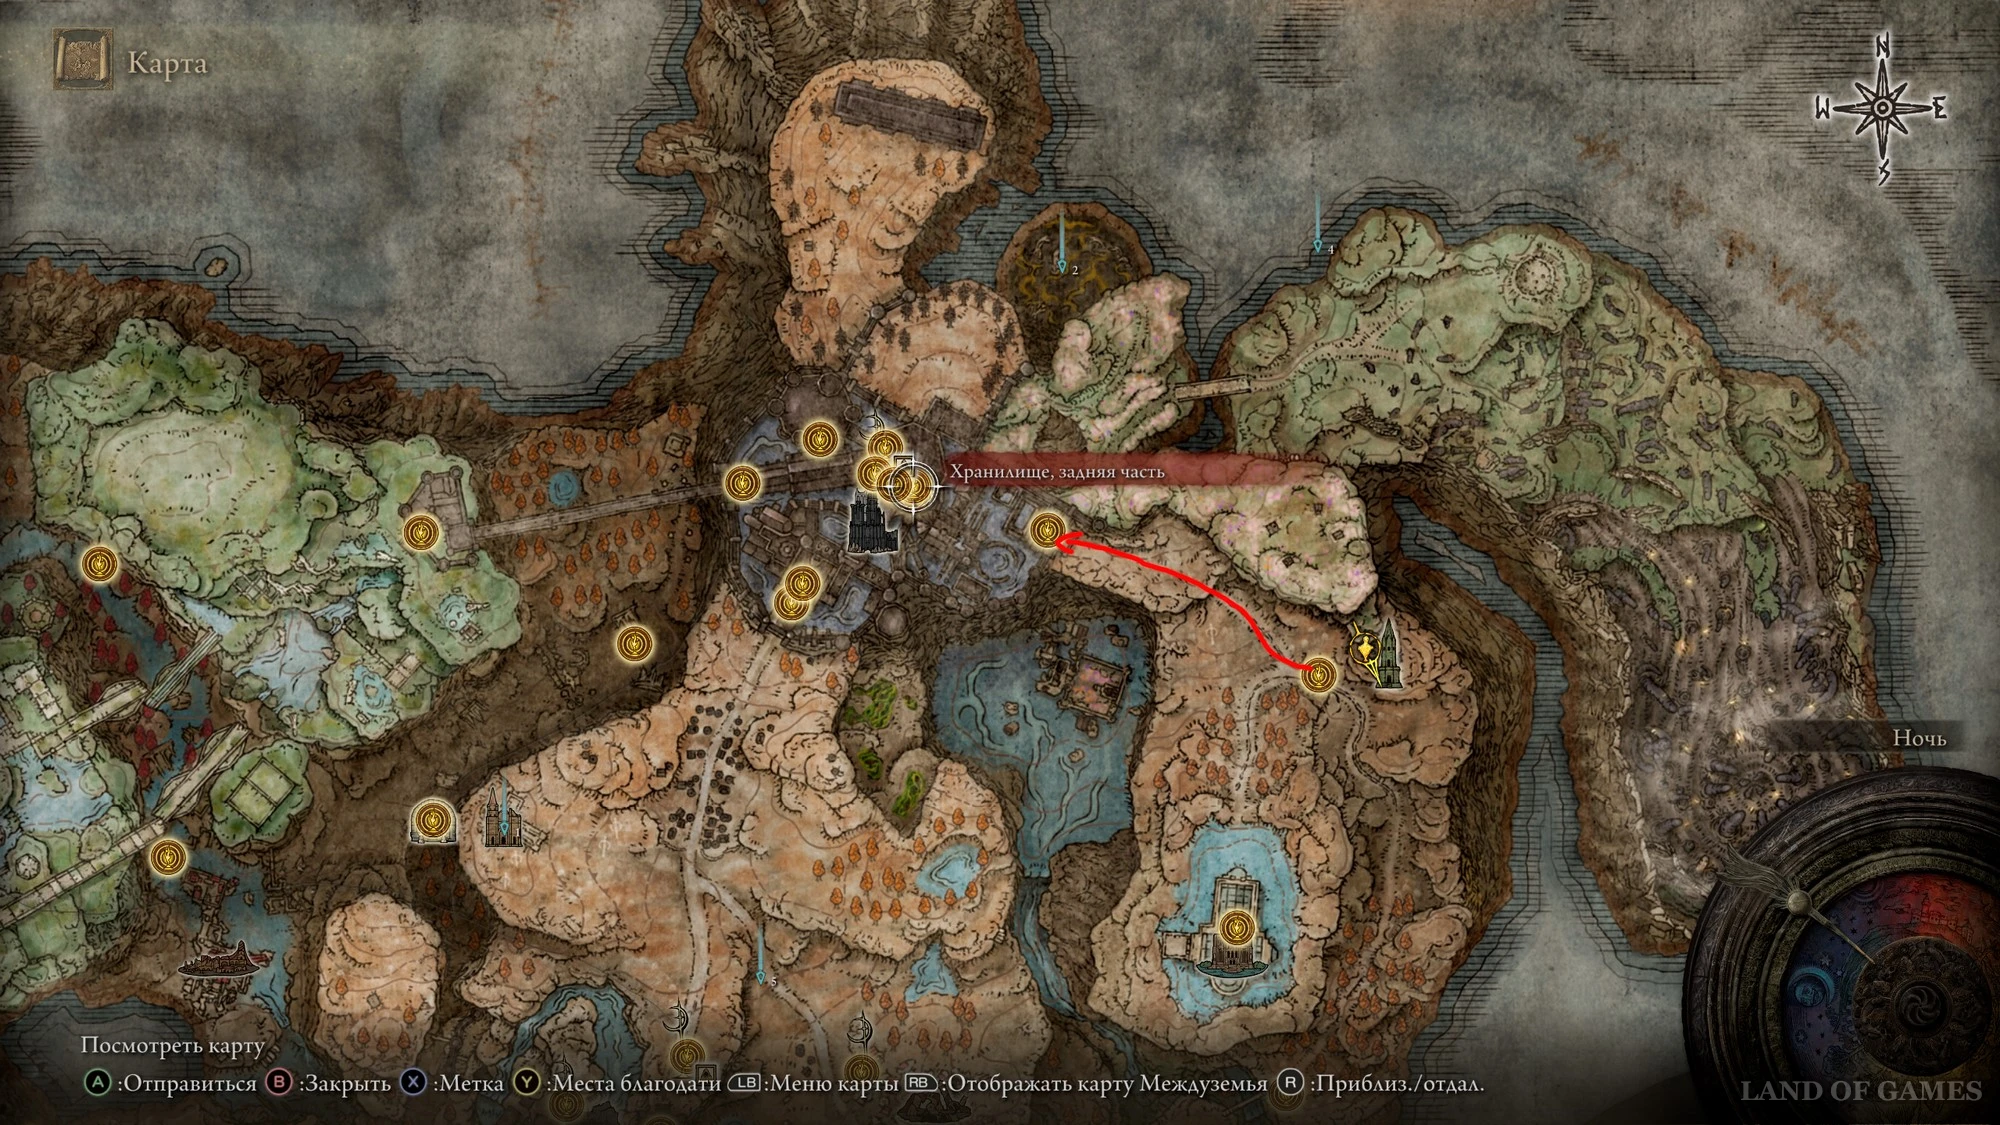
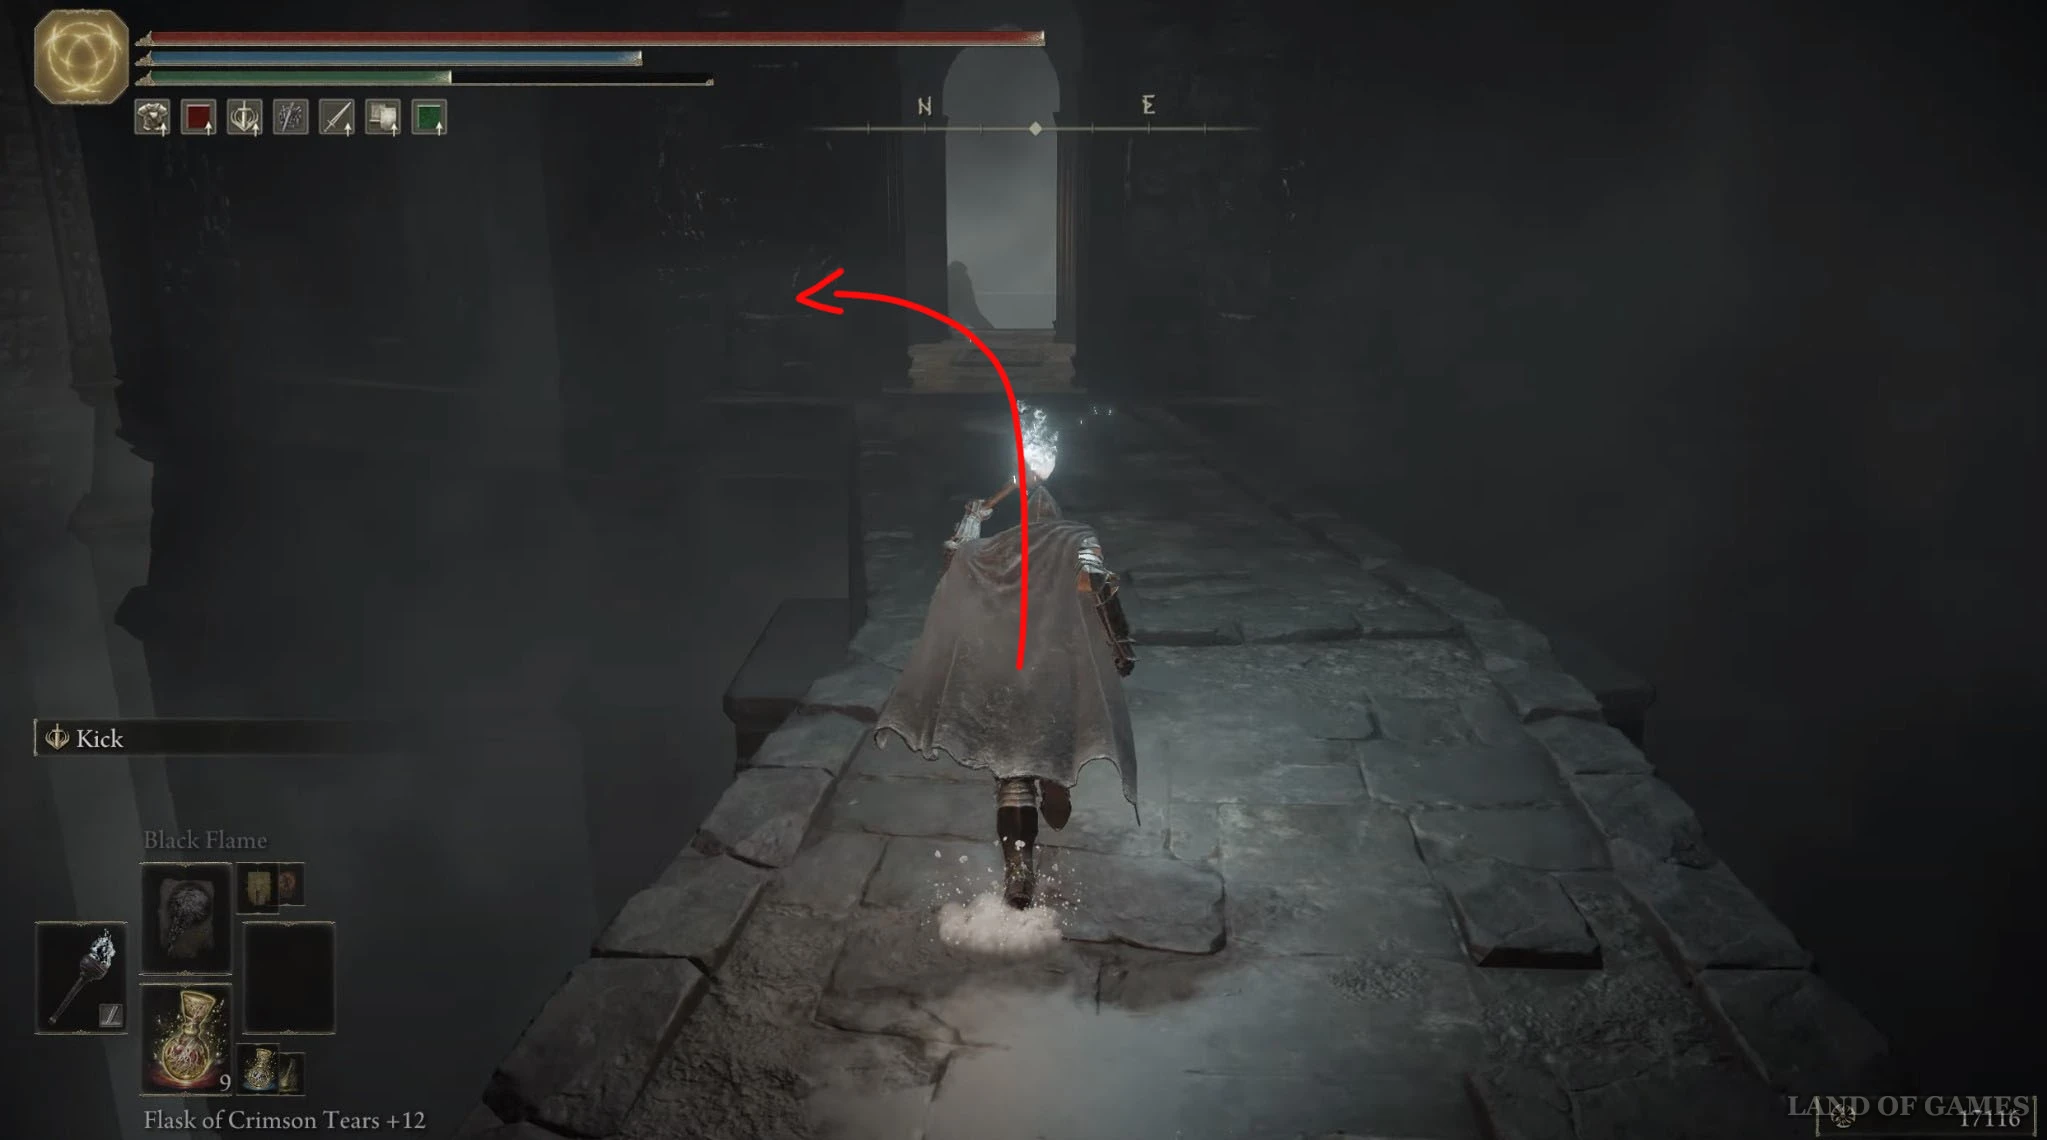
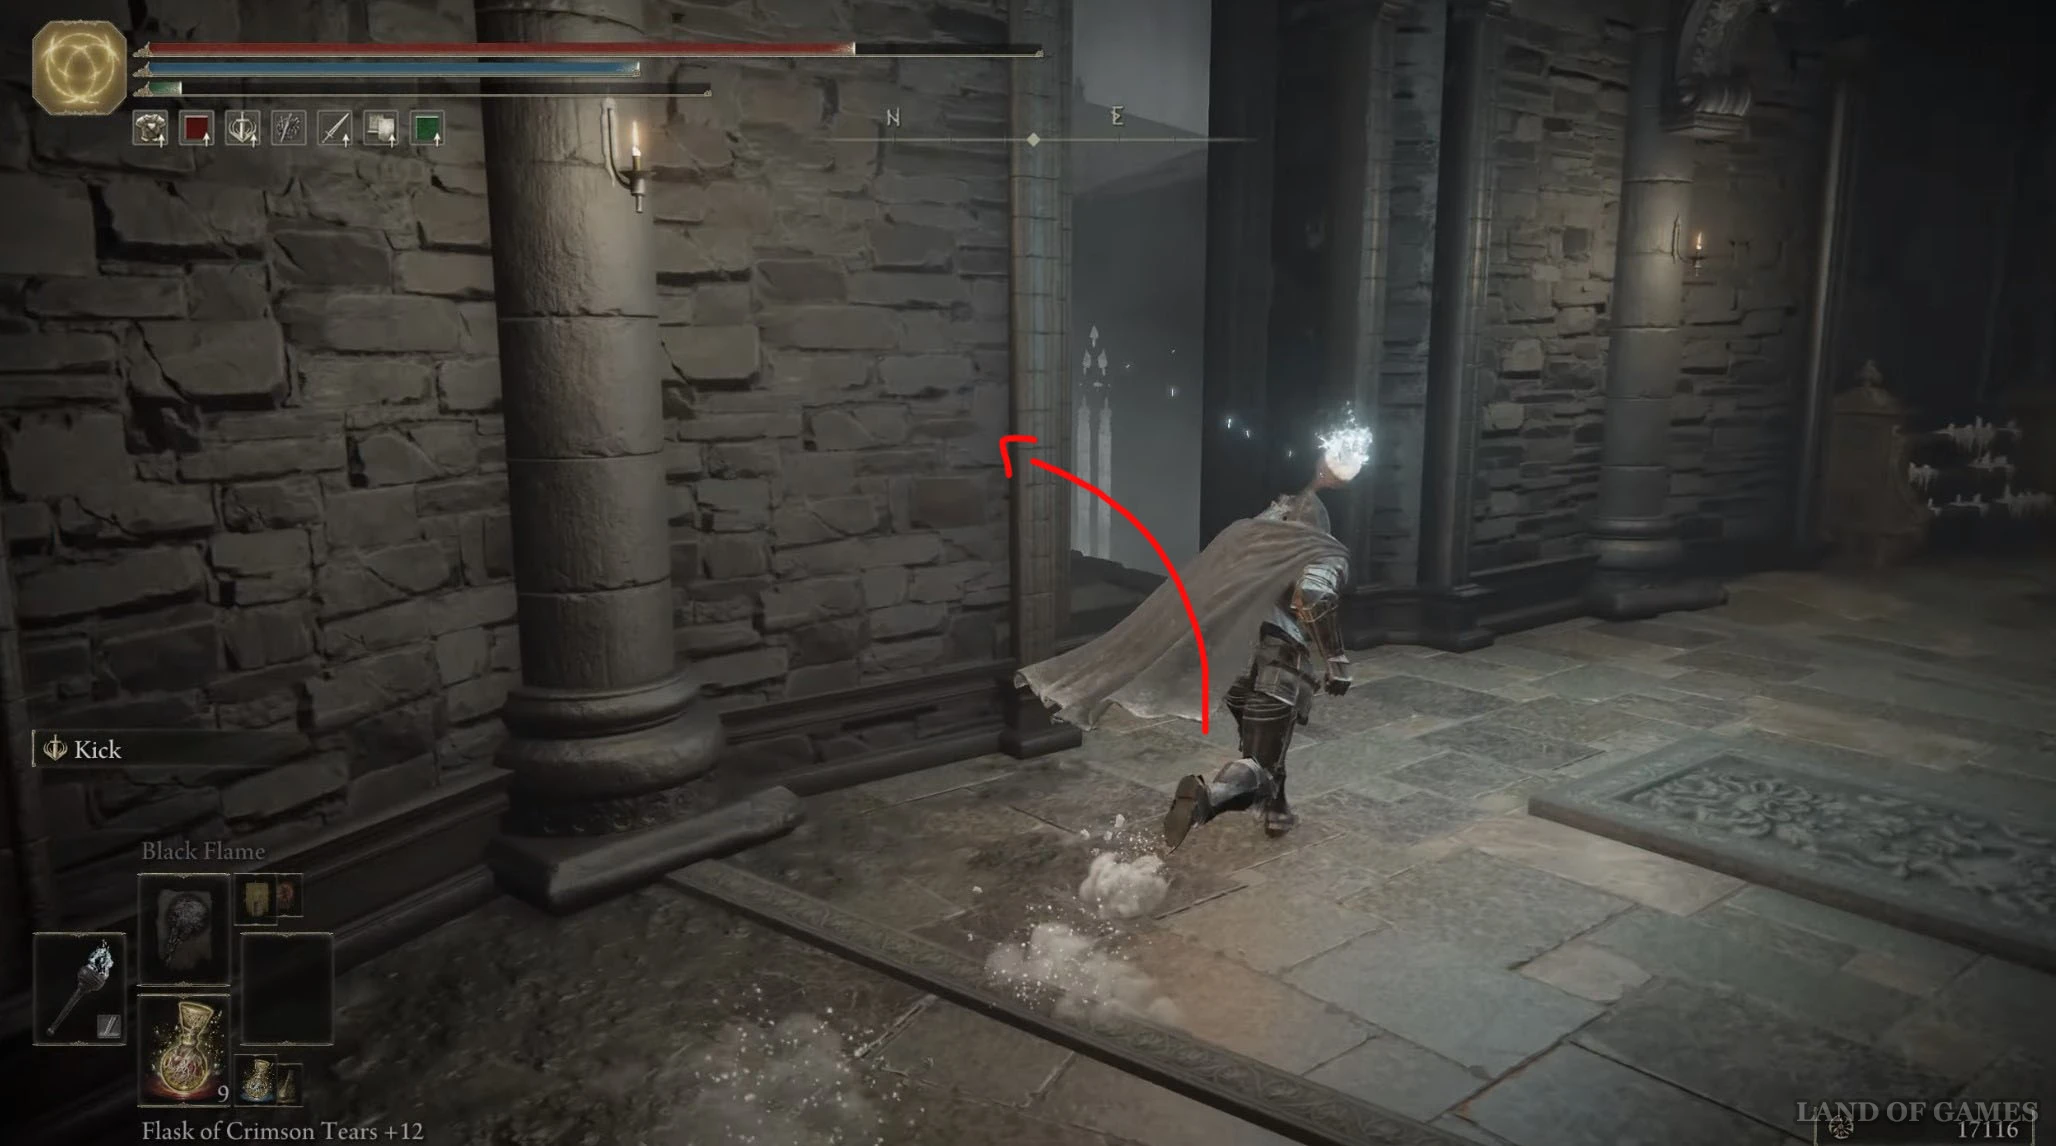
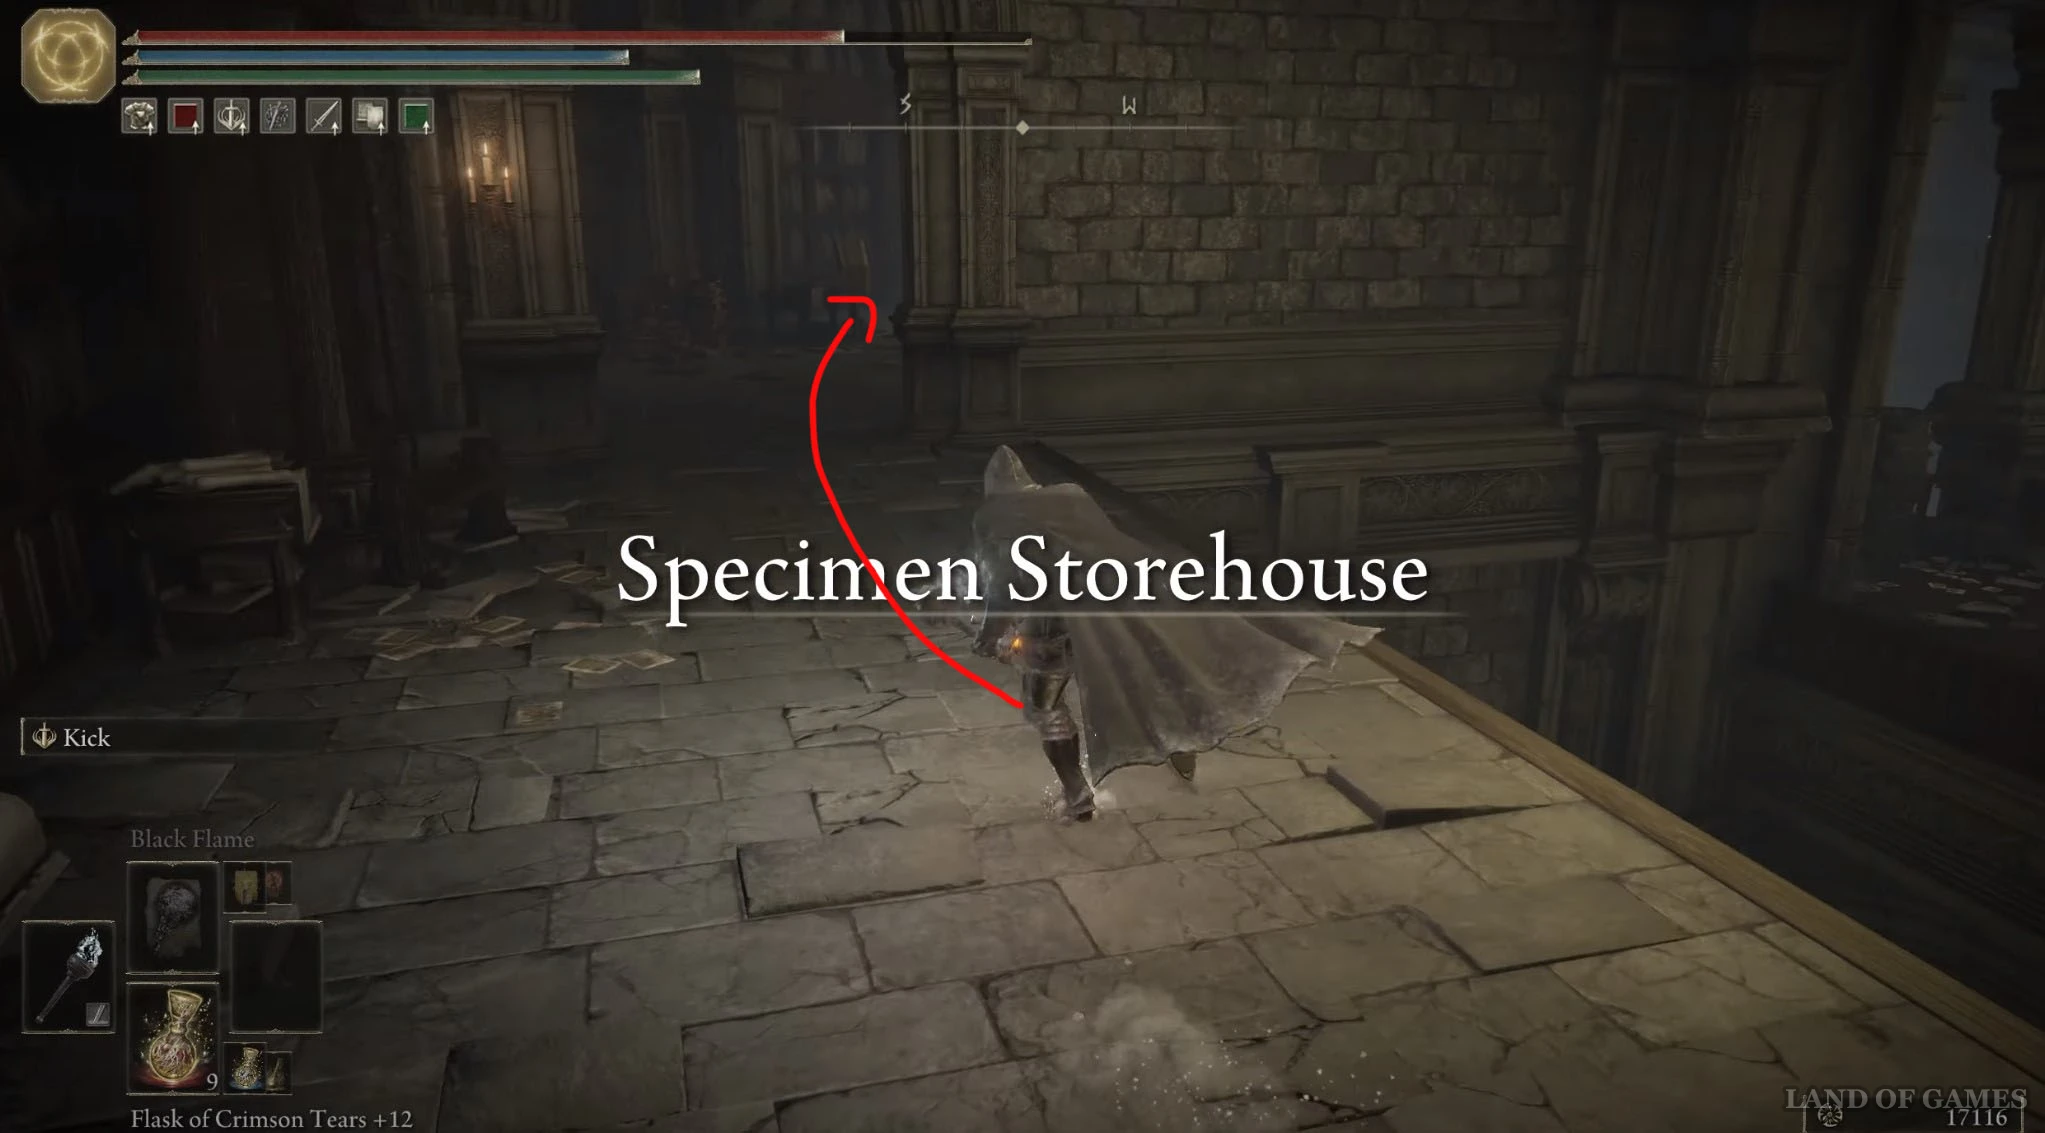
Возвратитесь в церковь и поверните налево. Бегите вперед по коридору в форме полукруга и поверните в первый проход слева. Воспользуйтесь подъемником, сойдите с платформы и сверните вправо. Пройдя немного вперед, вы обнаружите место благодати «Хранилище, задняя часть». Отсюда бегите на запад и поднимитесь по высокой деревянной лесенке.
Поднявшись, сверните вправо и поднимитесь по ступенькам наверх. Далее пройдите между стеллажом и стеной справа, чтобы найти дыру в стенке – выйдите через нее наружу и тут же поверните направо. Бегите по деревянному помосту наверх и снова войдите в здание, чтобы активировать место благодати «Хранилище, чердак». Затем сразу же сядьте в деревянный лифт, который поднимет вас еще выше.

Теперь двигайтесь в западном направлении по деревянным балкам и заберитесь по лесенке на верхний уровень. Поднявшись, начните идти на восток, а потом на север. Остерегайтесь летучих мышей, которые могут сбить вас с балок. Далее спуститесь вниз по двум лесенкам.
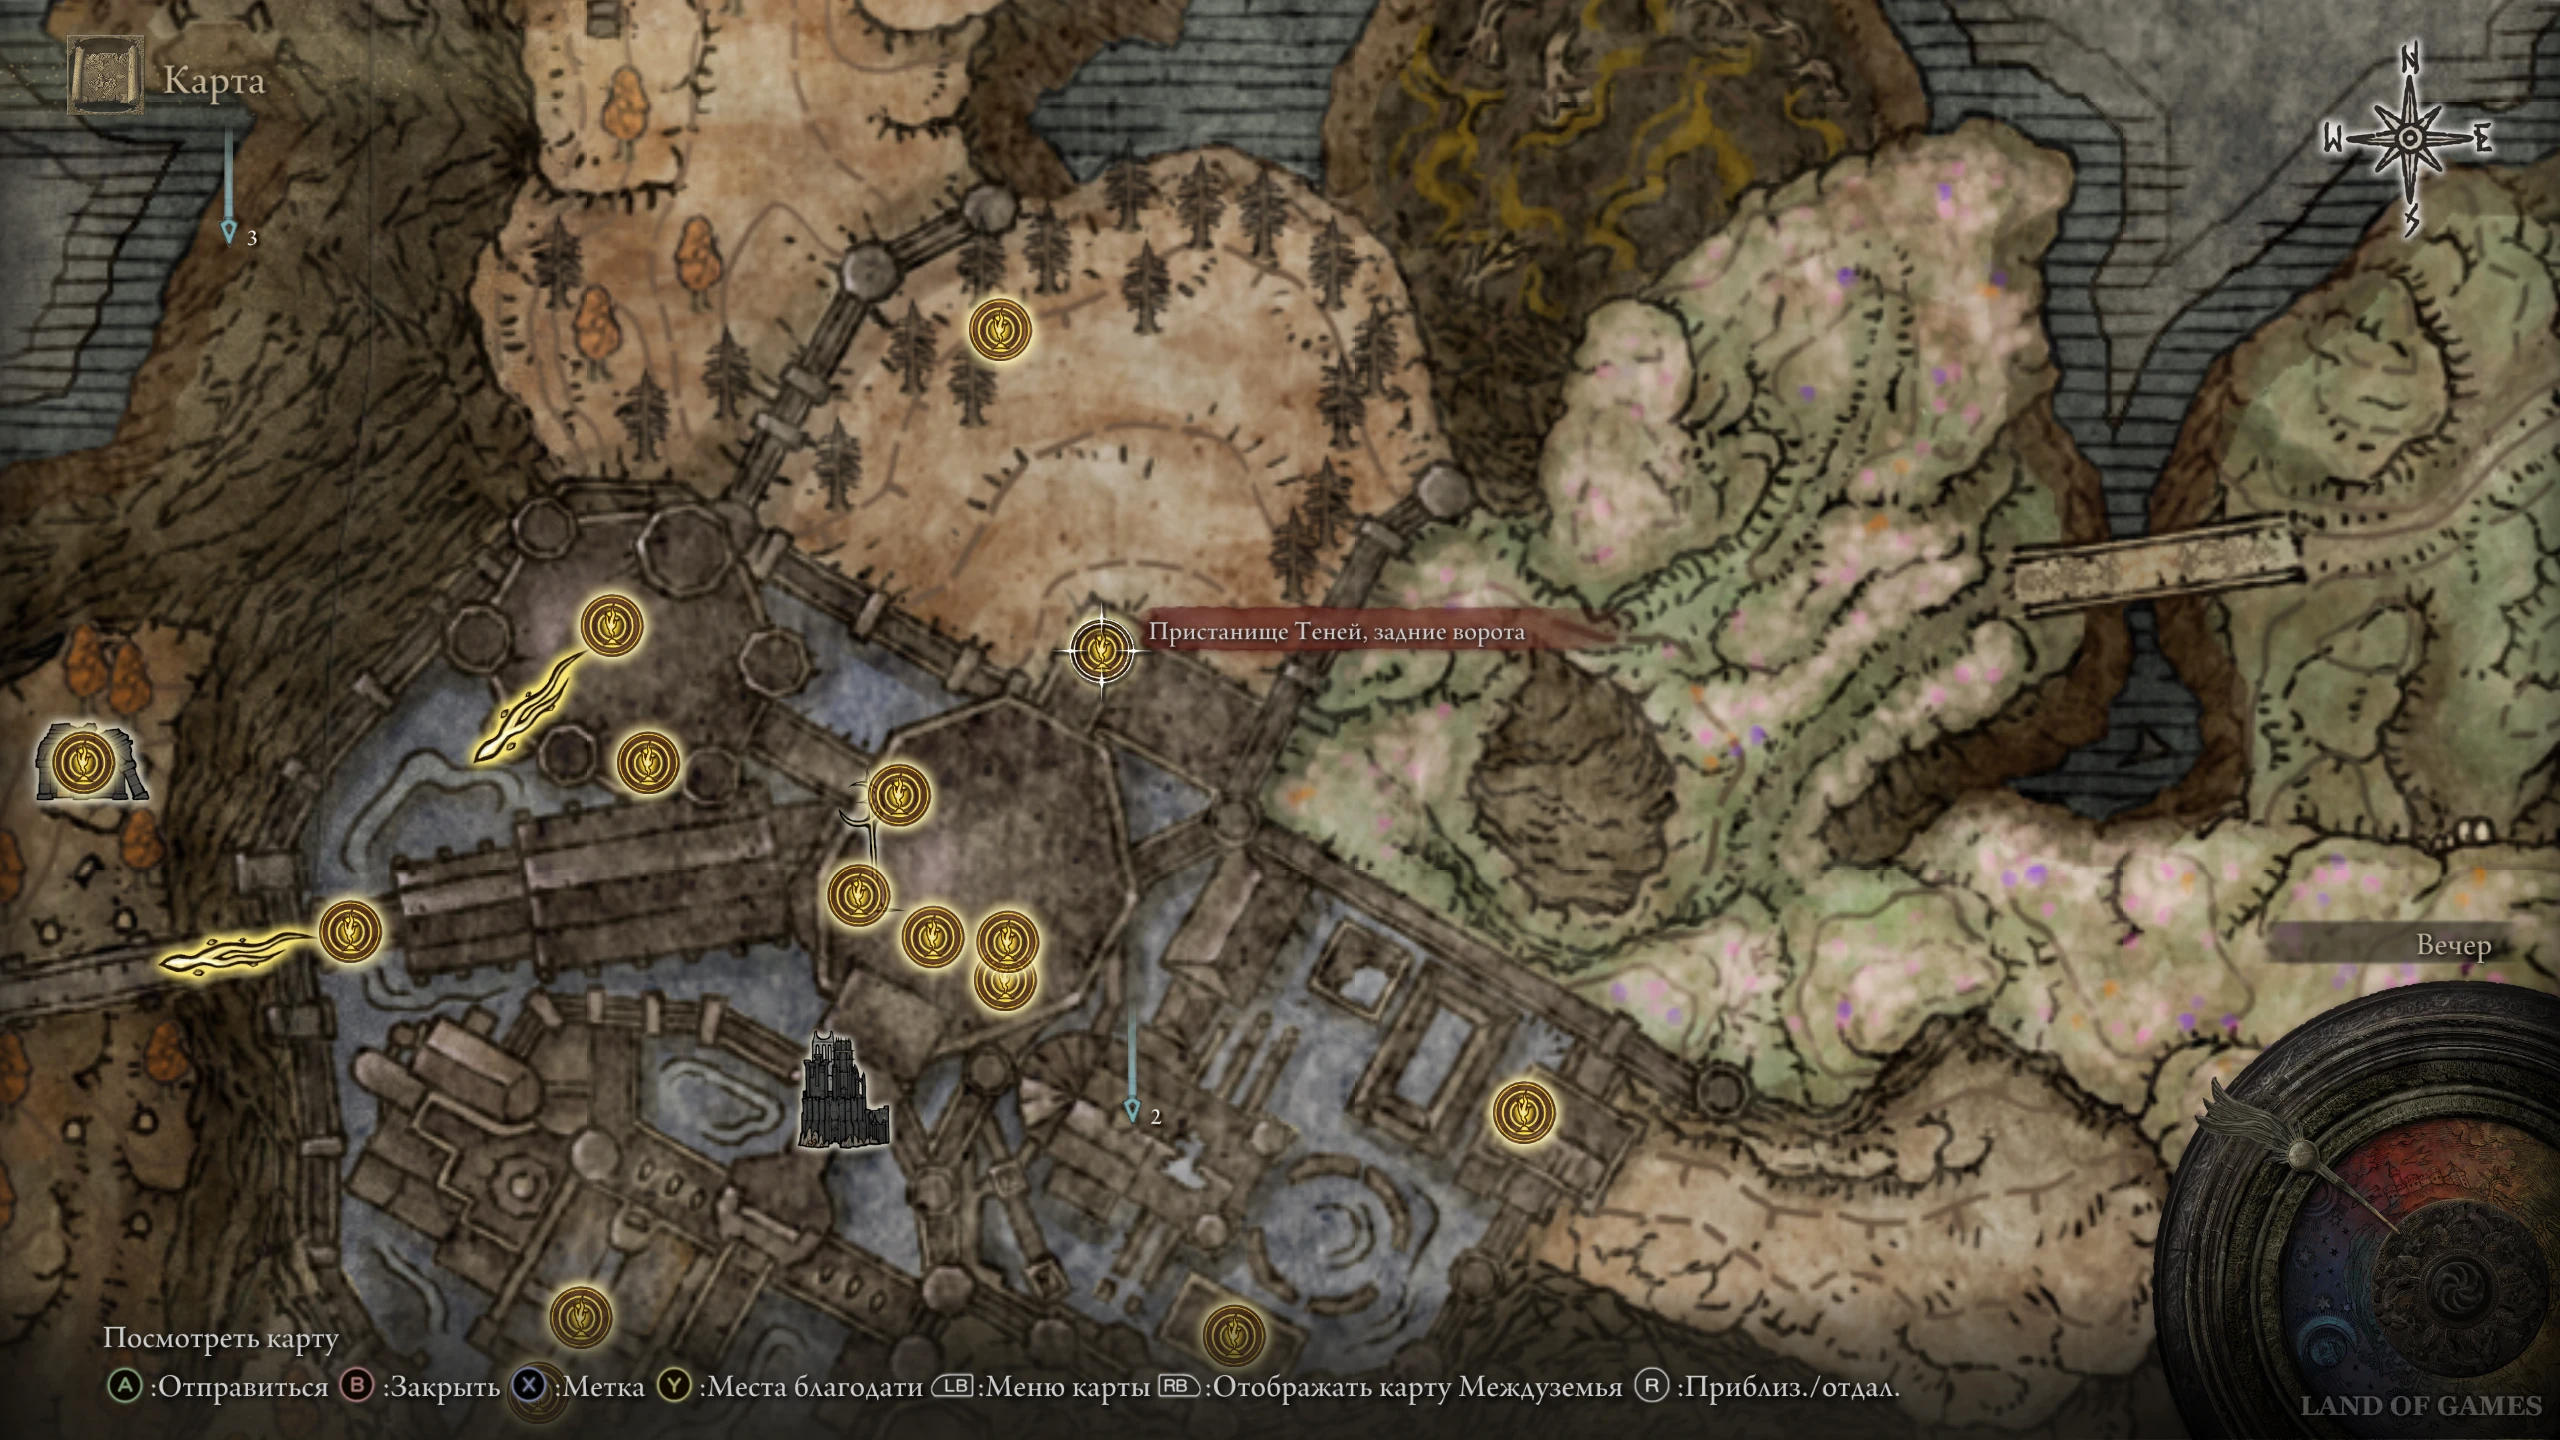
Спустившись, пройдите через проход справа и тут же снова сверните вправо и сядьте в подъемник, который опустит вас вниз. Продолжайте бежать вниз по деревянному помосту, а затем сверните вниз и встаньте на очередной лифт. Тем самым вы доберетесь до места благодати «Пристанище Теней, задние ворота». После активации костра поверните направо и войдите в арсенал. Возле подножья статуи Марики вы обнаружите очередной фрагмент.
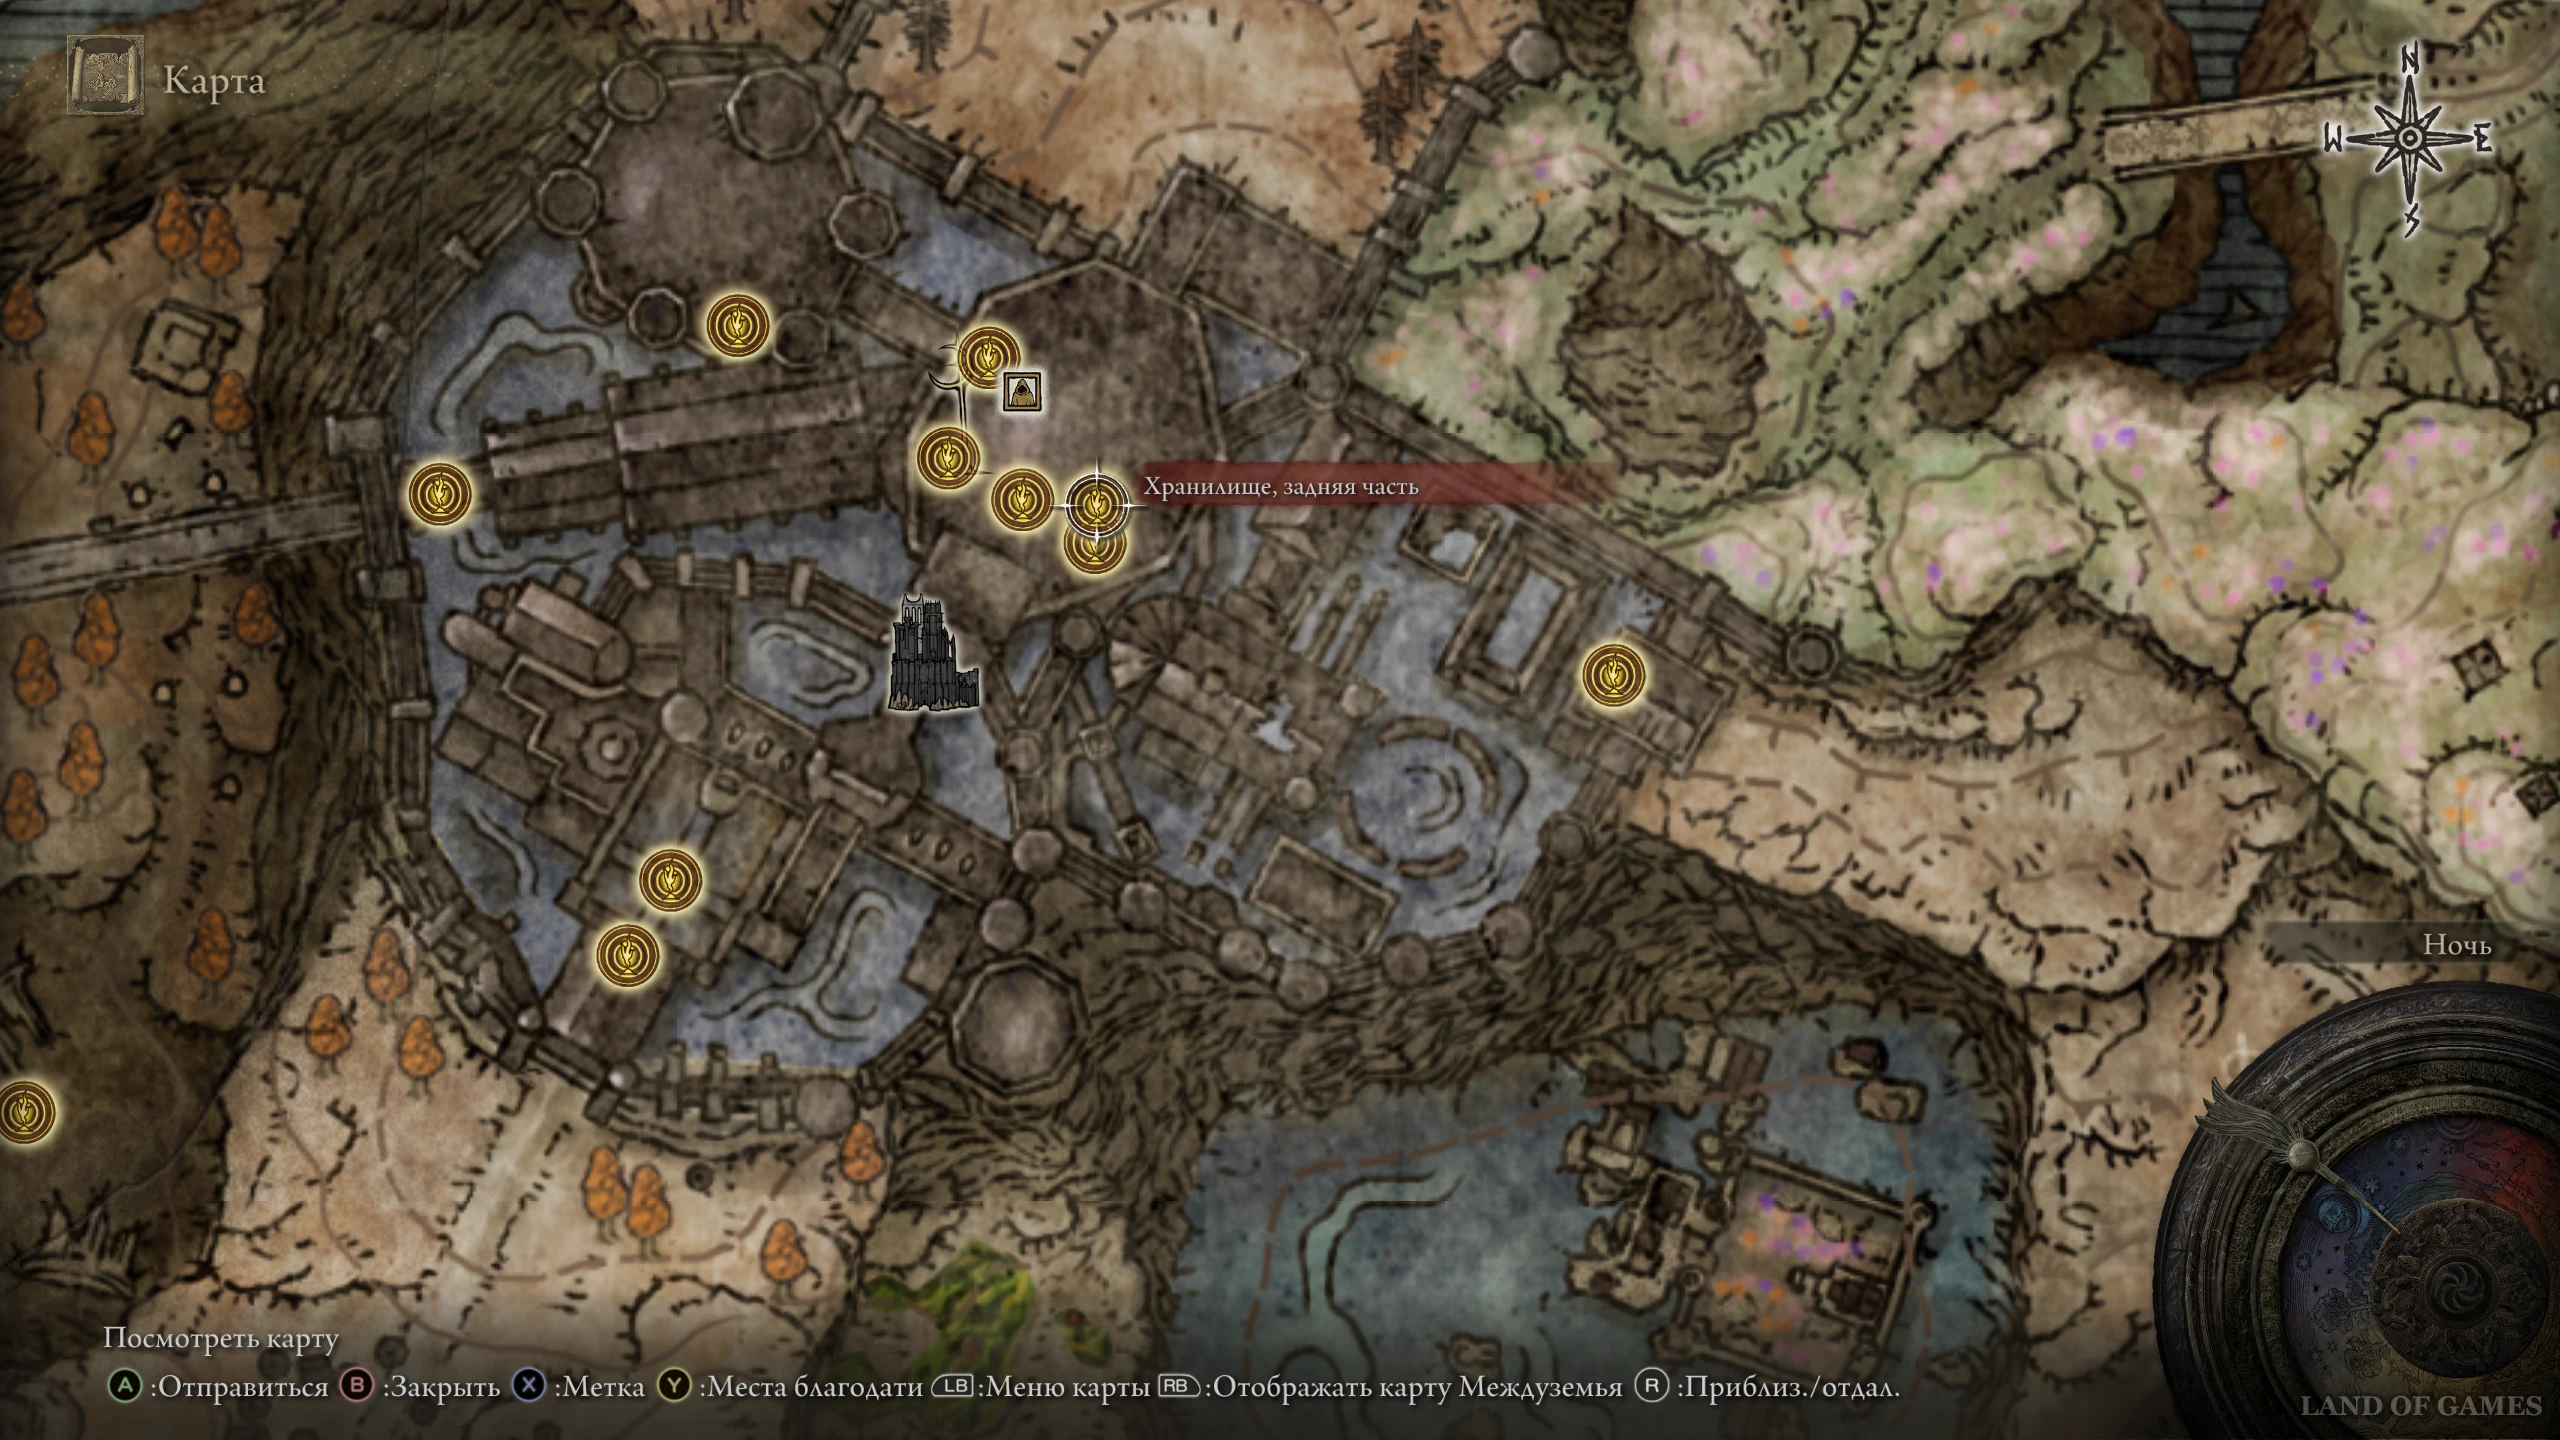
Осколки древа упадка 36, 37, 38, 39 и 40
Вернитесь к месту благодати «Пристанище Теней, задние ворота», а затем выйдите наружу и бегите на северо-запад к костру «Вид на Древо Упадка». После его активации пробегите через проход и направляйтесь к огромному сооружению на северо-востоке. Пробегите через него и подойдите к Чаше Древа Упадка. Возле нее вы обнаружите сразу пять фрагментов.


Осколок древа упадка 41
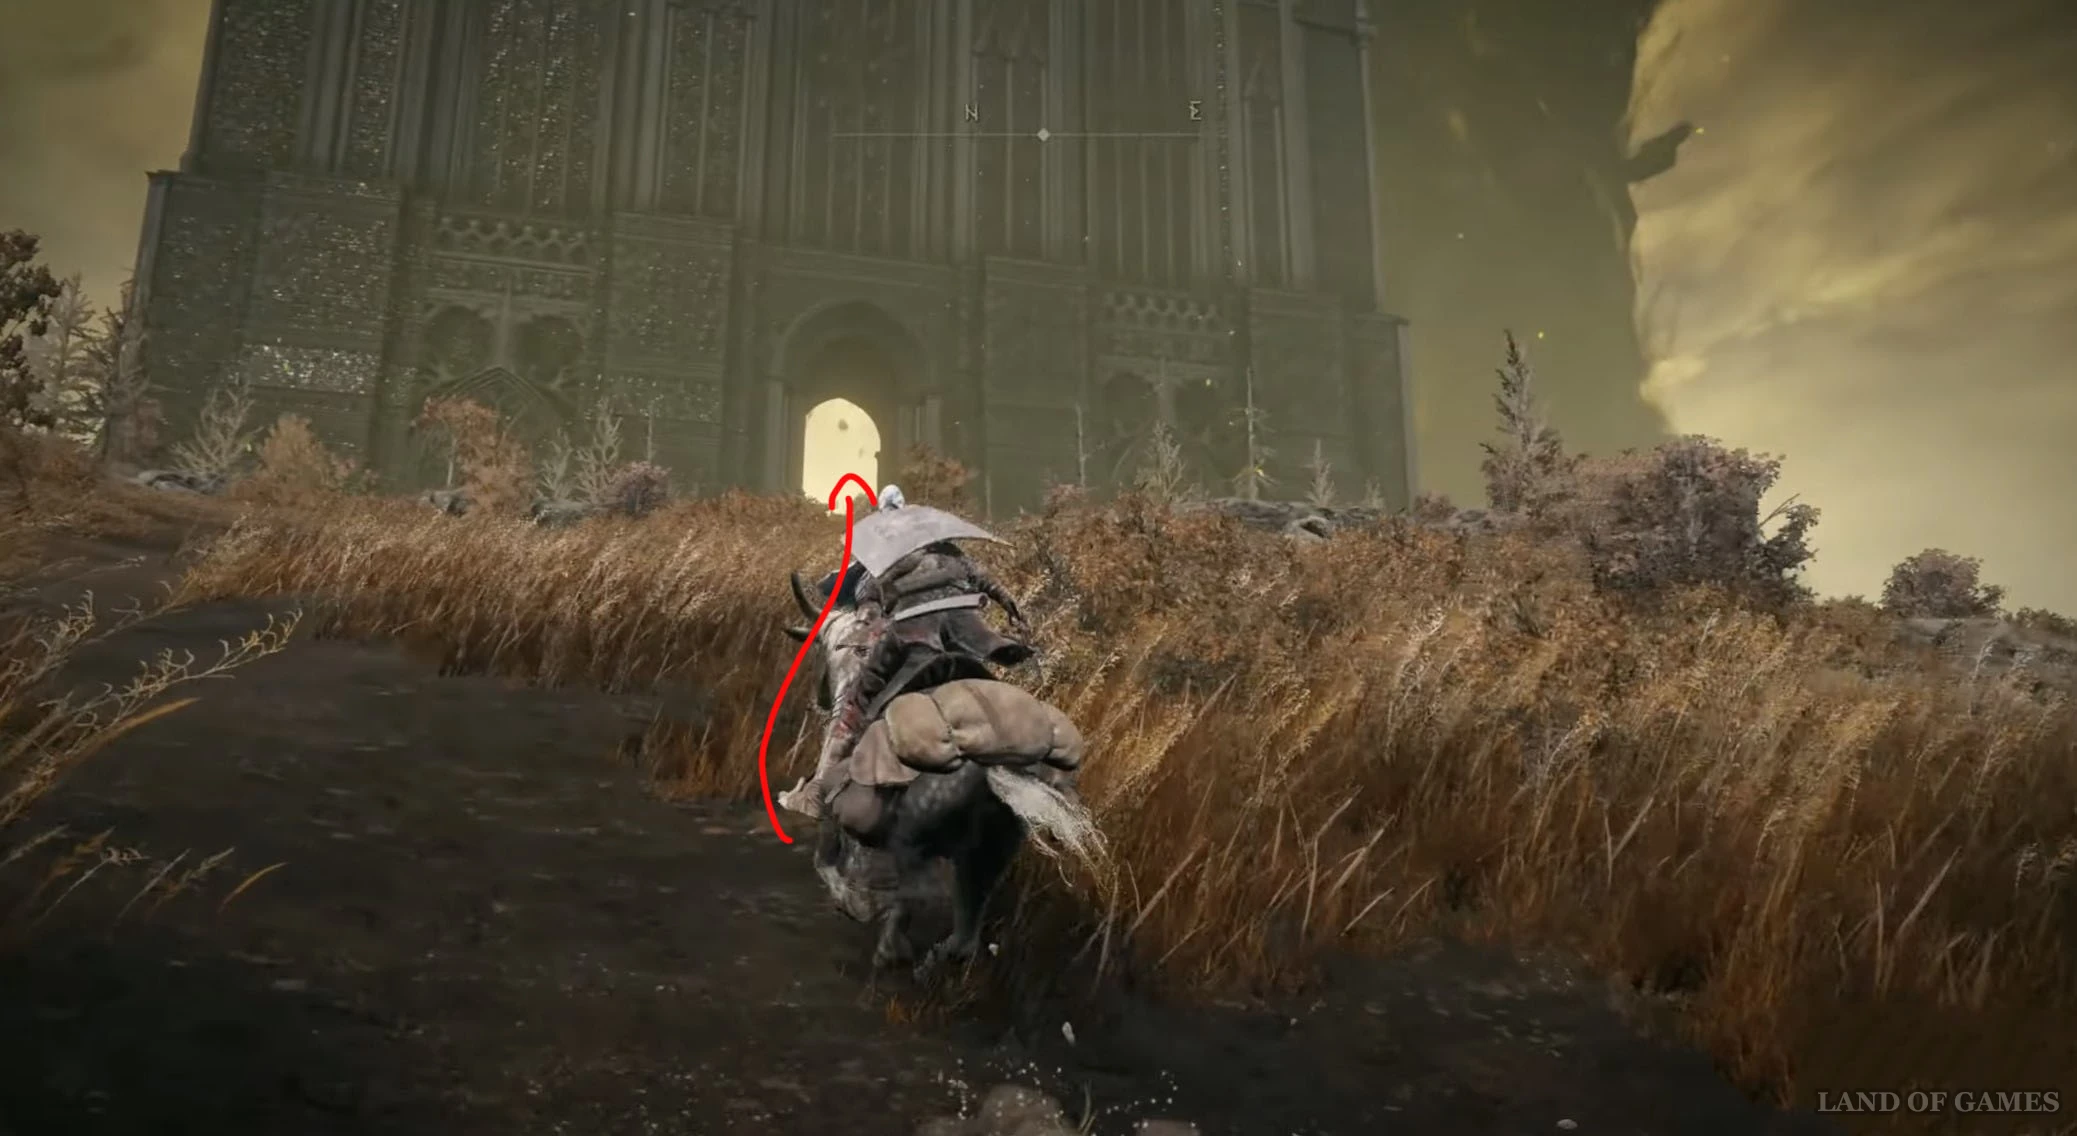
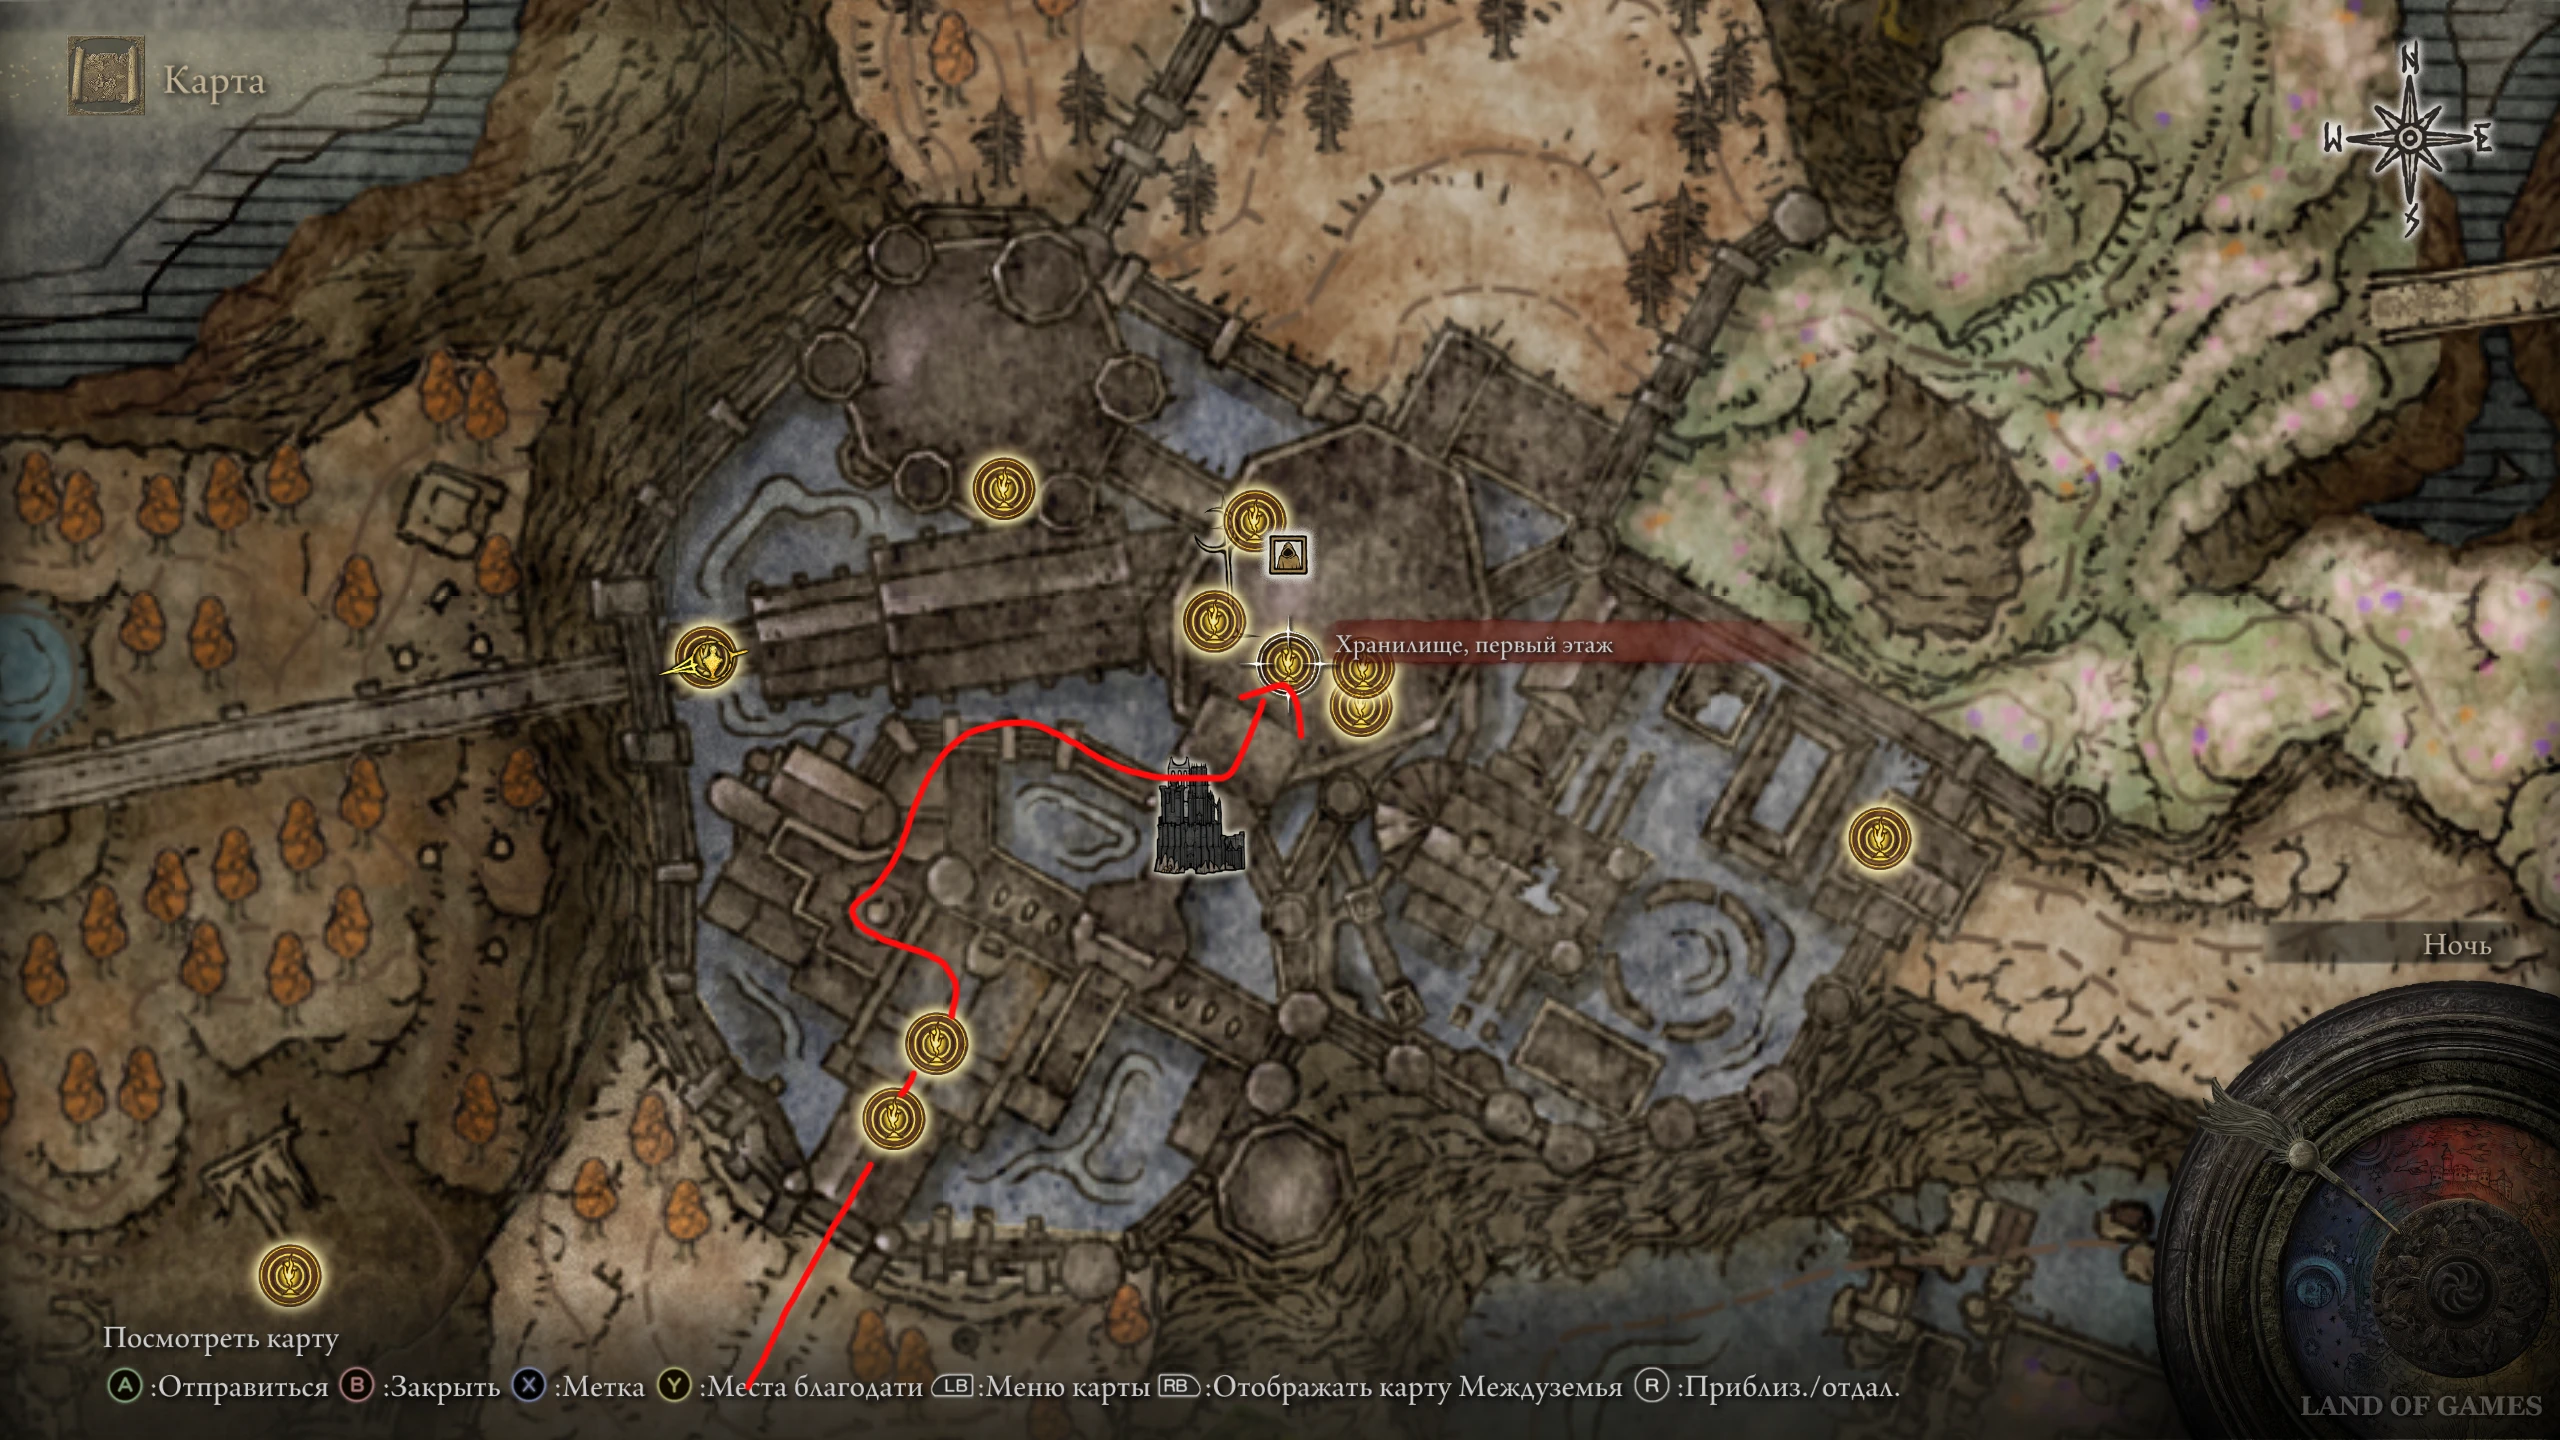
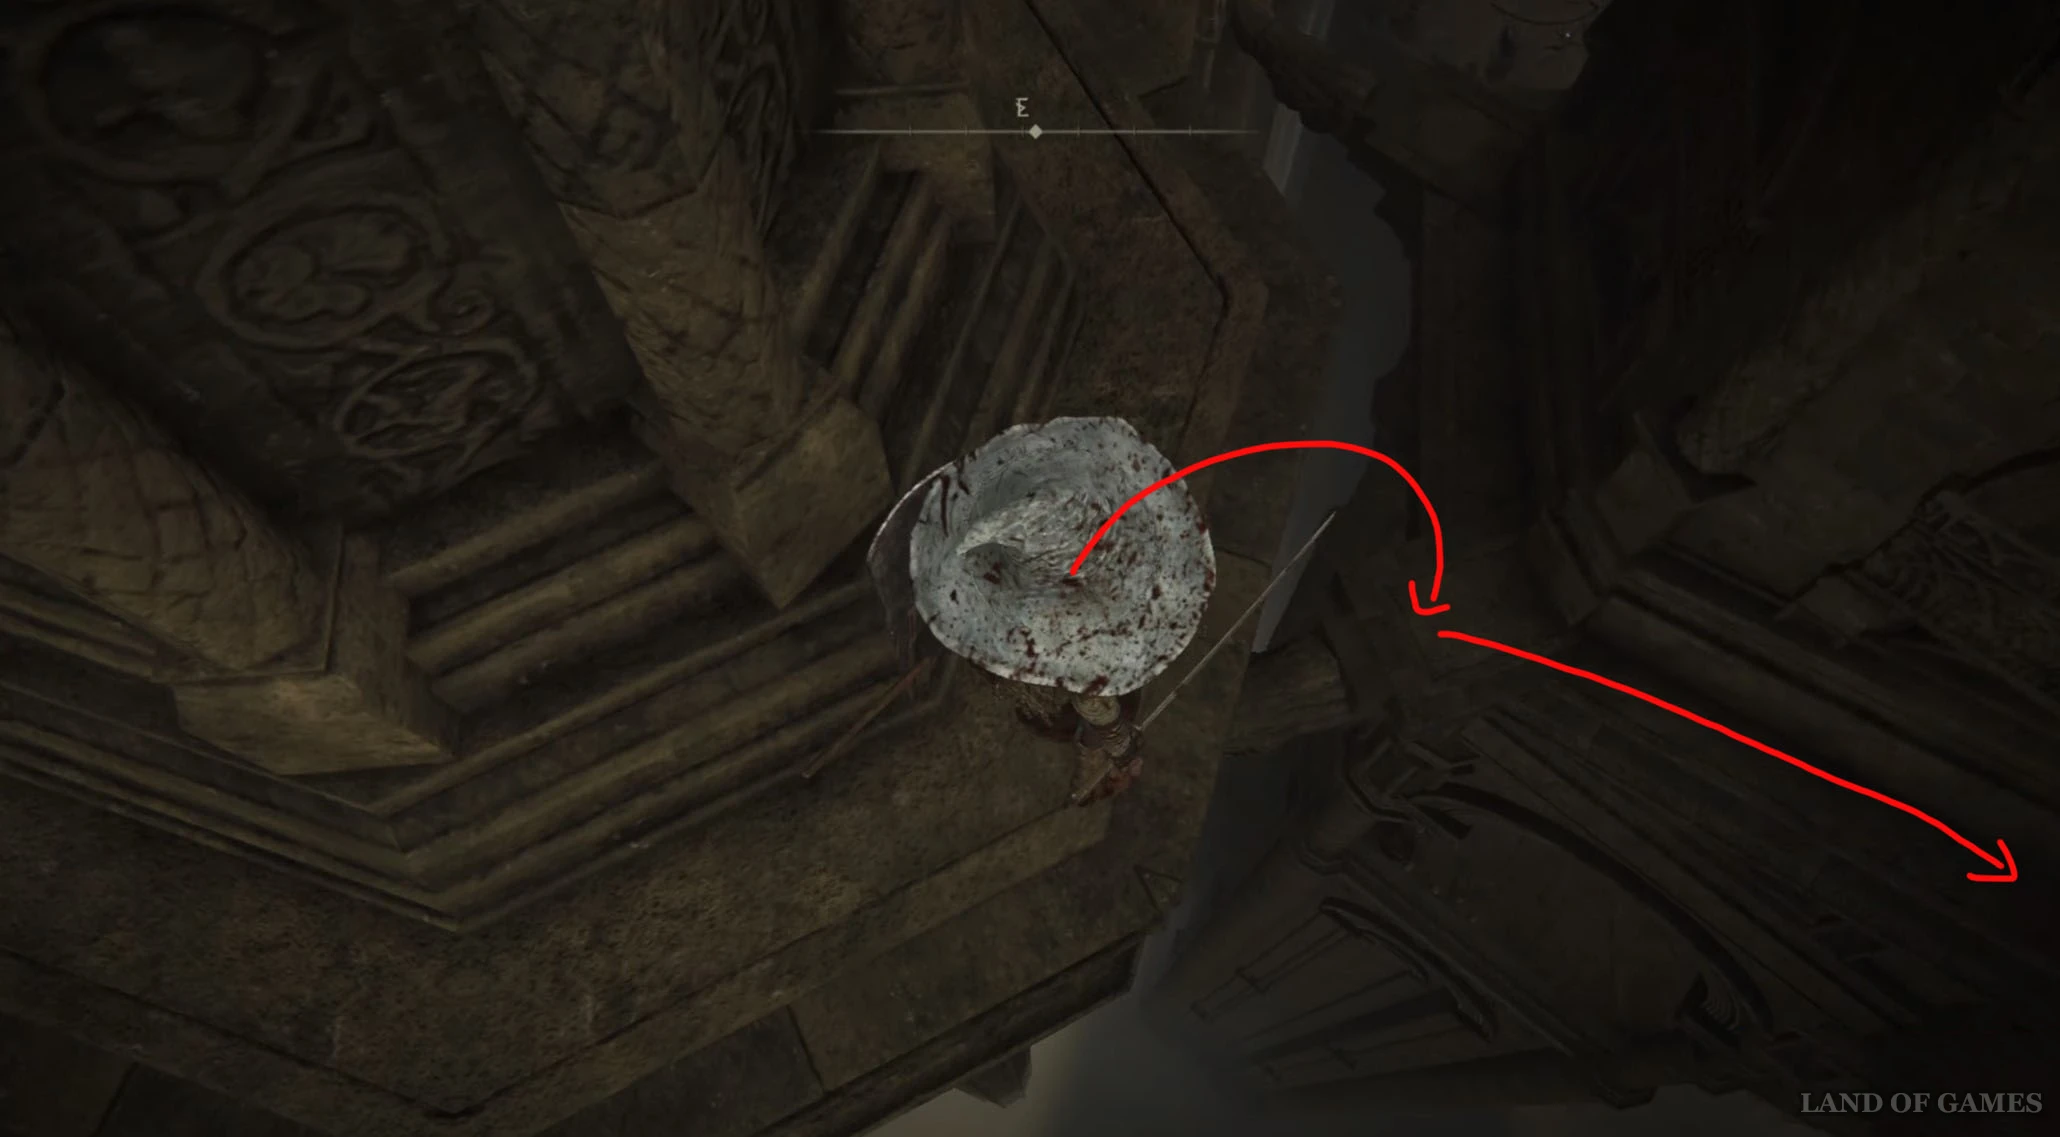
Вам нужно будет сначала добраться до места благодати «Хранилище, первый этаж». Для этого дойдите до «Площади перед главными воротами», а затем пройдите через проход на северо-западе, поднимитесь по ступенькам и сверните вправо к деревянной лестнице. Взберитесь по ней еще выше.

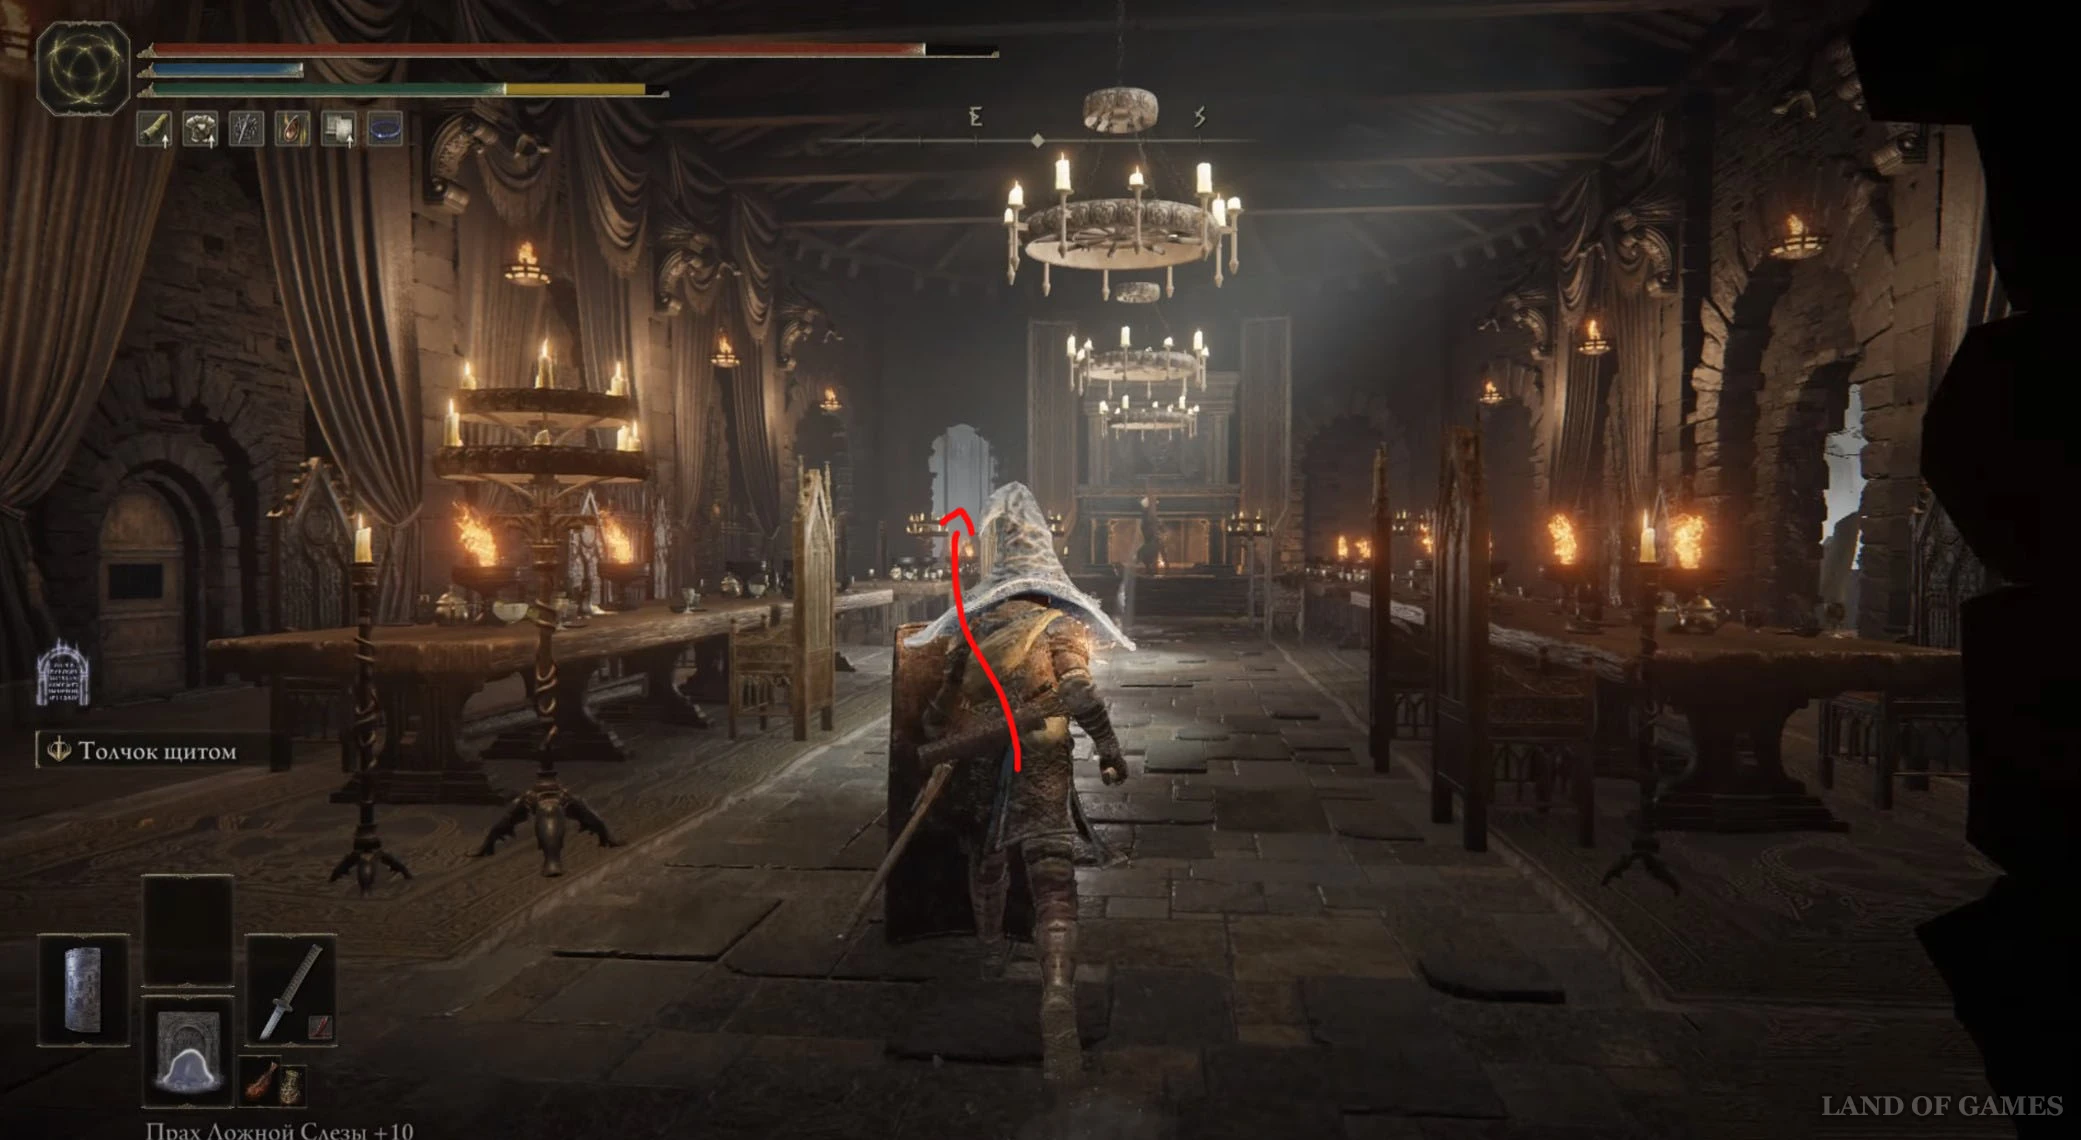
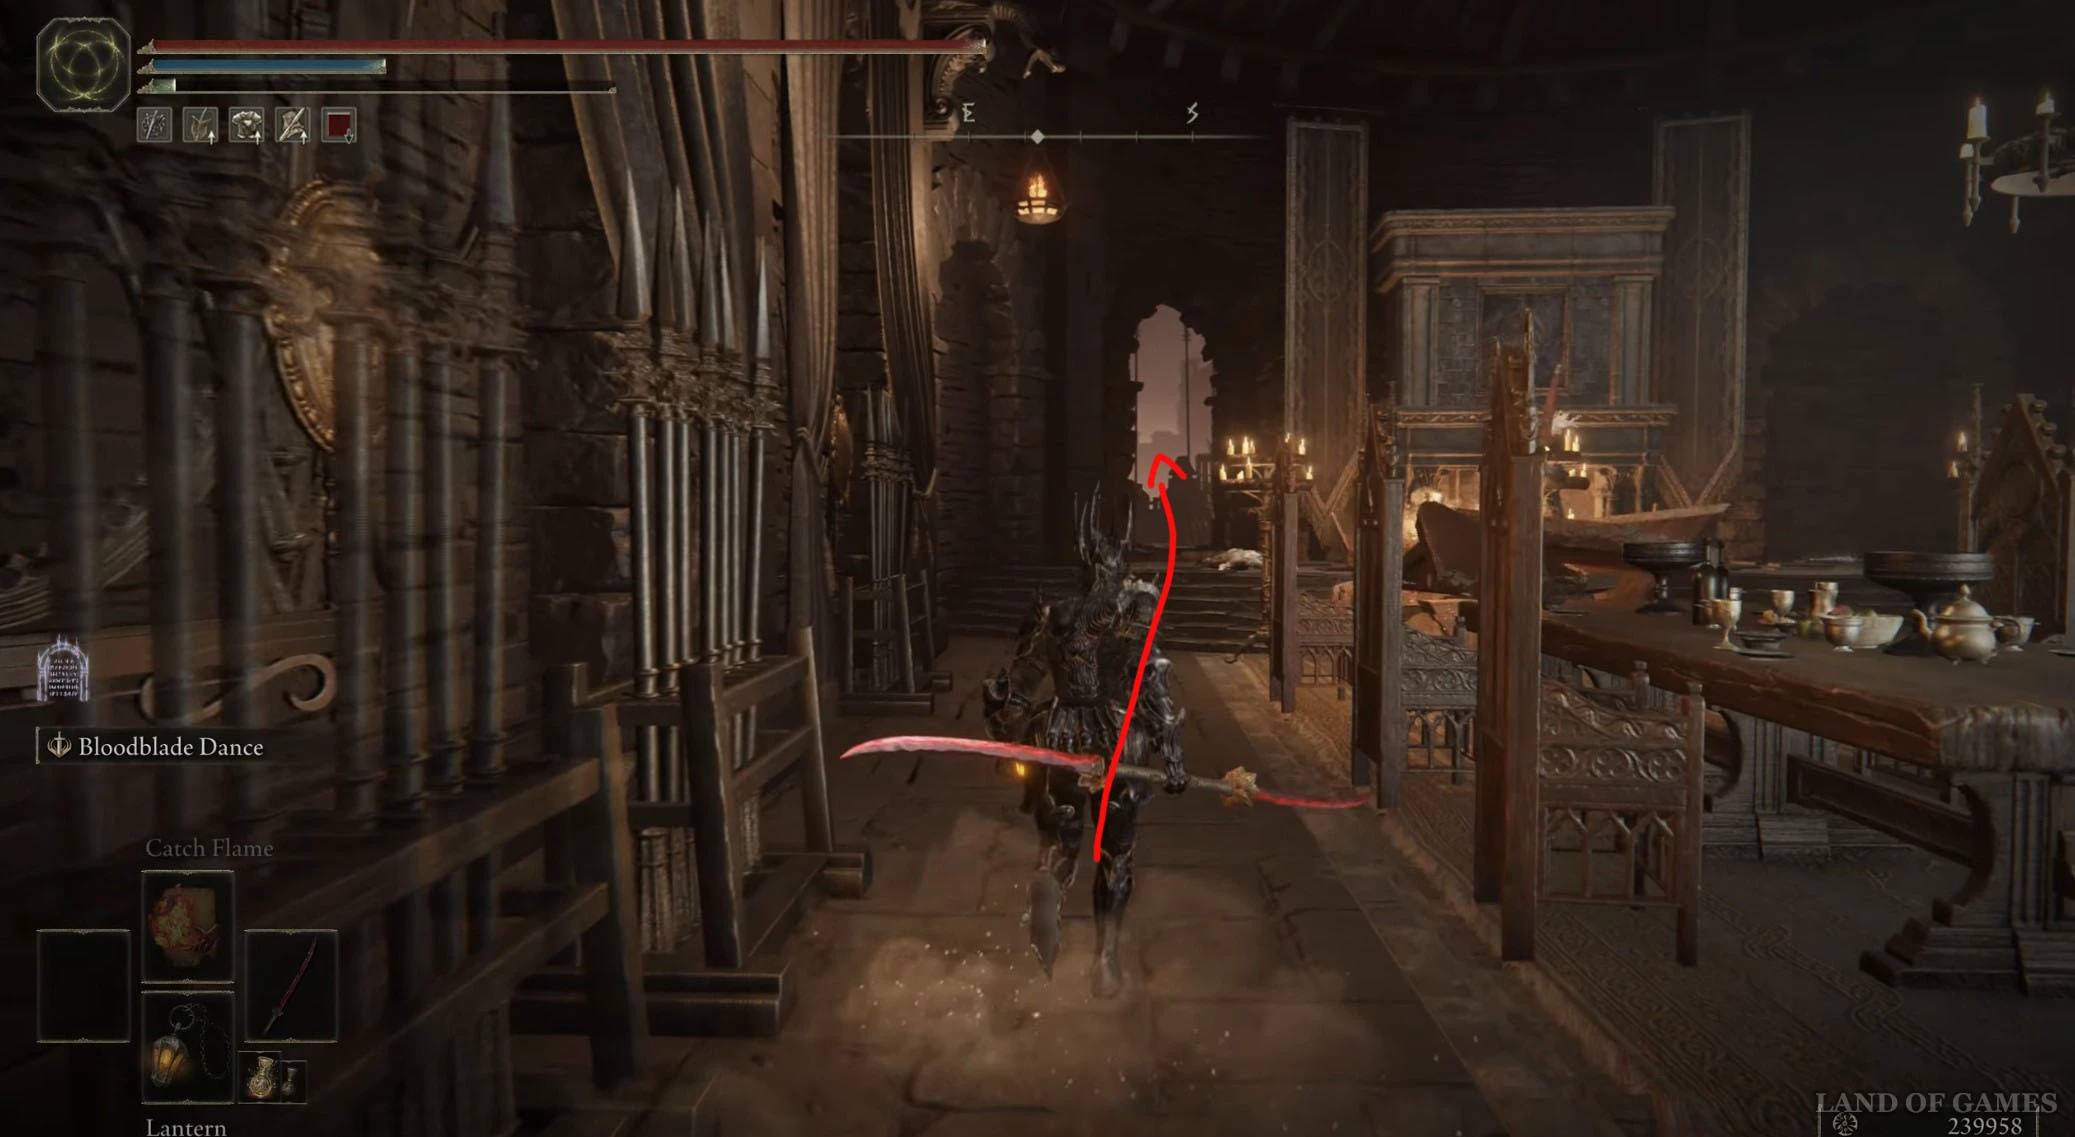
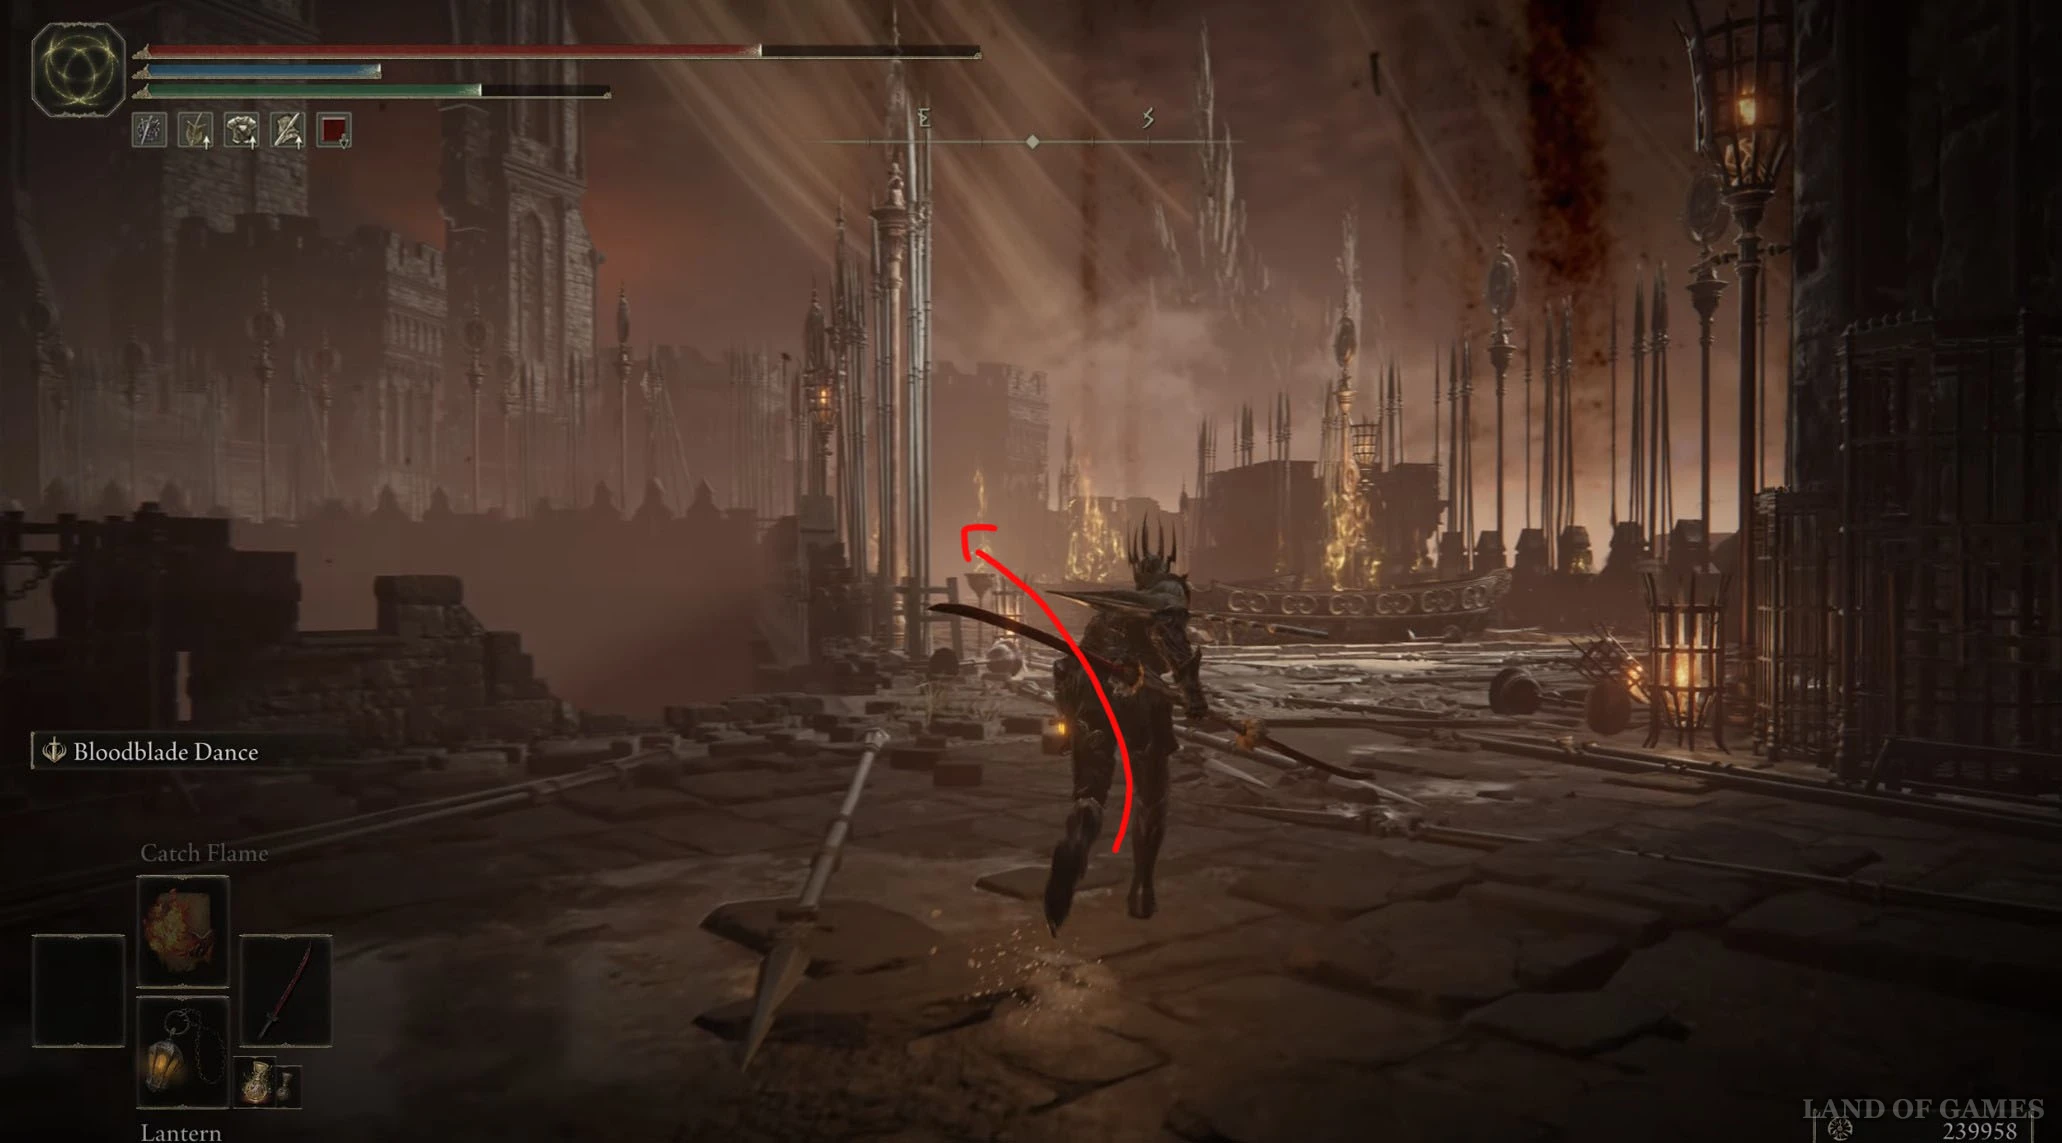
Далее войдите в столовую, где нужно пройти через проход на юго-востоке. Снова оказавшись снаружи, продолжайте бежать в юго-восточном направлении, а потом сверните на северо-восток, пройдите мимо огненного рыцаря и воспользуйтесь подъемником.
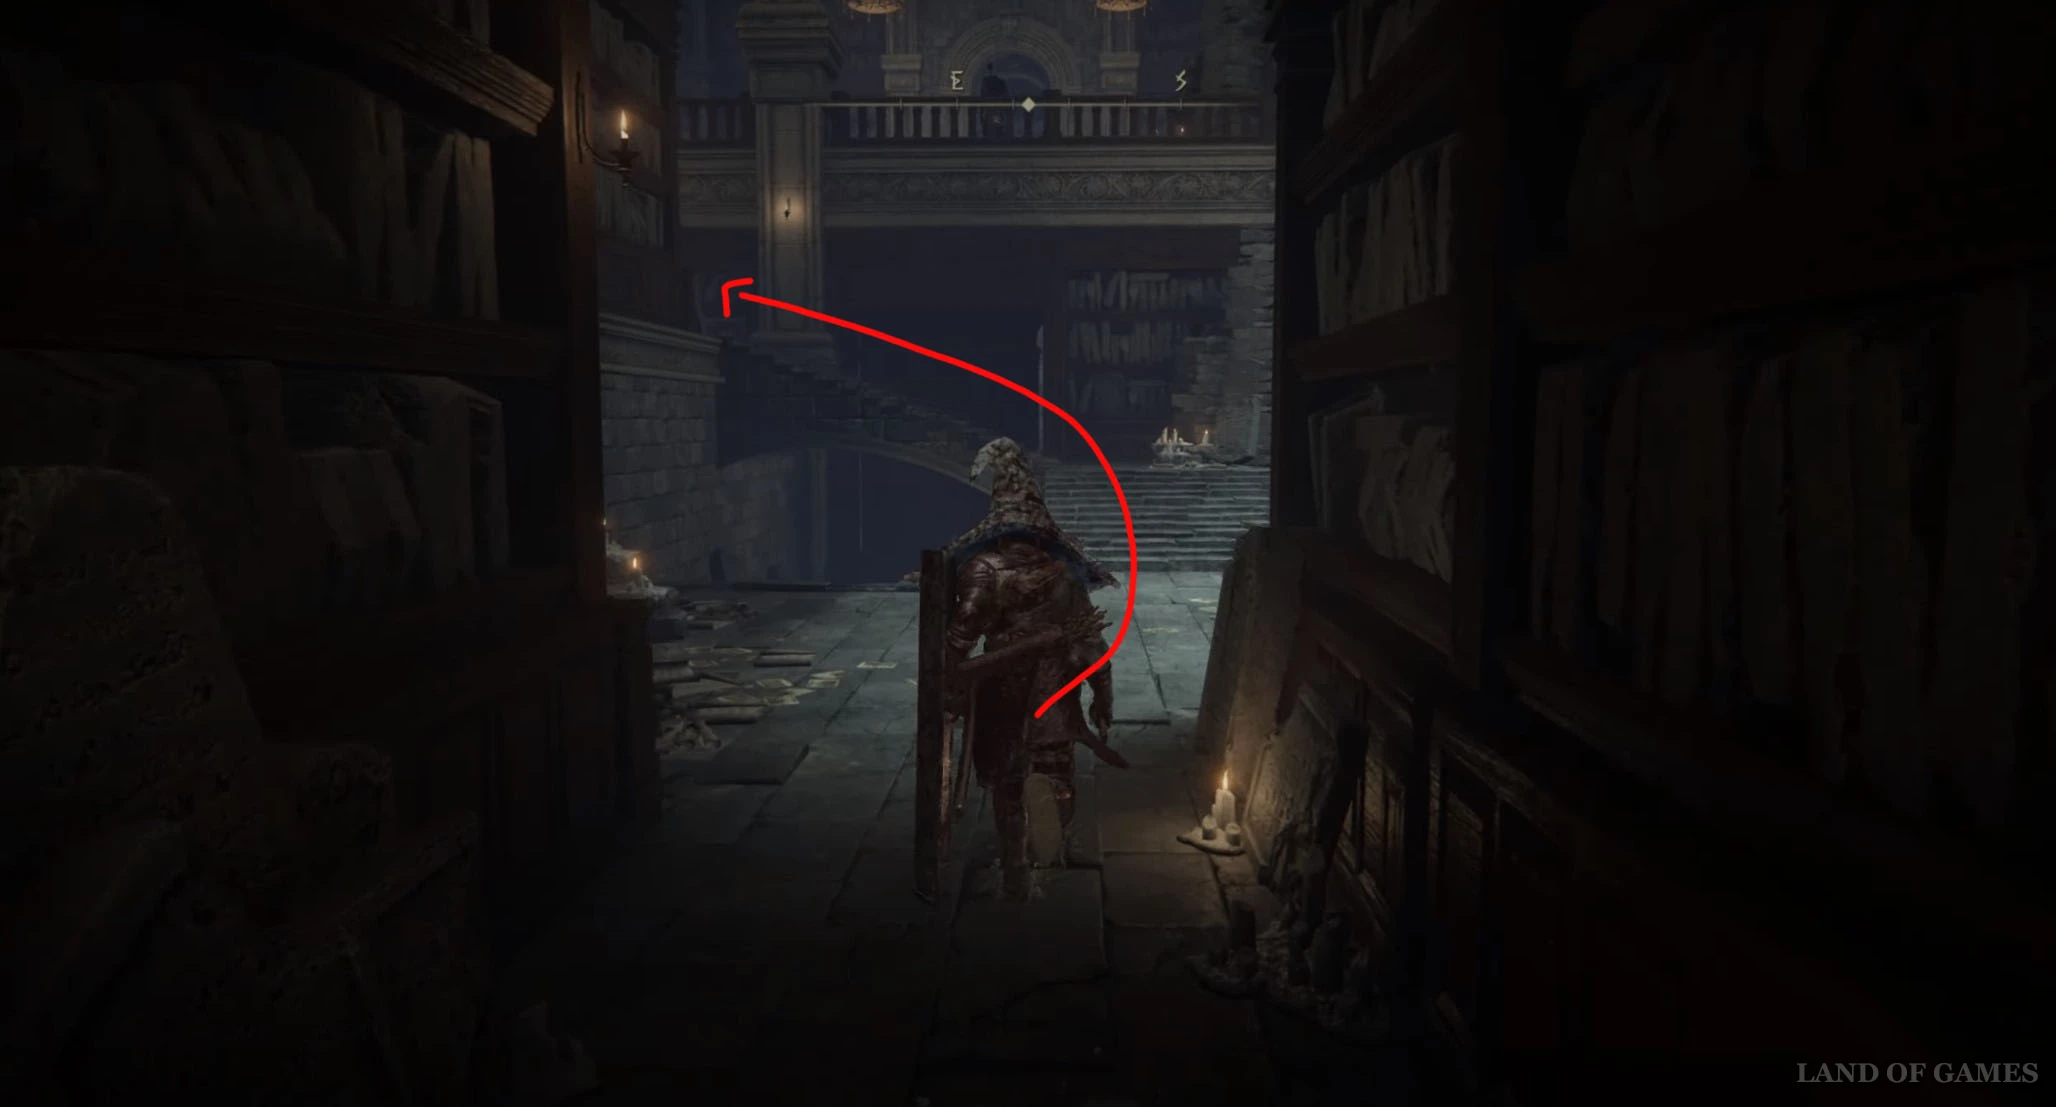
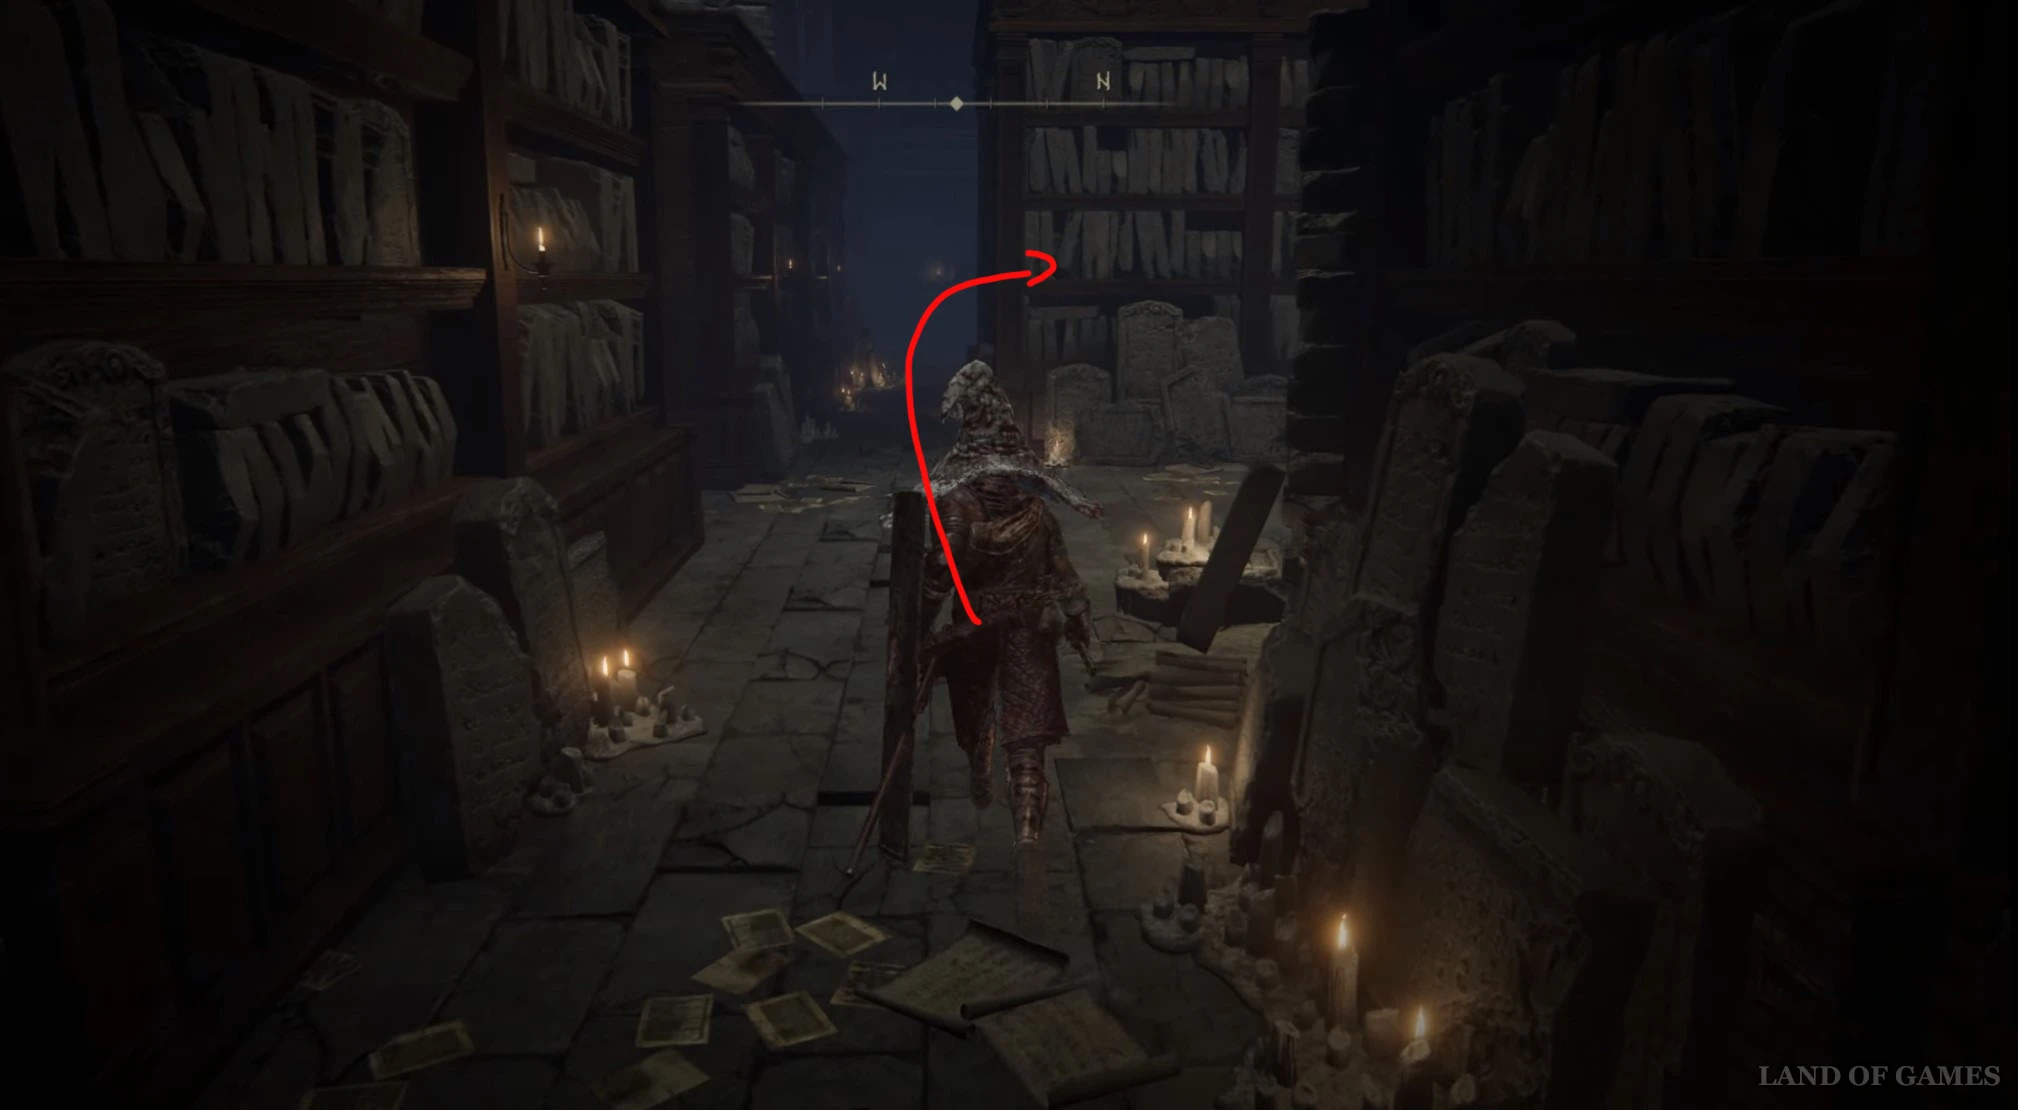
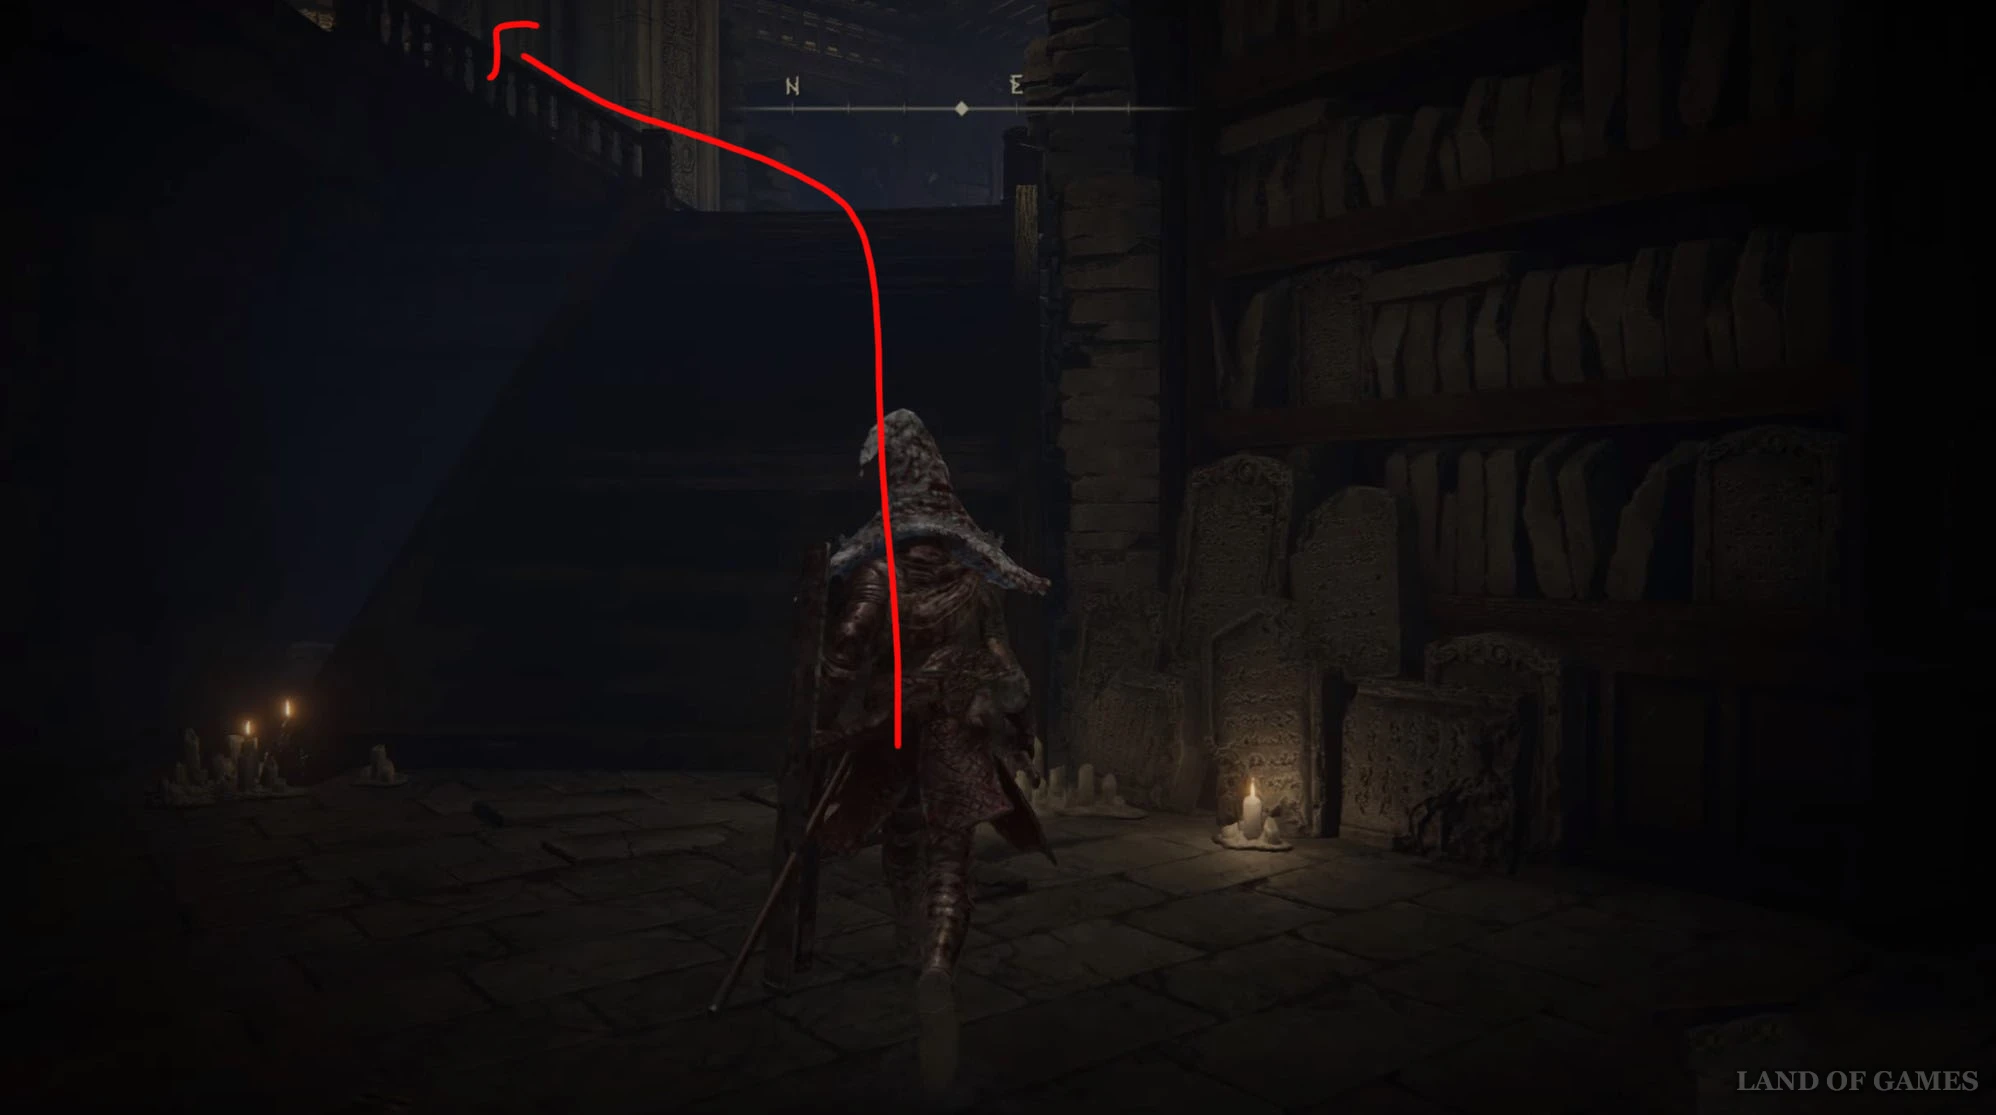
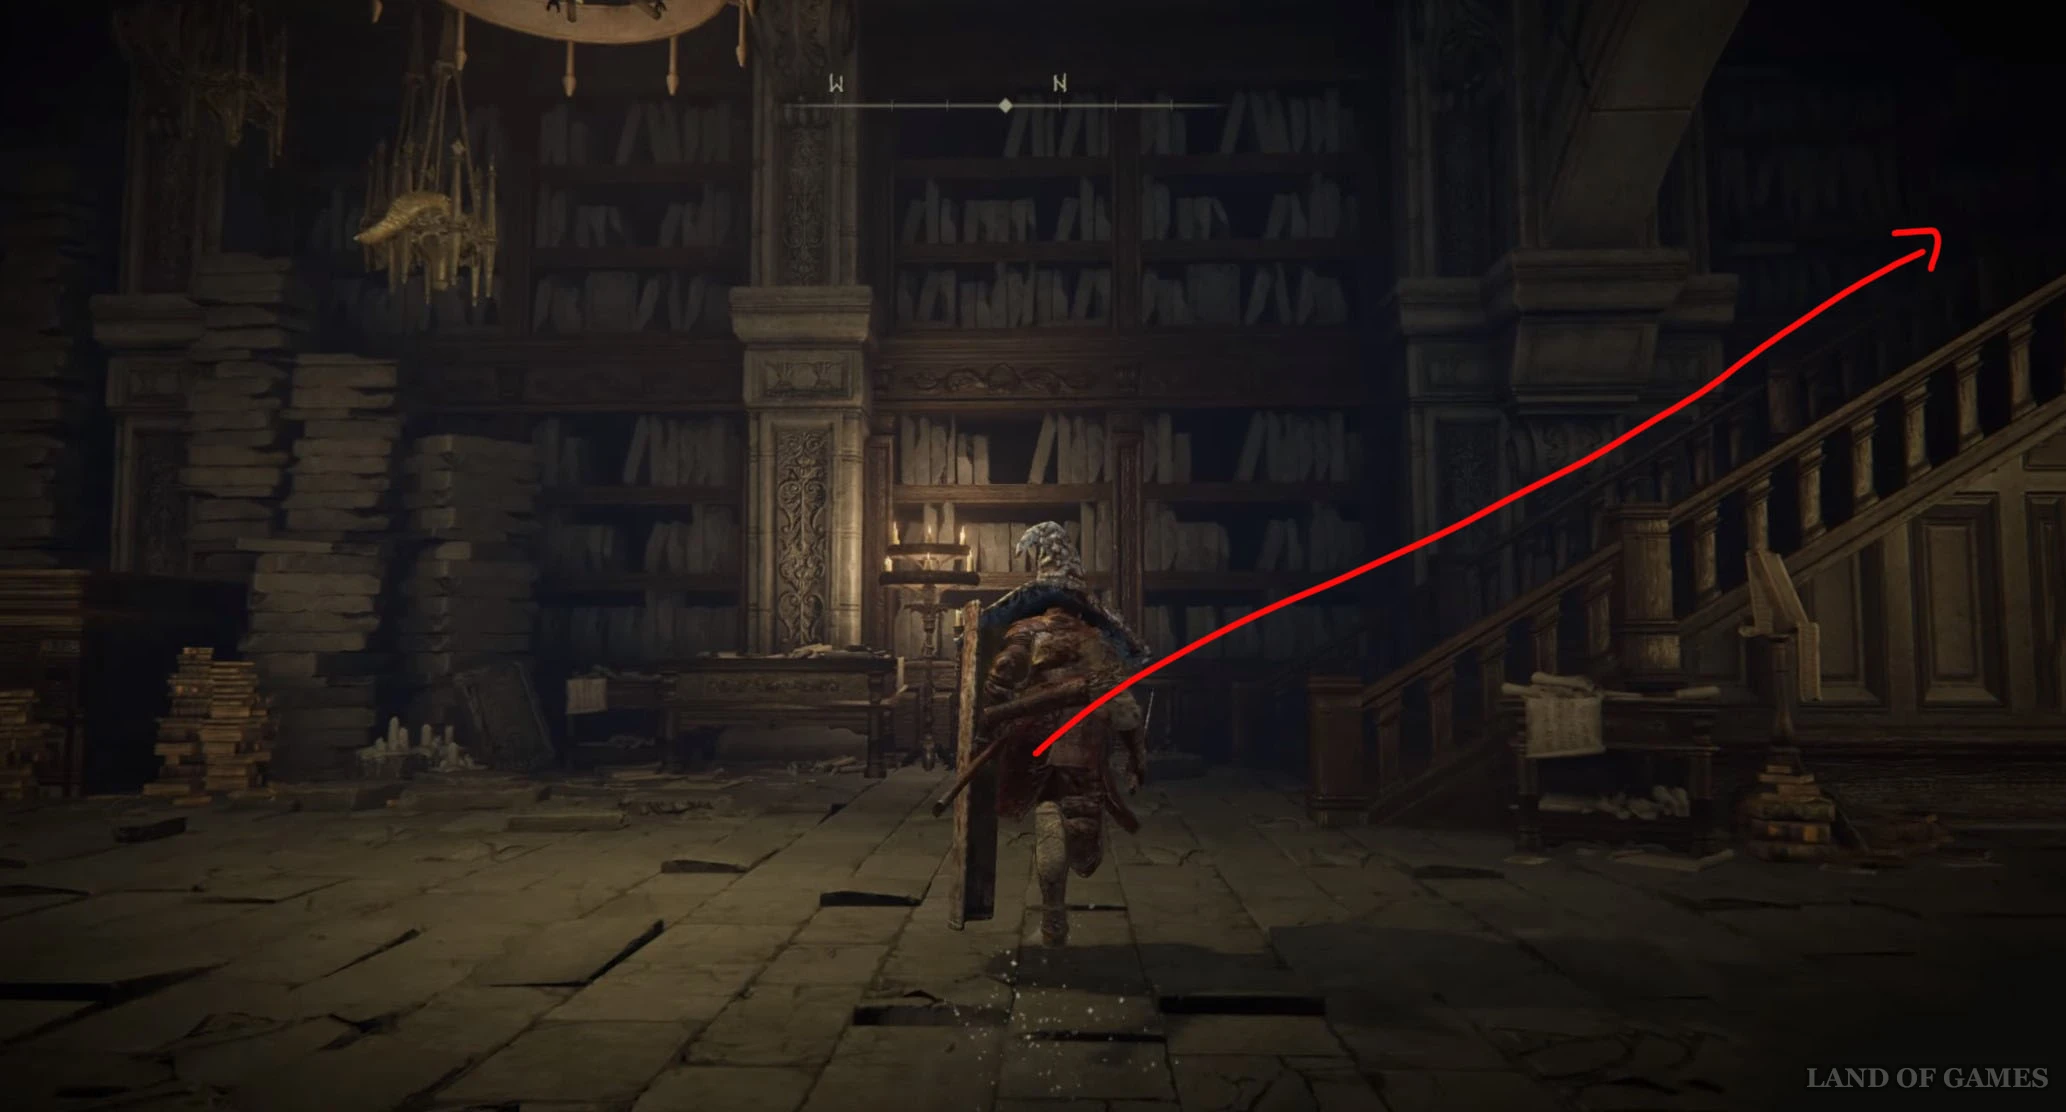
Добравшись до «Хранилища, первый этаж», поверните налево и забегите в небольшой закоулок между книжными полками и каменным постаментом. Затем поверните направо, выйдите в просторное помещение и заберитесь по лестнице налево. Далее сверните влево возле первой полки с книгами.
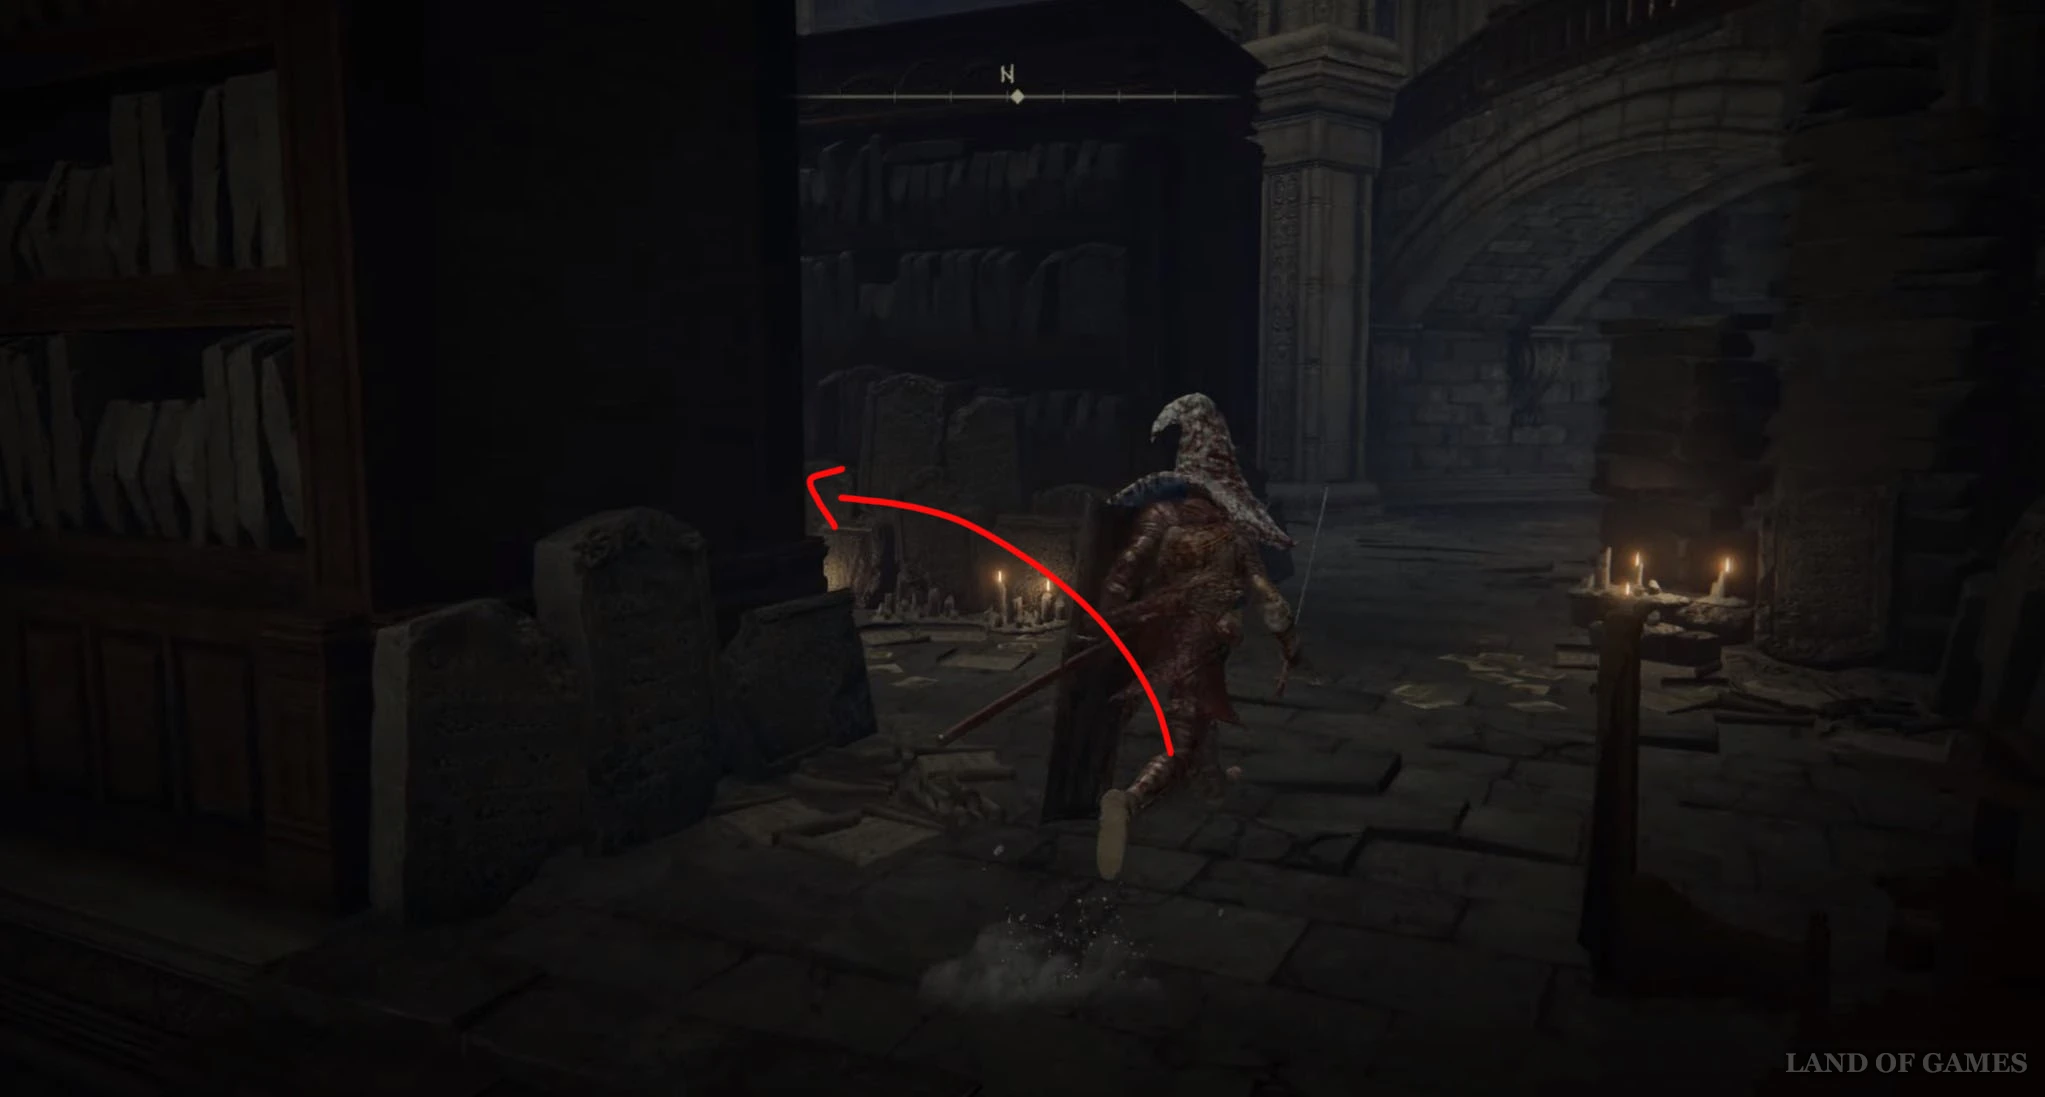
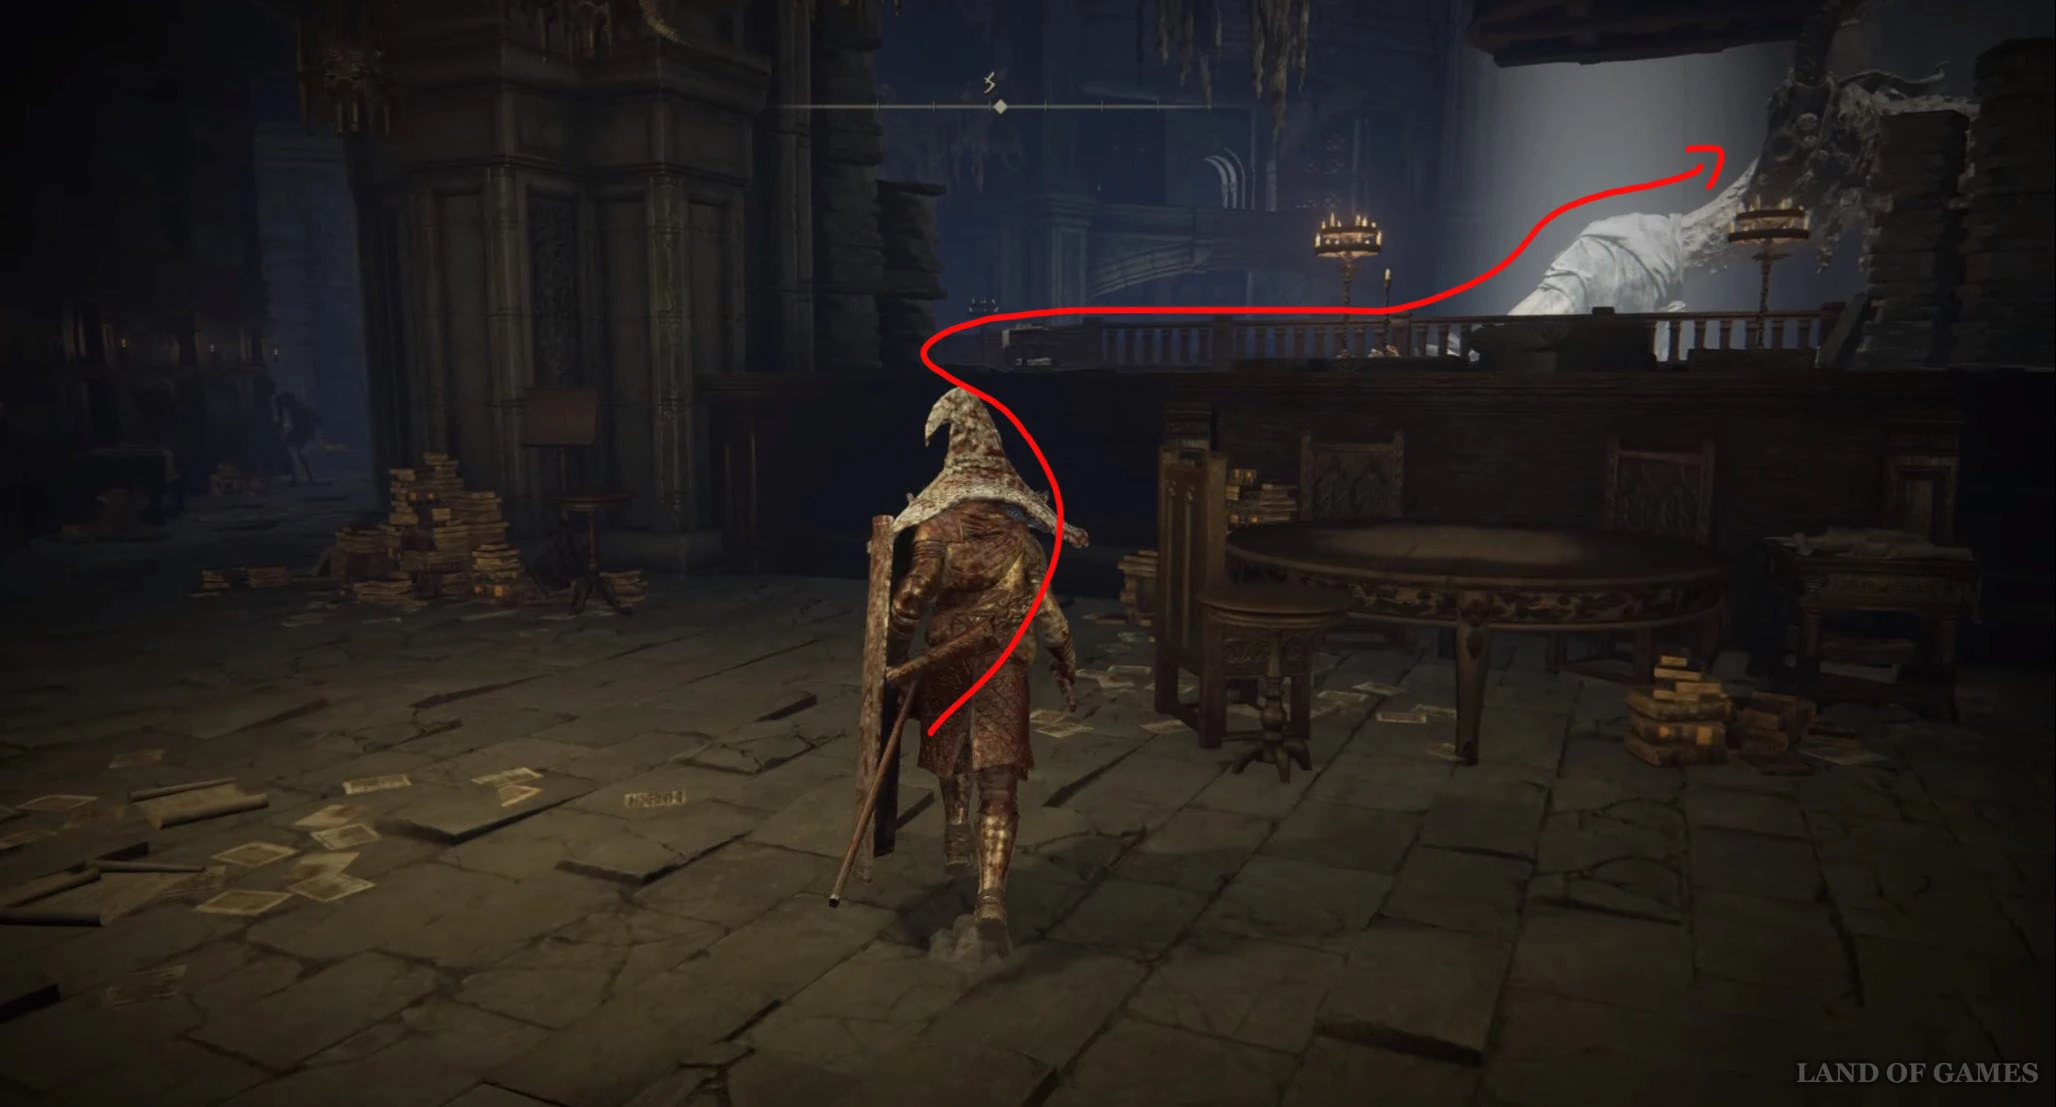
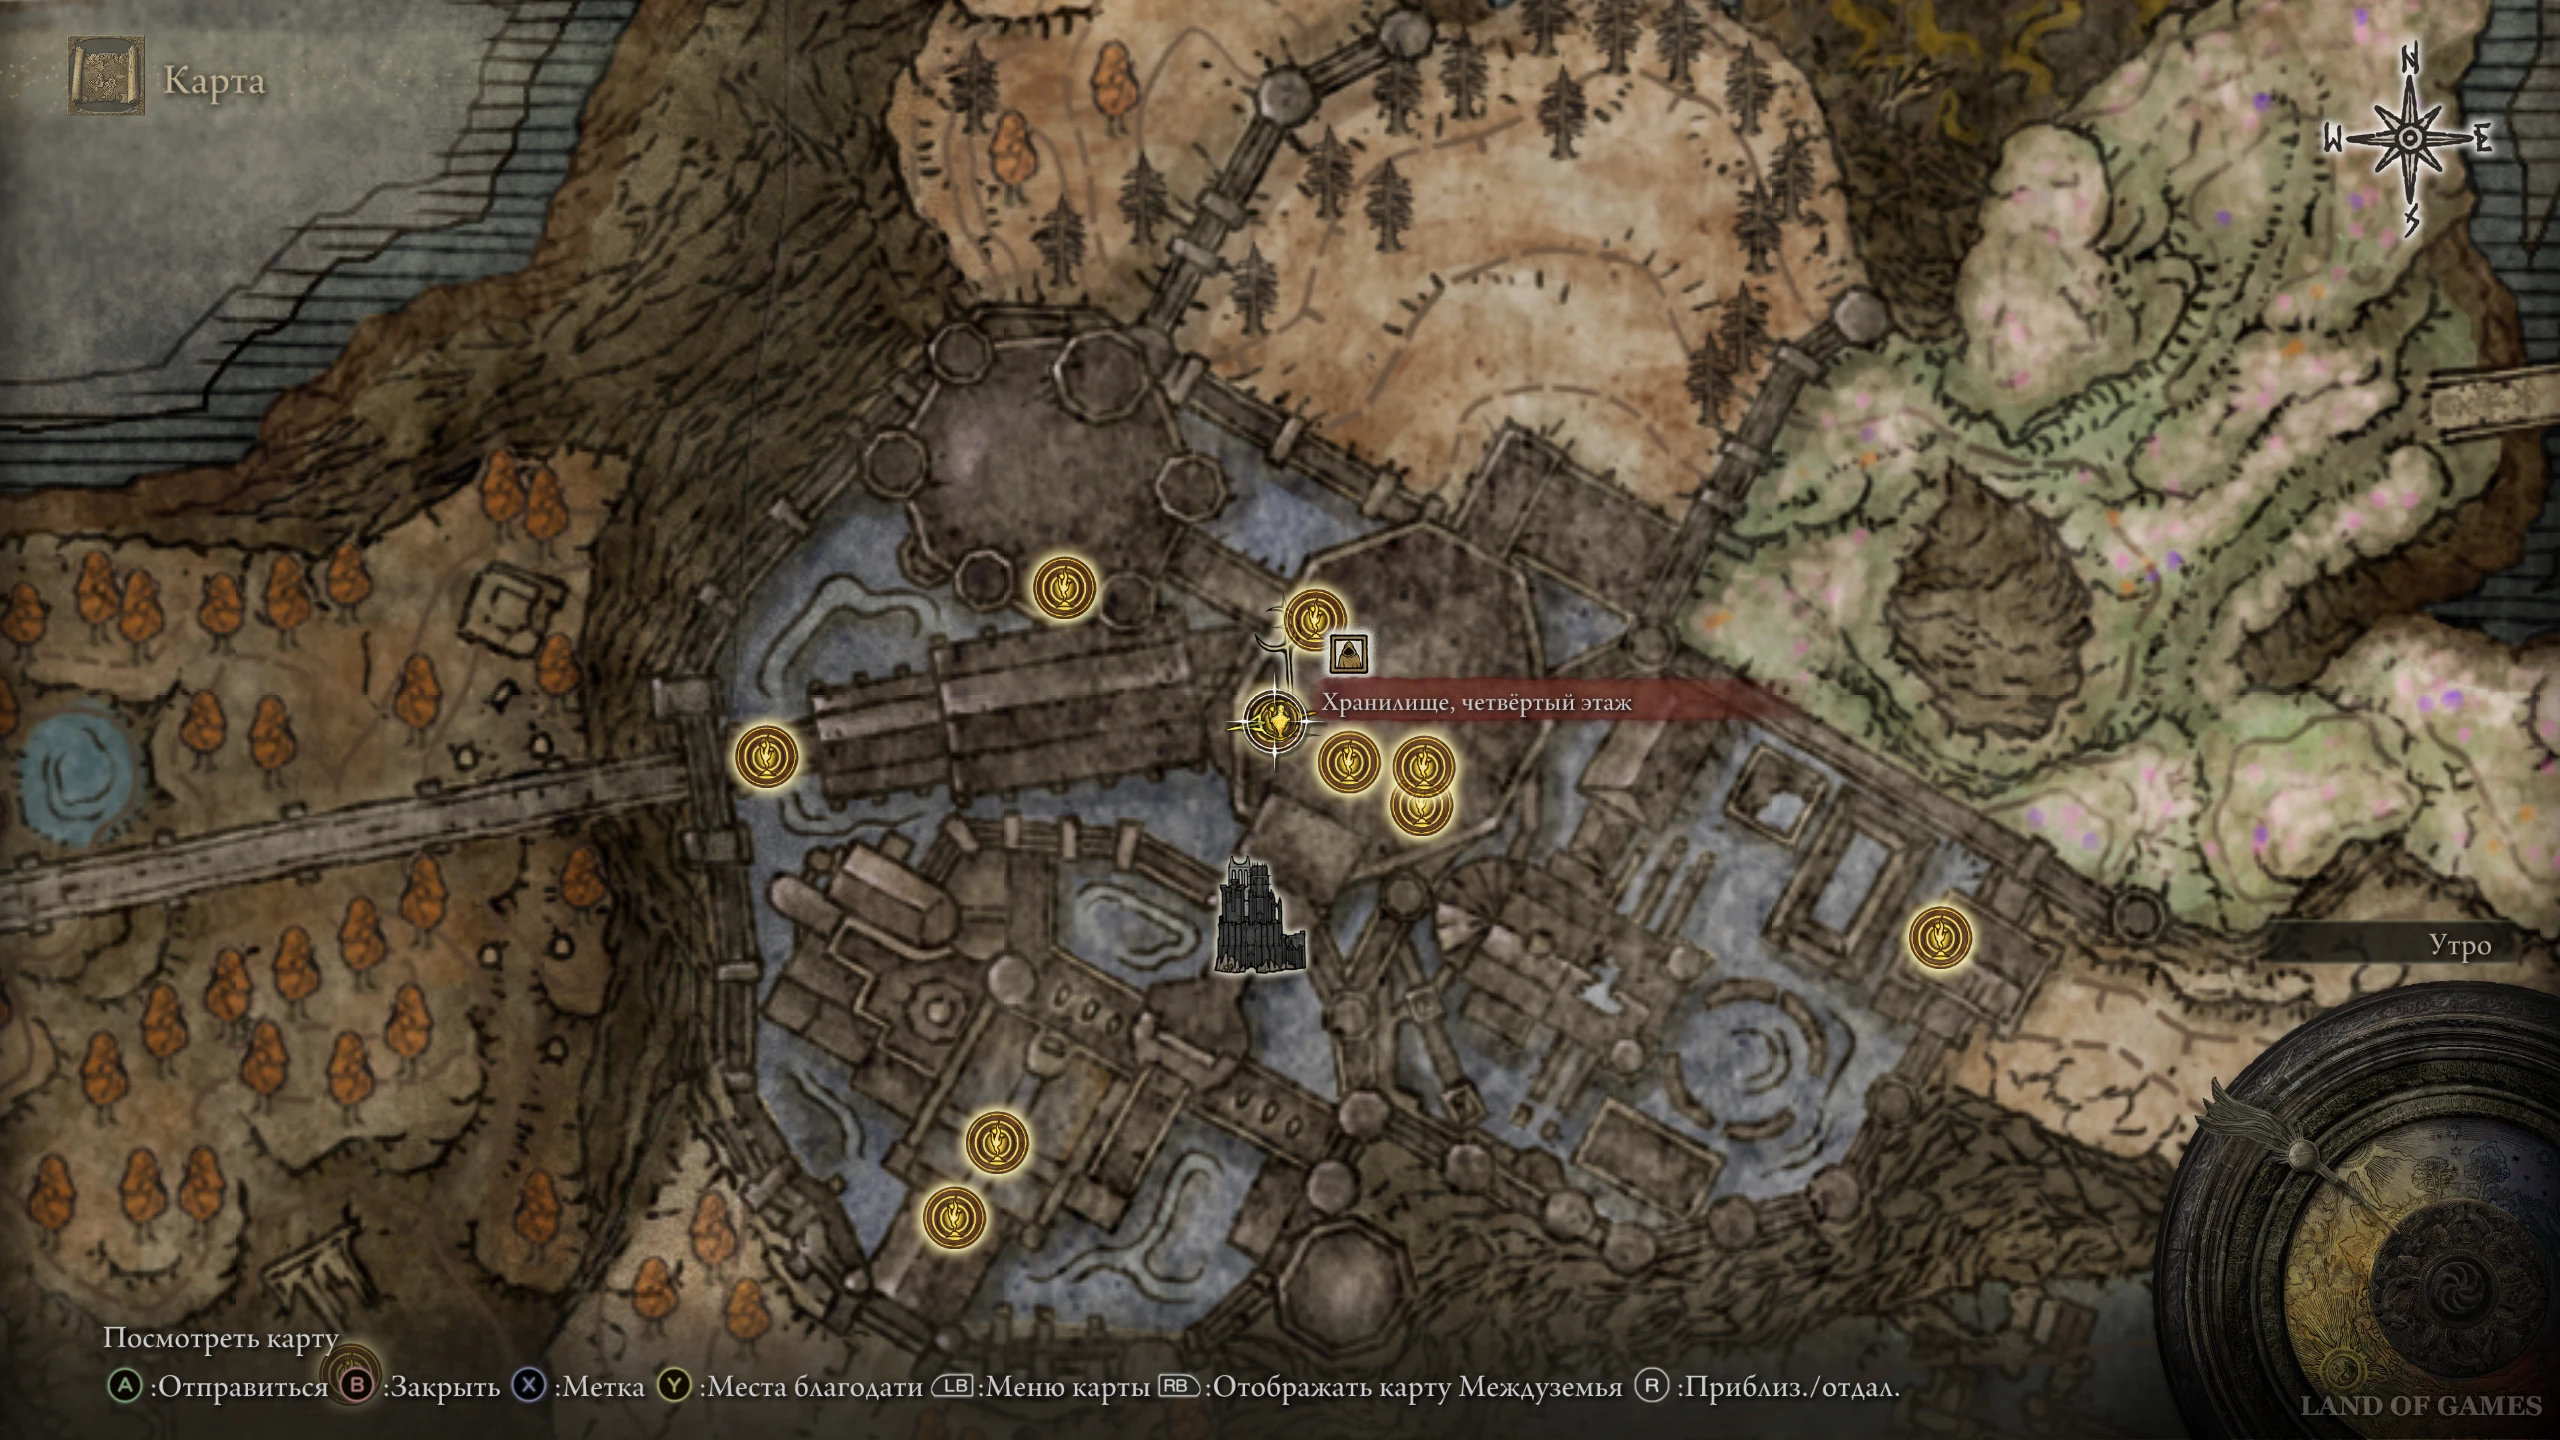
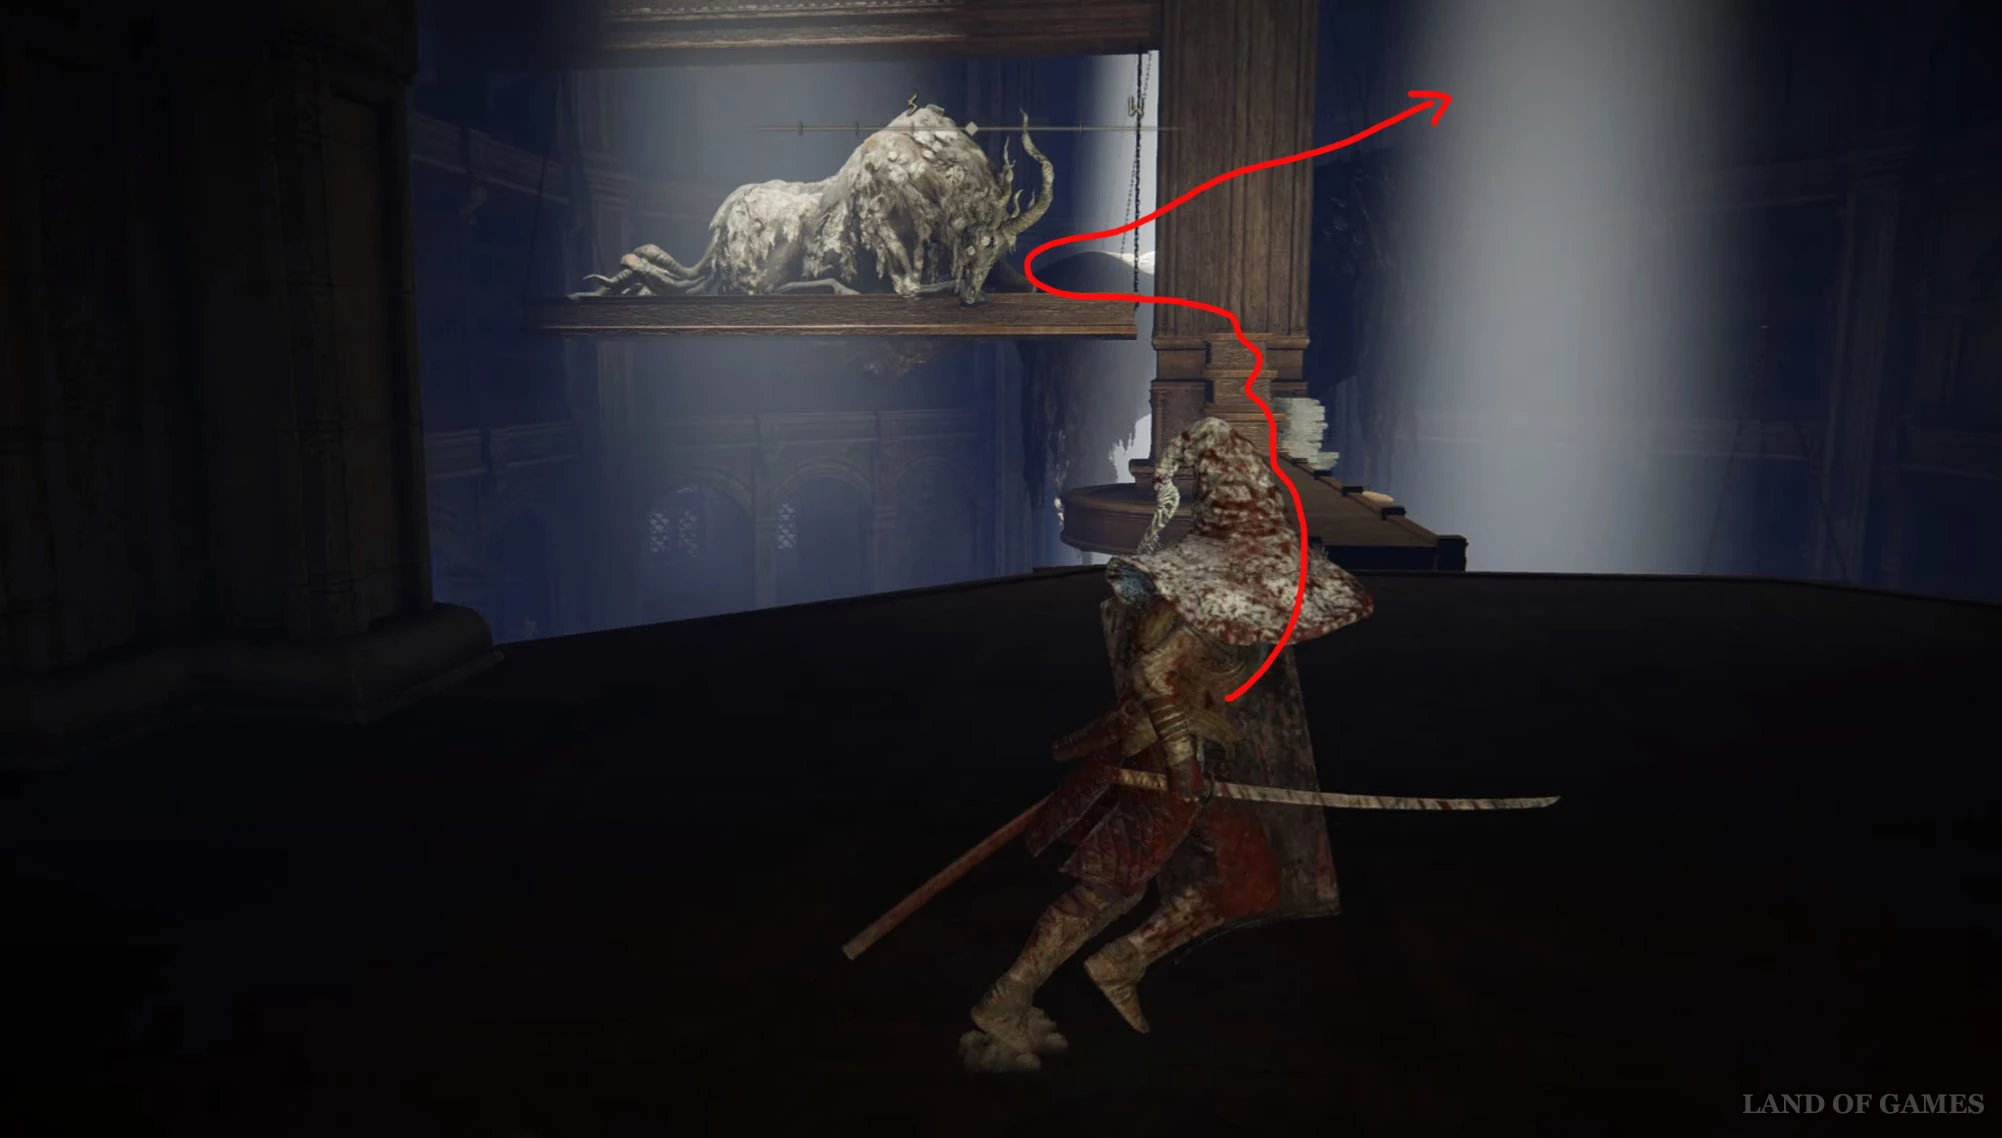
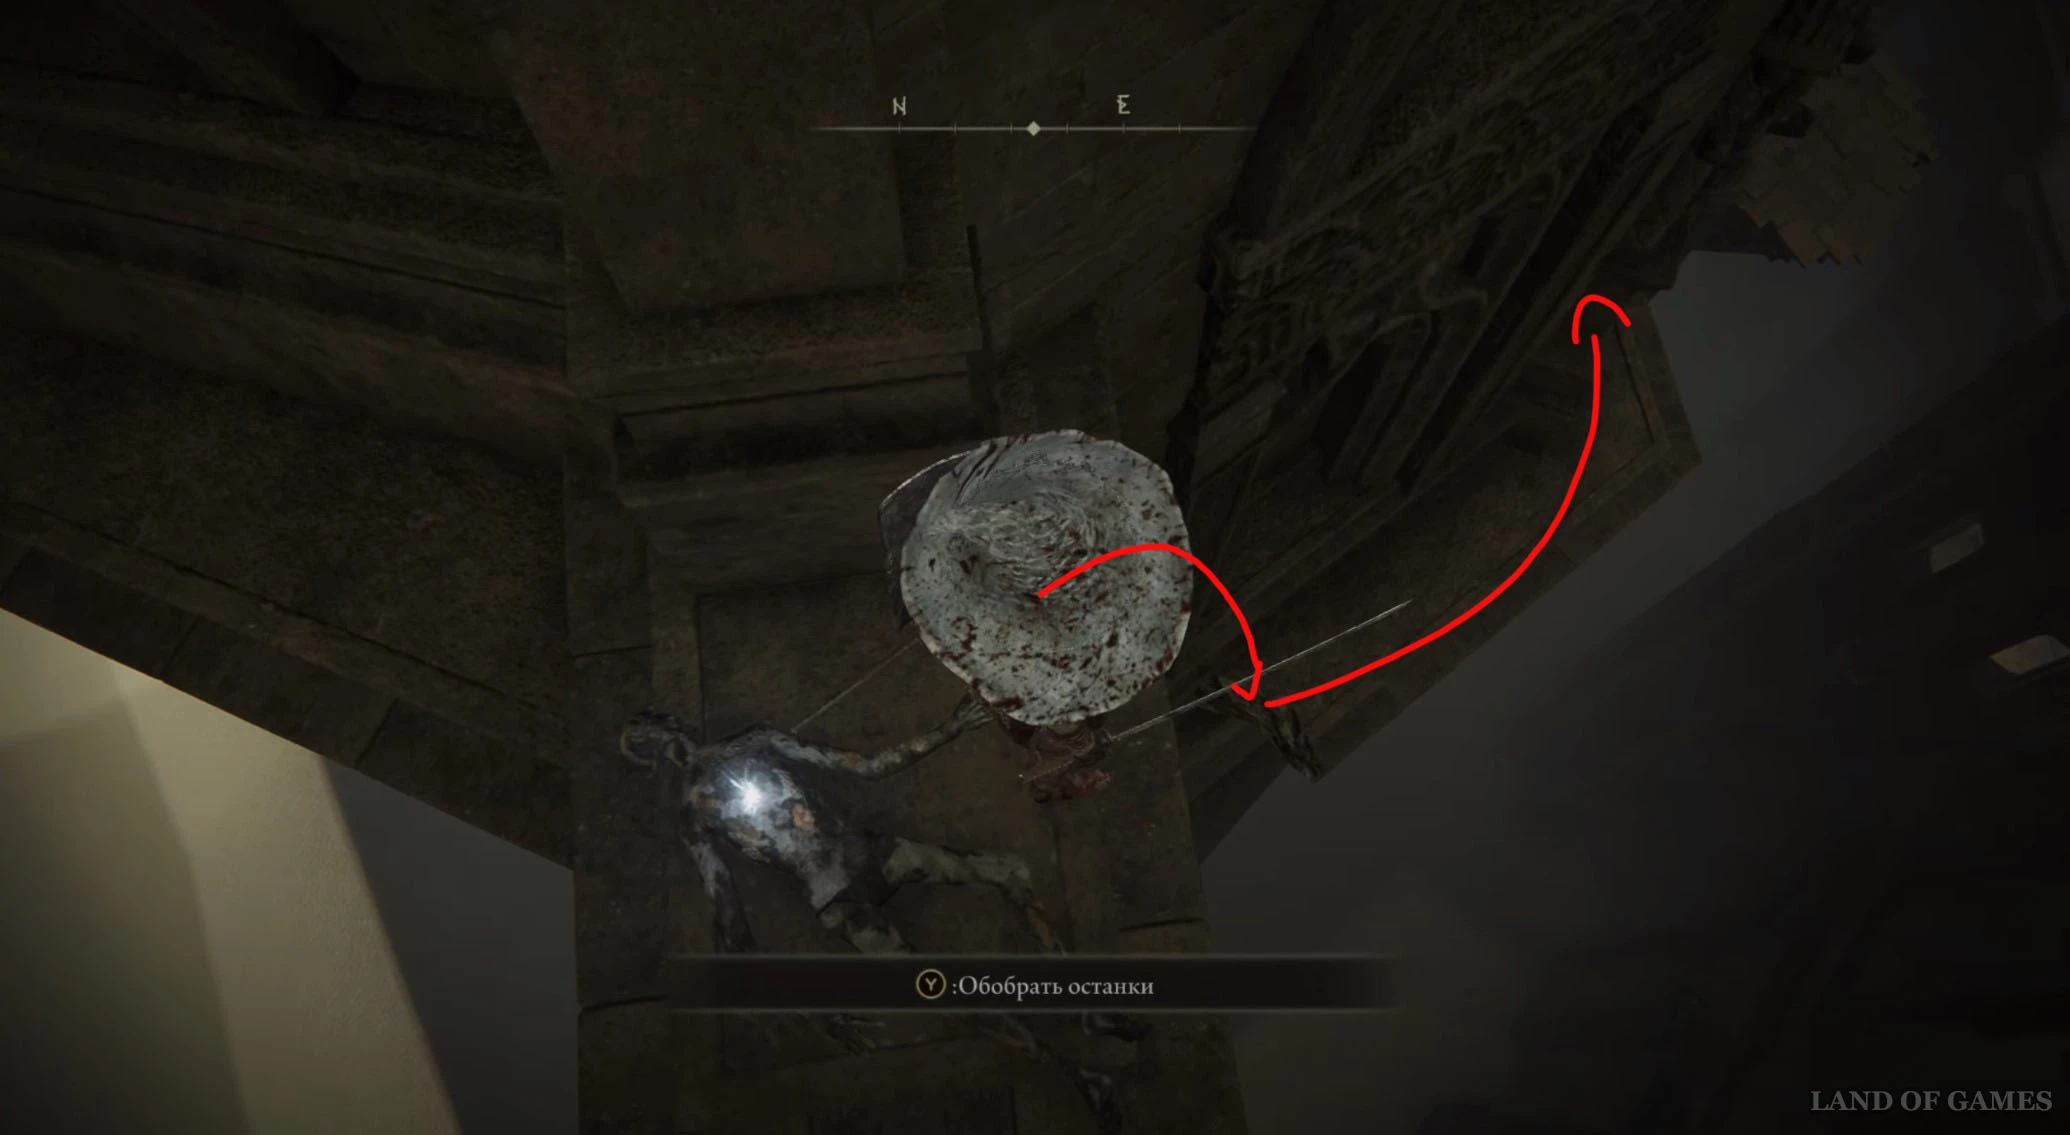
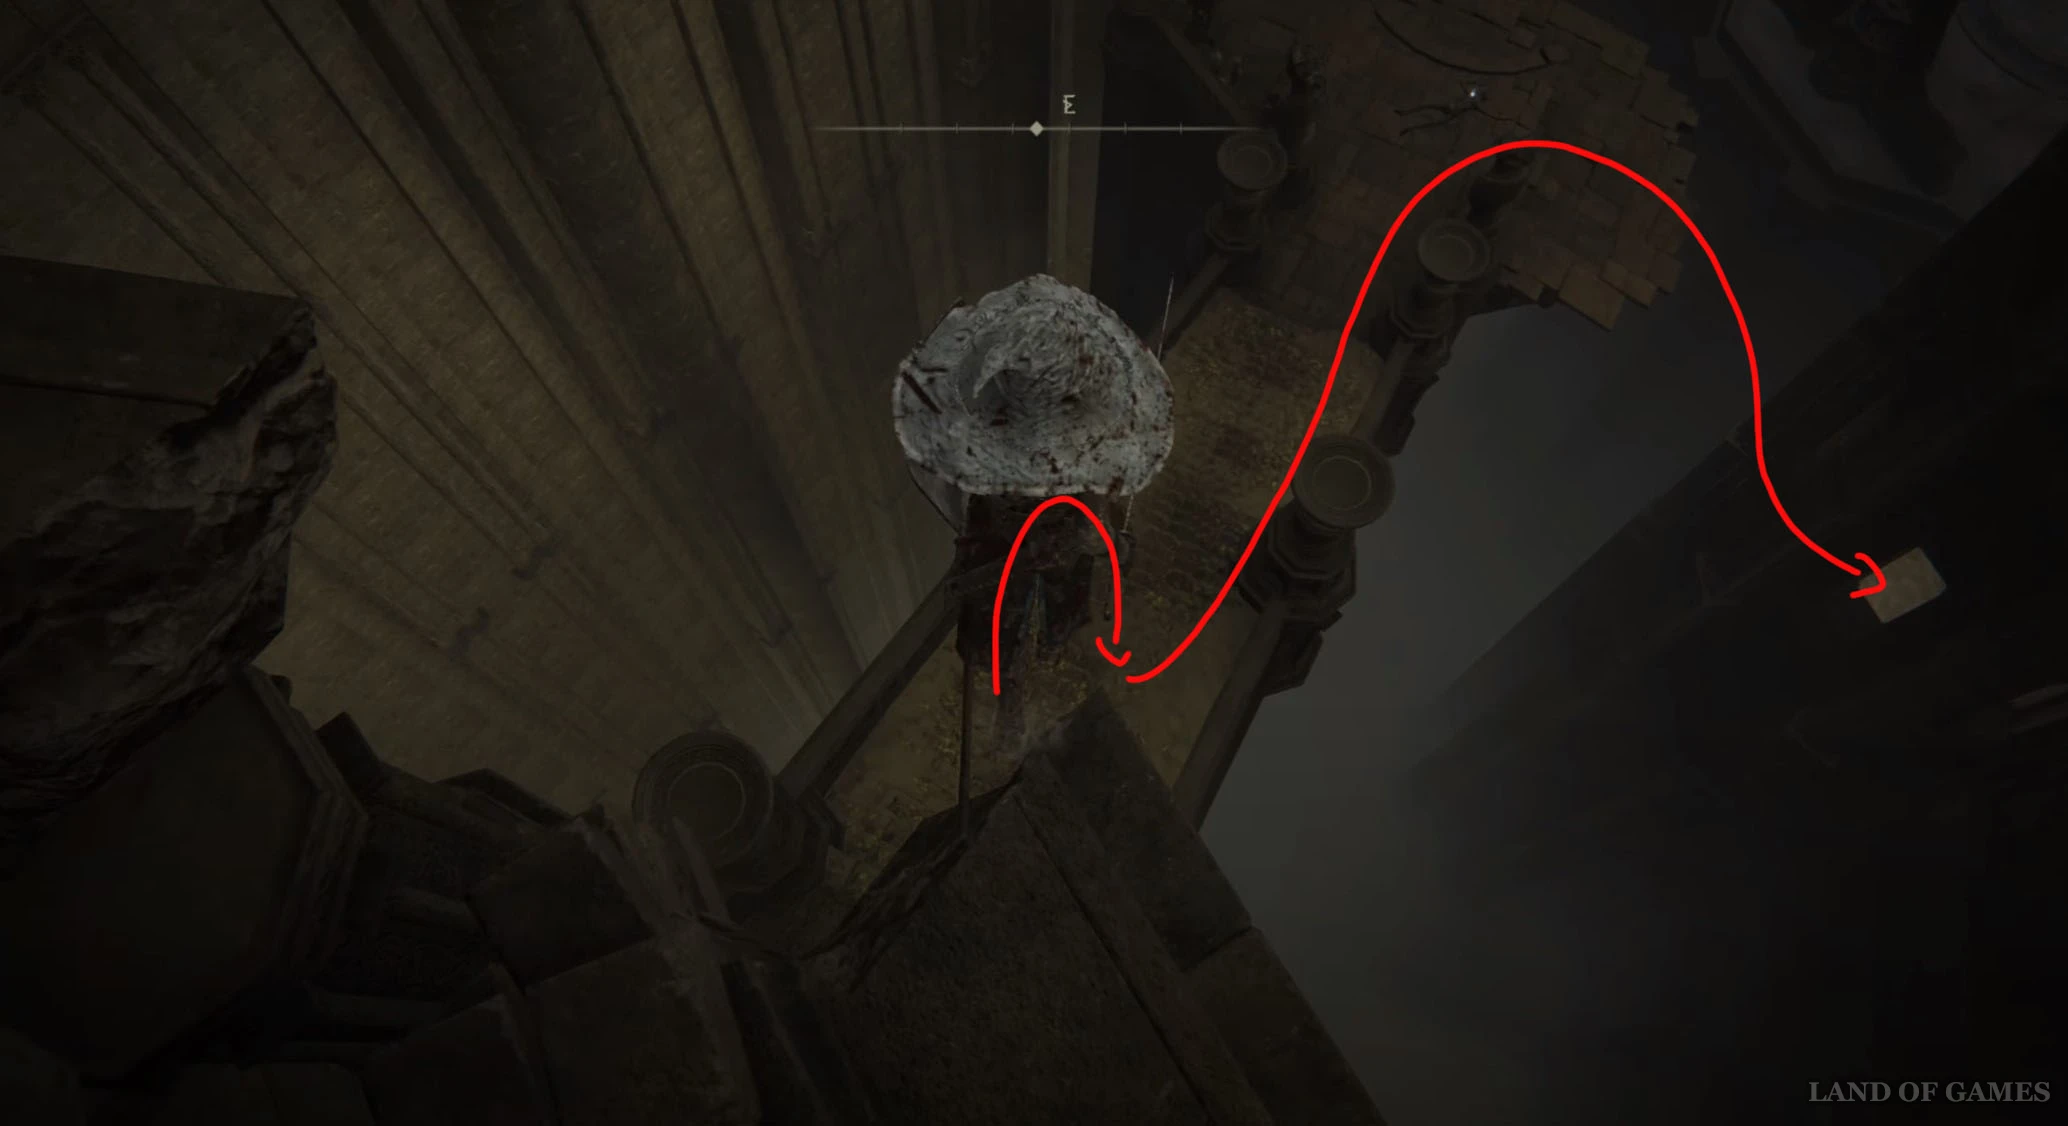
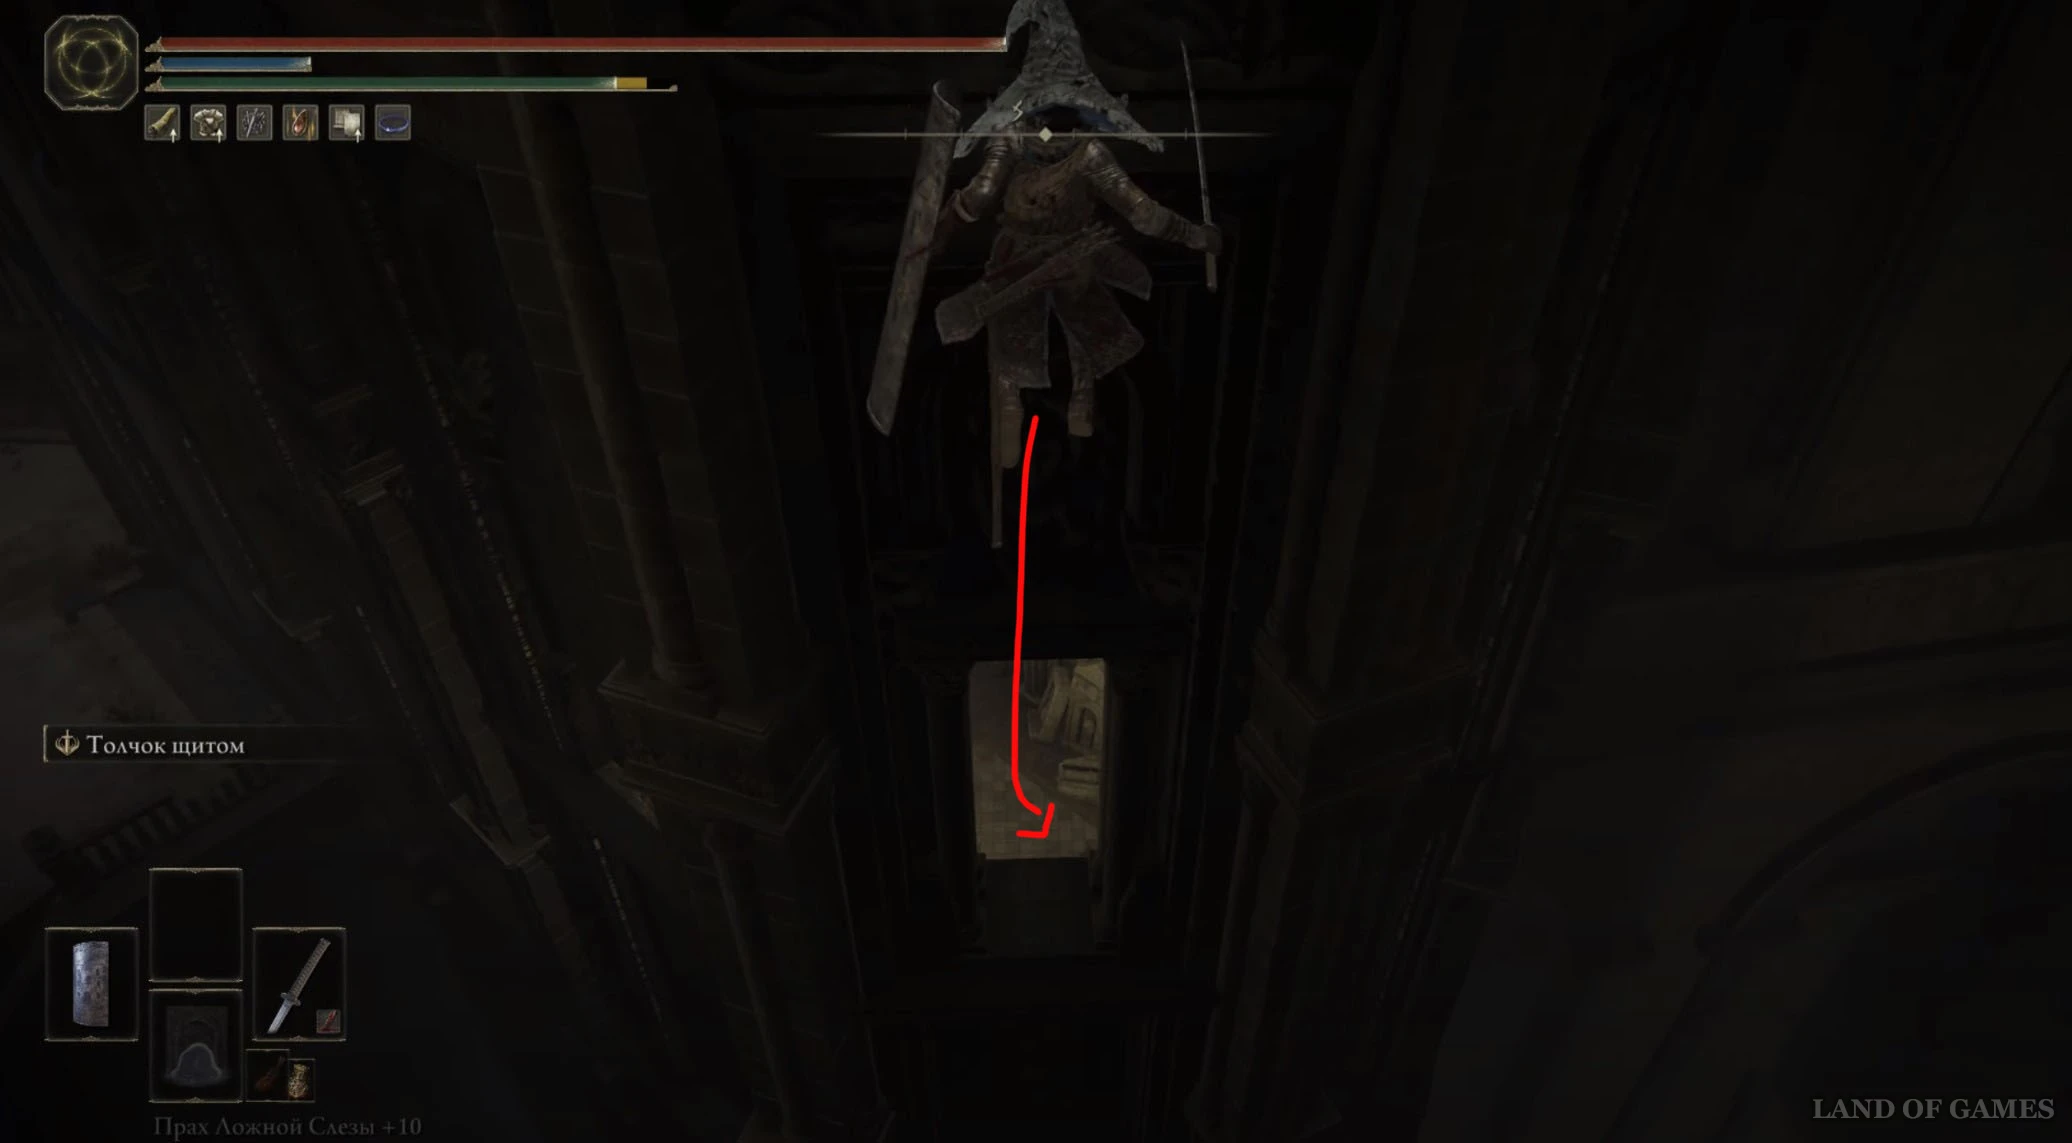
Бегите вперед и резко развернитесь вправо после второй полки. Поднимитесь по деревянной лестнице влево и воспользуйтесь второй лесенкой справа, чтобы подняться еще выше. Потом сверните вправо и запрыгните на висячую у потолка статую. Доберитесь до ее головы, а с нее спрыгните на площадку с местом благодати «Хранилище, четвертый этаж».

Осколок древа упадка 42
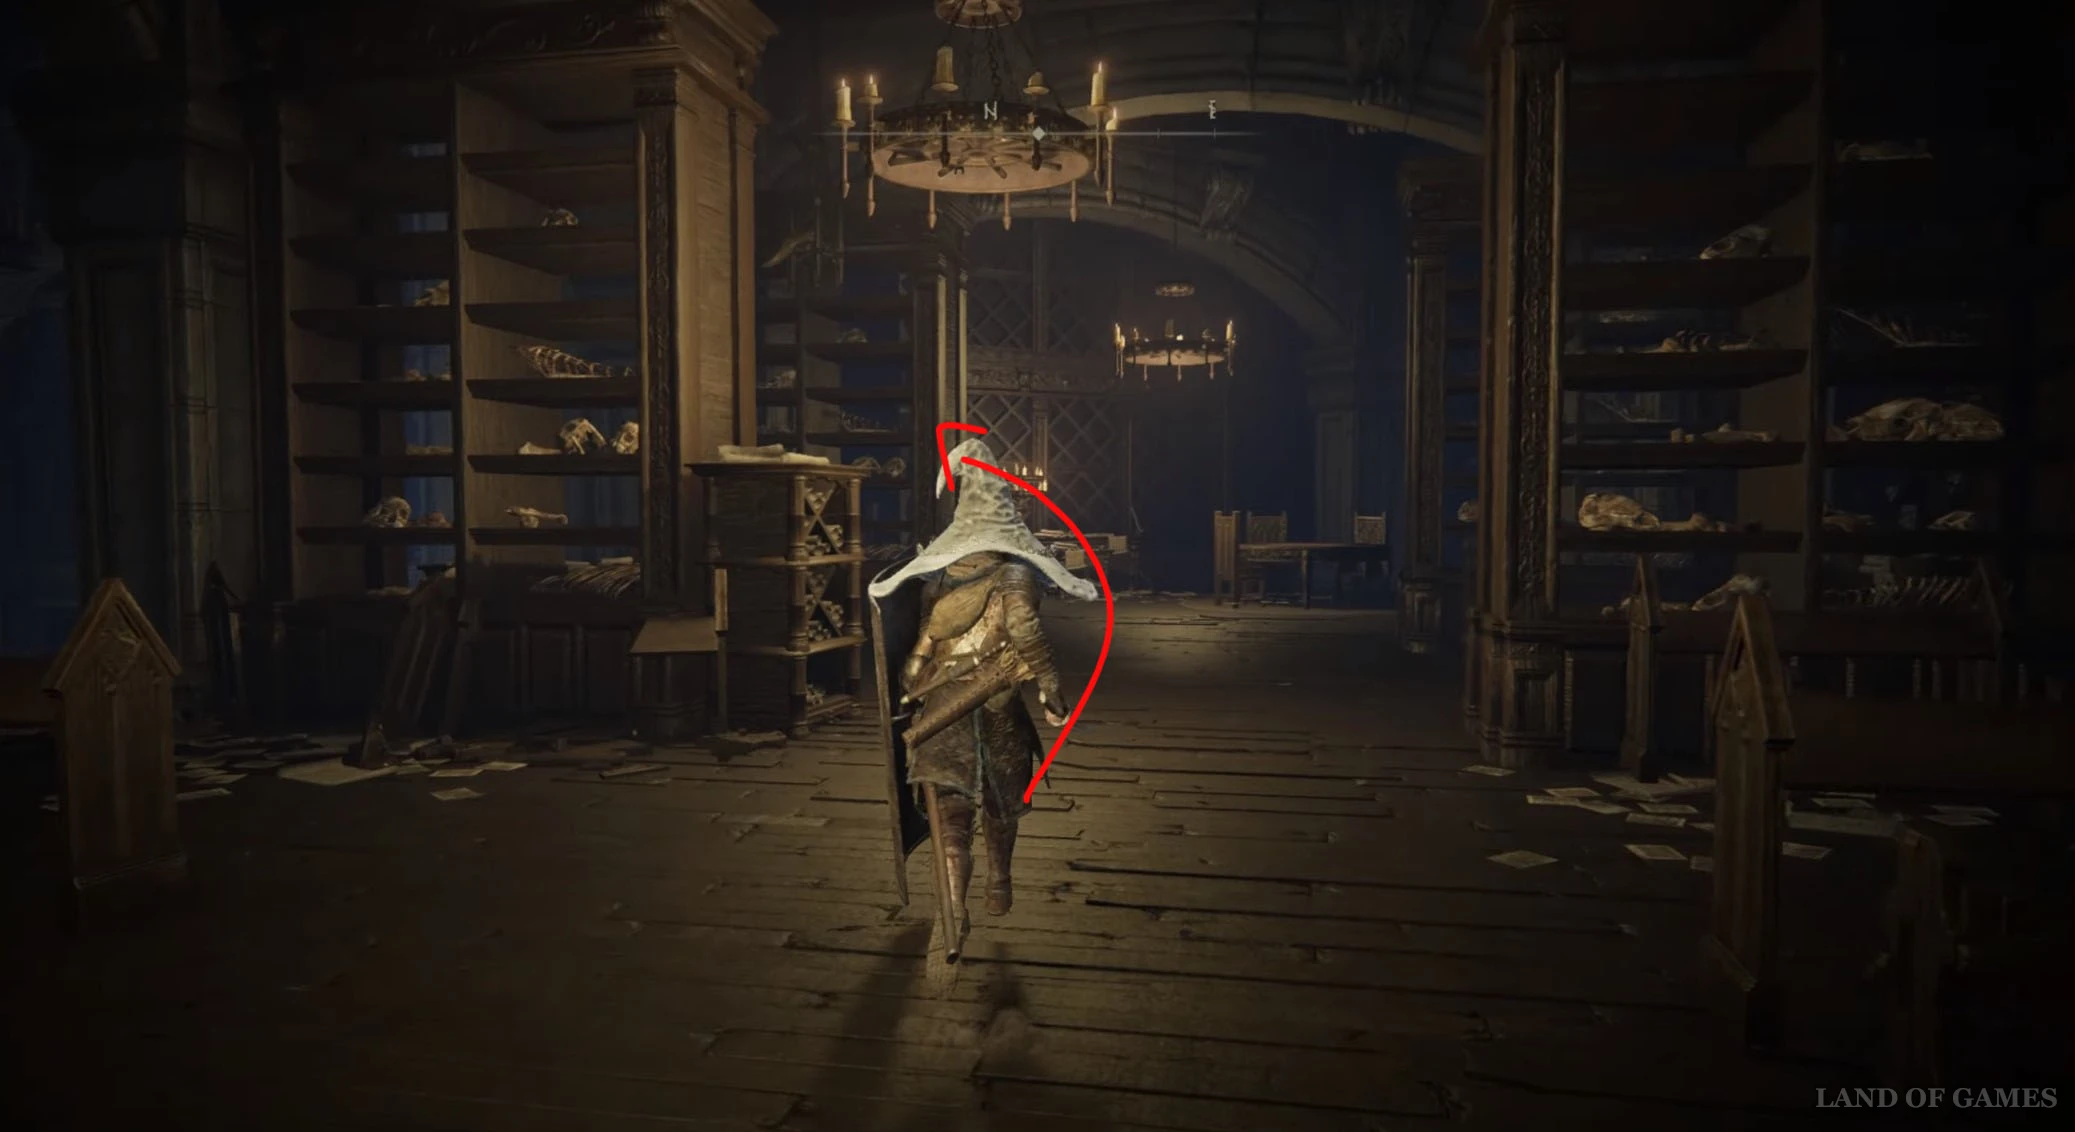
Вернитесь в «Хранилище, четвертый этаж». Затем начните двигаться в западном направлении, чтобы выйти на балкон, а потом сверните влево и поднимитесь по лестнице вверх. Двигайтесь дальше на юго-восток, пройдя мимо огней и поднявшись по еще одной лесенке.
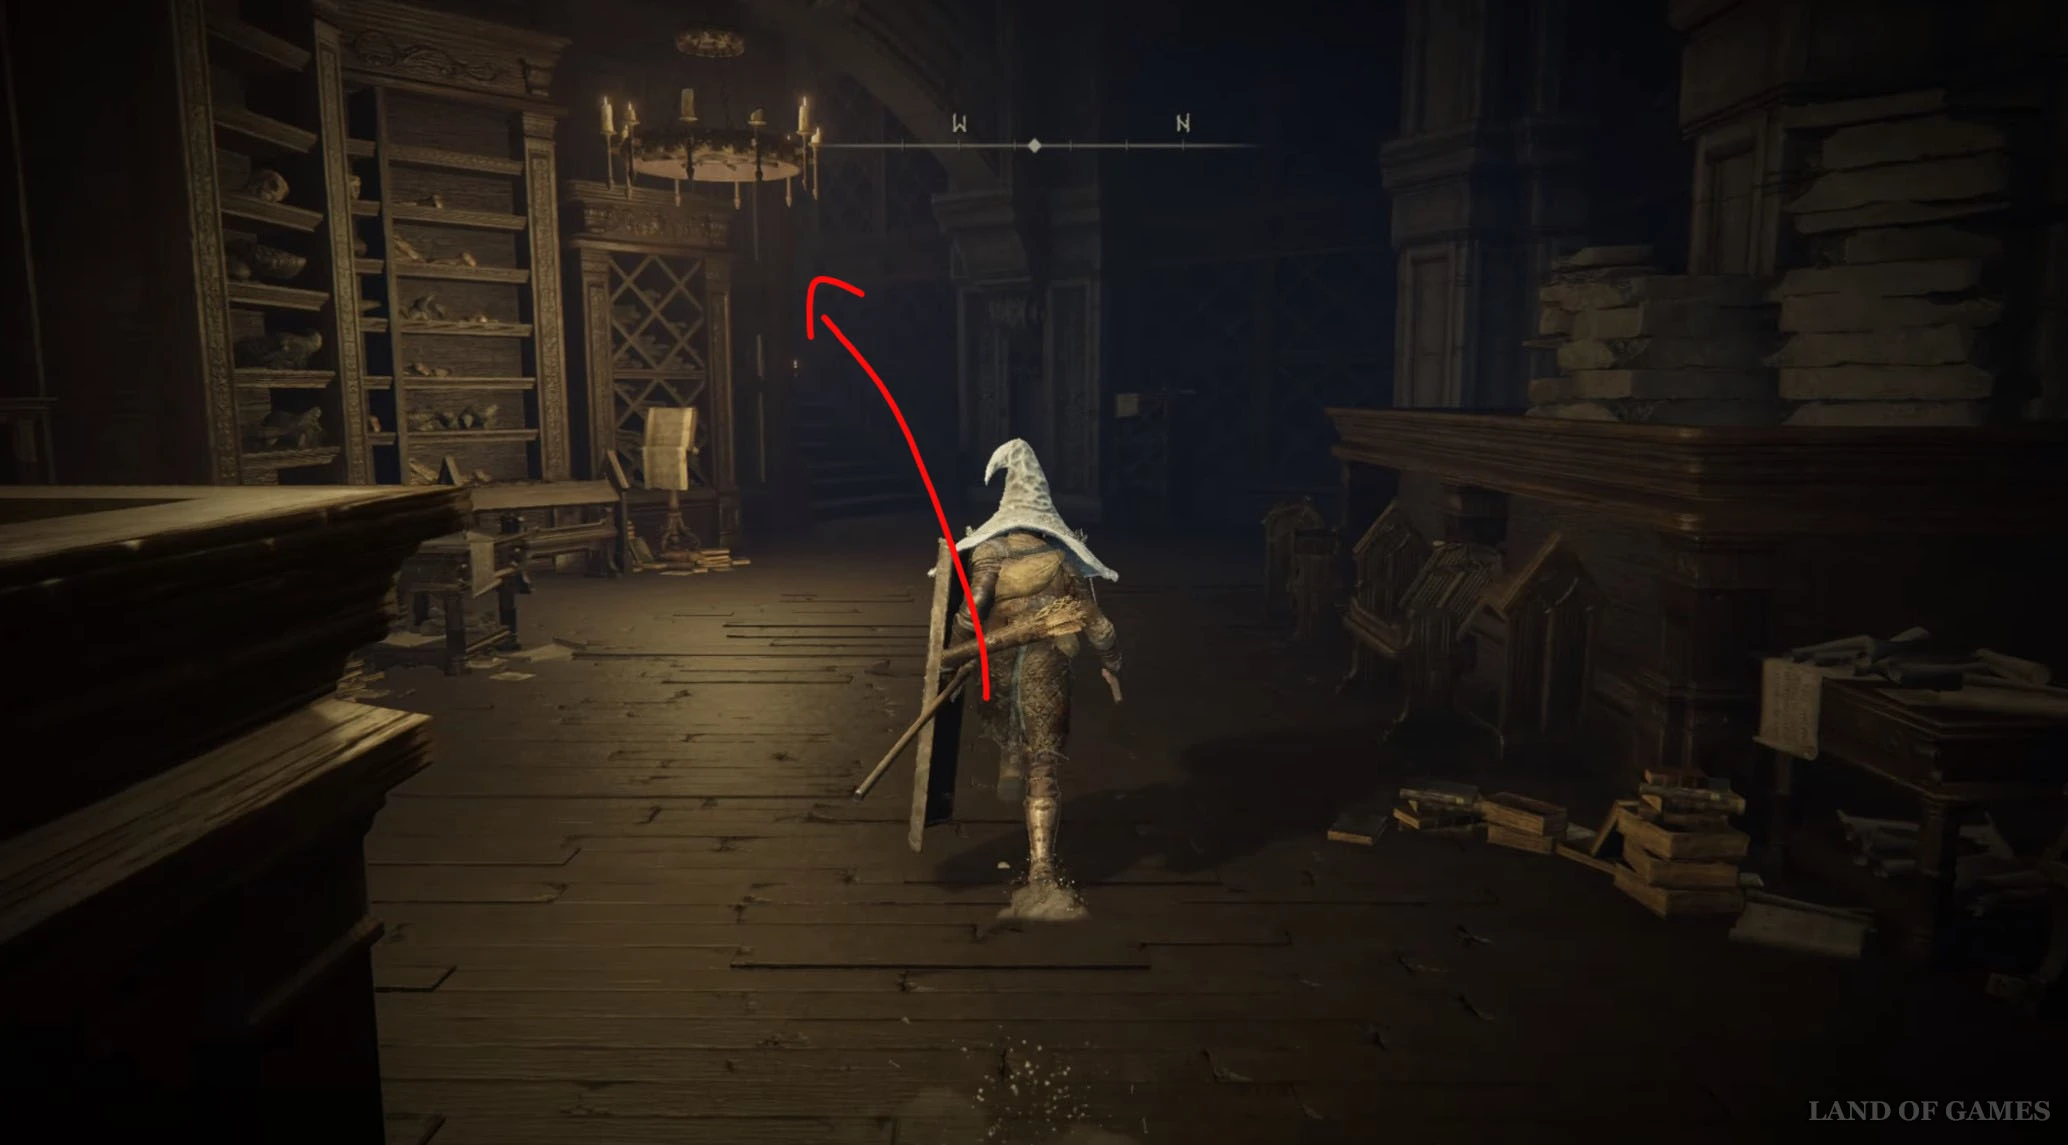
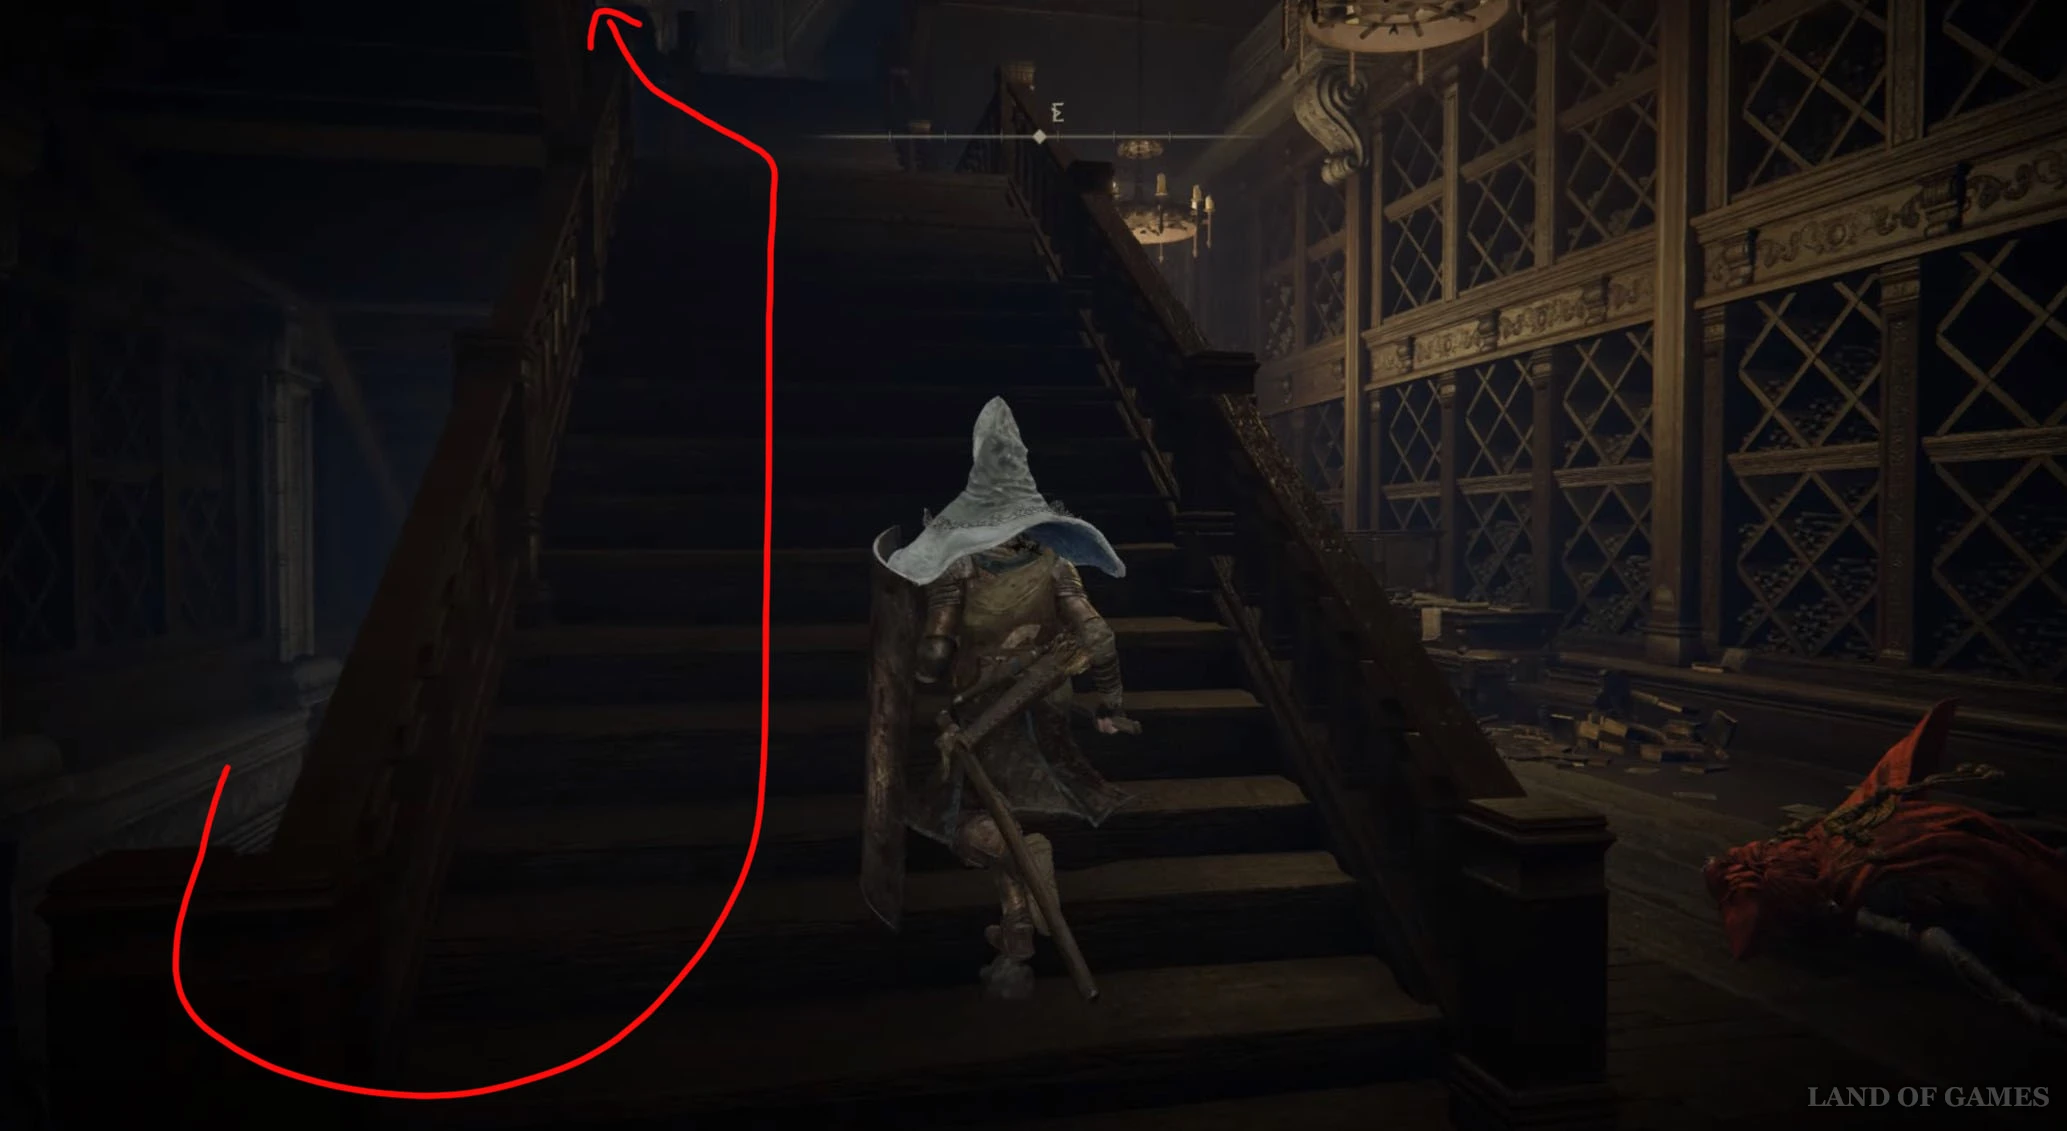
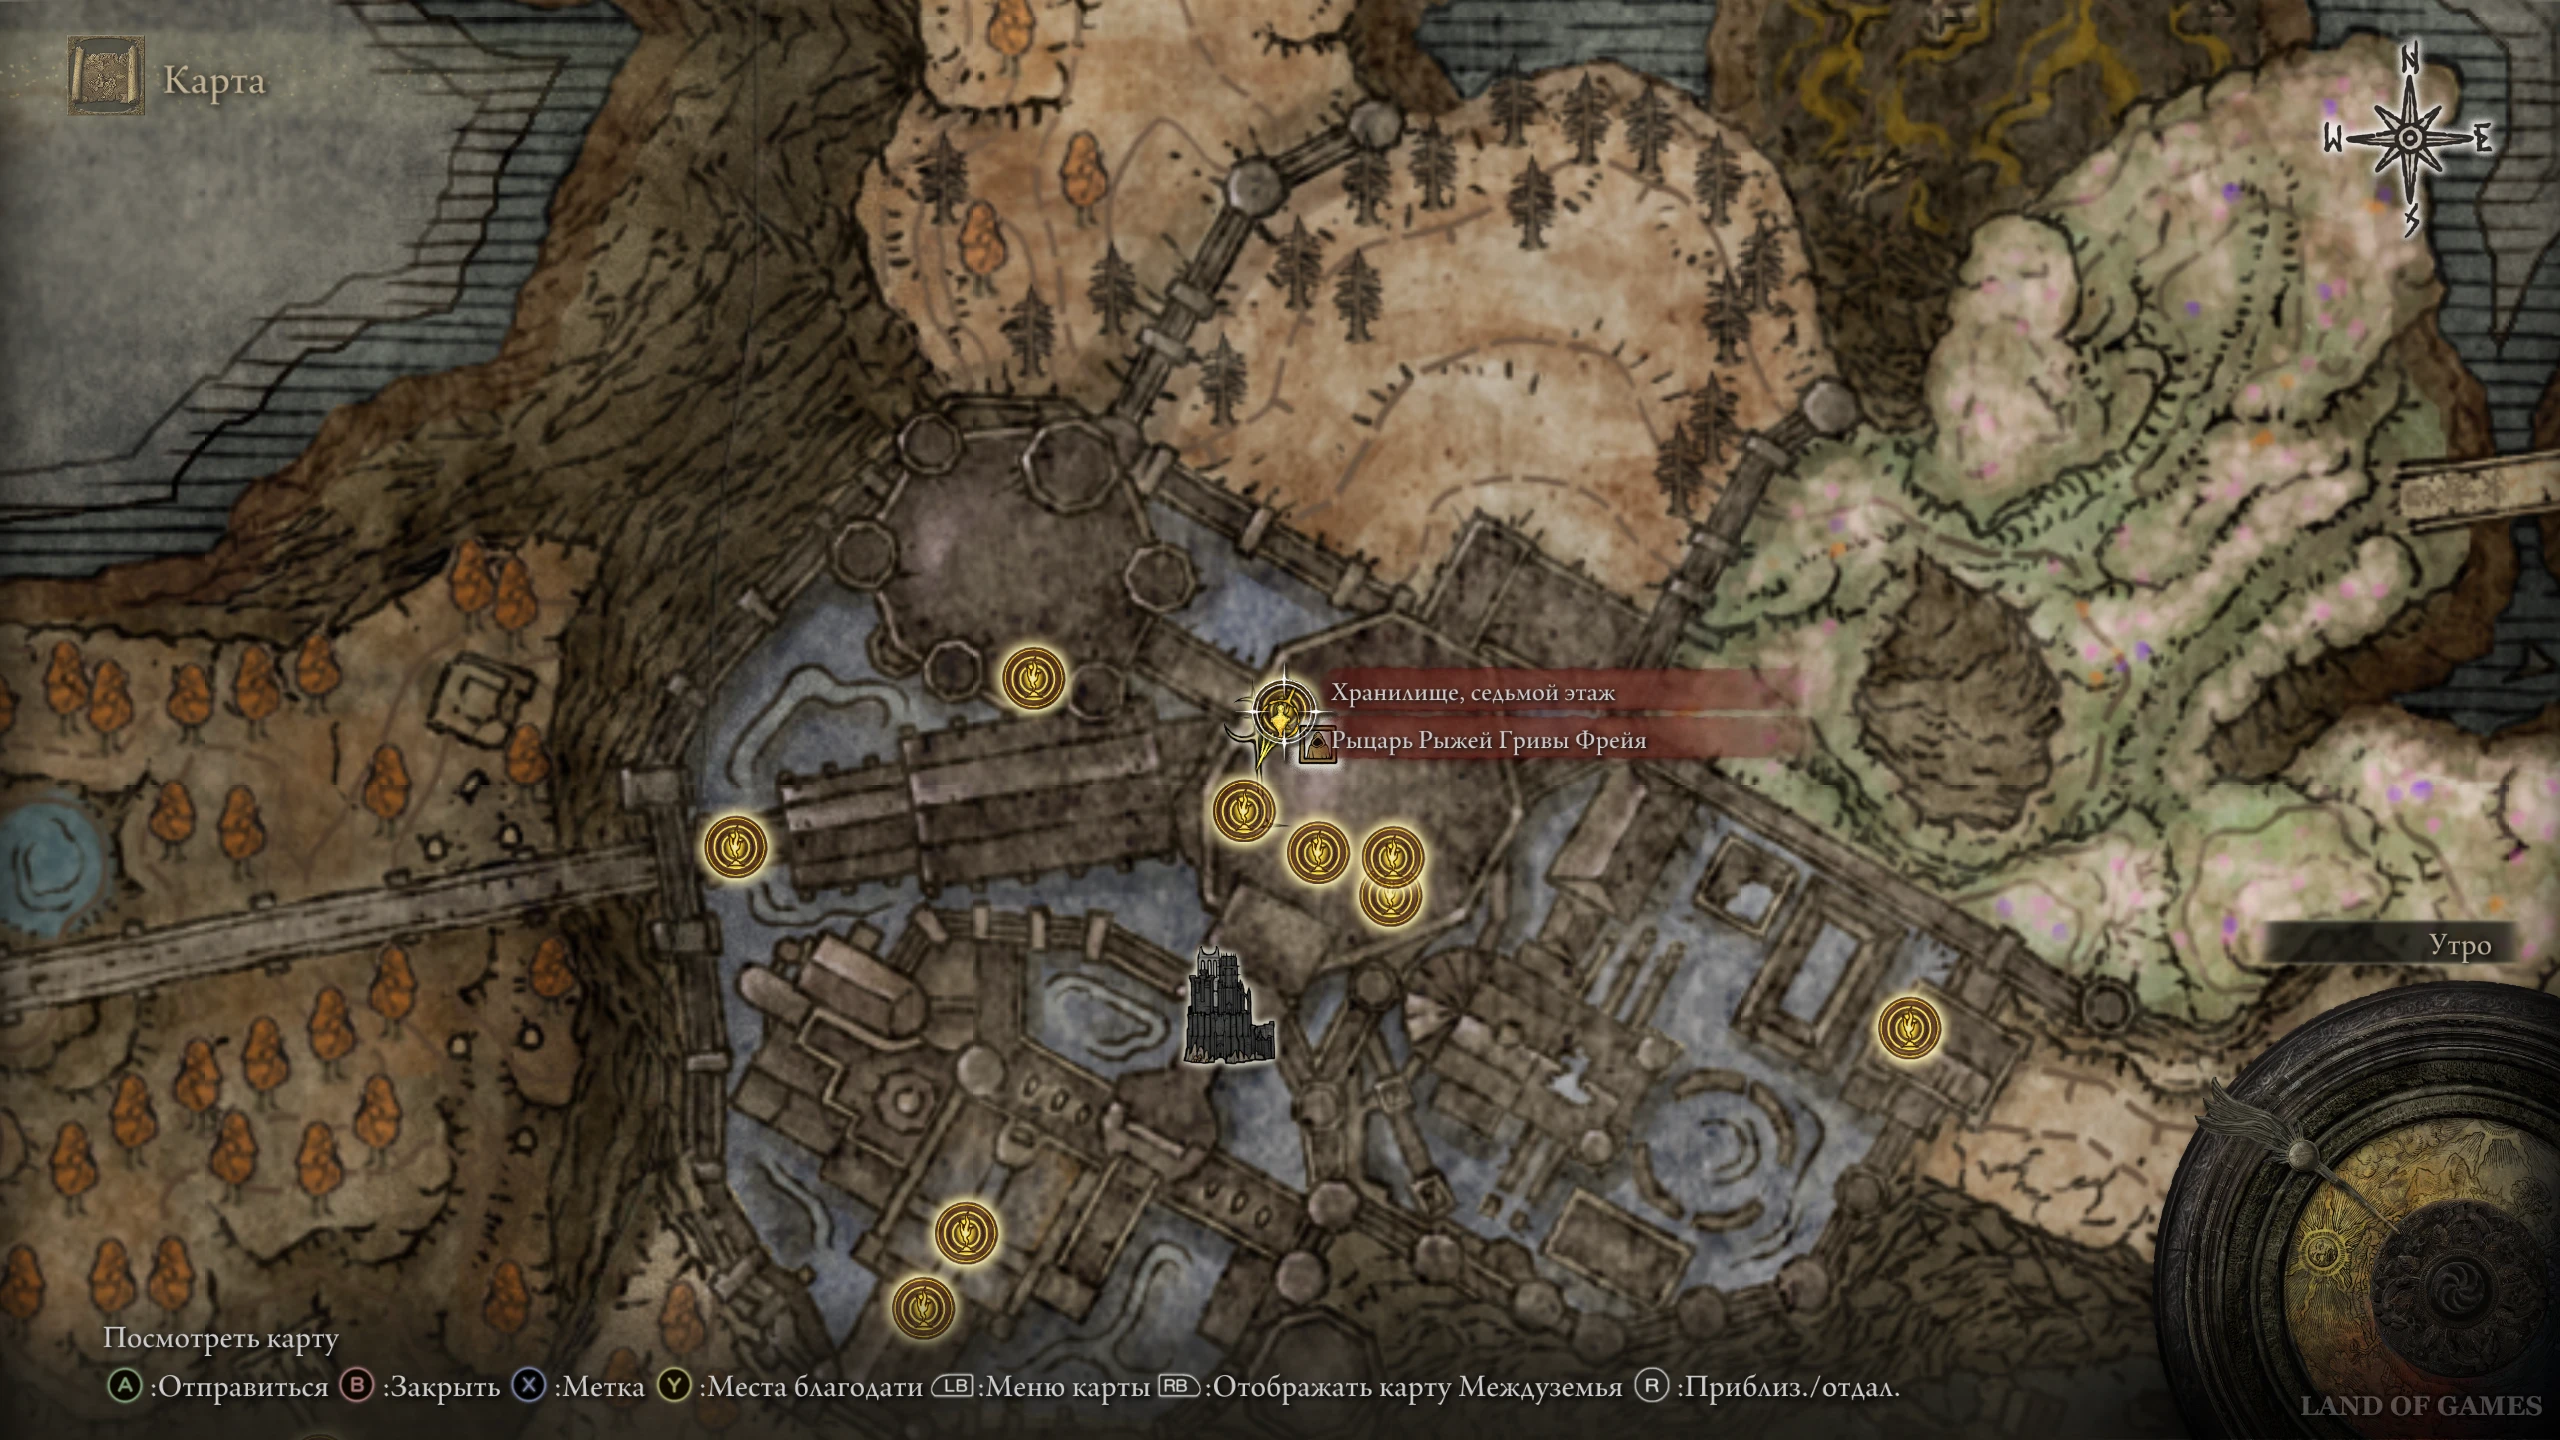
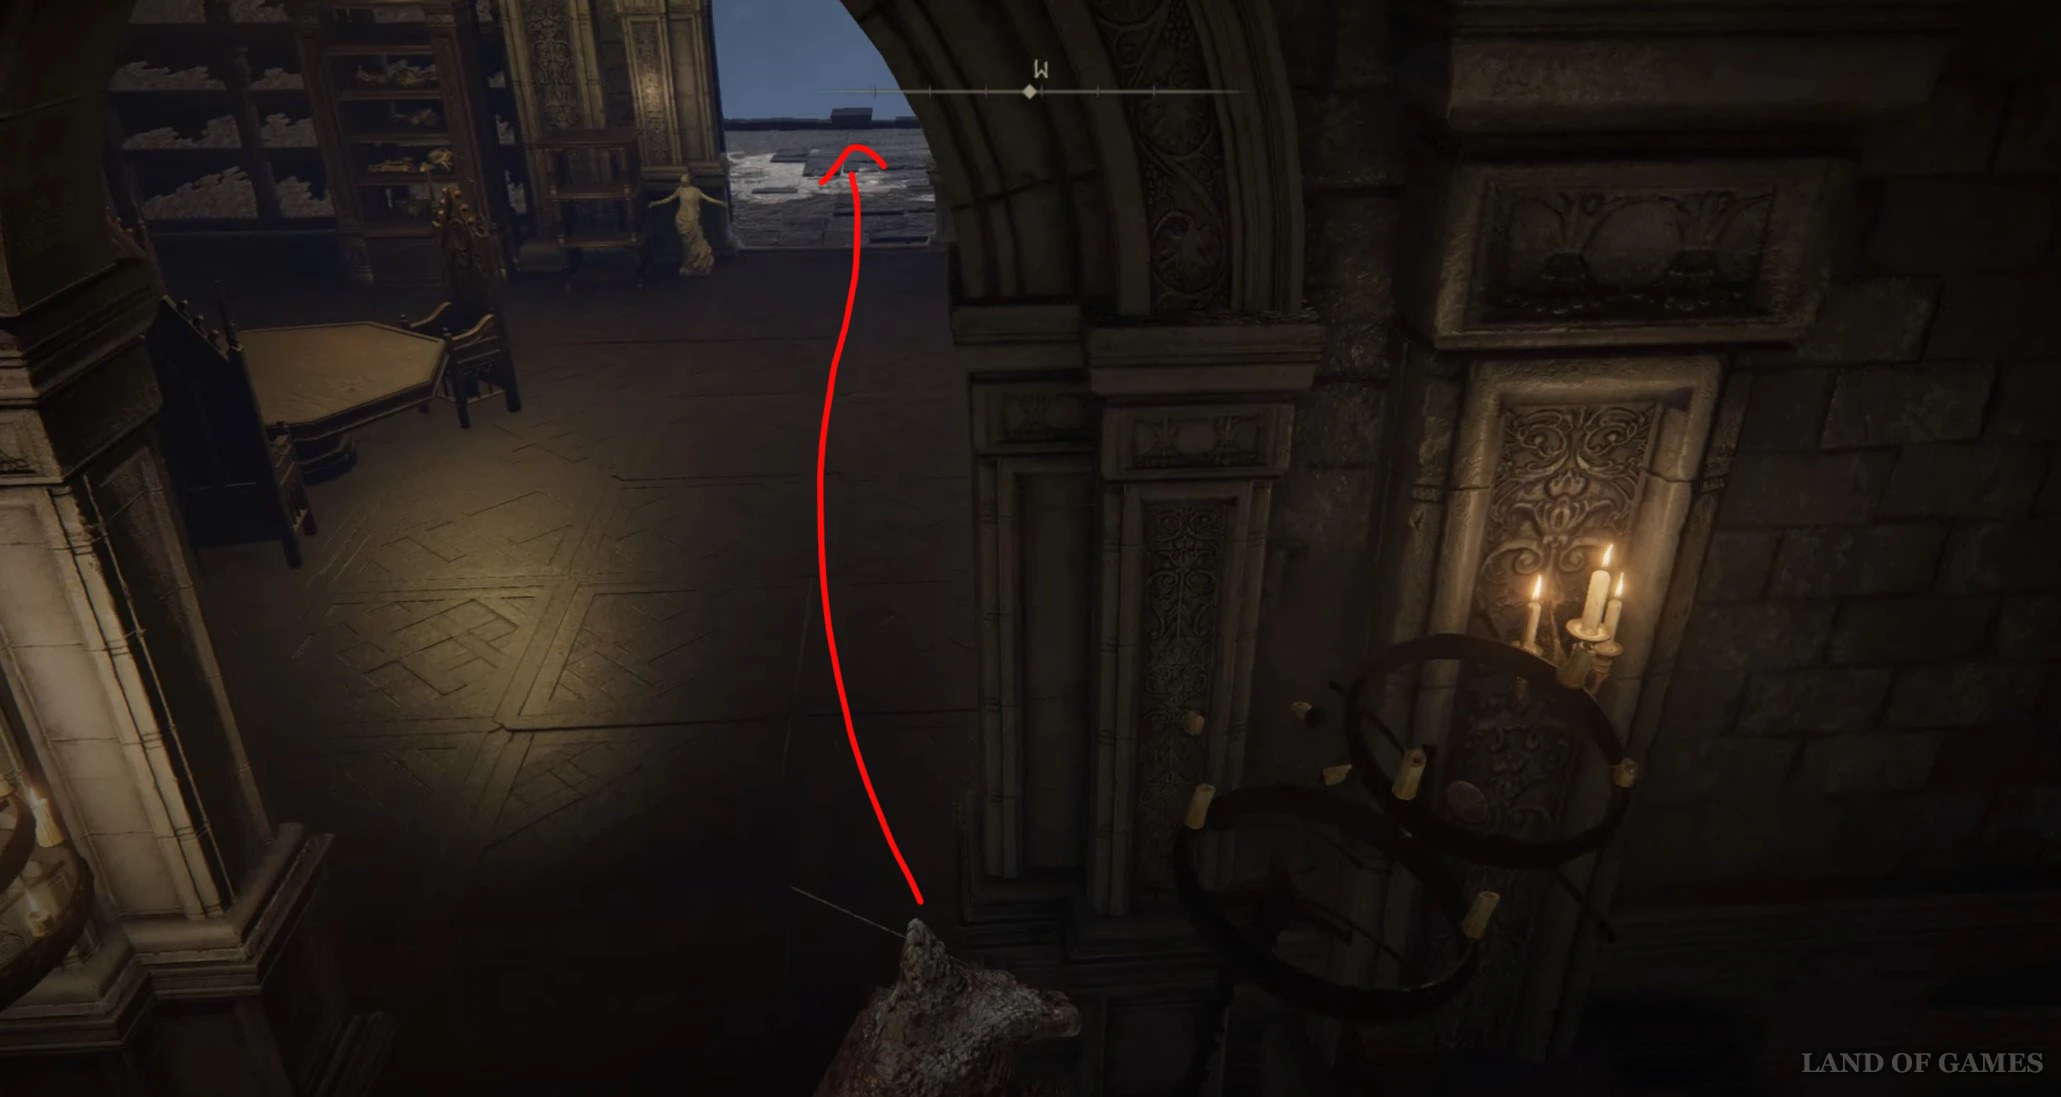
Идите по каменной площадке вперед, никуда не сворачивая, пока не увидите проход в здание с левой стороны. Оказавшись внутри, поверните вправо и начните двигаться в северном направлении, обходя столы и стулья. Затем поднимитесь по лестницам еще выше, пока не дойдете до места благодати «Хранилище, седьмой этаж», возле которого вы, кстати, обнаружите Фрейю.
Активировав костер, развернитесь и спуститесь по лестнице вниз. Войдите в проход на юго-востоке и продолжайте бежать в указанном направлении, пока не упретесь в стену. Здесь взаимодействуйте с рычагом, чтобы повернуть балки в основном зале.
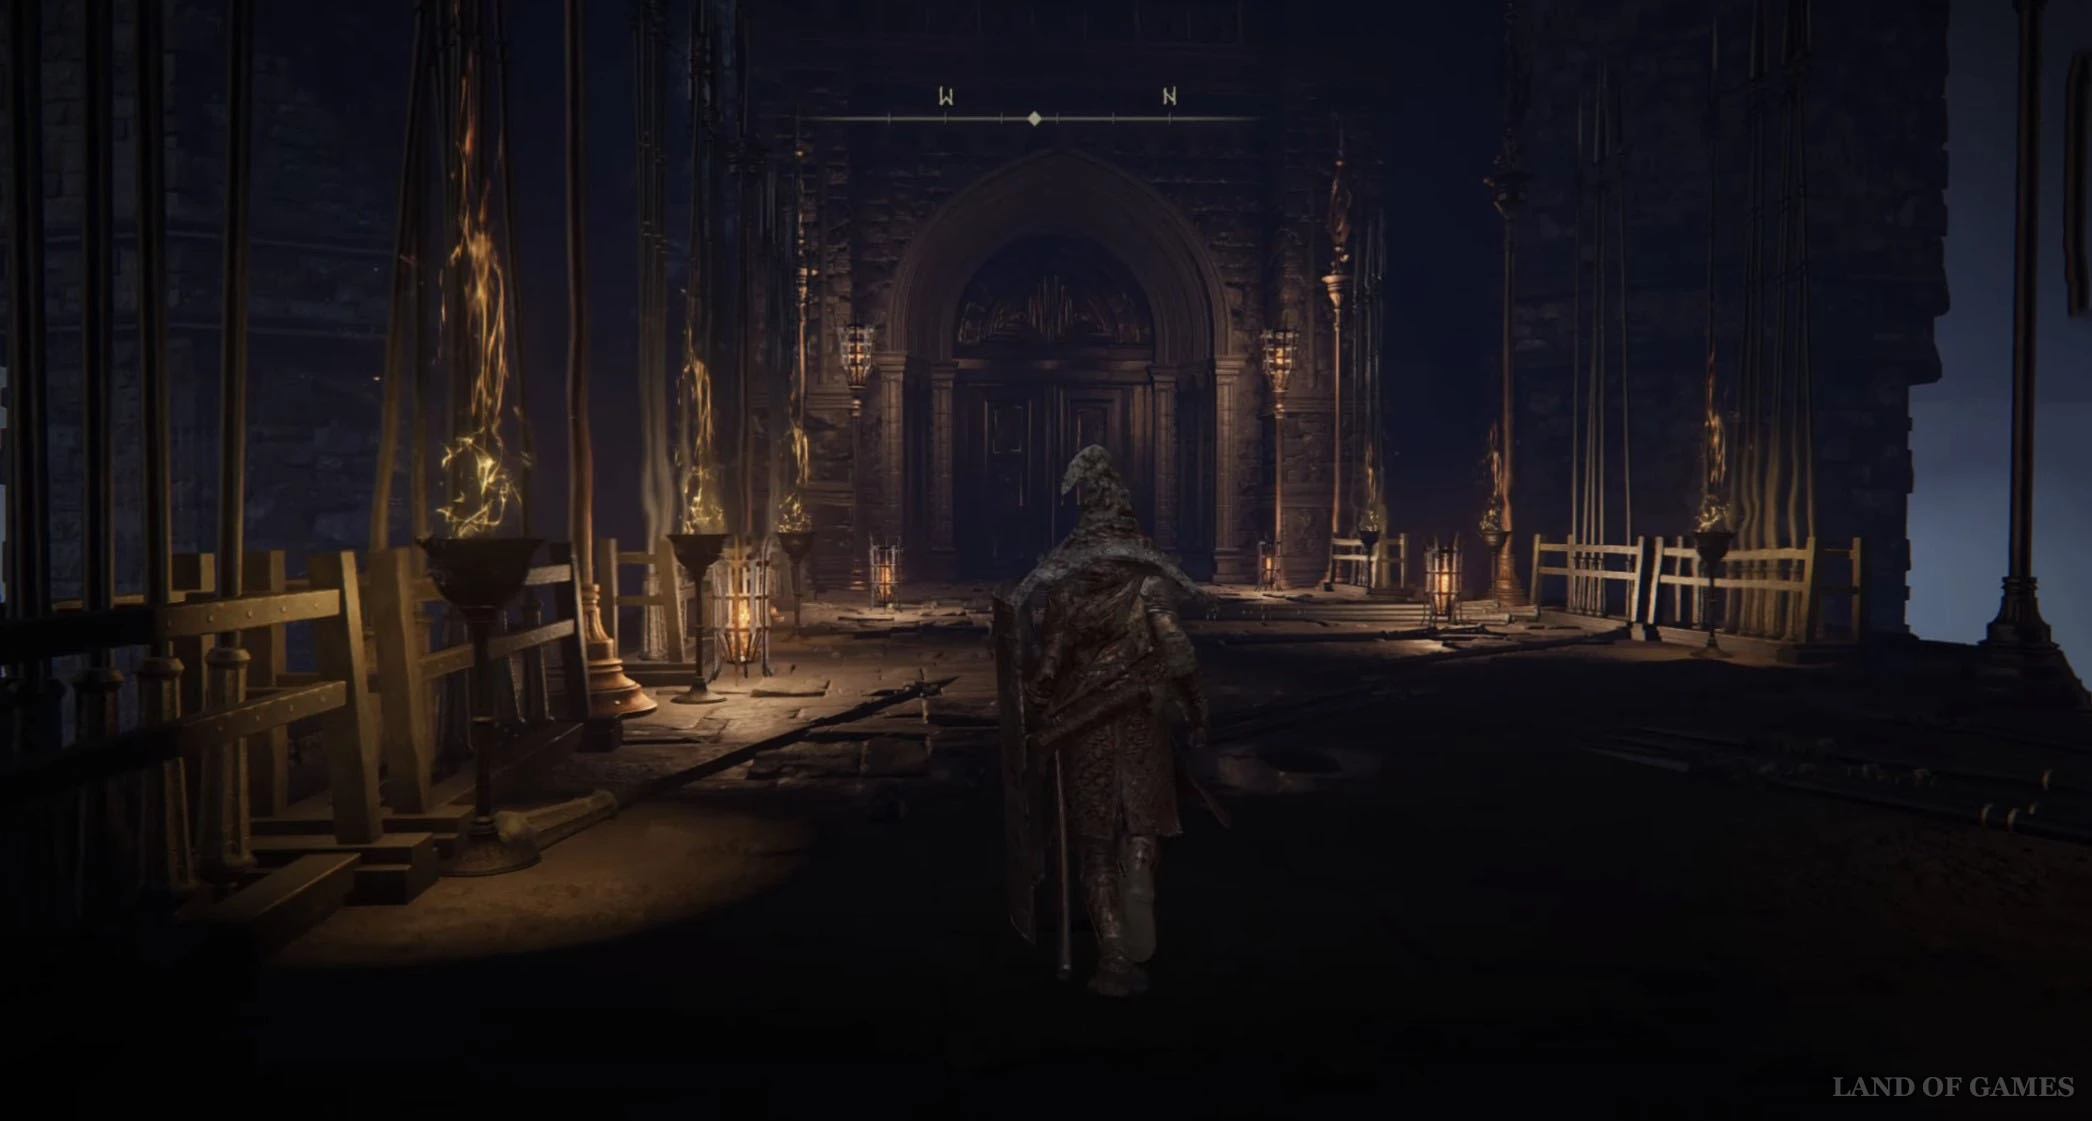
Дождитесь, пока балка не подъедет к балкончику, а потом спрыгните с него на нее. Заберитесь наверх по выступам и перейдите на балку слева с трупом животного. Далее запрыгните на статую справа, поднимитесь ей на голову и спуститесь на балкон внизу. Пройдите через комнату и выйдите наружу.
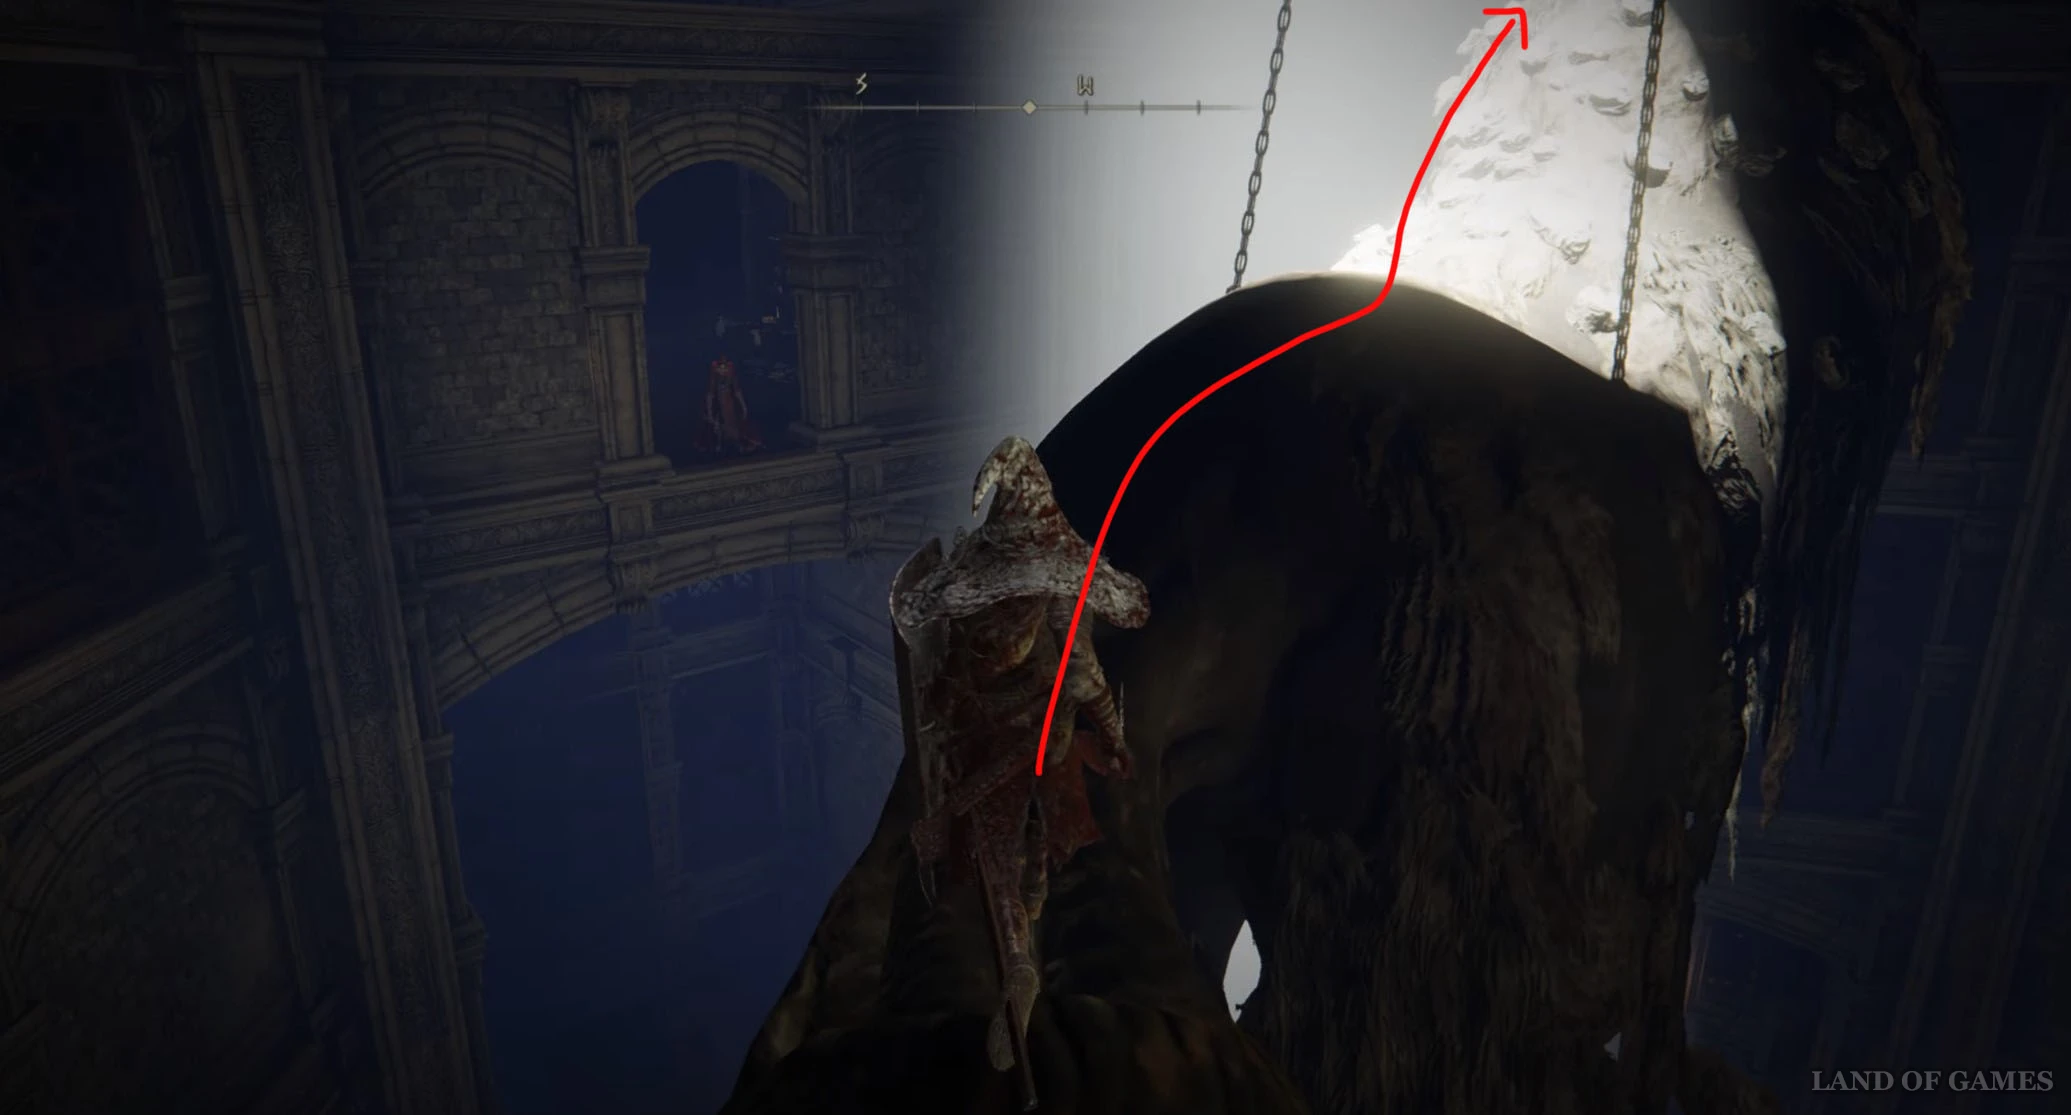
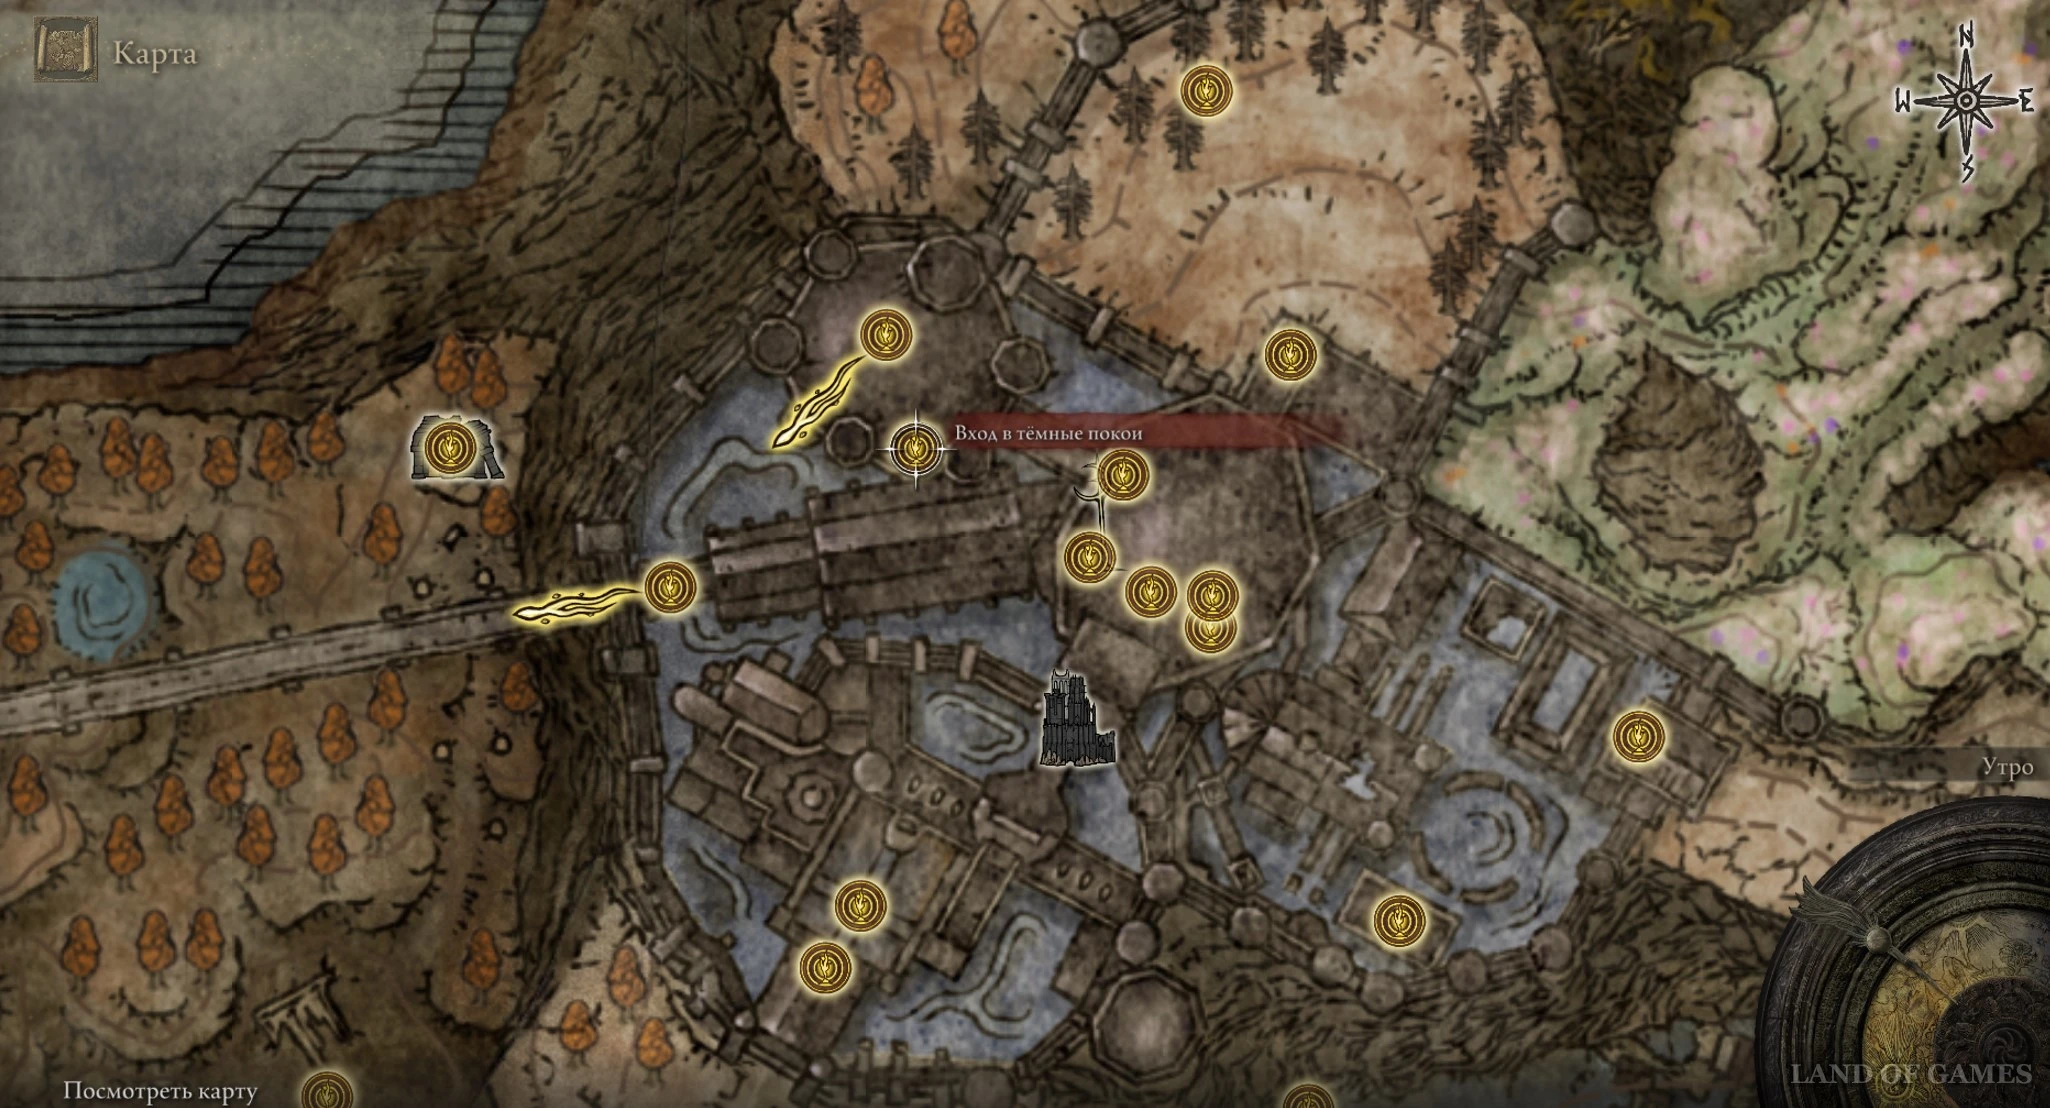
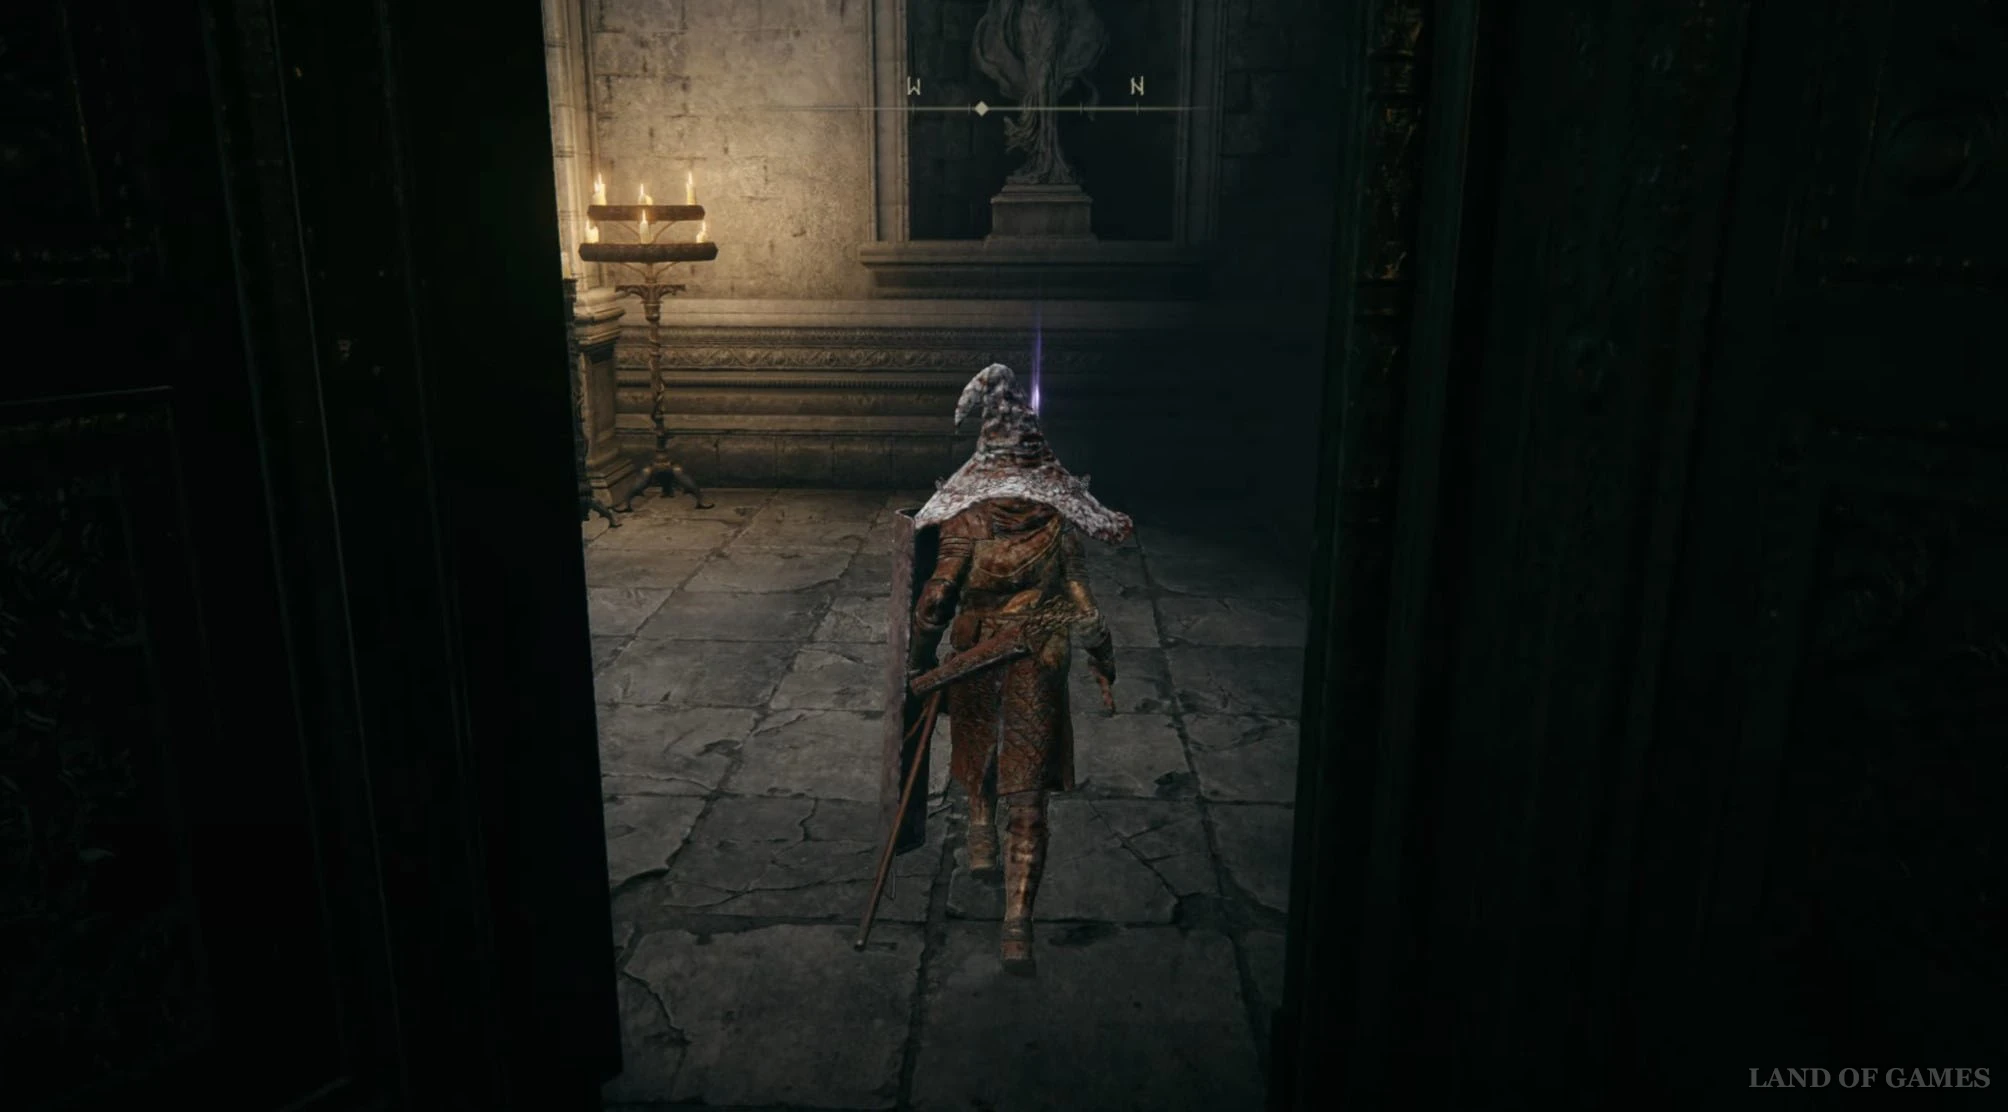
Поверните направо и поднимитесь по лестнице. Затем сверните влево и войдите в здание. Вы увидите статую Марики, под которой будет лежать нужная вам вещица. Отметим, что если вы поднимитесь выше, то активируете место благодати «Вход в темные покои». Пройдя еще дальше, вы столкнетесь с сюжетным боссом Мессмером. Разберитесь с ним, чтобы открыть доступ к следующим фрагментам.
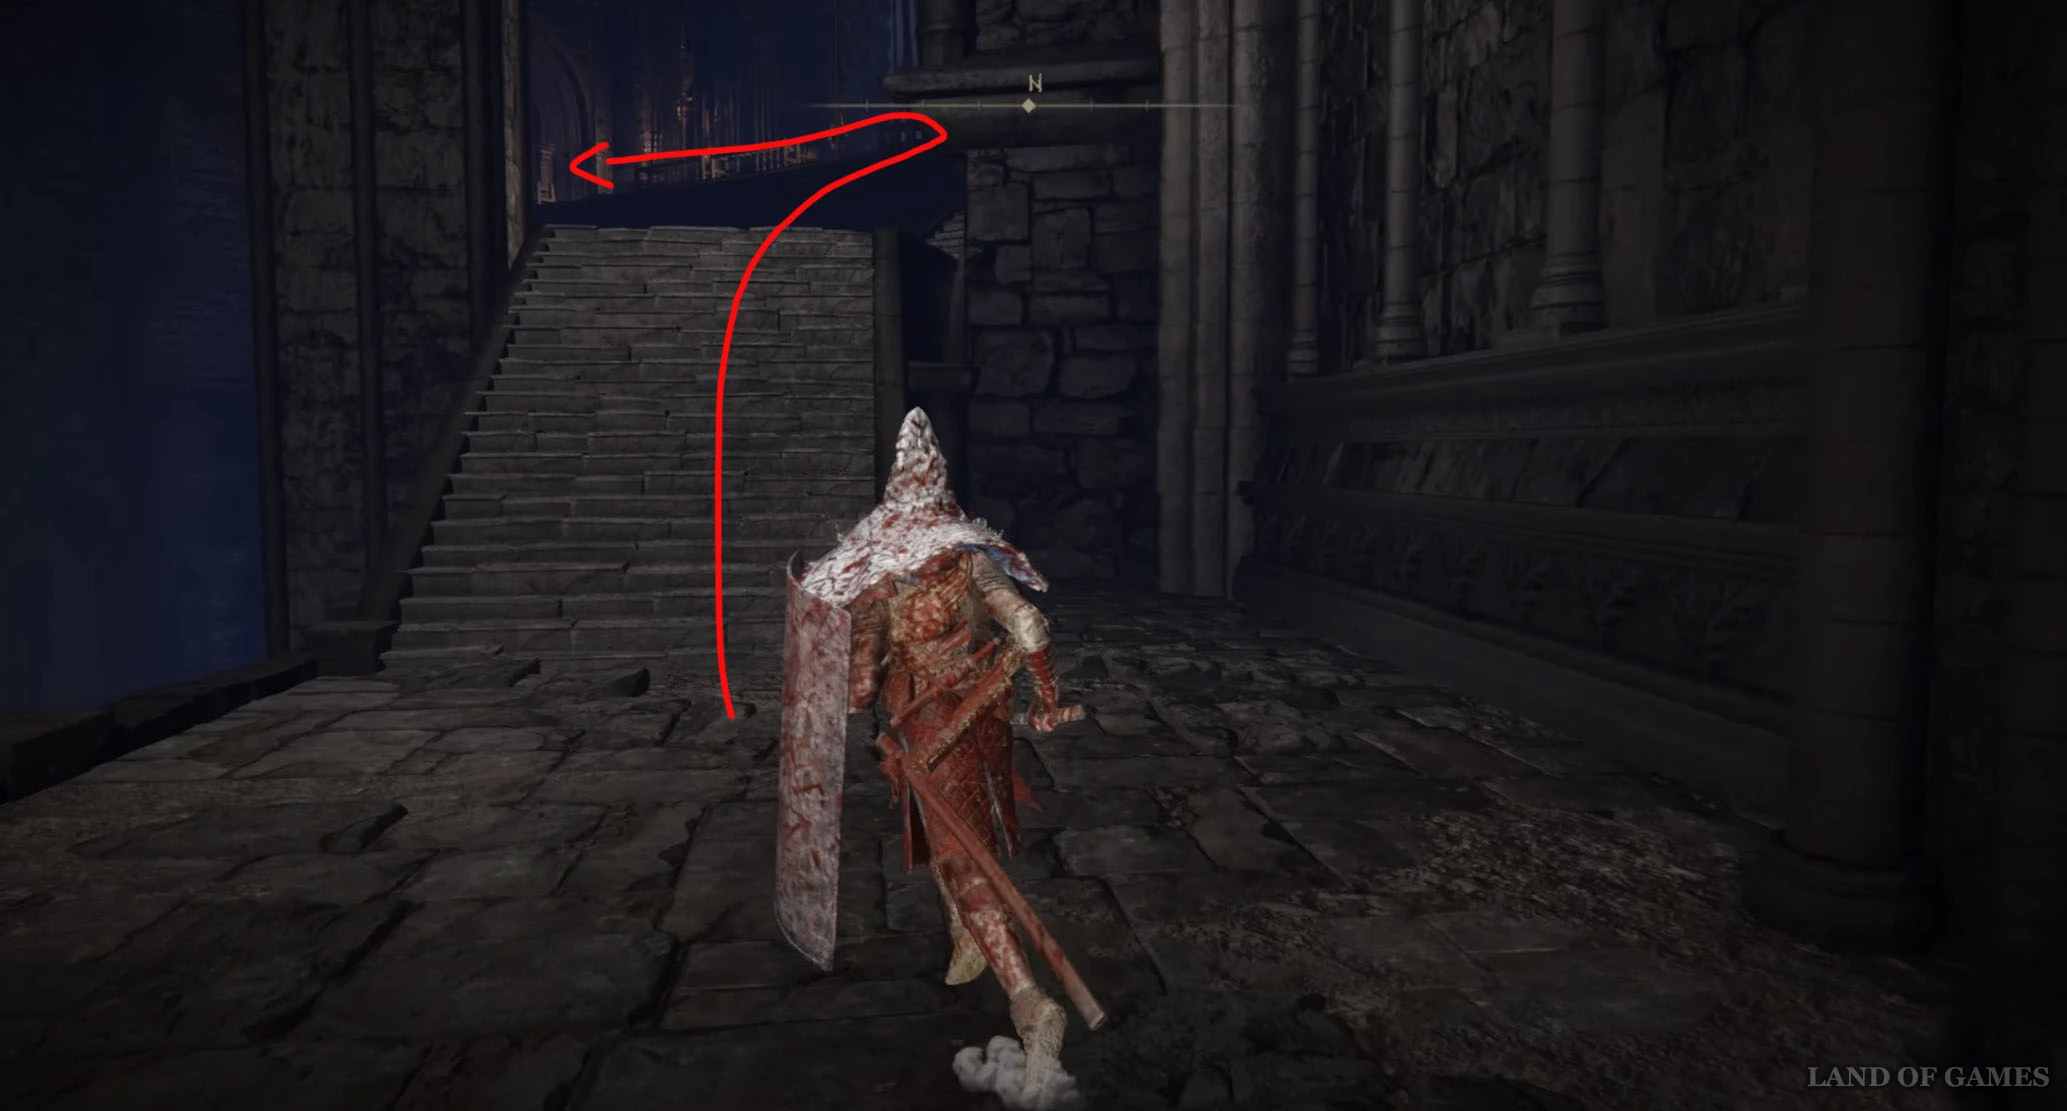
Осколок древа упадка 43
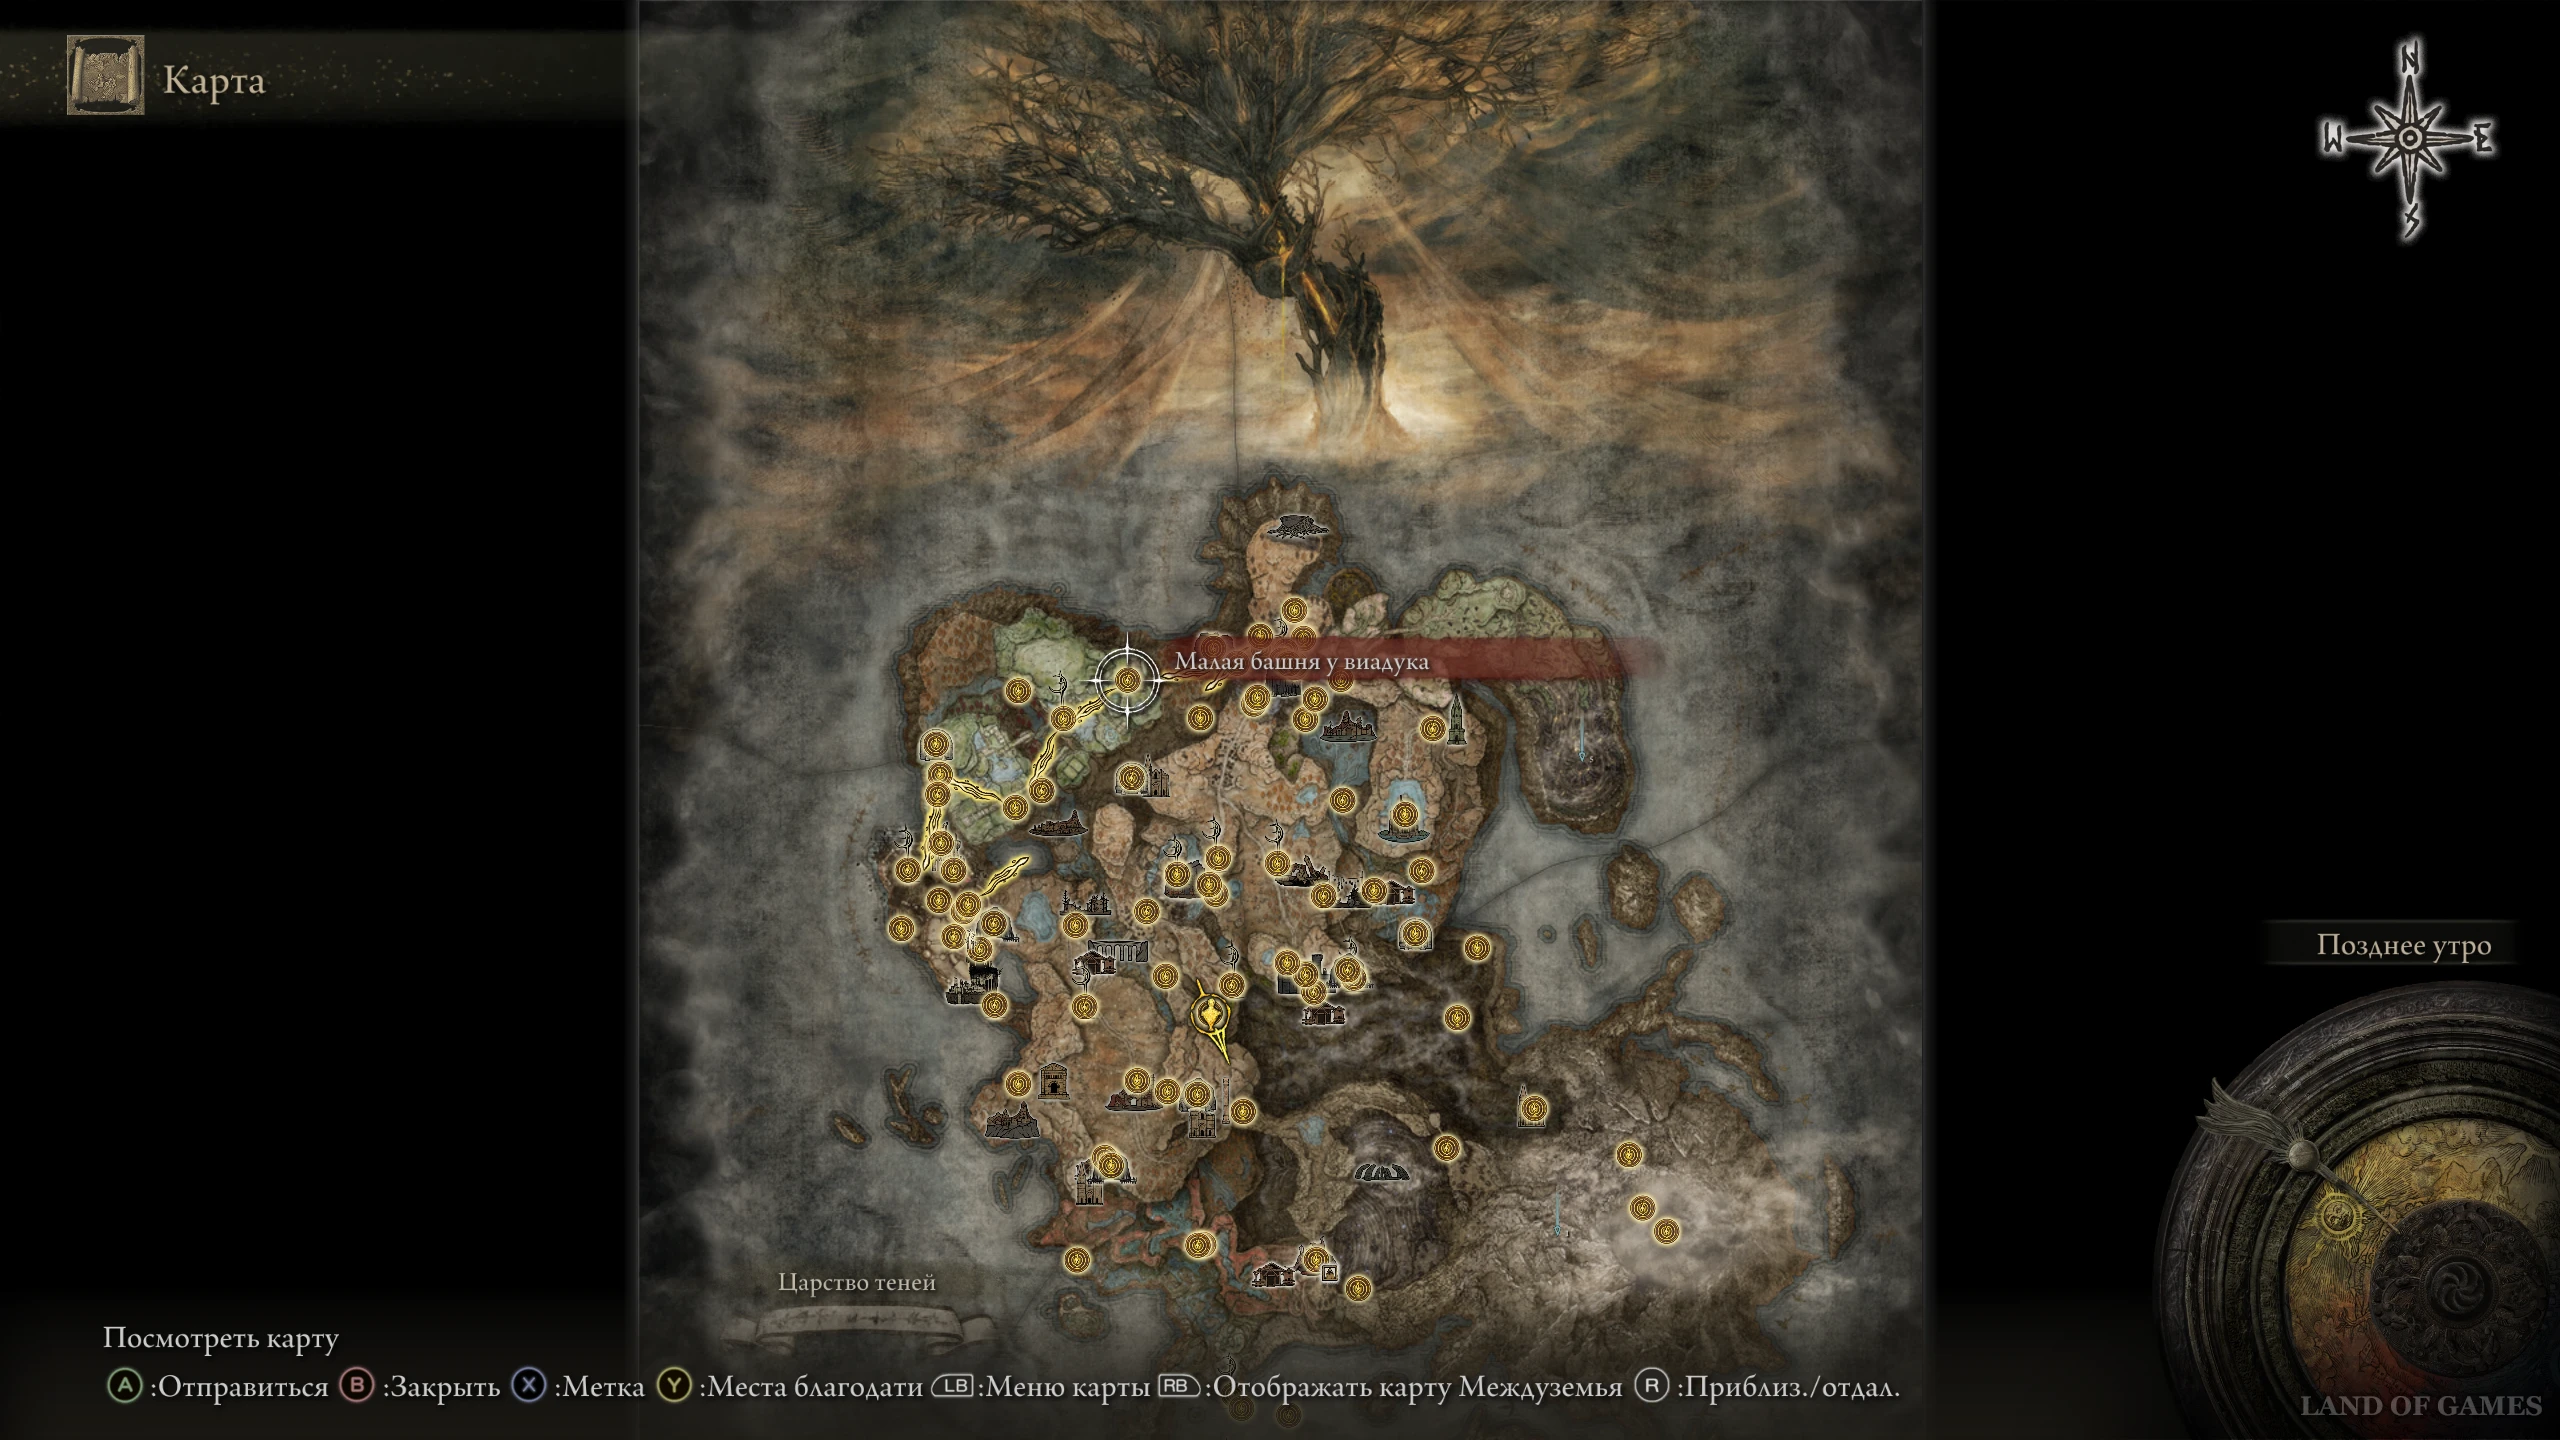
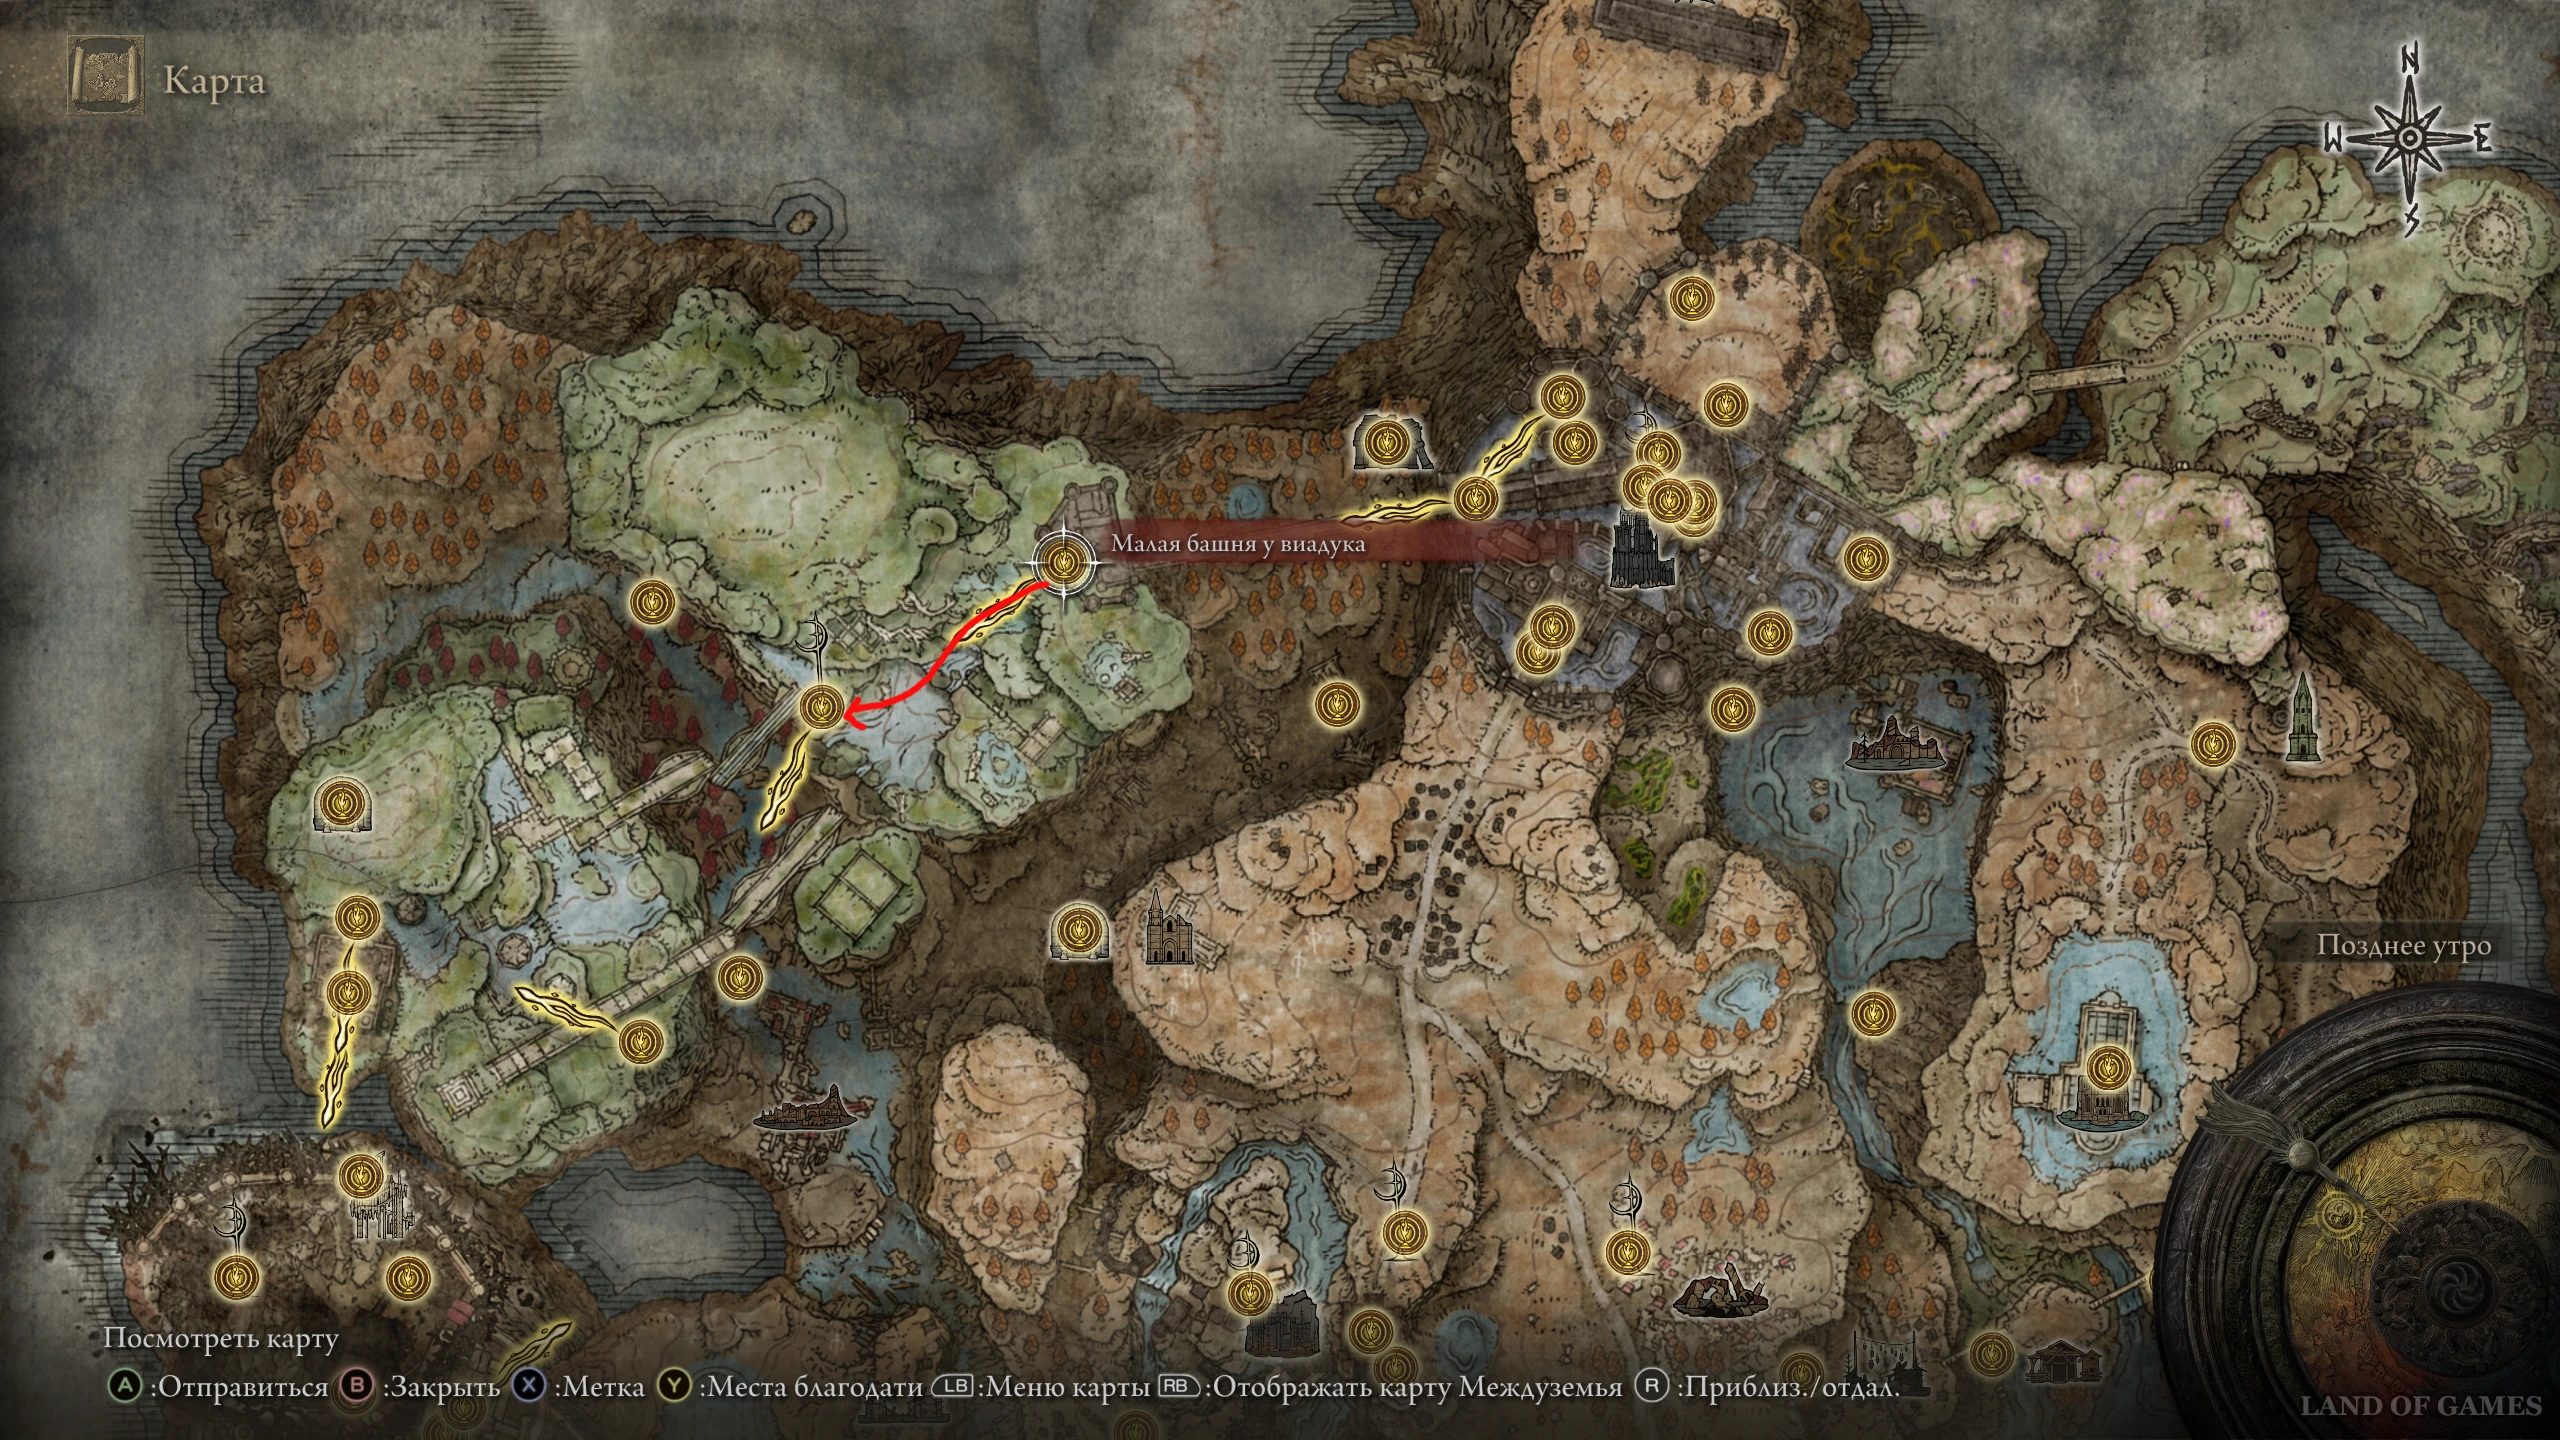
Переместитесь или доберитесь до места благодати «Малая башня у виадука», расположенного к западу от Пристанища Теней. Выйдите из крепости и скачите на запад по дороге, а затем сверните вправо и спуститесь в подвал сооружения.
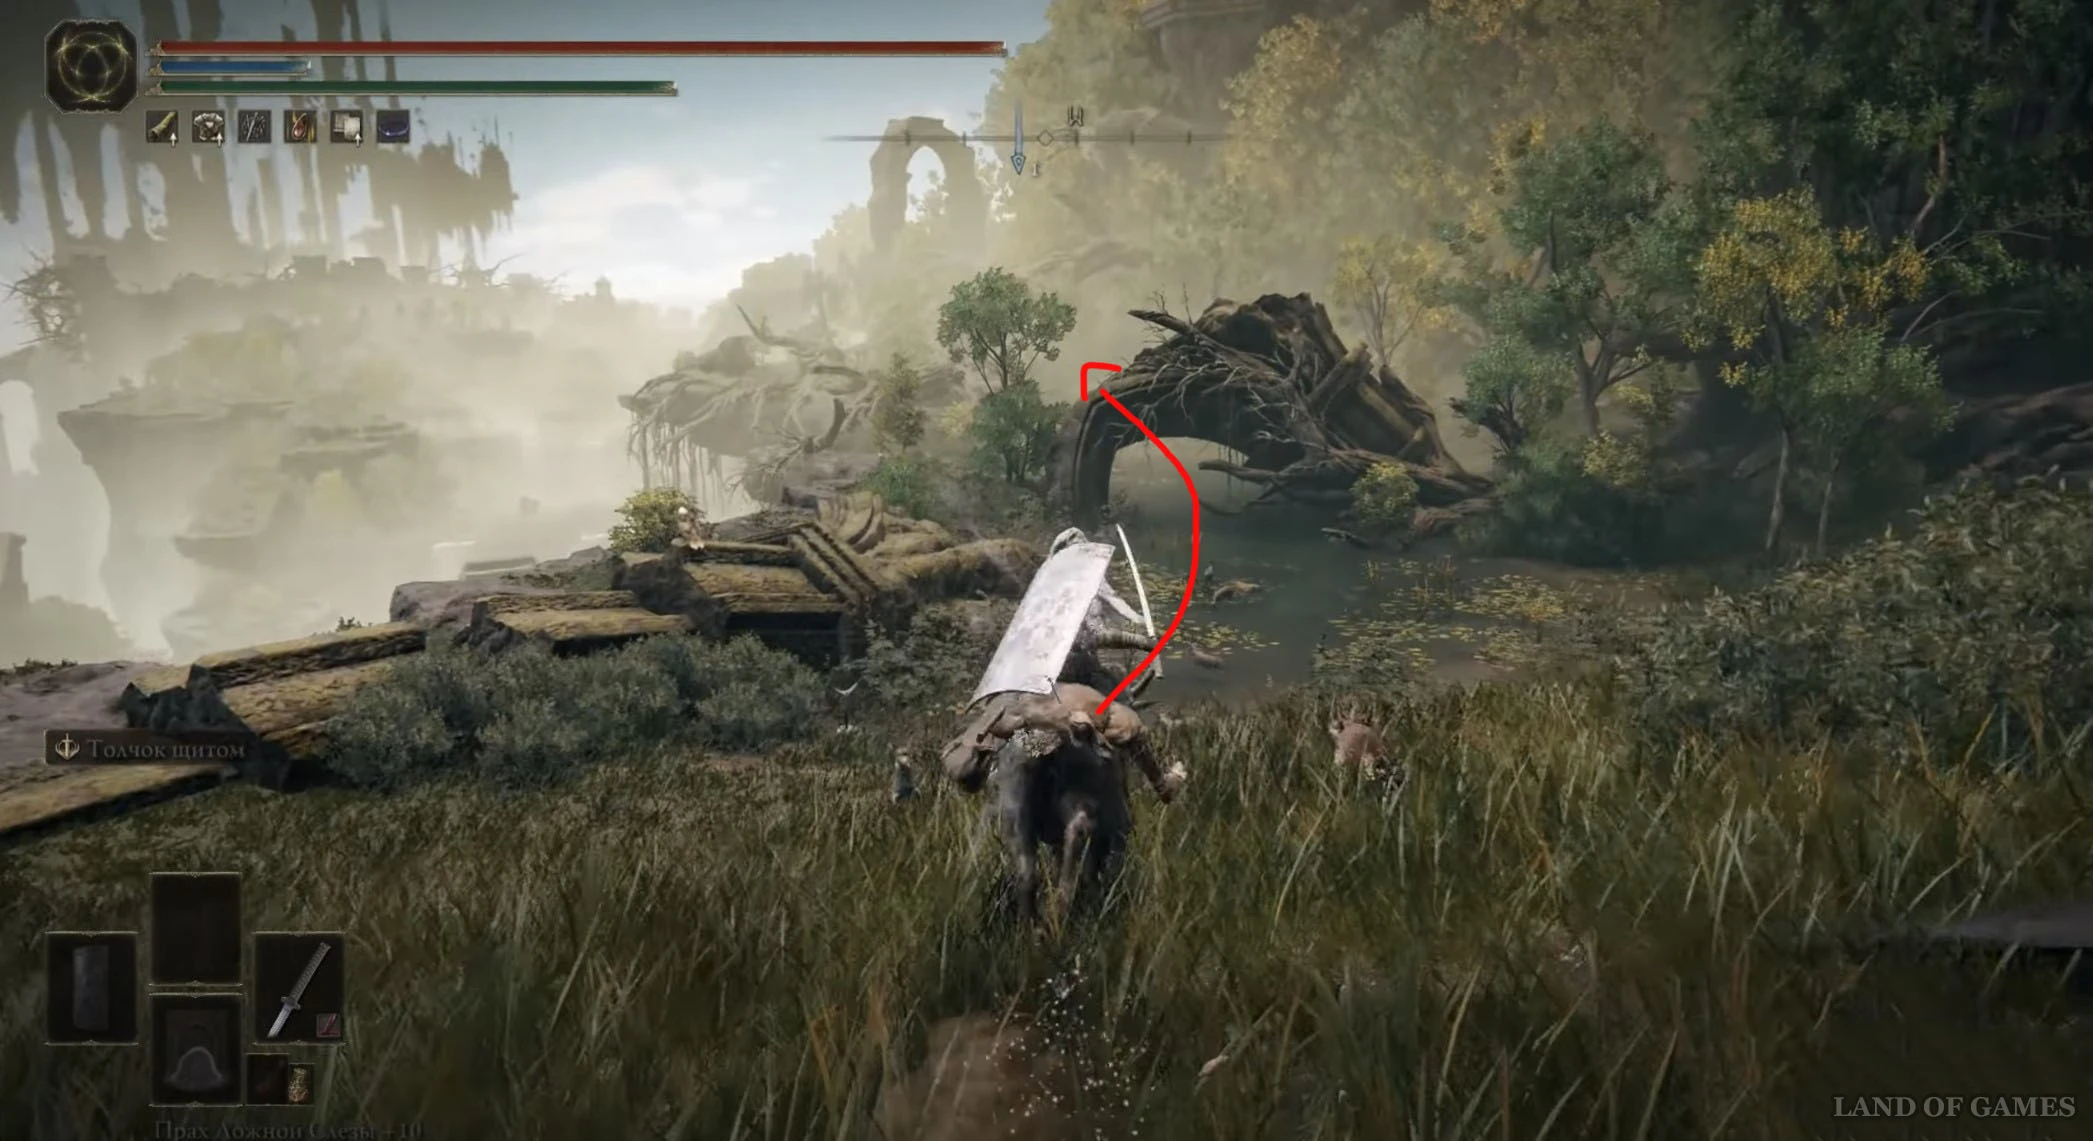
Двигайтесь в северо-западном направлении, пока не упретесь в стену, а затем сверните вправо. Дойдя до двери, поверните налево. Оказавшись в просторном помещении с чашей огня, спрыгните через дыру на нижний уровень здания.
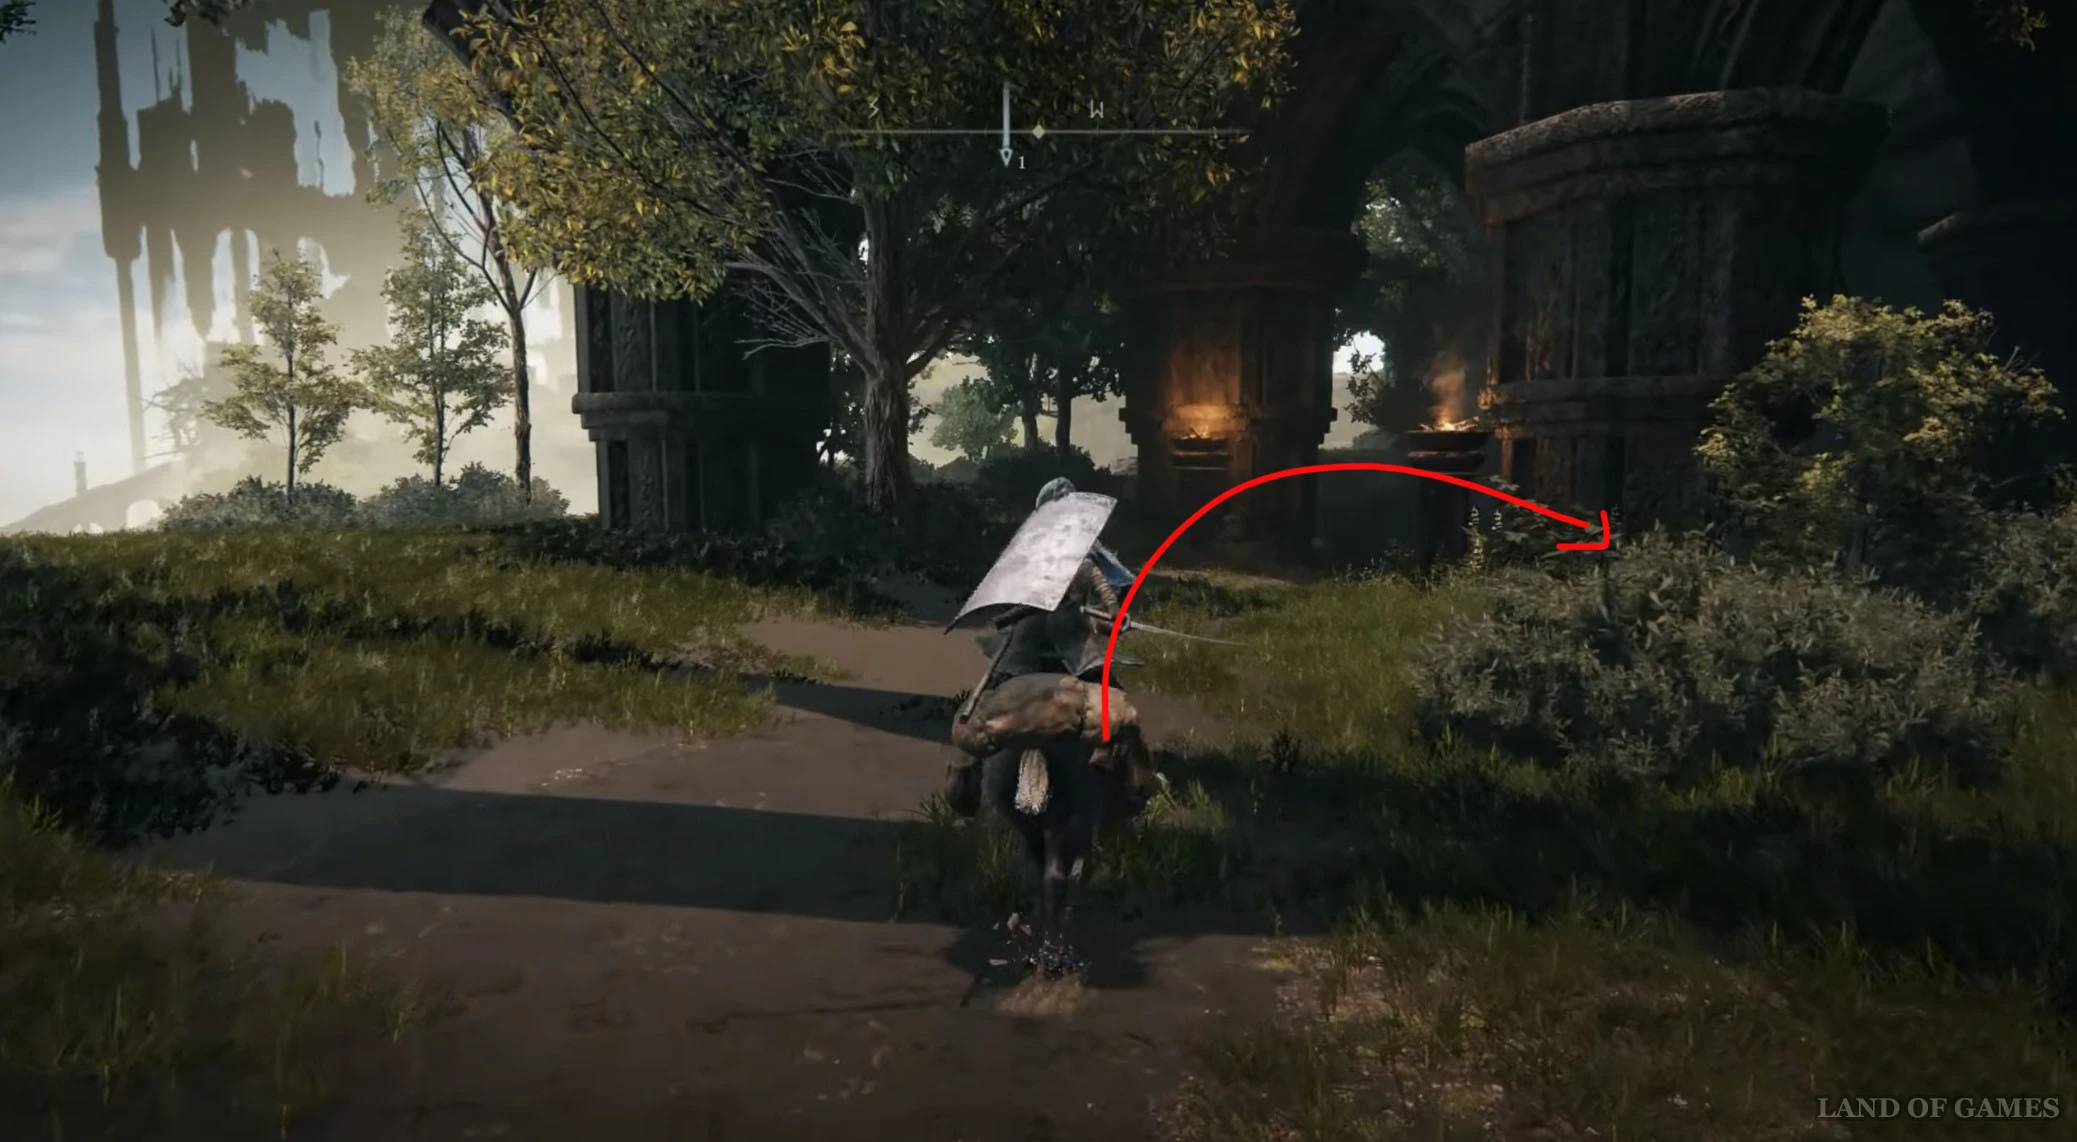
После прыжка пройдите через юго-западный проход, а потом сверните направо и бегите по коридору вперед. Далее прыгните в квадратную дыру, чтобы спуститься еще ниже. Упав вниз, пройдите через северо-восточный выход и тут же поверните влево. Пройдите под каменной аркой и снова сверните налево.
Бегите вперед и пройдите еще под двумя каменными арками, чтобы выйти на открытую область. Пройдите мимо полуразрушенной колонны и подойдите к кресту Марики, возле которого будет лежать фрагмент. Здесь также находится место благодати «Руины обители Рауха, восток».

Осколок древа упадка 44
Вернитесь в «Руины обители Рауха, восток», а потом скачите на северо-запад и пройдите под двумя каменными арками. Продолжайте двигаться в северо-западном направлении до самого конца, а затем сверните вправо и еще раз направо в комнату с воздушным потоком.
Обойдите поток, пройдите через проход на юго-востоке и воспользуйтесь ветром впереди, чтобы подняться наверх. Здесь вы обнаружите тень с кувшином на голове – расправьтесь с ней как можно скорее, чтобы затем поднять с нее фрагмент.
Осколок древа упадка 45
Вернитесь в «Руины обители Рауха, восток», а потом снова скачите на северо-запад и пройдите под двумя каменными арками. Продолжайте двигаться в северо-западном направлении до самого конца, а затем сверните вправо и еще раз направо к воздушному потоку. Воспользуйтесь им, чтобы подняться на верхний уровень.
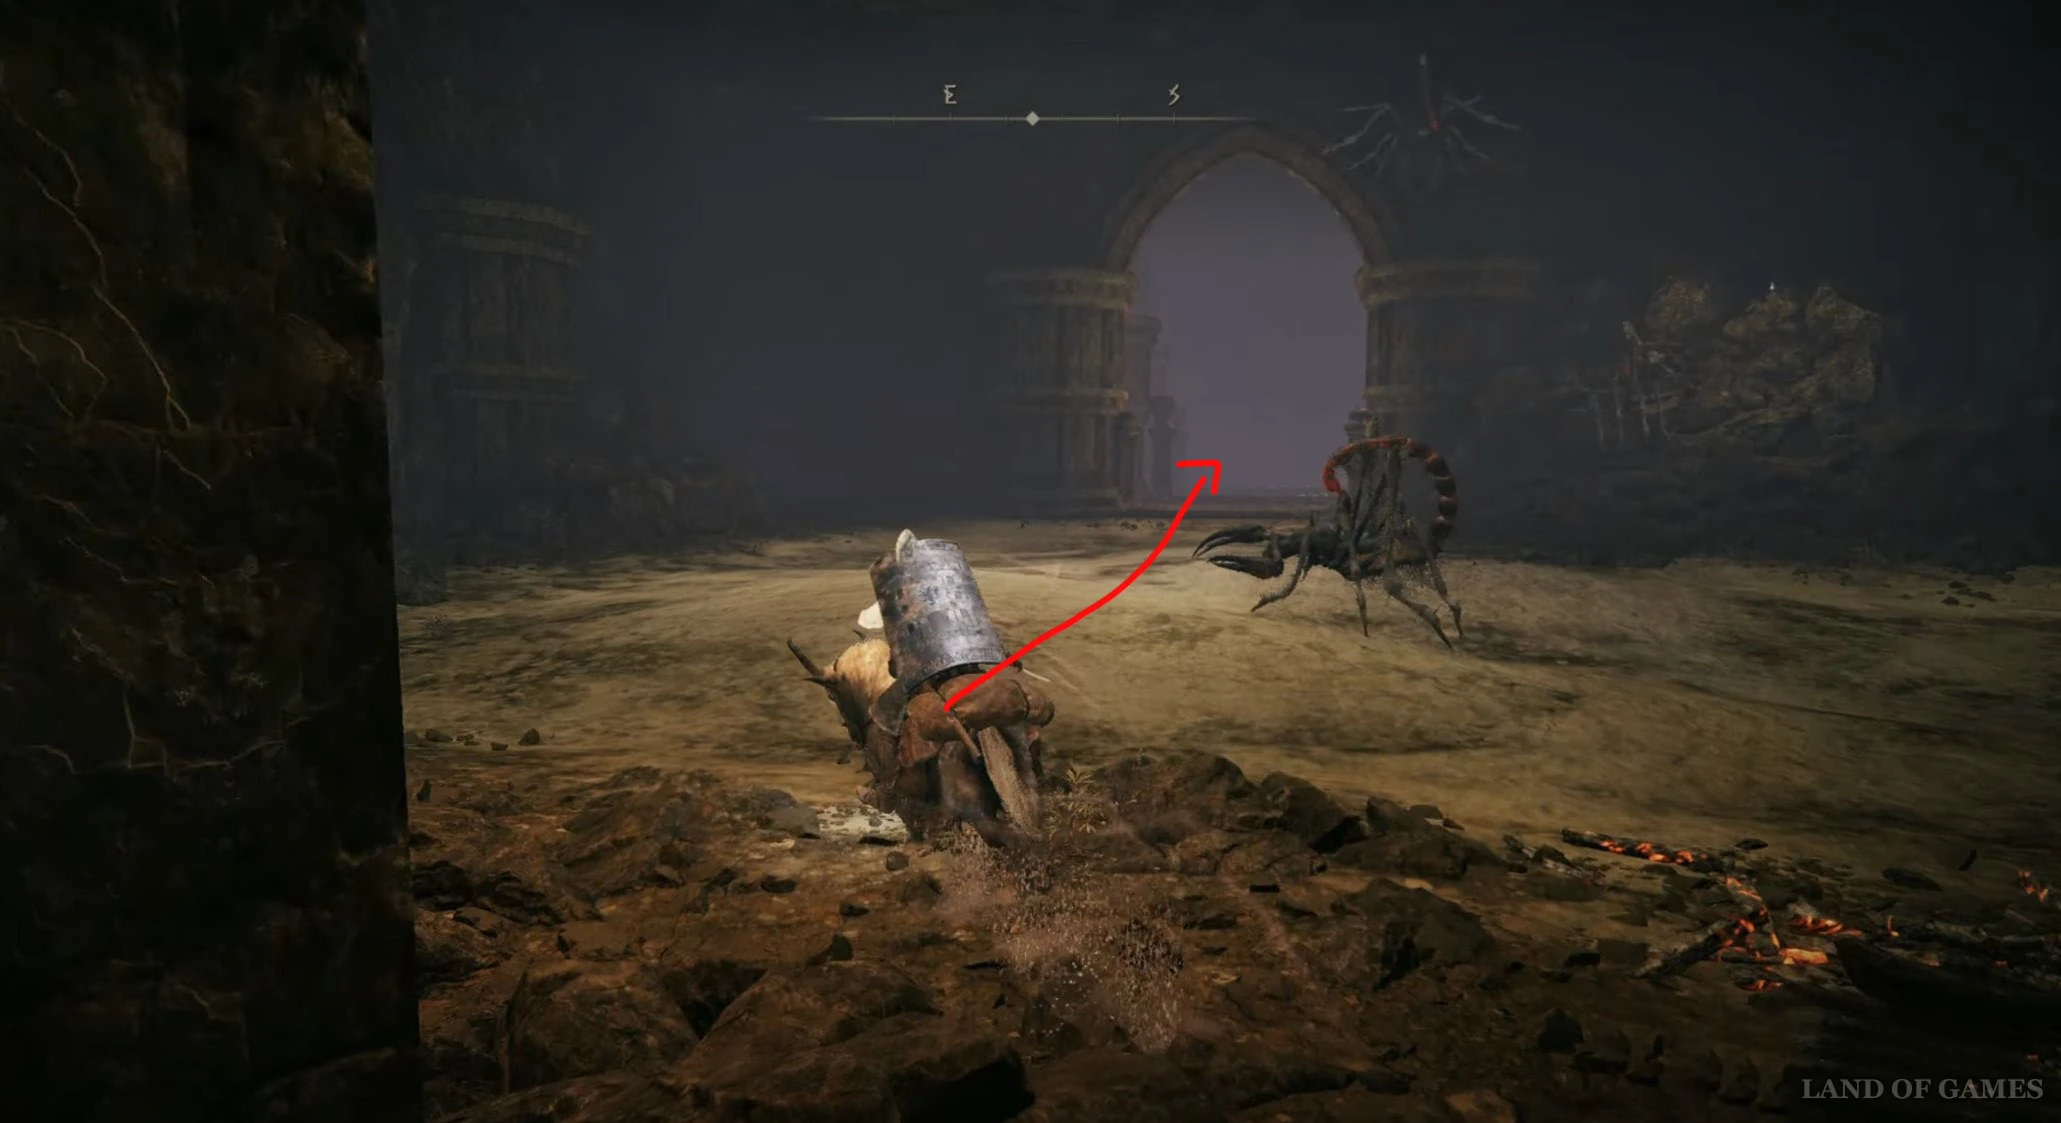
Продолжайте двигаться на юго-восток до стены, а потом сверните влево и пройдите через полуоткрытую дверь. Затем сверните вправо и войдите в квадратную дыру, чтобы попасть в помещение со скорпионом. Идите дальше в другой просторный зал и сверните налево после первой колонны.
Сделайте несколько шагов вперед, а потом сразу же поверните направо и выбегите наружу. Все так же идите на юго-восток и спрыгните с выступа вниз. Далее сверните вправо, спуститесь по лесенке вниз и сразитесь с золотым гиппопотамом, с которого и выпадет нужная вам вещица.

Осколок древа упадка 46
Вернитесь в «Руины обители Рауха, восток», а потом двигайтесь на юго-запад, пройдя по каменному мосту. Дойдя до конца, спрыгните на площадку внизу и продолжайте бежать в юго-западном направлении. Поднимитесь по лестнице и пройдите под каменную арку, а затем сверните влево.
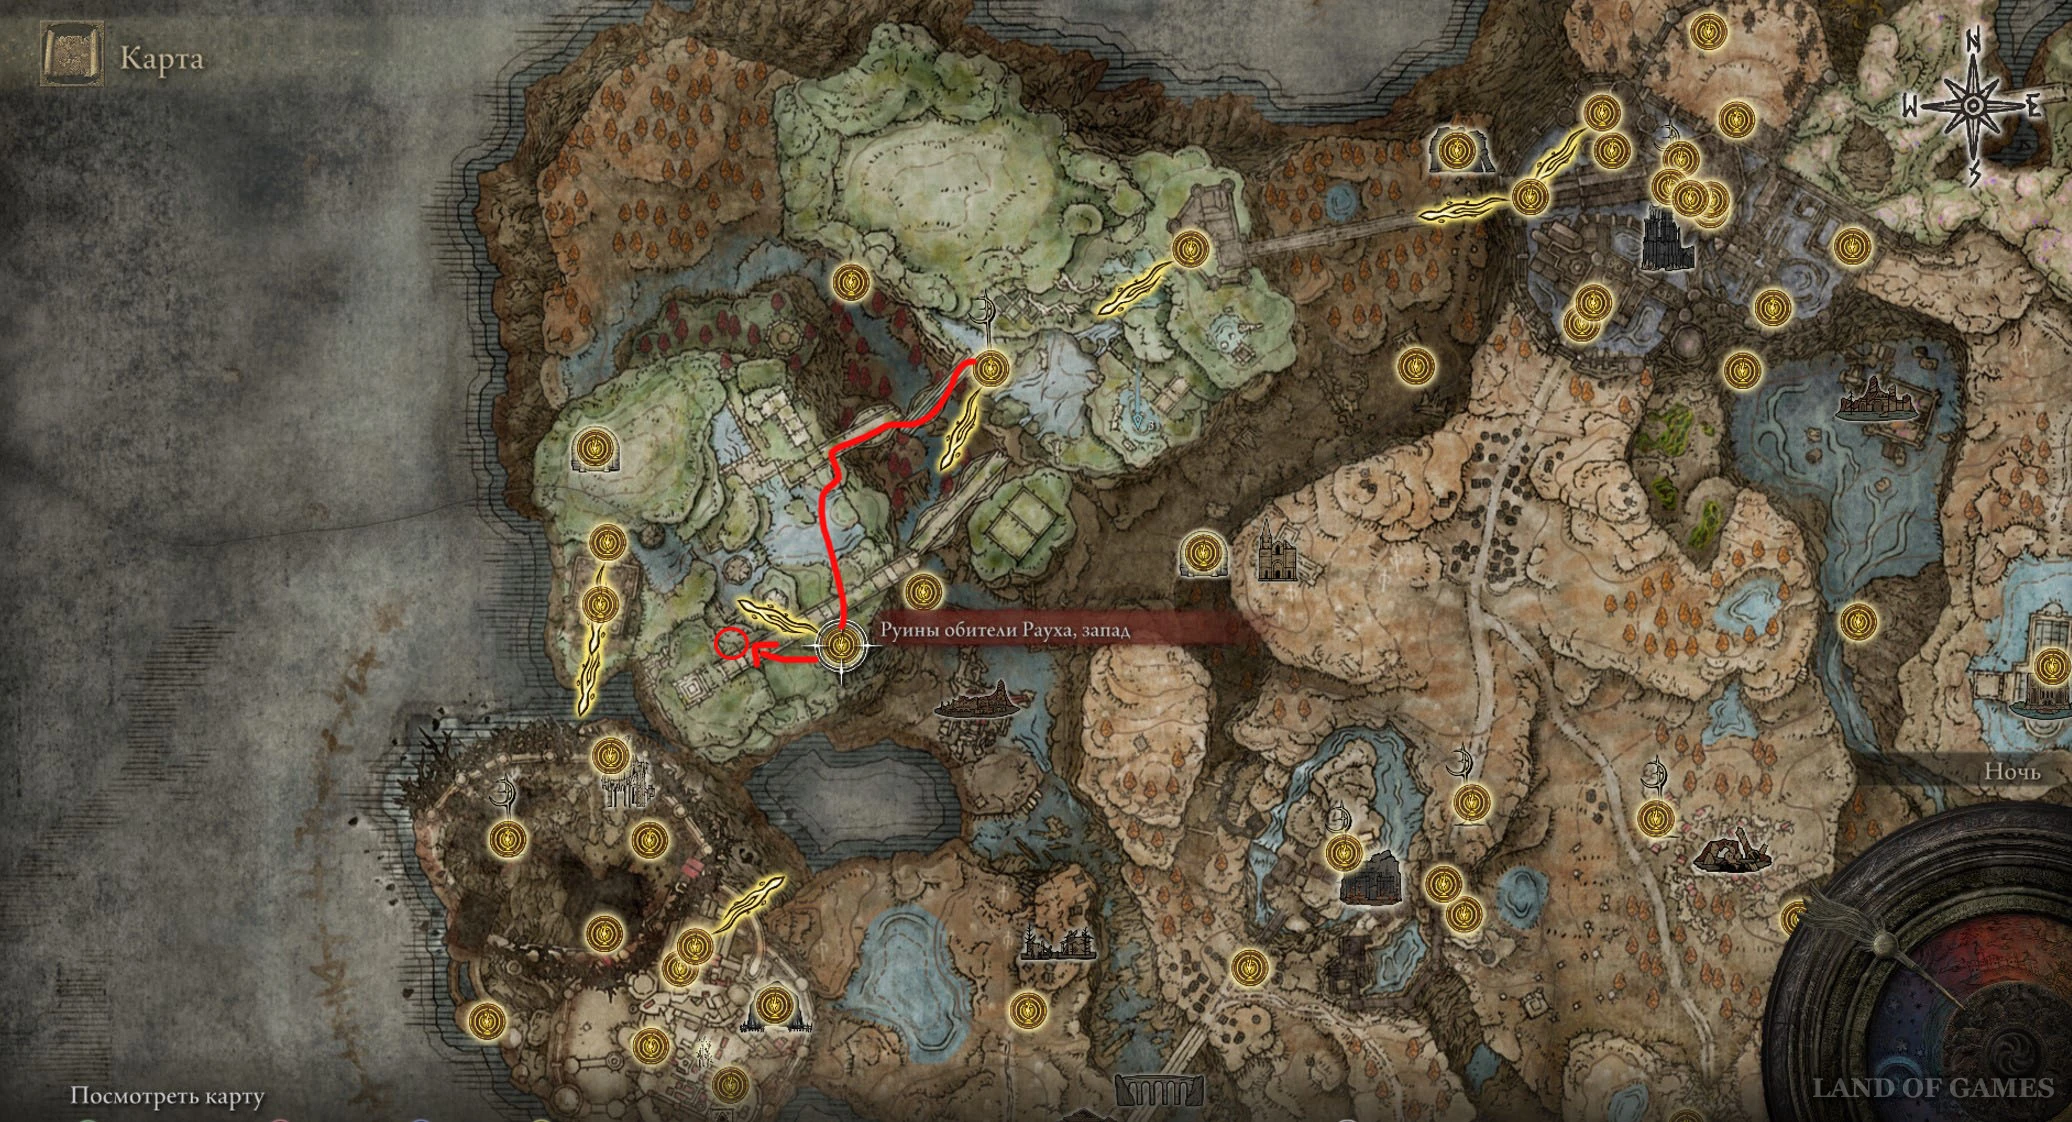
Идите на юг, пройдя мимо водопадов справа, и поднимитесь по склону наверх. Пройдите через очередную каменную арку и выйдите на поляну с местом благодати «Руины обители Рауха, запад». Теперь войдите в здание с правой стороны и поднимитесь по лестнице наверх и вправо.
Оказавшись в новом помещении, бегите вперед до противоположной стороны комнаты, разберитесь с находящимися тут врагами и подберите фрагмент возле монумента.
Осколок древа упадка 47
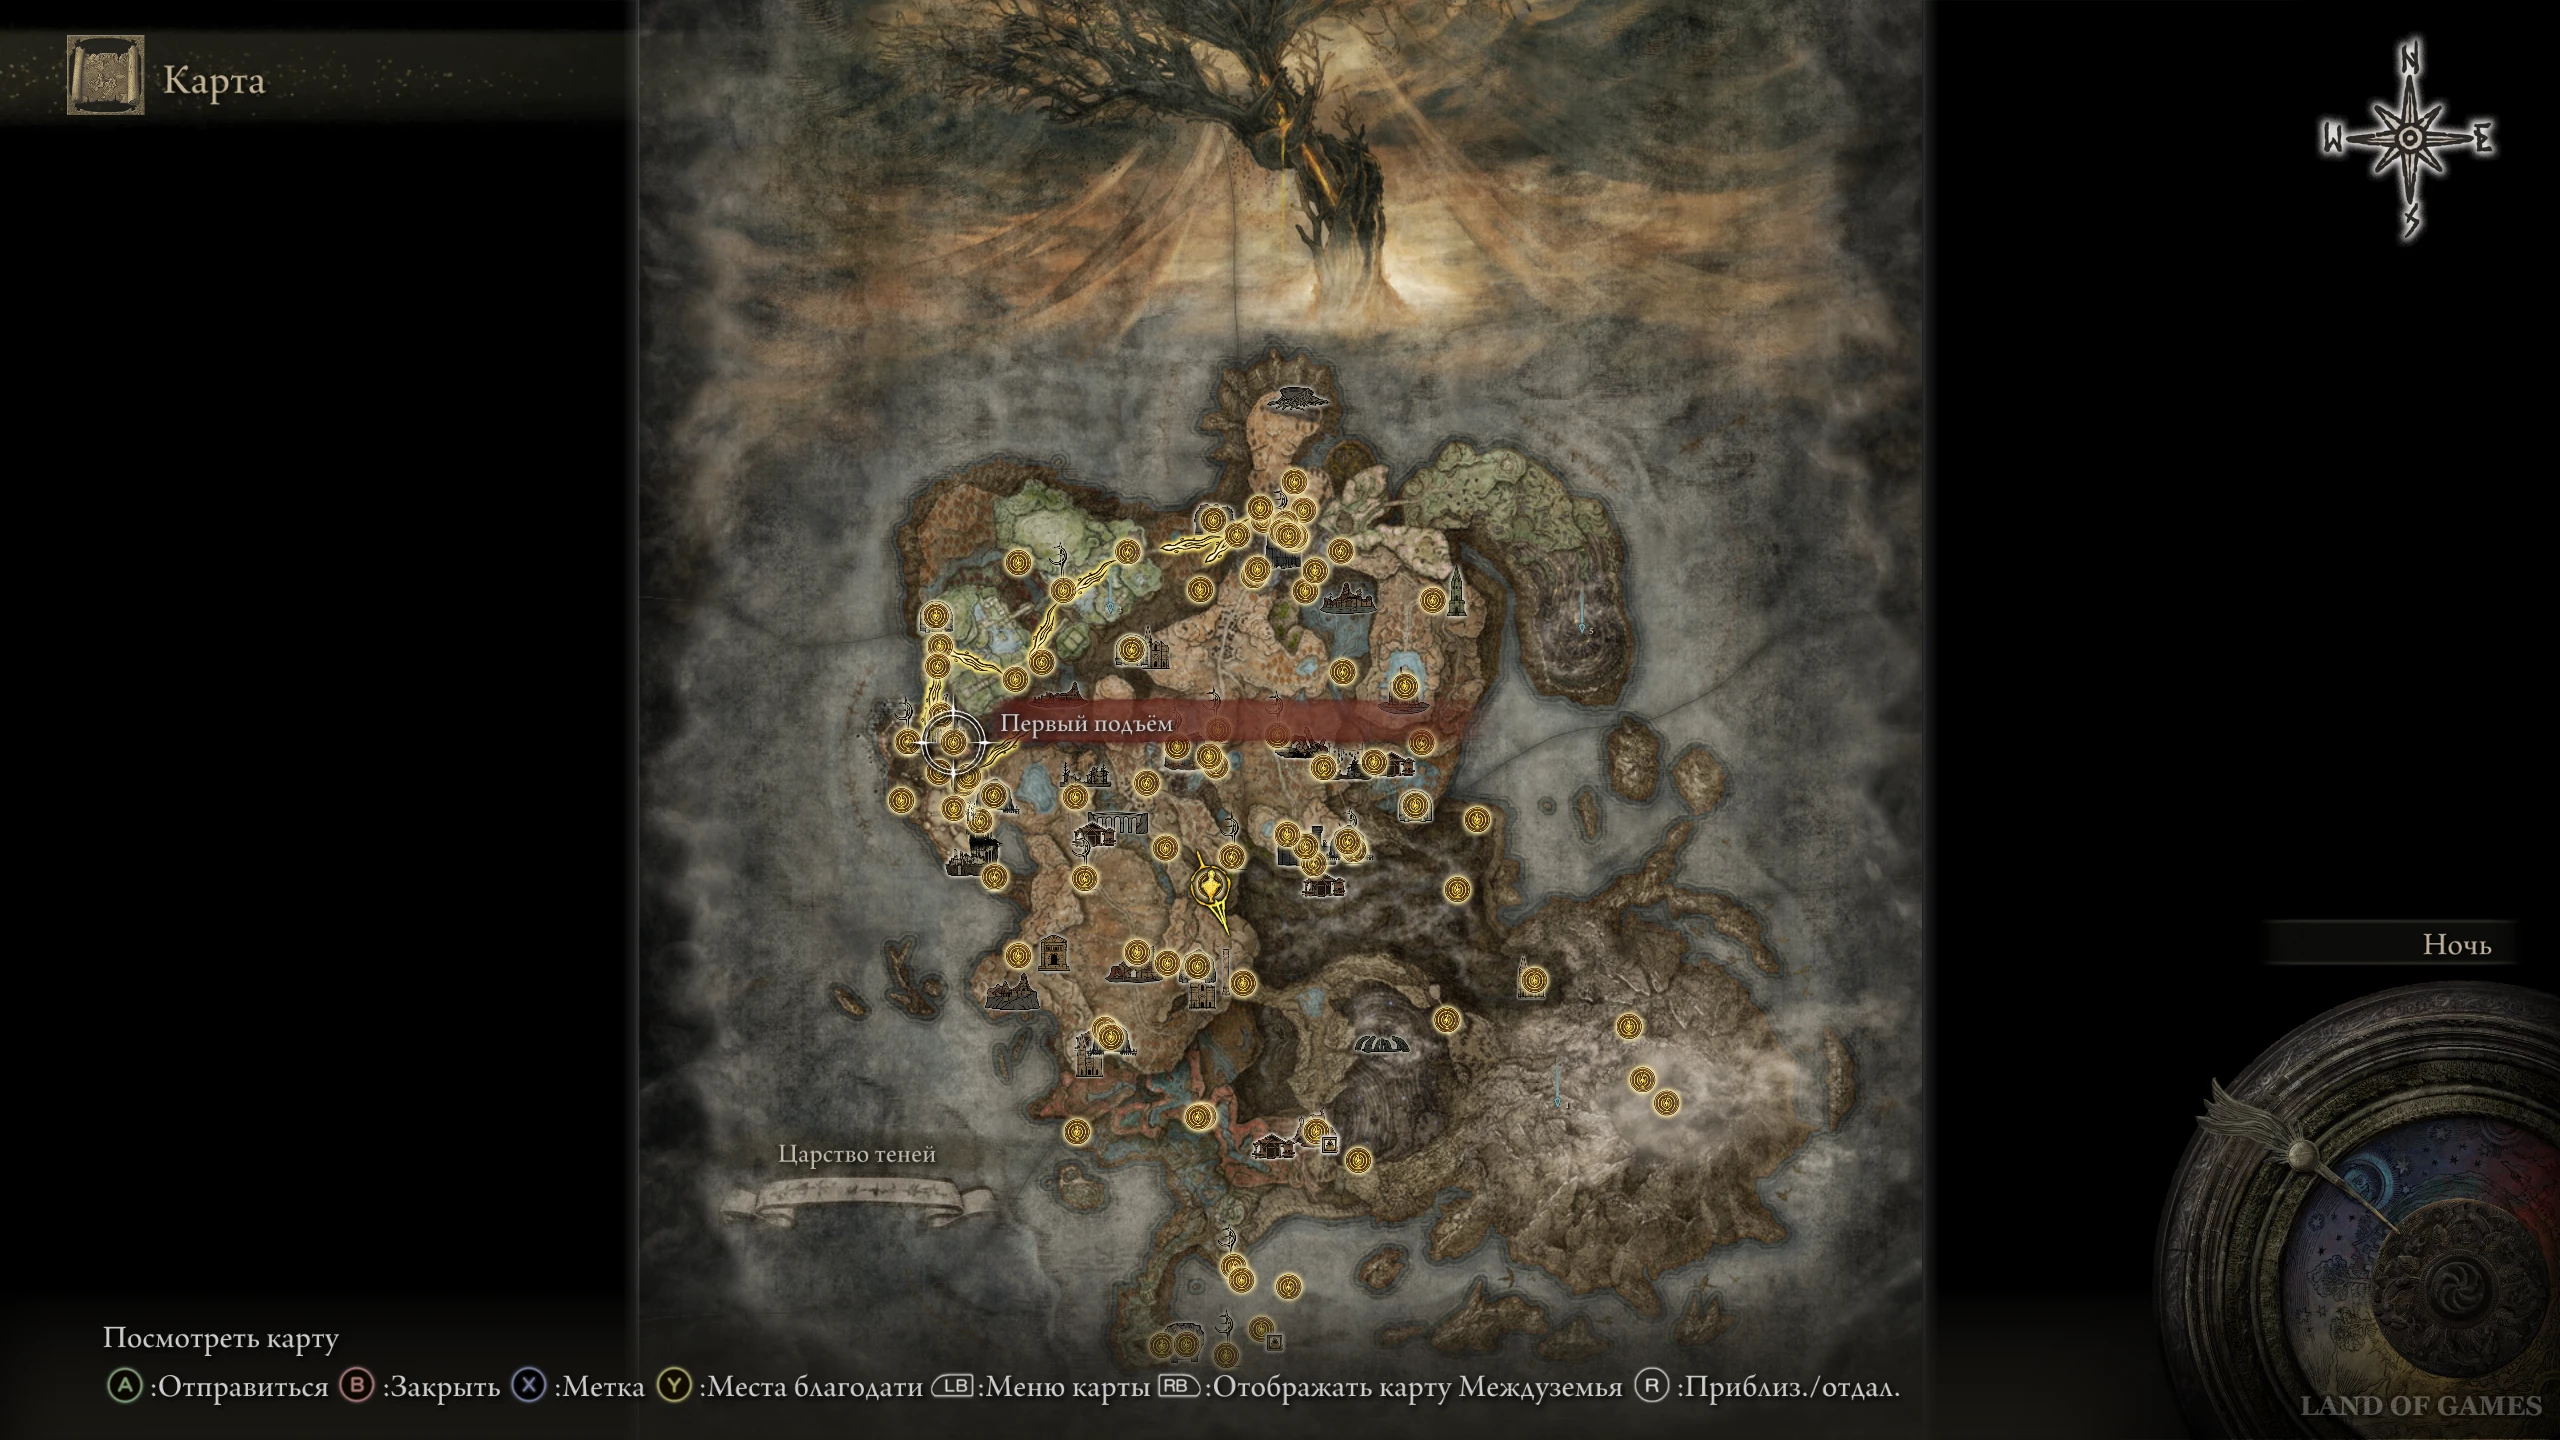
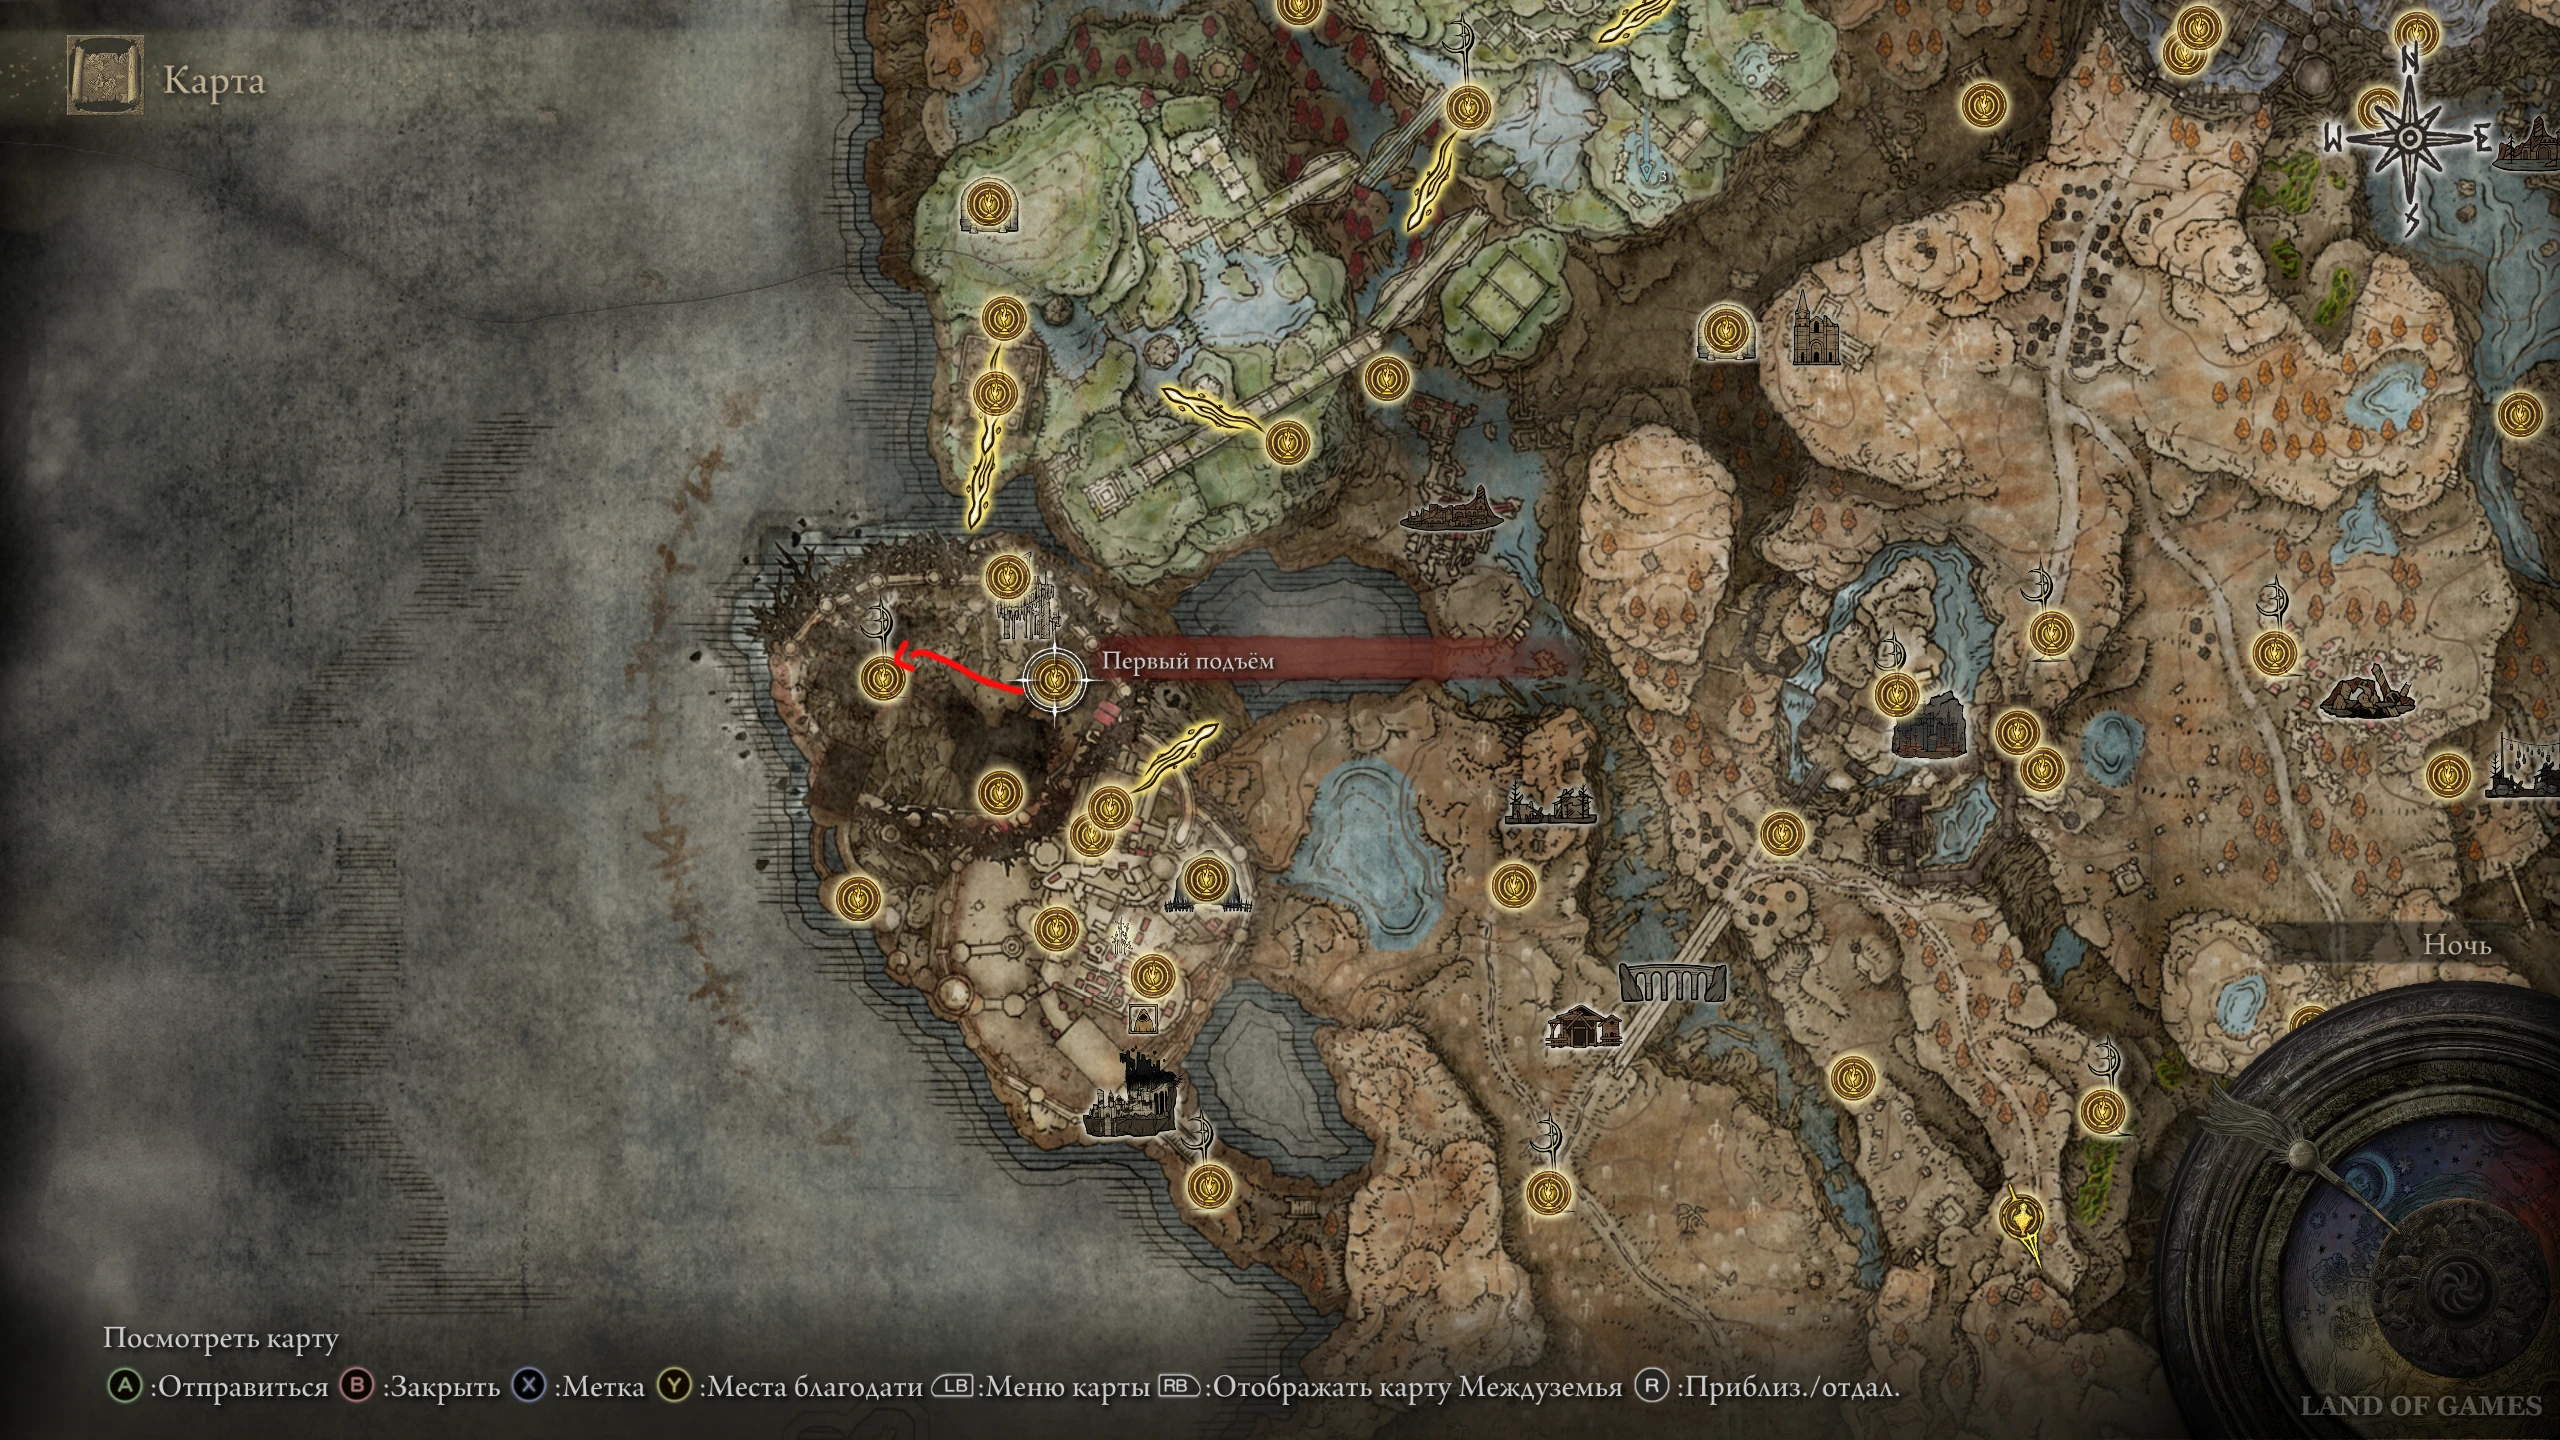
Переместитесь или доберитесь до места благодати «Первый подъем», а затем начните бежать на юго-запад и поднимитесь по лестнице наверх. Продолжайте бежать в том же направлении, перепрыгнув через разлом на другую площадку. Затем обойдите фонтан и поднимитесь по лестнице с левой стороны.
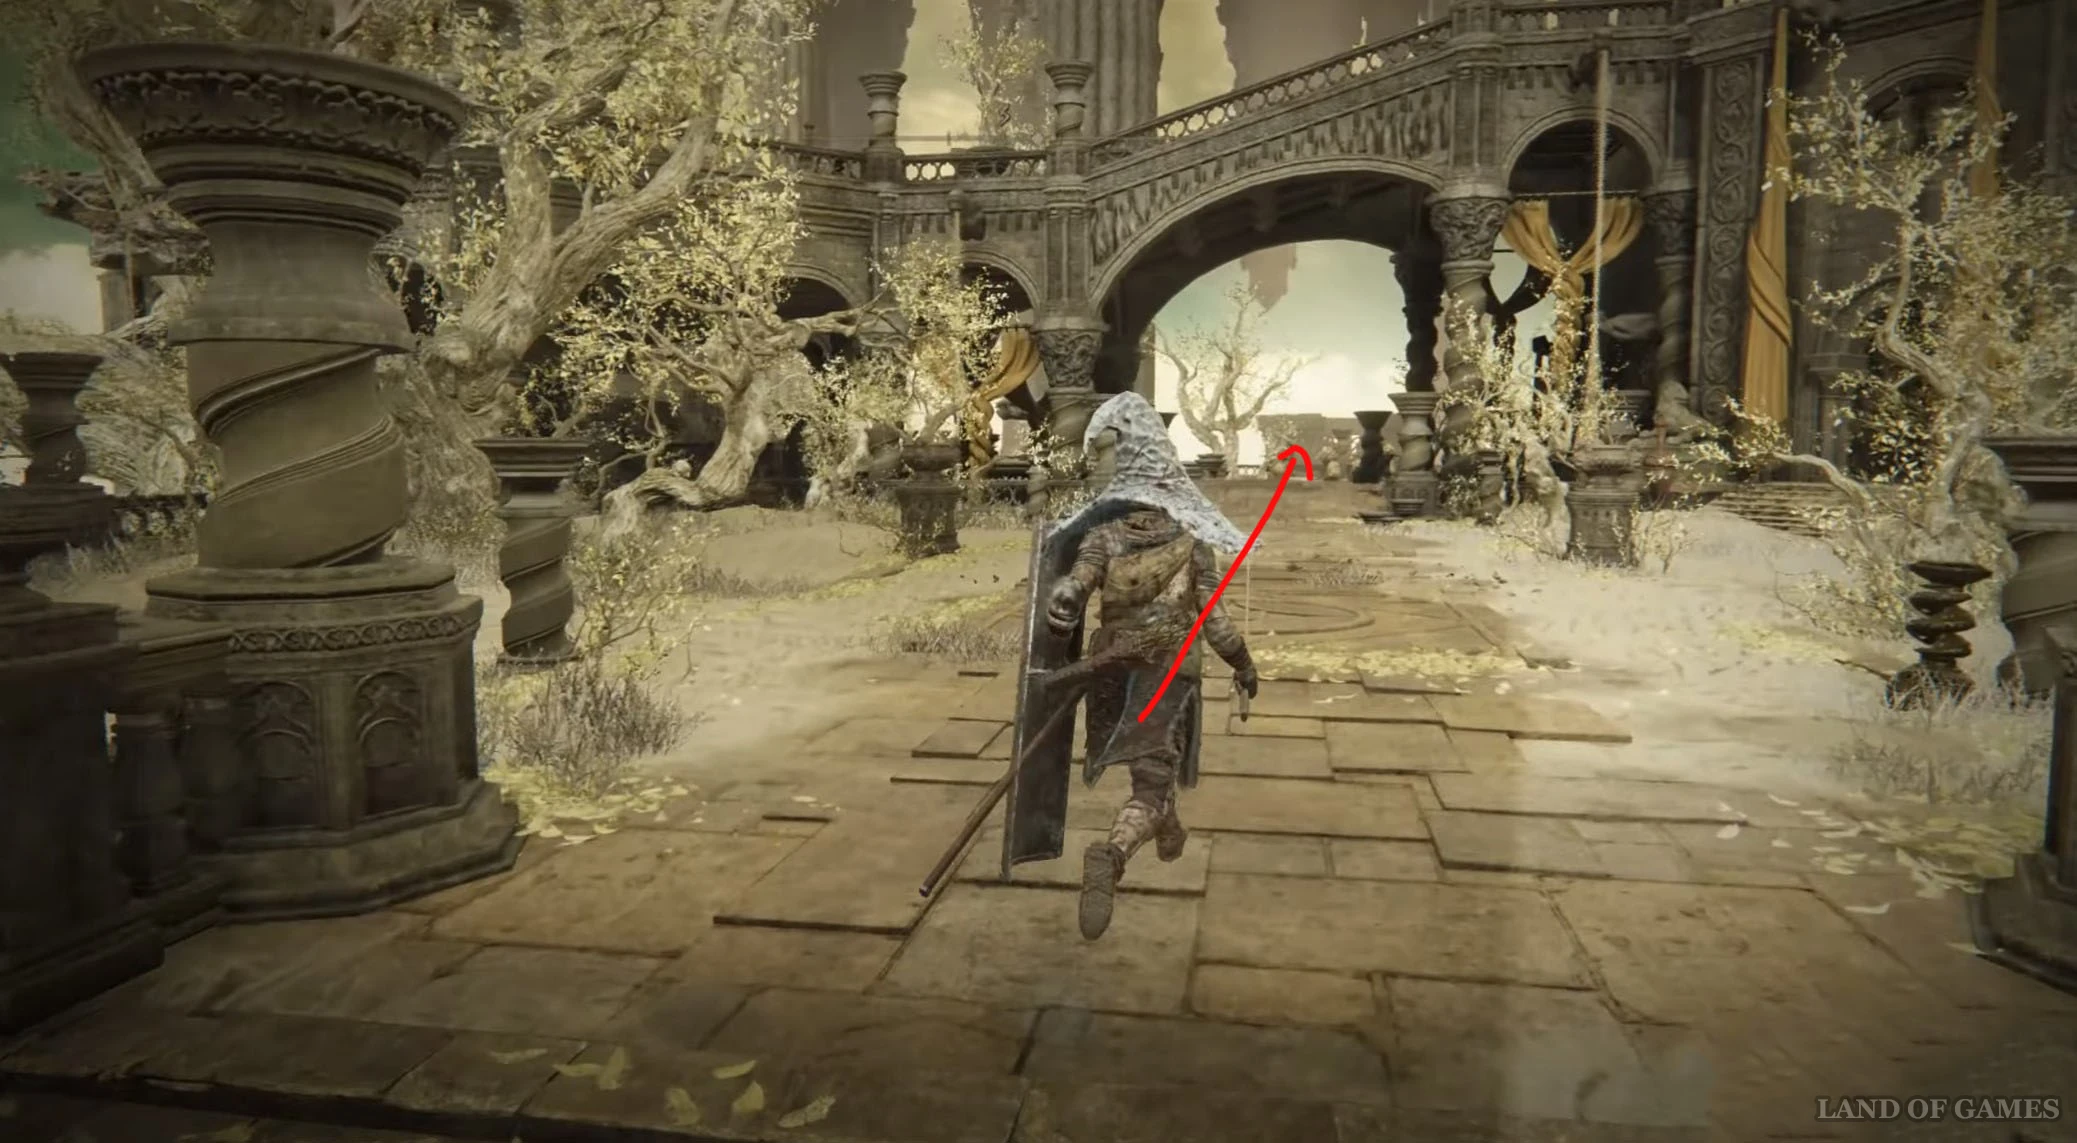
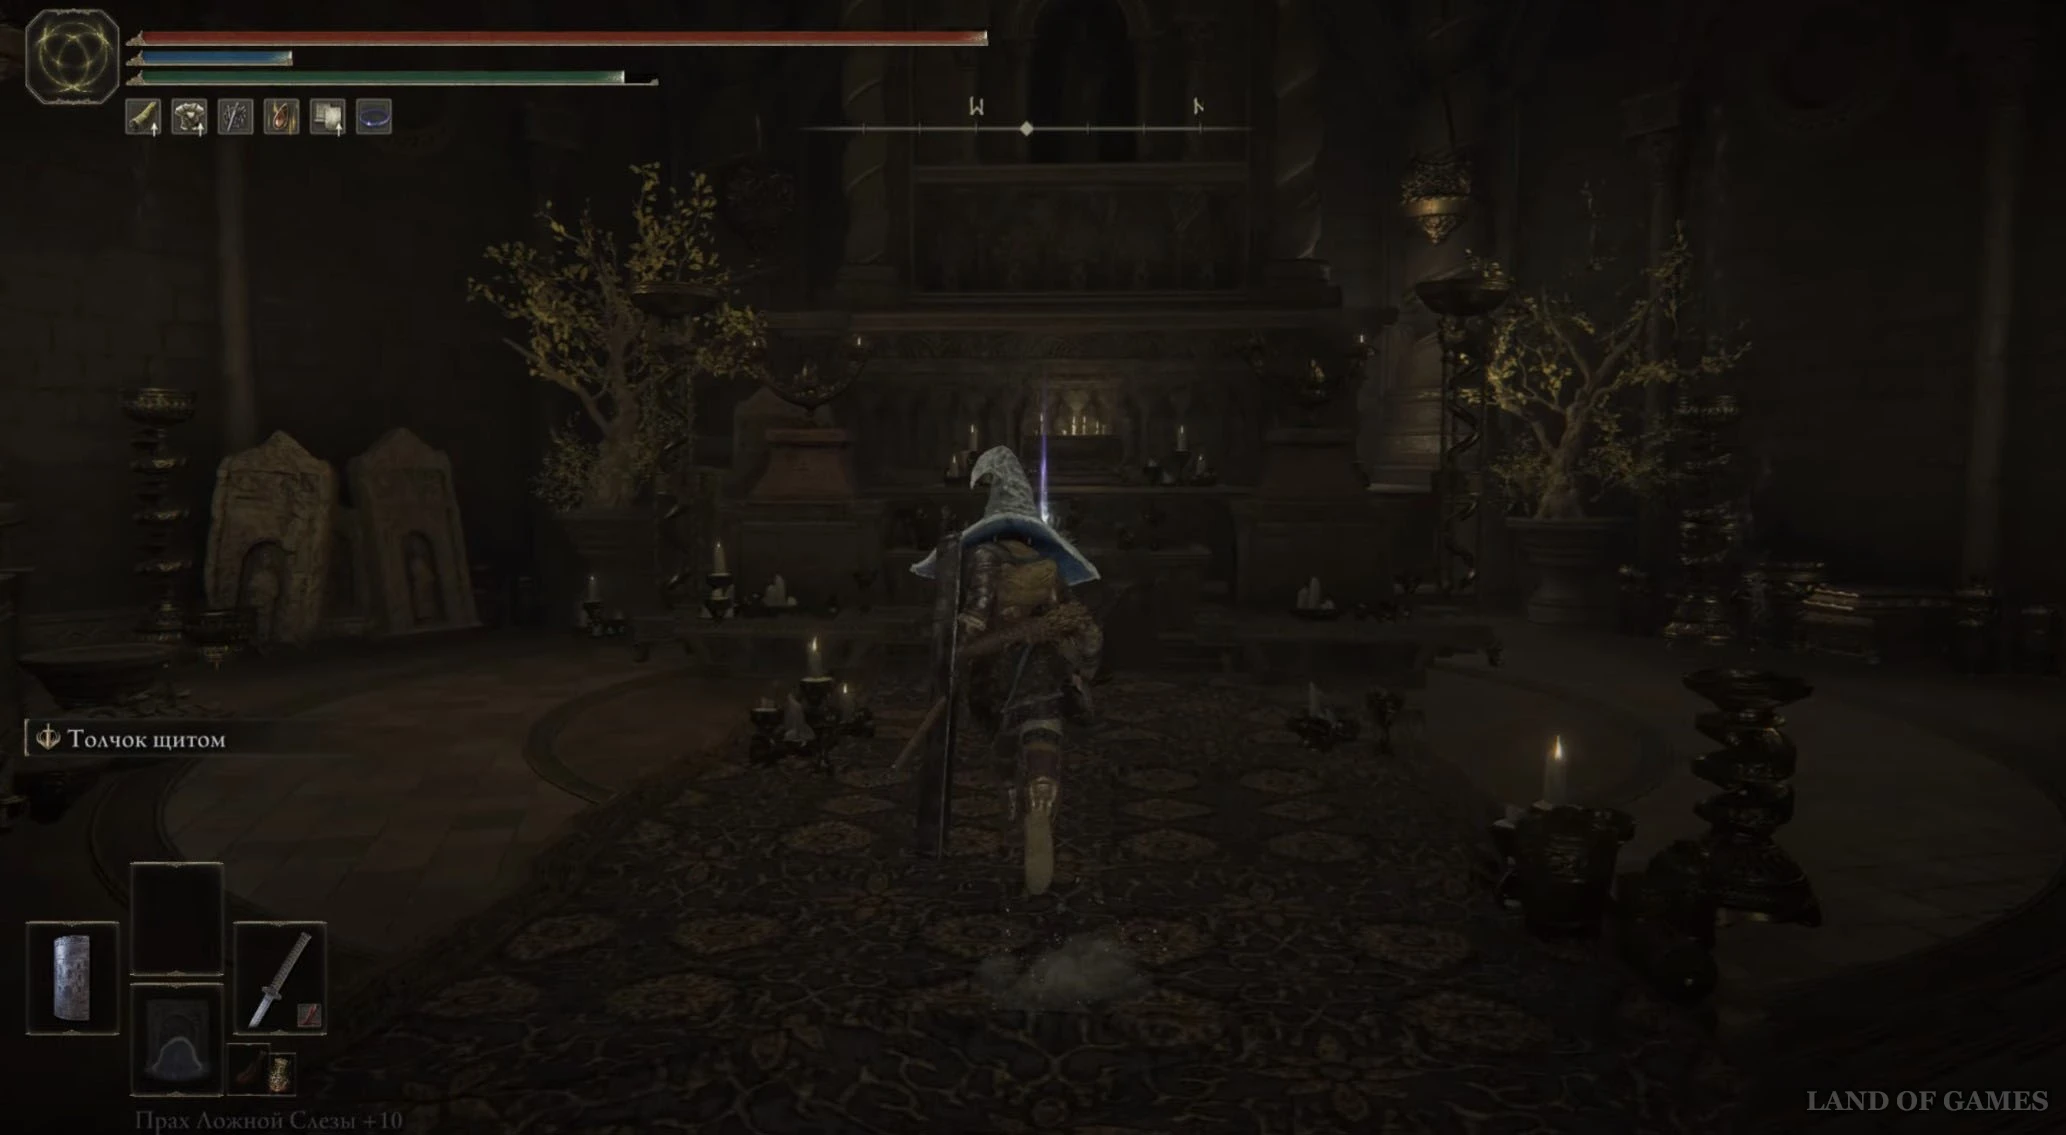
Продолжайте подниматься наверх по ступенькам в северо-западном направлении, пока не доберетесь до огромного храма – войдите внутрь него. Здесь вы обнаружите крест Марики, рядом с которым лежит фрагмент, и место благодати «Извилистый подъем».
Осколок древа упадка 48
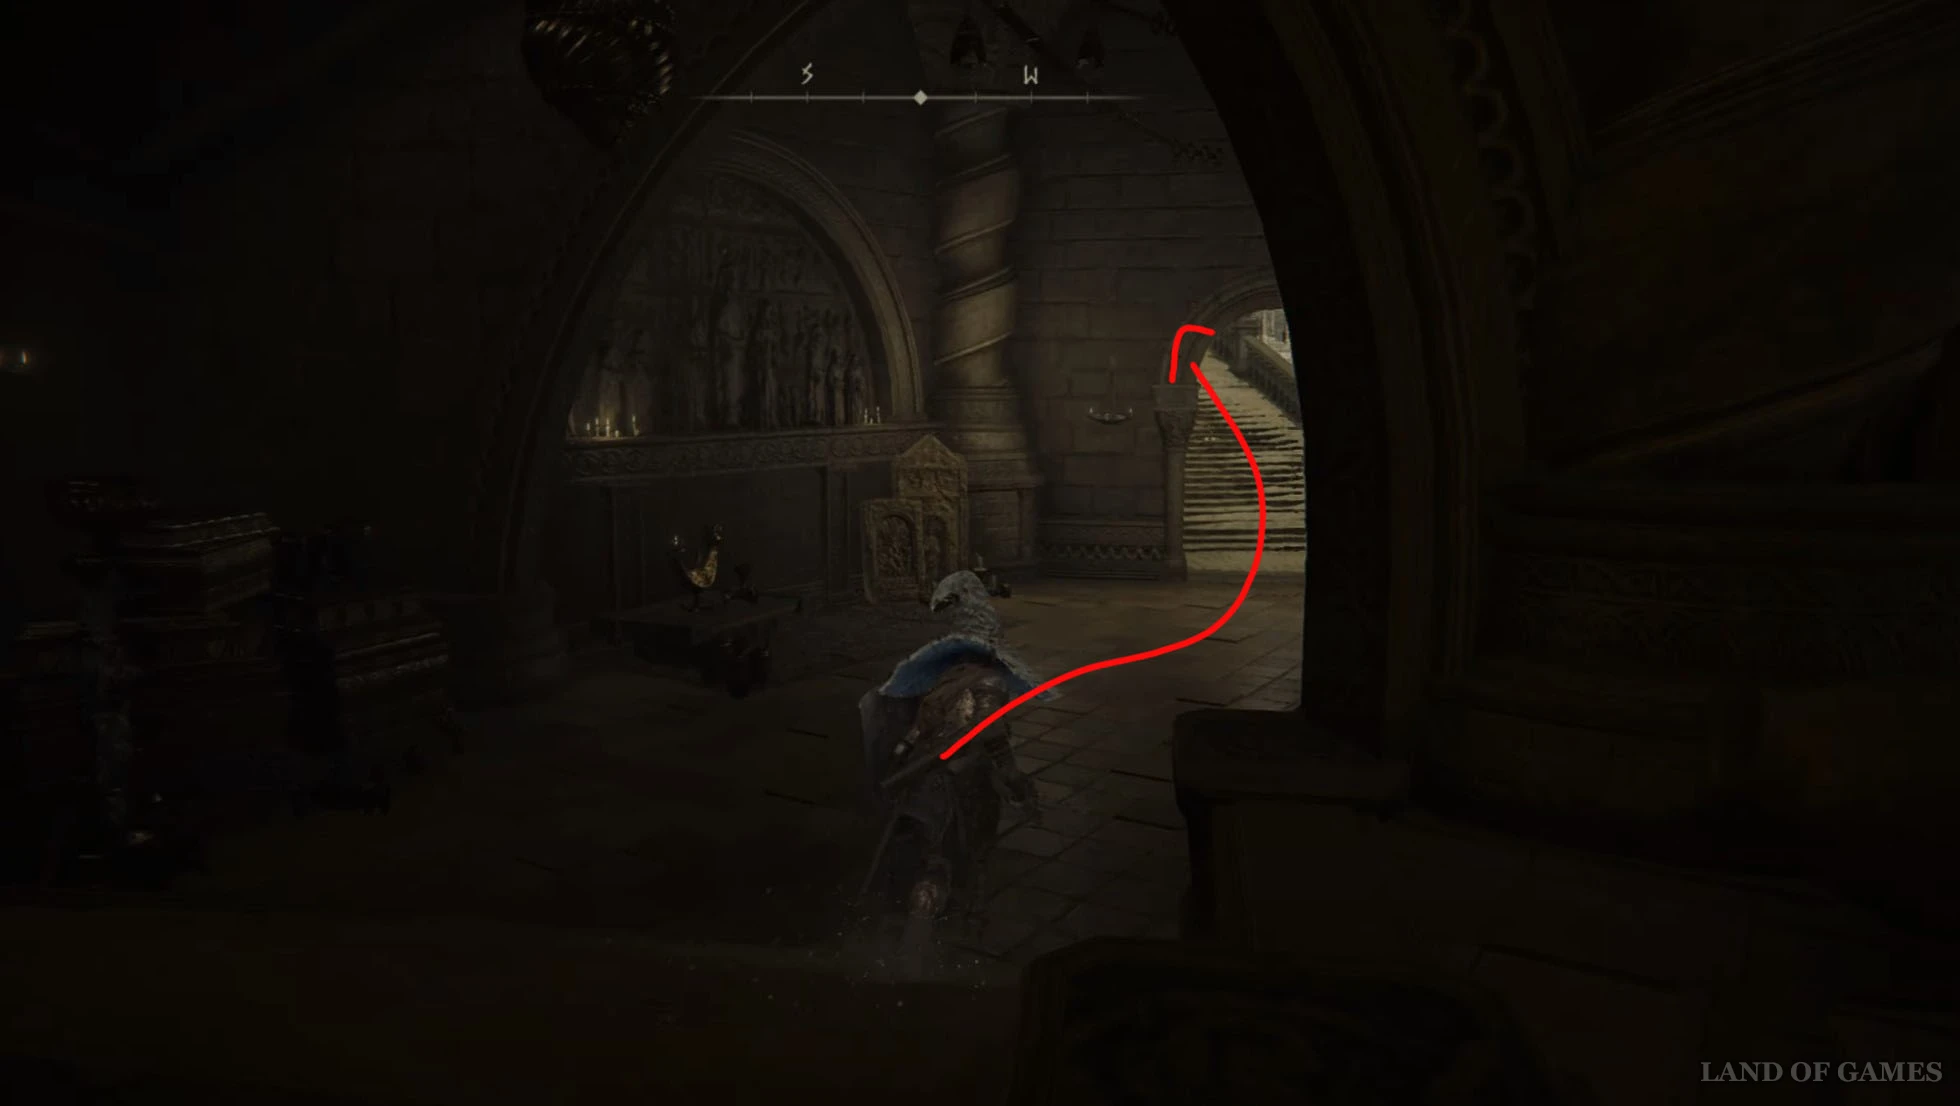
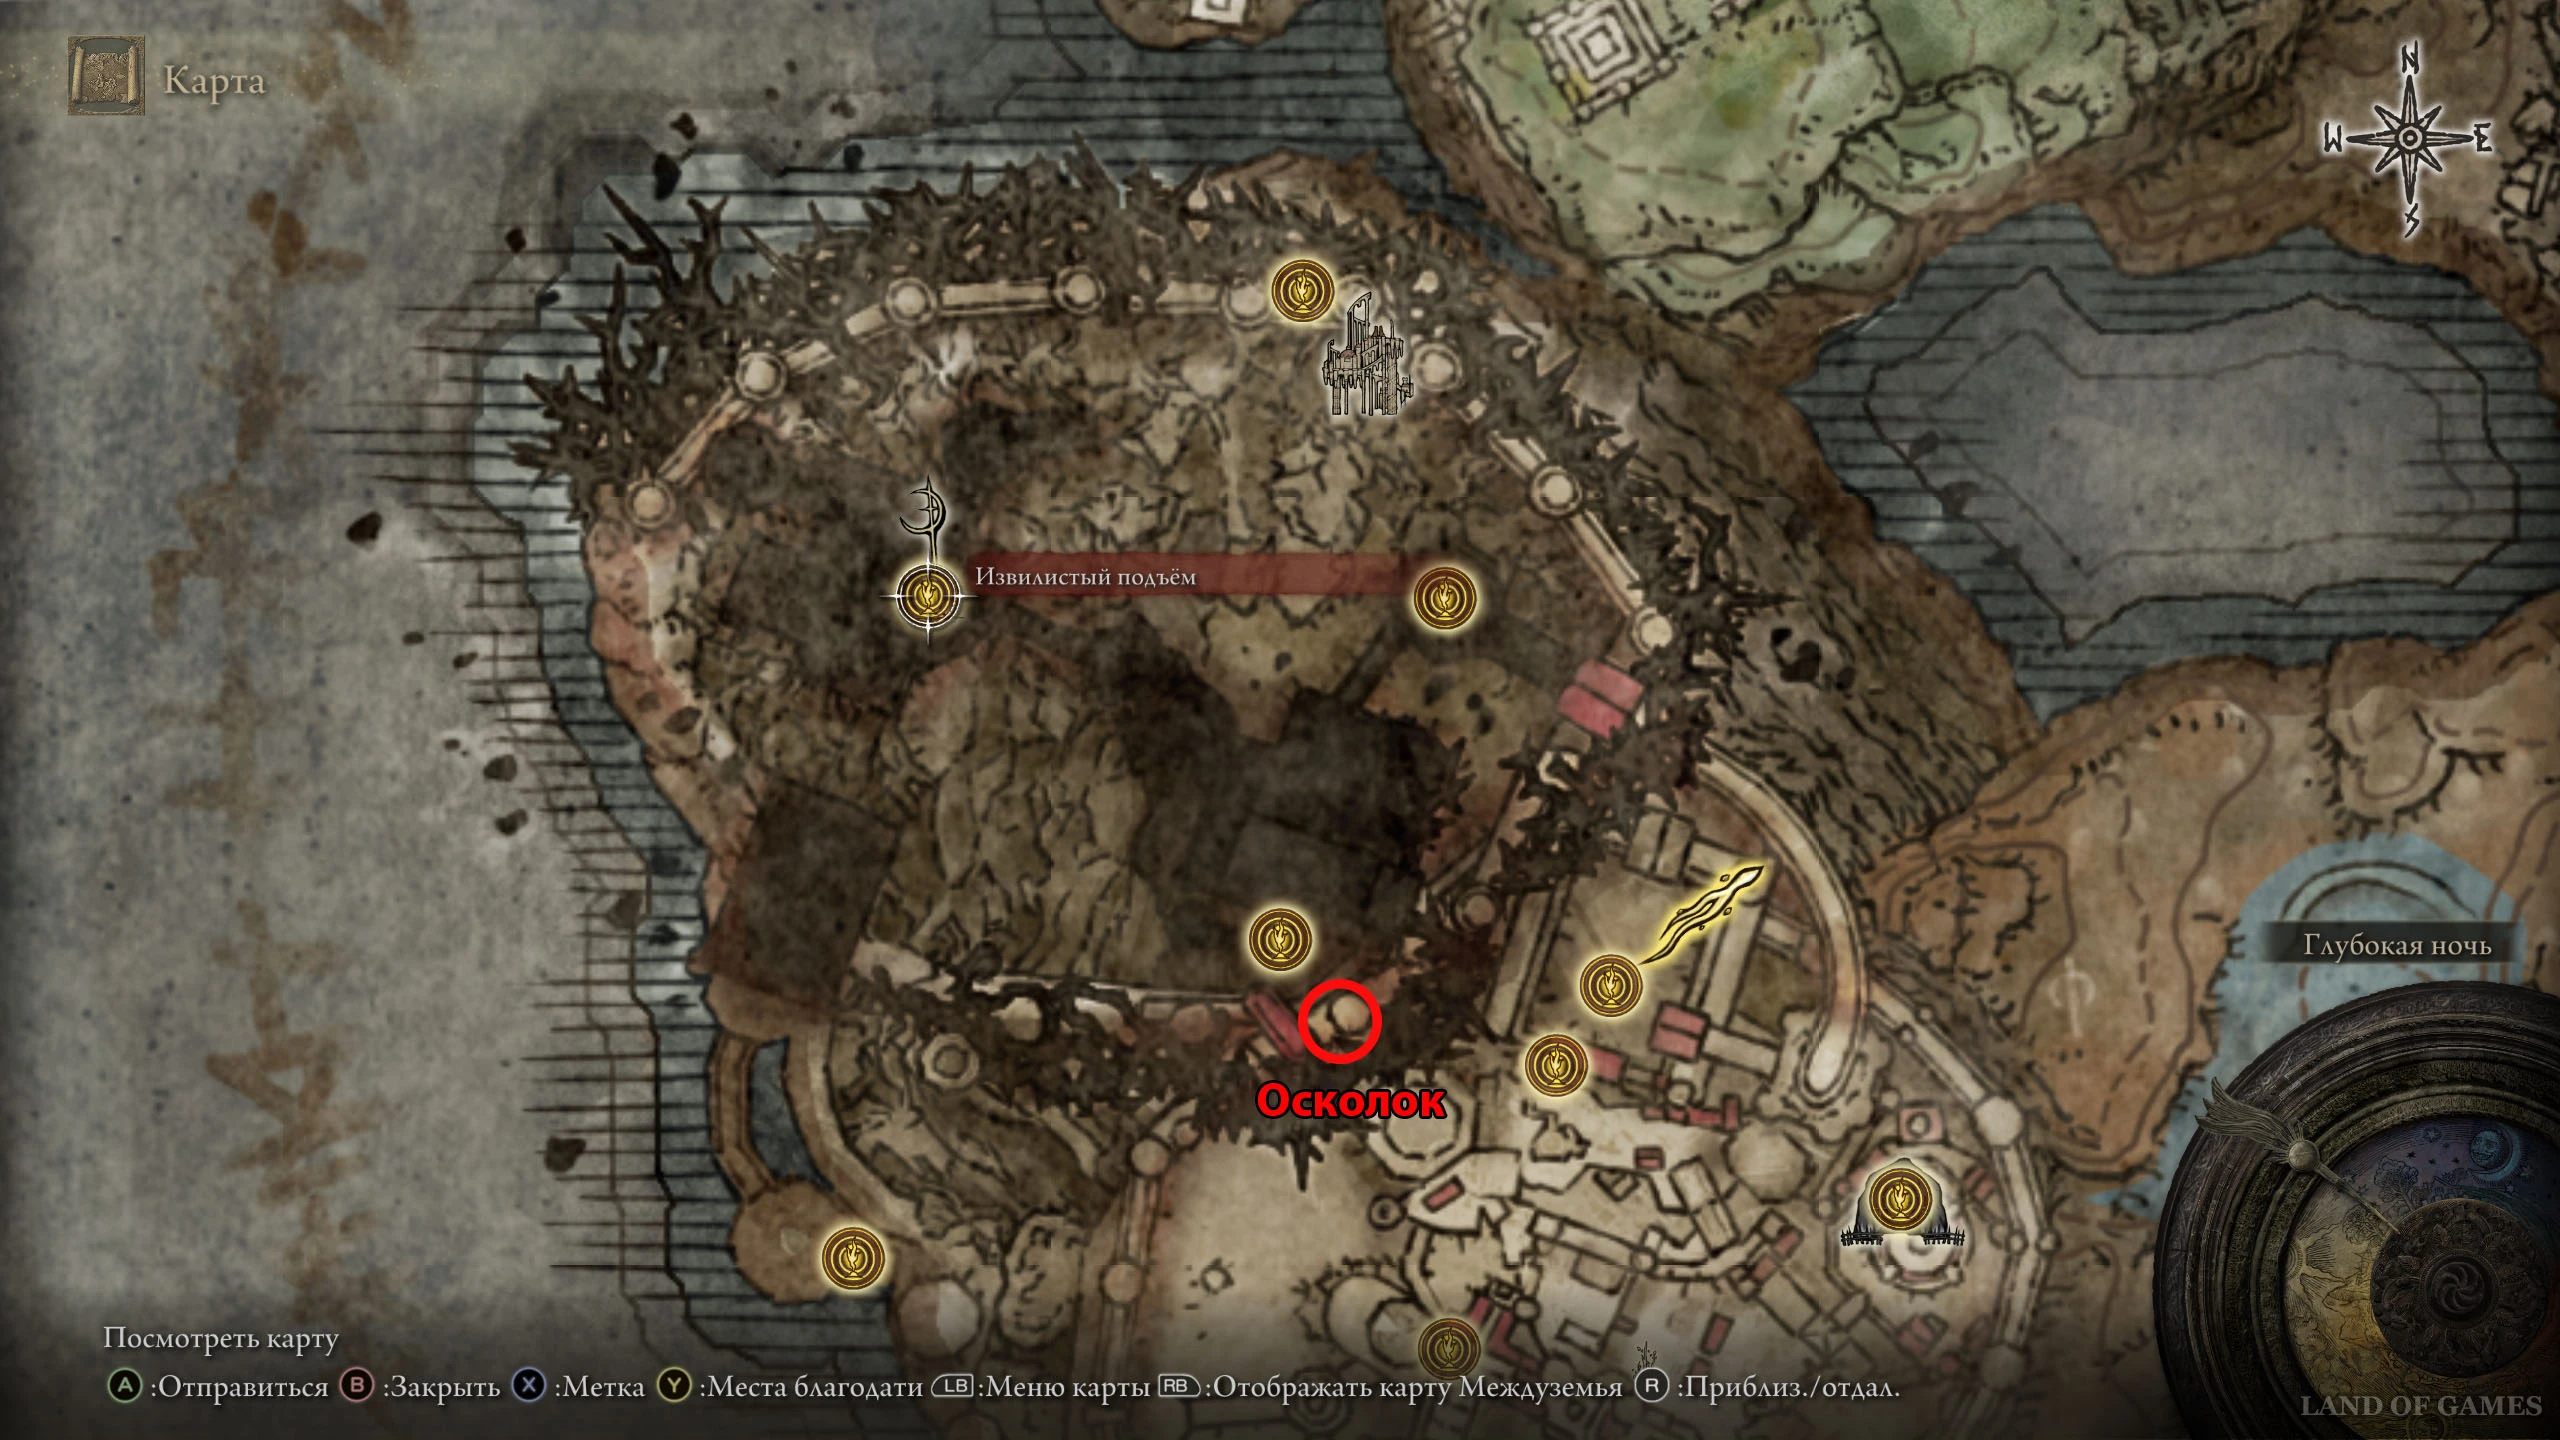
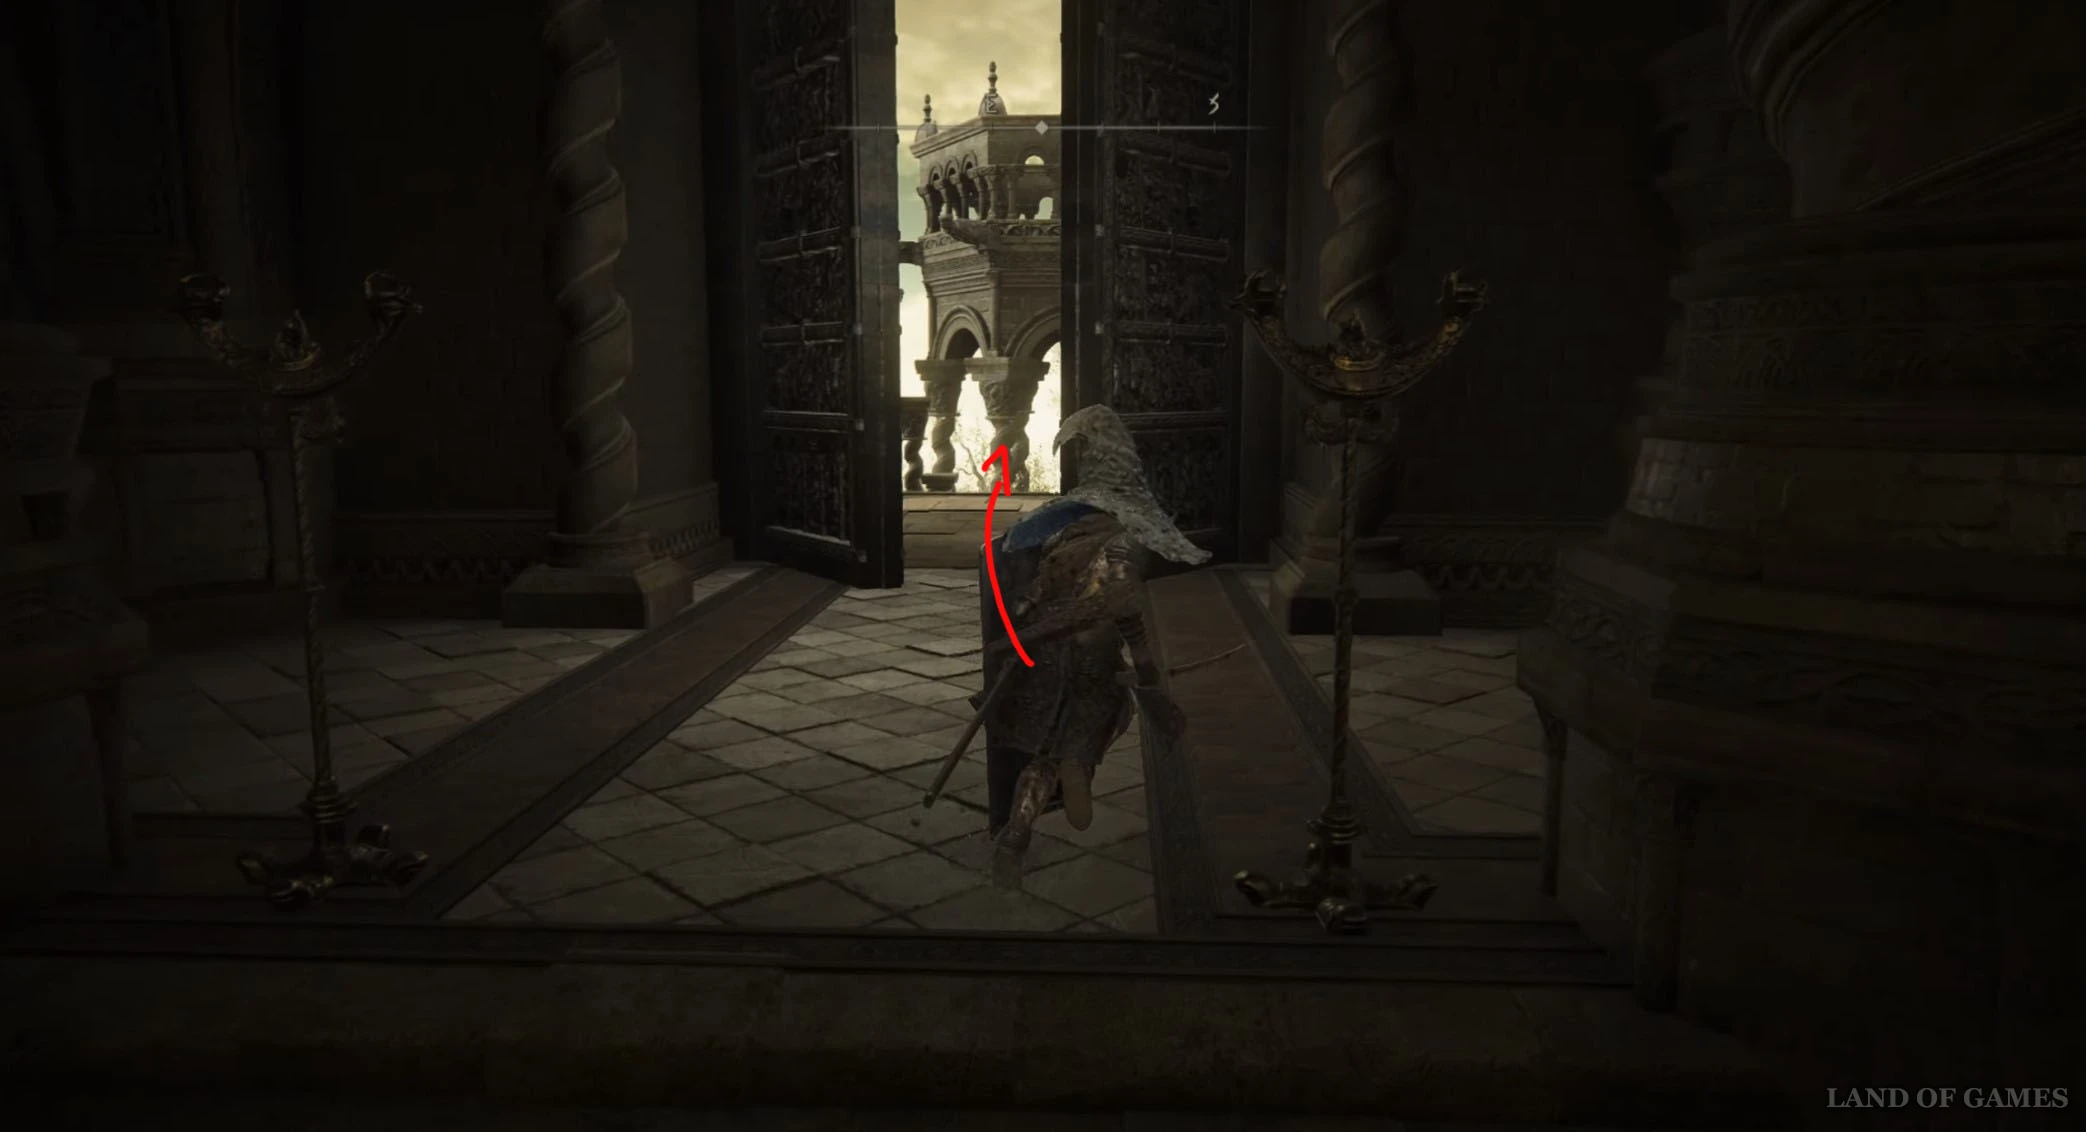
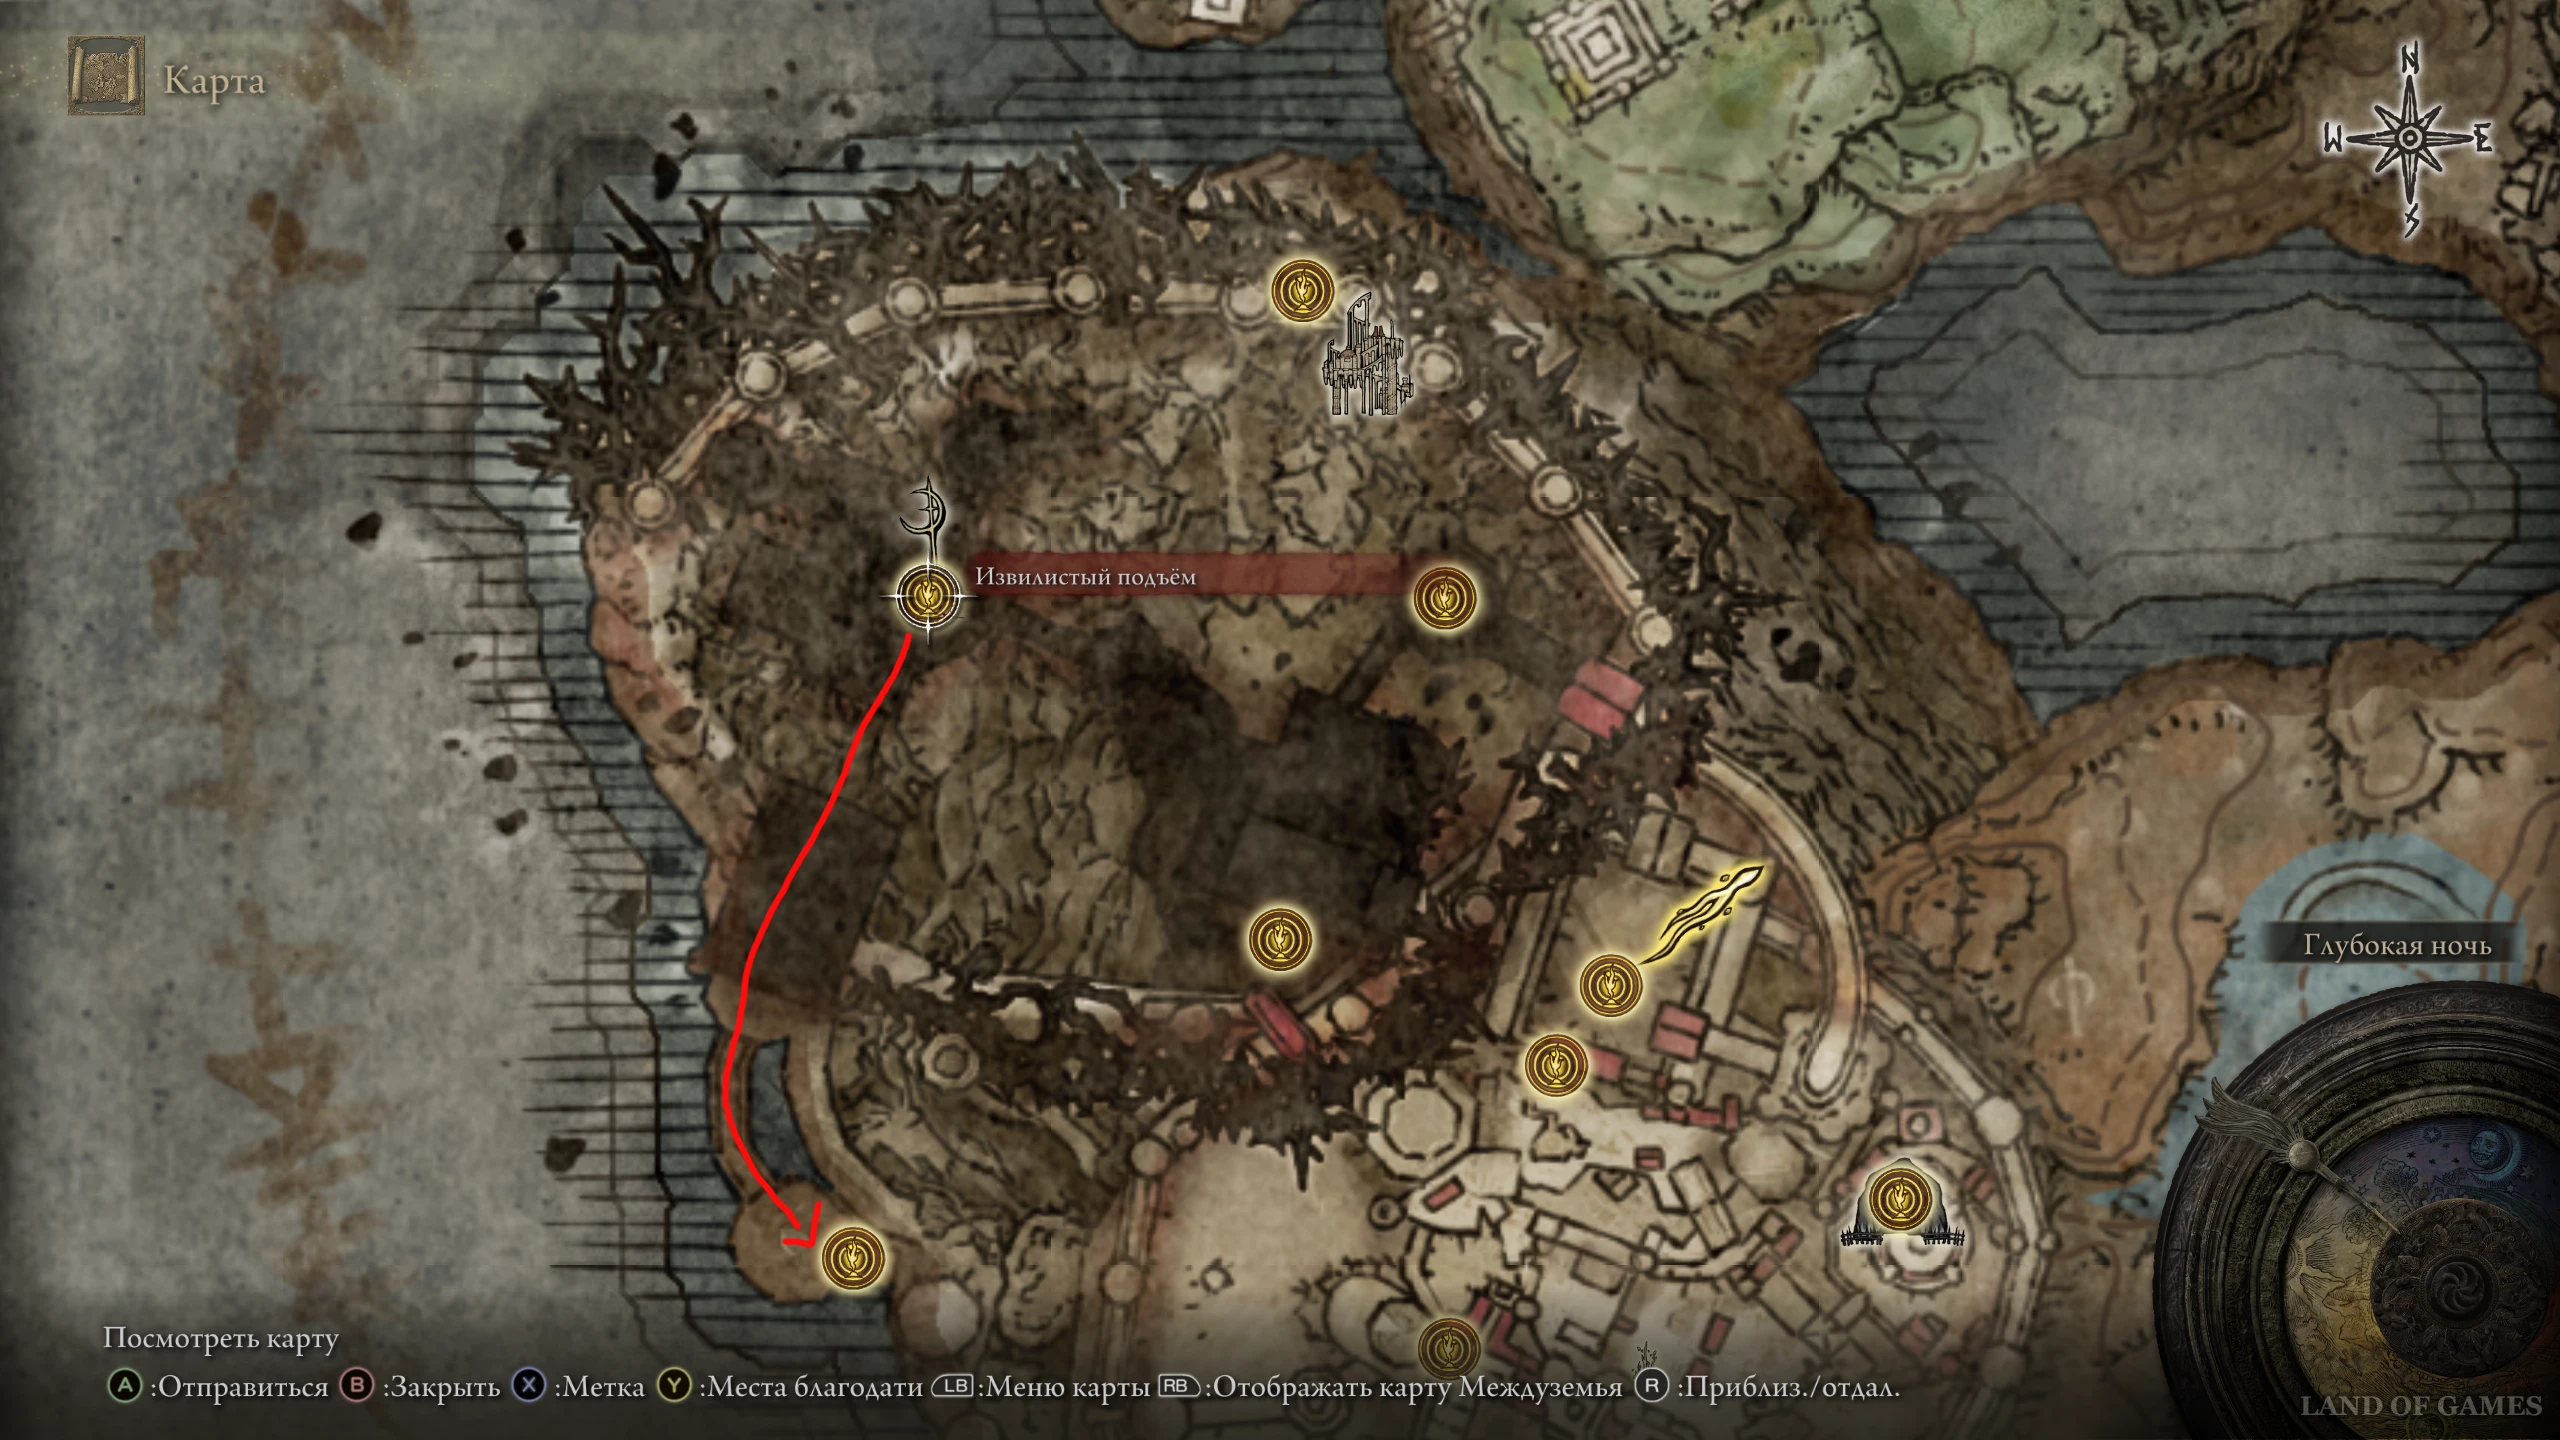
Переместитесь или доберитесь до места благодати «Извилистый подъем», расположенный в Энир-Илиме, а затем выйдите из здания через юго-восточный выход. Спуститесь по ступенькам вниз, поверните налево, когда доберетесь до площадки, и пройдите еще ниже по лесенке. Заверните в проход справа, пройдите к краю платформы и спрыгните на лестницу слева и внизу.

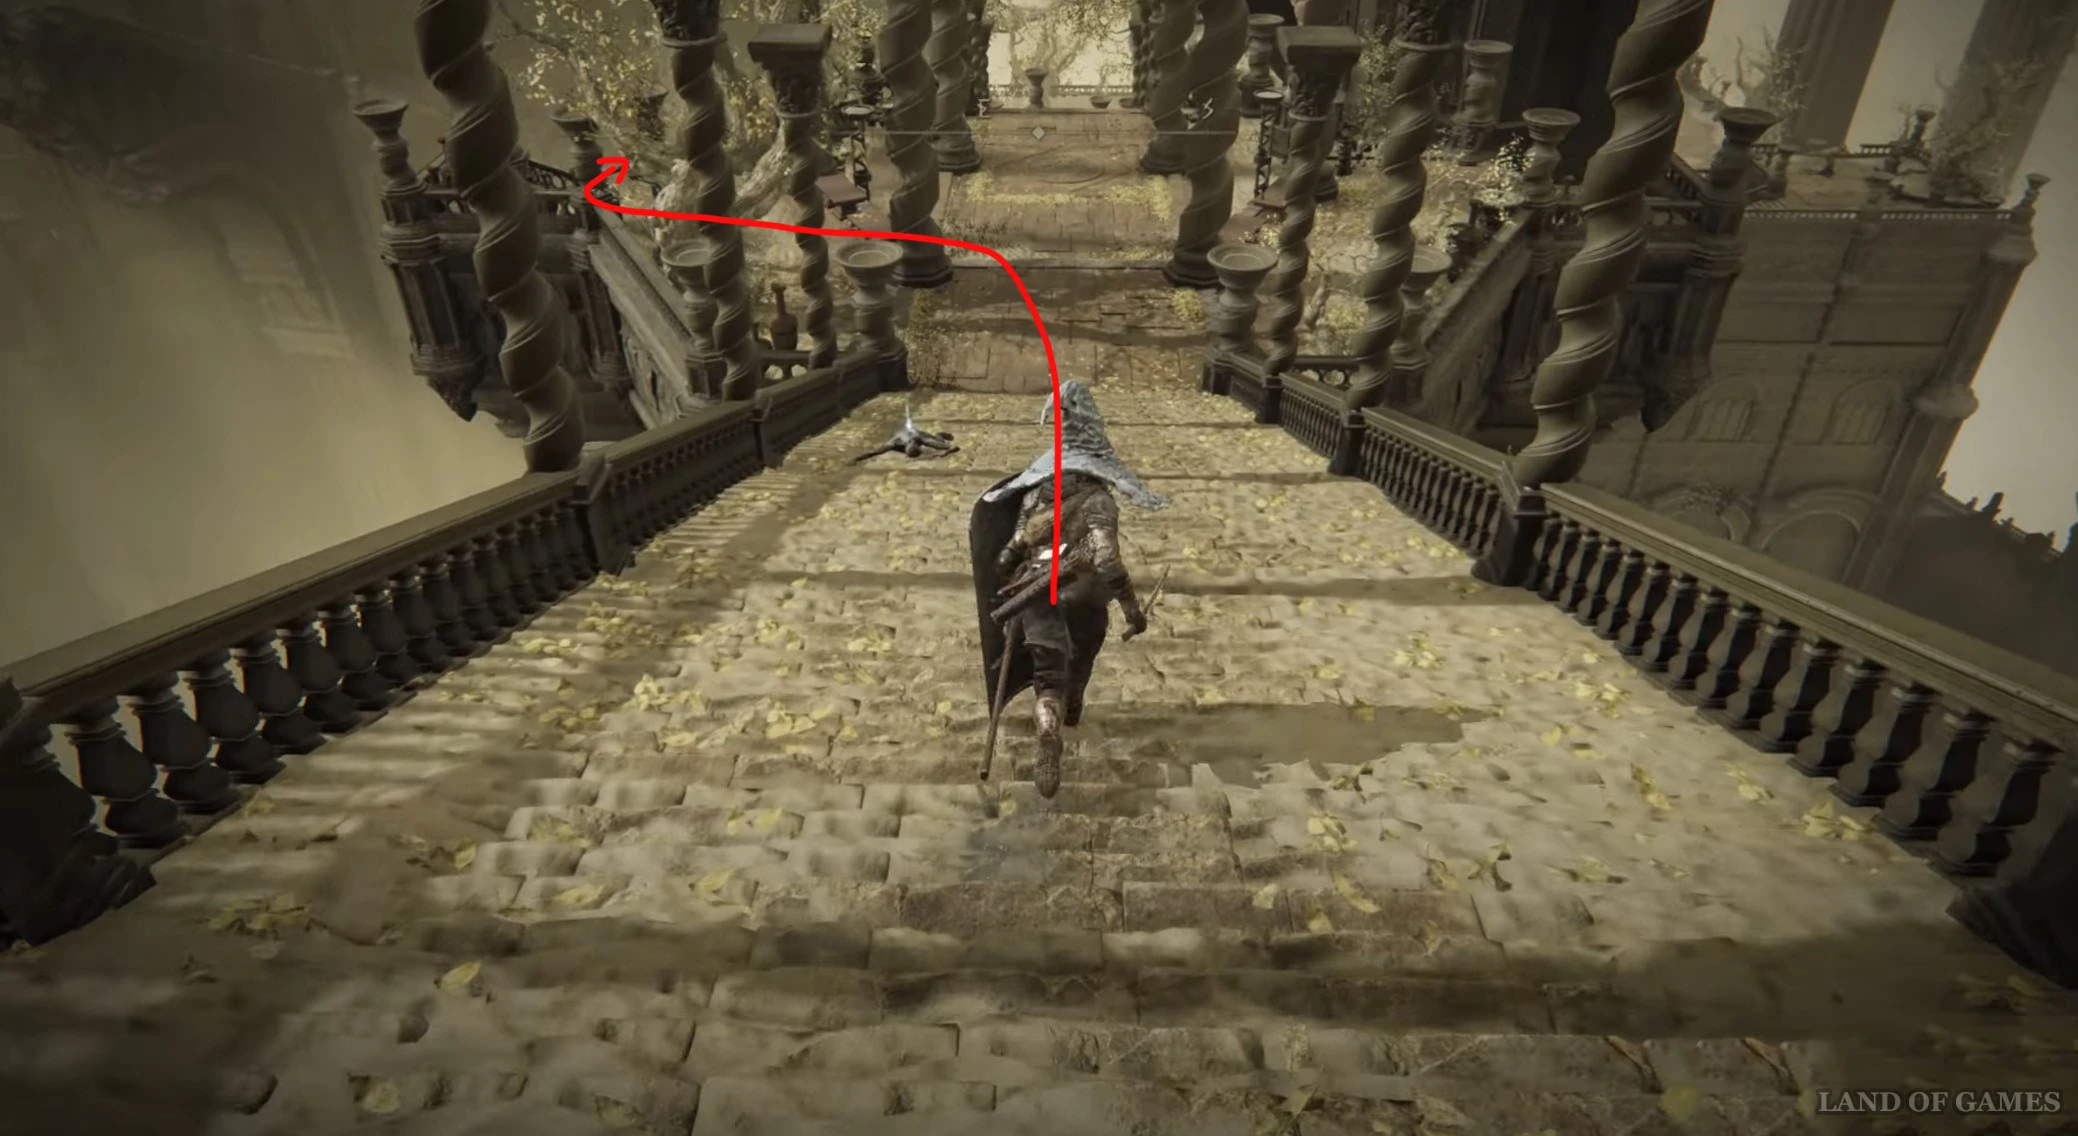
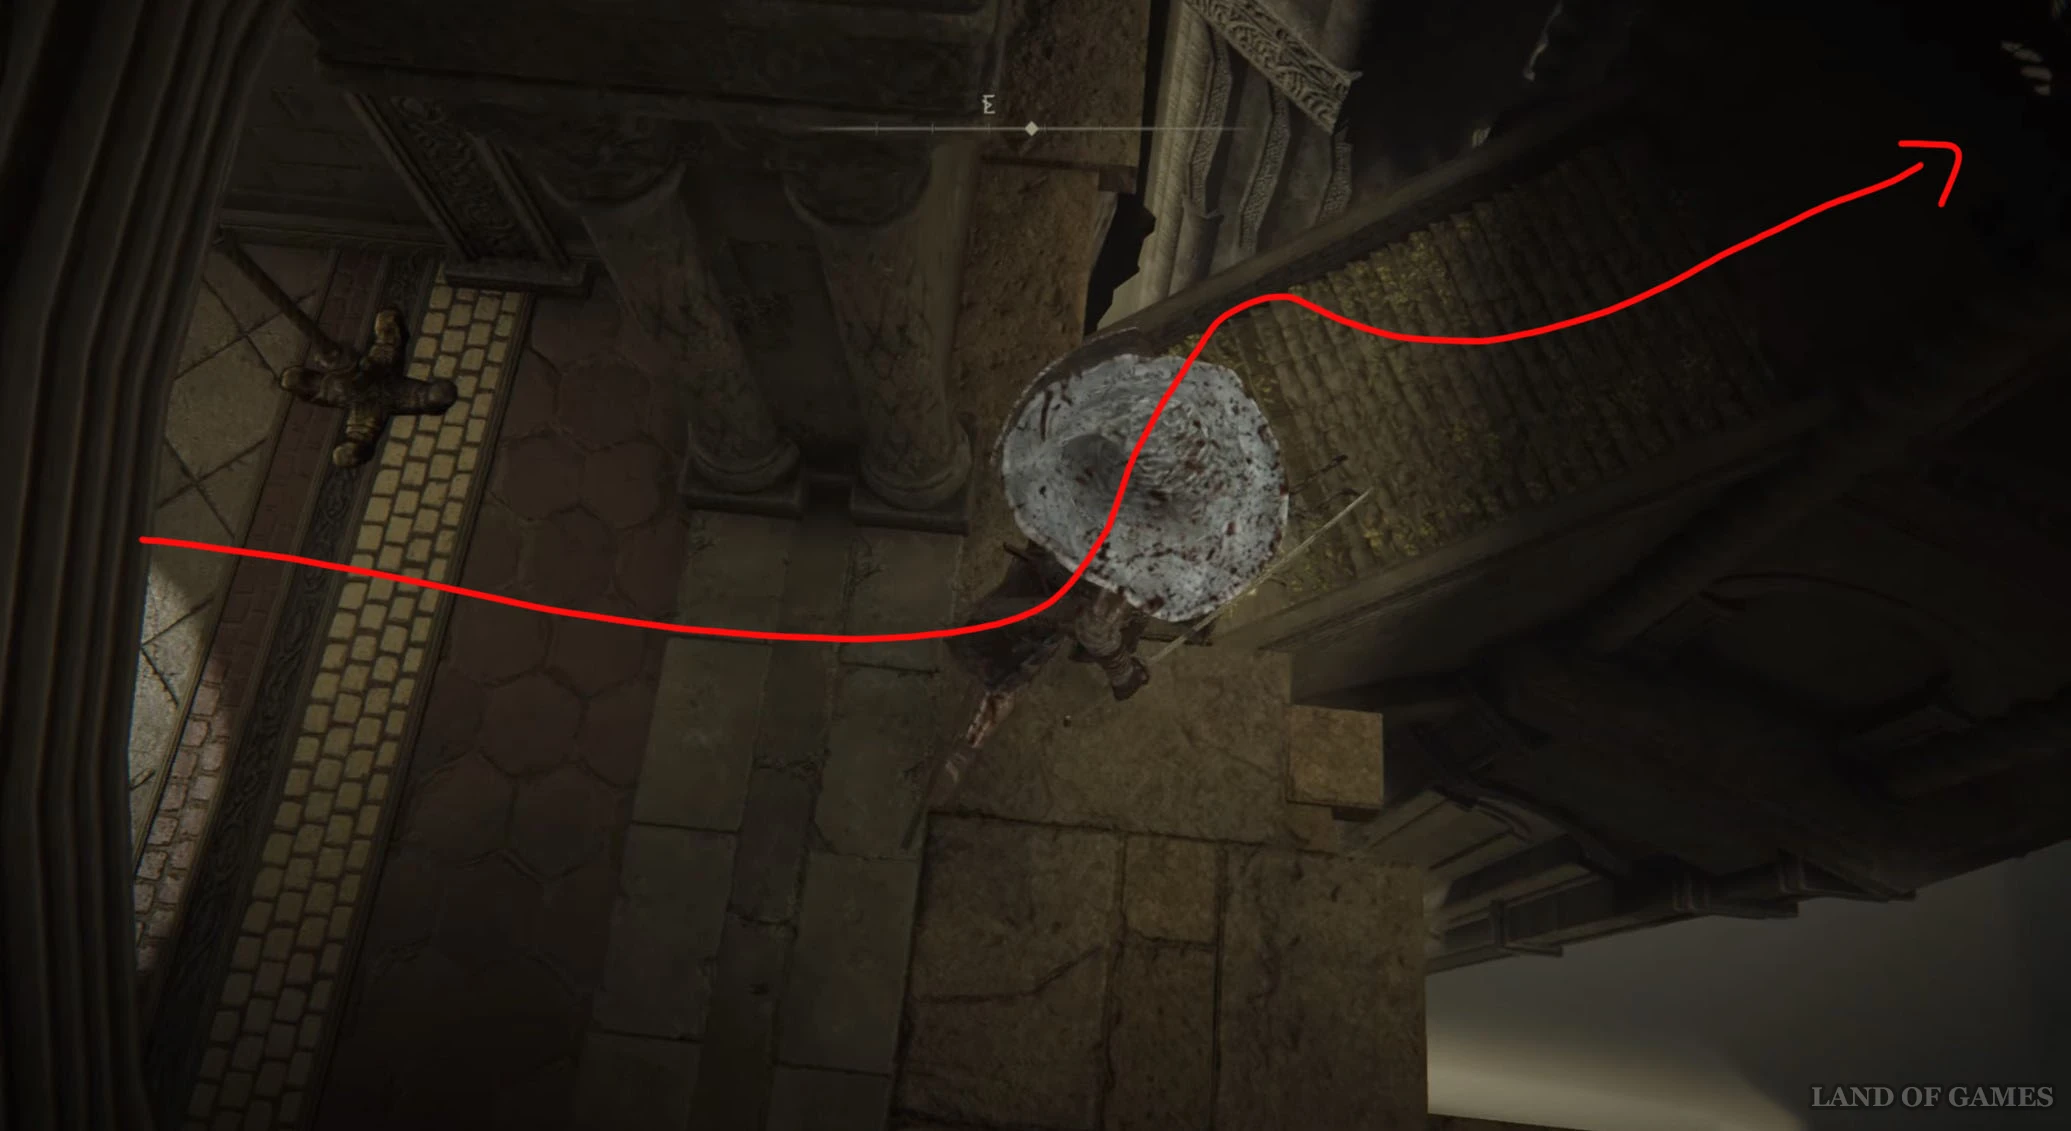
Поднимитесь по ступенькам и подойдите к краю очередной площадки, а потом спрыгните на каменный выступ внизу. Идите по нему на восток, а затем прыгните на другой уступ с правой стороны. Двигайтесь вперед, пока не дойдете до разлома и спуститесь еще ниже. Далее направляйтесь по выступу на юг.
Обойдя здание, спрыгните на выступ справа, чтобы перебраться на башню. Затем начните подниматься наверх, разбежитесь и спрыгните на уступ внизу. Идите дальше и прыгните на лестницу, расположенную еще ниже. Пройдите к правому краю площадки, разбегитесь и запрыгните в окошко в здании справа. Войдите в сооружение, дабы попасть в Белурат, поселение у башни.
Пройдите через единственный выход вперед и сразу же сверните влево – вы обнаружите здесь статую, у подножья которой лежит нужный вам фрагмент.
Осколок древа упадка 49
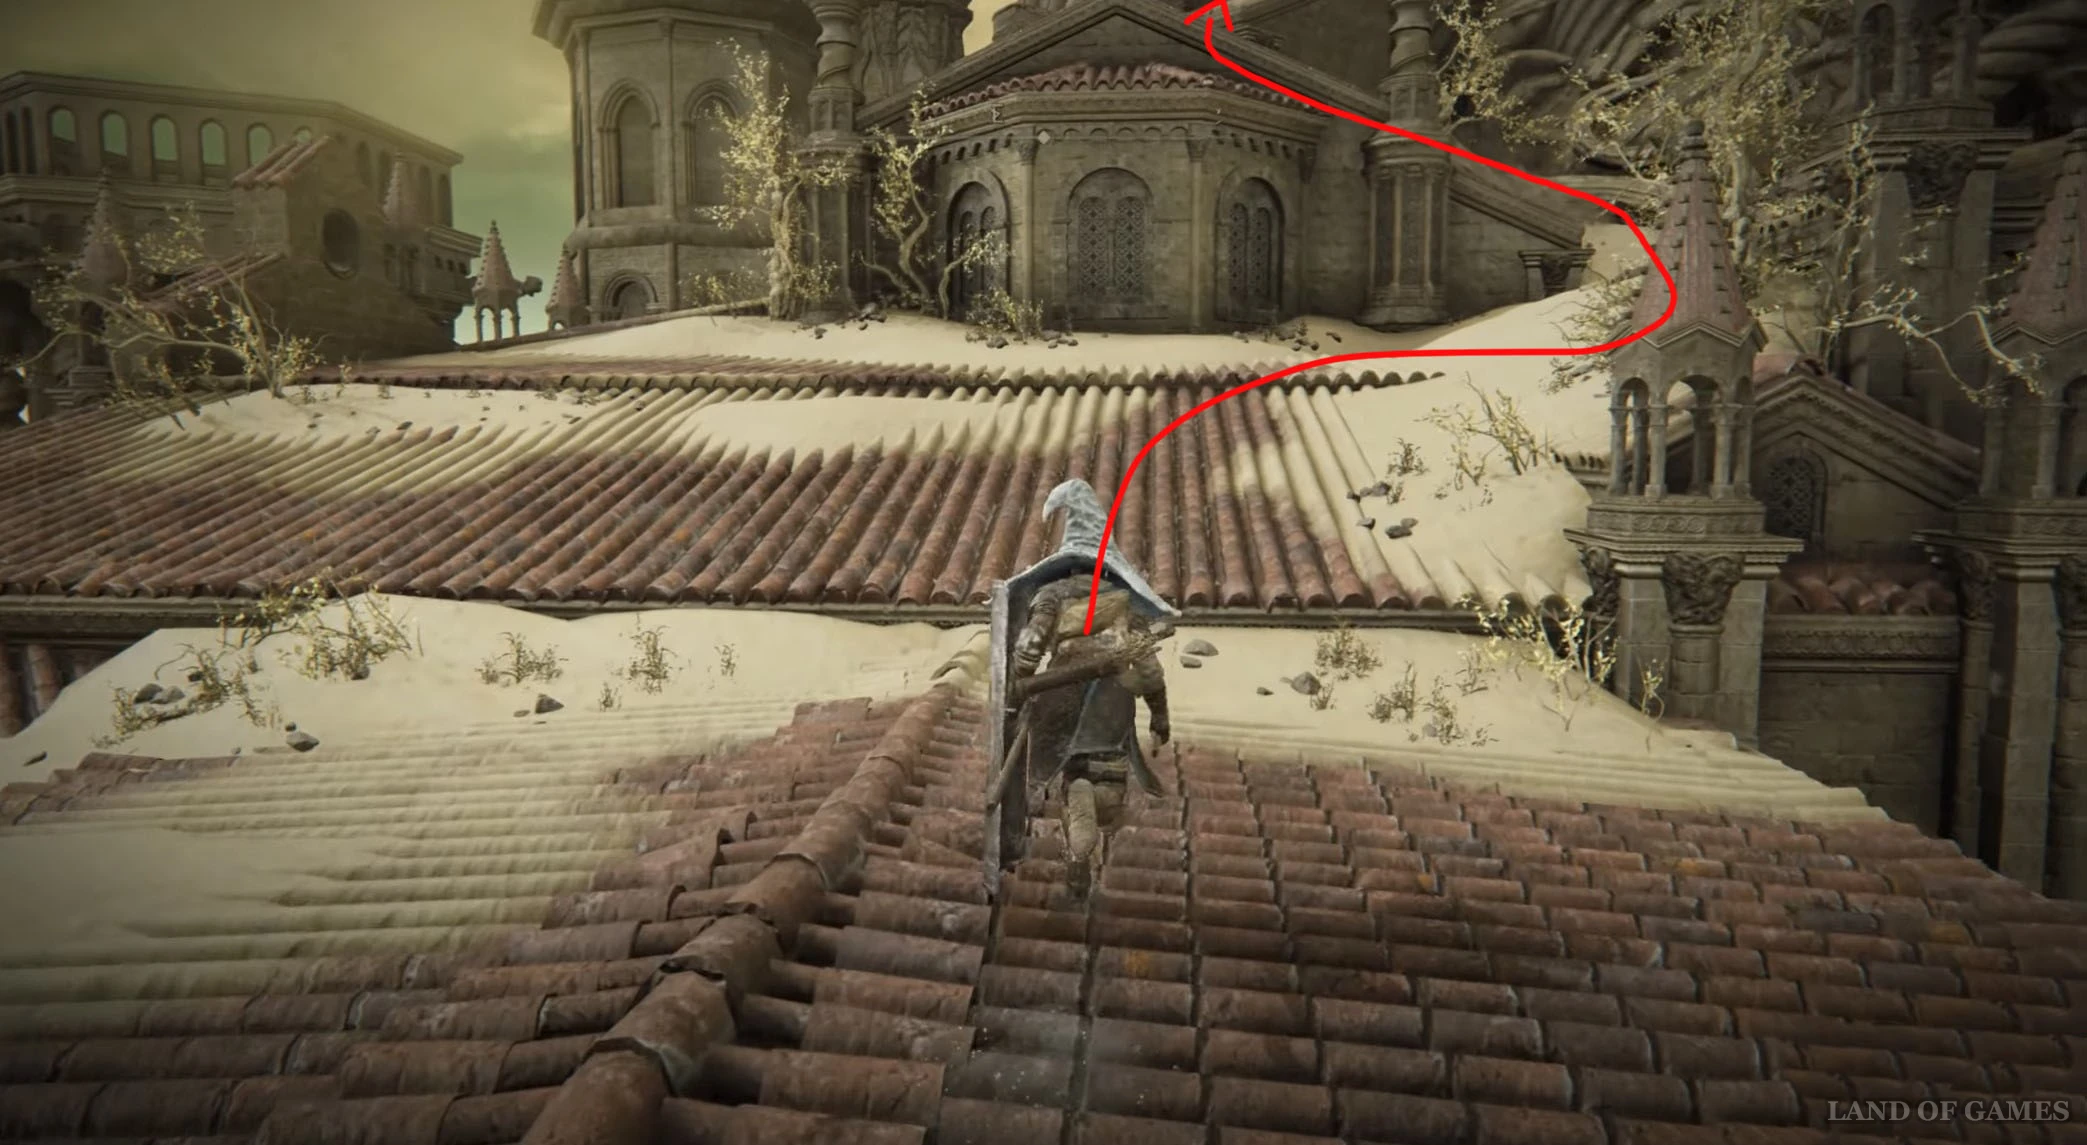
Вернитесь к месту благодати «Извилистый подъем», а потом начните подниматься по каменной лестнице. Через 3 больших пролета сверните влево и выпрыгните наружу через окошко, чтобы оказаться на крыше. Бегите по кровле на юго-запад, а затем на северо-запад, пока не доберетесь до площадки на другой стороне.


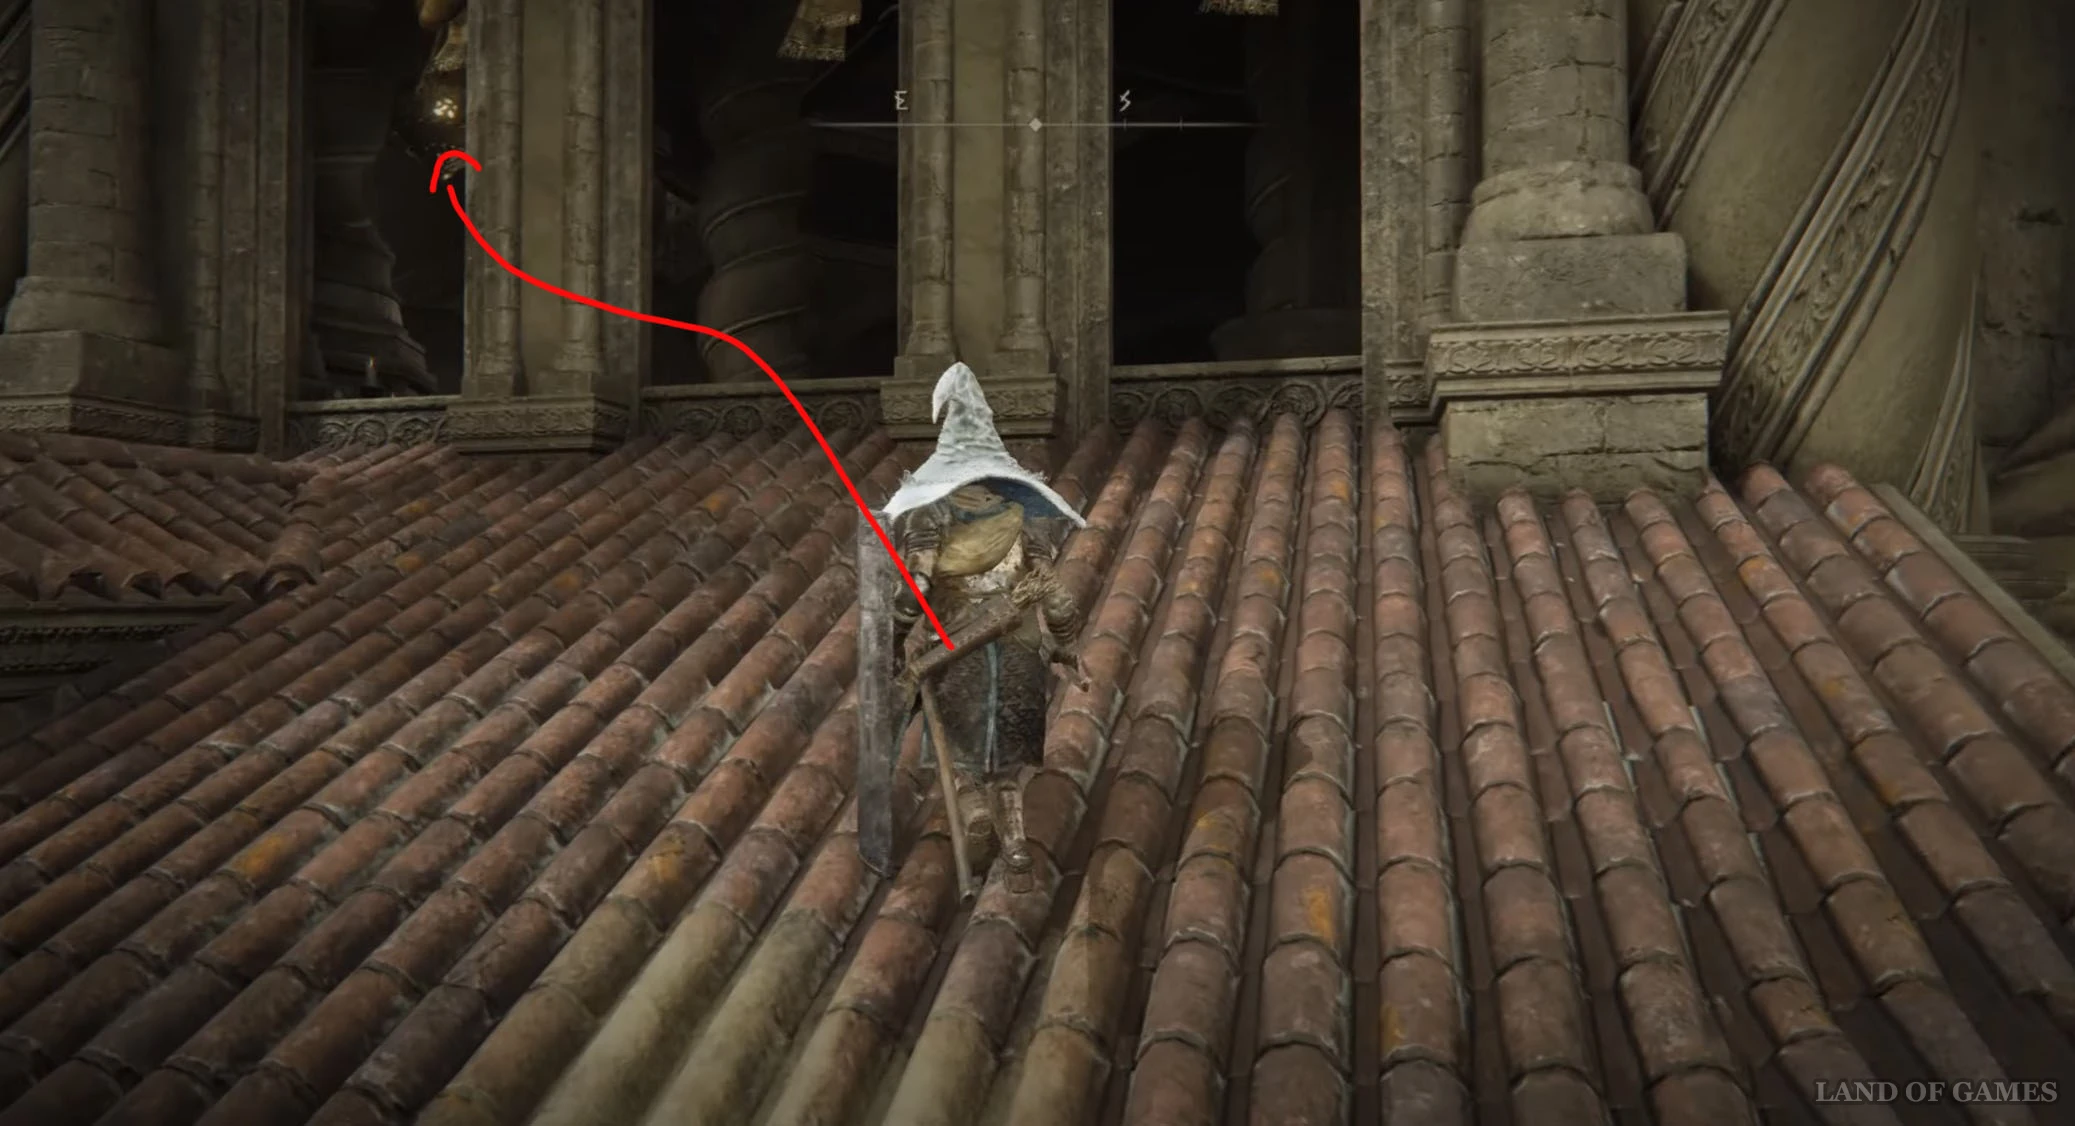
Далее поверните влево и поднимитесь по лесенке с правой стороны, войдя в здание. Сразу же выйдите из него и поверните направо, продолжив подниматься наверх. После подъема тут же сверните вправо и войдите в комнату. Здесь у подножья постамента вы найдете очередной фрагмент.
Осколок древа упадка 50
От предыдущего осколка развернитесь и выйдите из башни, а потом бегите по крышам на юго-восток и войдите в здание через большие окна. Далее начните подниматься по лестнице наверх и сверните в левый проход.
Снова поднимитесь по лесенке и войдите в храм, где находится место благодати «Прихожая Палаты Очищения». Здесь у подножья постамента вы обнаружите последний фрагмент, который позволит вам прокачать благословение Древа упадка до максимального уровня.

На этом наш гайд по поиску всех Осколков древа упадка в Elden Ring Shadow of the Erdtree завершен. Надеемся, что он поможет вам отыскать все частички и усилить своего персонажа.
Комментарии
Для добавления комментариев необходимо авторизоваться.
Вы можете войти через