
In Genshin Impact The Song of the Dragon and Freedom is the third chapter of the Prologue game story campaign. To start it, you will first need to reach the 18th adventure rank. As part of it, you will have to complete several Archon quests, fighting a lot of mobs, meeting new characters and solving a few puzzles. This guide provides a detailed walkthrough of all tasks.
Abyss Mage
Meet Dilyuk at the distillery
Immediately after watching all the cutscenes from the previous quest, you will need to go back to the Dawn distillery to discuss your next steps. Quickly head to the Statue of the Seven, located near the desired structure and go down to the winery, where you will meet Dilyuk, Venti and Jean. Talk to them to start the last act of the Prologue.
Defeat the enemies
Follow the quest marker to the area northwest of the distillery. Follow the dirt road and you will eventually reach a huge staircase with a Hydro Void Mage hovering nearby and some Helichurls. We recommend using Electro skills, as the mini-boss will make all other enemies wet.

After dealing with the enemies, watch a new cut-scene to complete the task. You have become even closer to Dwalin's lair. As a reward, you will be given 350 adventure points, 10,725 Mora, 4 adventurer experience and 2 magical enhancement ores.
Hurdle
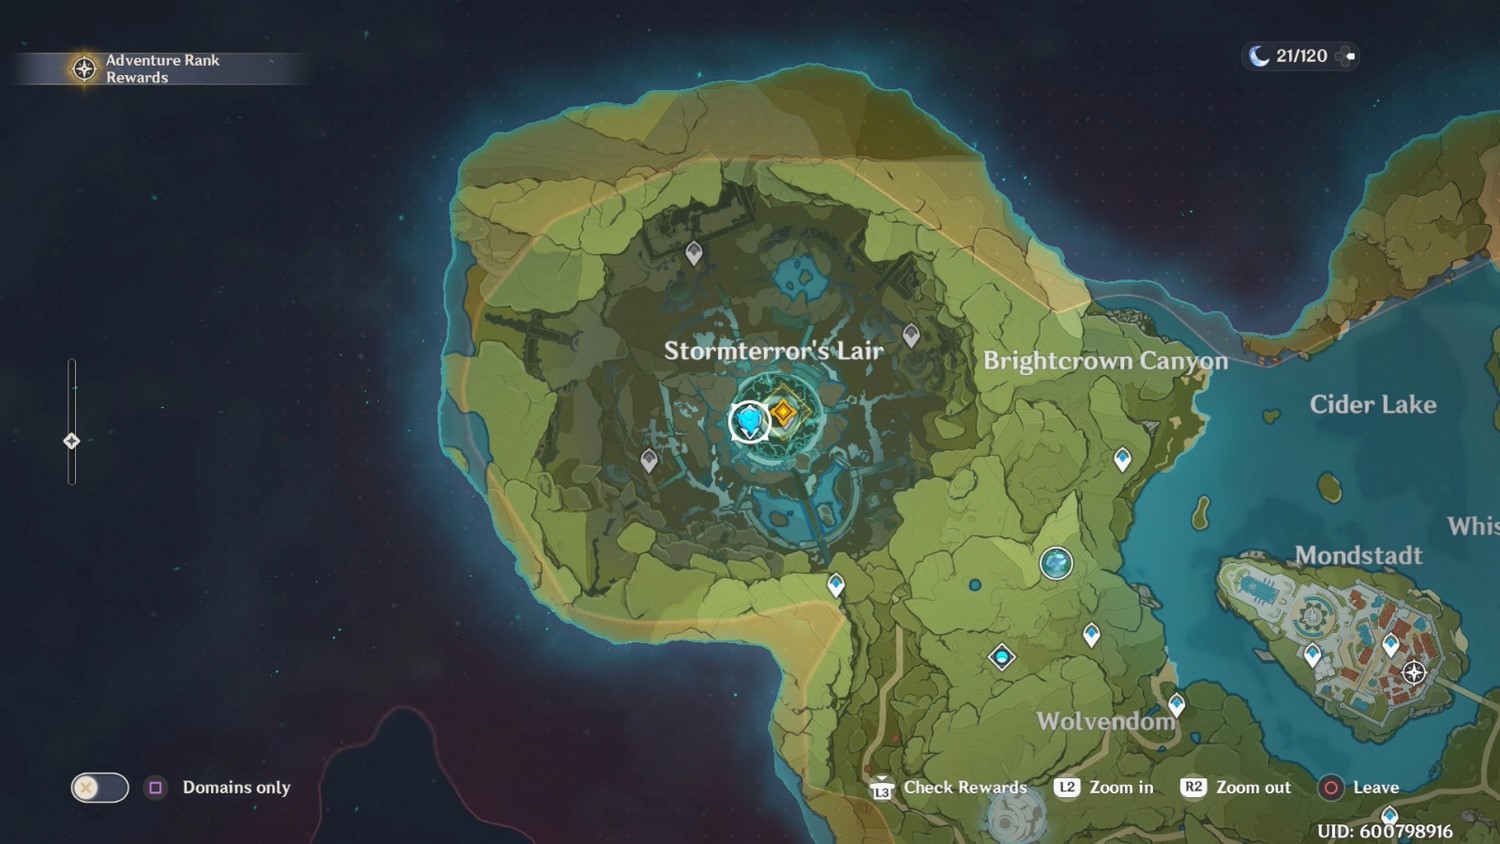
Go to Stormterror’s Lair
The quest marker will point to an "unknown" territory located to the north. The last Statue of the Seven can be found in the northwest corner, or you can simply follow the dirt road north to get to the point.
You can also teleport to the dungeon "Cecilia Garden", if you have it unlocked, and from there go west. Soon you will reach the wind barrier near the stairs, after which a new cutscene will begin.
Defeat the enemies
Hilichurls and one mitachurl with a huge shield will attack you. Deal with all opponents. Beware of mages standing behind ordinary warriors. We advise you to kill them first so that they do not bother you with their ranged attacks.
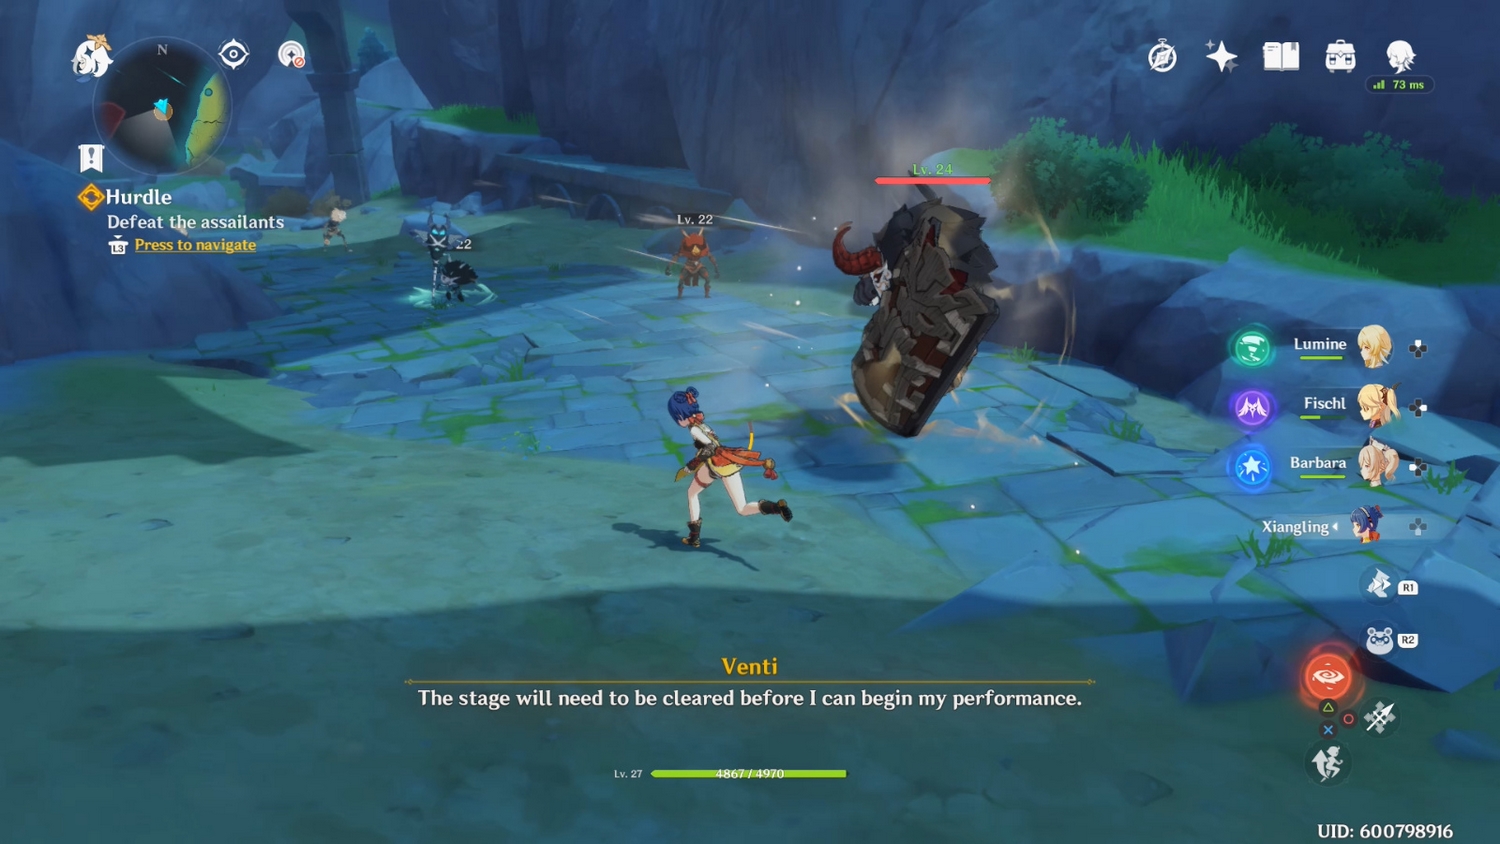
A new cut-scene will start, and Venti will eventually destroy the Hurdle. Now you will finally be able to get into the Stormterror’s Lair. As a reward, you will receive 350 adventure points, 10,725 Mora, 4 adventurer experience and 2 magical enhancement ores.
Empty Abode
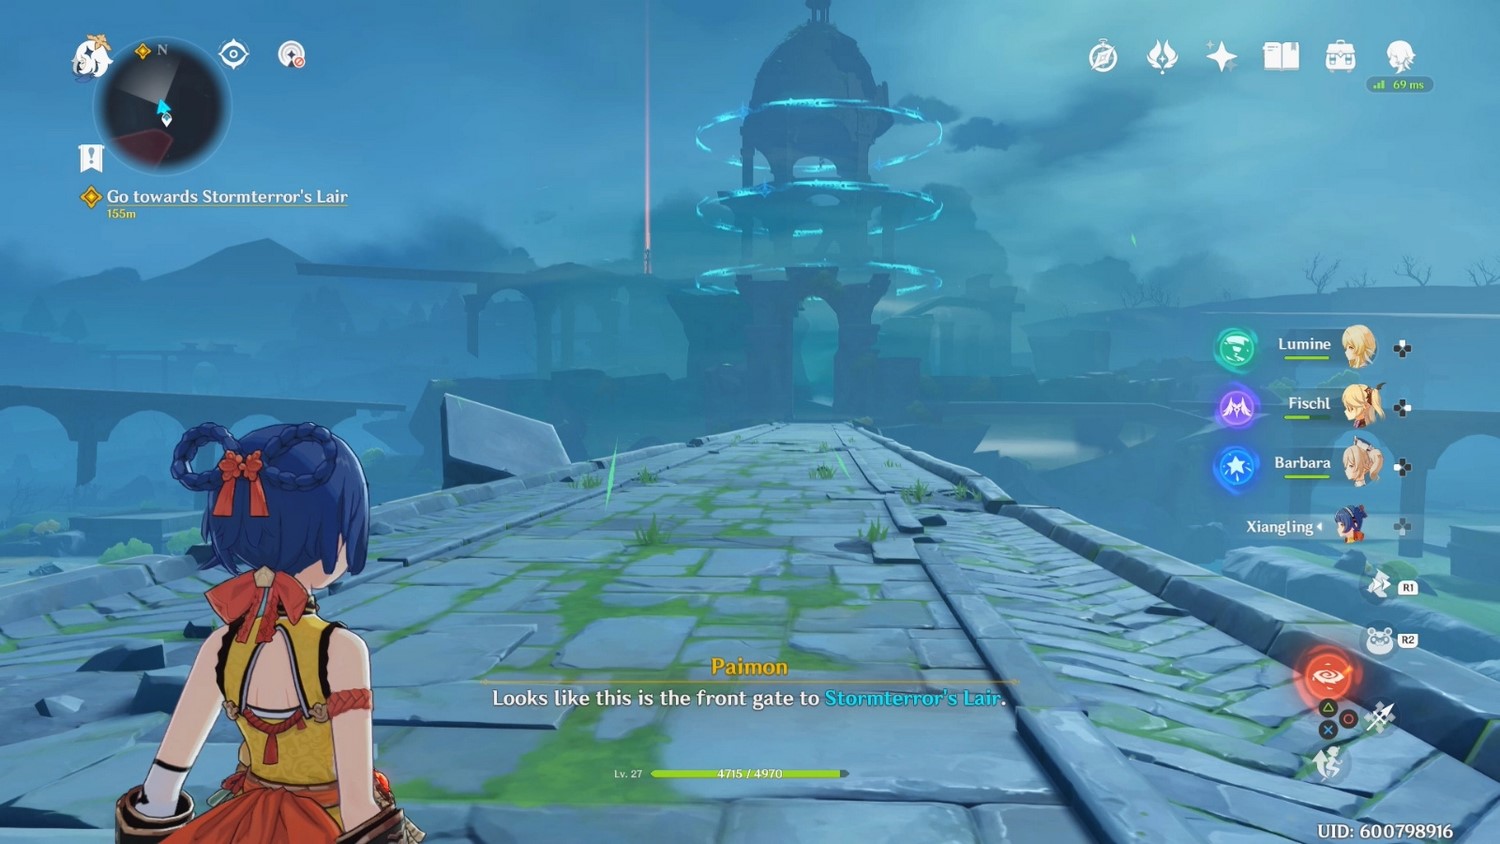
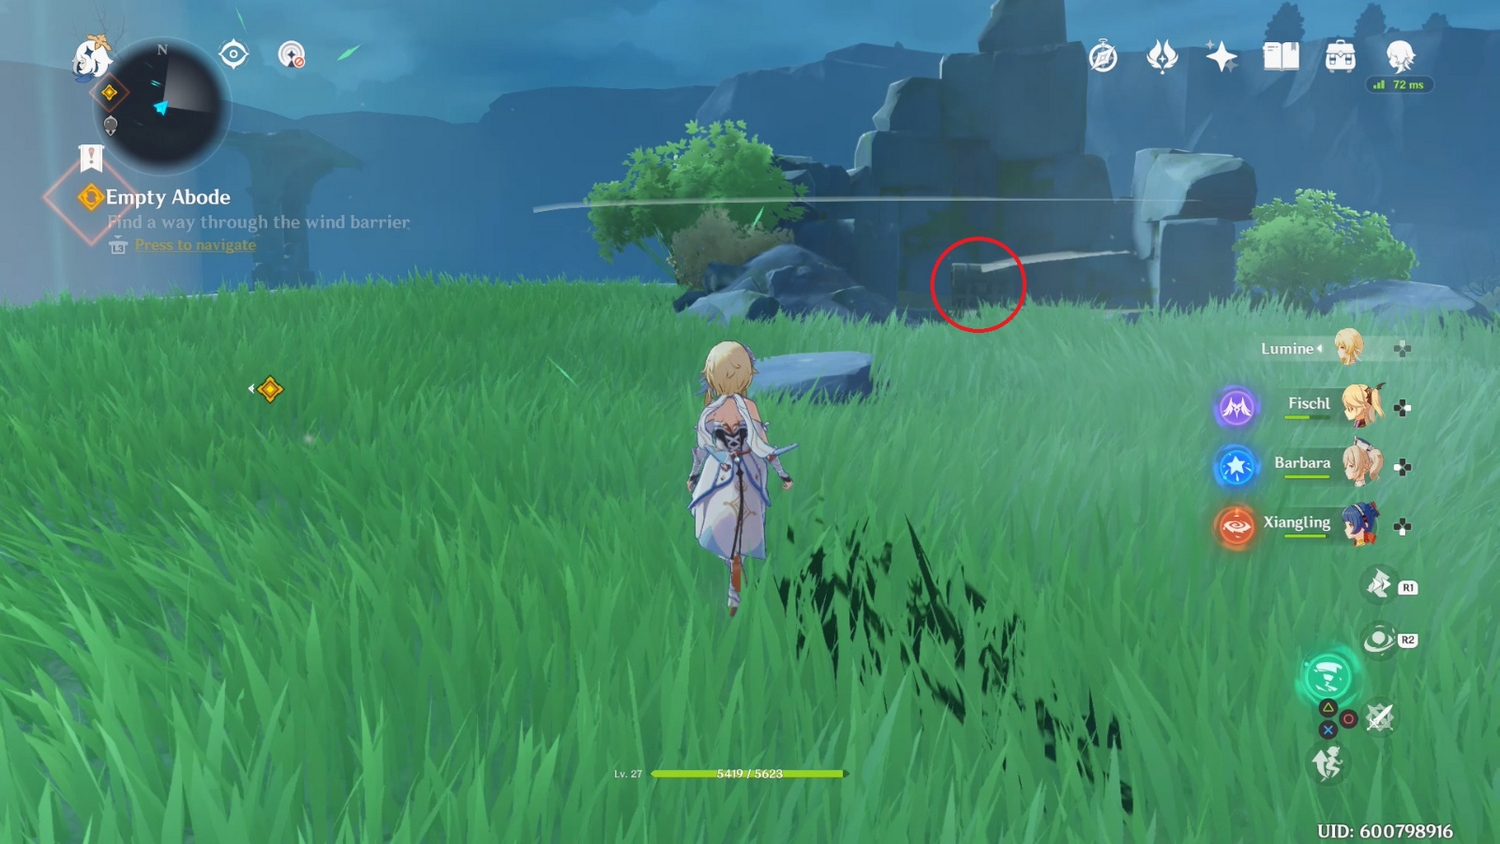
Head to the Tempest Terror's Entrance
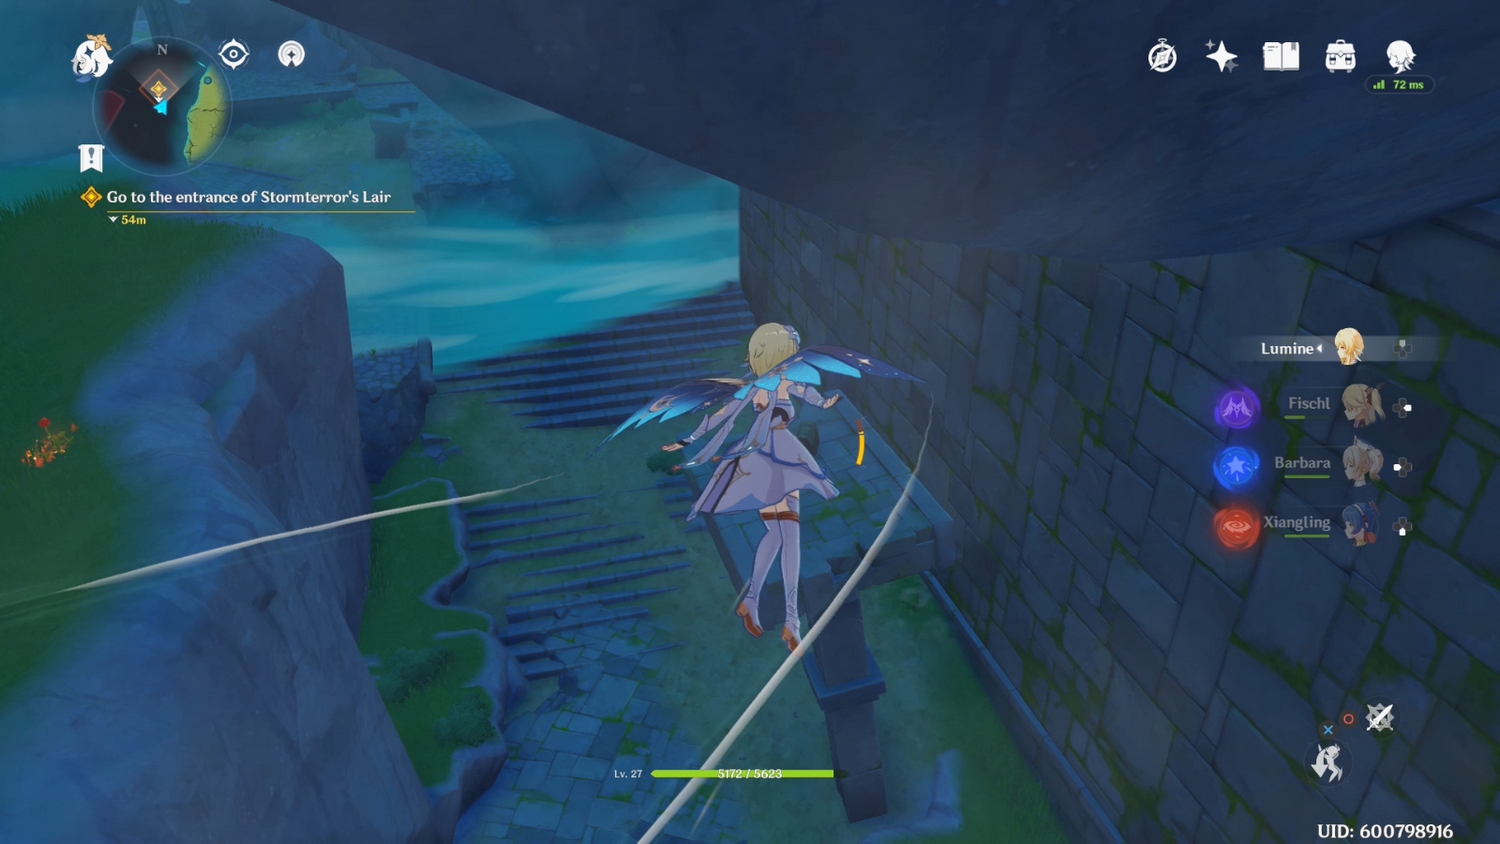
Climb up the steps and you'll come to an area overlooking the dragon's lair. There is a waypoint here that you can activate, as well as a chest that you should definitely open. When you try to do this, Anemo slimes will appear. Kill them and take your loot, then go north across the bridge to the main building.
While you can explore the area now, we strongly recommend that you do so after you have completed the quest associated with this area - in this case, the visibility will be much better! In any case, after crossing the bridge, a new cutscene will start, showing the presence of additional barriers that Venti cannot remove on his own.
Enter the tower
Climb up the stairs where the torch is lit and follow this path to find some Hilichurls. Deal with the monsters.
Note: Air currents in this place often disappear. You will have to wait until they reappear in order to use them. Keep this in mind when you jump from a high ledge or run away from opponents chasing you.
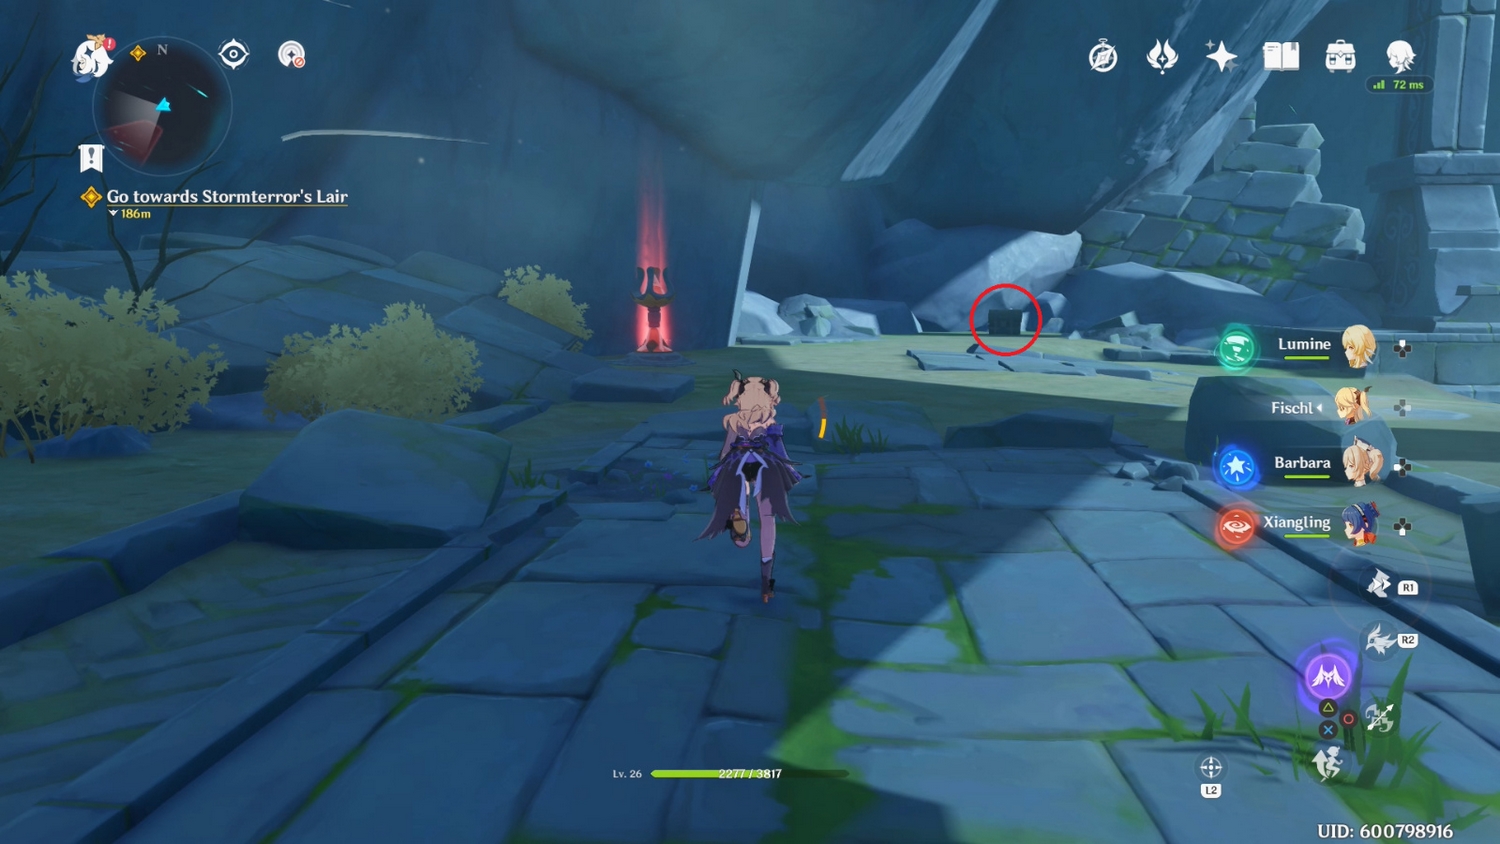
After the hilichurls, go under the stone archway and come out to a small open area. When you enter, look to your right to find a chest among the ruins.
You can also find a fairy behind these ruins. Escort her back to the statue near the stone arch for another chest as a reward. Head northwest - there will be some spikes along the way, so be careful. You don't have to burn them, just don't touch them. You can also use side winds to go around the entire track.
Along the way, you will pass under another stone archway. We advise you to climb to its top to find a chest. It is also very convenient to shoot at the hilichurls in front. Climb the stairs at the end of the passage, open the chest on the right side as you go up (another one is around the corner), and cross the small bridge that is located above the barrier.
Head west and climb up the platforms to find the Statue of Seven, which opens up this entire area on the map. It may also be your last statue in Mondstadt, so you will definitely unlock a new achievement and get 5 Source Stones.
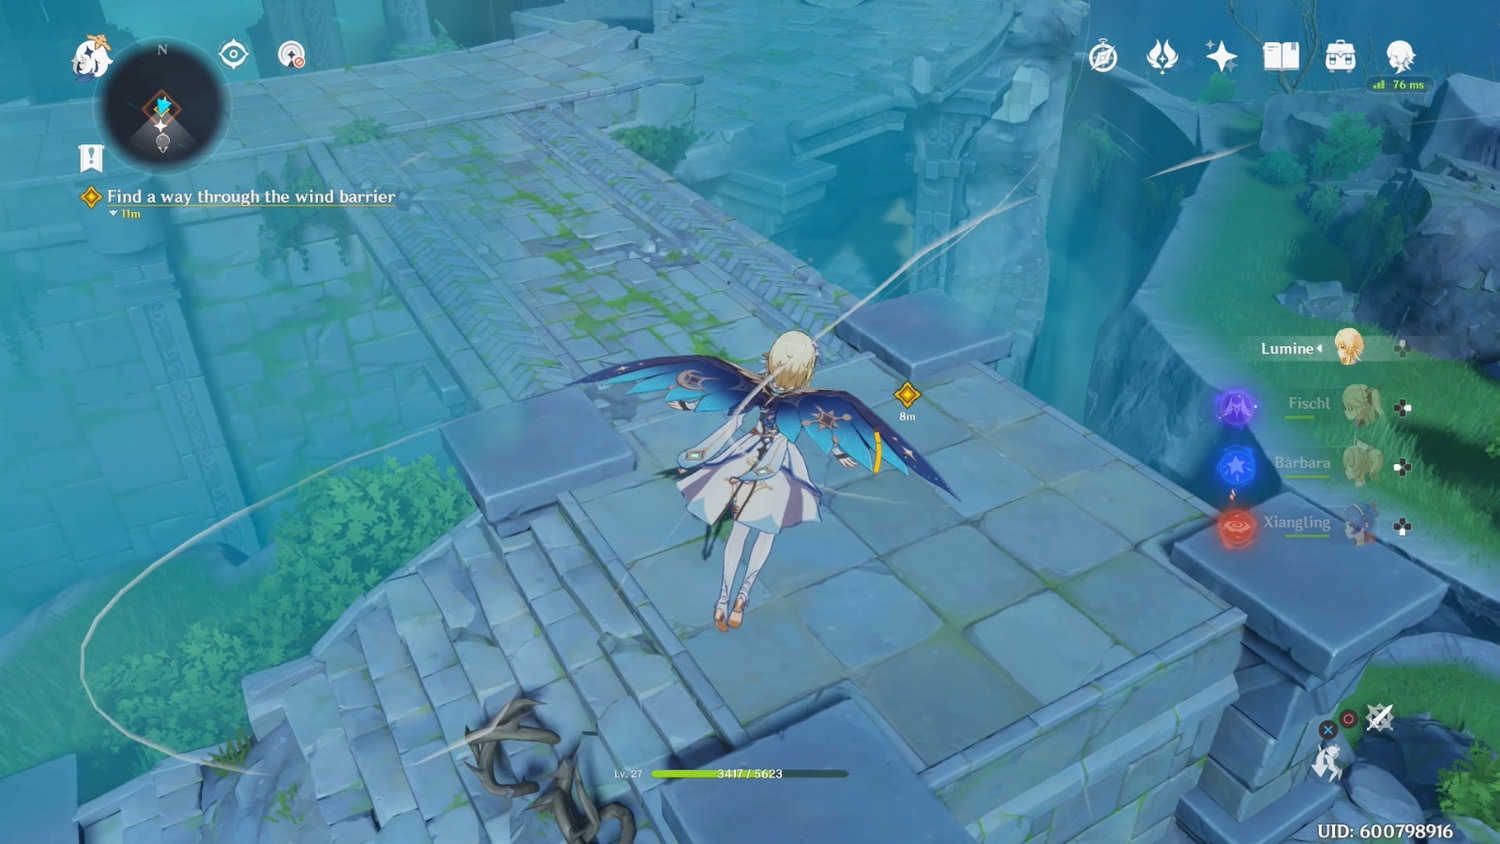
Find your way to the tower
After that, use the air current to fly over to the other side, and you can finally get inside the Lair.
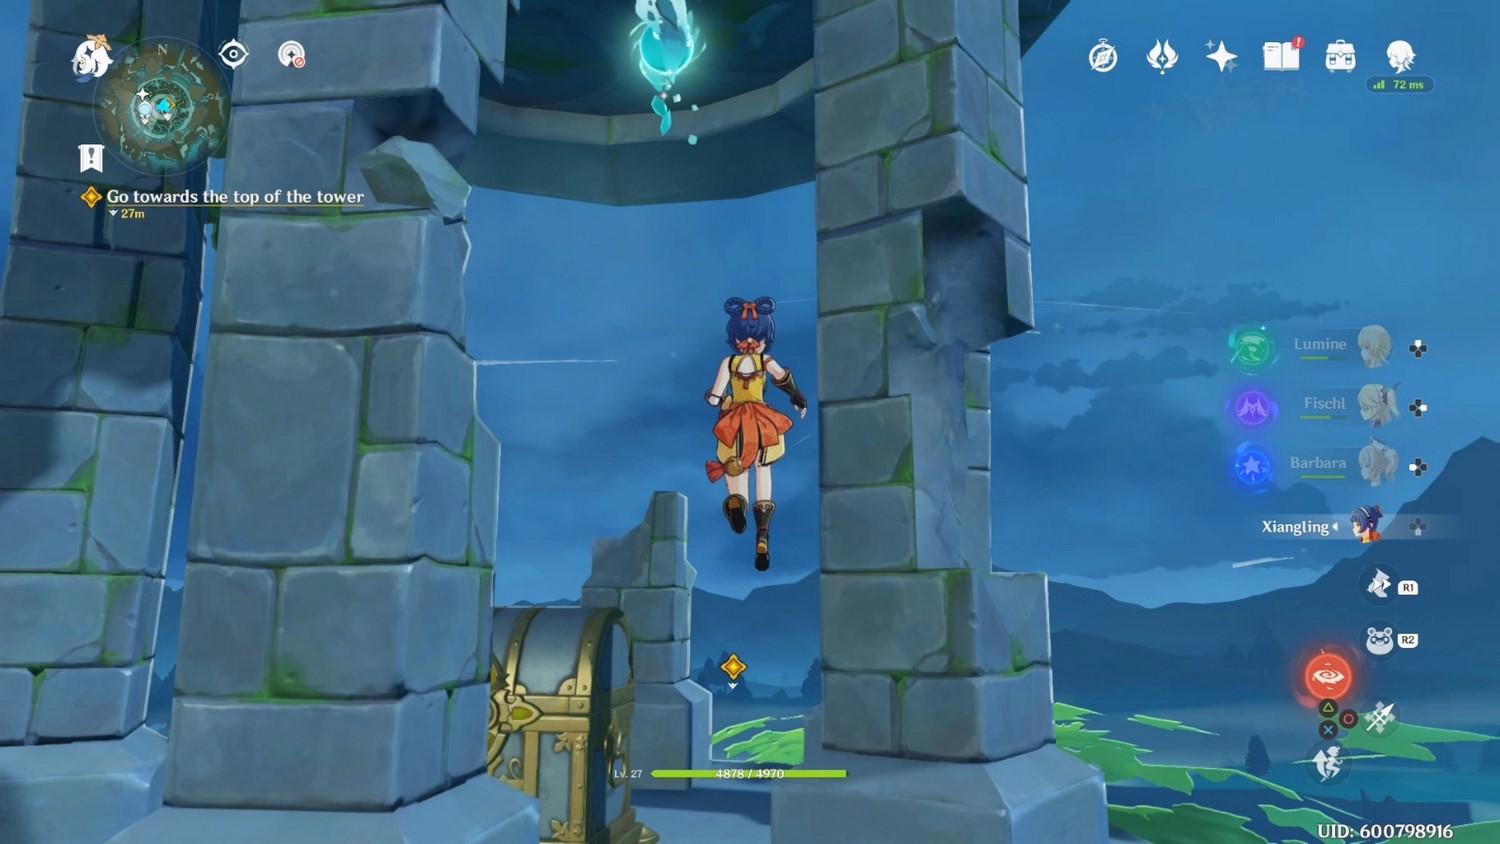
There will be a sealed chest that will open when you approach. Go forward, go around the platform and climb up the slope made of rubble. You will see a disabled Ruin Guardian. Now you don't have to fight him. There is a second wind stream here - use it and you will see a hole at the very top.
For now, DO NOT fly through it. Instead, head outside to the very top to find a deluxe chest. Also hovering on the ceiling Anemoculus, which we recommend to be sure to collect.
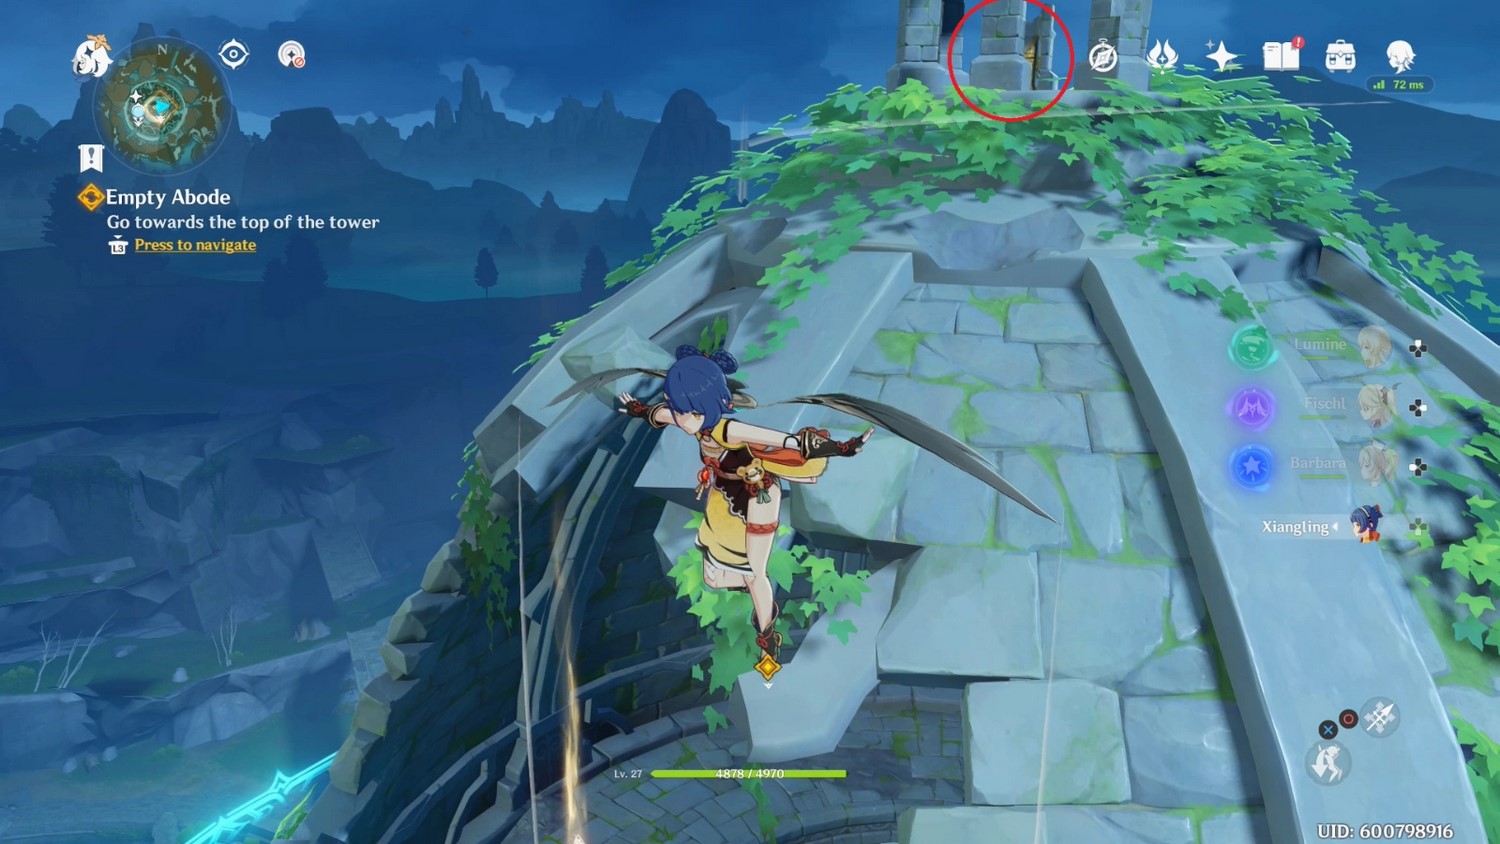
Now enter the opening on the side of the wall, and watch a new cutscene. This completes the quest and rewards you with 300 adventure points, 8,775 Mora, 3 adventurer experience, and 10 superior enhancement ore.
Light Guiding Ceremony
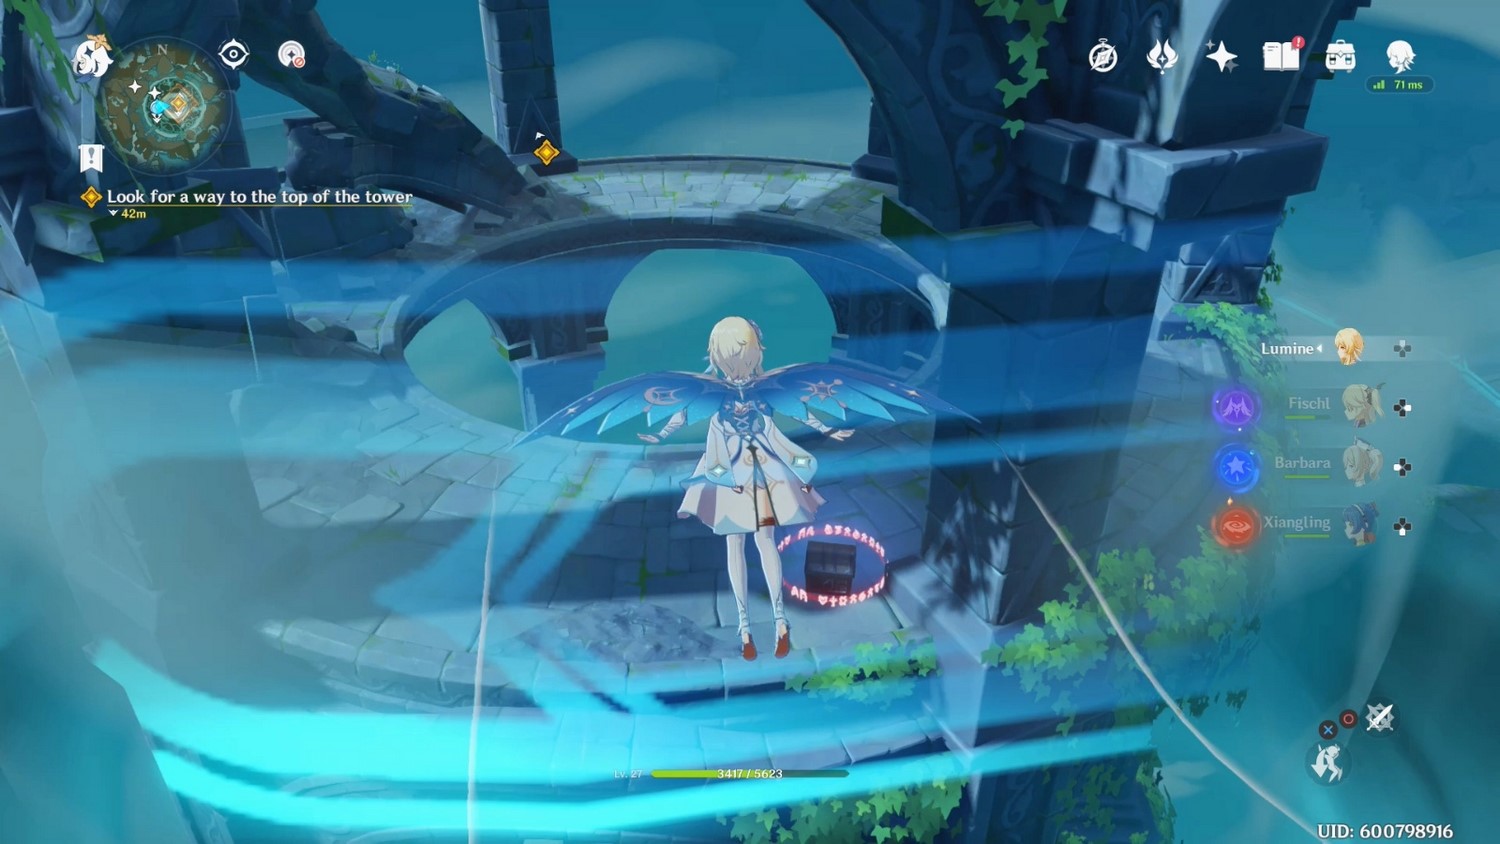
Explore the seal at the top of the tower
You will need to activate the light Key, and for this you will have to insert all the missing parts into it. However, before doing so, activate the teleport point located behind you. Behind it you will find the first "detail". These are pyramid-shaped crystals that will follow you when you touch them.
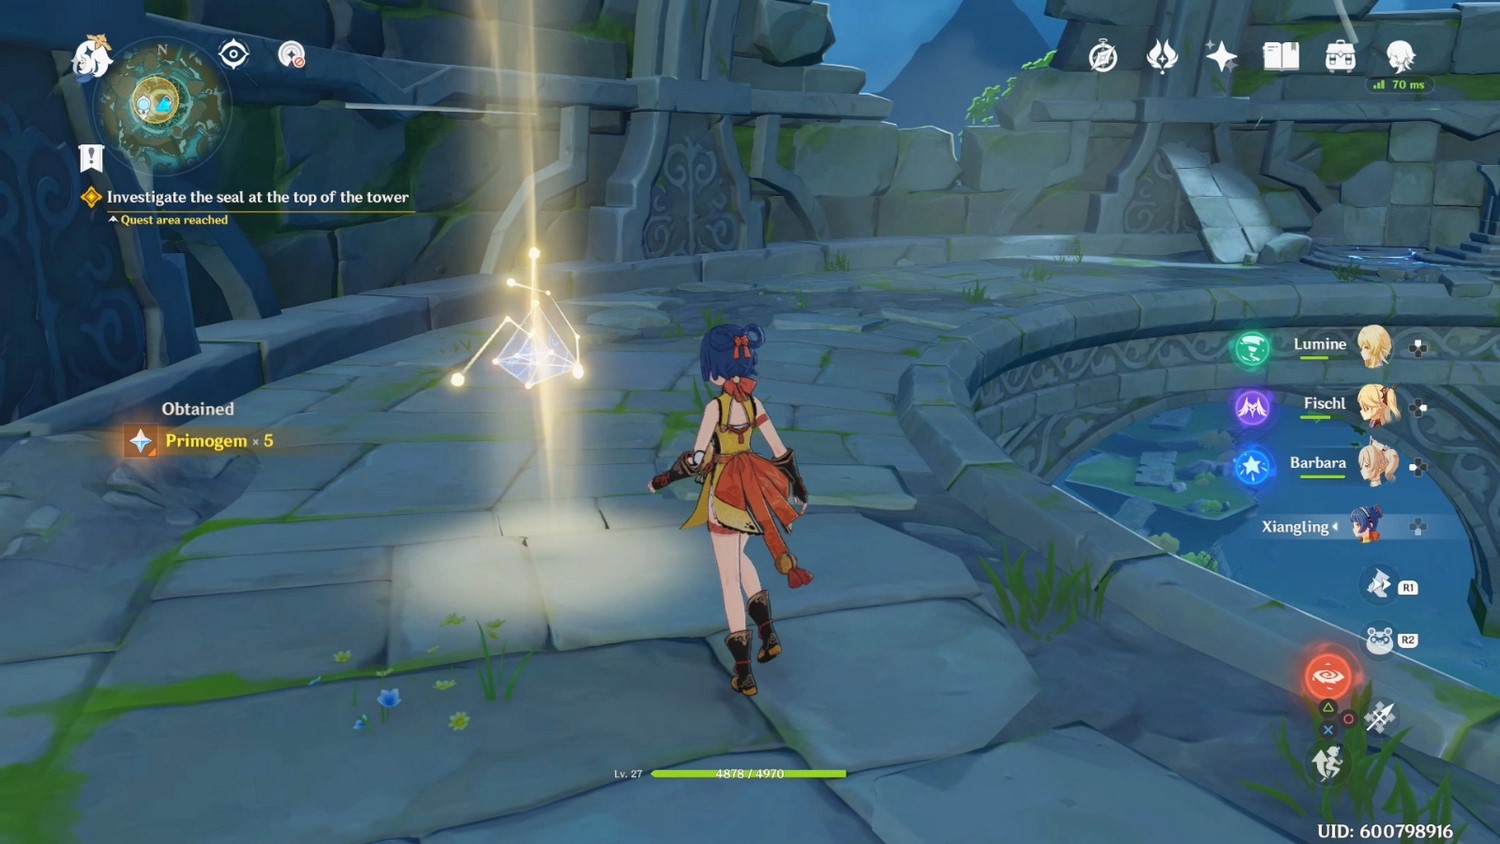

As soon as the particle is behind you, head towards the key of light, and it will stand in the right place by itself. This will destroy the first seal. Walk around the area, open the chest behind the ruins and talk to Venti.
Break the seal of the Stormterror's lair
Now you need to completely break the seal, and for this you need to unlock all 3 light keys in the indicated area. They differ from the previous mechanism in that they require 3 parts to repair, and not one. They are still relatively easy to find as they glow brightly.
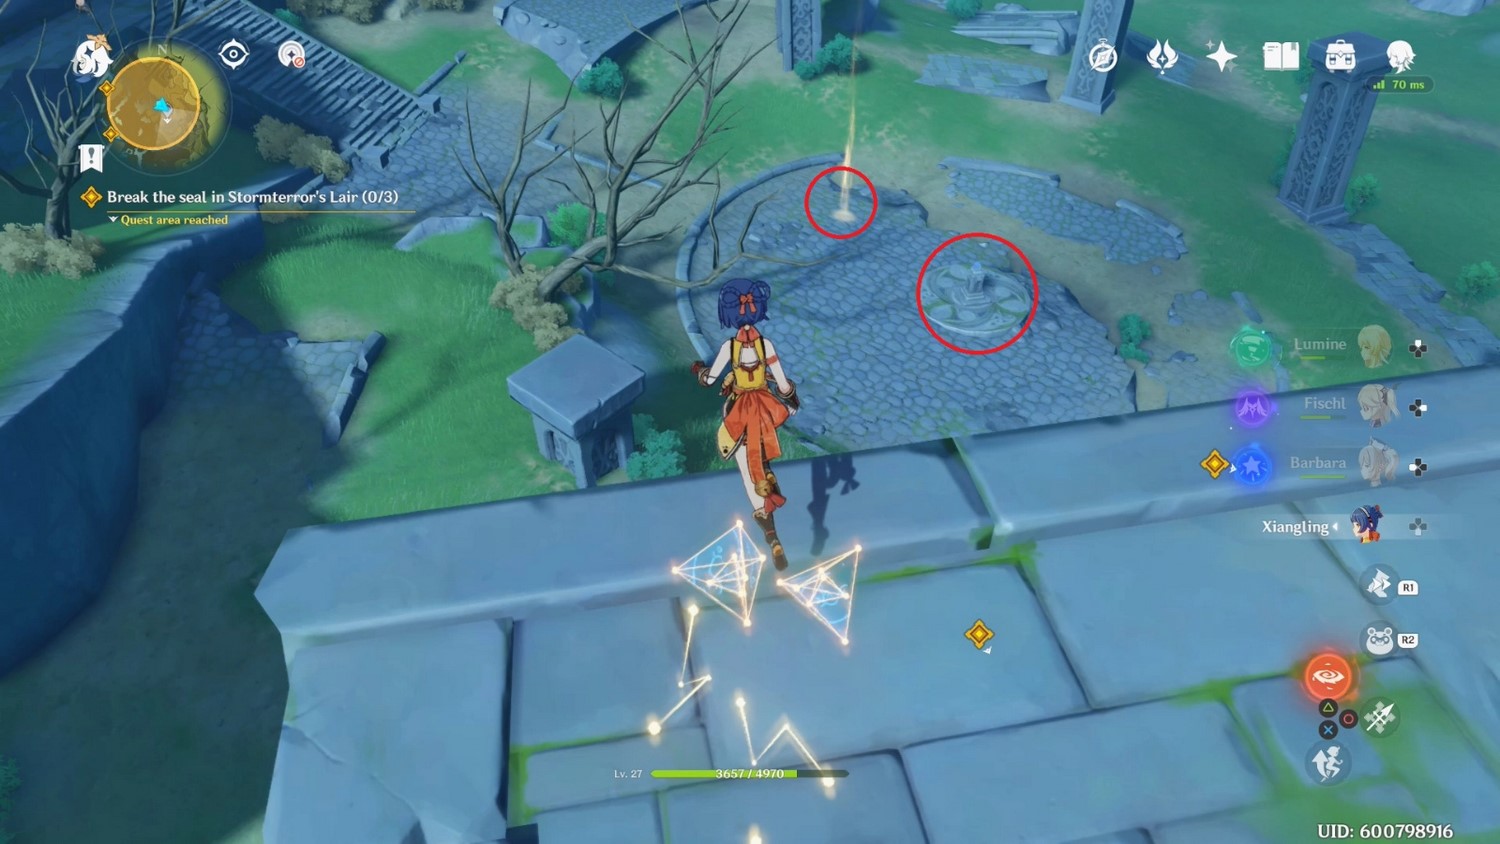
Also, you'll be able to reach each key from above by jumping off the ledge you're currently on, so you won't have to run all over the area. Below we will tell and show you where you can find all the light mechanisms and parts.
So jump down and hover towards the northeast quest marker. While descending, try to land on top of a pillar with a glowing object to find the first piece of the key. If you fail to do this, then don't worry, because there is an air current nearby. Directly below the part is an Anemoculus, so try to pick it up as well.

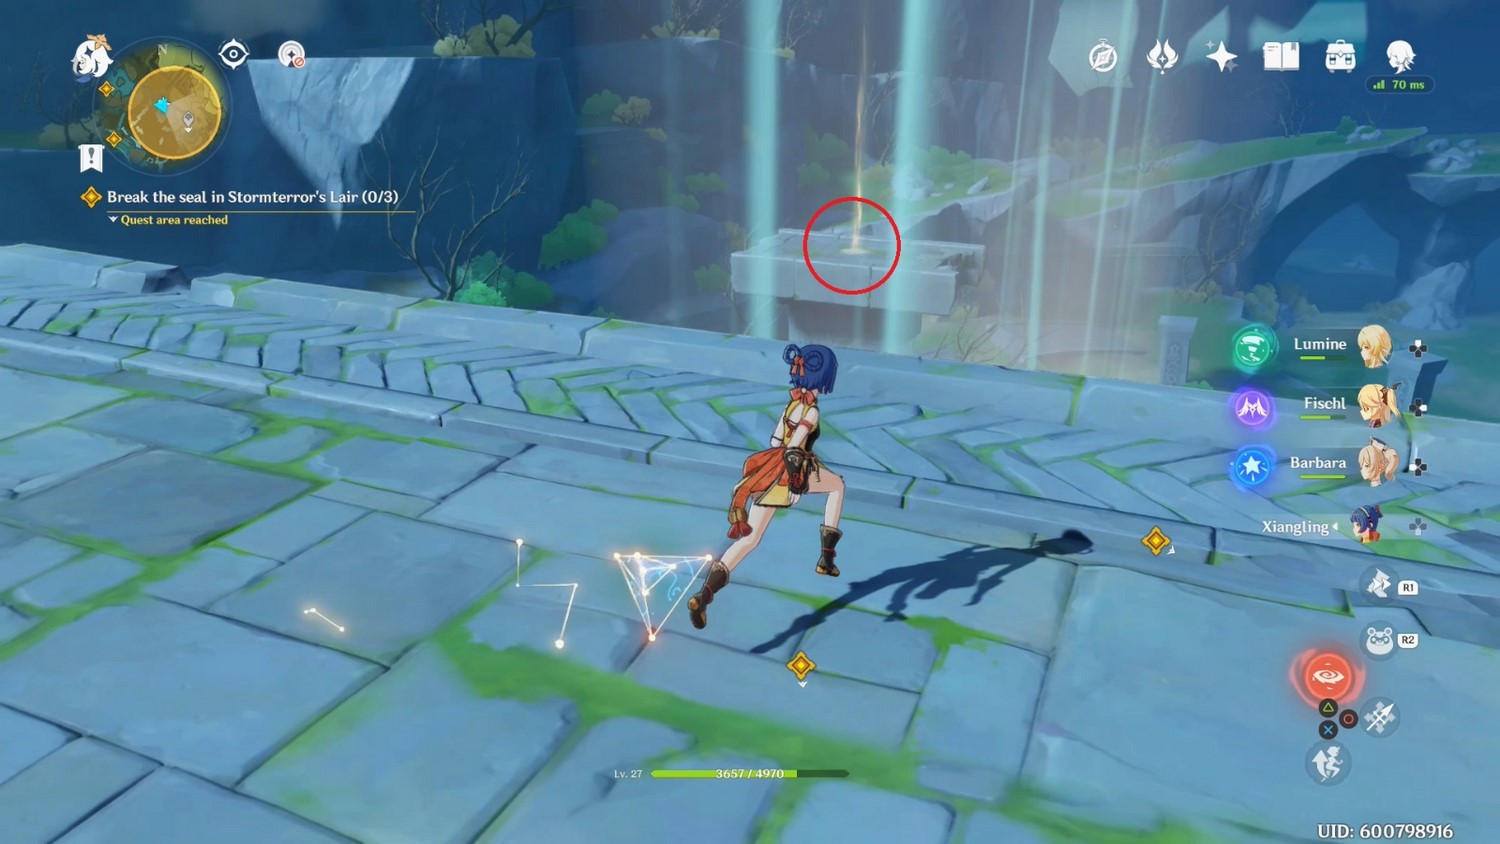
From here, you can look to the southeast and find the second piece on top of a similar pillar.
Look a little more to the southeast and you will find the third piece on the ground next to the light key that you need to activate. So just fly there and turn on the device.
There are two more keys left. There is also a fast travel point nearby, so be sure to activate it. Also, you can find a chest at the top of the stairs to the east, guarded by hilichurls. Next, you need to go north and circle around the area, moving towards the next marked area on your map.
Along the way, you will most likely see a huge pillar supporting the side of the mountain. In its interior is an Anemoculus, and the only way to get there is over the top of the cliff. Climb onto it, and then jump down and fly right into the pillar. To get out of here, just go back to the nearest teleporter.


From this column, continue west, keeping to the outer perimeter. If you wish, you can go to the pond to the south, which has an island with a challenge on top, where you will need to kill the Anemo Slimes. Once you reach the marked area, you will see another fast travel point - activate it.
If you go up the stairs, you will reach a small Hilichurl camp with one Mitachurl. Deal with them to open the sealed chest and the first part of the new key.
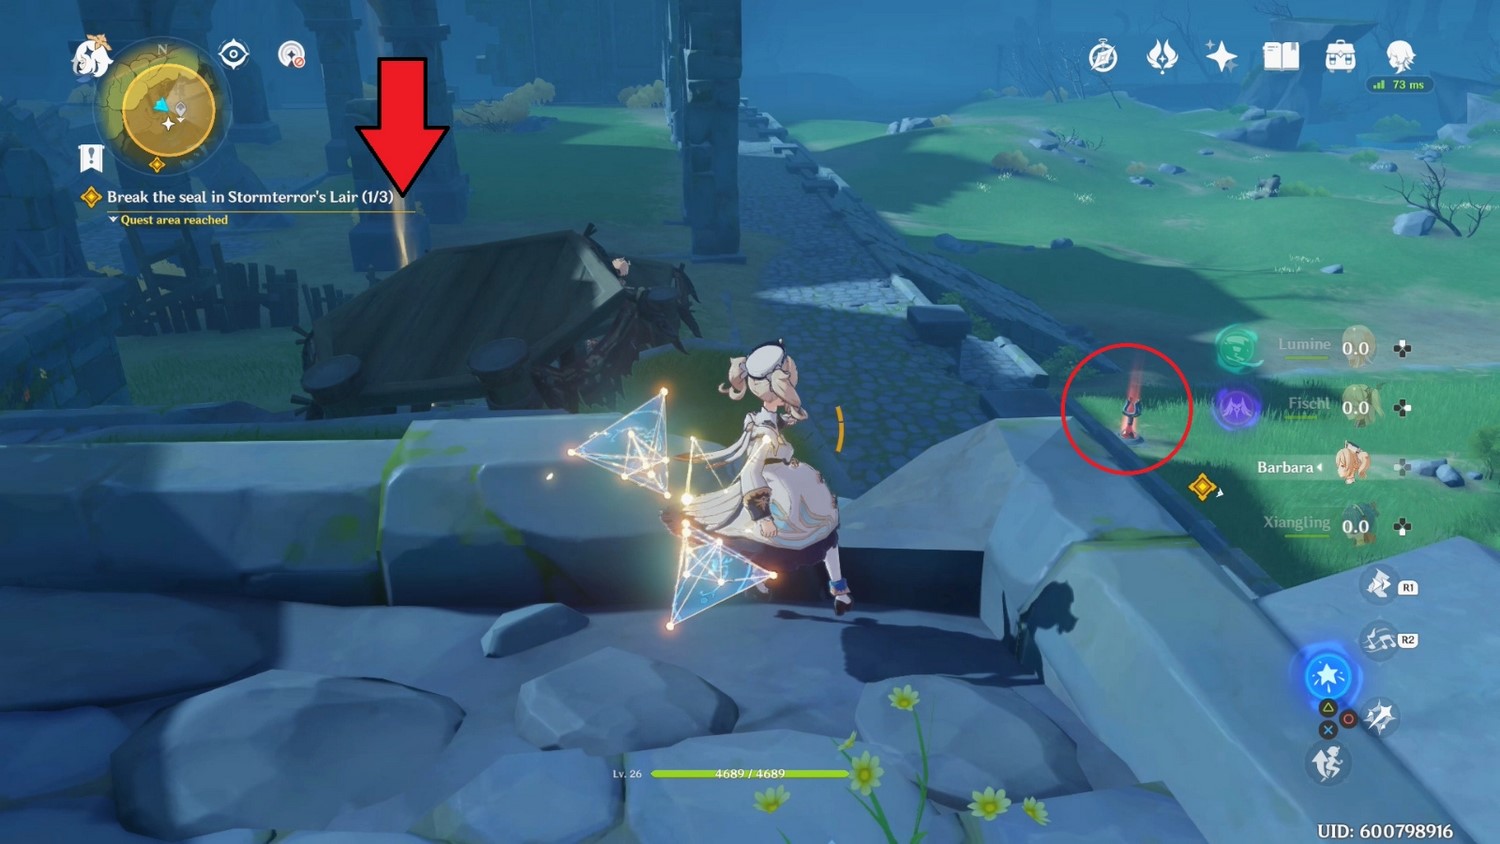
After walking forward a little, you will see another piece of mechanism in the middle of the wind barrier. You need to climb one of the nearby pillars and jump off it in order to fly over the Hurdle and take the item.
Now head west up the stairs and you'll see a beam of light coming out of the rubble in the corner. Break the cobblestones (a two-handed sword will significantly speed up this process), and you will find the third part.
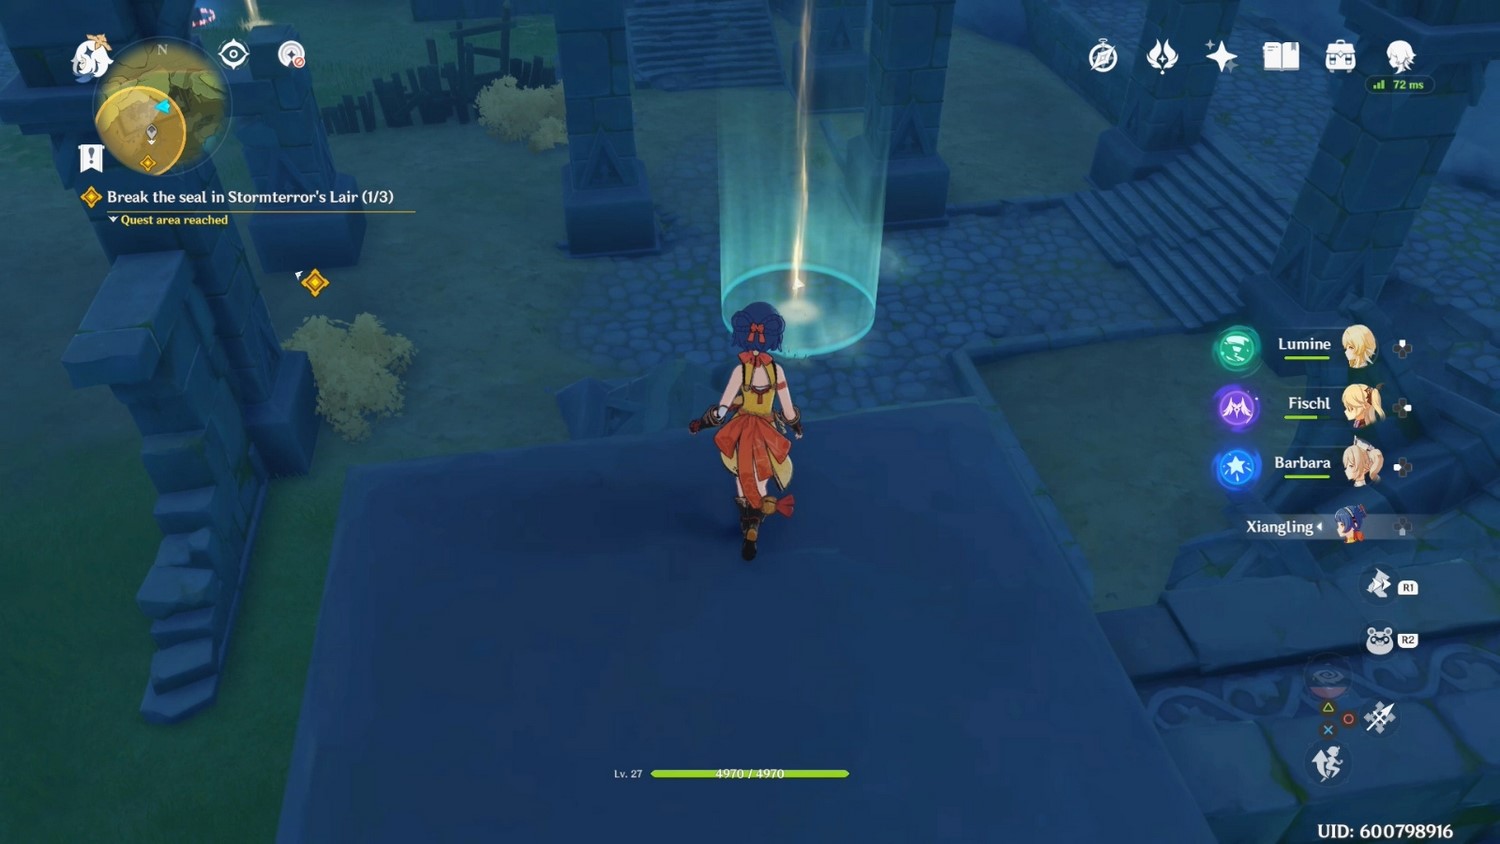
Go to the light key (located southwest of the teleporter) and place 3 parts in it to activate it. There is one more mechanism left.
You can climb one of the broken pillars surrounding this Key to find the fairy, who must be escorted to her monument. Hidden at the very top of this area is also an Anemoculus. You can now look around the entire area if you want, but we recommend that you teleport to the top of the Lair and jump down to the marked area - it will be much faster this way.
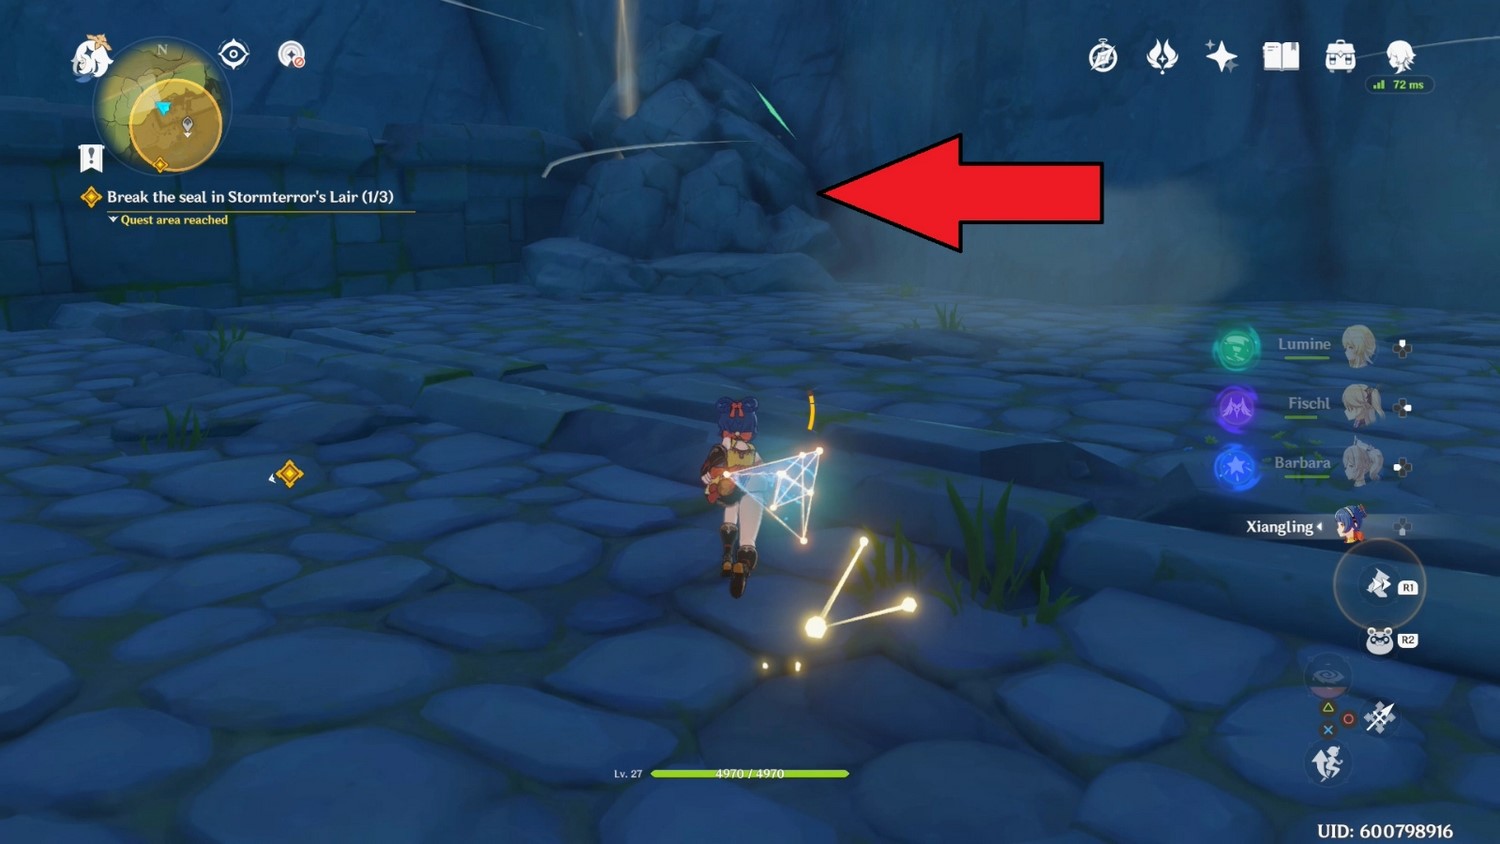
The next Key is slightly different from the previous ones, because all 3 parts will lie next to it, however, after collecting them, you will have to fight with several enemies: Pyro the abyss mage and a couple of Hilichurl mages. This must be done before the timer expires, so hurry up.

After you activate the last Key, the seal will be completely destroyed and the quest will come to an end. You will receive 375 adventure points, 20 sourcestones, 11,325 Mora, 4 adventurer experience, and 2 magical enhancement ores.
Calm Before the Storm
Activate the seal at the entrance
Once all 3 light keys are on, return to the top of the tower by either climbing up or fast moving. If you wish, you can explore the area to search for resources and valuable items.
Whatever you decide to do, as soon as your squad is at the top, a new cut-scene will begin. Listen to your allies to complete the task. As a reward, you will receive 275 adventure points, 8000 Mora, 3 adventurer experience and 9 superior enhancement ores.
A Long Shot
Break the seal
This is all! You can venture into the depths of Dvalin's lair and put him out of his misery. Talk to Venti to open the dungeon entrance window.
We add that in the future you will be able to return and repeat the passage of this dungeon at a higher difficulty level. To do this, you must first increase the Adventure Rank and level your characters. At the same time, rarer items and materials necessary for the rise of heroes will fall out from the enemy.
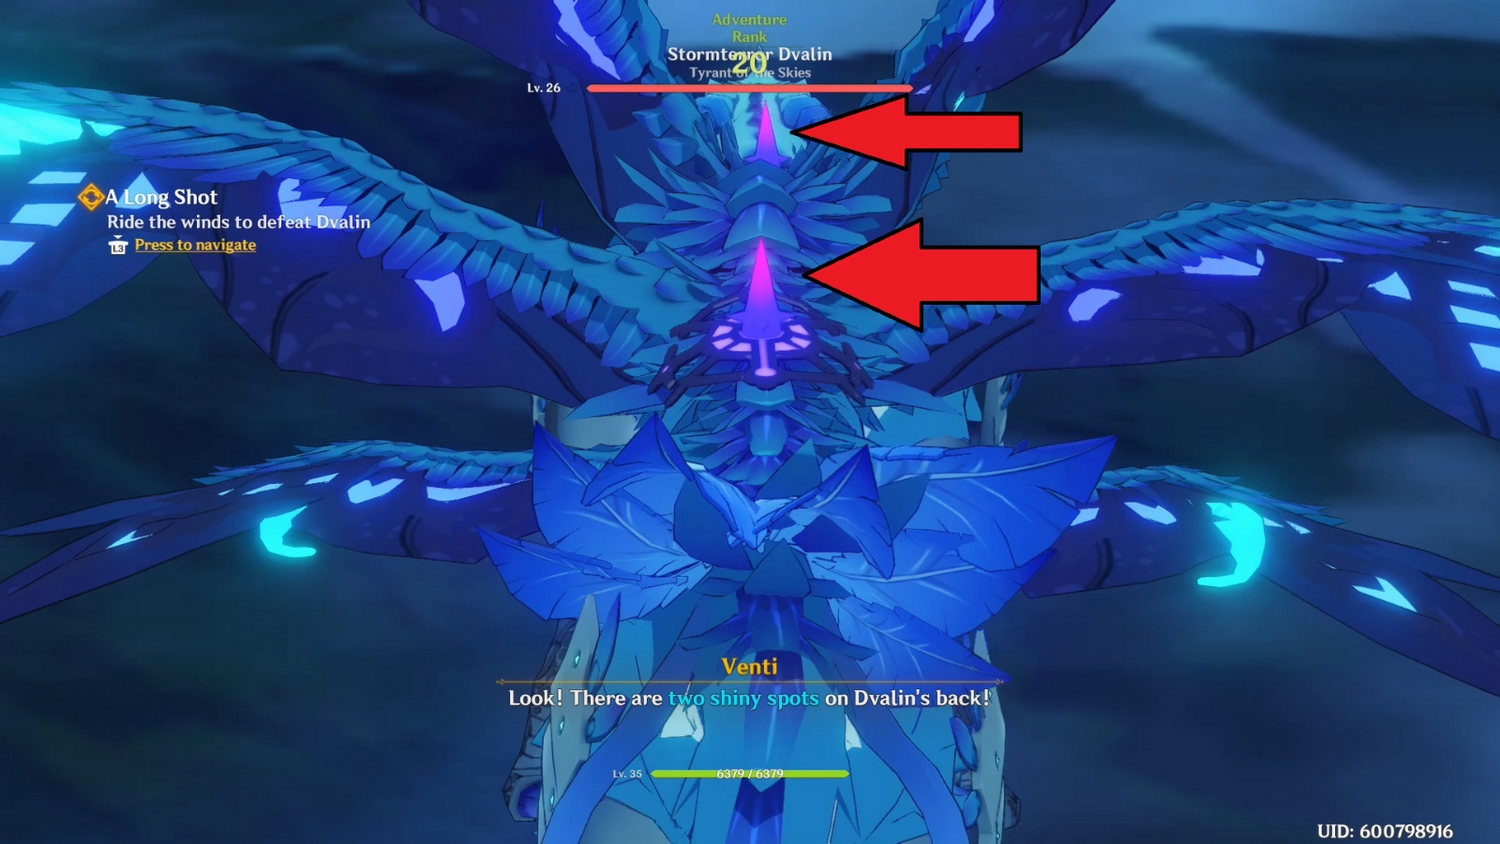
Defeat Dwalin by jumping in the wind
The first stage of the battle will be almost the same as the battle over Mondstadt at the beginning of the game. Venti will give you his power so that you can fly after the dragon and shoot him with Anemo energy. The Archon will immediately inform you of two shiny spots on Dwalin's back. You will need to destroy them in order to bring the beast down to the ground.
The main difference from the previous fight is that Dwalin will attack back, firing energy at you. This will happen when his health bar drops to 55-60% and he flies away. You have to catch up with him.
Soon you will see the energy balls that the dragon fired at you. There are 3 types of shells that differ in color:
- The blue beams are just moving in your direction and not aimed at you. So it's pretty easy to dodge them.
- Violet beams are homing and much faster than blue beams. The dragon usually releases them in groups of 3, so when you see them coming out of Dwalin's back, be sure to fly to the side to dodge them.
- Green spheres have their own life bar, so finding them is very easy. When destroyed, they leave behind air currents, so be sure to shoot these projectiles.
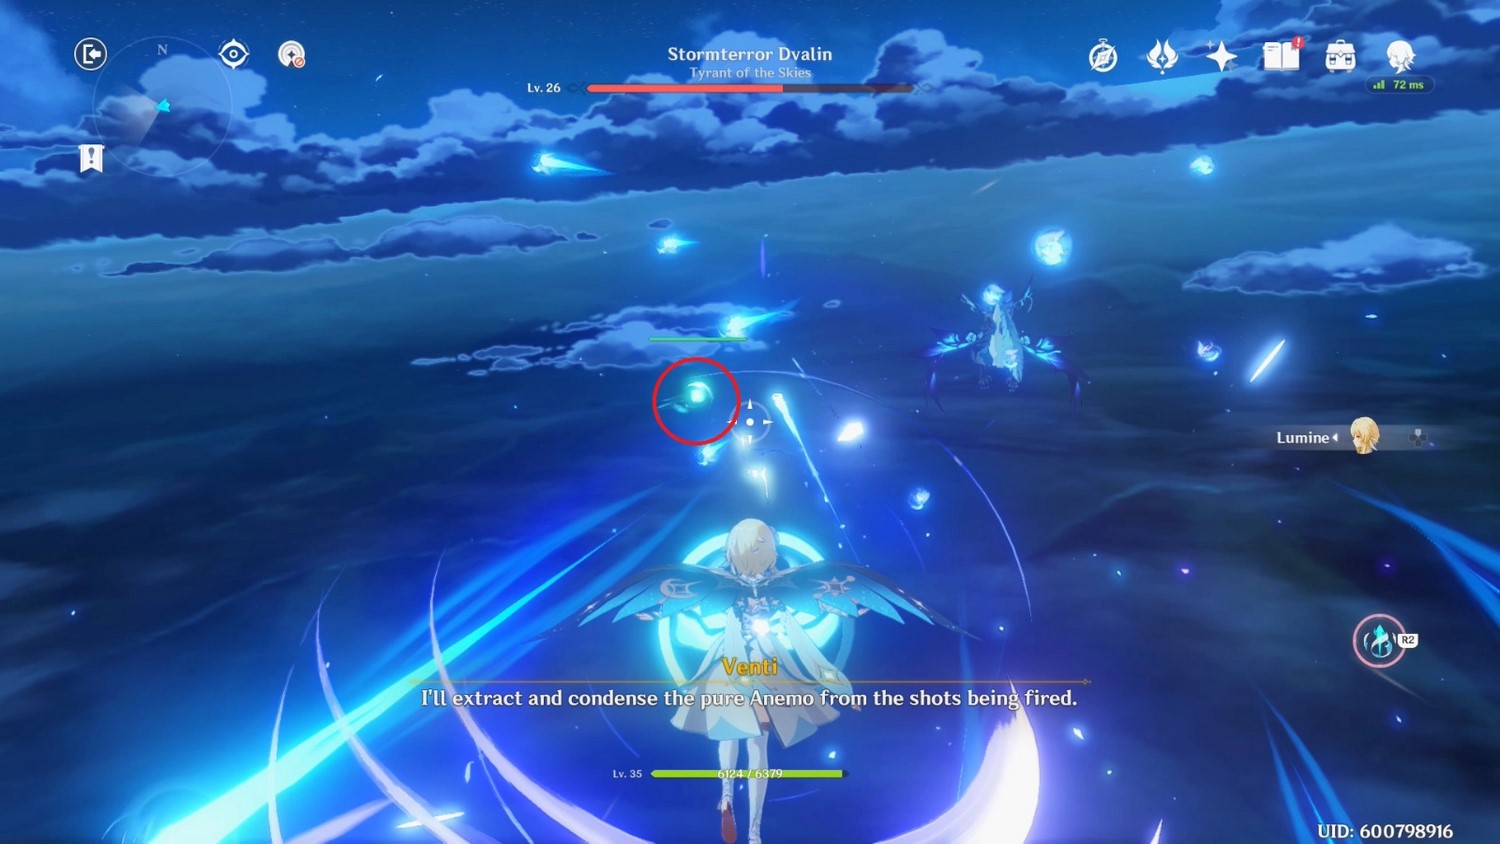
You need to use the wind currents left by the green orbs to catch up with Dwalin. As soon as you see a green projectile, shoot it and move your character in the direction of the airflow that has arisen in order to move forward a little. Then dodge the dangerous beams and wait for the next green ball.
As soon as the boss's health bar drops to zero, he will fall, and you will find yourself in a real arena where you have to finish off the dragon.
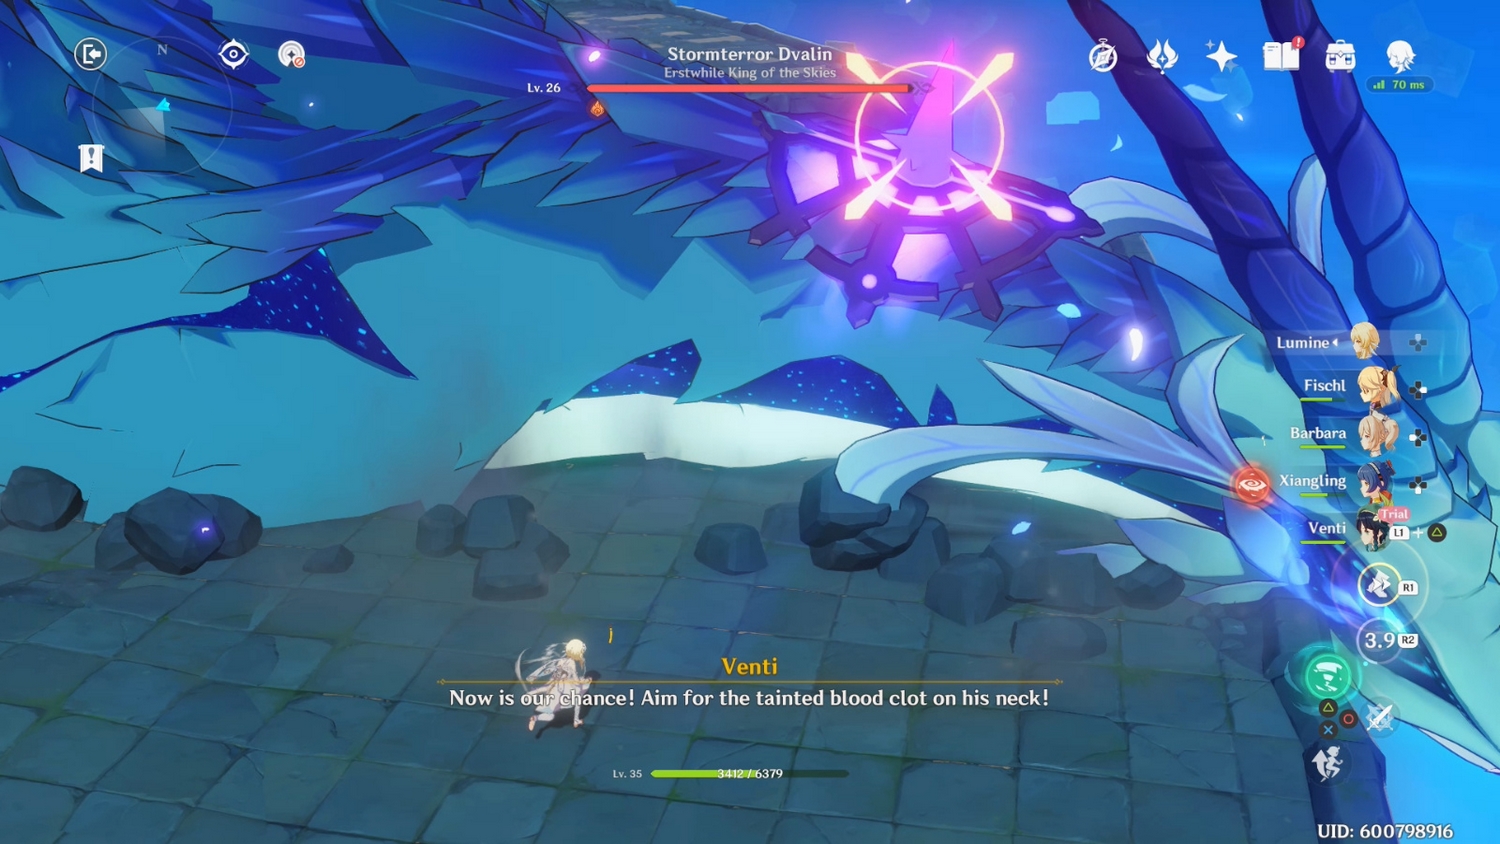
Defeat Dwalin
This opponent looks intimidating, but in reality it is not very difficult to fight him if you know about his movements. During the fight, he will most often keep his distance from you, which means that there is little you can do with him. You must wait for him to make his move before attacking him. The move you need is his Air Roar. It holds on to the platform you are on and releases air from its mouth. This is the only chance to damage him.
If you look at the top of the screen, you will see that under the boss's health bar there is a white indicator - it shows the status of his "shield". When you attack one of his claws, this bar will rapidly decrease, and as soon as it drops to zero, he will fall onto the platform. You will have enough time to get on his neck and attack the blood clot on his back.
Be careful when fighting him and use the wind currents to move from one platform to another. If one of the mini cutscenes starts while you are moving between platforms, you will fall and take damage.
When Dwalin uses his most powerful attack, you will see that all the platforms are covered with cracks. The dragon can completely destroy them with a few hits, so the boss needs to be defeated as quickly as possible.
Below are all of his attacks:
- Sweep - it flies towards the screen and sweeps away everyone and everything on the platform. Use side wind currents to avoid damage.
- Energy Beams - He will use the same blue projectiles you saw earlier when chasing him through the air. Luckily, they are very easy to dodge.
- Air Roar - He grabs the platform you're on, looks in your direction, and releases a small whirlwind from his mouth. At the same time, he begins to turn his head towards his second claw.
- Final blow - he will release a lot of energy beams that fall on the platform. We advise you to immediately run away to the side and jump down.
Overall, this is a pretty easy boss. After dealing with him, watch the cut-scene and get a well-deserved reward: 425 adventure points, 30 source stones, 12,400 Mora, Favonius Warbow, Tainted Blood, 5 adventurer experience and 3 magical enhancement ores.
When the Wind Dies Down
Talk to Amber
Watch the cutscenes with Amber after completing the previous quest. Looks like the hilichurls were ready to attack Mondstadt at any moment! Thank the winds Amber and the others were nearby.
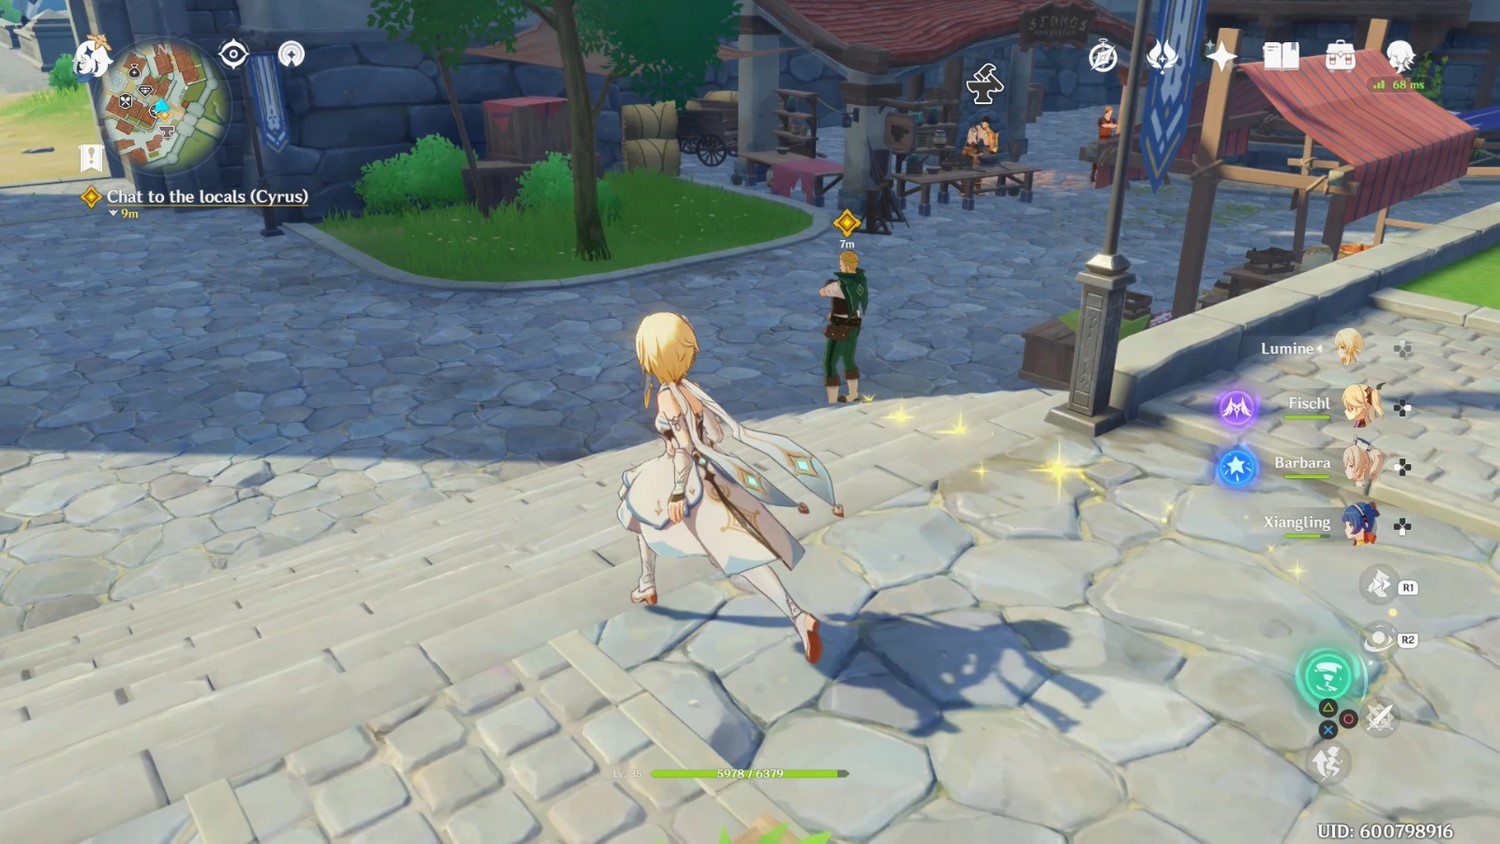
Chat with the locals
Cross the bridge and enter To Mondstadt. First, chat with Cyrus, who is the head of the local Adventurer's Guild. After that, talk to Nimrod, who is behind Cyrus, next to the souvenir shop. Now chat with the nun Grace, who is nearby. Next, go to the local restaurant and you will meet Kaya here.
Watch the cutscene and then sit down with Amber for your final honey roast. We talk about our plans for the future. This will complete the task. You will receive 275 adventure points, 8000 Mora, 3 adventurer experience and 9 superior enhancement ore.
Ending Note
Meet Jean and Venti at the Cathedral
Head into the Cathedral to find Jean and Venti in the back. There will be another person here - Barbara! Watch a new scene, and then run out into the street With You Venti. There you will meet with agents of Fatui. Watch another video. At the end, you will learn that Barbara saved you from injury.
Now you will need to meet with Venti in the Valley of the Wind. Head to the huge tree east of Mondstadt and you'll see the target character wrapped in a green aura.
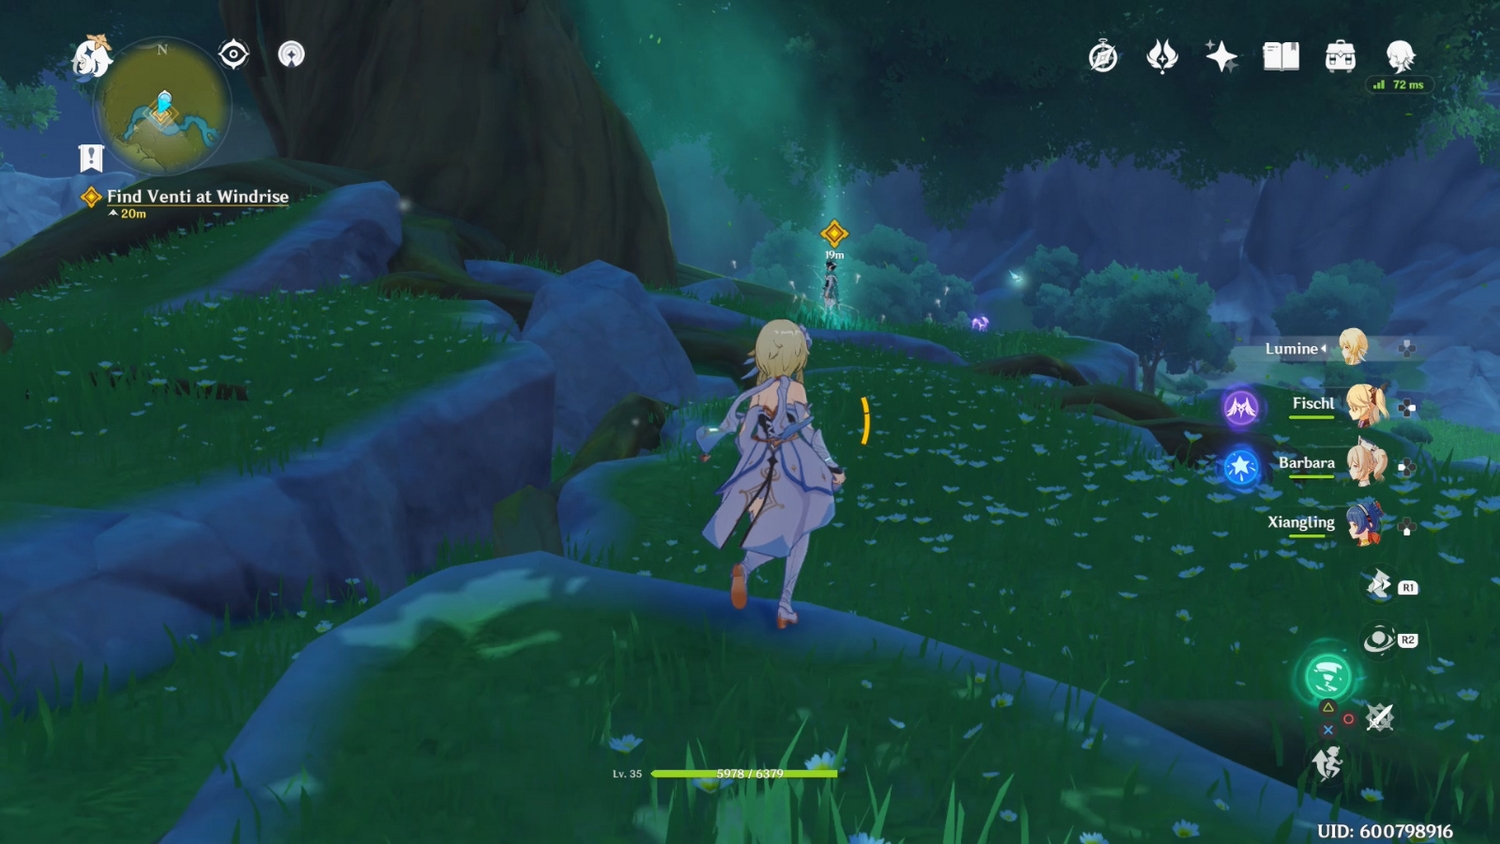
Talk to him and he will tell you a lot of new information. After the conversation ends, the Prologue will finally end and you can move on to the next chapter. As a reward, you will be given 375 adventure points, 30 source stones, 11,325 Mora, Memory of Roving Gales, 4 adventurer experience and 2 magical enhancement ores.
Comments
You need to login to add comments.
You can login with