Leonardo AI is a large platform with a multimillion-dollar audience, offering an extensive and free database of artificial intelligence tools. The service operates under the slogan “ combining advanced neural network technologies with highly customizable creator control
", and for many it will also be a good alternative to such a top competitor as Midjourney.
If you are looking for a worthy replacement for the famous but hard-to-find neurons, or want to start creating at a higher level, then our article will help you get to know this dynamically developing resource for creating your own unique art generations.
How the Leonardo AI neural network works
By revising TOP 10 neural networks for image generation, we have already explained the basic operating principles of most of them. However, the large functionality of Leonardo AI forces us to go a little deeper into the details and understand the intricacies of its multifunctional interface - this is what we will do.

Here is a little introductory information on neural networks Leonardo AI :
- To use the service, you do not need to log in to third-party resources - you just need to go through standard authorization;
- You can enjoy most features without investing any money, and the number of free credits is enough to create ≤ 150 images in 768x768 format;
- With a paid subscription, you can train your own artificial intelligence models;
- Neuron can be downloaded to mobile devices (iOS and Android);
- You do not need to have a powerful video card, since the entire generation process takes place on the Leonardo AI server;
- The community feed allows you not only to view, but also to create art based on the settings of the works of other users you like.
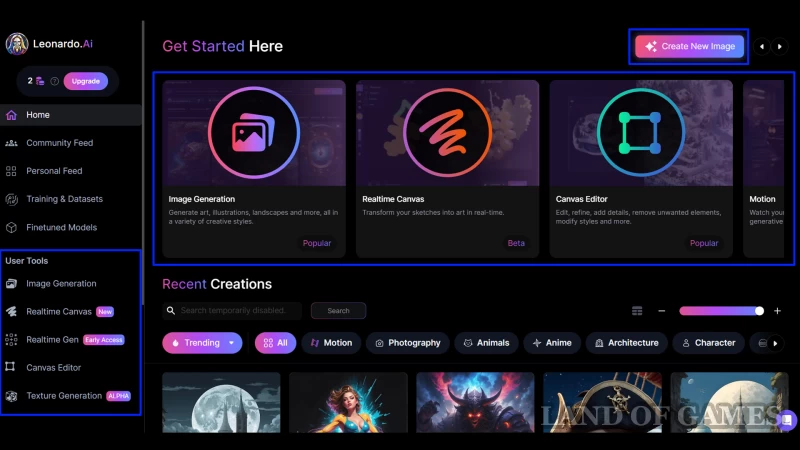
After registration, select one of the proposed commands on the main page of the service, Create New Image or Image Generation , with which you can go to the editor.
There is no Russian language on the site, so for convenience, use a browser translator.
How to create illustrations in the Leonardo AI editor
To start, let's look at the interface Leonardo. When you enter the editor, you have two work areas: a menu on the left and a panel at the top of the screen. Below we will leave a screenshot with the functionality of all buttons.
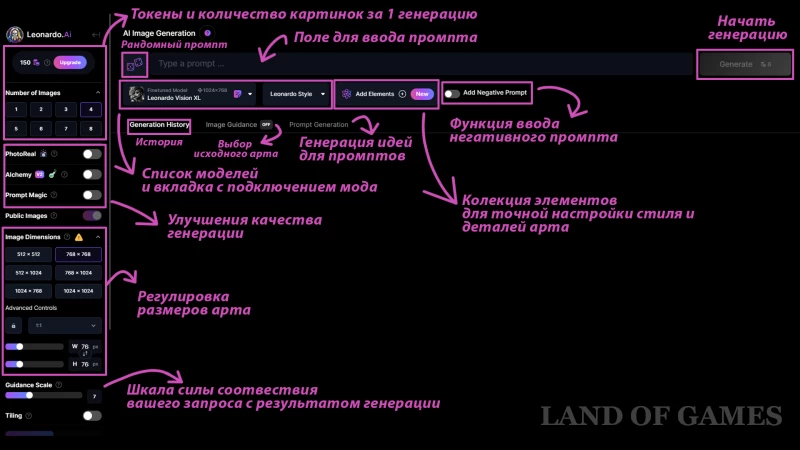
Enough for a quick start enter your prompt, or use the tab Prompt Generation — here you can select ideas by keyword/phrase. Or just click on dice icon before the input line and receive a random detailed request.
We recommend checking out our article on Midjourney, at the end of which there is tips for creating quality prompts.
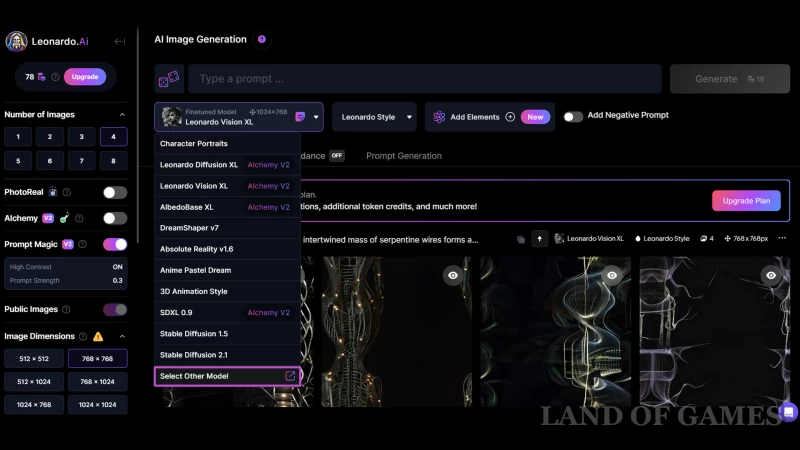
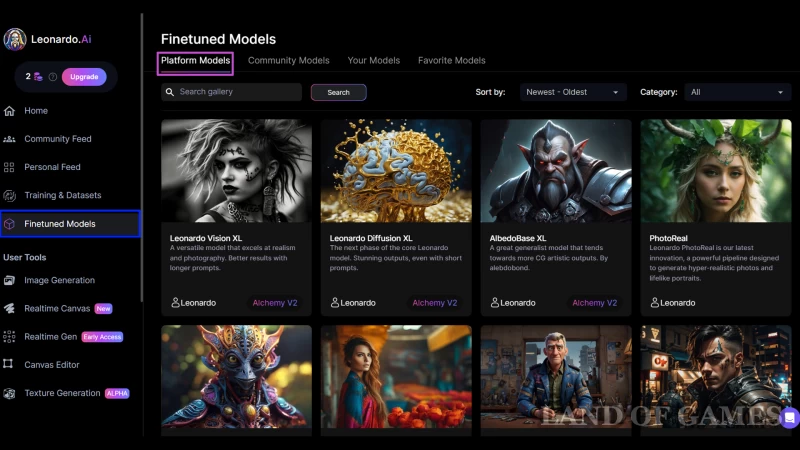
Further choose a model — a kind of engine on the basis of which the picture will be created. Their full list can be opened by clicking the button Select Other Model at the end of the pop-up list (screenshot above).
Leonardo has a bunch of different models for every taste, but many of them are created by users, so they cannot boast of impressive generation results. We recommend choosing something from the tab Platform Models , For example:
- Leonardo Diffusion is the main engine that shows good results in photorealism, depth of shades and contrasts. The model marked XL is an improved version with upscale in understanding even the simplest prompts;
- AlbedoBase XL is a universal option that is suitable for those who want to create art in the style of computer graphics;
- DreamShaper is a series of models based on the popular Stable Diffusion. Good at various 2D styles, advanced composition, depicting environments and people;
- Deliberate 1.1 is an alternative to the main engine, but based on the older version of Stable Diffusion. Also suitable for both realism and book illustrations;
- Anime Pastel Dream is good for lovers of juicy anime art in the StableWaifu style.
These are just some popular models that will help fulfill your needs. However, nothing prevents you from trying any of 36 official engines , or thousands of models from the community.
So, entering a query and selecting a model are the two main steps before starting work. Additionally, you can enter Add Negative Prompt (what should not be in the picture) and add elements of certain styles through the tab Add Elements , and then start creating art.
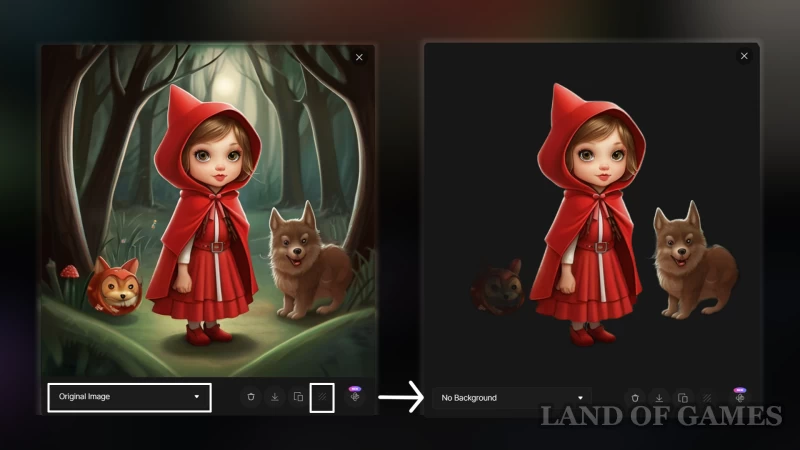
Many functions for processing finished images in Leonardo AI are becoming paid, but one of the available ones is still background removal : click on the result you like and select the button Remove background . Once the process is complete, you will be able to review and download both options.
Important Note : Leonardo AI is more suitable for amateur use, so its settings do not need major changes. Therefore, by changing the recommended parameters, you may not get the most correct generations.
Copy ideas from other users
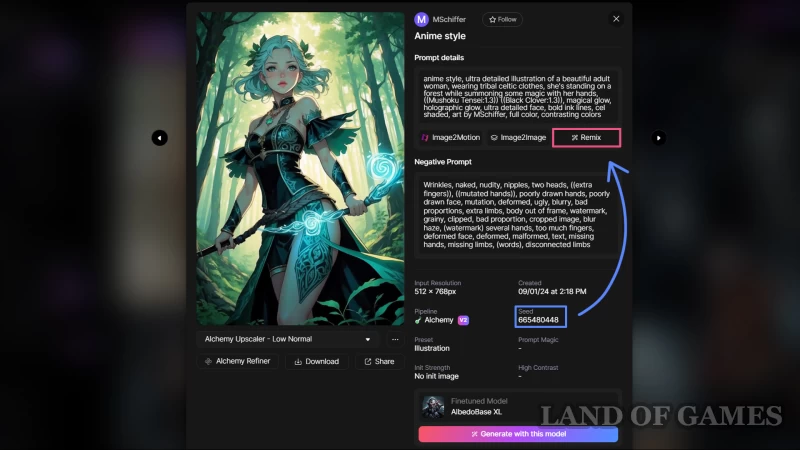
Leonardo AI has another interesting mechanic: you can copy technical specifications for the art of other users, whose works can be seen in the community feed.
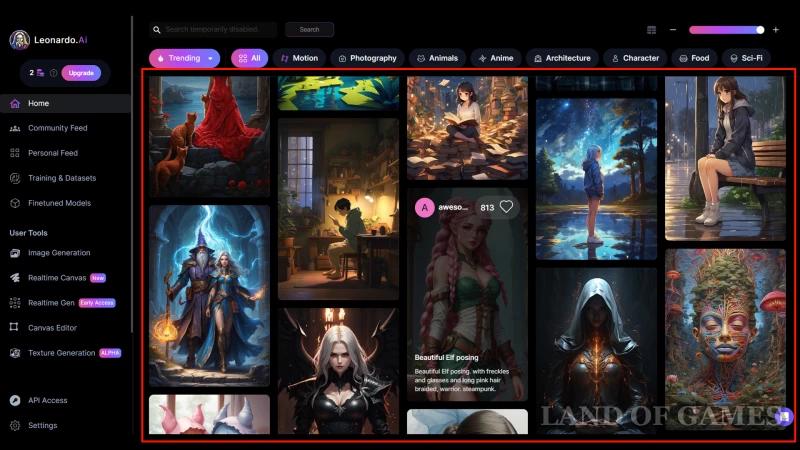
Go to section Community Feed or view the latest work feed on the main page. Next, click on the art you like: here you can download or share the work, read and copy the text hint and negative prompt (if there is one), and also consider the generation details (size, improvements used, preset, model, etc.). But the main thing here is the button Remix — it will copy some of the settings and transfer you to the editor.
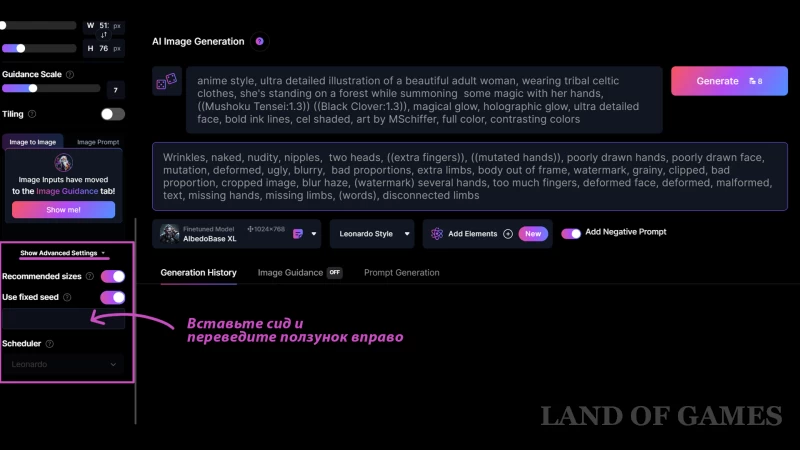
To add uniqueness, you can change the text of the author's prompt.
To achieve similarity, you will also need image led (essentially a unique code). We copy the numbers, as shown in the first screen above, then click Remix, and on the editor page we scroll the menu on the left to the very bottom and open additional settings ( Show Advanced Setting ). In the line below the inscription Use fixed seed insert the seed and apply it by moving the slider on the right to active mode.
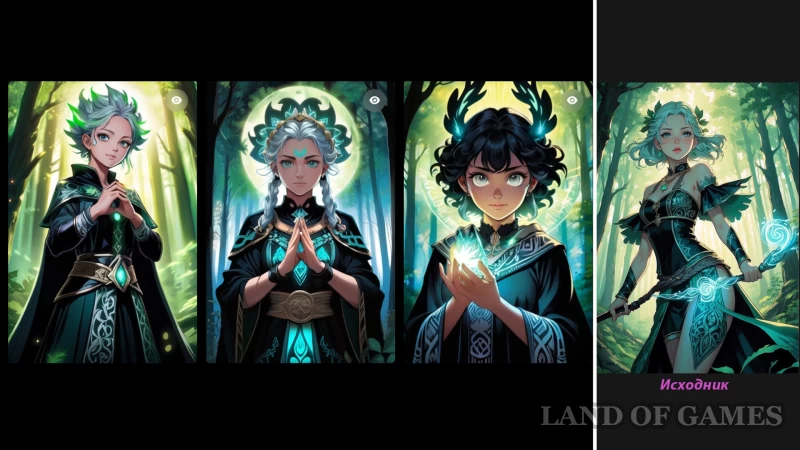
Thus, when you start generation, you will achieve a style similar to the work you like. This feature is especially good for beginners who want to get quick and high-quality results in a short time.
Bottom line
For those who are just joining the world of generative neural networks, Leonardo AI will be a great start. Of course, it cannot be called a professional tool in the full sense of the word - the neuron lacks more control over the settings, and to achieve correct results you will have to spend some time.
And yet, the platform has extensive functionality for creating and editing digital illustrations and can please you with its loyal free use policy, which has already won over millions of users around the world.
Comments
You need to login to add comments.
You can login with