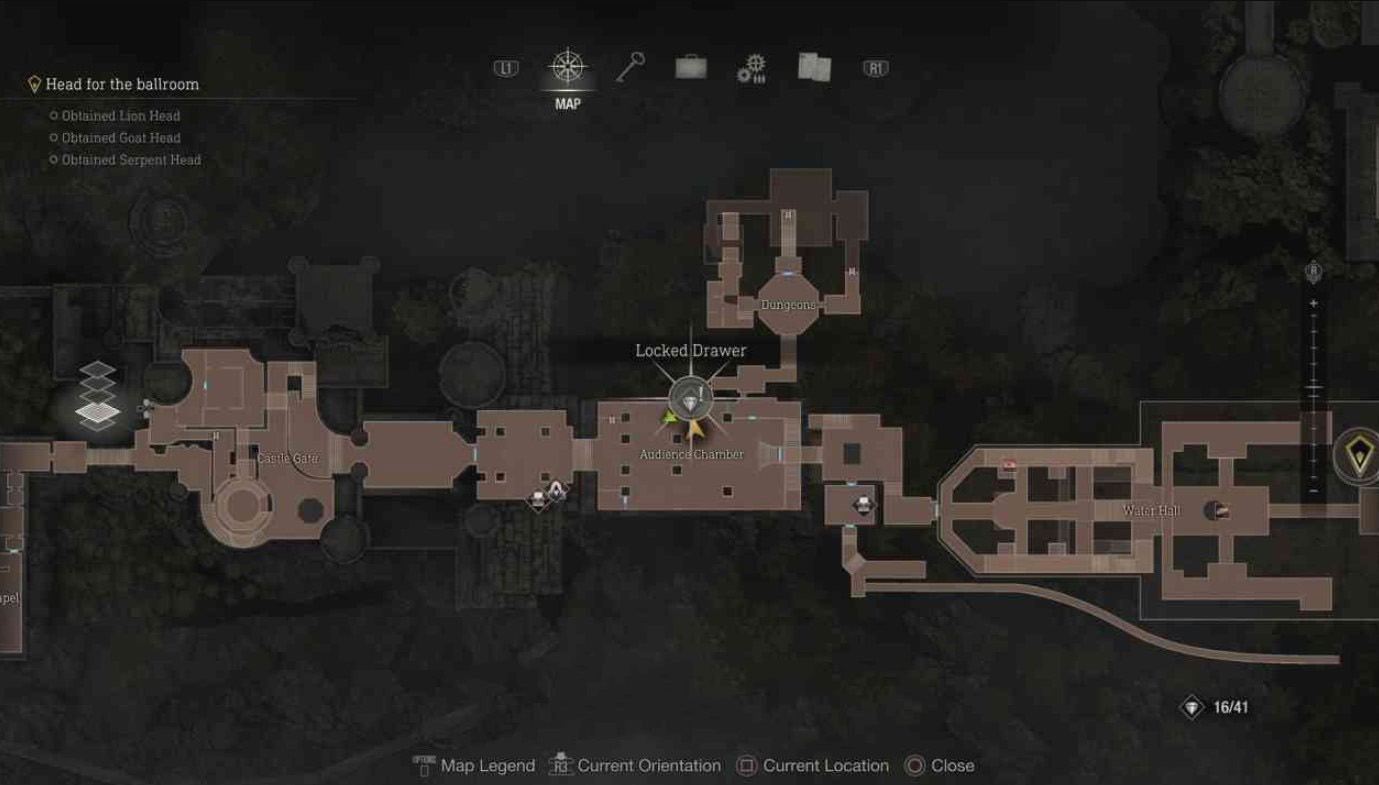
In Resident Evil 4 (2023), treasures in the Castle are special collectibles that you can sell to a merchant for a considerable amount of money. Finding all of these relics and decorations in the marked area will unlock the Robber achievement. In this guide, we will tell you where to find them.
Castle Treasure Hunt Tips in Resident Evil 4 (2023)
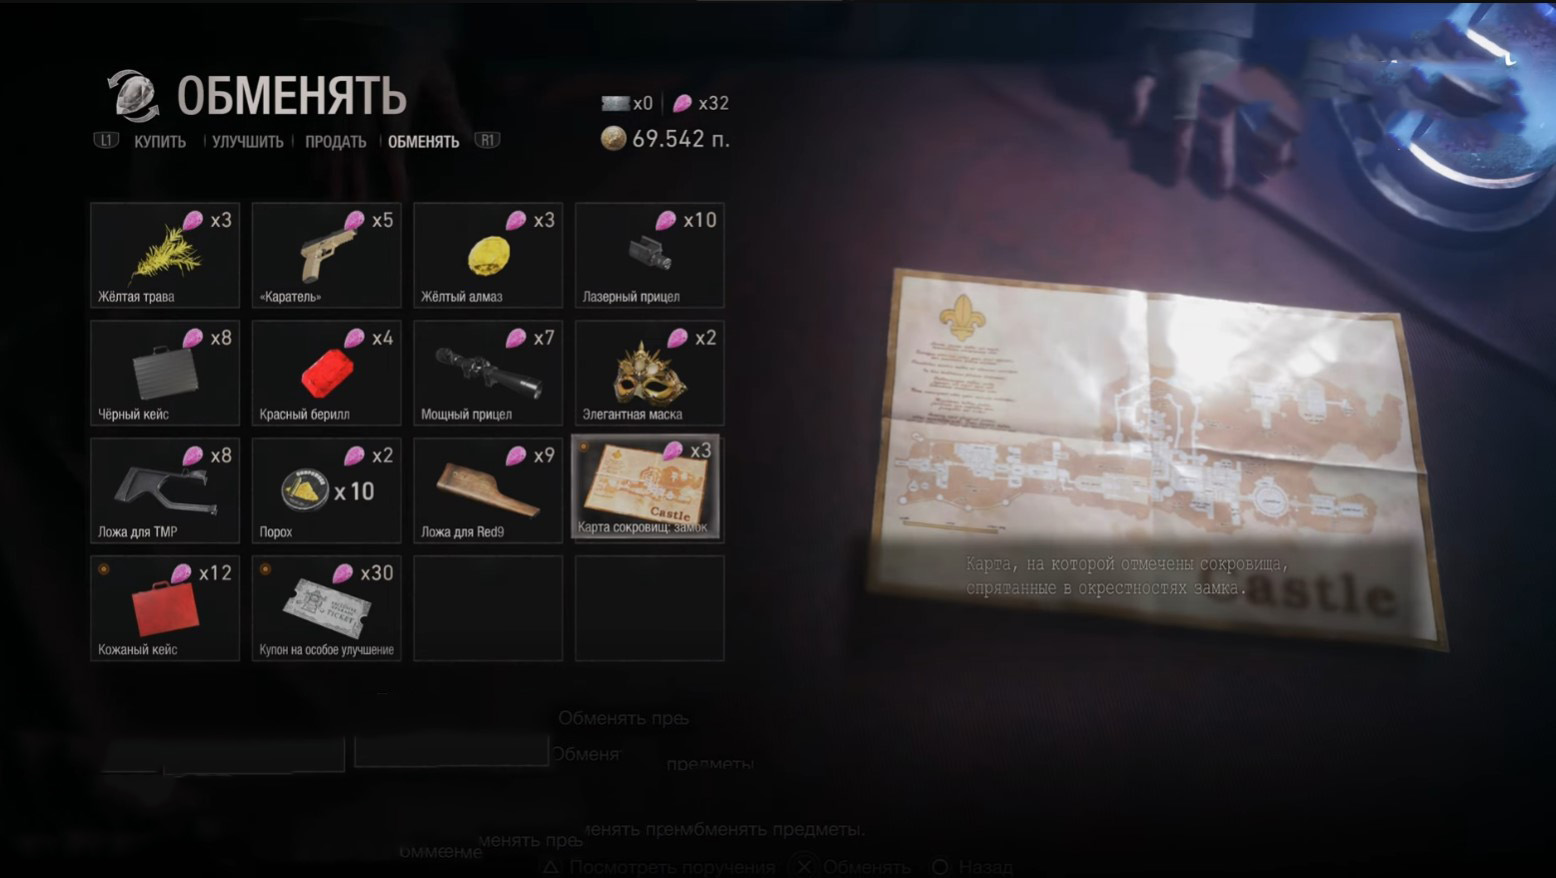
You can significantly simplify your search for jewelry by purchasing a treasure map of the Castle from a merchant for 3 spinels (can be obtained by execution of instructions ) located in the passage area in Chapter 7. Go under the stone arch and turn into the building on the right, next to which there is a purple torch, and you will find the right shop. However, if you follow our guide, then you will not need this piece of paper.

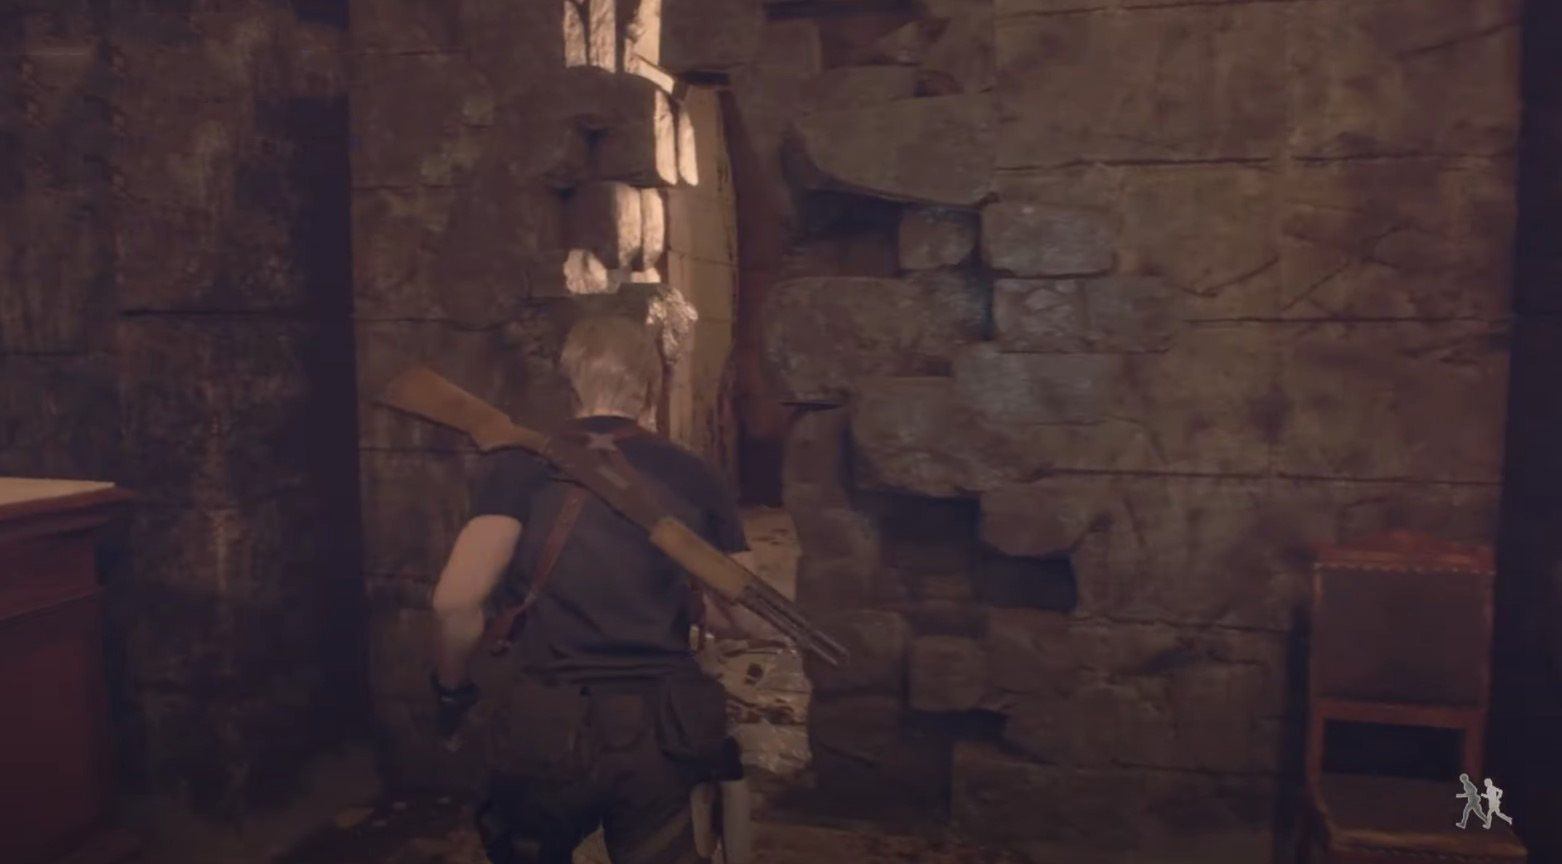
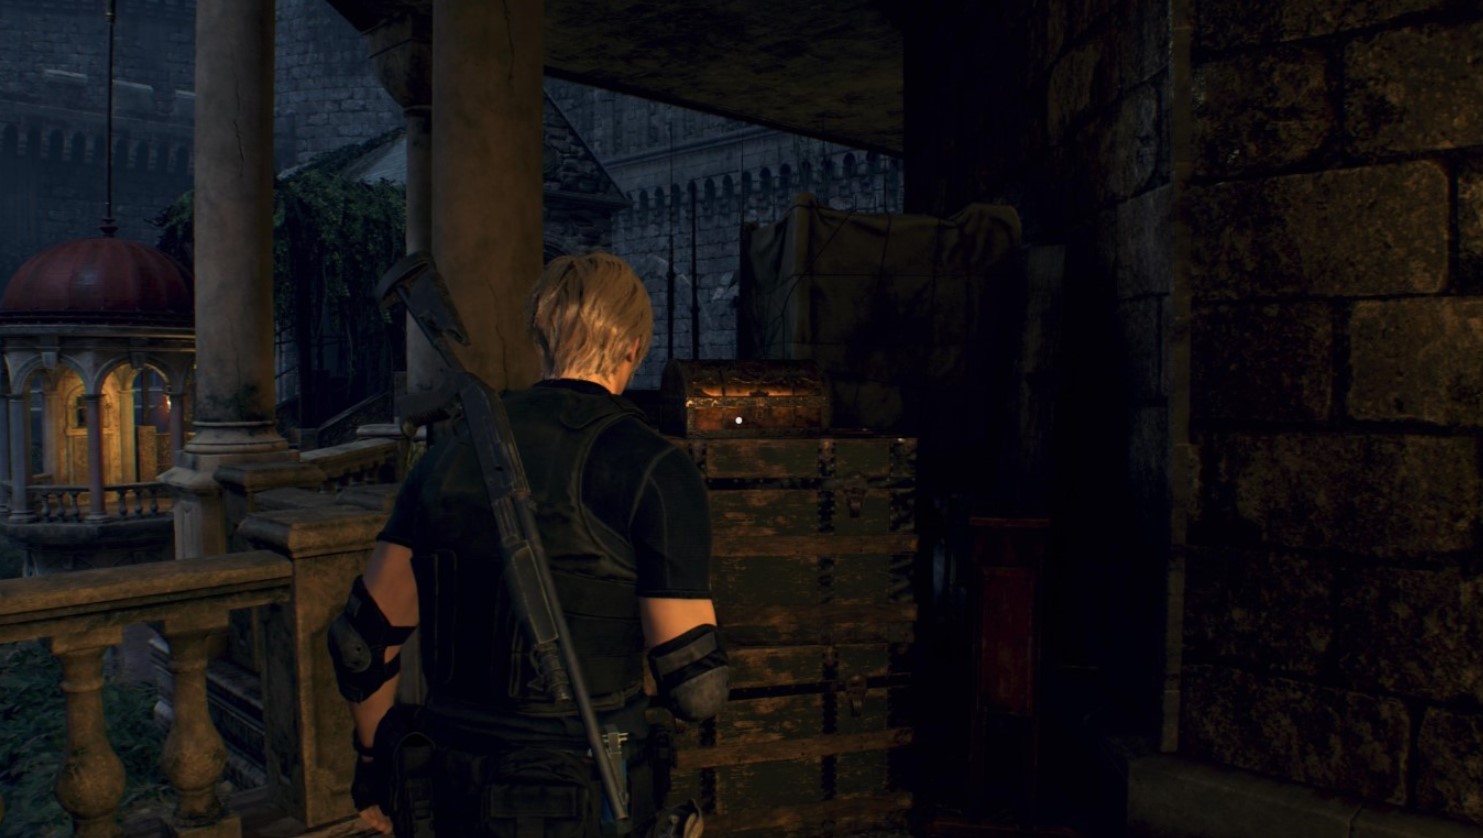
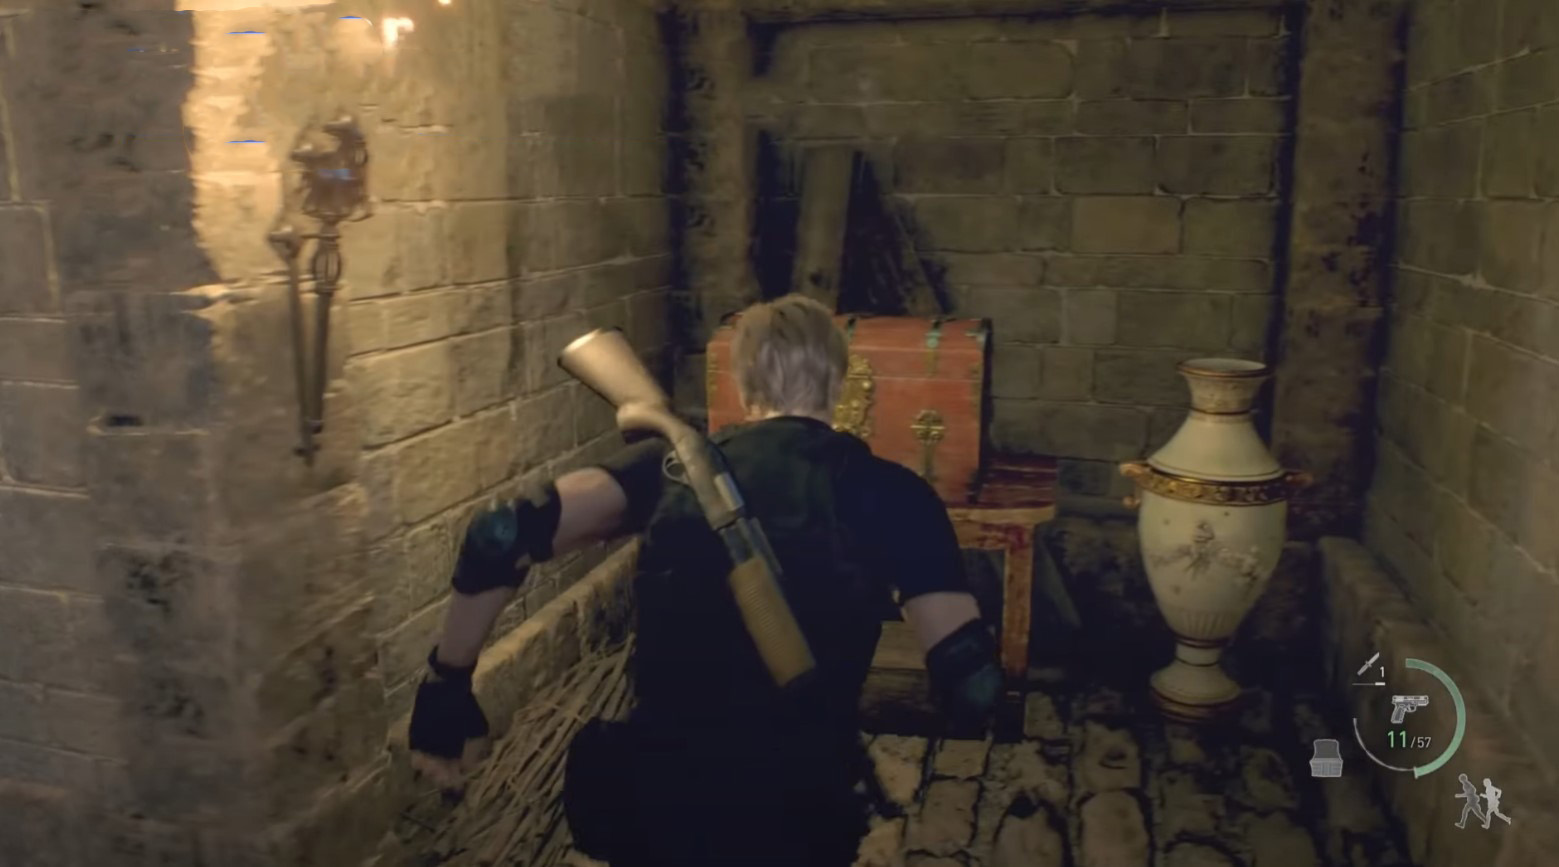
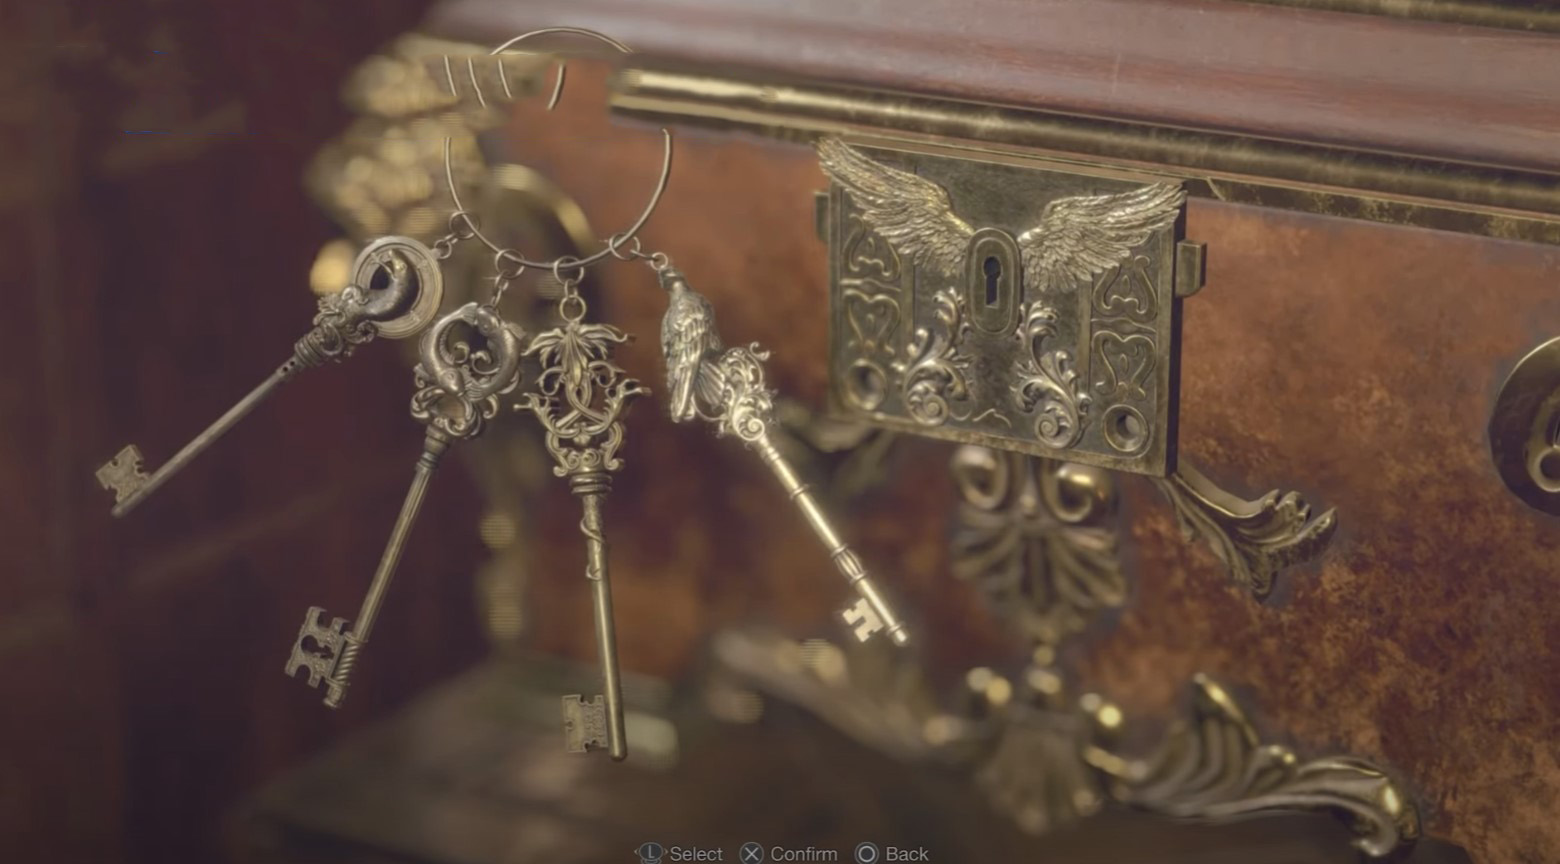
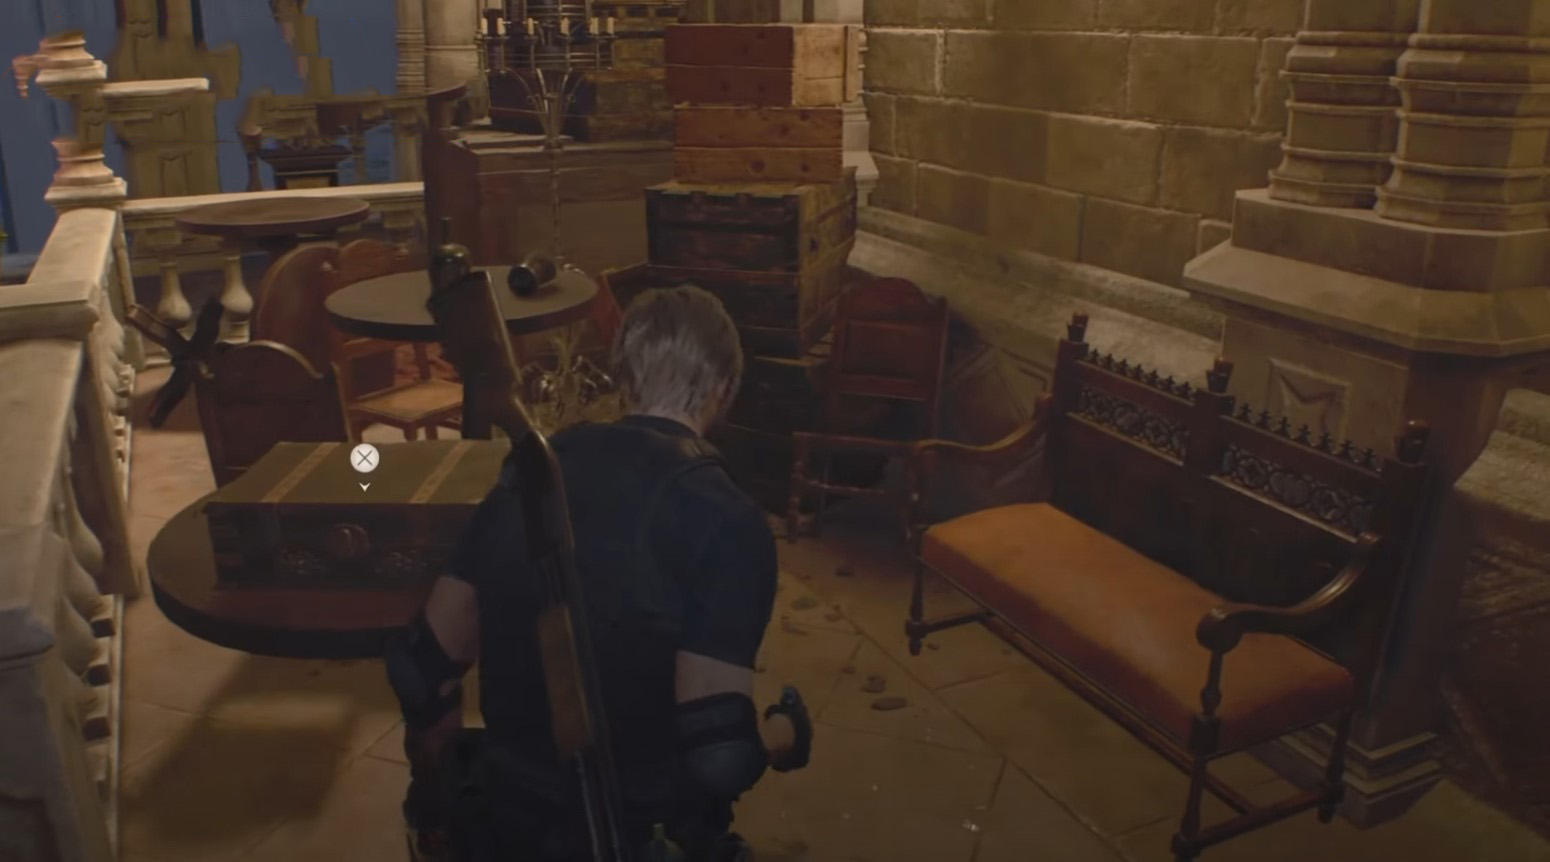
Some treasures will be in unopened blue or red chests, while others will be hidden in barrels that will need to be broken. Still others will be completely locked in special boxes, to open which you will need to find a small key or solve a puzzle.
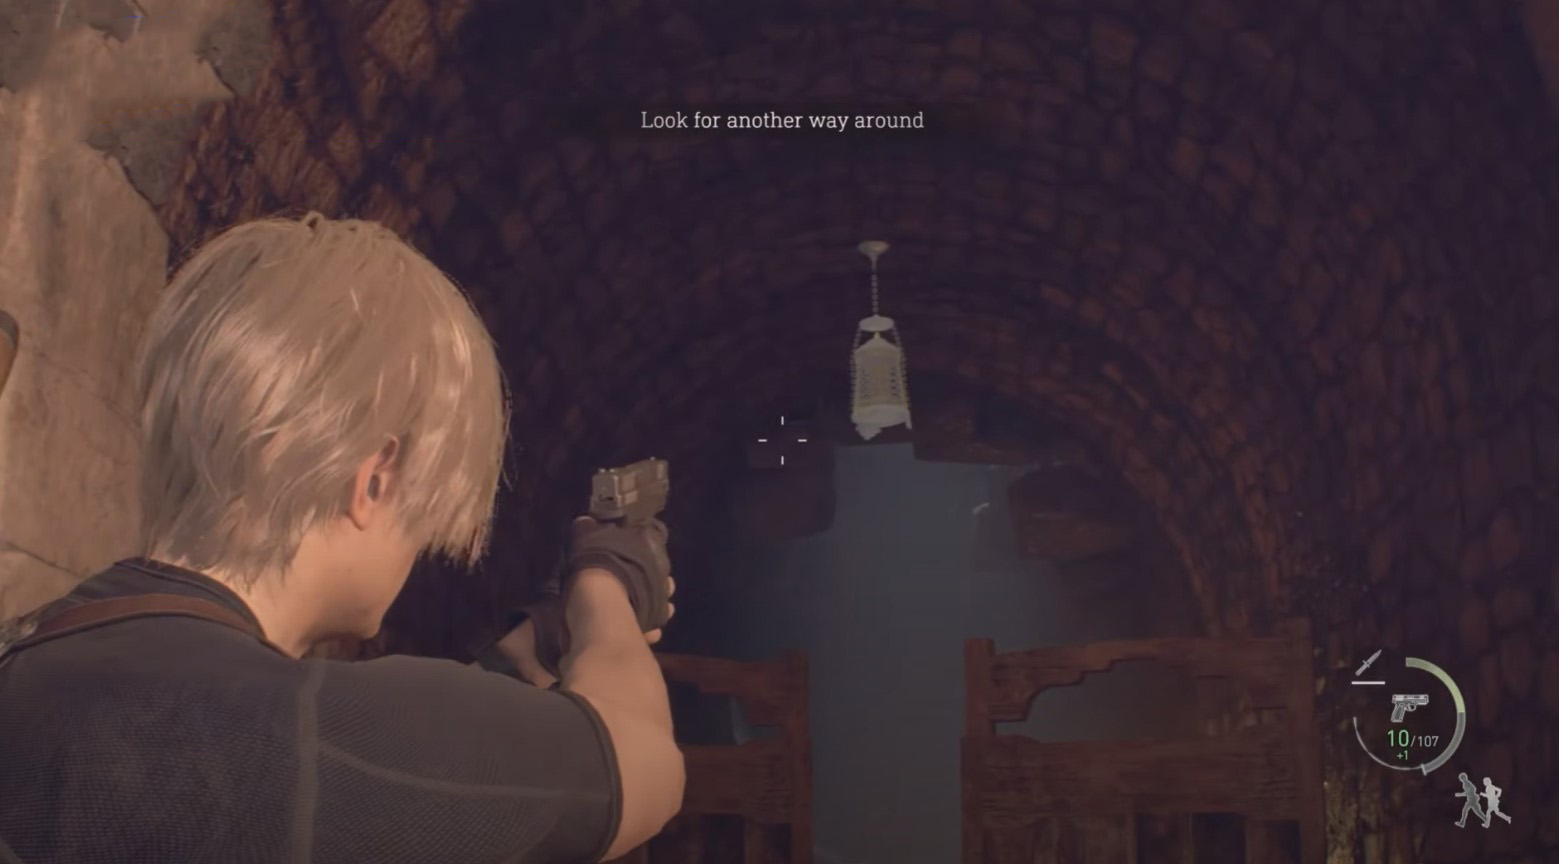
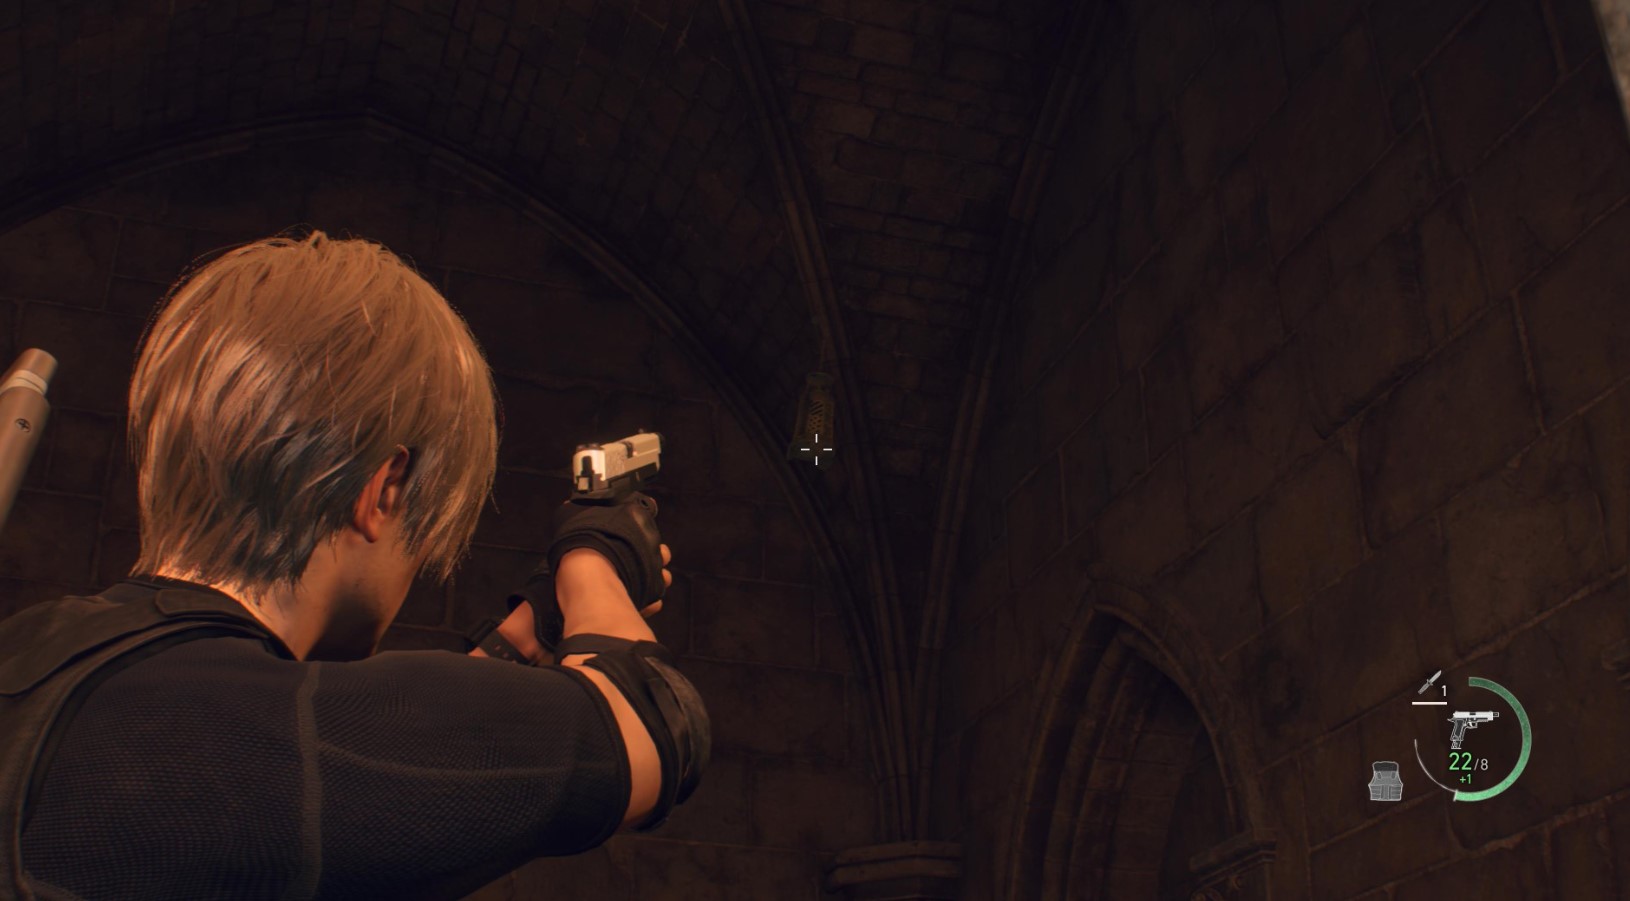
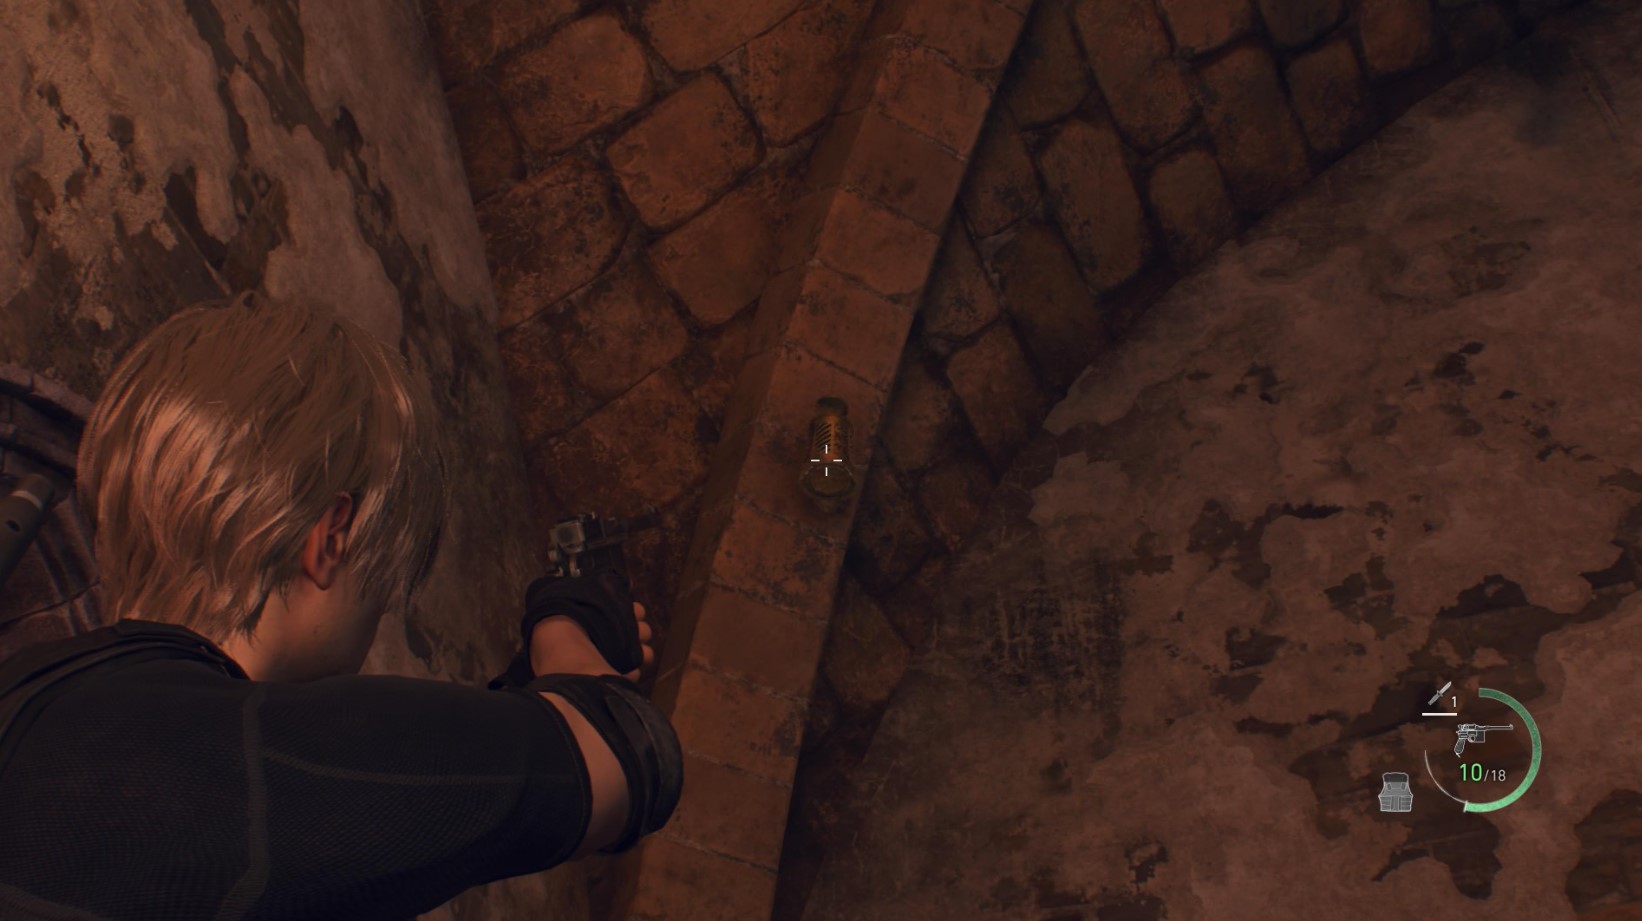
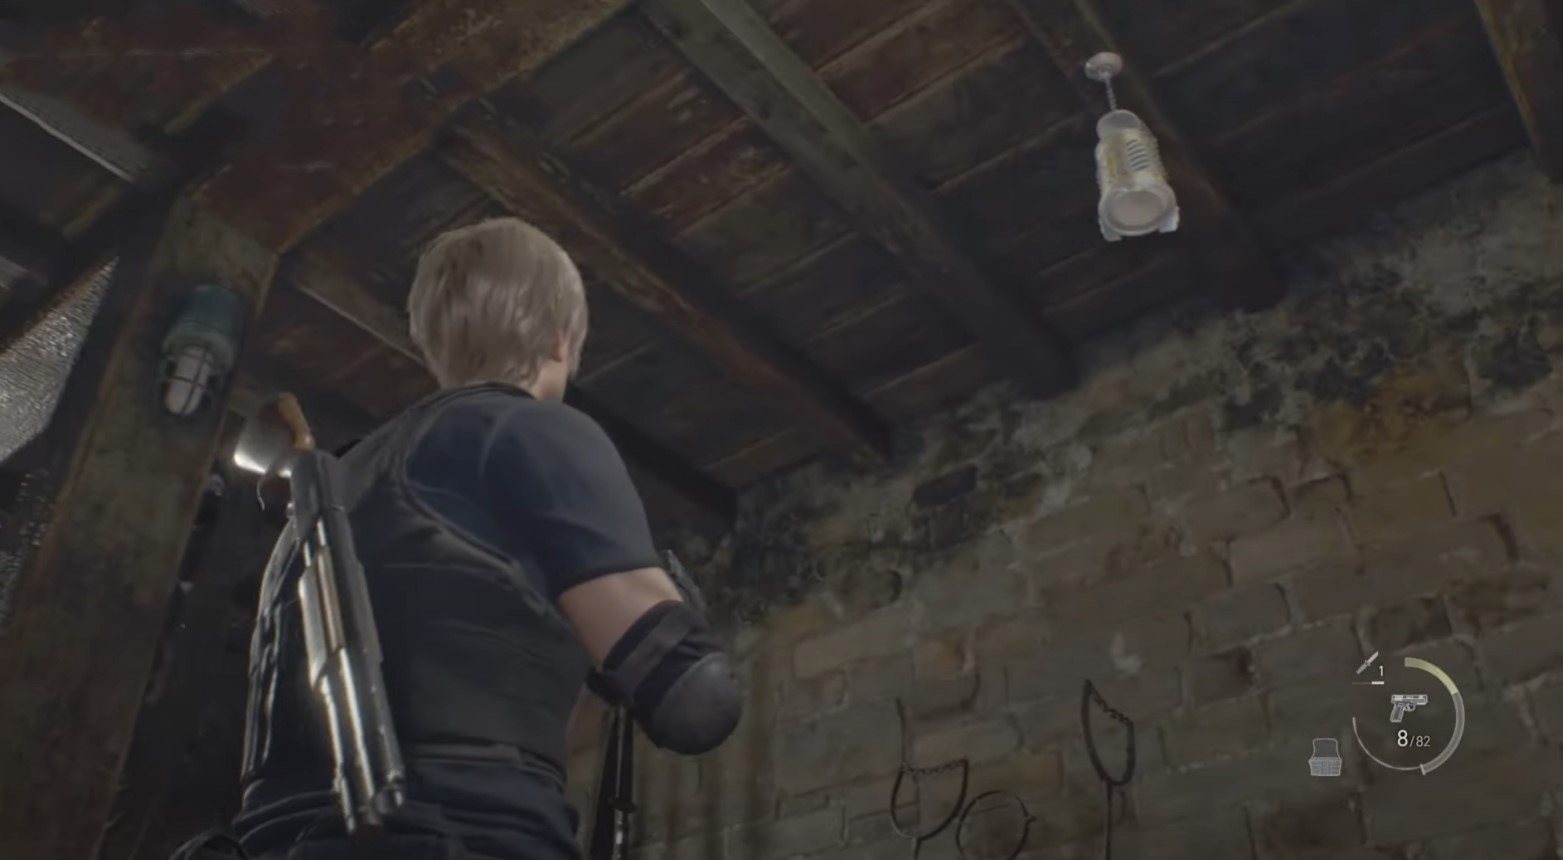
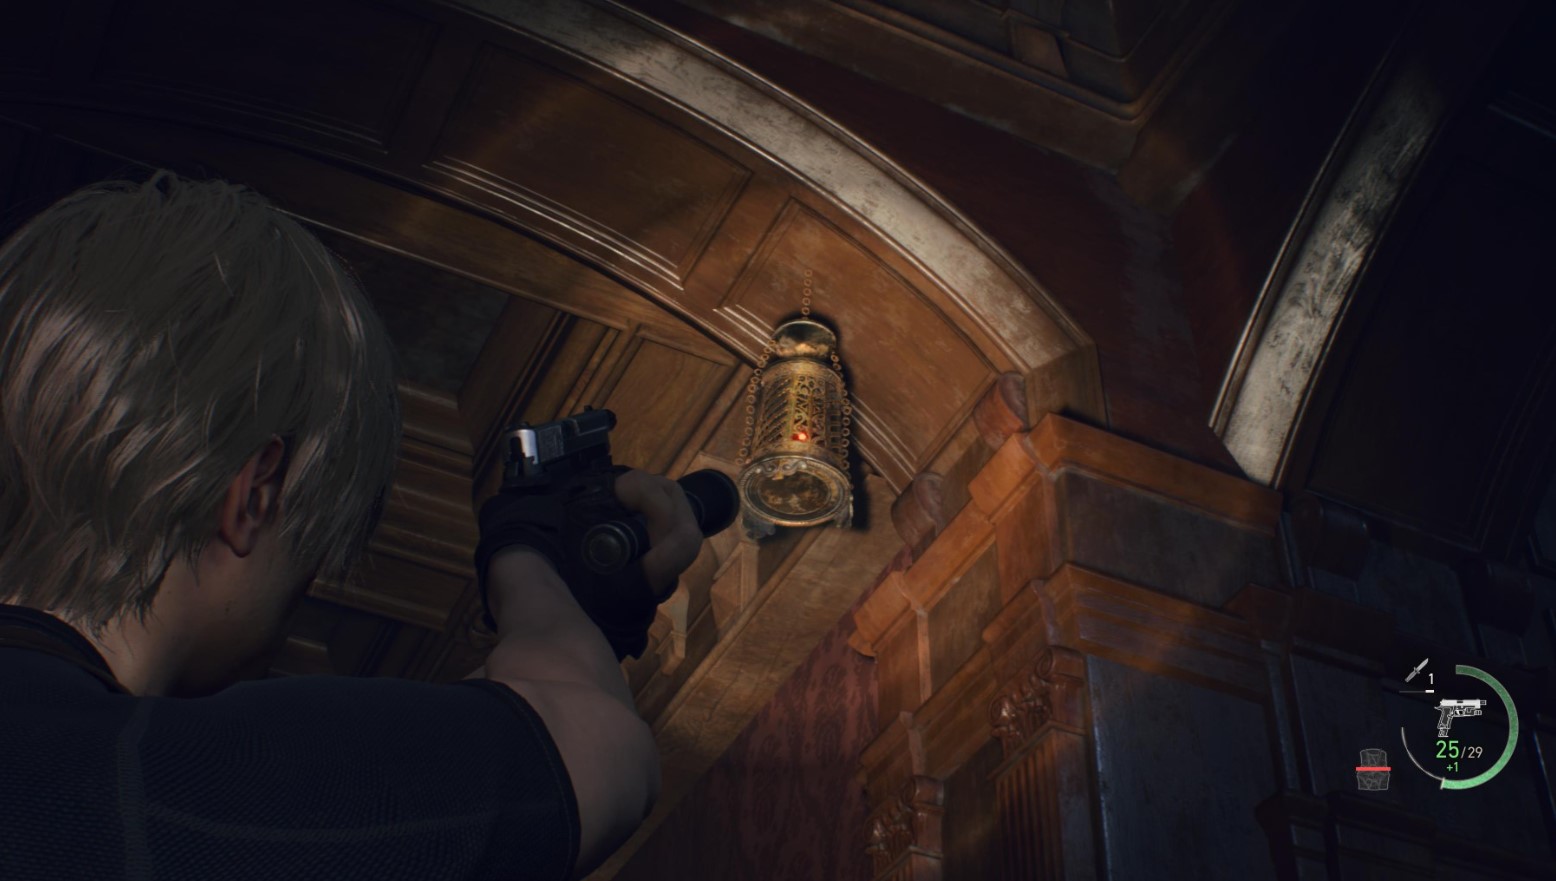
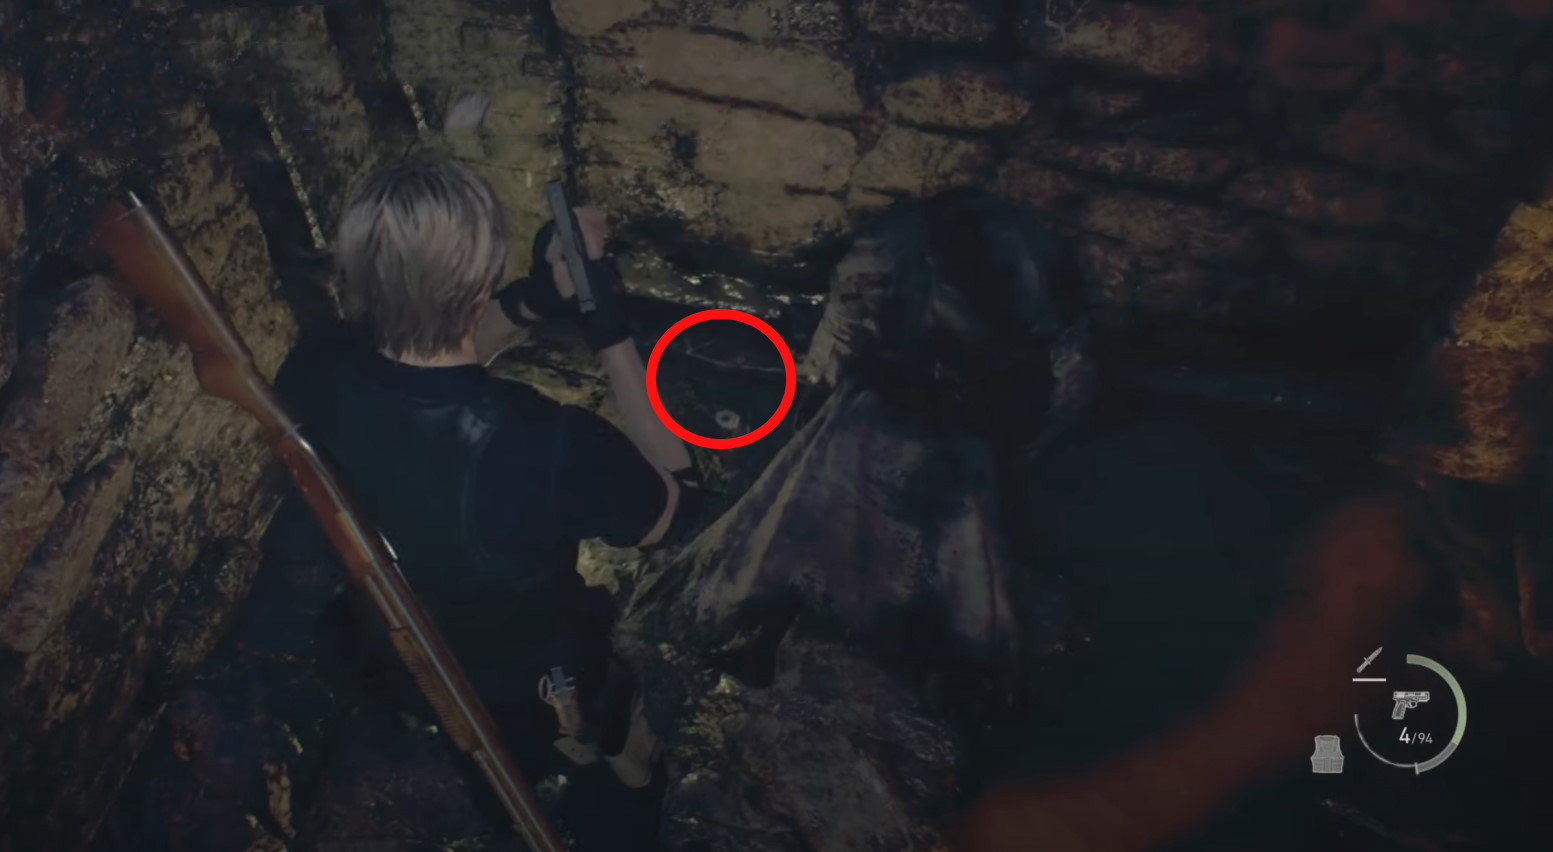
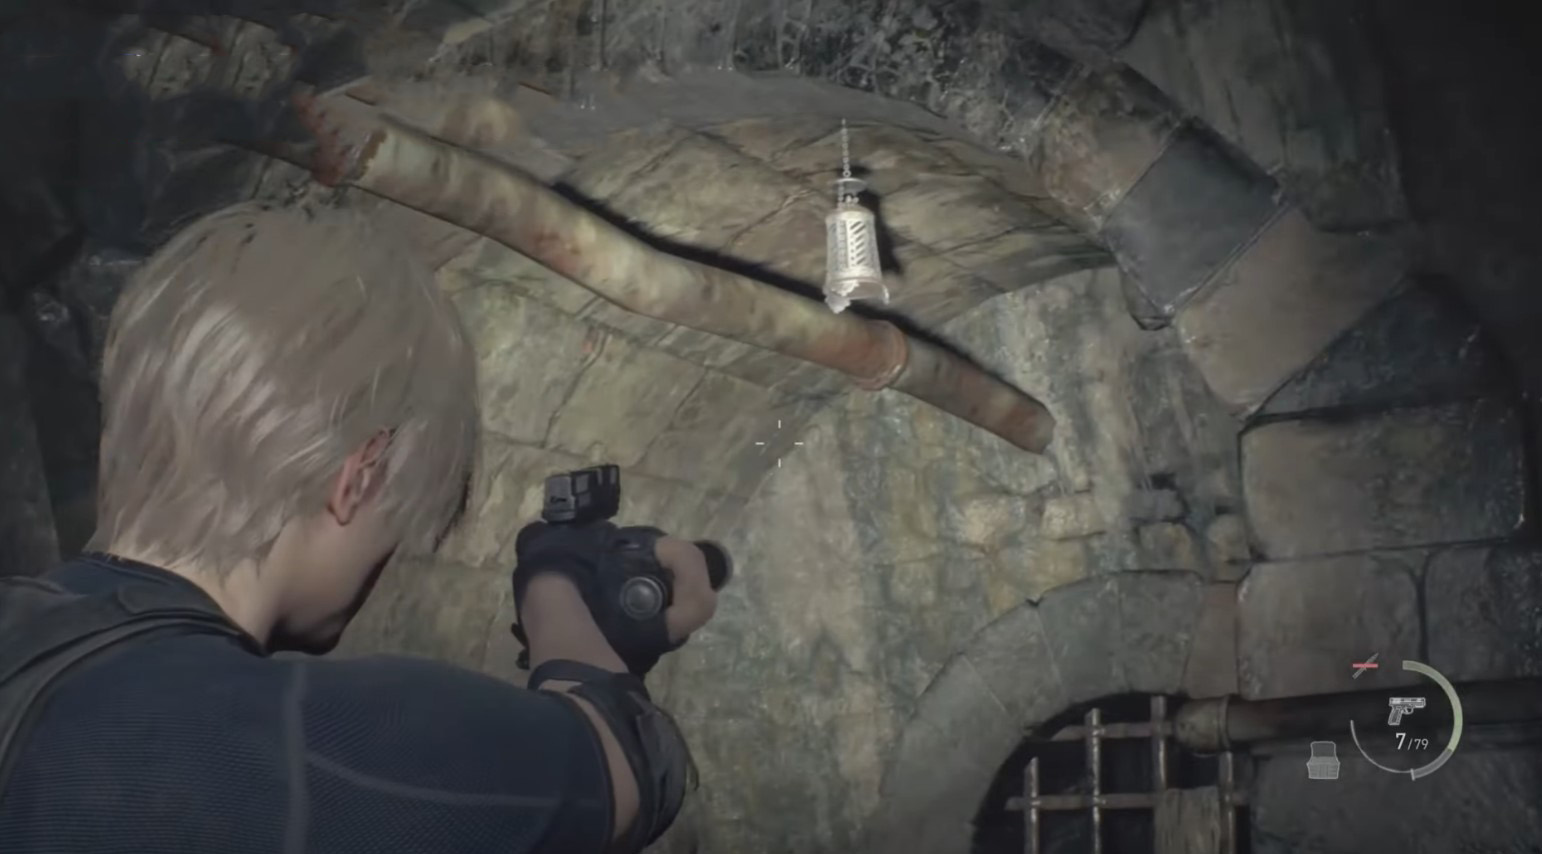
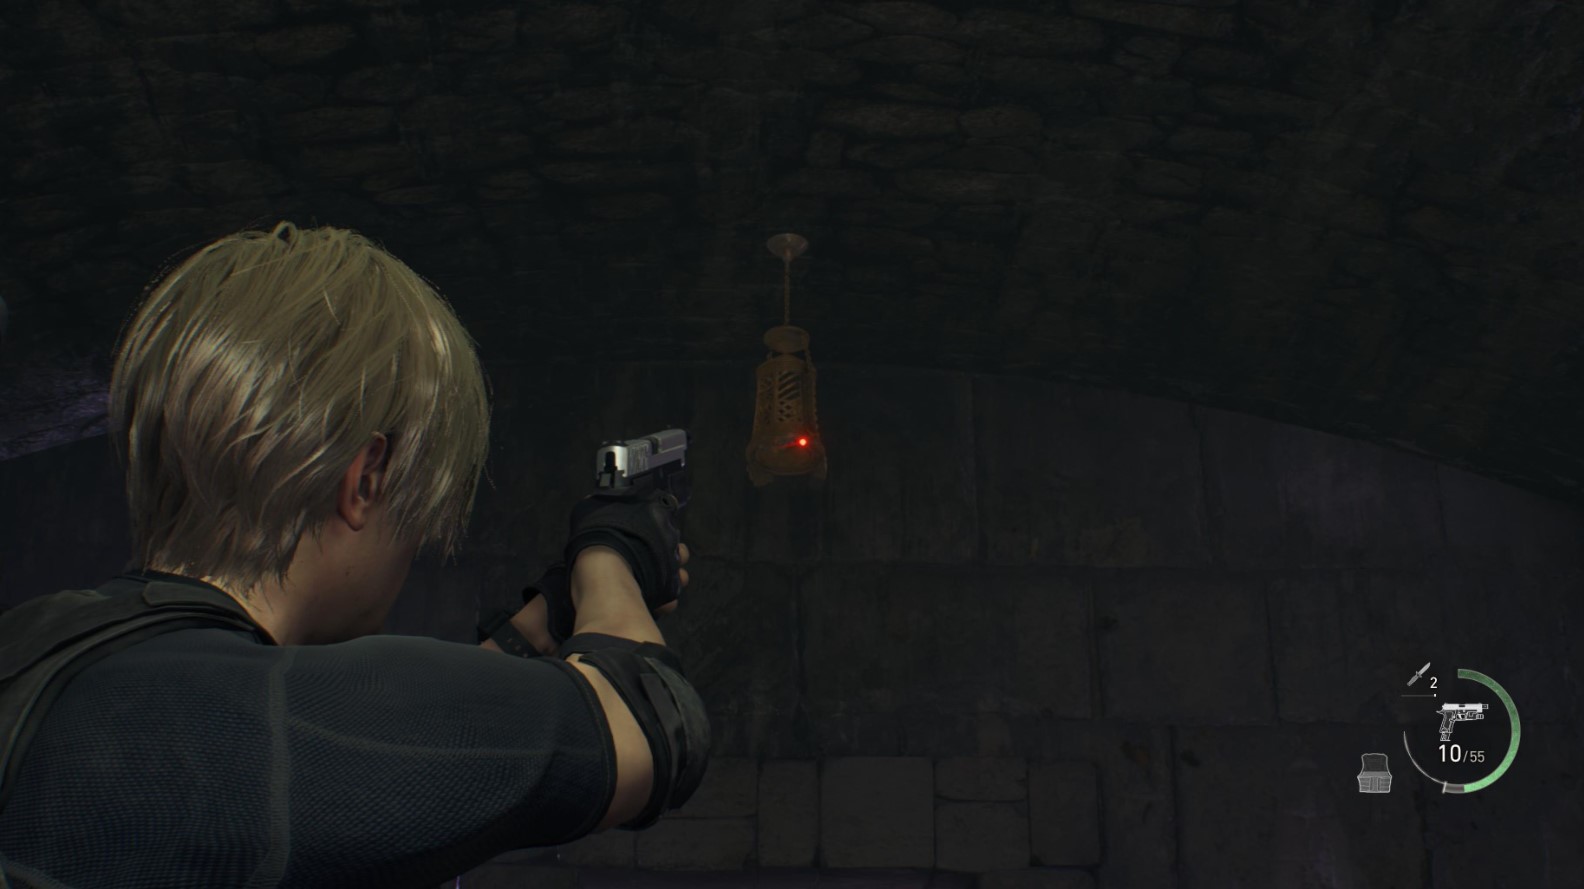
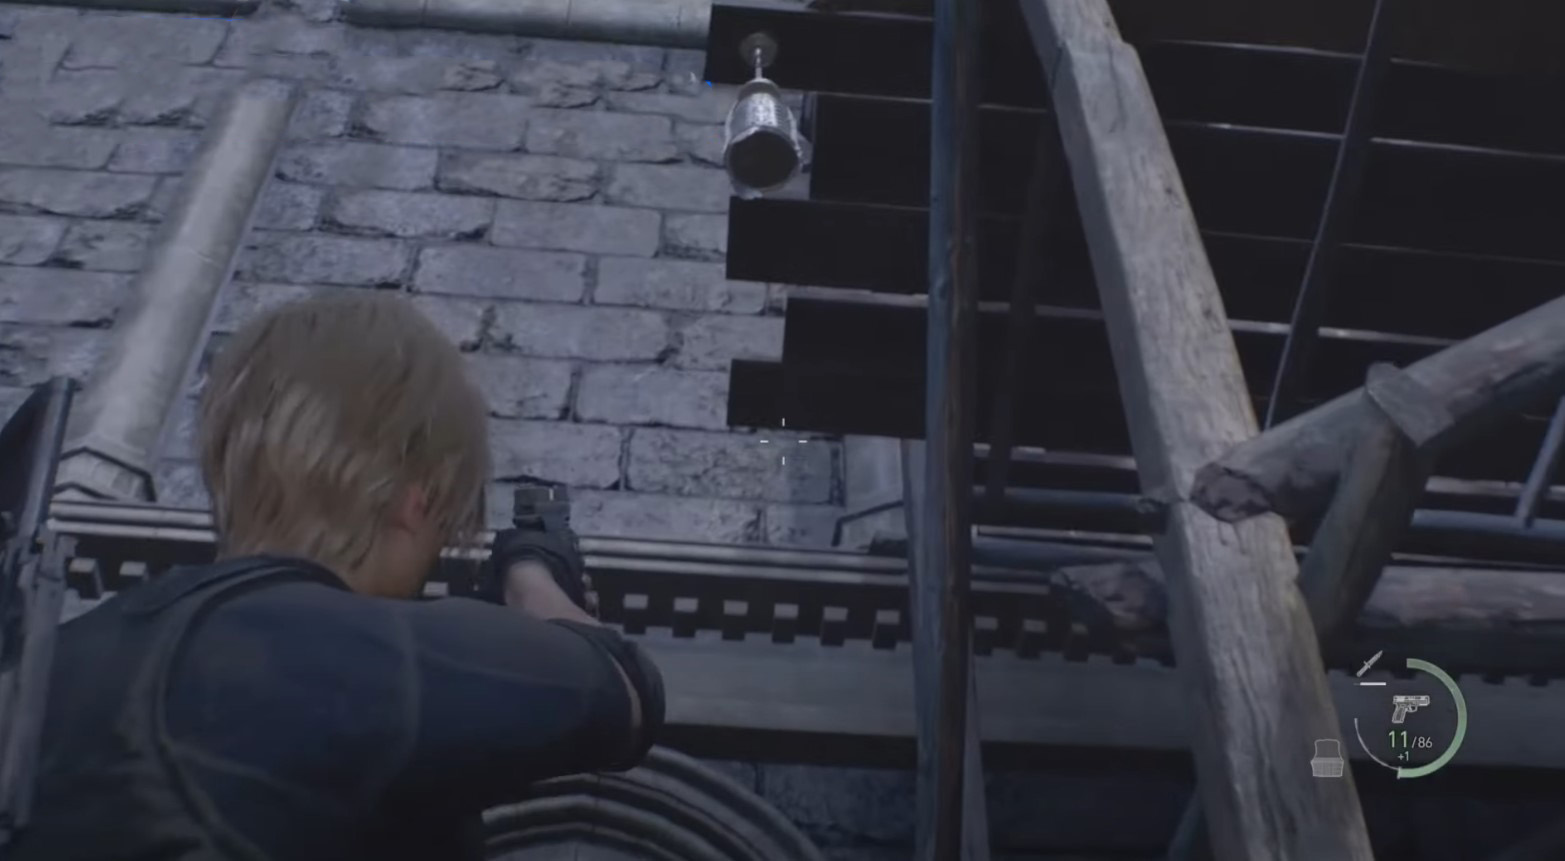
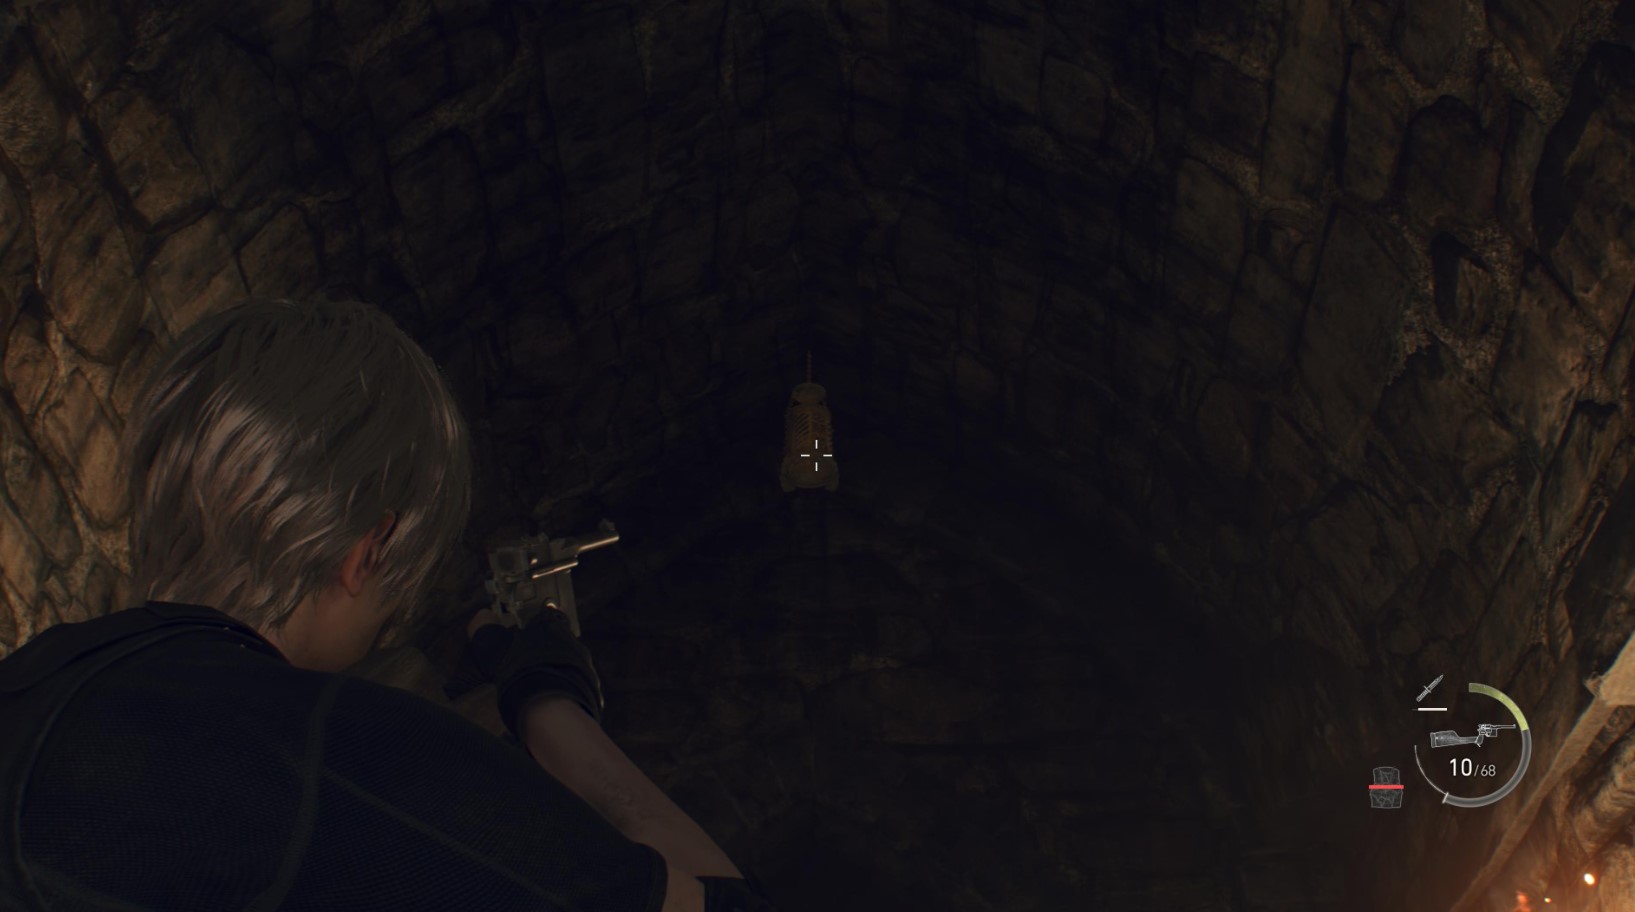
Sometimes the decorations will be in small metal bells (lamps) suspended above the ground and making a squeaky sound. They can be shot down with firearms. However, be careful, because if the bell falls into the water, the value of the item in it will drop. Therefore, you need to accurately calculate the time for the shot.
Combining Treasures (achievement "Smart Jeweler")
Quite often, you will come across gems and artifacts with empty slots. These items can be combined with each other, increasing their total cost. To do this, go to your inventory, open the "Important things and treasures" tab, and then select some item with cells and click the "Combine" button.
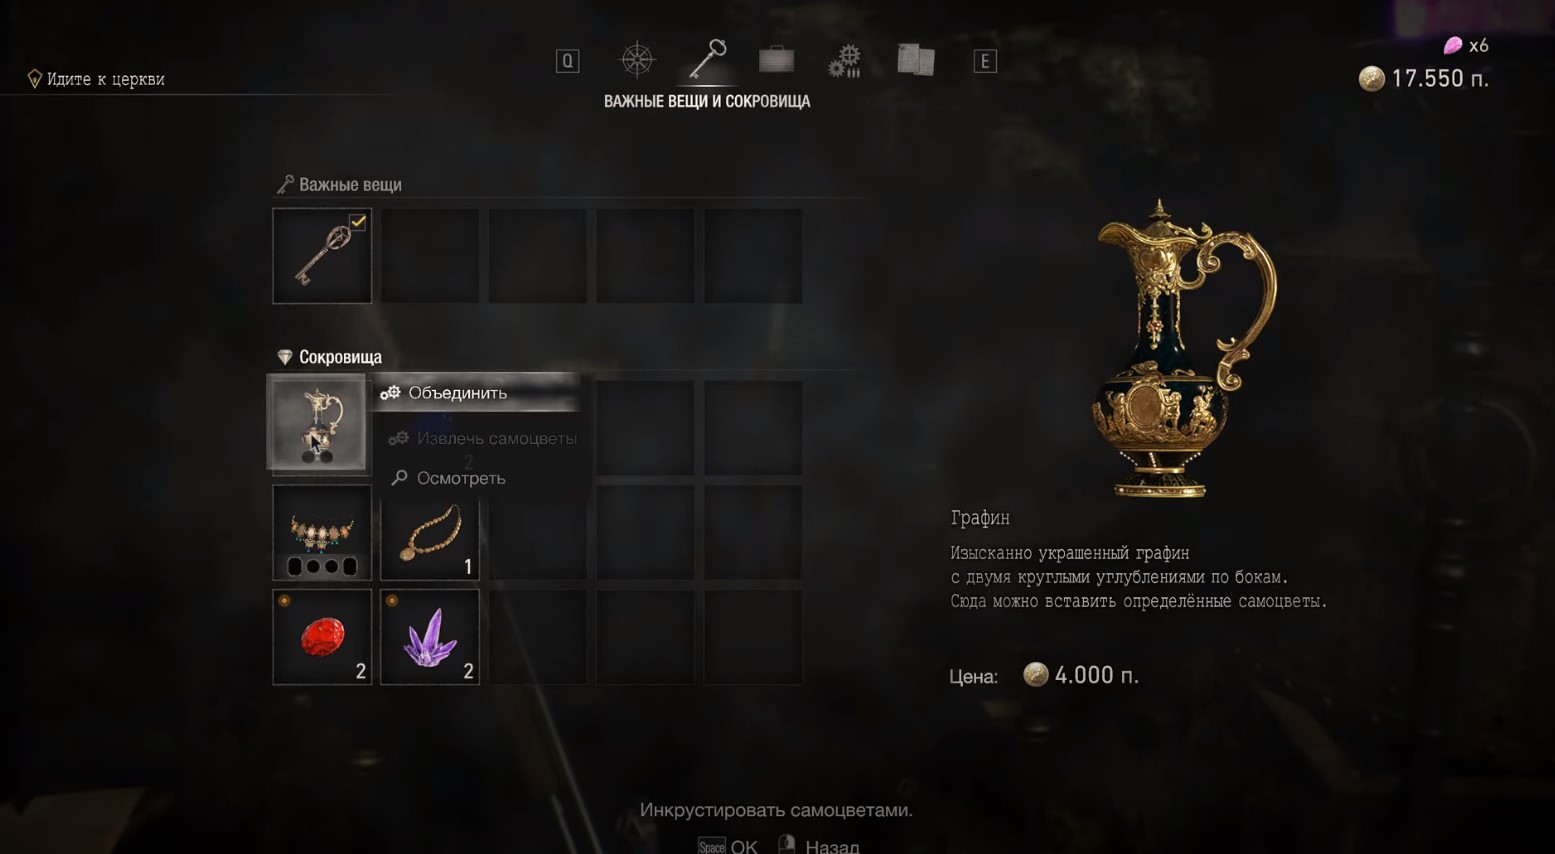
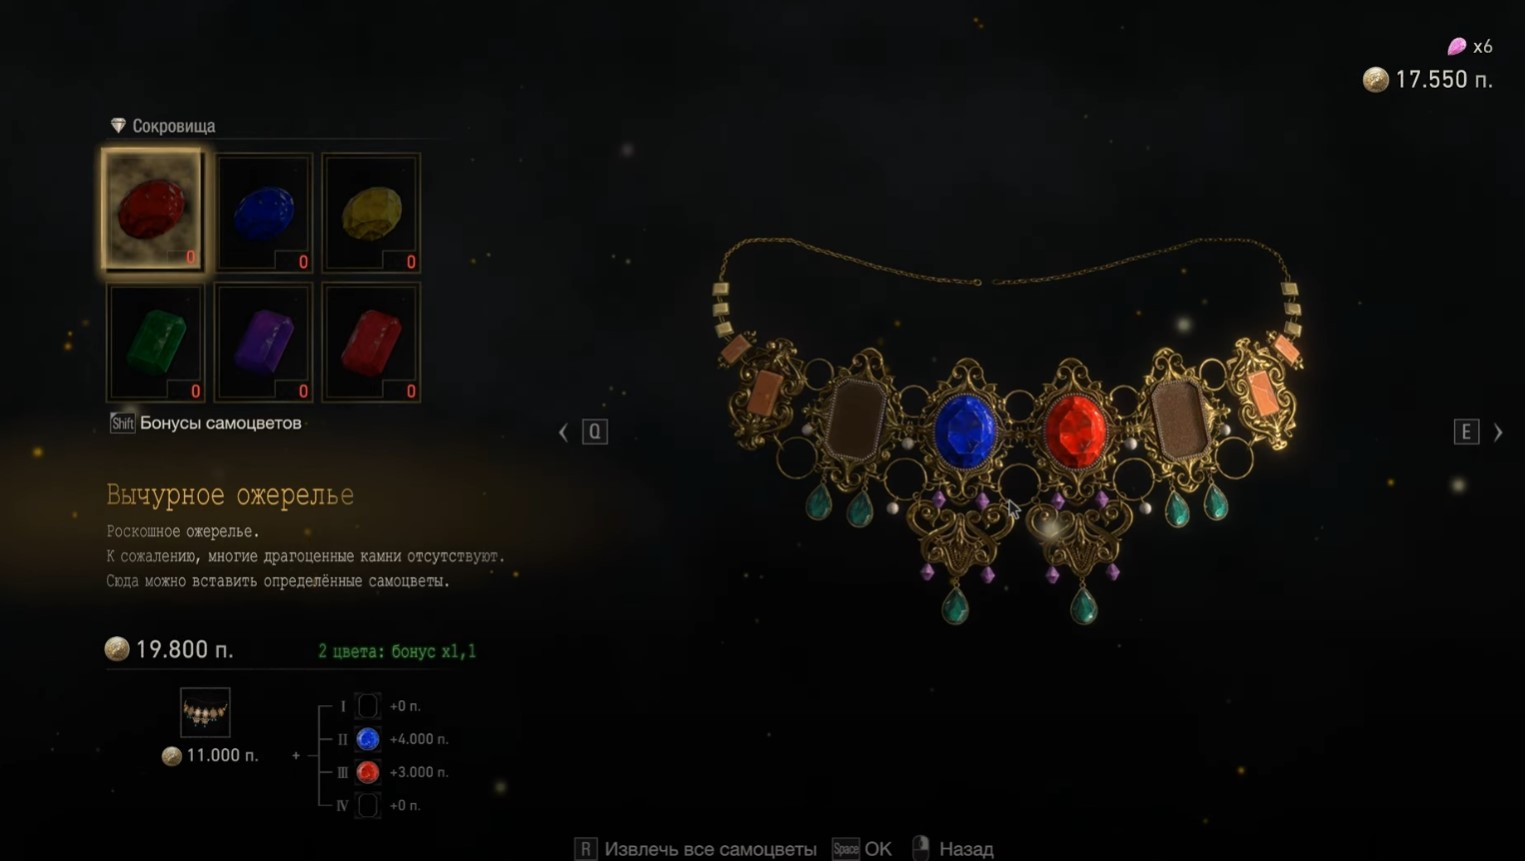
A new window will open in which you can select gems and place them in the treasure. The new price of the item can be seen in the lower left corner of the screen. We advise you to study the bonuses from combining to get the maximum benefit. For example, identical gems usually give more money than multi-colored gems. As such, we strongly discourage you from selling gems and socketed jewelry separately, as you will lose a lot of money if you do so.
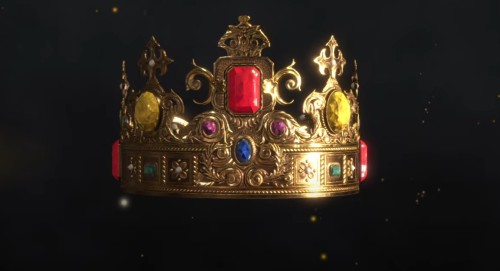
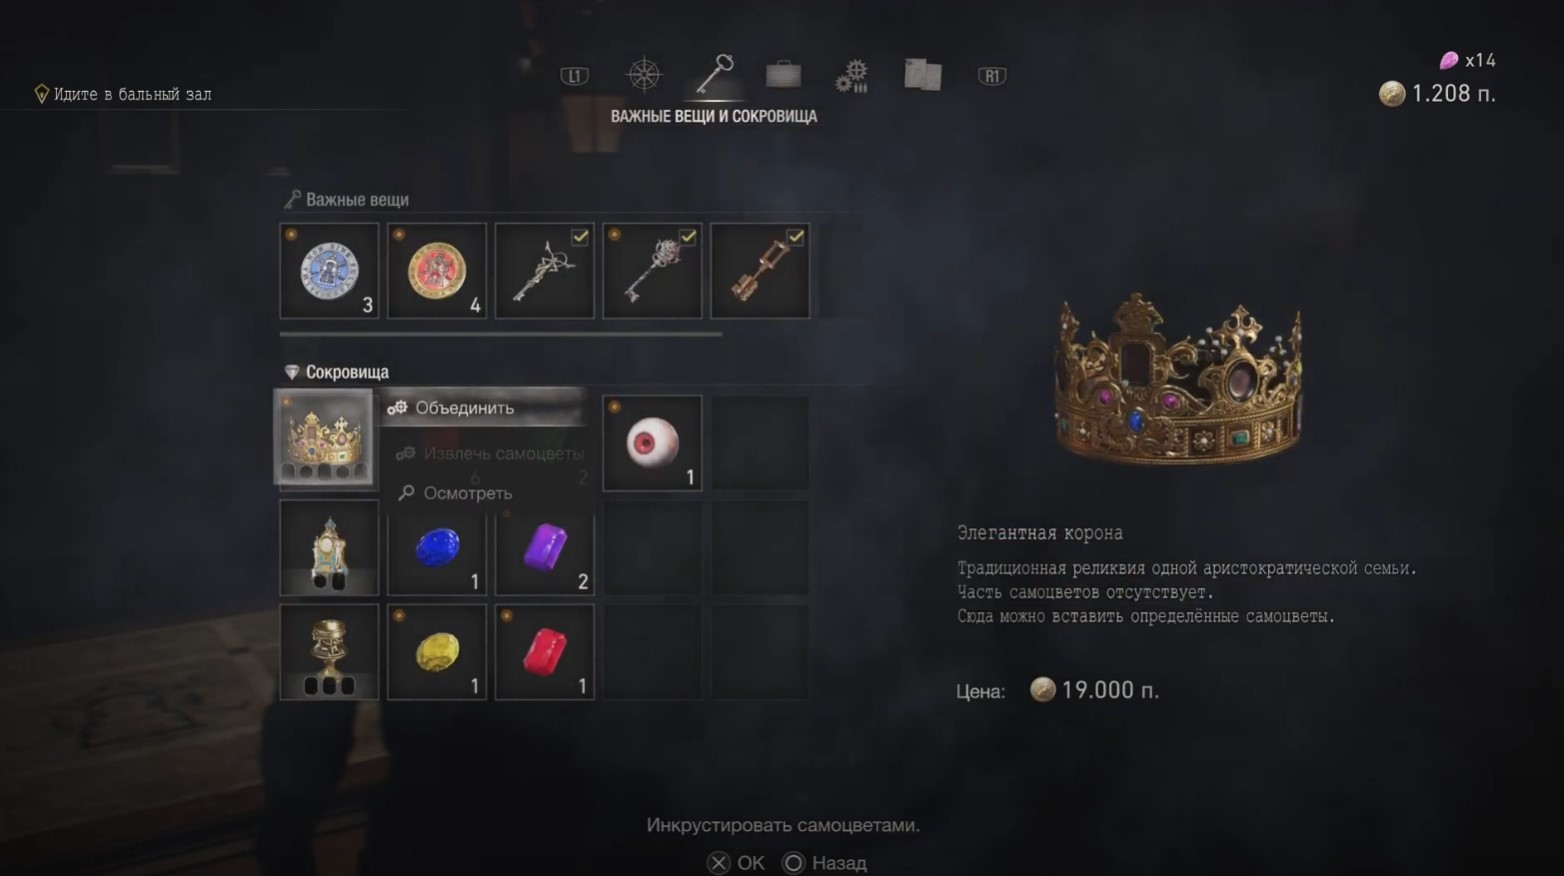
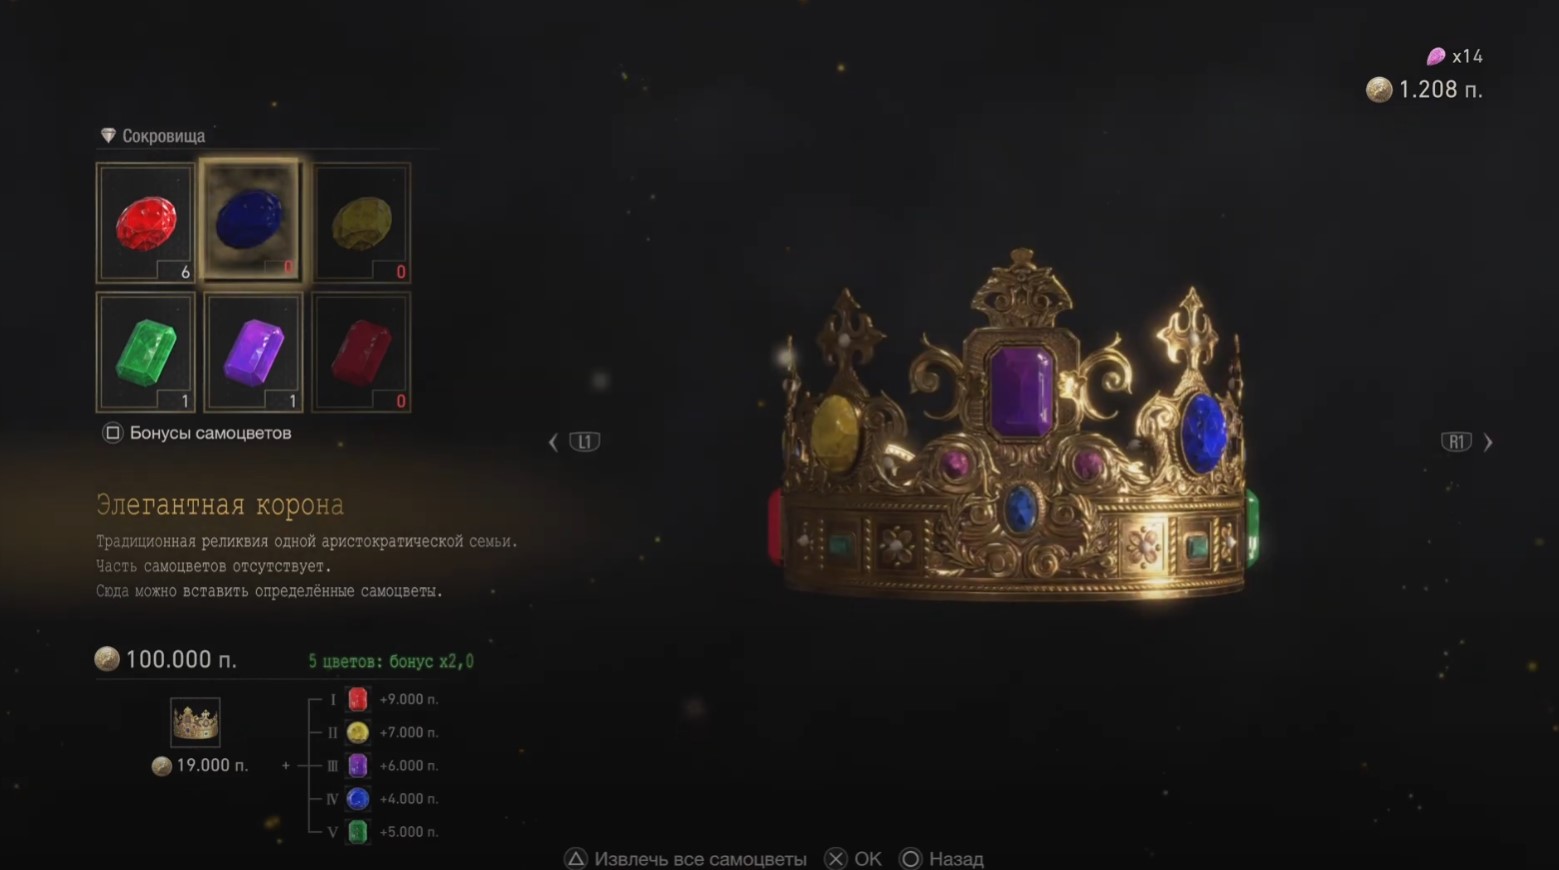
We add that it is this mechanic that will help you unlock the Smart Jeweler trophy. To do this, you need to find elegant crown (Chapter 9 for Deluxe Edition owners or Chapter 10 for everyone else) and then either place 5 different gems (100,000 pesetas) in it, or install 3 red beryl and 2 yellow diamonds (108,000 pesetas).

Now just sell the resulting item to the merchant and you will immediately unlock the specified achievement.
Expansion "Treasure Map"
To all owners of the Deluxe edition, Capcom presented a DLC that adds additional treasures. We will also indicate their location (the map below shows approximate locations), however, if you are playing the regular version, then you will not have these items.
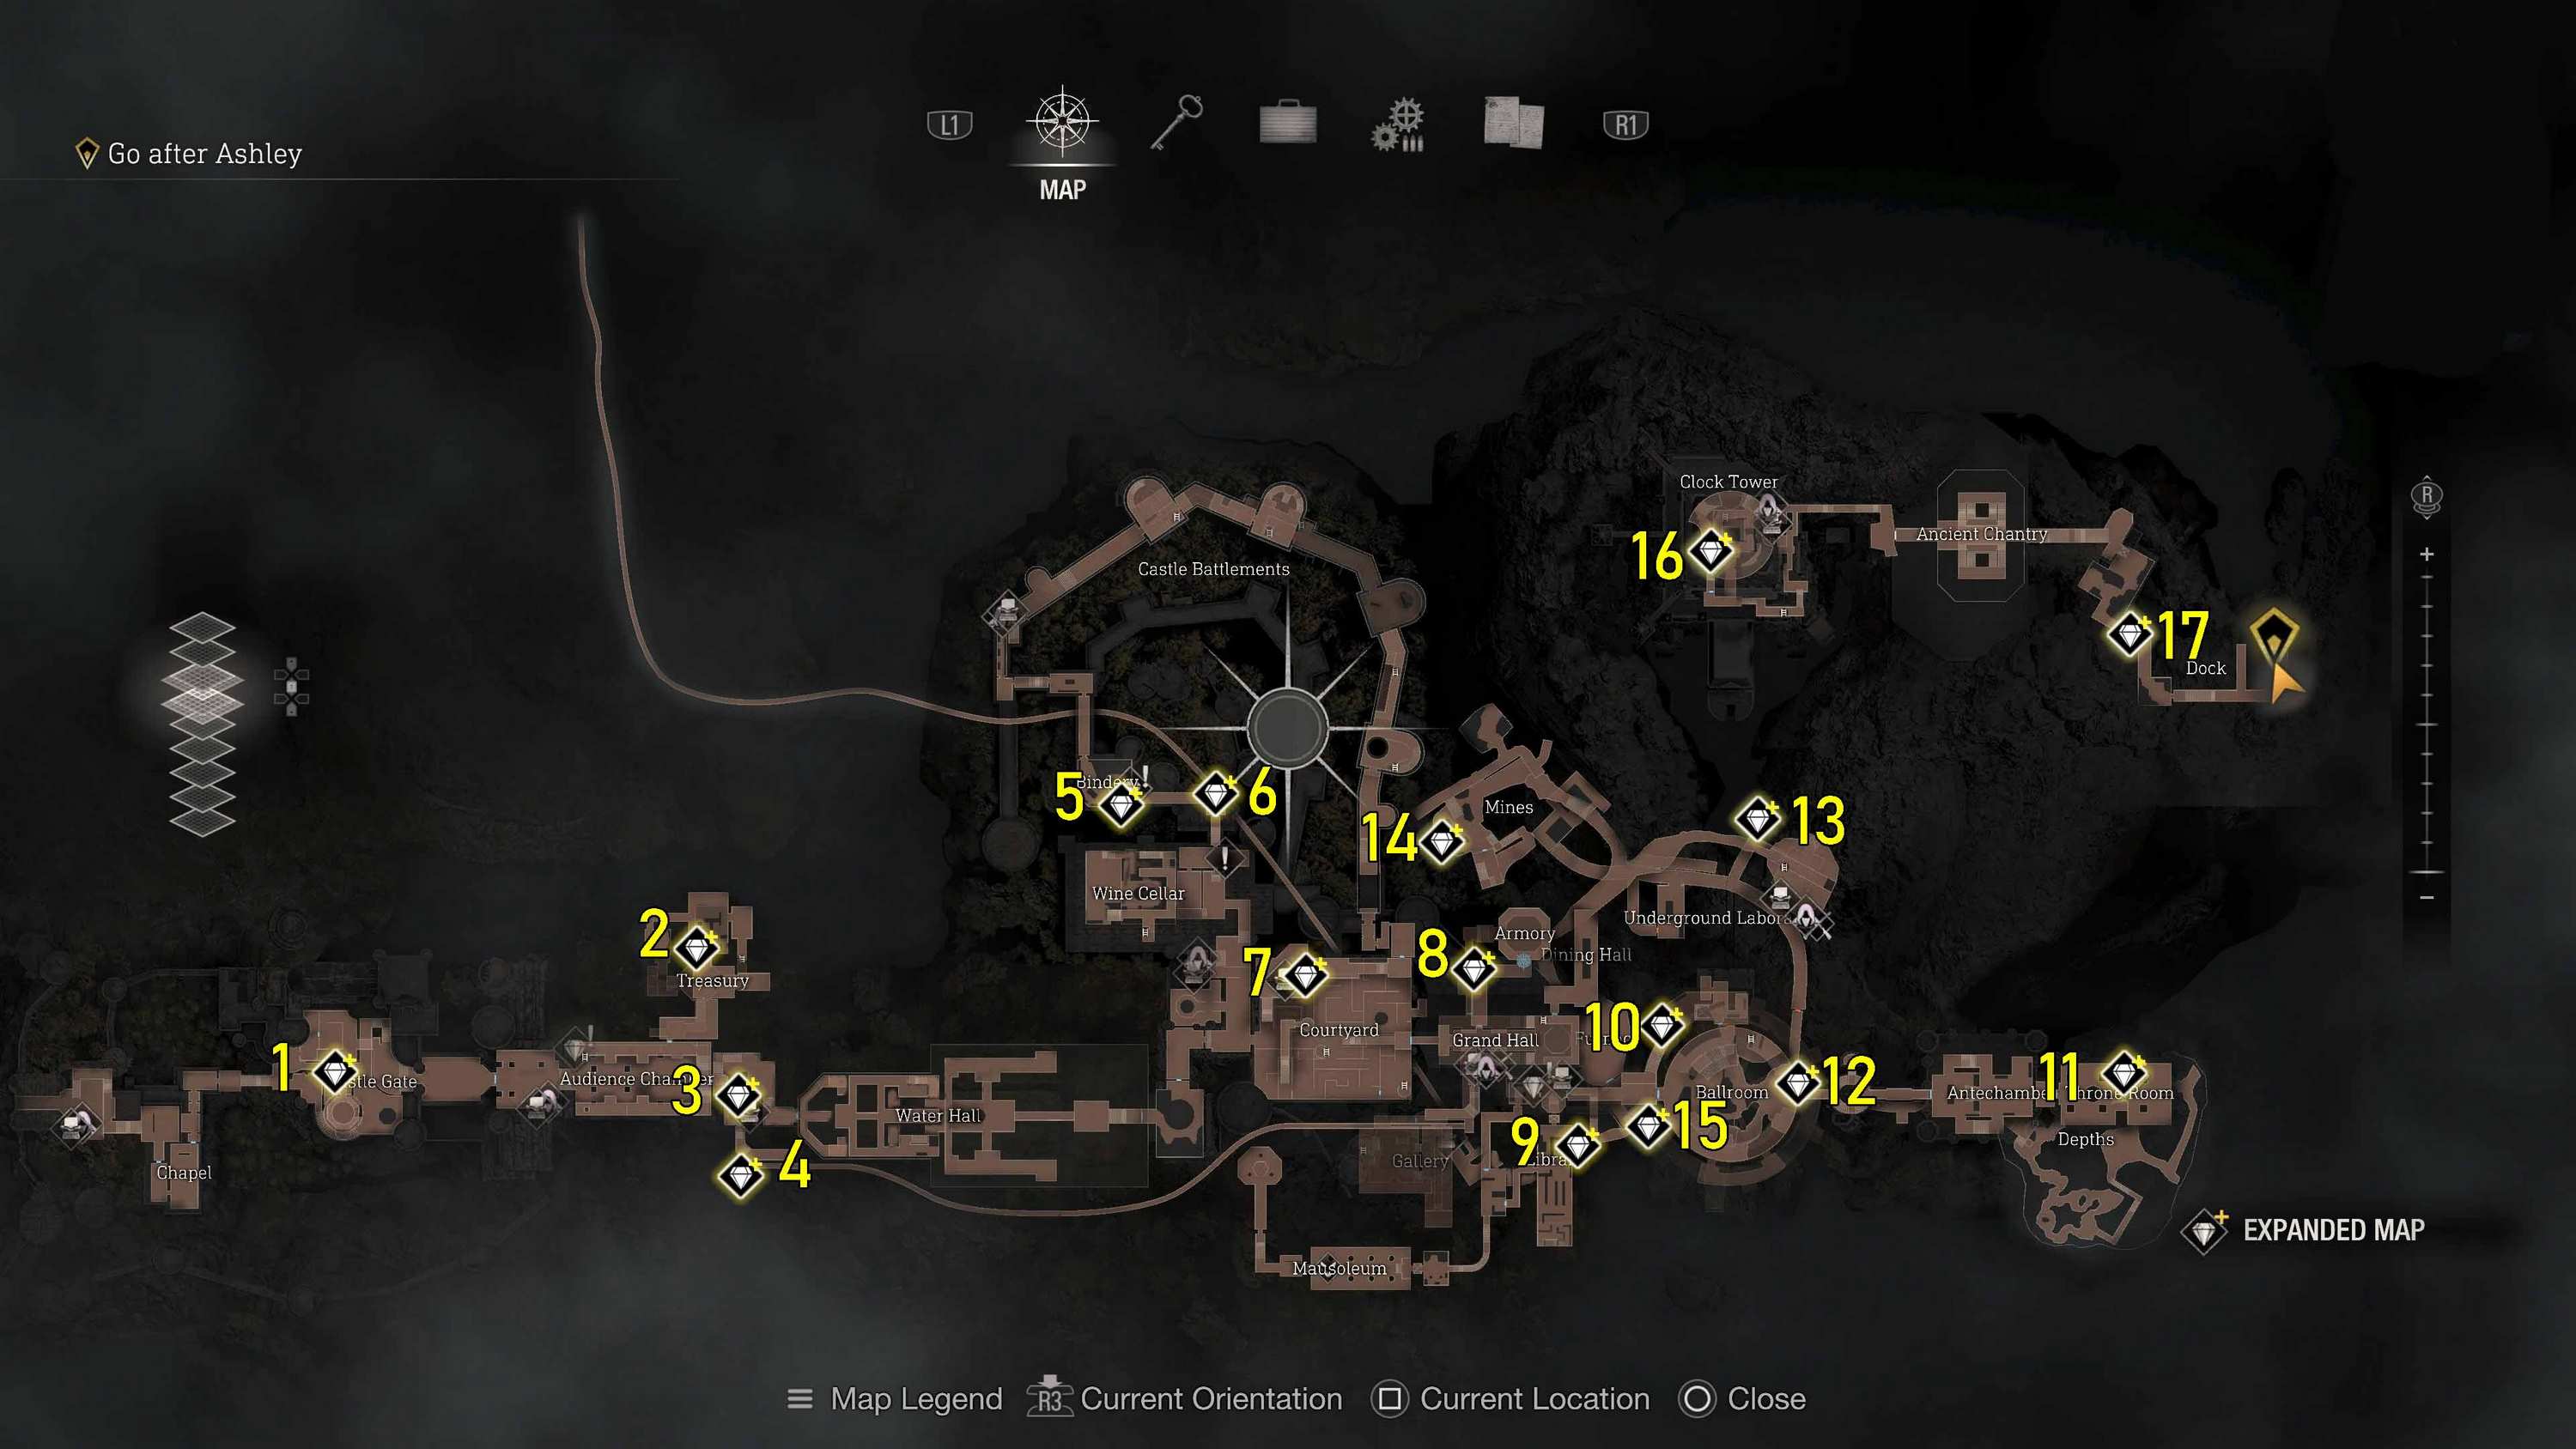
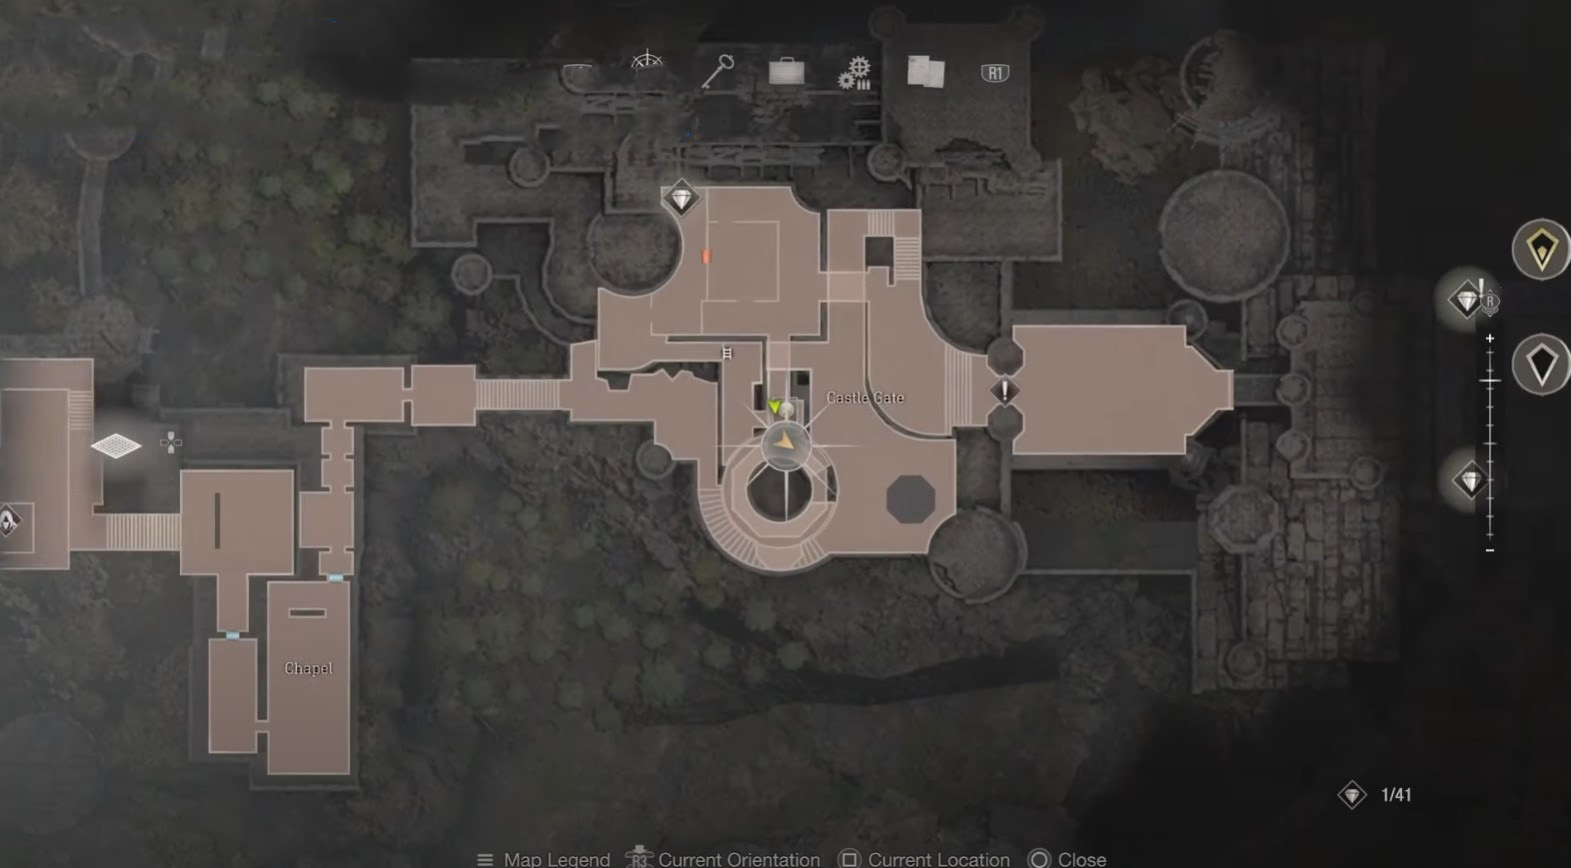
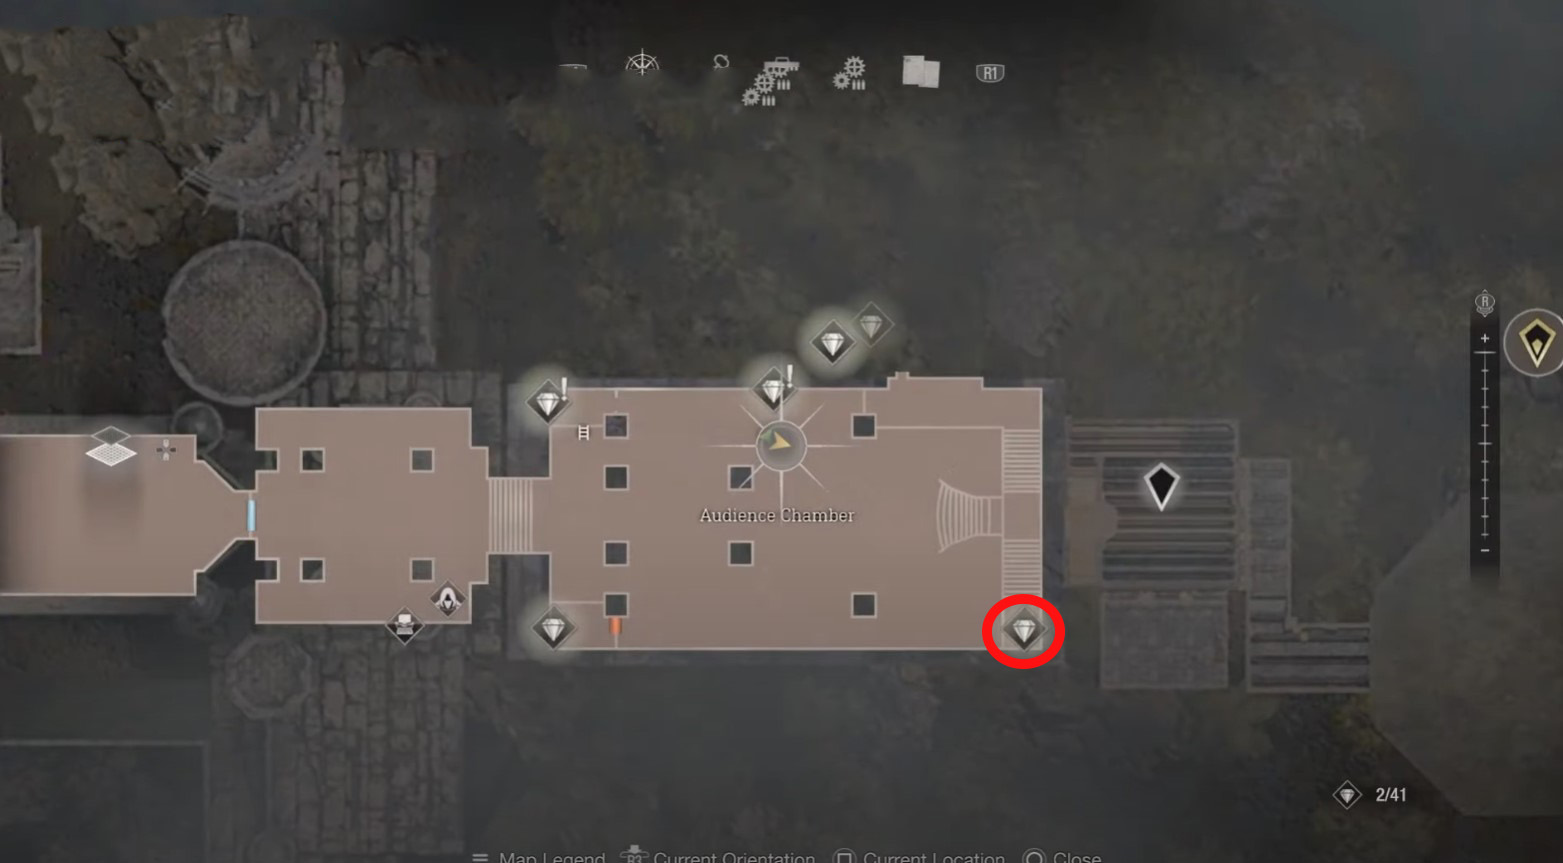
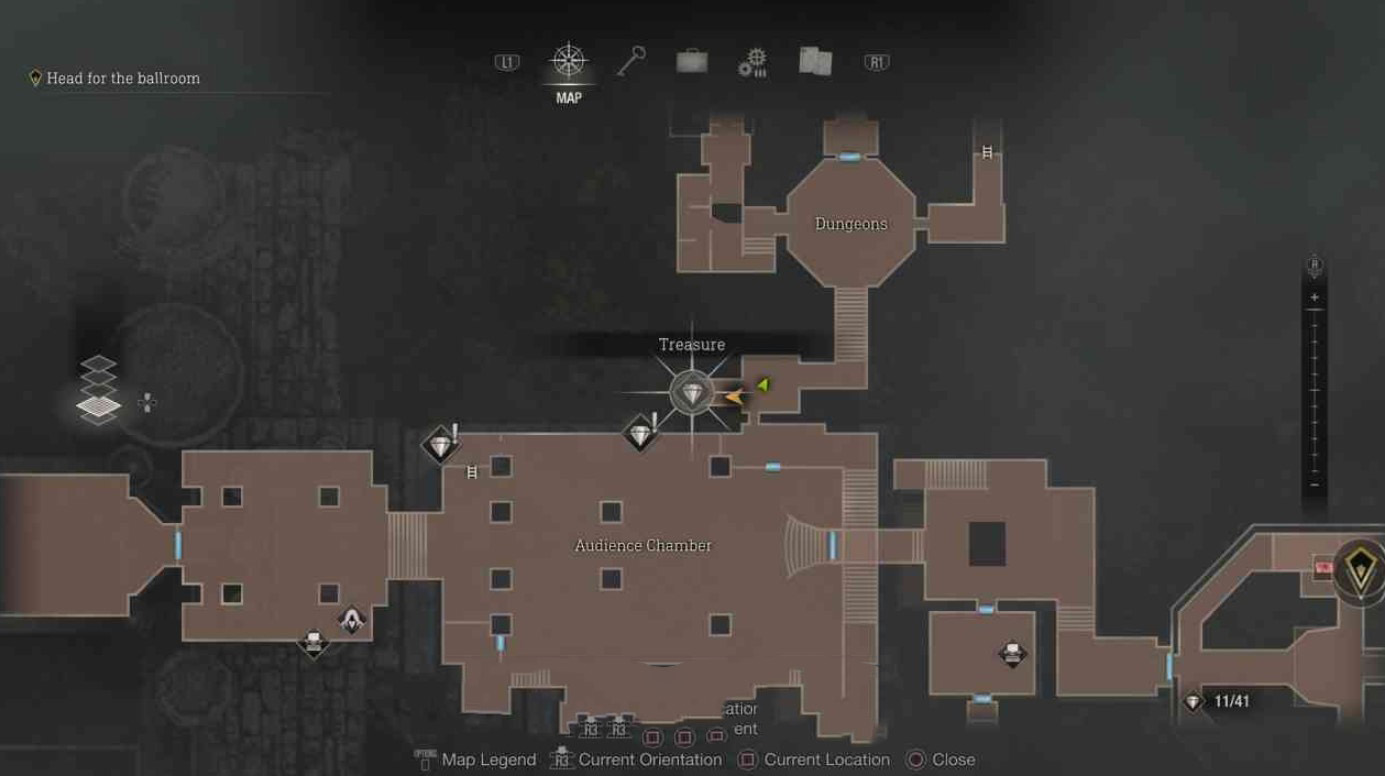
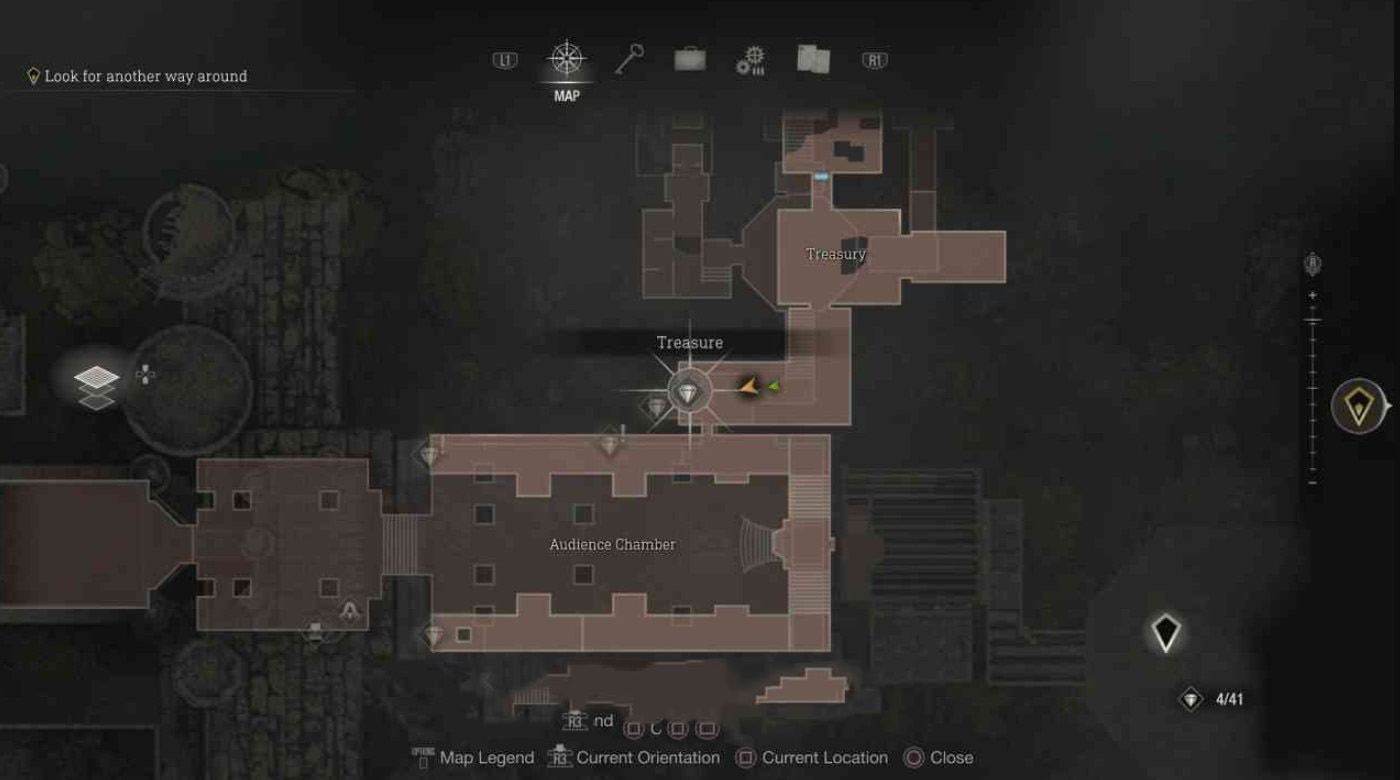
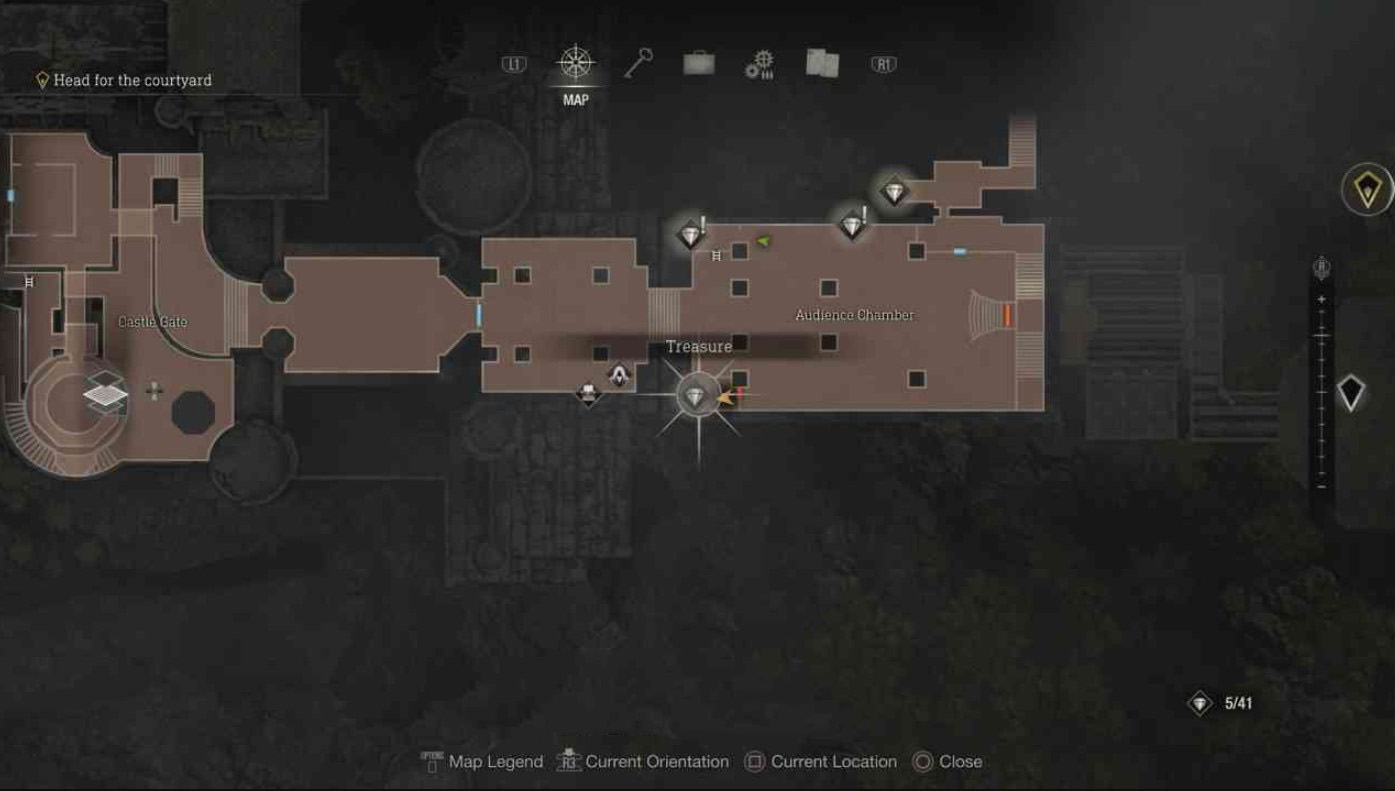
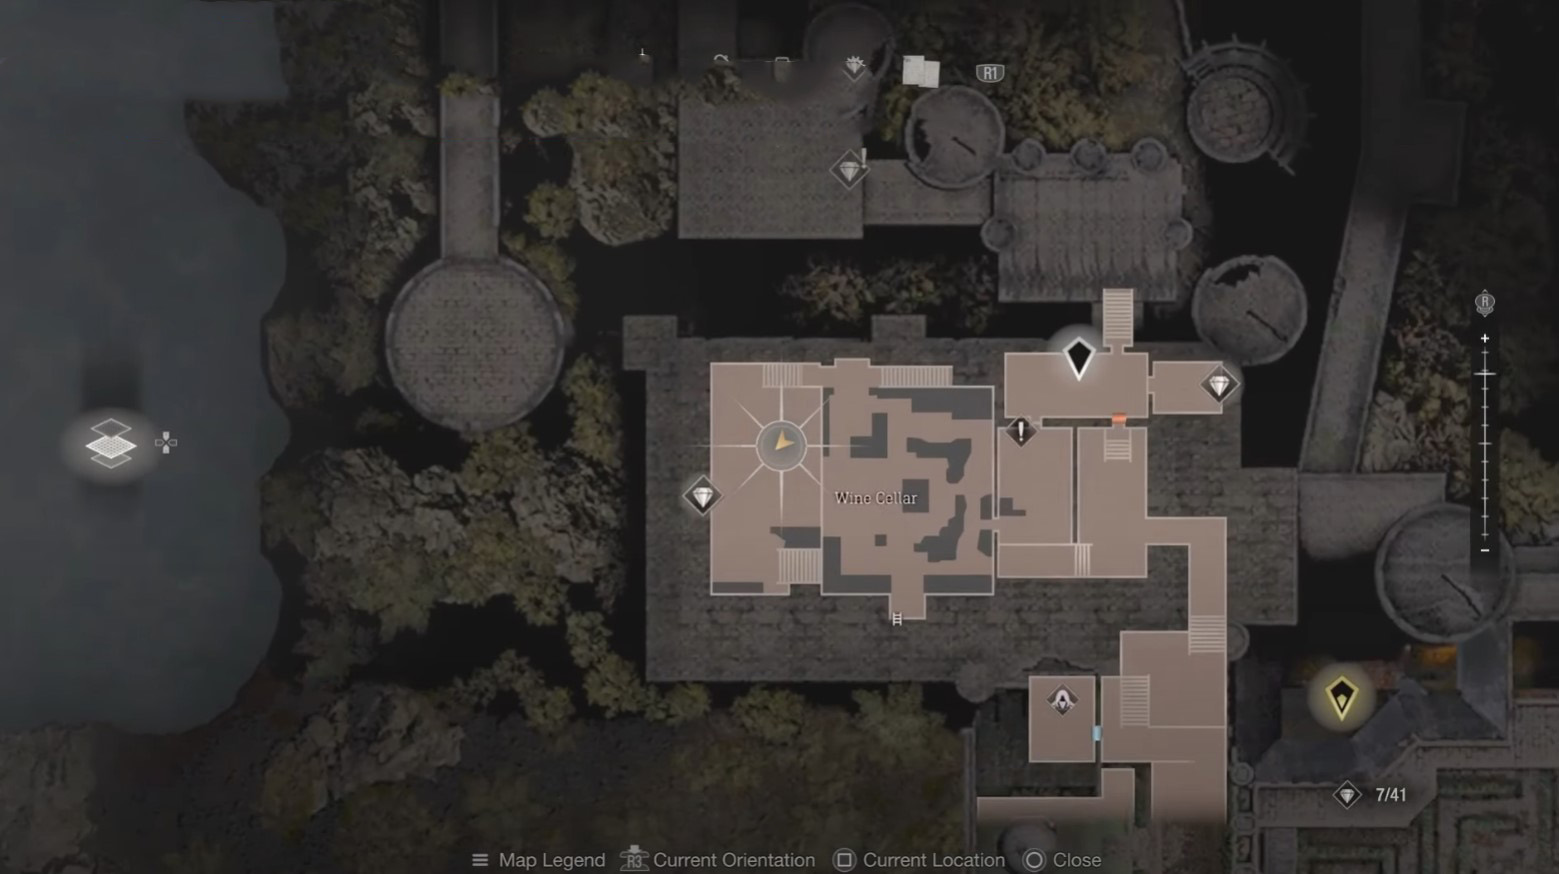
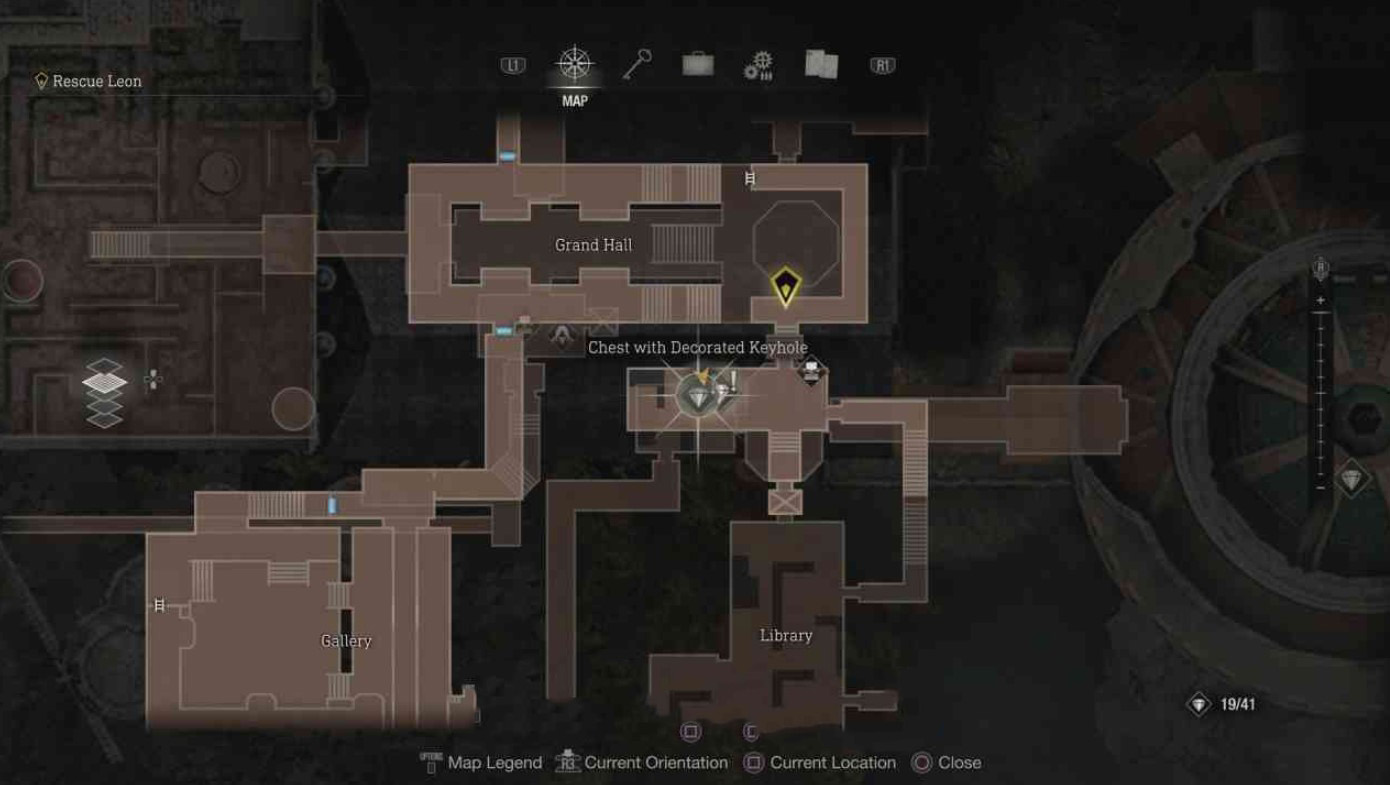
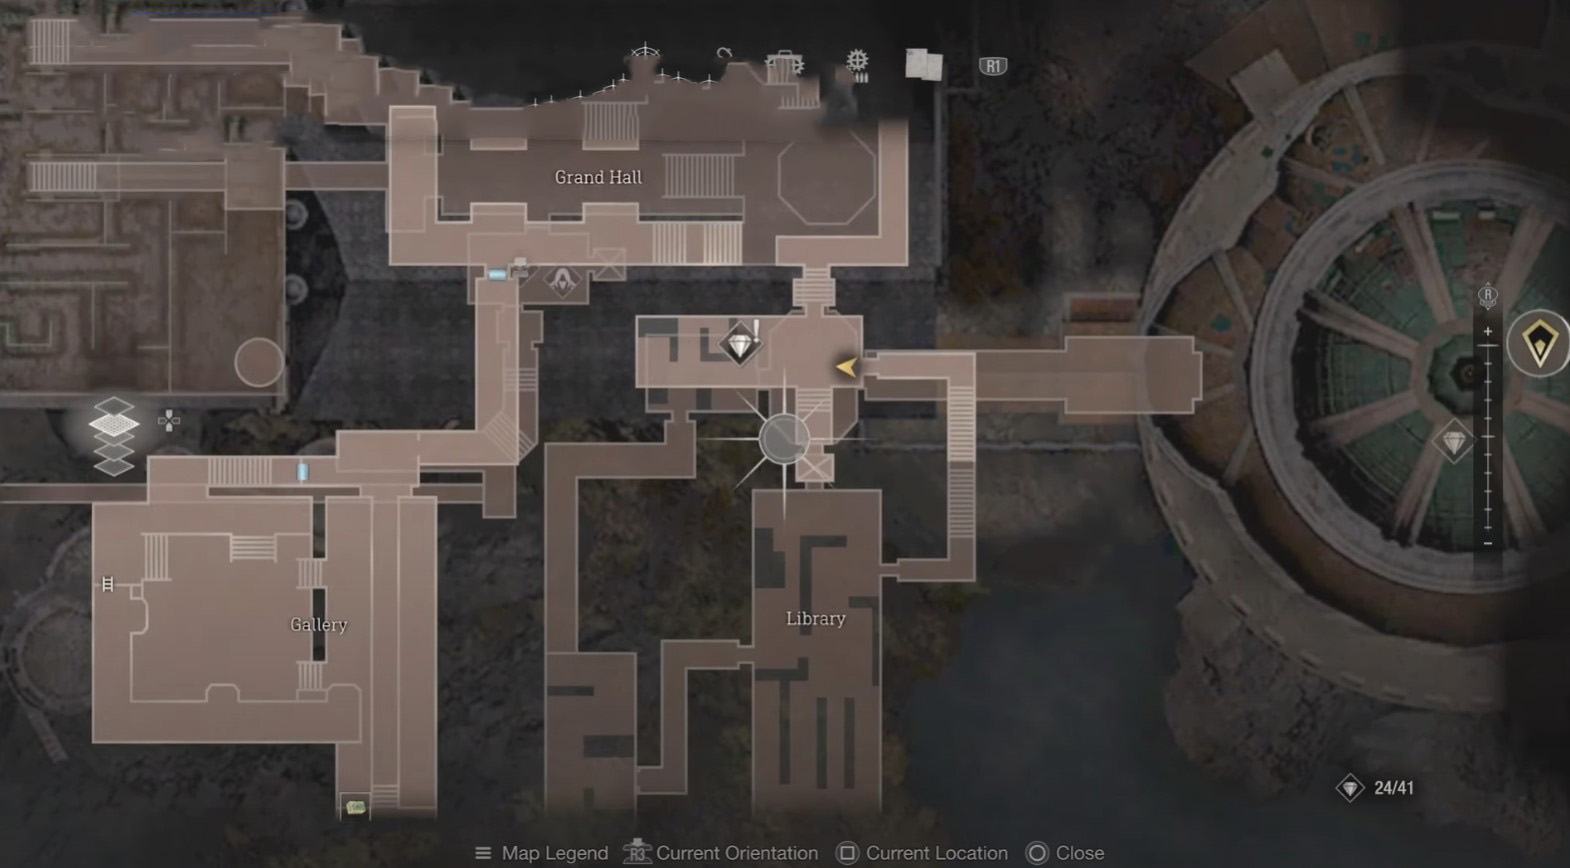
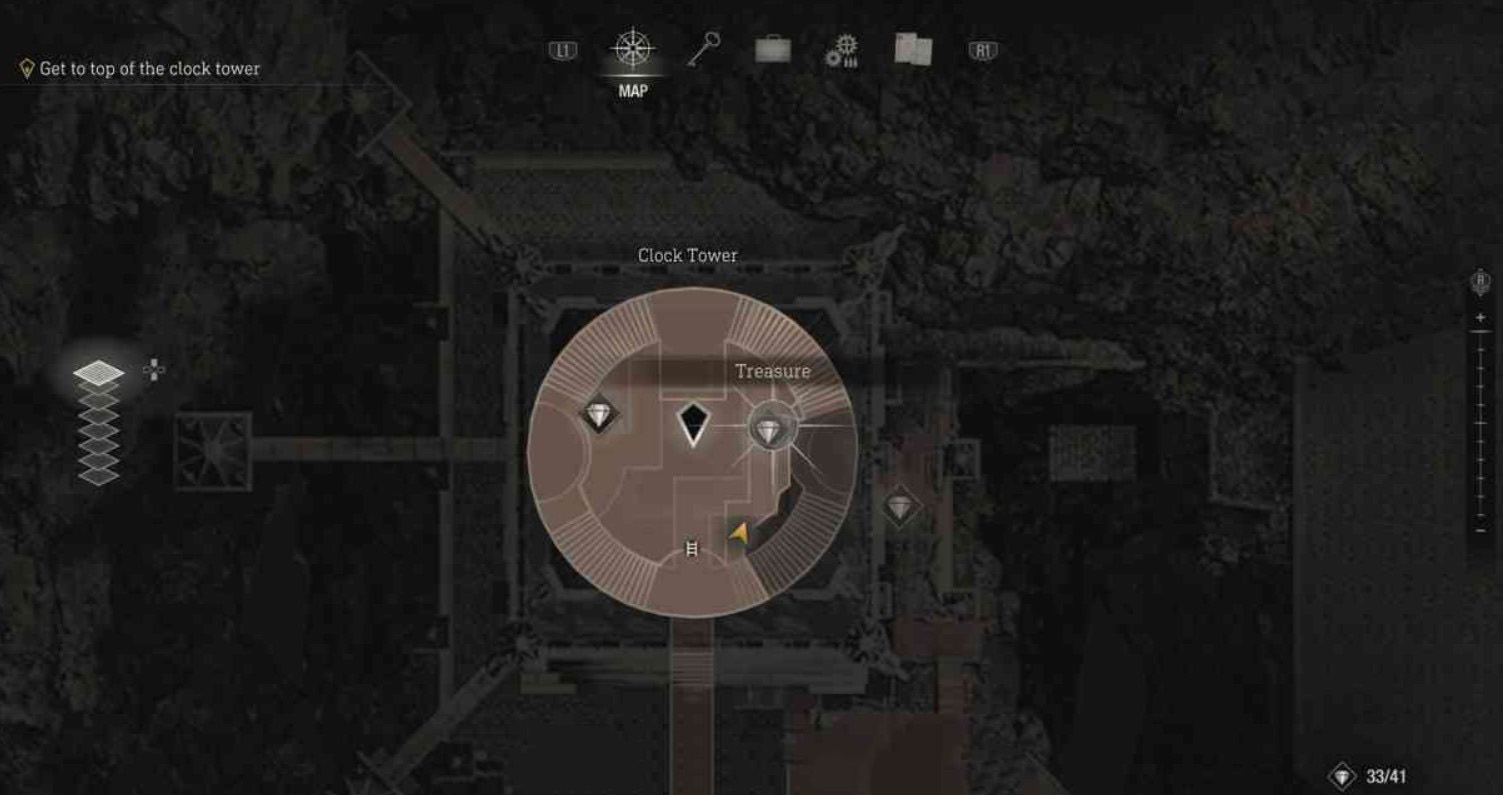
Where to find all the treasures in the Castle in Resident Evil 4 (2023)
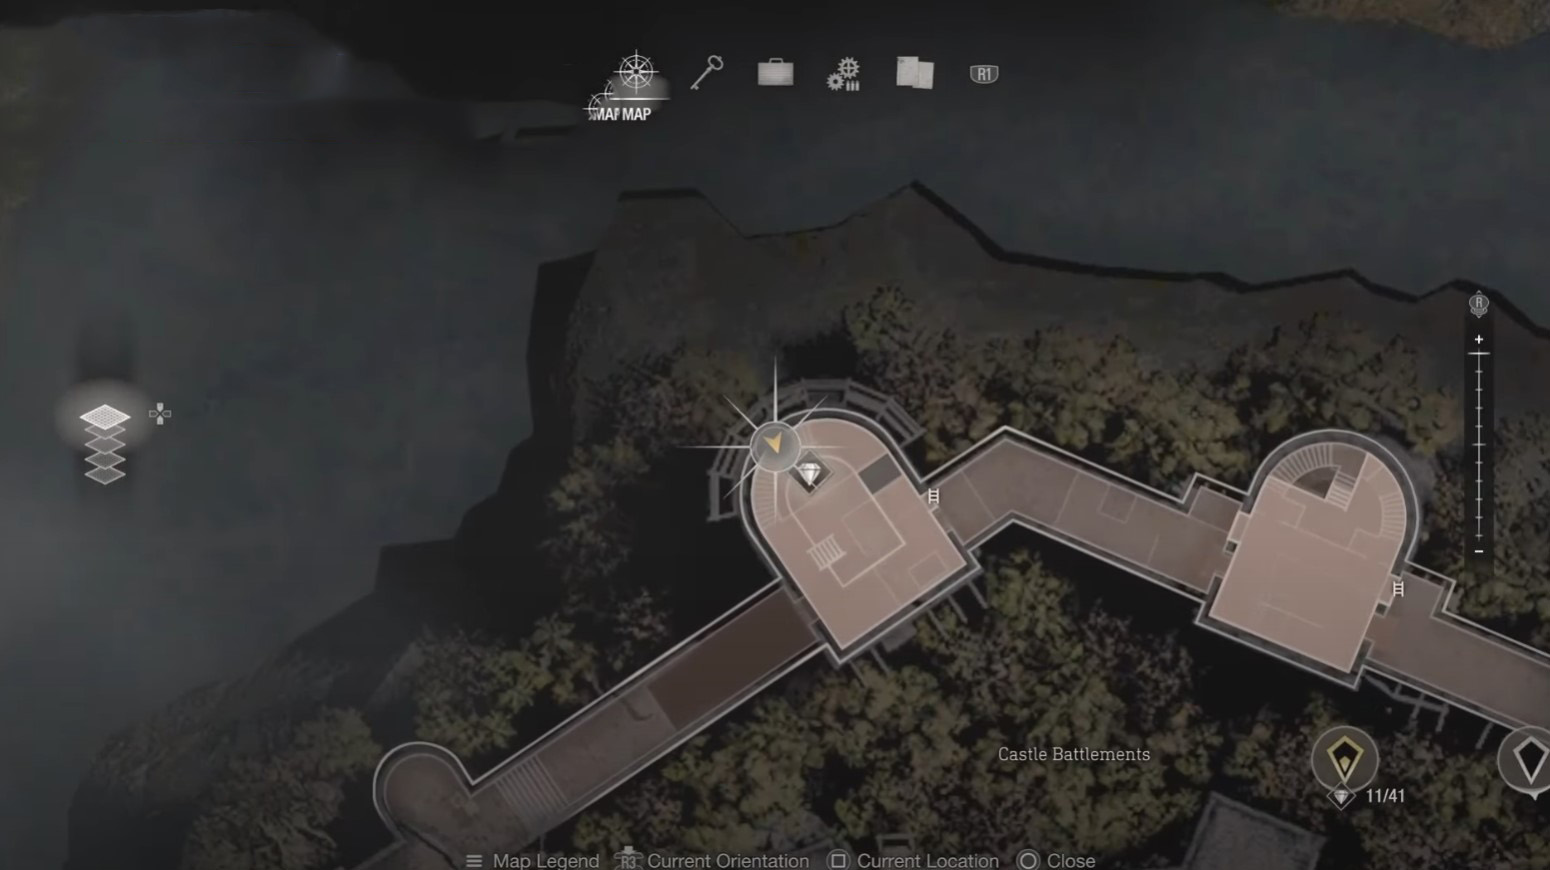
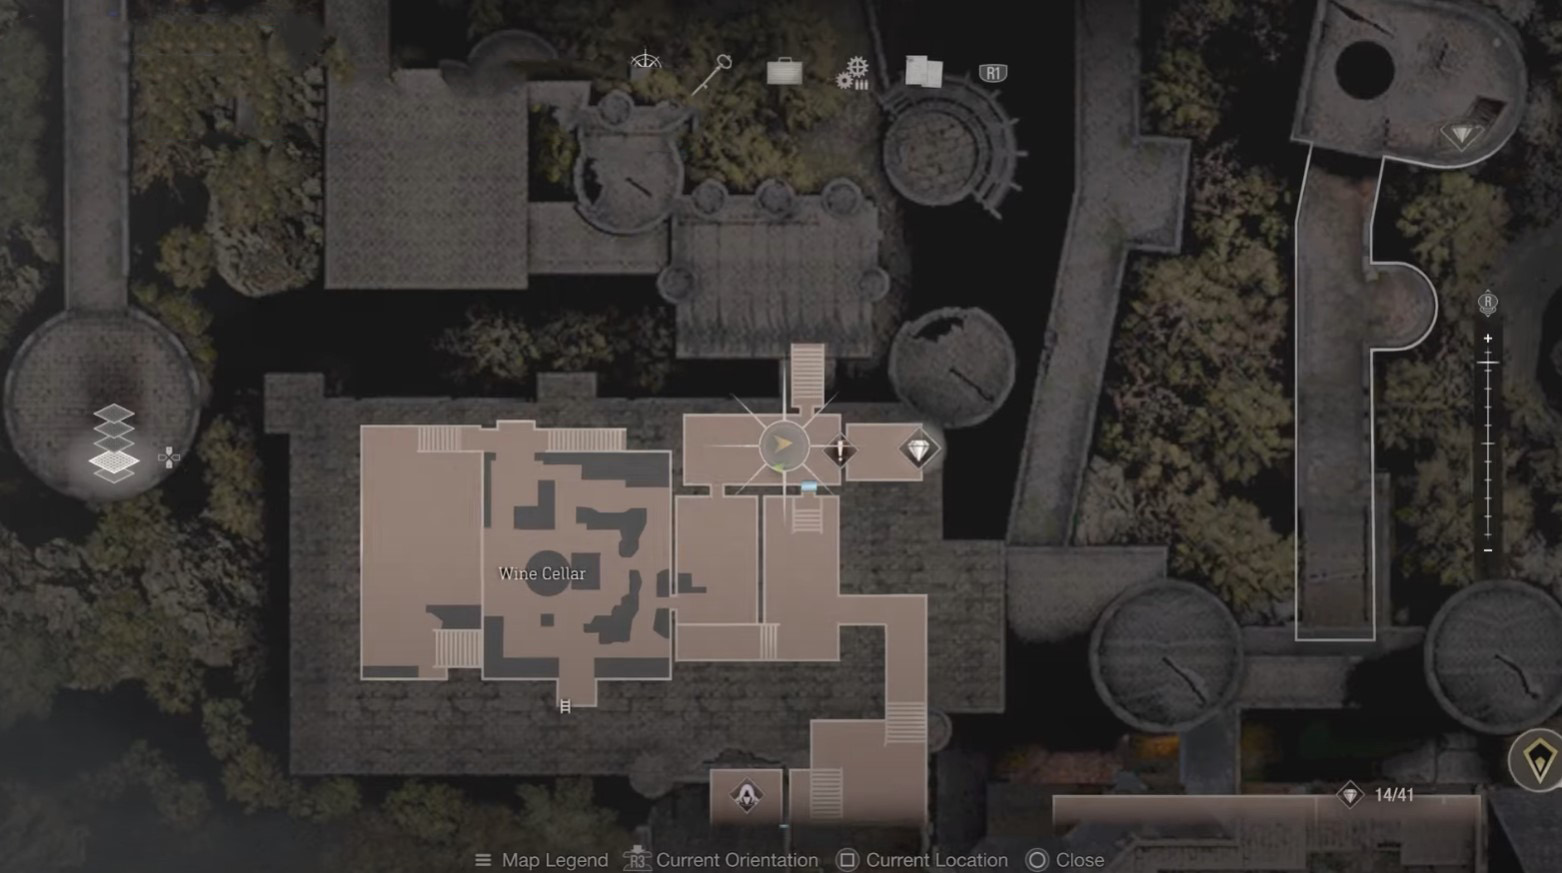
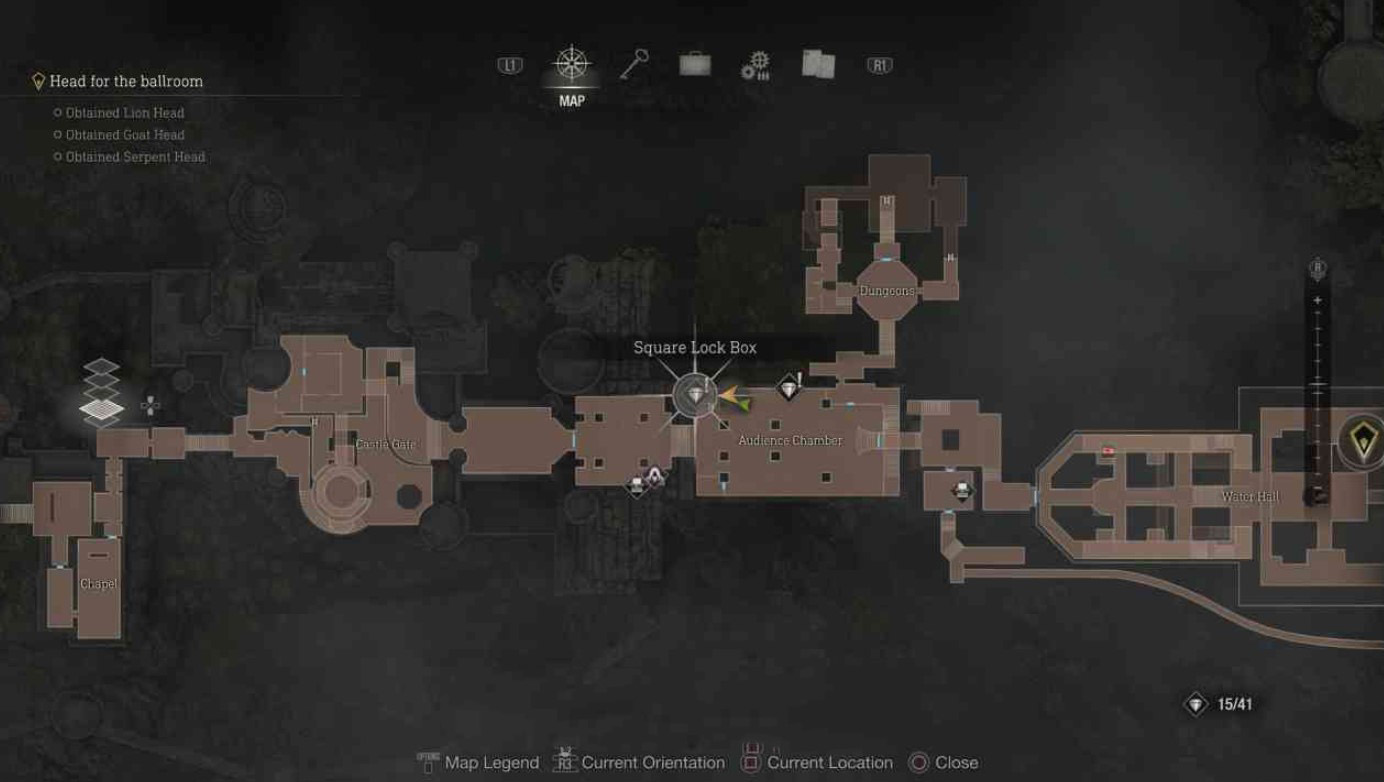
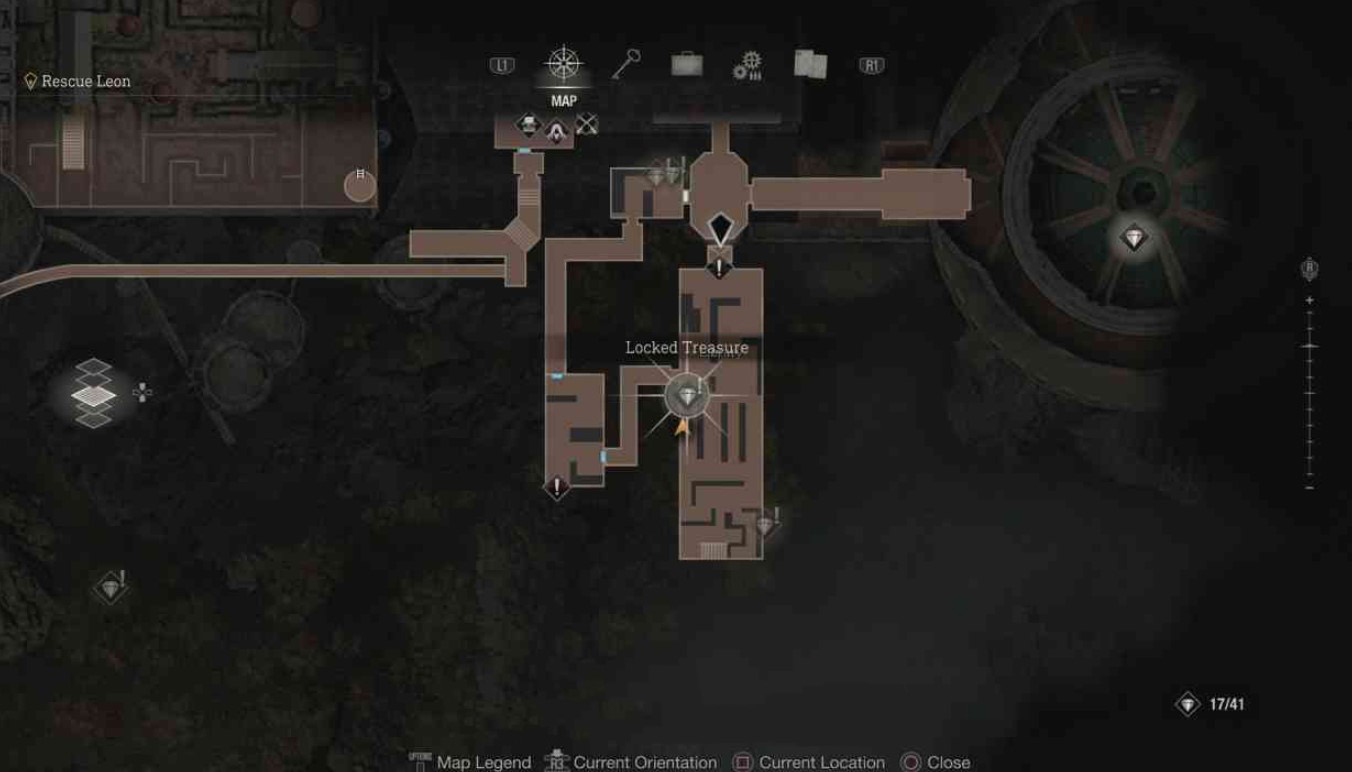
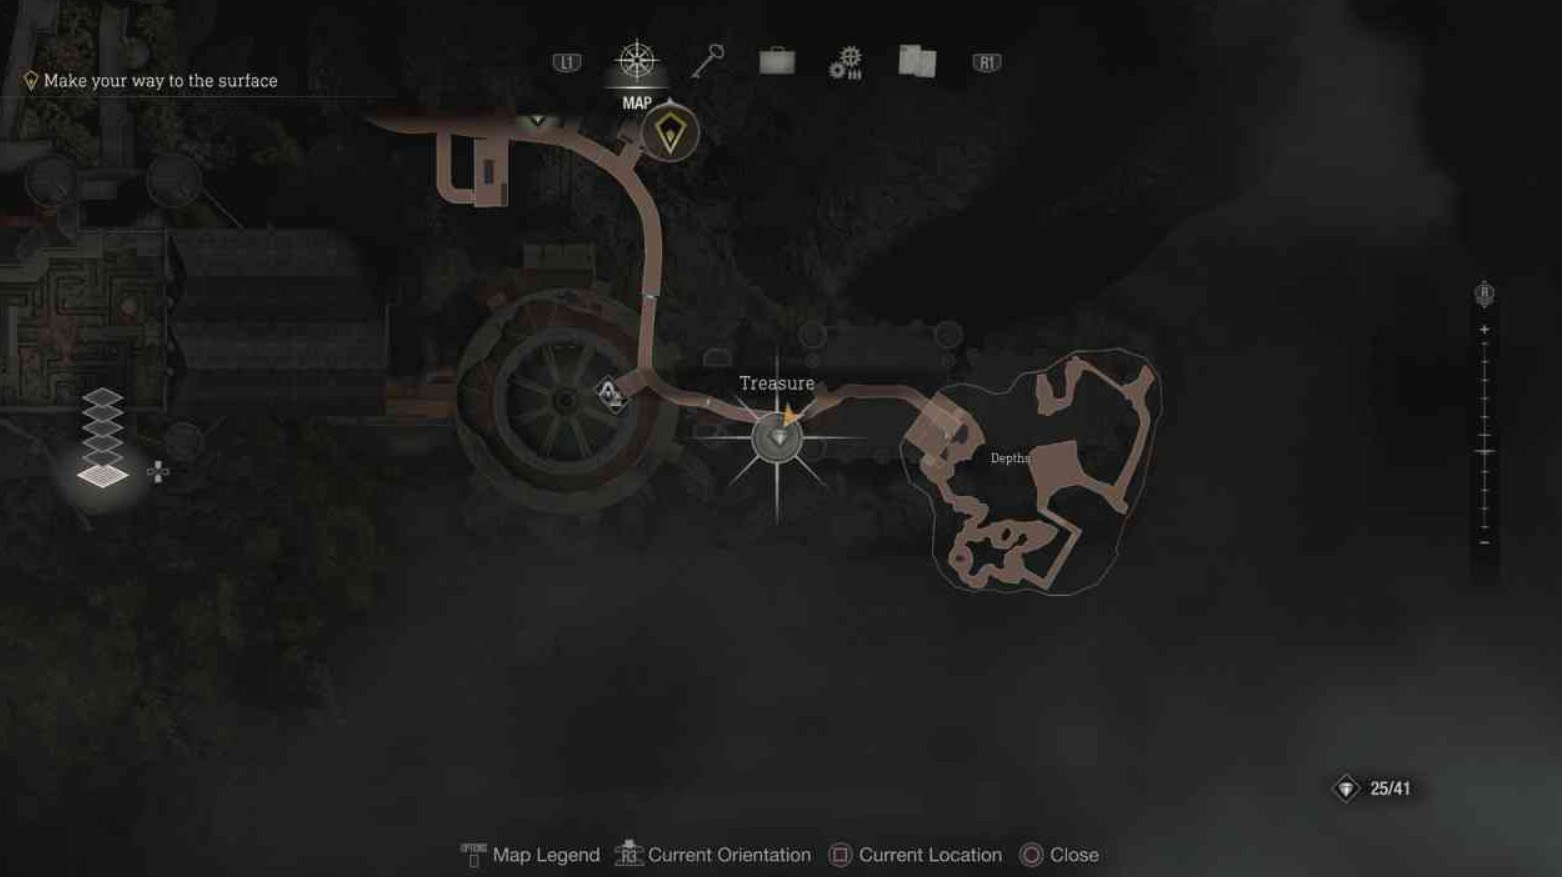
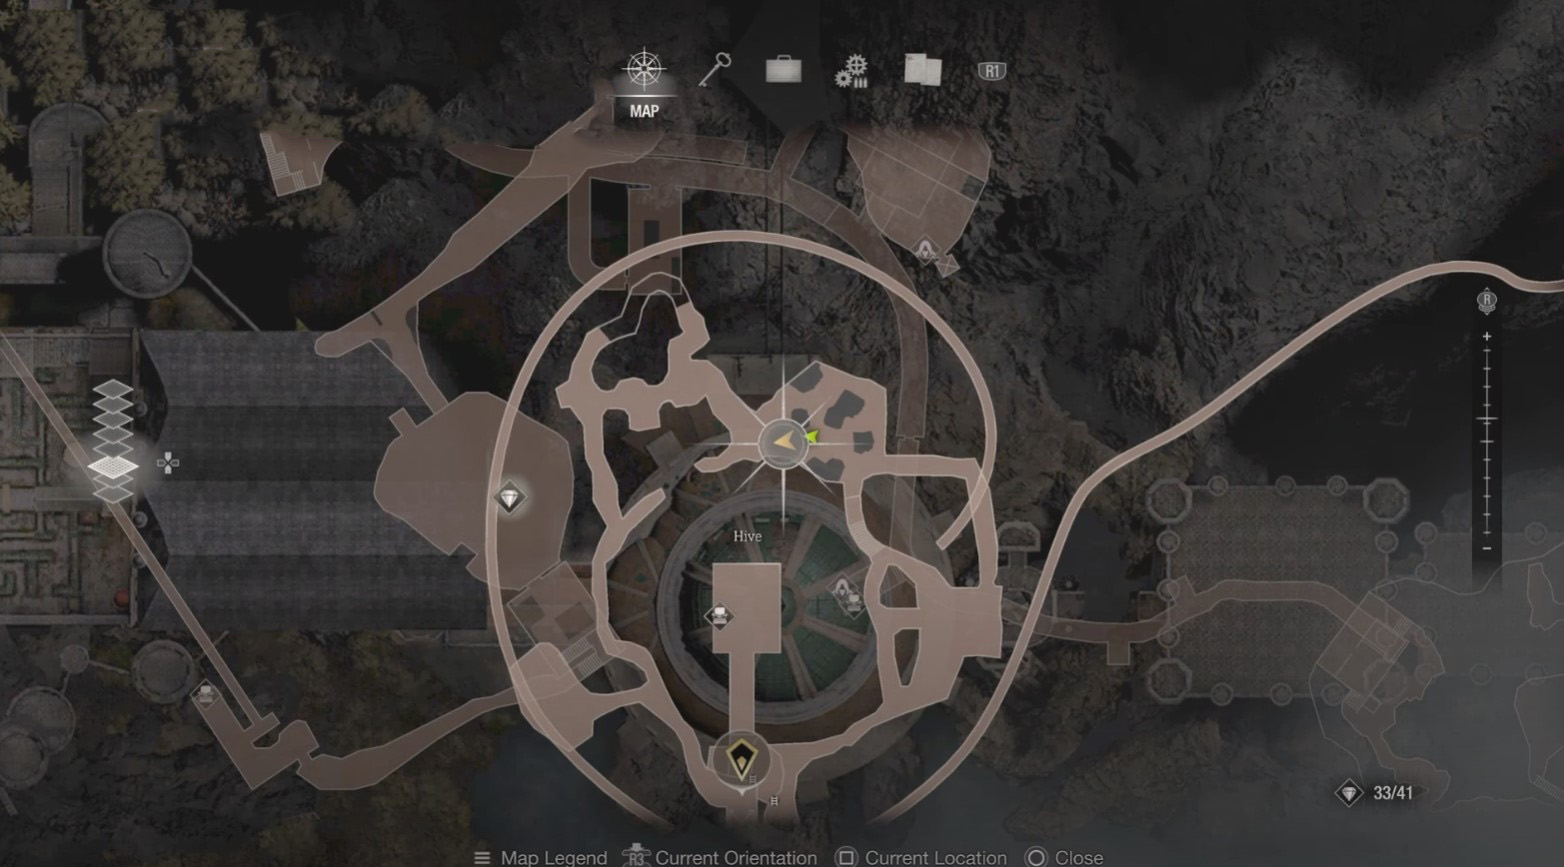
In total, in this area you can find 41 treasures. You will explore the Castle for six chapters (from 7th to 12th). Below we will not only indicate the location of the jewels, but also tell you, if necessary, how to solve puzzles and find keys to get to the right items.
You will not be able to return to the specified area after the completion of the 12th episode, so it is advisable to collect all the treasures in one playthrough. If you get killed and you didn't save after getting the relic, you'll have to pick it up again.
Treasure 1: Antique Compass
- Plot: Chapter 7
- Location: entrance area
- Cost: unknown
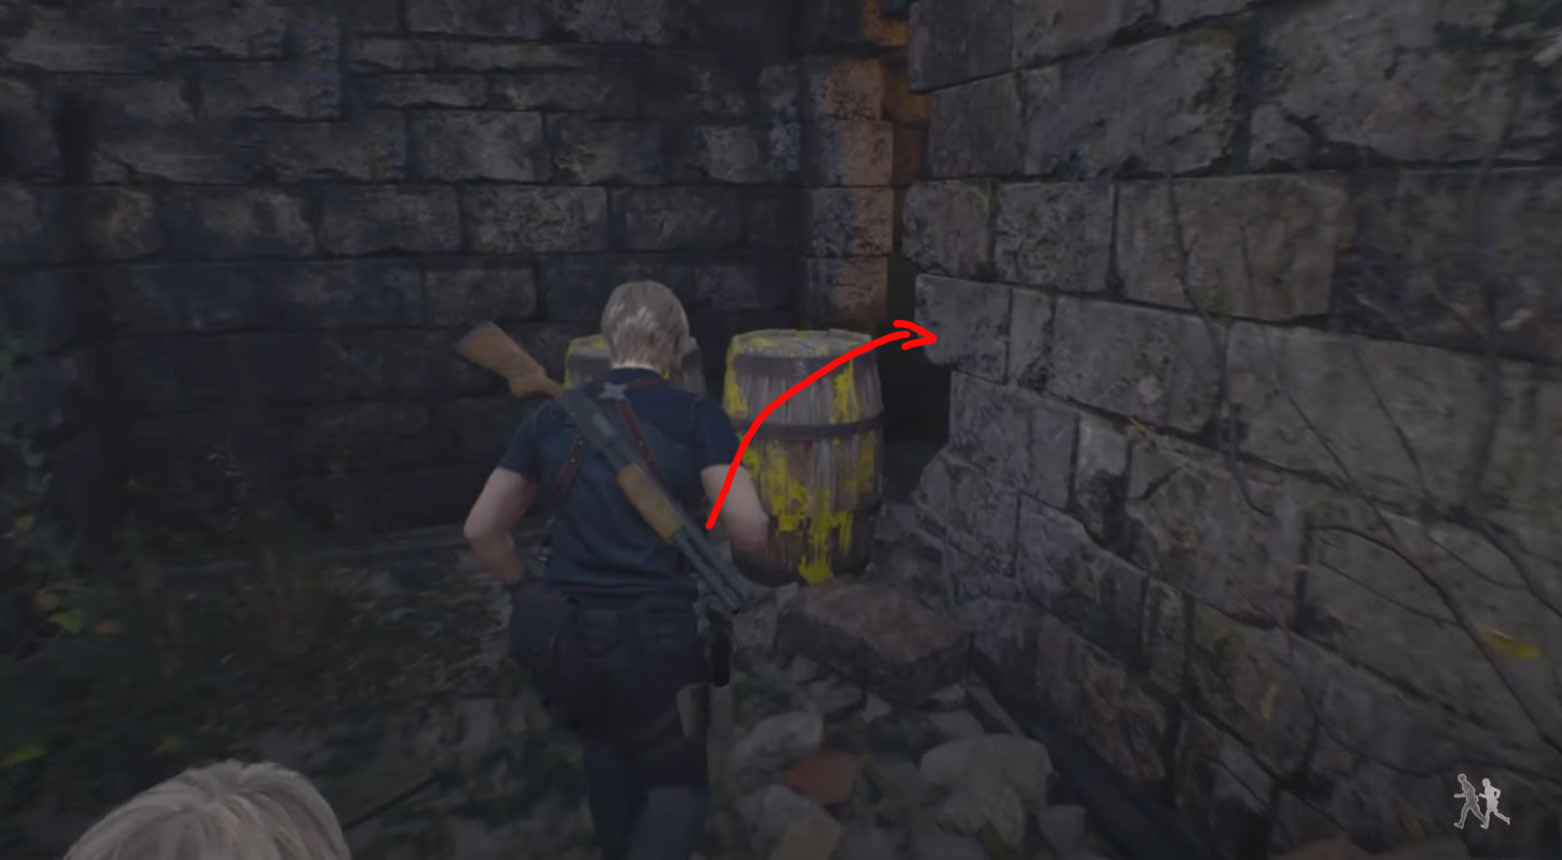
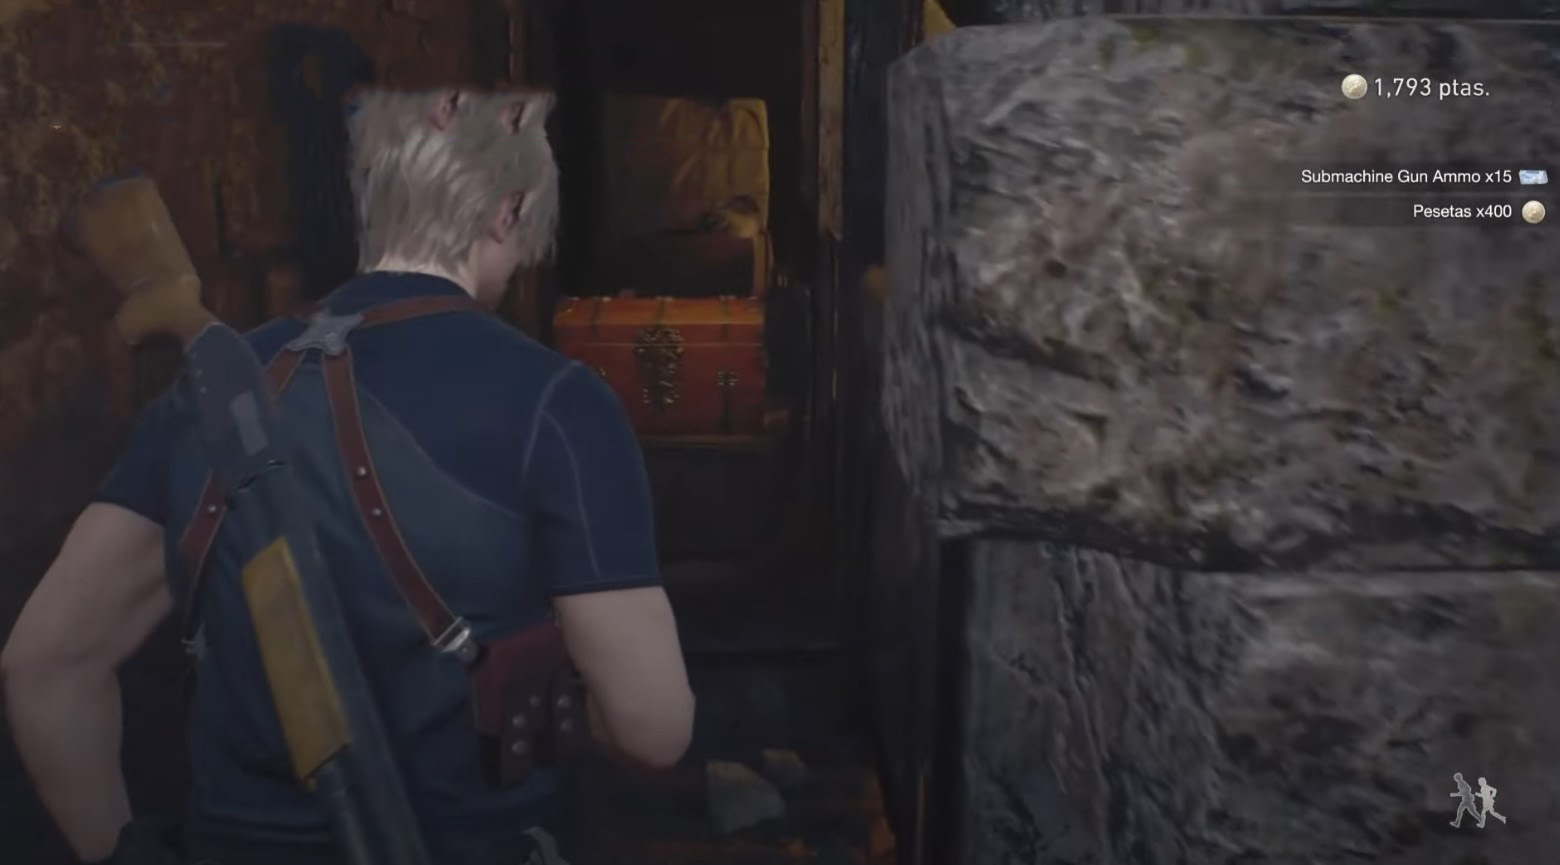
Exit the room with the merchant, go around it and turn right. Destroy the barrels and go into the passage, at the end of which there is a chest with the item you need.
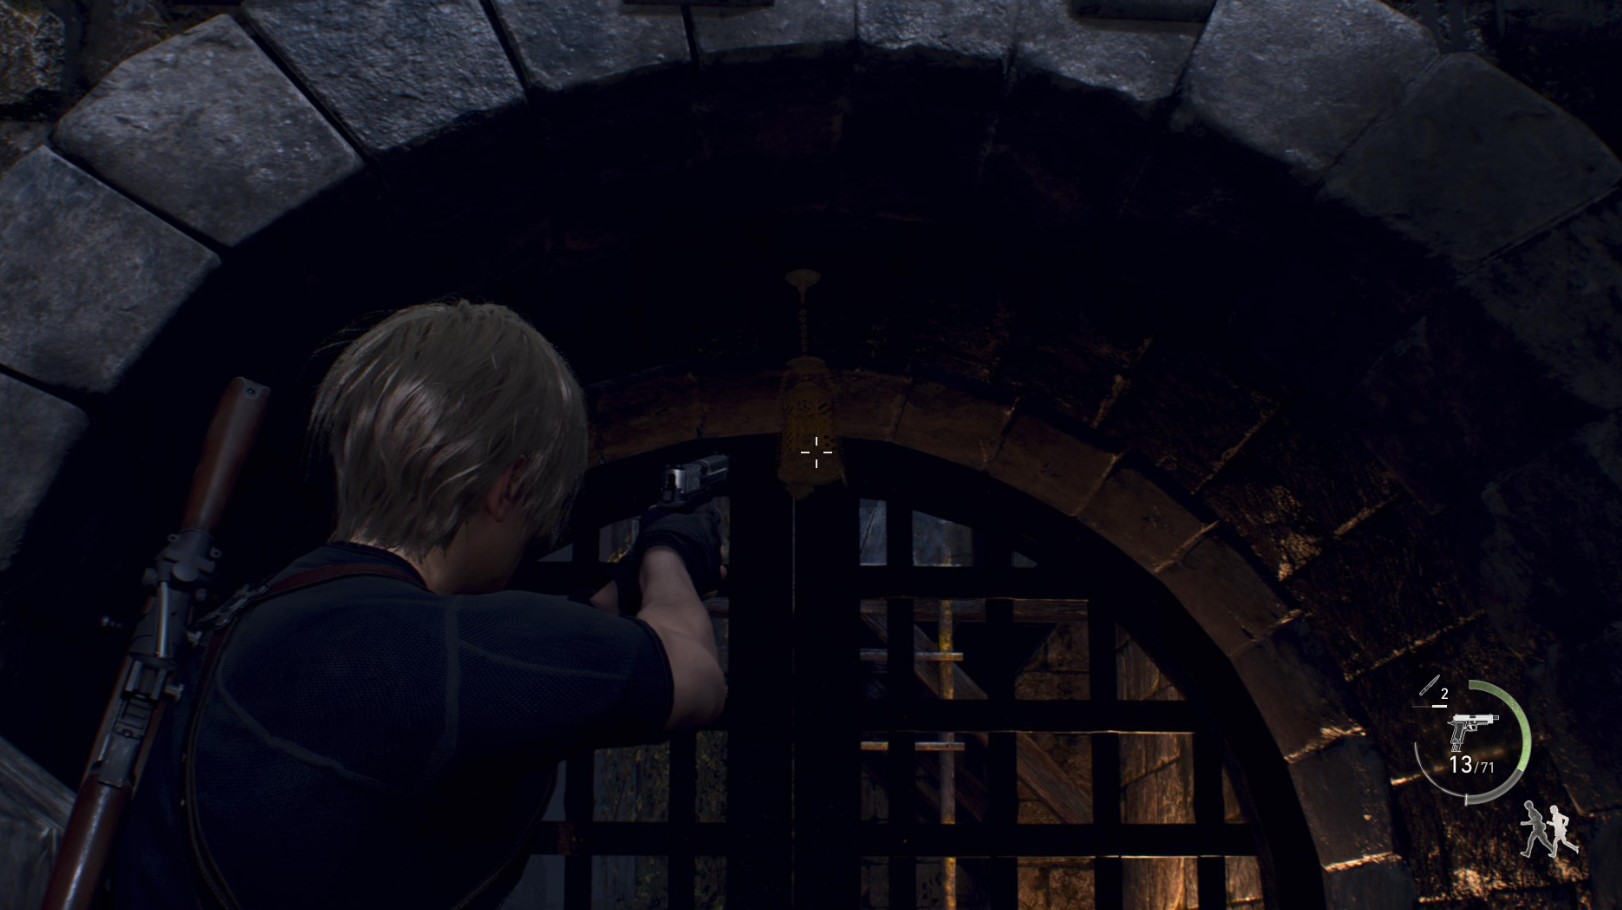
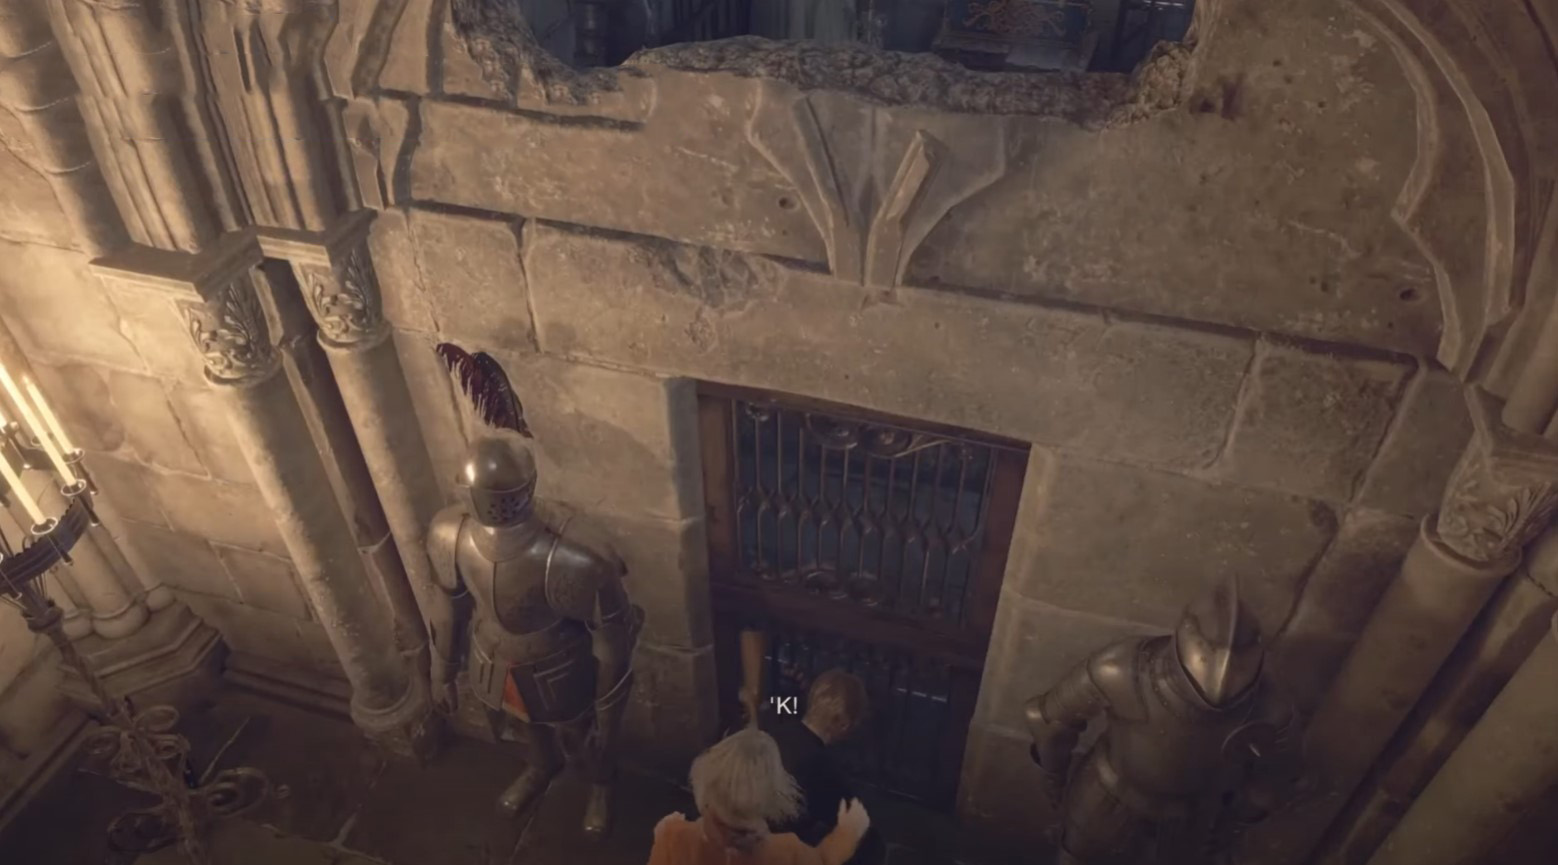
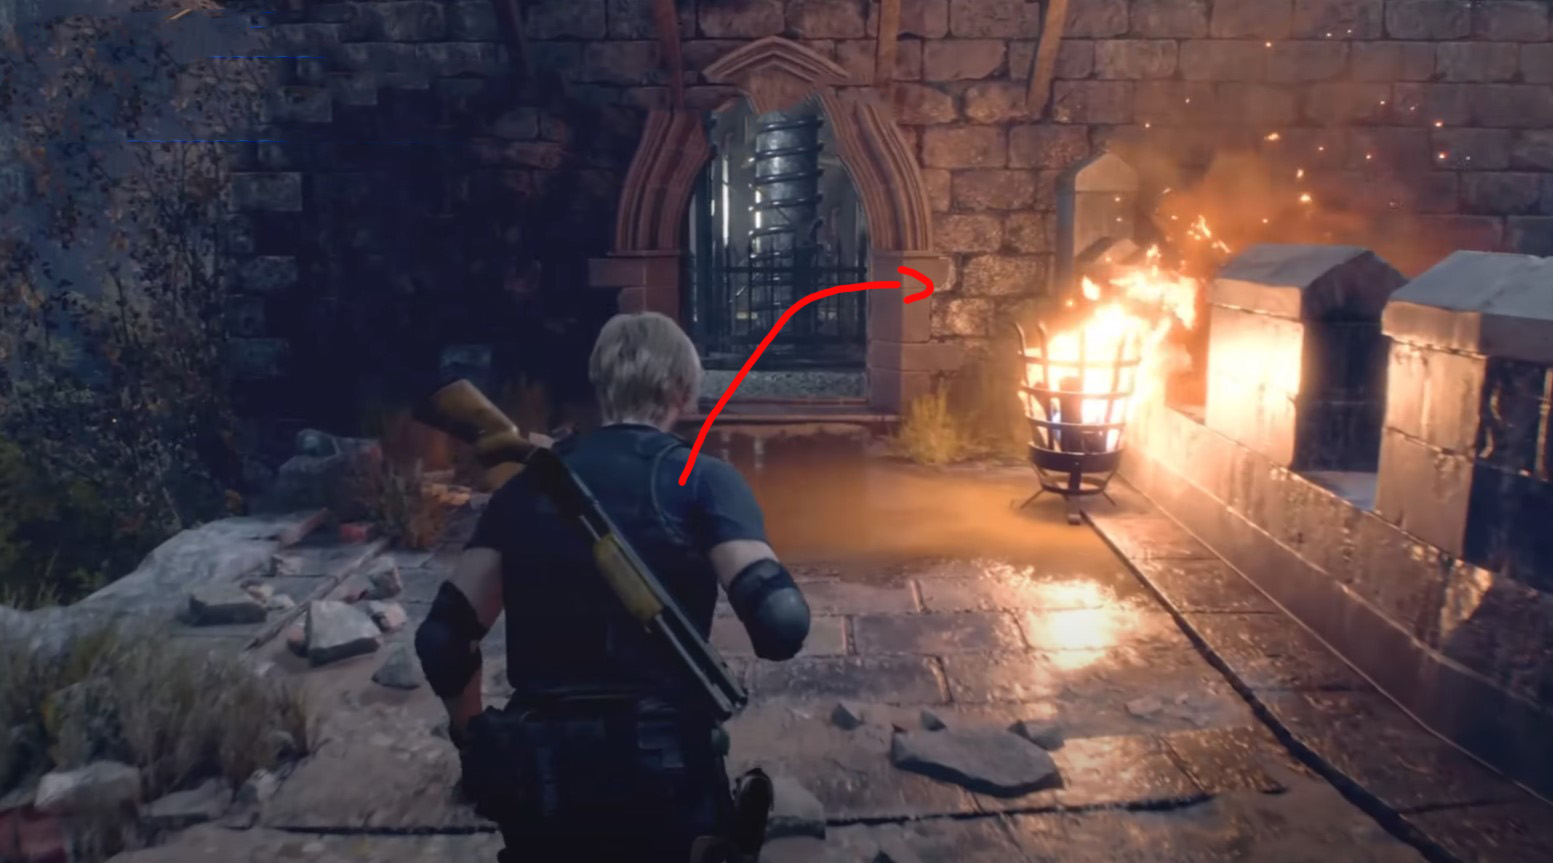
DLC Treasure 1: Sapphire
- Plot: Chapter 7
- Location: Castle gate
- Cost: 4000 pesetas
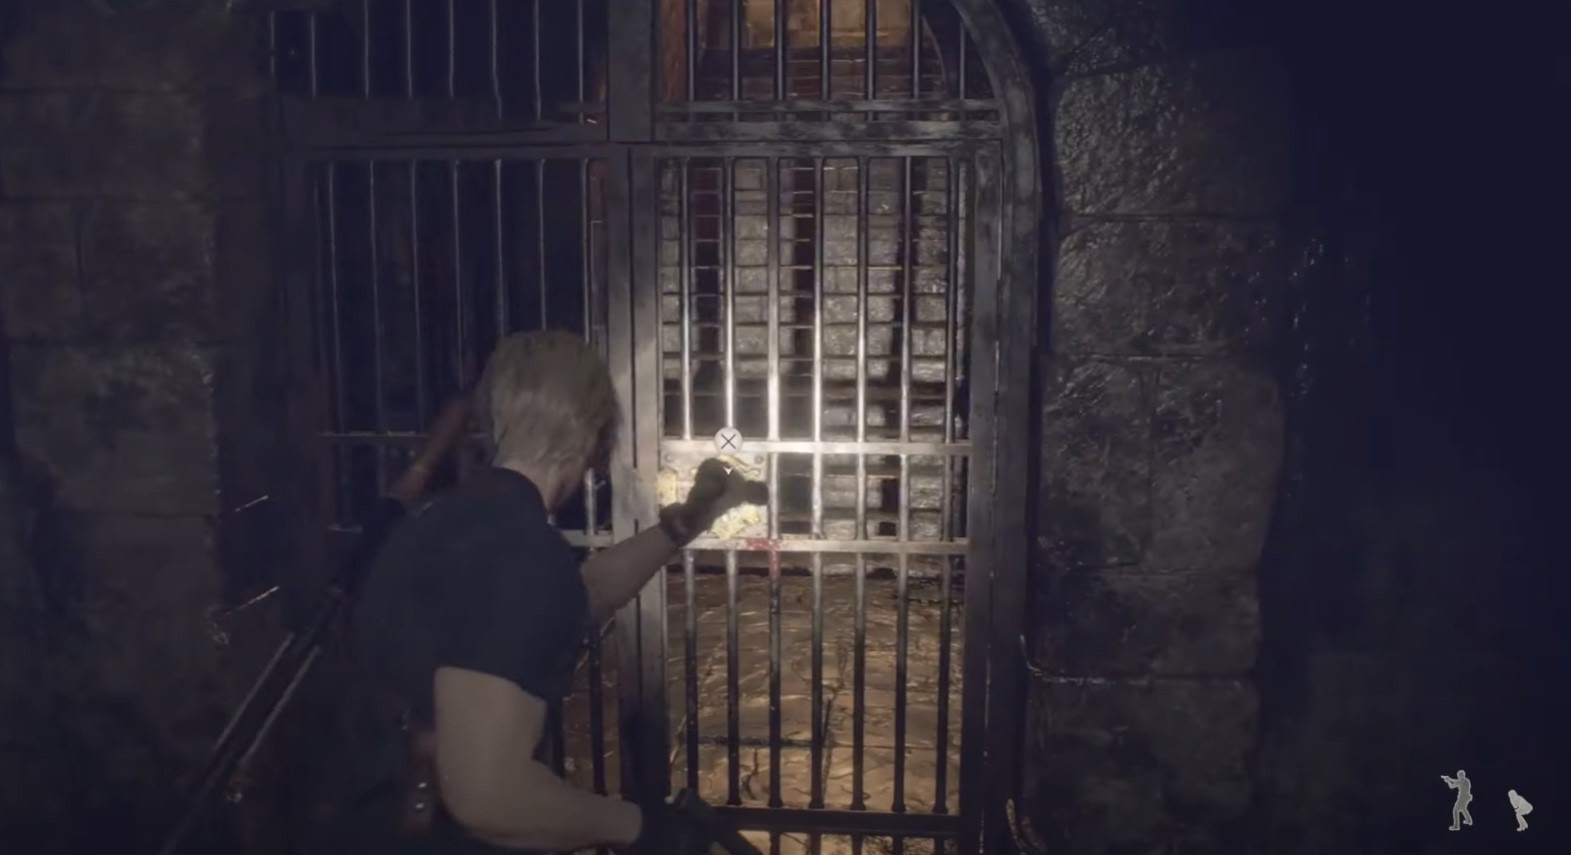
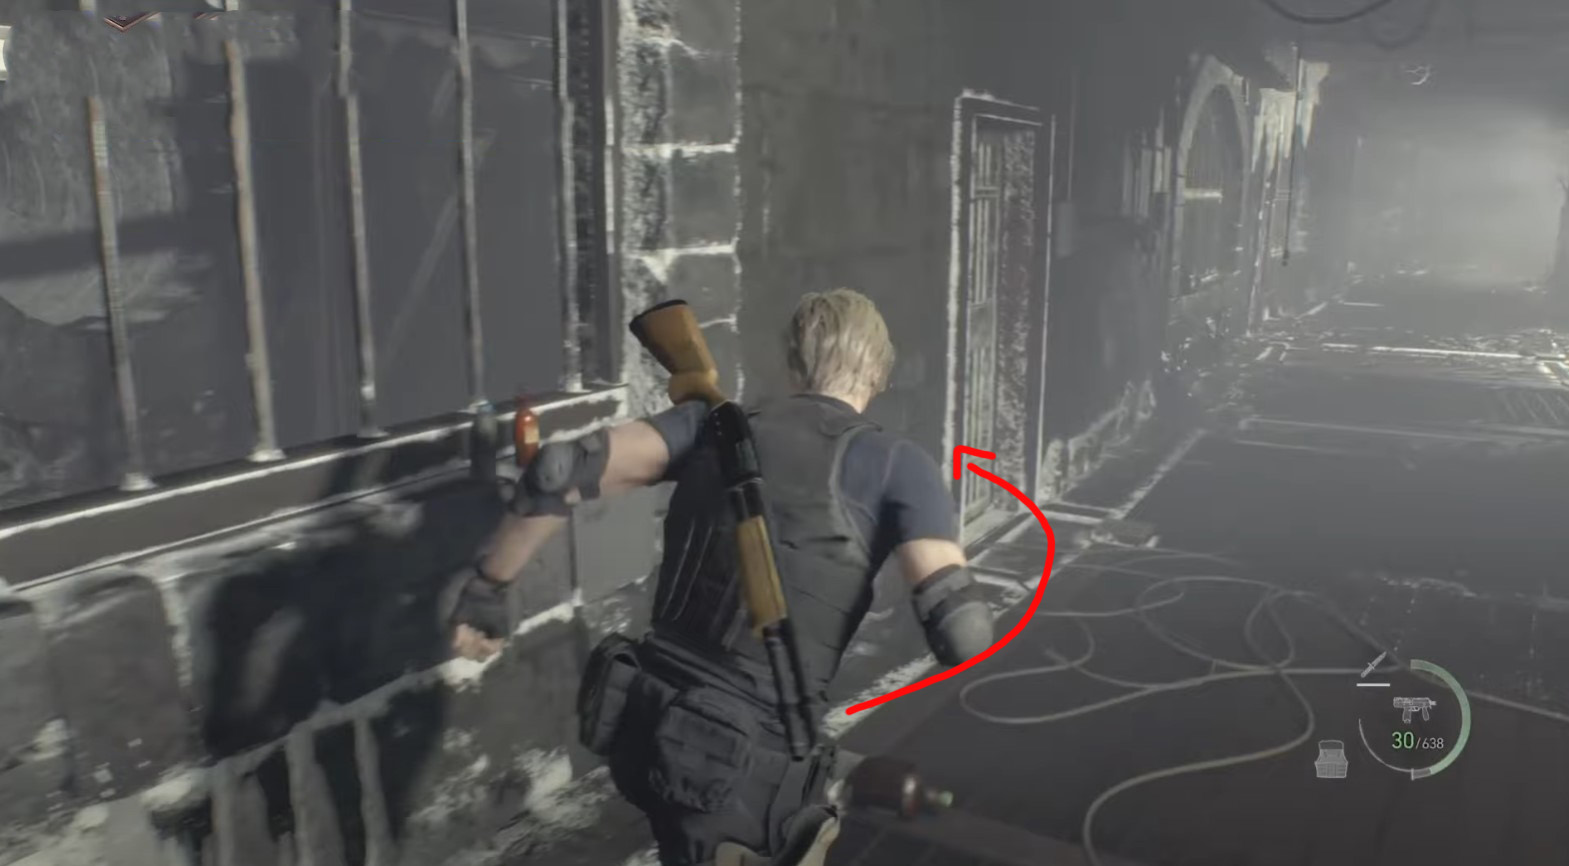
The lamp with the indicated object hangs directly above the stone arch with lattice gates. The right place is near the beginning of the zone fired by cannons. Shoot the bell for a gem.
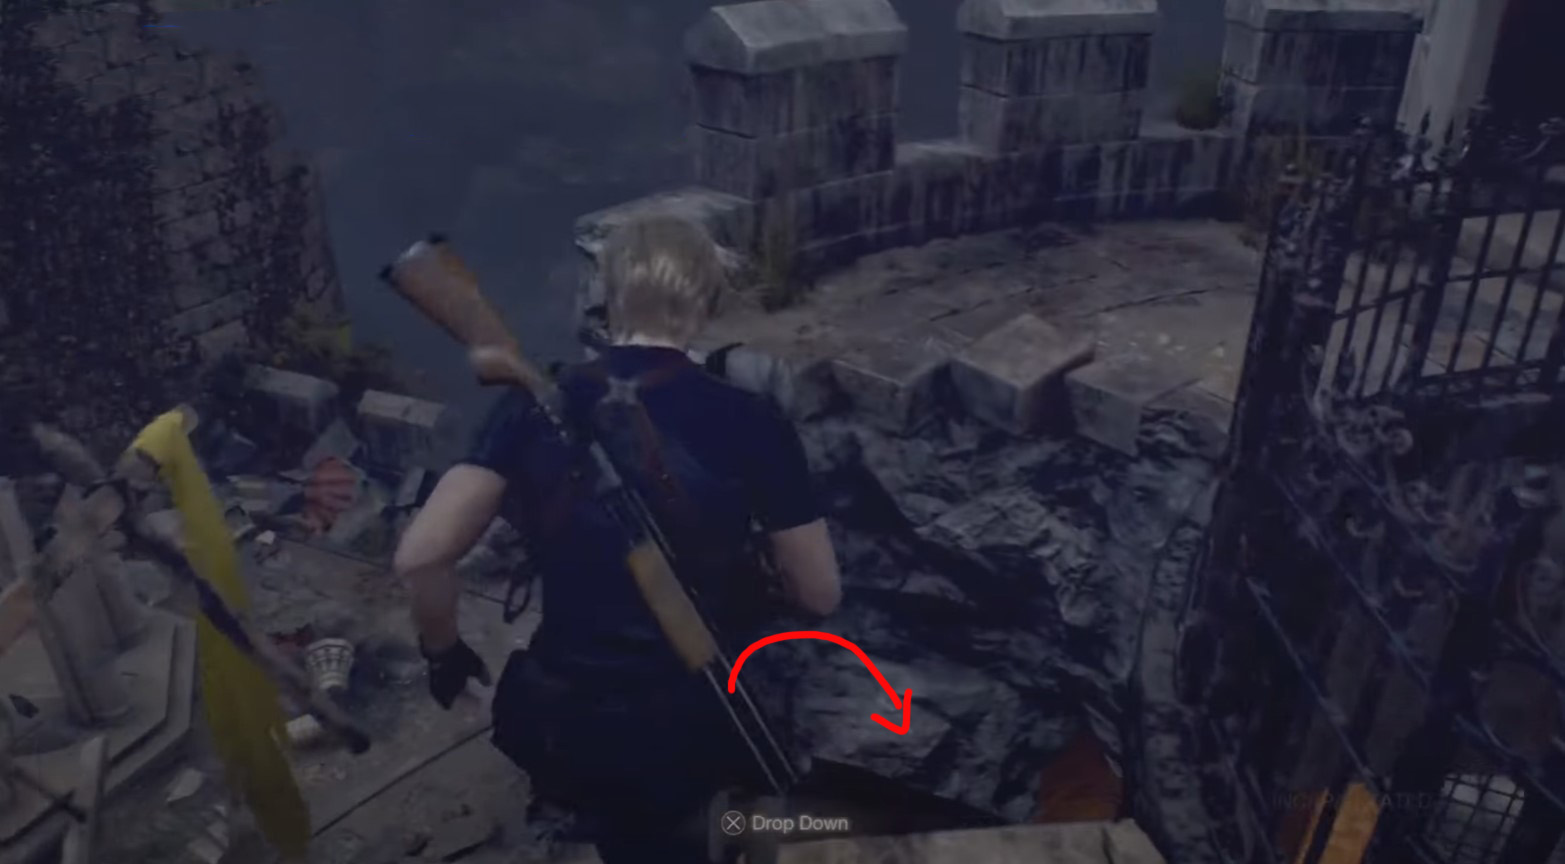
Treasure 2: Elegant Bracelet
- Plot: Chapter 7
- Location: Castle gate
- Cost: 5000 pesetas
After destroying the counterweight to raise the cannon, jump into the hole near the pavilion and the cannon. Go into the passage on the left, turn right and go up the stairs. Jump off the wall, turn right and run to the very end, where you will find a chest with a decoration.
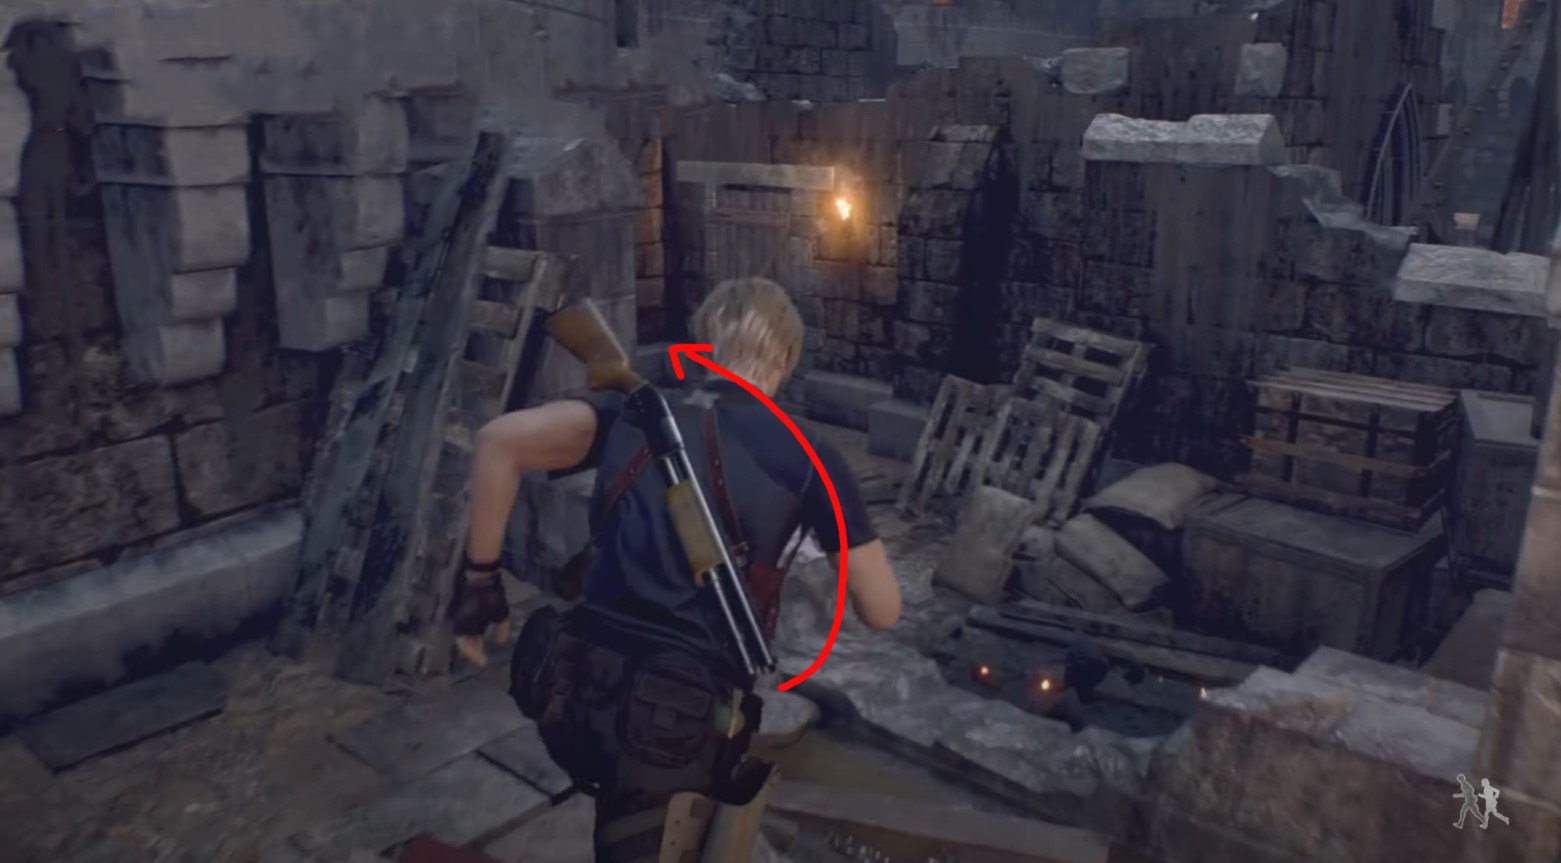
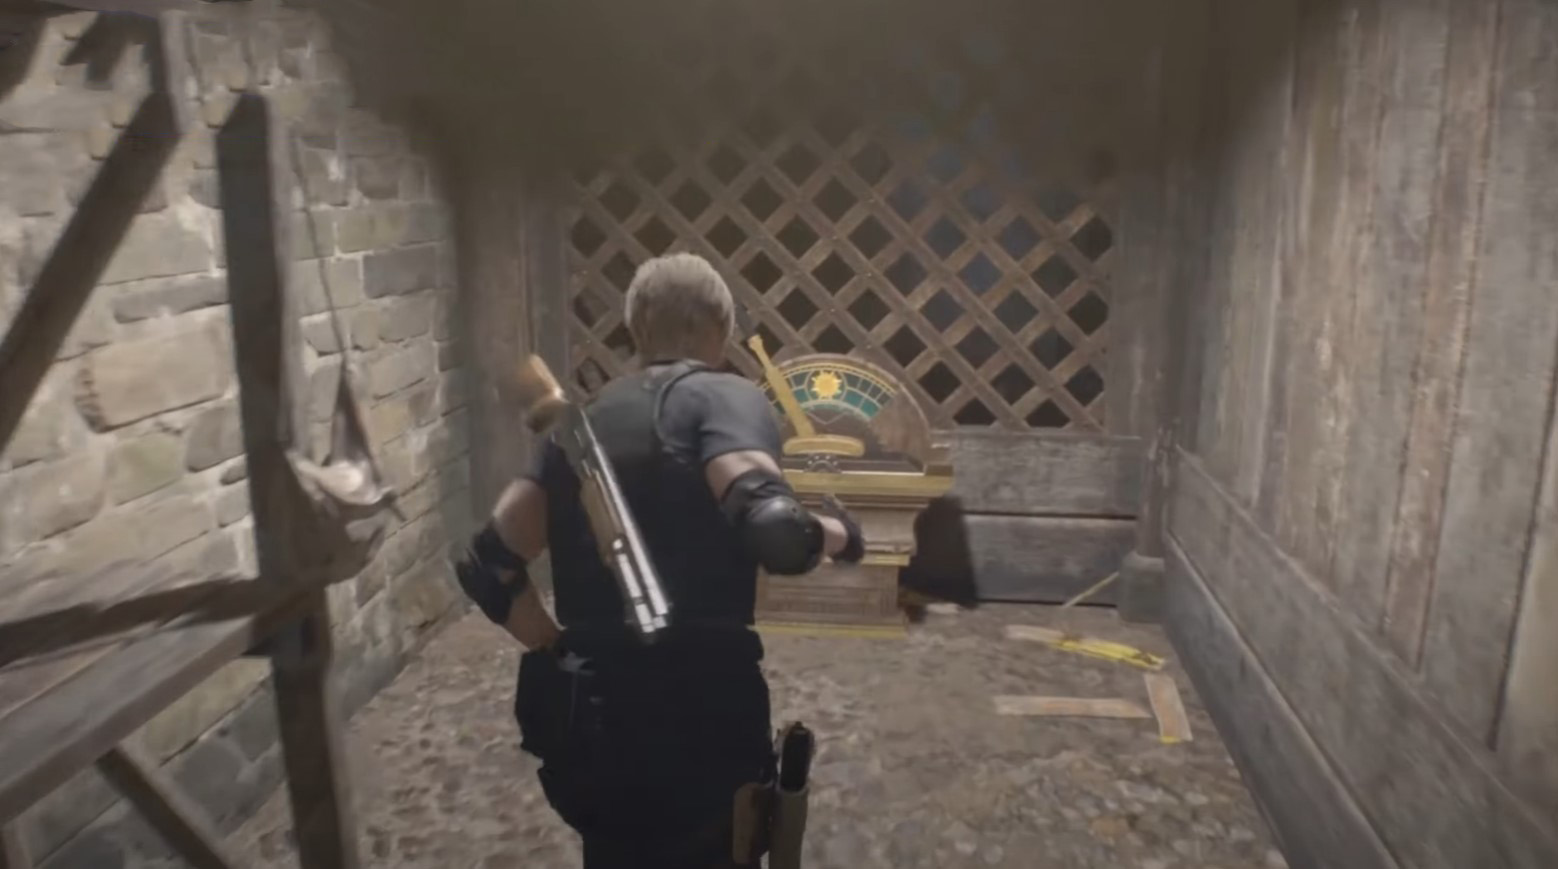
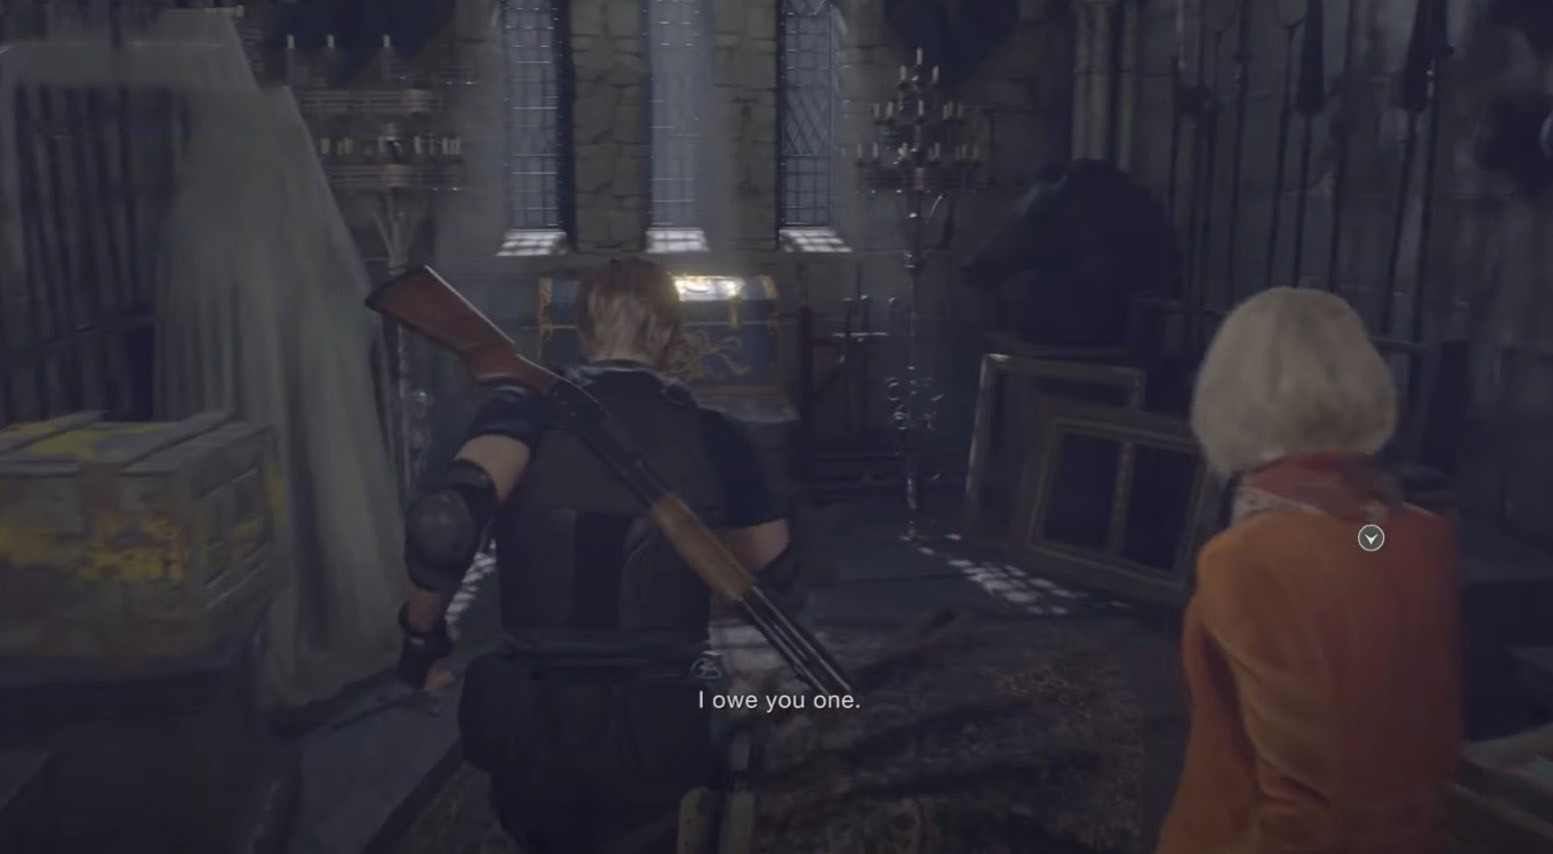
Treasure 3: Fine Perfume Bottle
- Plot: Chapter 7
- Location: Audience Hall
- Cost: unknown
Reach the indicated area, go to its left side and give Ashley a lift so that she moves to the other side and opens the door for you a little ahead and to the left. Enter inside and run to the right to the very end, where you will find a red chest with perfume.

Treasure 4: Ruby
- Plot: Chapter 7
- Location: Audience Hall
- Cost: 3000 pesetas
Return to the grate that Ashley opened for you, and squeeze through the gap opposite. Then immediately pan the camera up and to the right to see the lamp suspended from the ceiling. Hit it with a weapon to get a pebble.
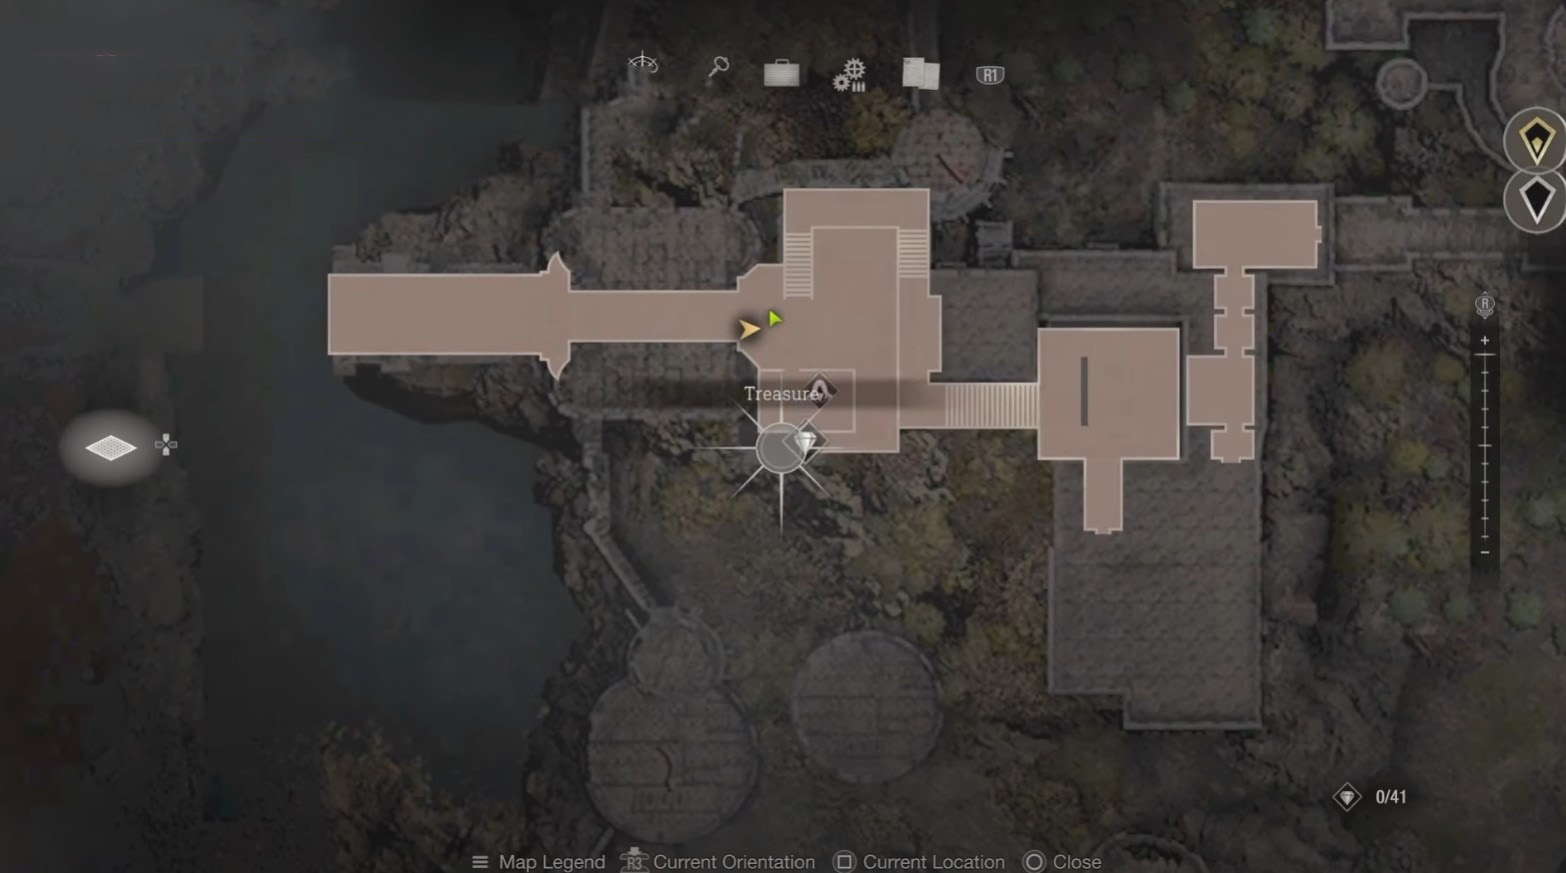
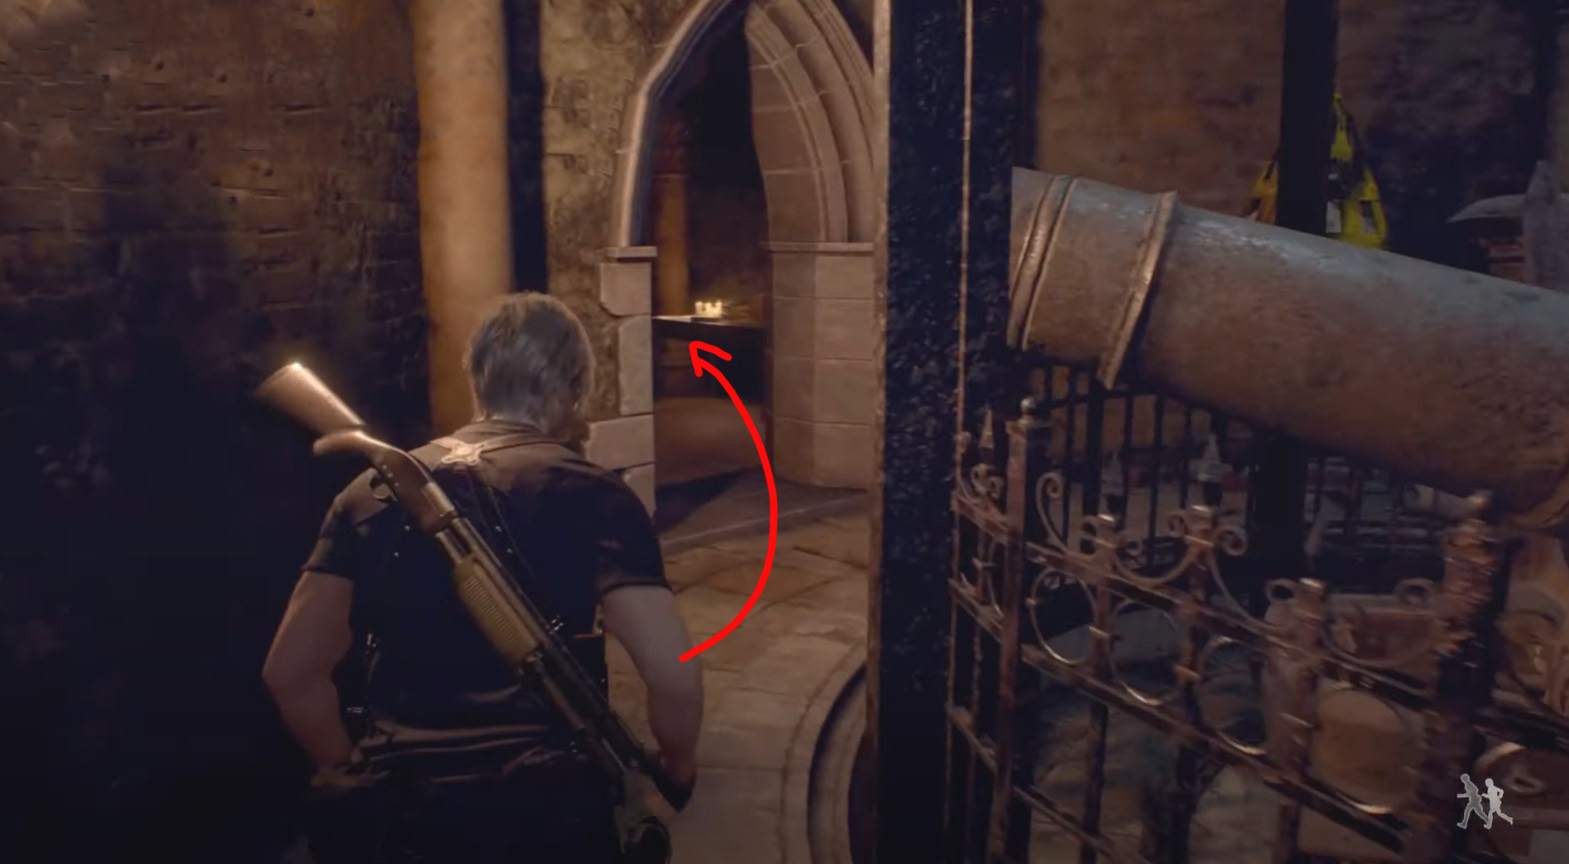
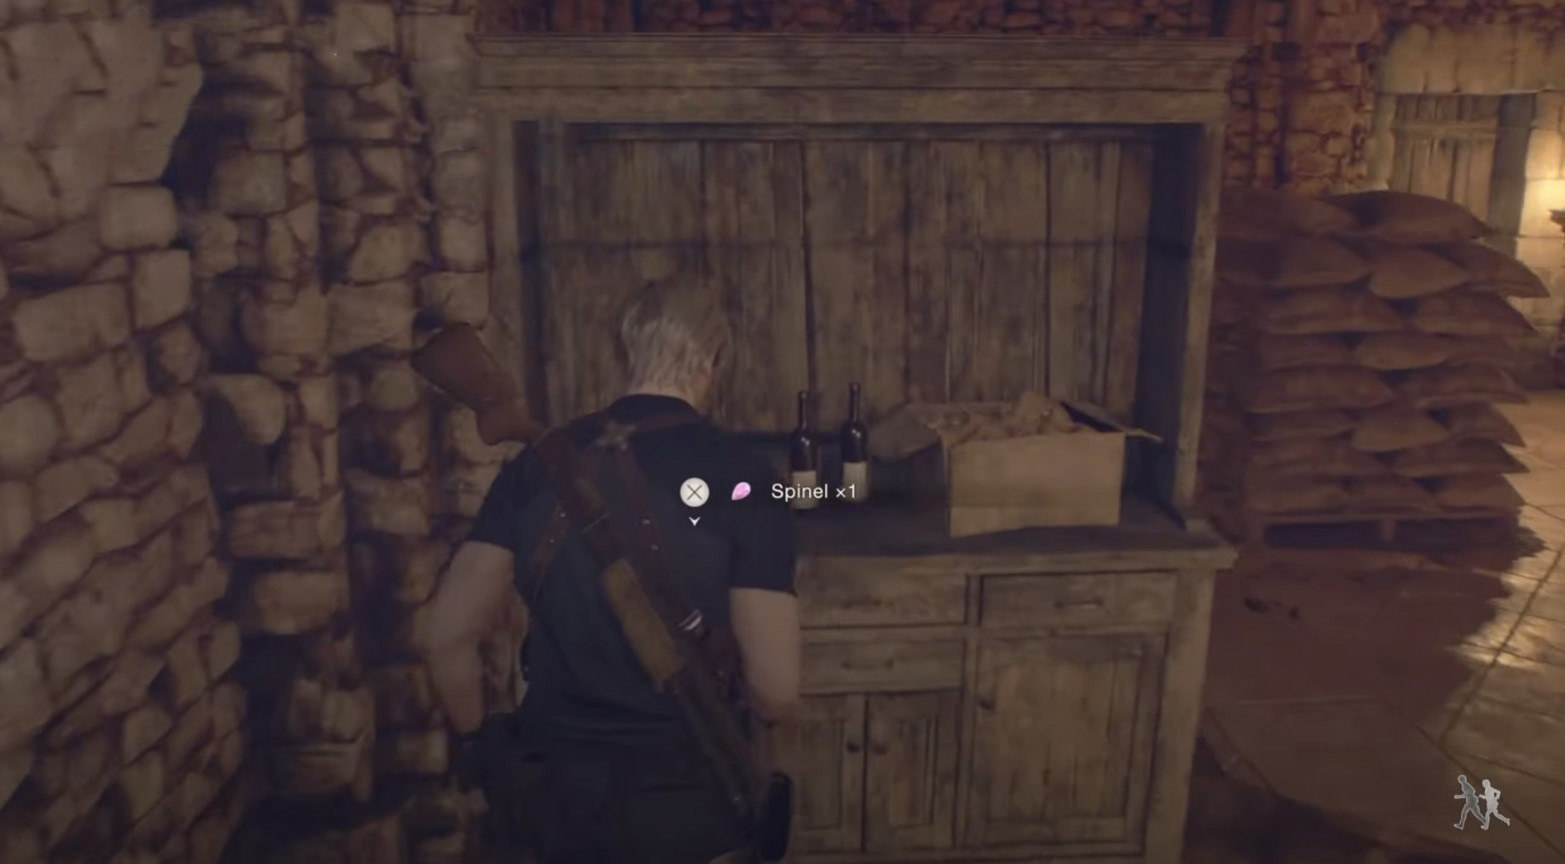
Treasure 5: Spinel
- Plot: Chapter 7
- Location: Treasury
- Cost: for exchange
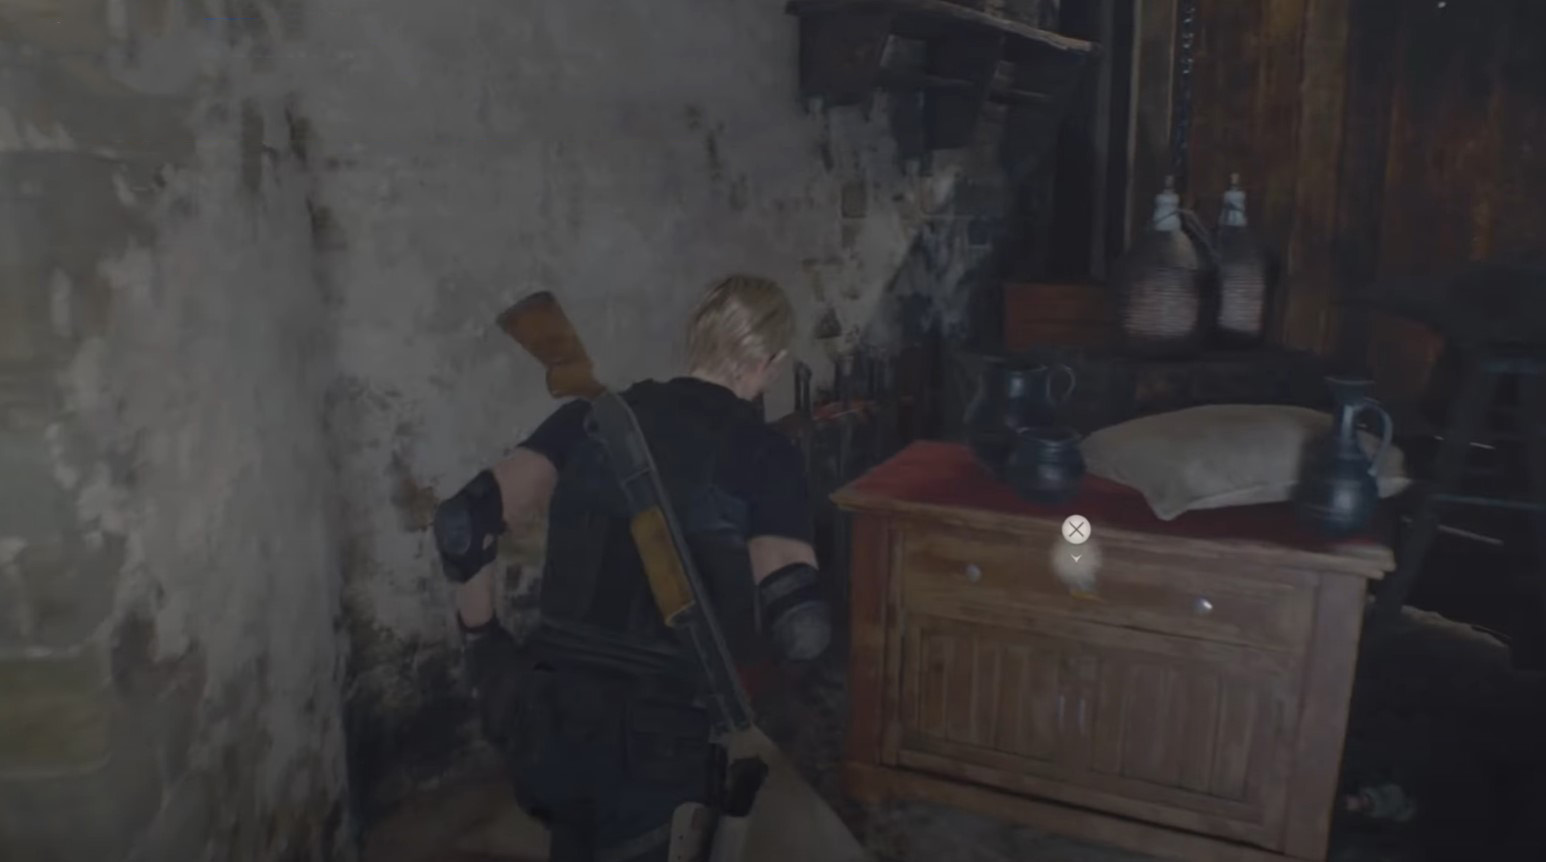
After unlocking the dungeon door in the indicated area, go up the ladder to the top. Then go forward and look for a crystal on a cabinet near two bottles of wine.

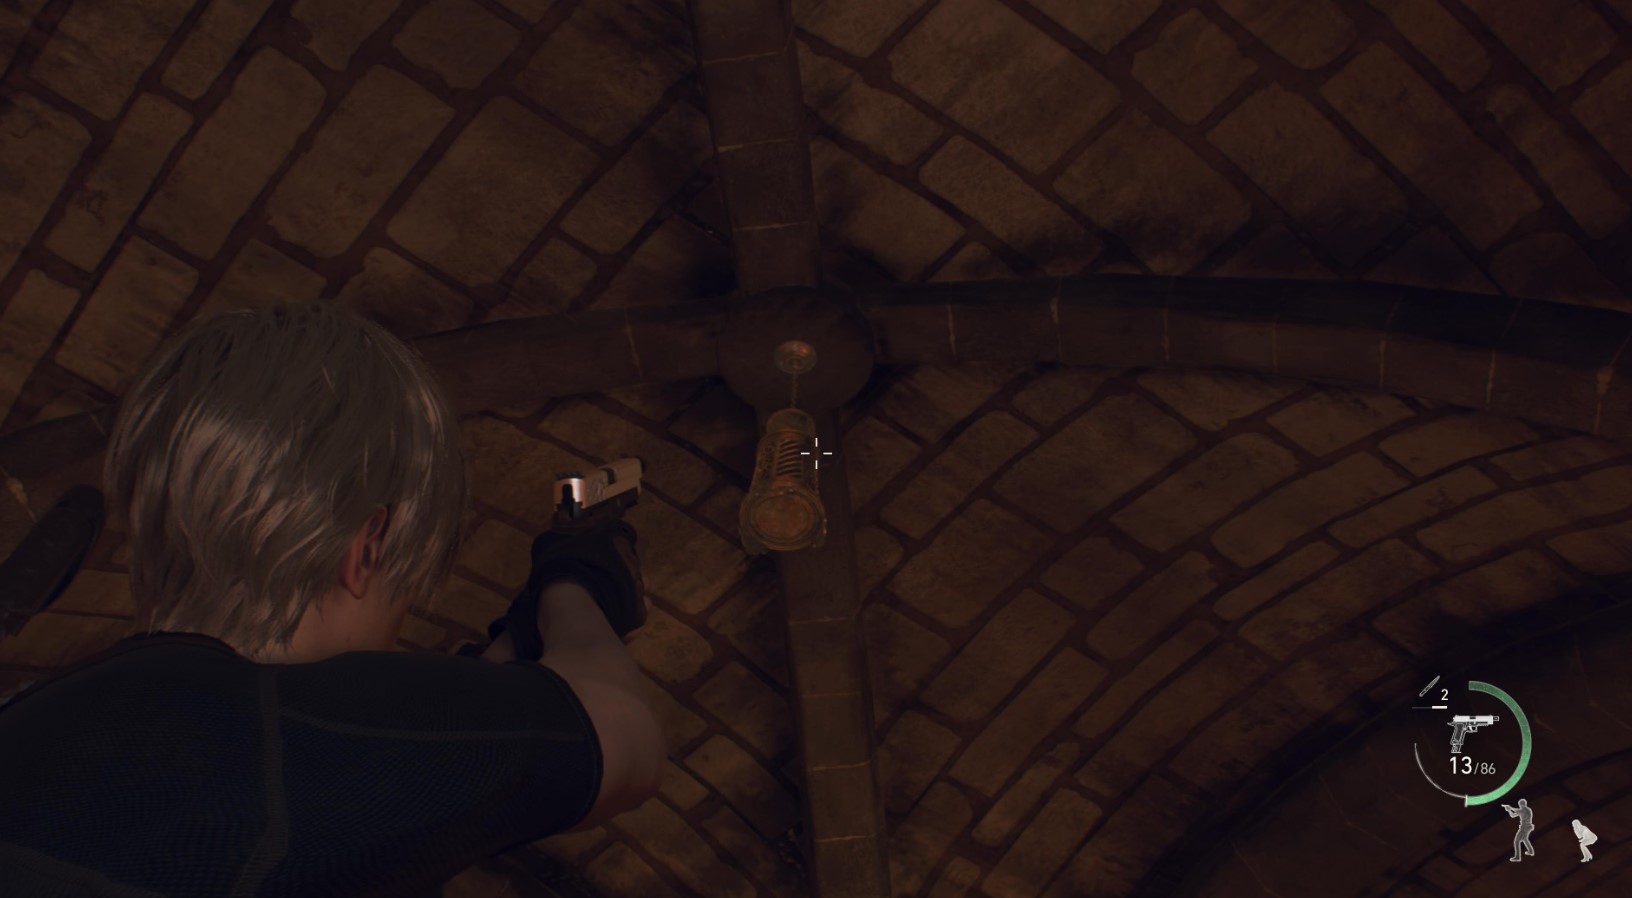
DLC Treasure 2: Silver Token
- Plot: Chapter 7
- Location: Treasury
- Cost: 4000 pesetas
In the same room, lift the camera up and you will find a golden bell tied to the ceiling. Shoot it down with a weapon to get an ornament.
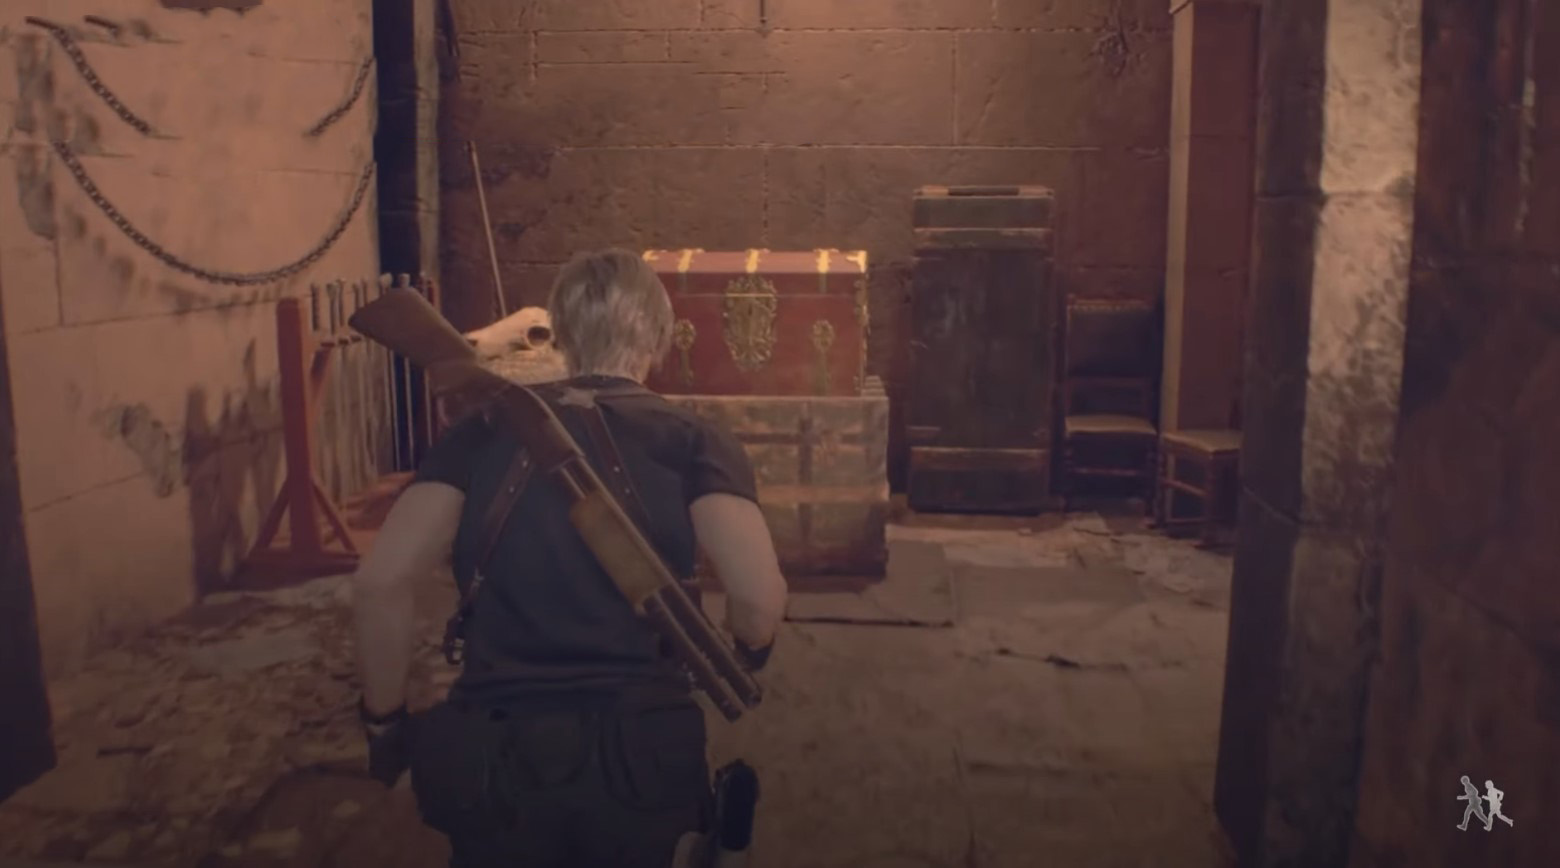
Treasure 6: Golden Bracelet
- Plot: Chapter 7
- Location: Treasury
- Cost: unknown
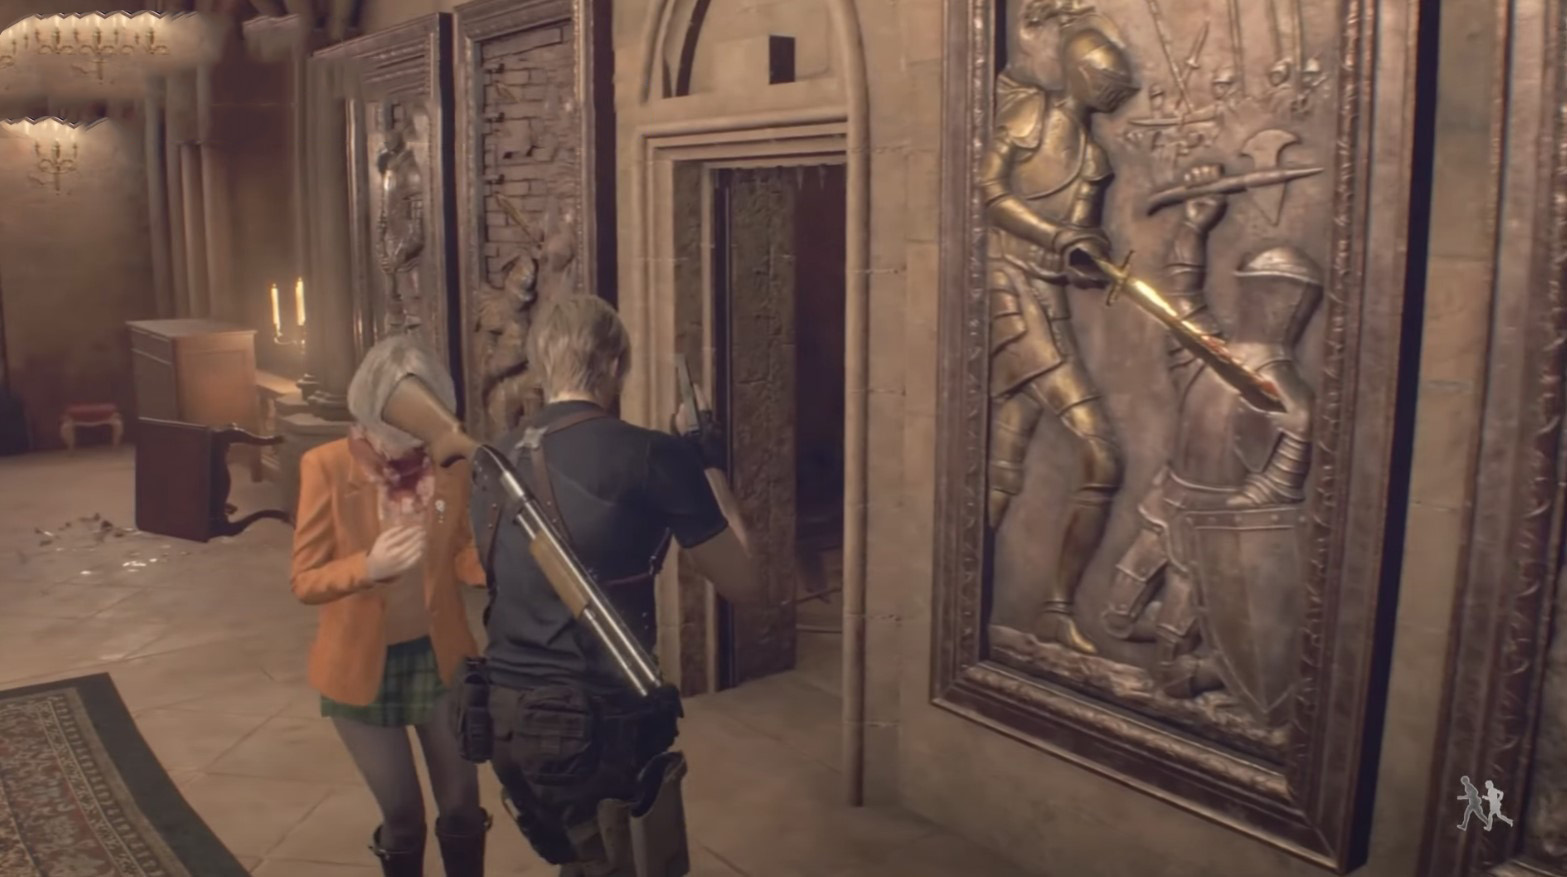
Deciding puzzle with swords and paintings on the wall, go through the opened passage and turn right. Along the way, you will notice a red chest containing a treasure.
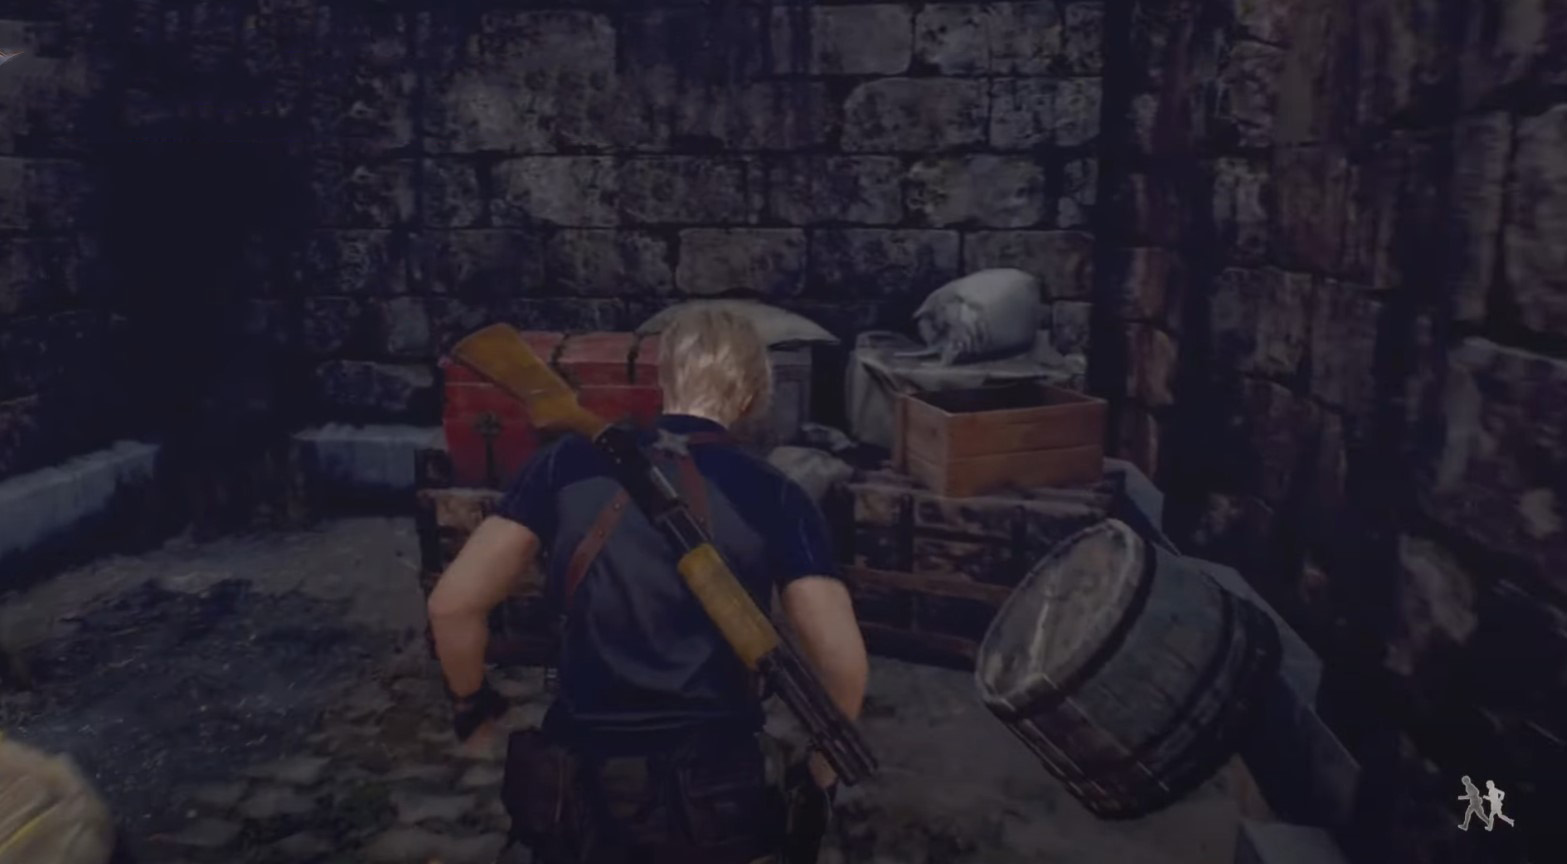
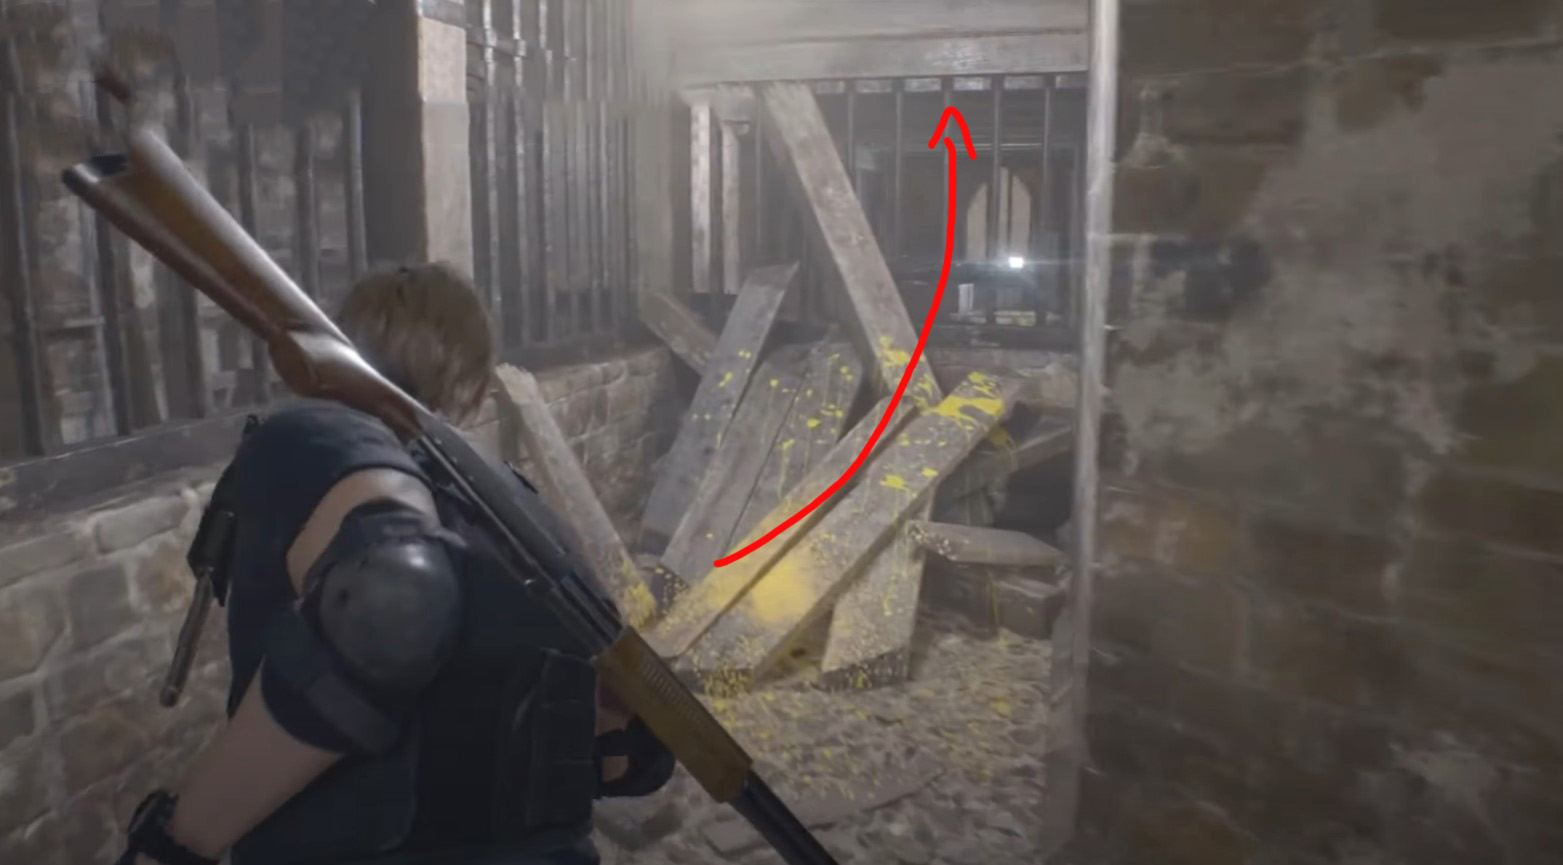
Treasure 7: The Golden Hourglass
- Plot: Chapter 7
- Location: Audience Hall
- Cost: unknown
After going to the second tier of the indicated area, go along the right side to the end and drop the ladder down. Now go back a little and jump over to the other side with the help of a huge chandelier hanging in the center of the location. Next, immediately turn right and jump down the hole. There you will find a chest with a decoration.
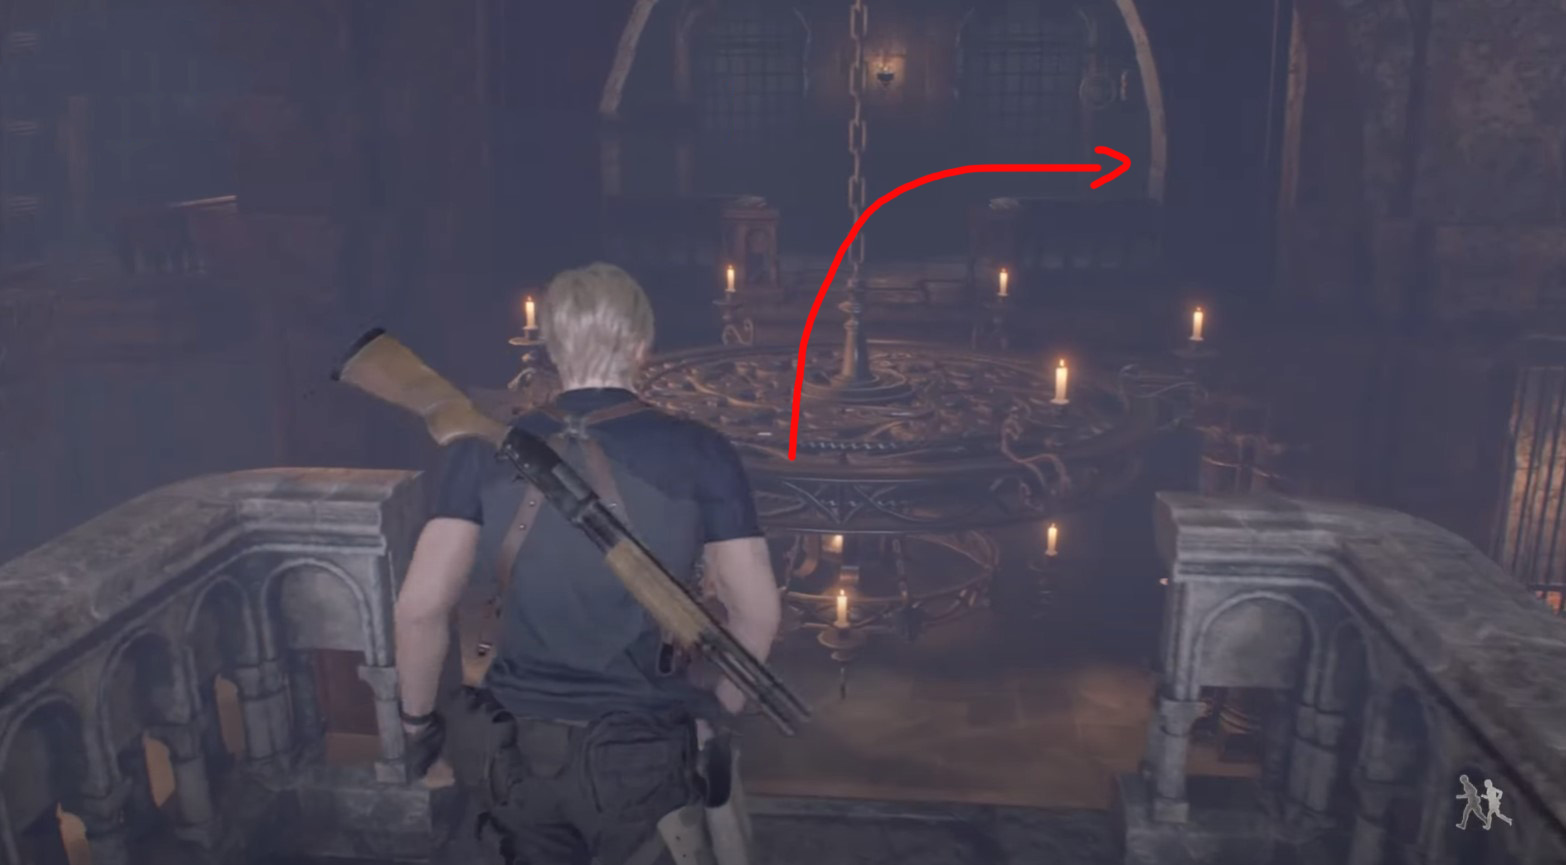
DLC Treasure 3: Spinel
- Plot: Chapter 7
- Location: Audience Hall
- Cost: for exchange
Go to the next room after the specified area and turn the camera up. Next to the chandelier, you will notice a lamp that needs to be knocked down.
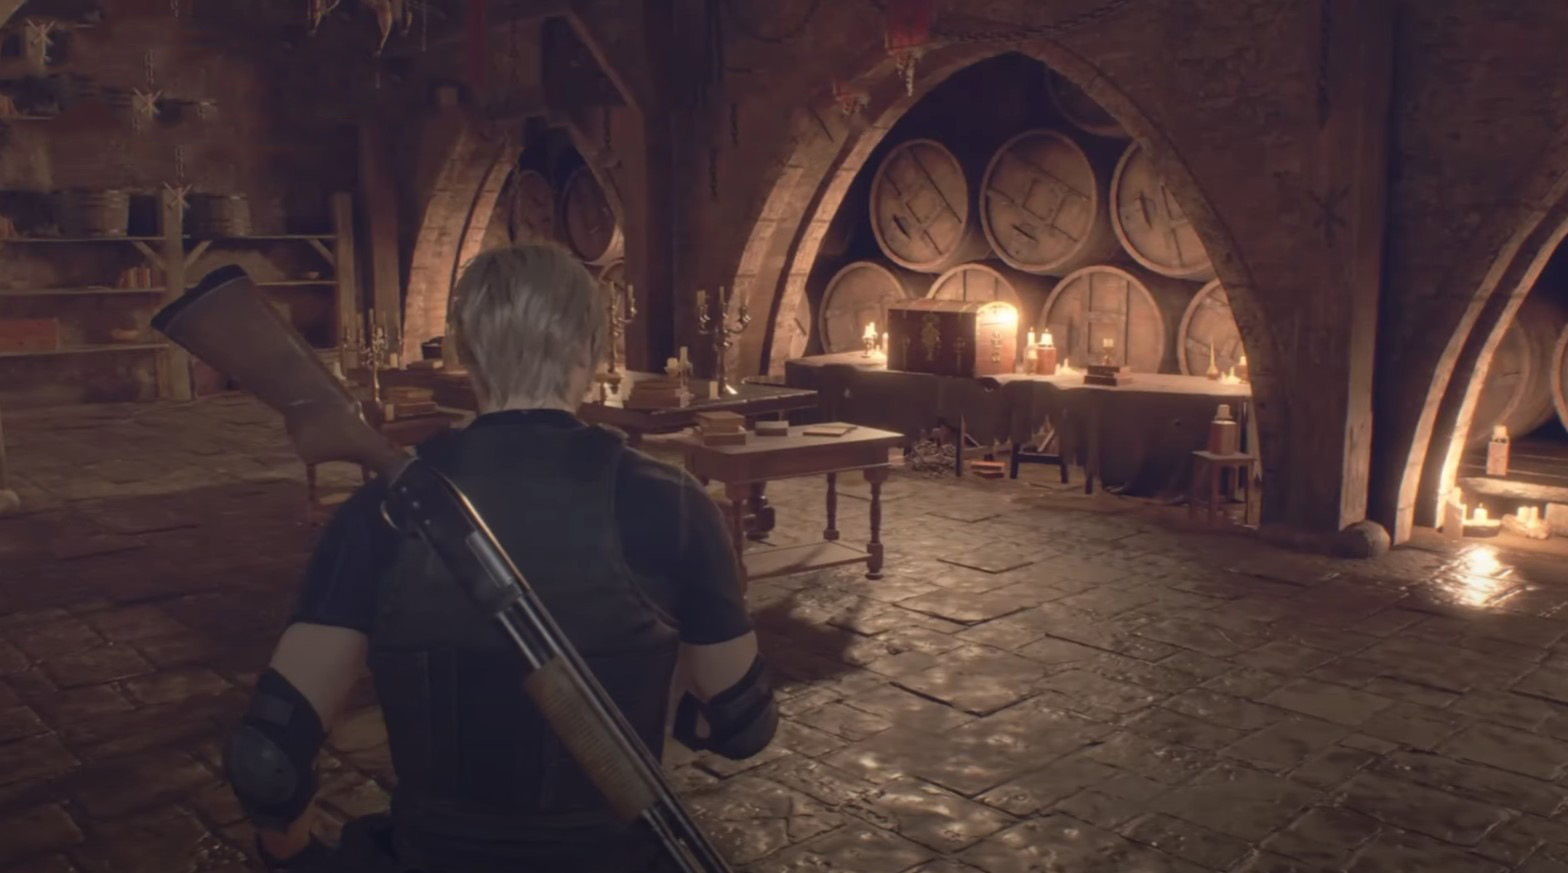
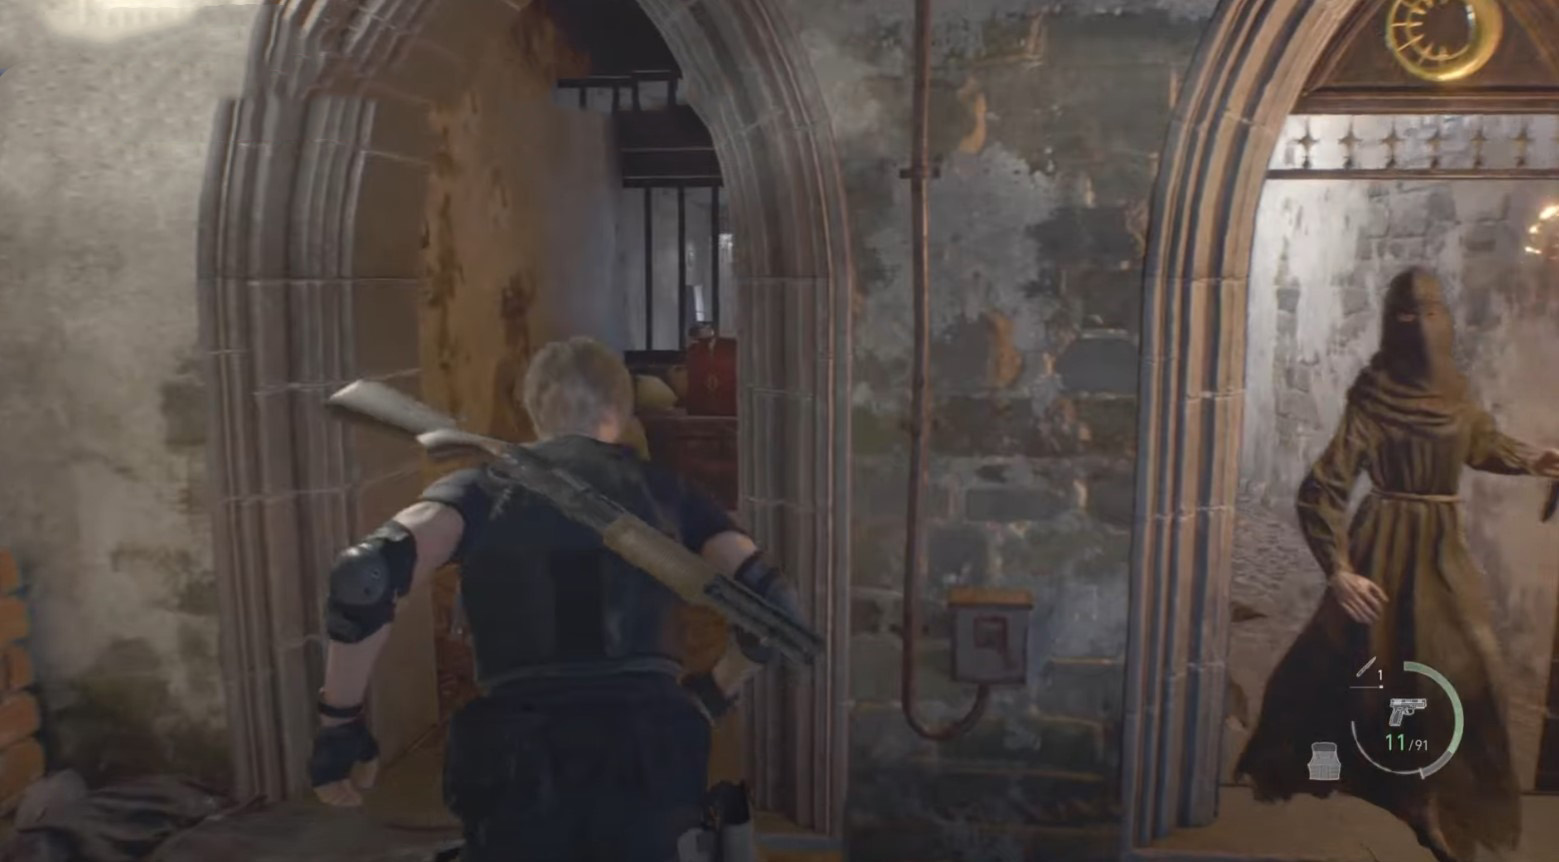
Treasure 8: Mirror (pearls and rubies)
- Plot: Chapter 8
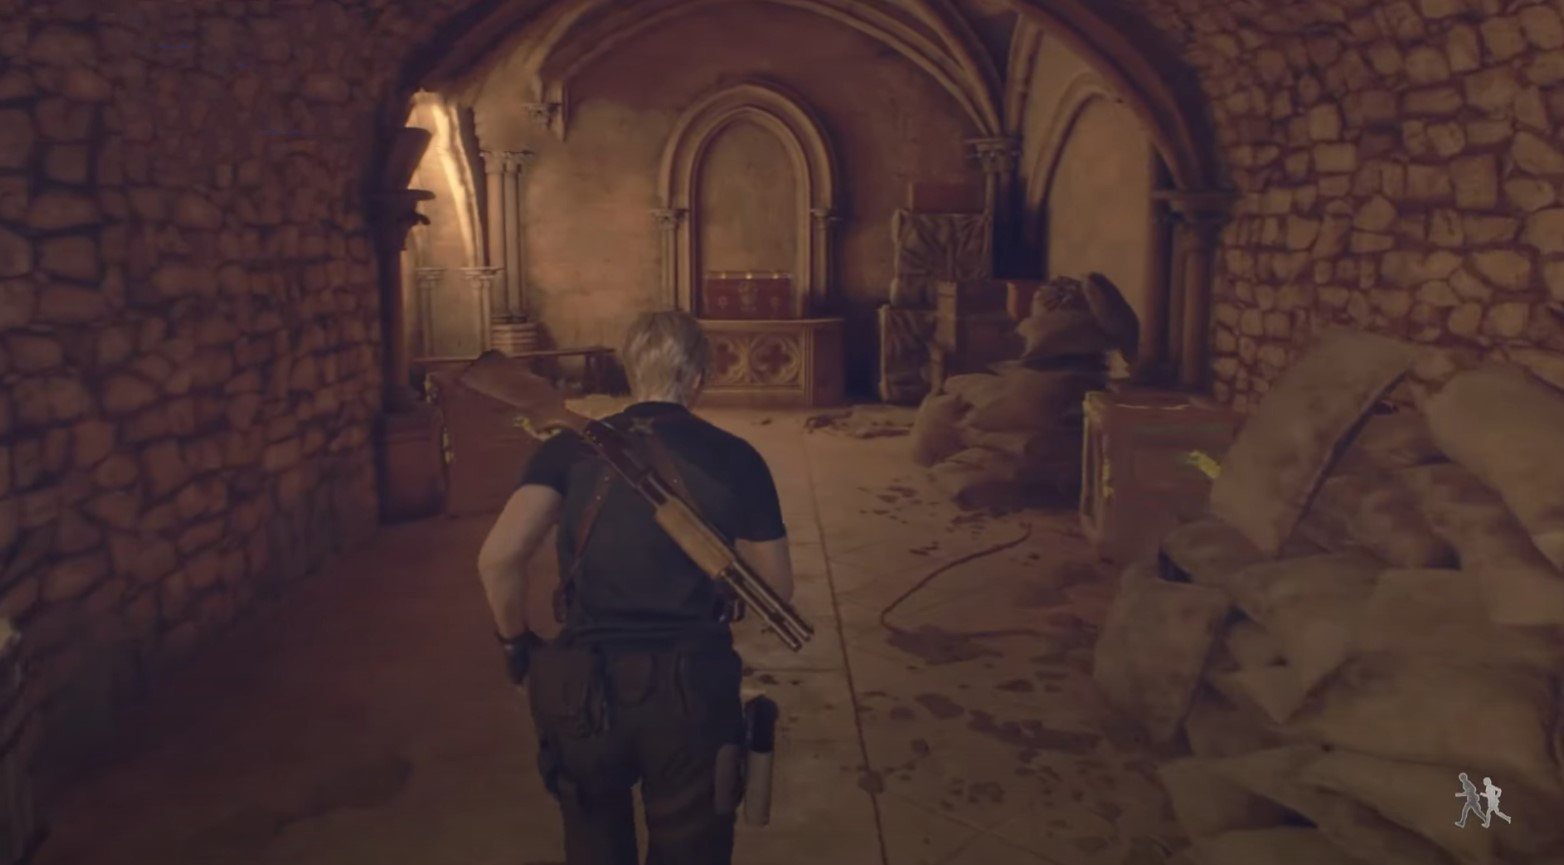
- Location: wine cellar
- Cost: unknown
Go to the specified area and deal with opponents. Climb to the top tier and go to the far wall with barrels. There you will find a red chest with a relic.
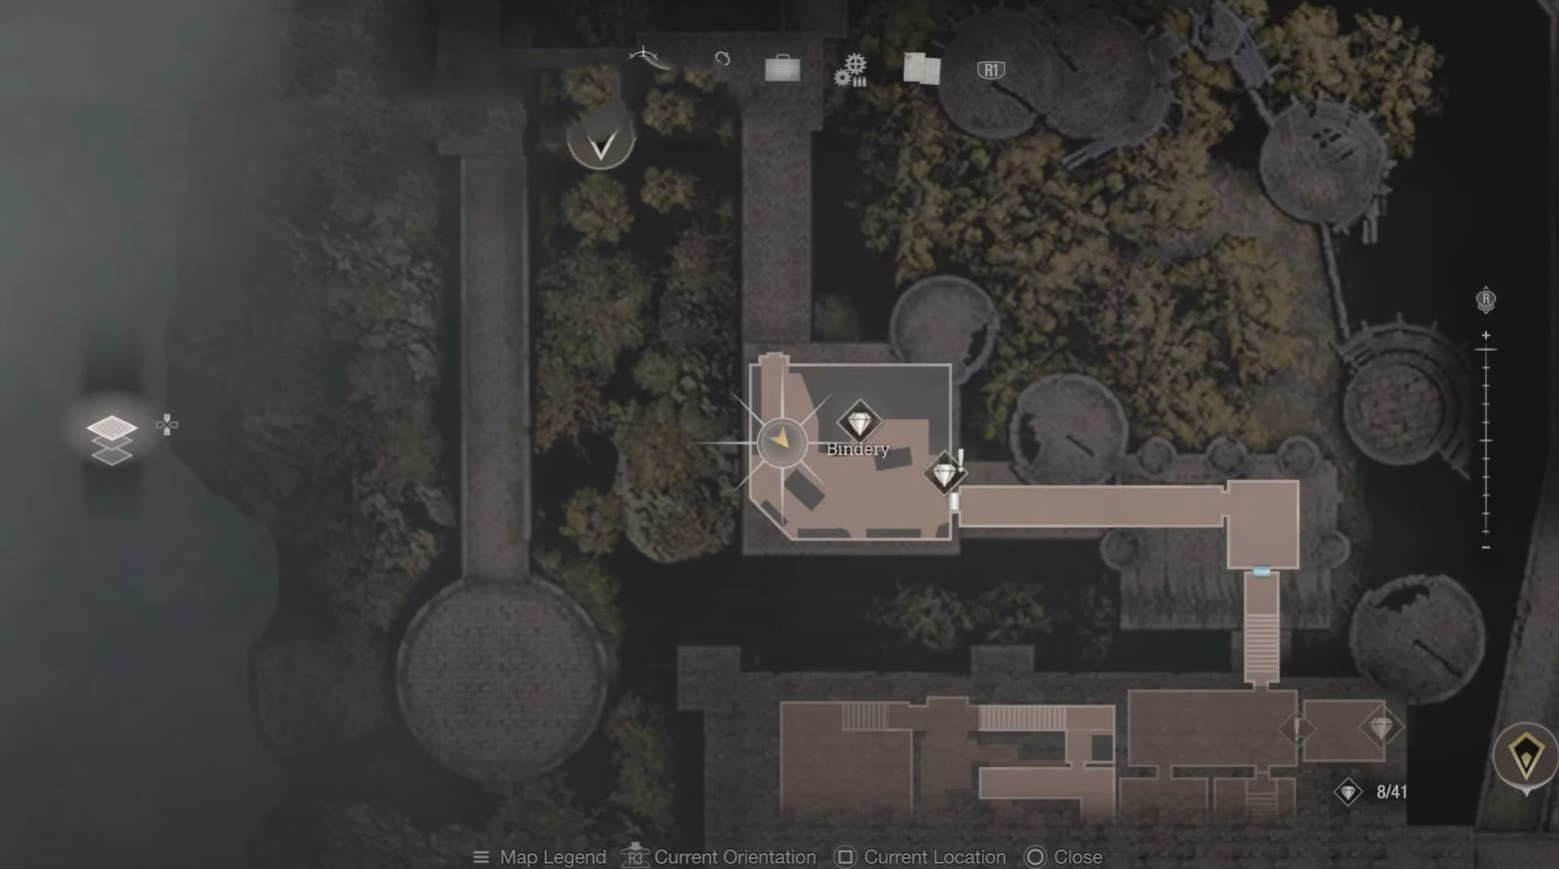
DLC Treasure 4: Alexandrite
- Plot: Chapter 8
- Location: Binding shop
- Cost: 6000 pesetas
From the Wine Cellar, move towards the Binding Workshop. In the corner of the corridor, you will find a bell tied to the ceiling. Shoot him for a stone.
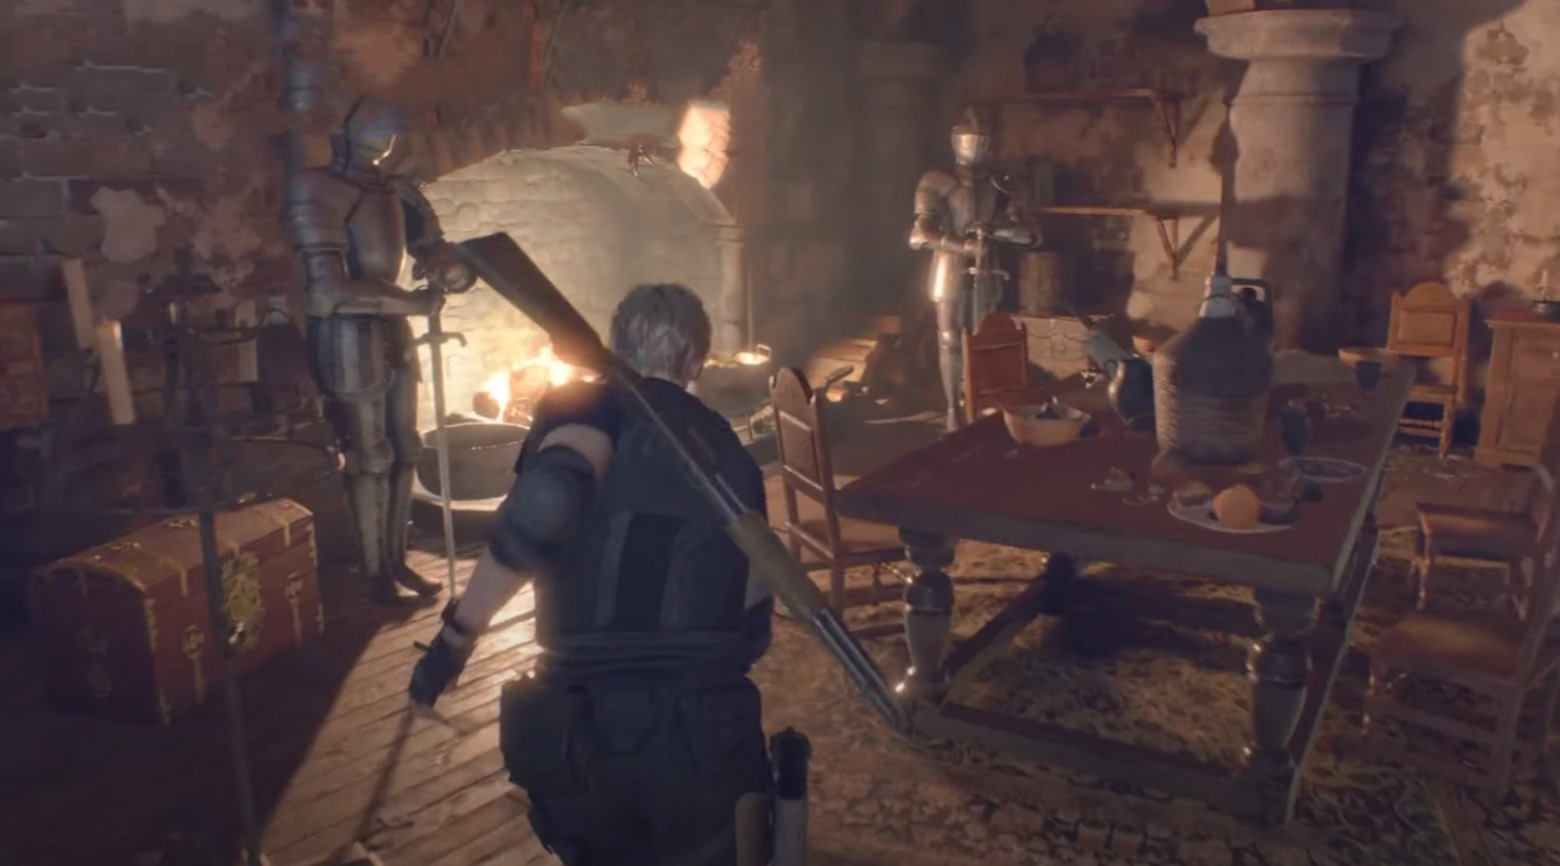
Treasure 9: Expensive Watches
- Plot: Chapter 8
- Location: Binding shop
- Cost: unknown
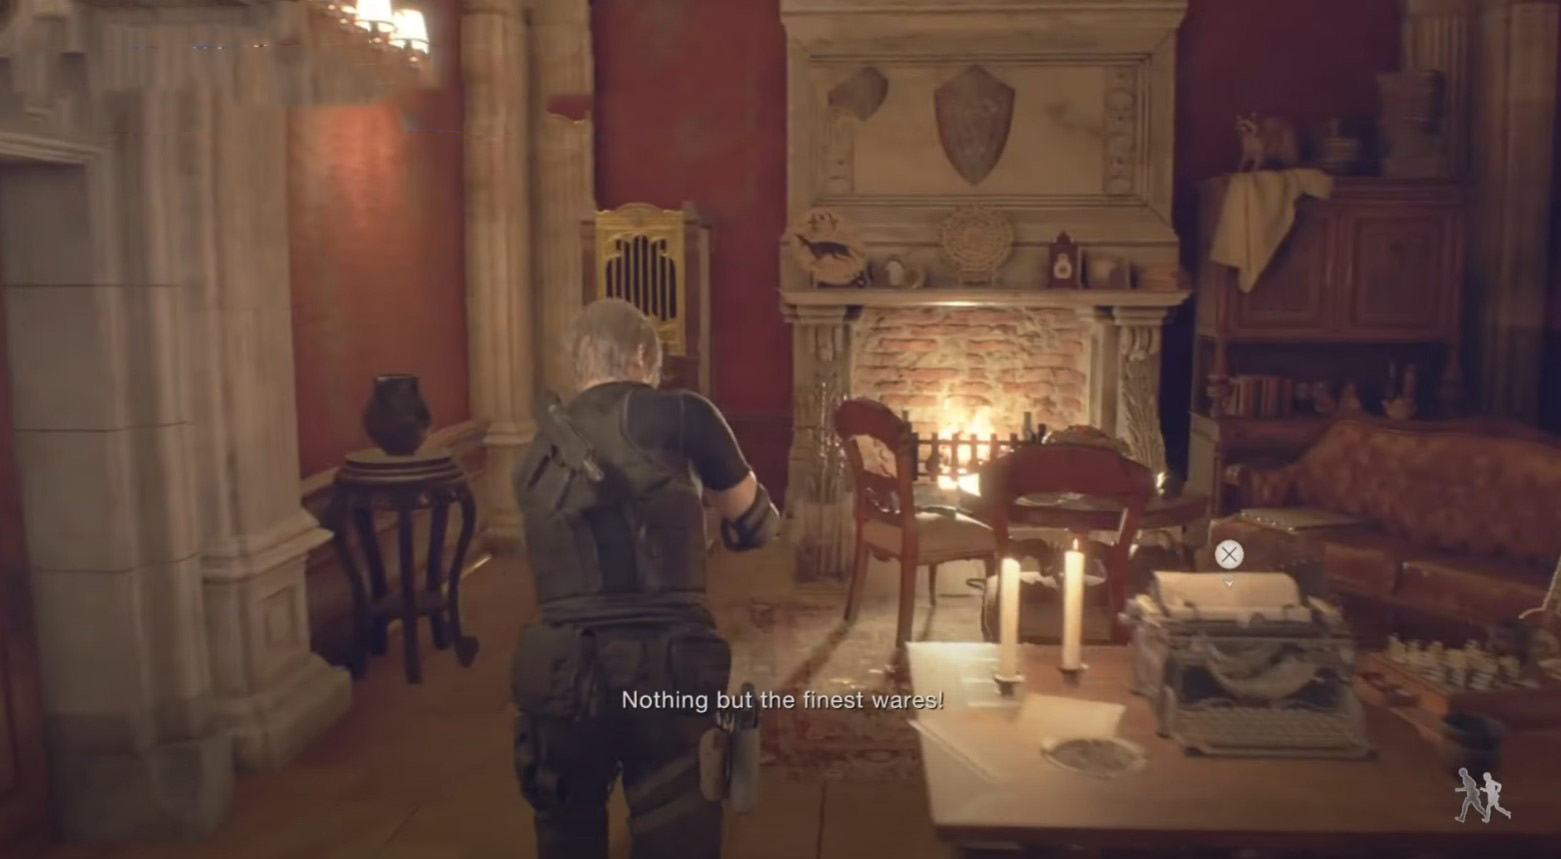
When you get to the indicated area, look to the left of the fireplace, and you will find a red chest there, in which the relic is hidden.
DLC Treasure 5: Silver Token
- Plot: Chapter 8
- Location: Binding shop
- Cost: unknown
Stand with your back to the fireplace and pan the camera up to see the lamp tied to the ceiling. Shoot her for a decoration.
Treasure 10: Small Pocket Watch
- Plot: Chapter 8
- Location: Binding shop
- Cost: unknown
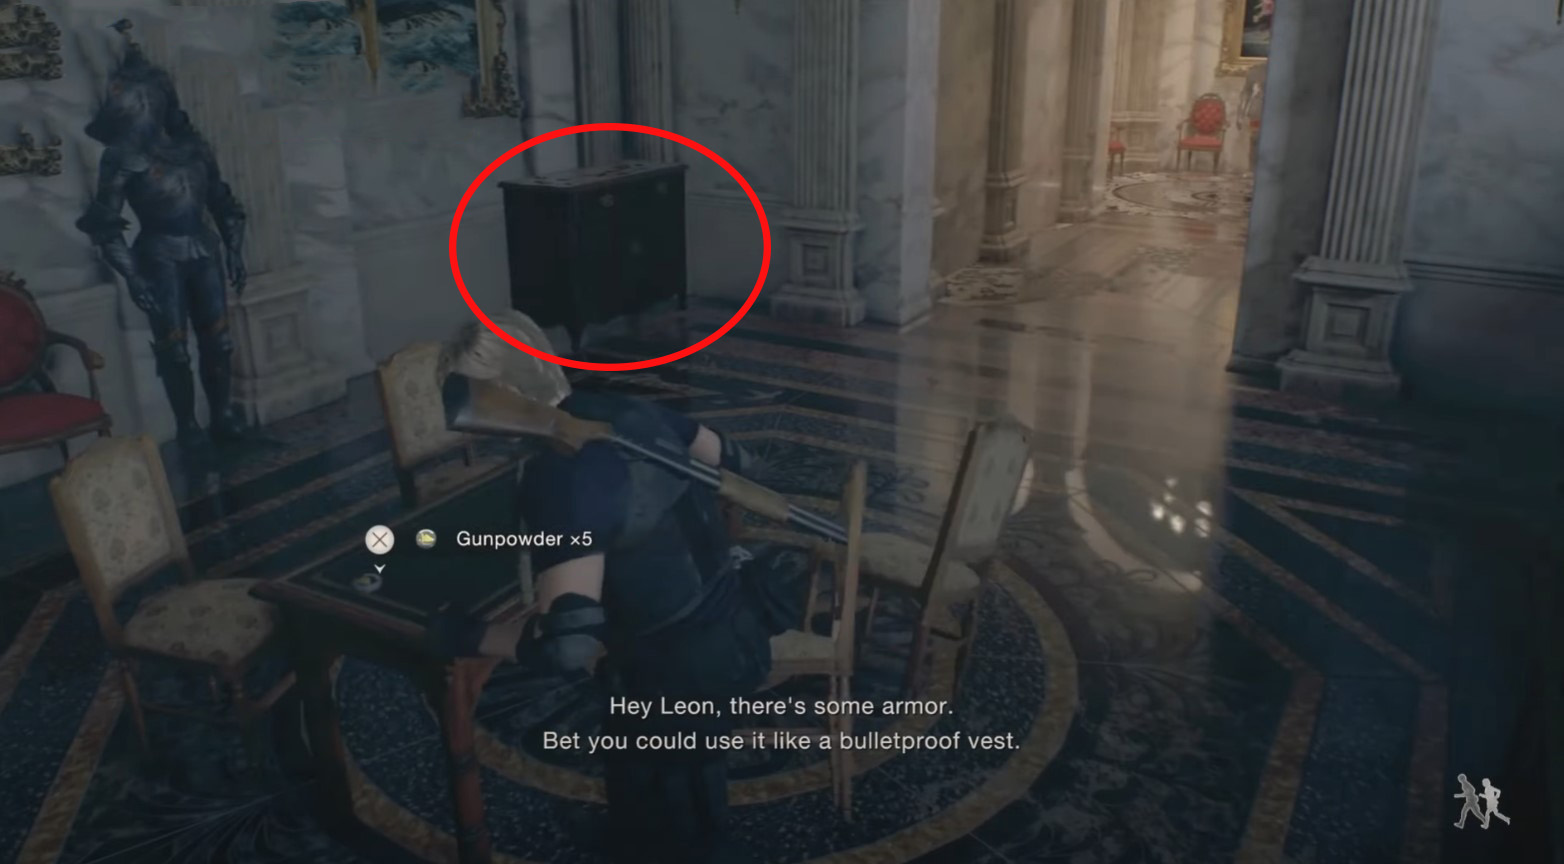
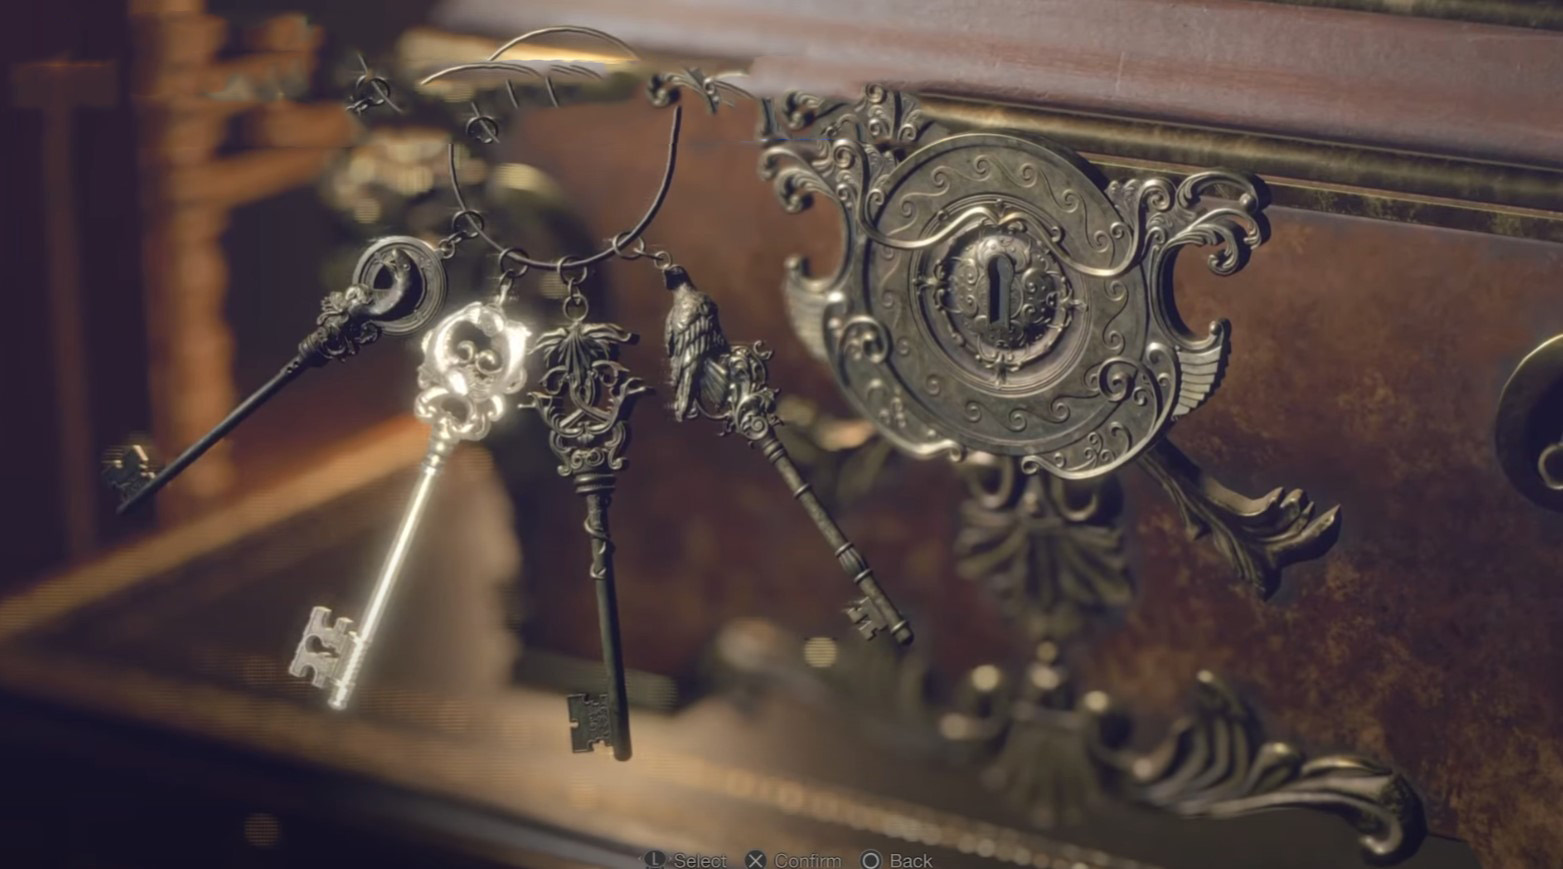
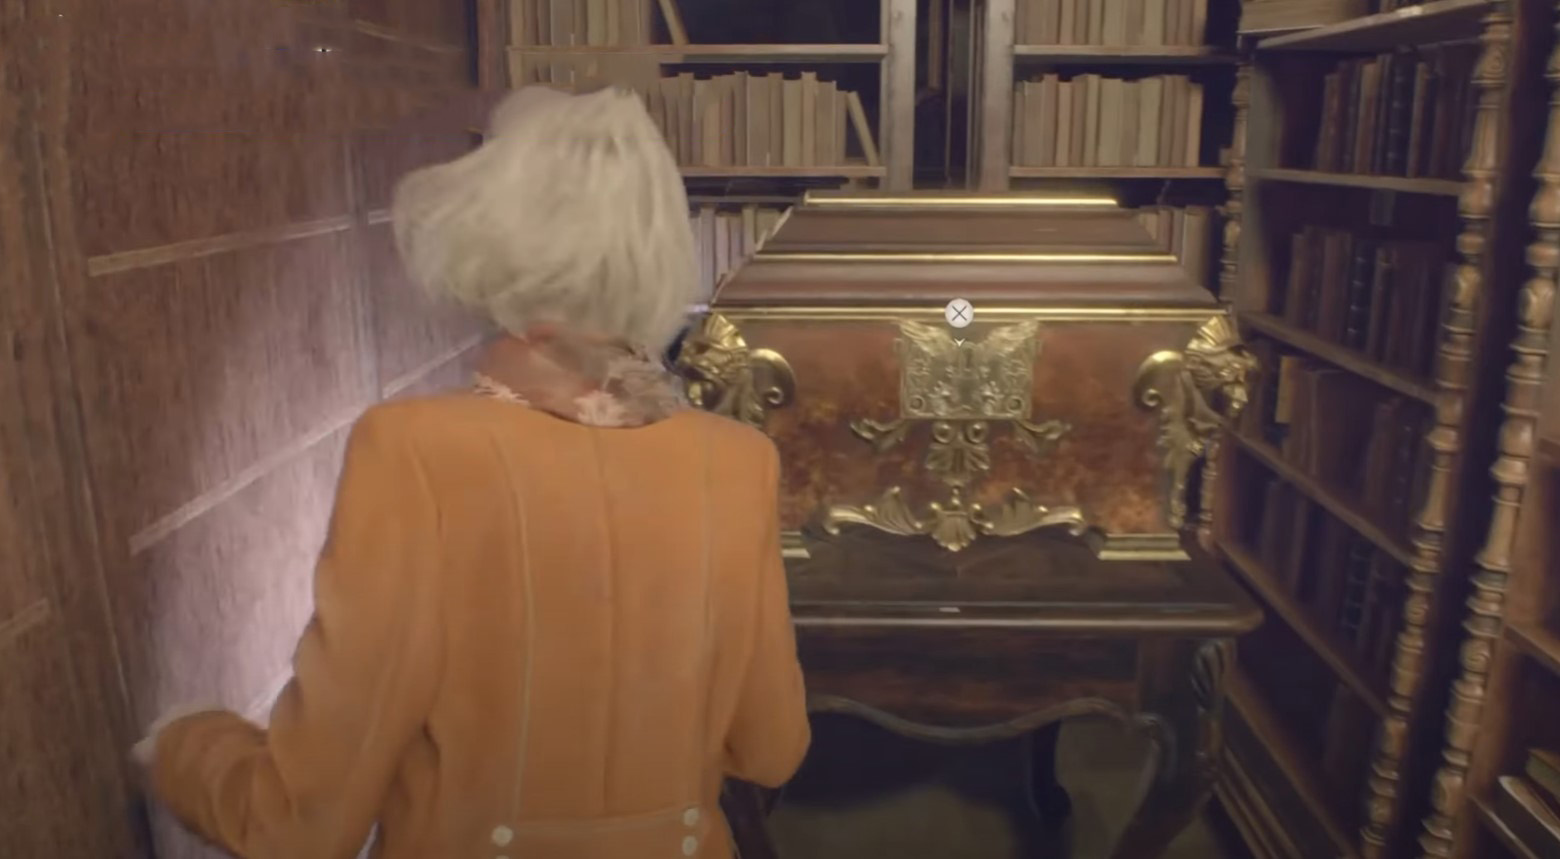
Having guessed riddle with lithographic plates, go out into the corridor and go forward along it. Then turn left and pick up small key which lies on the book.
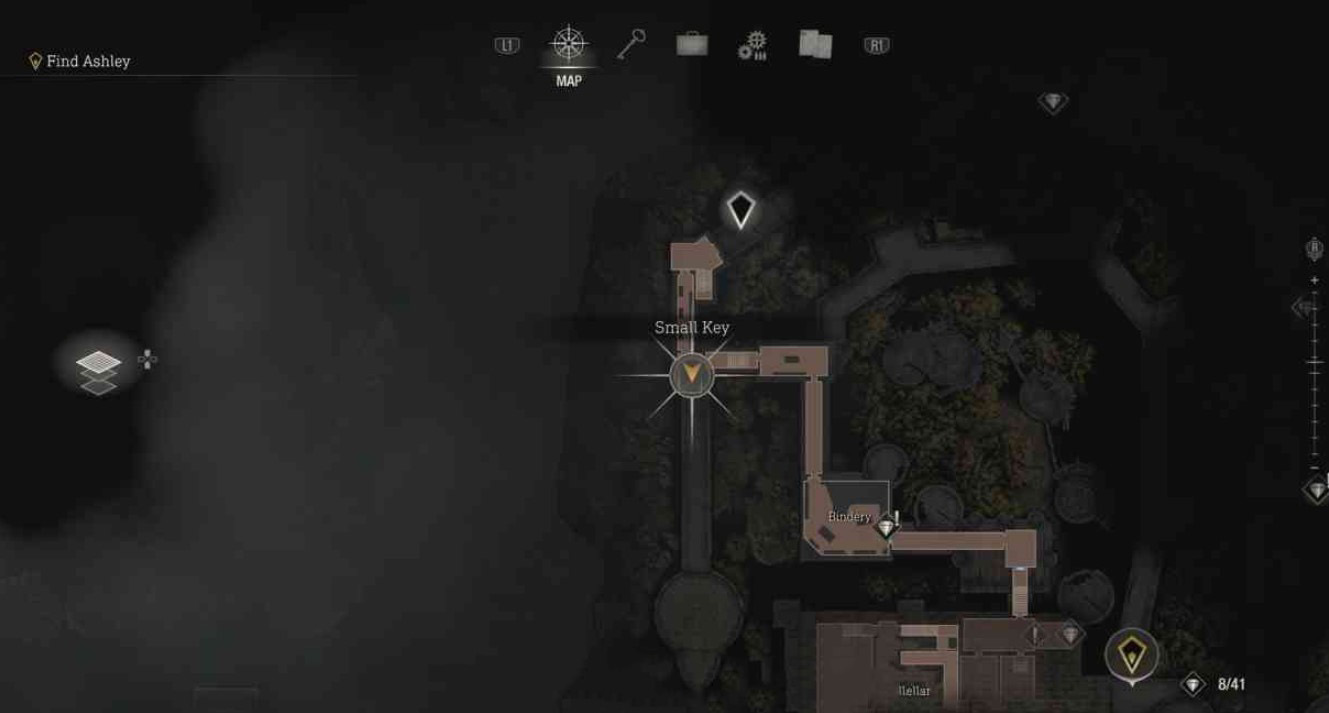
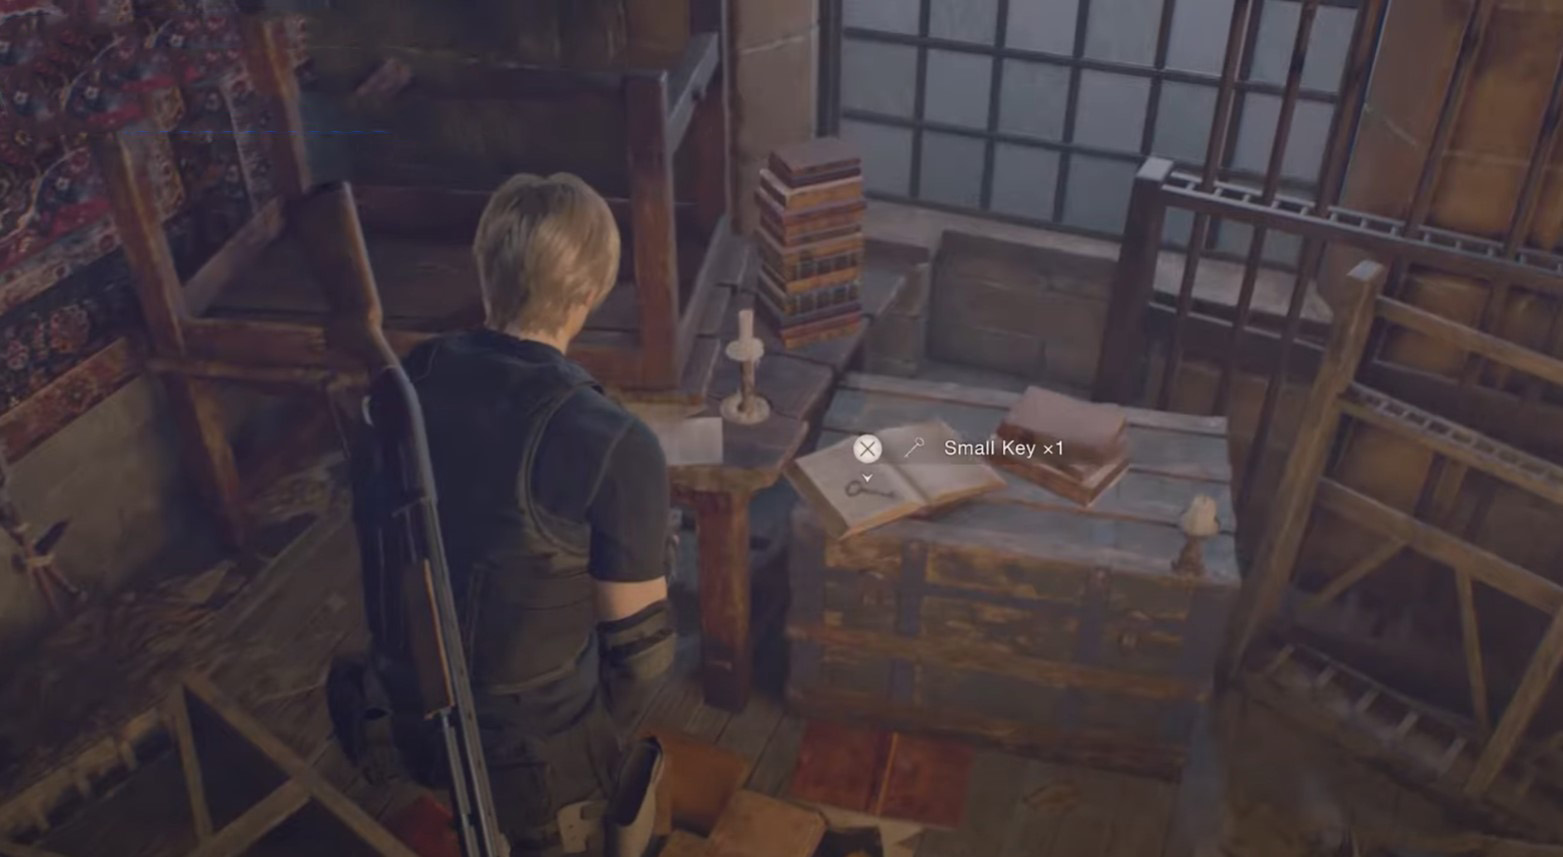
Next, return to the workshop and use the key to open one of the drawers of the chest of drawers to get the jewelry out of it.
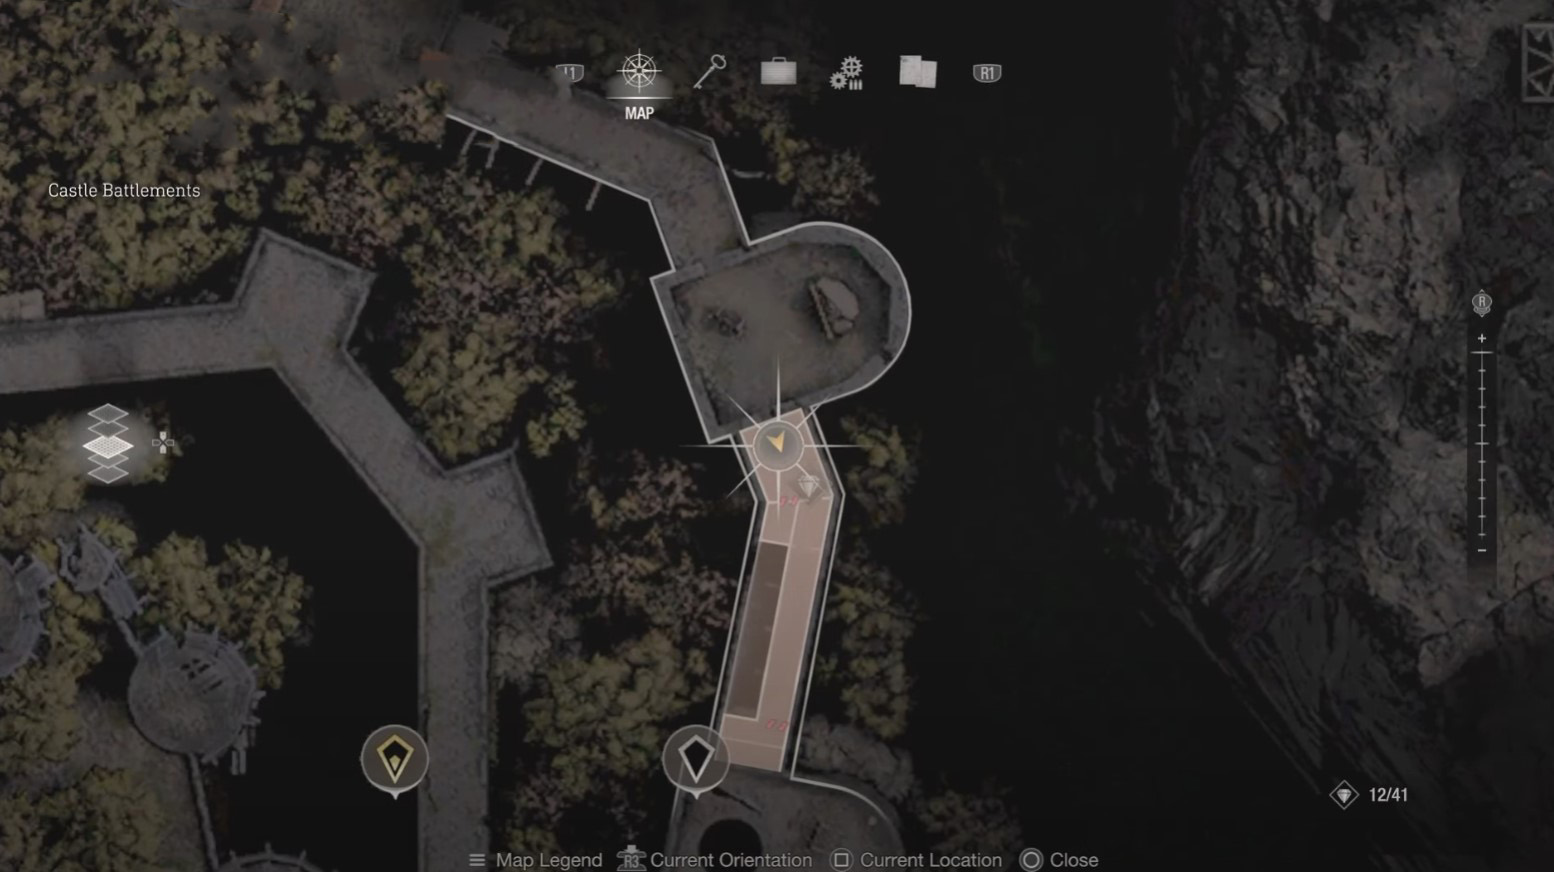
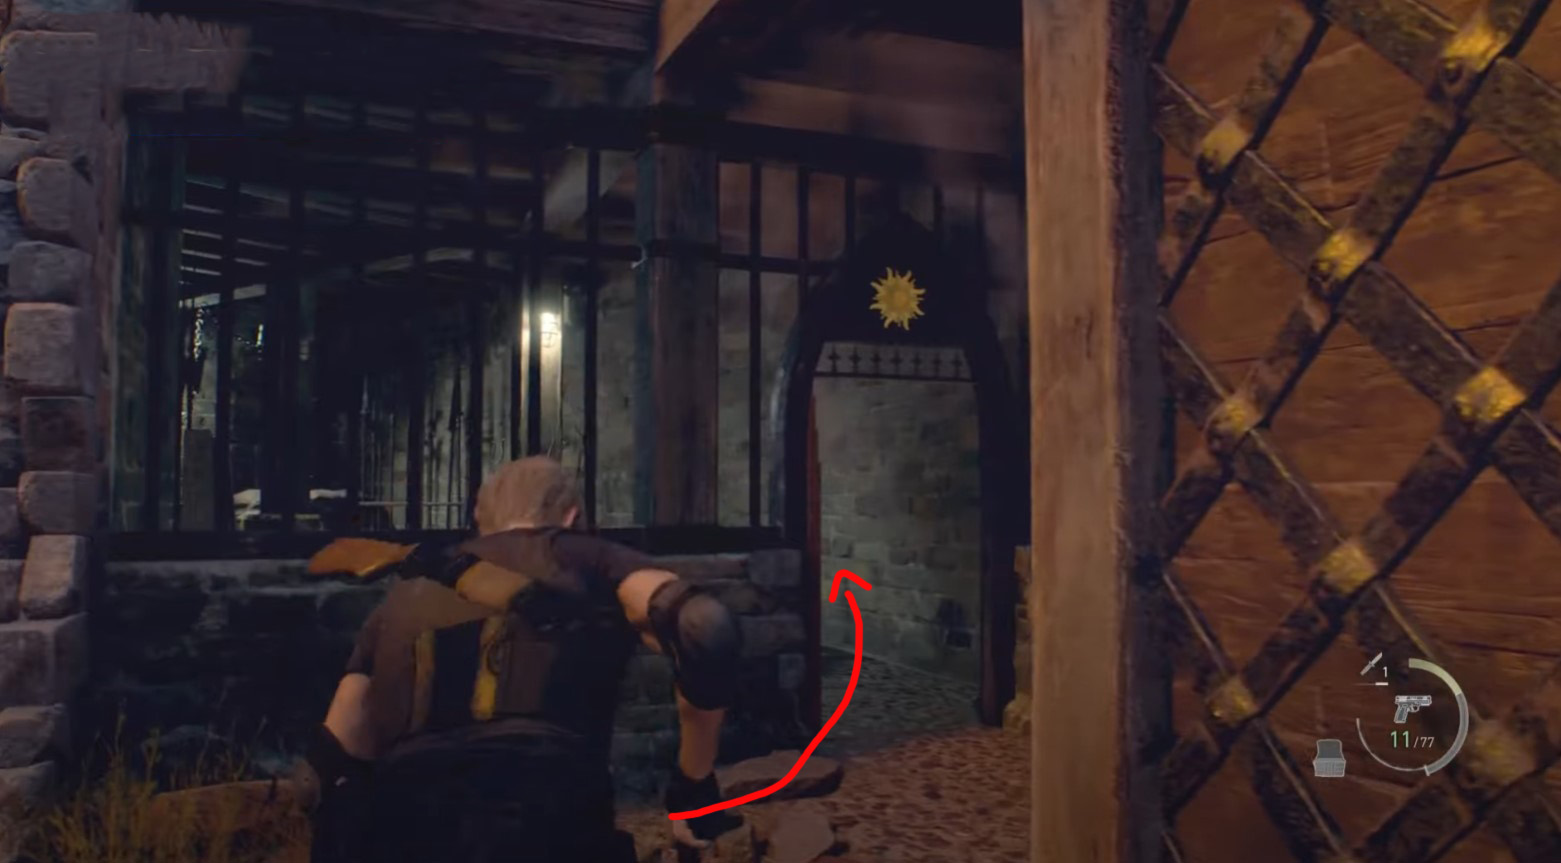
Treasure 11: Fancy Necklace
- Plot: Chapter 8
- Location: Castle walls
- Cost: unknown
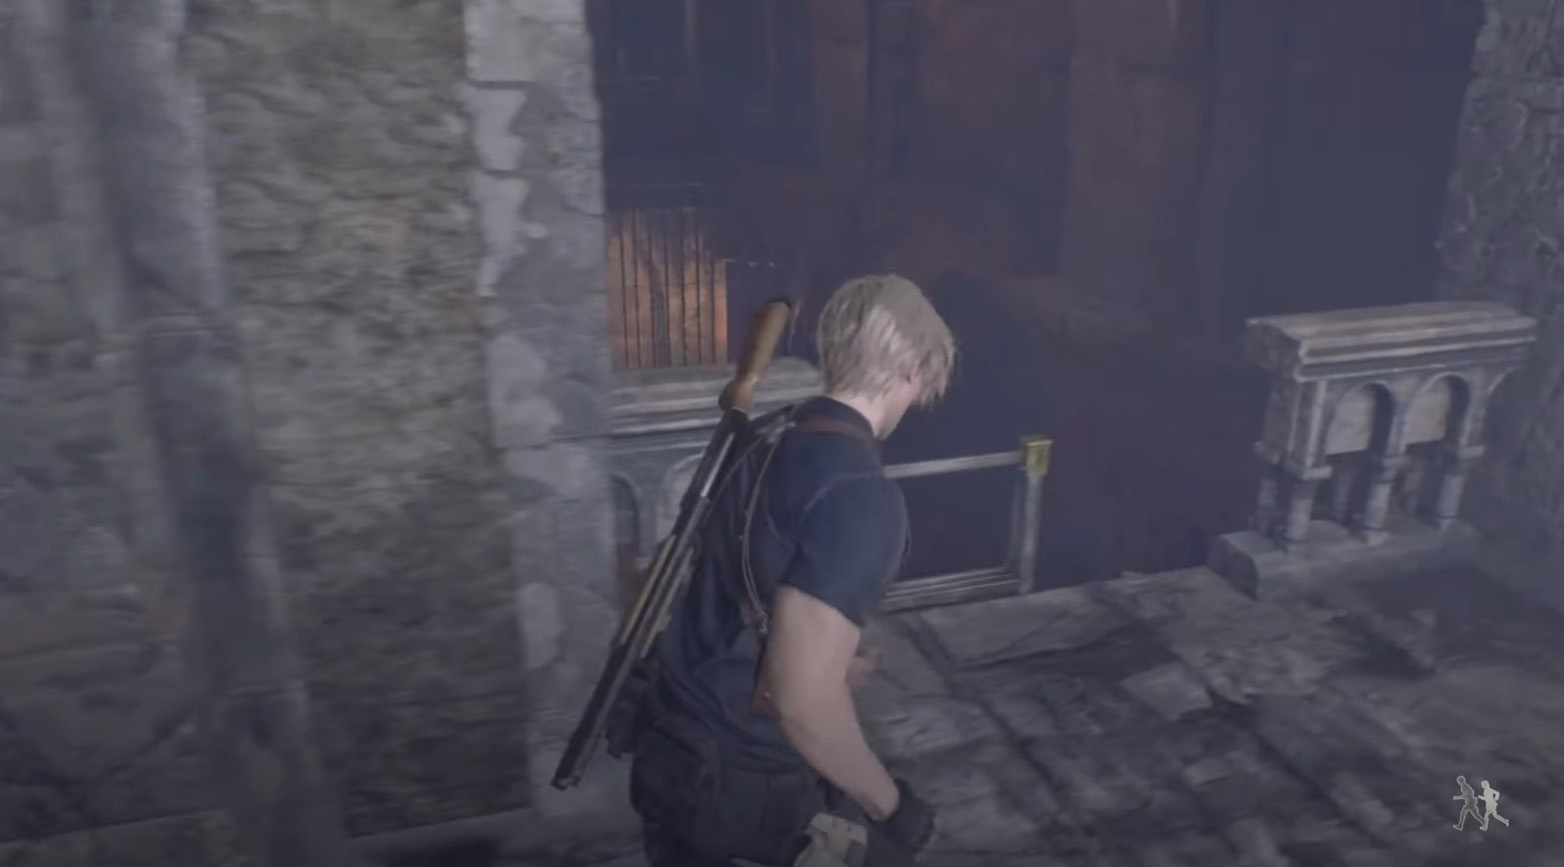
Progress through the story until you reach the castle walls. The right place is located in the first tower, where you need to rearrange the lever at night to open the door. At the indicated moment, Leon will be on the 1st tier (if you count from bottom to top).


Go through the door with the moon, climb up the boards, take a few steps forward and jump into the hole in the floor on the left side. Then open the door, turn right, and you will find a chest with a decoration in front of you.
Treasure 12: Emerald
- Plot: Chapter 8
- Location: Castle walls
- Cost: unknown
Climbing up to the 4th level of the castle walls, you will encounter a huge stone-throwing ogre. Stand facing him, and then turn right and jump down. Move forward, climb the stairs to the tower and find a chest with a gem.
Treasure 13: Ruby
- Plot: Chapter 8
- Location: Castle walls
- Cost: 3000 pesetas
After passing through the third tower, jump down one tier and switch the handle to the day (sun). Then jump even lower and go through the passage that appears. Raise the camera up and you will notice a bell attached to the ceiling - knock it down.
DLC Treasure 6: Gold Token and Stylish Mask
- Plot: Chapter 9
- Location: Yard
- Cost: unknown
After the start of the chapter, go back a little to find a chest lying on boxes near the door. Inside you will find two jewels.
Treasure 14: Elegant Chessboard
- Plot: Chapter 9
- Location: Yard
- Cost: unknown
Head down to the indicated area and enter the hedge maze. Head east, and in a small alley you will find a chest with this decoration.


Treasure 15: Corrupted Idol
- Plot: Chapter 9
- Location: wine cellar
- Cost: 15000 pesetas
After clearing the puzzle in the Courtyard, go through the gate to the west and head back to the indicated area. Get Ashley to the hole in the wall so that she opens the door to the chest with the relic for you.
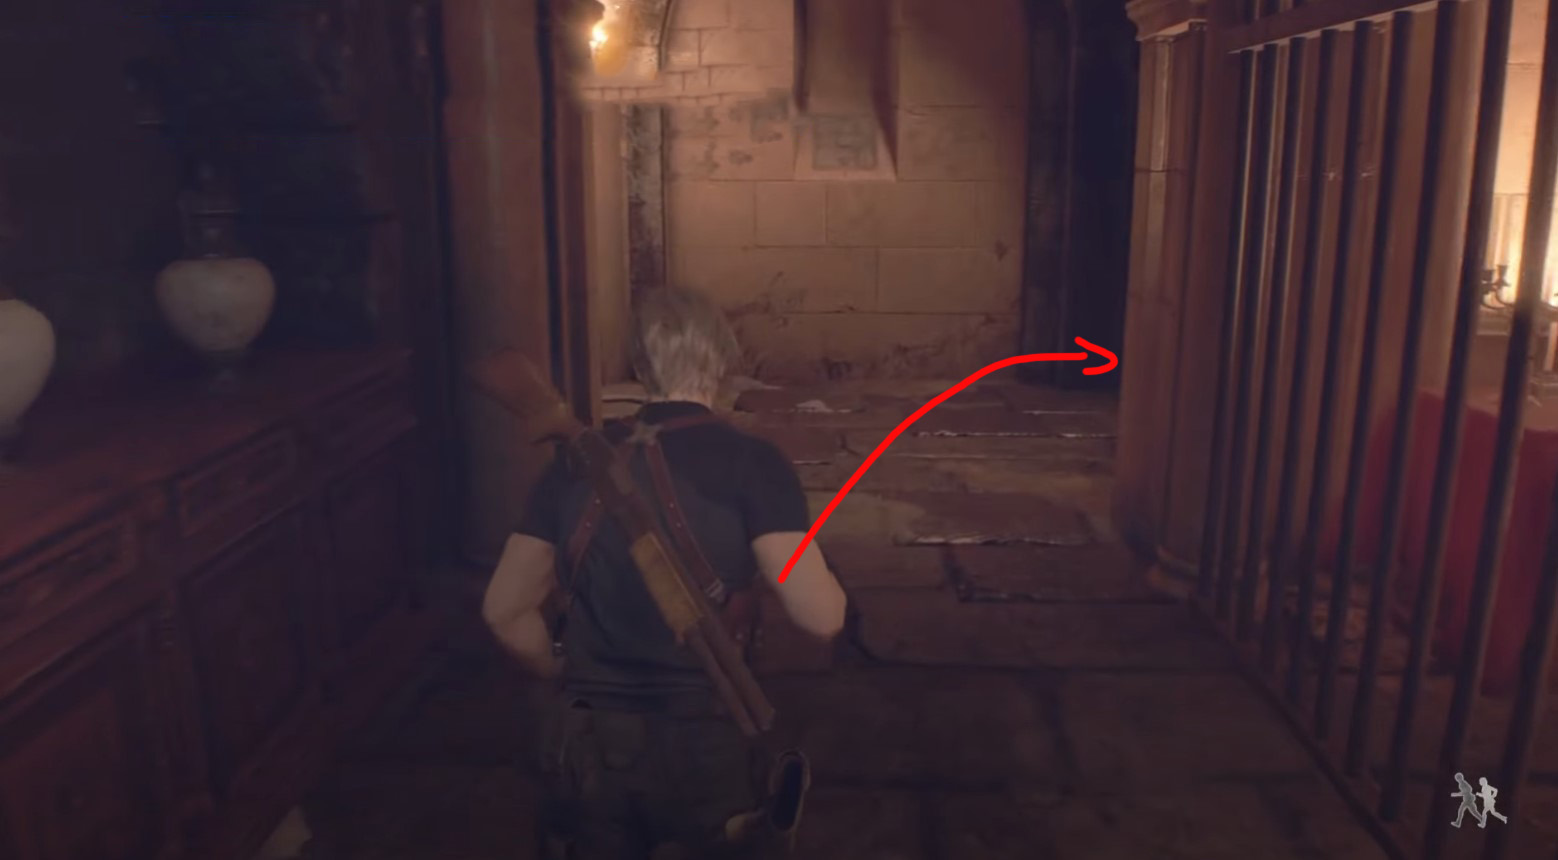
Treasure 16: Alexandrite
- Plot: Chapter 9
- Location: main hall
- Cost: 6000 pesetas
Return to the Courtyard and go through the large doors to the east to enter the Main Hall. While walking along the corridor, look to the right until you notice a statue with a bell - break it to get a gem.

DLC Treasure 7: Silver Token
- Plot: Chapter 9
- Location: main hall
- Cost: unknown
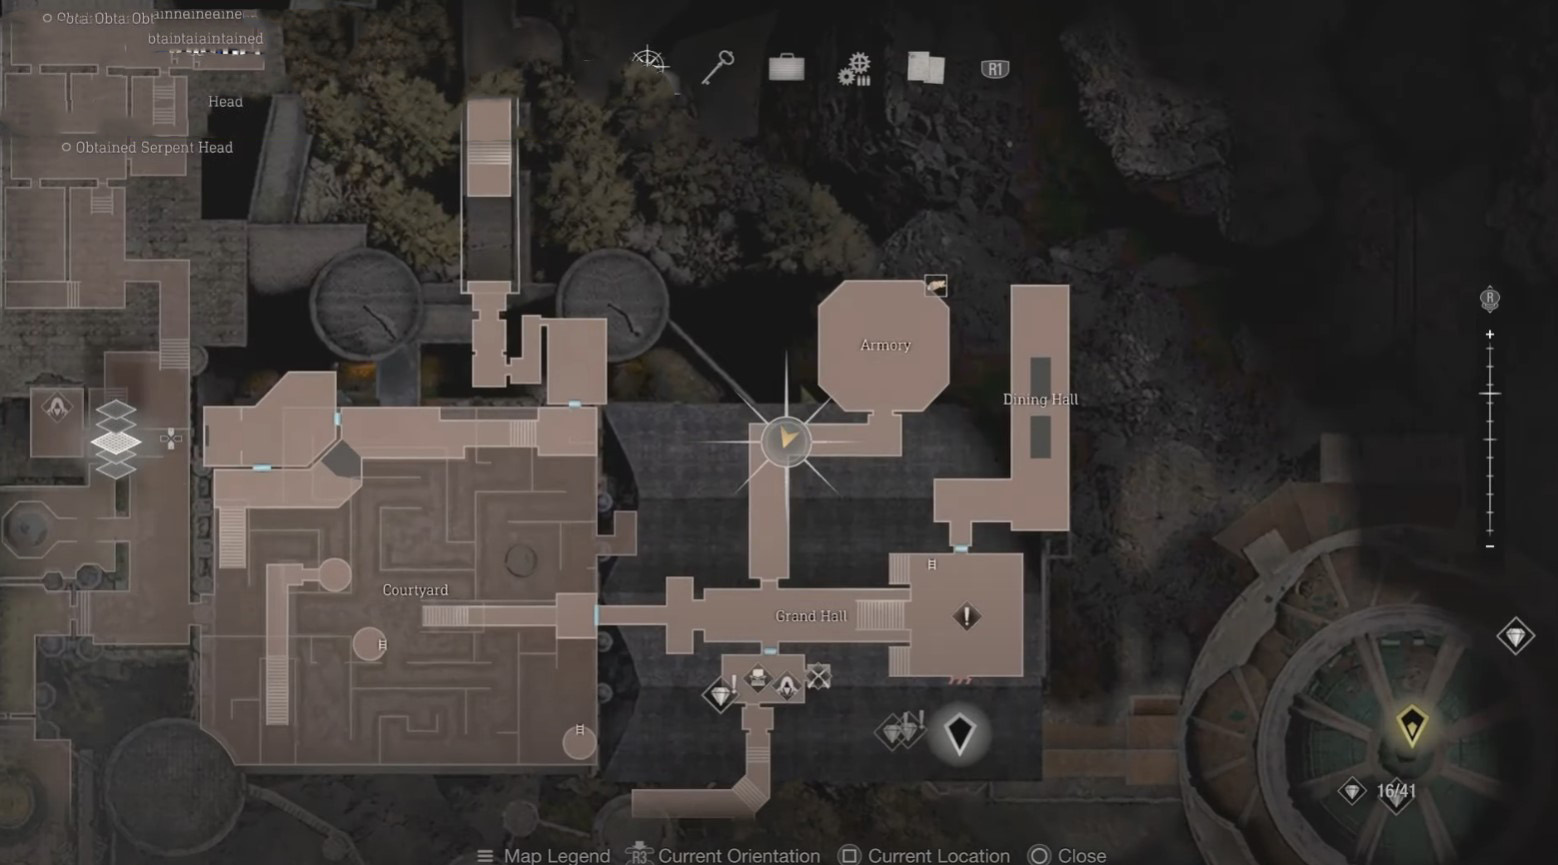
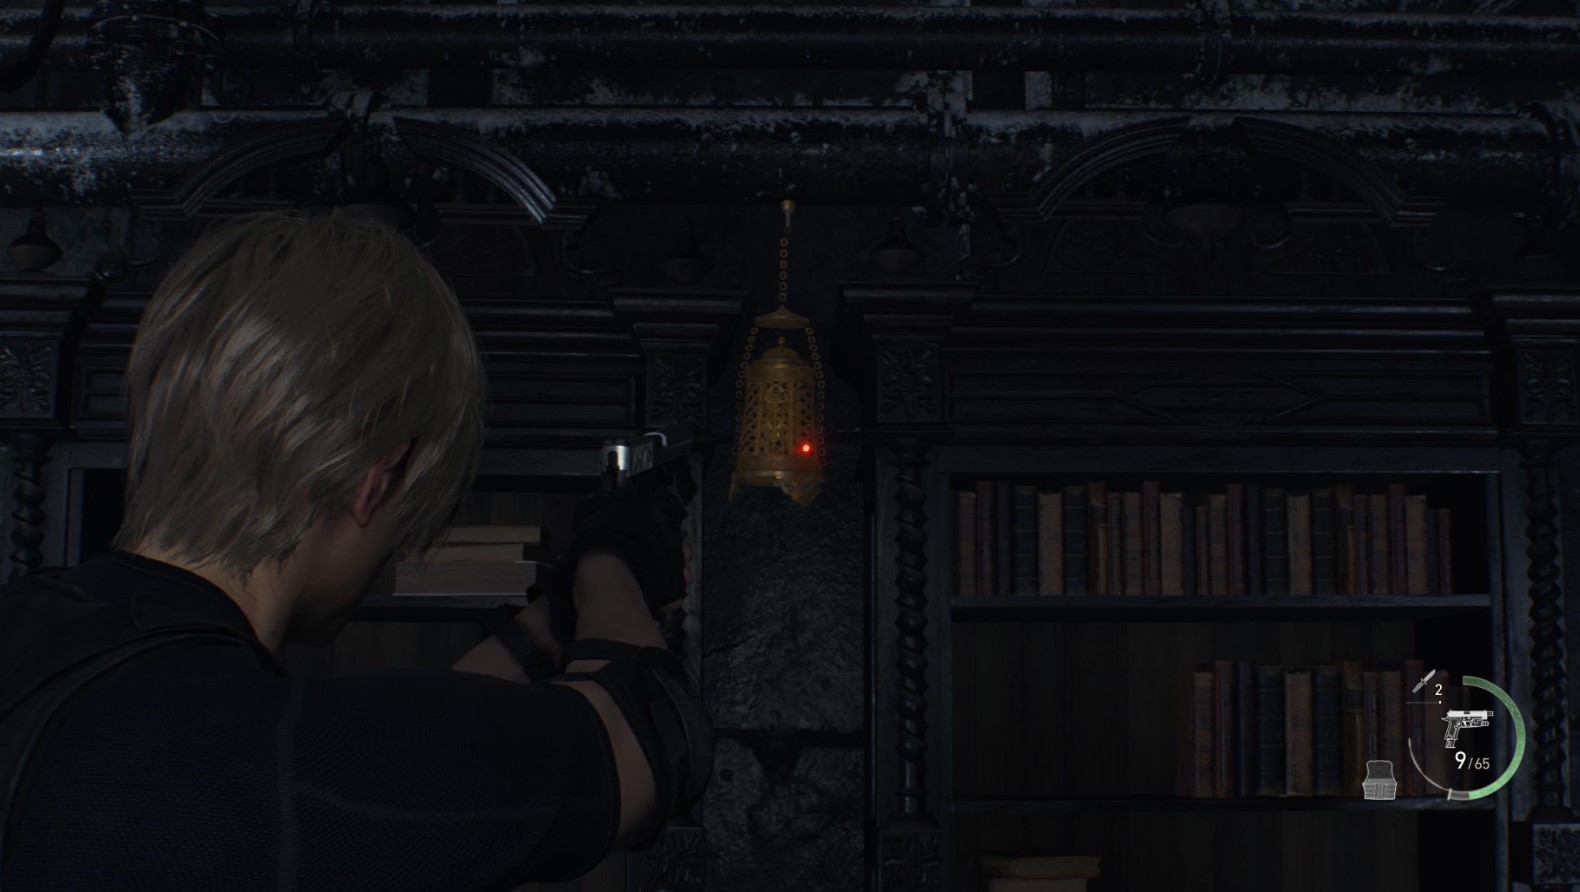
In the indicated area, go up to the second level and go through the door in the northwest, which leads towards the Armory. While walking along the corridor, turn the camera up and you will notice a lamp with decoration above the large windows.
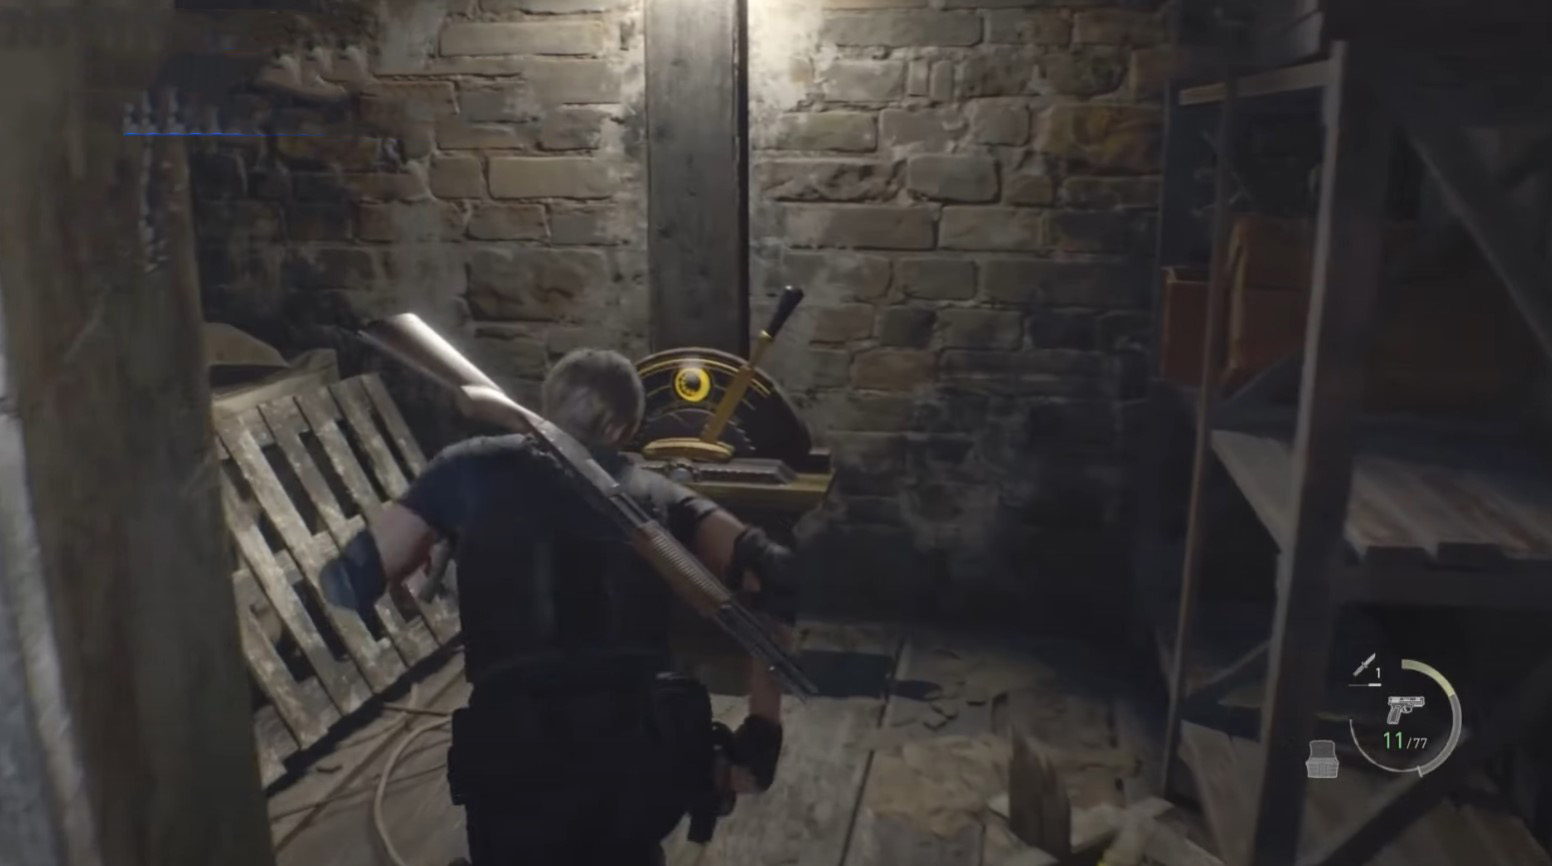
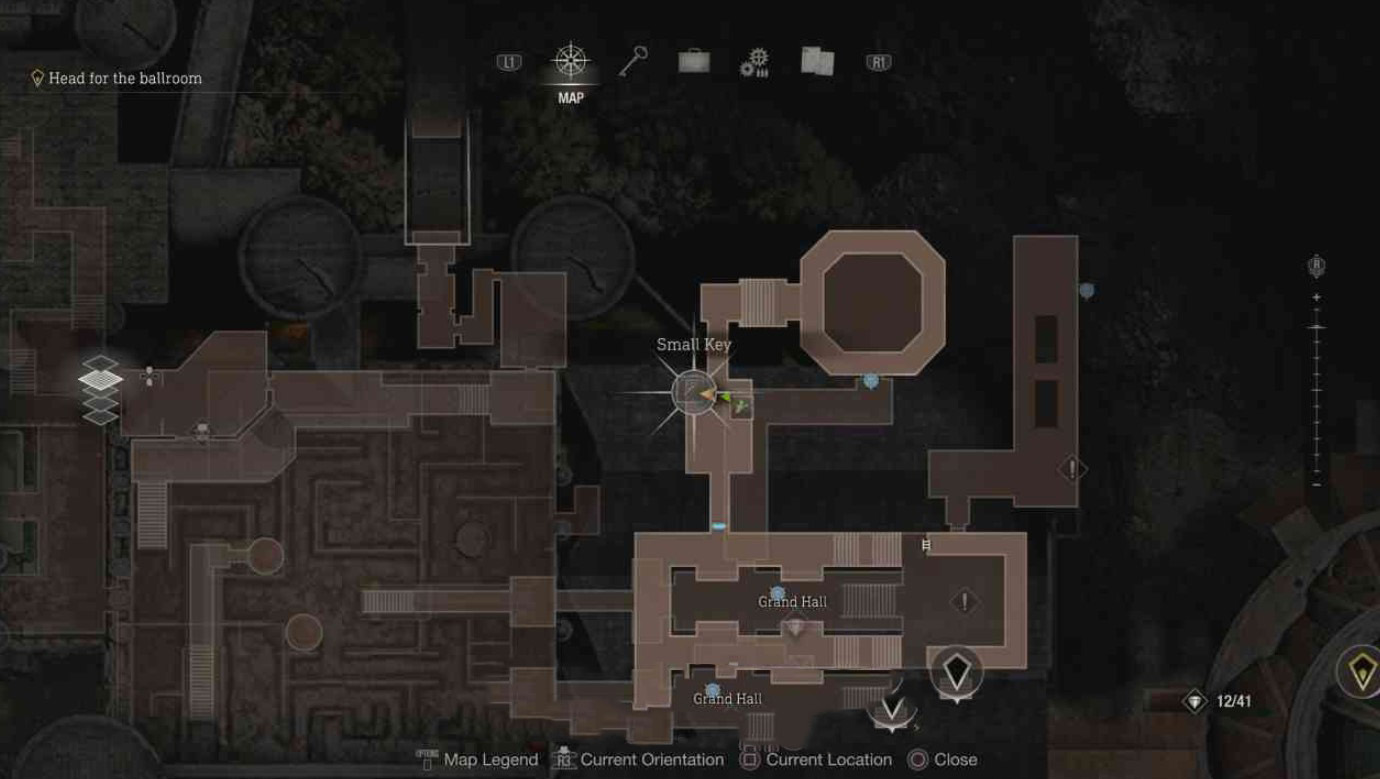
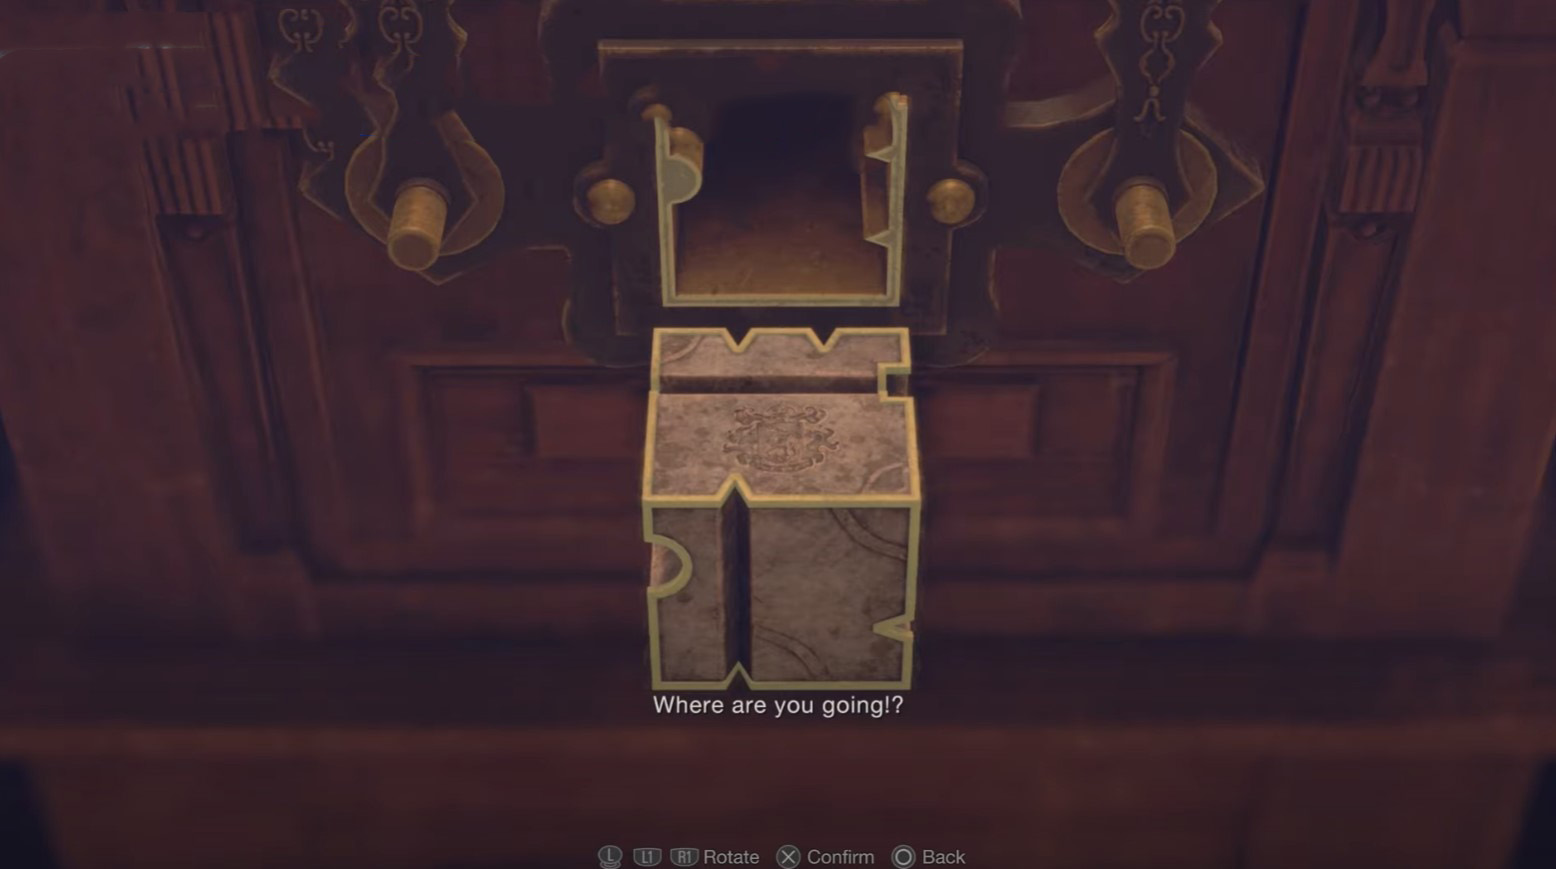
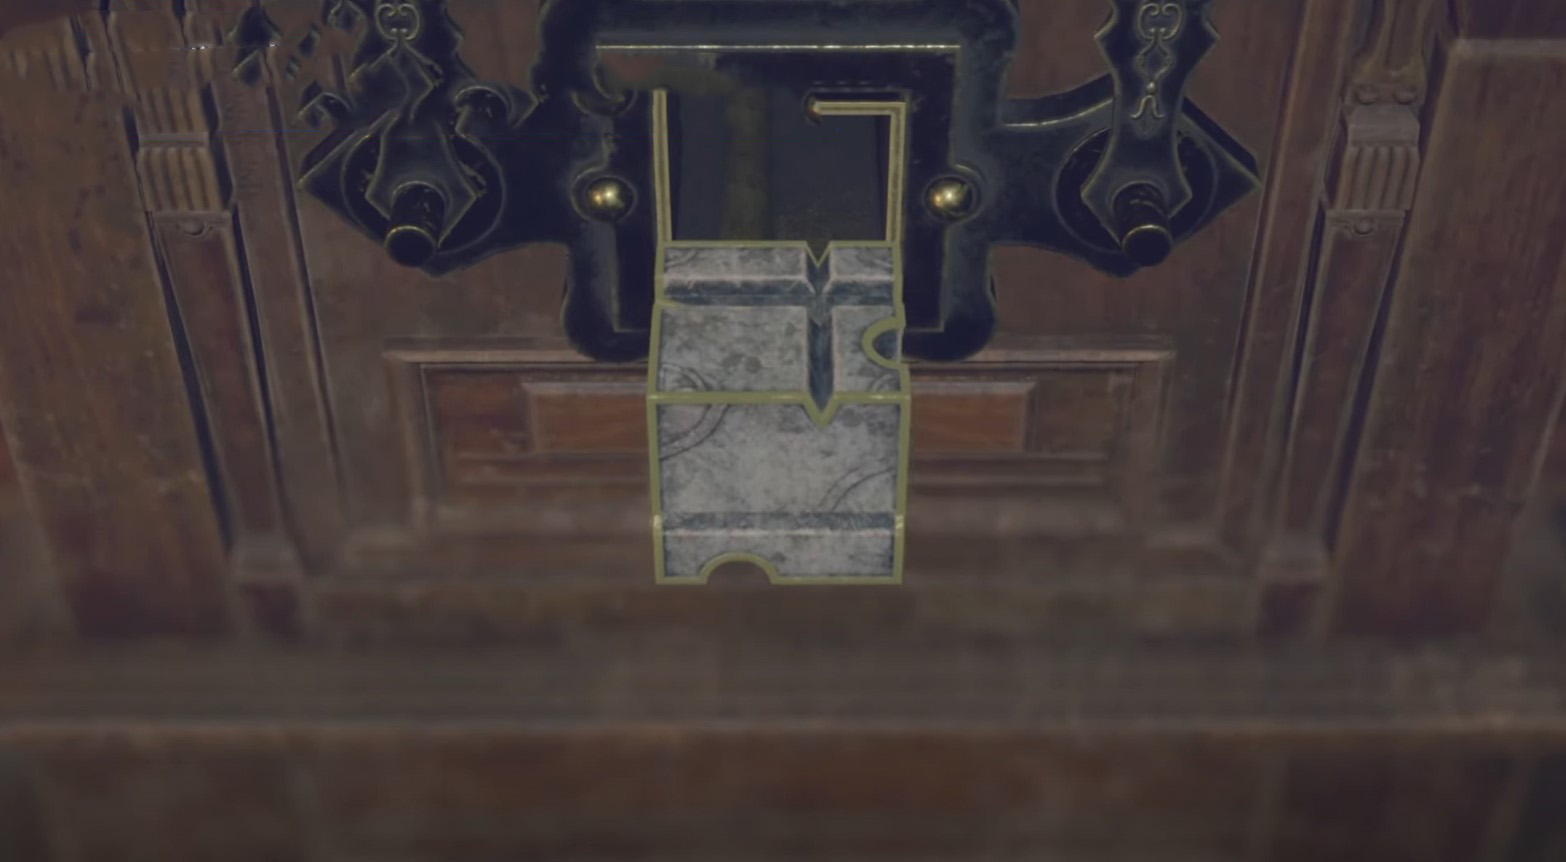
Small Key and Cubic Device
First of all, you need to find a small key. It is located in the same corridor as the previous treasure. Go to the dark brown chest of drawers on the left side and take the key out of it.
After finding the lion's head in the Armory and heading out into the hallway, open the red chest along the way and pick up a cube device from it, which you will need to get some treasures.
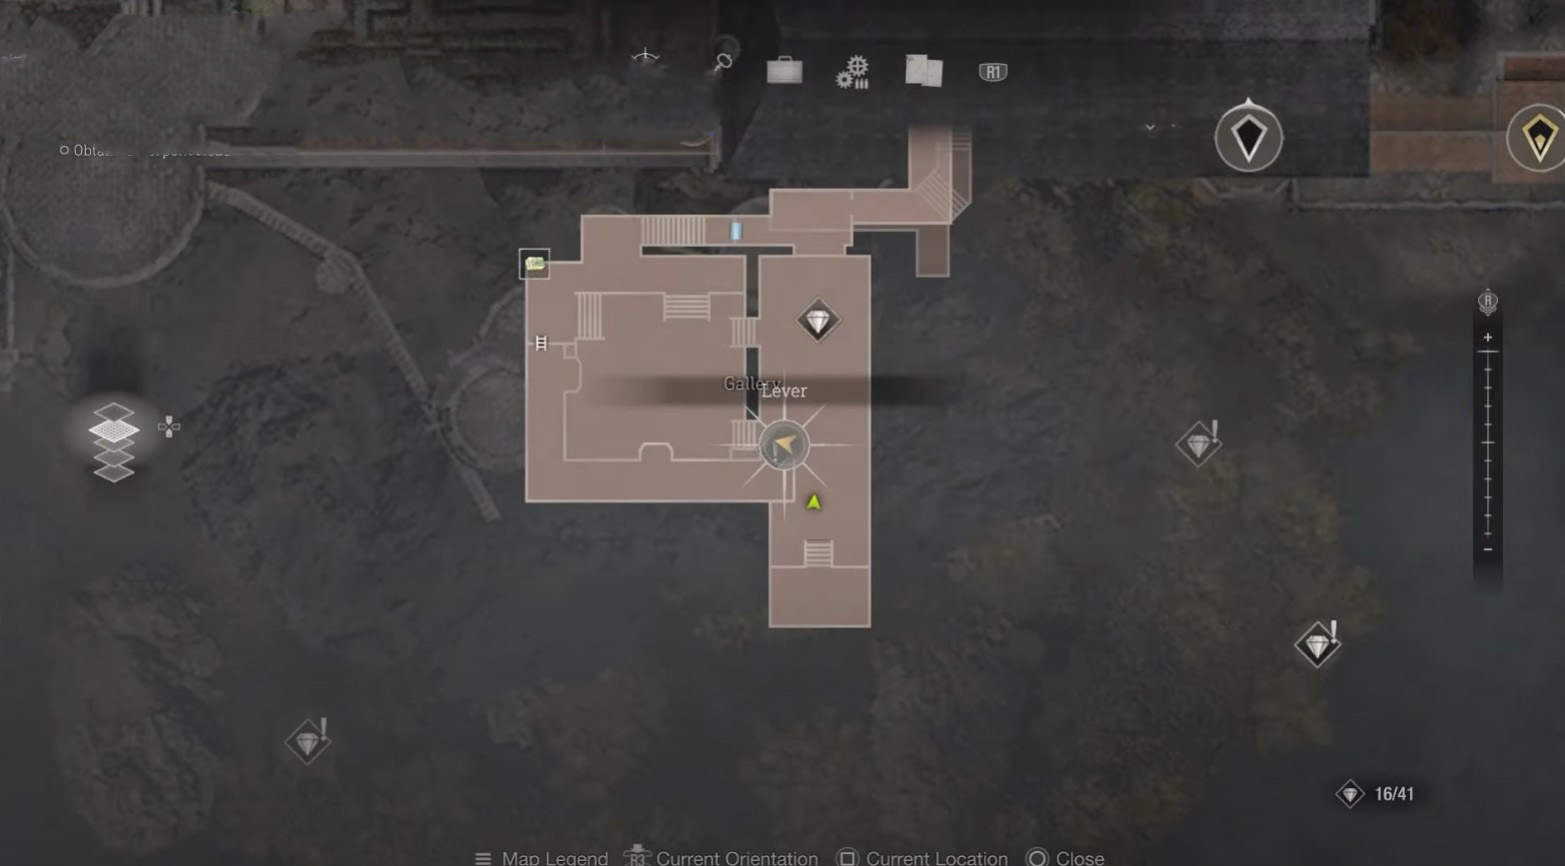
Treasure 17: Yellow Diamond
- Plot: Chapter 9
- Location: Gallery
- Cost: 7000 pesetas
Return to the 2nd tier of the Main Hall and go through the door on the other side (southwest side). Defeat the opponents in the painting room and interact with the handle at the top to extend the bridge. You will now be able to open the chest underneath it and pick up the gem.
Treasure 18: Butterfly Lamp
- Plot: Chapter 9
- Location: main hall
- Cost: unknown
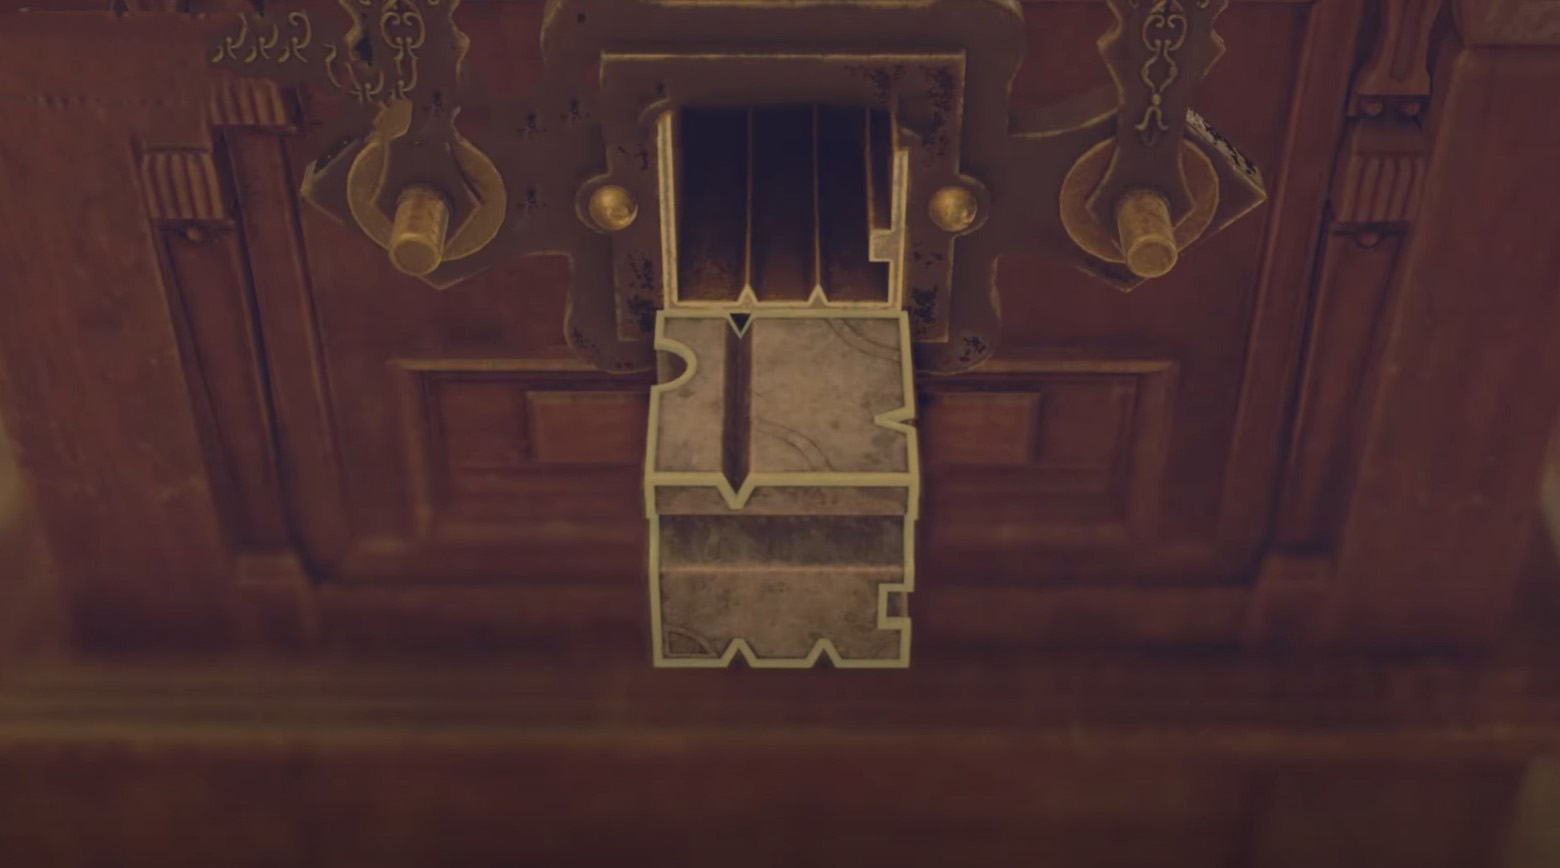
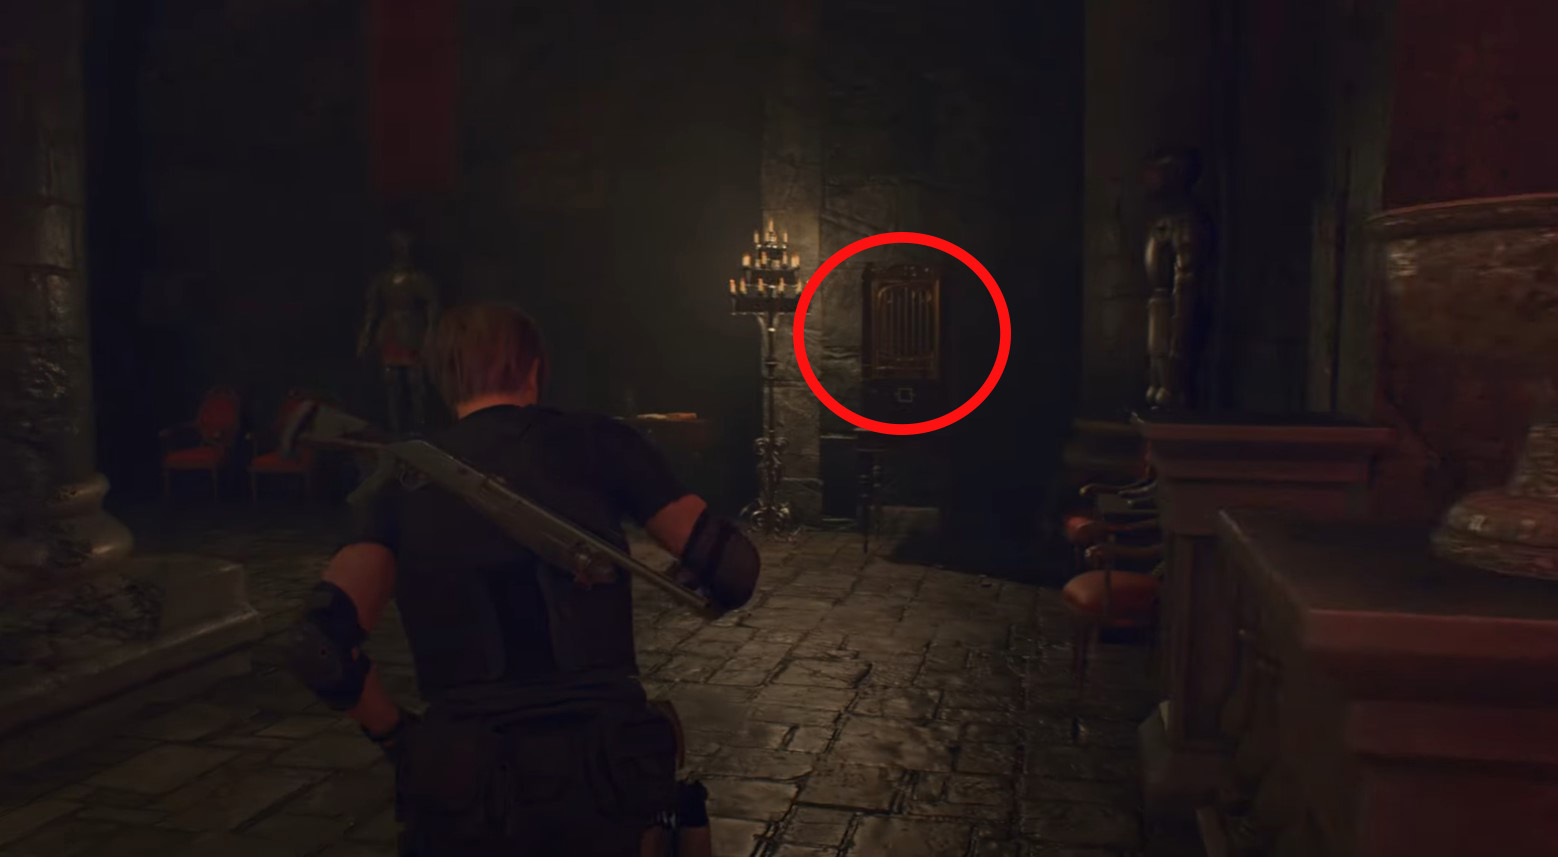
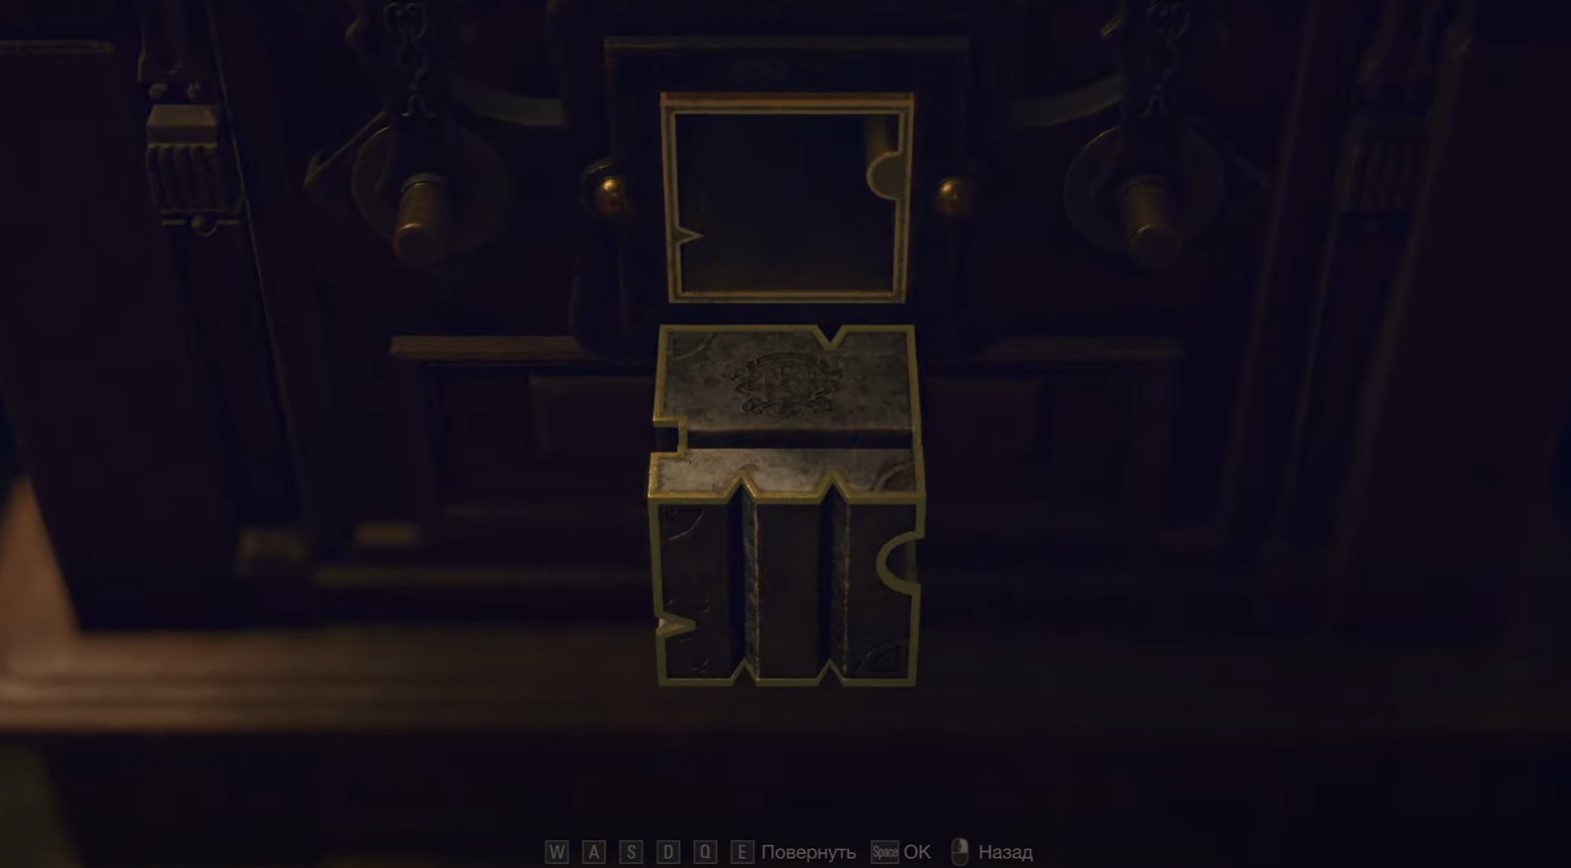
Before placing the heads on the chimera statue, return to the room with the merchant and writing device, and then interact with the golden cage. Install a cube lock in it, choosing the right side (see the screenshot below). As a result, you will find a relic.
DLC Treasure 8: Elegant Crown
- Plot: Chapter 9
- Location: main hall
- Cost: unknown
In the room with the merchant, go through the door and get into the golden cart to return to the Audience Hall. Near the place where you arrive, you can see a chest in which the crown is hidden.
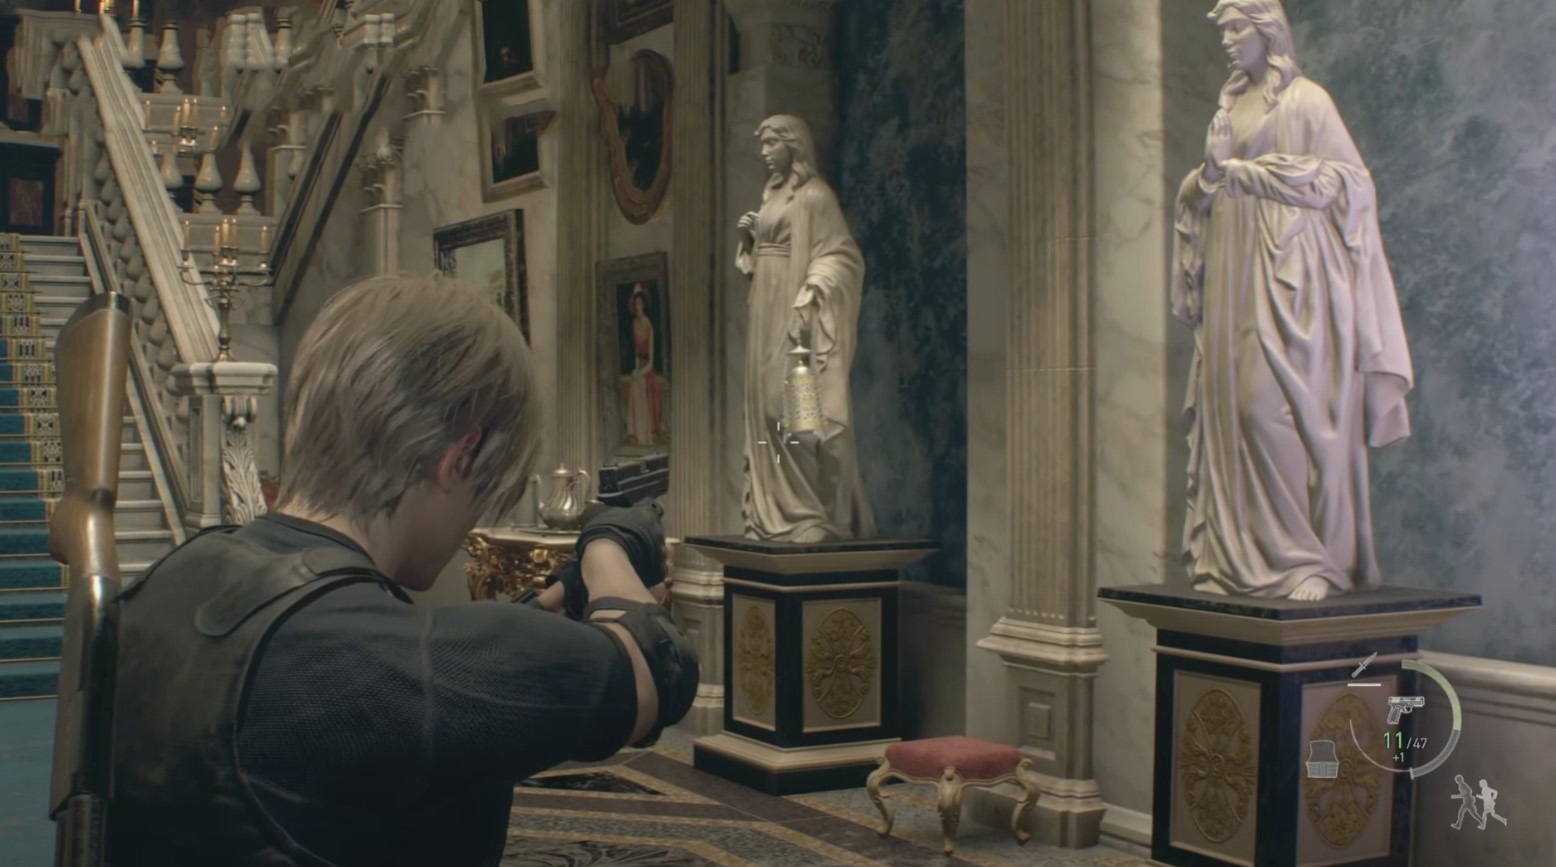
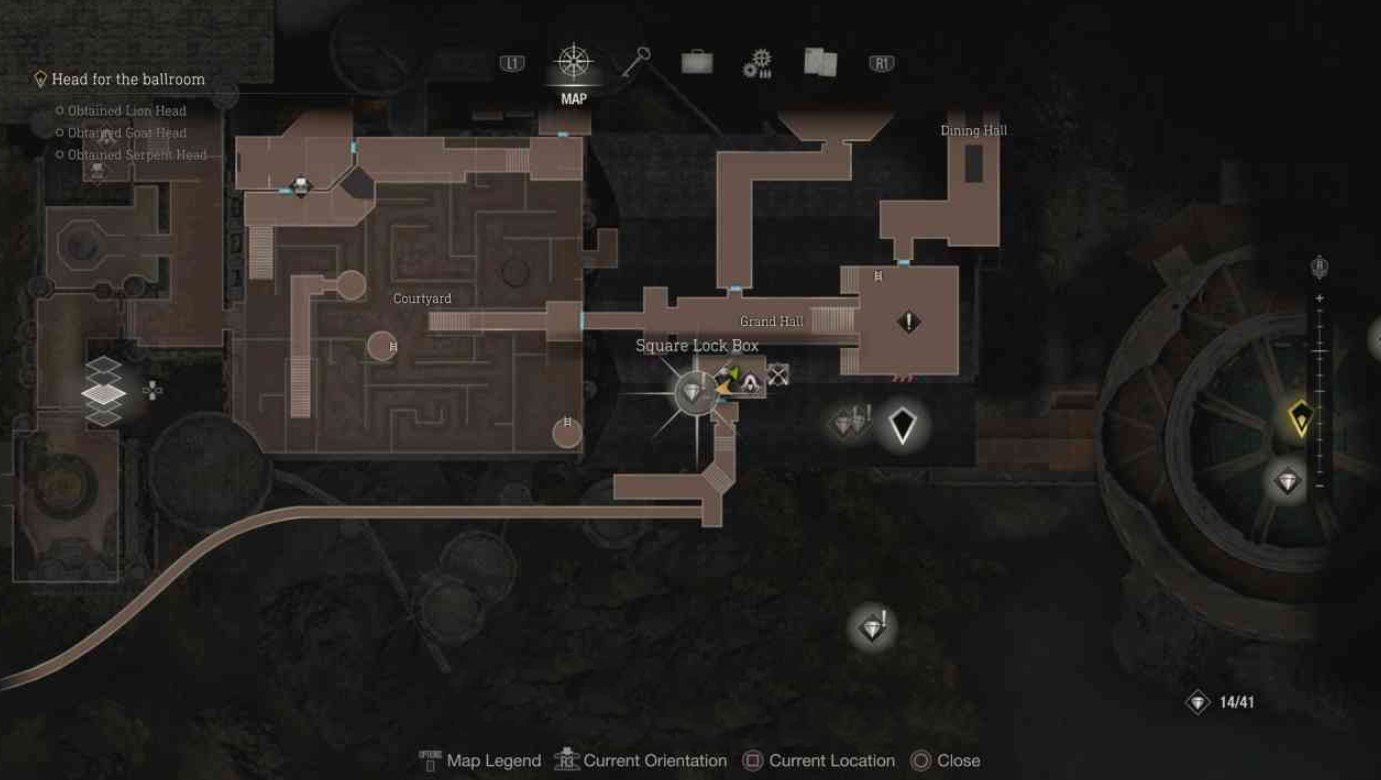
Treasure 19: Statuette of Justice
- Plot: Chapter 9
- Location: Audience Hall
- Cost: unknown
After riding the golden trolley, return to the indicated area. Here, look for a golden cage located in the northwest of the location. Open it with the cube device to get the relic.

Treasure 20: Gold Bar
- Plot: Chapter 9
- Location: Audience Hall
- Cost: unknown
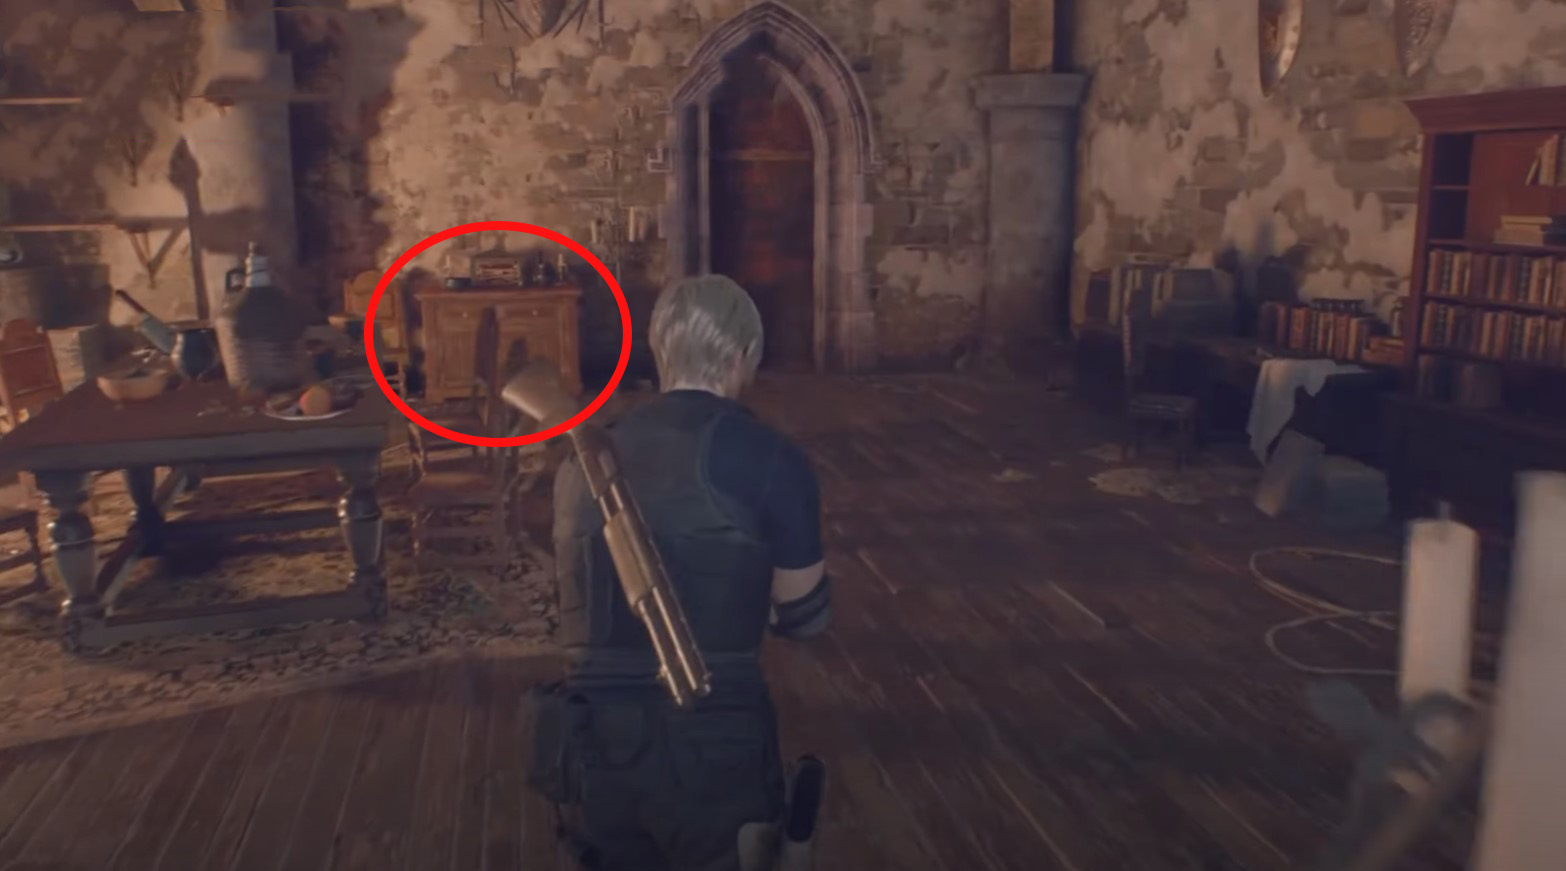
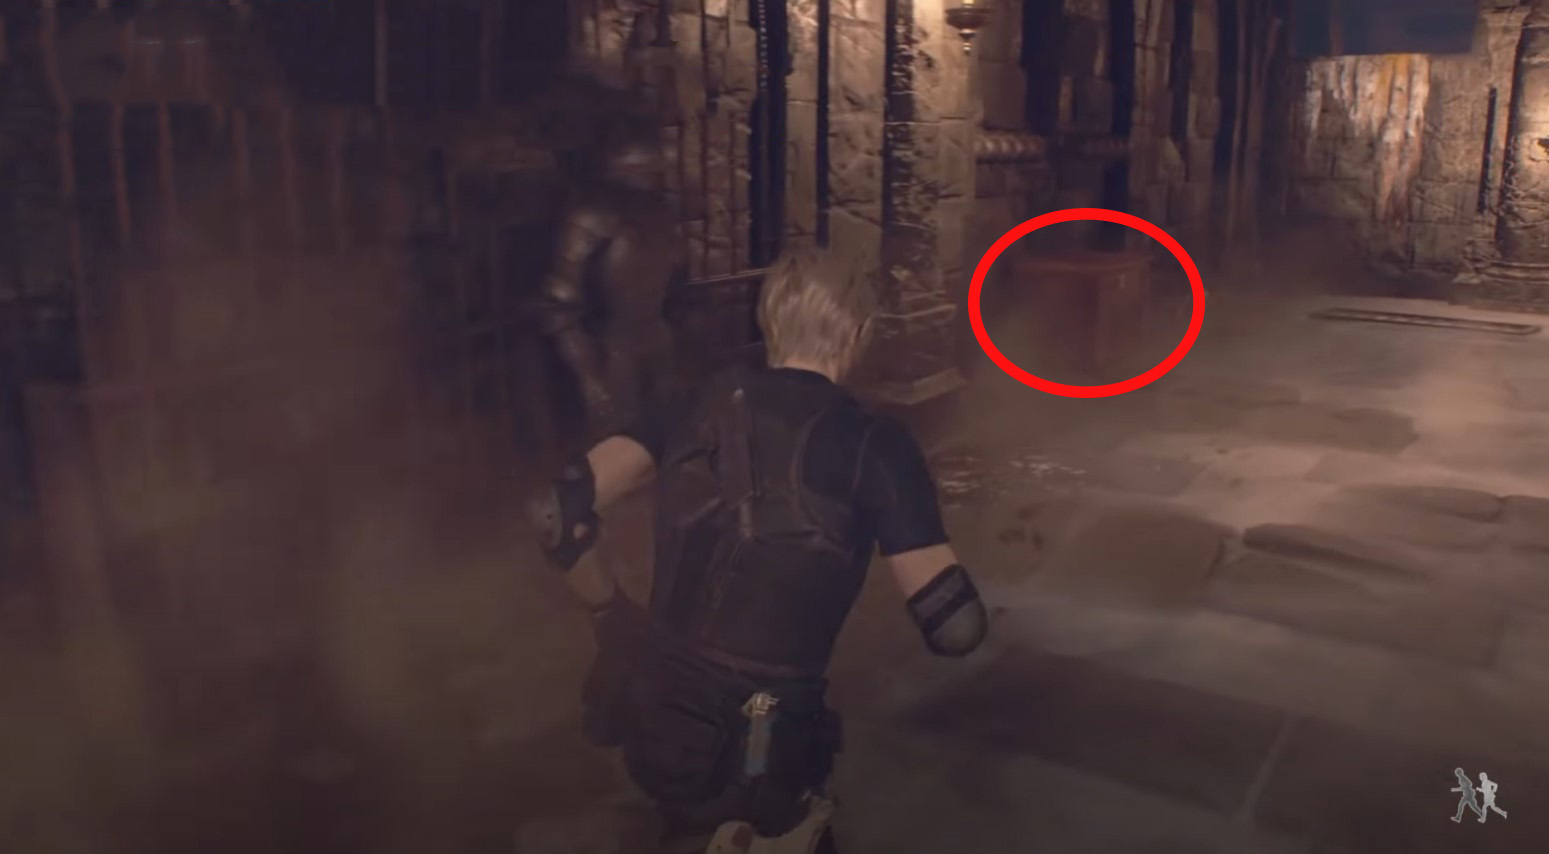
After finding the previous treasure, go to the north wall and find a chest of drawers there. Open one of his drawers with the small key you found earlier. Inside you will find an ingot.
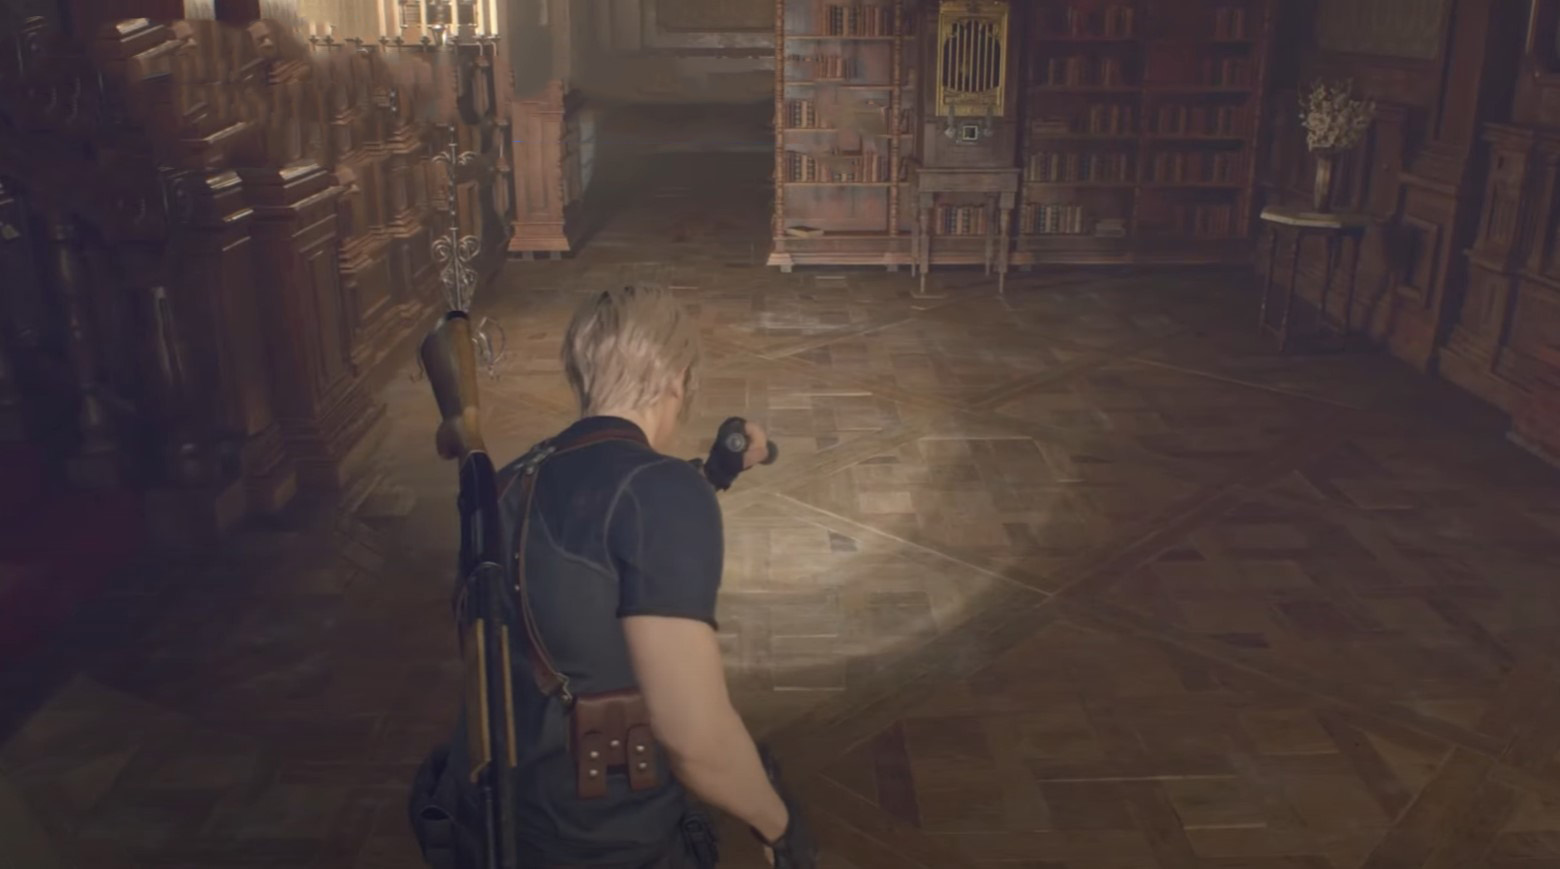
Treasure 21: Fine Perfume Bottle
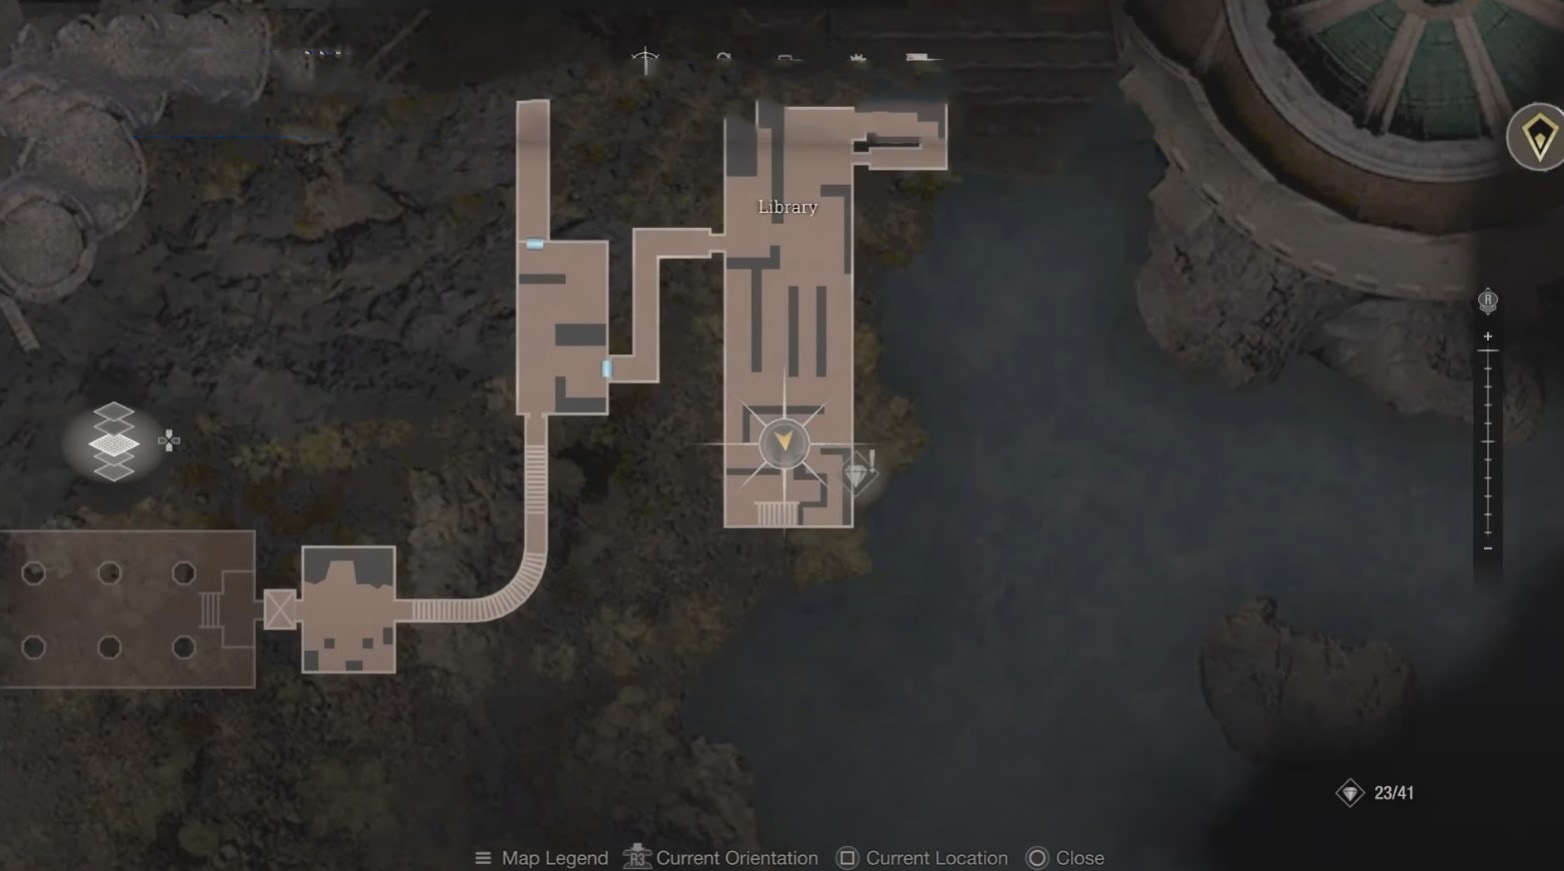
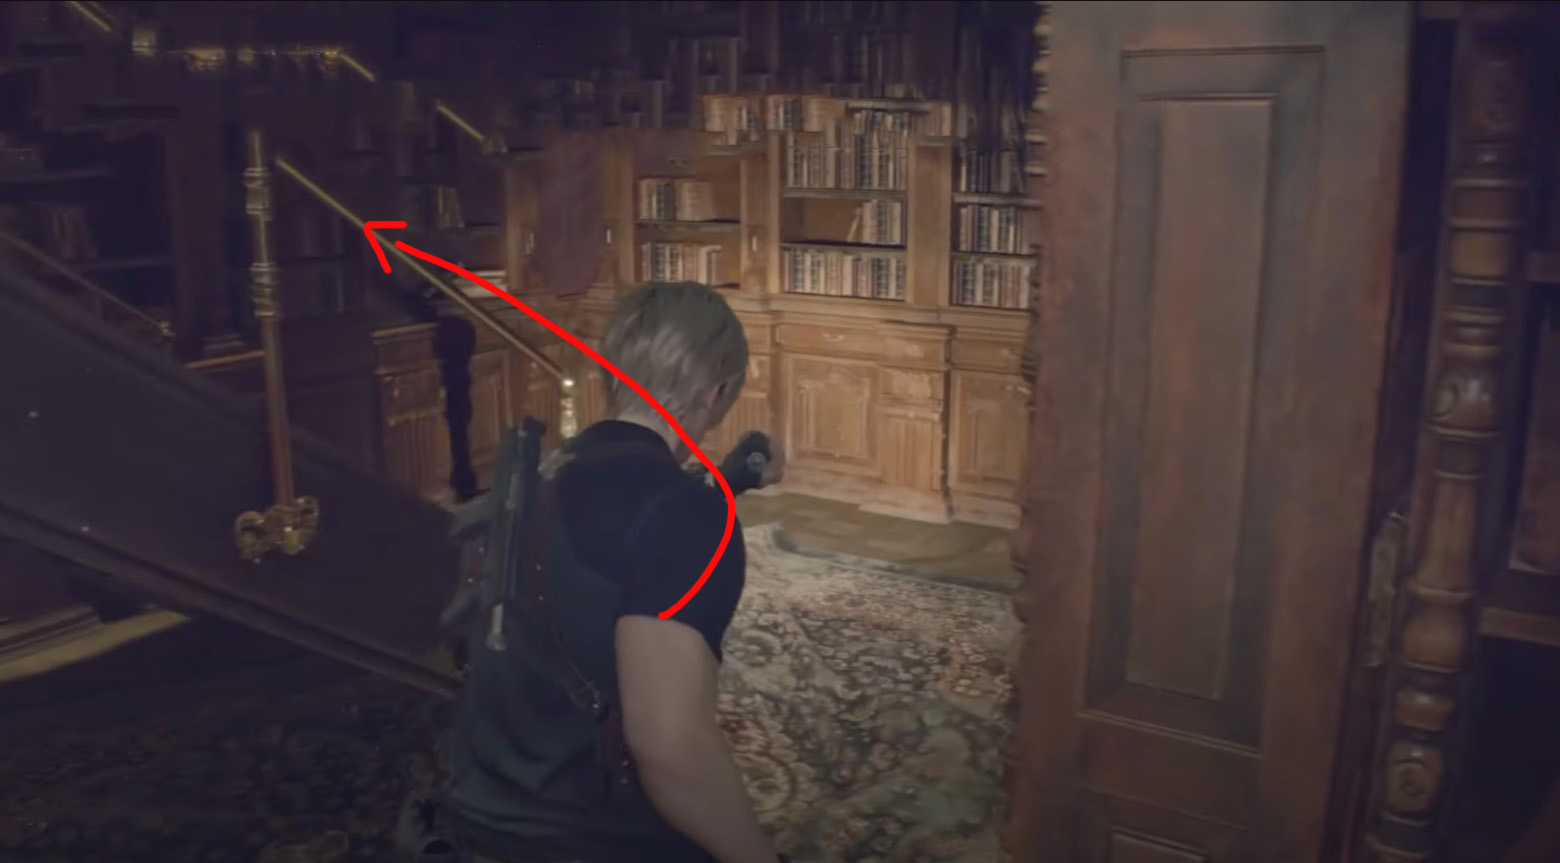
- Plot: Chapter 9 (Ashley)
- Location: Library
- Cost: unknown
First of all, you will need to find A bunch of keys while playing as Ashley. Go to the southern area of the indicated location and place the lantern on the pedestal for a ladder to appear. Climb up it and take the desired item from the table.

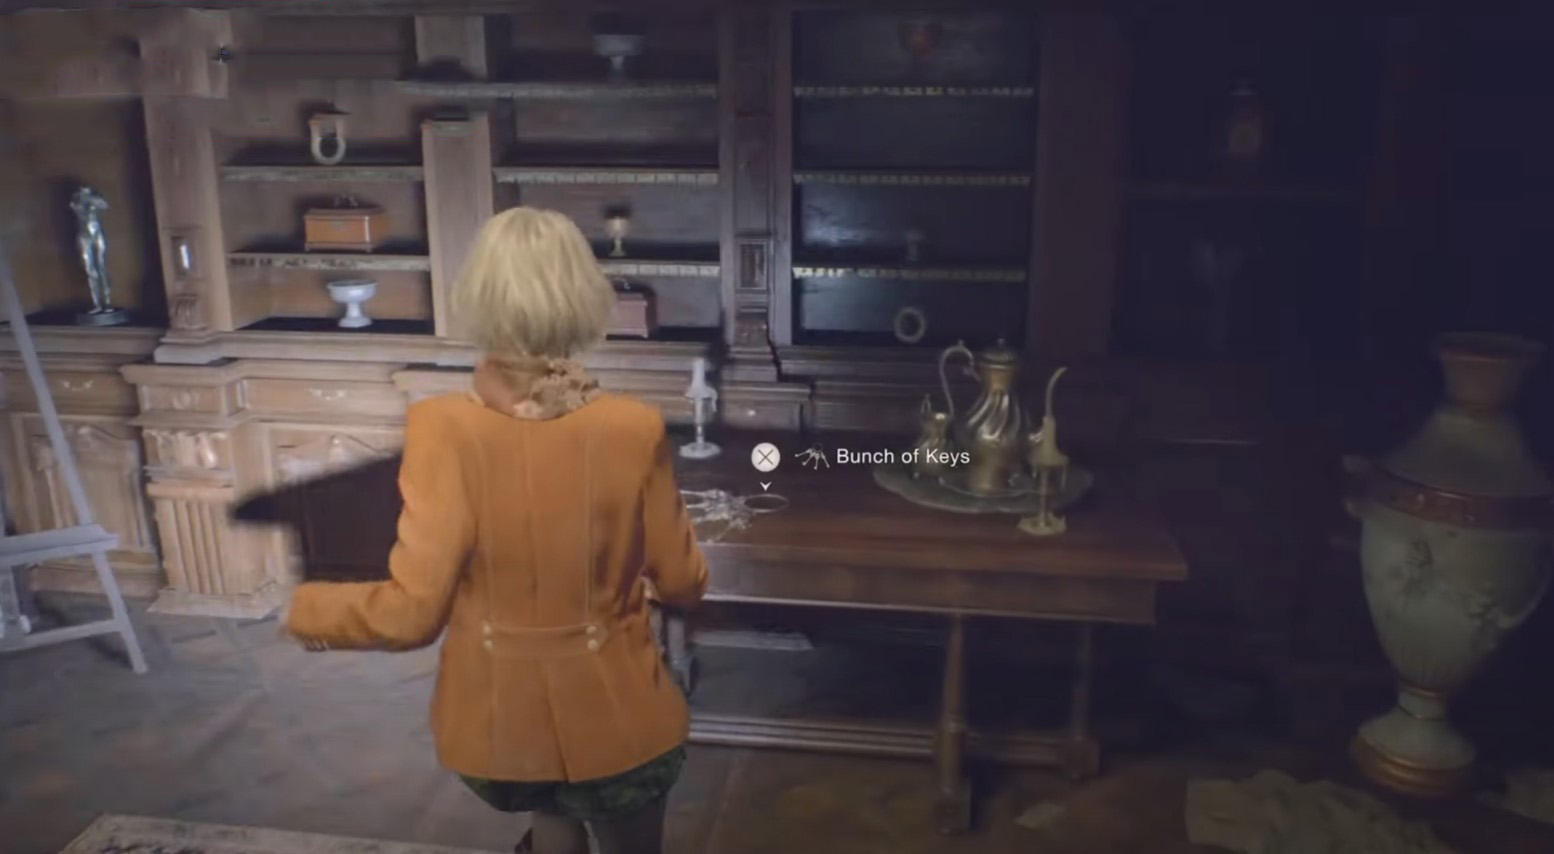
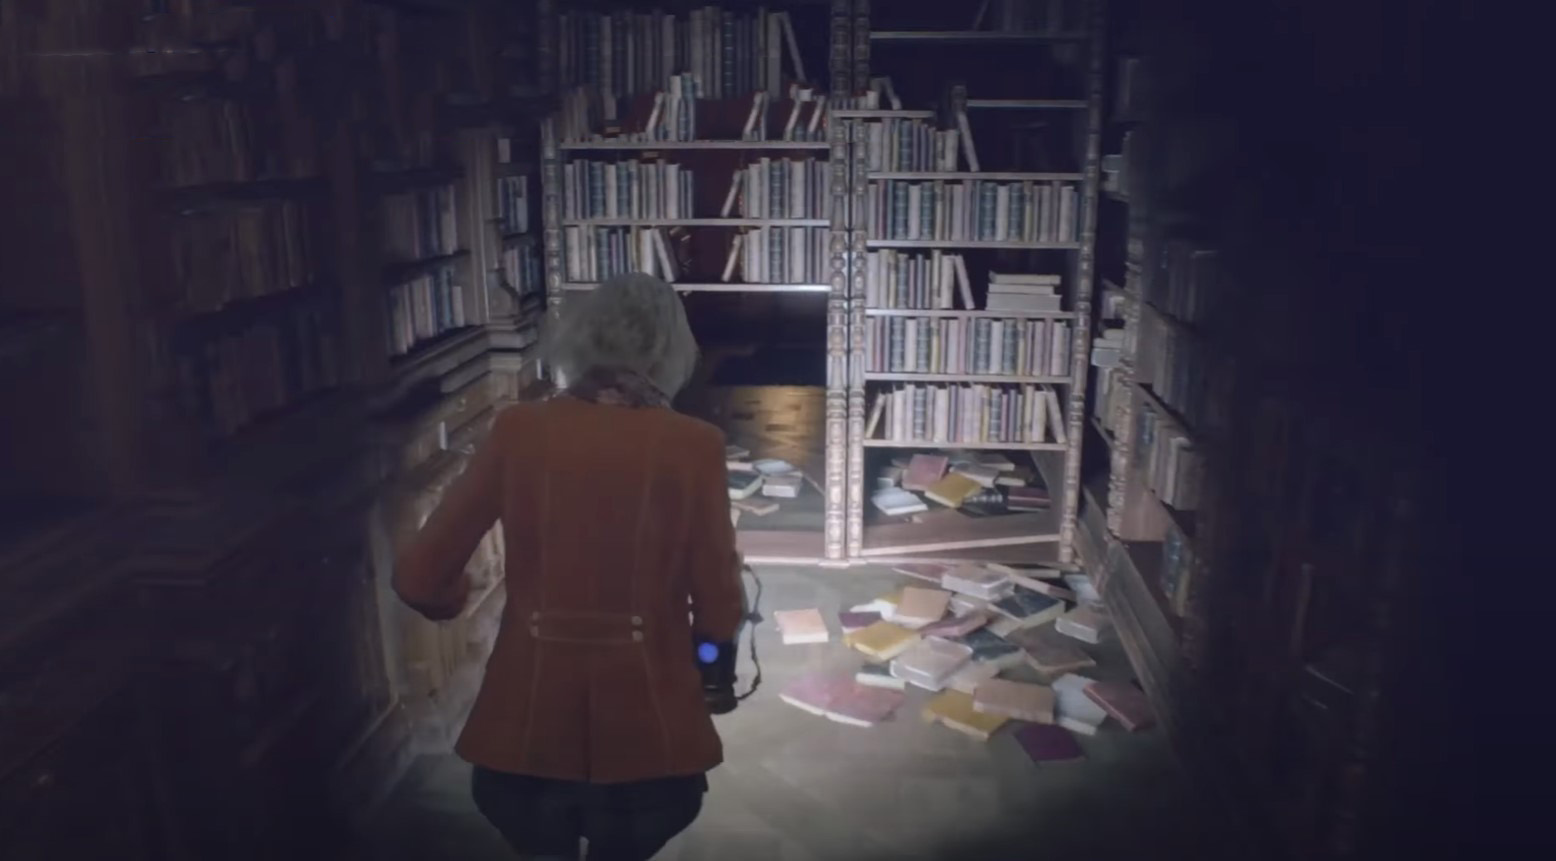
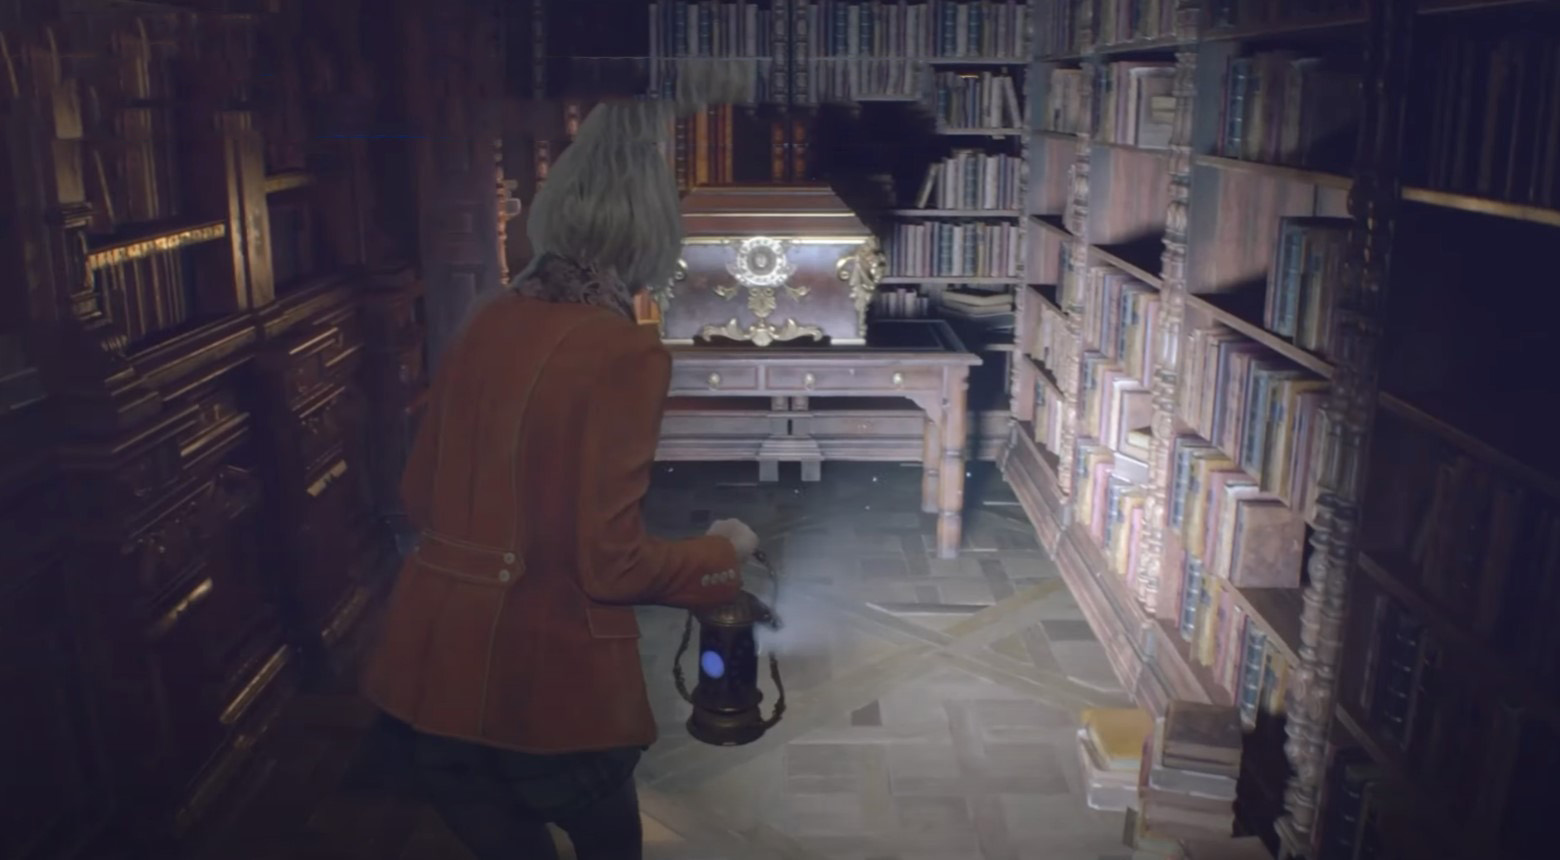
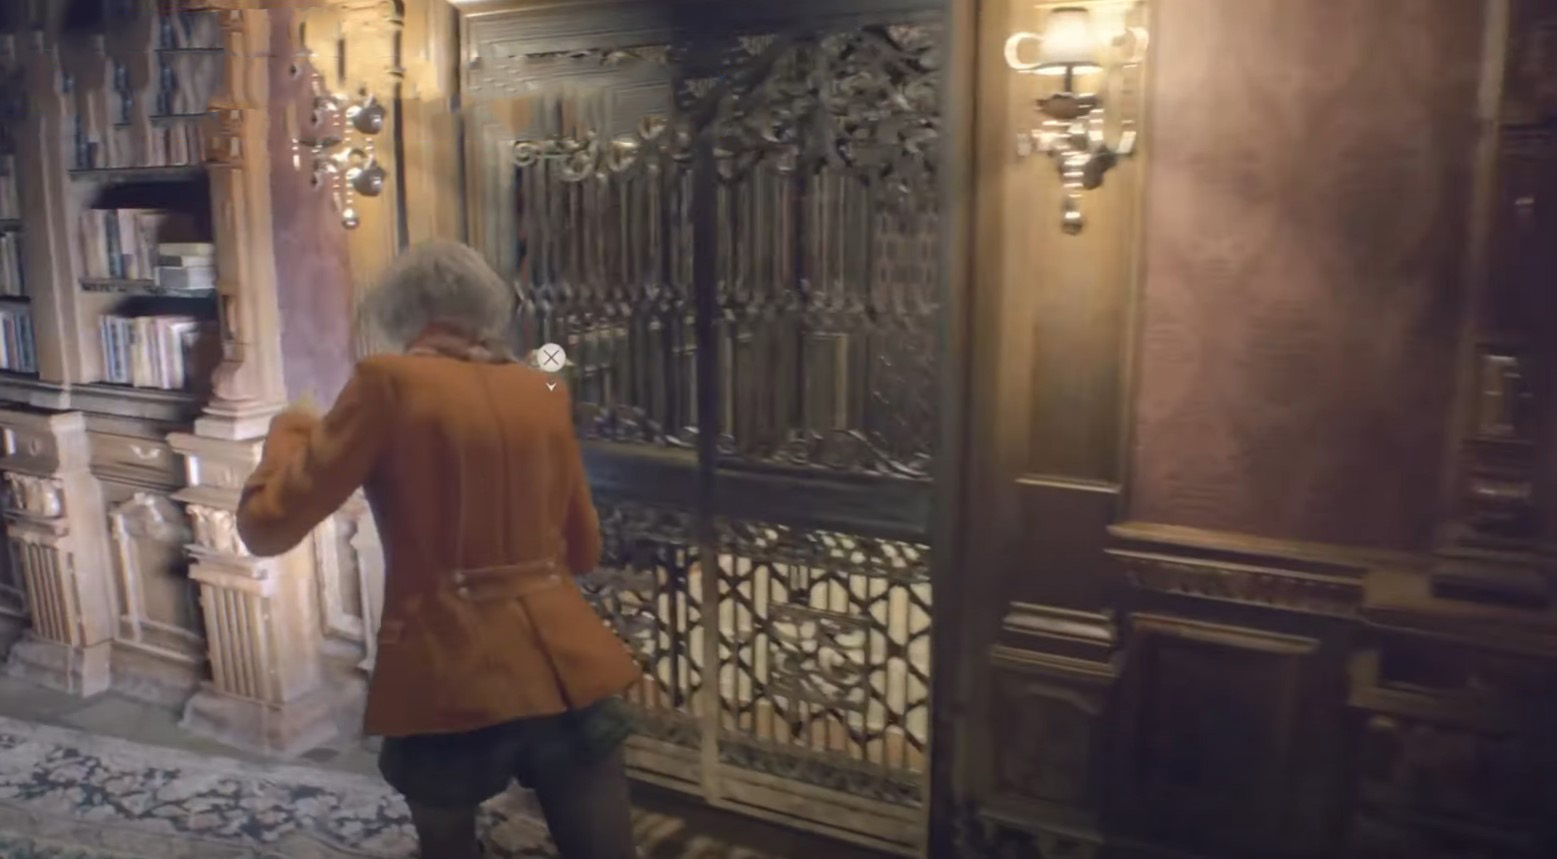
Now return to the center of the library, go left and crawl under the shelves. You will see a beautifully decorated chest, which can be opened with the 2nd key from the previously found bundle.
Treasure 22: Sapphire
- Plot: Chapter 9 (Ashley)
- Location: Library
- Cost: 4000 pesetas
Move to the elevator located in the northern area of the library and use the 3rd key from the bundle to open it. After taking the elevator up, go to the room with the recording device. Here, behind the bookshelves, find a beautifully decorated chest - open it with the 4th key and take the gem.
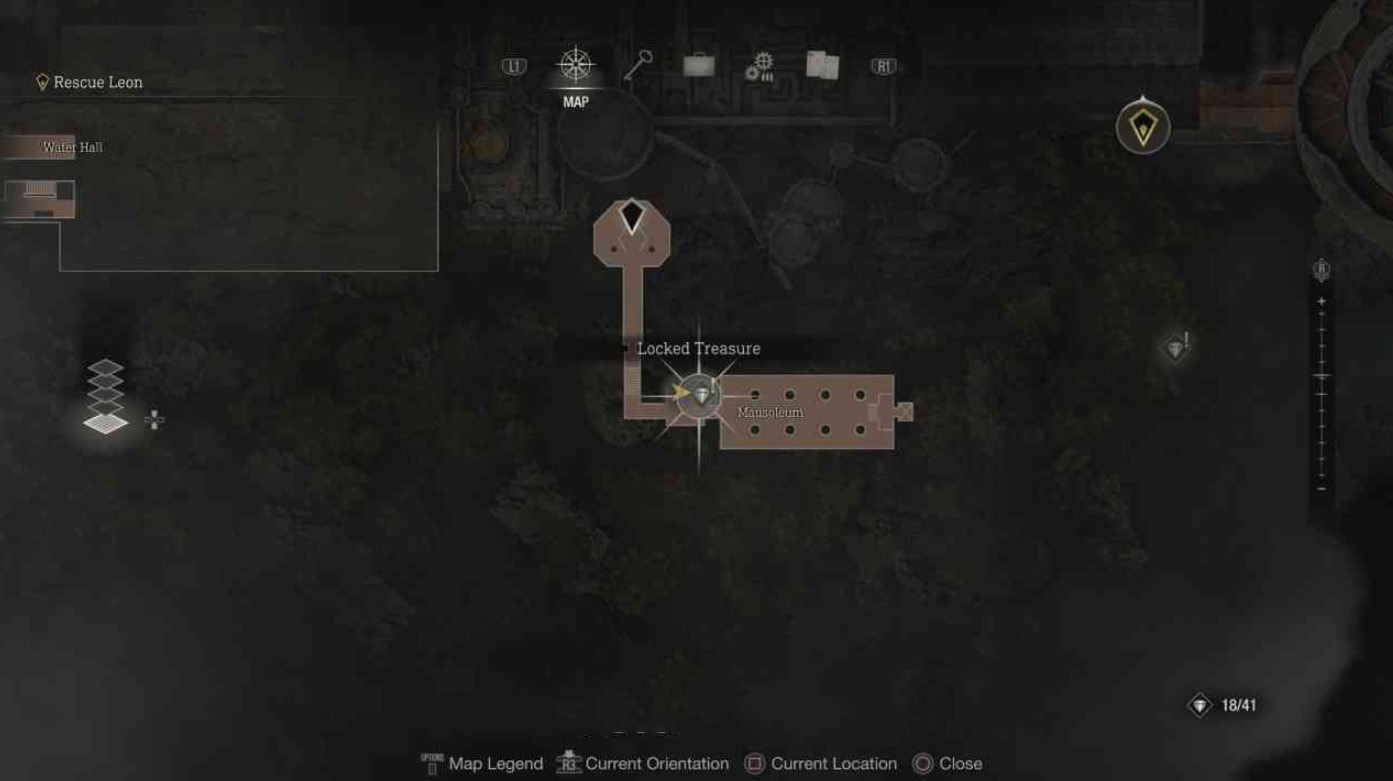
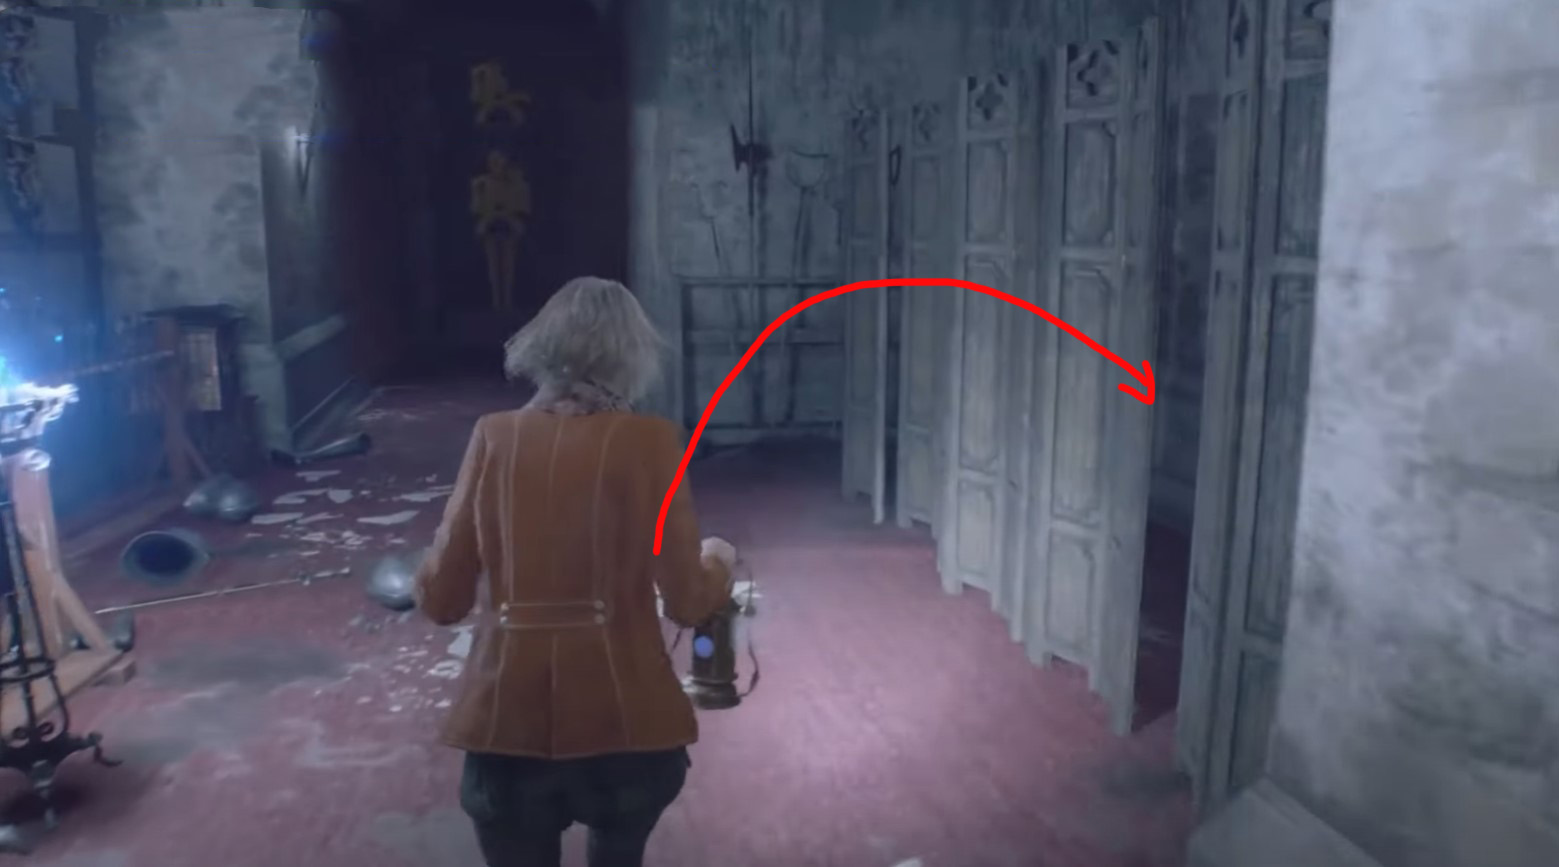
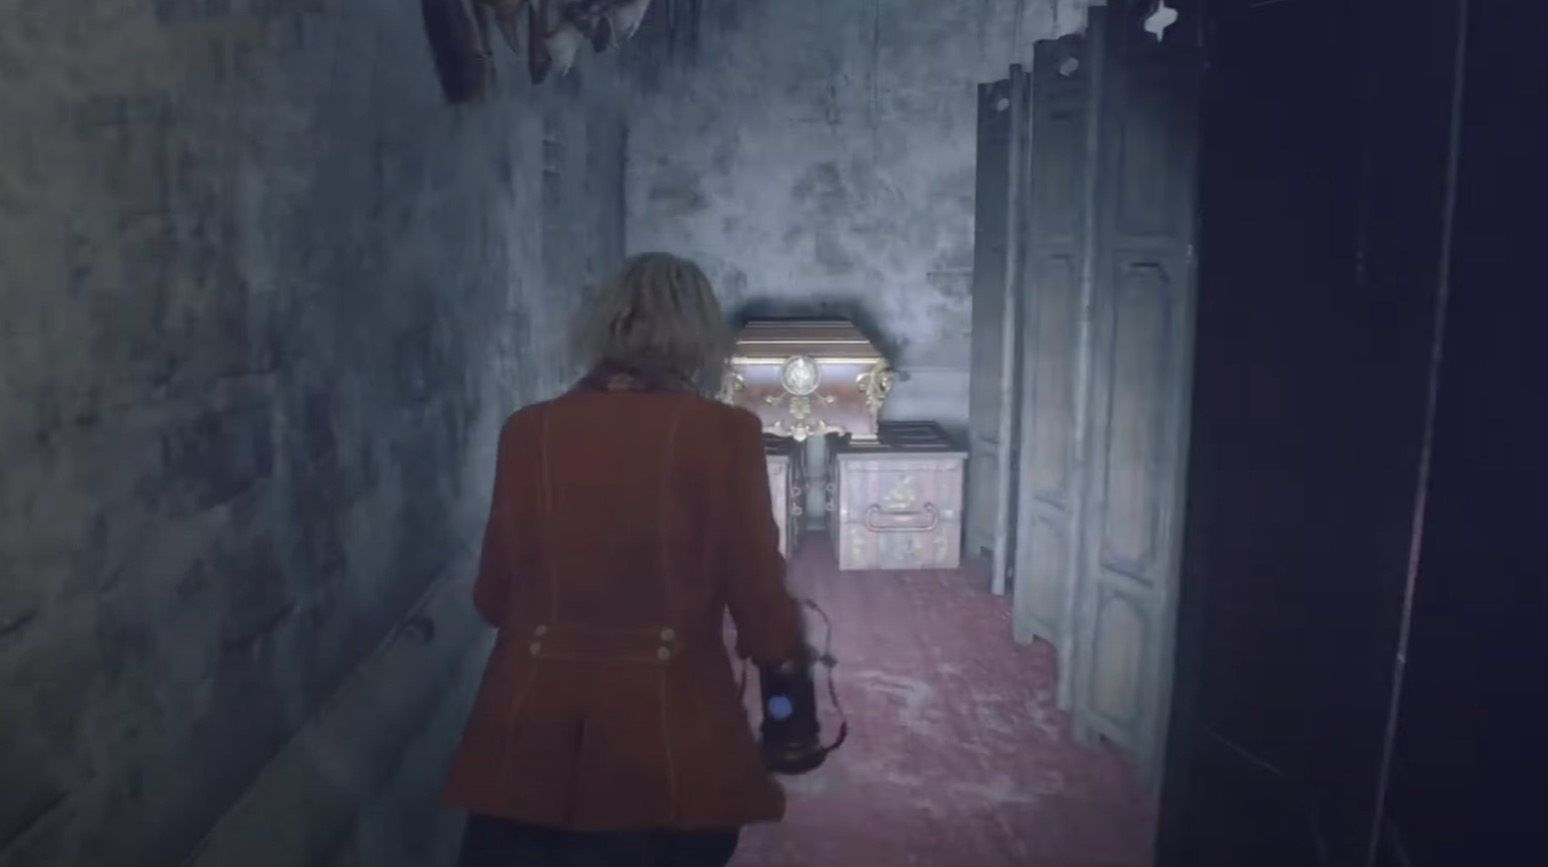
Treasure 23: Emerald
- Plot: Chapter 9 (Ashley)
- Location: Tomb
- Cost: 4000 pesetas
Proceed through the story and take the elevator down to the indicated area. Open the door by pulling the four ropes and go through the opened passage. Then immediately turn right and go around the screen to find a chest. It can be opened with the first key from the bundle.

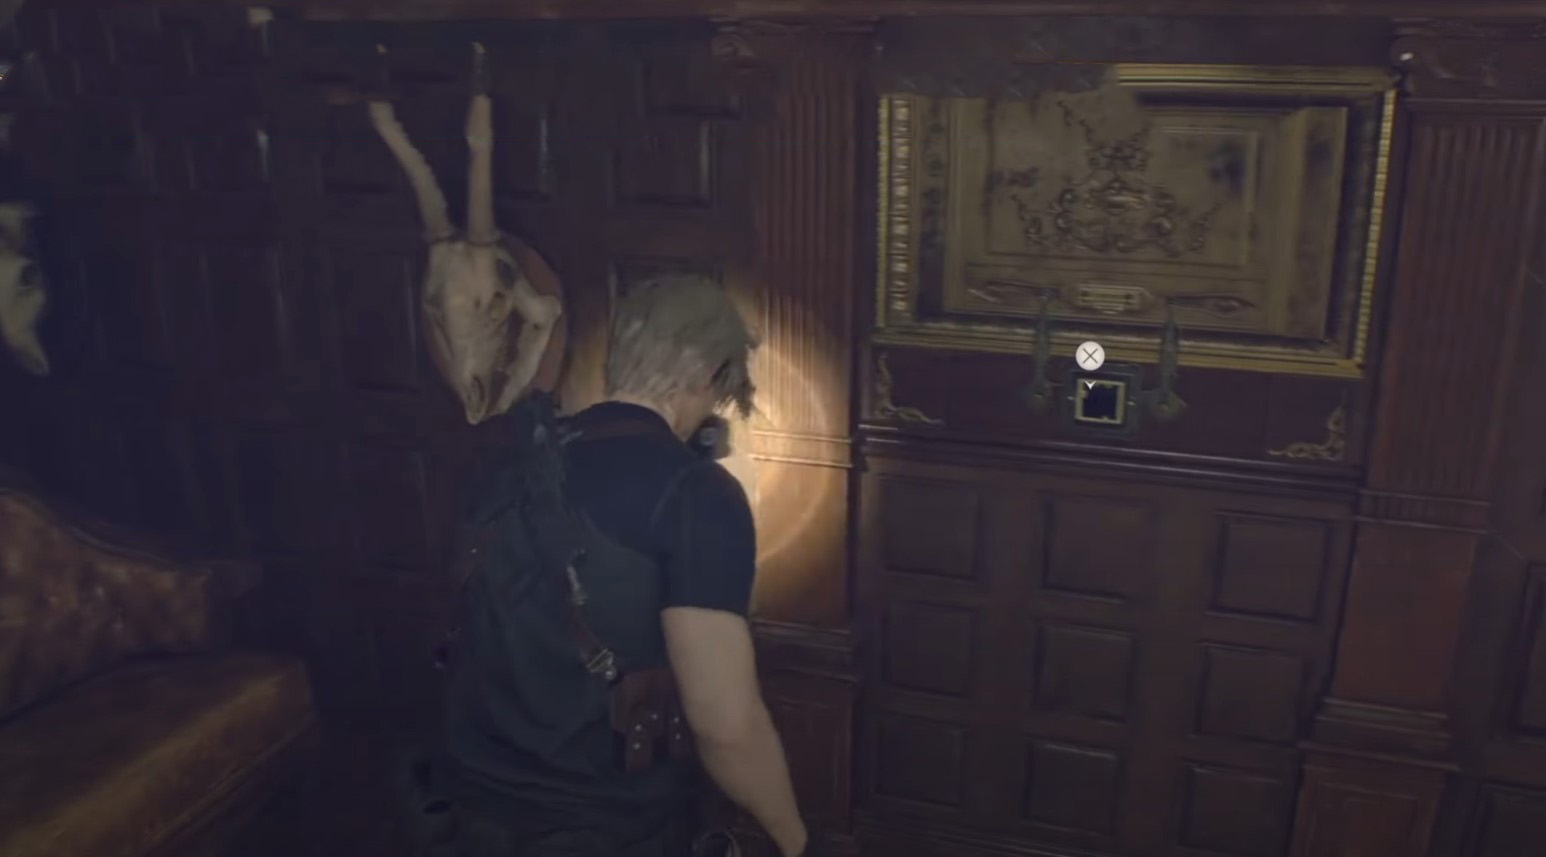
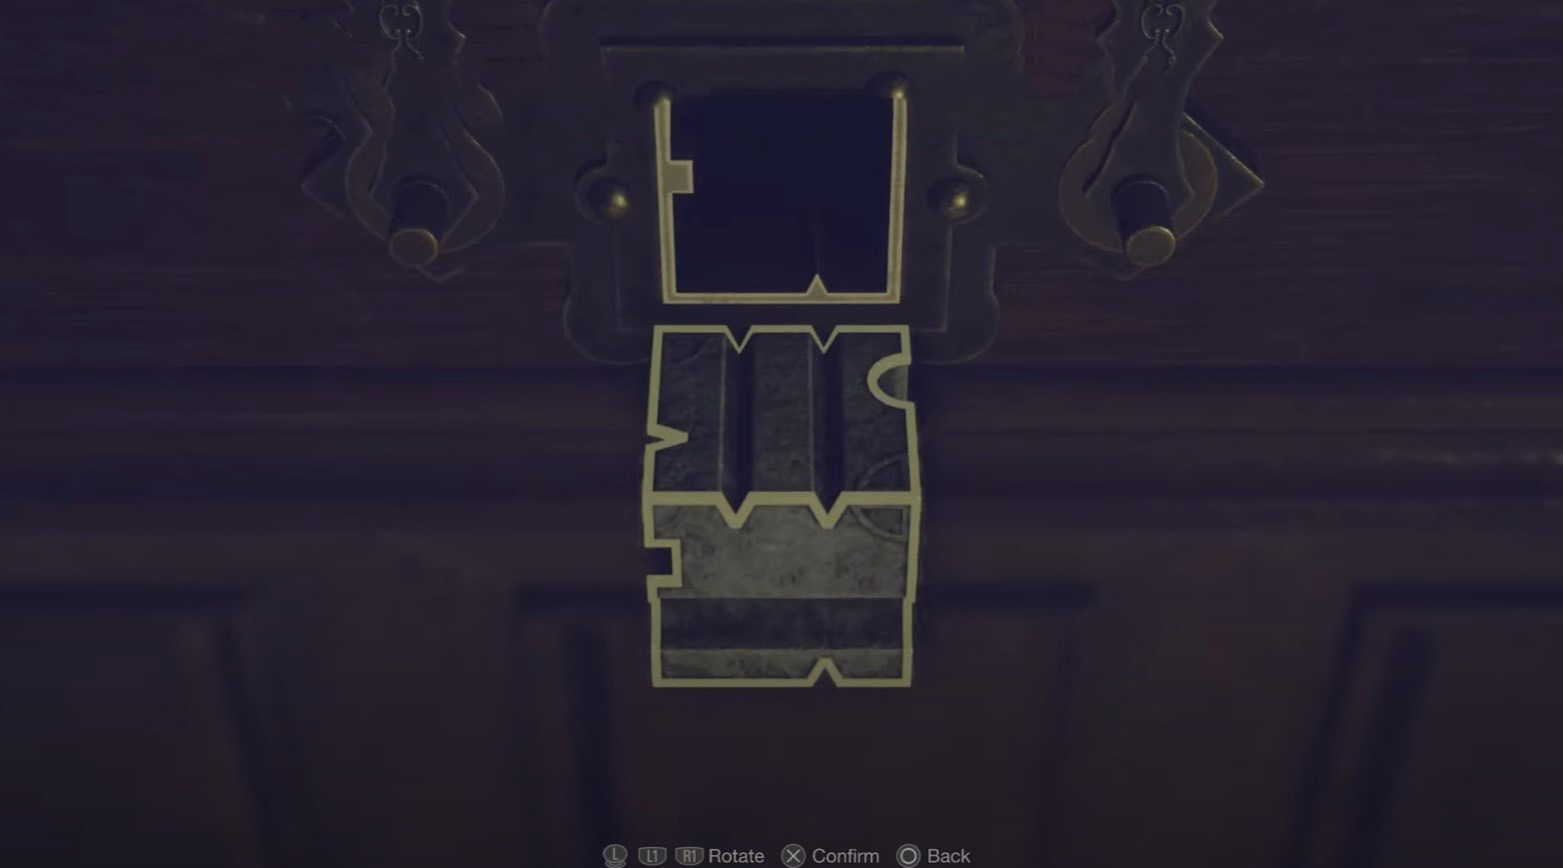
Treasure 24: CQBR Assault Rifle
- Plot: Chapter 10
- Location: Library
- Price: weapon
Having regained control of Leon, go to the southern part of the indicated area and climb the stairs to the room where the president's daughter found a bunch of keys on the wound. Approach the golden safe in the wall and open it with the cube device. Take the weapon.
DLC Treasure 9: Yellow Diamond
- Plot: Chapter 10
- Location: Library
- Cost: 7000 pesetas
Go down to the 1st level of the library and go through the door in the northeast part of the room, which leads to a small corridor. Turn the camera up and you will find a lamp with a gem on the ceiling.
Treasure 25: Golden Lynx
- Plot: Chapter 10
- Location: main hall
- Cost: unknown
Enter the room south of the three-headed chimera statue. Here, find the golden cage and correctly insert the cube device into it. Inside you will find a relic.
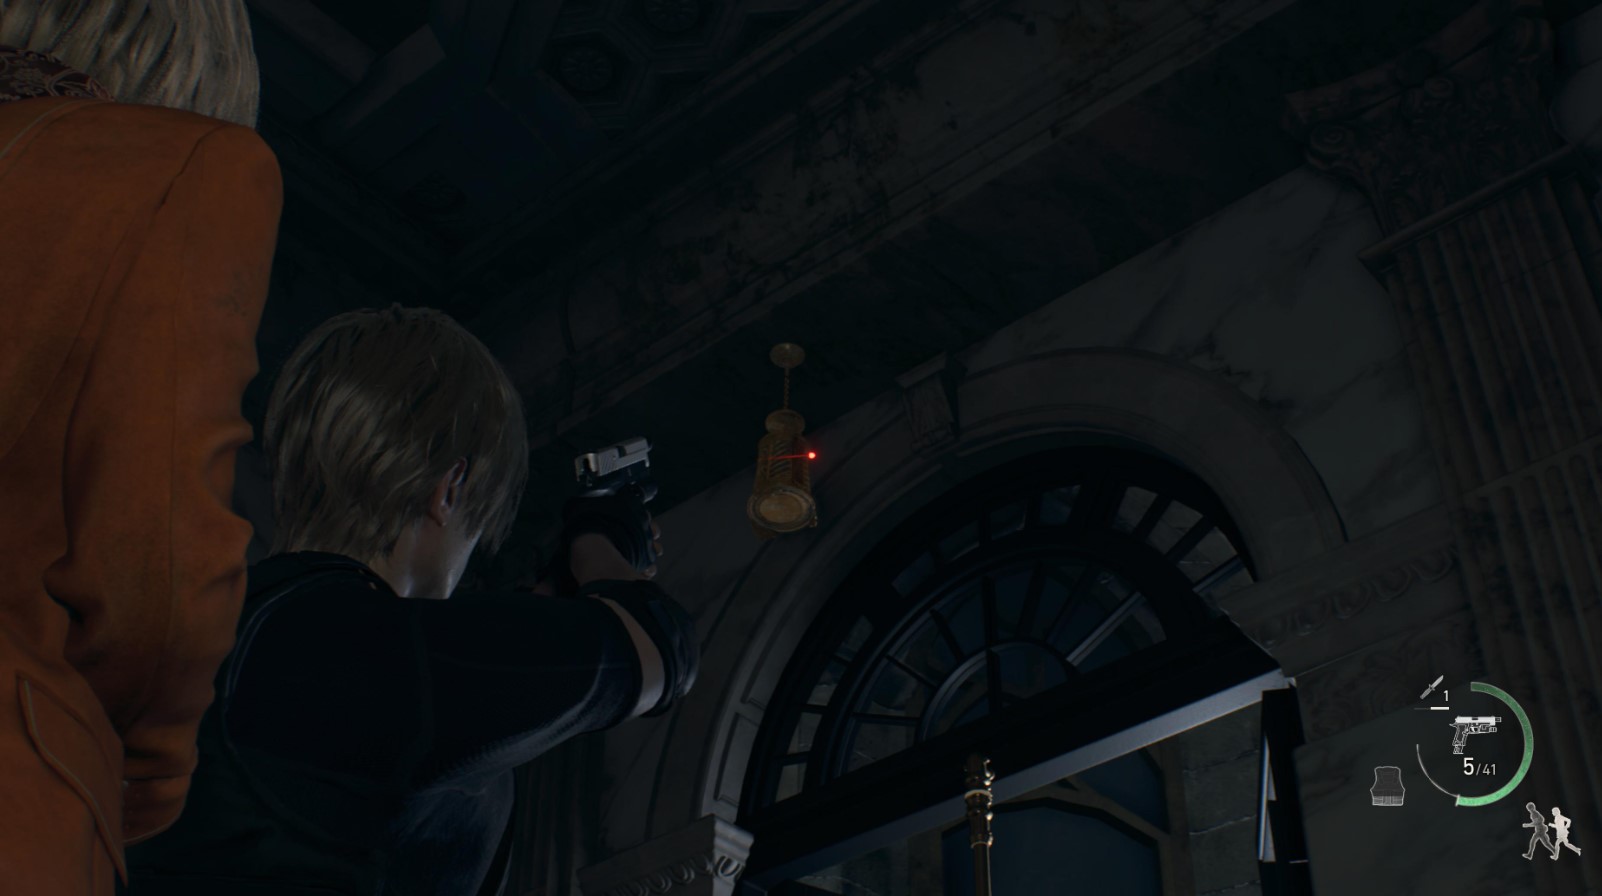
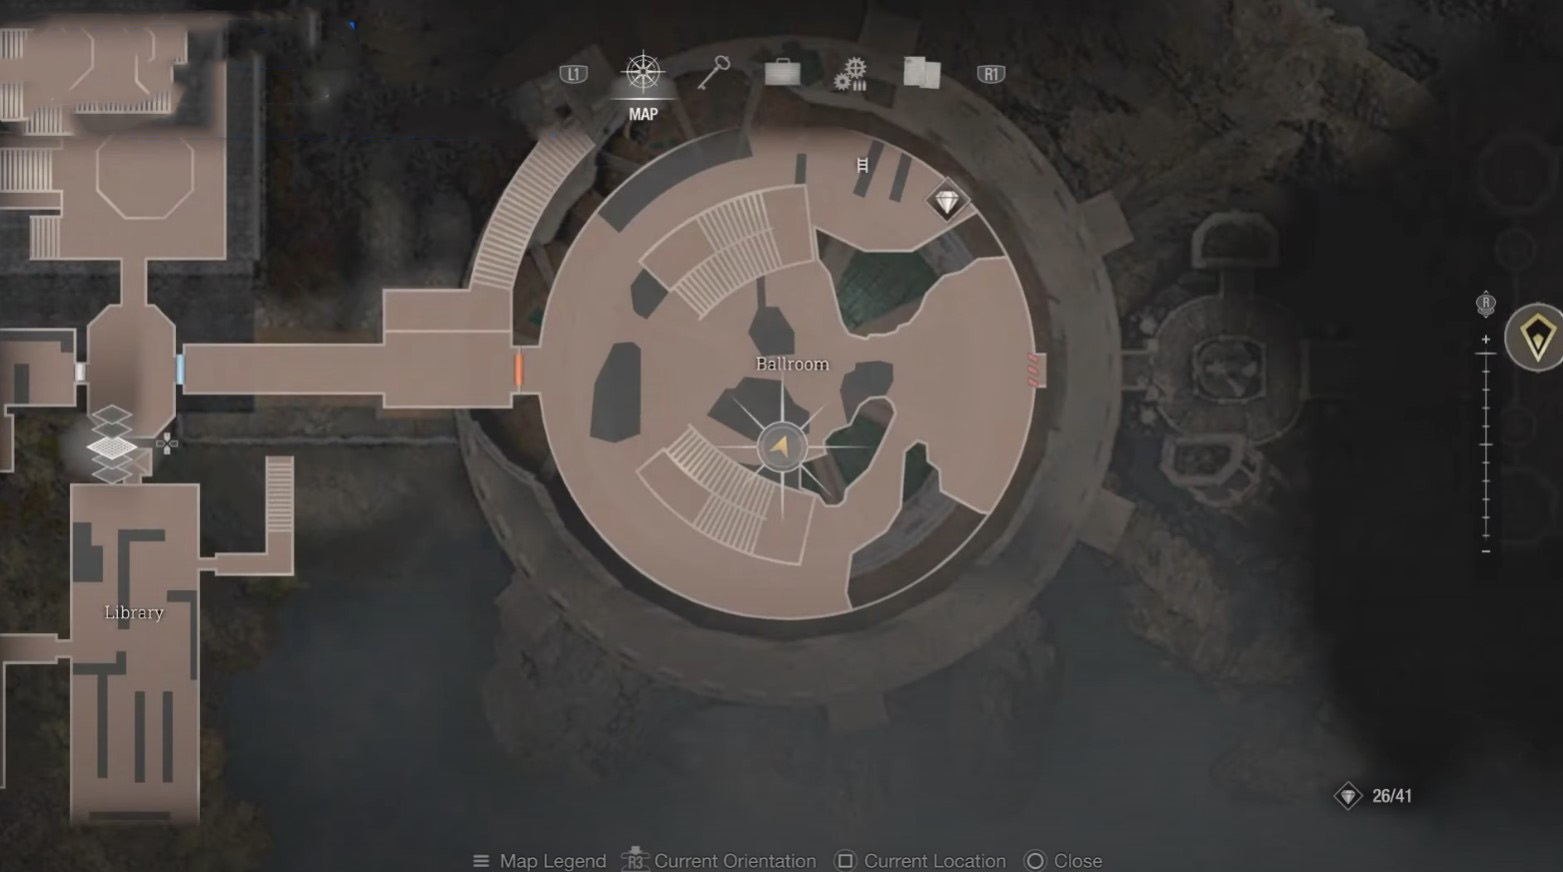
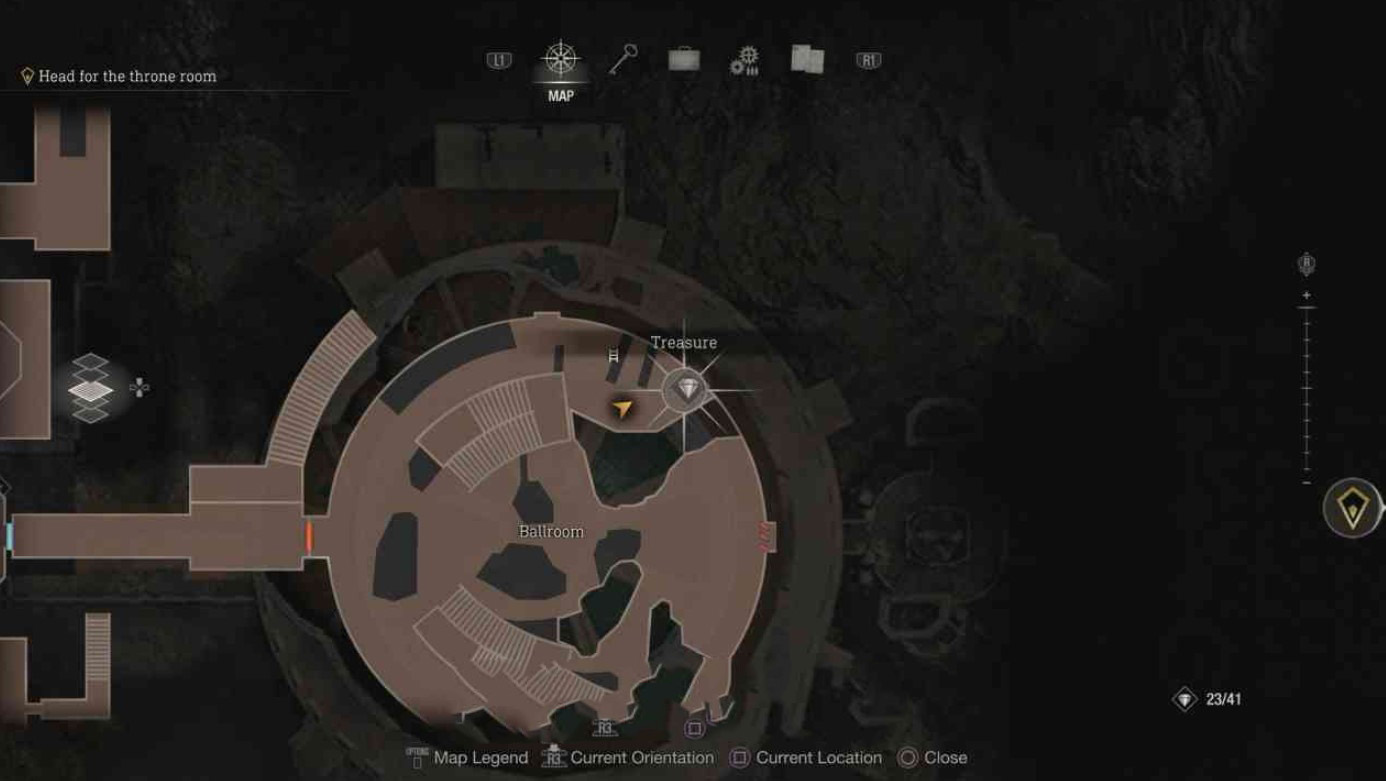
DLC Treasure 10: Silver Token
- Plot: Chapter 10
- Location: Ballroom
- Cost: unknown
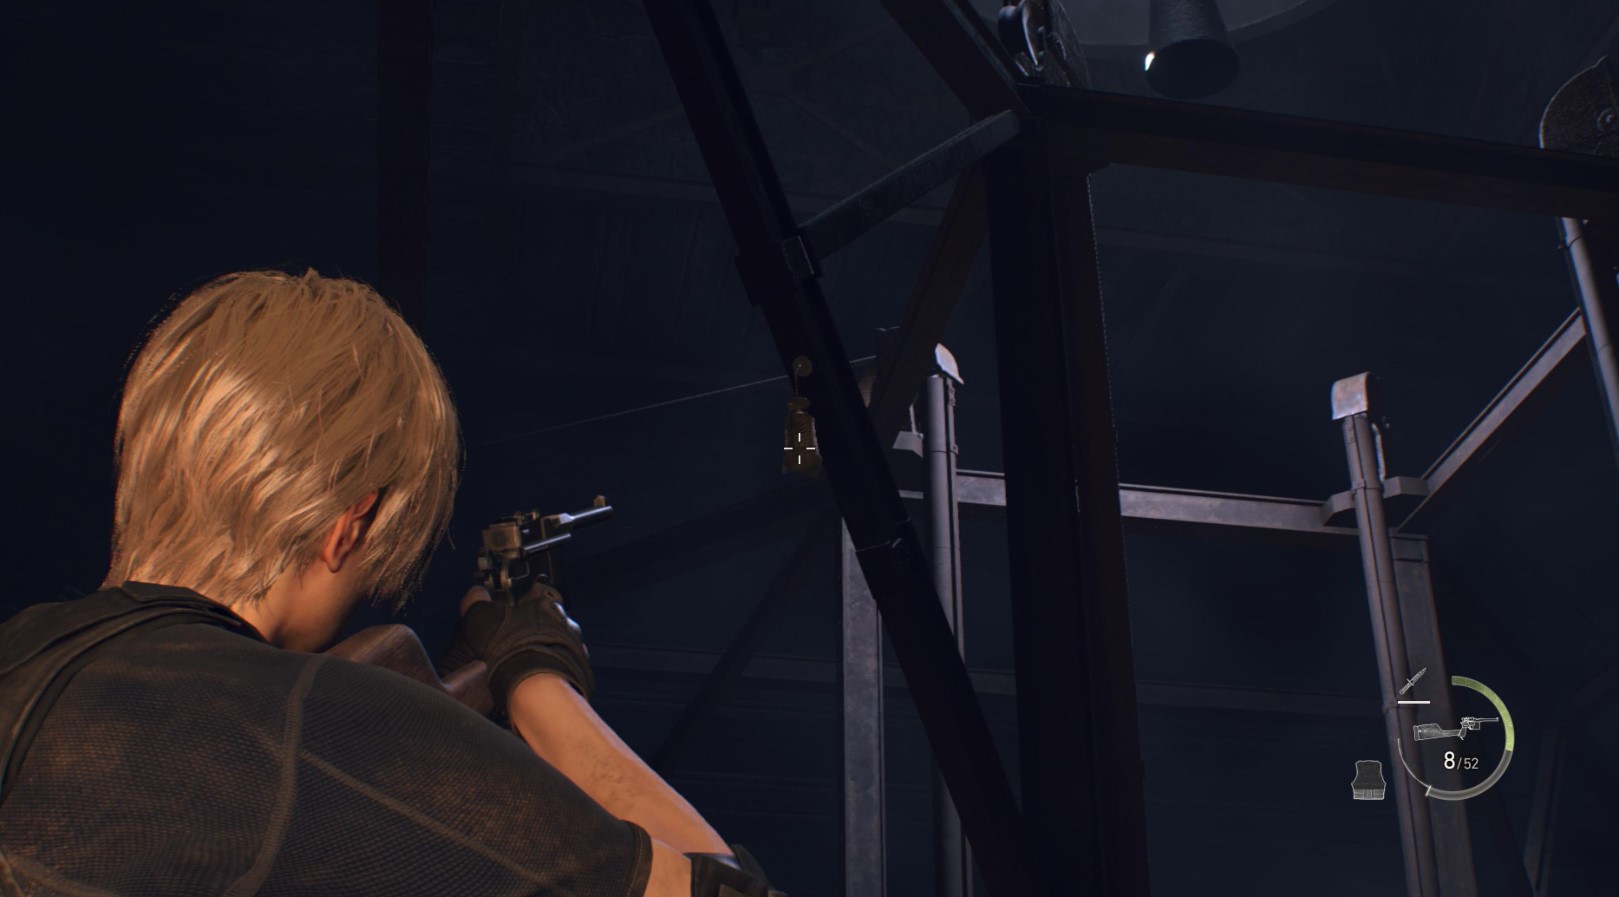
Move towards the Sick Hall. After climbing the stairs, turn left and lift the camera up - you will see a lamp in a small niche. Shoot it down to get the item.
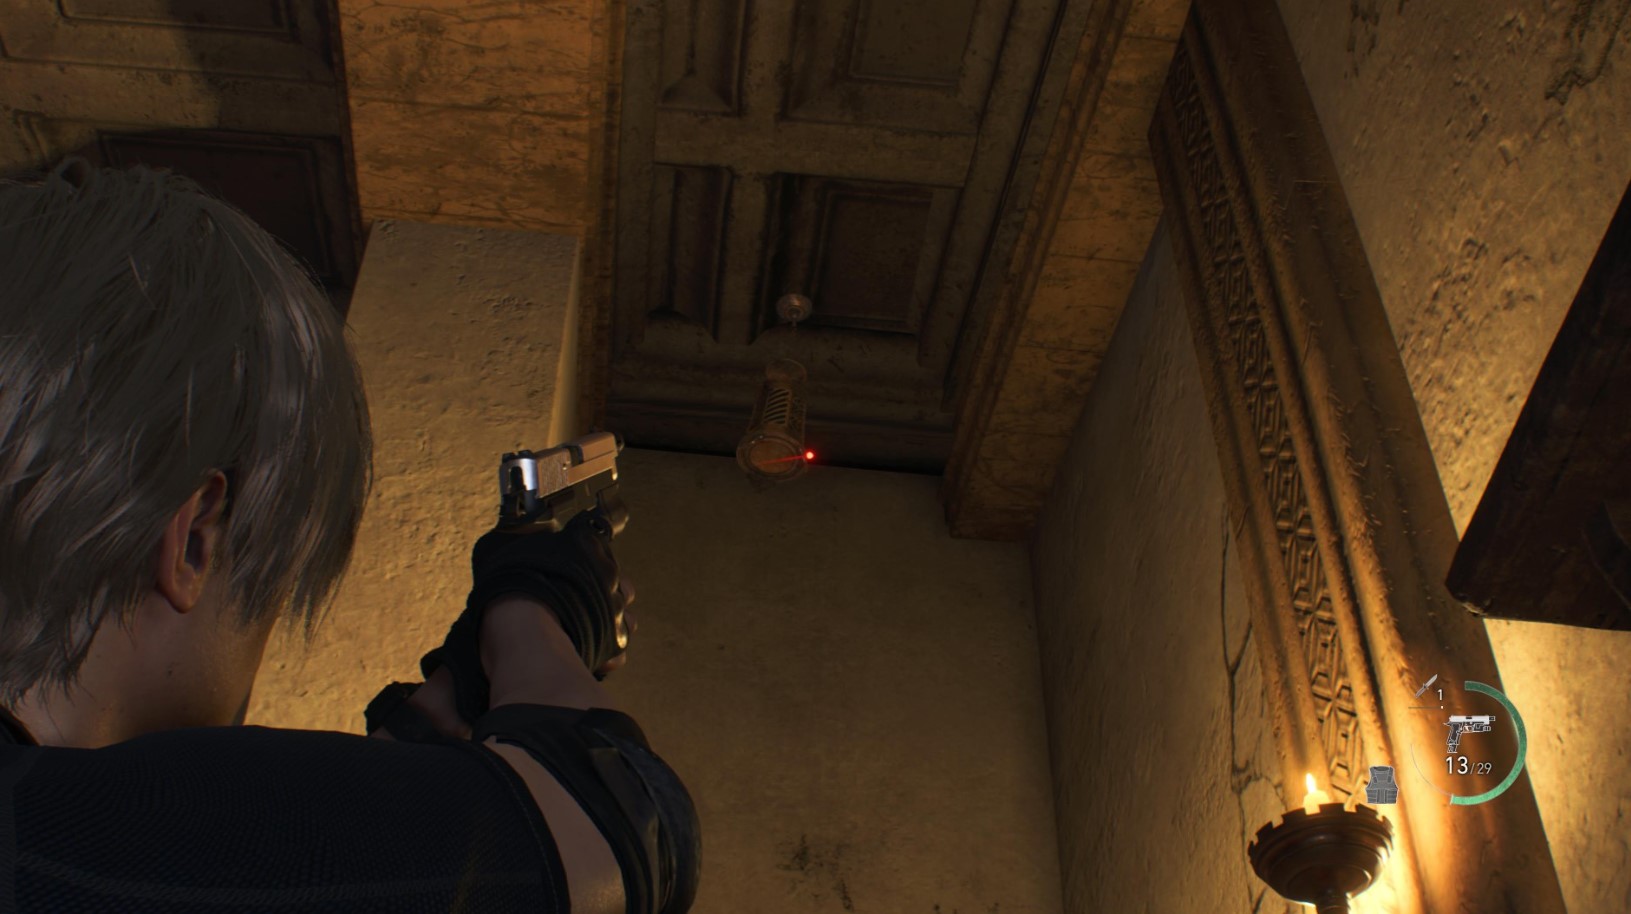
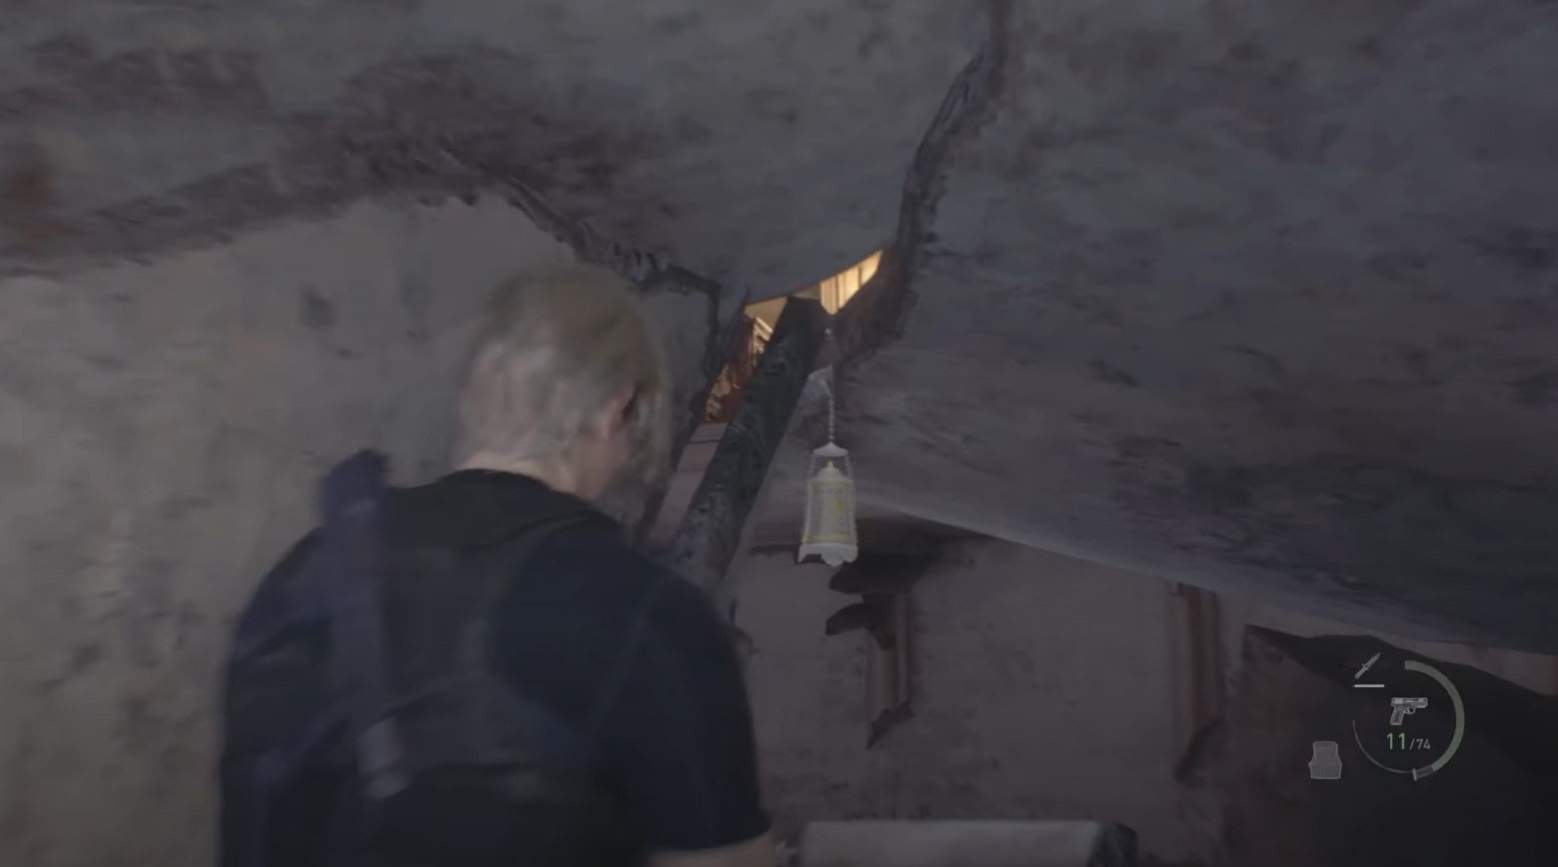
Treasure 26: Ruby
- Plot: Chapter 10
- Location: Ballroom
- Cost: 3000 pesetas
Go down to the middle level of the specified area, crawl under the rubble next to the stairs and look on the left for the lamp in which the pebble is hidden.
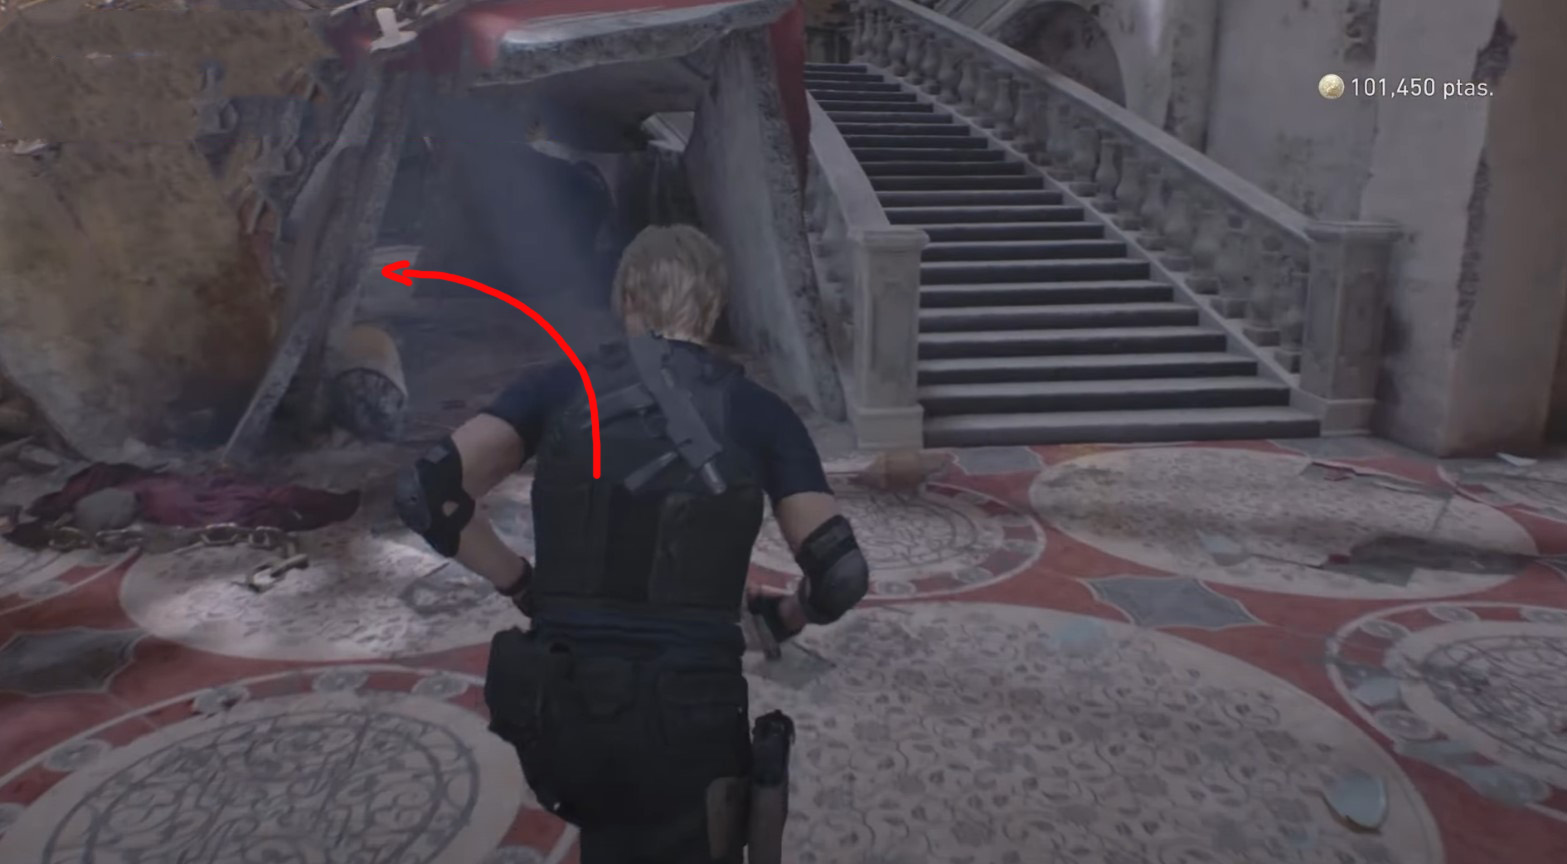
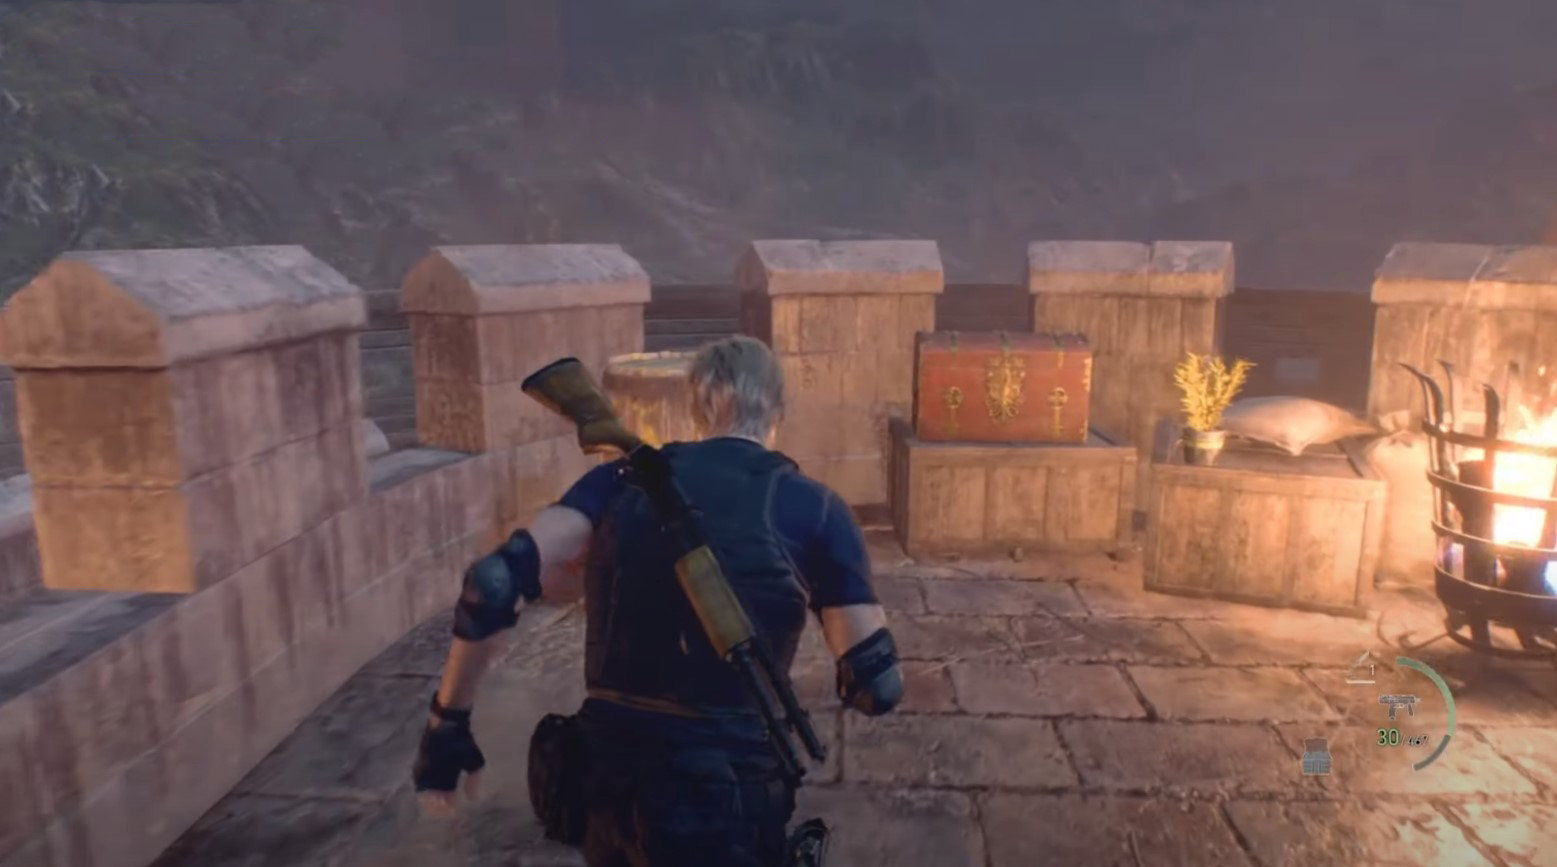
Treasure 27: Beautiful Beetle
- Plot: Chapter 10
- Location: Ballroom
- Cost: unknown
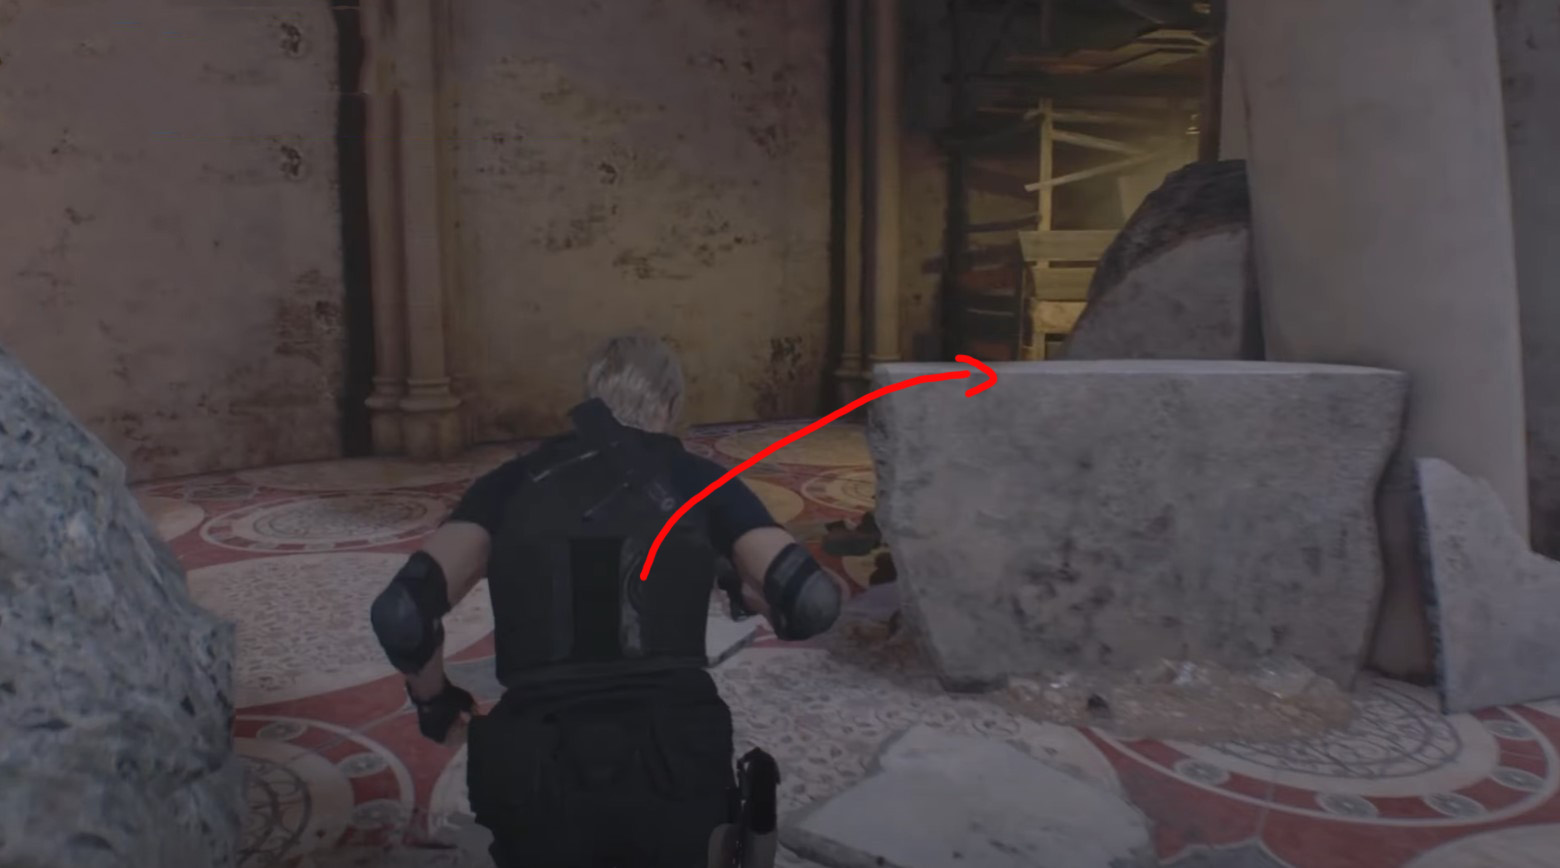
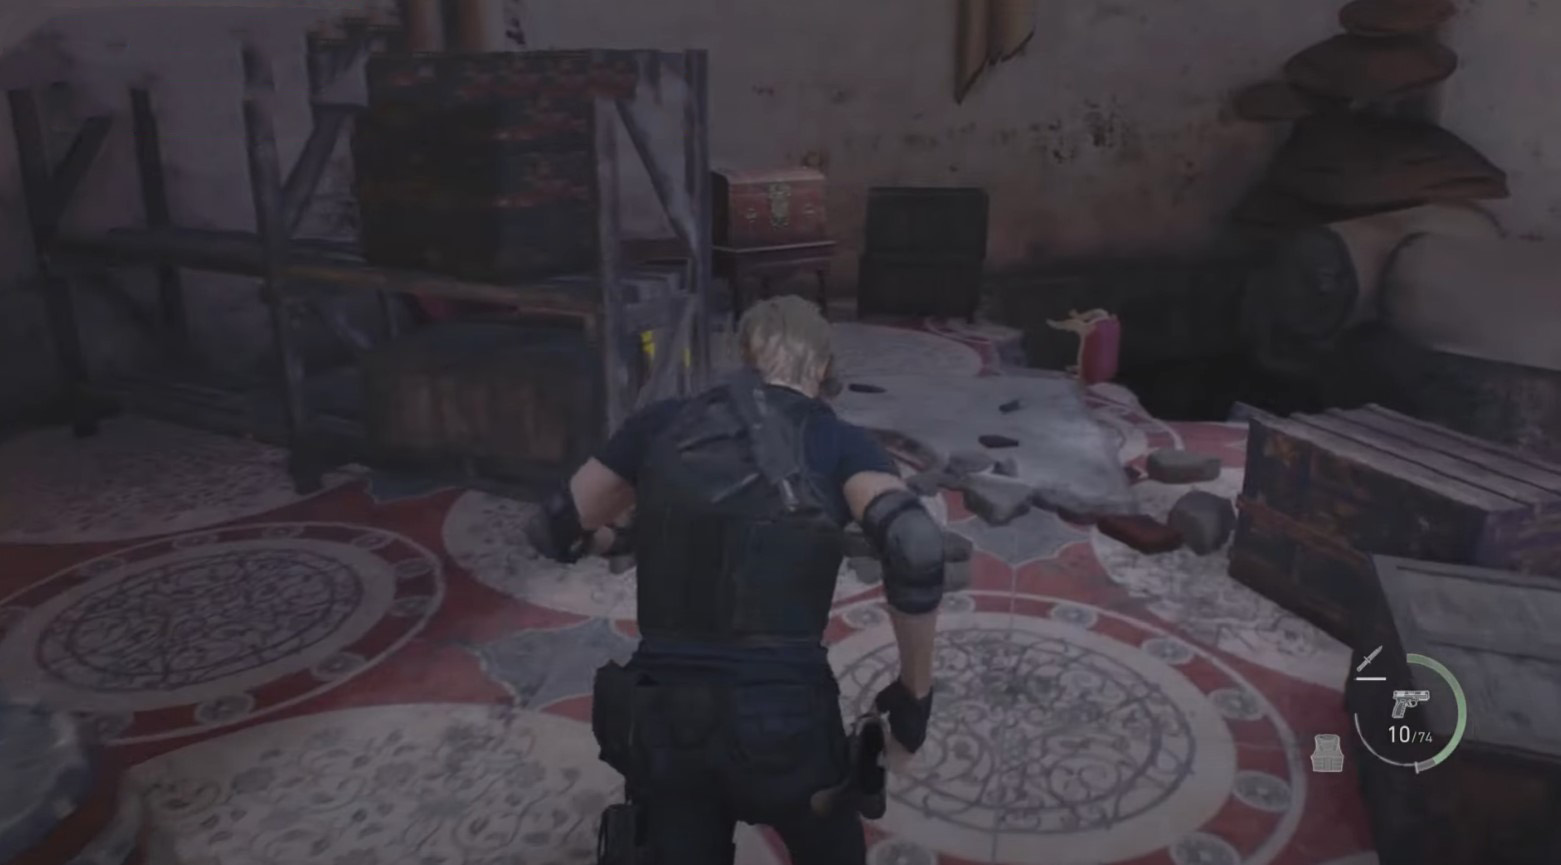
While on the same tier of the indicated area, go to its northern part and look for a large red chest with a relic near the crates.
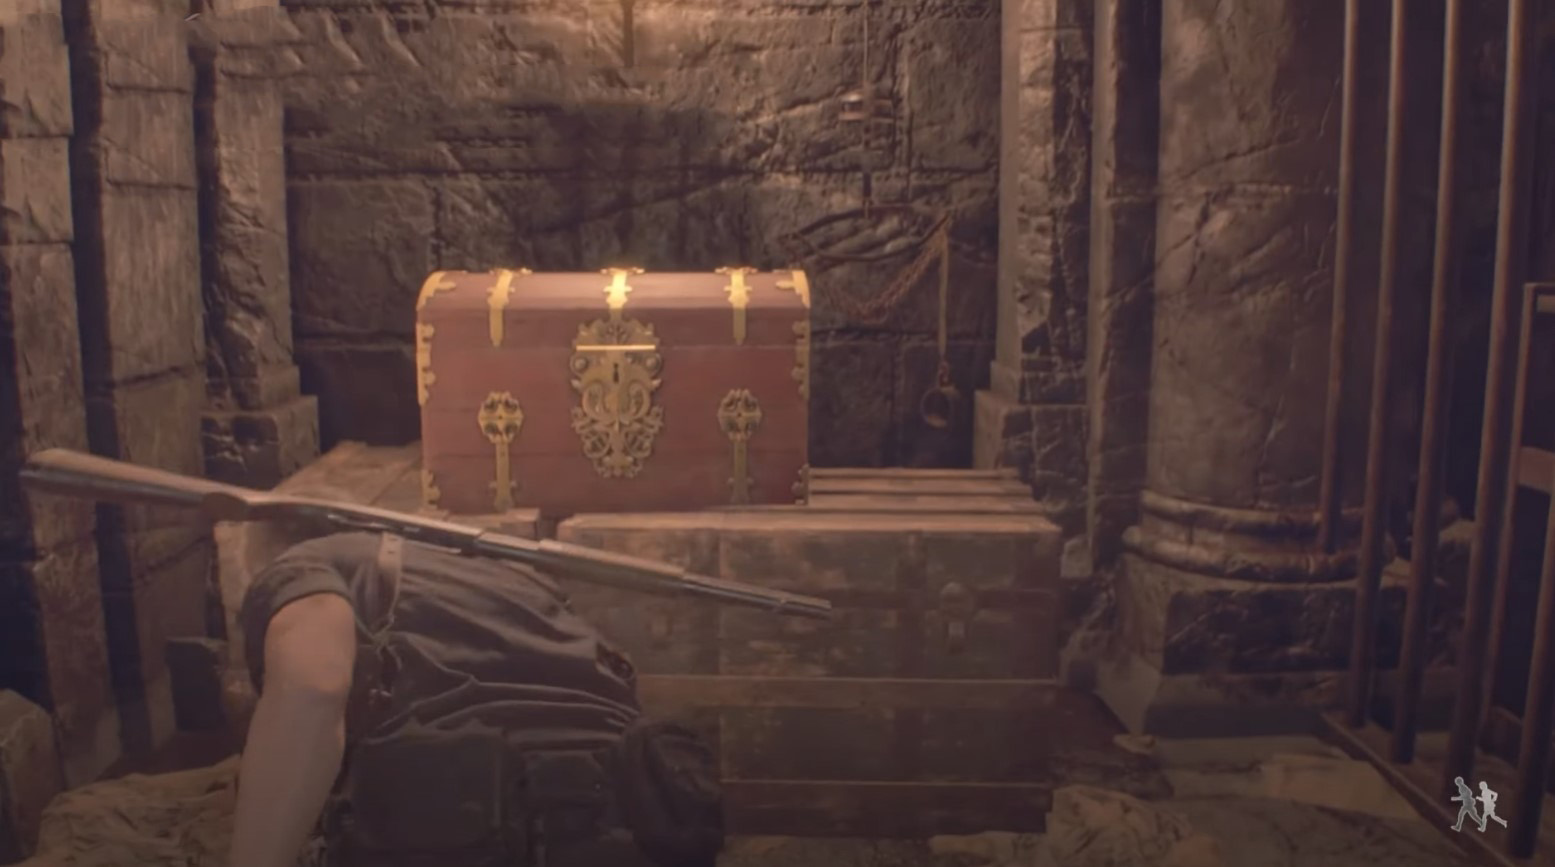
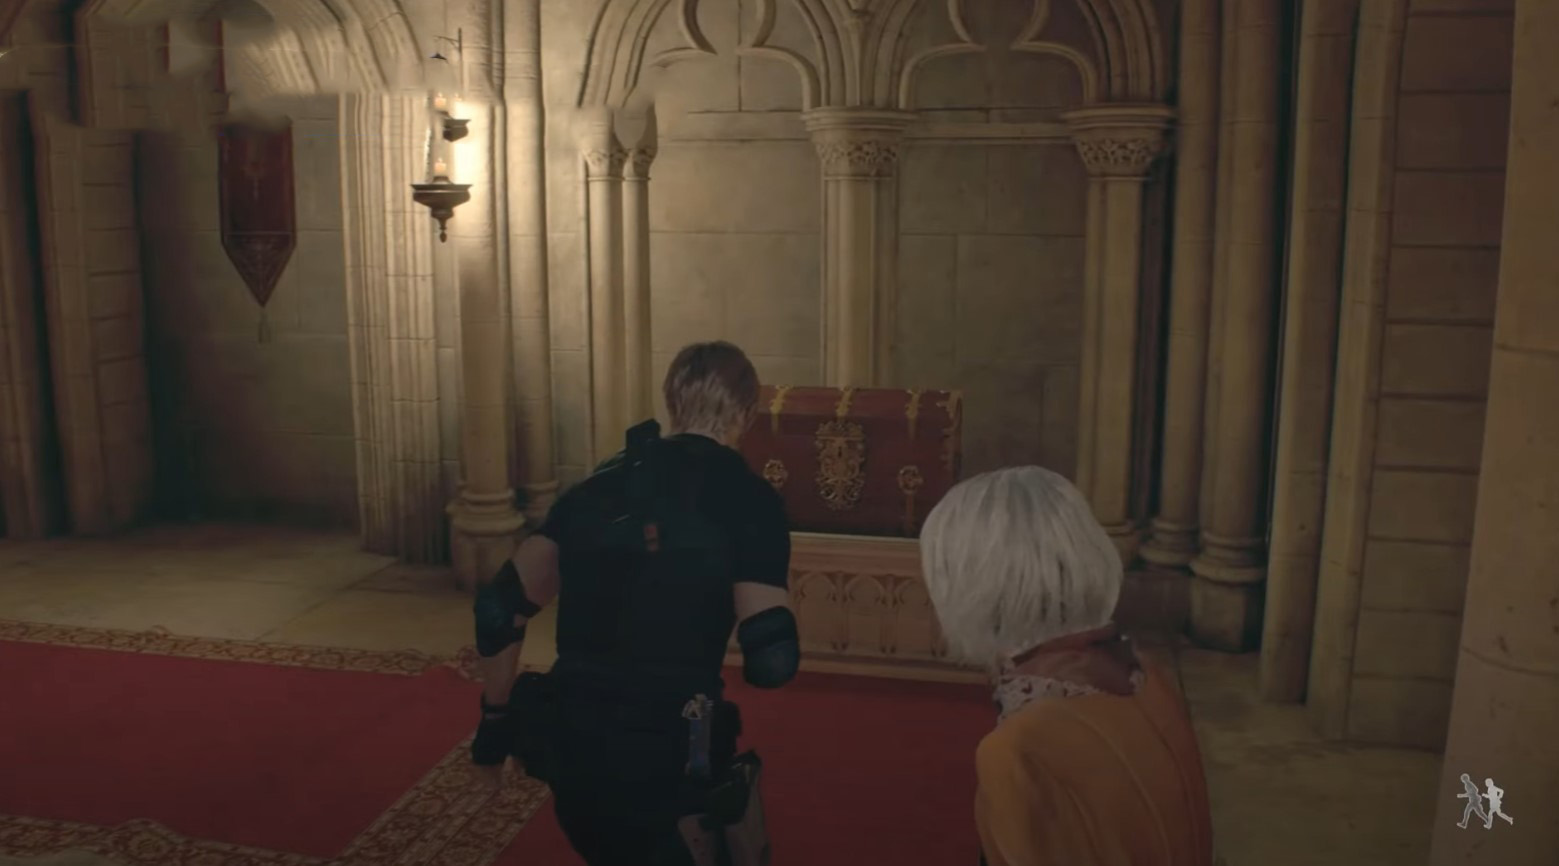
Treasure 28: Elegant Crown
- Plot: Chapter 10
- Location: Nedra
- Cost: 19000 pesetas
Once in the indicated area, start moving forward to the end of the flooded area. However, before climbing through the hole in the wall and climbing the stairs, go to the corner of the room and pick up the crown next to the corpse.
Treasure 29: Red Beryl
- Plot: Chapter 10
- Location: Nedra
- Cost: unknown
Climb up the stairs and move further along the tunnel. Look to the left to see a niche in which a bell with a gem is hidden.
DLC Treasure 11: Spinel
- Plot: Chapter 10
- Location: Nedra
- Cost: for exchange
After collecting the previous treasure, move forward along the tunnel and after a while you will reach a room with a merchant's shop. A lamp will be hung above the entrance, which must be knocked down.
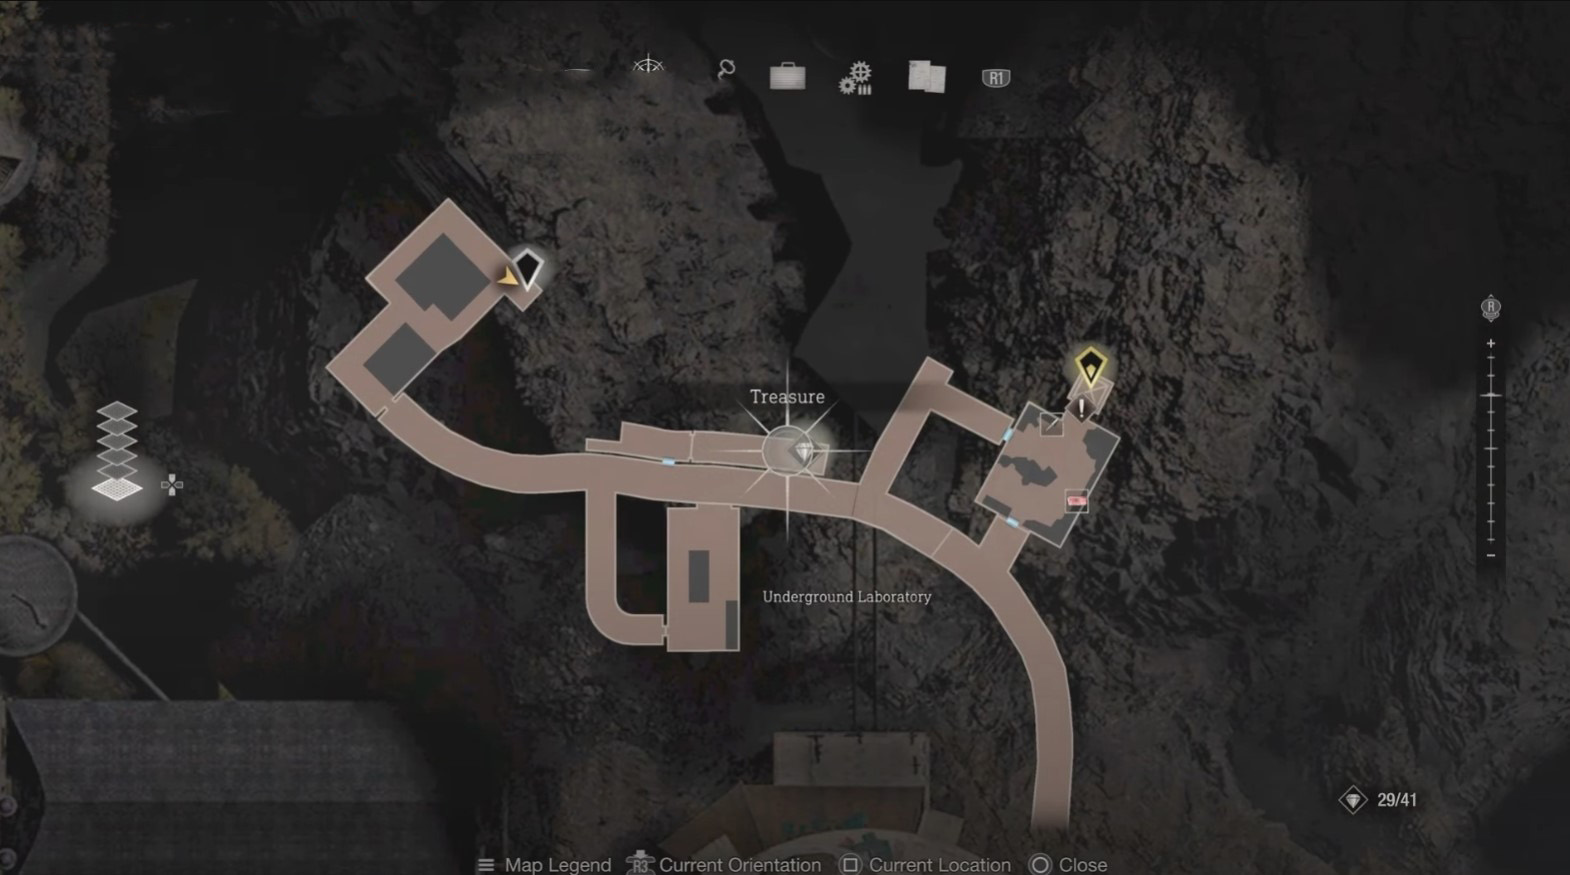
Treasure 12 DLC: Emerald
- Plot: Chapter 10
- Location: Underground laboratory
- Cost: unknown
After collecting the last crystal, go even further until you reach a room with an elevator (you need to use it in the story). Between two bookshelves you will find a bell with a precious stone.
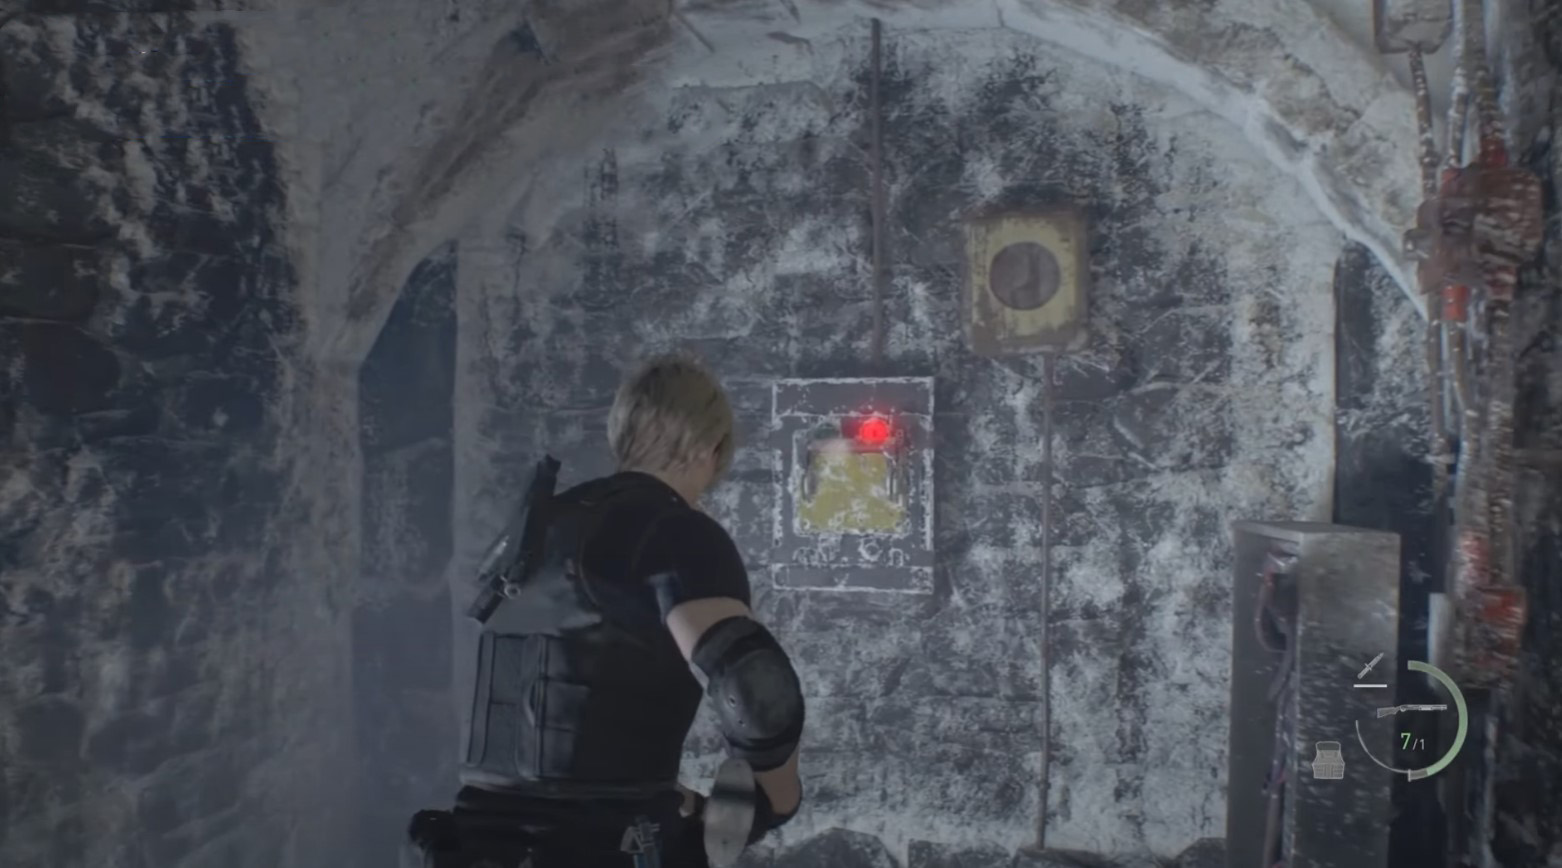
Treasure 30: Yellow Diamond
- Plot: Chapter 10
- Location: Underground laboratory
- Cost: 7000
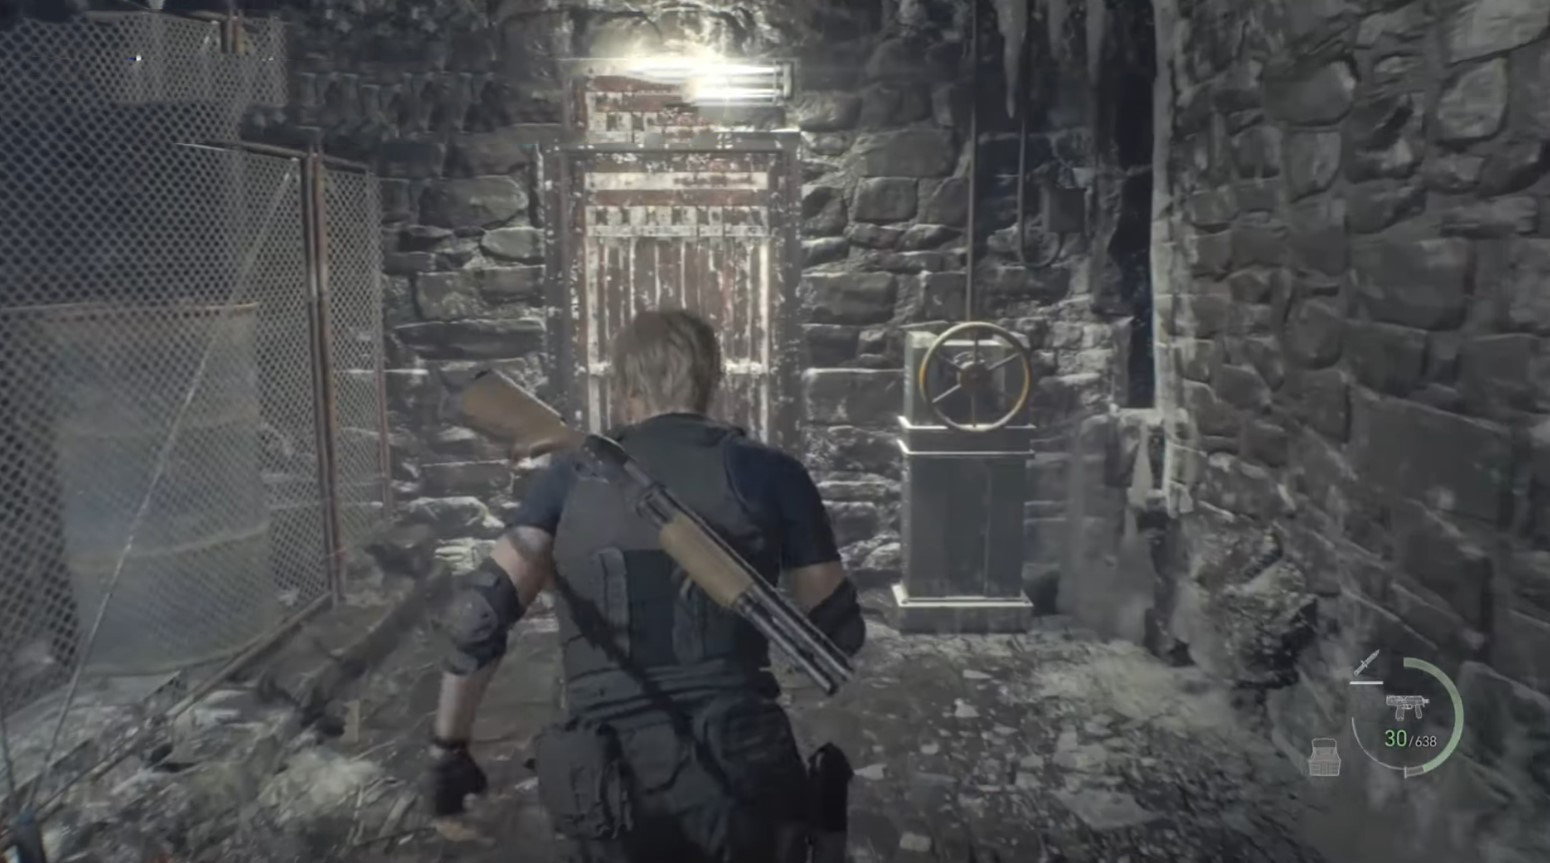
First, go to the end of the area to restore power using the electrical panel. Then go back a little and open the door with the valve. Turn left in the corridor and you will see a chest with a gem.
Note: If you do not run away from Verdugo, but give him a fight and defeat him, you will also receive a Golden Monocle.
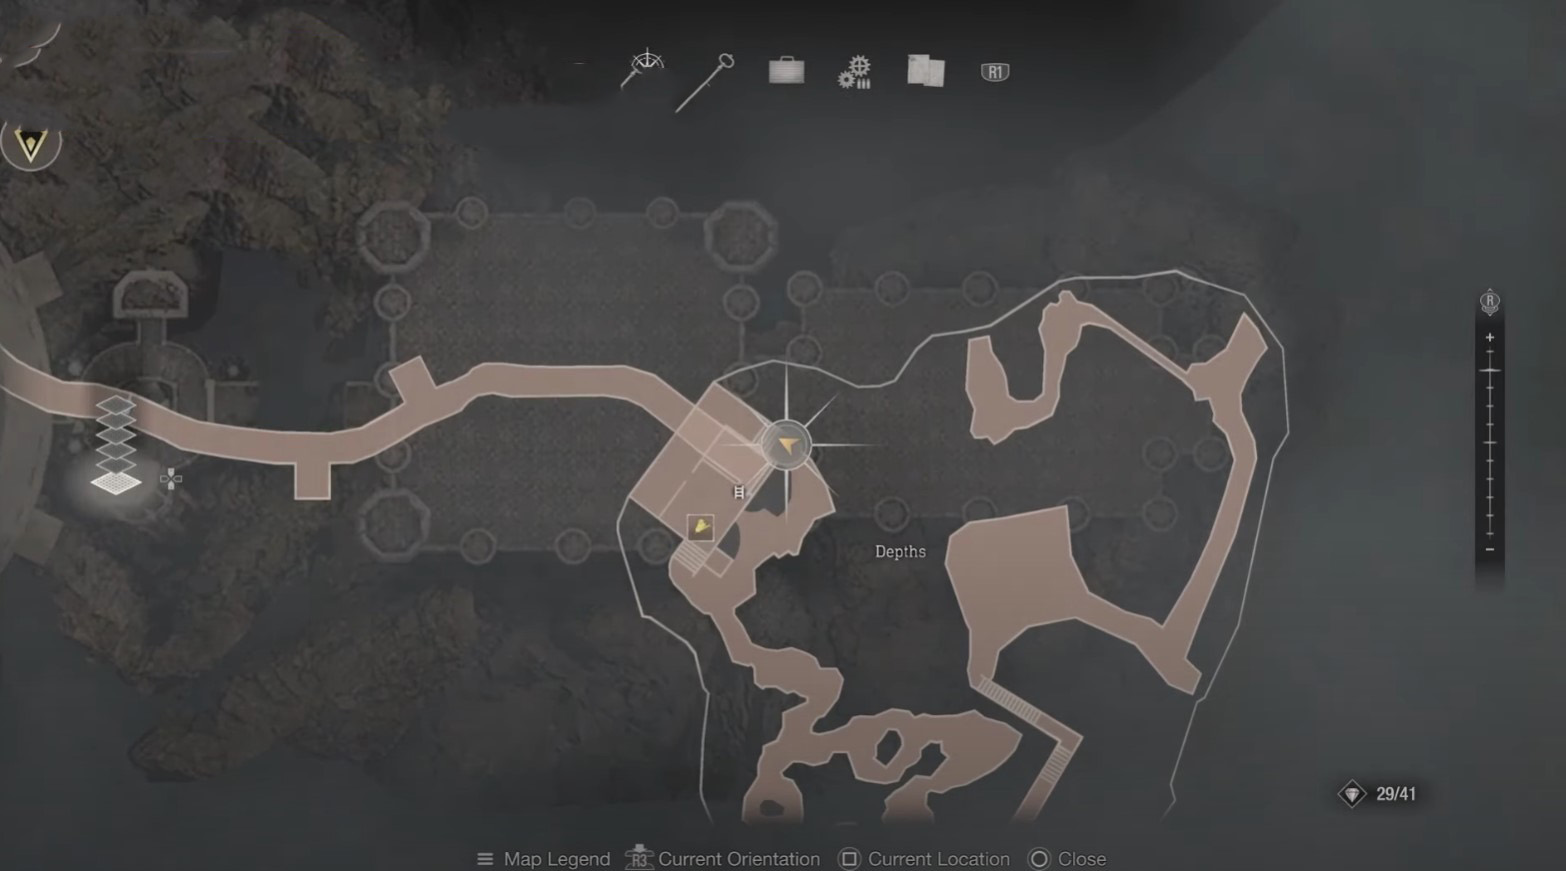
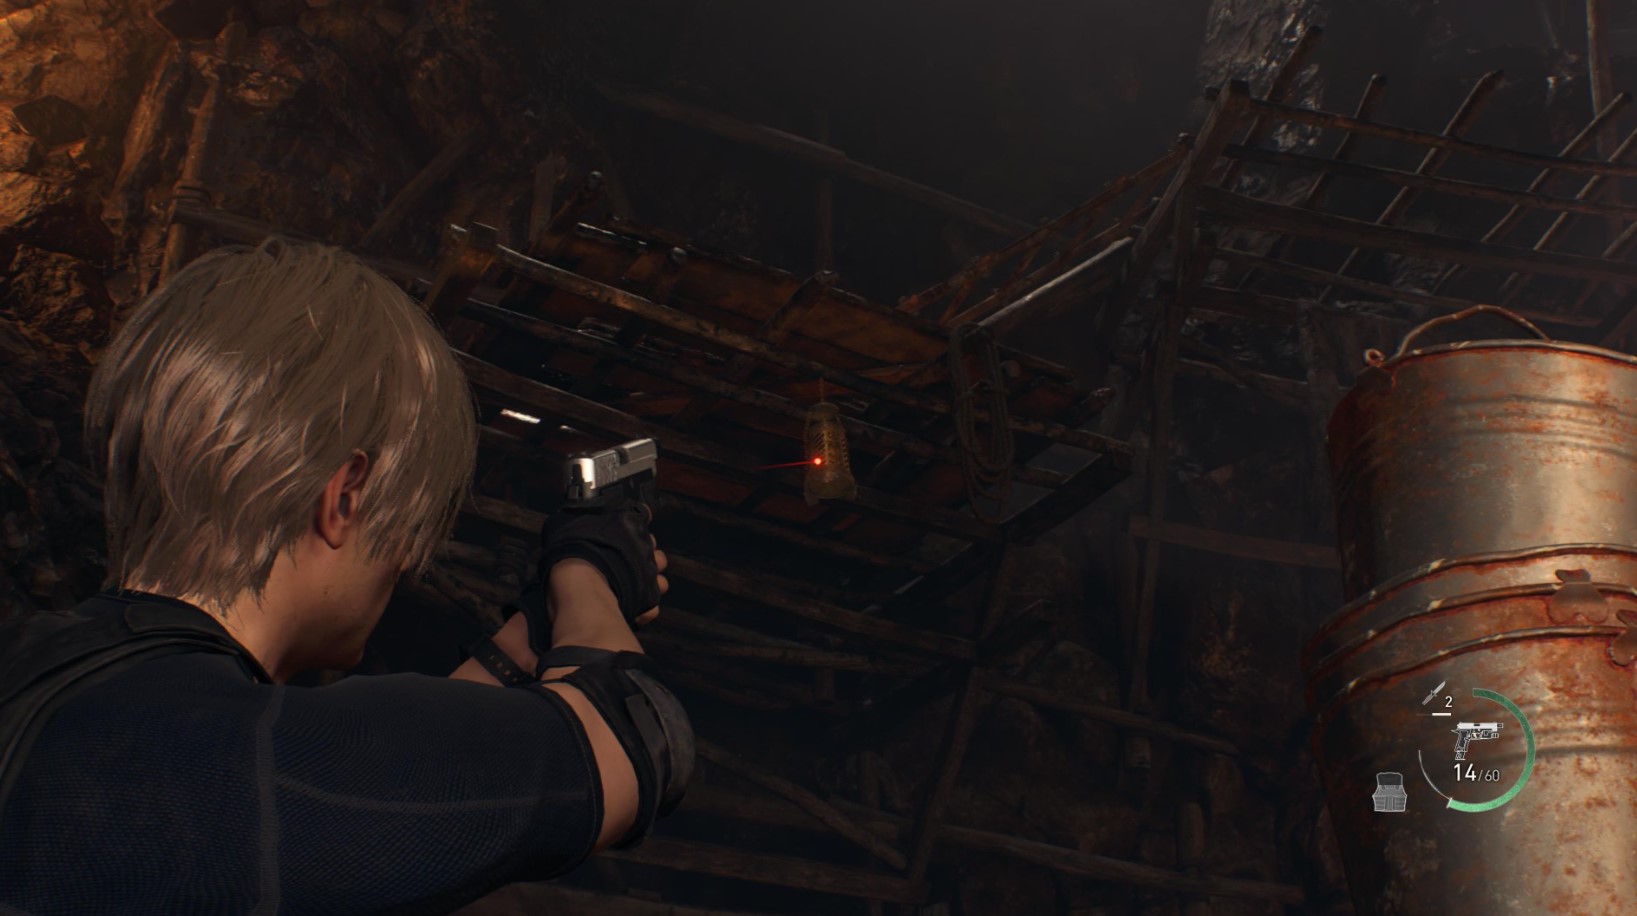
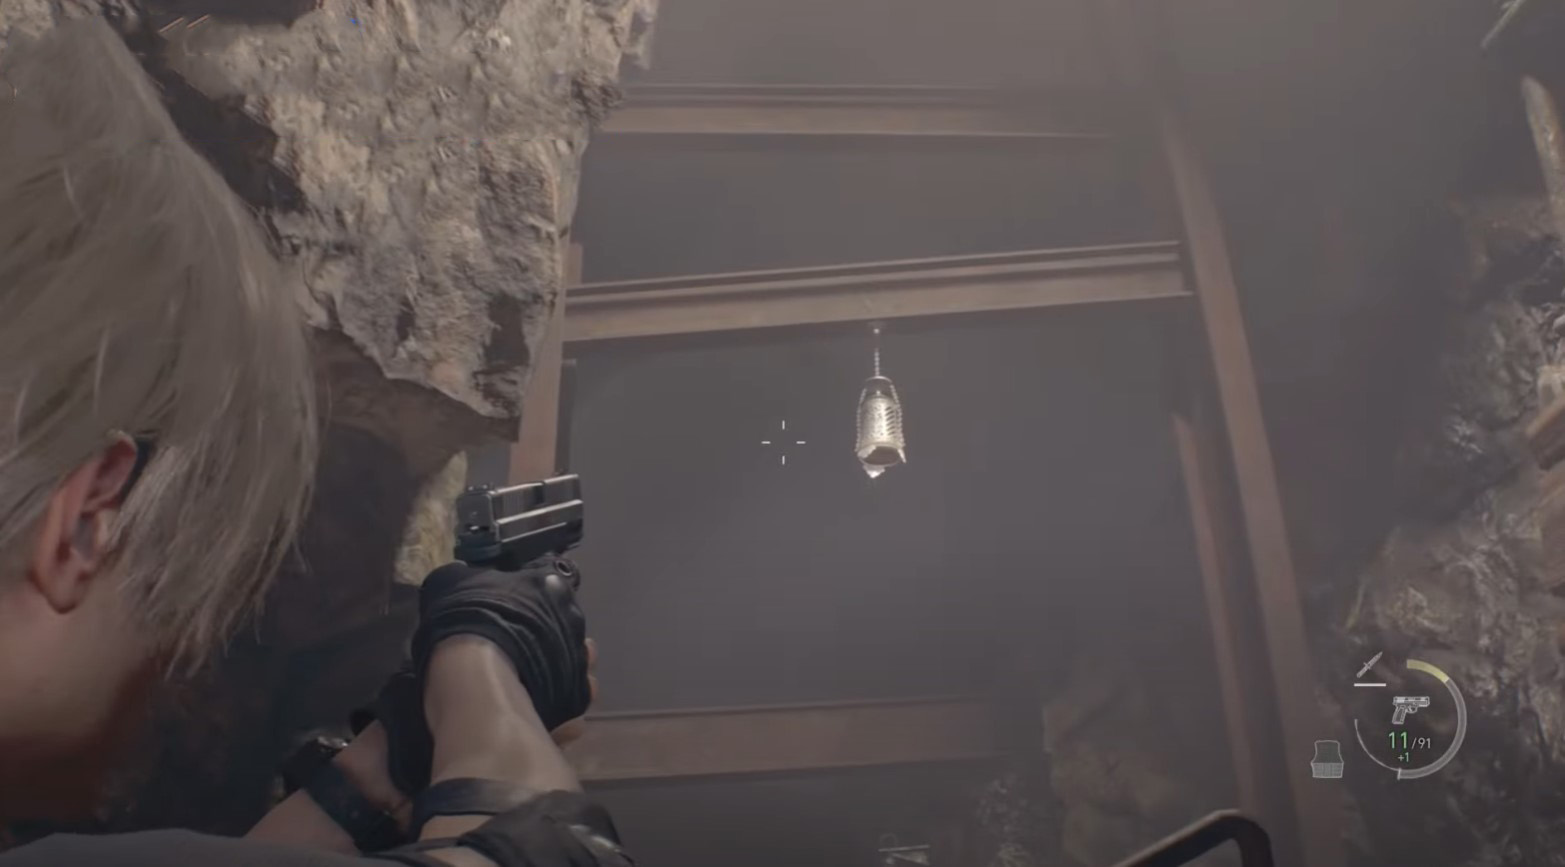
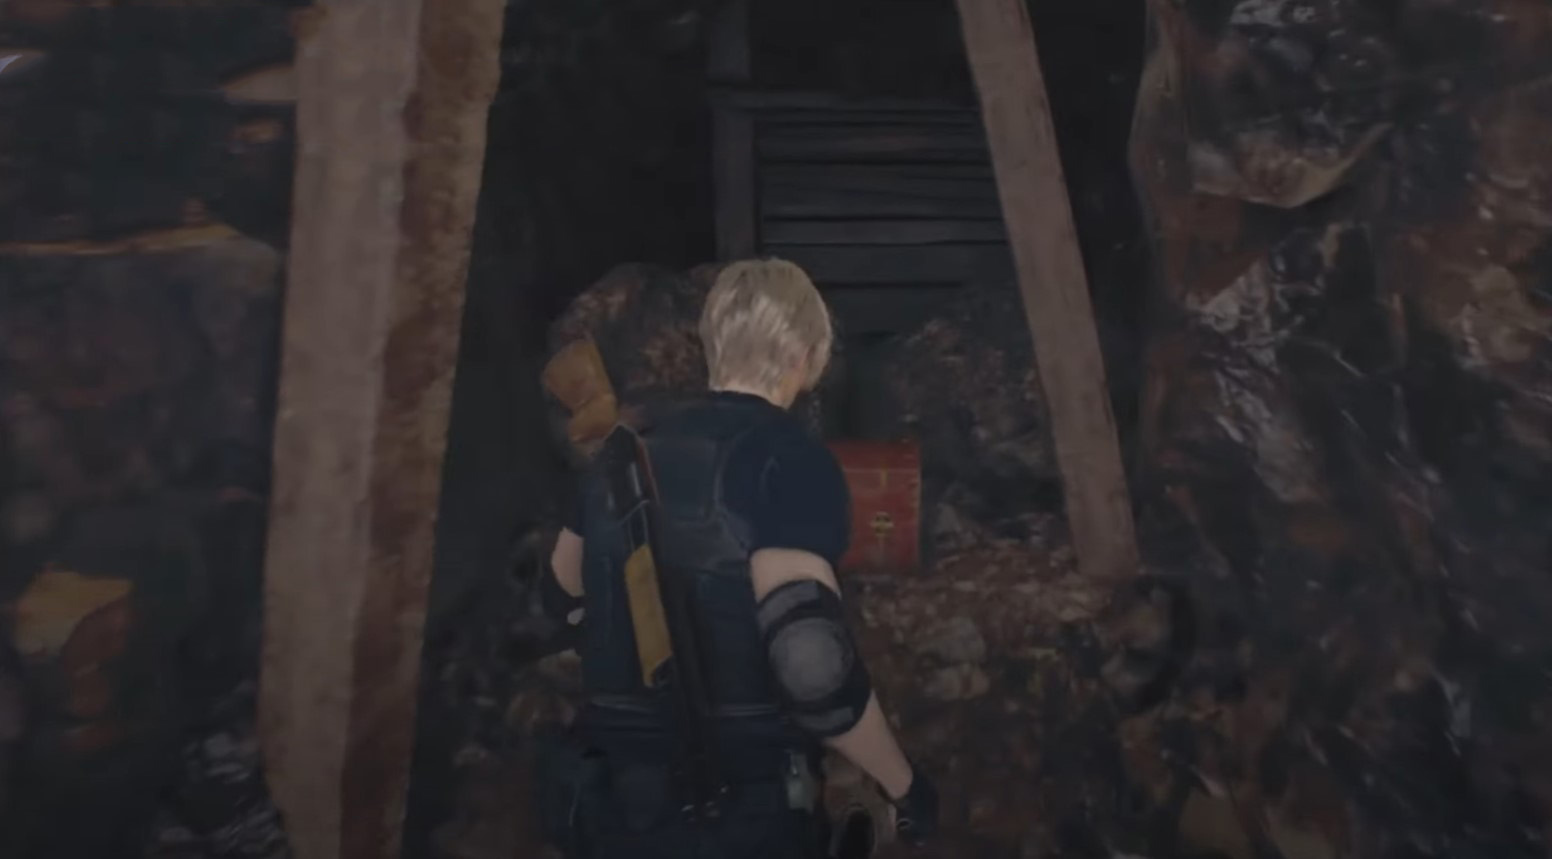
Treasure 13 from DLC: Spinel
- Plot: Chapter 11
- Location: Mines
- Cost: for exchange
Having reached the indicated area, deal with all opponents. Then go to its western part and turn the camera up to see the lamp tied to the platform.
Treasure 31: Sapphire
- Plot: Chapter 11
- Location: Mines
- Cost: 4000
In the same location as the previous treasure, use the ladder to go upstairs. Then turn the camera to the left and you will see a new bell that can be knocked down.
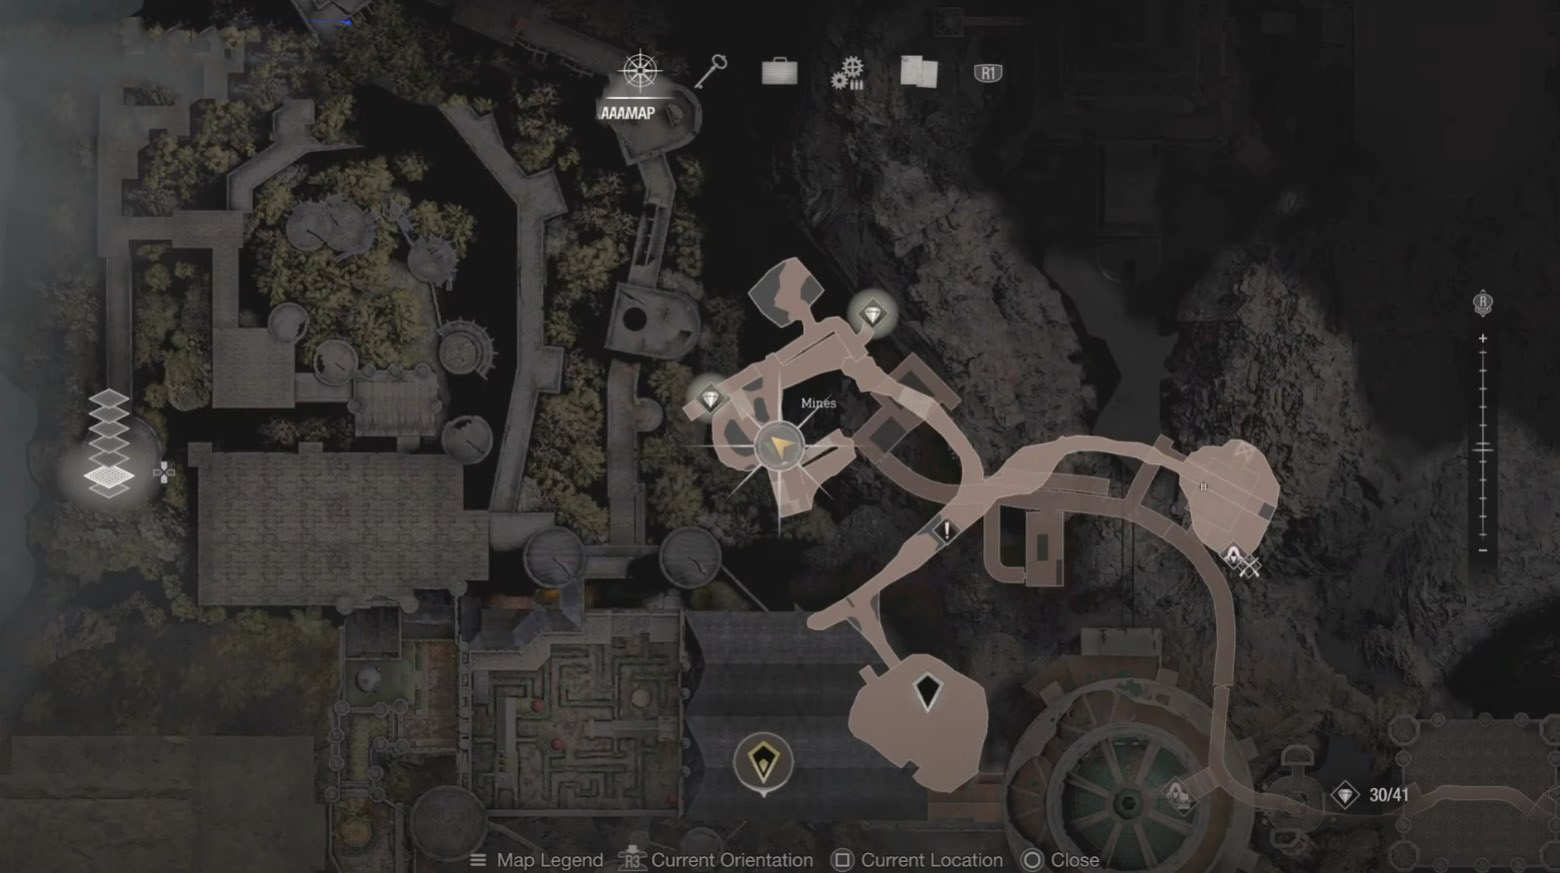
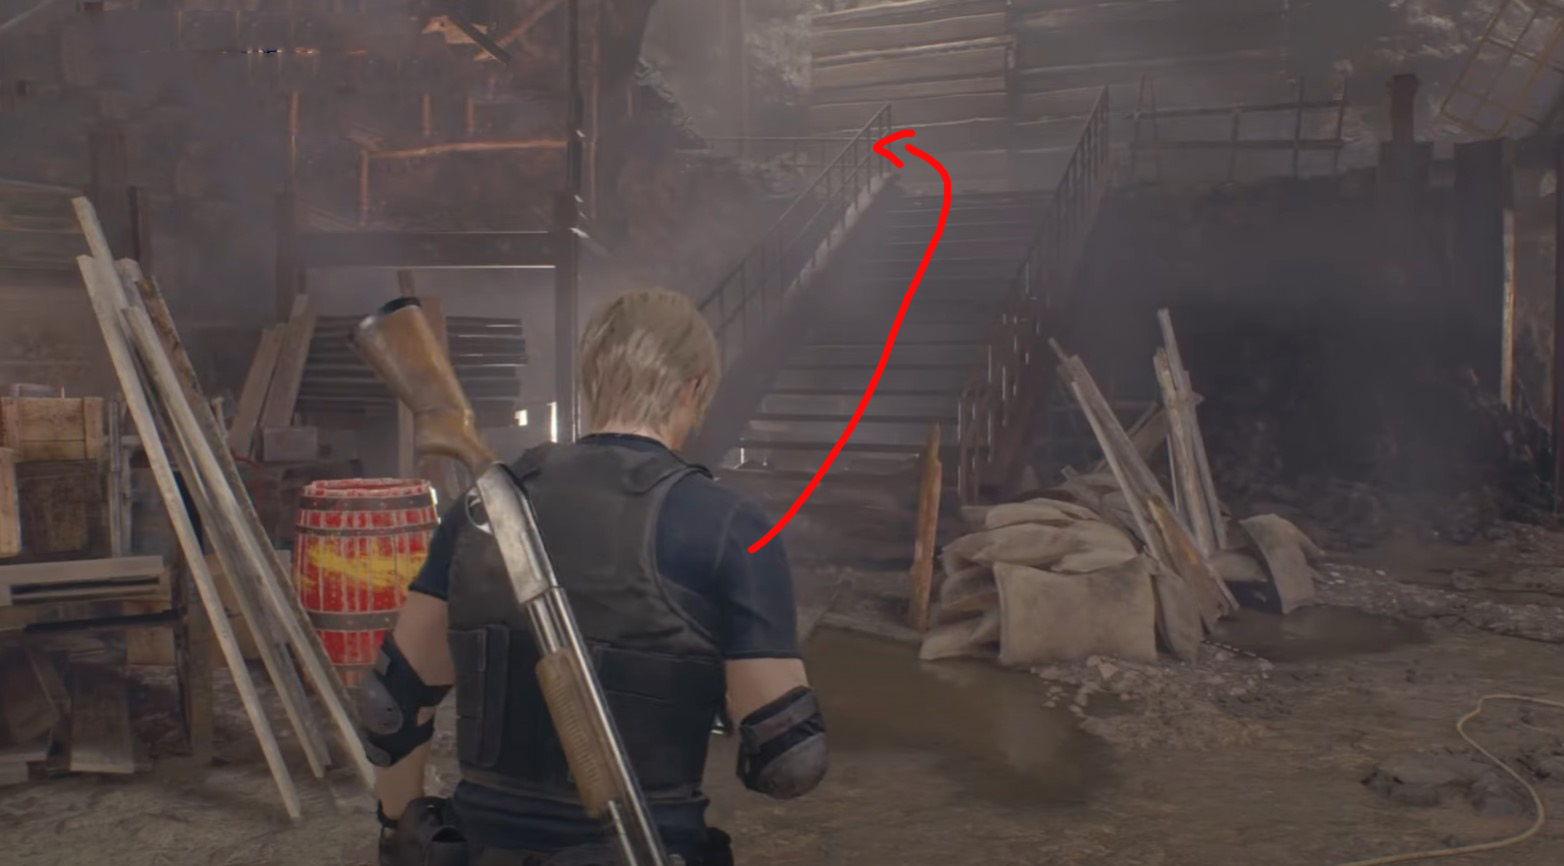
Treasure 32: The Golden Hourglass
- Plot: Chapter 11
- Location: Mines
- Cost: unknown
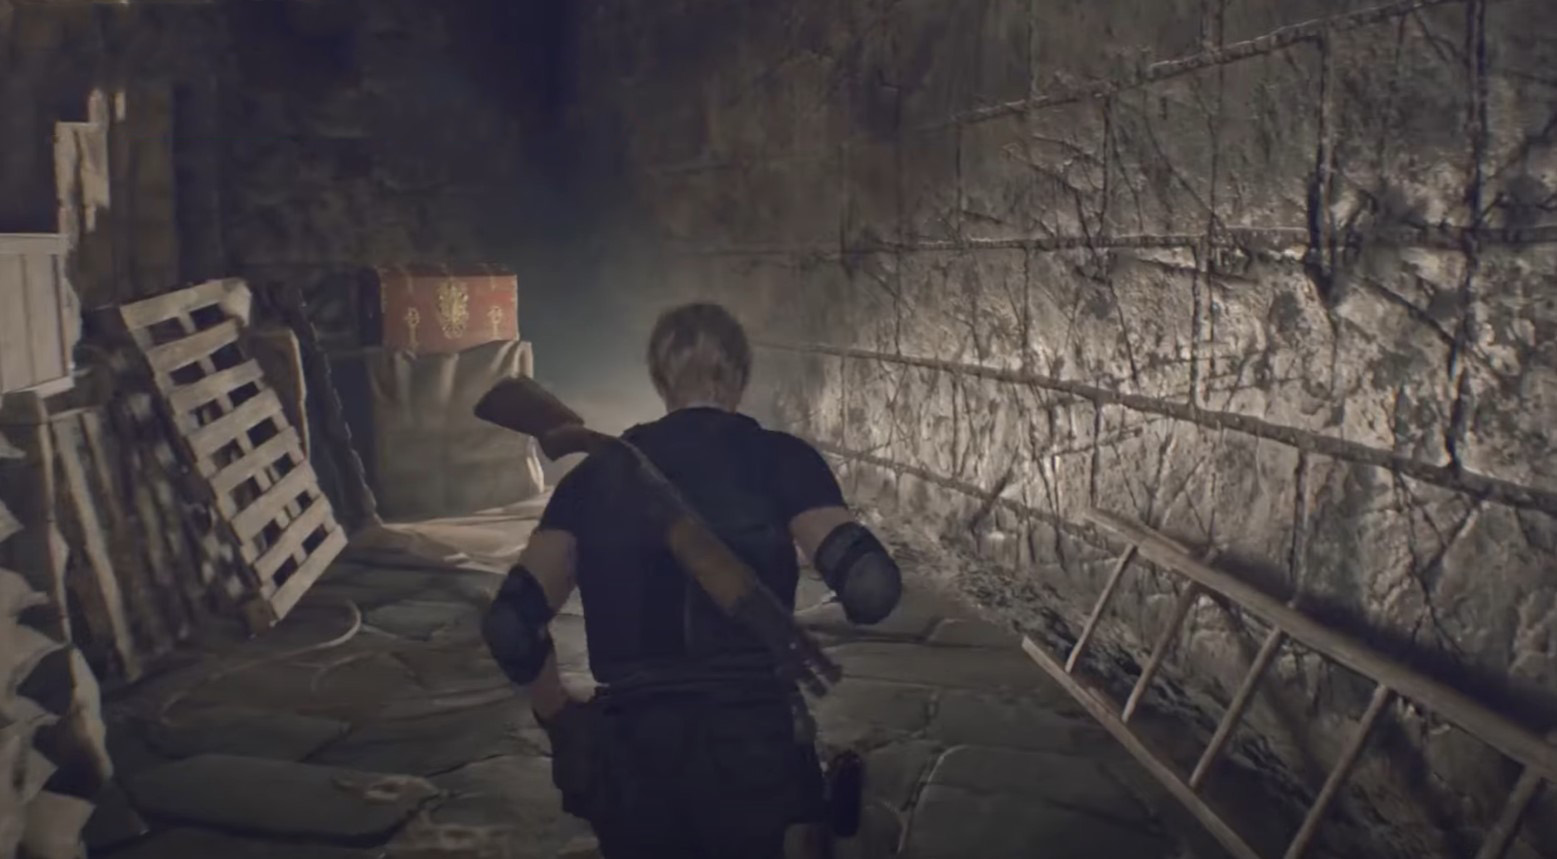
Go to the building located in the southern area of the indicated location and interact with the console for a bridge to appear. Then go to the opposite side and look for a chest in an inconspicuous niche.
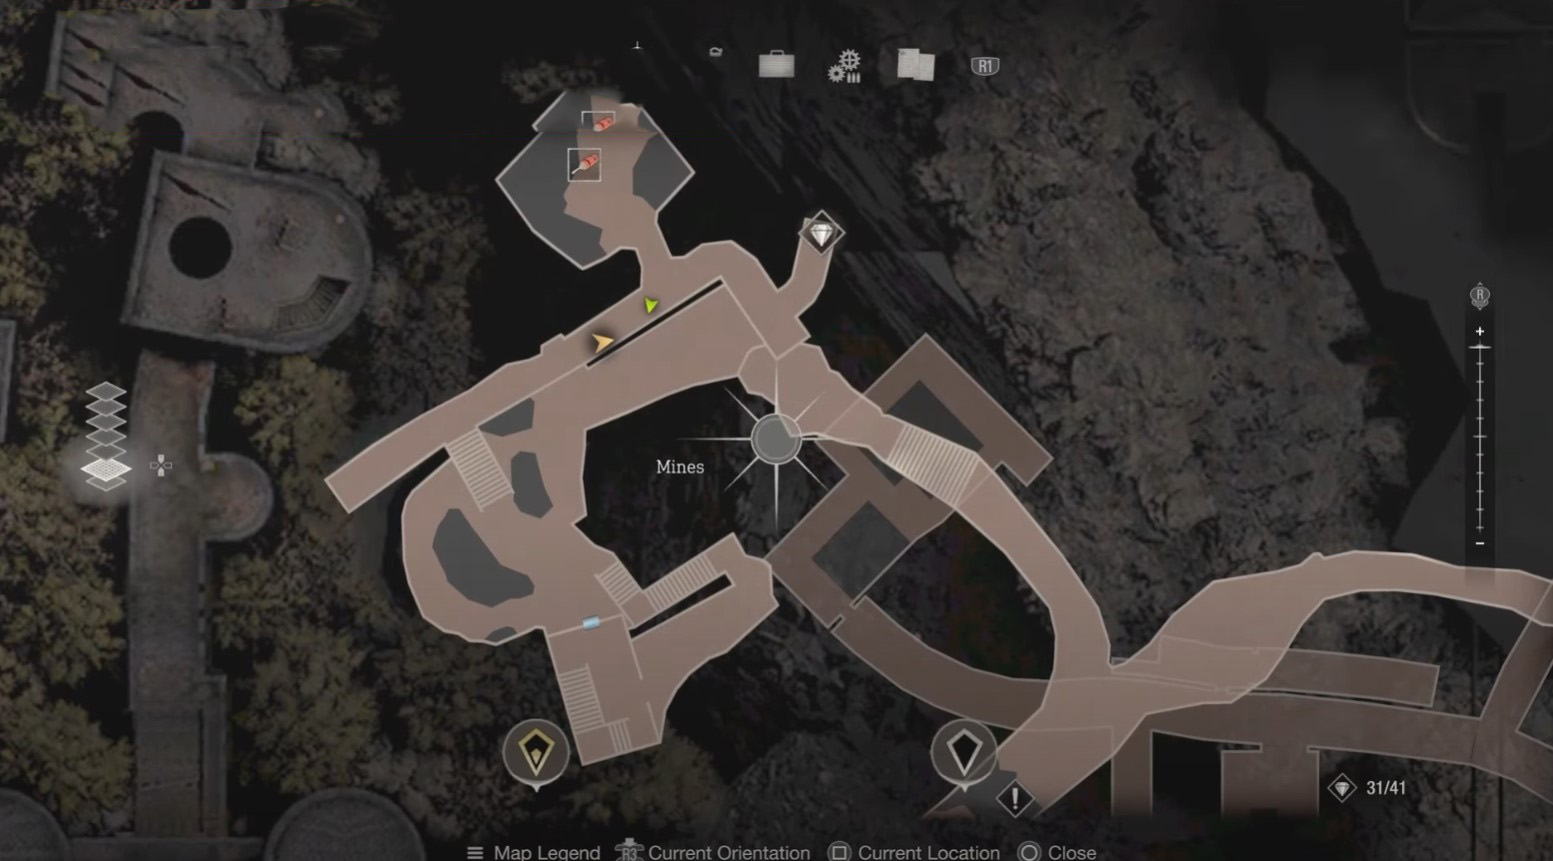
DLC Treasure 14: Iluminados Pendant
- Plot: Chapter 11
- Location: Mines
- Cost: unknown
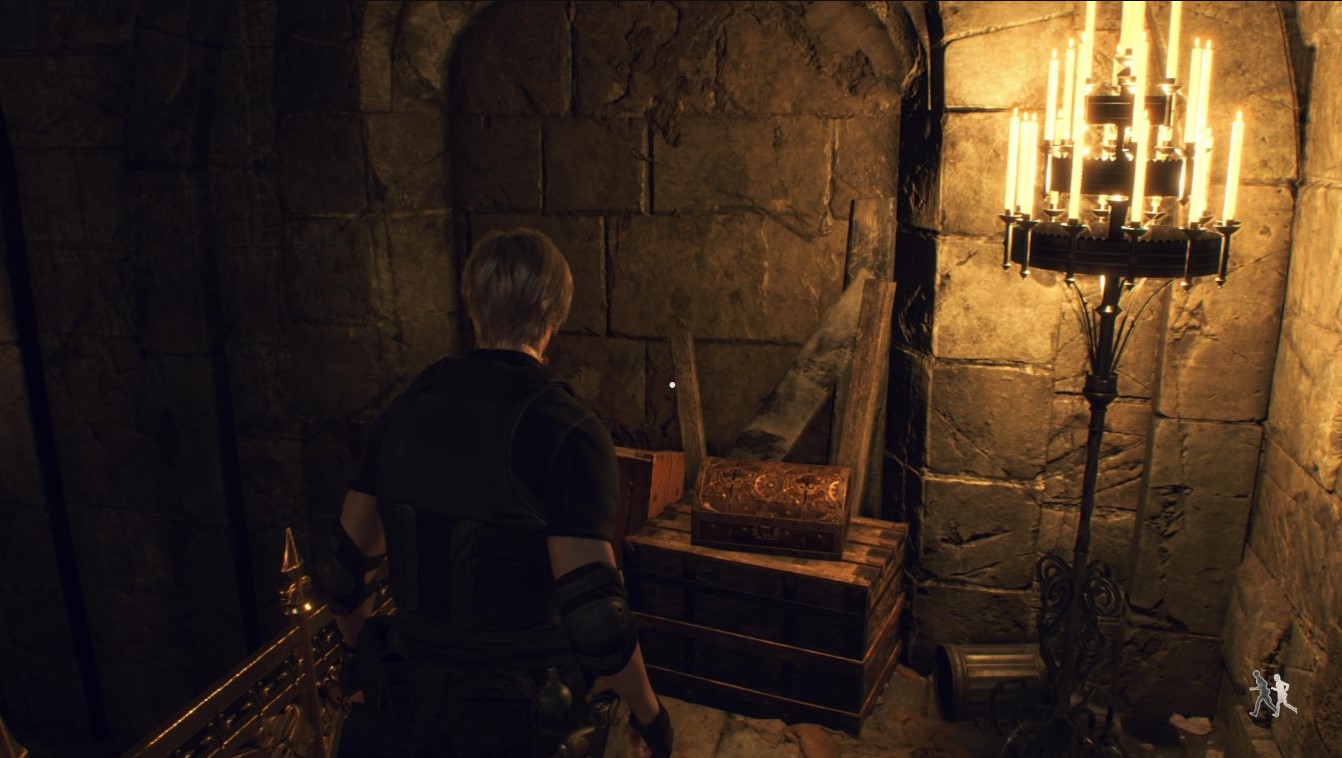
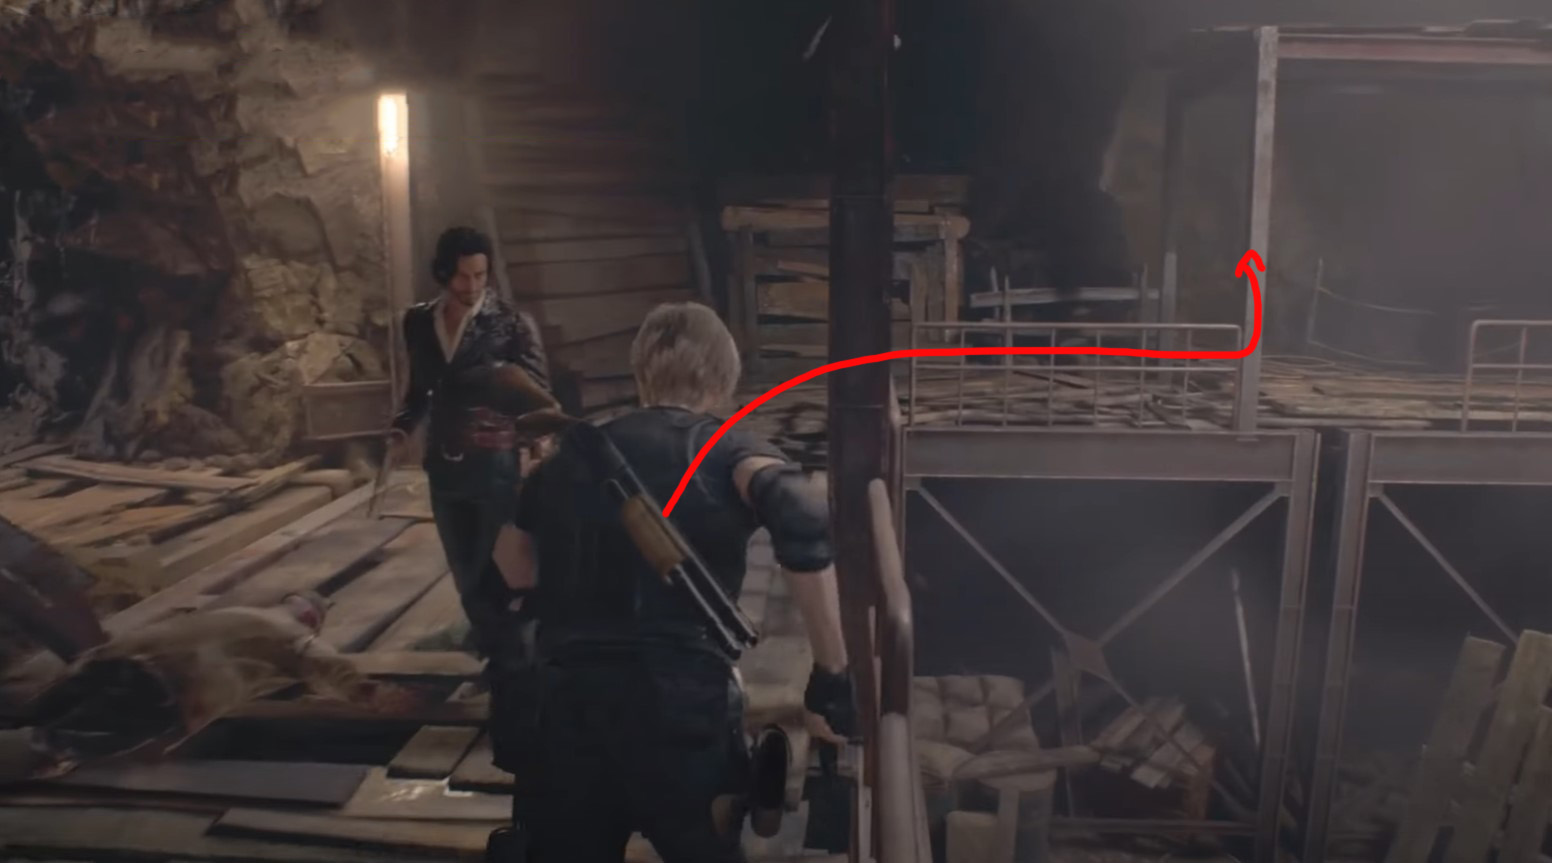
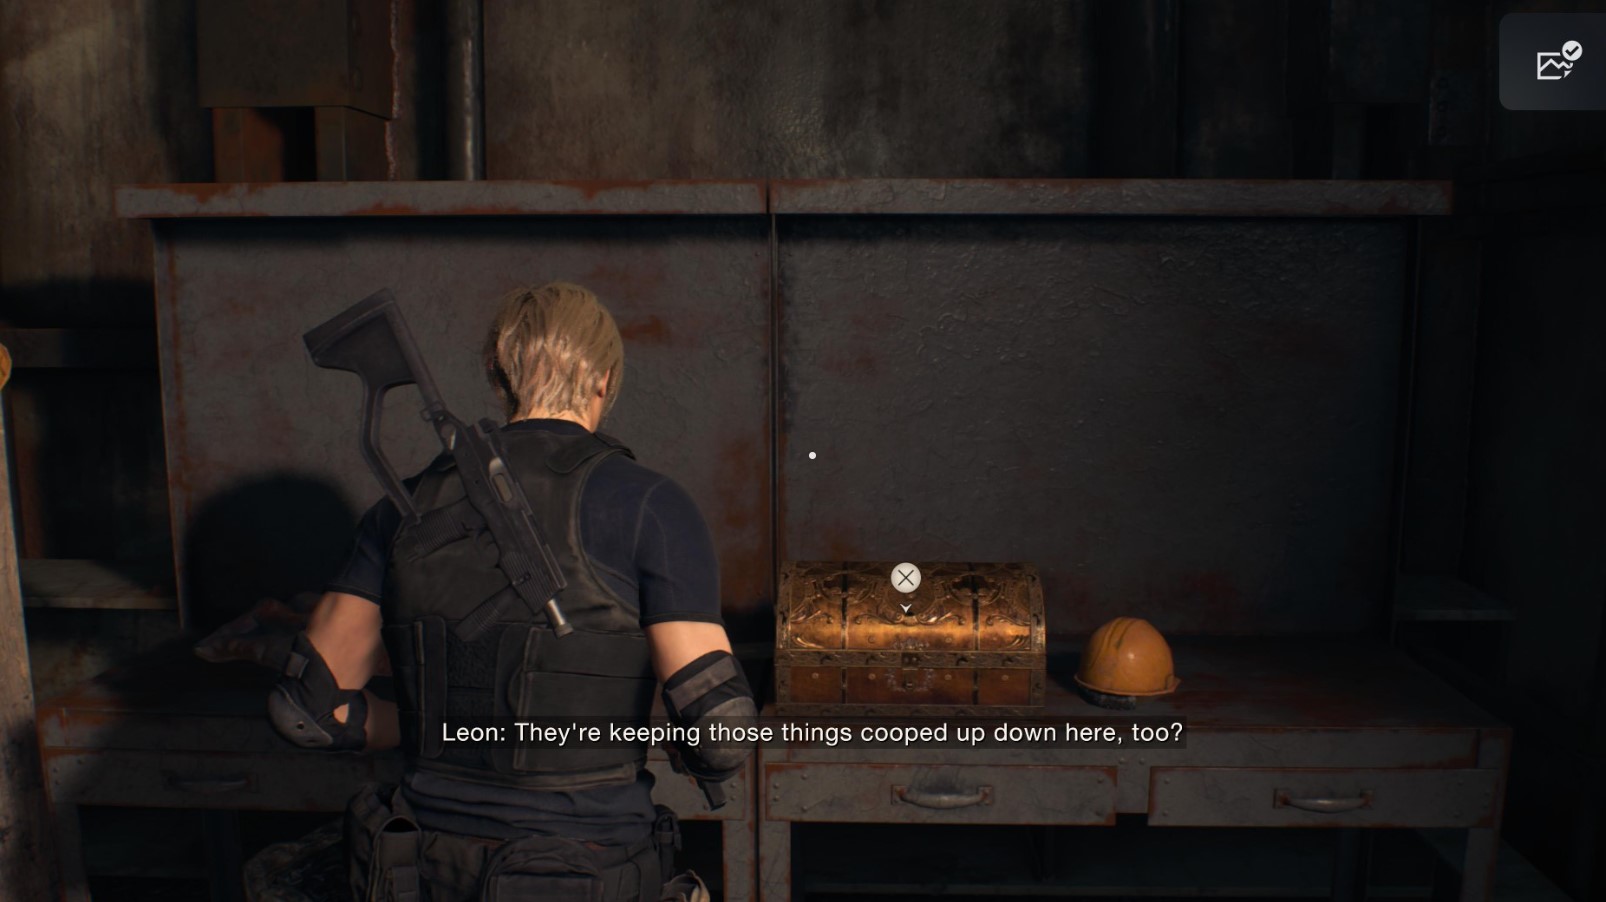
Having dealt with a couple of giants, move towards the first trolley. Before you get into it, you will pass through a room with a ladder, next to which there will be a golden casket with decoration on the table.
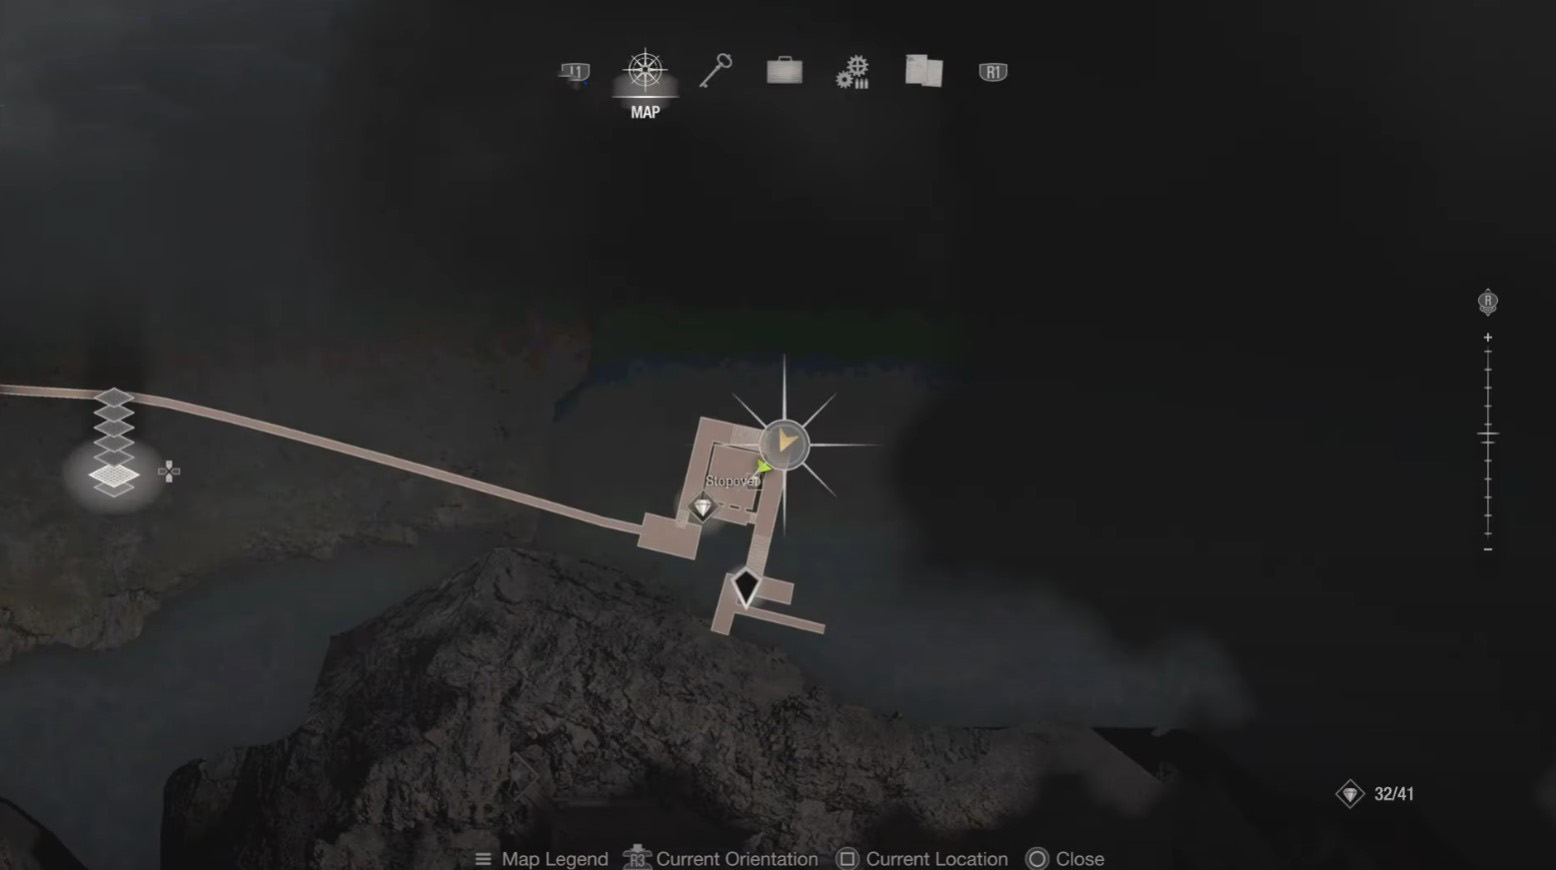
Treasure 33: Decanter
- Plot: Chapter 11
- Location: Stopover
- Cost: 4000+ pesetas
Using the first trolley, you will be taken to the specified area. Before you get into the next cart, look for a chest on the balcony of the upper floor. In it you will find a relic.
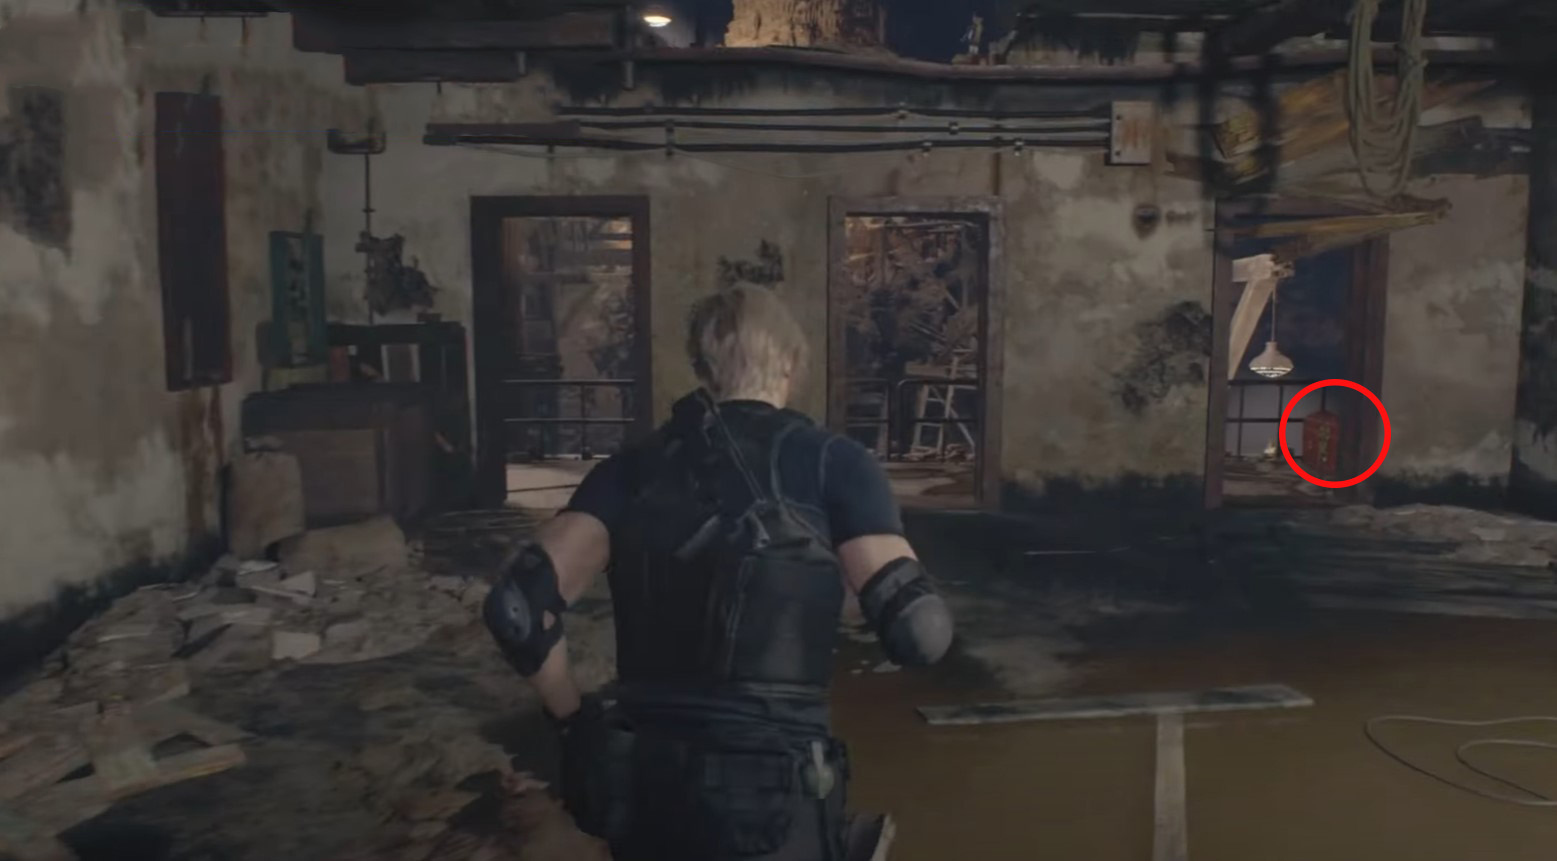
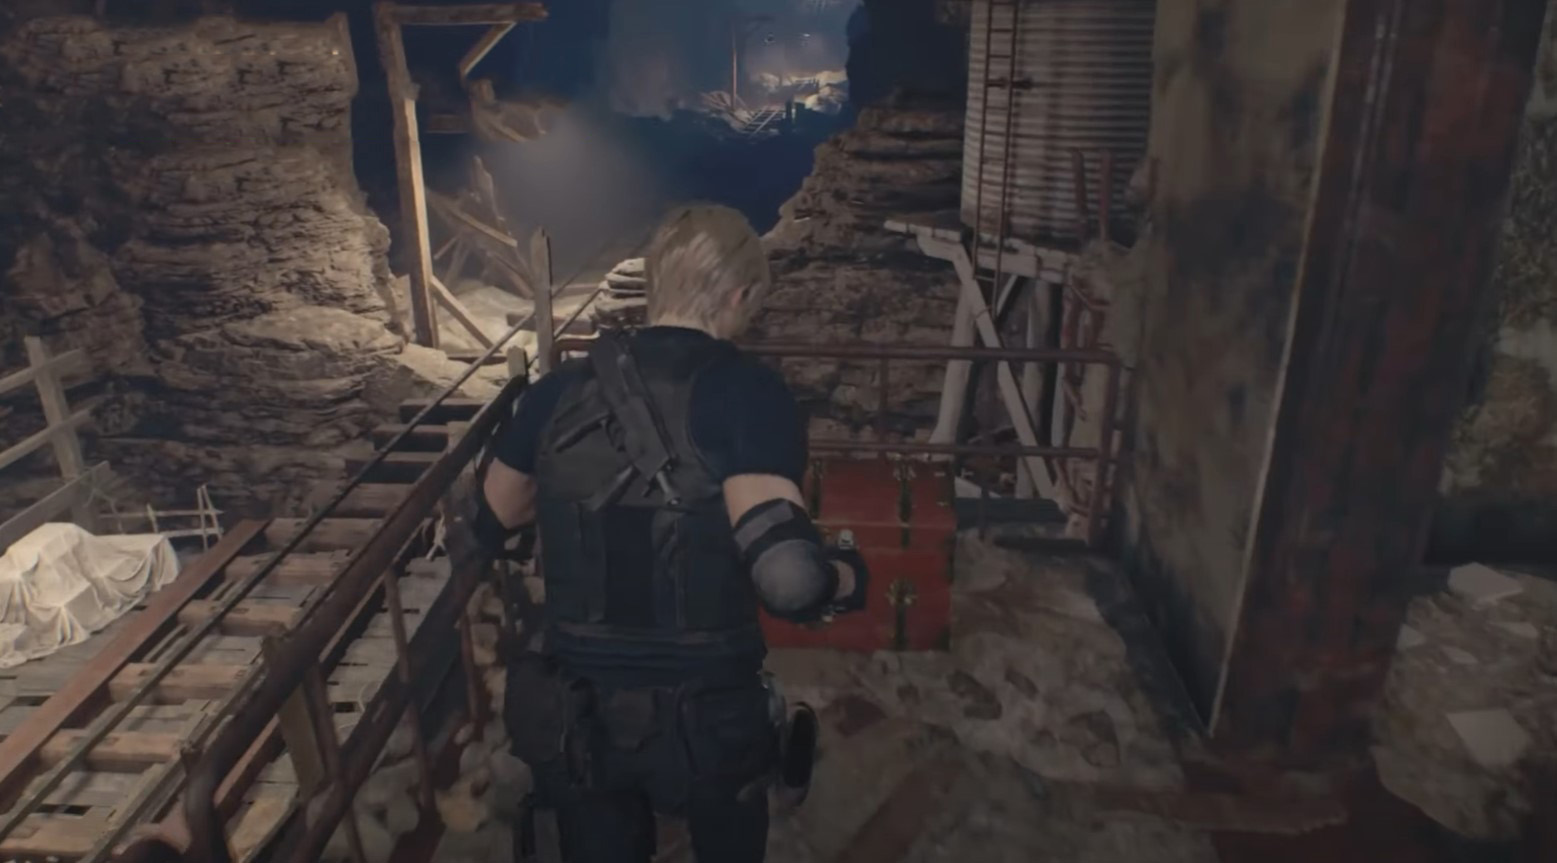
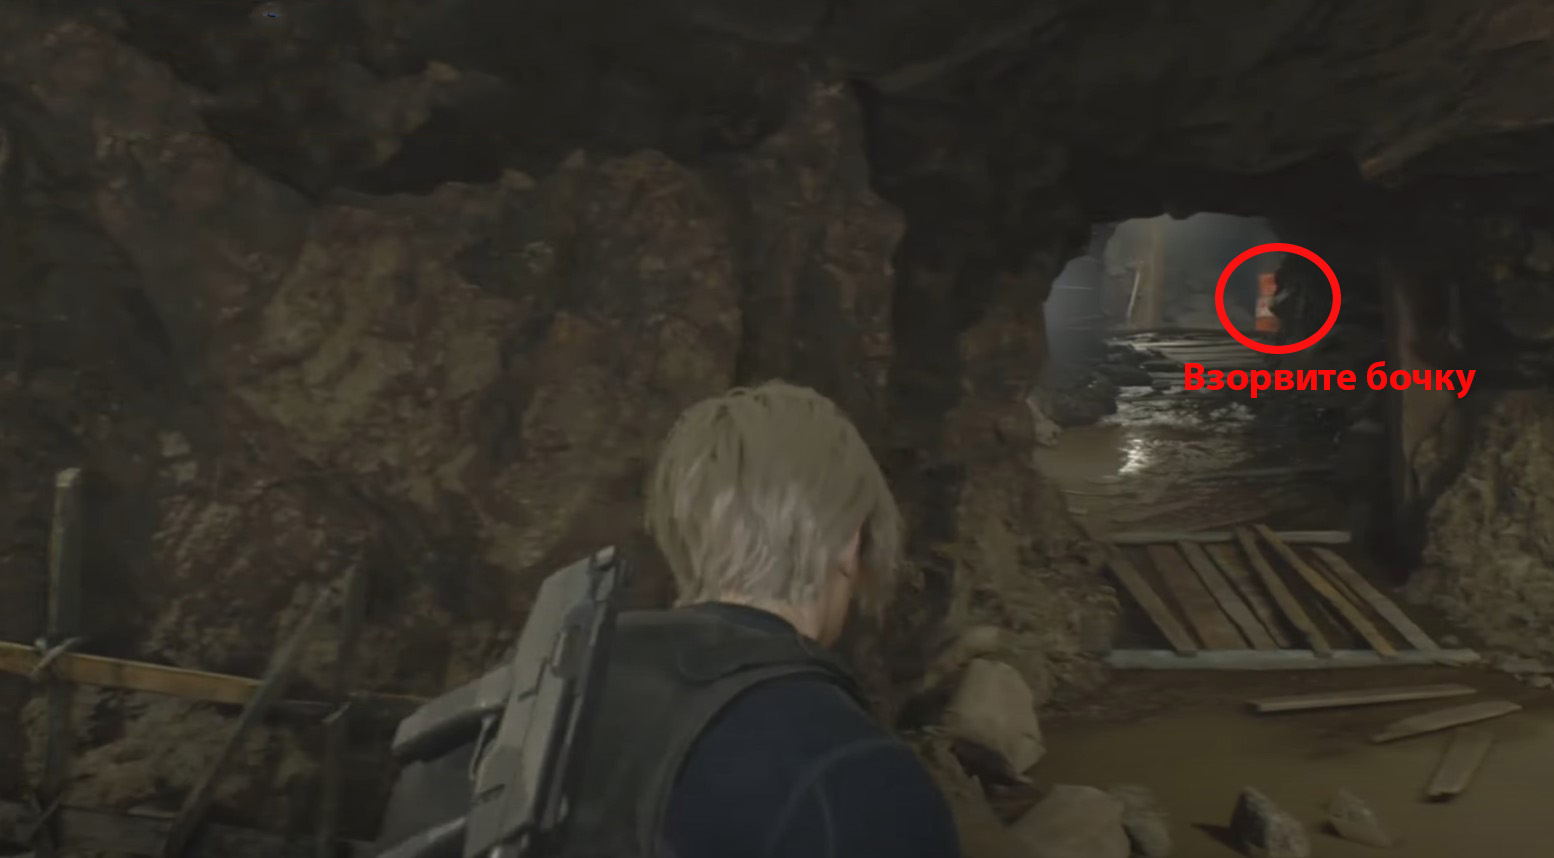
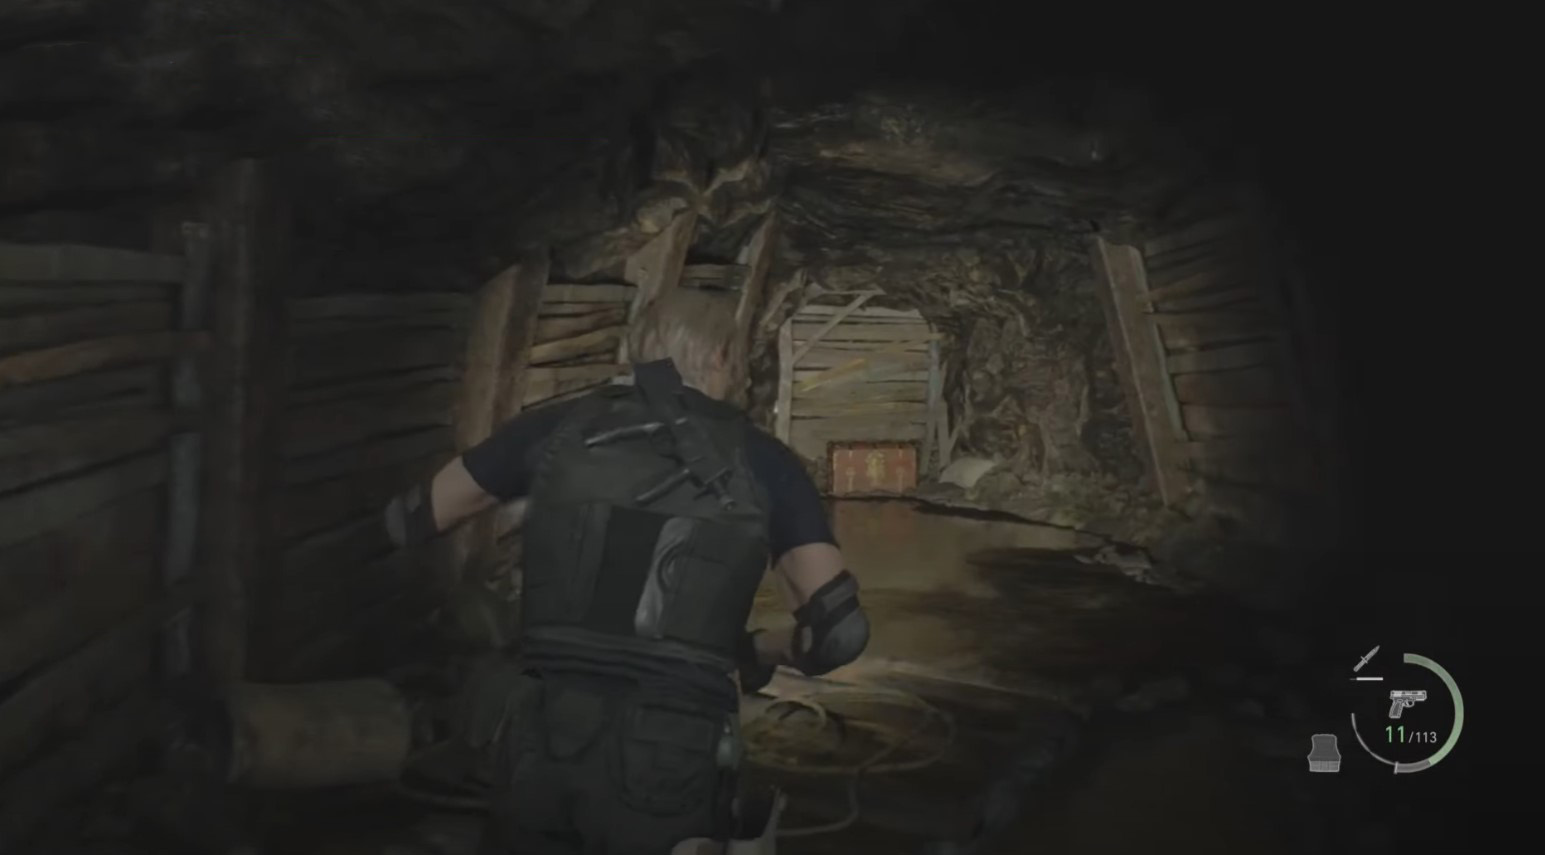
Treasure 34: Gold Bar
- Plot: Chapter 11
- Location: Hive
- Cost: unknown
After using the second trolley, you will be taken to the indicated area. Head west and shoot the barrel in the tunnel to open a passage leading to a chest containing this item.

Small key 2
After starting Chapter 12, use the elevator to go upstairs to the Ballroom. Then go to the right of the trolley and open the suitcase lying on the table. In it you will find a small key that you will need in the future.
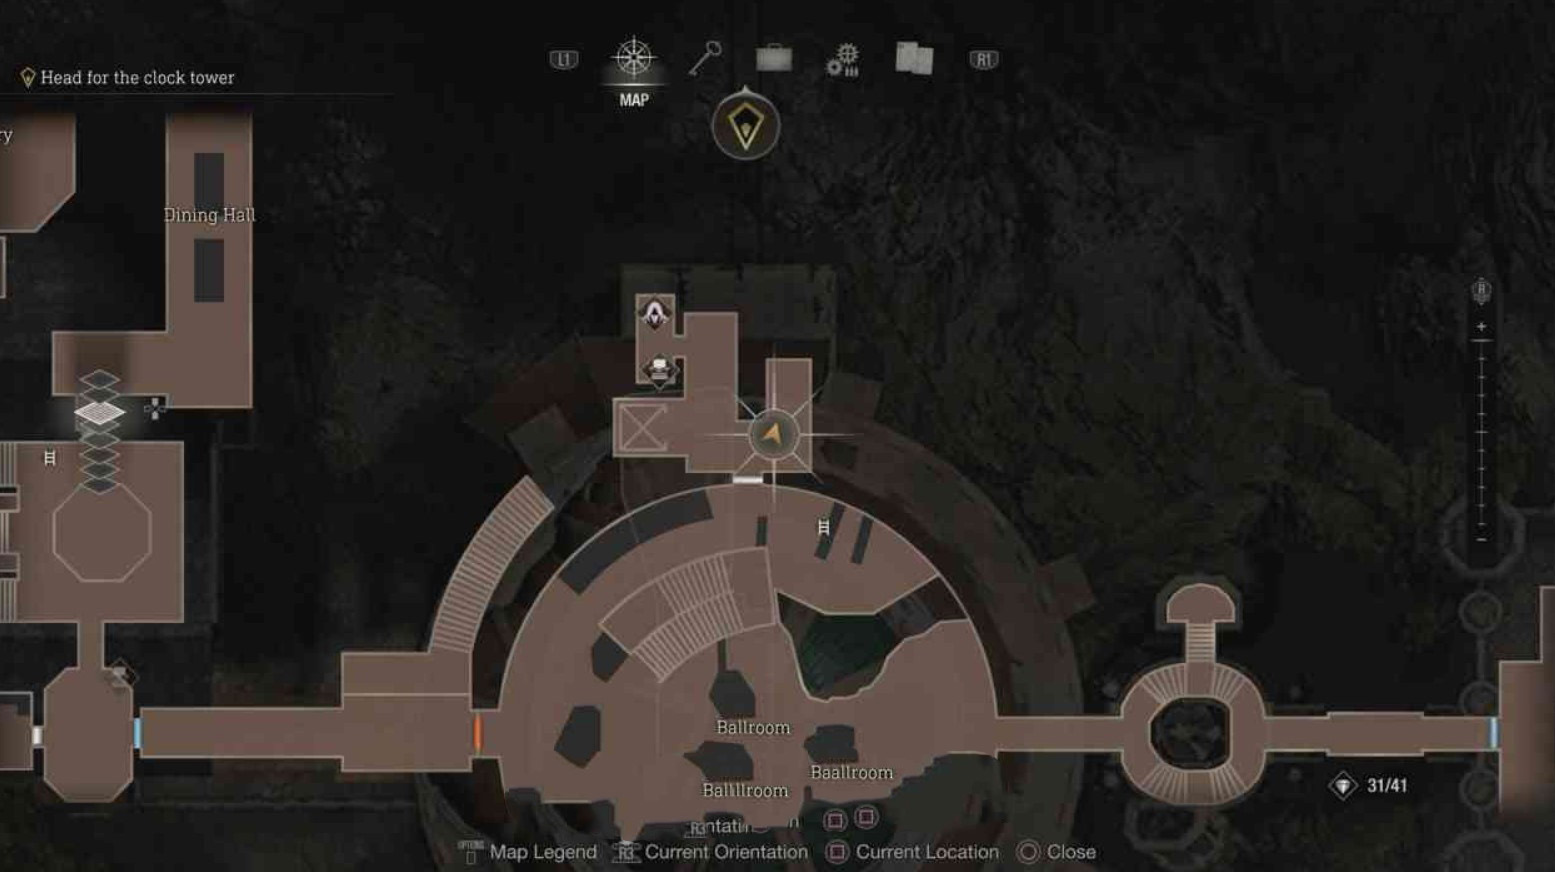
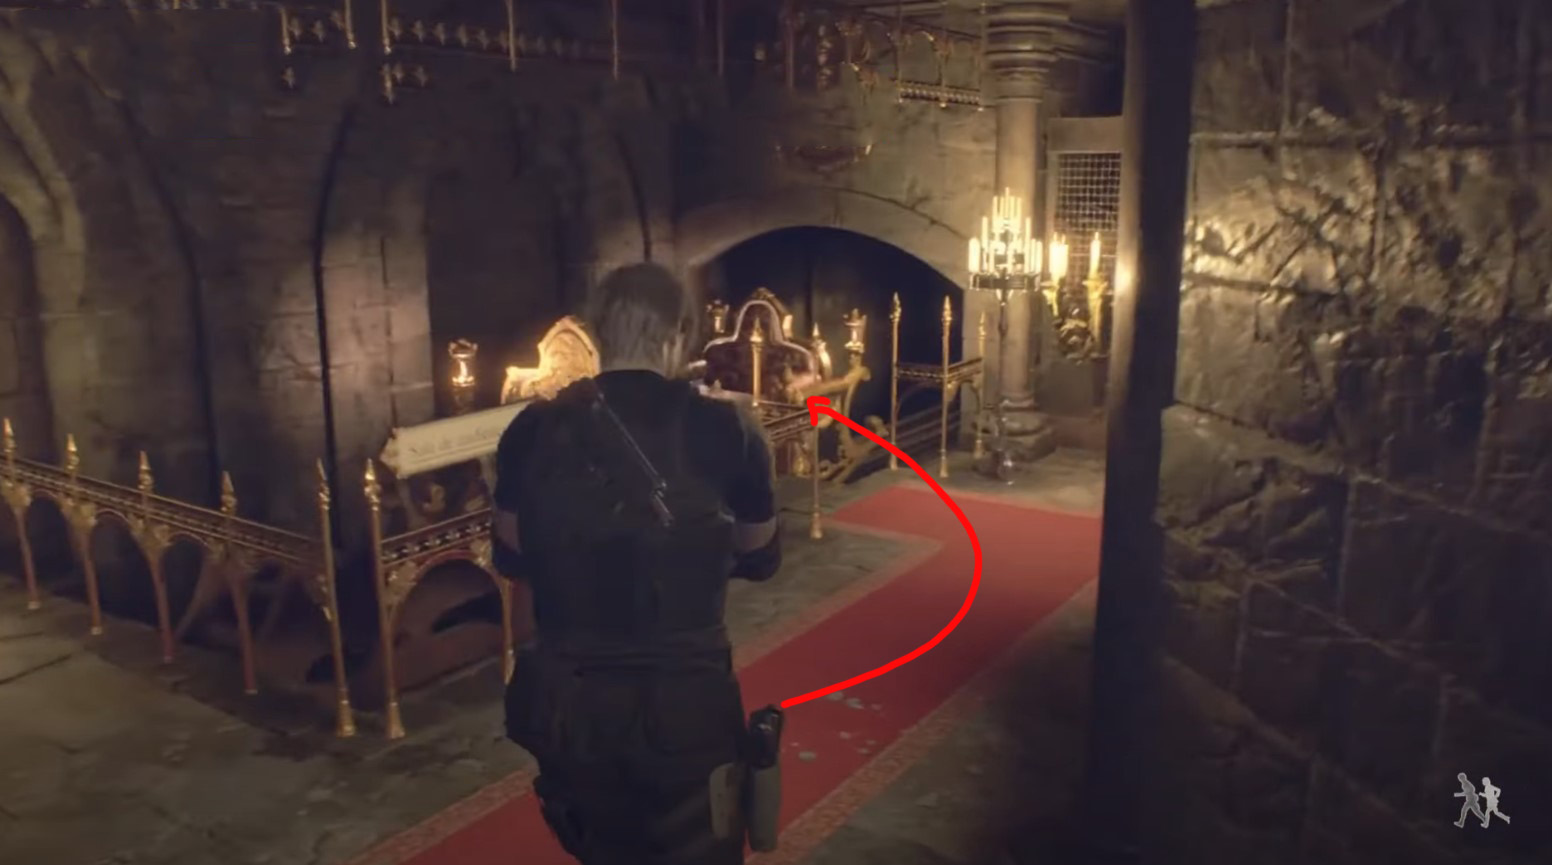
DLC Treasure 15: Fancy Necklace
- Plot: Chapter 12
- Location: Ballroom
- Cost: unknown
Instead of getting into the golden cart next to the typewriter, return to the Throne Room and look for the chest on the stone pillar. Inside it will be an ornament.

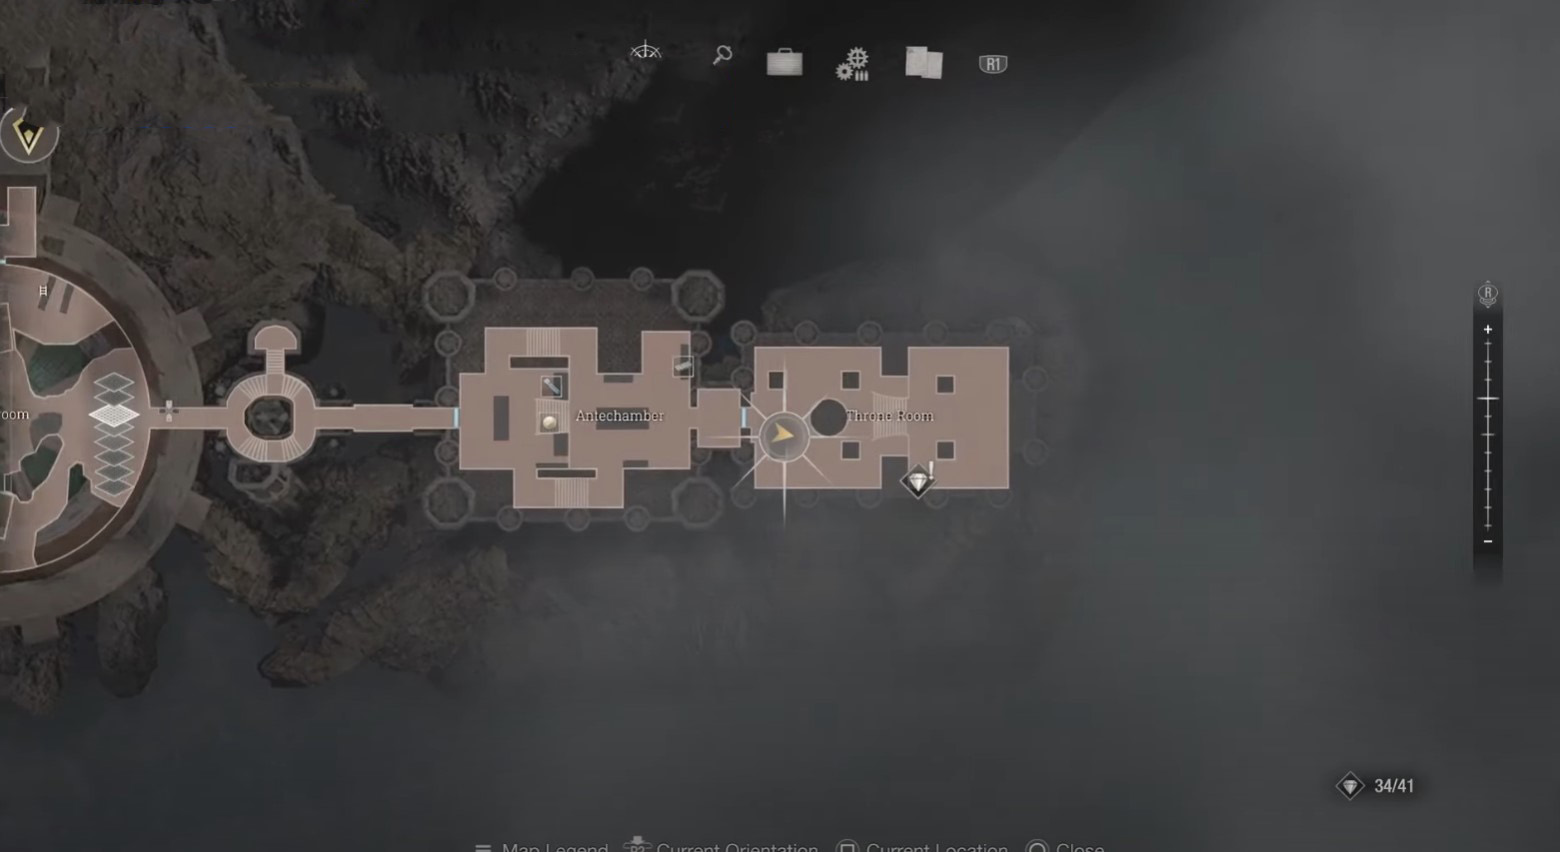
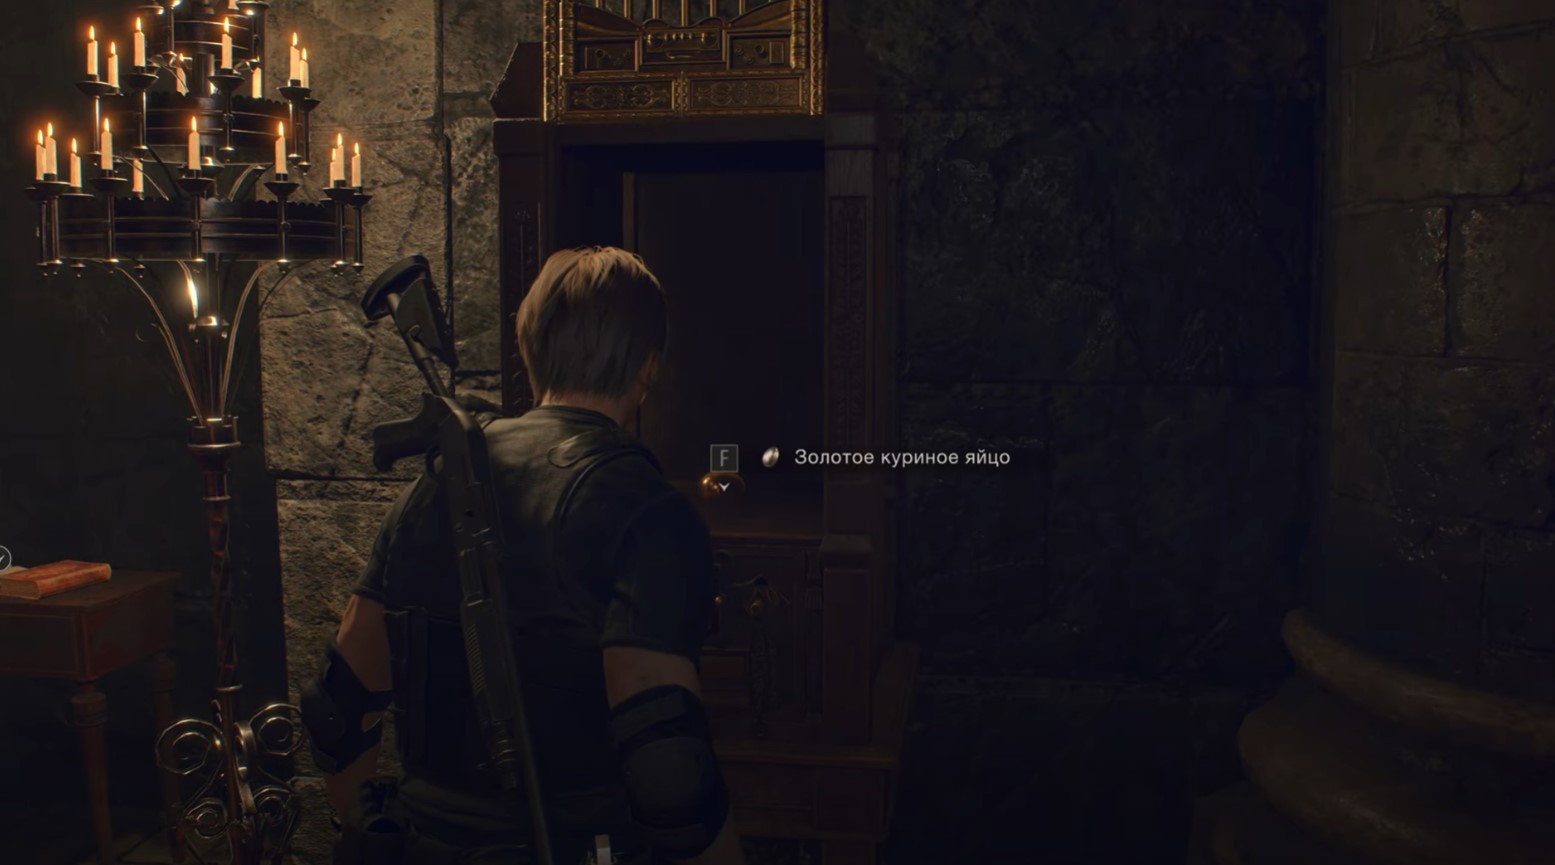
Treasure 35: Golden Chicken Egg
- Plot: Chapter 12
- Location: Throne room
- Cost: unknown
In the same room as the previous treasure, look for a golden cage in the corner on the right side of the room. Use the cube device to open it and get the treasure.
Treasure 36: Beautiful Beetle
- Plot: Chapter 12
- Location: Castle wall
- Cost: unknown
Return to the castle wall to the 4th tower. It contains a locked cabinet, which you can now open with a small key. You can get to this location both from the Wine Cellar and from the Yard.
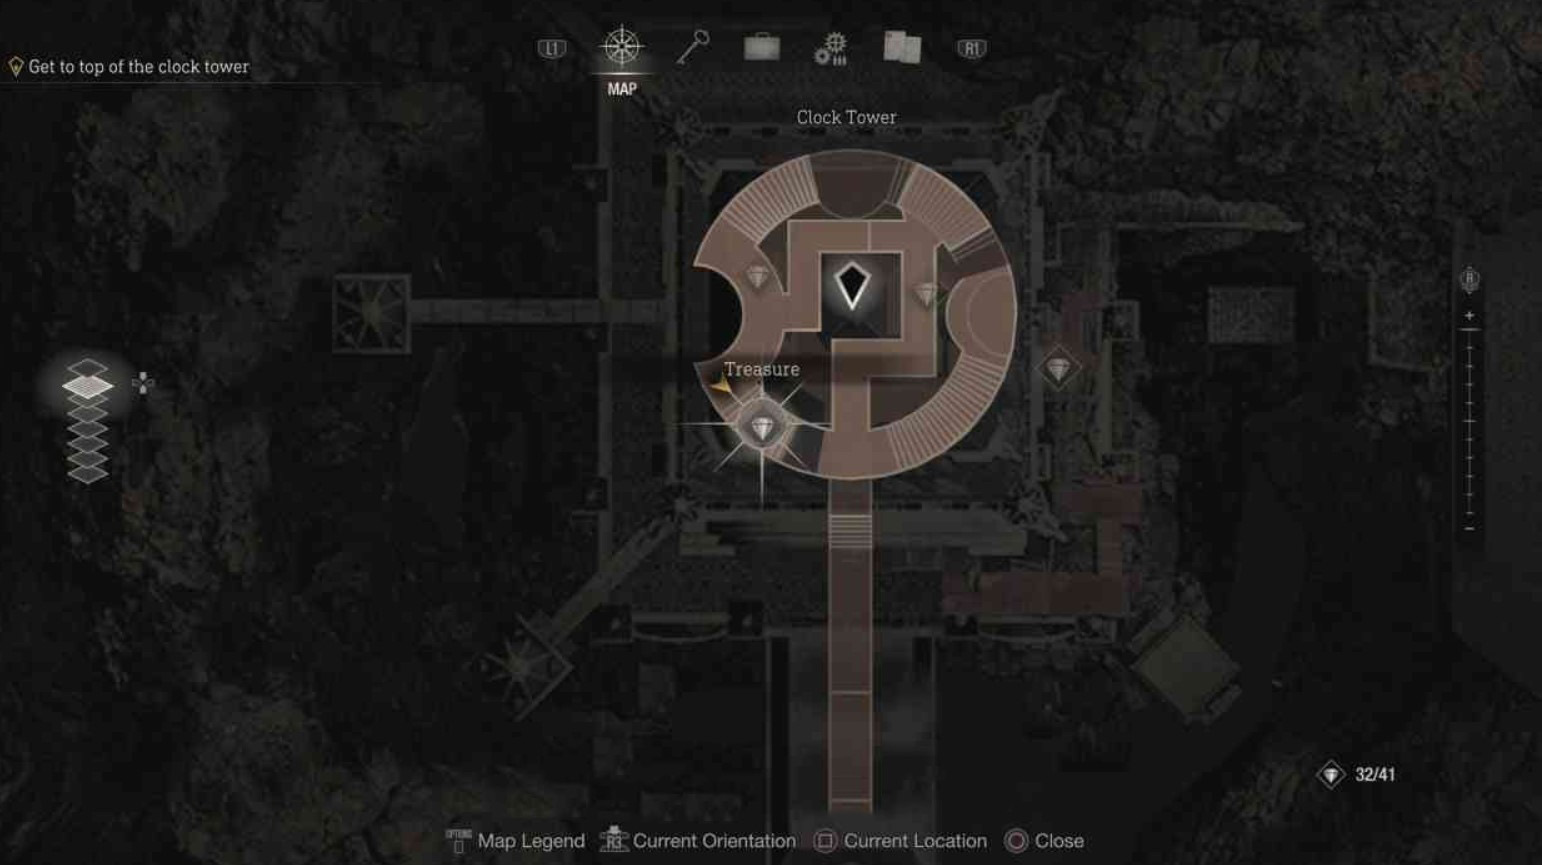
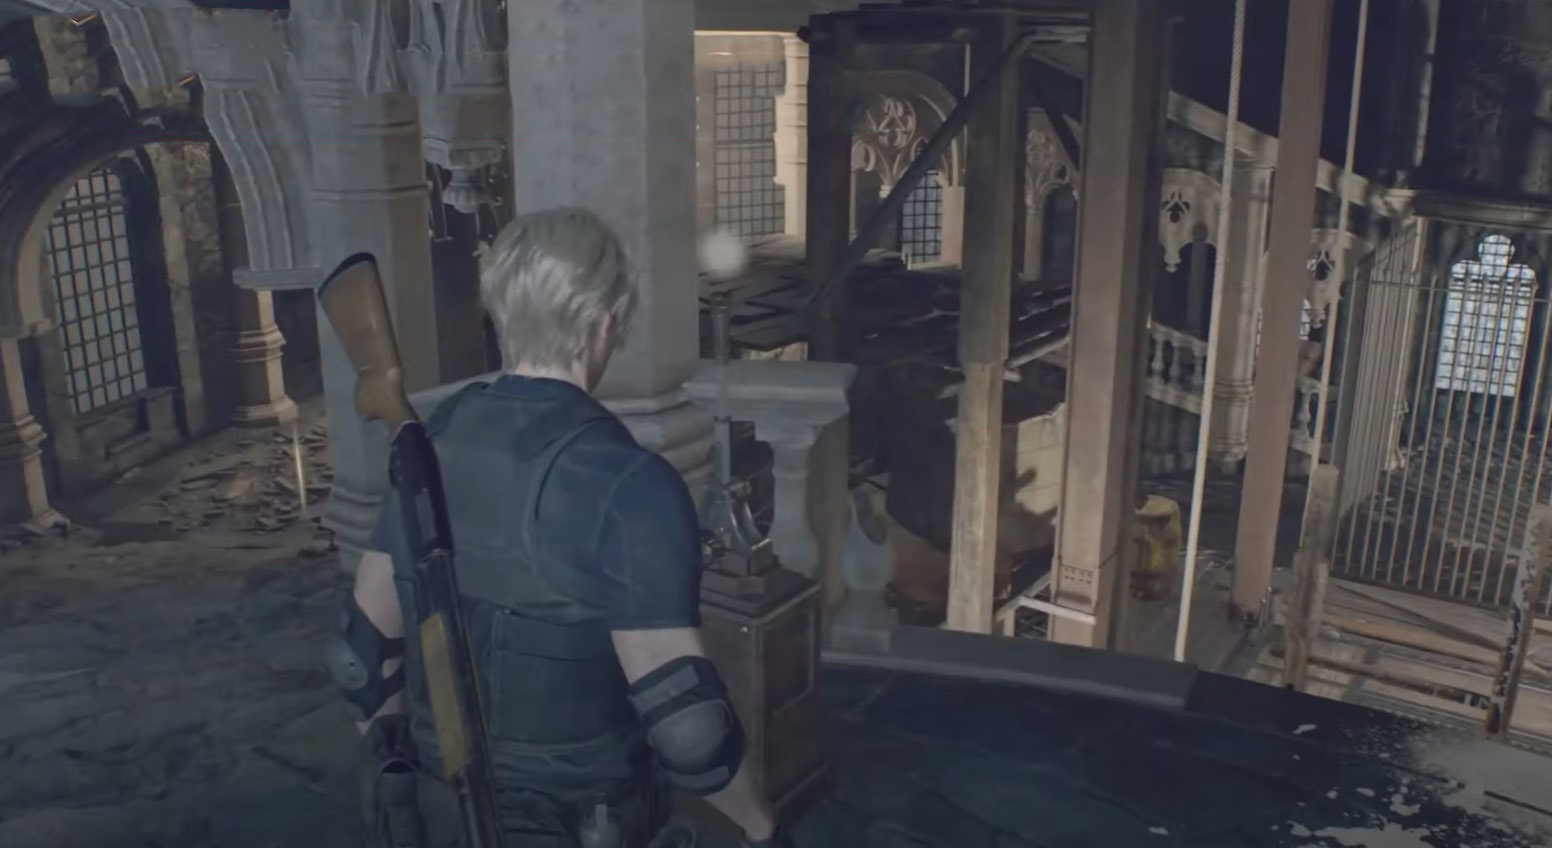
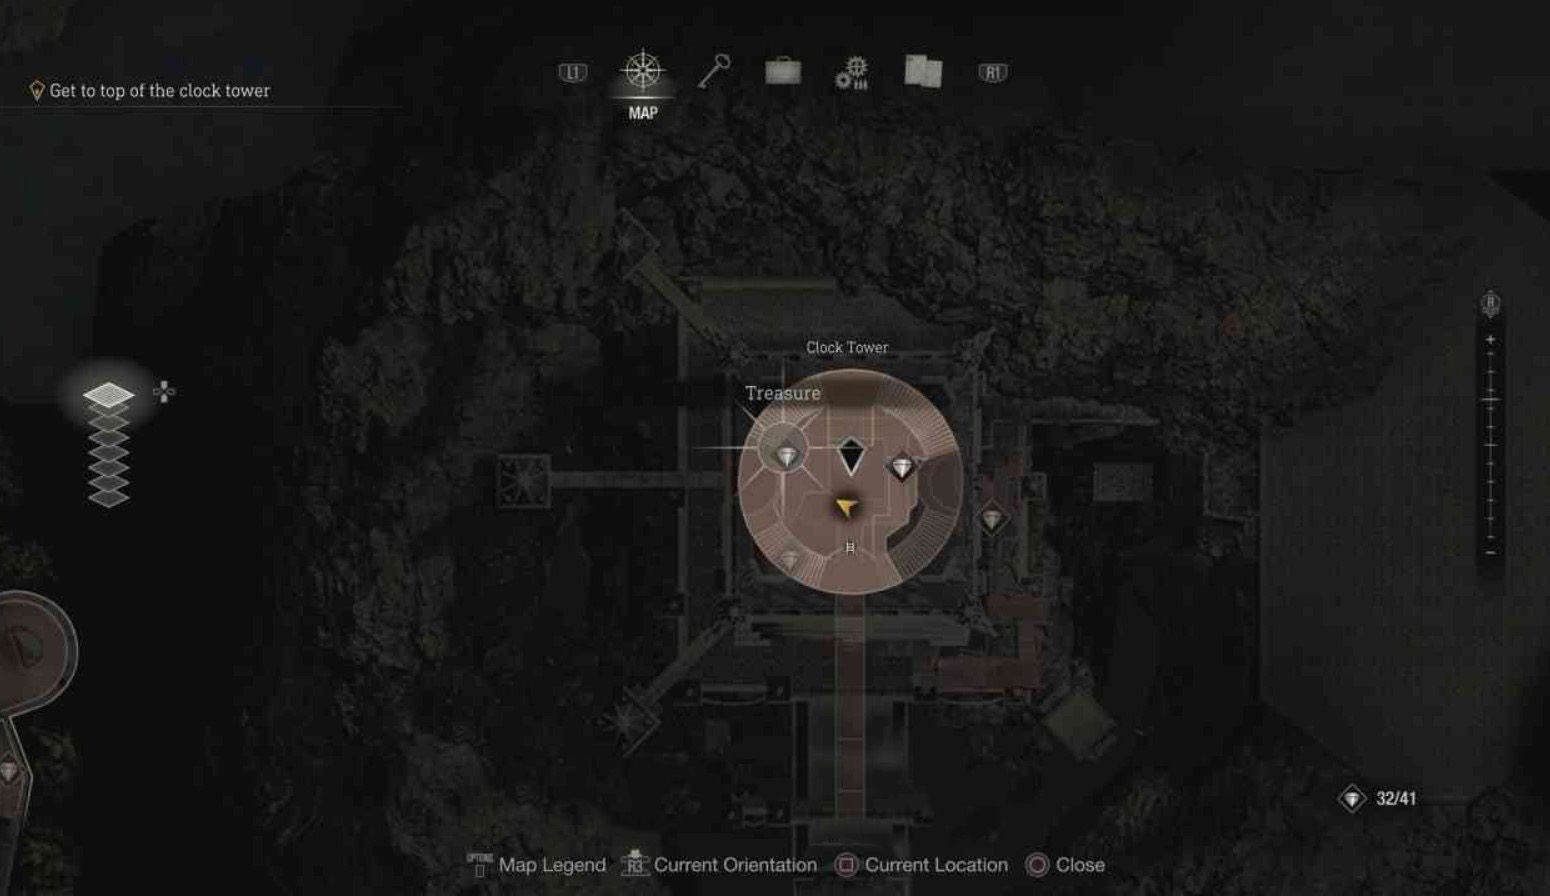
Treasure 37: Gold Bar
- Plot: Chapter 12
- Location: Clock tower
- Cost: unknown
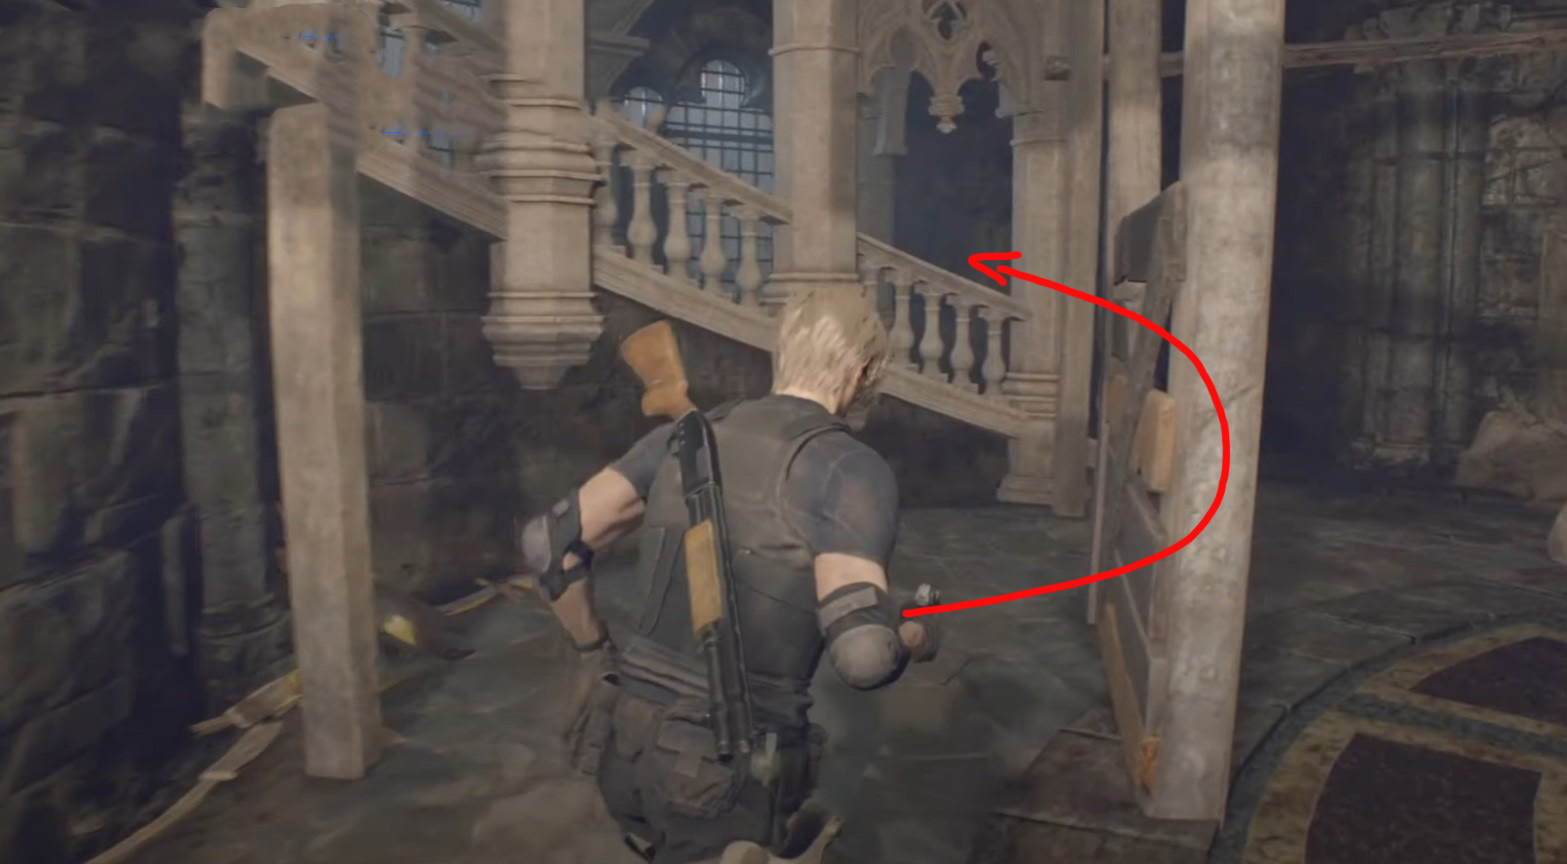
Board the golden cart located near the merchant and the Ballroom to reach the area above. Being on level 3 (if you count from top to bottom), go to the southern part of the location and look for a red chest standing on a bale.

Treasure 38: Alexandrite
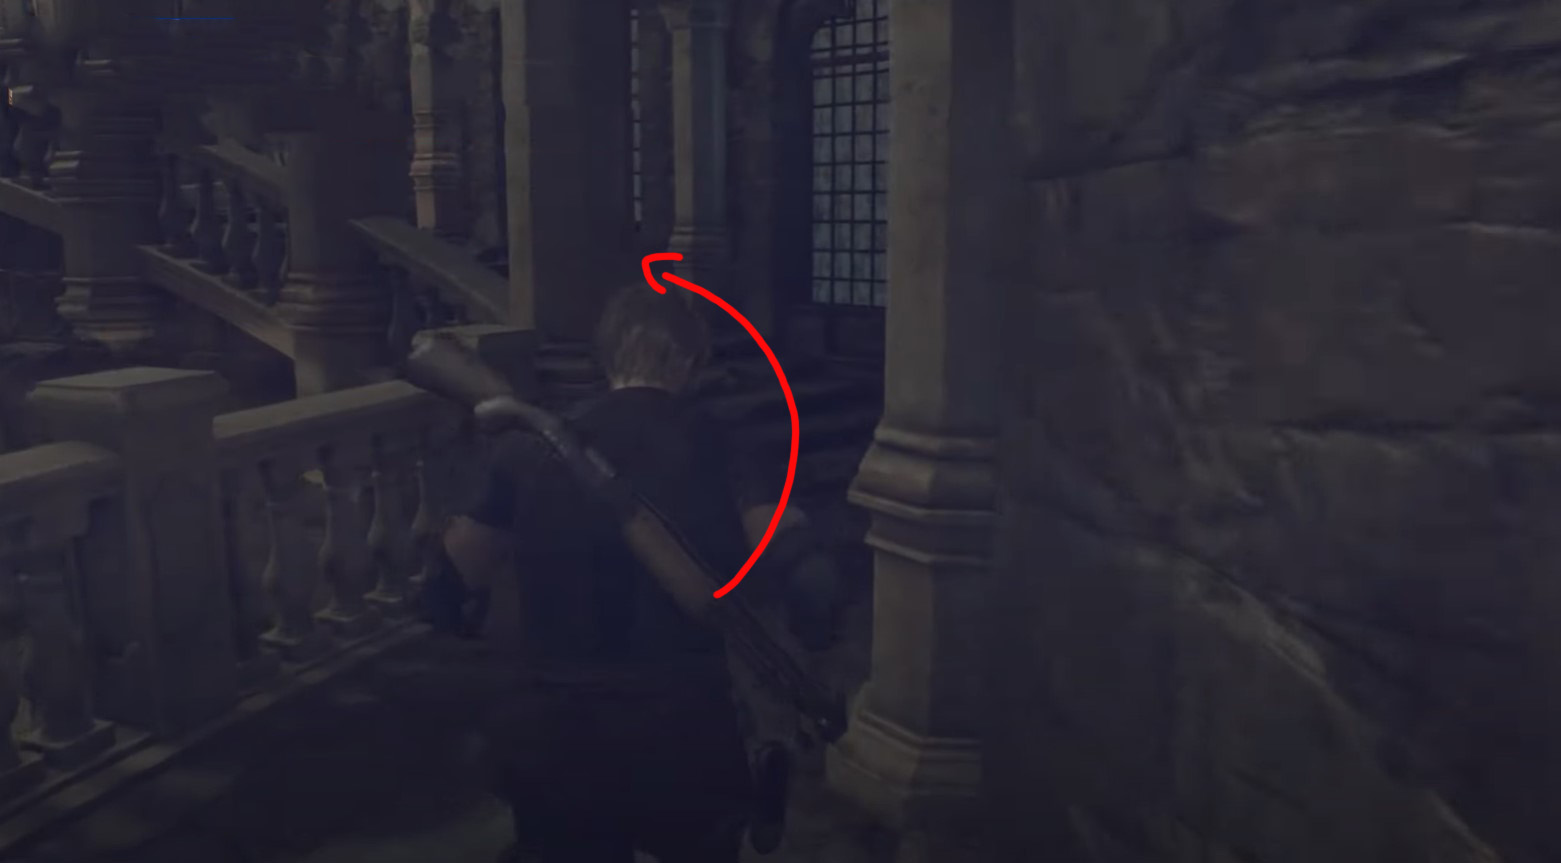
- Plot: Chapter 12
- Location: Clock tower
- value: 6000 pesetas
Climb up to the 2nd level (counting from top to bottom) by the stairs, avoiding the fire, and start walking along the stairs leading even higher. At this point, raise your head up to see a lamp with a gem.
Treasure 39: Mirror (pearl and rubies)
- Plot: Chapter 12
- Location: Clock tower
- Cost: unknown
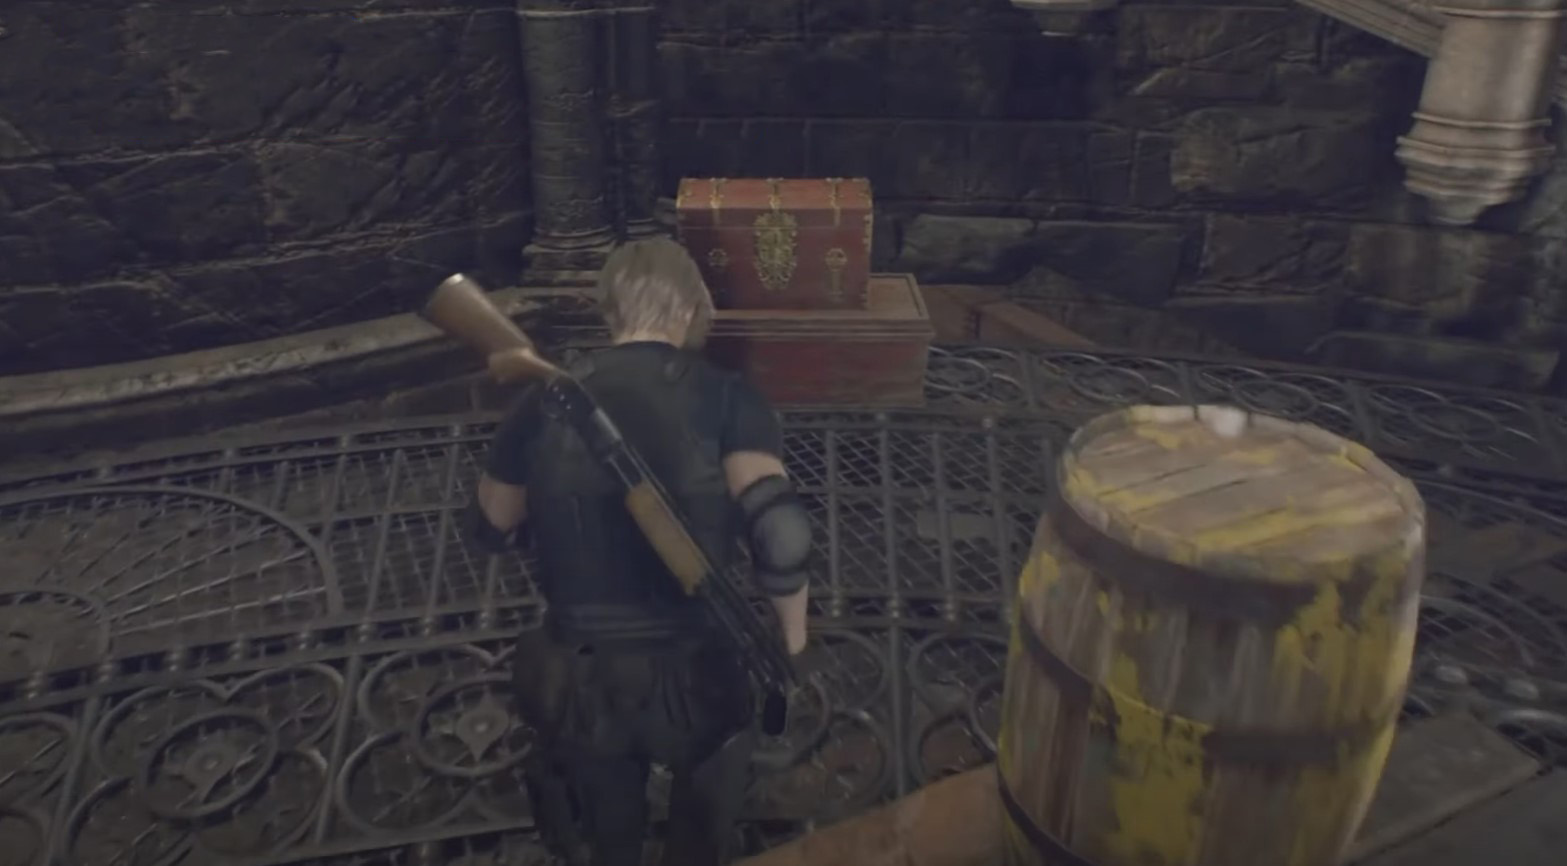
After finding the previous treasure, pull the lever on the left, and then go through the broken fence to the wooden platform. Next to the barrel, you will find a red chest containing a relic.
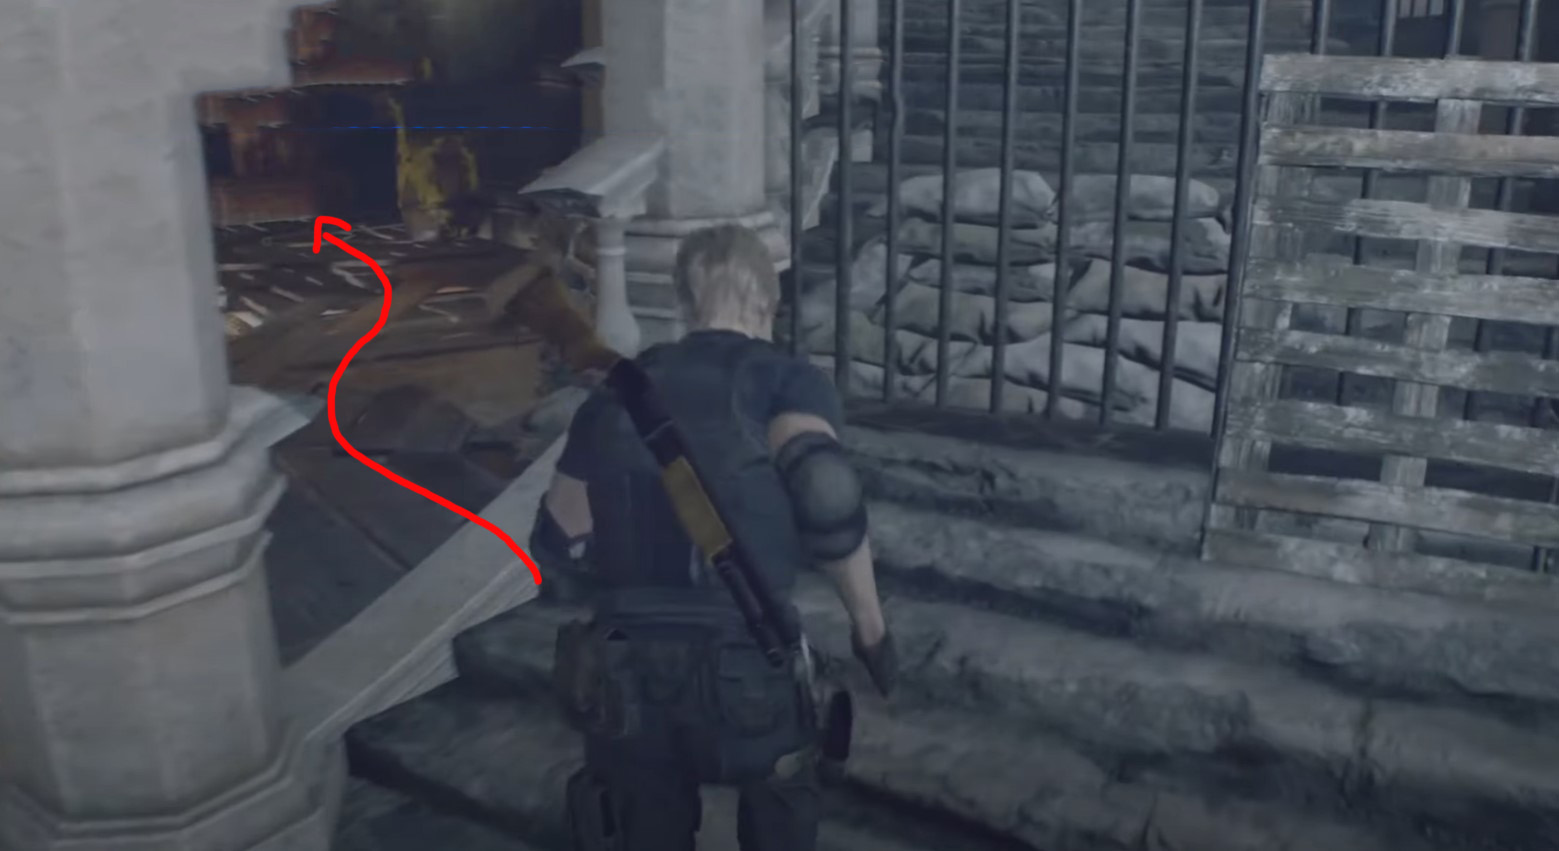
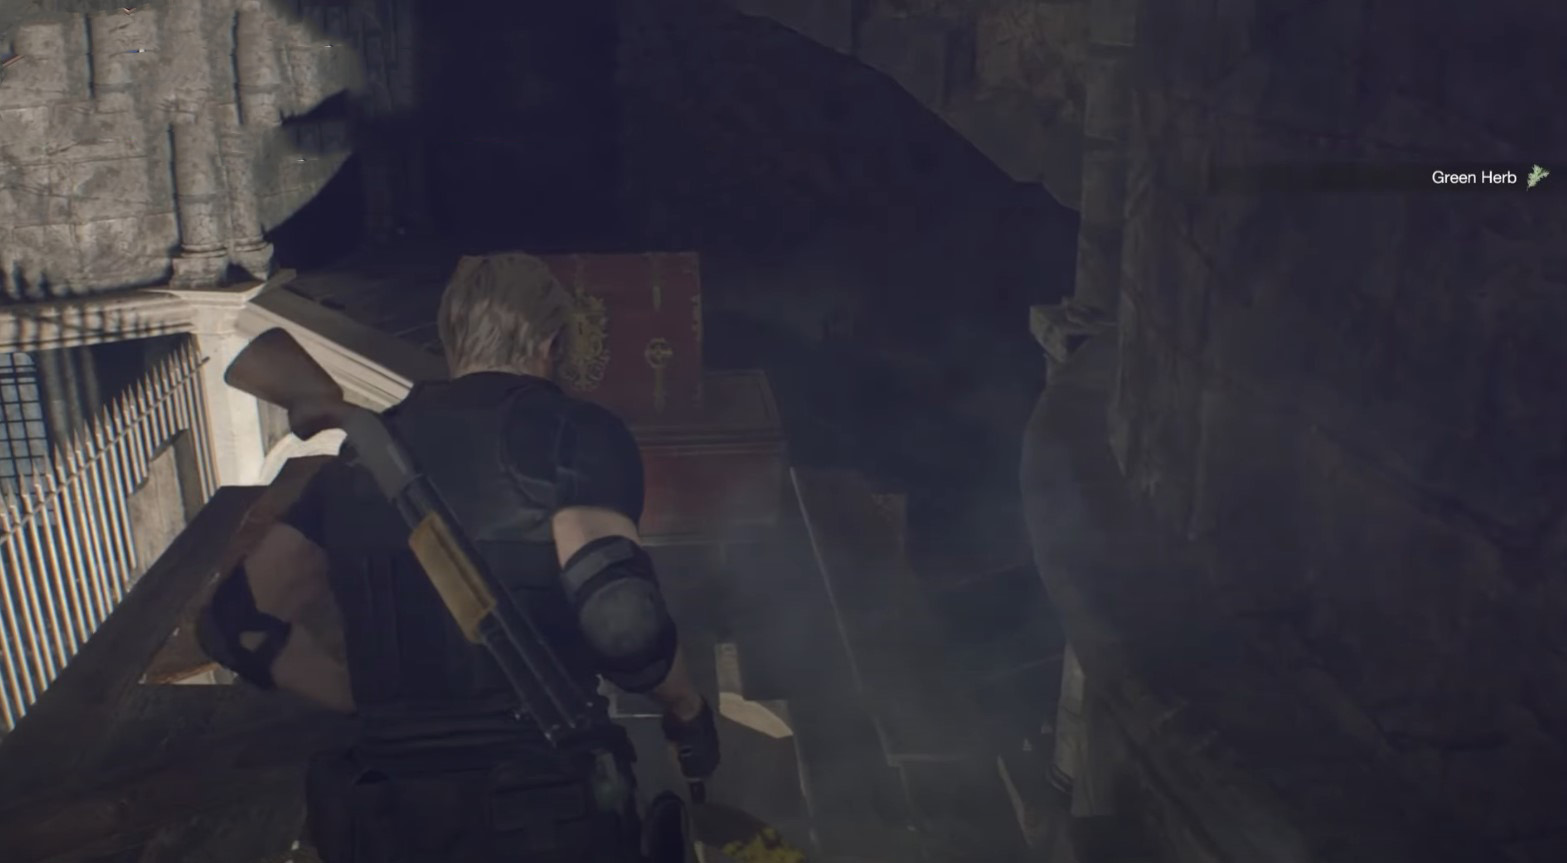
Treasure 40: Expensive Watches
- Plot: Chapter 12
- Location: Clock tower
- Cost: unknown
After finding the previous treasure, turn left and jump down. In no case do NOT touch the lever on the right, otherwise you will start the elevator and will not be able to continue exploring the lock. Instead, go forward a little and open the red chest.
DLC Treasure 16: Silver Token
- Plot: Chapter 12
- Location: Clock tower
- Cost: unknown
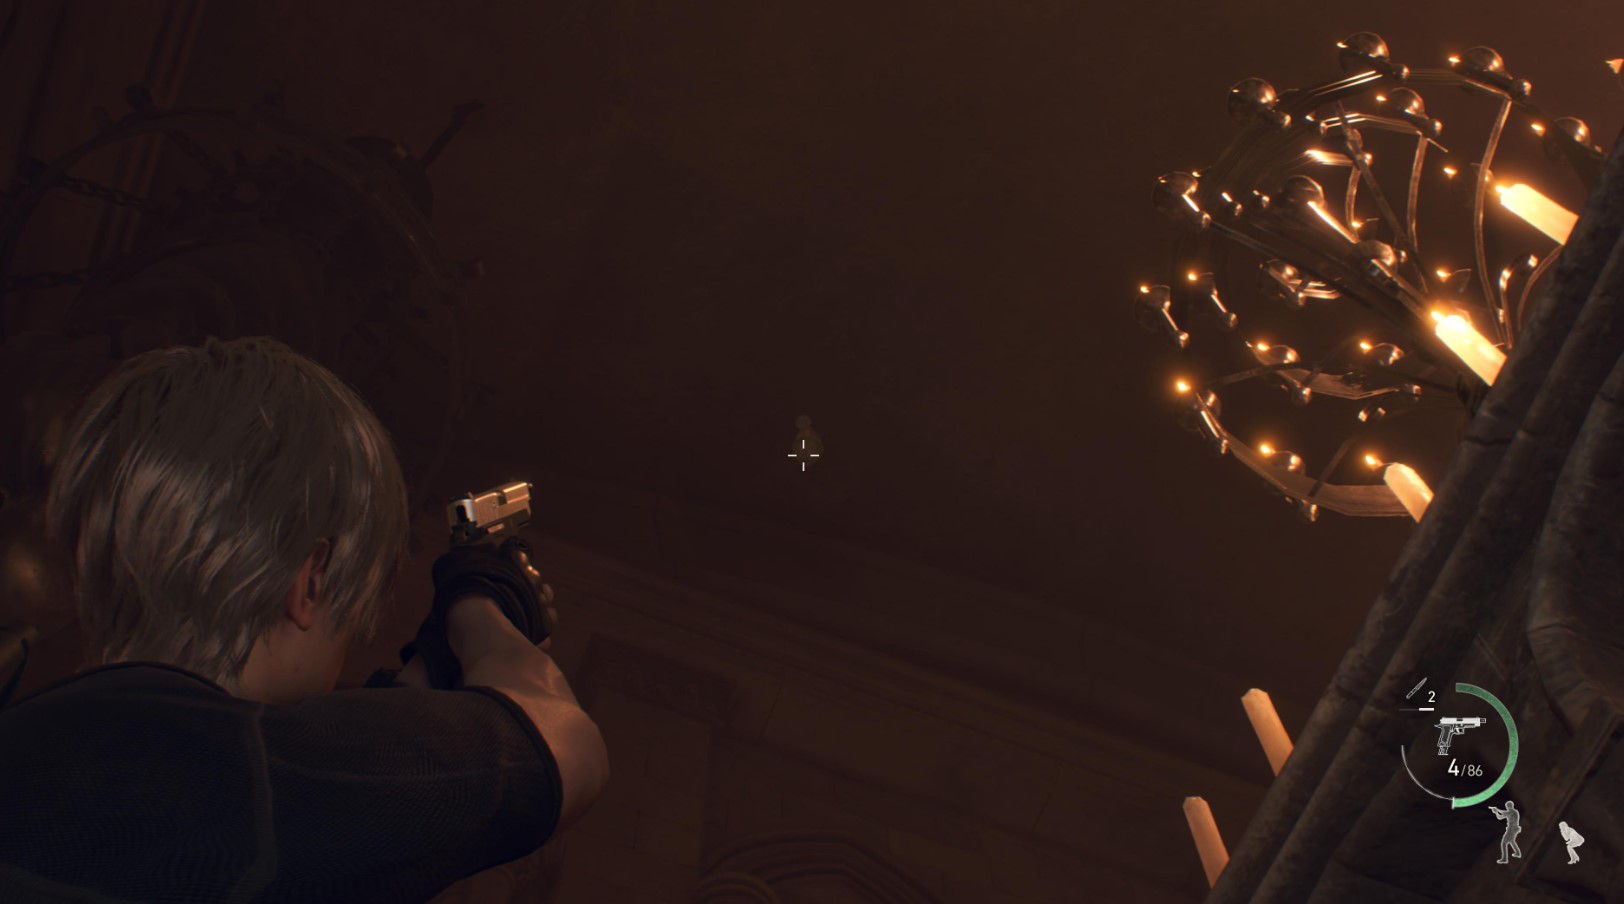
After climbing to the roof of the specified area using the elevator, go to the stairs and turn the camera up - you will see a bell in which the decoration is hidden.
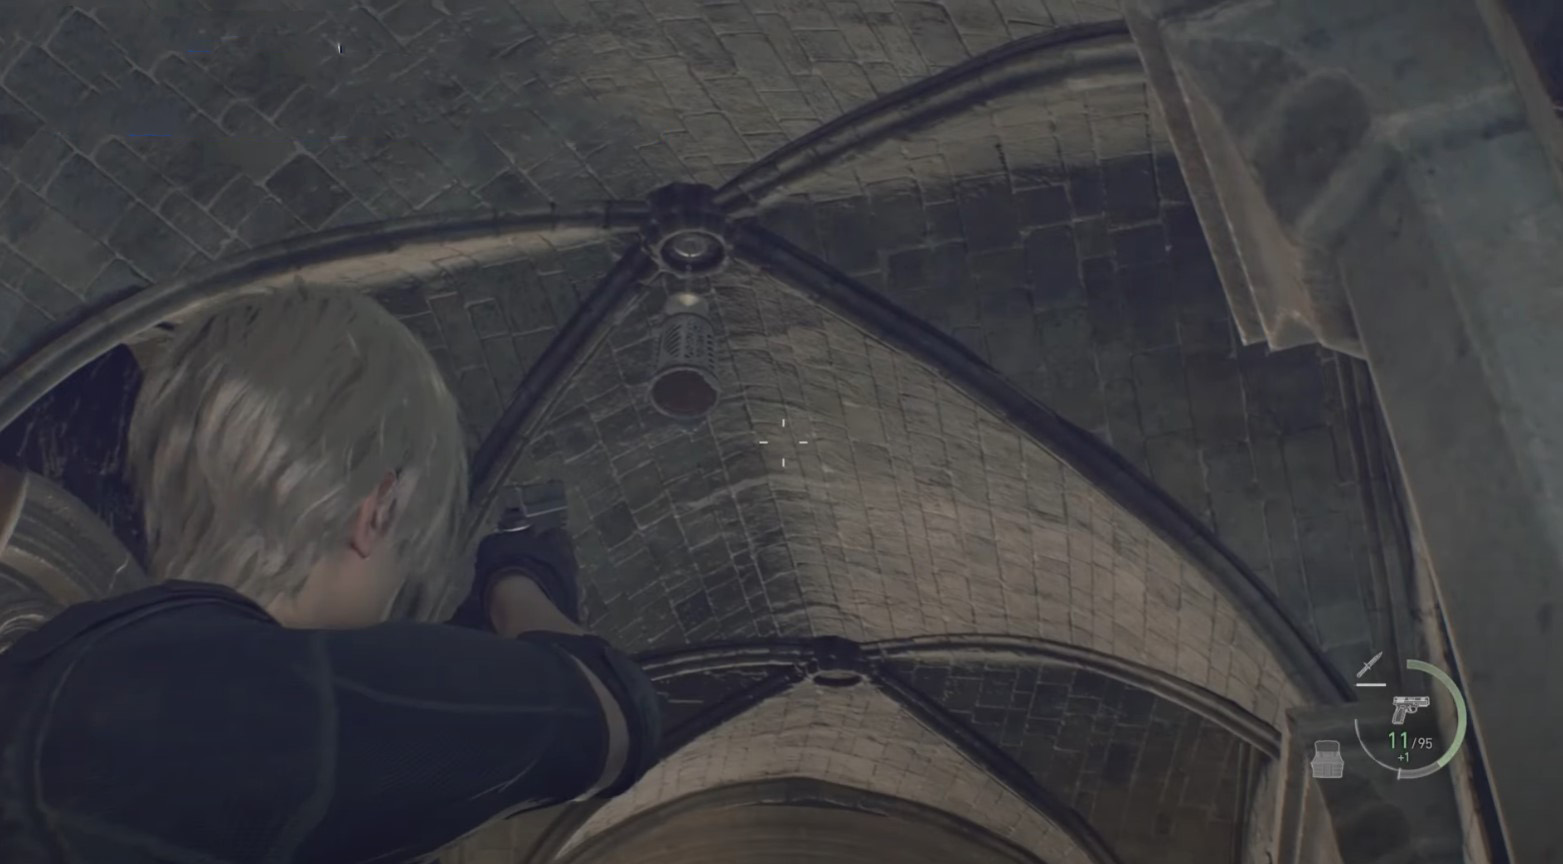
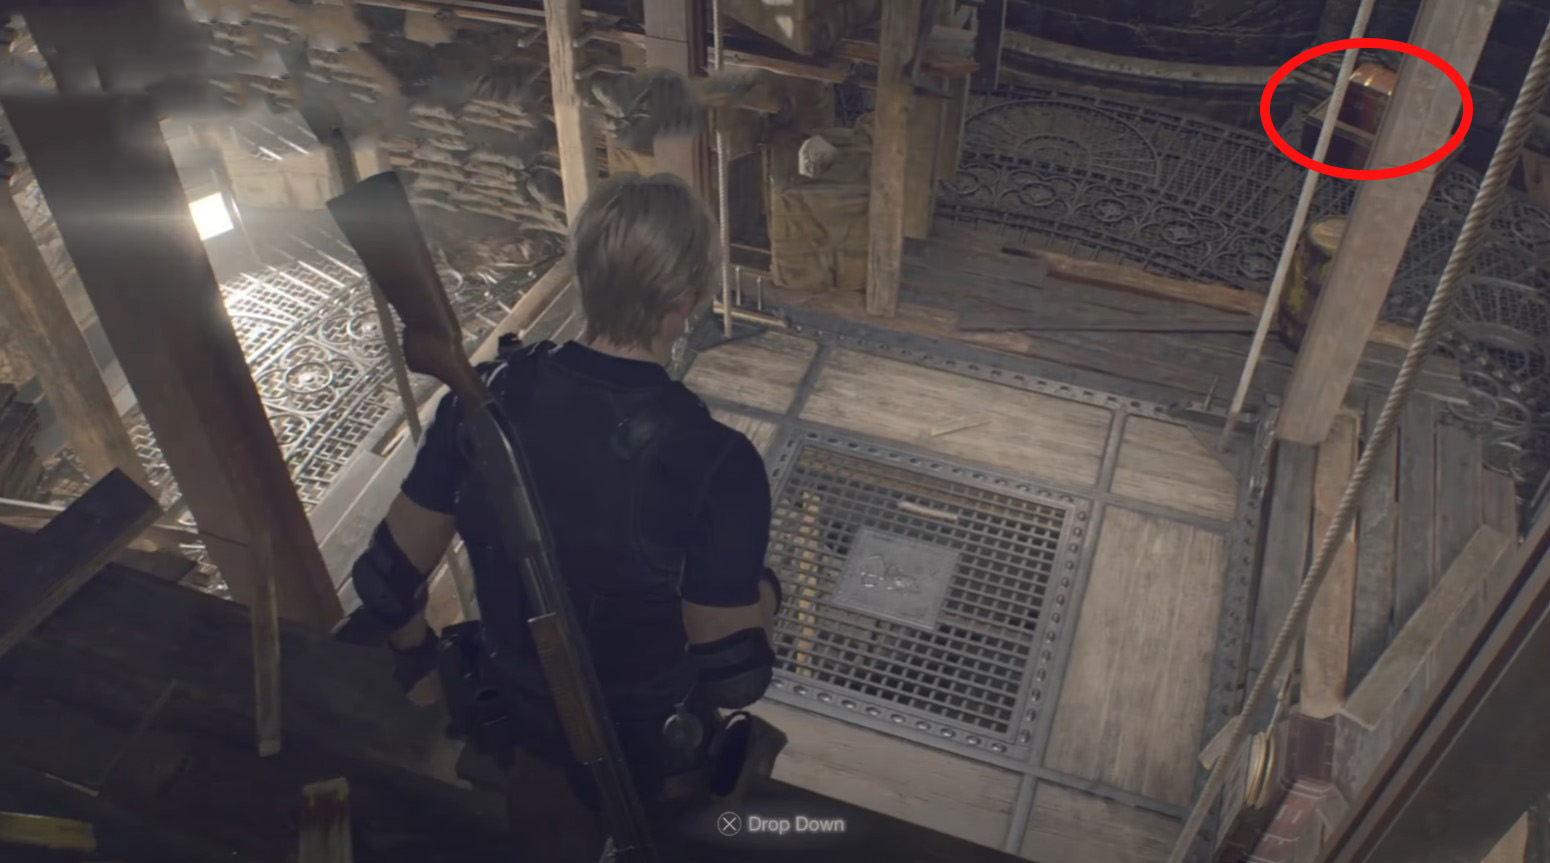
Treasure 41: Yellow Diamond
- Plot: Chapter 12
- Location: Clock tower
- Cost: 7000 pesetas
Move on until you reach the place shown in the images below. Pan the camera up and you'll notice a silver lamp hanging from the scaffolding. Shoot it down and take the stone. If you followed our guide, you should now unlock the trophy "Robber".
Treasure 17 from DLC: Yellow Diamond
- Plot: Chapter 12
- Location: Pier
- Cost: unknown
After fighting Ramon Salazar, you will enter a corridor leading to a boat. As you move along it, look up to see a bell tied to the ceiling.
These are all the treasures that can be found in the Castle in Resident Evil 4 Remake. We hope that this information will help you find all the gems, jewelry and relics in the specified area, and then sell them to the merchant.
Comments
You need to login to add comments.
You can login with