Traveling the world Assassin's Creed Mirage you will definitely come across chests containing legendary weapons and costumes, as well as blueprints for upgrading them. In addition, if you find all the chests, then in the future this will help you get the “Explorer” trophy. In total, you can find 30 chests in the game. Below we will tell you where to look for them and what you can get by opening them.
Where to find all the chests in Assassin's Creed Mirage
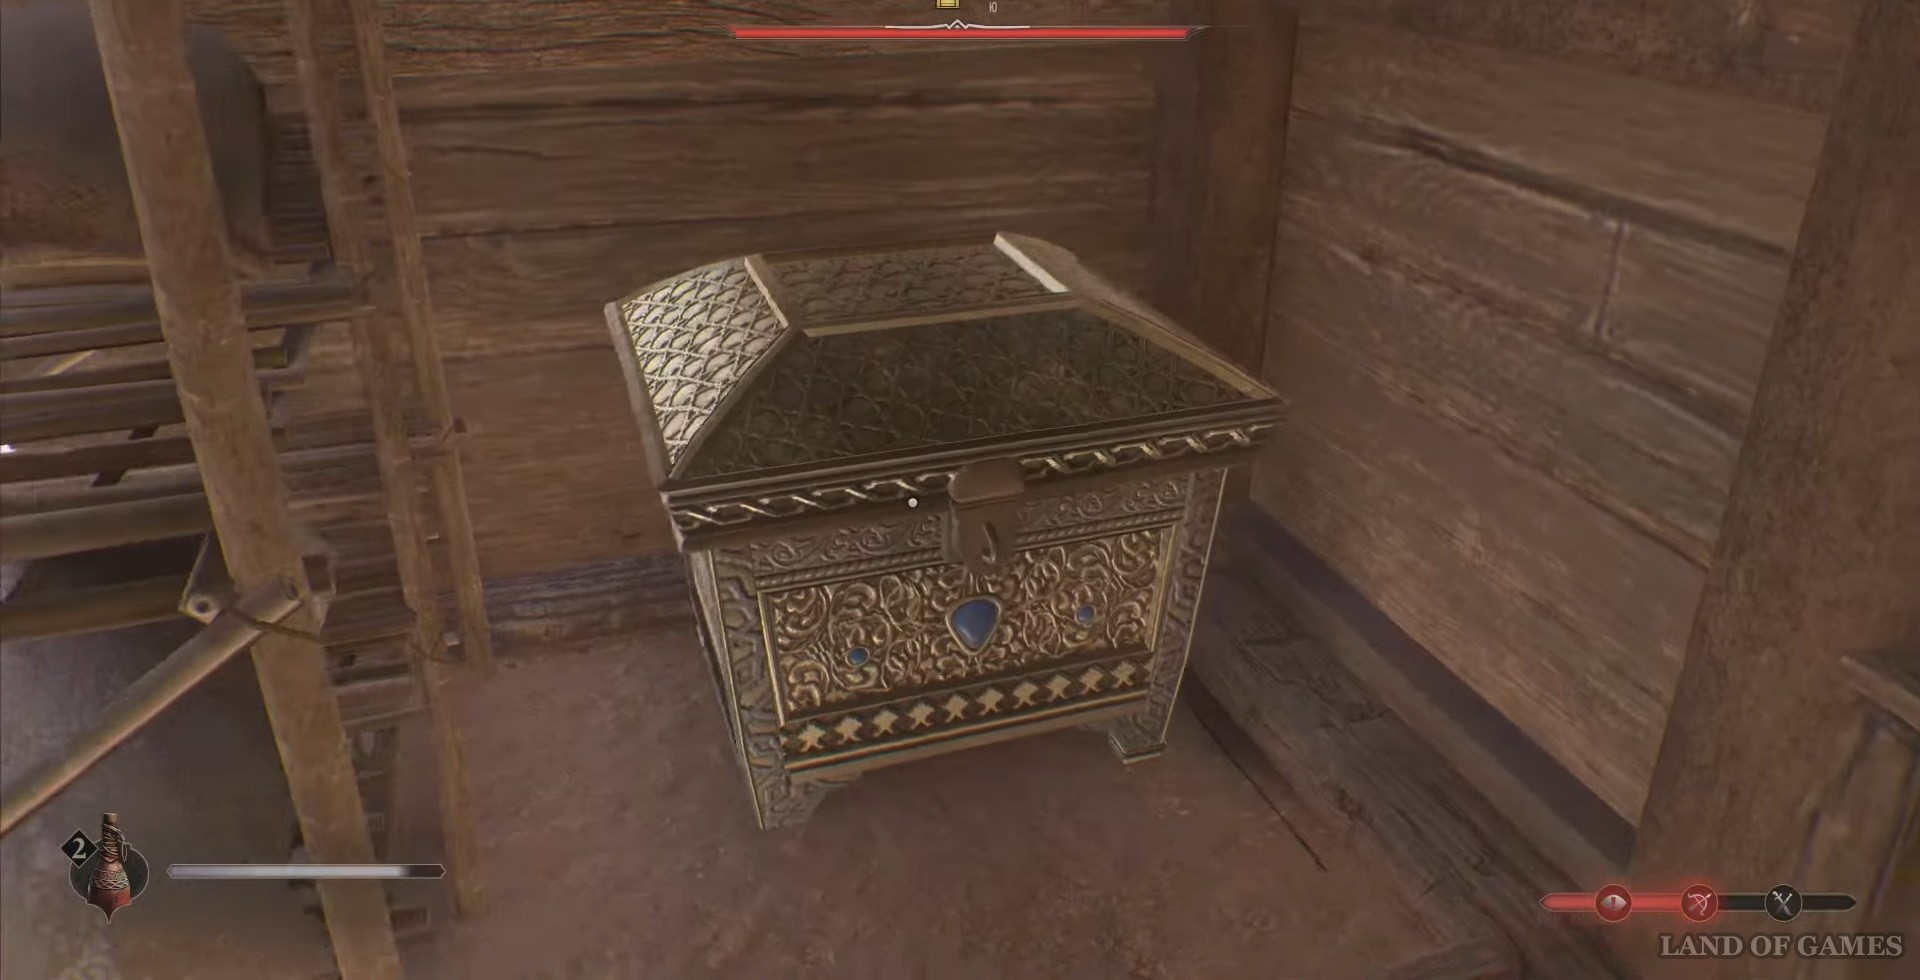
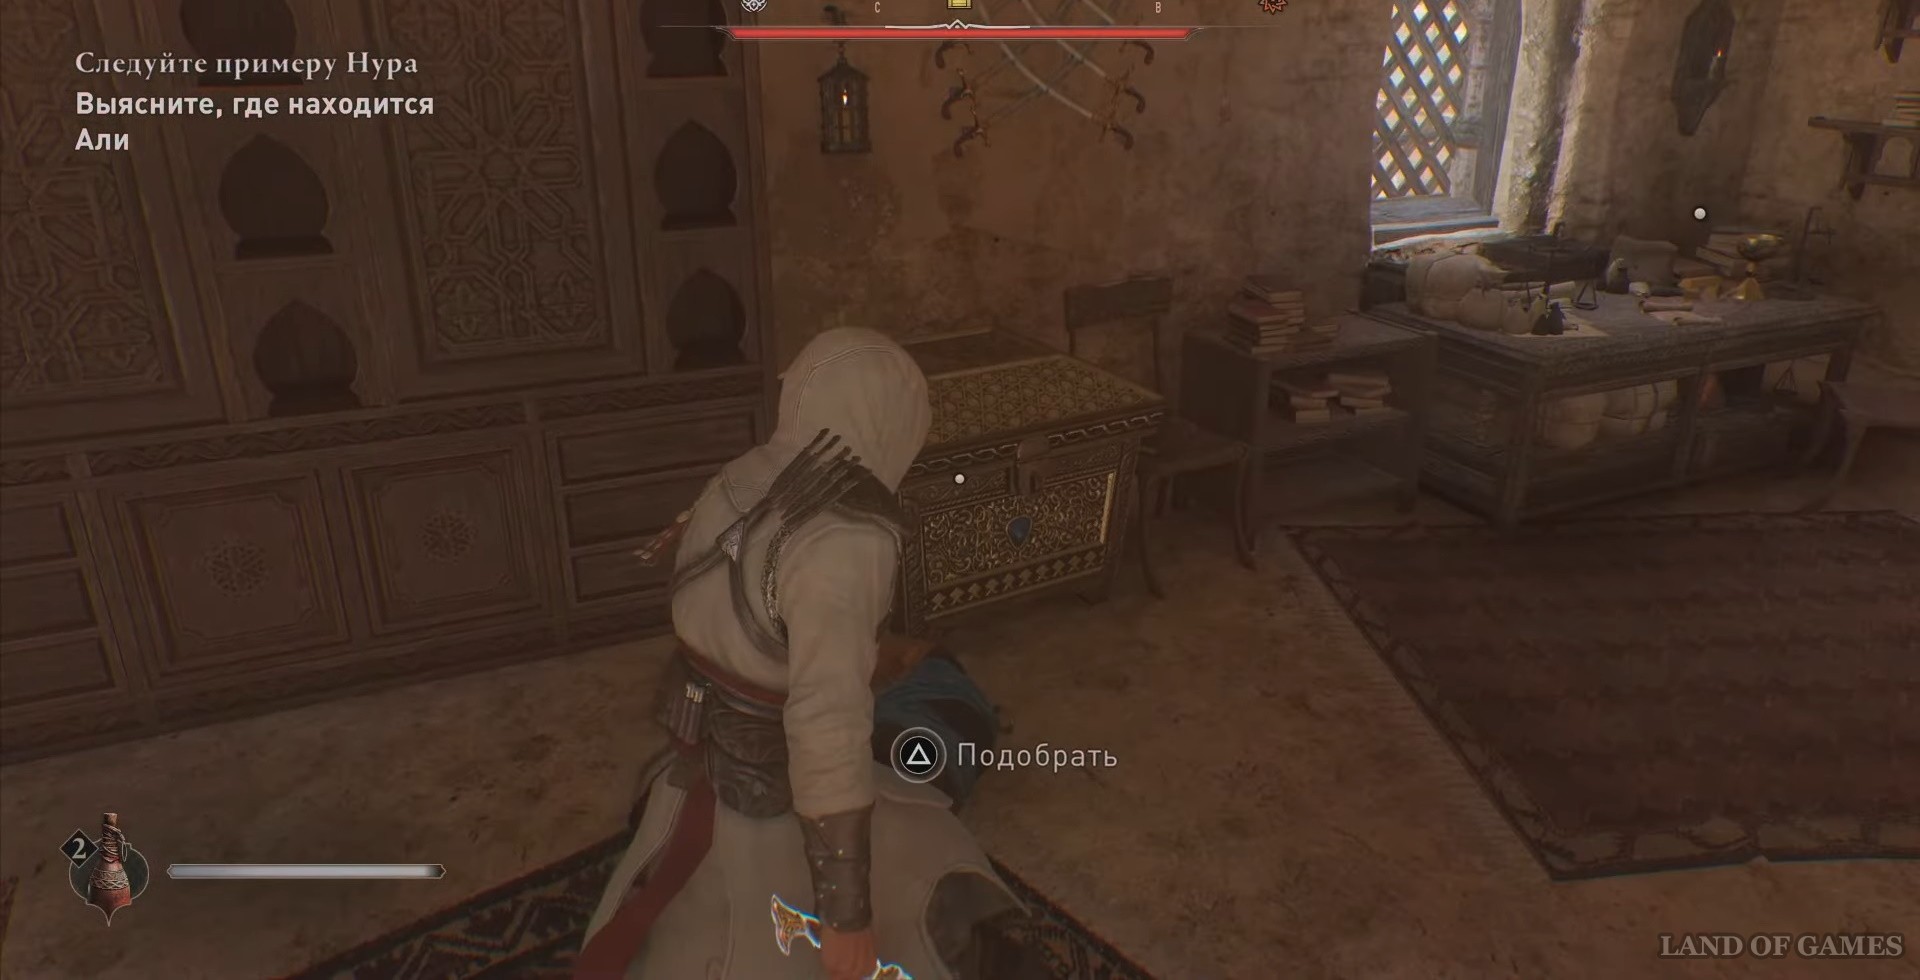
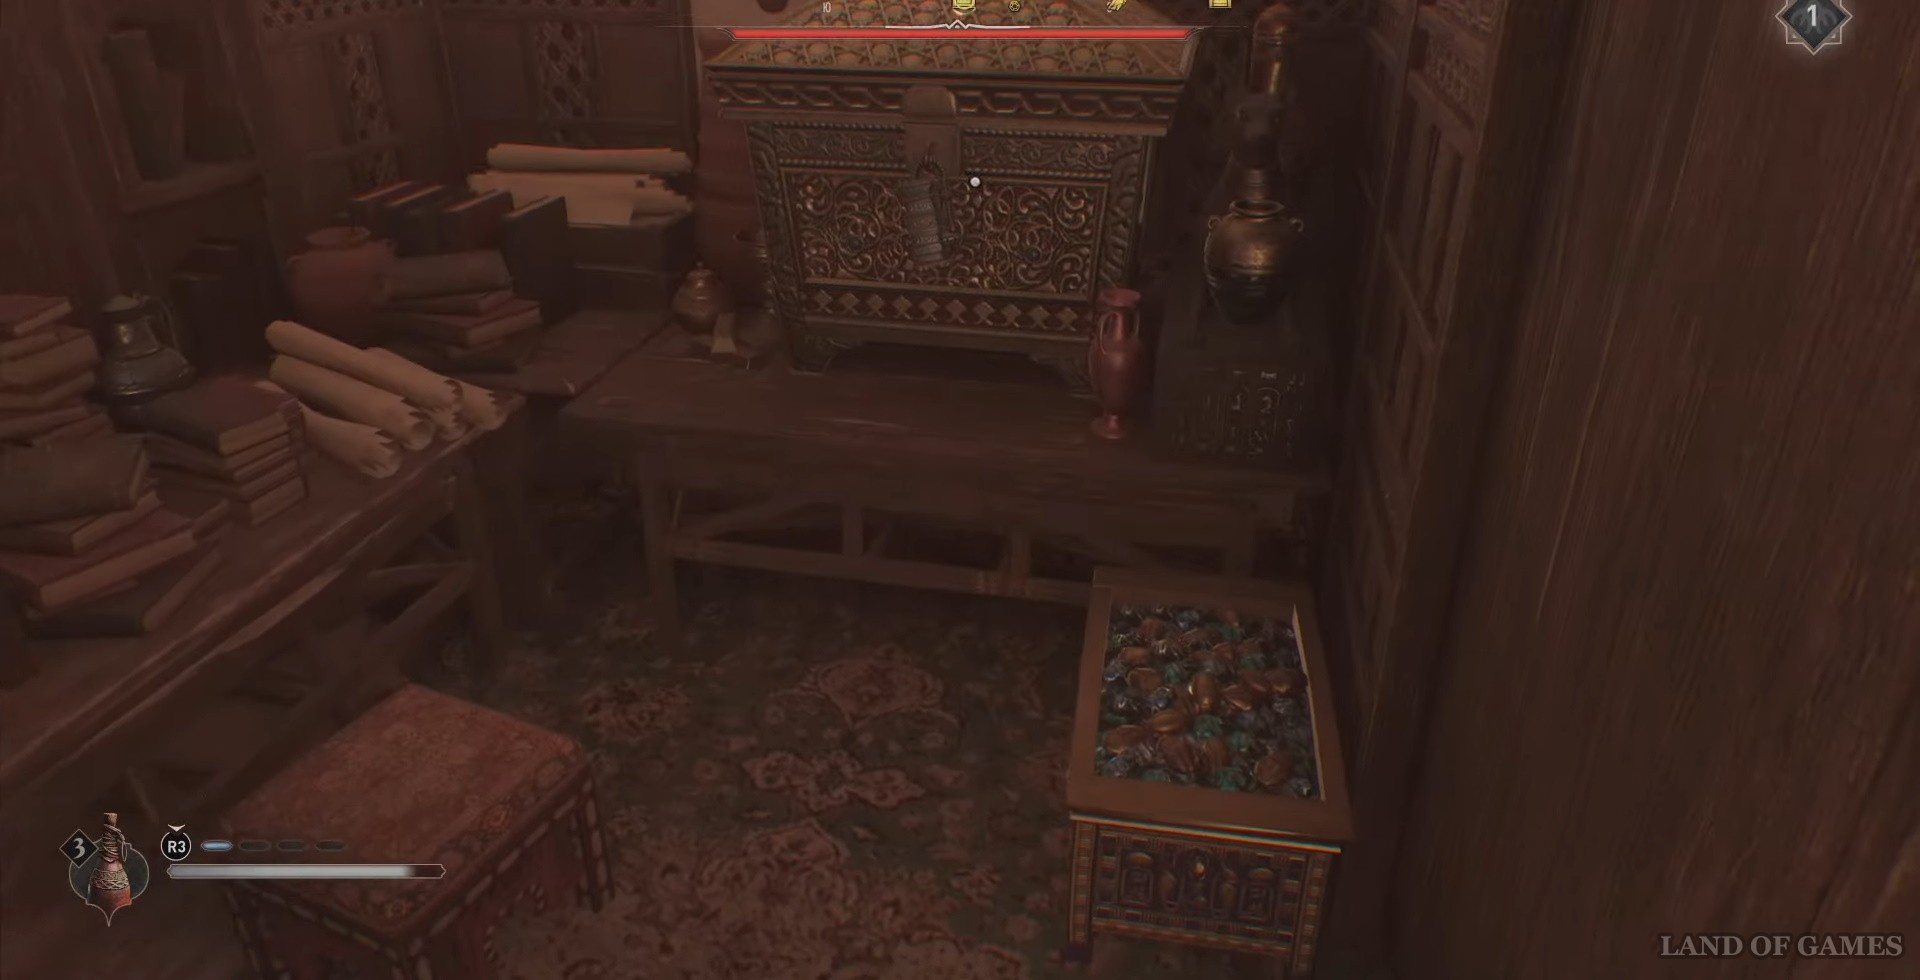
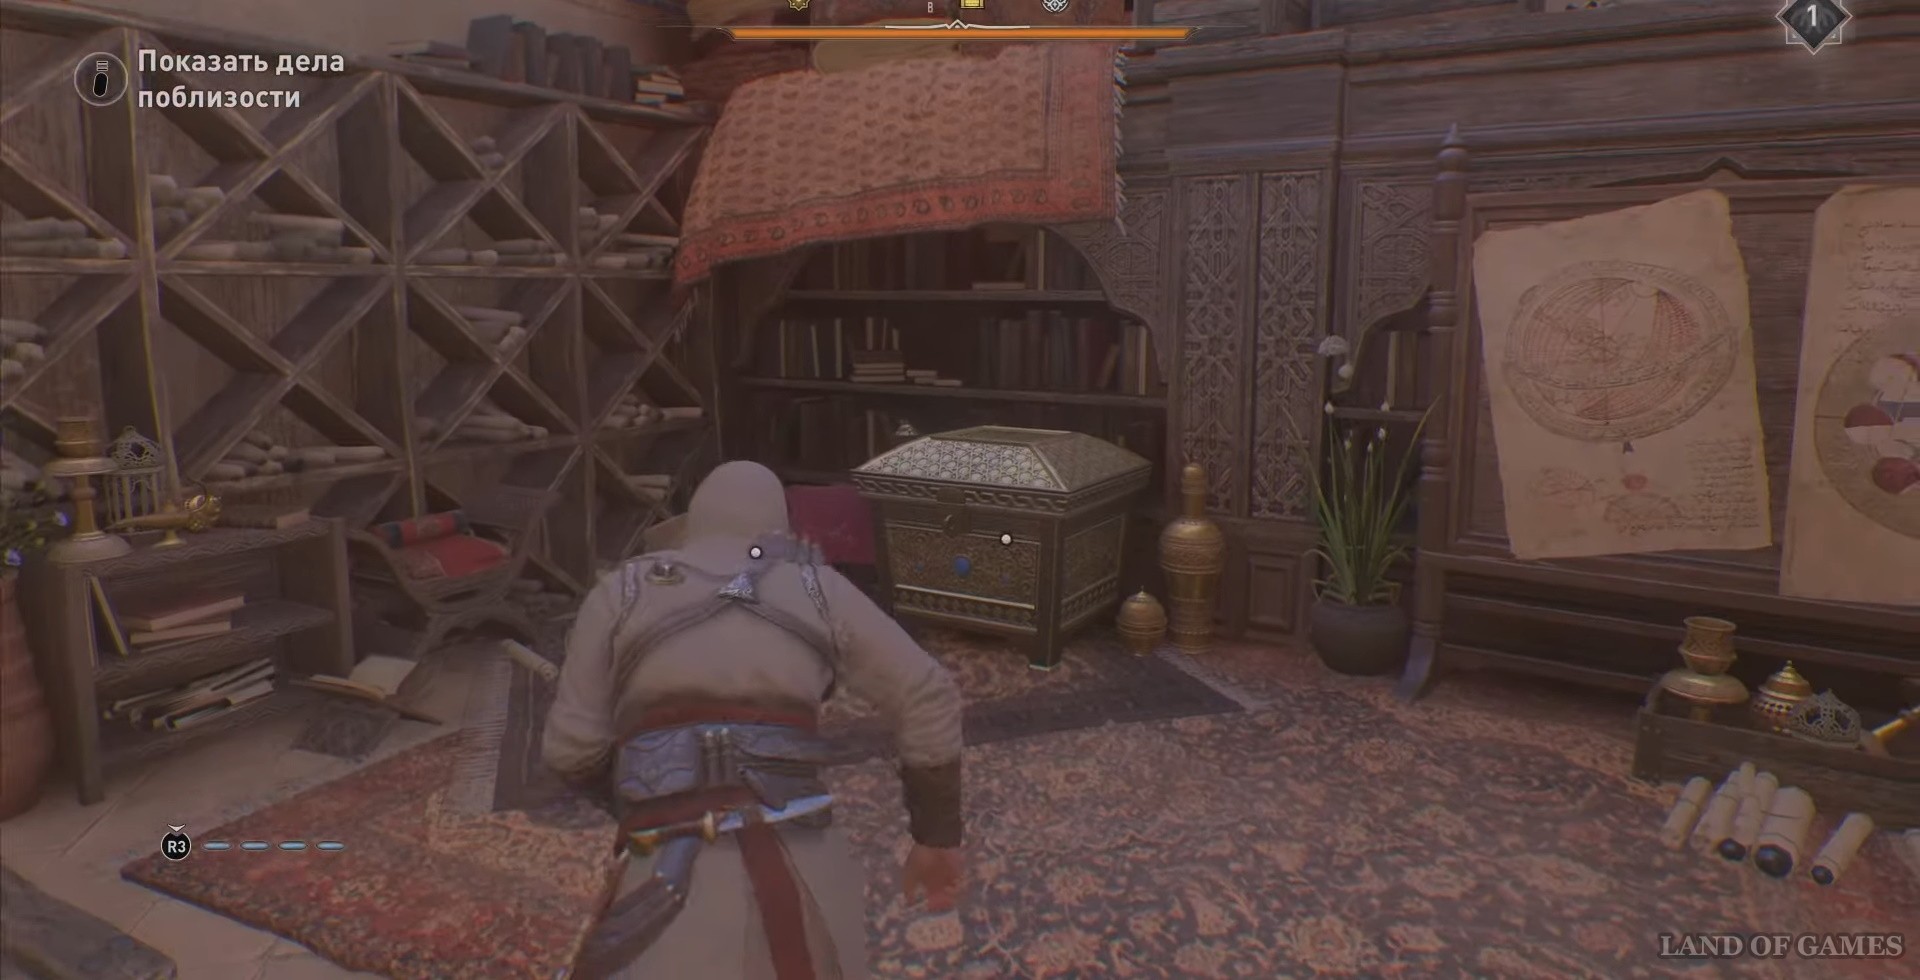
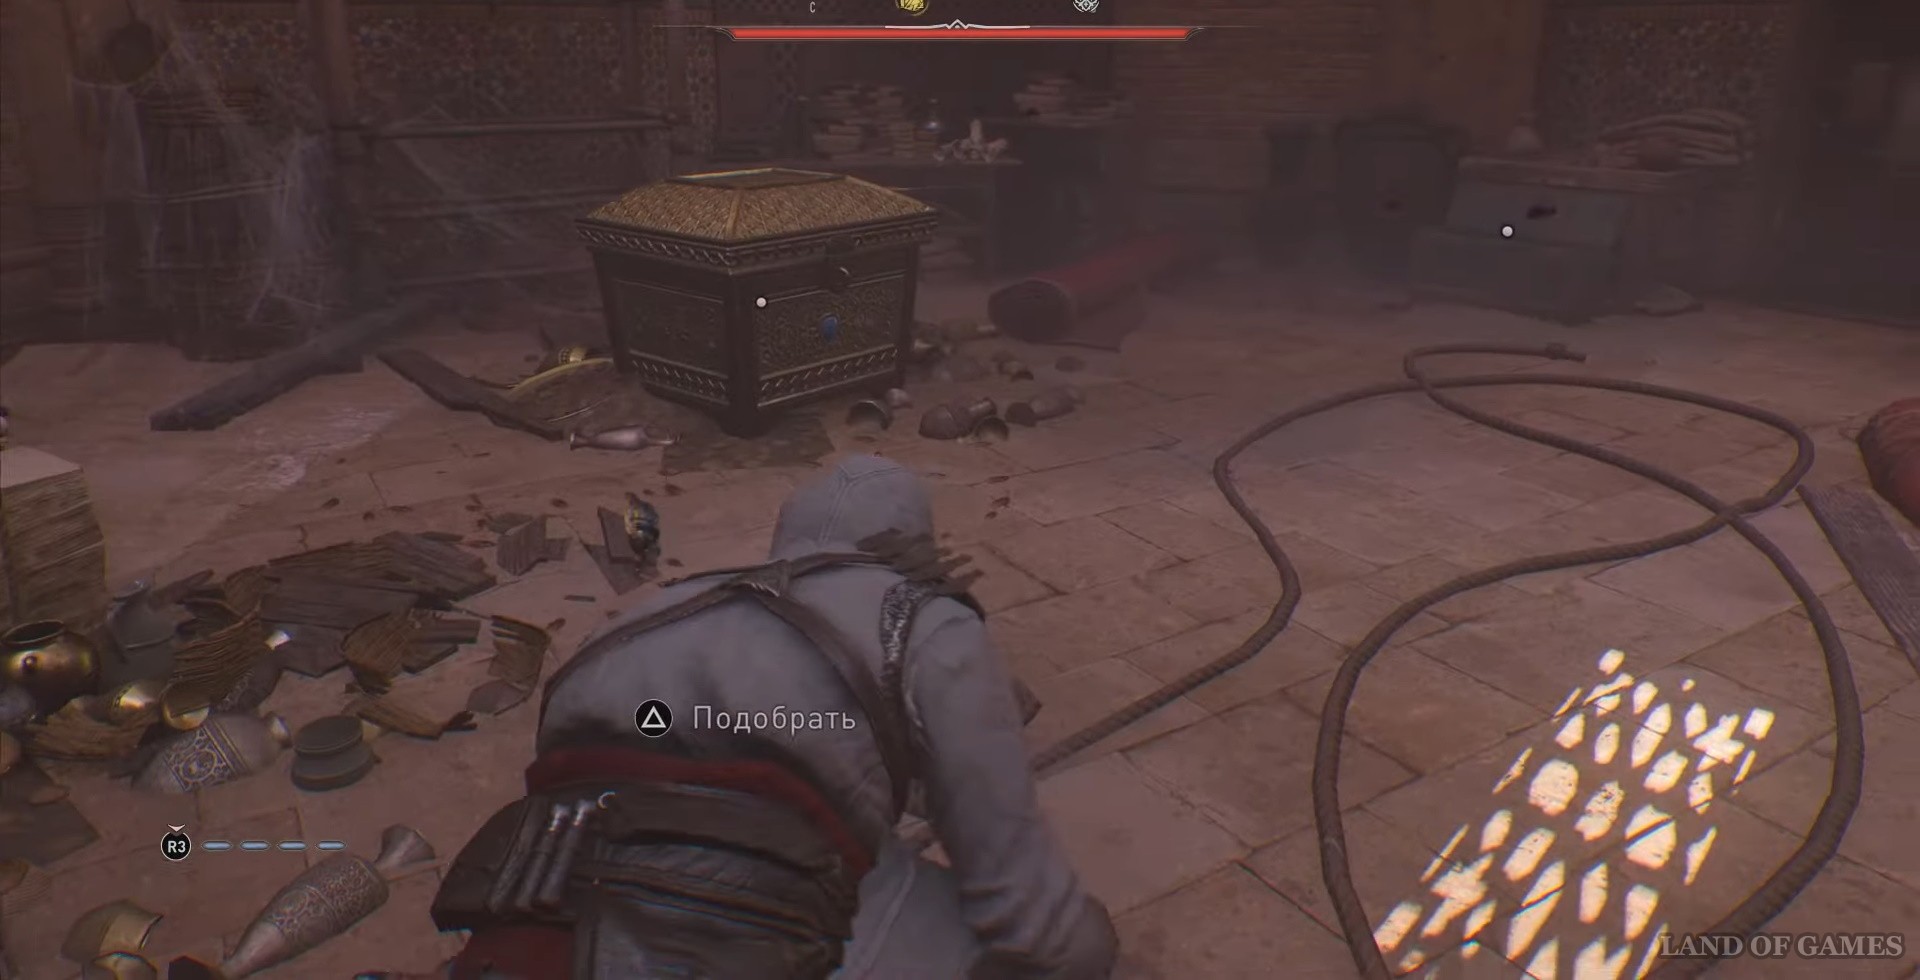
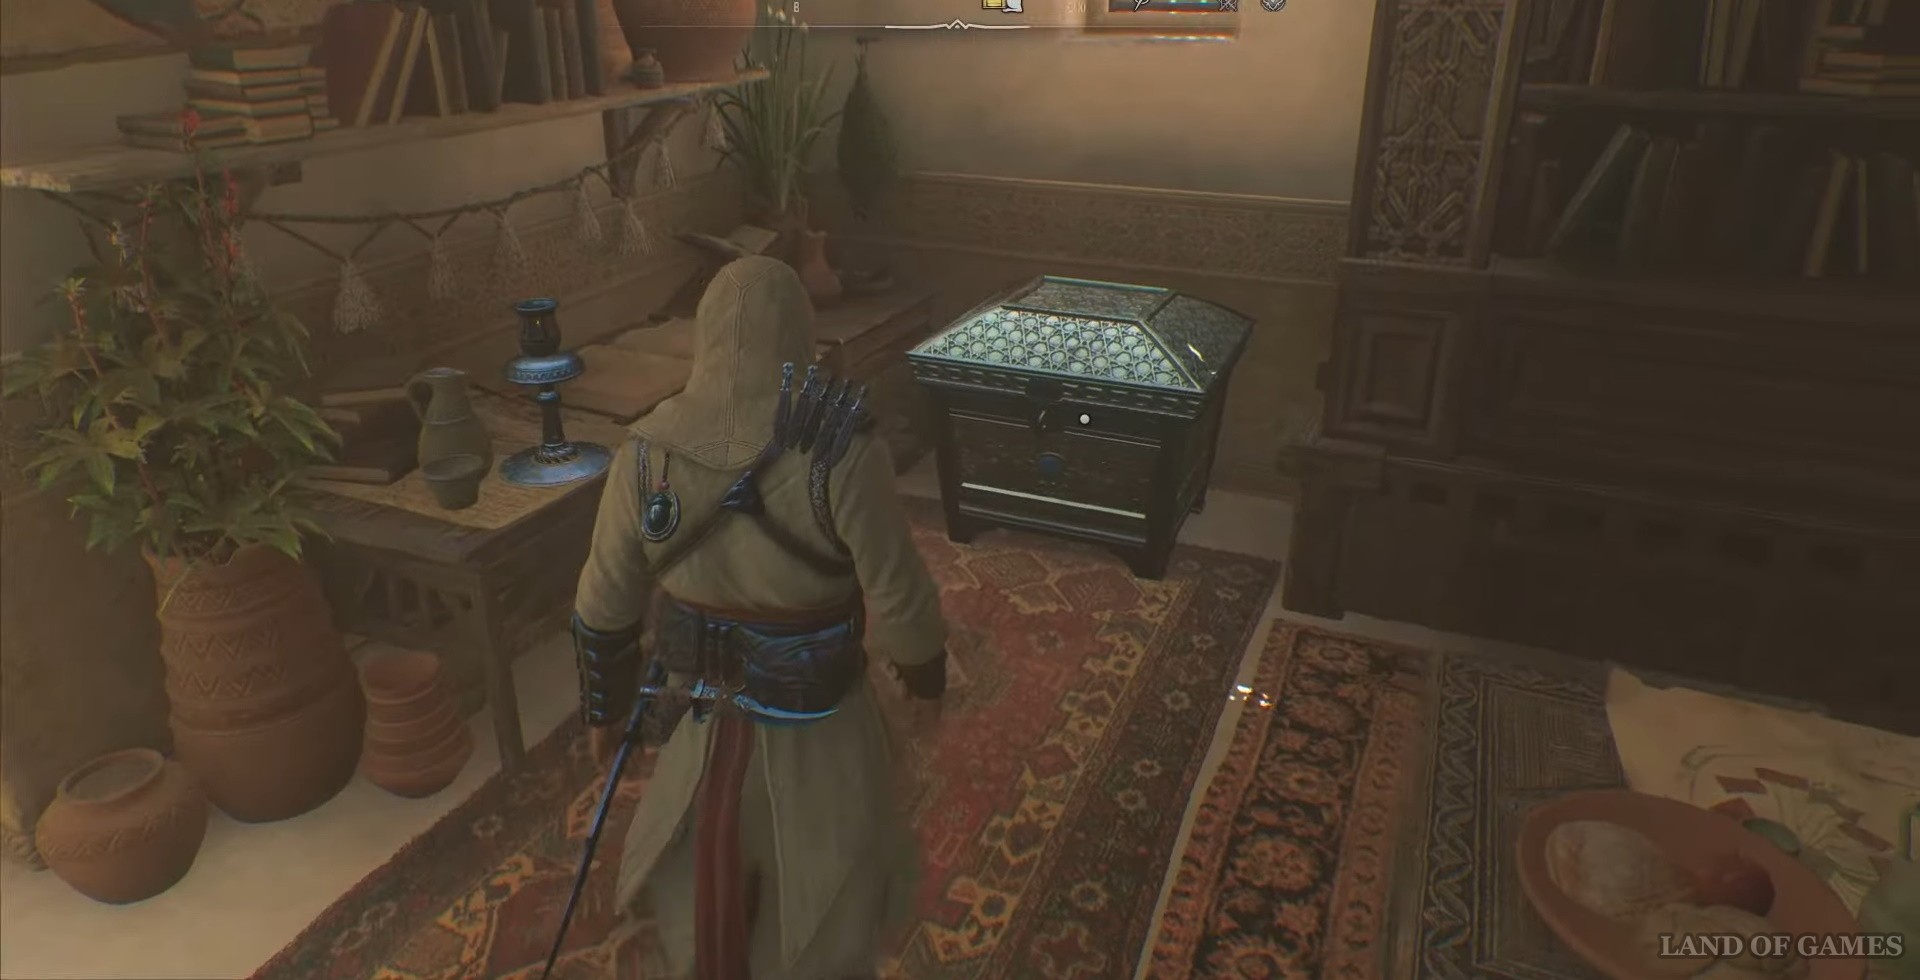
There are three chests for each item. It doesn't matter in what order you open them. Either way, the first thing you'll find is a basic version of the suit or weapon. The other two chests will contain schematics to upgrade them later.
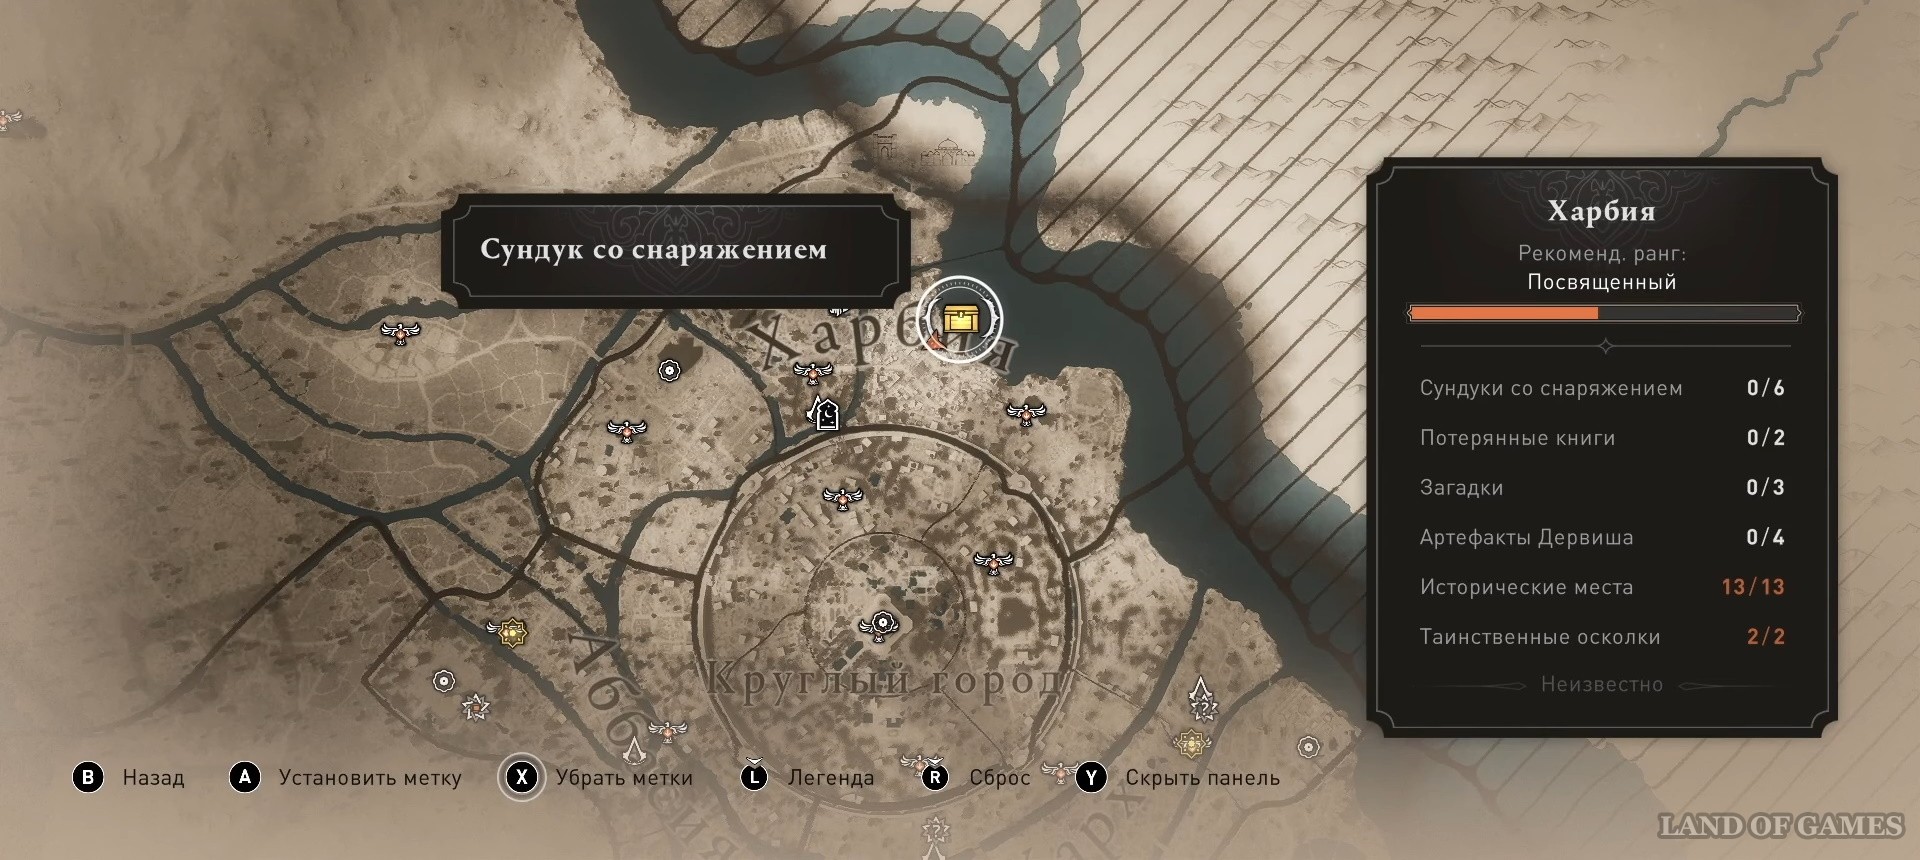
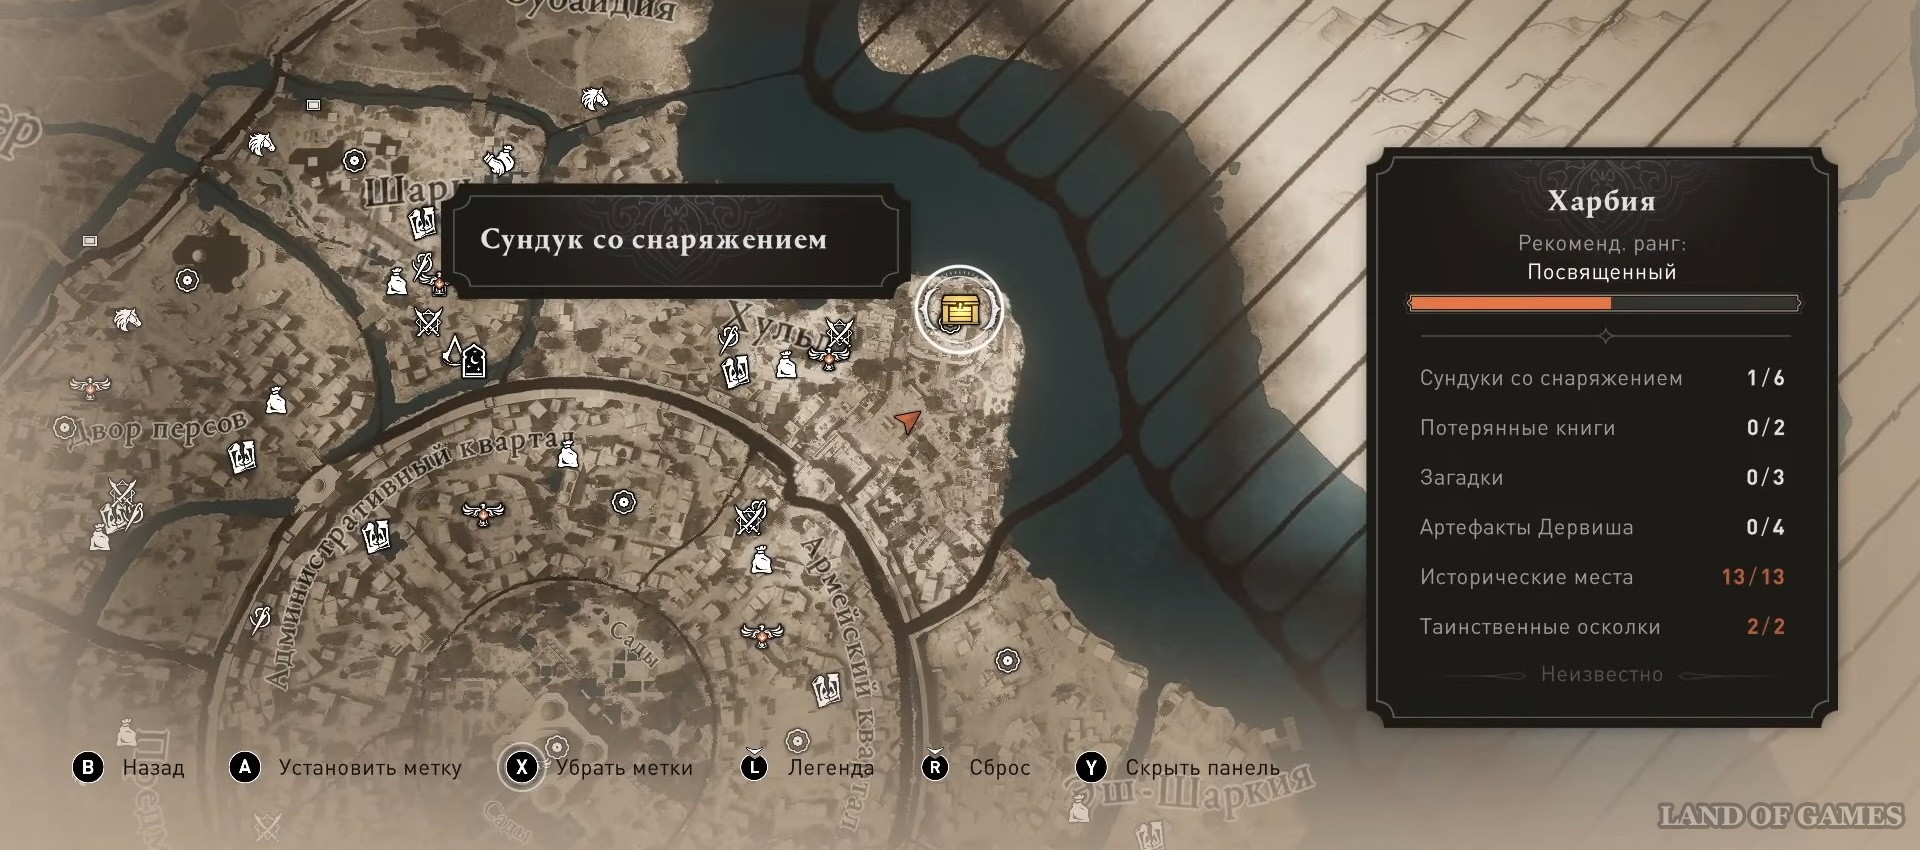
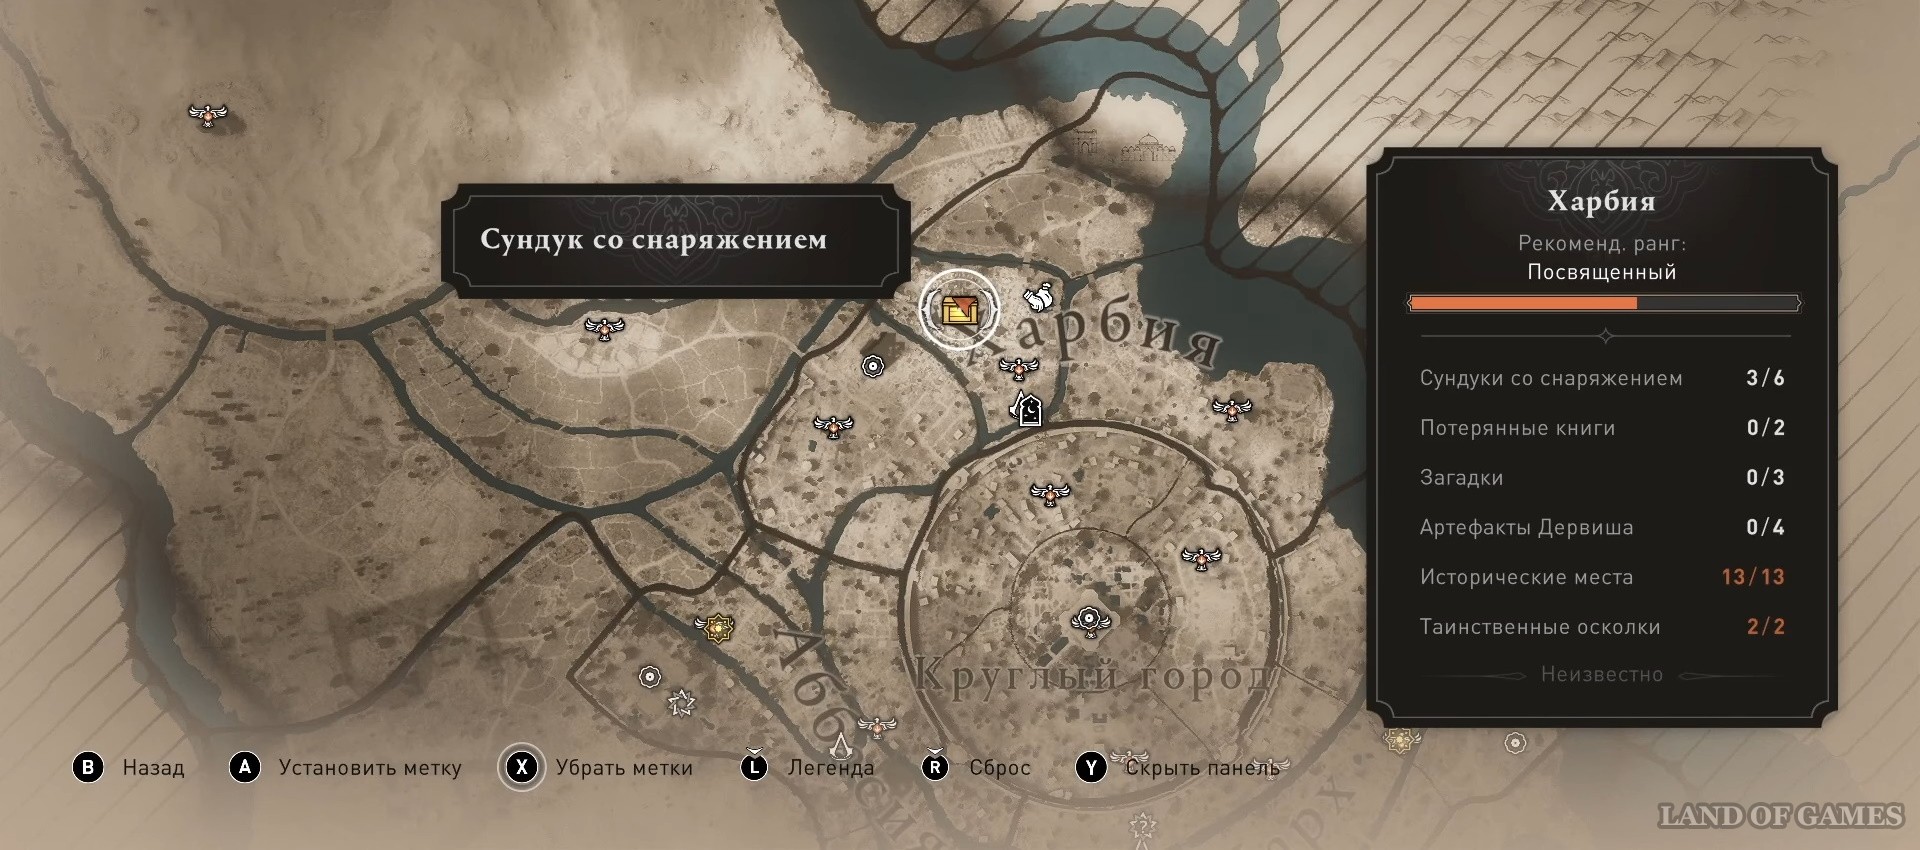
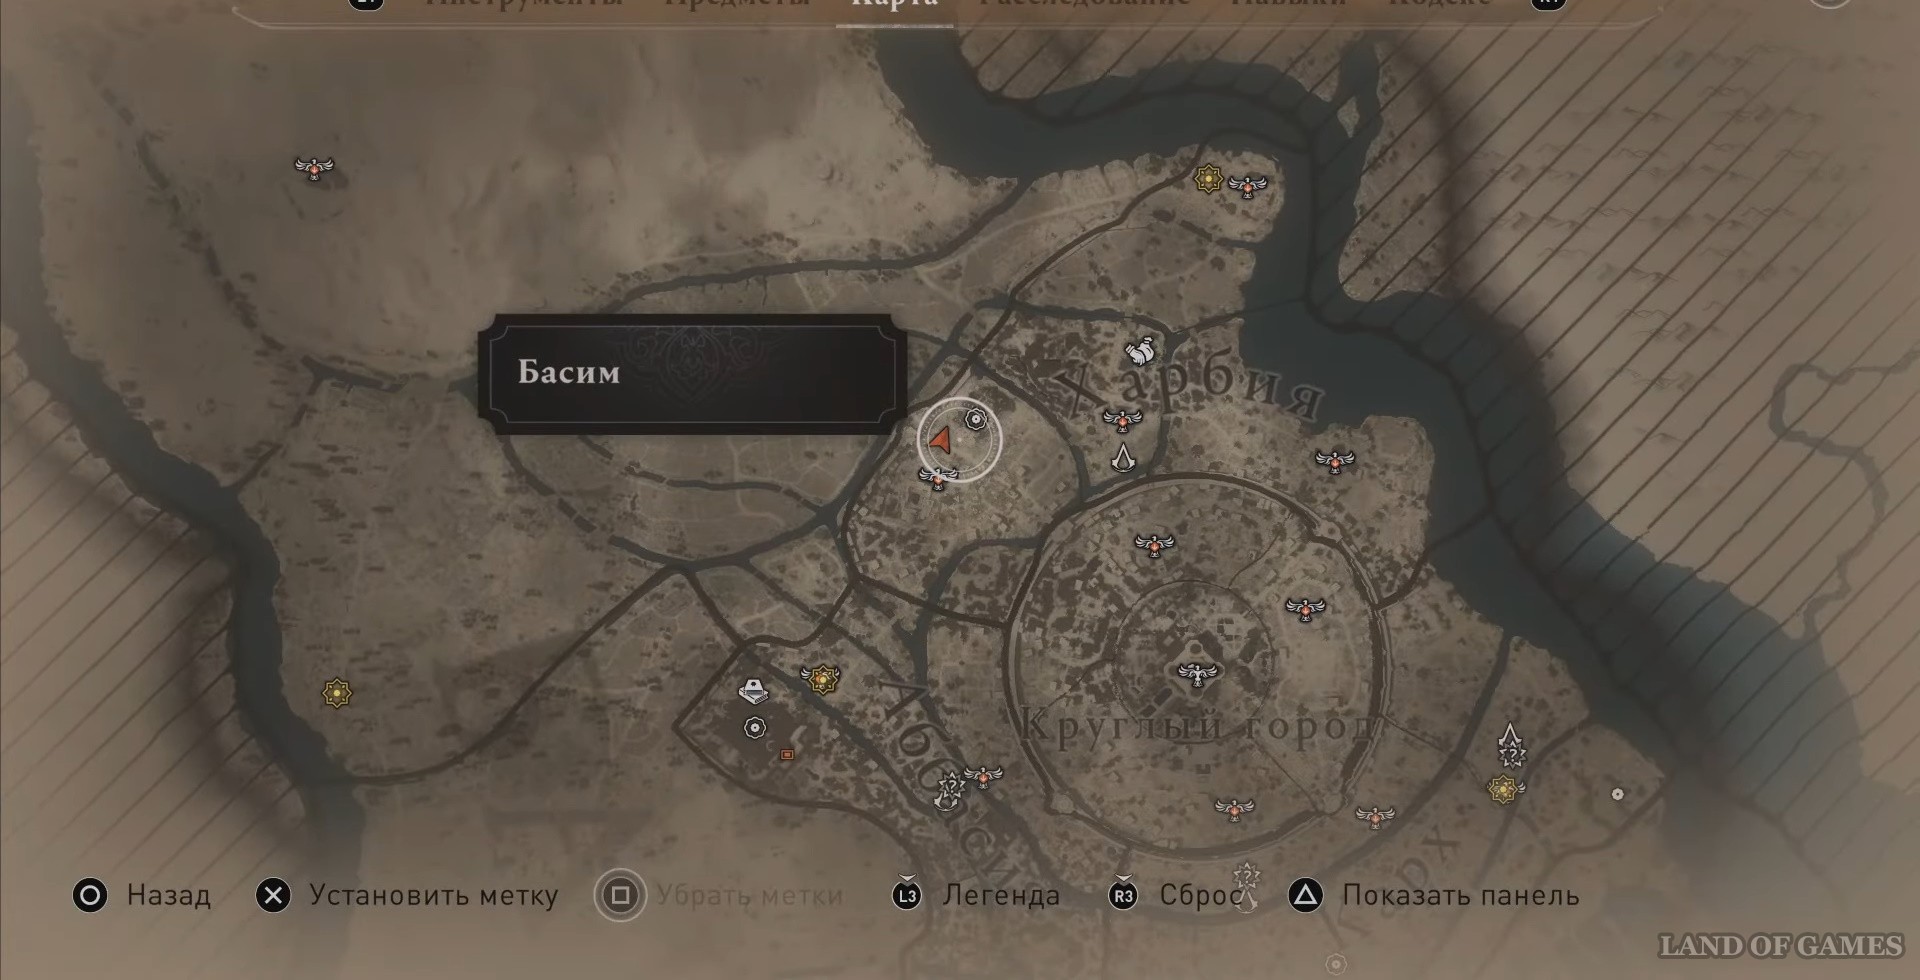
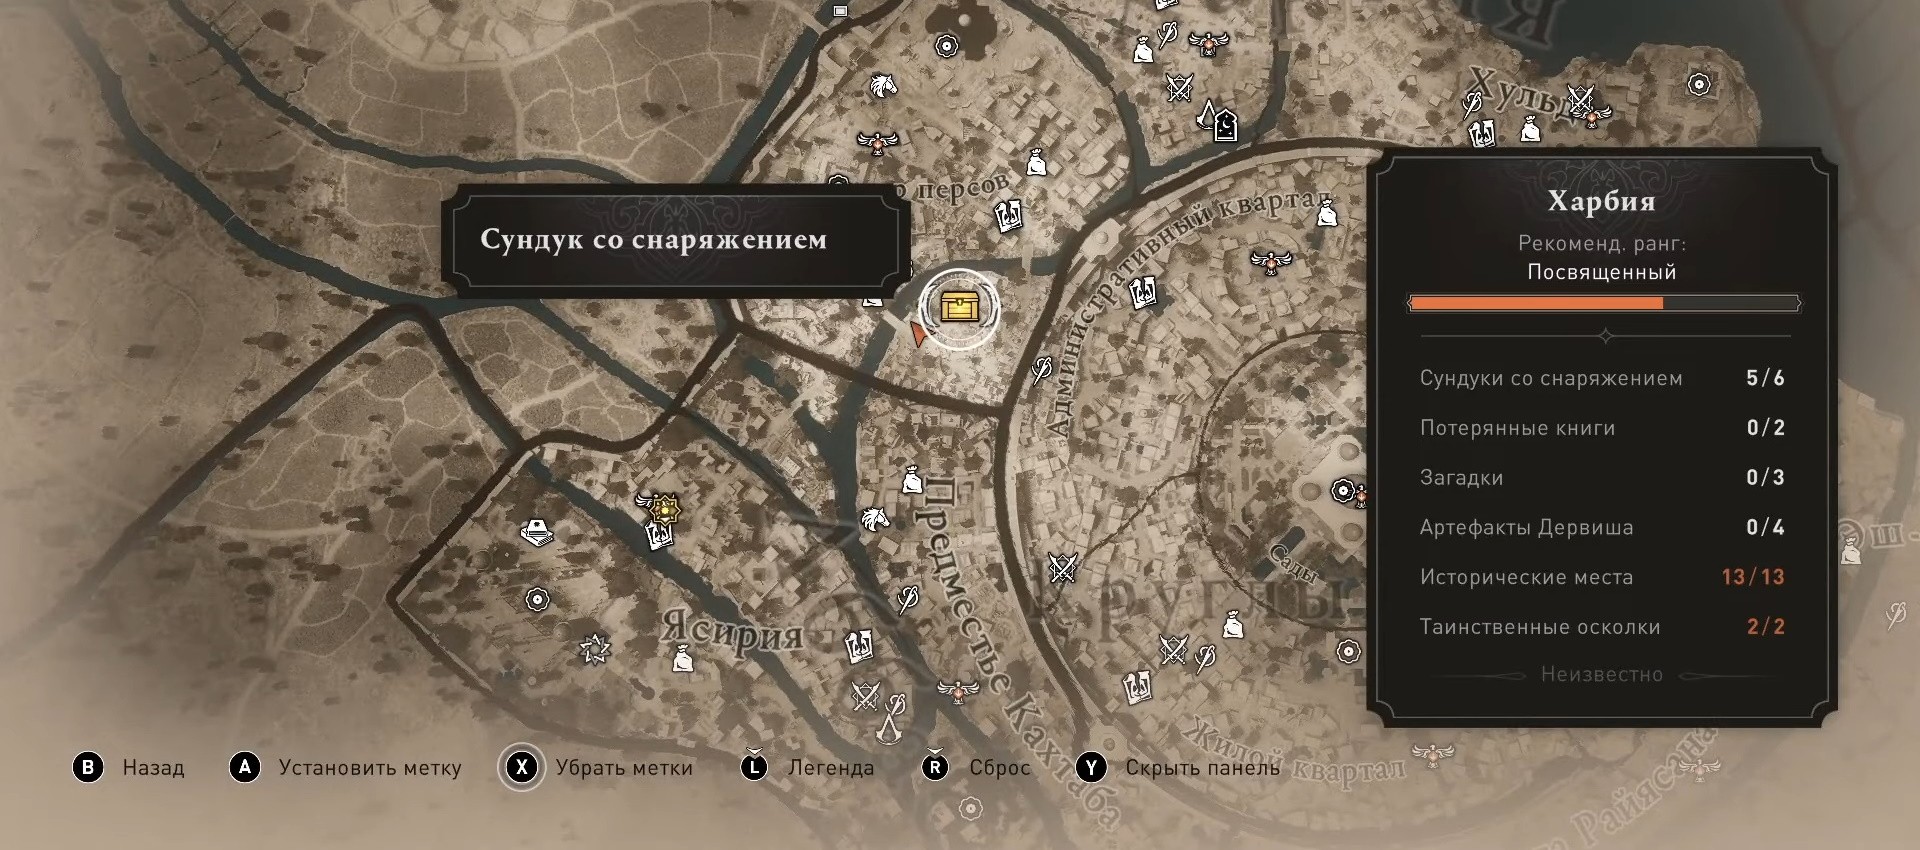
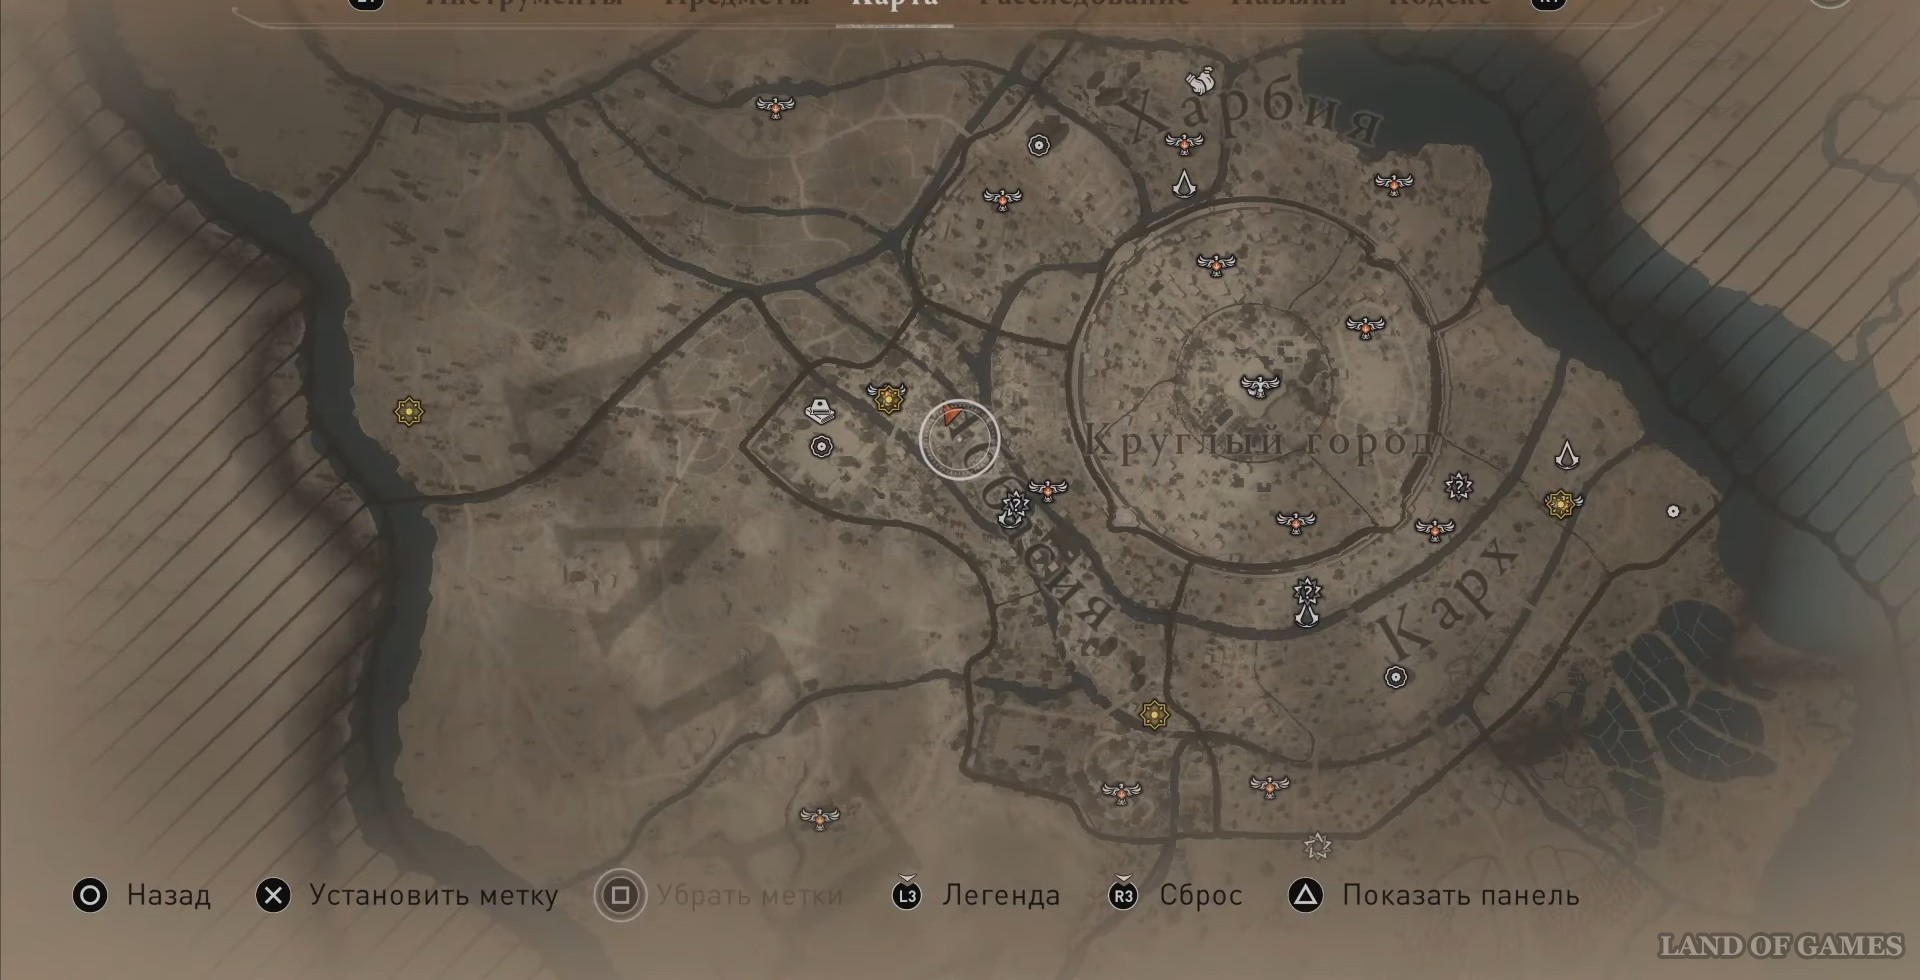
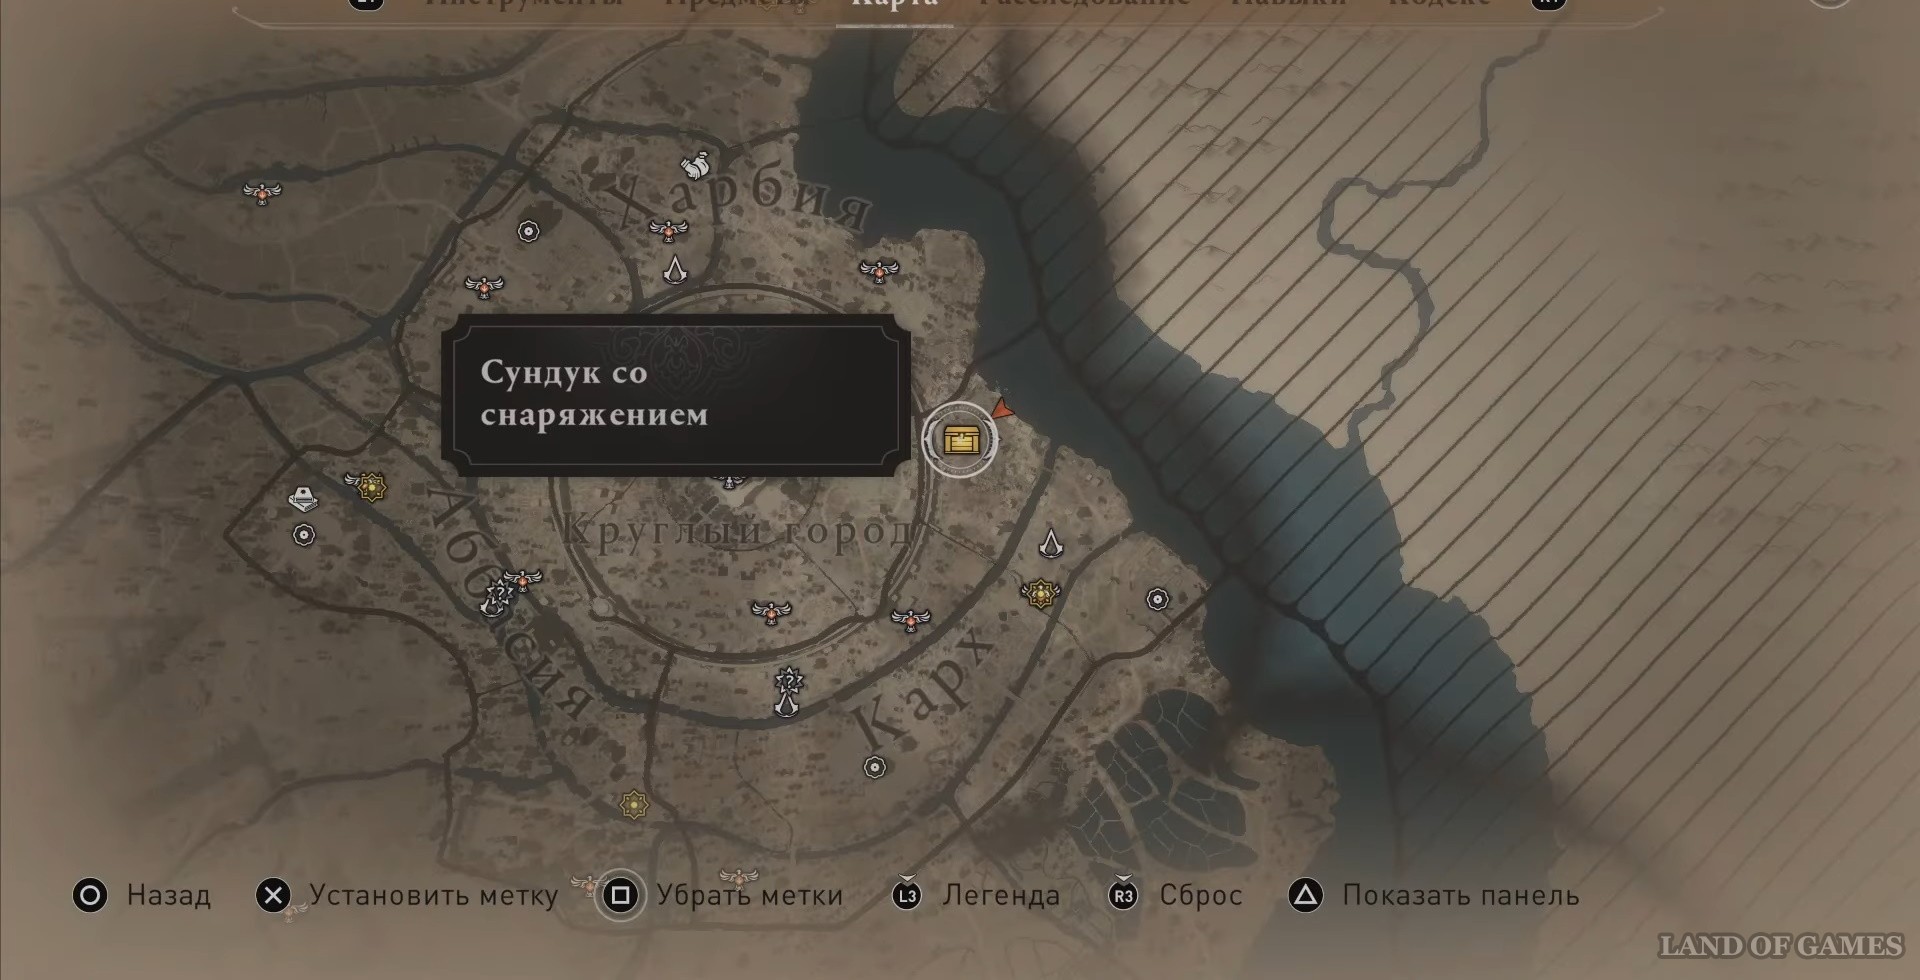
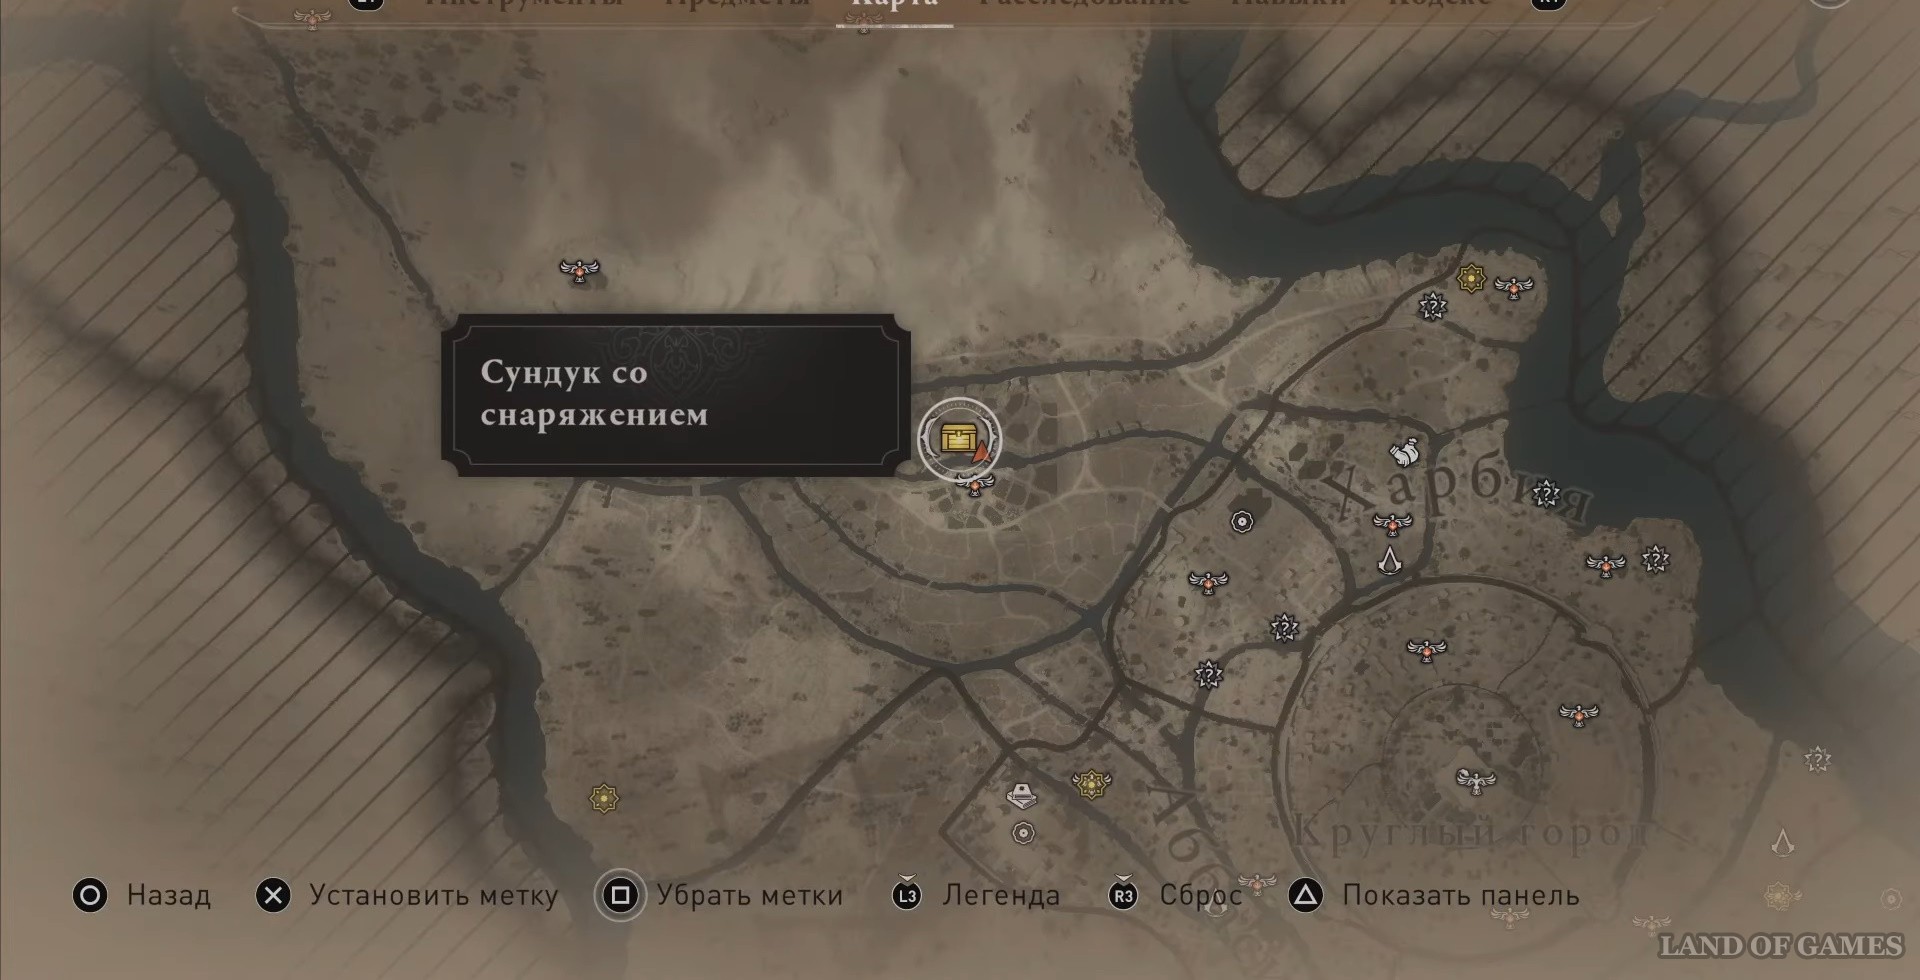
Region: Harbia
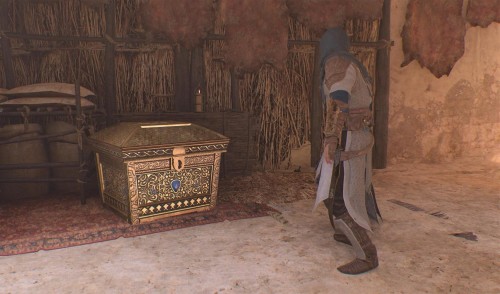
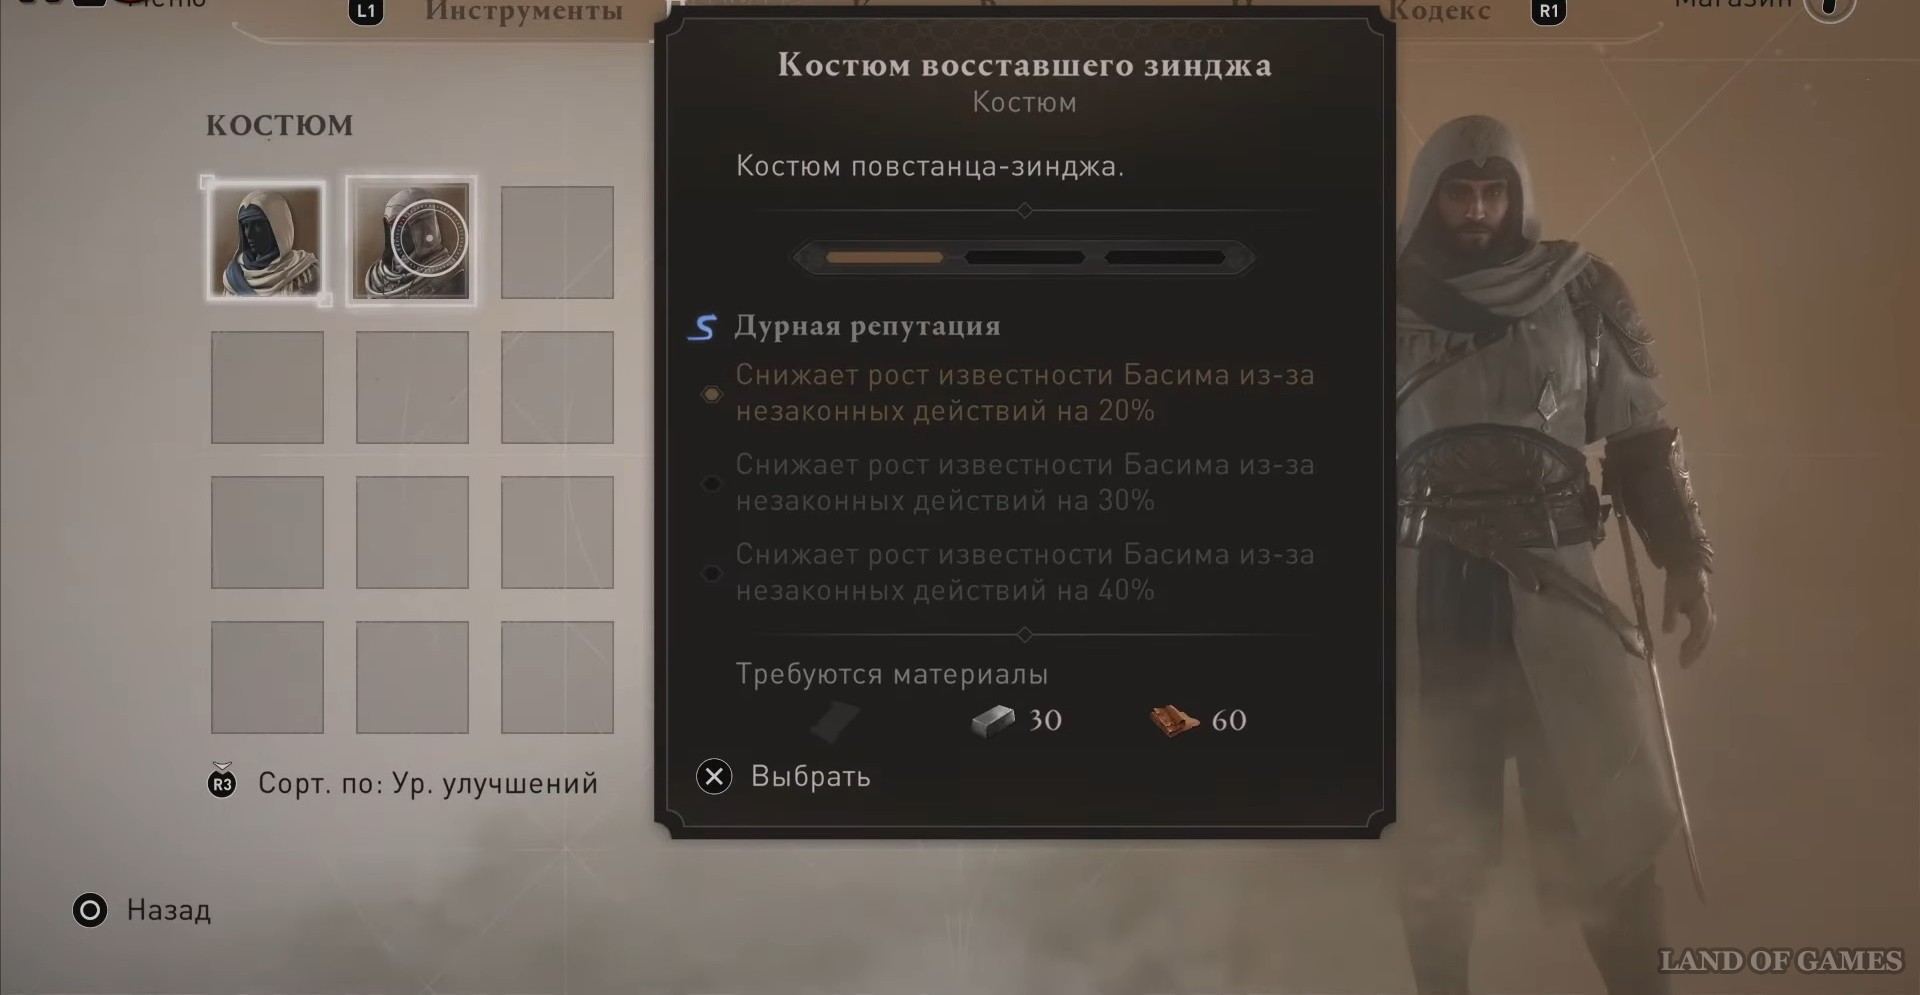
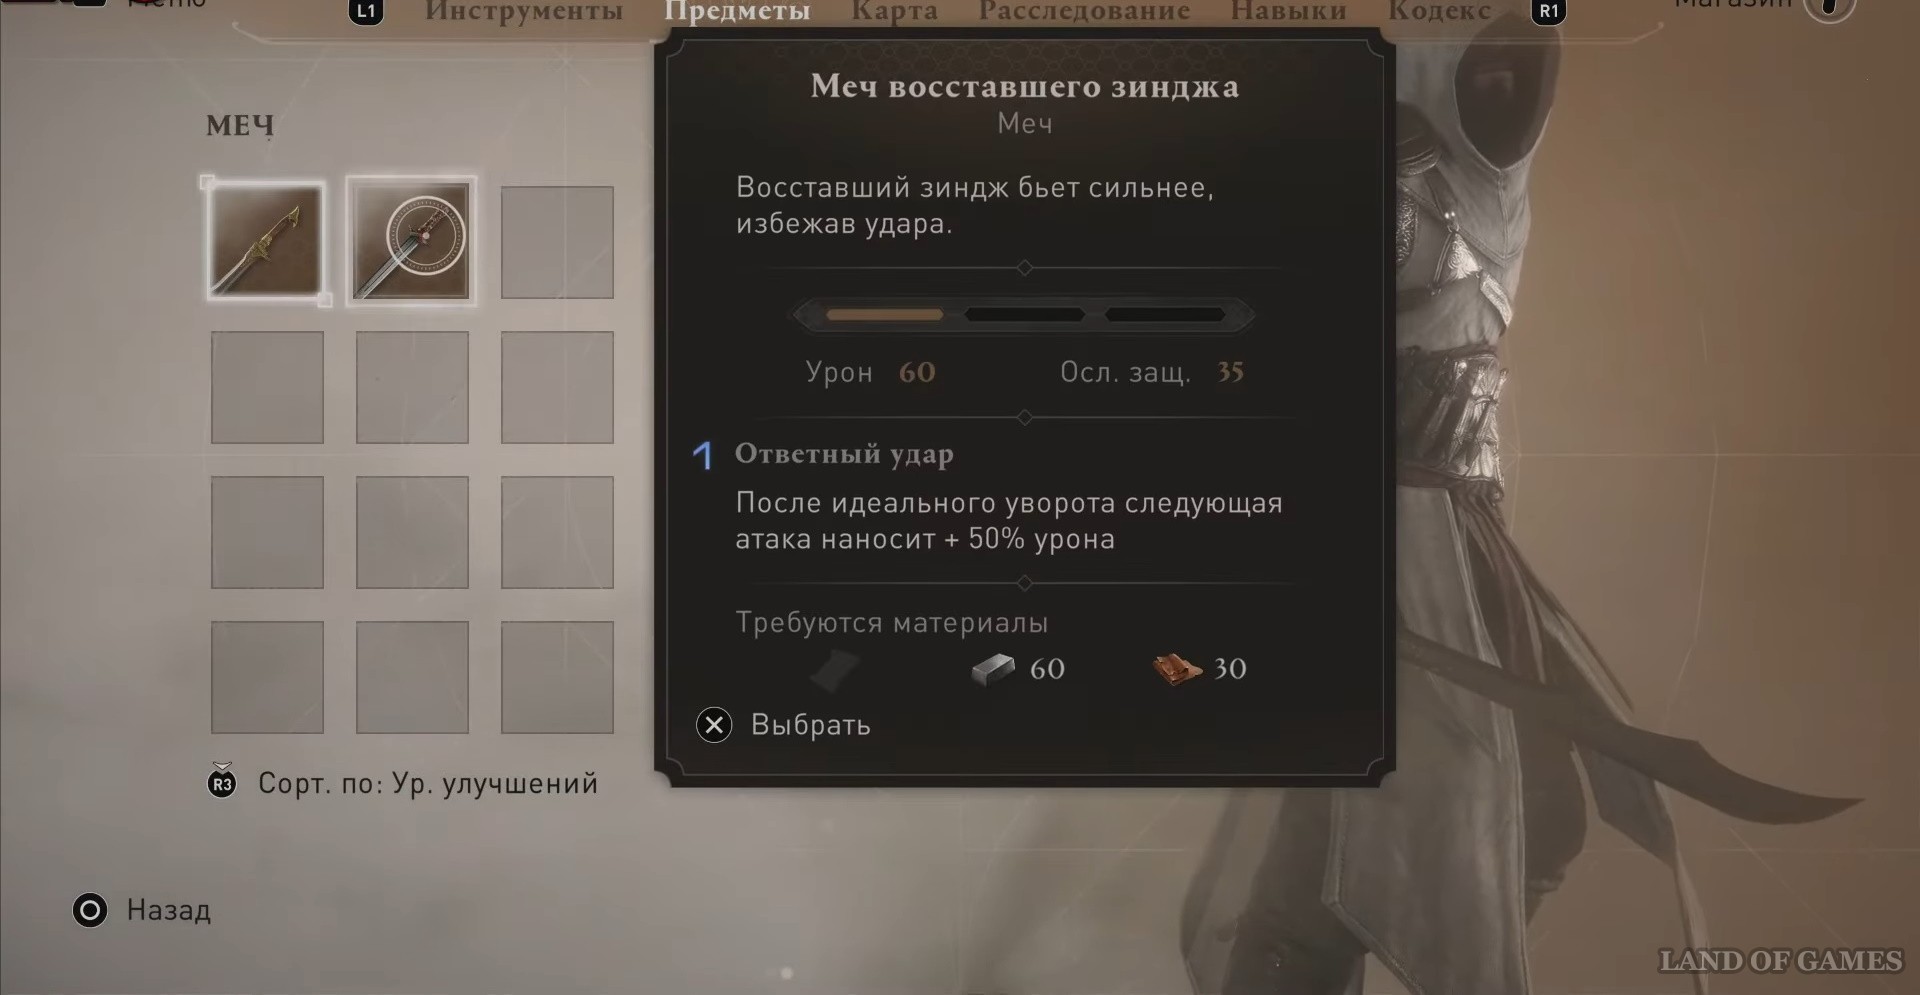
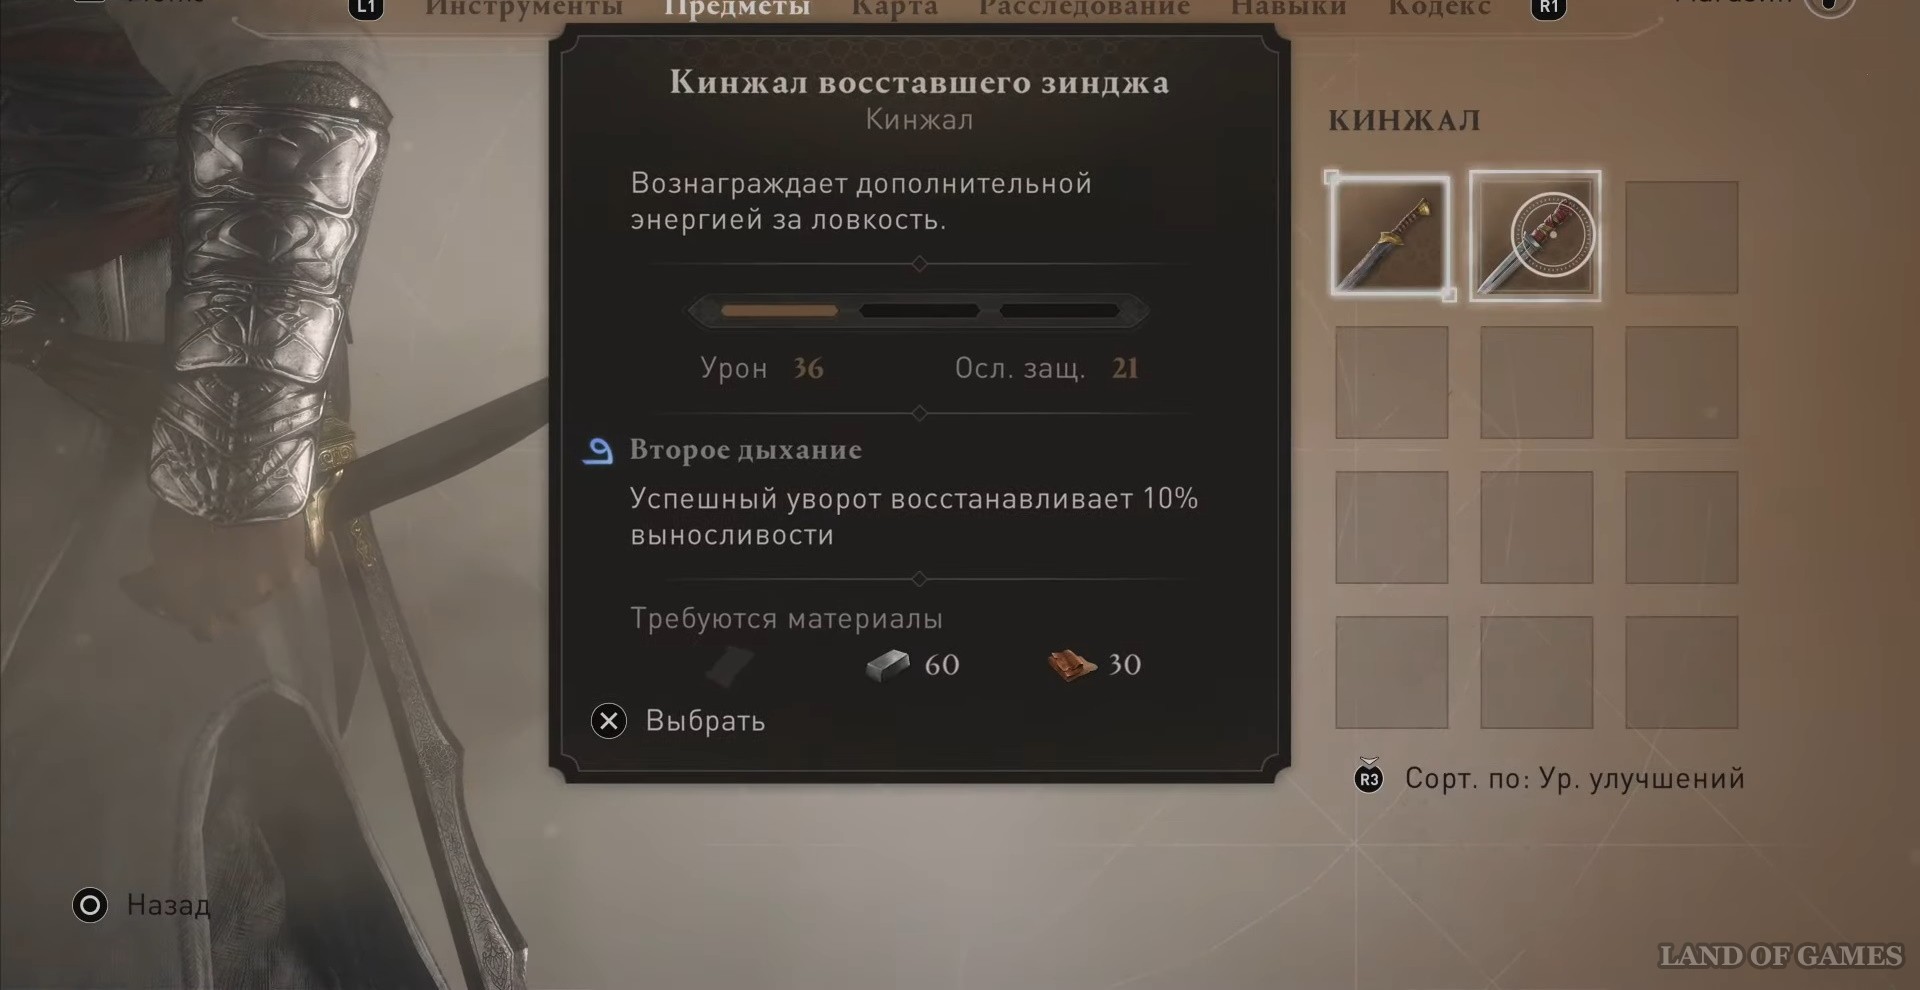
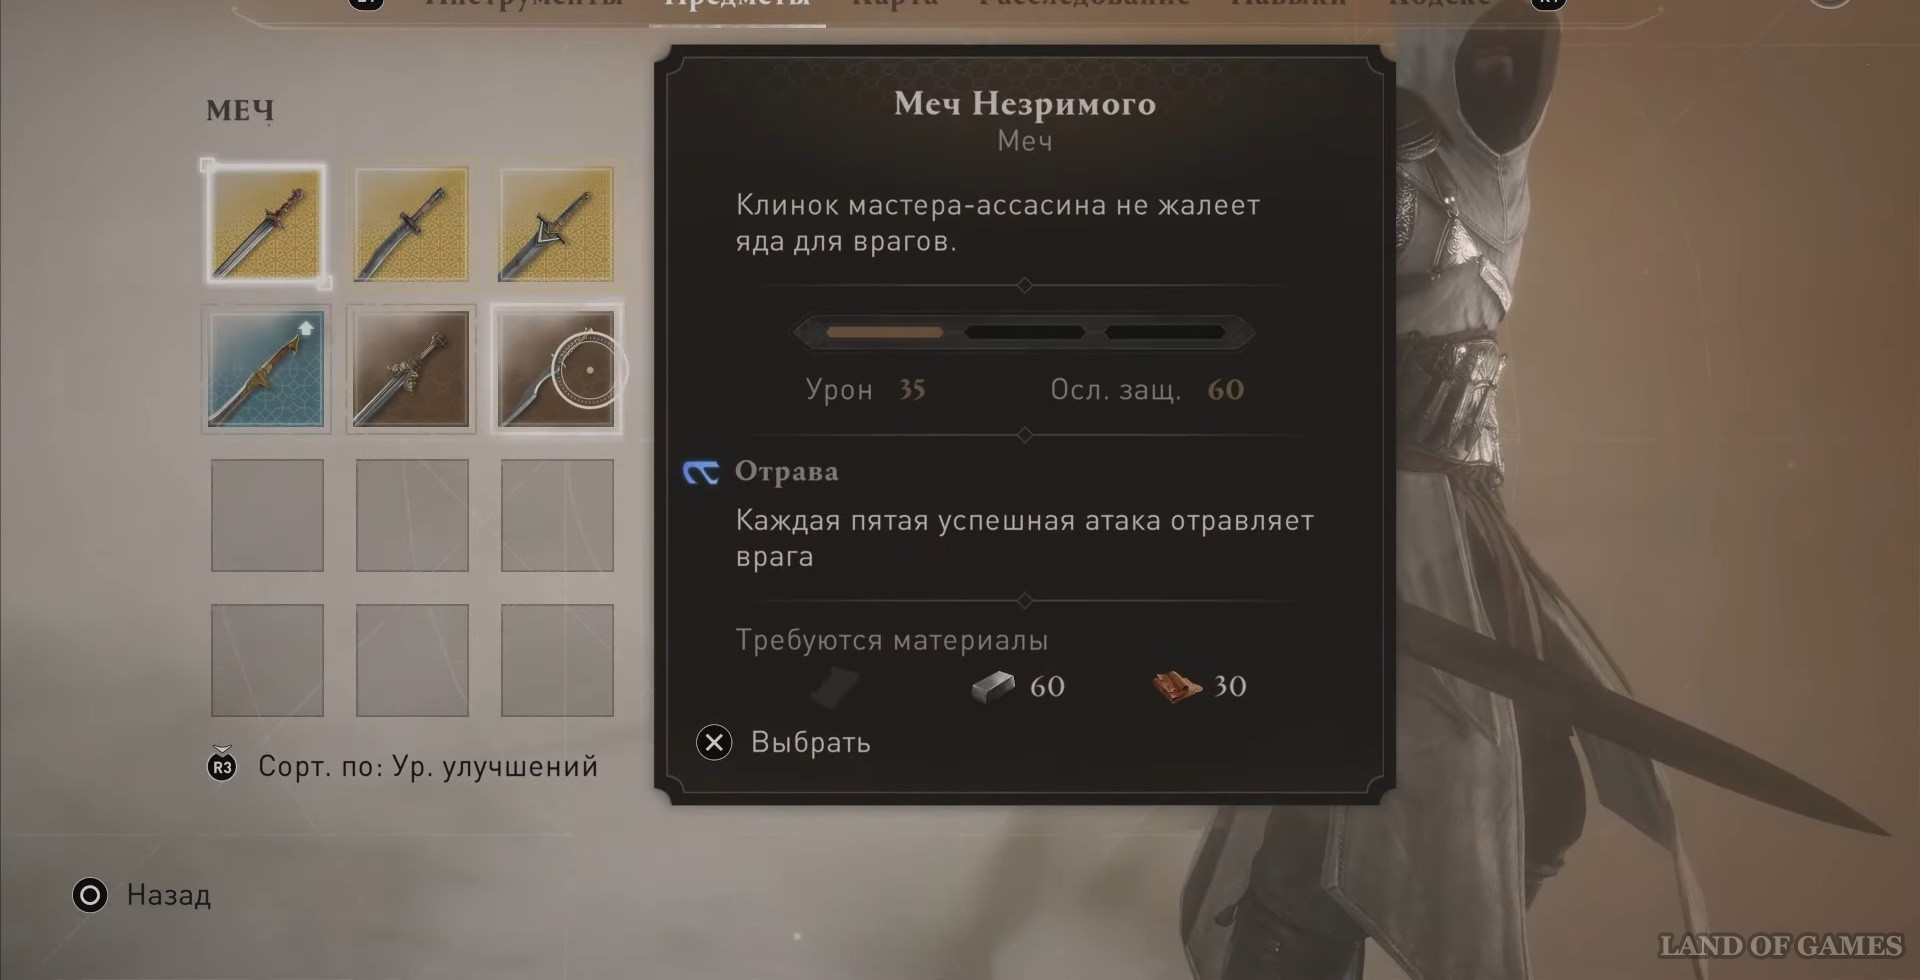
There are a total of six chests hidden in this location. Finding them will give you the costume and sword of the rebel Zinj. The characteristics of the items can be seen in the screenshots below.
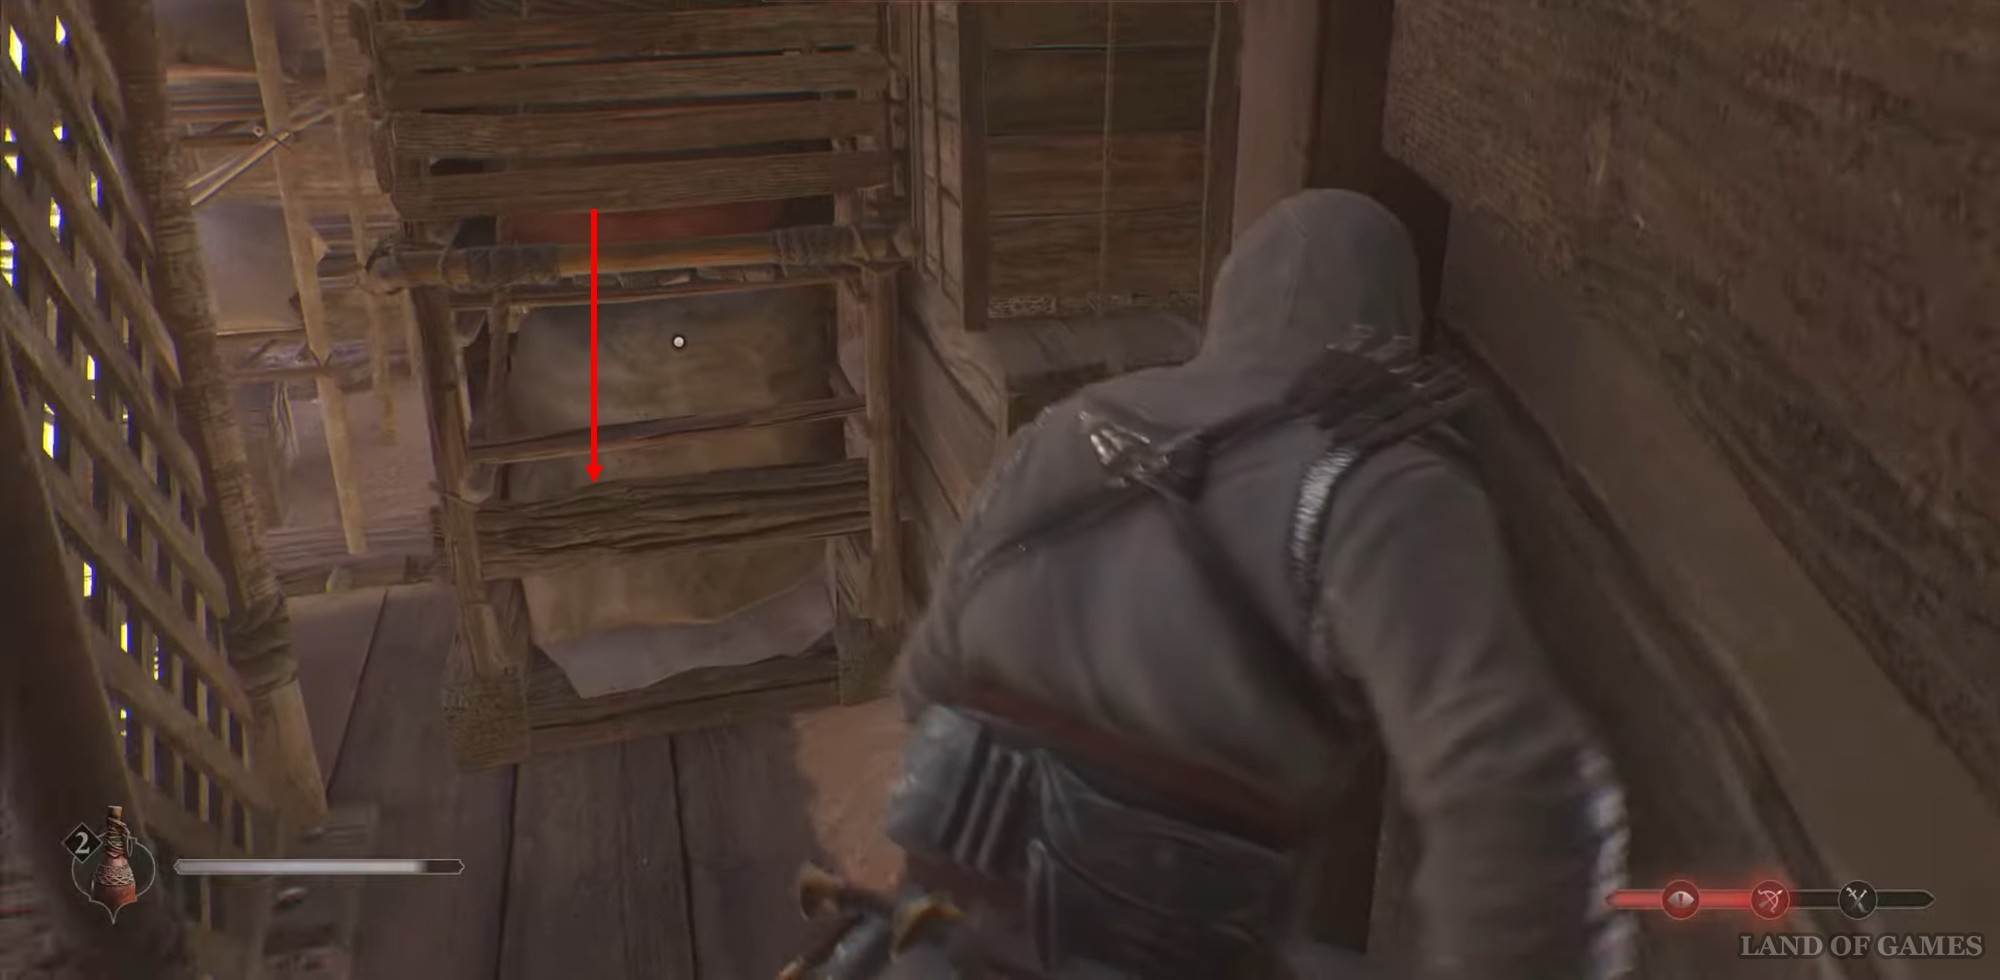
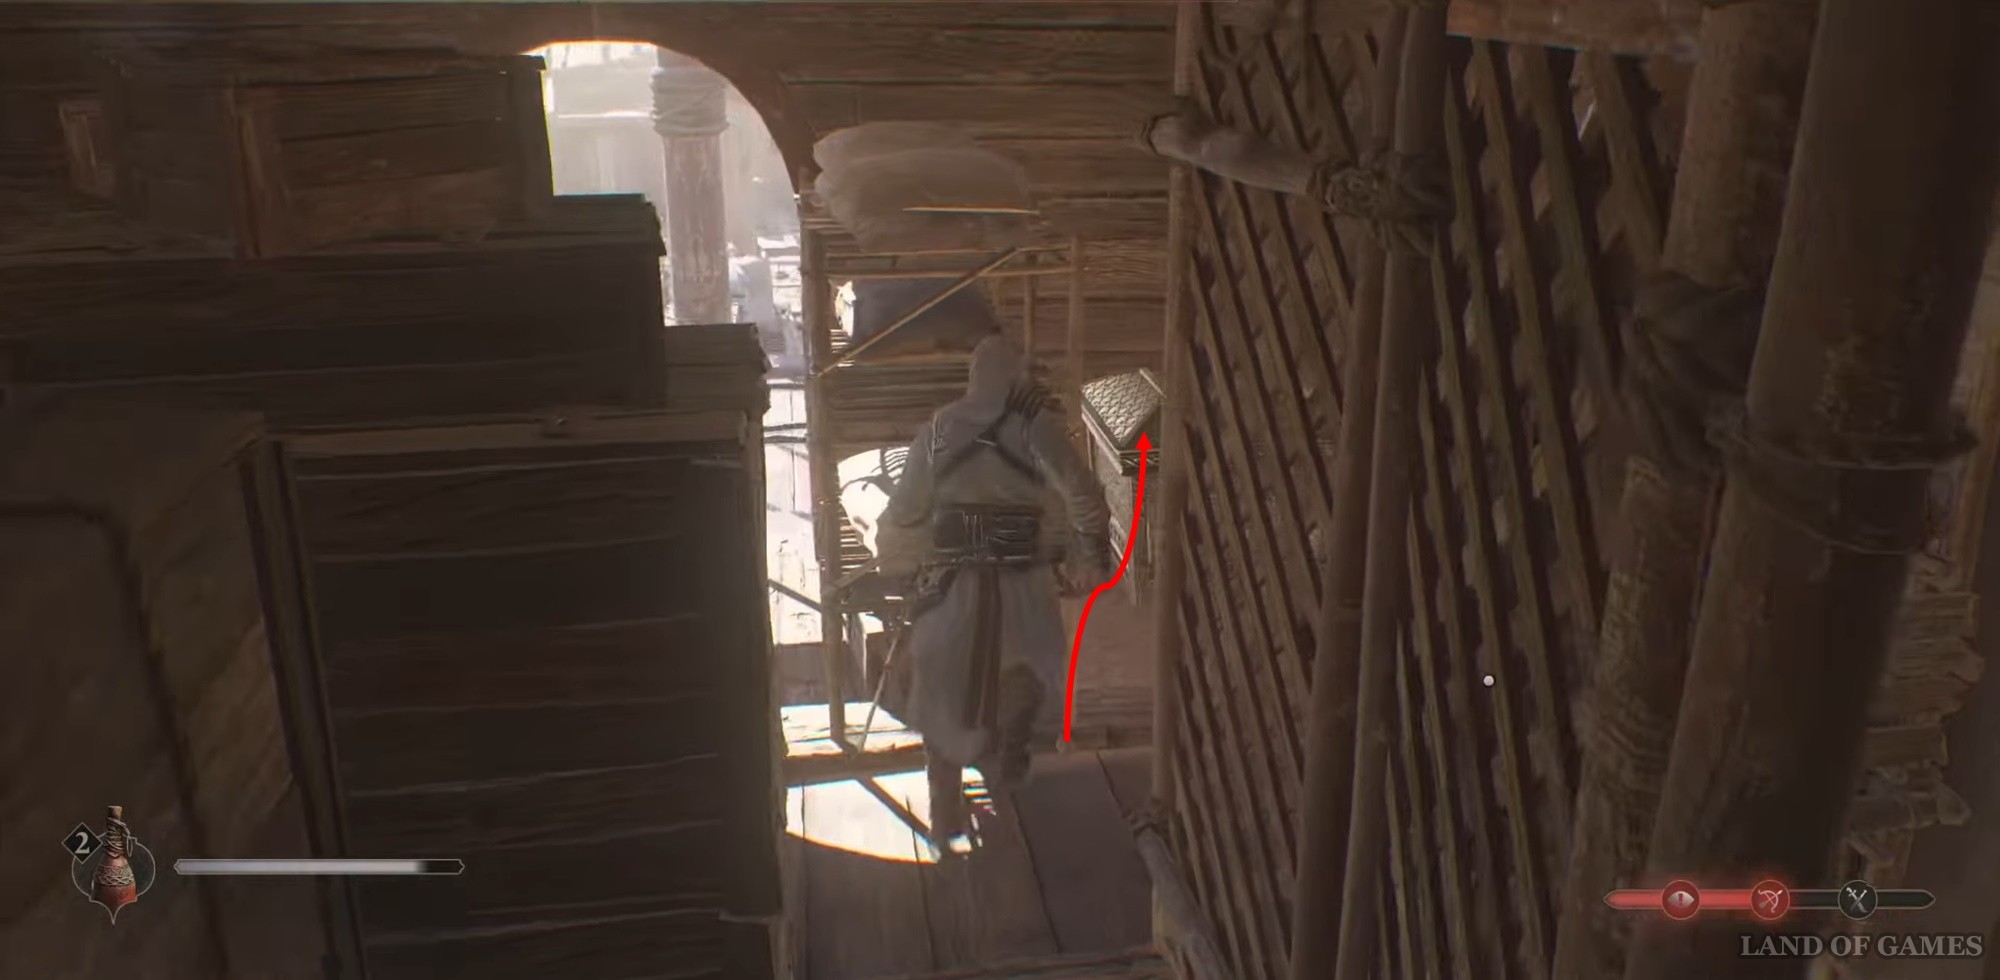
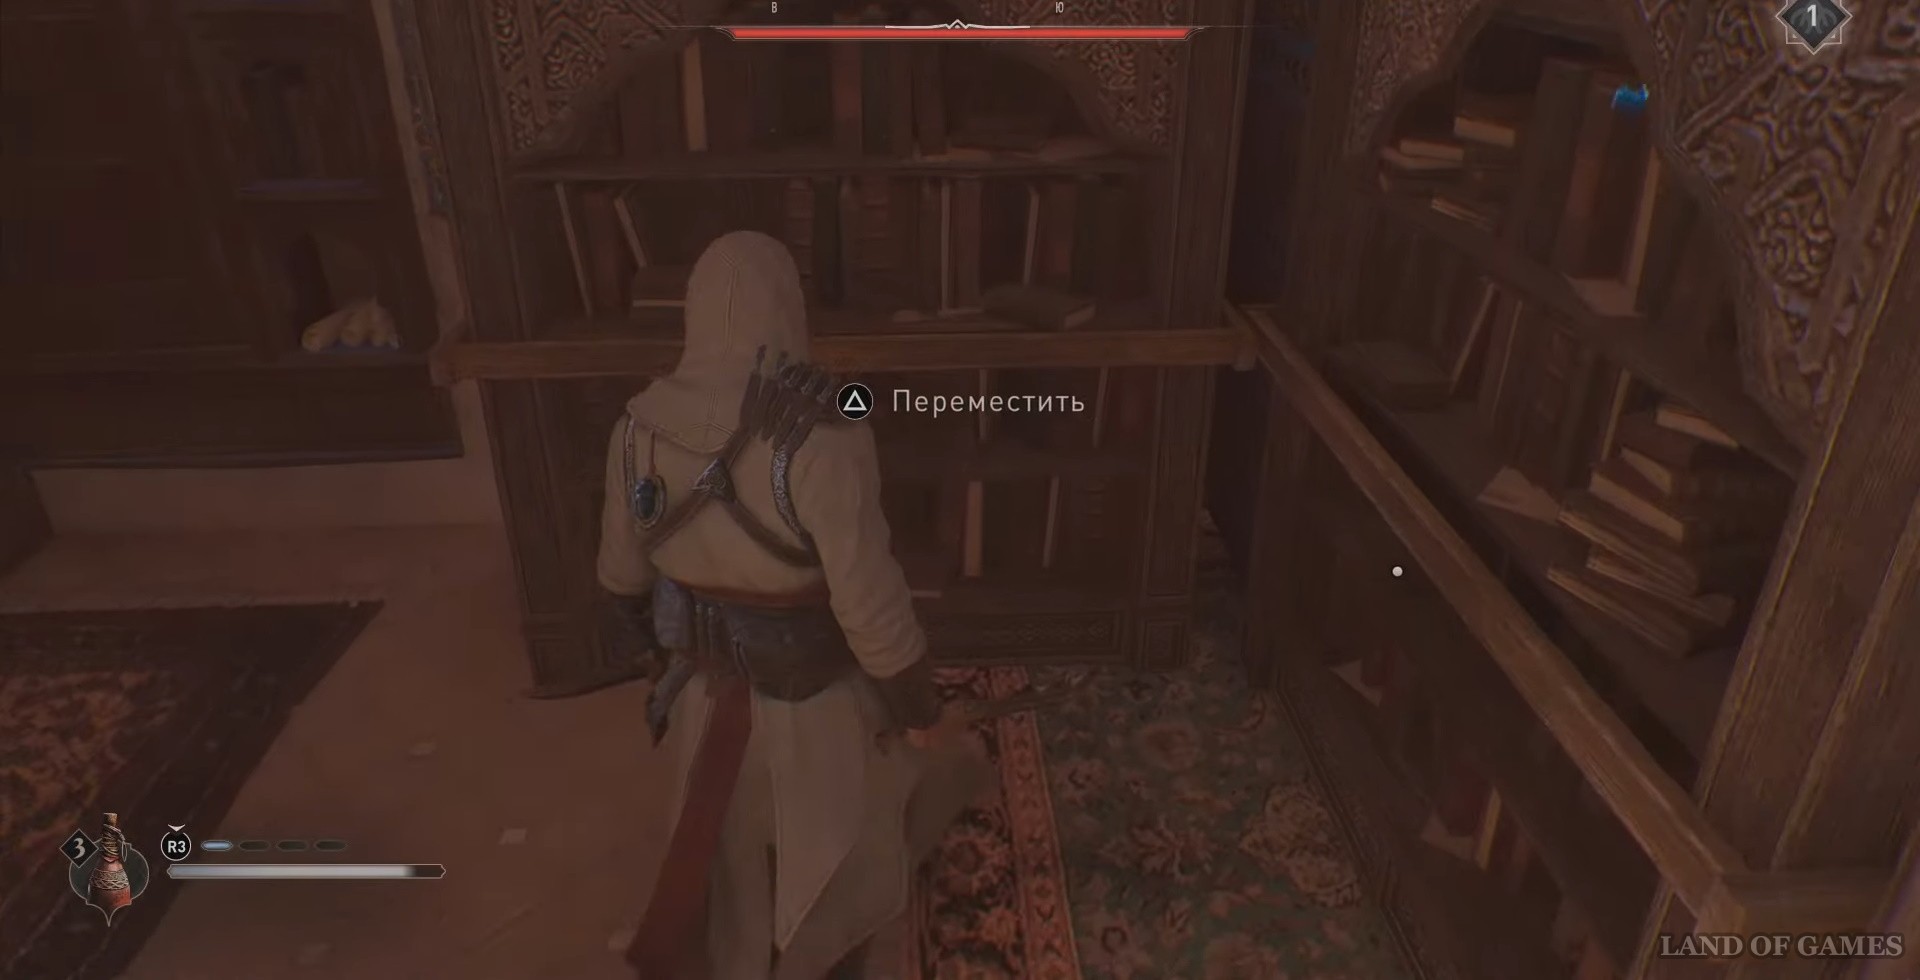
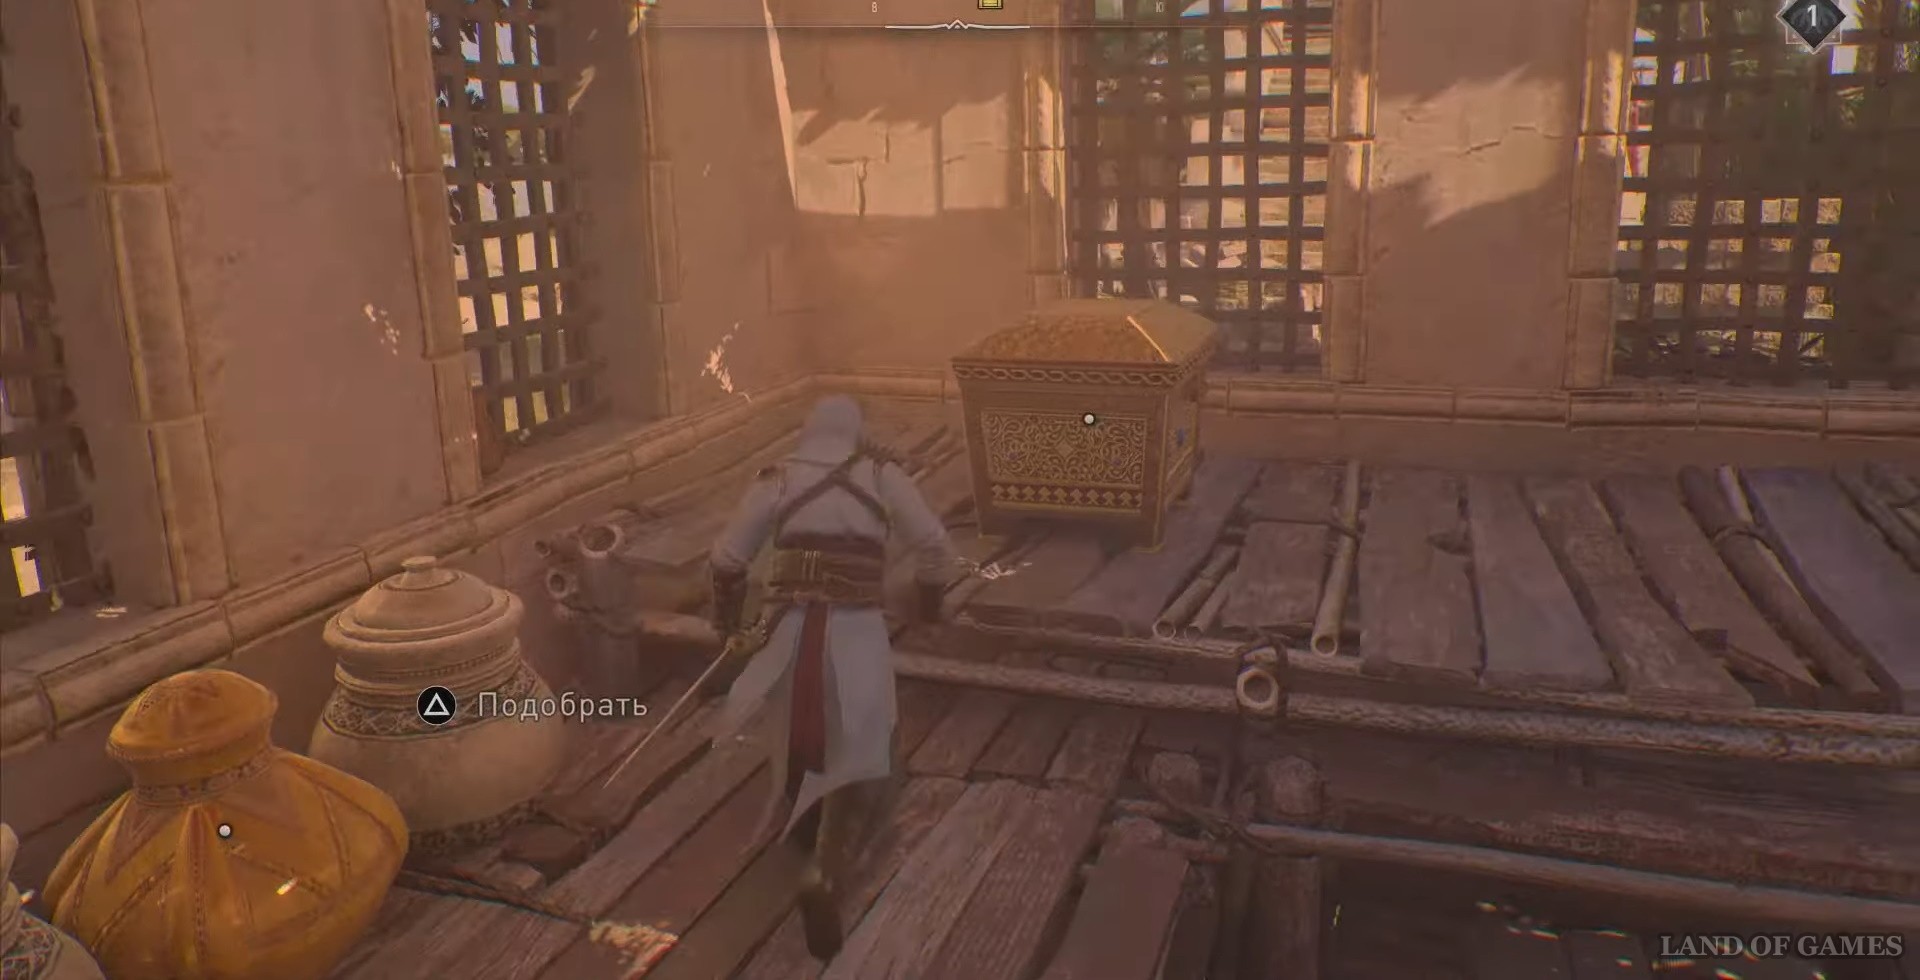
Chest #1 Upper Port
You need to go to the ship. The map below shows its exact location (Huld district).

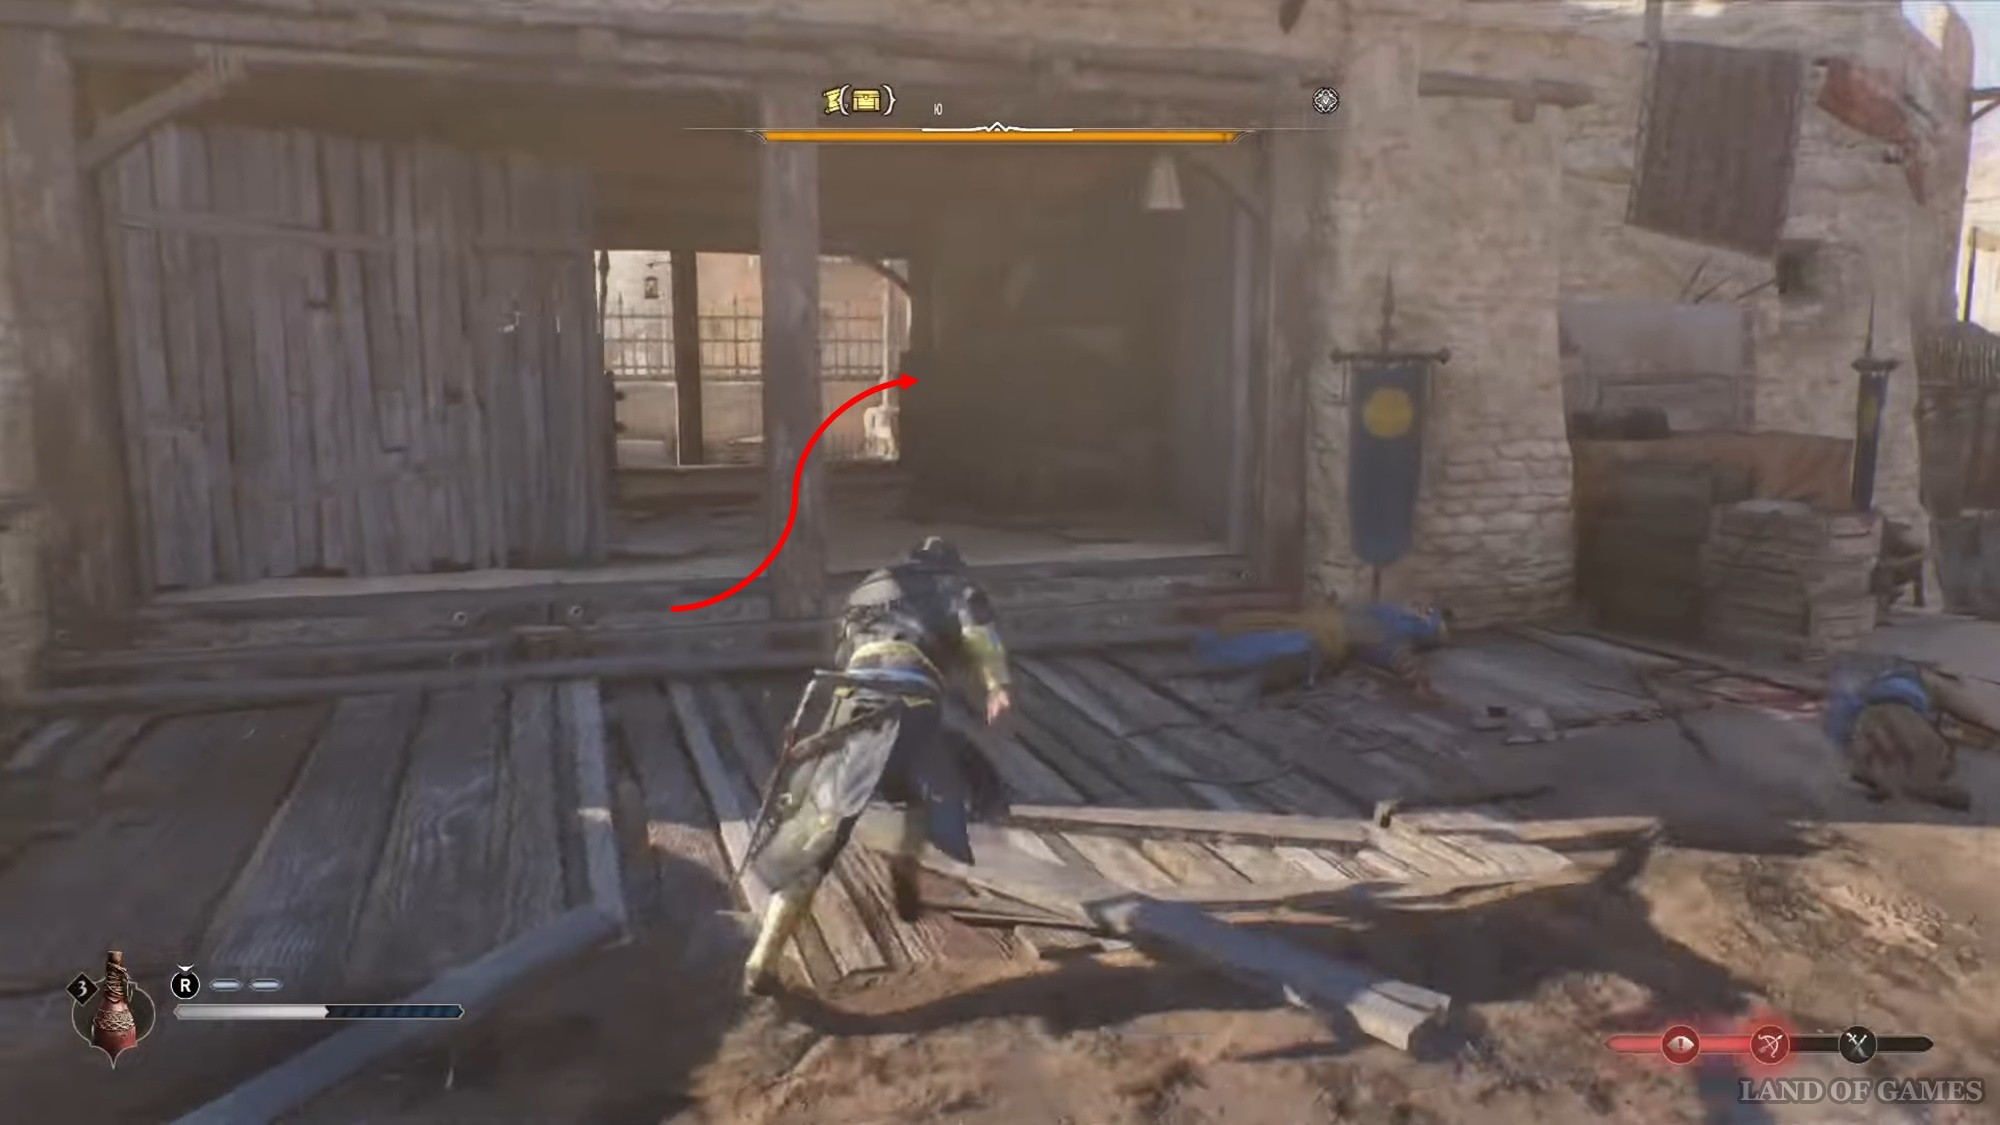
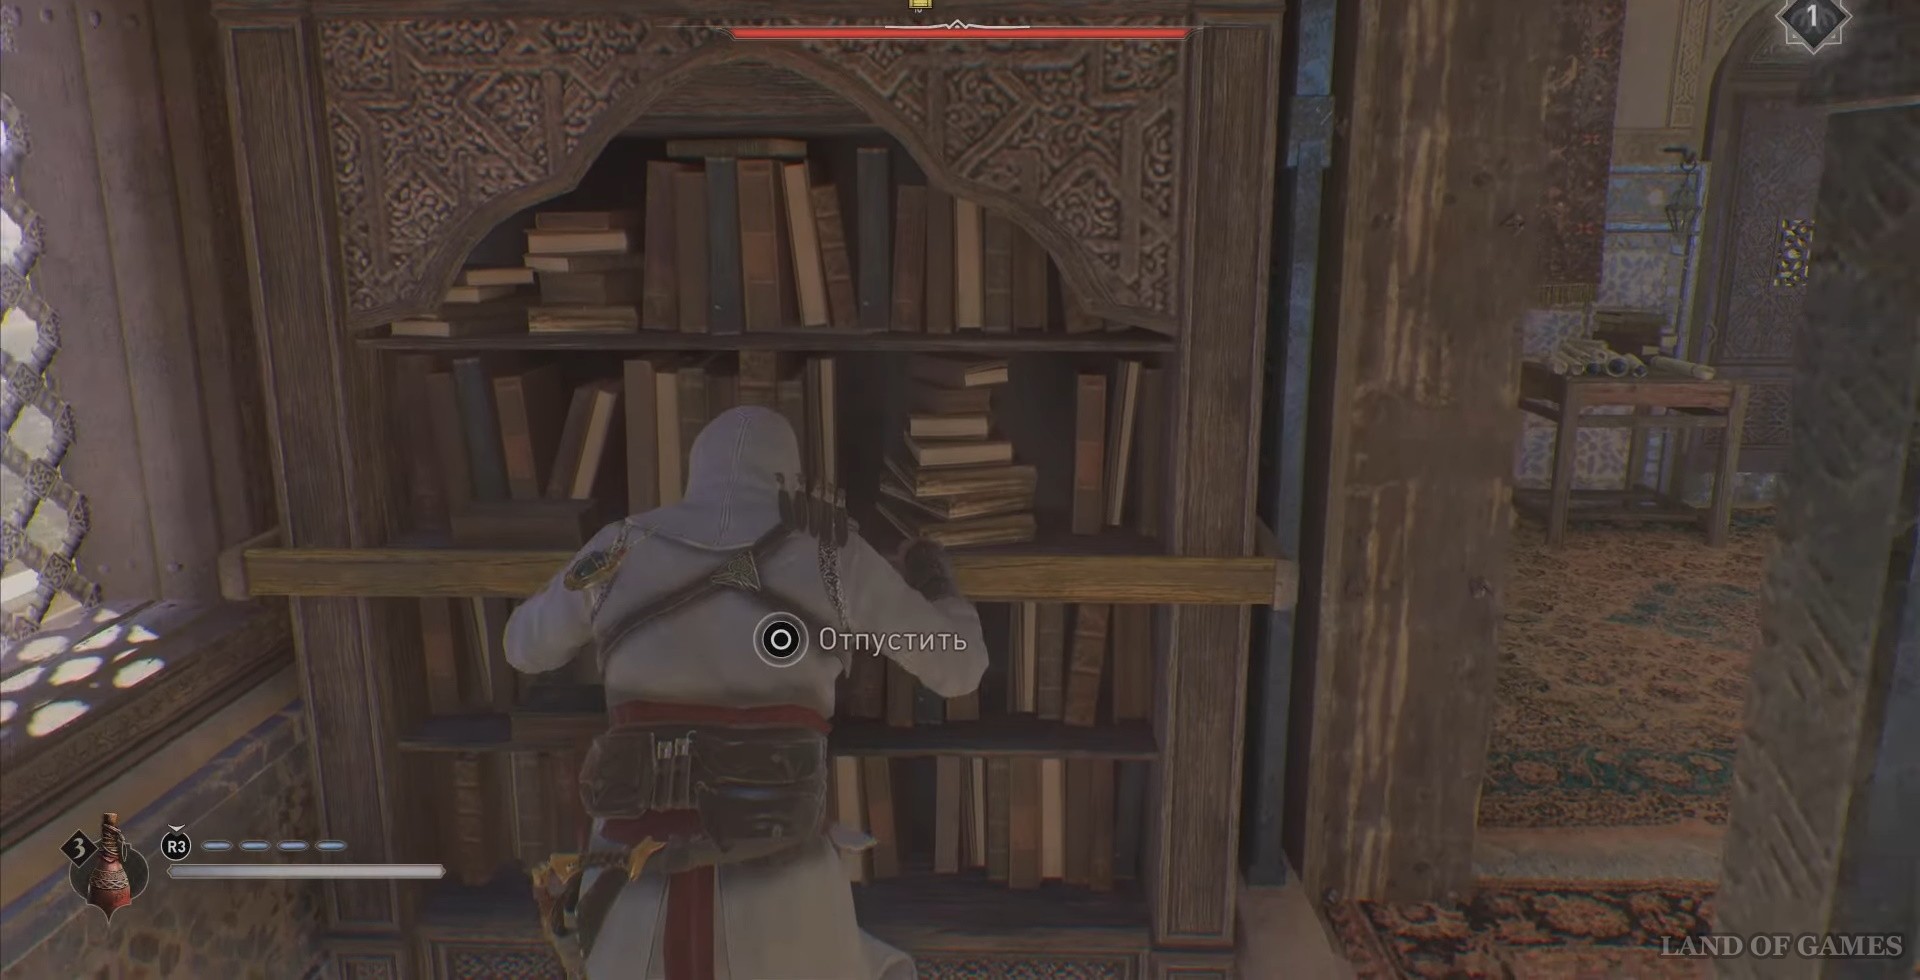
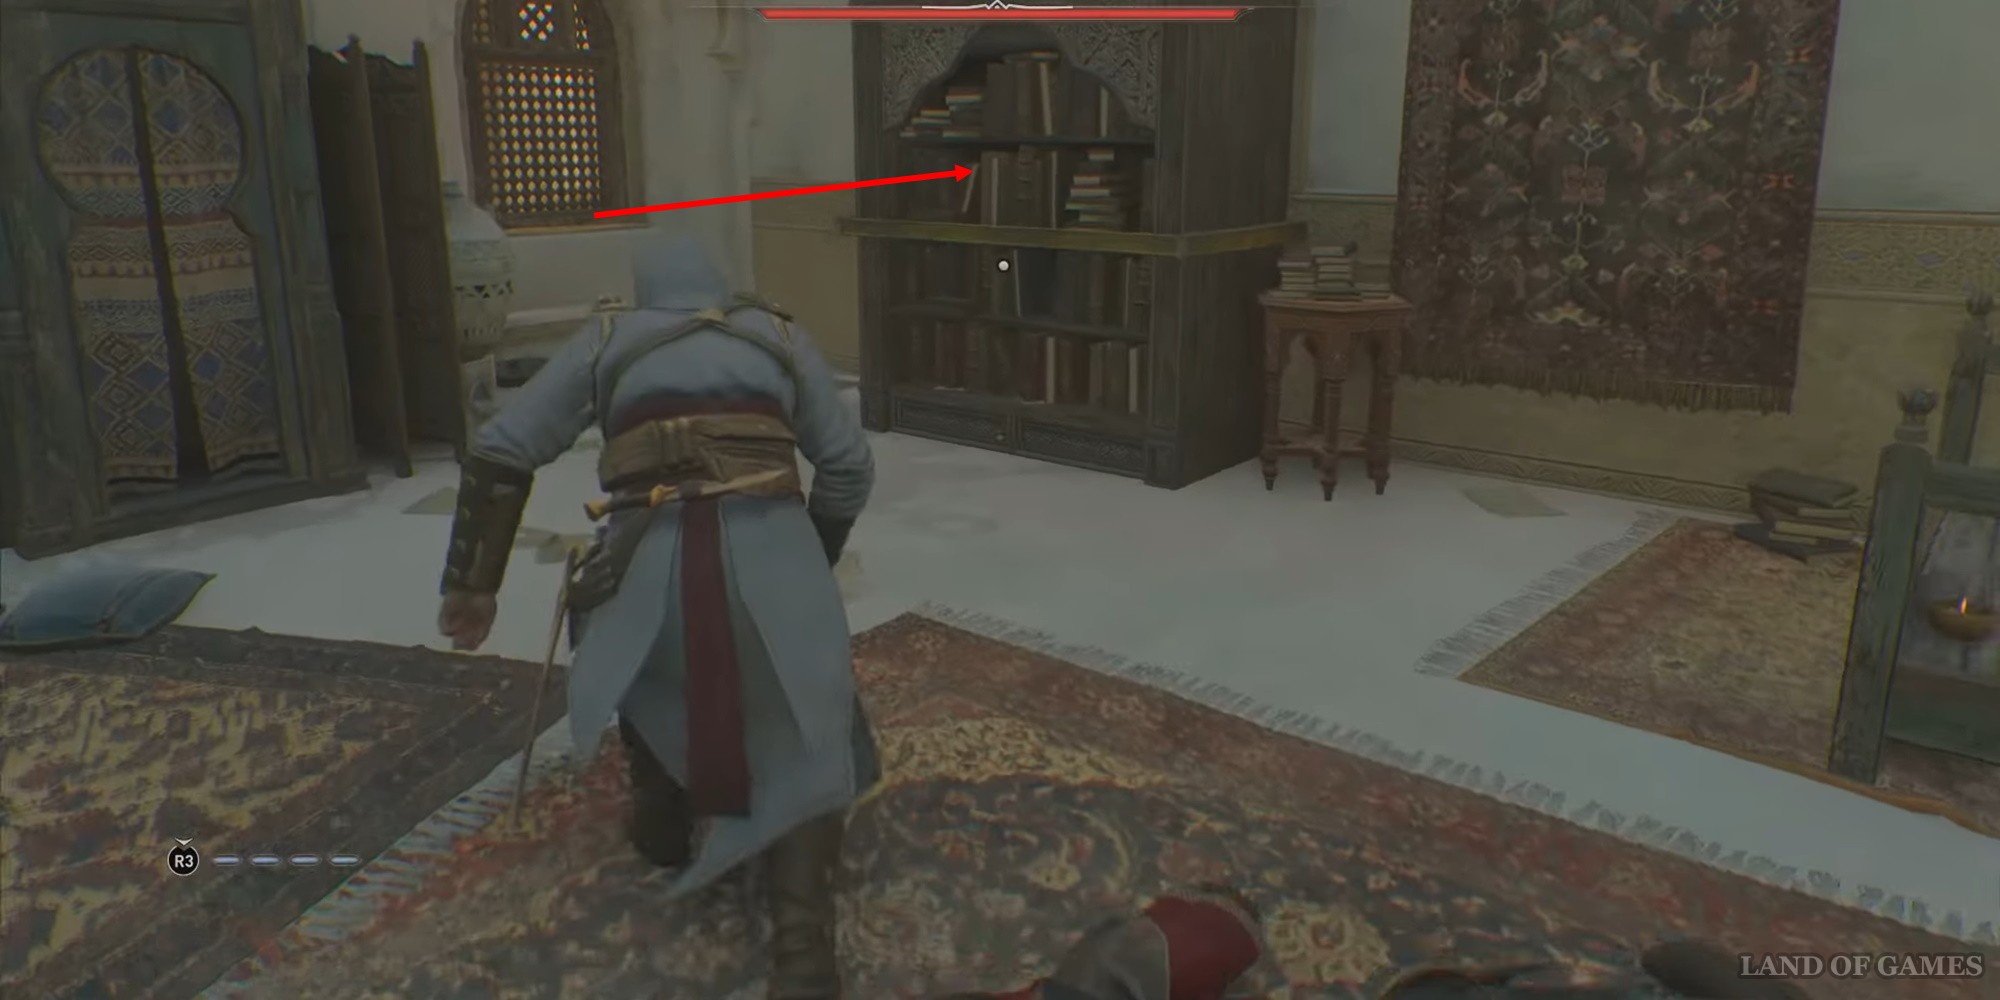
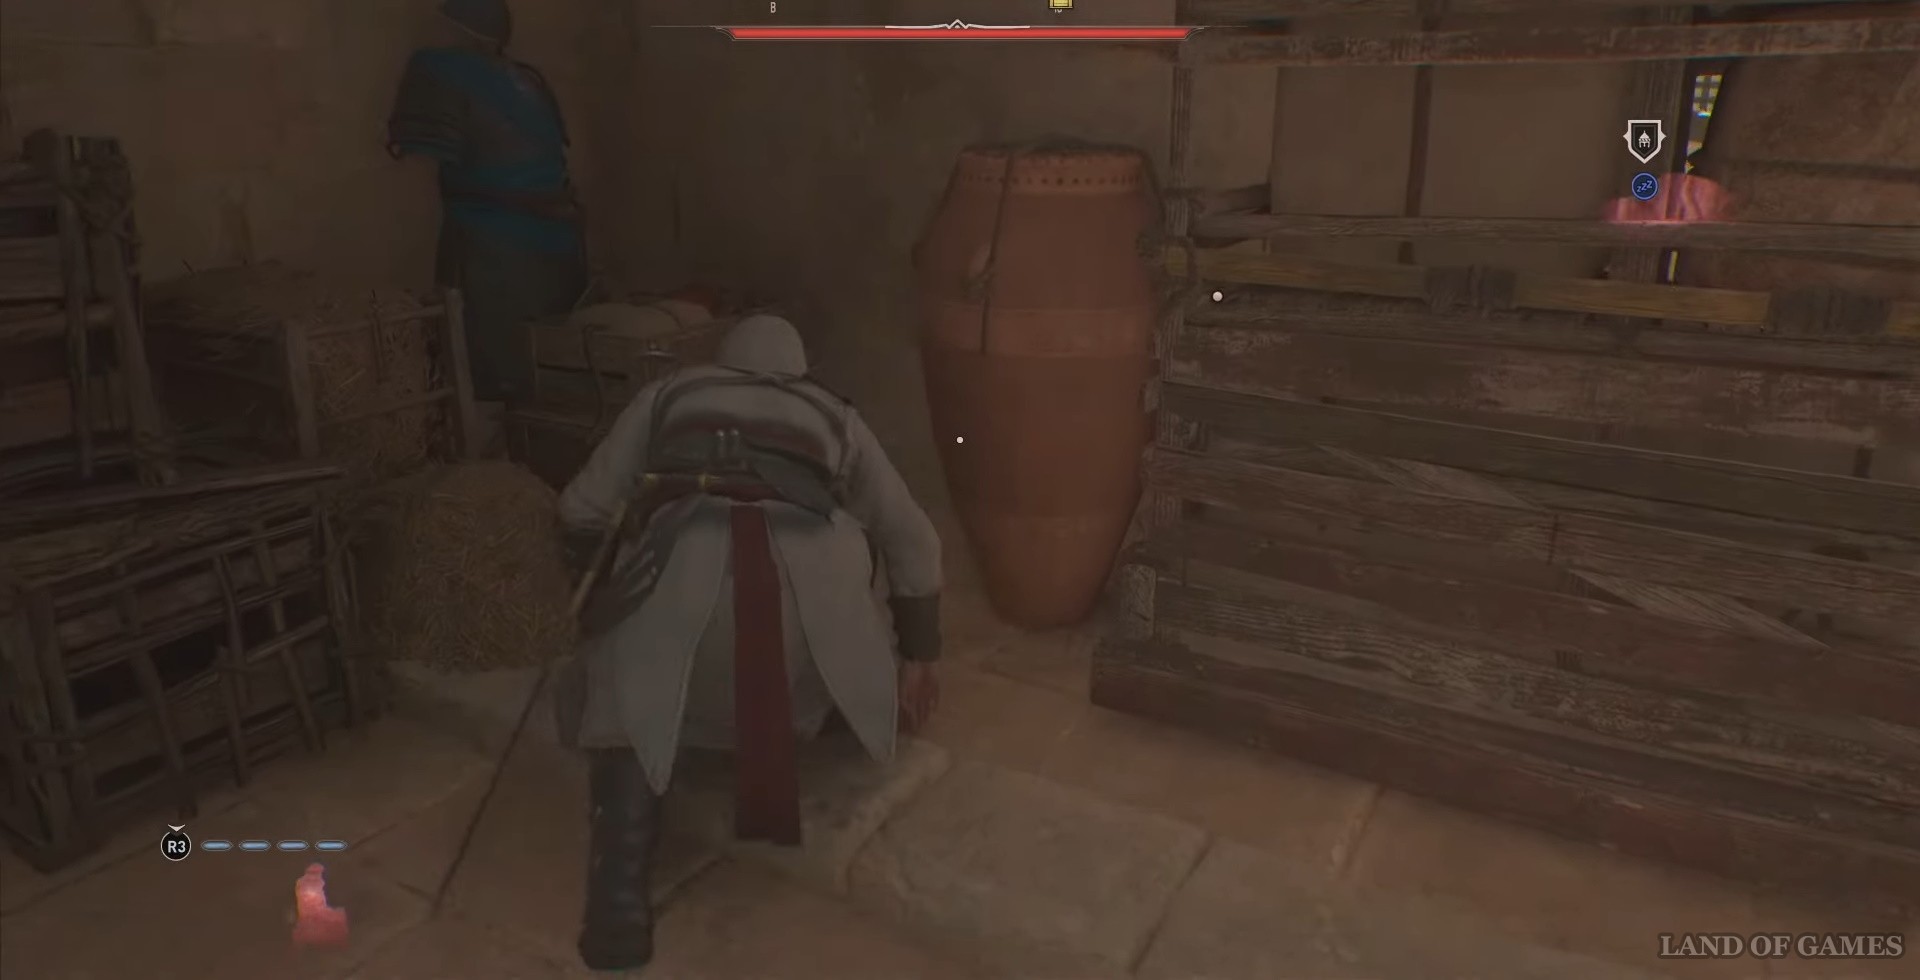
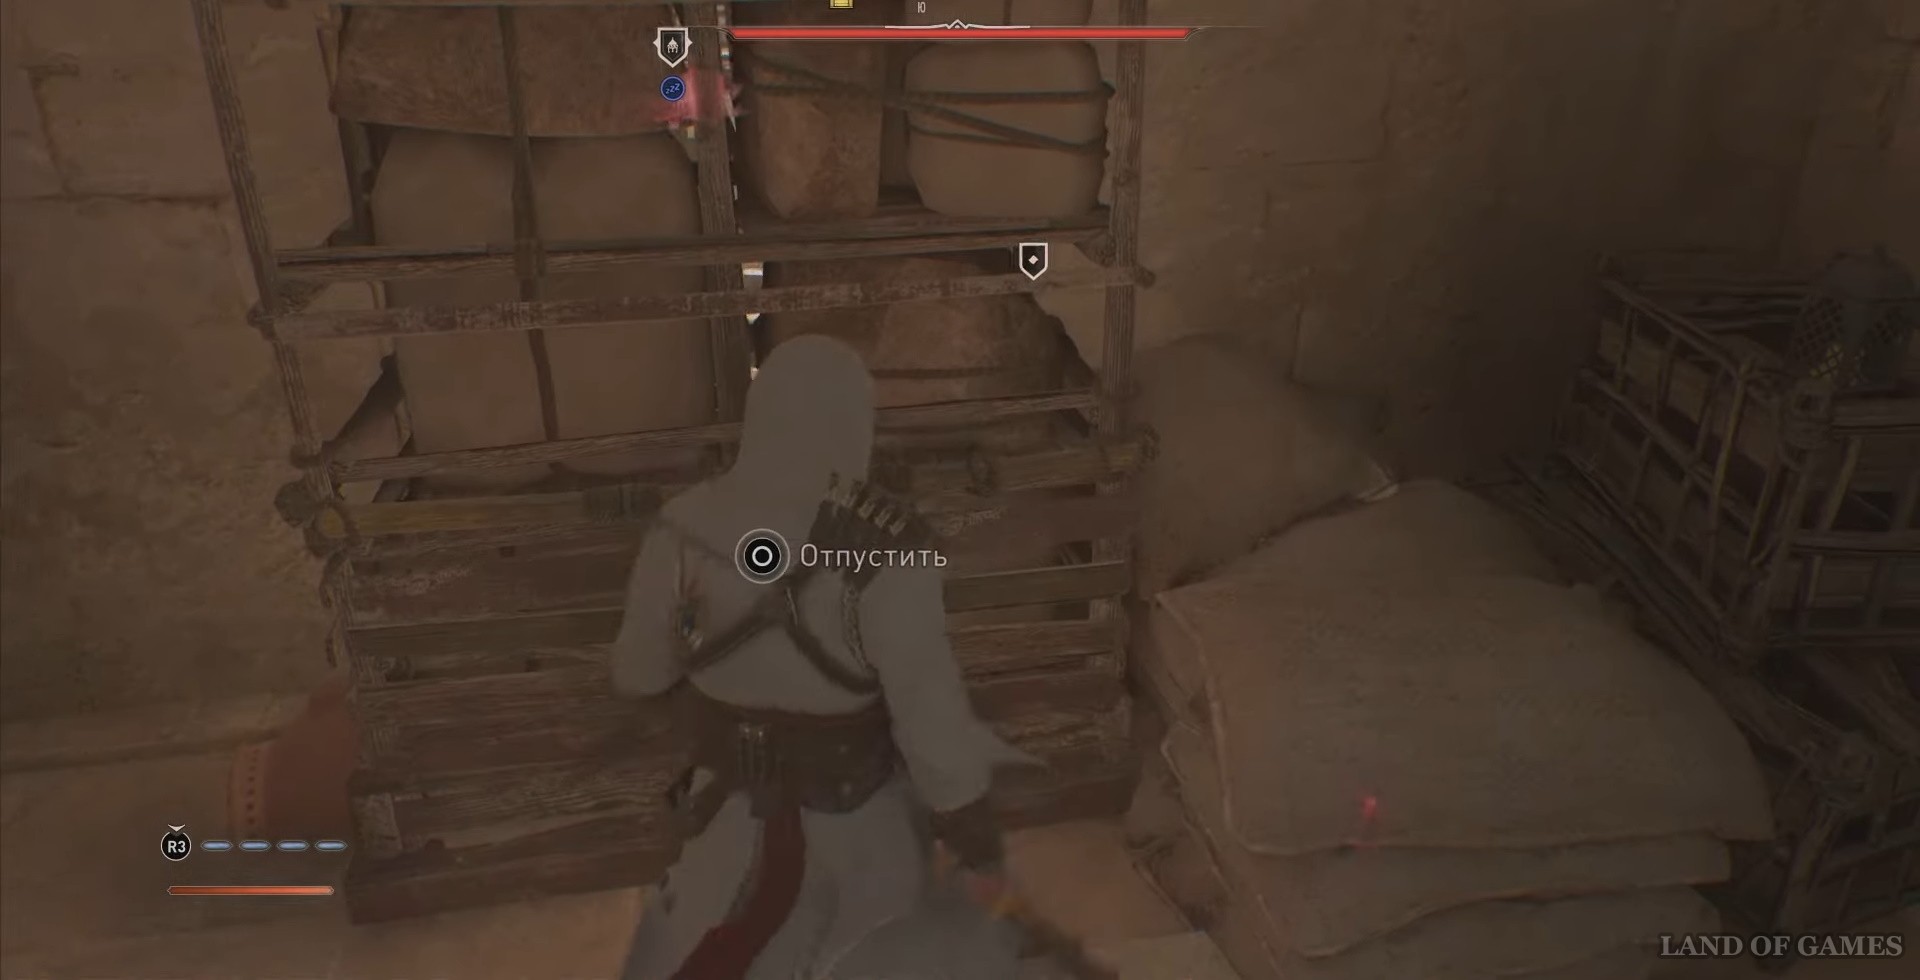
Next, run to the captain's cabin. When you try to enter it, you will come across an obstacle in the form of a shelf with boxes - move it forward. Then turn right, jump over the wooden boxes, you will see another shelf - push it towards you.

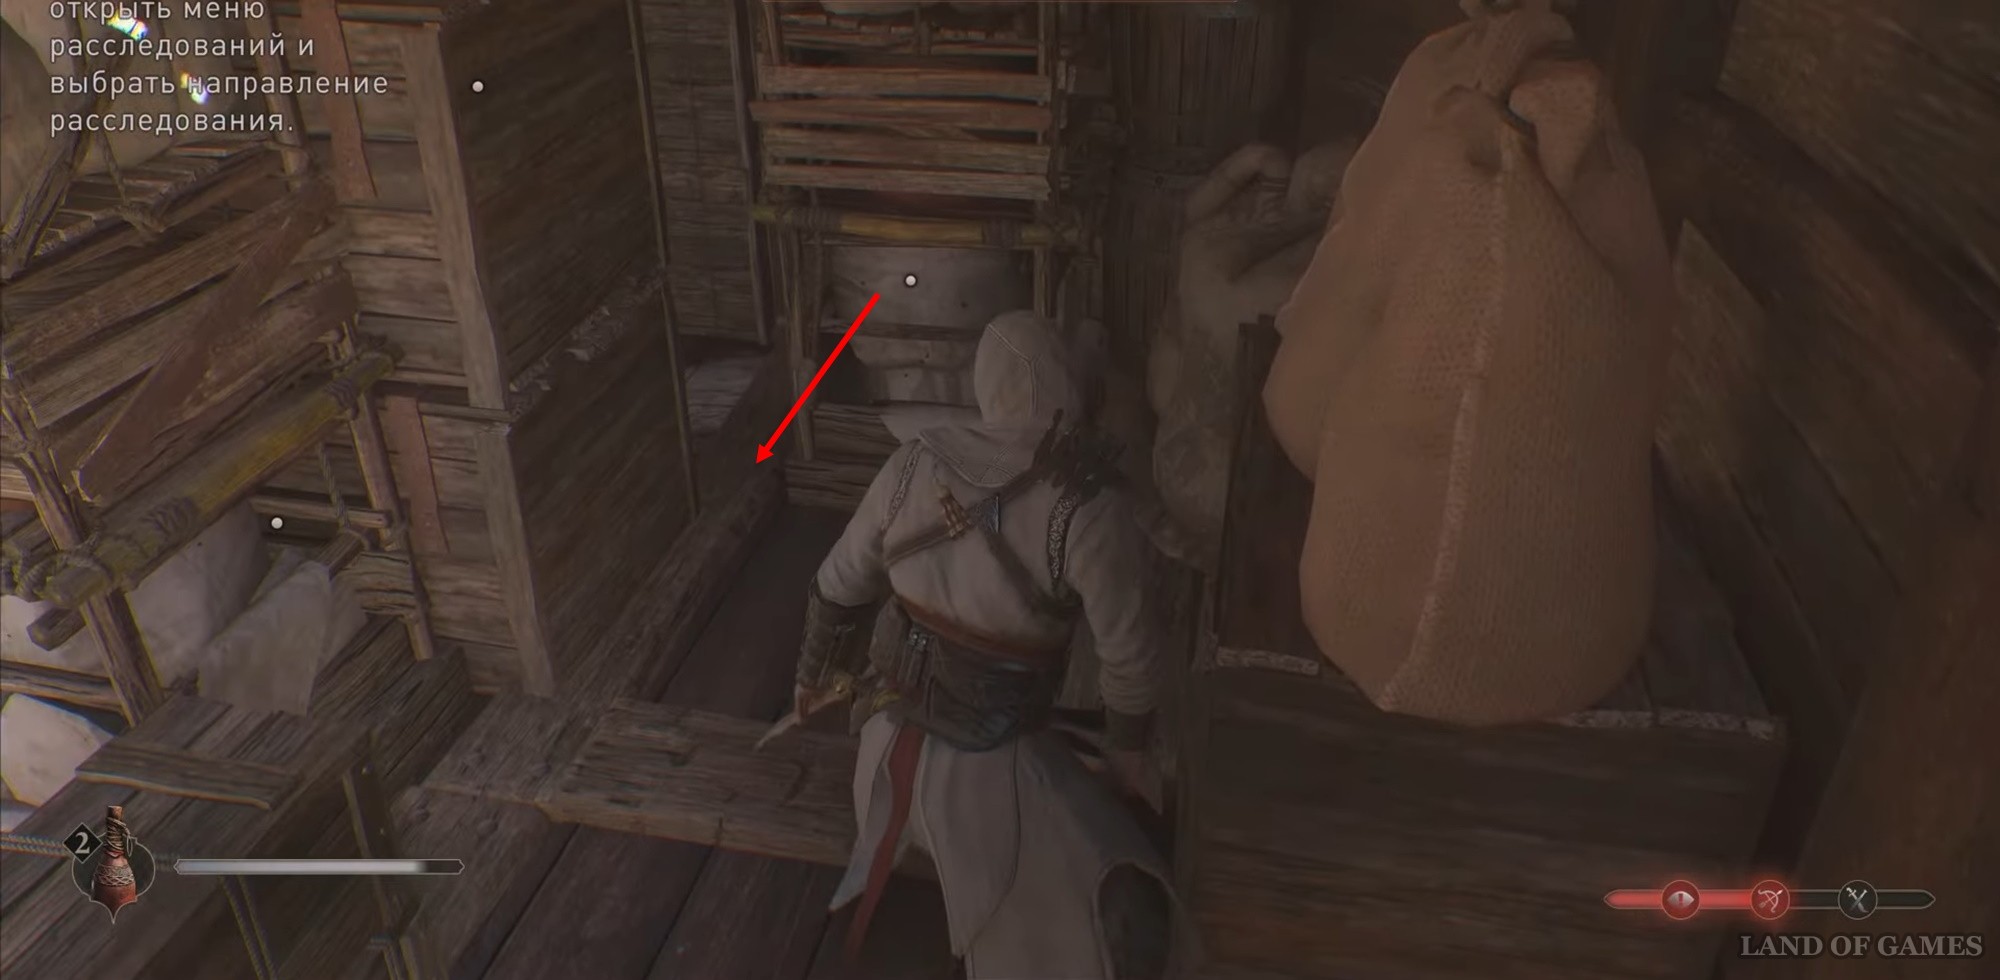
Move the shelf that you pushed first against the wall until it stops. Turn right, run forward a little and turn right again - pull the shelf towards you.
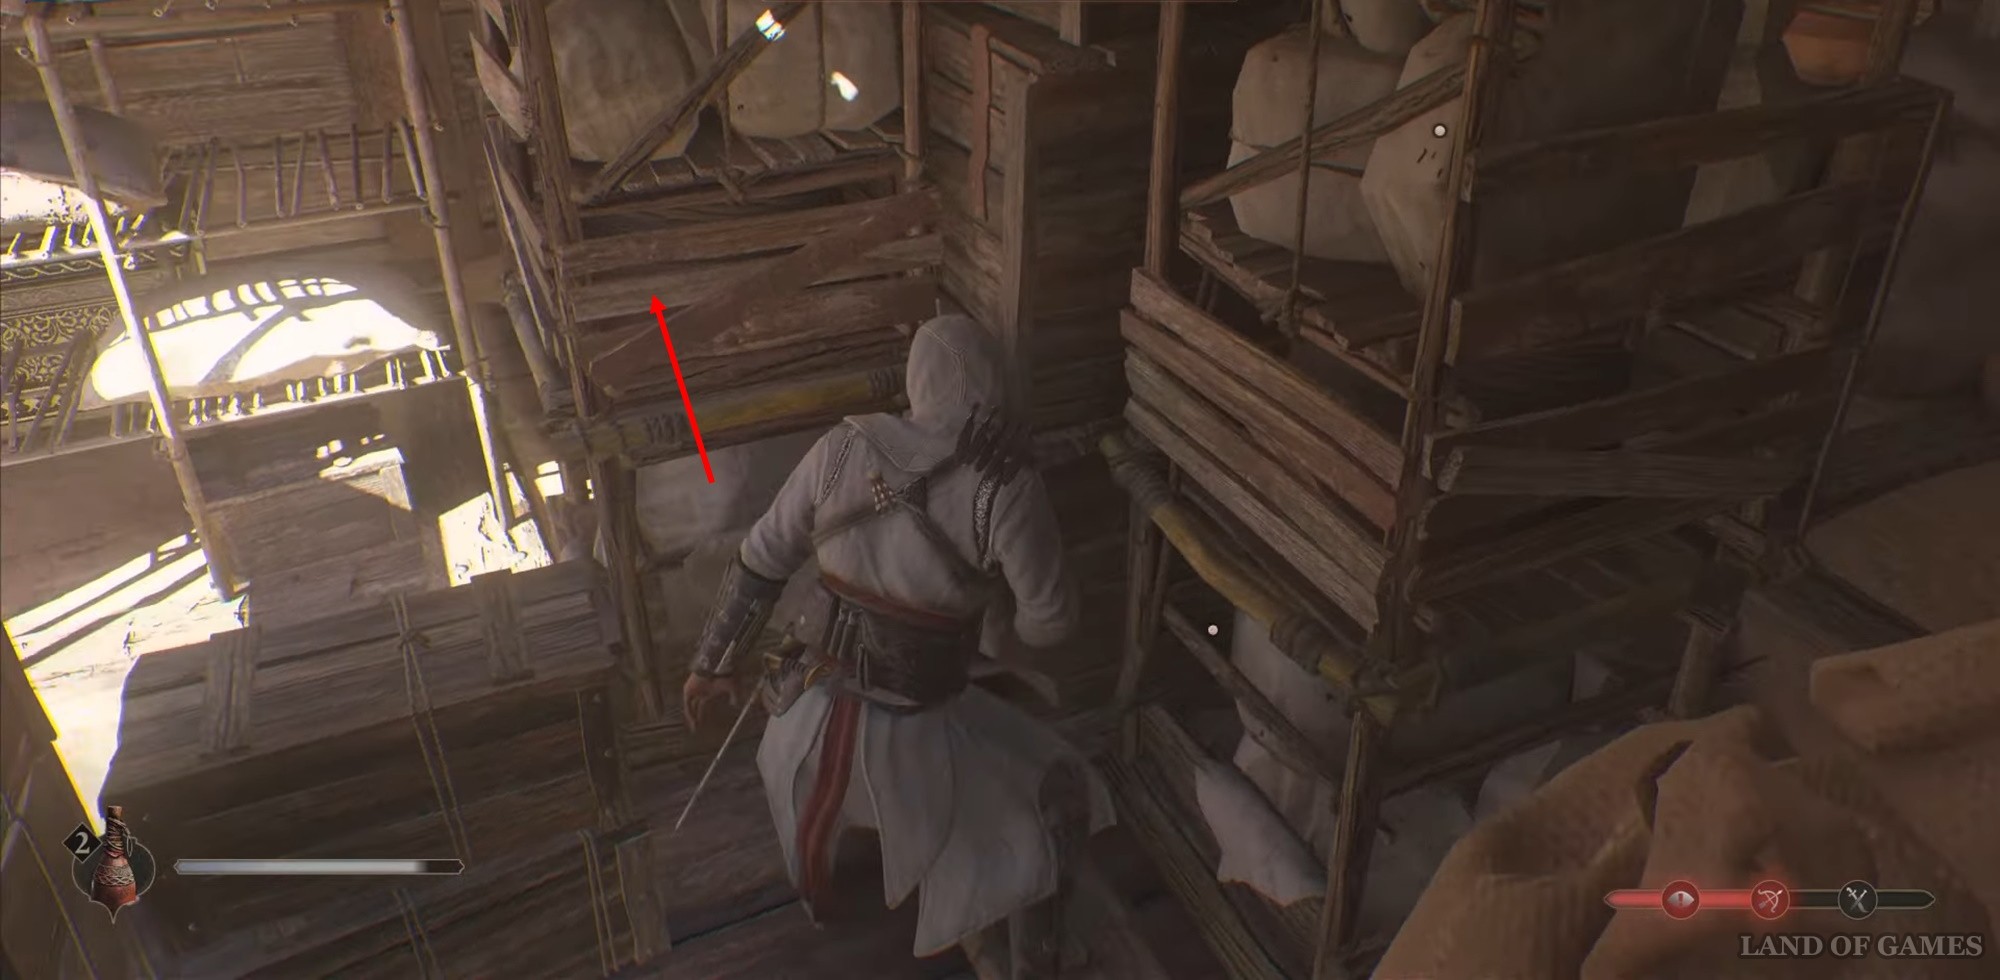
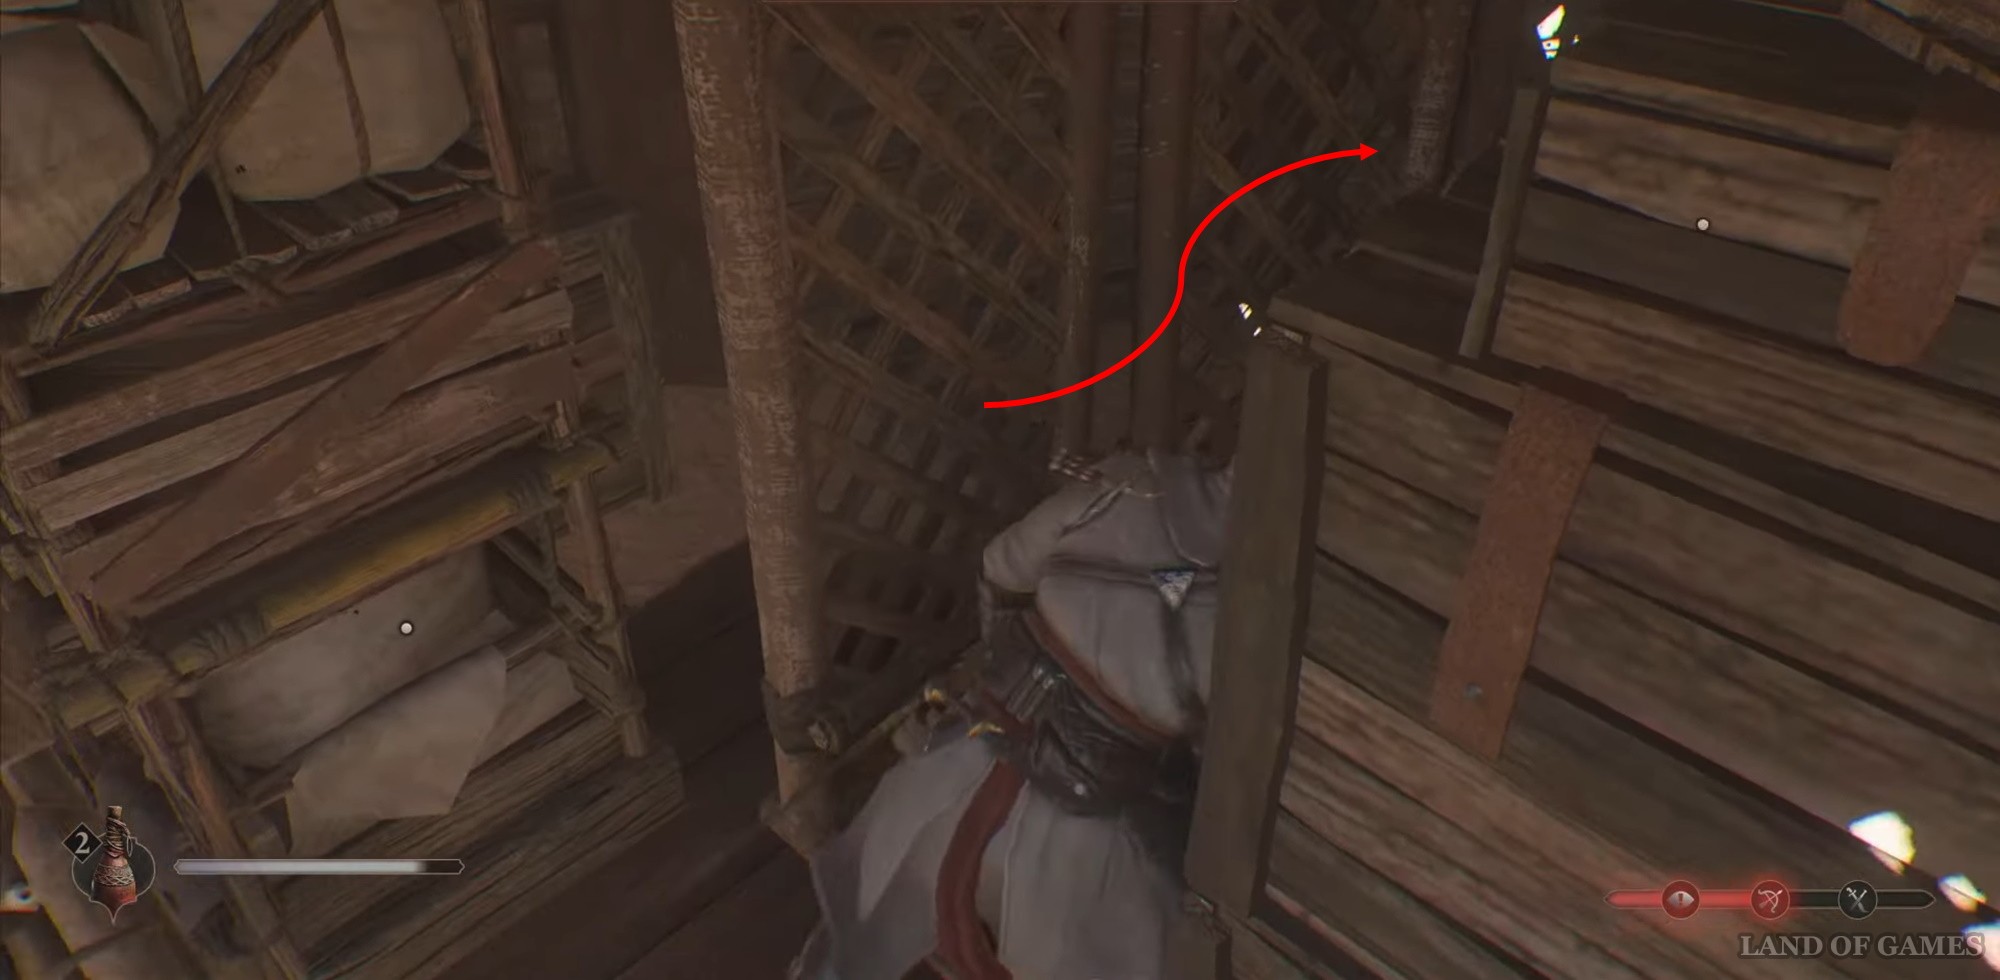
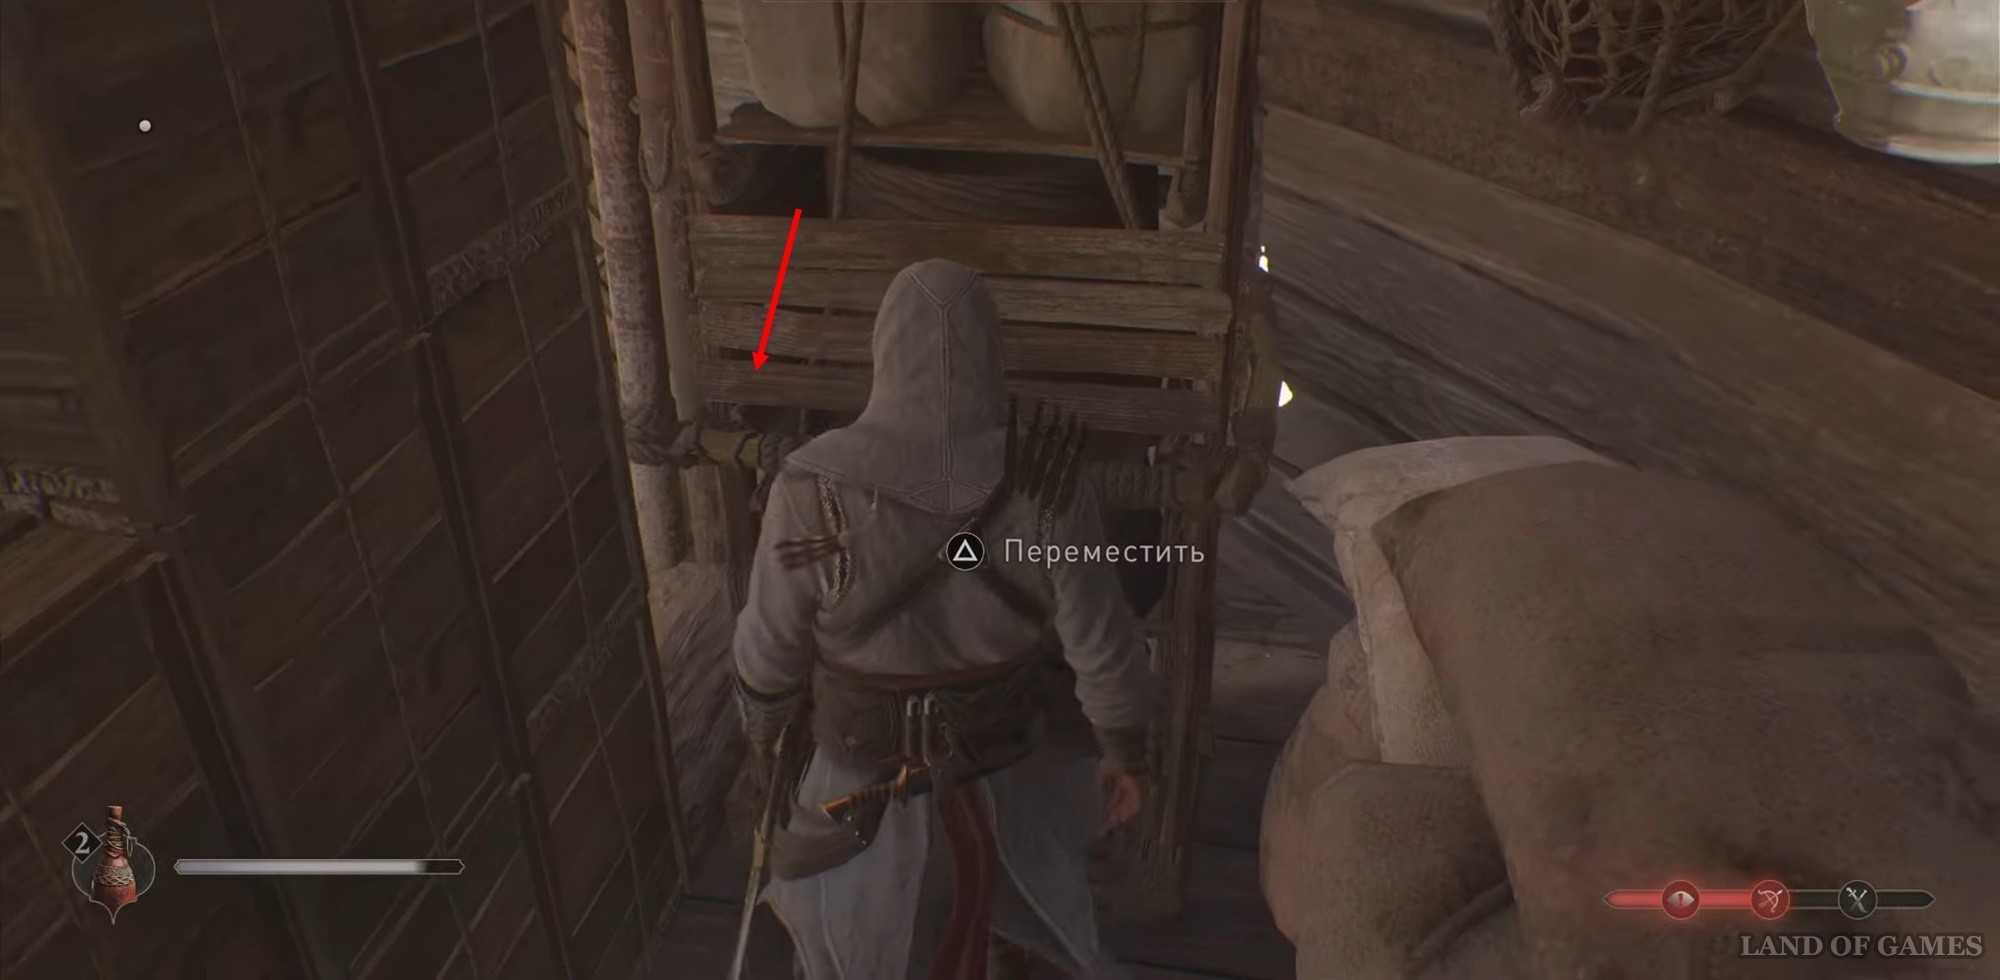
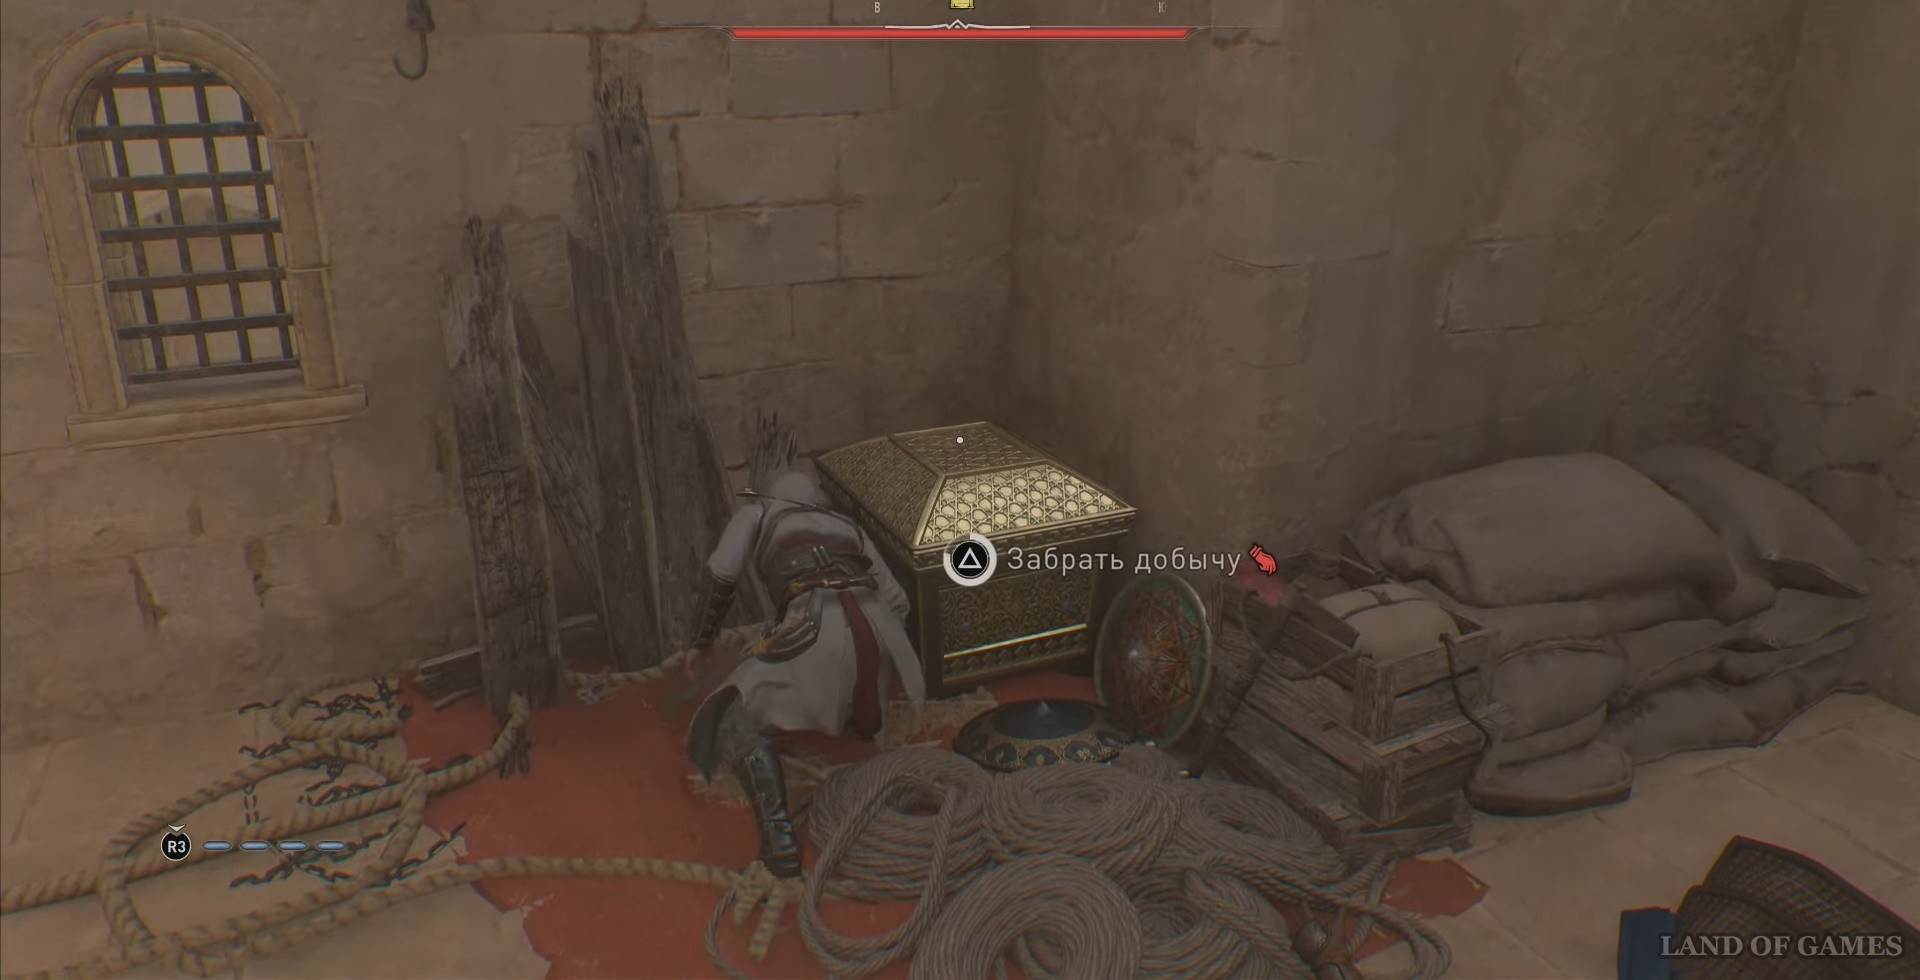
Then return to where the screen is, go behind it and drag the shelf towards you. Run around the screen on the other side and you will see a chest.
Chest #2 Prince's Palace
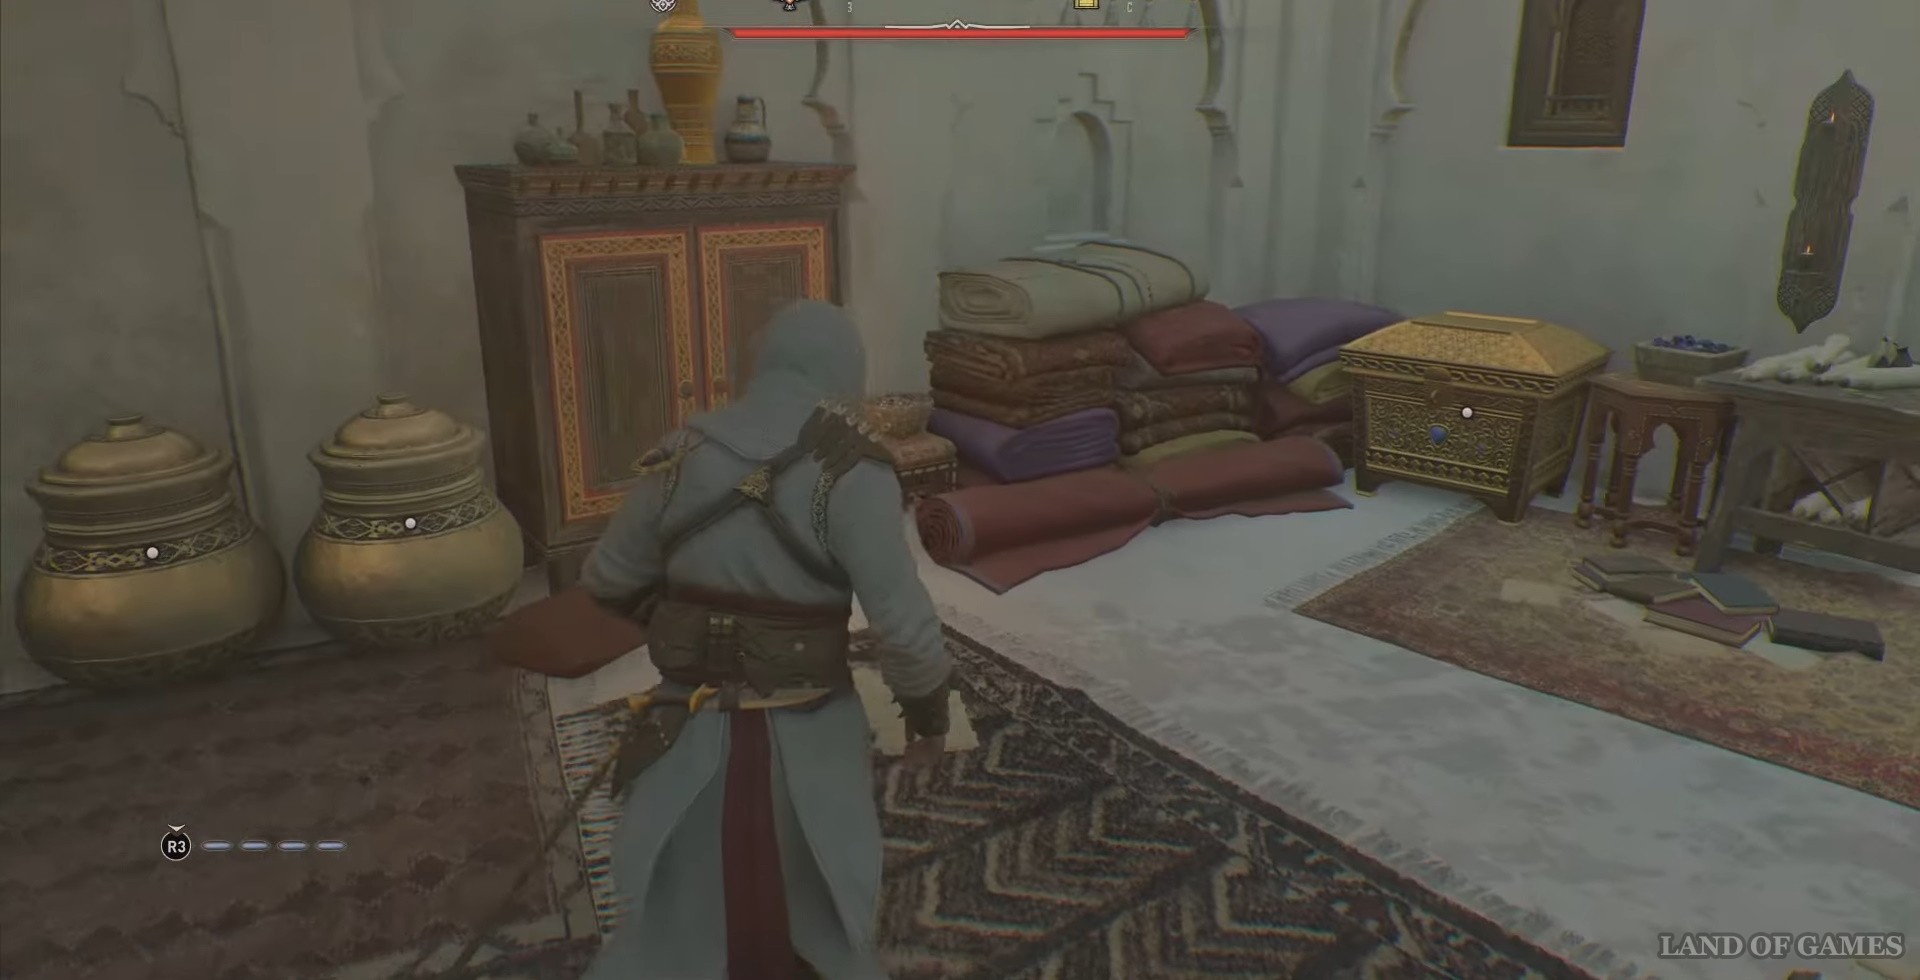
Go to the Prince's Palace. Enter through the front door and kill a couple of guards.
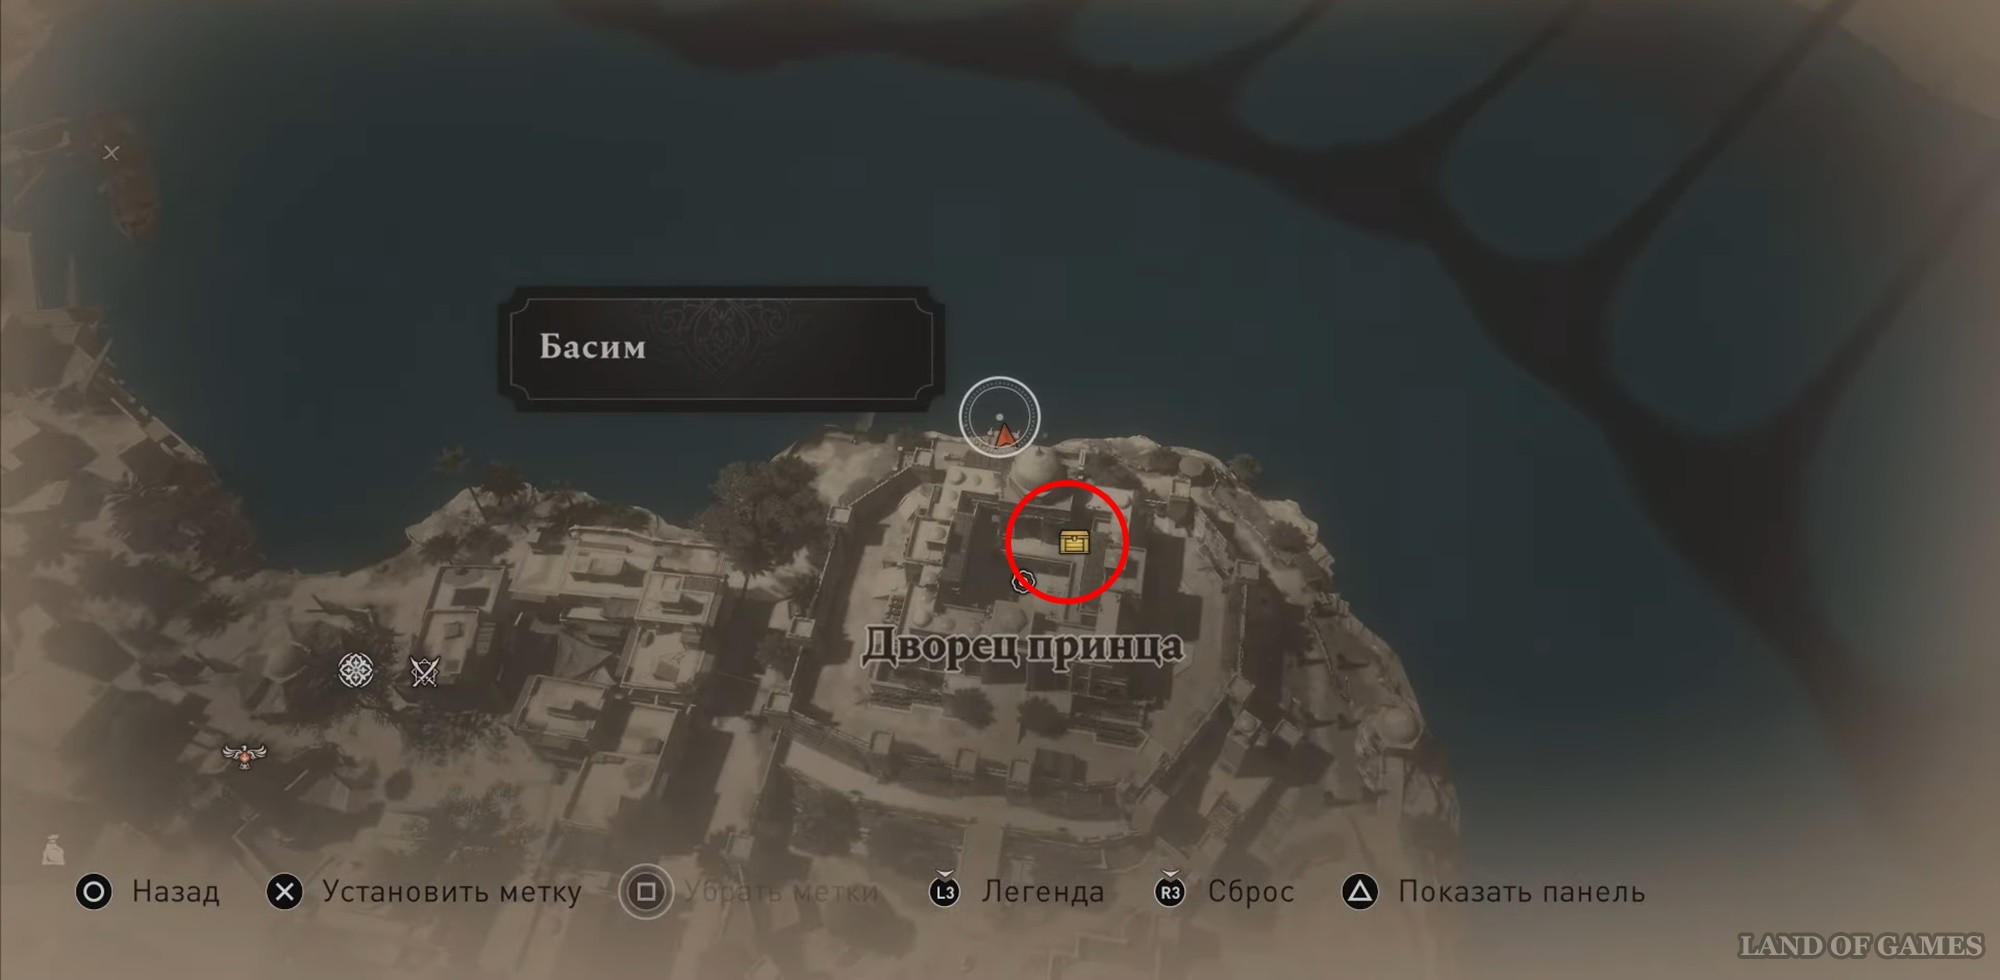
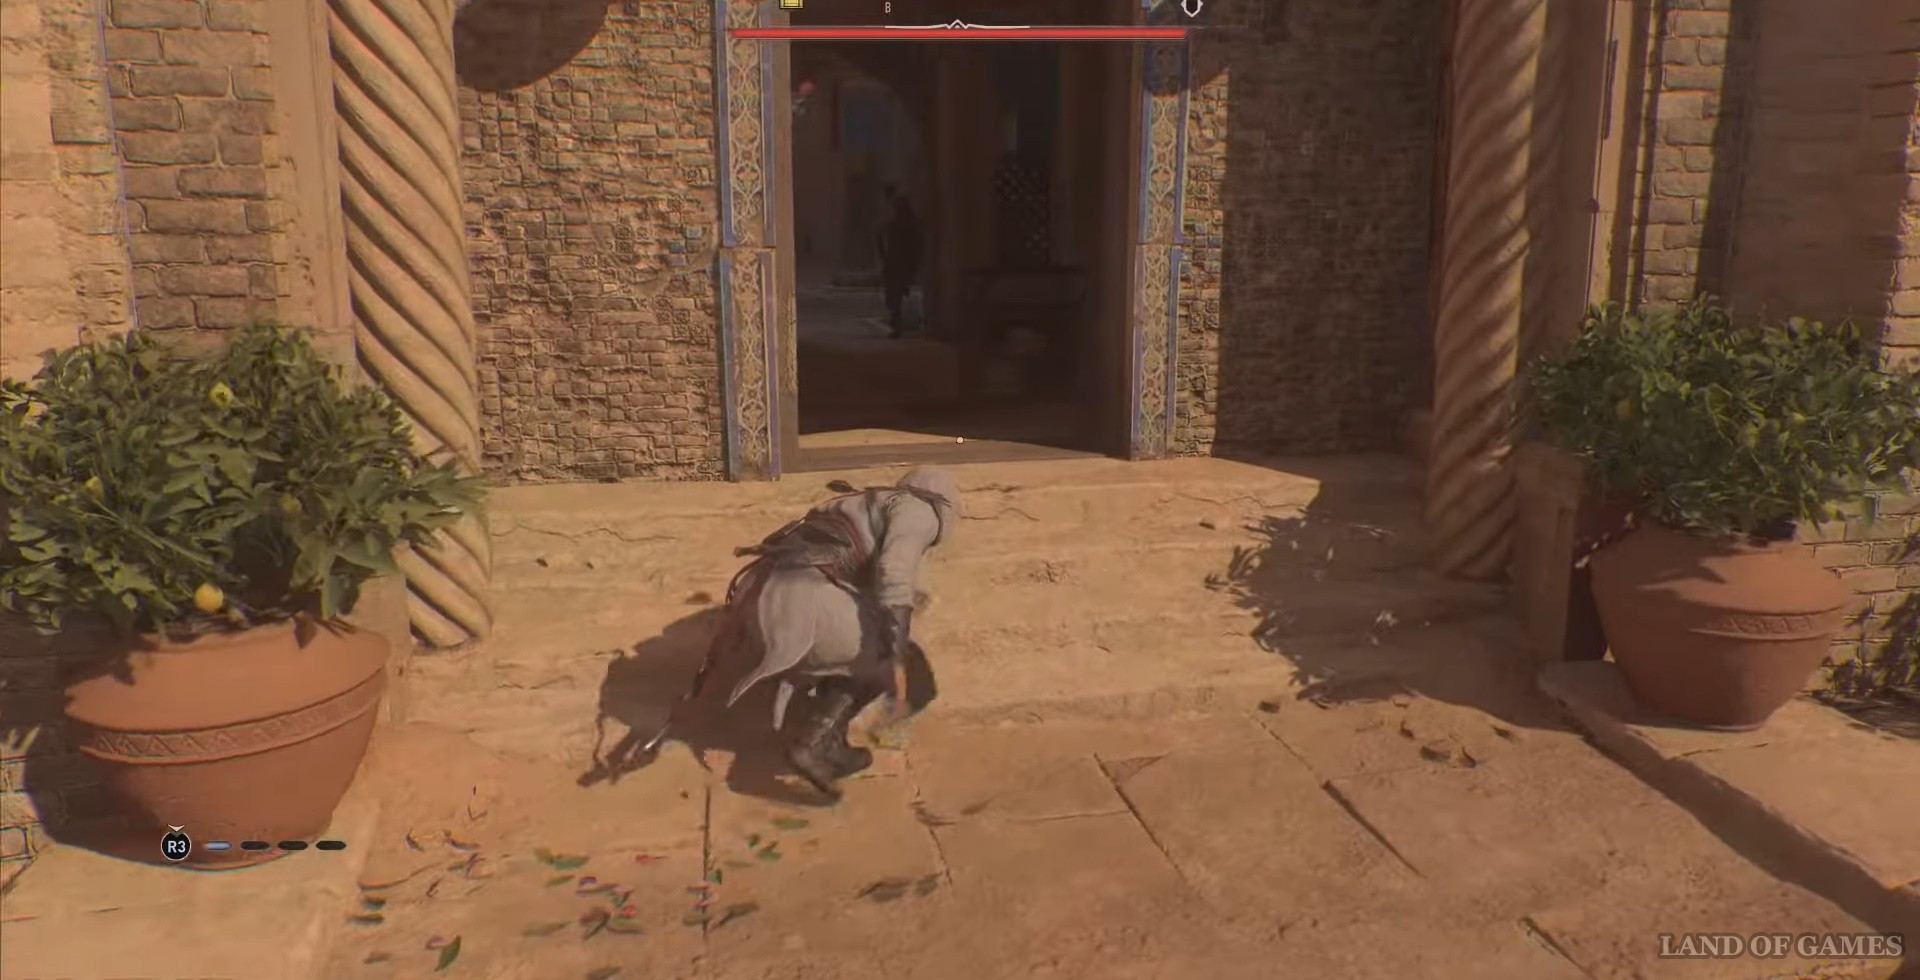
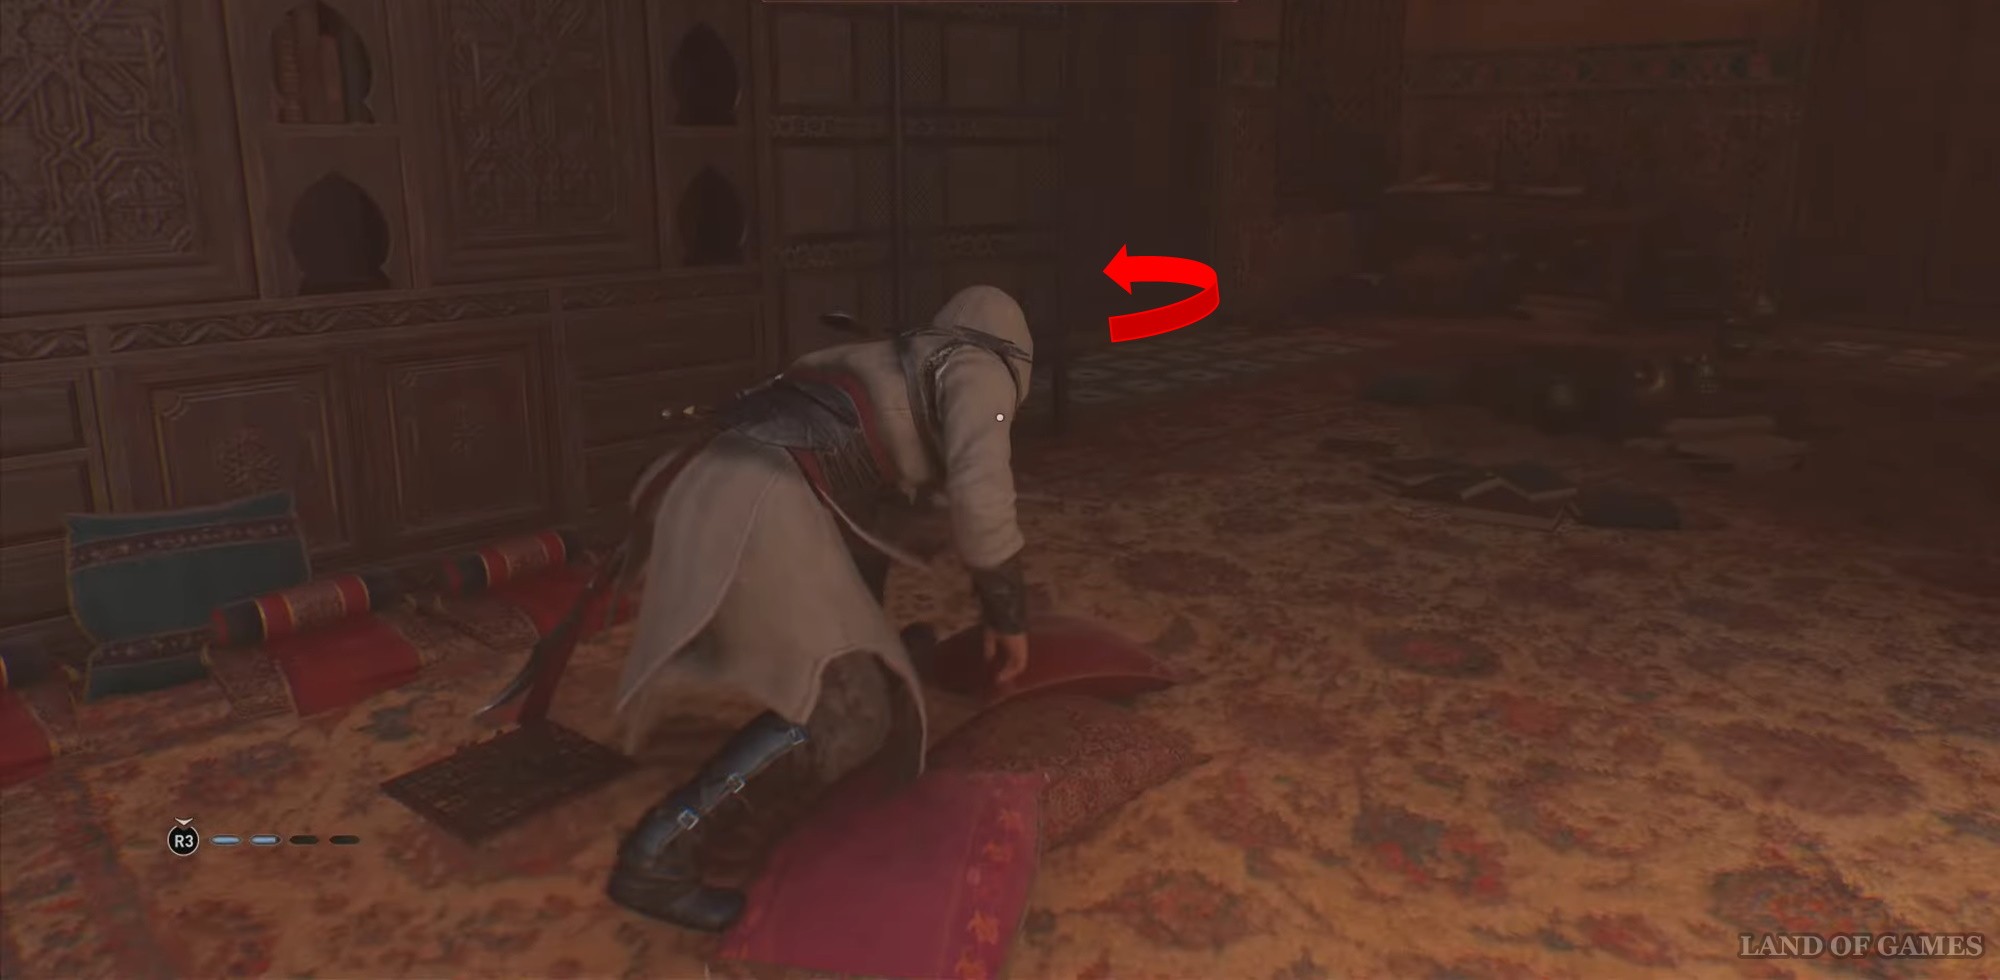
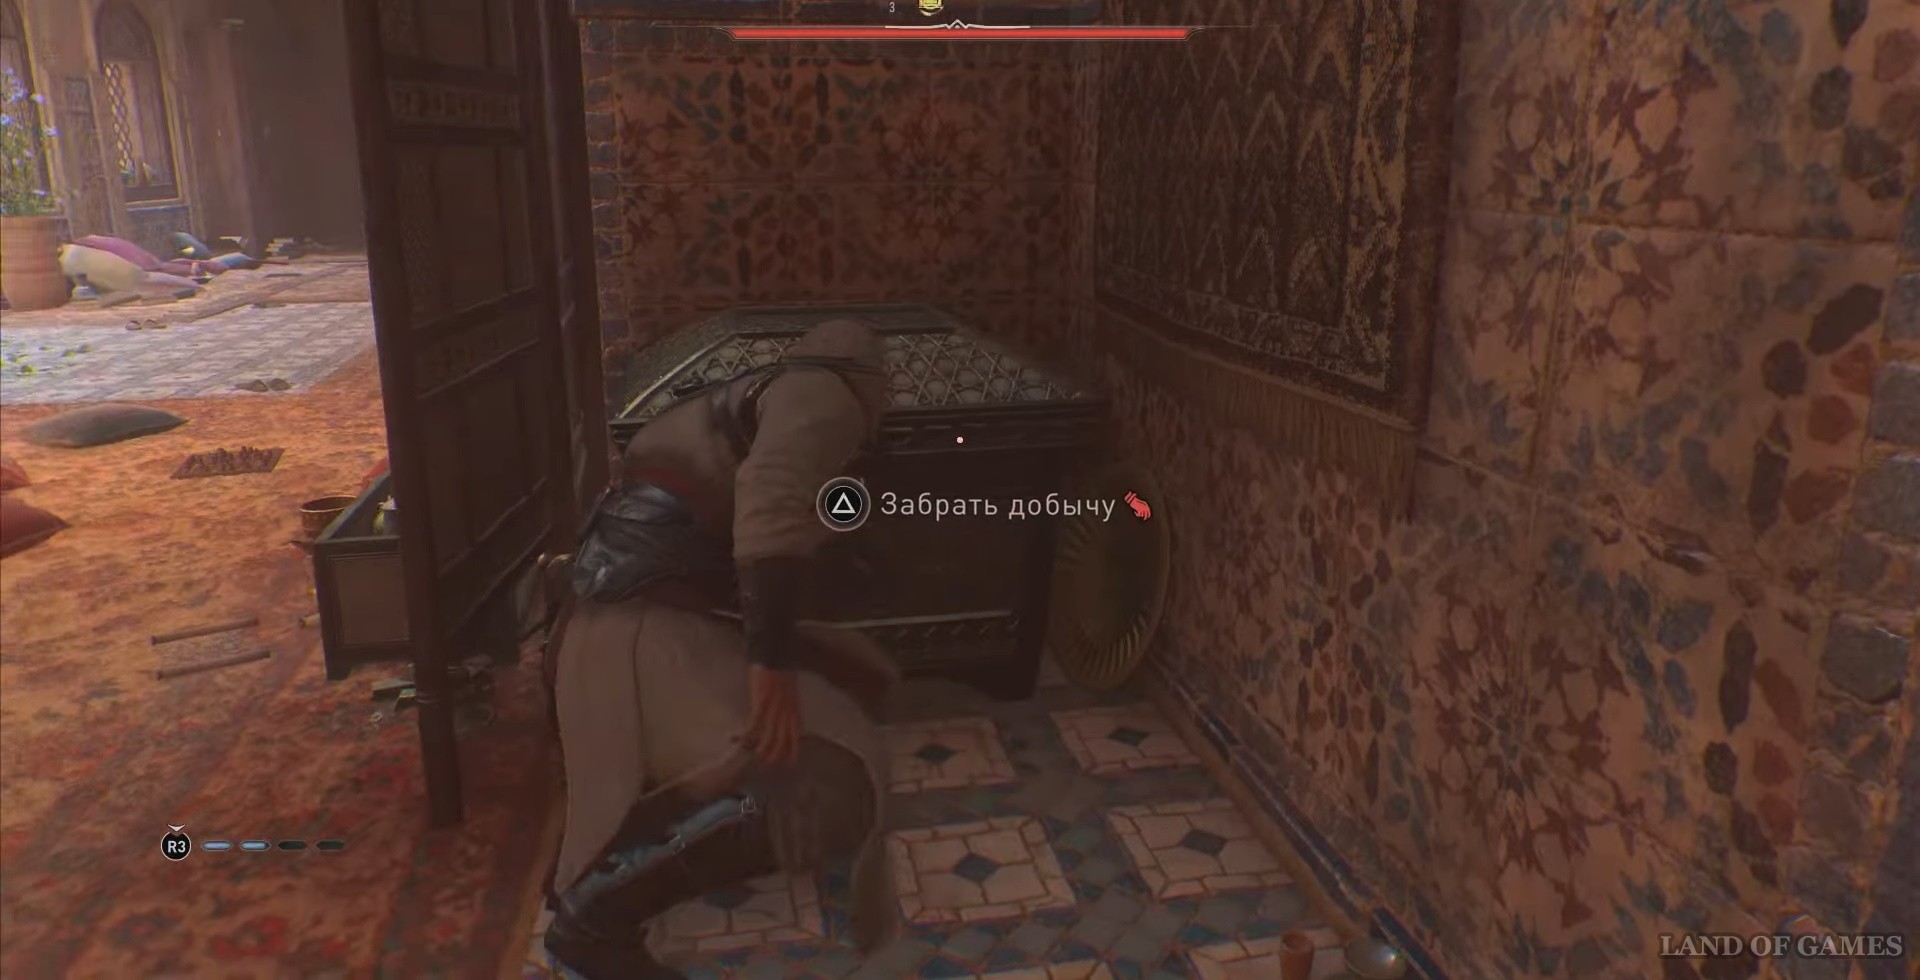
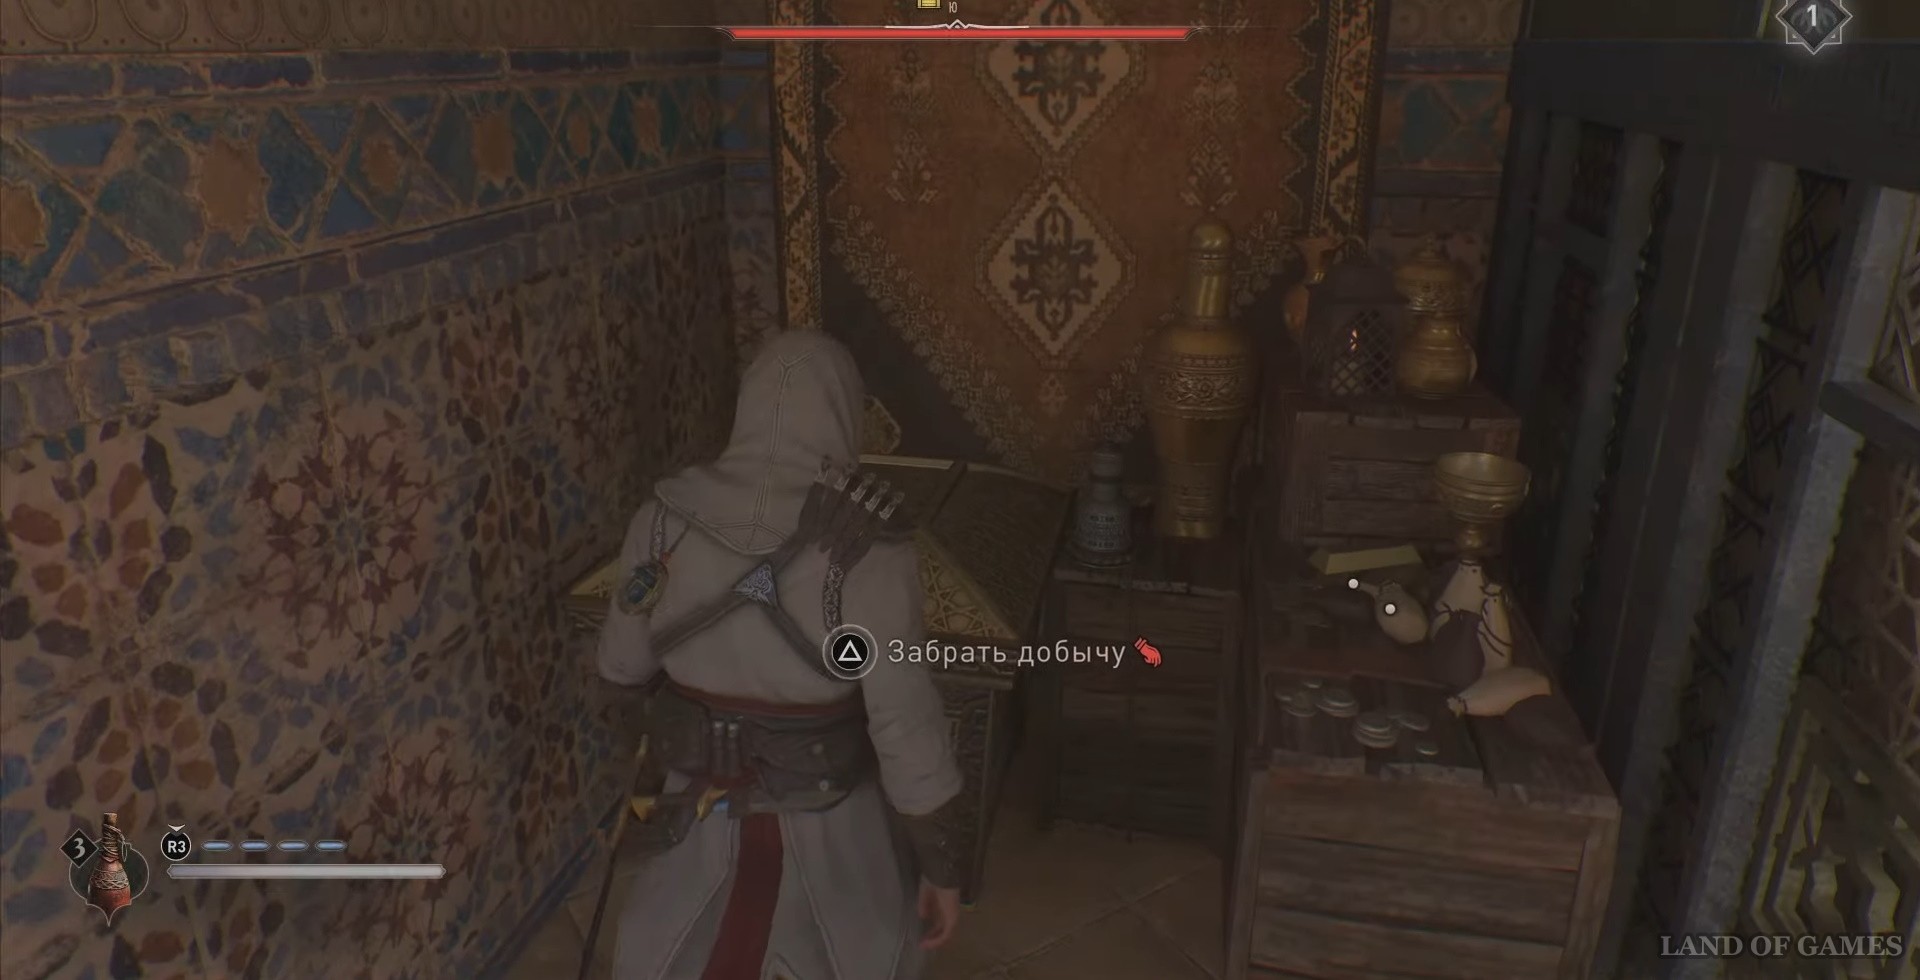
Walk forward a little and turn left, there is your reward behind the screen.
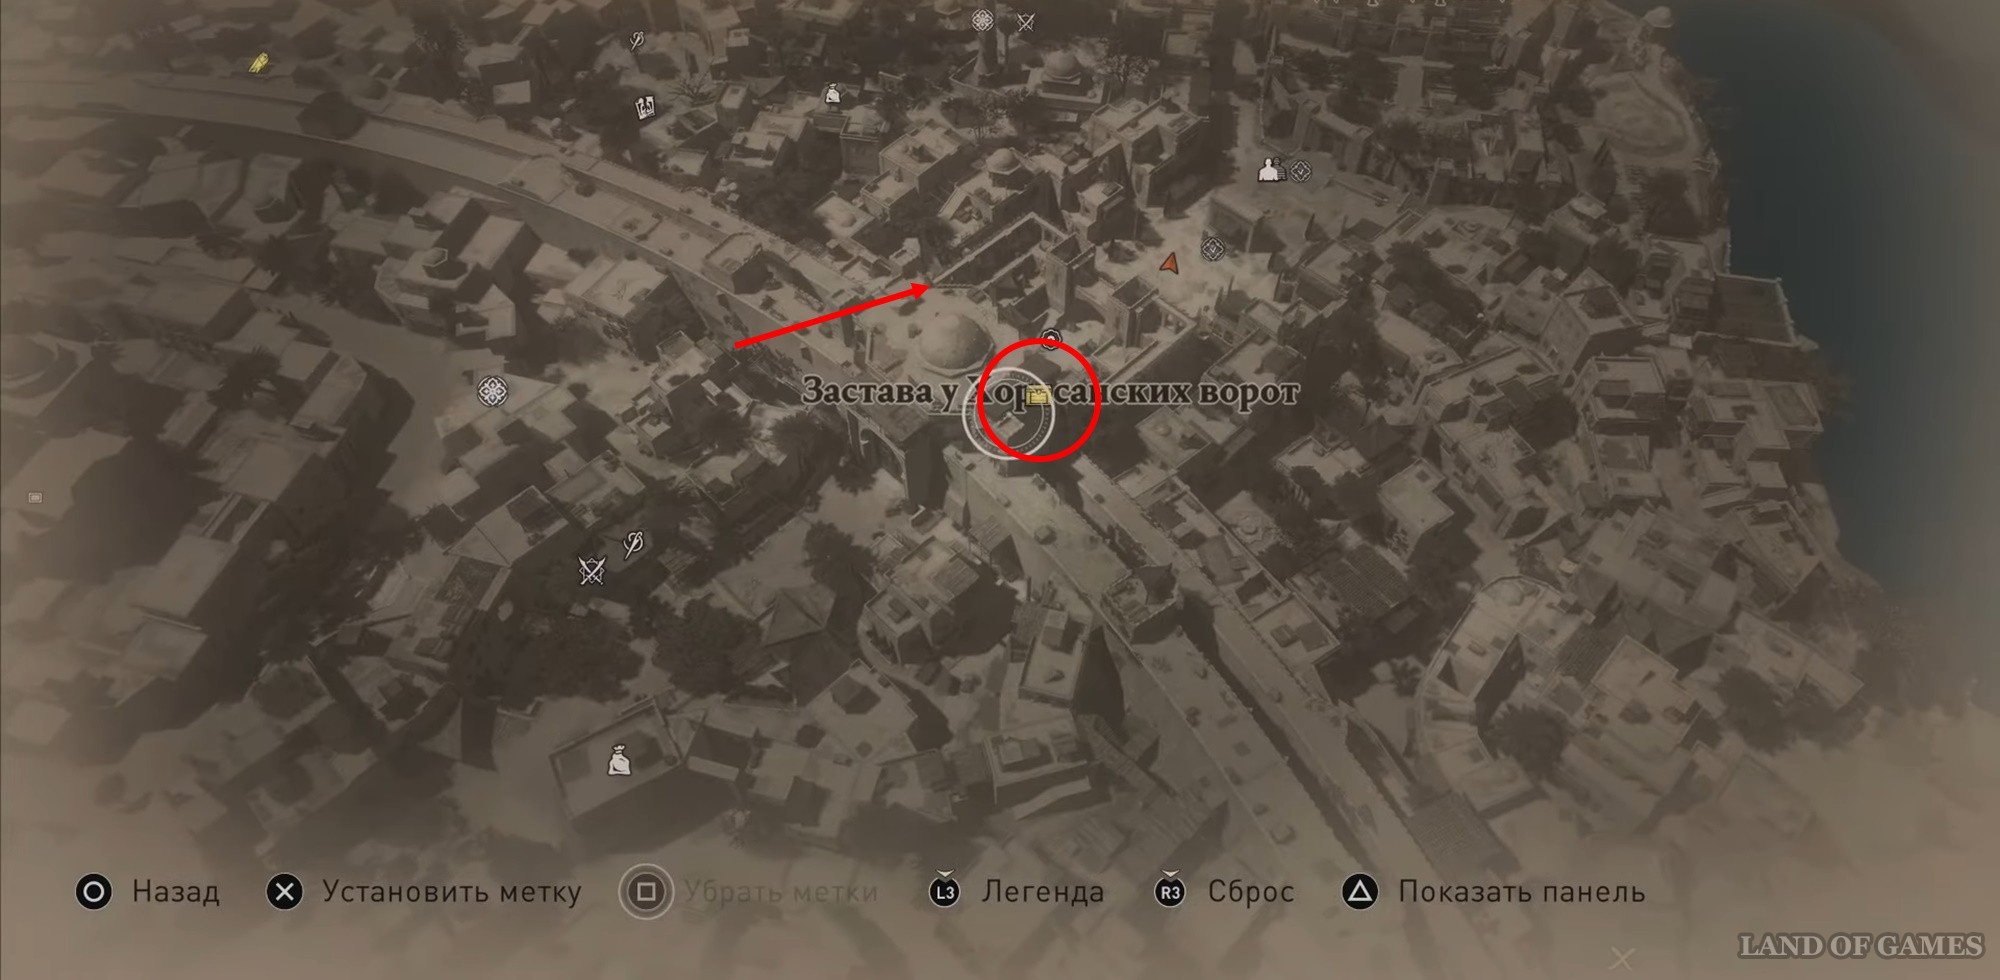
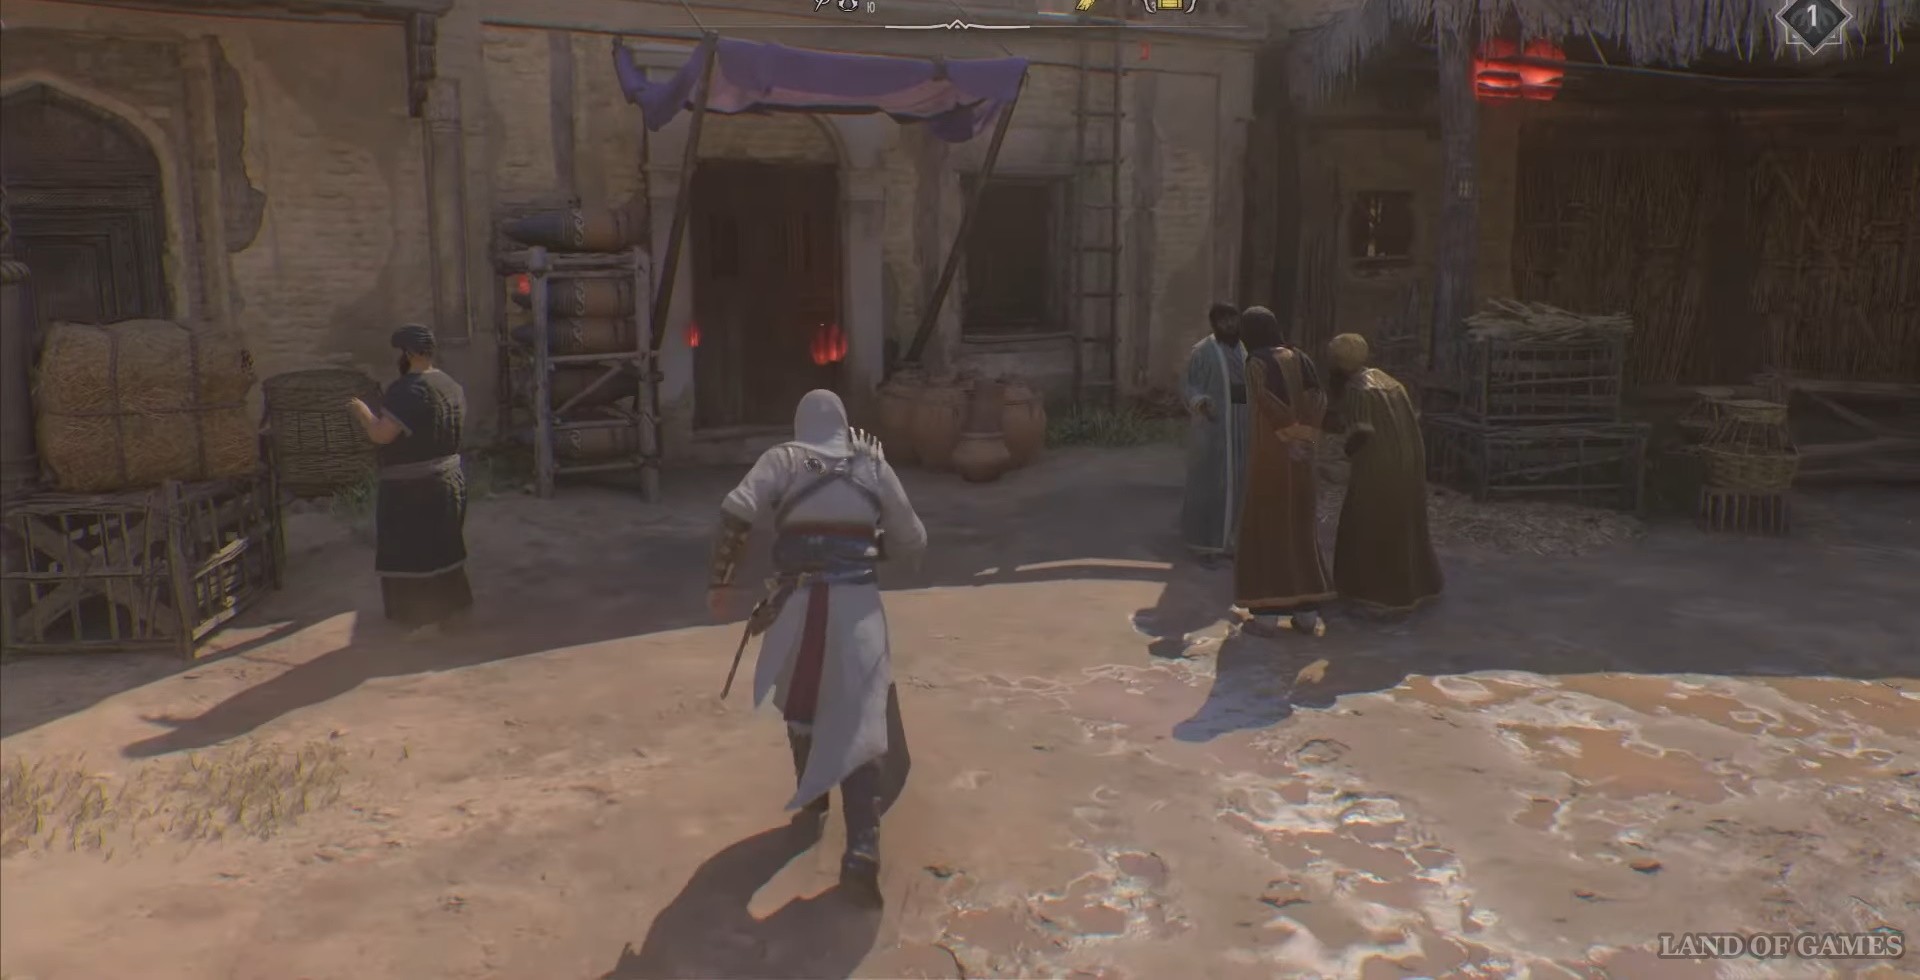
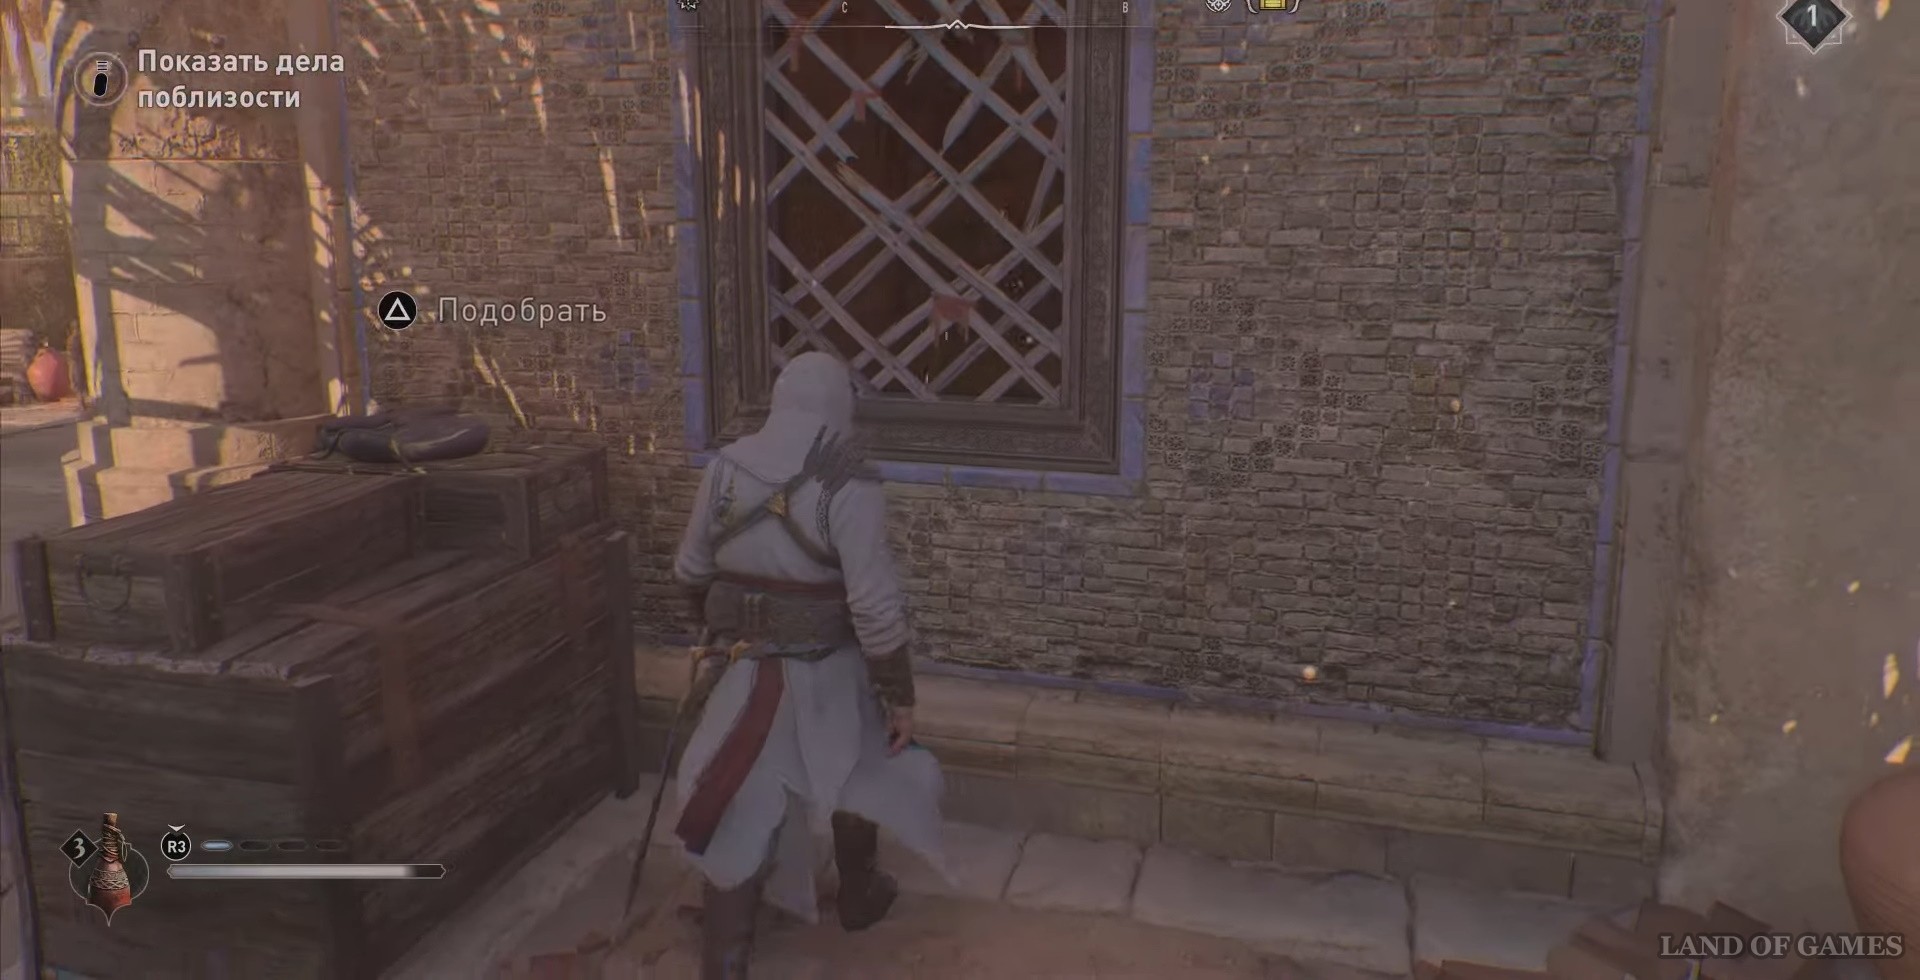
Chest No. 3 Outpost at the Khorasan Gate
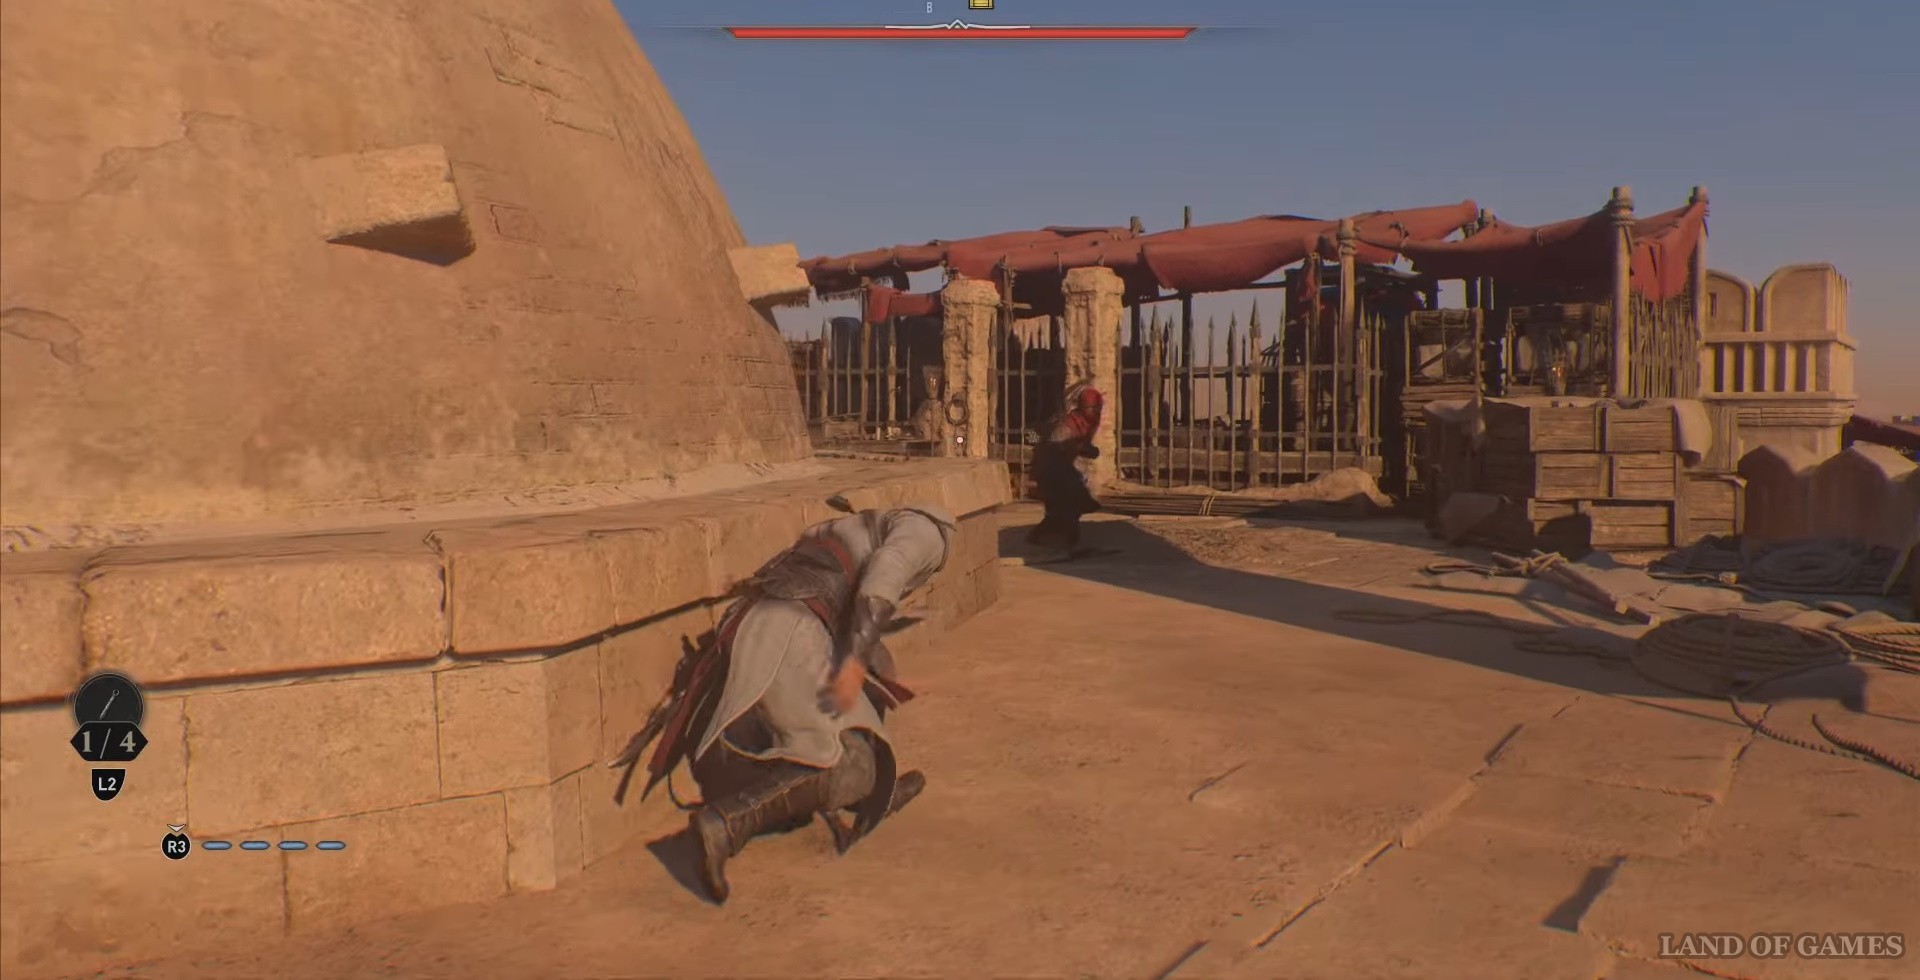
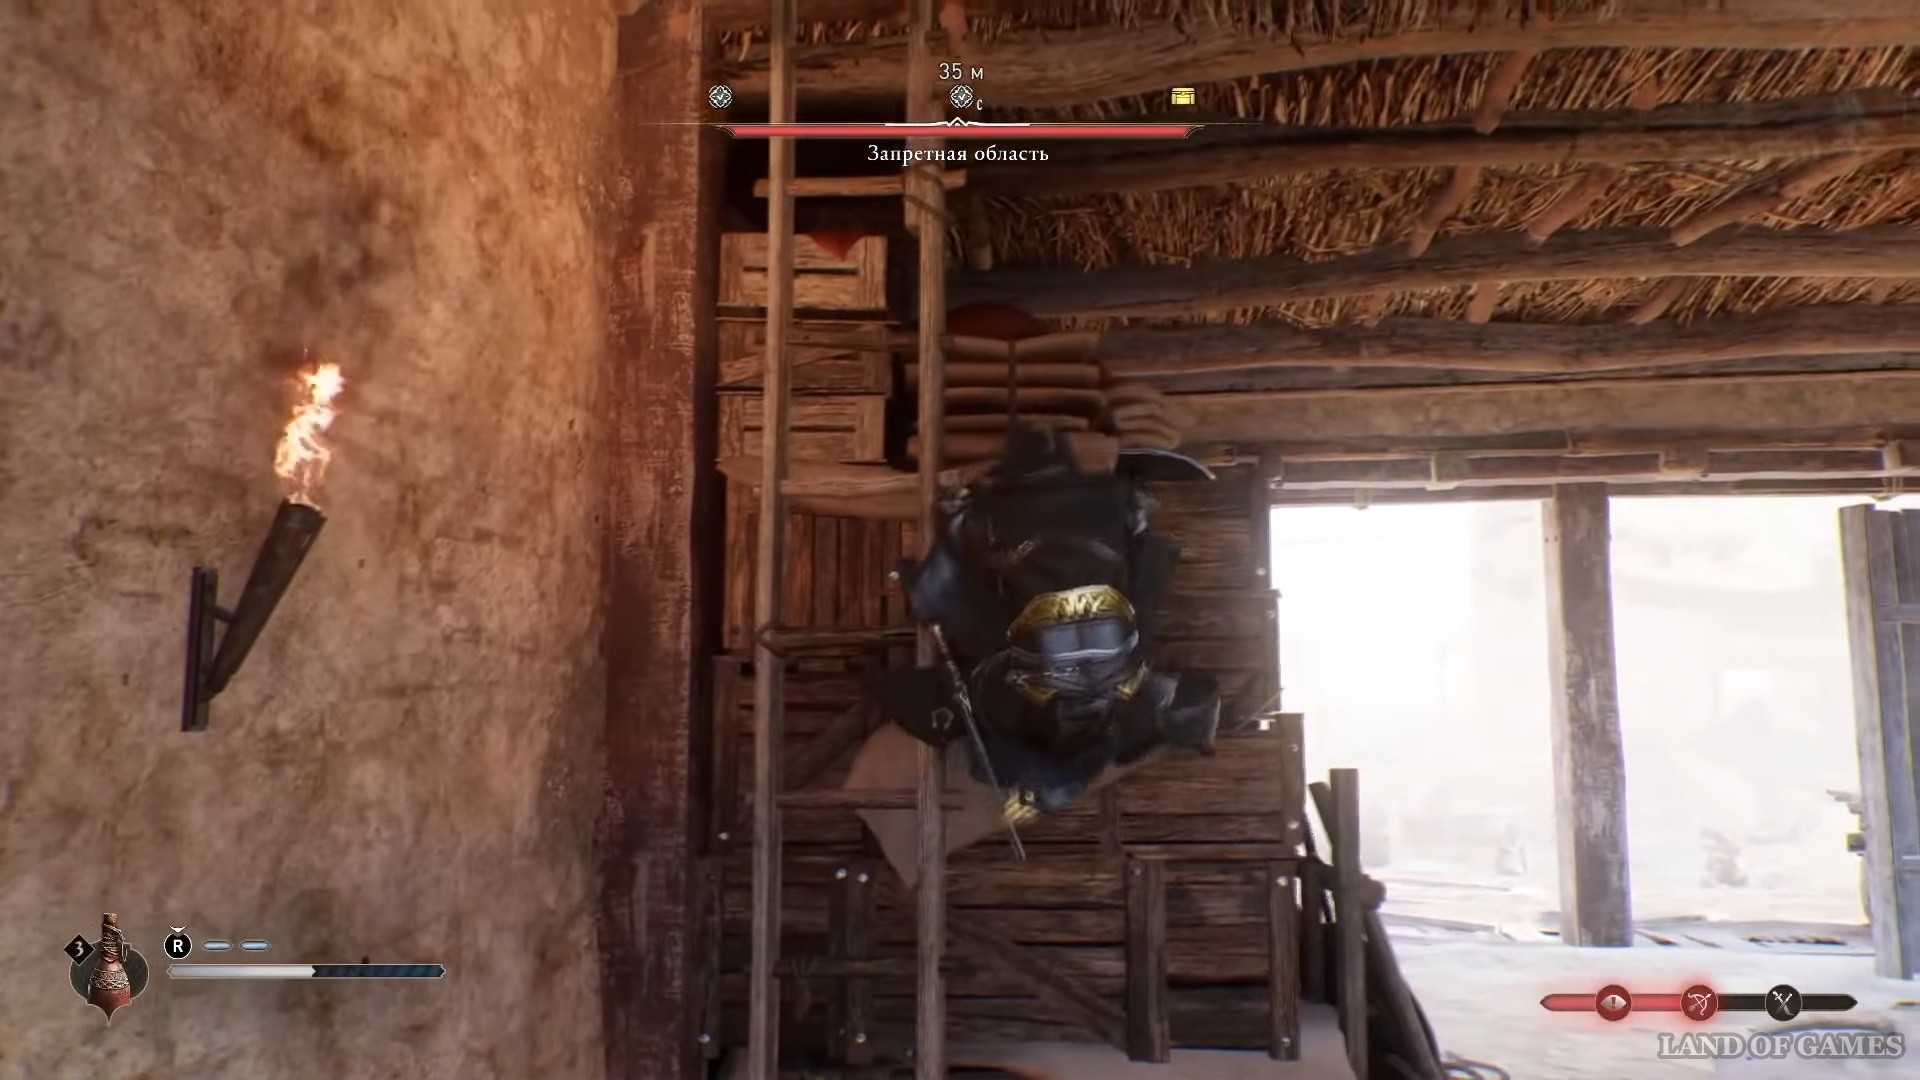
To find the third chest, go to the location marked below in the screenshot. You need to get to the roof of the guardhouse. The easiest way to get there is from the south.
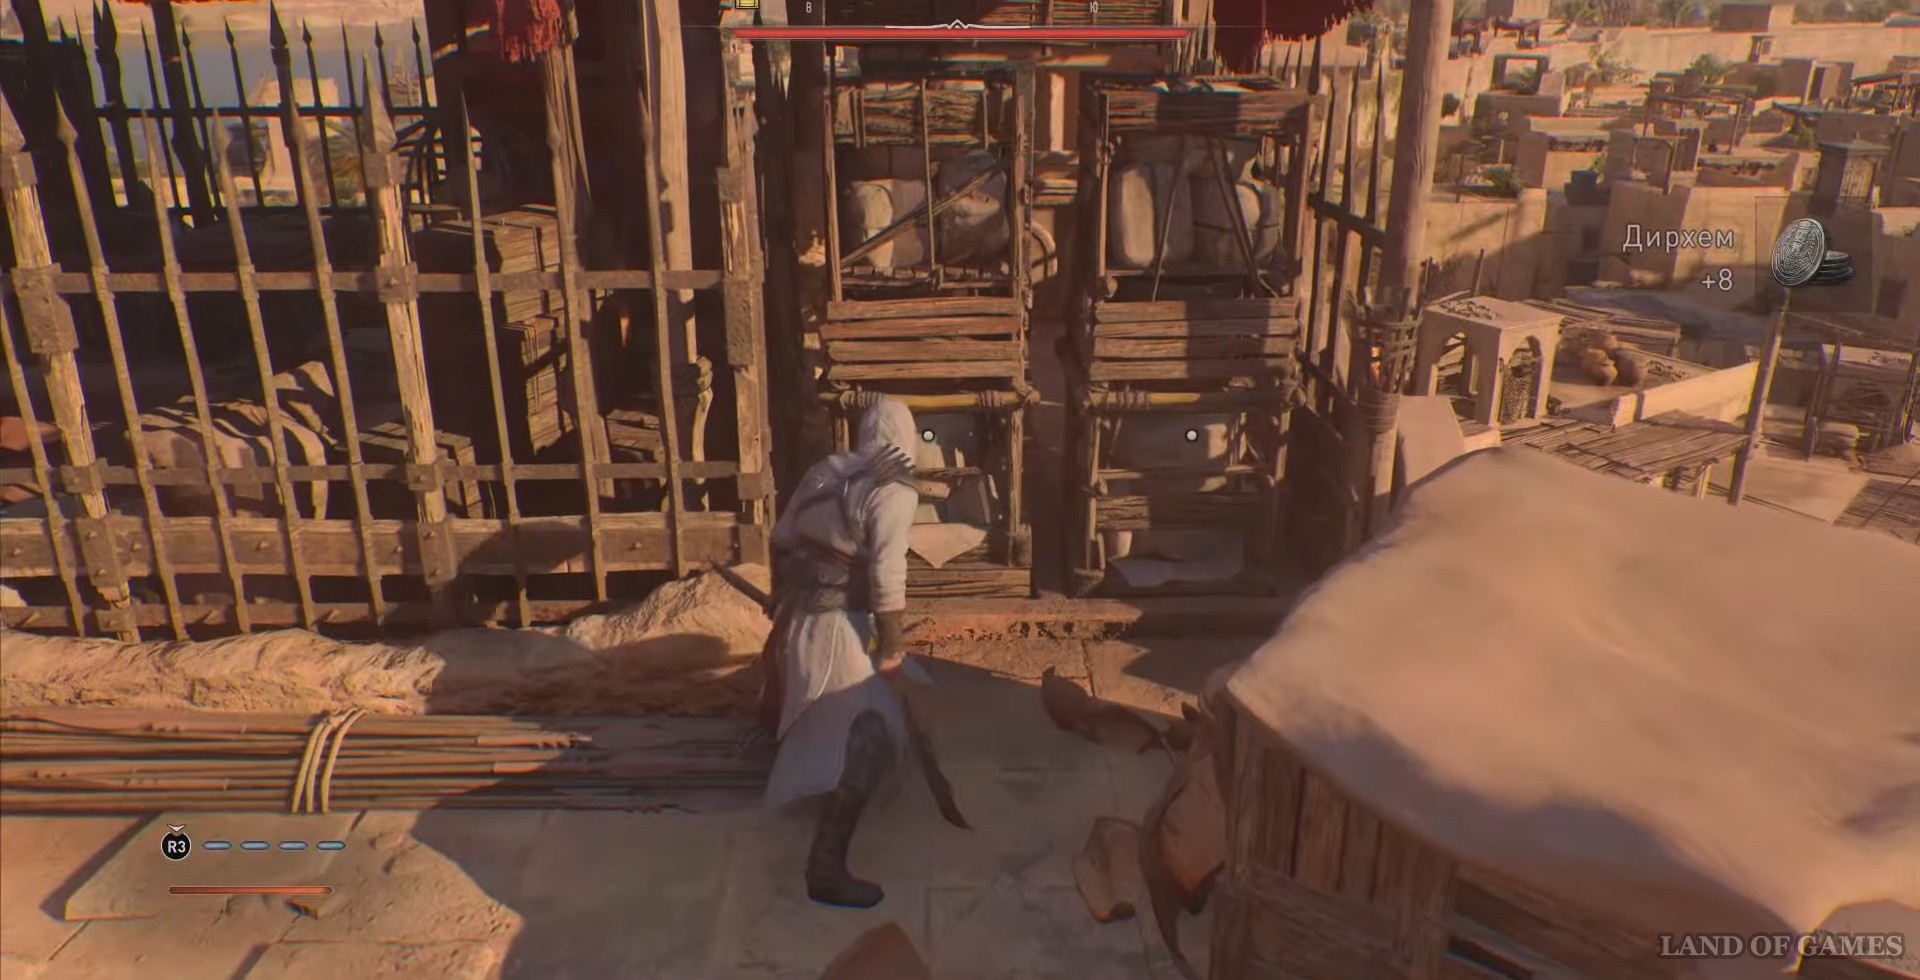
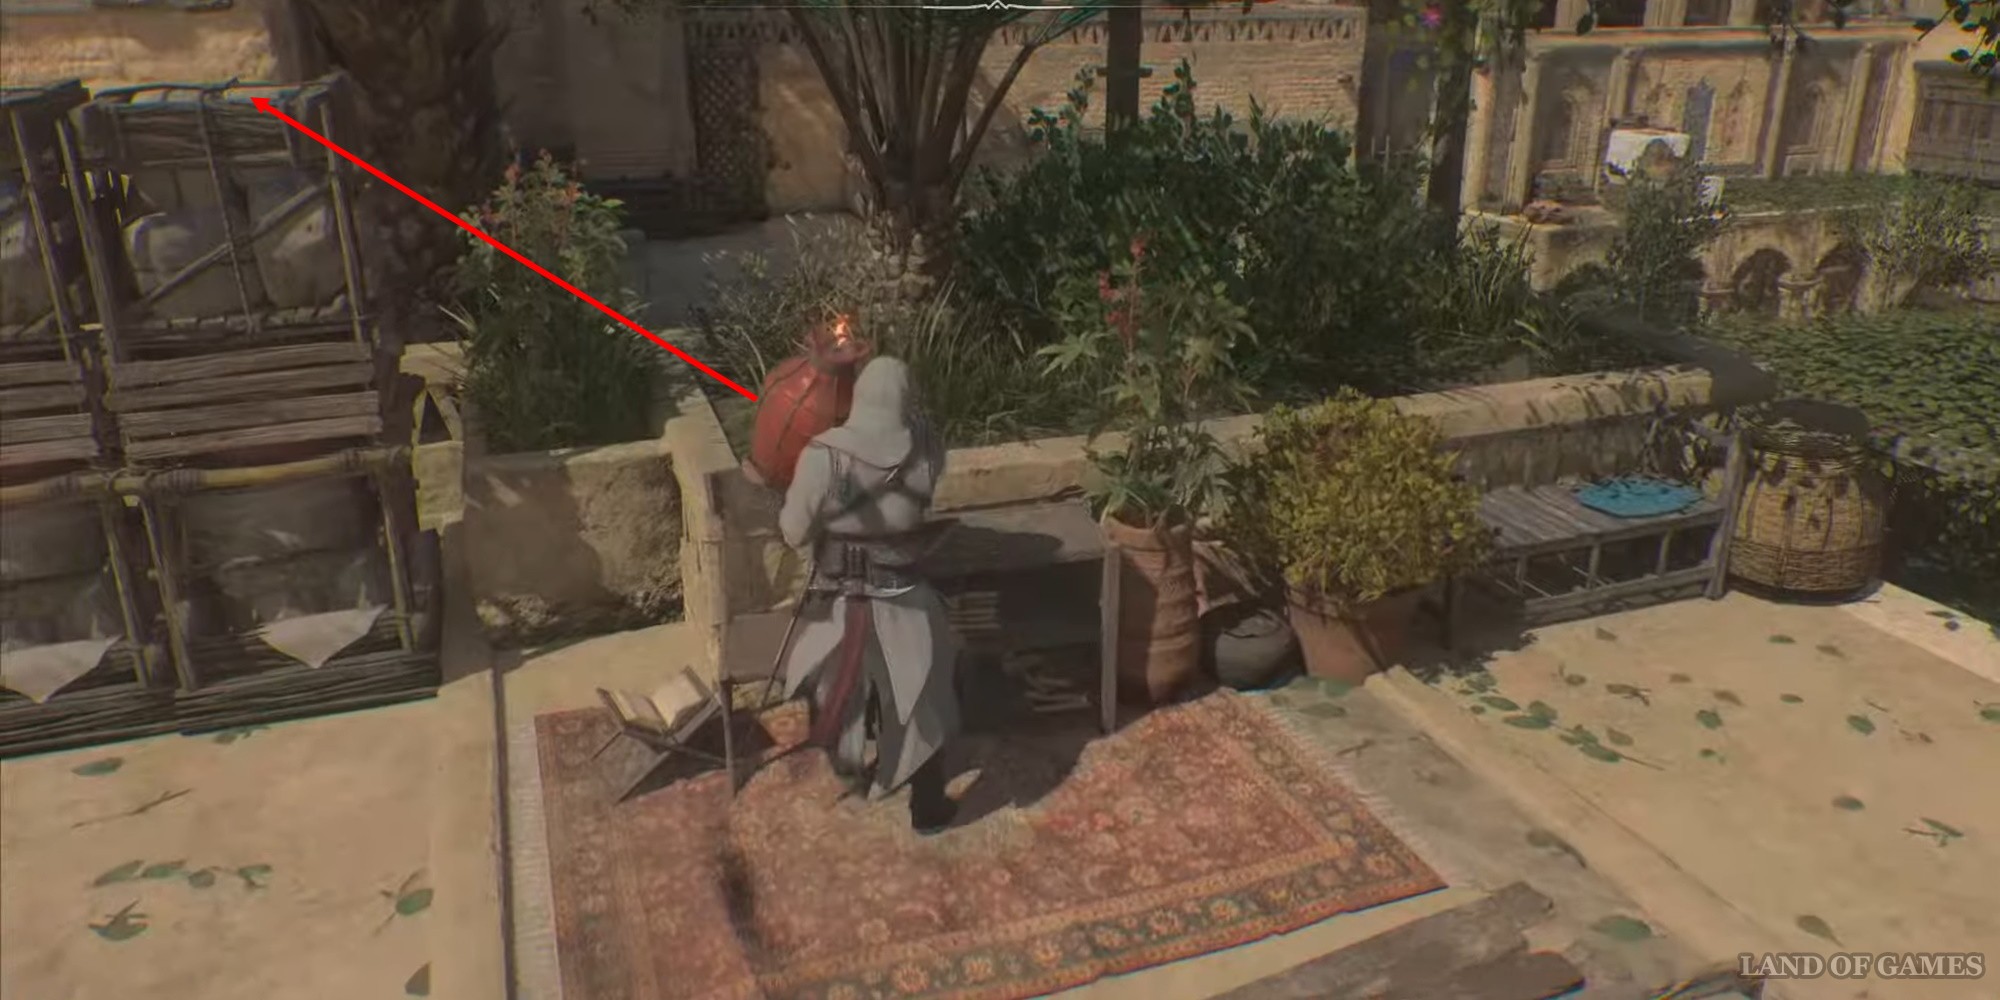
Deal with a couple of guards and you will see a building with a red canopy ahead. First move the left box, and then break the jug on the right, move the right box. Go a little further and break the jugs located in front of you - you will find the third chest.

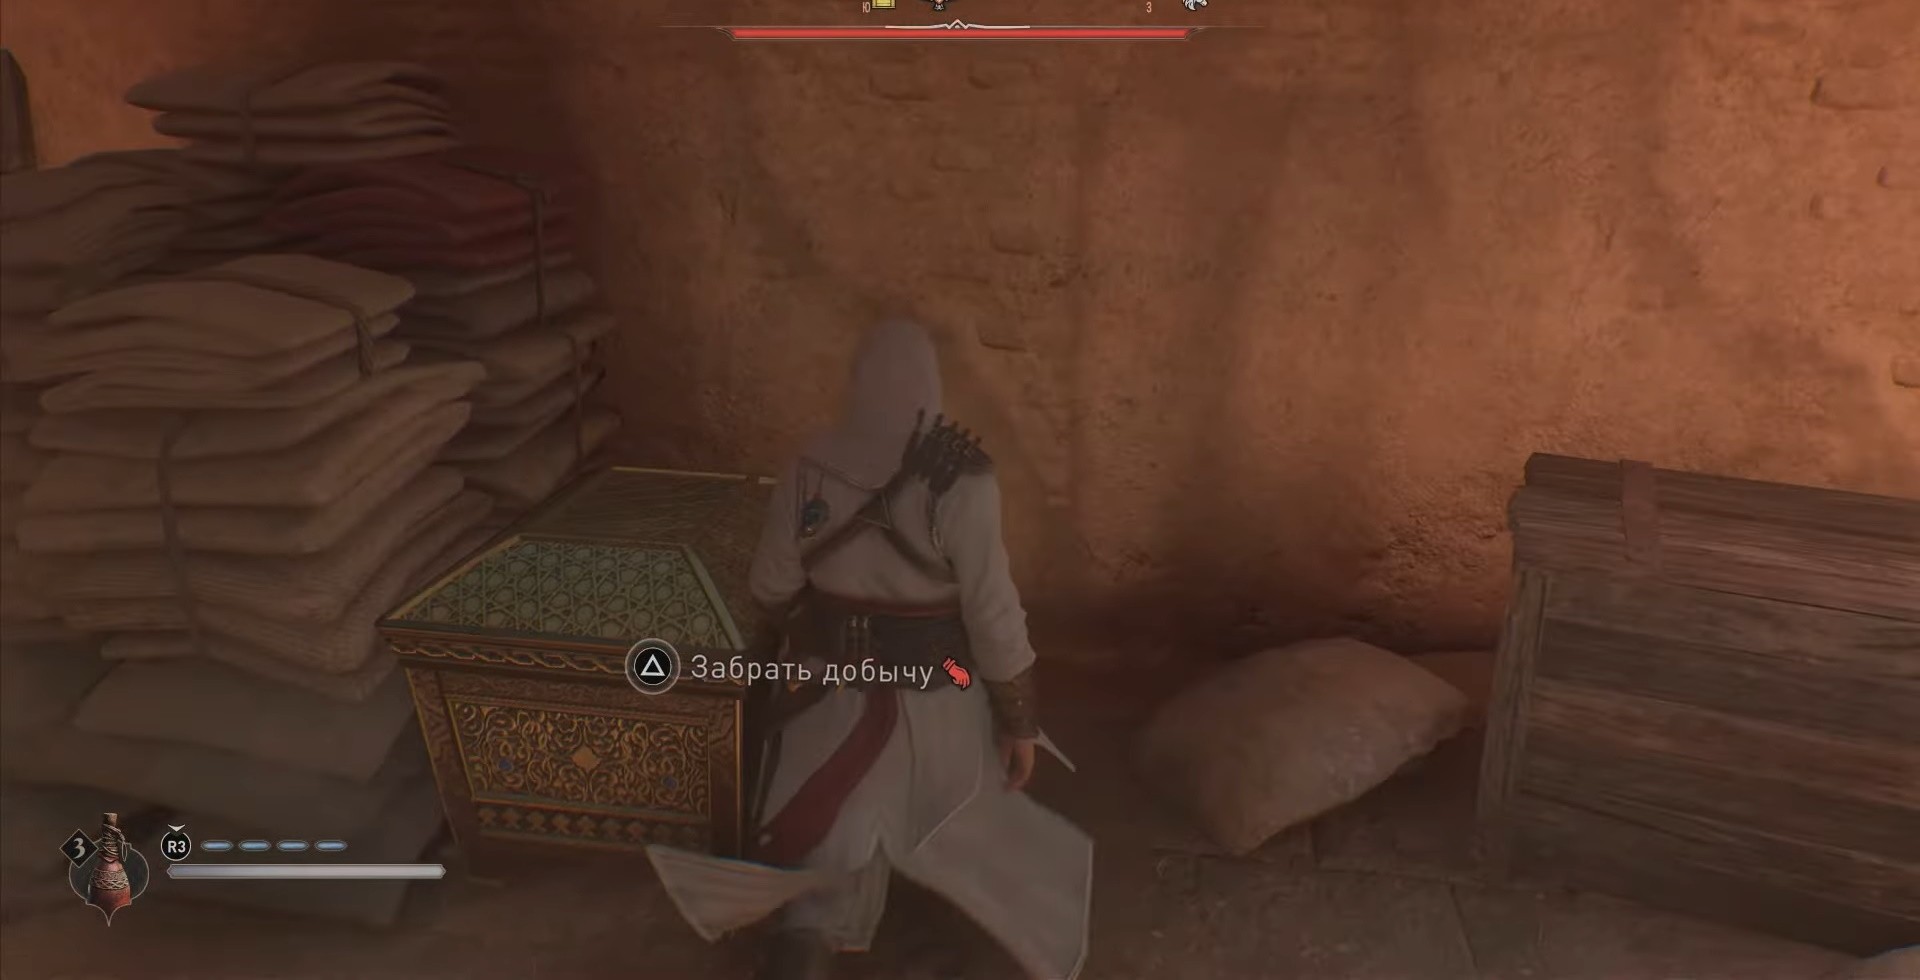
Chest #4 Blacksmith's Workshop
You need to get into a small building, which is located on the second floor. You can get there simply by walking in from the street.
There will be boxes on the right, and behind them a ladder - go up it and find the loot.
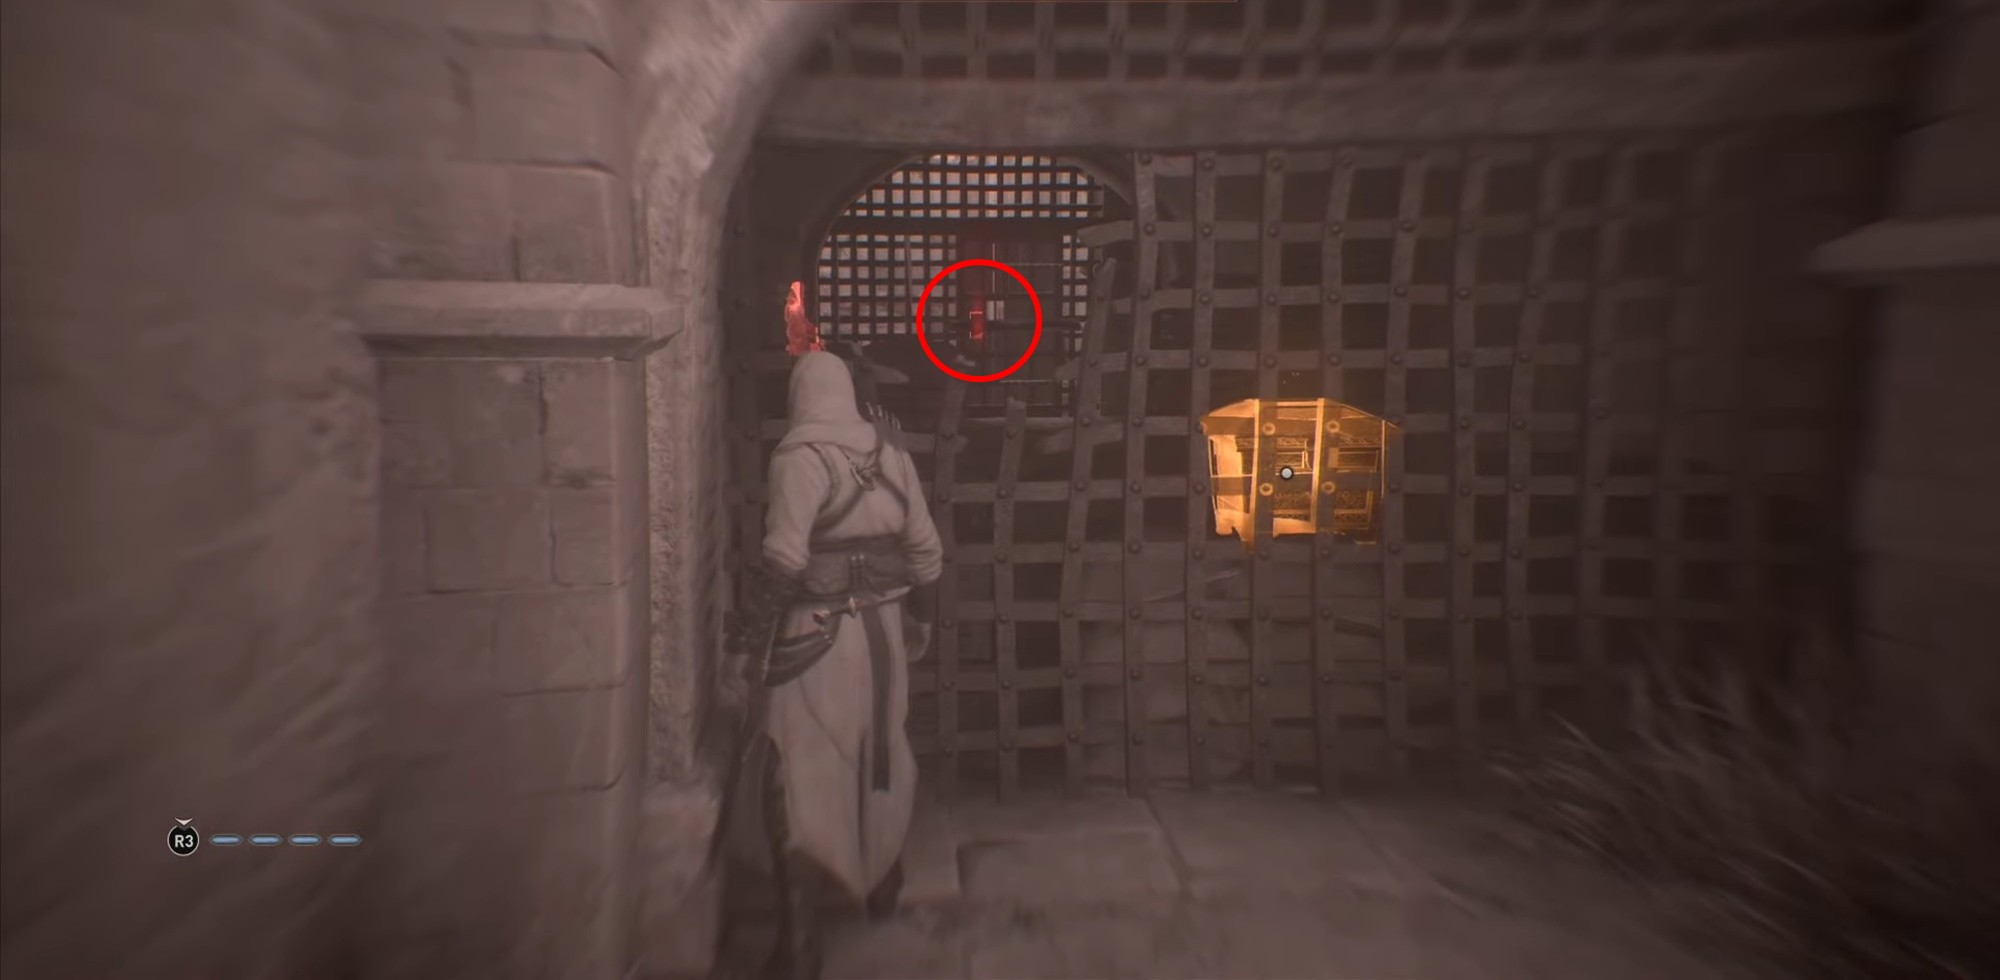
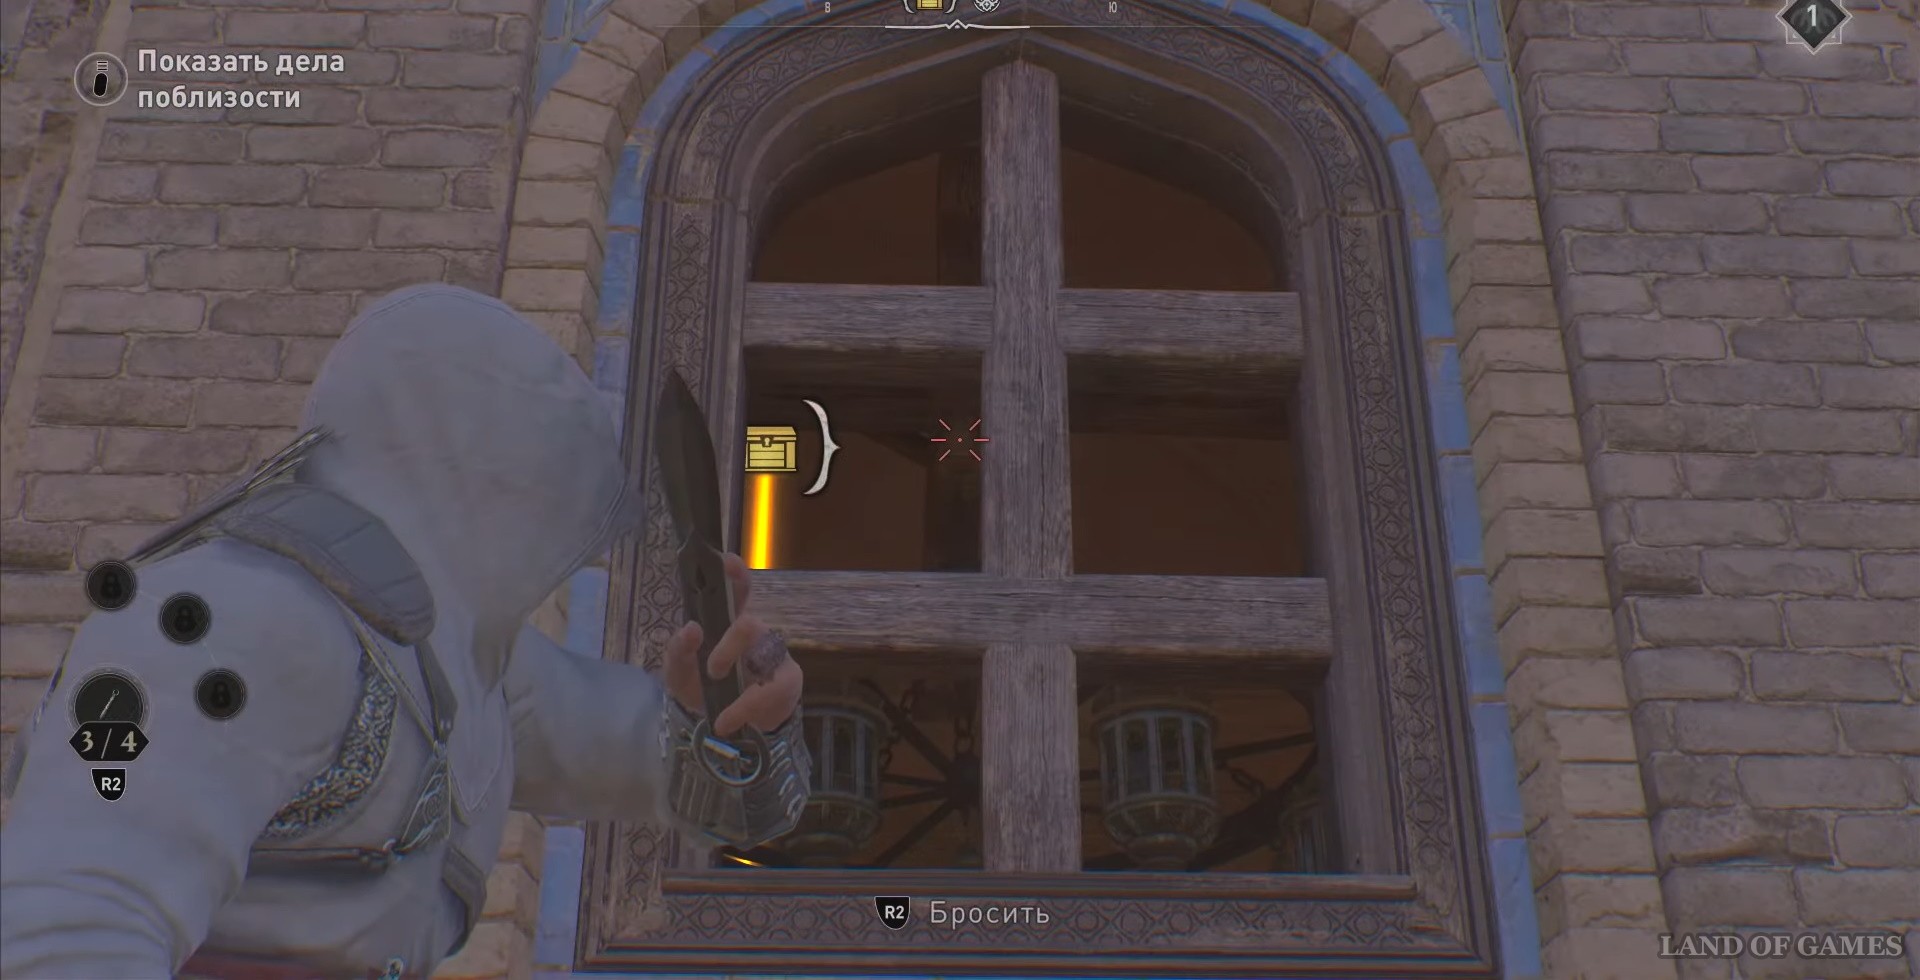
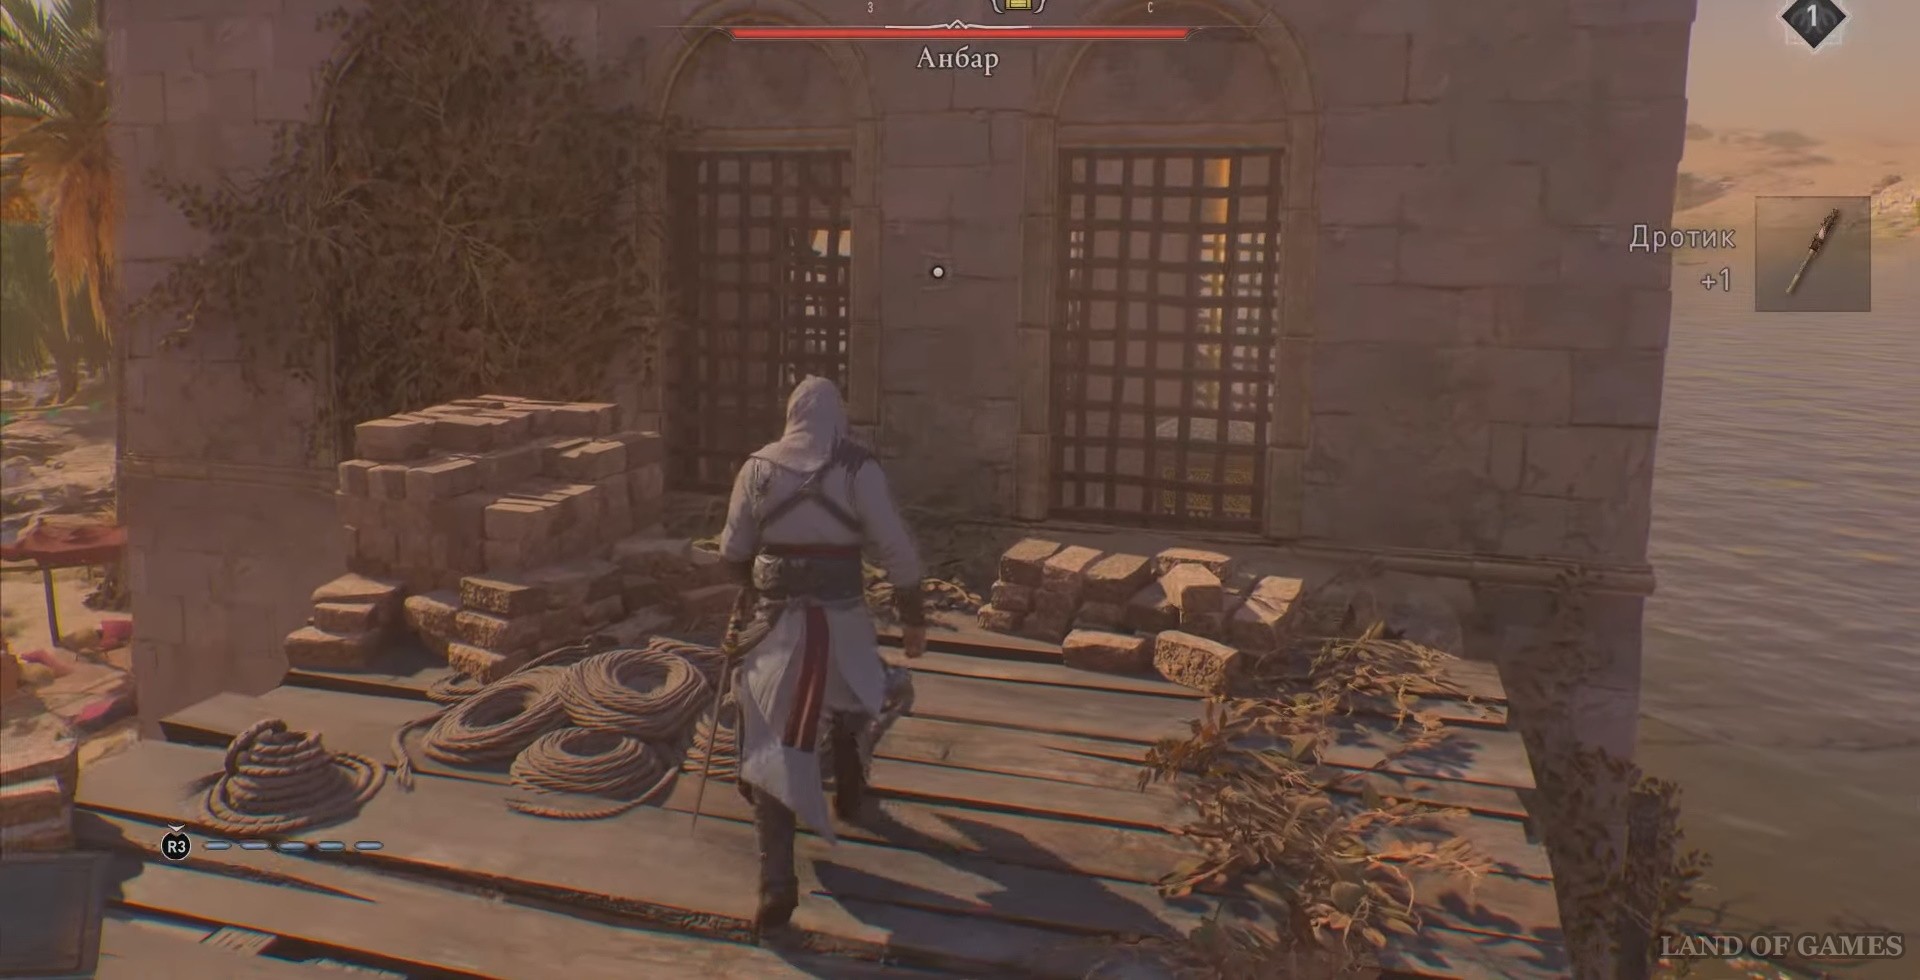
Chest No. 5 Prison at the Damascus Gate
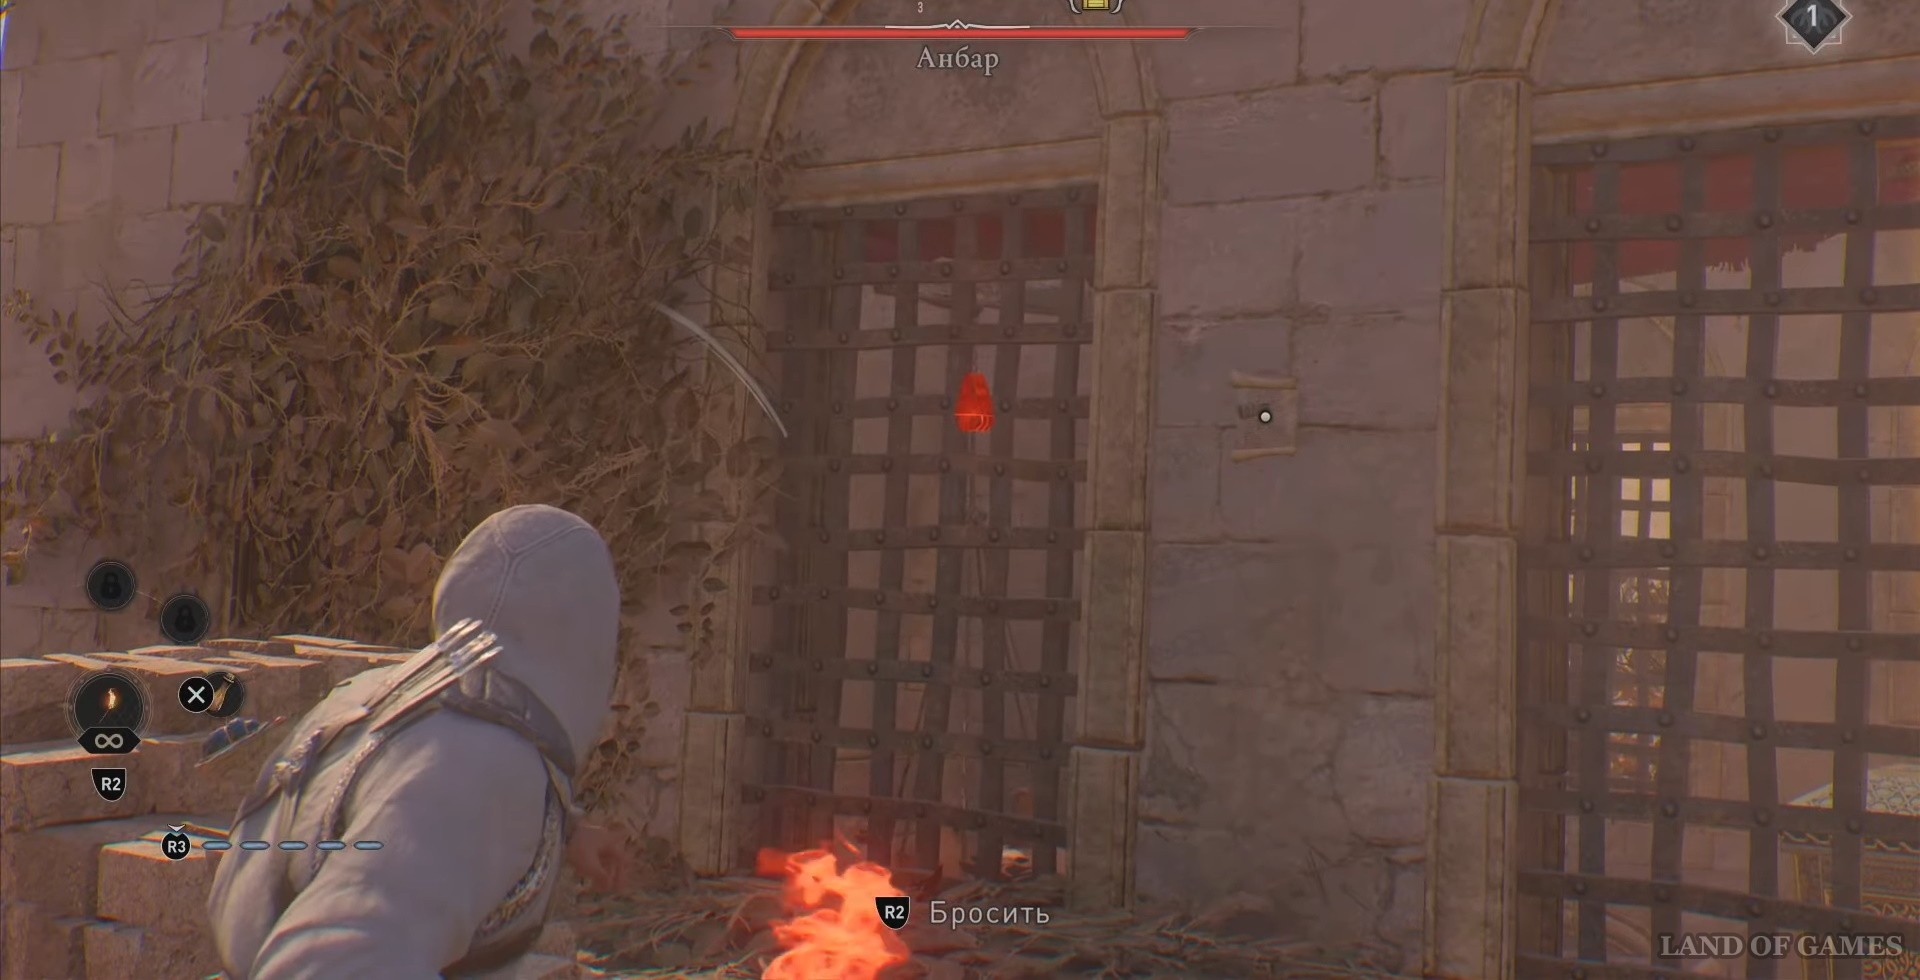
It is located right at the entrance - under the bridge, but there will be an iron grate on the way.

Throw the knife at the door through the hole in the bars. After this, you can get into the room by running around the bridge from the other side.
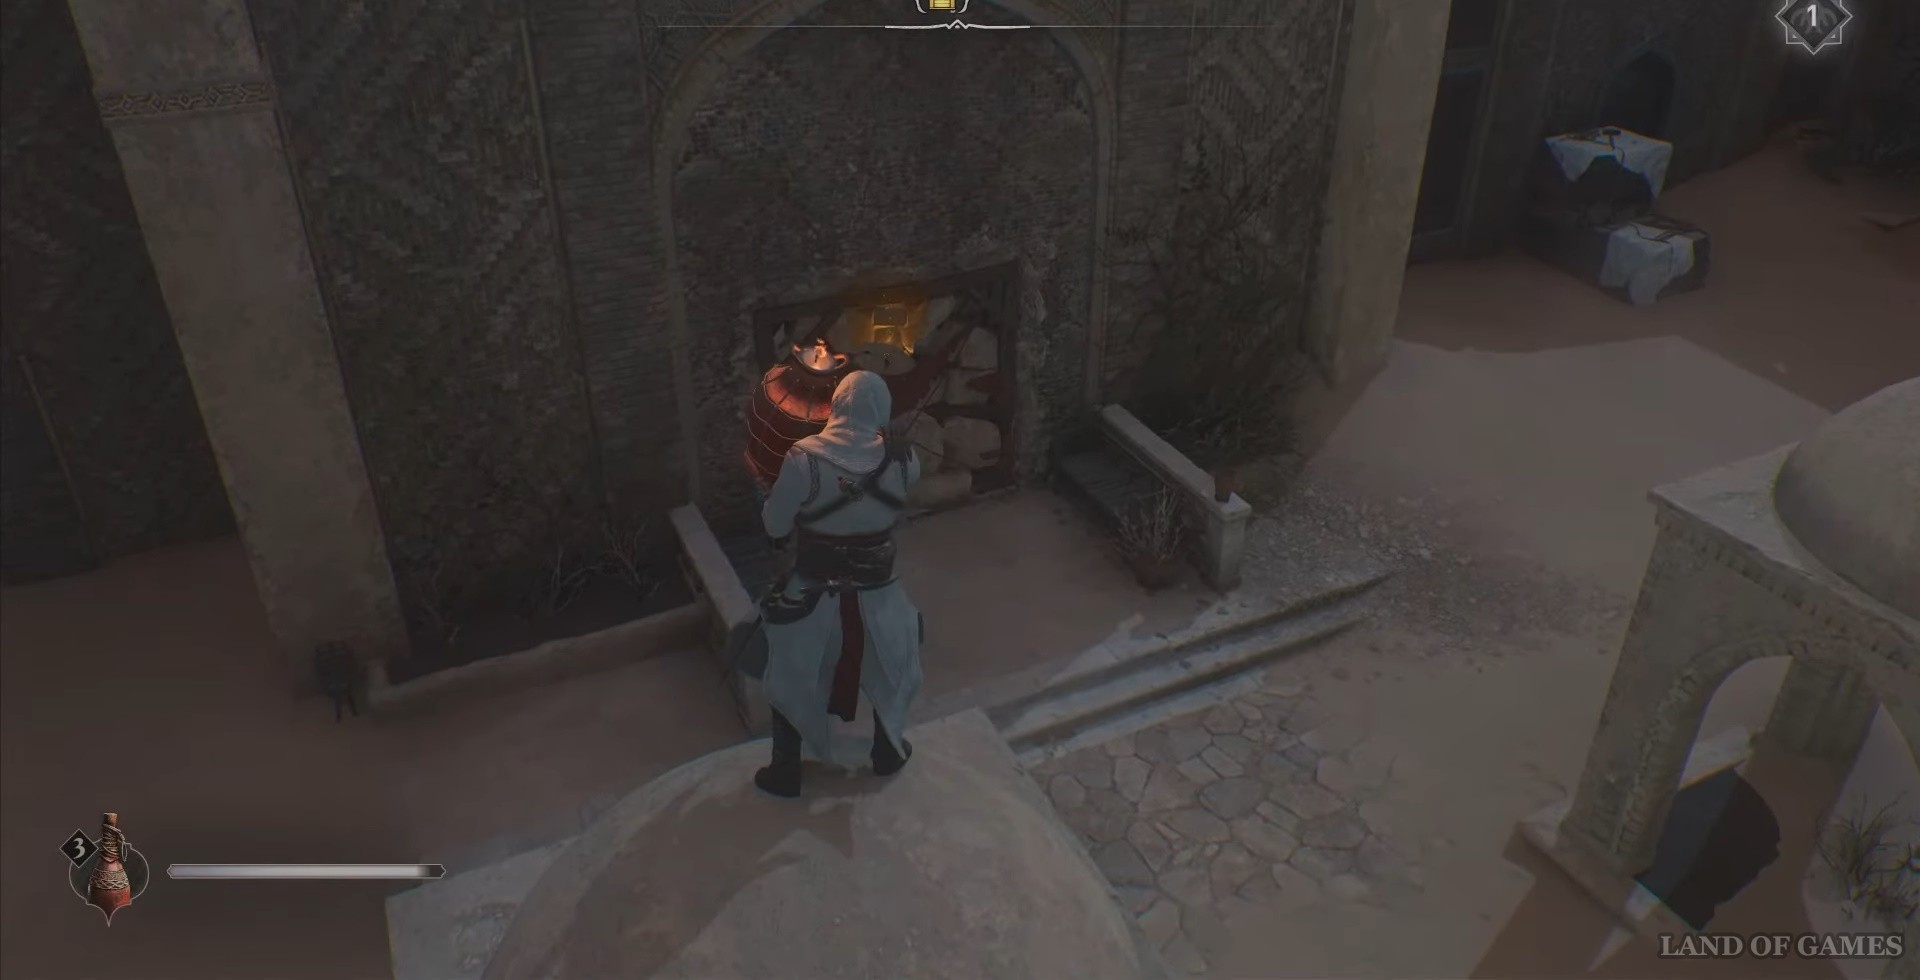
Chest No. 6 Soapmakers' Quarter
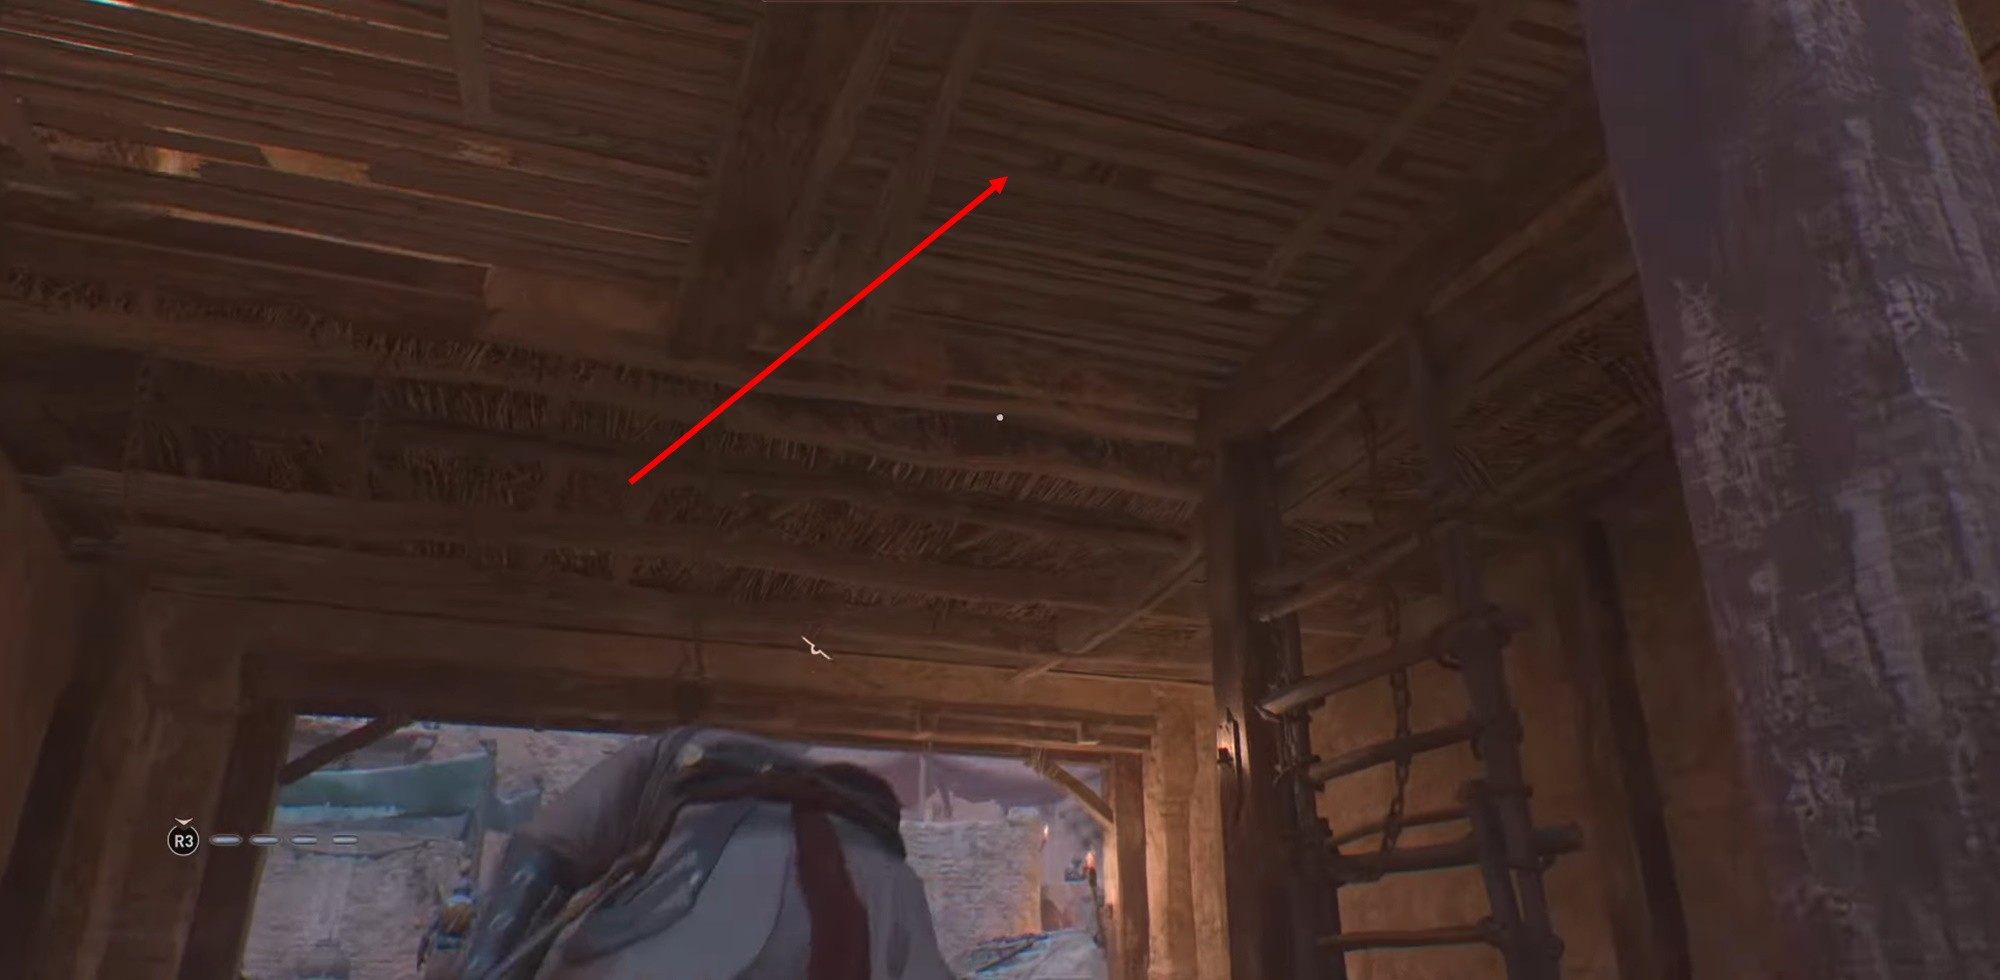
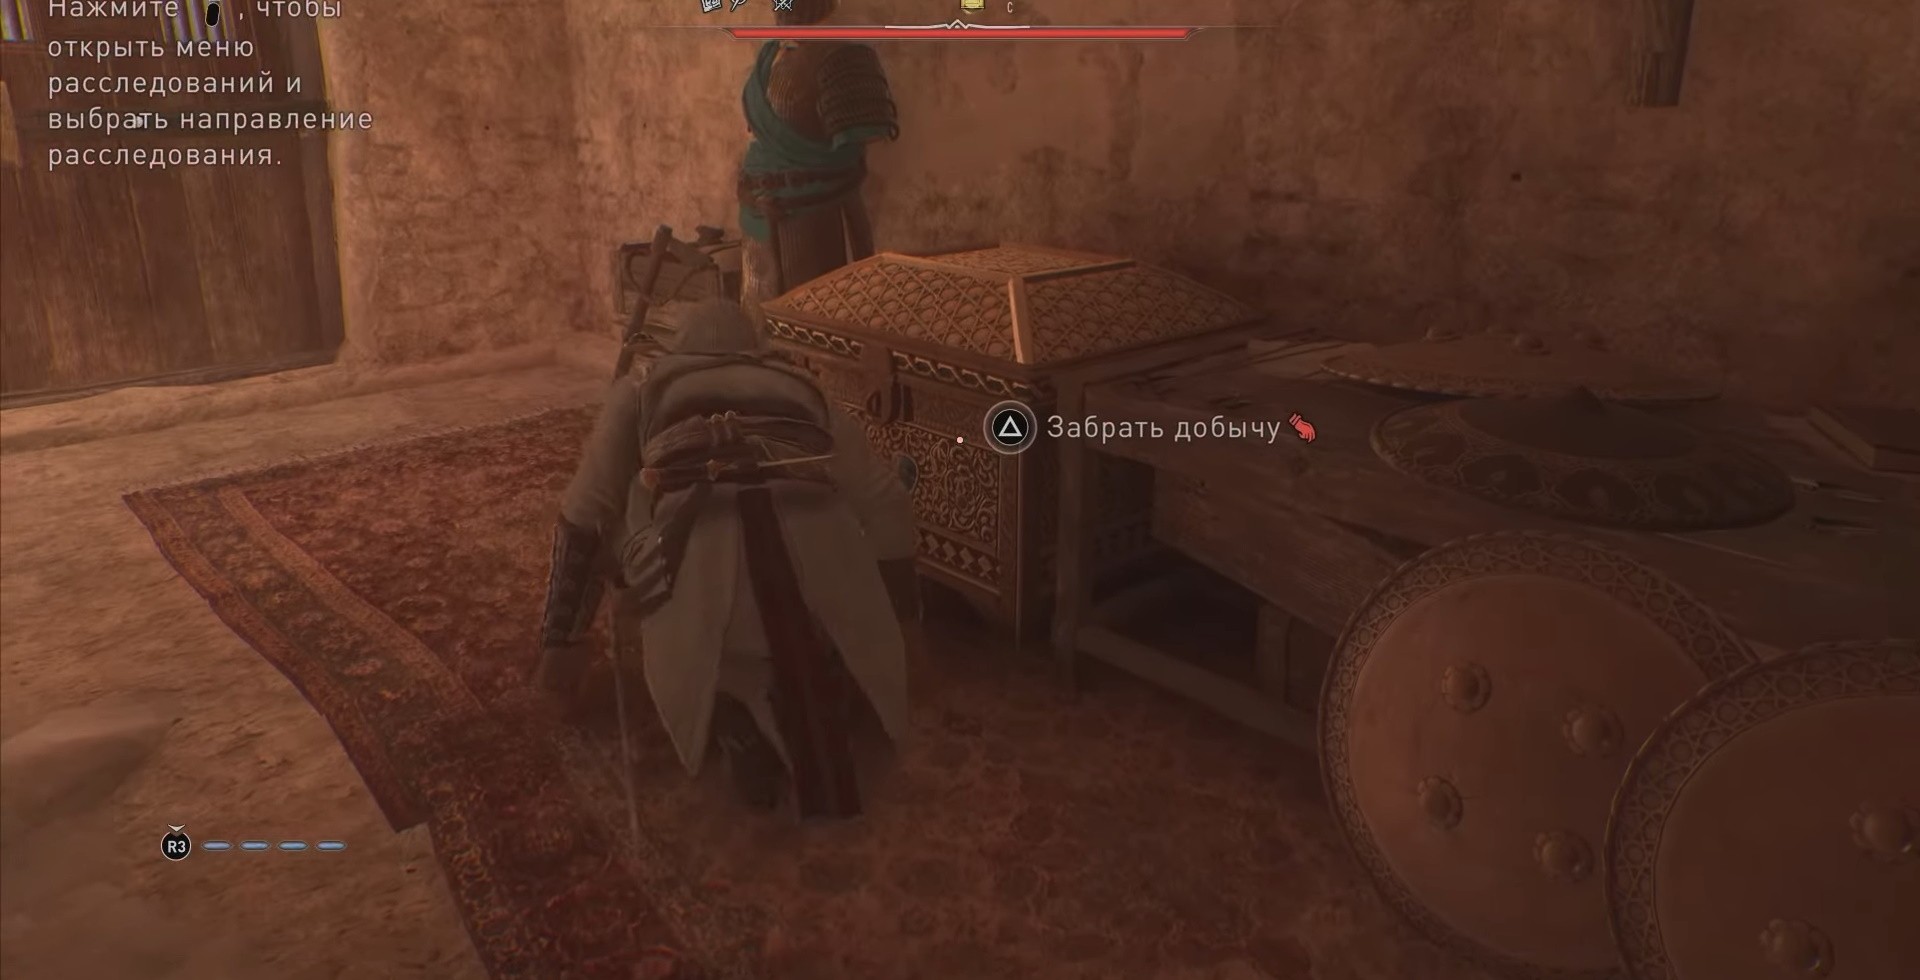
The last chest in this region is located on the top floor of the quarter; its exact location can be seen on the map below.
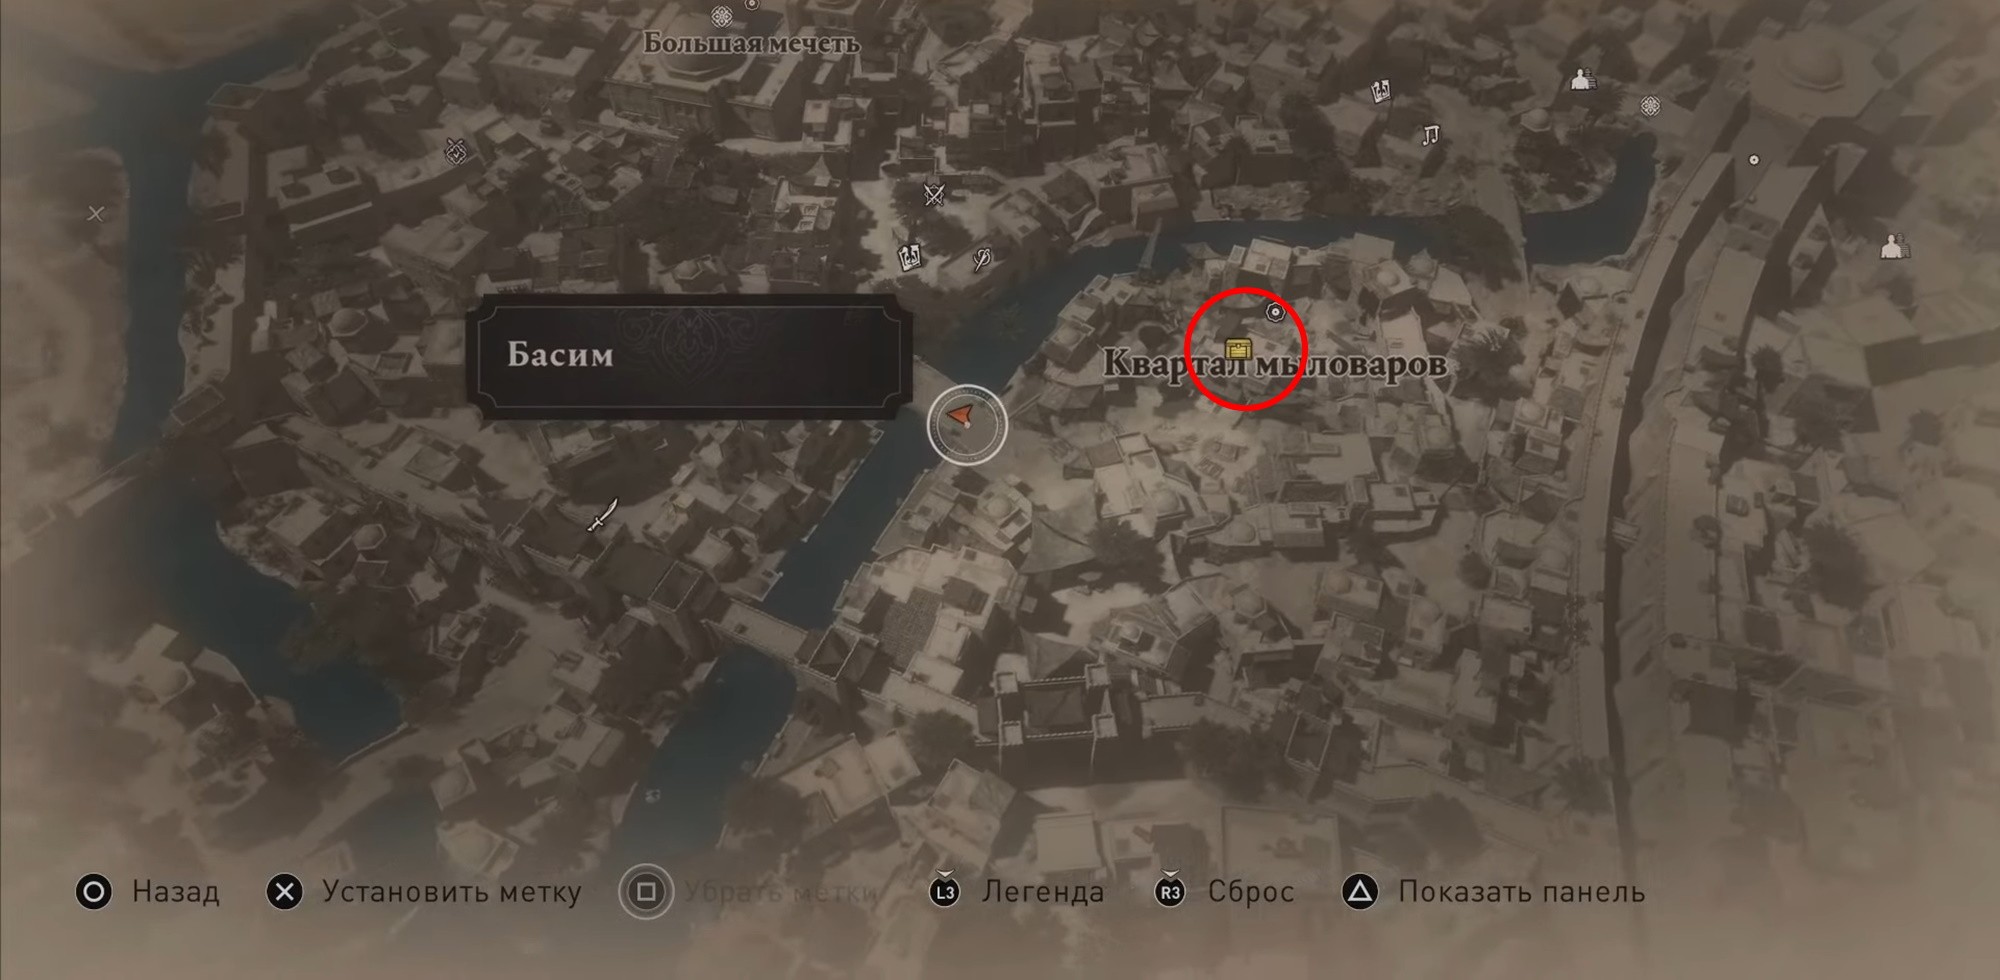
To get to the right place, throw a knife at the ceiling while at the bottom and go up the stairs.
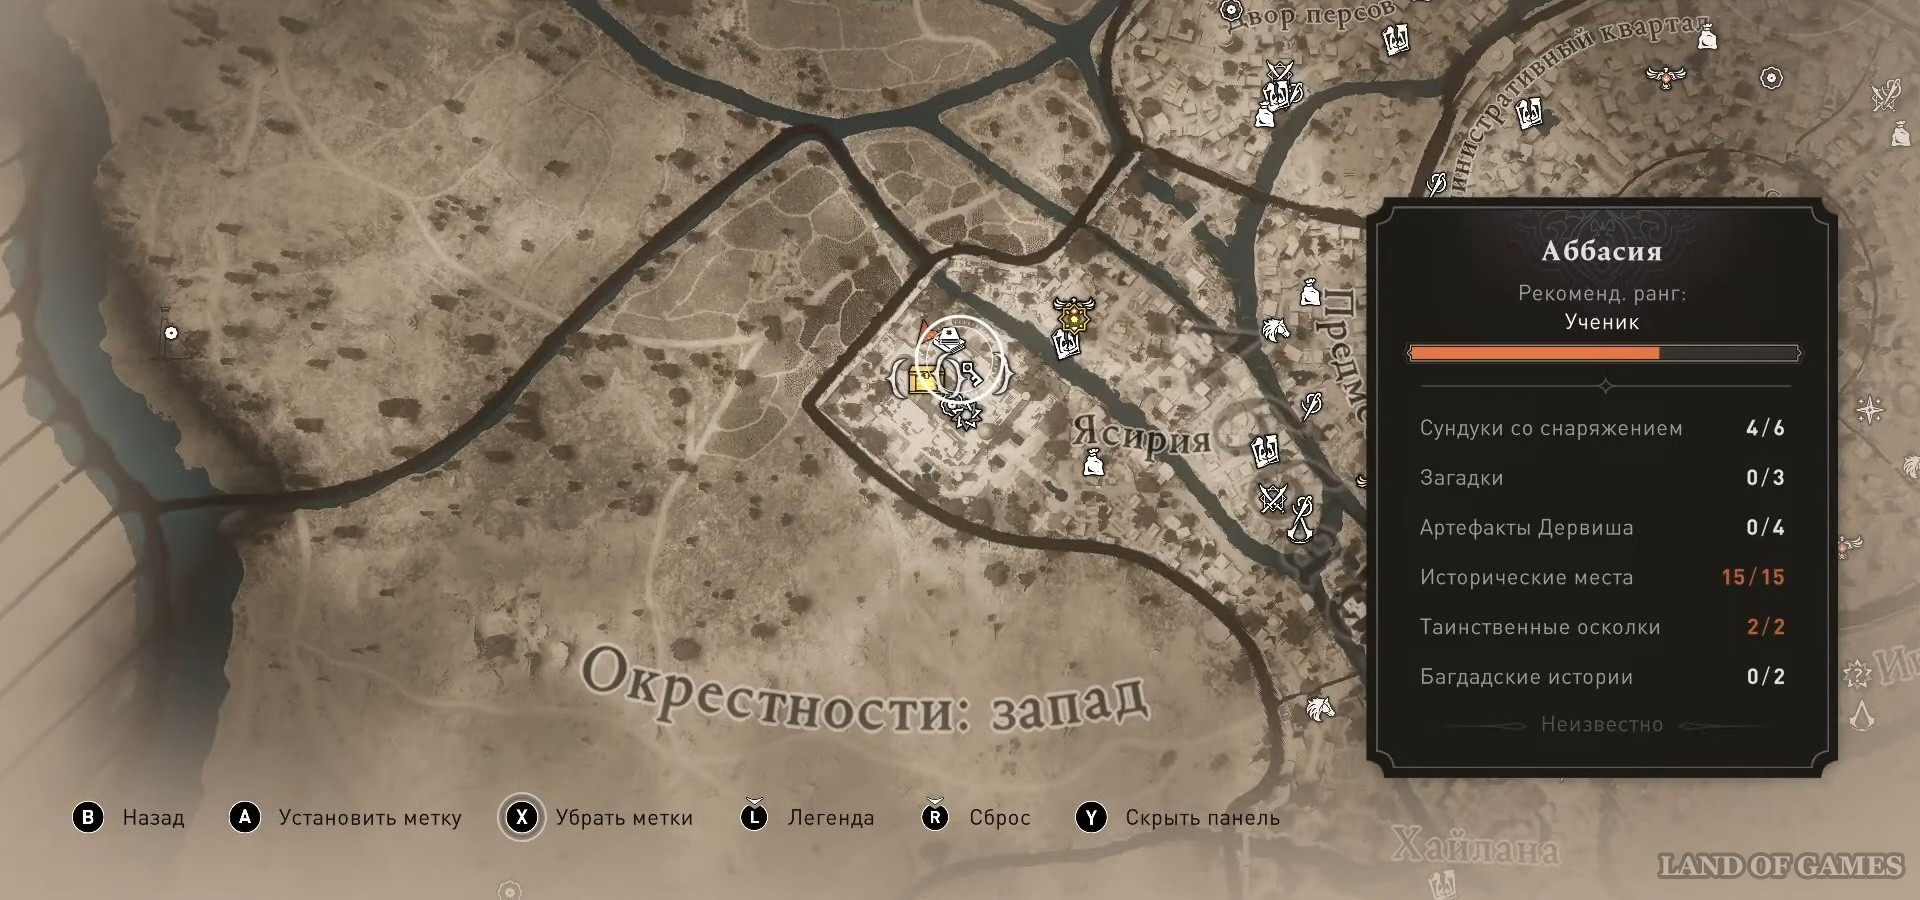
Region: Abbasiya
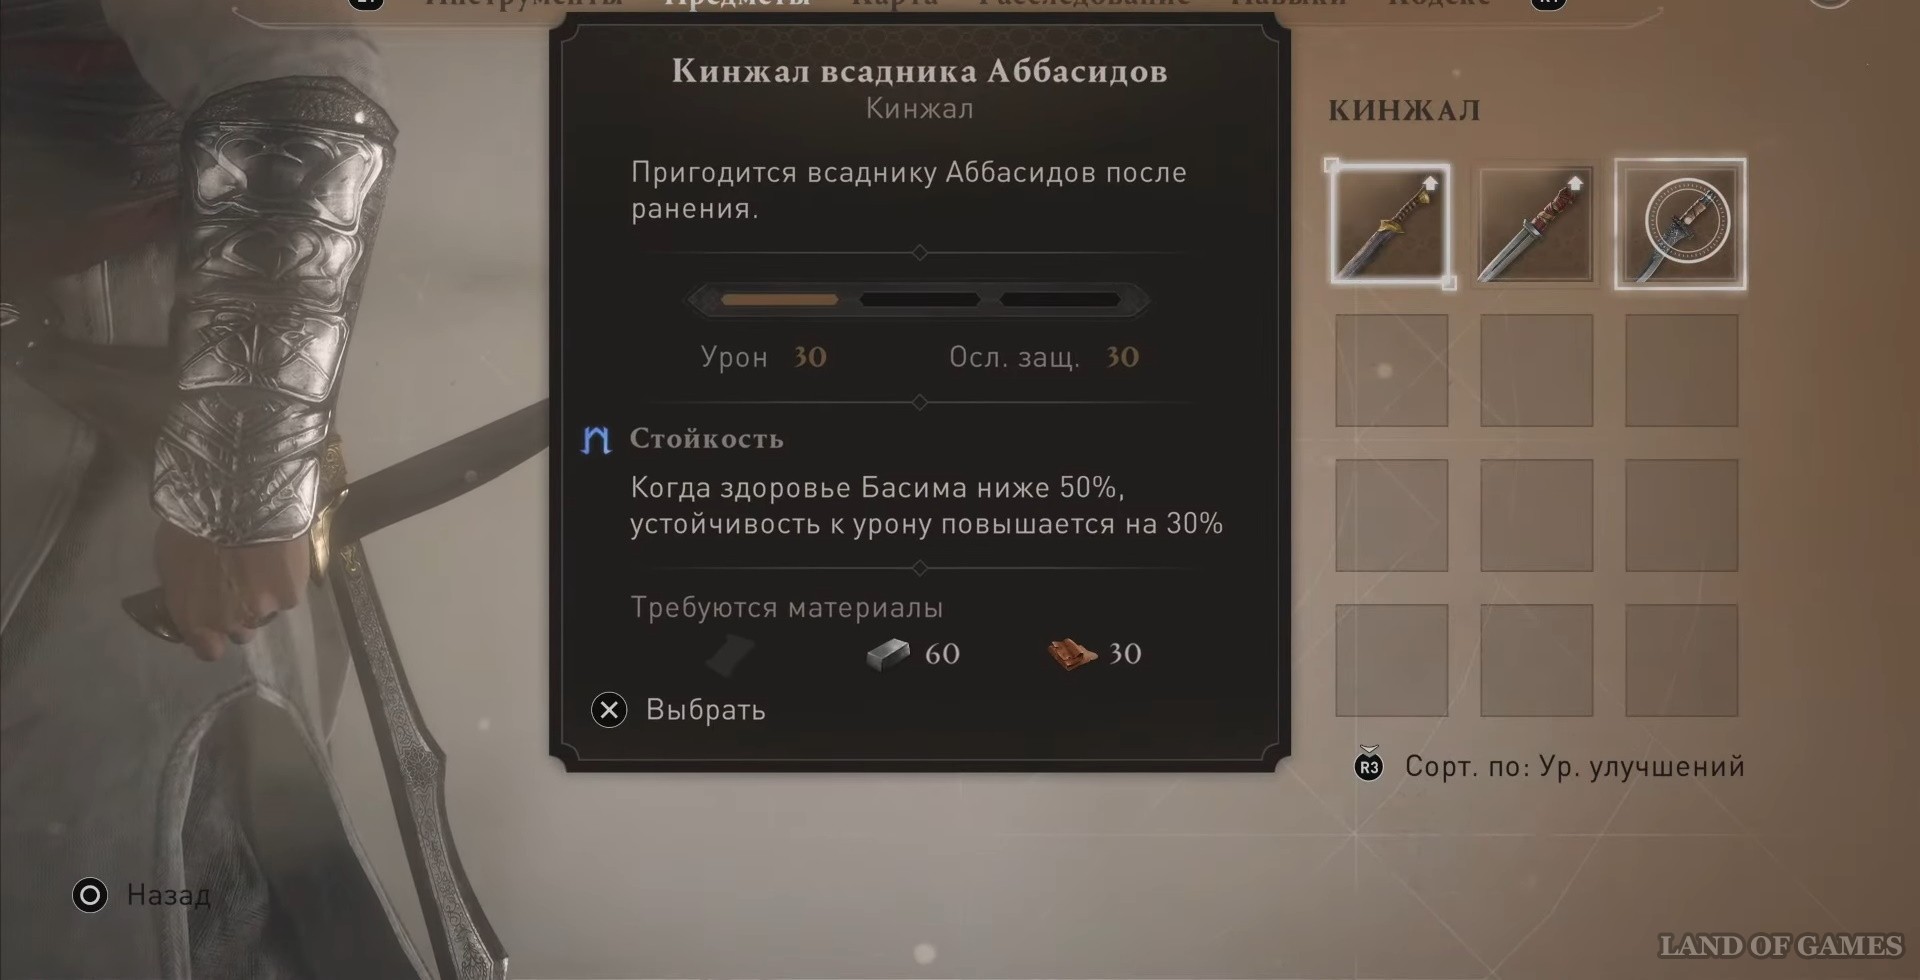
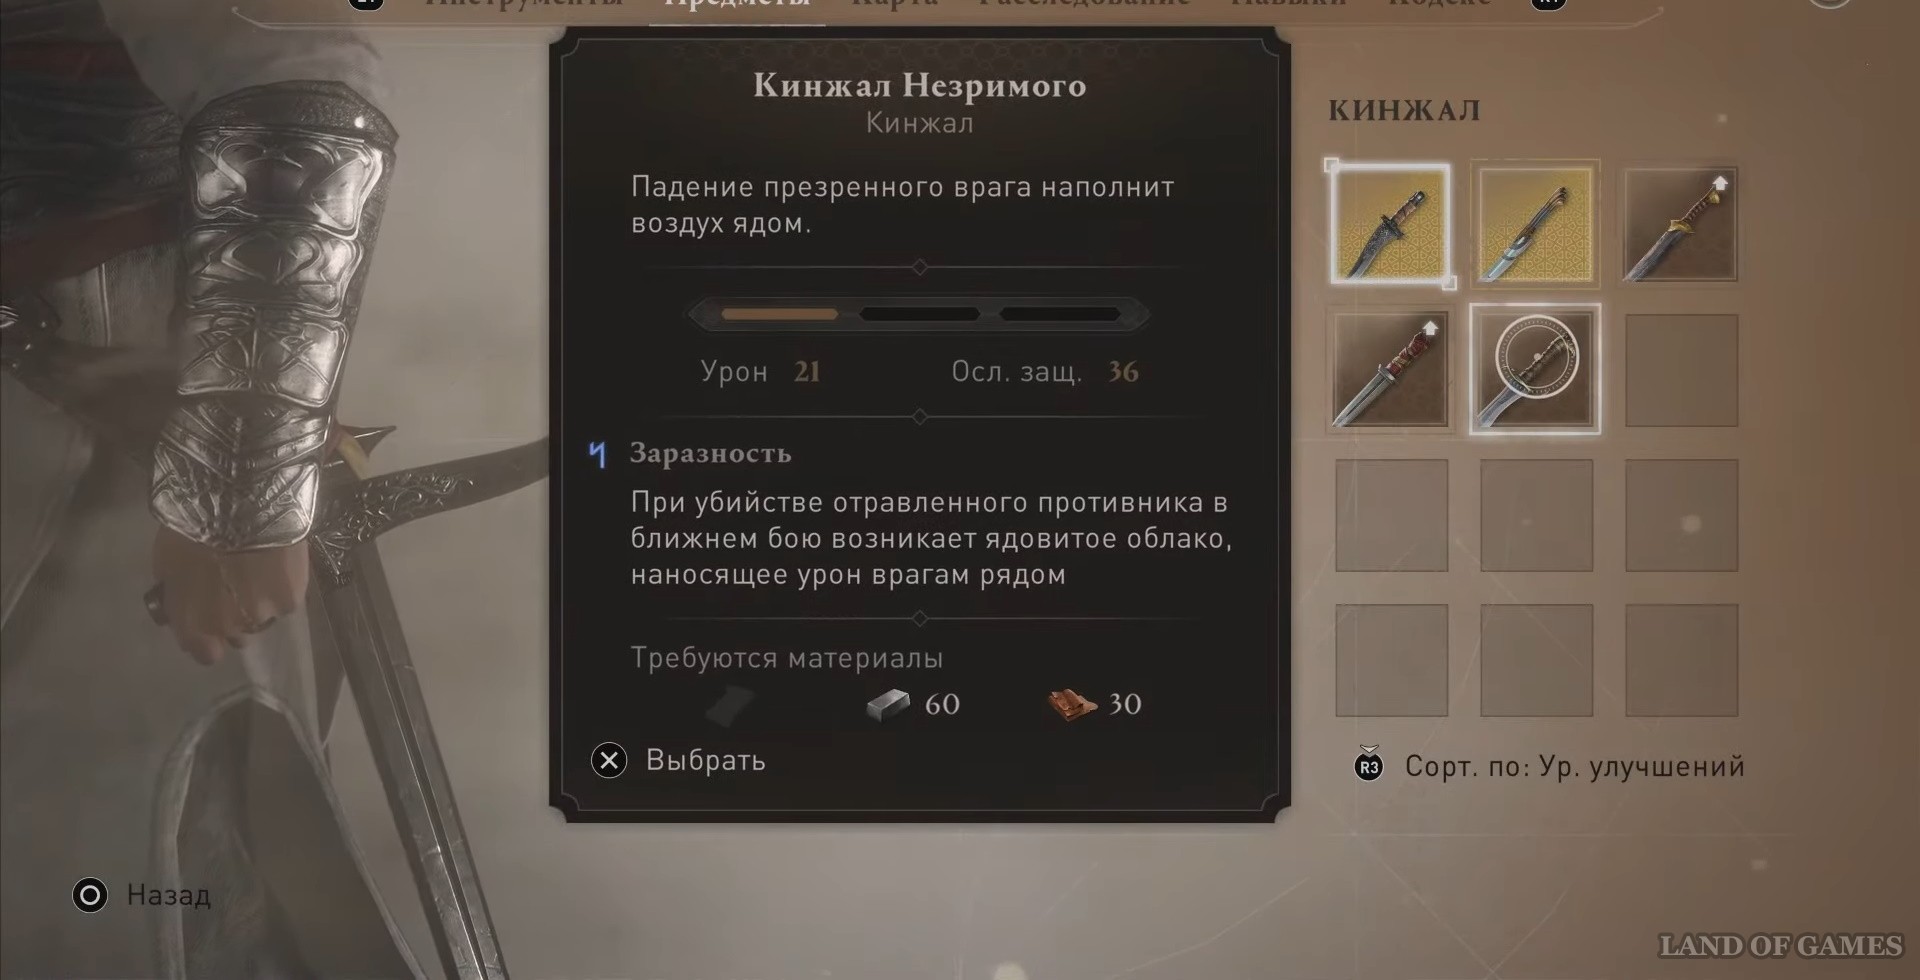
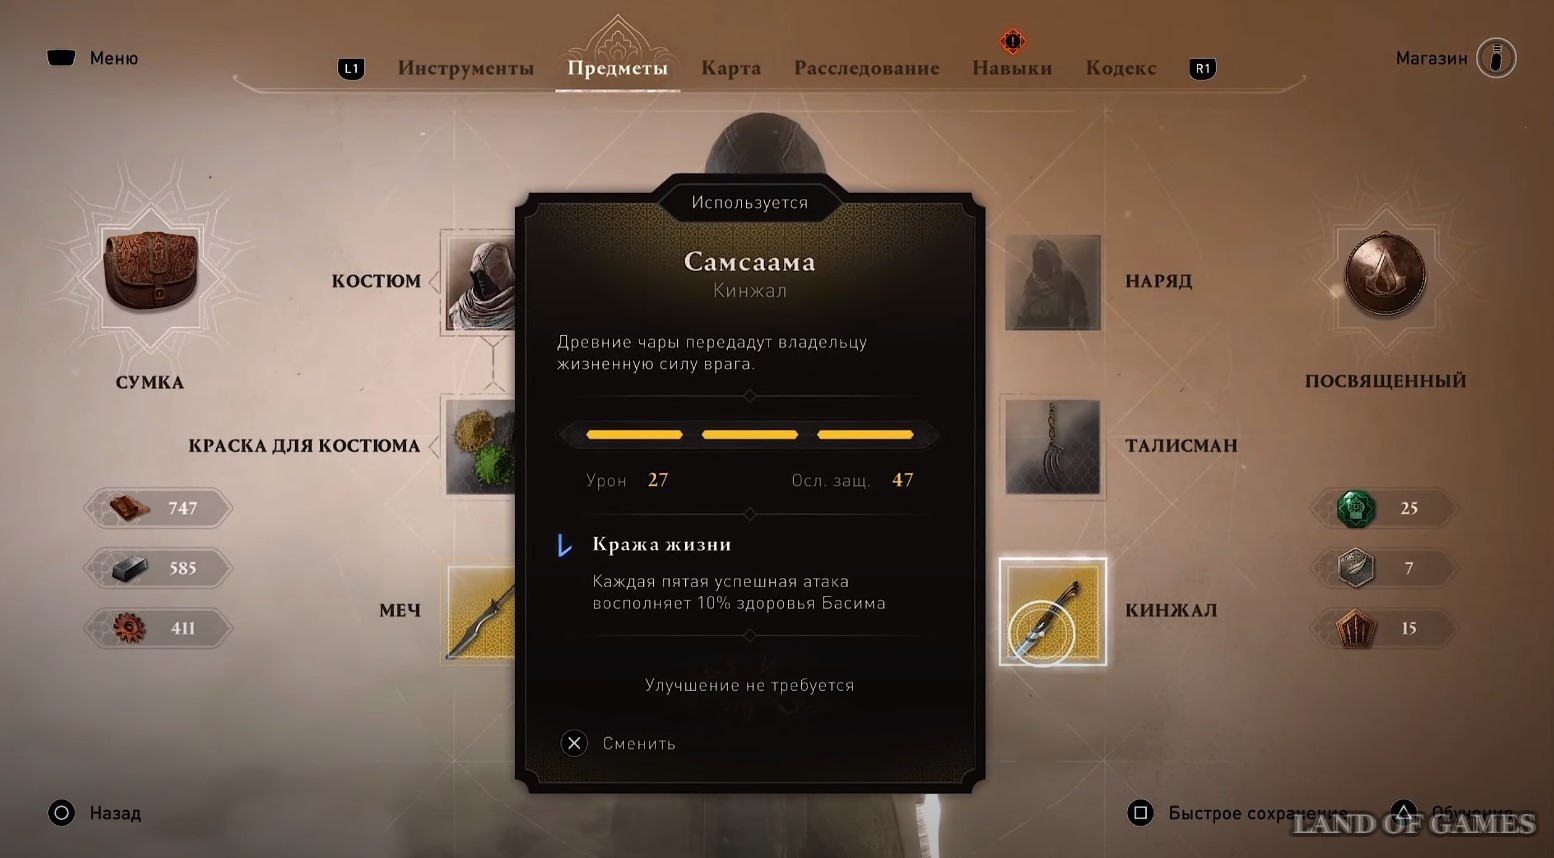
There are six chests hidden here. By opening them you will receive two legendary weapons. Their characteristics can be seen in the screenshots below.

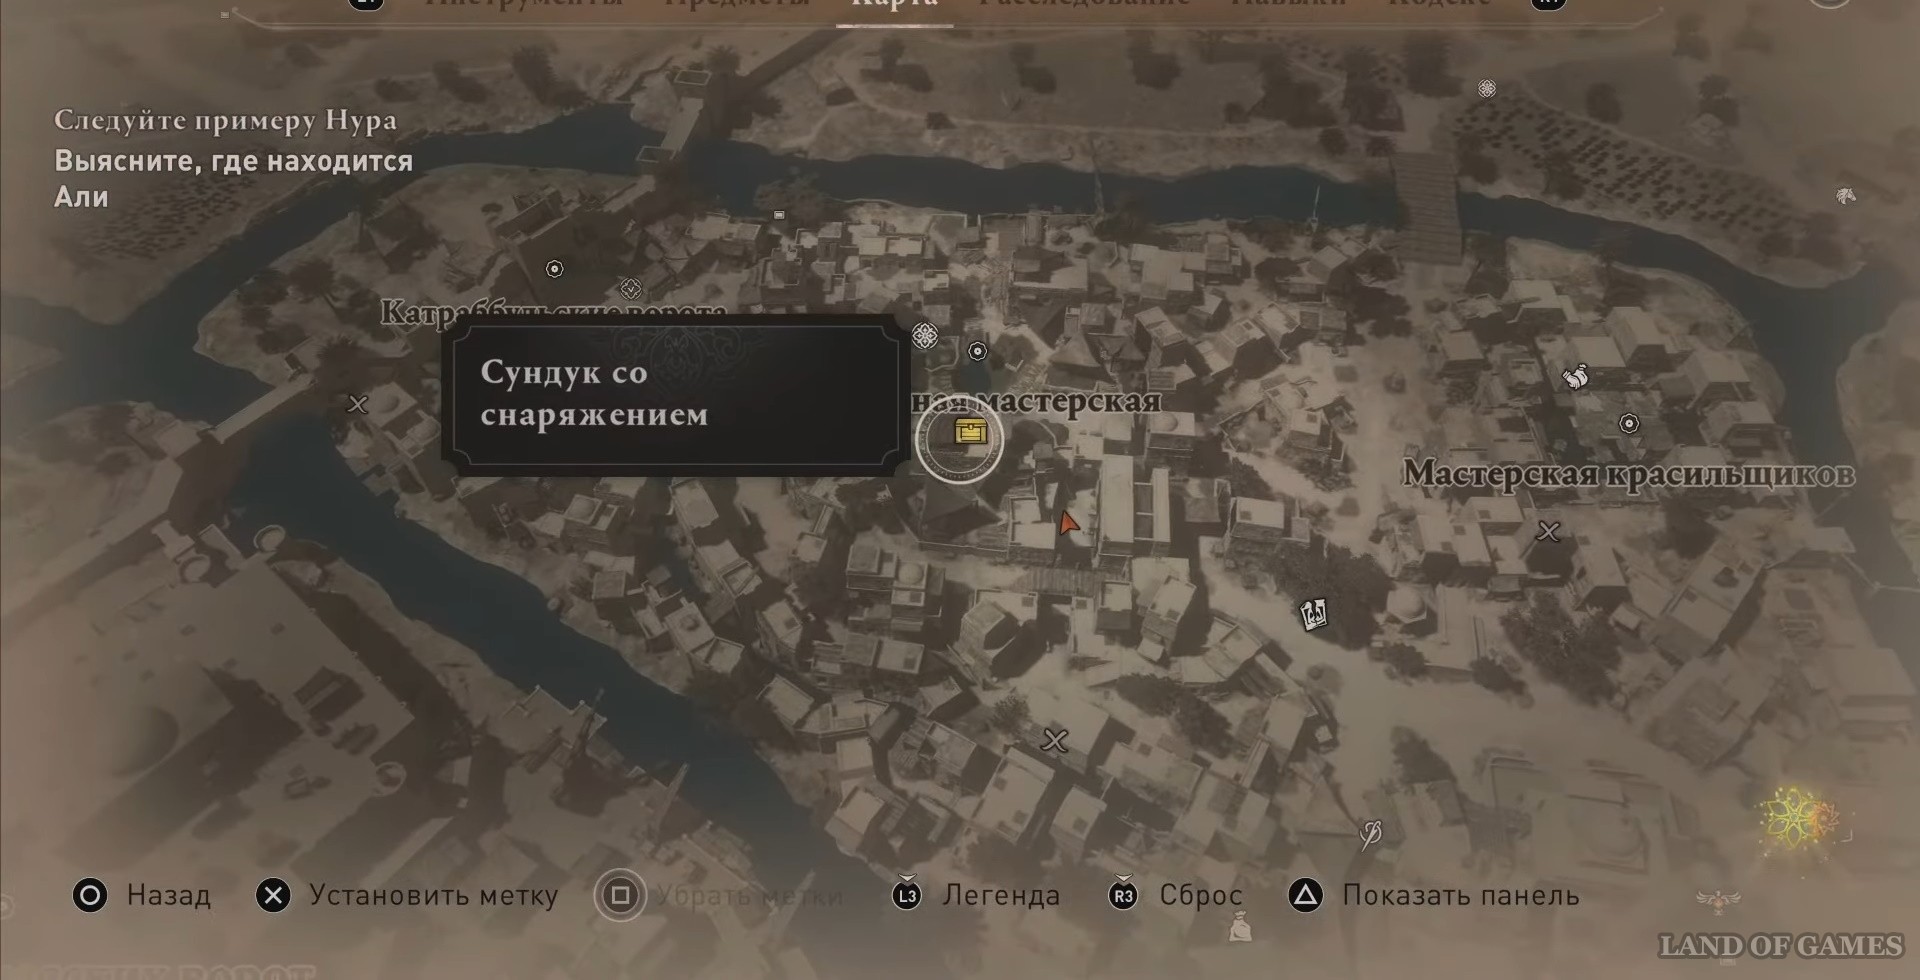
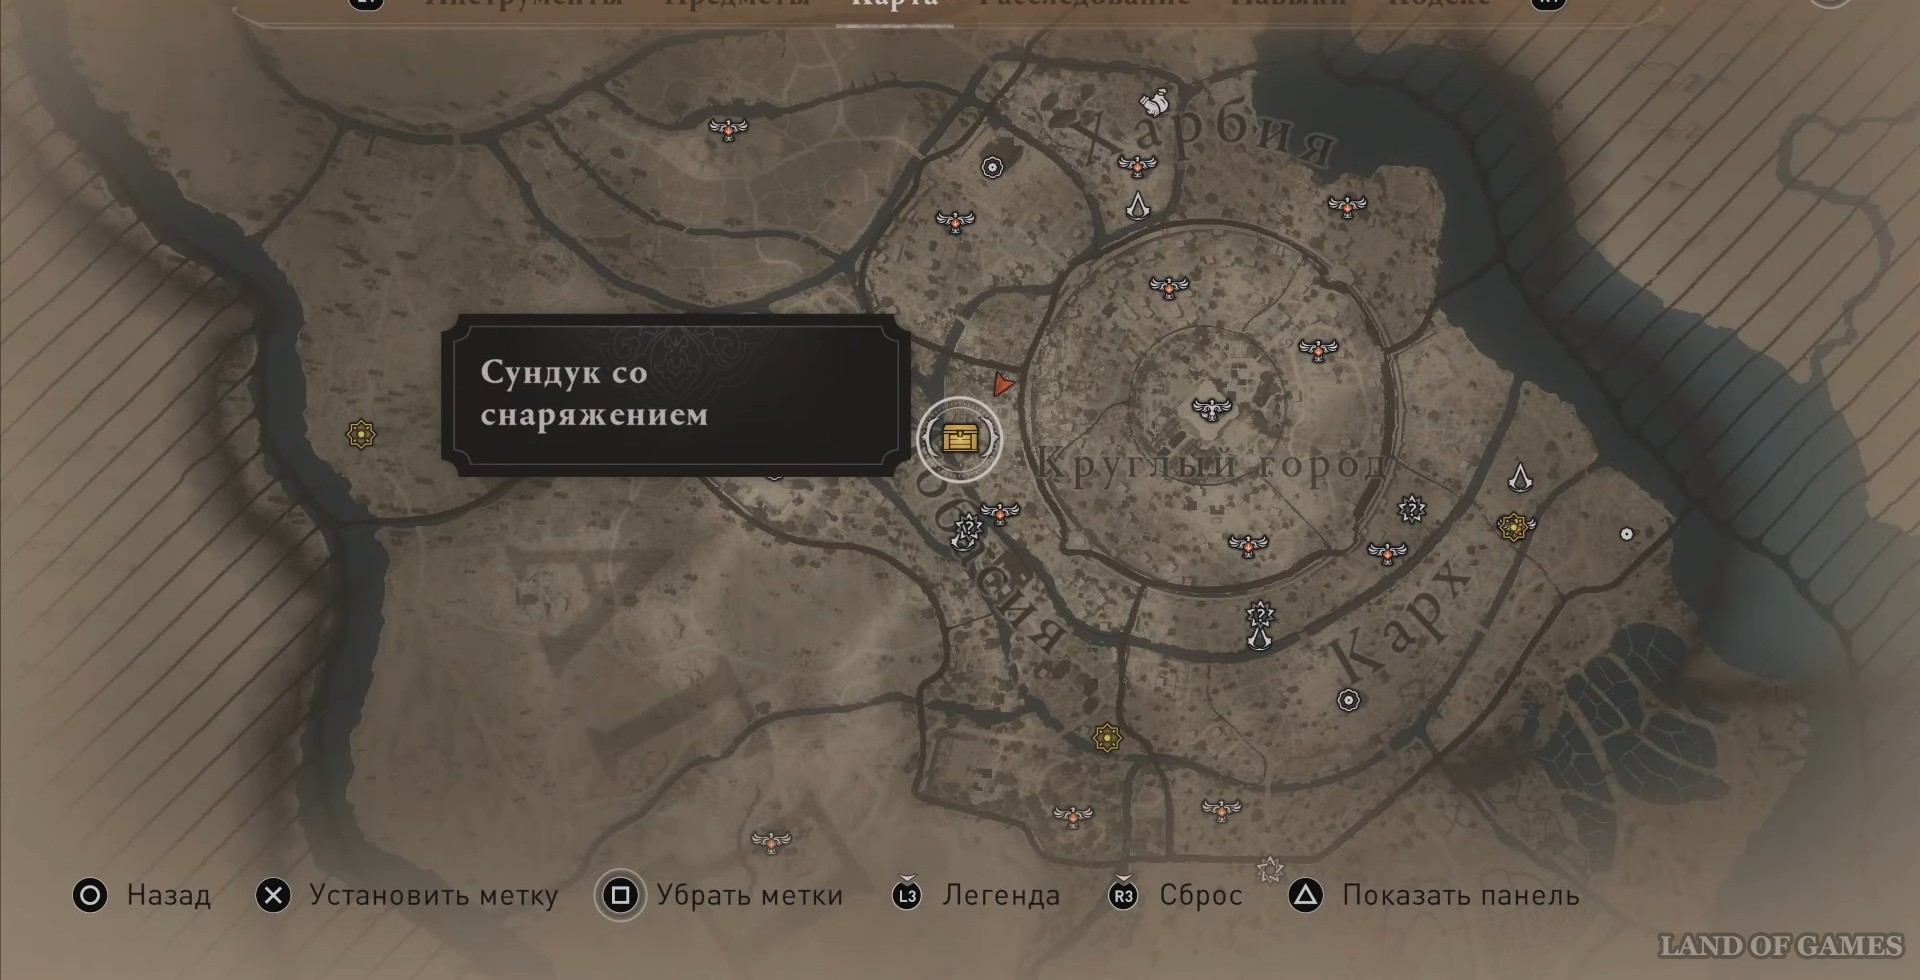
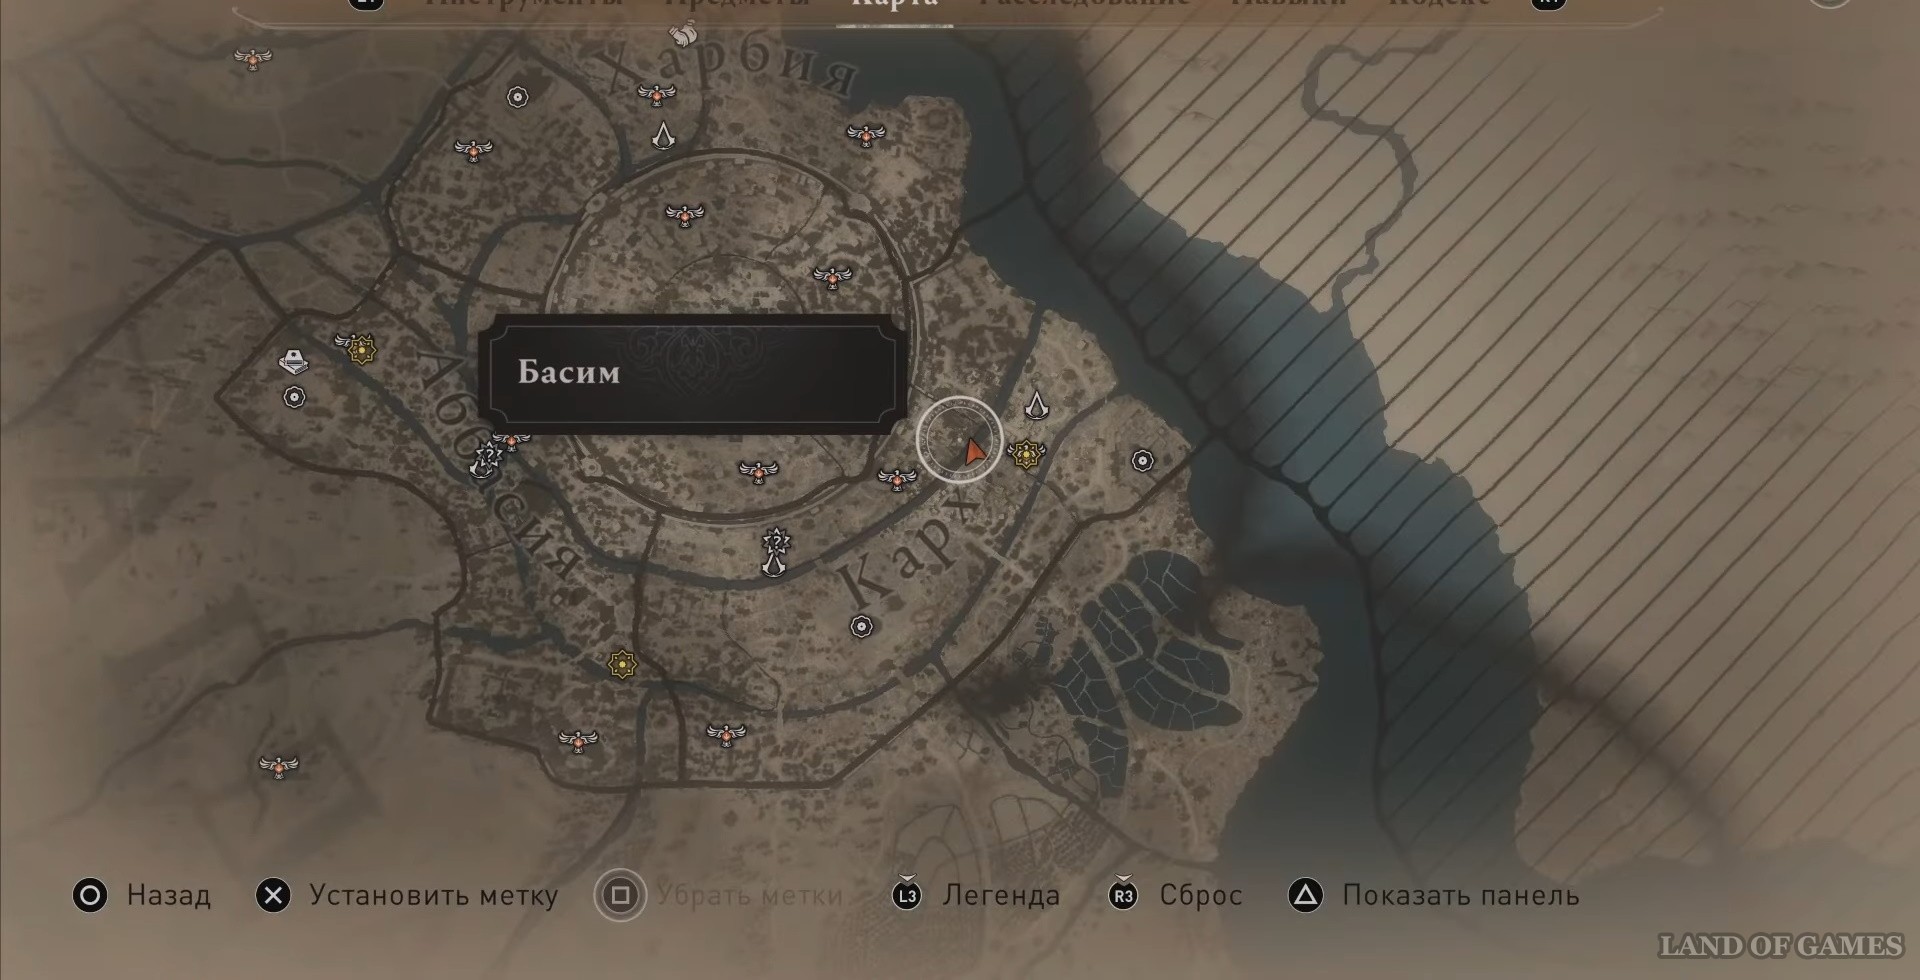
Chest #7 Four Markets
Head to the Four Markets area. To get to the chest, you first need to get a key. To do this, go to the location highlighted in the second screenshot.
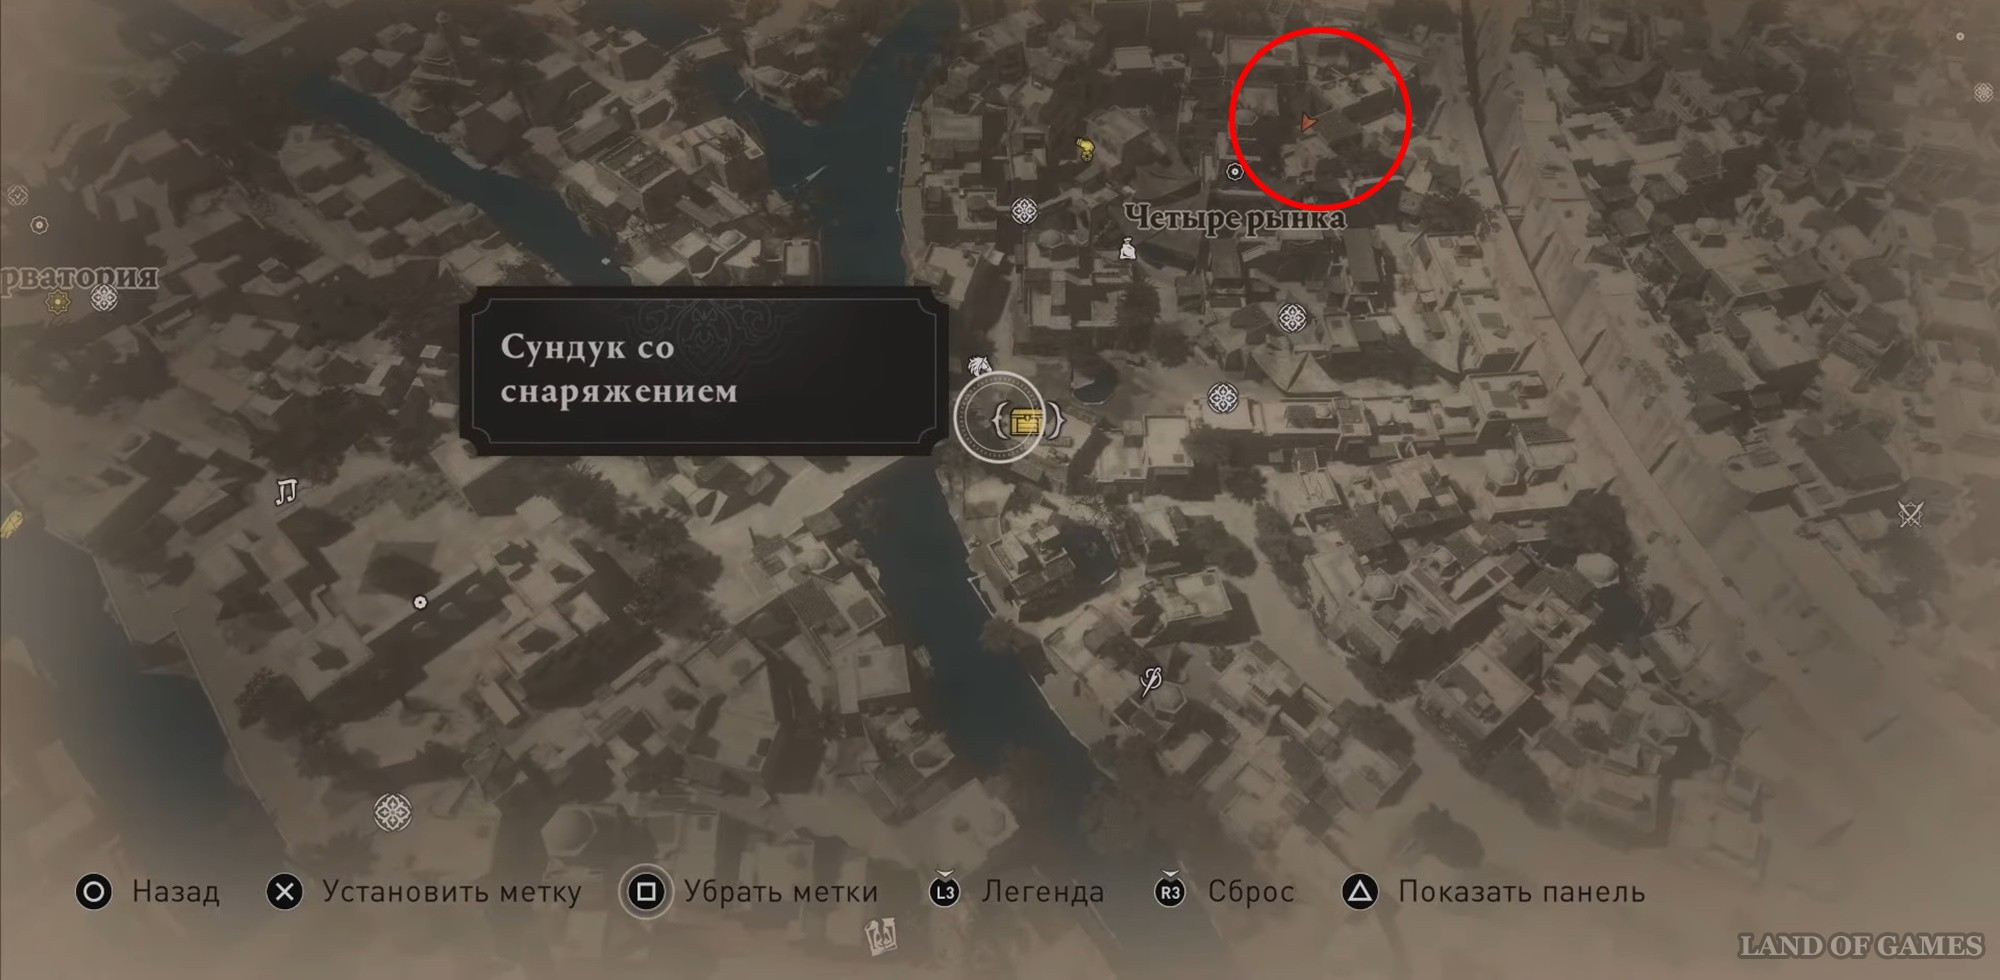
On the second floor of the tea house you will find a man, steal the key from him.
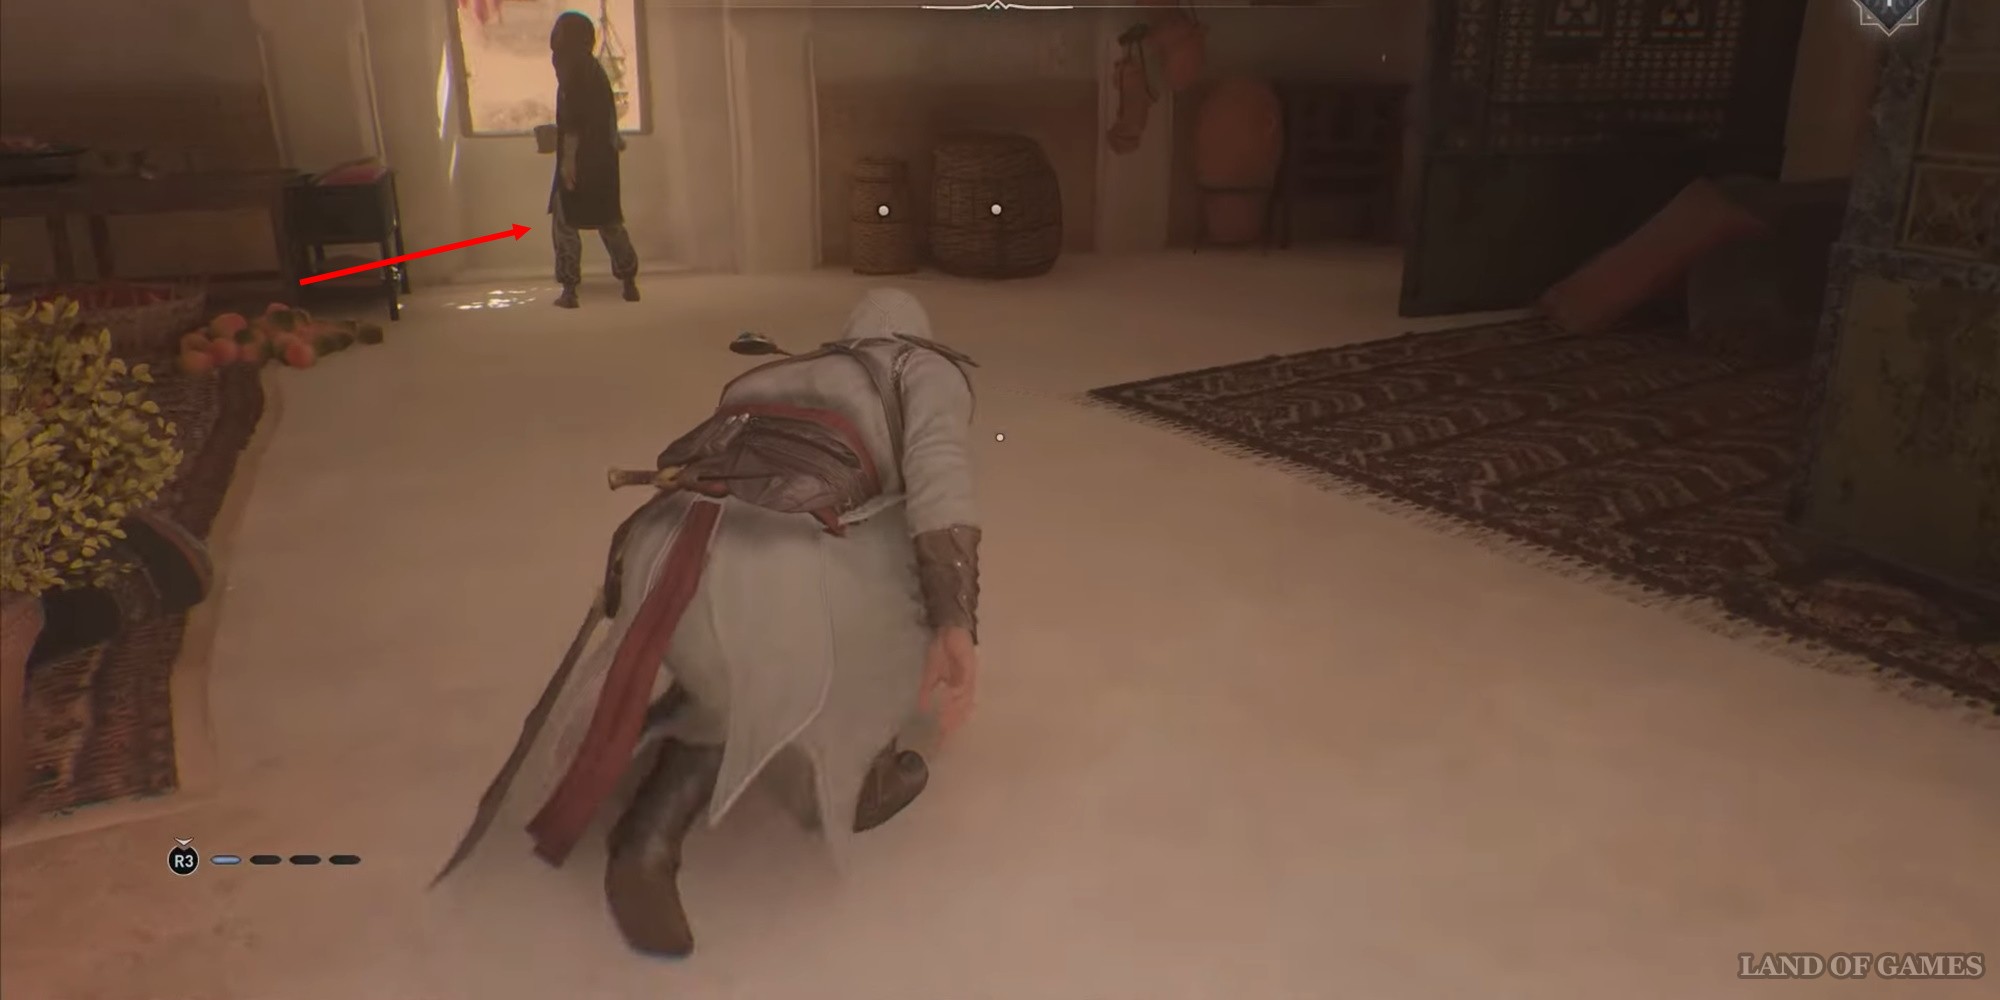
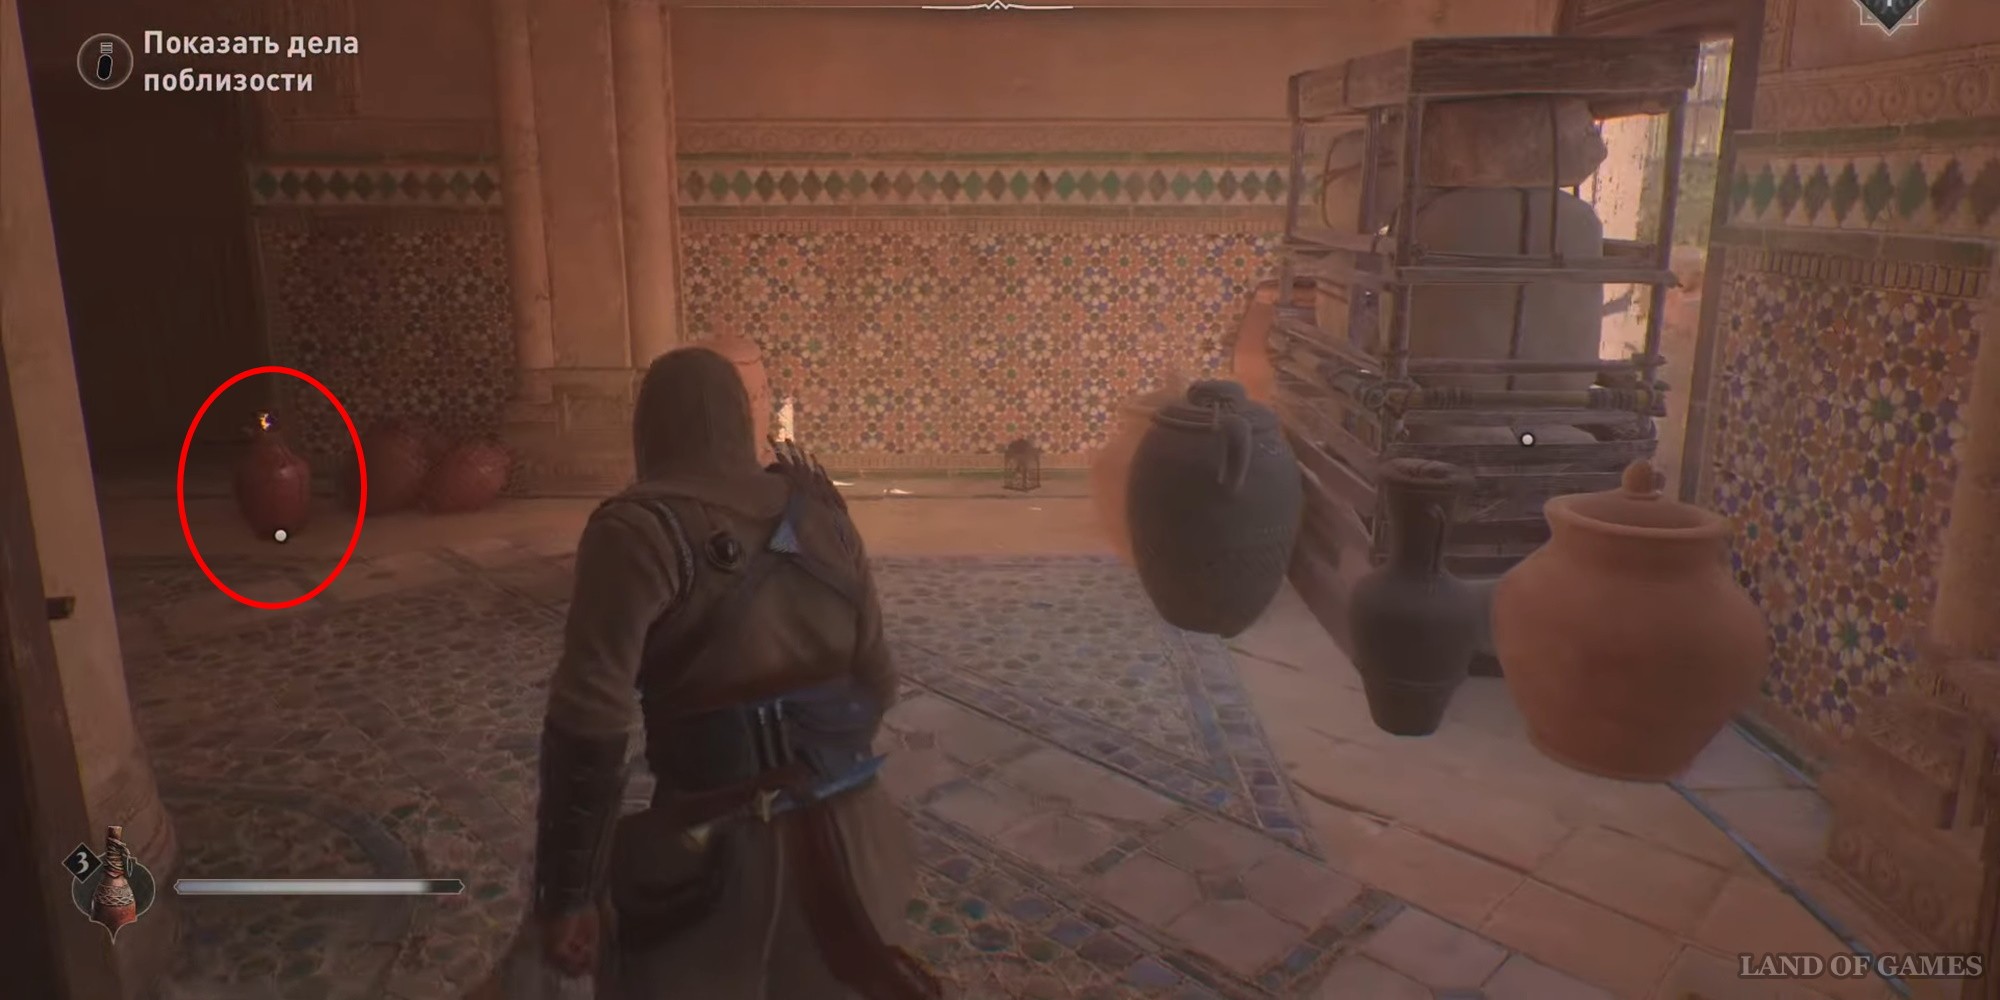
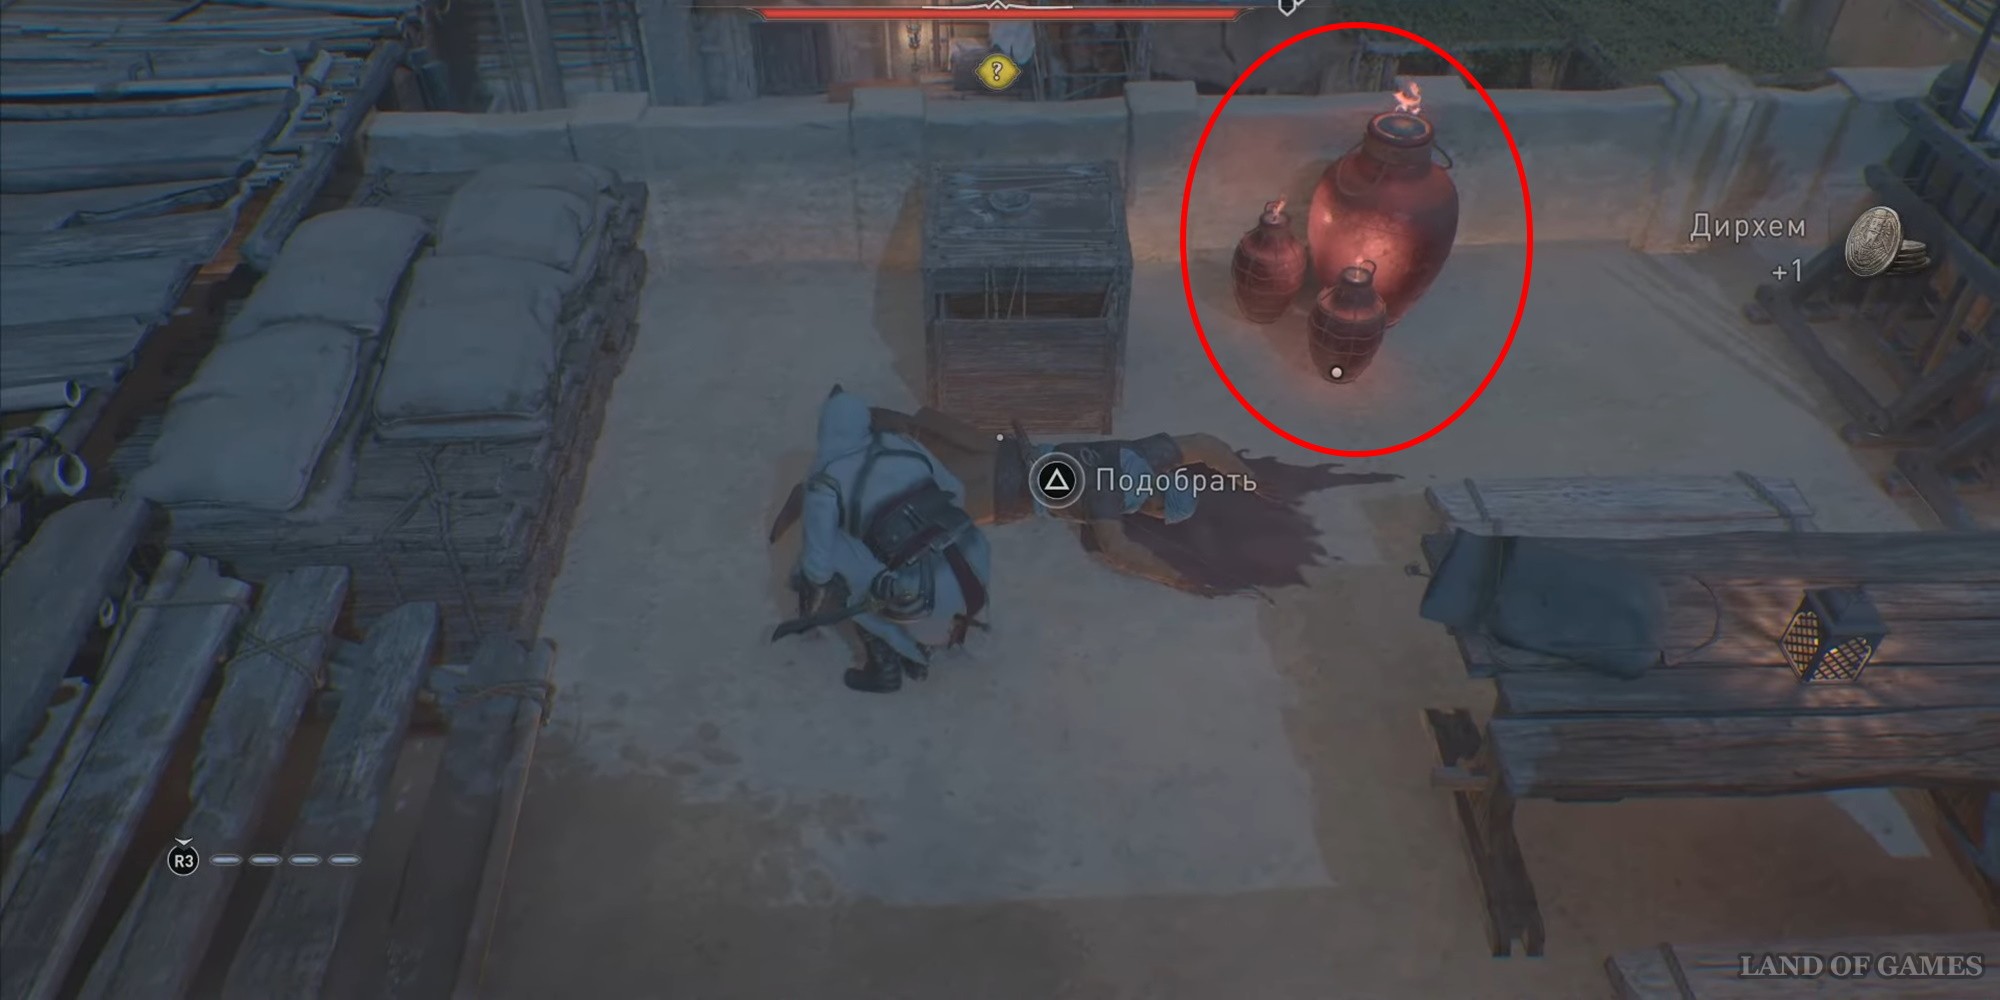
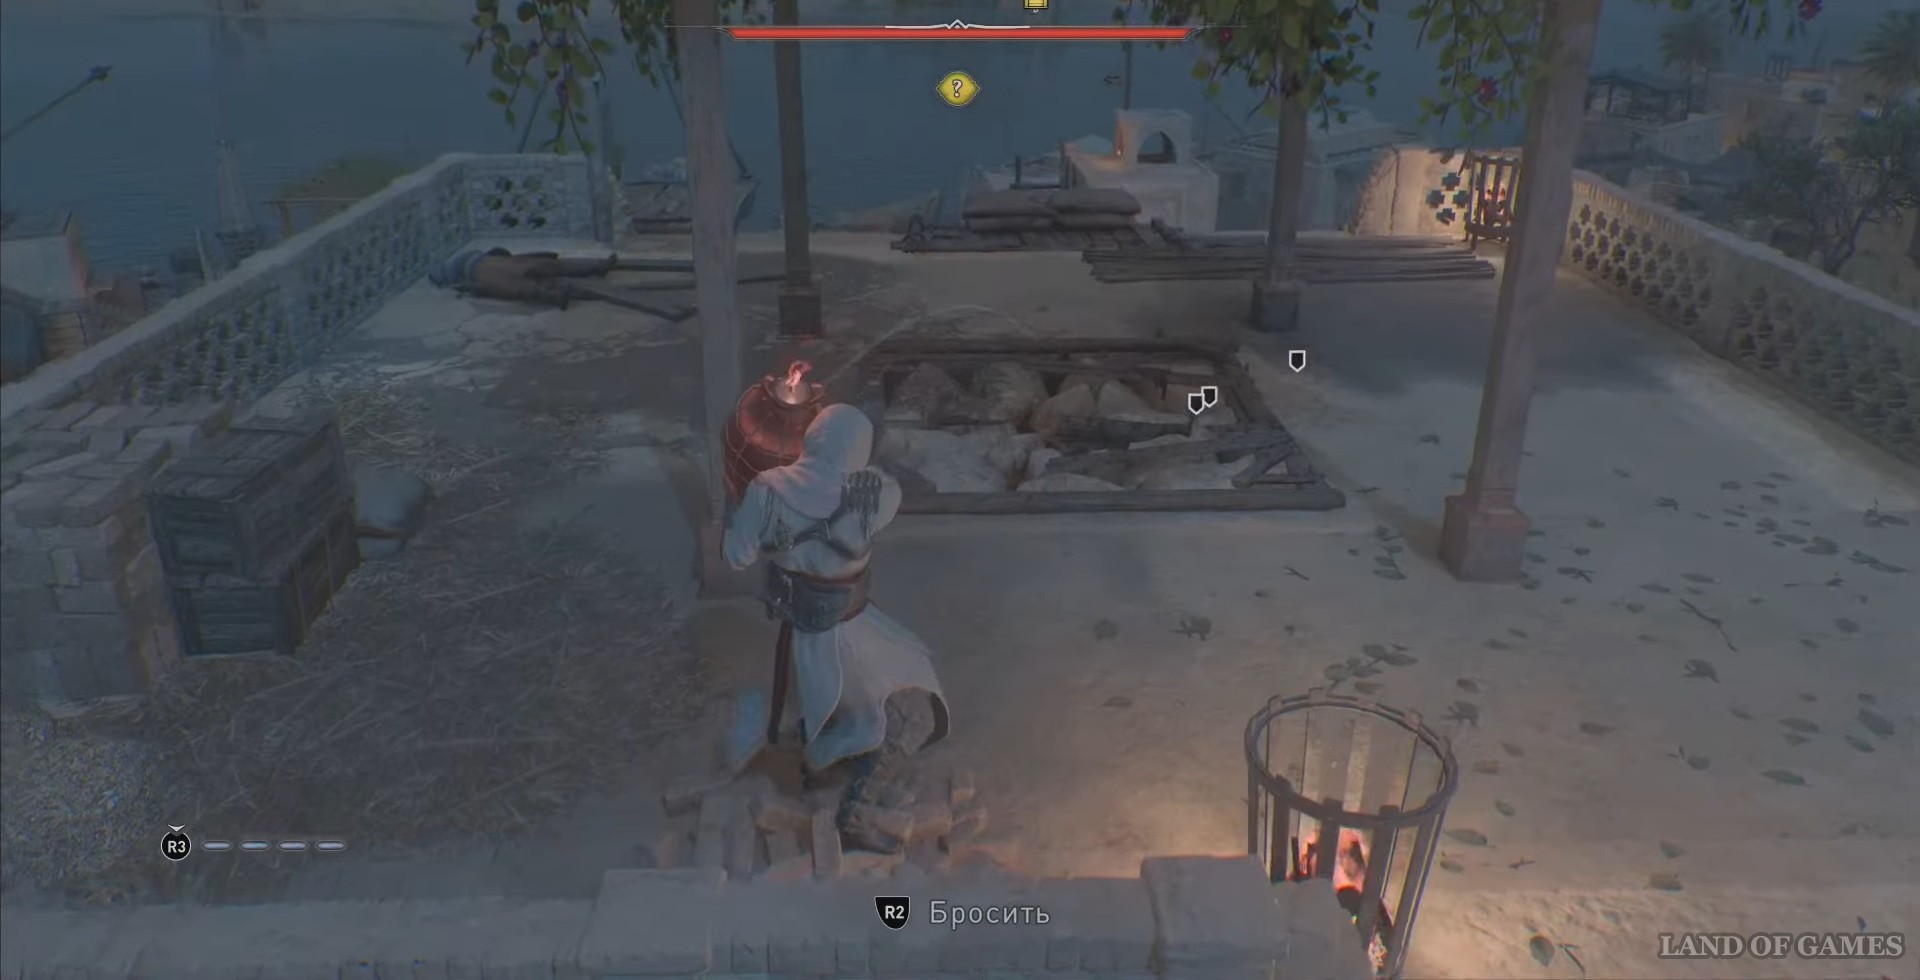
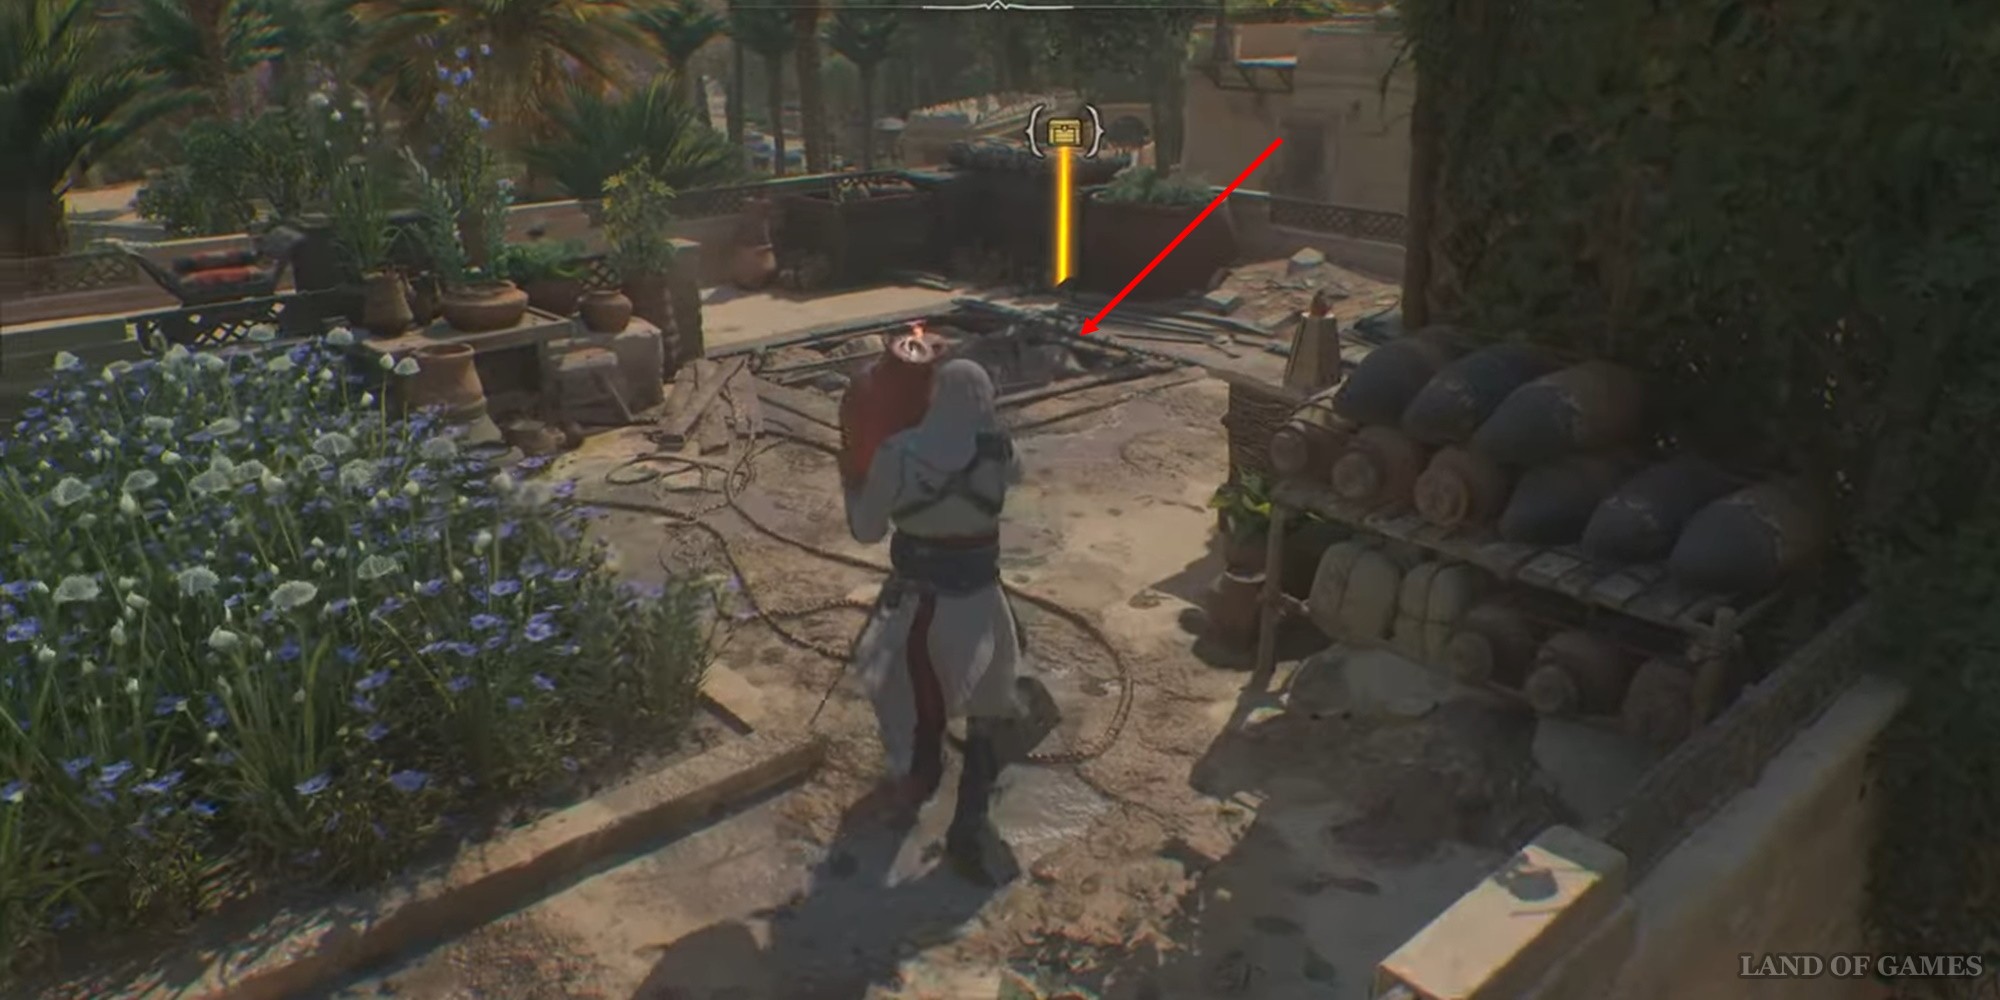
Next, go to the pantry, you will easily recognize it - there is a blue canopy hanging over the door. Inside you will find jugs of burning oil, these are exactly what you need, grab one and run forward - to the second exit.
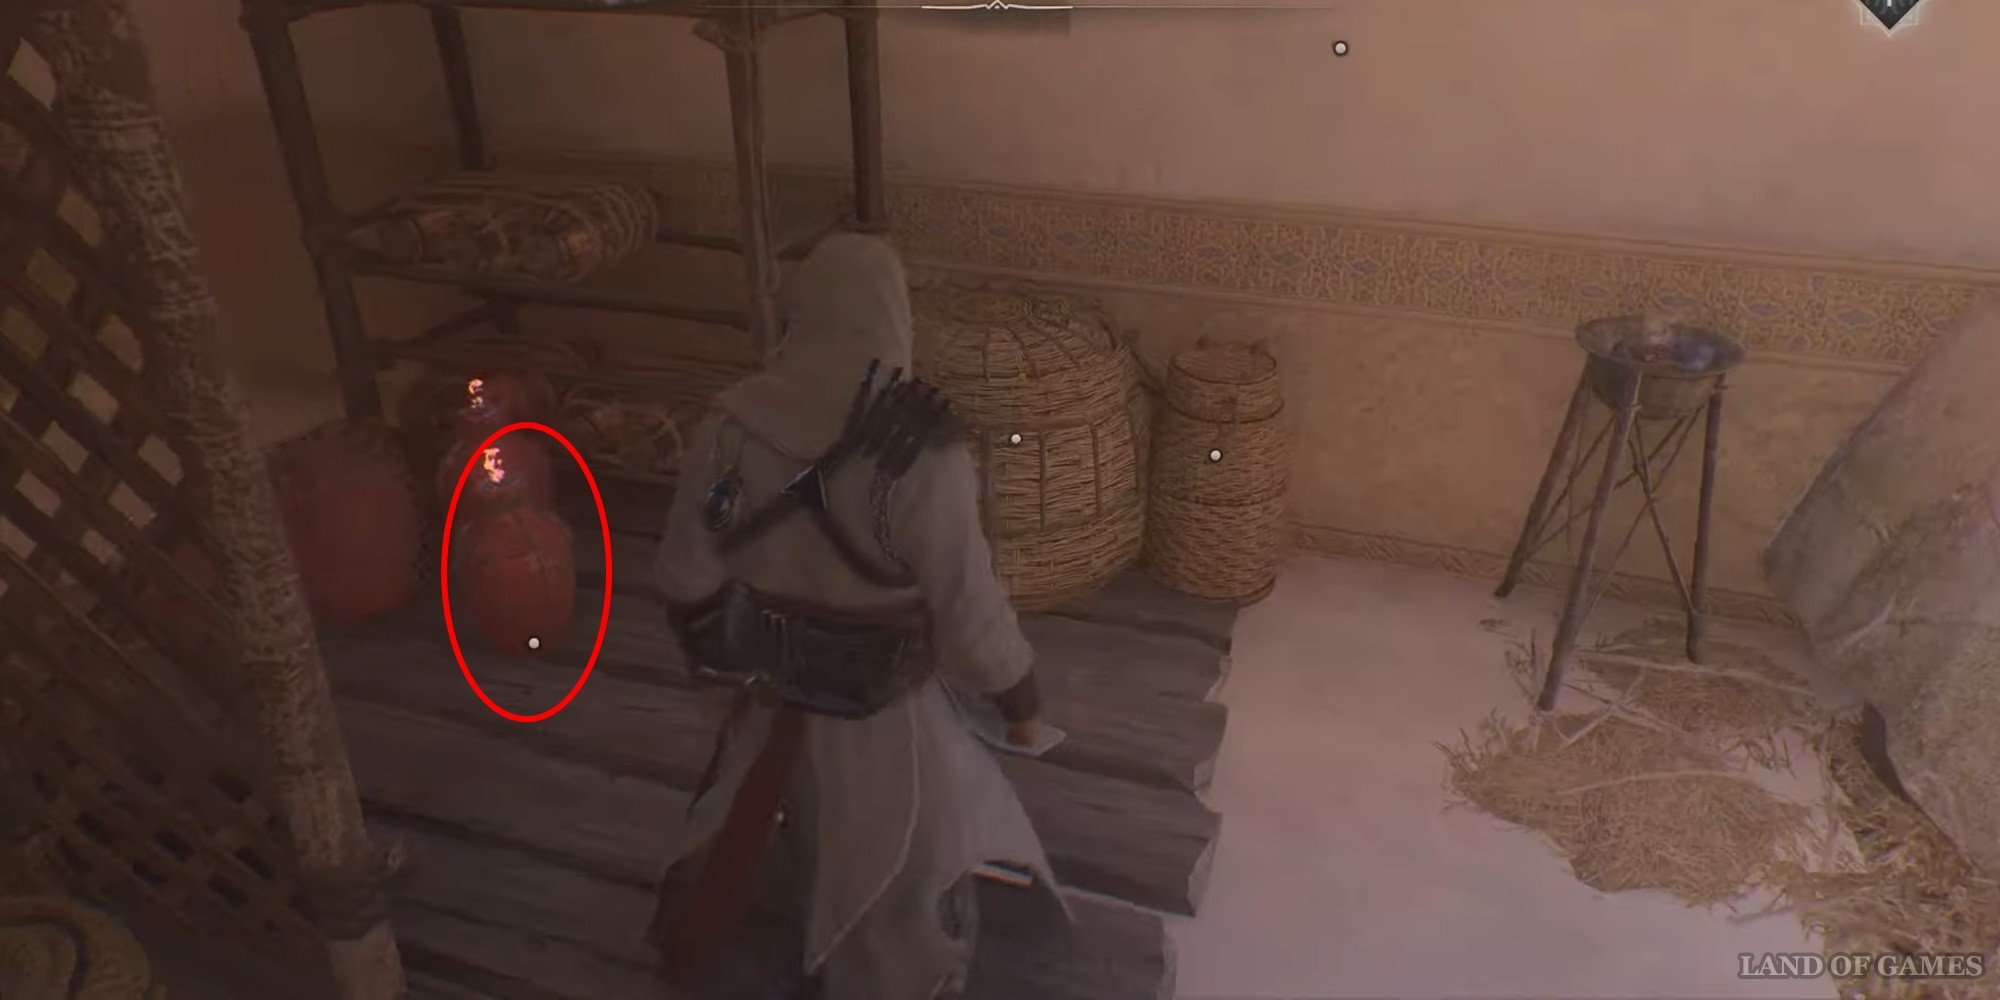
Exit the storeroom, turn right, walk a little further and you will see a wall. Your reward is hidden behind it. Blow up the barrier with the jug.
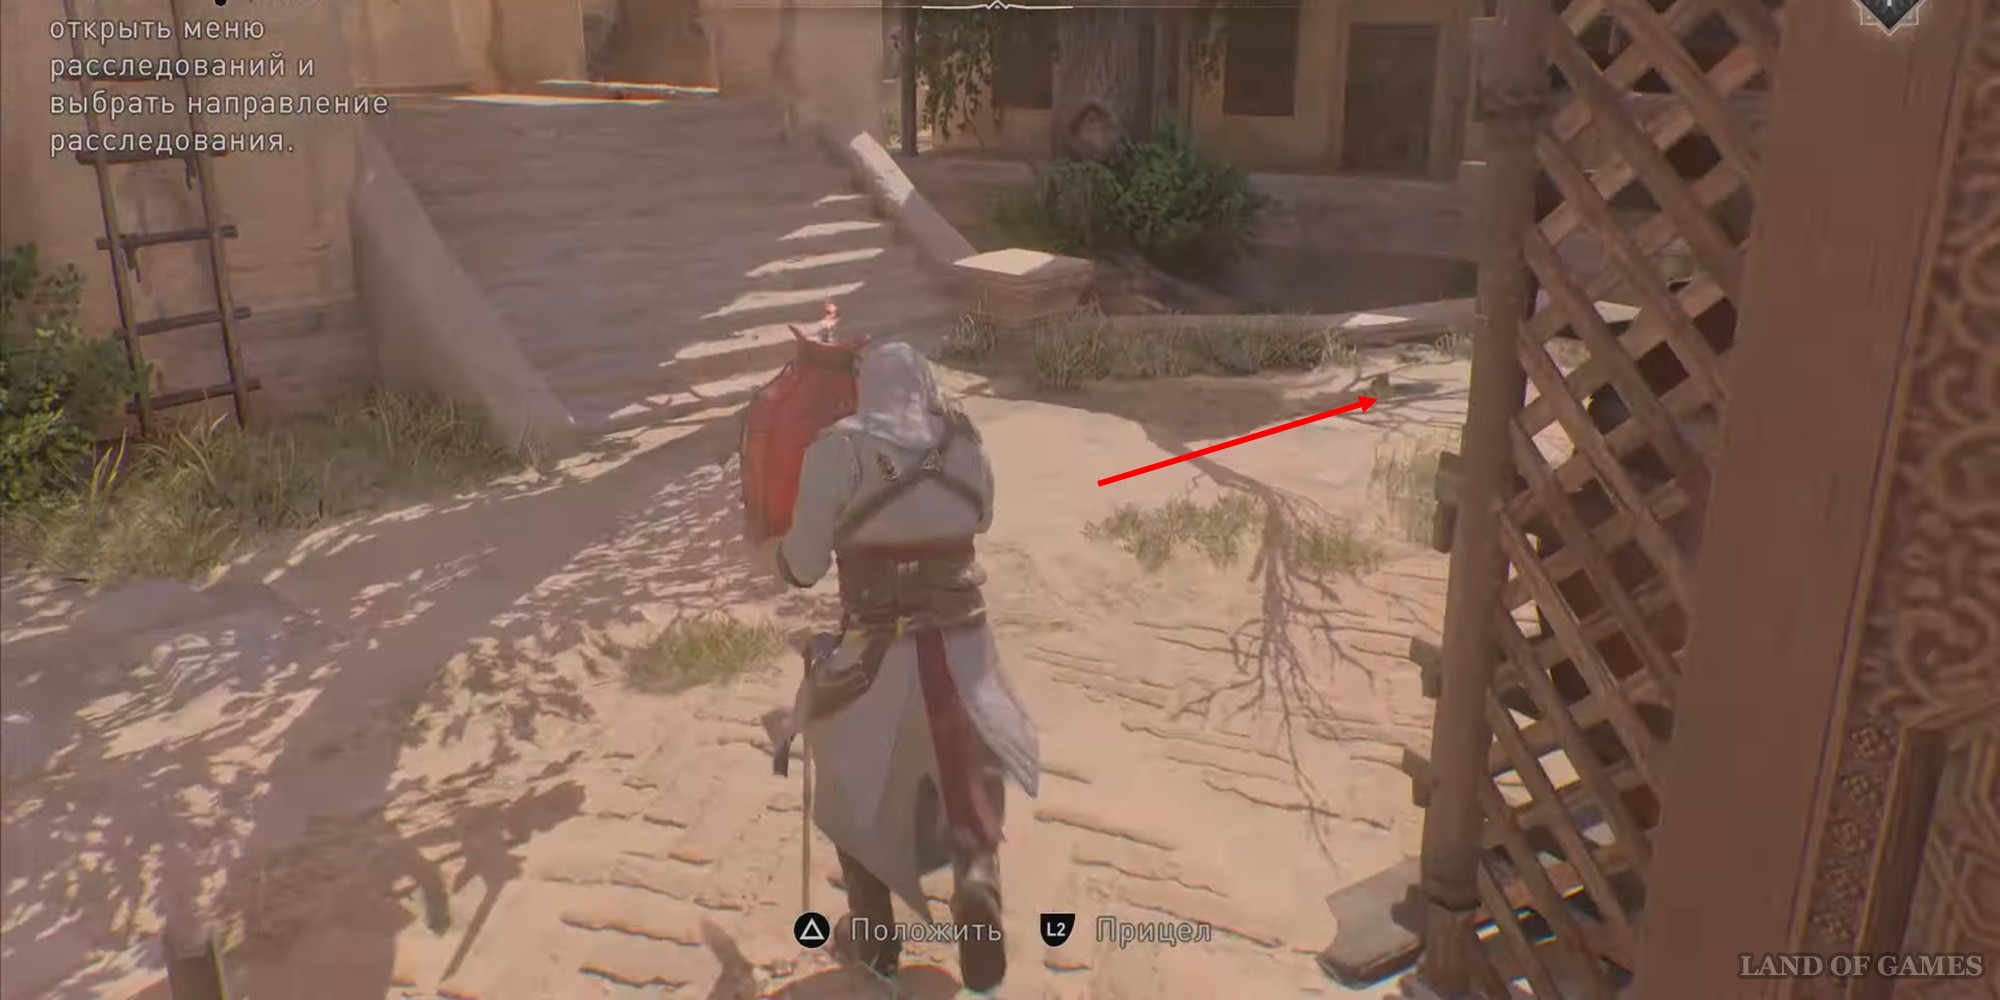
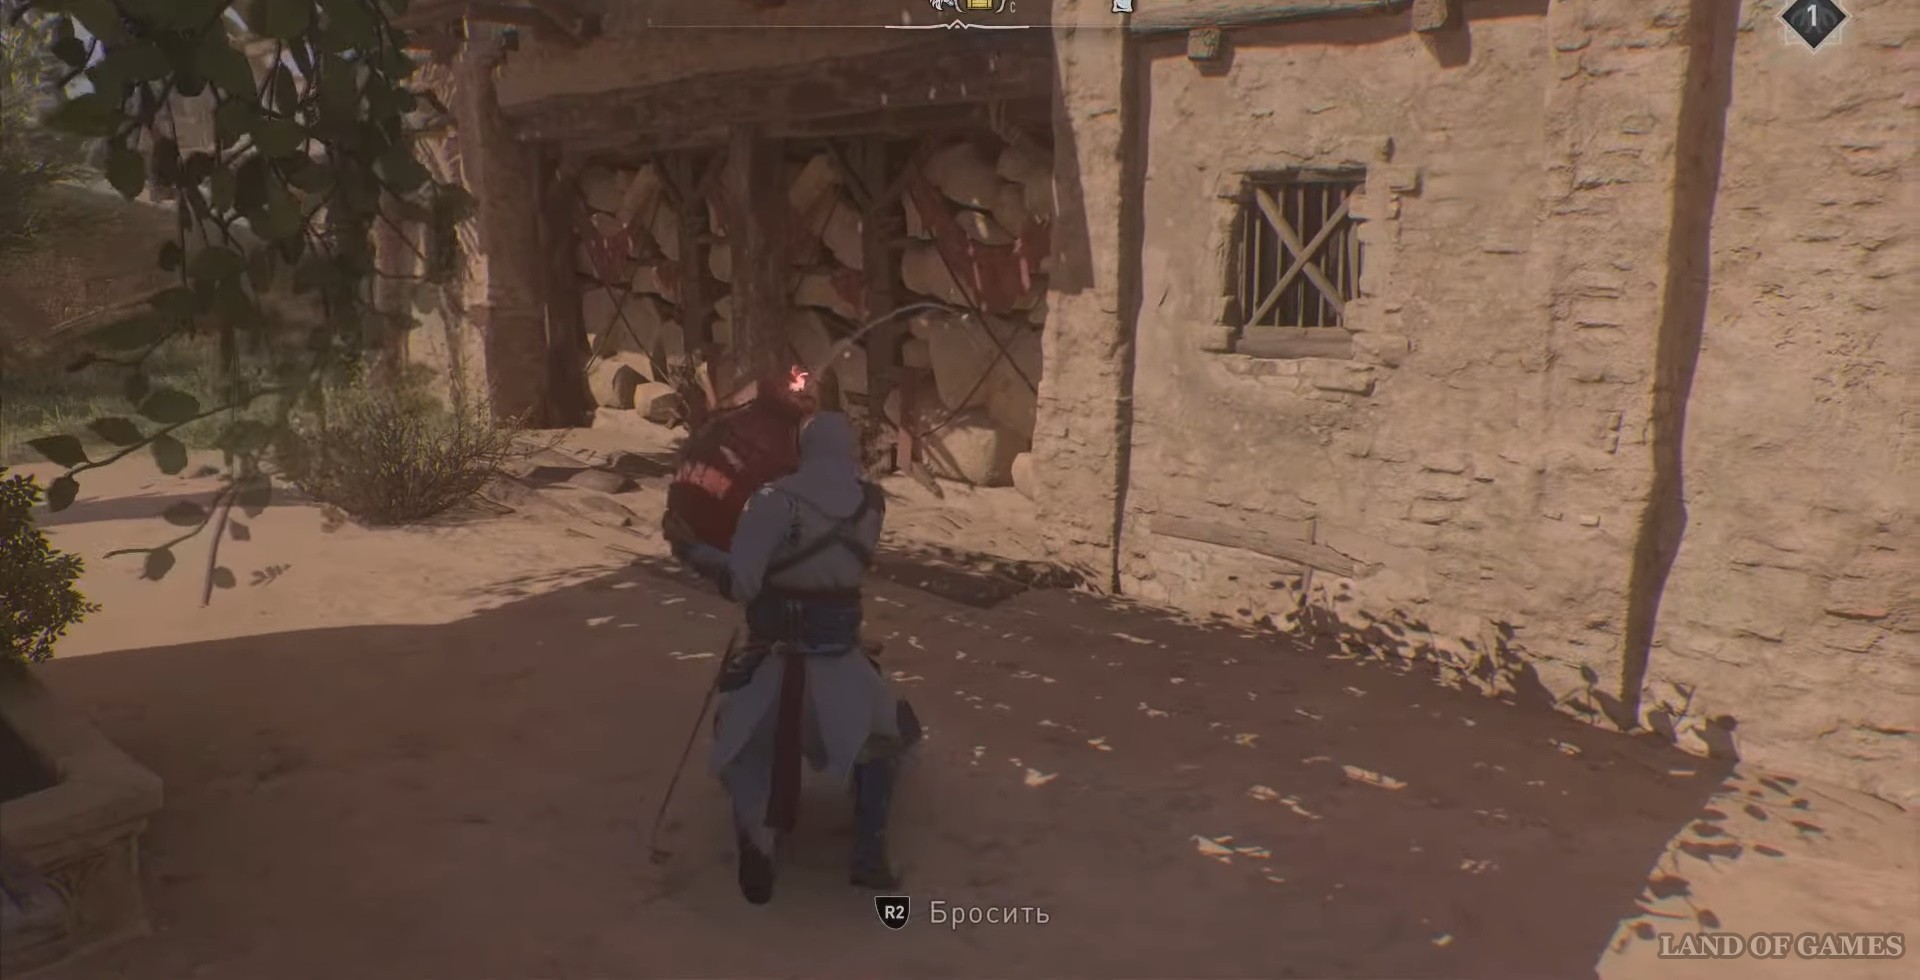
Return to the pantry and grab the next jug. Run again to where you blew up the wall - now you need to blow up the ceiling.
Look to the right, you will see a shelf, move it under the hole formed by your efforts, and jump to the second floor. Discover what you came here for.

Chest #8 Hammam
For the next reward, go to Hammam, this location is shown below on the map.
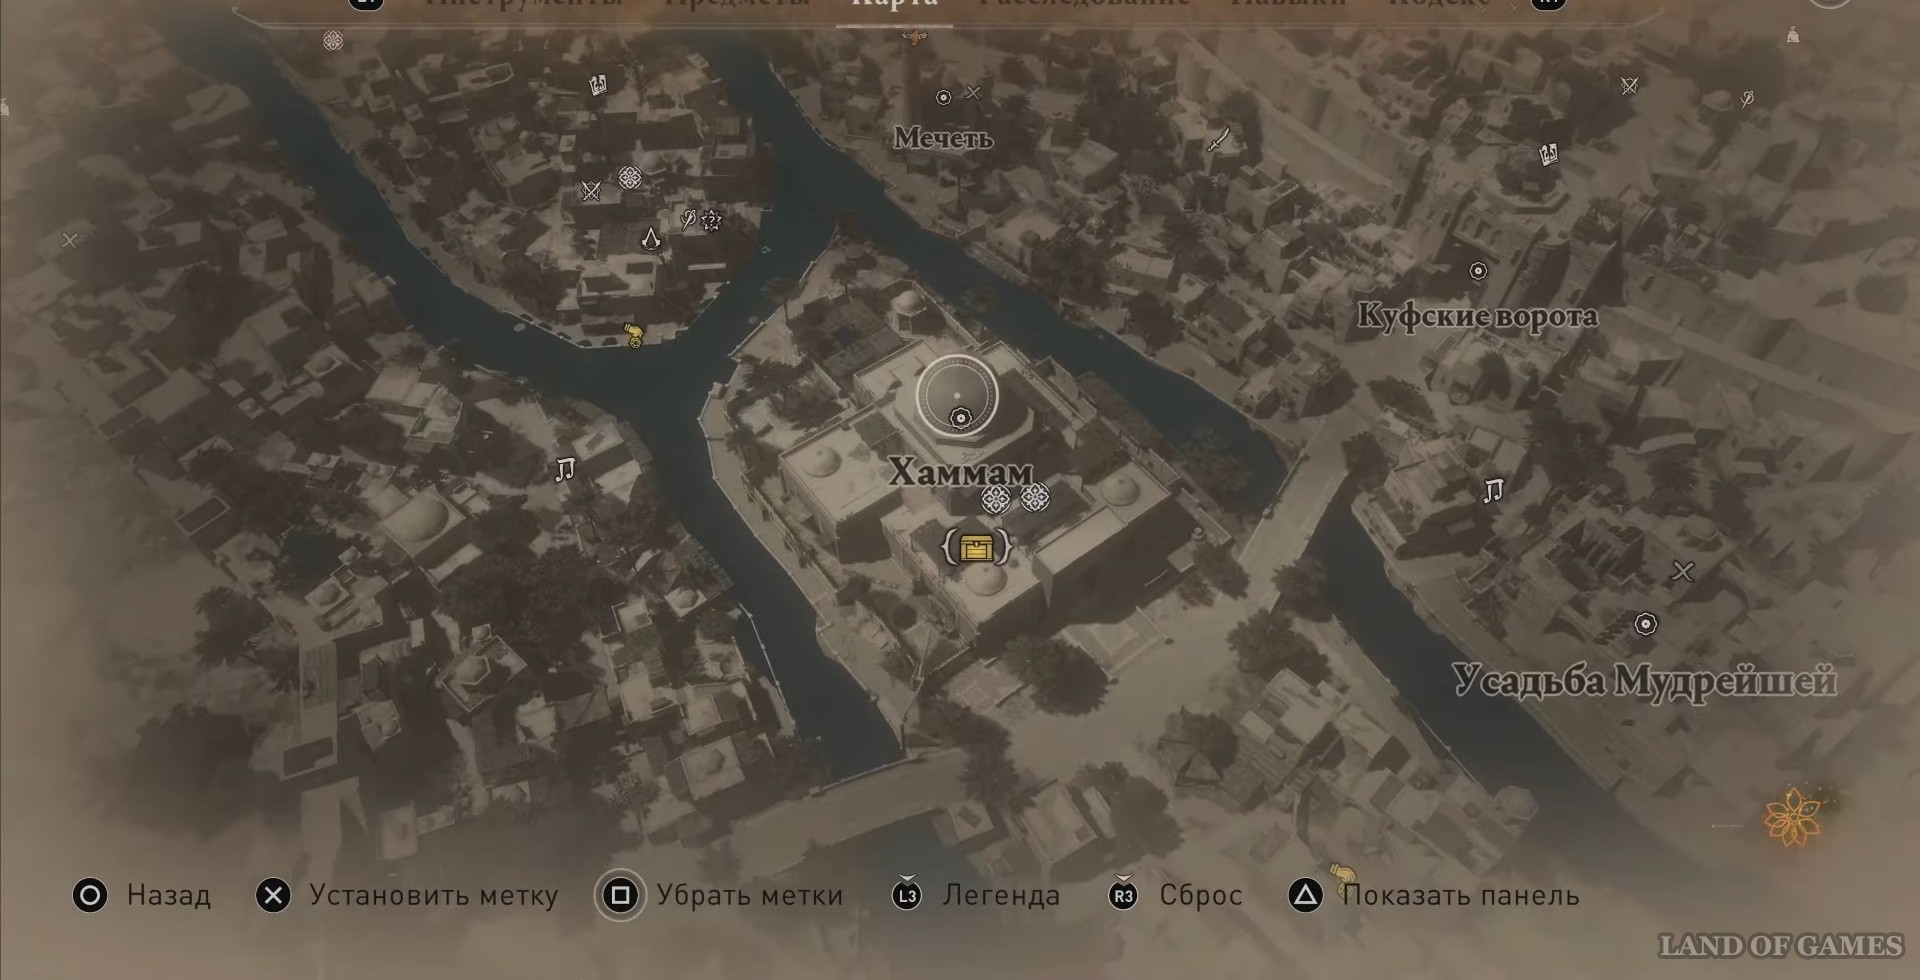
Once in place, the first thing you need to do is get a jug of burning oil. Approach the building from the east and you will see a window with bars, break it, go inside and take the jug.
Now run south, you will see a wall there - blow it up and take the reward.

Chest #9 Great Bimaristan
Go to the location shown in the screenshot below.
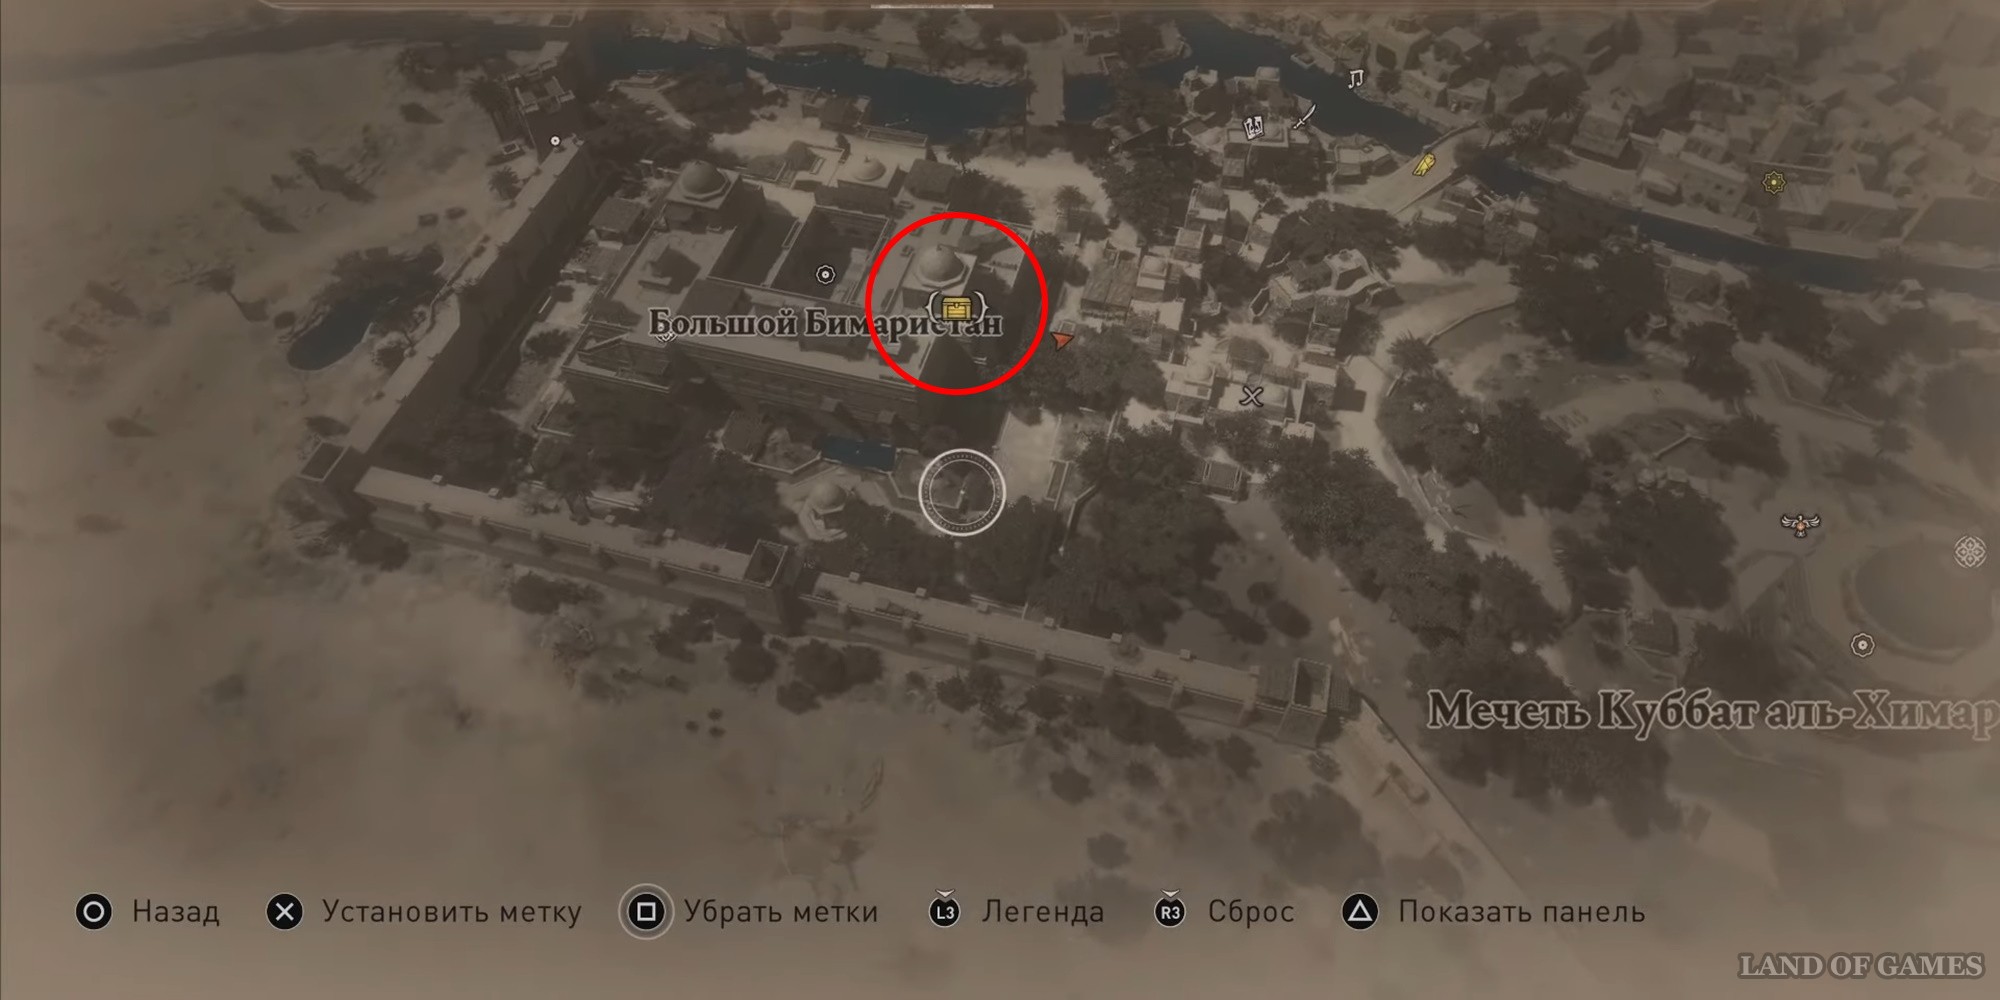
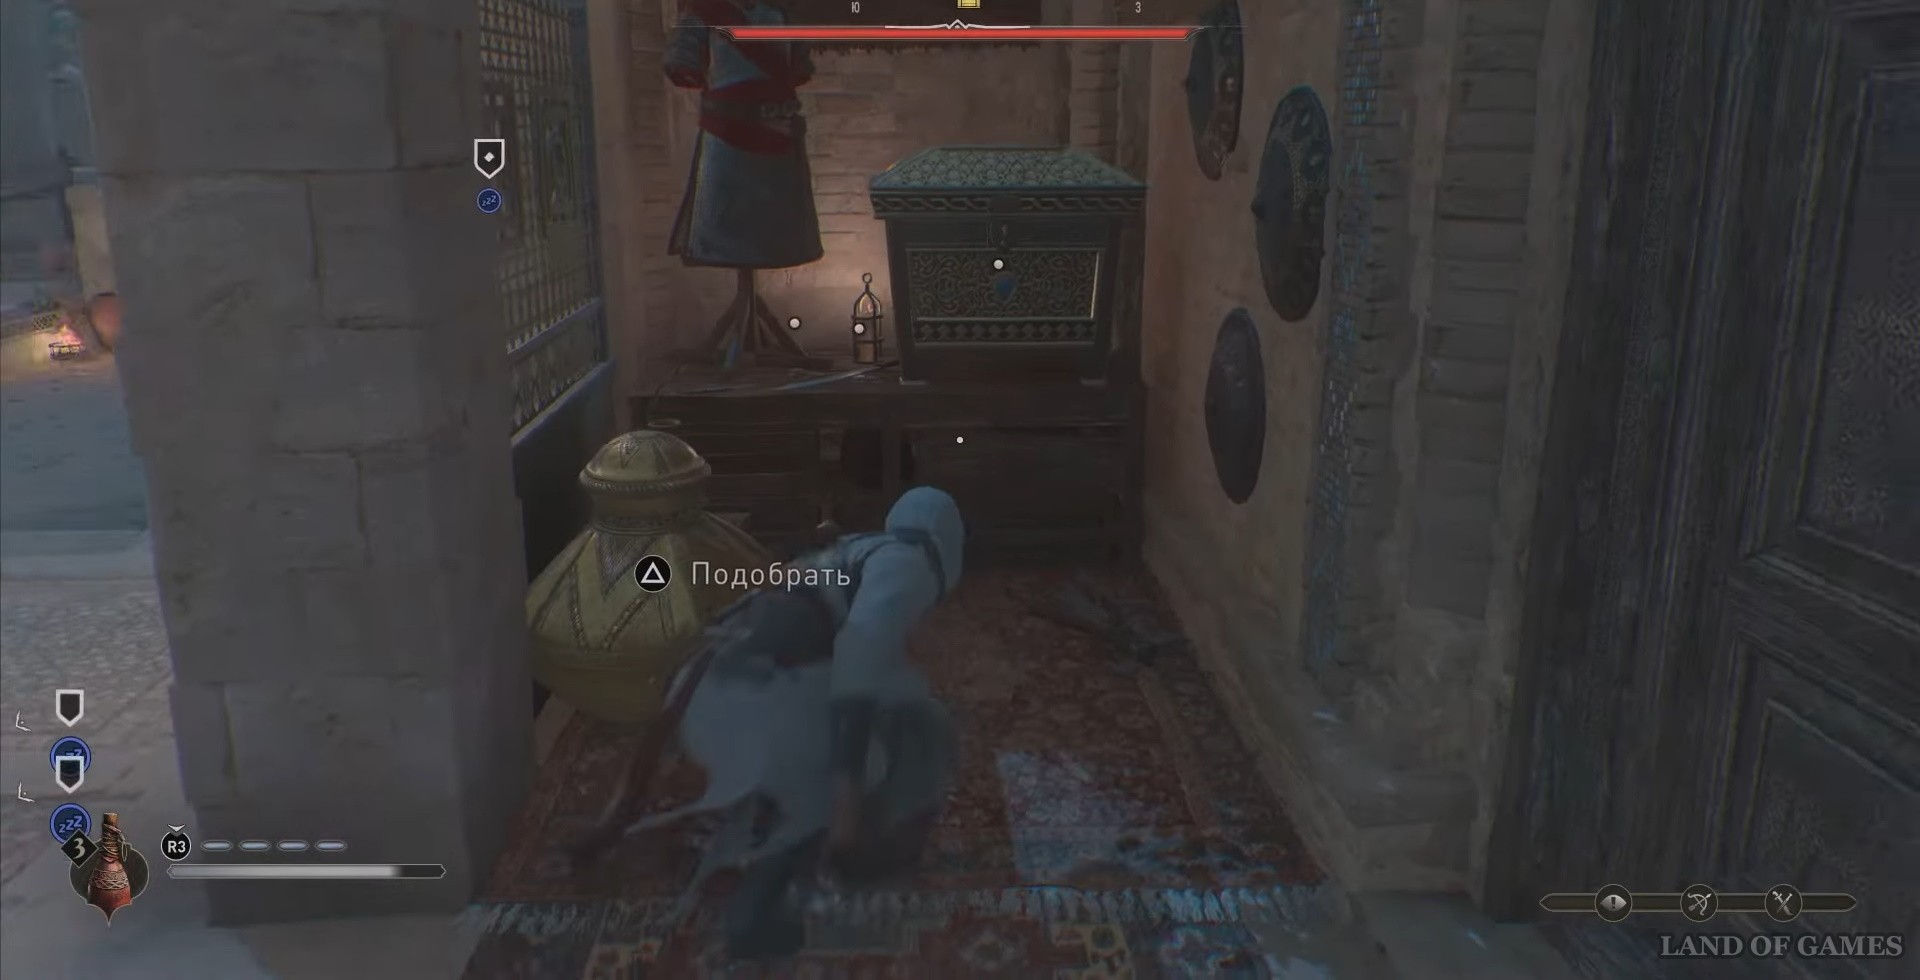
You will find the loot on the roof of the building. The room door will be locked. Go around the building on the other side and use the dagger to open the lock. Go in, you will see a shelf on the right, move it and you will find a reward behind it.
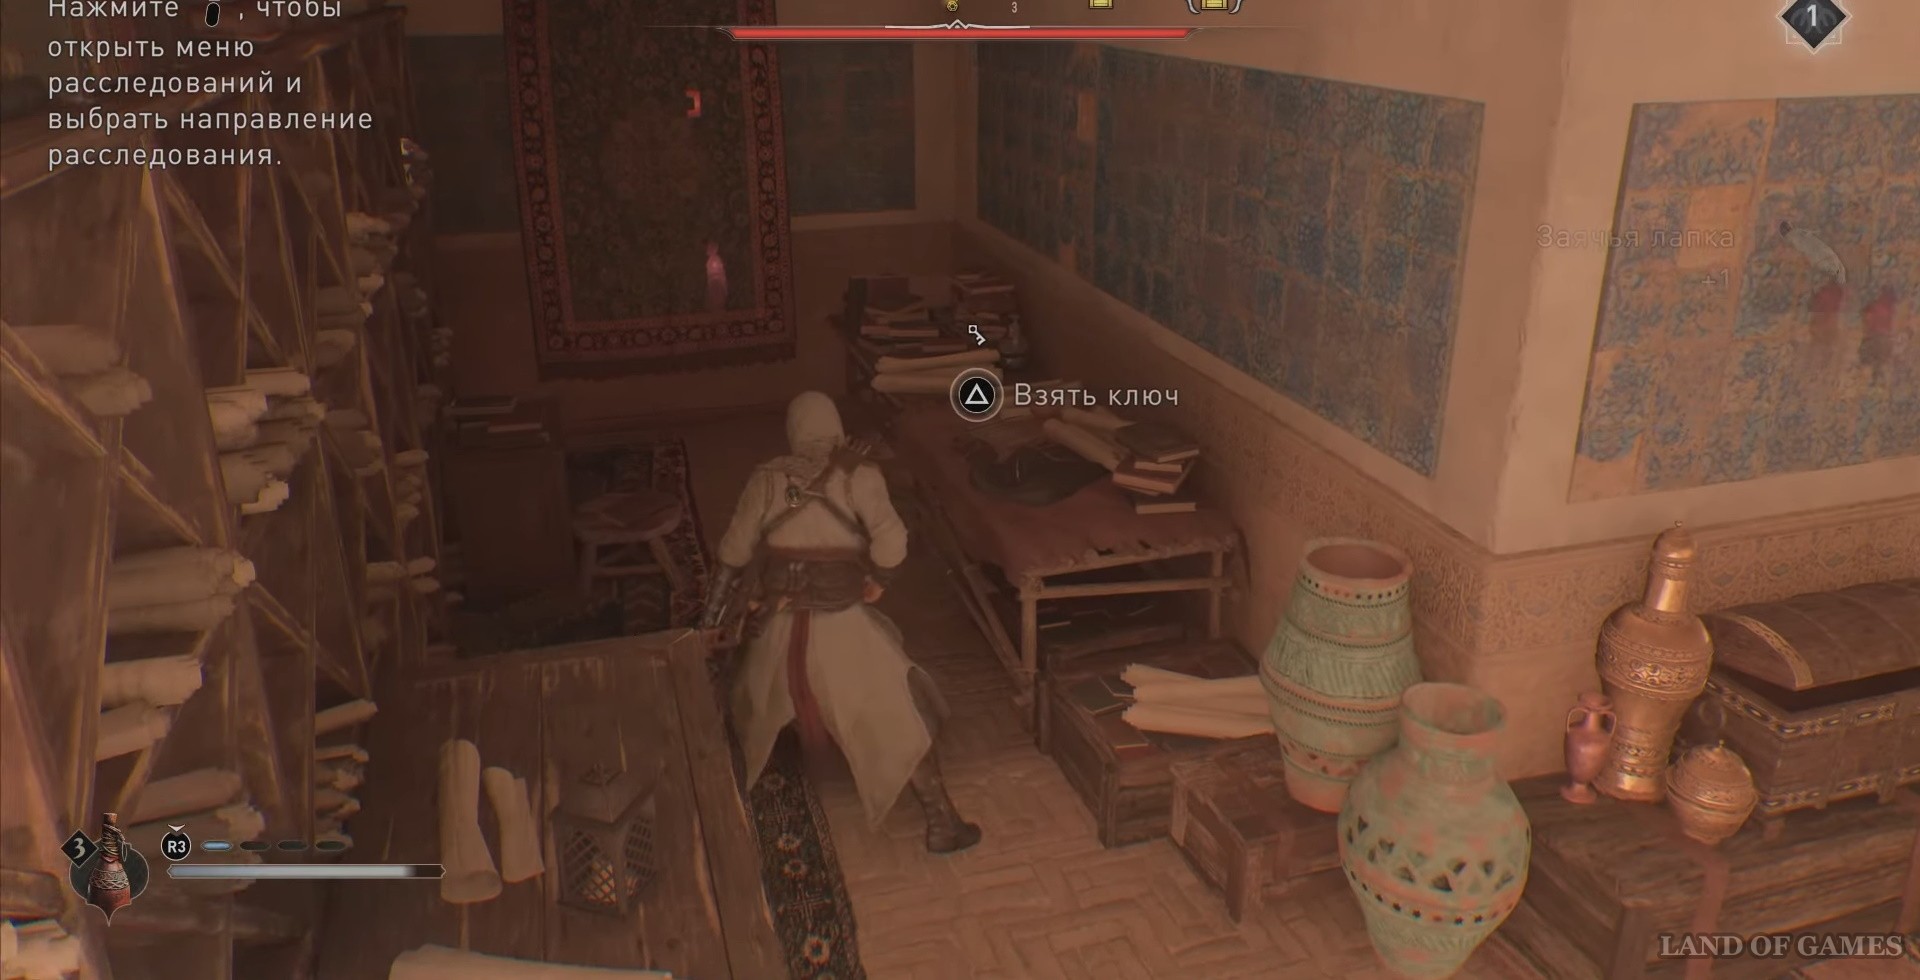
Chest No. 10 The wisest manor
It is located in the storage room, but first you need to get the key. To do this, go to the location indicated in the screenshot. The door will not be locked; take the key on the left side of the table.
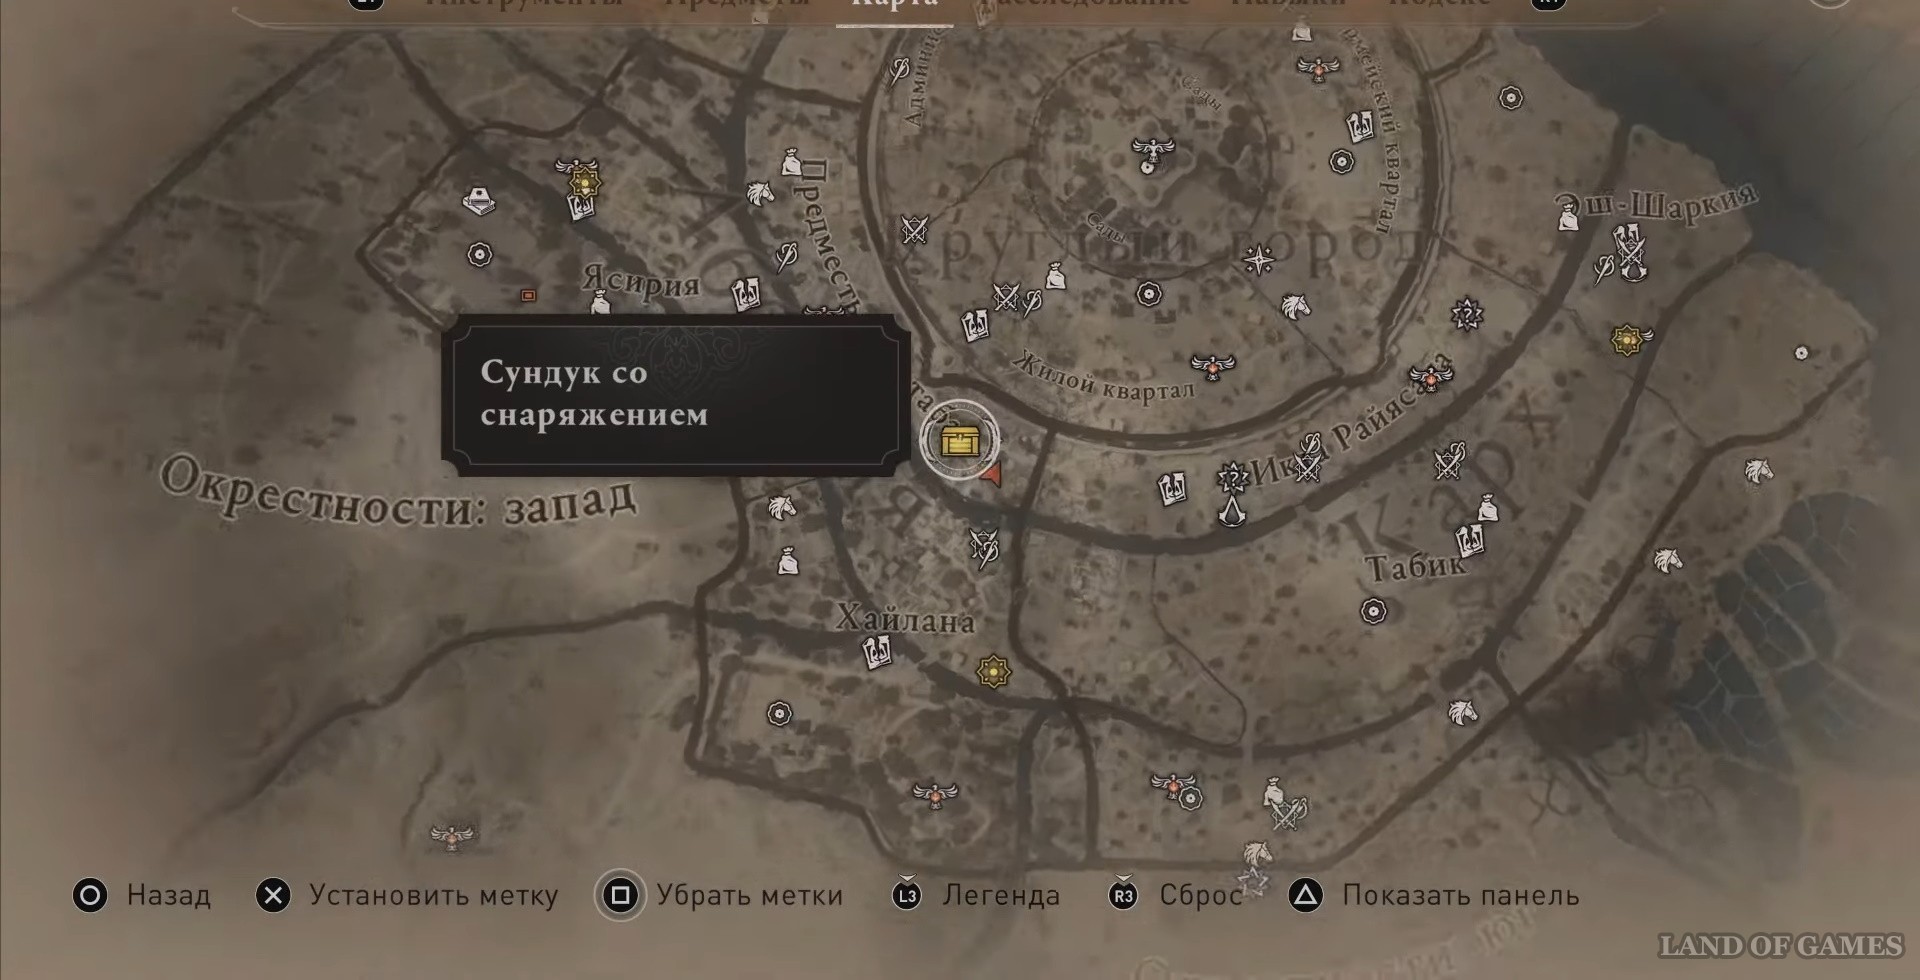
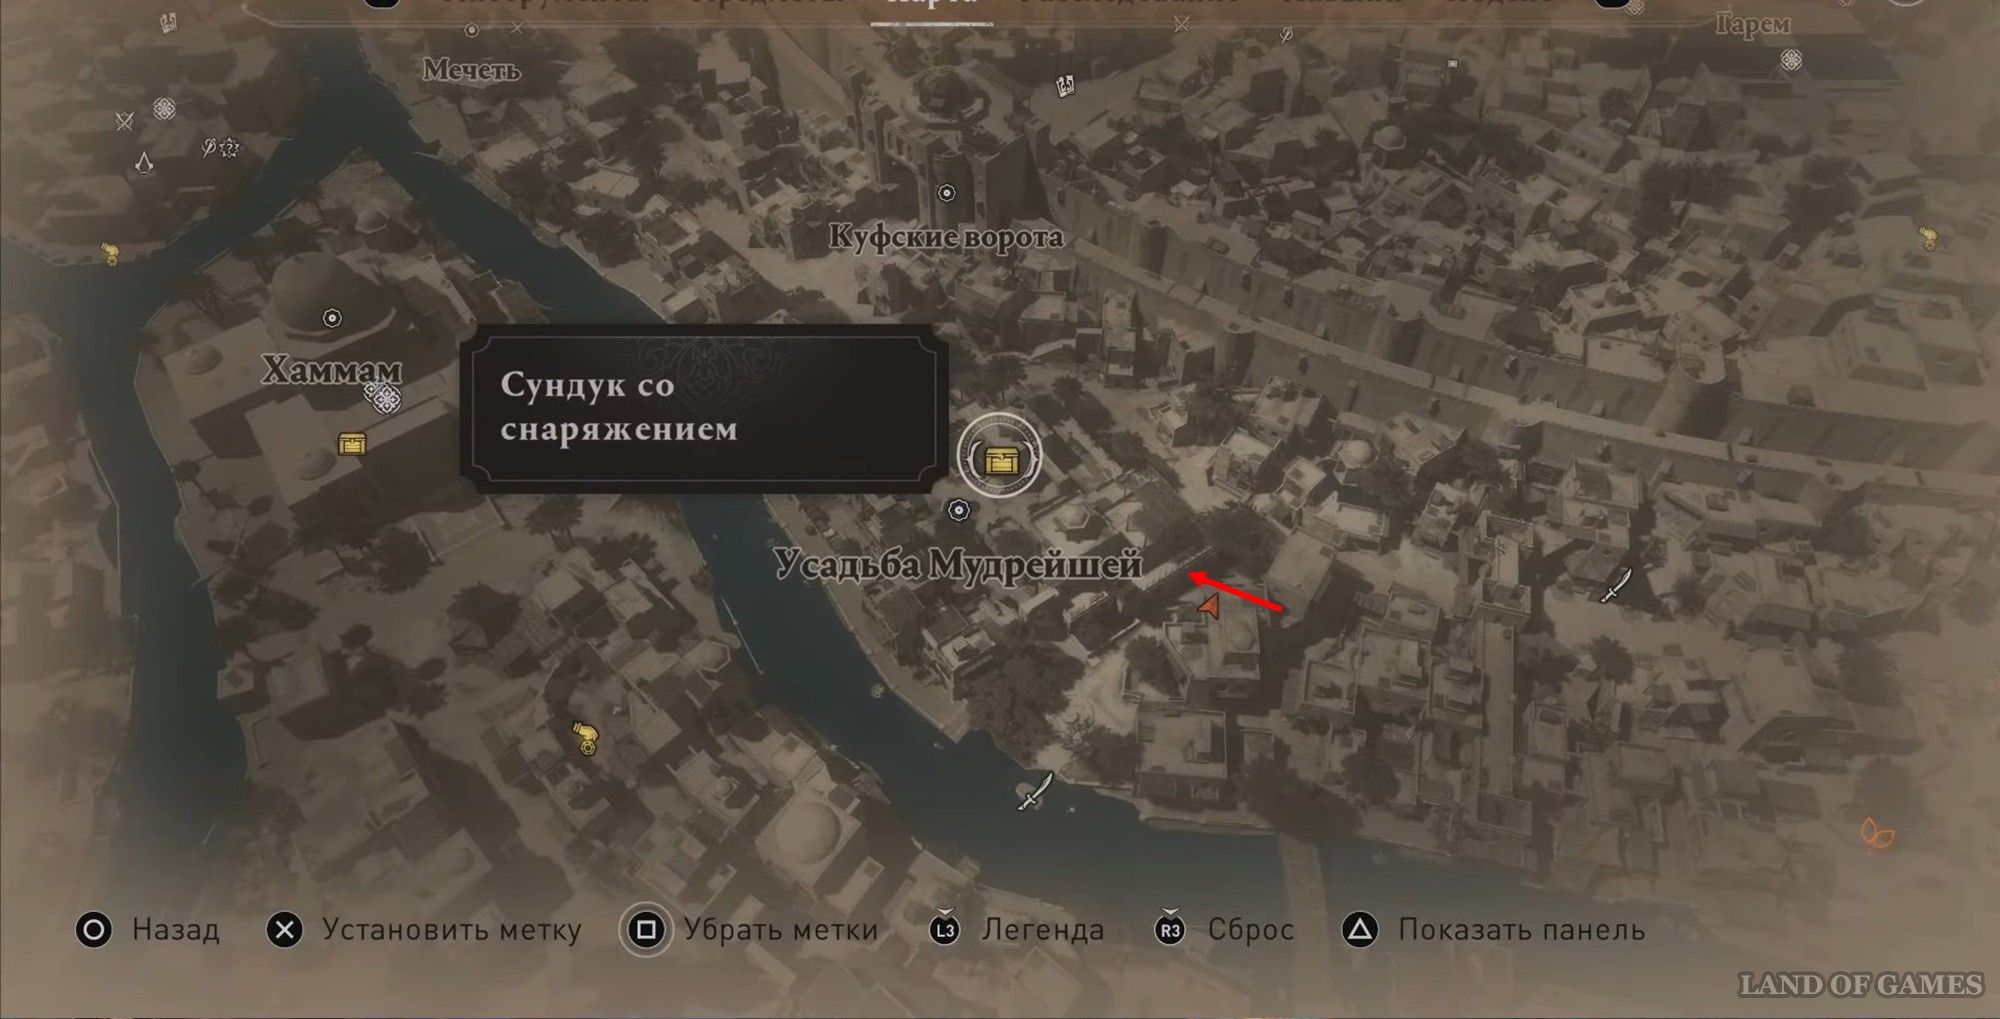
Go outside and head north. If you see a window with a wooden grill, break it.
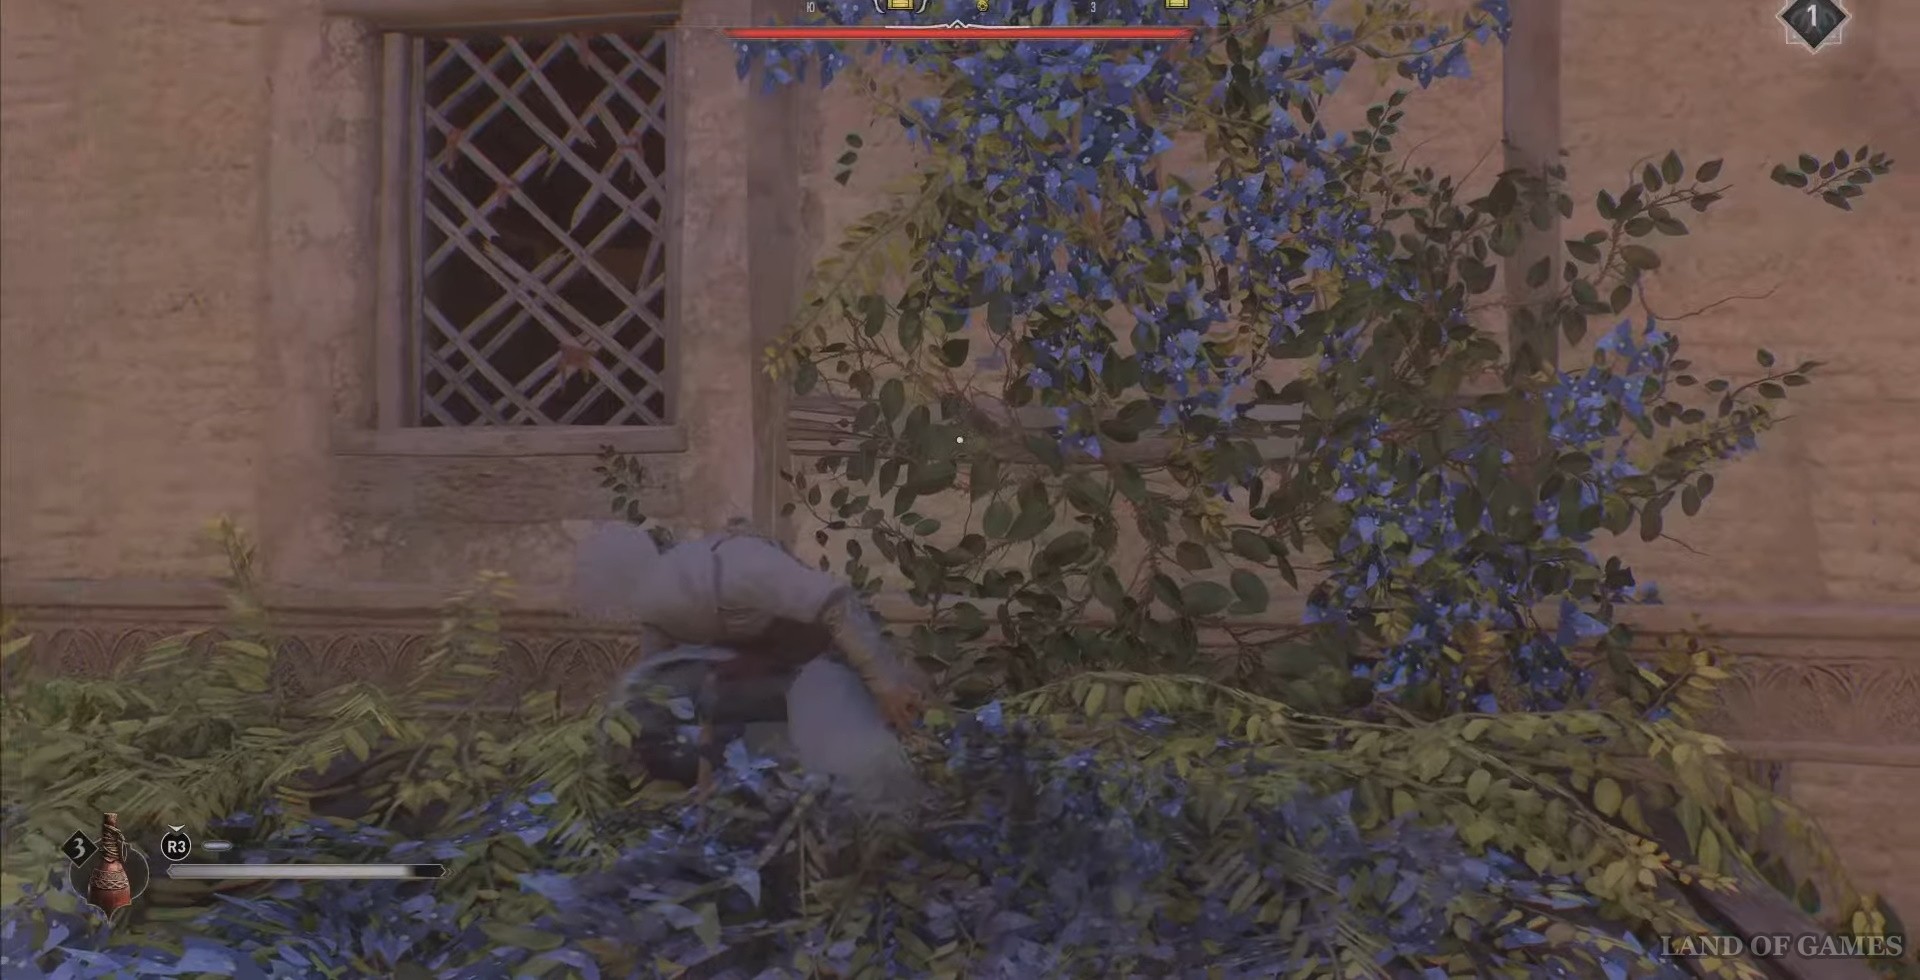
Once inside, turn left, there are two tall shelves. Move them and collect your reward.
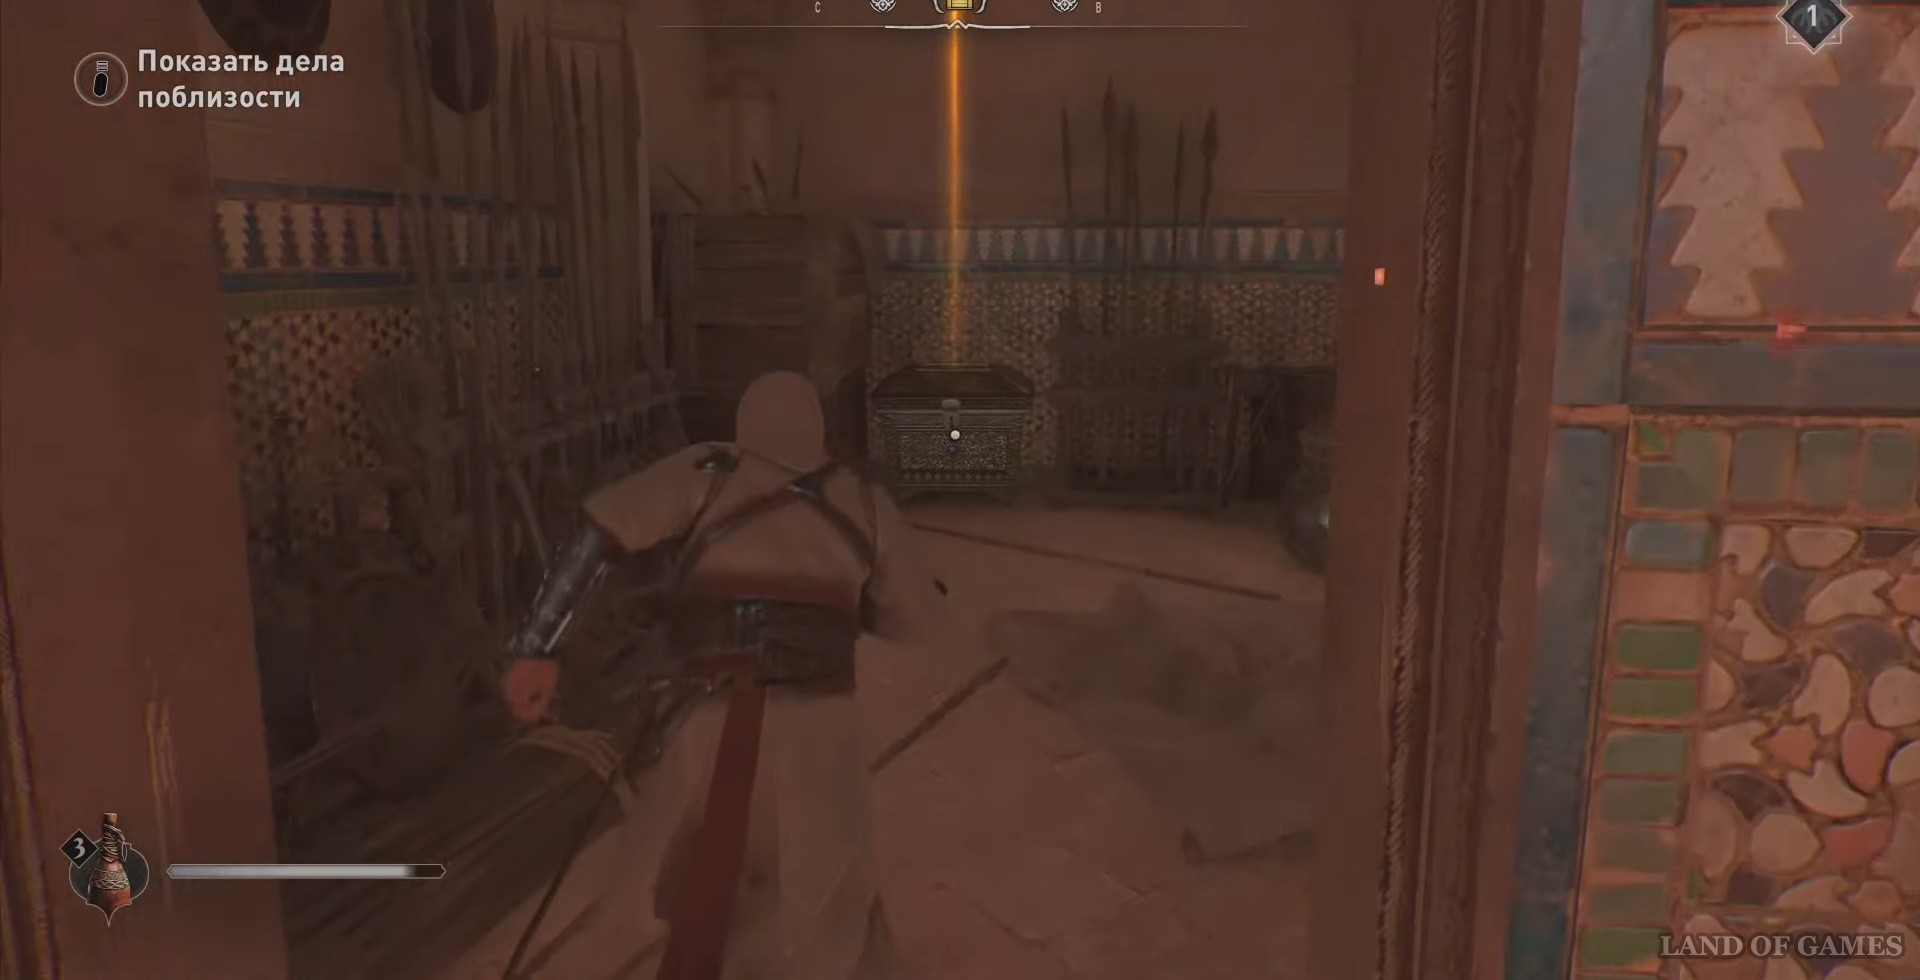
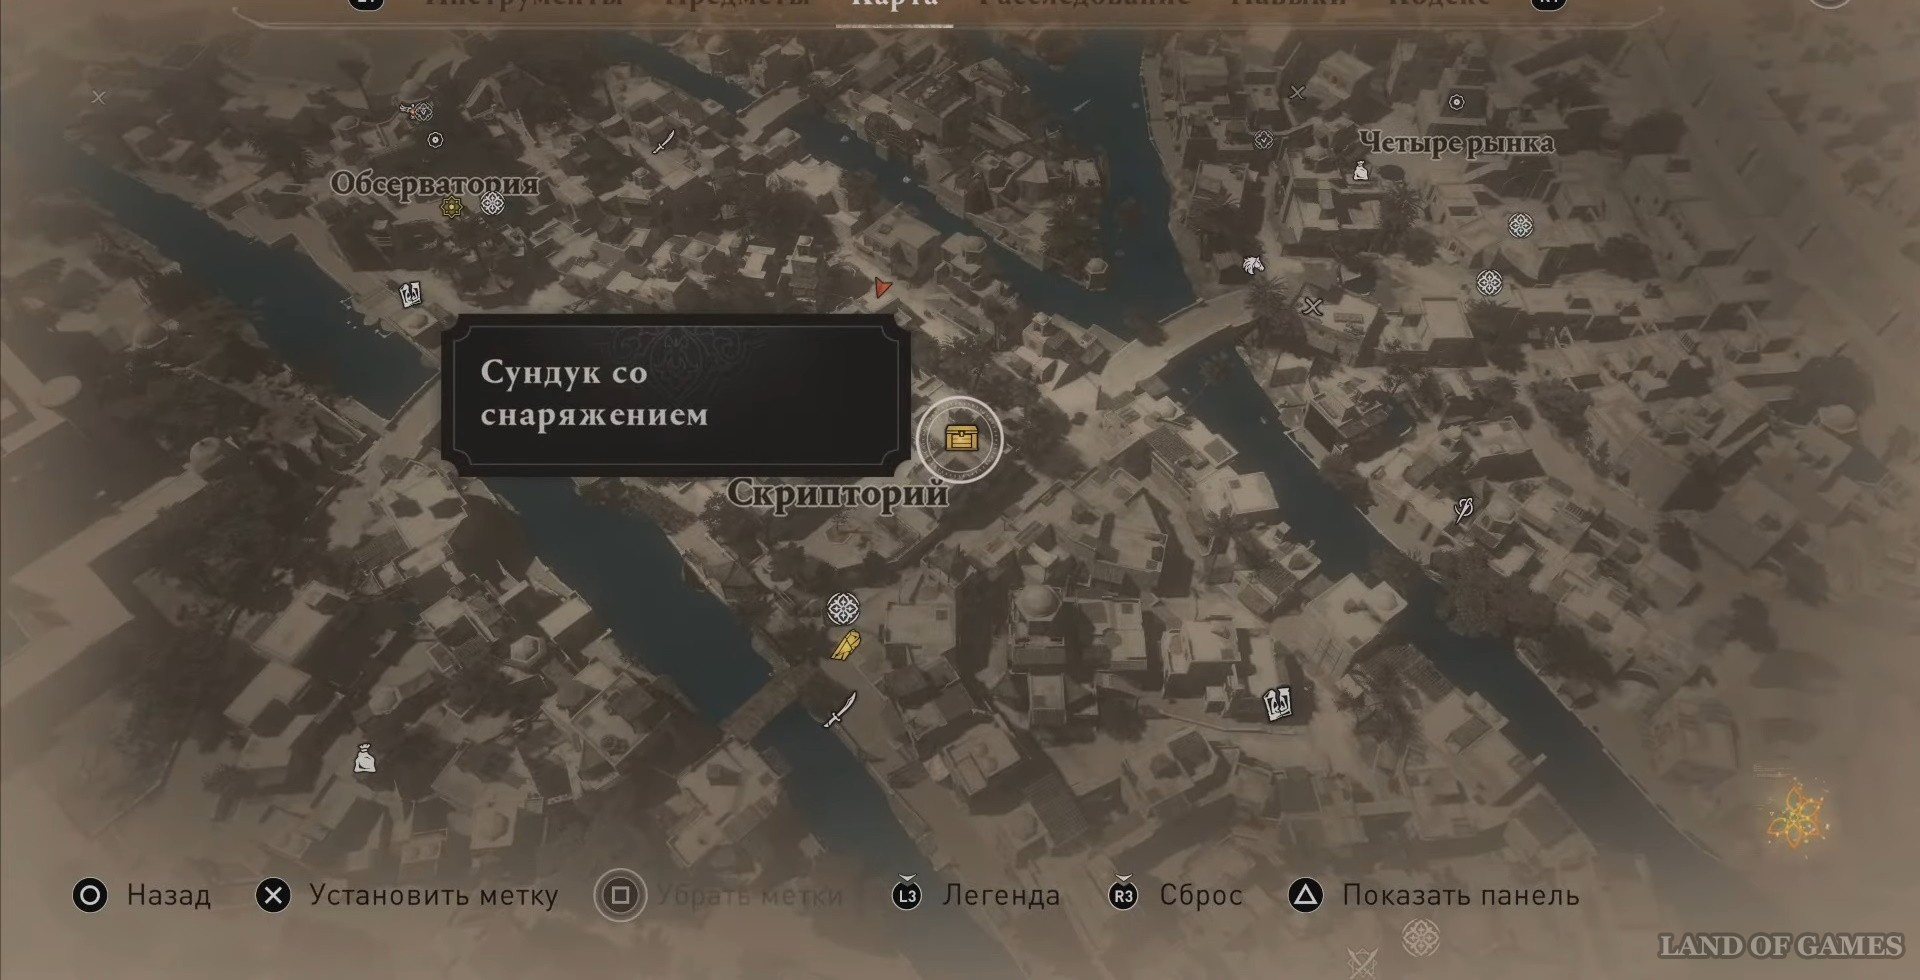
Chest #11 Scriptorium
The exact location can be seen on the map below. On the way to the loot you will meet only a couple of guards.
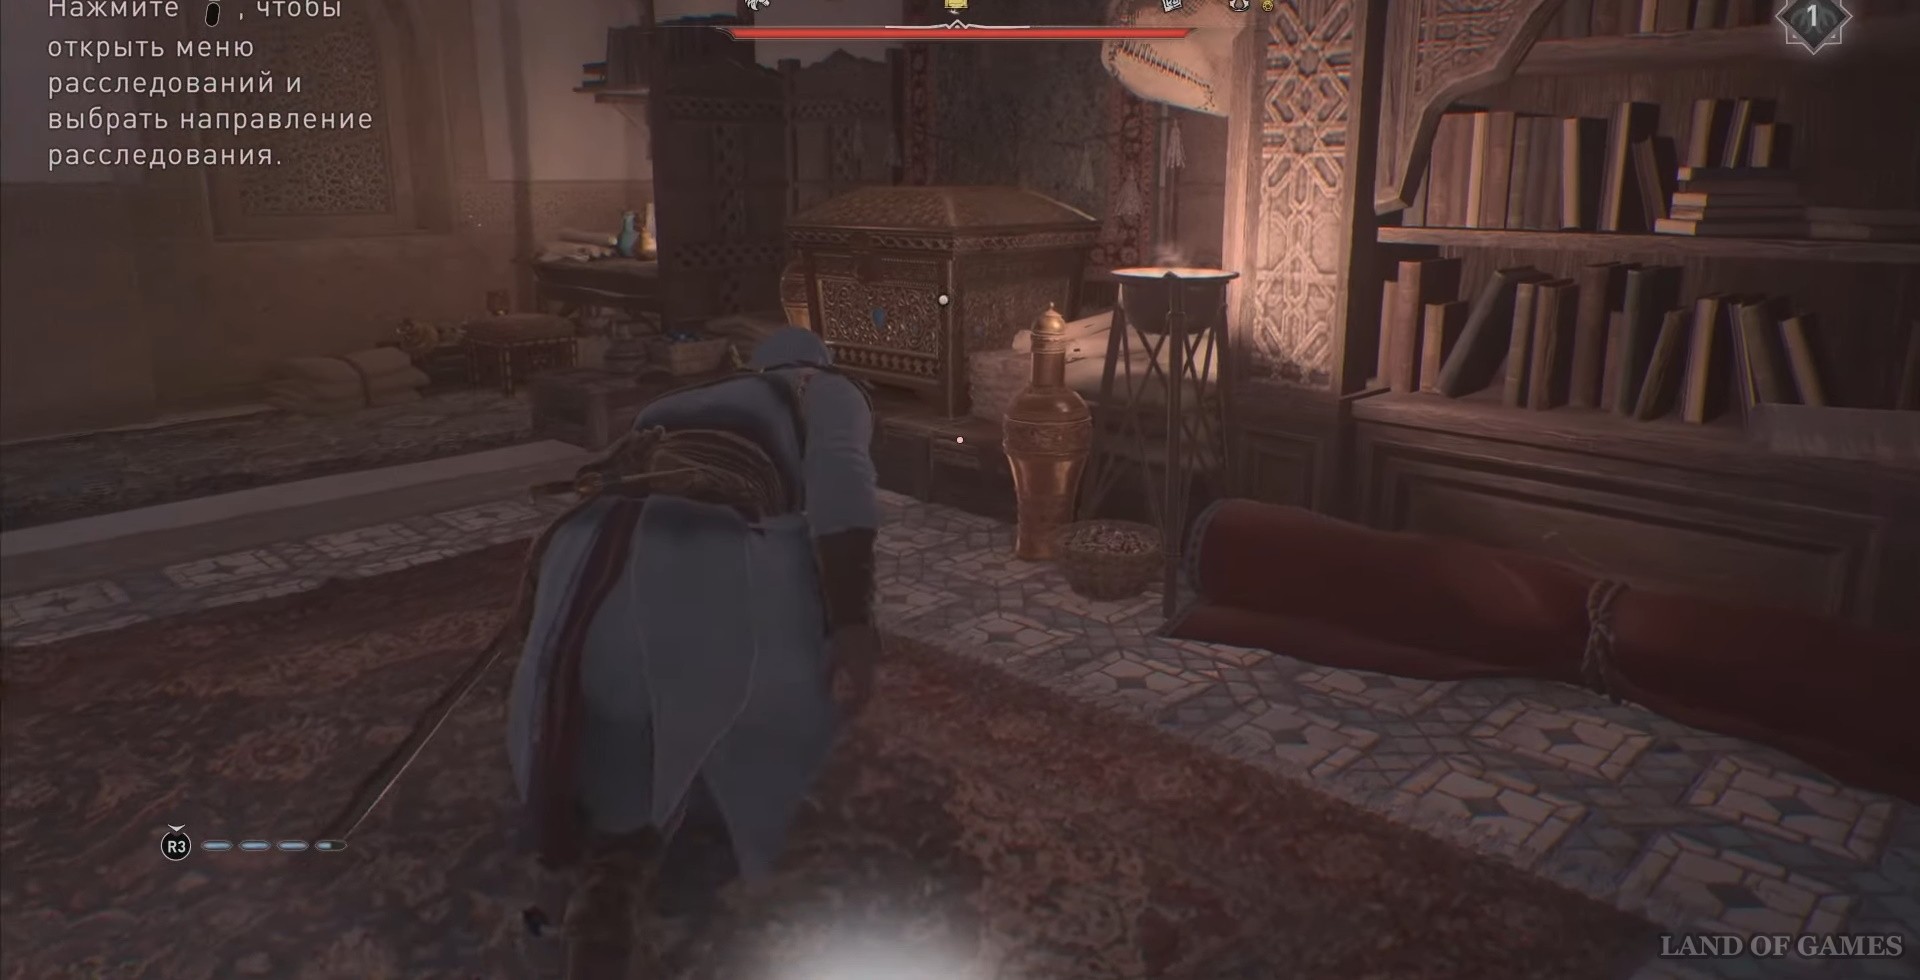
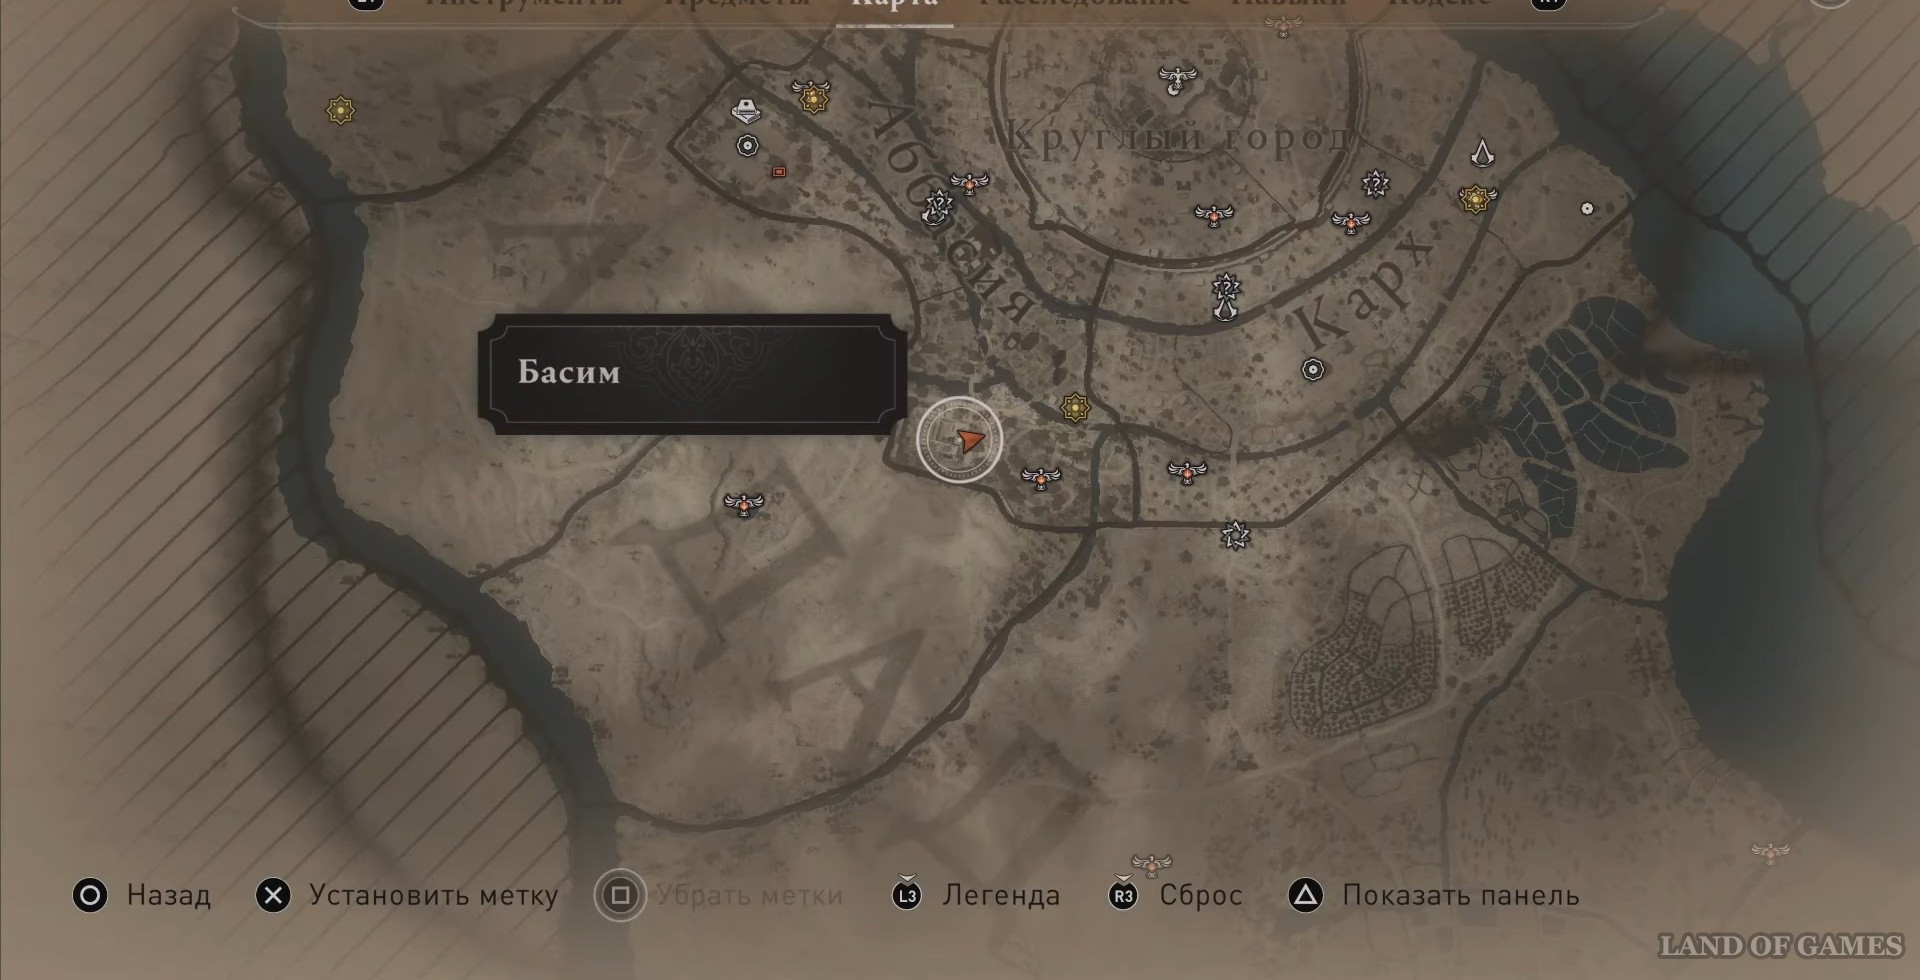
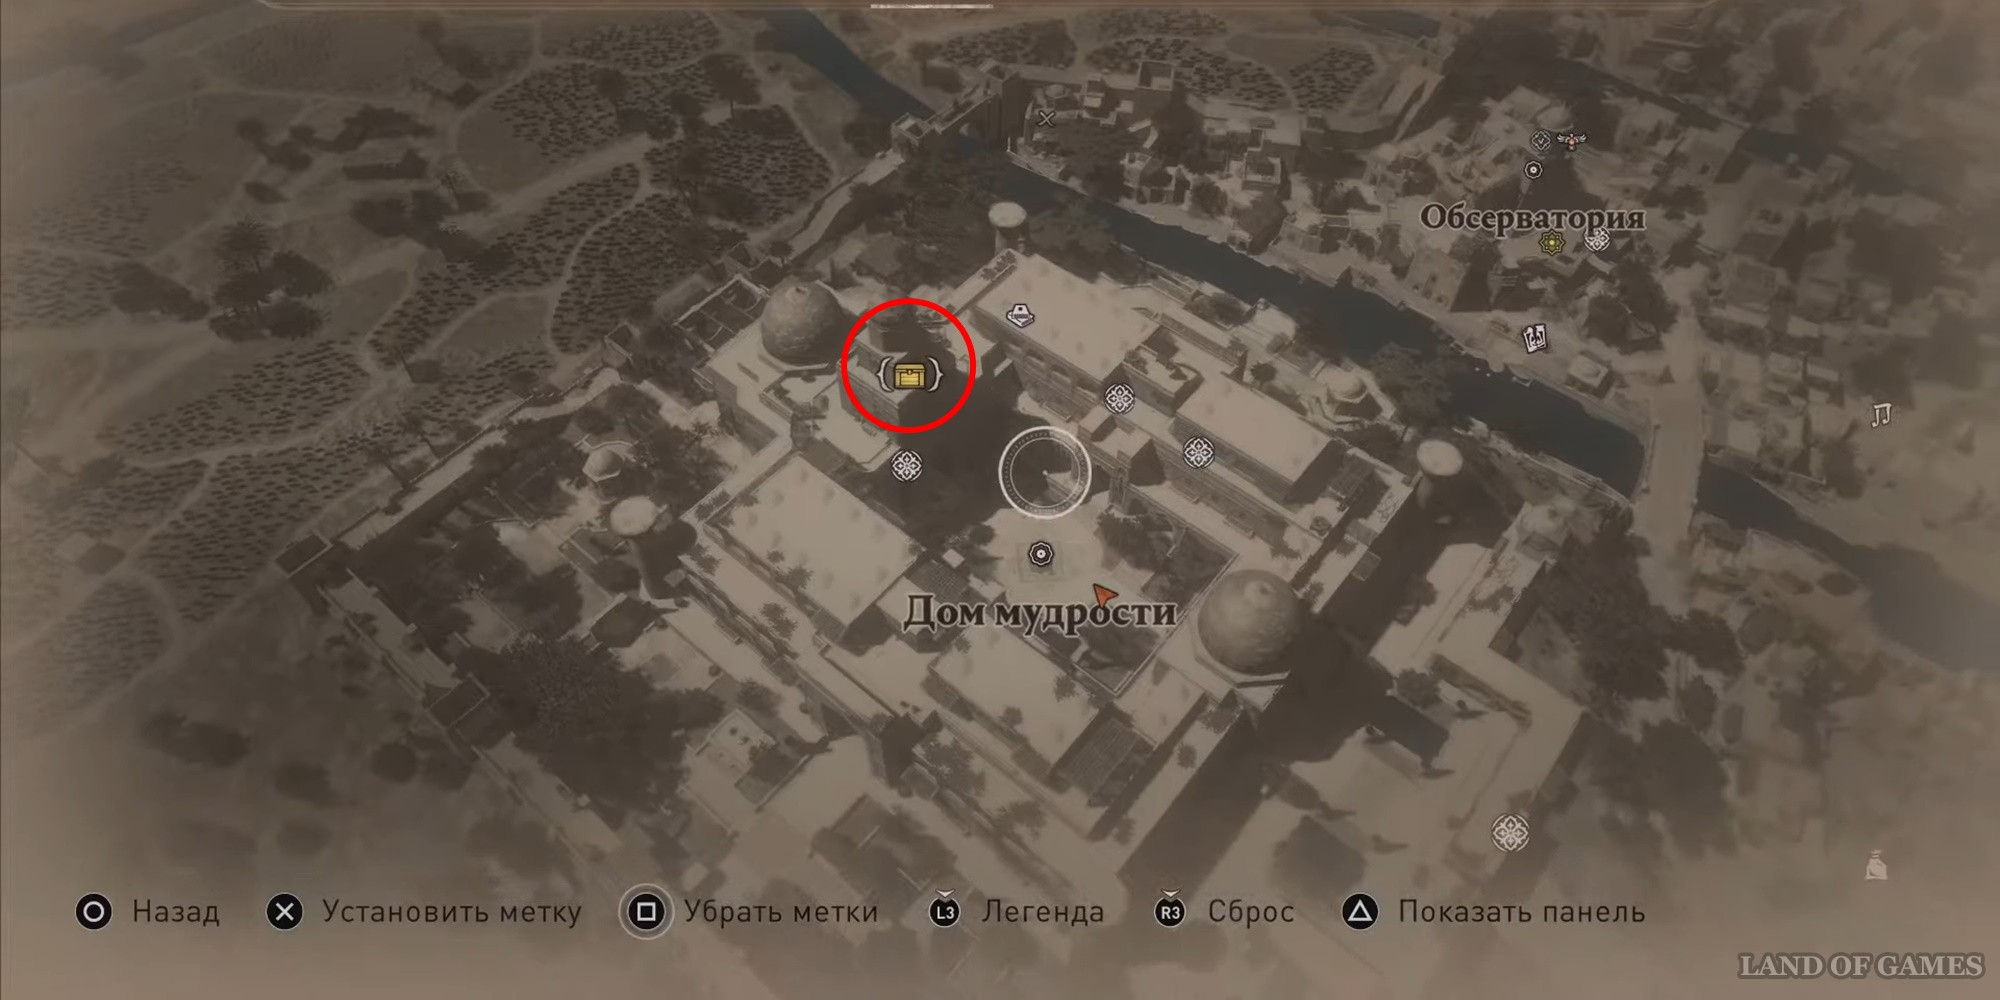
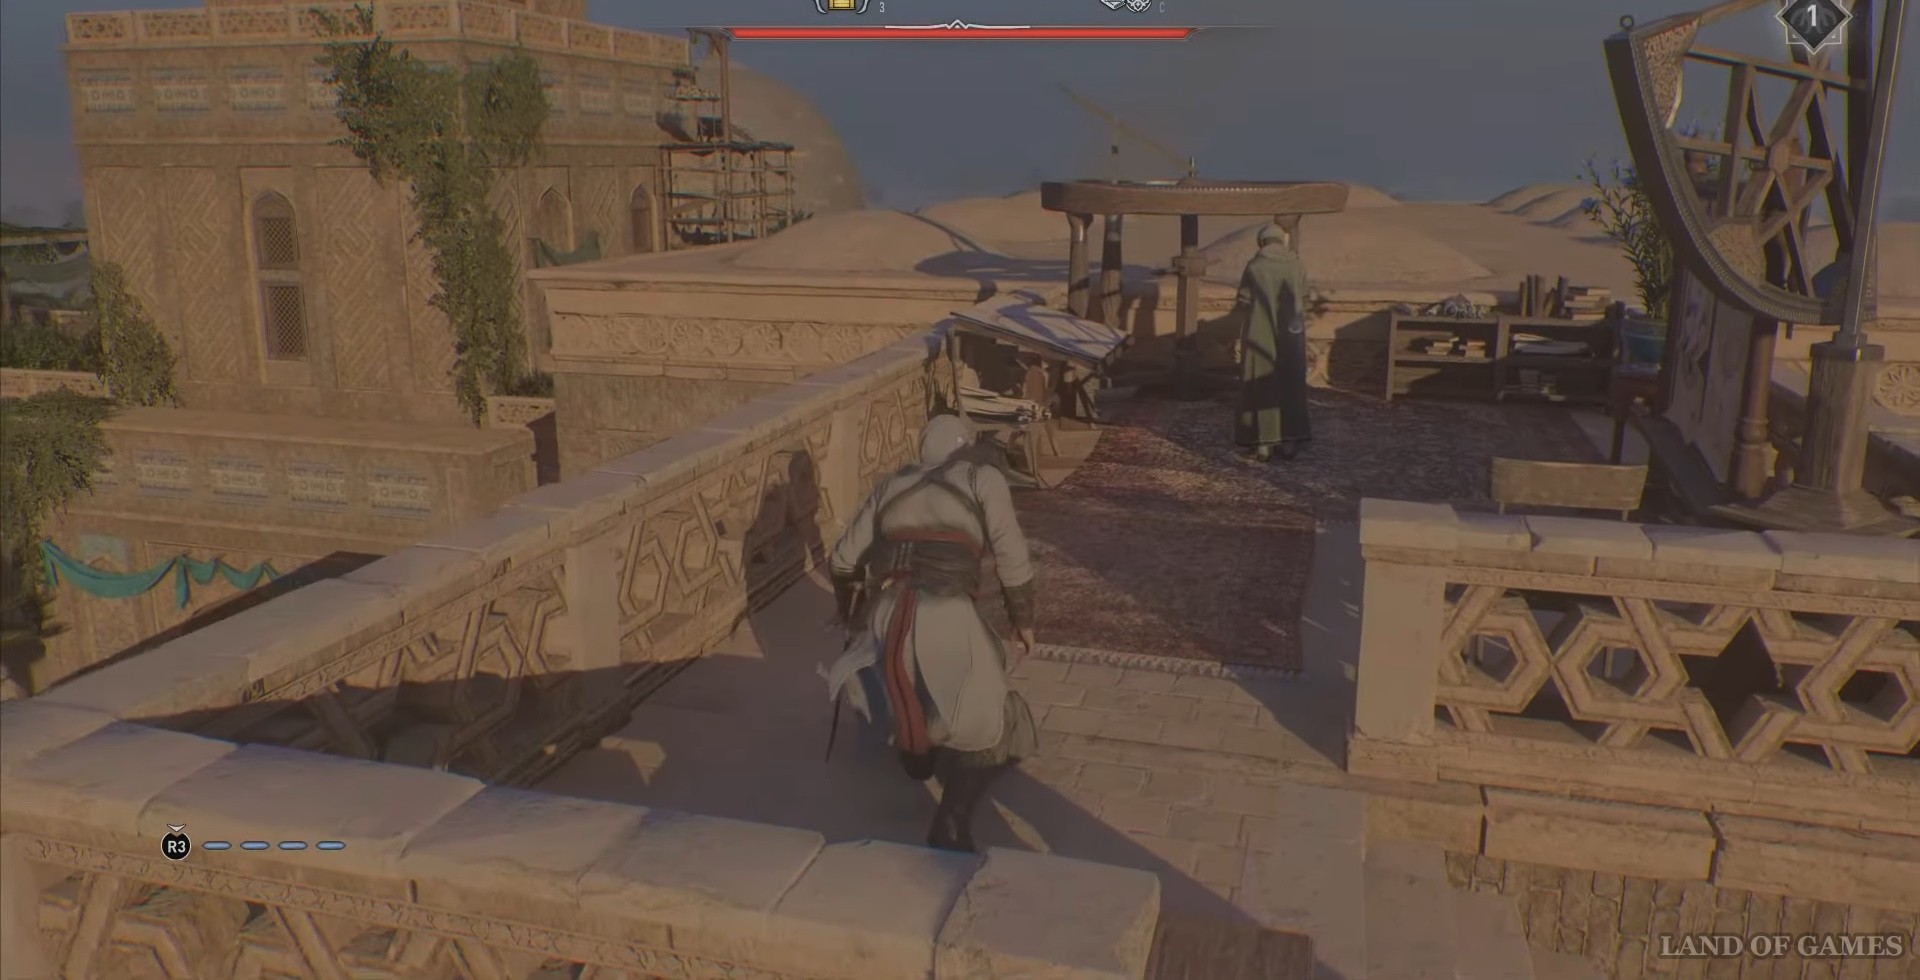
Chest #12 House of Wisdom
Go to the location marked below on the map.
Once in place, the first thing you need to do is get the key to the tower where the chest is located. To the northeast of its location there is a man from whom you need to steal the key.
To get to the chest, first climb a little higher, but not to the very top. Using a dagger, knock down the chandelier through the window - this will destroy the floor. Now you can return, go into the tower and collect your reward by climbing the stairs.
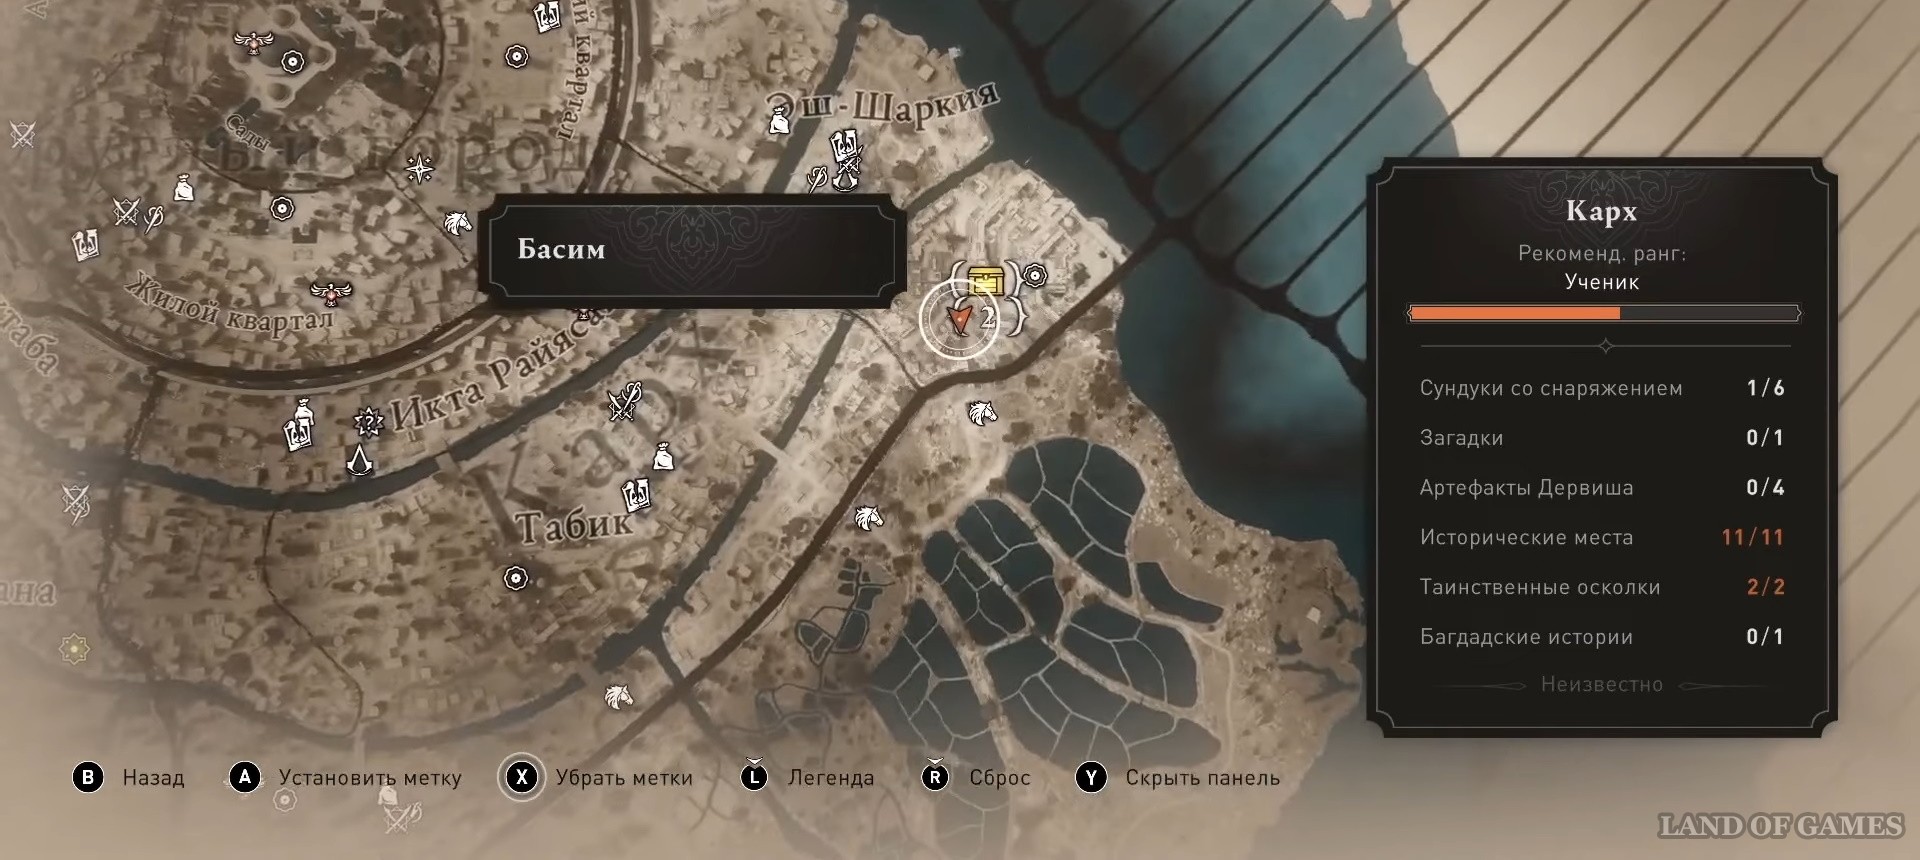
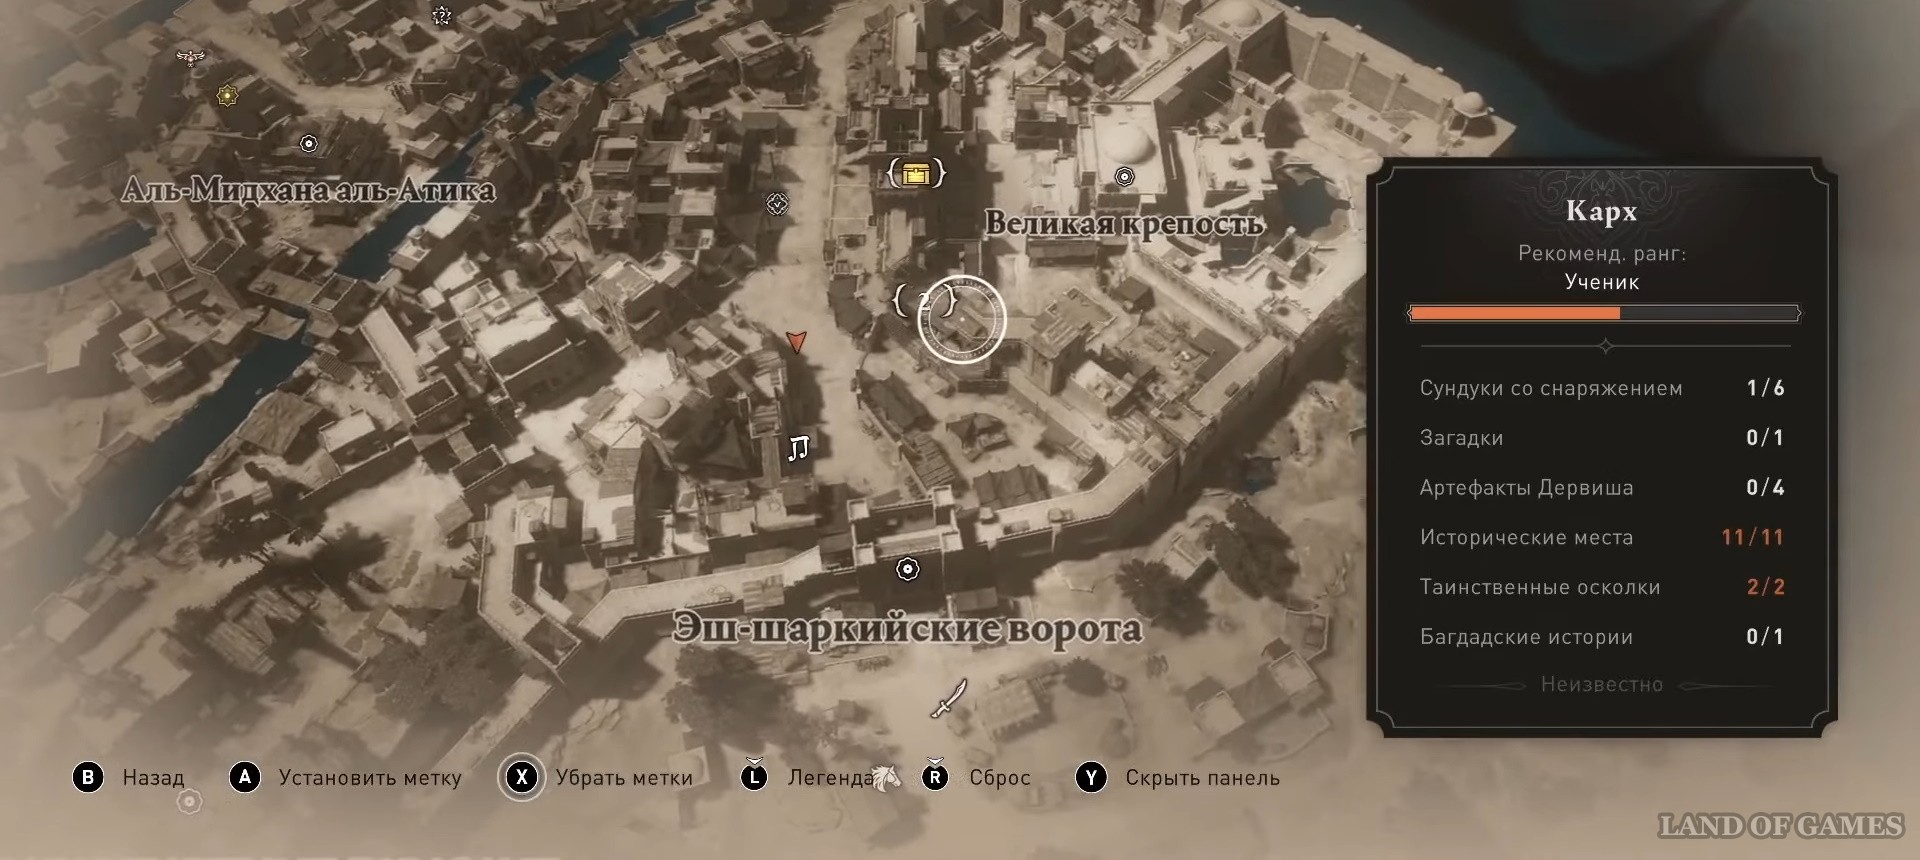
Region: Karkh
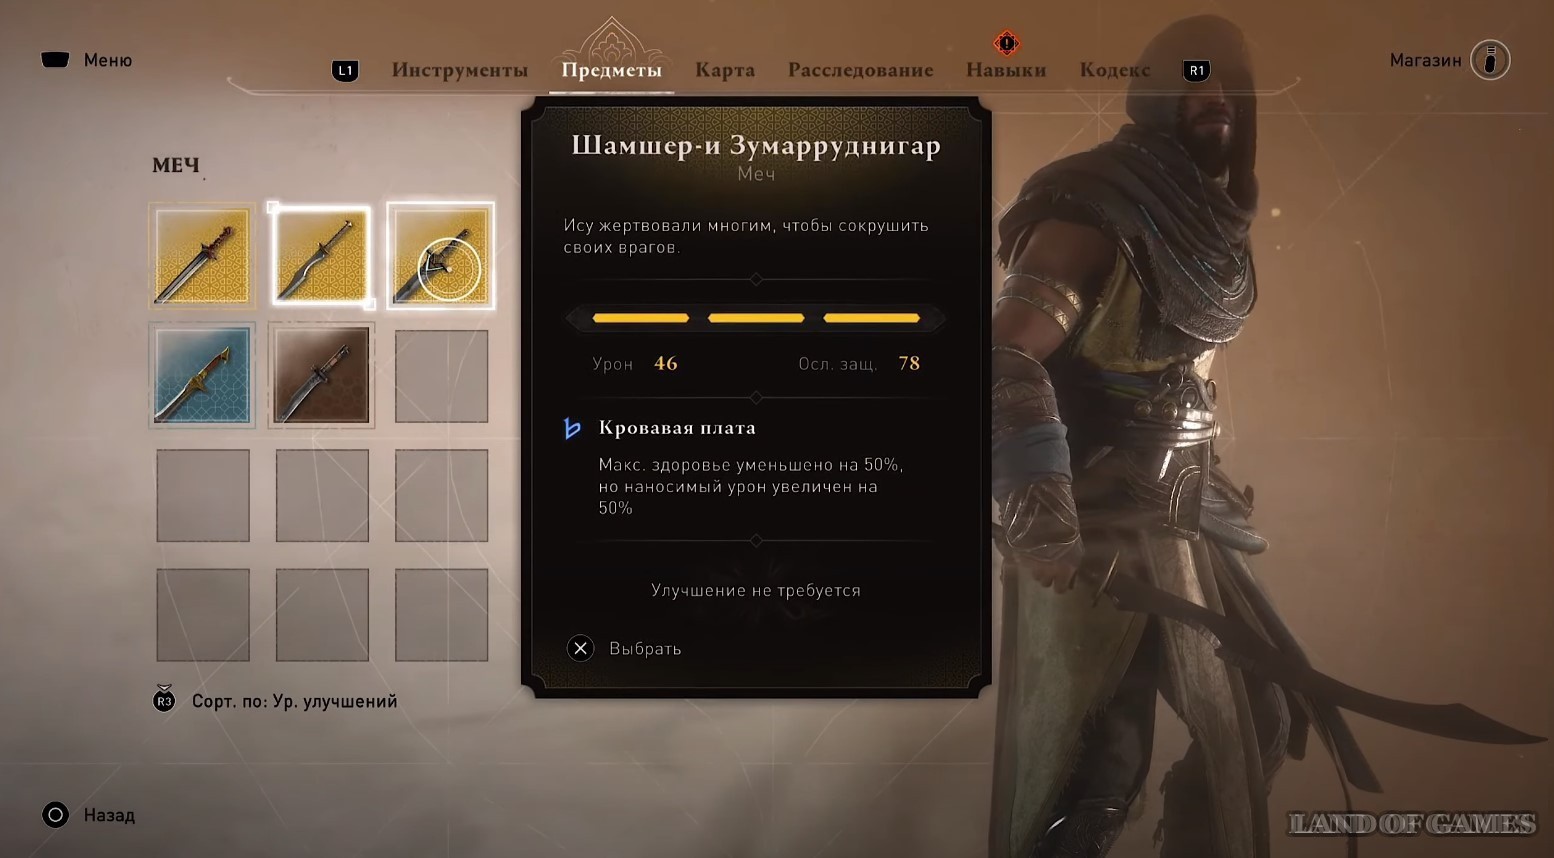
There are also six chests hidden here. By opening them you will receive a legendary weapon and costume. Their characteristics can be seen in the screenshots below.
Chest #13 Monastery of Virgins
Go to the location shown on the map below.
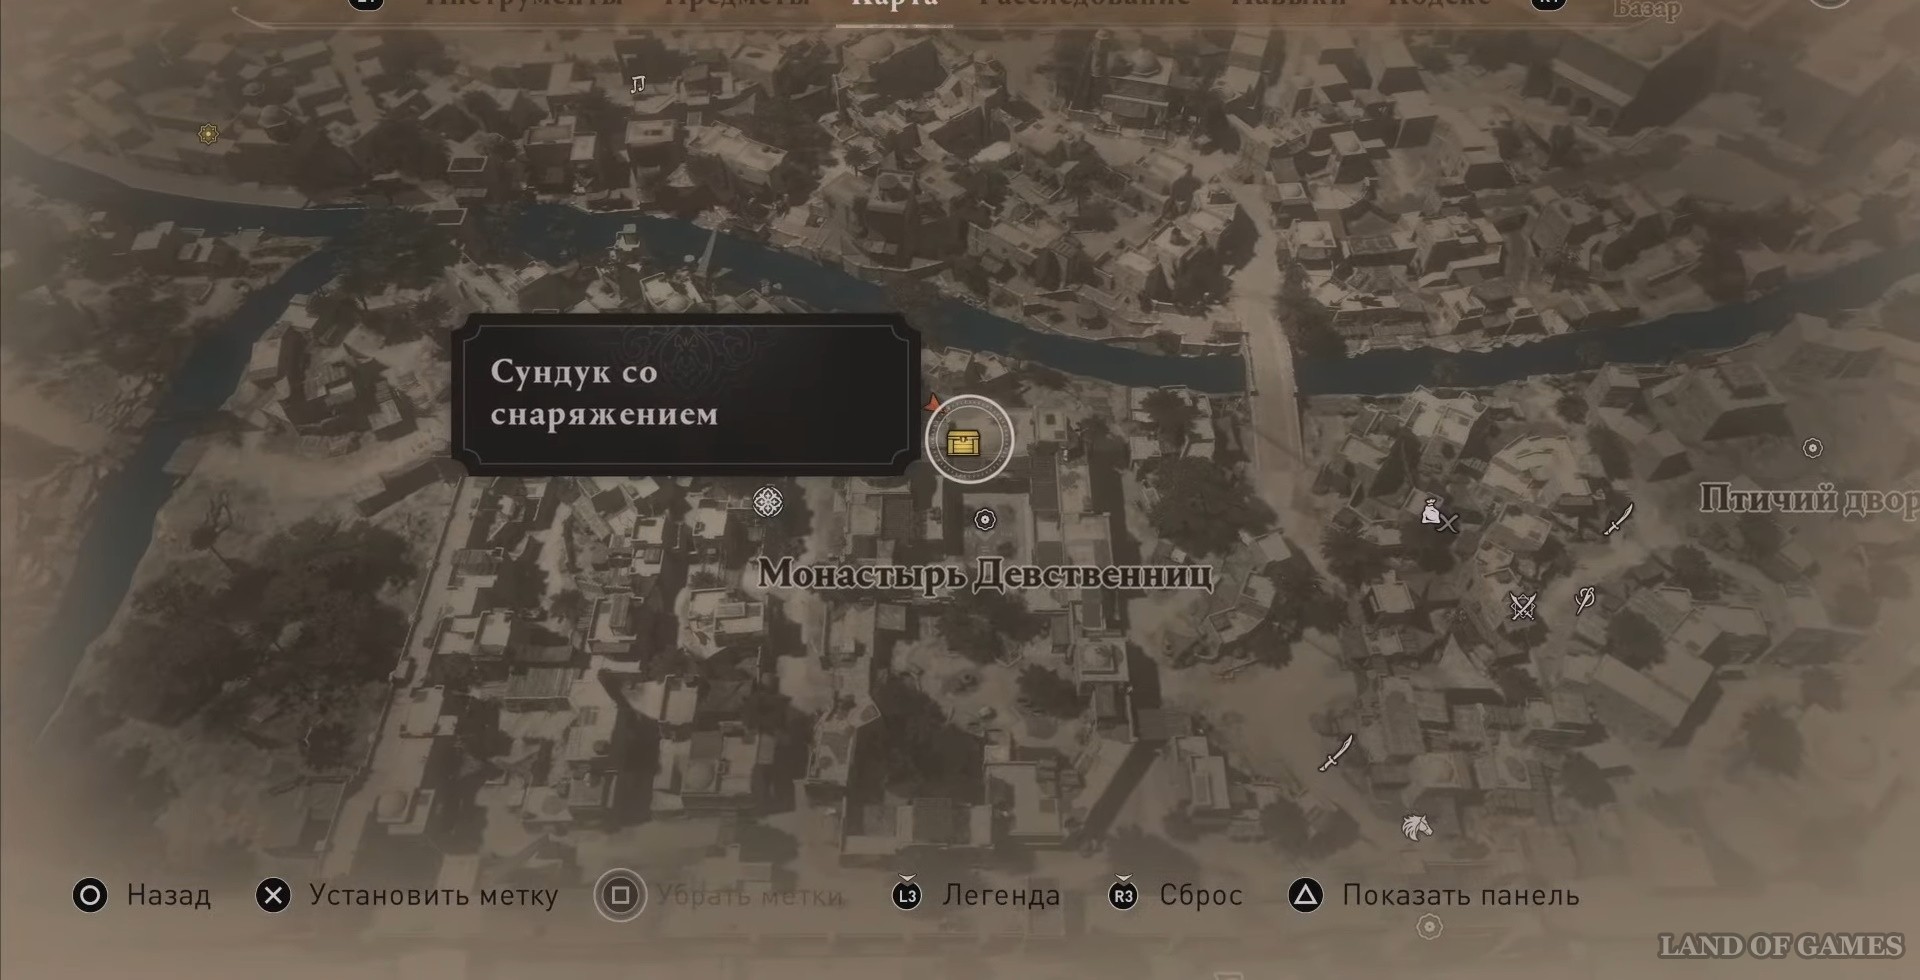
The loot is located near the entrance. Be careful as there are guards walking around. Pull the shelf towards you and you will find yourself in the desired room.
Chest No. 14 Officers' Assembly
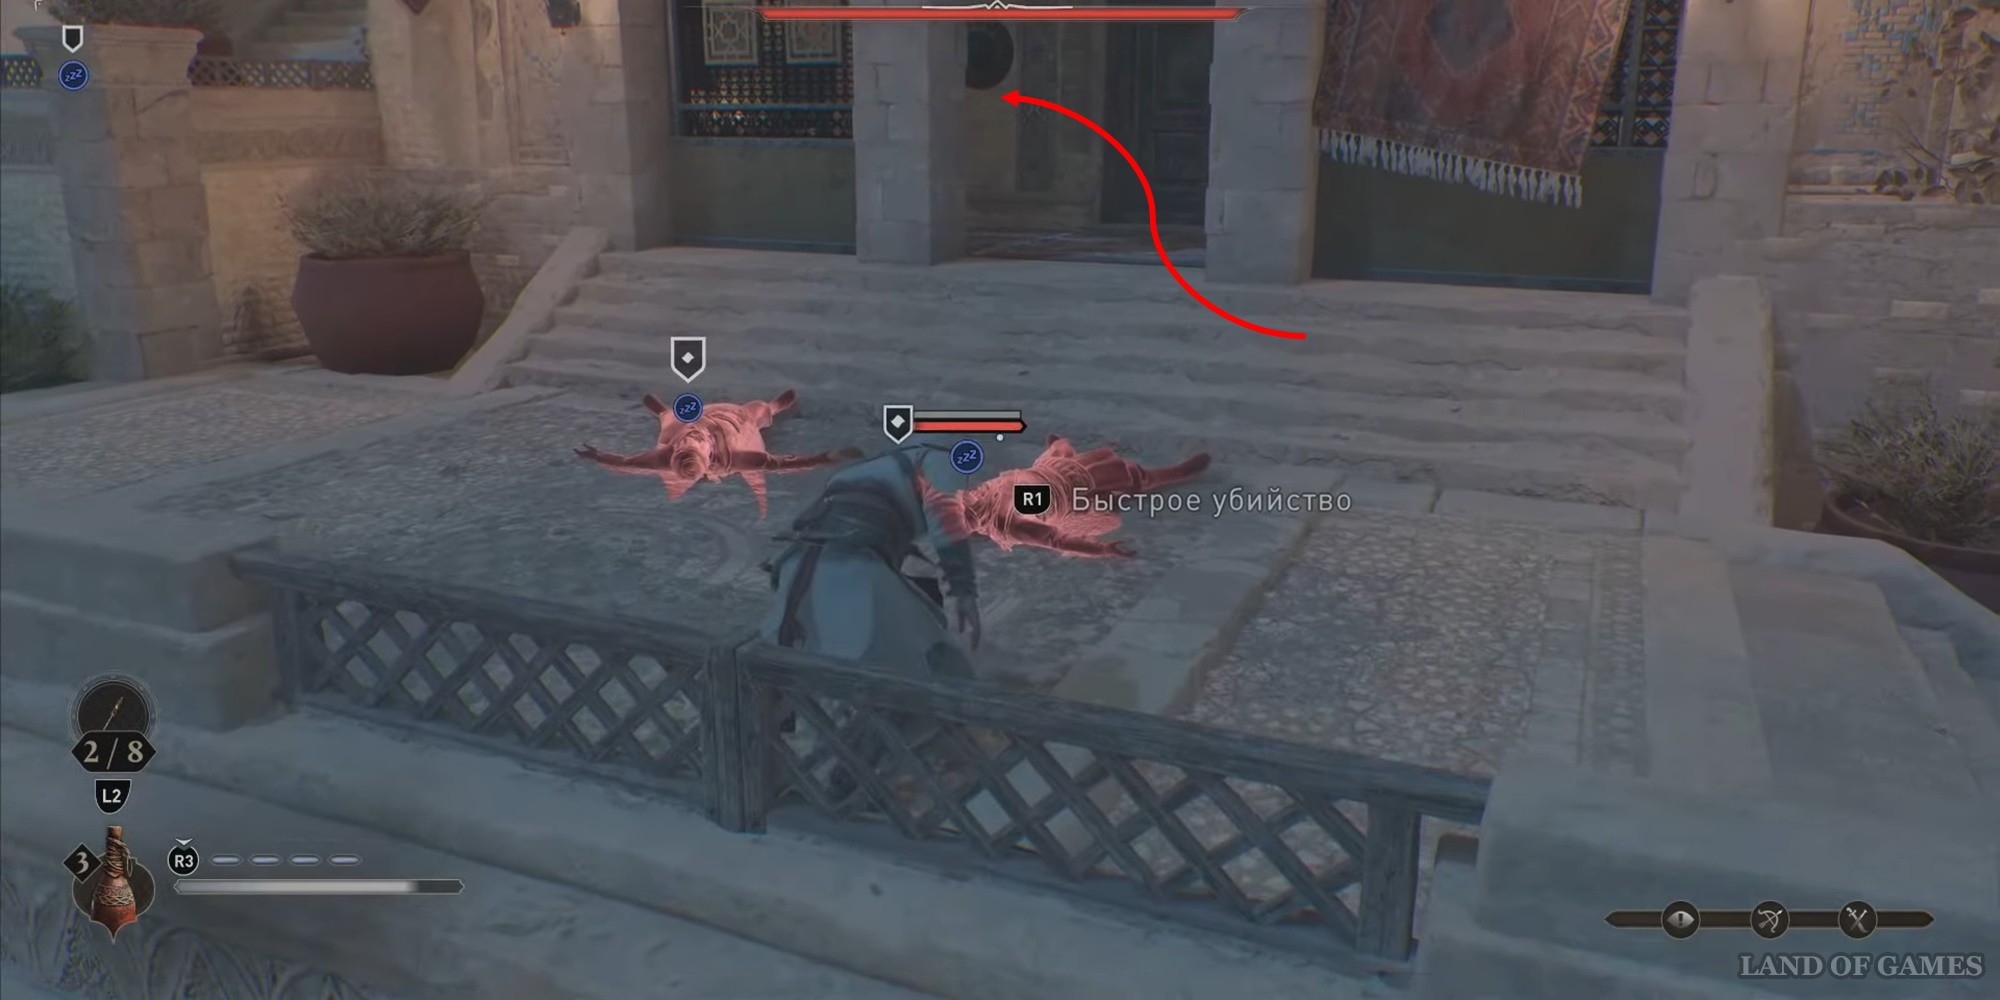
You must approach the room from the east. There will be two guards standing in front of the entrance, deal with them and take the loot.
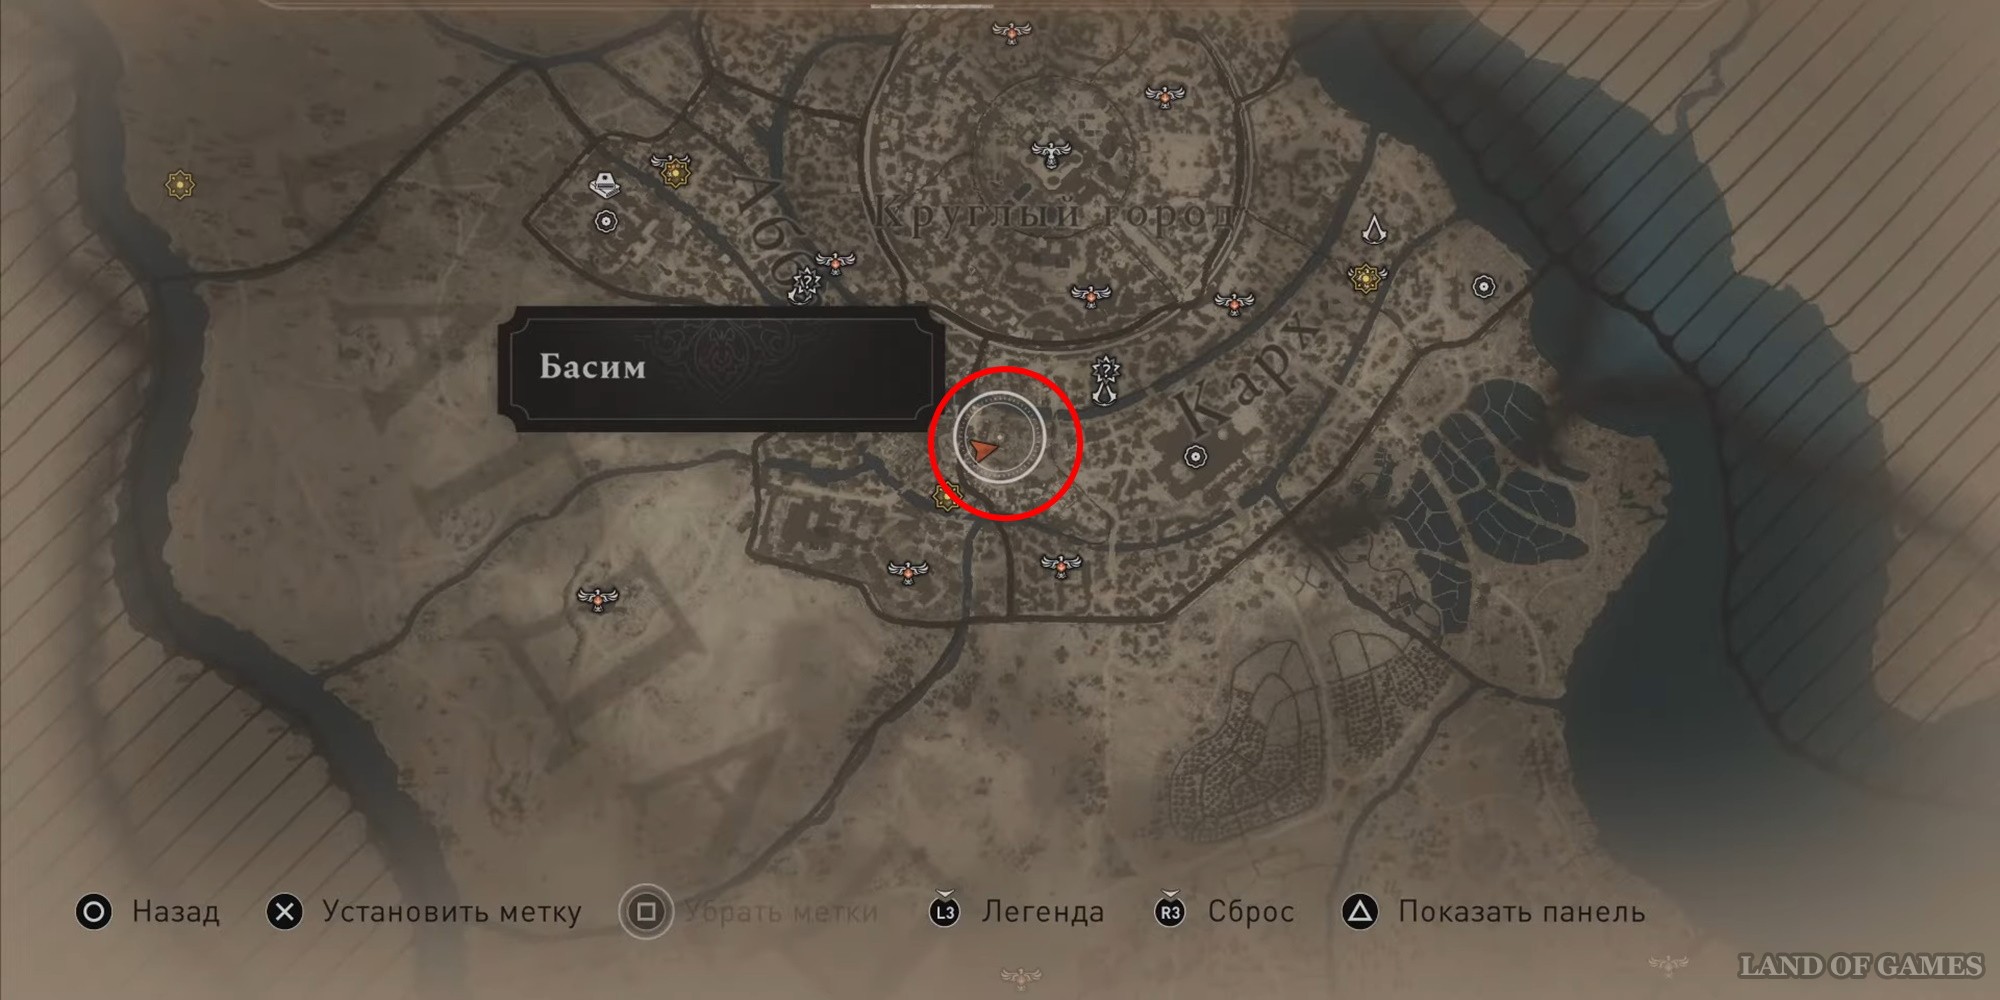
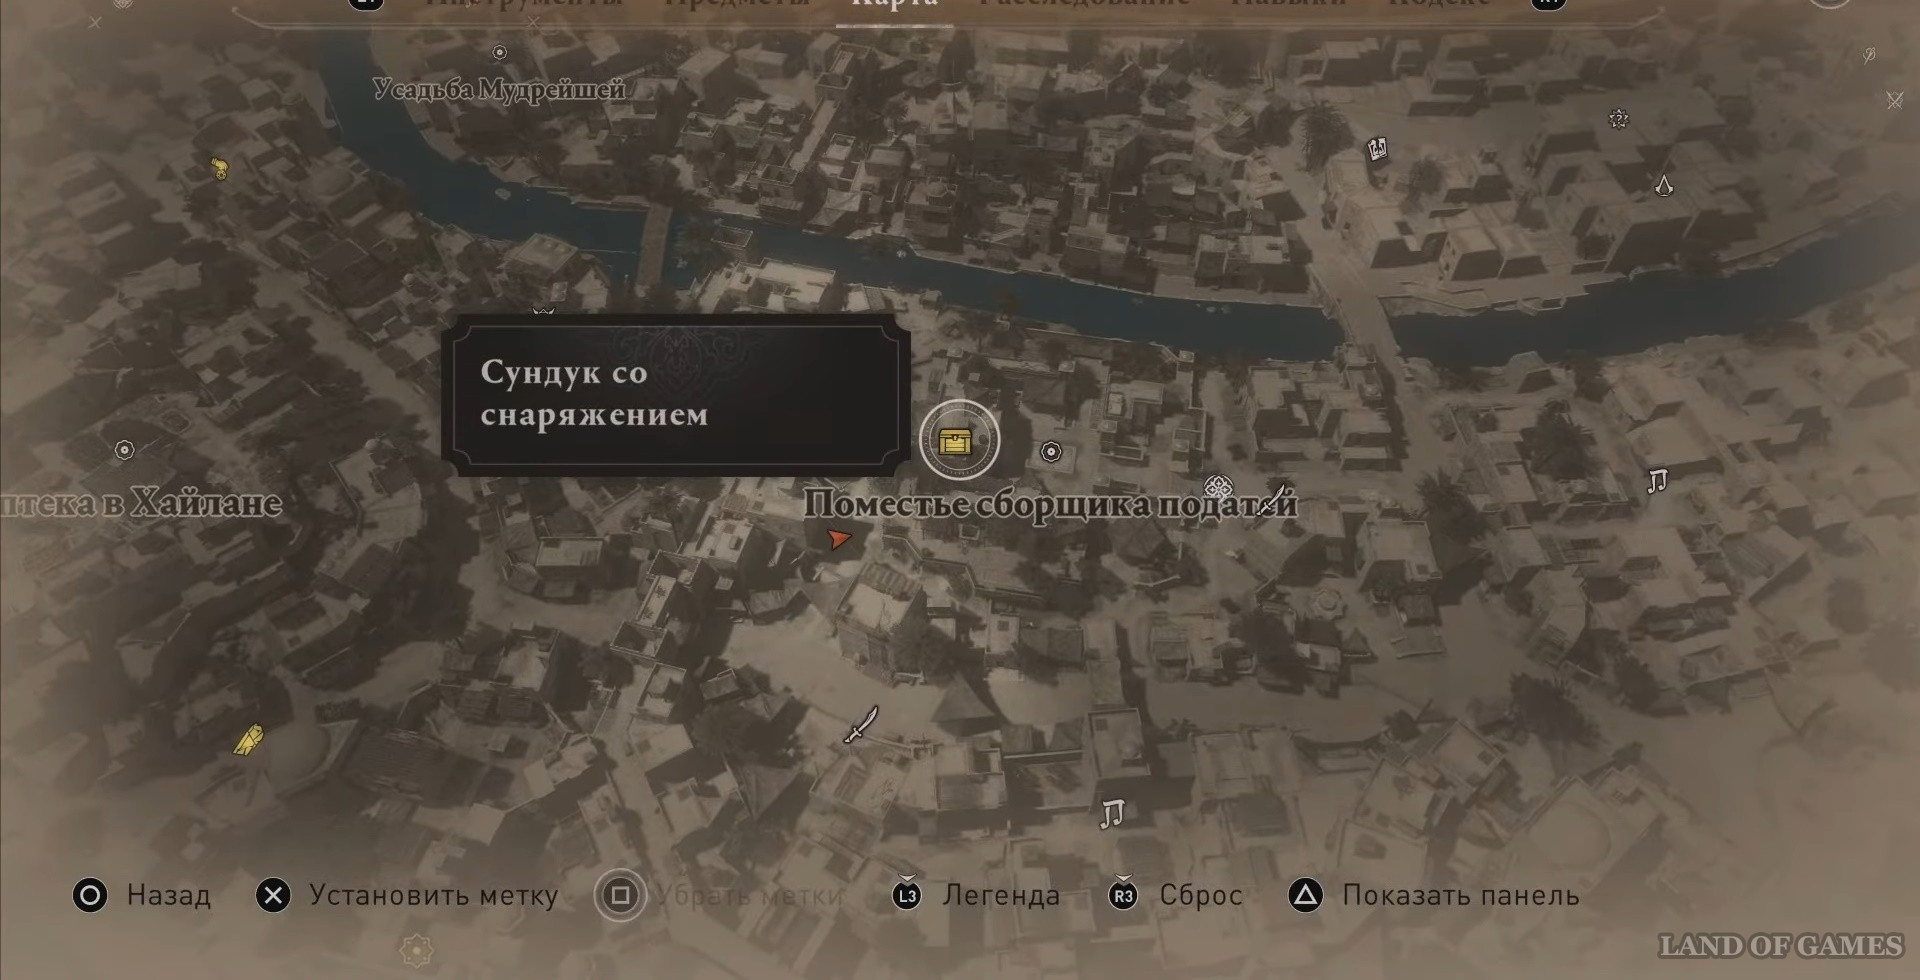
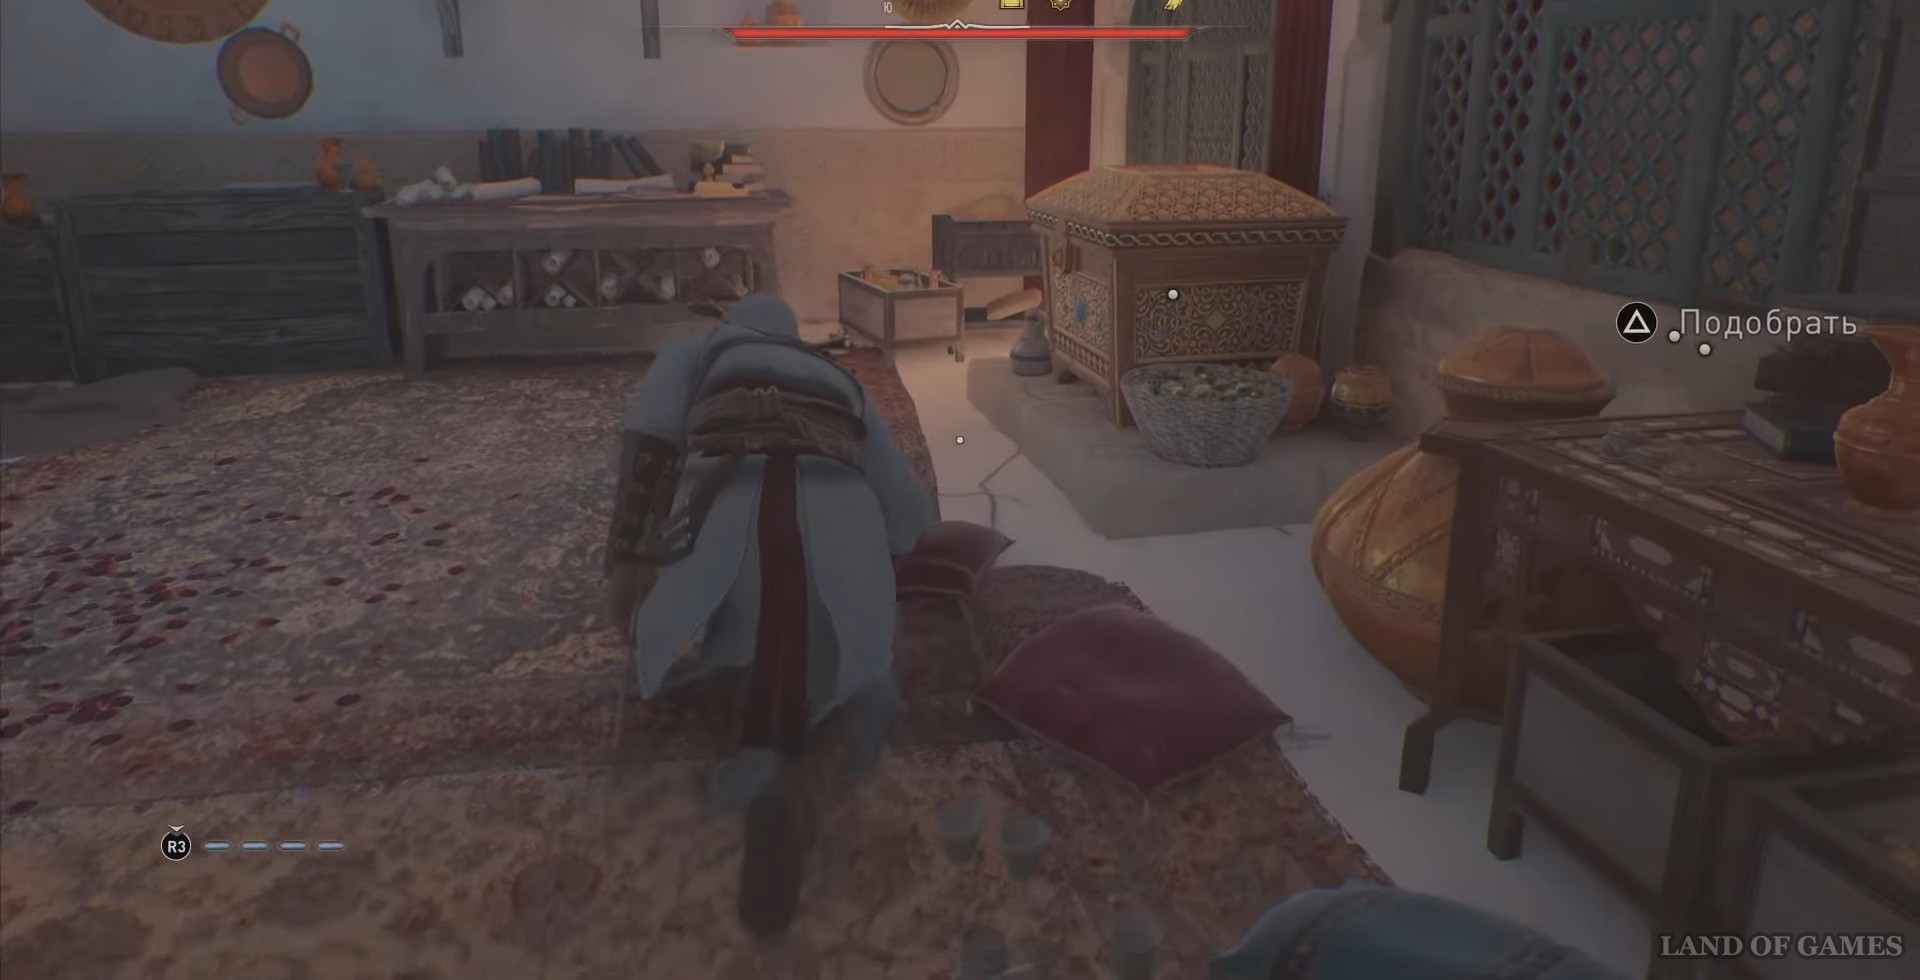
Chest #15 Tax Collector's Estate
You will find the loot by going to the estate - marked in the screenshots. Go up to the top floor, kill the two guards and get your reward.
Chest #16 Great Fortress
For the next chest, go to the tower located above the main entrance of the fortress (see map below).
There are a lot of guards in this place, so you should be extremely careful. Climb the stairs to the western wall and head towards the chest. Once in the tower, break the brown pot to the left of the shelf and move it to the left.
Walk forward and you will see a chest with one guard standing next to it. Kill him and take the loot.
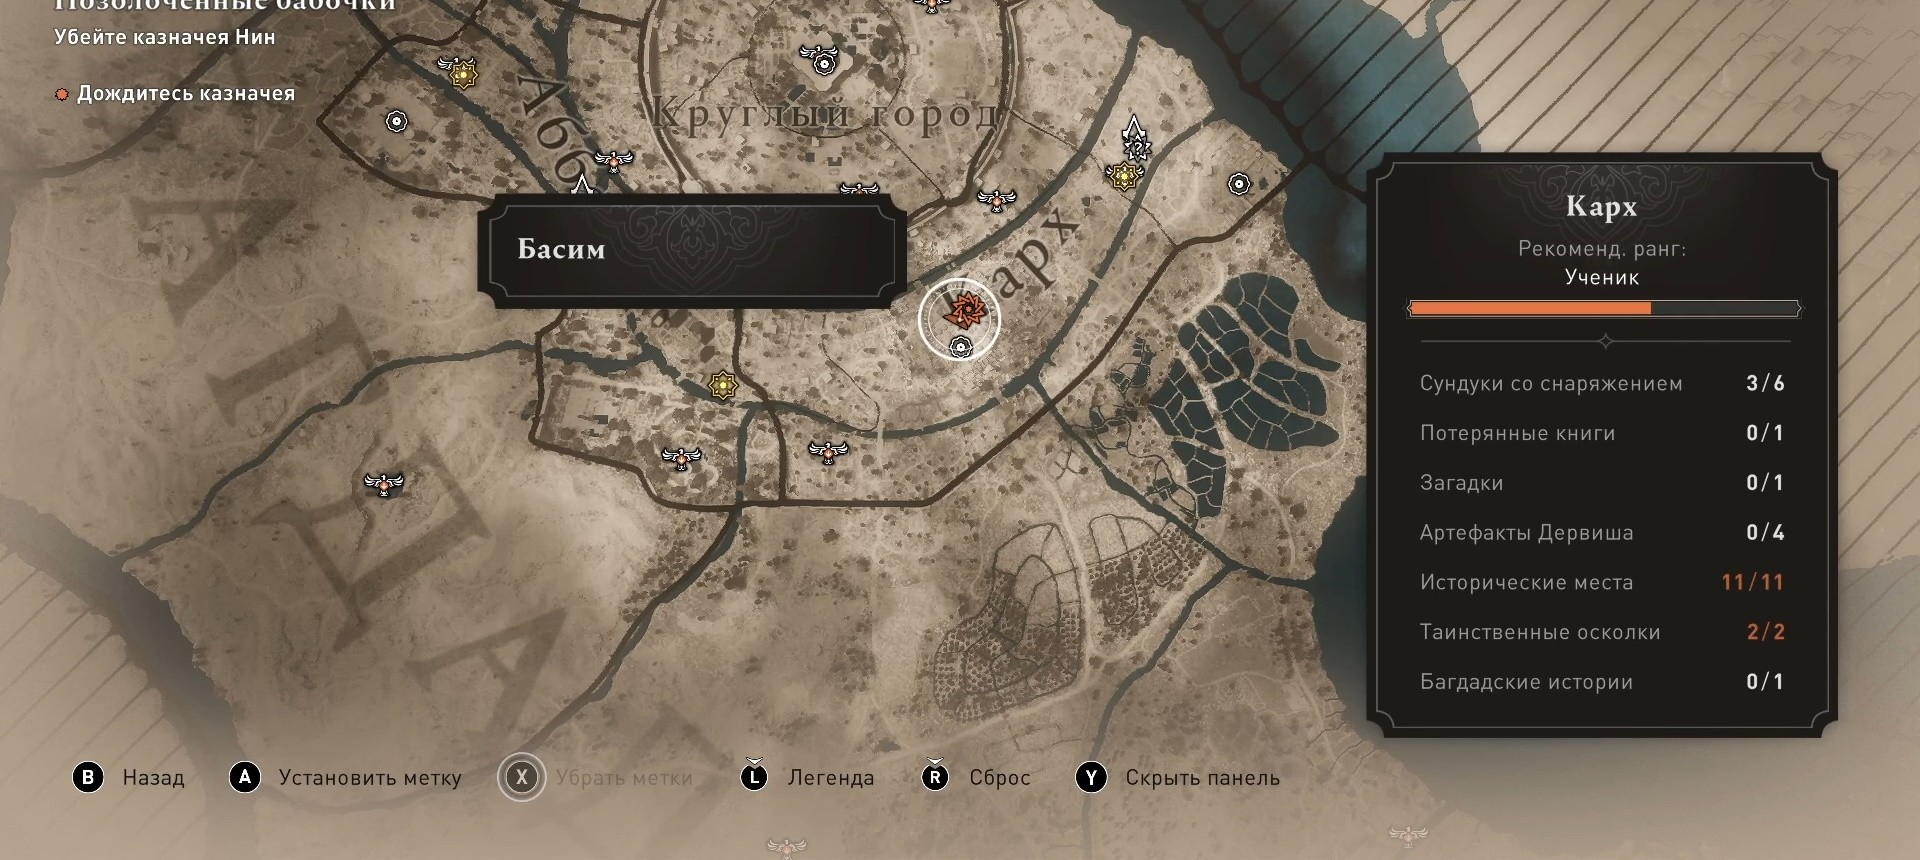
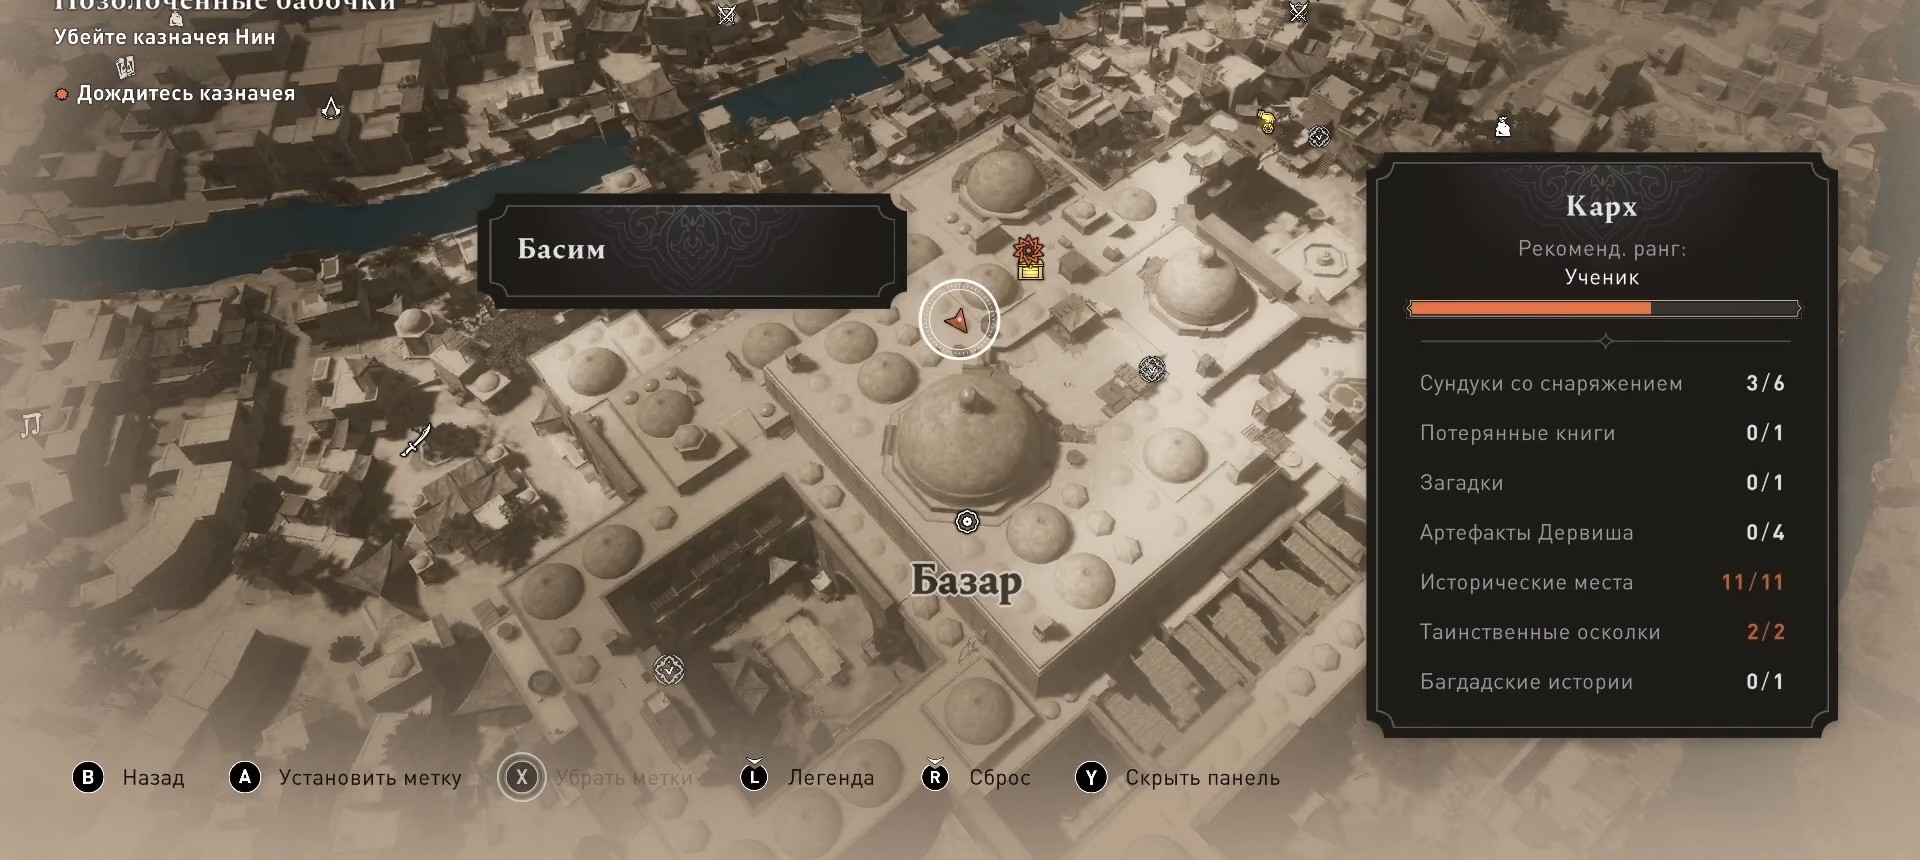
Chest #17 Bazaar
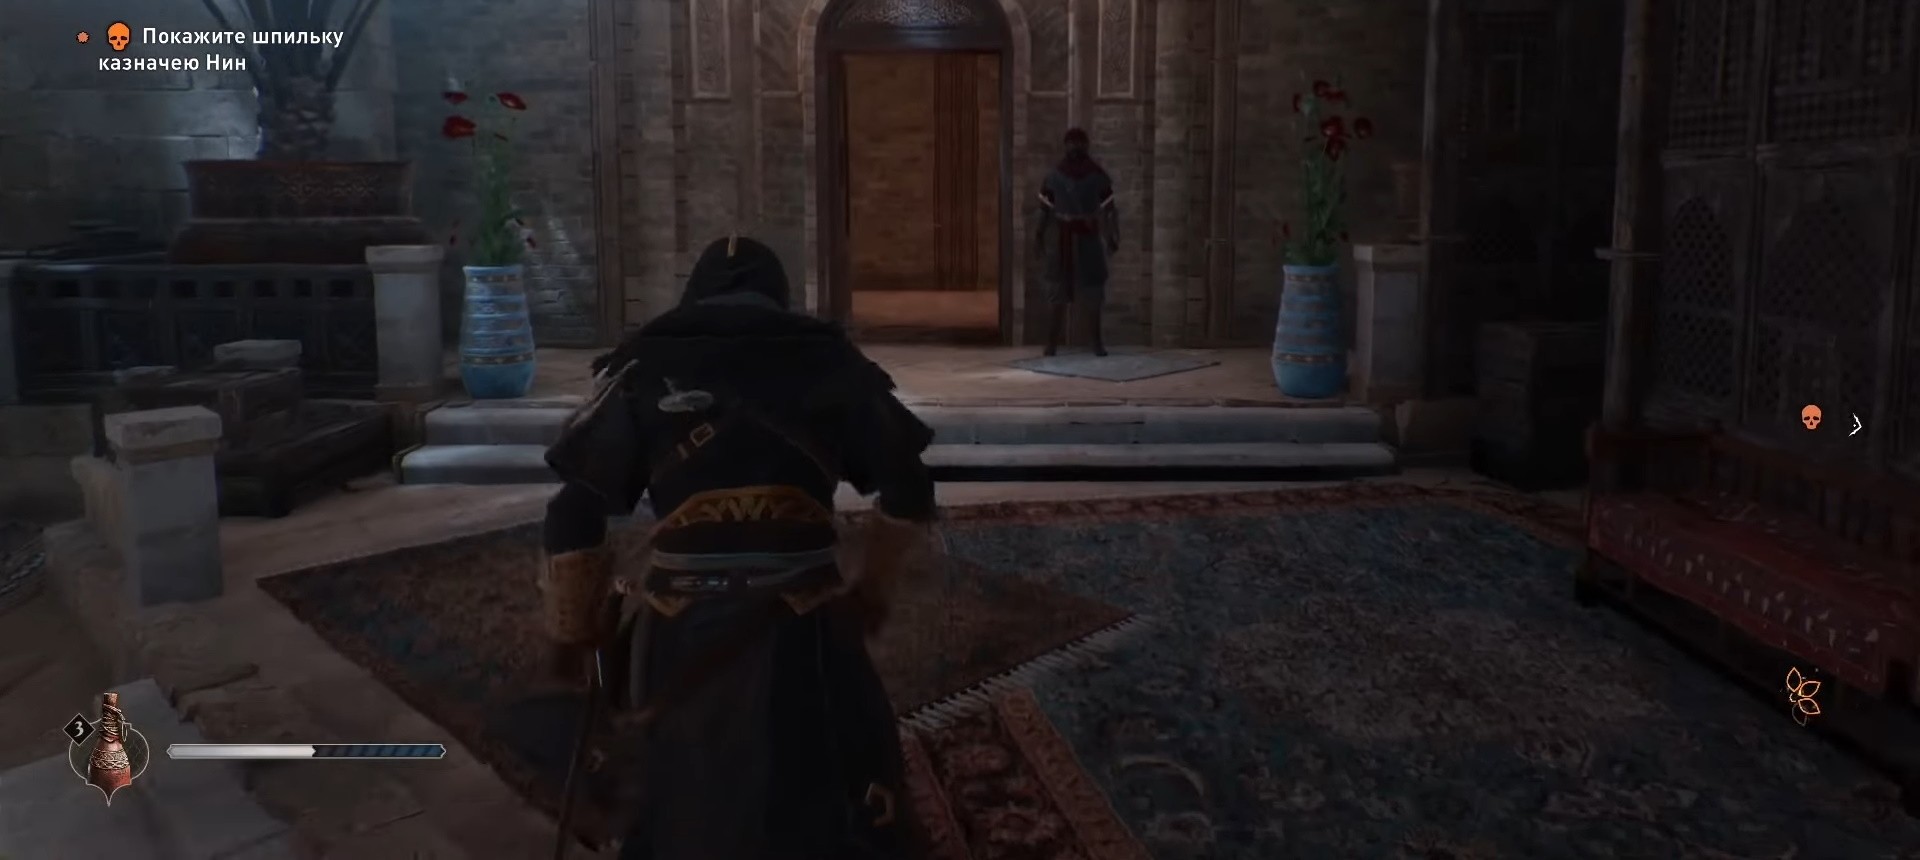
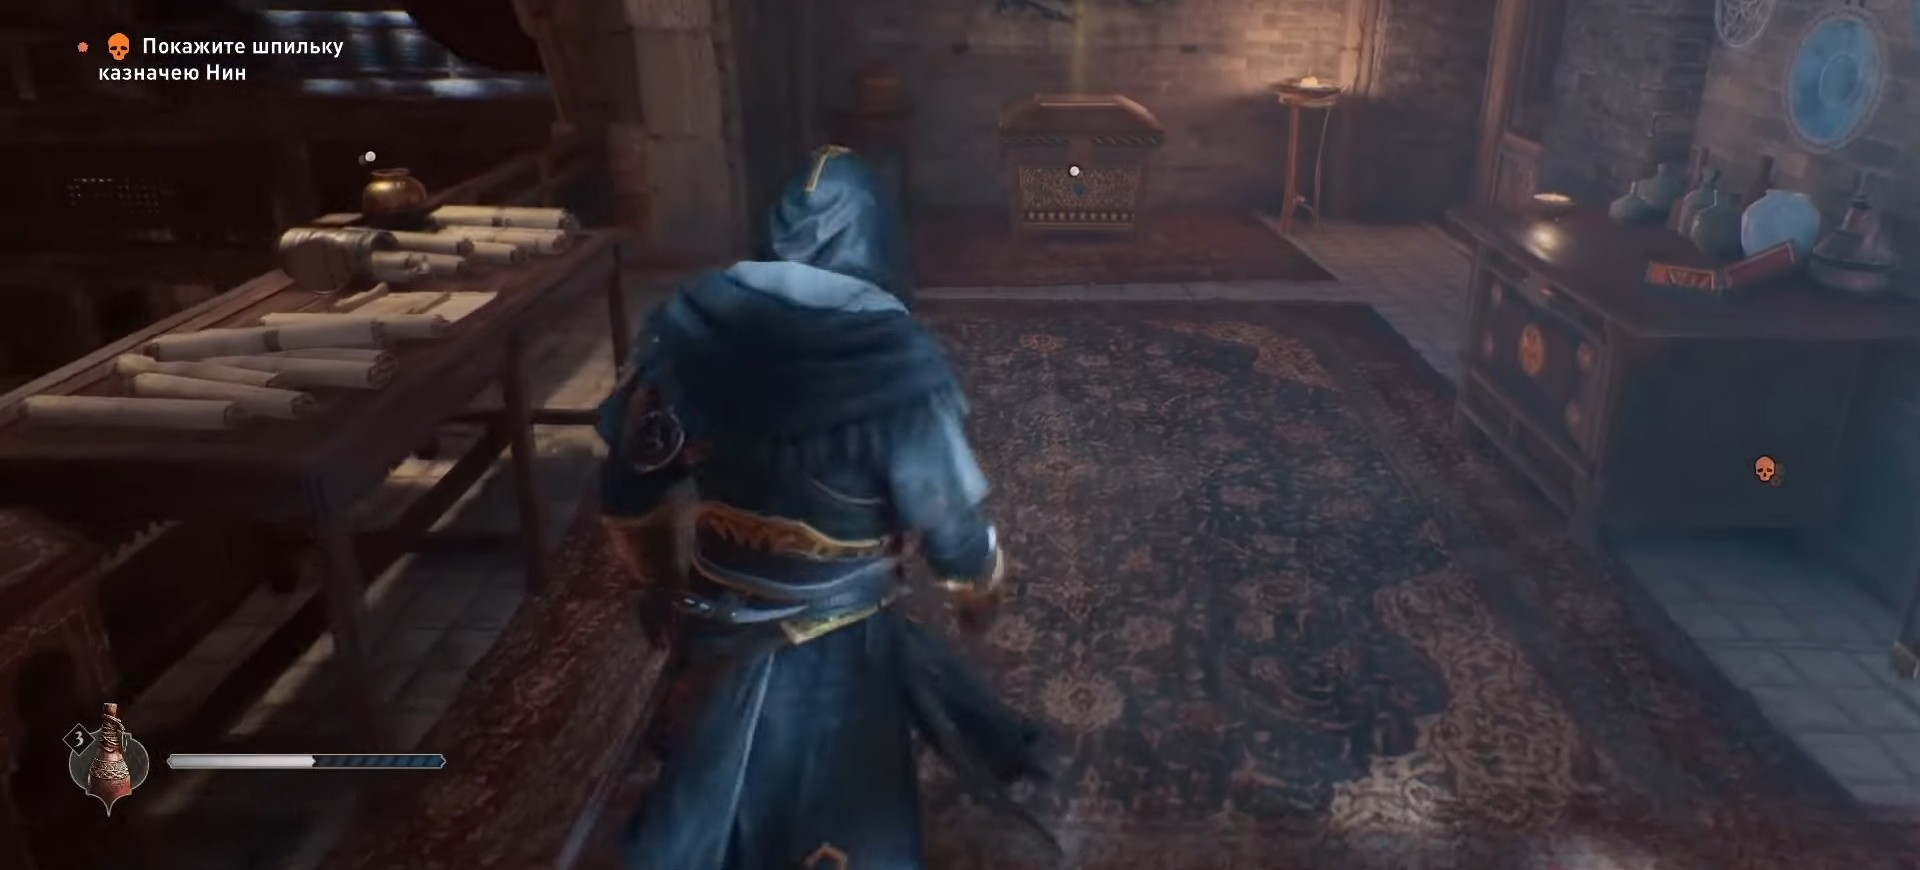
The chest in the Bazaar can only be accessed after completing a quest called “Gilded Butterflies”, which is located at the very end of the game. Complete the main story first, after which the passage to the upper floor will open. Your reward is there.
Chest #18 Qasr-Salih
Go to the location according to the map below.
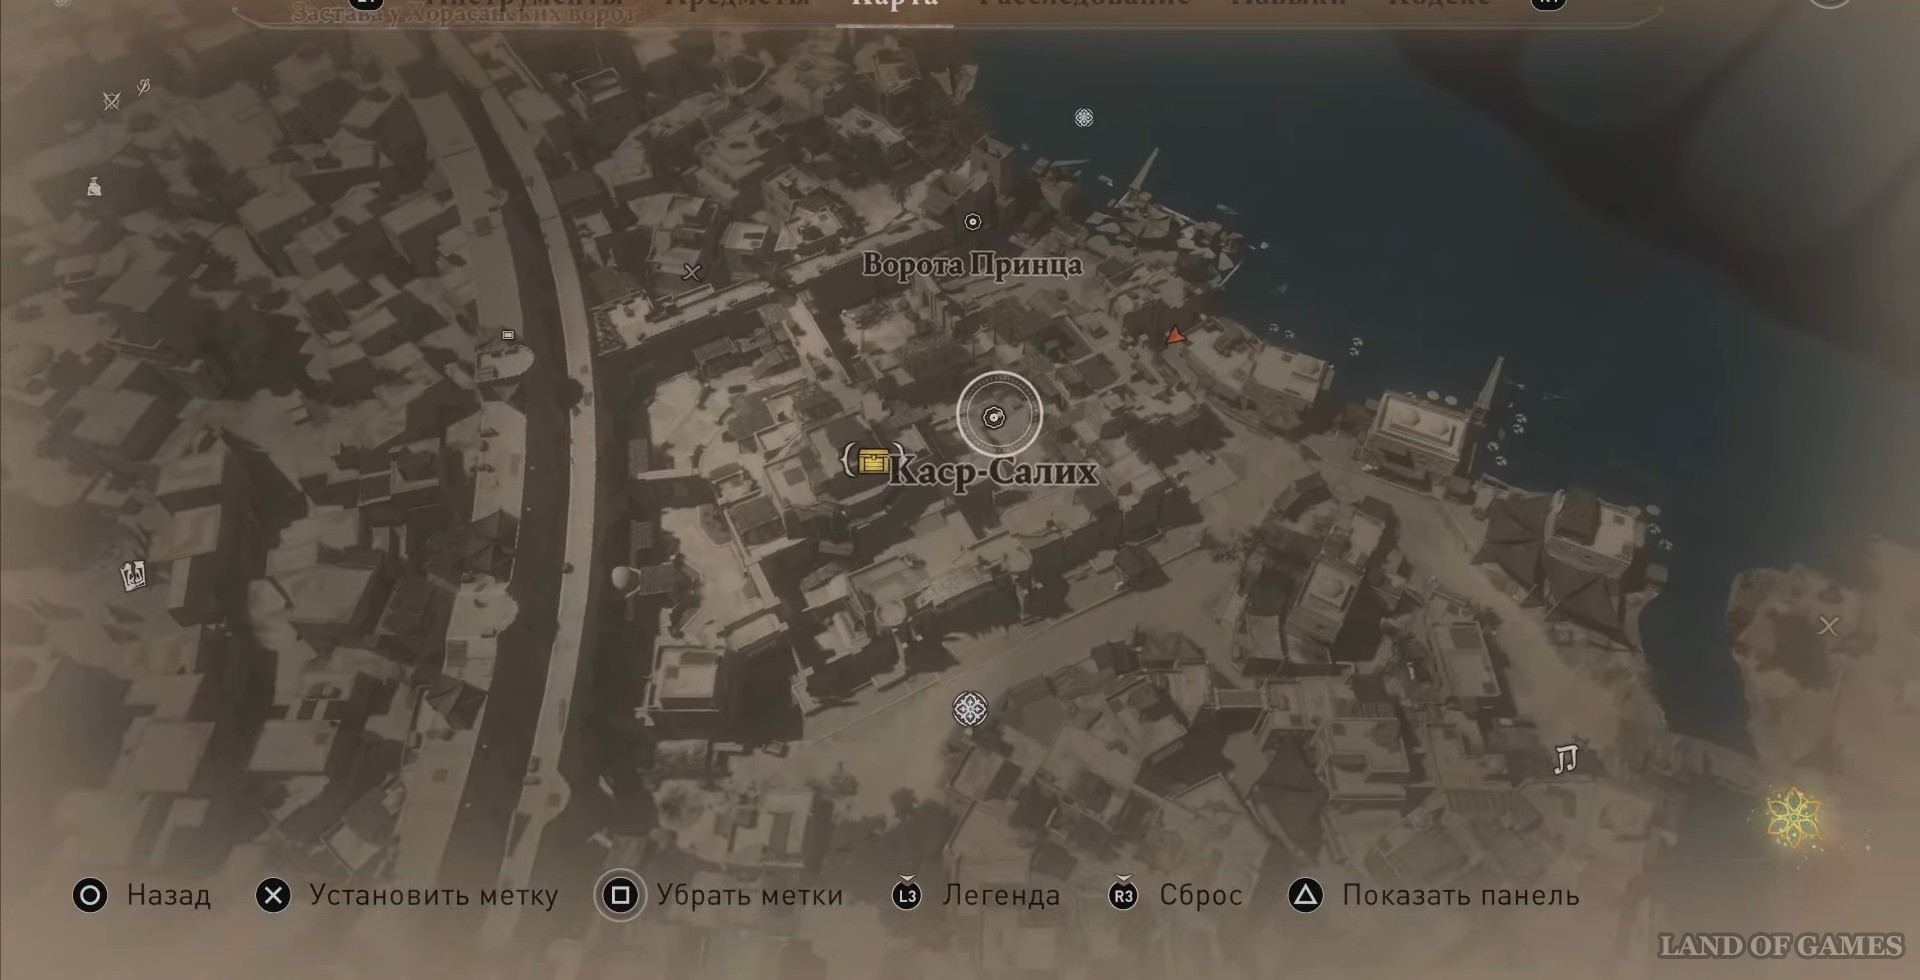
The reward is in the tower. In the center of its roof you need to create a hole through which you will go down inside. There are pots at the back of the tower. Grab one and carefully climb up, jumping over the boxes against the wall.
Use a pot to blow up a place littered with stones and sticks, and jump down to pick up your loot.
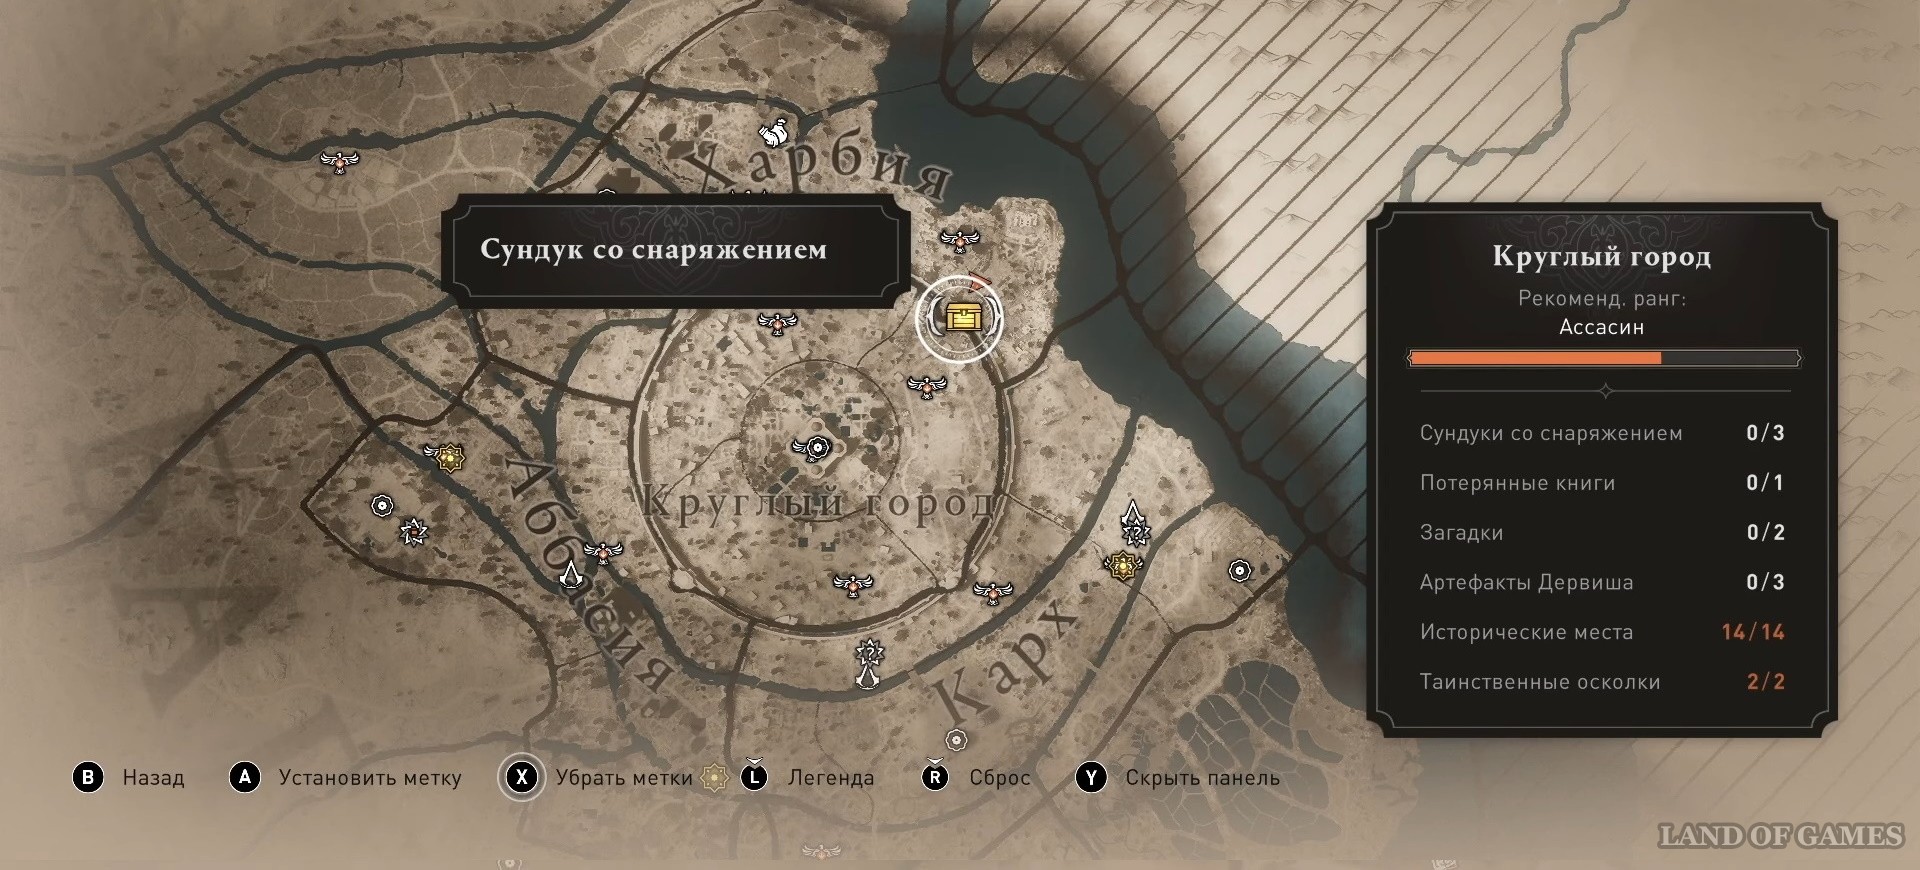
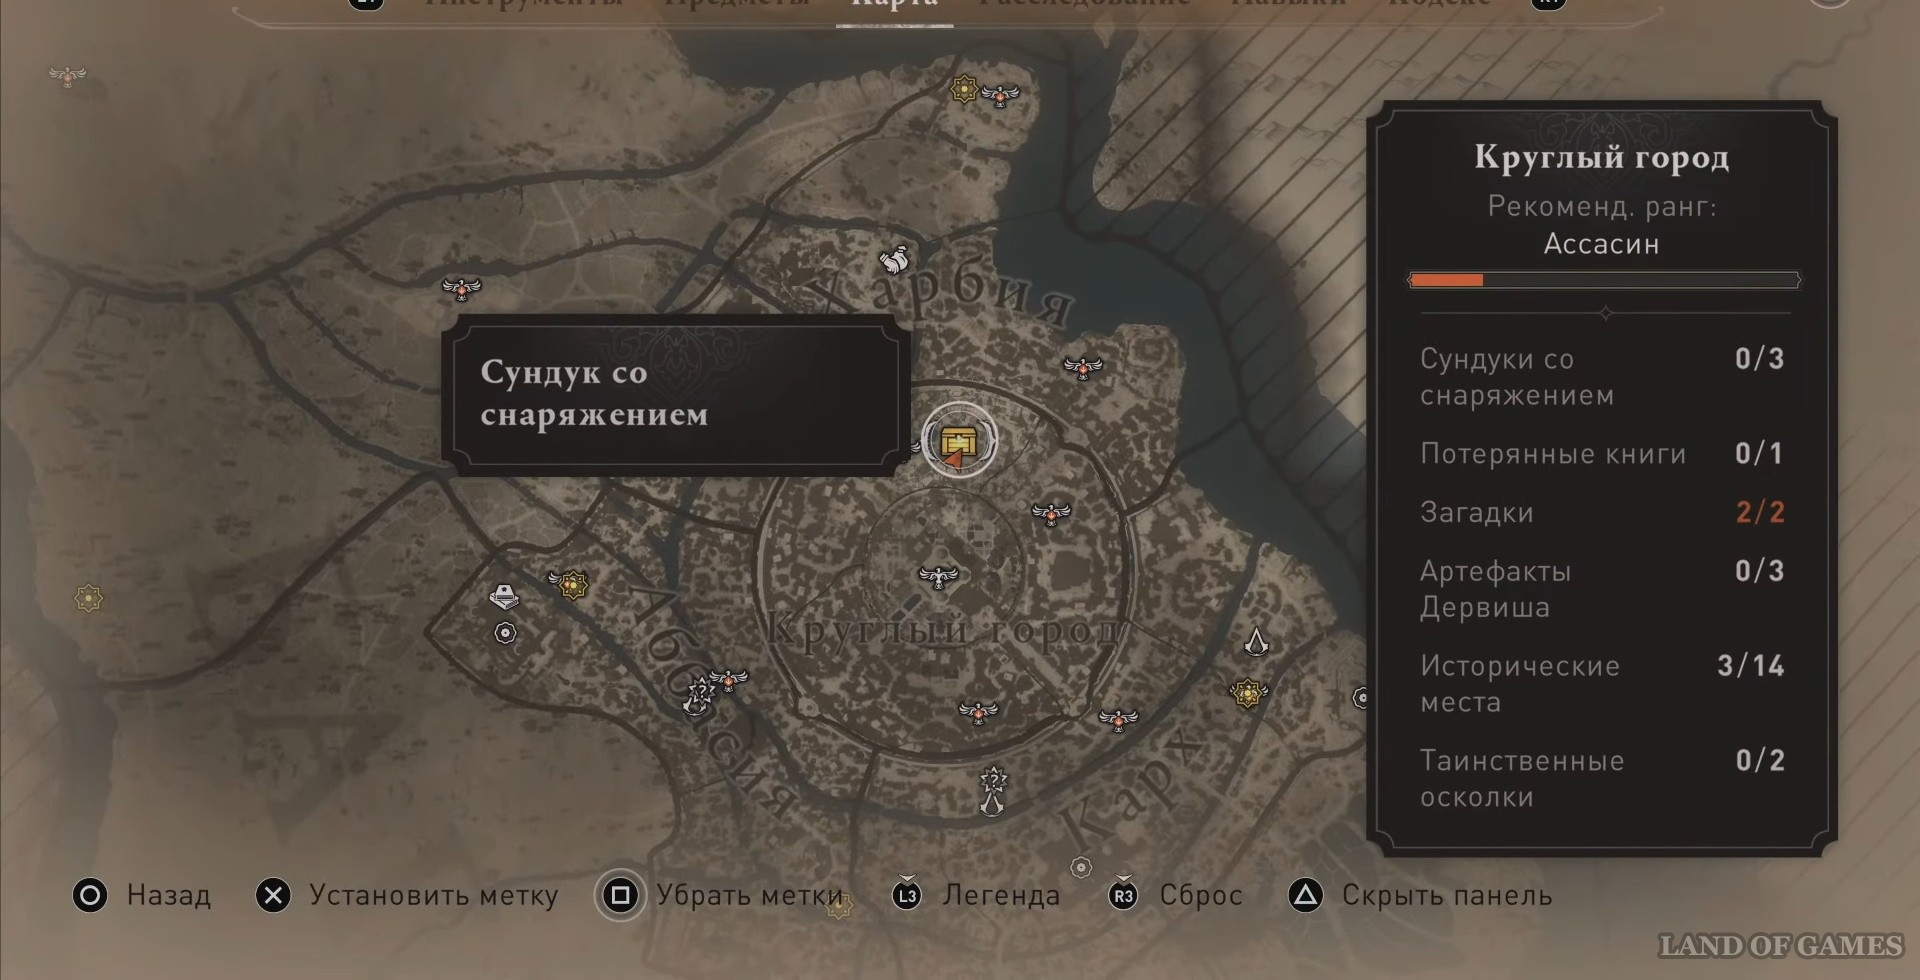
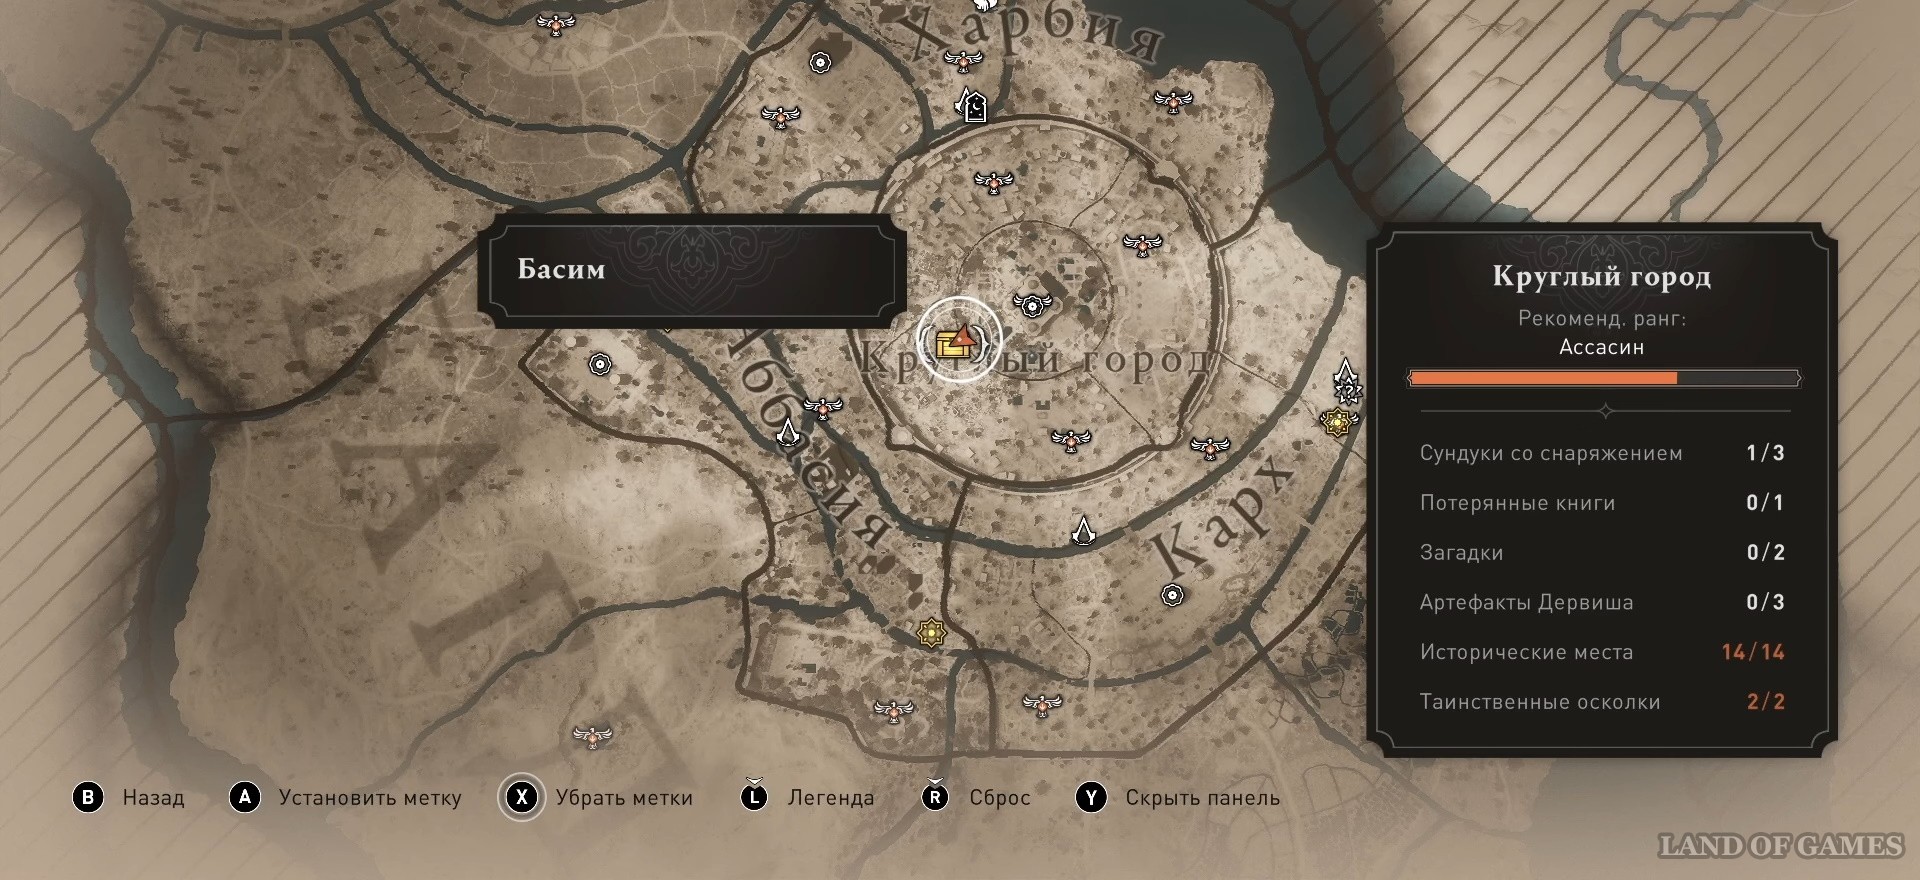
Region: Round City
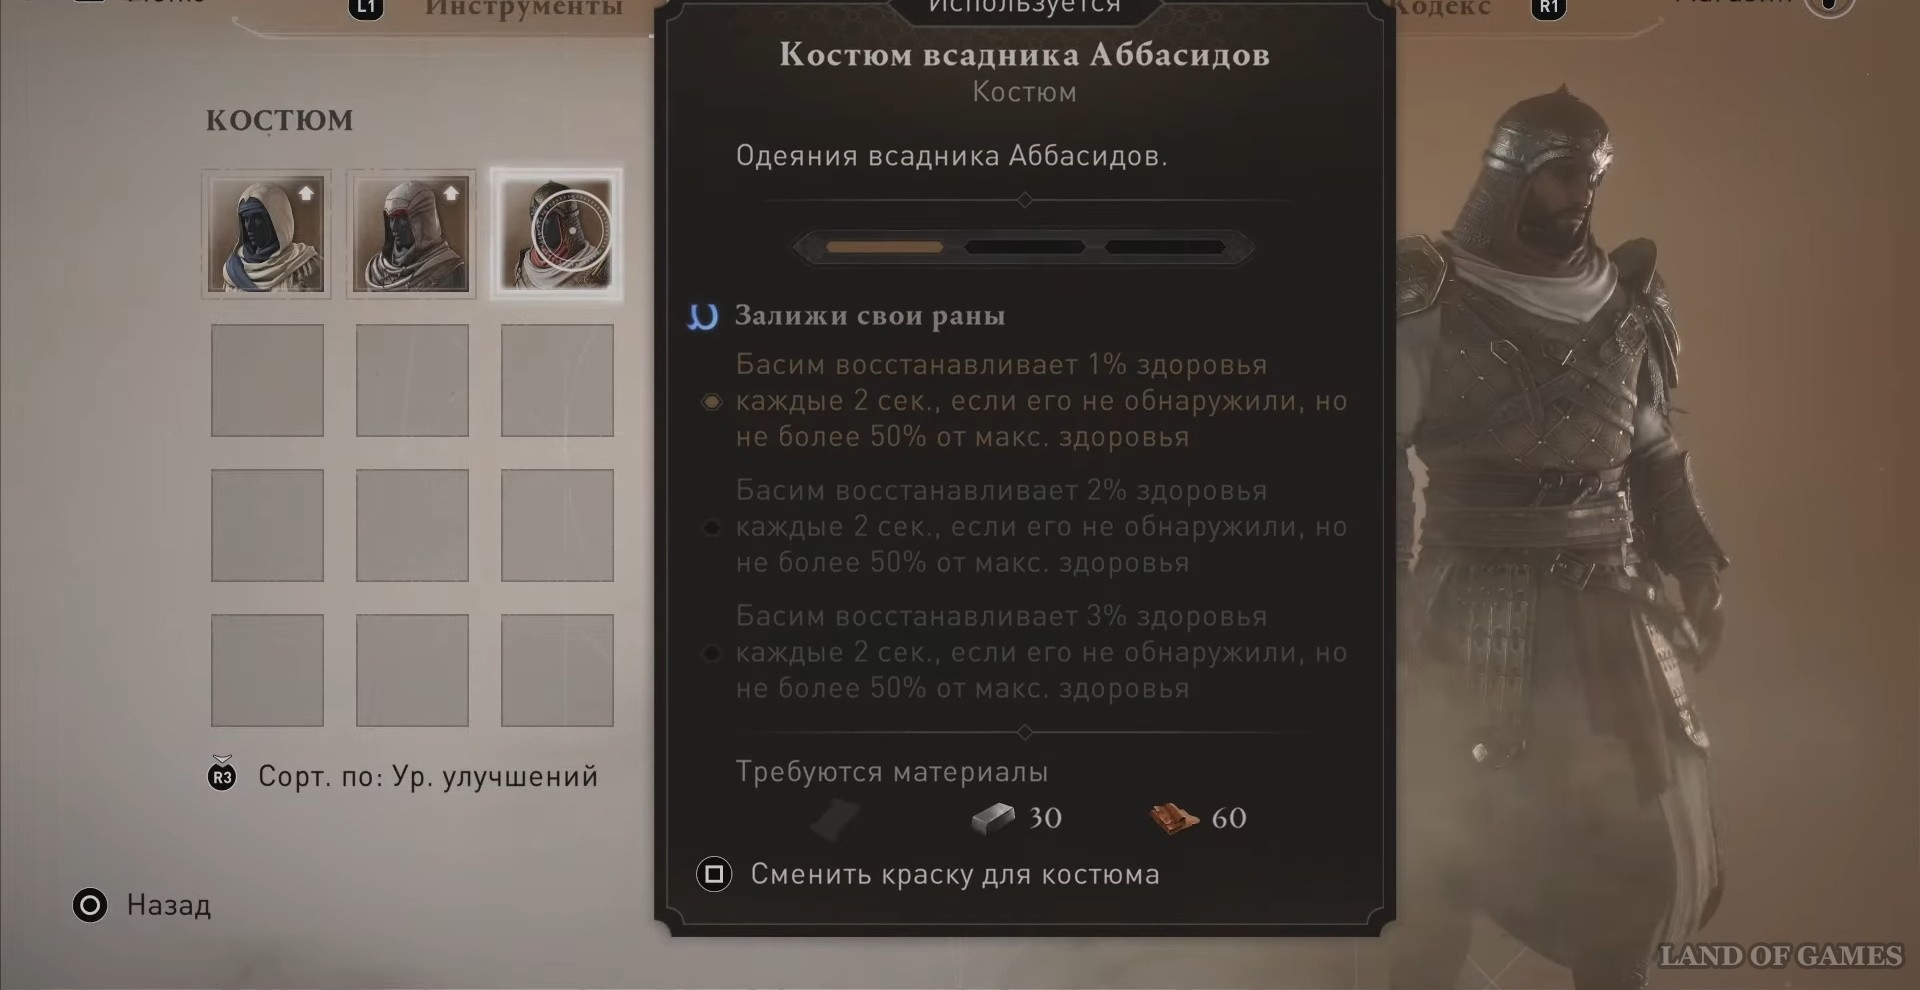
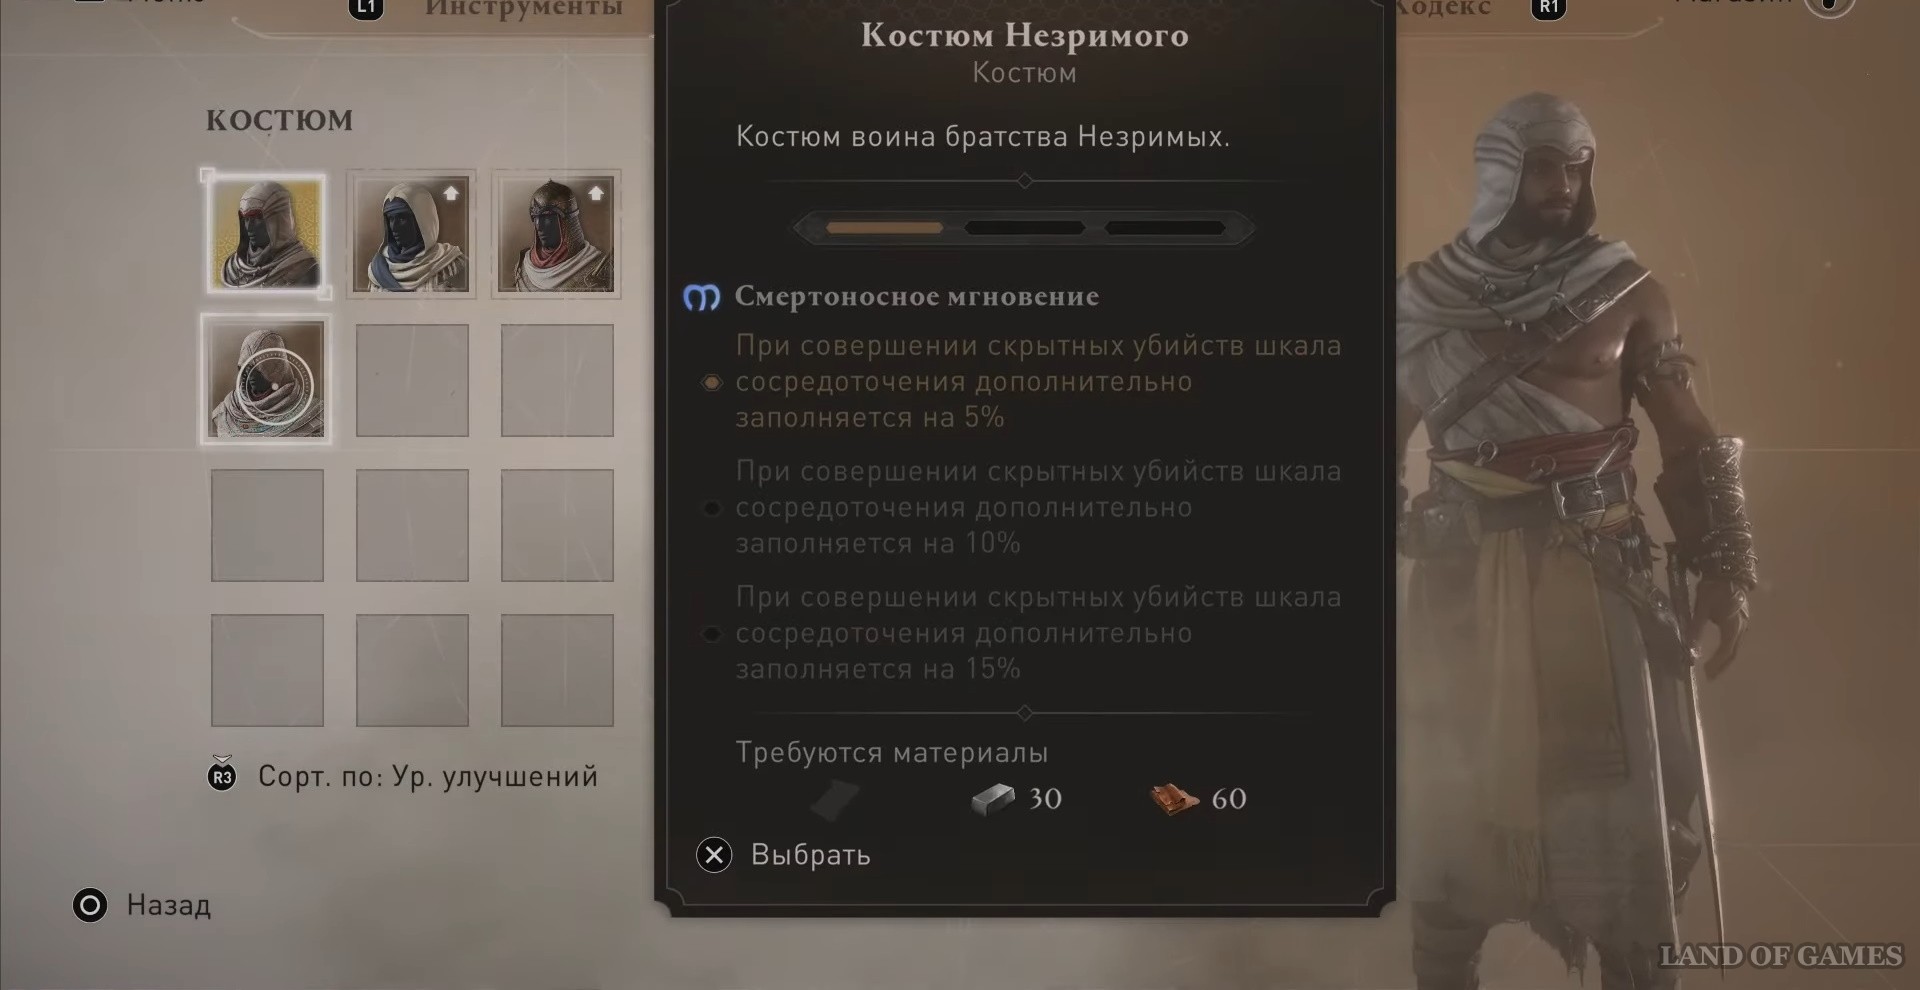
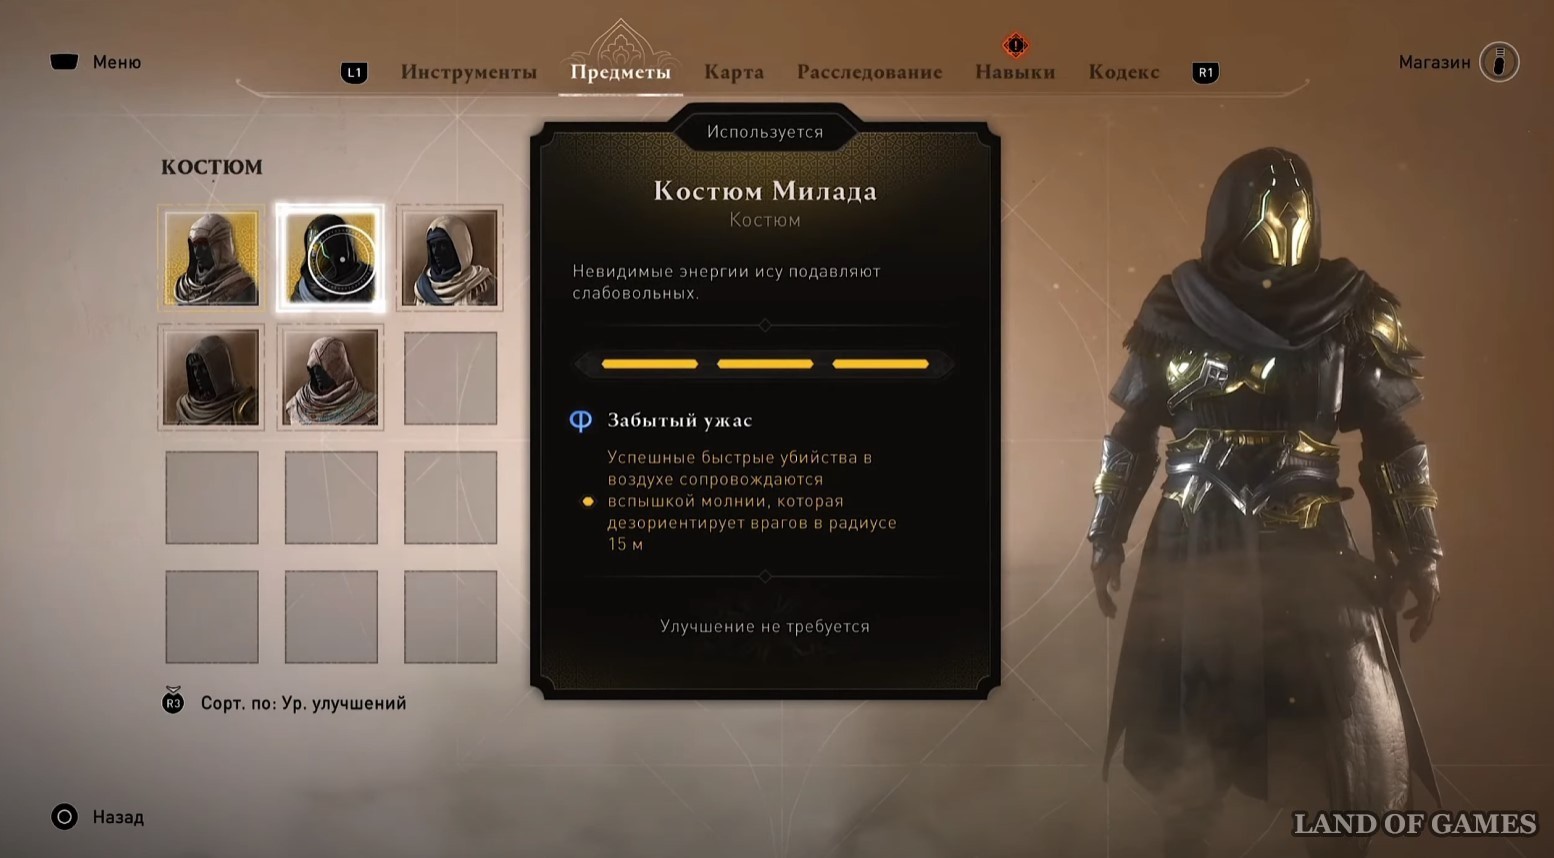
There are three chests hidden in this location. You will receive a legendary costume as a reward. Its characteristics can be found below.
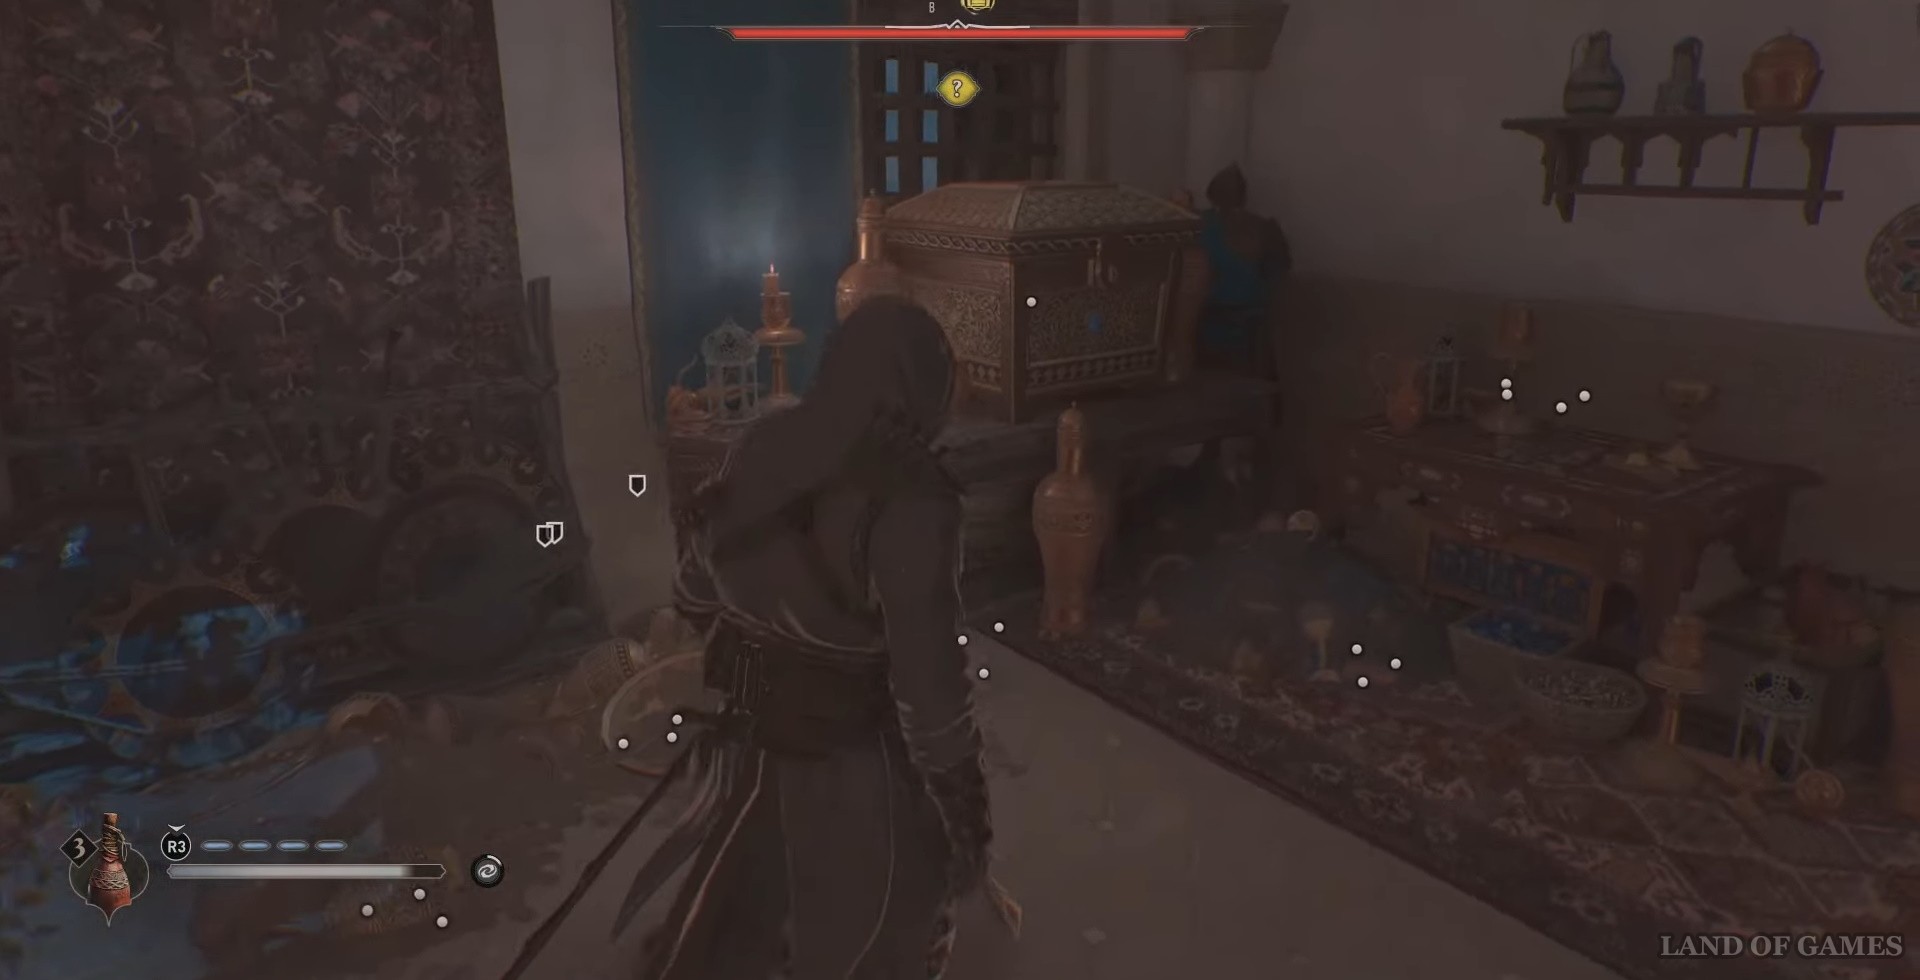
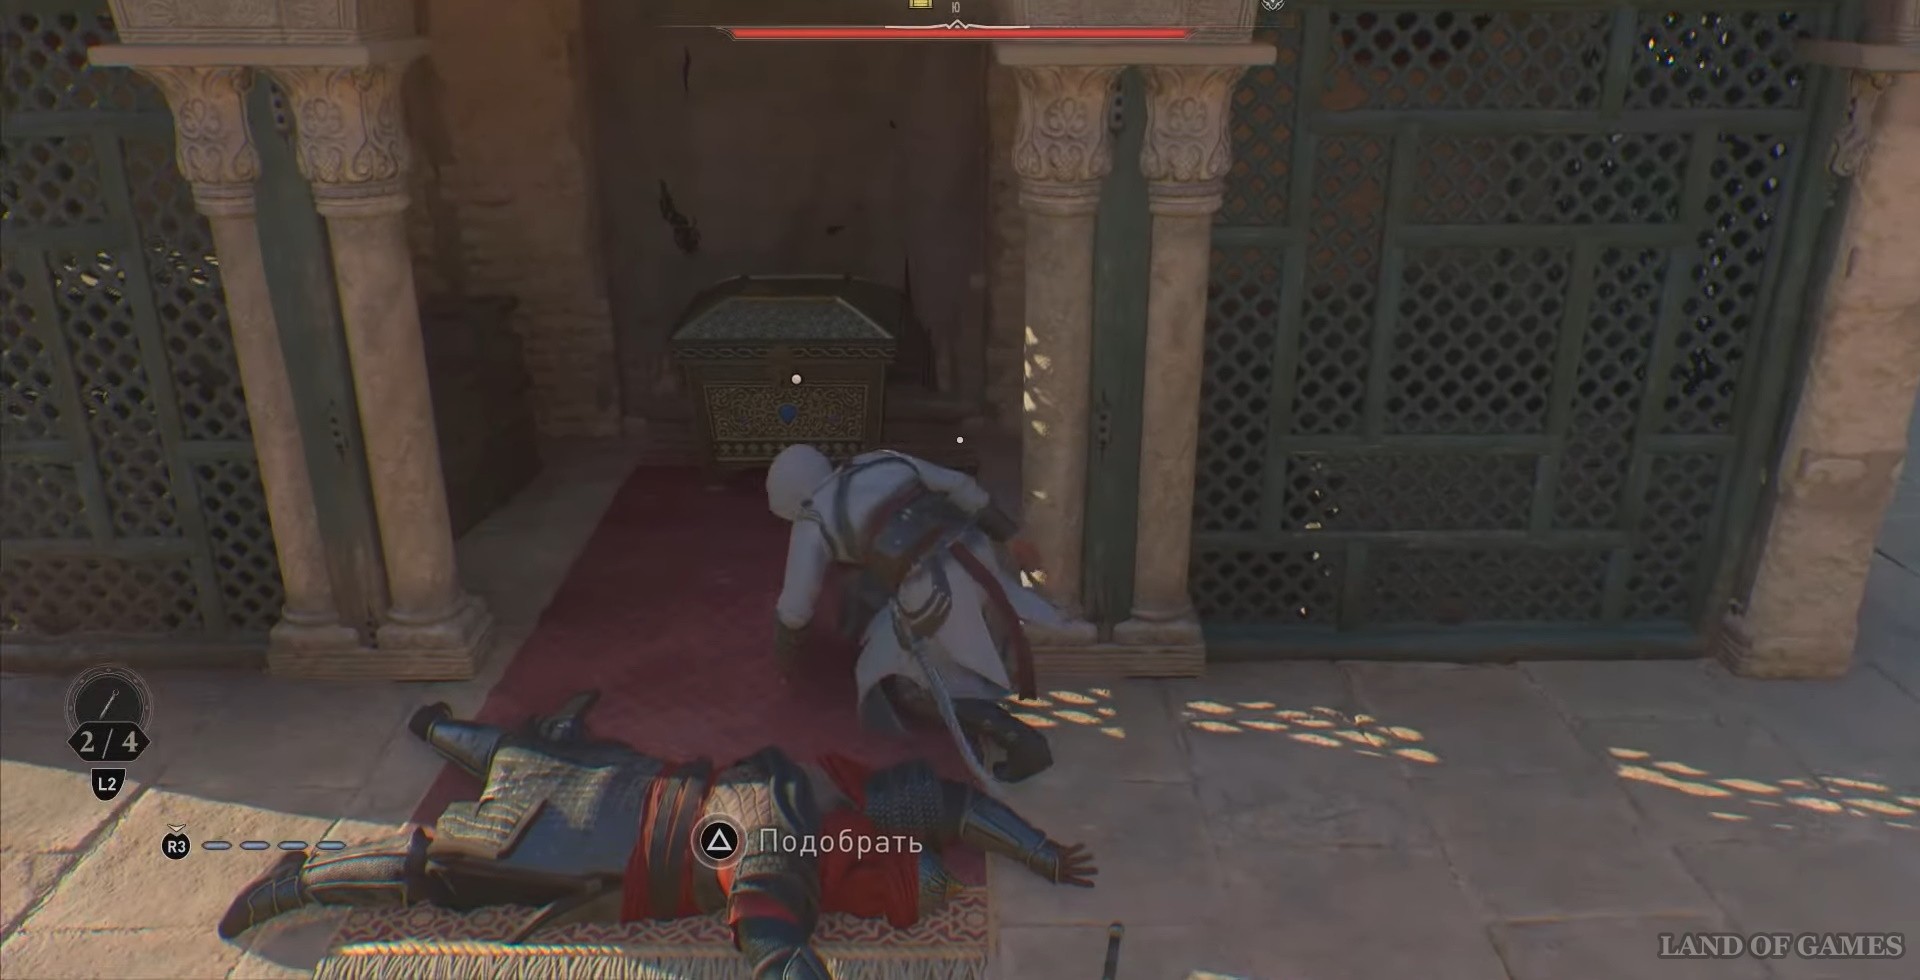
Chest No. 19 The court is anointed
Go to the location shown on the map.
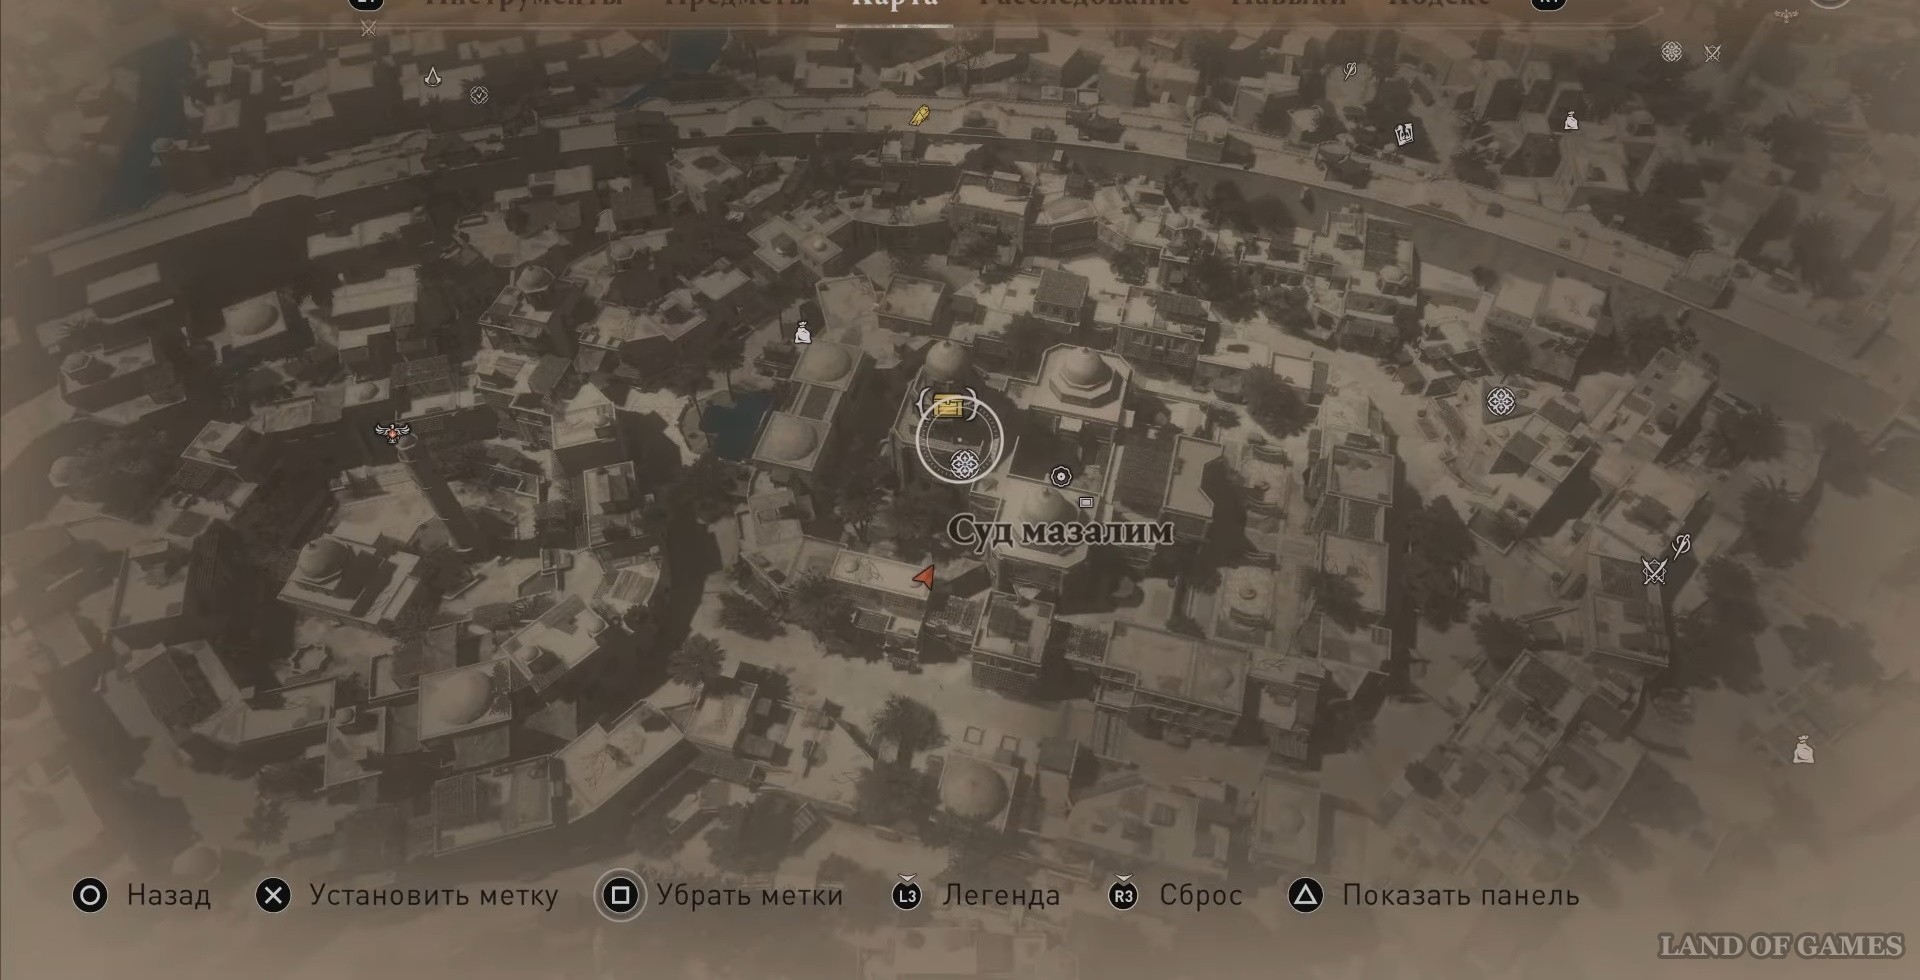
You need to get to the very top of the building. Enter from the west and go upstairs, there will be a barred window, break it and climb inside - get your reward.
Chest No. 20 Shura Headquarters
The headquarters is a very well guarded place. In addition to the guards on the roof, there are a huge number of traps around the perimeter of the building. Below in the screenshot we have highlighted the area from which there will be the most convenient approach - with the least number of guards and without traps.
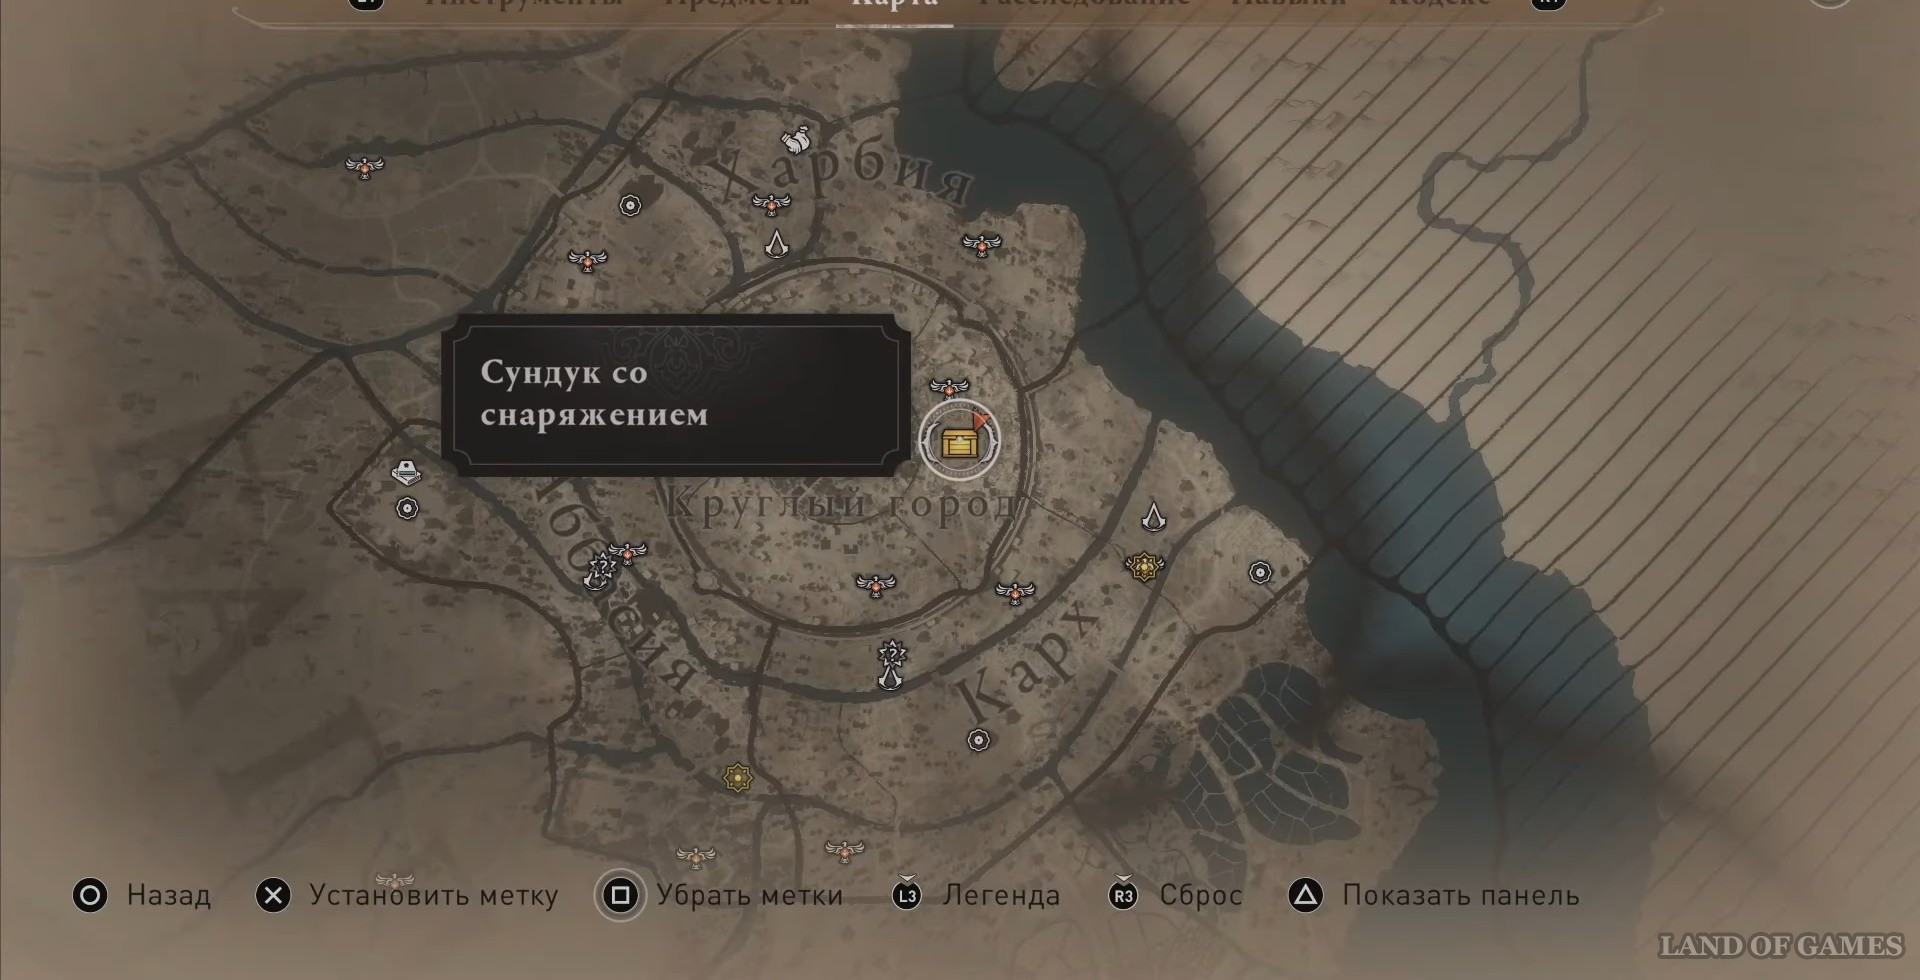
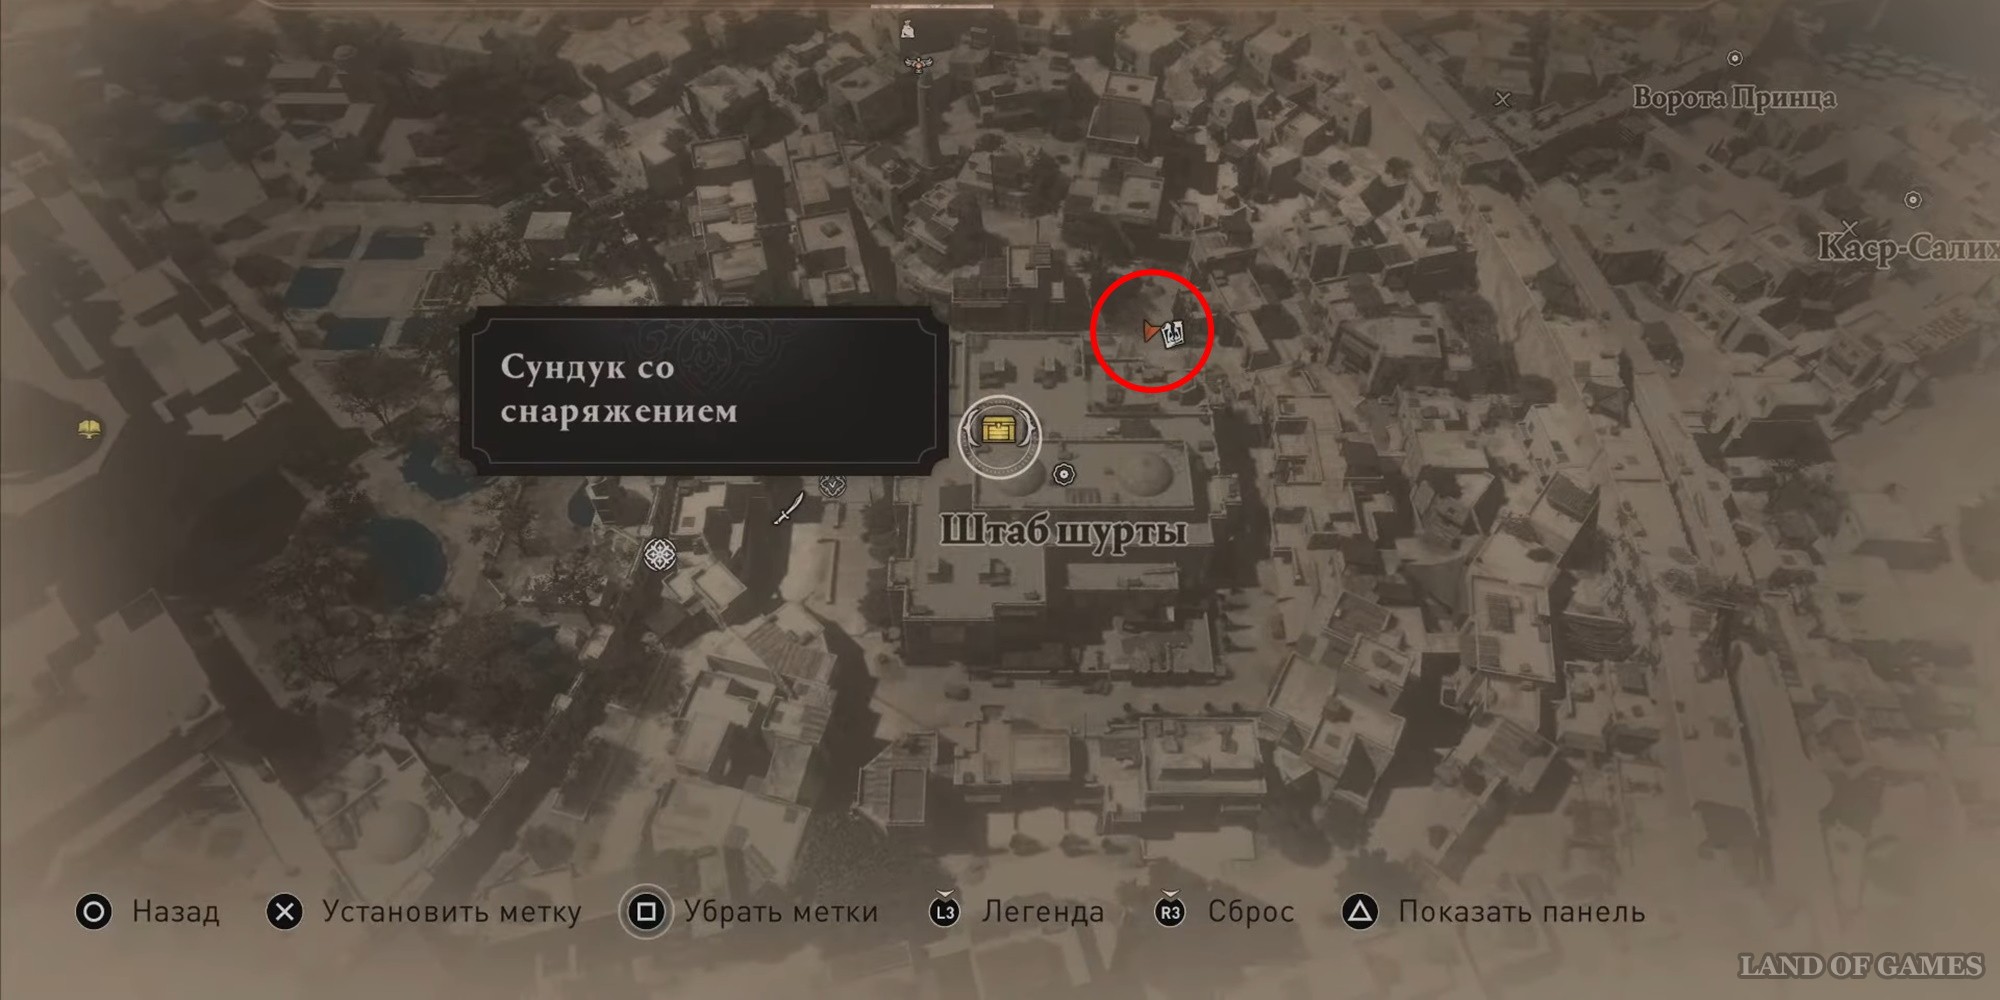
Kill the guards without being noticed and take the reward.
Chest No. 21 House of al-Jahiz
Head to the location shown on the map.
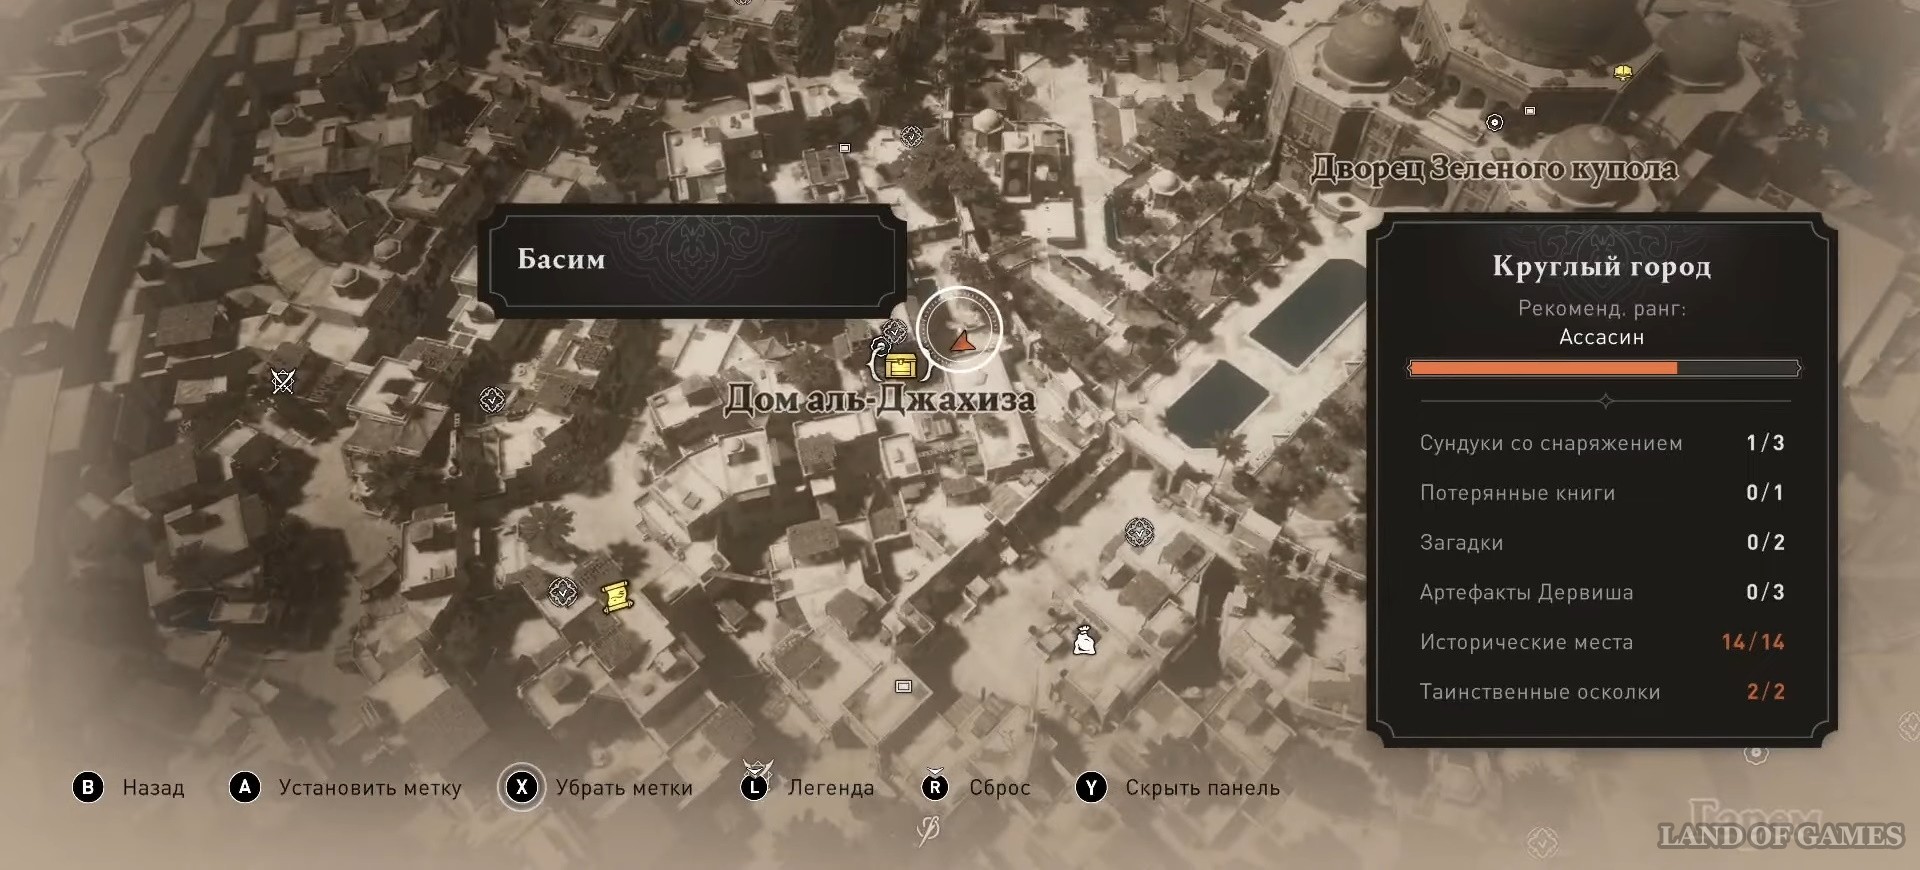
To get into the house, you need to create a hole in the roof. First, move the tall wooden shelves from the north of the room to the right.

After that, run a little to the left of the place with the shelves, there you will see a pot of oil (it can be detected with the help of eagle vision).
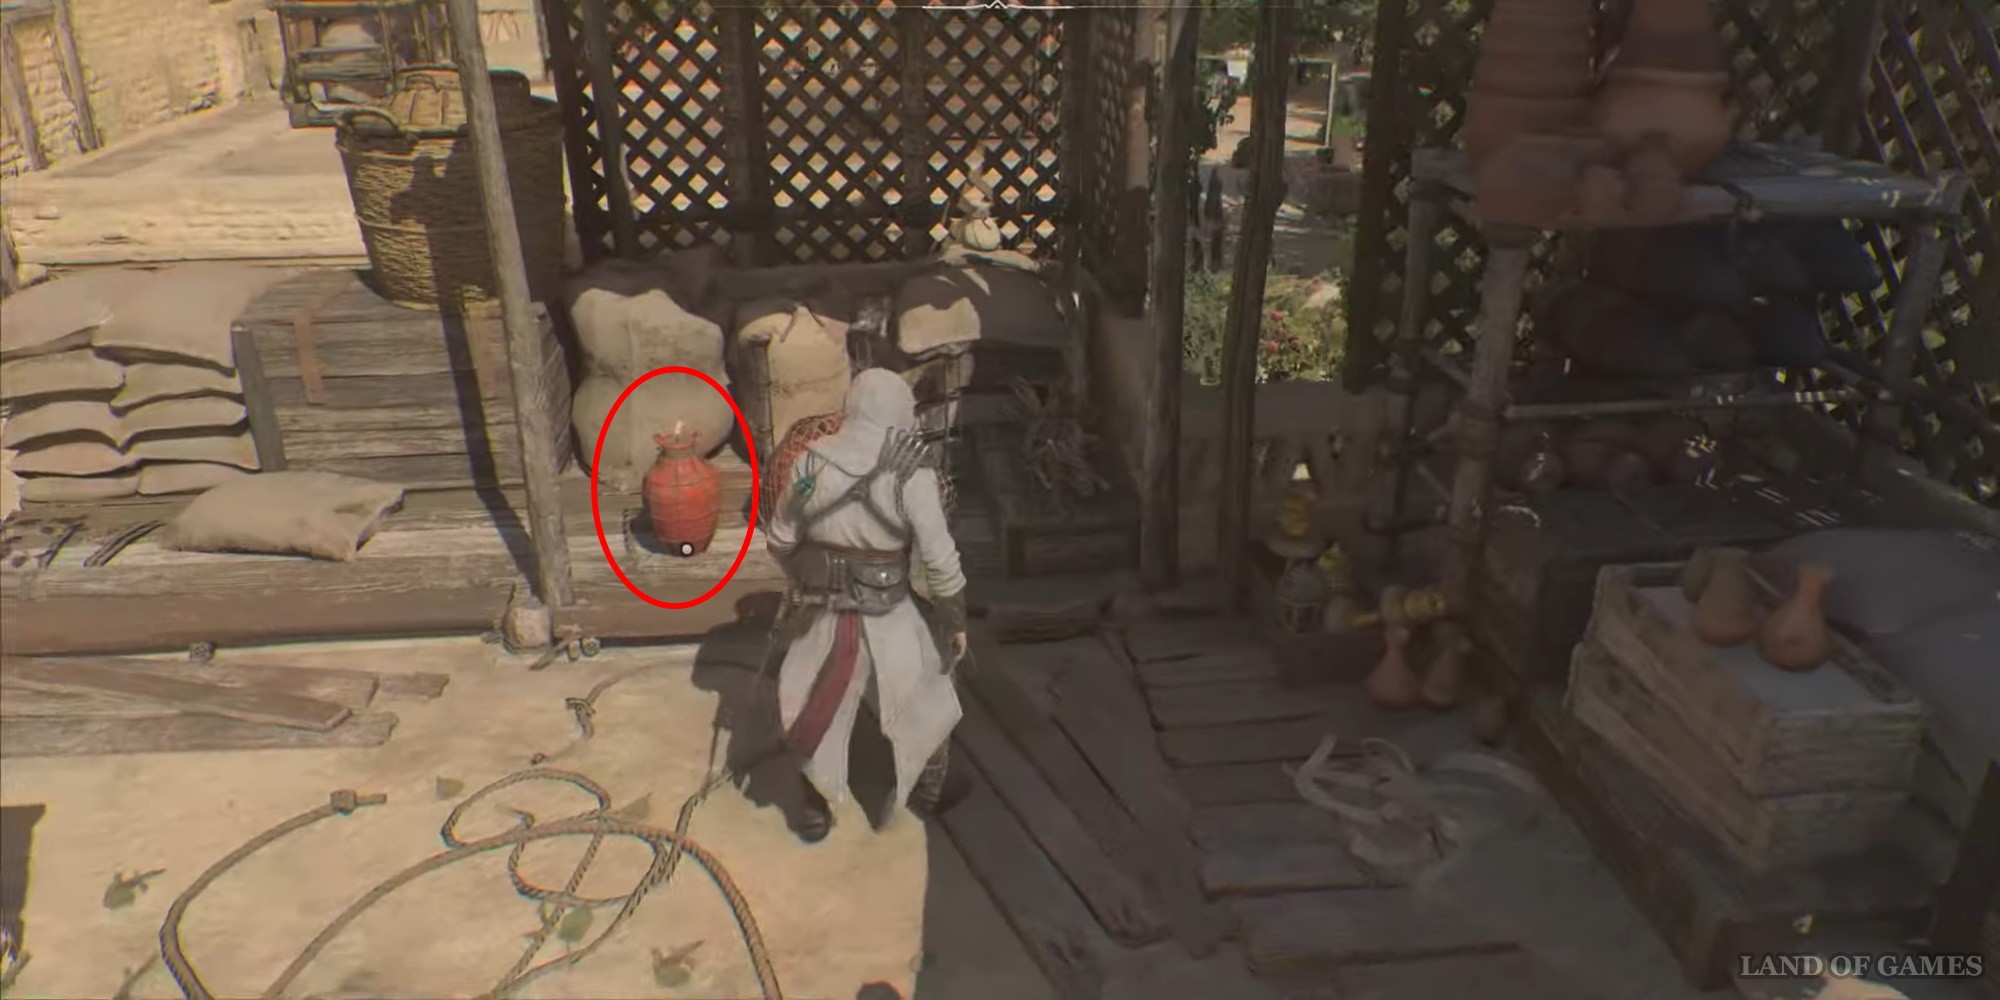
Grab the pot and go to the shelves and climb up them.
Once inside the house, go downstairs and pick up the loot.
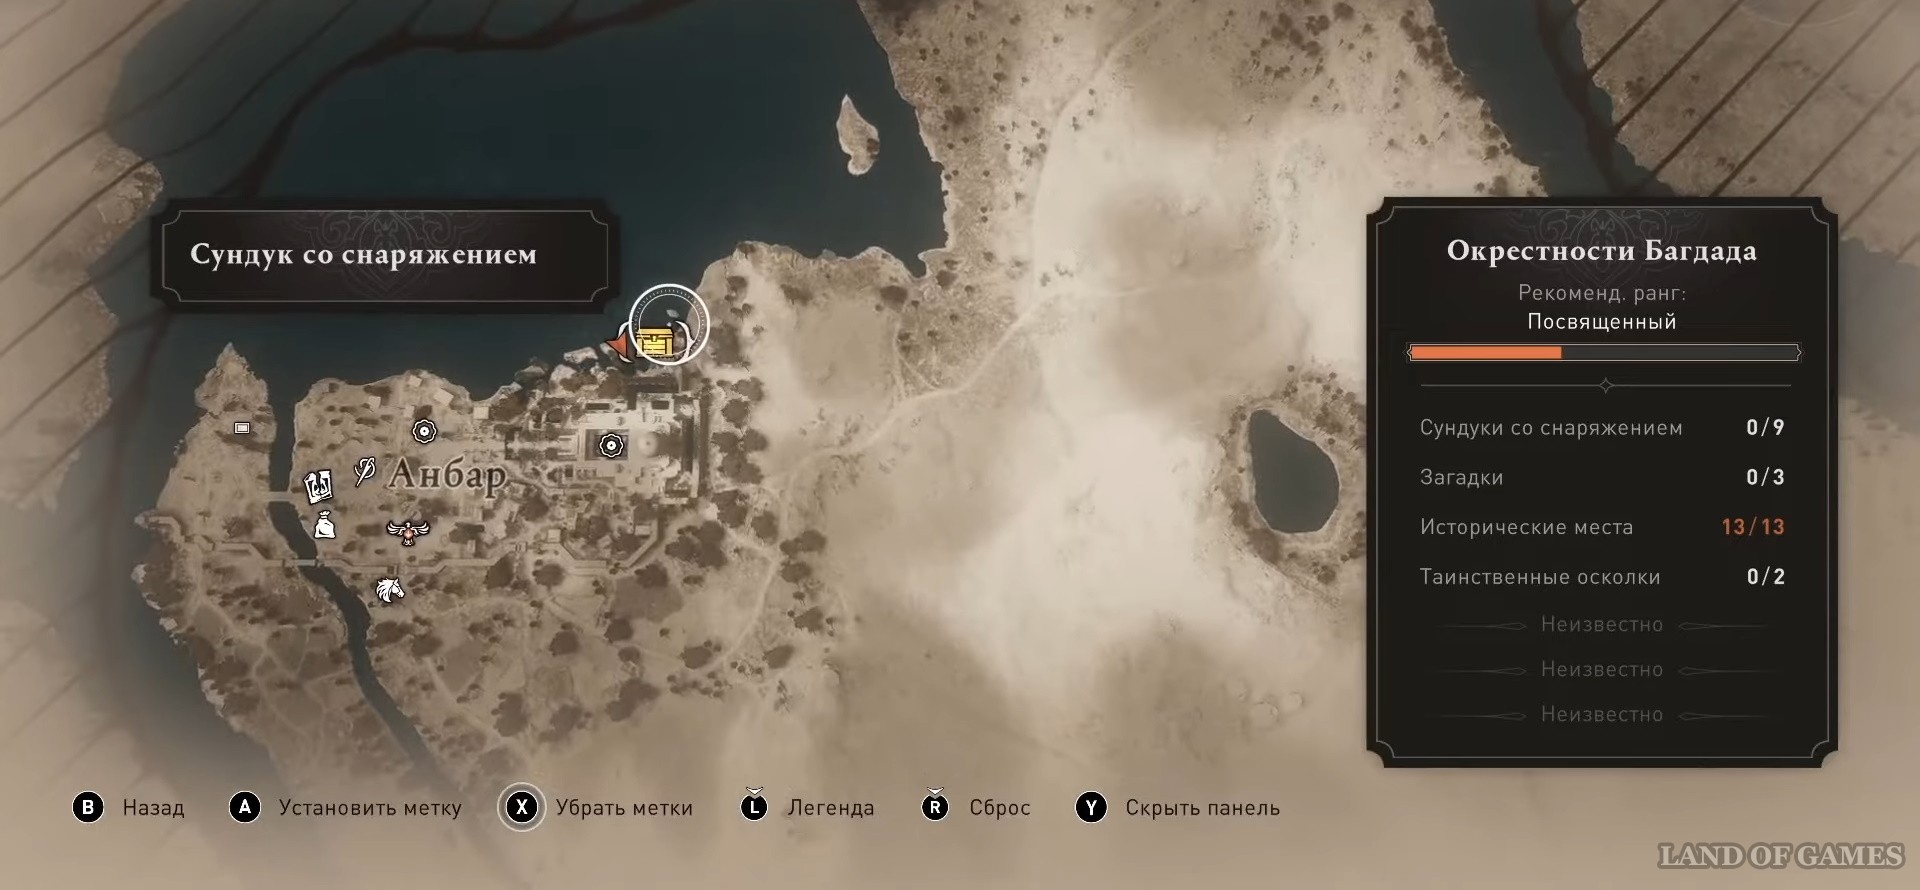
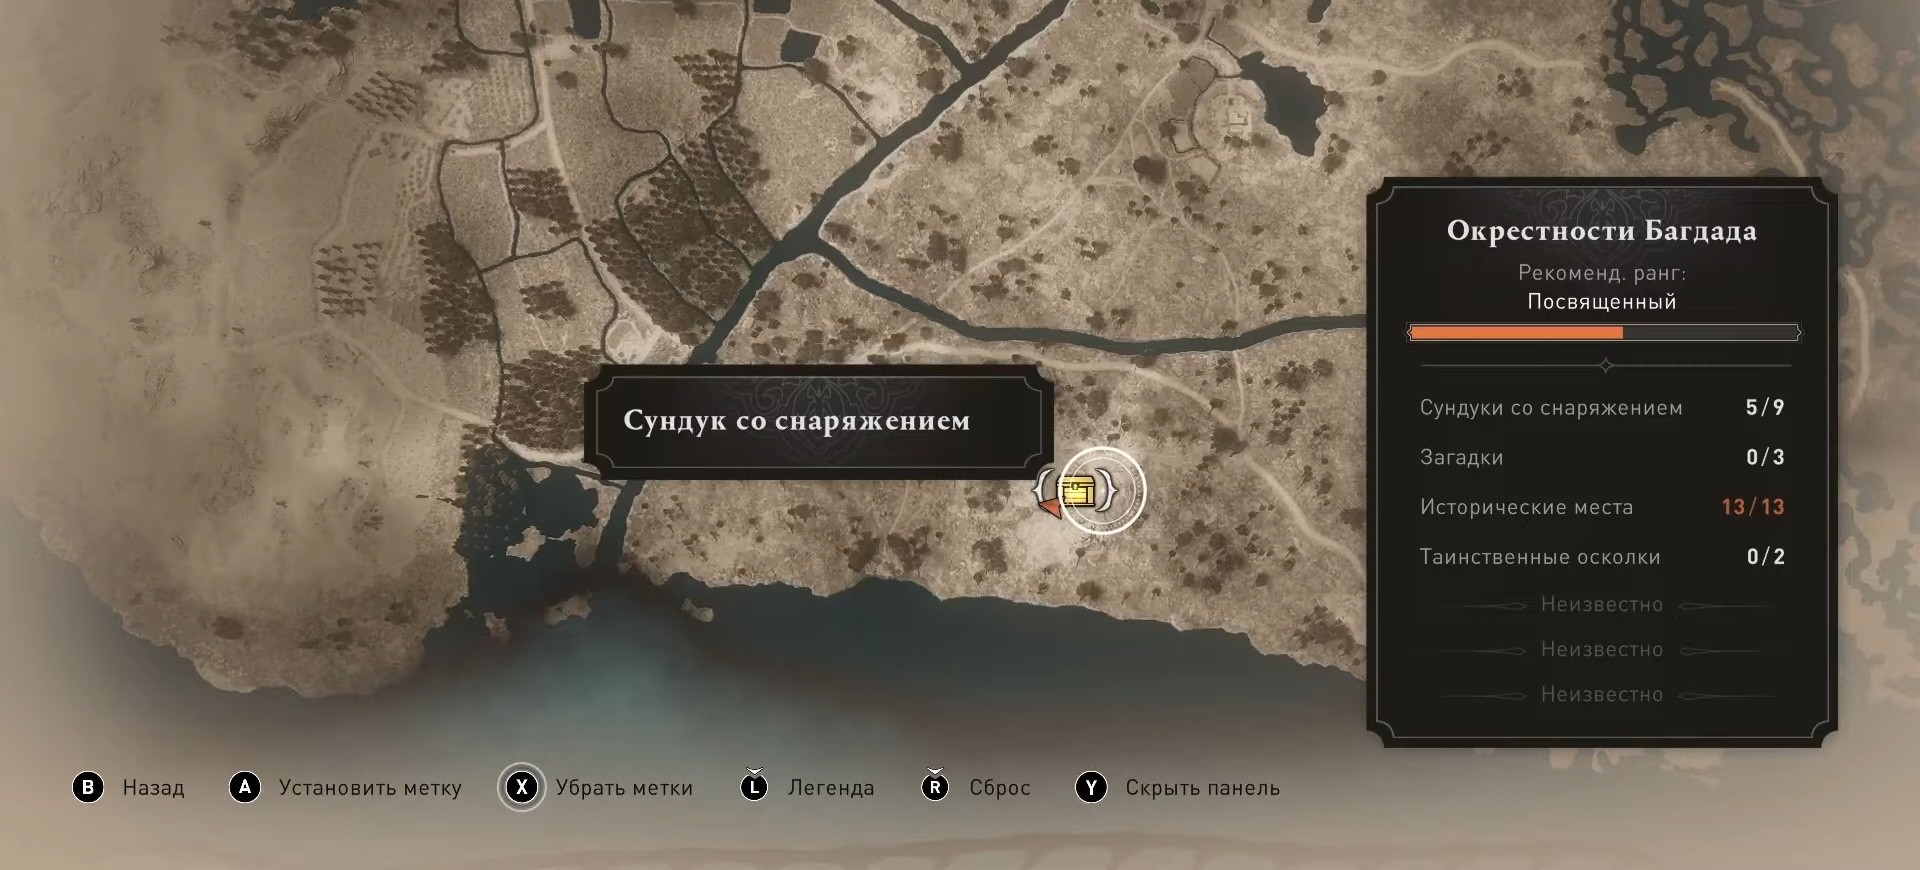
Region: Baghdad area
Nine chests can be found in this location. As a reward you will receive a dagger, three legendary weapons and one suit. Their characteristics can be seen in the screenshots below.
In order to open three of the nine chests, you need to find all the mysterious shards. We described in detail how to do this in separate material.
Chest No. 22 Winter Palace
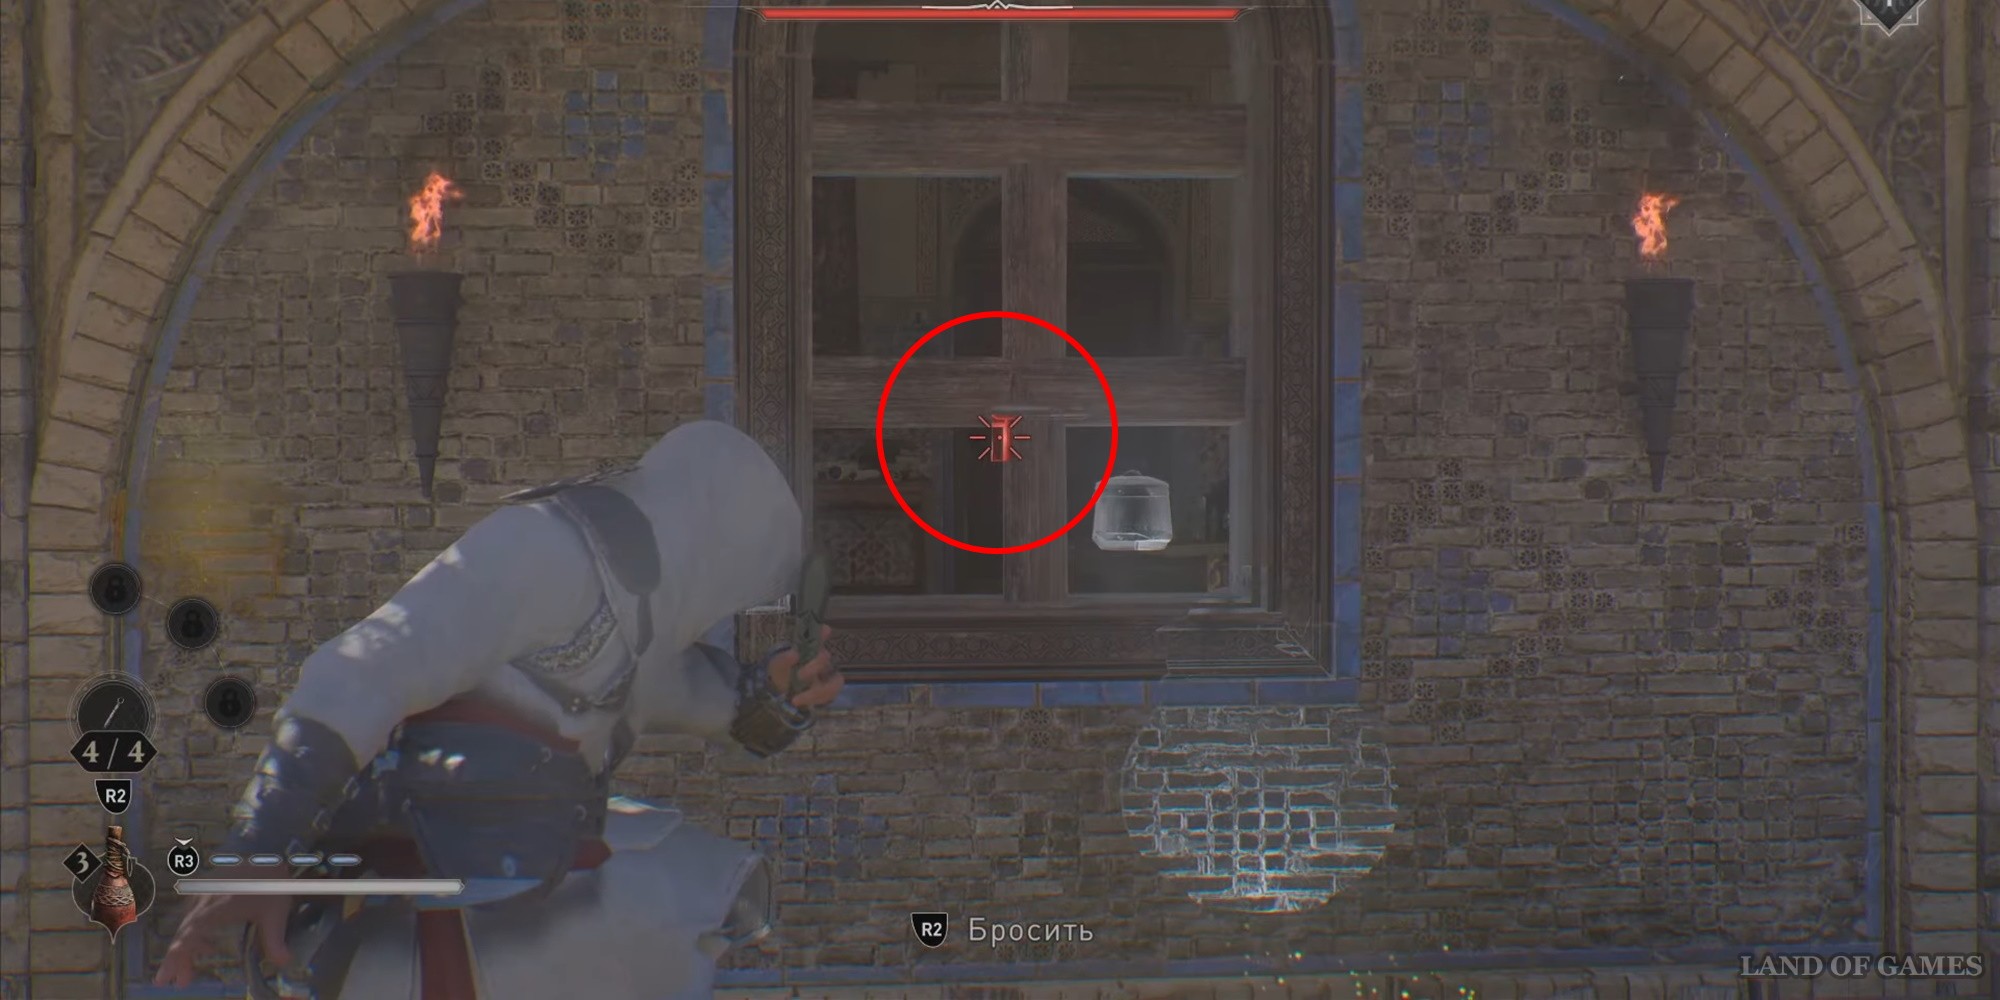
Head northwest of Baghdad, the chest is located near the Winter Palace. Enter from the south of the palace, you will see two windows with wooden bars.
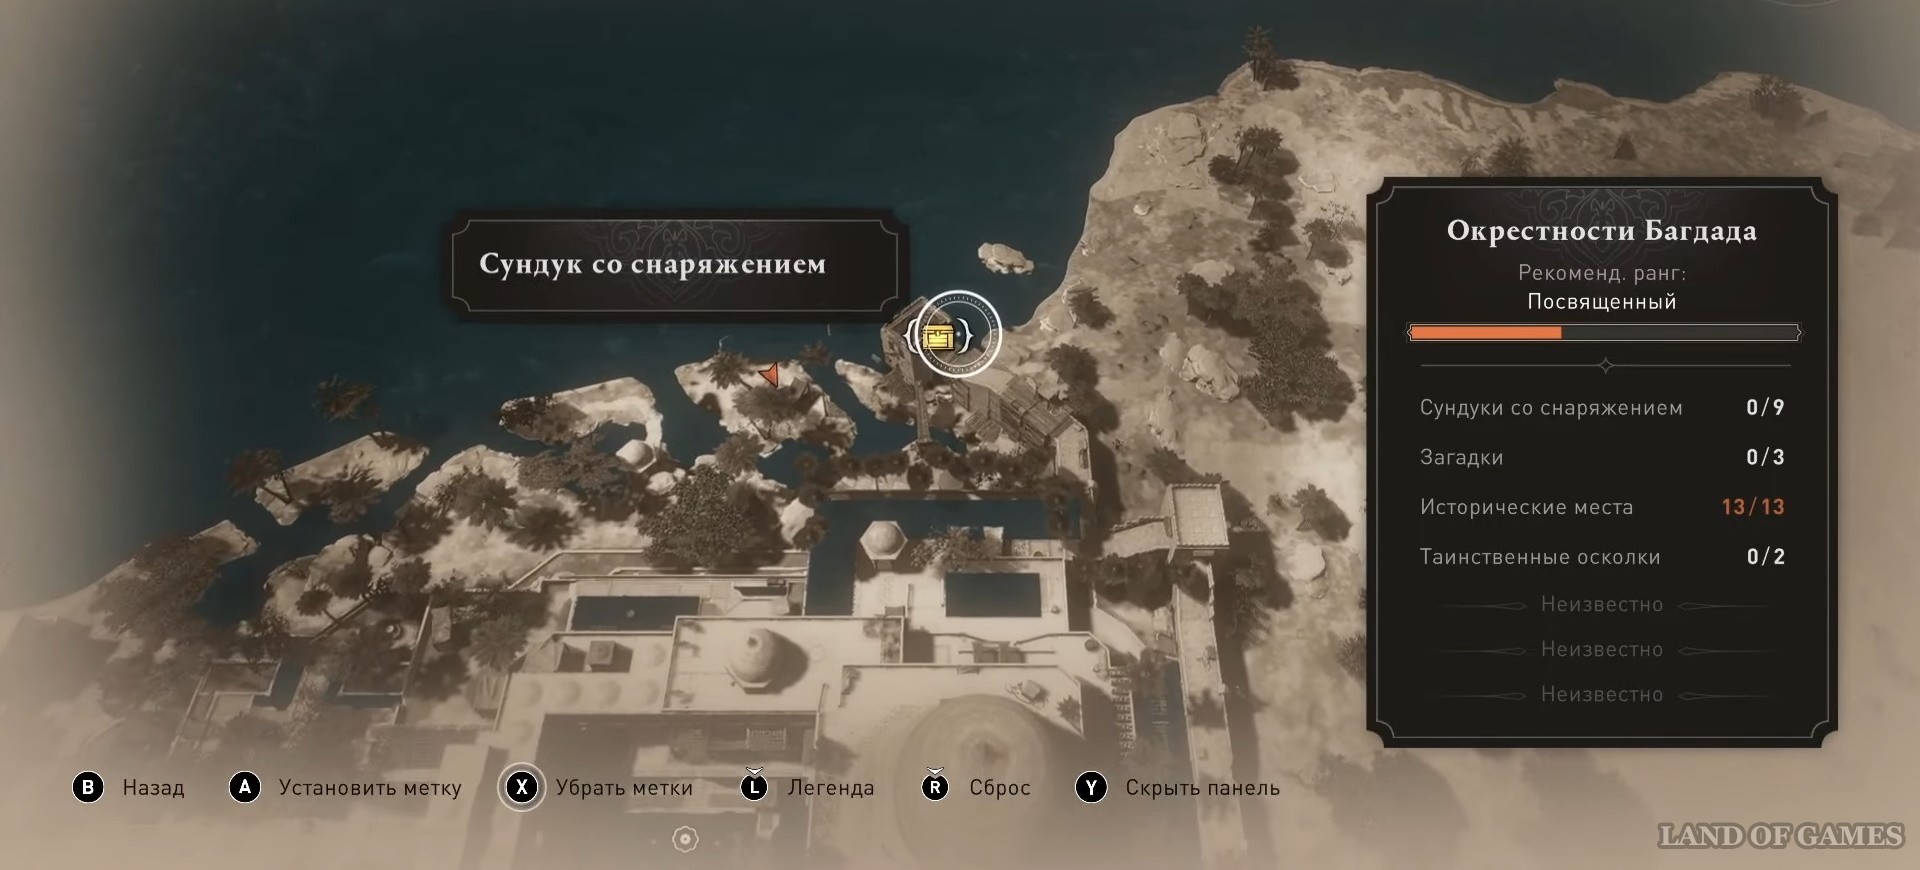

Throw a knife through them, thereby knocking down the chandelier. As a result of this action, the entrance on the other side will open and you can get inside.
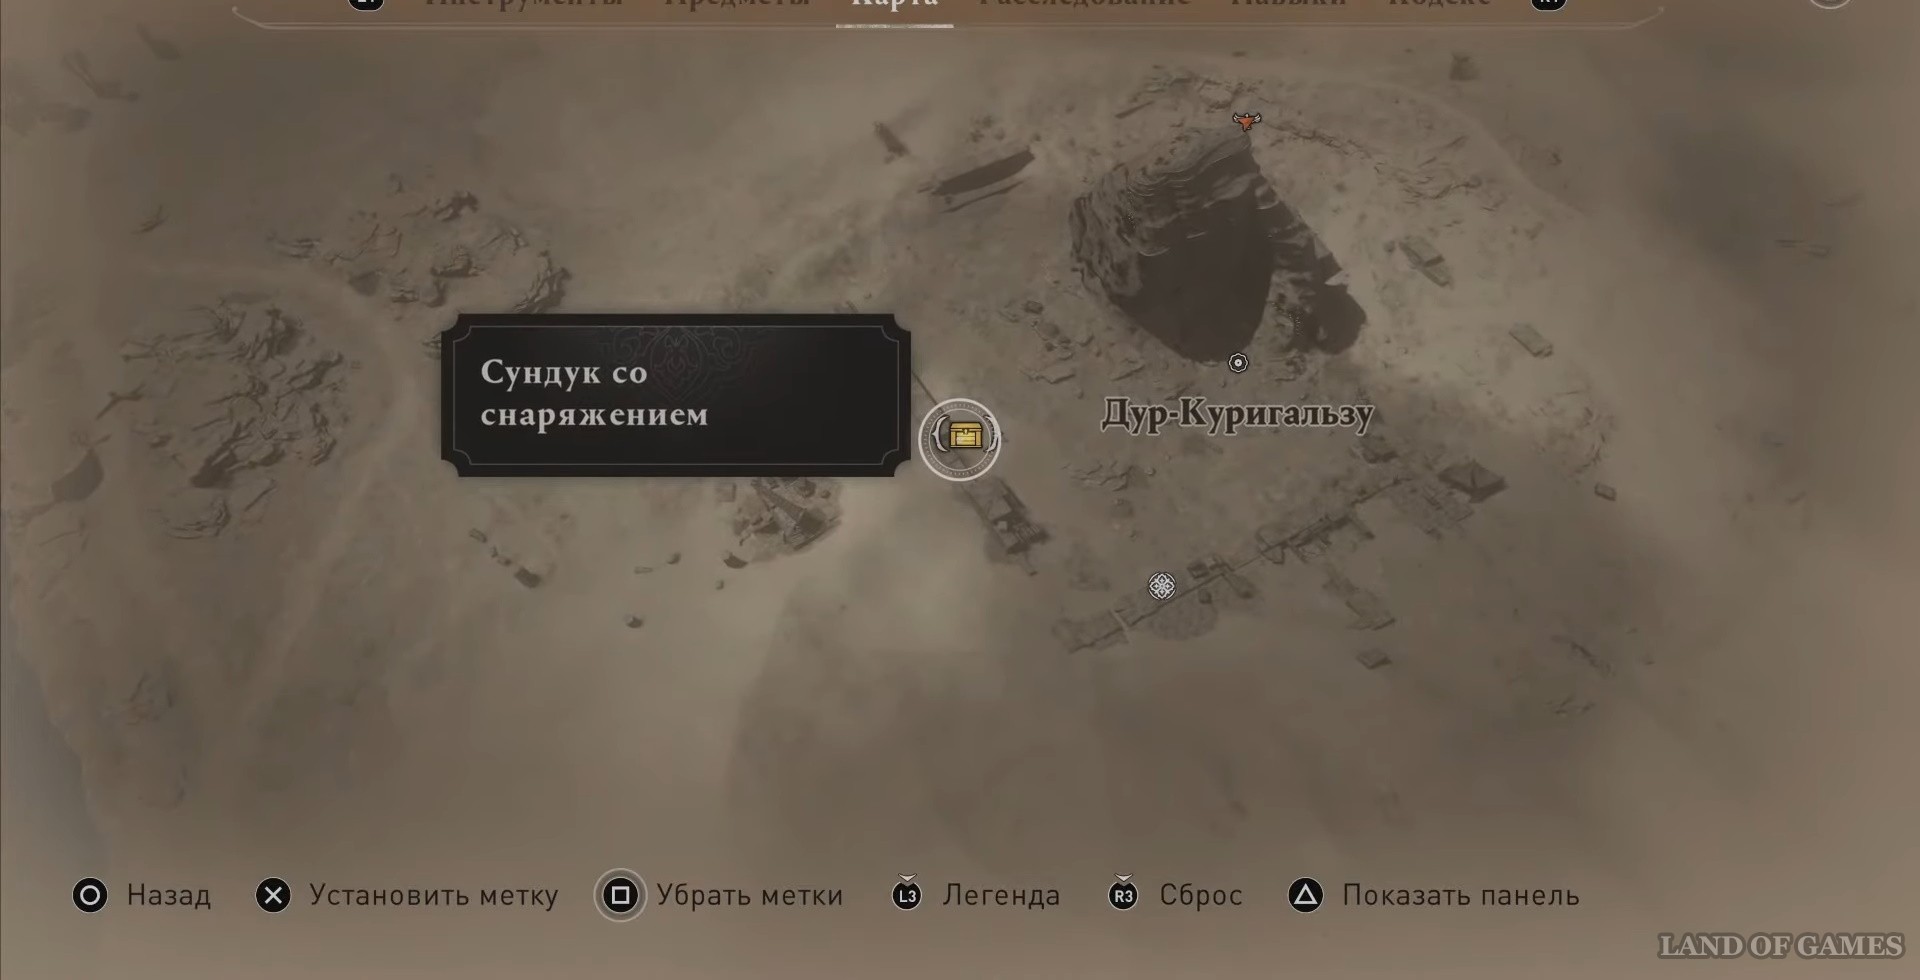
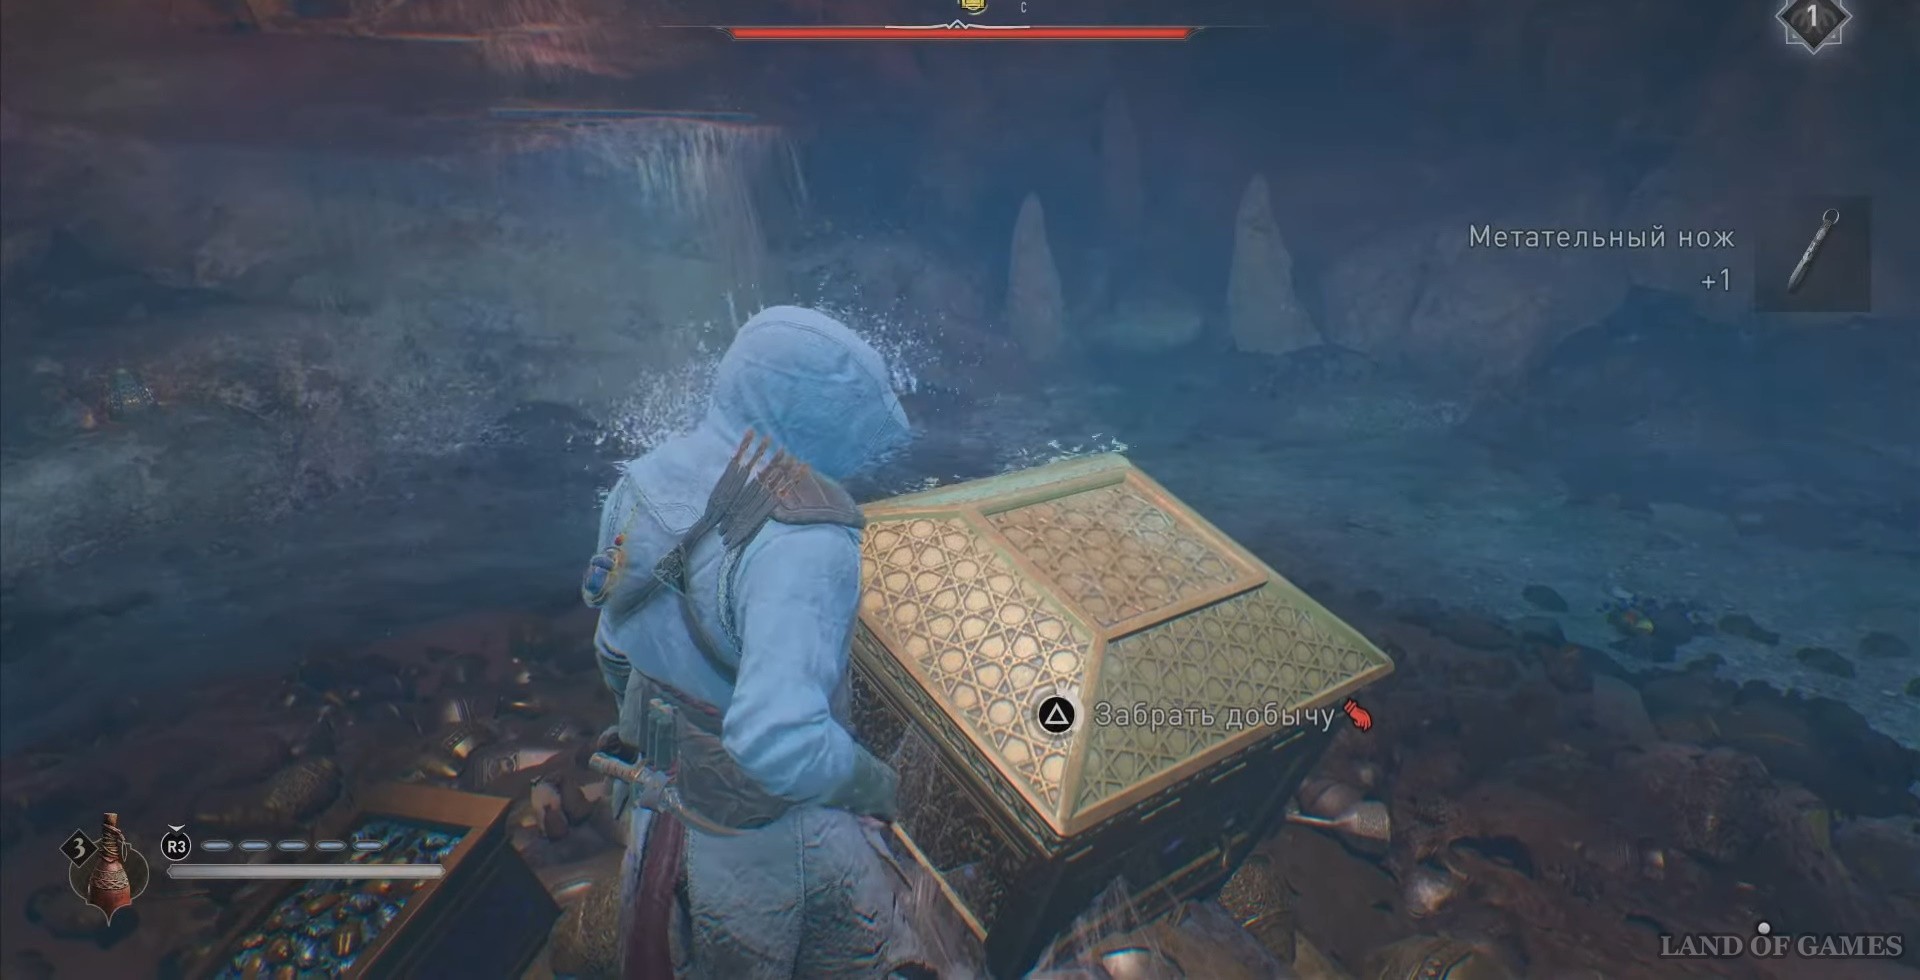
Chest #23 Dur-Kurigalzu
This location can be reached using a fast travel point. Once in place, jump down.
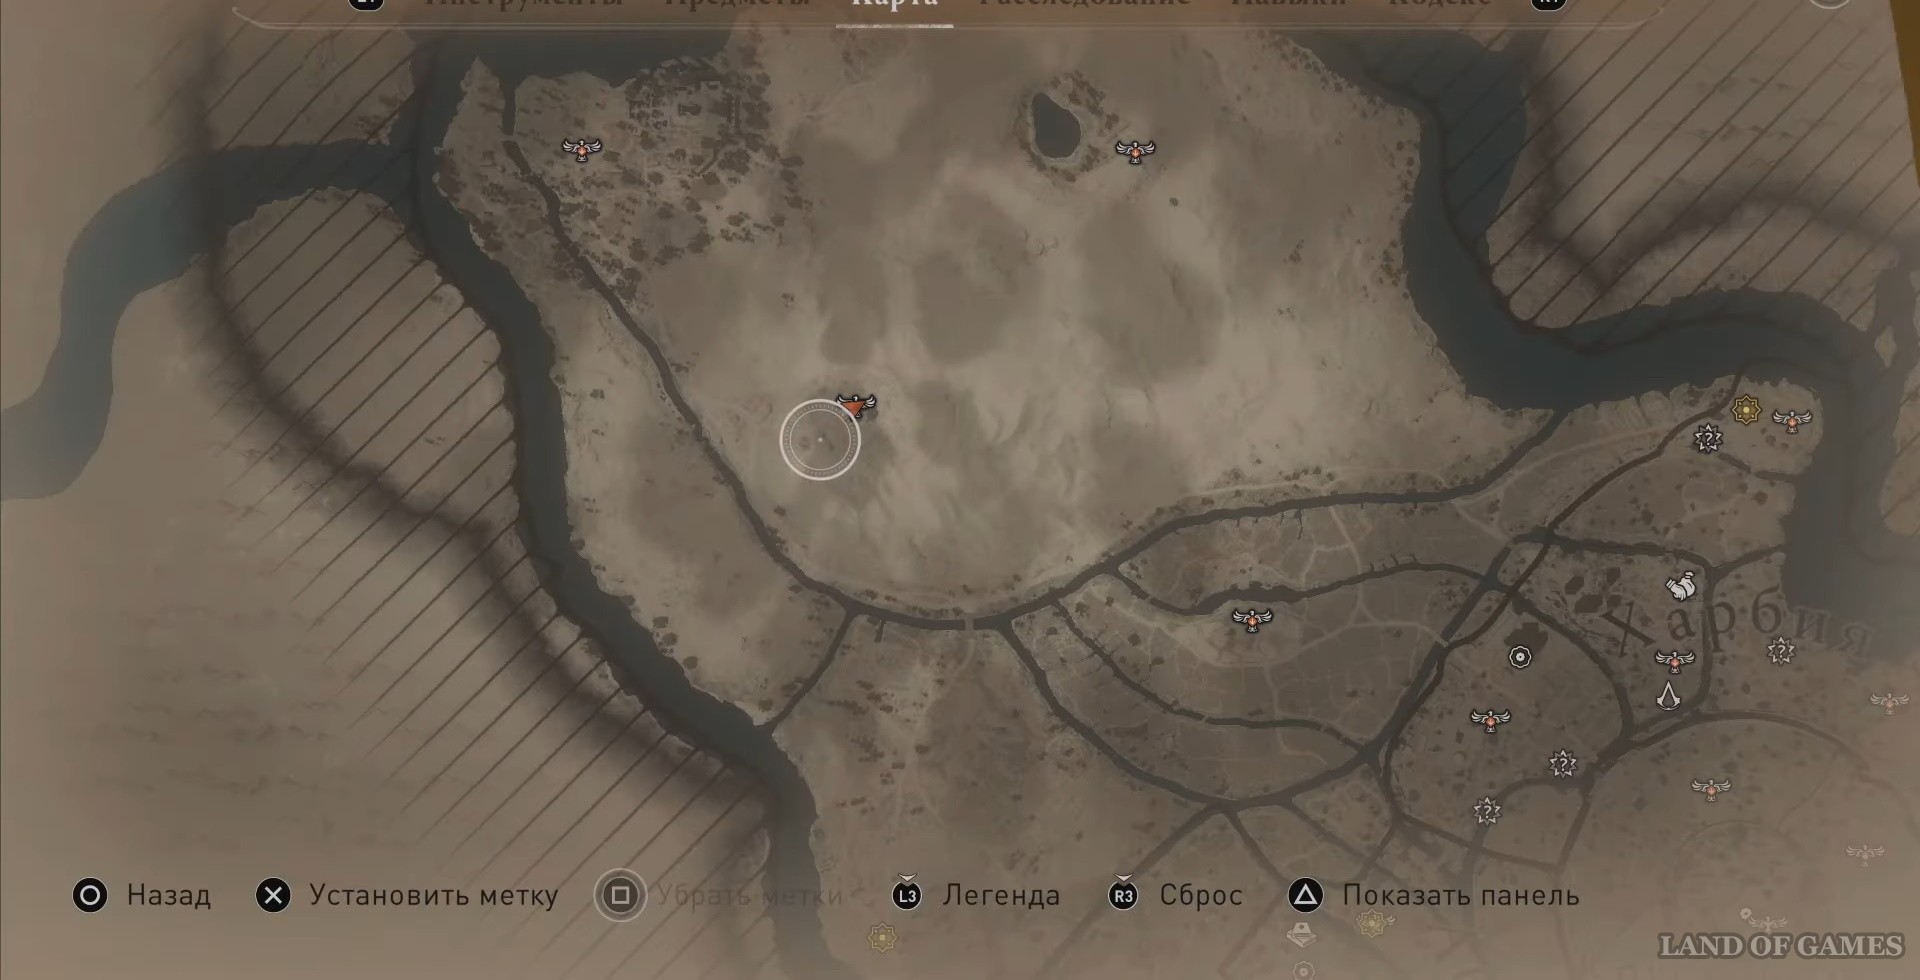
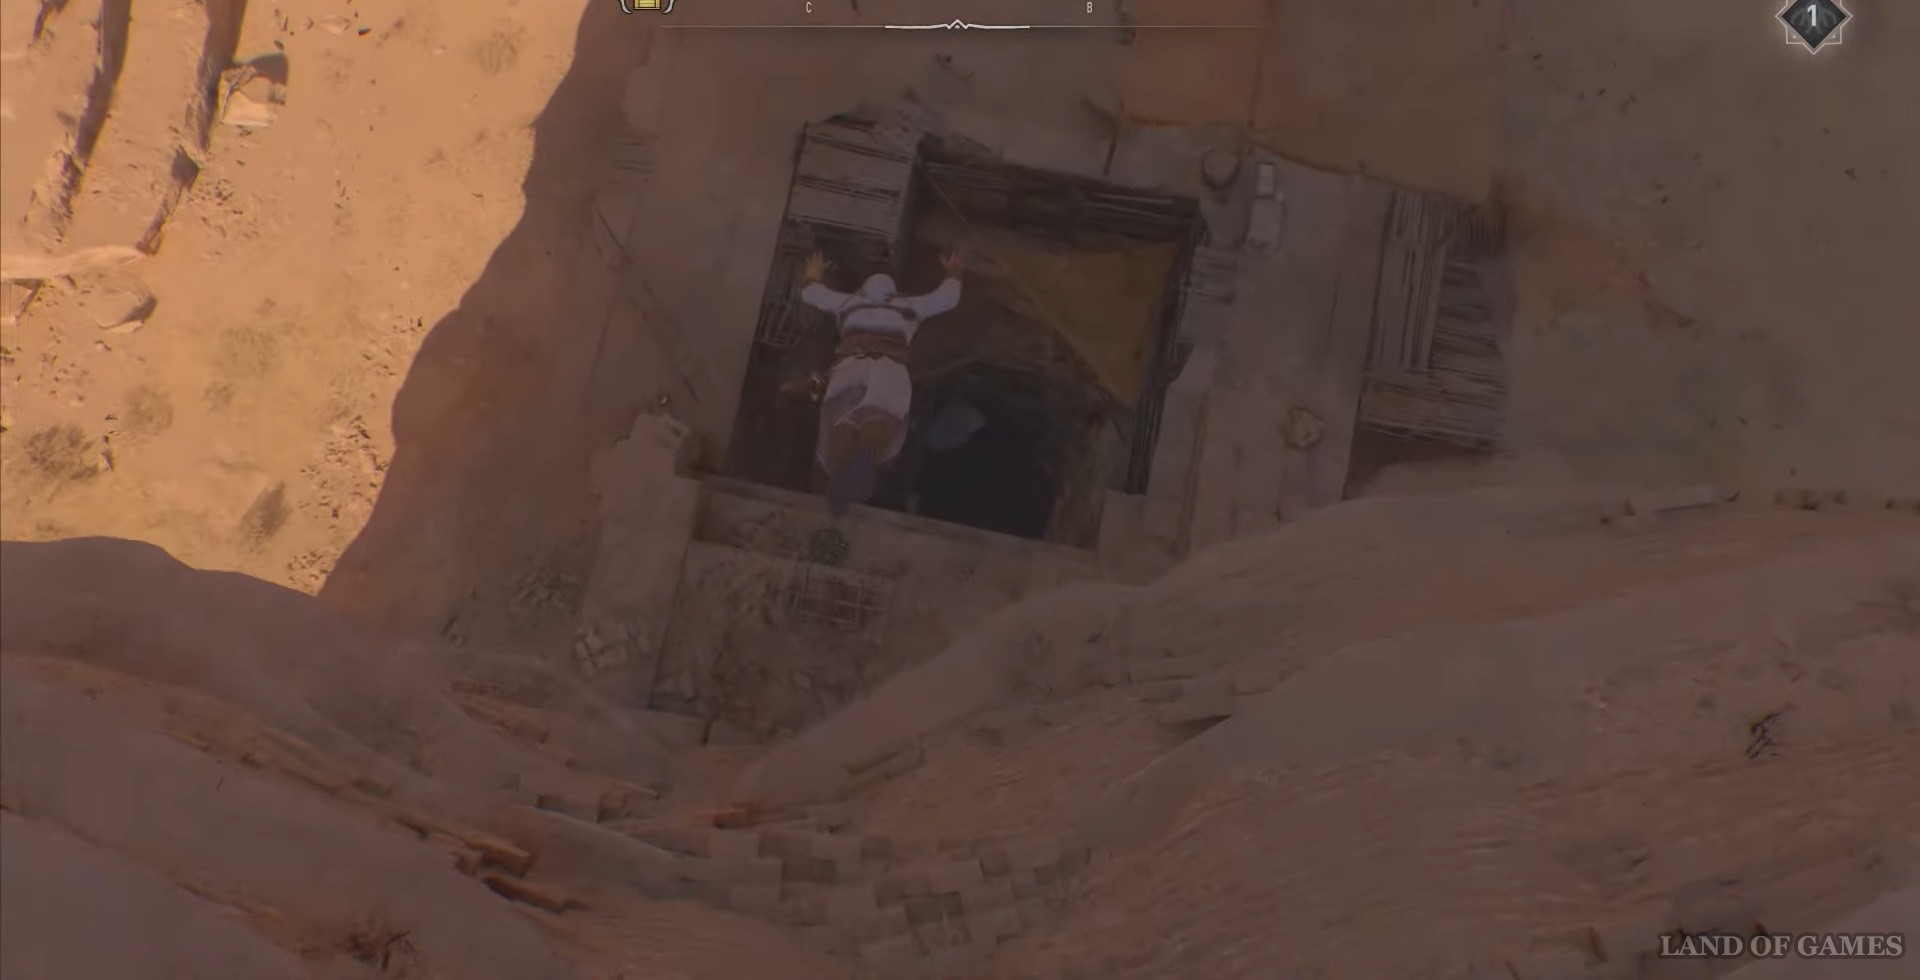
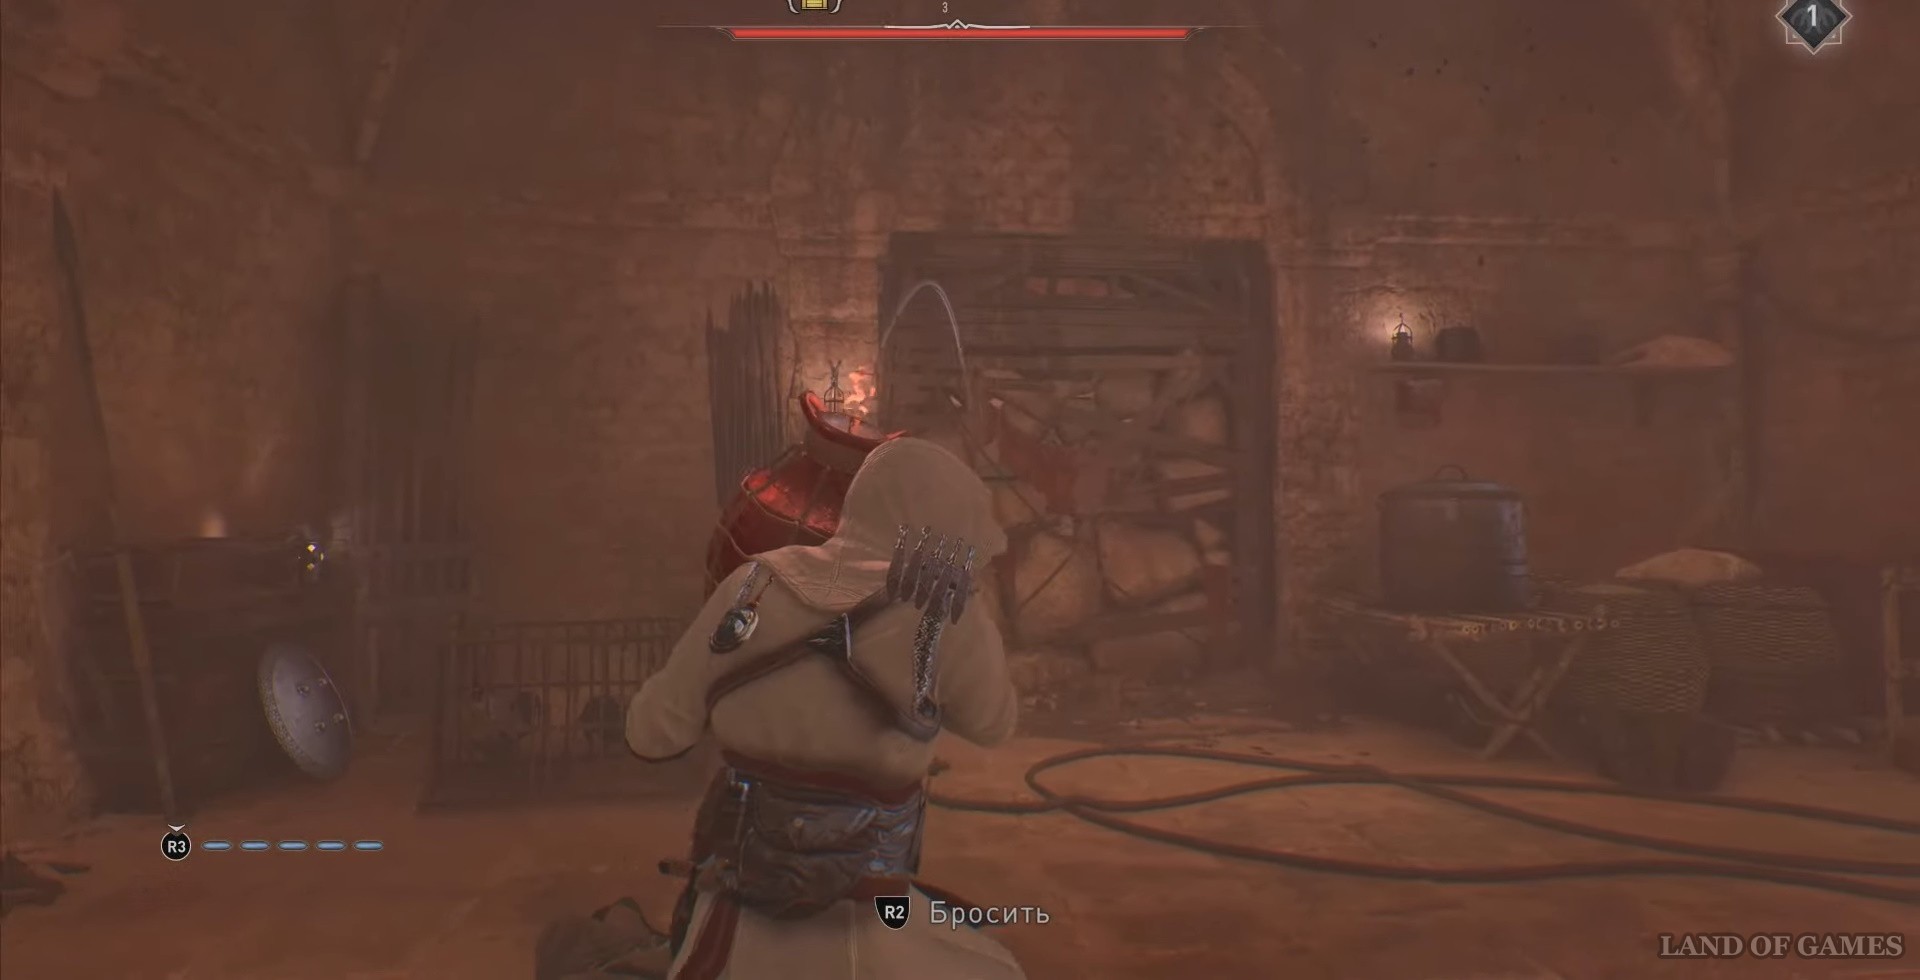
Inside the cave you will need to kill several enemies. Next, go to the huge boulder, move it, walk a little forward and take the red jug with boiling oil.
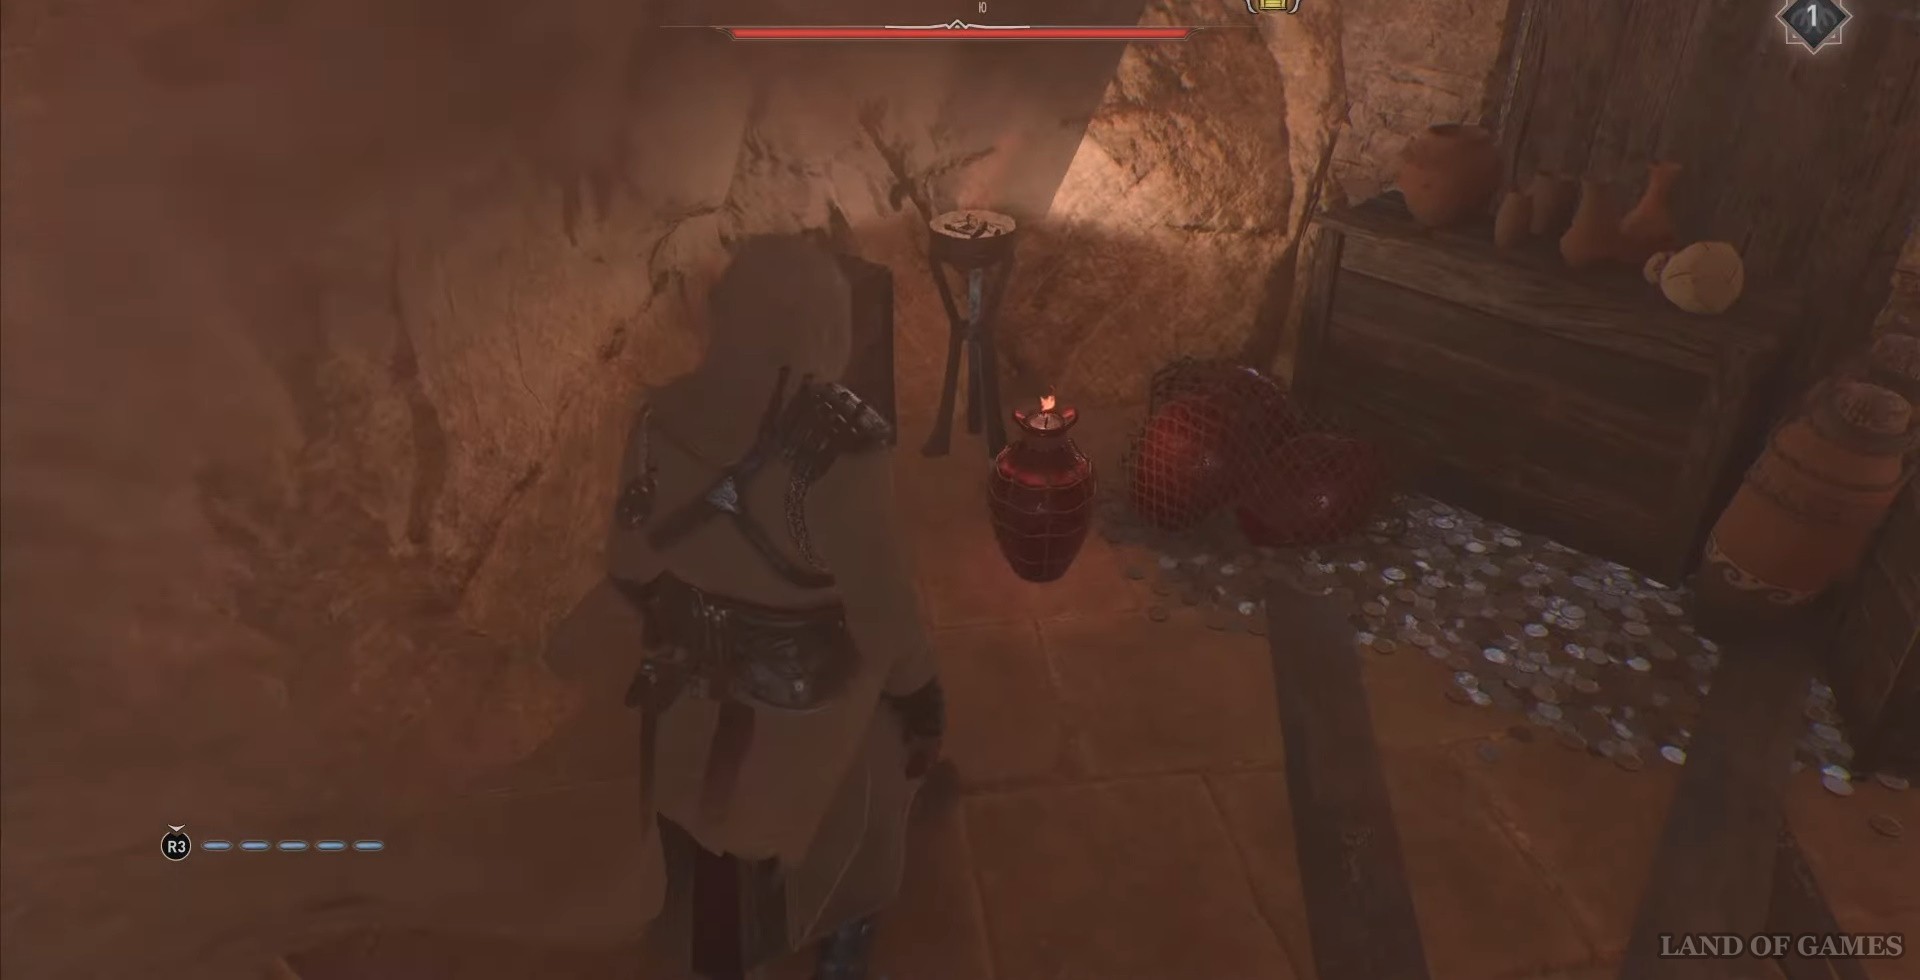
Take the oil to the back room, there will be a wall covered with stones. Throw a jug into this place and the entrance to the tunnel will open for you - run along it to the very end. Once in place, jump down and take the loot.
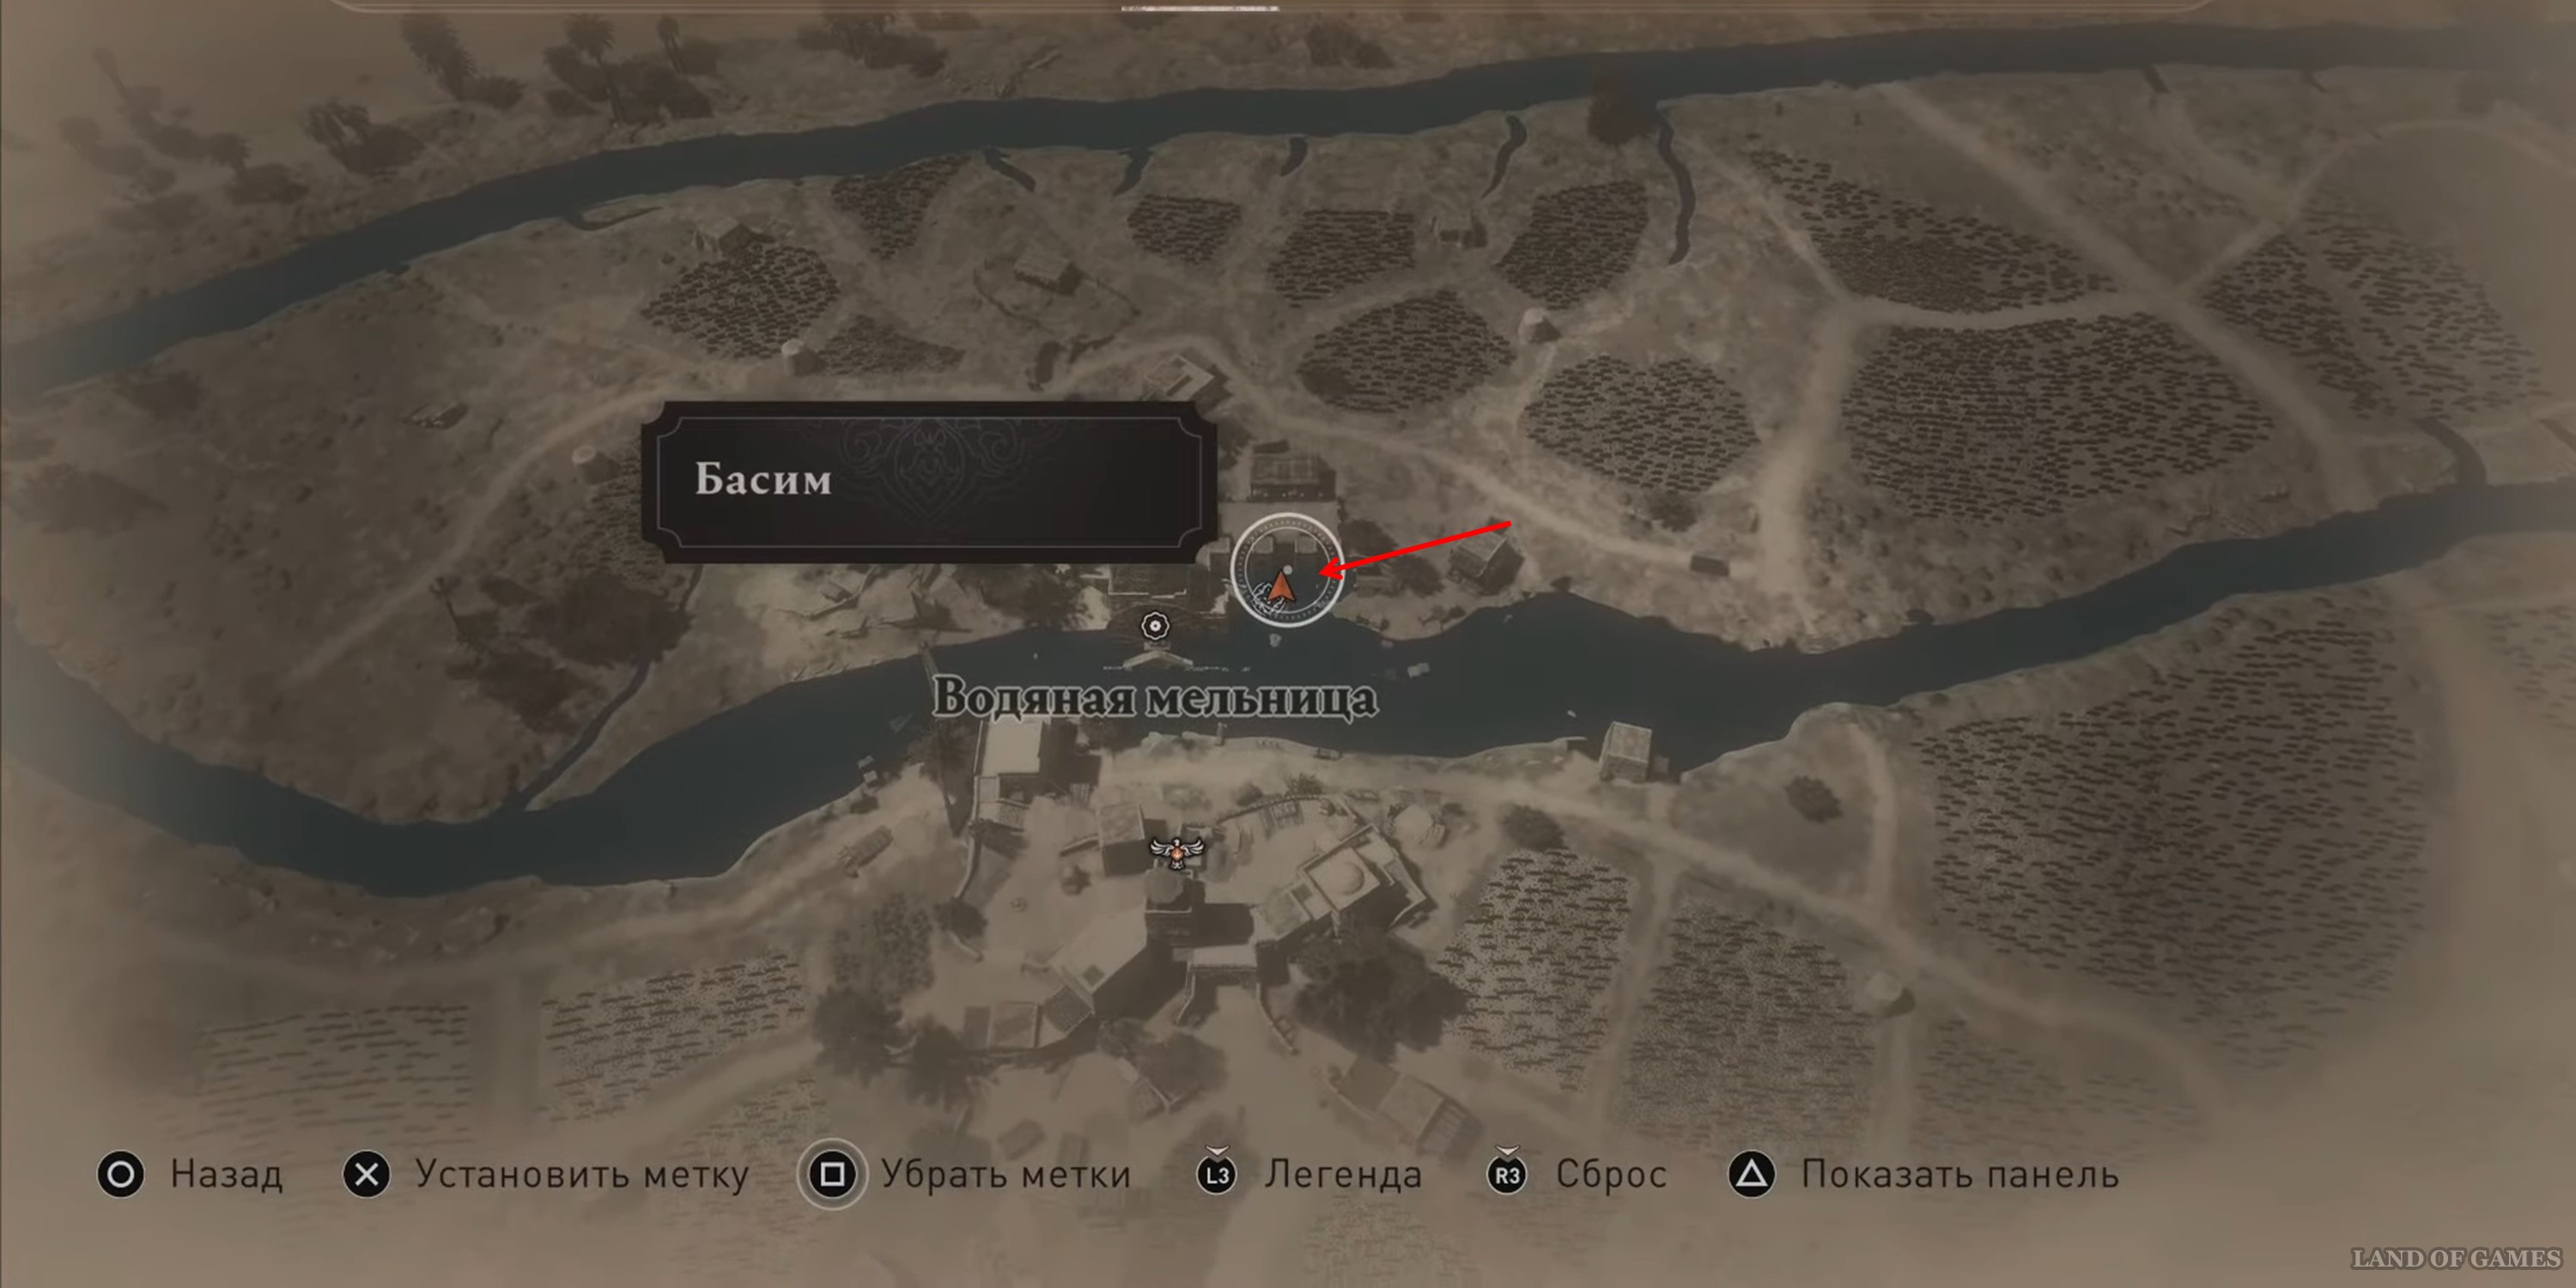
Chest #24 Water Mill
Go to the location shown on the map below.
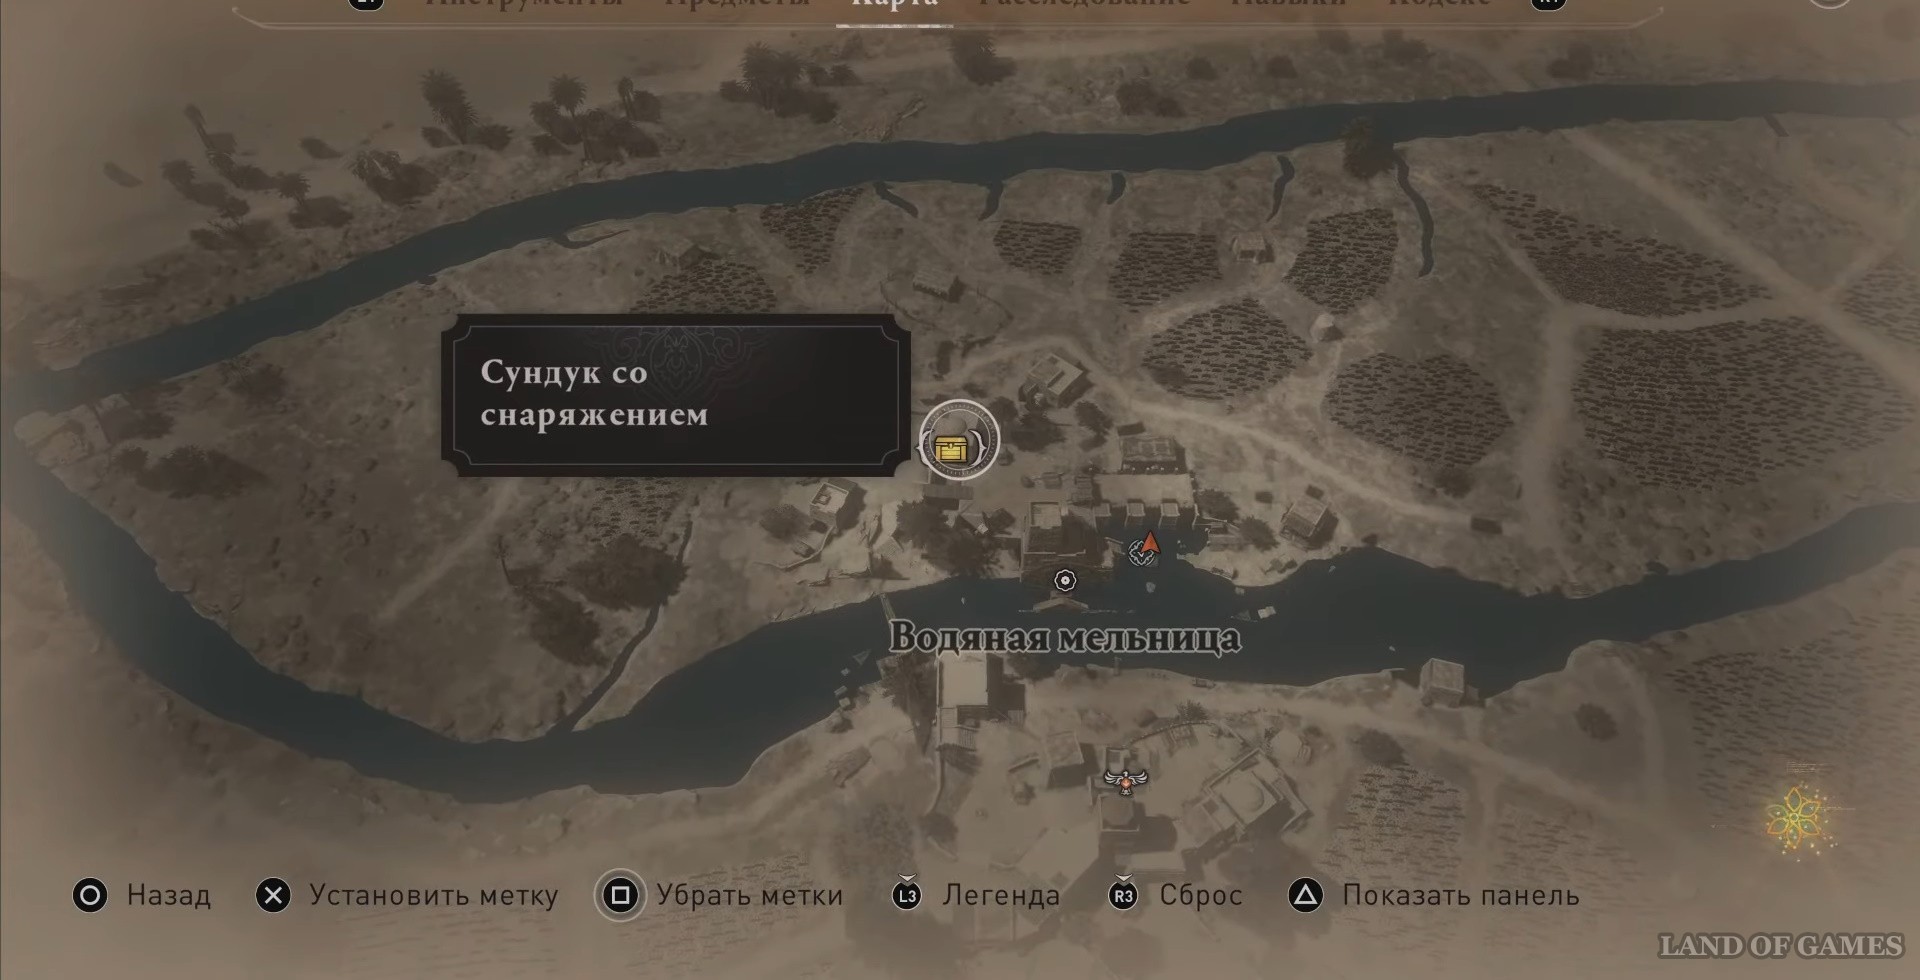
First you need to get a key to the chest. We have marked the location of the key in the screenshot below.
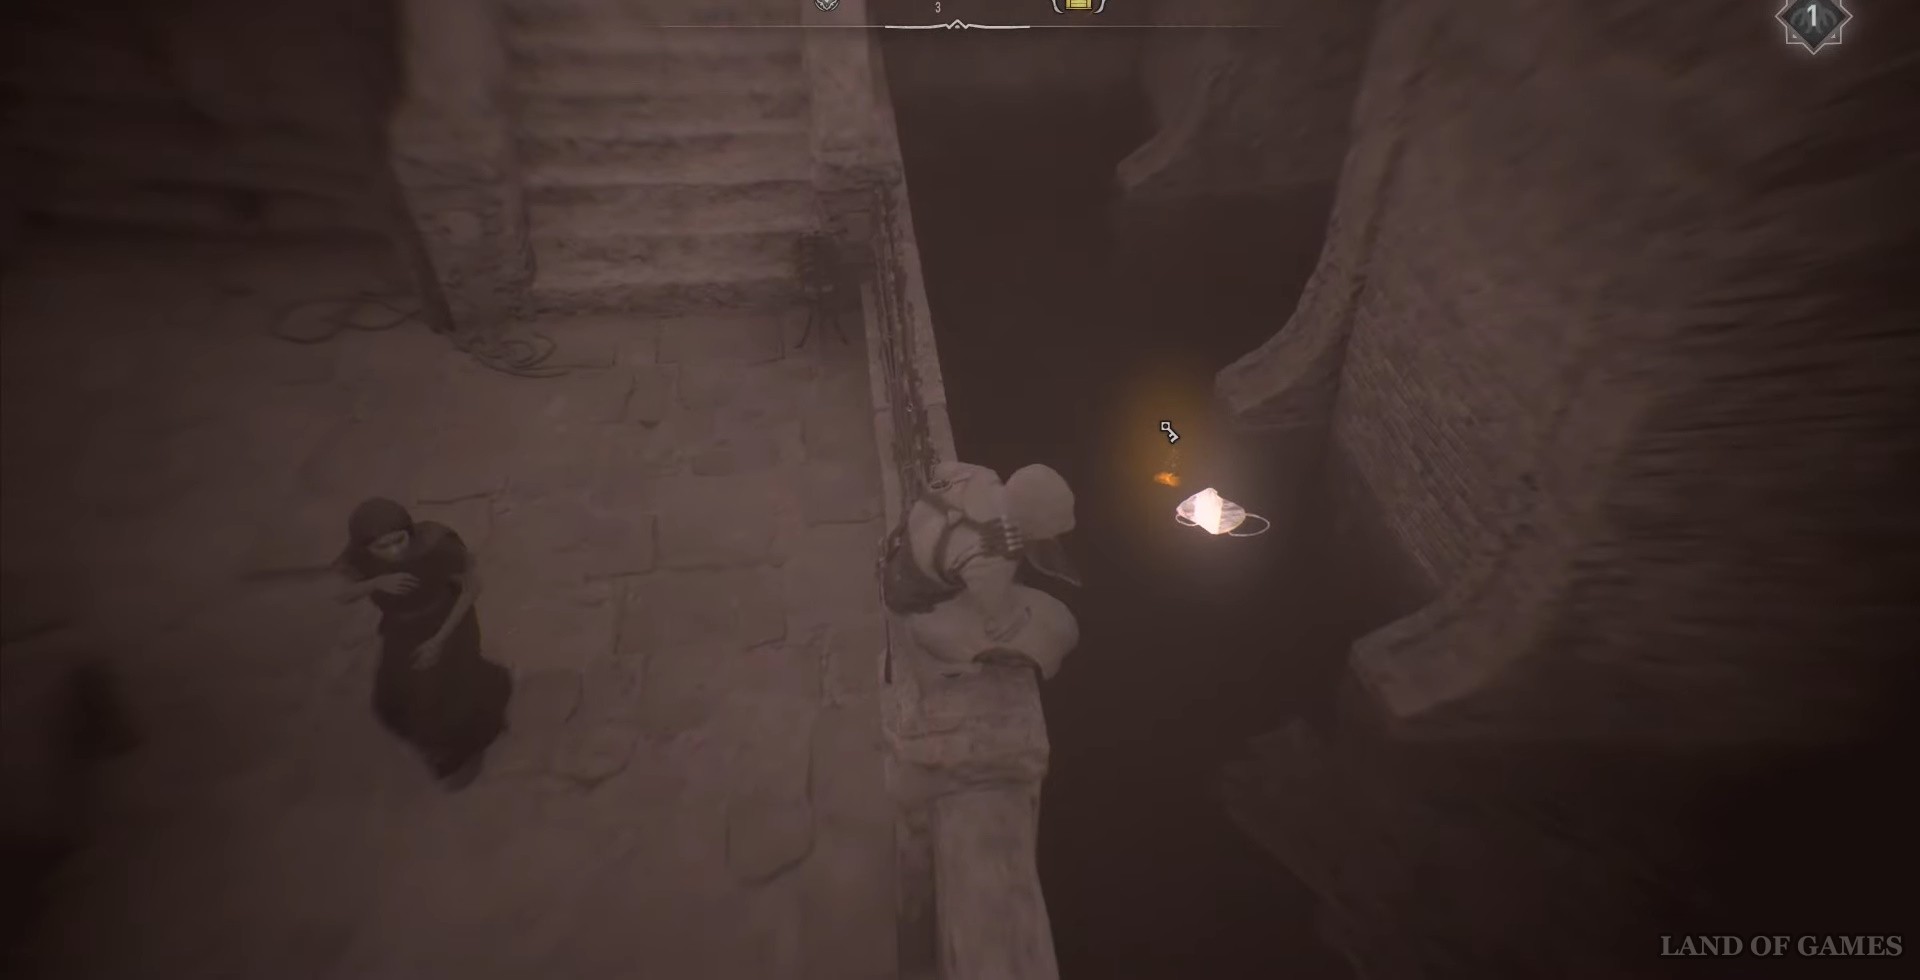
Now run to the chest, the passage is blocked by a shelf - move it and take the reward.
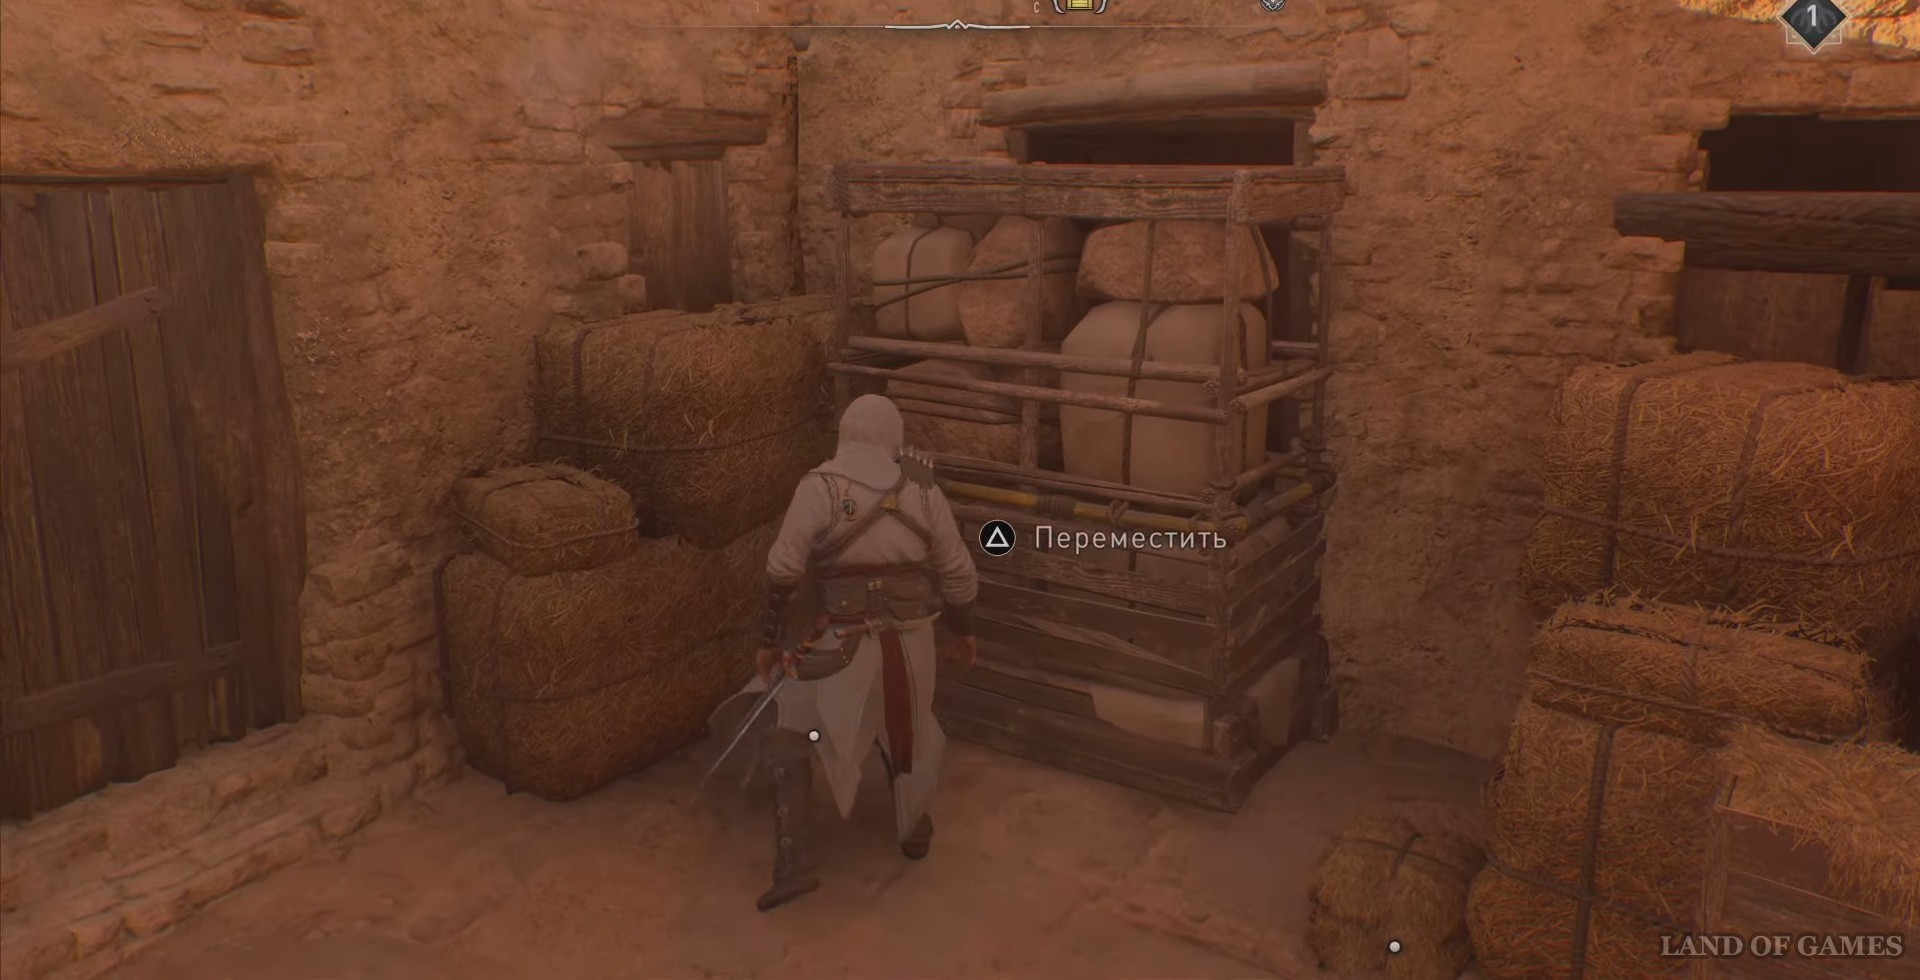
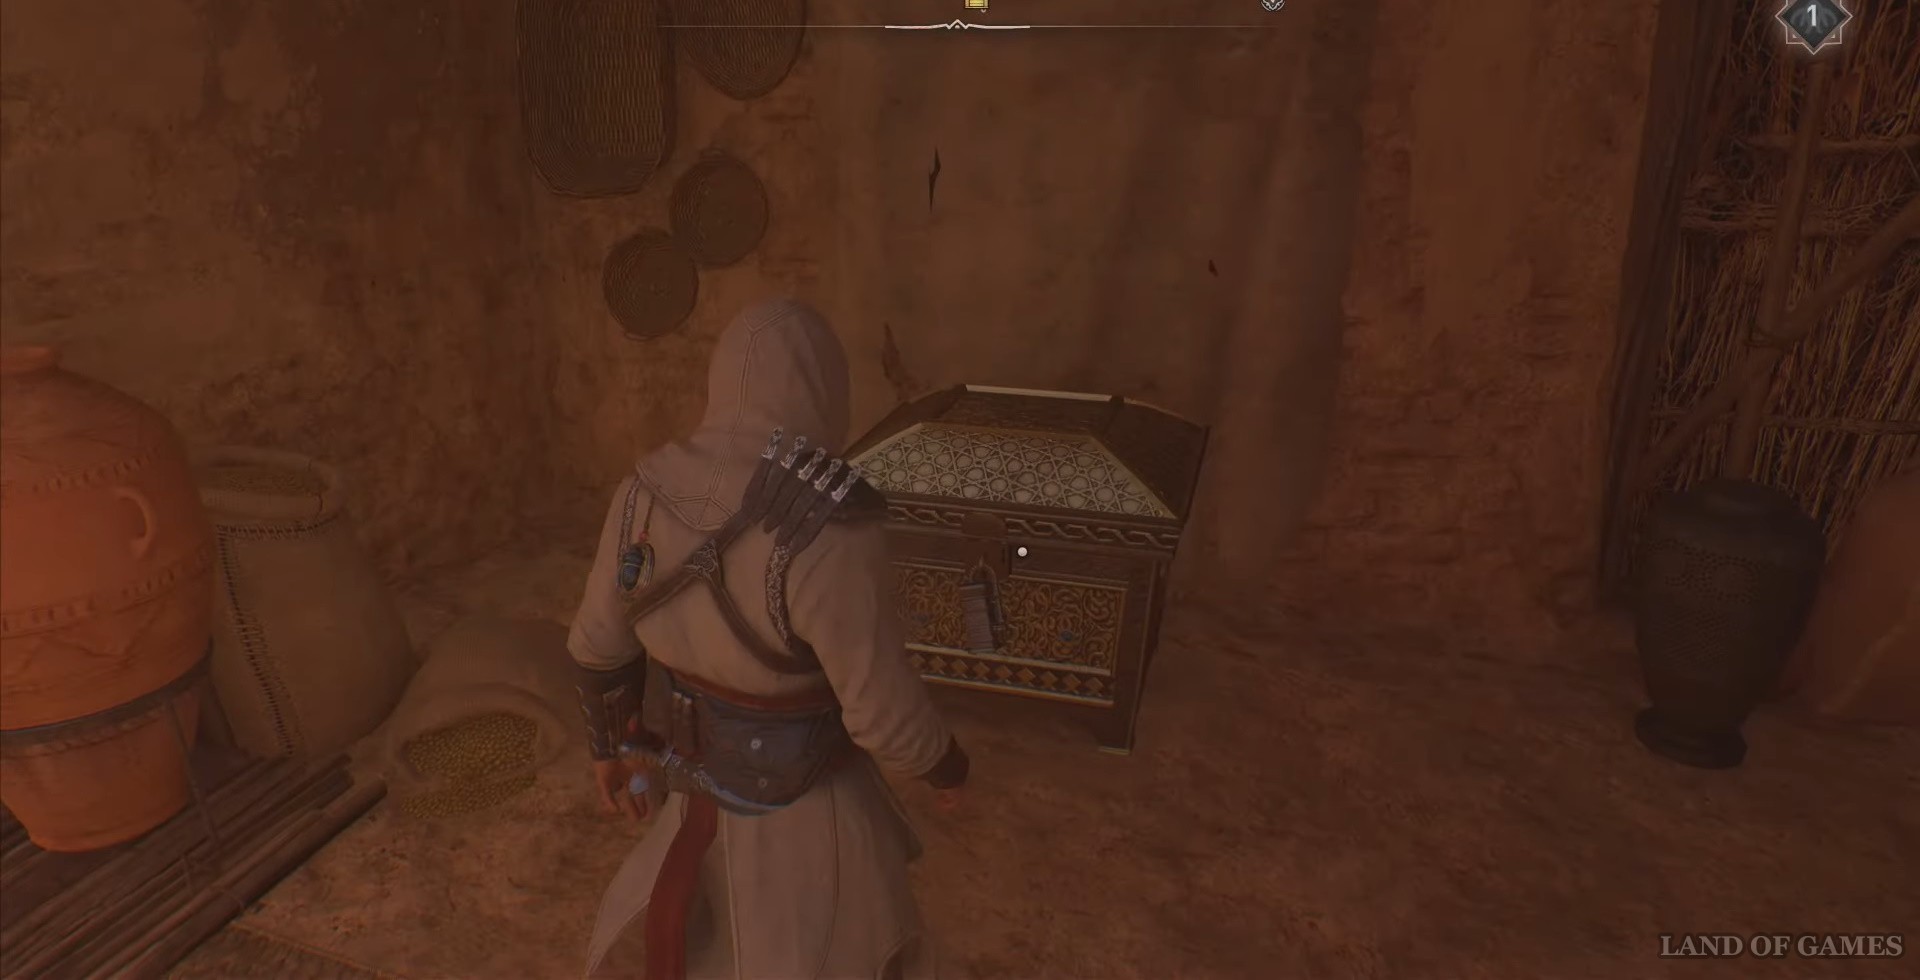
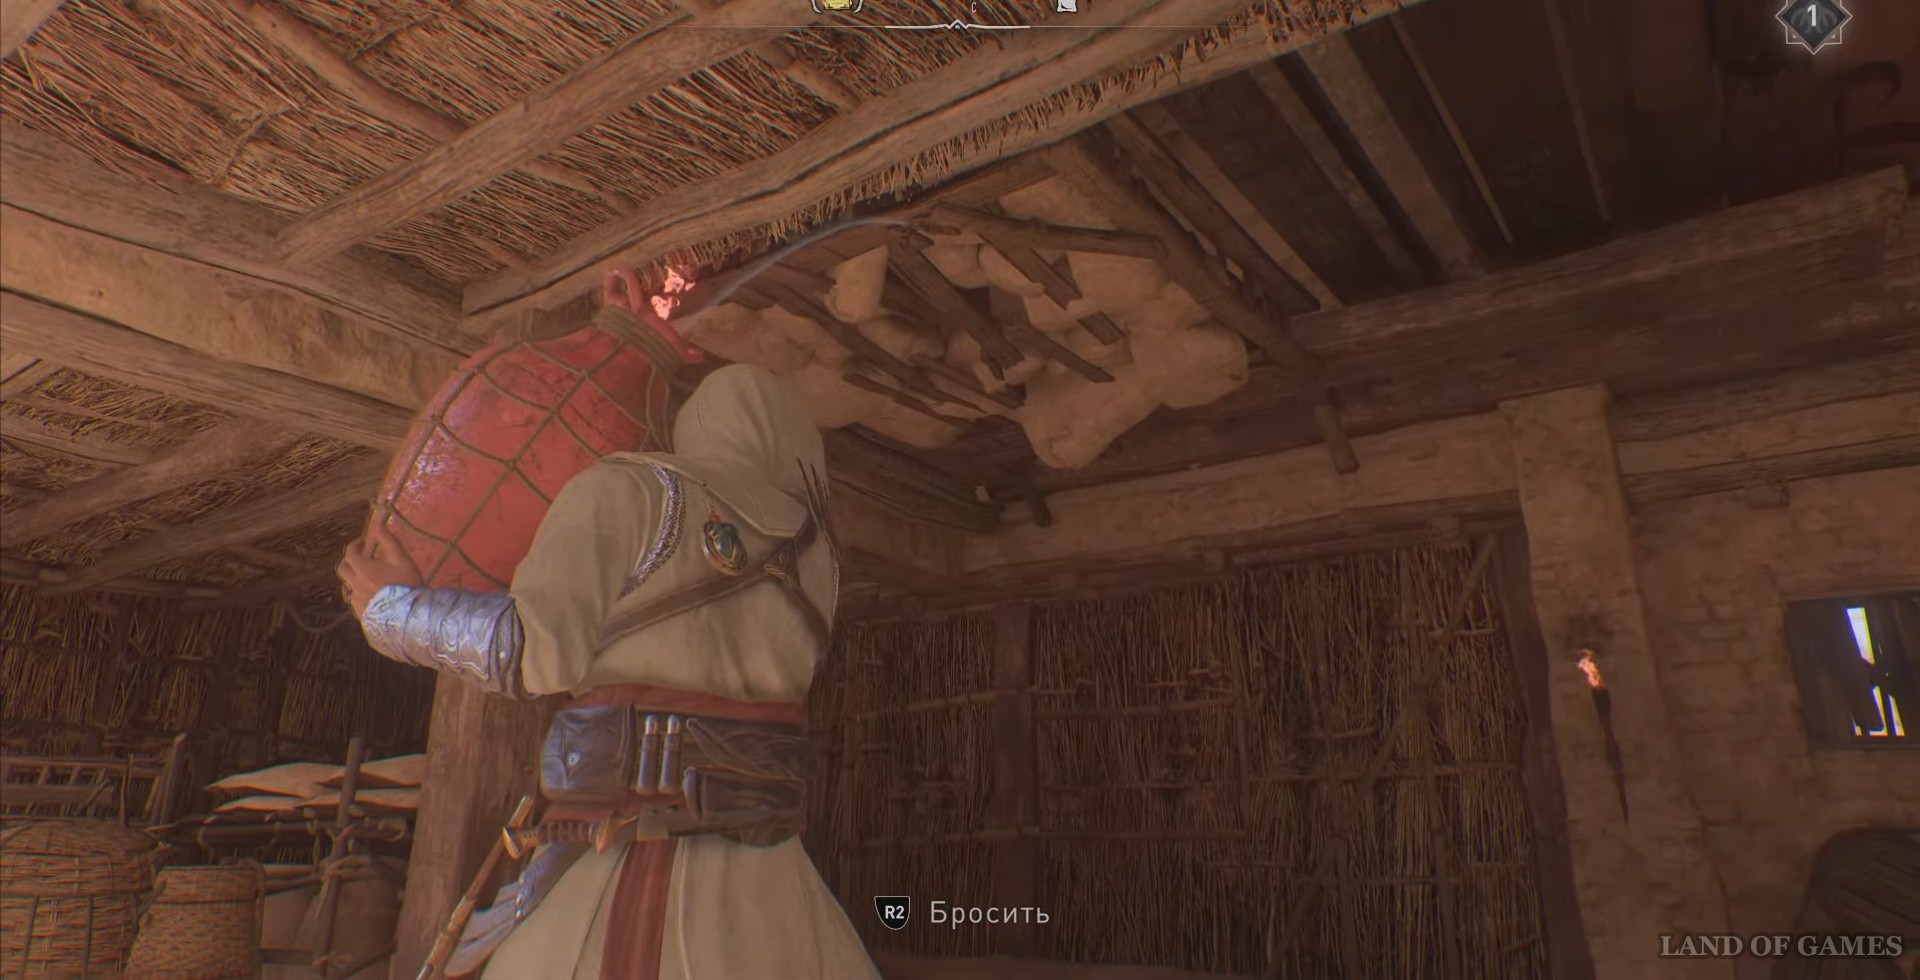
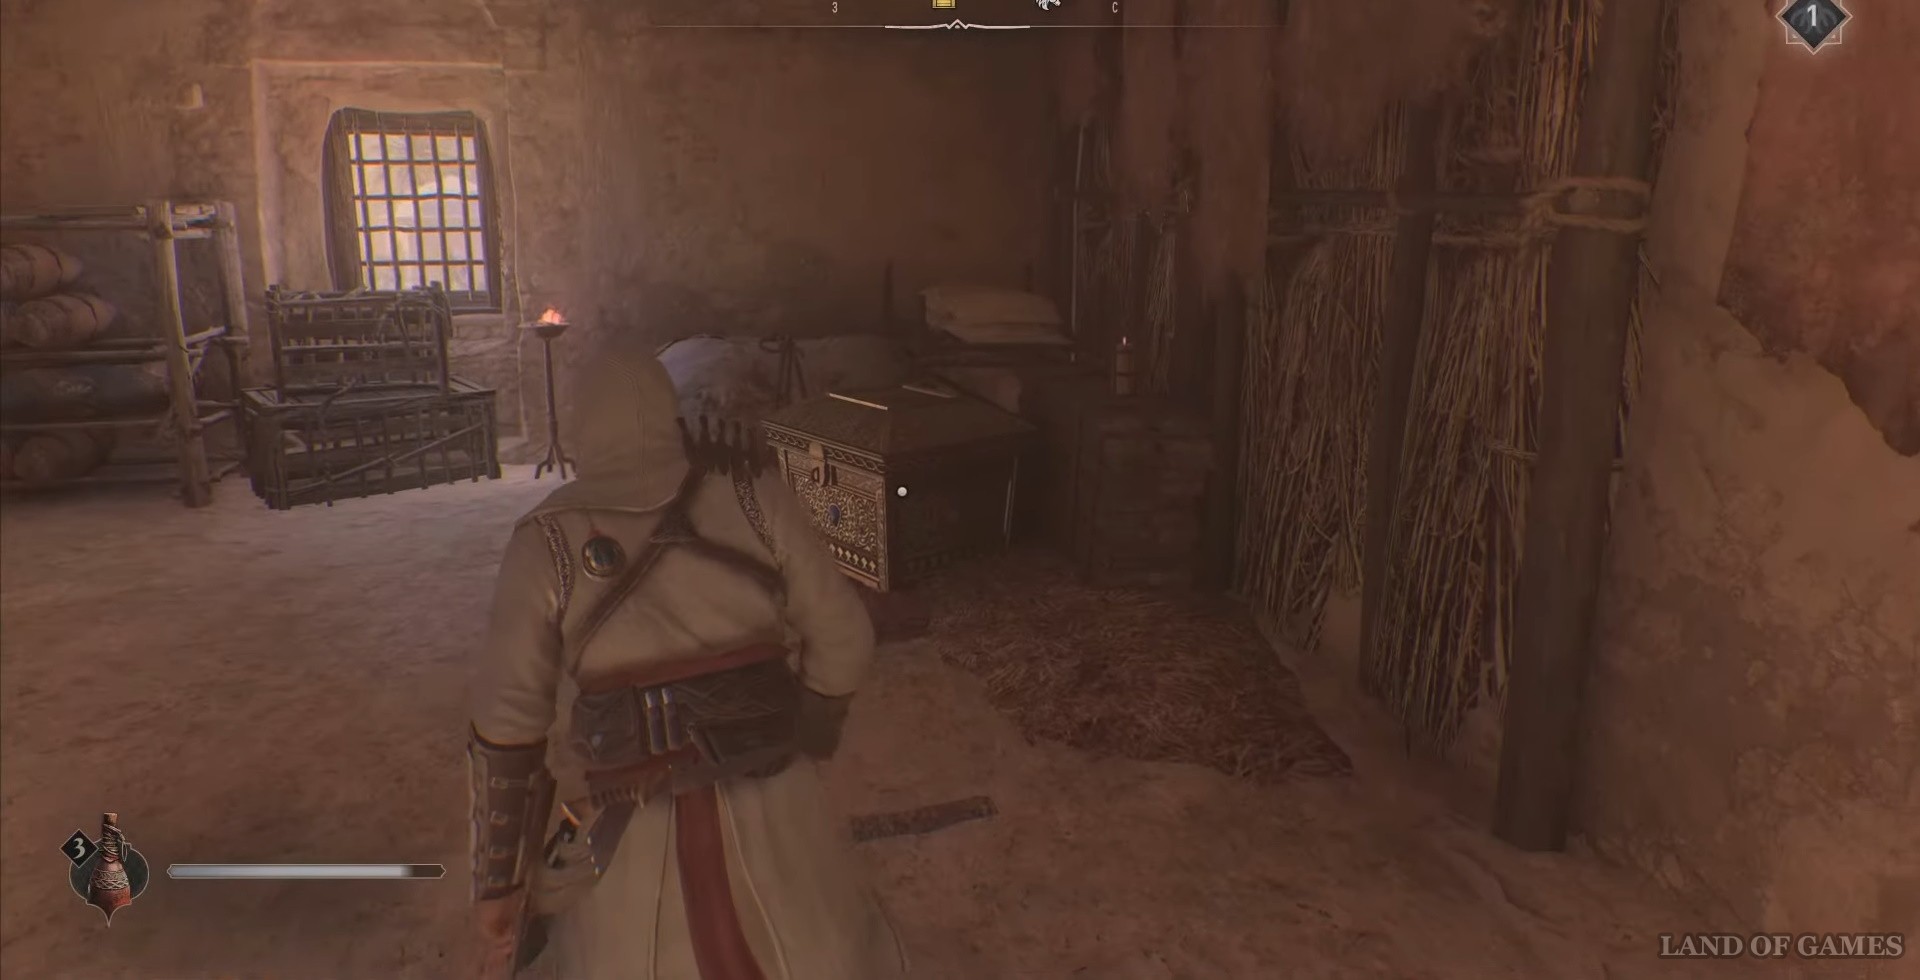
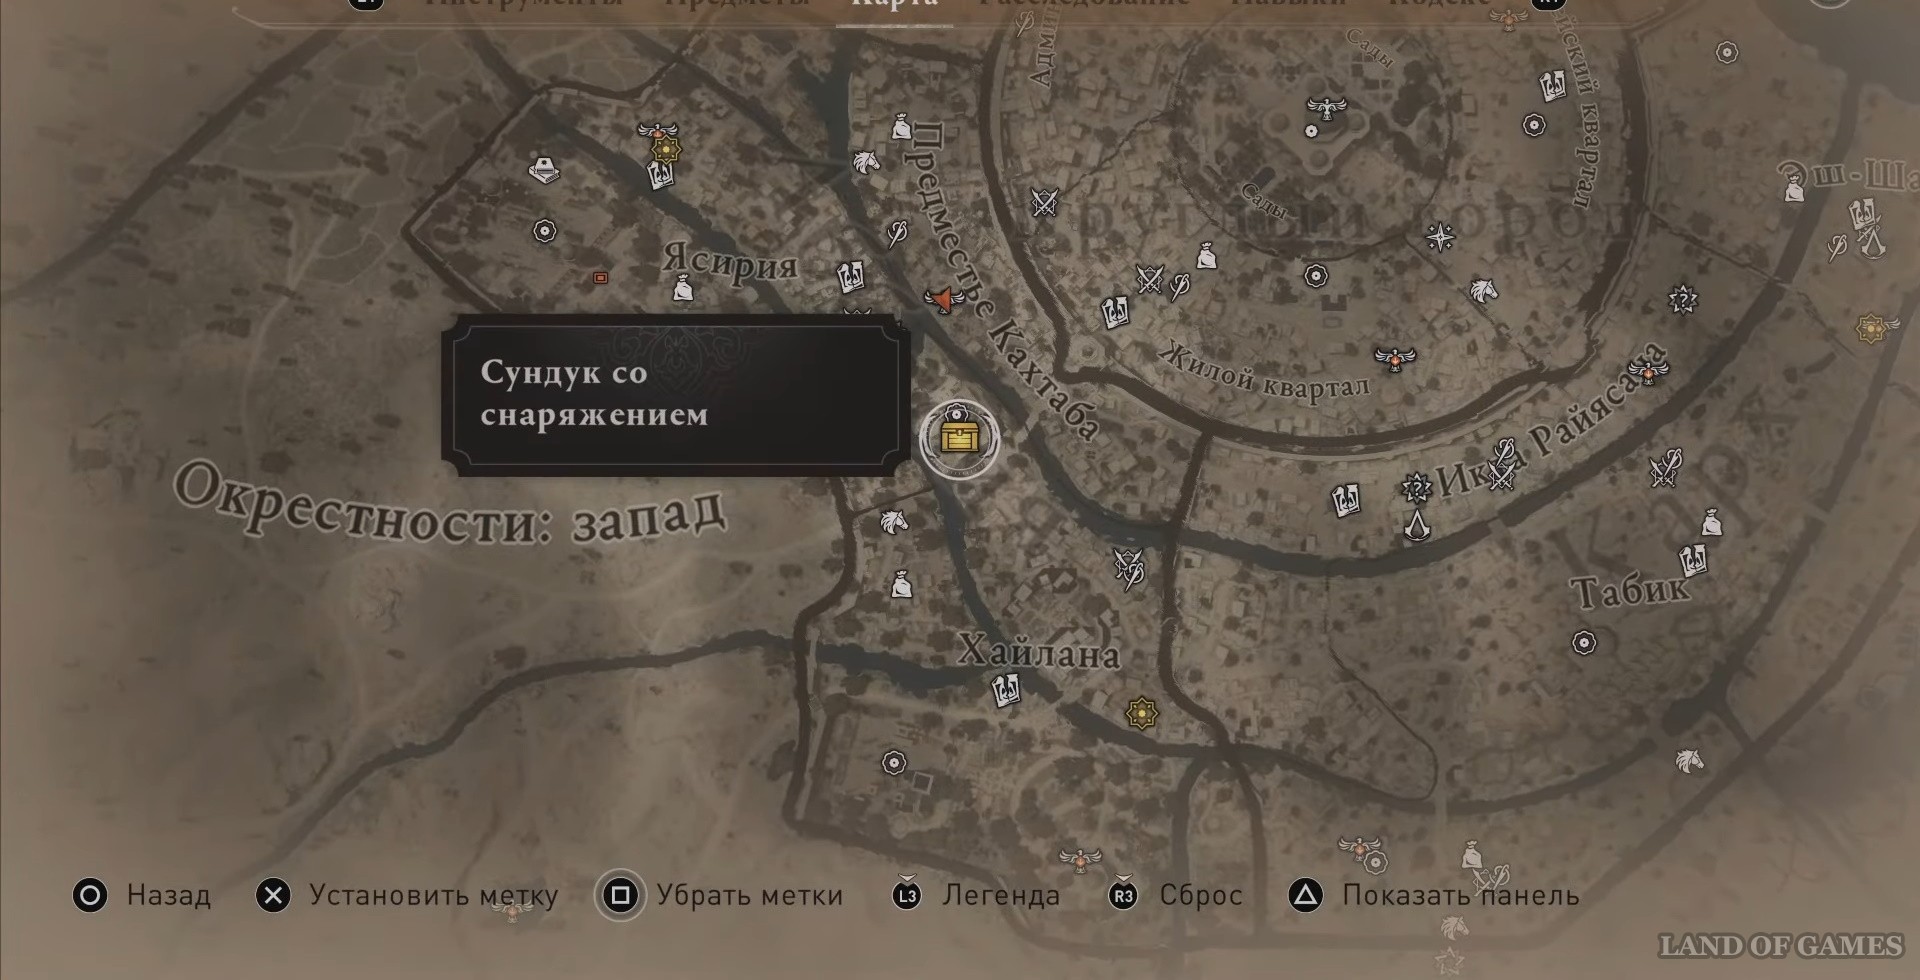
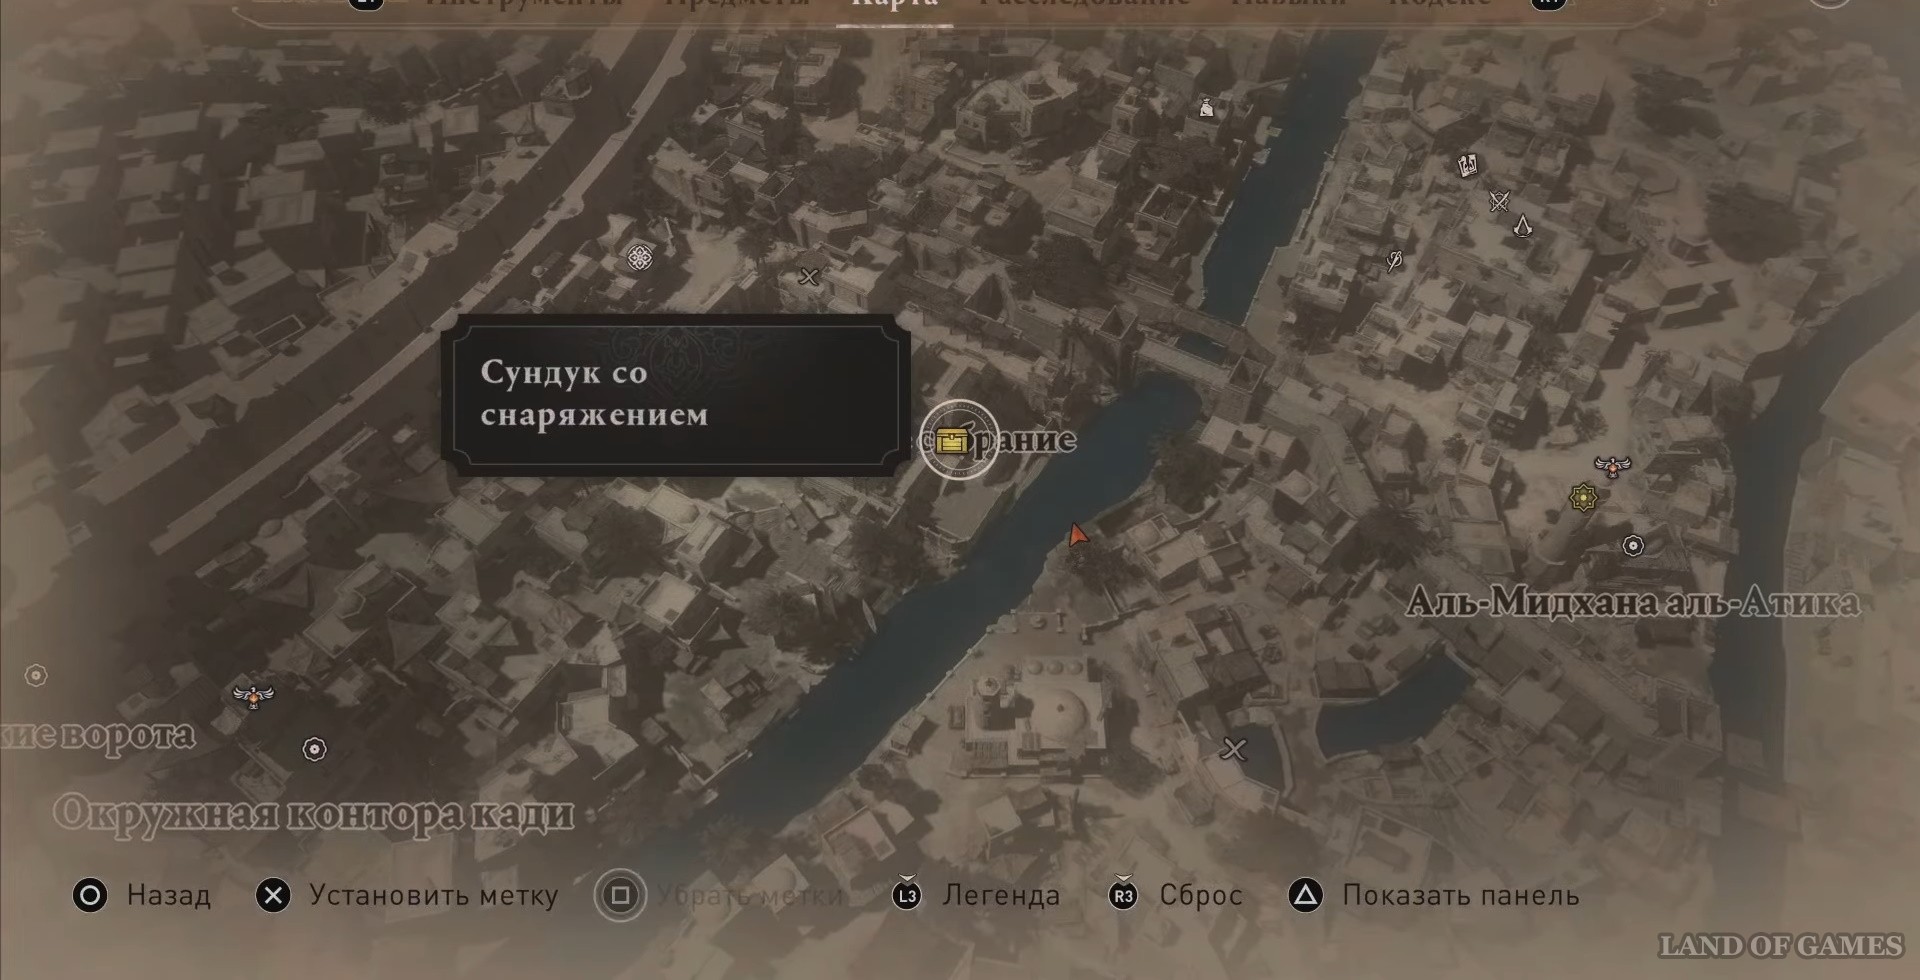
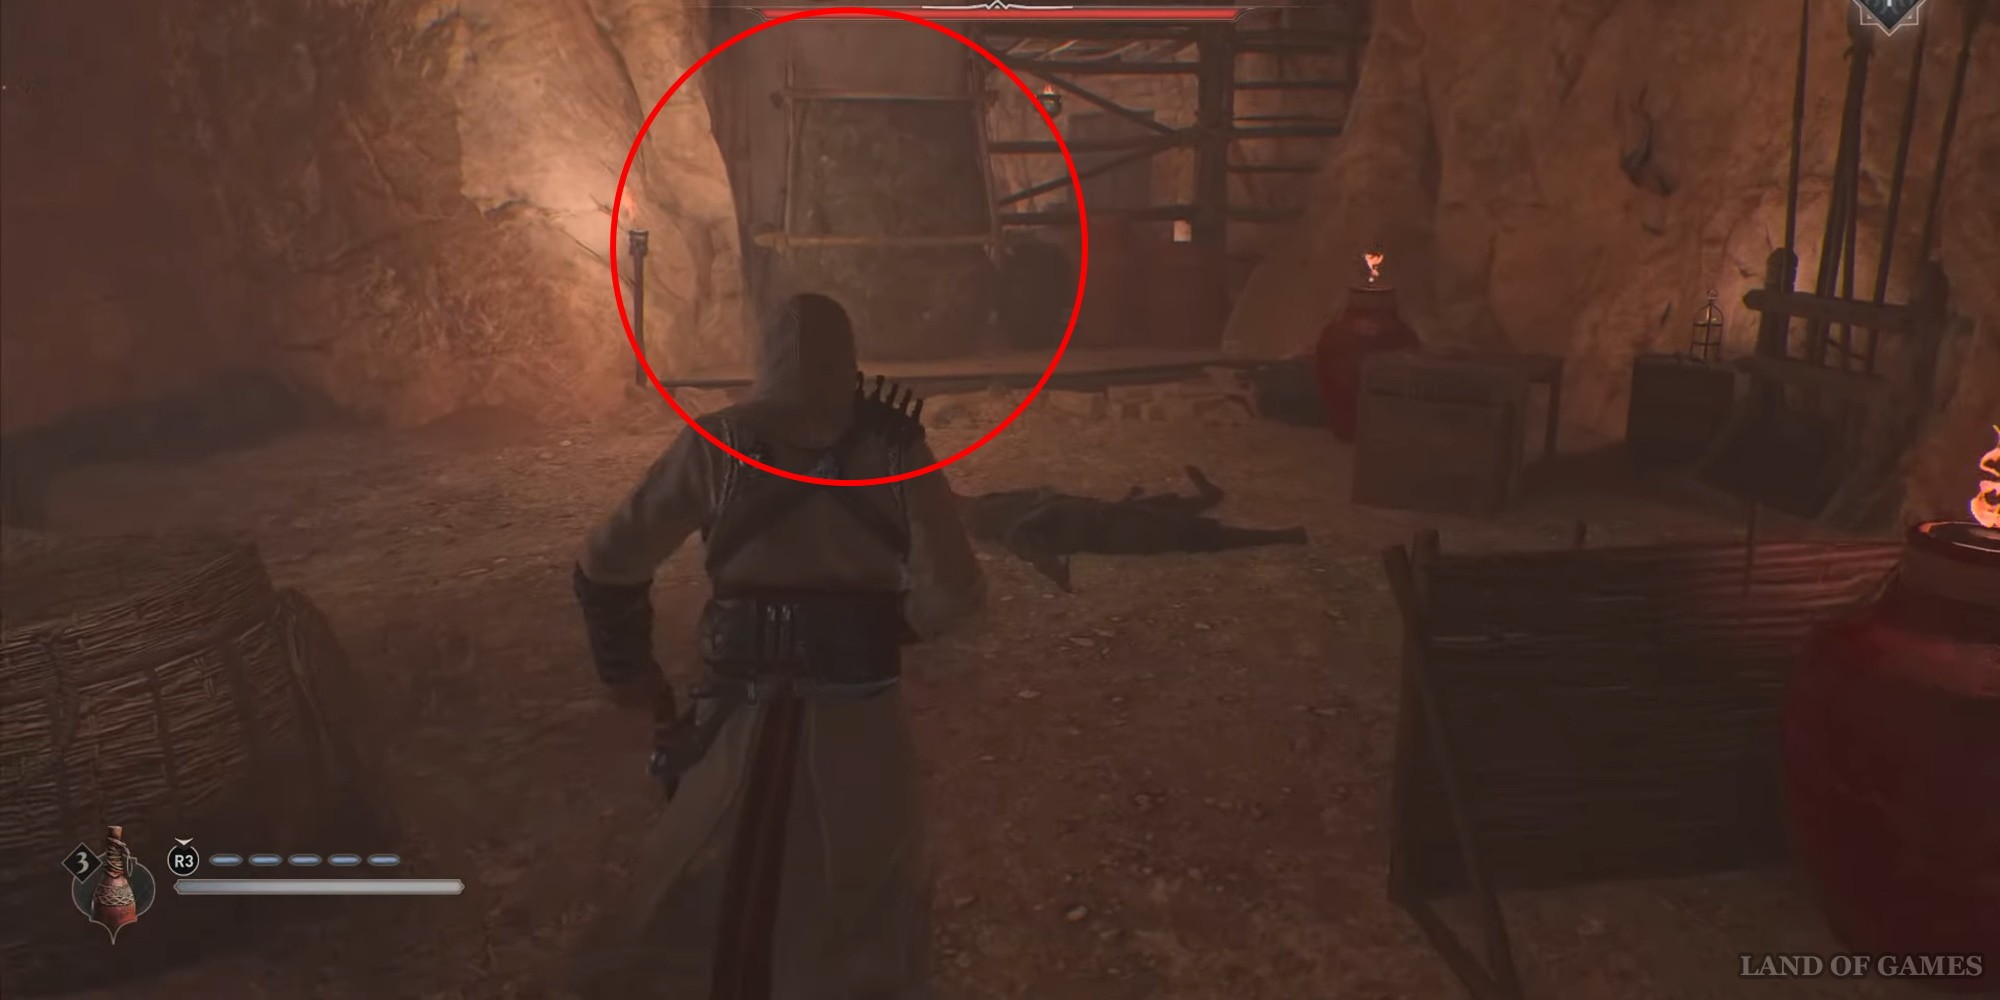
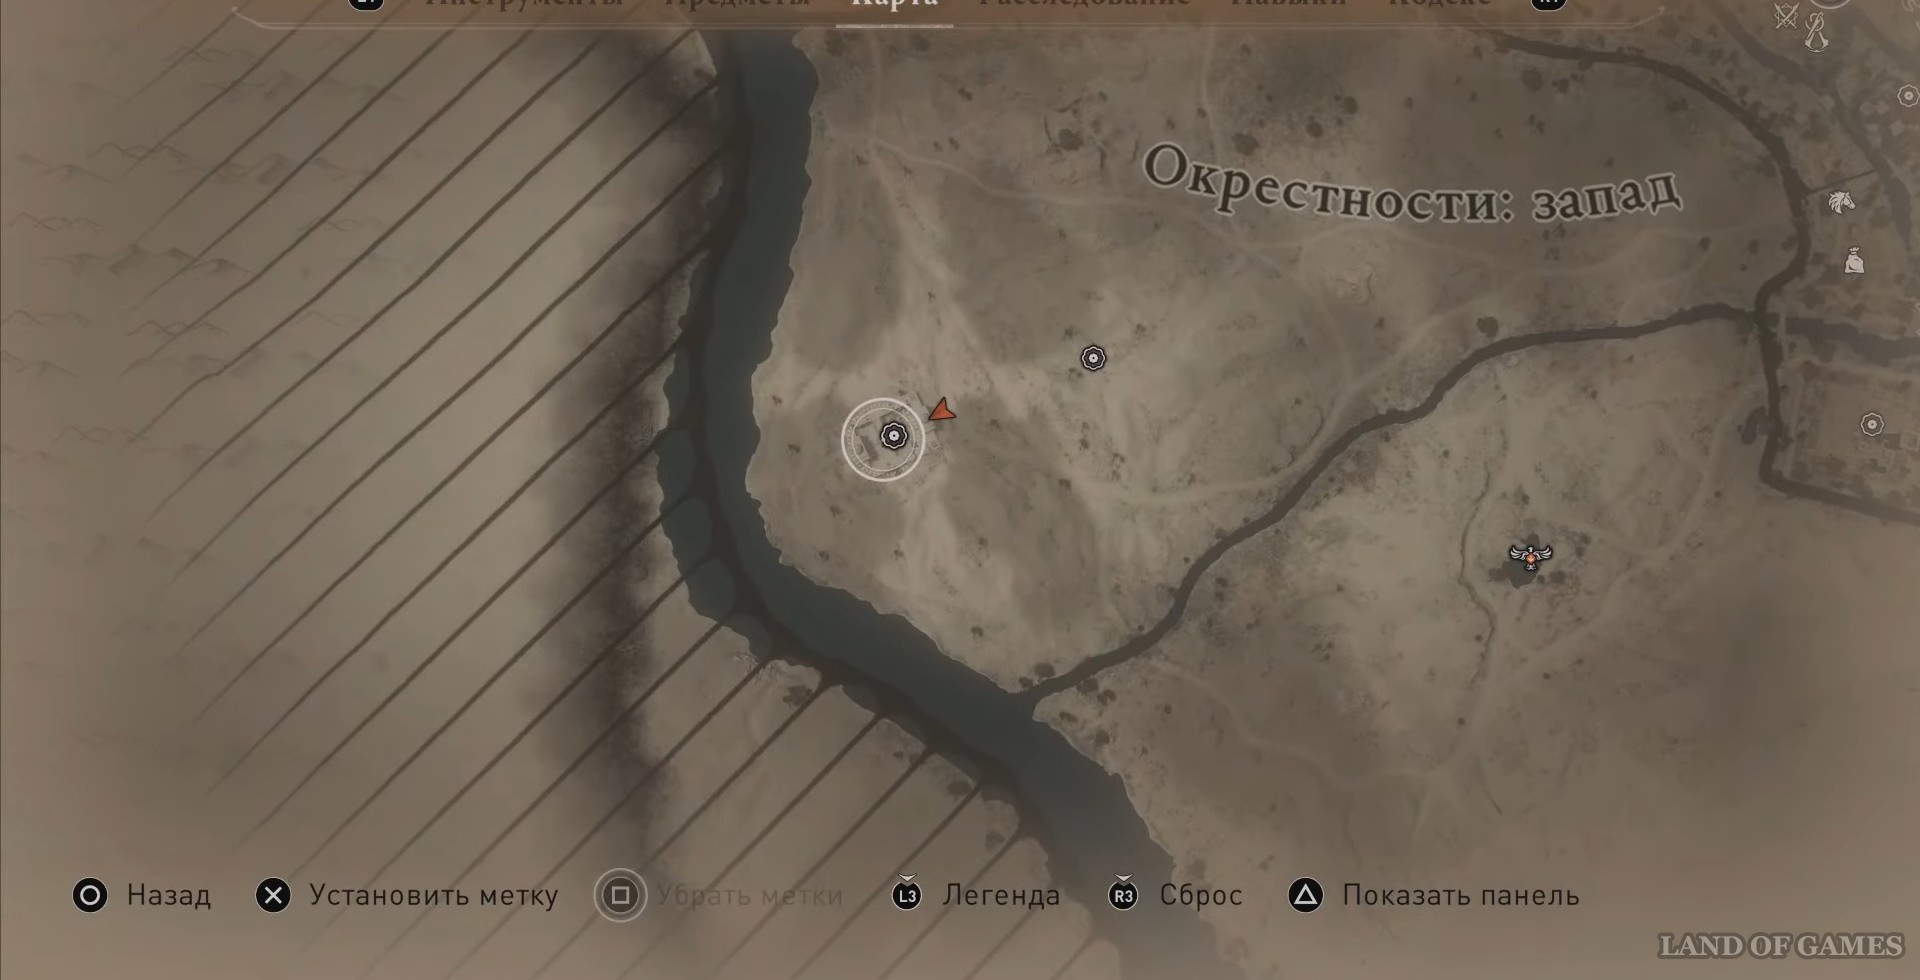
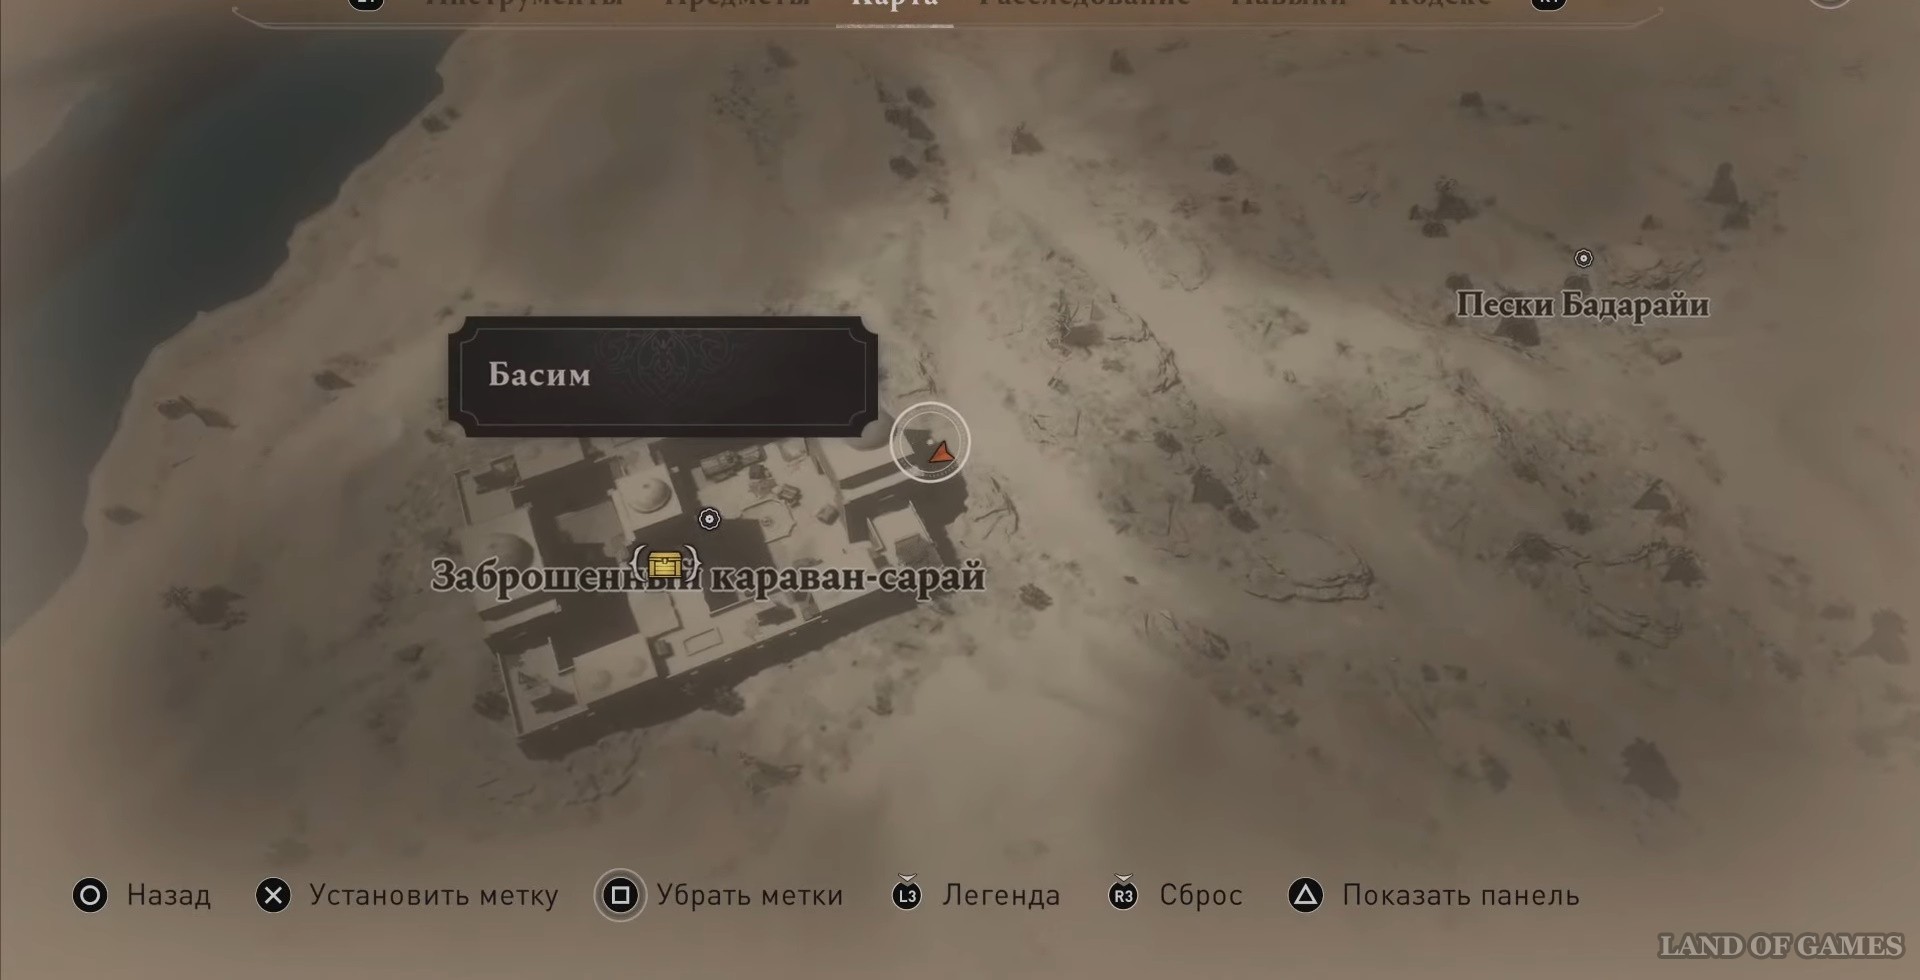
Chest #25 Abandoned caravan barn
For the next chest, go to the Abandoned Caravan Barn.
Once you enter the barn, turn right. Run to the shelf with the boxes and move it towards the rope.
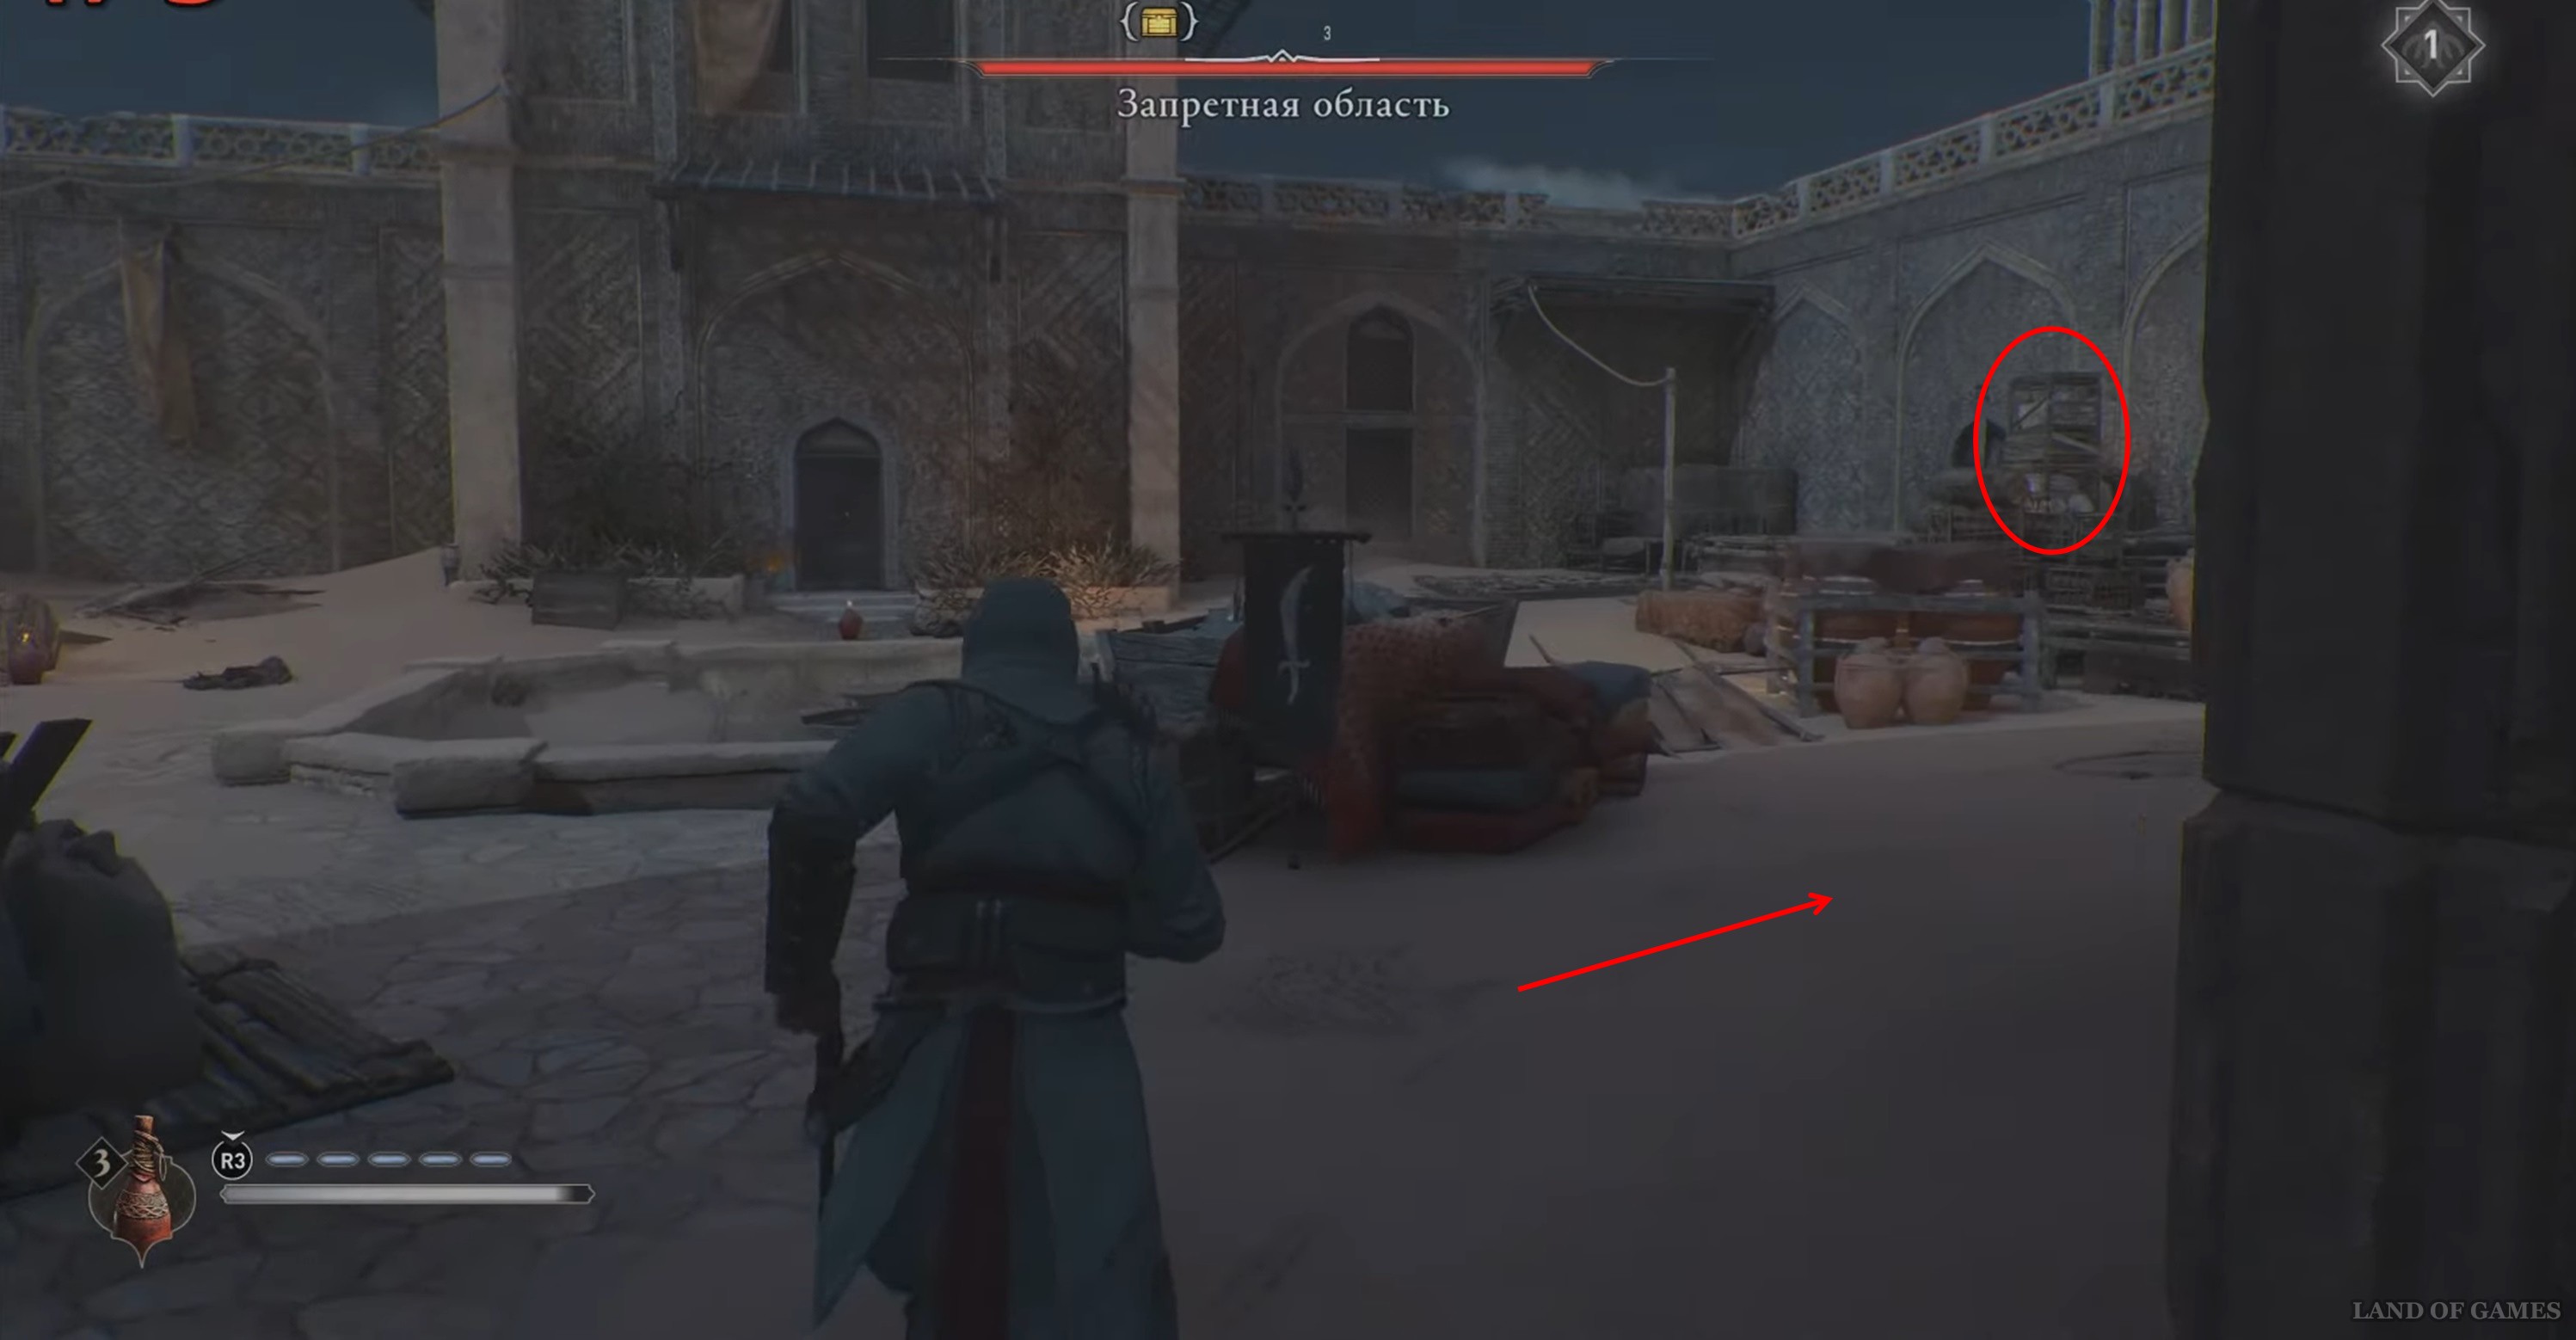
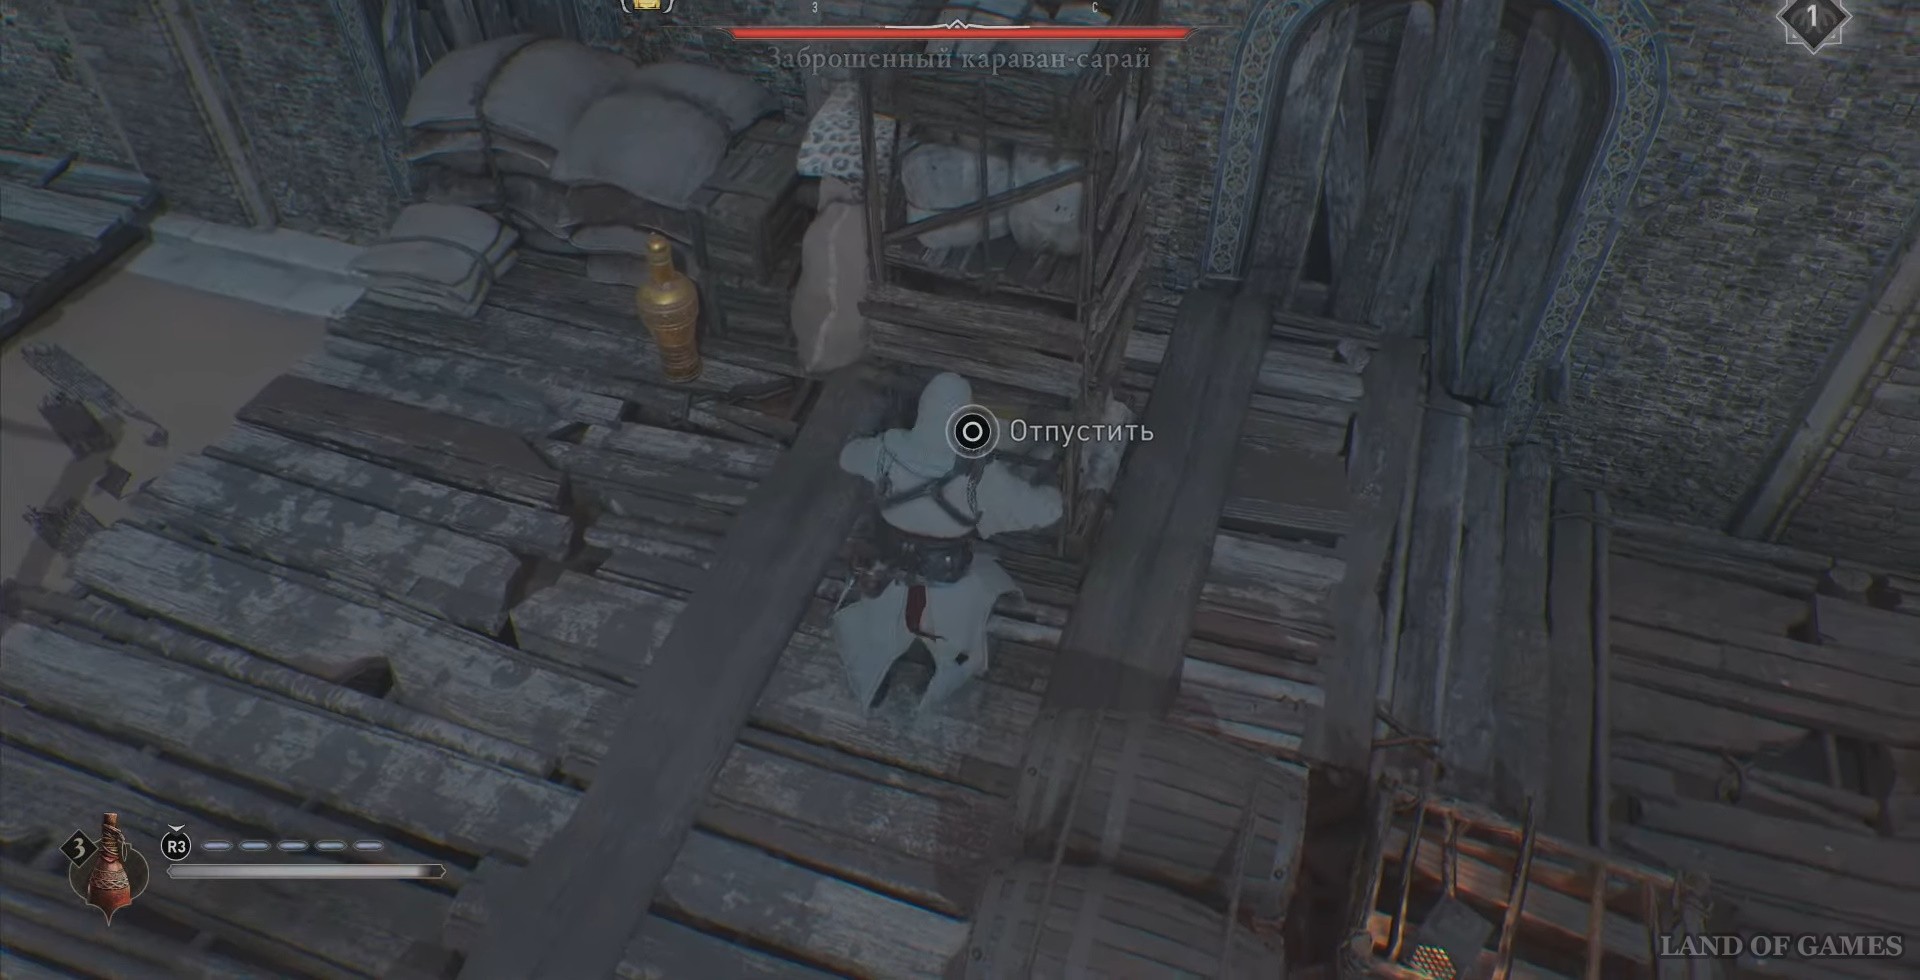
Now grab the jug a little further from the shelf and go upstairs with it.
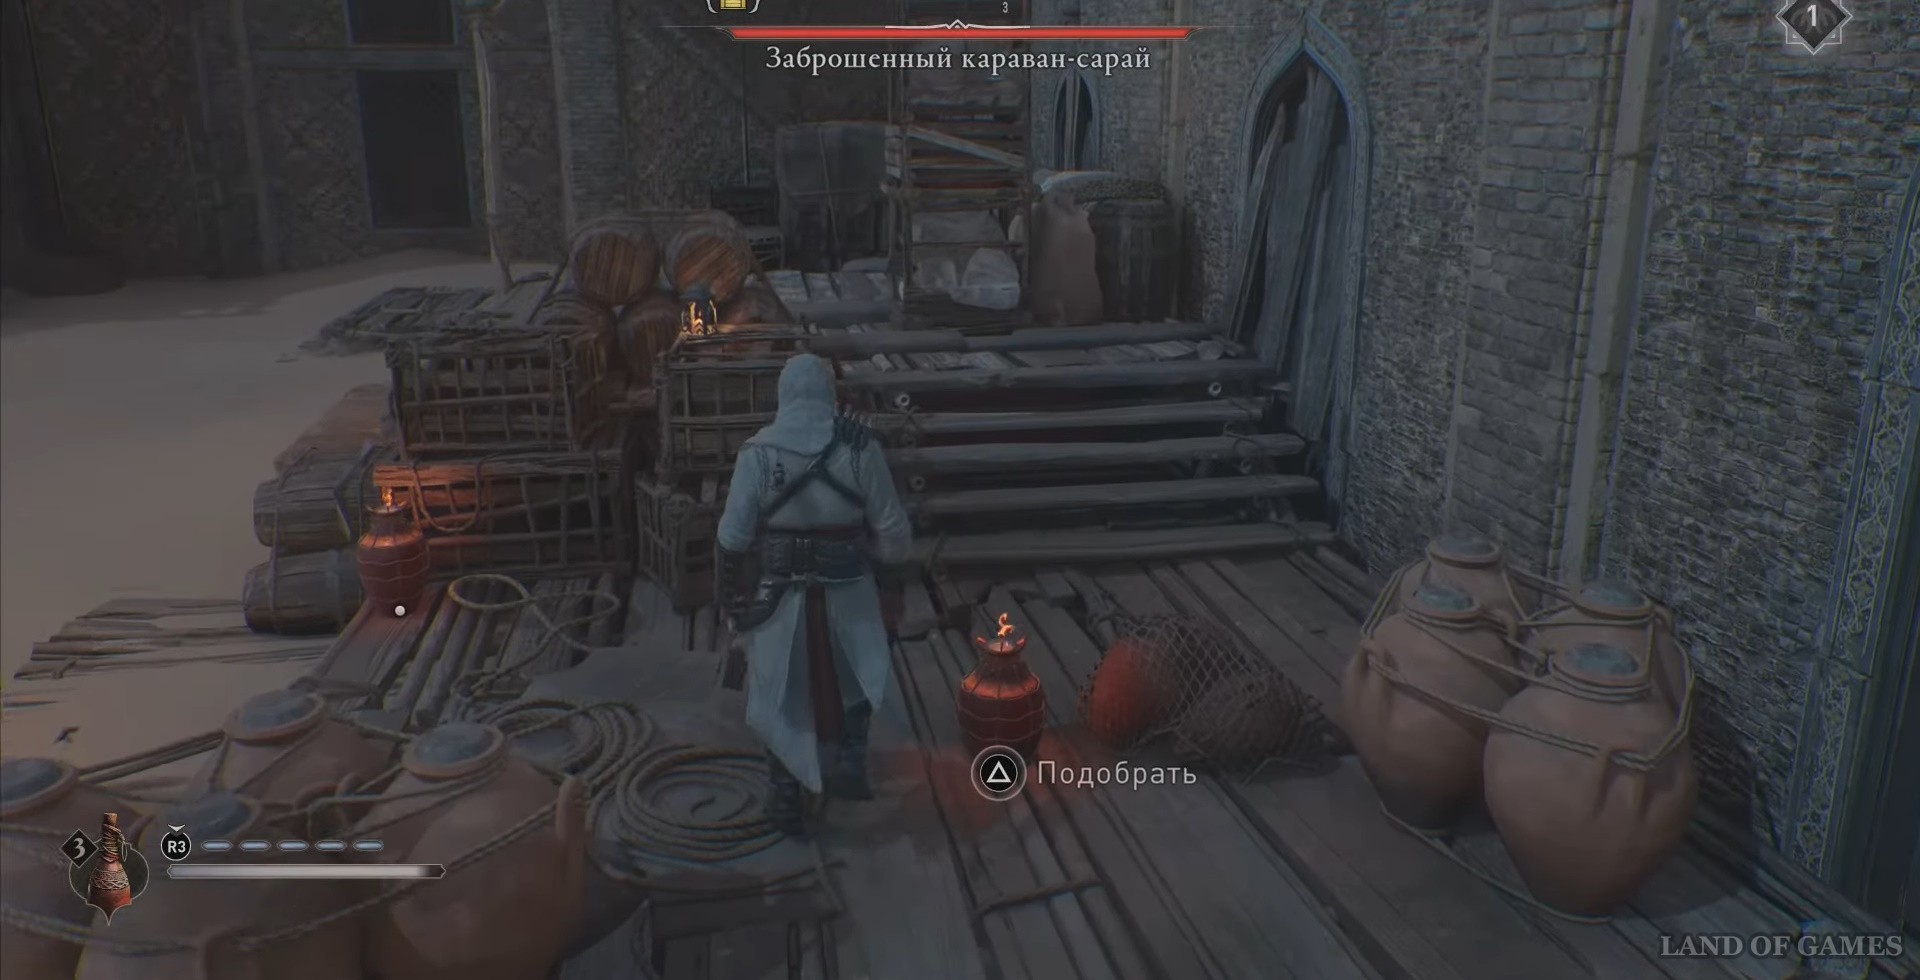
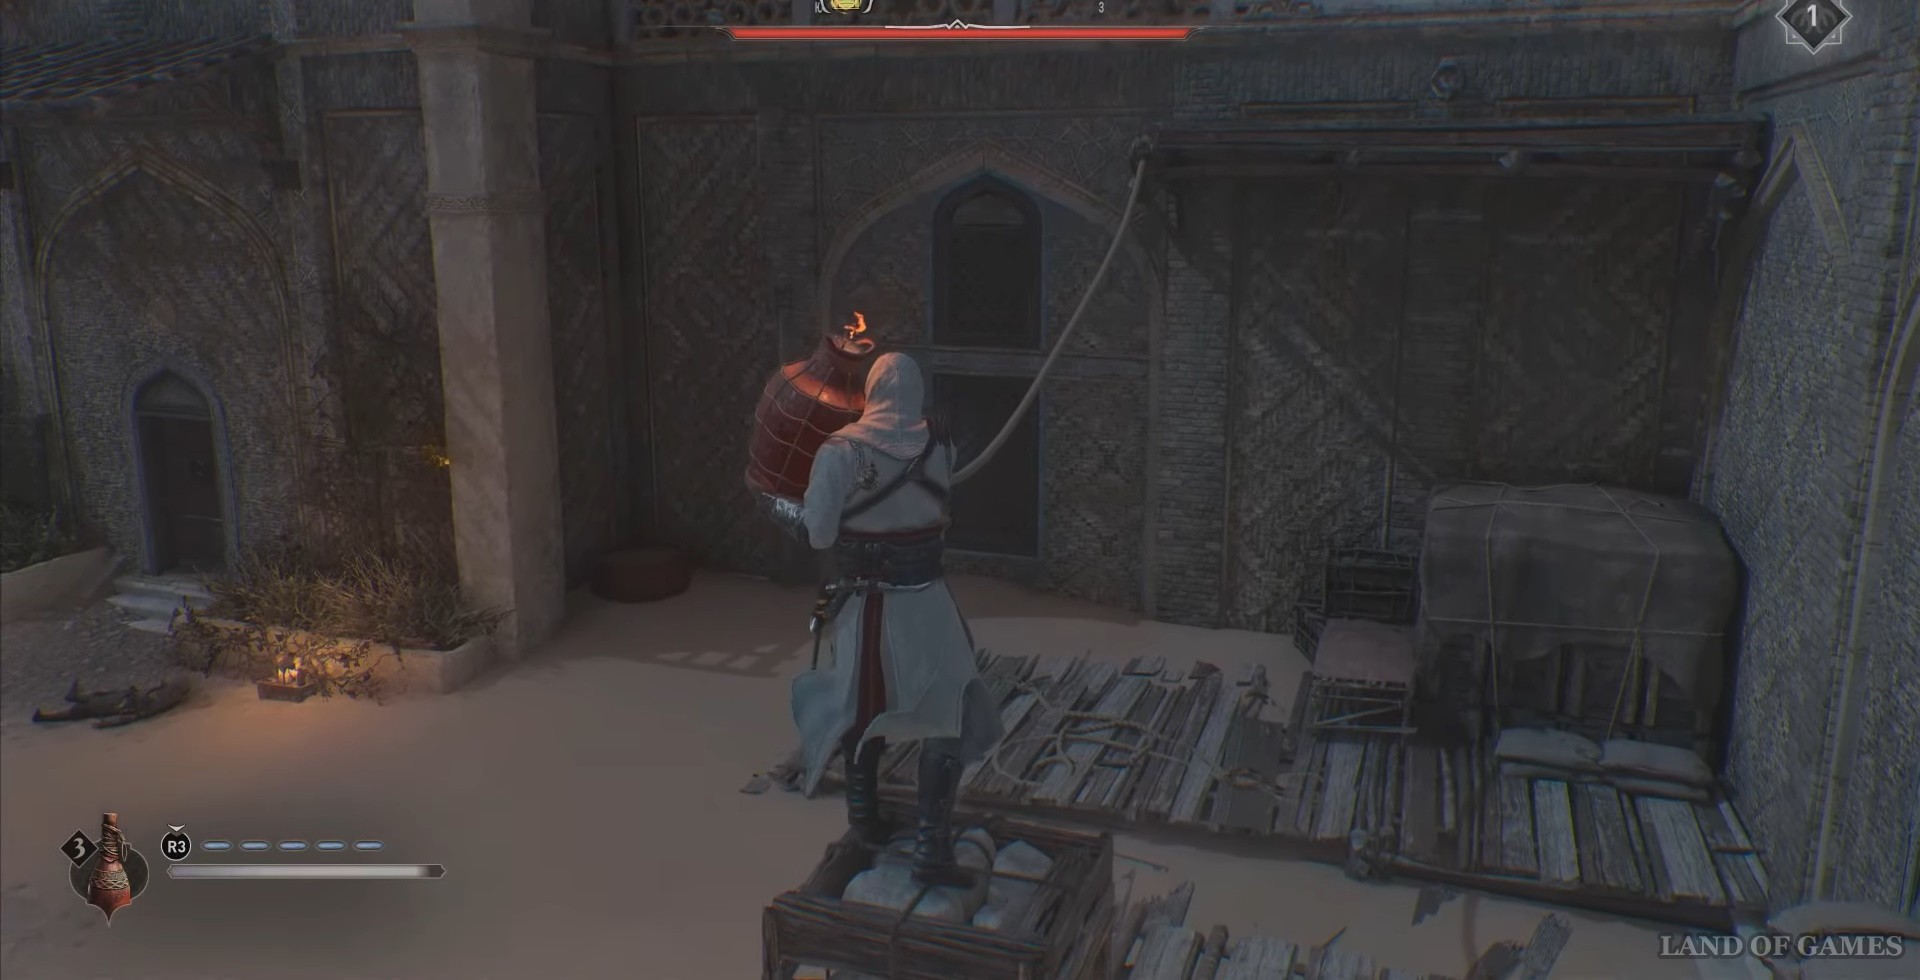
Walking around the perimeter of the building, you will see the wall you need below (shown in the screenshot below). Throw the jug at it and run forward - you will see a chest.
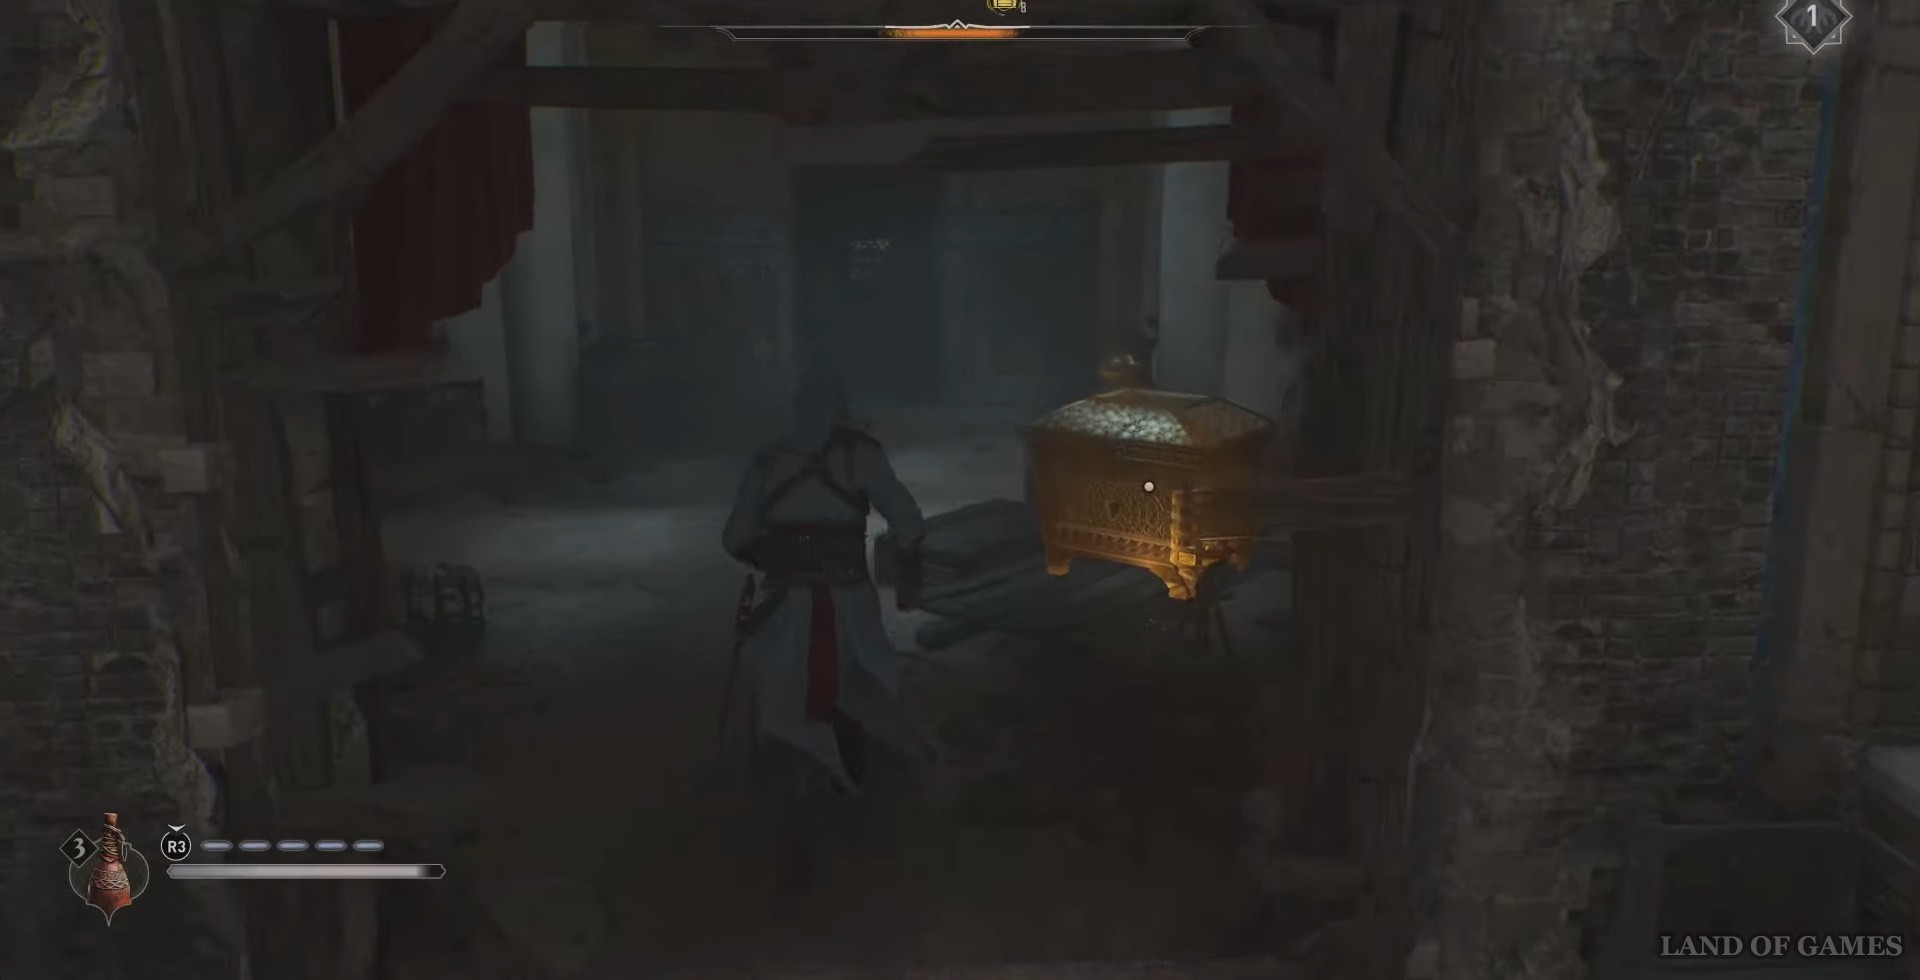
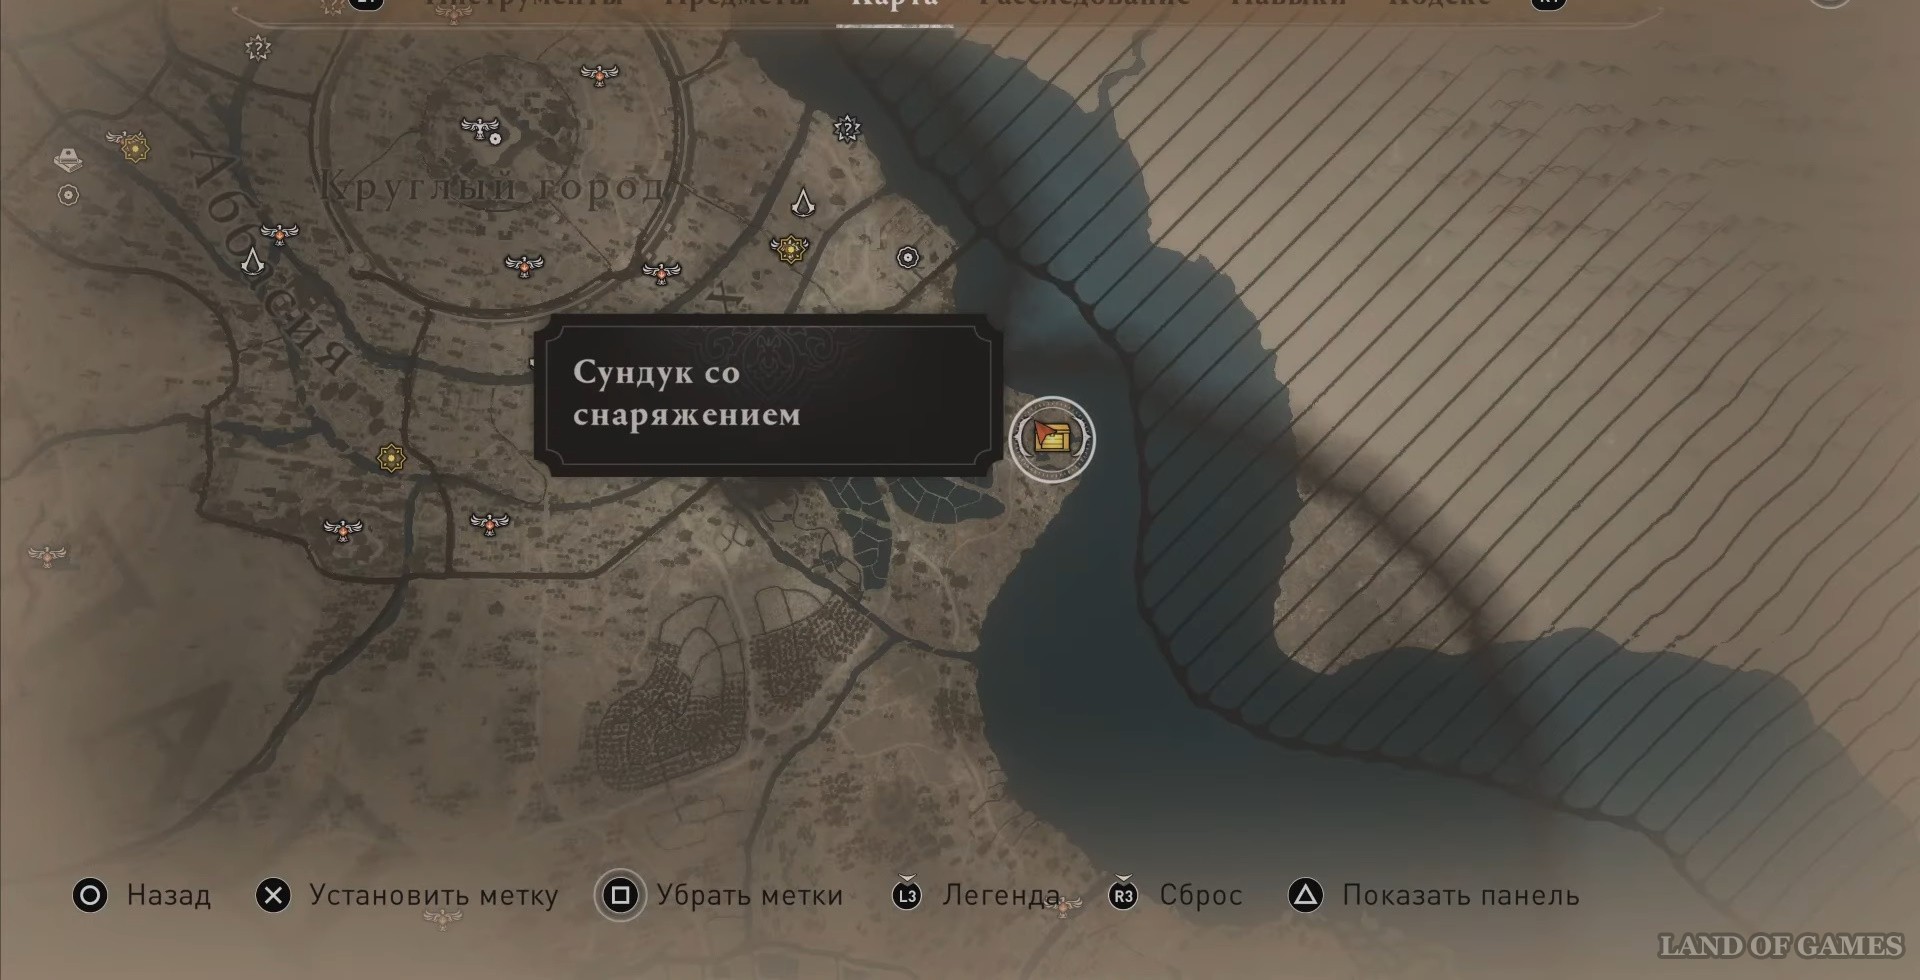
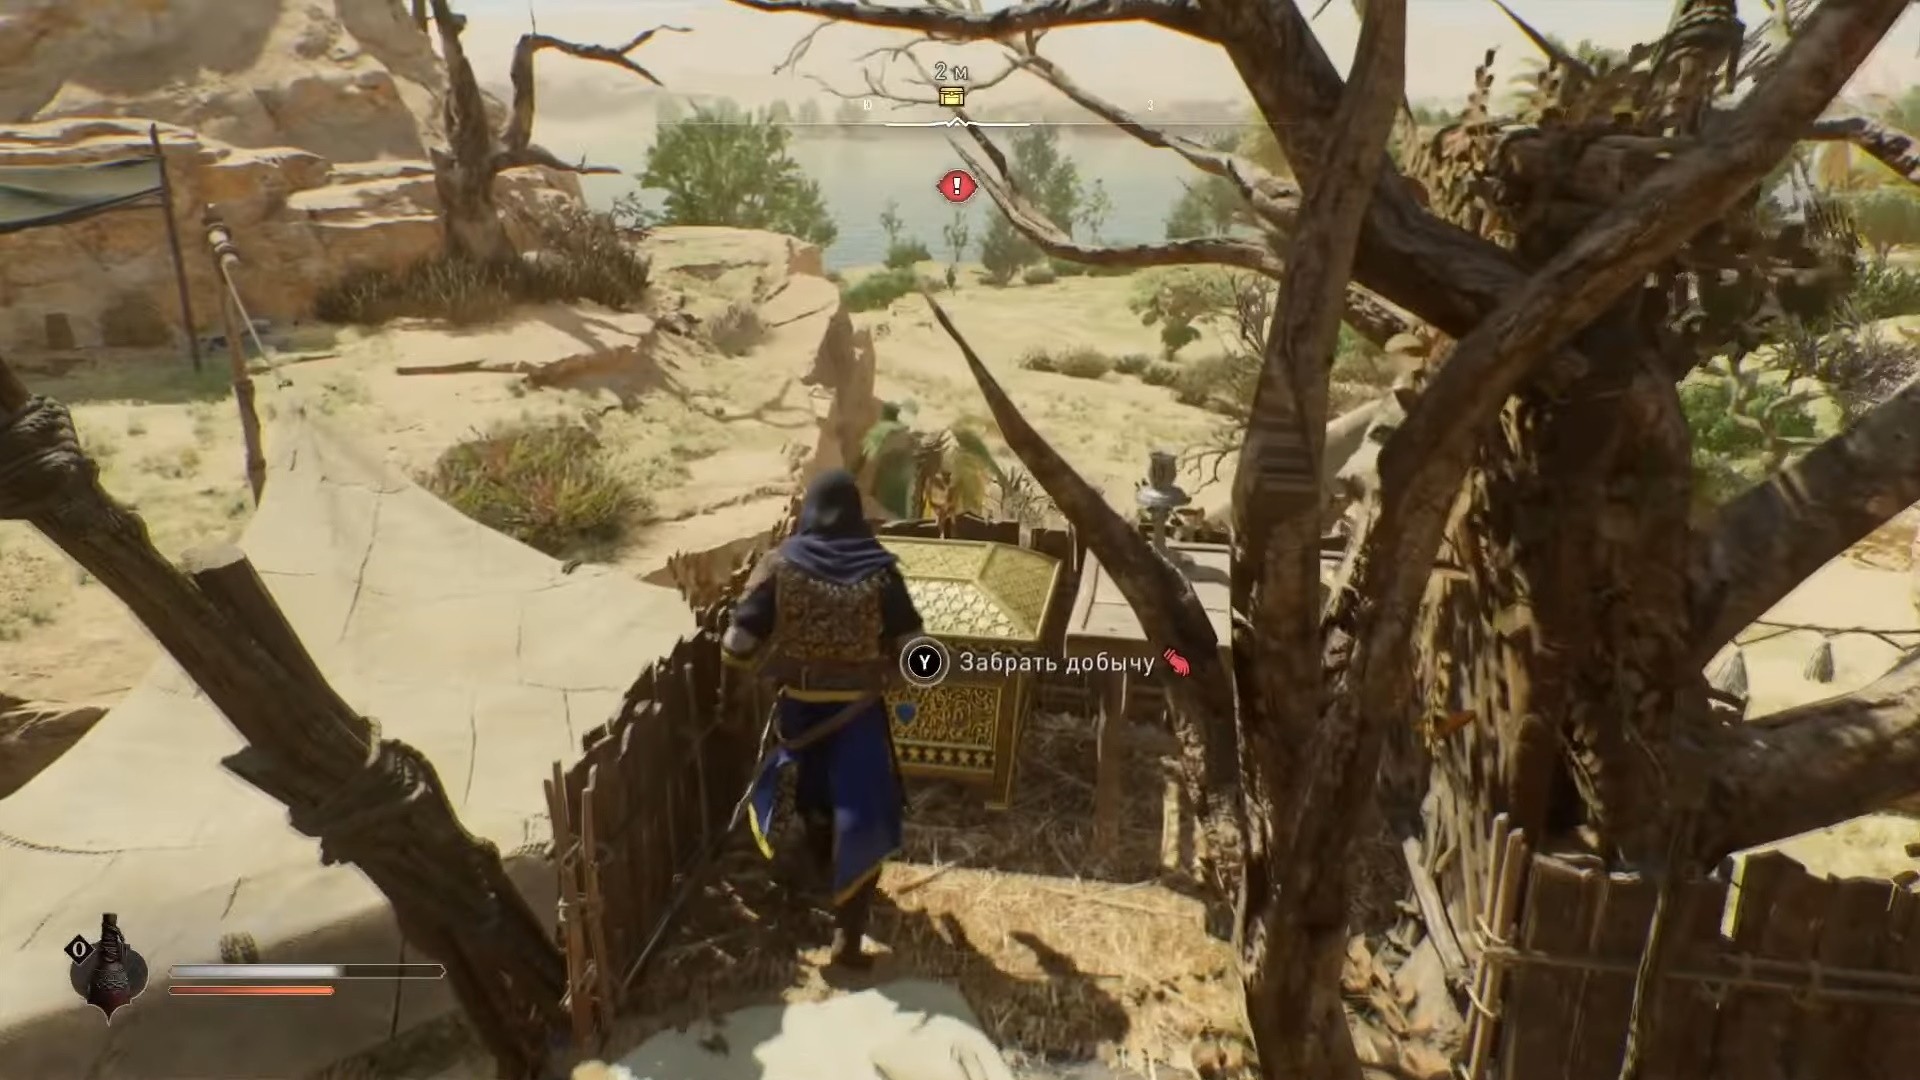
Chest #26 South Camp
Go to the location shown on the map below. You won't have to search for long here - but you should be very careful, there are many enemies around. Kill the guards and take the loot.
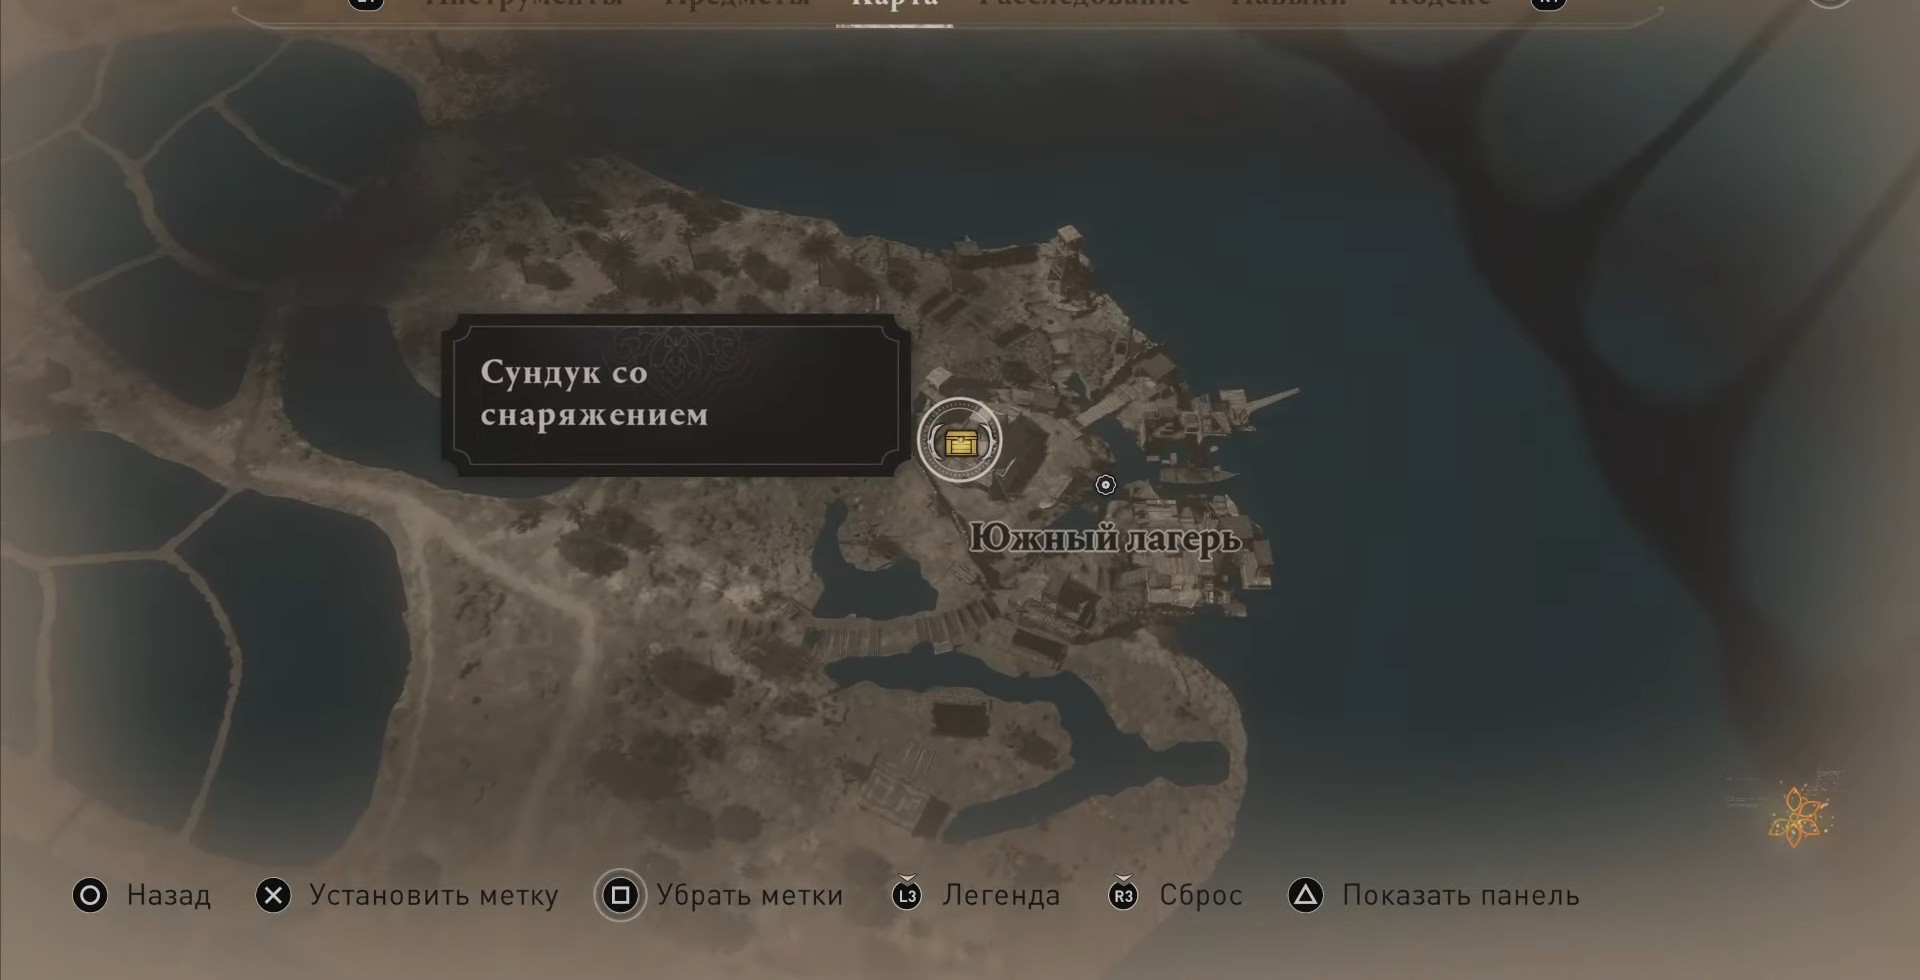
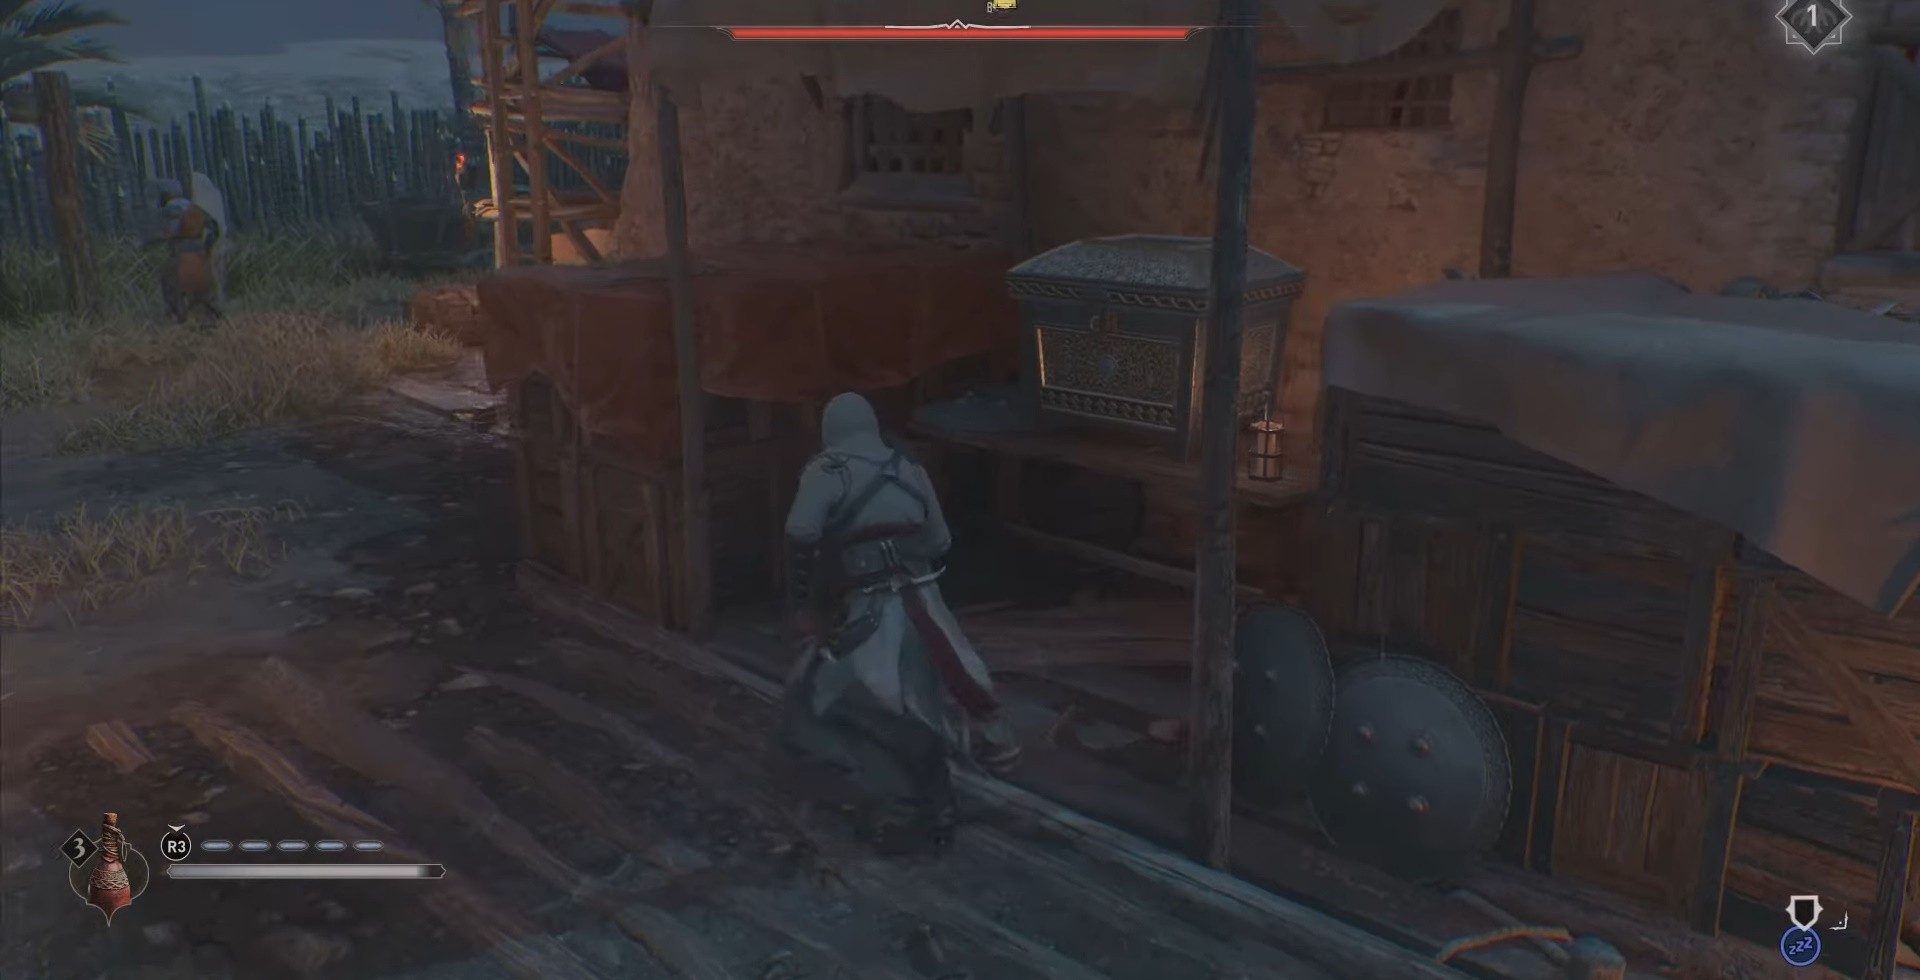
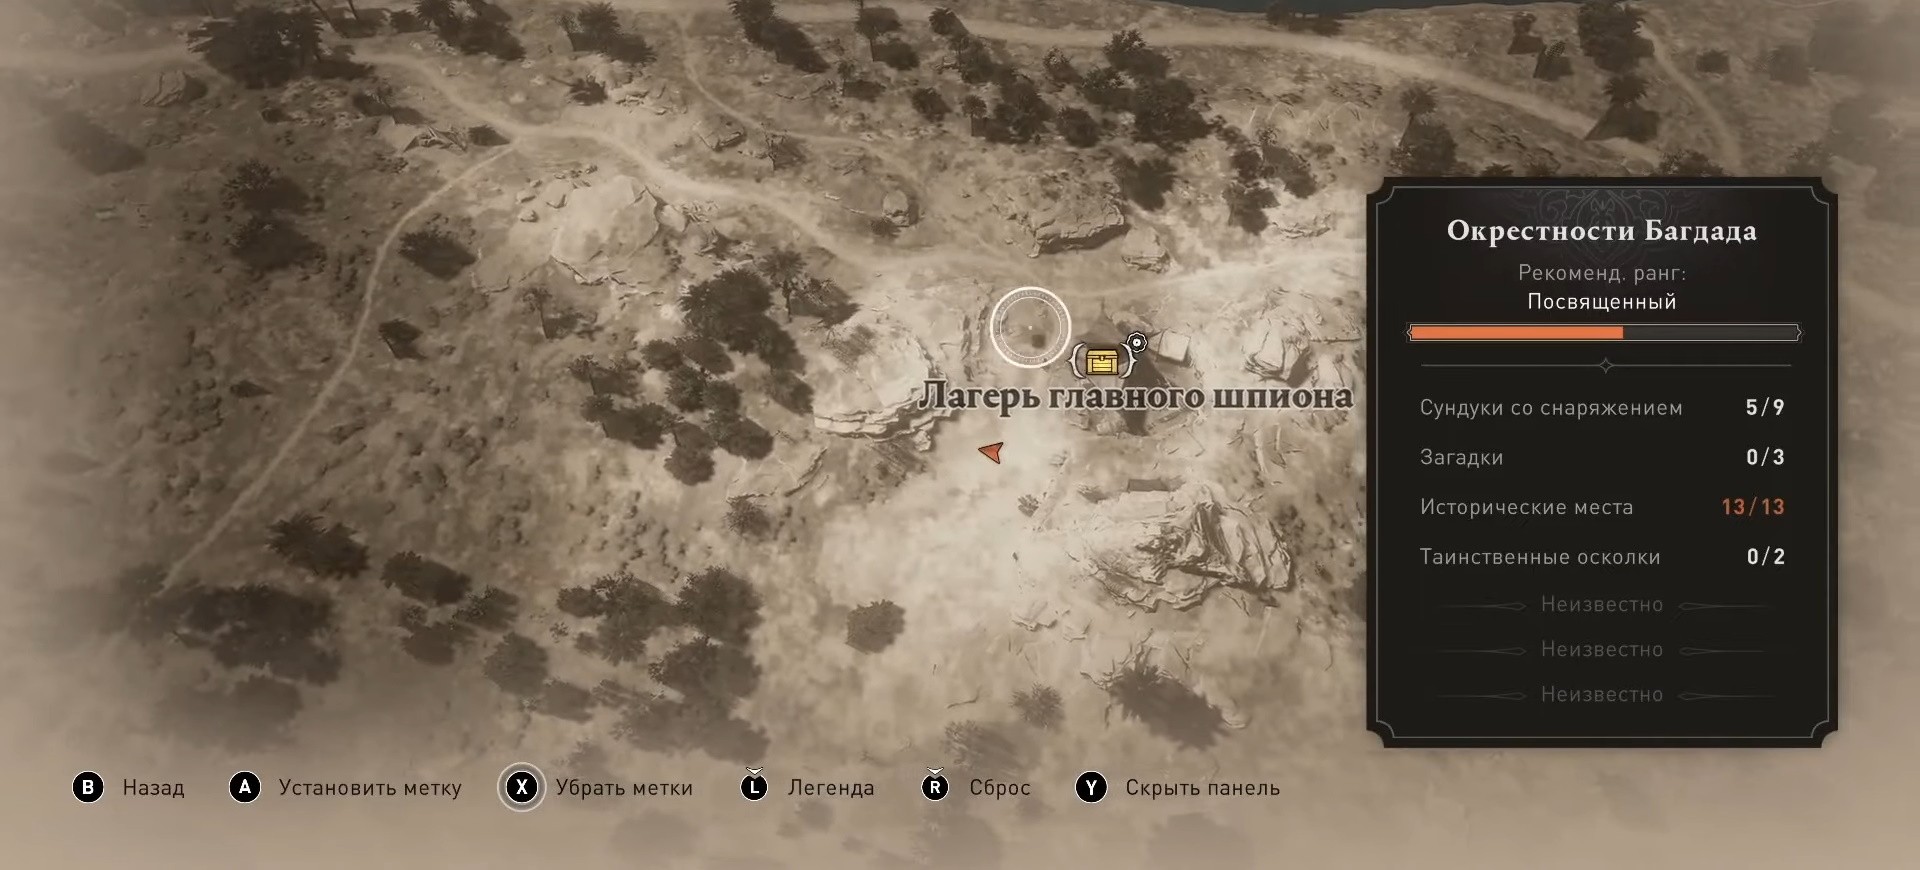
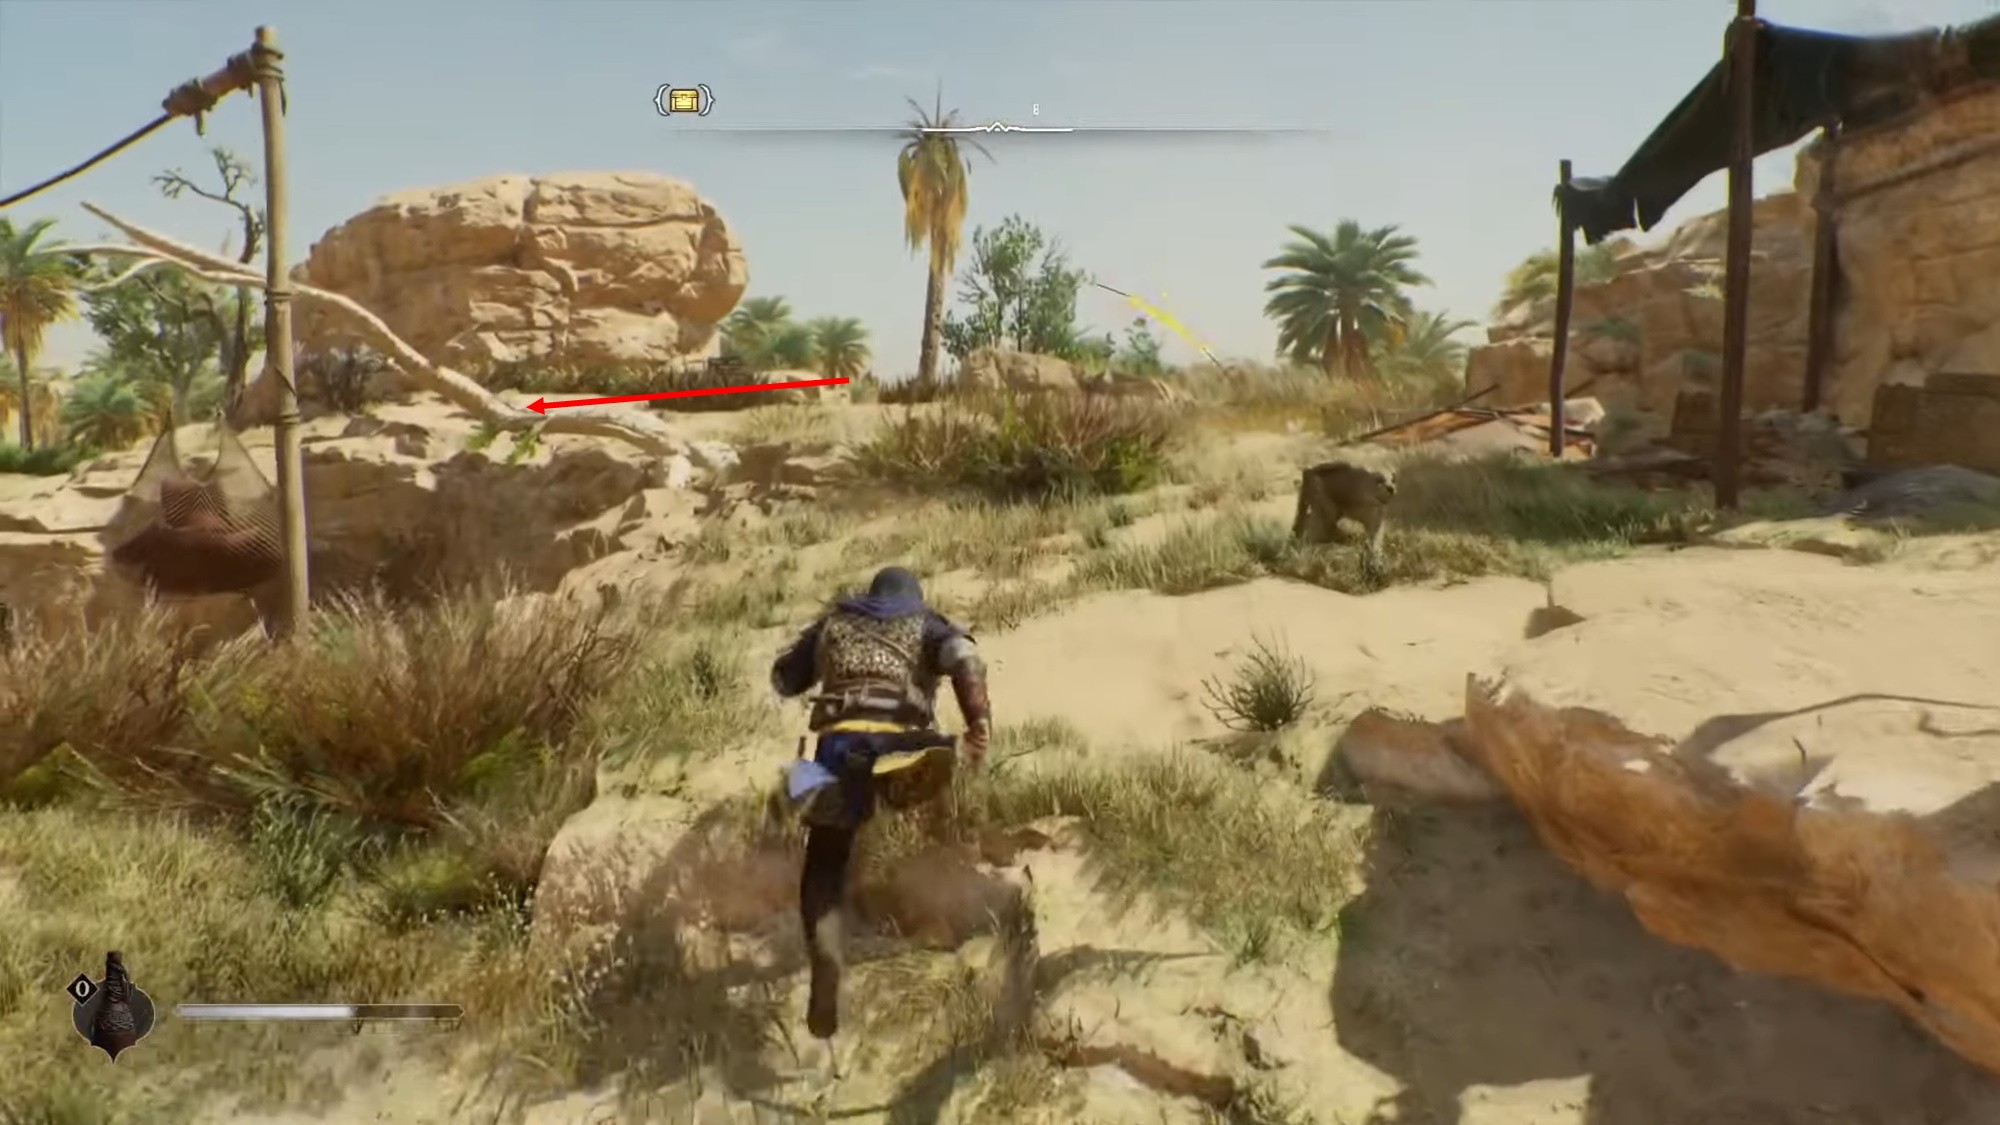
Chest No. 27 Master Spy's Camp
Once in the camp, climb up the wall and find a dry branch along which you can go to the treehouse and find a chest.
Chest #28-30
Let us remind you that the last three chests can be opened using mysterious fragments.
Comments
You need to login to add comments.
You can login with