In Honkai: Star Rail Hanu's Prison Break is the main event of Patch 2.0, in which you will have to solve various puzzles related to sphere throwers, Dream World Walkers, Dreamers and Hanu's adventures. By completing these challenges you will receive various rewards, including Star Jades and Mora.
At the end you will be able to pick up one 4-star character absolutely free. In this guide we will tell you how to start this event and solve all its mysteries.
How to start the event "Hanu's Prison Break"
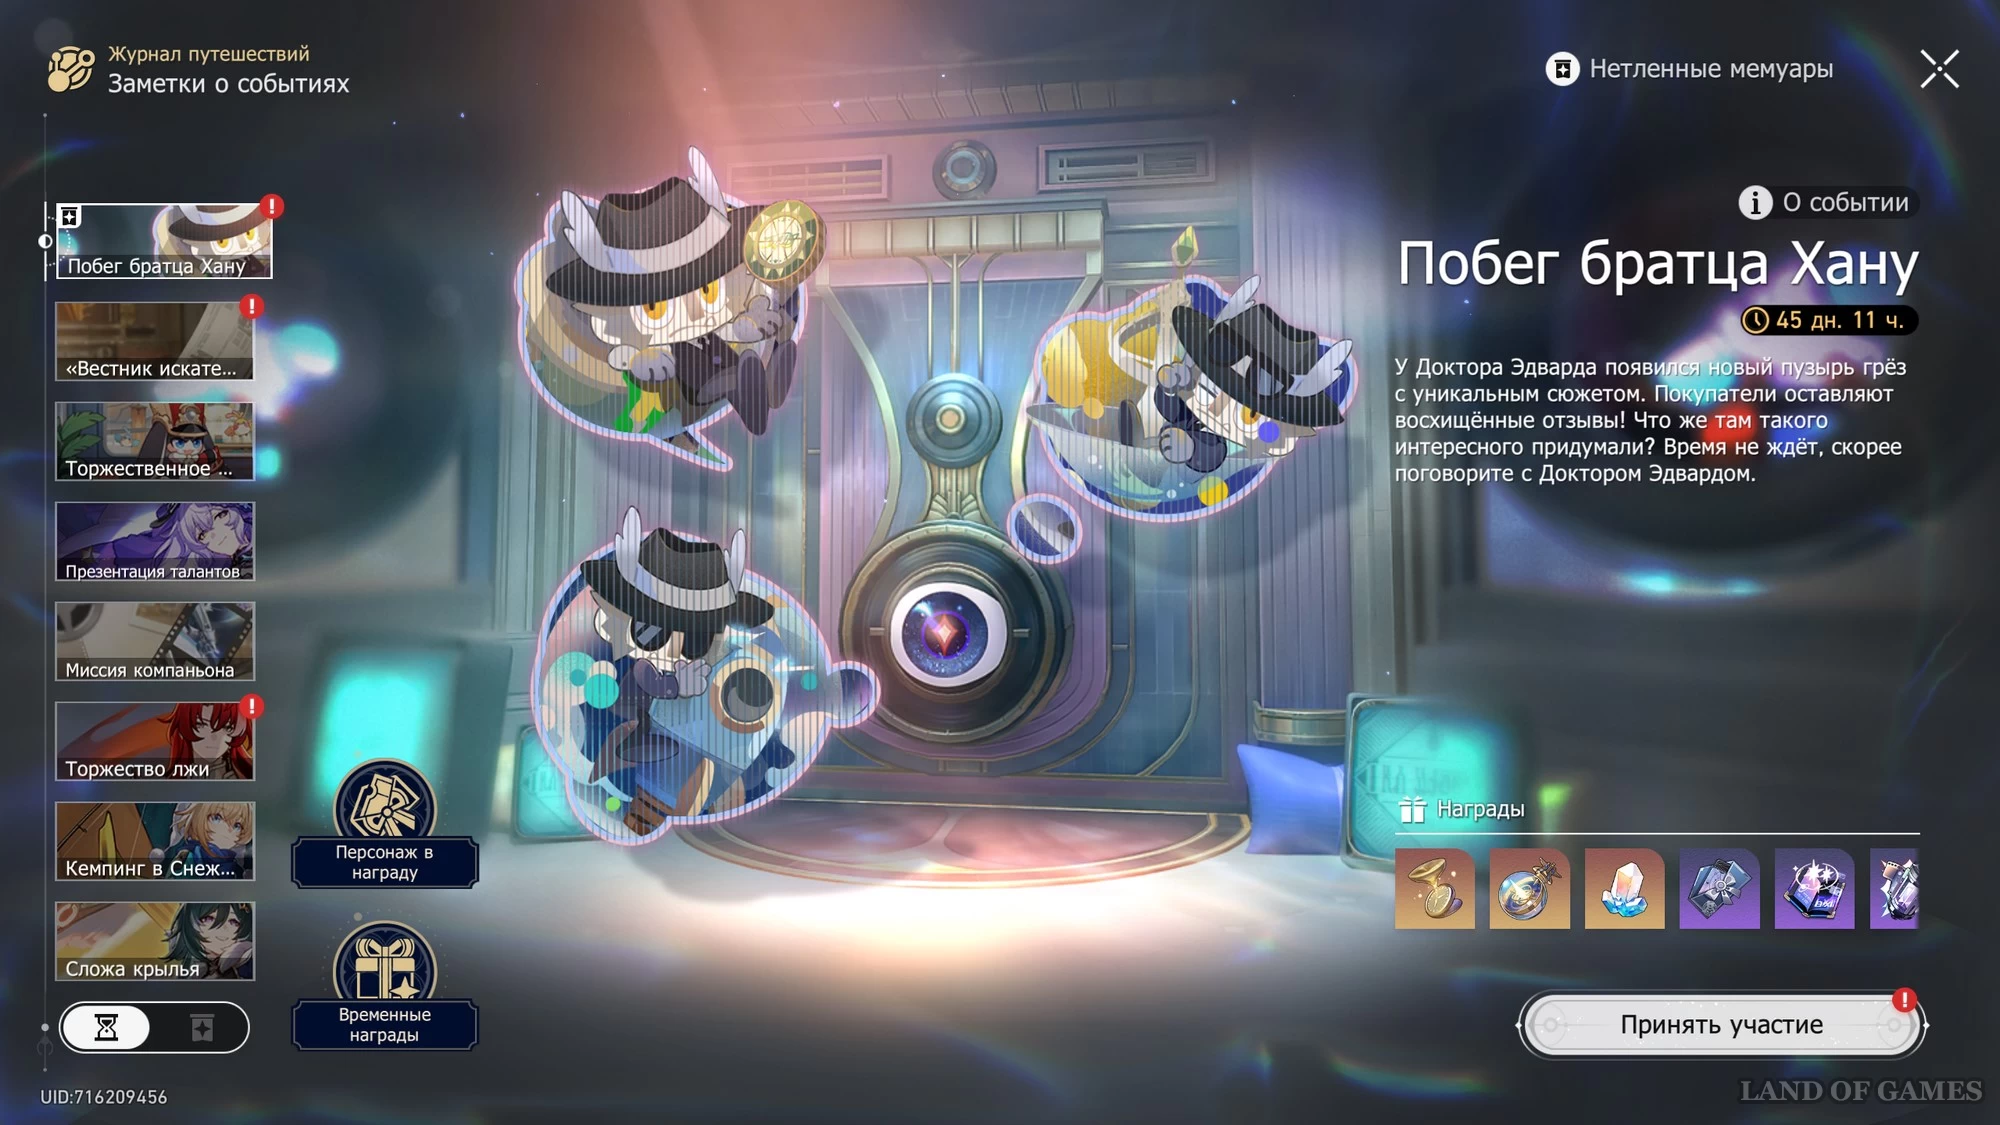
The event started on February 8, 2024, and will end on March 25 at 03:59 server time. After its completion, it will be moved to the “Immortal Memoirs” category, allowing new Pioneers to familiarize themselves with it at any time and receive the standard reward. However, before this you will need to fulfill a couple of conditions:
- Reach at least 40 Mastery level.
- Complete the Mastery mission called "Through a Glass Darkly".
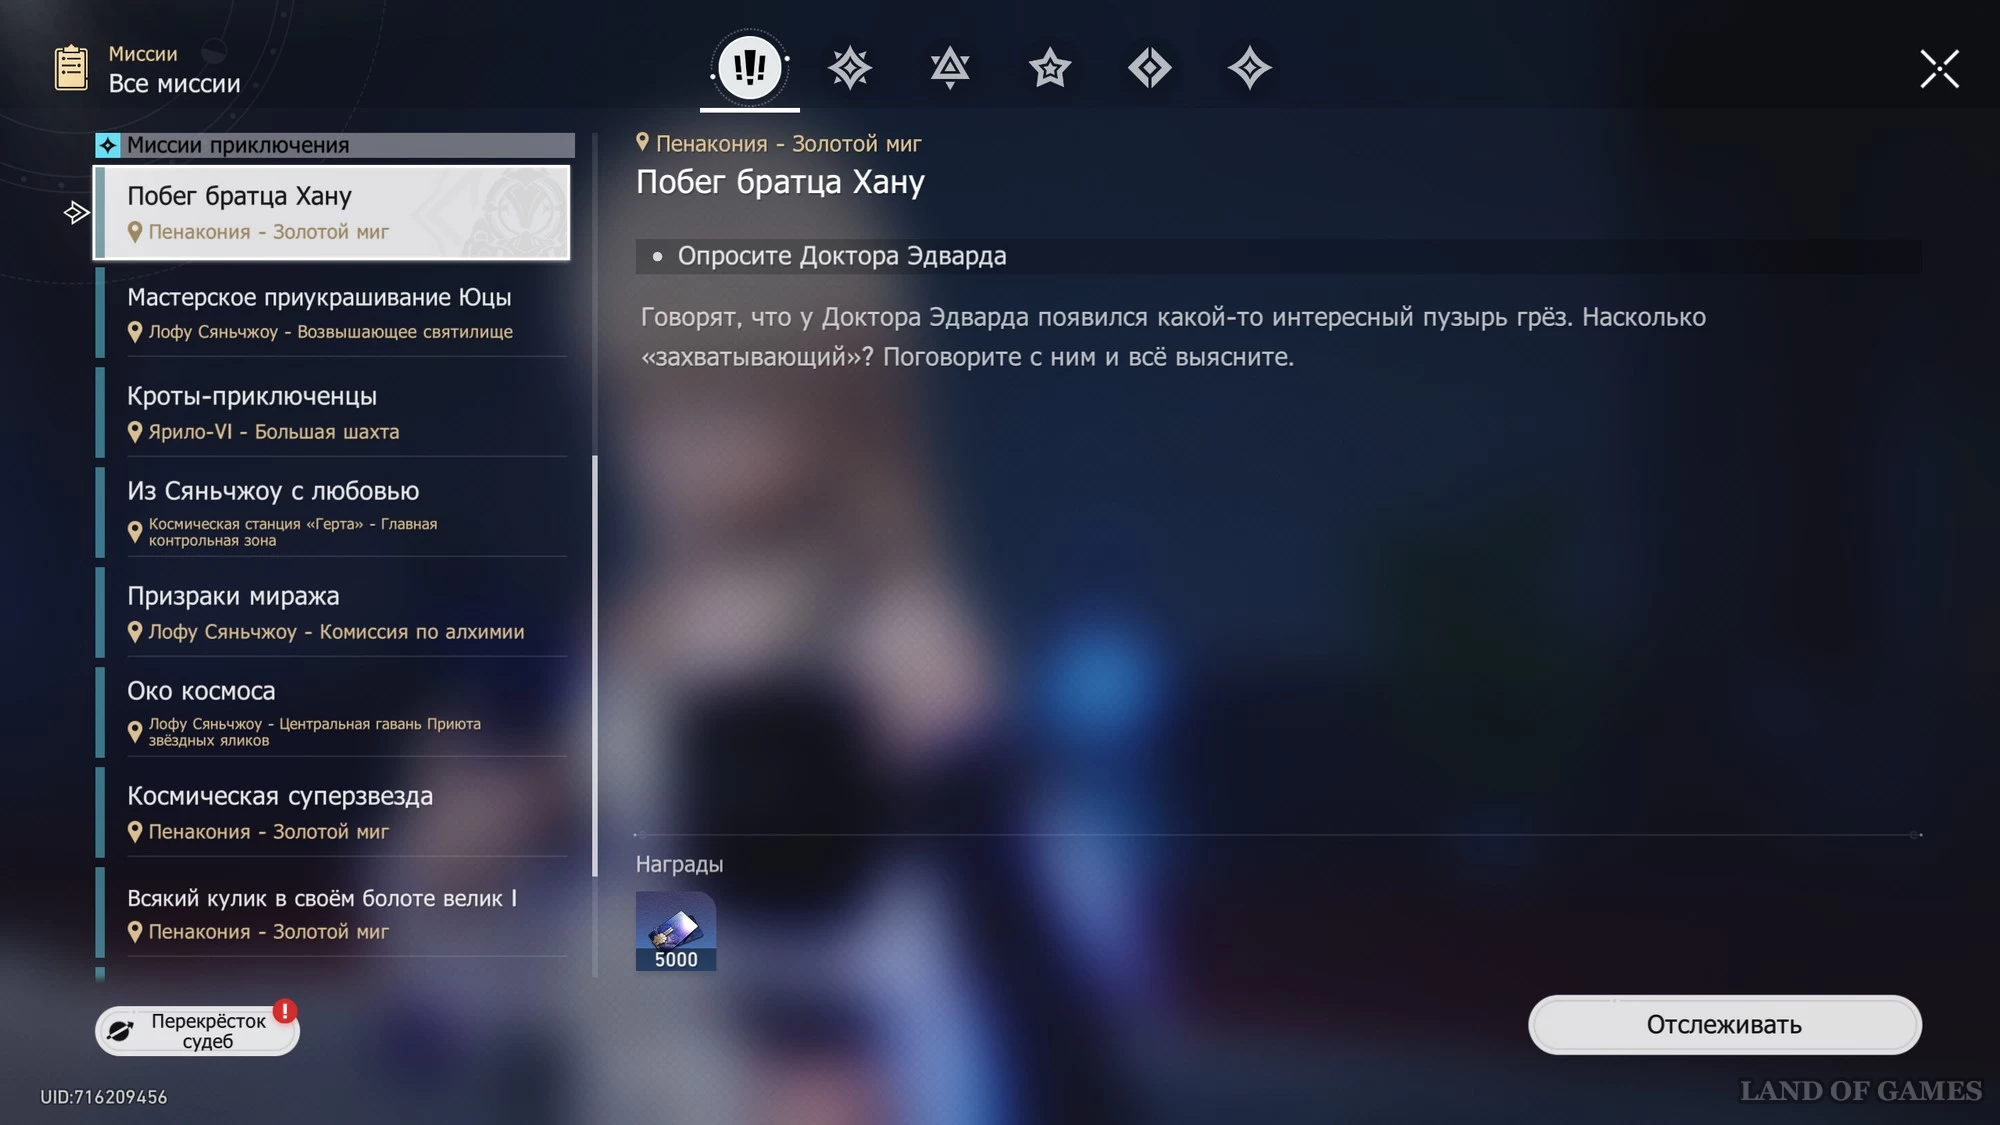
Having dealt with the specified conditions, you should automatically receive the starting mission of the event. If this does not happen, then go to the Travel Log, find the desired event and click on the button "Participate"
.
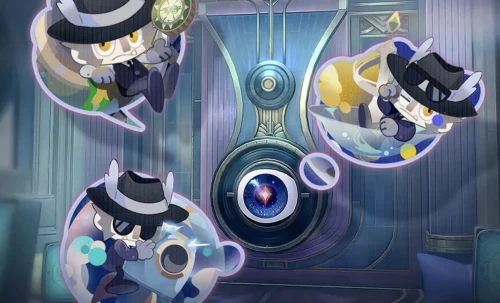
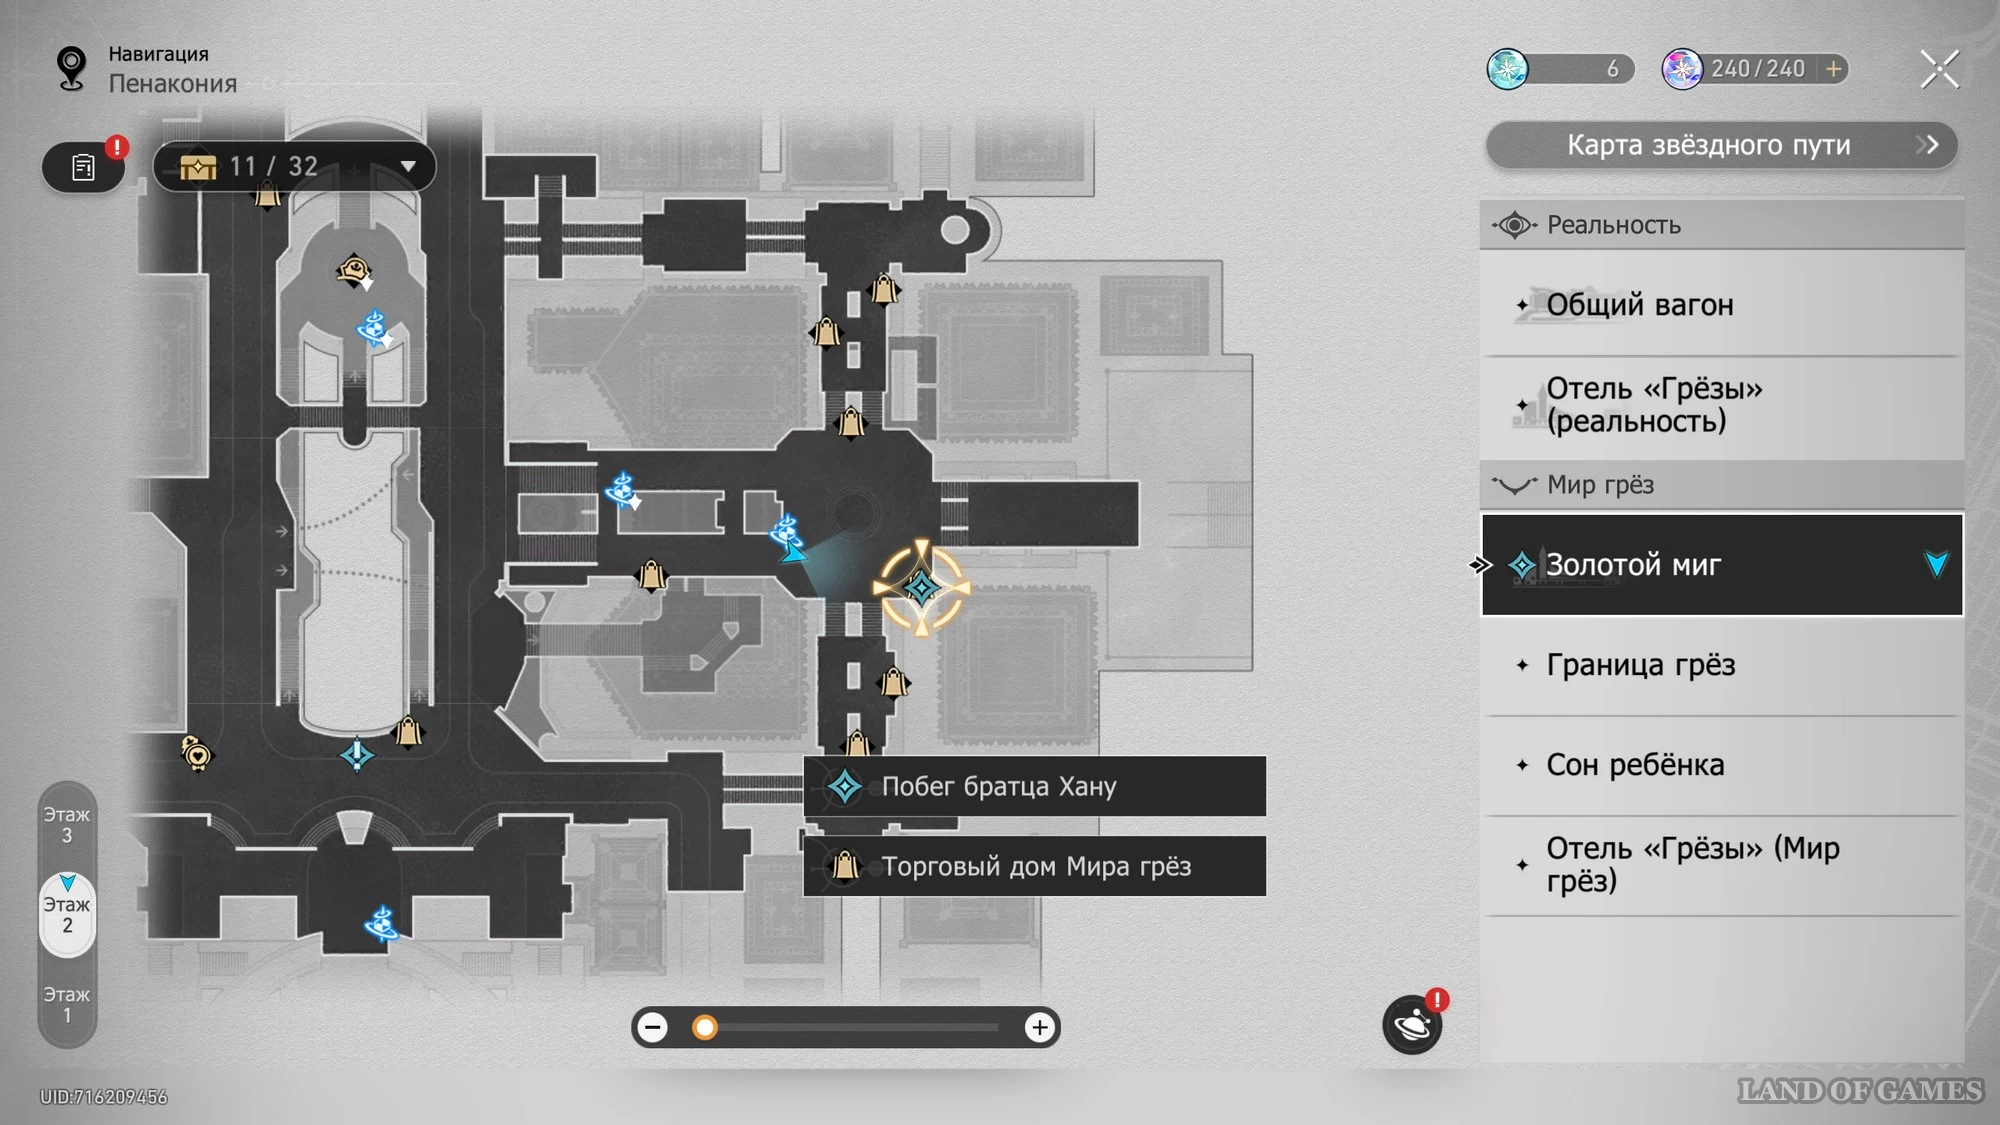
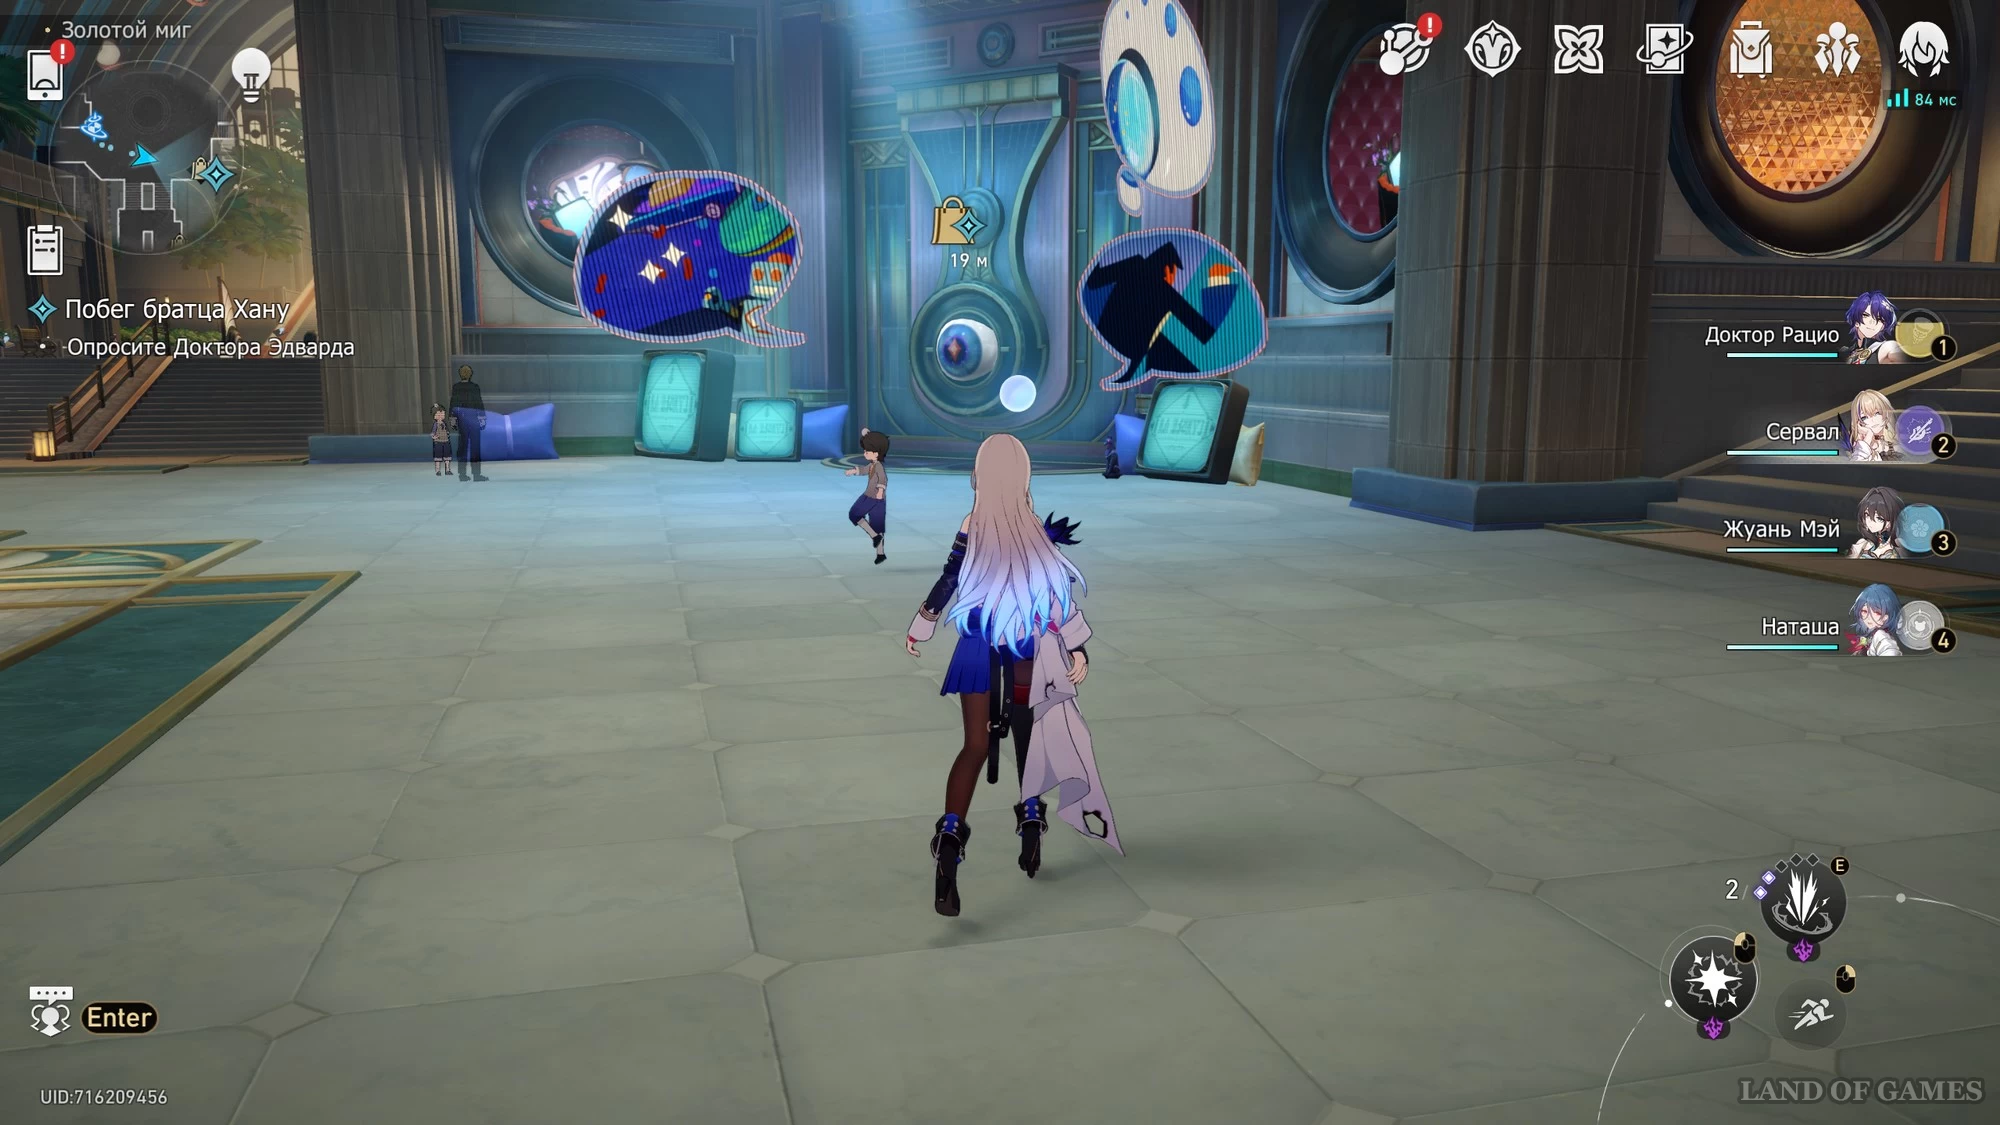
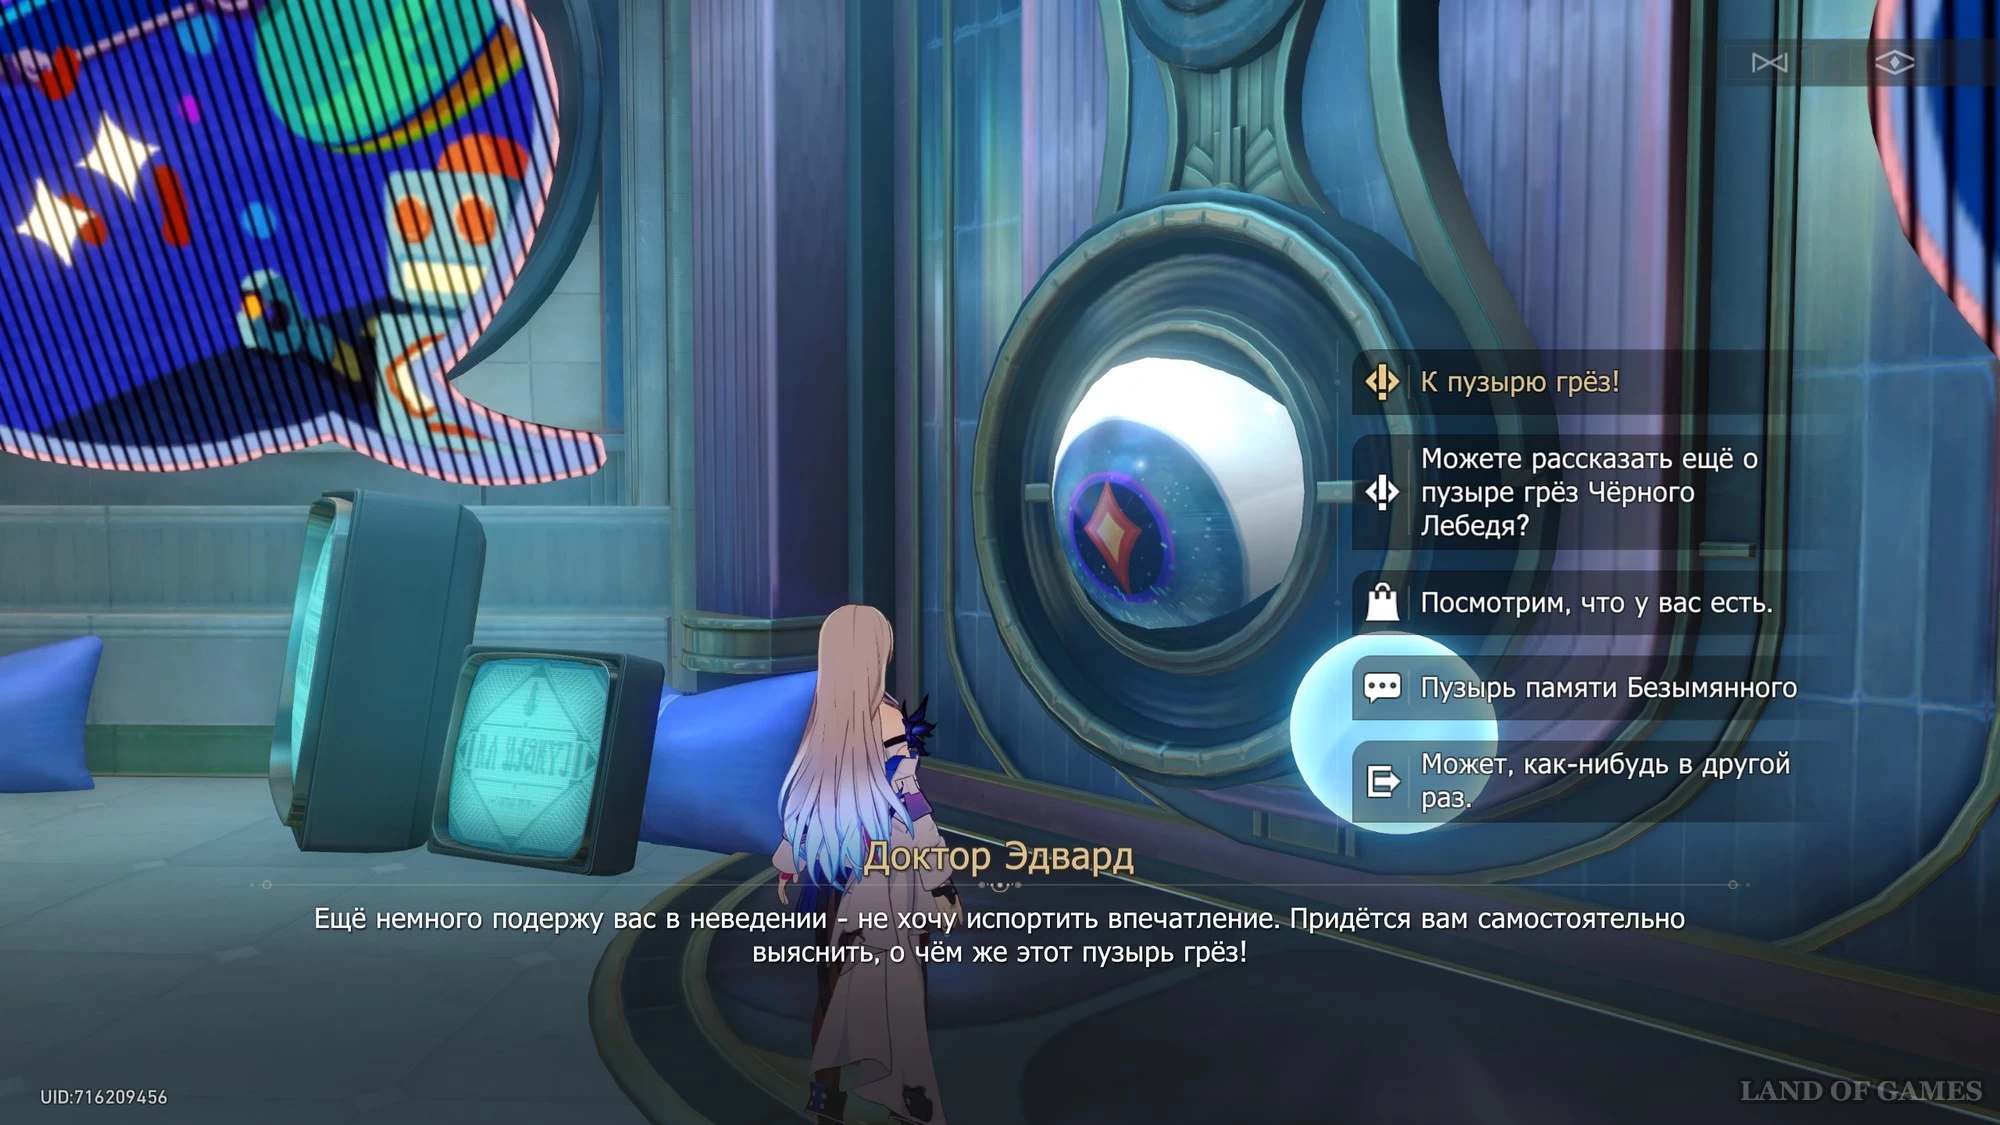
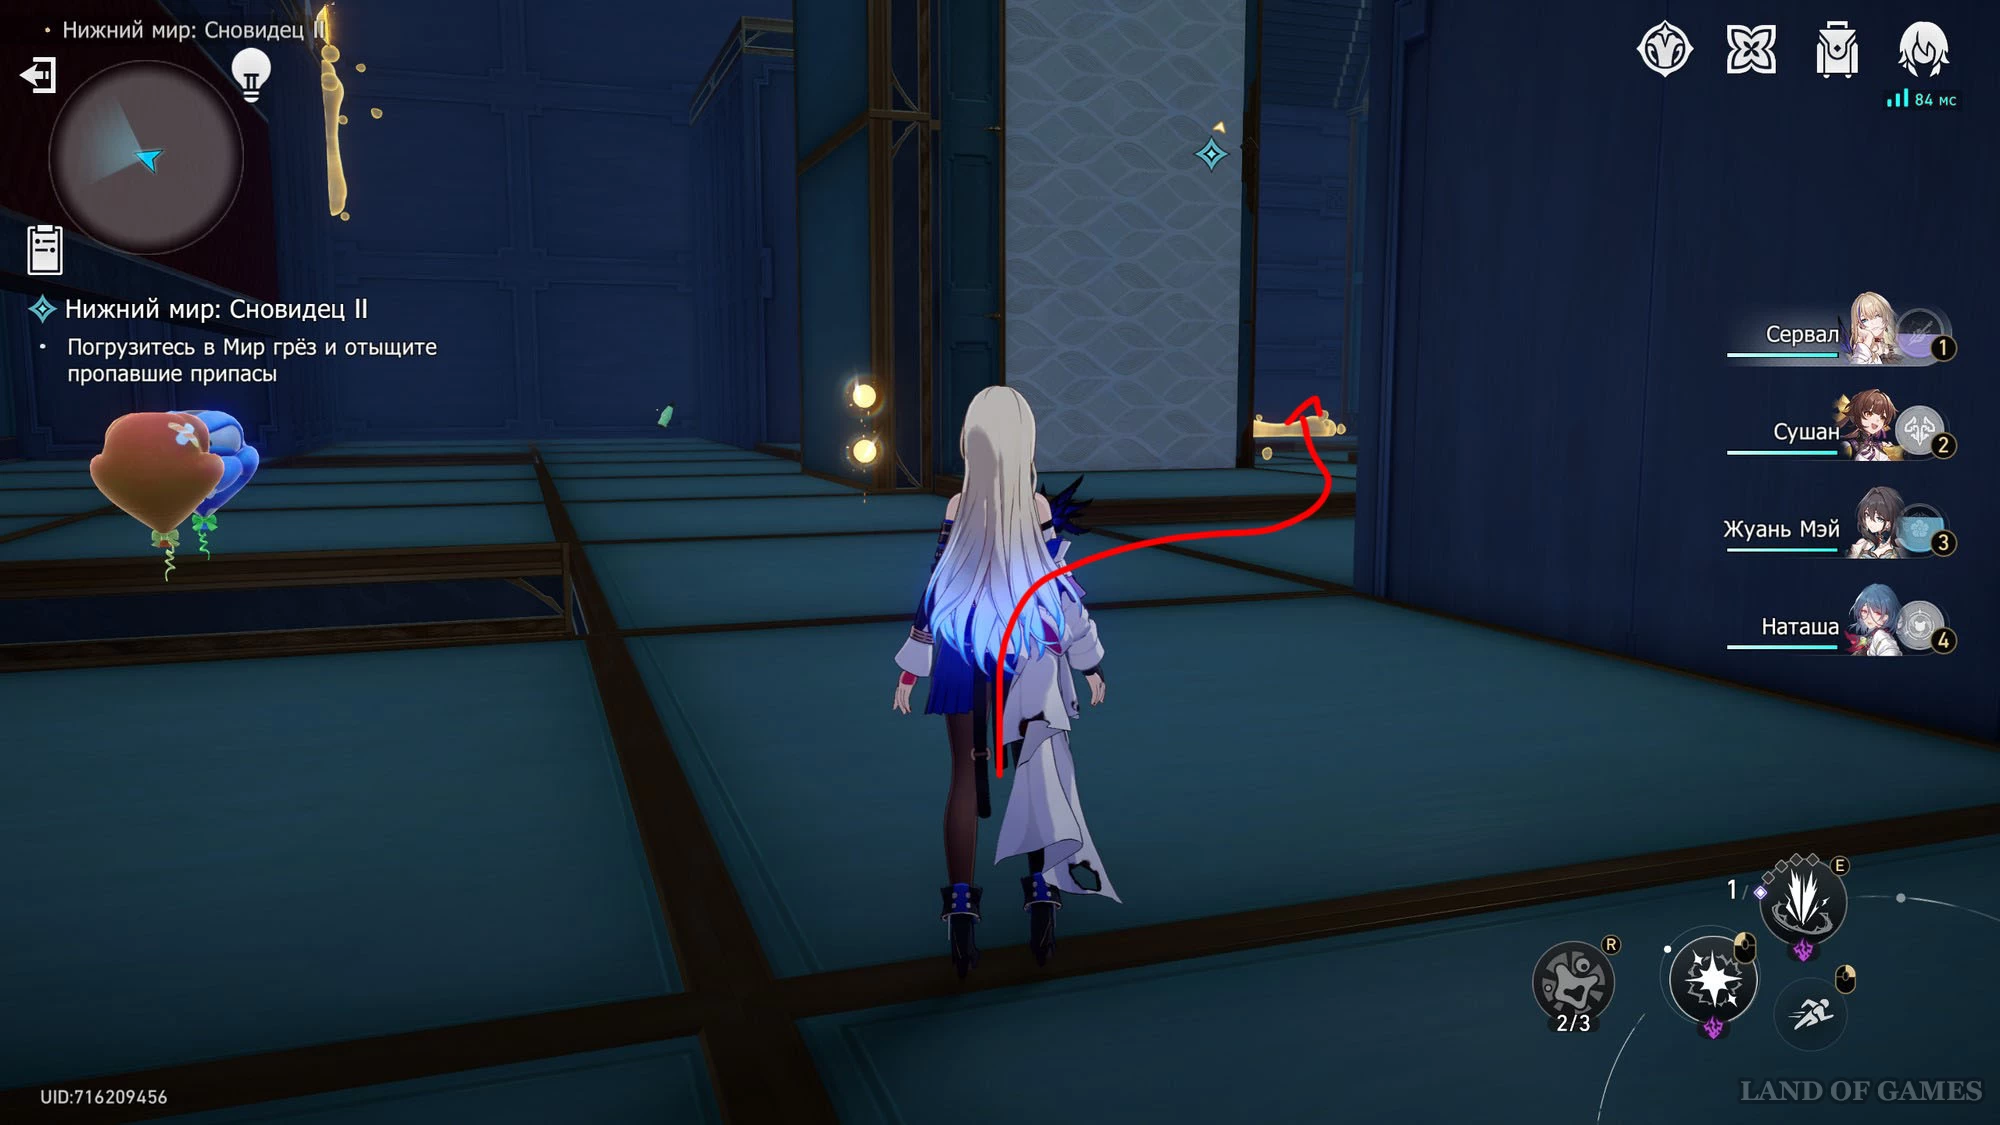
Now move to the Oty's Mall anchor and approach Doctor Edward (the big eye). During a dialogue with him, select an answer "To the dream bubble!"
. After this, a menu with tests will open.
Spherometries
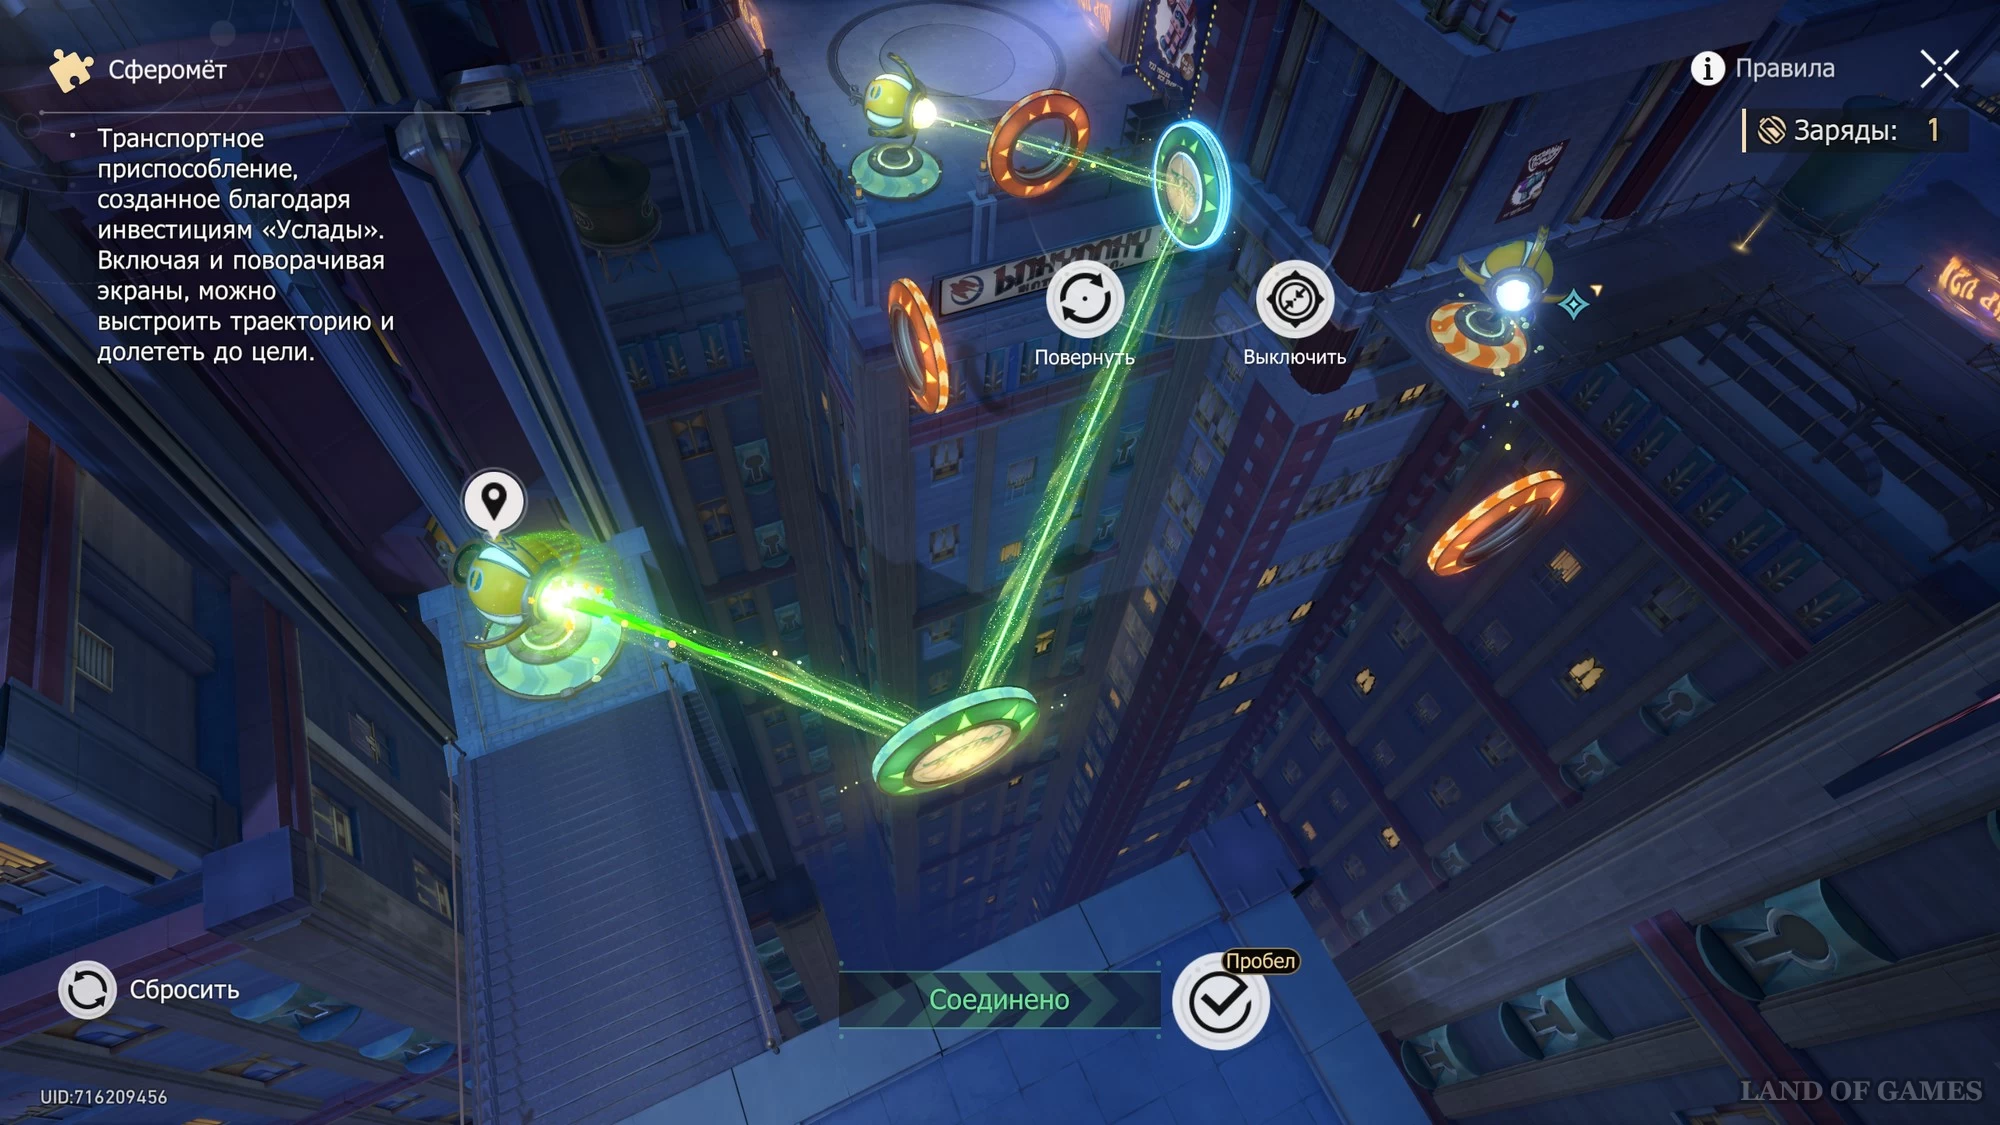
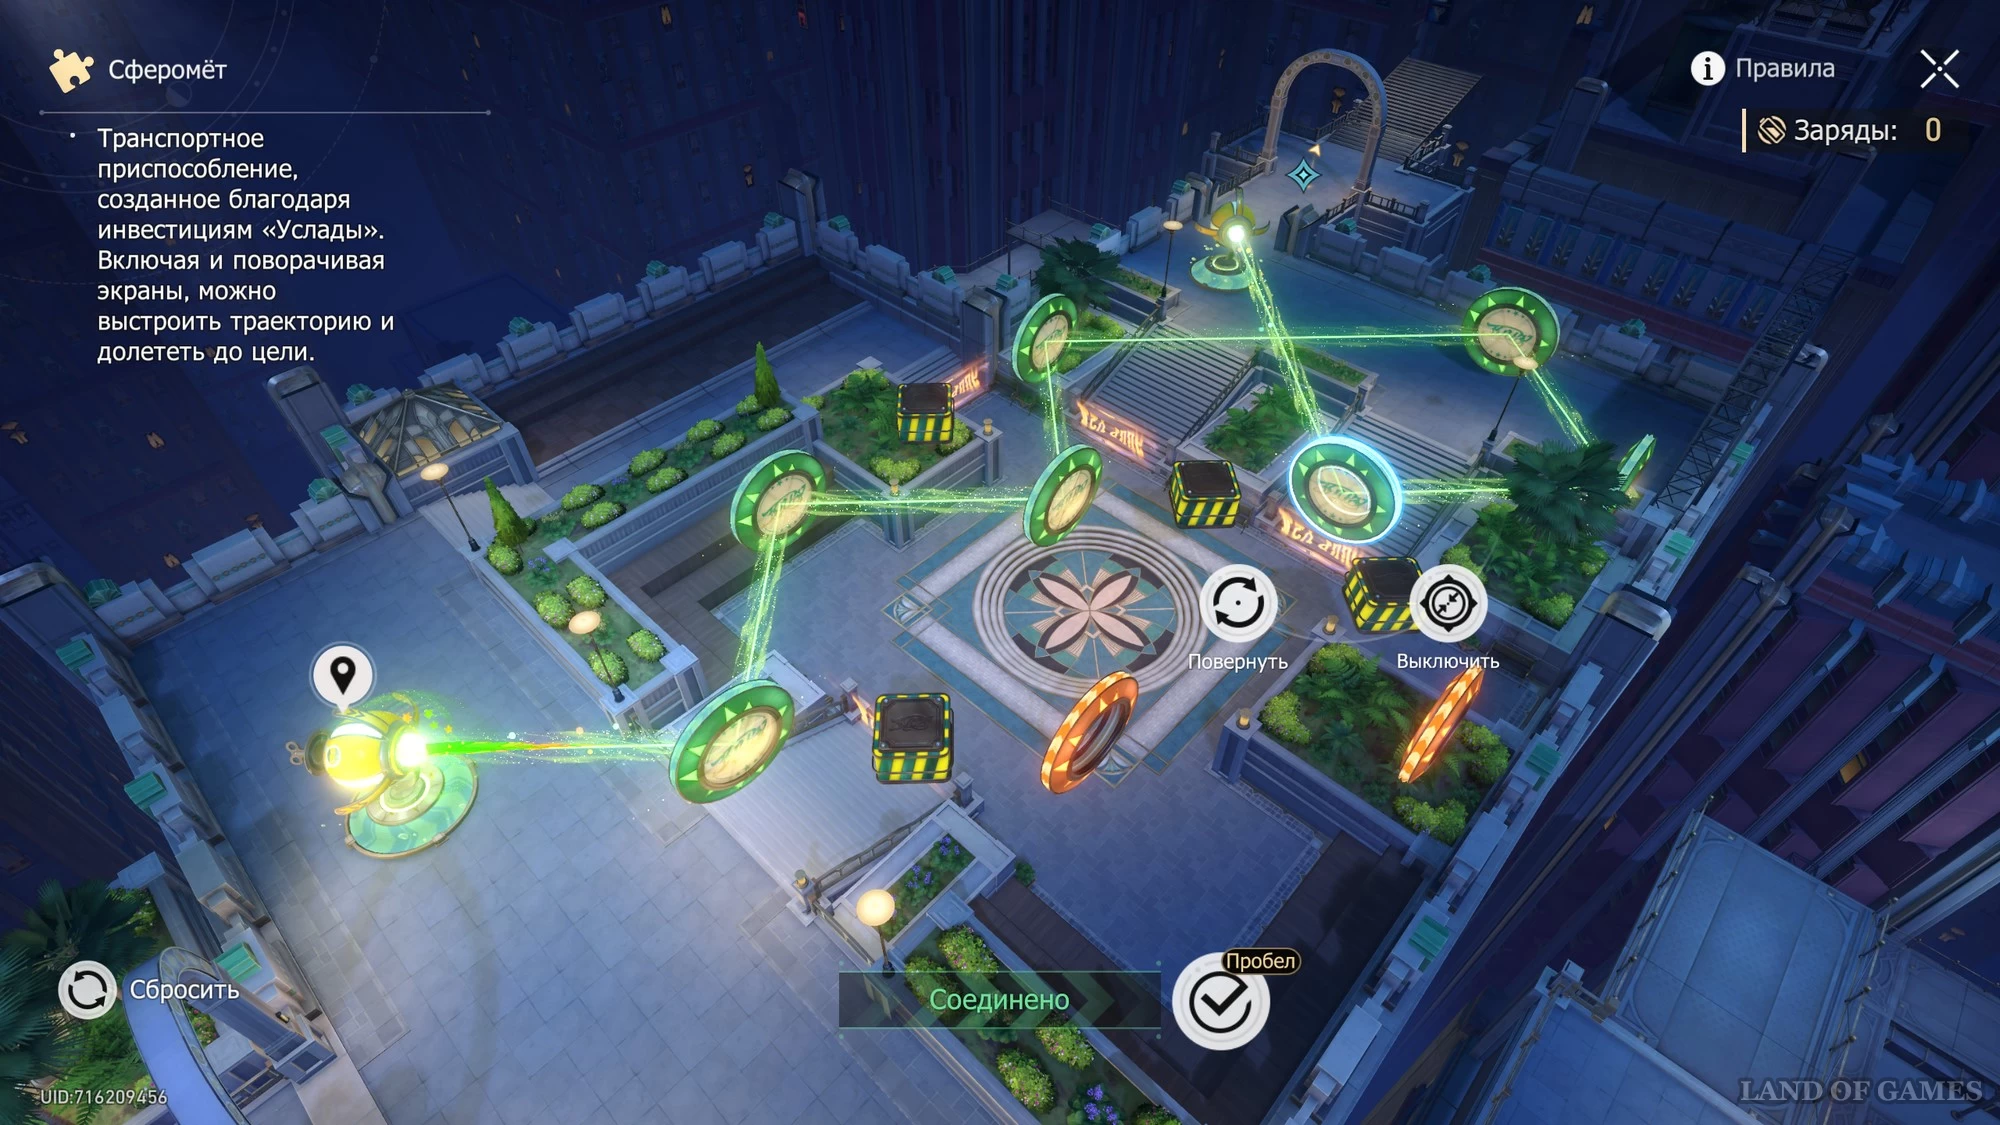
Overworld: Spheromet 1
Select the indicated challenge and talk to your cellmate. Then interact with the sphere launcher standing slightly ahead and study the instructions for its use. You will have four charges, so you will be able to activate all screens. Do this, and then rotate them so that the green beam hits the second sphere. The picture below shows the final result.
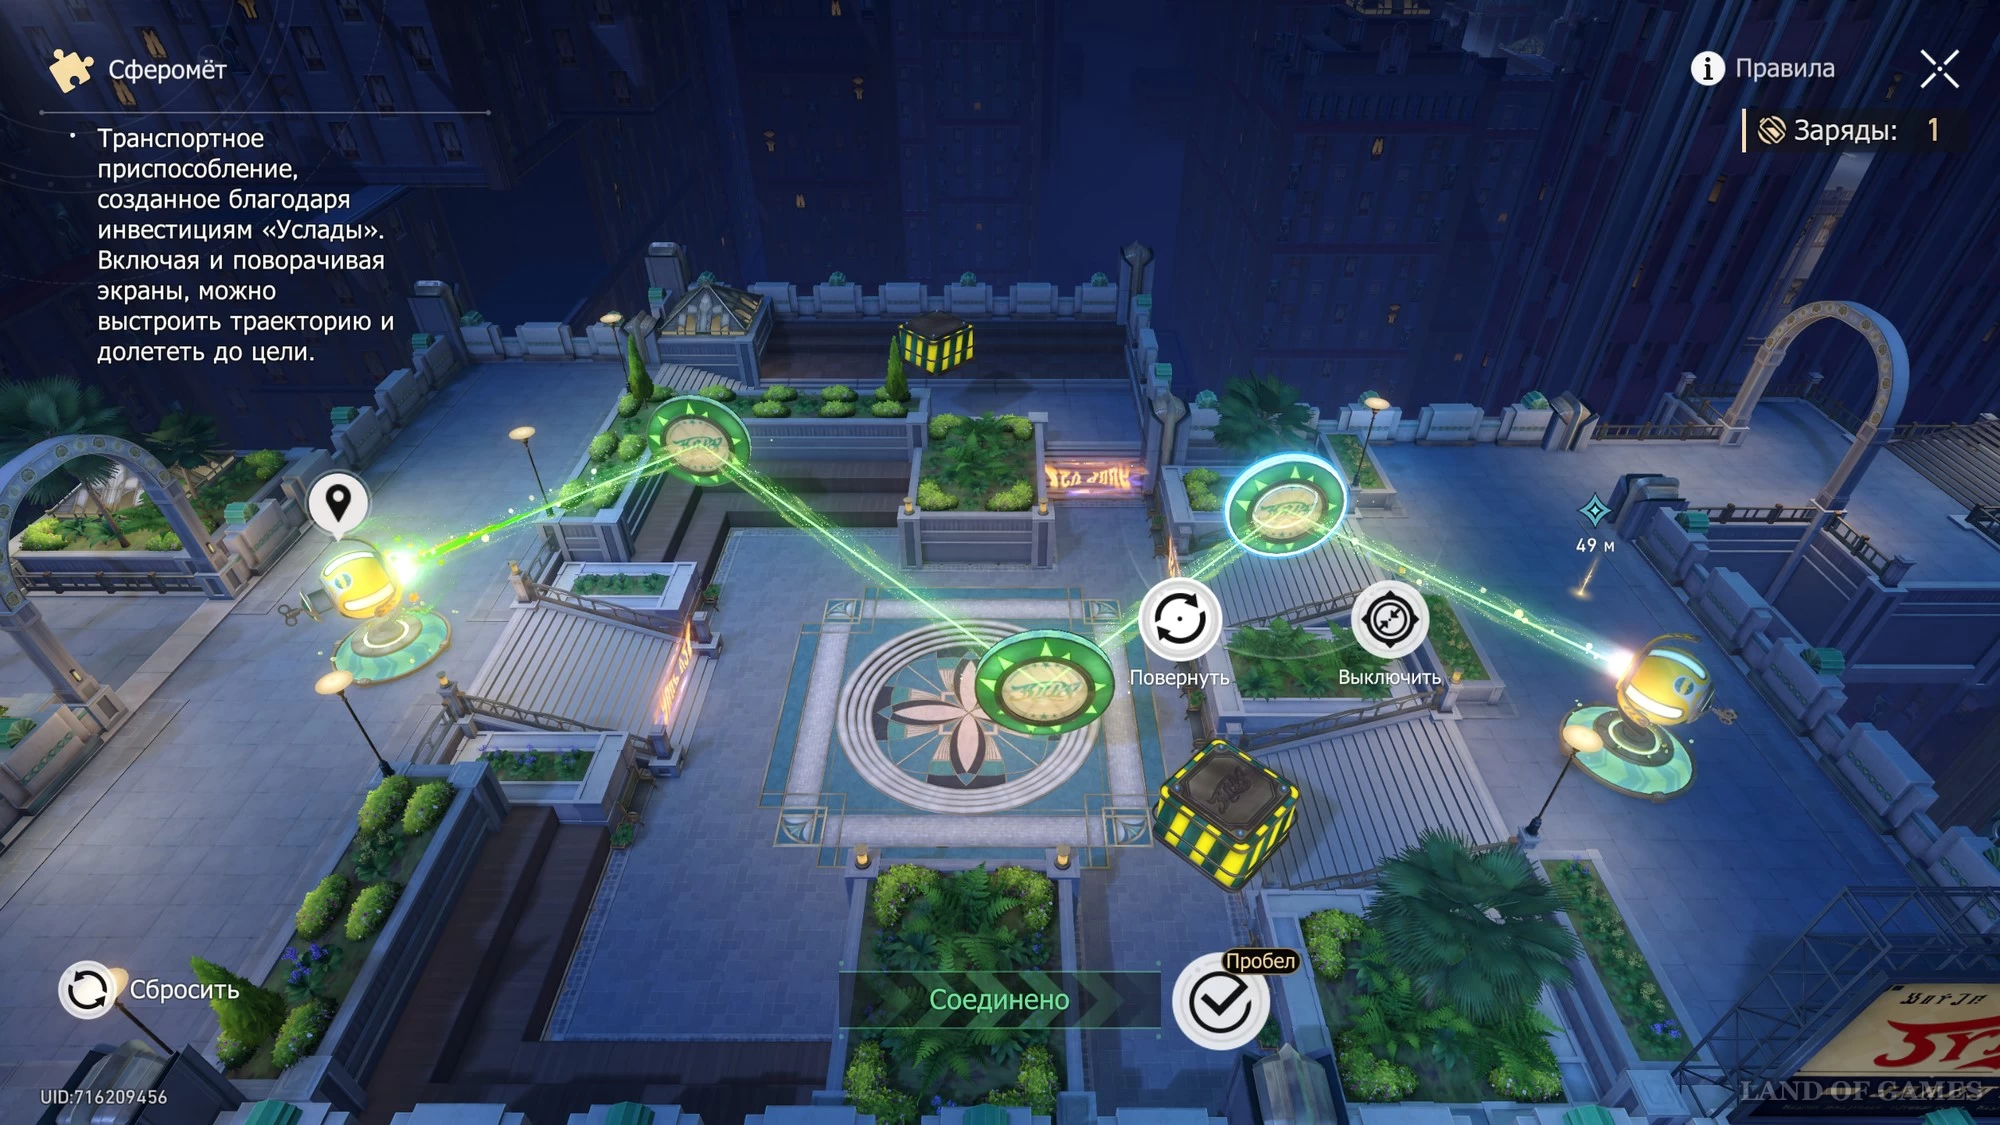
The gif below demonstrates the entire process of solving the riddle. Once on the other side, simply go to the quest marker to complete the challenge.
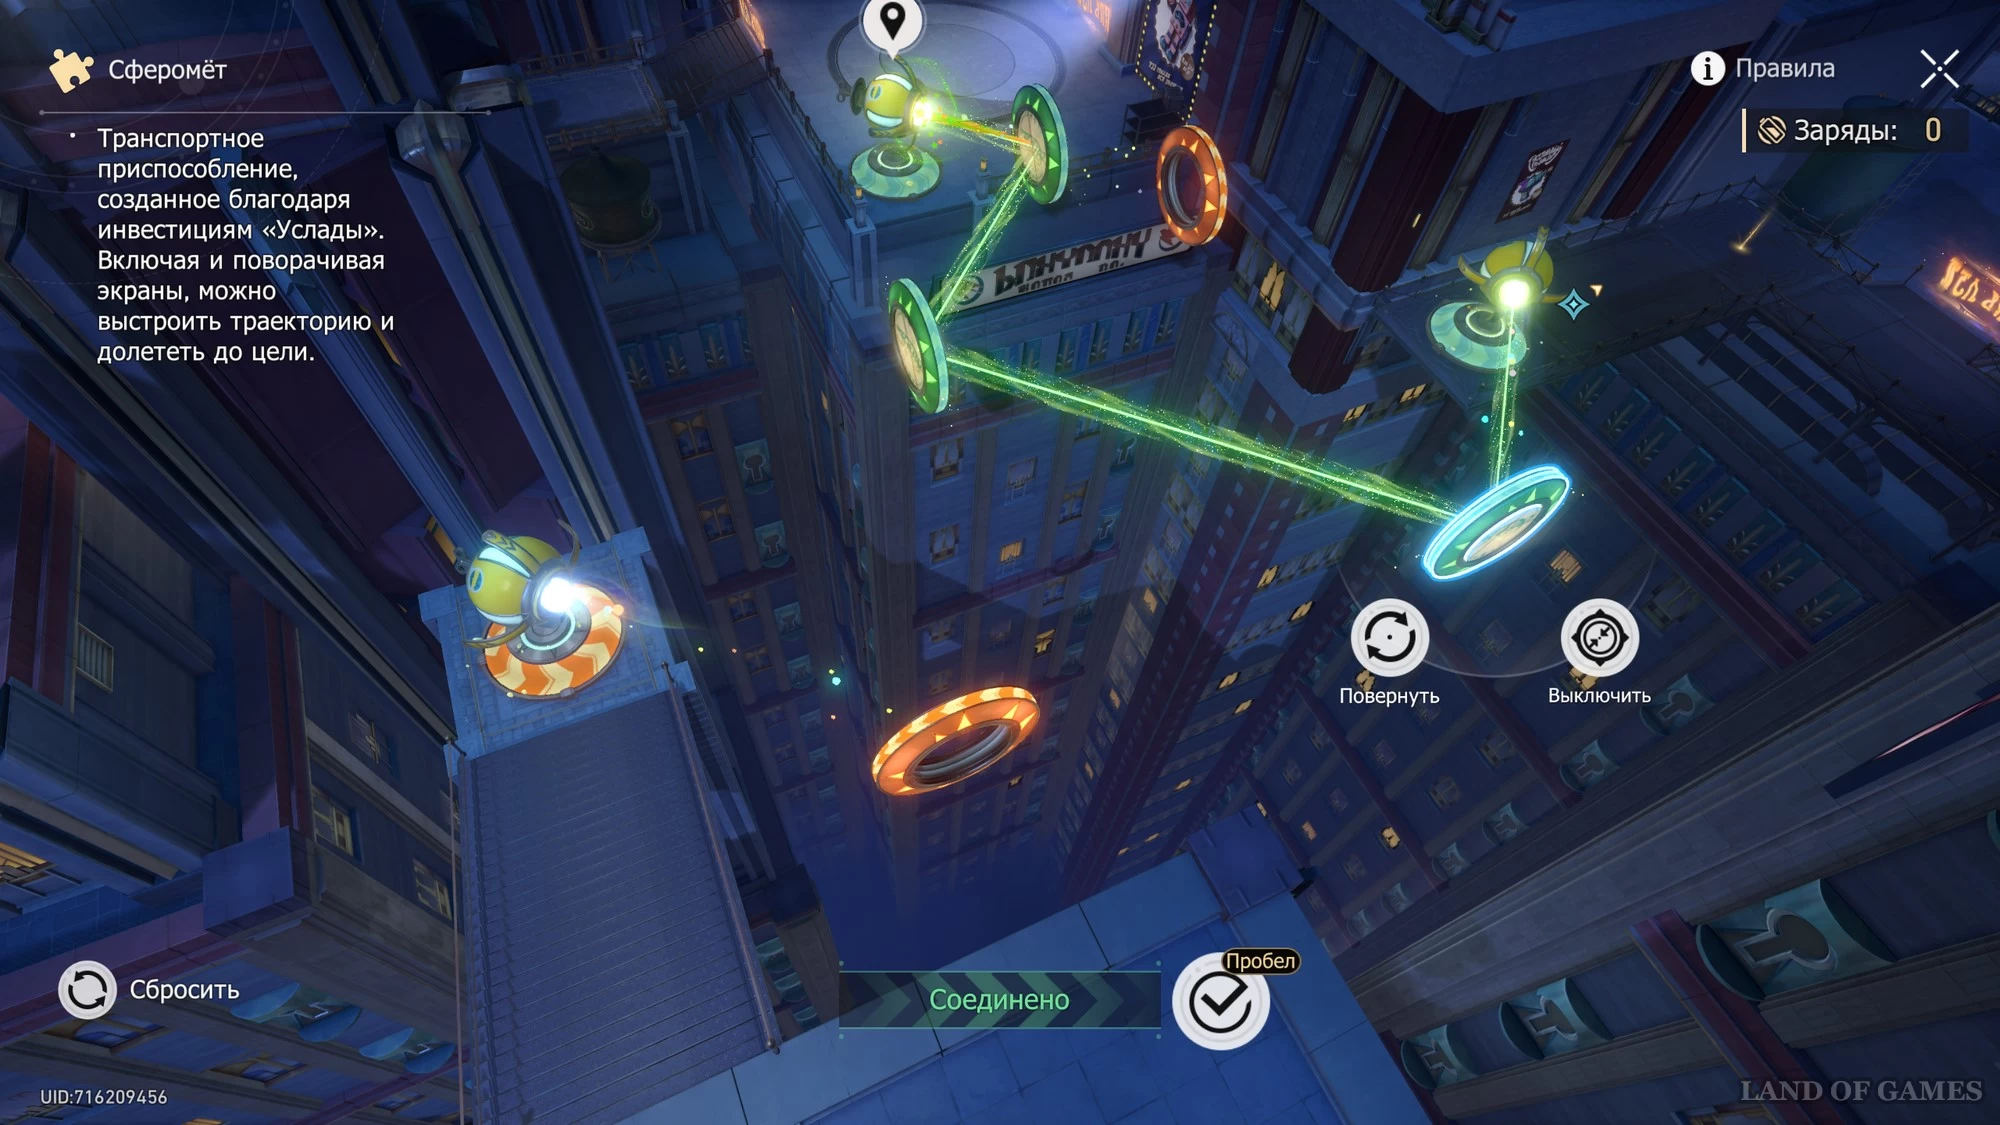
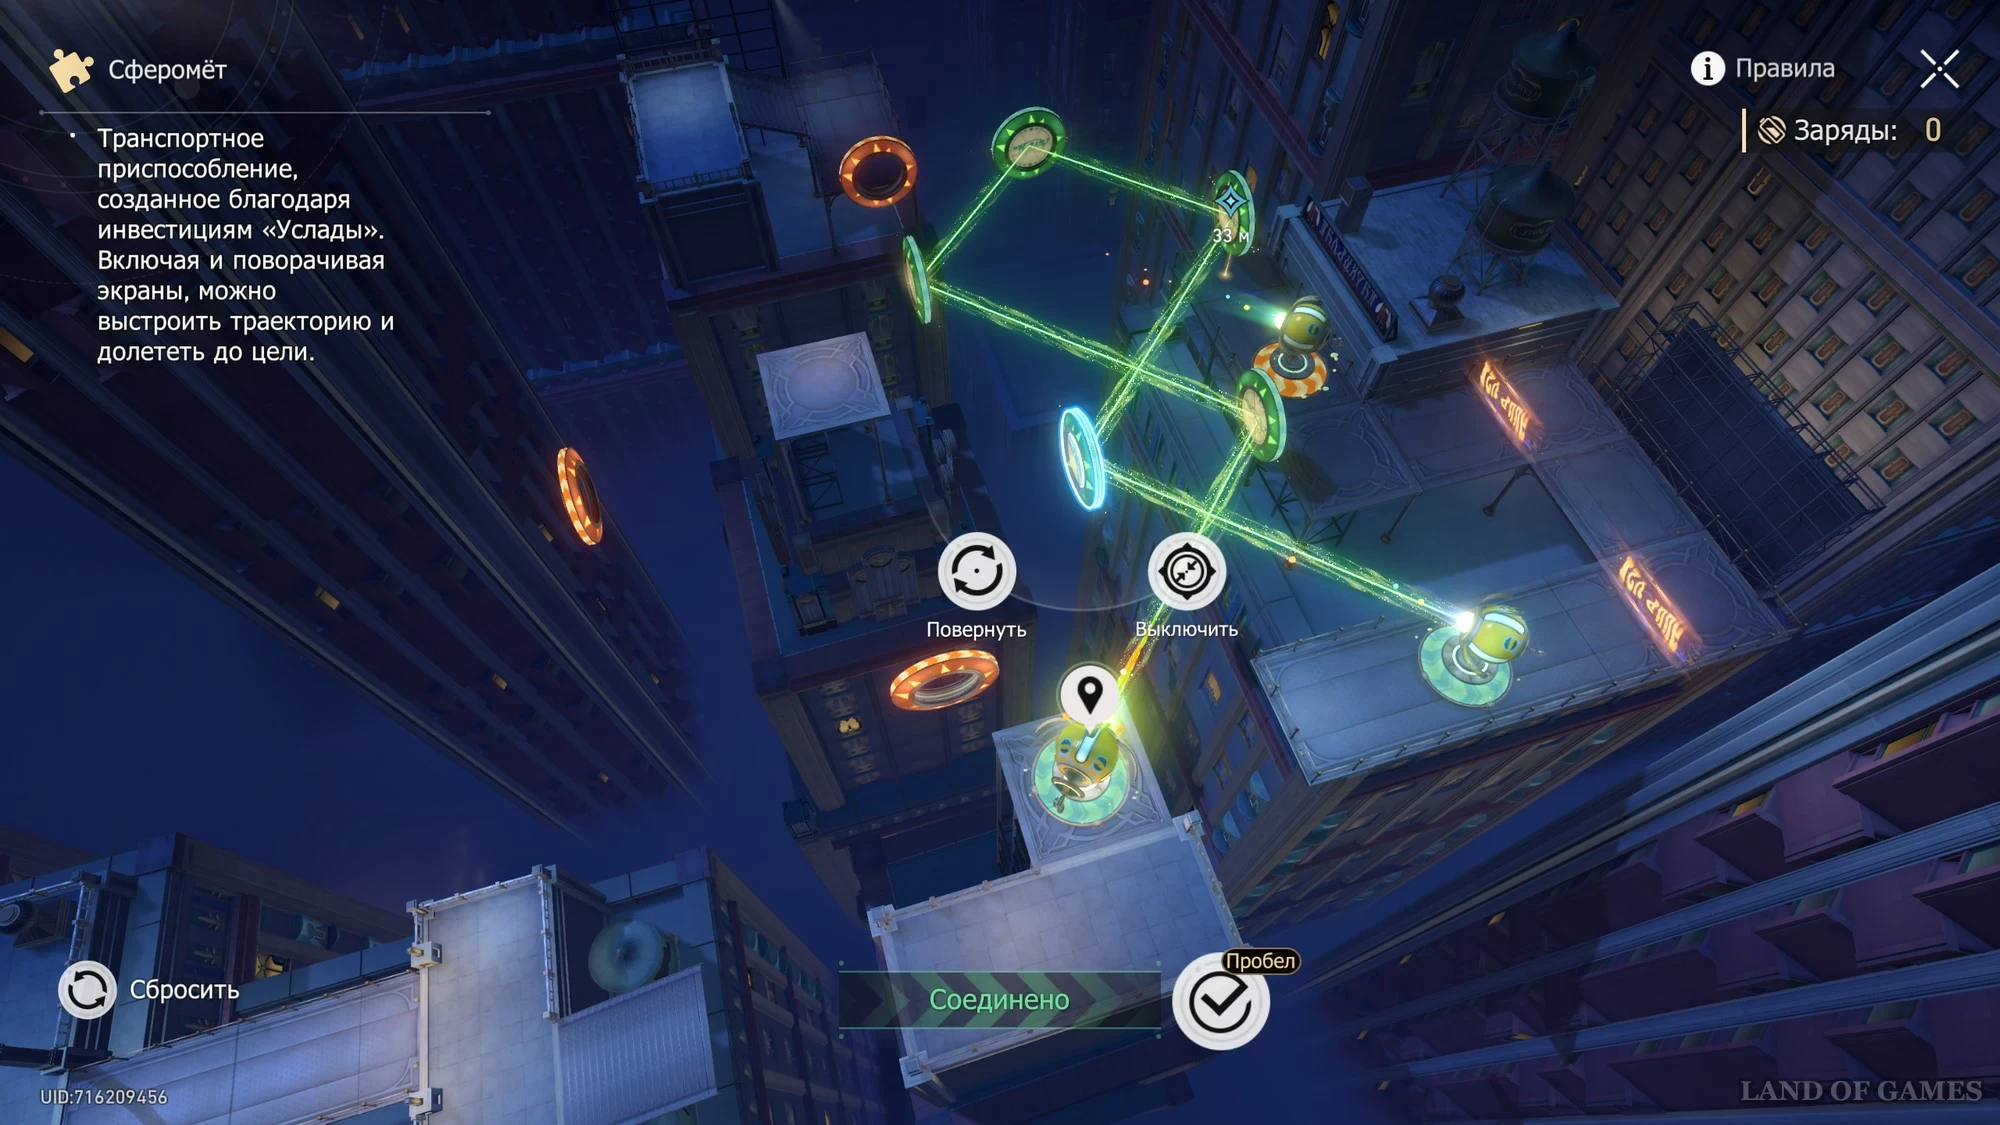
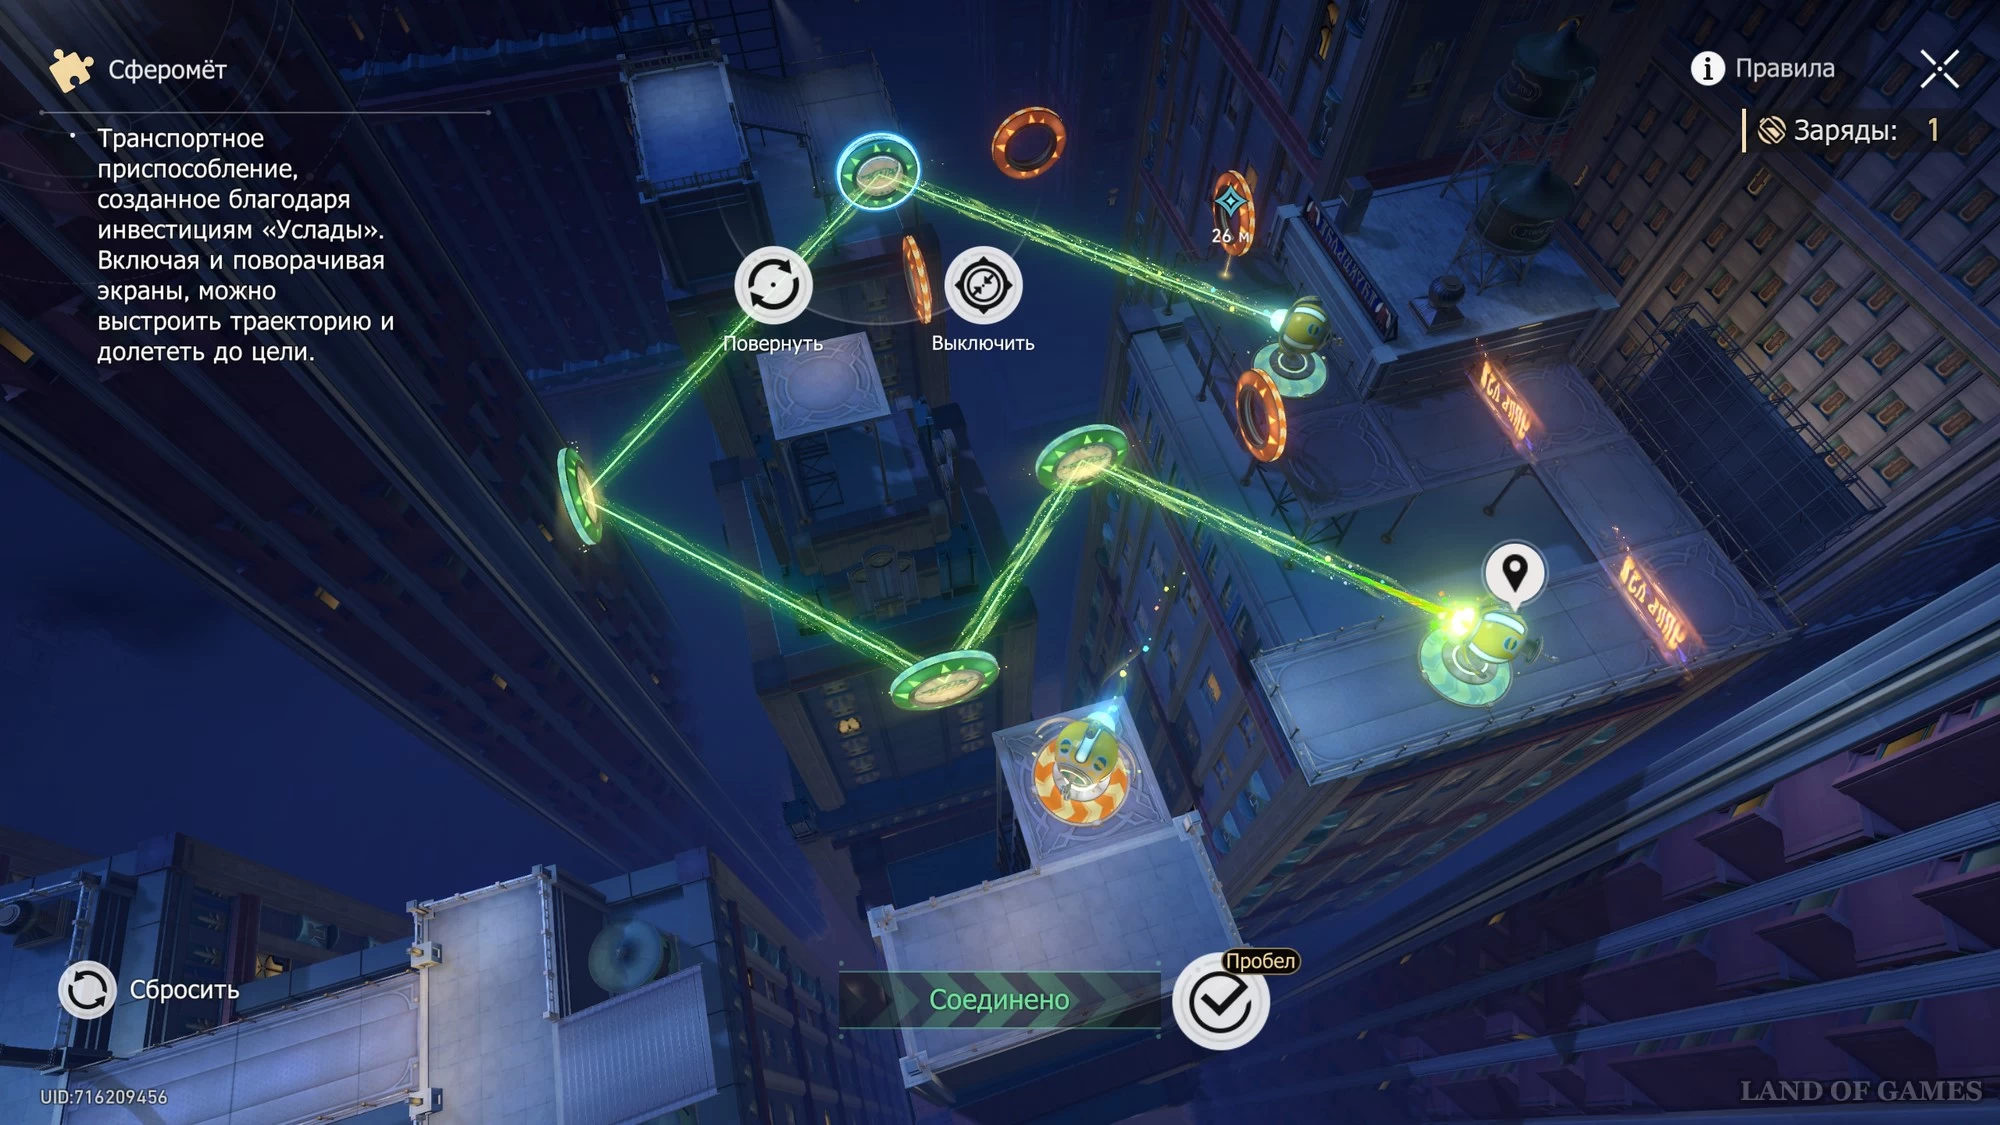
Overworld: Spheromet 2
Approach the second ball and interact with it. You will only have 5 charges, so you won't be able to activate all the screens. The picture below shows which screens should be turned on and where exactly they need to be turned so that the green beam reaches the second sphere.
The gif below demonstrates the entire process of solving the riddle. Once on the other side, simply approach Brother Khan to complete the challenge.
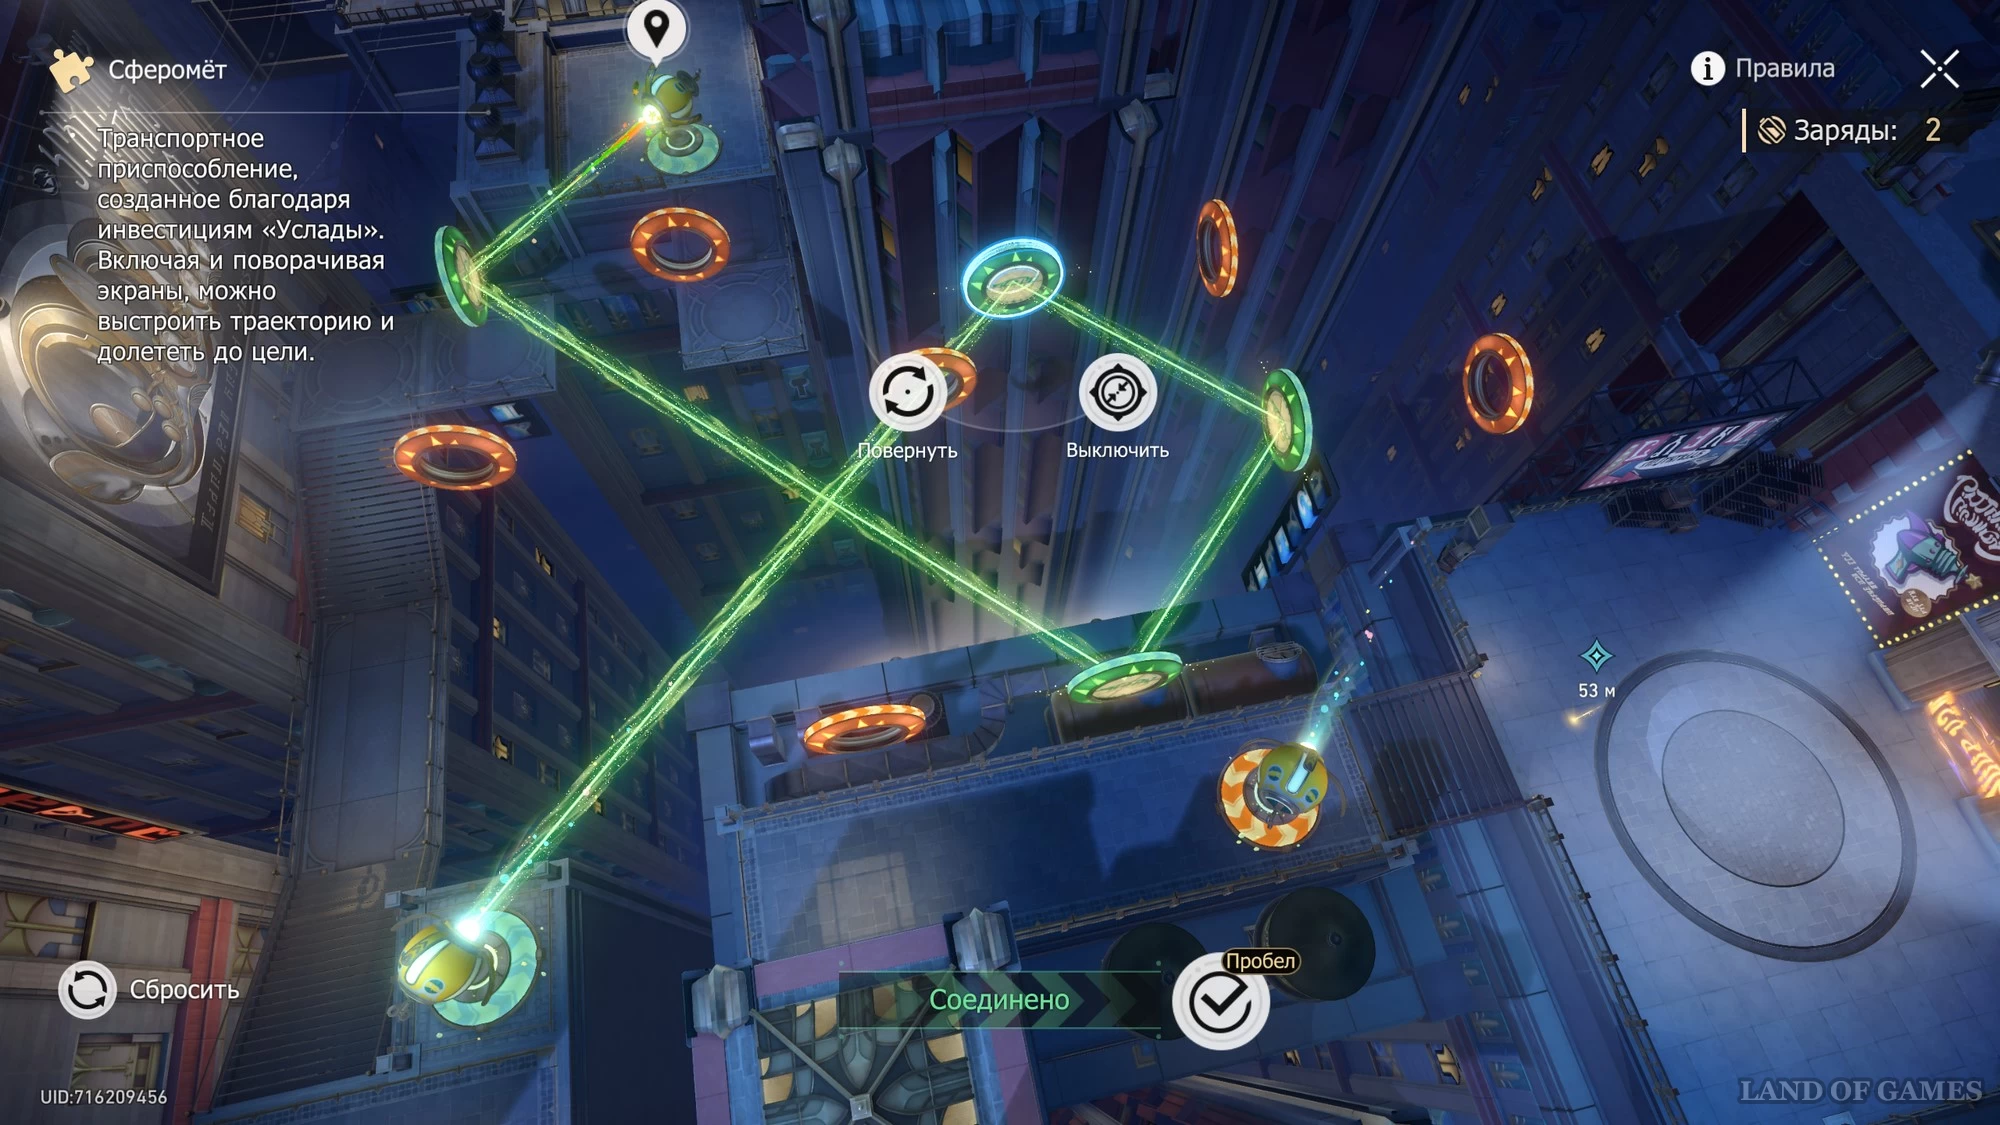
Nether: Spheromet 1
Approach the ball in front and click on it. This time a multi-stage puzzle awaits you. First you need to direct the beam to the sphere on the left side, activating only two screens. The picture below shows the final result.
After exiting the capsule, interact with the second sphere. Now you can hit the right ball by activating the three screens and turning them the right way. The picture below shows the correct result.
The gif below demonstrates the entire process of solving the riddle. Once on the other side, simply go to the quest marker to complete the challenge.
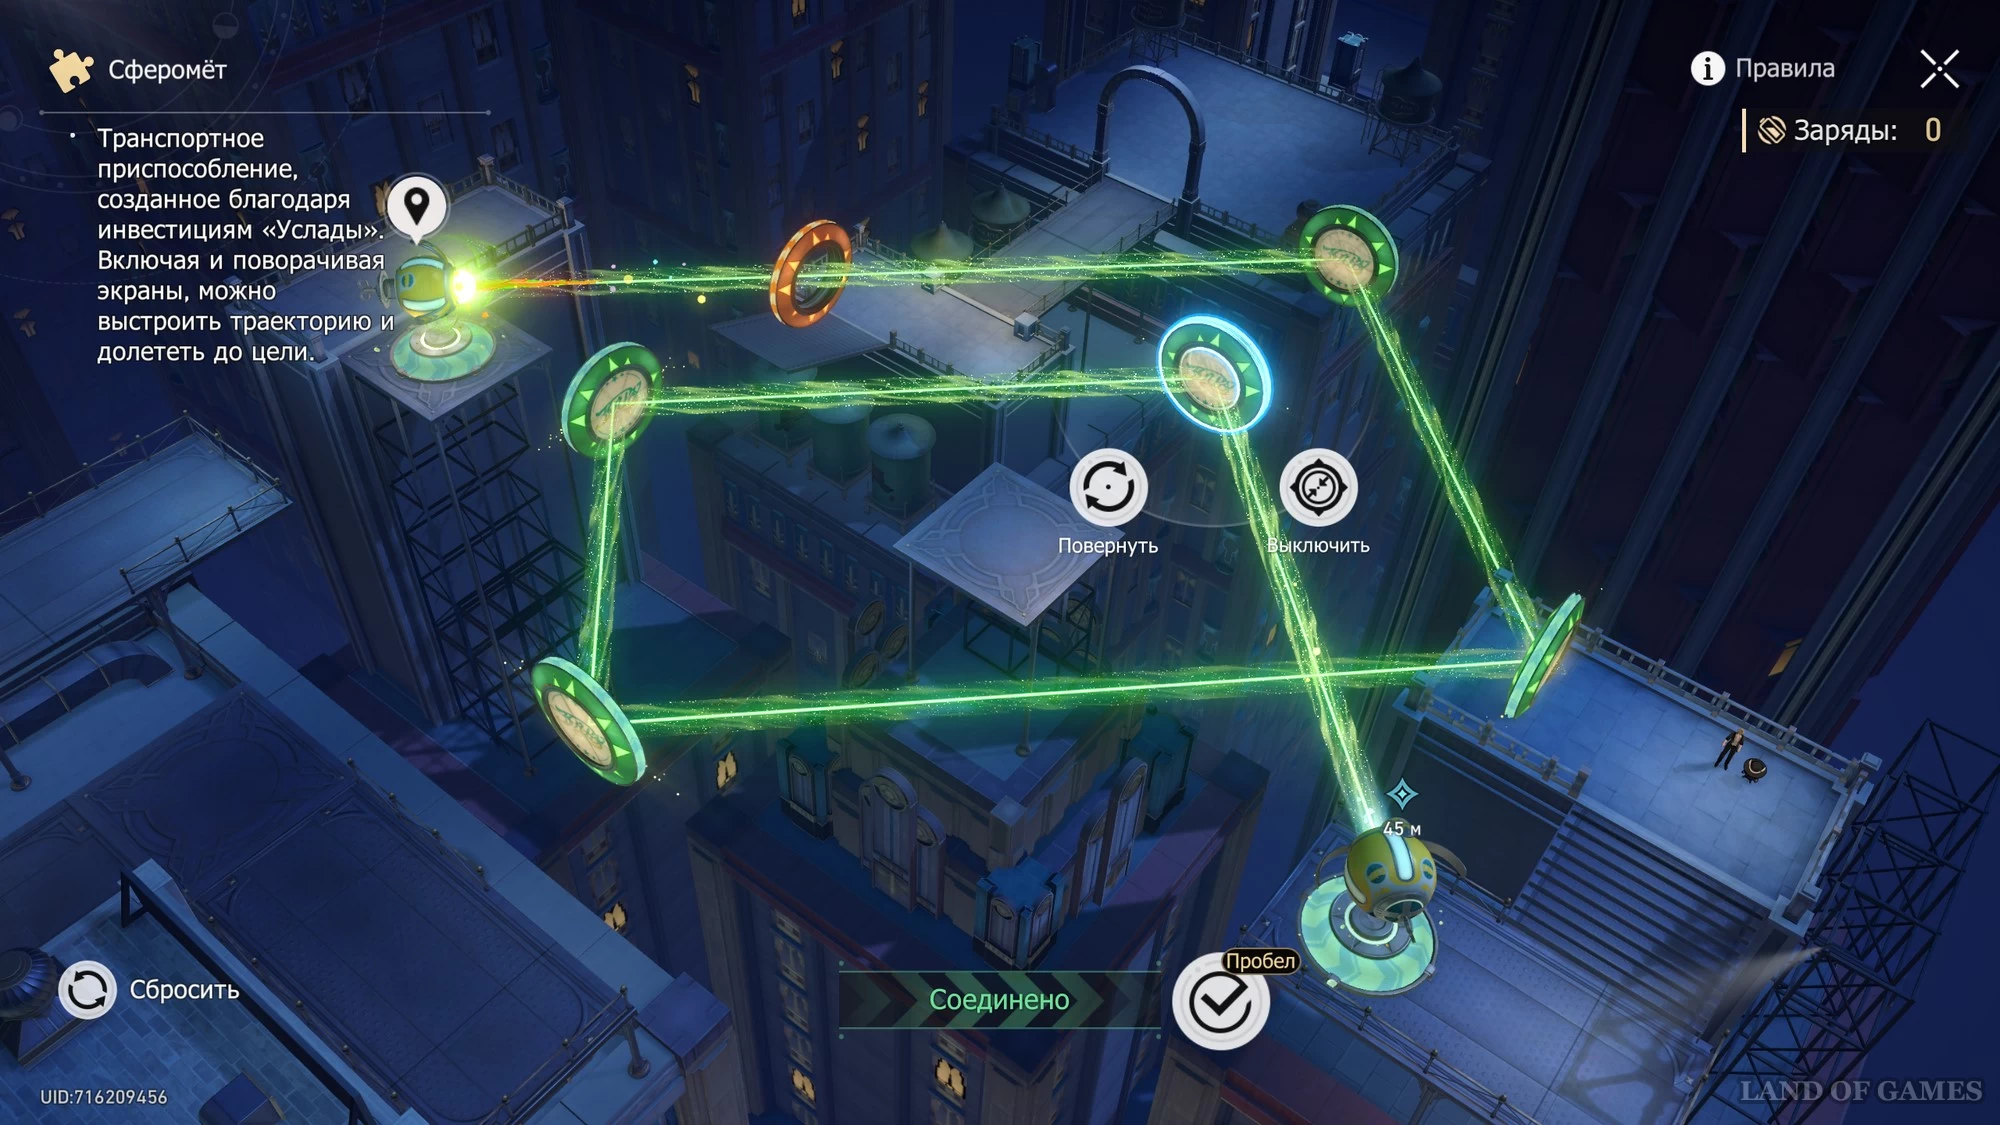
Nether: Spheromet 2
Approach the ball in front and click on it. A multi-stage puzzle awaits you here too. First, you will need to get into the sphere on the left by activating the 5 correct screens to do this. The picture below shows the final result.
After leaving the capsule, immediately interact with it again. Turn off any screens you have previously activated. Now you will need to turn on 6 screens and rotate them in the desired directions. The screenshot below shows the correct option.
The gif below demonstrates the entire process of solving the riddle. Once on the other side, simply go to the quest marker to complete the challenge.
Nether: Spheromet 3
Approach the ball in front and click on it. You will need to activate 7 screens and turn them in the right directions. The picture below shows the correct result.
The gif below demonstrates the entire process of solving the riddle. Once on the other side, simply go to the quest marker to complete the challenge.
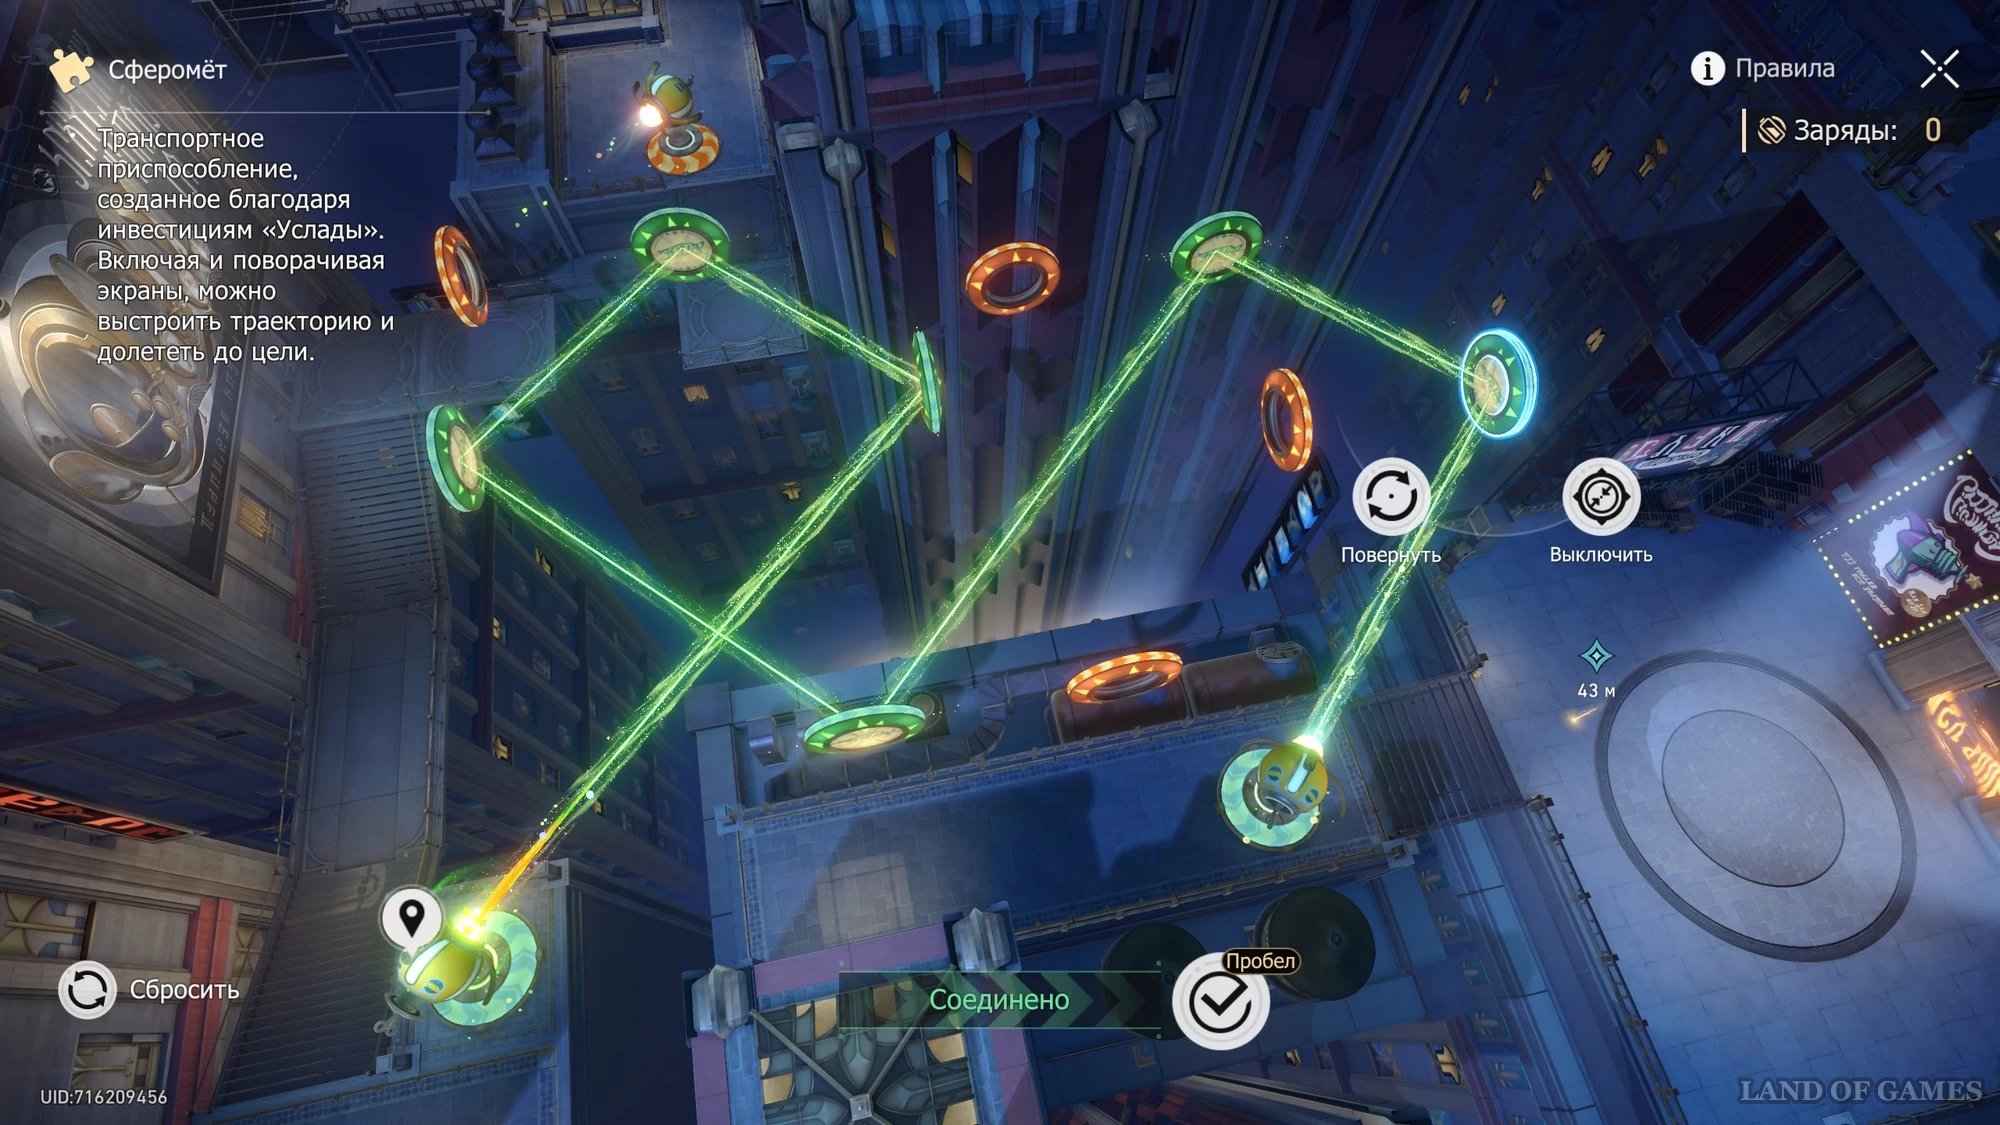
Nether: Spheromet 4
Approach the ball in front and click on it. A multi-stage puzzle awaits you here too. First, you will need to aim the beam at the lower sphere on the right side, activating 5 screens for this and turning them in the right directions. The picture below shows the final version.
After leaving the capsule, immediately interact with it again. Turn off any screens you have previously activated. Now you only need to enable 4 screens which are shown in the screenshot below.
The gif below demonstrates the entire process of solving the riddle. Once on the other side, simply go to the quest marker to complete the challenge.
Nether: Spheromet 5
Approach the ball in front and click on it. You will need to activate 11 screens and turn them in the right directions. The picture below shows the correct result.

The gif below demonstrates the entire process of solving the riddle. Once on the other side, simply go to the quest marker to complete the challenge.
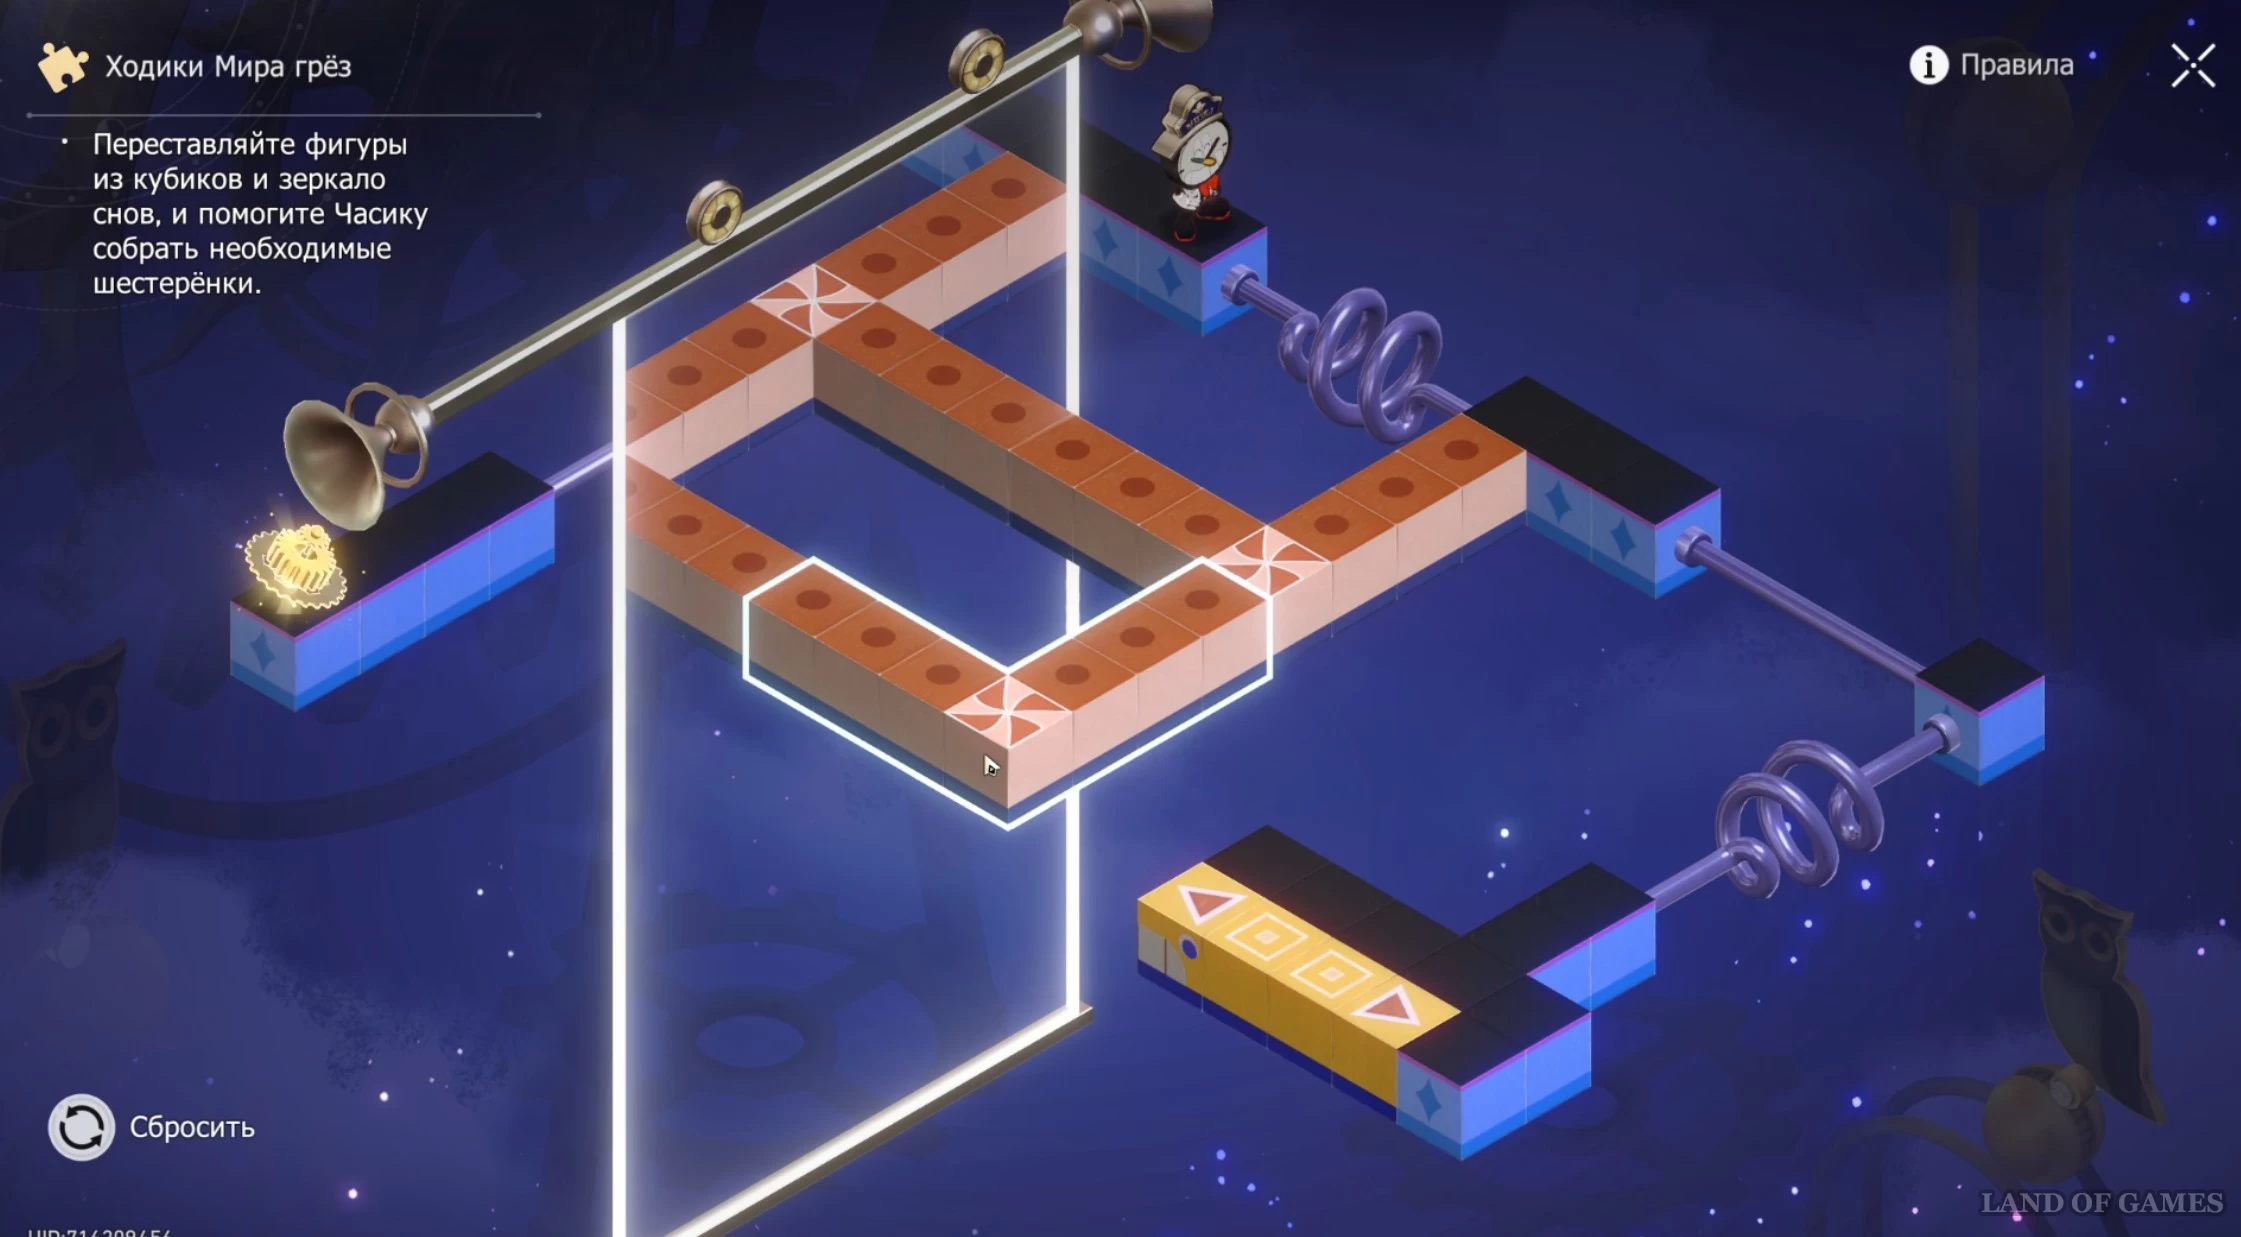
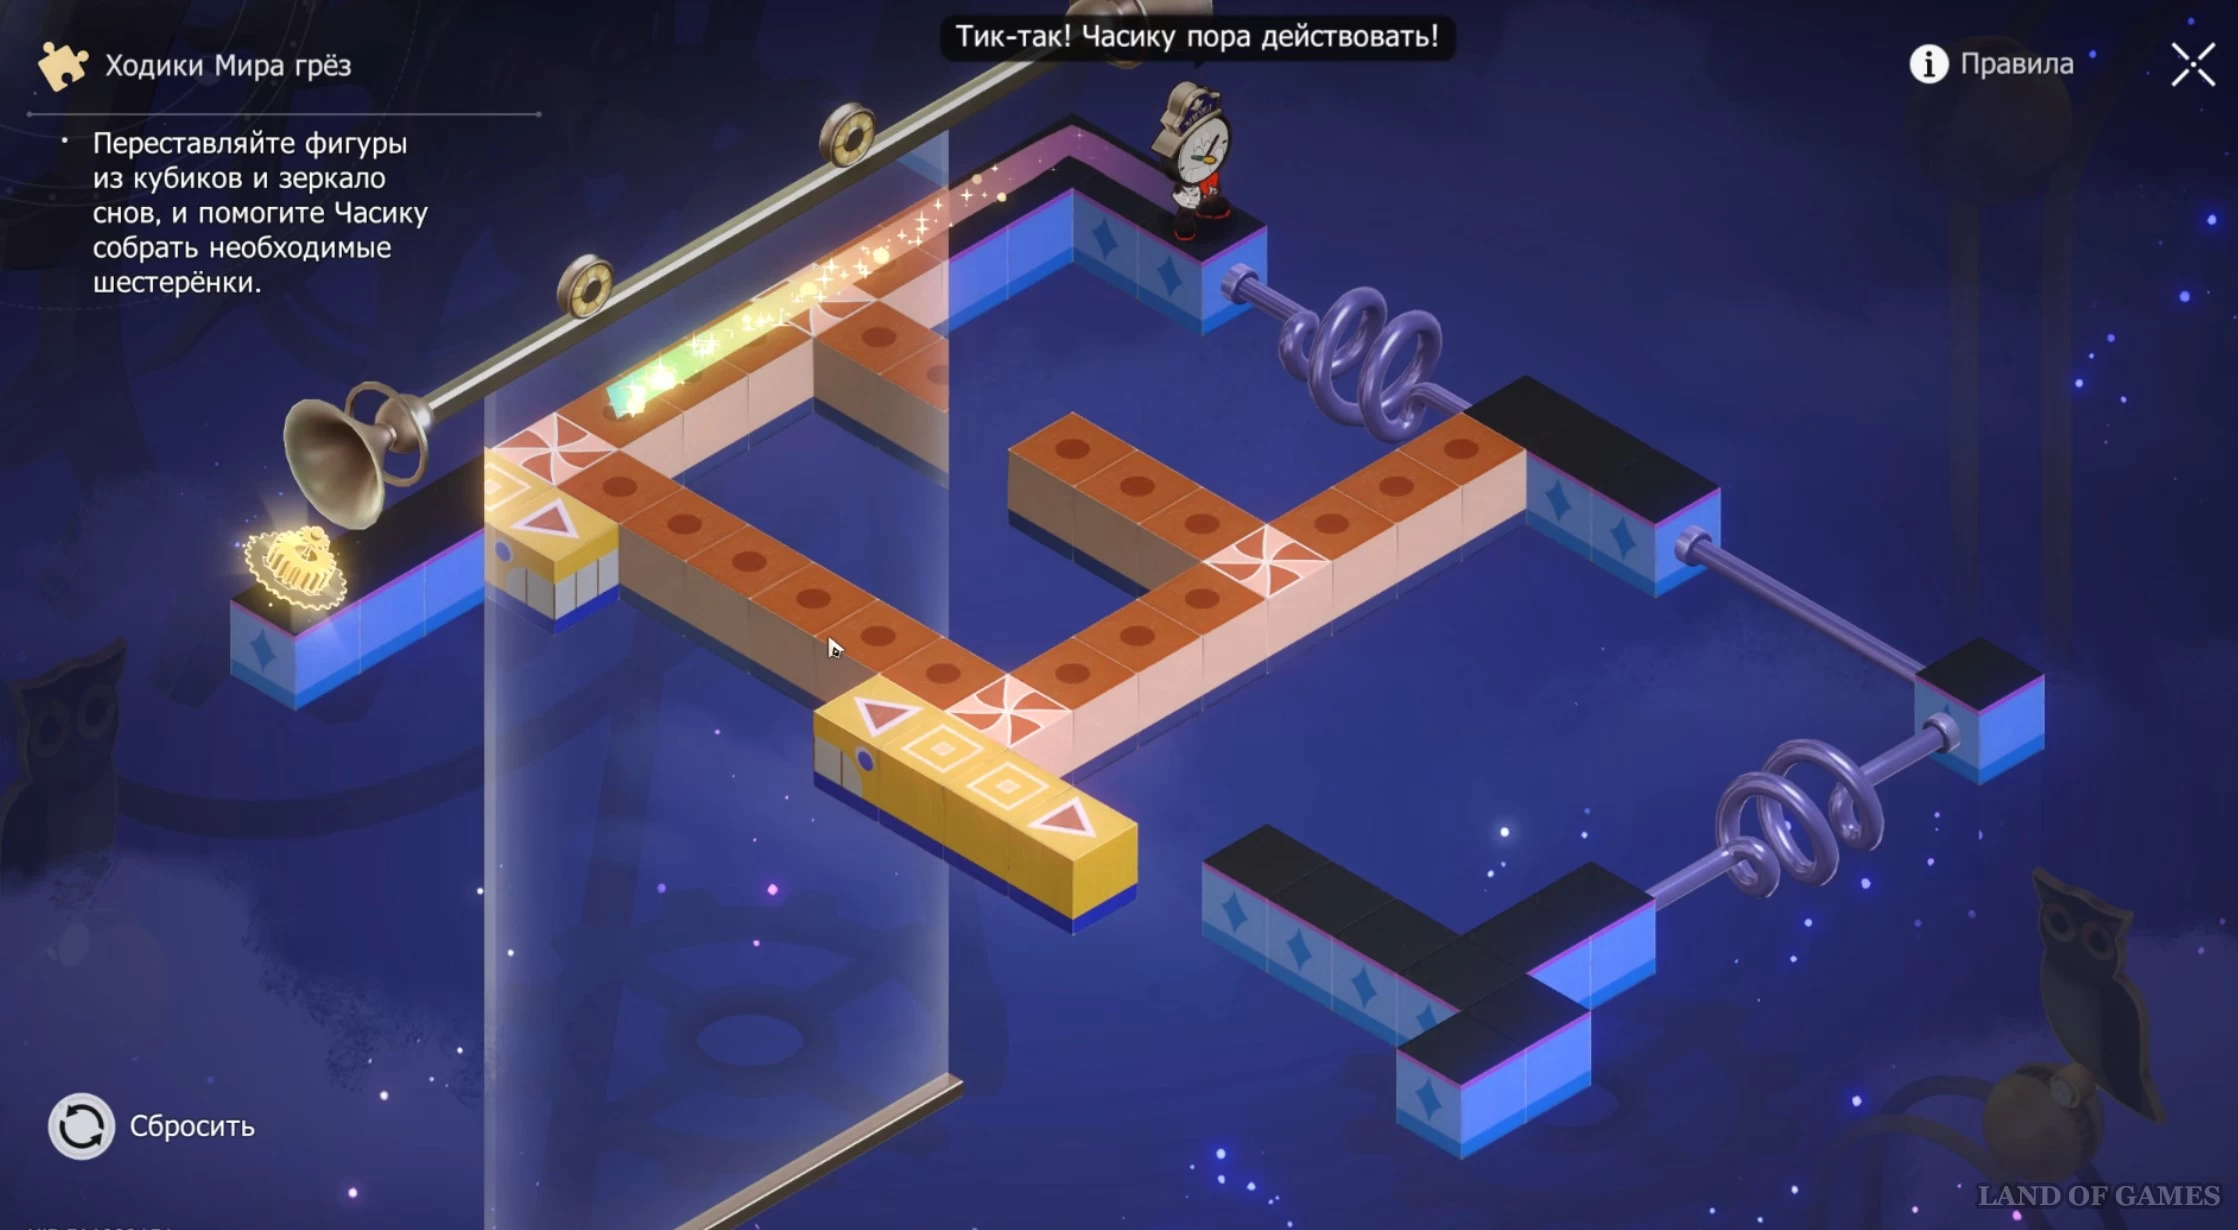
Walkers of the Dream World
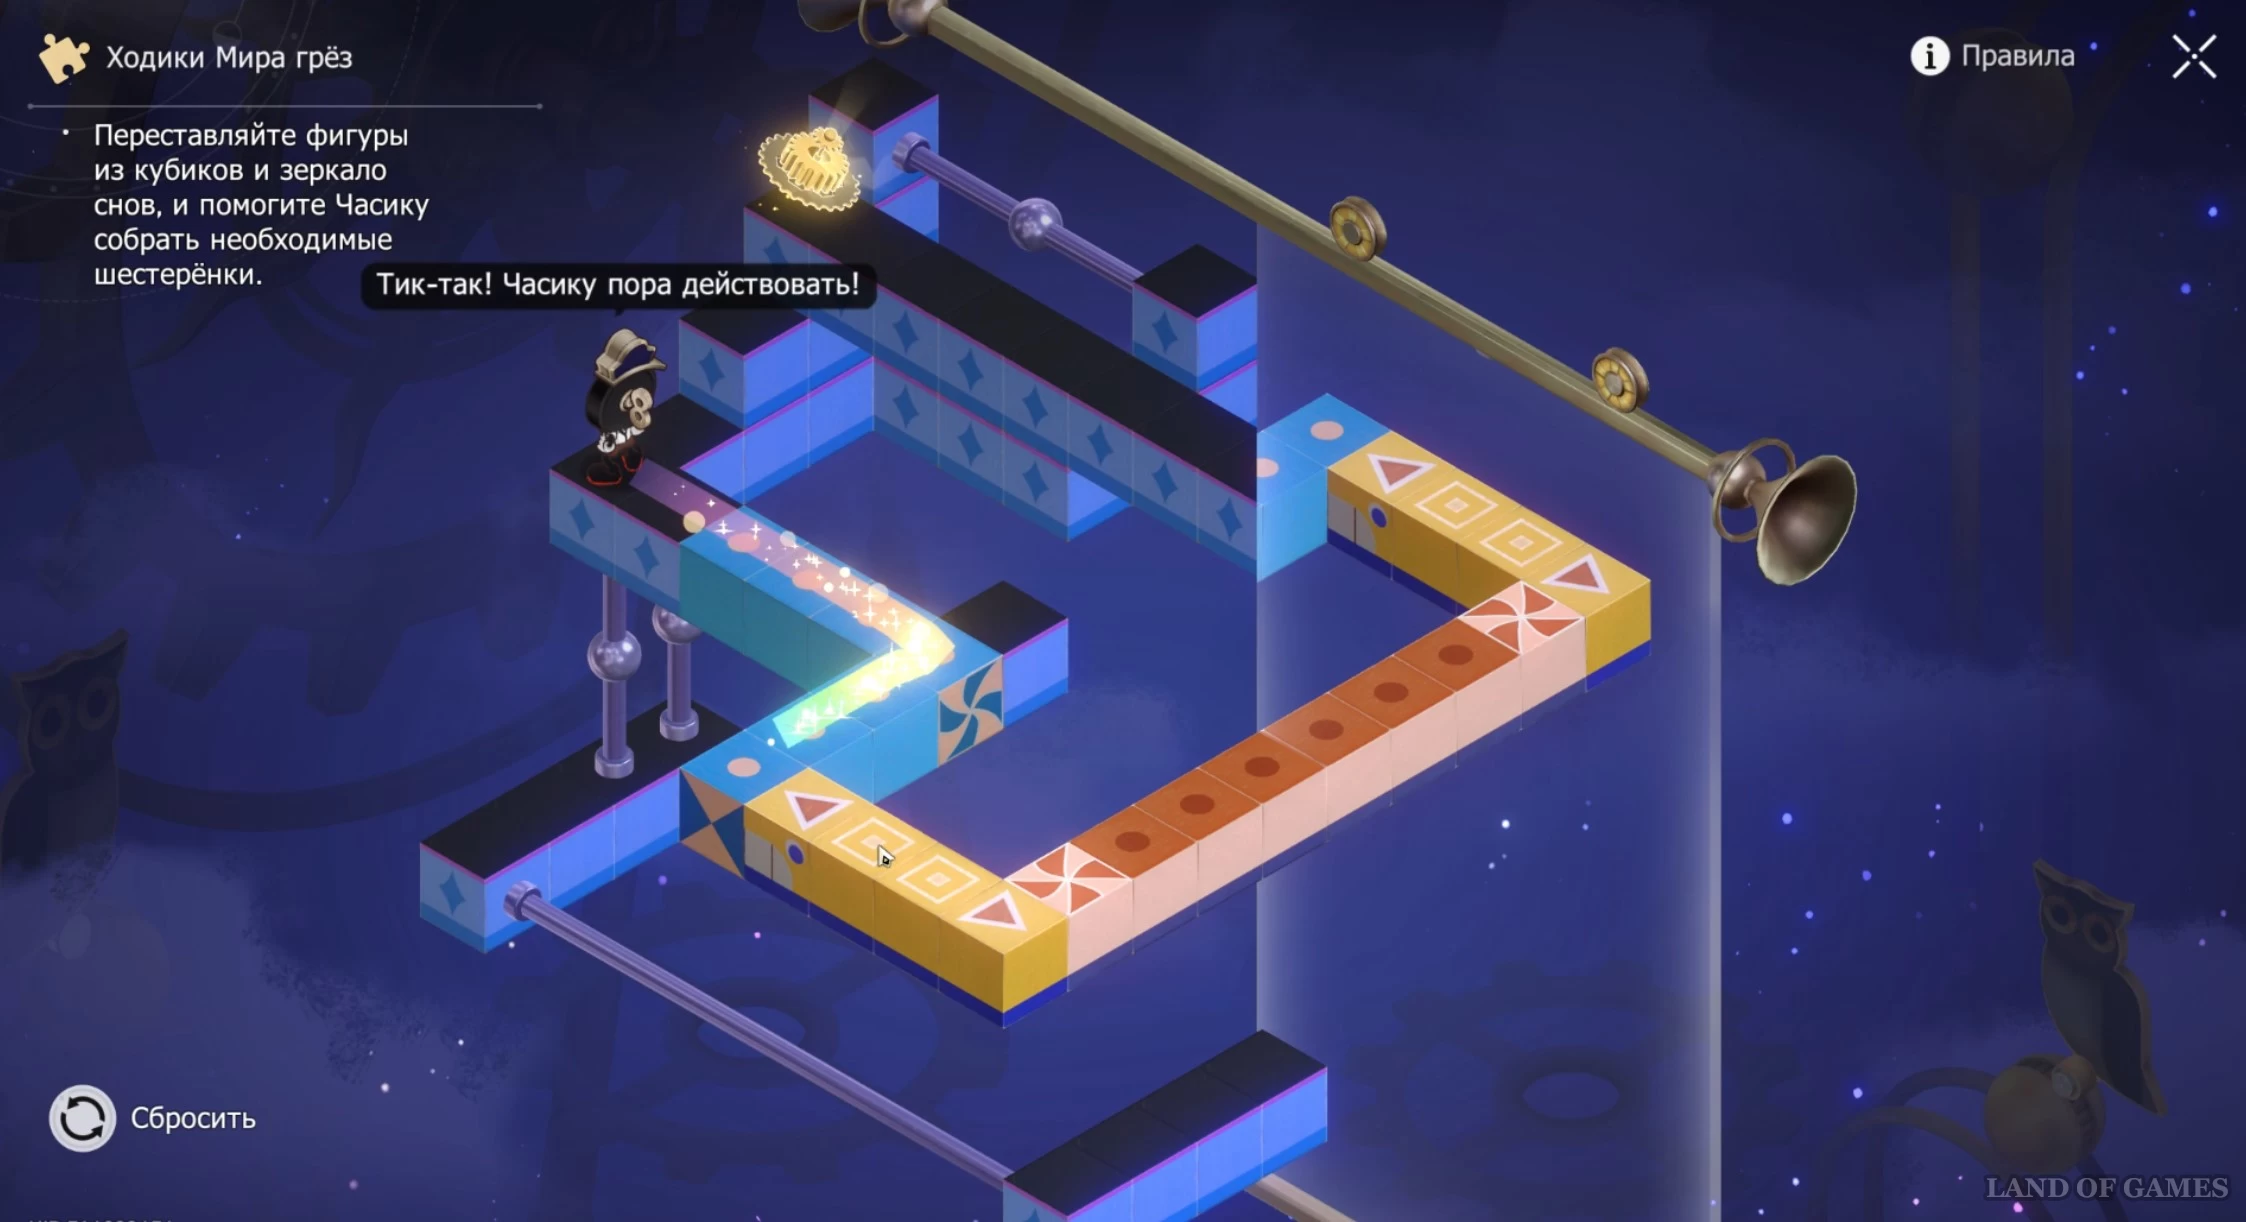
Overworld: Dreamland Walkers 1
Approach the clock ahead and interact with it. Study the instructions for solving similar puzzles. First, move the yellow cubes down, and then rotate the red figure twice to bring Chasik to the first piece. Now rotate the red figure once and move the mirror to the right all the way.
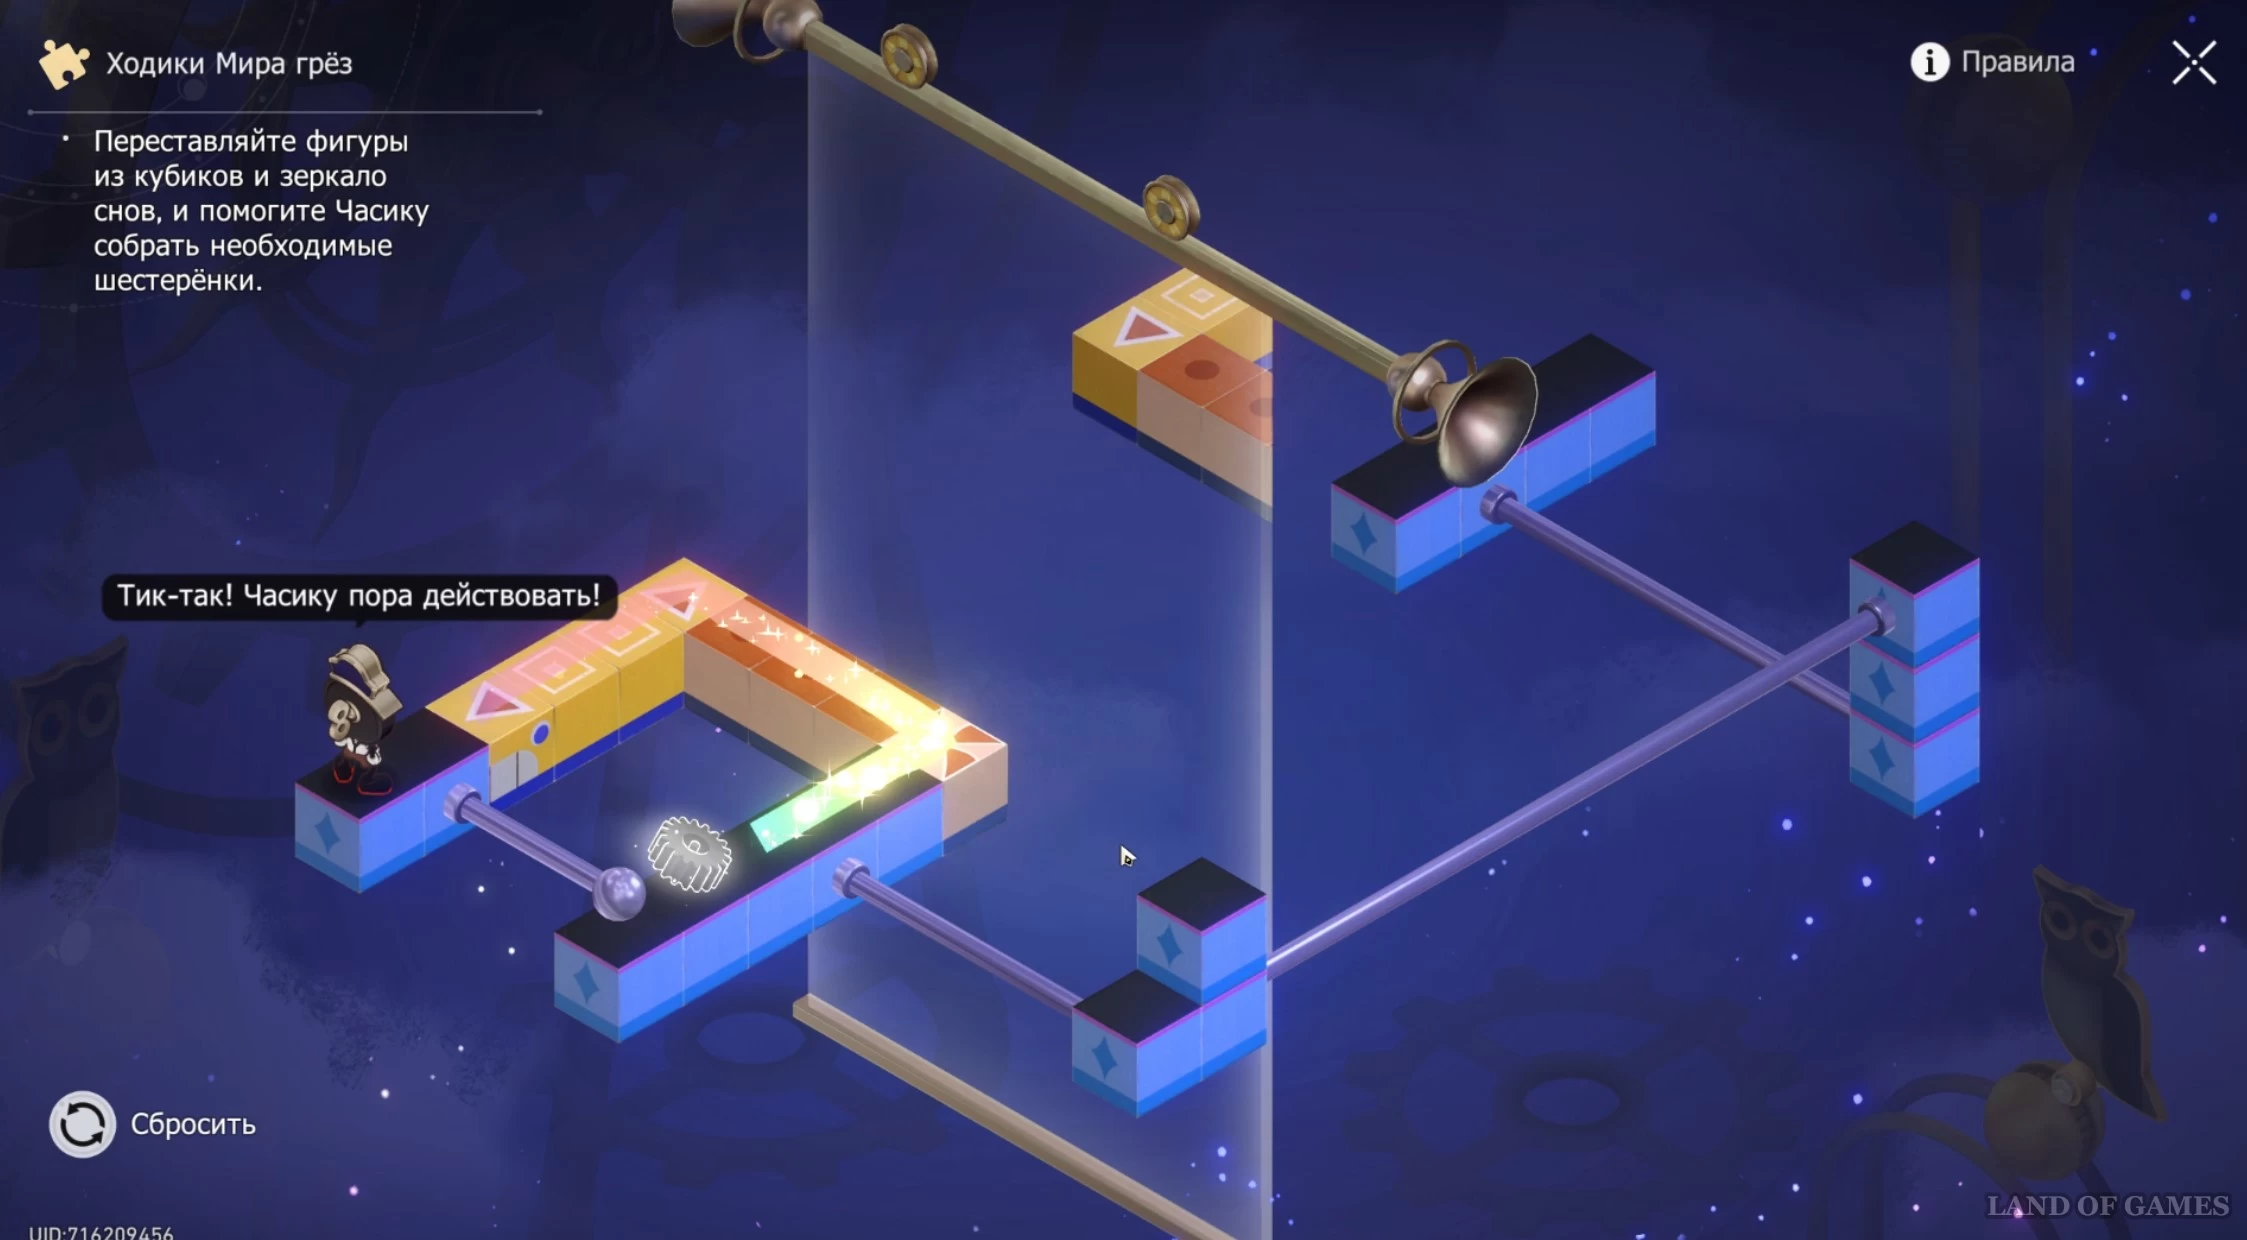
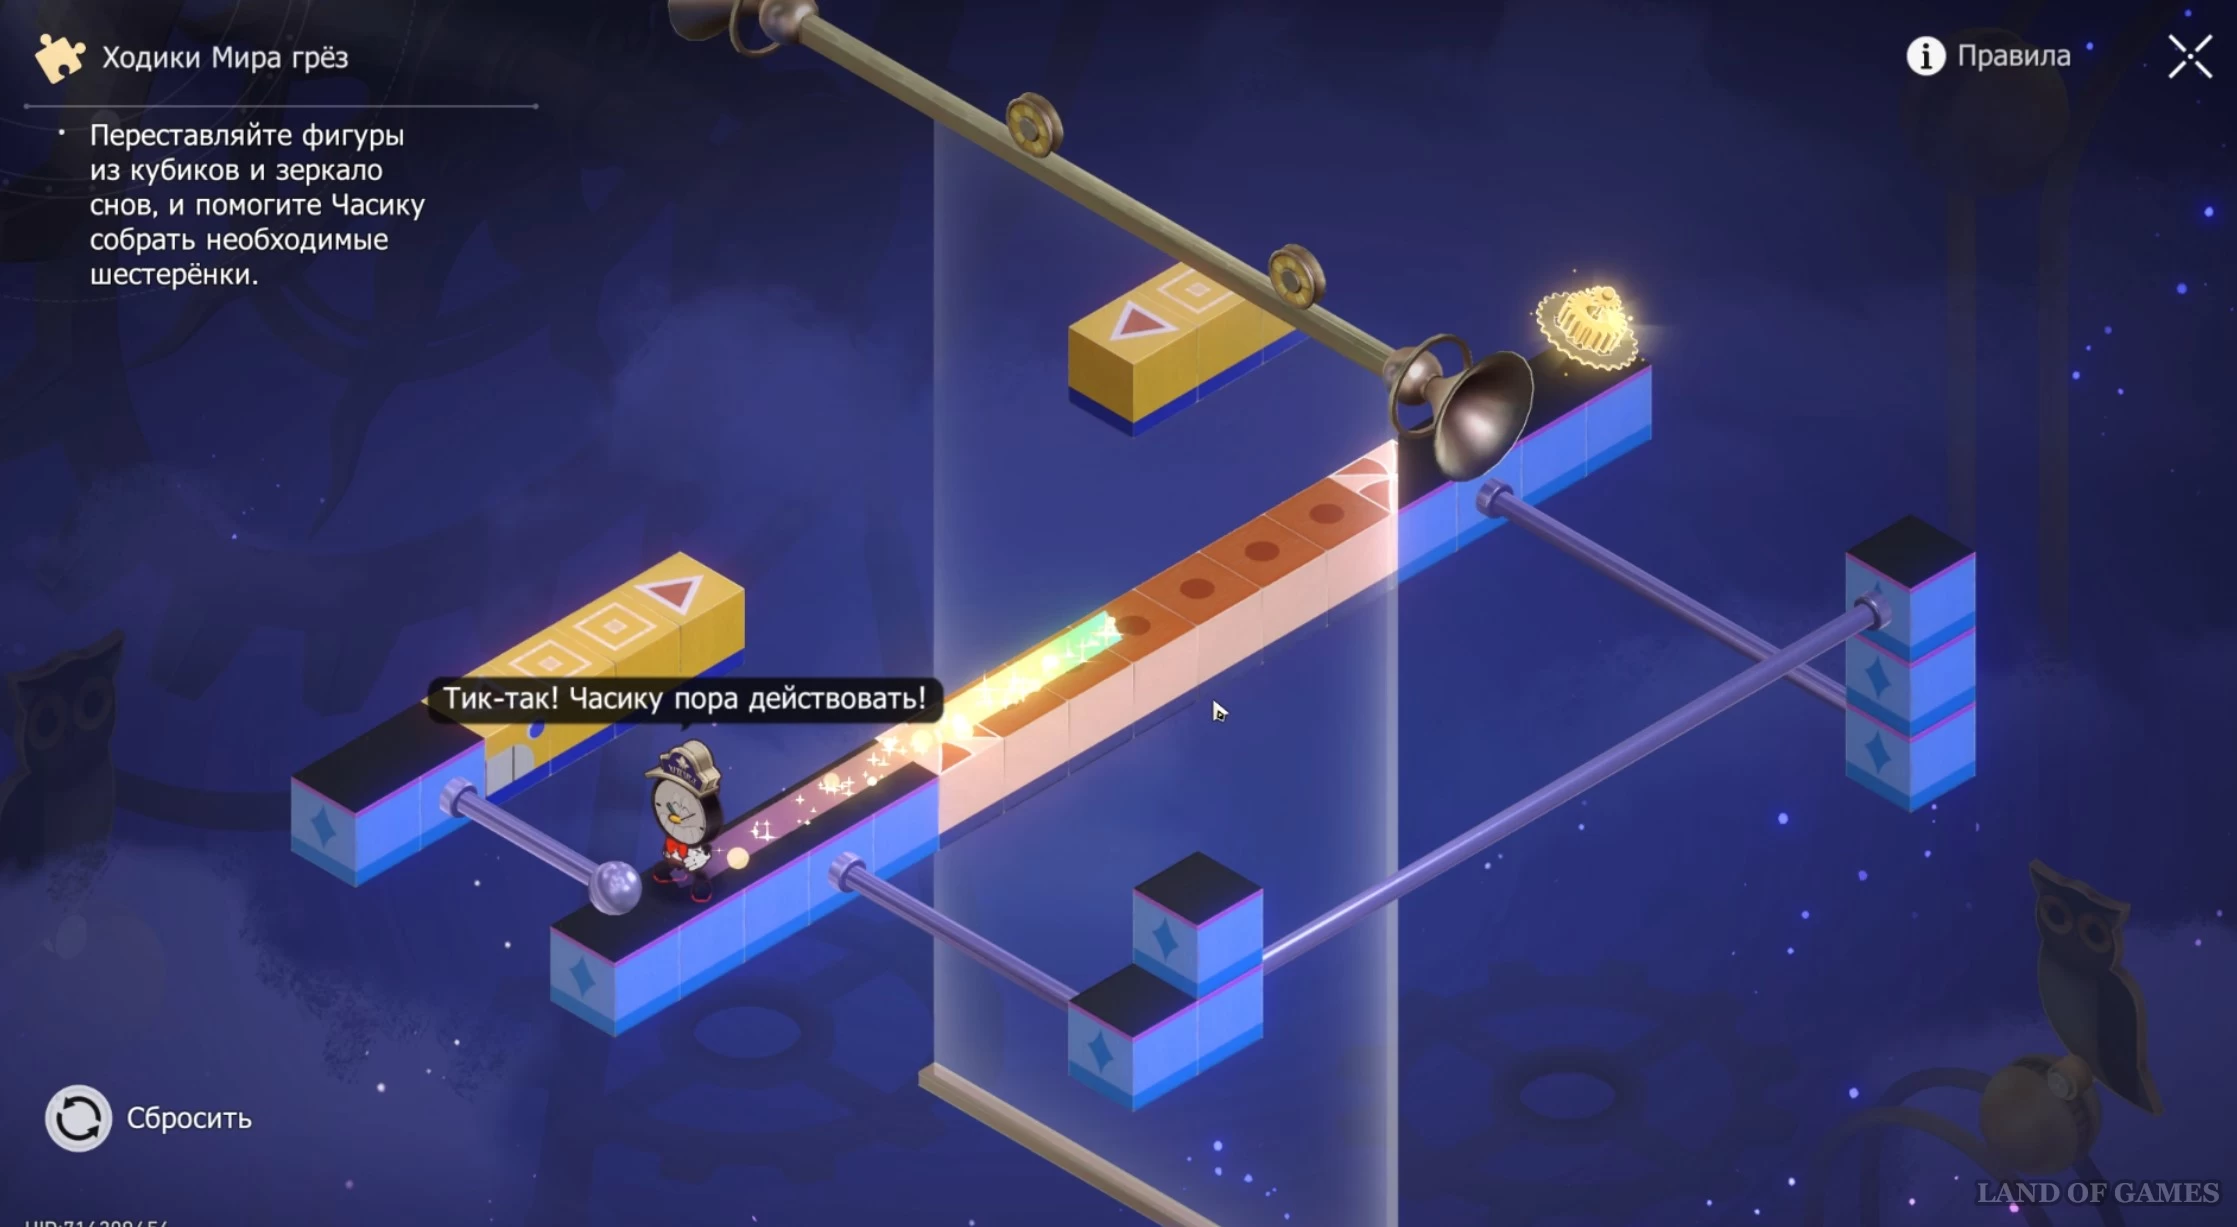
In the gif below you can see the entire process of solving the puzzle. By fixing the watch, you will complete the challenge and receive a reward.
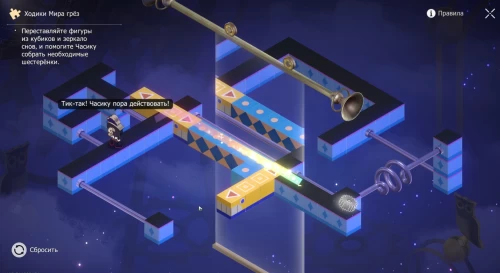
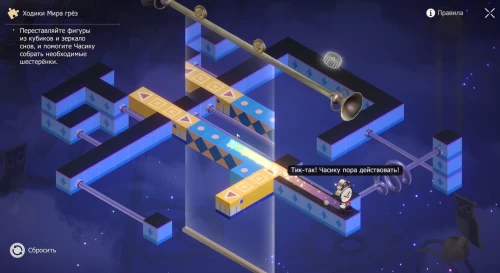
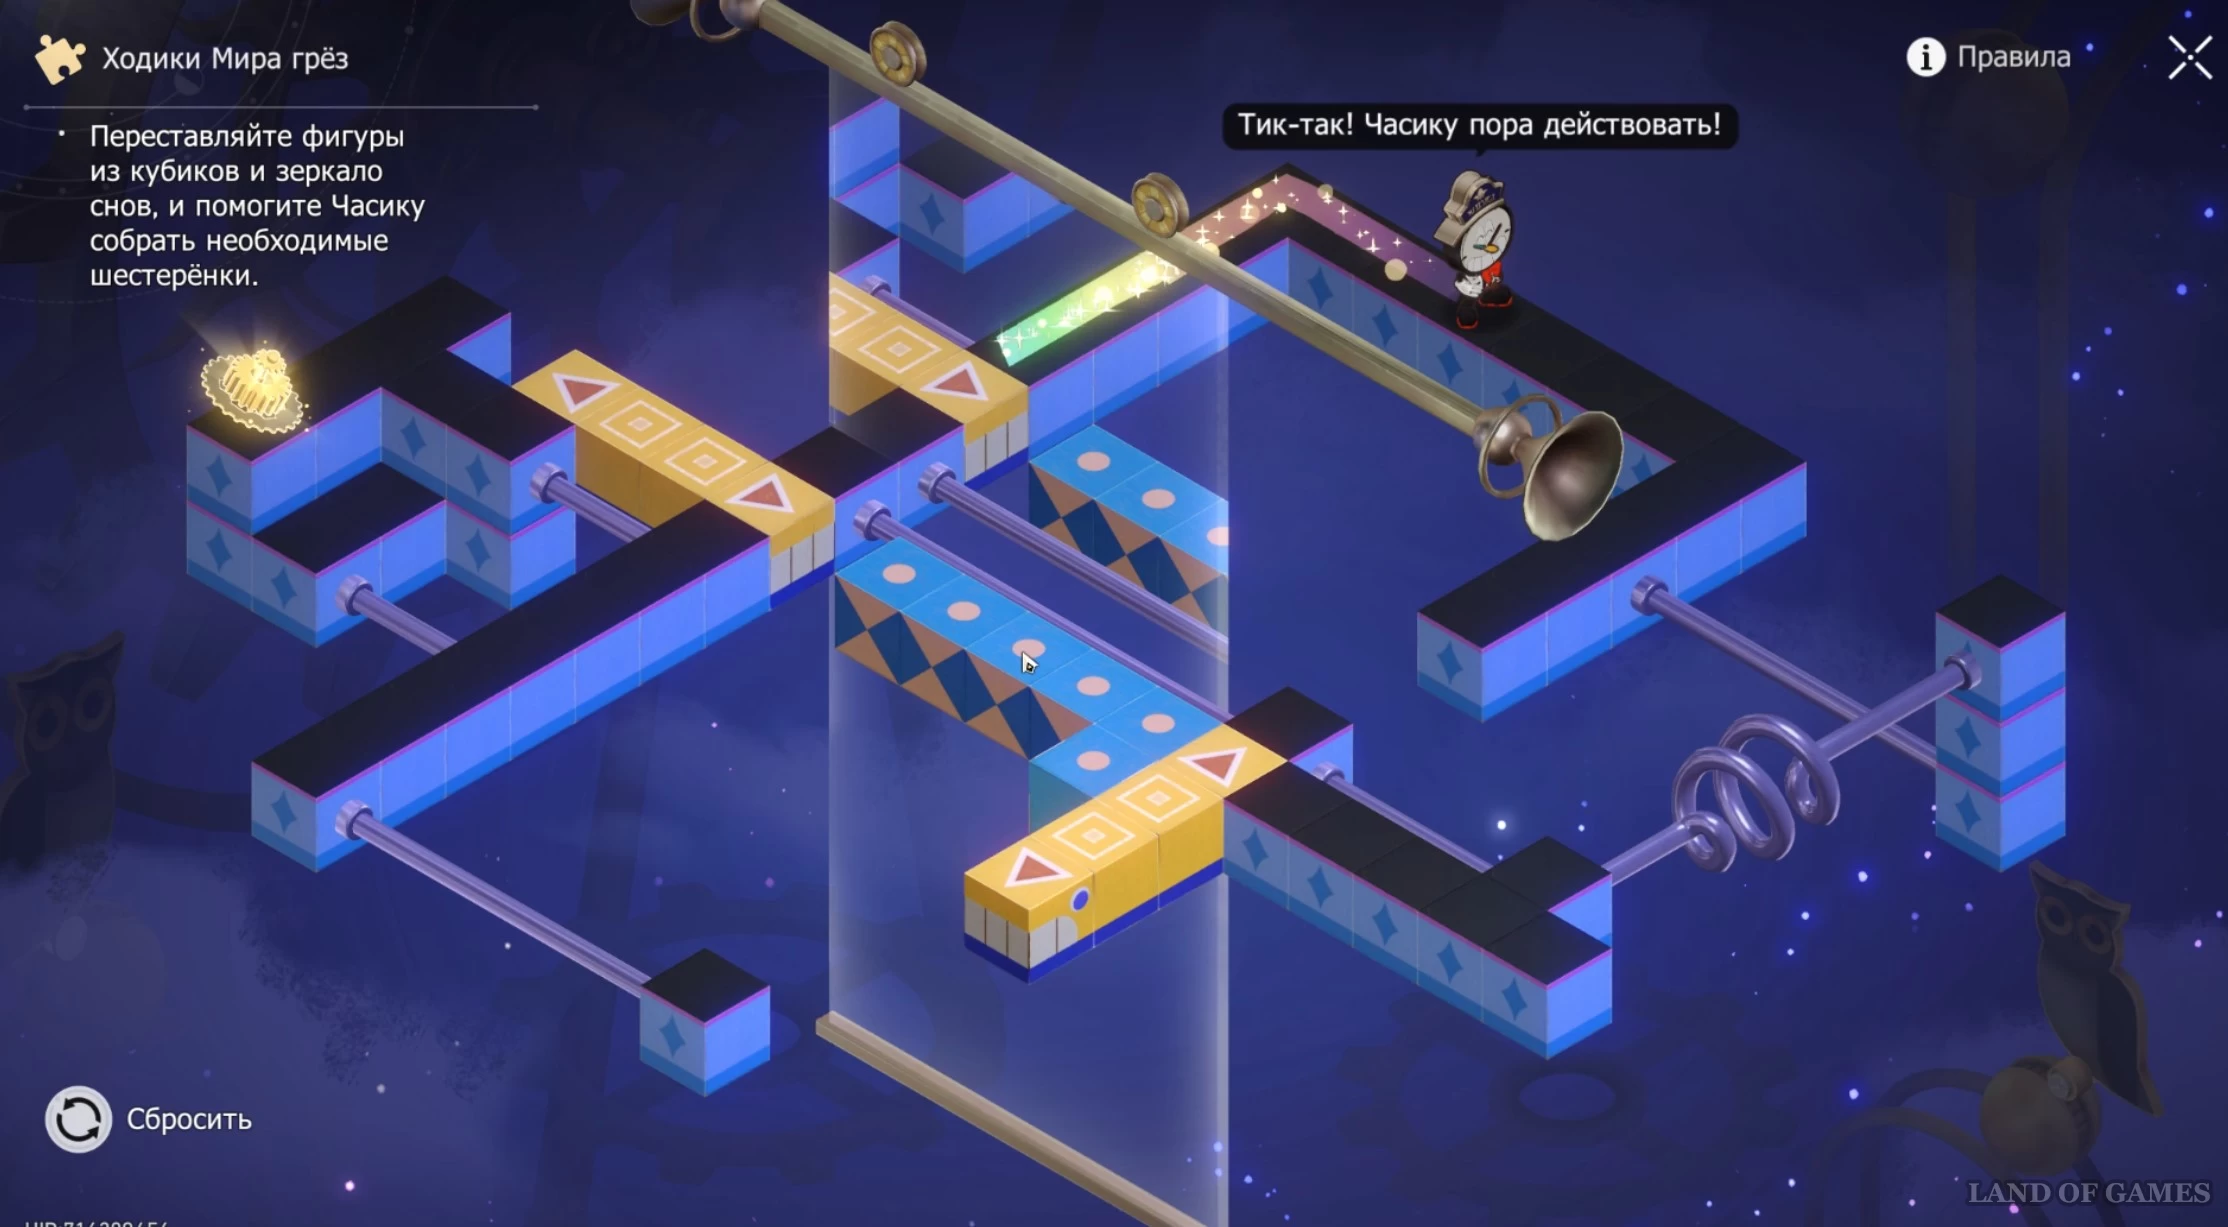
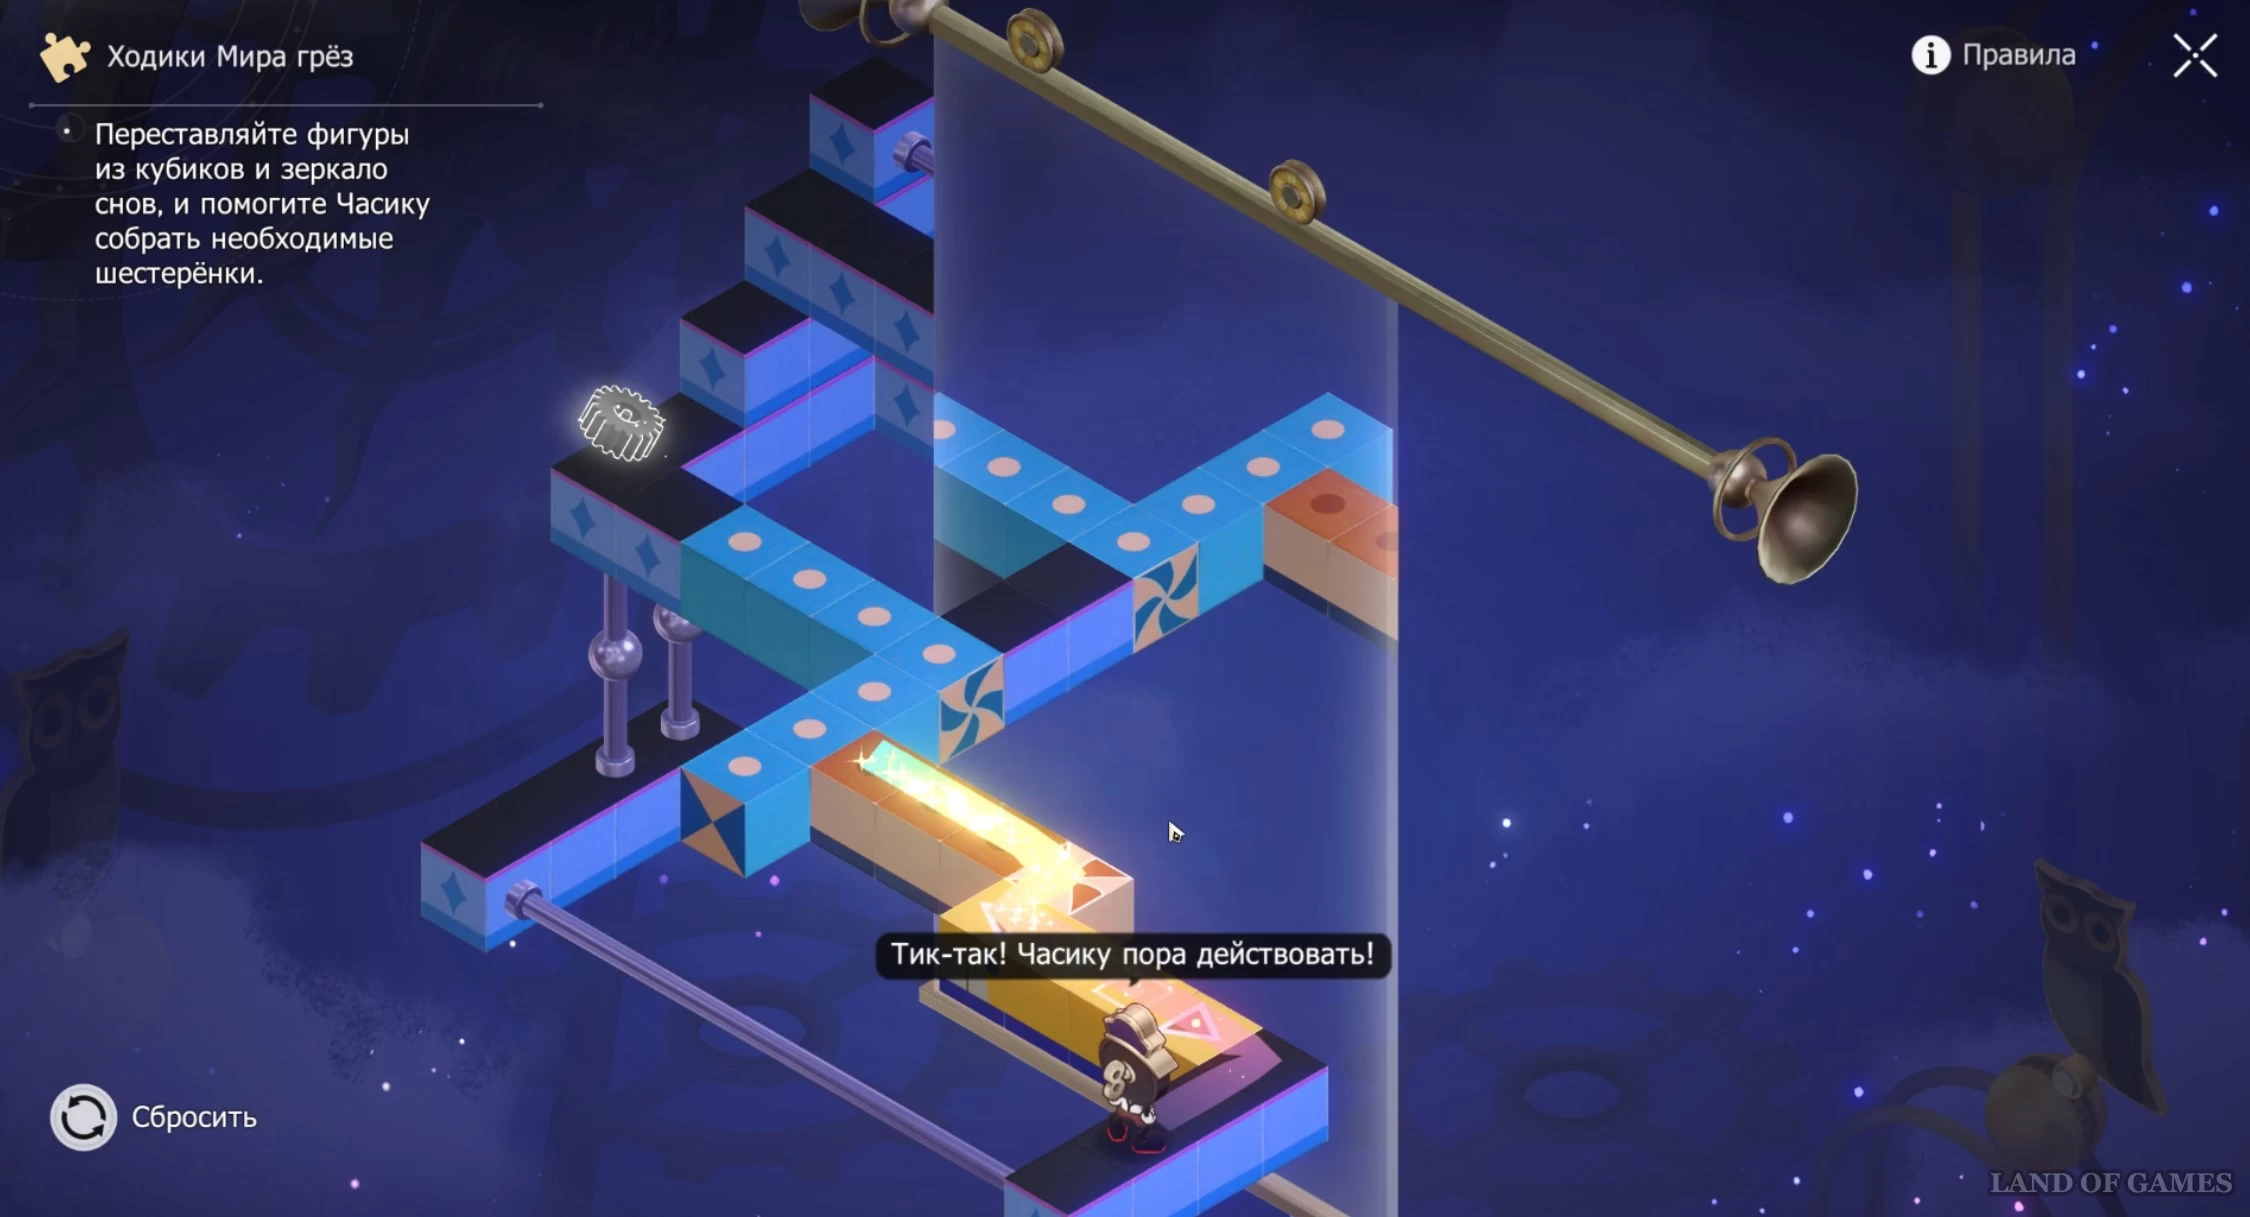
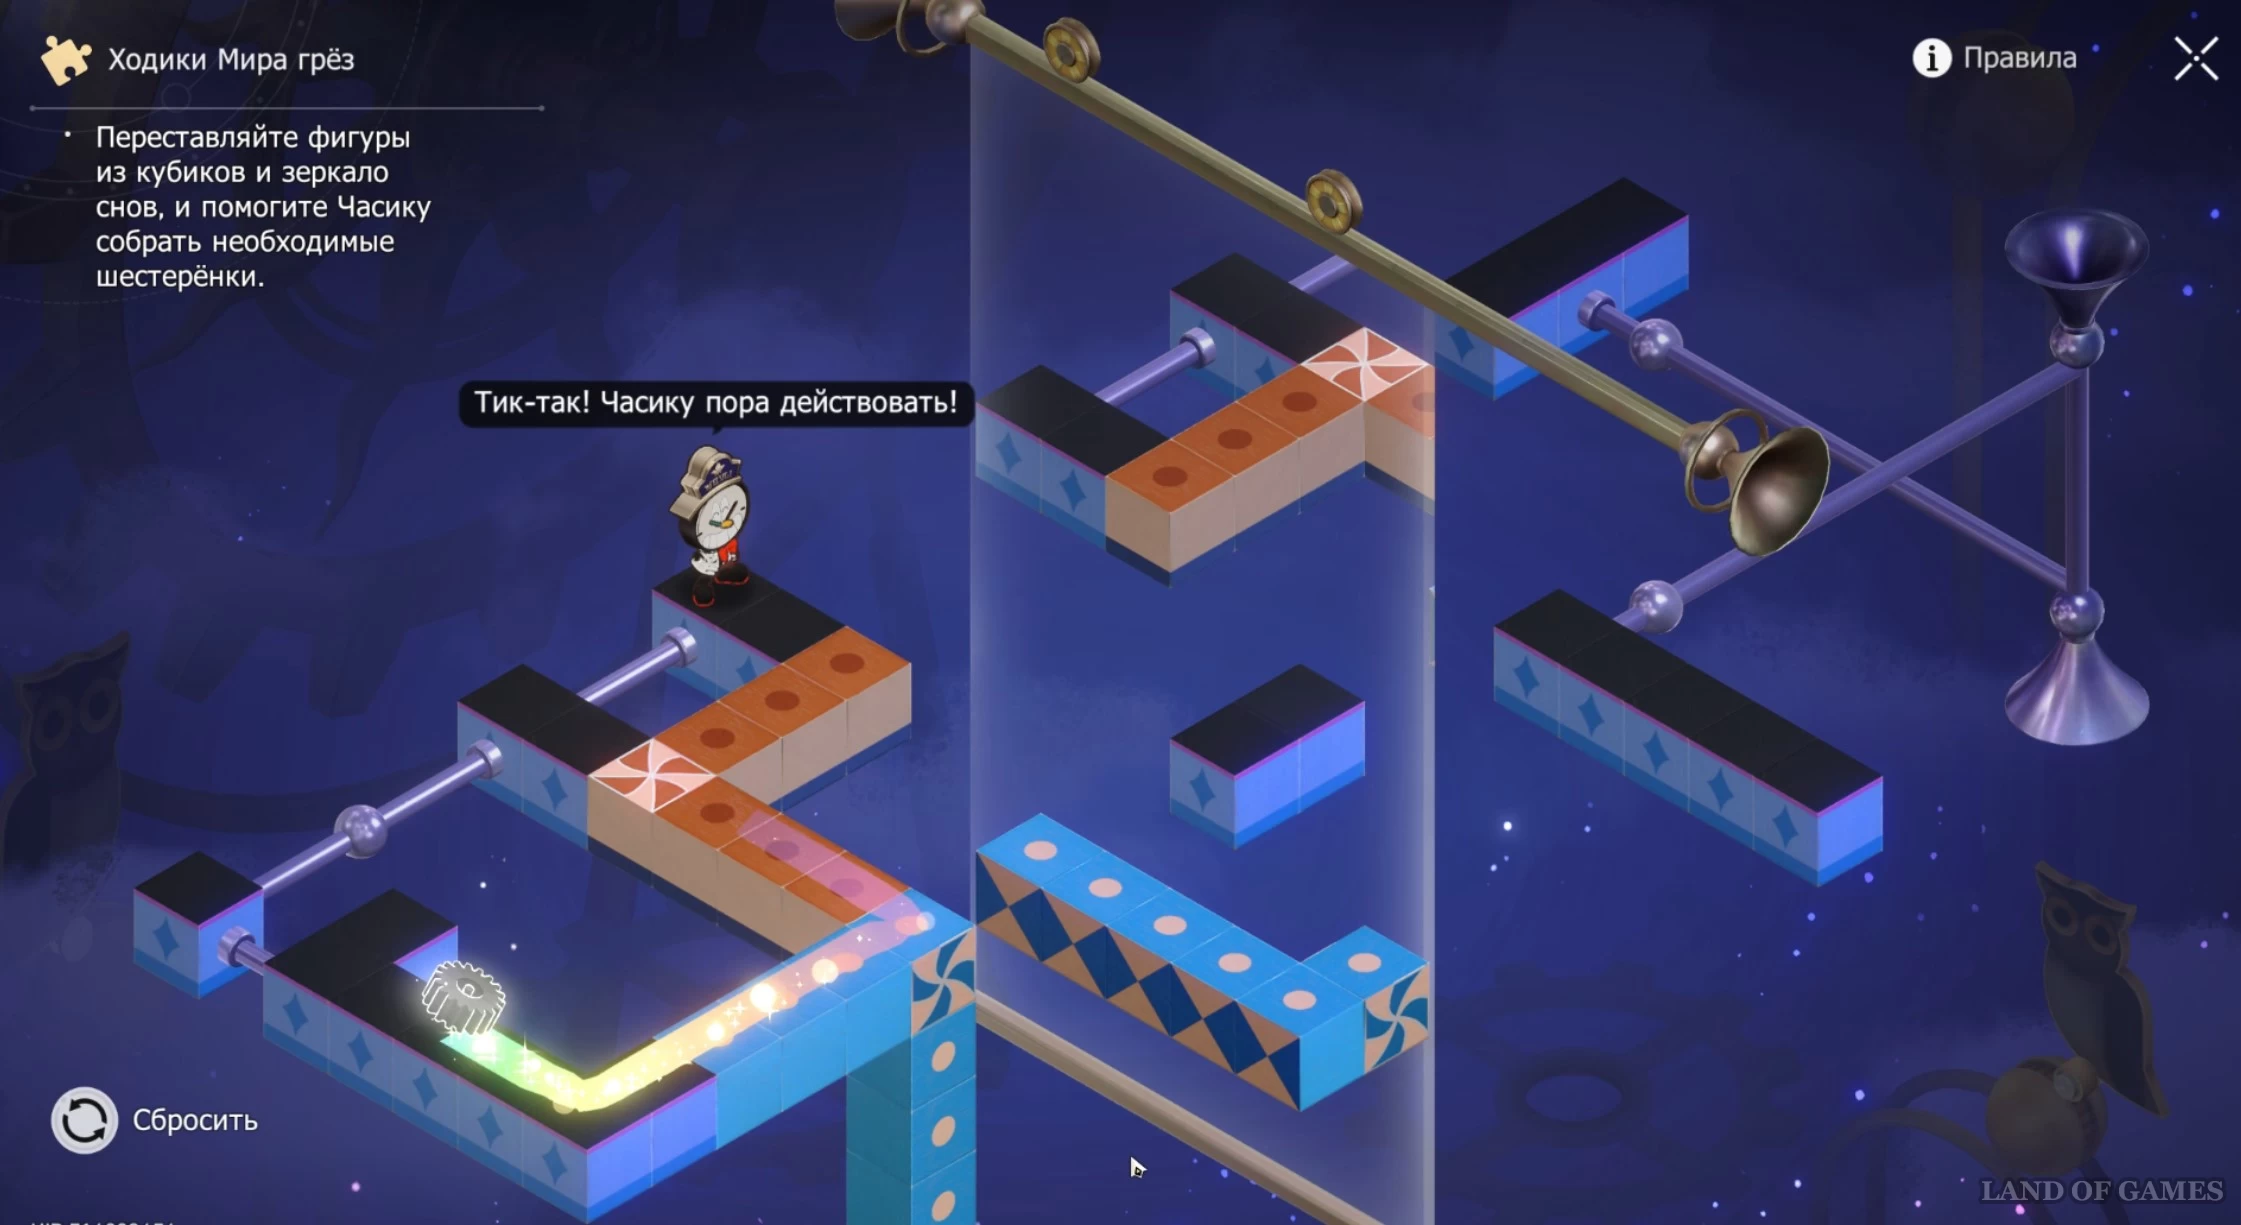
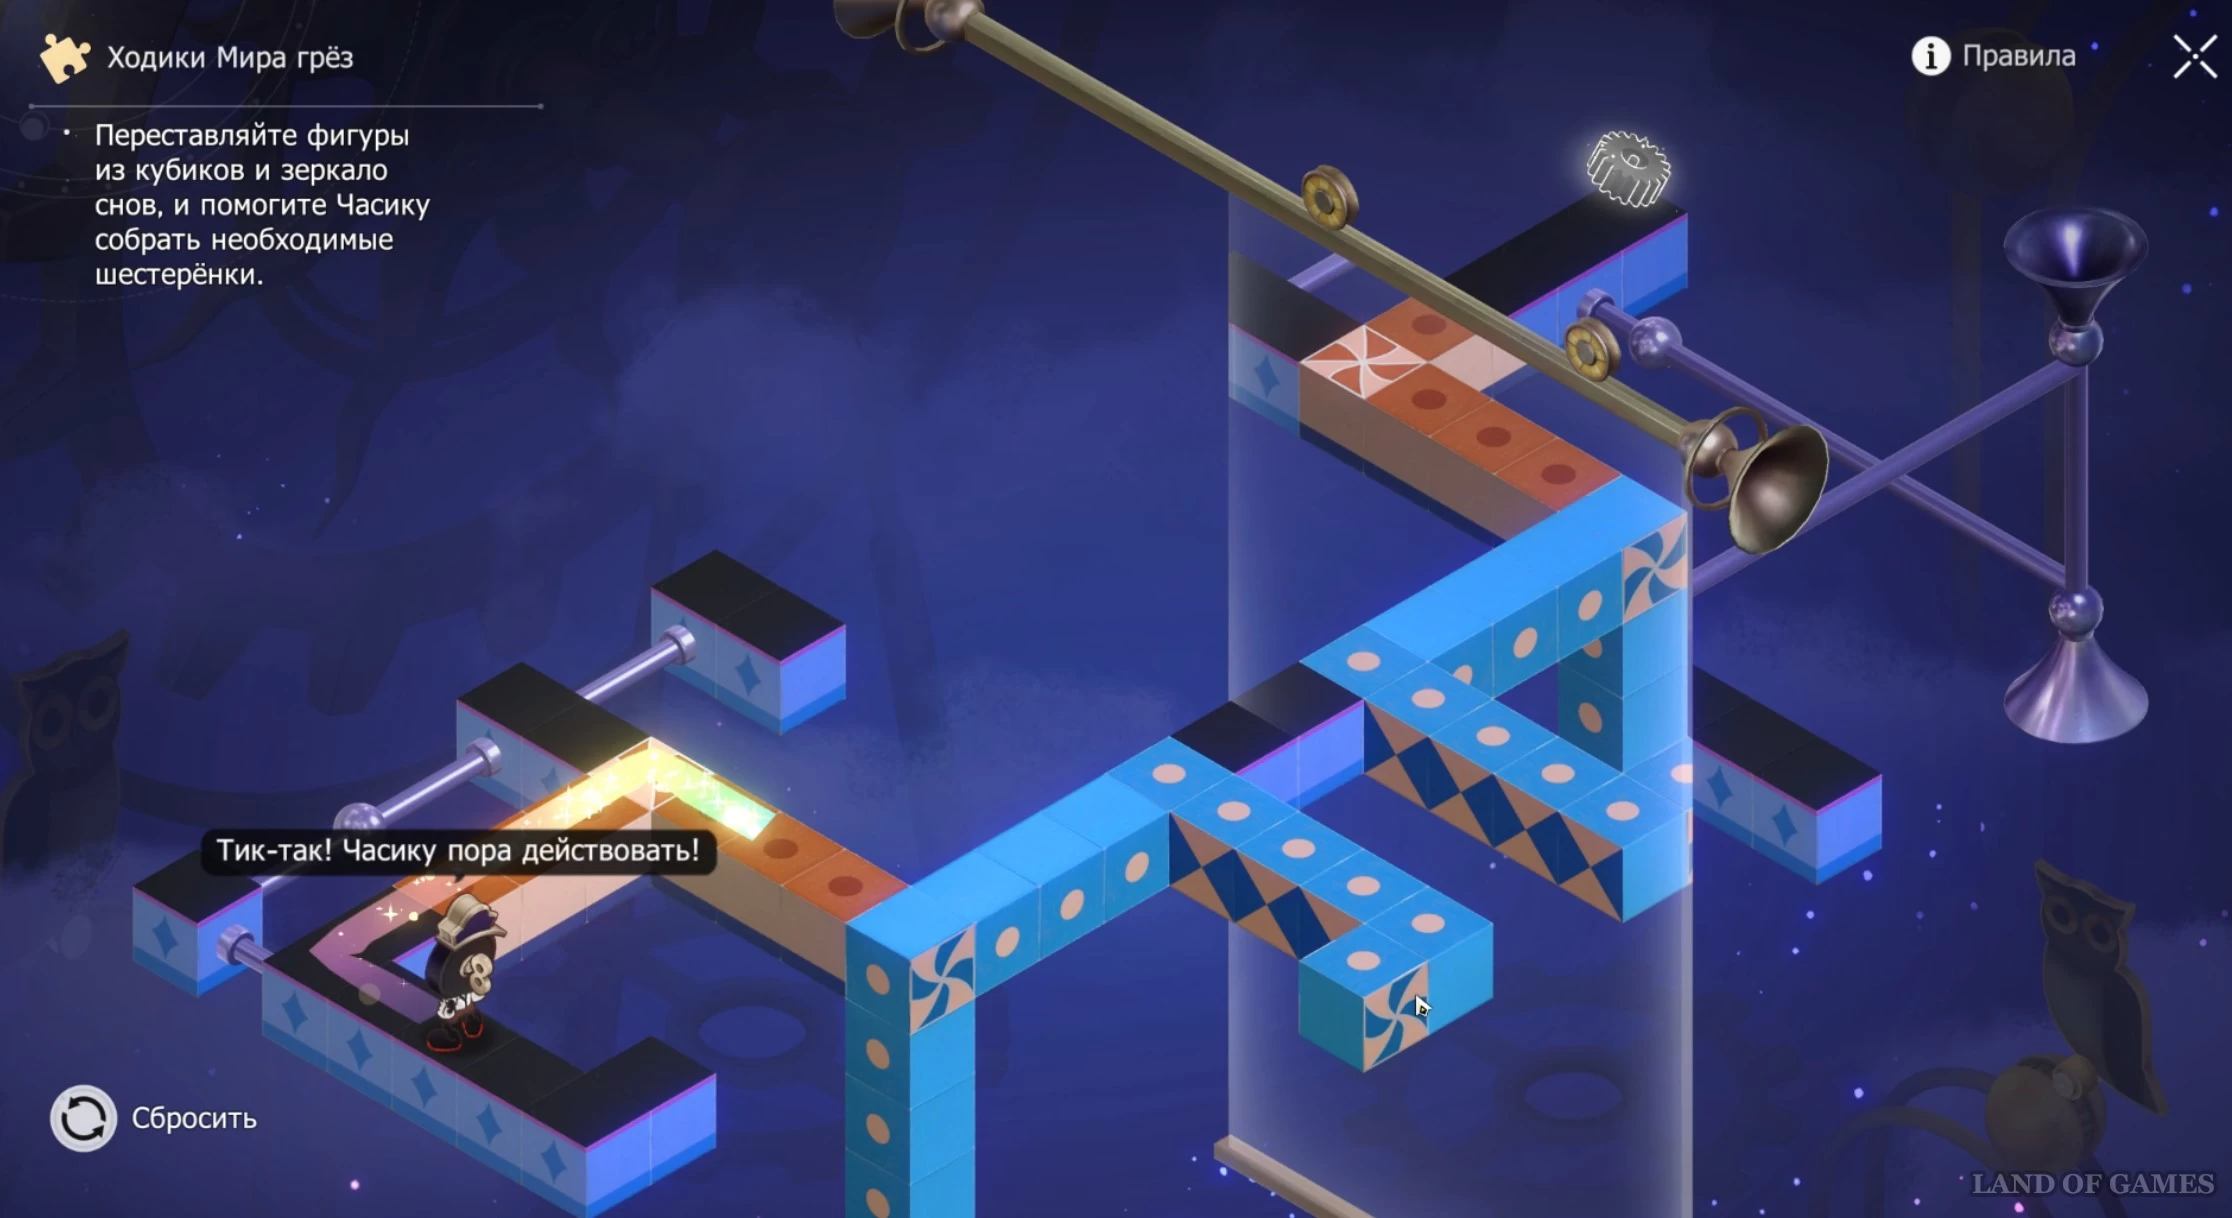
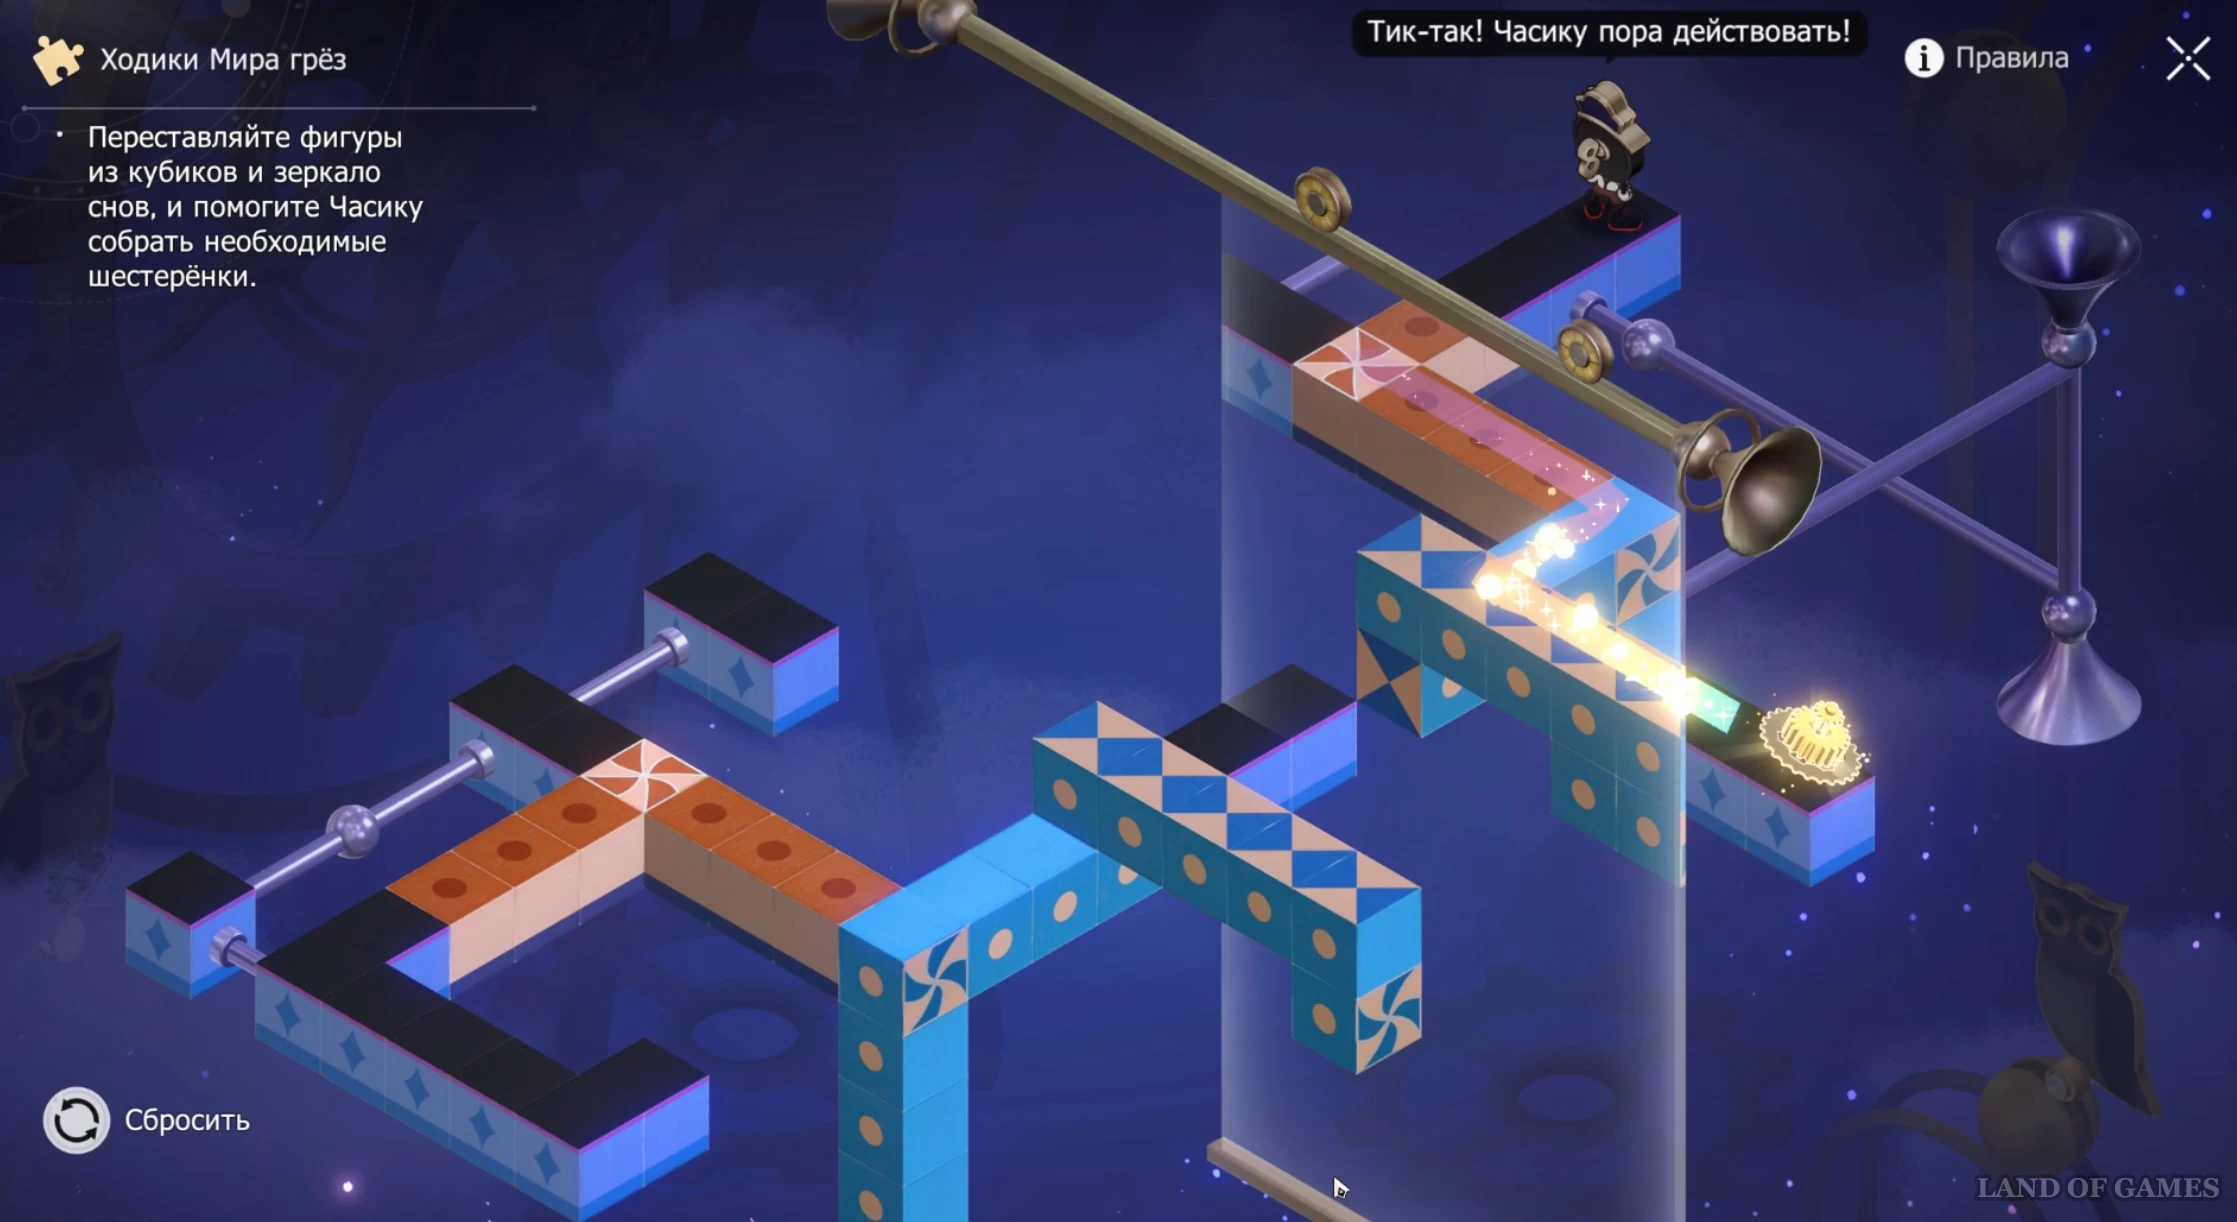
Overworld: Dreamland Walkers 2
Approach the clock ahead and interact with it. Rotate the red piece twice and the blue piece once to create a bridge to the first piece. Then move the mirror up a little and bring the Clock to the second gear.
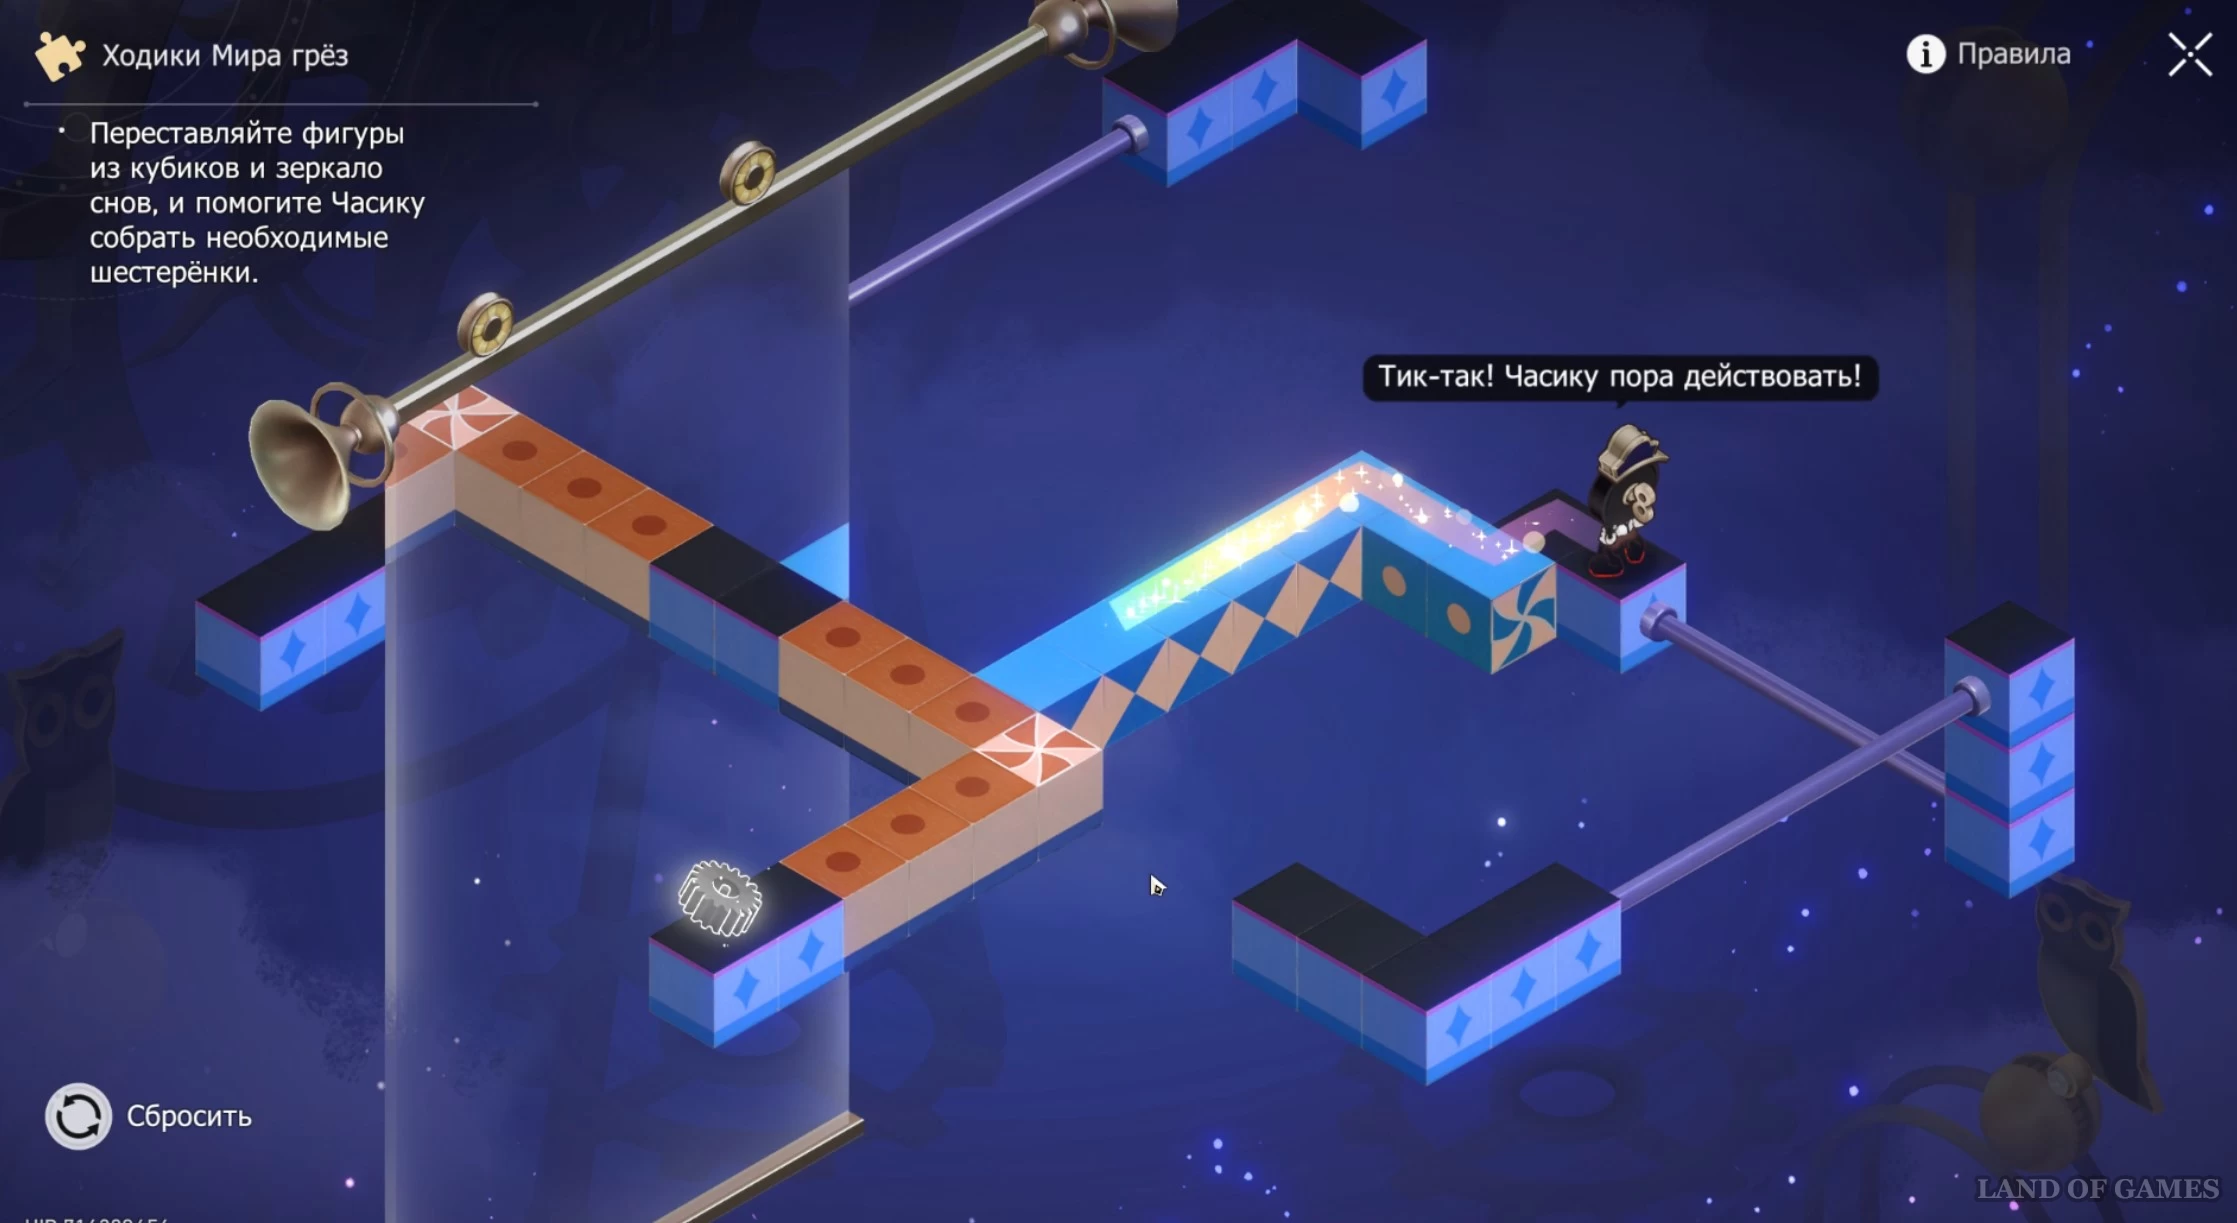
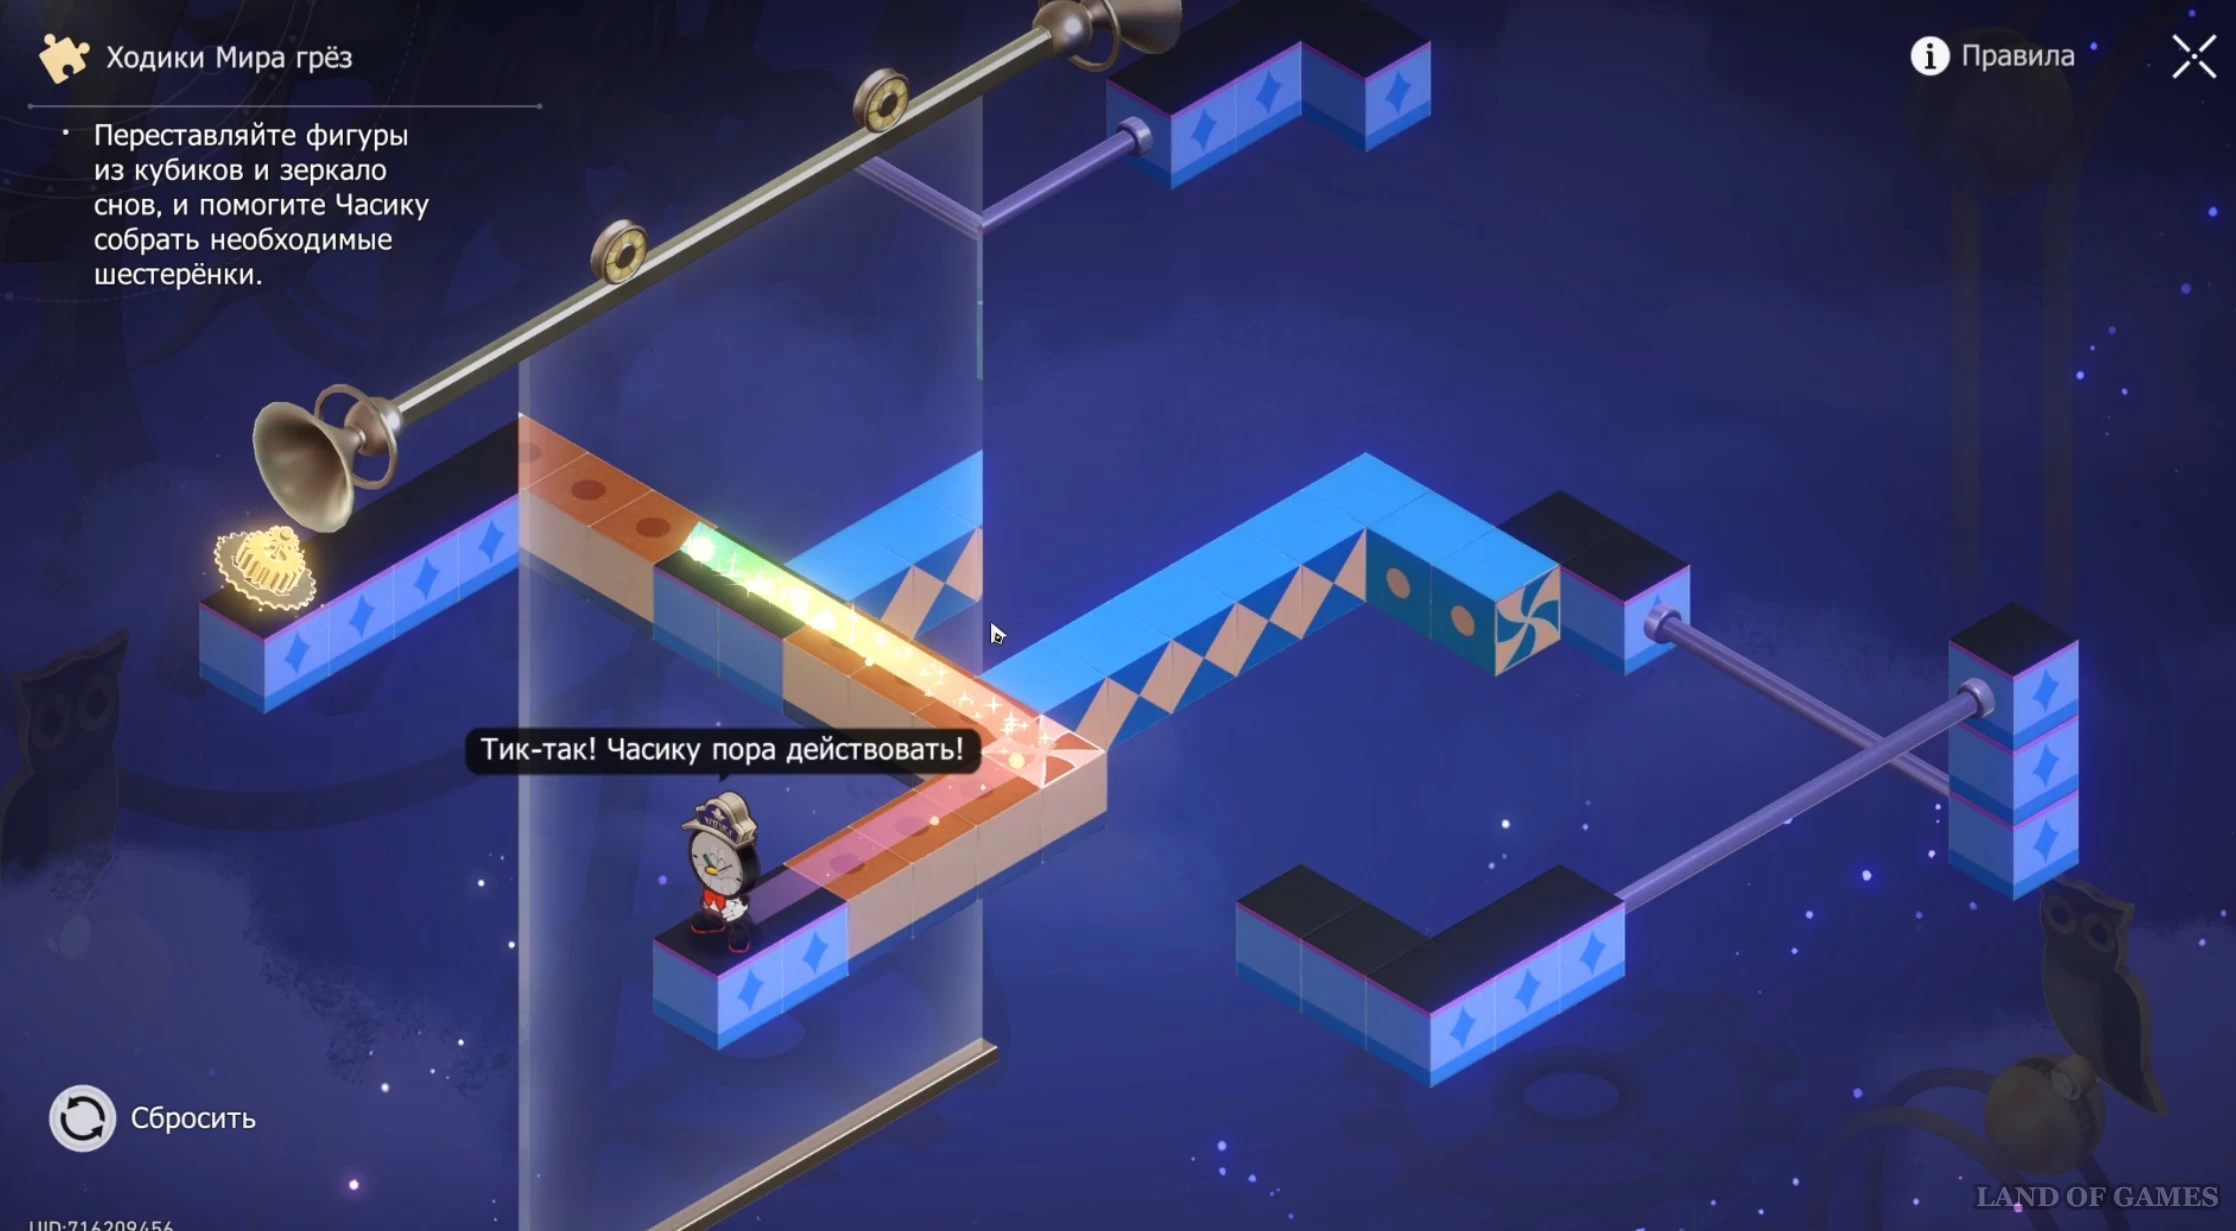
In the gif below you can see the entire process of solving the puzzle. By fixing the watch, you will complete the challenge and receive a reward.
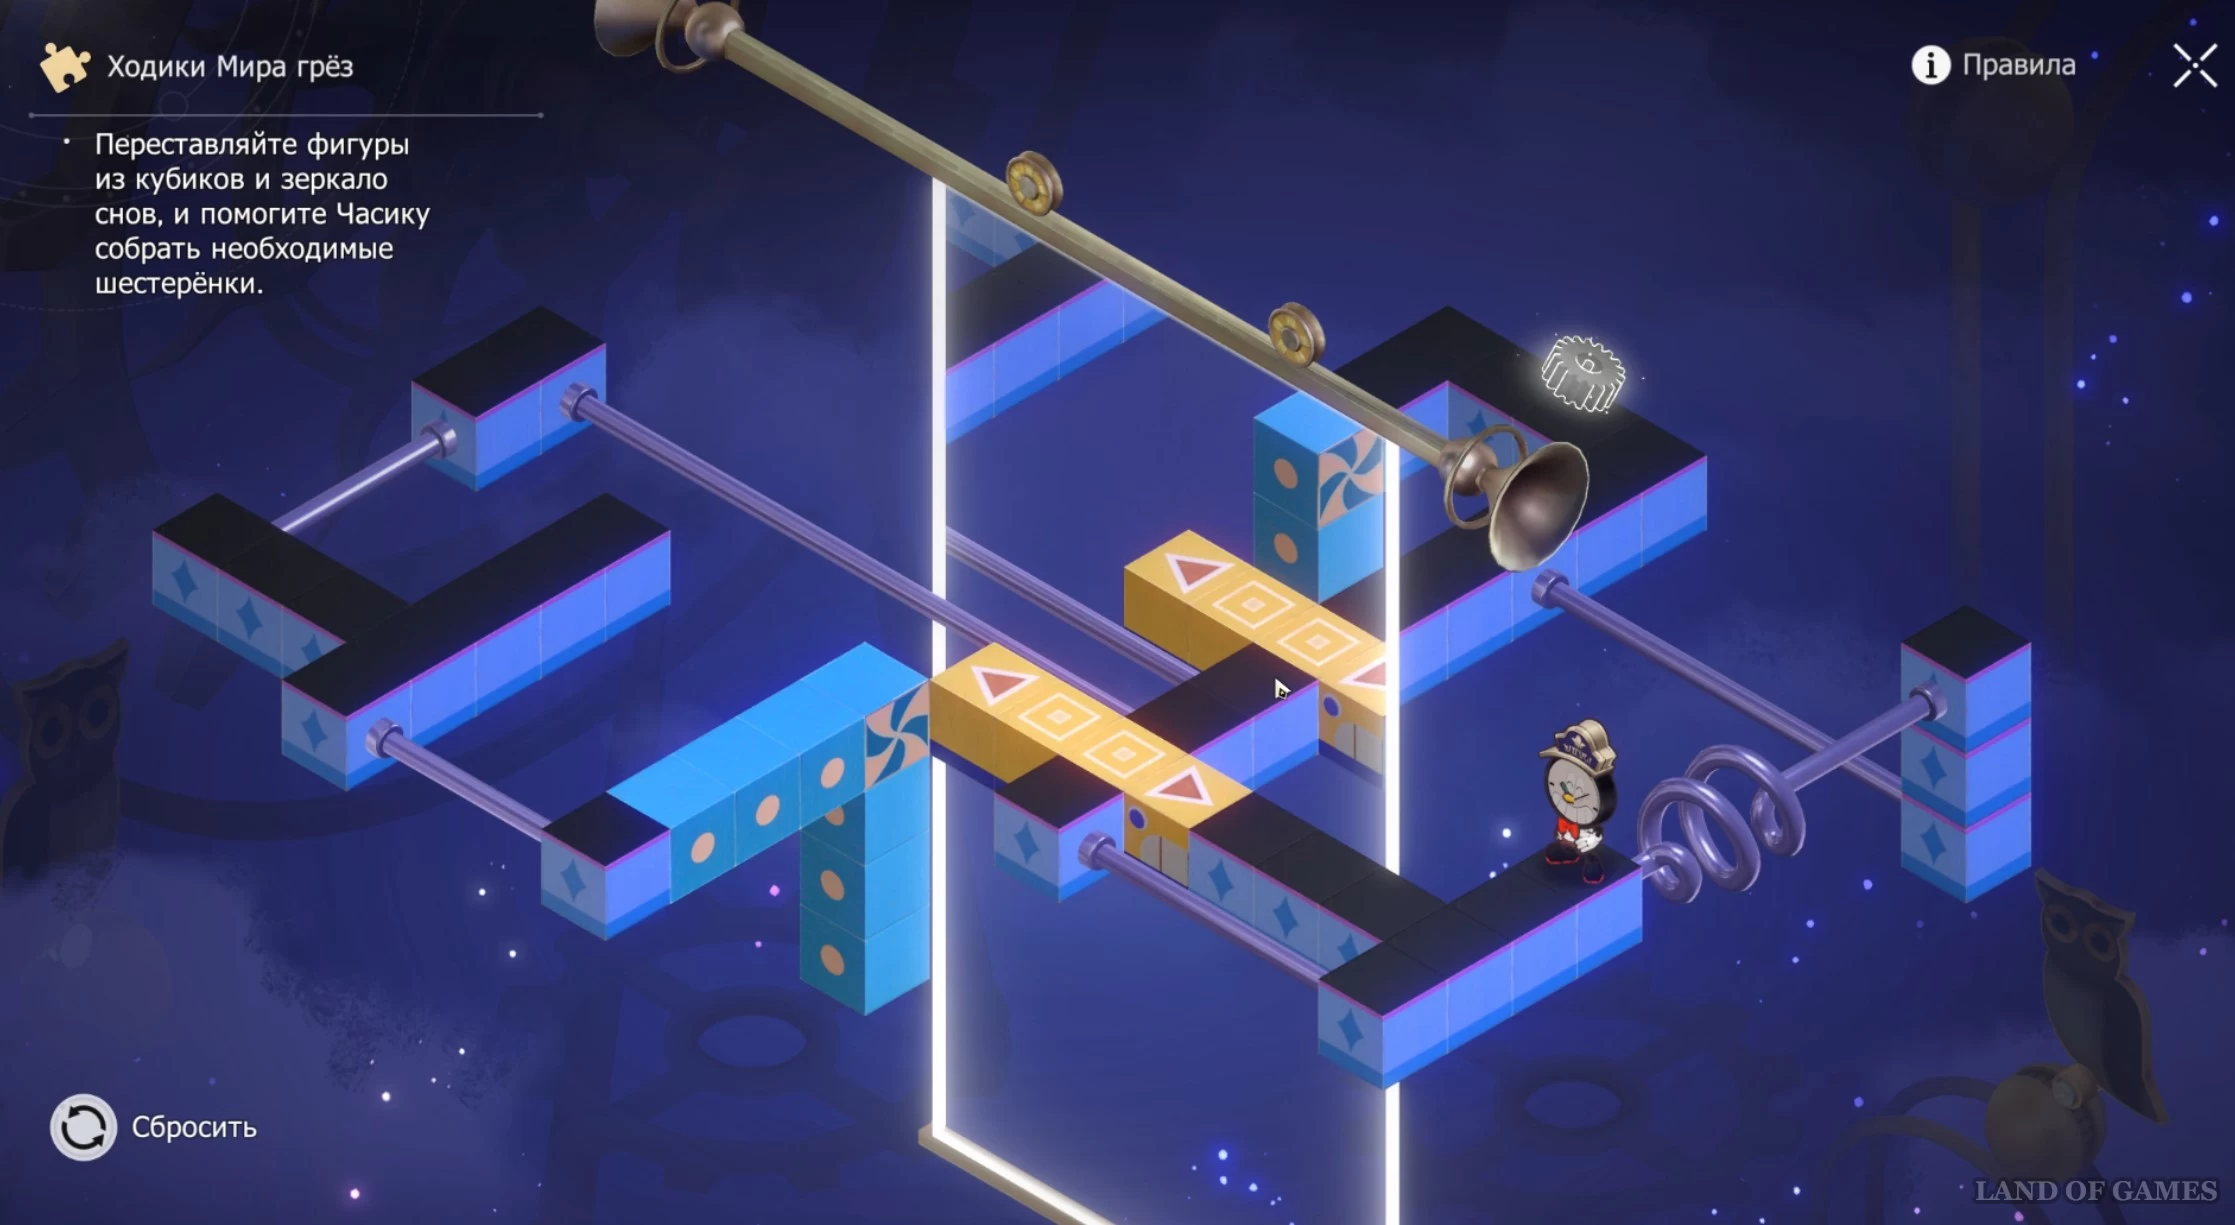
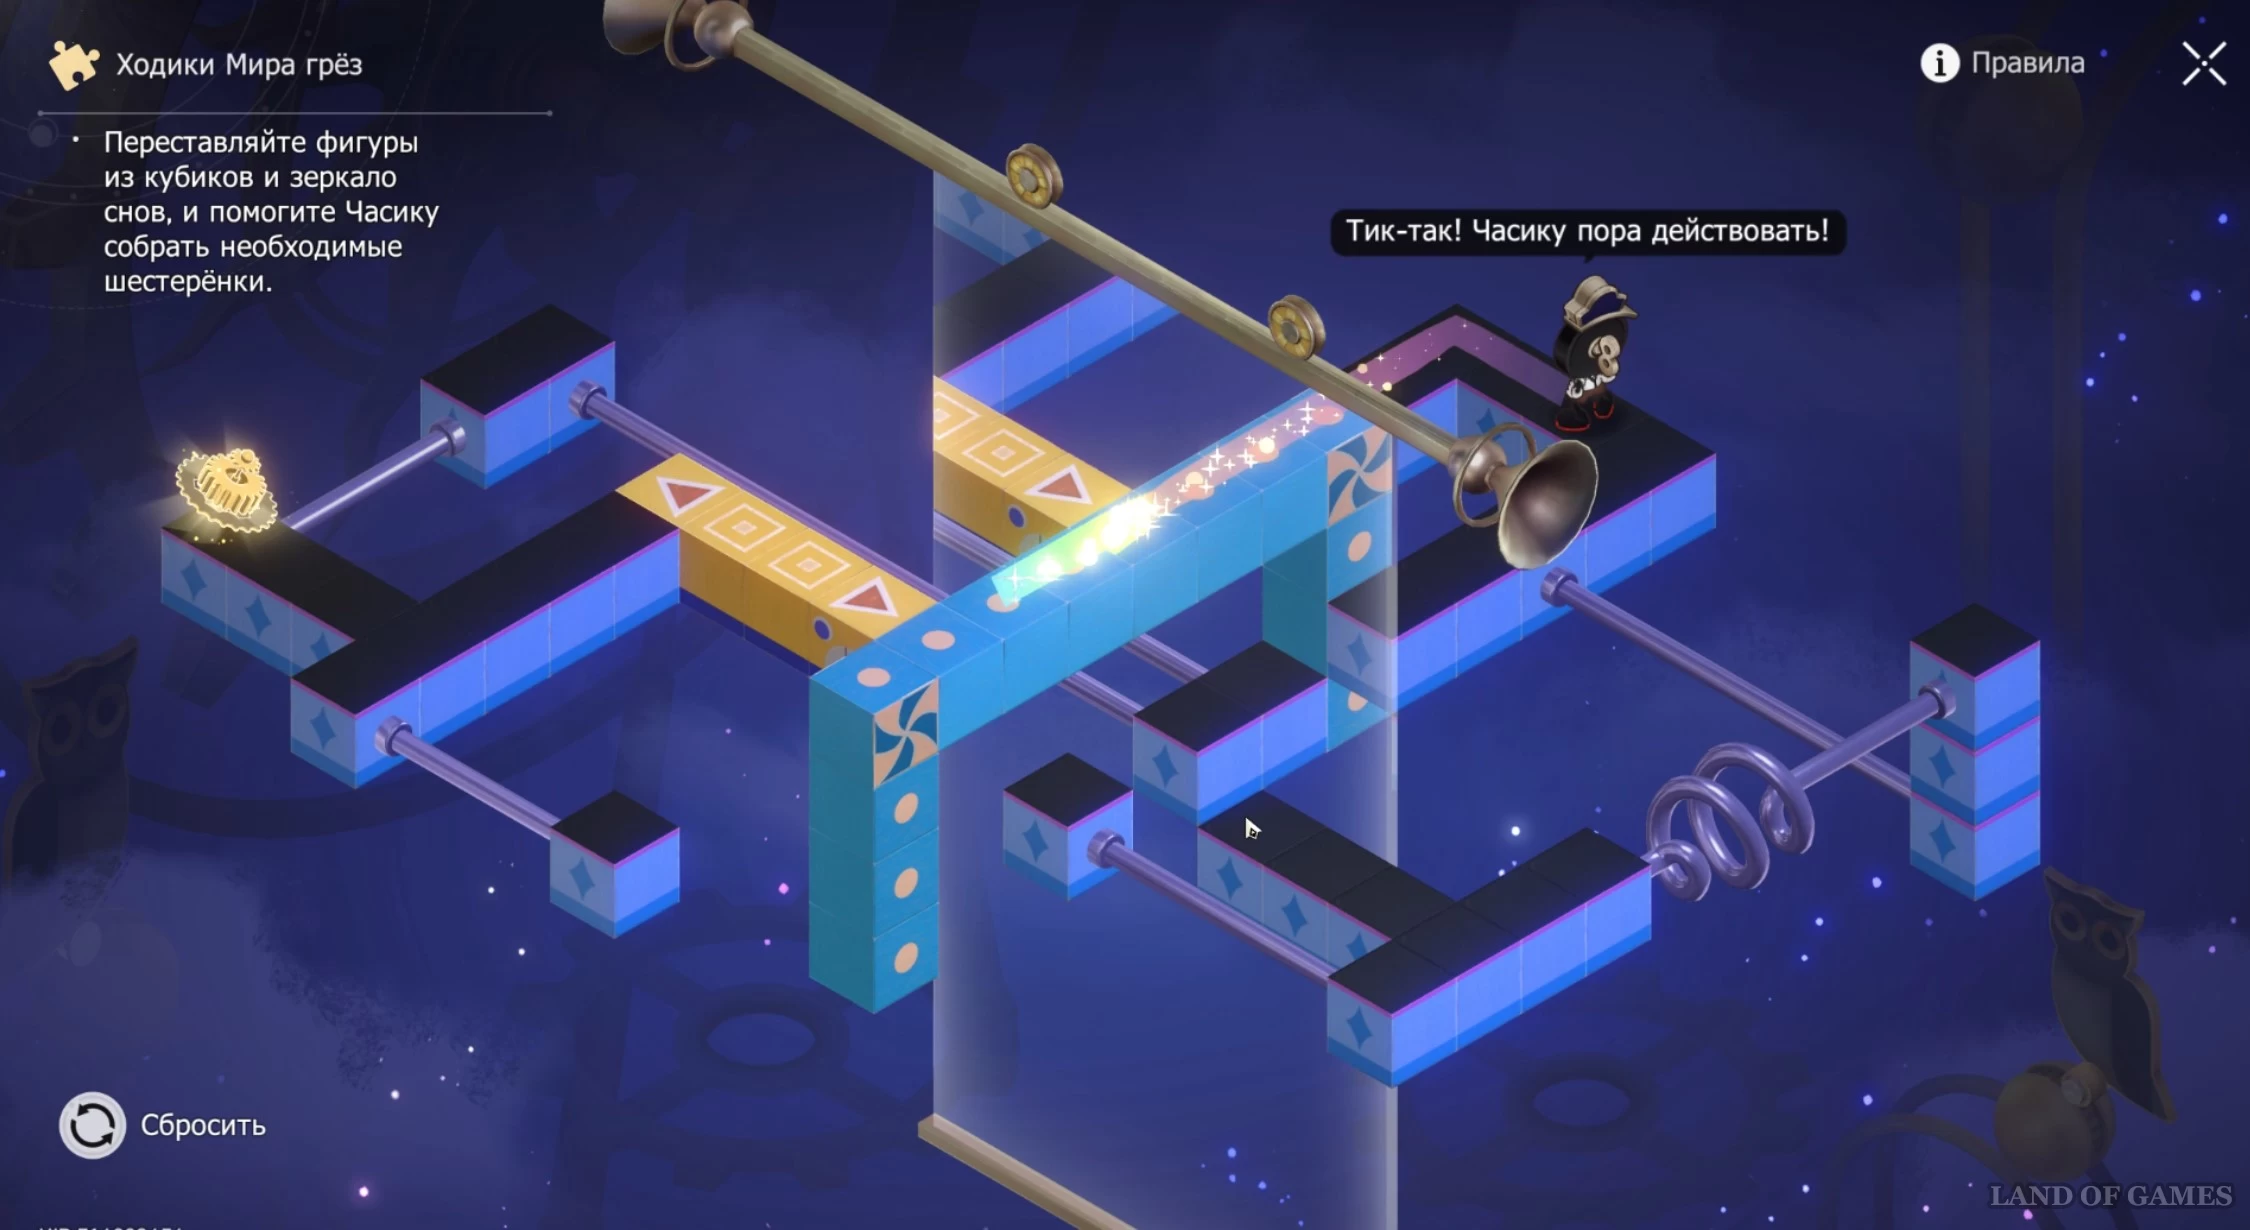
Nether: Dreamland Walkers 1
Rotate the top red piece twice, move the yellow cubes to the right and rotate the second red piece three times. An hour will reach the first part, and then immediately go to the second.
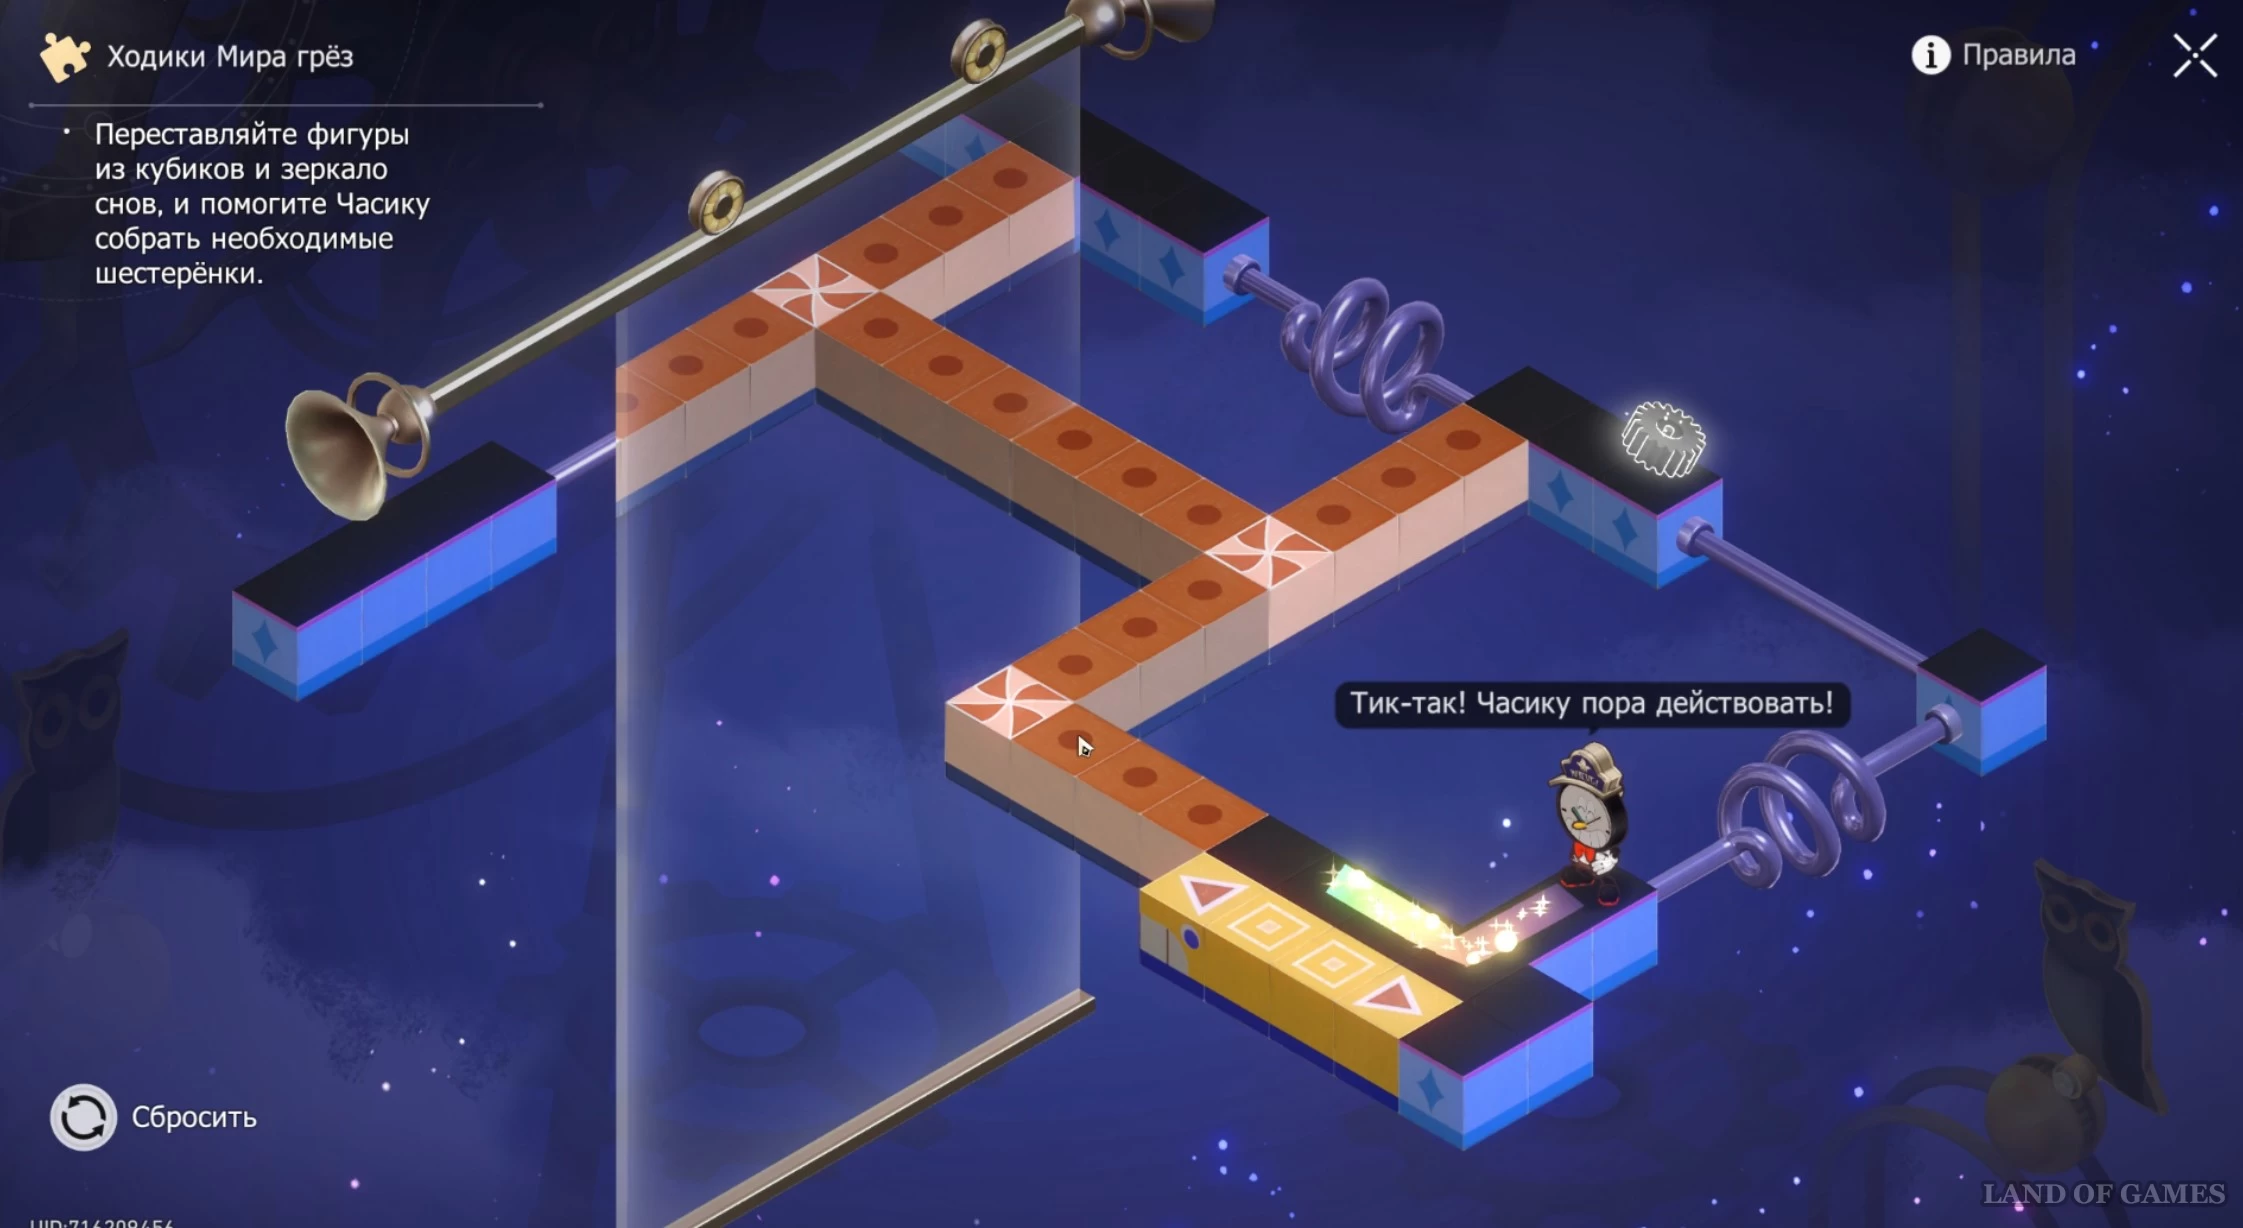
Now rotate the red pieces as shown in the first screenshot below, and move the yellow cubes to the left. Next, lower the mirror down a little to create a bridge to the third gear.
In the gif below you can see the entire process of solving the puzzle. By fixing the watch, you will complete the challenge and receive a reward.
Nether: Dreamland Walkers 2
Move the yellow figure all the way down, and the mirror almost all the way down. Then spin the blue piece three times to create a bridge and push the yellow cubes up. Move the mirror up a little too, and Chasik will be able to reach the second gear.
In the gif below you can see the entire process of solving the puzzle. By fixing the watch, you will complete the challenge and receive a reward.
Nether: Dreamland Walkers 3
Spin the blue piece once, and then move the horizontal yellow piece all the way to the right, and the vertical one all the way up to create a path to the first gear. Then move the mirror a little to the left so that Chasik reaches the second part.
Push the horizontal yellow shape a little to the left and align the mirror to create a bridge to the third gear.
In the gif below you can see the entire process of solving the puzzle. By fixing the watch, you will complete the challenge and receive a reward.
Nether: Dreamland Walkers 4
Rotate the red piece once and move the yellow cubes all the way to the right. Then spin the red piece two more times, and the blue piece once. An hour will be enough to reach the first gear.
Turn the mirror all the way to the right and rotate the red figure once, and move the yellow cubes to the left all the way. An hour will now get to the second part.
In the gif below you can see the entire process of solving the puzzle. By fixing the watch, you will complete the challenge and receive a reward.
Nether: Dreamland Walkers 5
Rotate the red shape once and the blue shape near the gear once to create a path to the part.
Rotate all the shapes to connect them to each other, and then turn the mirror a little to the right and you will create a bridge to the second gear.
Rotate only the blue pieces to create a bridge, and move the mirror to the right all the way, and Chasik will be able to reach the last detail.
In the gif below you can see the entire process of solving the puzzle. By fixing the watch, you will complete the challenge and receive a reward.
Adventures of Hanu
Overworld: Hanu's Adventures 1
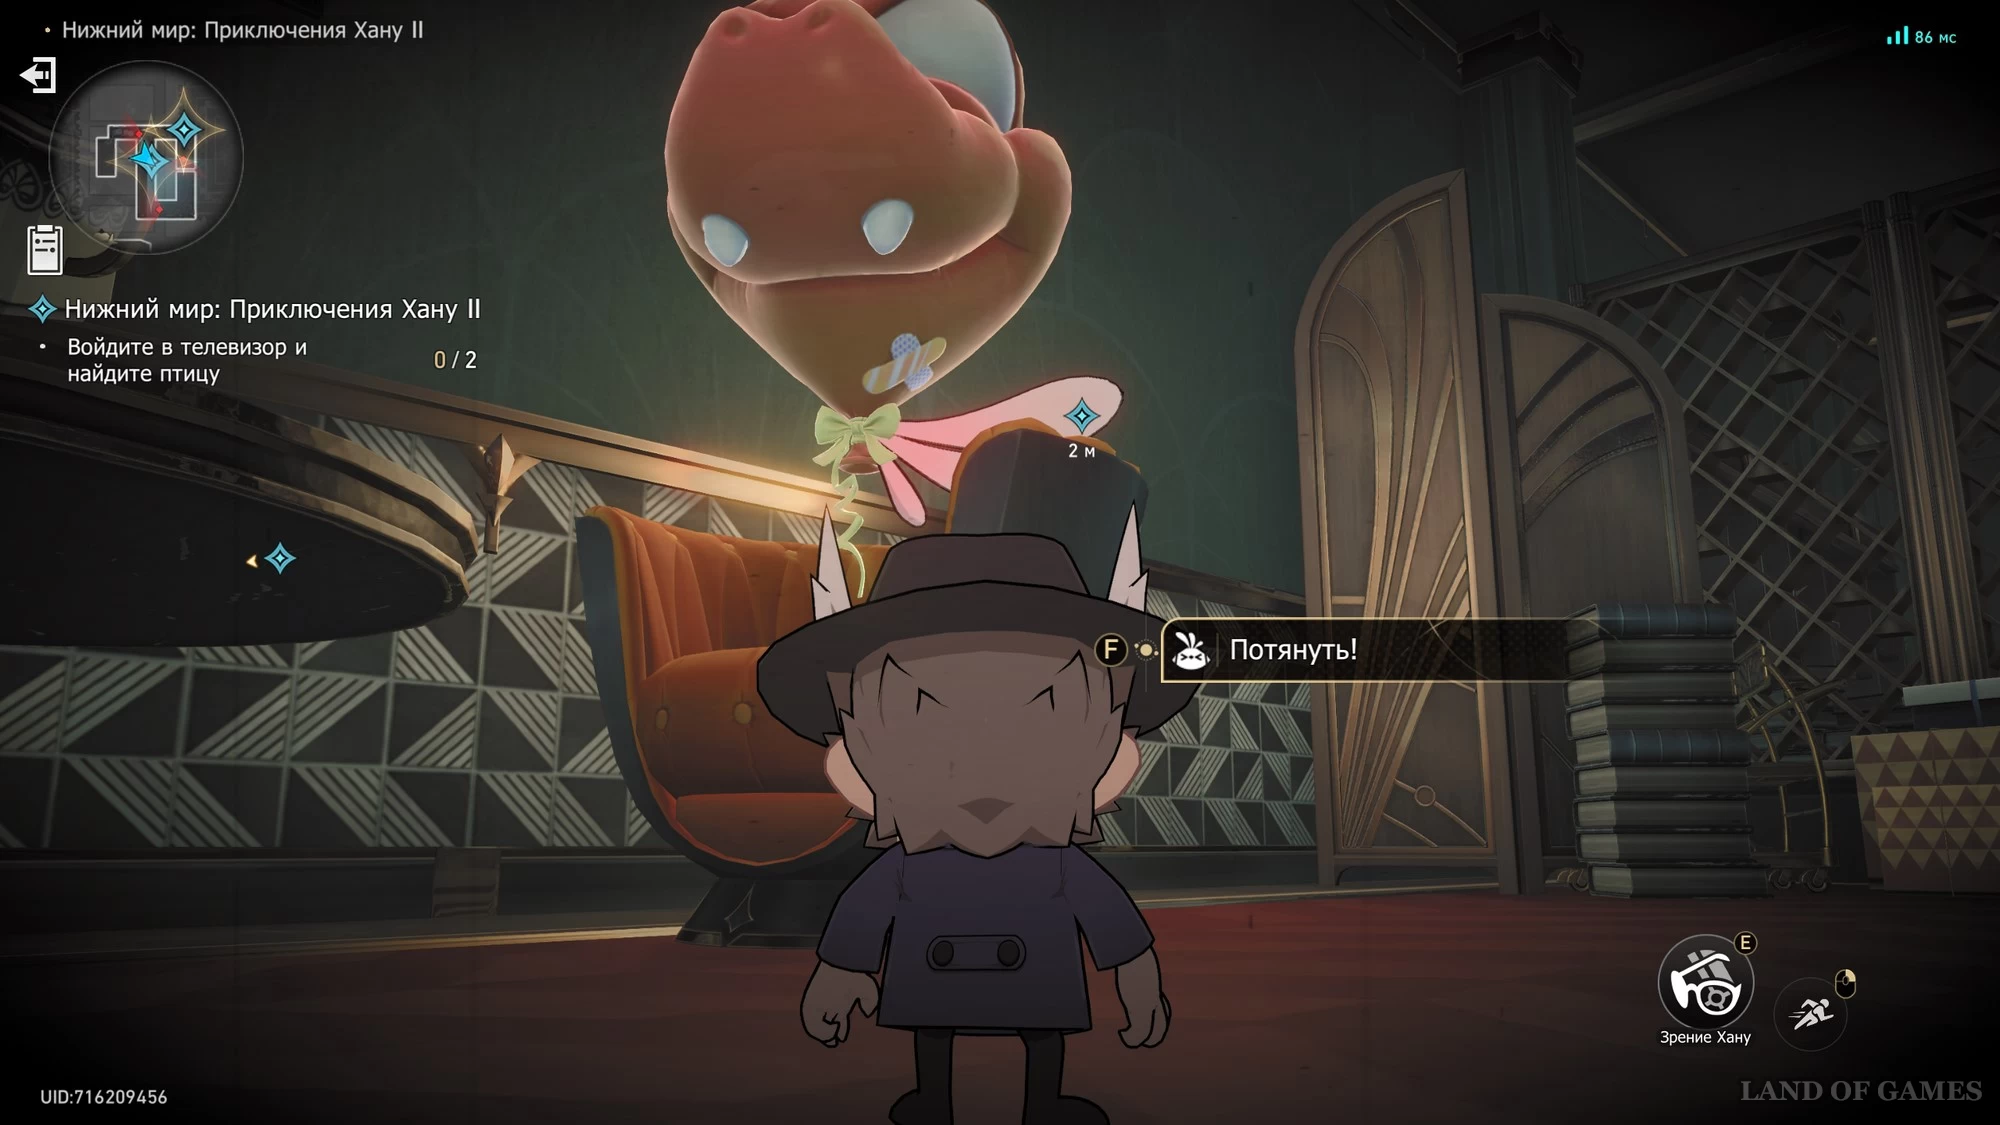
Start the first stage and click on the TV to turn into Brother Hana. Study the instructions, and then go to the blue rocket ahead, trying not to get caught by the enemies. You will be teleported to a ventilation pipe.
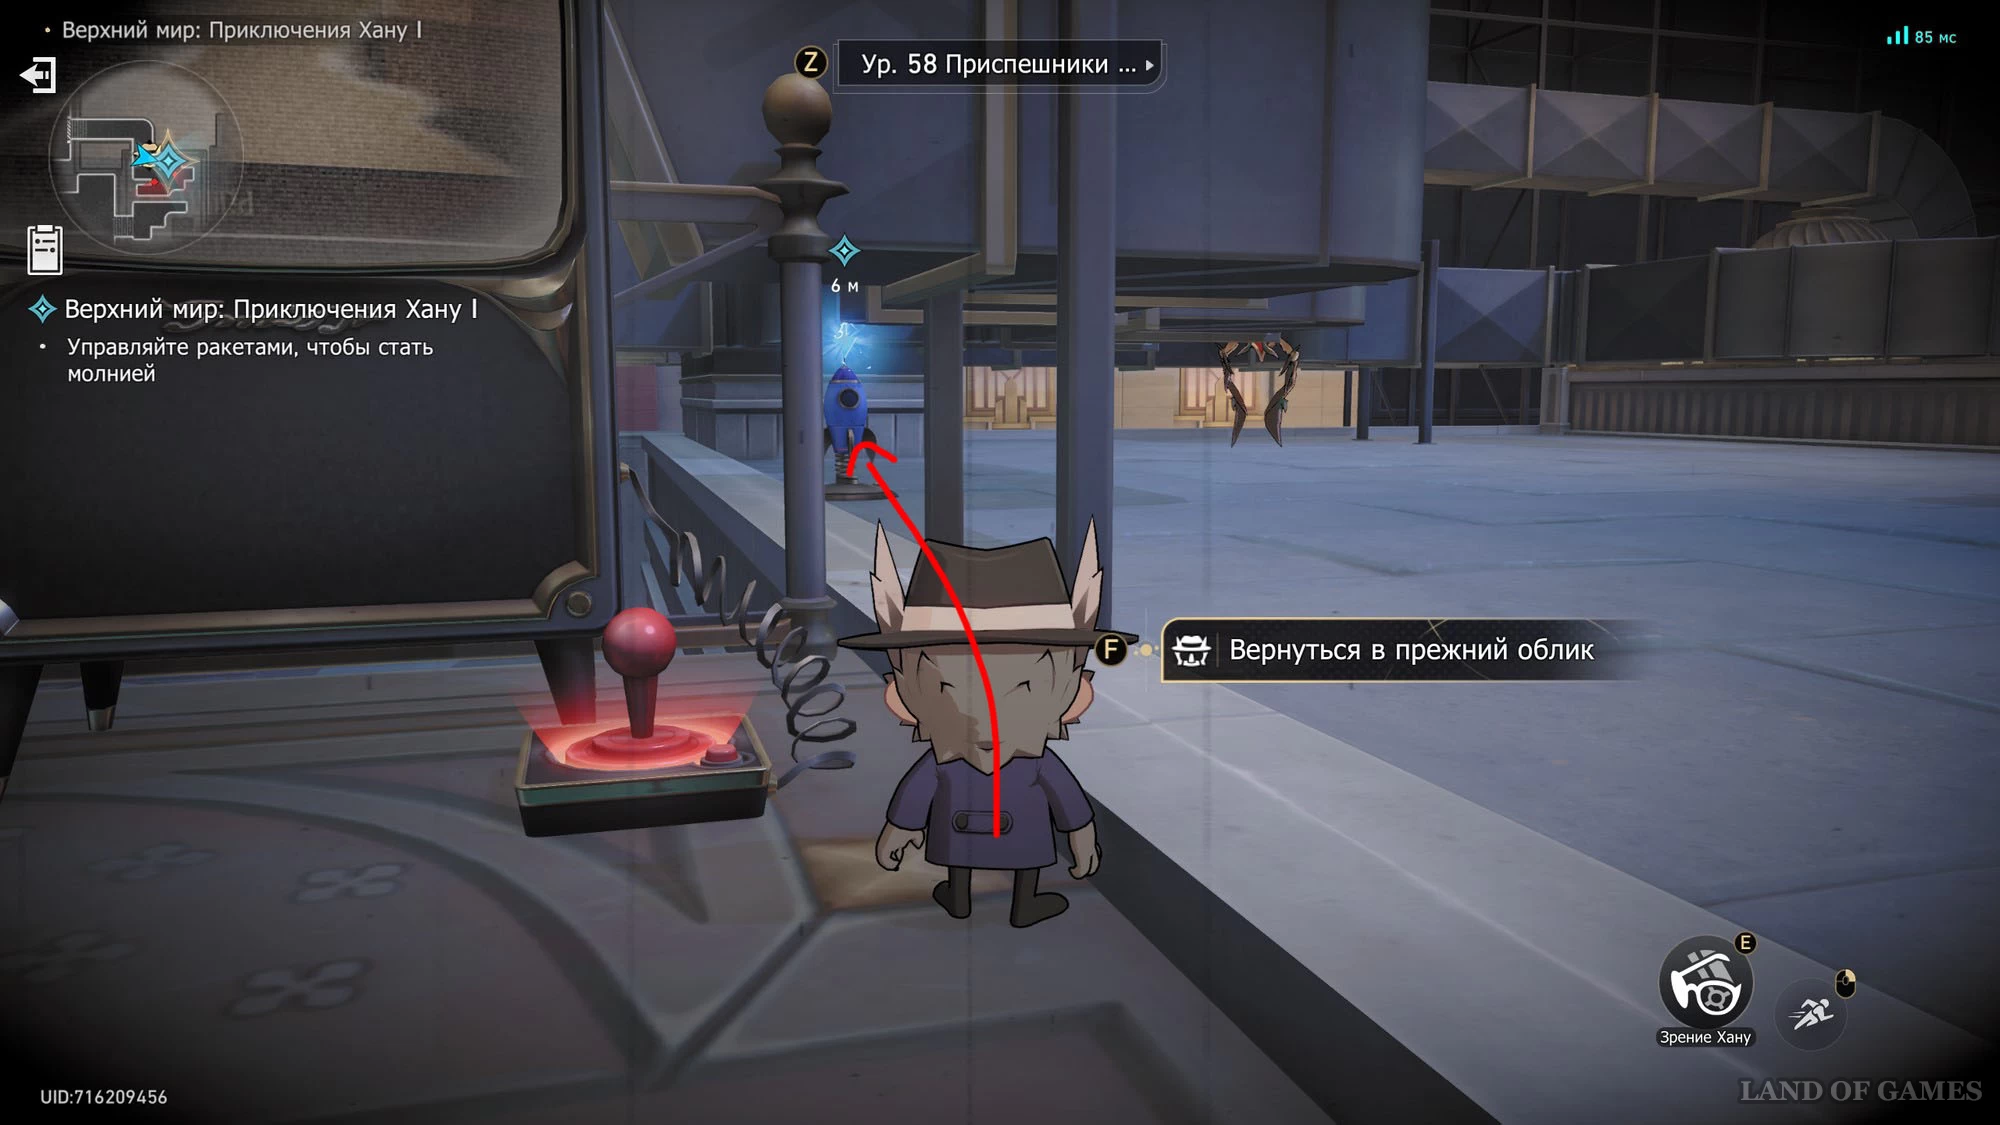
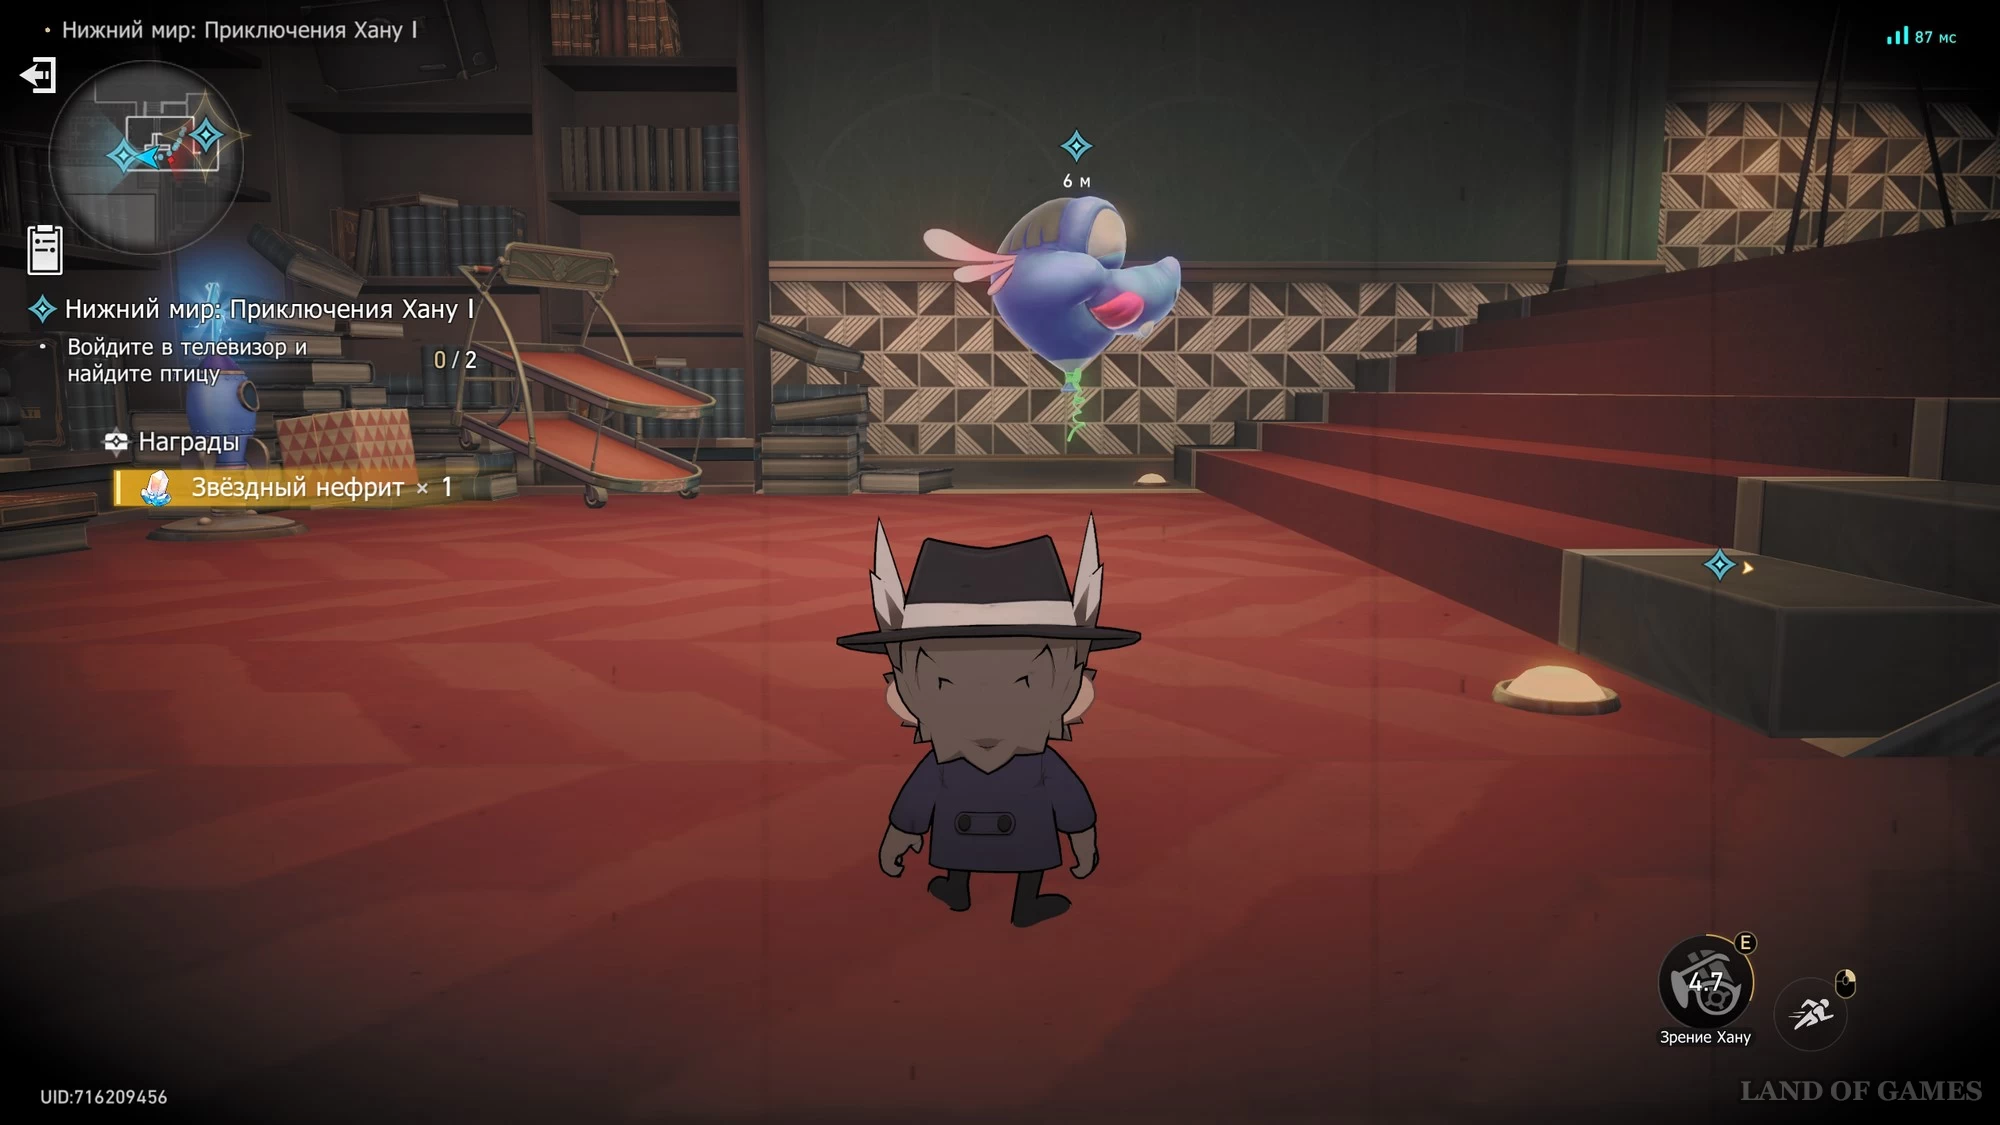
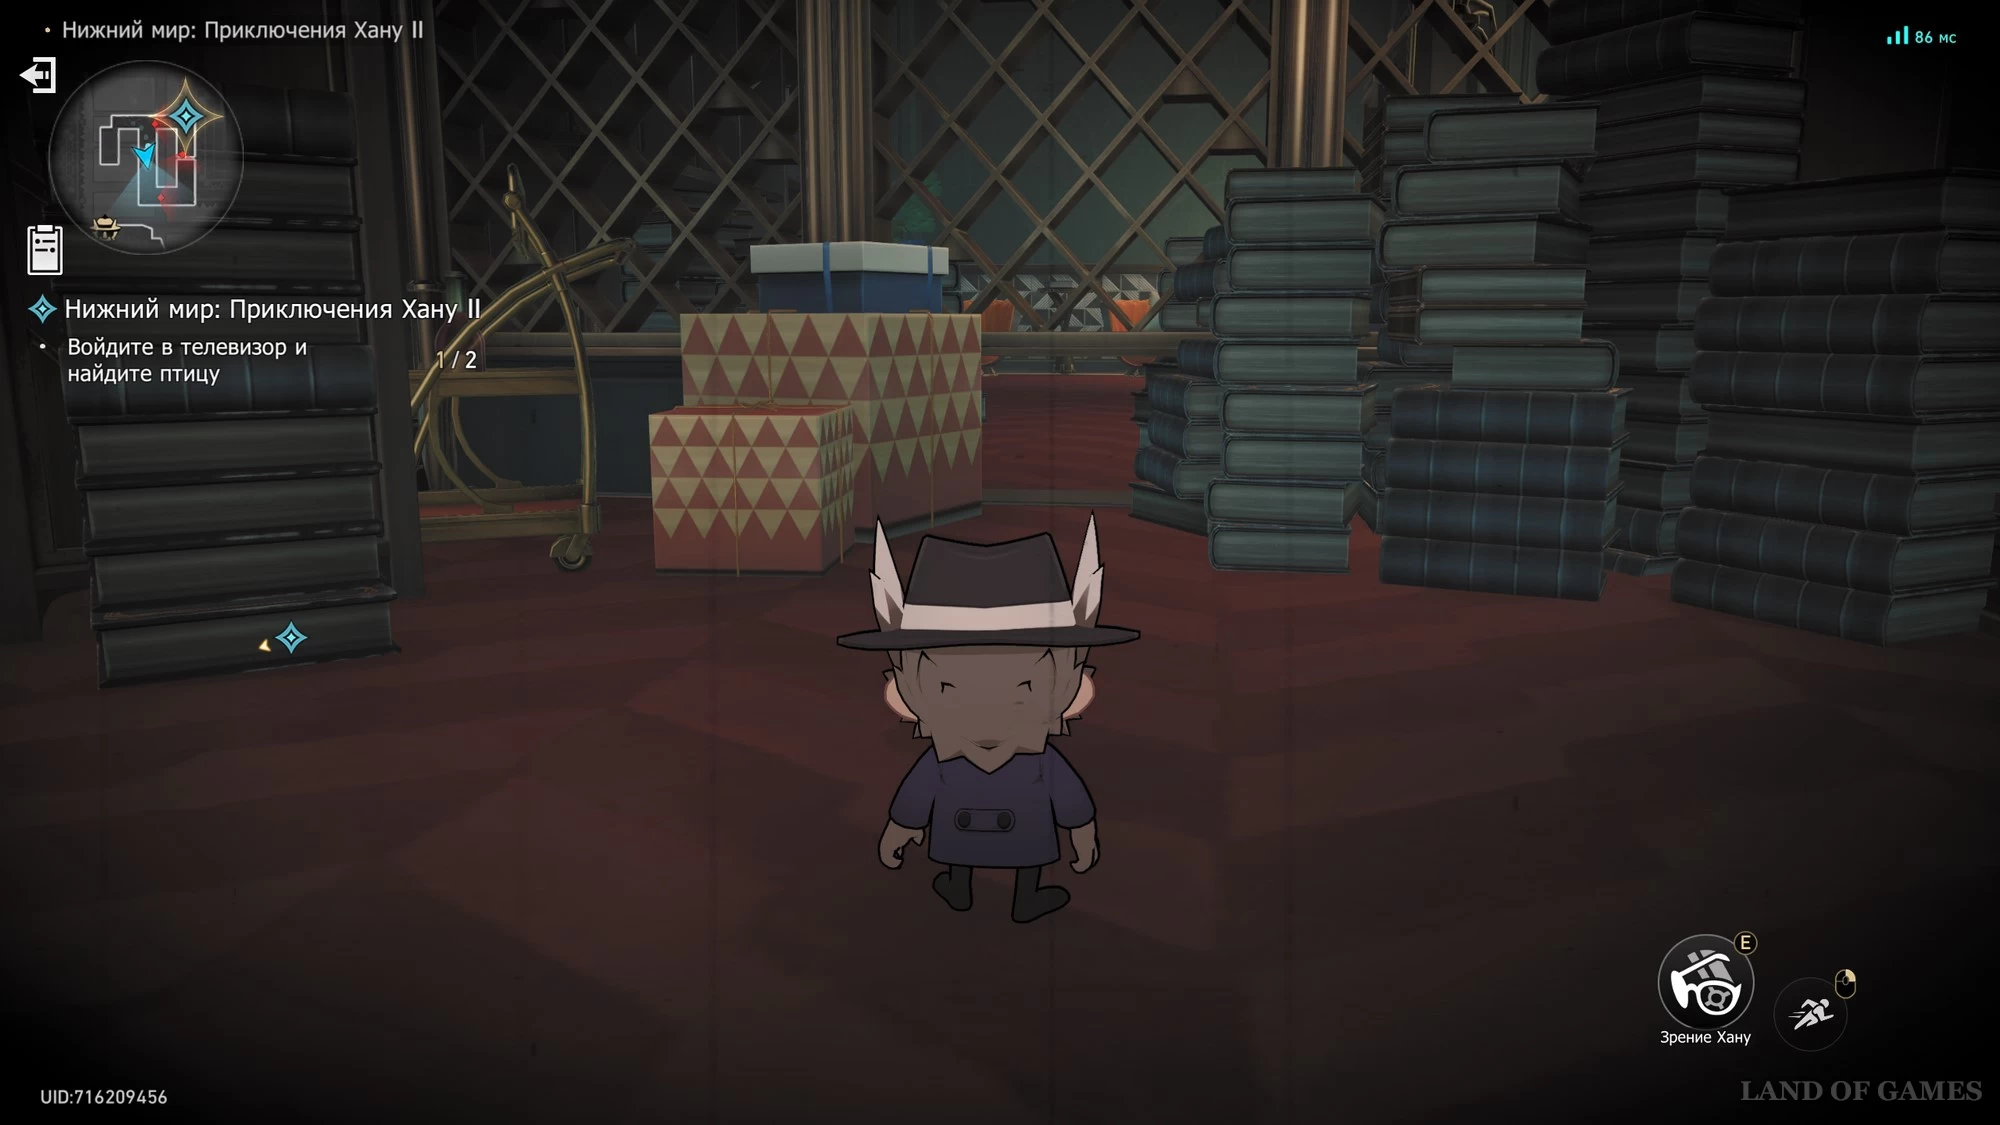
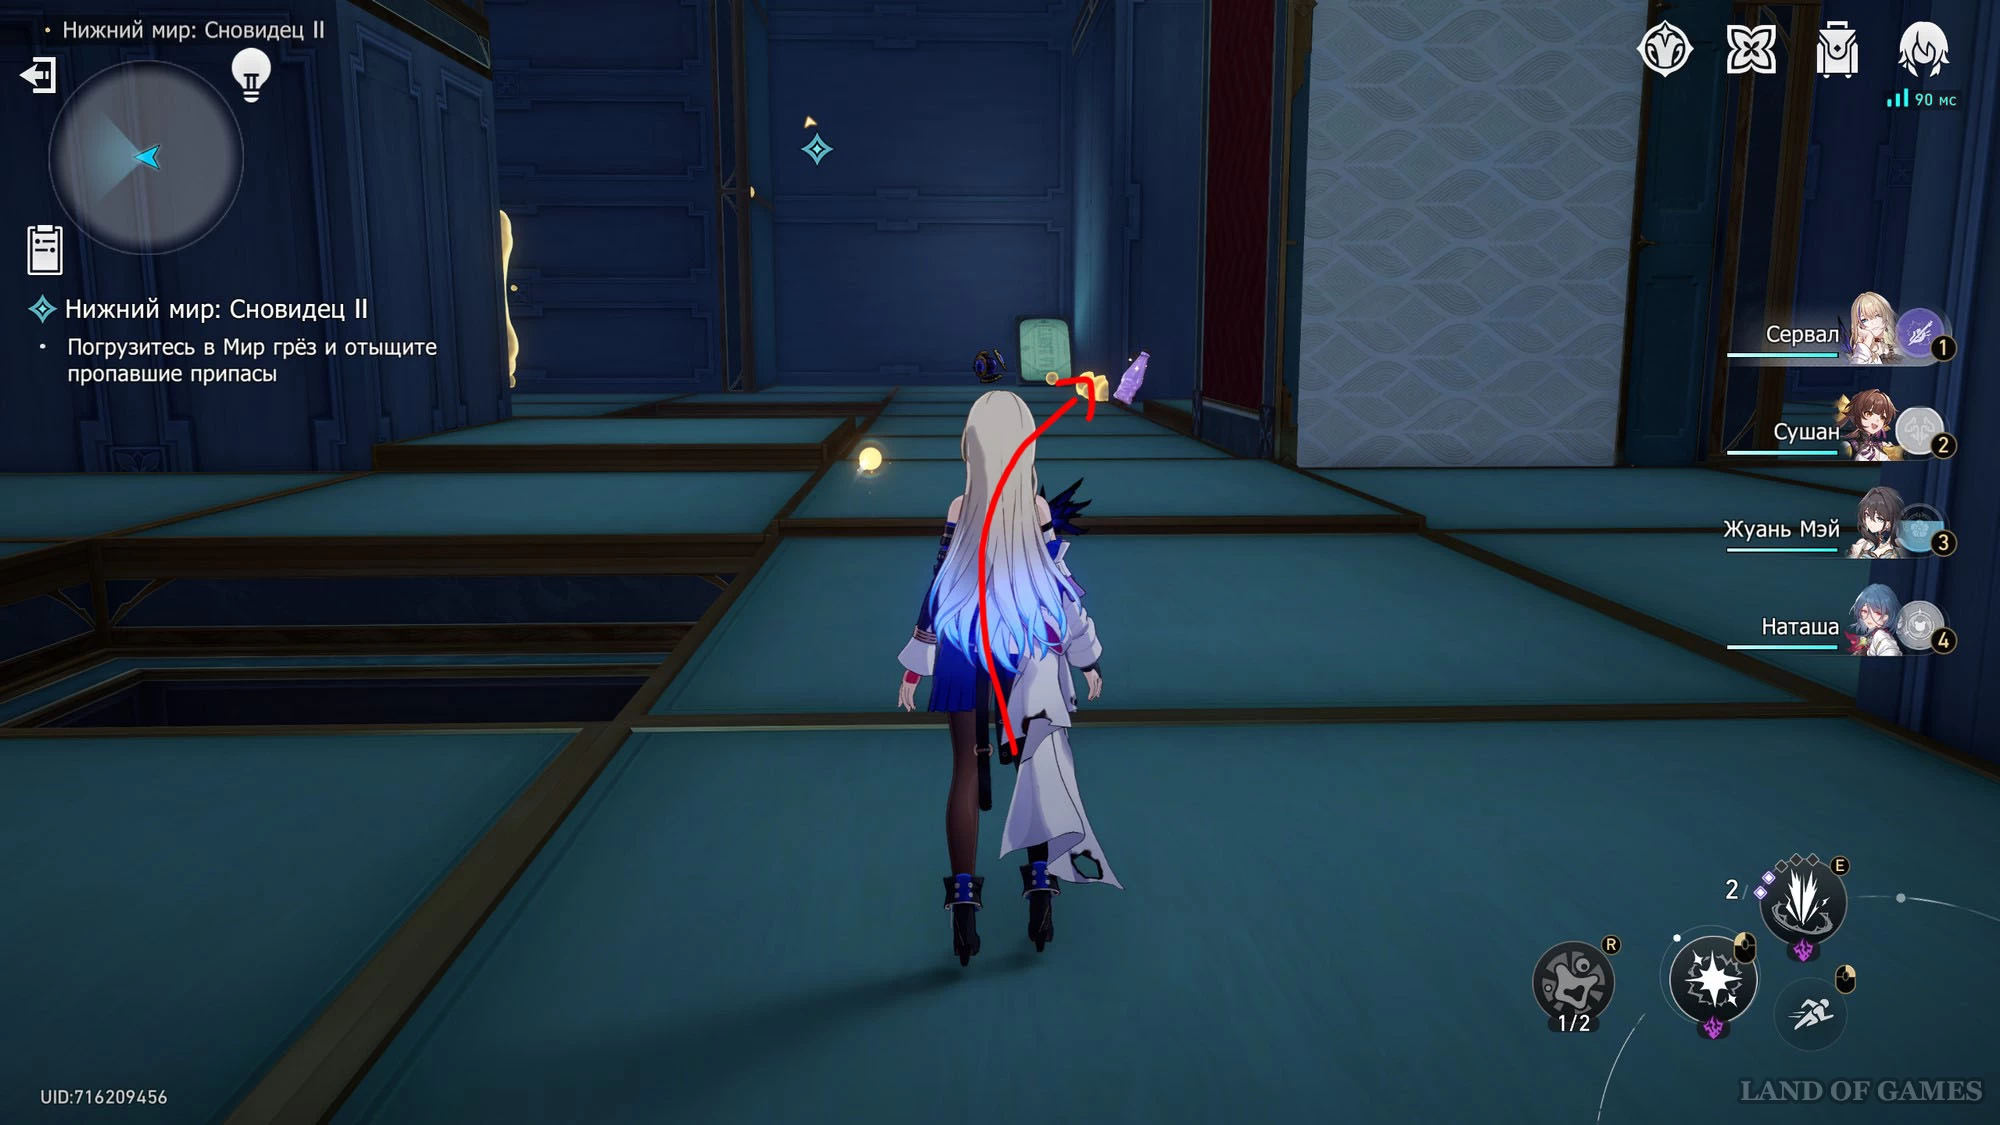
Start walking along it forward towards the marker, hiding behind or in boxes if necessary. When you reach the ball, press “Pull” to pull out the origami bird.
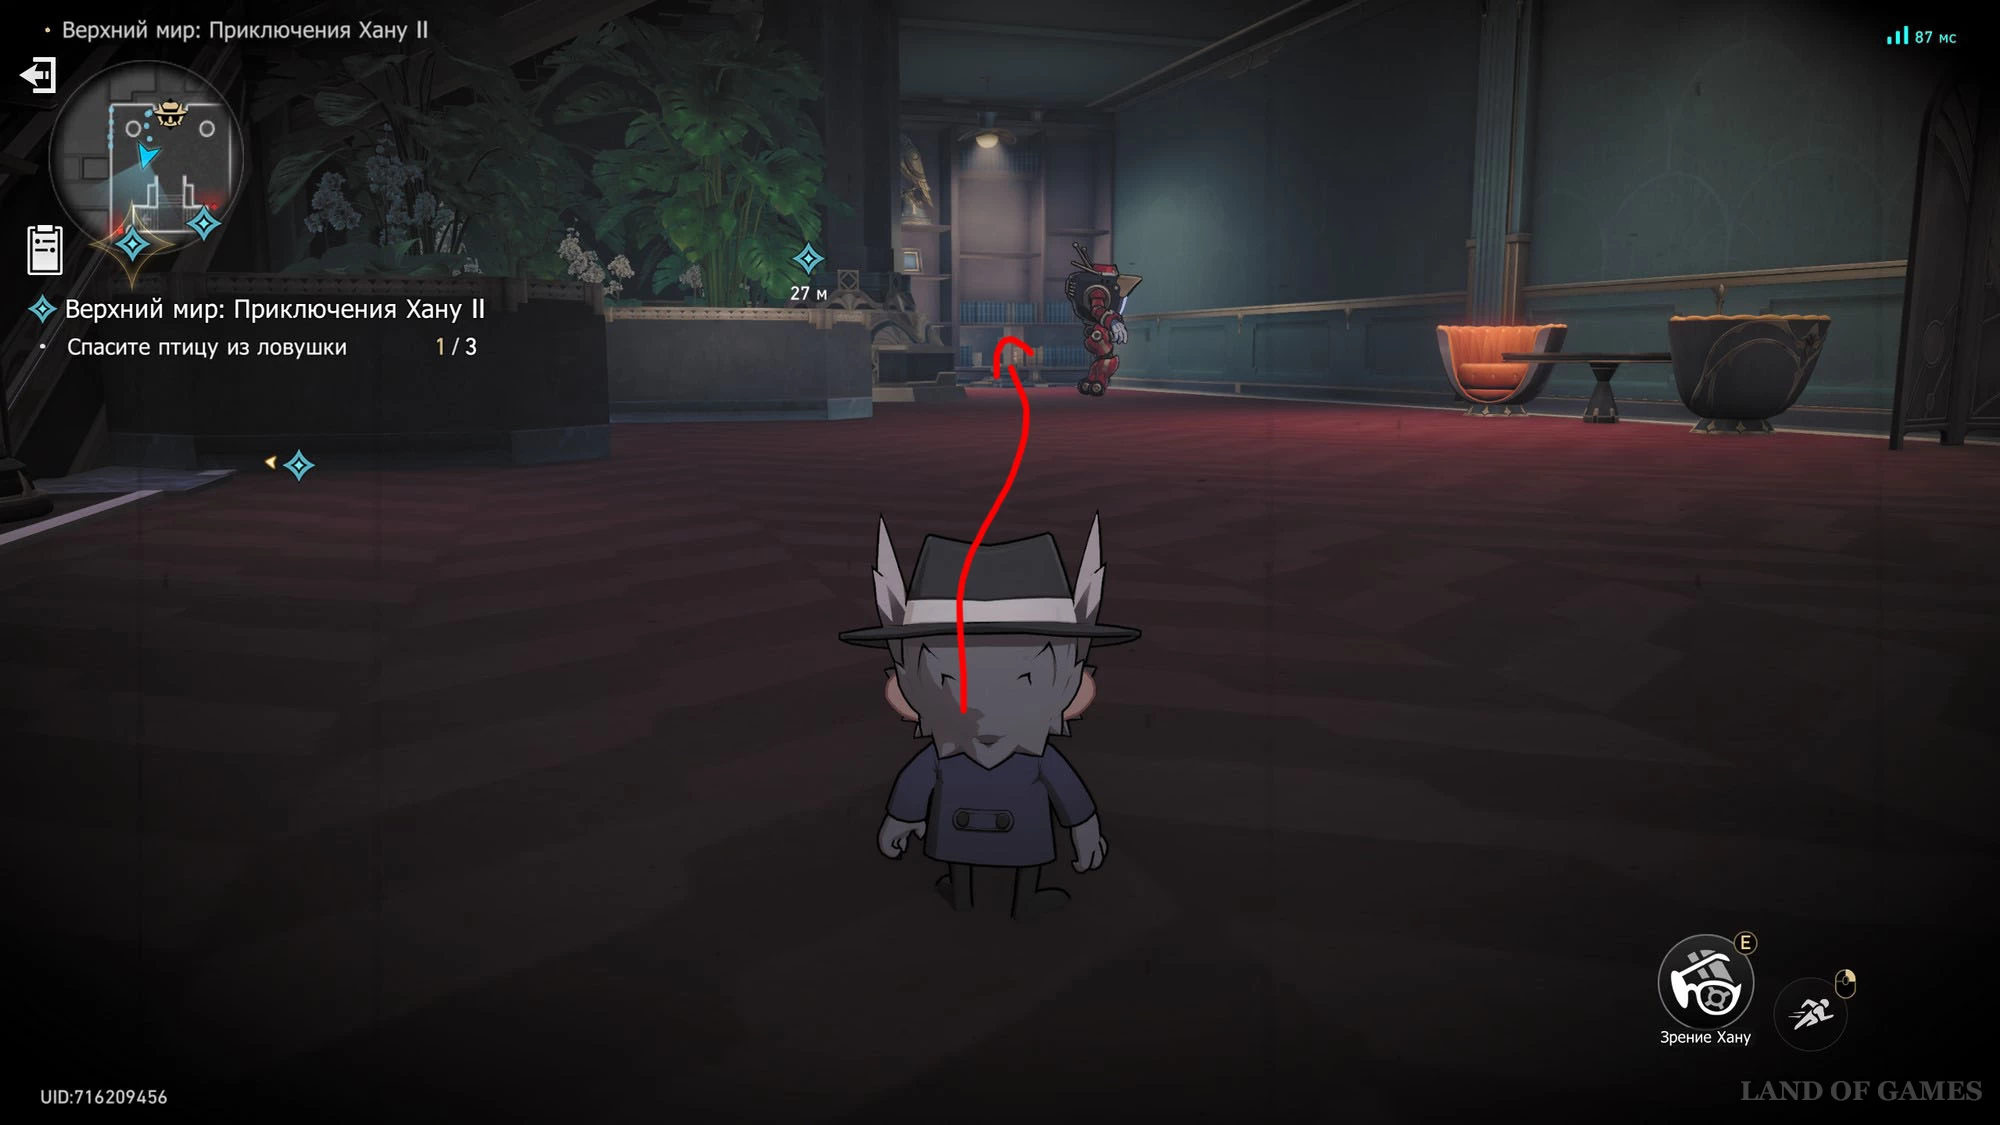
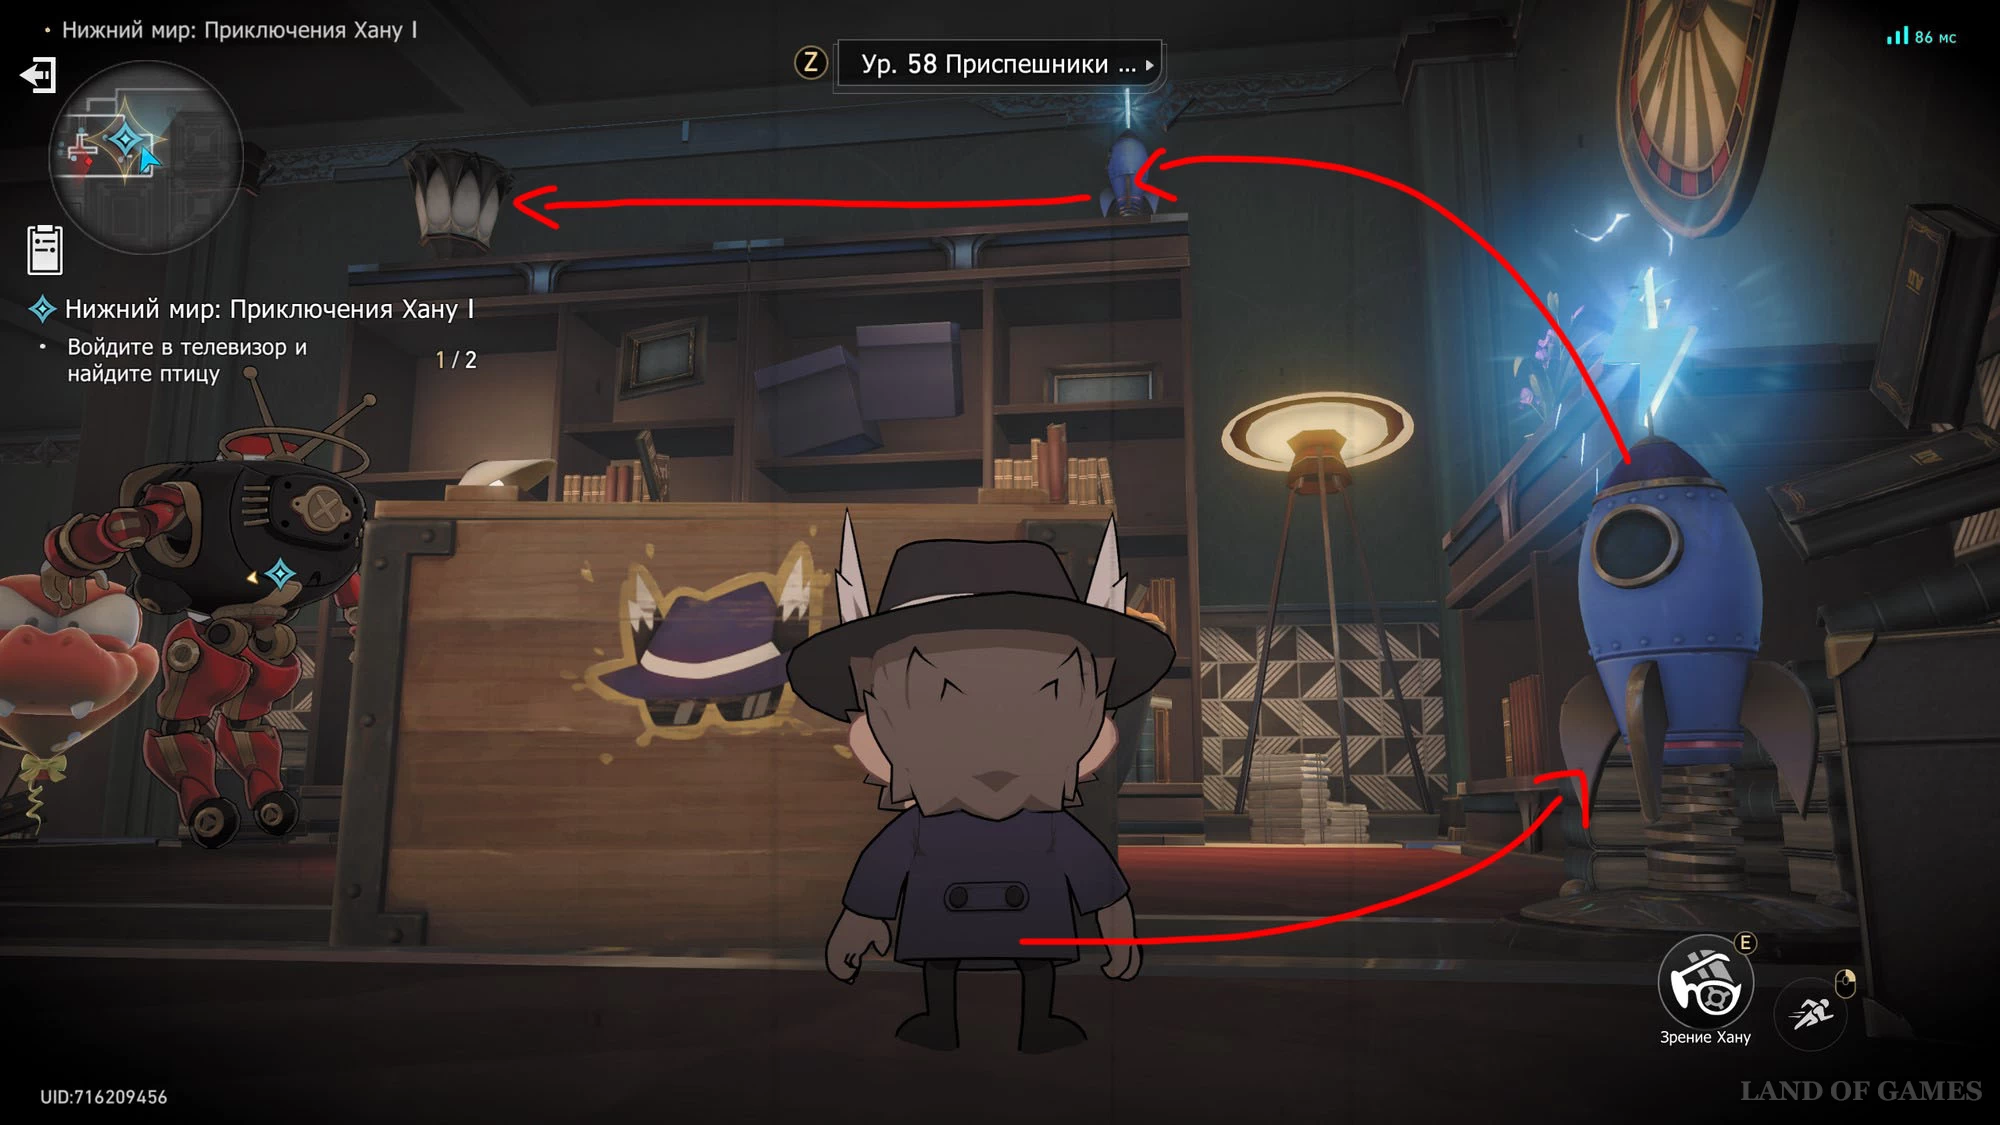
Overworld: Hanu's Adventures 2
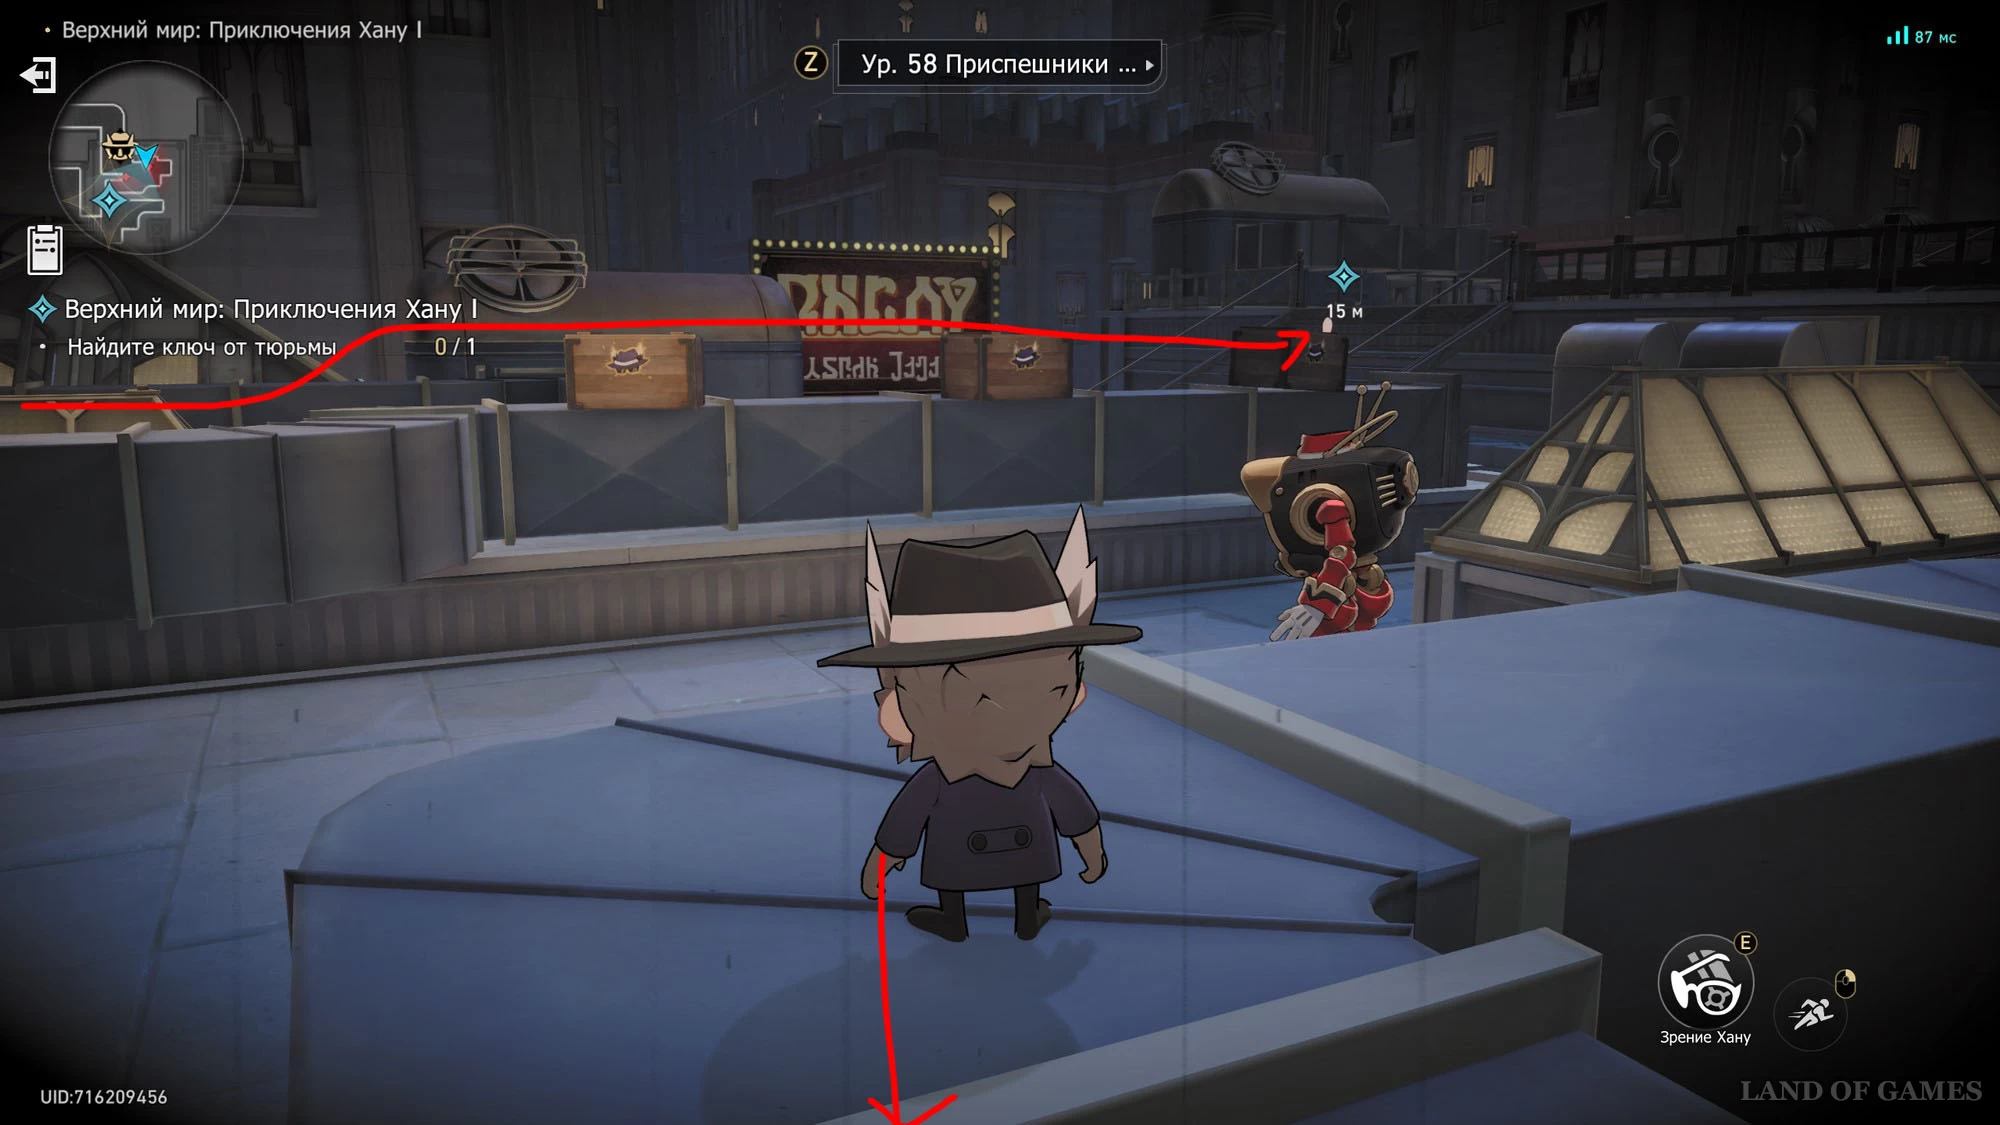
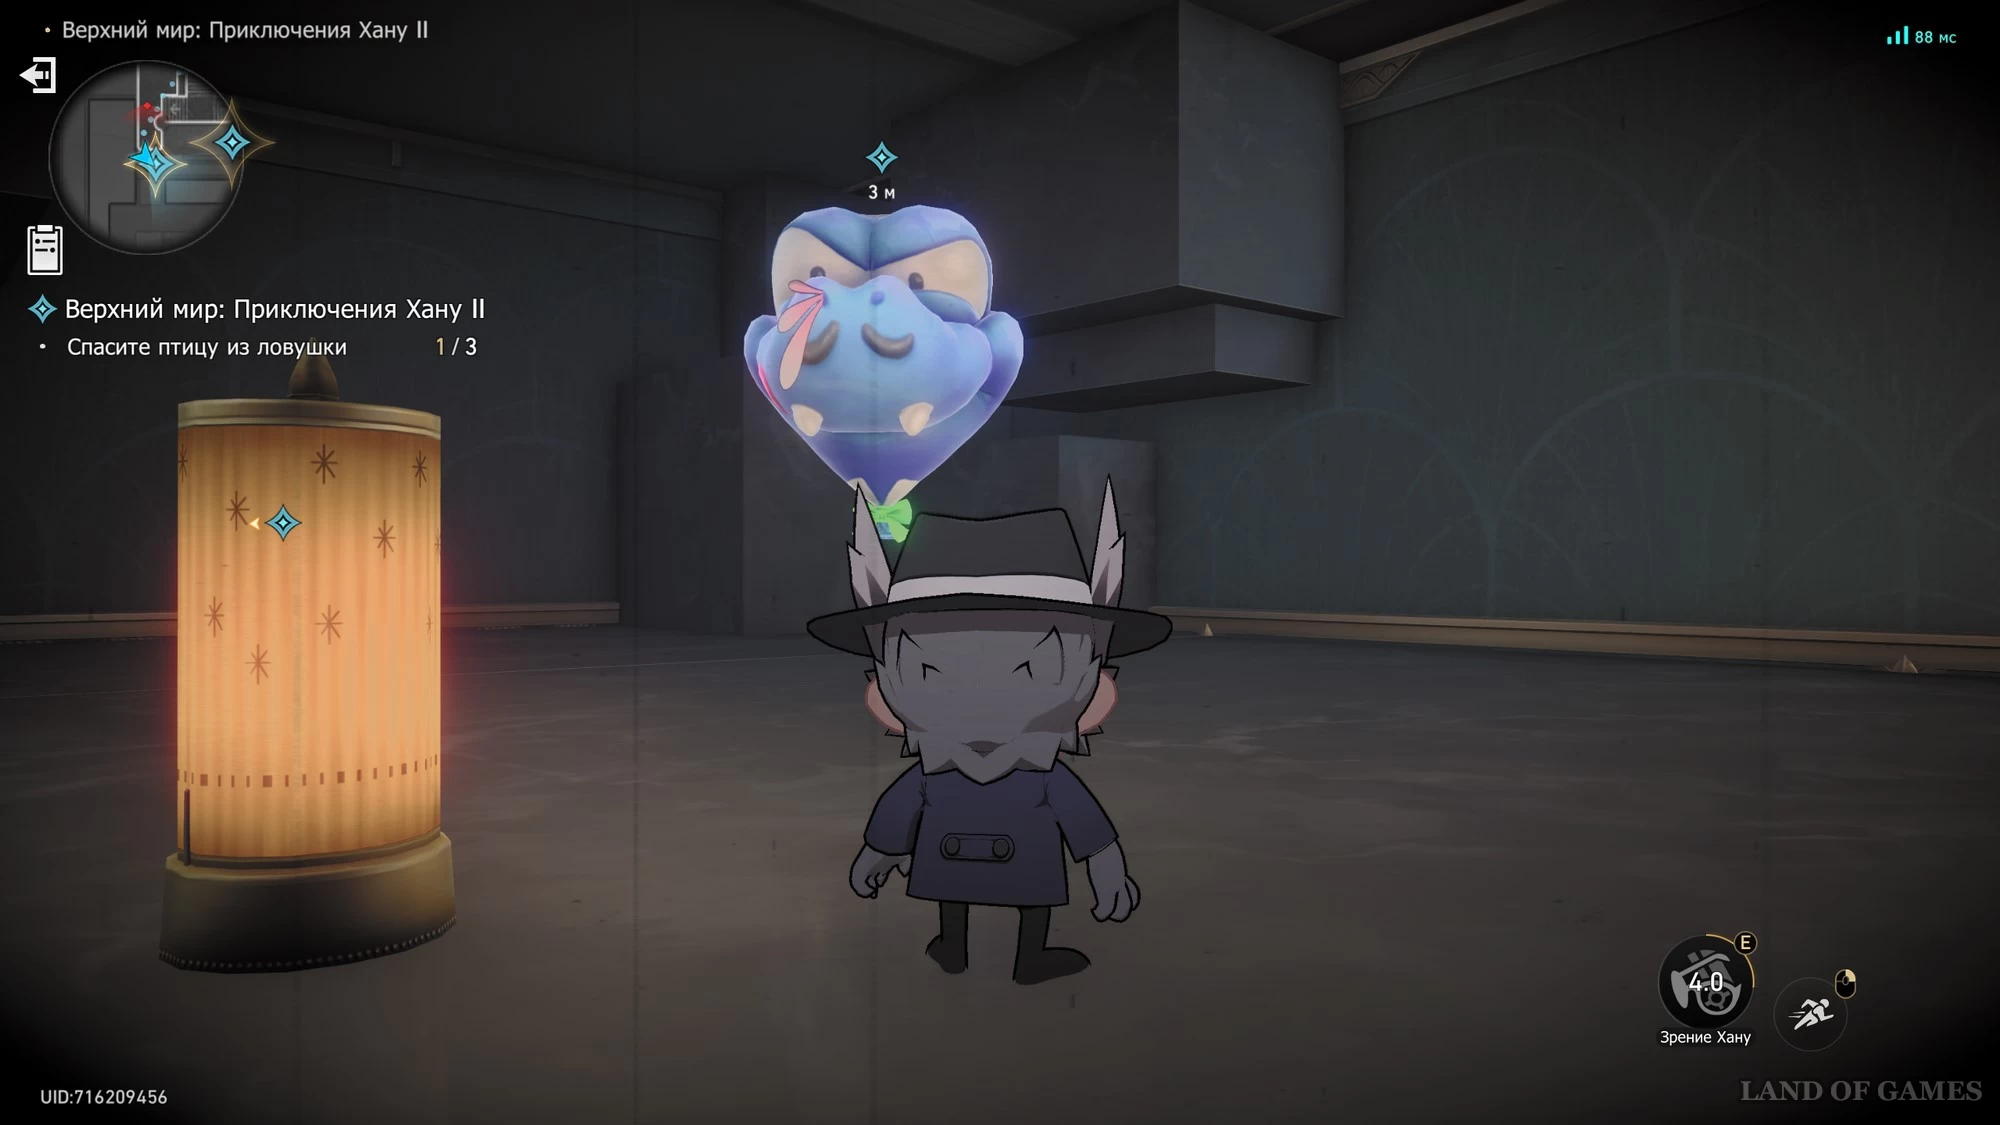
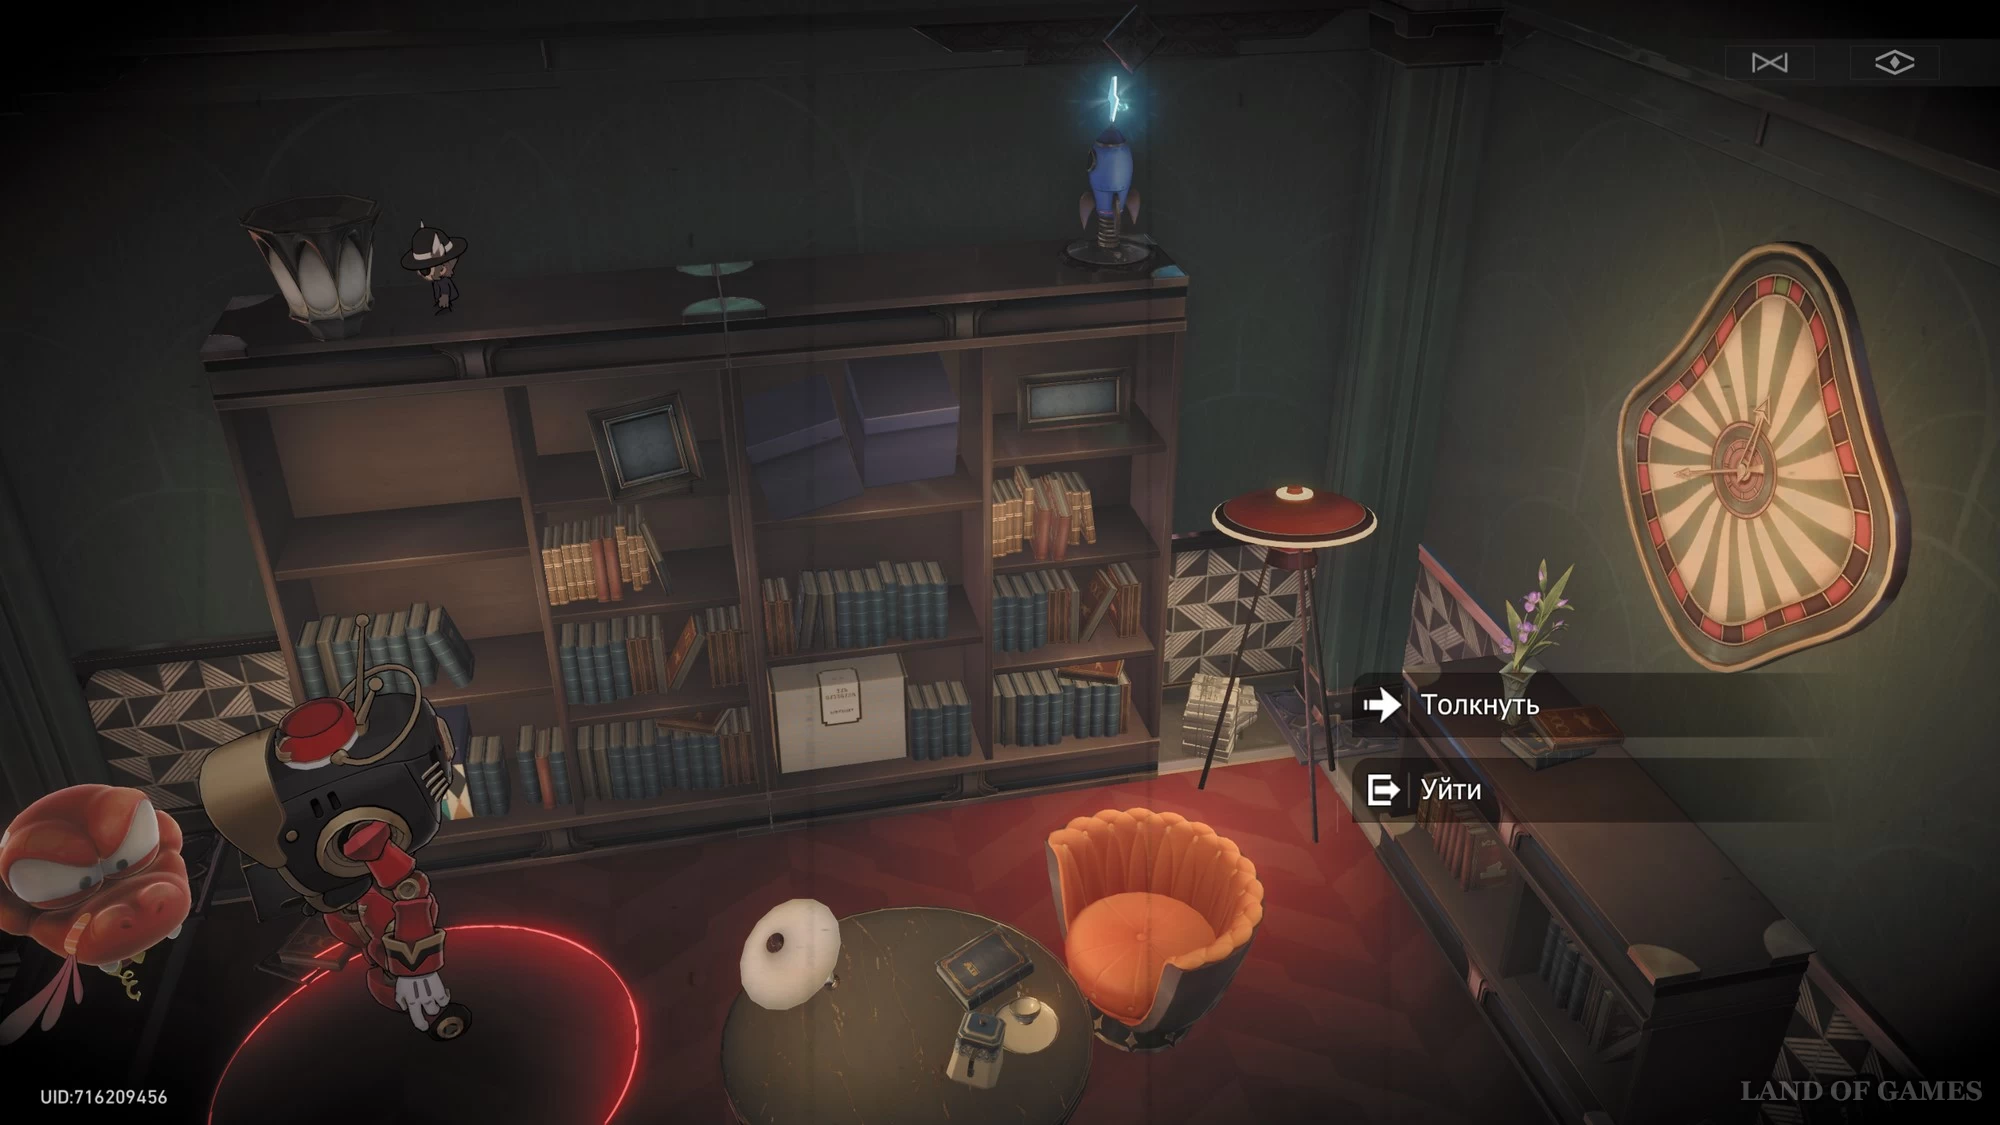
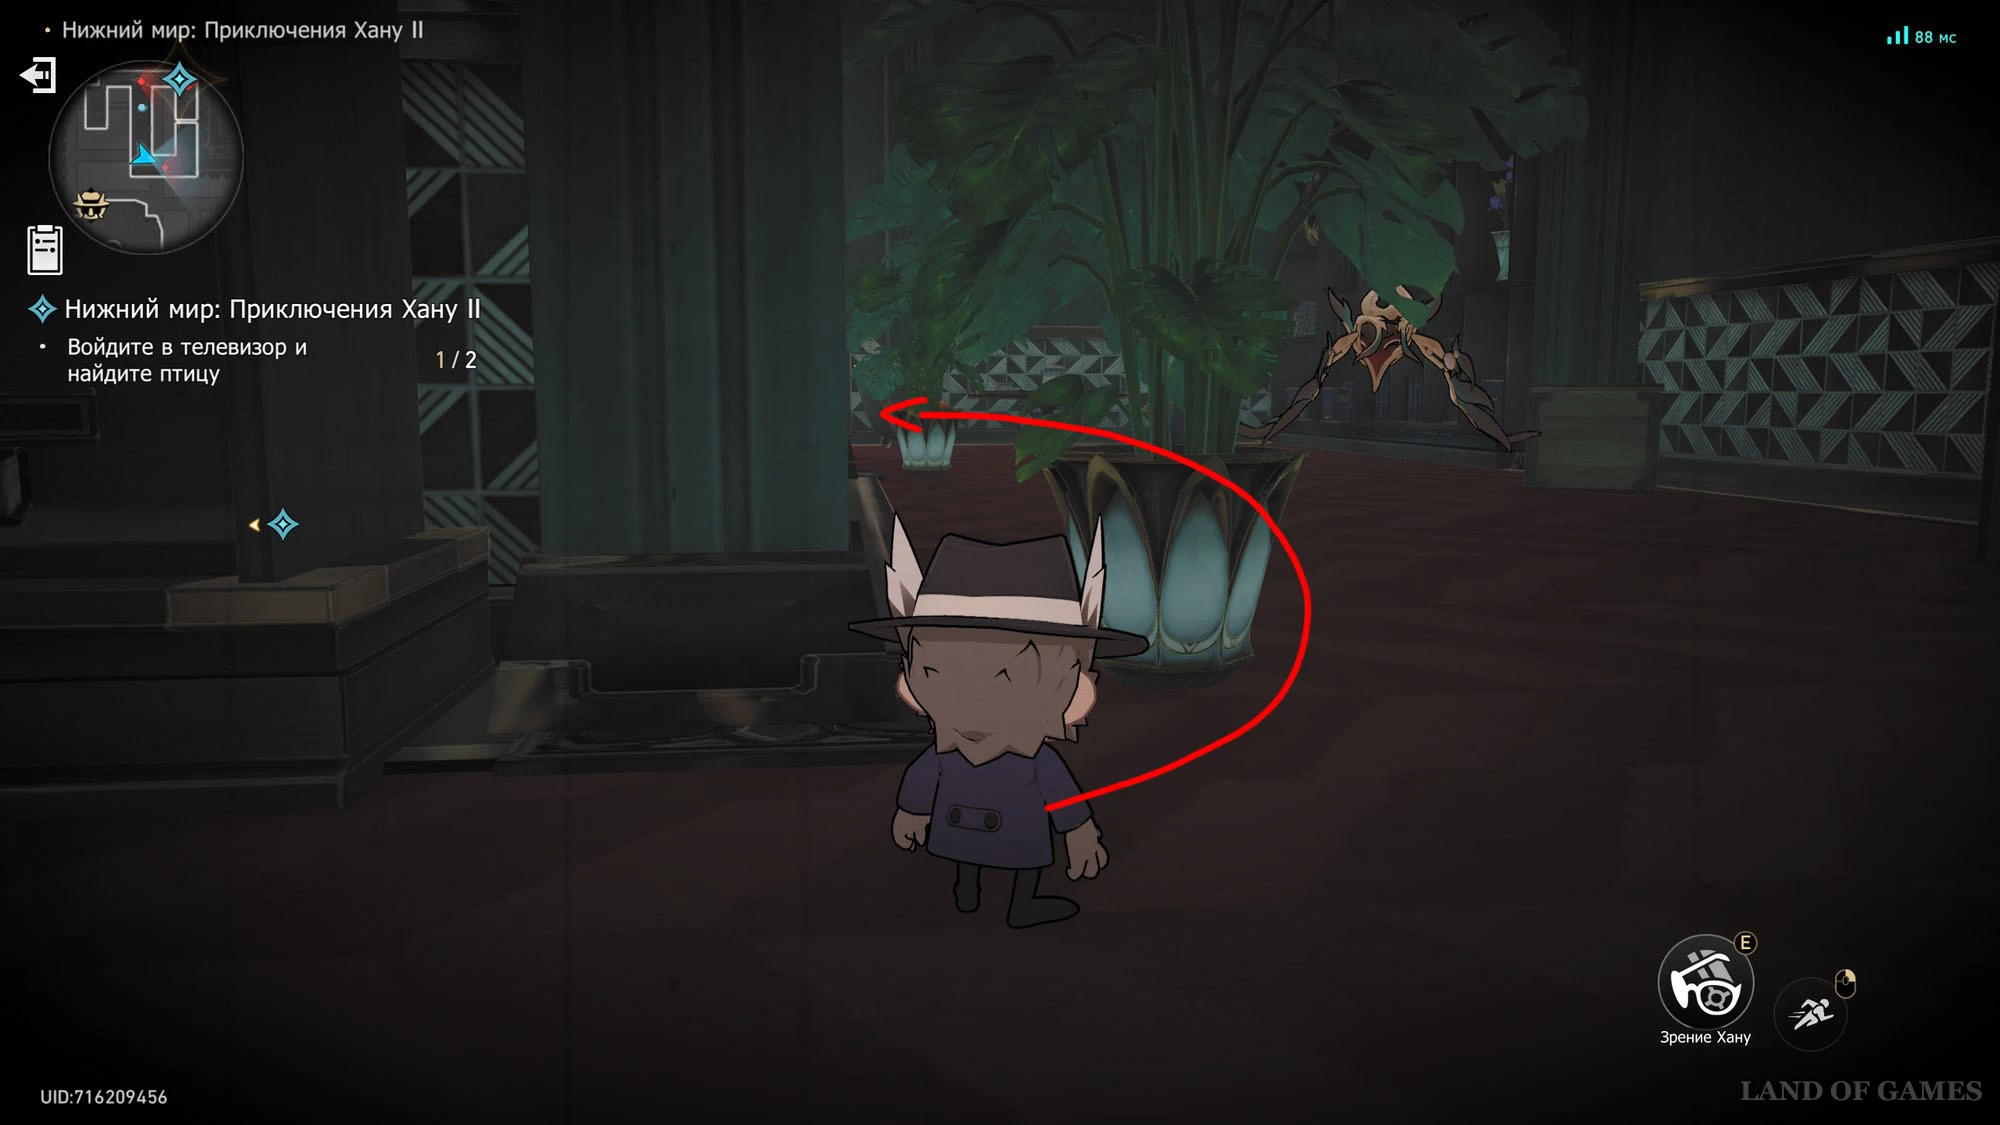
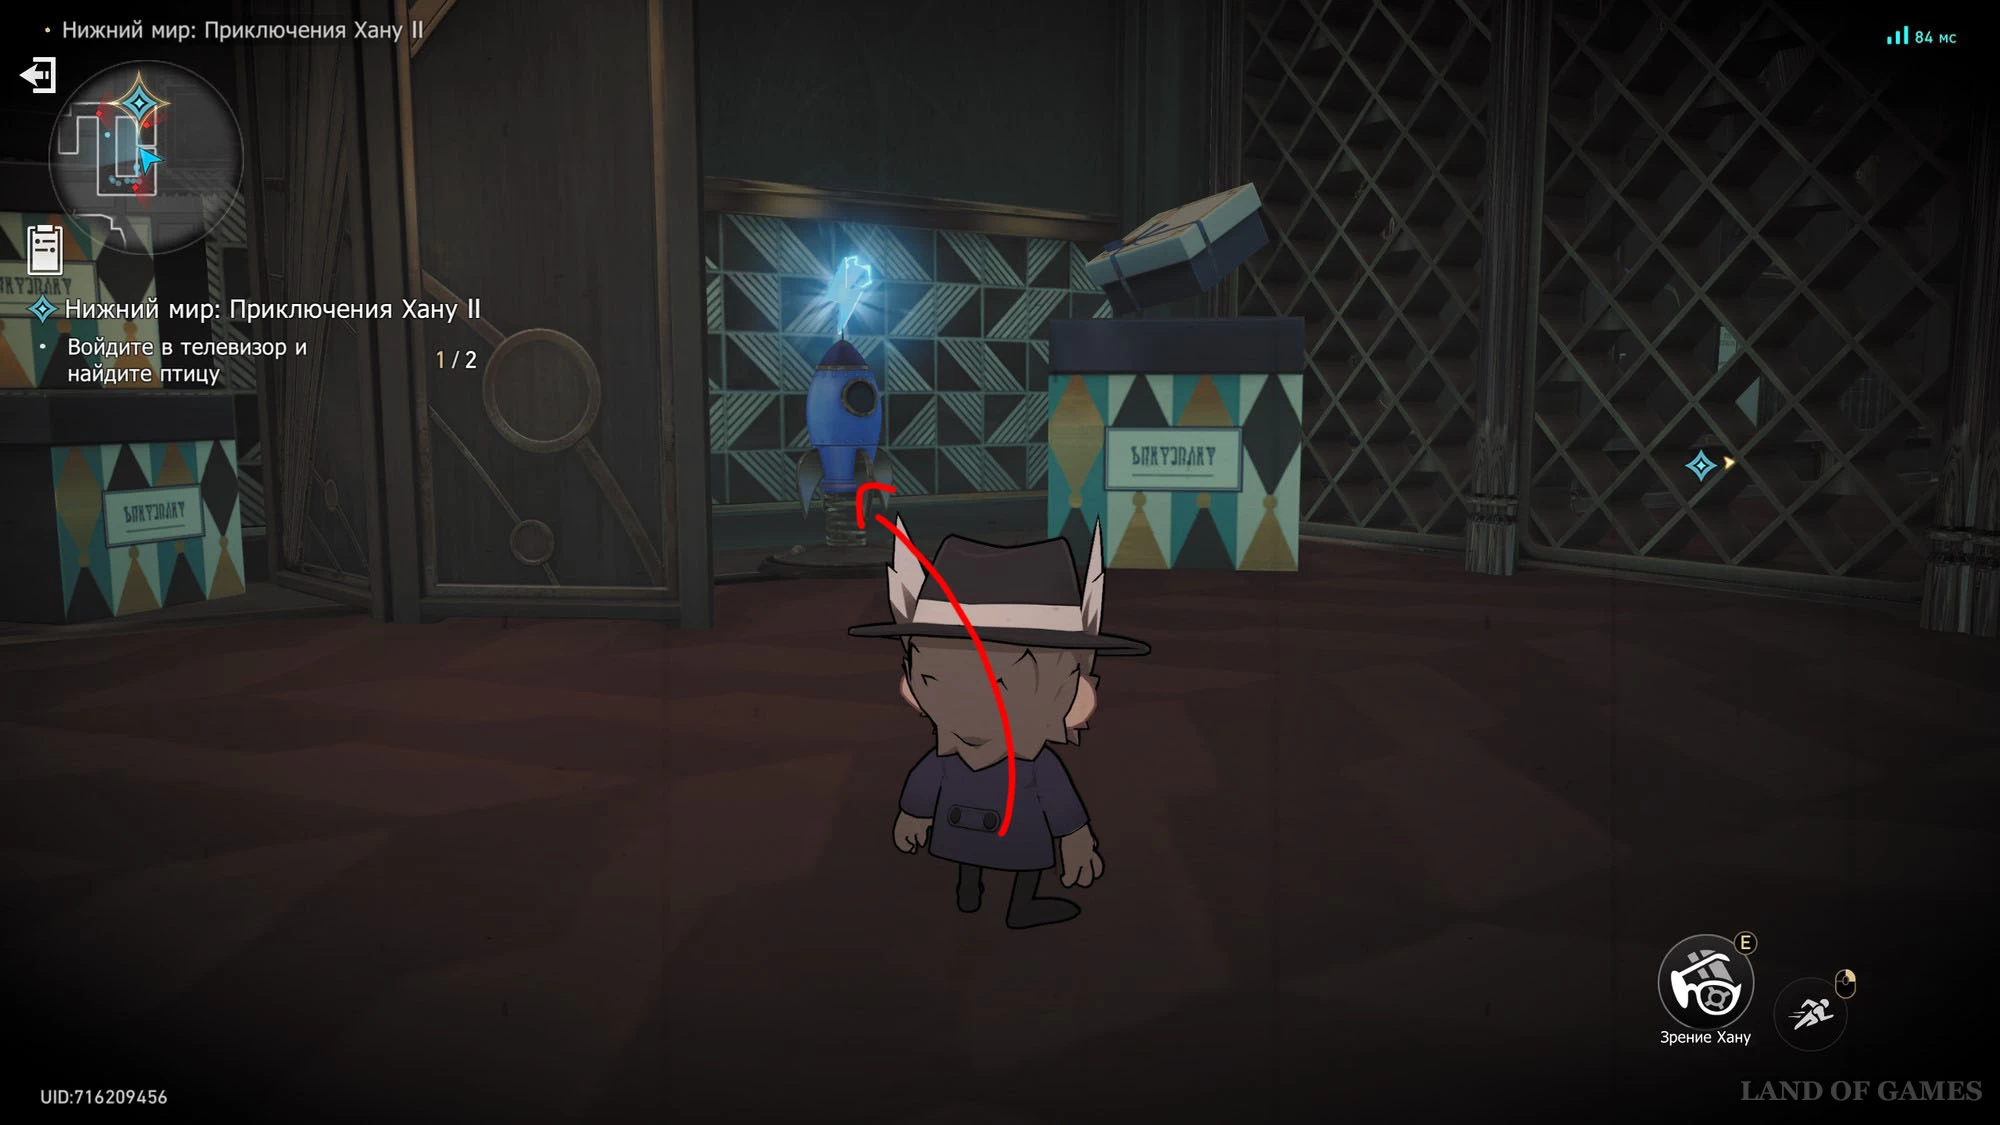
Start the second stage and click on the TV to turn into Brother Hana. Turn left and interact with the rocket to teleport to the top shelf on the left. Run to the blue ball and pull it out first bird.
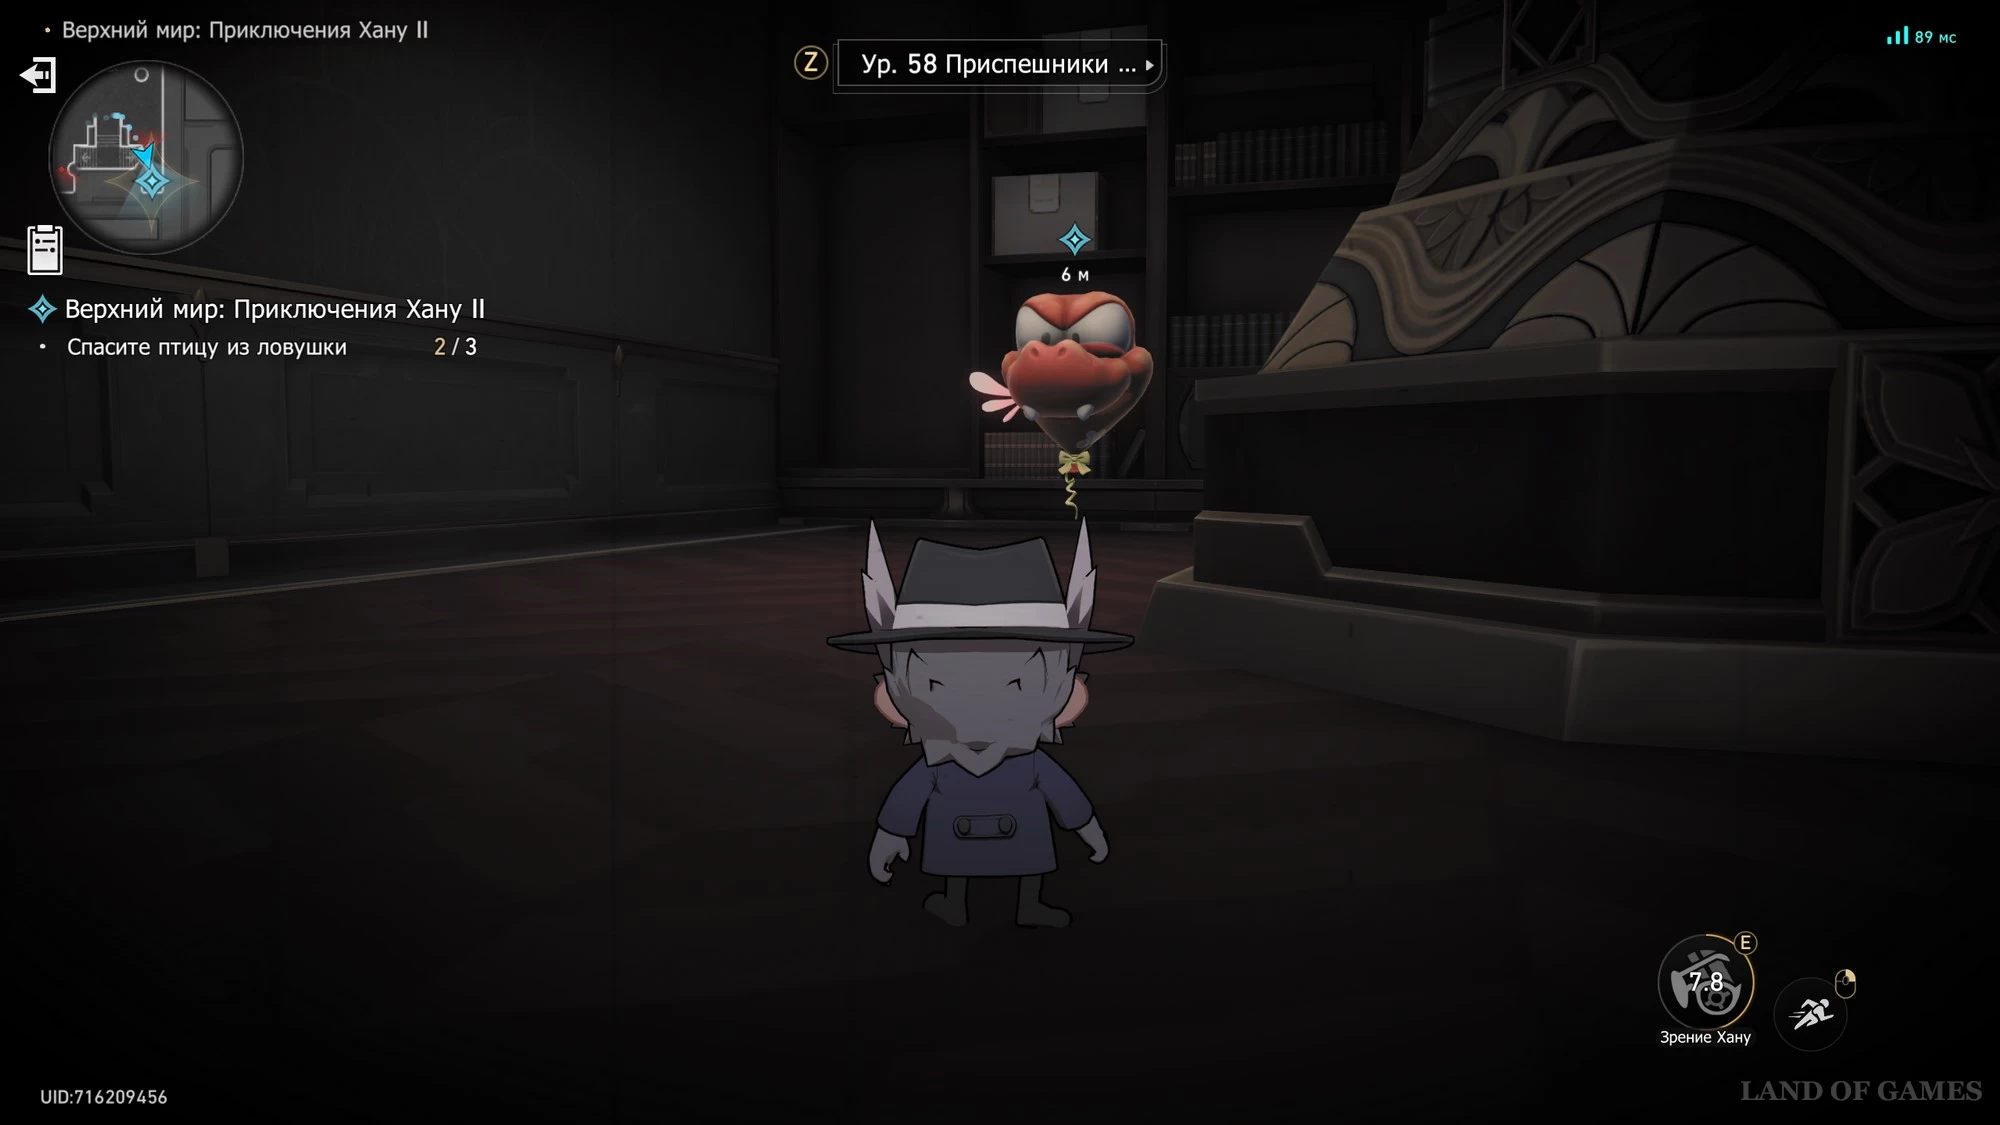
Go back and run to the right side of the room. Avoid the enemy's sight (use Hanu's vision to see the enemy's Adeptal Energy Overview ) and go through the hole in the wall. Inside the little room you will find second birdie.
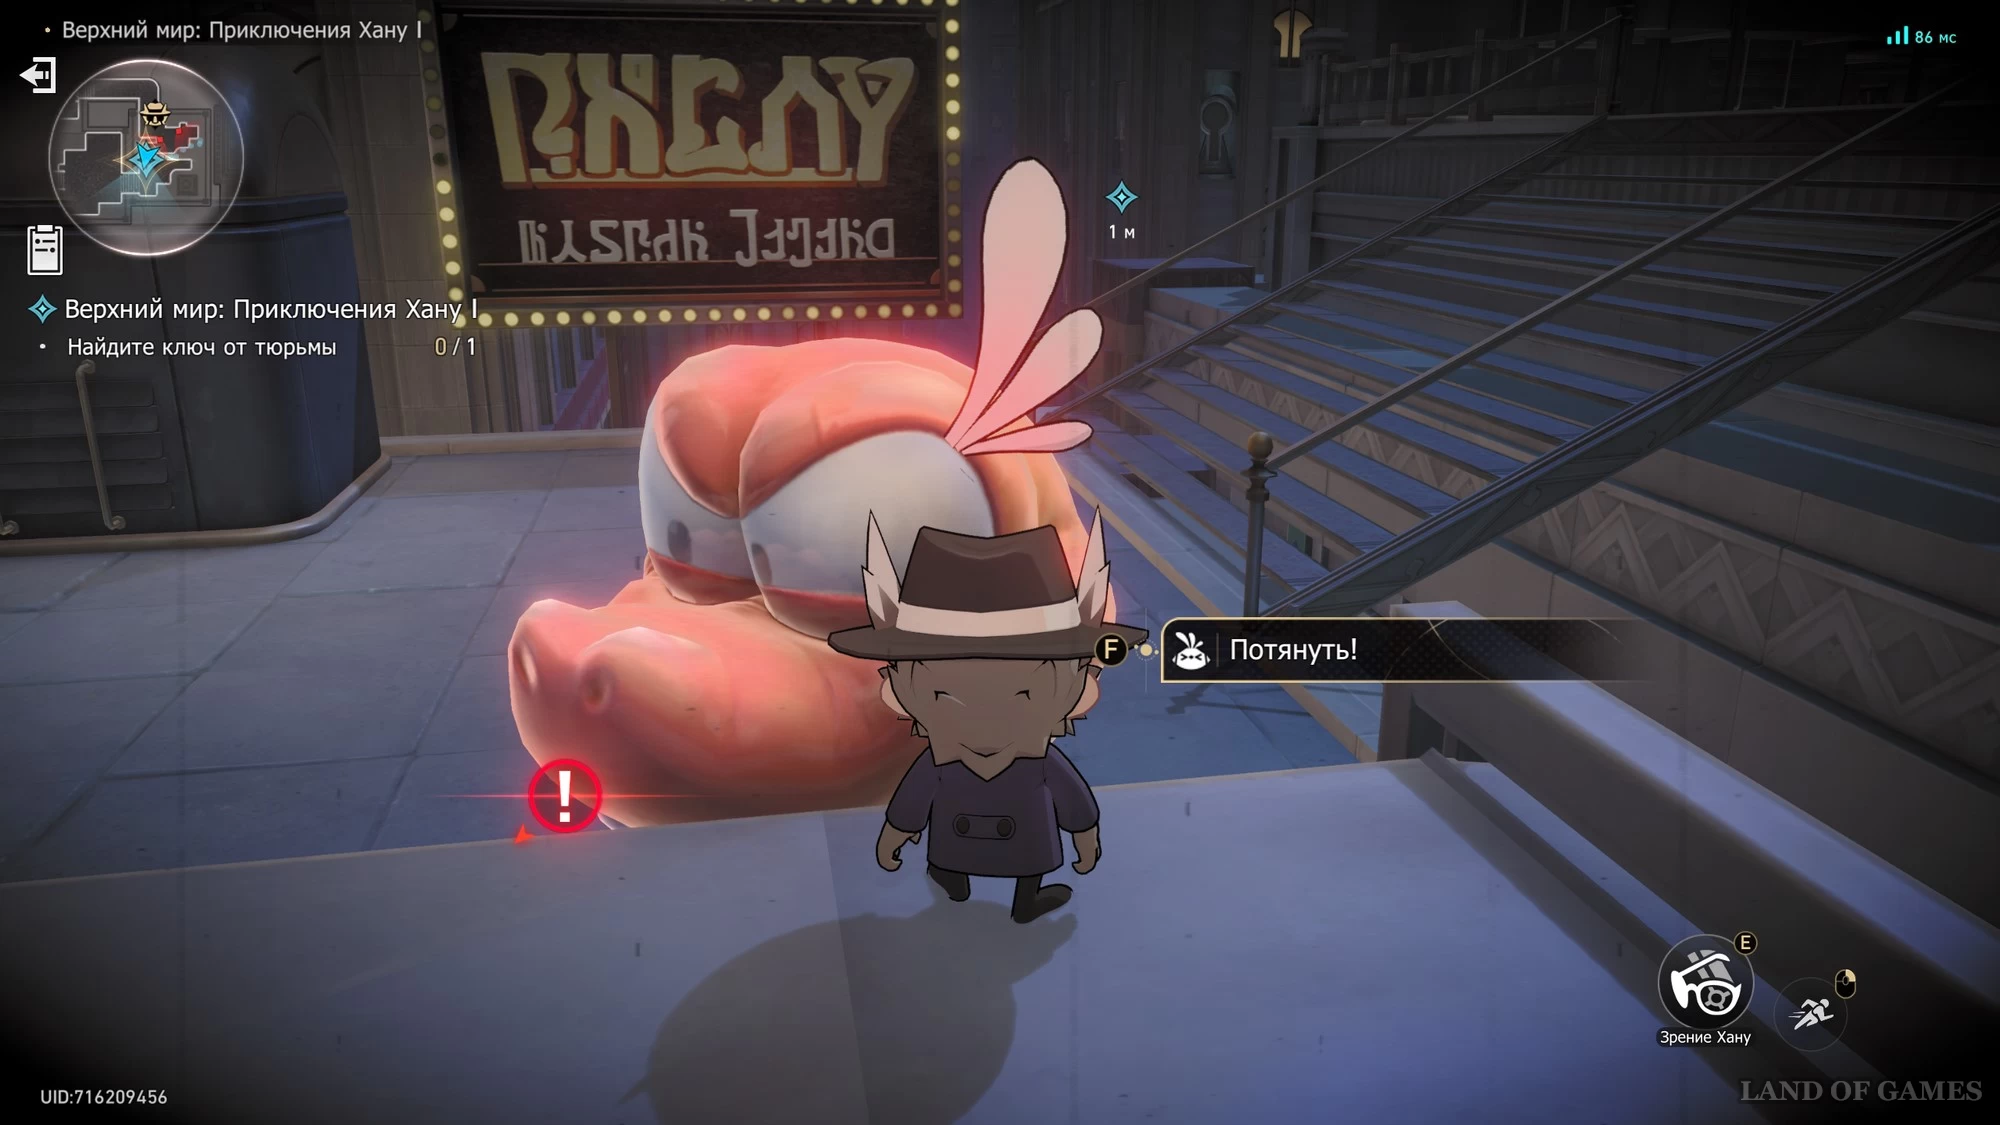
Go back and now run to the left side of the room. Go around the TV and interact with the red ball to pull out last birdie. This will complete the test.
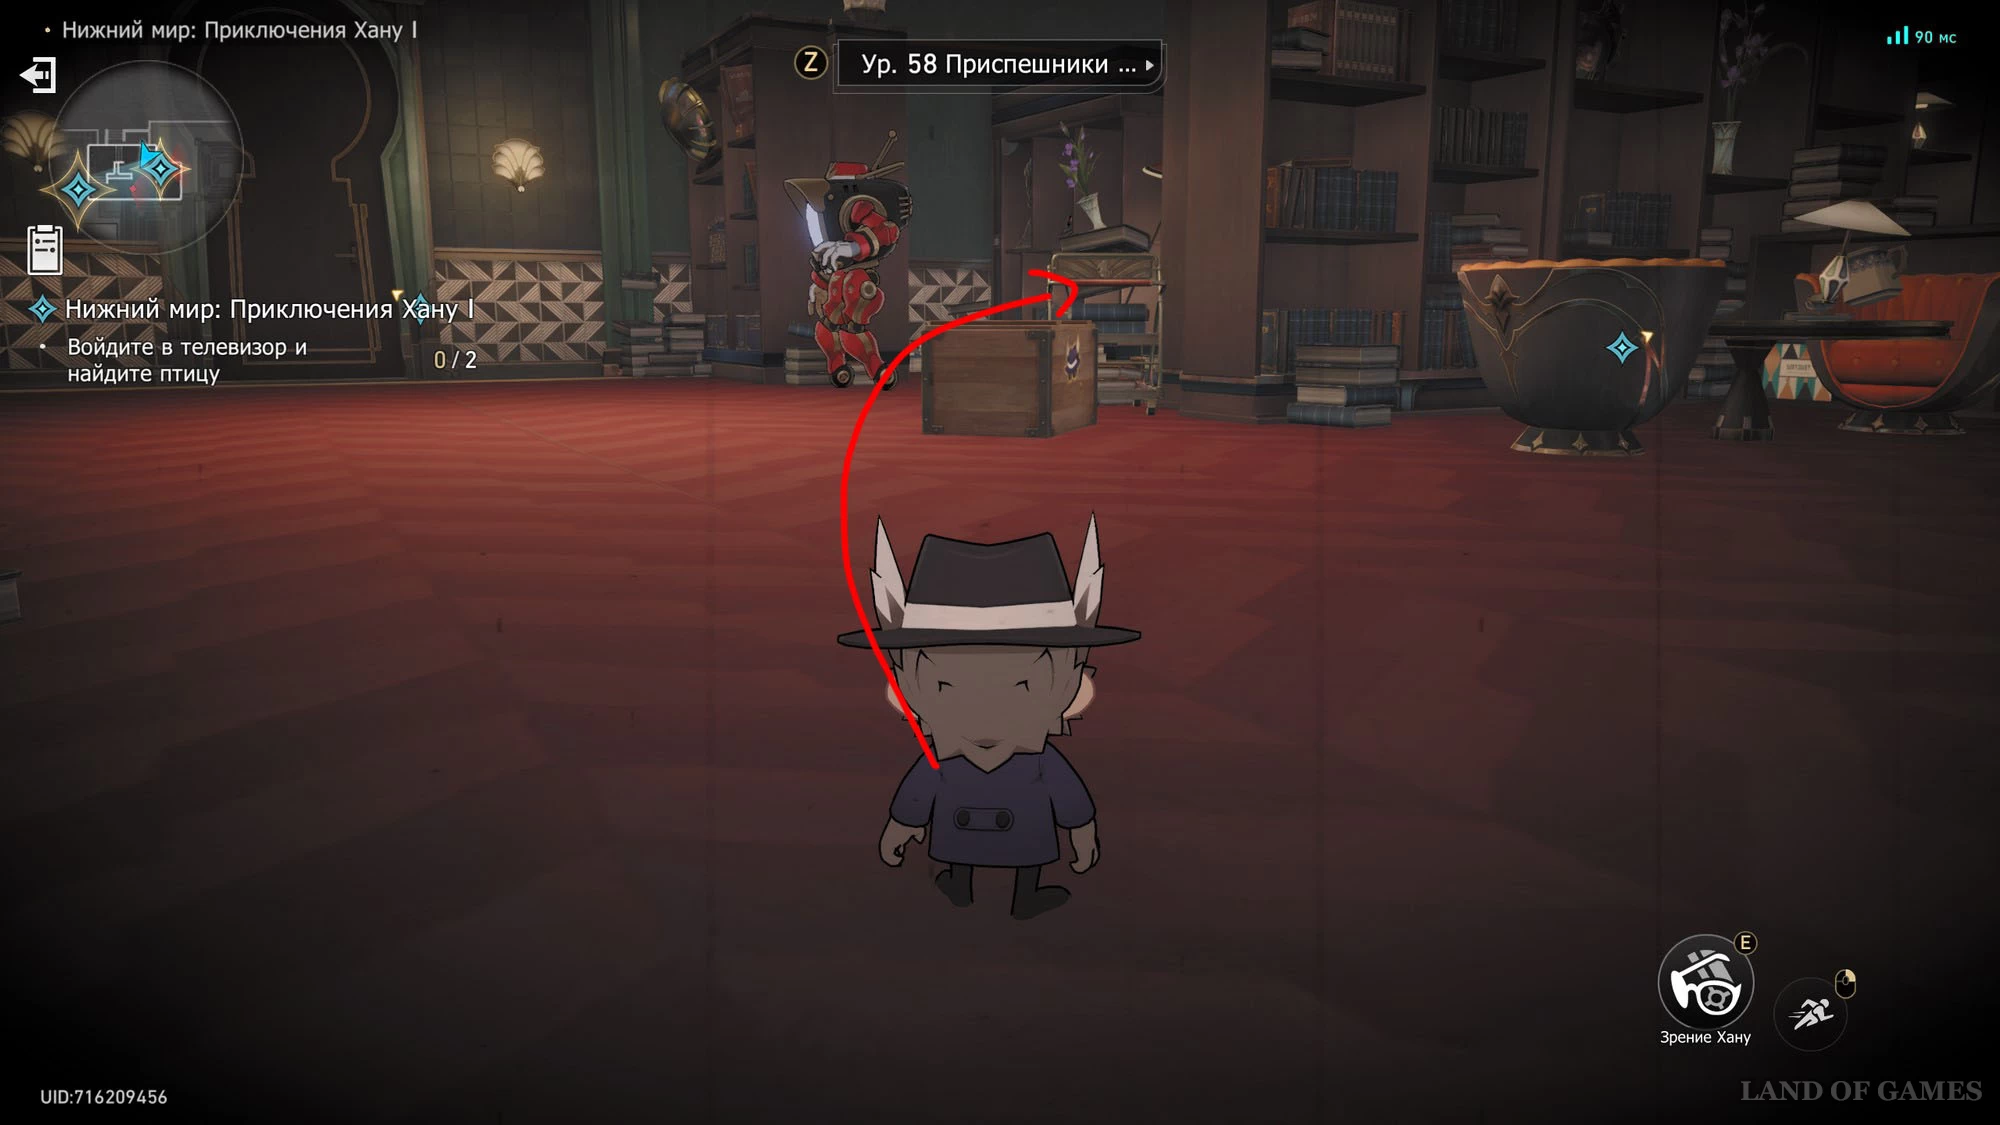
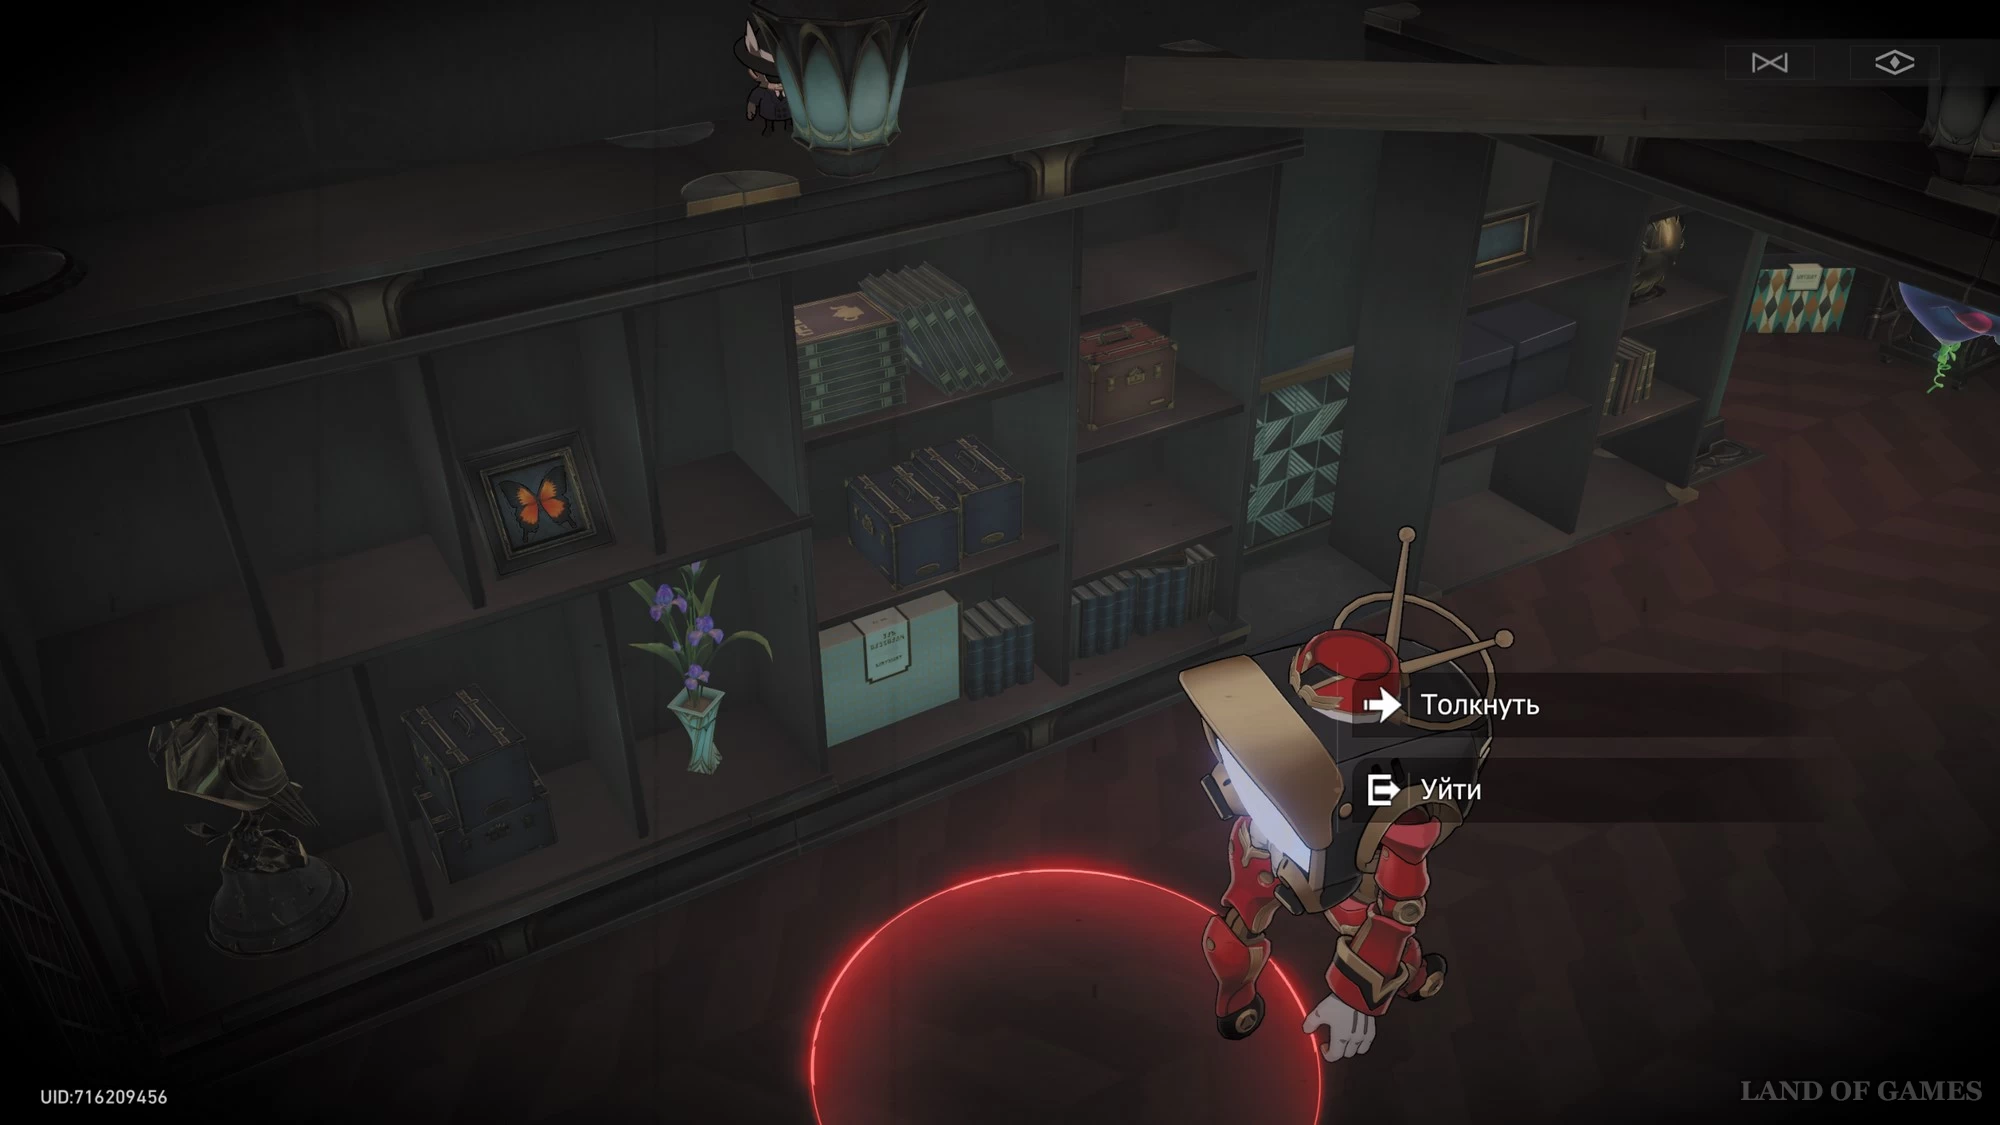
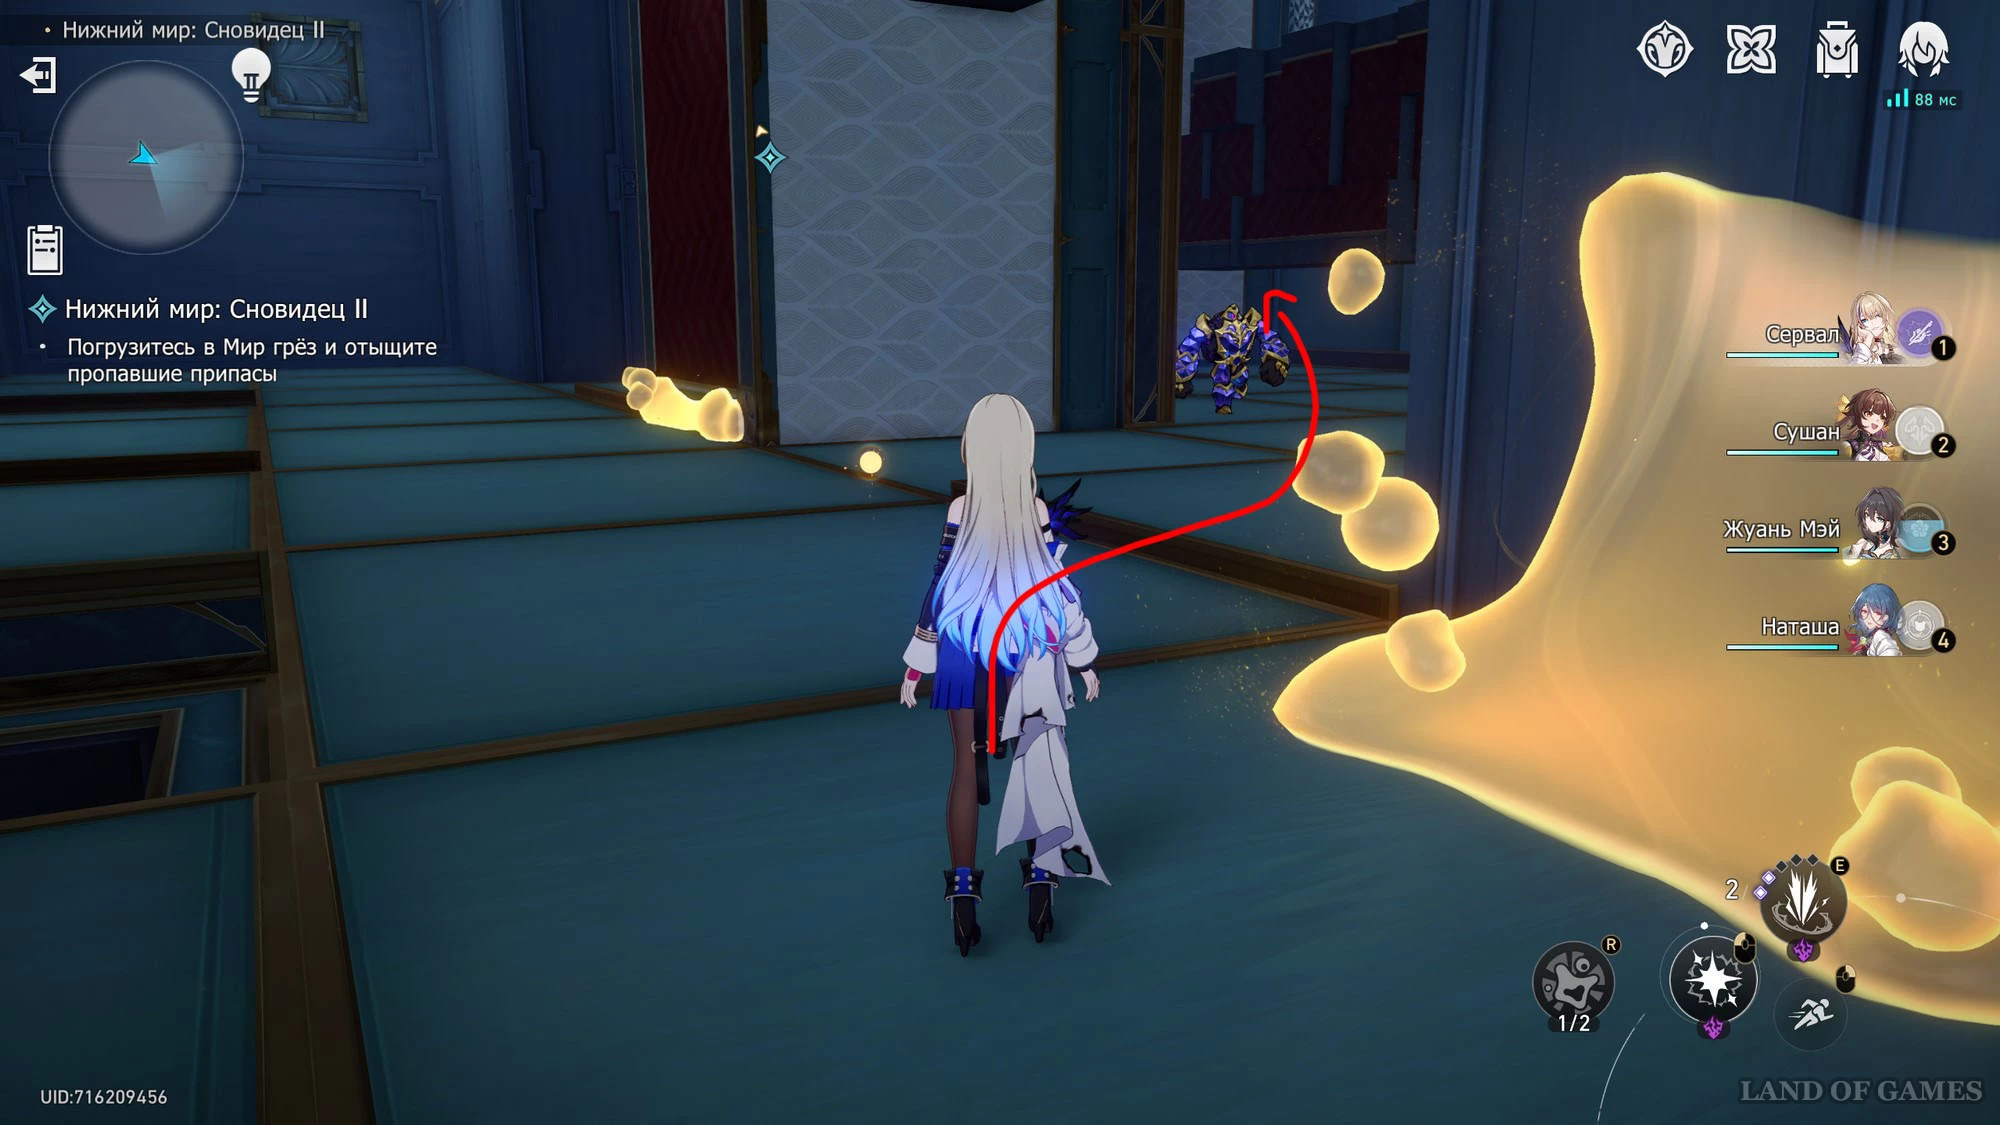
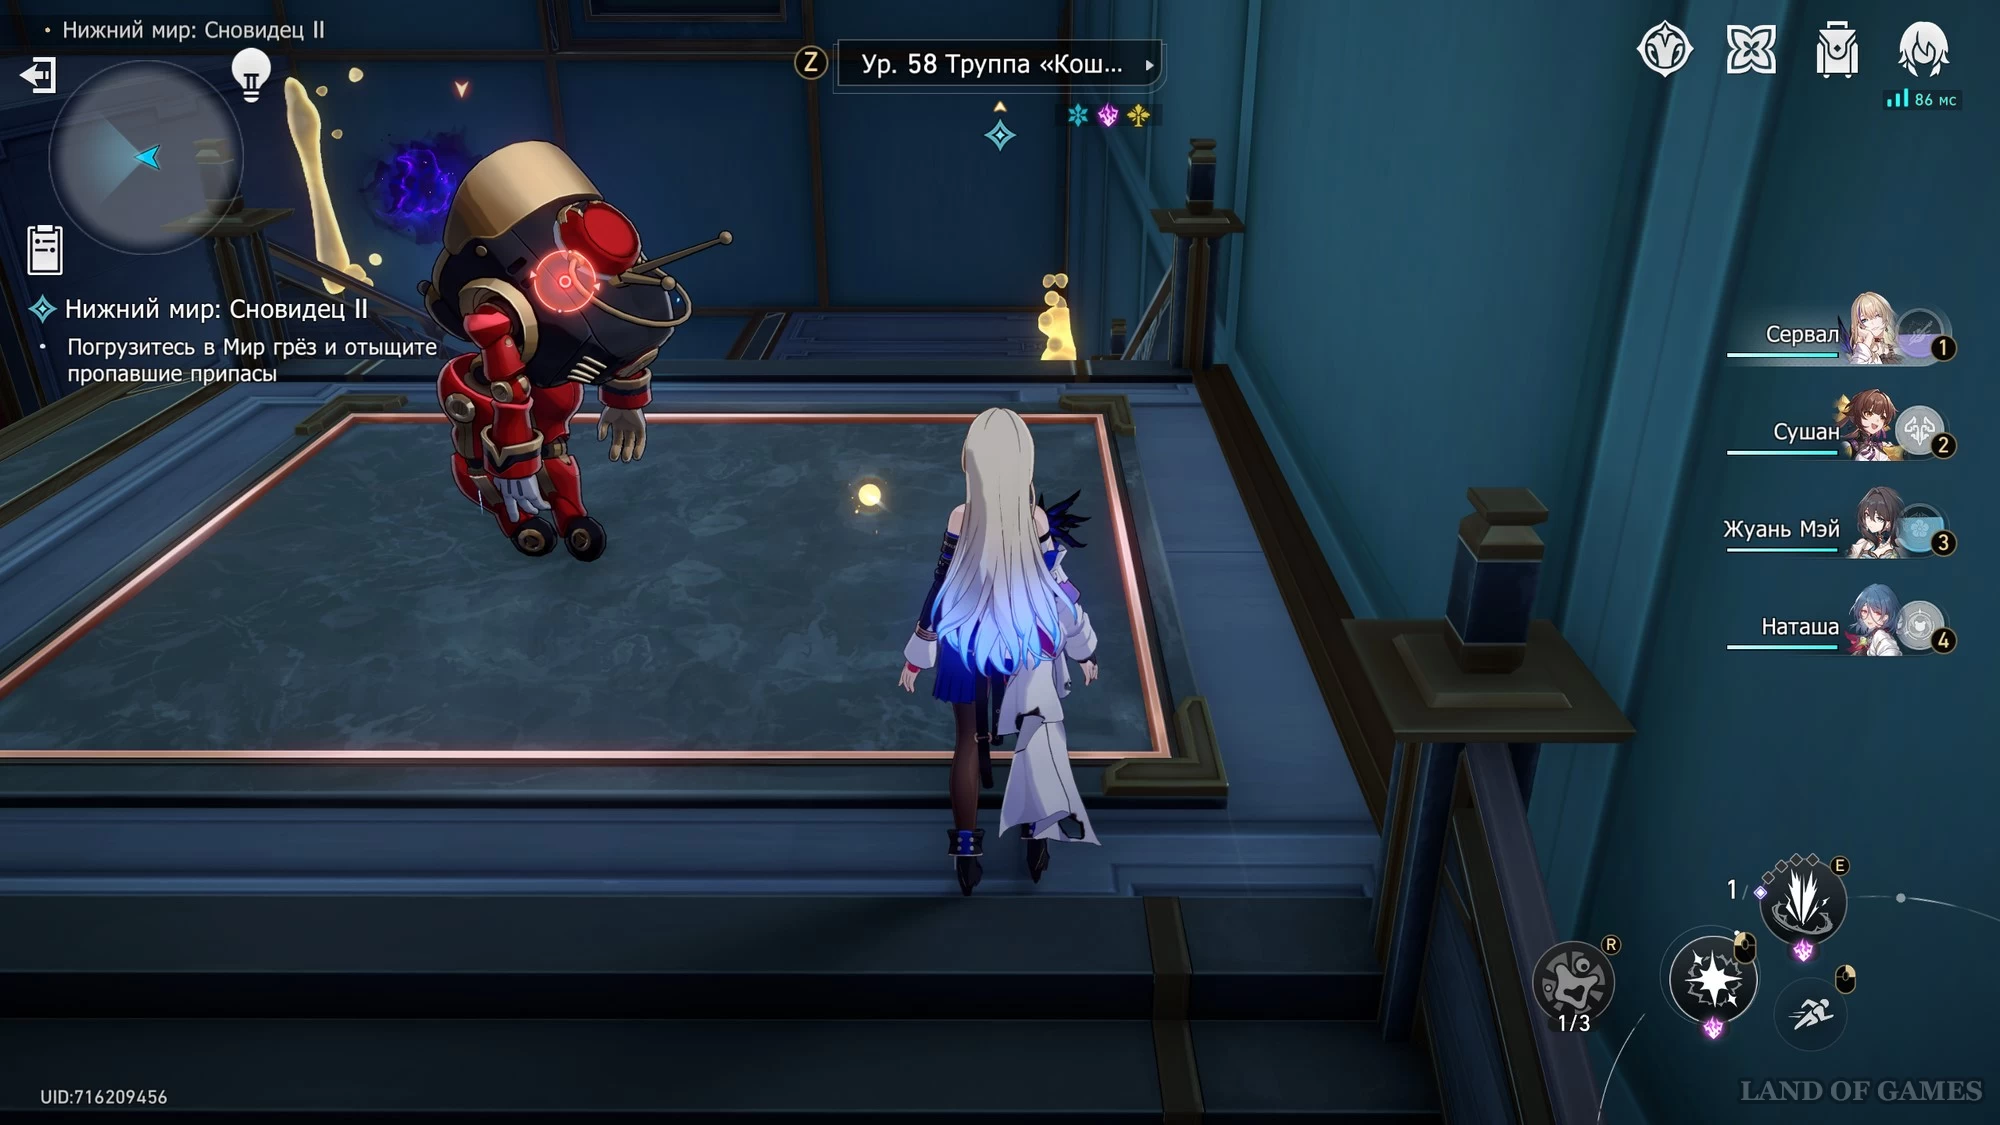
The Nether: Hanu's Adventures 1
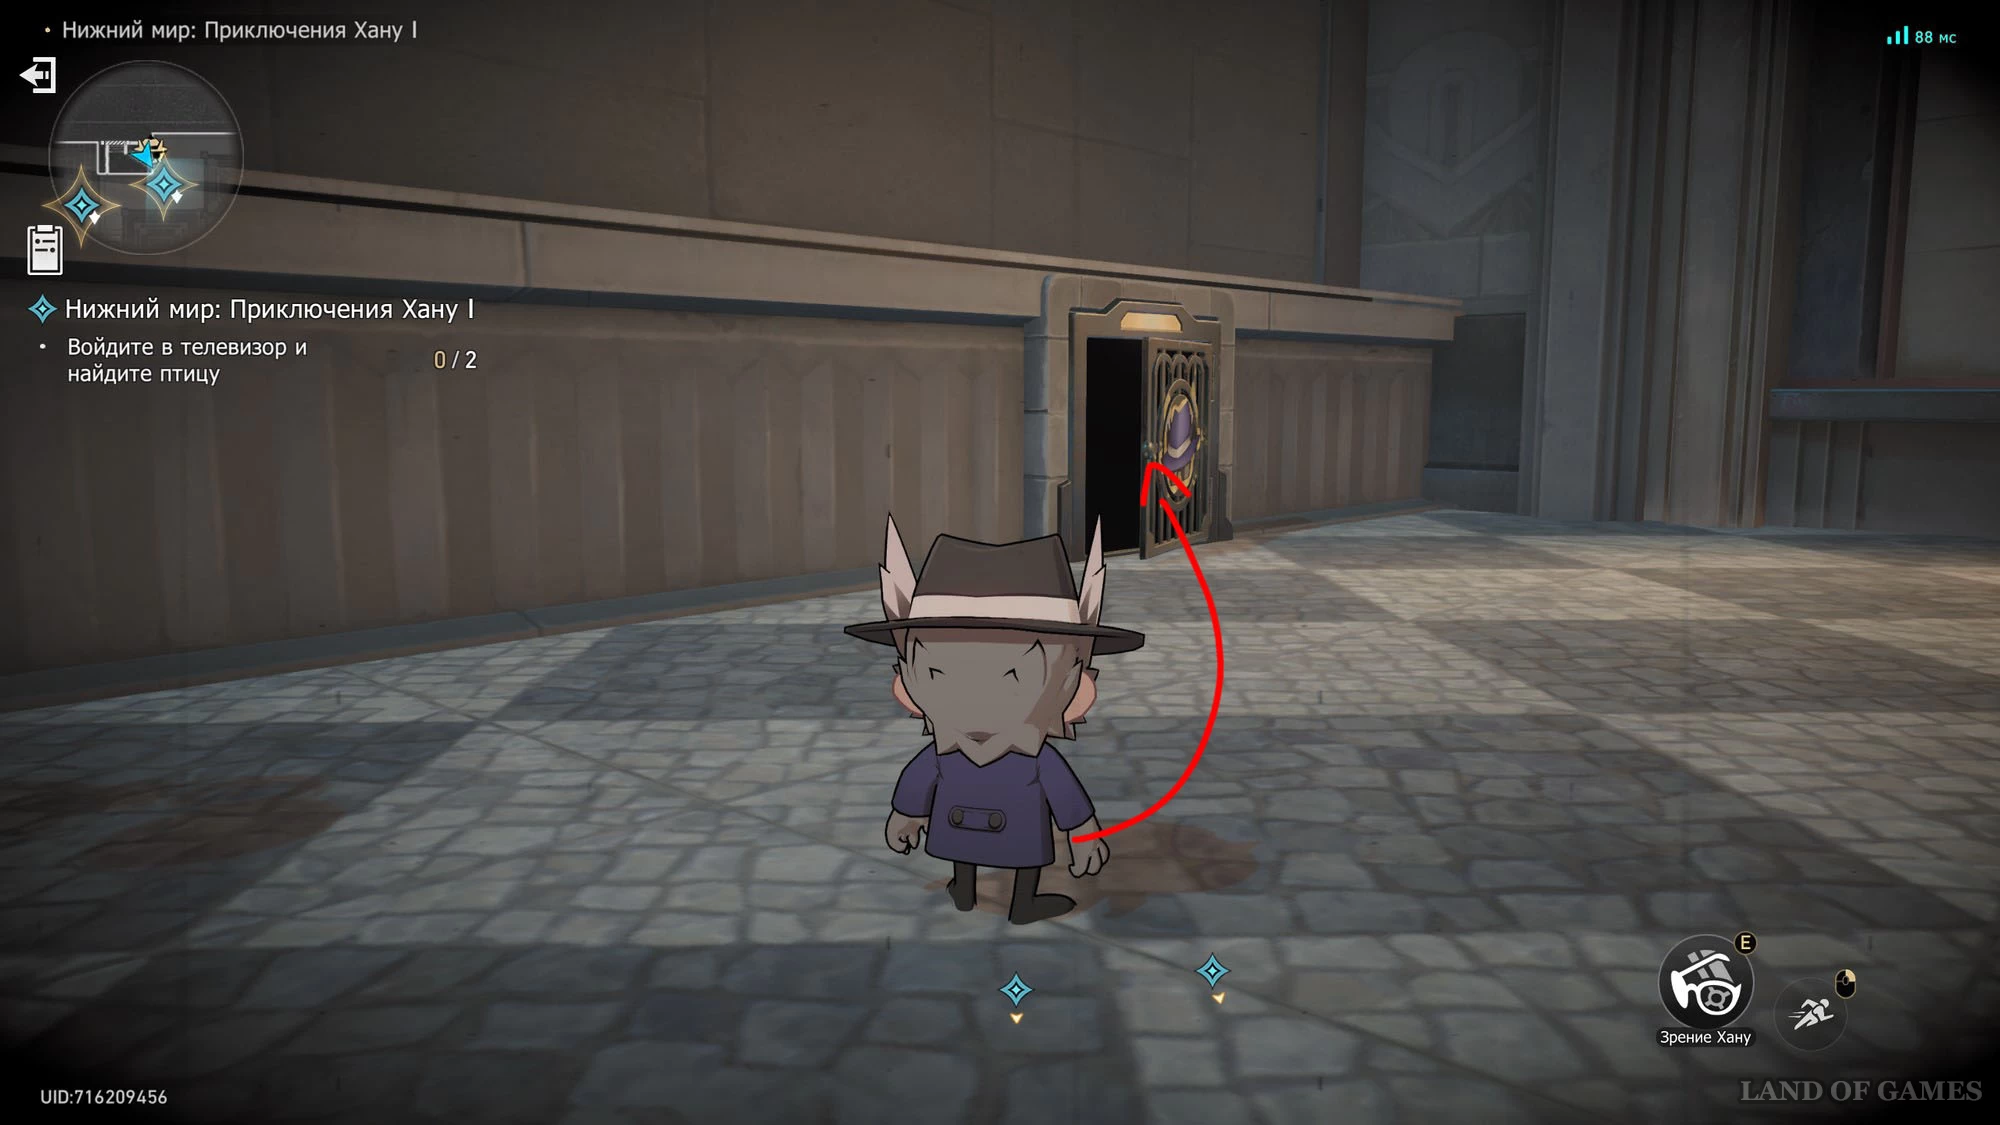
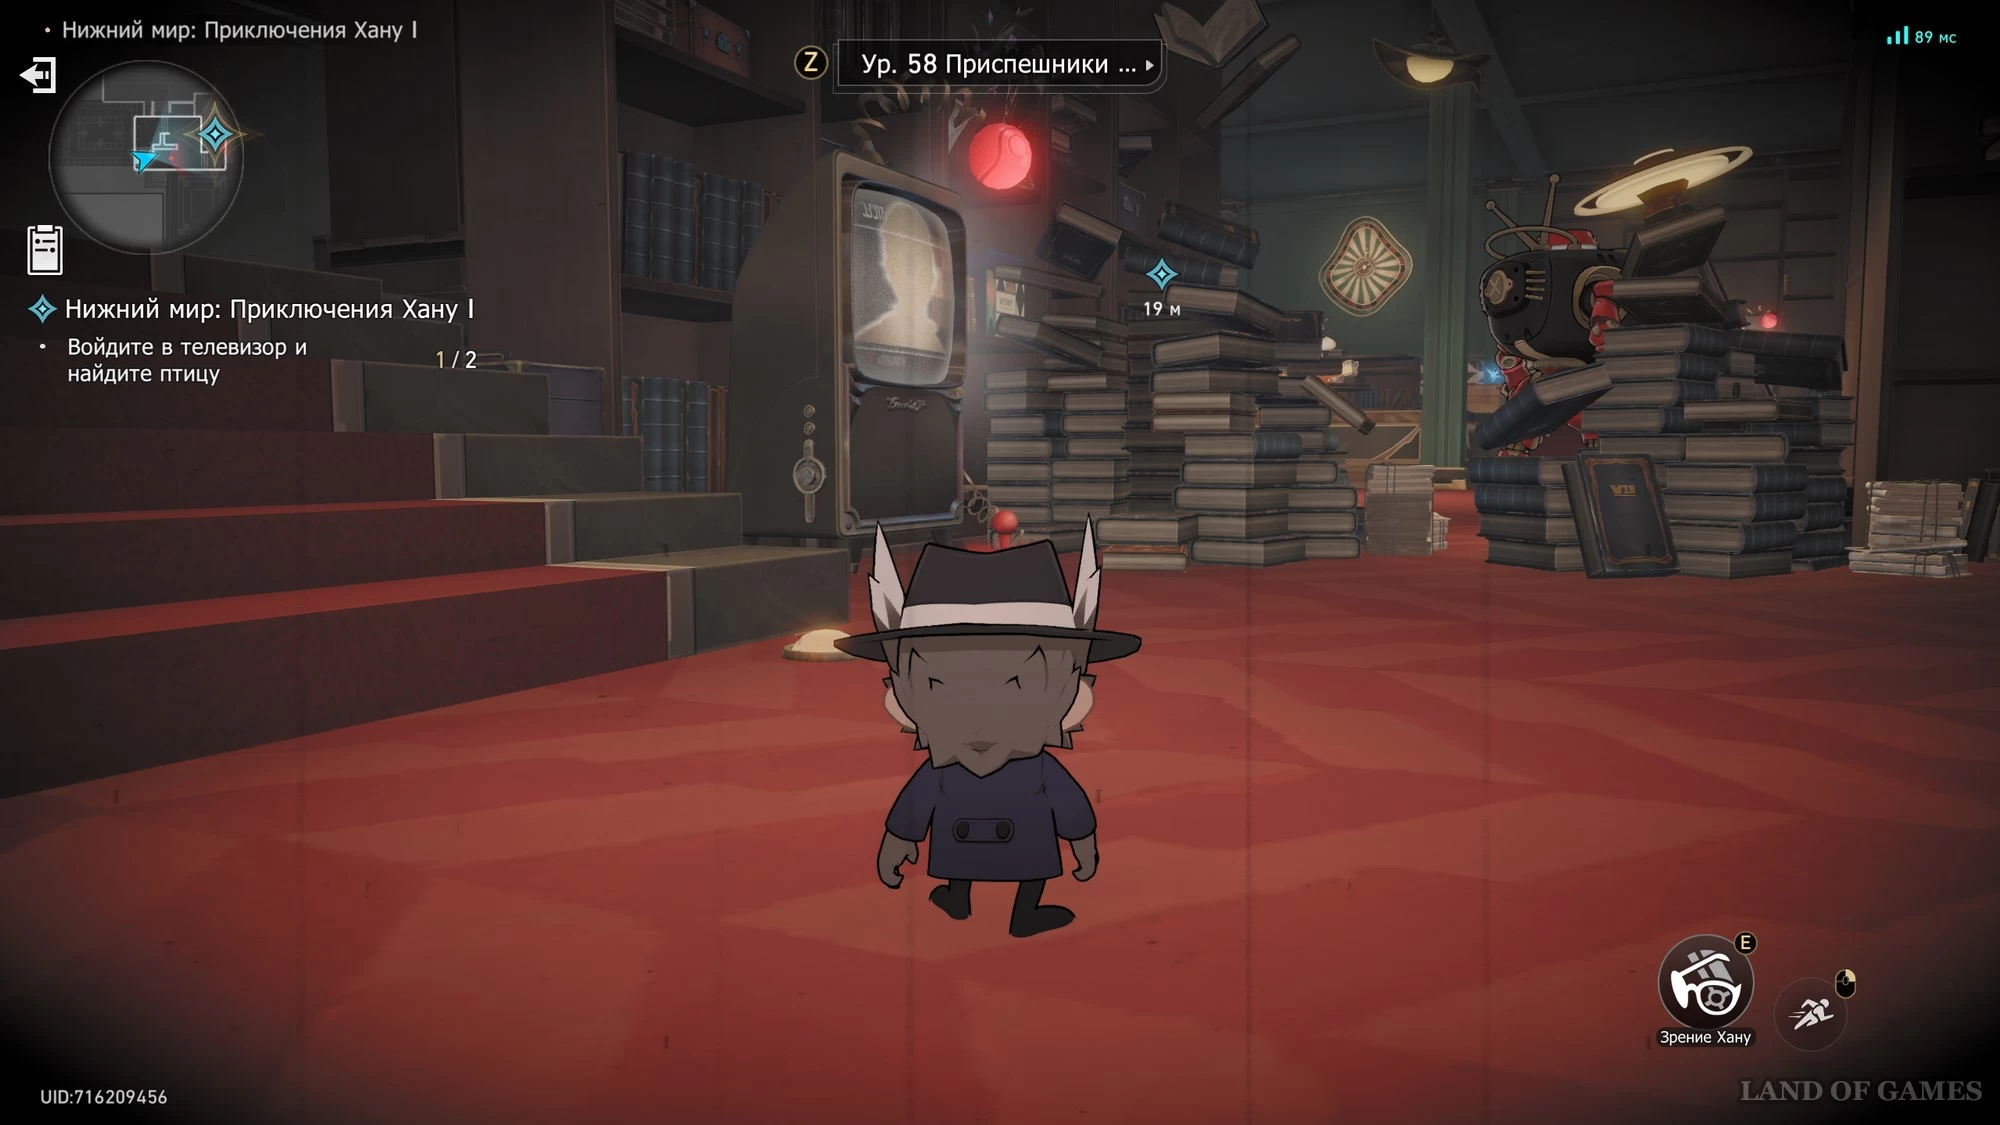
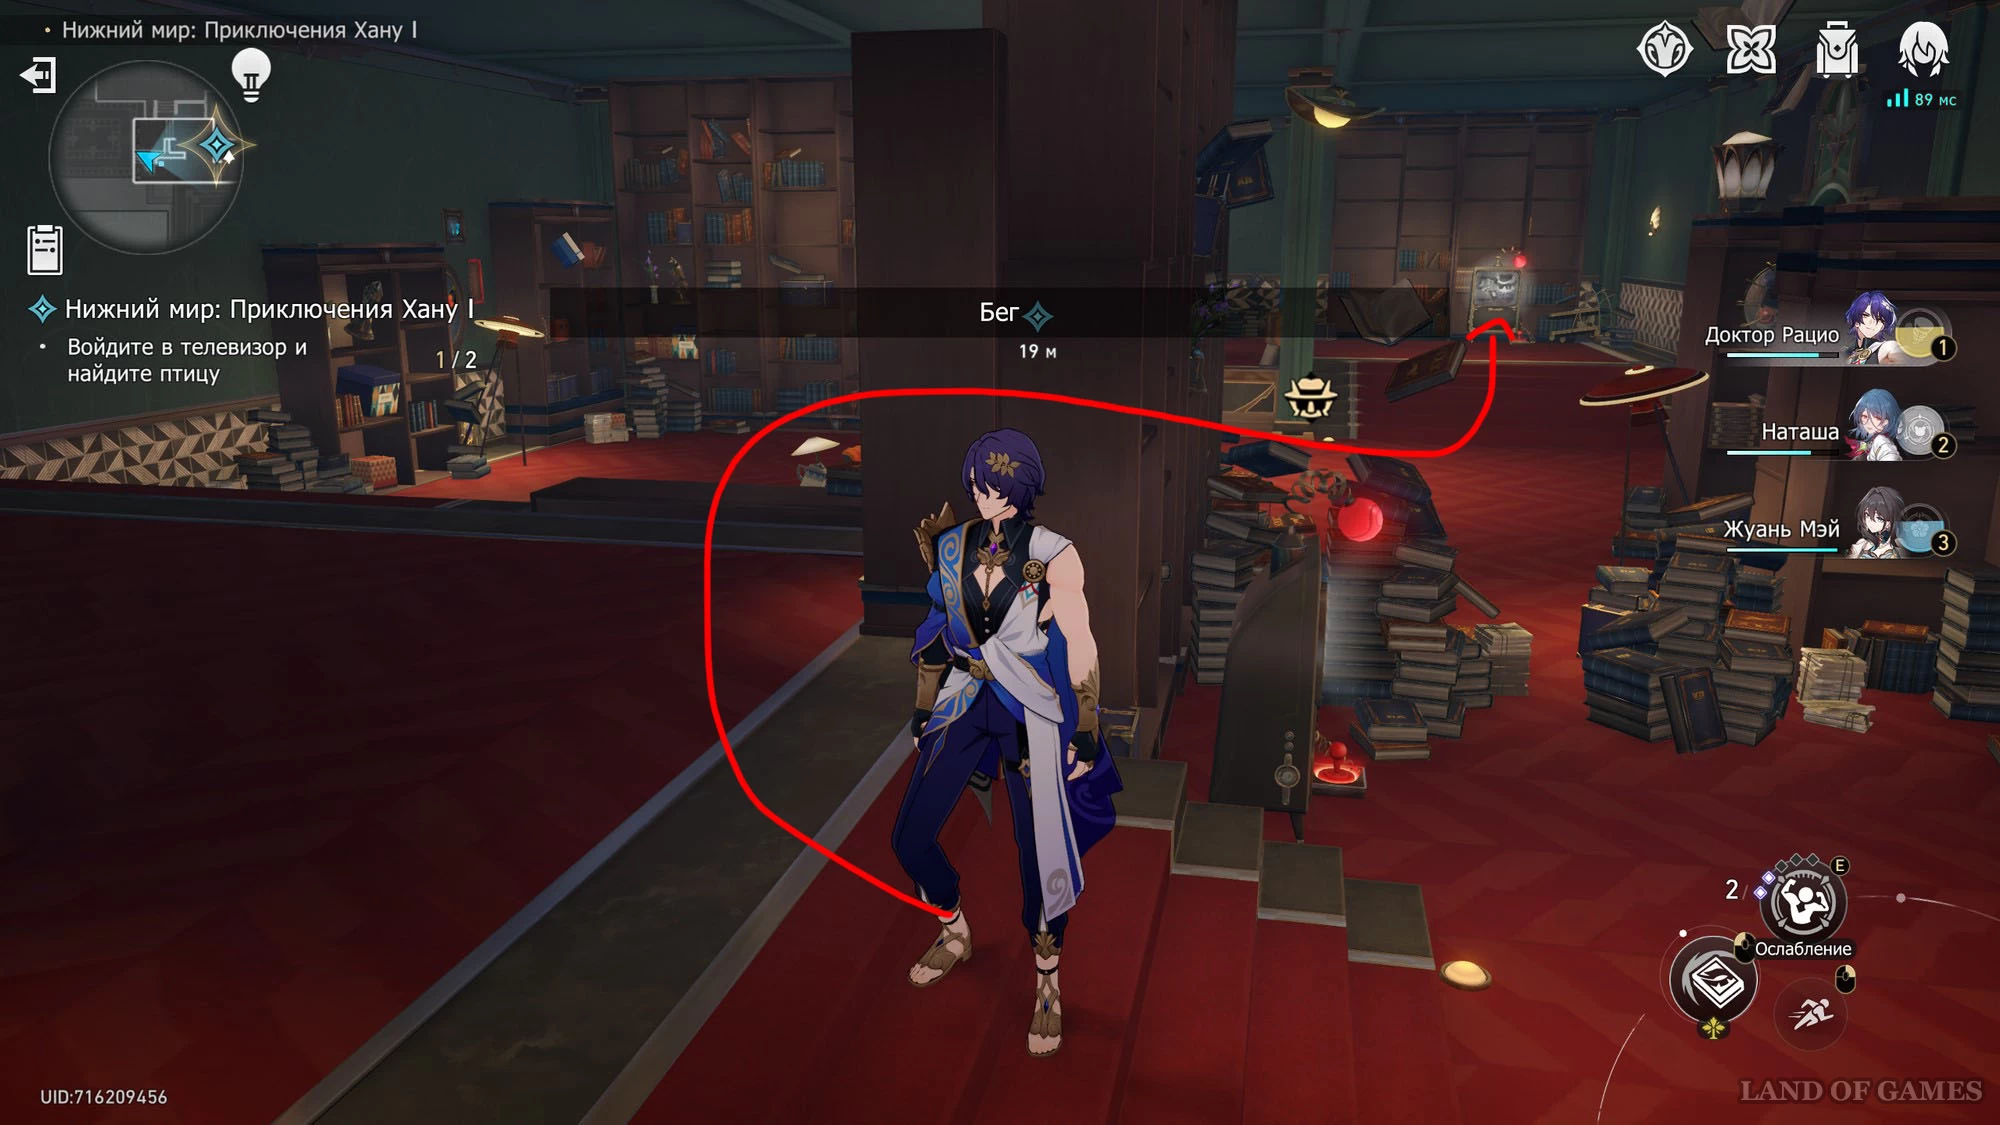
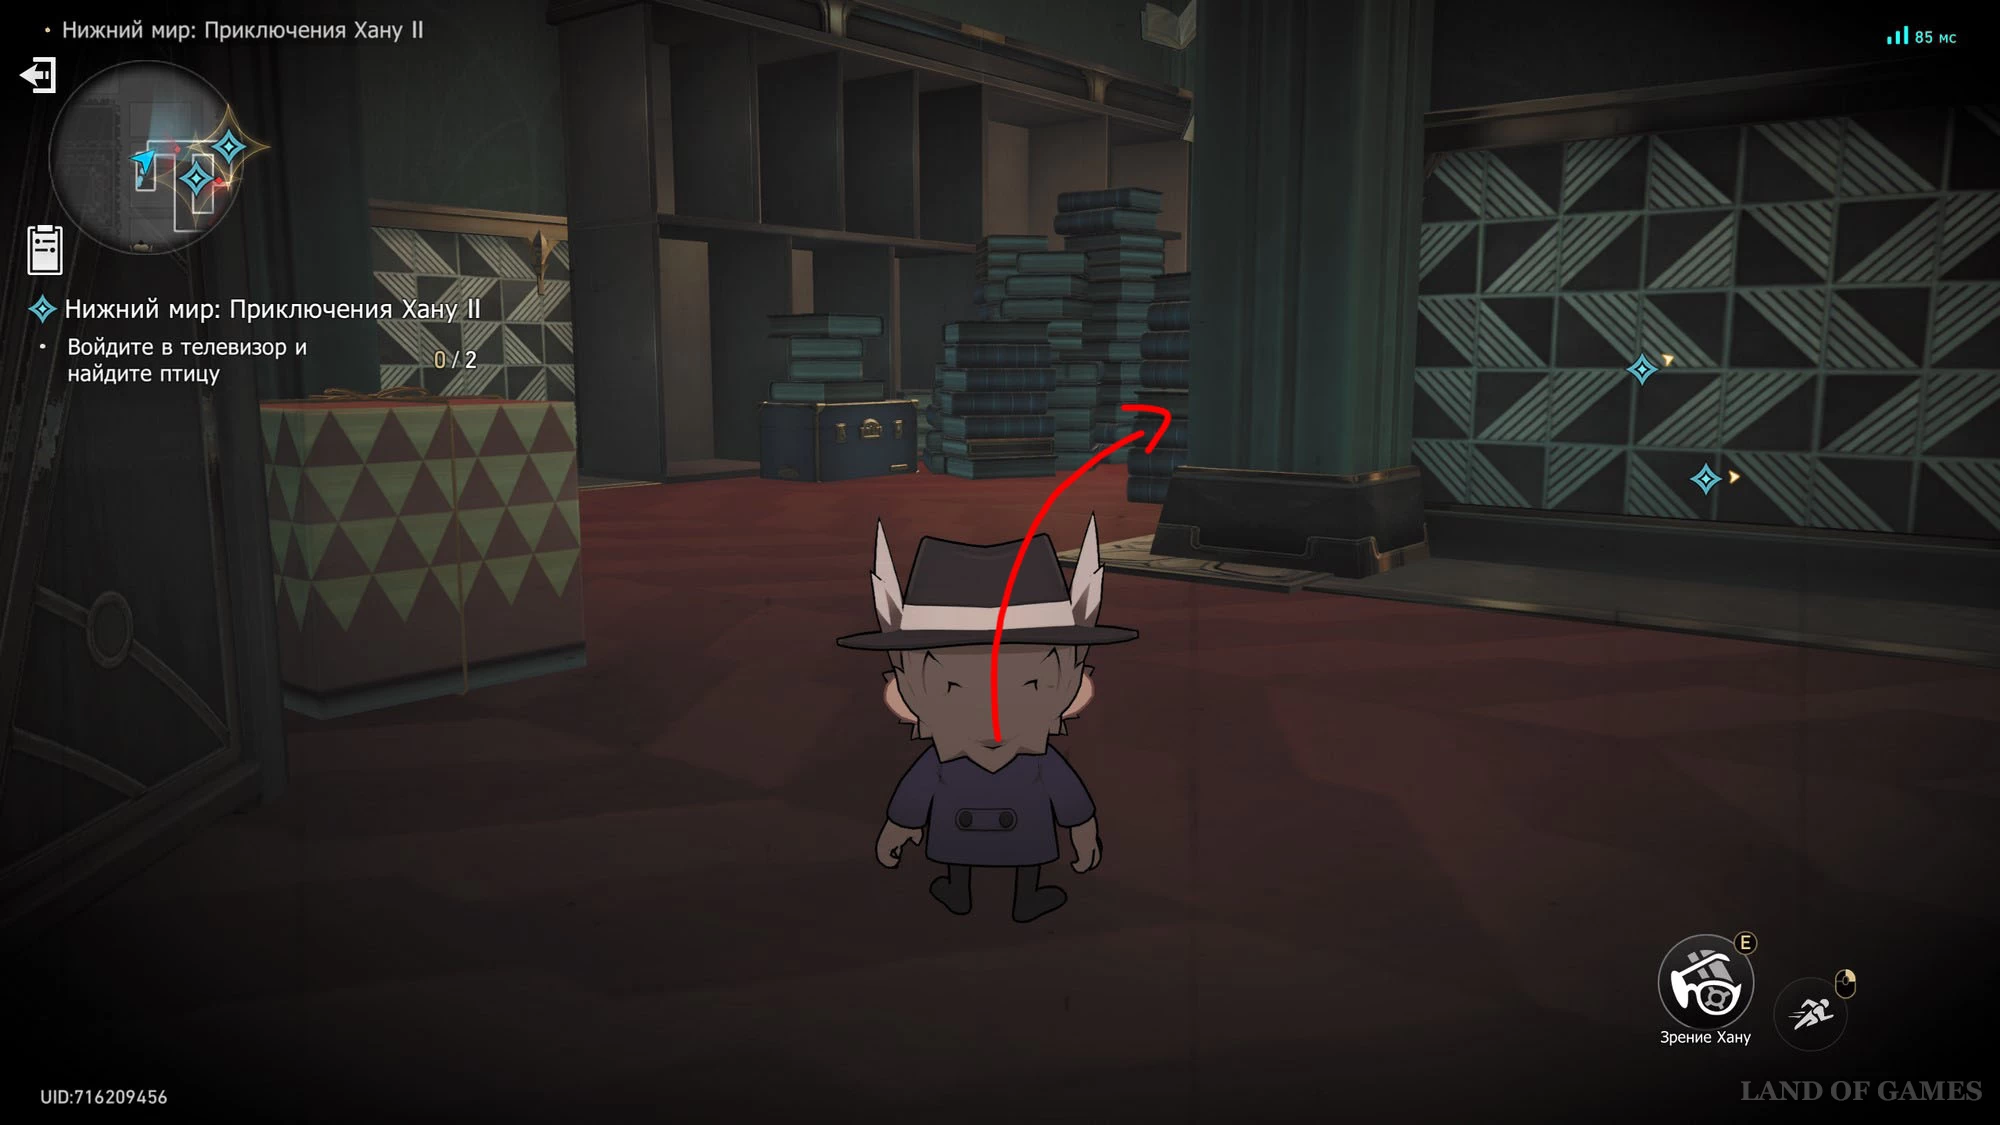
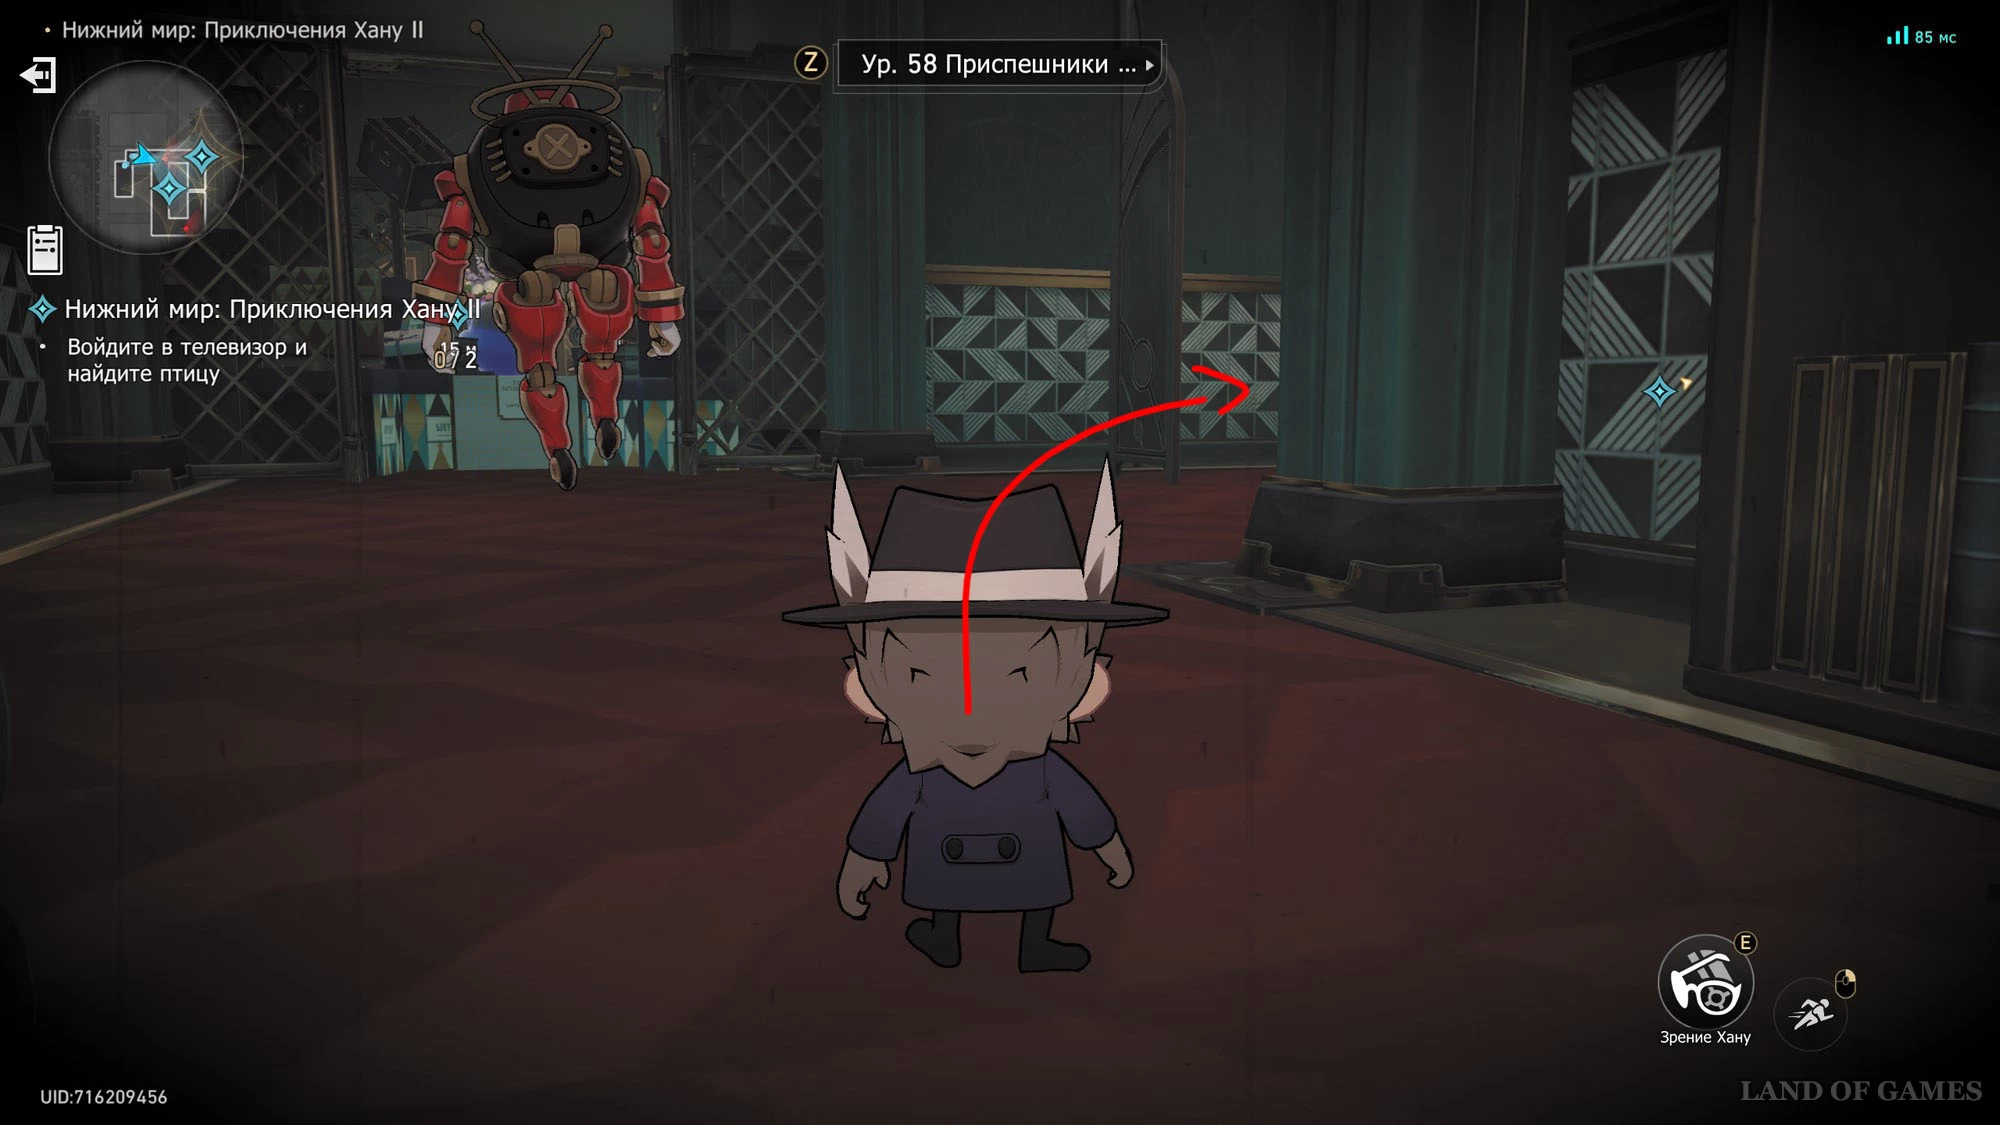
Start the first stage and click on the TV to turn into Brother Hana. Then enter the small door on the right. You will need to find two birds. First, run to the right, passing the TV. Go between the books and interact with the blue ball to find the first bird.
Now interact with the TV standing nearby to return to your previous appearance. Walk along the stairs and go to another part of the room. Interact with the TV again and click on the blue rocket to climb to the top shelf and drop the vase on the enemy's head when he is in the red circle.
Go back down and click on the “Pull” button to draw the second bird from the red ball. This will be the end of the test.
The Nether: Hanu's Adventures 2
Start the first stage and click on the TV to turn into Brother Hana. Then enter the small door on the left. Rush along the corridor forward to the books, wait until the enemy turns away and sneak past him, turning to the right. Get the first bird out of the red ball.

Go under the grate and stop at the turn, as the enemy is patrolling here. Wait for the right moment and sneak past him. Approach the blue rocket and use it to teleport upward. Now drop the vase on the TV below, go down and pull the second bird out of the blue ball.

Dreamer
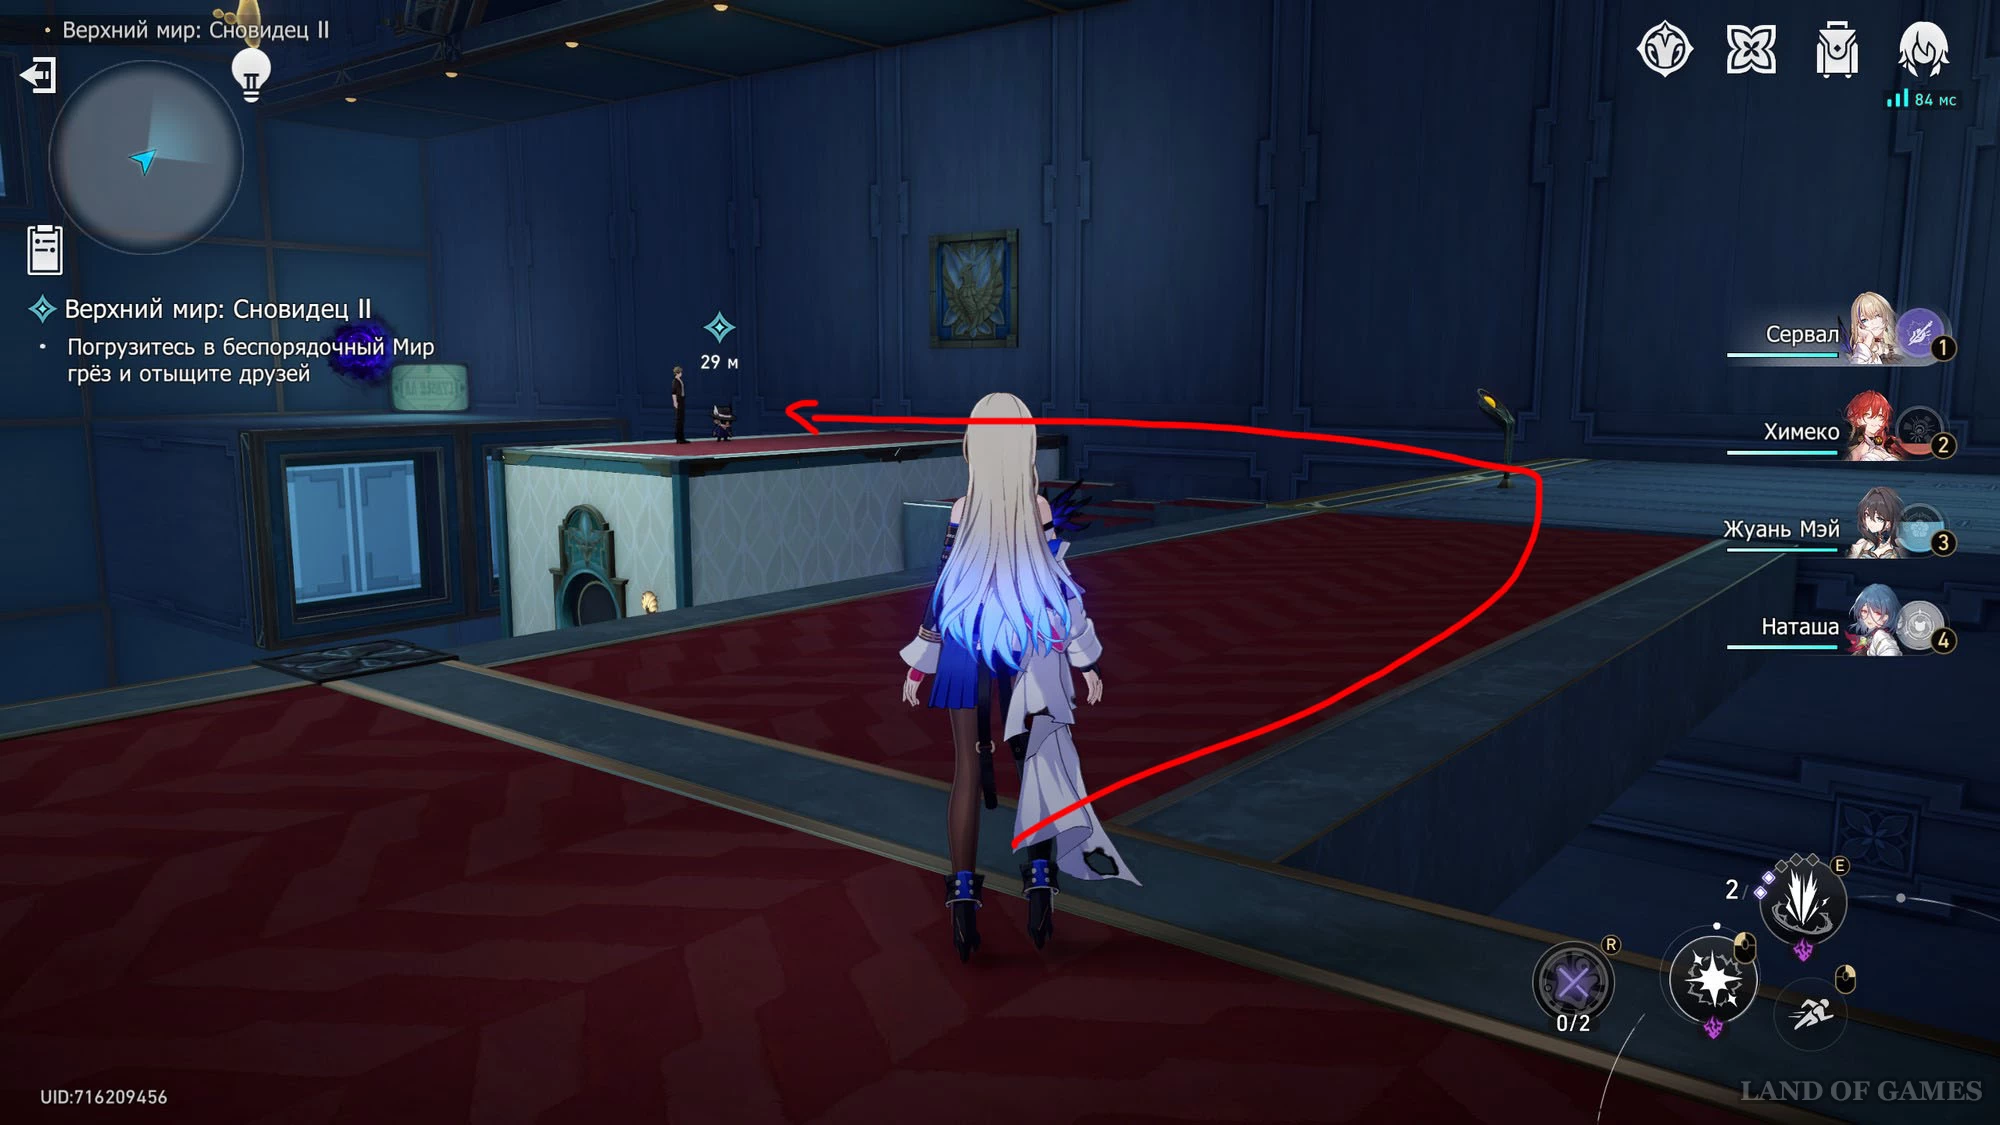
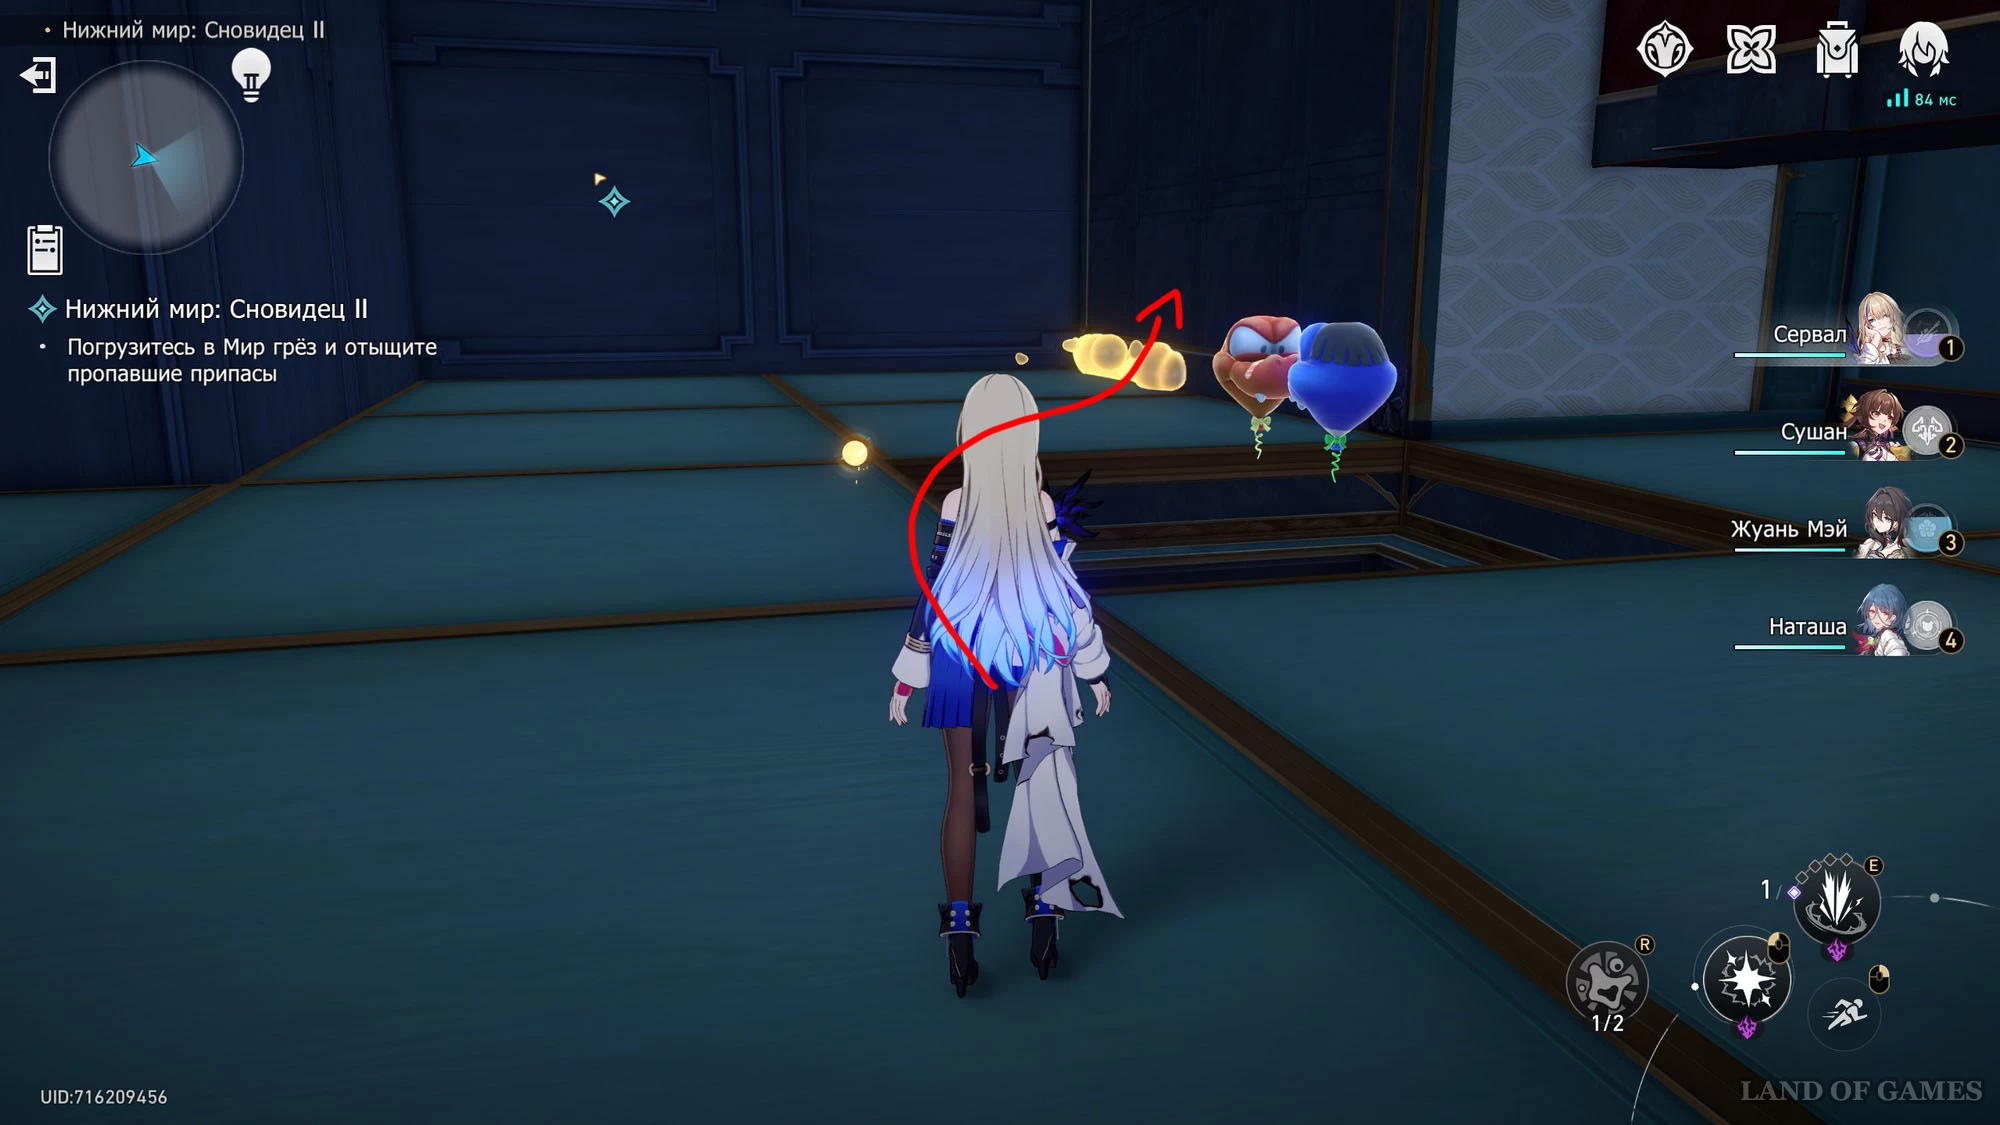
Overworld: Dreamer 1
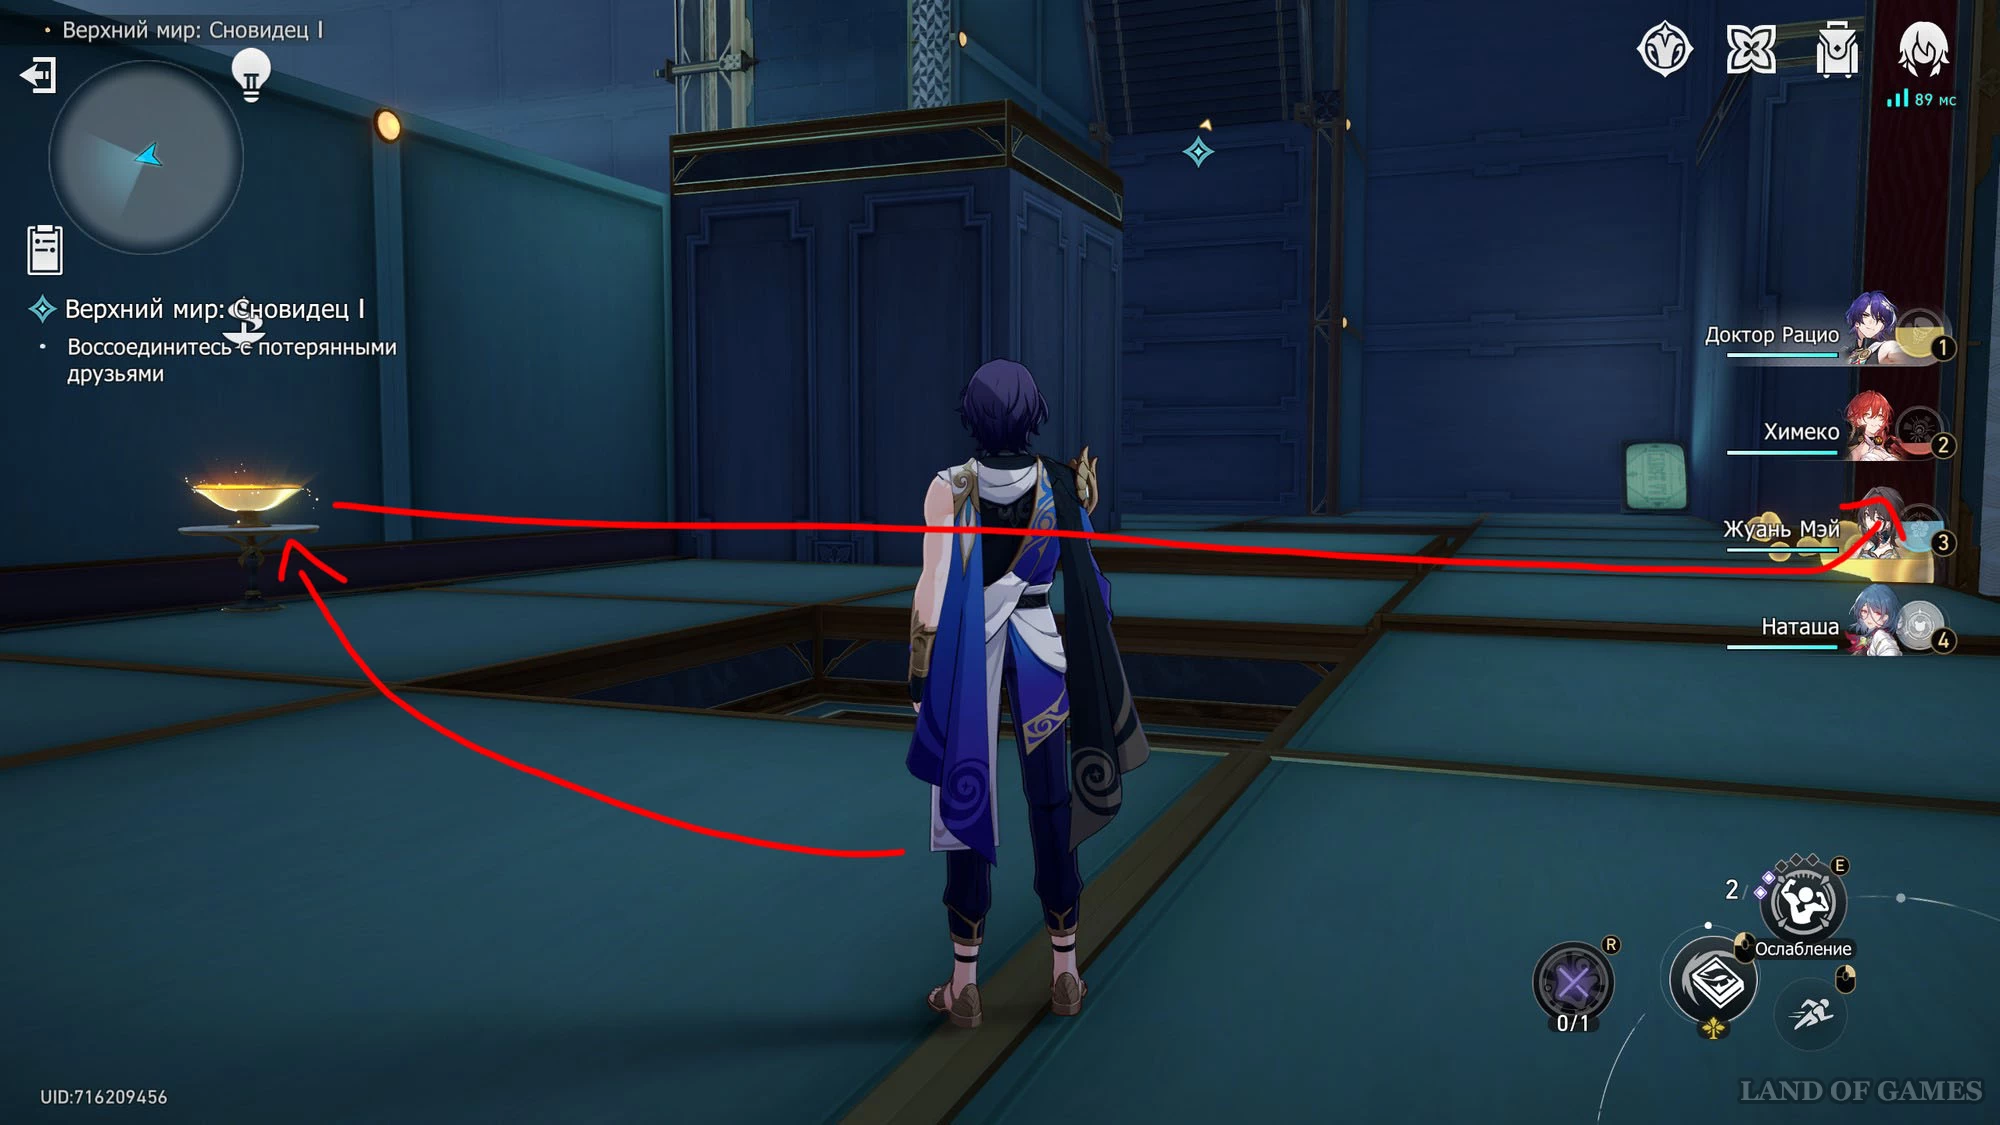
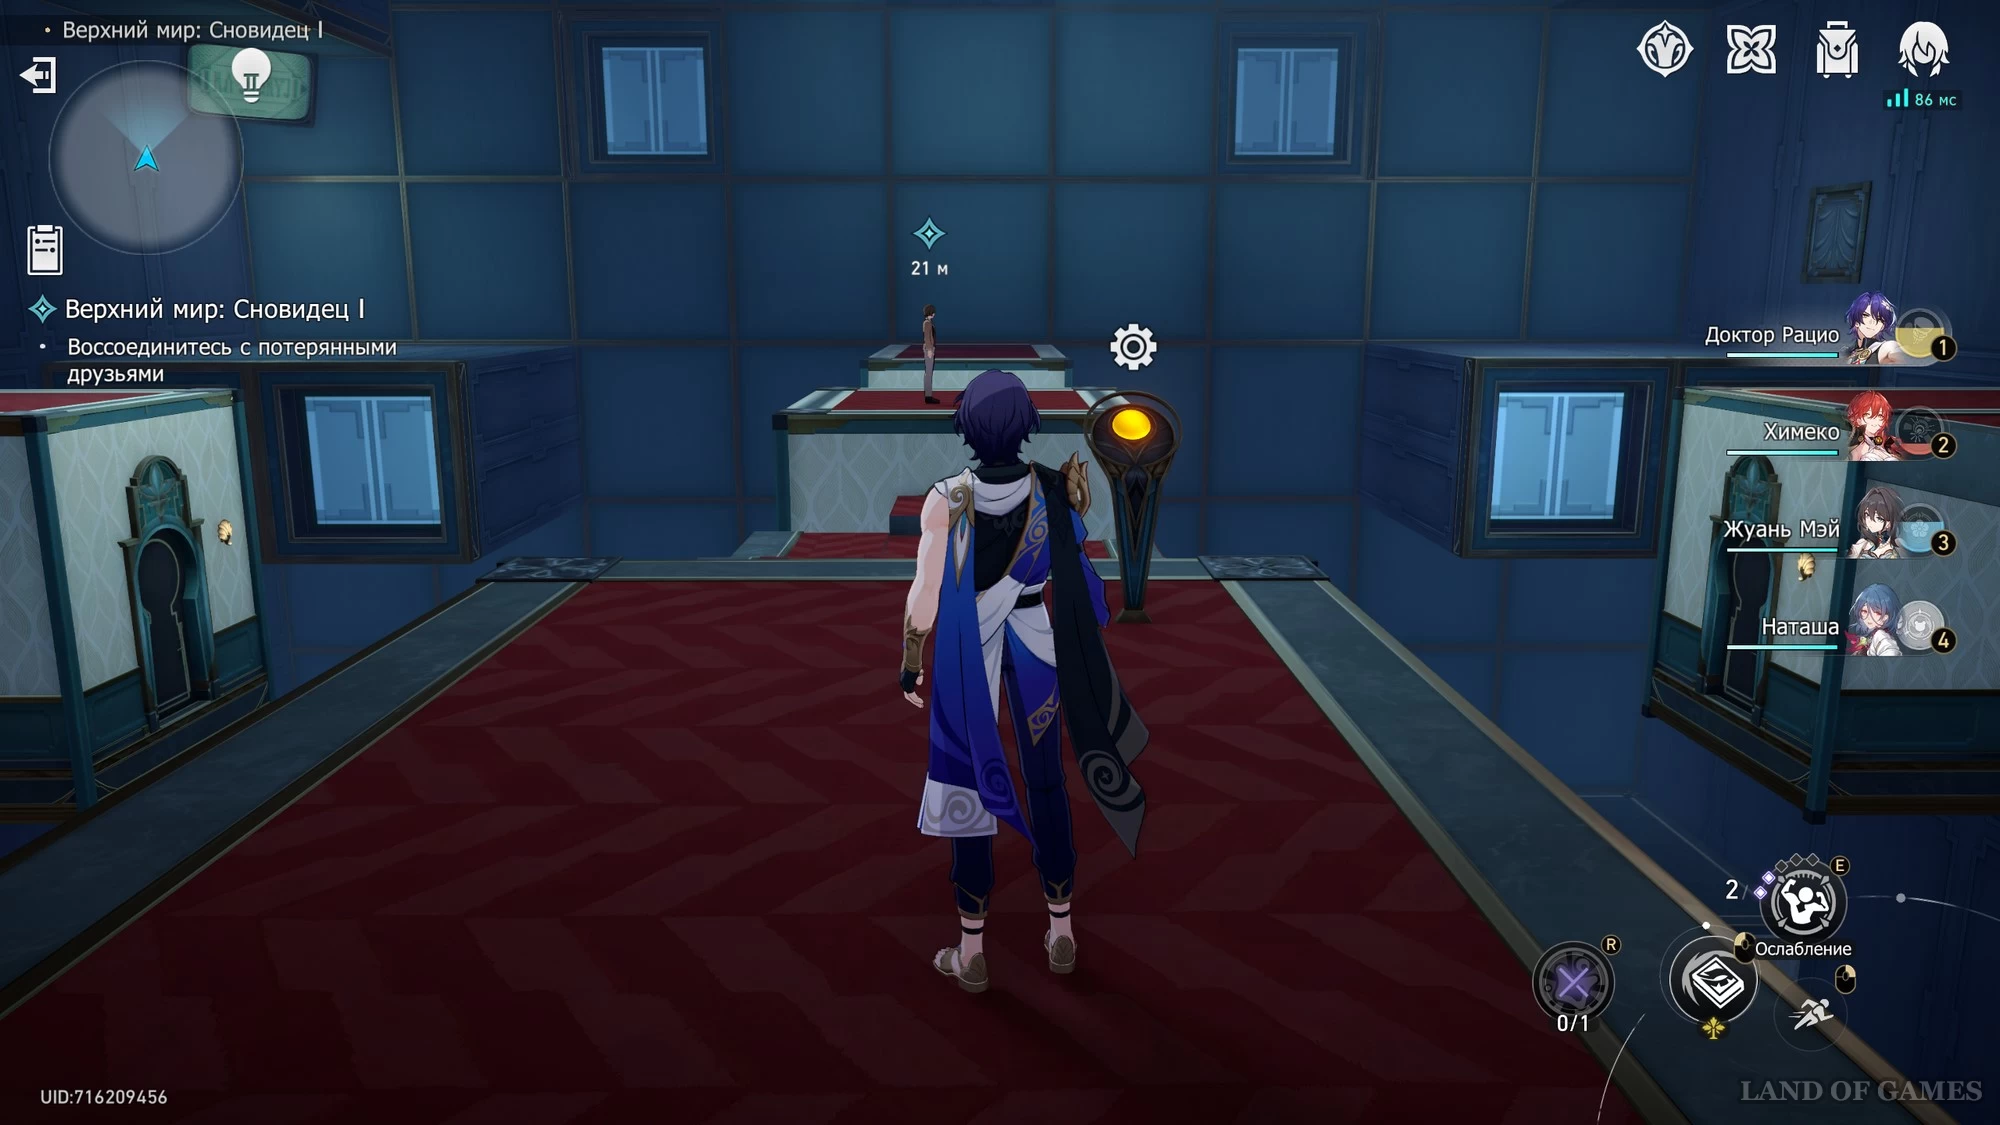
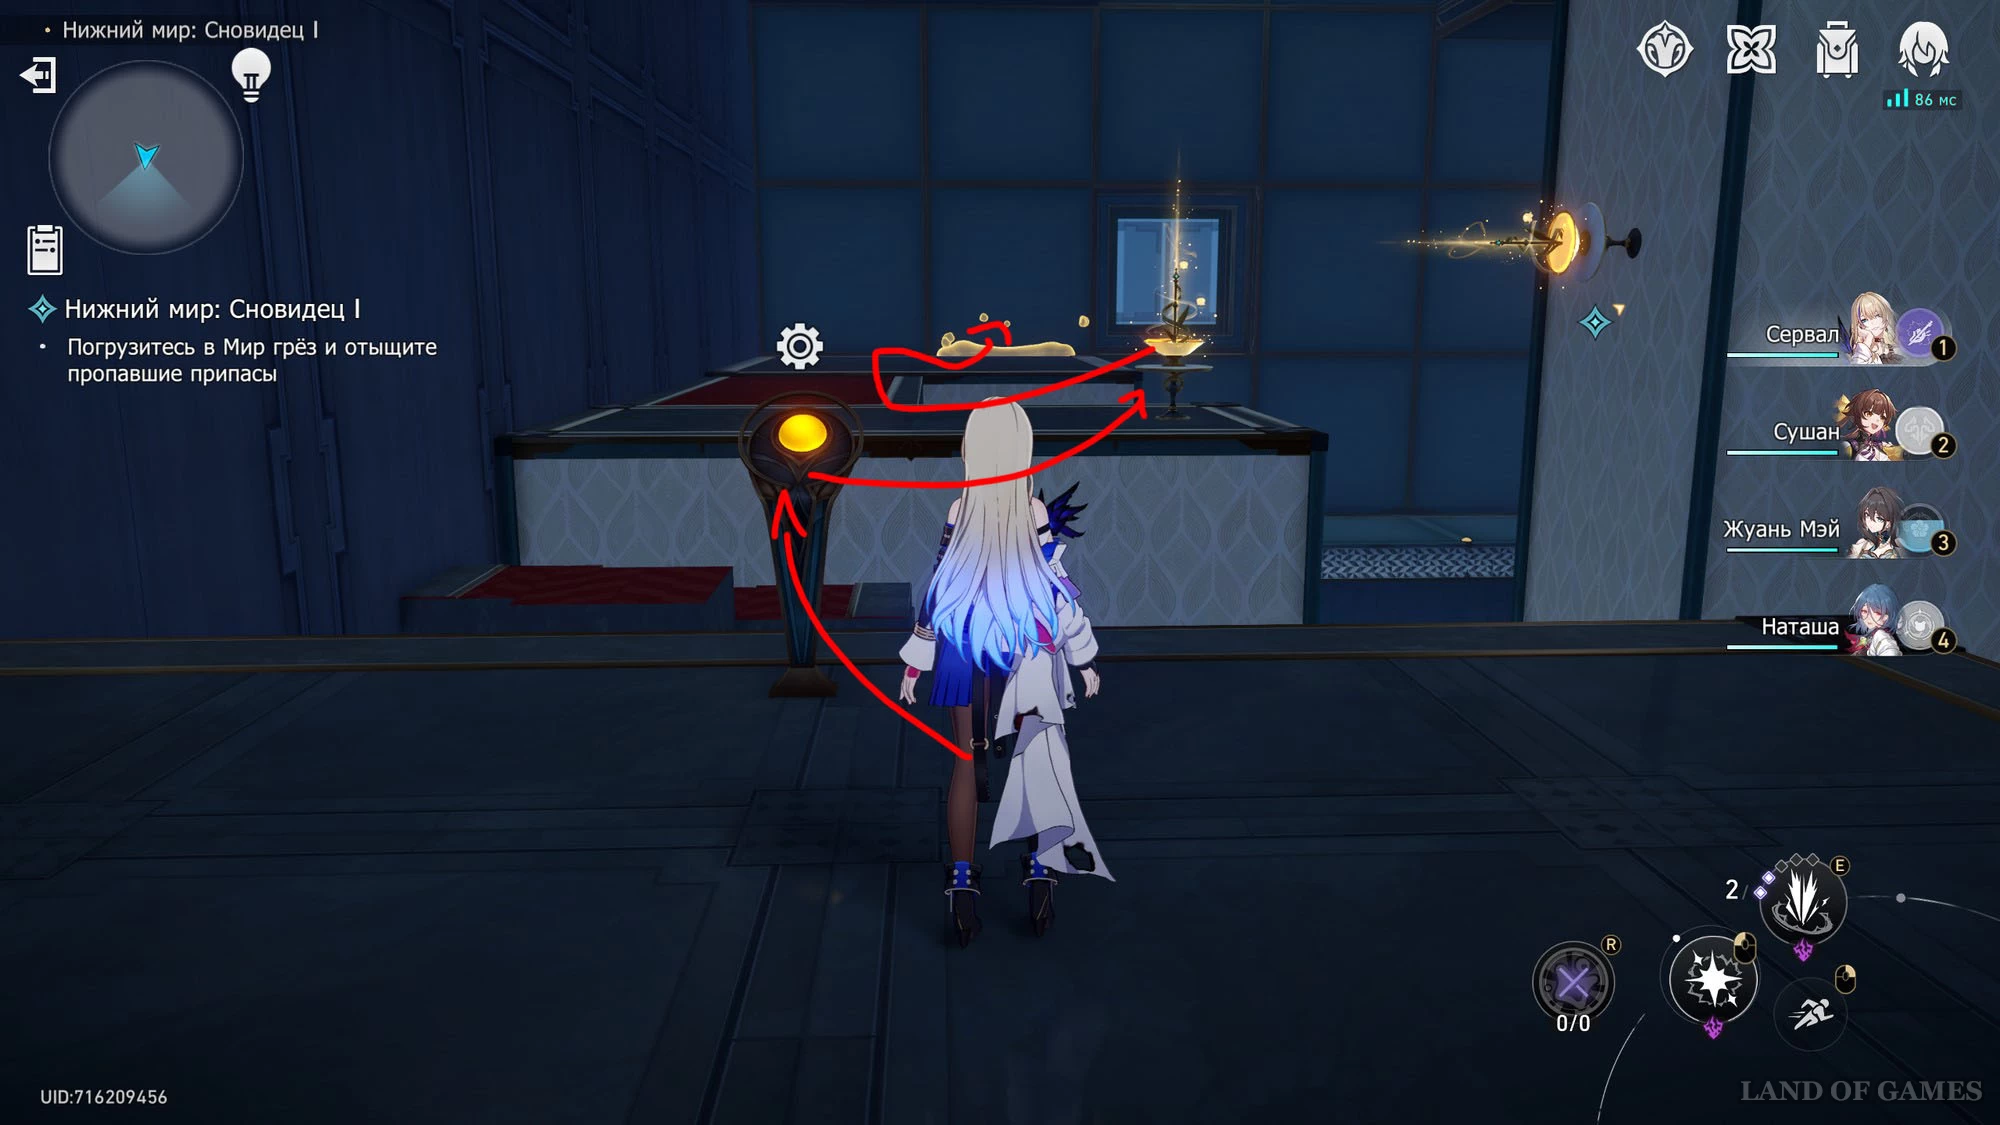
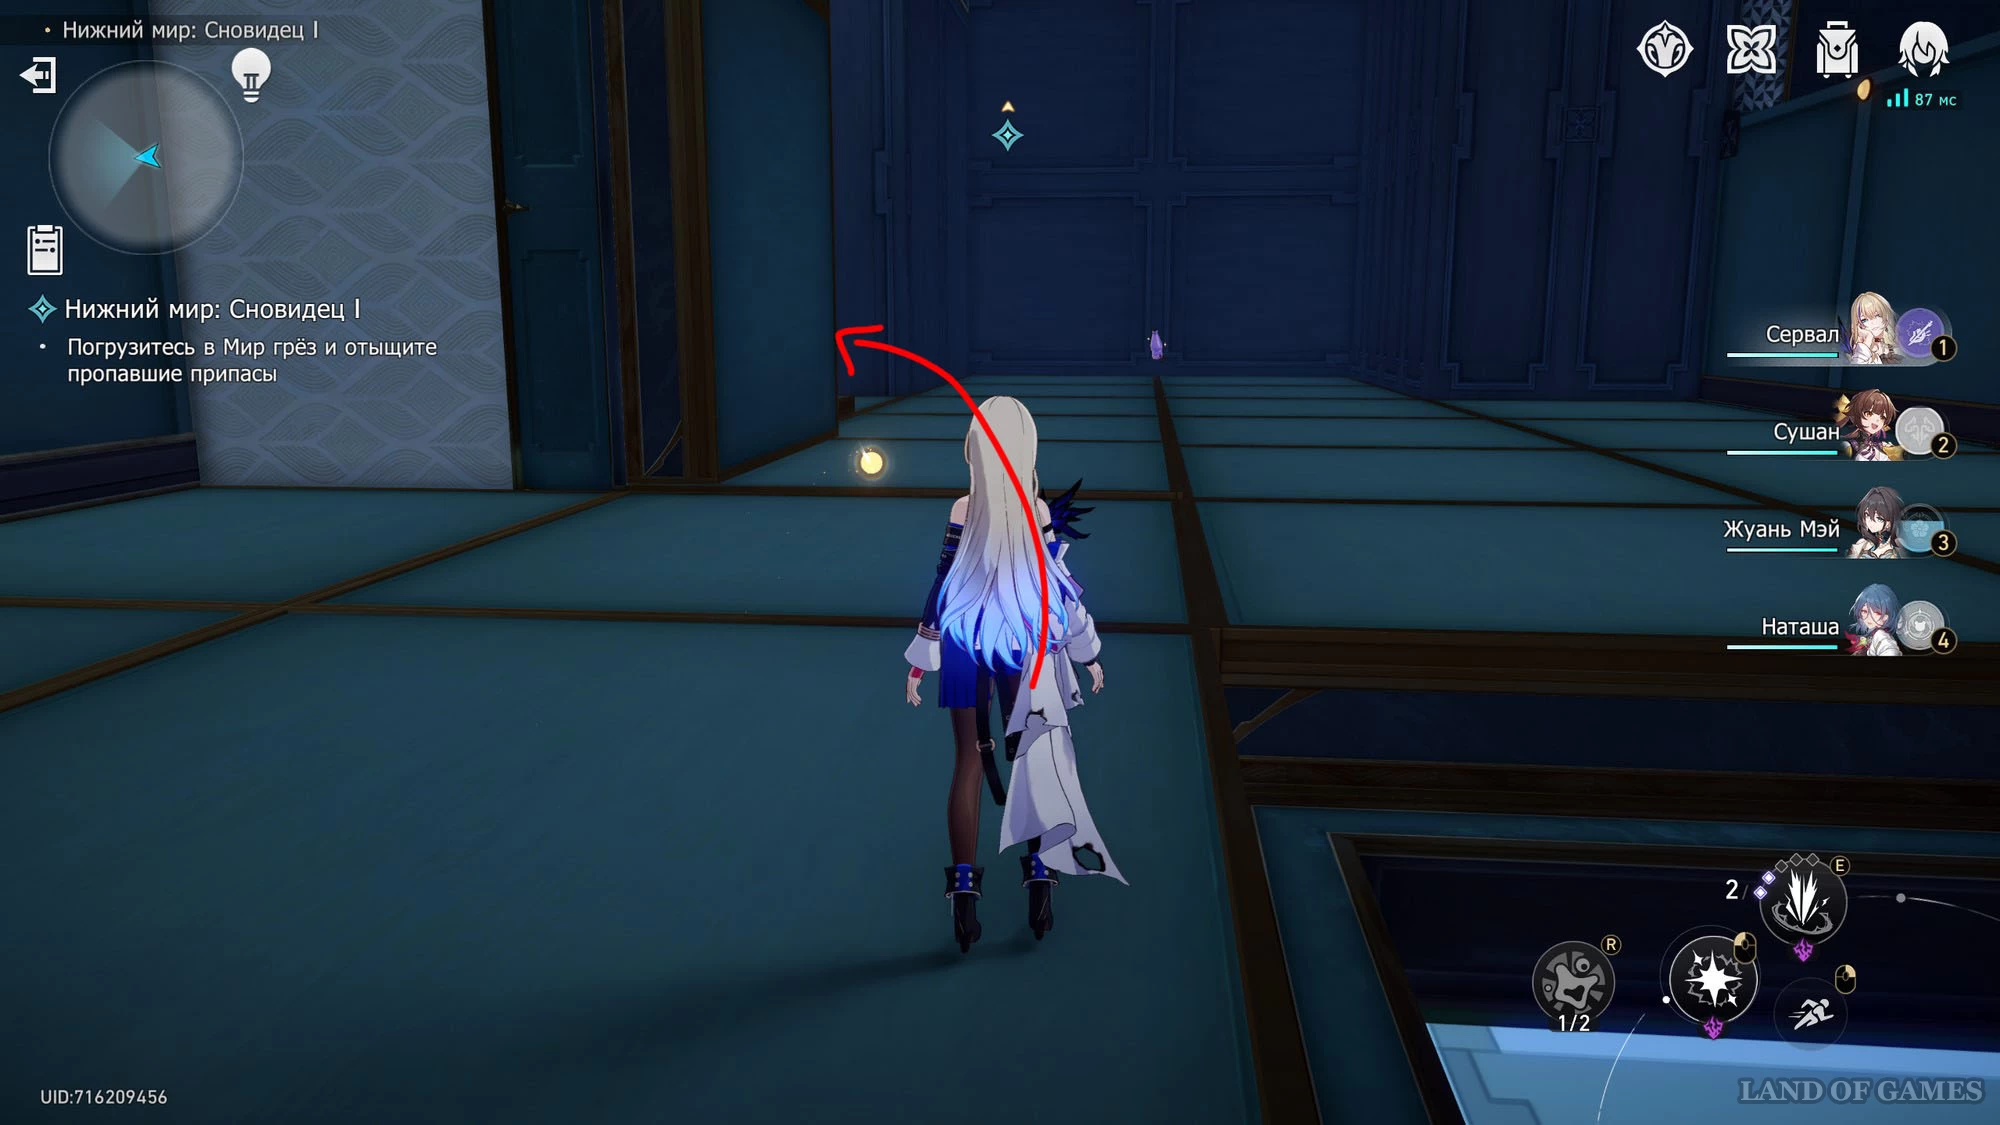
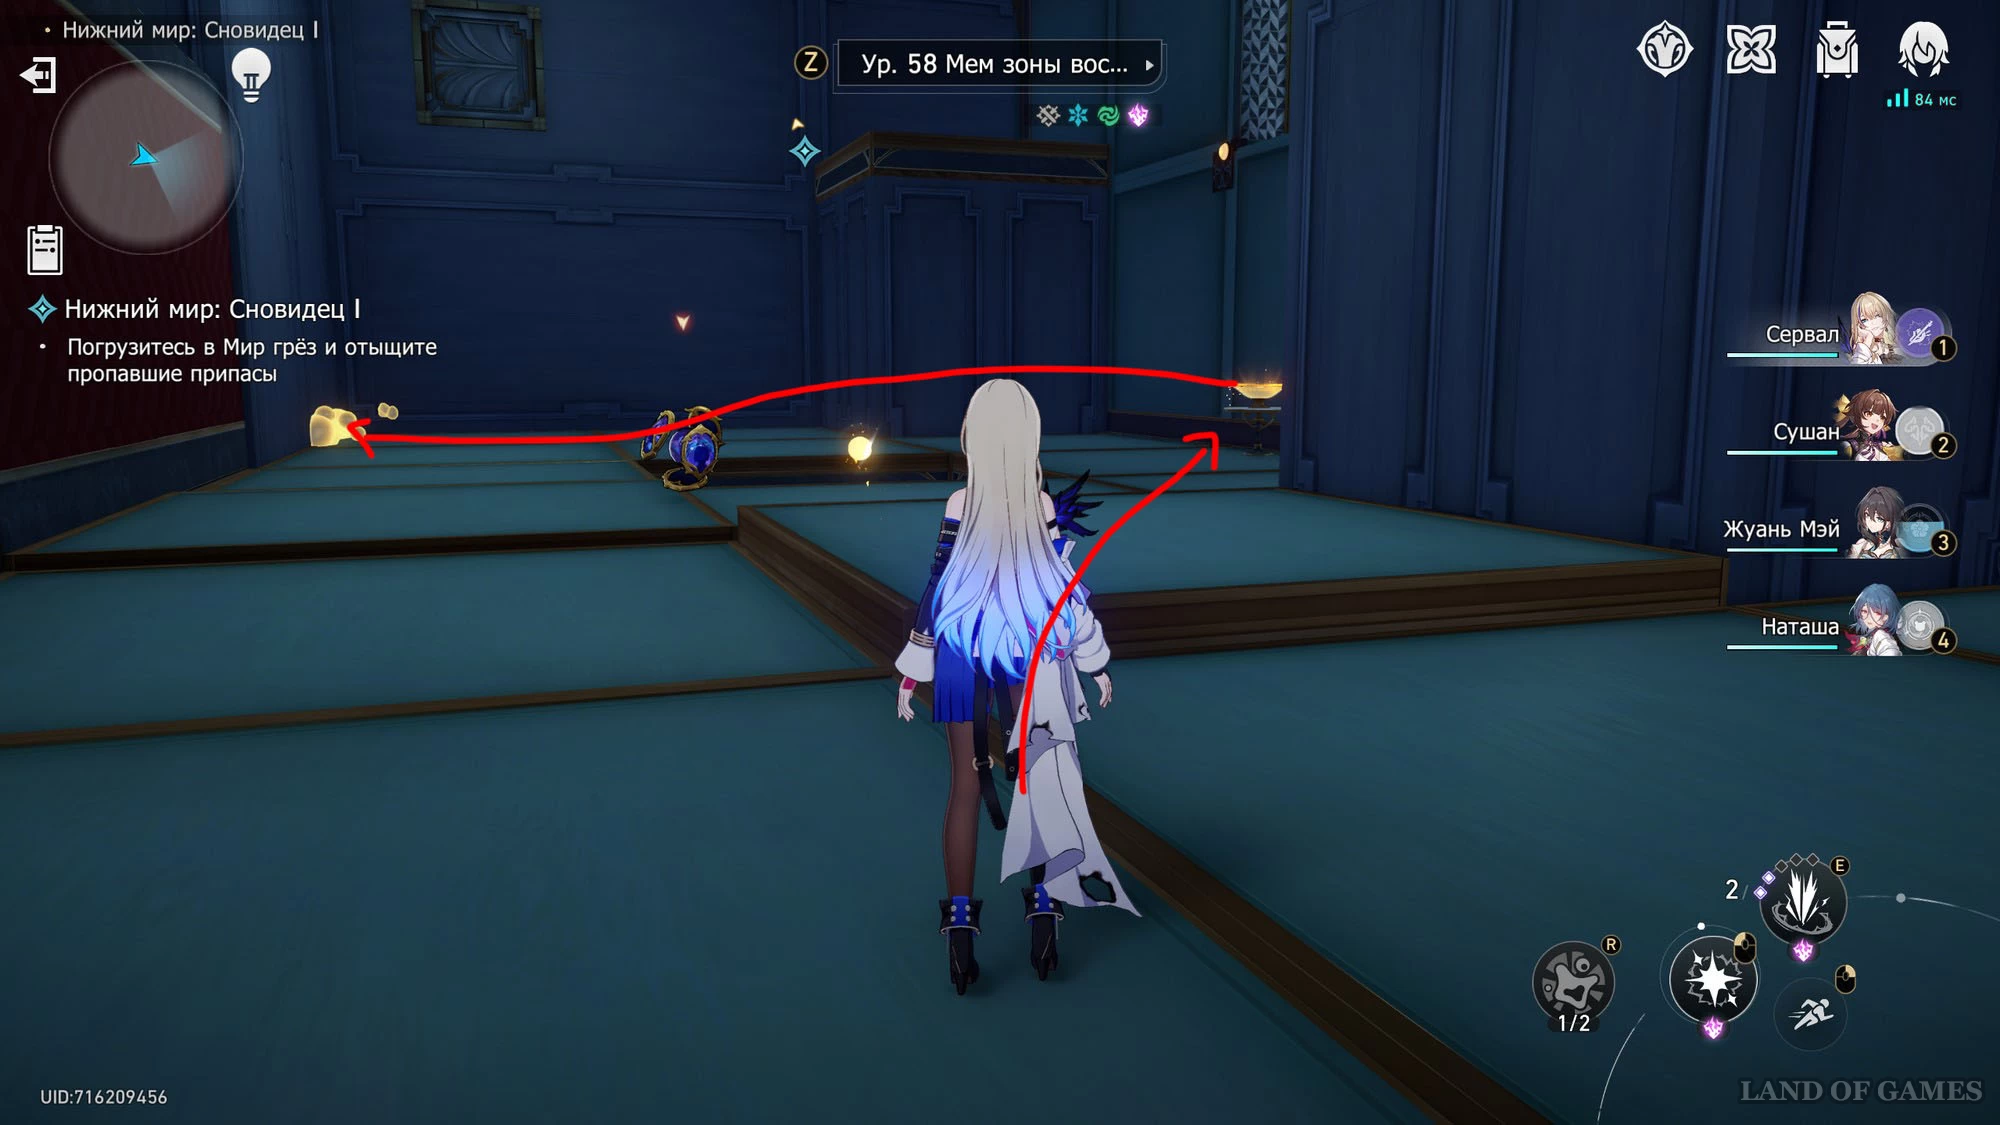
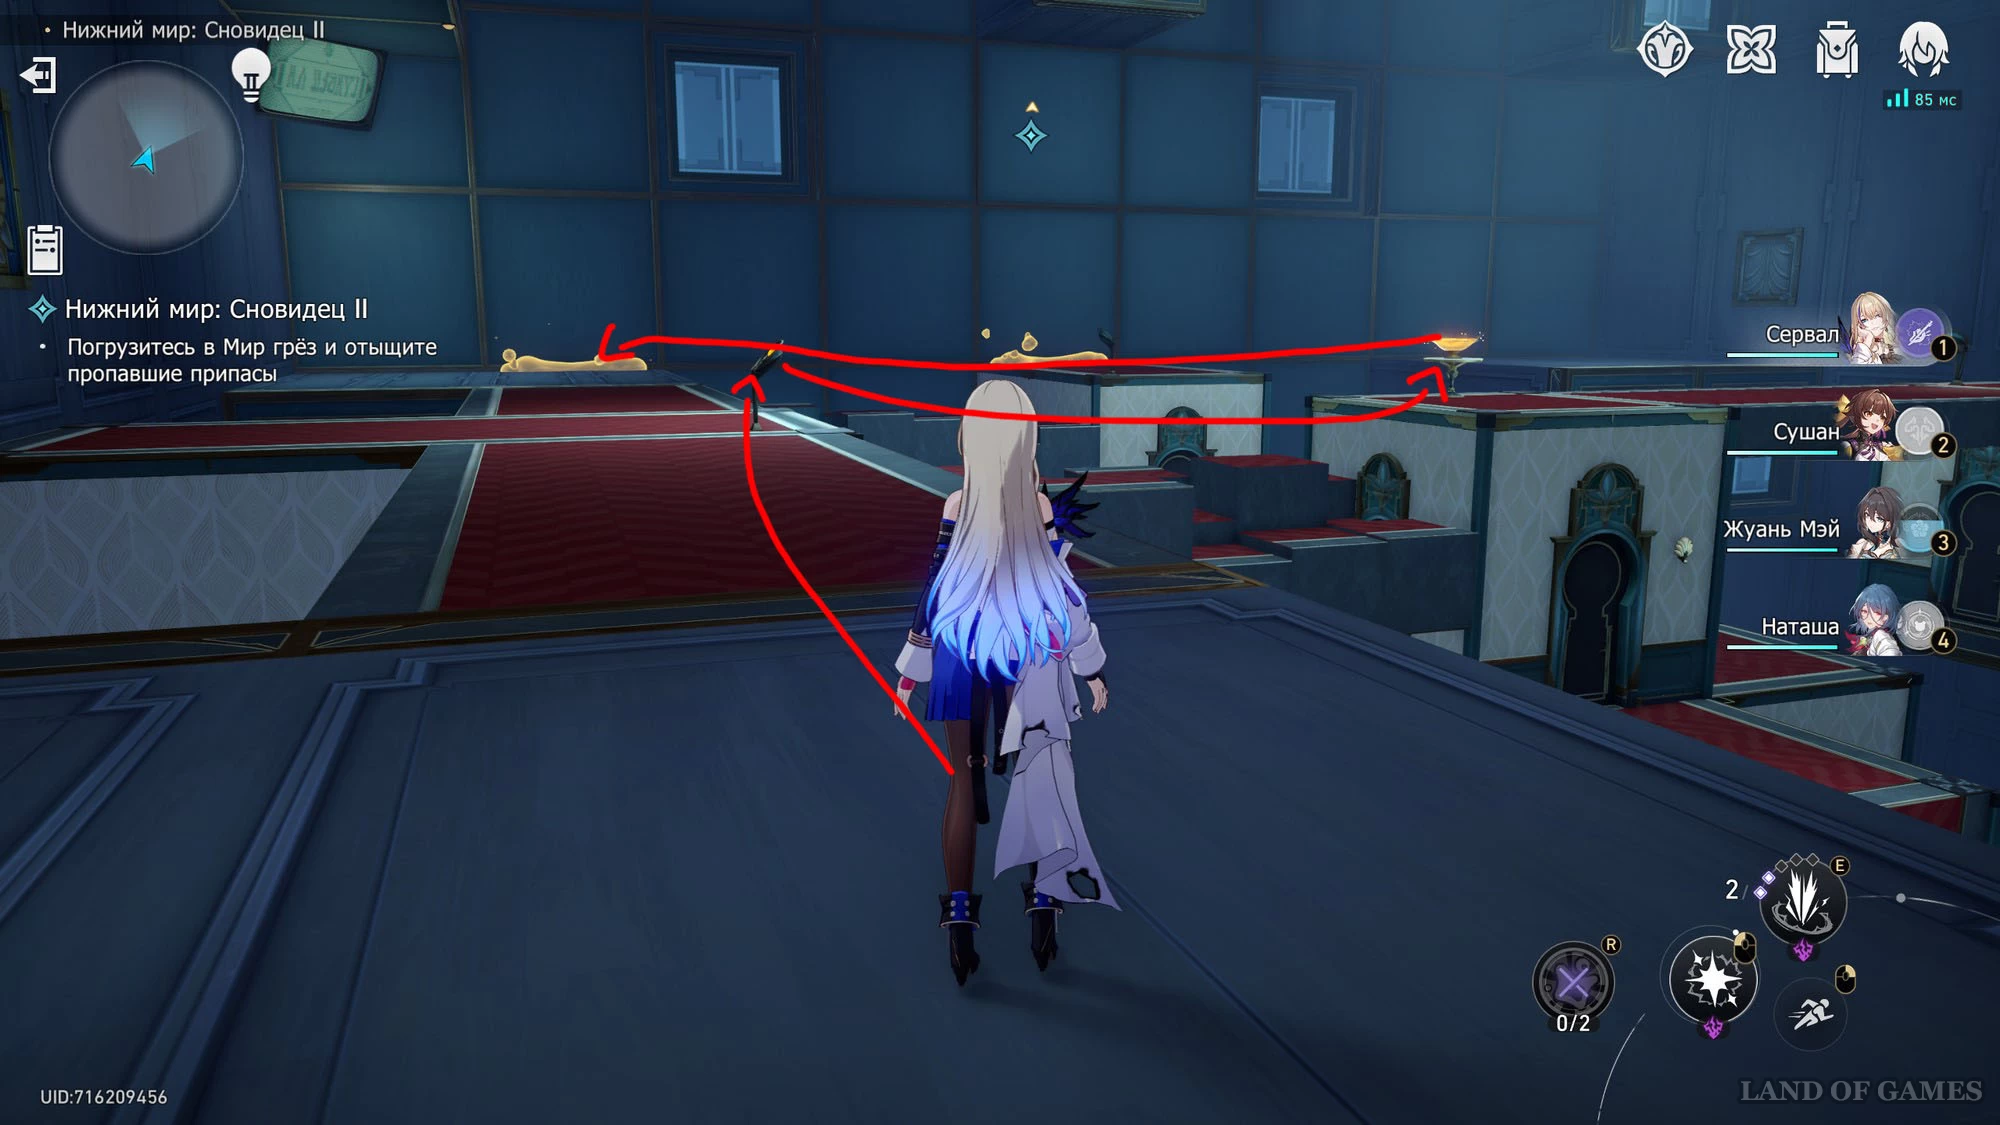
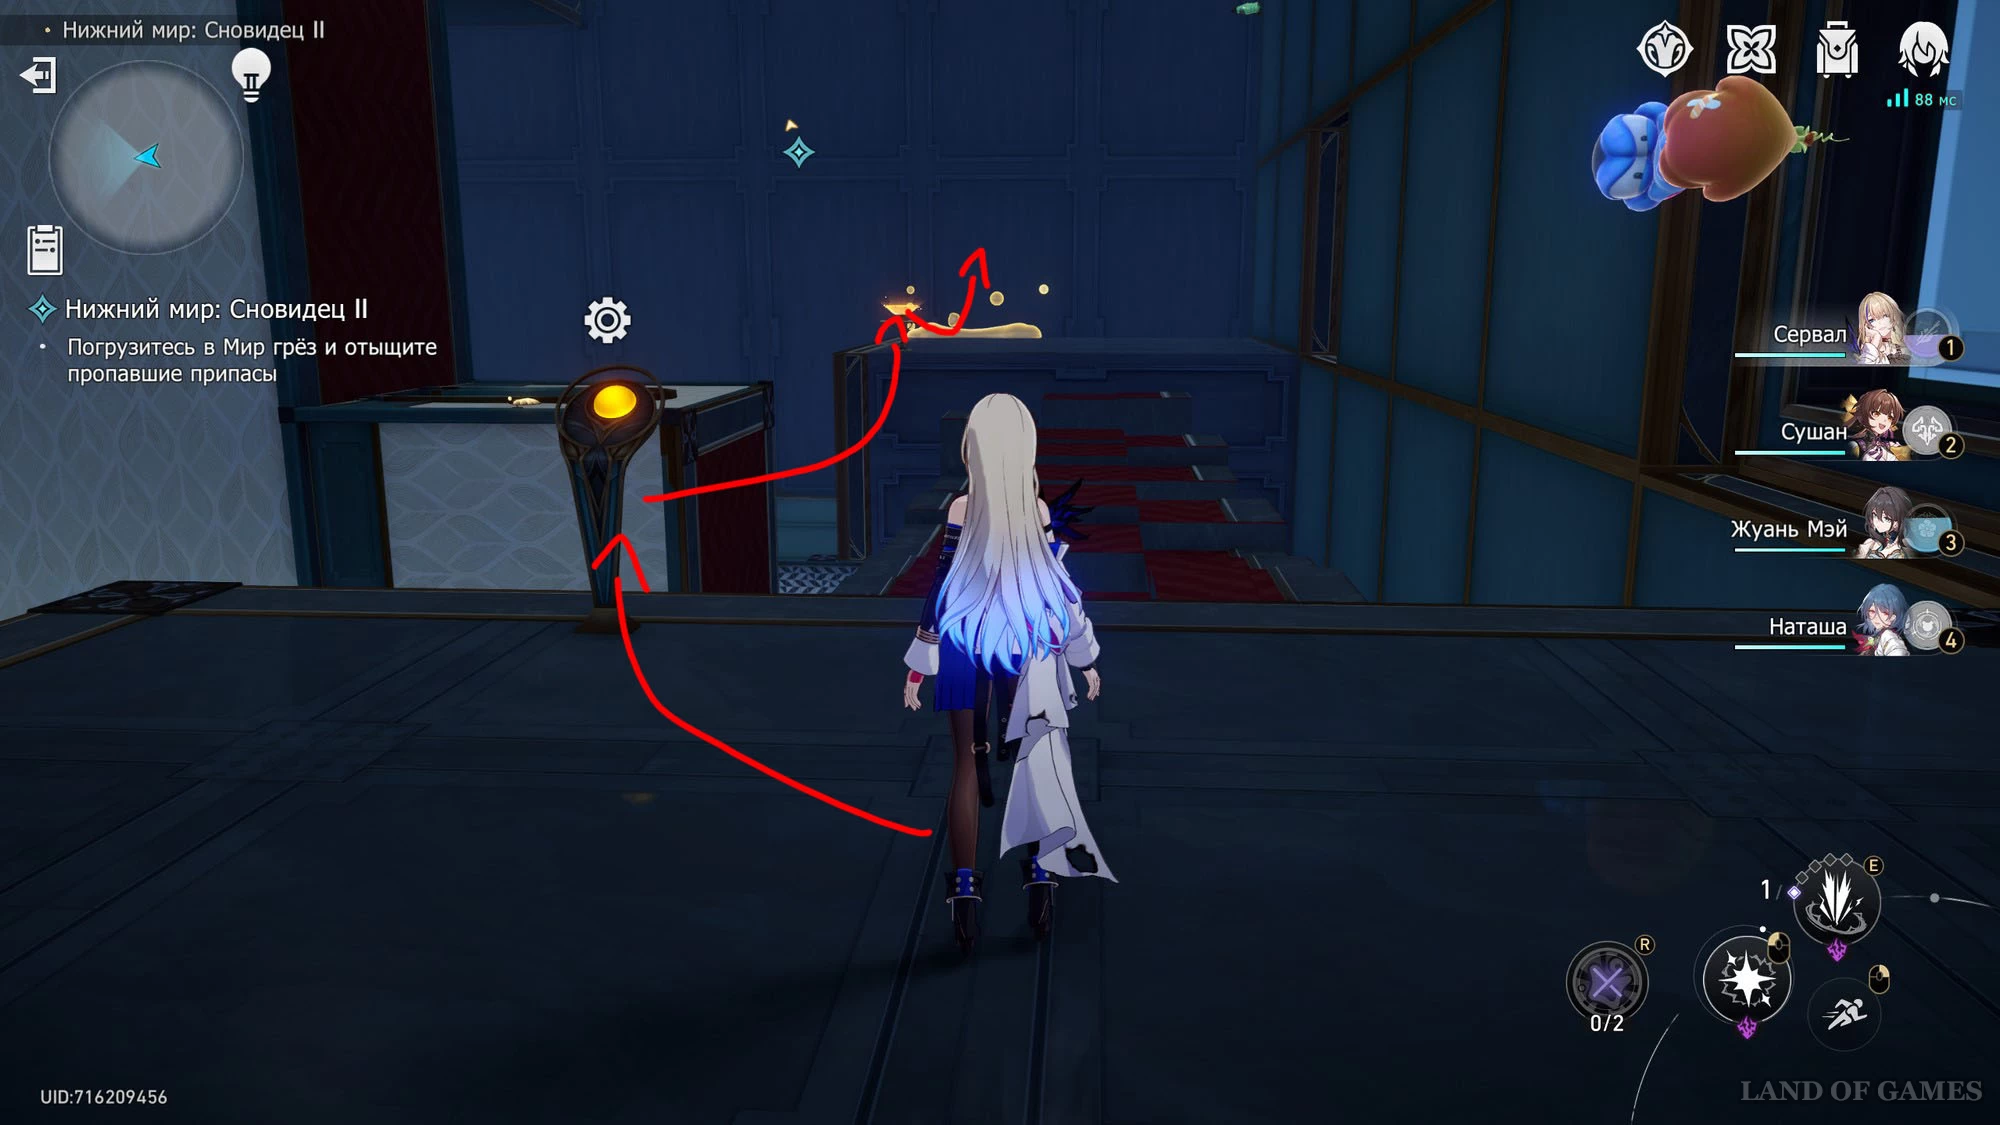
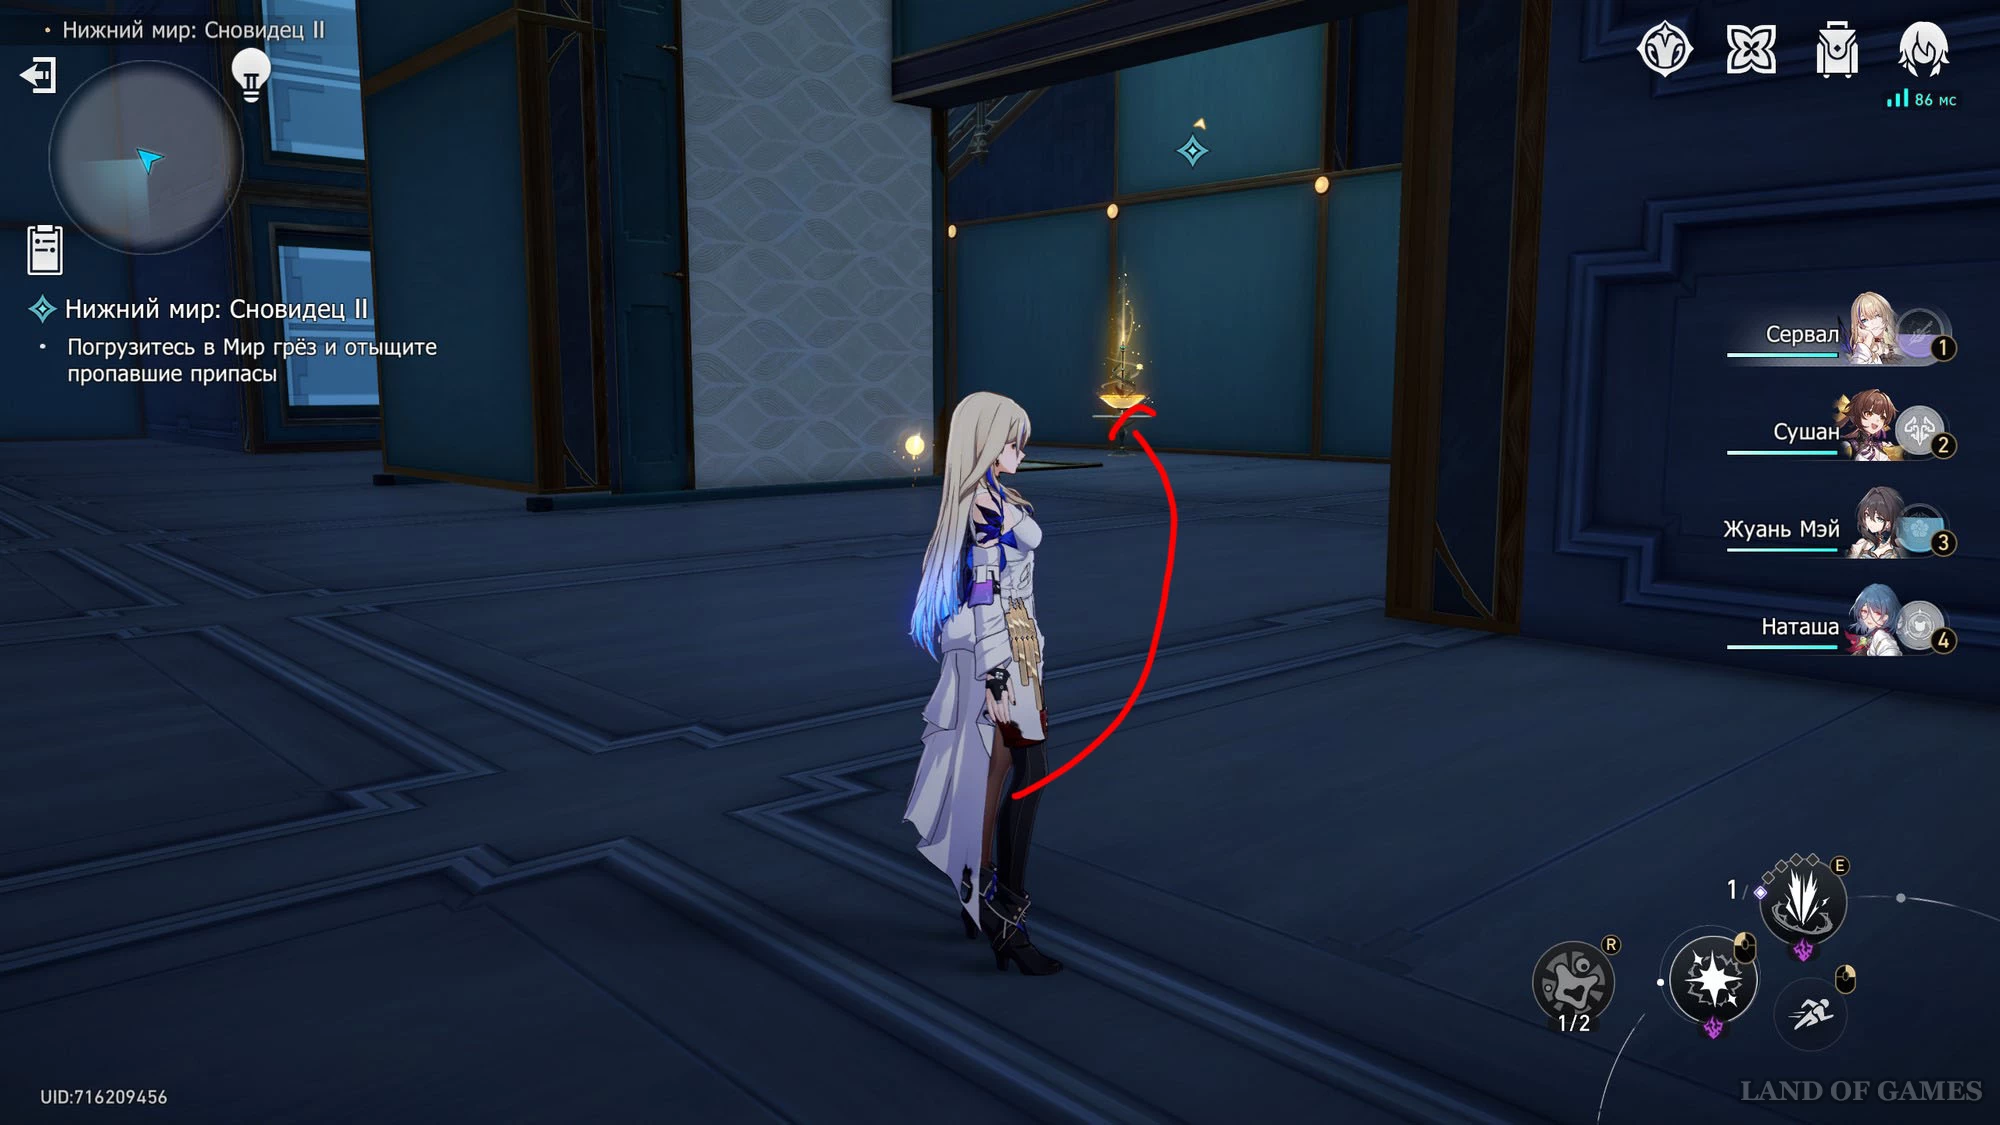
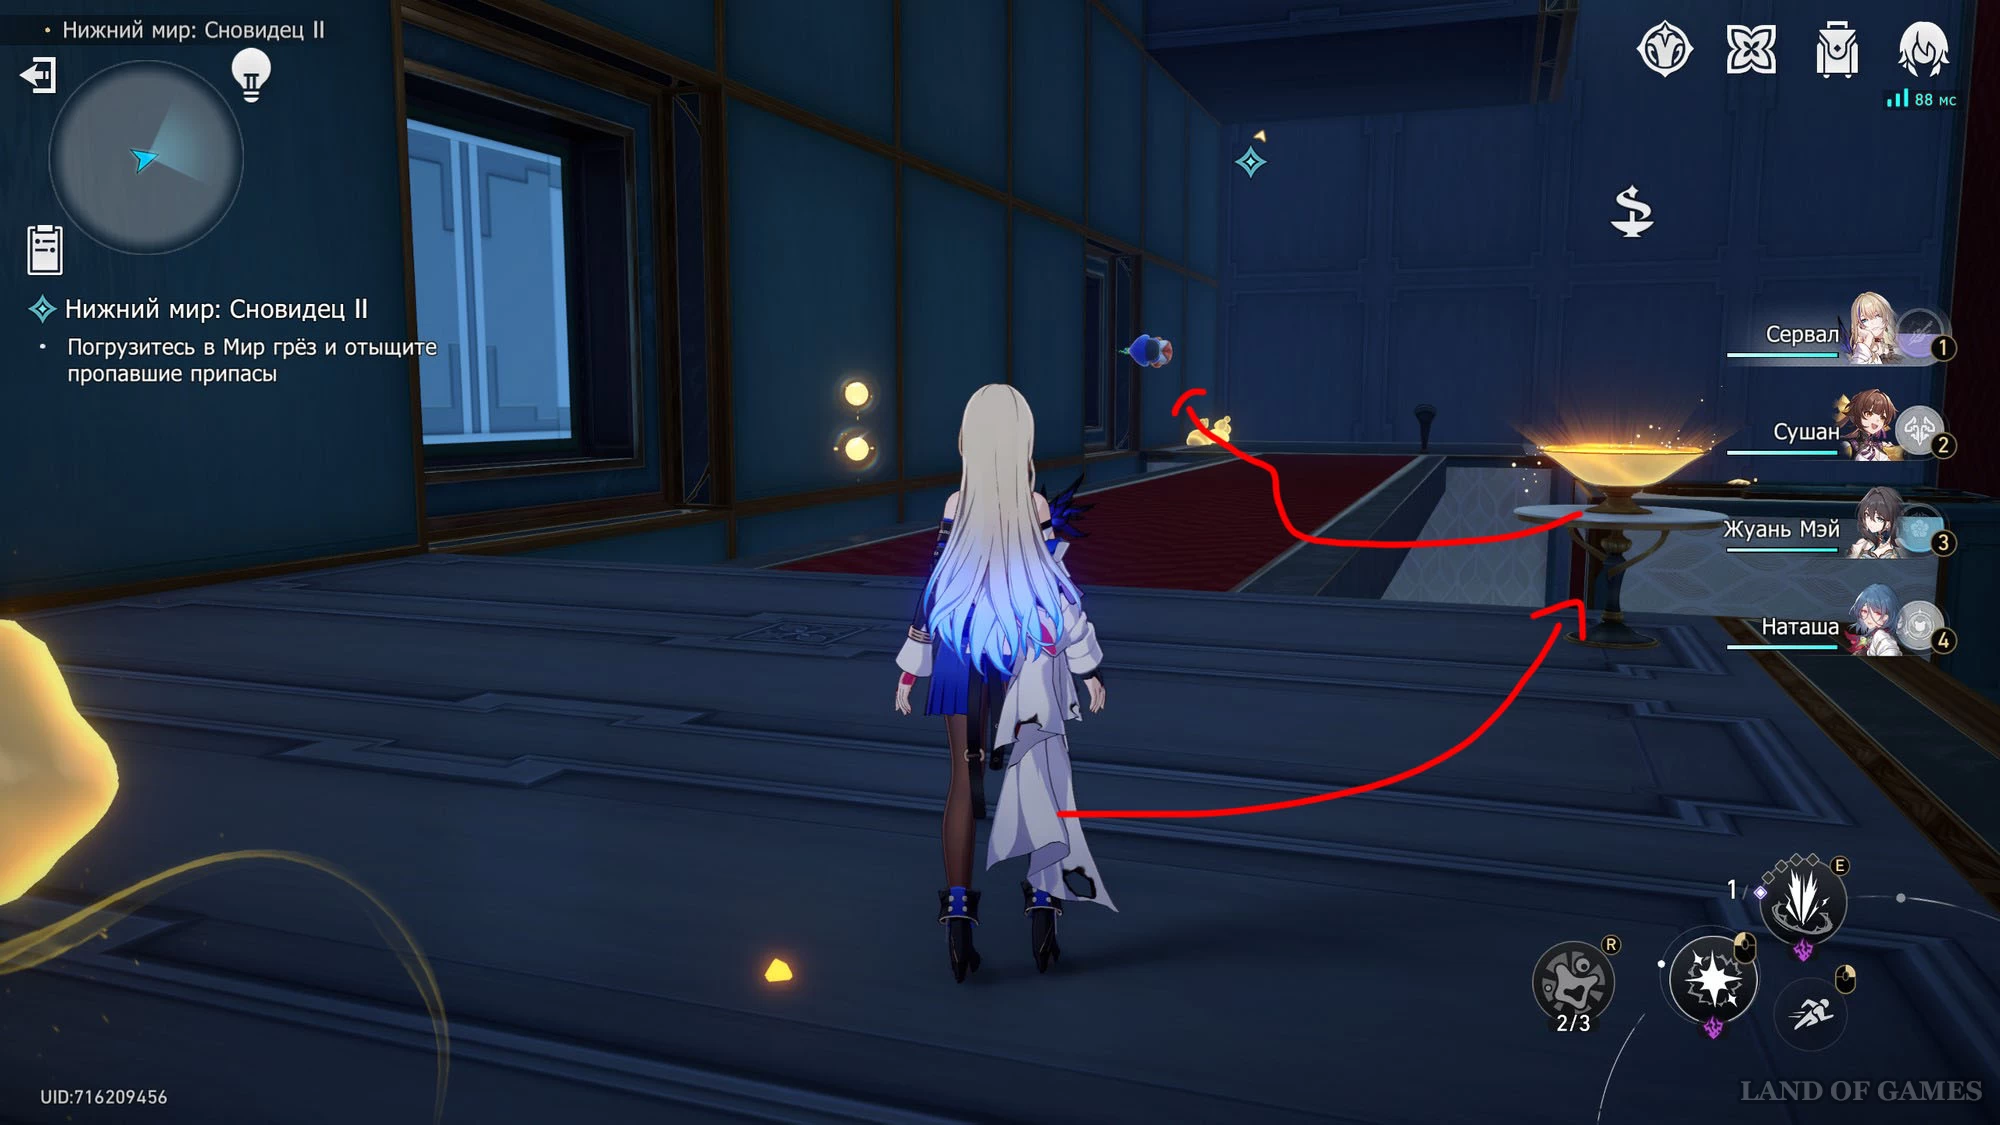
Once you begin the challenge, interact with the picture in front of you to enter the dream world. Turn left, go to the golden bowl and take 1 dream bubble. Activate the golden bridge ahead and climb up the wall.
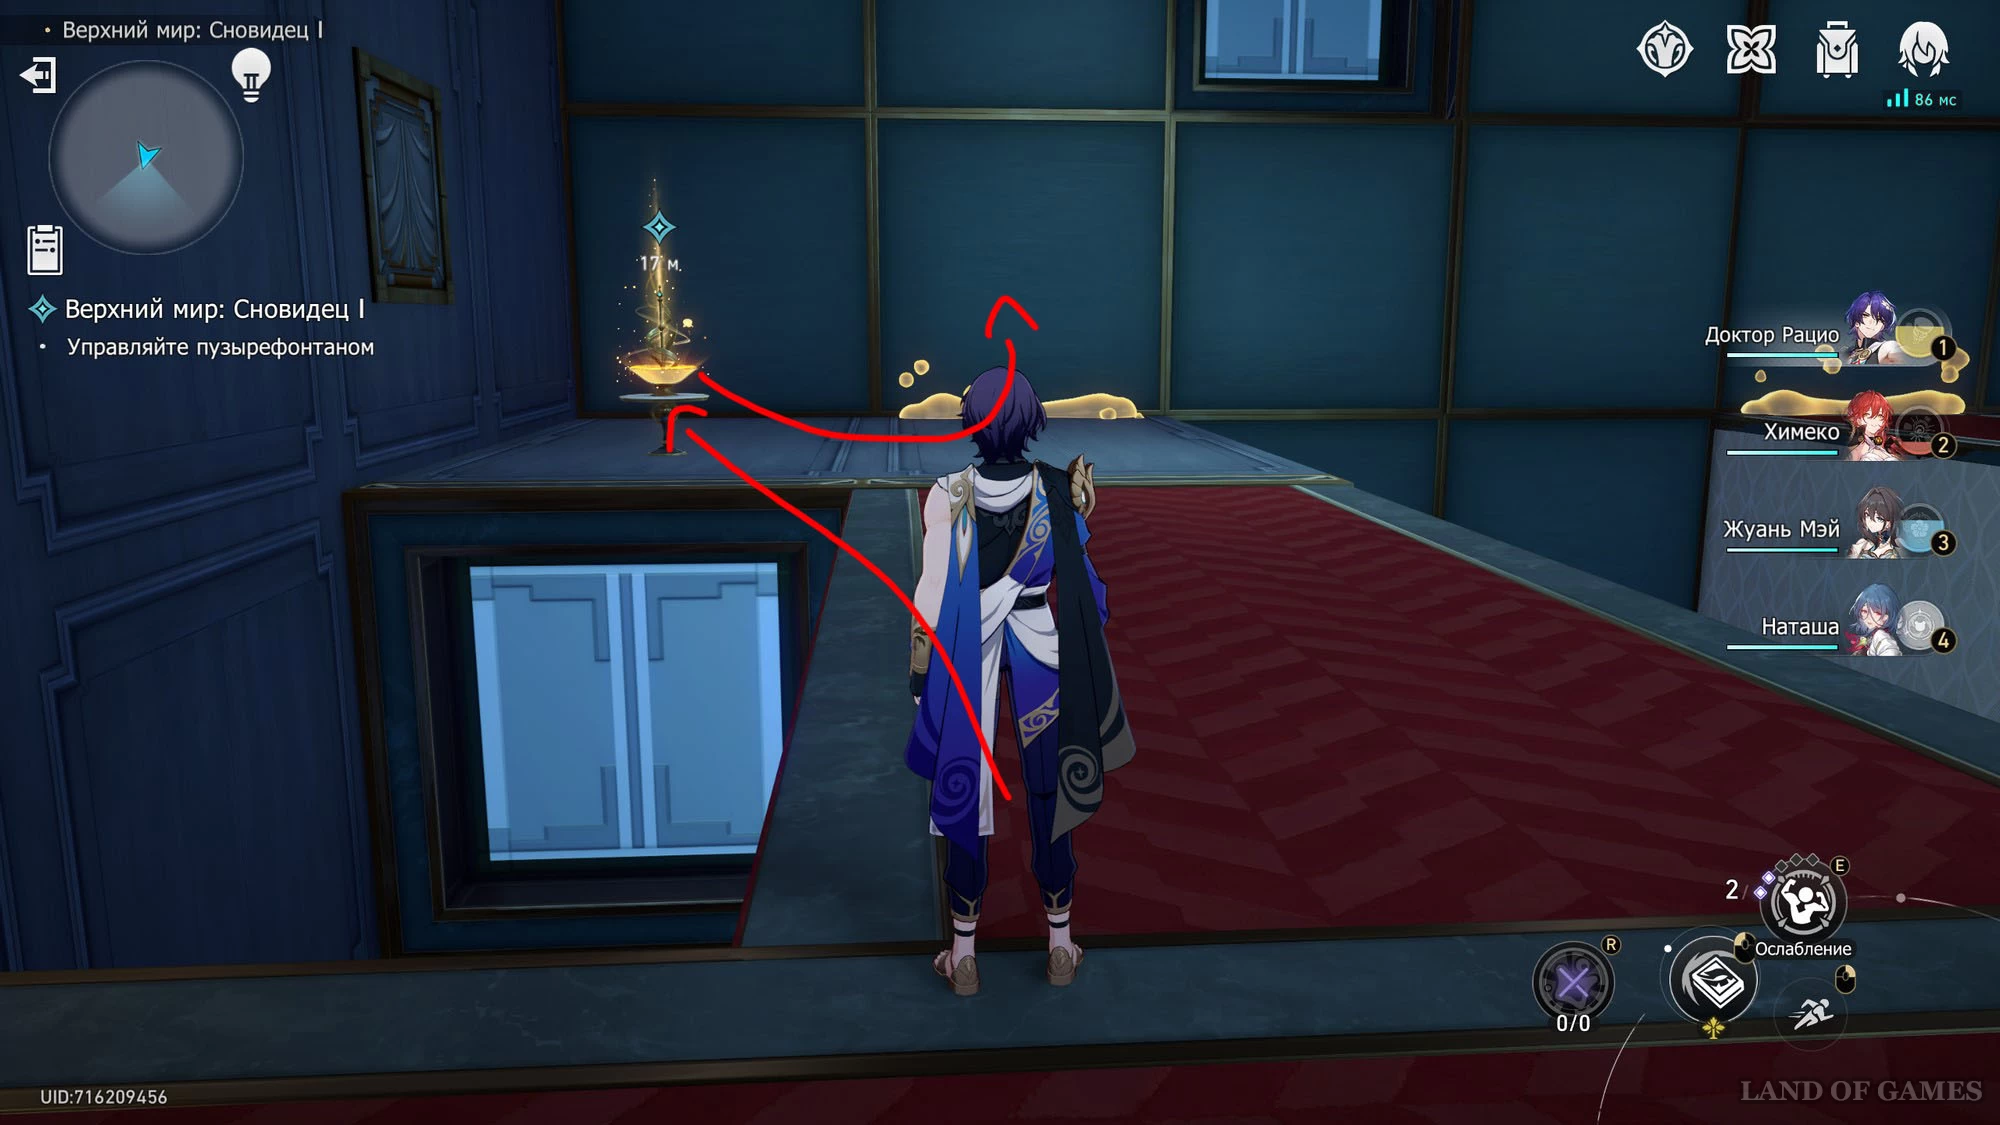
Approach the second bowl to get 1 more bubble, turn around and activate the bridge on the left. Returning to the normal plane, press the button to create a path for yourself. Talk to your cellmate.
Overworld: Dreamer 2
Once you begin the challenge, interact with the picture in front of you to enter the dream world. Run forward and press the yellow button to create a path for yourself to the bowl. Take the two dream bubbles, turn right and activate the bridge that will take you to the wall. Having done this, activate the bridge ahead on the left and interact with the second bowl.
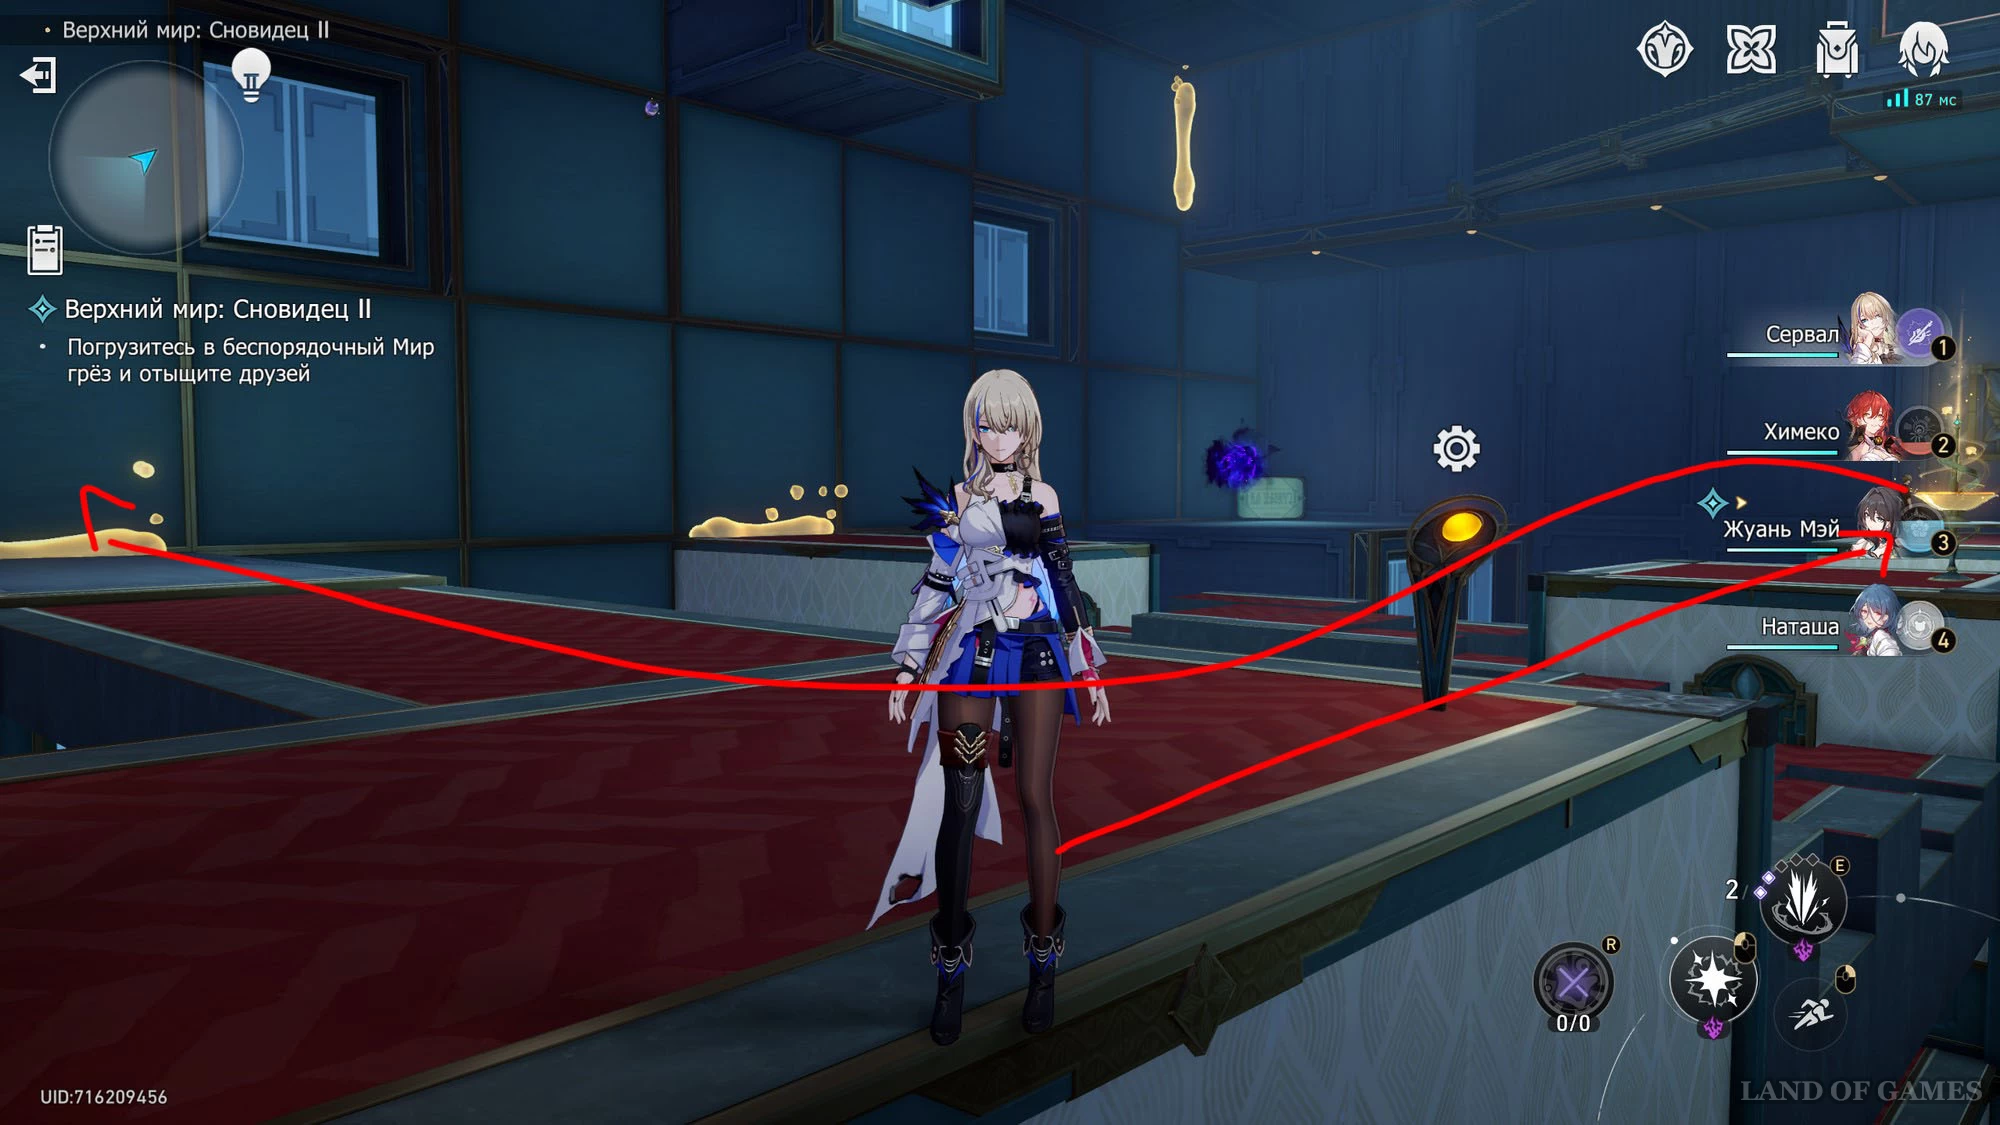
Move further to the bridge and activate it. Go to the wall and place the bridge on the right. Turn right, press the button and approach Brother Khan to complete the Achievement: Challenger.
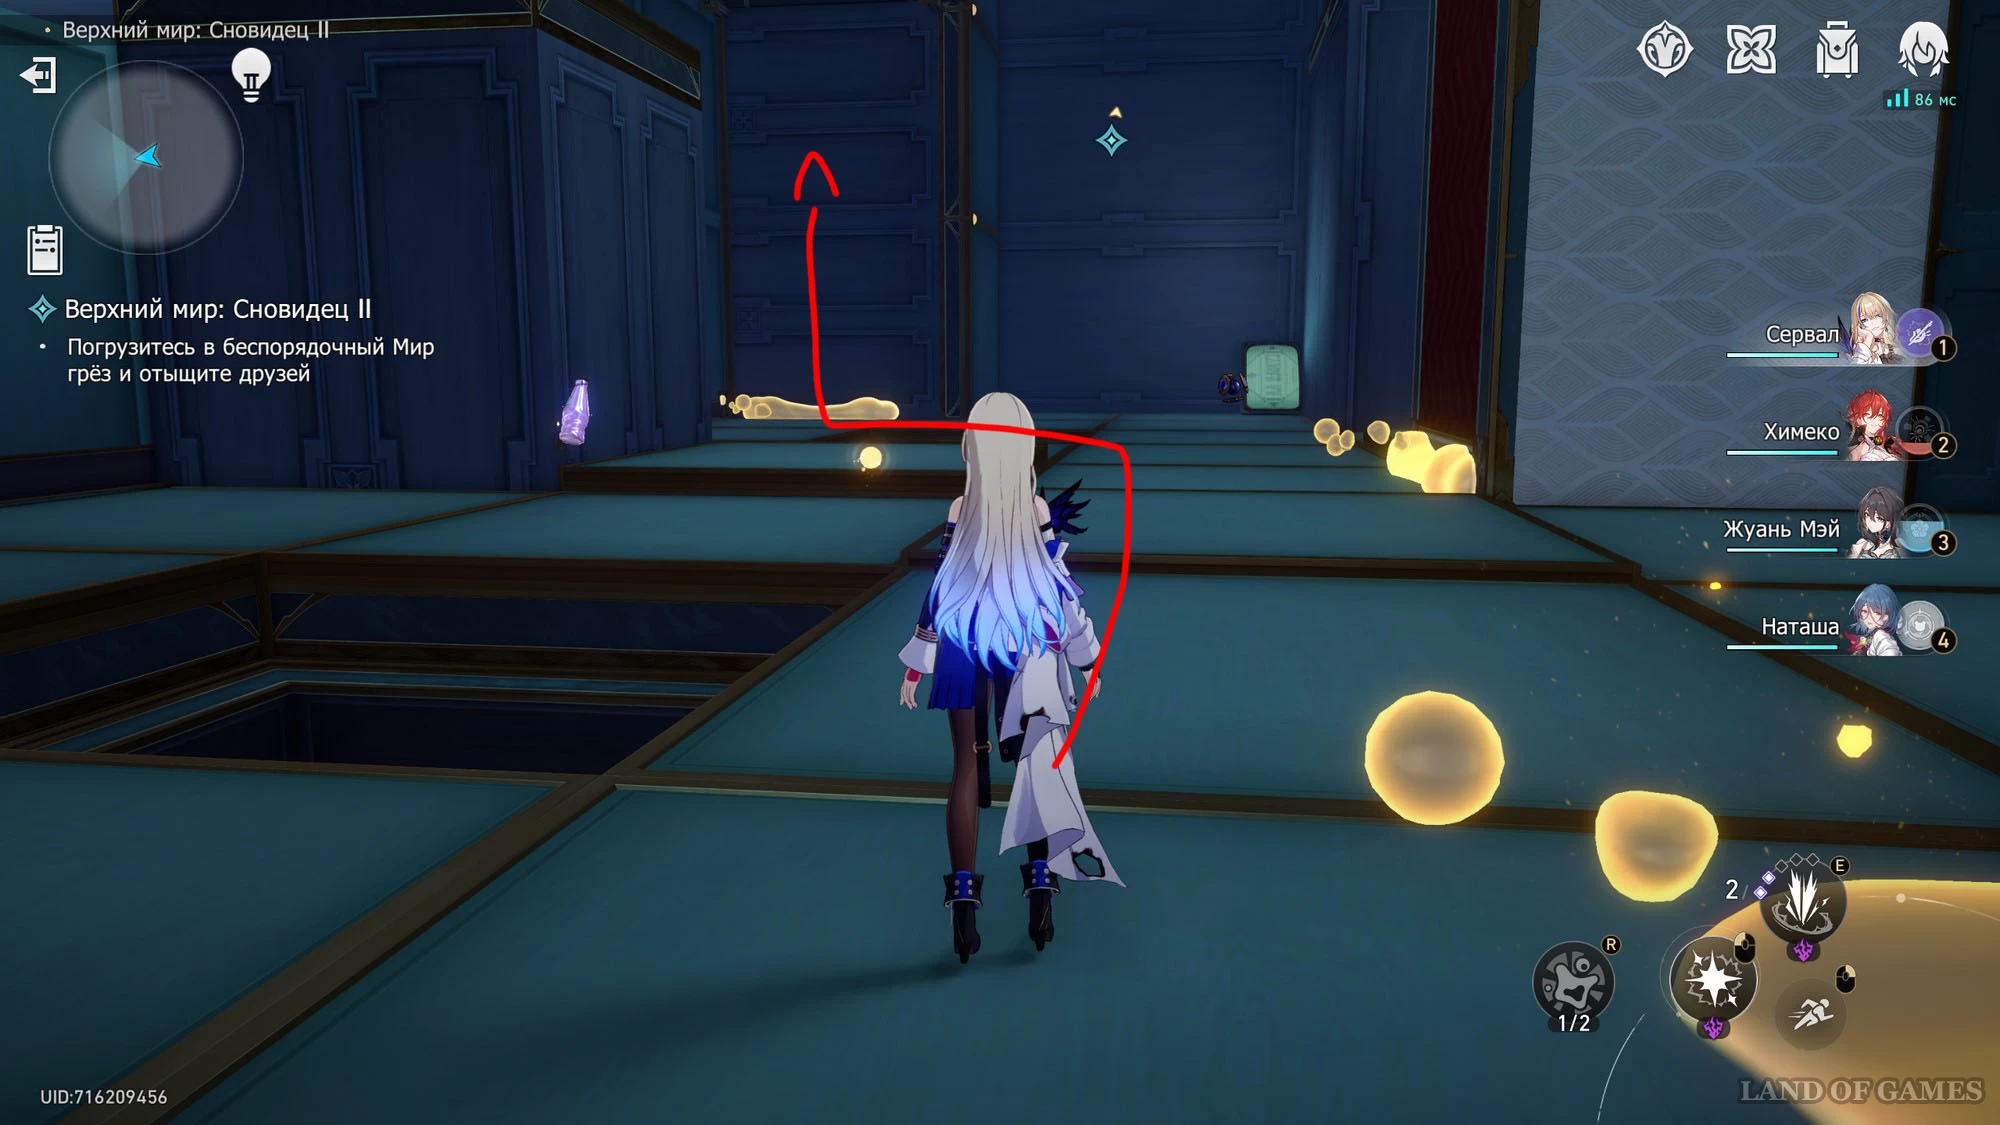
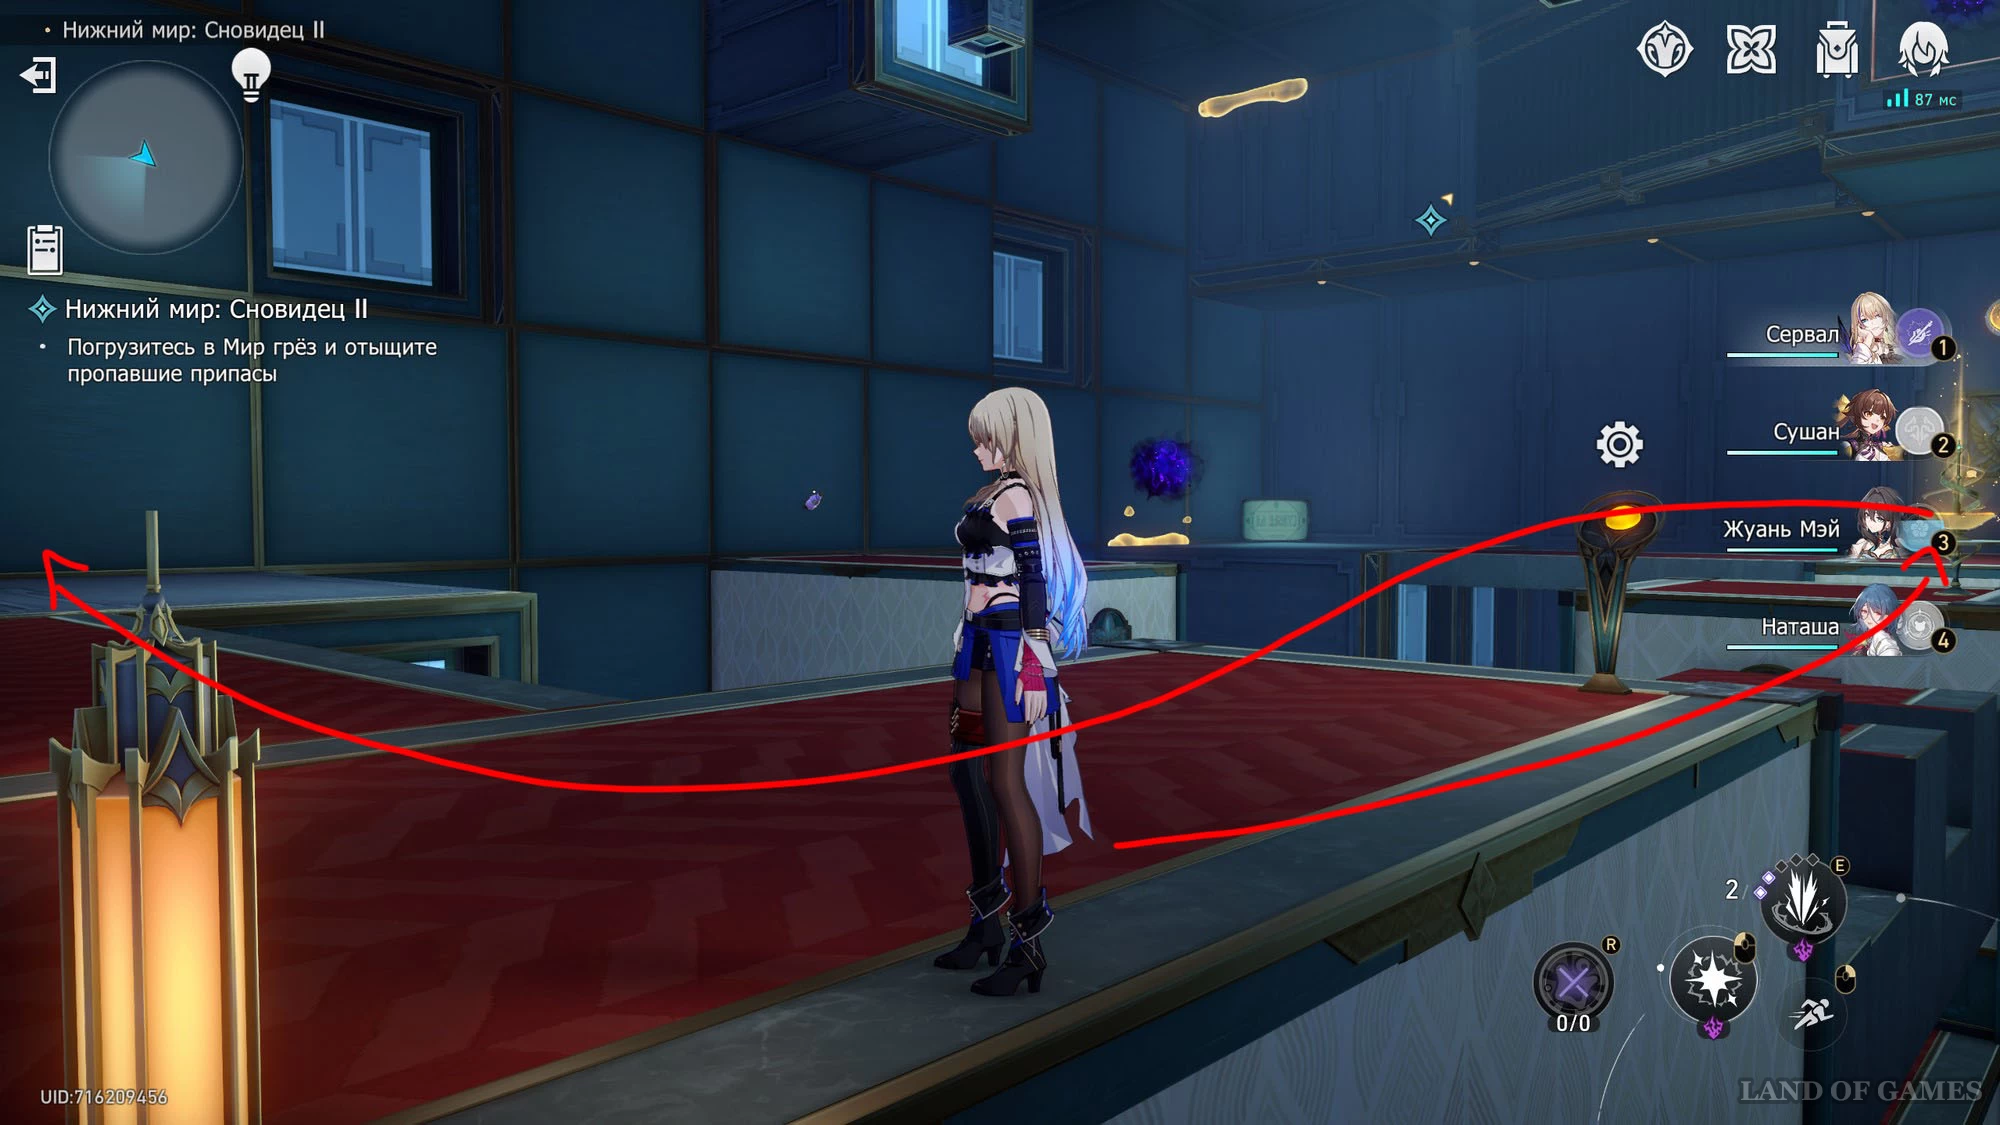
Nether: Dreamer 1
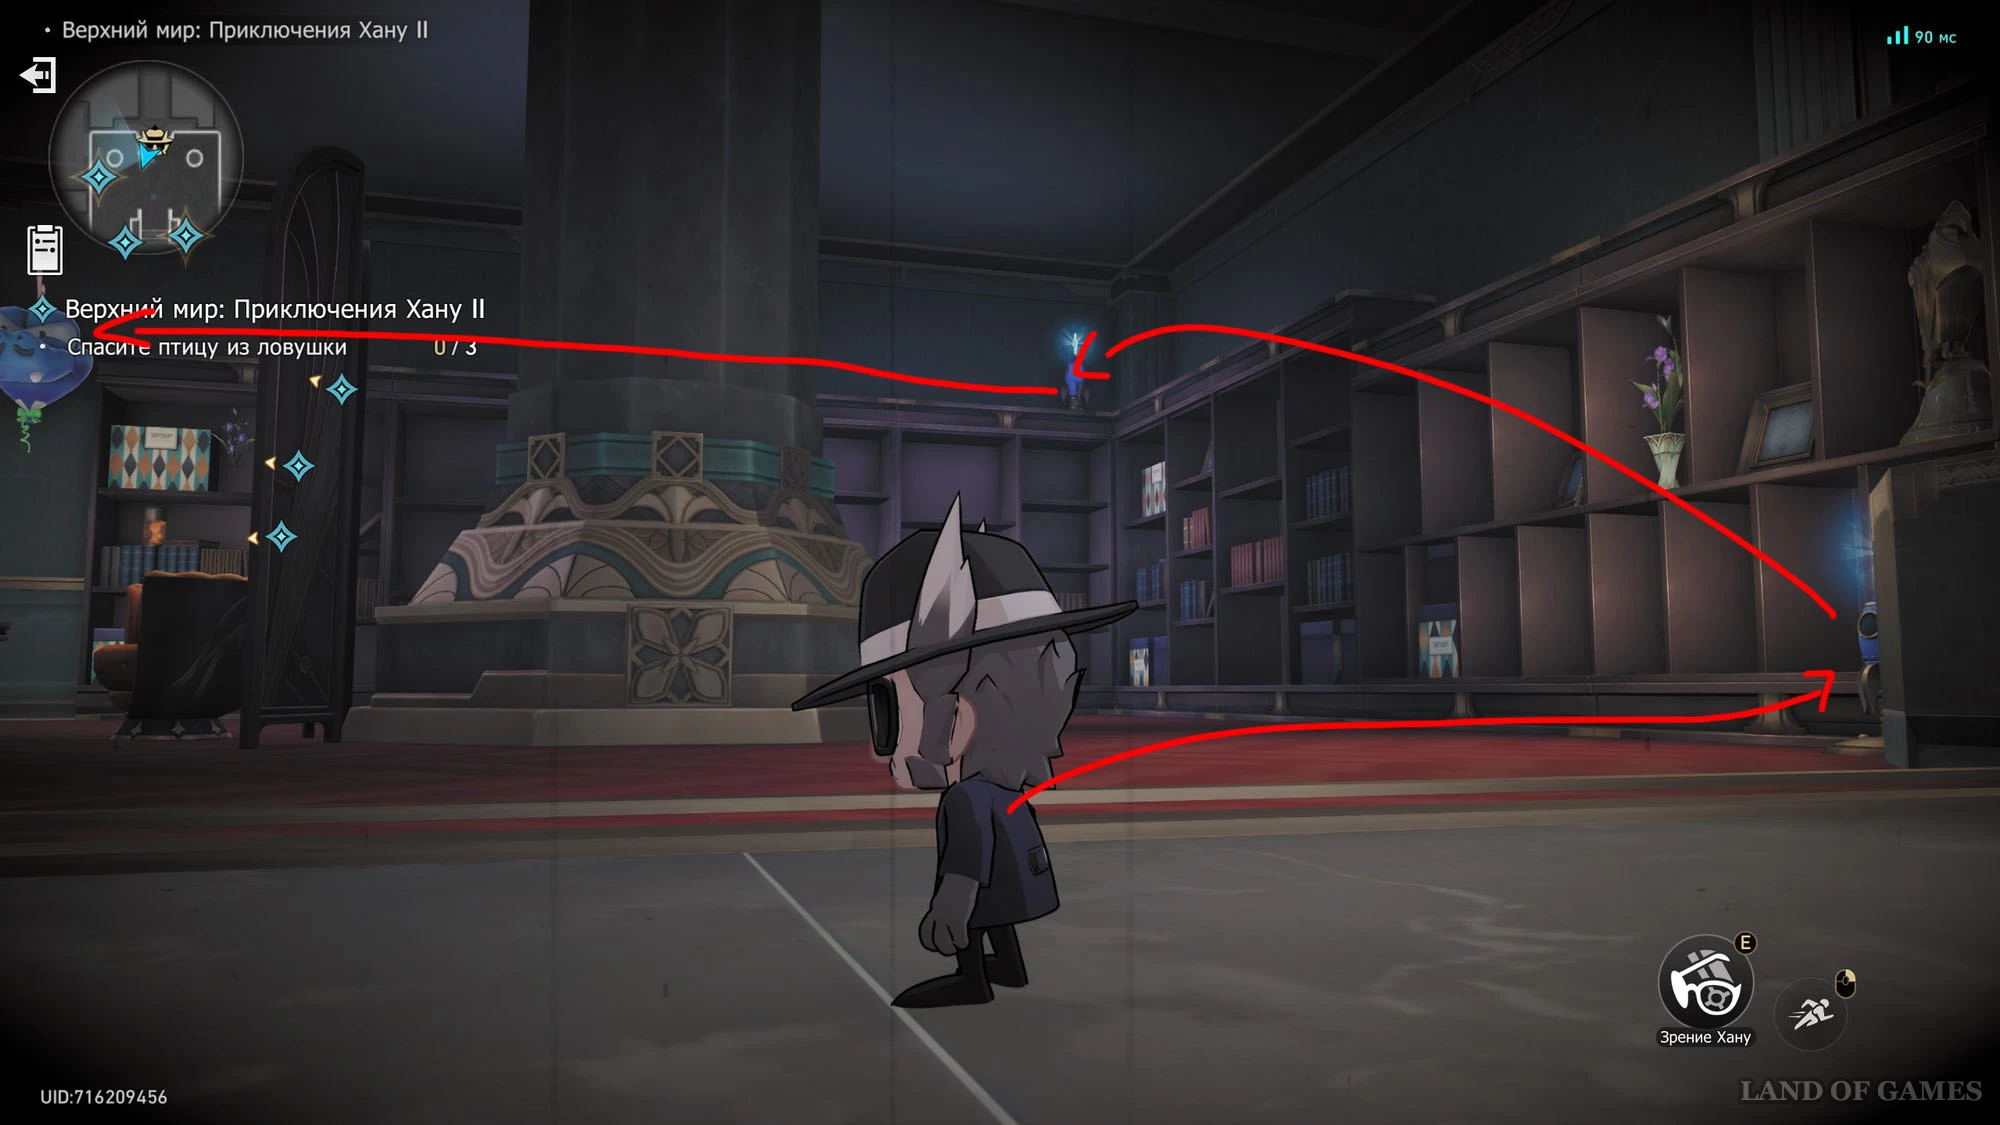
Once you begin the challenge, interact with the picture in front of you to enter the dream world. Turn left and press the yellow button. Walk along the path that appears and take 2 dream bubbles from the golden bowl on the right, and then activate the bridge ahead.
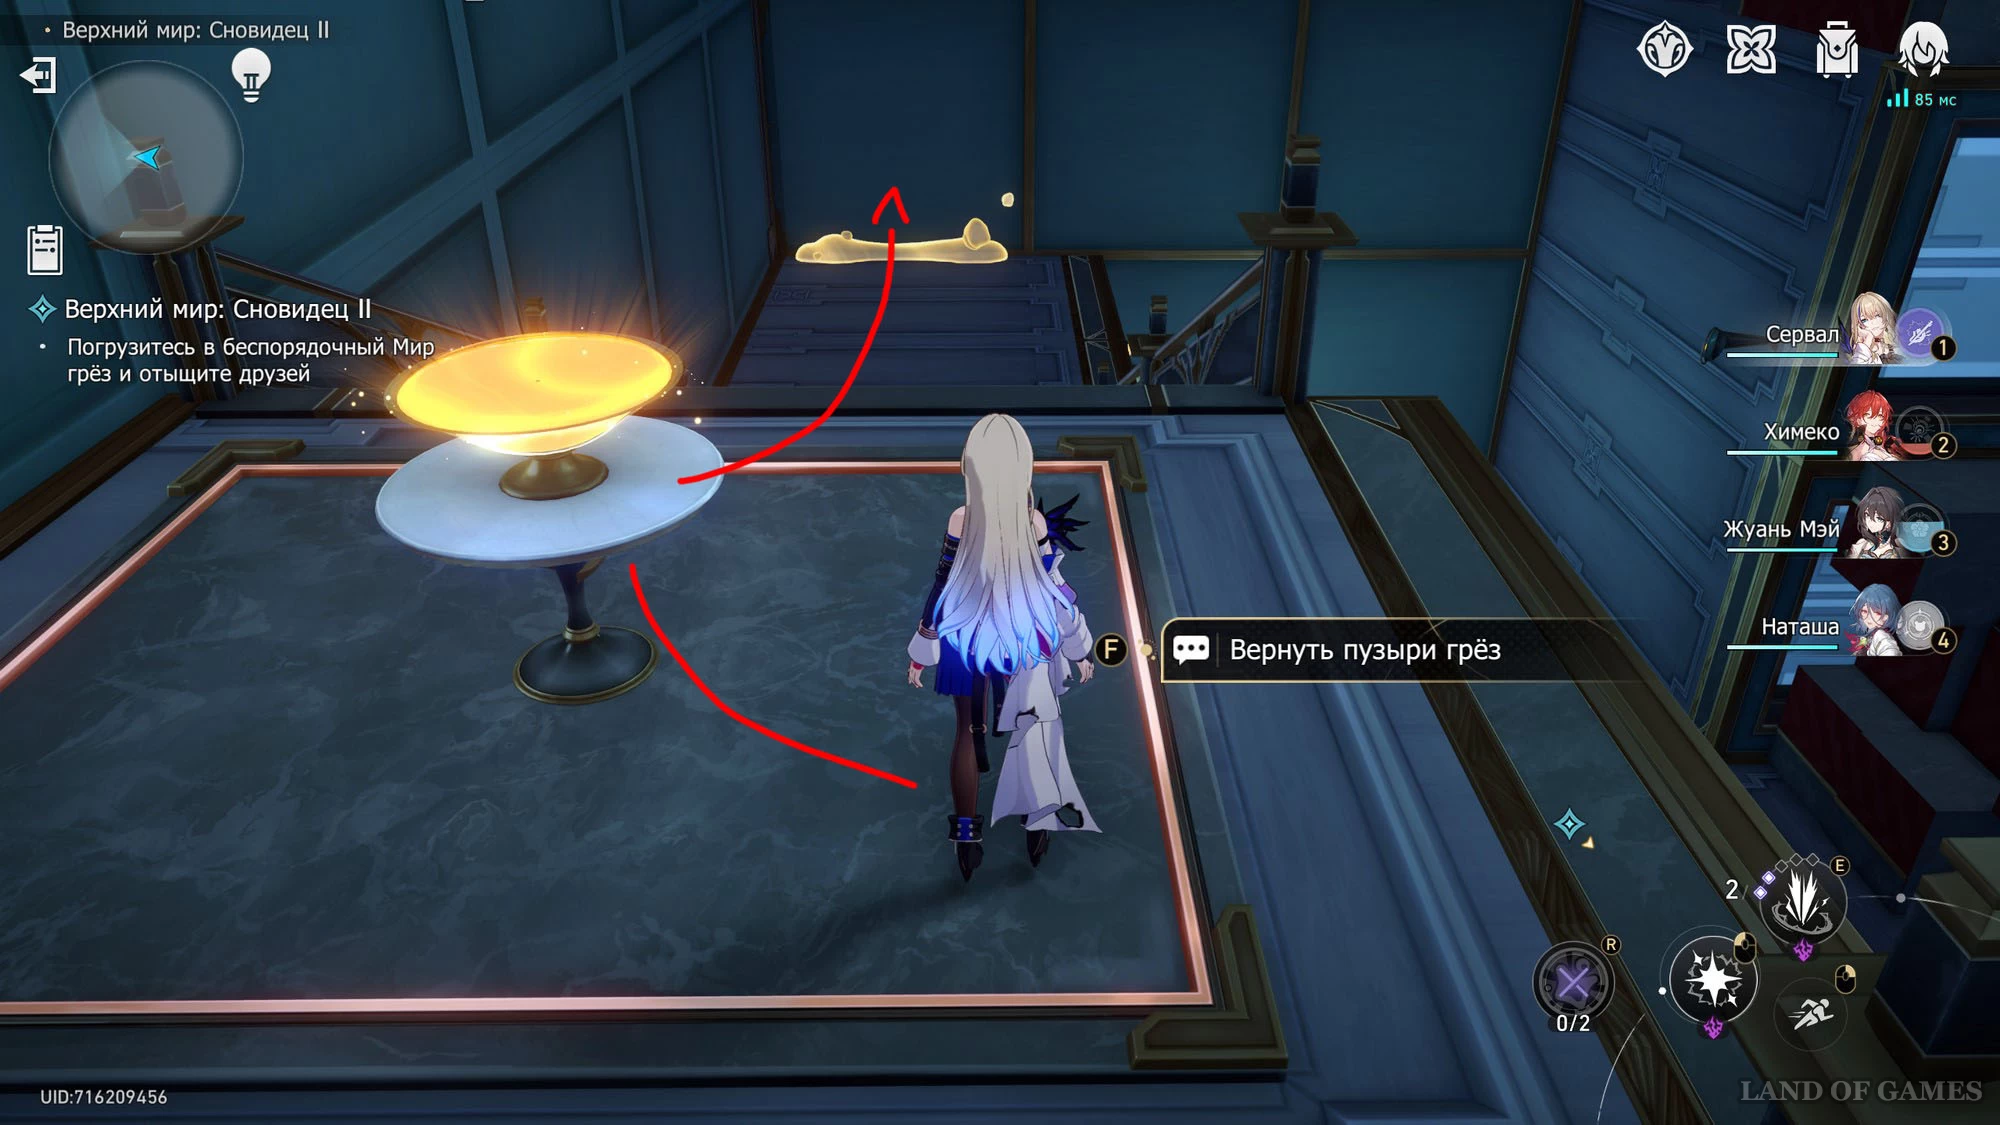
Once on the wall, move forward and turn left 180 degrees. Interact with the second bowl to restore bubbles and activate the bridge on the left. Returning to the normal plane, turn left and press the button. Then activate the bridge on the right and go to the third bowl to get 3 bubbles.
Go back and activate the bridge opposite, and then the jelly on the right. As a result, you will reach the chest and complete the challenge. It is not necessary to fight enemies along the way.
Nether: Dreamer 2
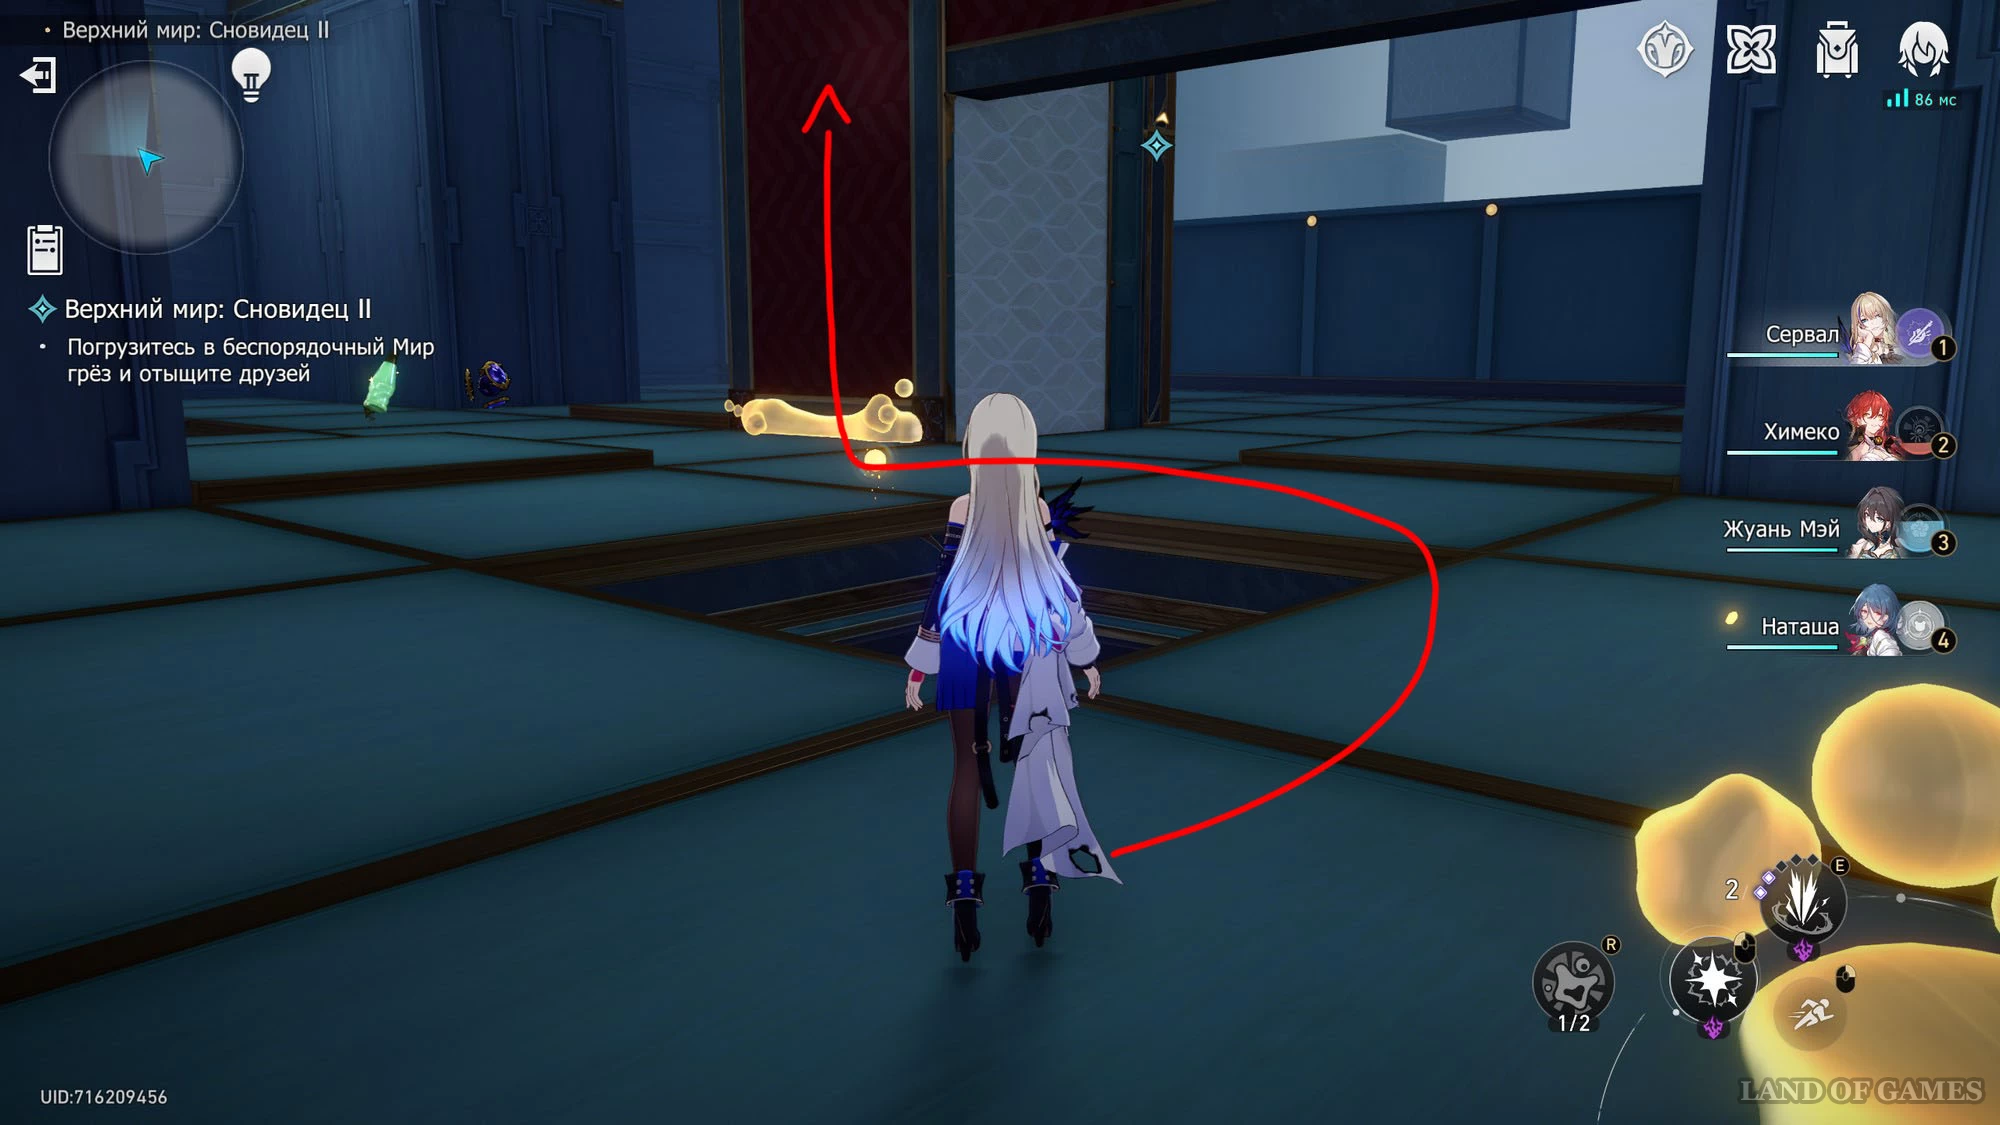
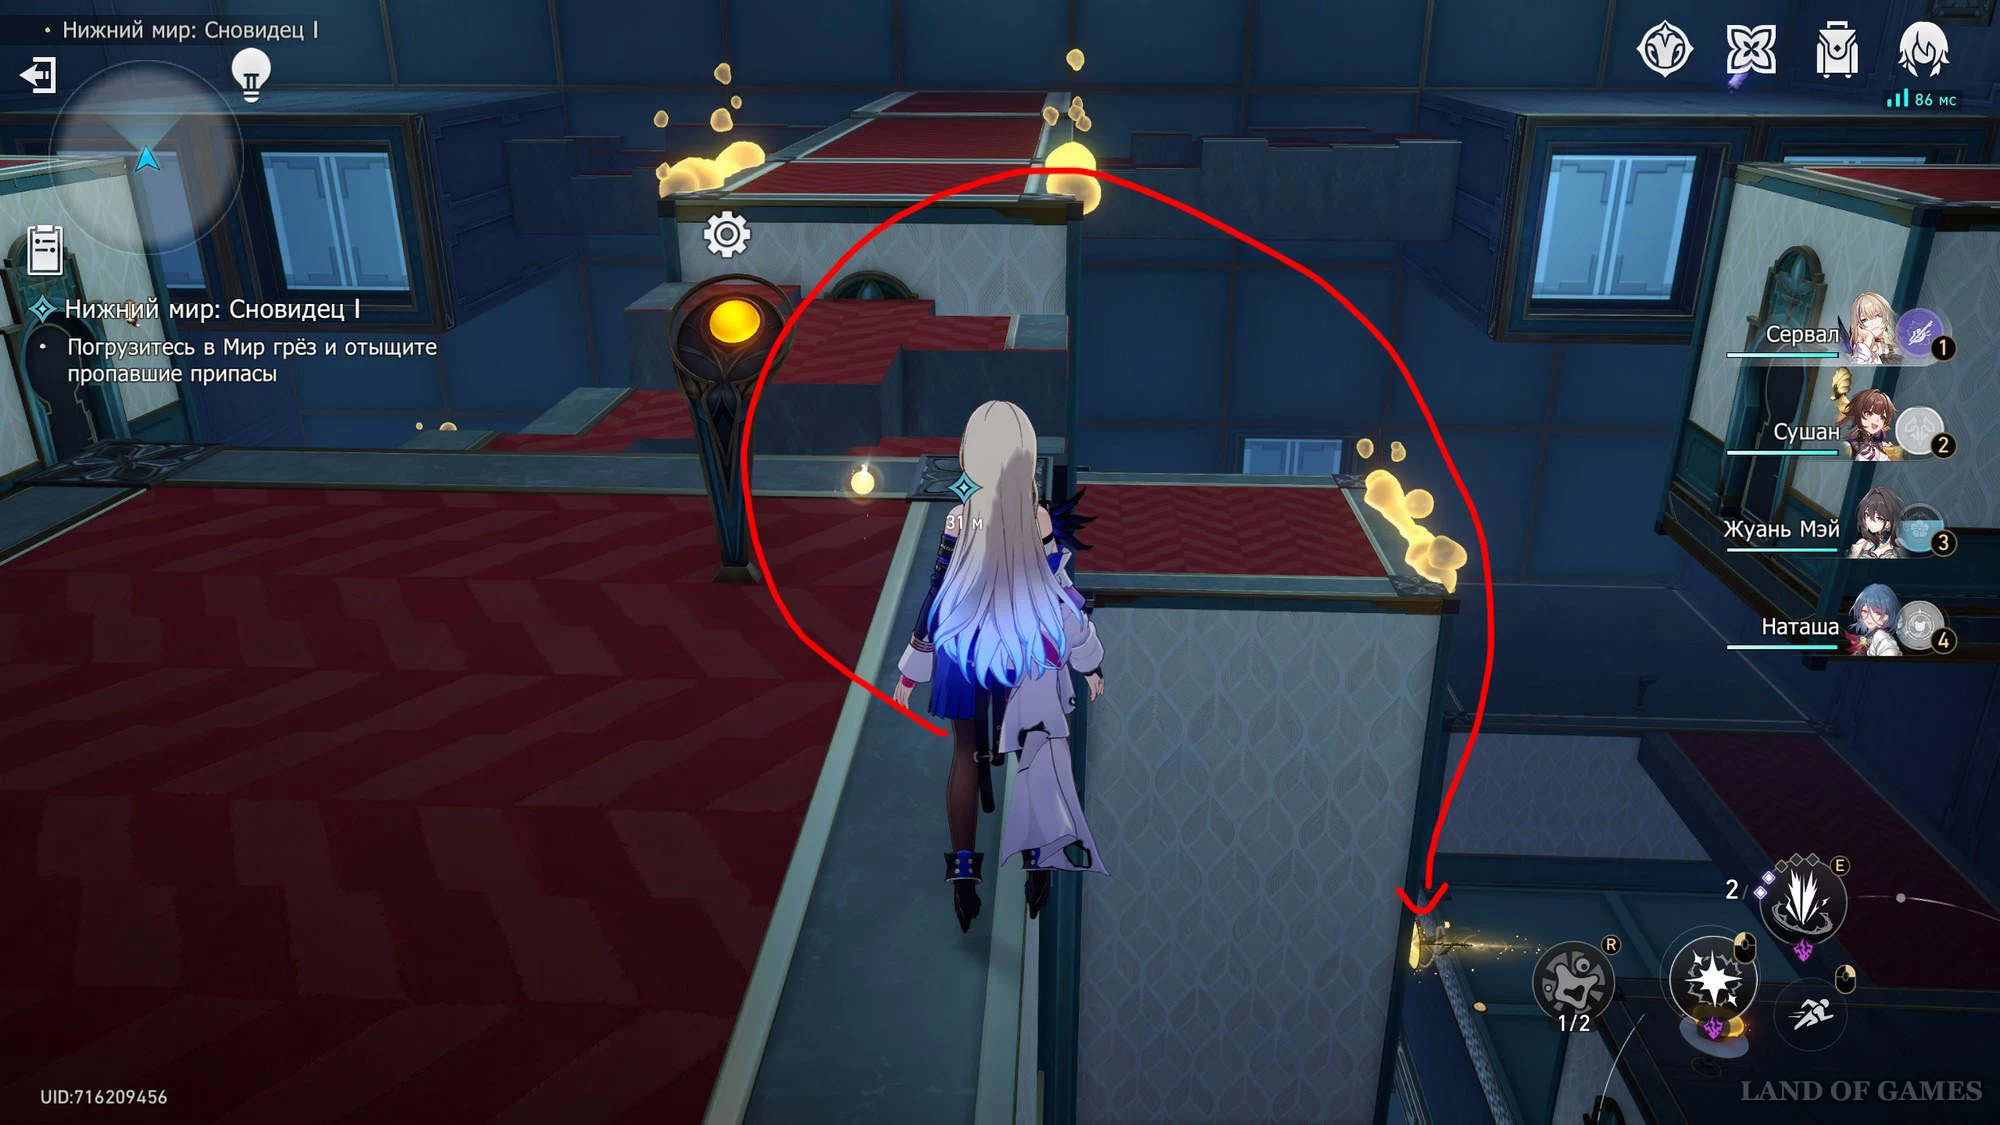
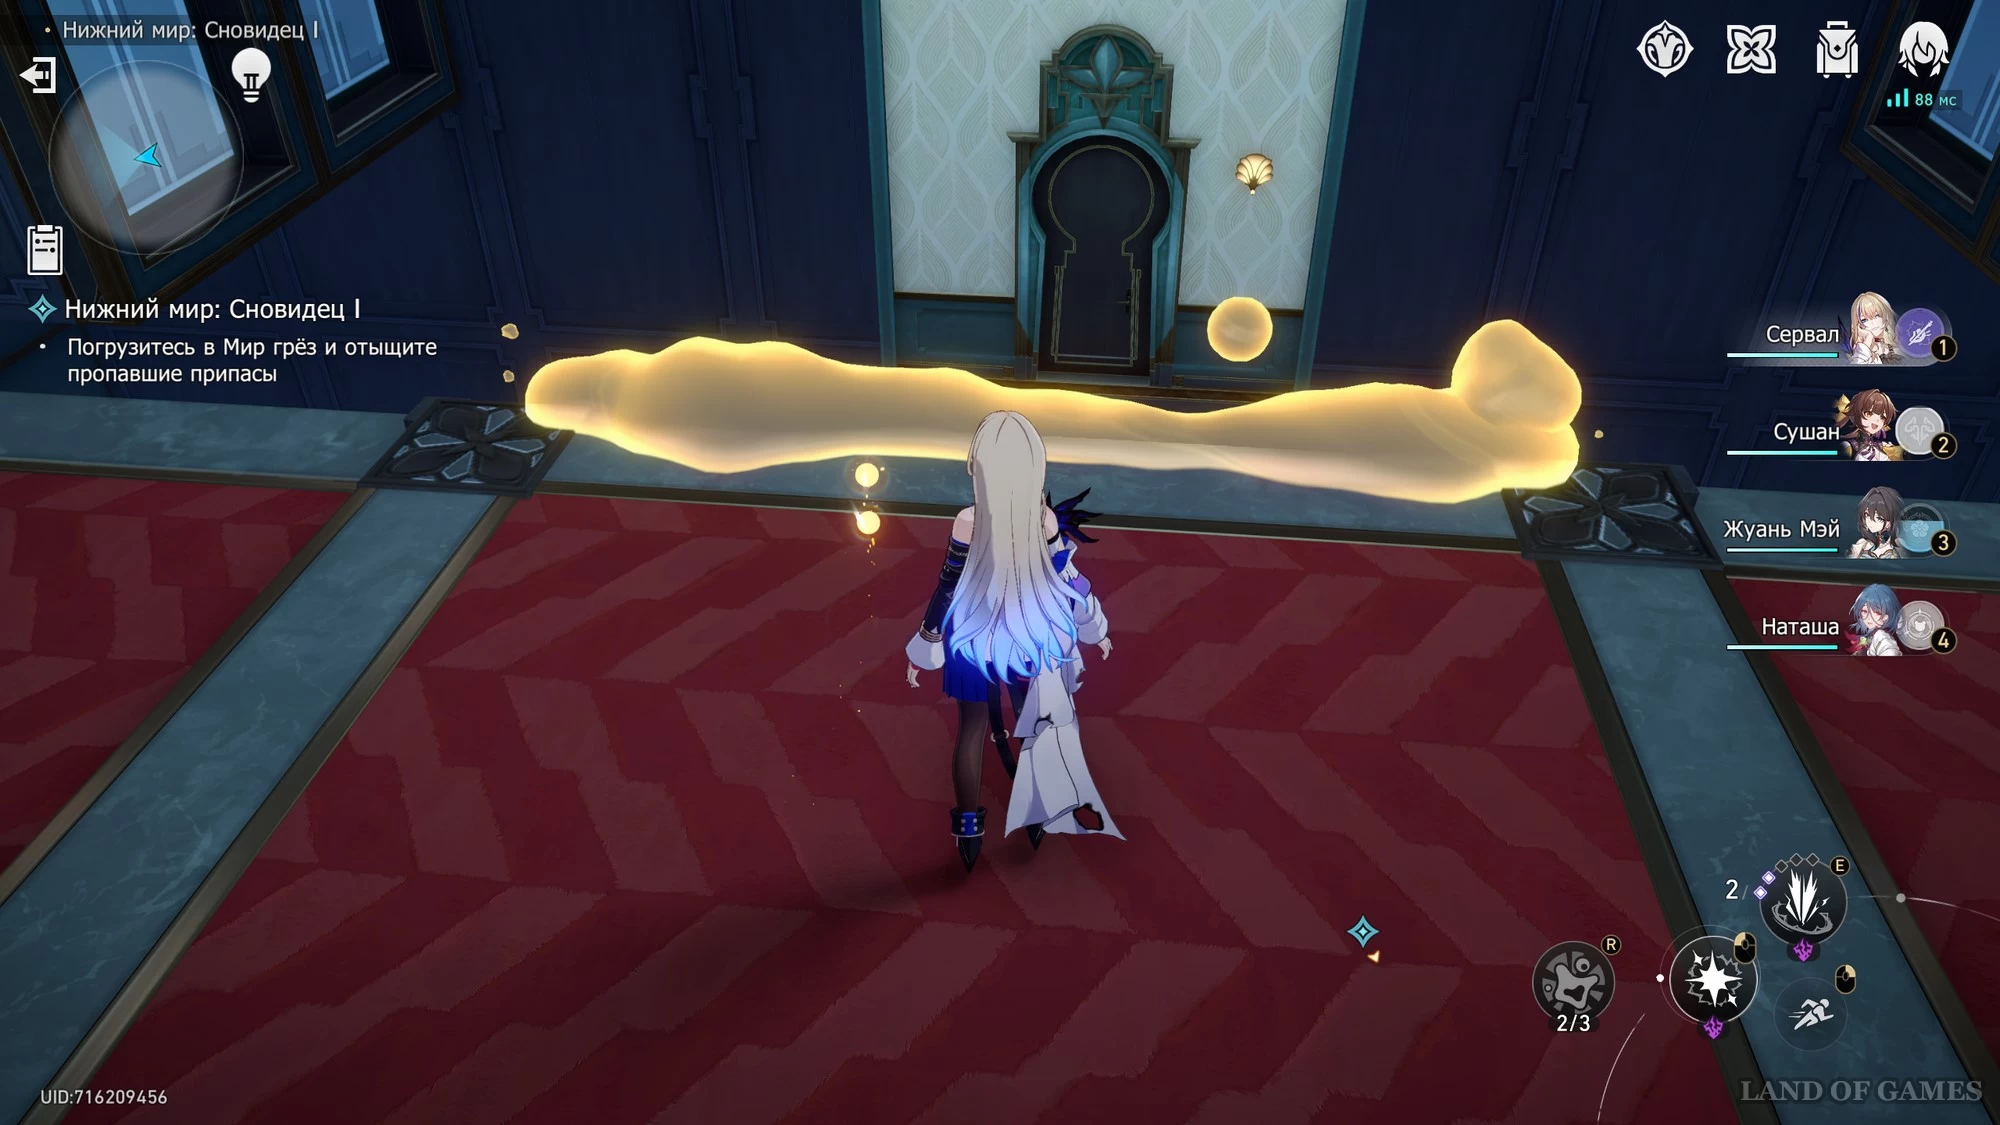
Once you begin the challenge, interact with the picture in front of you to enter the dream world. Go forward, press the button, go to the bowl and take 2 dream vials. Turn around, turn right and activate the bridge.
After crossing onto the wall, run forward and activate the bridge on the right. Returning to the normal plane, click on the button on the right and interact with the second bowl to replenish the bubbles. Turn around, turn right and activate the bridge.
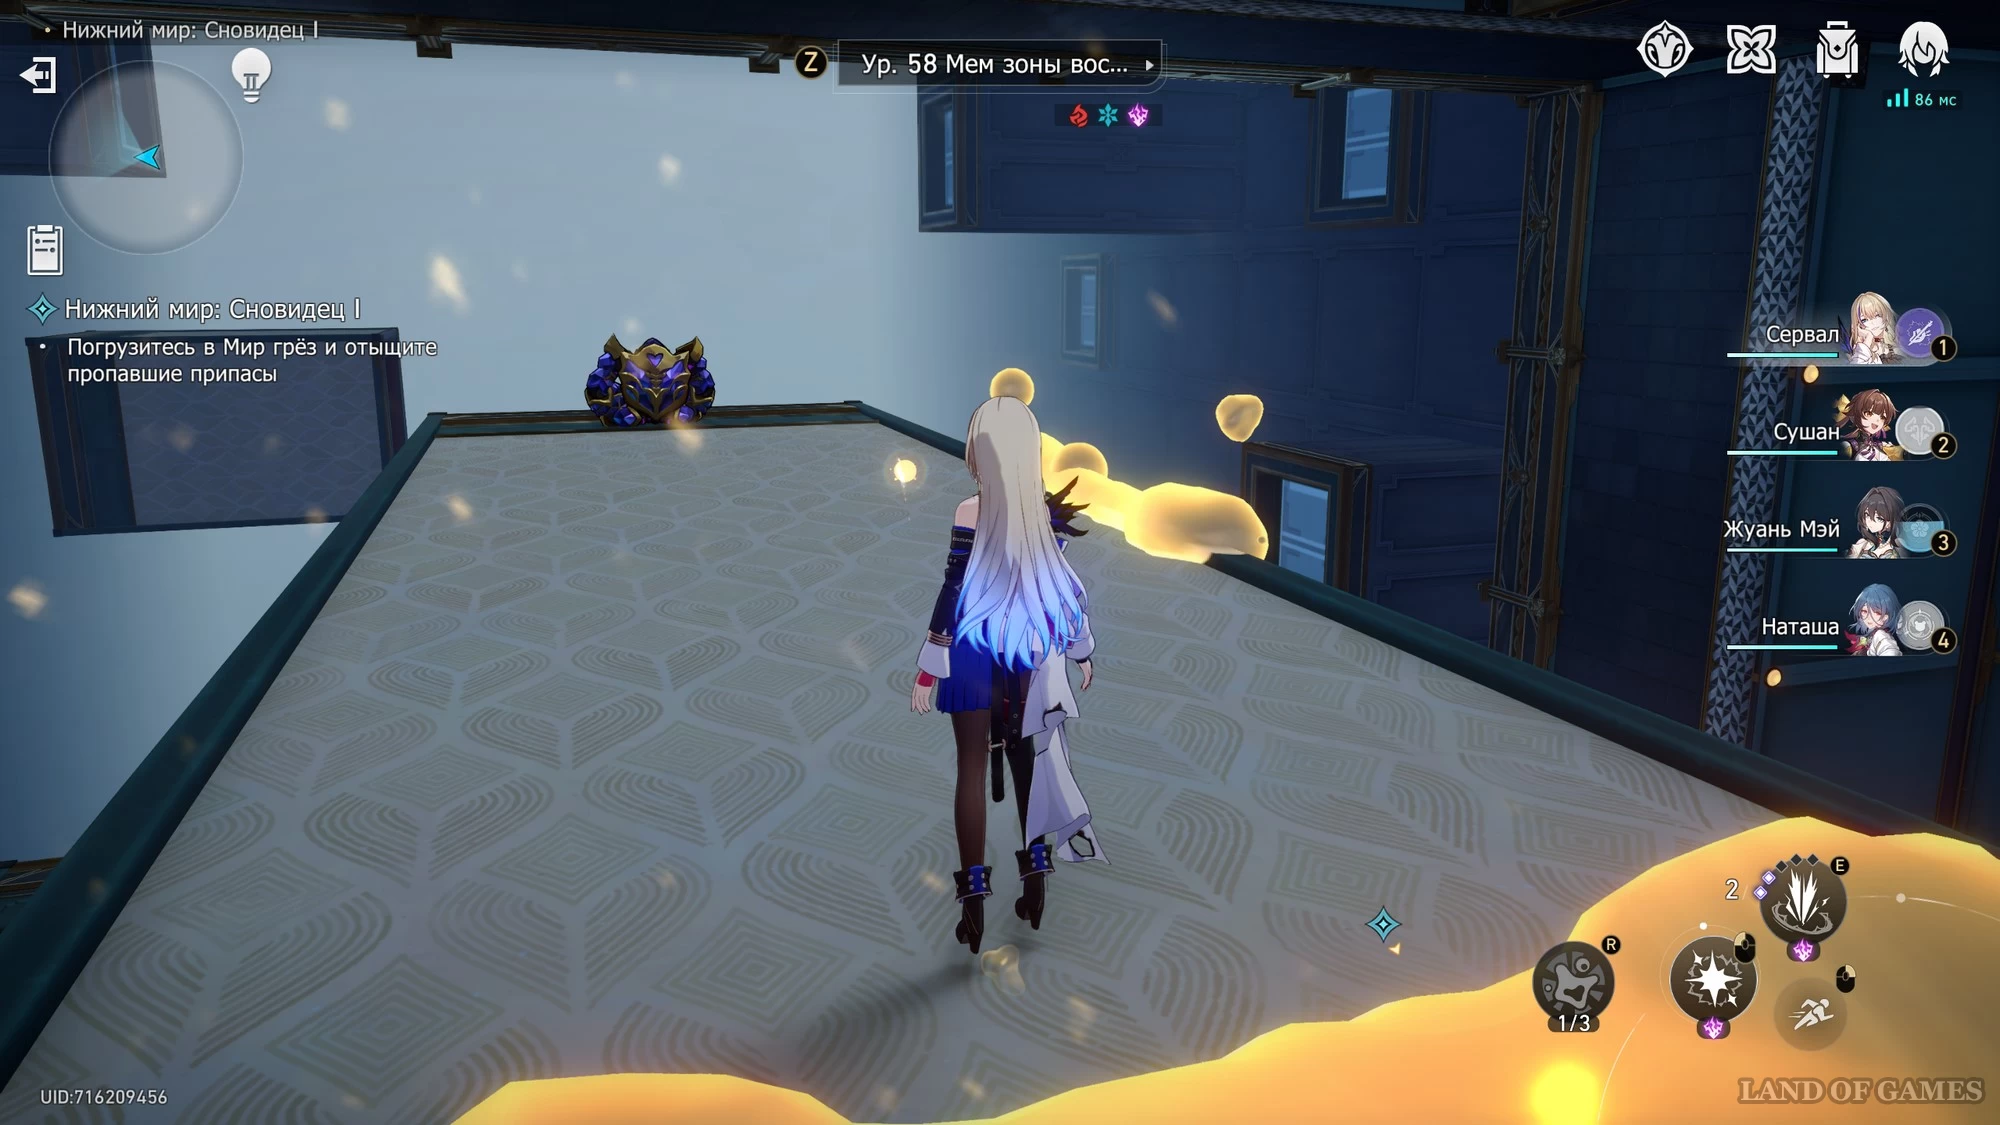
Once on the wall, turn right into another area with enemies, go to the far right corner and activate the bridge there. Turn right and click on the button to create a path. Interact with the third bowl and go across the bridge on the right.
Once on the other wall, run forward to the fourth bowl to get 3 dream bubbles and go back. Replenish the bubbles at the third bowl and continue running back. Go to the area where there are 3 bridges at once and activate the one on the right at the end (see screenshot below).
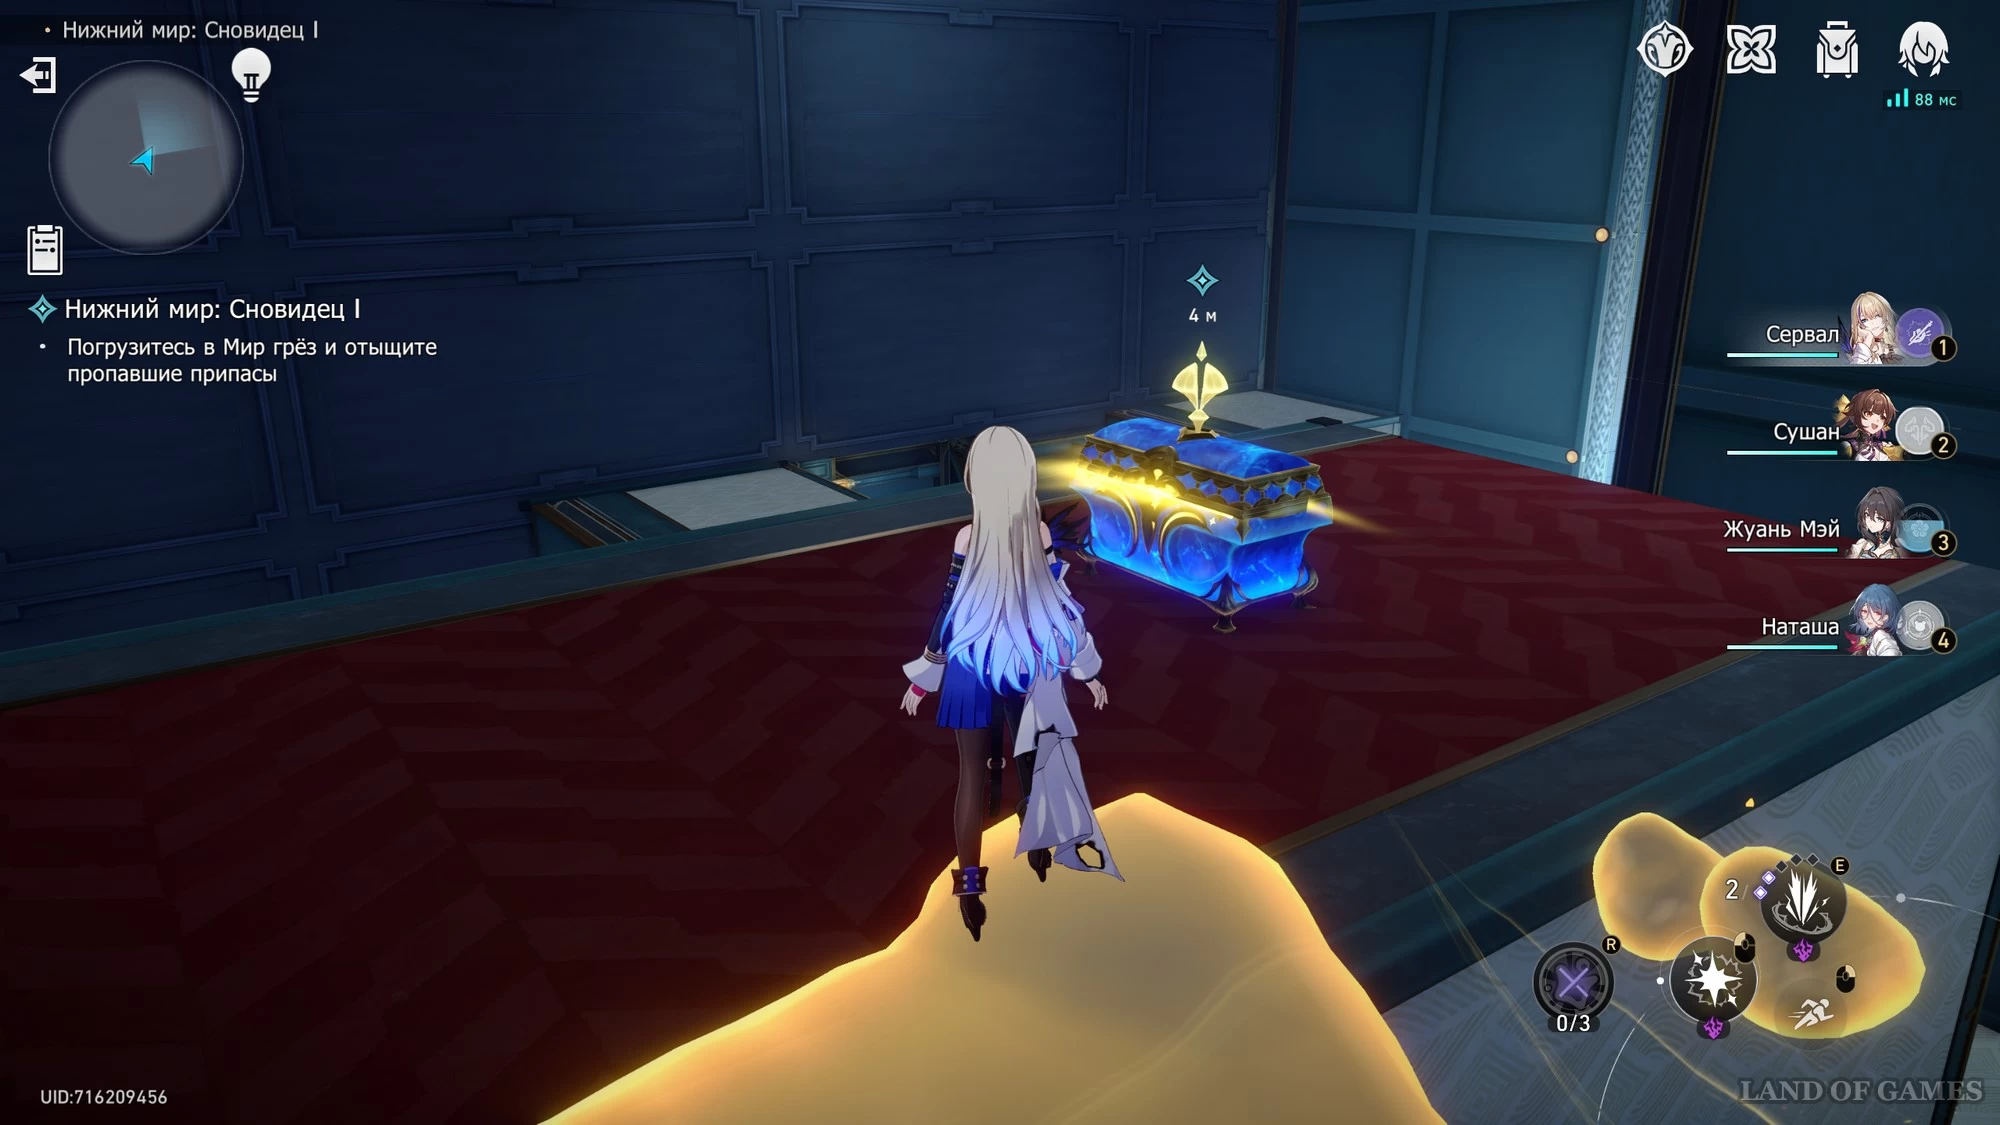
Move forward and activate the bridge on the right. Then turn right and interact with the chest to complete the Achievement: Challenger.
Don't forget to pick up all the rewards on the event page afterwards, including one free 4-star character.
Comments
You need to login to add comments.
You can login with