
Going on adventures around Fontaine in Genshin Impact You may have come across puzzles with stabilizers more than once, when solving them you need to adjust the devices by hitting them at a certain moment. For solving such puzzles you can get both regular and precious chests filled with valuable loot. In this guide we will tell you where to find and how to deal with unstable mechanisms.
How to solve puzzles with stabilizers
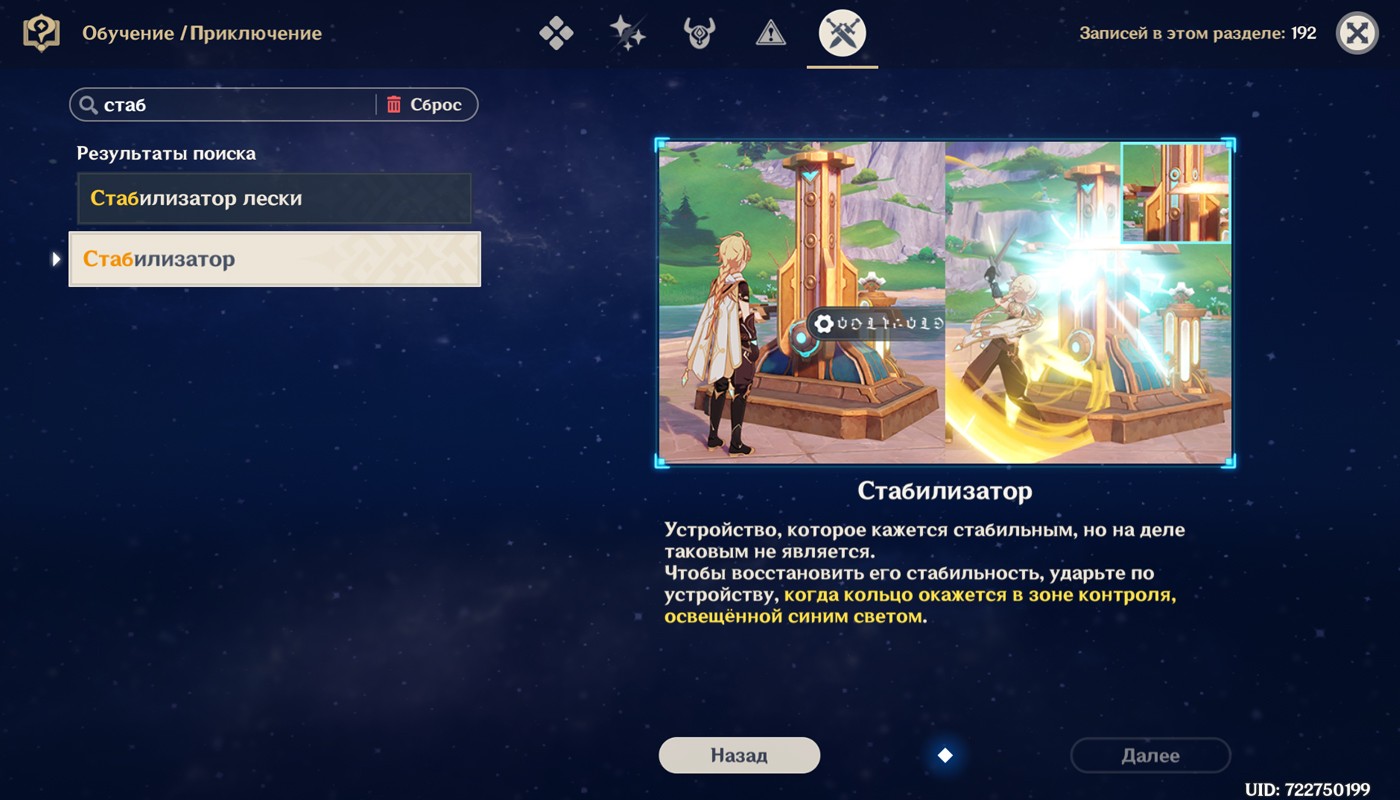
In most cases, this puzzle requires the player to place a block with an energy field next to the stabilizer, activate the device, and then attack the device at the moment when its moving part is at the level with the illuminated gap of the scale.
Sometimes you have to use strength pneumusia, and also charge inactive power supplies through video communication terminals.
Read more about the various puzzles from the Hydro region in separate guide.
Where to find all stabilizers in Fontaine
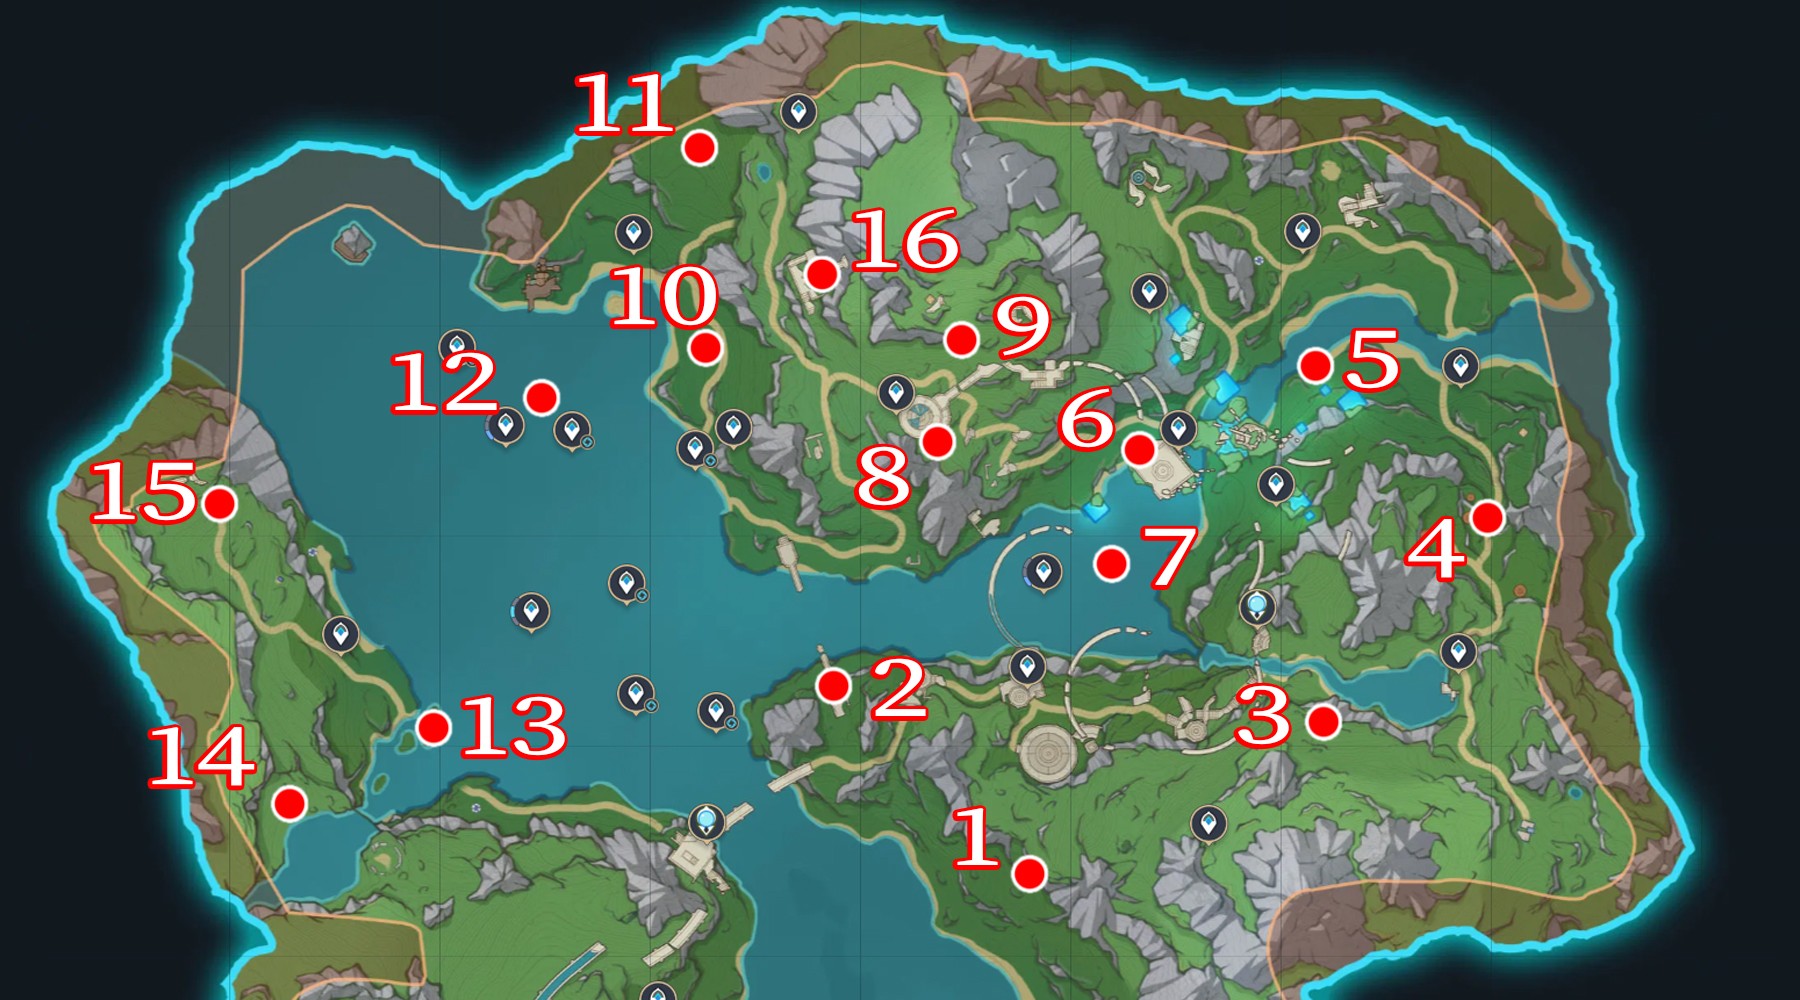
All stabilizer locations are in the northern half of the region (Liffey and Kinetic Energy Institute areas). In total, you have to decide 16 puzzles with destabilized devices. Let's look at each one separately.
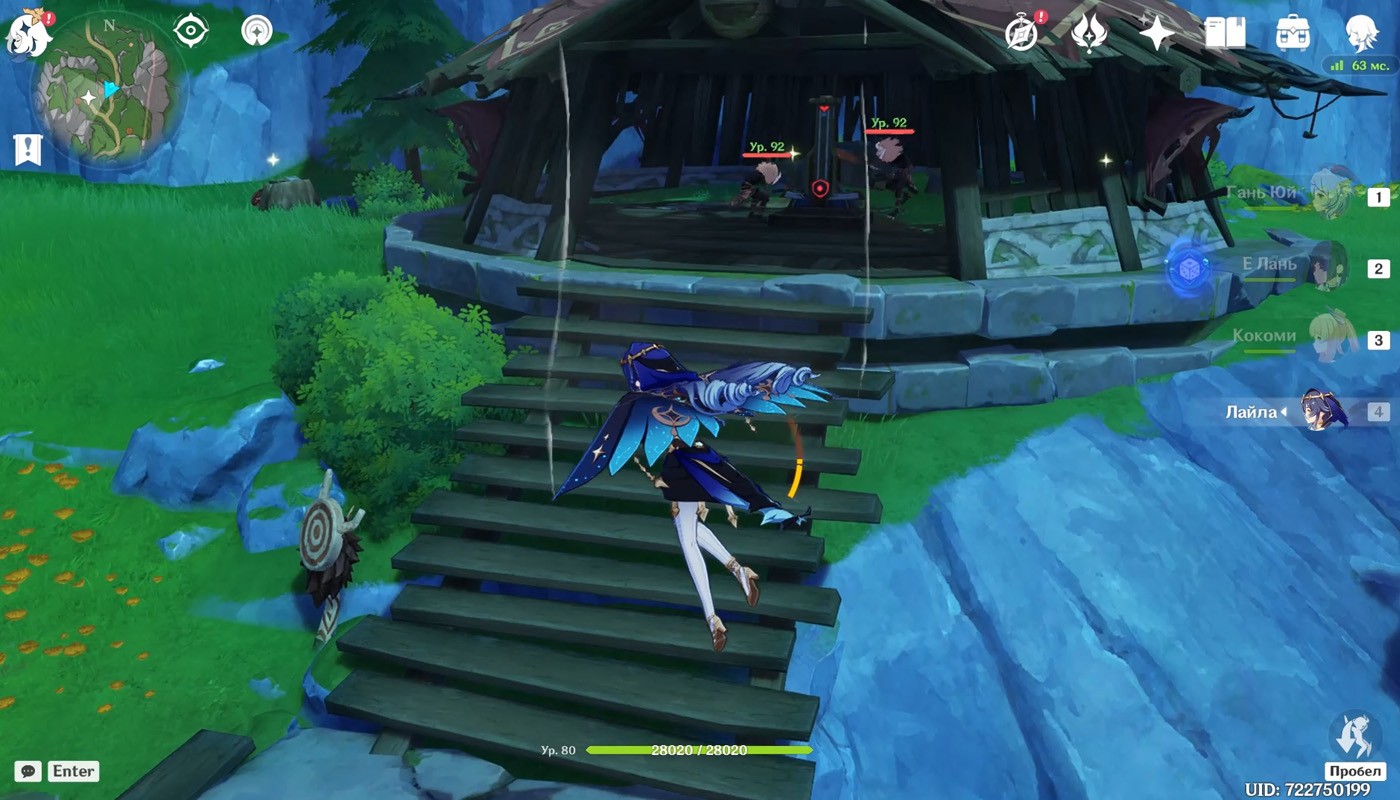
Stabilizer 1
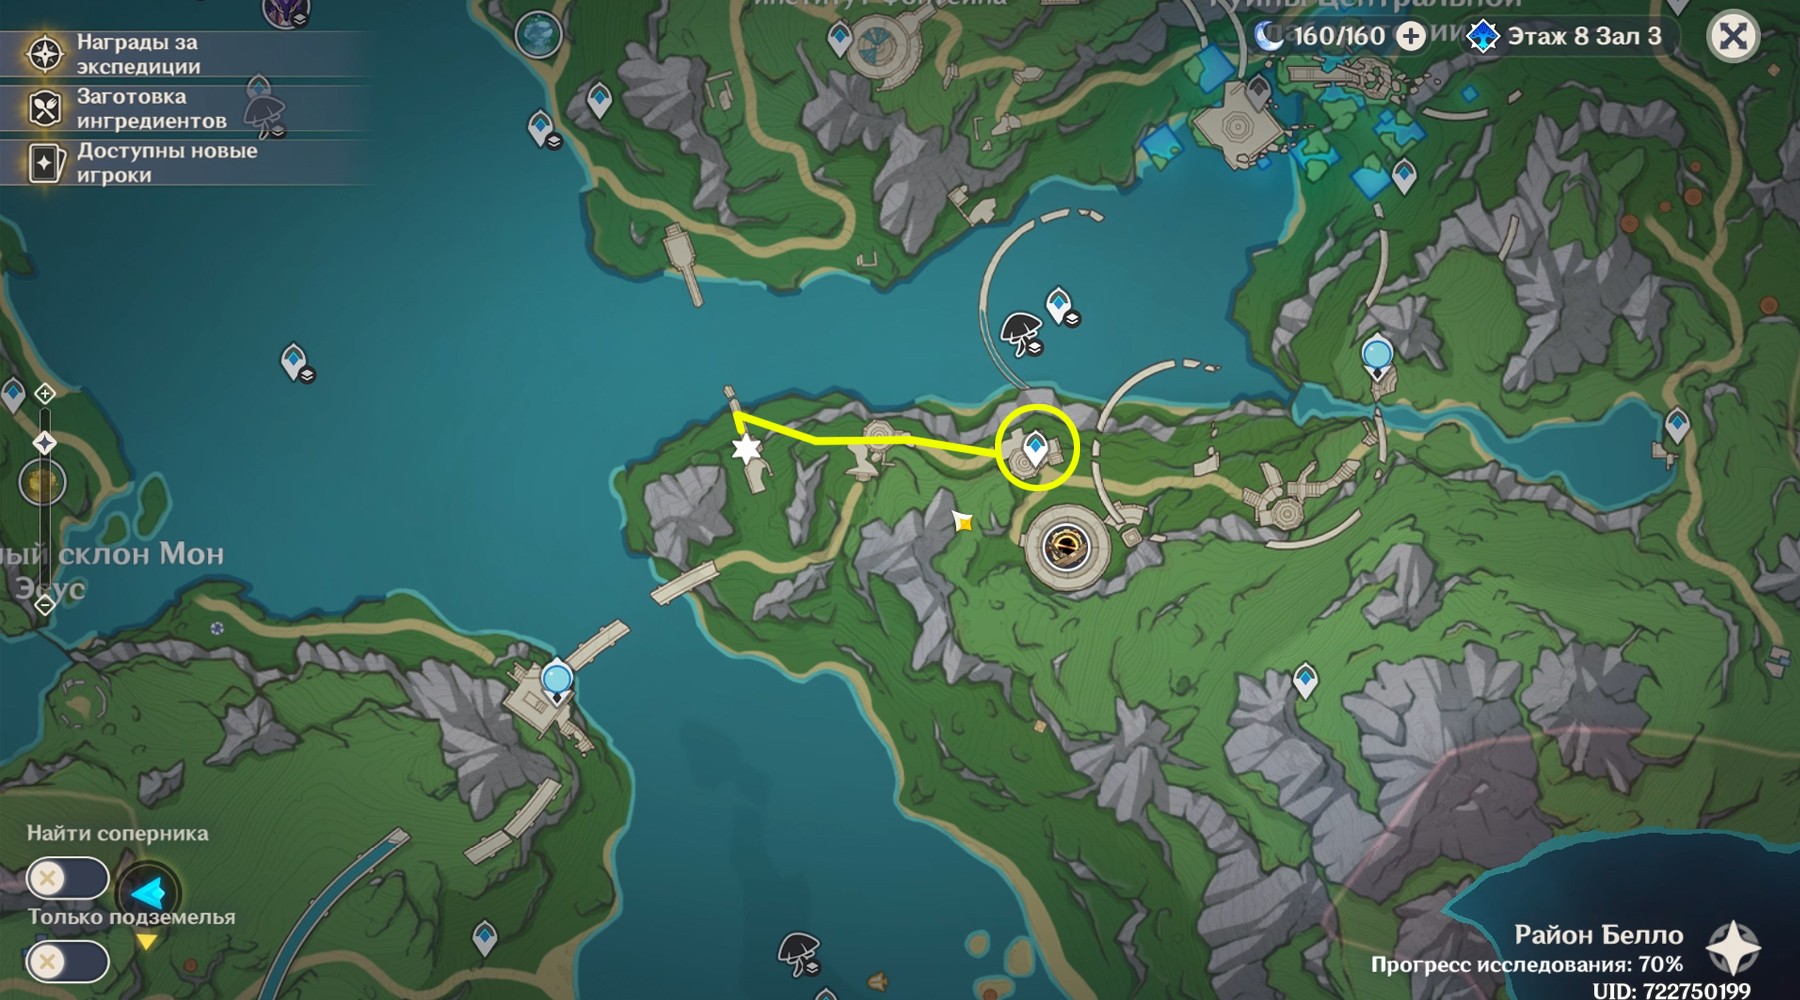
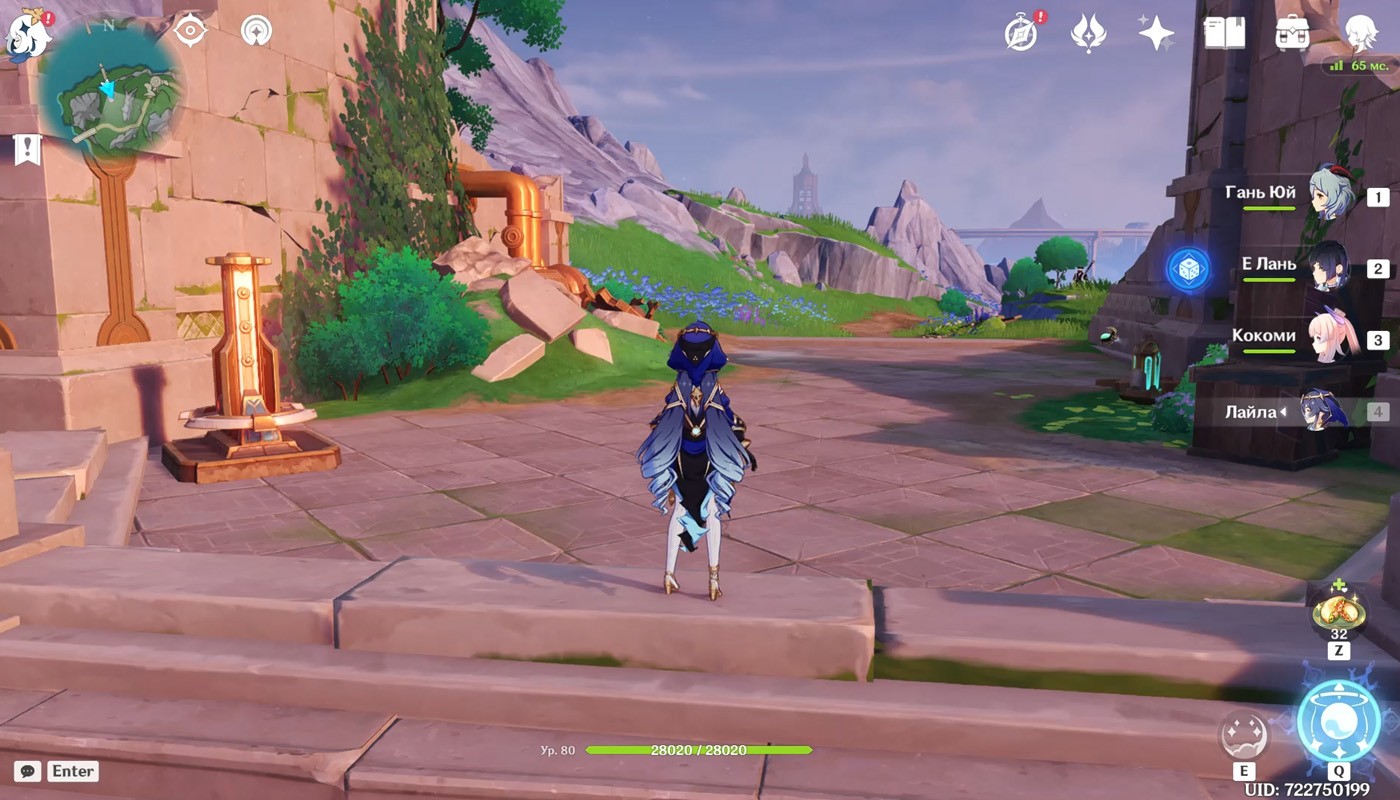
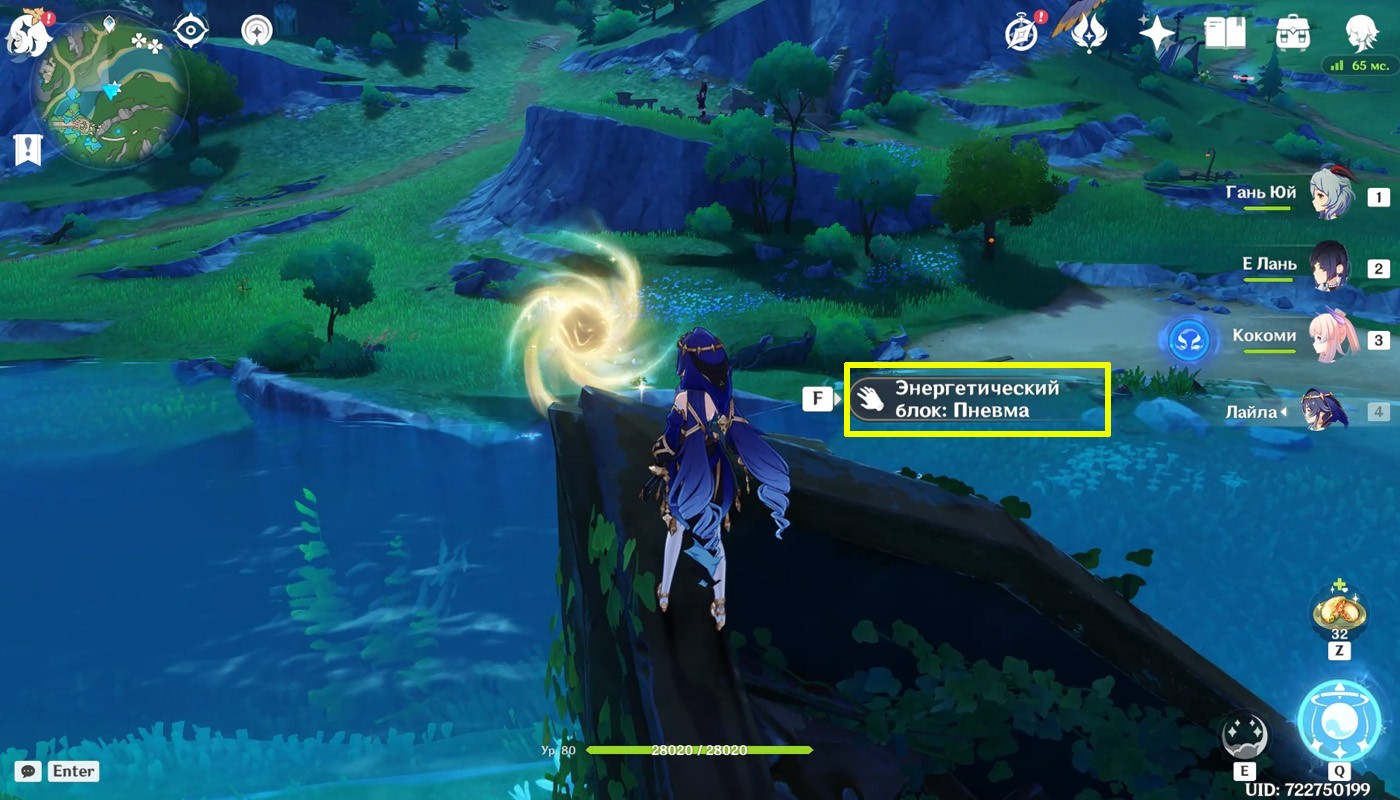
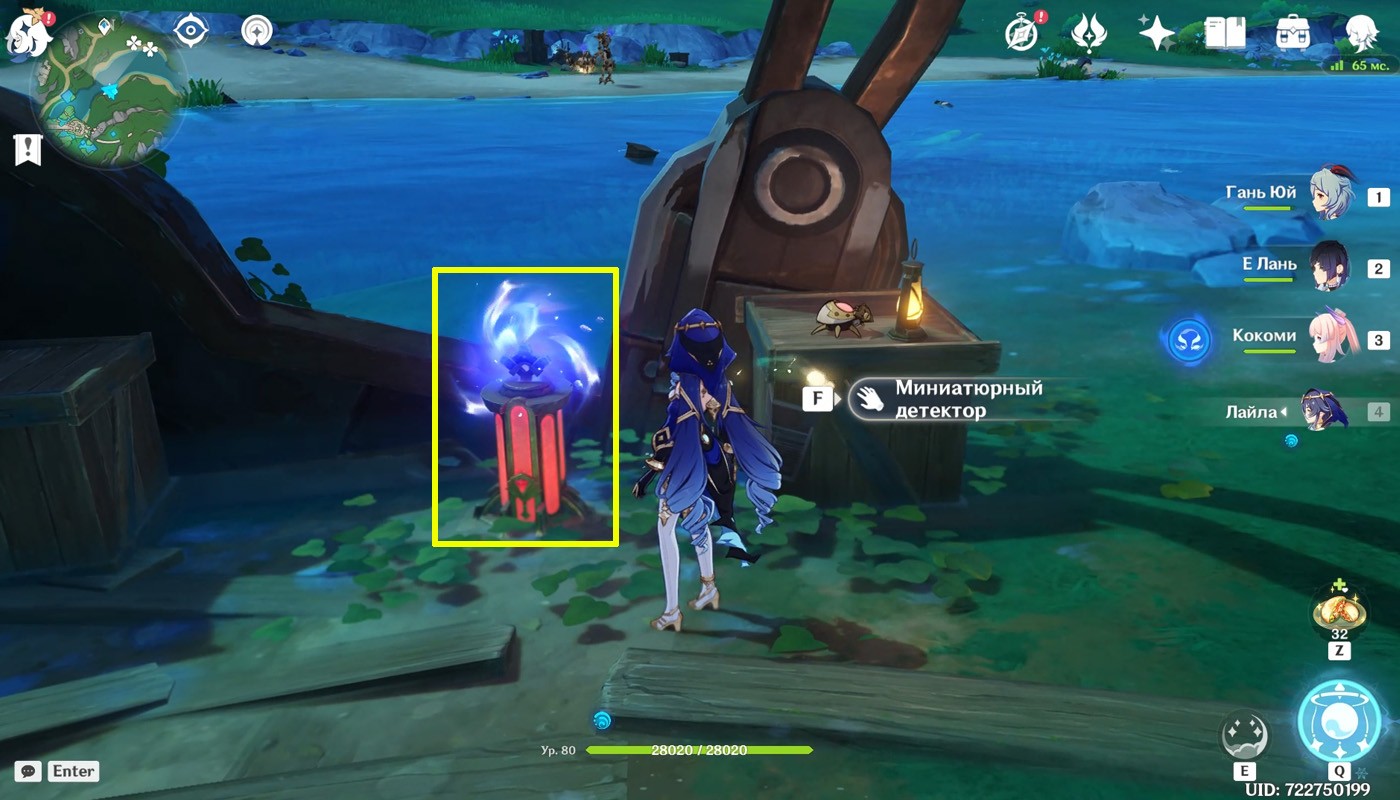
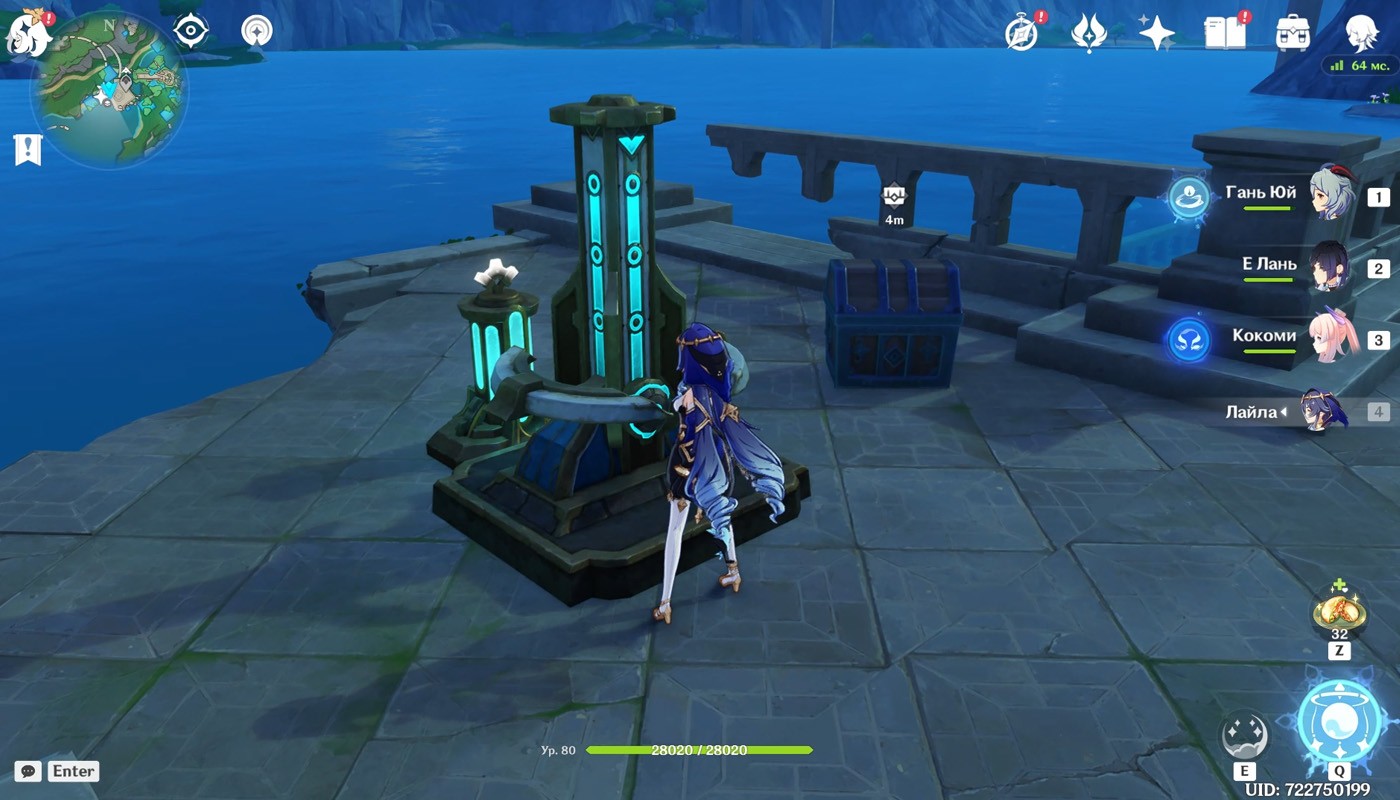
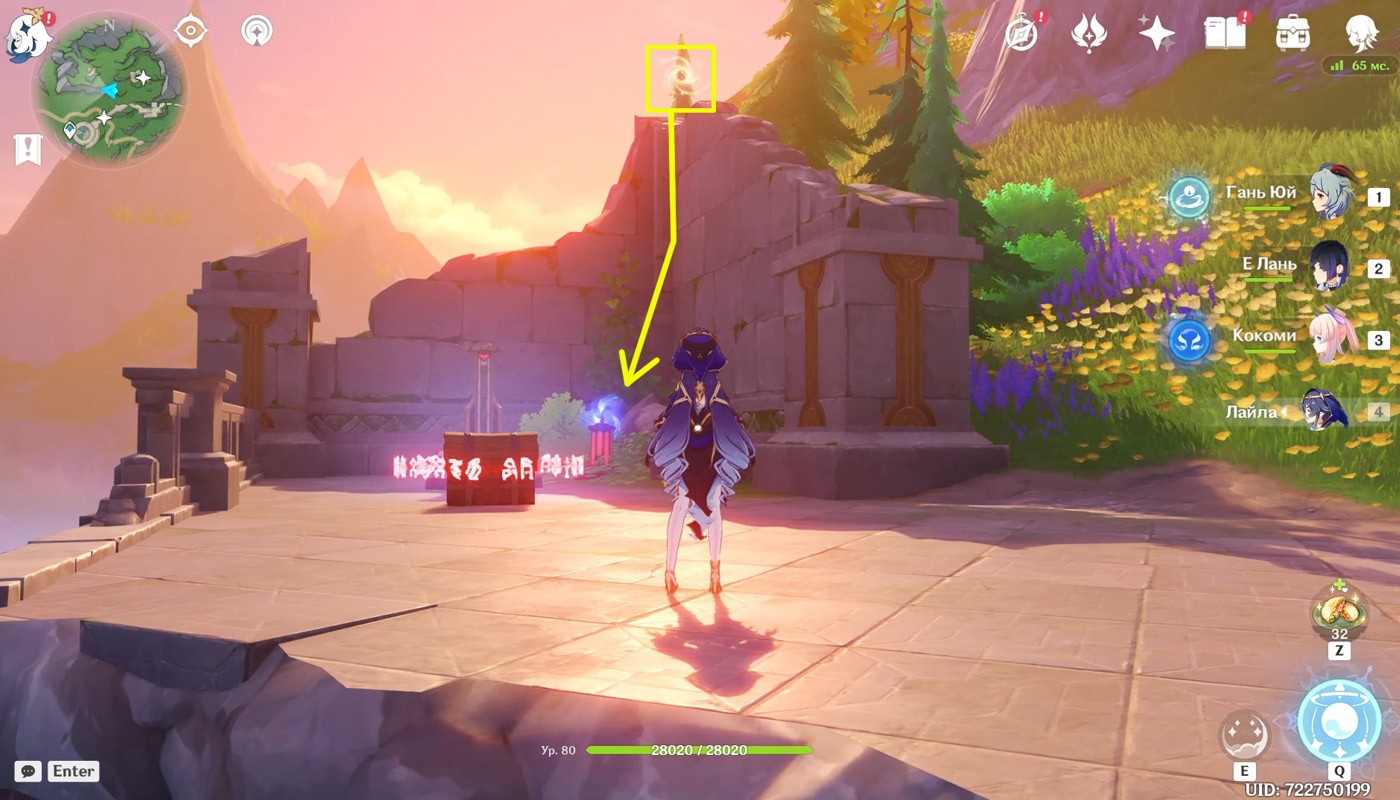
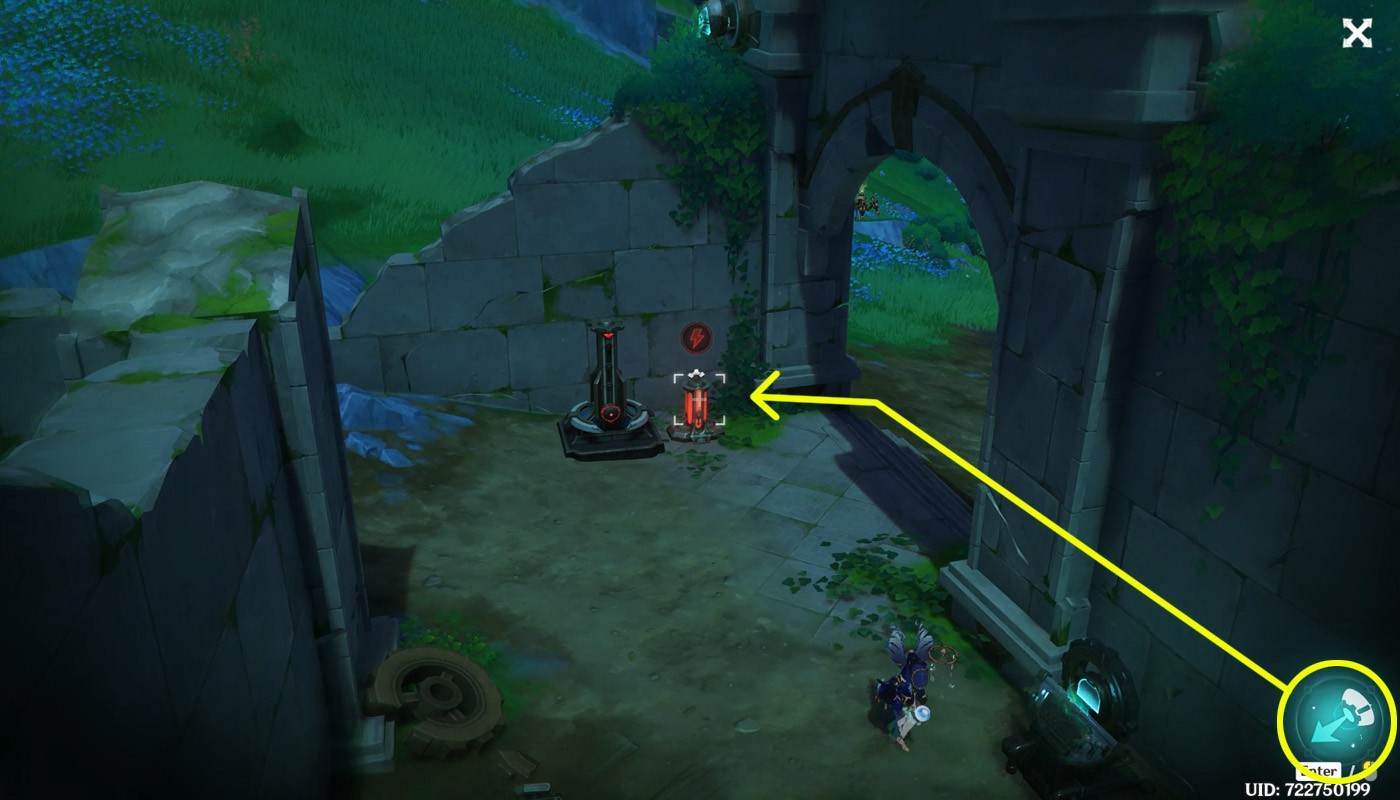
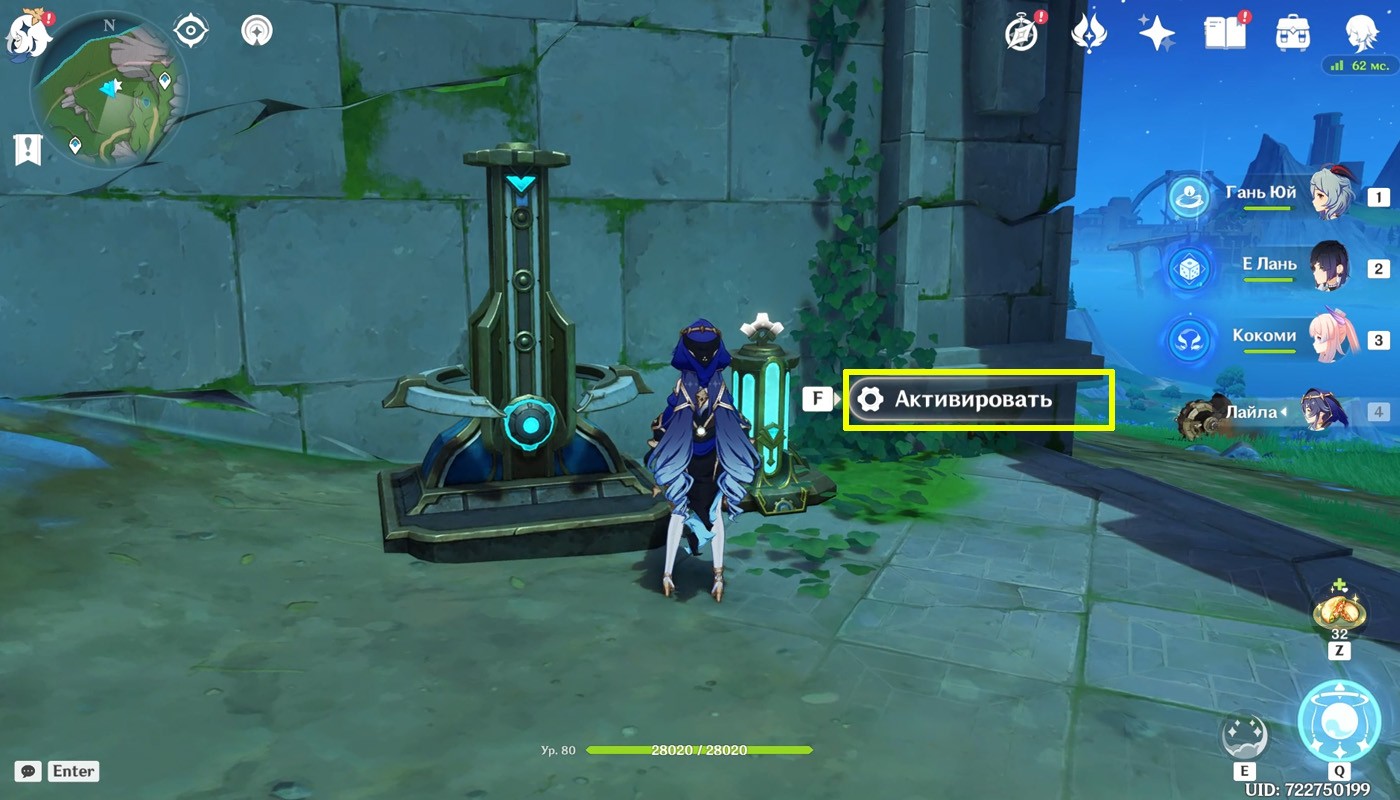
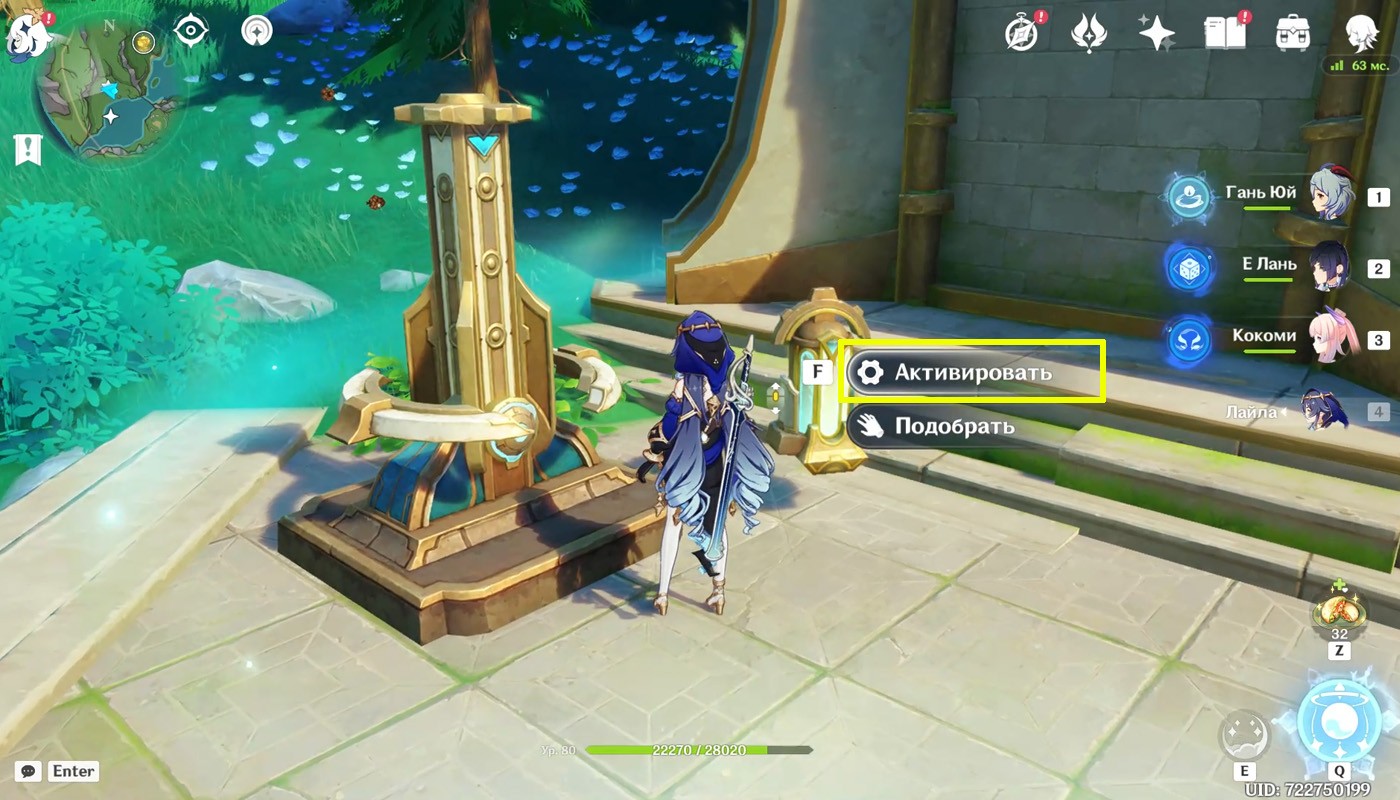
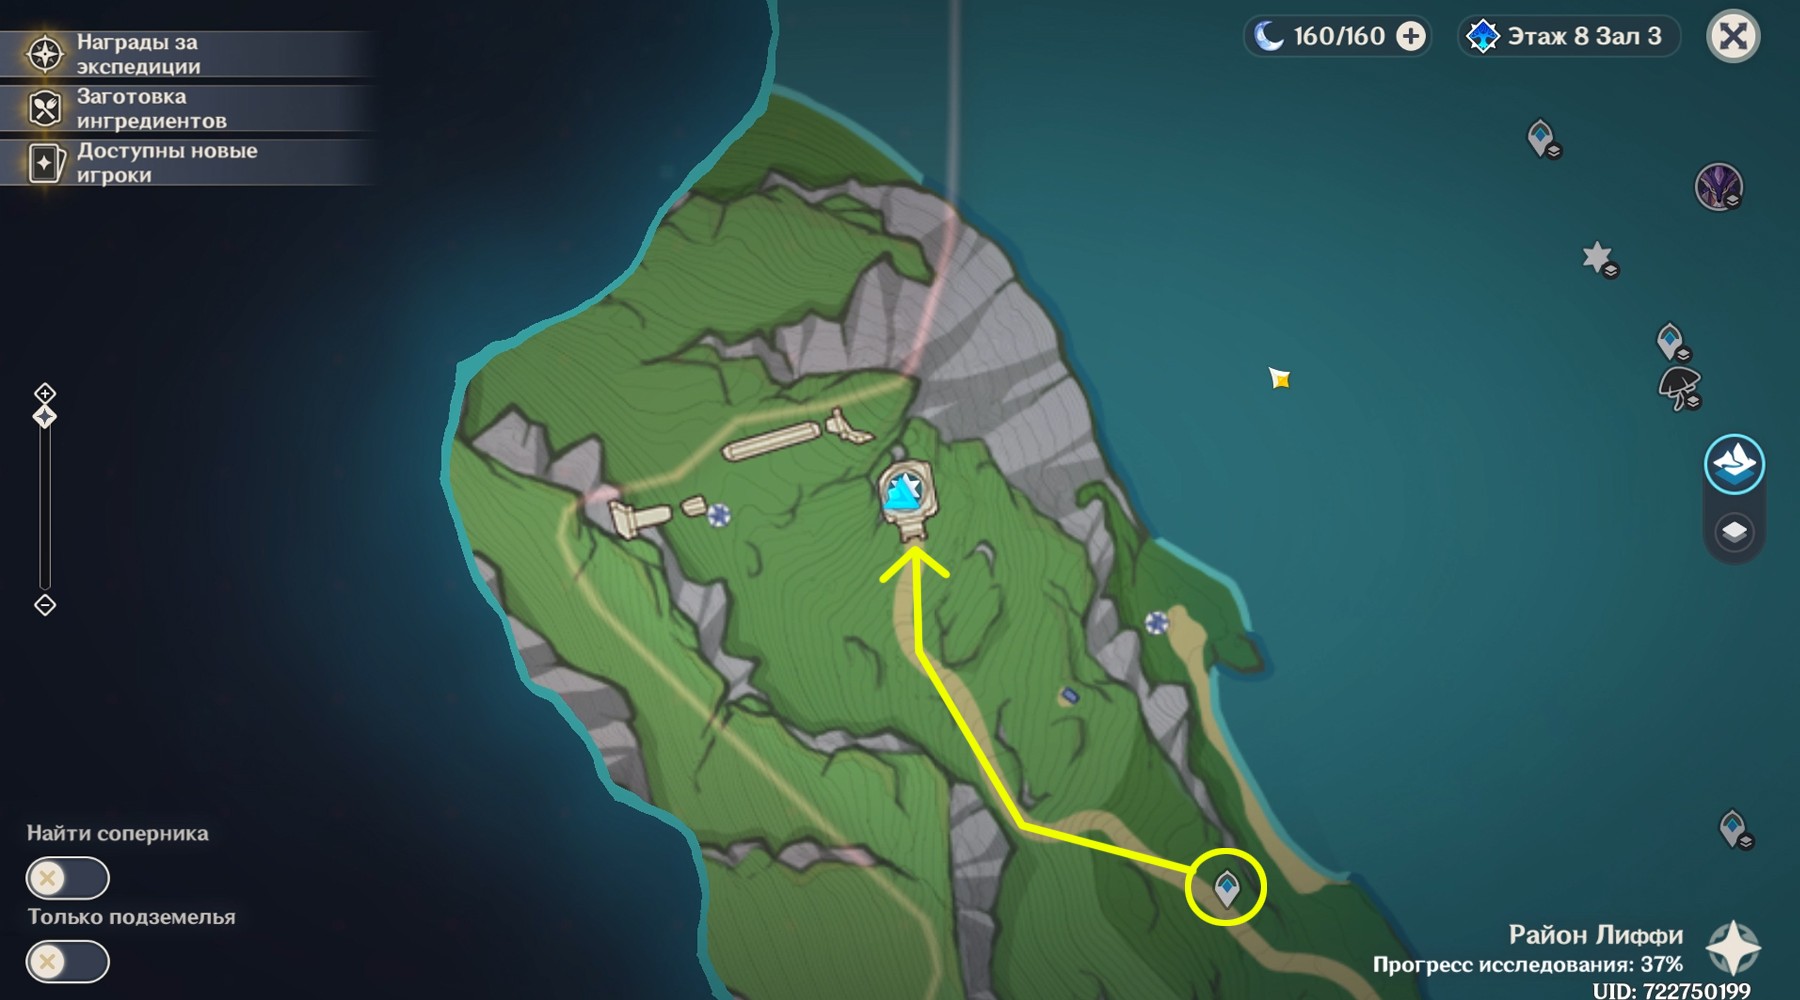
The first stabilizer on our route is located southeast of the Hydro Archon statue on a destroyed bridge, but it will be more convenient to get from the teleport from the top of the nearest mountain by simply flying down to the place with the puzzle.
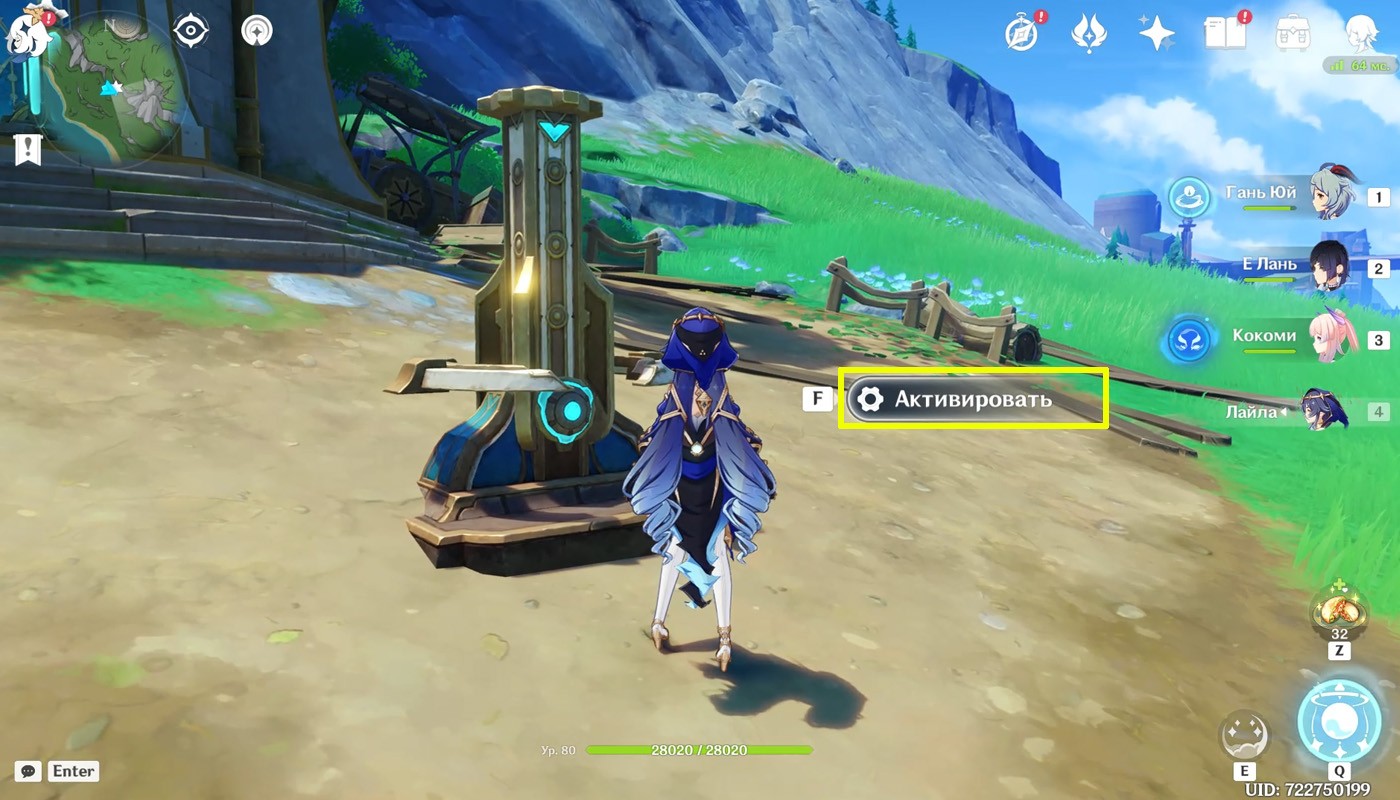
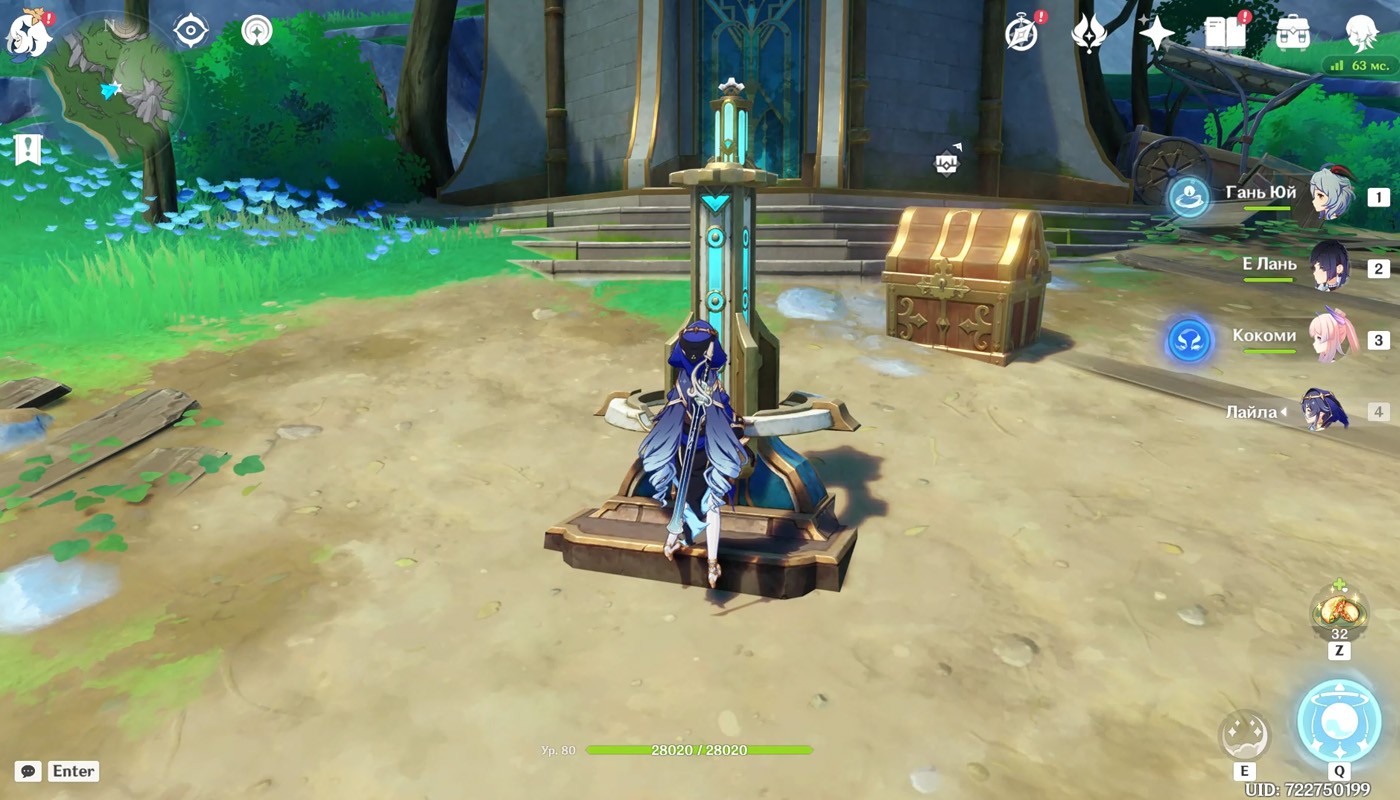
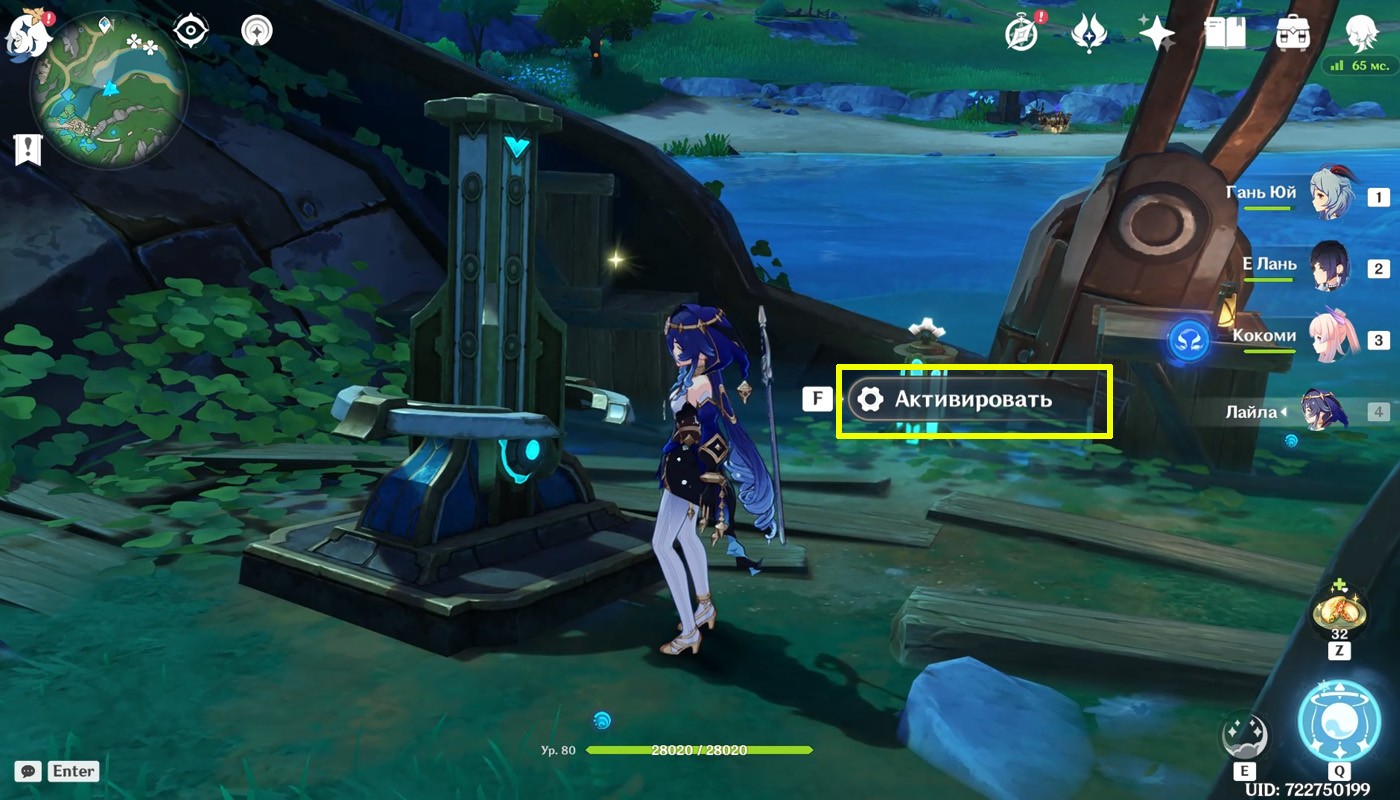
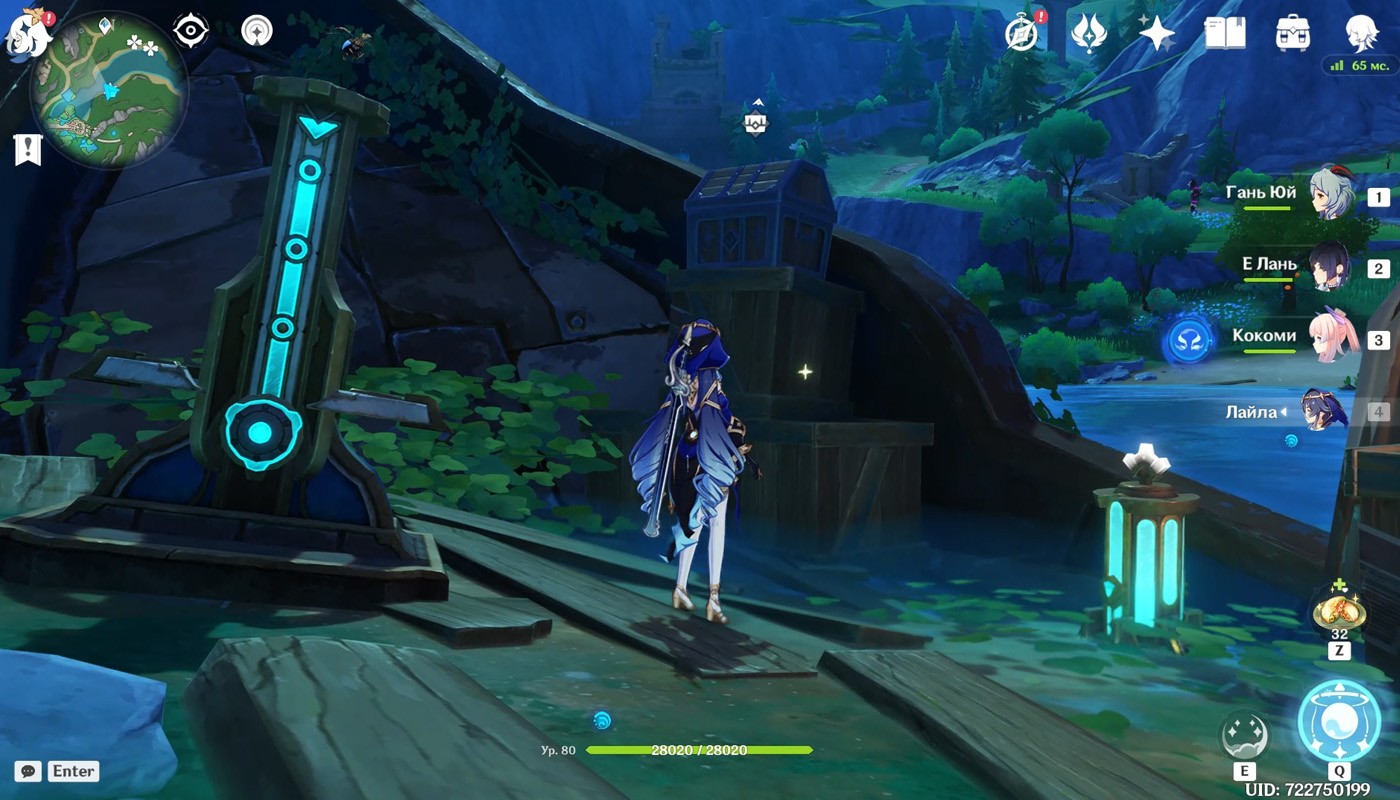
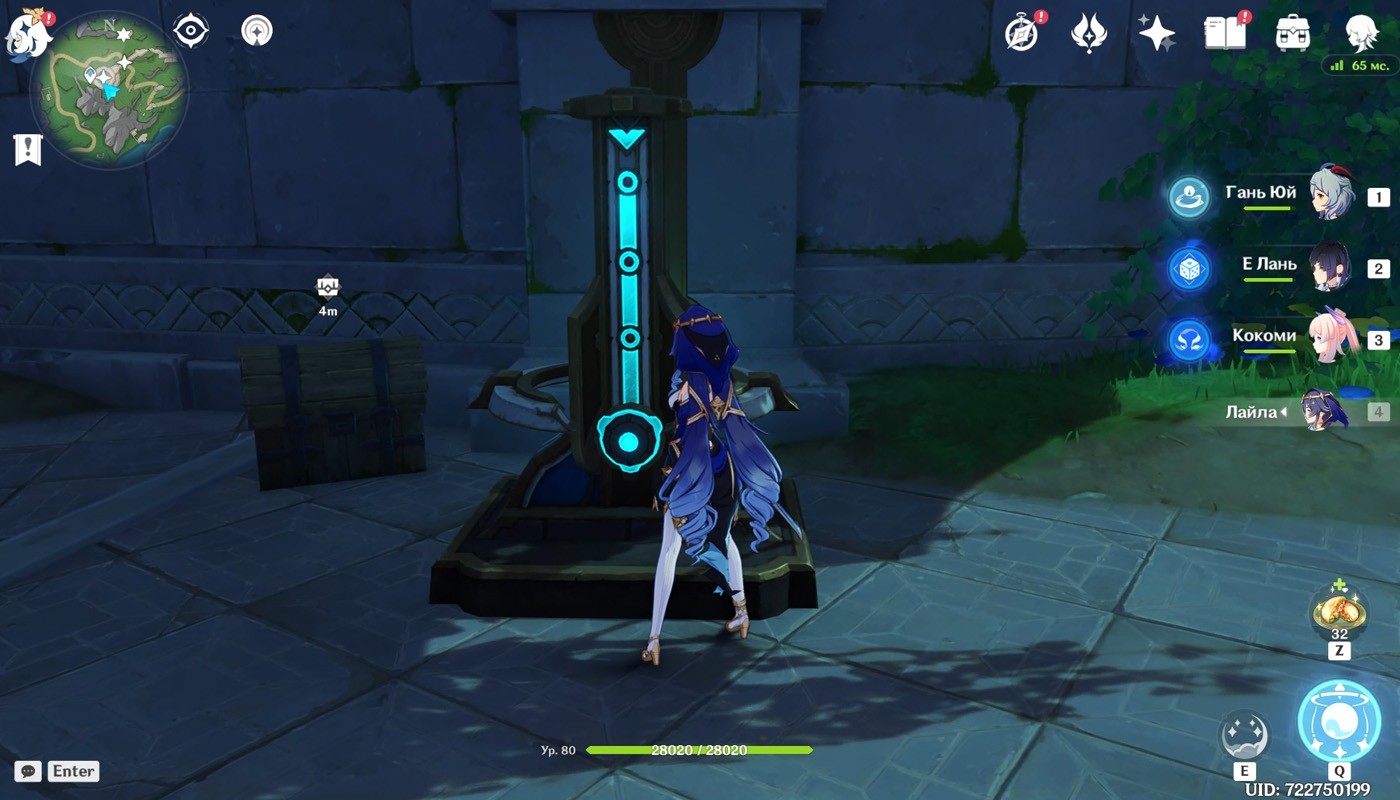
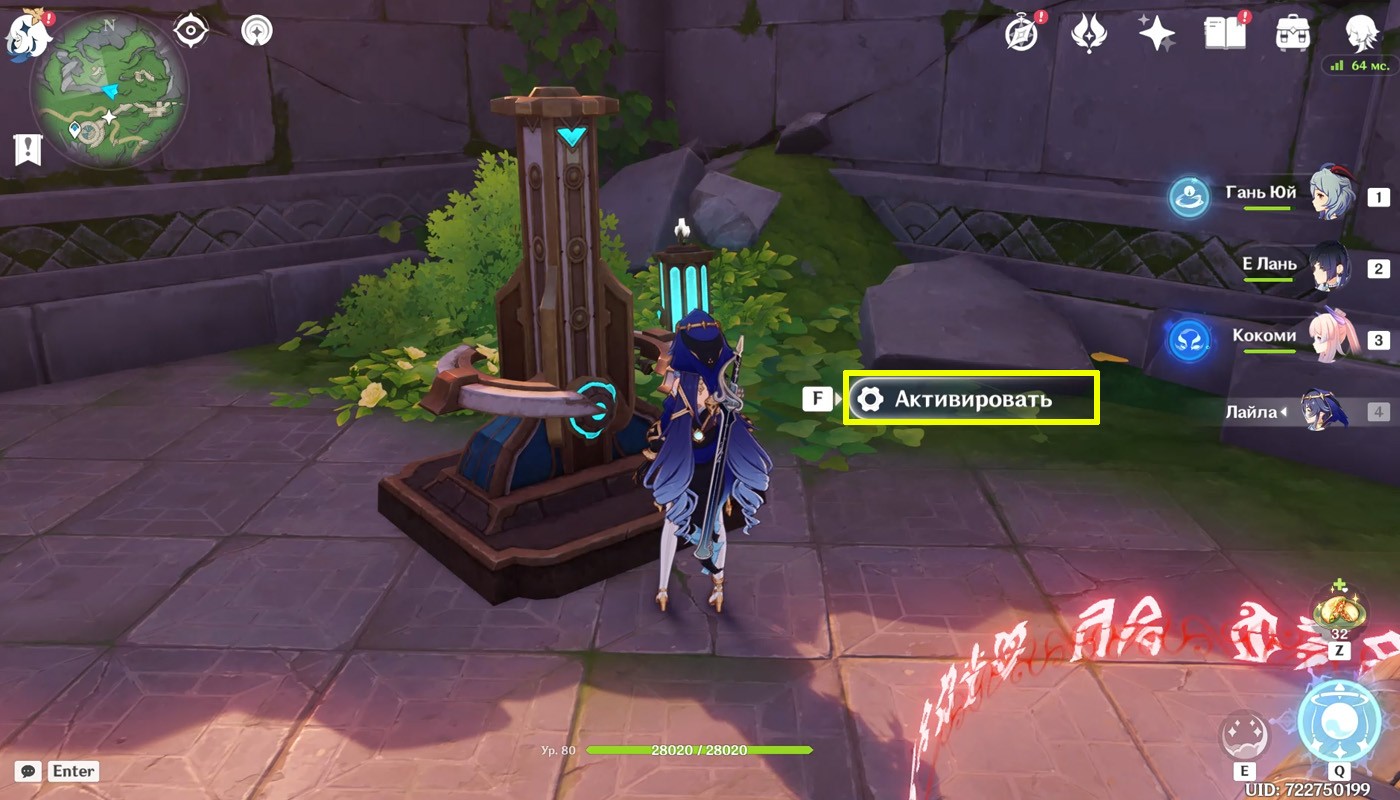
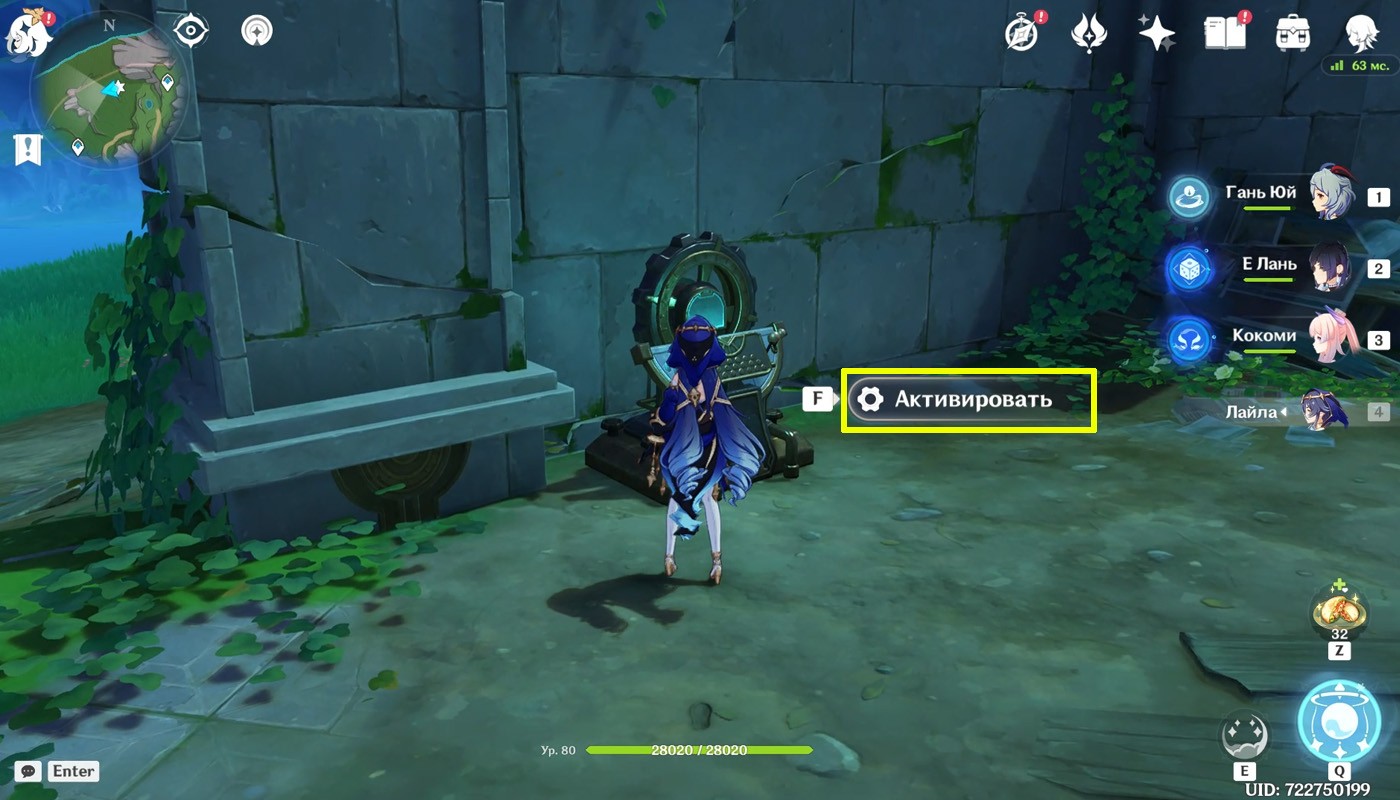
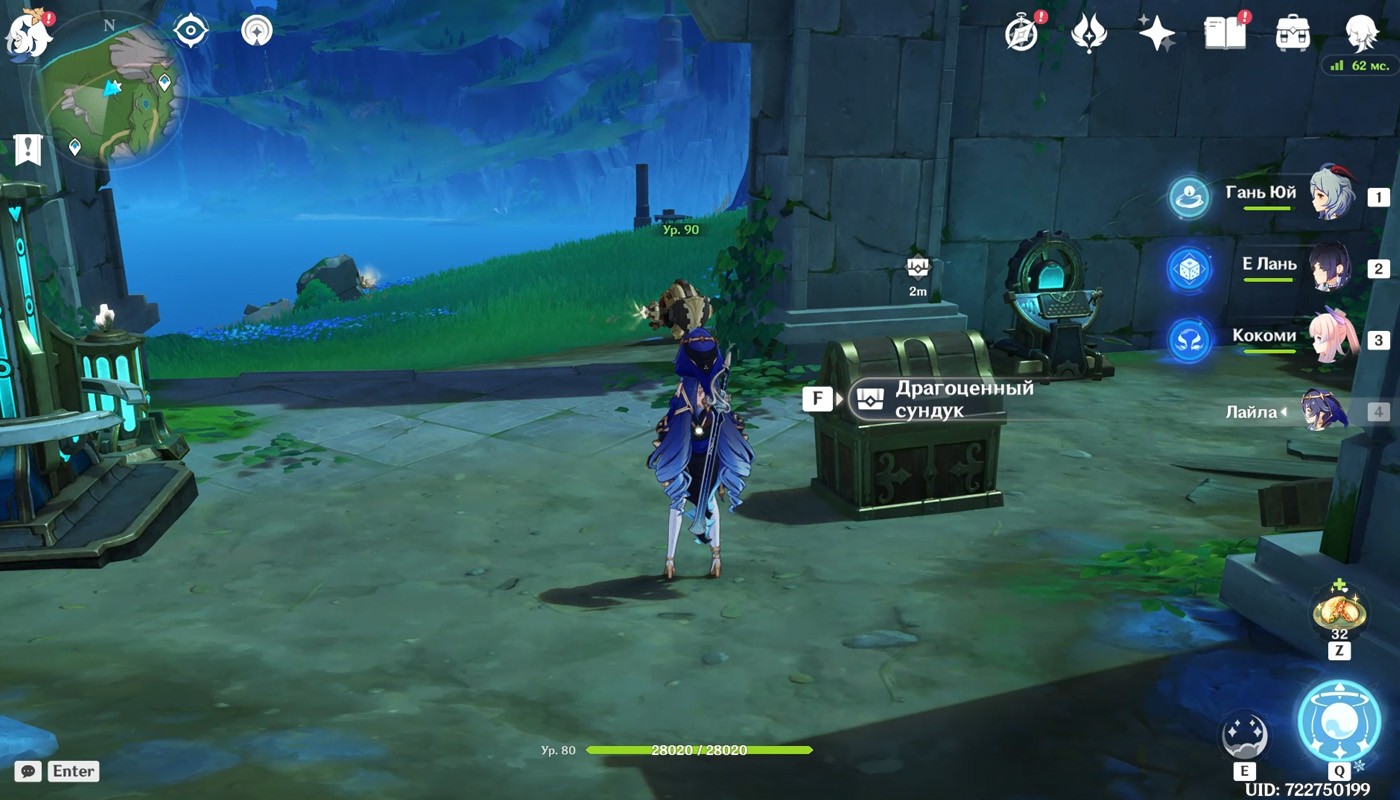
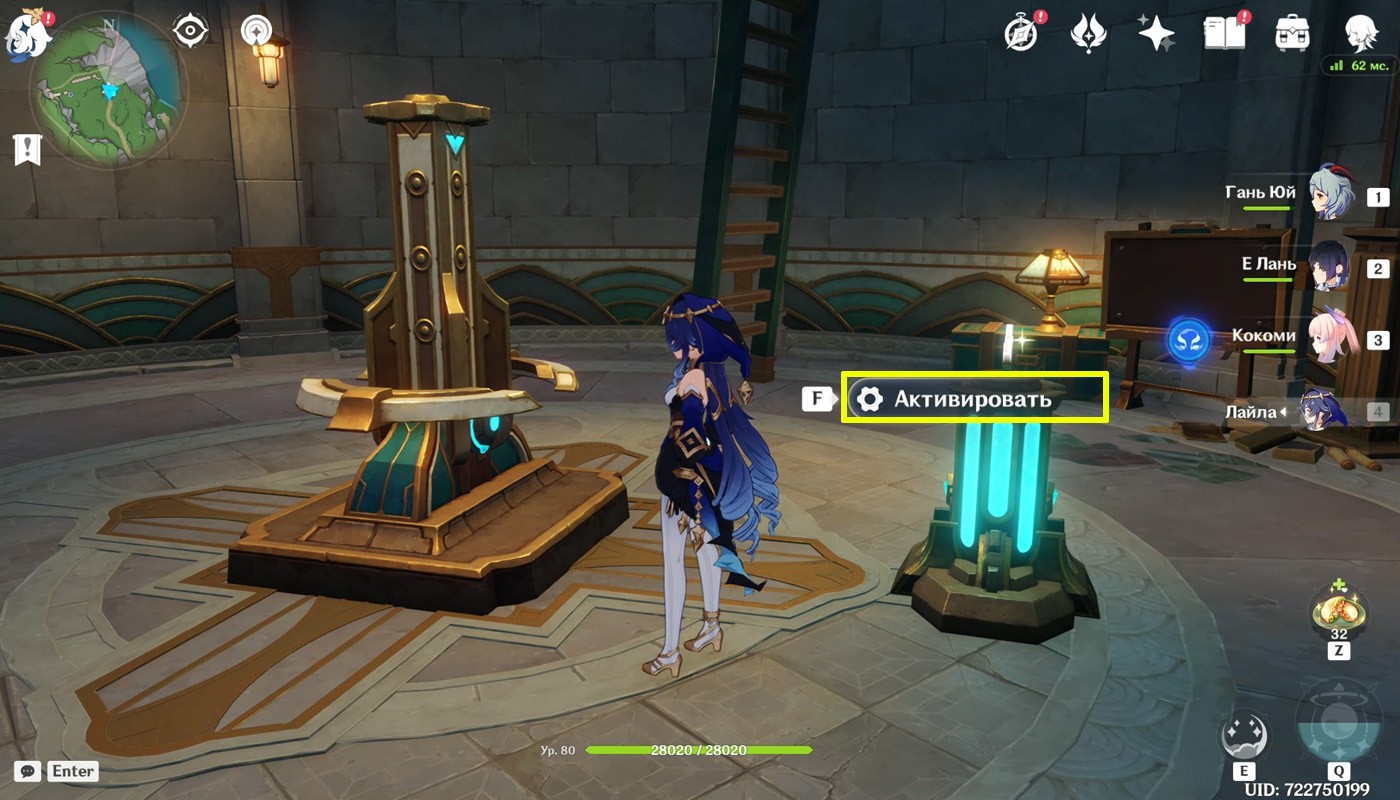
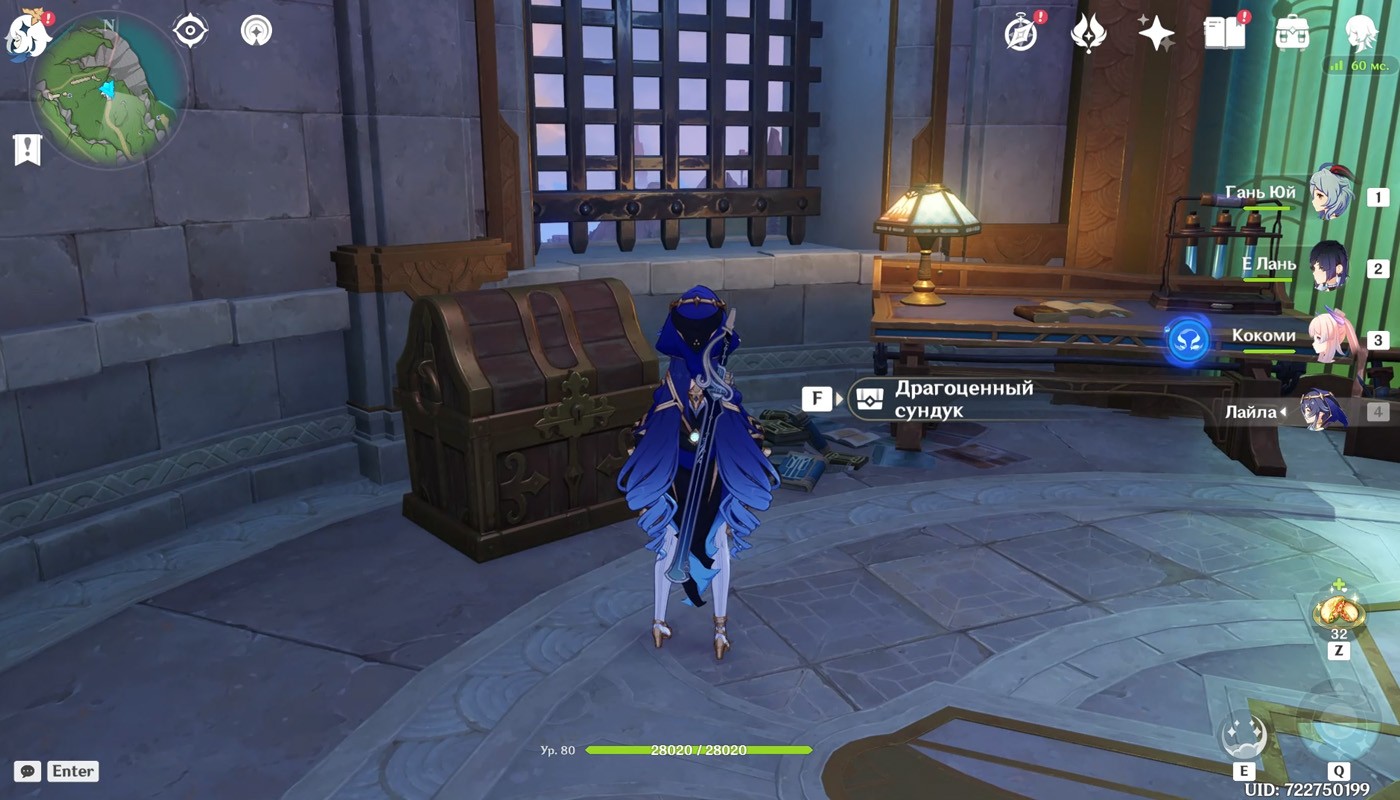
The device is already active, so go to it, click “ Activate ", and then hit 9 times by design, when the ring is in the center of the scale. The reward for the solution will be a precious casket.
Don't rush to hit the ring: the puzzle will only stop if you solve it, or when you don't hit the right part of the scale. Some stabilizers work quickly, so we advise you to get used to their pace.
Stabilizer 2
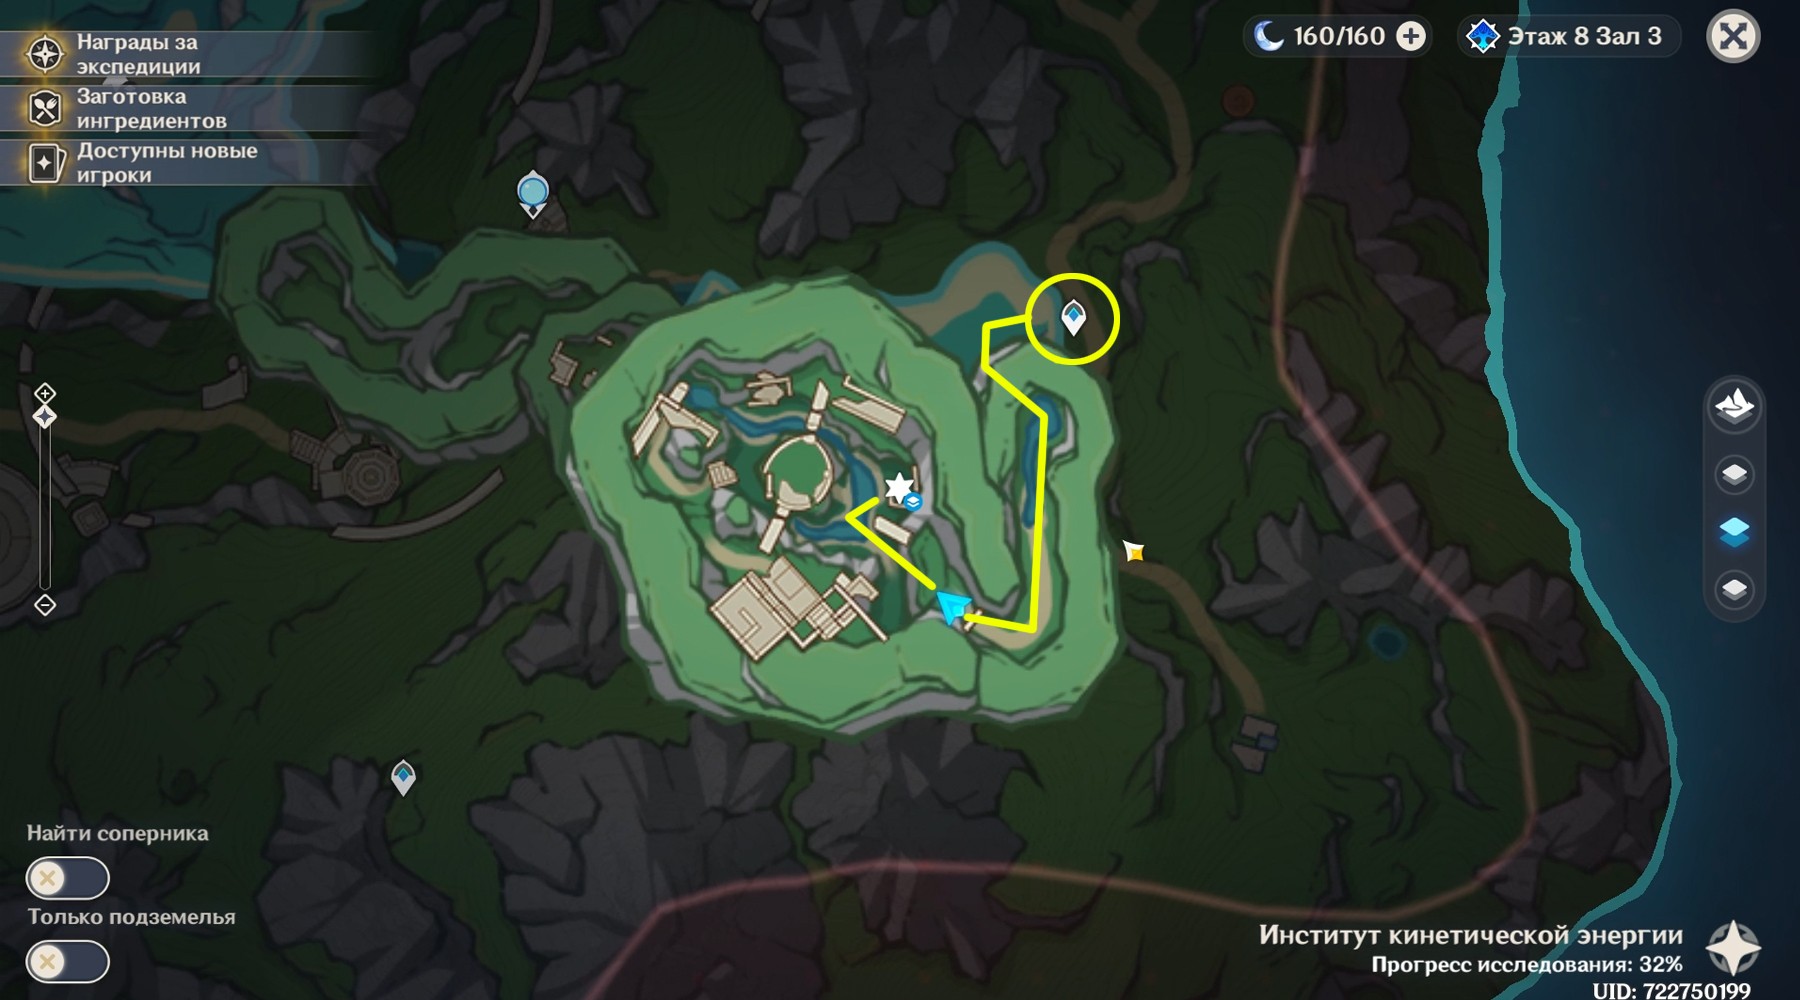
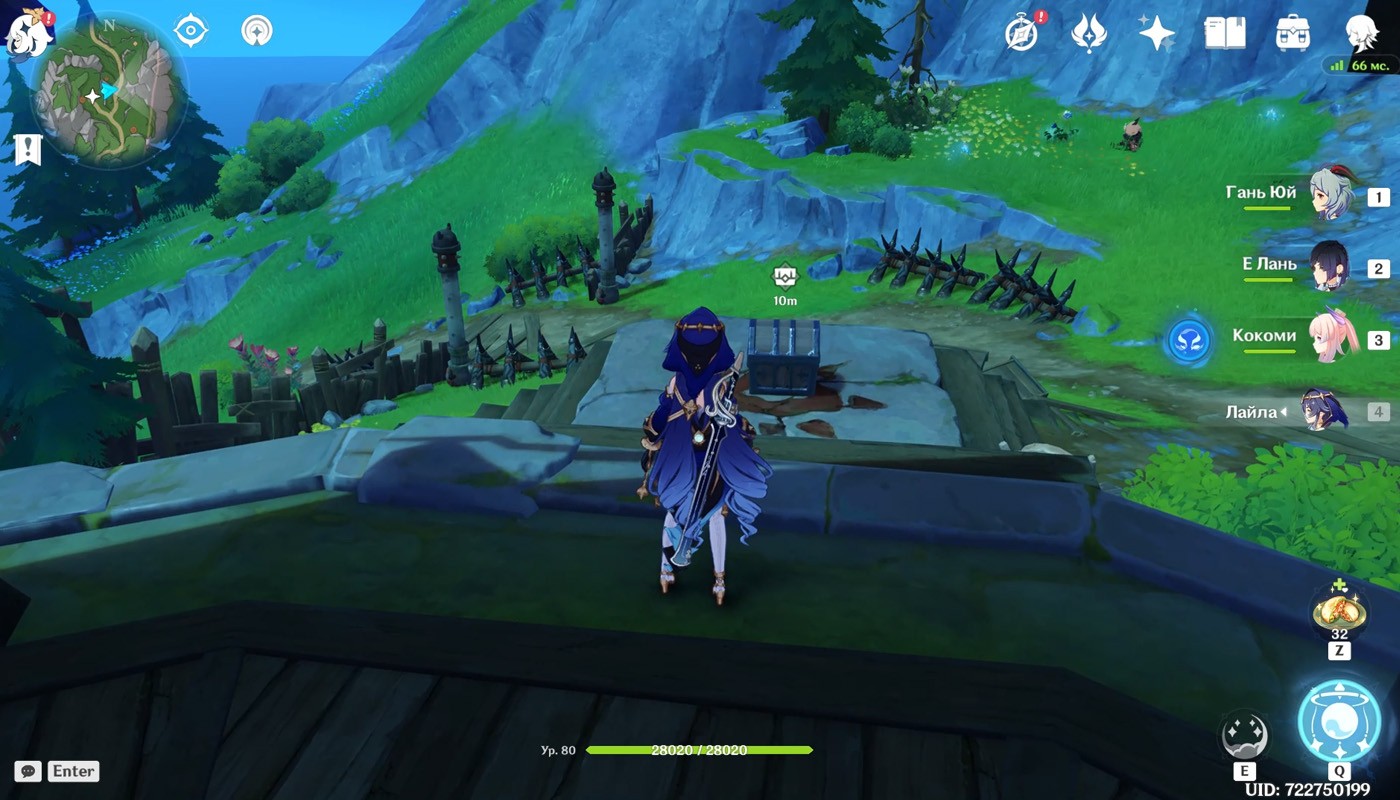
Next, move to the teleport above the boss arena Experimental Field Generator and move west to the destroyed pavement.
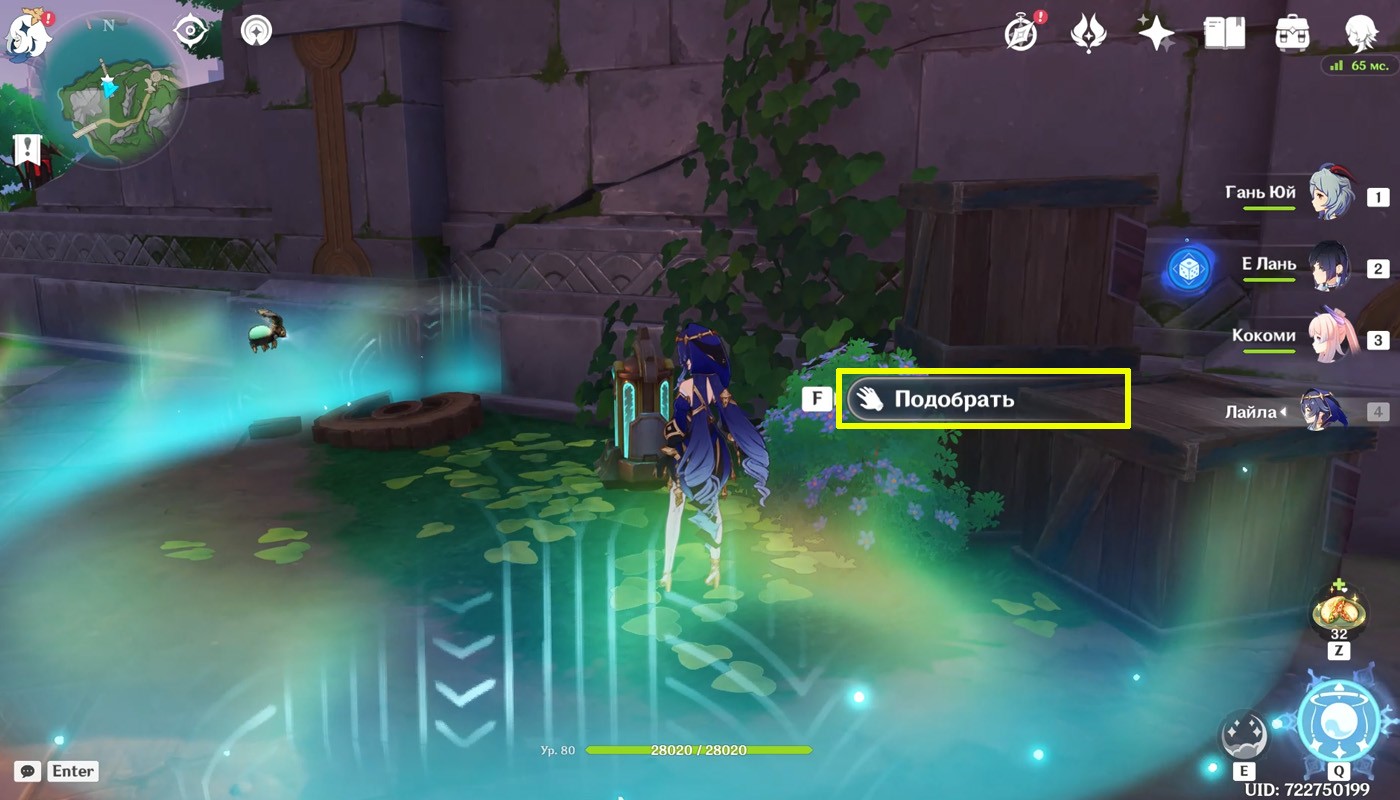
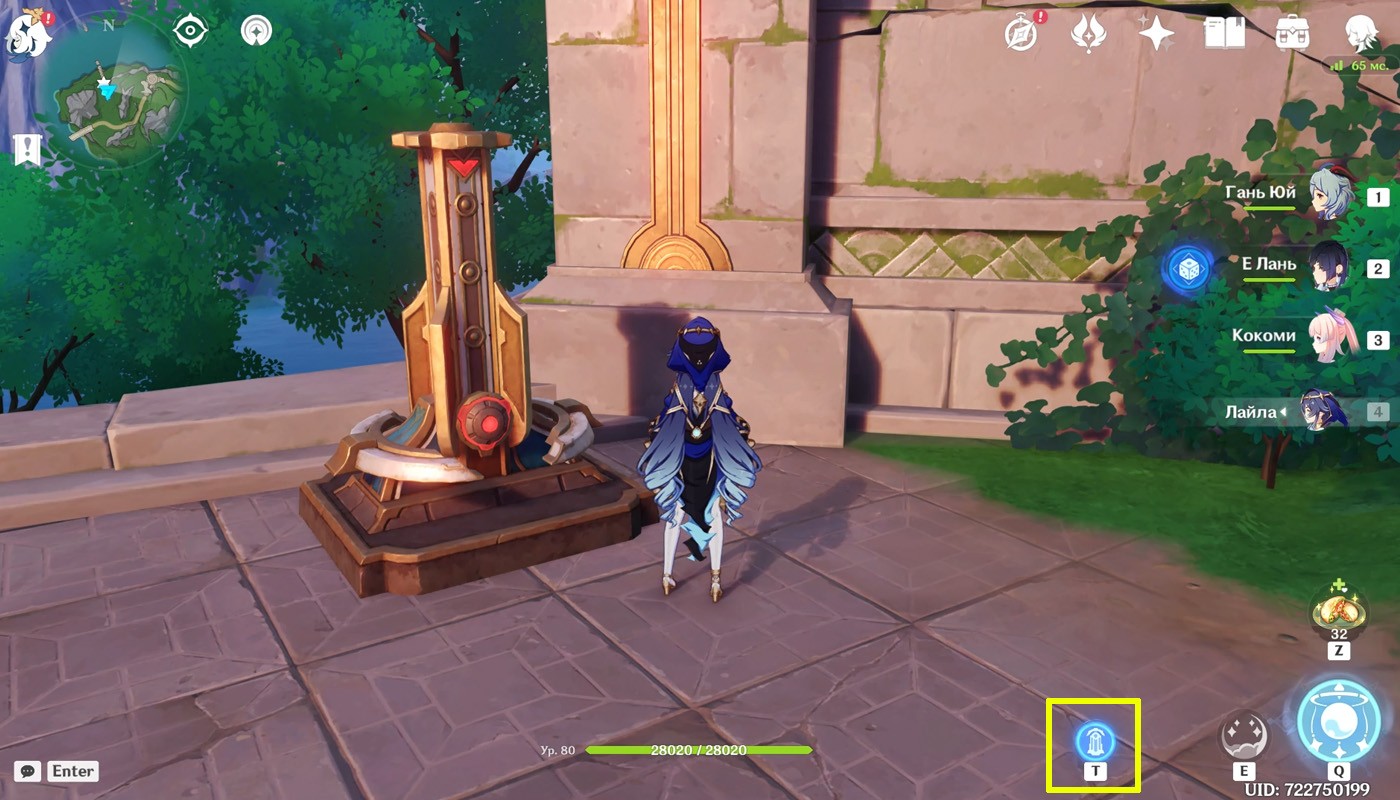
Take the charged part near the boxes on the right and place it near the stabilizer so that it falls within the radius of the field.
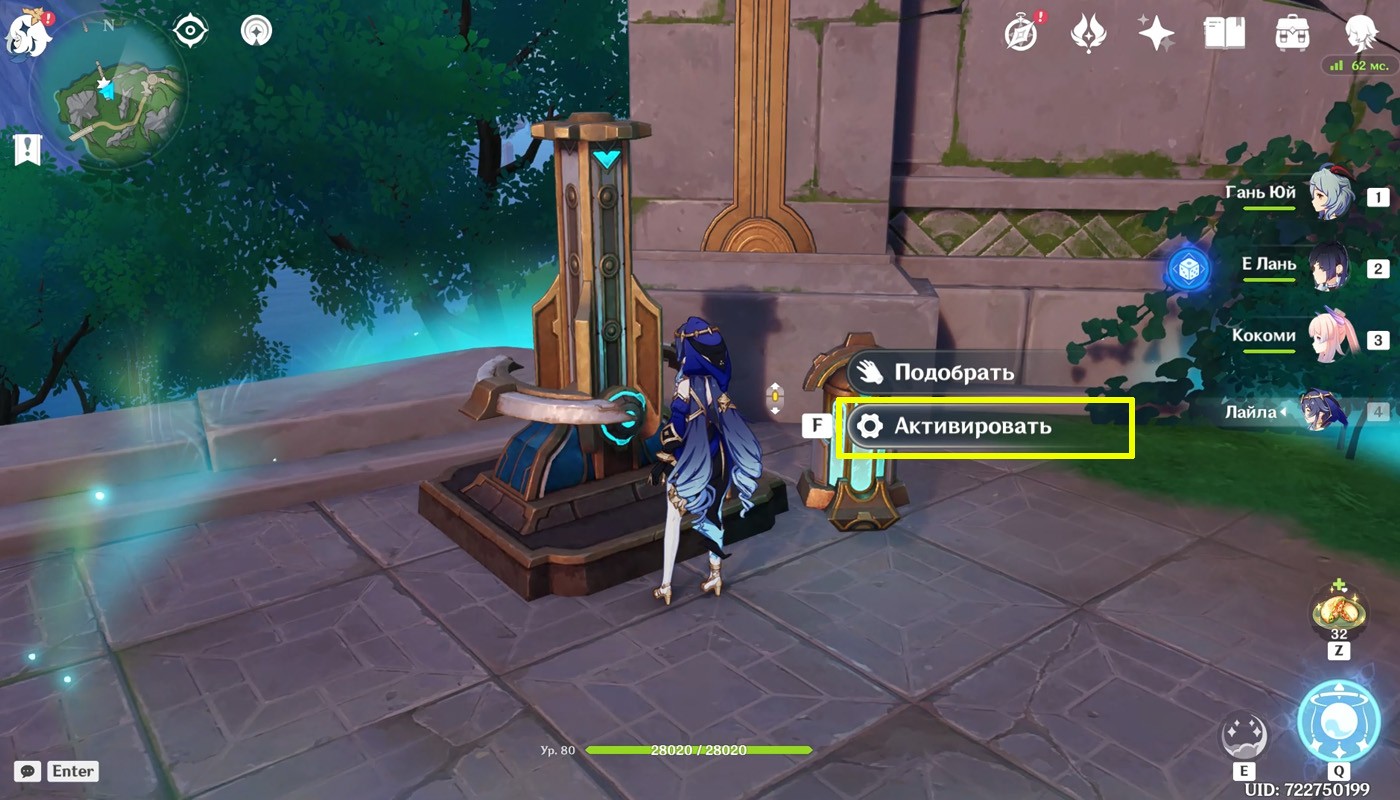

Next, activate the device and perform the following order of attacks: top, bottom, center. For solving this puzzle you can loot a rich chest.
Stabilizer 3
The third stabilizer is located in the dungeon with optical mechanisms. The location is associated with completing the world quest " Treacherous Light of the Depths » – check out our guide for directions to this area.
The device sits in the lower half of the exploration area, surrounded by ruined walls.
Climb the ruins to the right of the stabilizer and pick up pneuma block and then go down to the red part and hit the ushii block above her. Then activate the ring and hit the device in this order: top, bottom, top, center. The trophy for a successful solution will be another rich chest.

Stabilizer 4
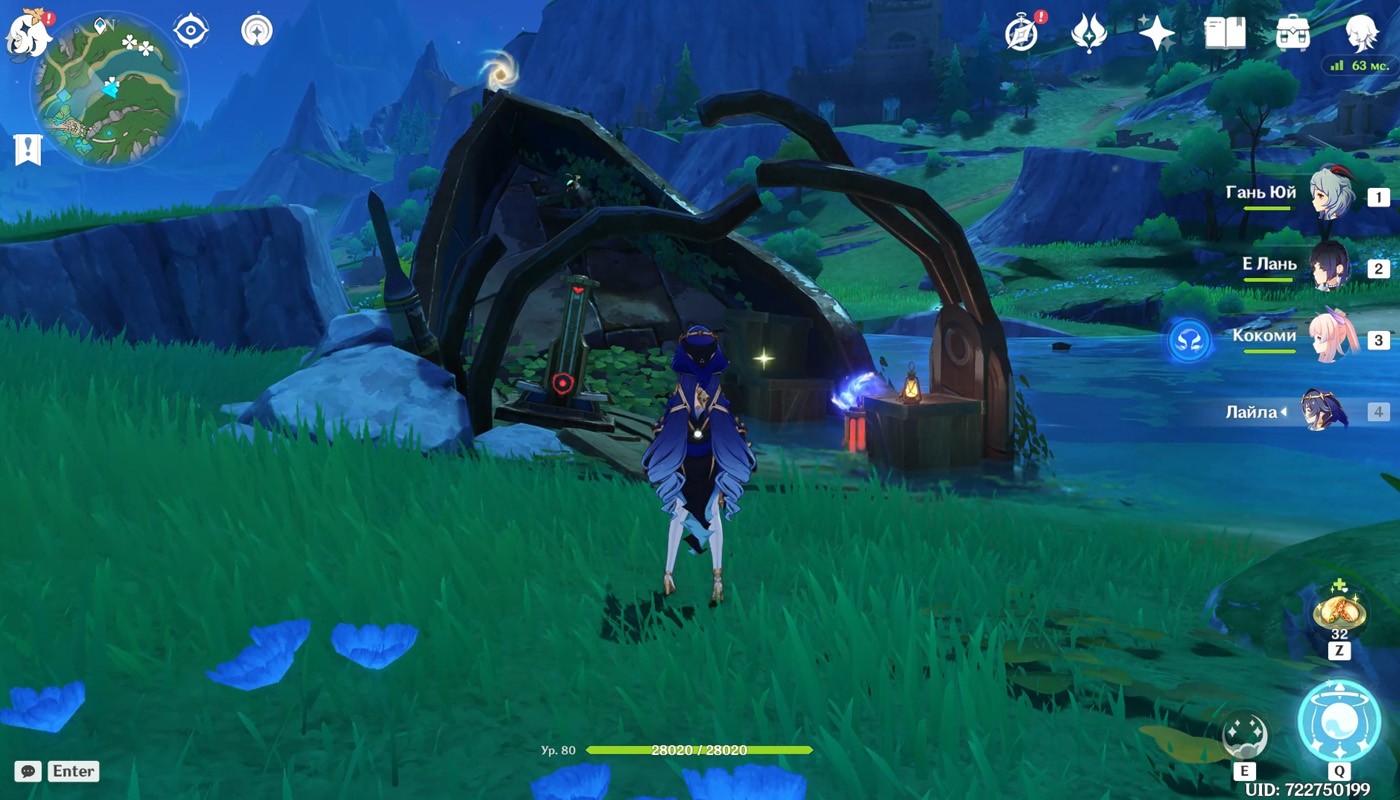
Get to the Hilichurl settlement, which is located southeast of the ruins of the Central Laboratory. The stabilizer is located in one of the huts with monsters, and for setting it you can open a rich chest with spur gear T.
Find out how to stabilize this device and what the gears are for separate guide.
Stabilizer 5
Next, head to the teleport to the north, and from it run along the coast to the west: the destabilized device is standing on the deck of a collapsed ship.
Pick up the pneuma block on top of the shipwreck and hit the usia block located on the disabled part. The next step is to activate the stabilizer and perform strikes in this order: middle, top, bottom. Then loot the rich chest on the crates to the right of the device.
Stabilizer 6
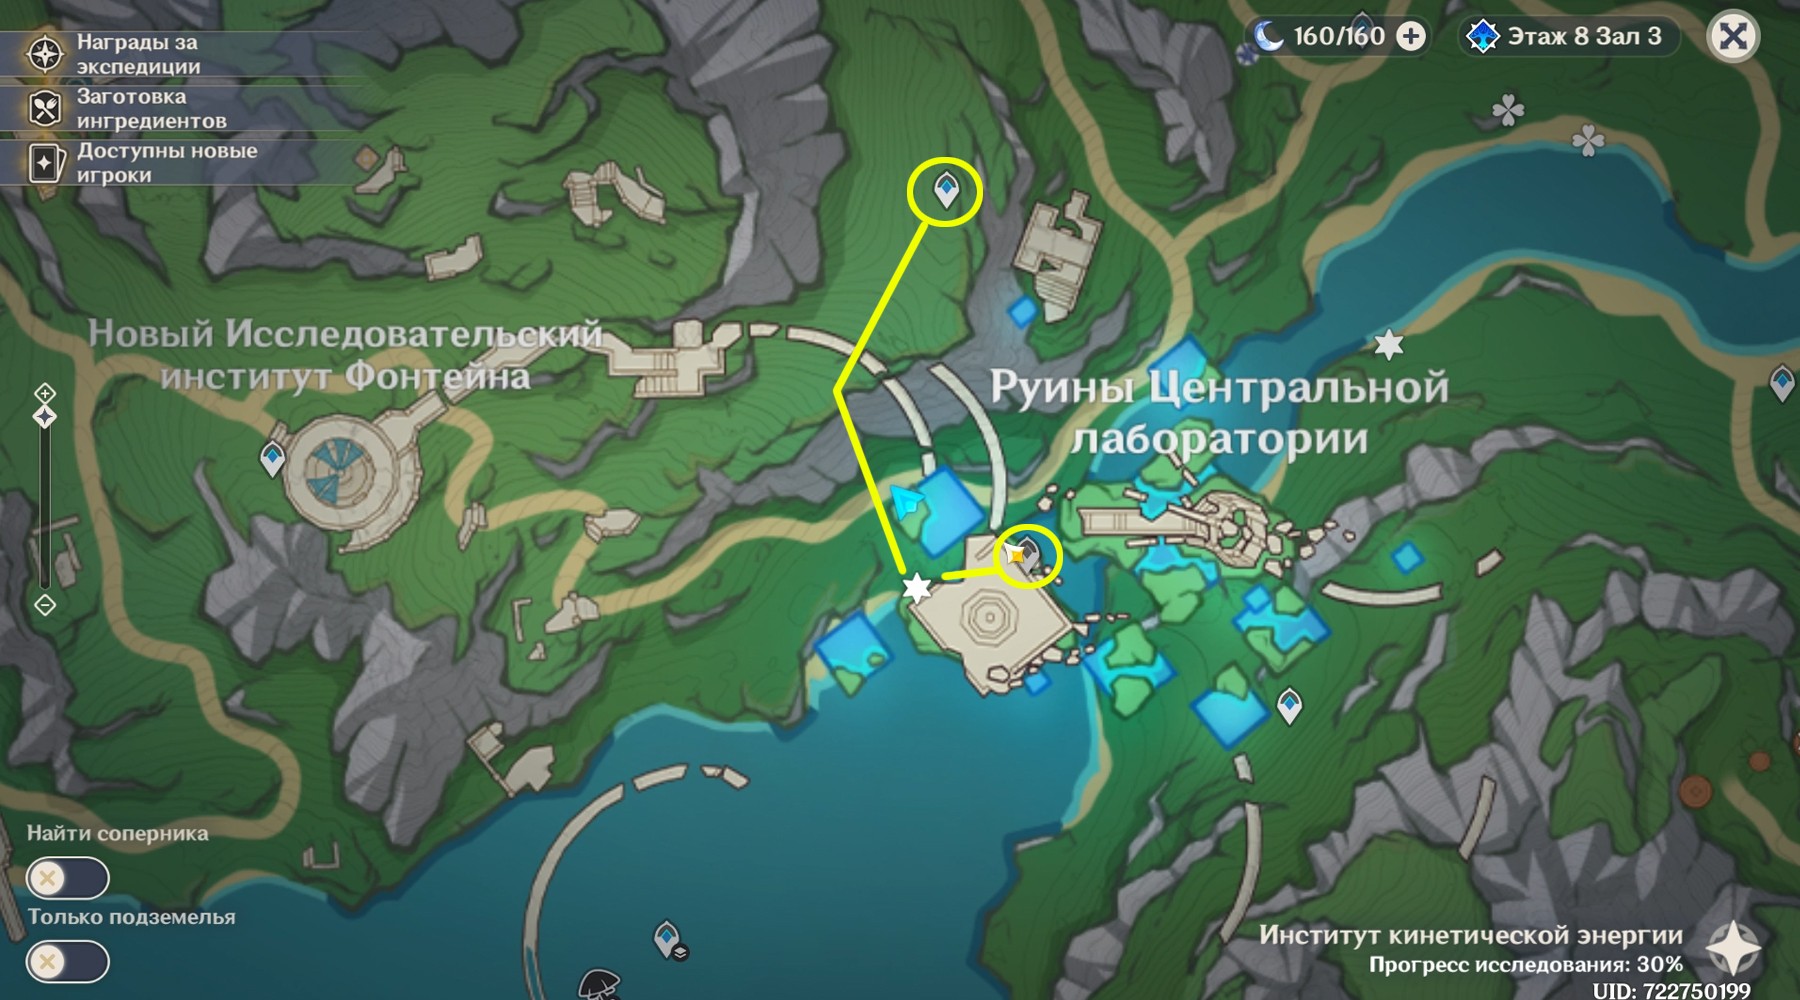
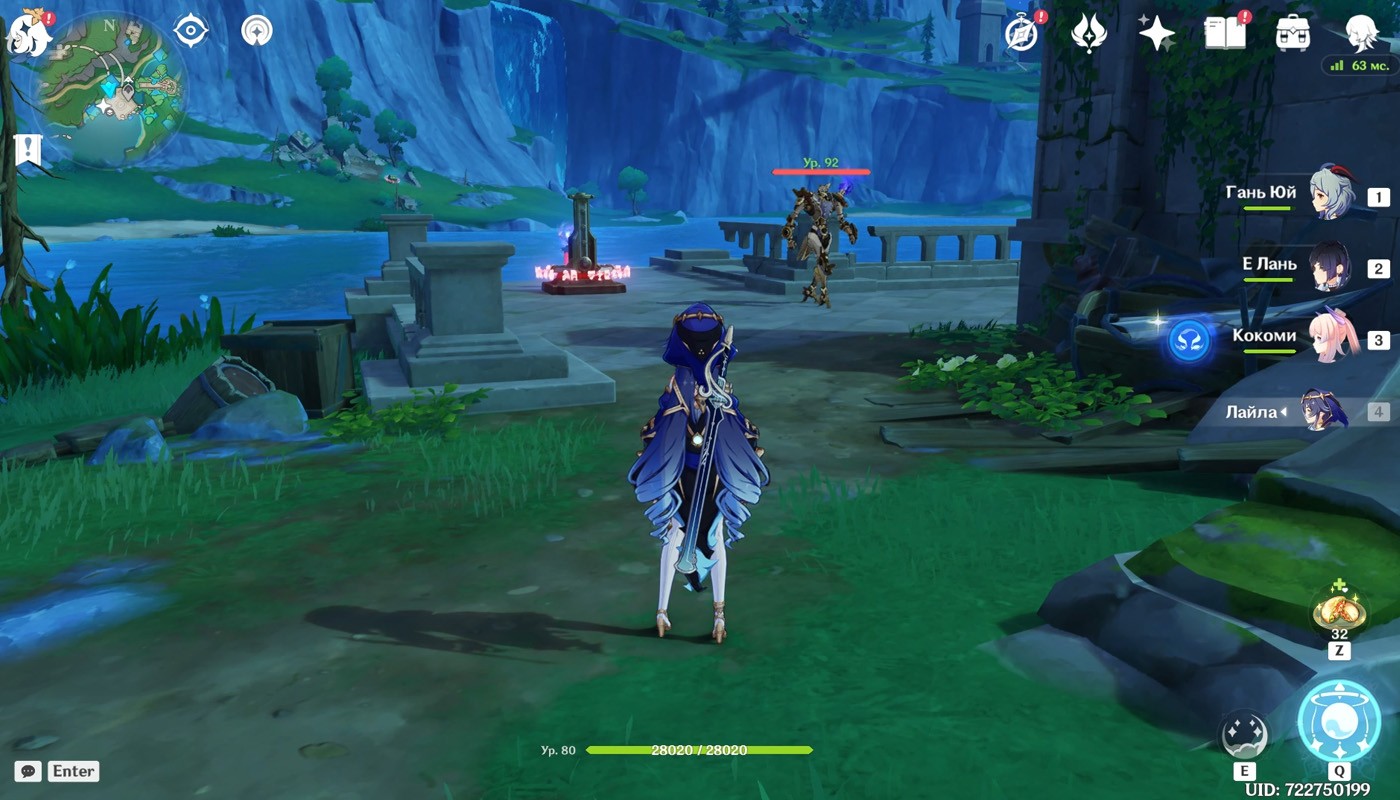
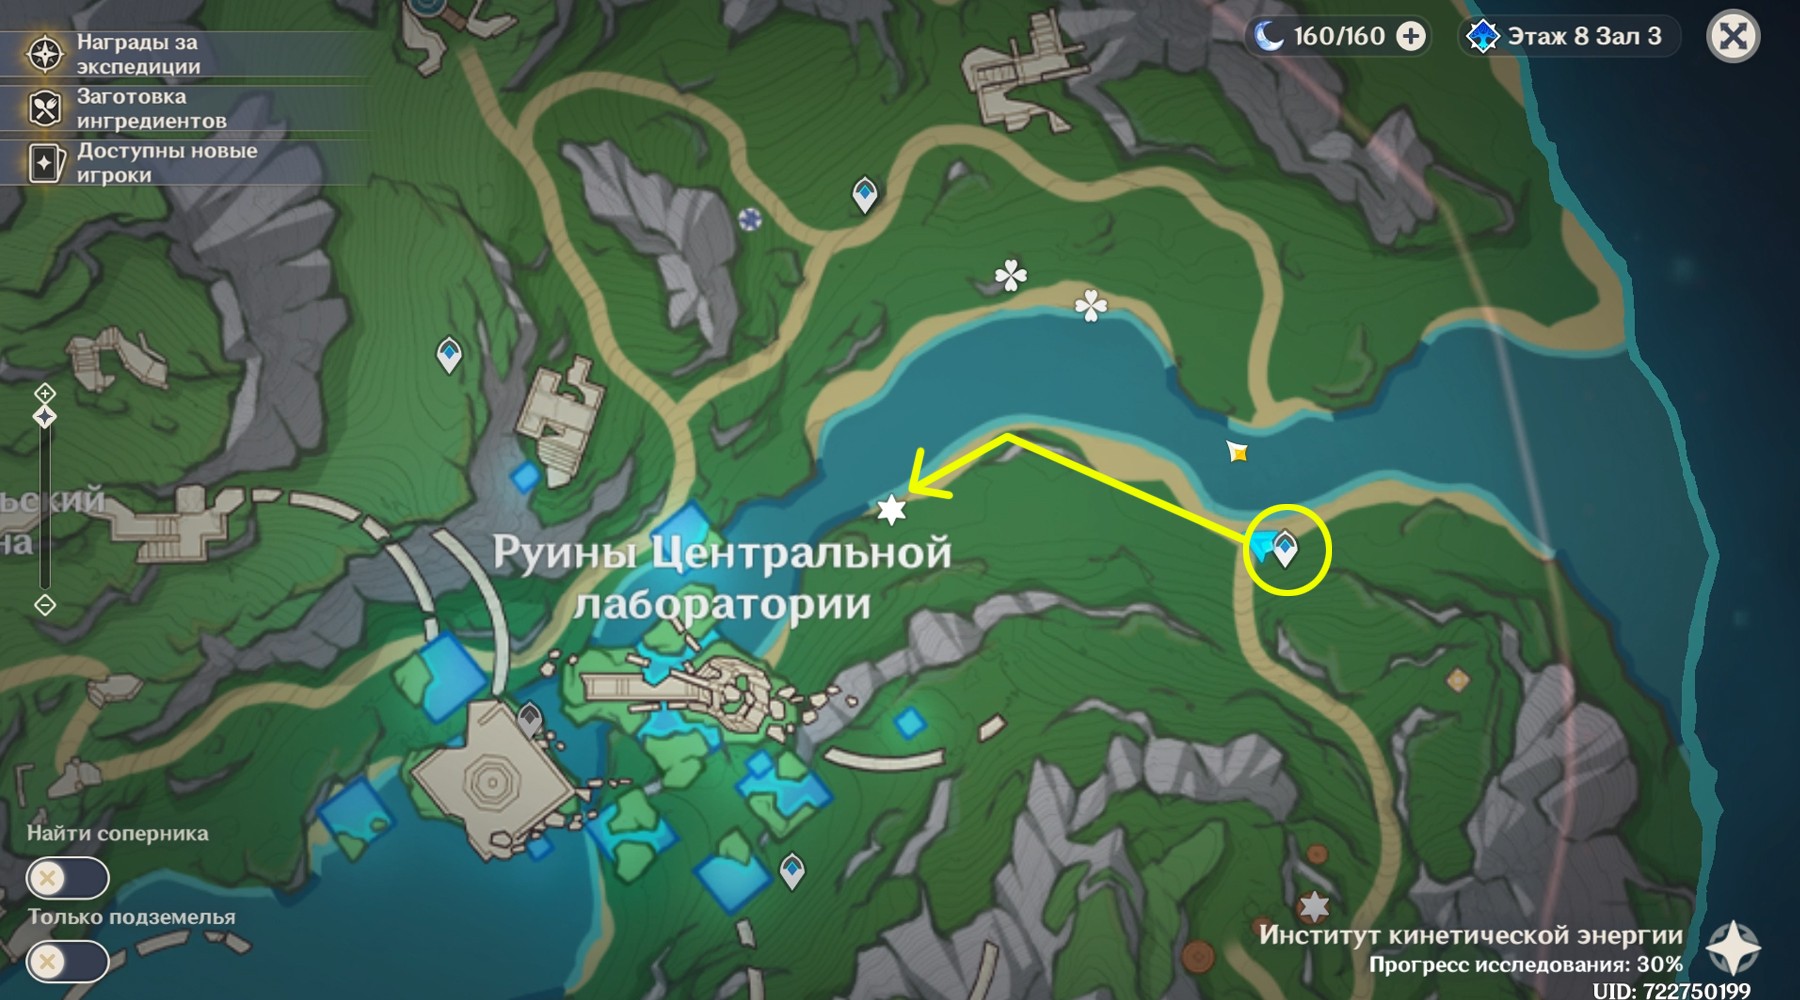
The sixth stabilizer is located in the ruins of the Central Laboratory. There are two teleports in the area from which you can reach the goal. The mechanism stands on a stone “pier” in front of the reservoir and is guarded by a special mech.
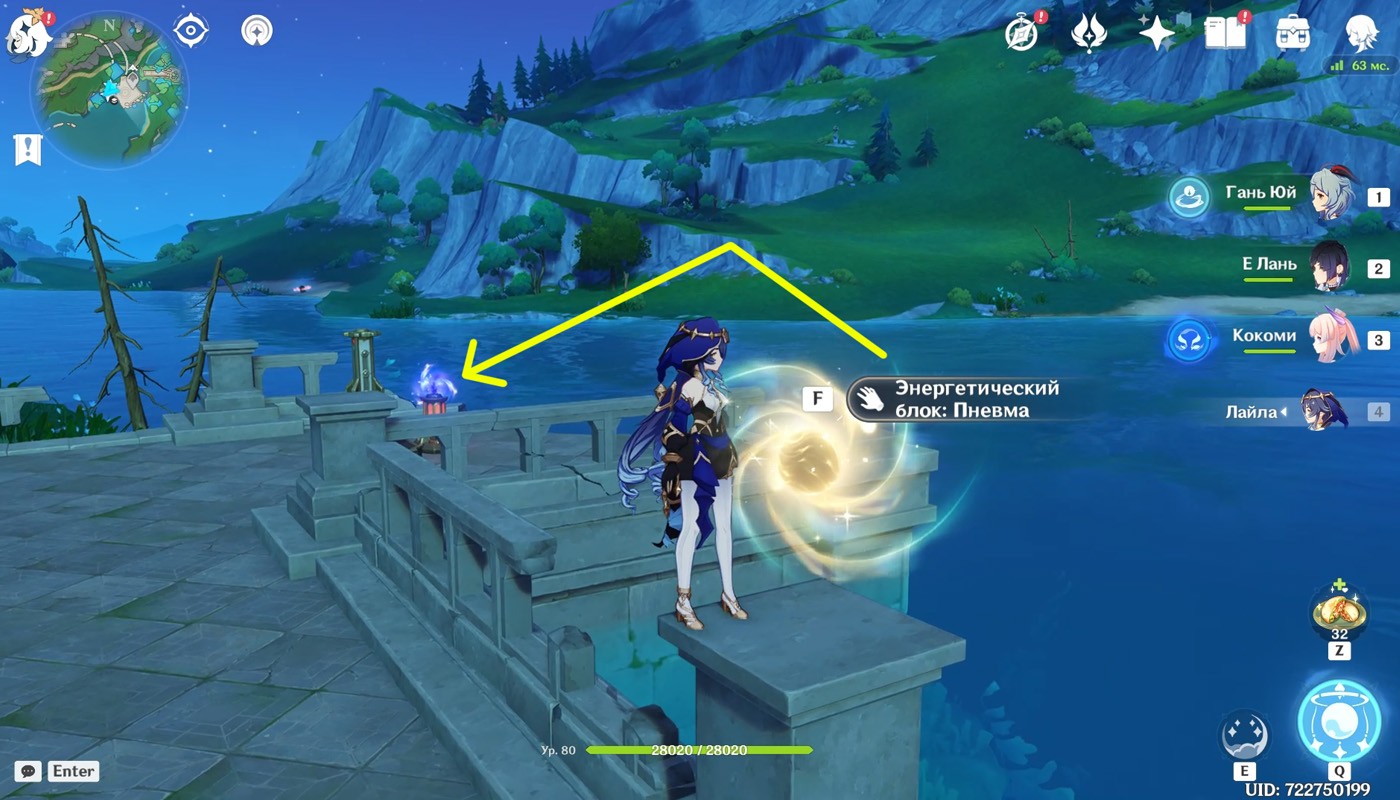
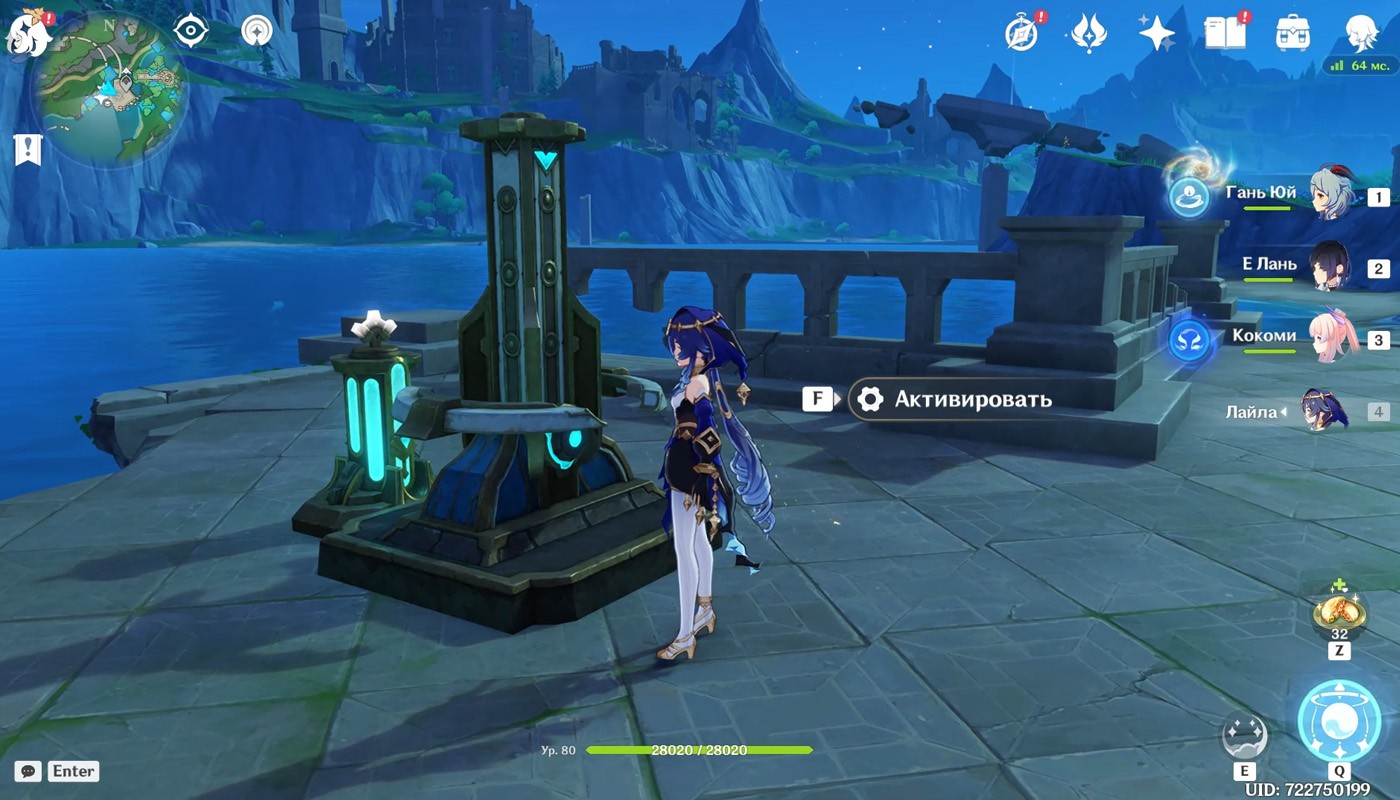
Defeat an enemy and return the charge to the energy block by hitting it pneuma sphere, which hovers on the stone fence on the right. Then start the stabilizer and make strikes in this order: center, top, bottom. Reward: rich casket.
Stabilizer 7
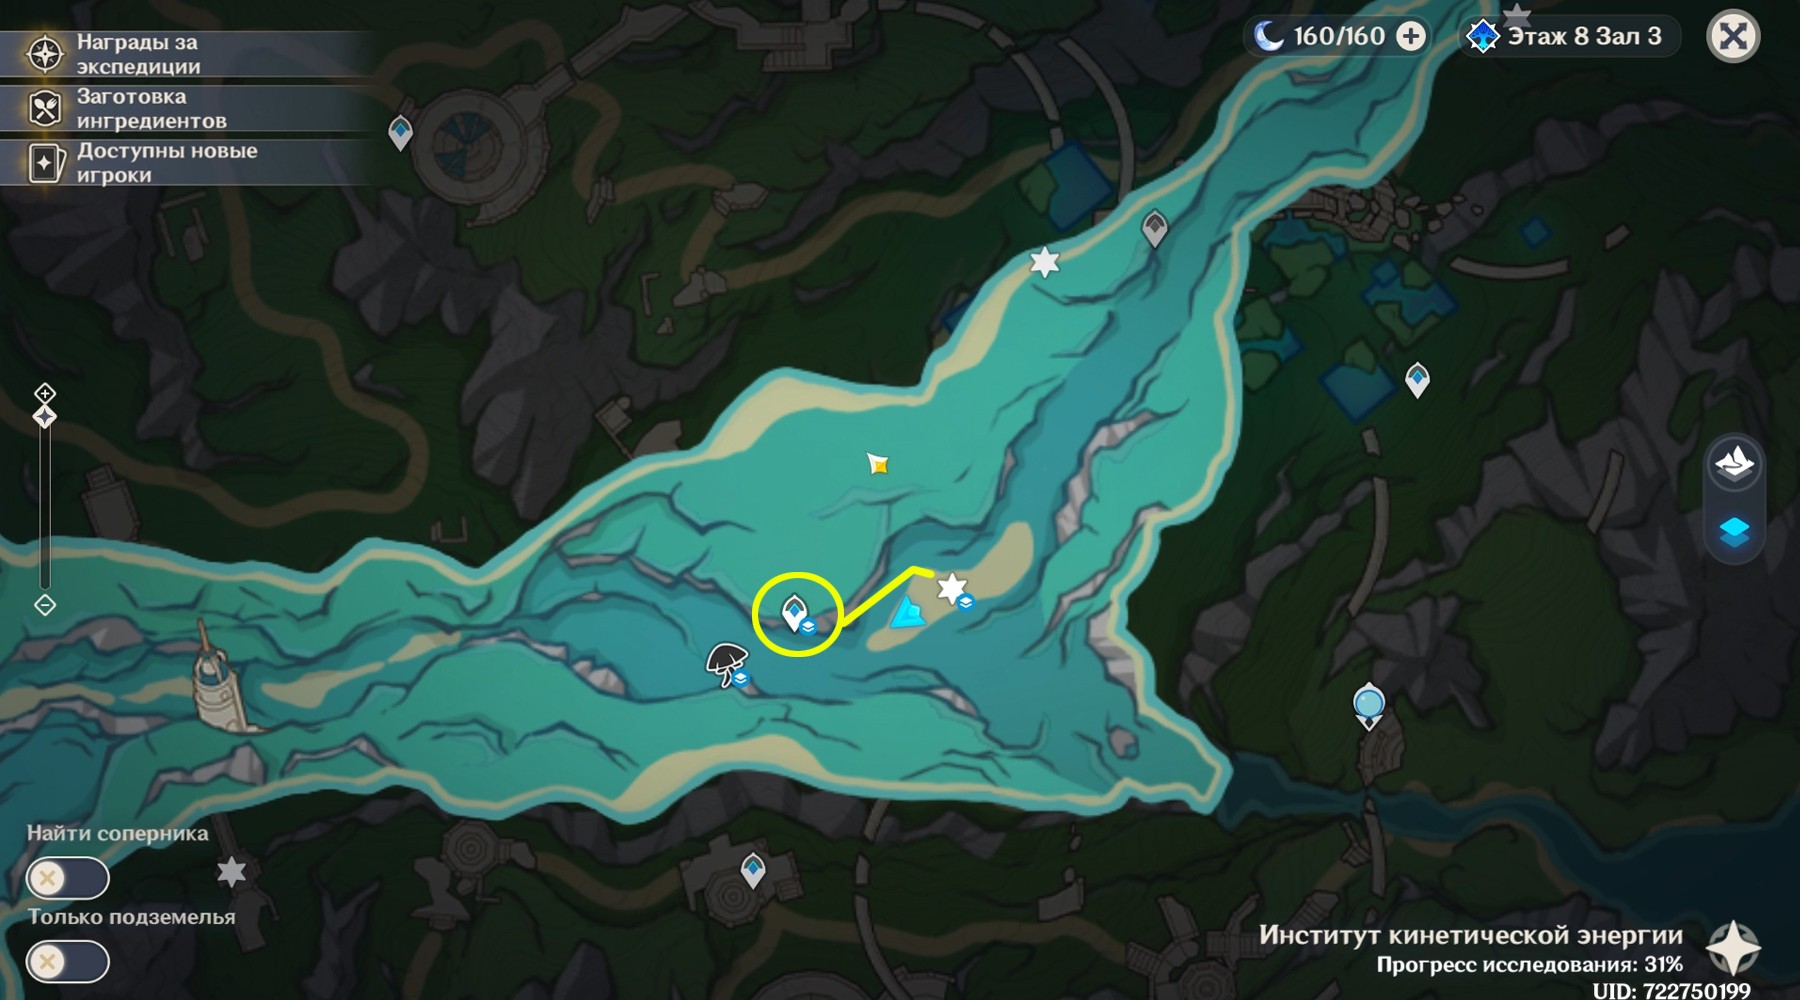
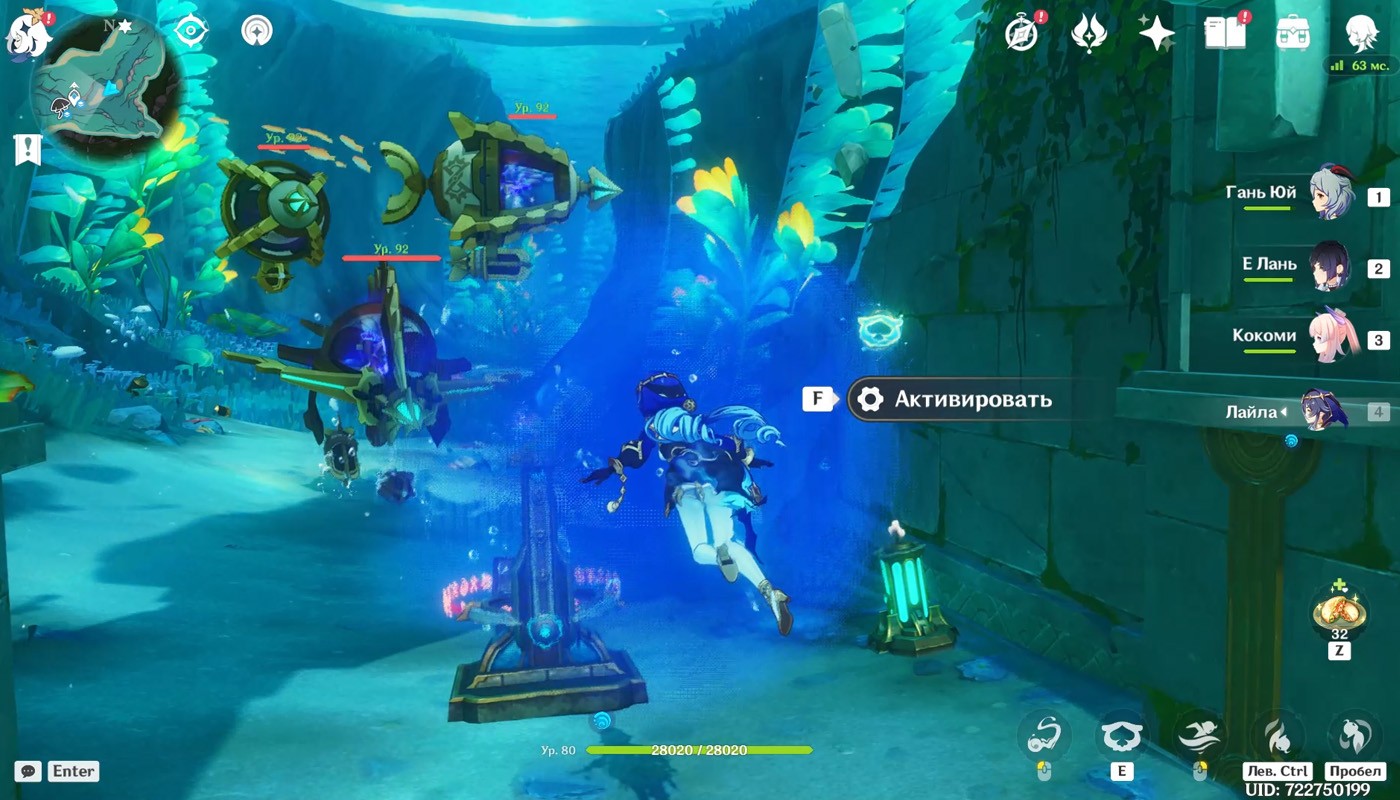
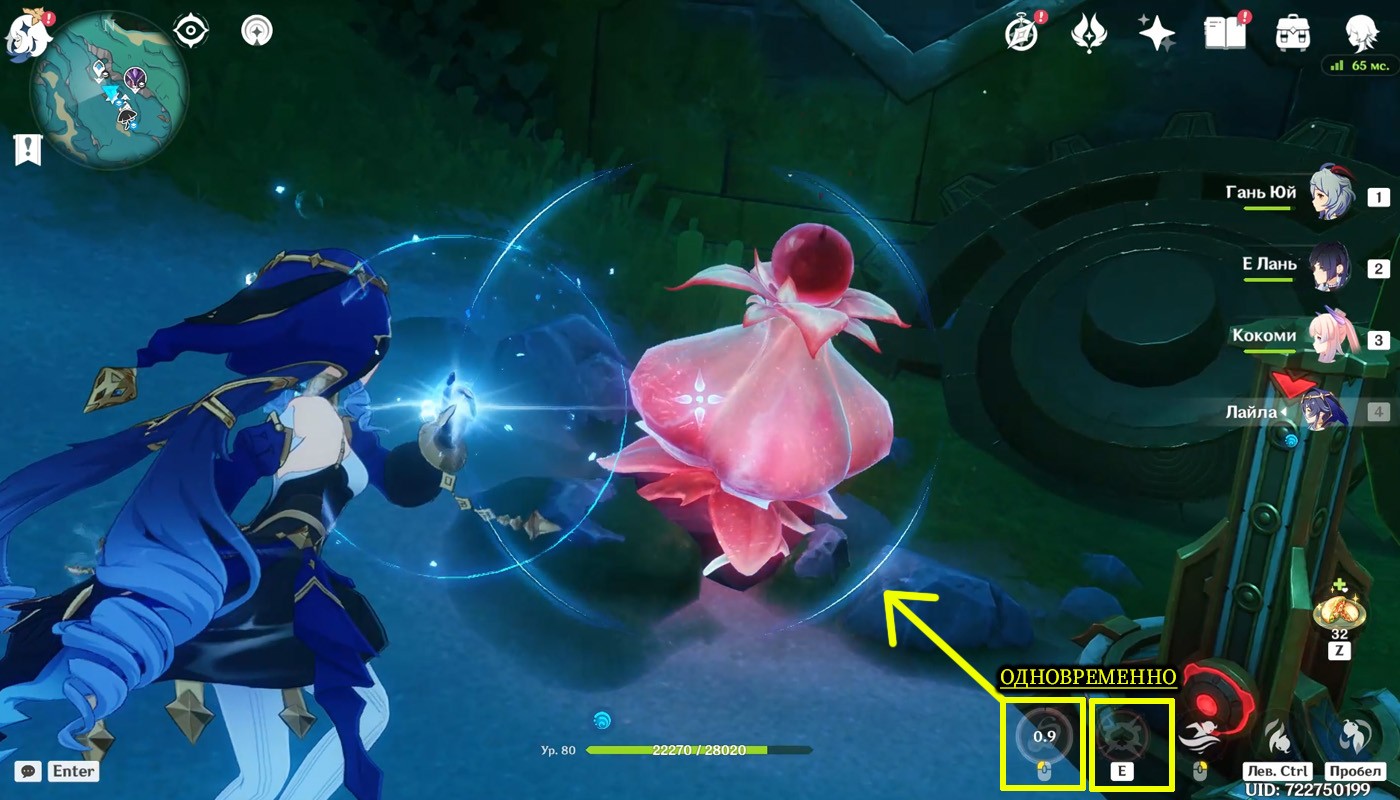
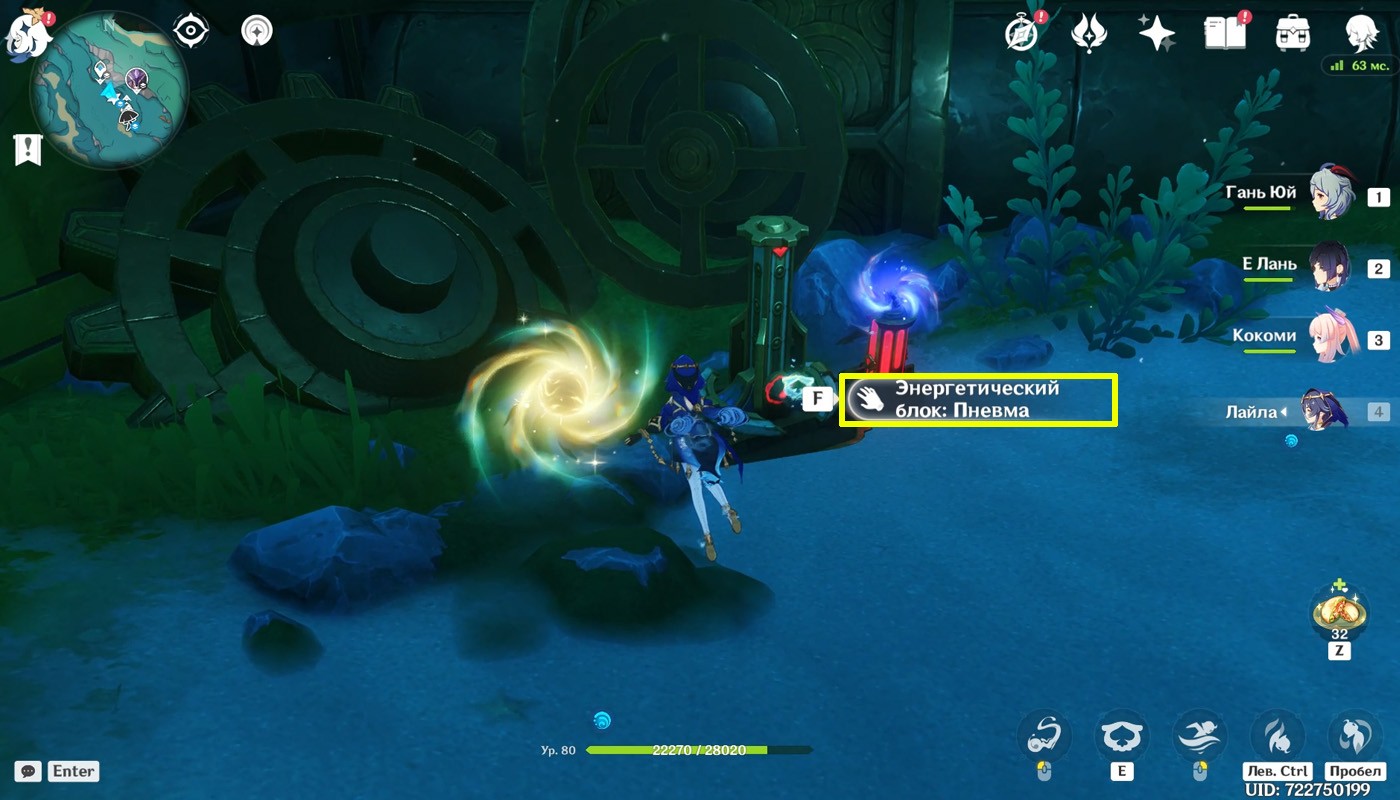
From the previous puzzle, jump into the pond and swim to the place we marked on the map (there is also an underwater teleport nearby): the stabilizer is located under a flooded stone arch and blocked by hydro field.
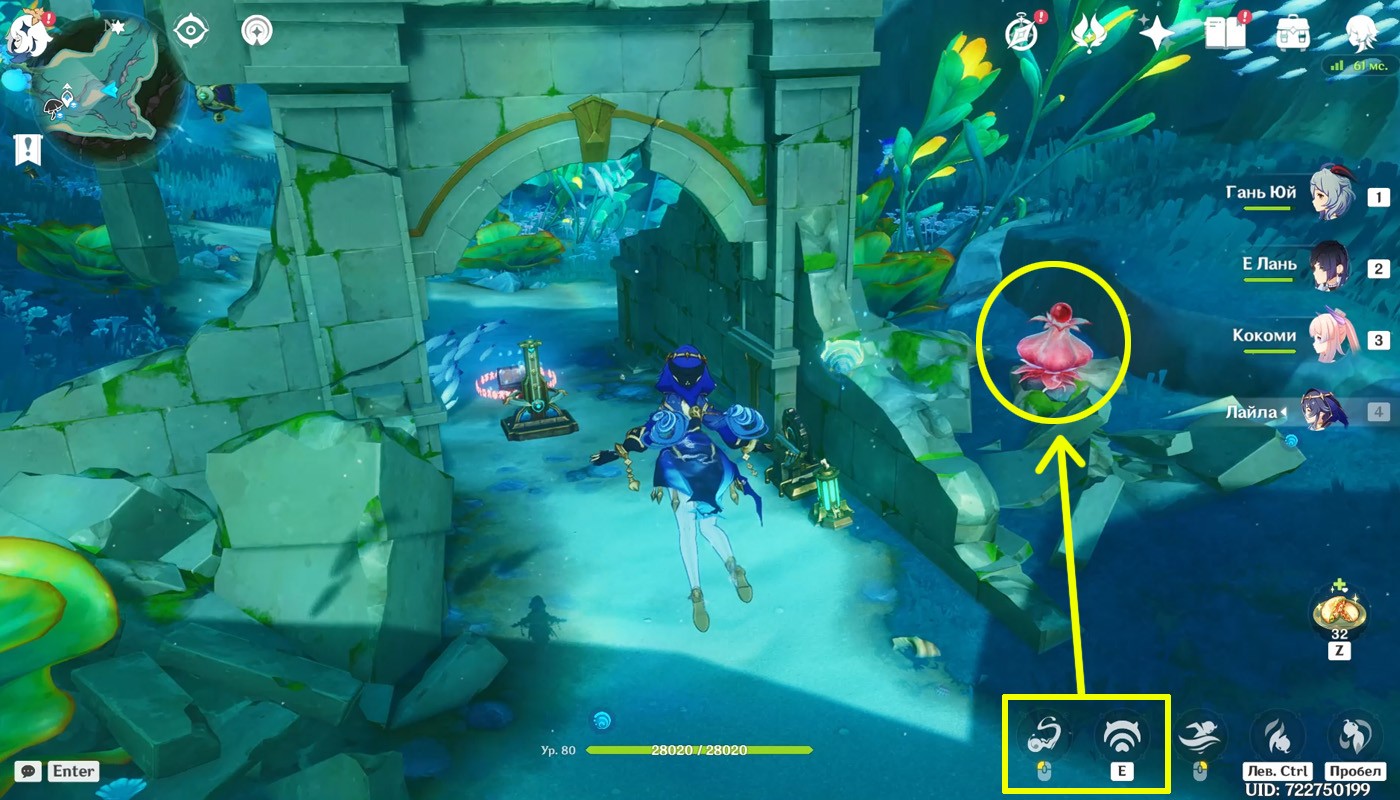
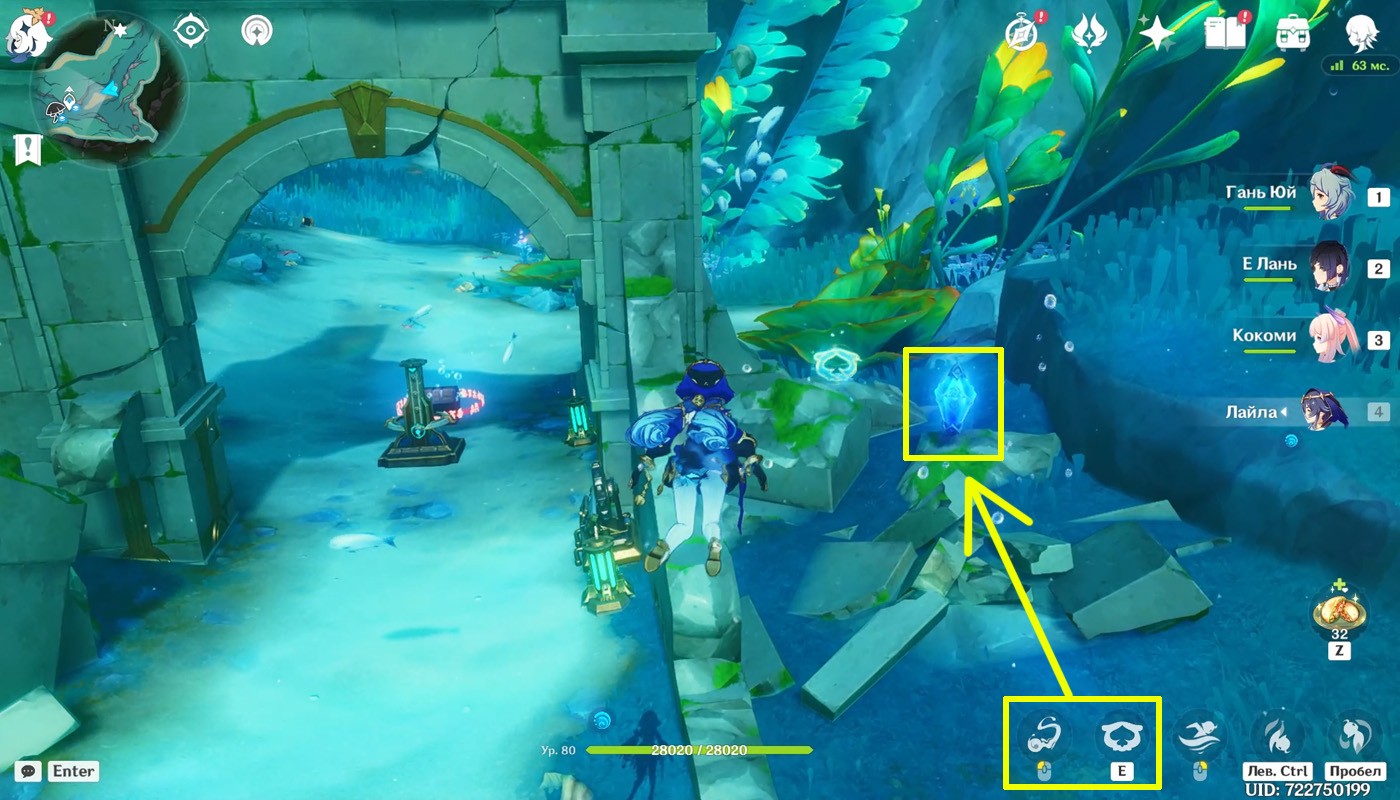
To remove the barrier, destroy the fruit Scarlet Prankster with any attack, and then hit the Elemental Reaction: Crystallize hiding under it so that it changes color from blue to golden-orange.
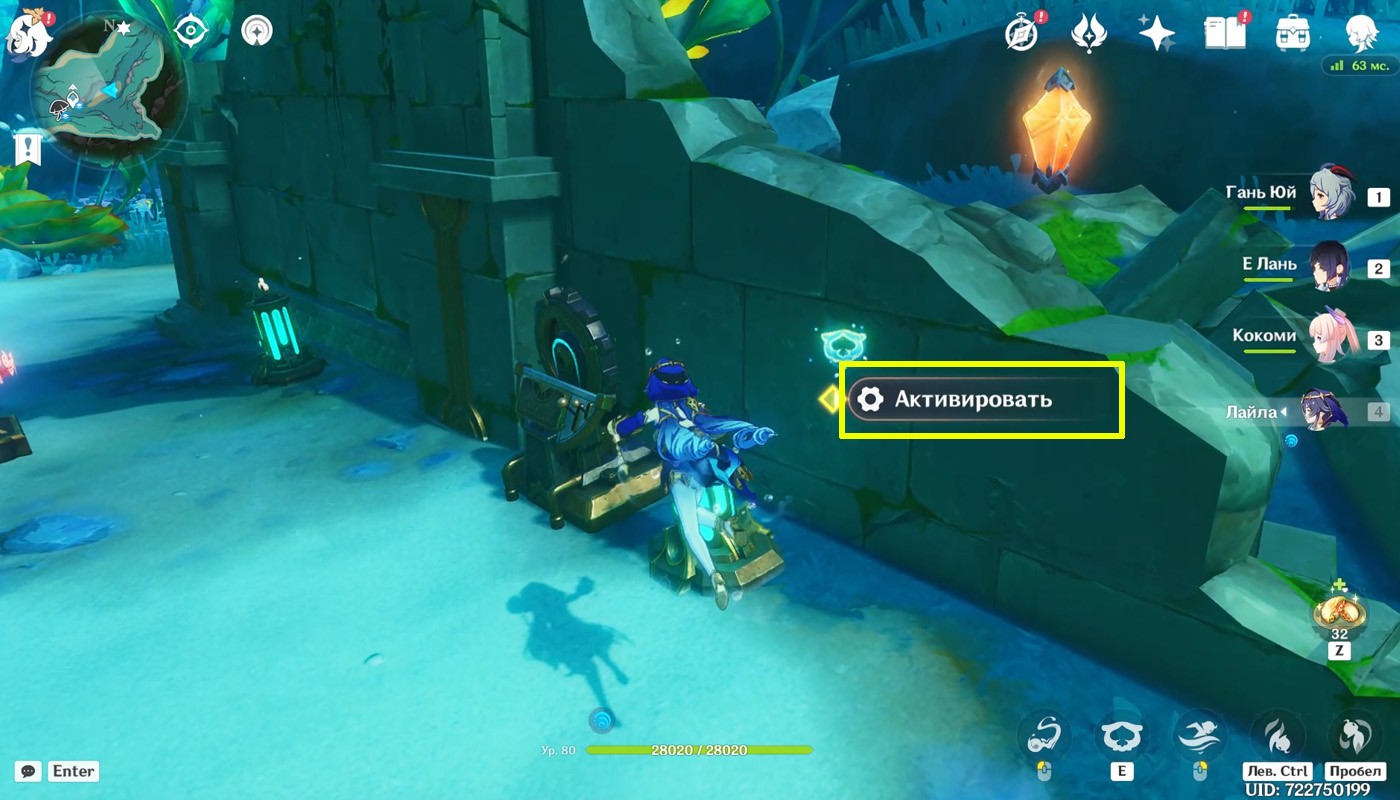
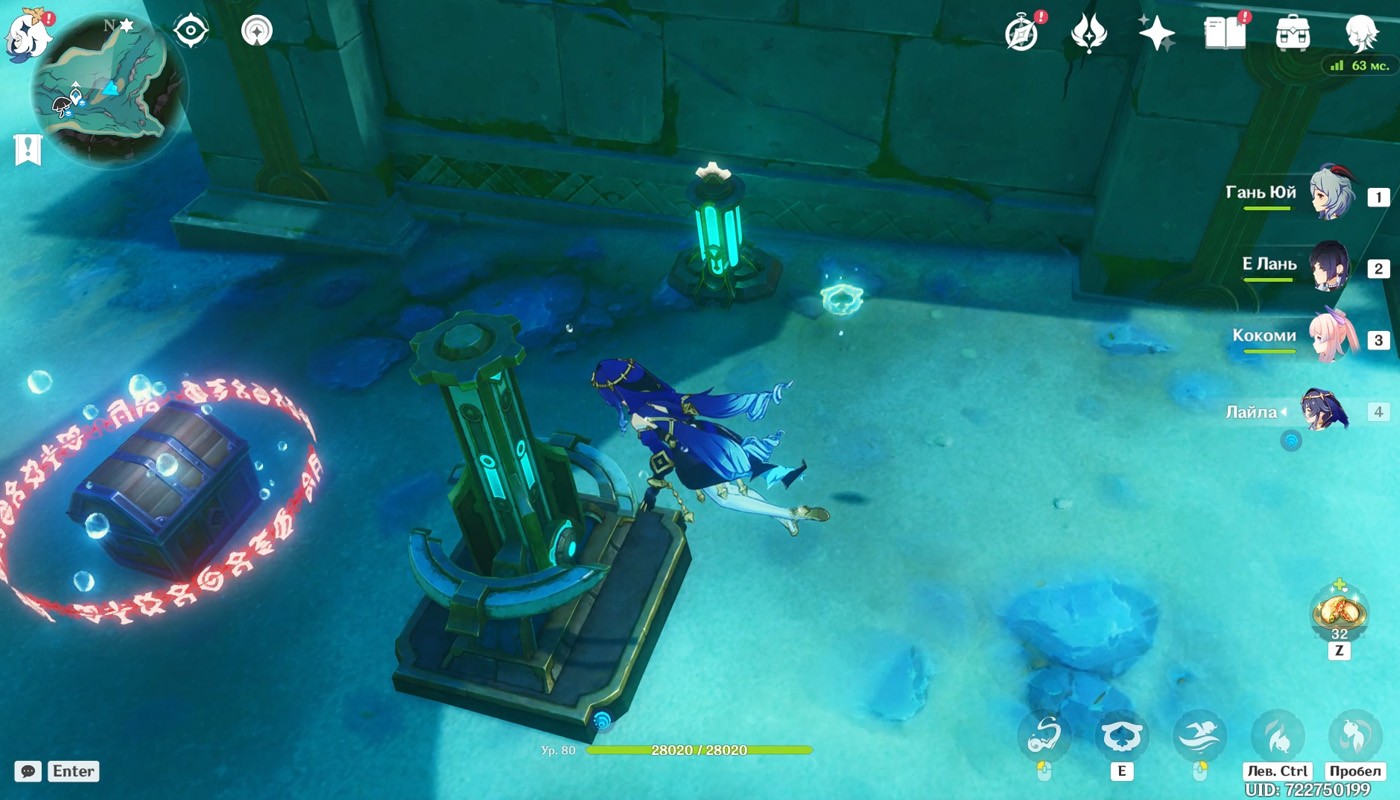
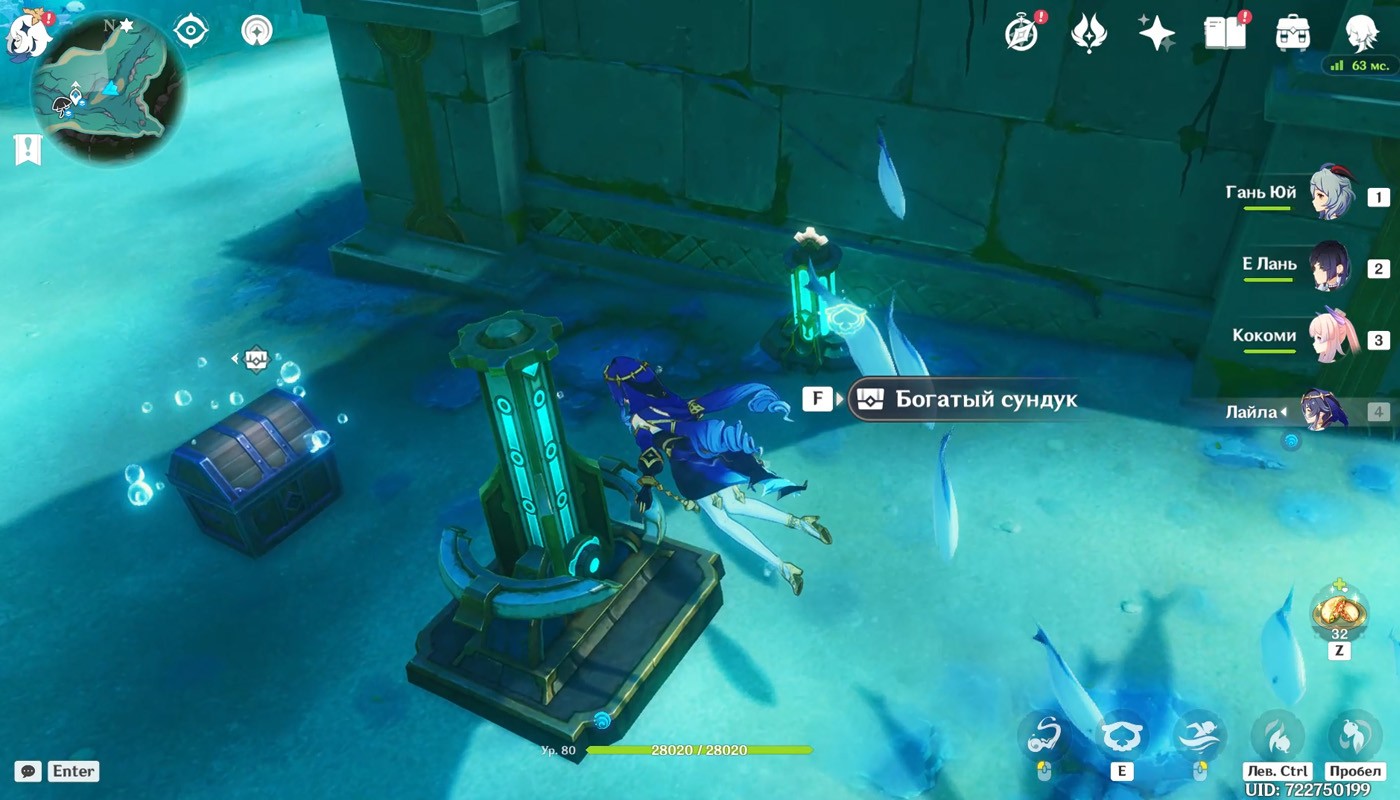
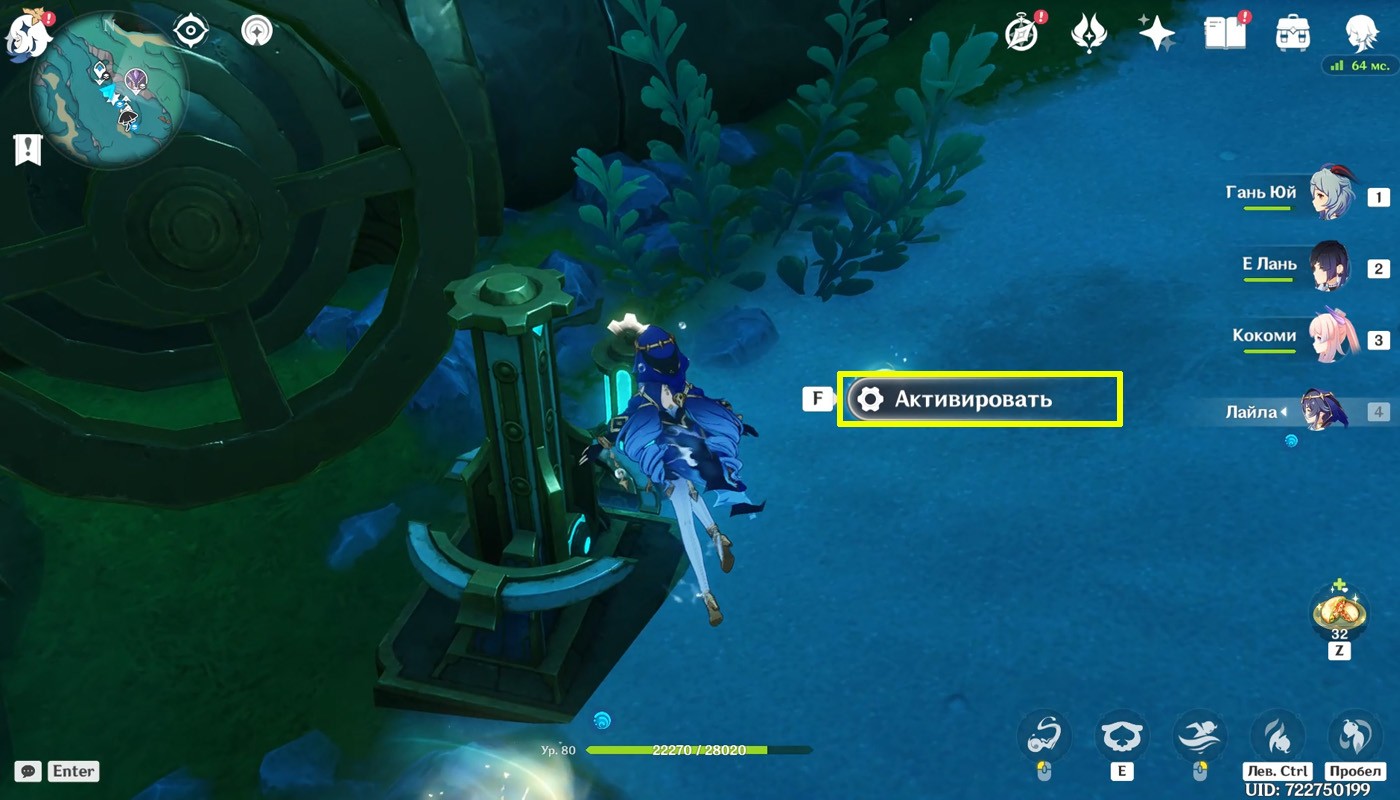
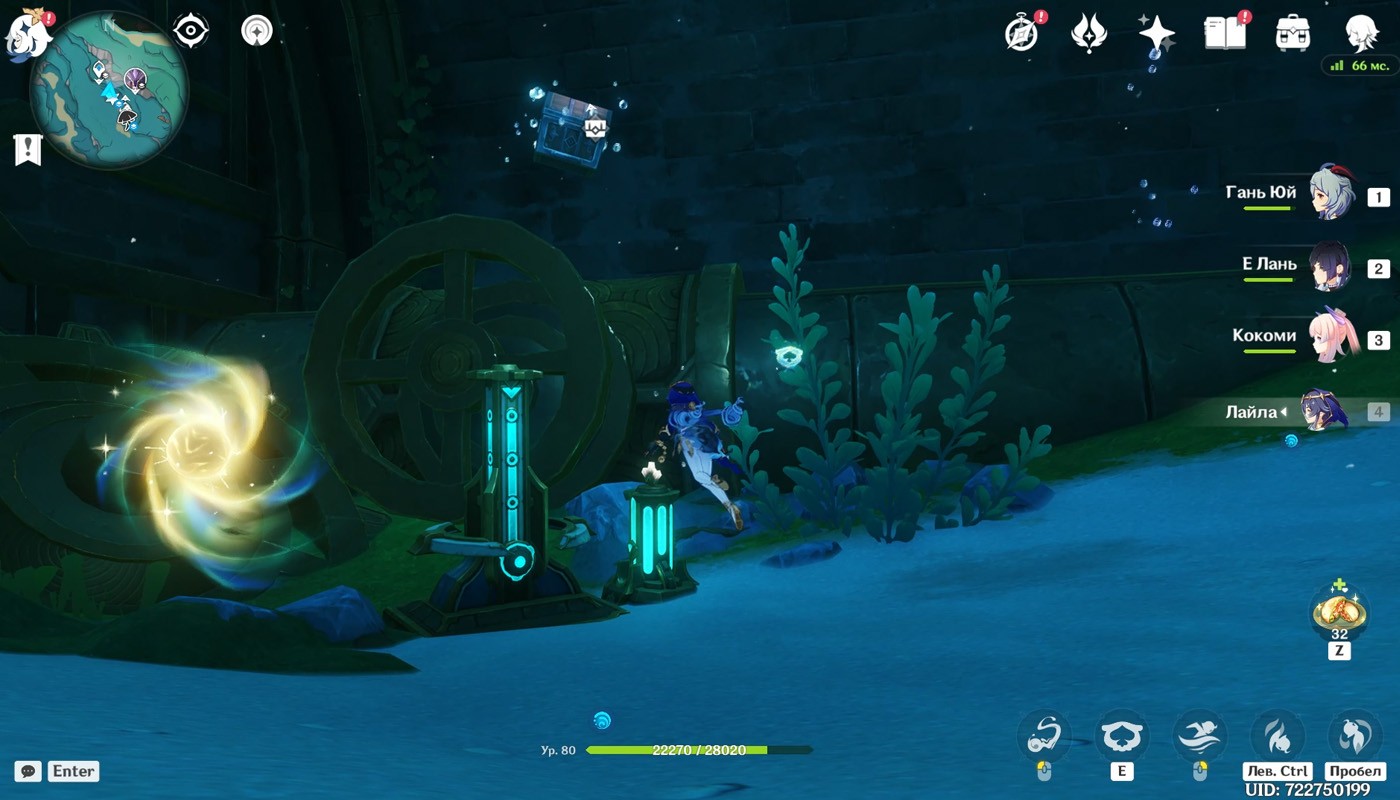
Activate the terminal near the device, and then swim to the activated mechanism and hit in the following sequence: middle, top, bottom. Successfully solving the puzzle will unlock a rich chest.
Stabilizer 8
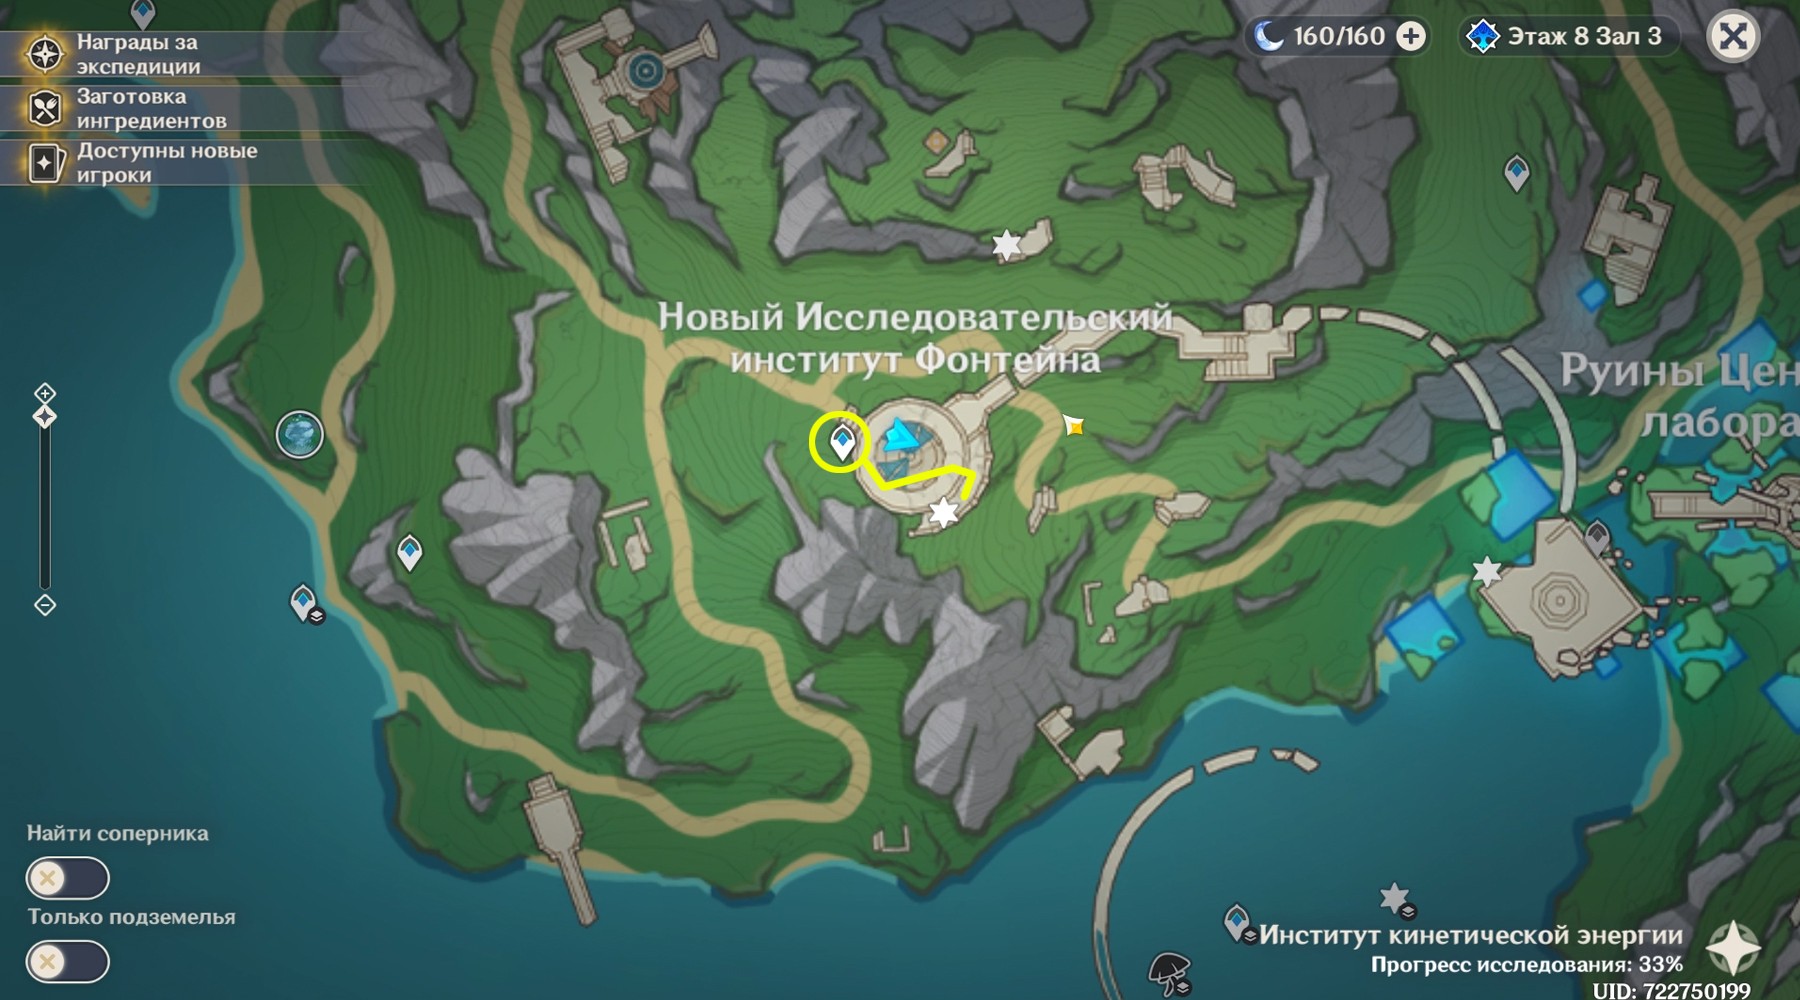
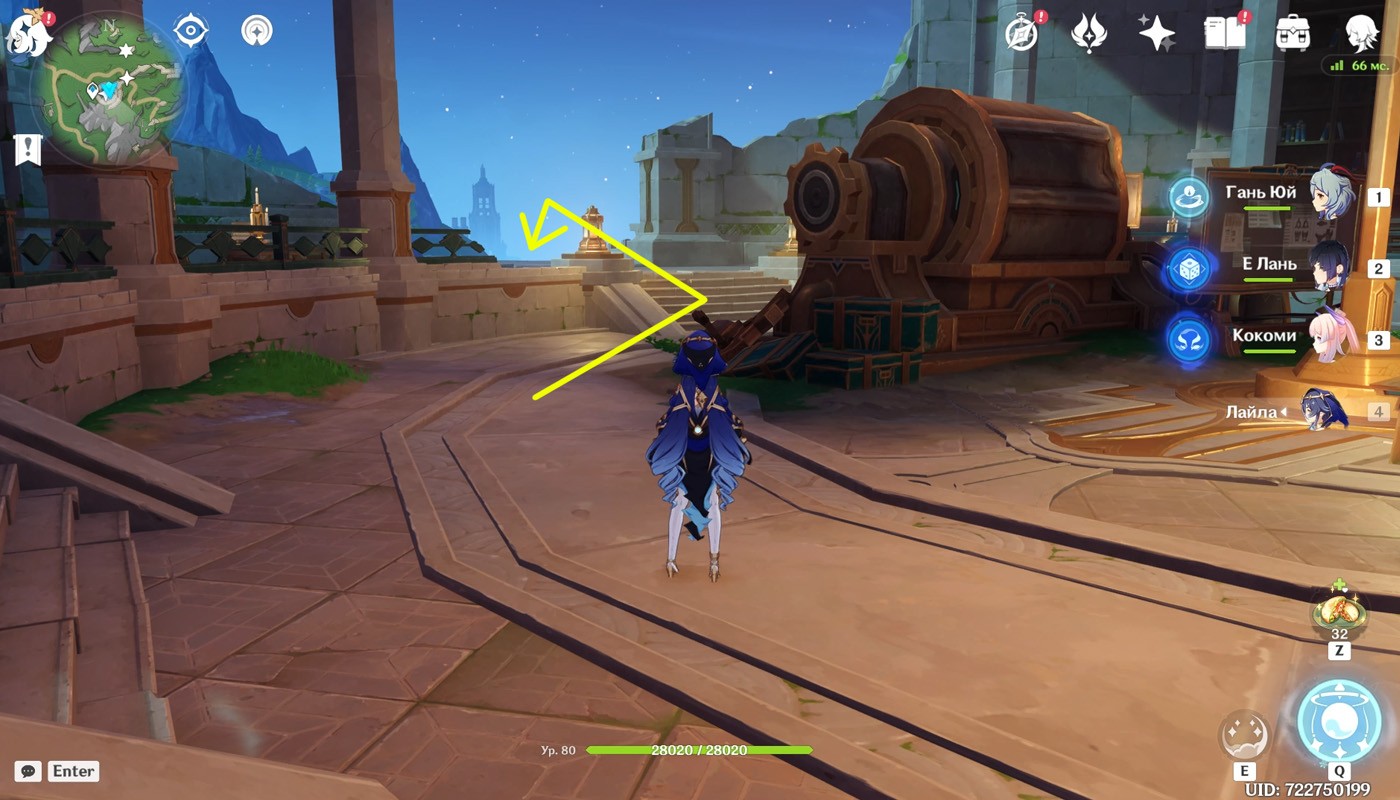
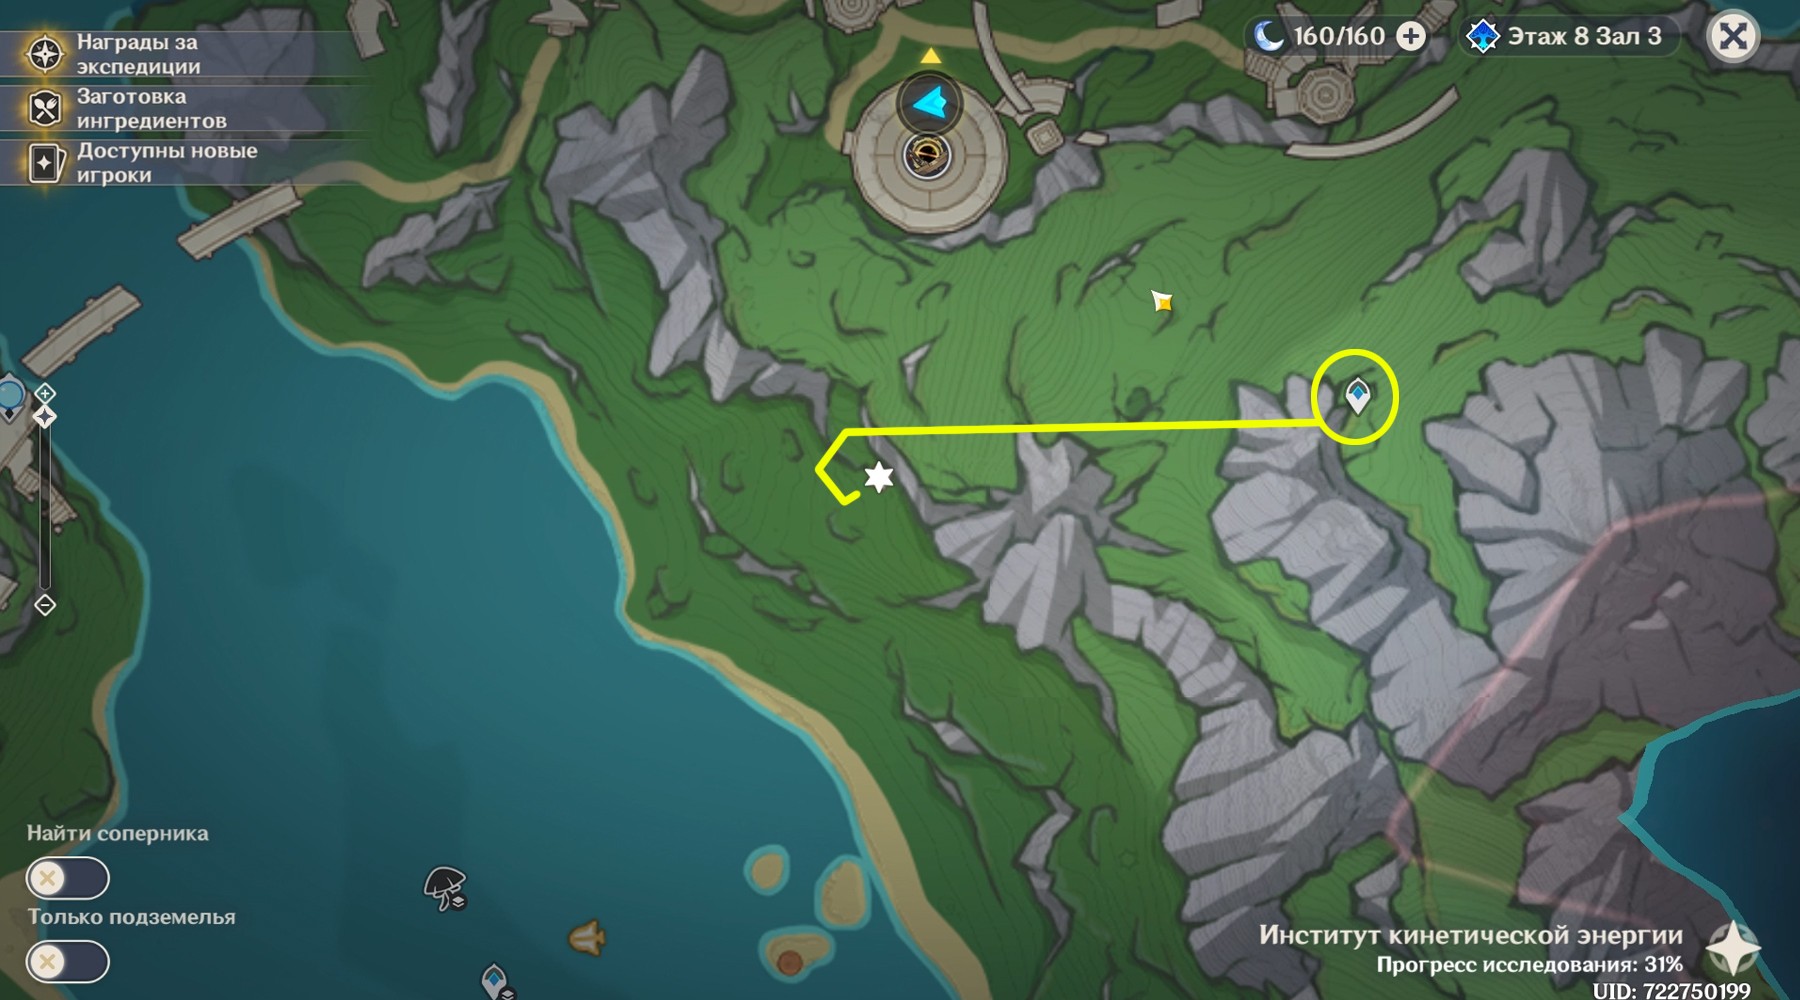
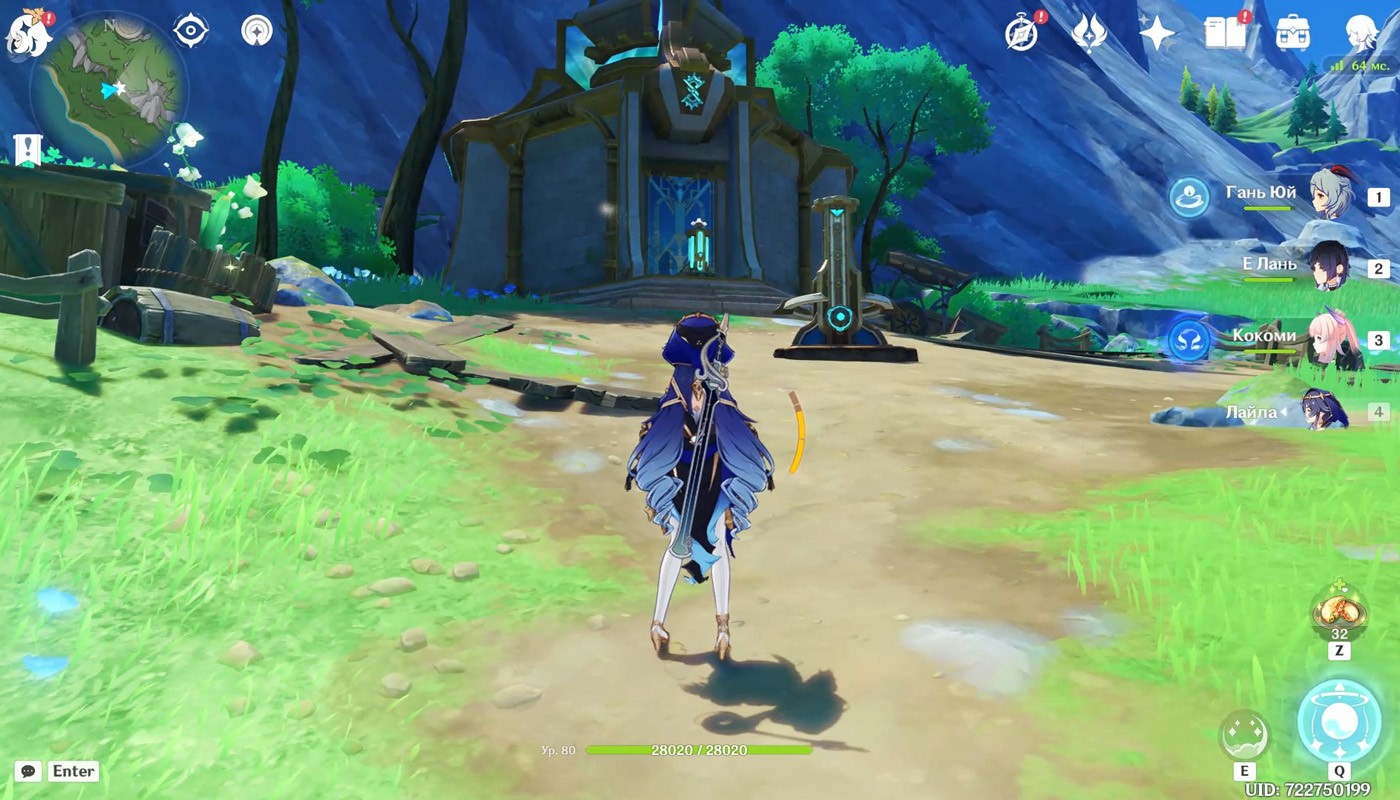
The eighth puzzle can be found on the lower level of the New Fontaine Research Institute. Move to the teleporter in front of the building, run through the central hall to the eastern half of the building and jump down.
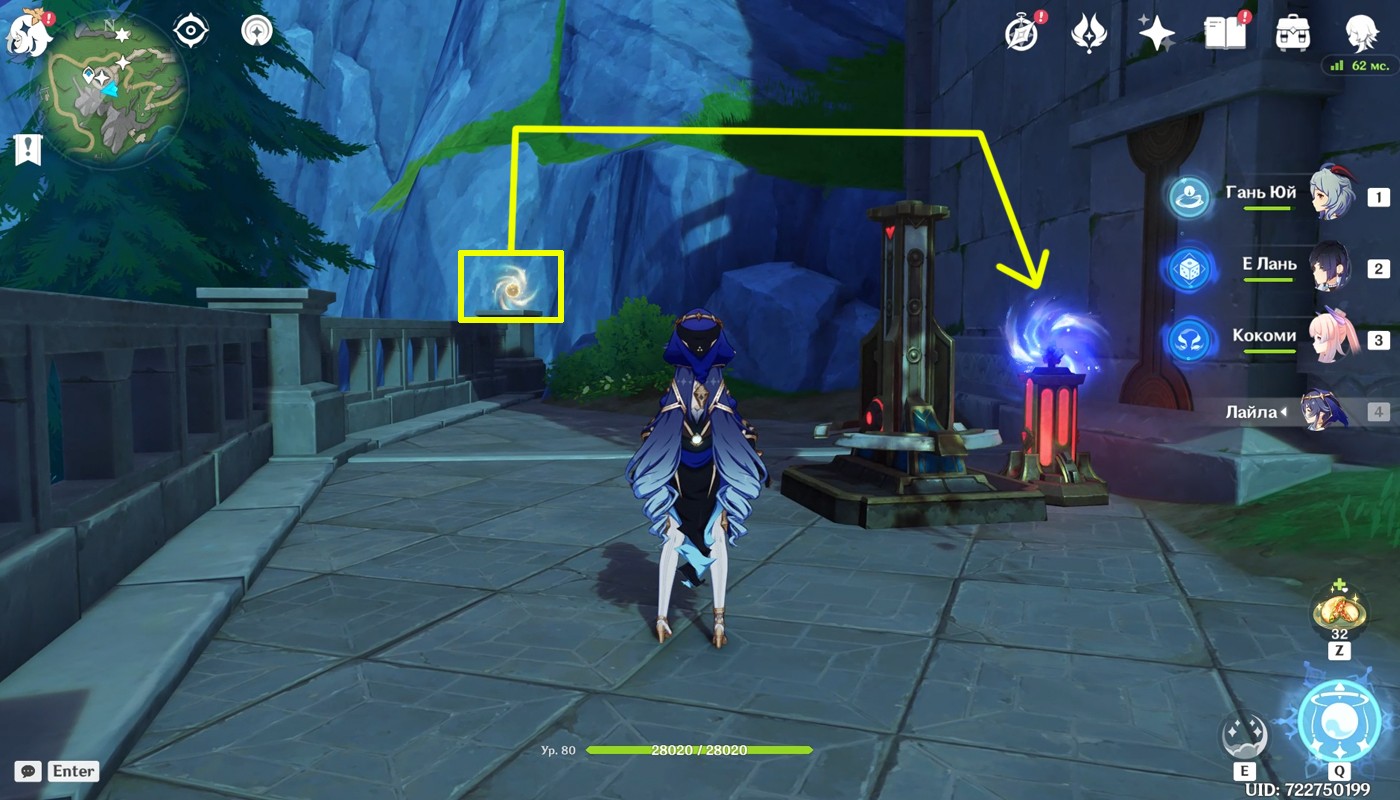
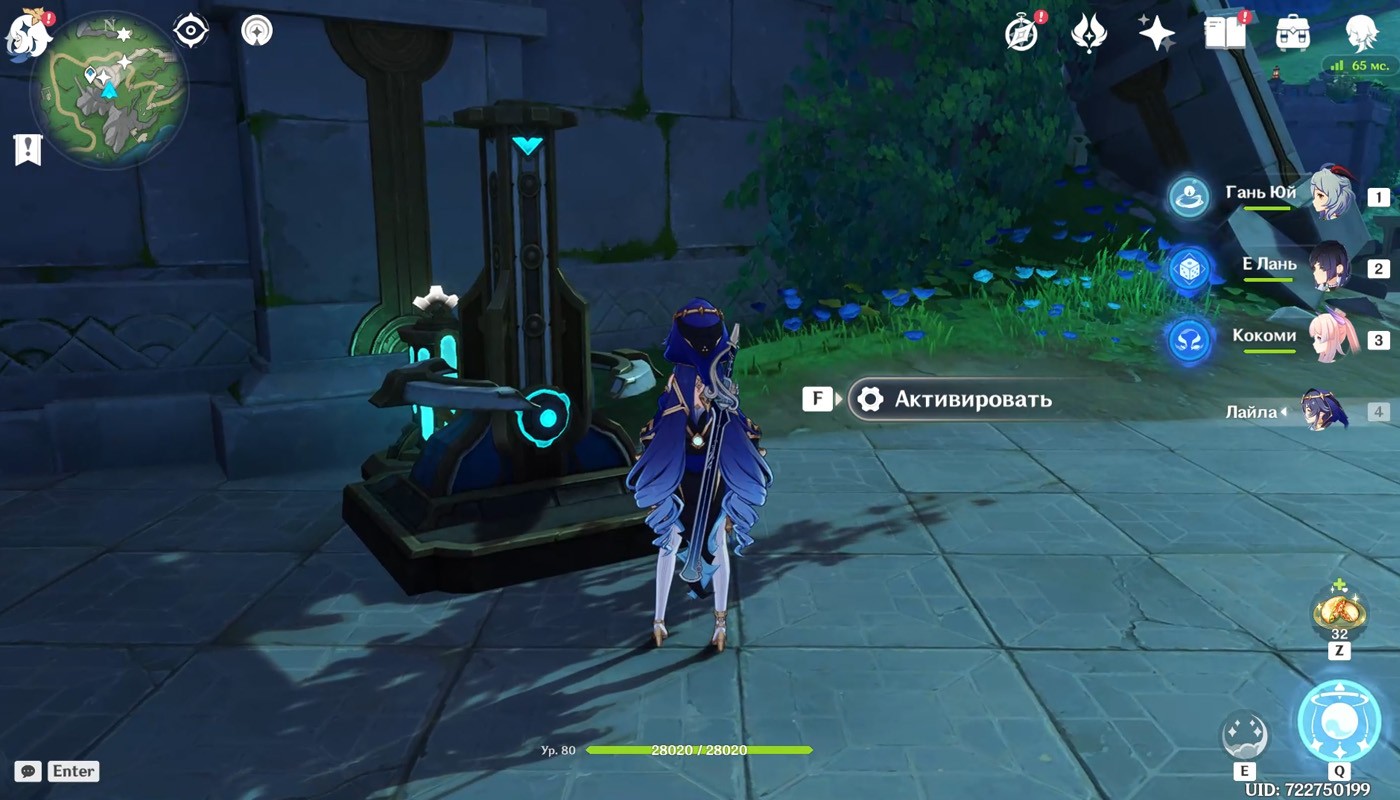
Pick up the pneuma sphere not far from the device, and then hit the power supply, shrouded in a purple ushii glow. After activating the stabilizer ring, you need to hit it in this order: bottom, center, top, and then loot an ordinary casket.
Stabilizer 9

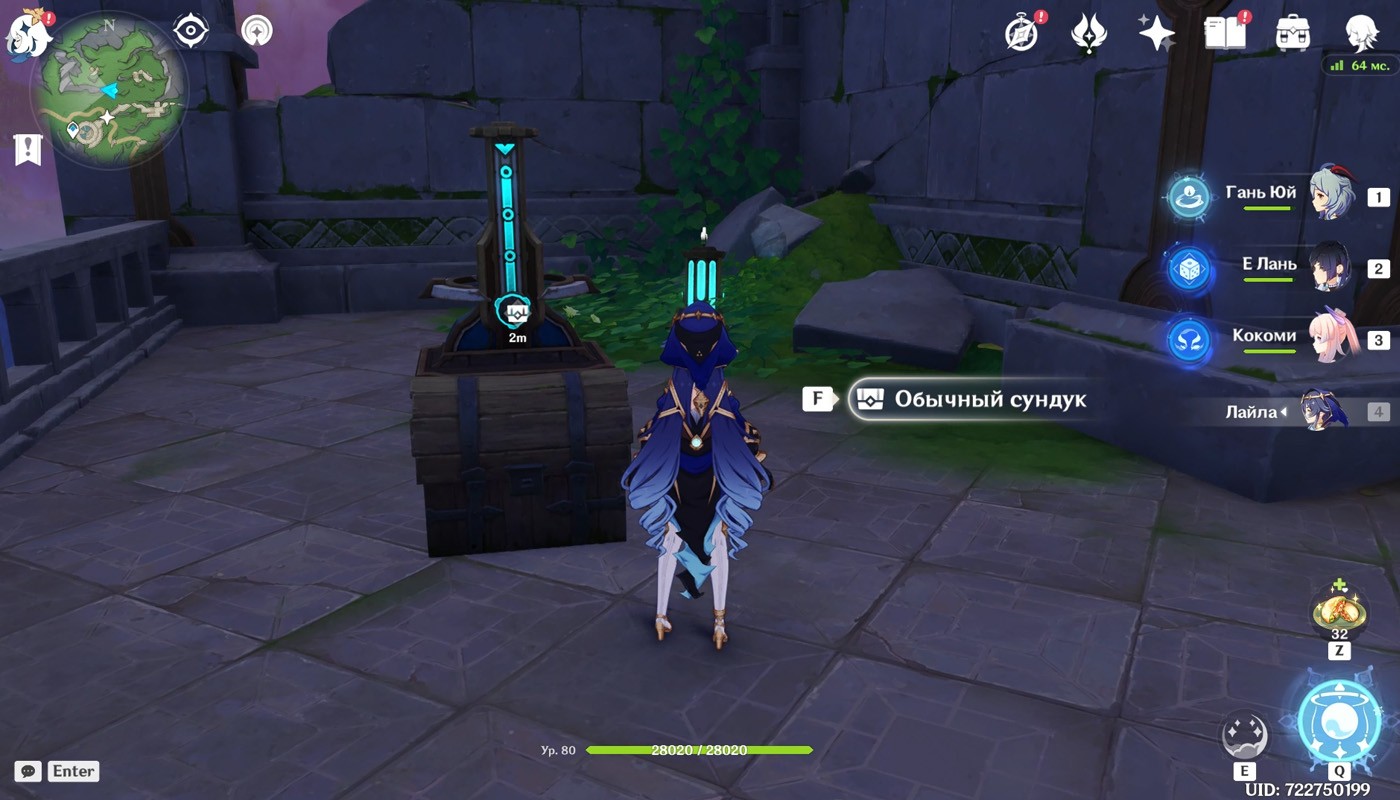
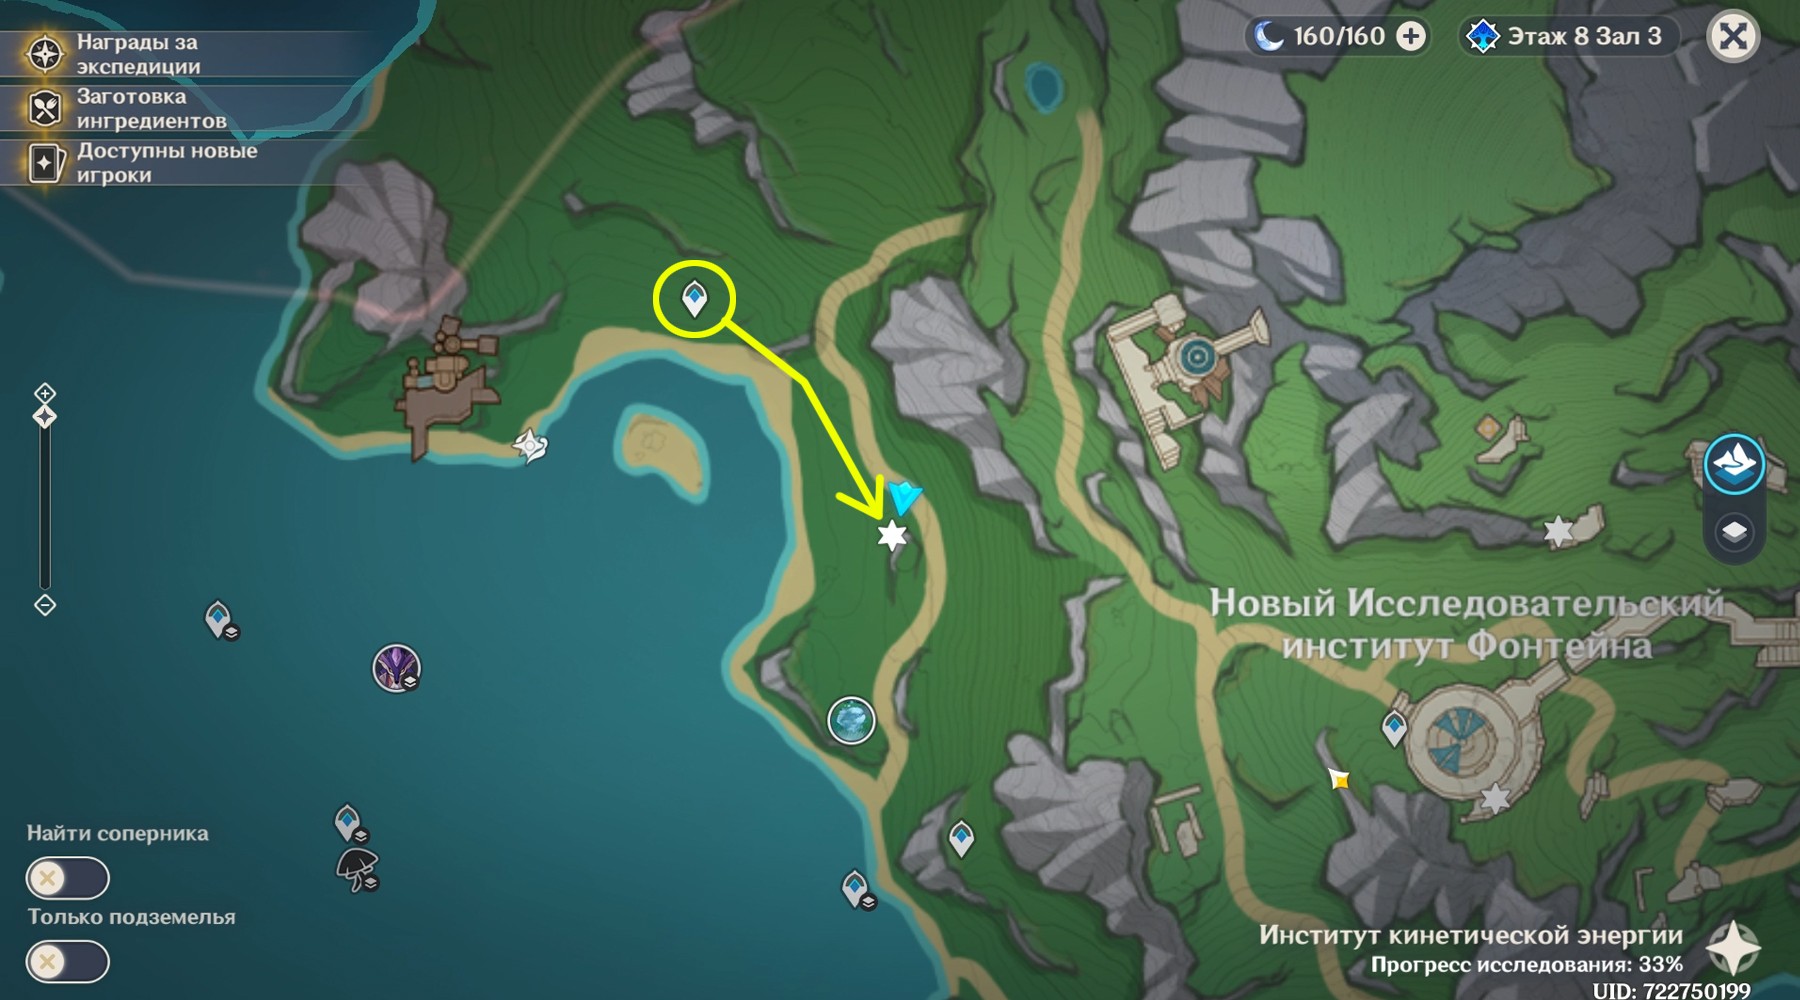
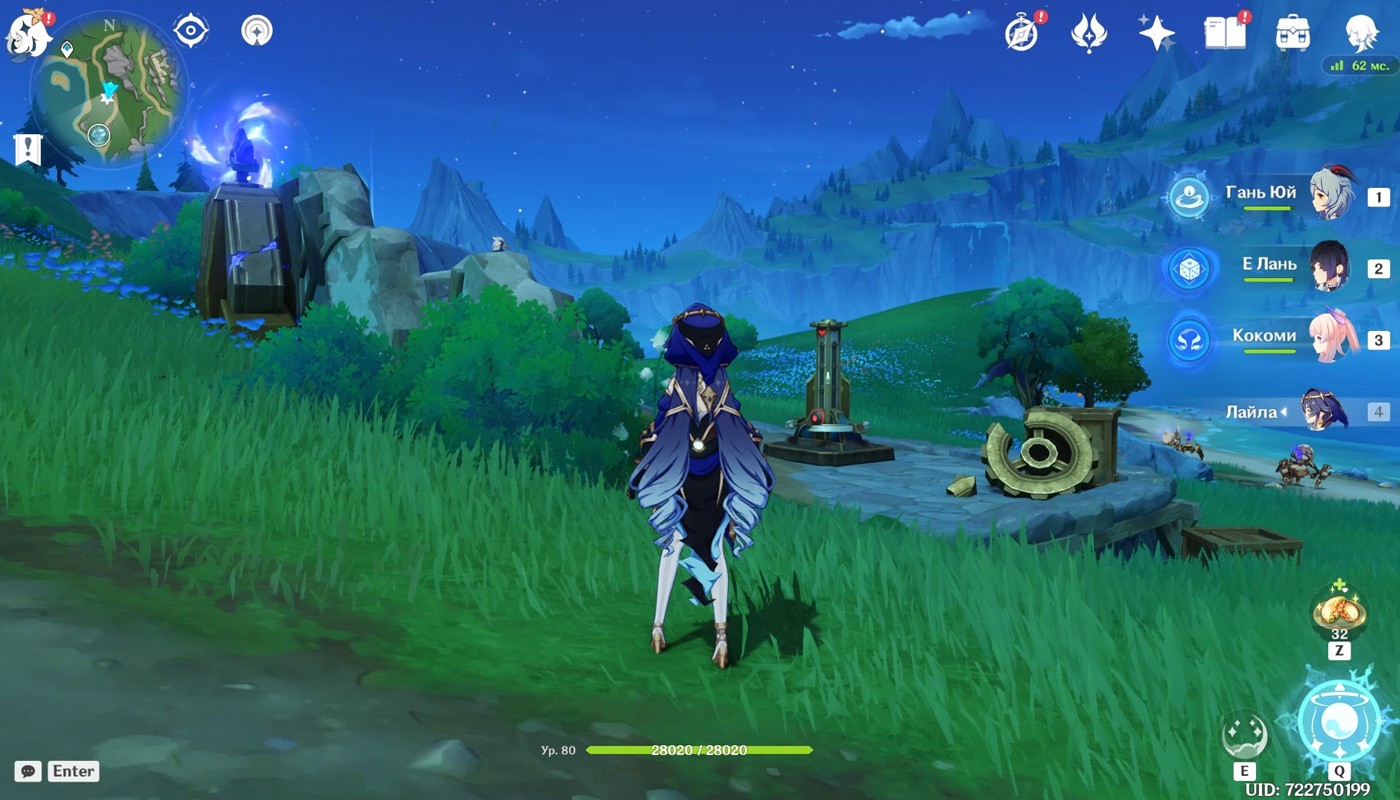
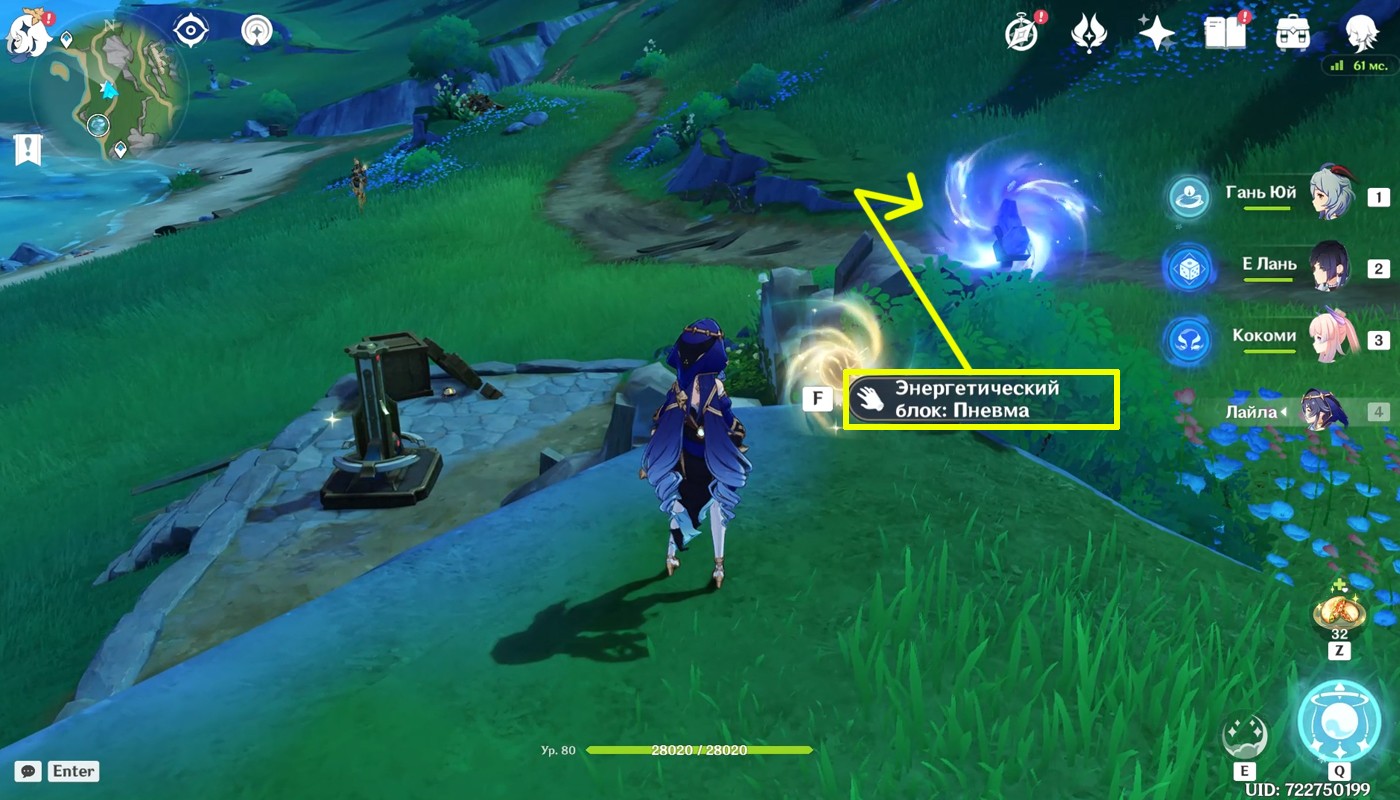
The next stabilizer is also located near the teleport at the entrance to the New Fontaine Research Institute: run northeast to the hill with the ruins. In the corner of the destroyed wall there is a device, and above it there is a pneuma sphere, which you need to pick up and attack the power unit from below.
Activate the stabilizer and hit the ring in the following sequence: below, above, in the center. Complete the device setup and then destroy the two mek that appear, defeating which will allow you to open one regular chest.
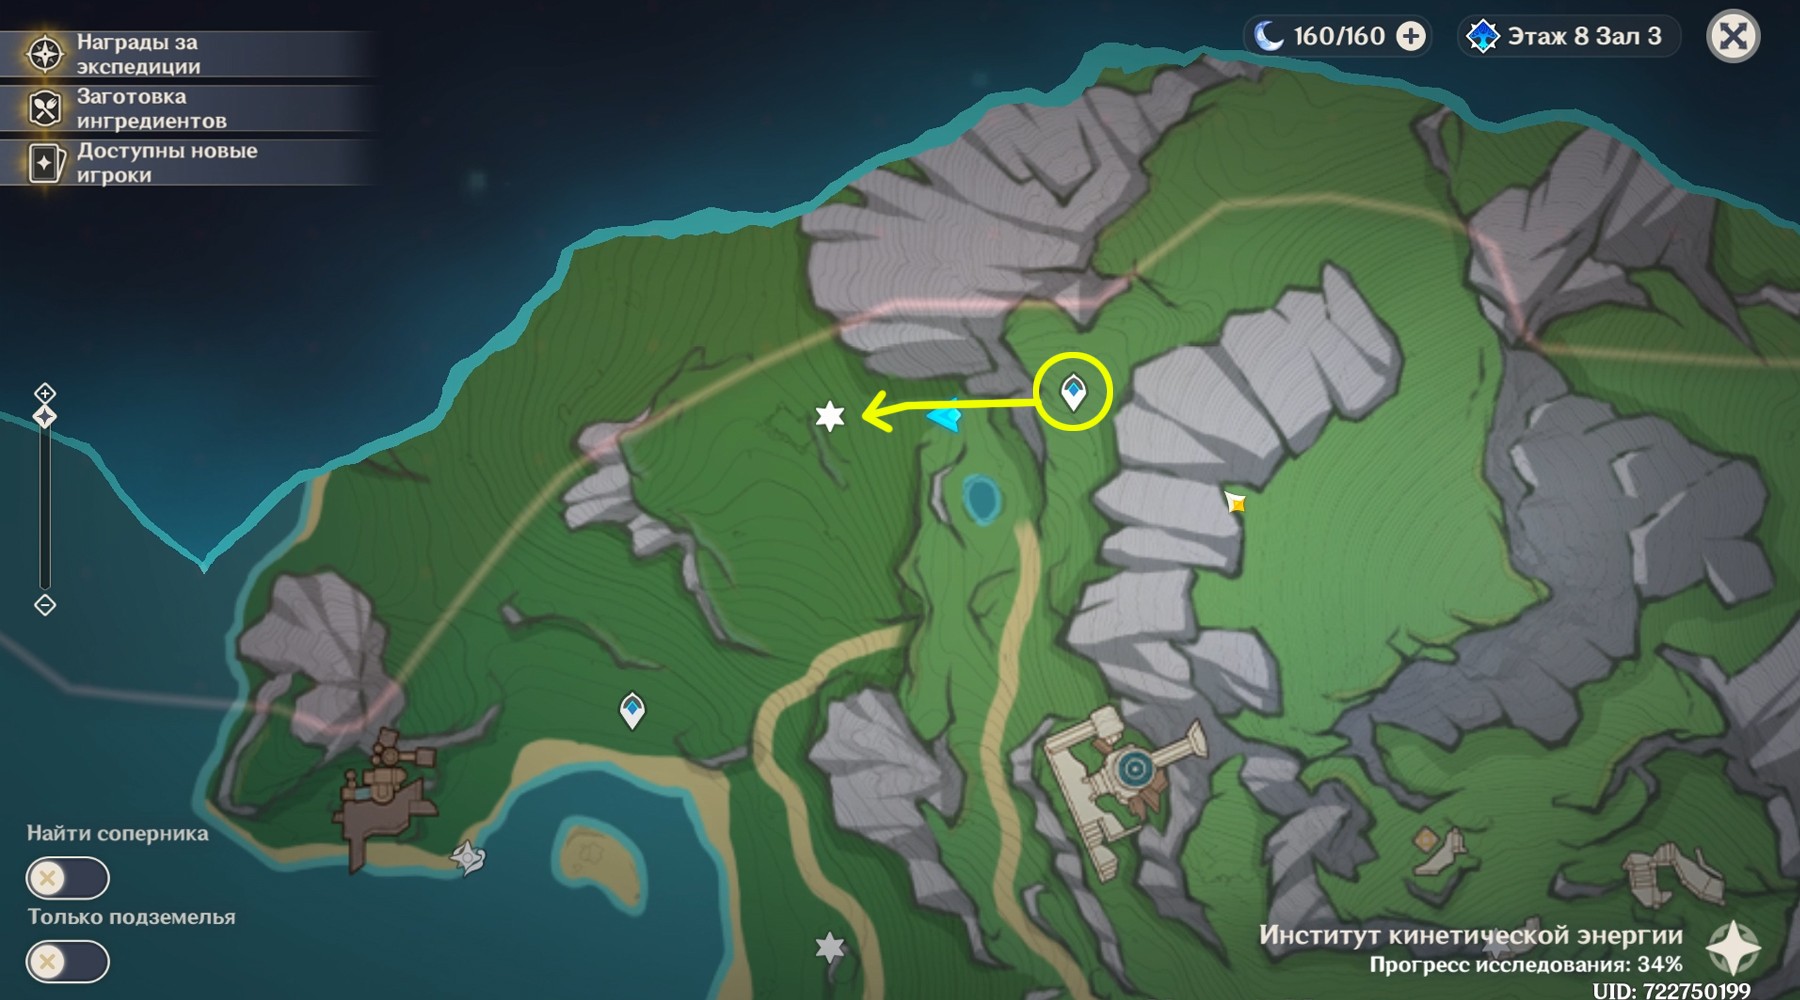
Stabilizer 10
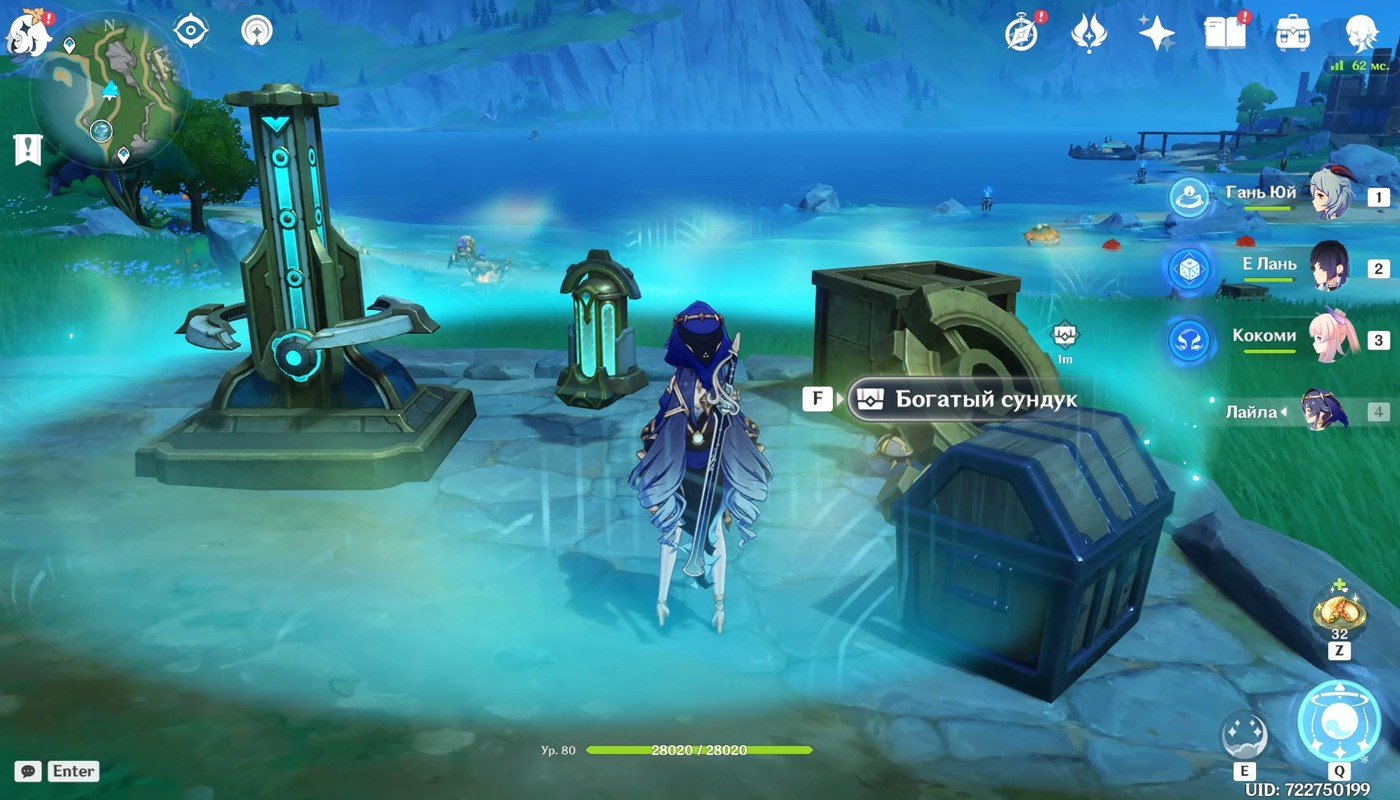
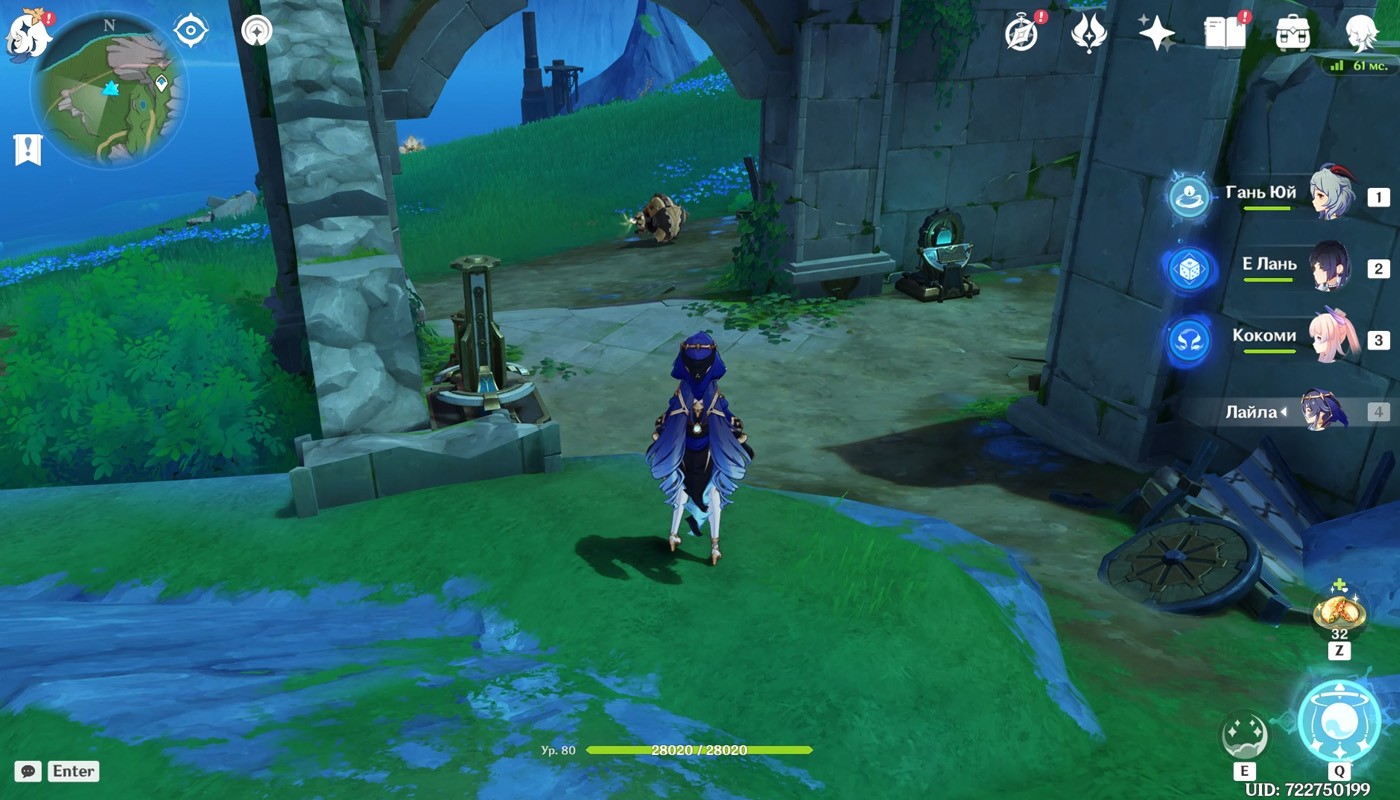
The tenth device is located in the north of the map, not far from puzzles with hydro totems : according to the usual scheme, we select the pneuma block and go down to the auxiliary storage box. By hitting the structure, it will be possible to pick up the part emitting an energy field.
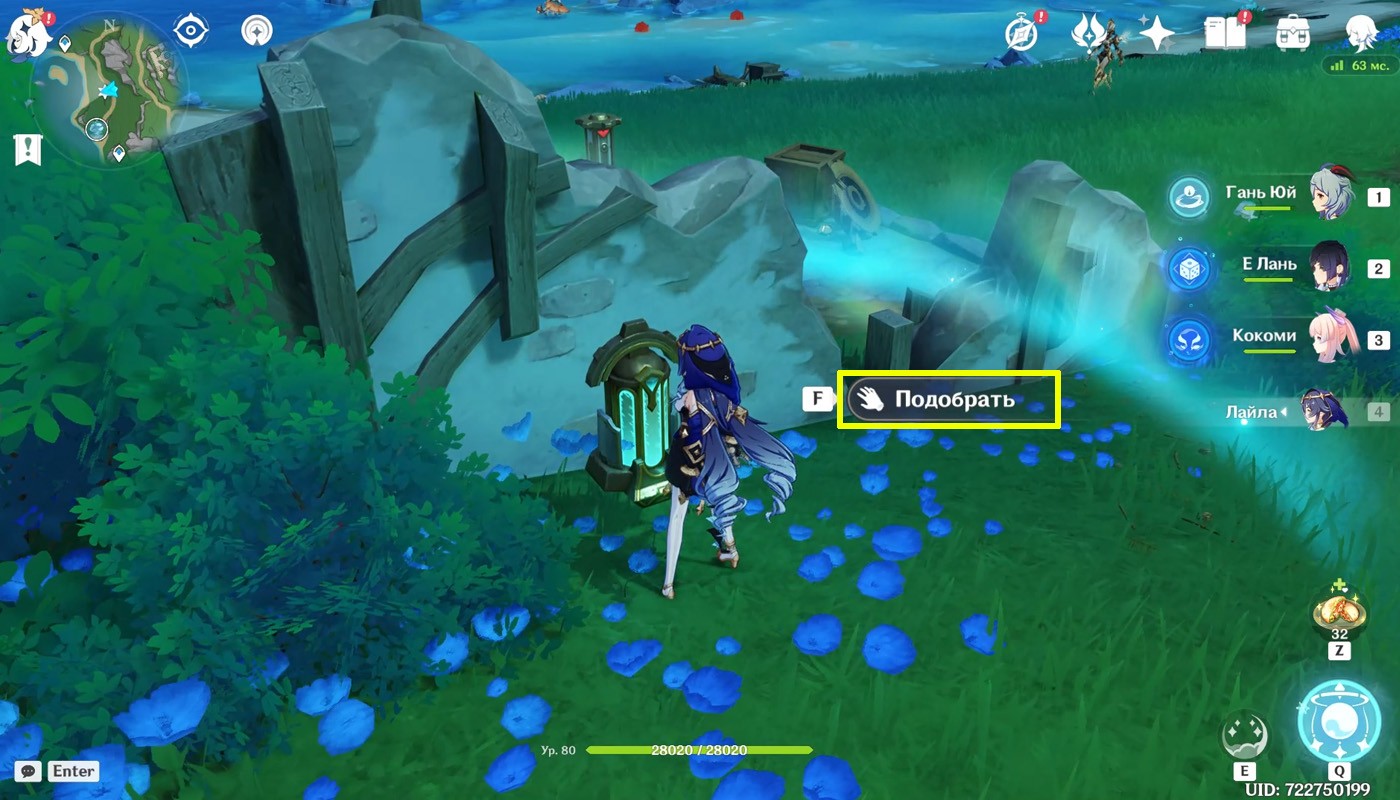

Place the “battery” near the stabilizer, start the movement of the ring and attack it at the level of these sections of the scale: top, top, center. At the end, a rich casket will appear.

Stabilizer 11
From the previous place, teleport to the hill to the north, and then go down lower to the west to the stone ruins.
Start with the terminal to the right of the inactive device, which you can use to connect to the video communication system. Then perform the following manipulations:
- Switch the camera to the opposite side of the area.
- Collect the charge from the flask near the wall below.
- Return to the first observation source.
- Transfer the charge to the block near the stabilizer and exit camera mode.
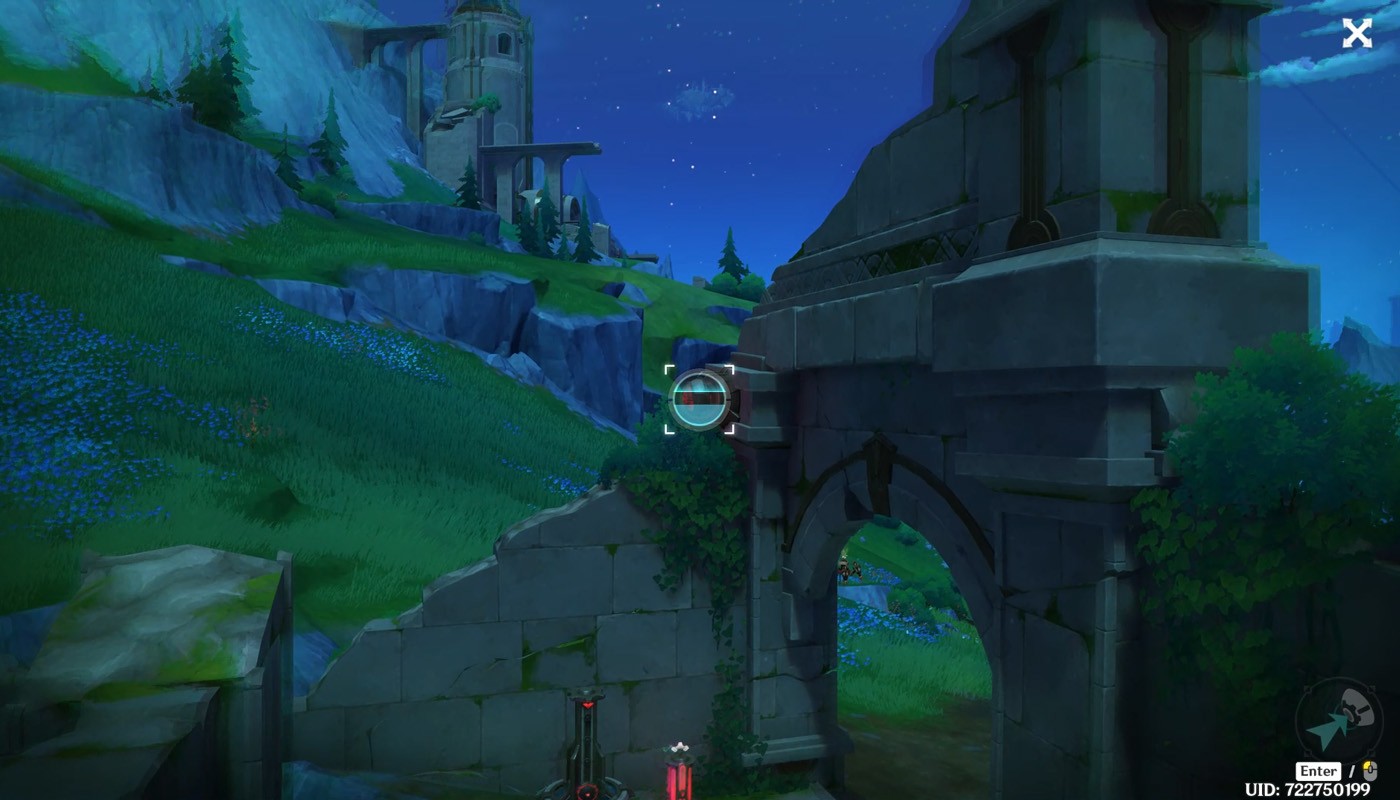
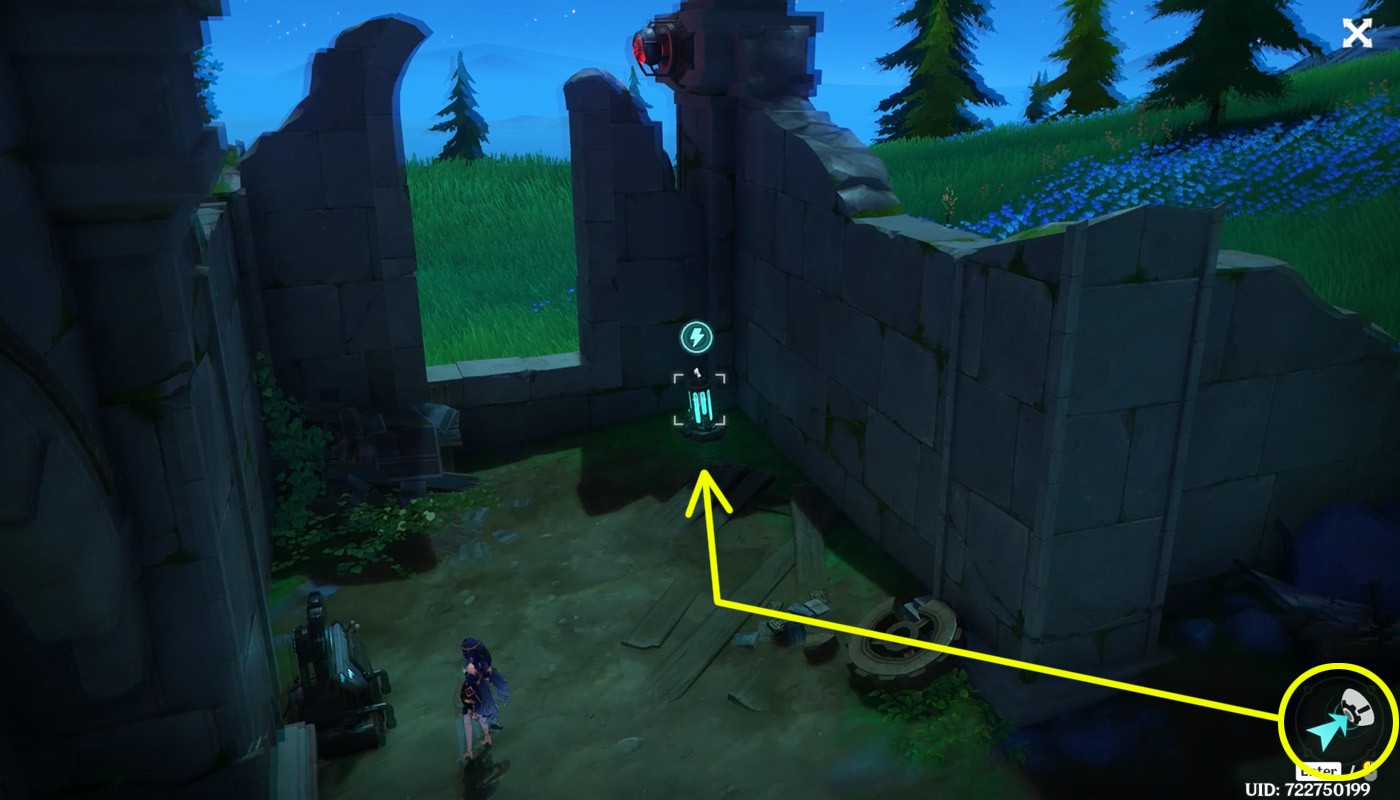
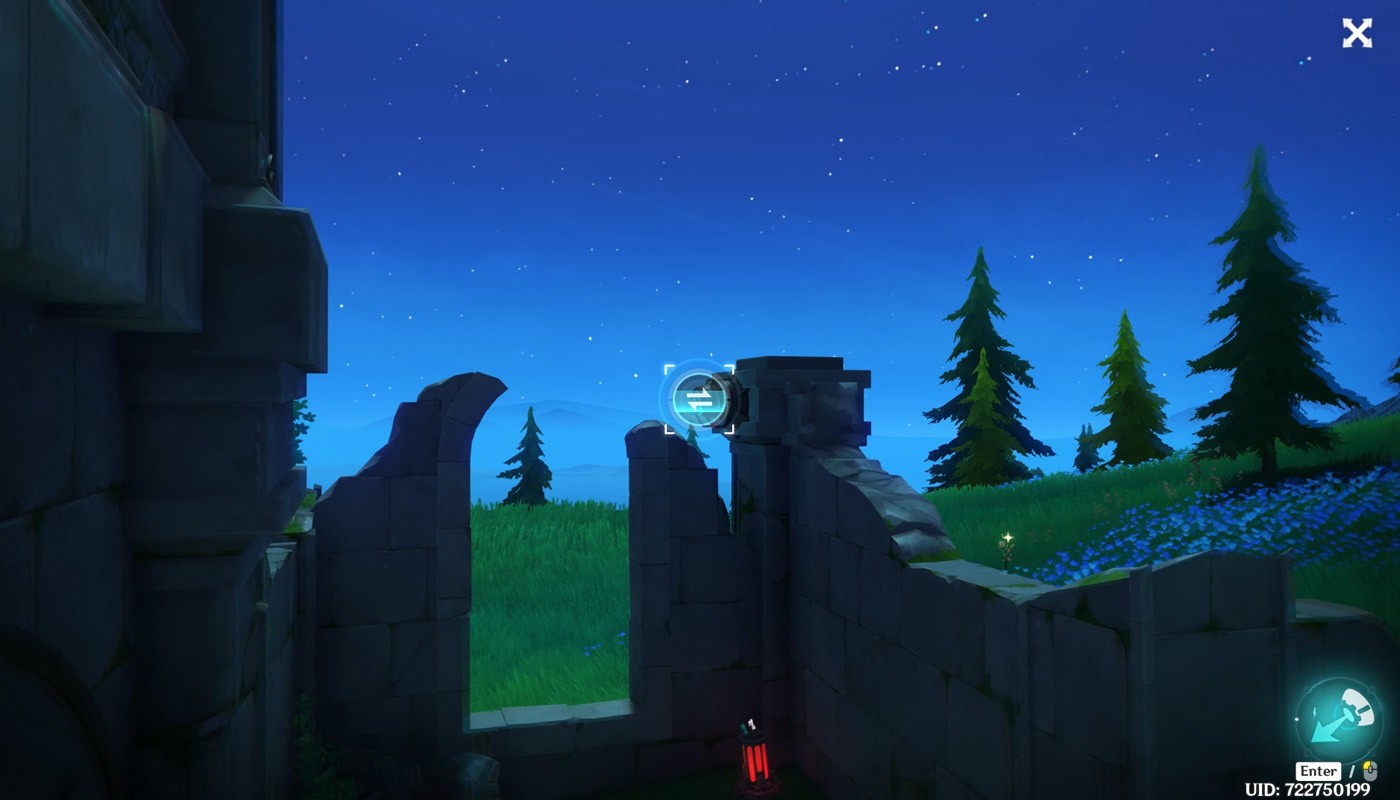
Then activate the puzzle and hit 3 times when the ring is on the upper half of the scale. After finishing setting up the stabilizer, loot the precious chest.
Stabilizer 12


The second underwater area, where you can stumble upon the next, 12th puzzle, is located northeast of Meropida fortress. Swim into the pipe in front of the teleport, picking up the power of the xenochrome jellyfish.
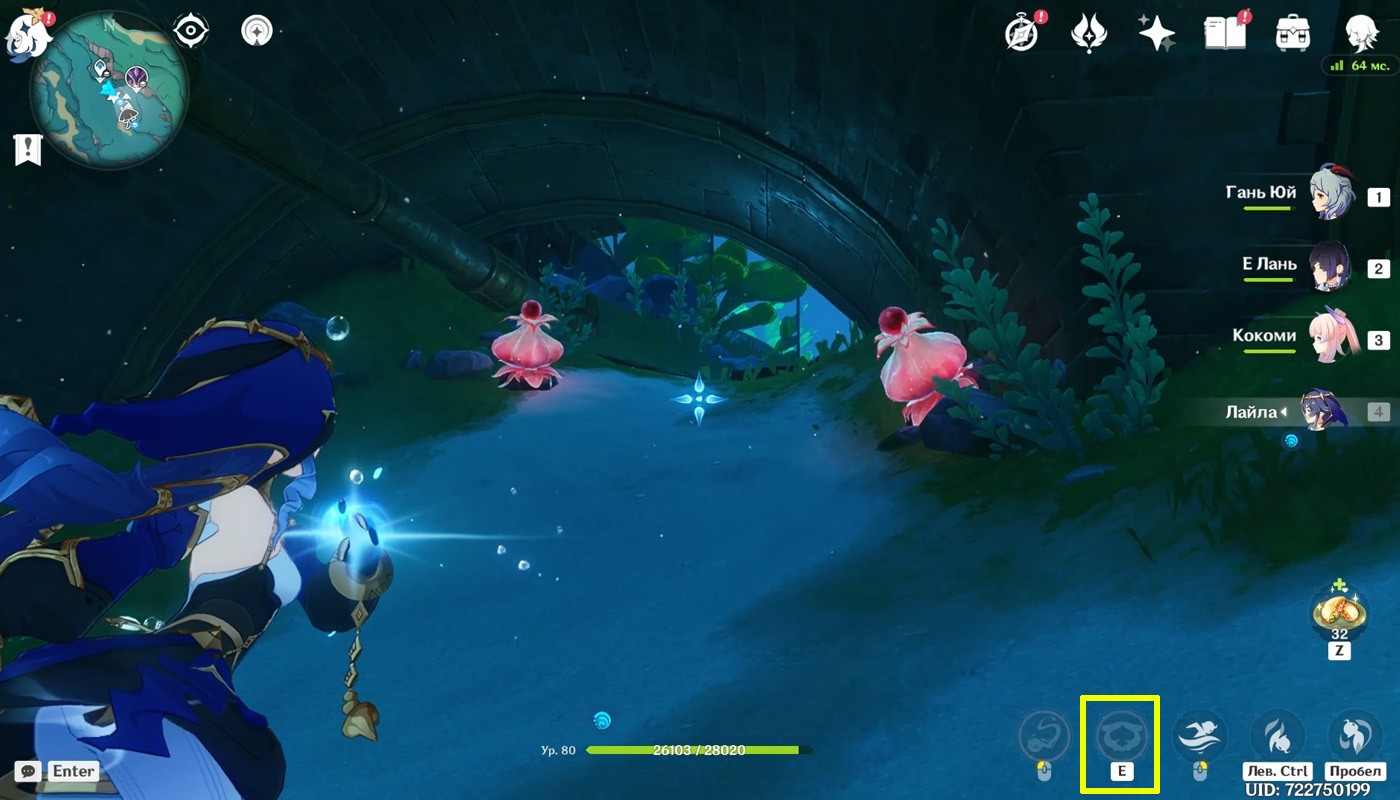
There are three Scarlet Pranksters inside the area: one near the stabilizer, and the other two in front of the entrance opposite. Destroy them by sending the E-shank jellyfish towards two fruits in the distance, and then simultaneously hit the third one with a normal attack and activate the projectile explosion.
Under the nearest Scarlet Prankster there will be a sphere of pneuma, which you need to hit the inactive energy device, above which the ushii block hovers. Finally, activate the stabilizer by conducting a series of attacks on the following areas of the device: top, center, top. Reward for solution: rich casket.
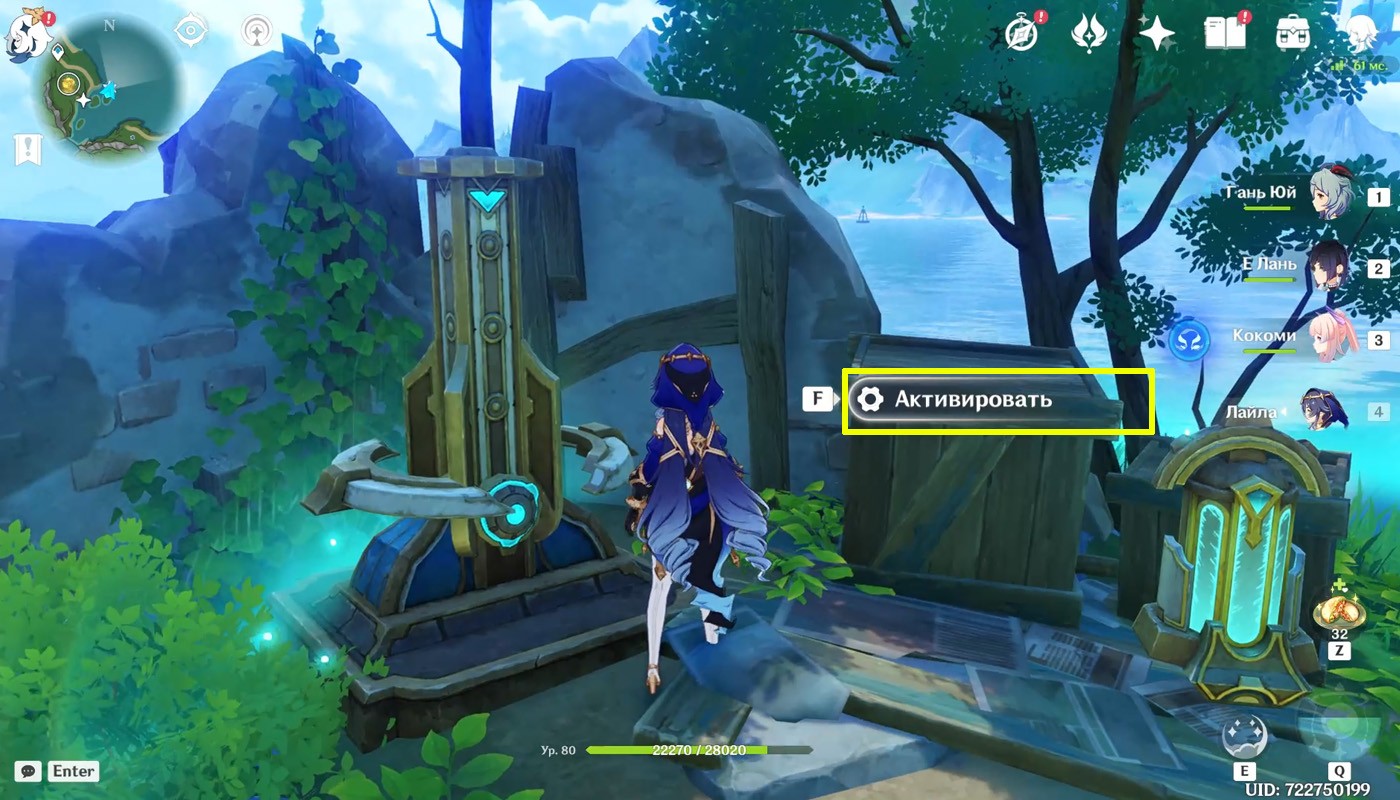
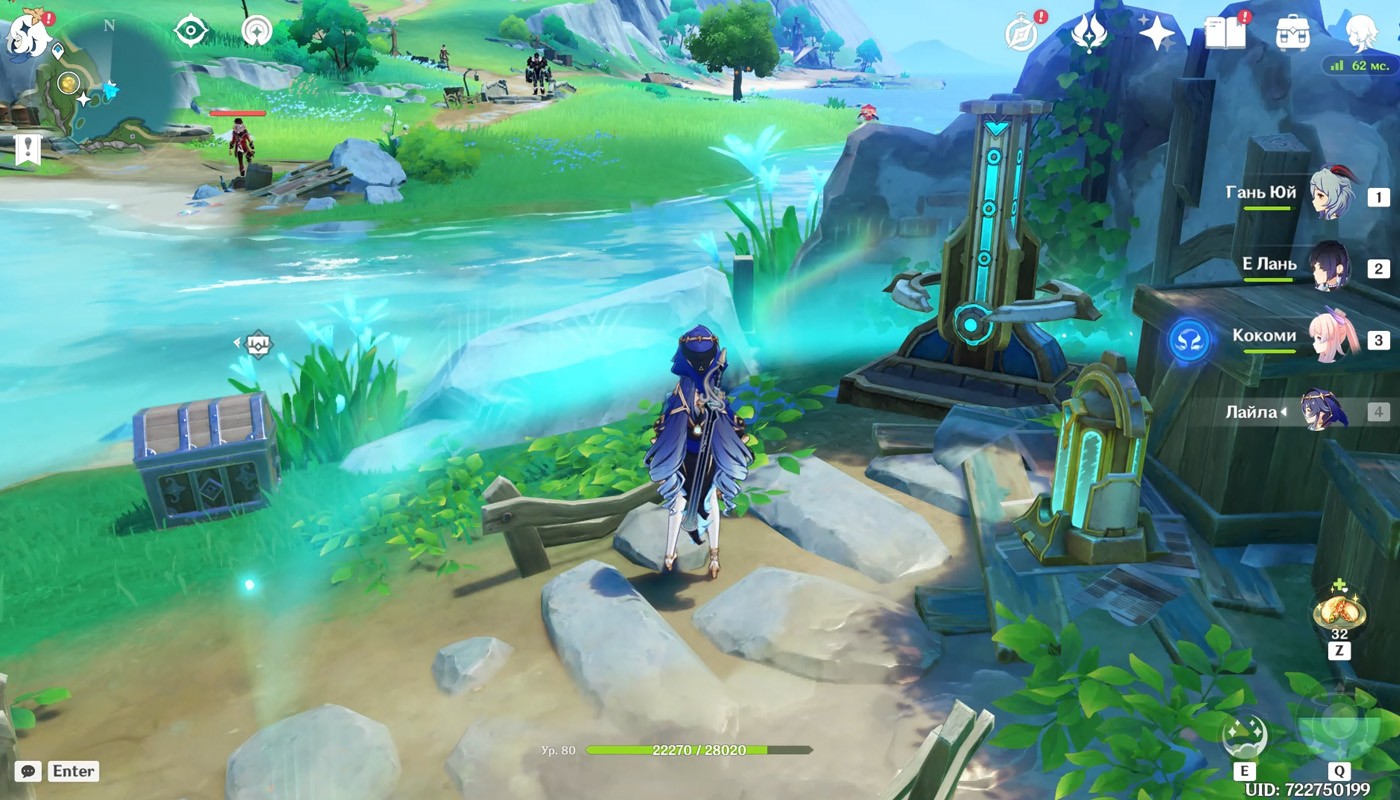
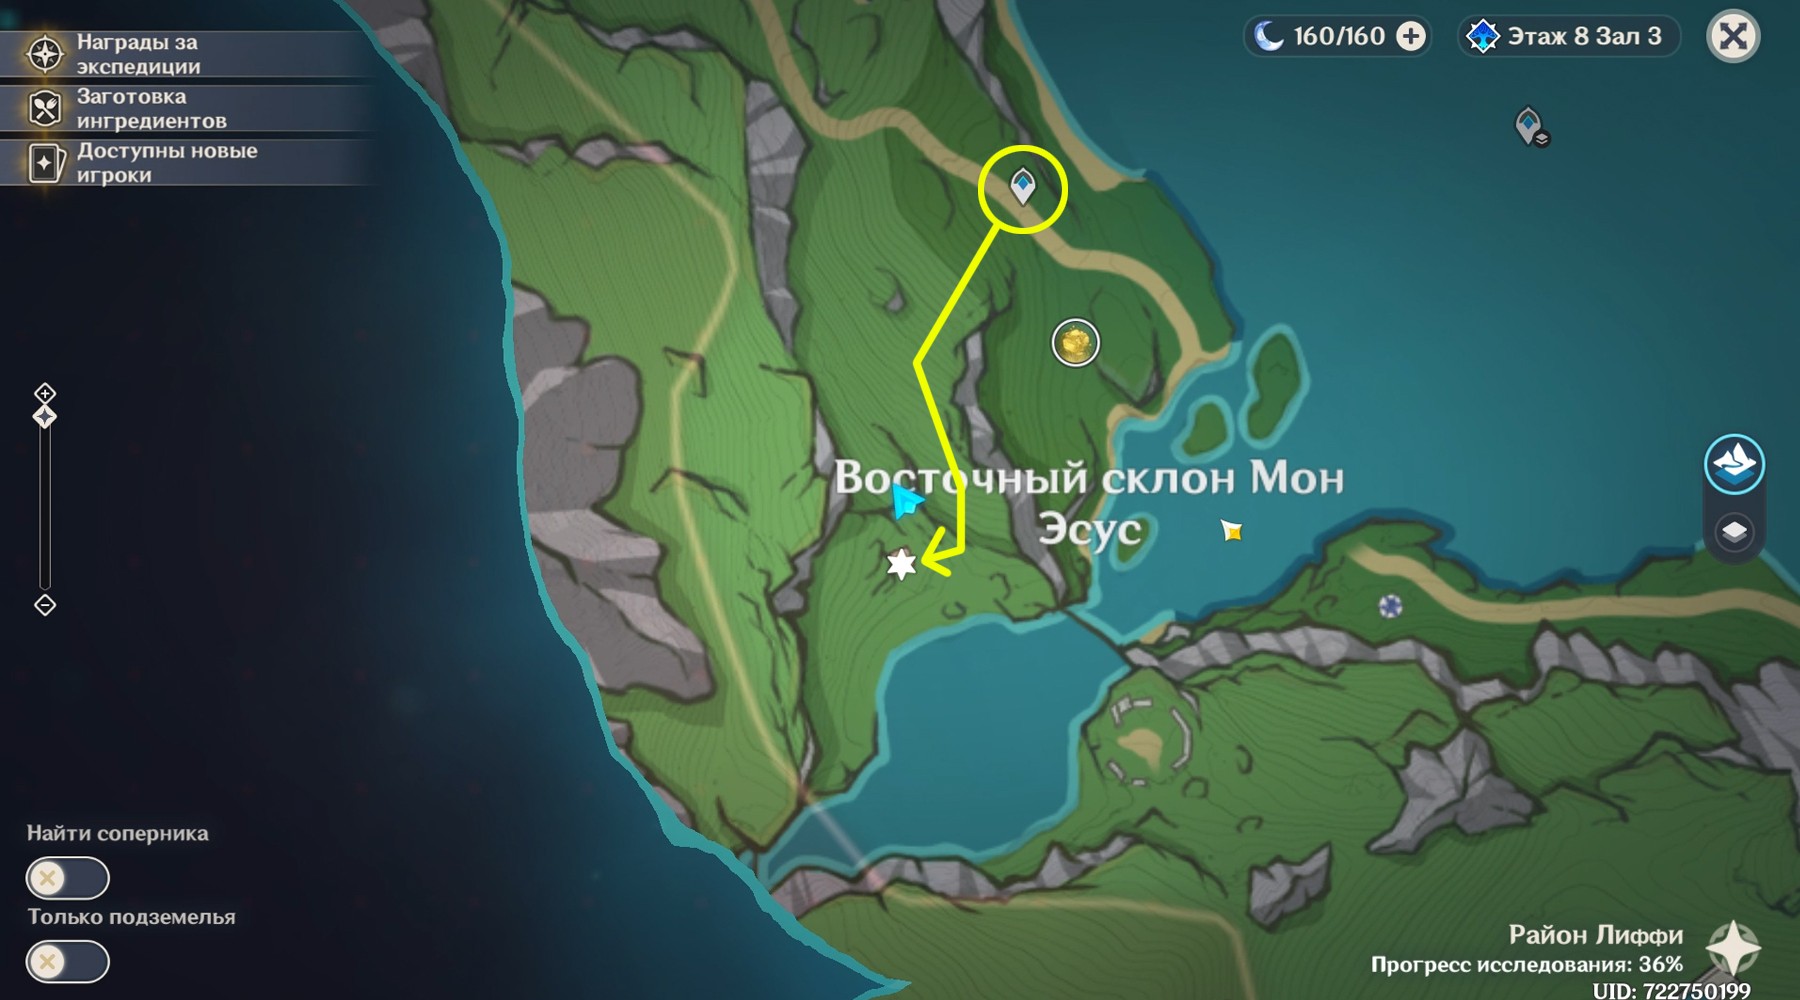
Stabilizer 13
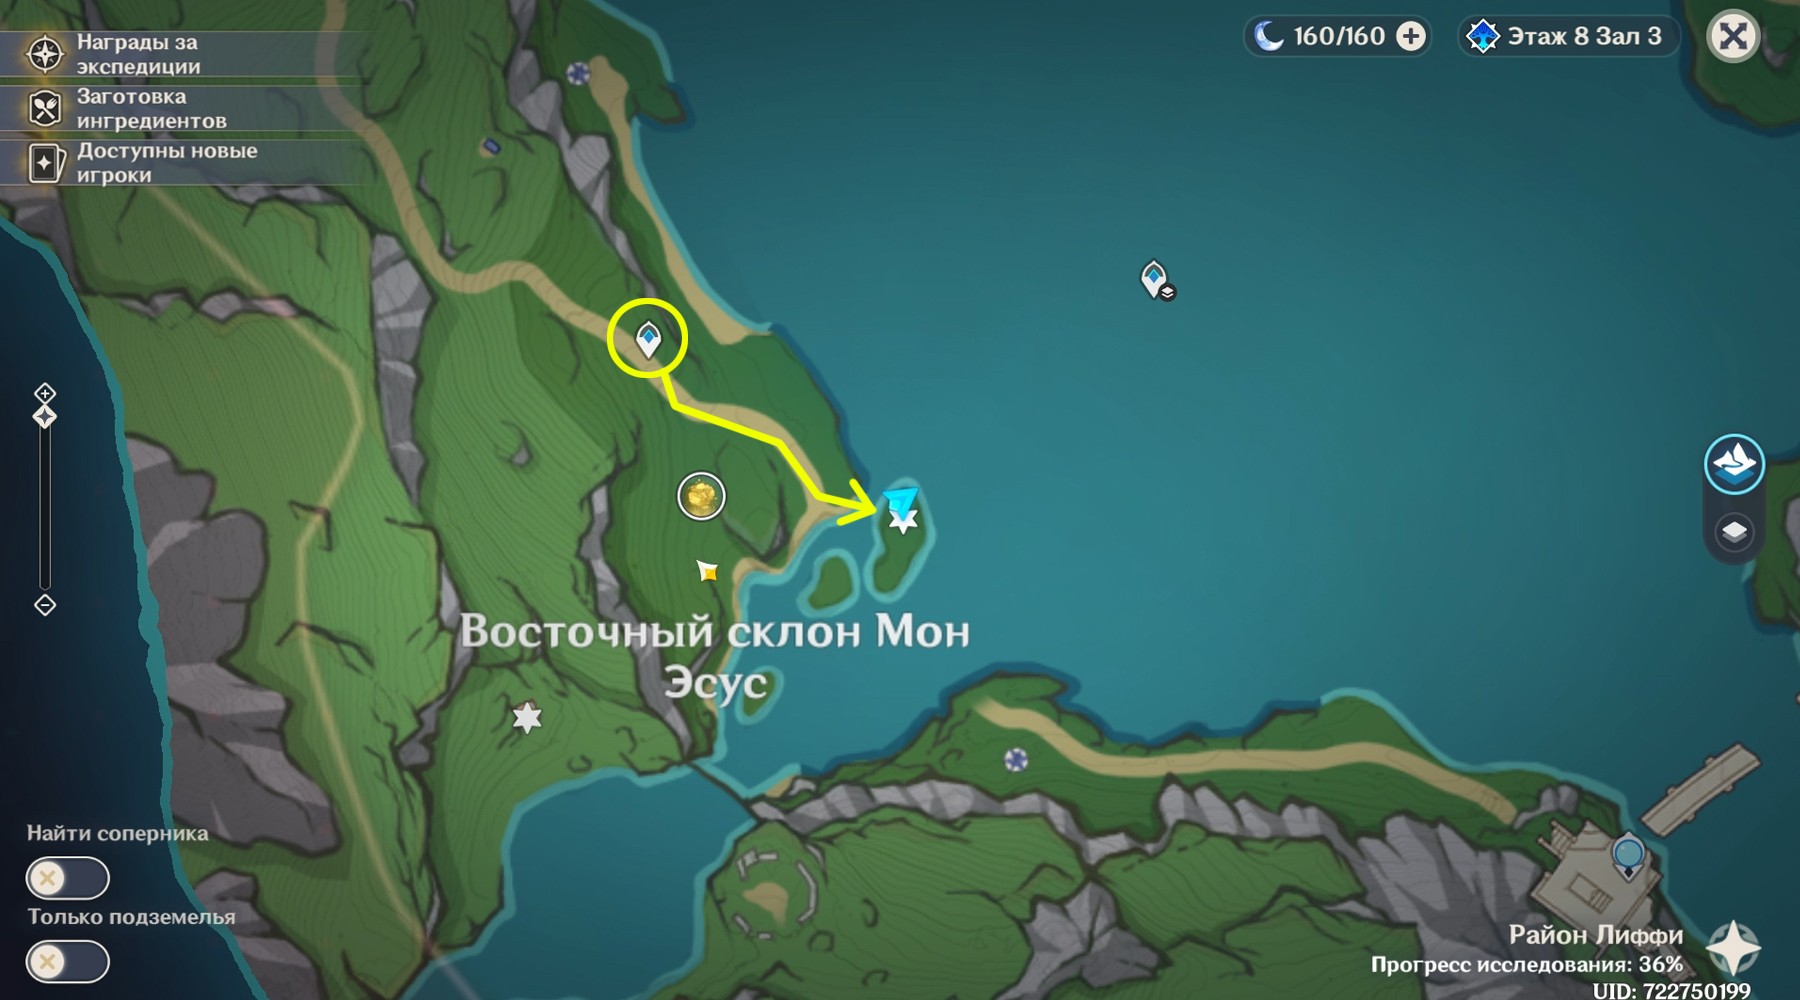
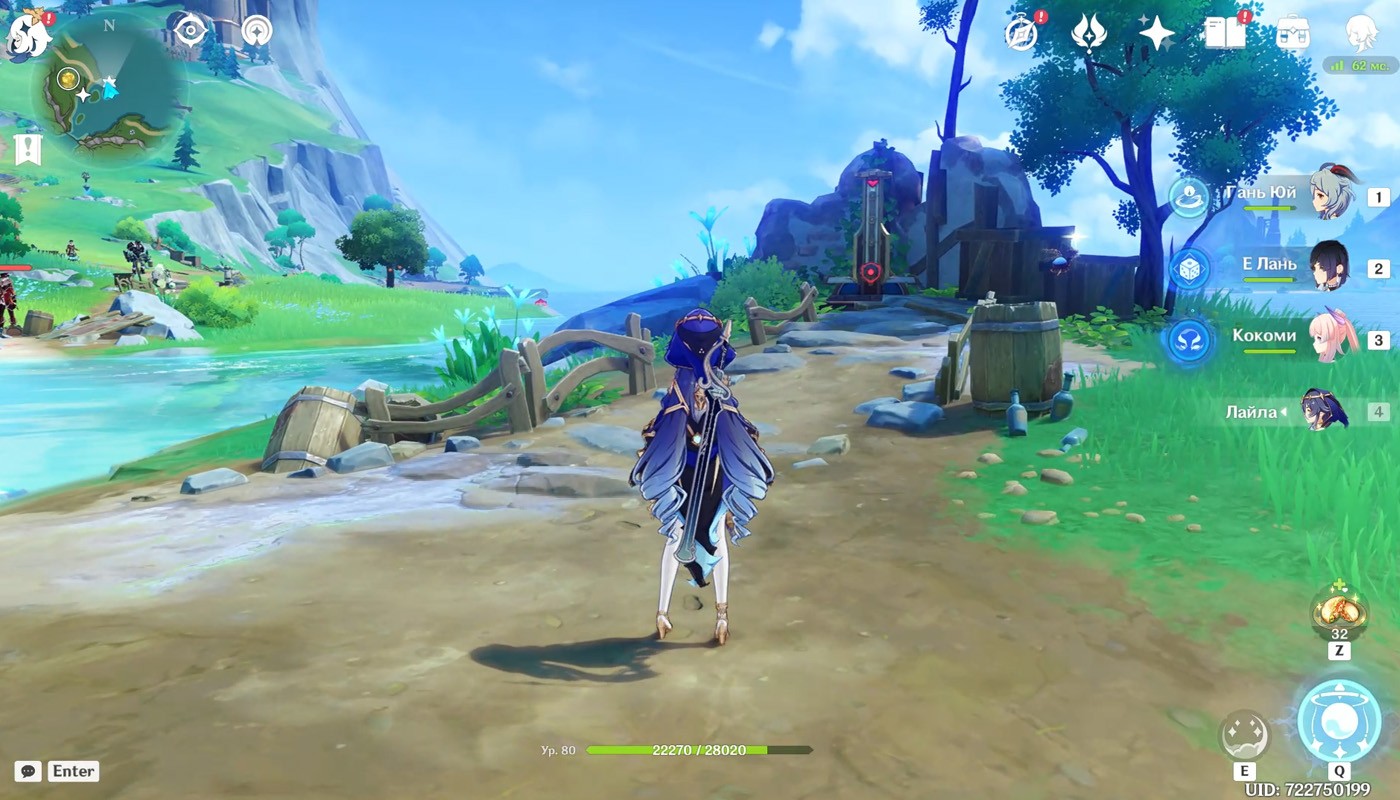
Go to the eastern slope of Mon Esus: there are small areas of land along the coast south of the teleport, and the stabilizer is located under the trees on one of them.
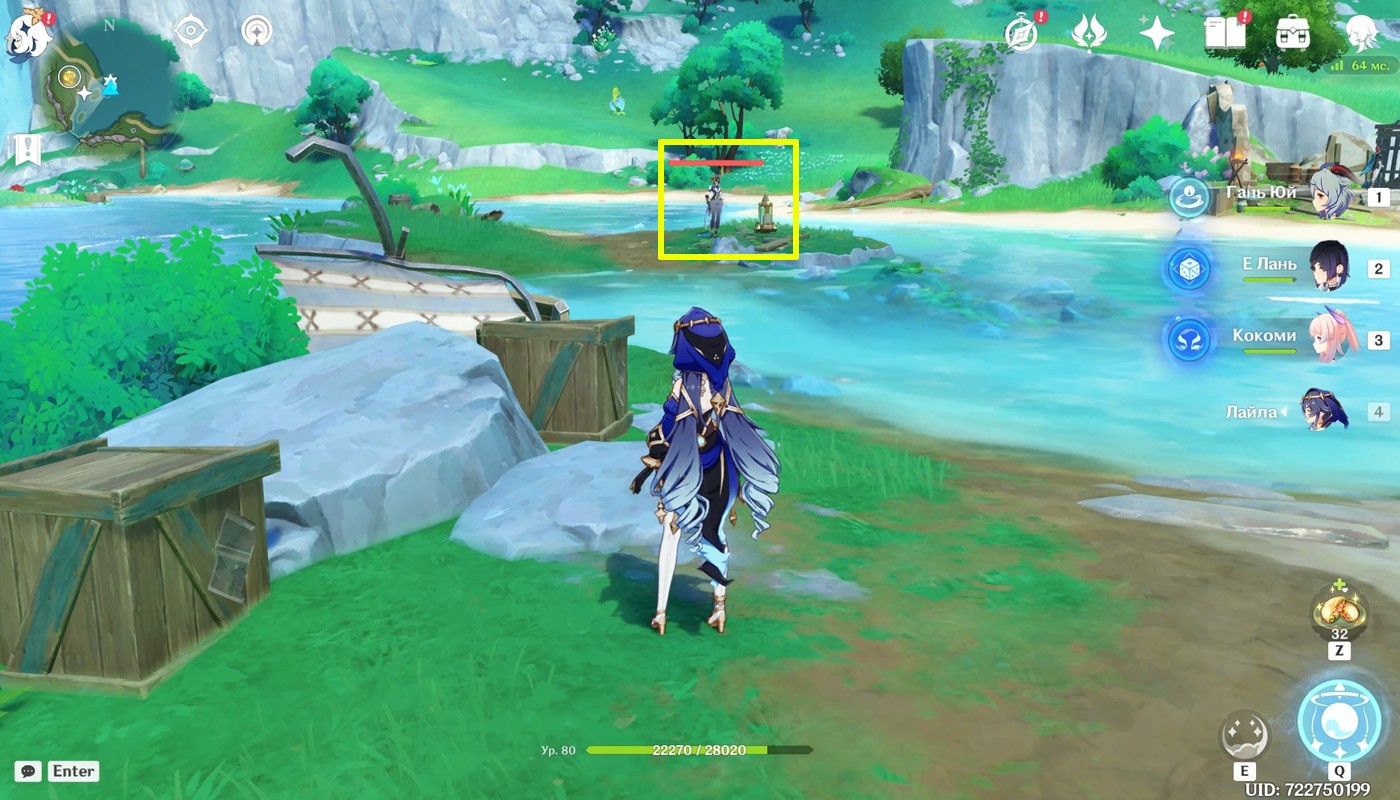
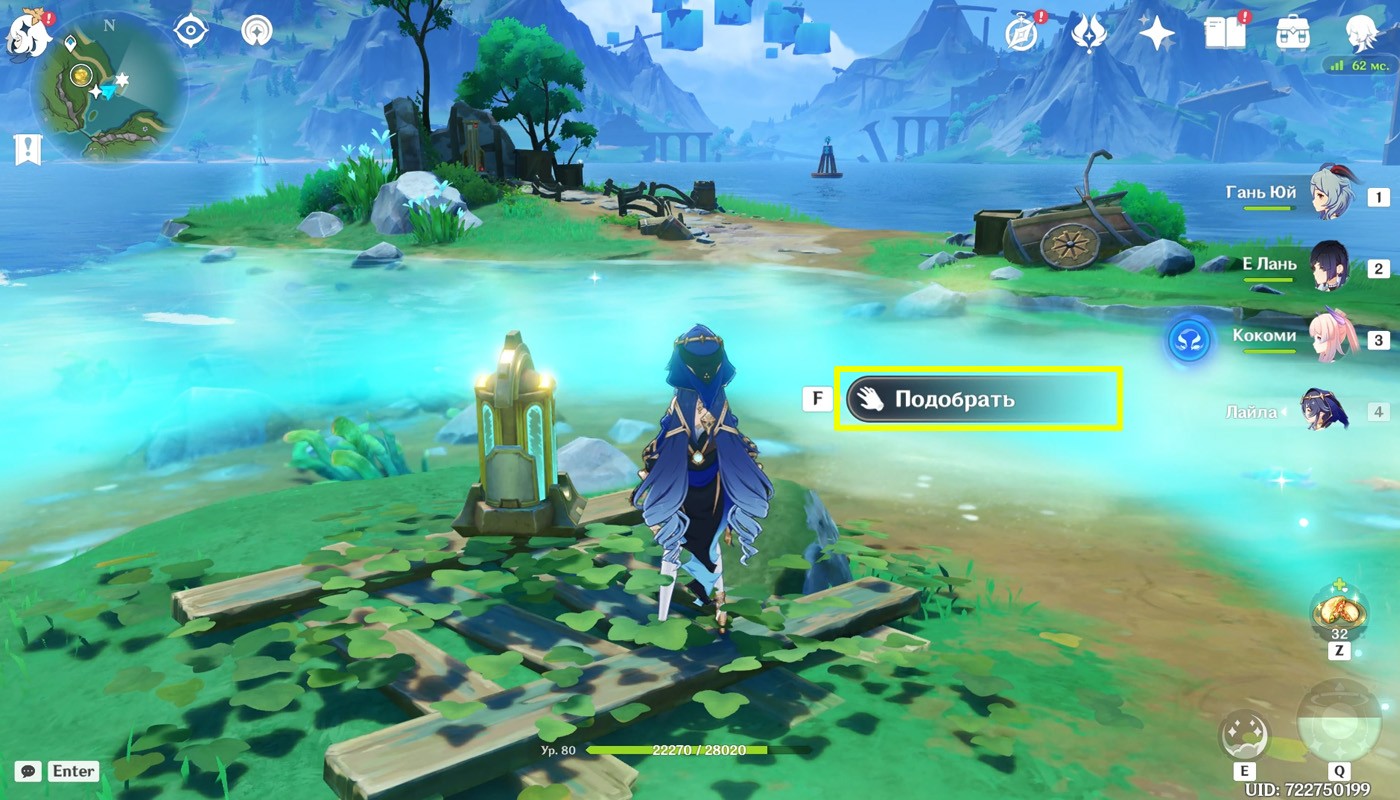
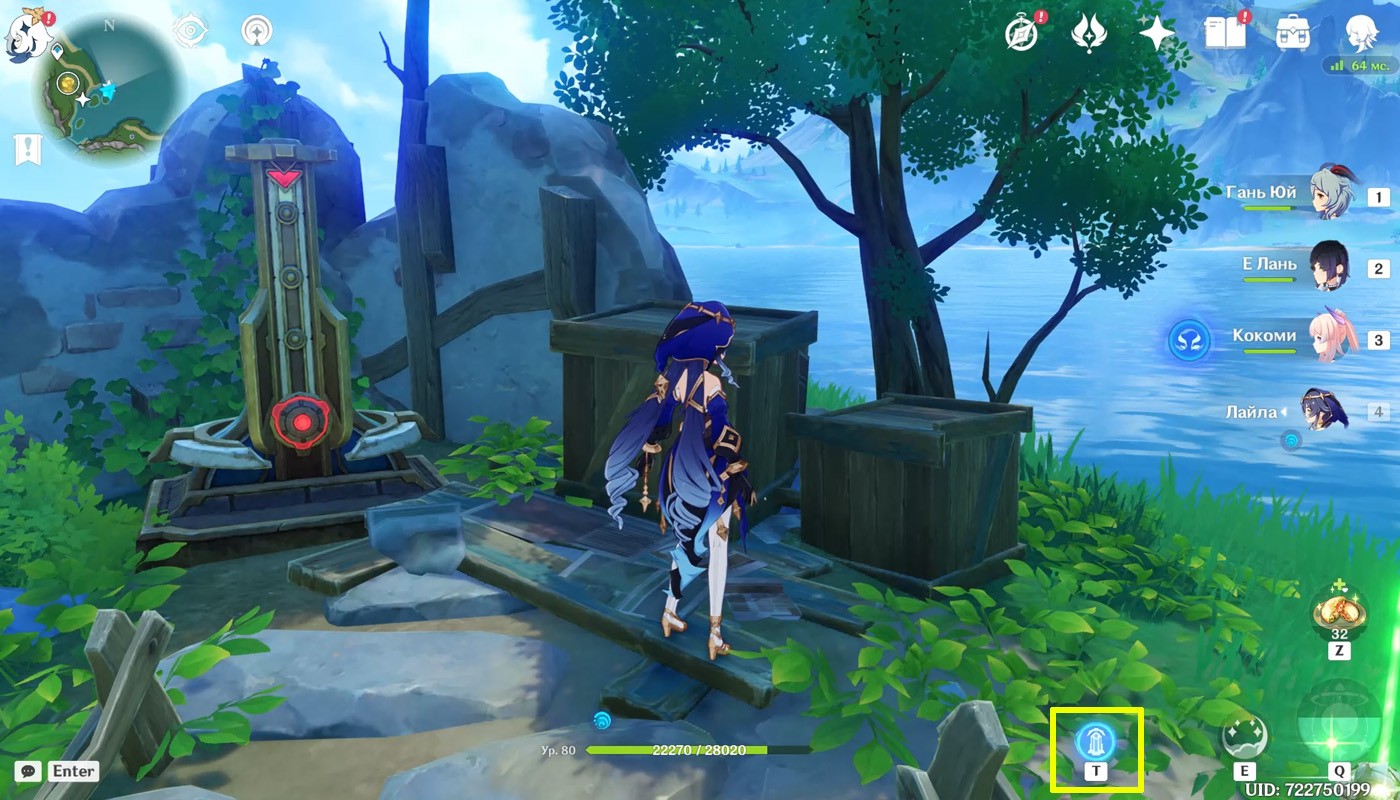
Turn east and fight a frost operative, protecting the energy block. Afterwards, pick up the part and place it near the stabilizer, then activate the movement of the ring and hit the device in the following order: center, center, top. As a result, a rich casket will appear to the left of the puzzle.
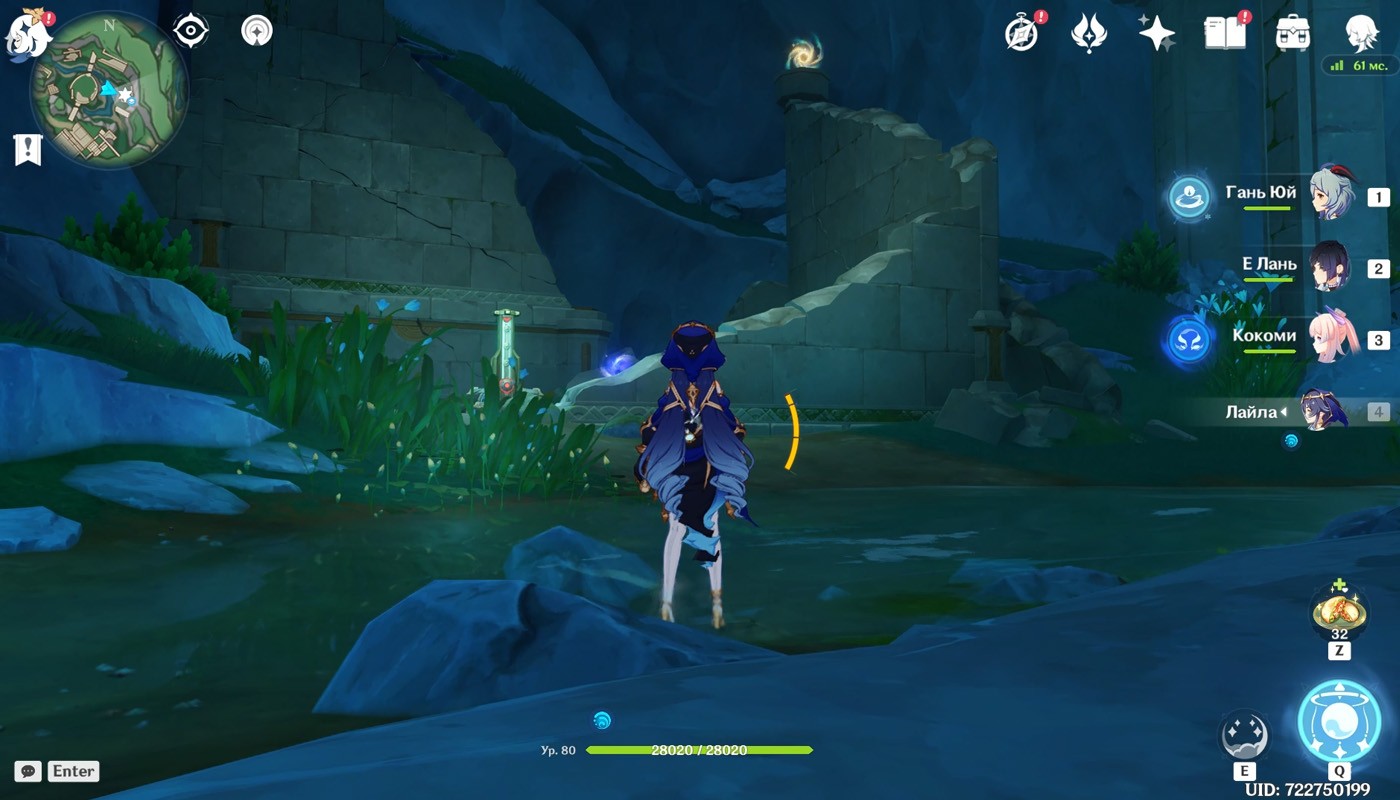
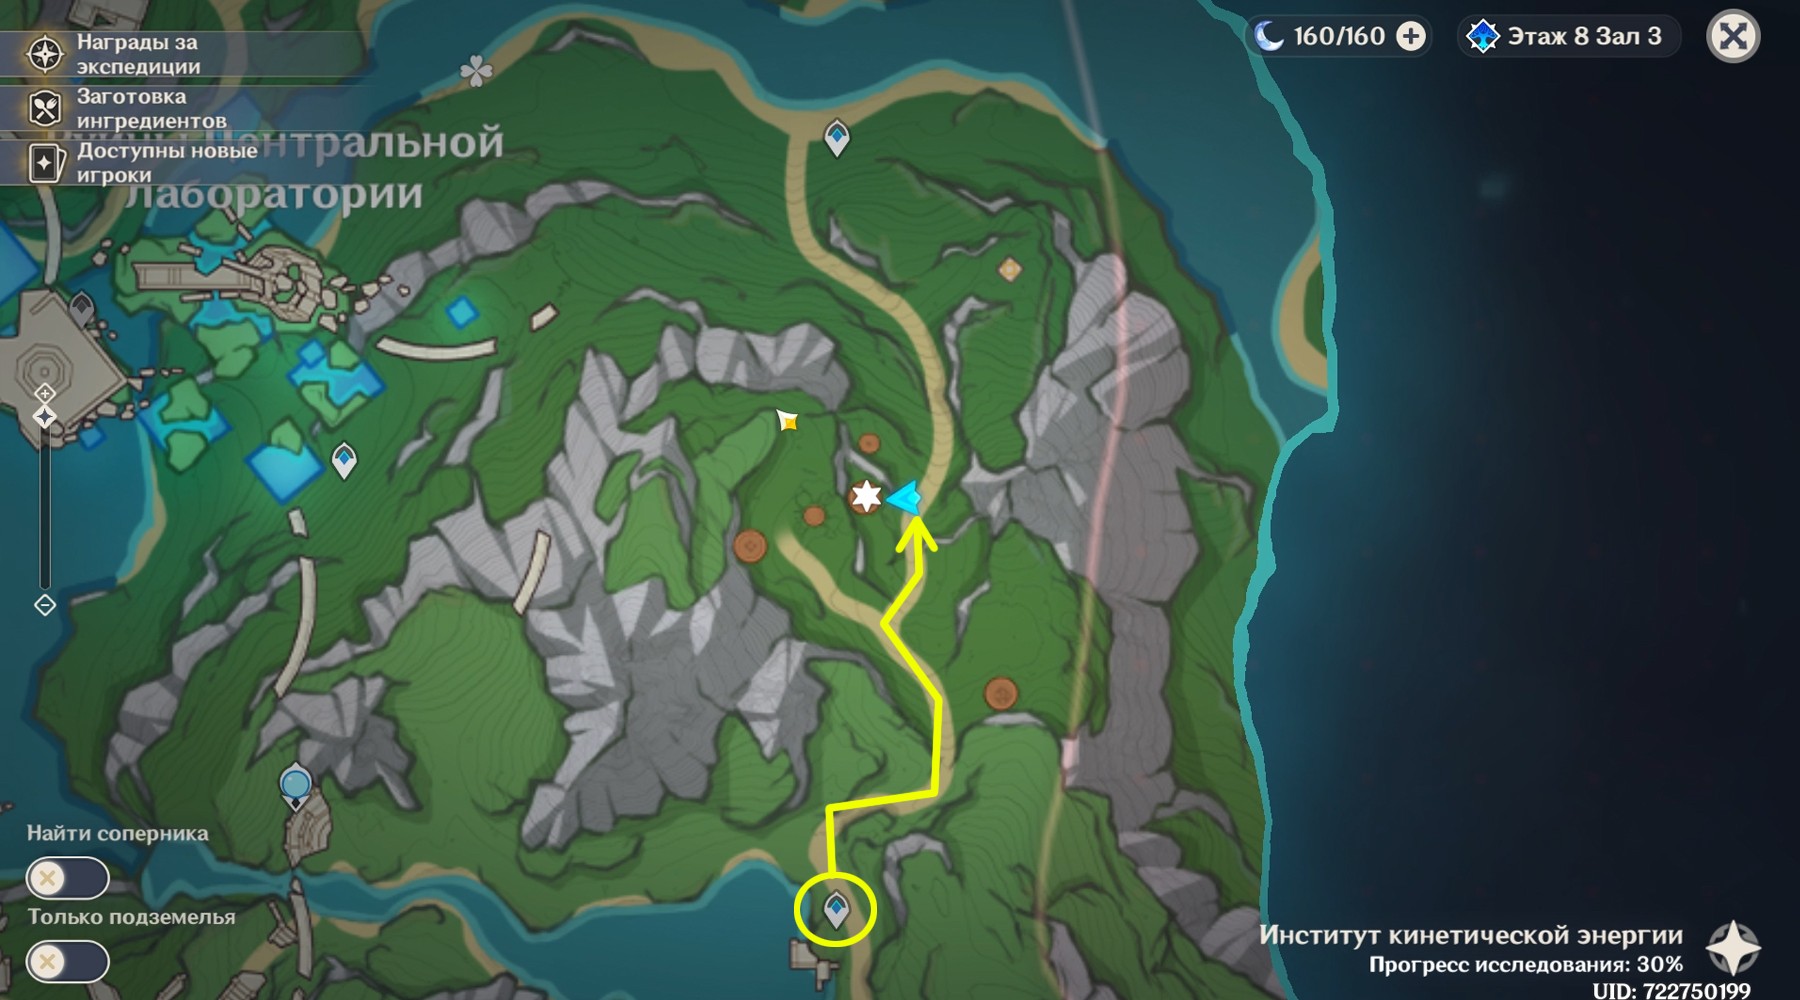
Stabilizer 14
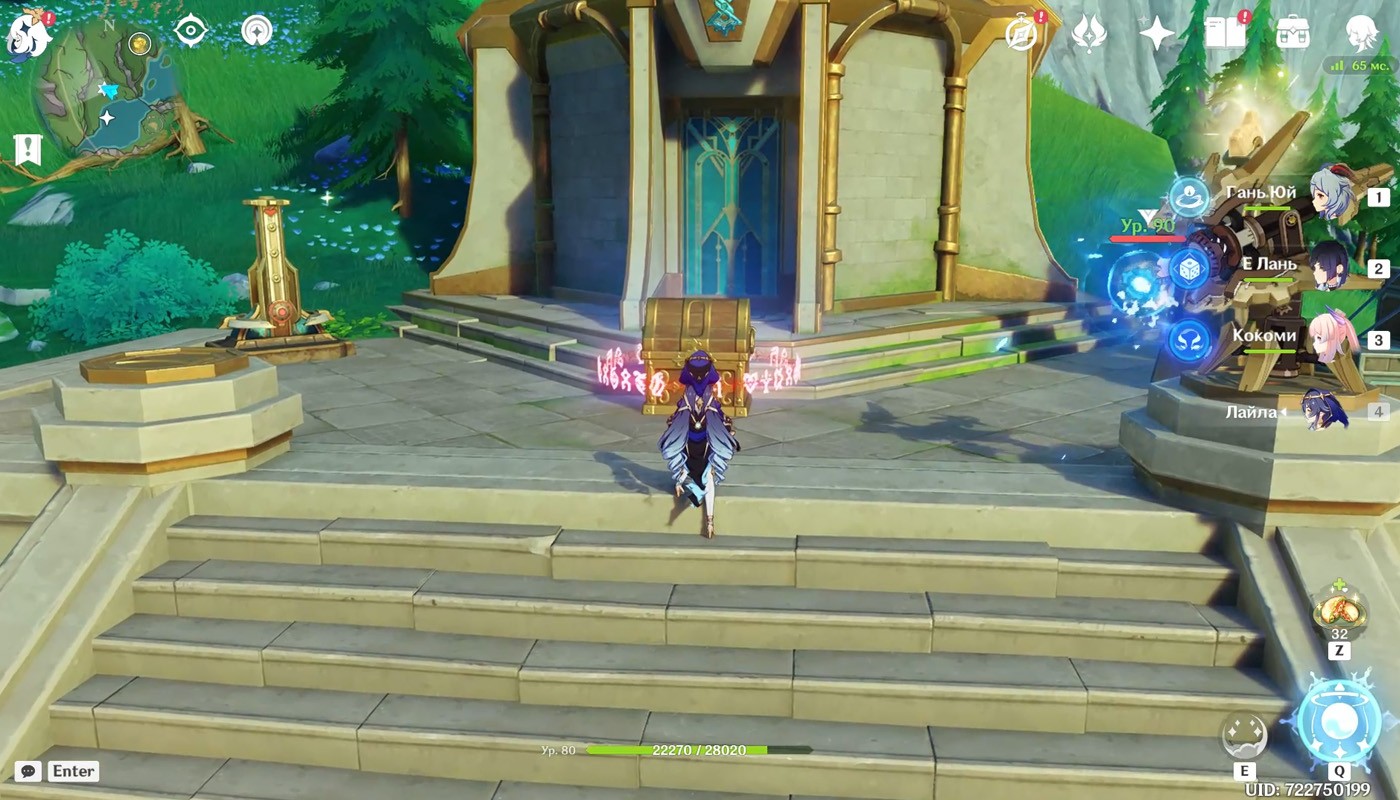
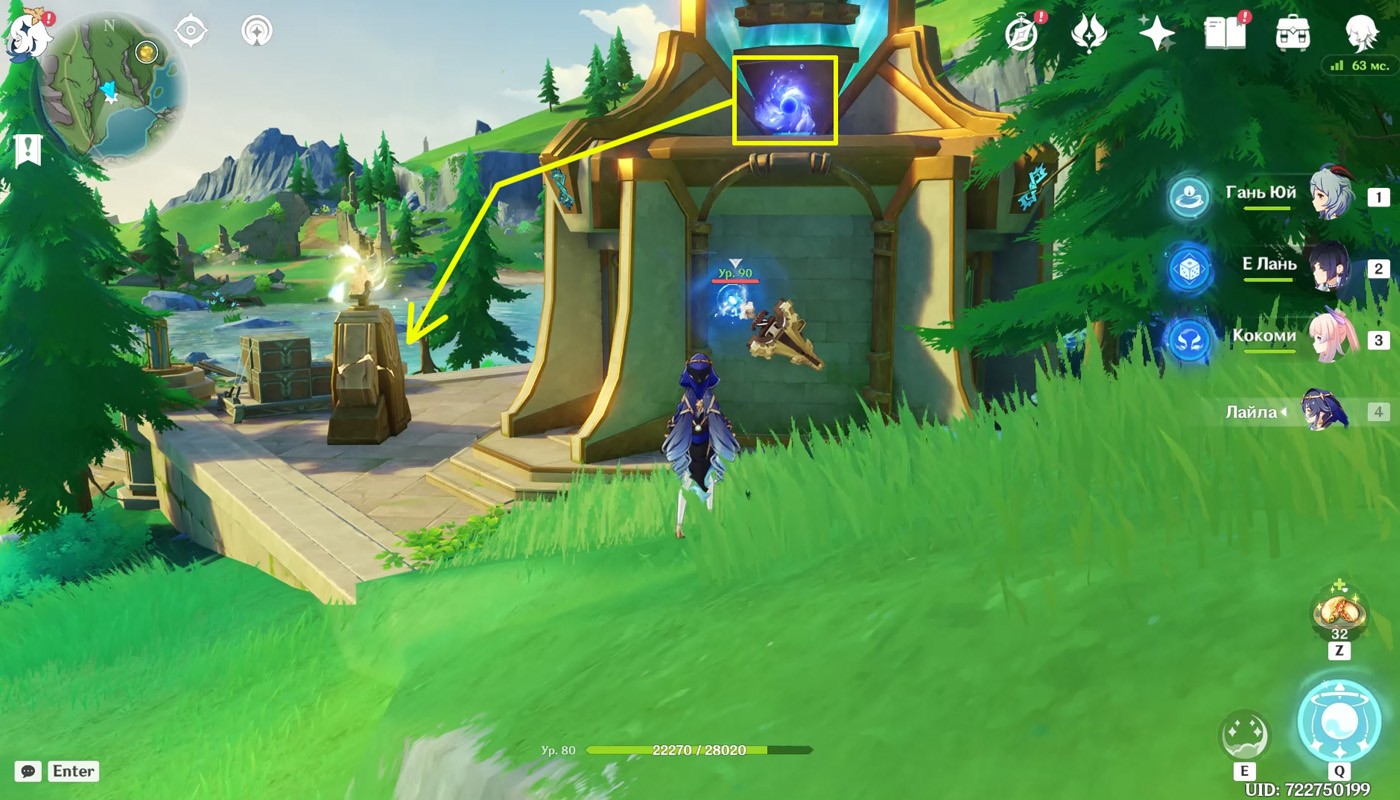
The fourteenth puzzle is located on the hill above the previous 13th device: return to the same teleporter and run along the marked route to the stone tower with a turquoise spire. Get rid of hostile robots around the building, go around it and pick it up usii block – with its help you can destroy the storage box to the right of the stabilizer.
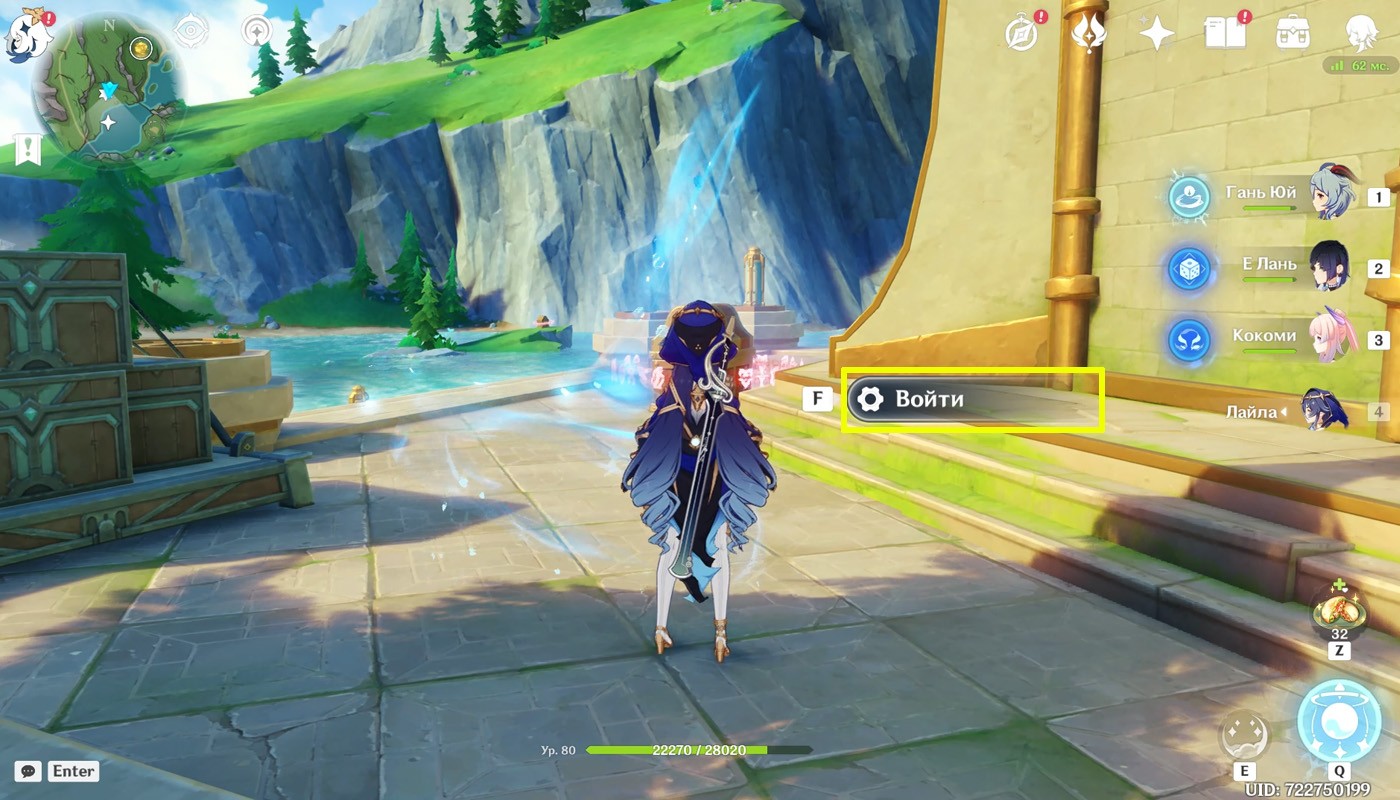
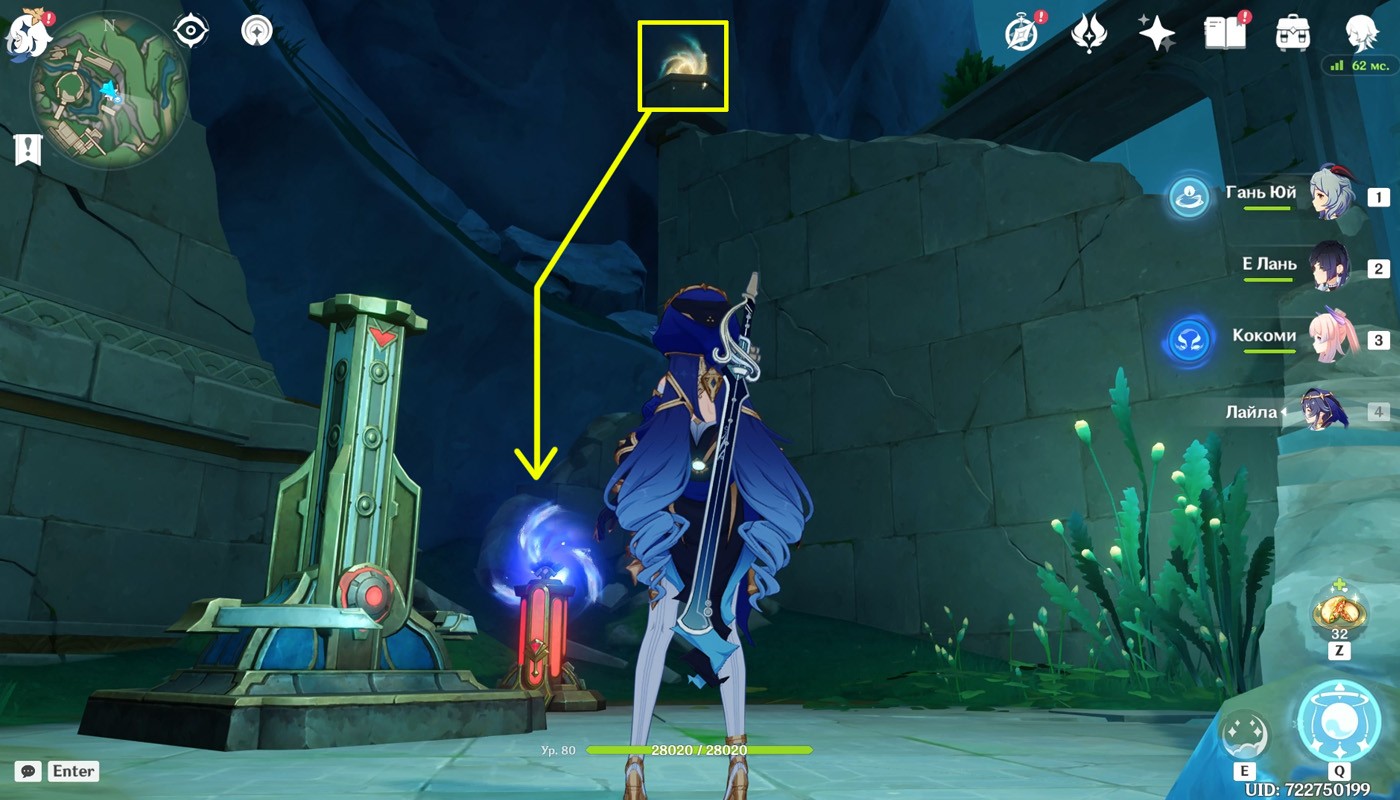
Login to the portal, leading to the top of the spire, and activate the glider. Pick up the power supply located on the gear in flight, and then place it near the stabilizer.
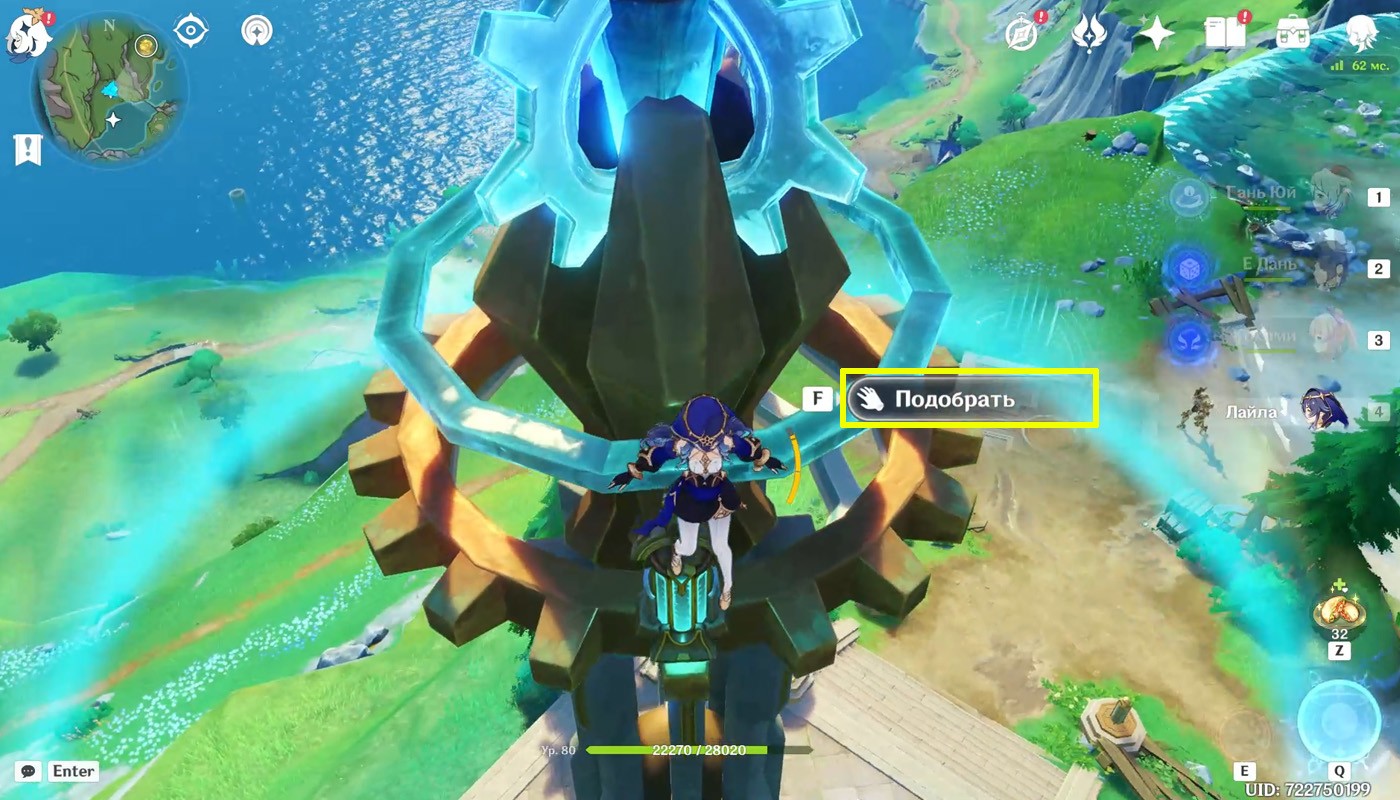

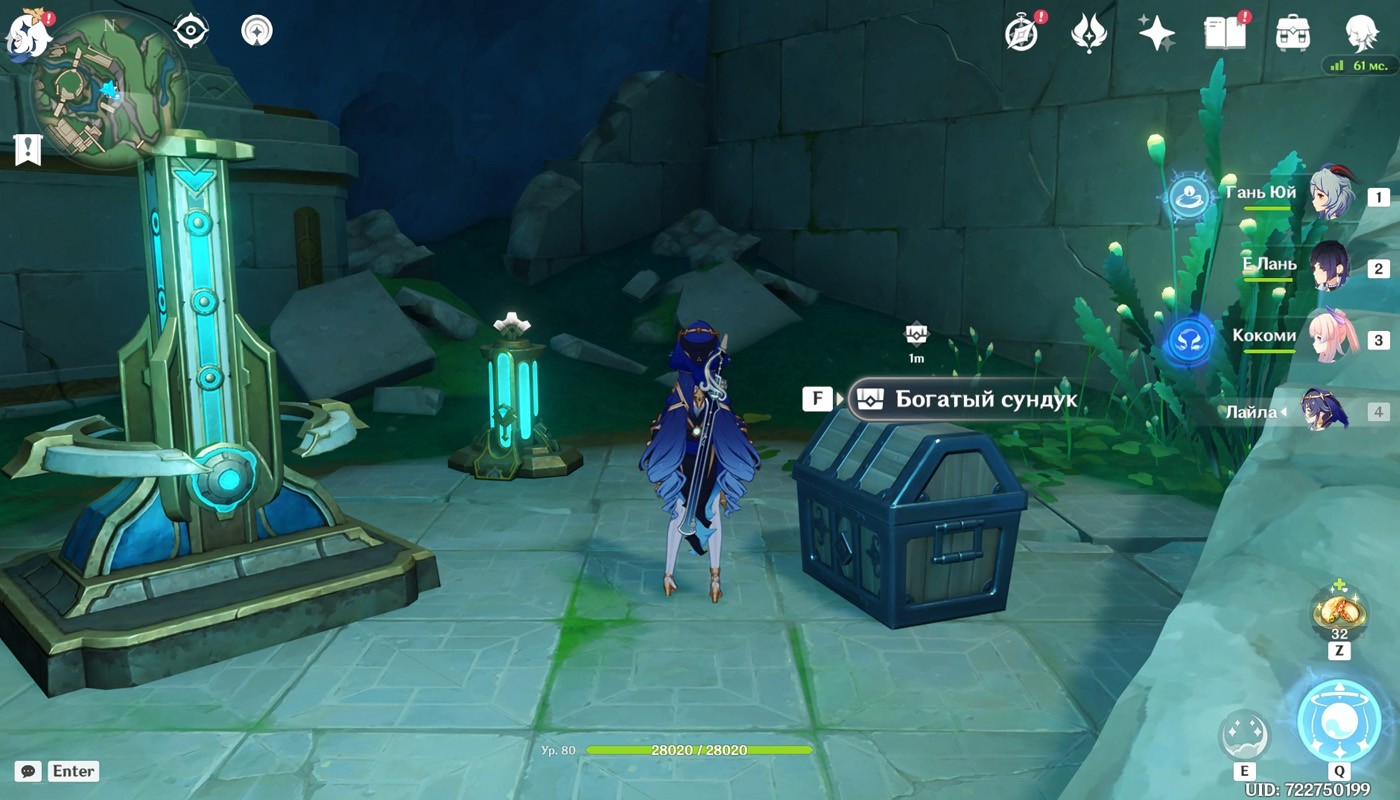
Once activated, perform the following series of attacks: top, top, middle. Solving the puzzle will give you access to the precious casket.

Stabilizer 15
The penultimate puzzle is located north of the eastern slope of Mon Esus and is part of the world quest " In Search of Lost Time » - learn how to get into the room with the stabilizer and activate it in our separate manual.
Stabilizer 16
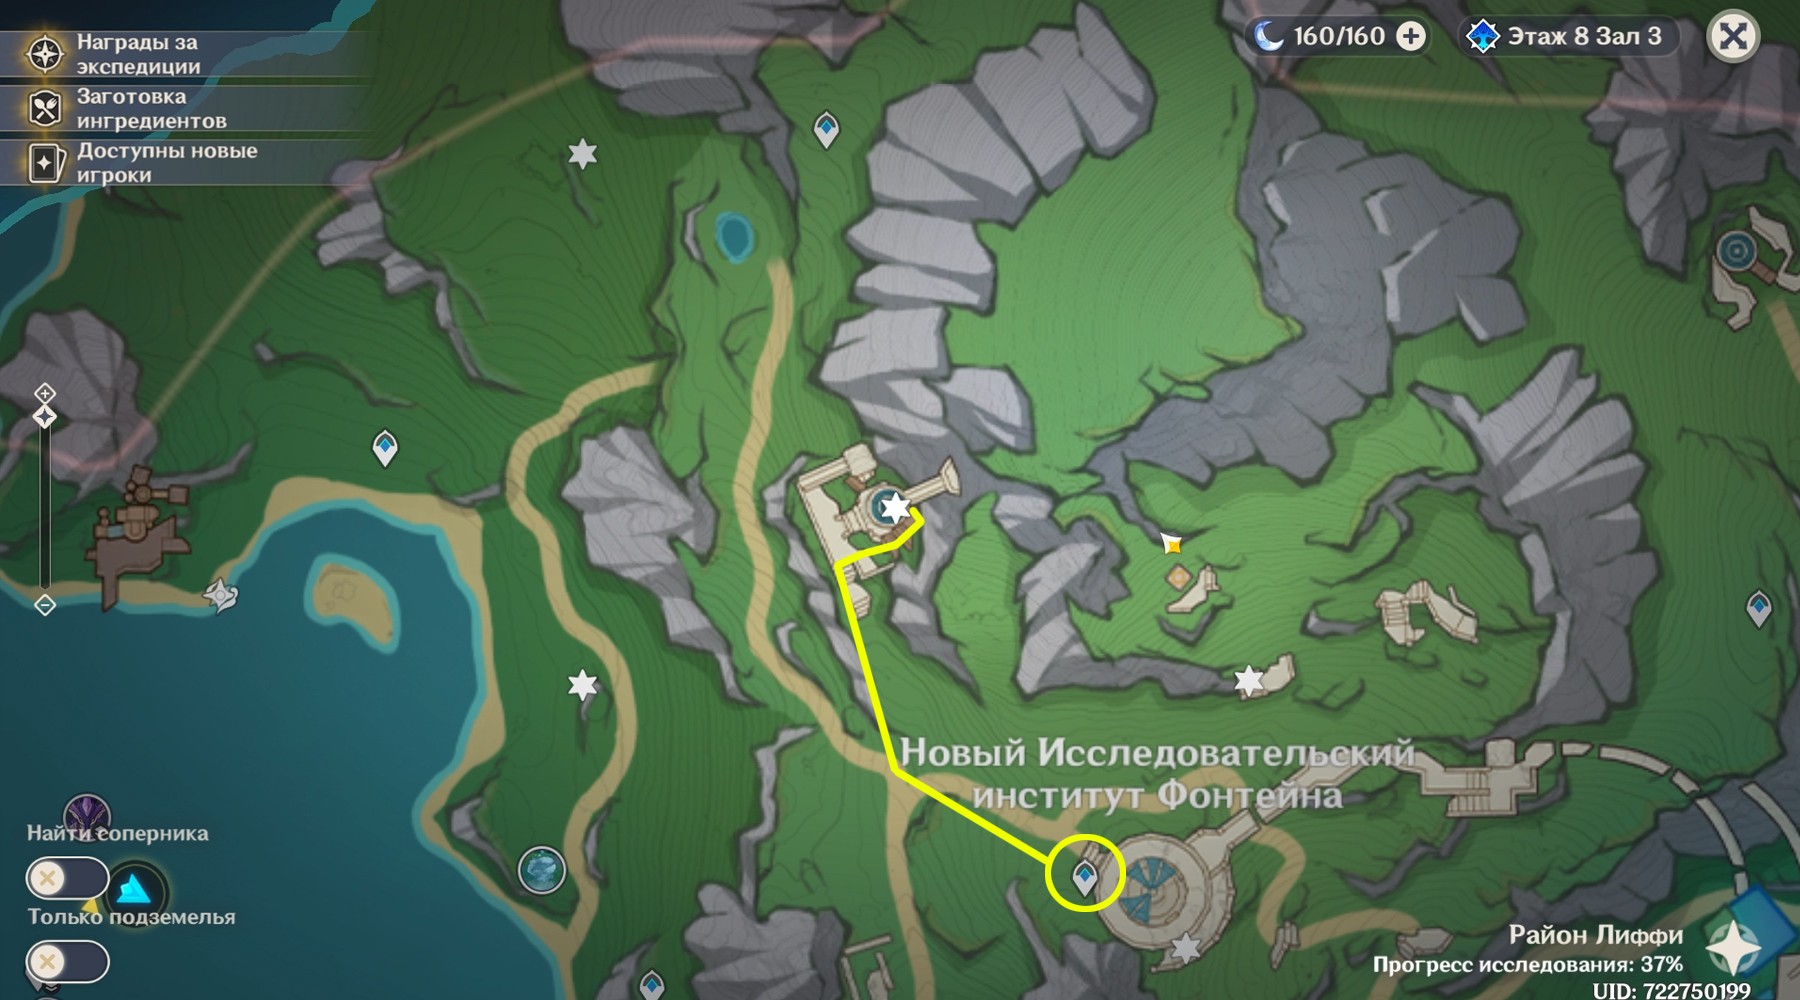
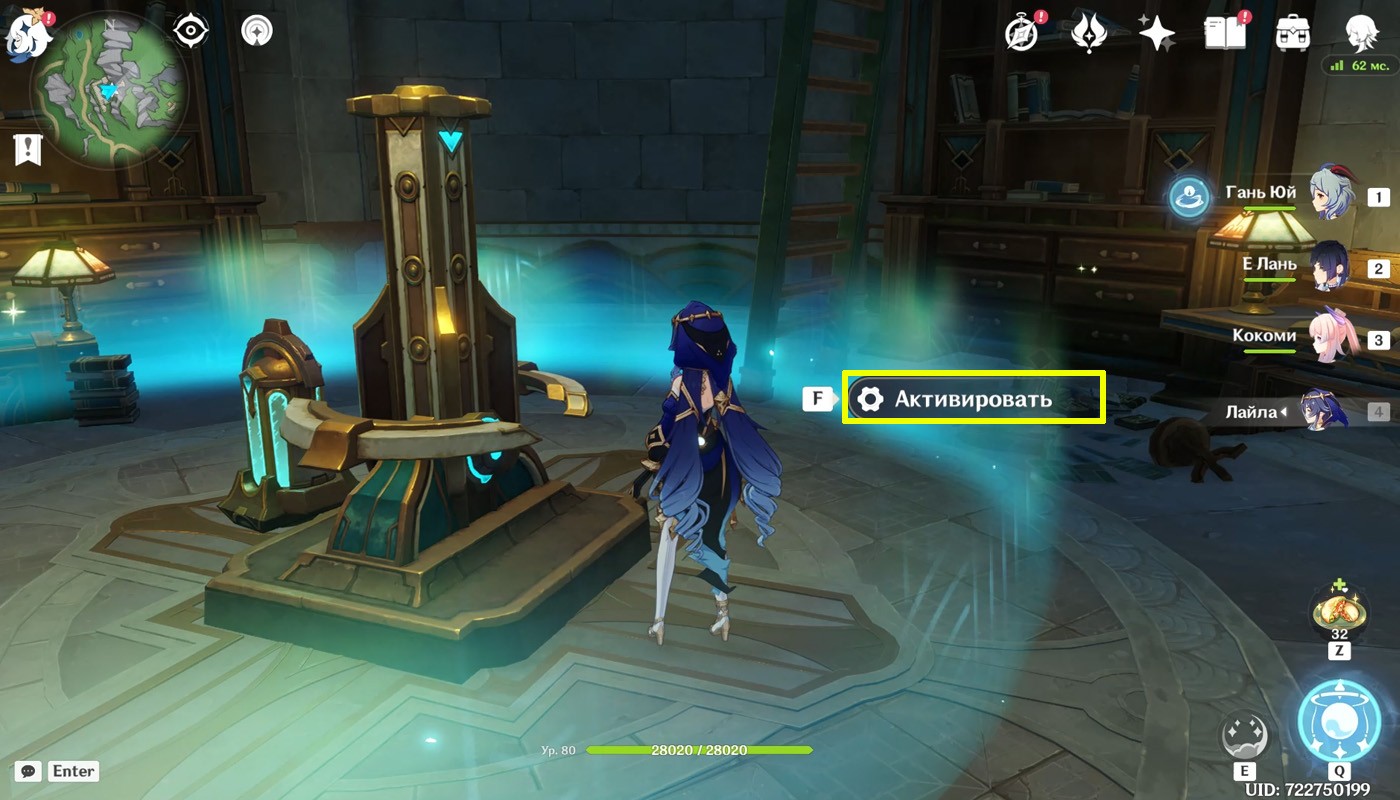
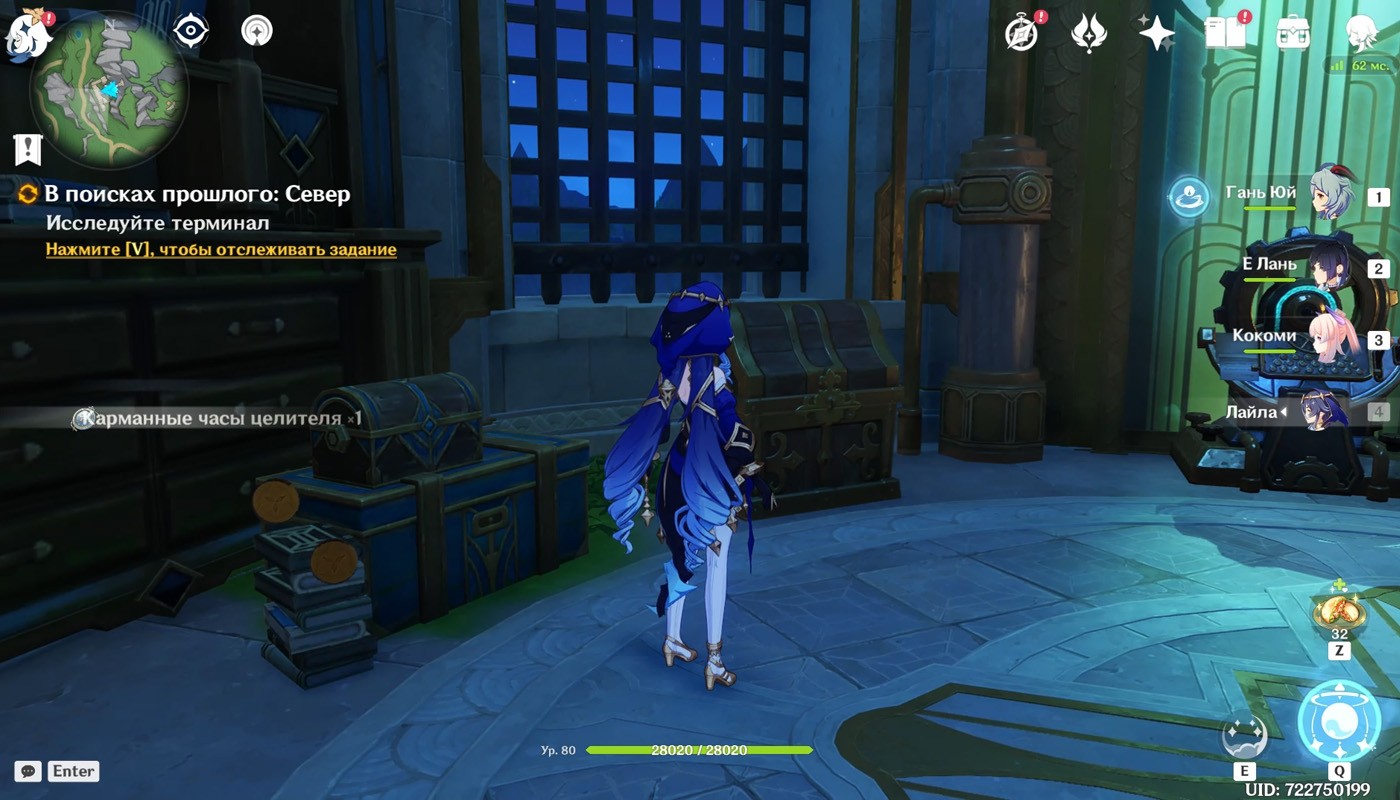
The last 16th stabilizer, as in the case of the previous one, can be reached during the assignment “ In Search of Lost Time " In separate guide we described how to get to the fortress in the north, set up the device and receive a precious reward.
Comments
You need to login to add comments.
You can login with