
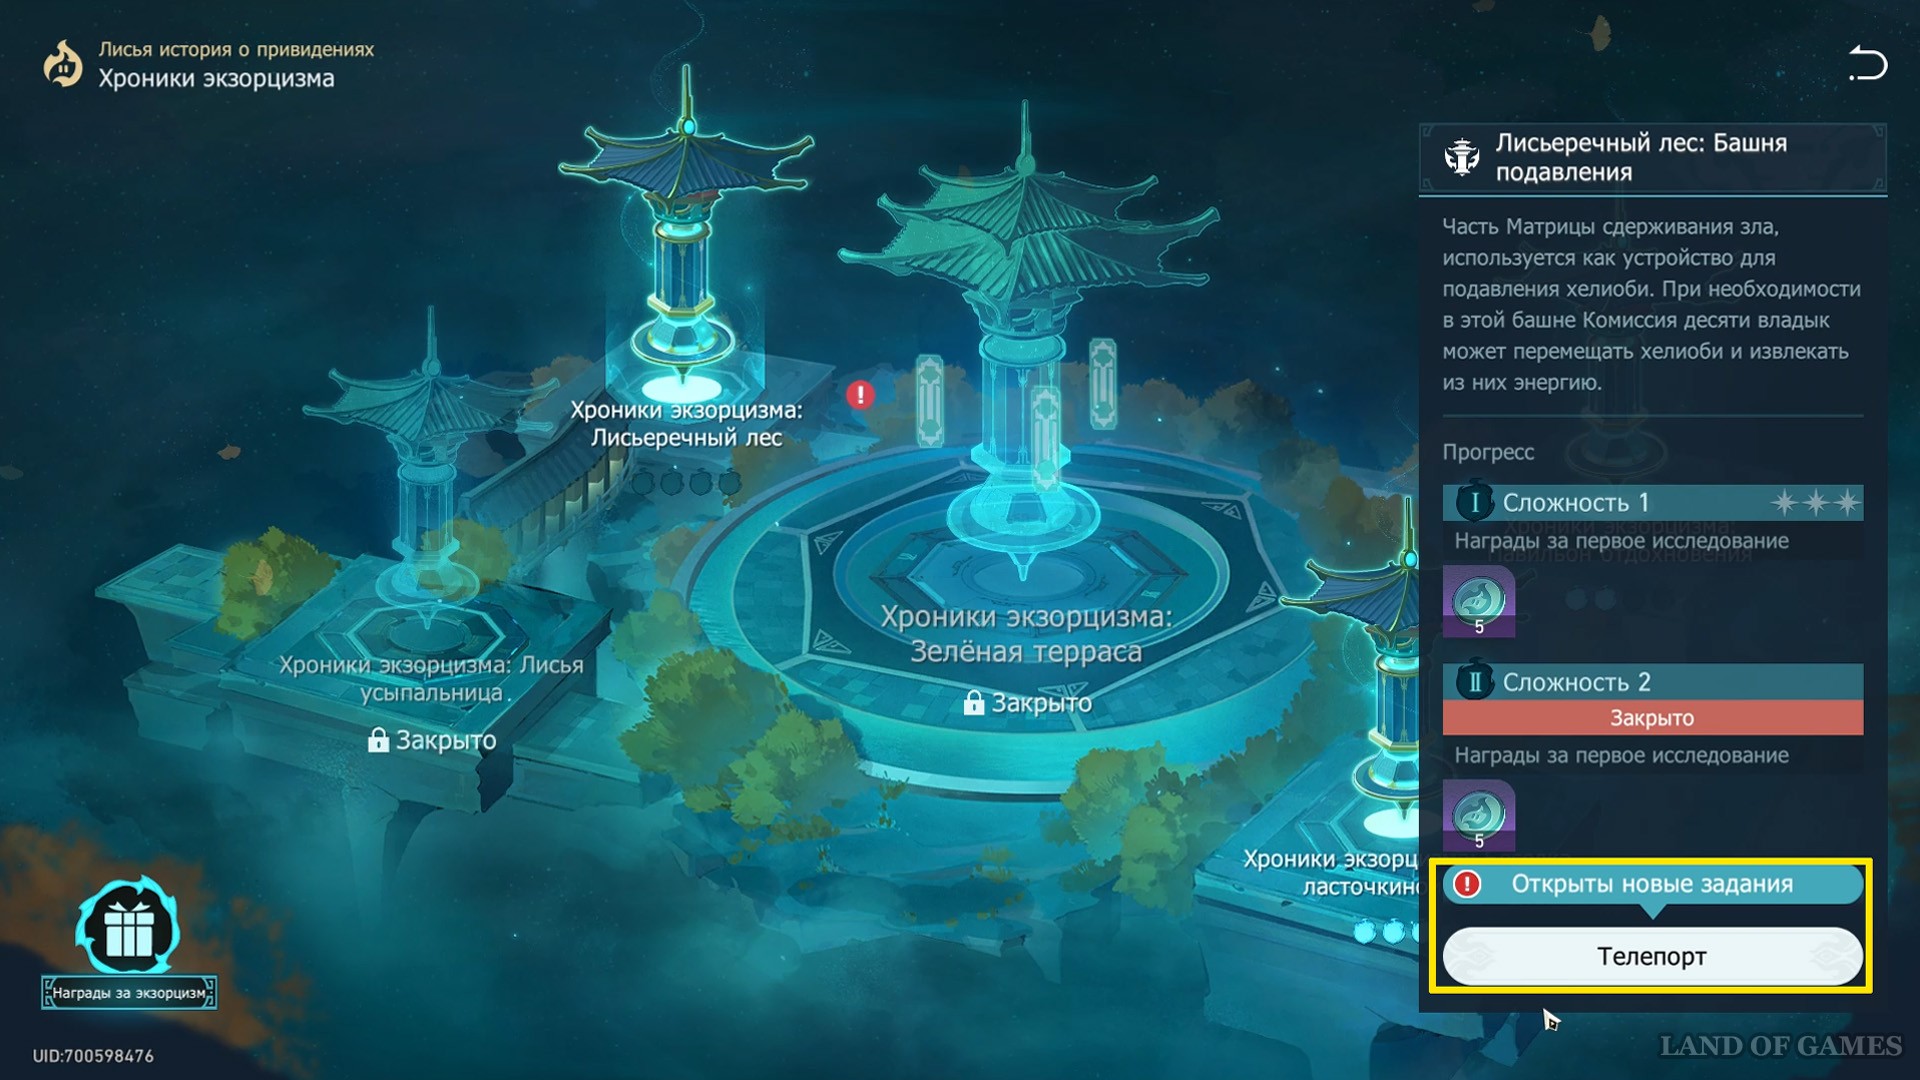
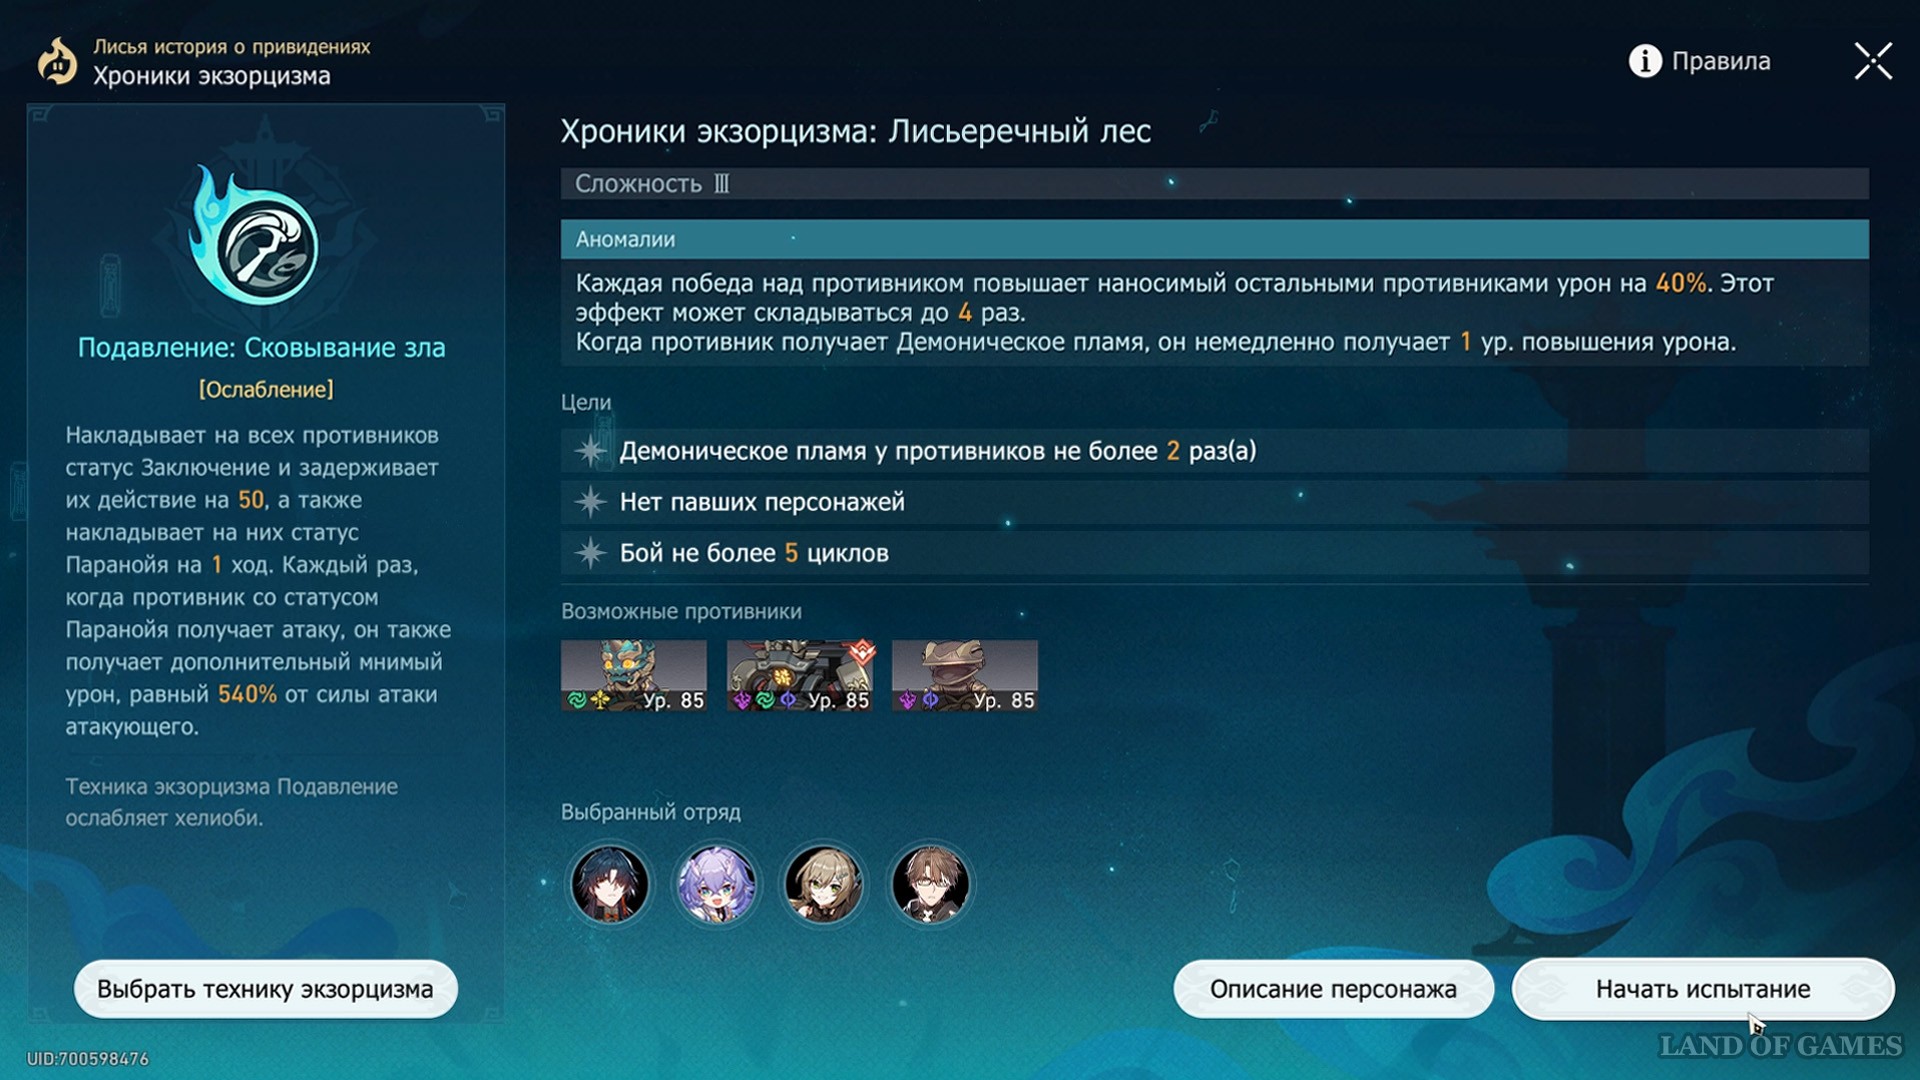
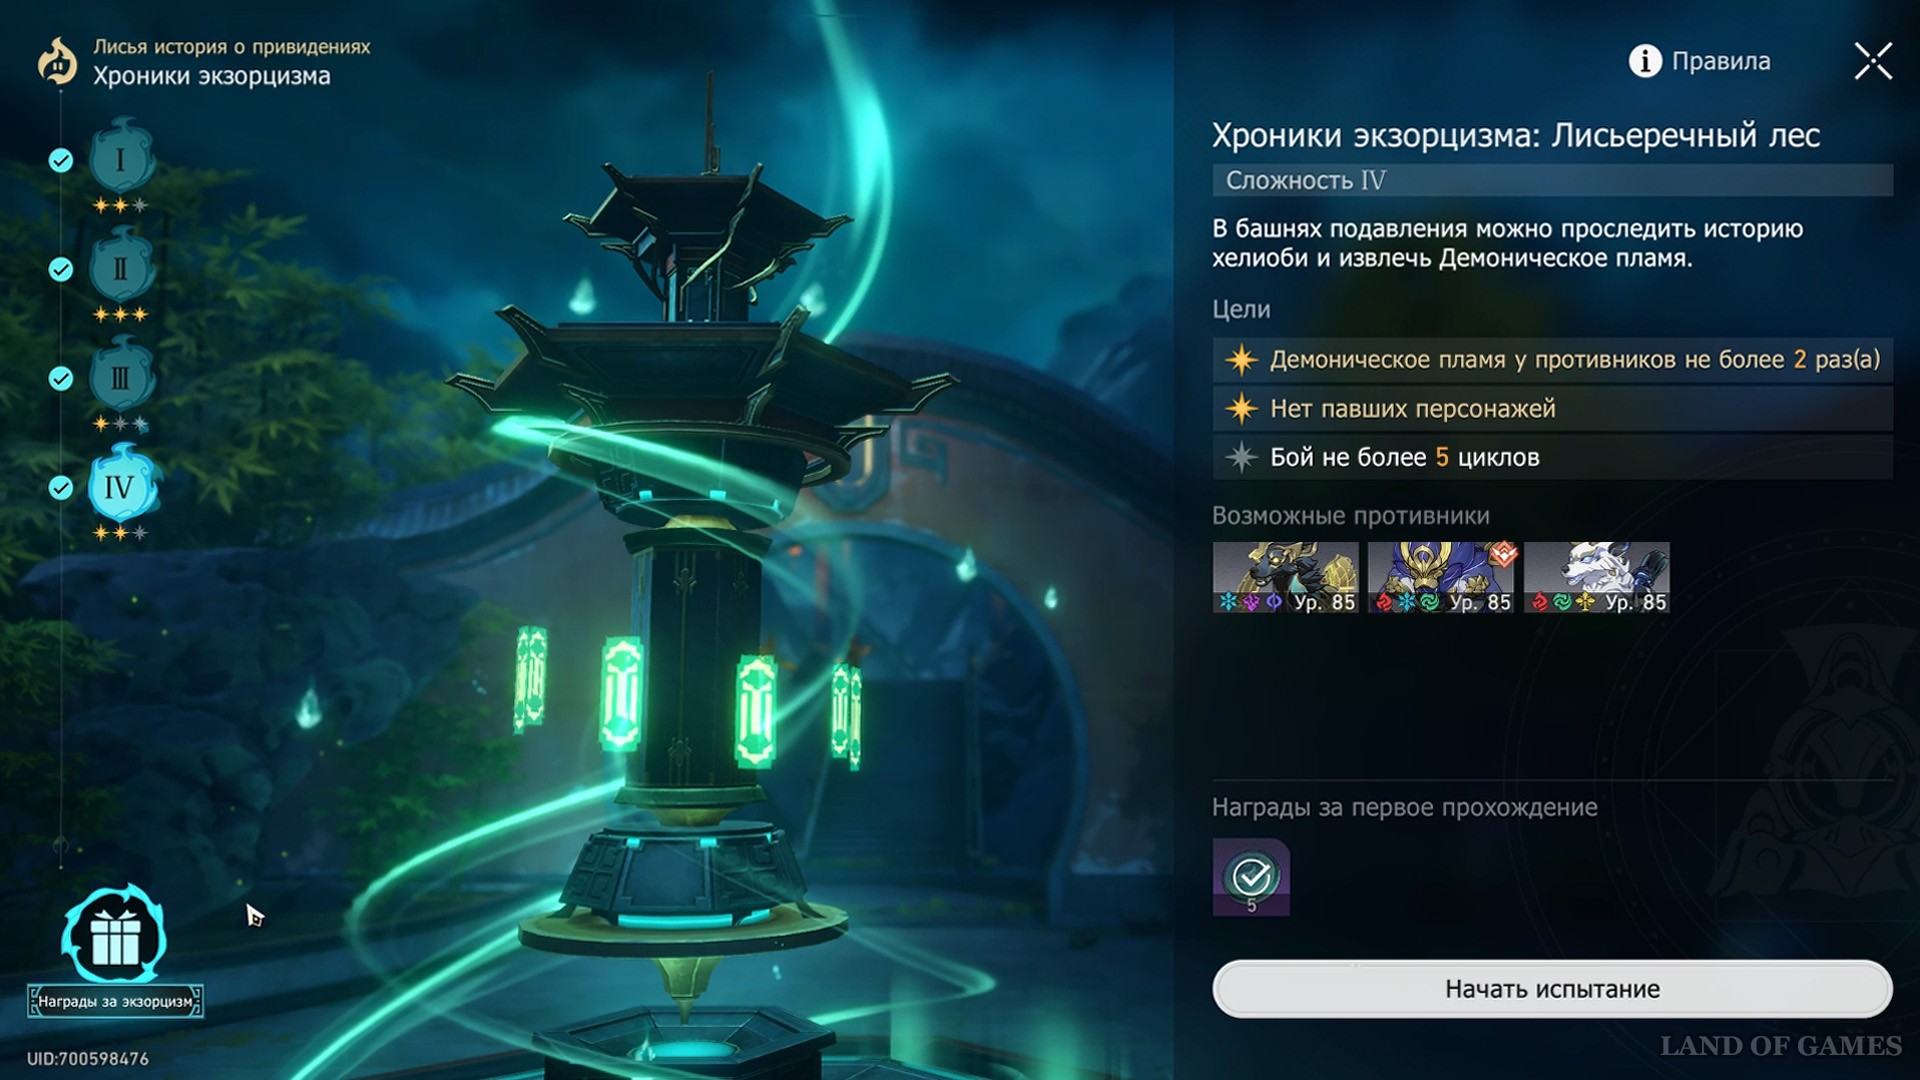
In Honkai: Star Rail "Chronicles of Exorcism: Locufox Forest" is adventure mission and the 3rd stage of the combat competition in the Towers of Suppression, which can be completed during a major chain of quests " The Fox's Ghost Story "
Travel to the mystical northwest Garden of Serenity and complete 4 levels of battles to loot star jade, fragments for crafting relics and other valuable rewards. Our guide will help you select winning teams and go through all the difficulties of the Tower in the Fox Forest.
Completing the "Chronicles of Exorcism: Locufox Forest" challenge
To get started, read the guide on the first Tower in the Pavilion of Relaxation - The guide will help you understand the event interface, Demonic Flame mechanics and basic strategies.
Then make sure that you have completed those tasks that will allow you to gain access to the 3rd Tower:
- Story campaign " Sword Essence ";
- Lofu Horror Stories : " Phantom Bell " And " haunted house »[с них вы получите рекомендованные техники] ;
You can also additionally go through " Notes on Will-o'-the-wisps (continued) "to get the equipment Amulet: Protection of the Altar, which will be very useful in the competitions of the 3rd Tower.
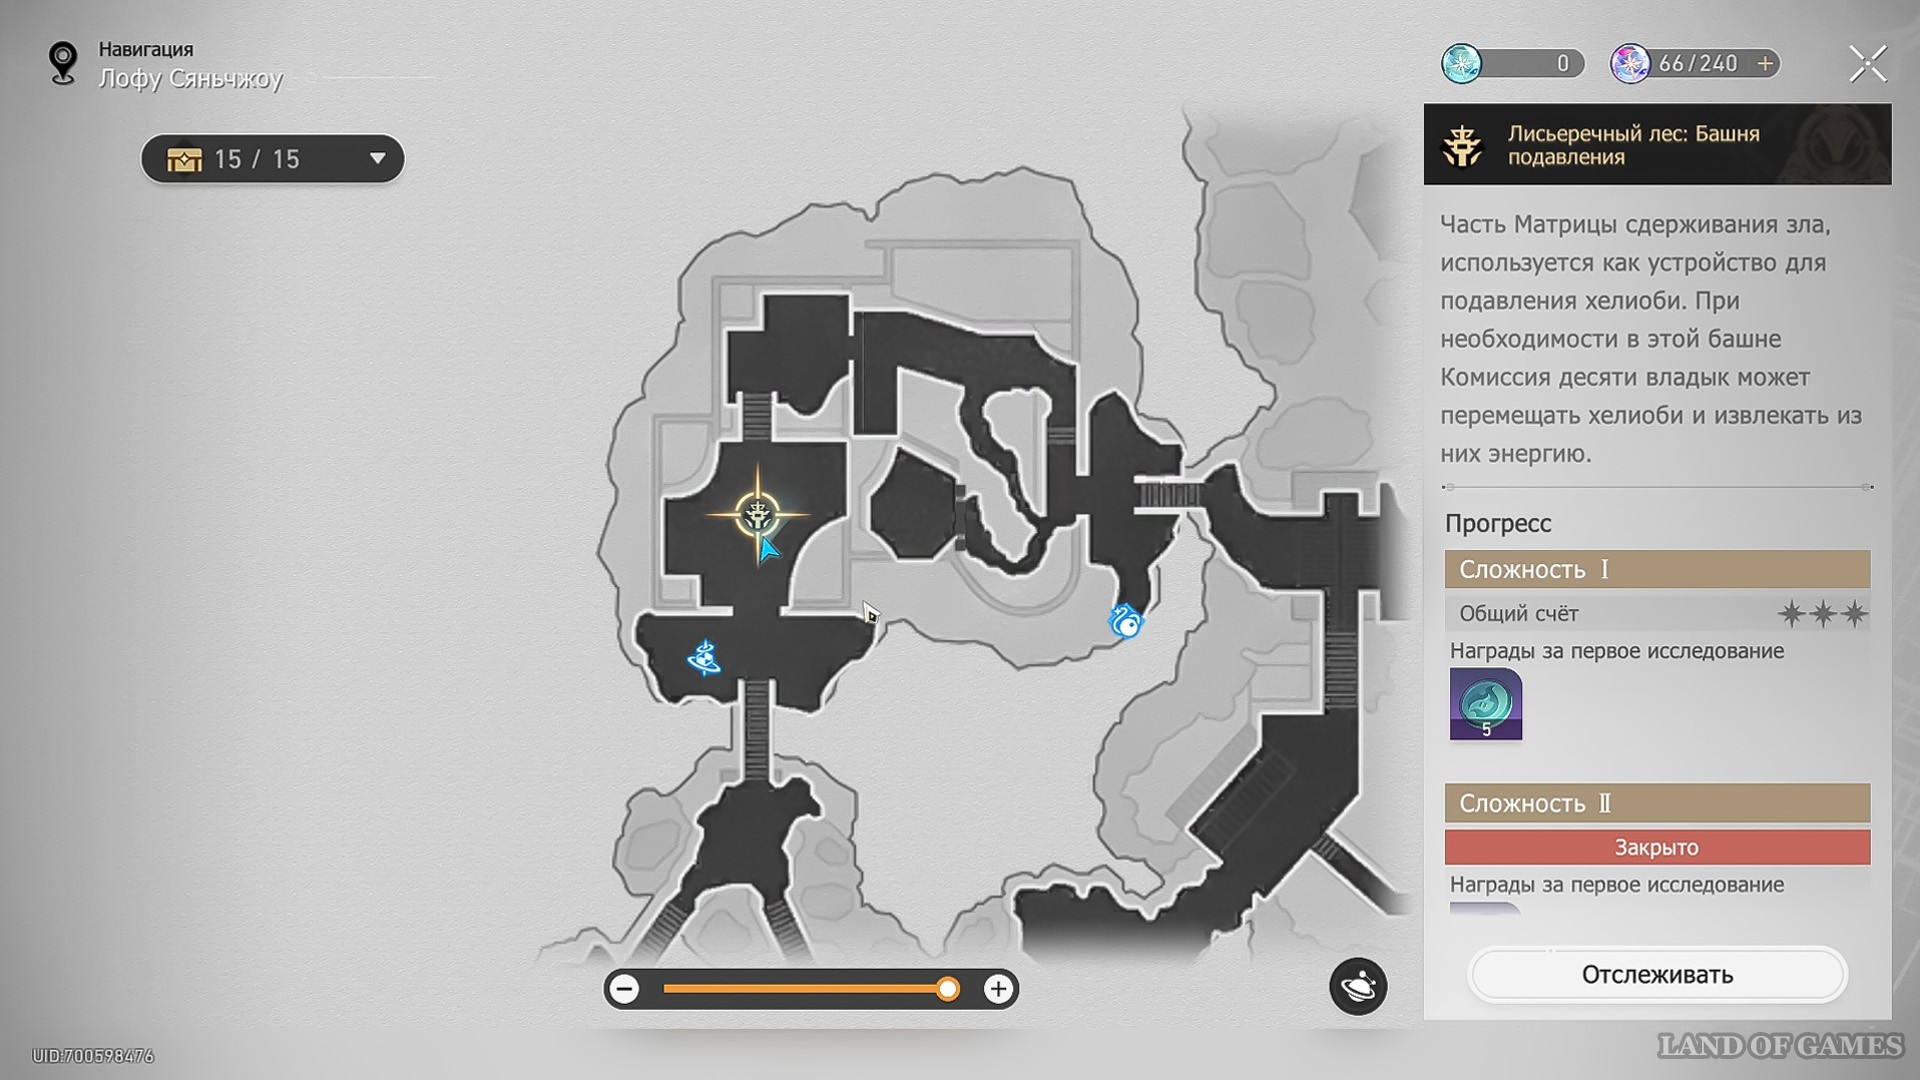
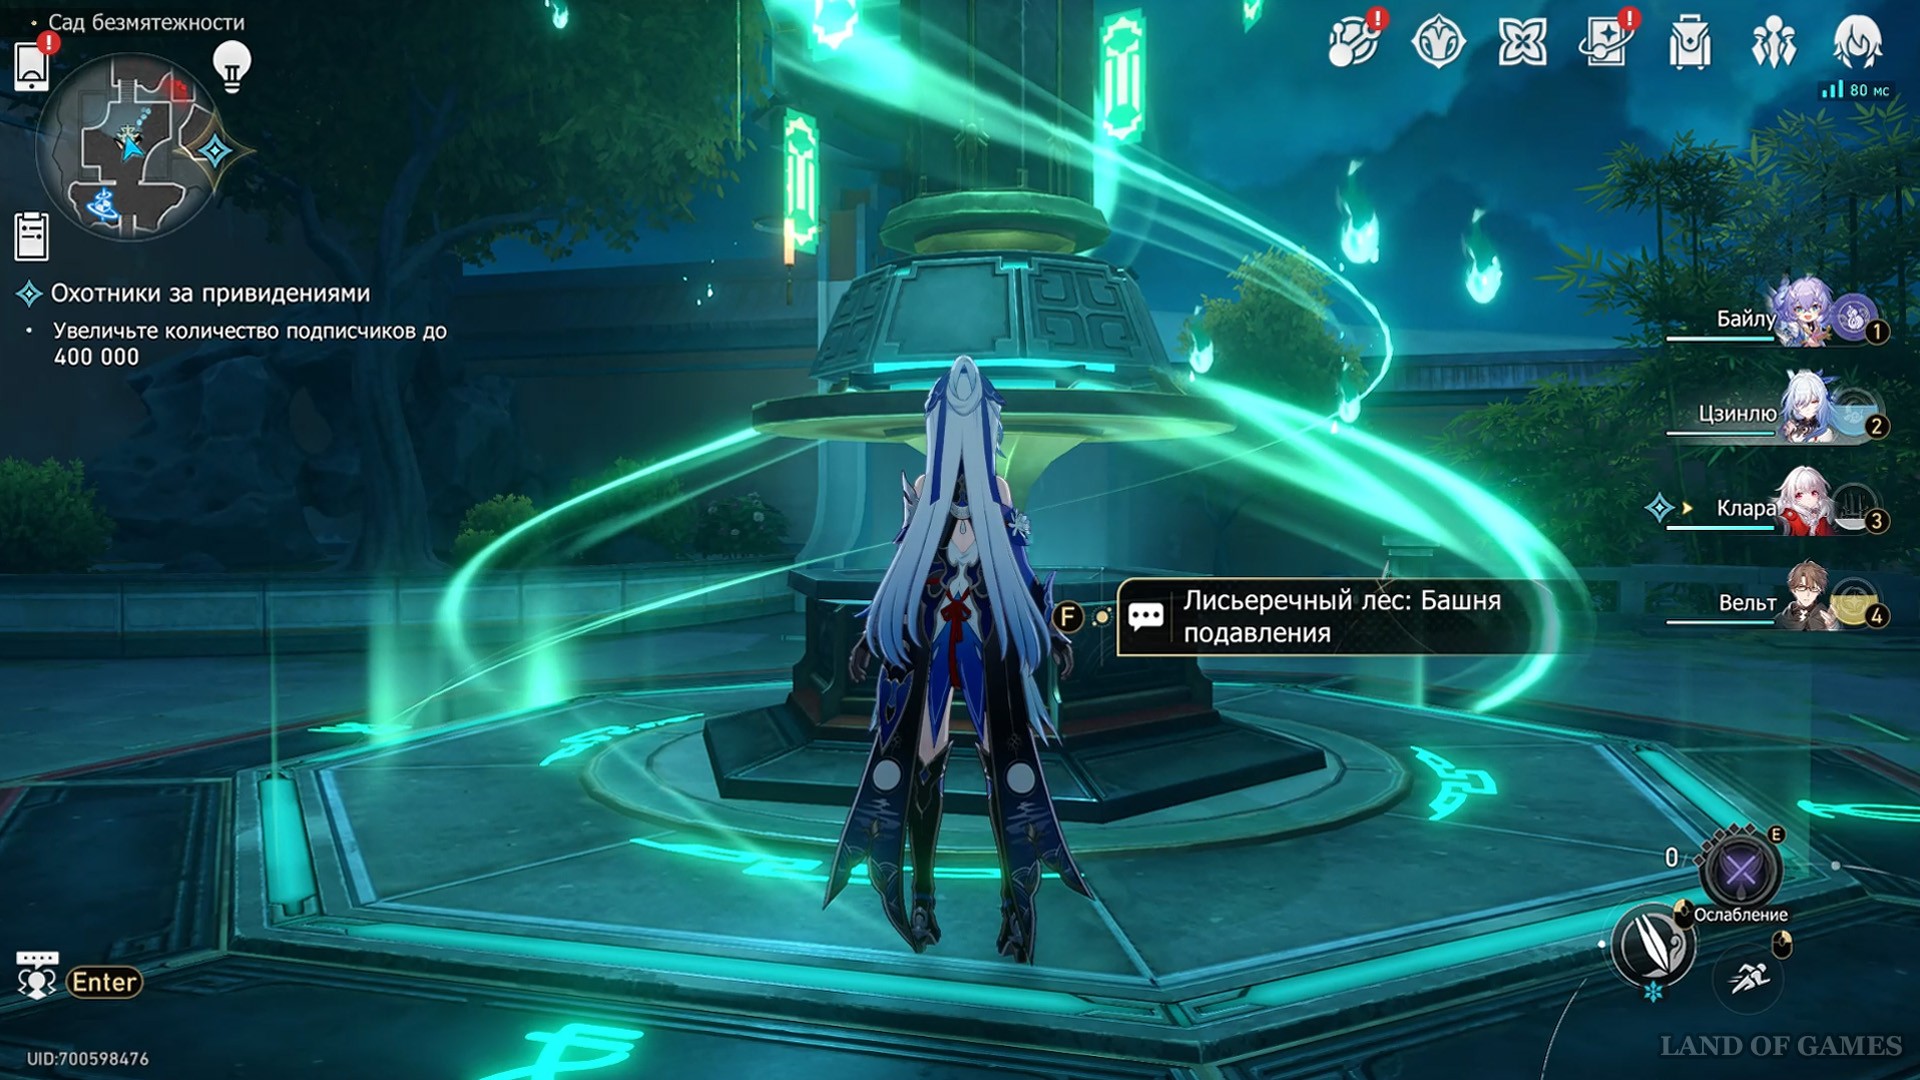
Once all the conditions are met, make your way to the tower north of the Foxwood Back Door.
Recommendations for combat tactics

First of all, it is worth mentioning the three most suitable techniques, which greatly influence the selection of the squad and the strategy of the fight.
- Suppression: Shackle Evil[накладывает на врагов мнимый стан] . If you are going through the Towers as they open, then this technique will be the only recommendation among those available at this stage. You can easily go through all levels with her, but her bonus is aimed at defense, which means you will have to select well-trained damage dealers.
- Amulet: Higher Flow[накопление ульты] . The second recommendation, which helps to instantly fill energy and buffs the damage of the ult, is a good option, for the implementation of which you definitely need support characters with the skills of healing, shields and/or removing negative statuses.
- Amulet: Protection of the Altar[дает всей пачке непробиваемый щит] . This technique is not on the list of recommendations, but it can help a lot with enhanced mob attacks, as well as with a lot of damage over time at some levels + thanks to it, you can free up a shield slot for another damage dealer.
You can also use techniques that deal damage (such as Decree: Banish Evil). However, remember that in this case, enemies will receive the buff from the loss of their squad members uncontrollably faster. With such techniques, you will have to monitor the team's defense and health very often.
It is equally important to keep track of which mobs you attack first. By and large, this applies to wolves and hounds, which create copies of themselves, impose many statuses and promote allies forward after their defeat. Remember: anomaly 3rd Tower significantly increases the damage of mobs after you reduce their number. If you do not have sufficiently pumped up damage dealers, the fight can drag on for a very long time (especially if you chose a defensive technique).
You can find out other recommendations from the guide to the 2nd Tower " Swallow's Song Gazebo "
Squad selection: level 1
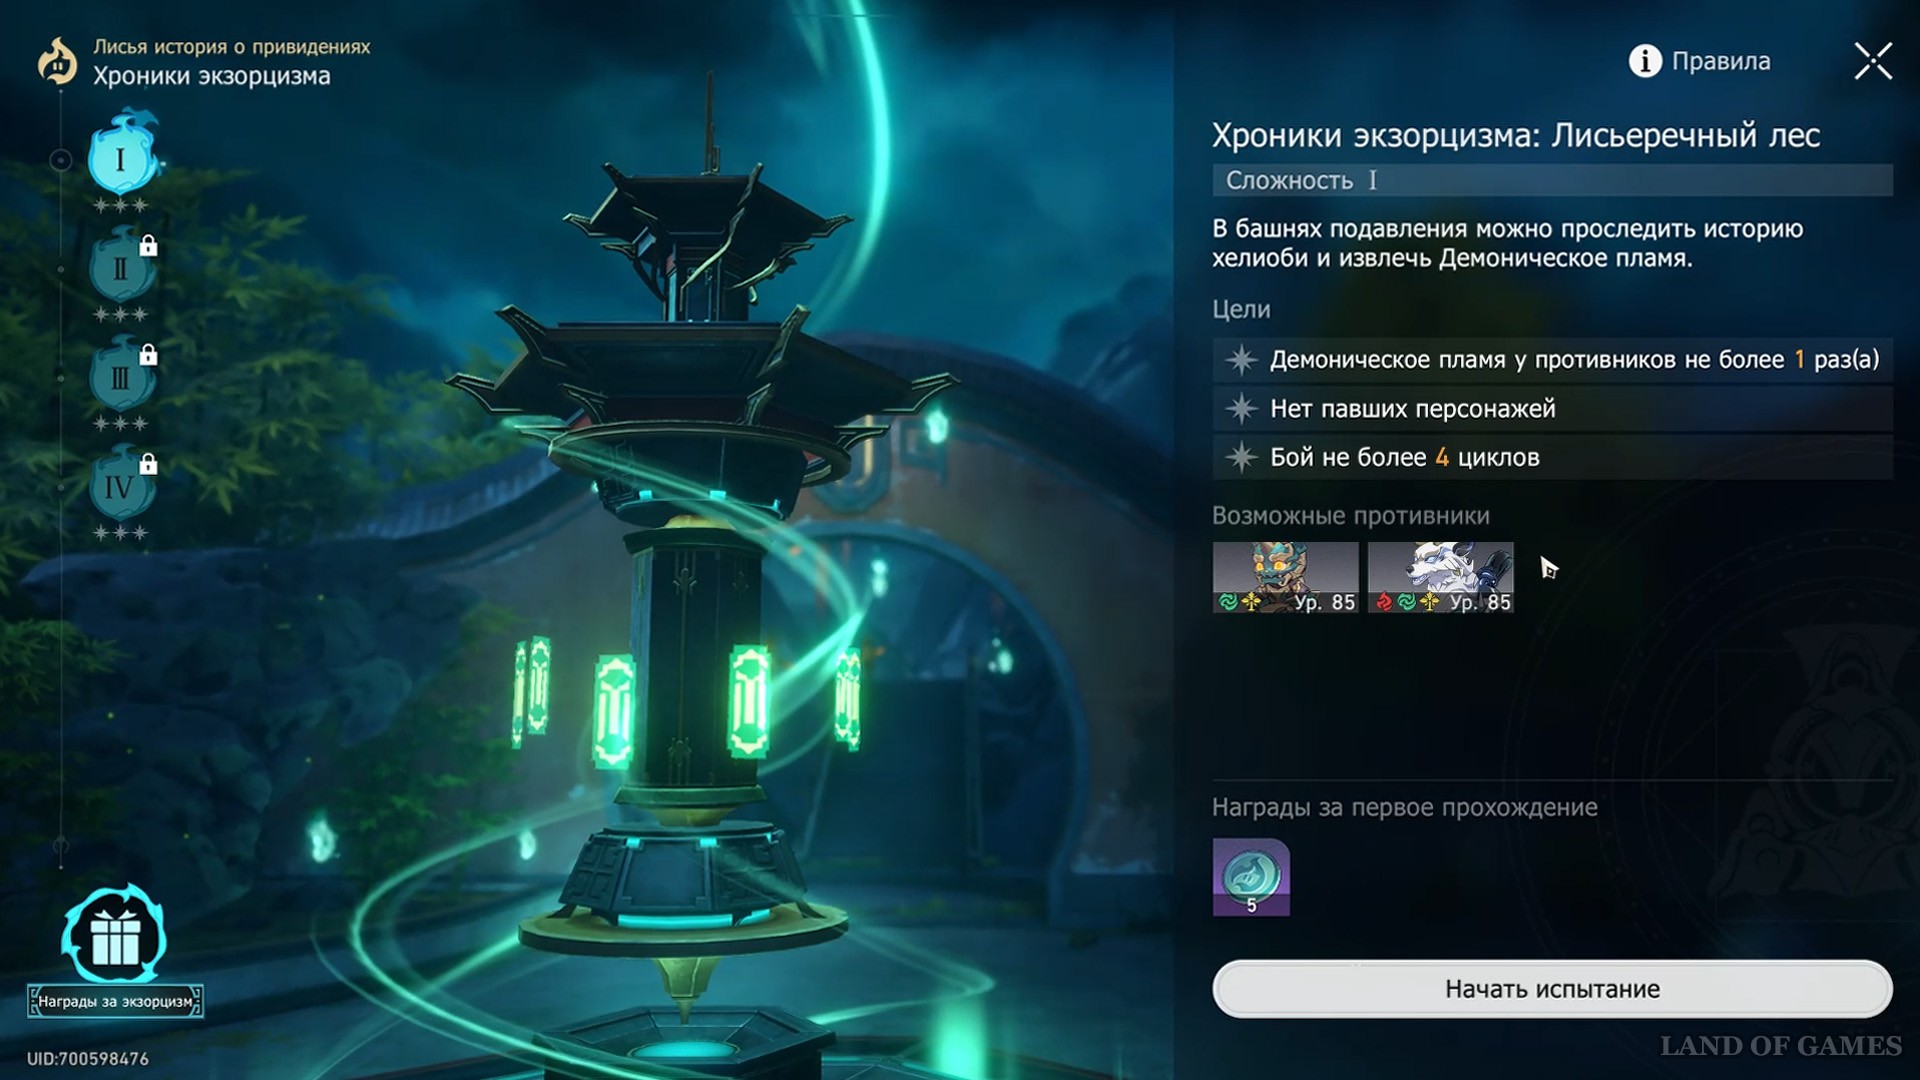
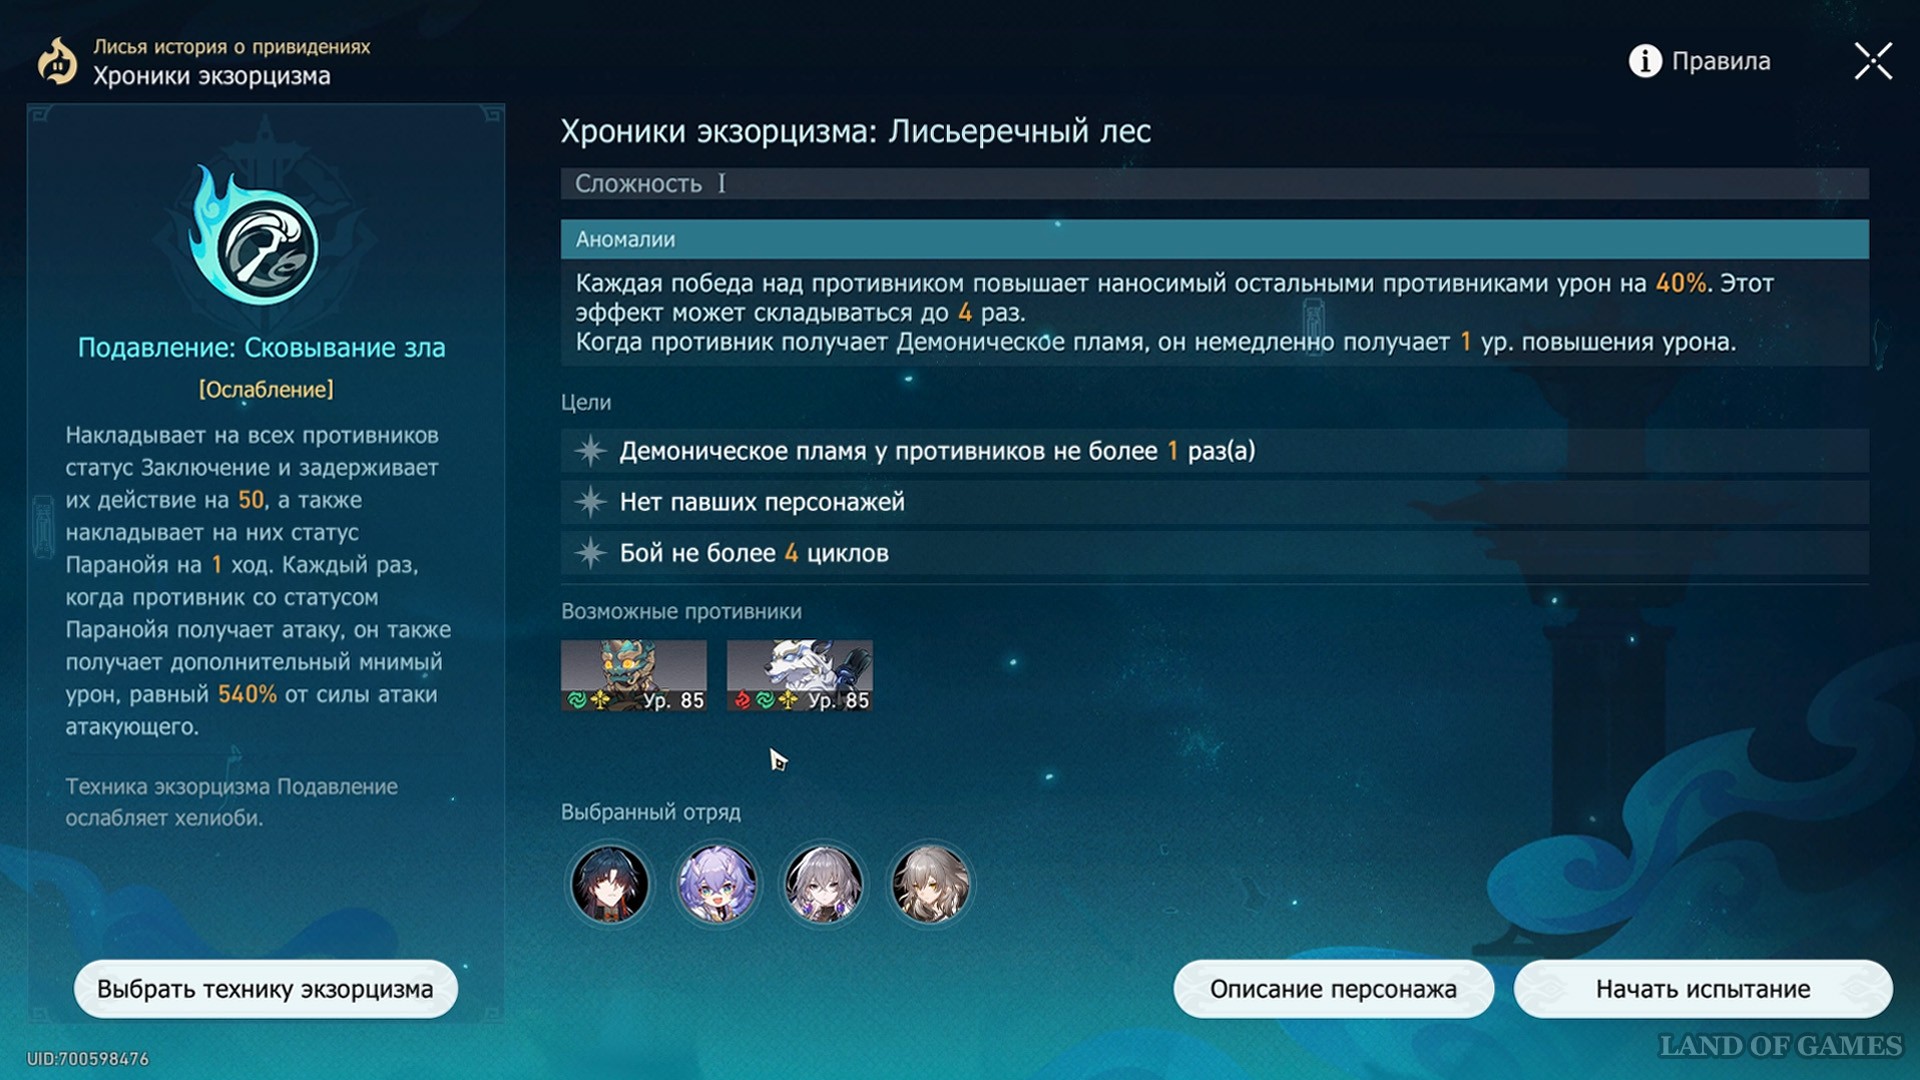
Enemies on difficulty 1 are vulnerable to the following elements: Imaginary, Wind and Fire. Based on them, let's look at suitable units.
Team 1
| Maine-DD | Sub-DD | Sub-DD/Support | Support |
|---|---|---|---|
|
Dan Heng |
Yukun |
Asta (GG fire) |
Natasha |


A collection of shareware characters. As you can see, the main damage dealer is taken as a basis, and useful supports are selected for him. If you have problems with defense, it is better to change Asta to the GG Save path. Natasha is responsible for healing, but does not have a useful damage type, so if you have Hoho, Locha or Bailu, it is definitely better to put them.
Team 2
| Maine-DD | Sub-DD | Sub-DD/Support | Support |
|---|---|---|---|
|
Moon Eater |
Sang |
Tingyun |
Locha |


This team also plays on the core+support principle: thanks to Tingyun’s skills, the Devourer will be able to quickly accumulate energy and receive a personal damage buff. Pela will remove buffs from enemies, which is especially useful due to the Tower anomaly.
You can also take Welt or Fiery GG as support, for the role of DD Blade, and leave the heal to Hoho.
Squad selection: level 2
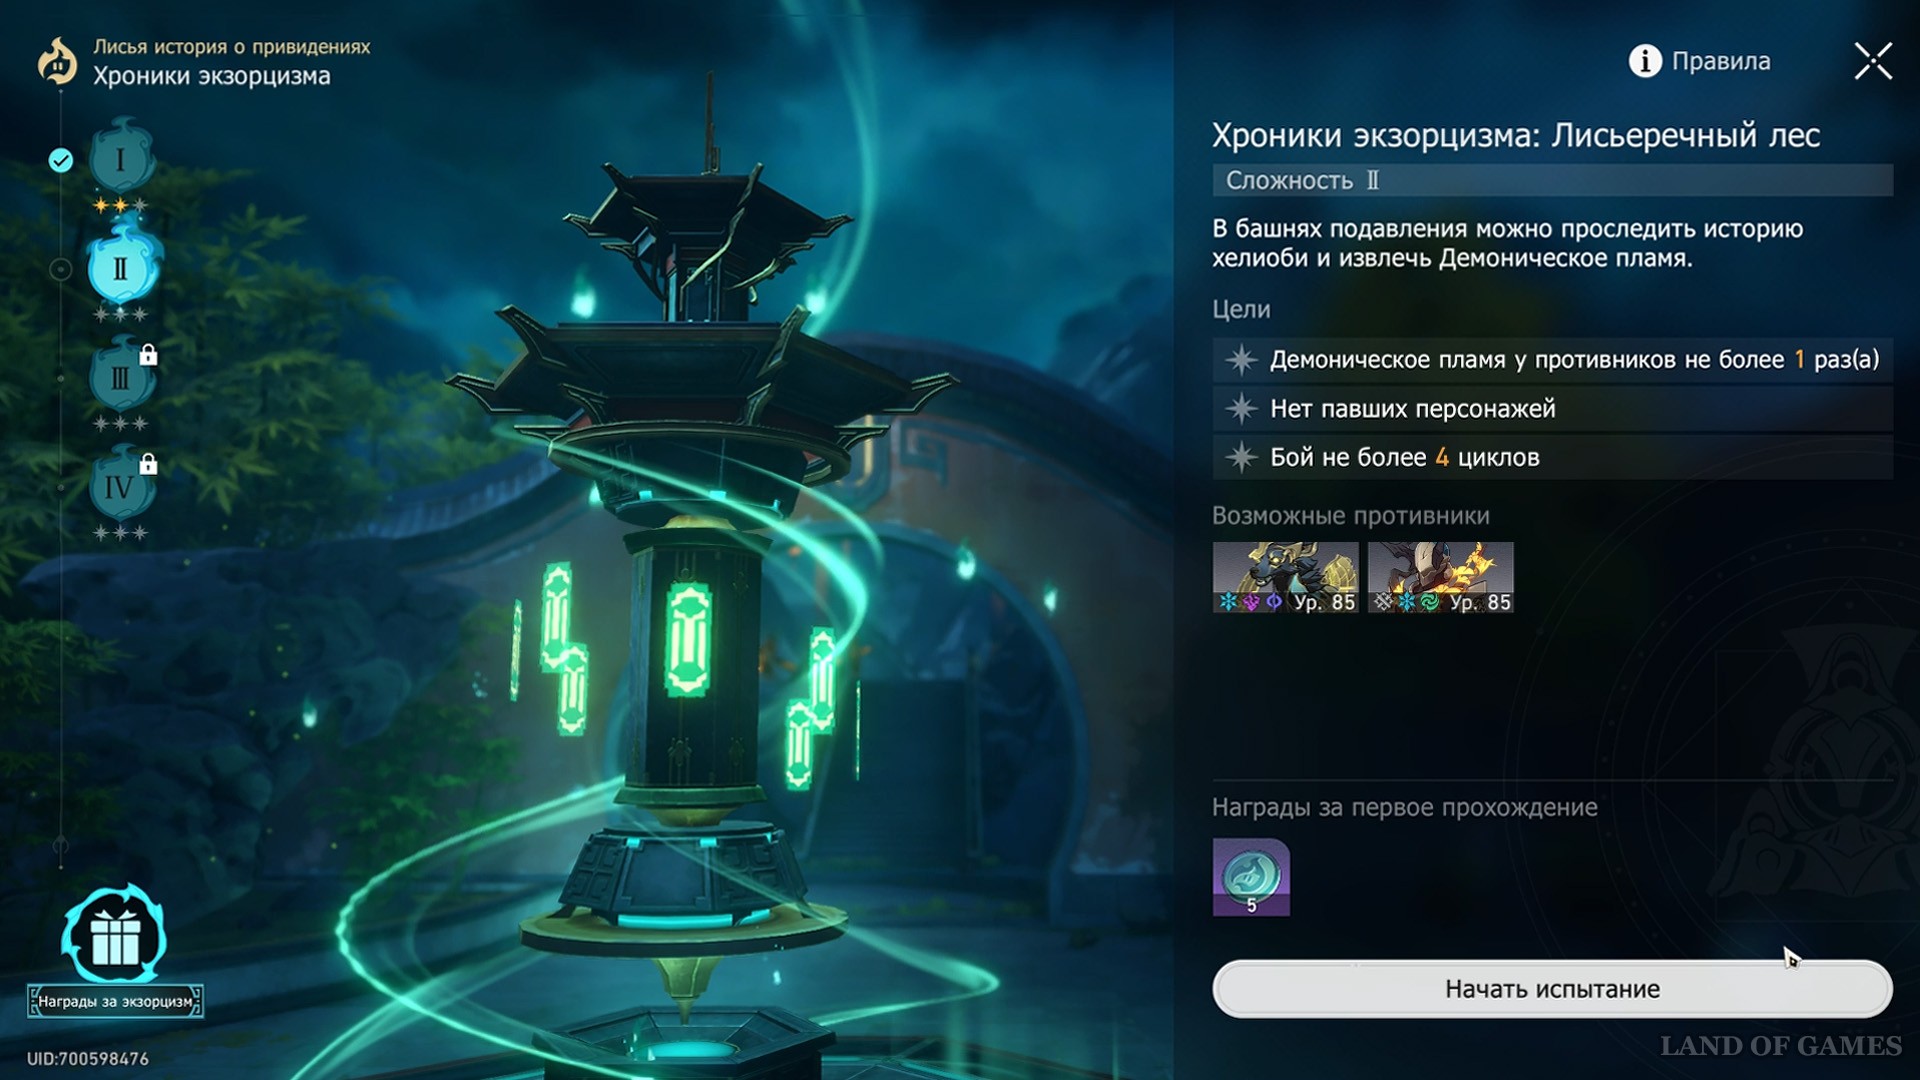
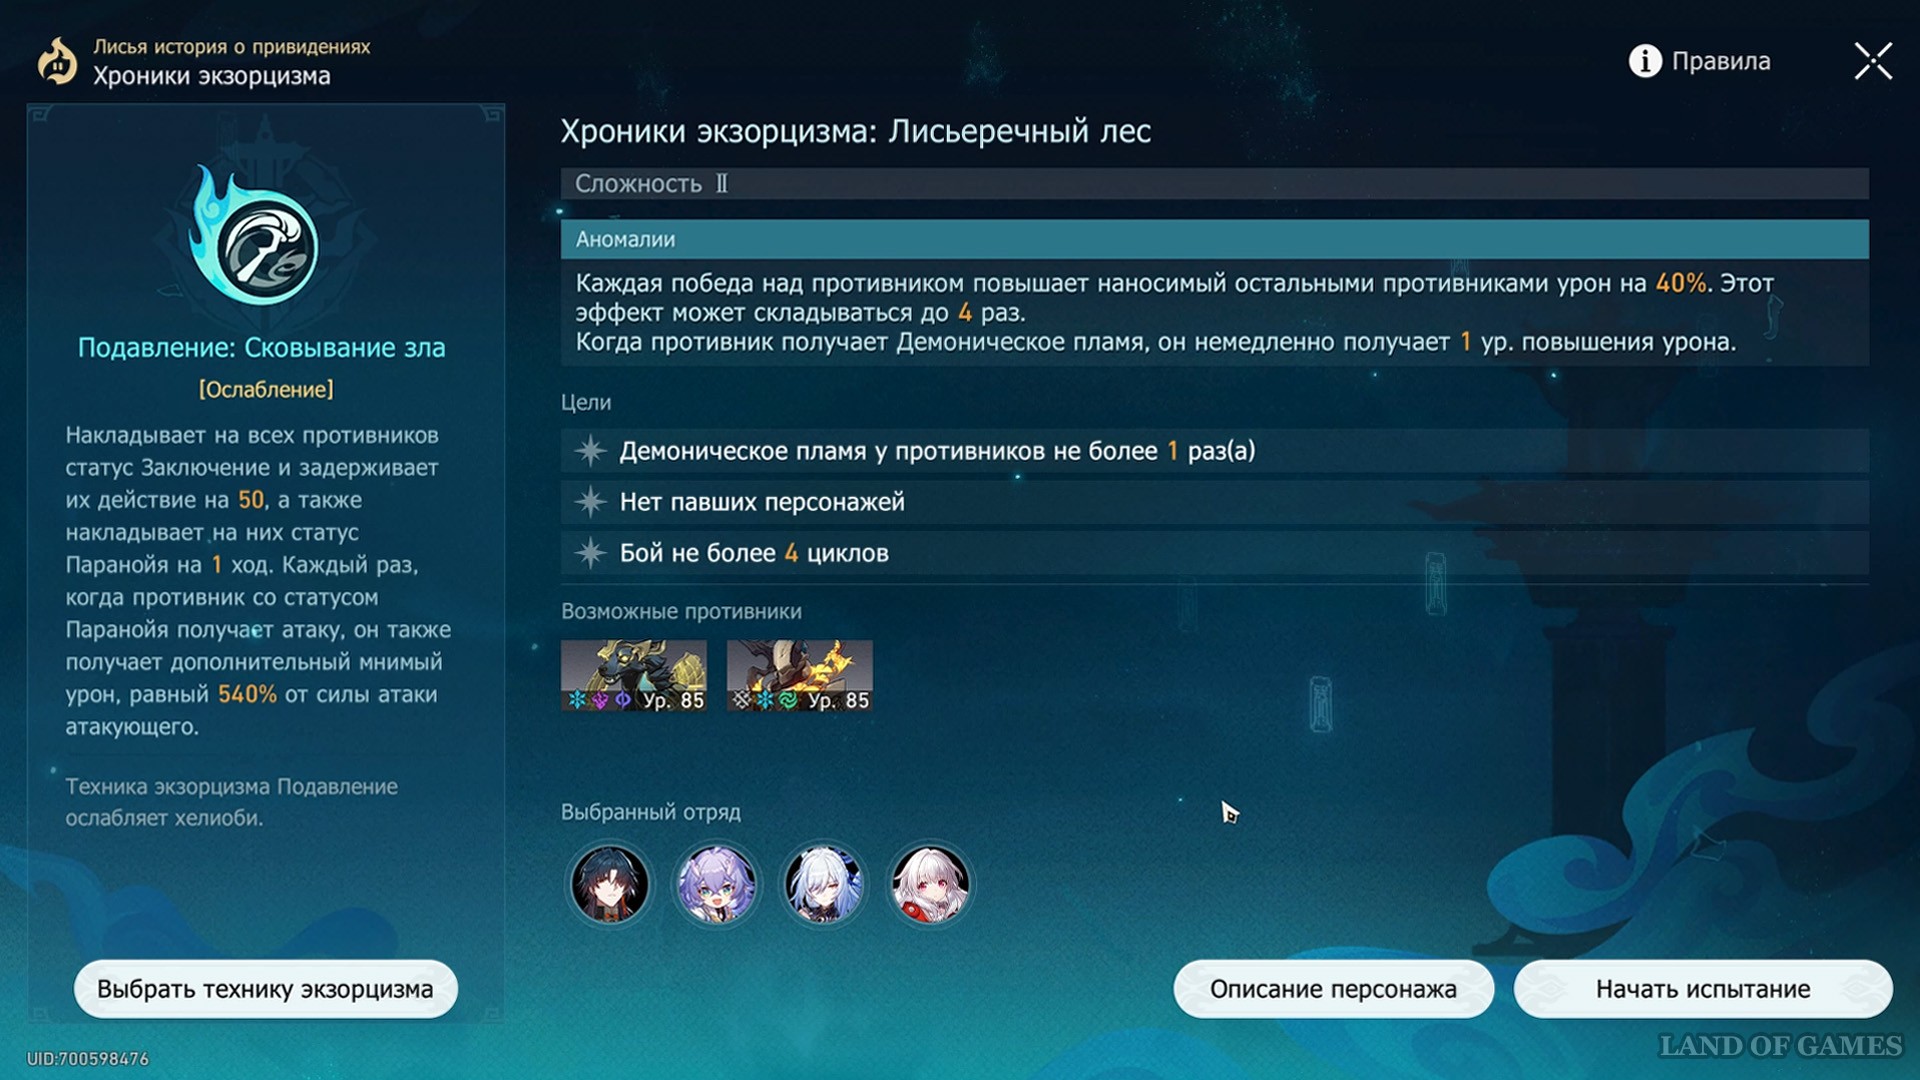
This is perhaps the easiest of all levels. The vulnerability of mobs on difficulty 2 can be broken through by Ice (main), Electric, Wind, Physical and Quantum damage types. The following squad options are suitable.
Team 1
| Maine-DD | Sub-DD | Sub-DD/Support | Support |
|---|---|---|---|
|
Hertha |
Asta (Qingque or Pela) |
March 7 |
Natasha |


It is best to put defensive techniques in place with this unit to avoid the possibility of losing Asta or Gerta. Otherwise, there should be no problems with passing this pack.
Team 2
- Jingliu/Pela/Armor/Hoho (Bailu).
A very powerful build that goes well with the Amulet: Higher Flow technique. In a squad with Armor and Hoho, you can minimize the problem of debuffs, and additional. accumulating energy from vehicles will help you quickly deal with a small number of enemies.
Instead of Jingliu, you can take Yanqing, and for support the same March or Fu Xuan (if there is a problem with survivability).
Squad selection: level 3
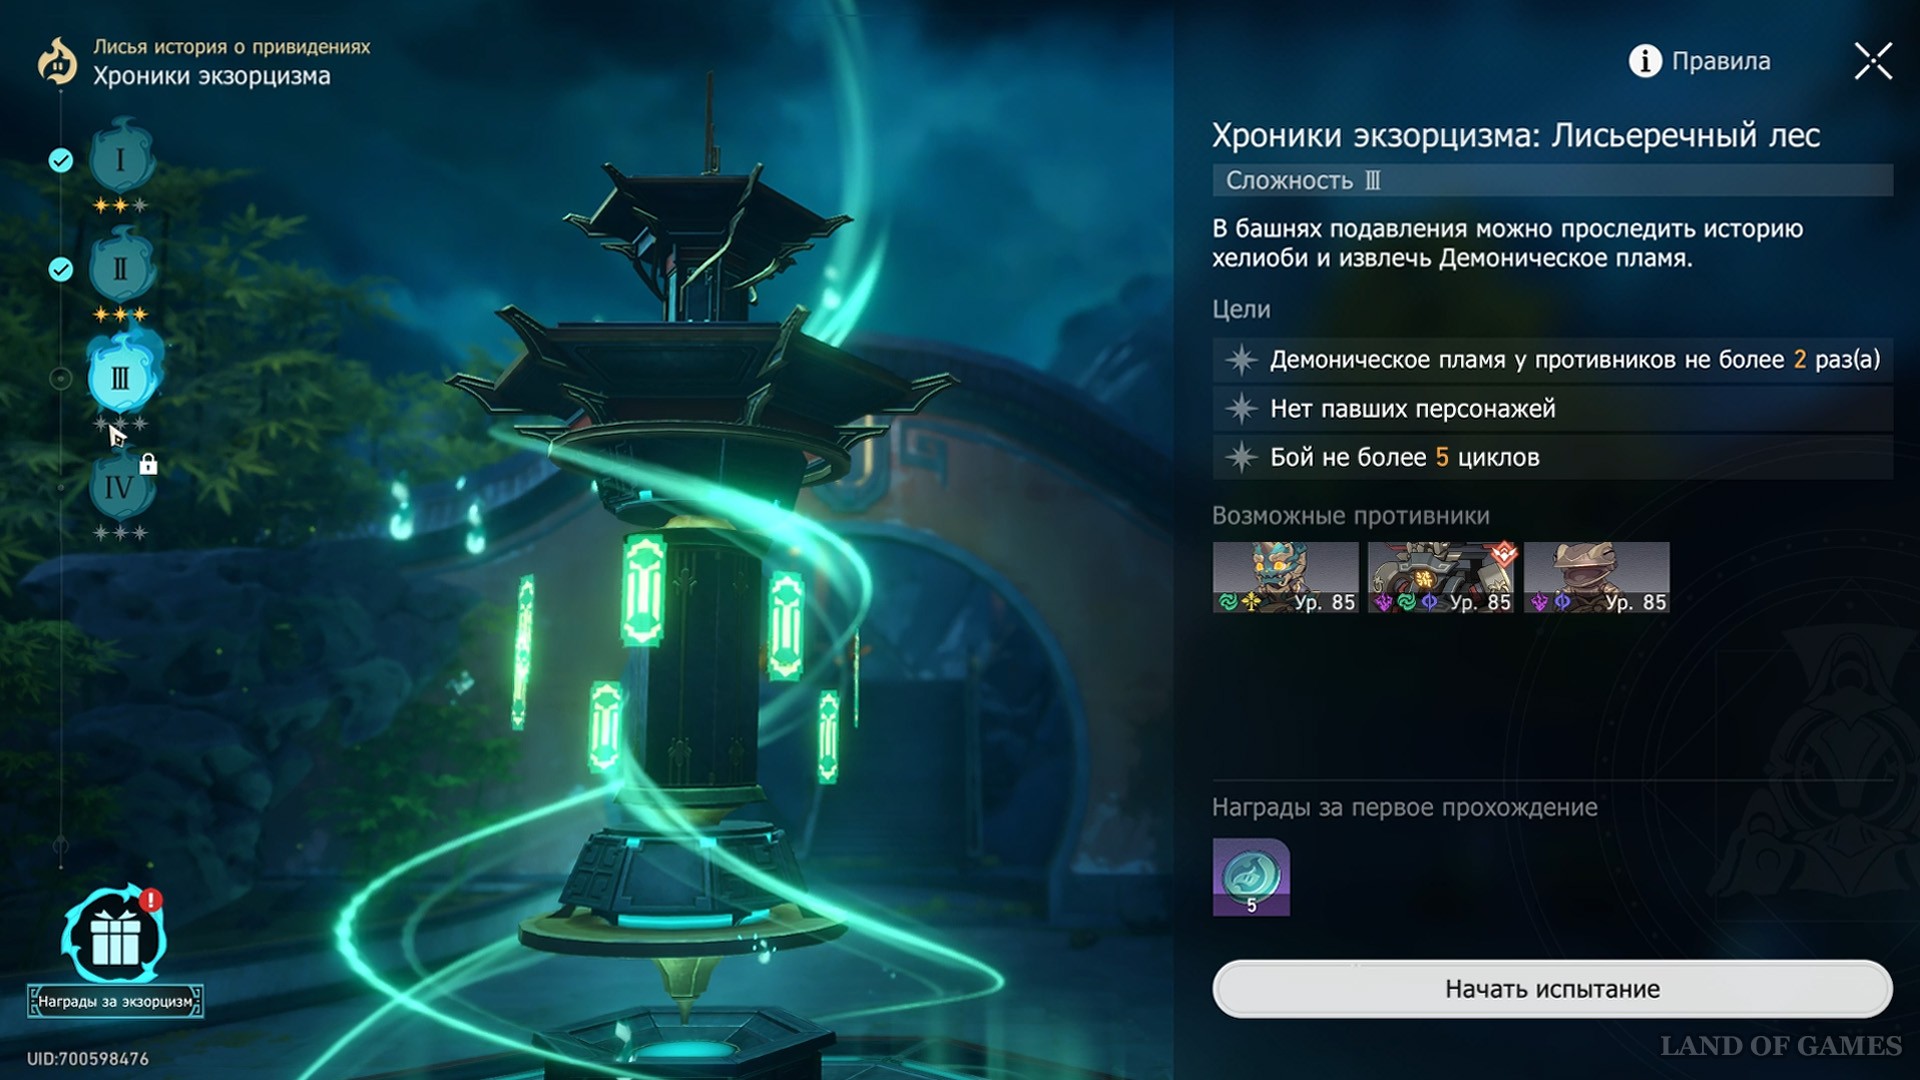
On the next difficulty, the first strengthened opponent awaits us, Aurumaton. This stage can cause some problems, so we strongly recommend taking the Amulet: Altar Defense technique and someone to remove the robot's camp. Stage vulnerabilities: Wind, Quantum, Electric and Imaginary.
Team 1
- Serval/Sampo (Qingque)/Lynx (Natasha)/Yukun (March 7).
Among the epic heroes there are many who would be suitable for this squad, but we do not recommend taking heroes at the expense of a suitable type of damage. You will also benefit from units that deal a lot of periodic damage that finishes off mobs. If you play with the Amulet we recommend, there may be a problem due to frequent robot attacks that will stun your heroes. In this case, it is better to put March 7 in the squad. Also try to hit the dragon fish first in order to quickly finish off the mechanical boss.
Team 2
- Blade/Armor/Sang/Hoho.
This is a strengthened team that has two characters that remove debuffs - Armor and Hoho. Therefore, with such a squad you will minimize the problem of robot attack. Instead of DD, Jing Yuan or Zele would also fit well in this pack.
Team 3
- Kafka/Sampo/Luka/Locha.
Here, the large dot damage carried out by all squad members will greatly help you. Owners of these characters don’t have to worry about finishing off their enemies. The main thing is to keep track of the number of cycles so that it doesn’t turn out that the debuffs are activated already on the 6th.
Squad selection: level 4
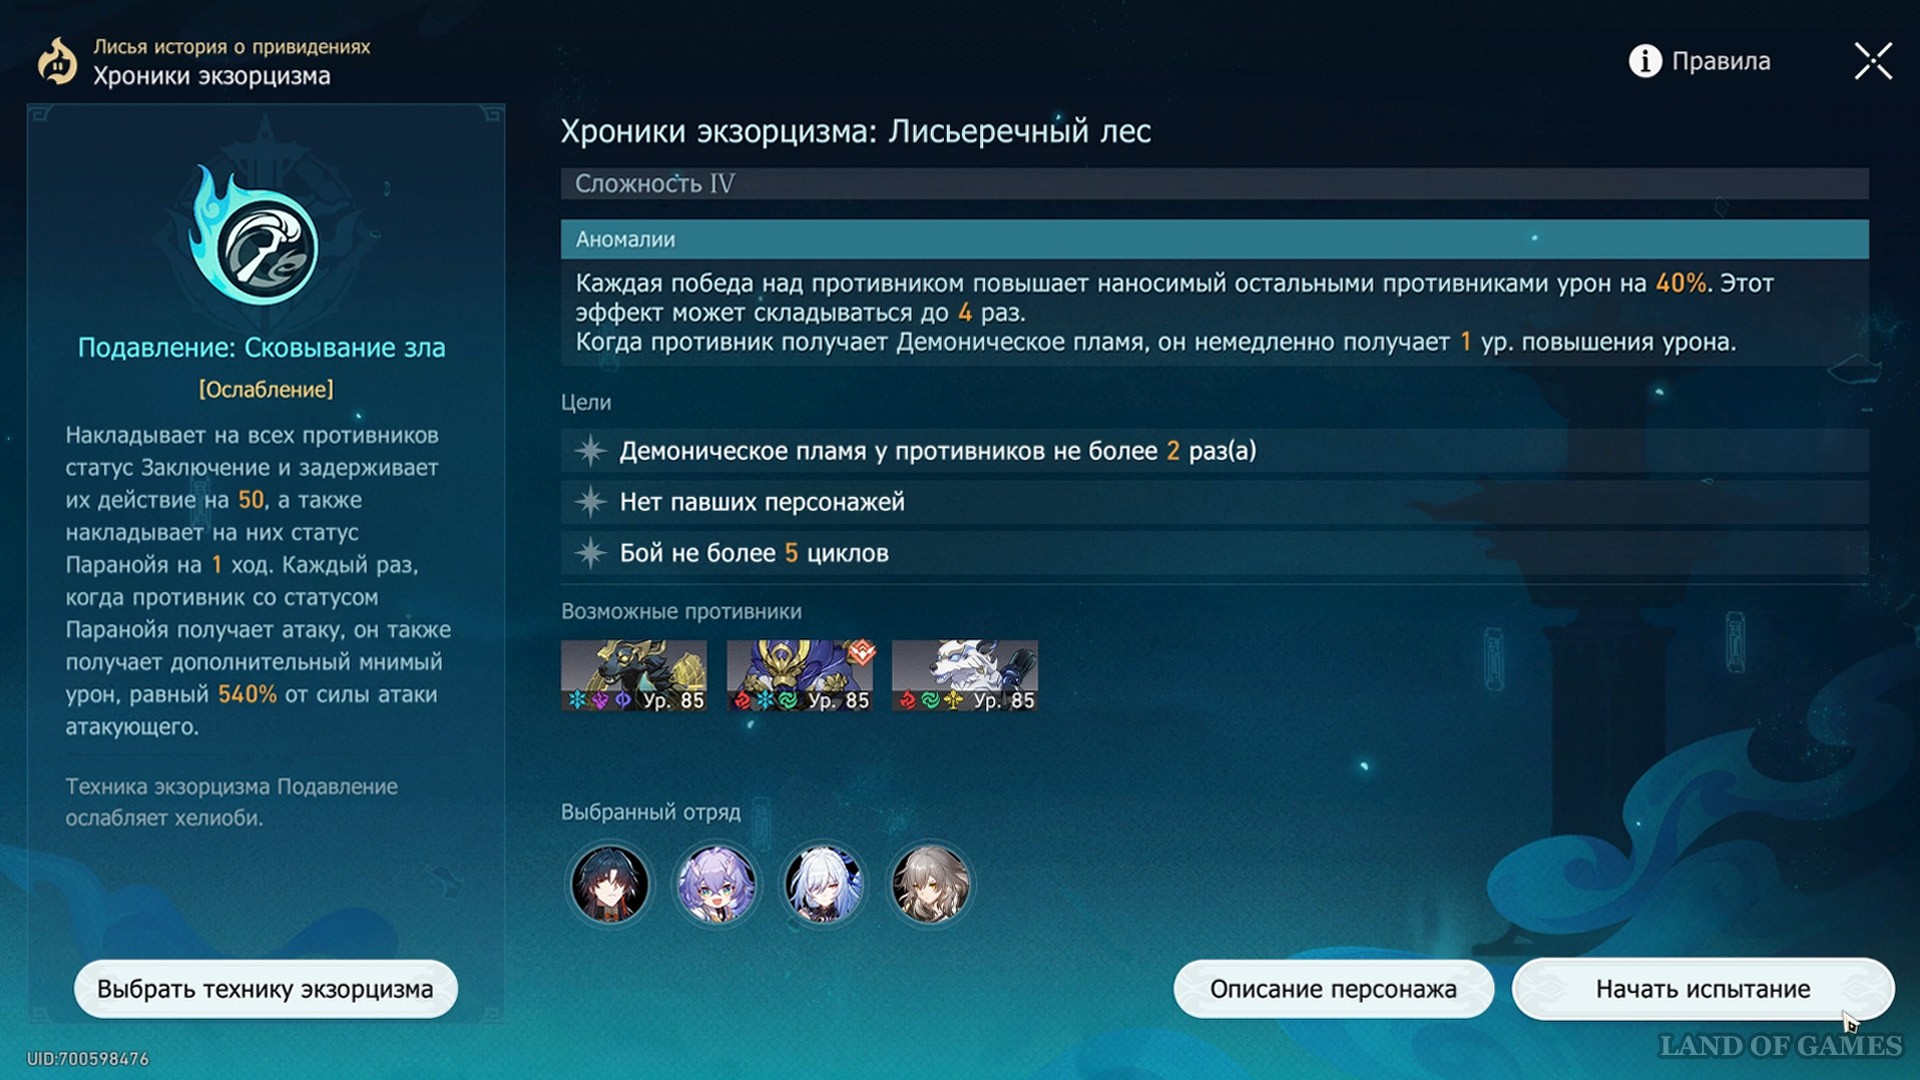
The final difficulty level is filled with enemies whose shields can knock down Ice, Wind, Fire, Imaginary, Electric and Quantum damage types. But be careful: the last two finish off the golden hounds, which, when killed, will propel their allies upward. The pack options below will help you.
Team 1
- Tribute to Hen/Asta/Natasha/GG Fiery.
Two fiery heroes will help you deal with the two main targets - the primate and the wolves. Don't forget to keep an eye on who the boss chooses as his target, dropping damage on the shieldman.
Team 2
- Jingliu (Yanqing)/Sang/Armor/Hoho.
One of the units of the previous level, the survivability of which can be increased using the “Amulet: Higher Flow” technique - using it in time, you free up a tank slot in the unit for two support characters. Among them, Armor is especially useful, pushing your damage dealer forward and countering the similar skills of the hounds of the enemy squad.
If you don't have enough damage, put another damage dealer in place of support (Jingliu and Blade would be a good combination). Hill can also be entrusted to Bile, and in support take the same GG of the Preservation path.
Awards
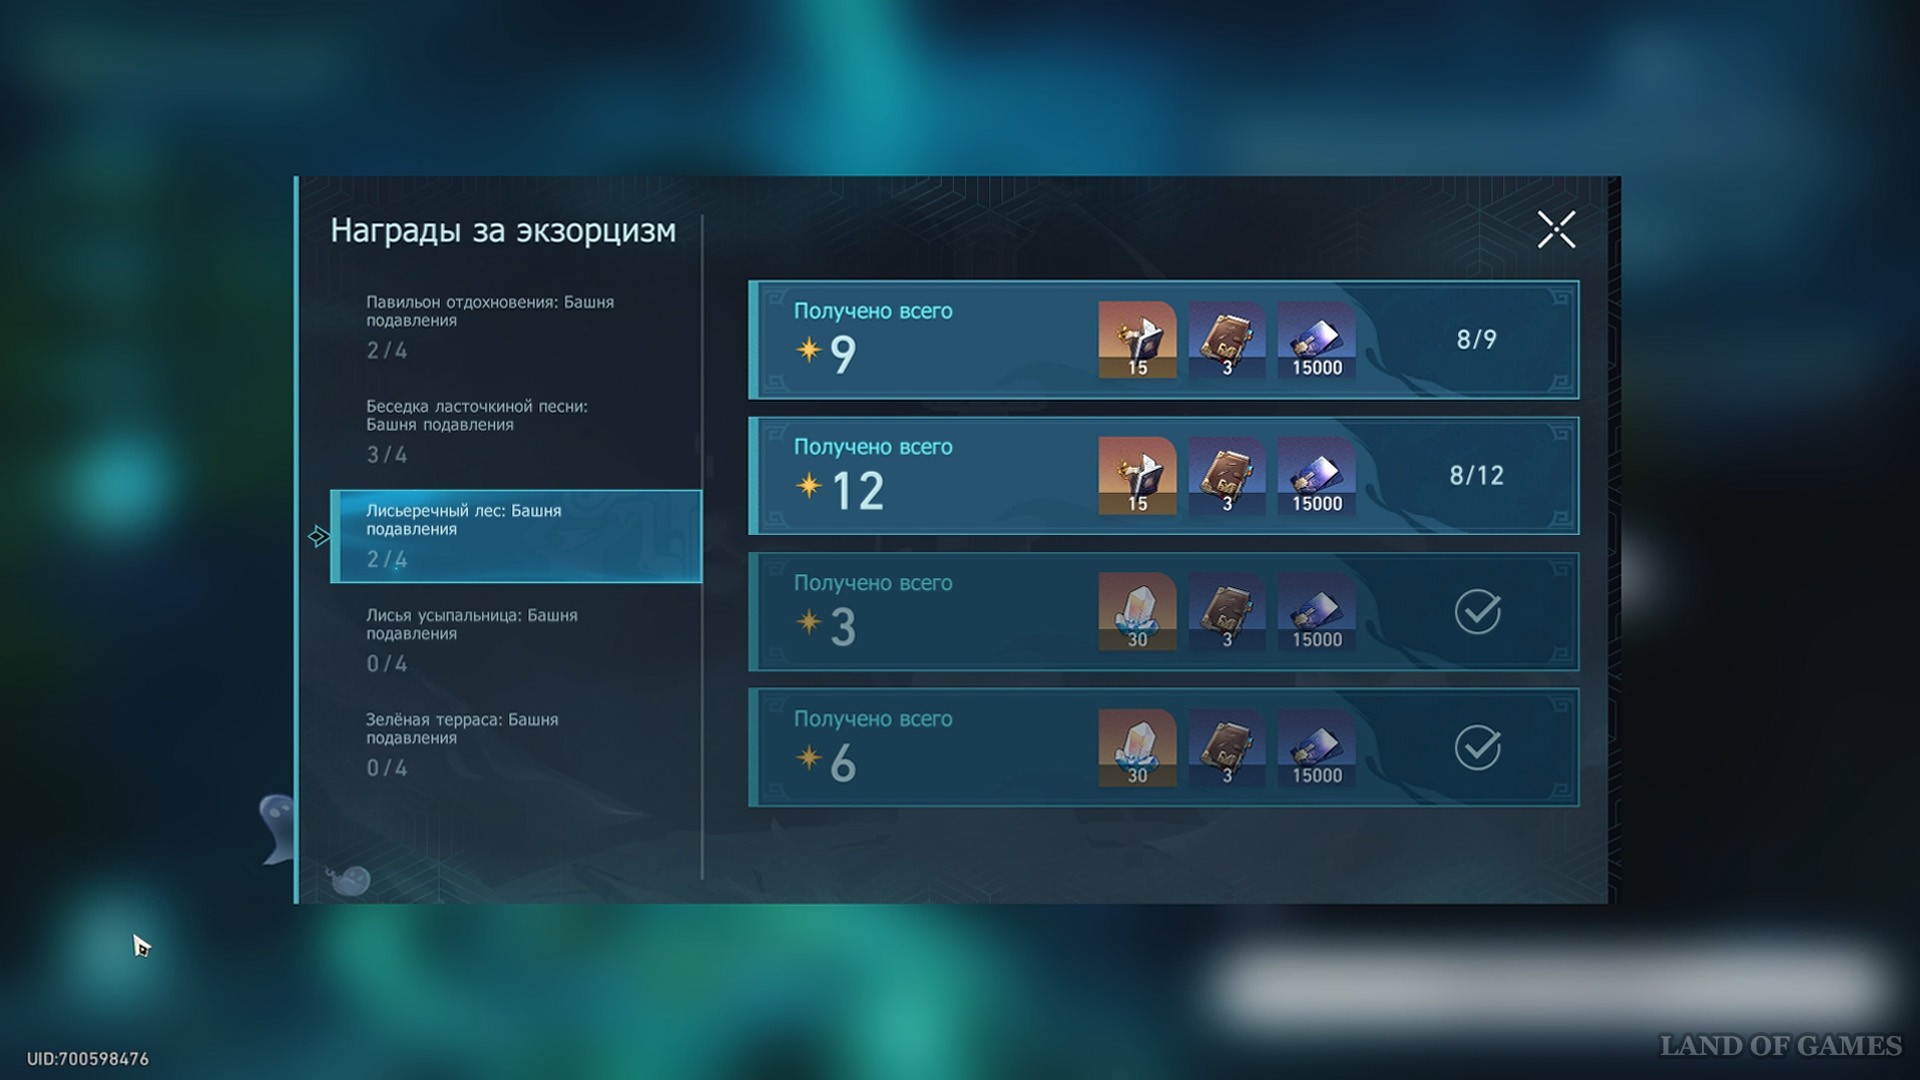
As a standard, for clearing all levels with 12 stars, you will be given 60 units of jade, 12 books of experience, 30 shards for crafting relics and credits.
Comments
You need to login to add comments.
You can login with