We've previously written about riddles using the knockback and pull spell mechanics. If you've already passed "Herodia's Hall" And Depulso's first test, it's time to look into the room with the Depulso 2 puzzle in Hogwarts Legacy, which will be discussed in this guide.
How to start a test
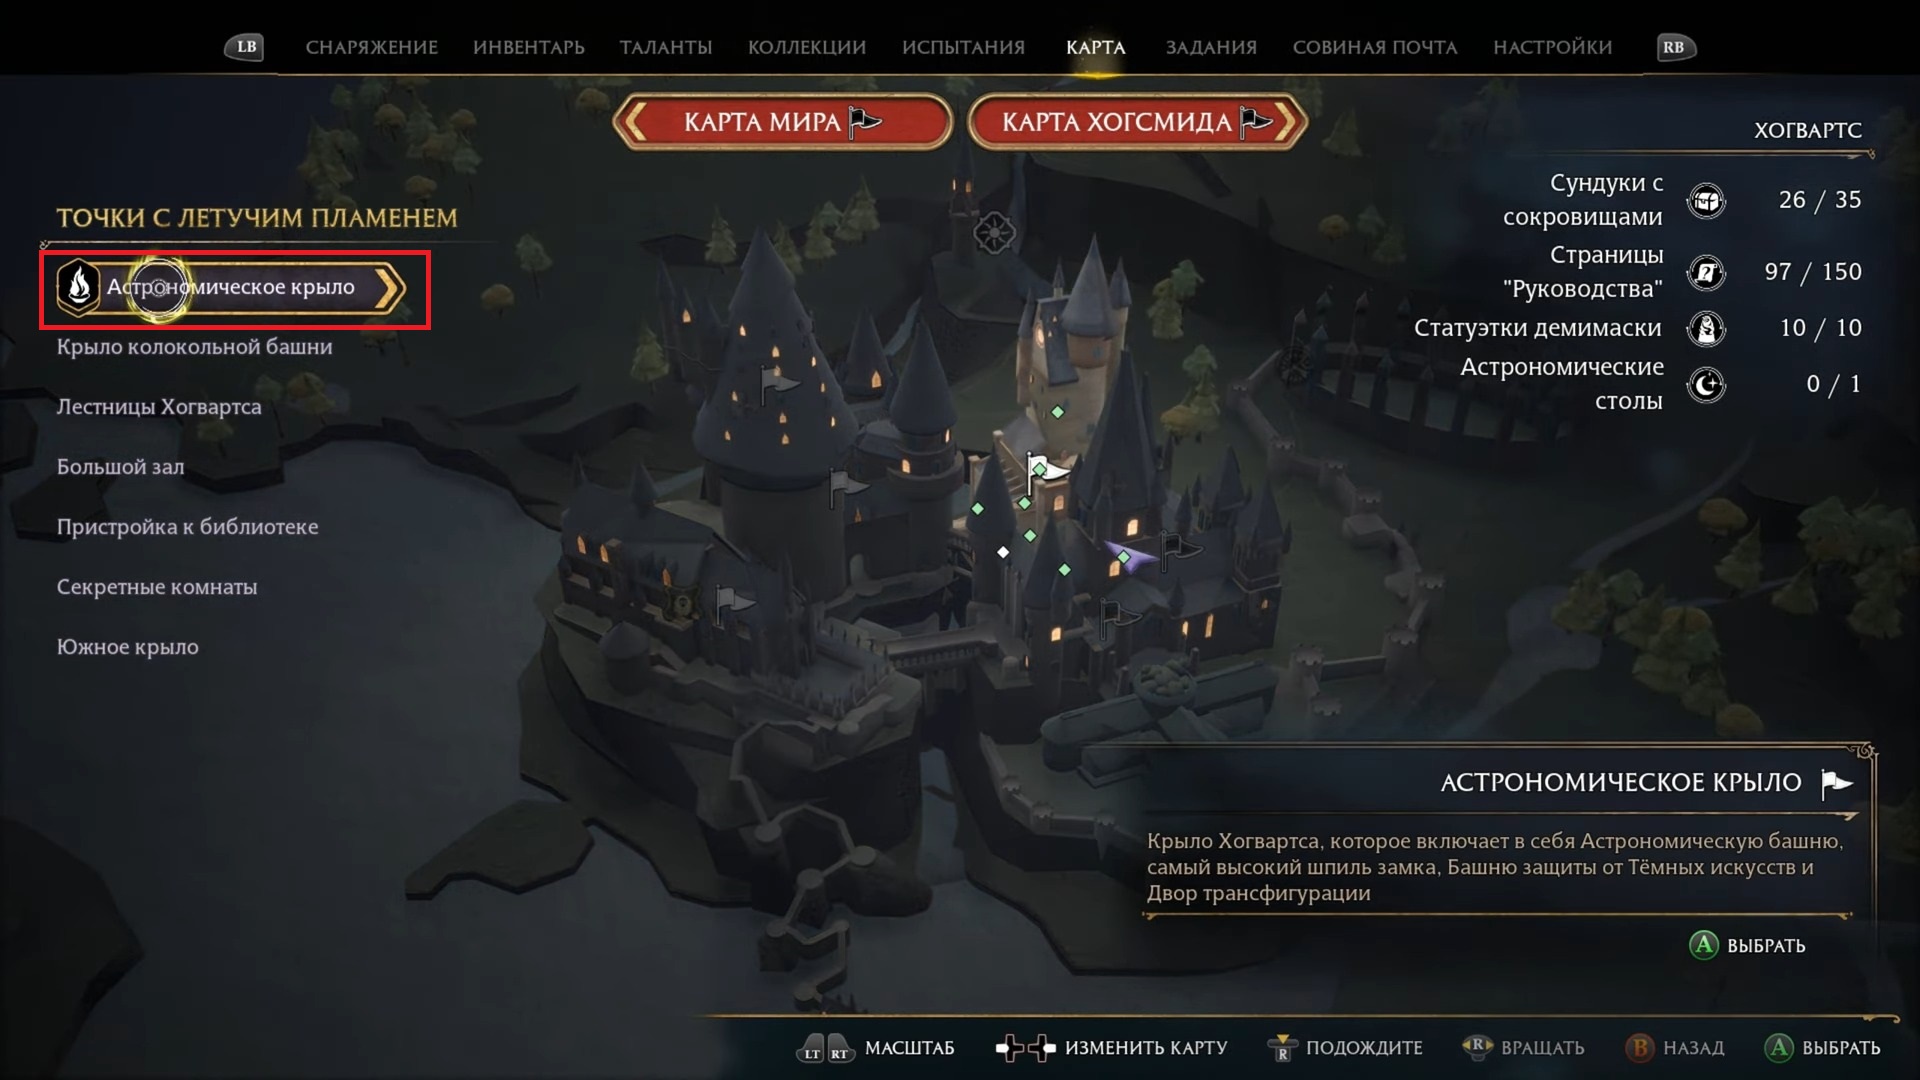
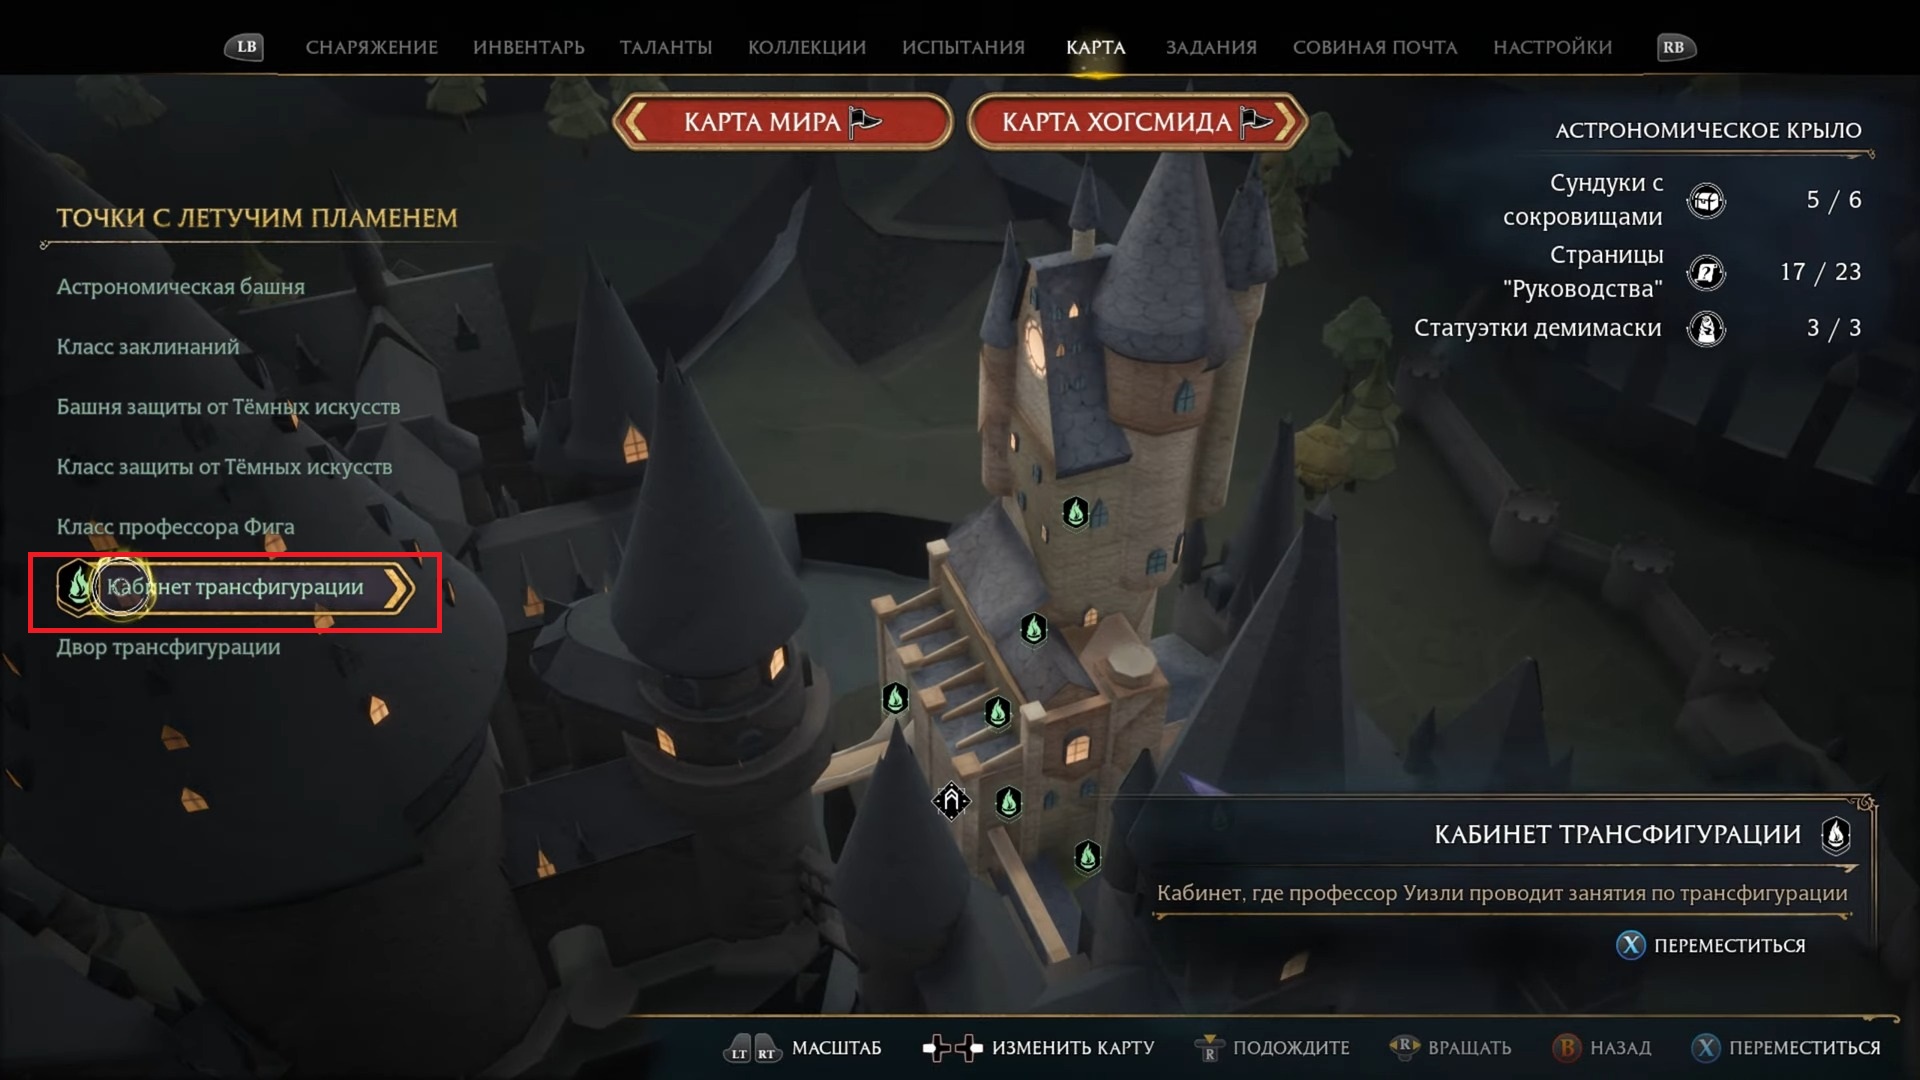
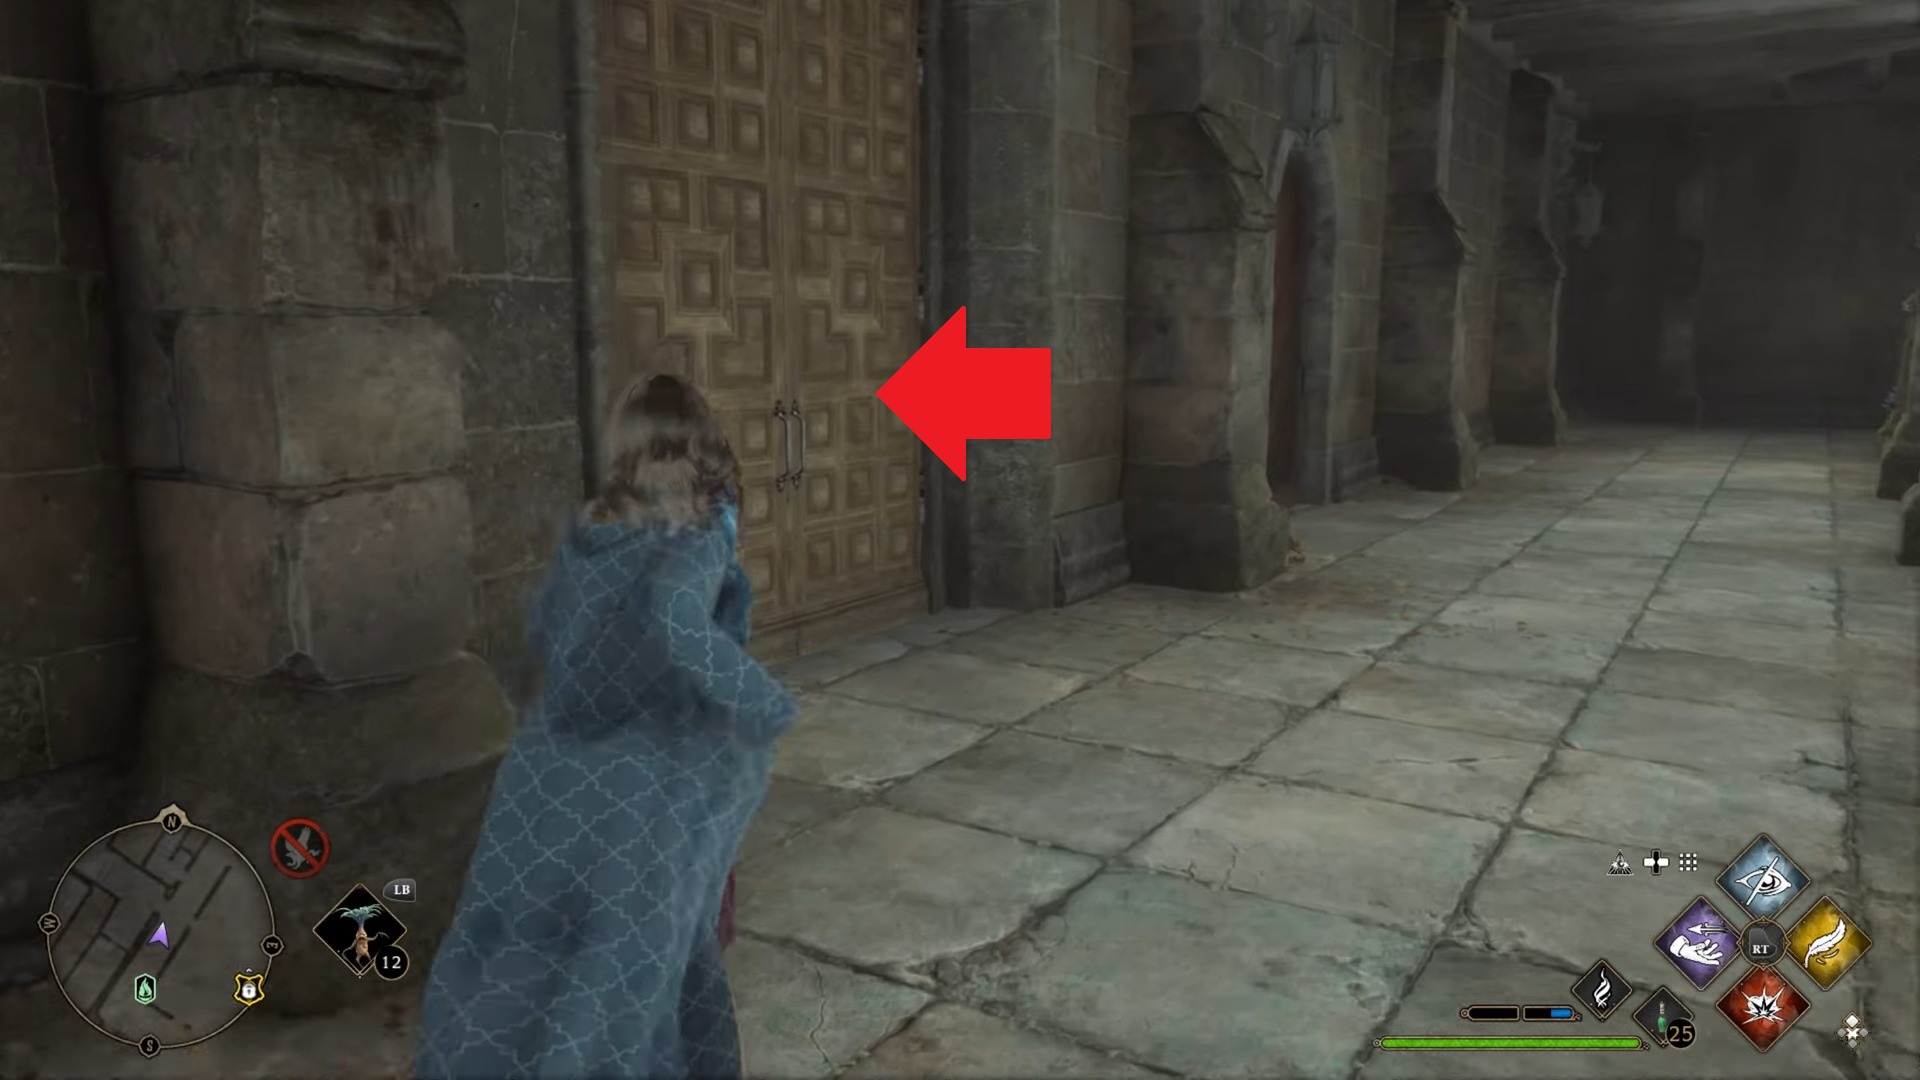
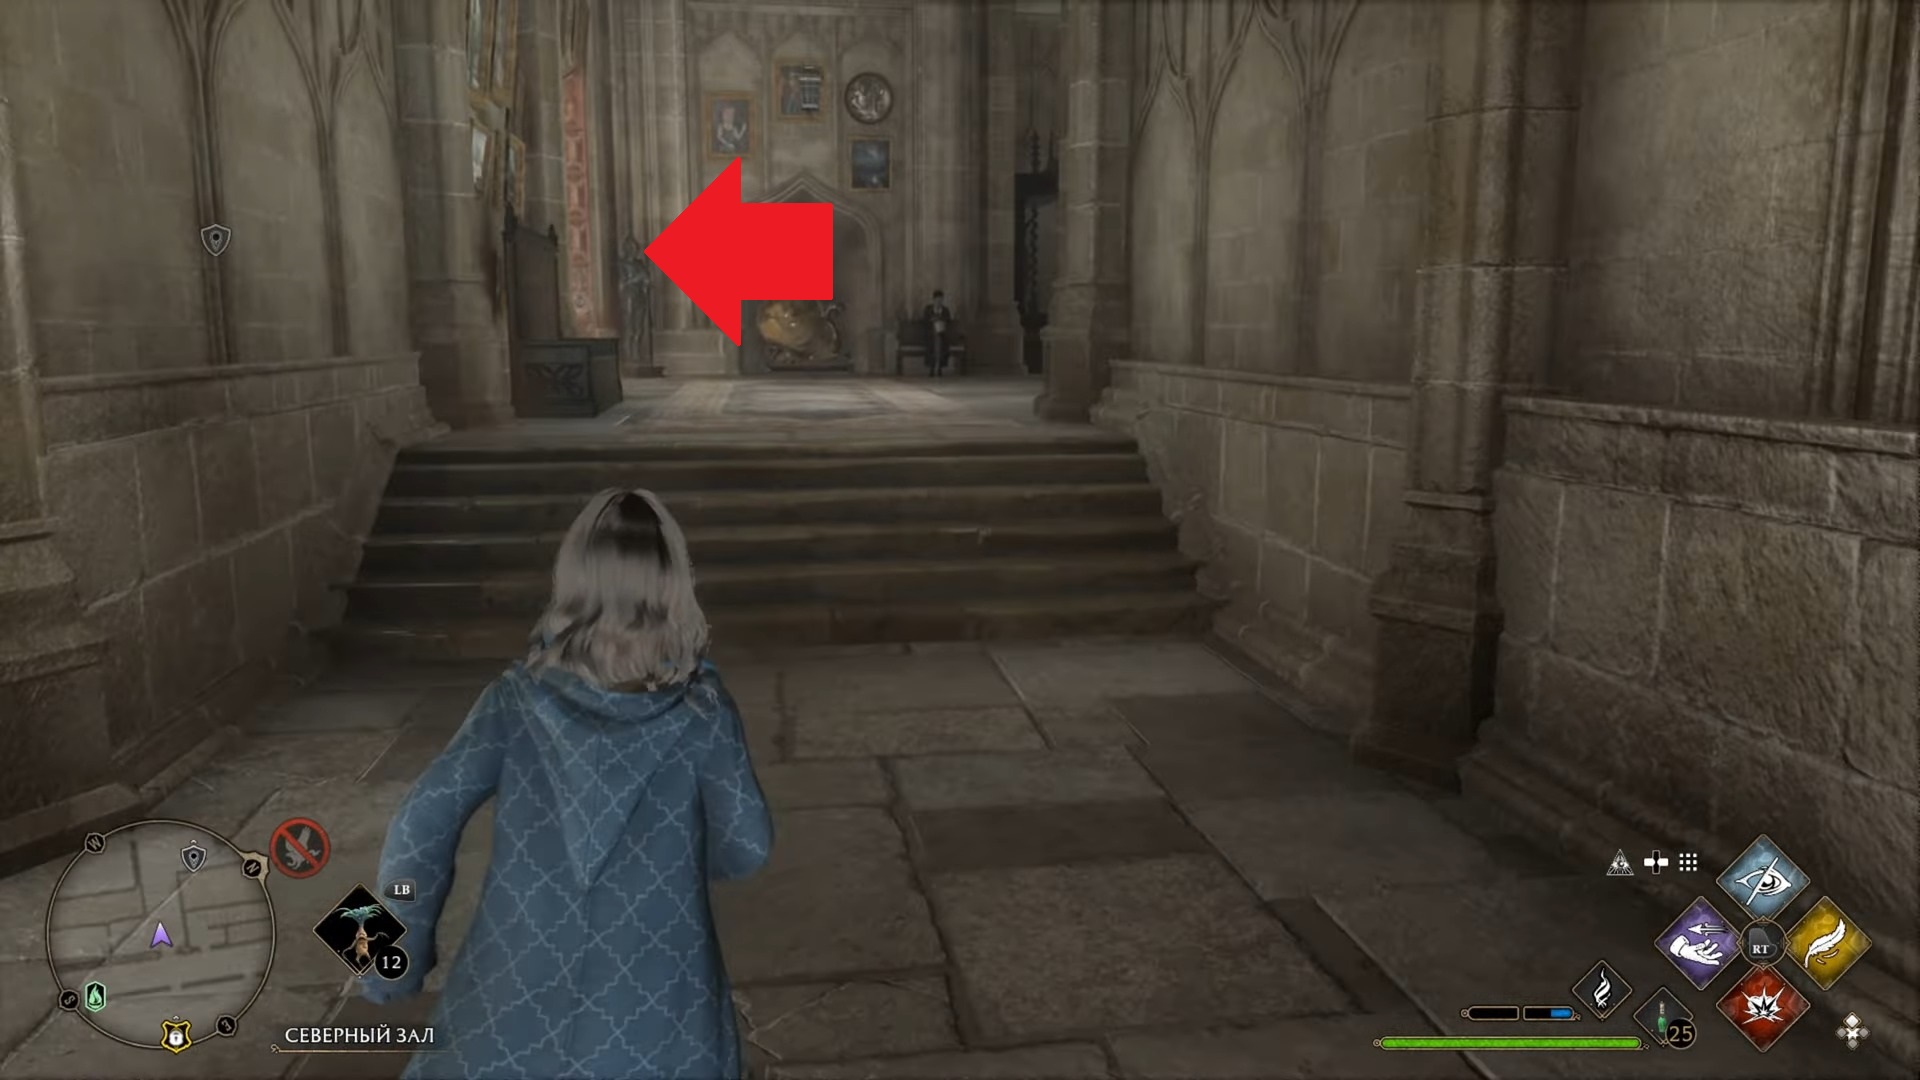
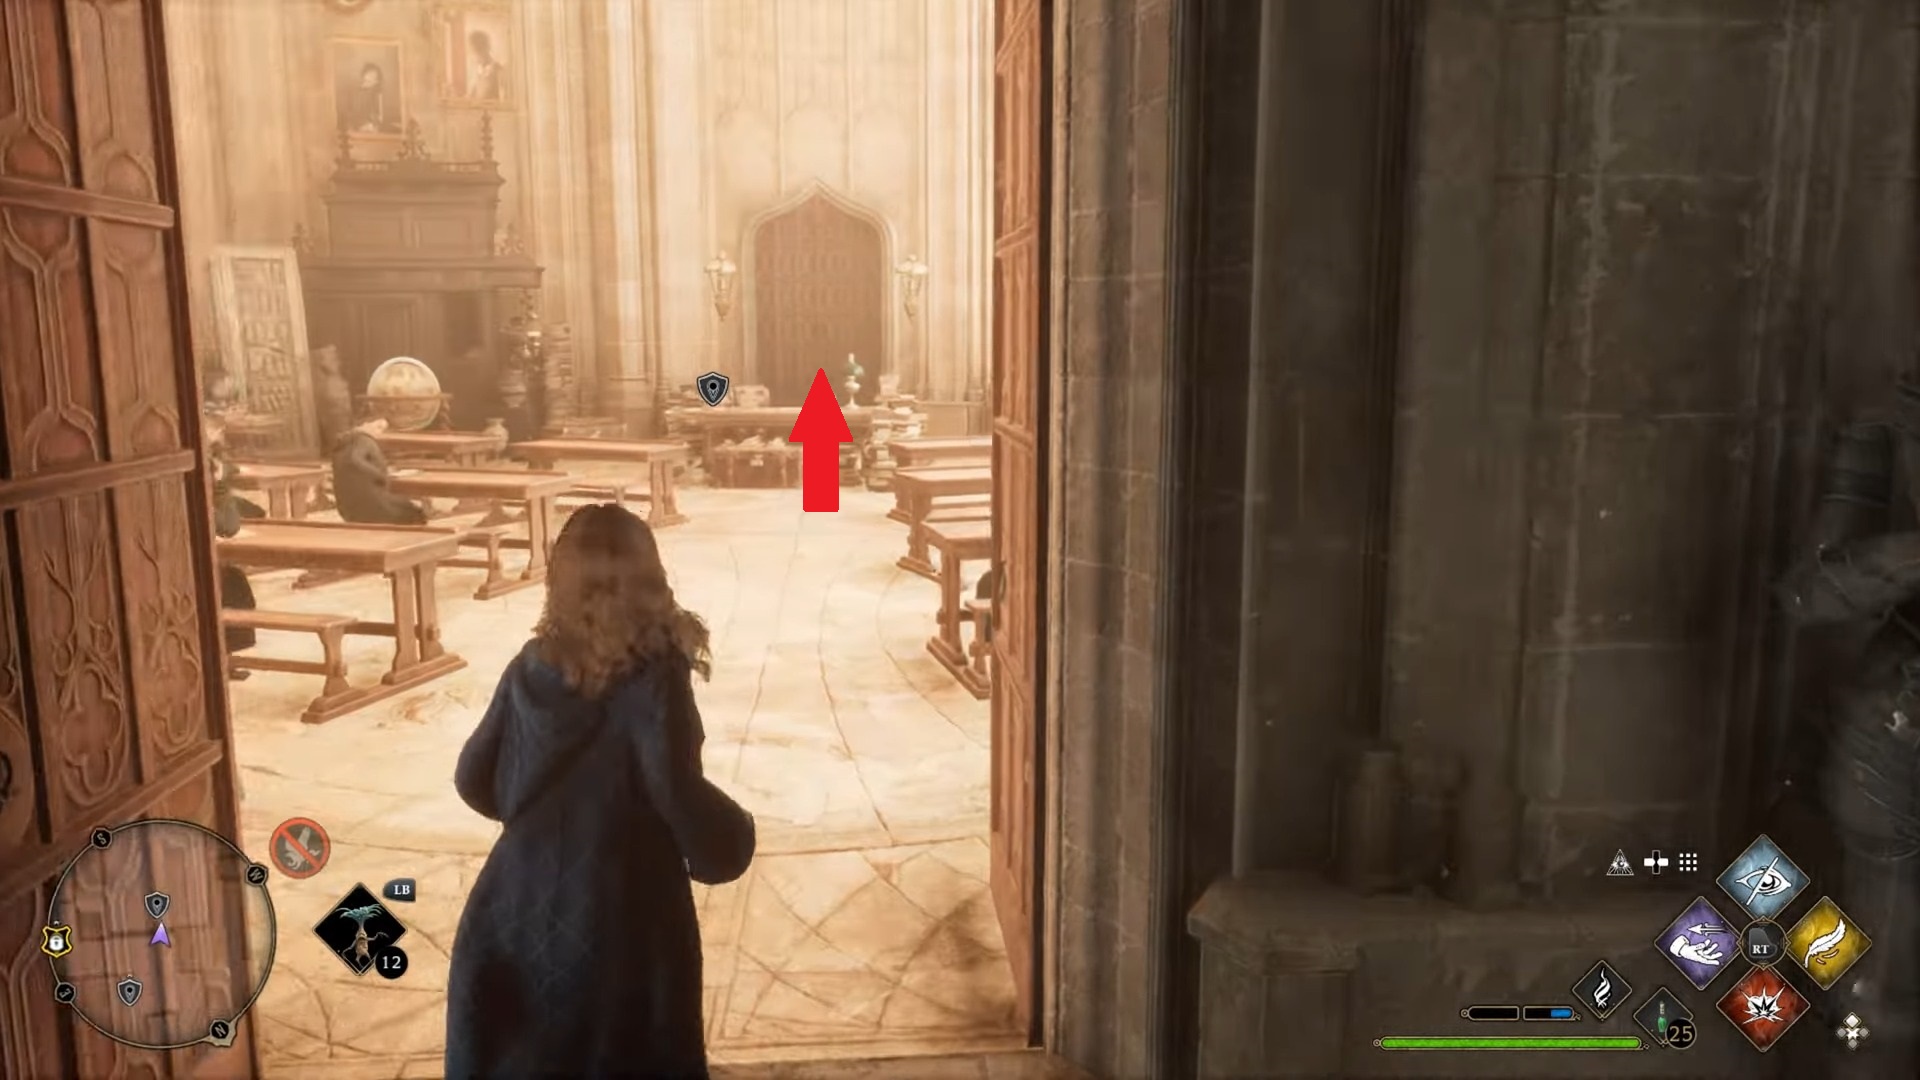
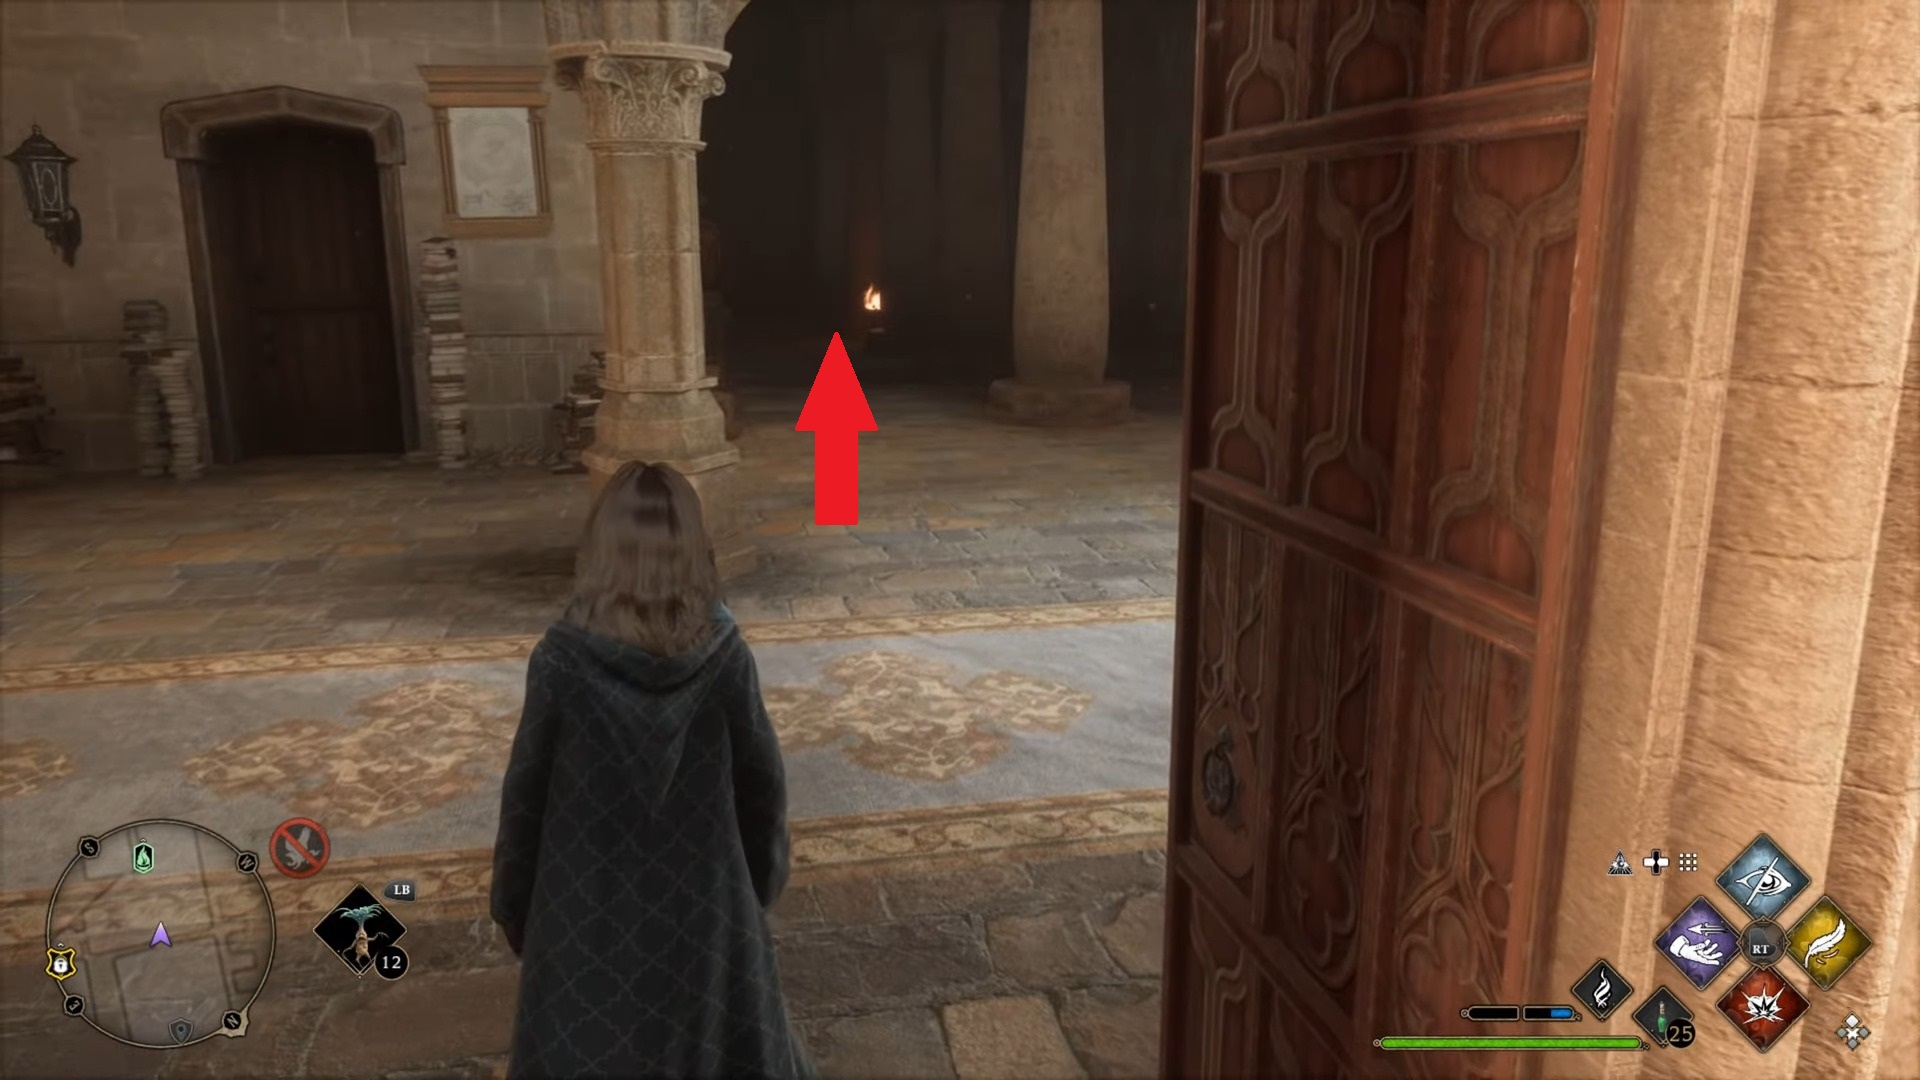
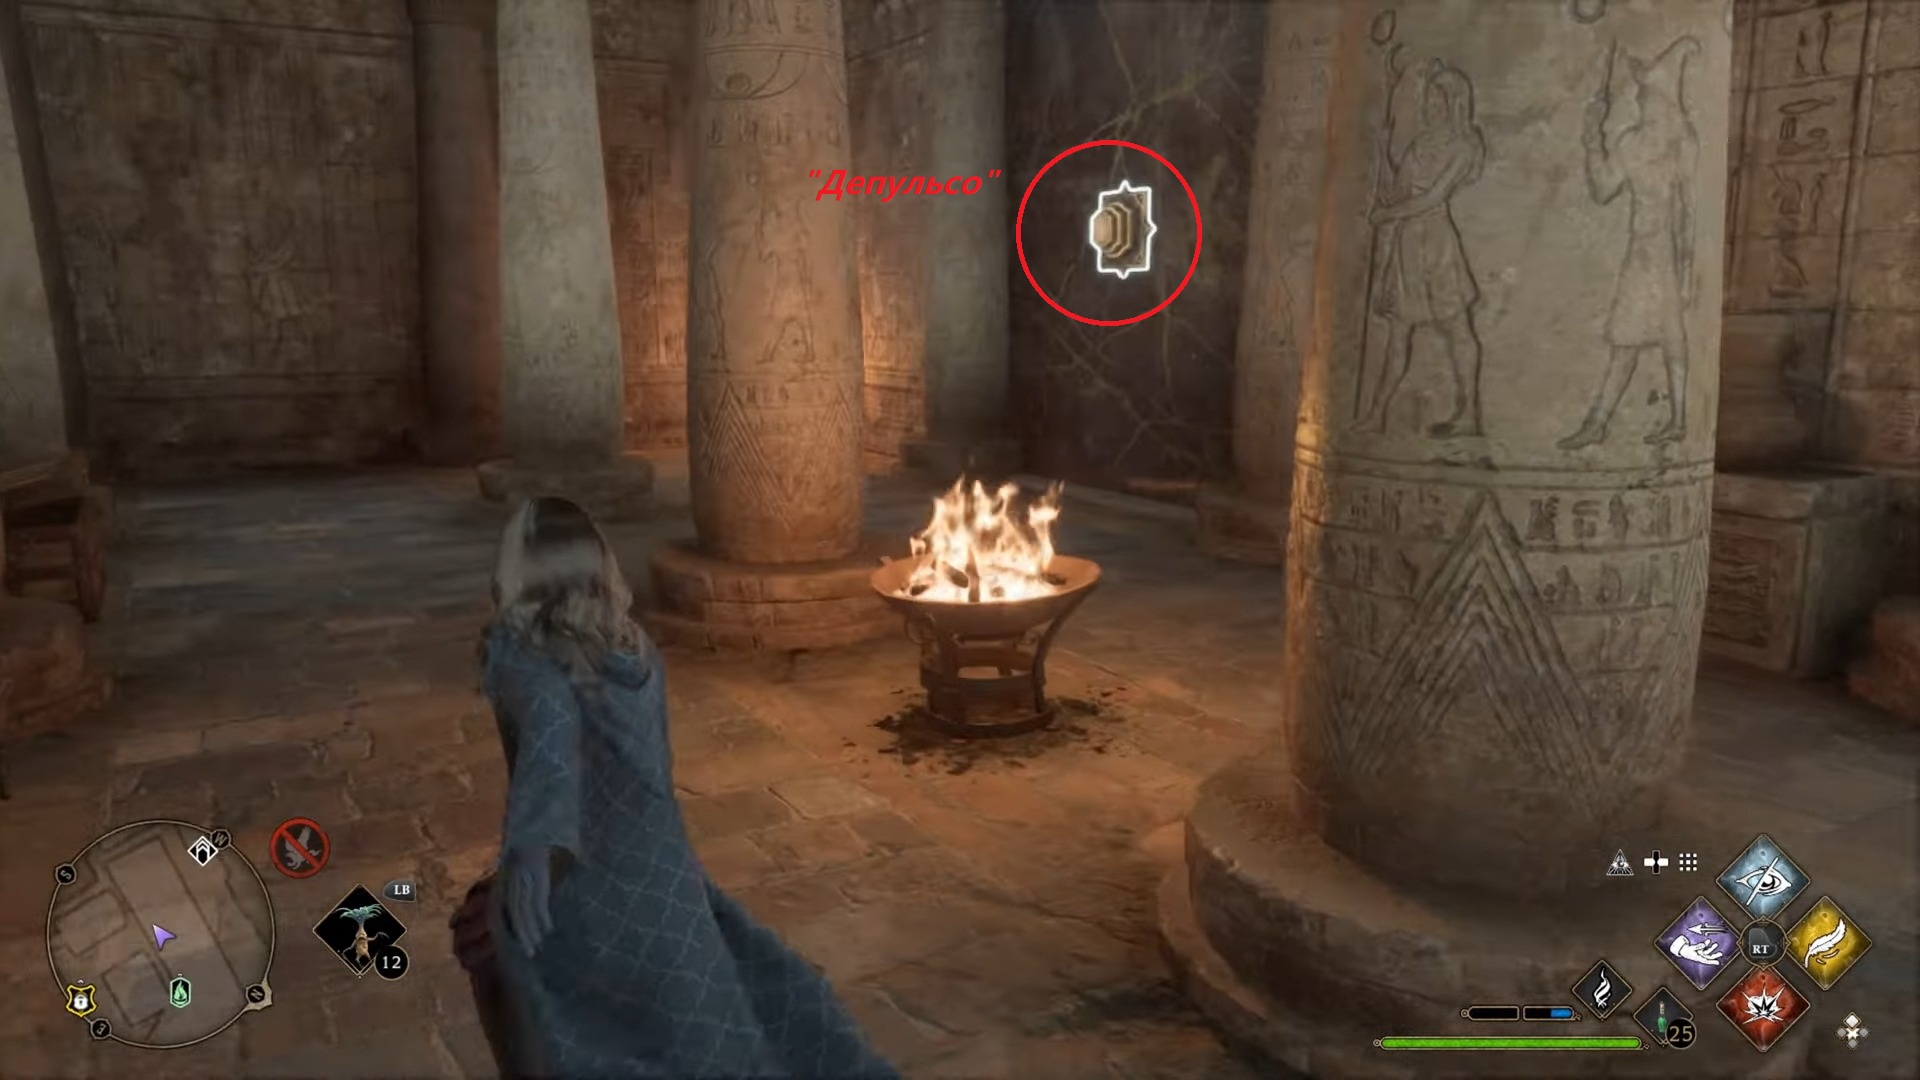
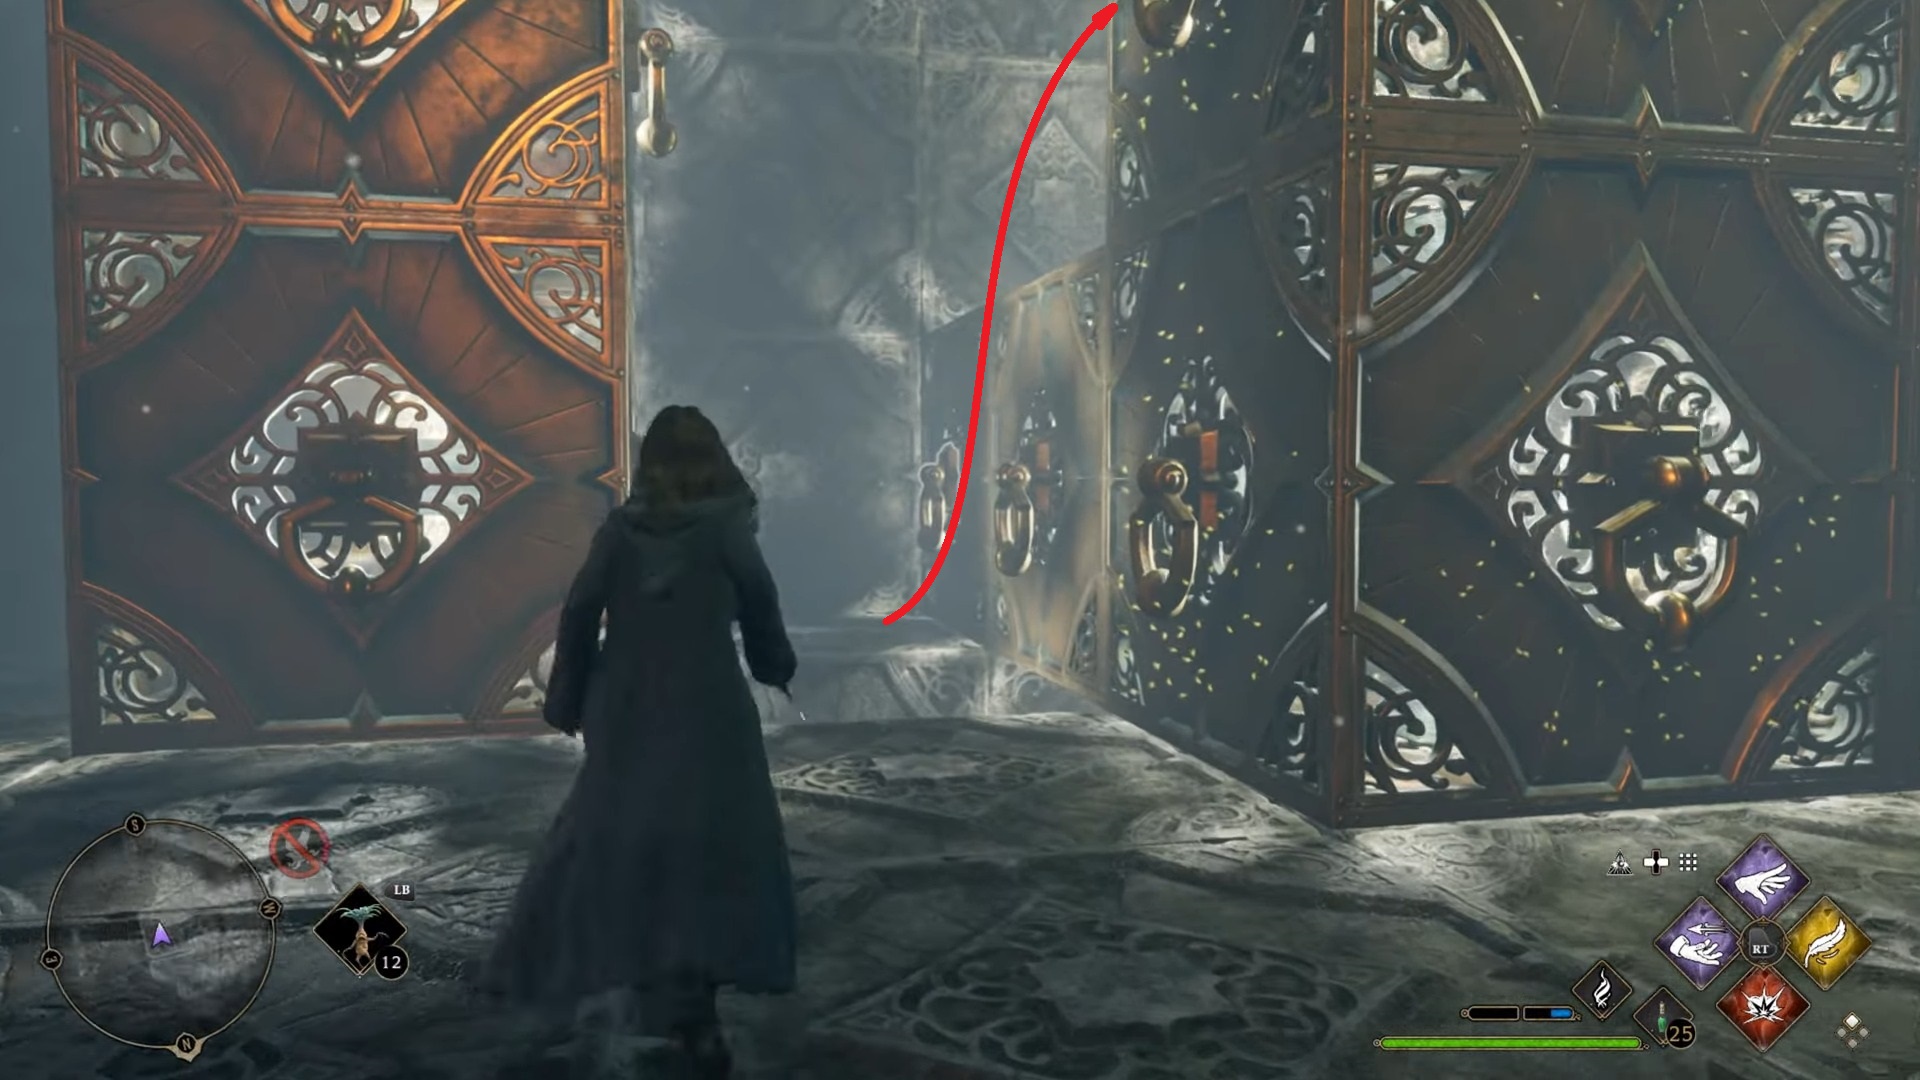
The entrance to the second puzzle room is located in the astronomical wing. Use the point with the flying flame in the courtyard of the transfiguration. Then turn left through the door. Each turn we marked on the screenshots. Like the previous challenges, this will unlock when using the enchantment "Depulso" on a wall ornament.
You will find yourself in a hall that will change during the test. We propose to follow the step-by-step scheme of passage described below.
How to pass the Depulso 2 puzzle
We remind basic principles operation of the test room:
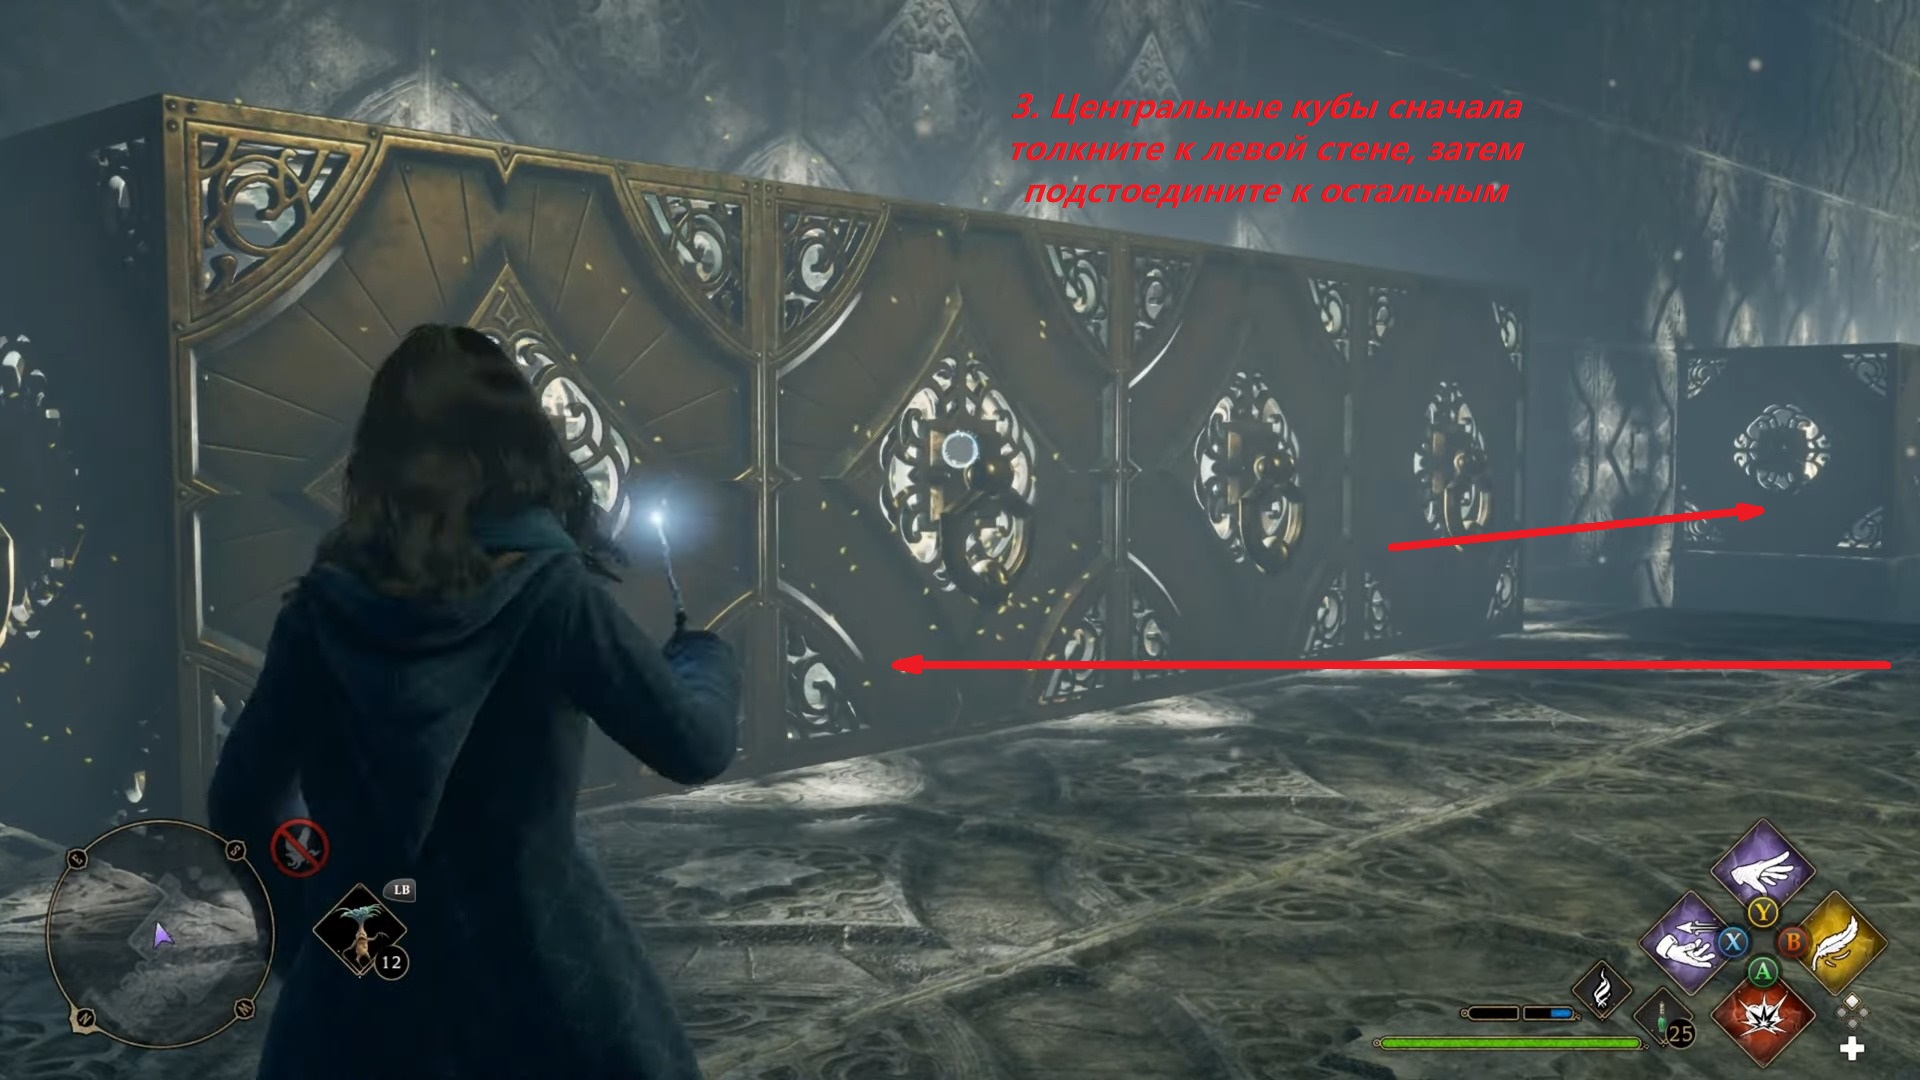
- The spells "Depulso" and "Accio" act on the face of the cube, which they are aimed at, respectively attracting or repelling the cube to the next obstacle;
- Cubes can "stick" to each other, in this case, interaction with the lower tier of cubes moves the entire structure;
- A spell shot at a luminous sphere resets the position of the cubes to their original position;
- Falling a character into a gap moves them to the start of the challenge without resetting the cubes.
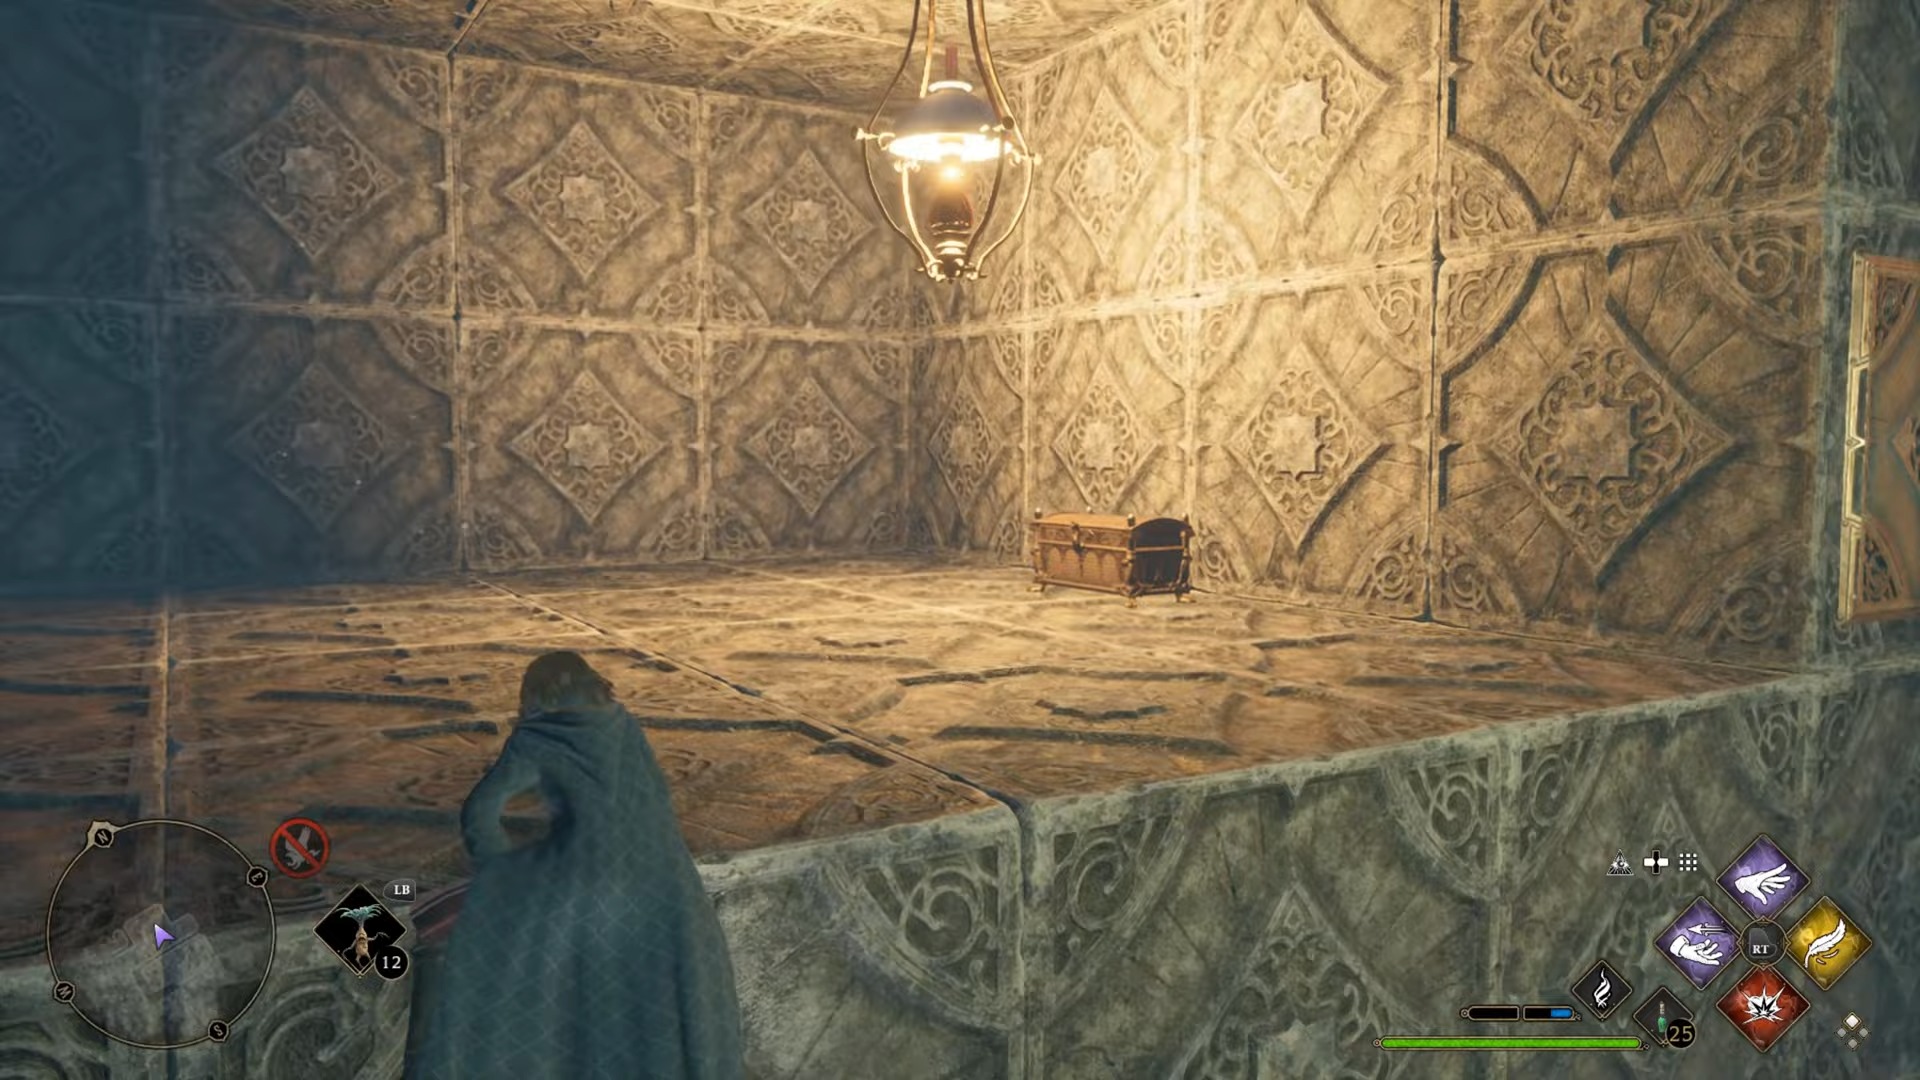
Chest 1
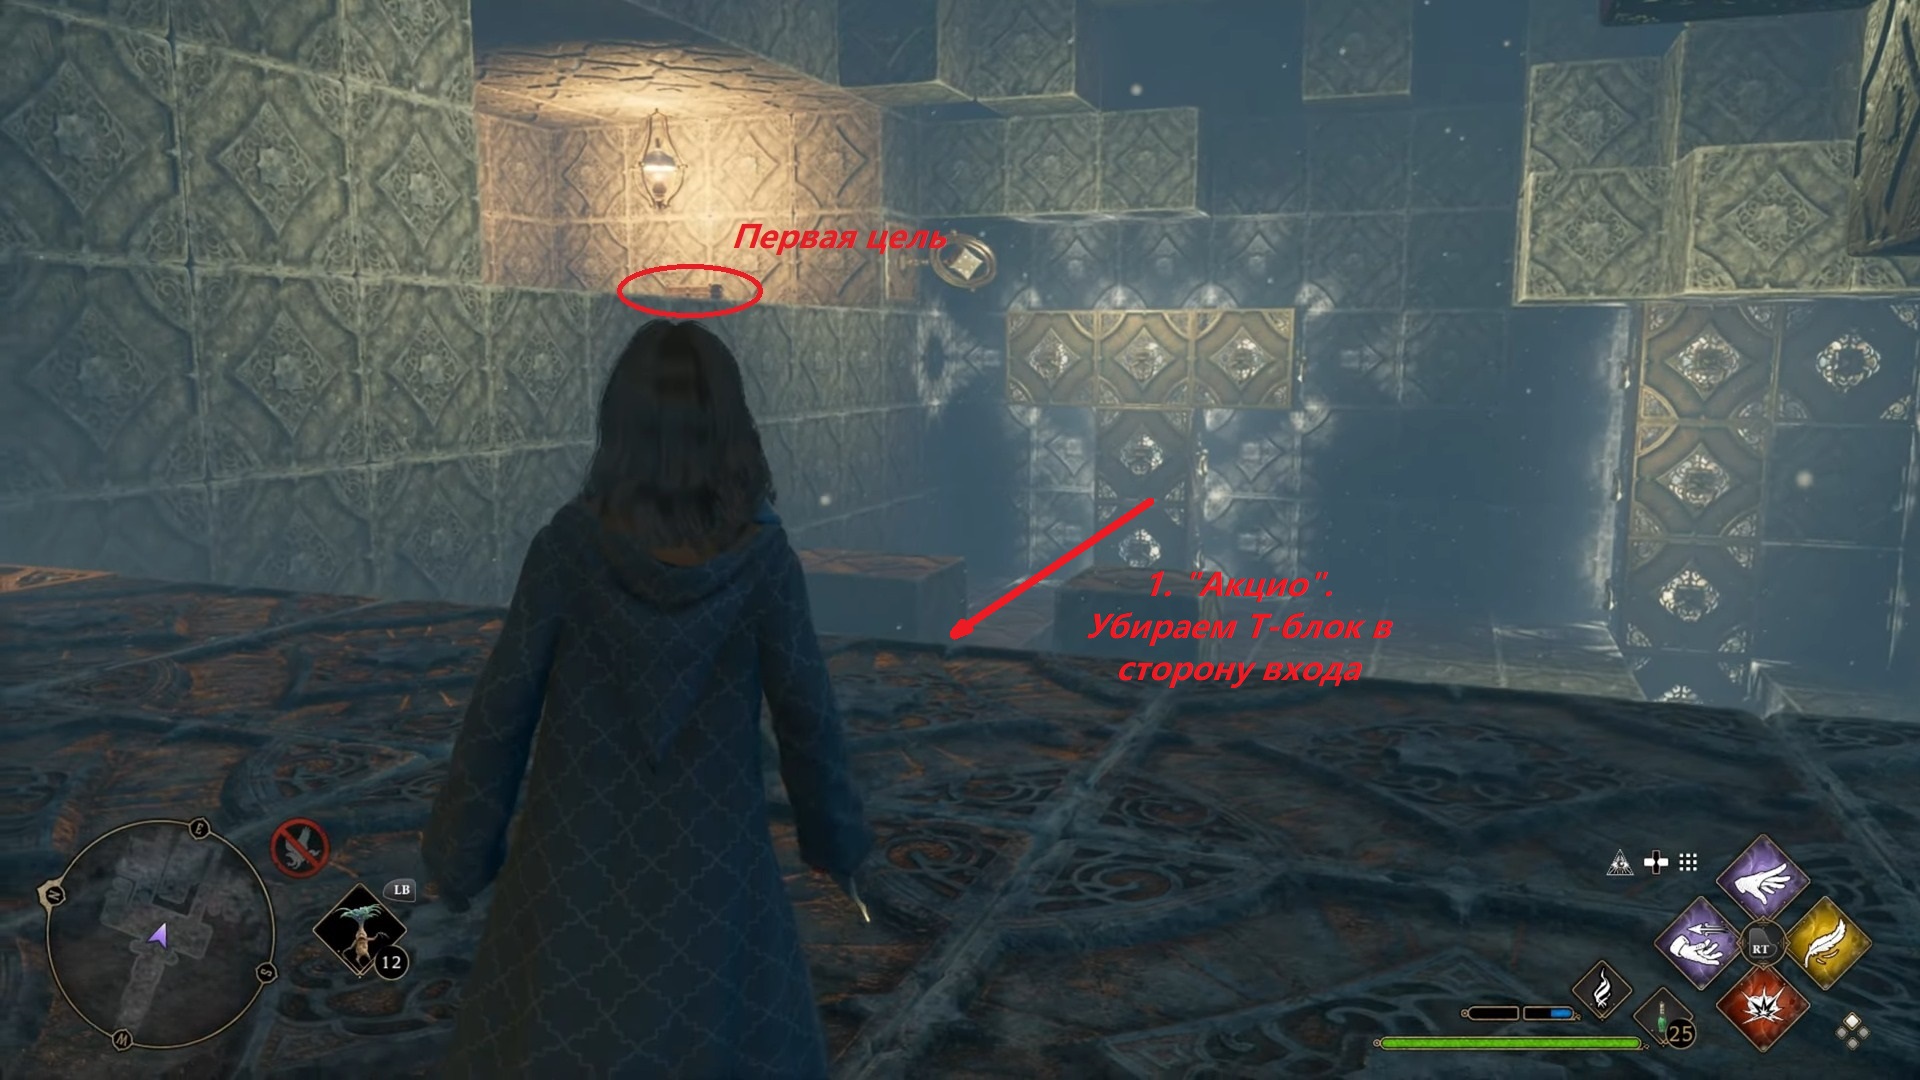
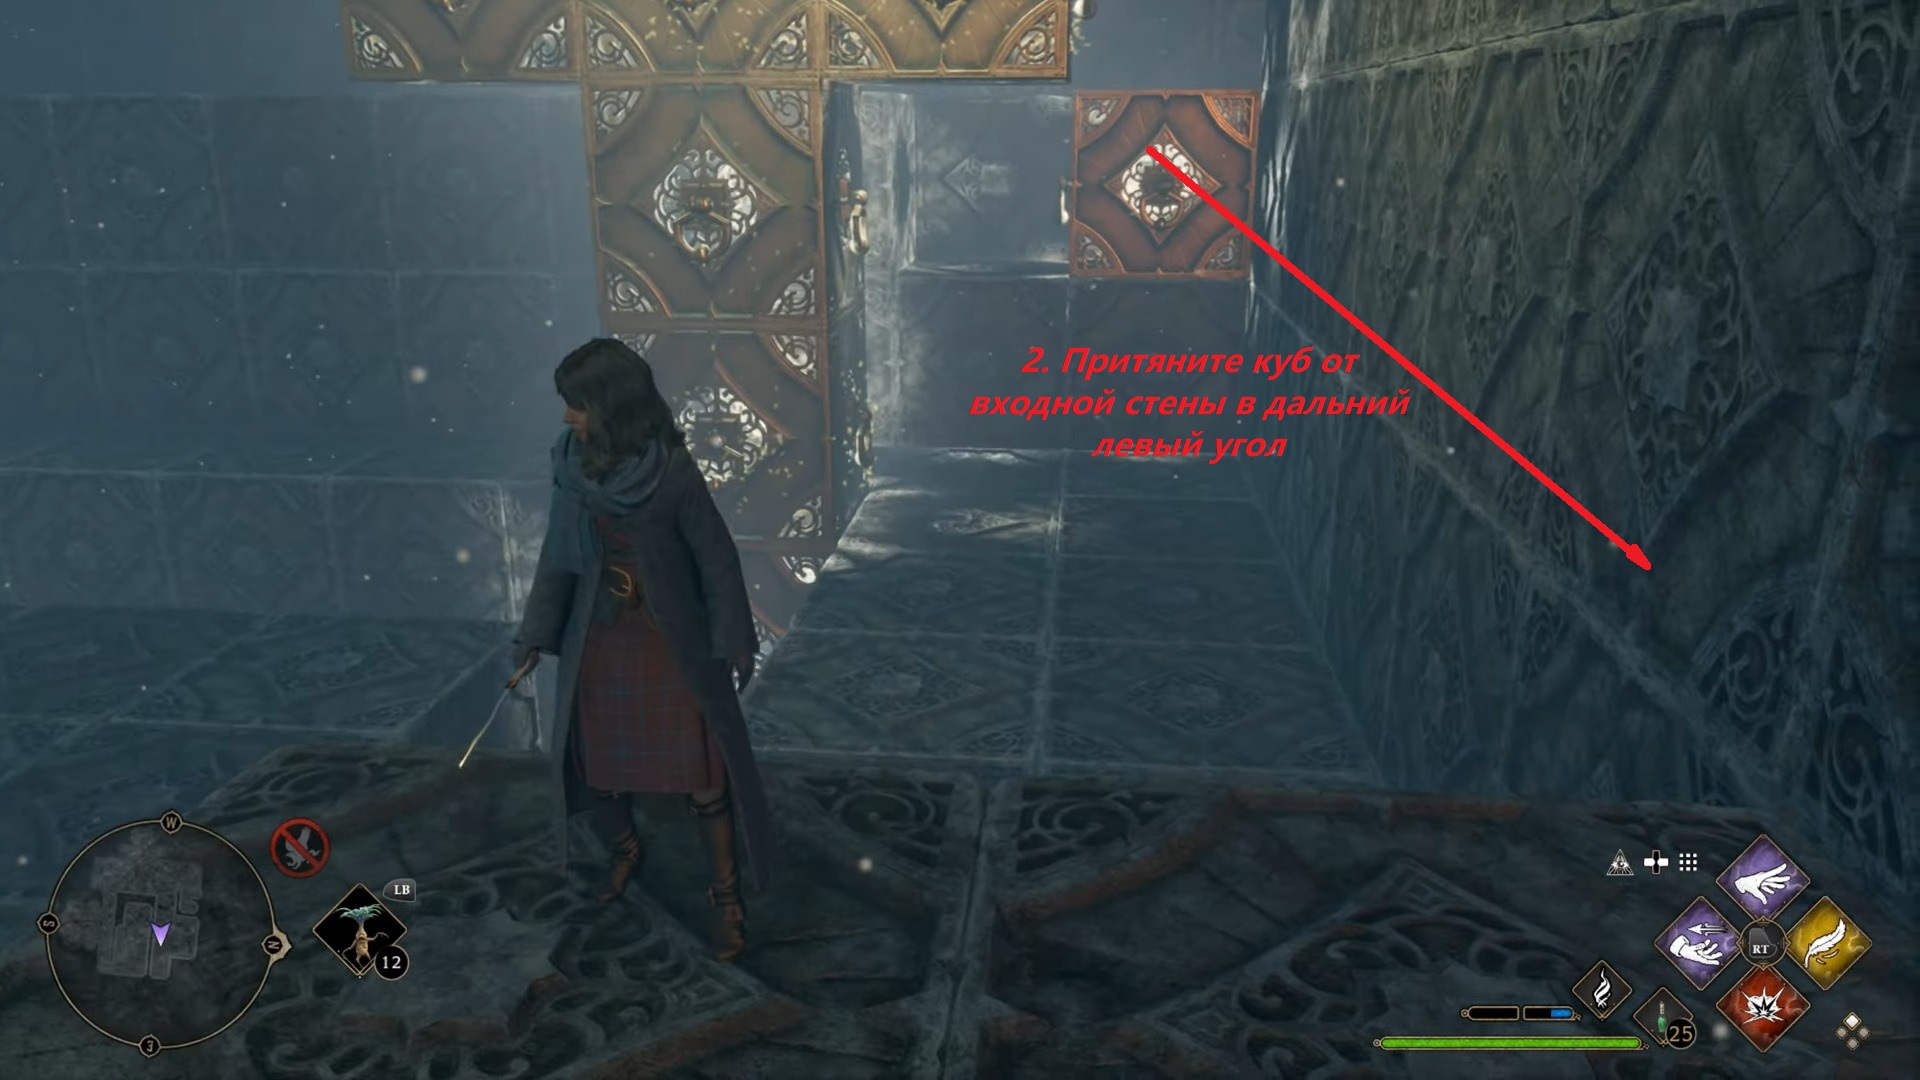
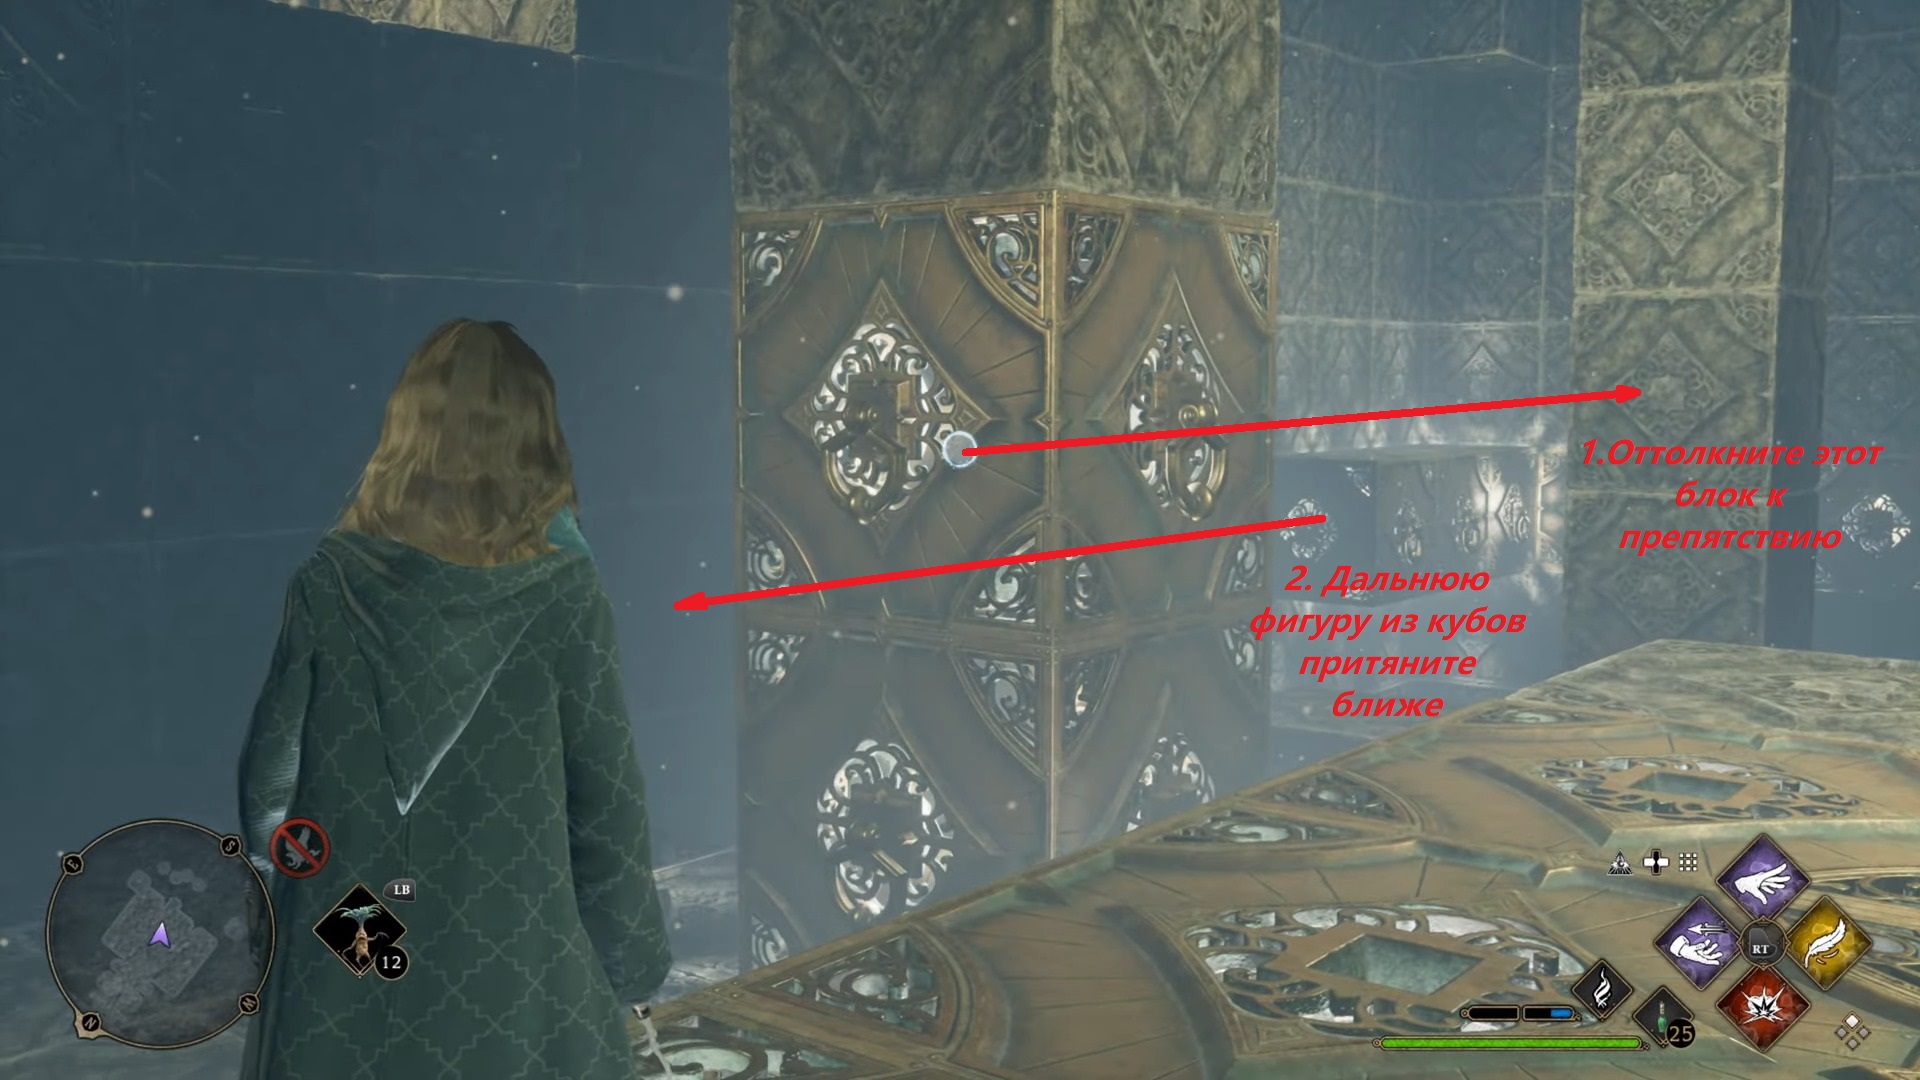
The first chest is waiting on a raised platform to the left of the entrance. Immediately pull the T-shaped block to the entrance, freeing the far left corner - in it you need to collect a ladder of cubes.
As soon as you climb up to the chest, the room will change its configuration - directly opposite the platform where you are standing, a passage will open to the next room.
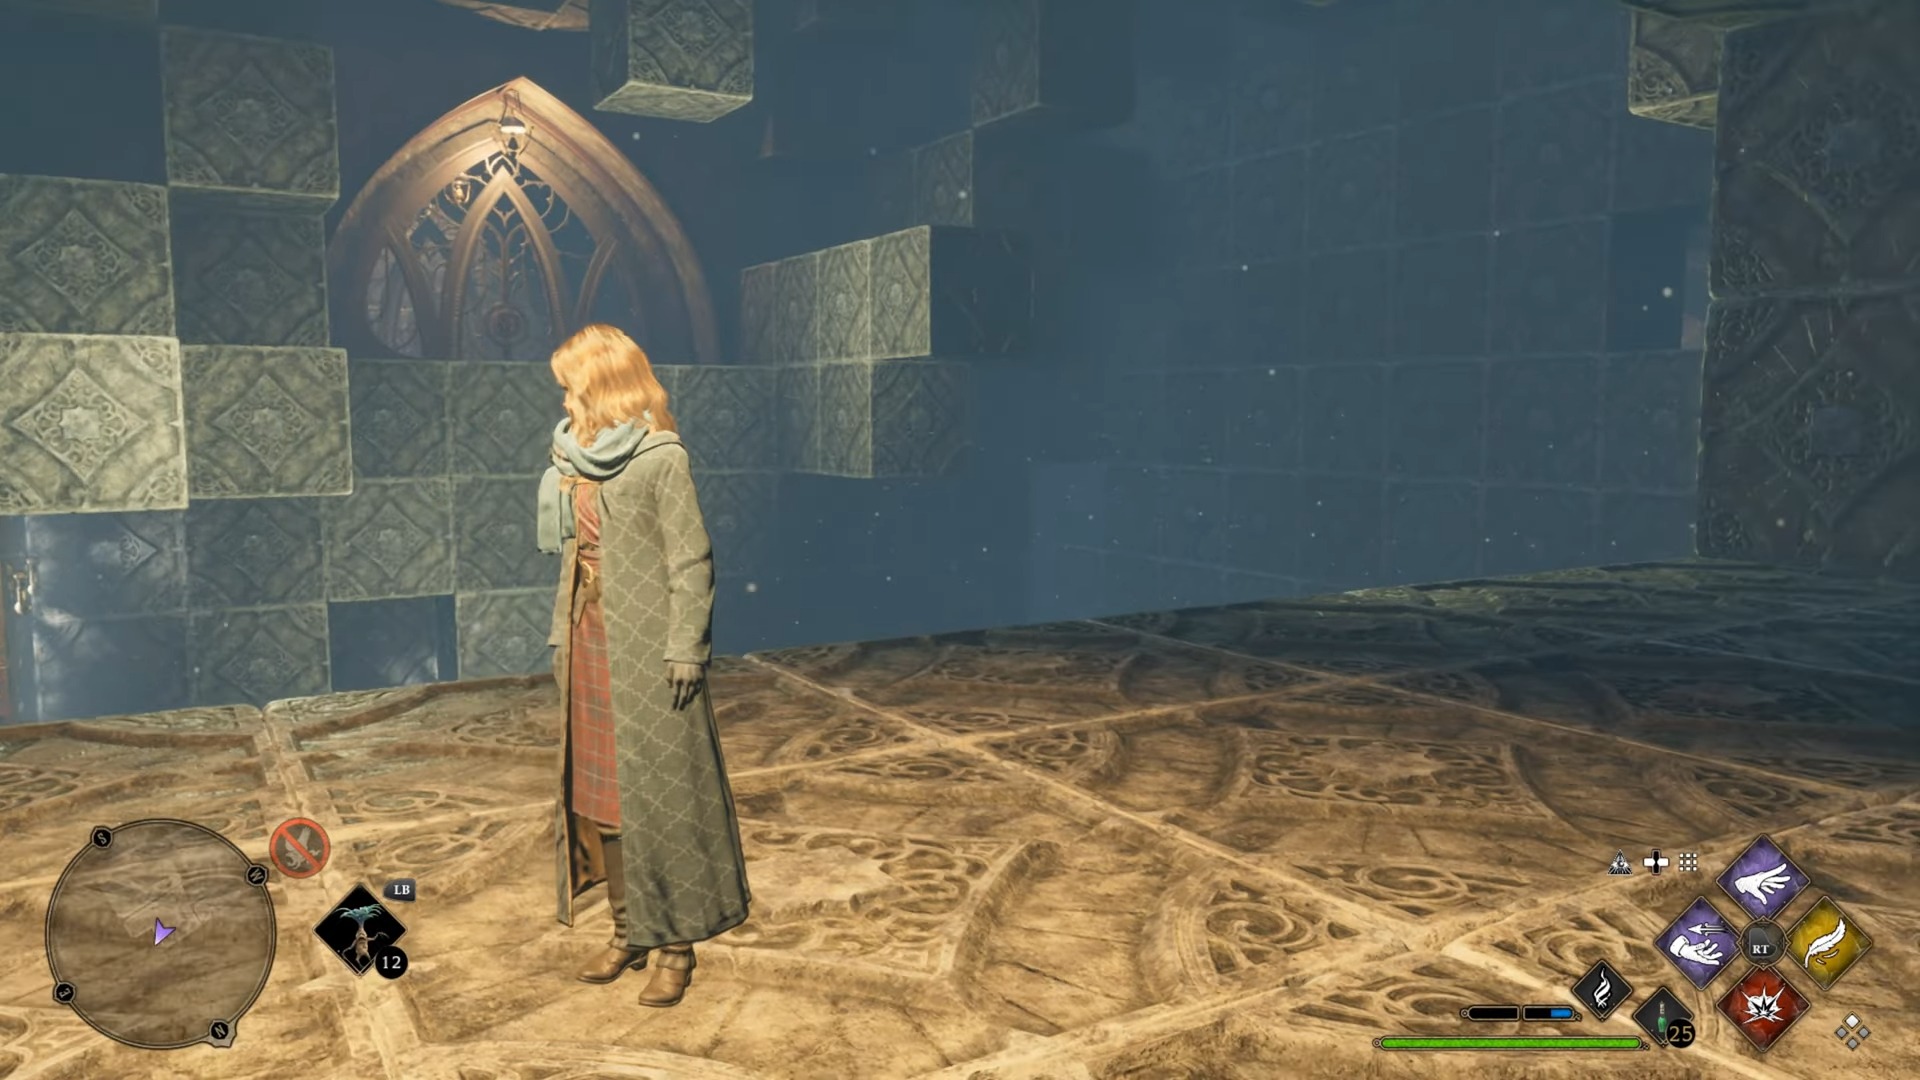
Moving to the next room
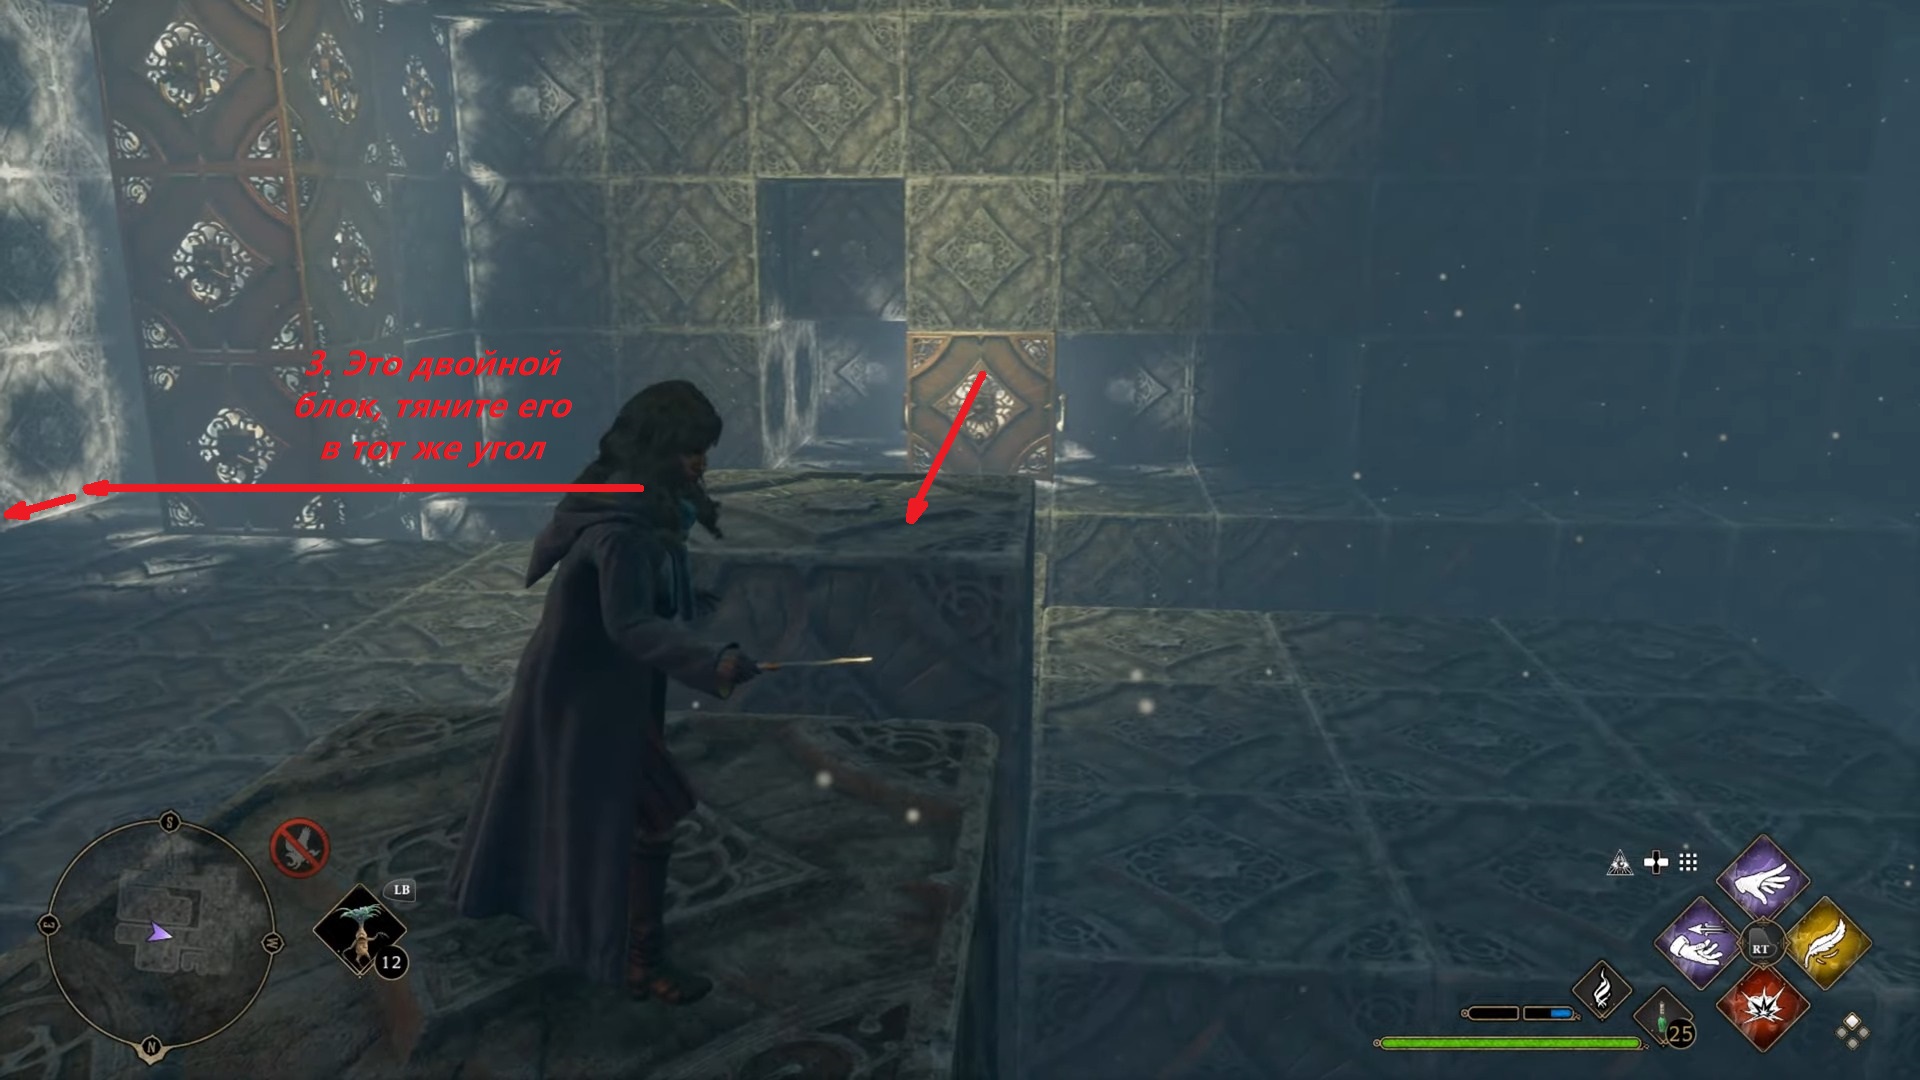
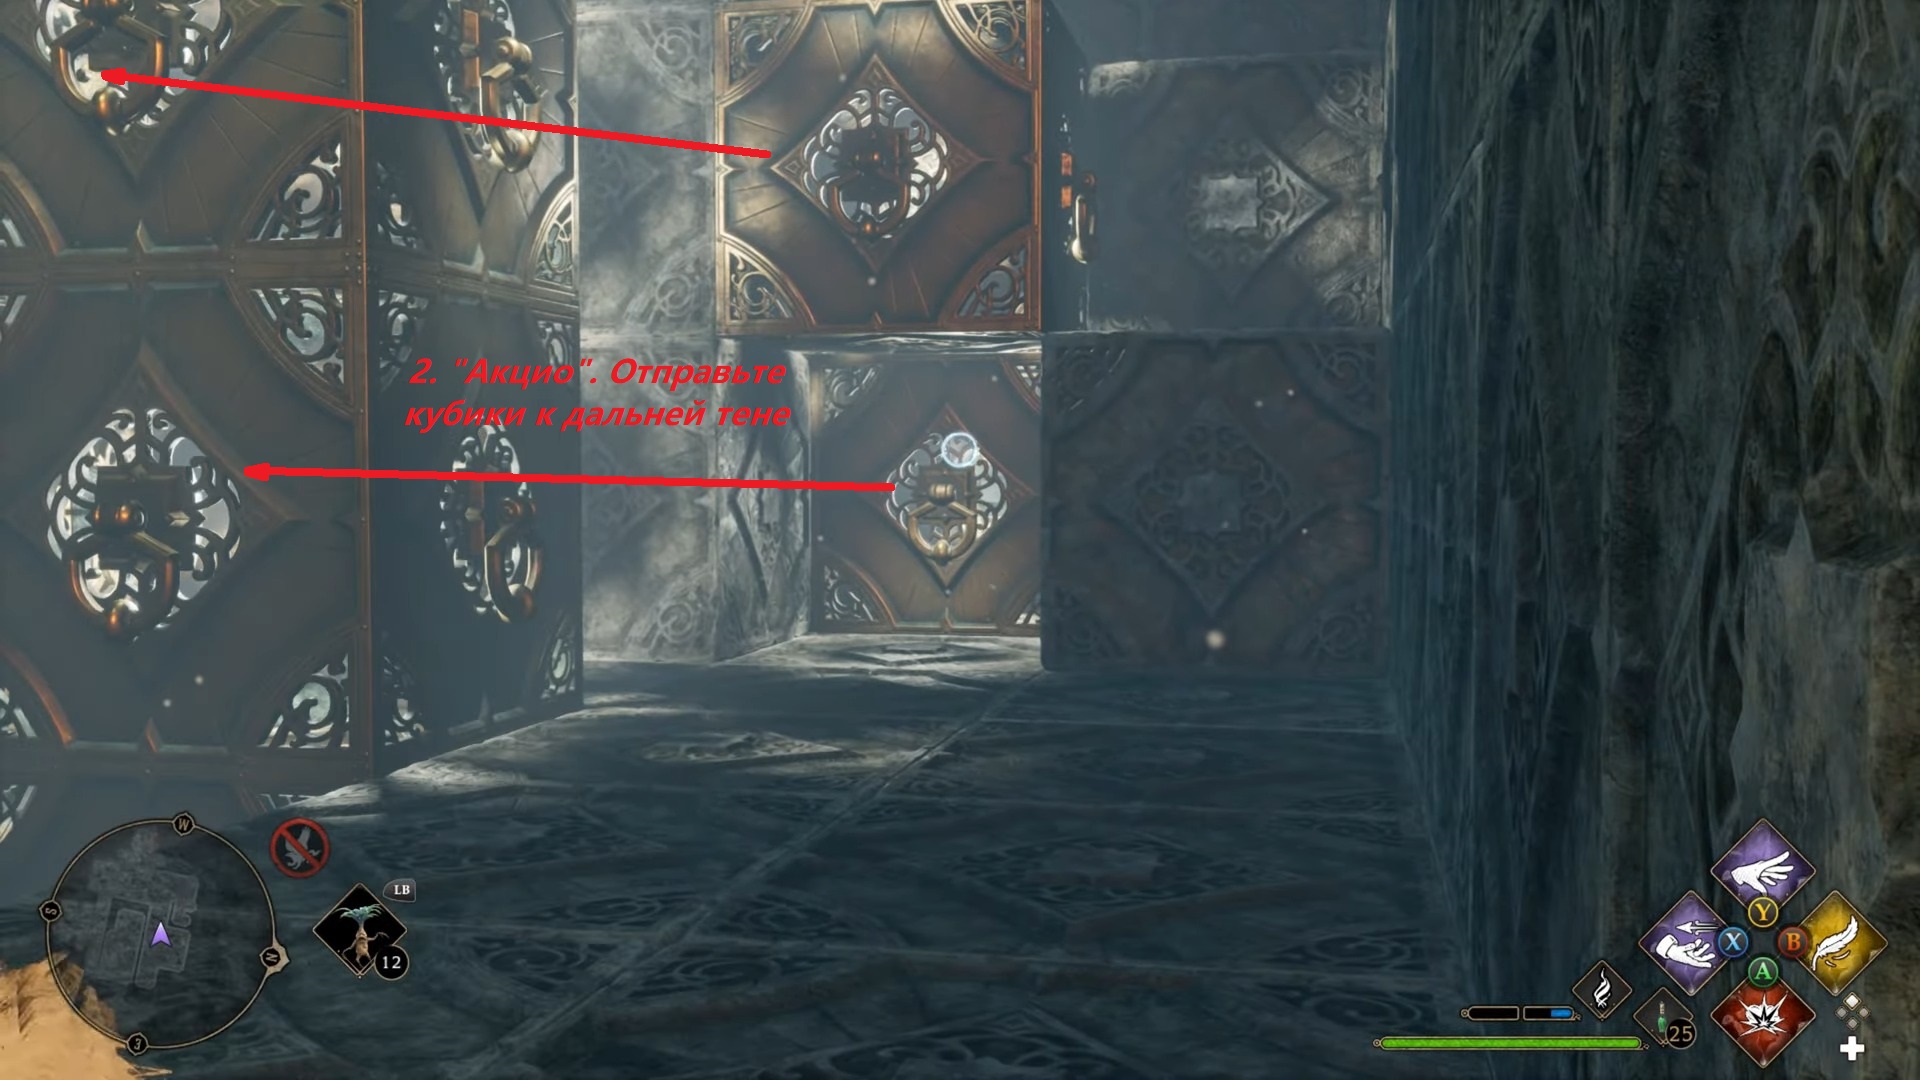
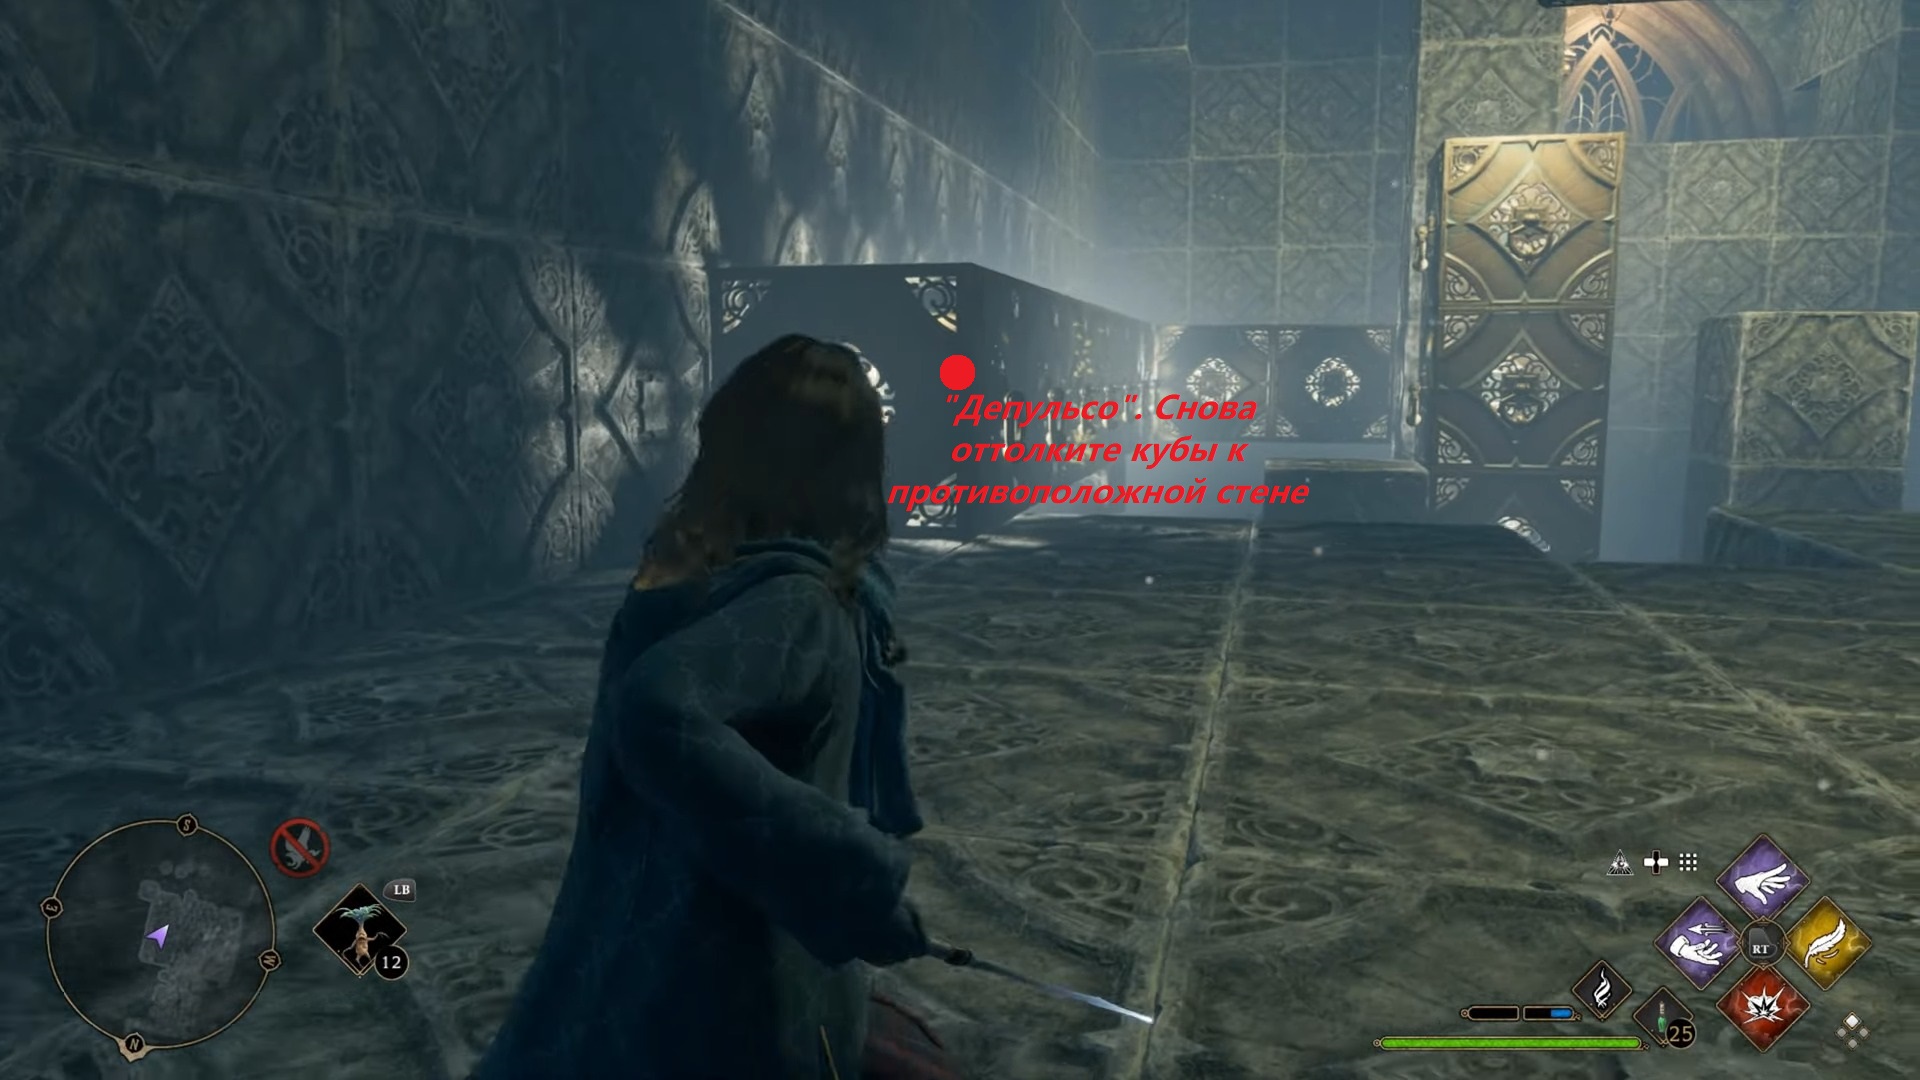
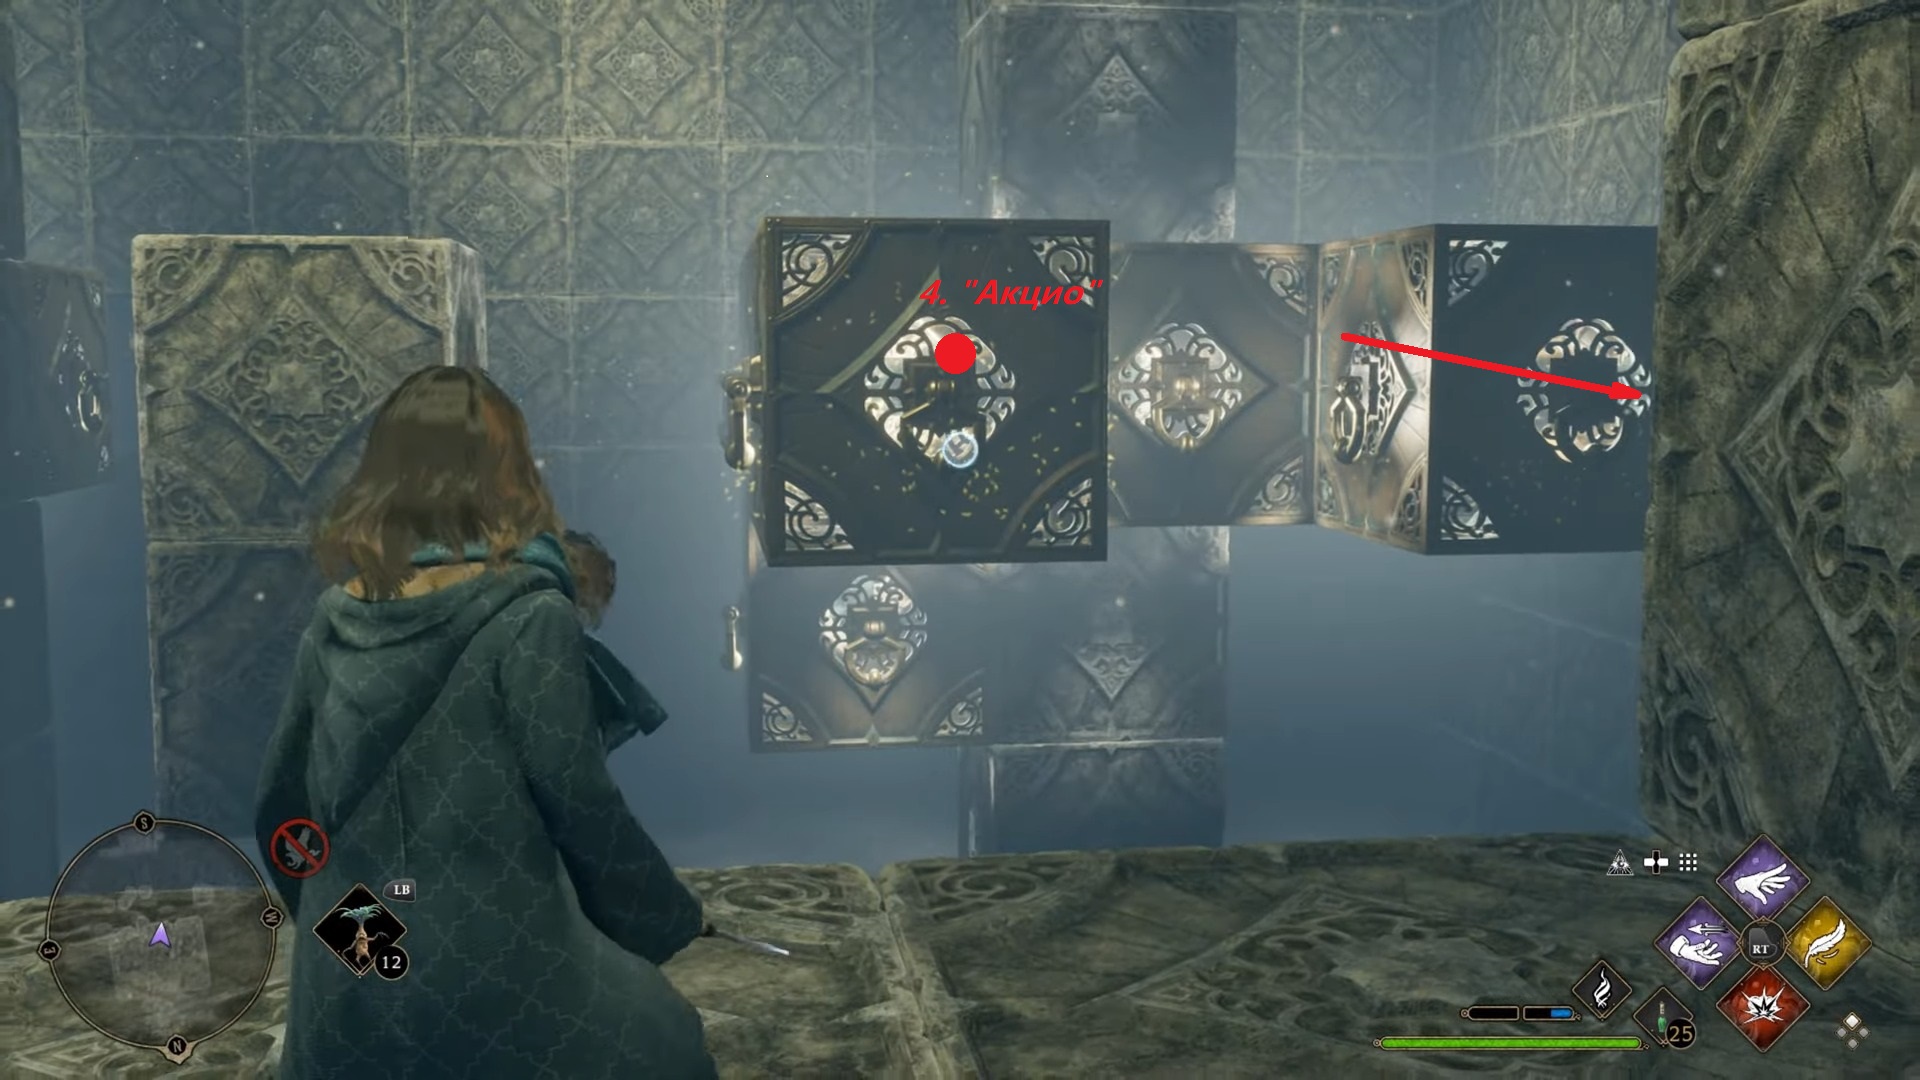
Now you need to find a way to get to the opposite end of the hall. To do this, again release the same corner from the T-shaped figure, assembling a structure there from the rest of the cubes of the first and second tiers. We have shown the sequence of actions in the screenshots.

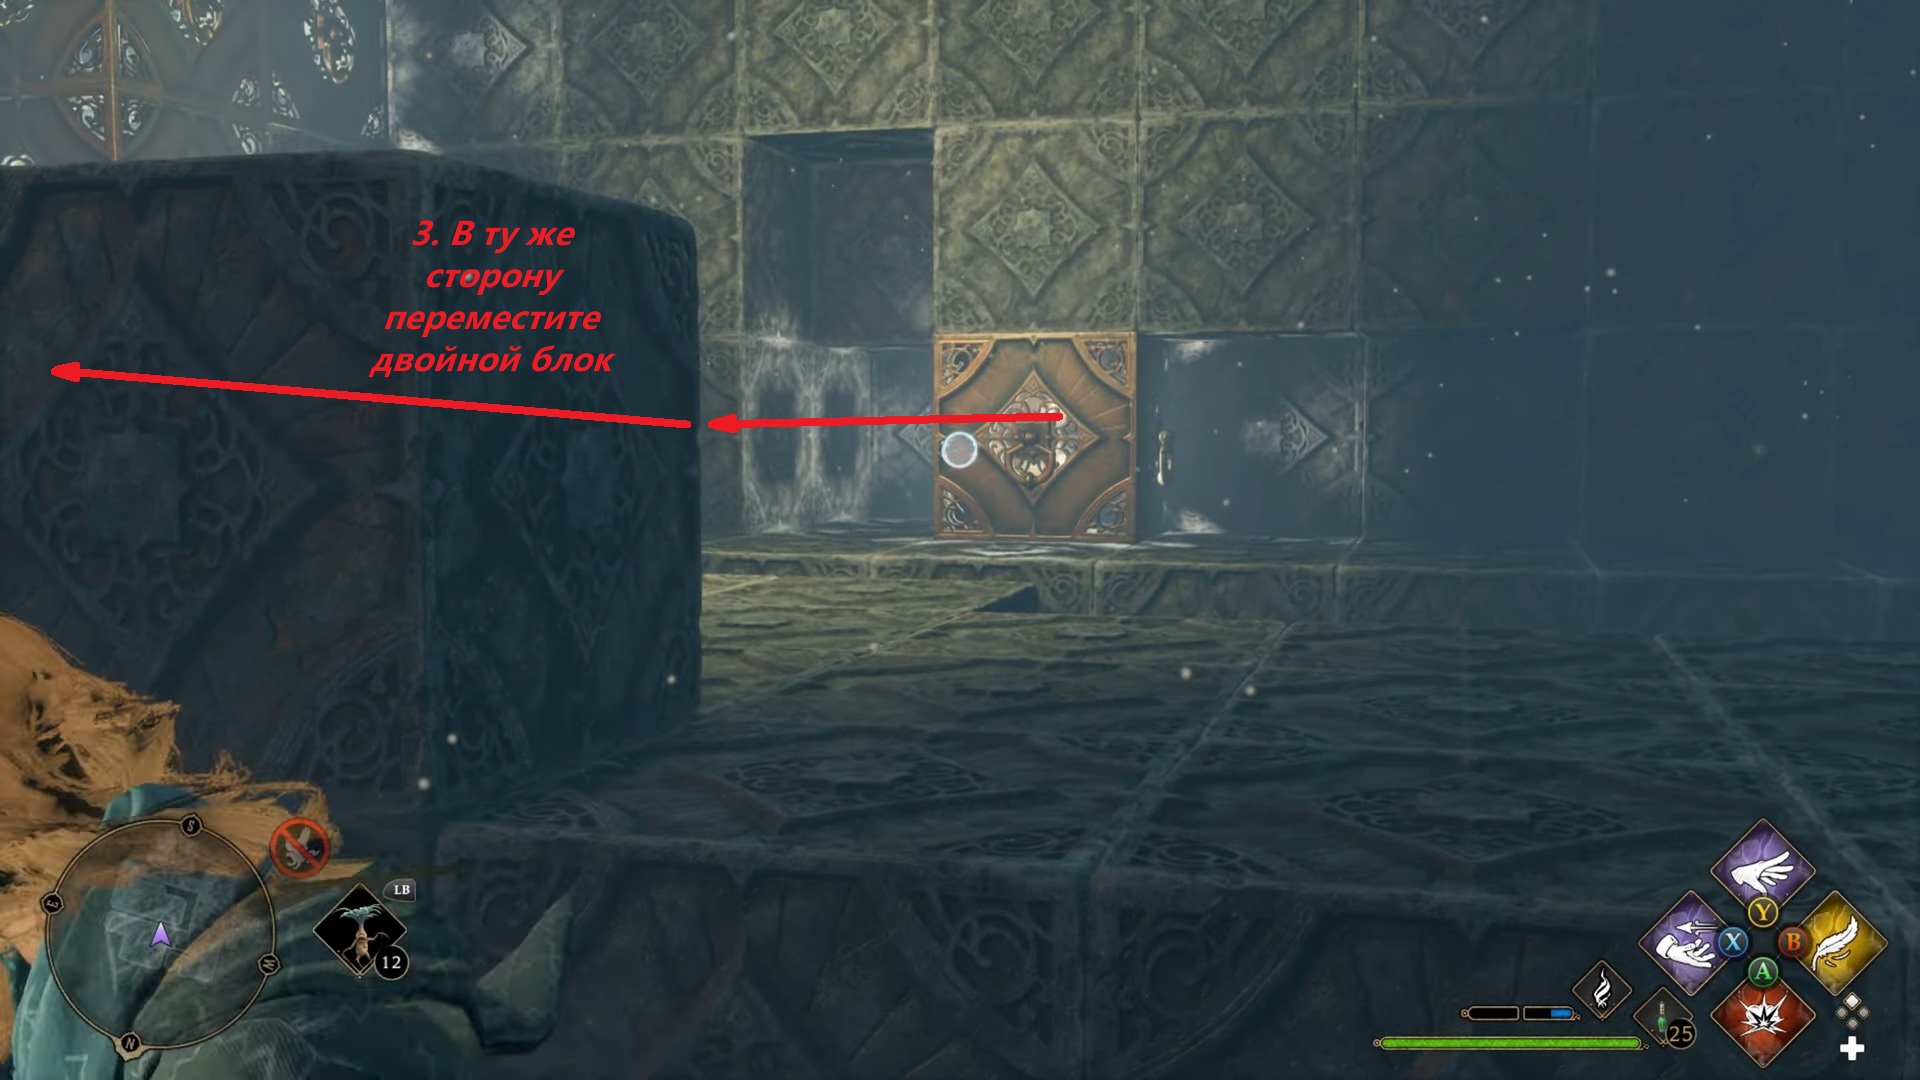
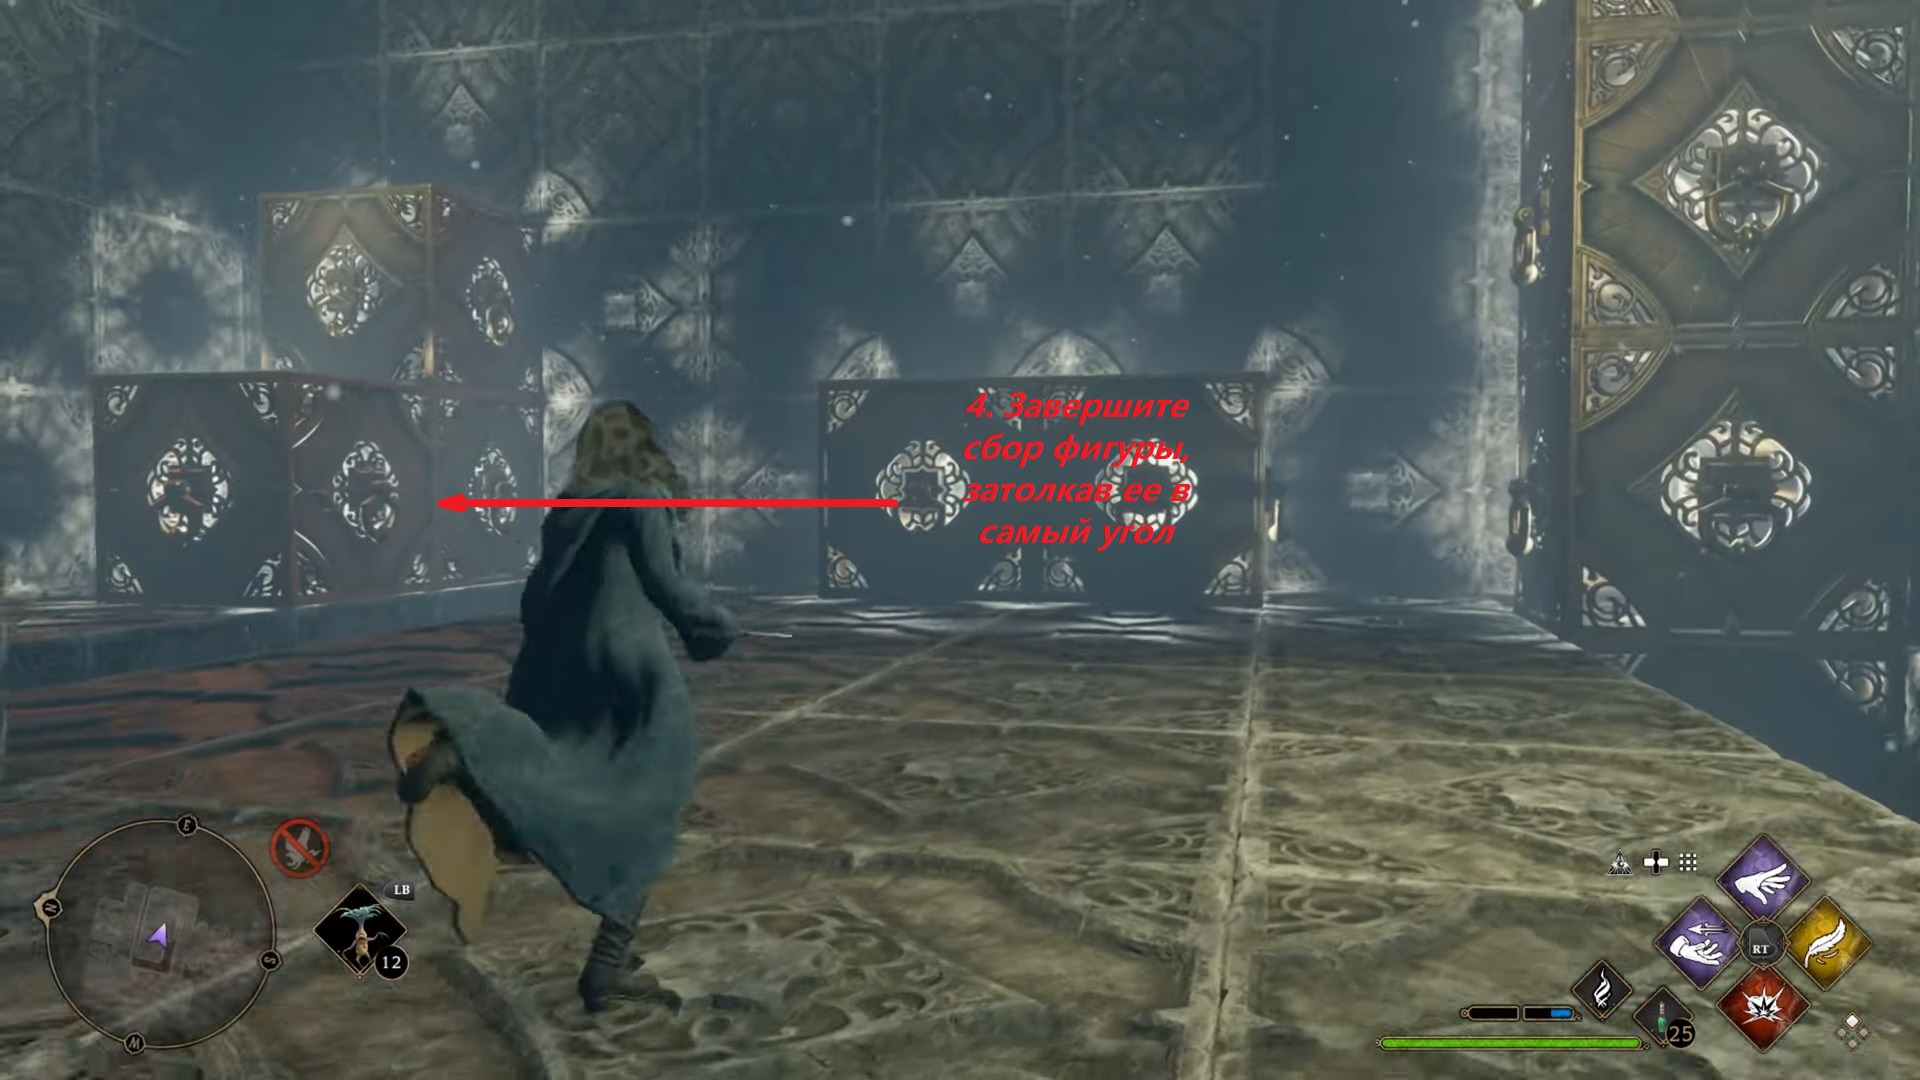
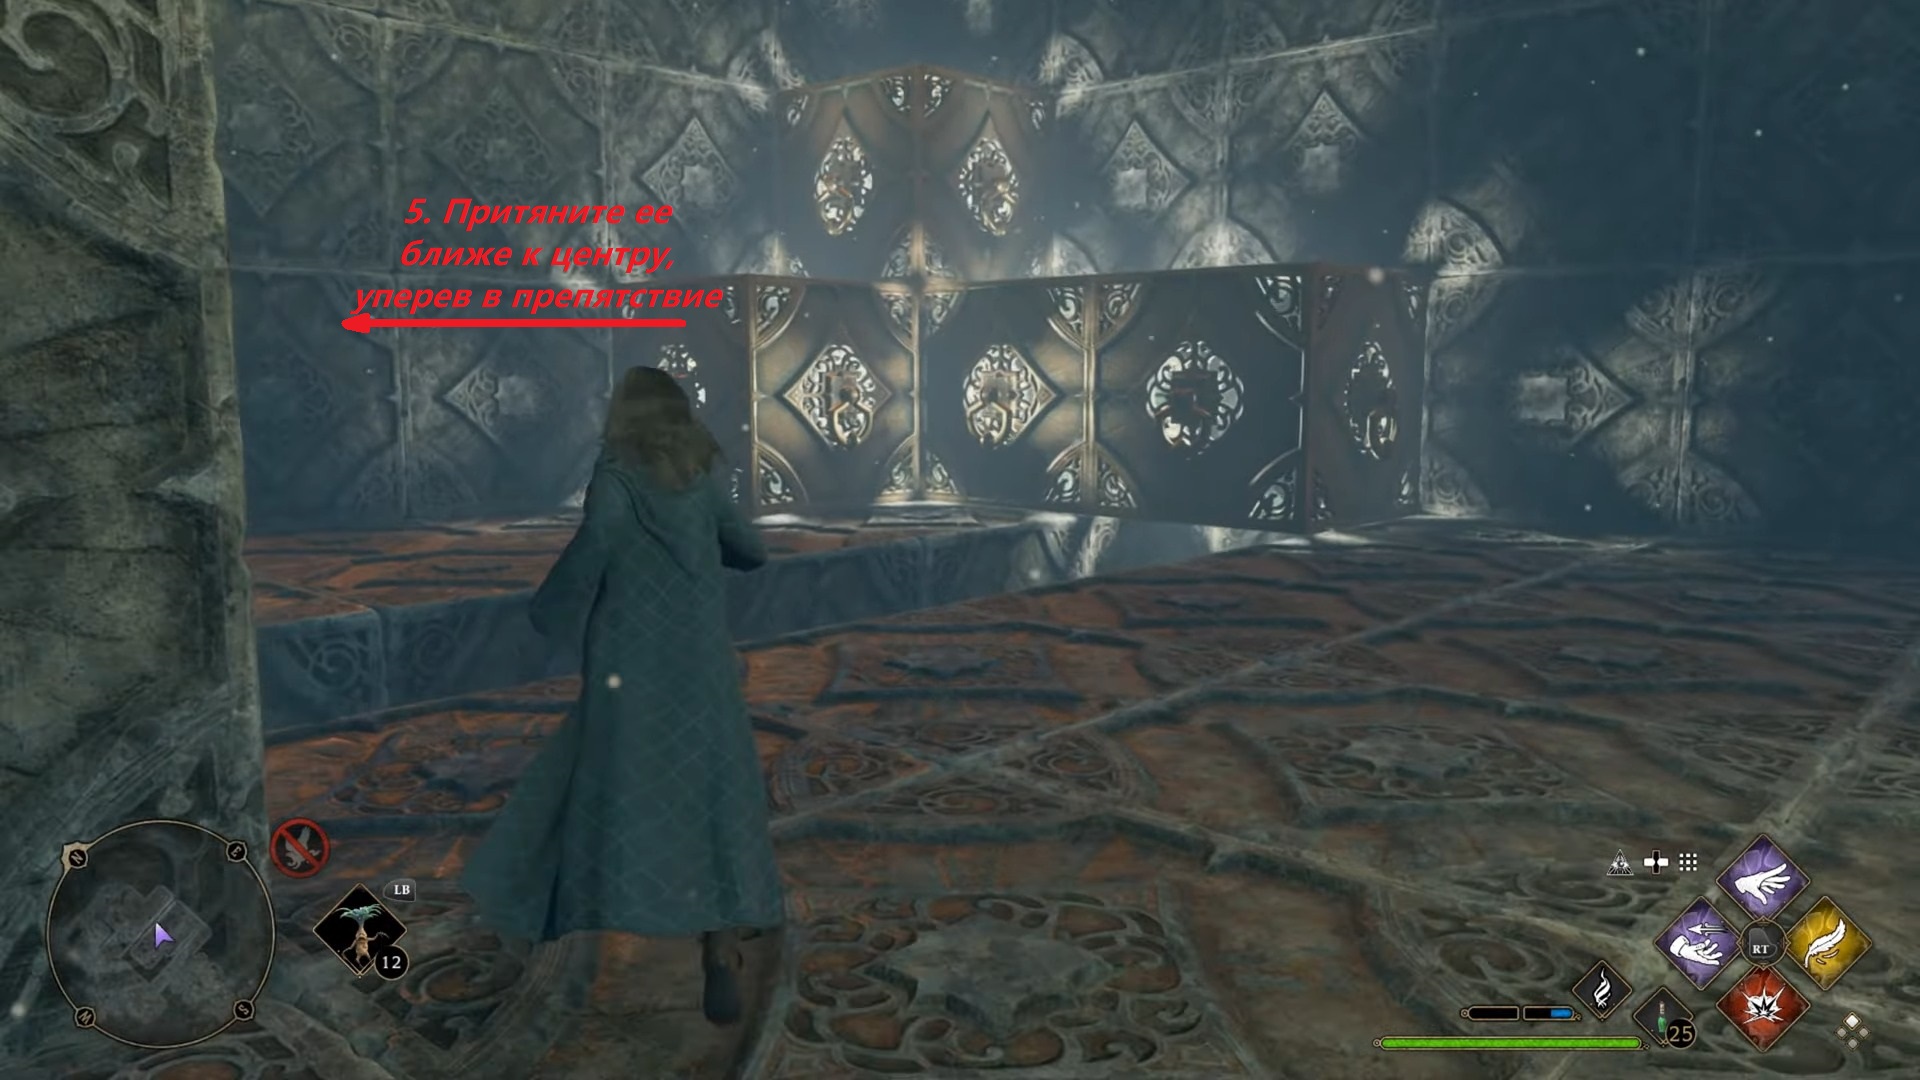
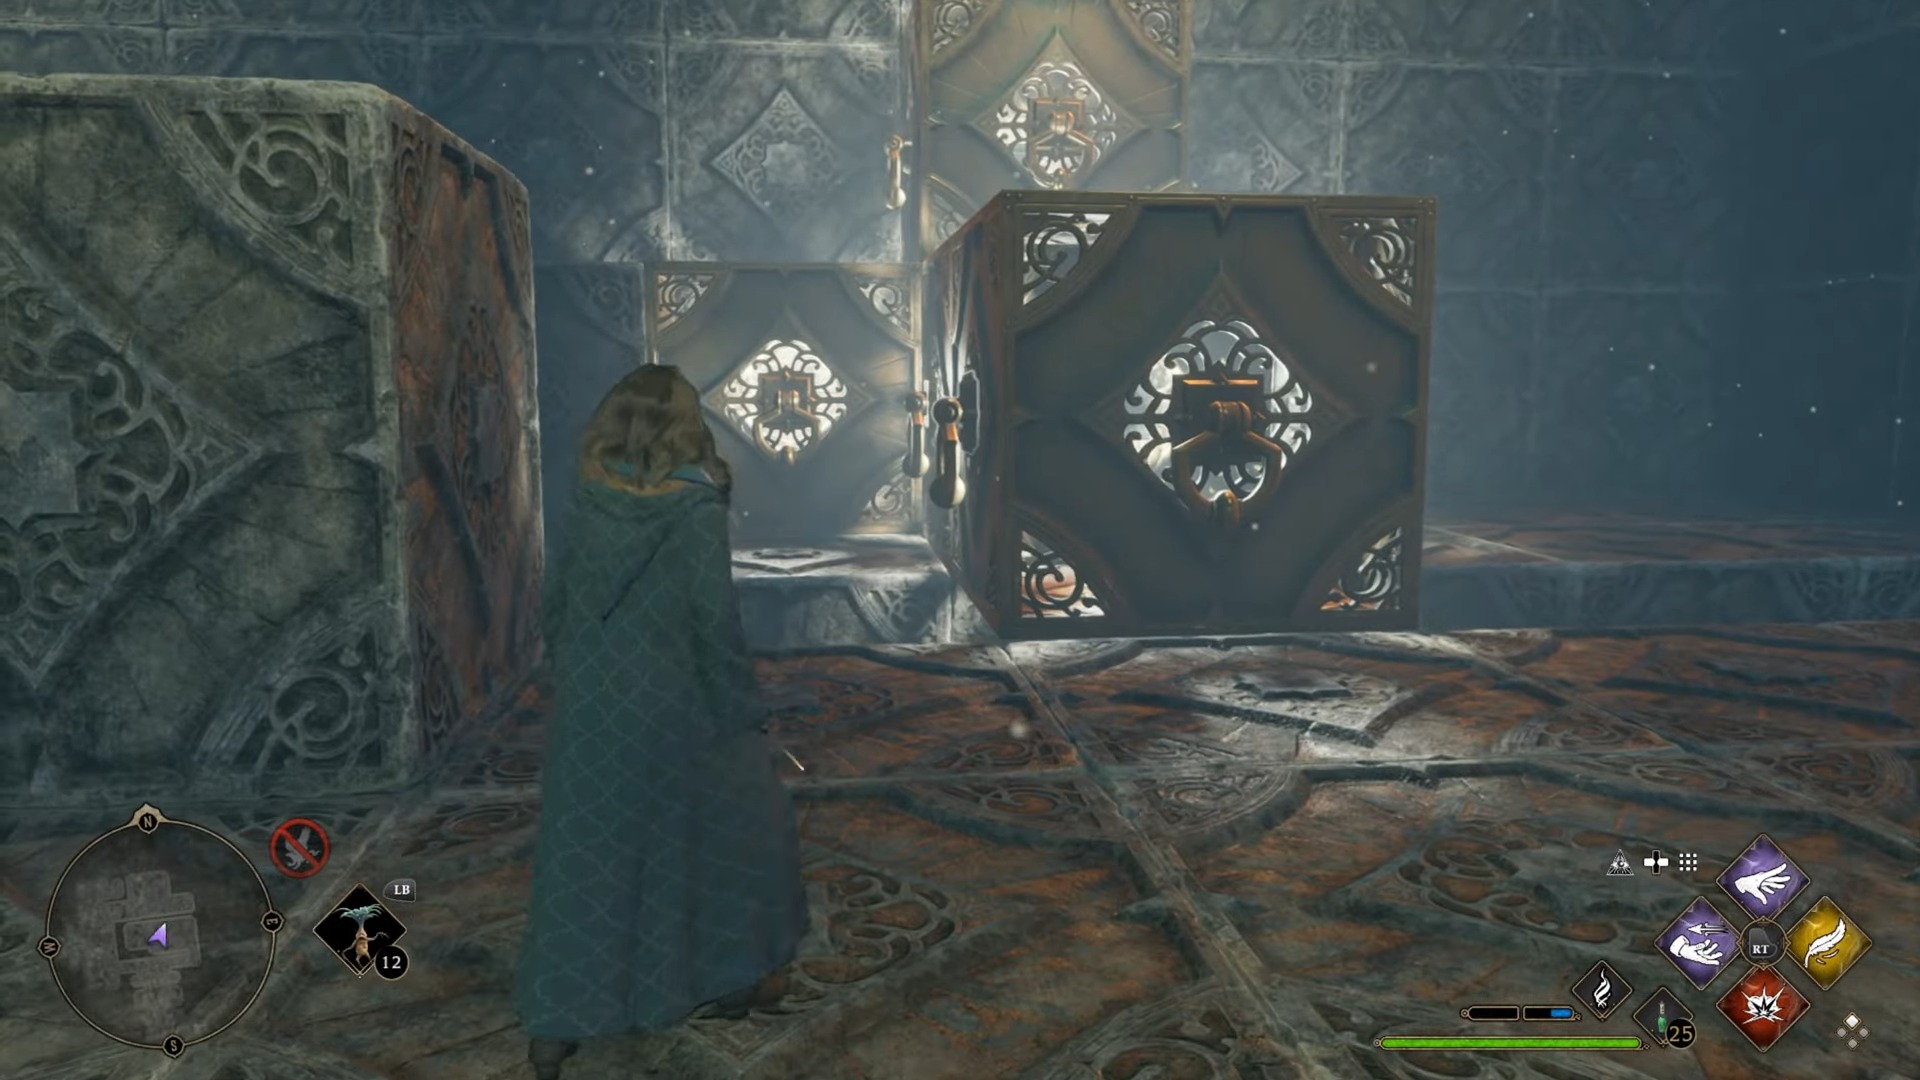
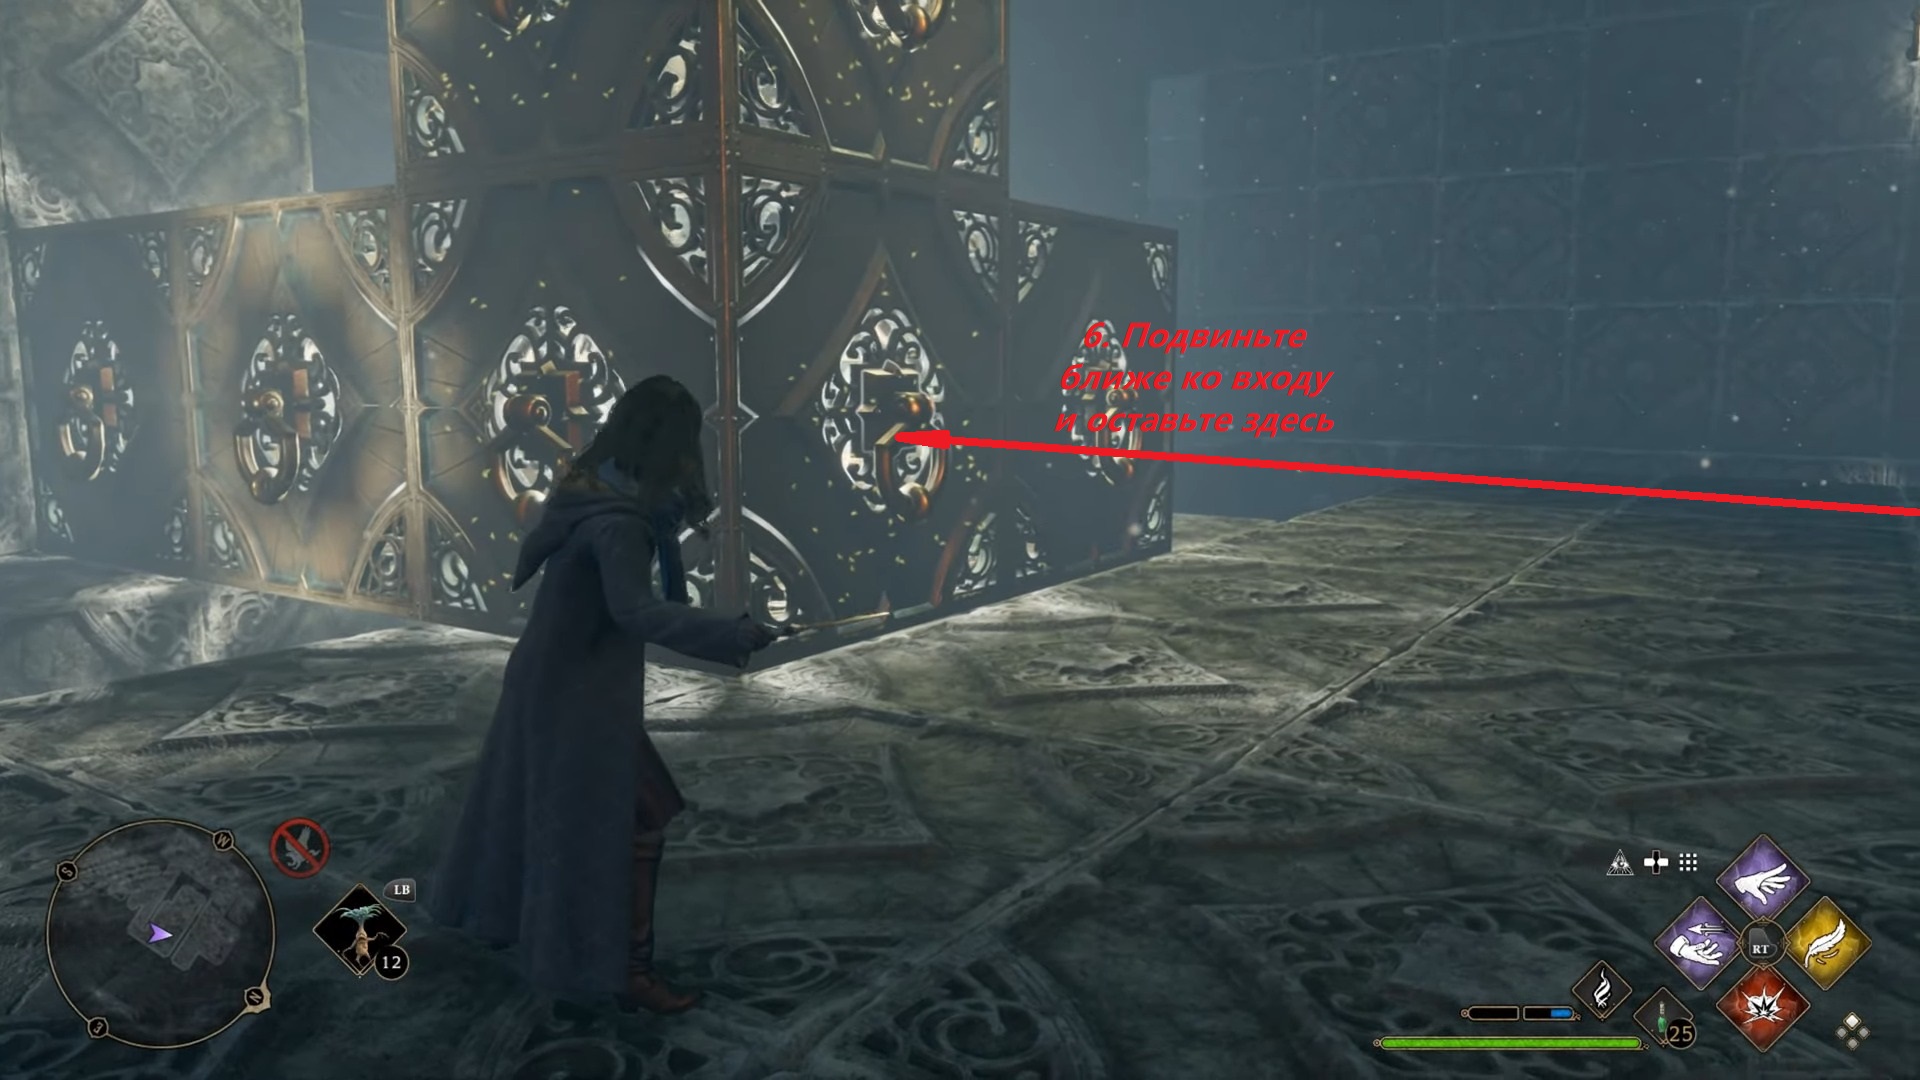
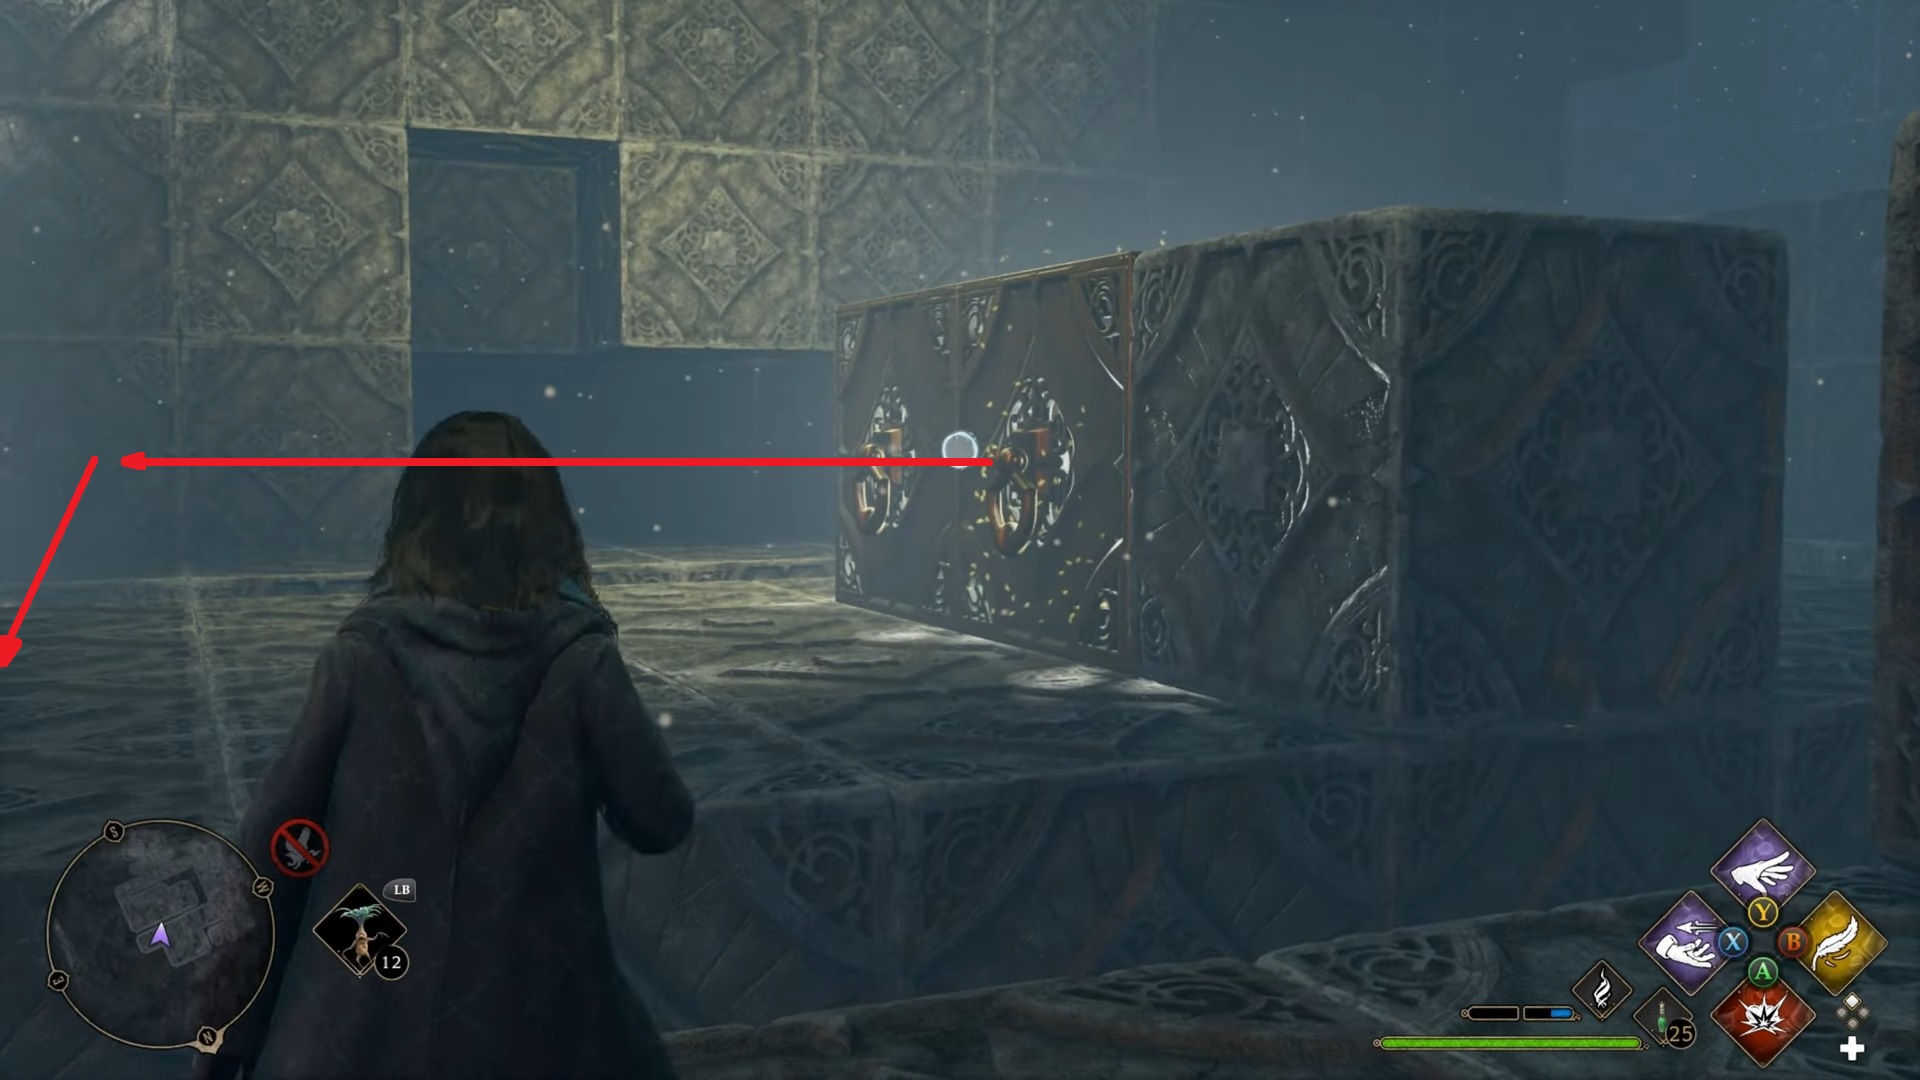
When the lower block is assembled, all that remains is to move the T-shaped one that remains against the wall to it along the grooves in the floor.
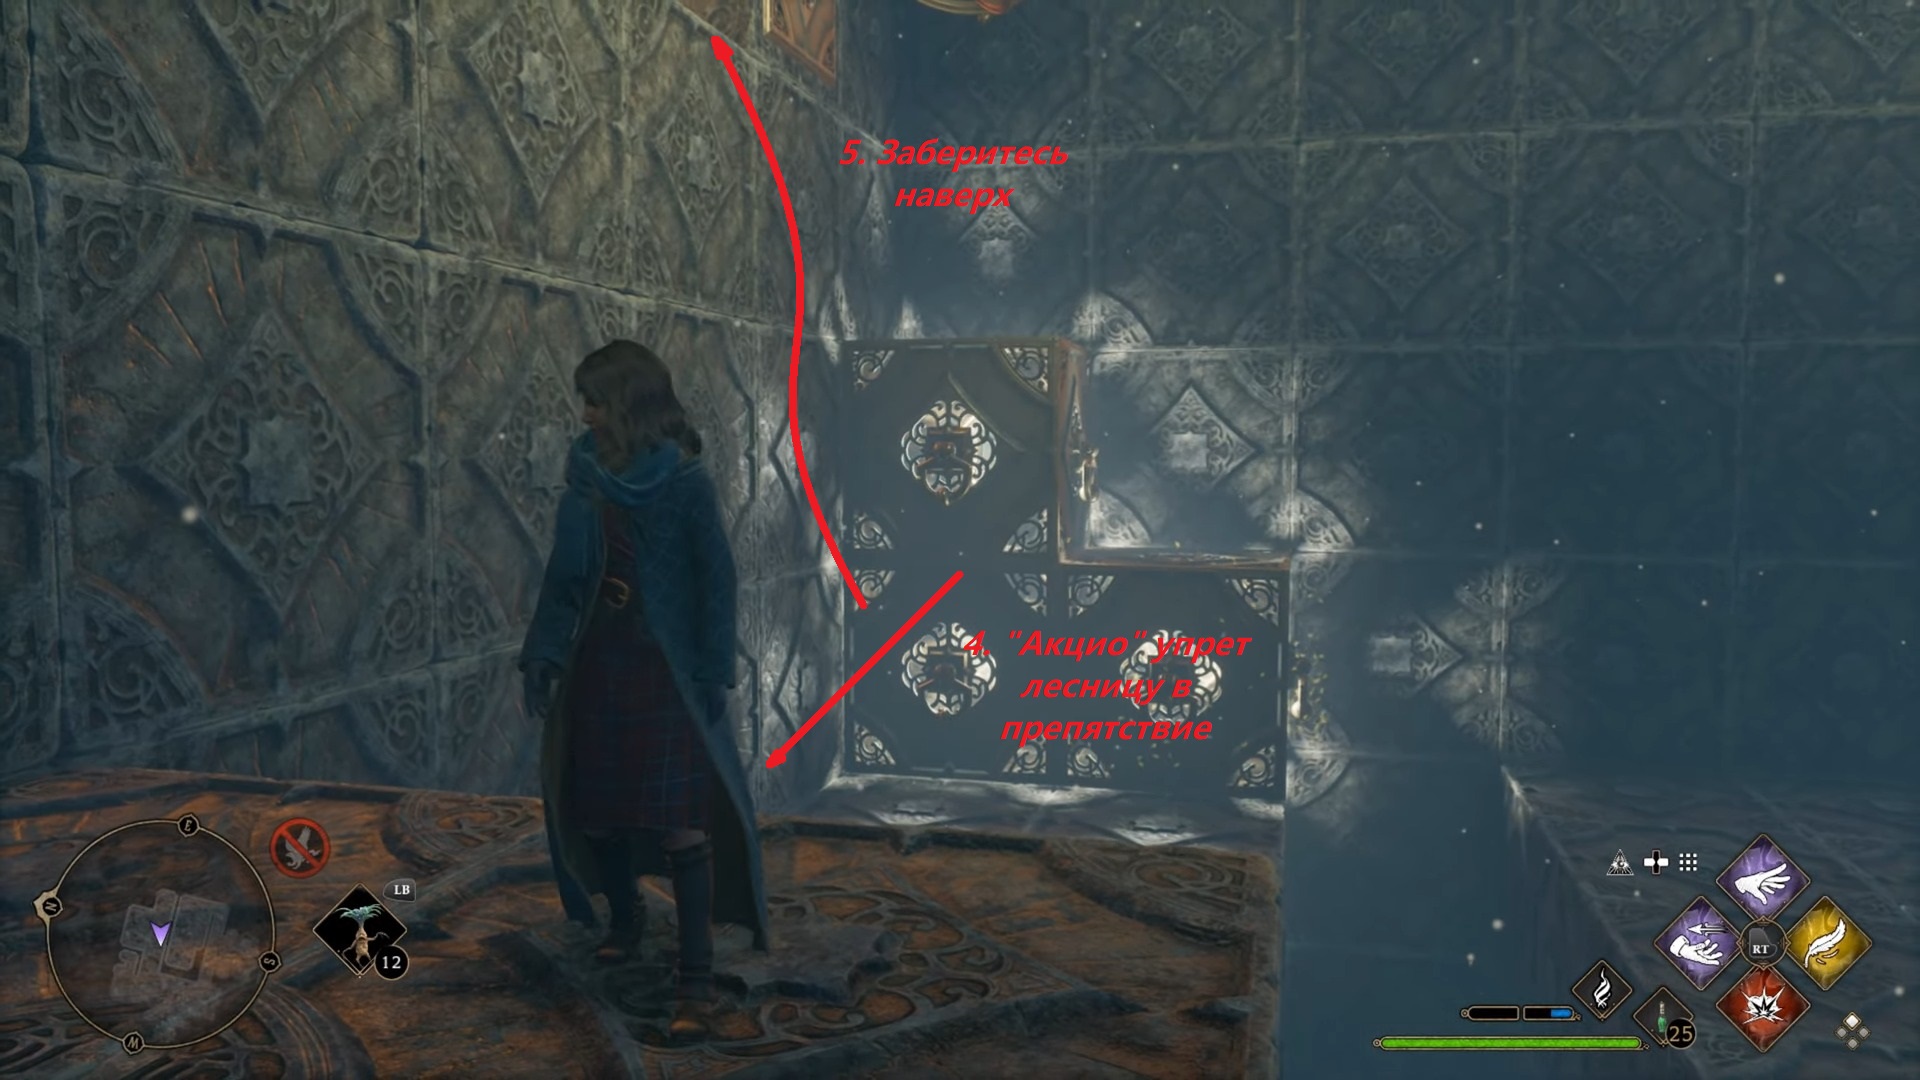
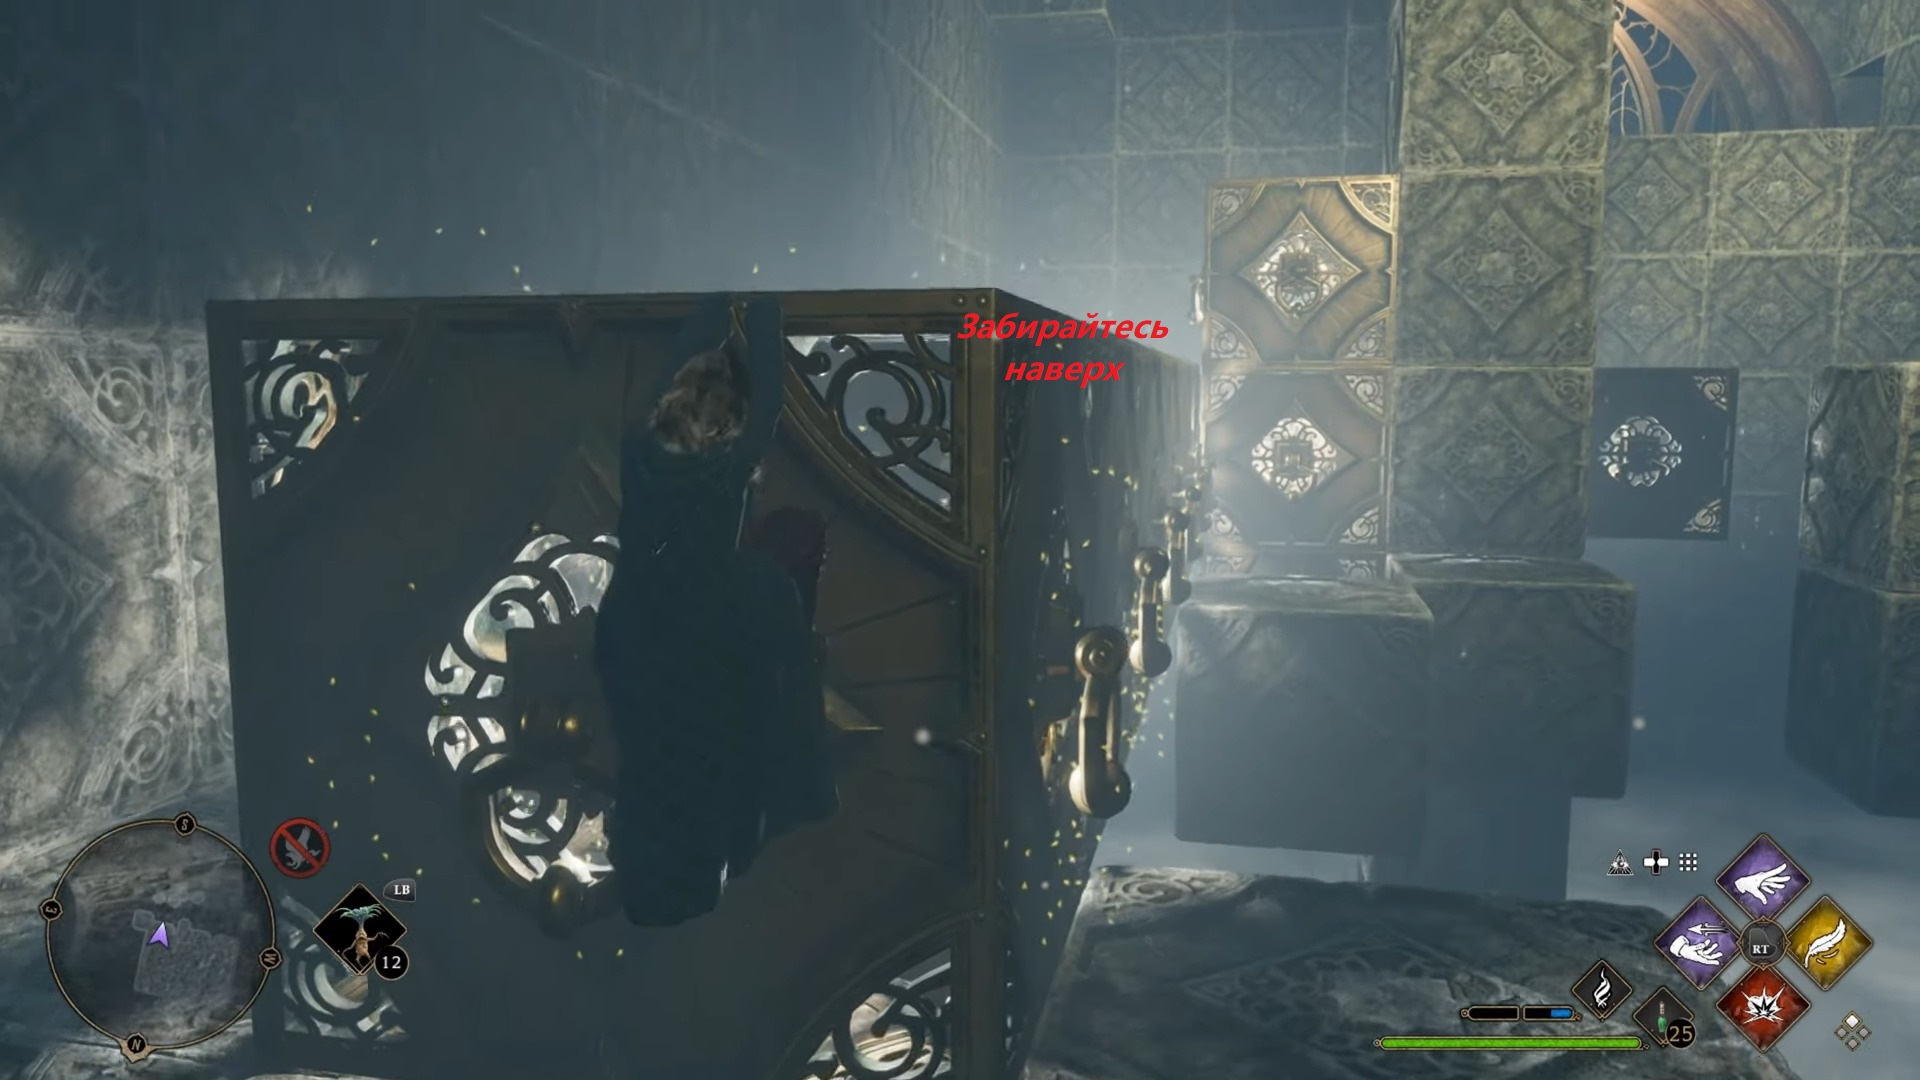
You can finally climb this structure and proceed to the next room, where the last stage of this test will take place.
Last hall

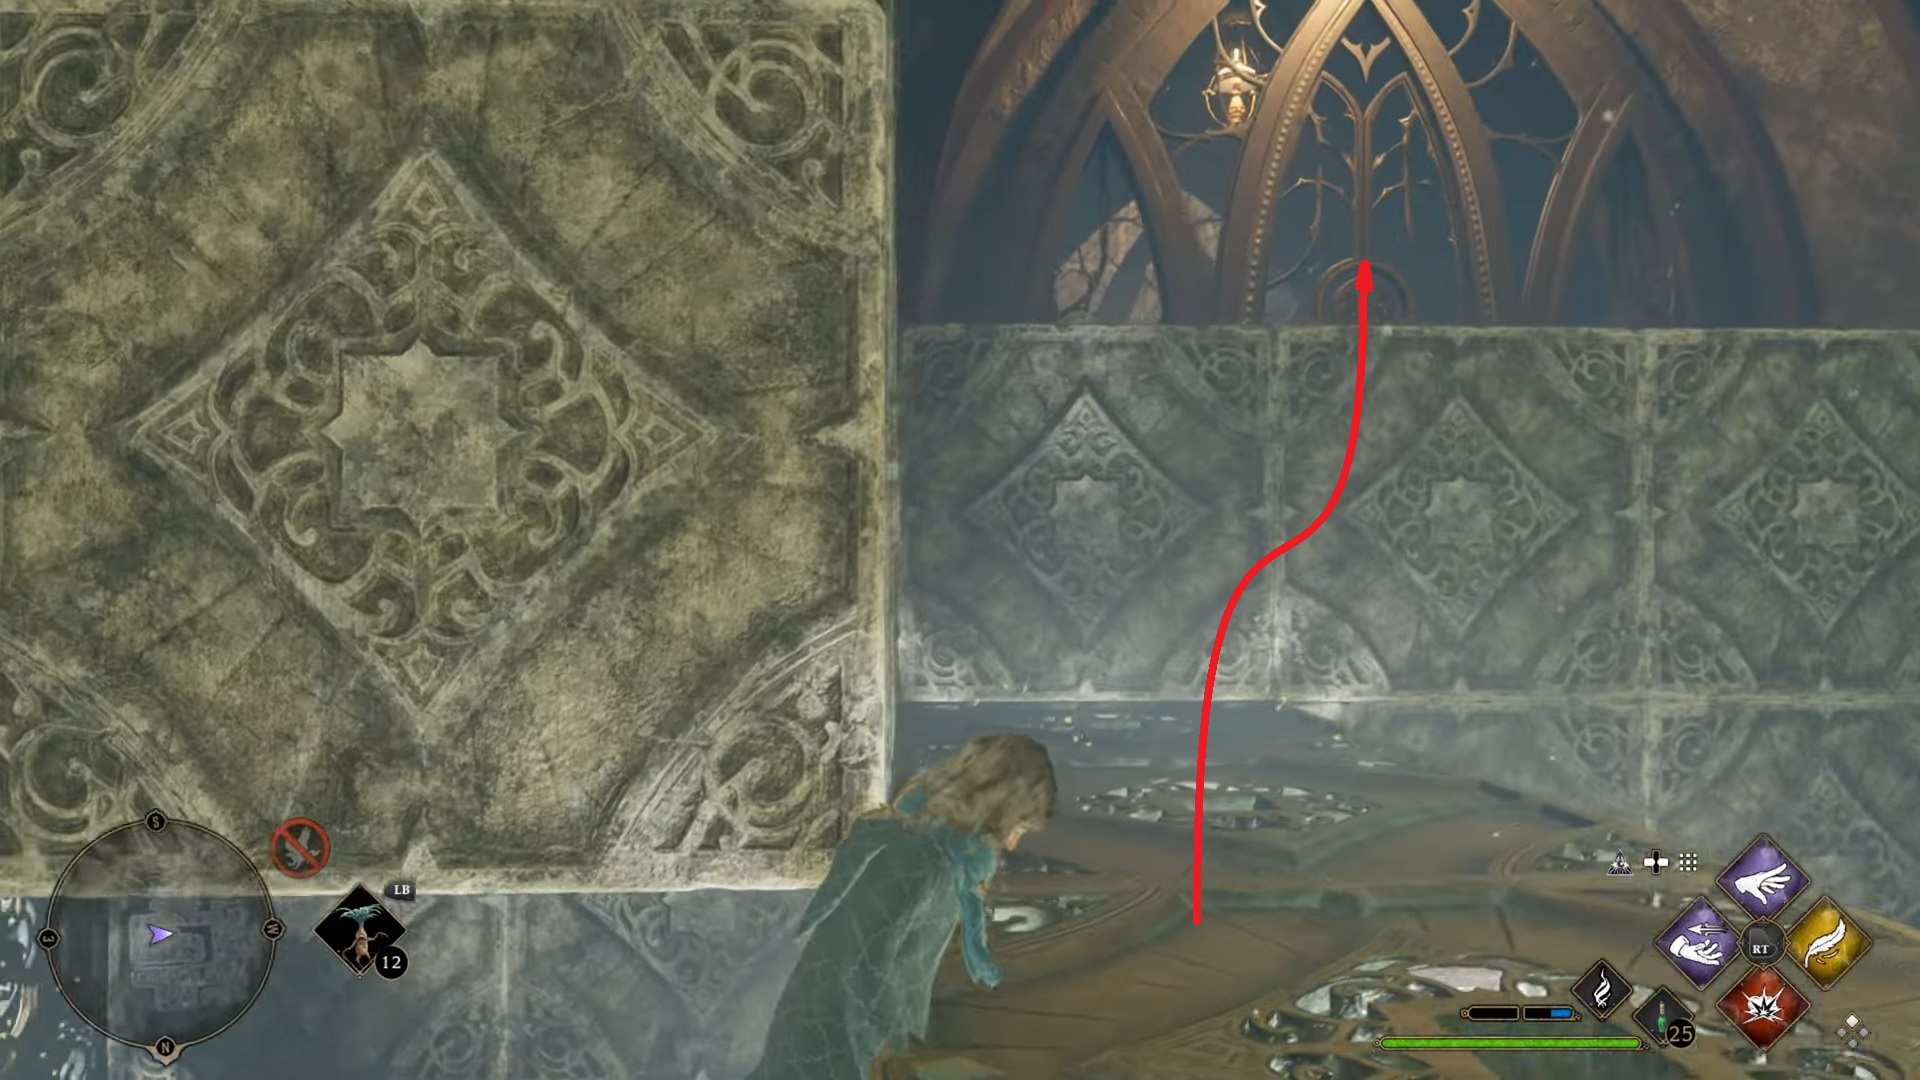
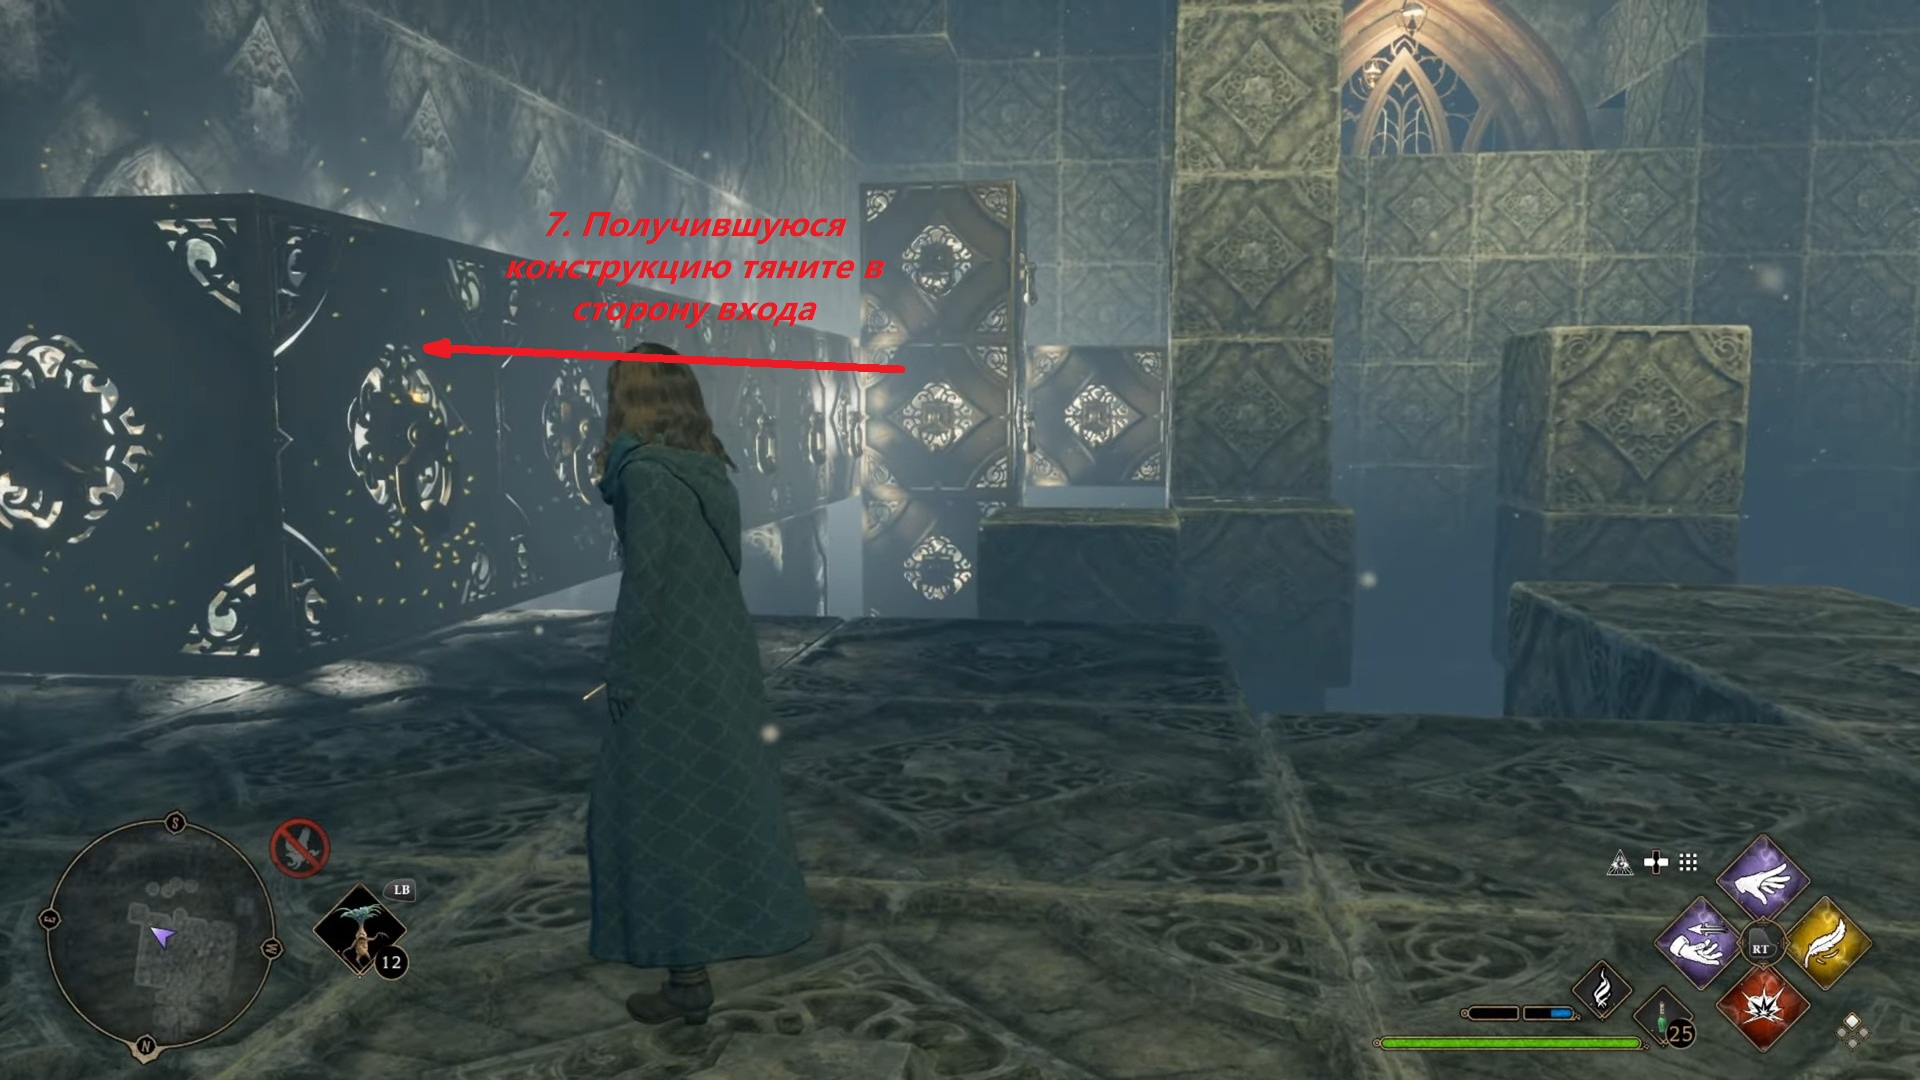
Here you will see a wide space with dips in the floor, which you need to somehow cross and climb to the exit. Focus on the left side of the room, there we propose to assemble something like a bridge. The scheme is again presented in the screenshots.


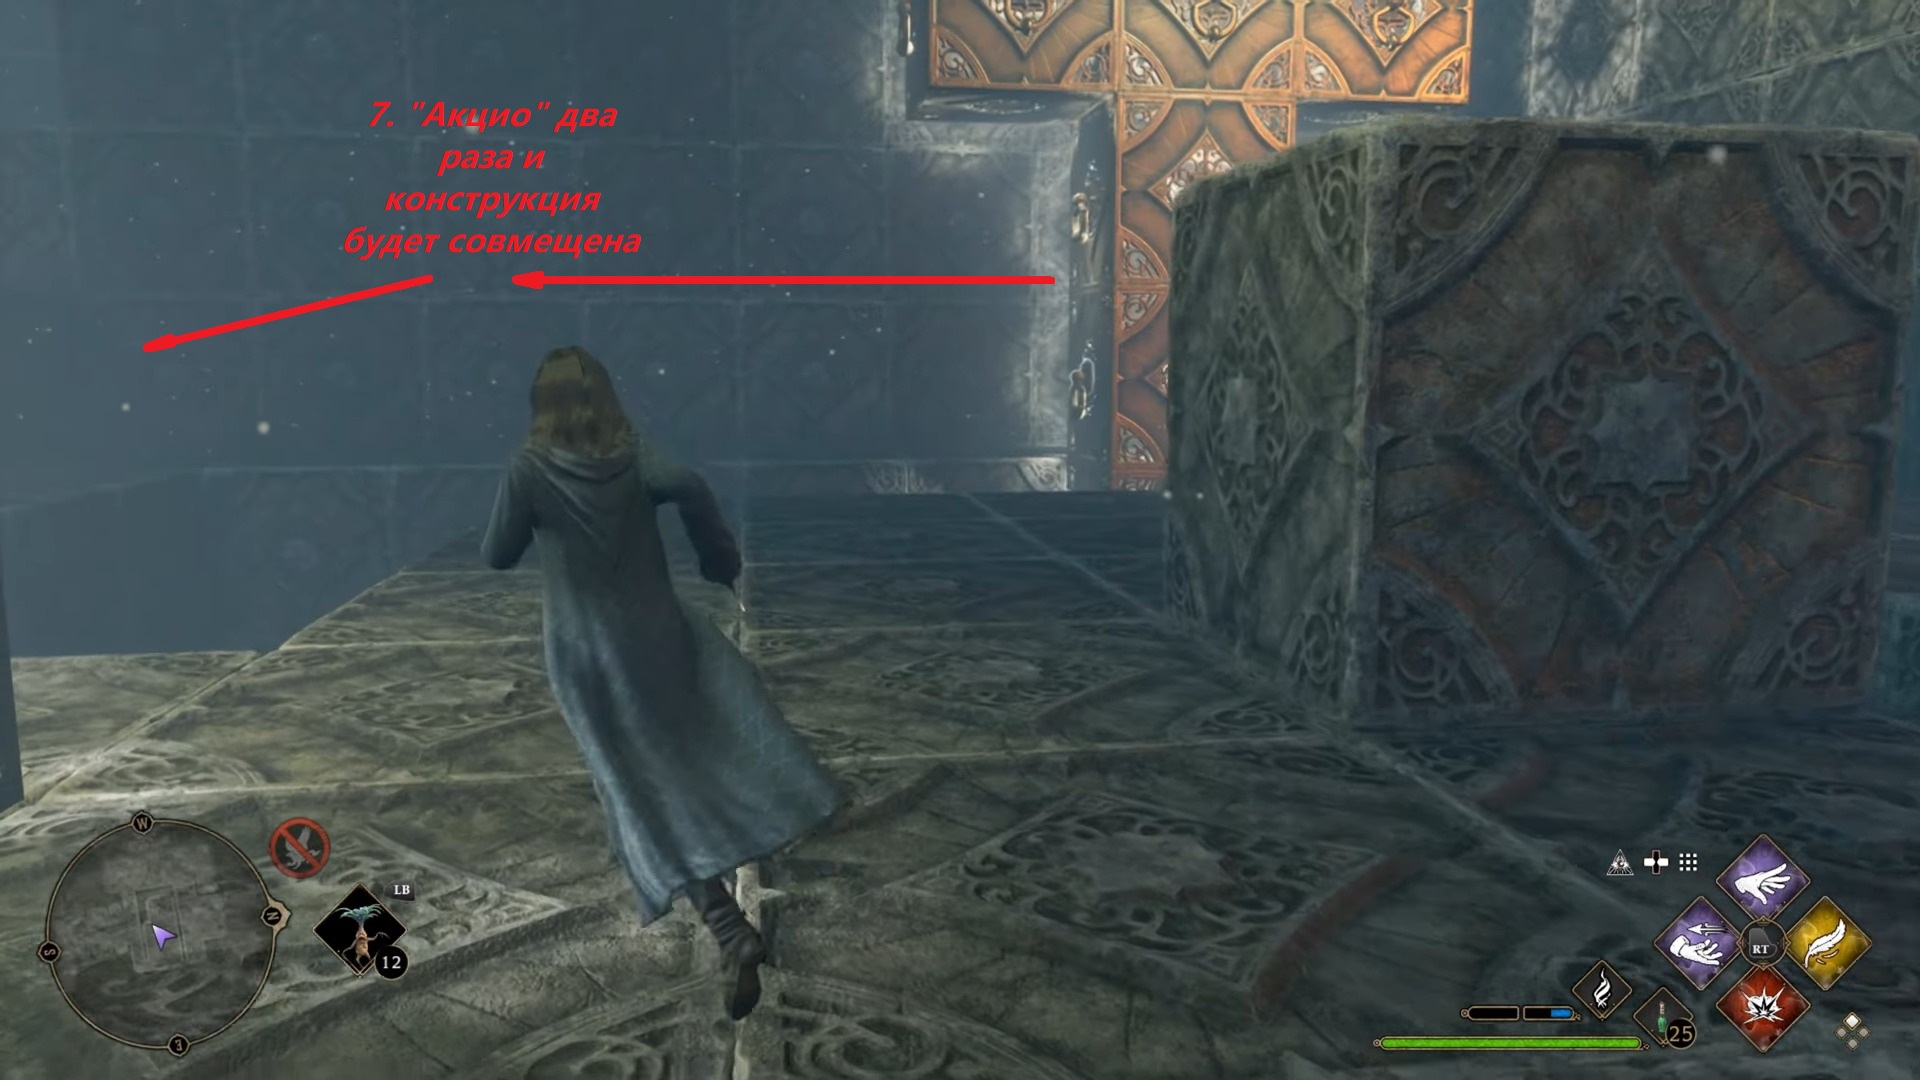
Now you can cheat a little, as we already did in one of the tests. It is necessary to climb onto the resulting block of cubes and push it with the help of Depulso to the far wall right along with you. After that, you will only need to jump and grab the top edge.

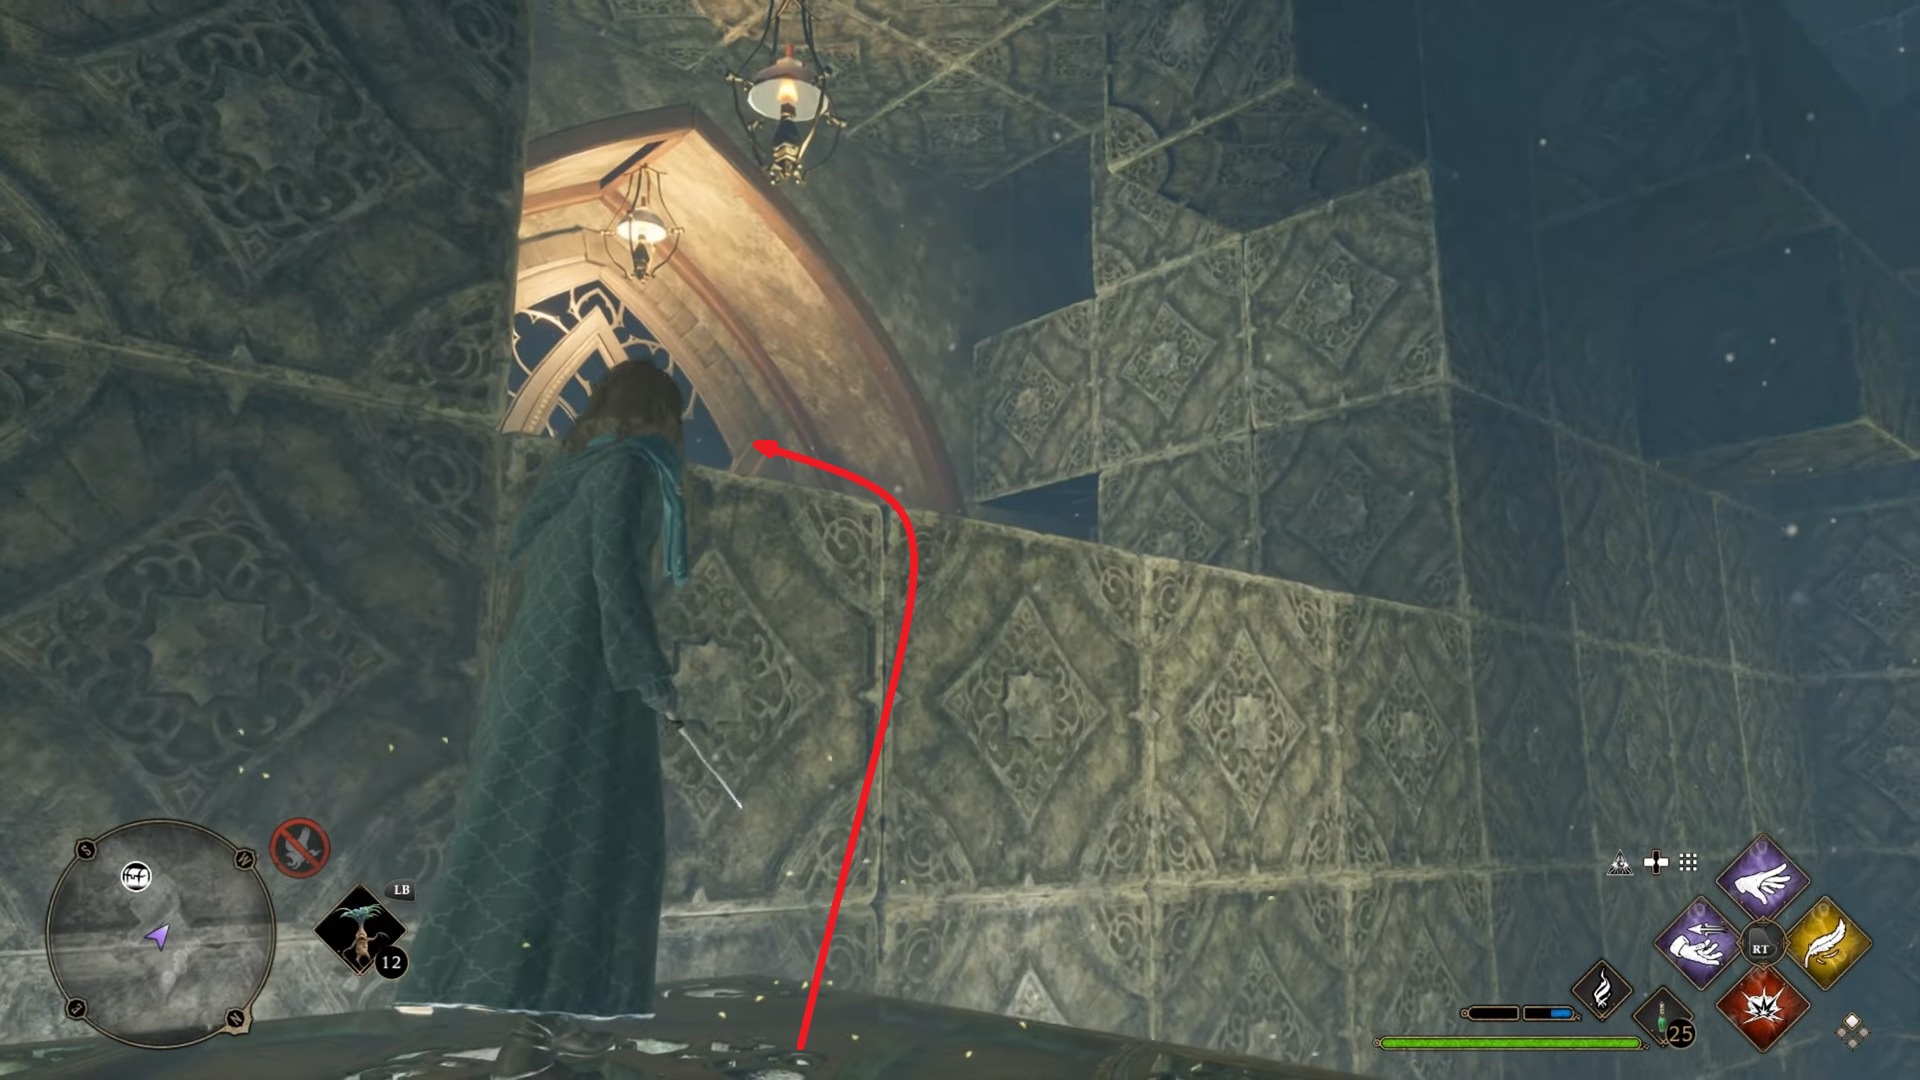
This was the last room - you can safely pick up a random appearance scheme from the chest and leave the room.

We hope our guide has shown you how to get through the Depulso 2 puzzle room in Hogwarts: Legacy. Comments, additions and advice to other players on the topic of the article can be left in the comments.
Comments
You need to login to add comments.
You can login with