In Genshin Impact one of the types puzzles, which can be found in the vastness of the Hydro Kingdom, are various interactions with energy transfer terminals - control panels that can switch to video surveillance mode and move charges between various mechanisms, as well as open access to rooms and valuable loot. In this guide, we'll show you how to solve the terminal puzzles and where to find all the activities on the Fontaine map.
How to solve puzzles with energy transfer terminals
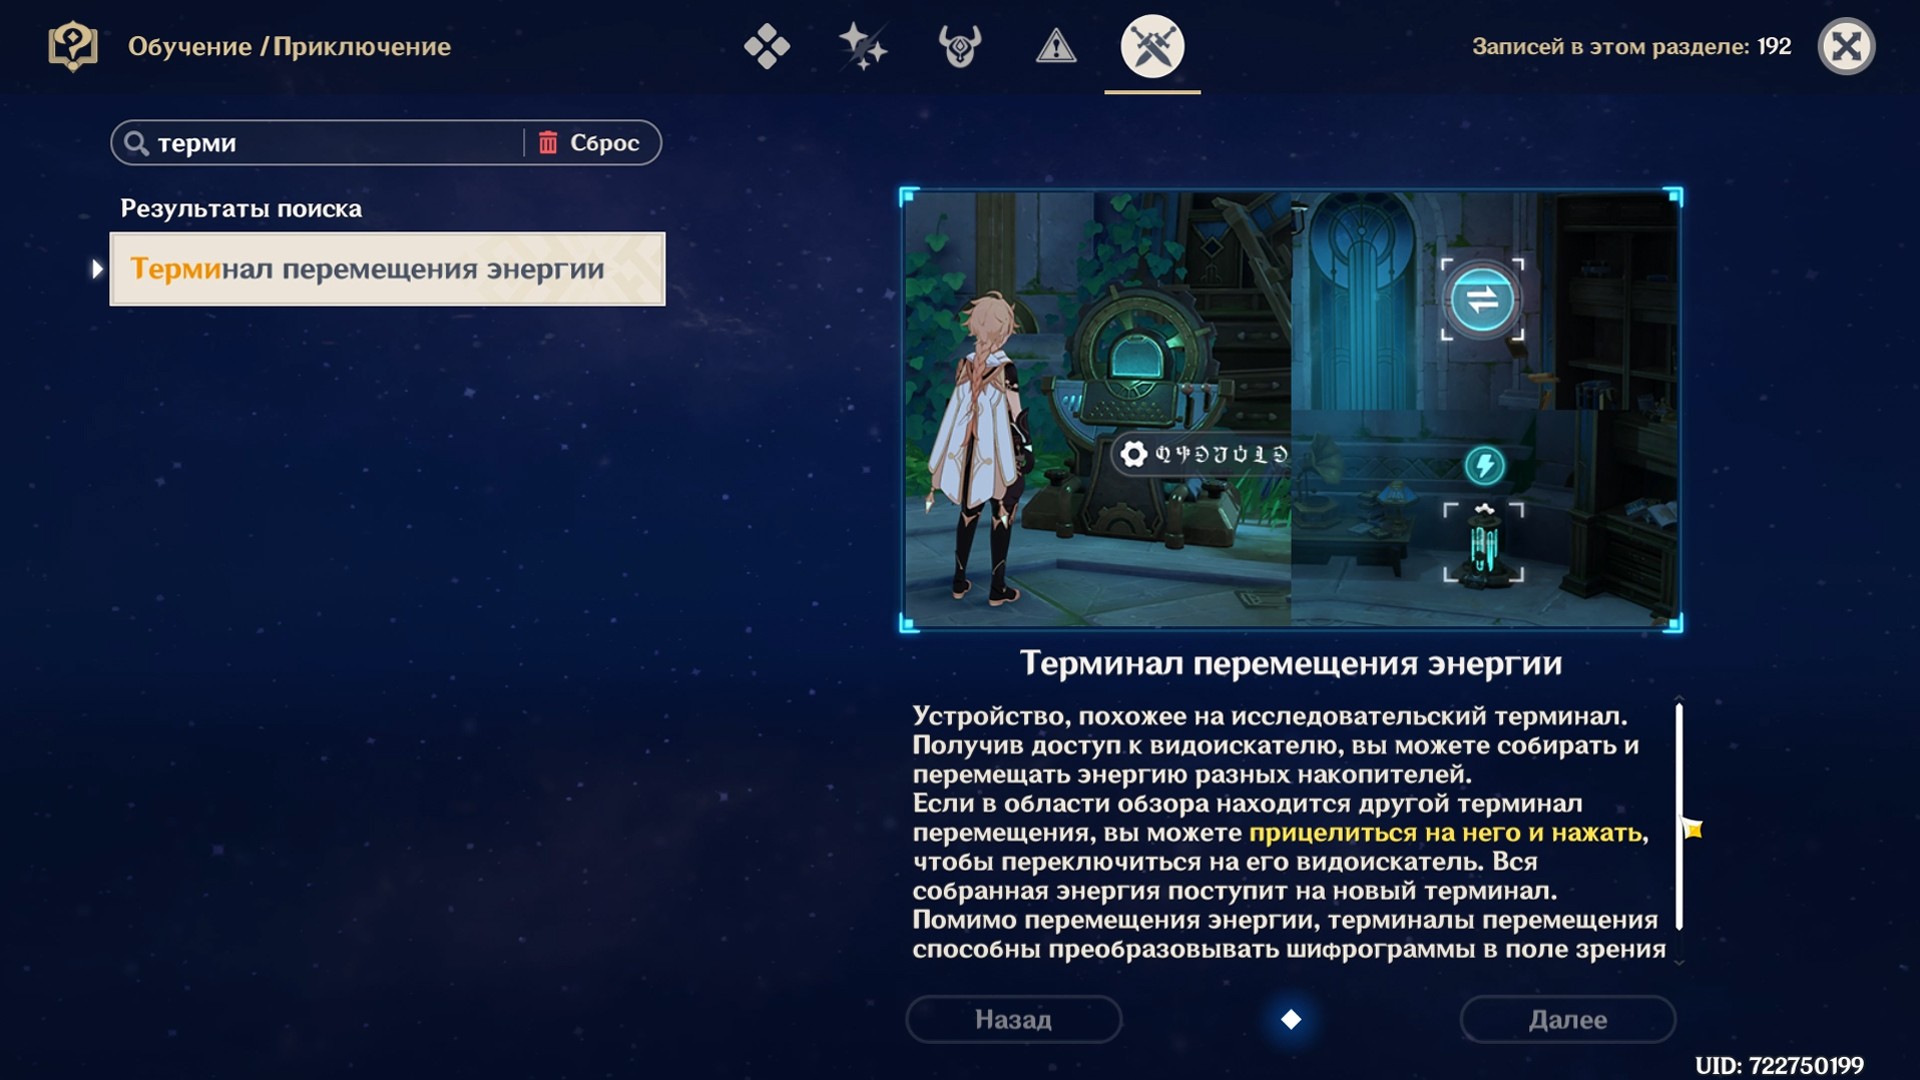
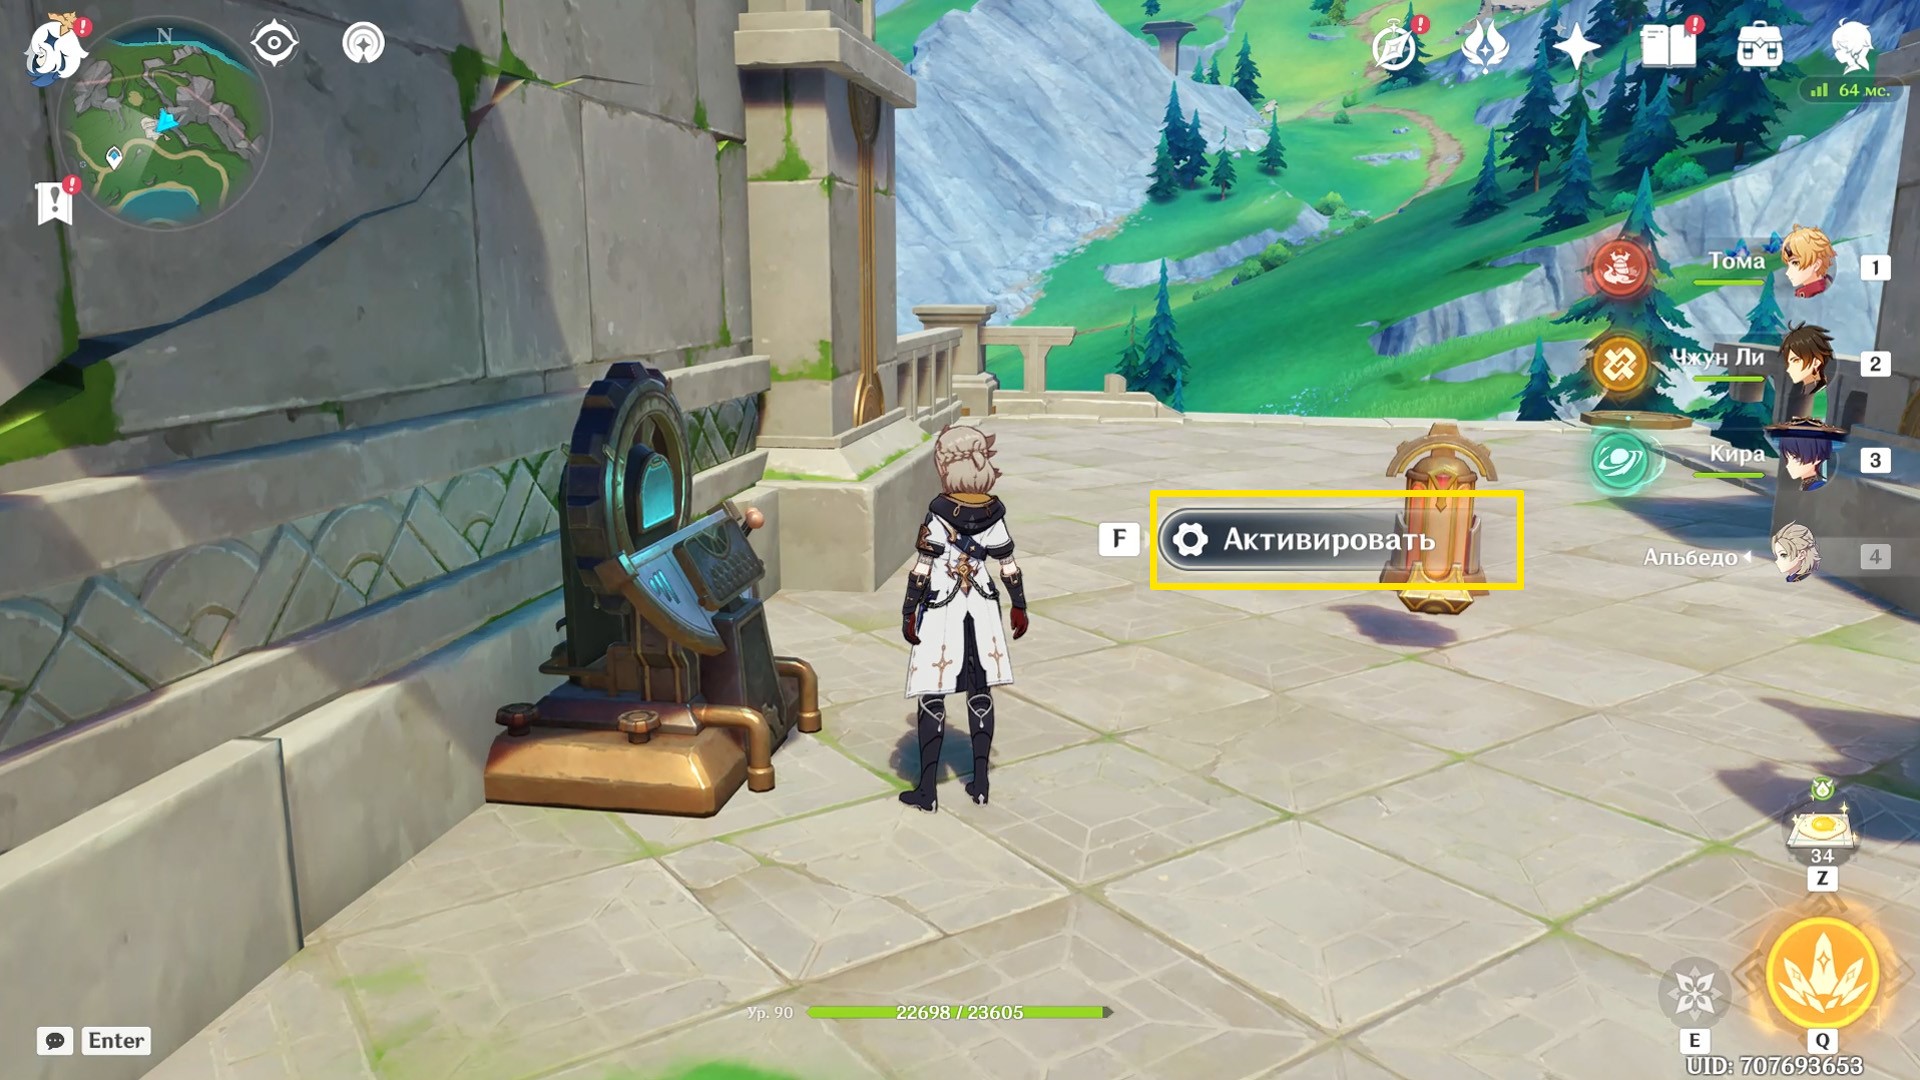
Fontaine is a technologically advanced region, so developments such as energy displacement panels are not uncommon here. When visiting the northern part of the Hydro Archon's domain, you can come across these devices both in the open world and during various assignments. When interacting with them, you need to take these features into account:
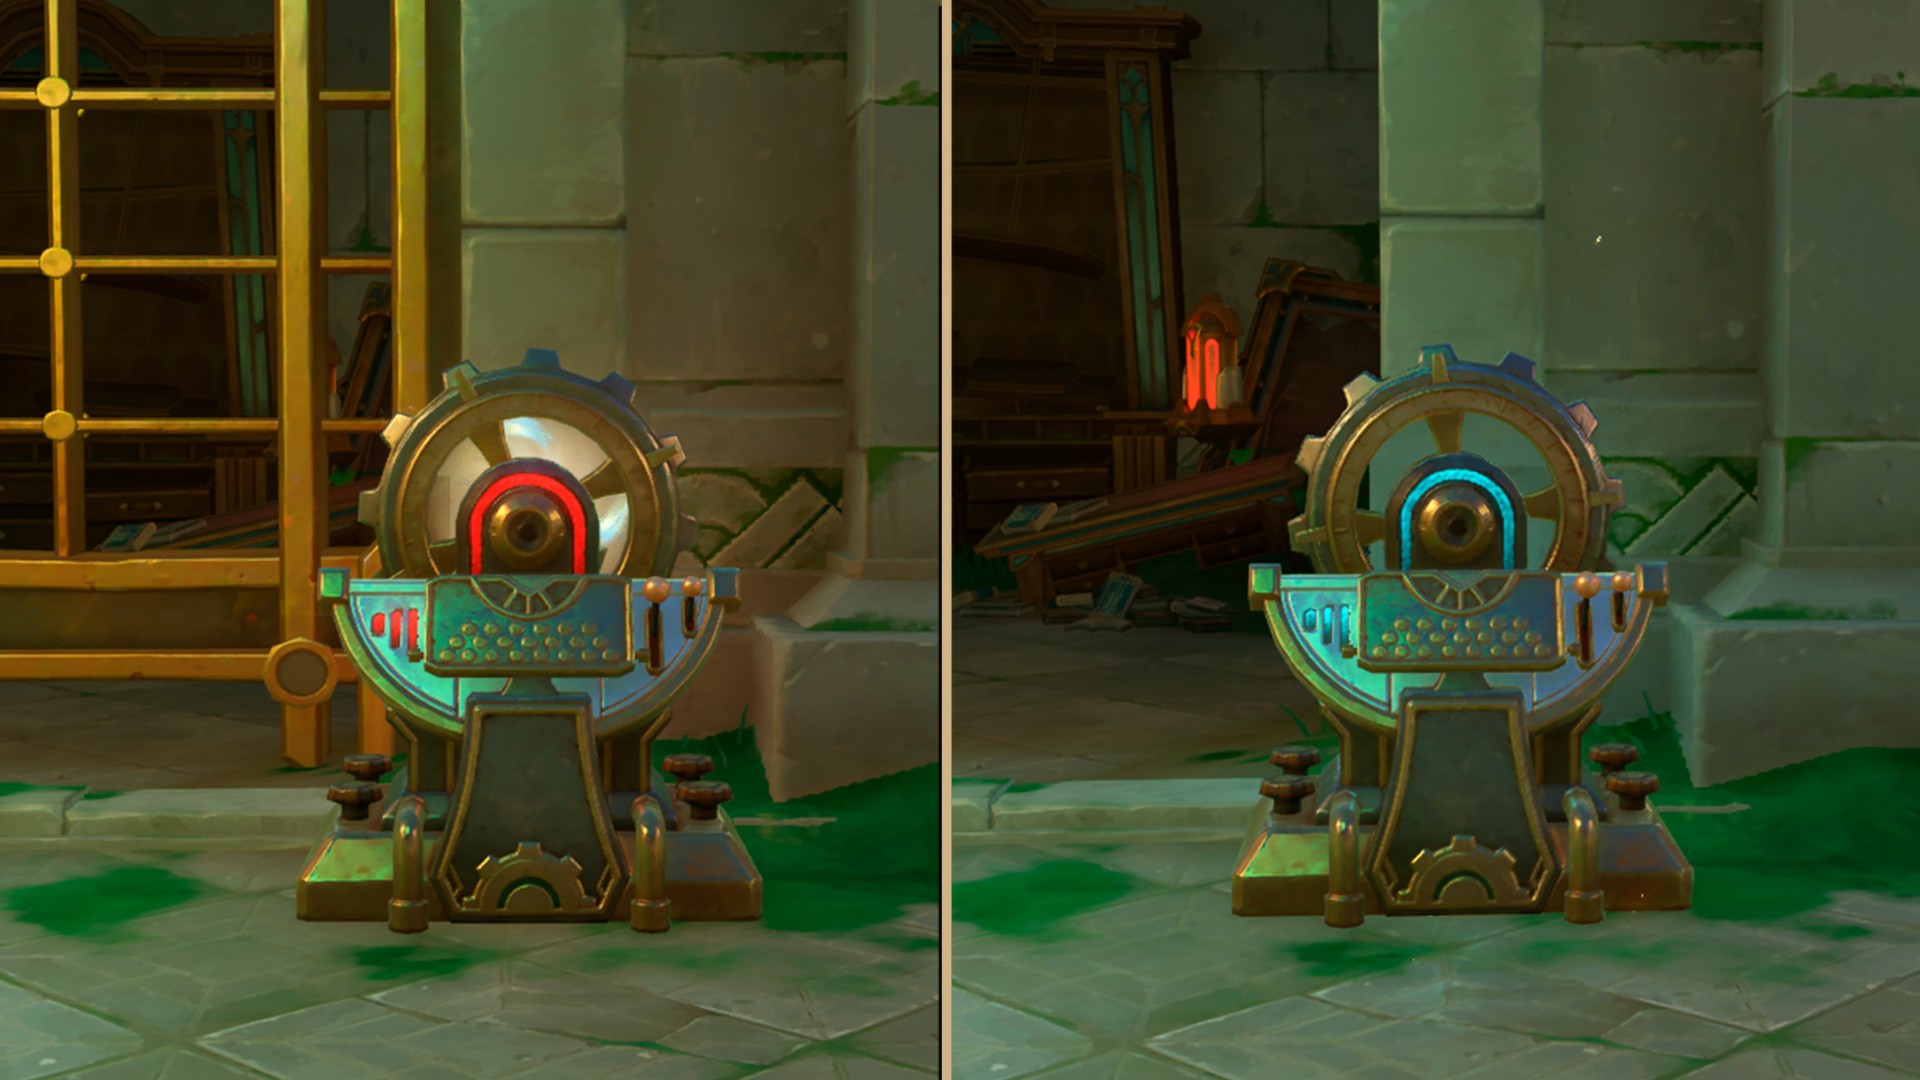
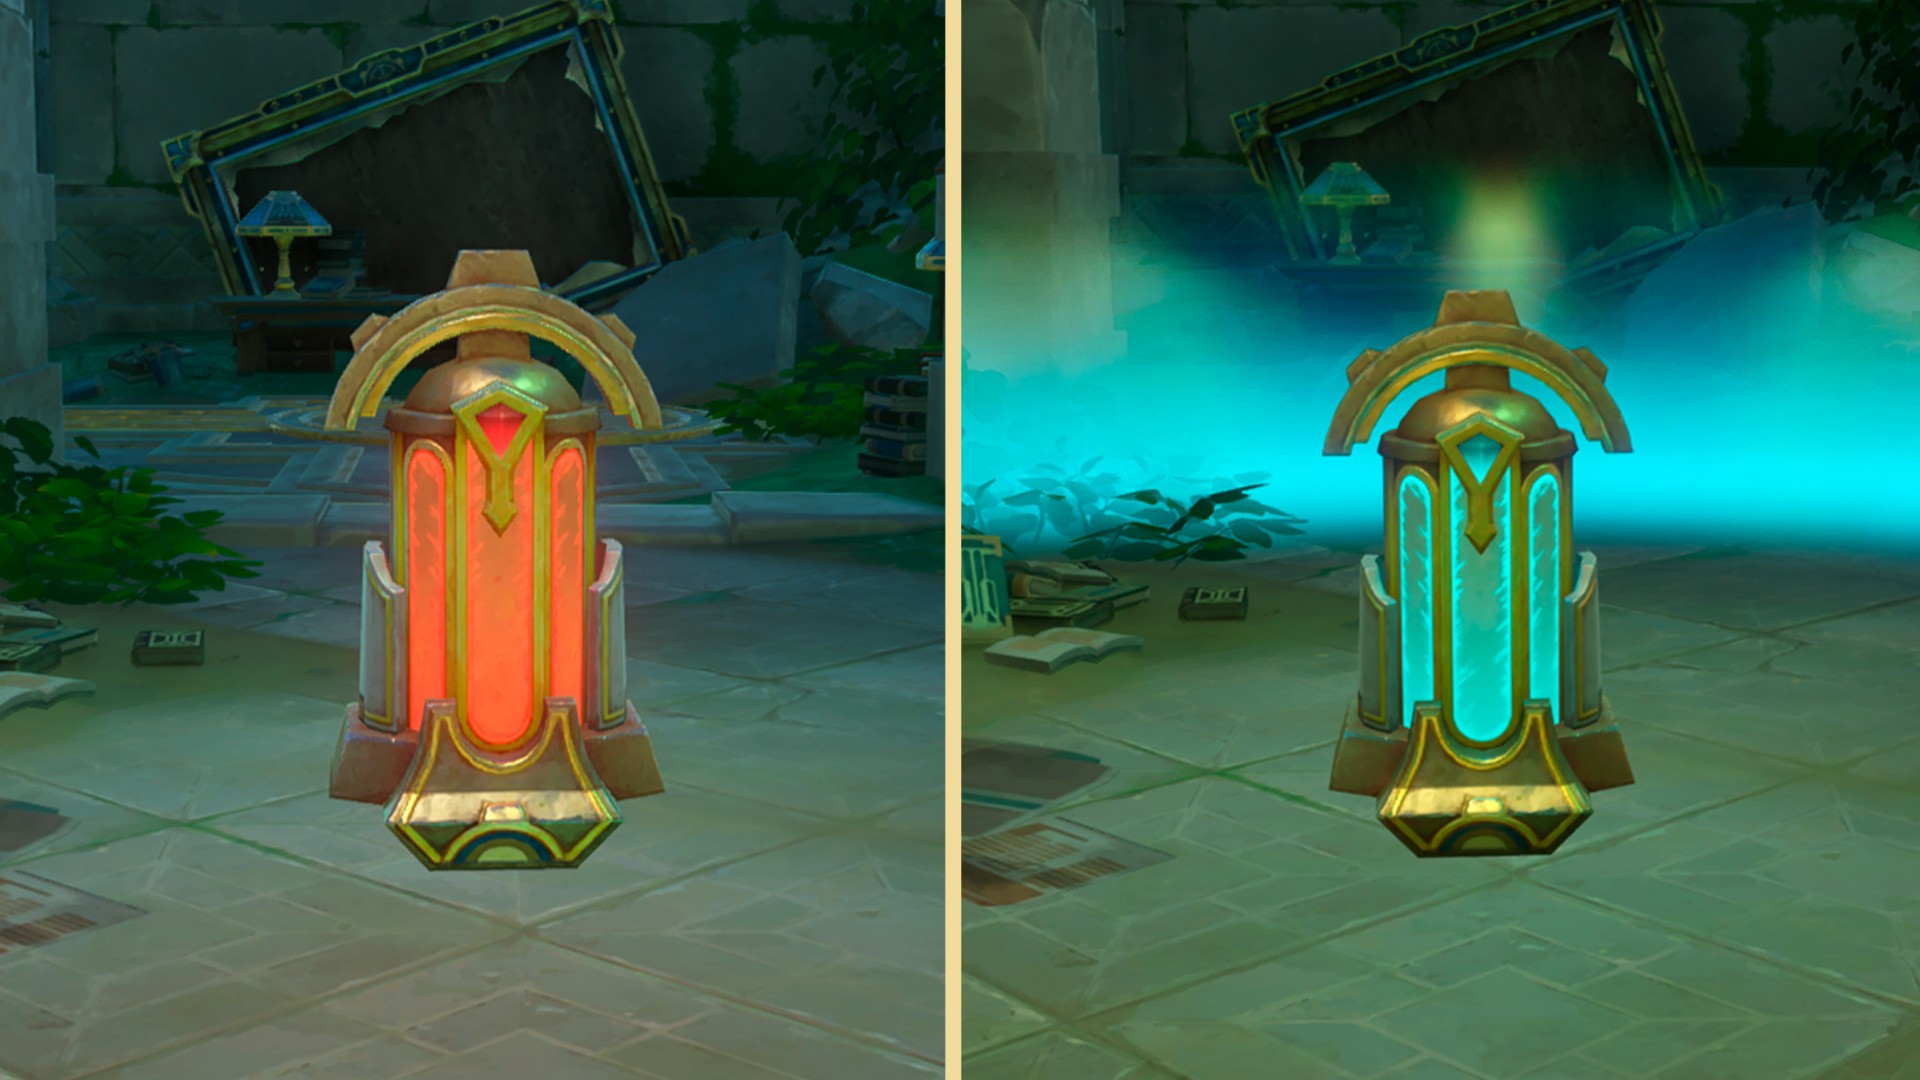
- Only those terminals that are filled with turquoise energy can be activated.
- To charge the remote control, you need to bring a charged power unit to it.
- Using video finders, you can move energy from one device to another, charging the storage devices.
If the solution to any of the puzzles involves connecting to video surveillance, then in the area under study there is usually one or more cameras located between which you can move, pointing the lens at them.
Where to find all energy transfer terminals in Fontaine
To solve all terminal puzzles, visit 13 places within the Liffey and the Institute of Kinetic Energy.
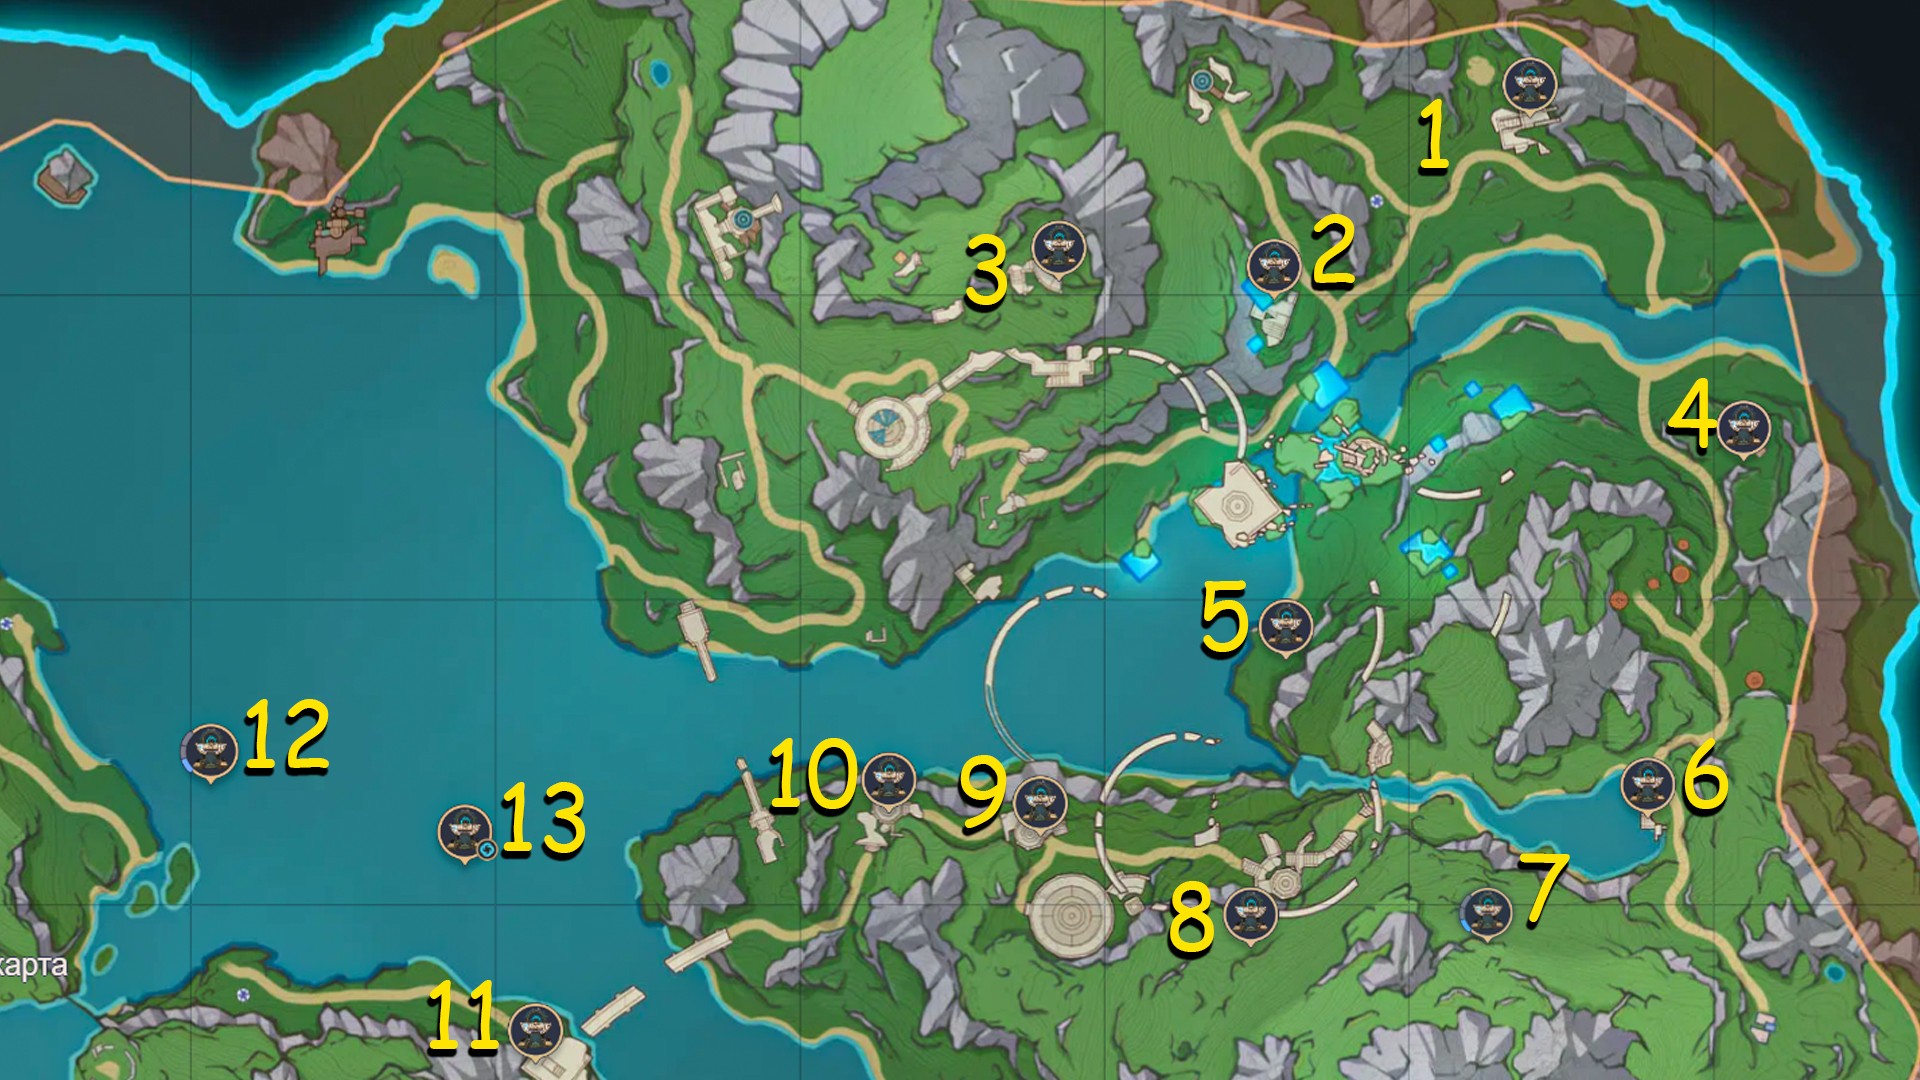
Most of the mechanisms are located on the surface, and only three of them are located at deeper levels of the map: underwater, as well as in underground locations such as a prison controlled by Wriothesley. For solving 11 of them, you can loot 3 precious, 2 amazing, 5 rich and 1 ordinary casket.
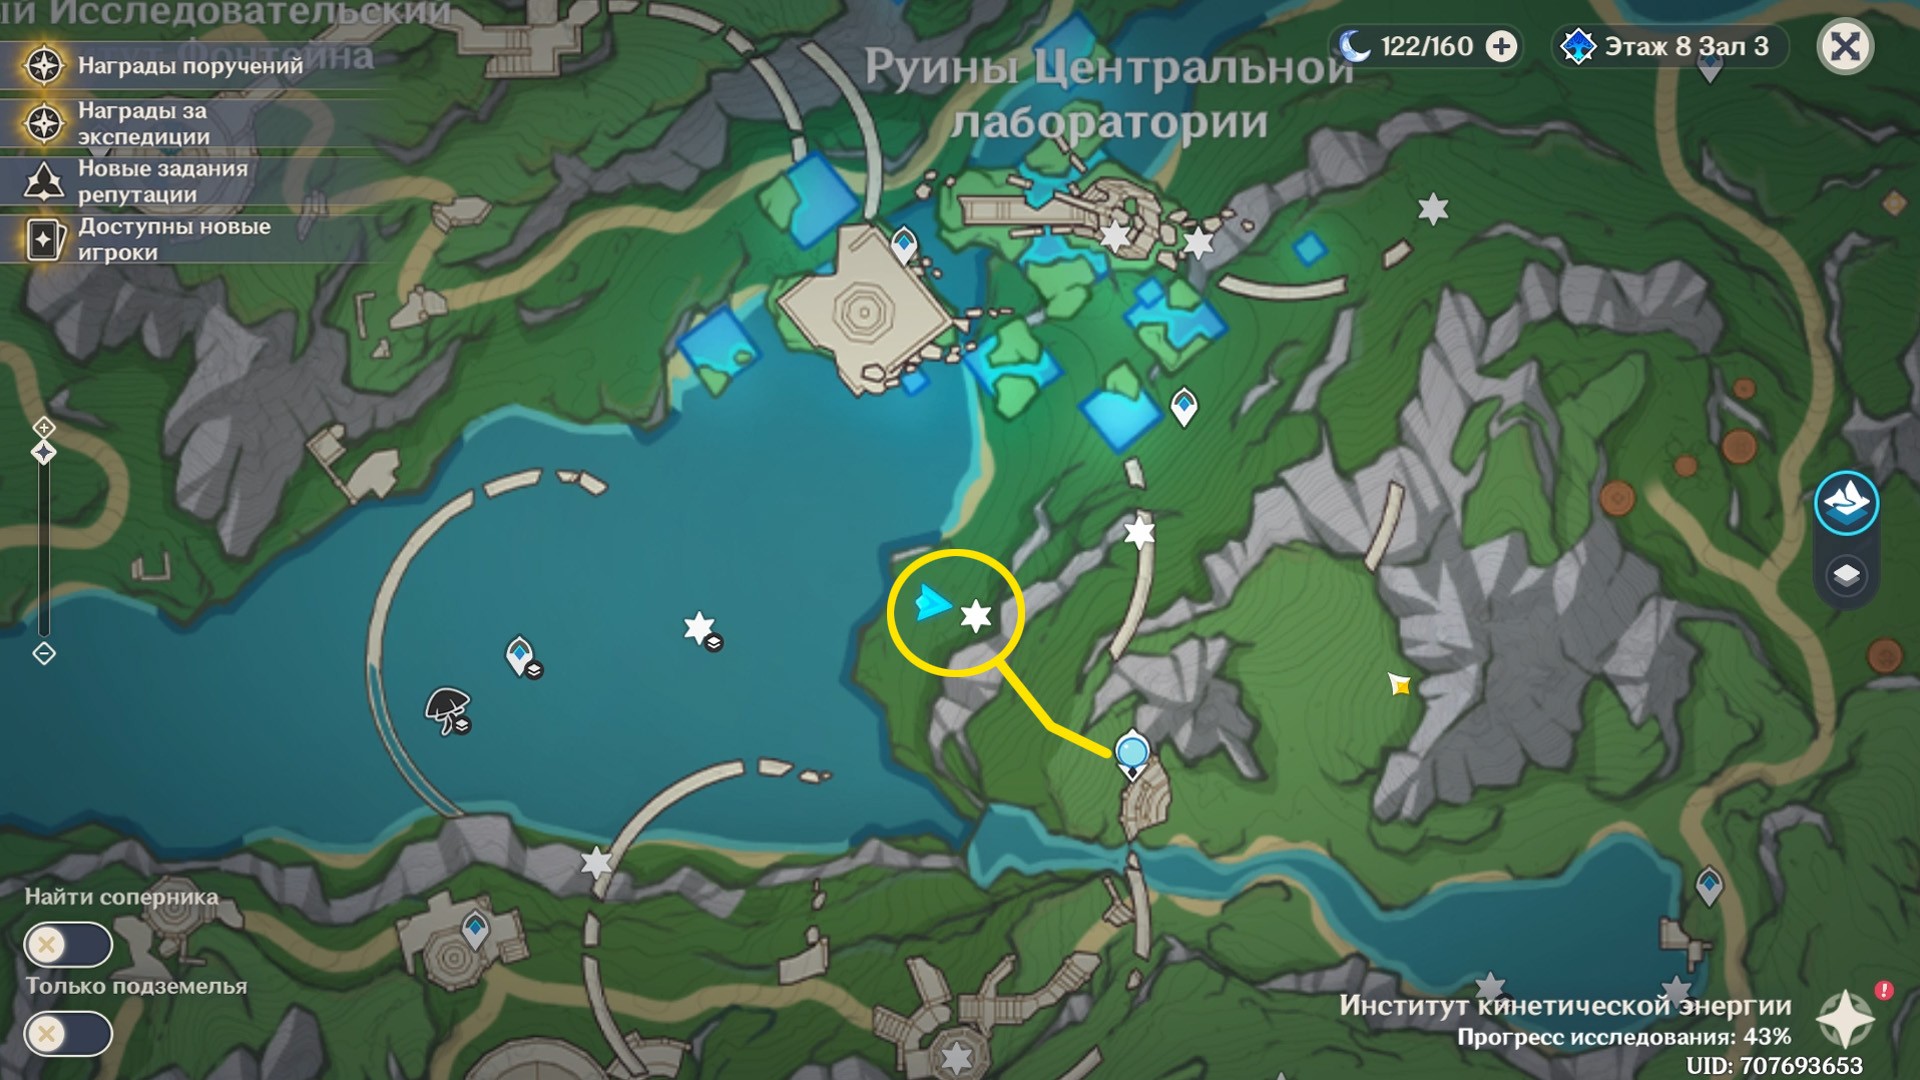
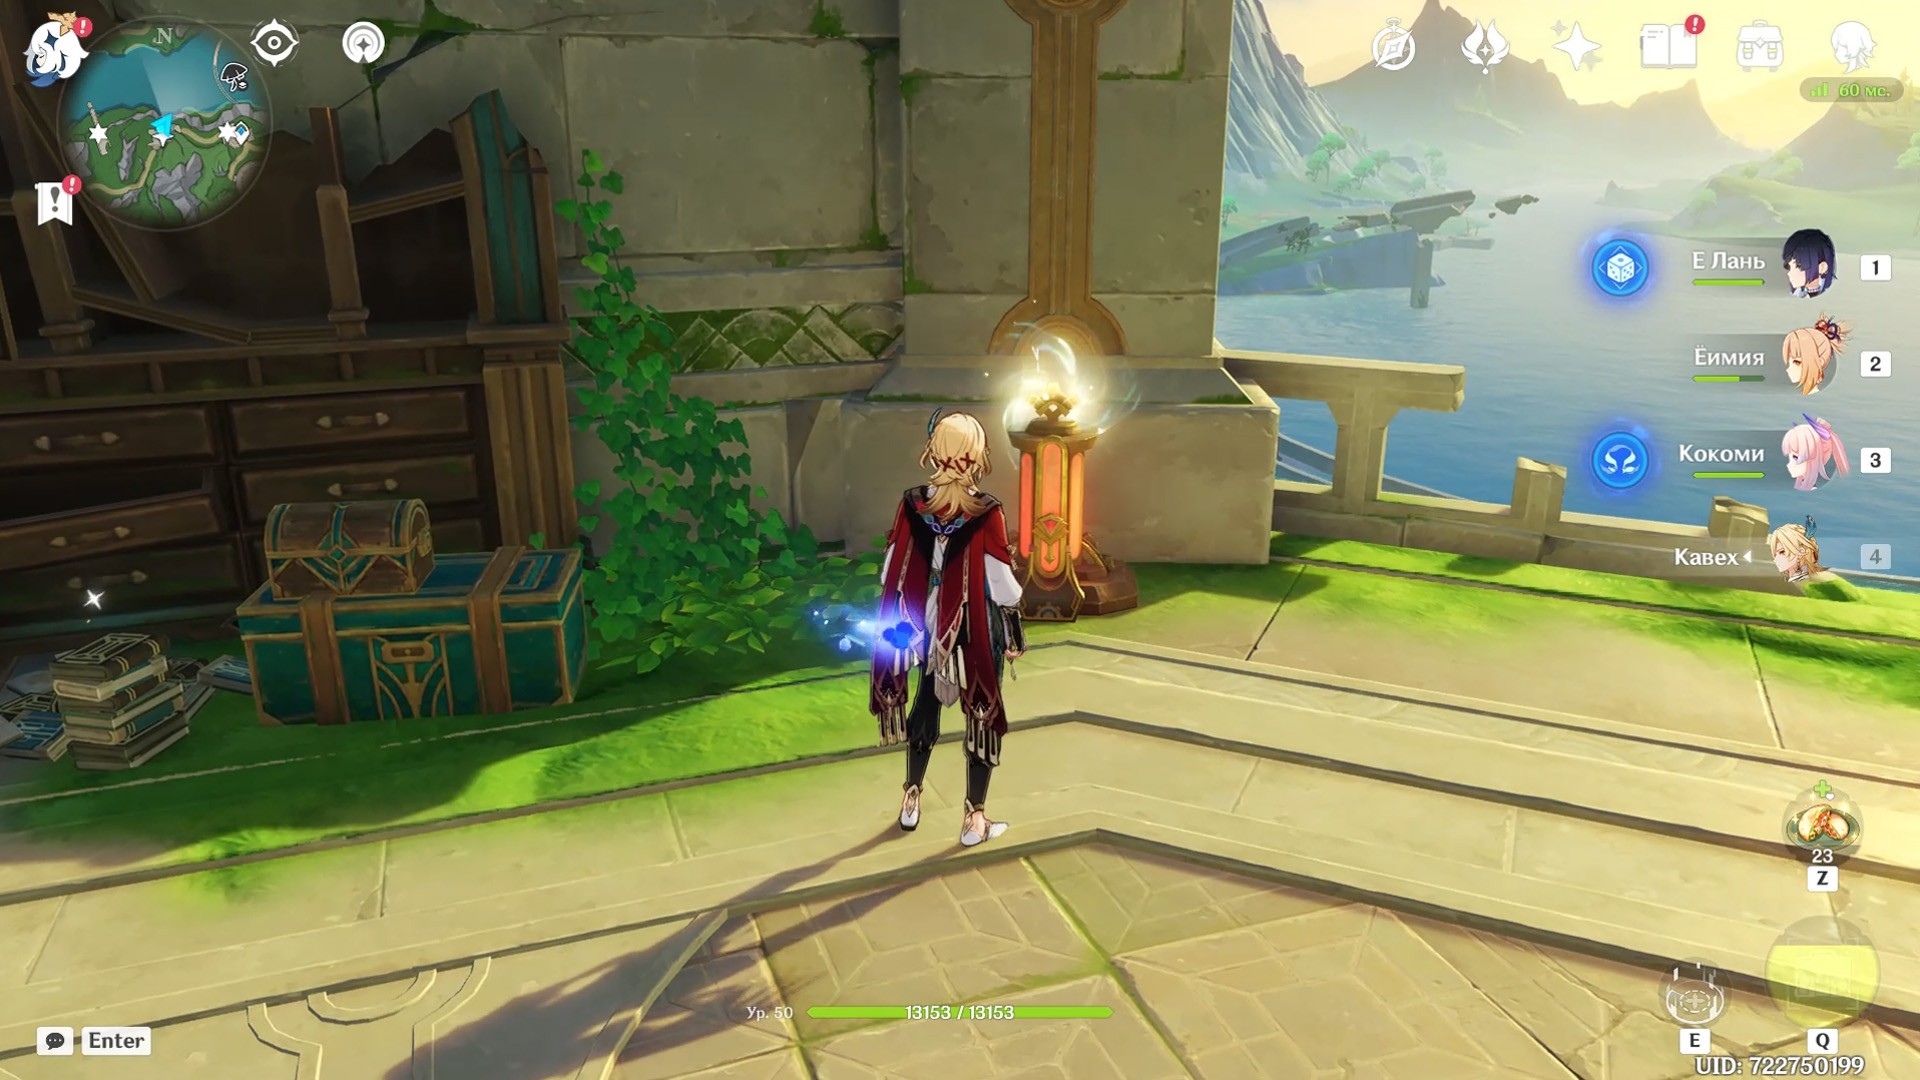
Panel 1
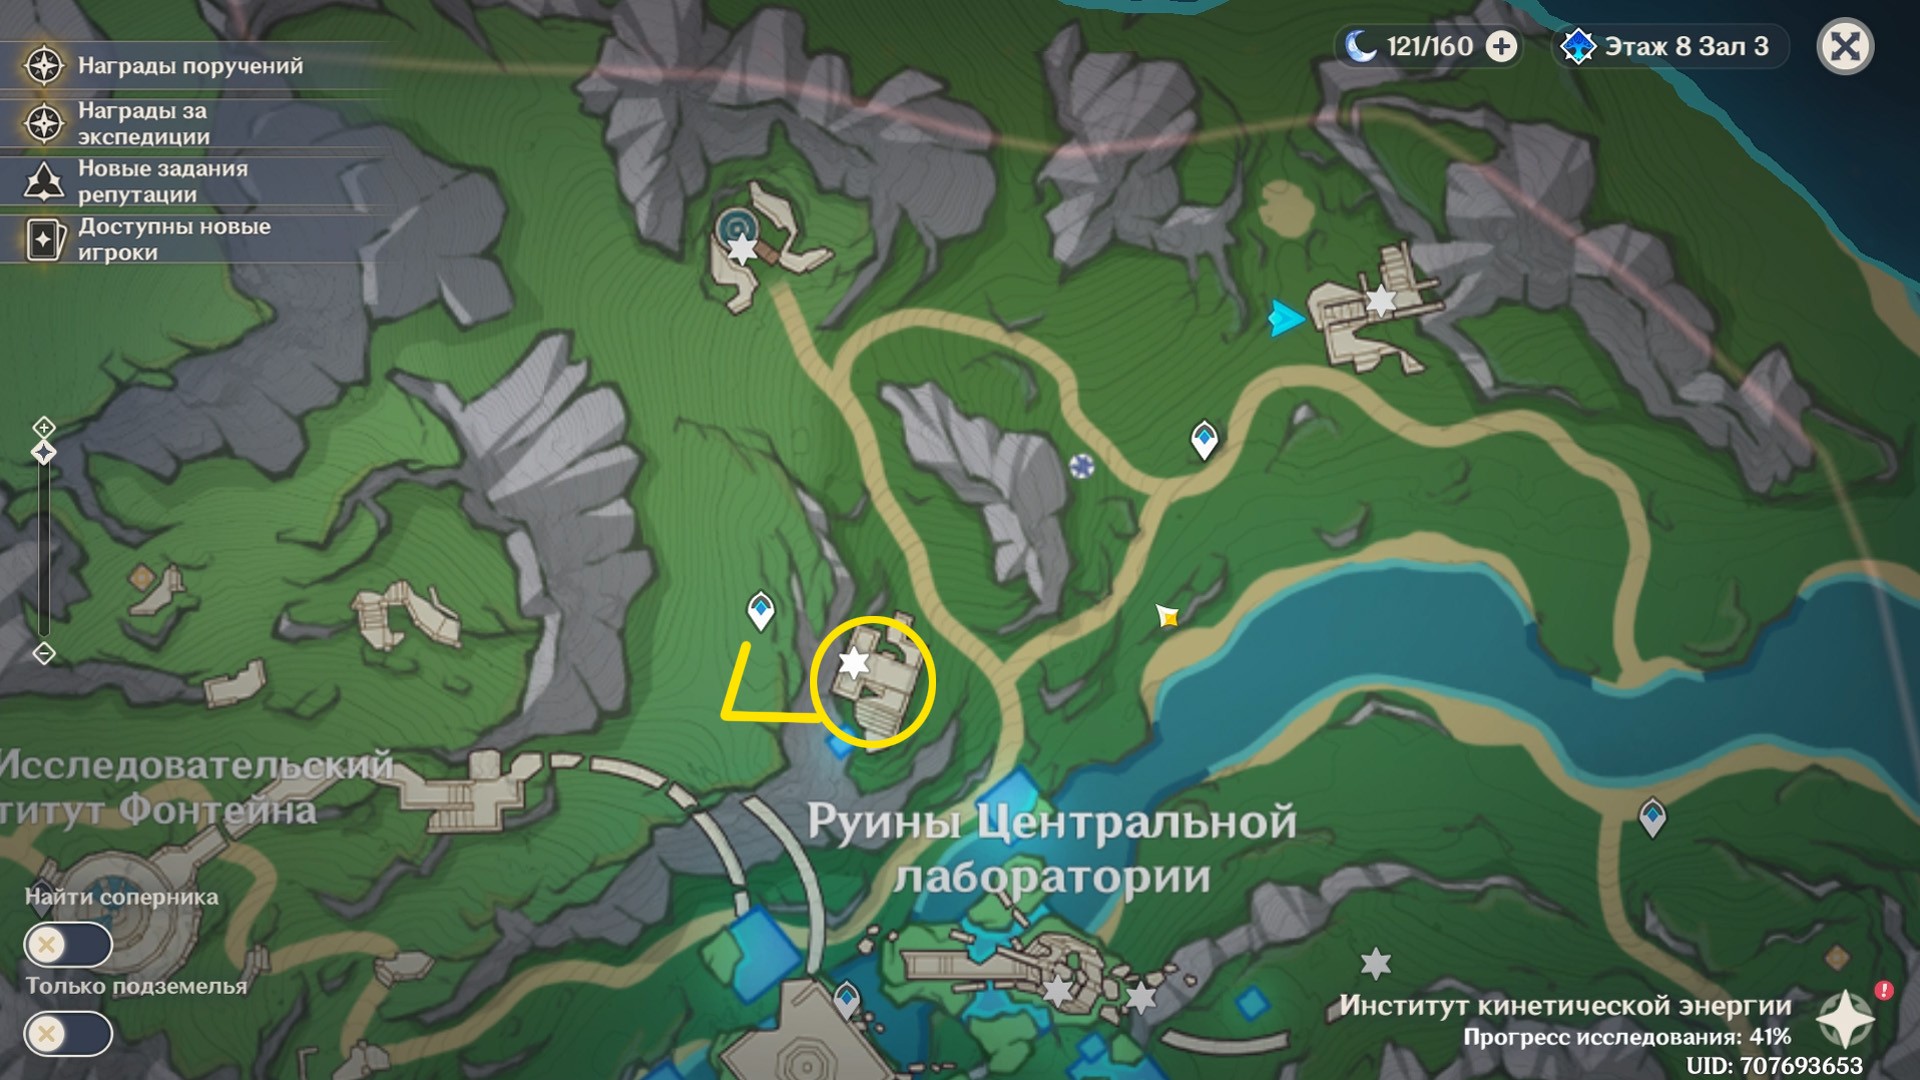
- Location: northeast of the ruins of the Cent Laboratory.
- Reward: precious chest.
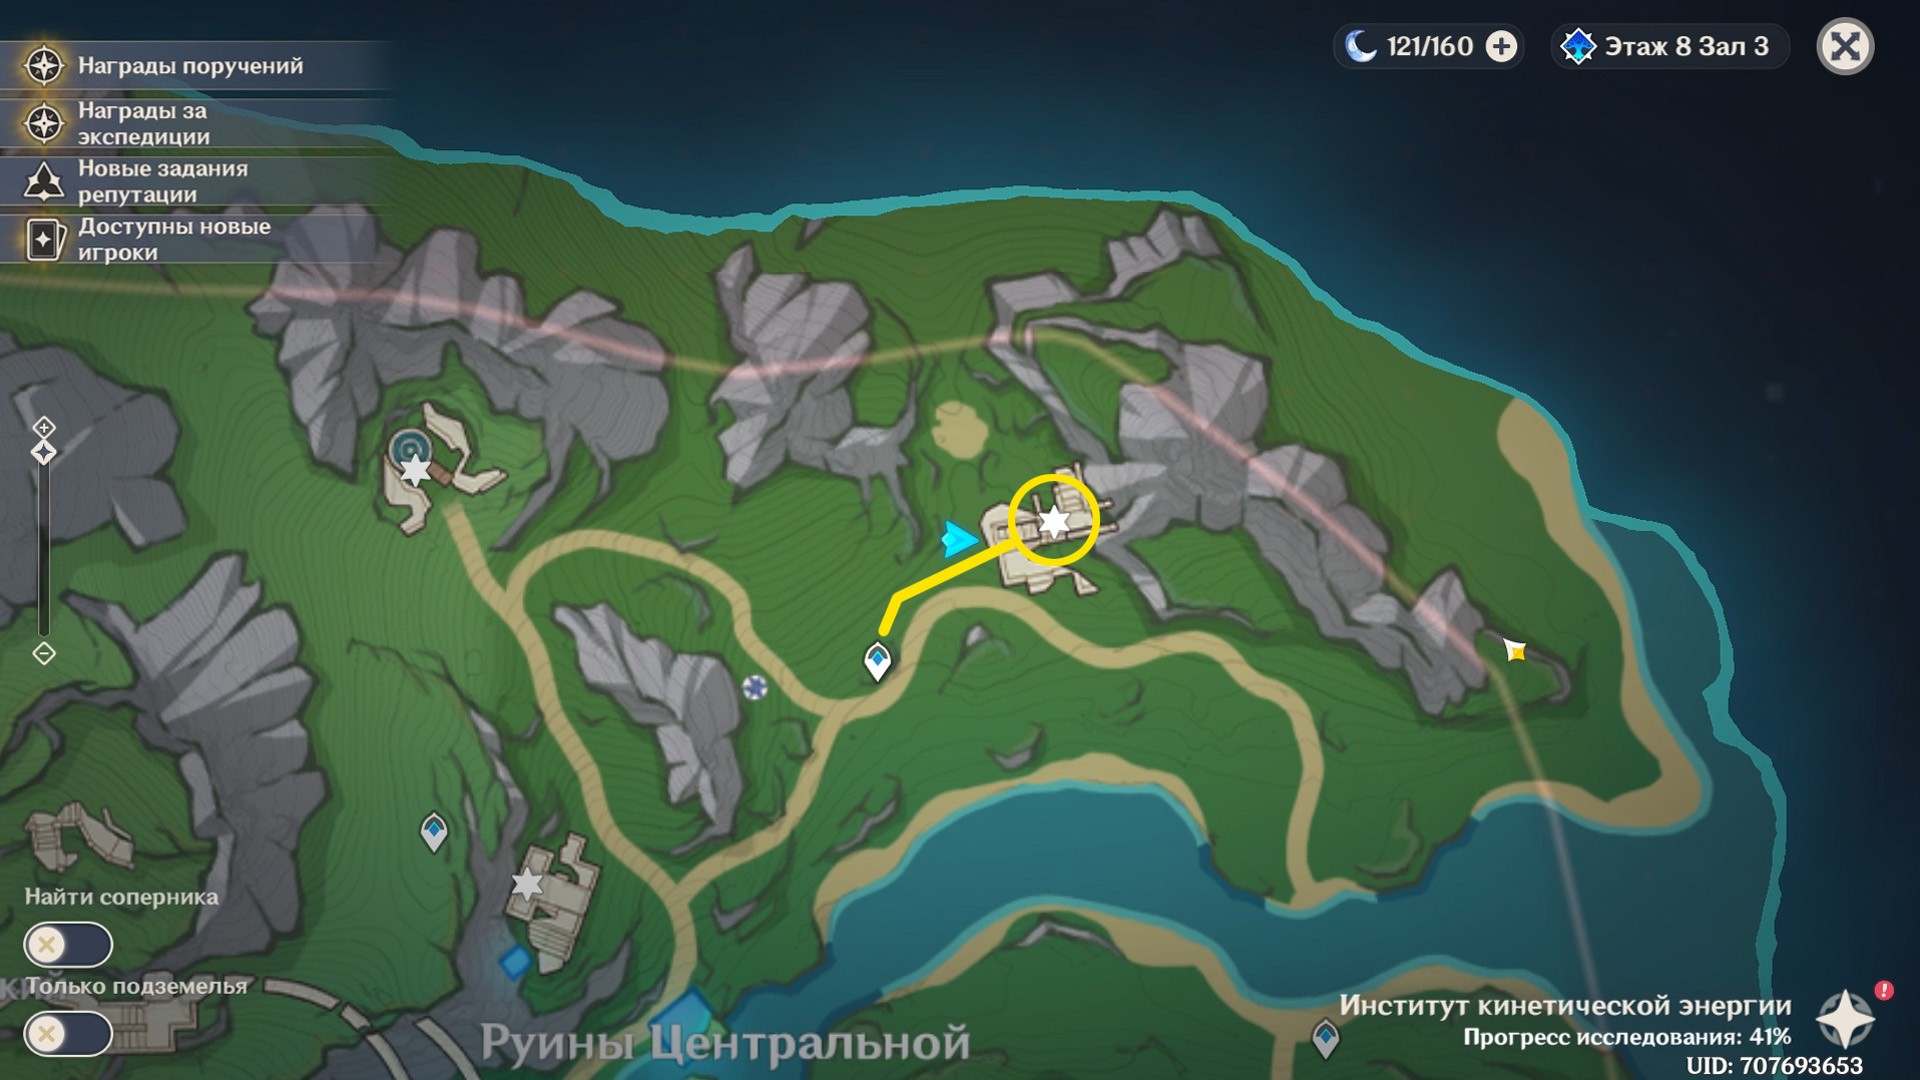
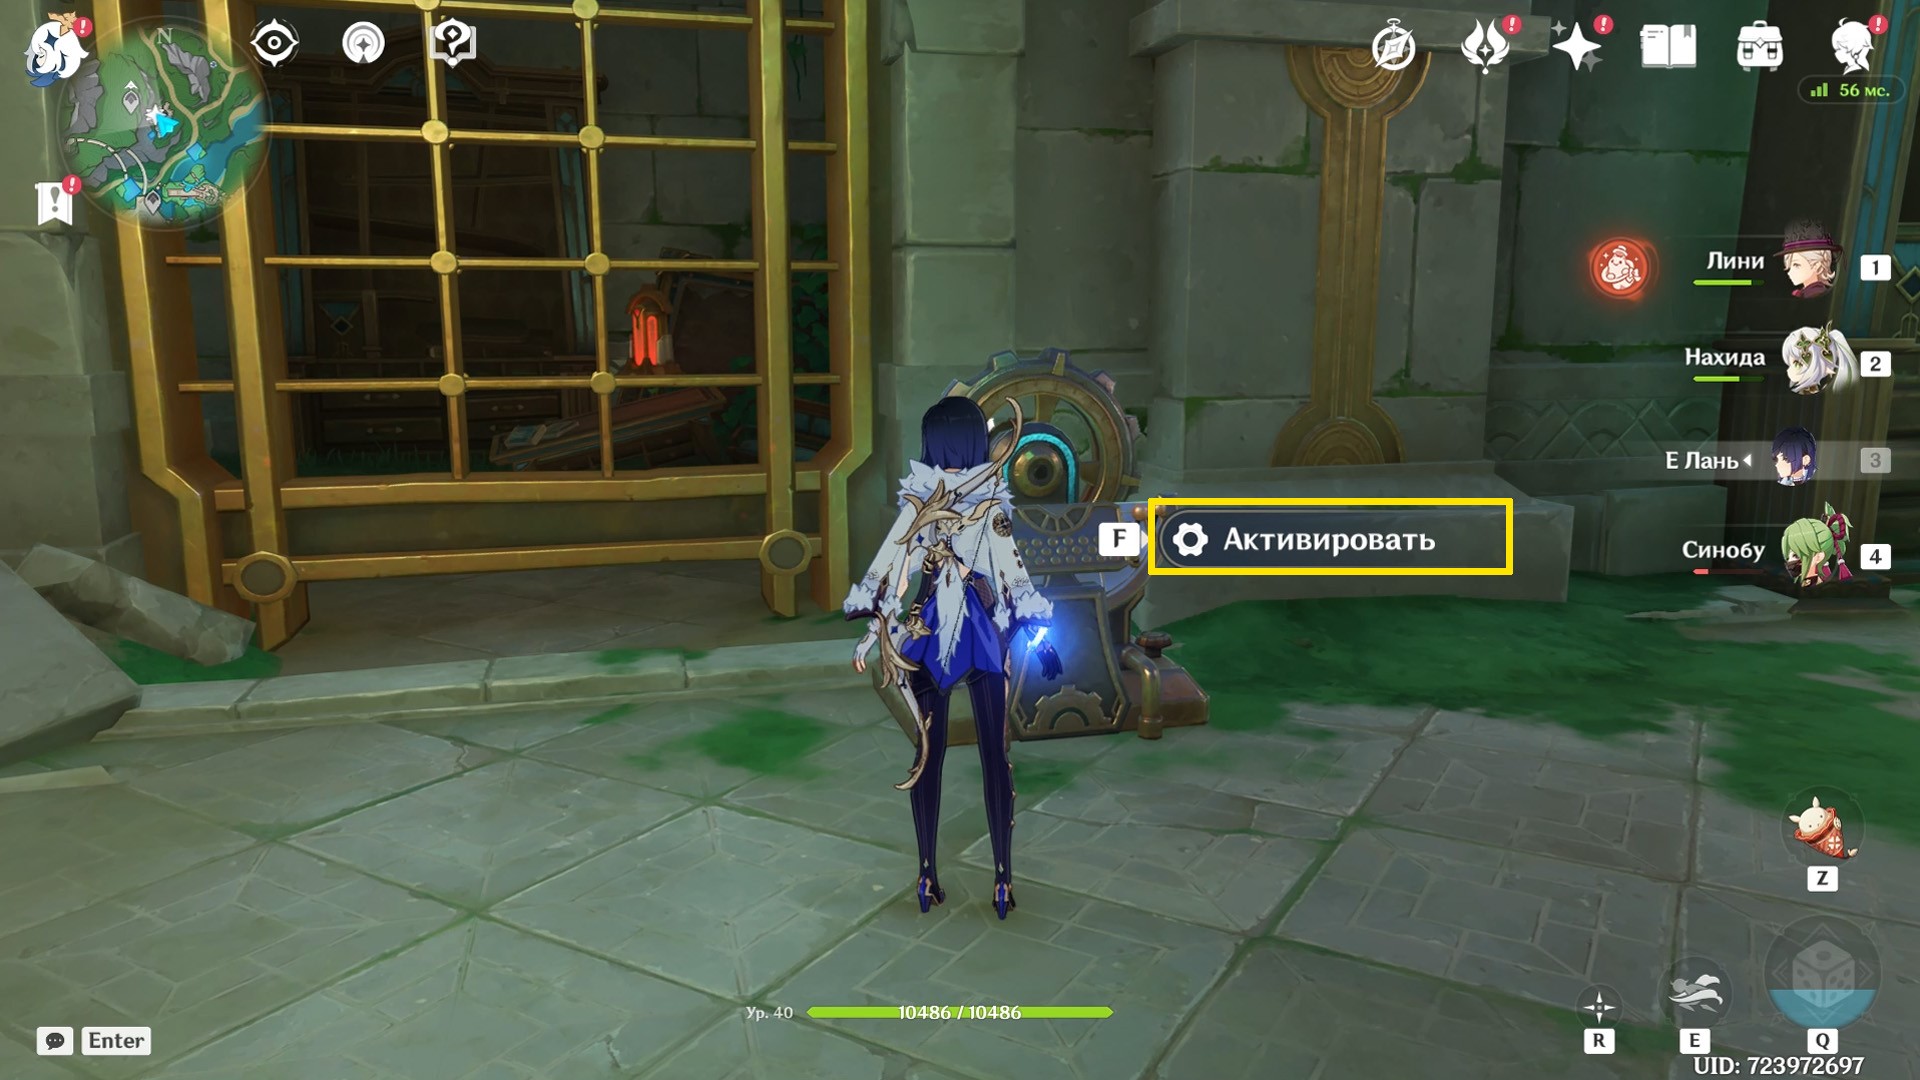
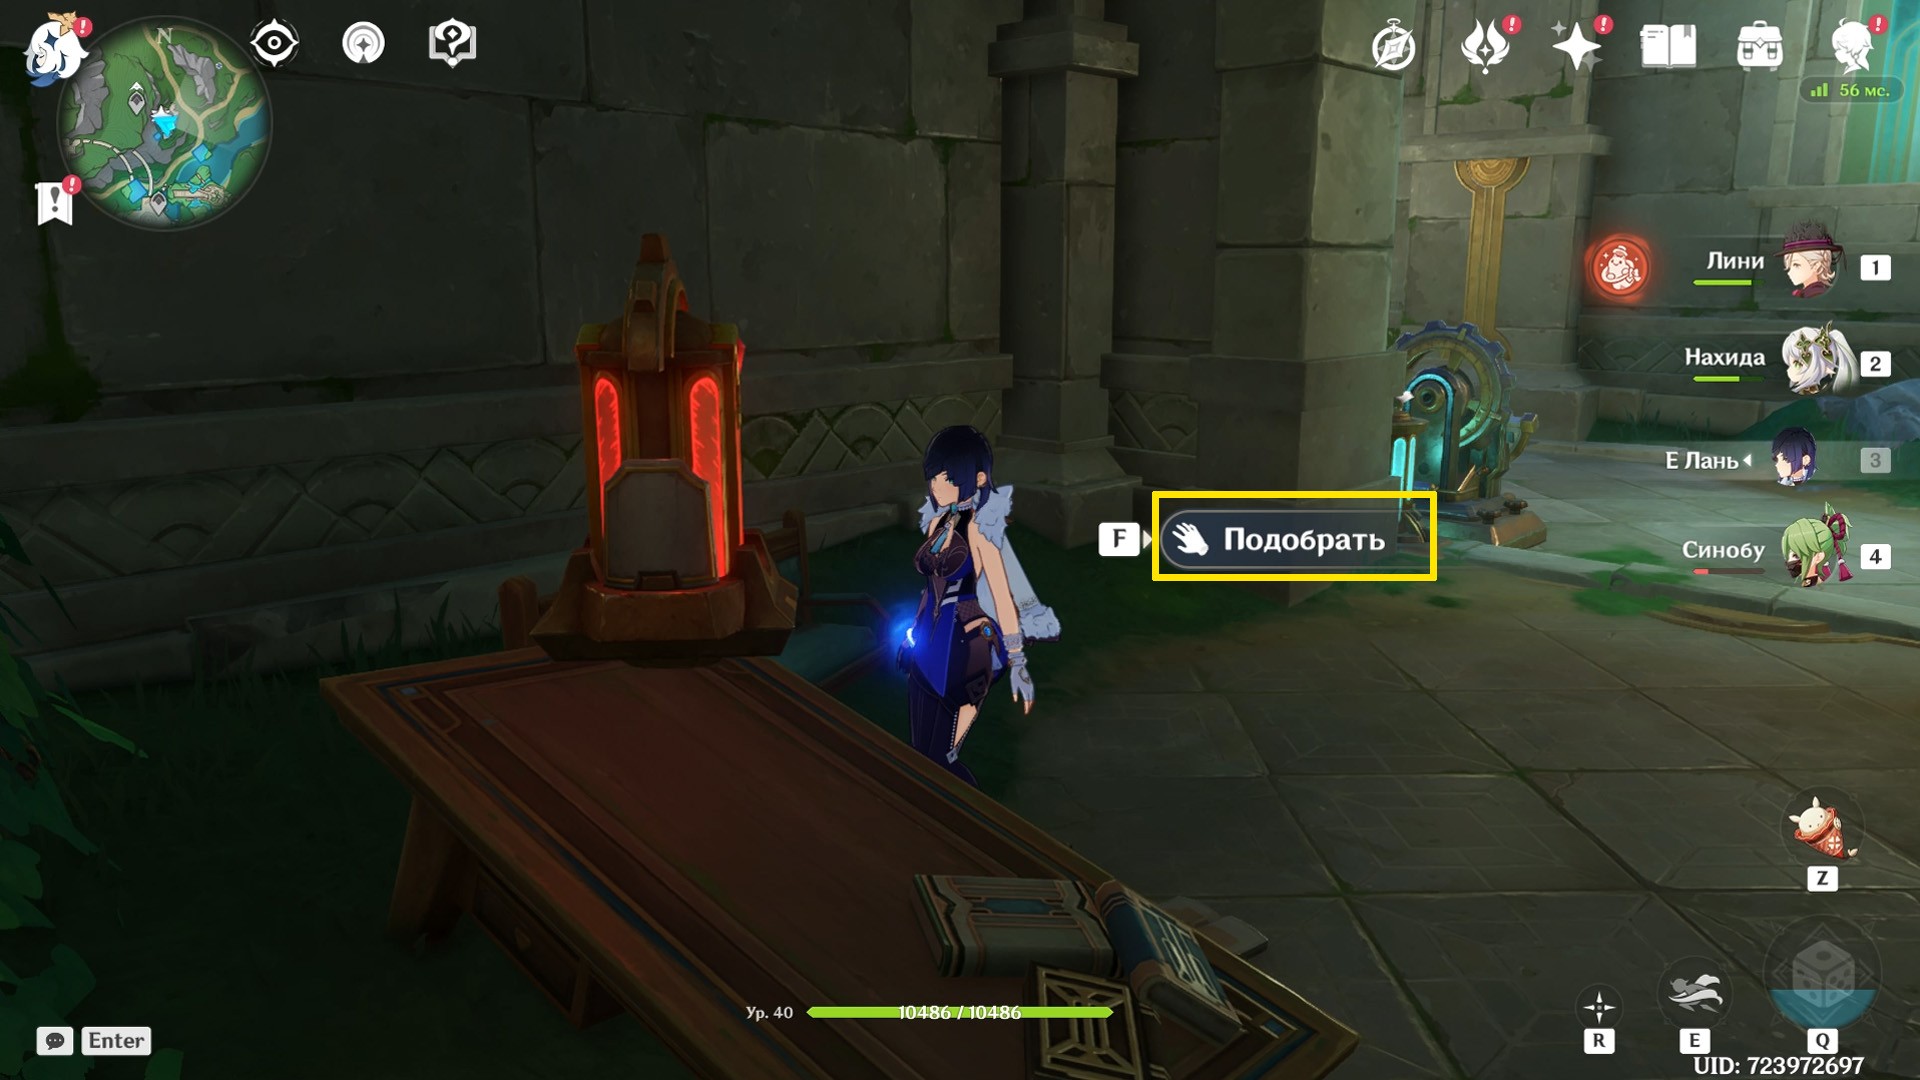
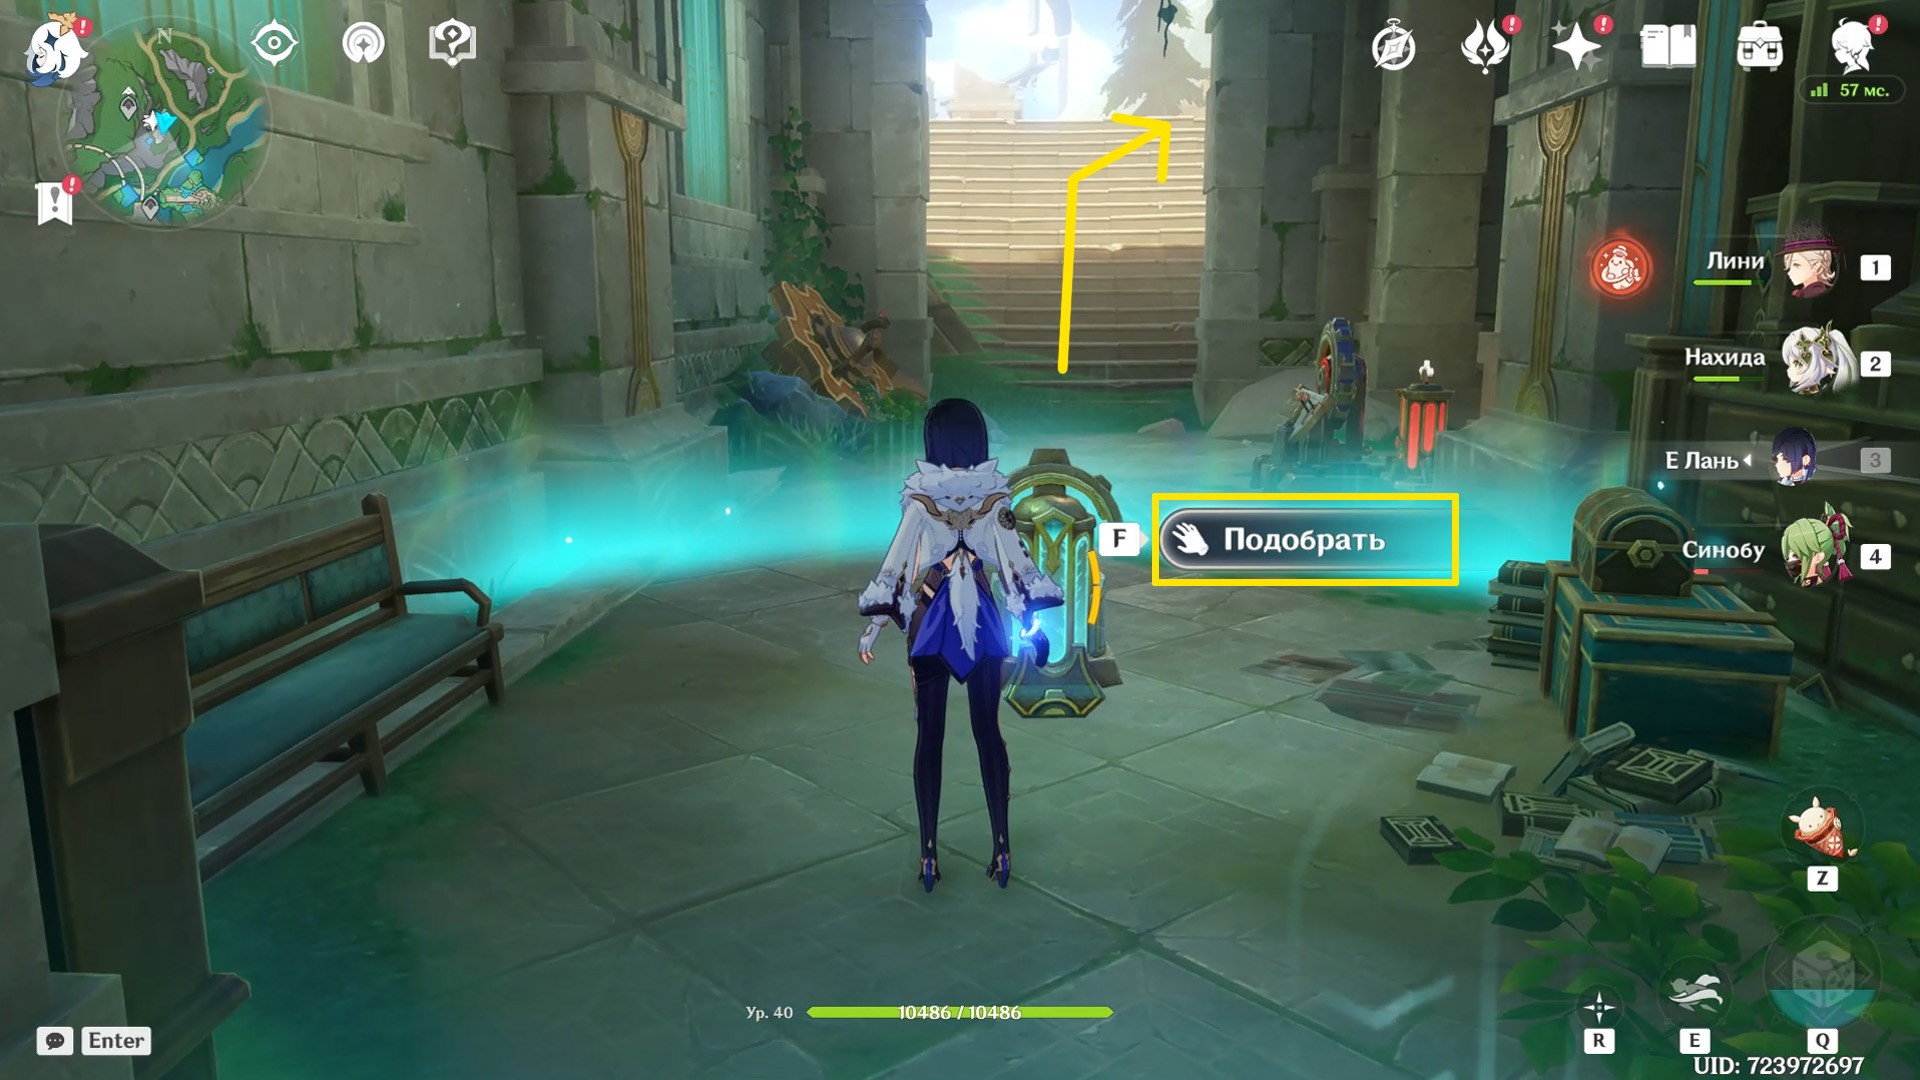
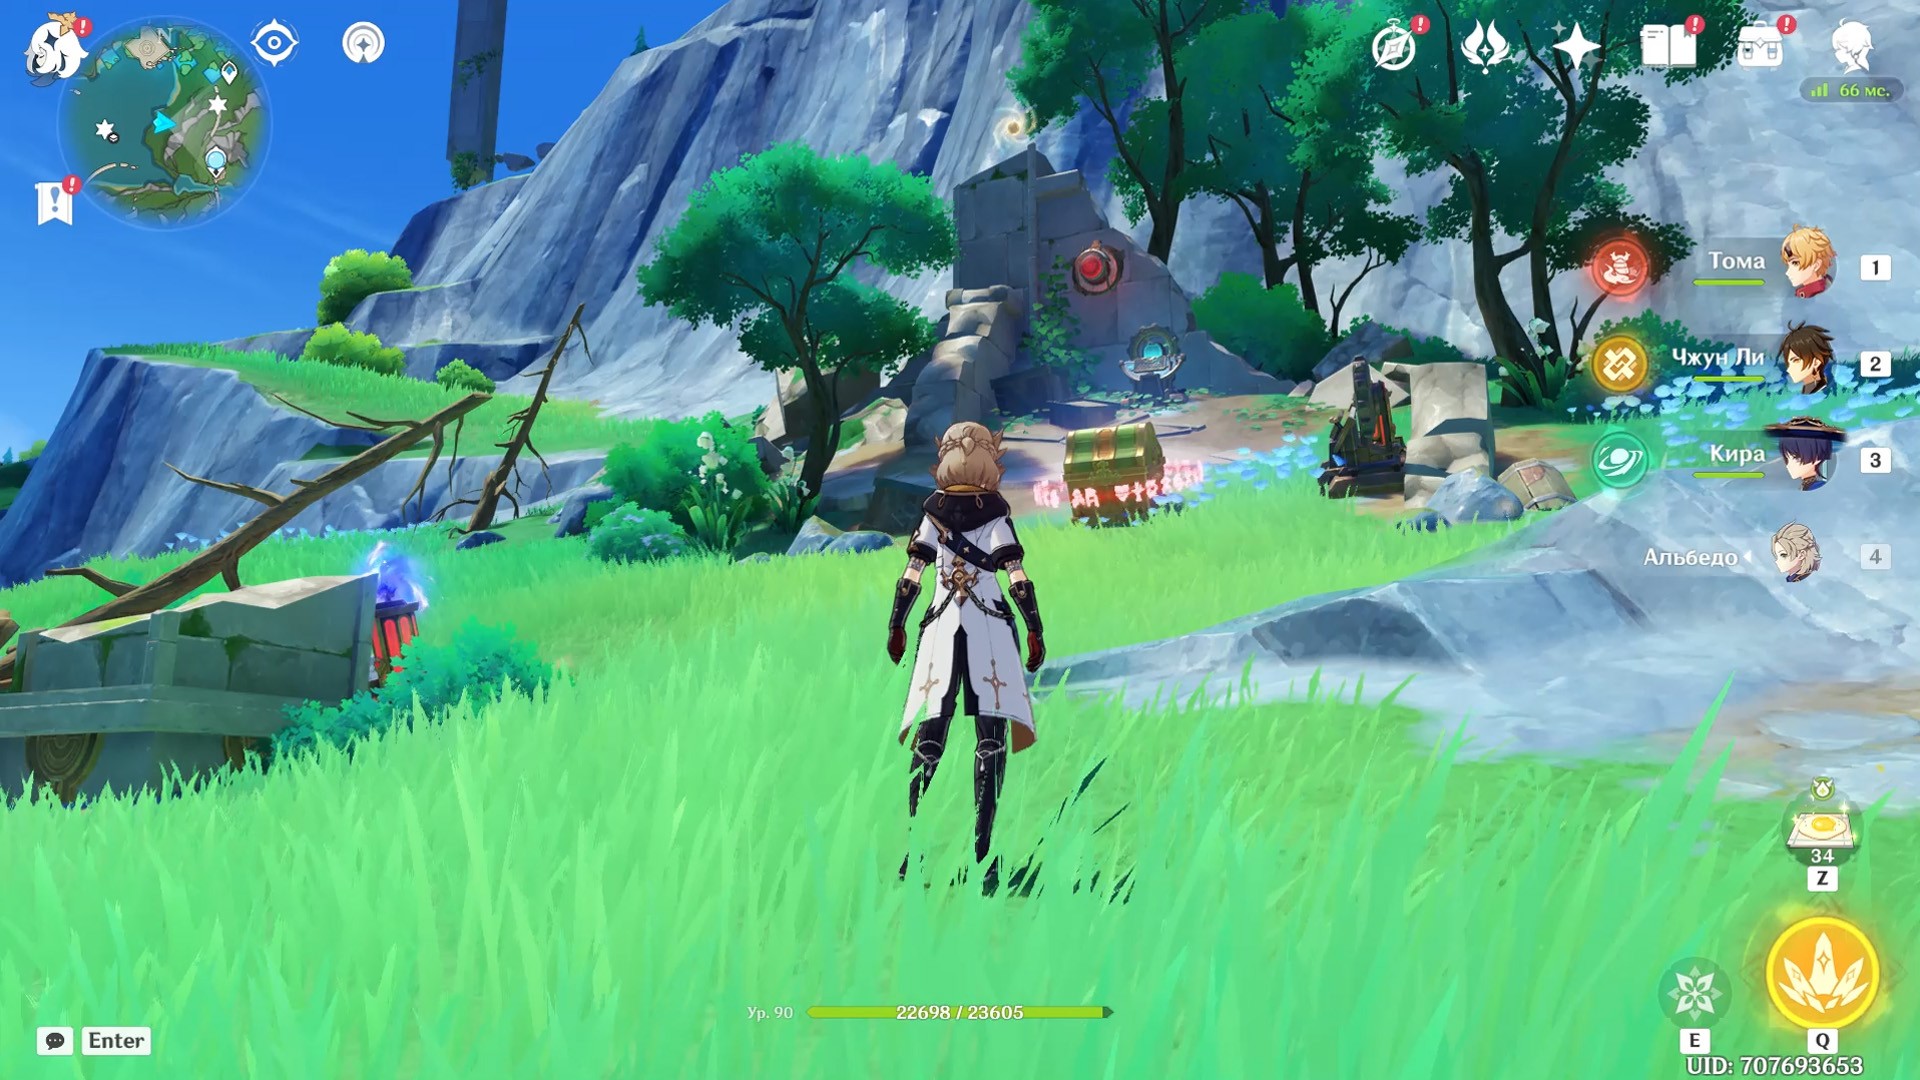
In the marked location there is a three-level dilapidated building, in the center of which there is a locked chest and an inactive control panel. First of all, climb to the upper tier, if necessary, neutralizing the meks surrounding the building.
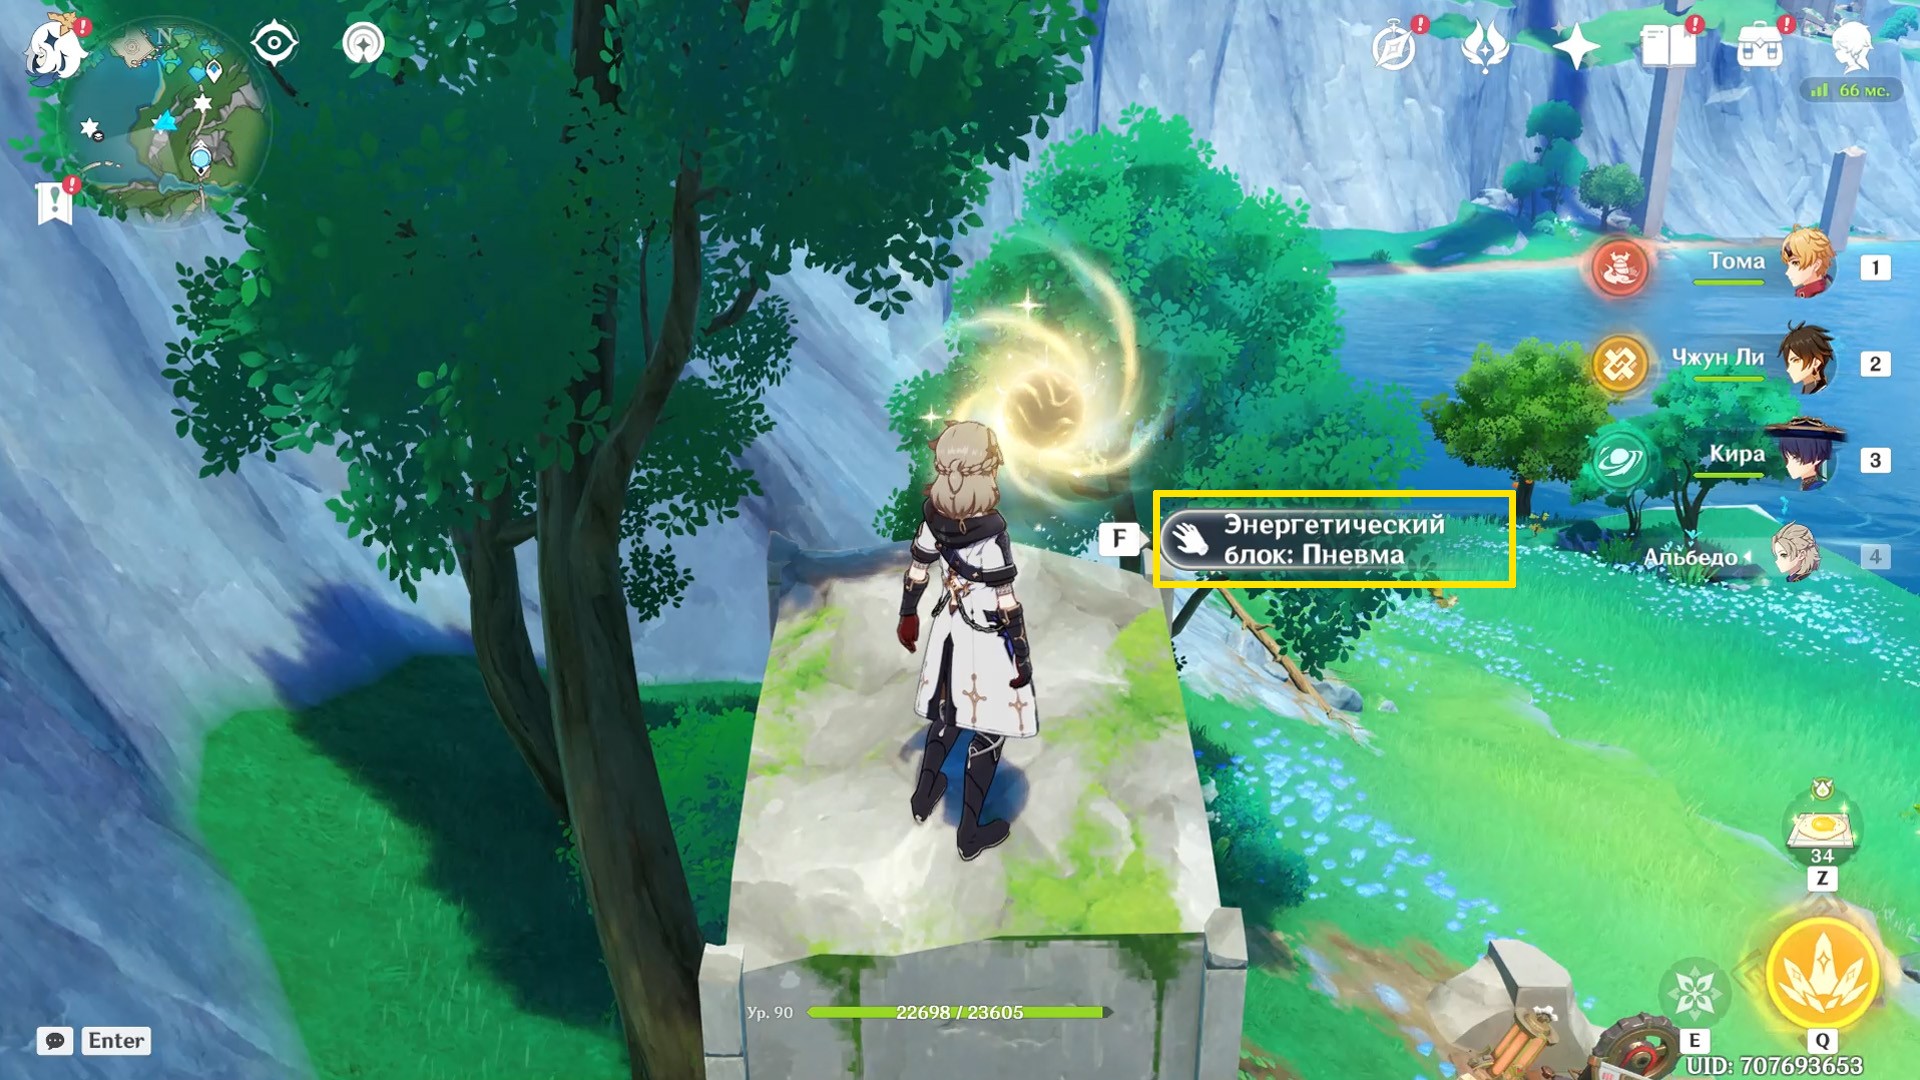
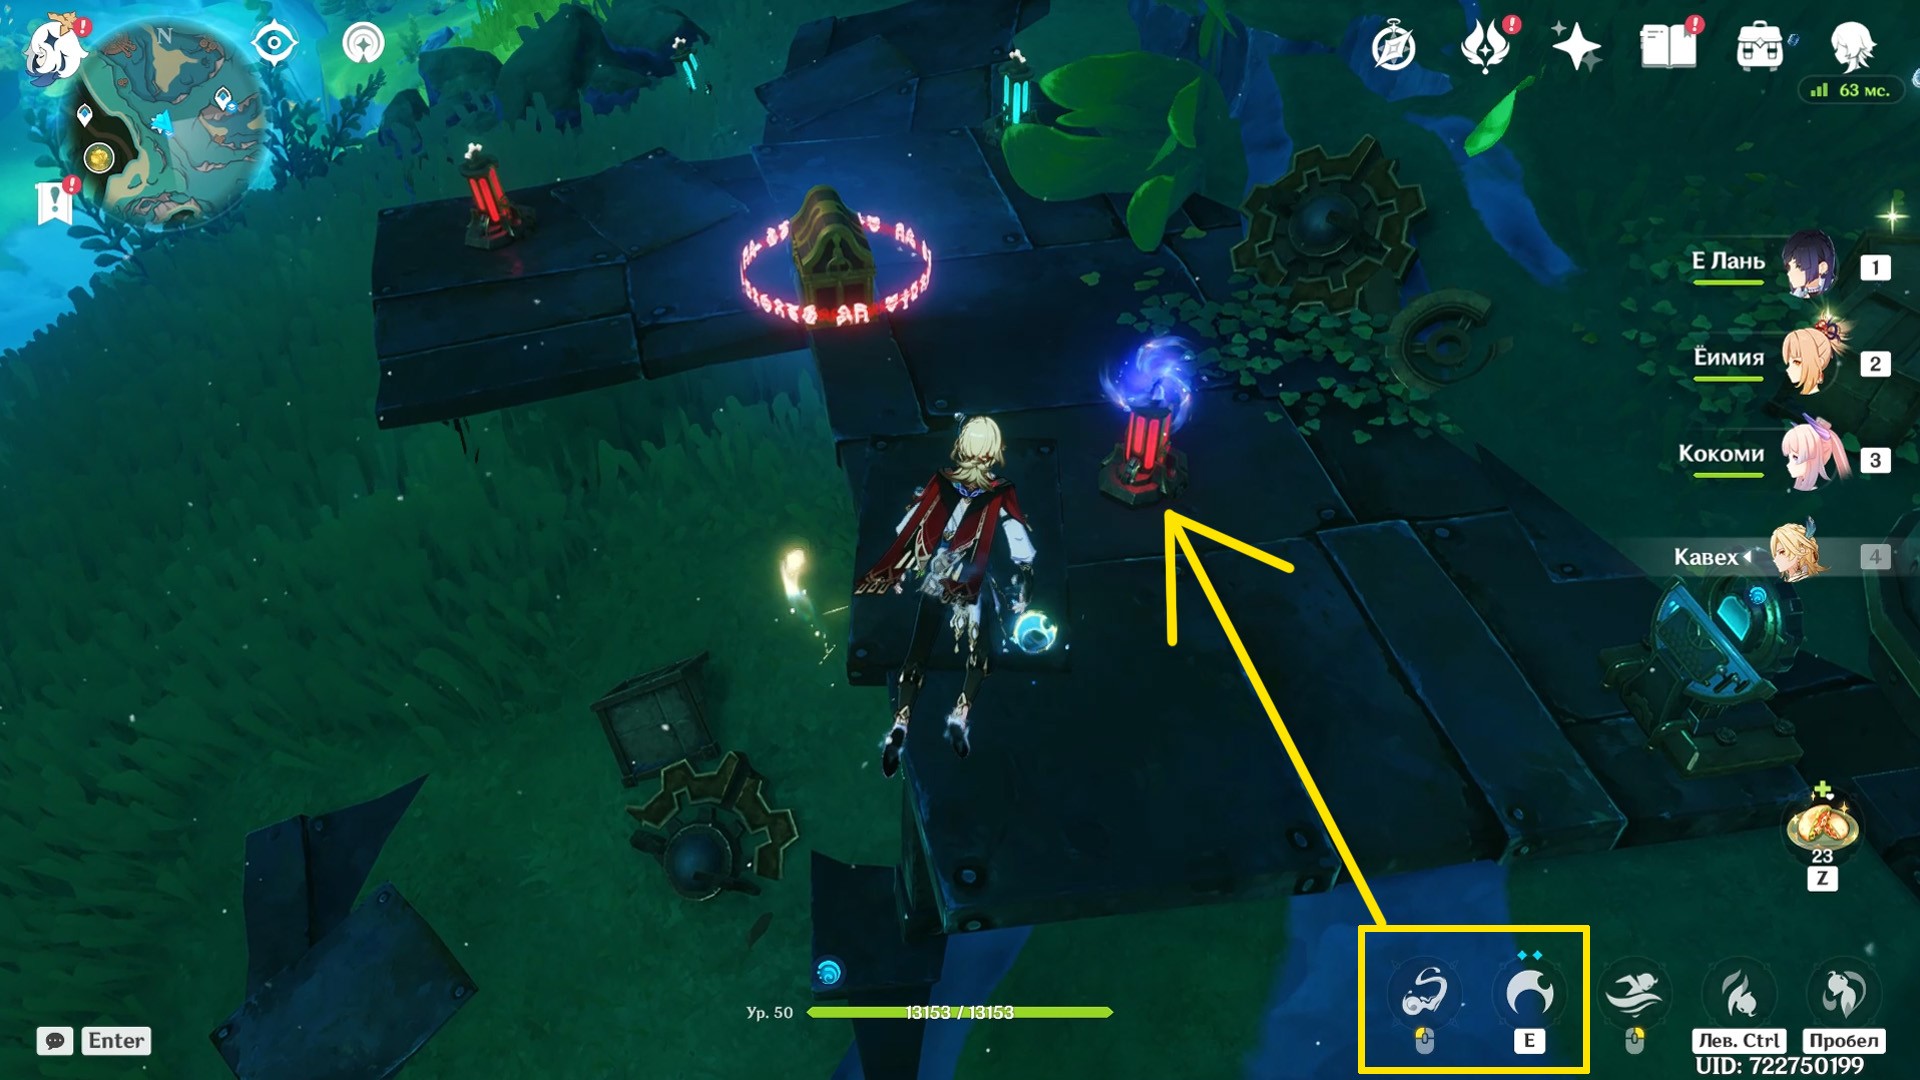
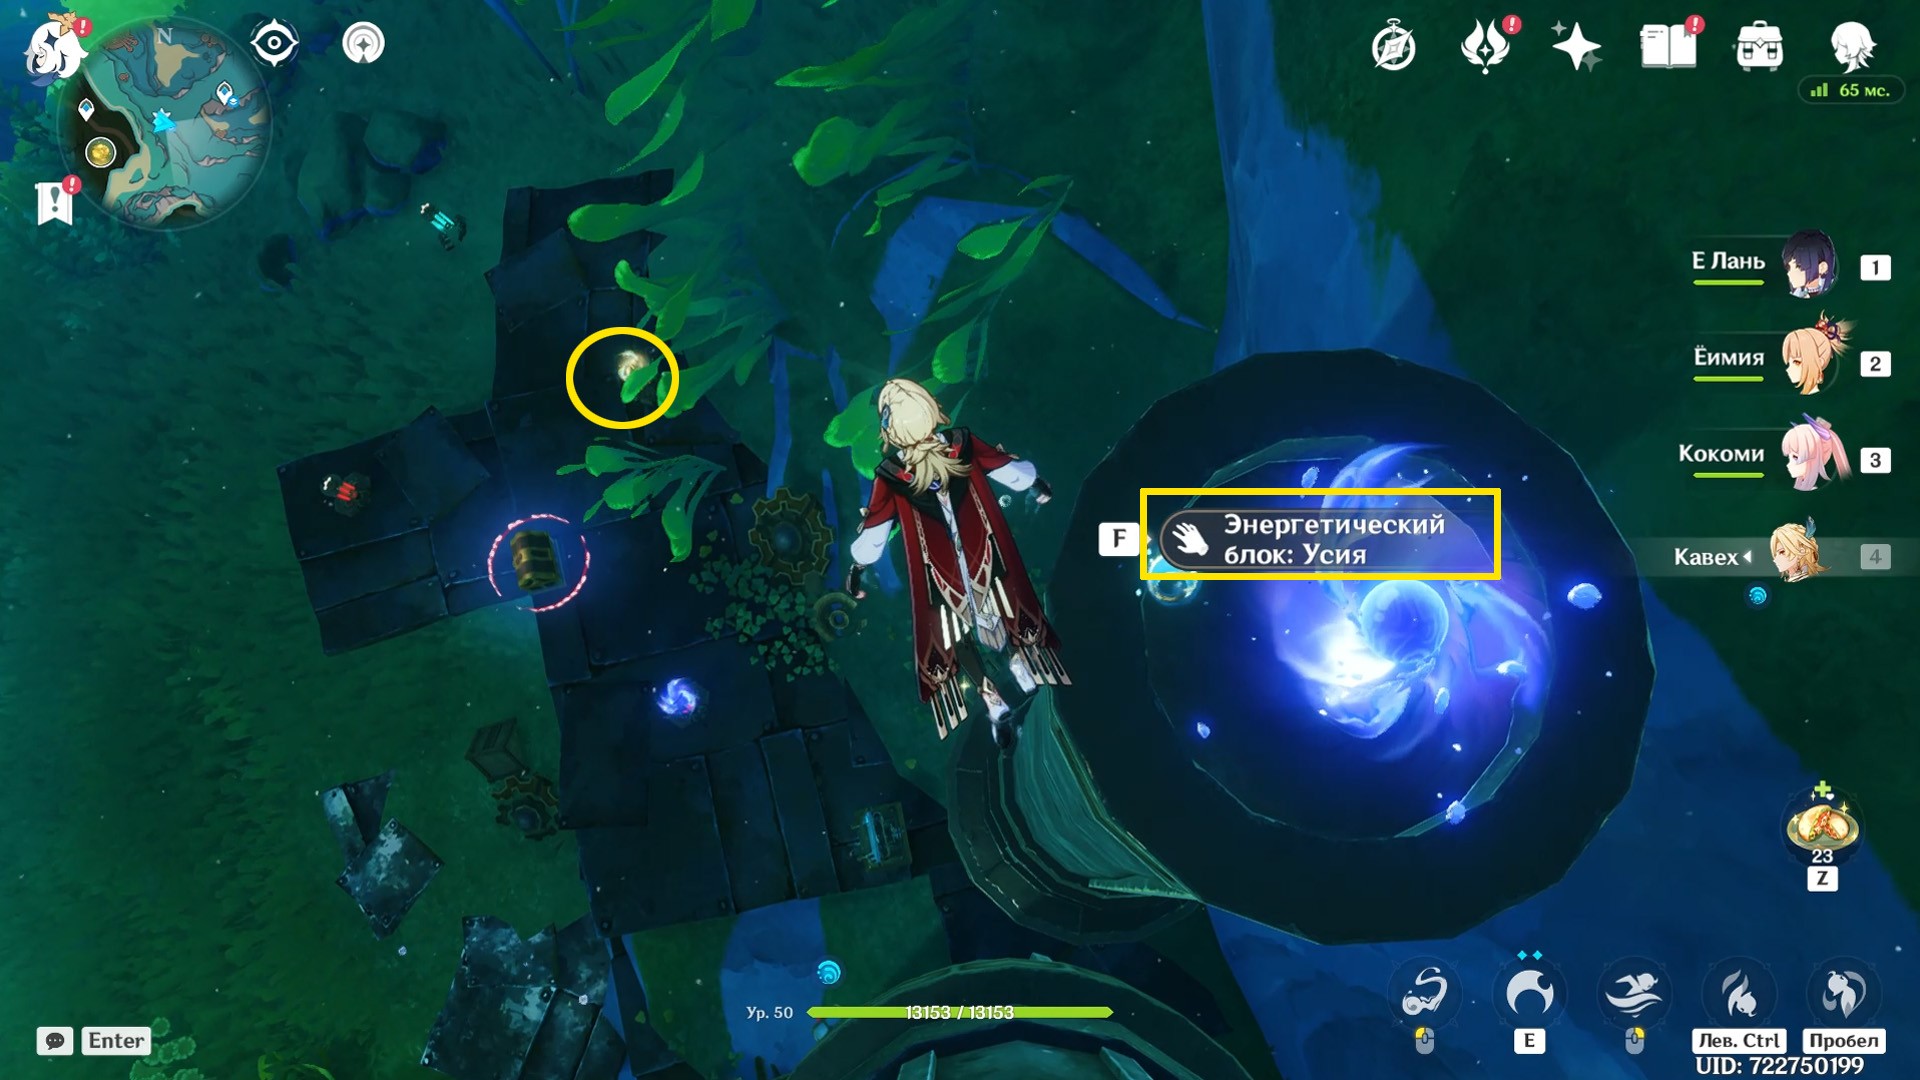
Pick up an ushii block and attack the drive on the column (read more about Arche energy in separate manual ) for it to charge.

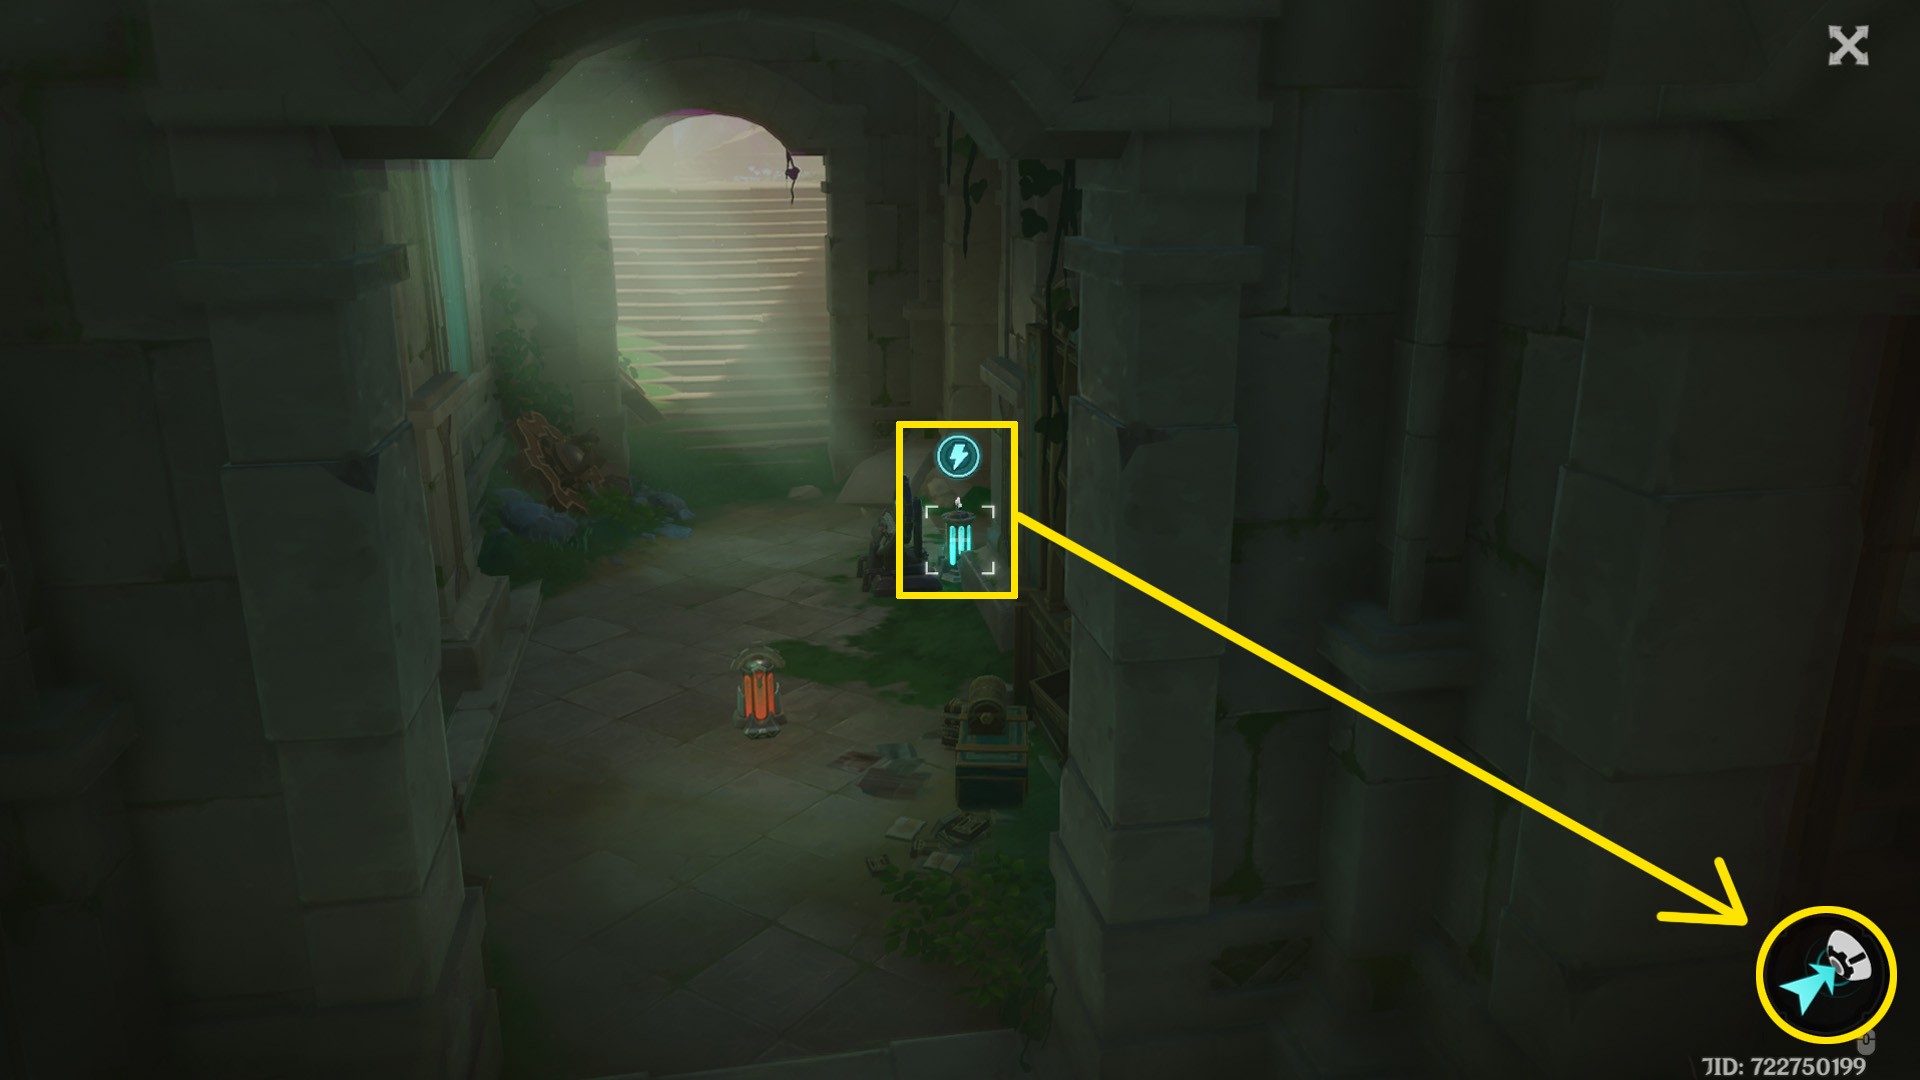
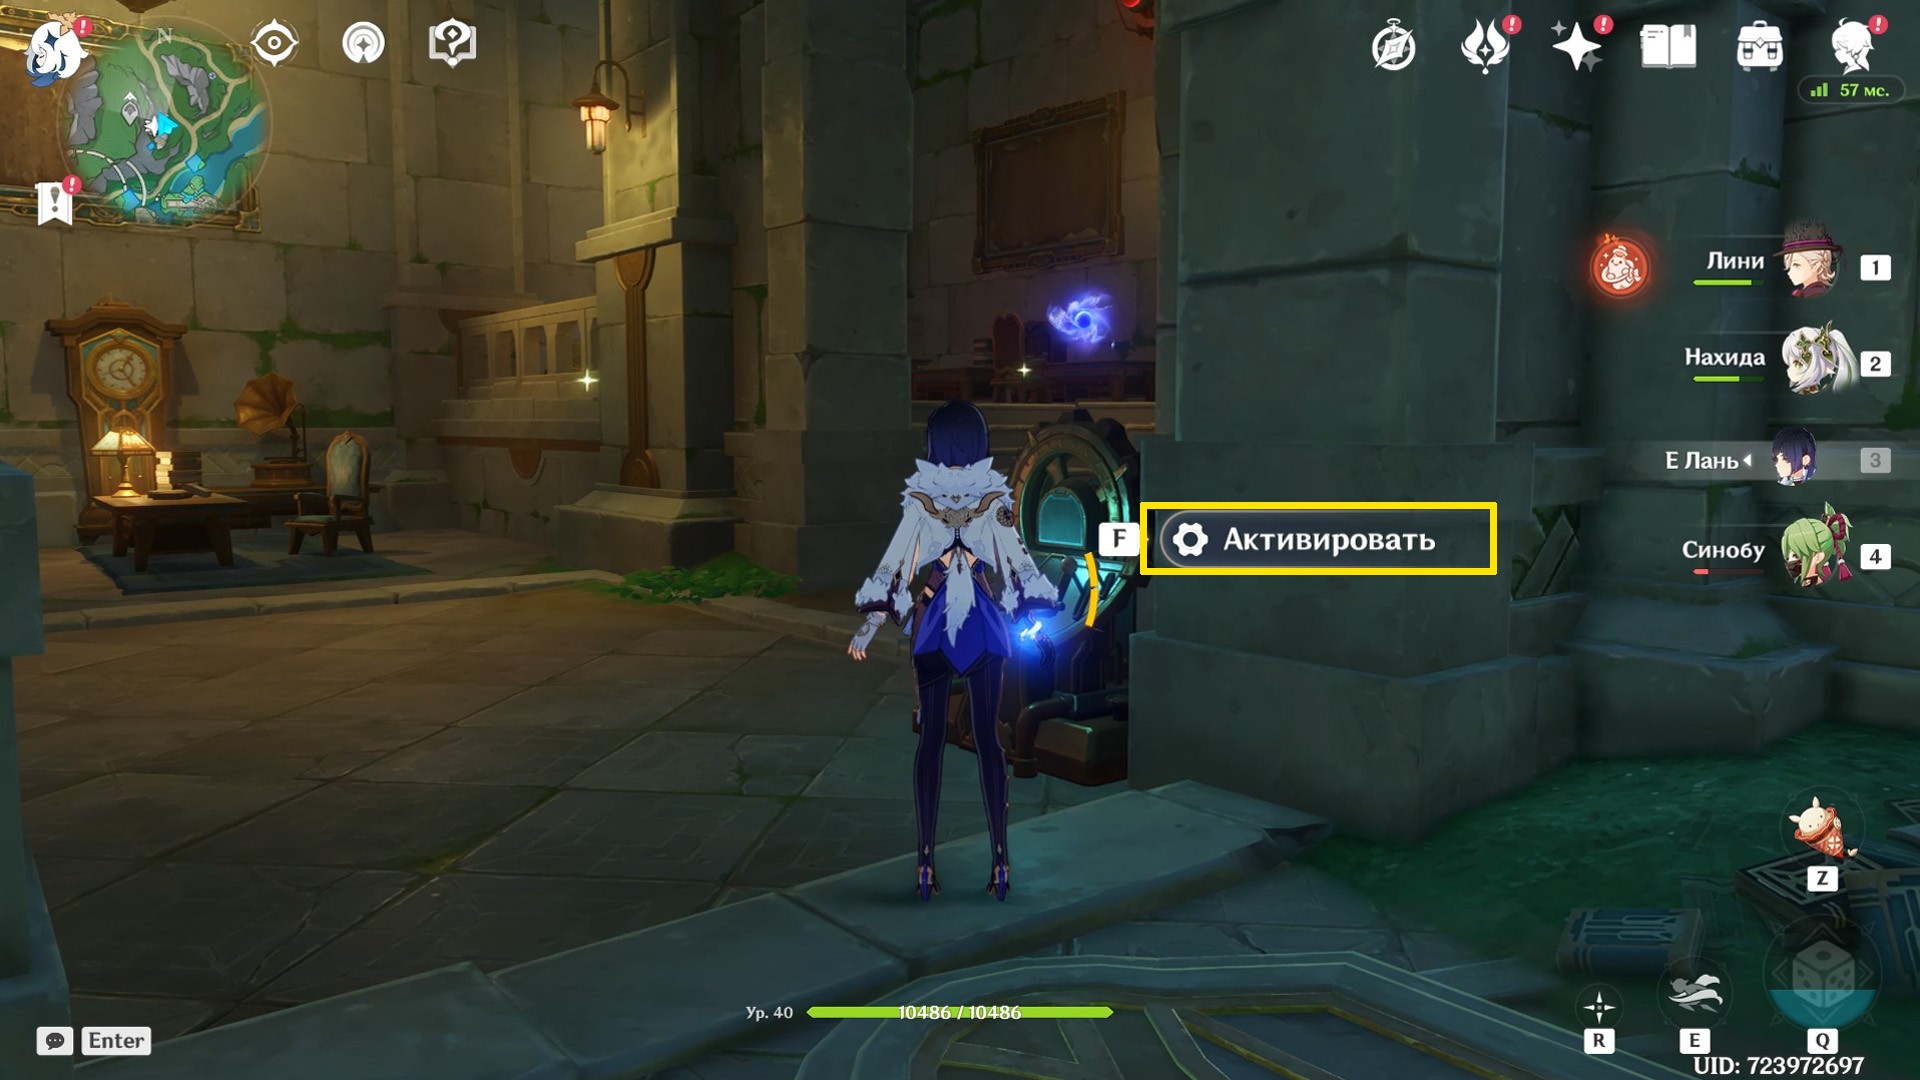
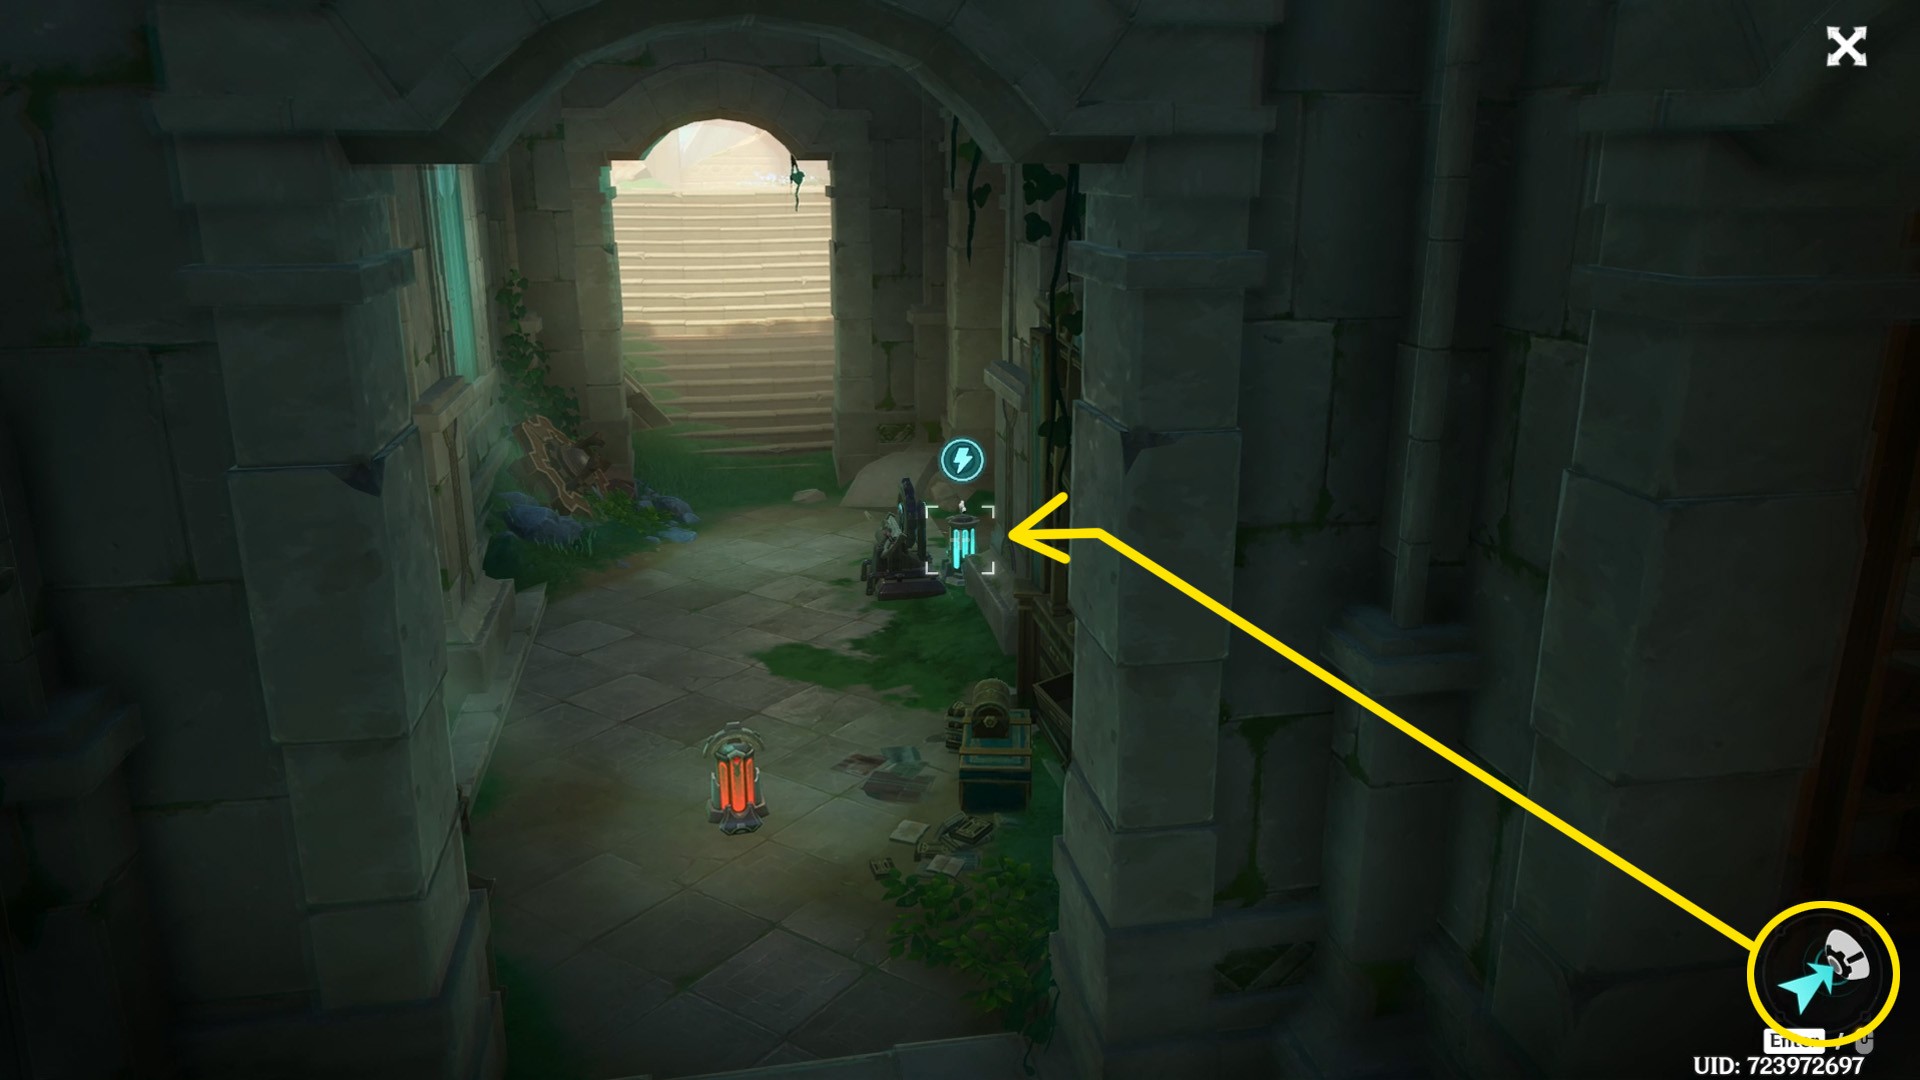
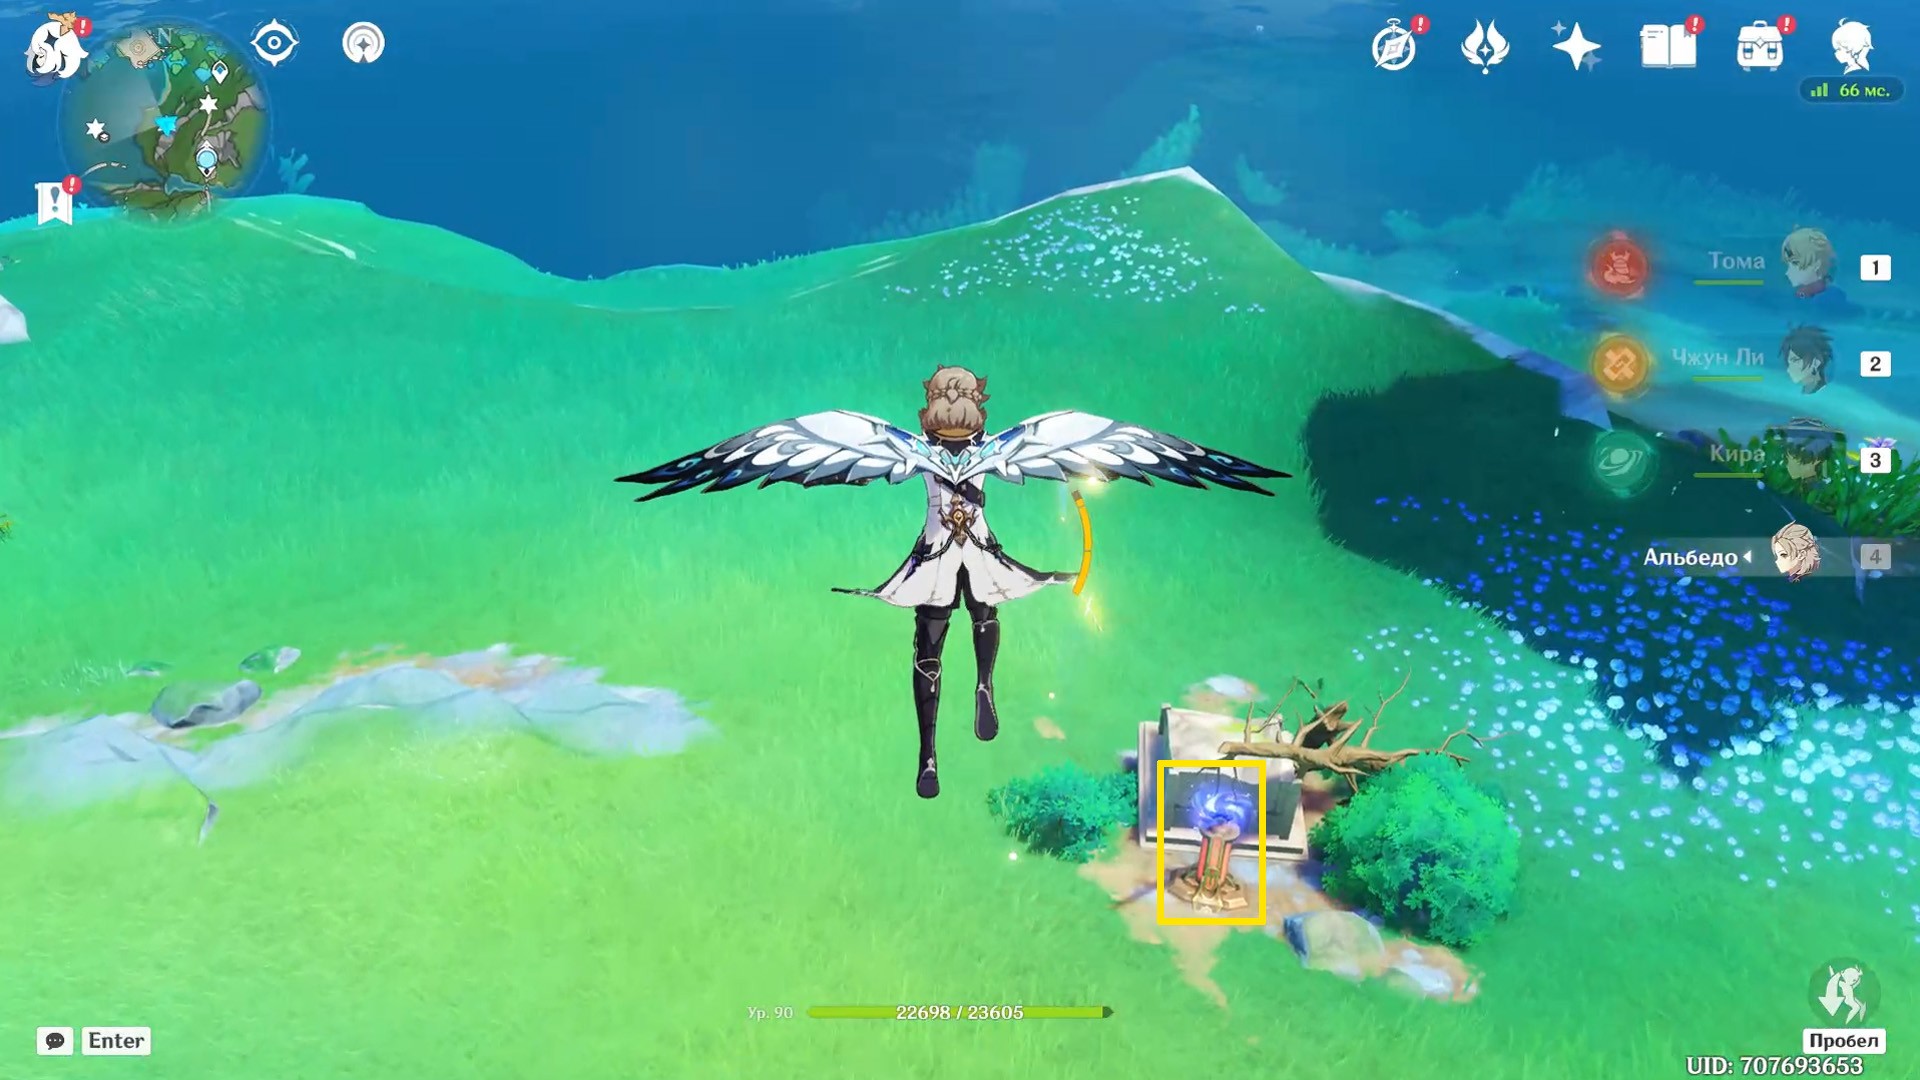
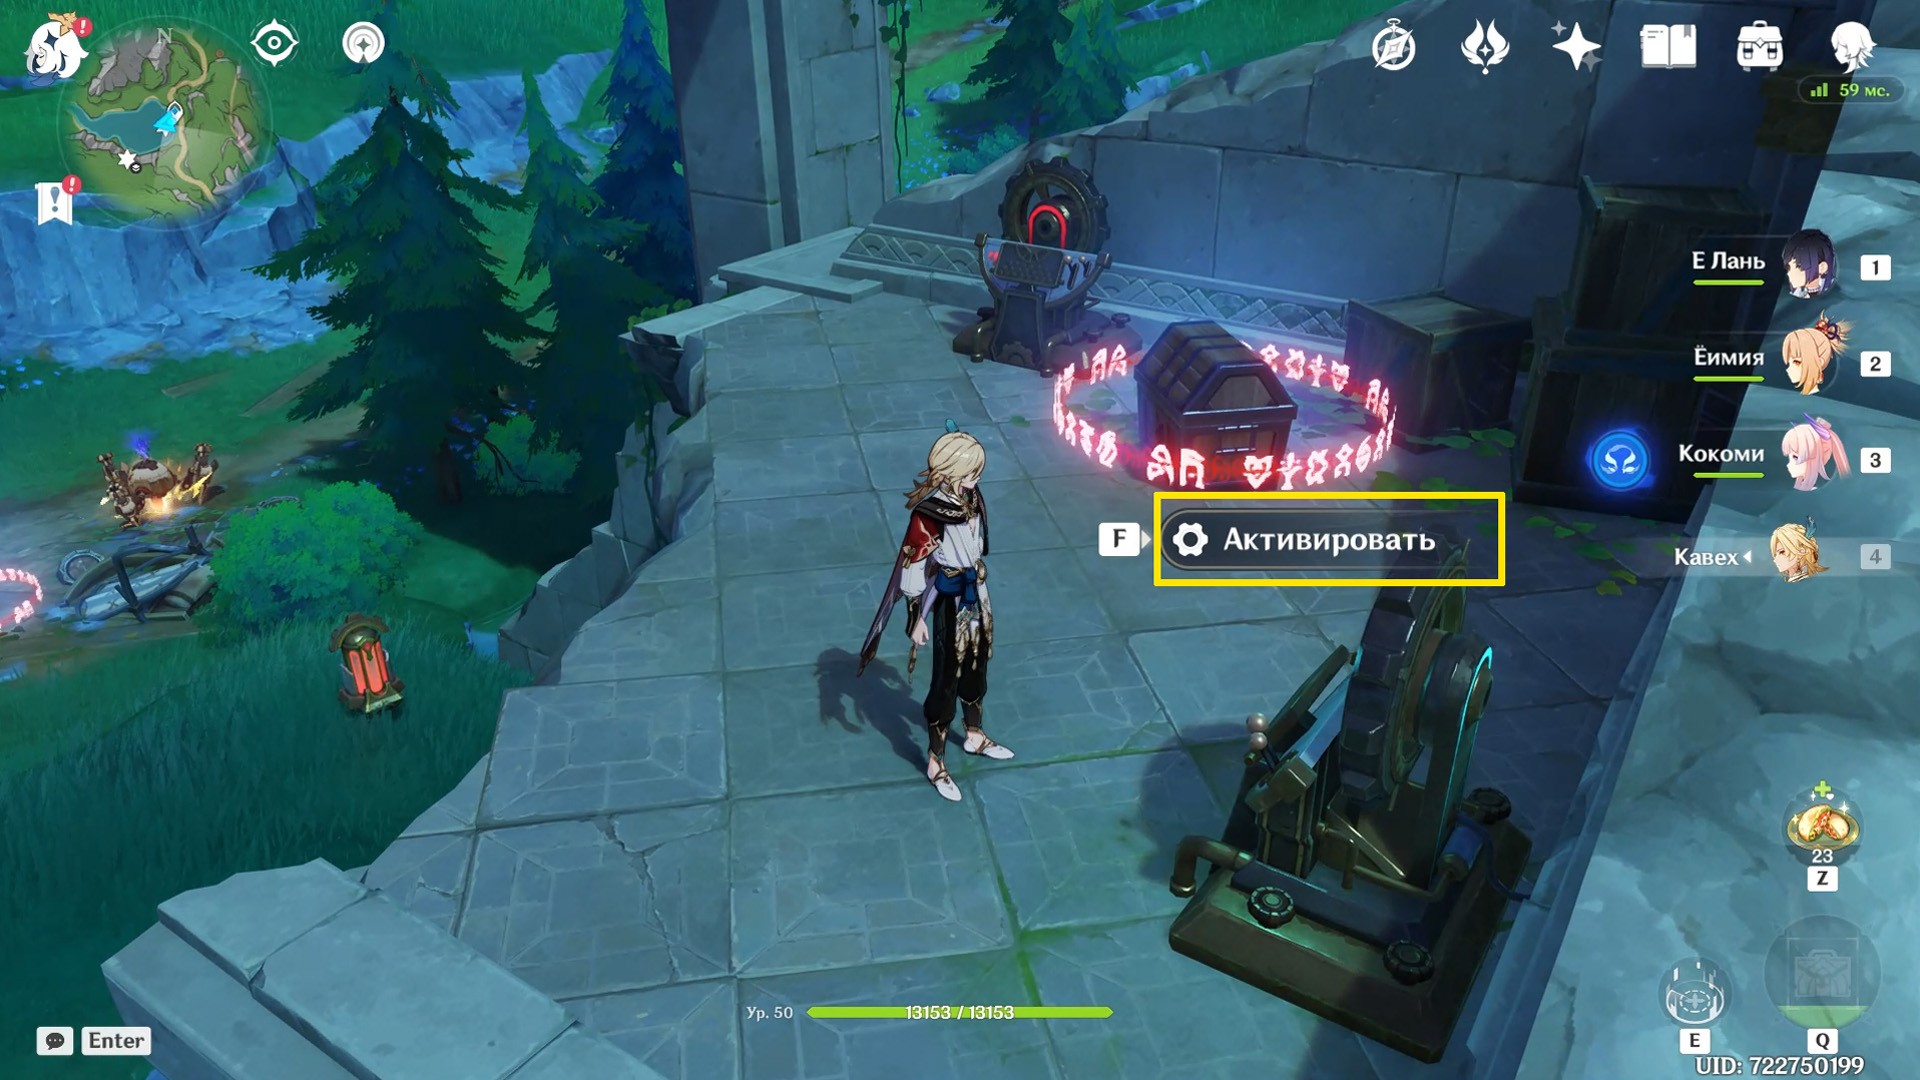
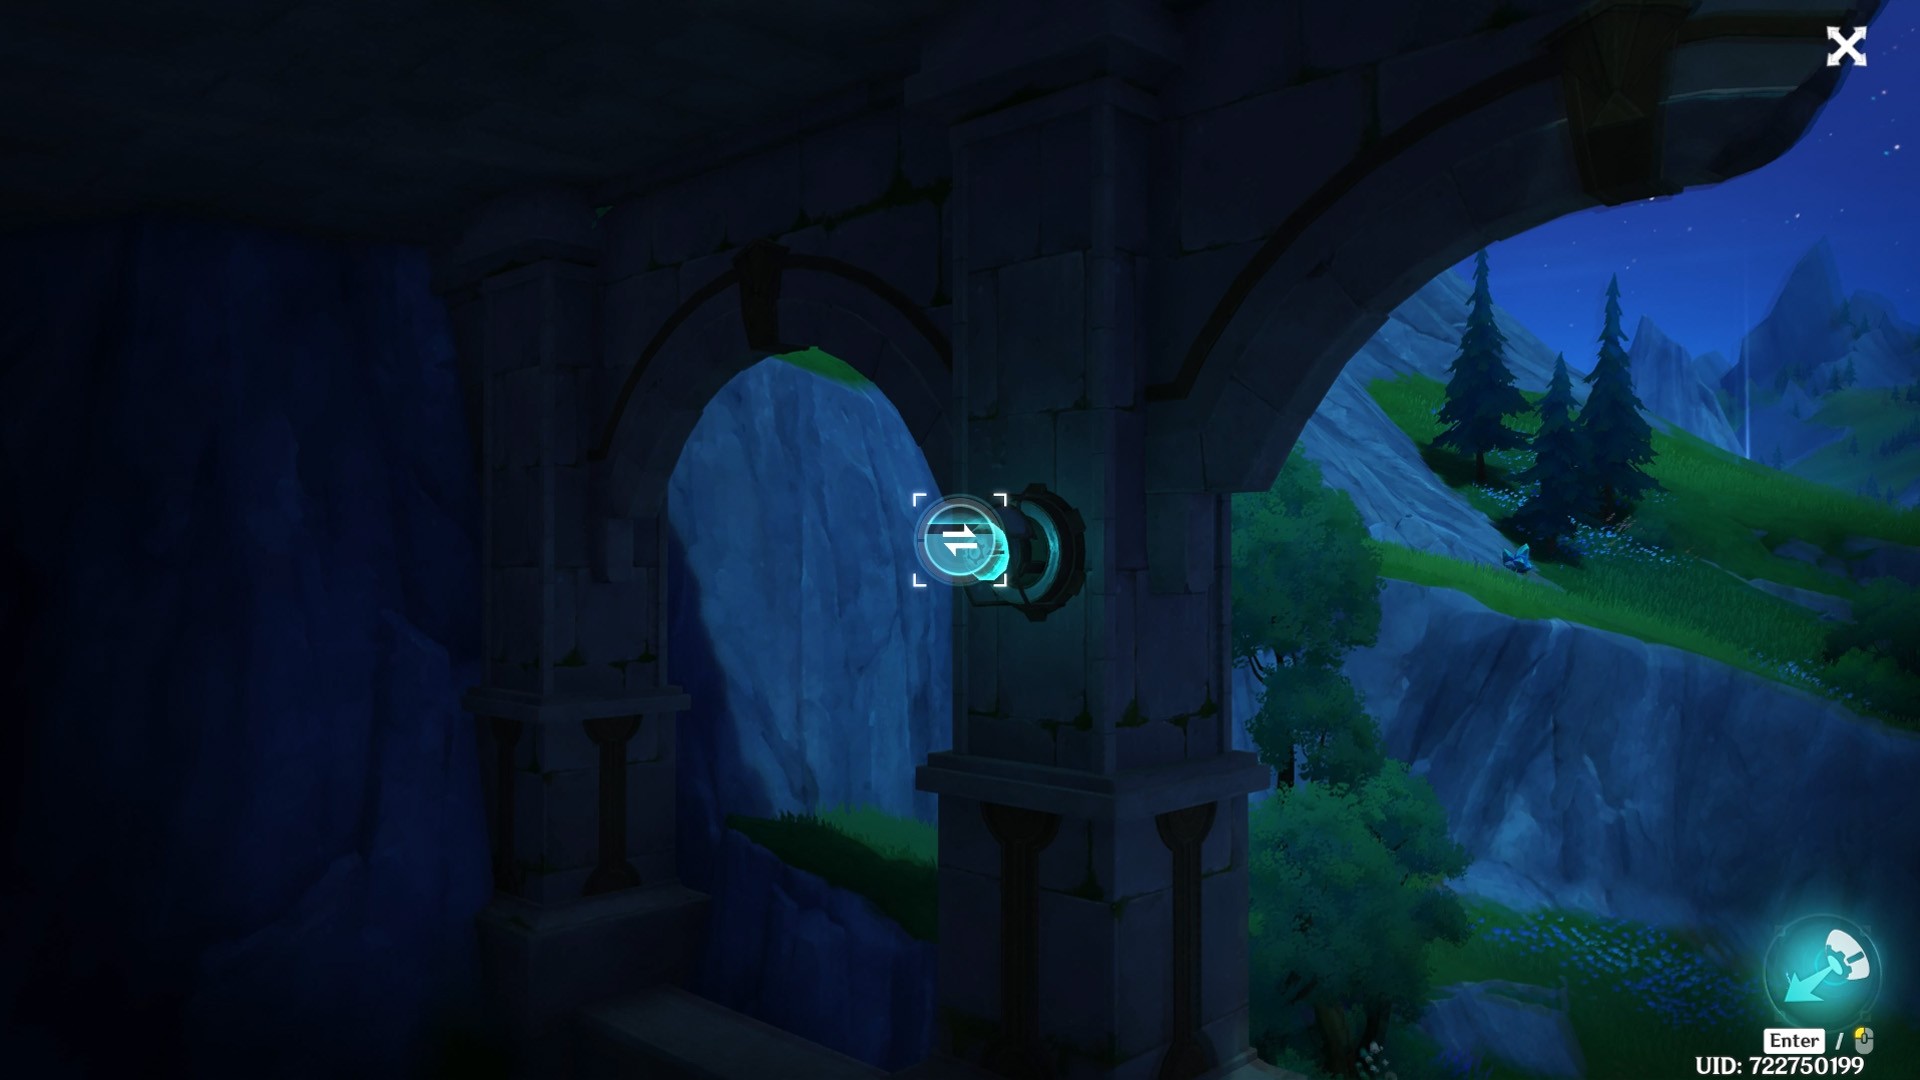
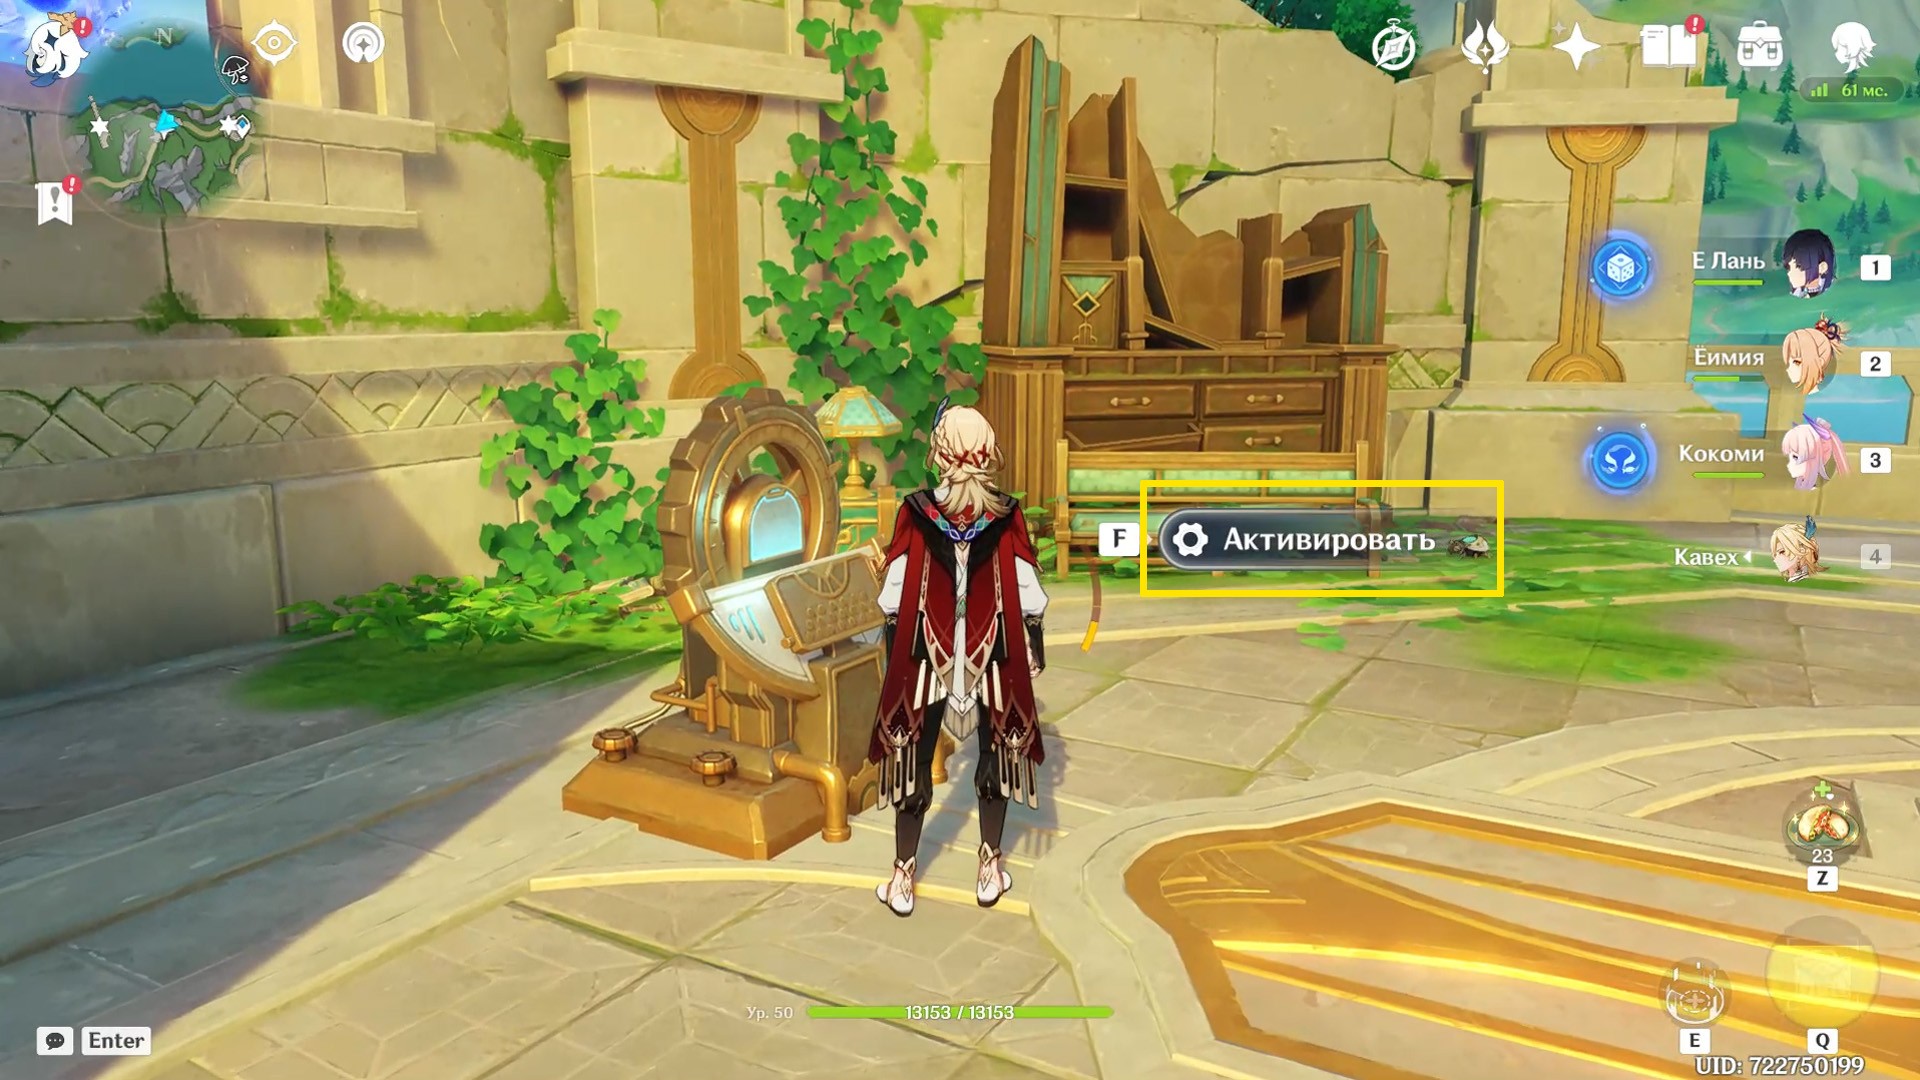
Pick up the red block at the edge of the ruins and place it closer to the terminal, then activate the CCTV mode.
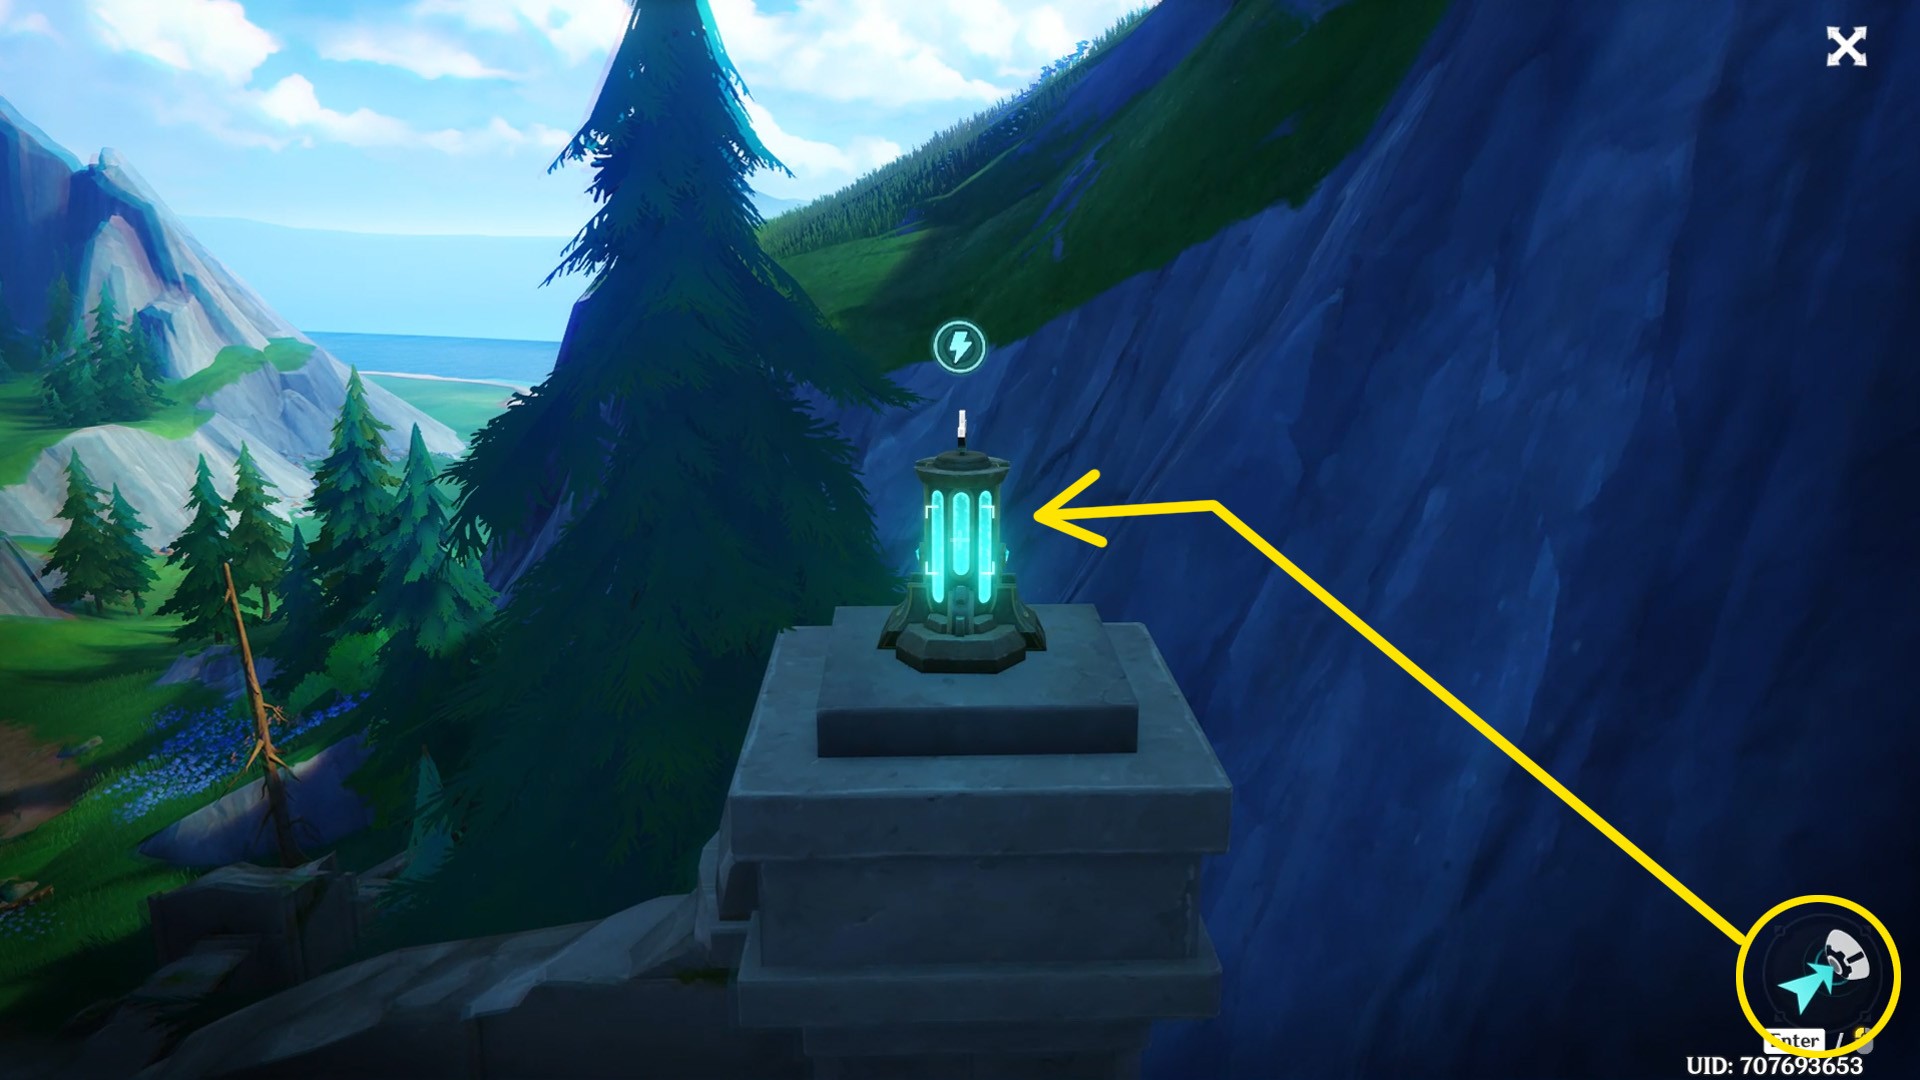
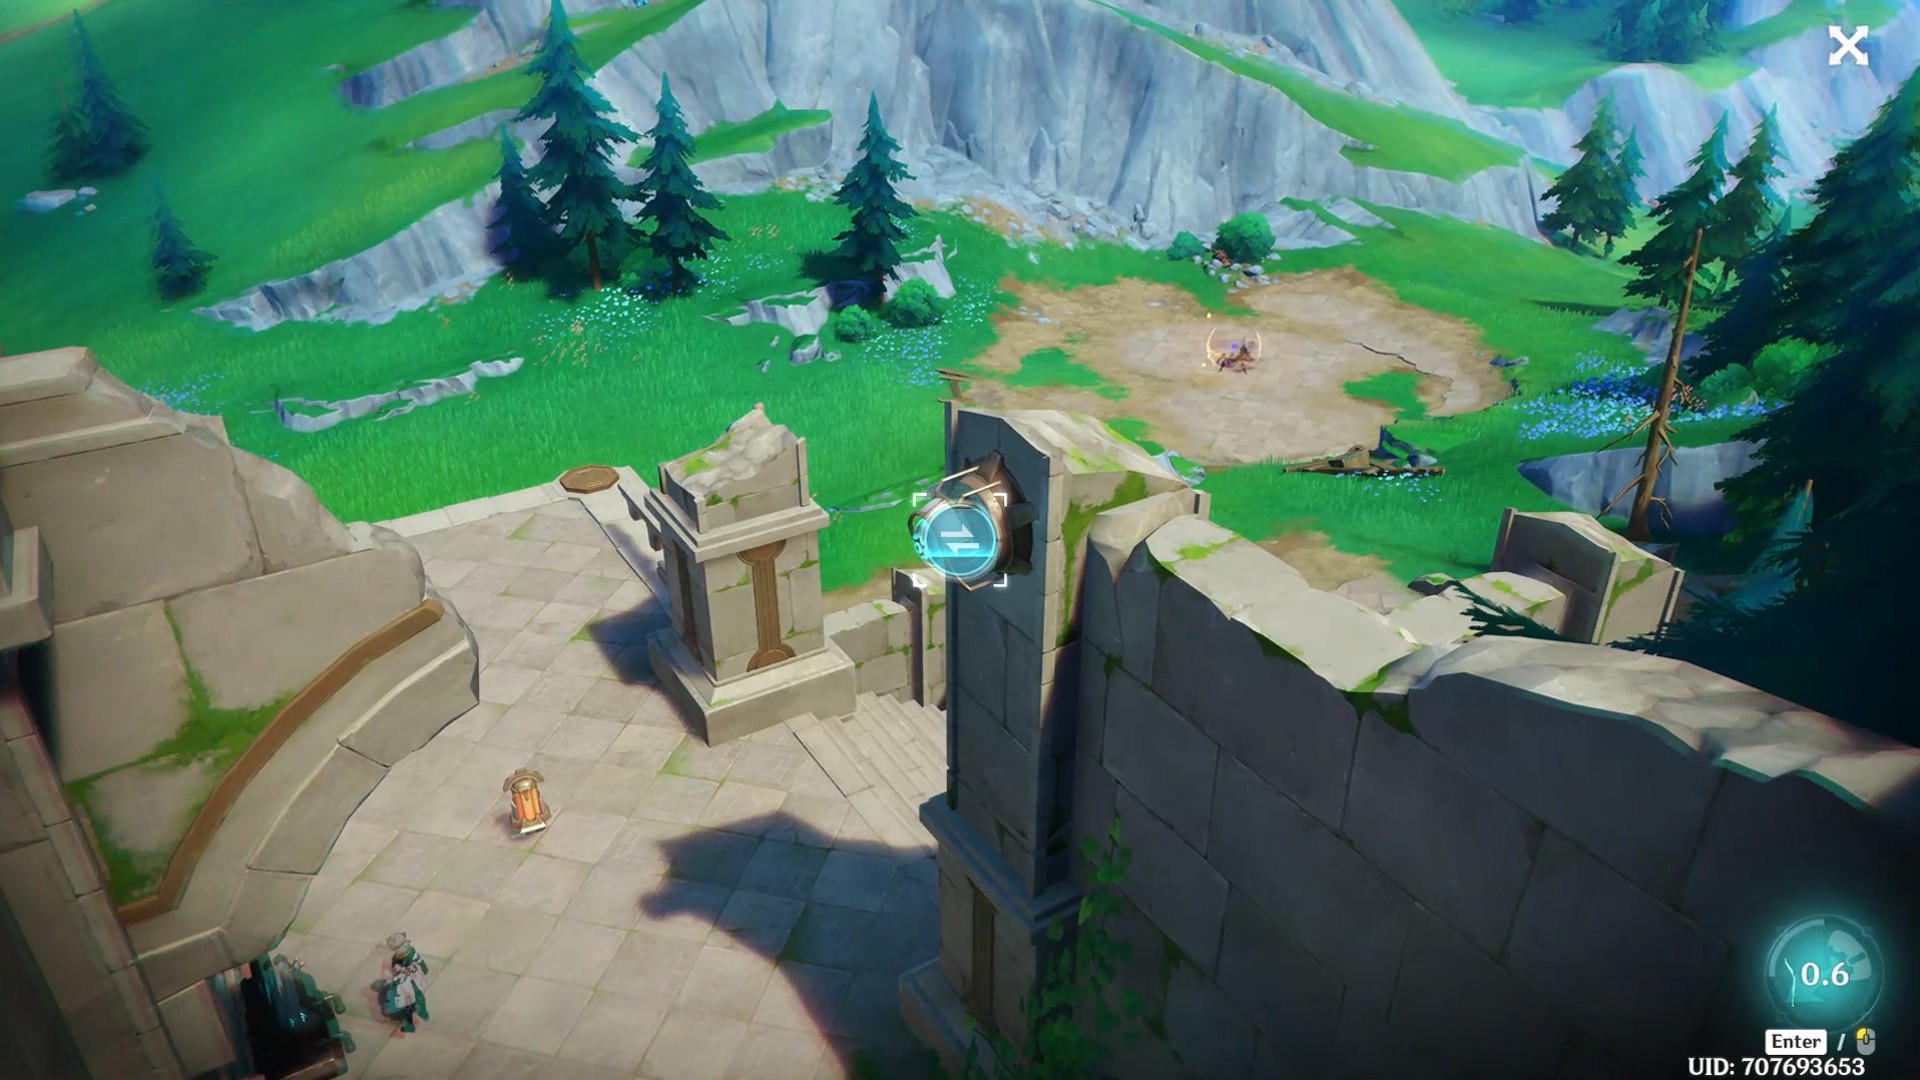
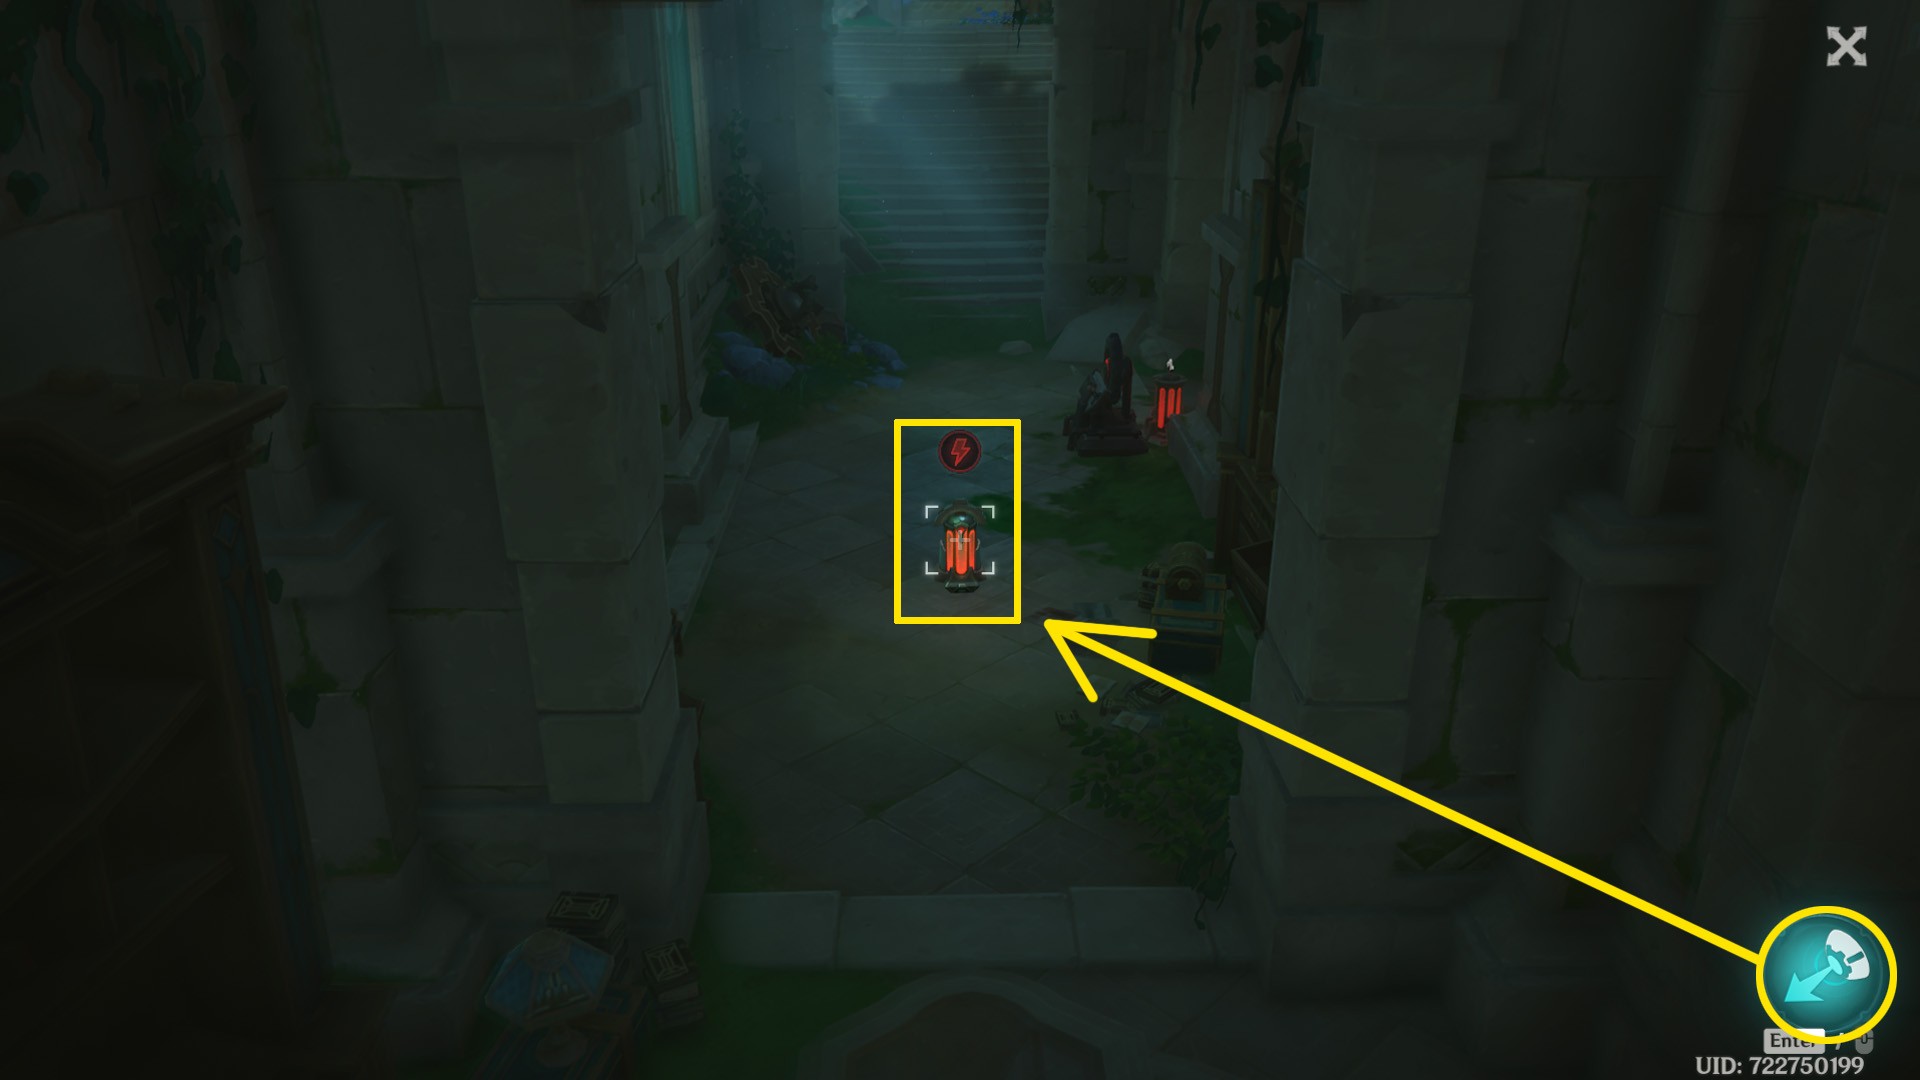
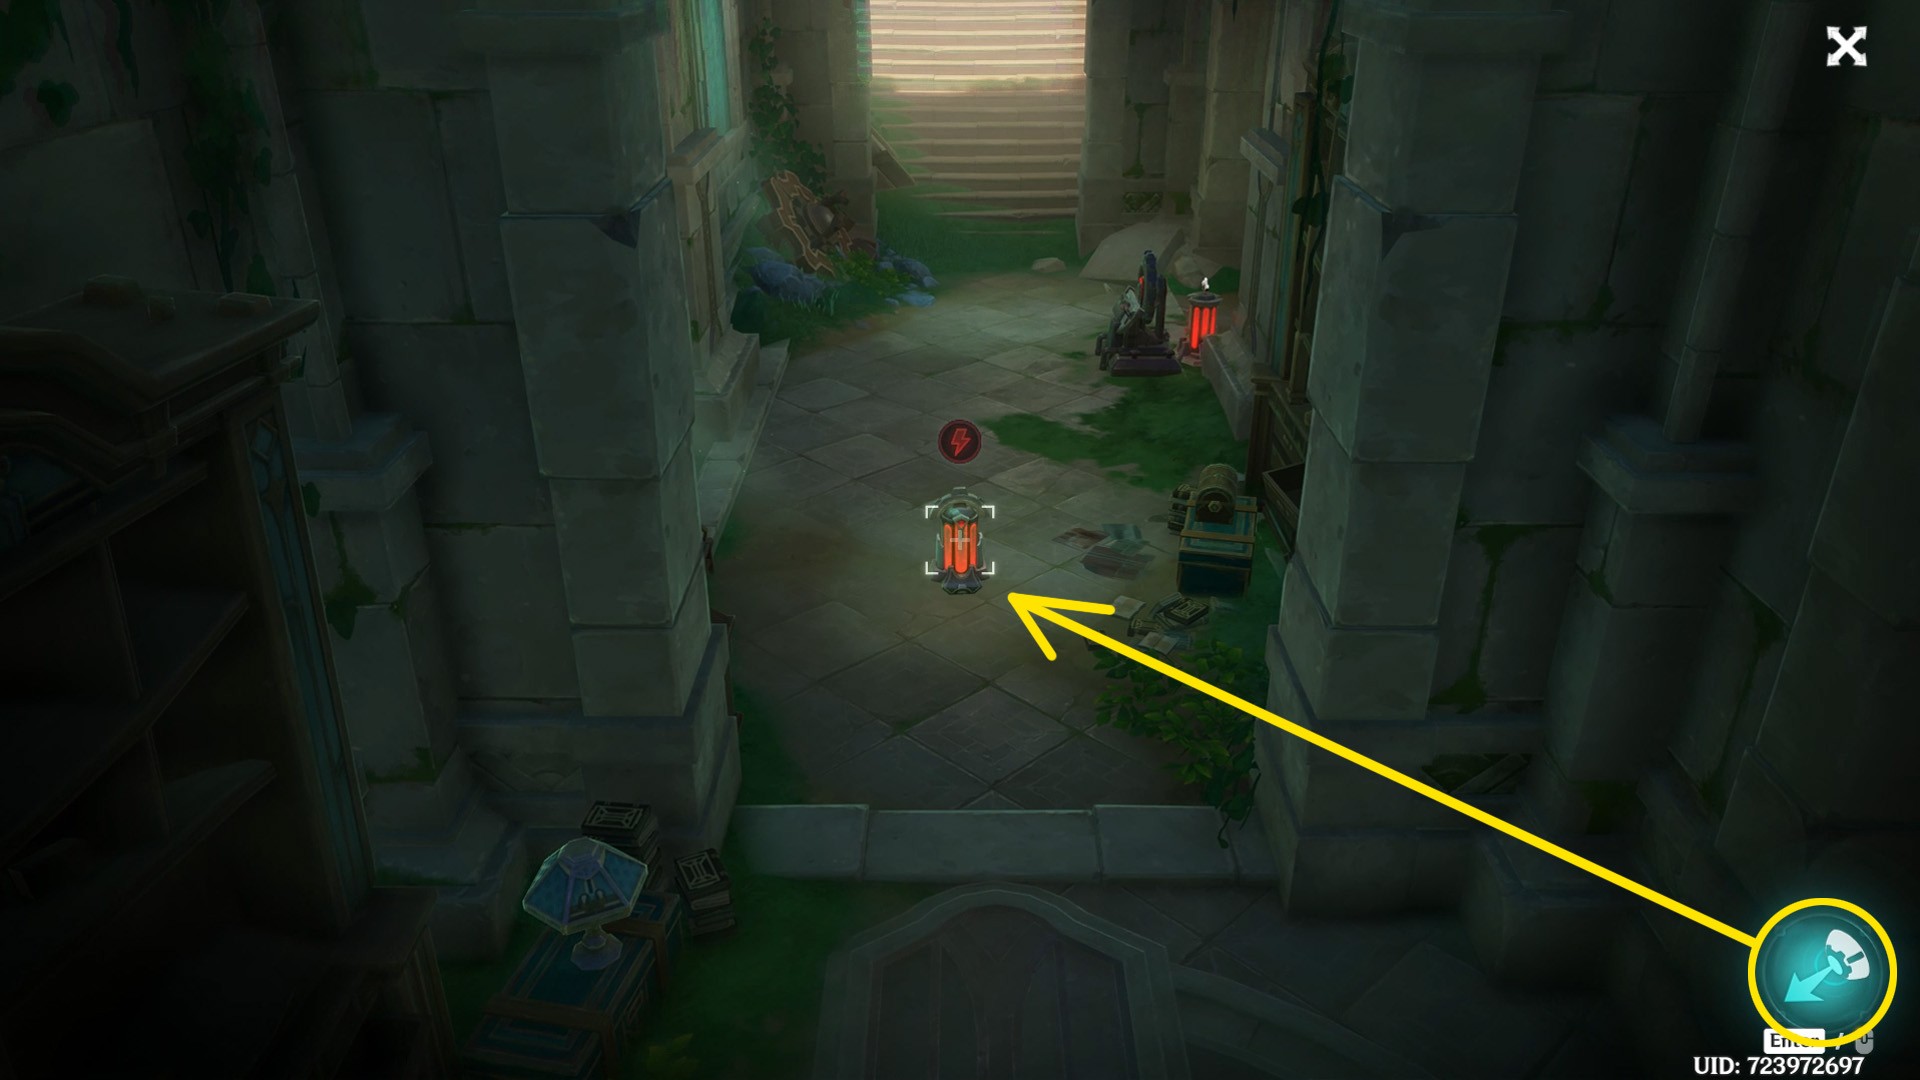
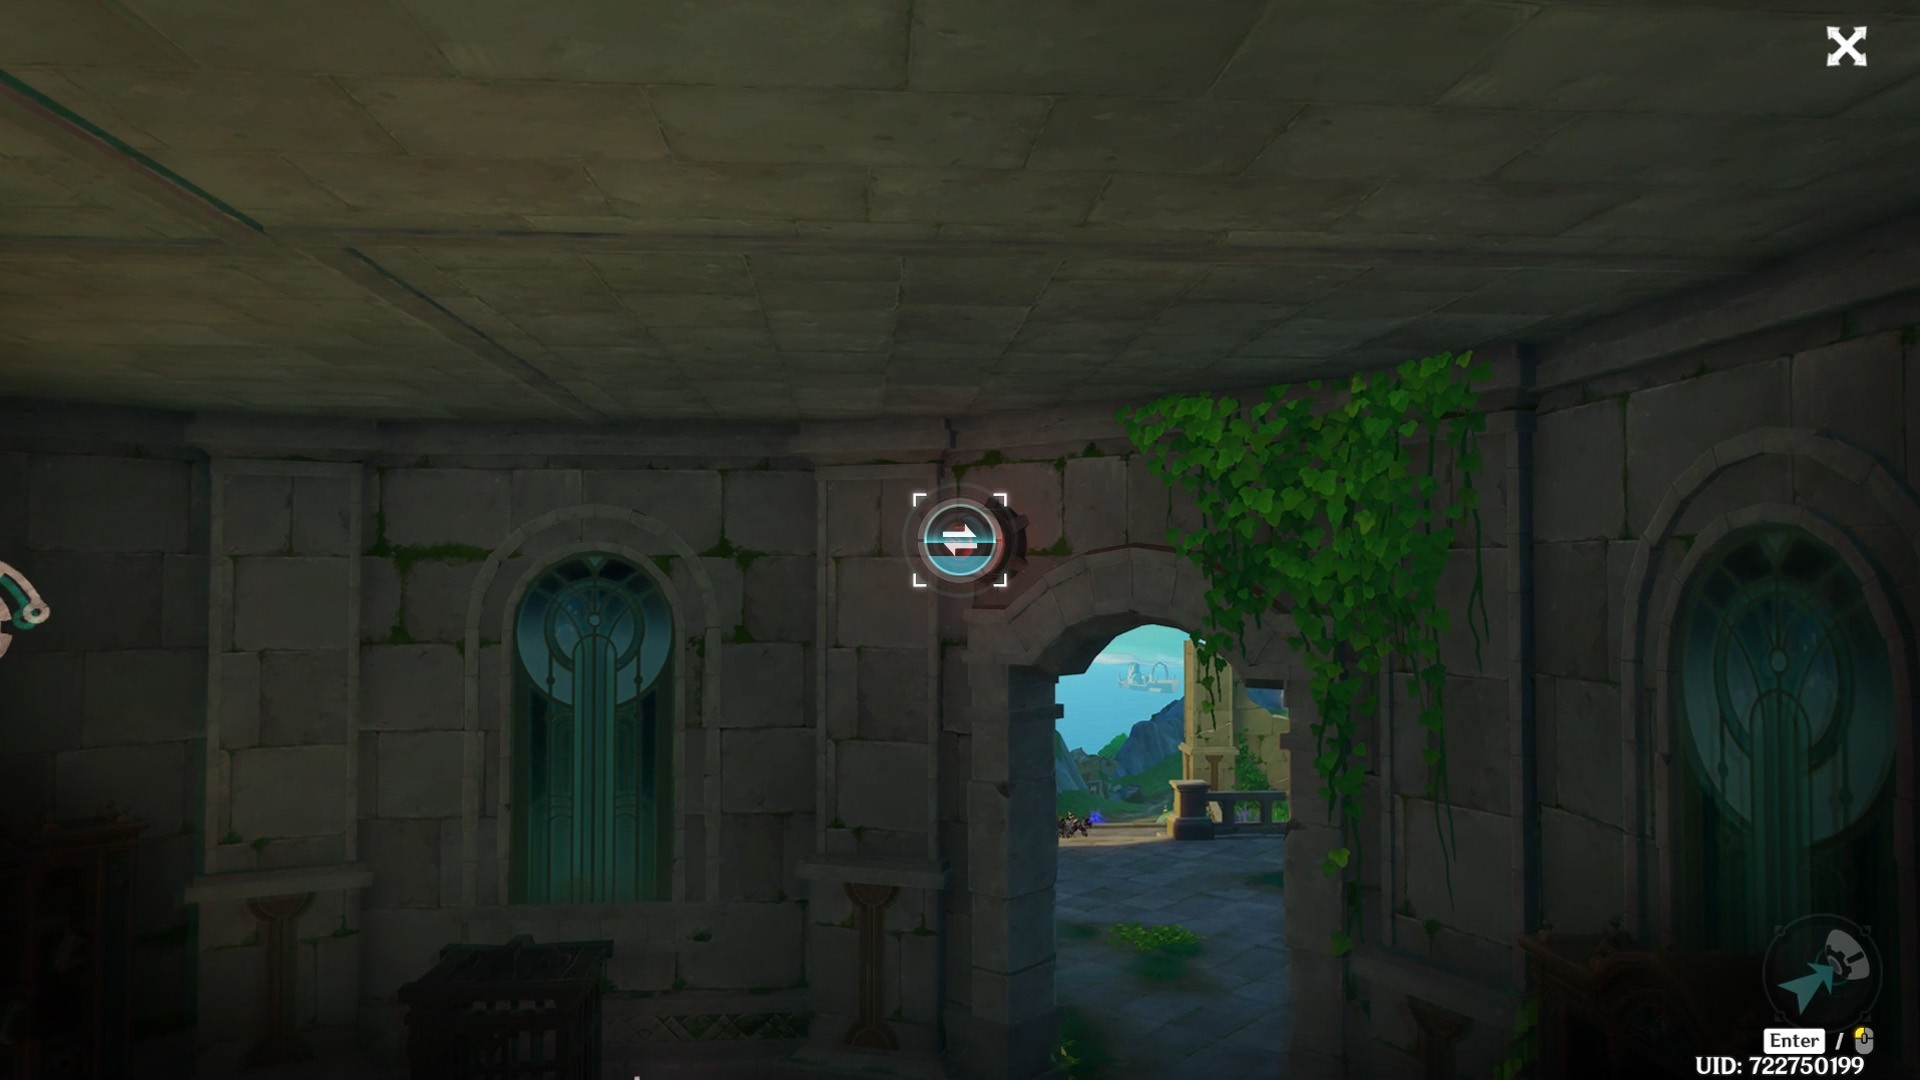
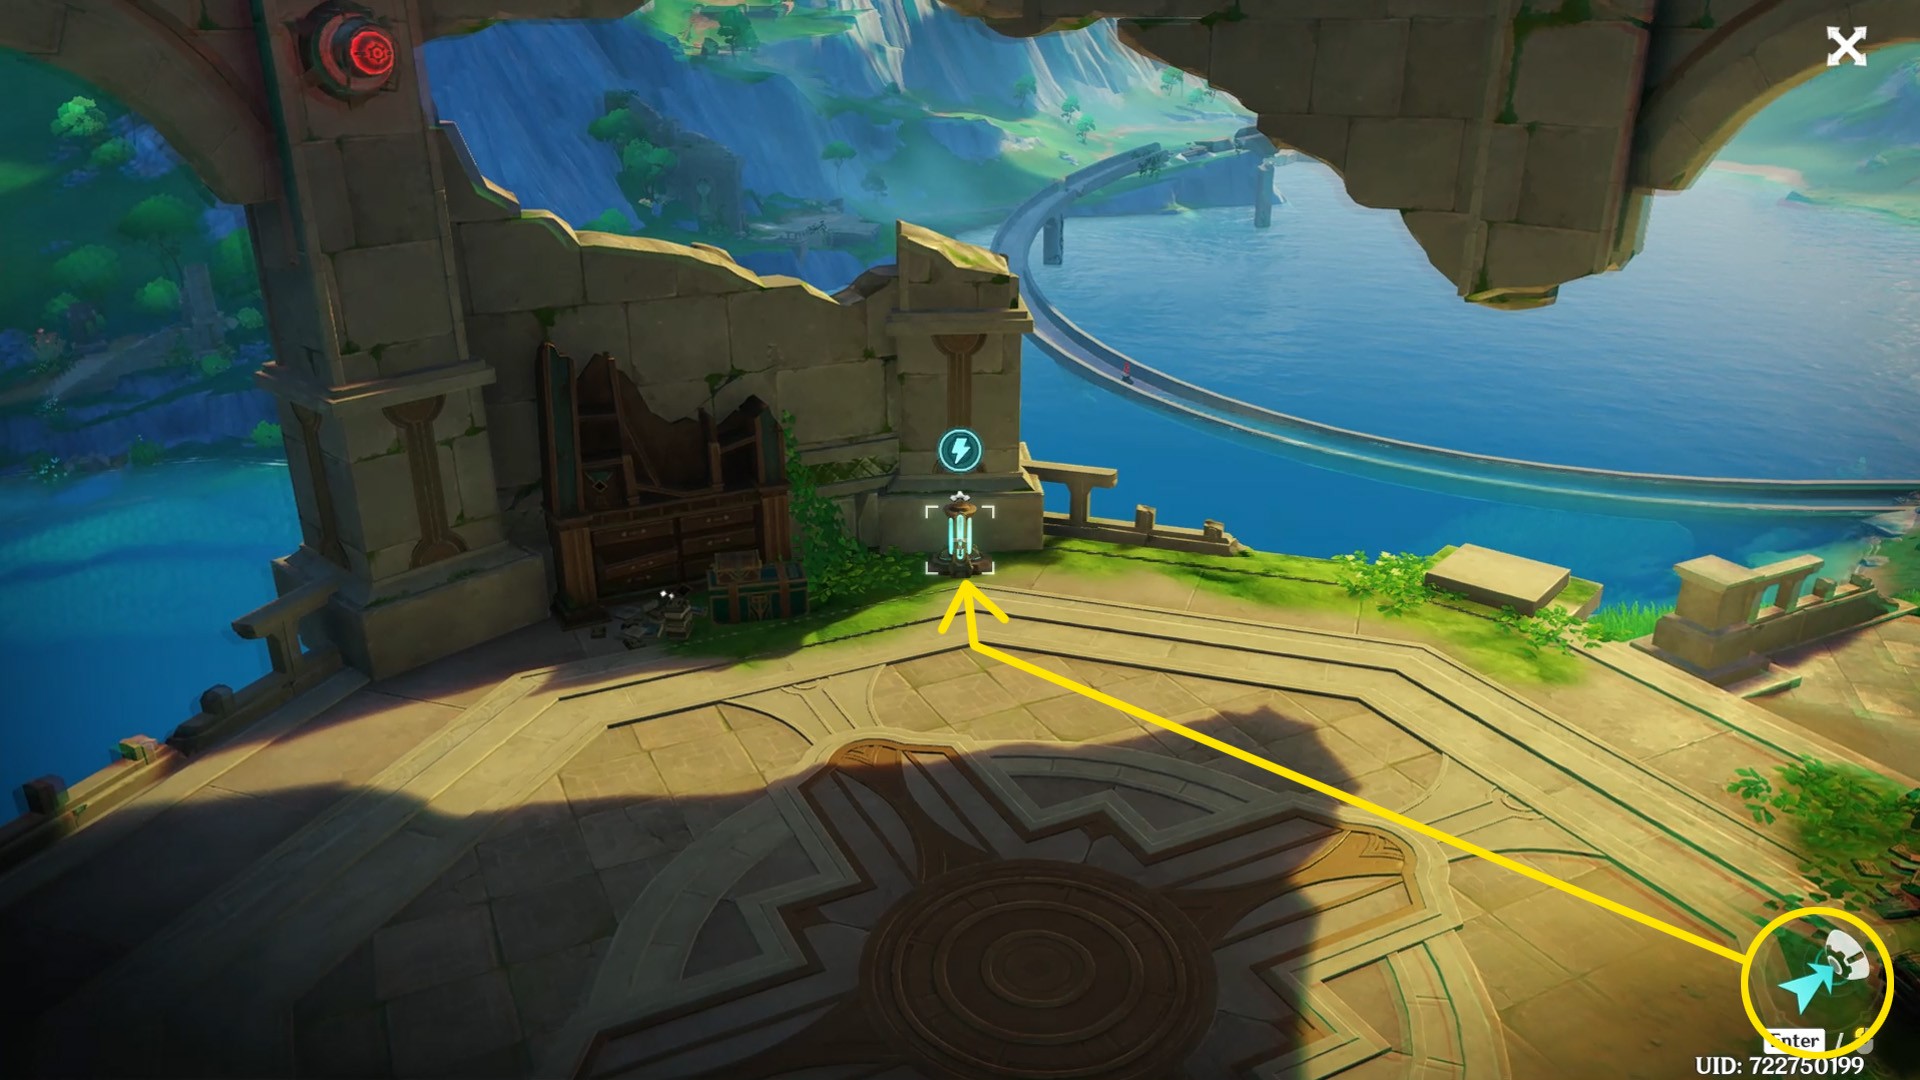
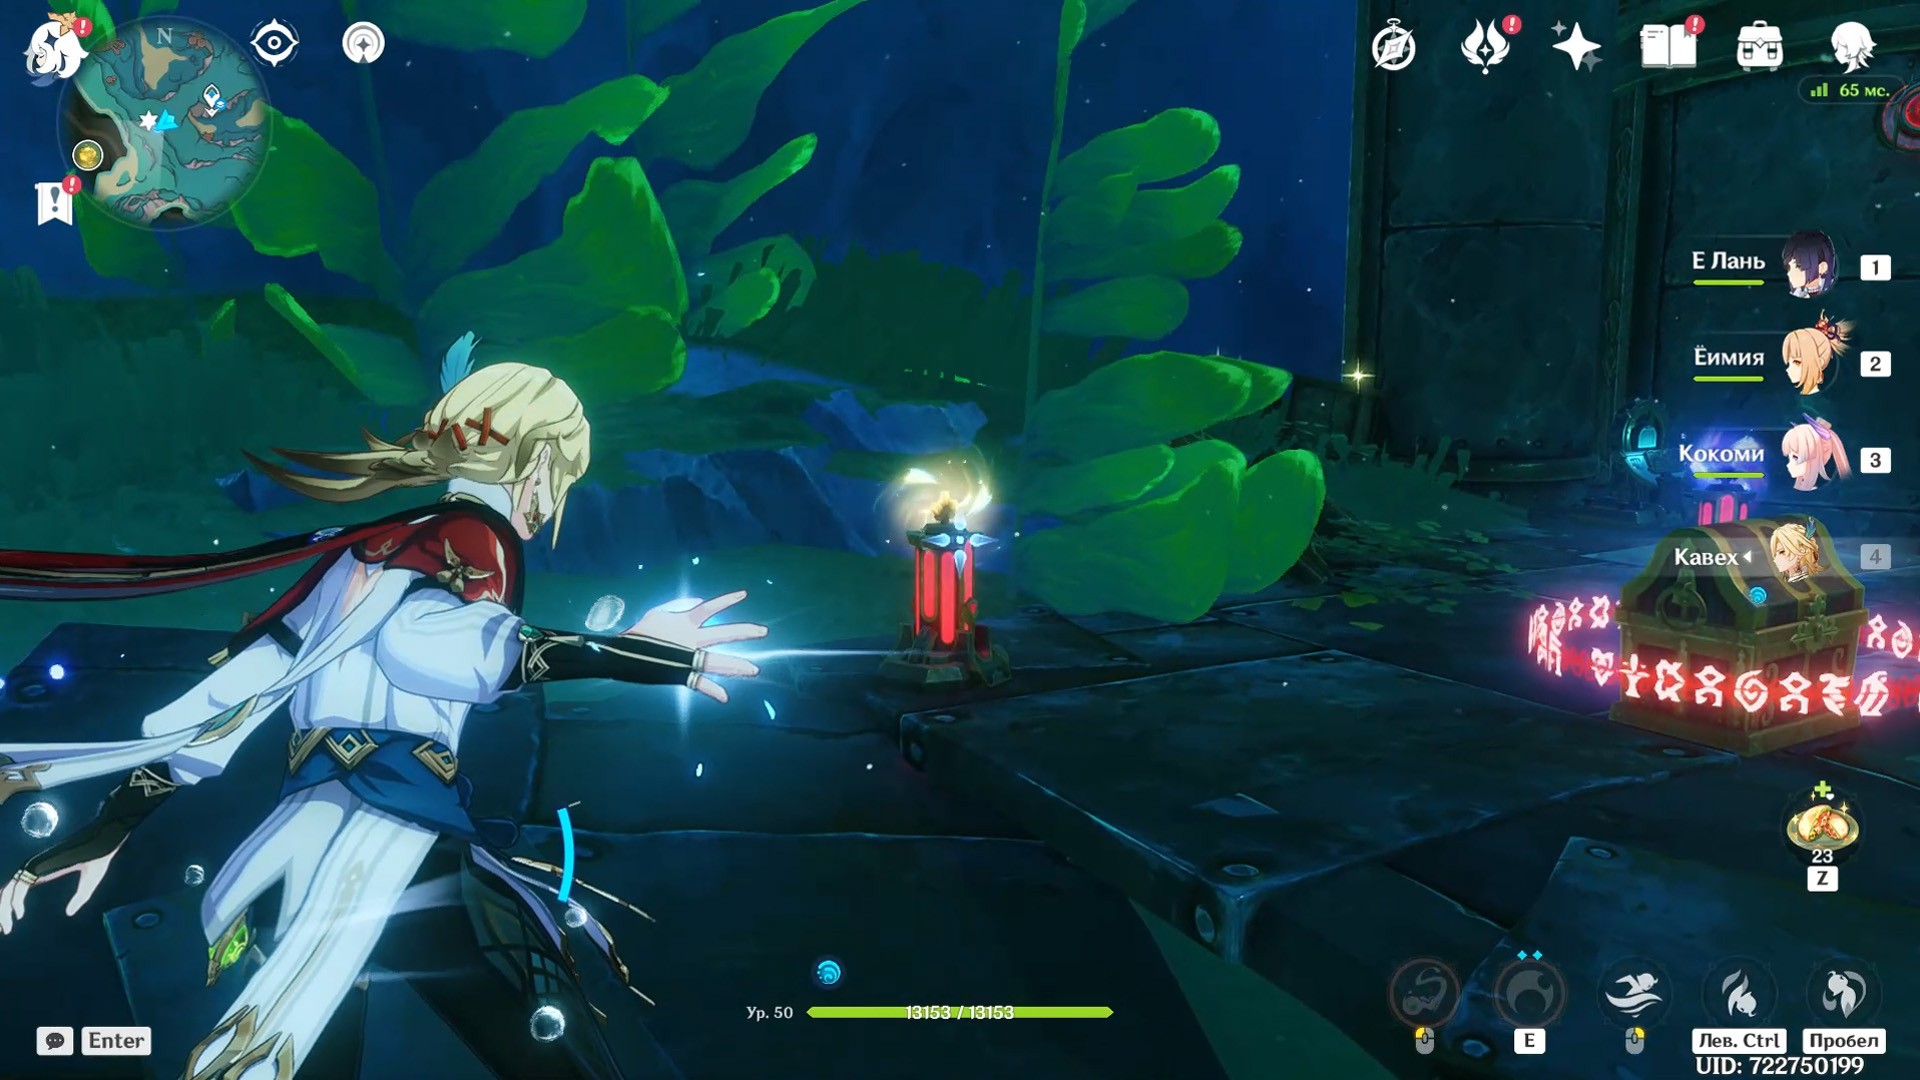
Collect a charge from the block that was attacked by the ushii sphere, then change the viewing angle to the camera on the left and transfer the energy to the drive near the video communication console.
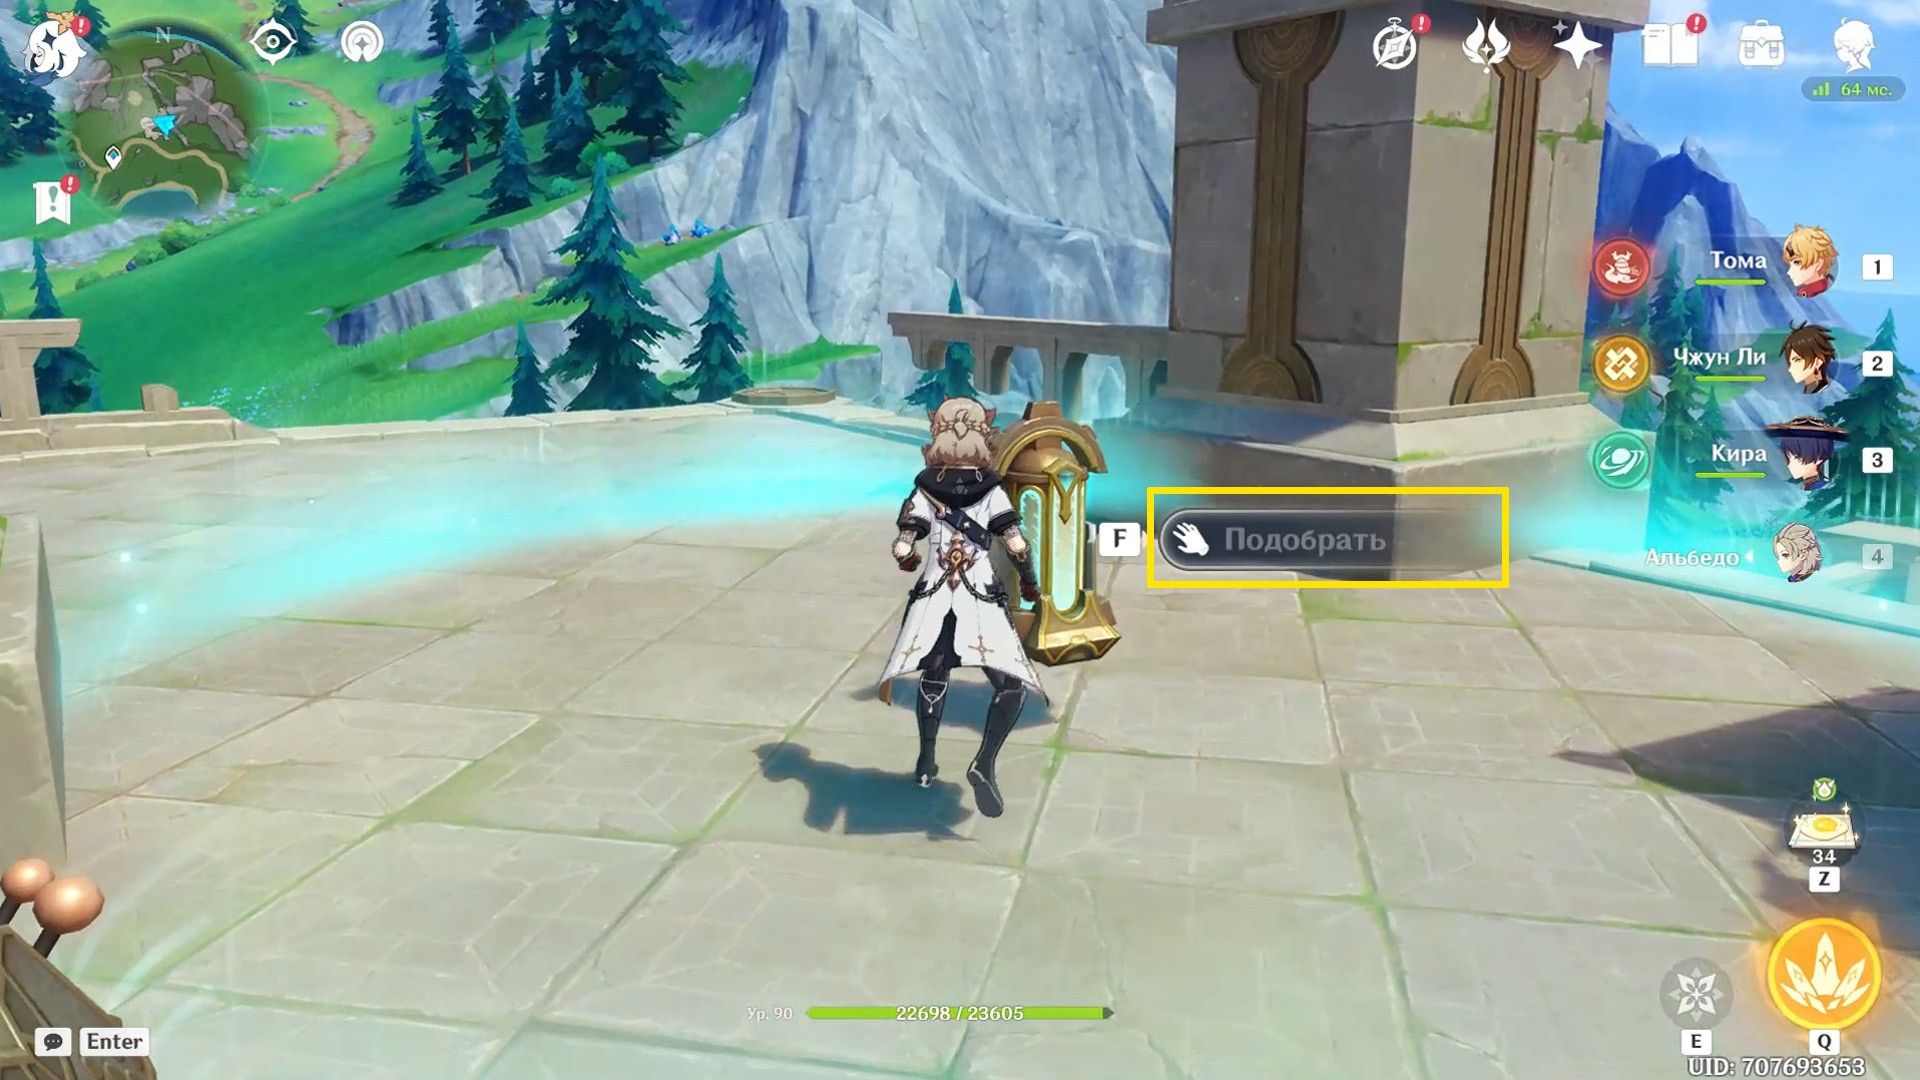
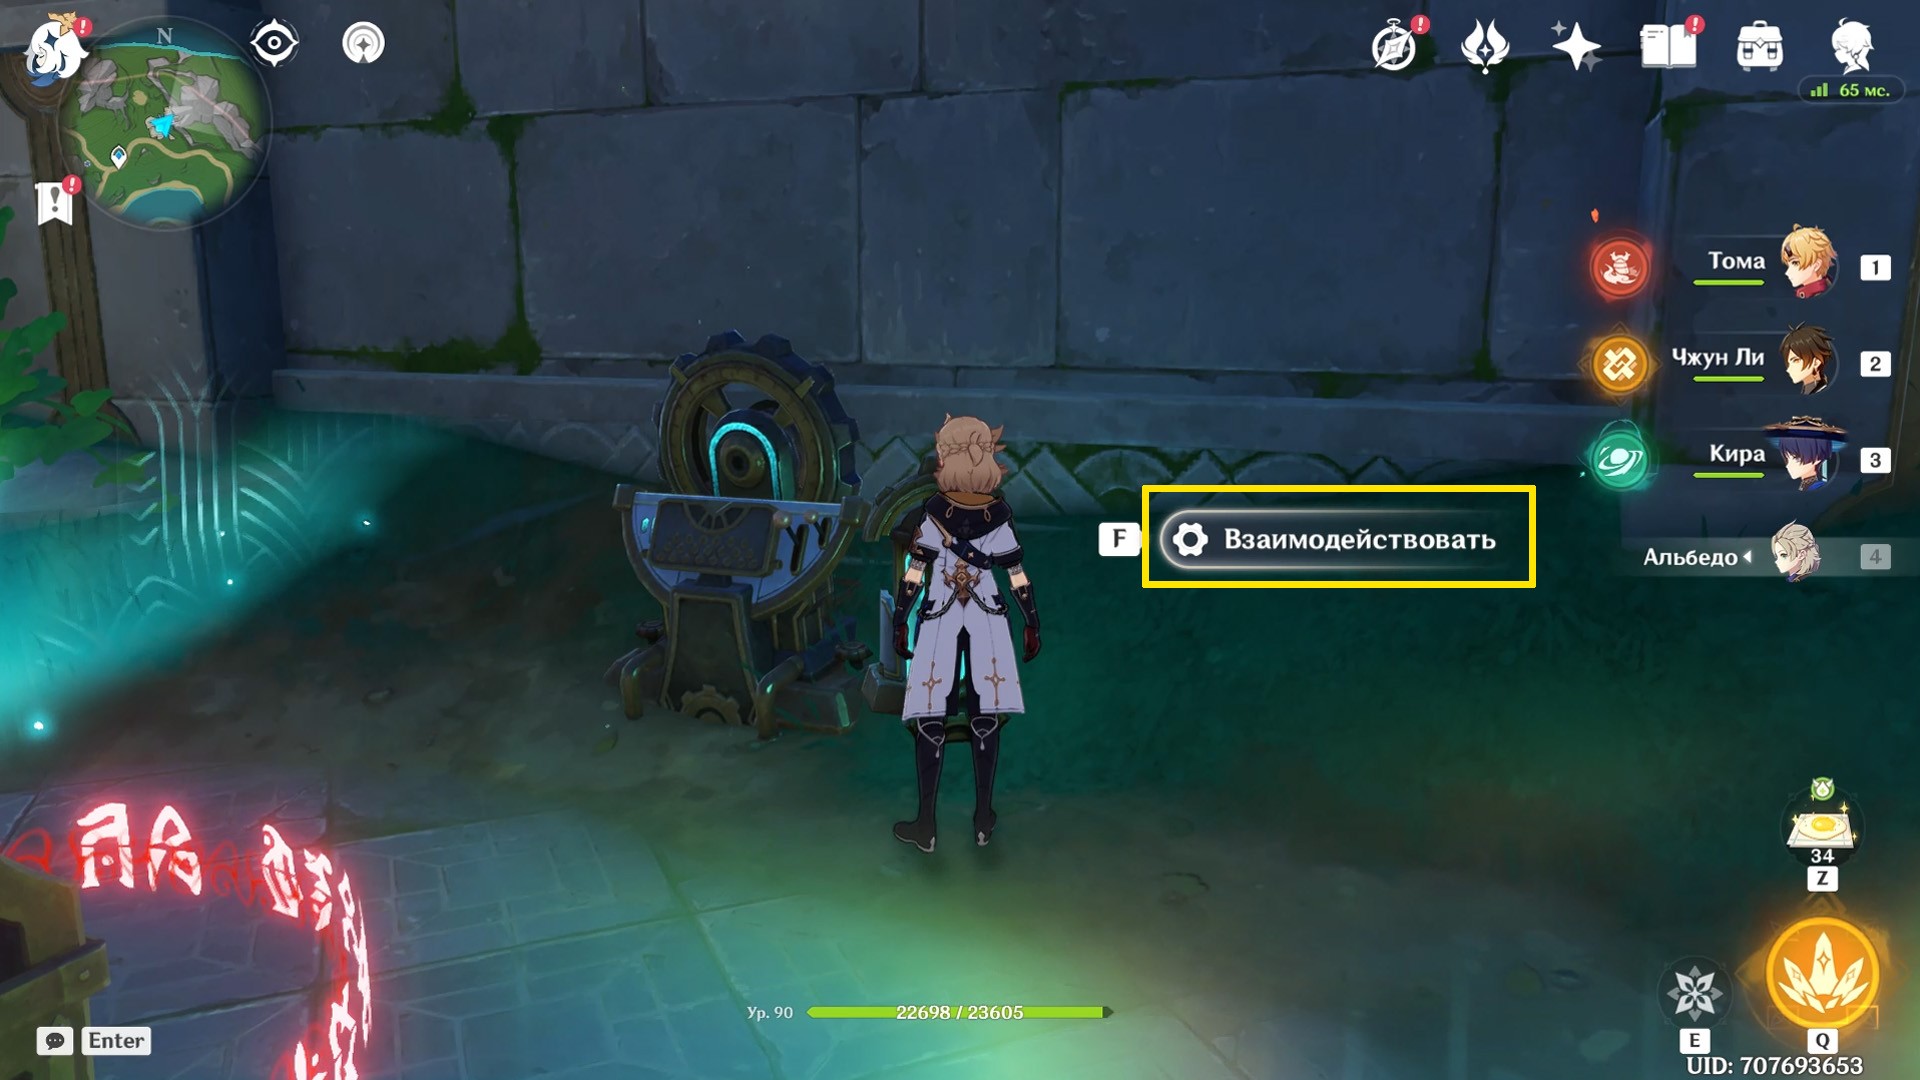

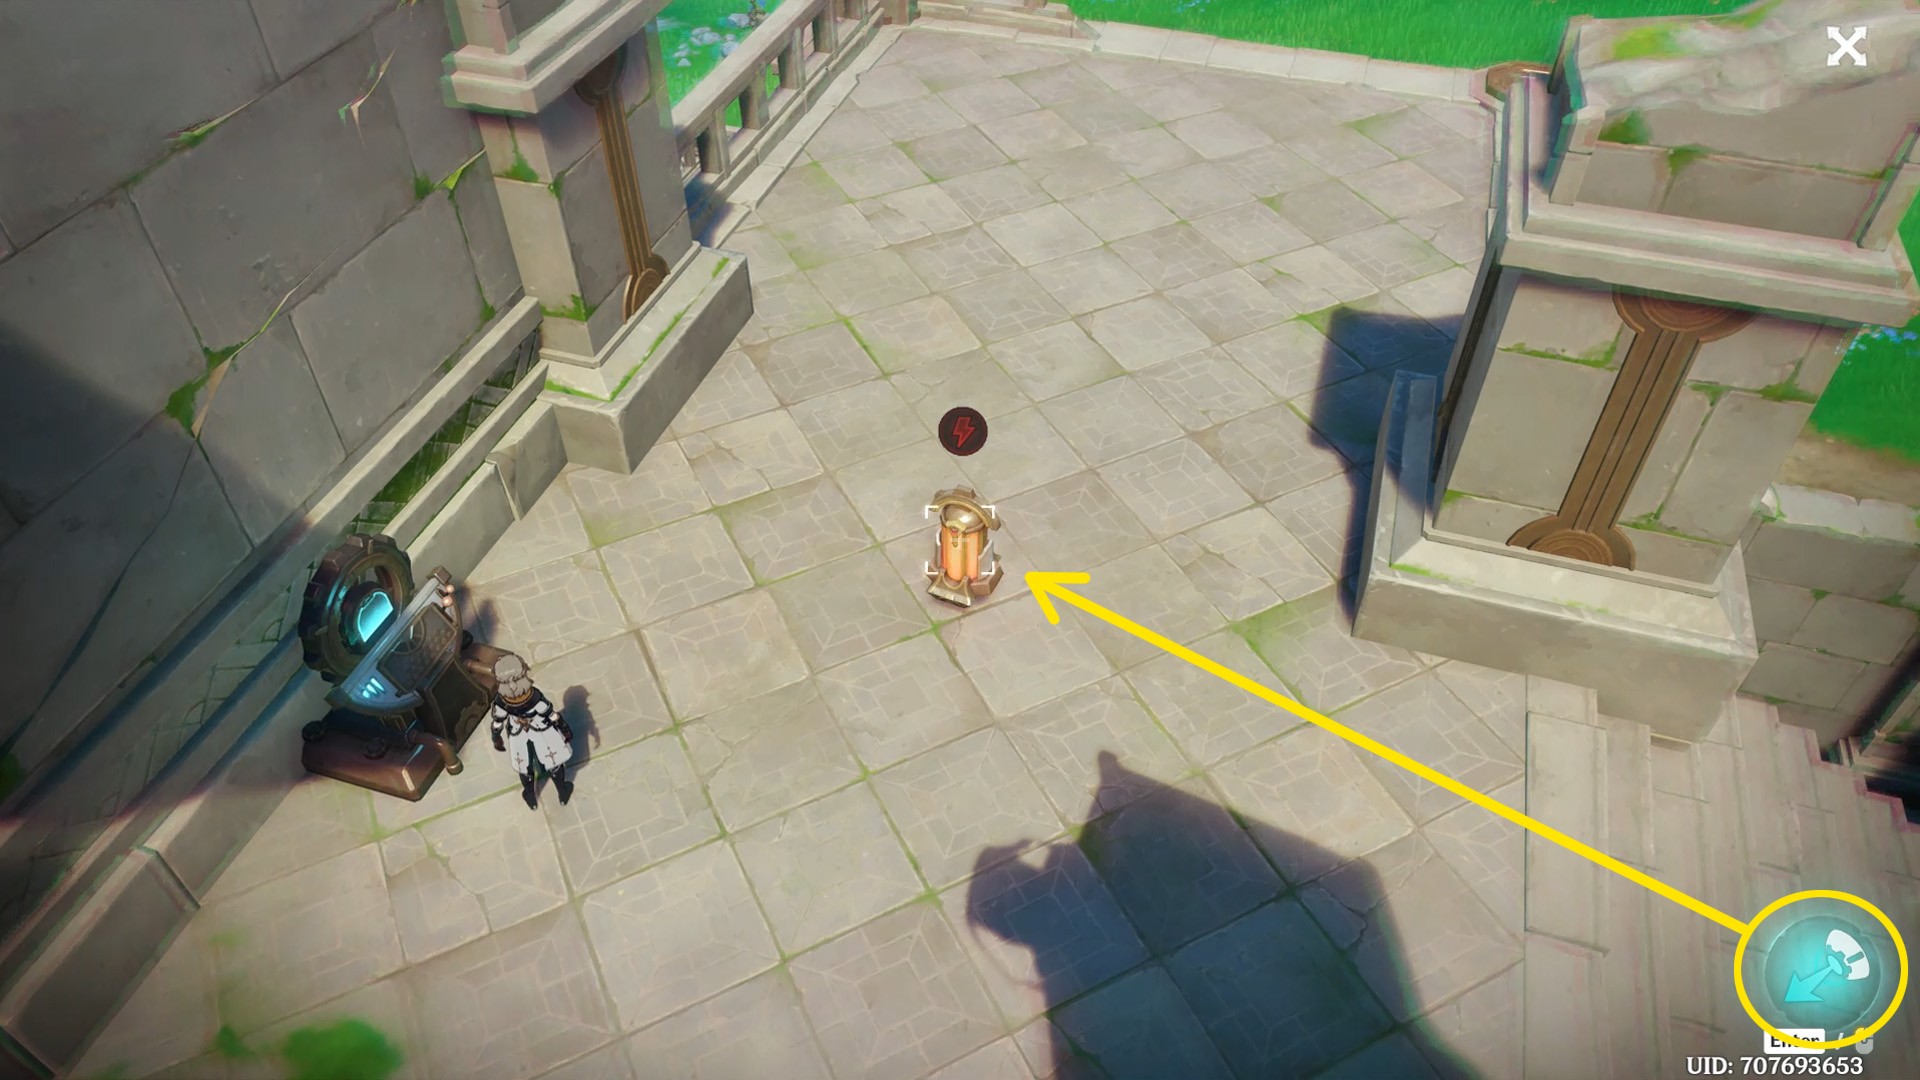
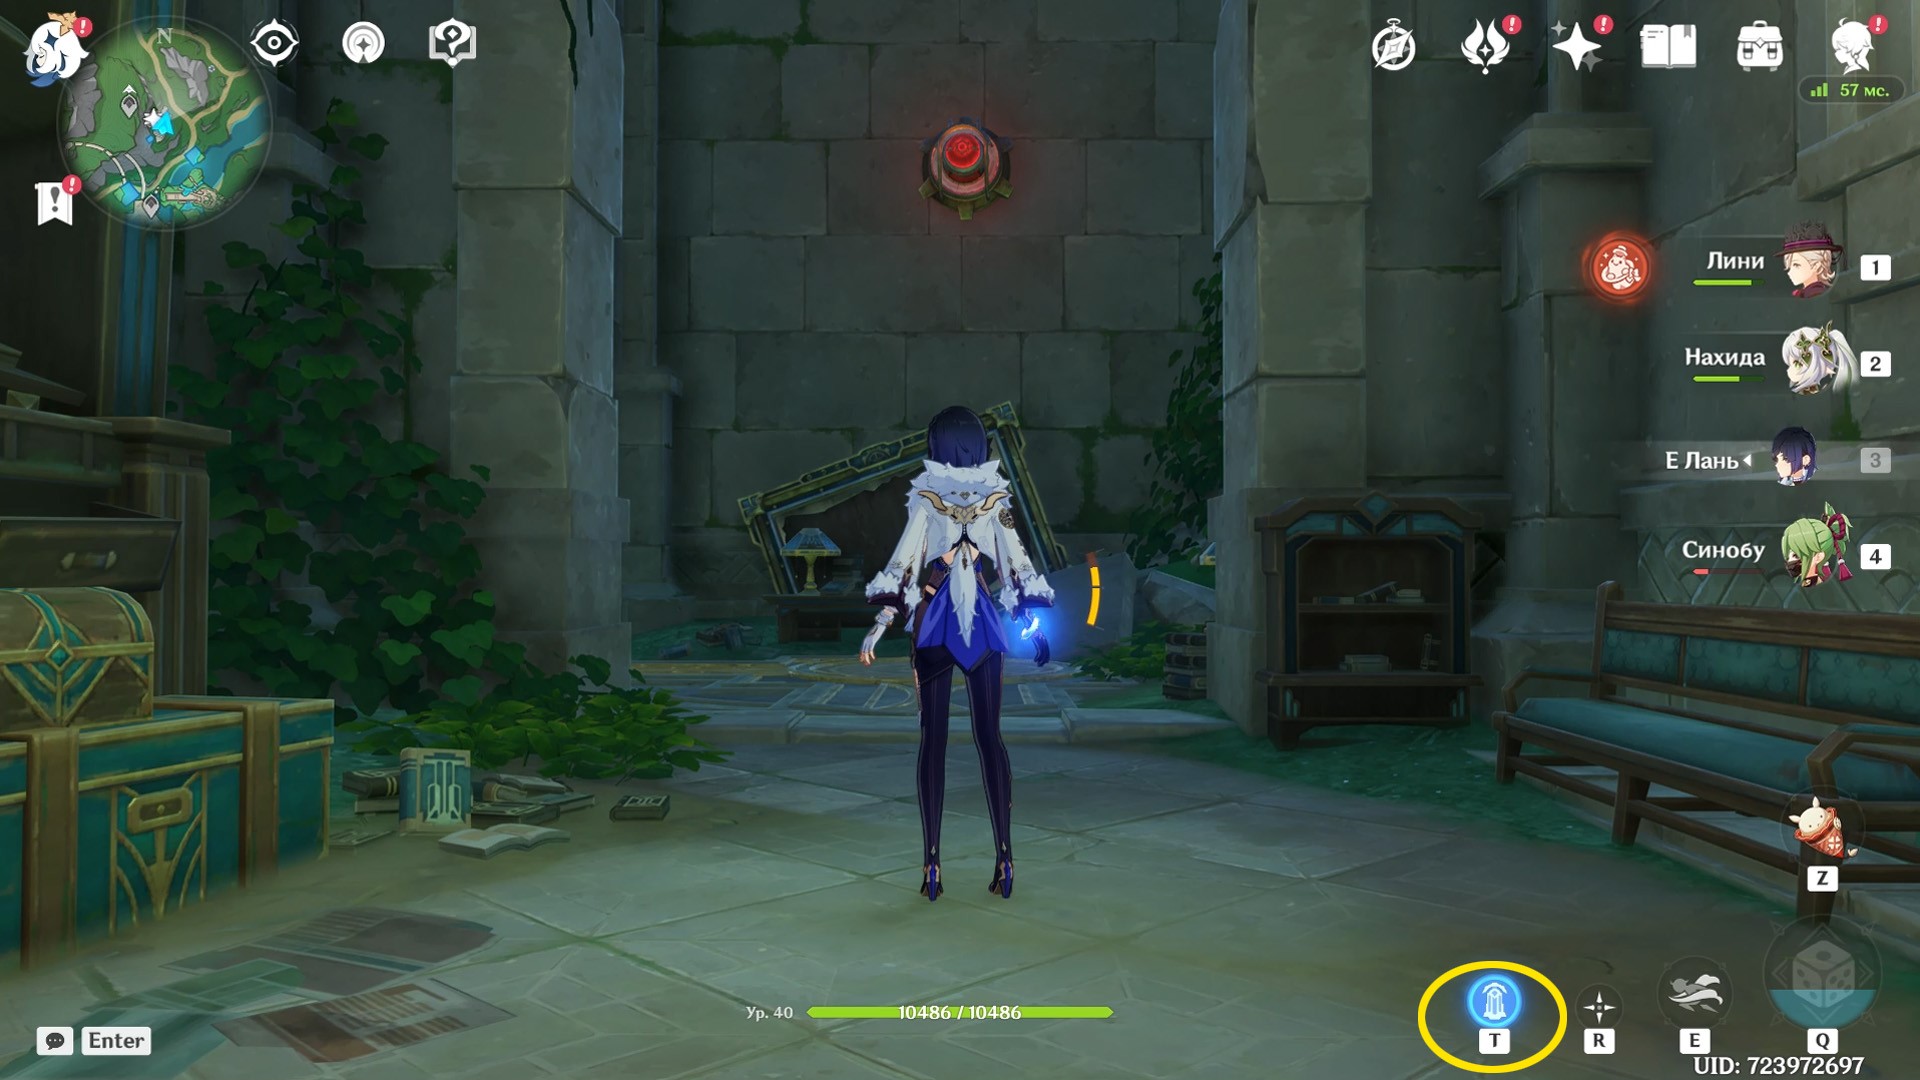
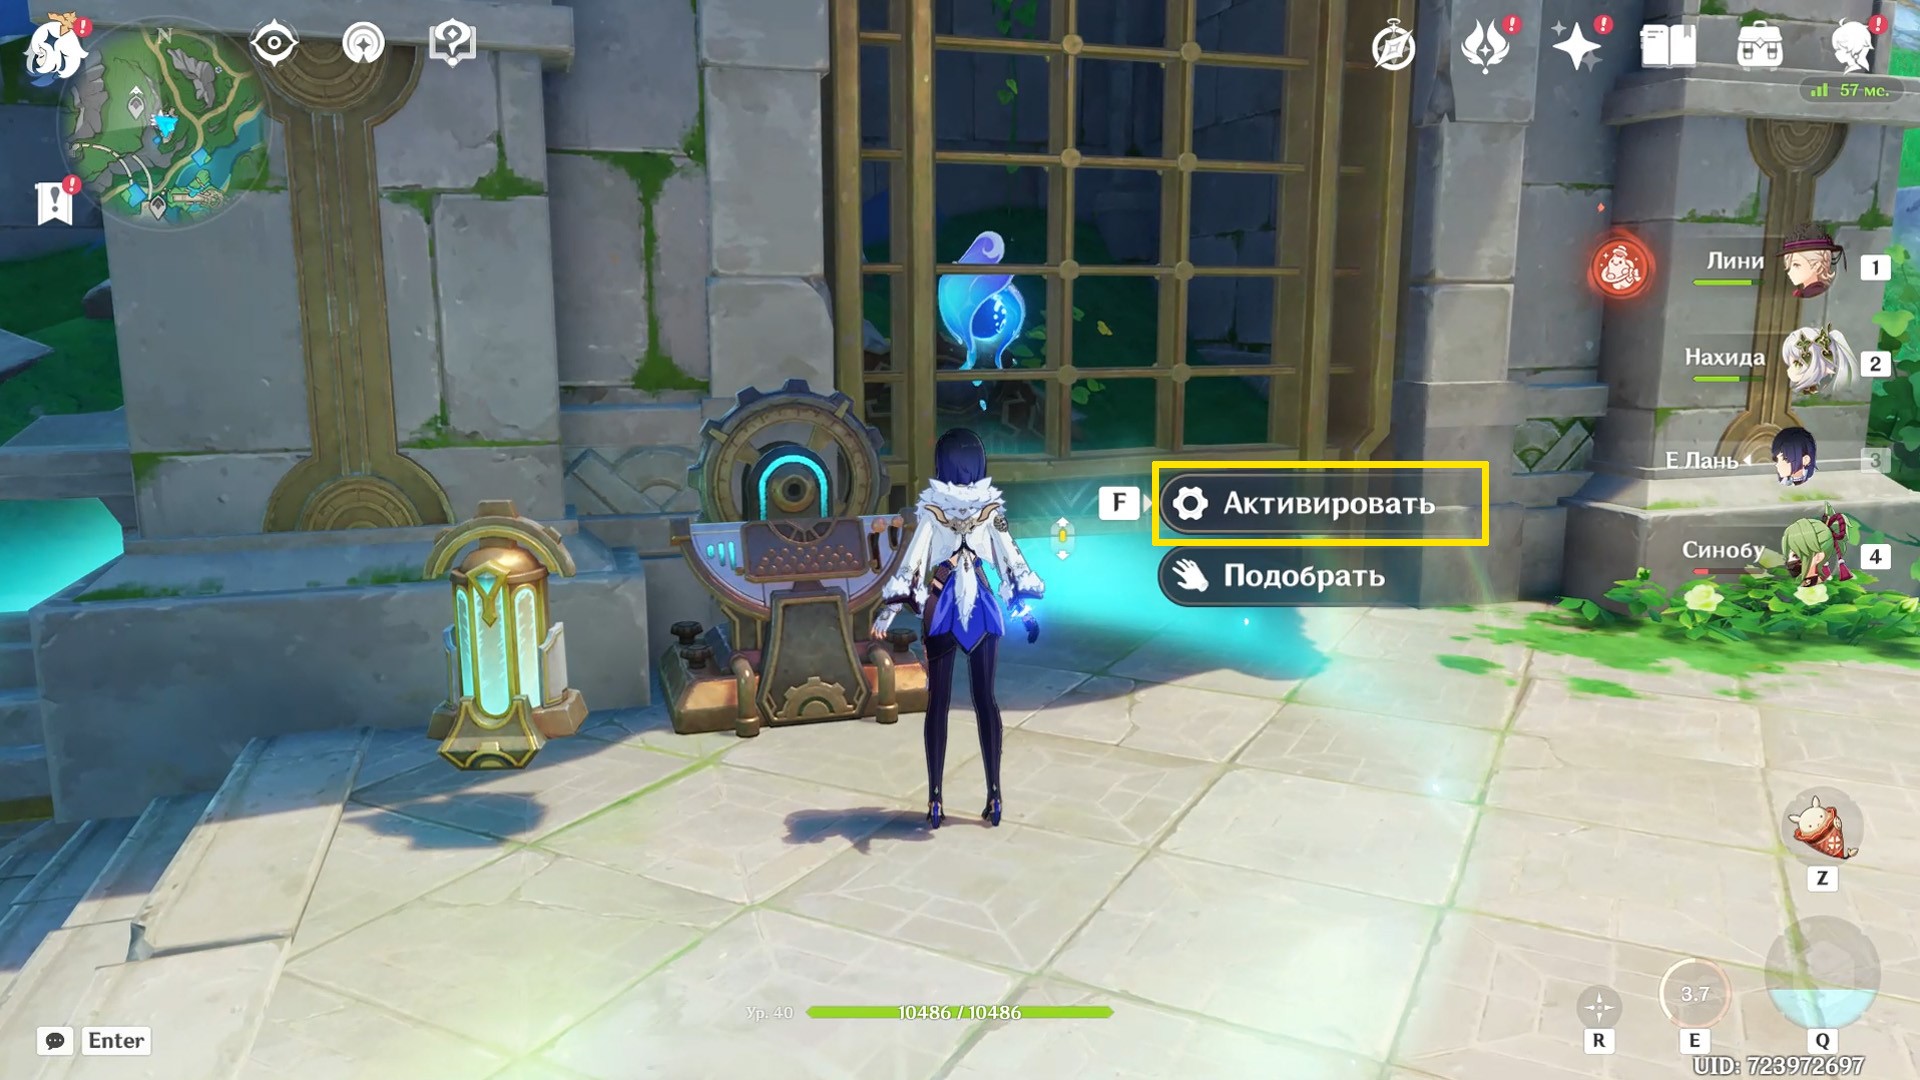
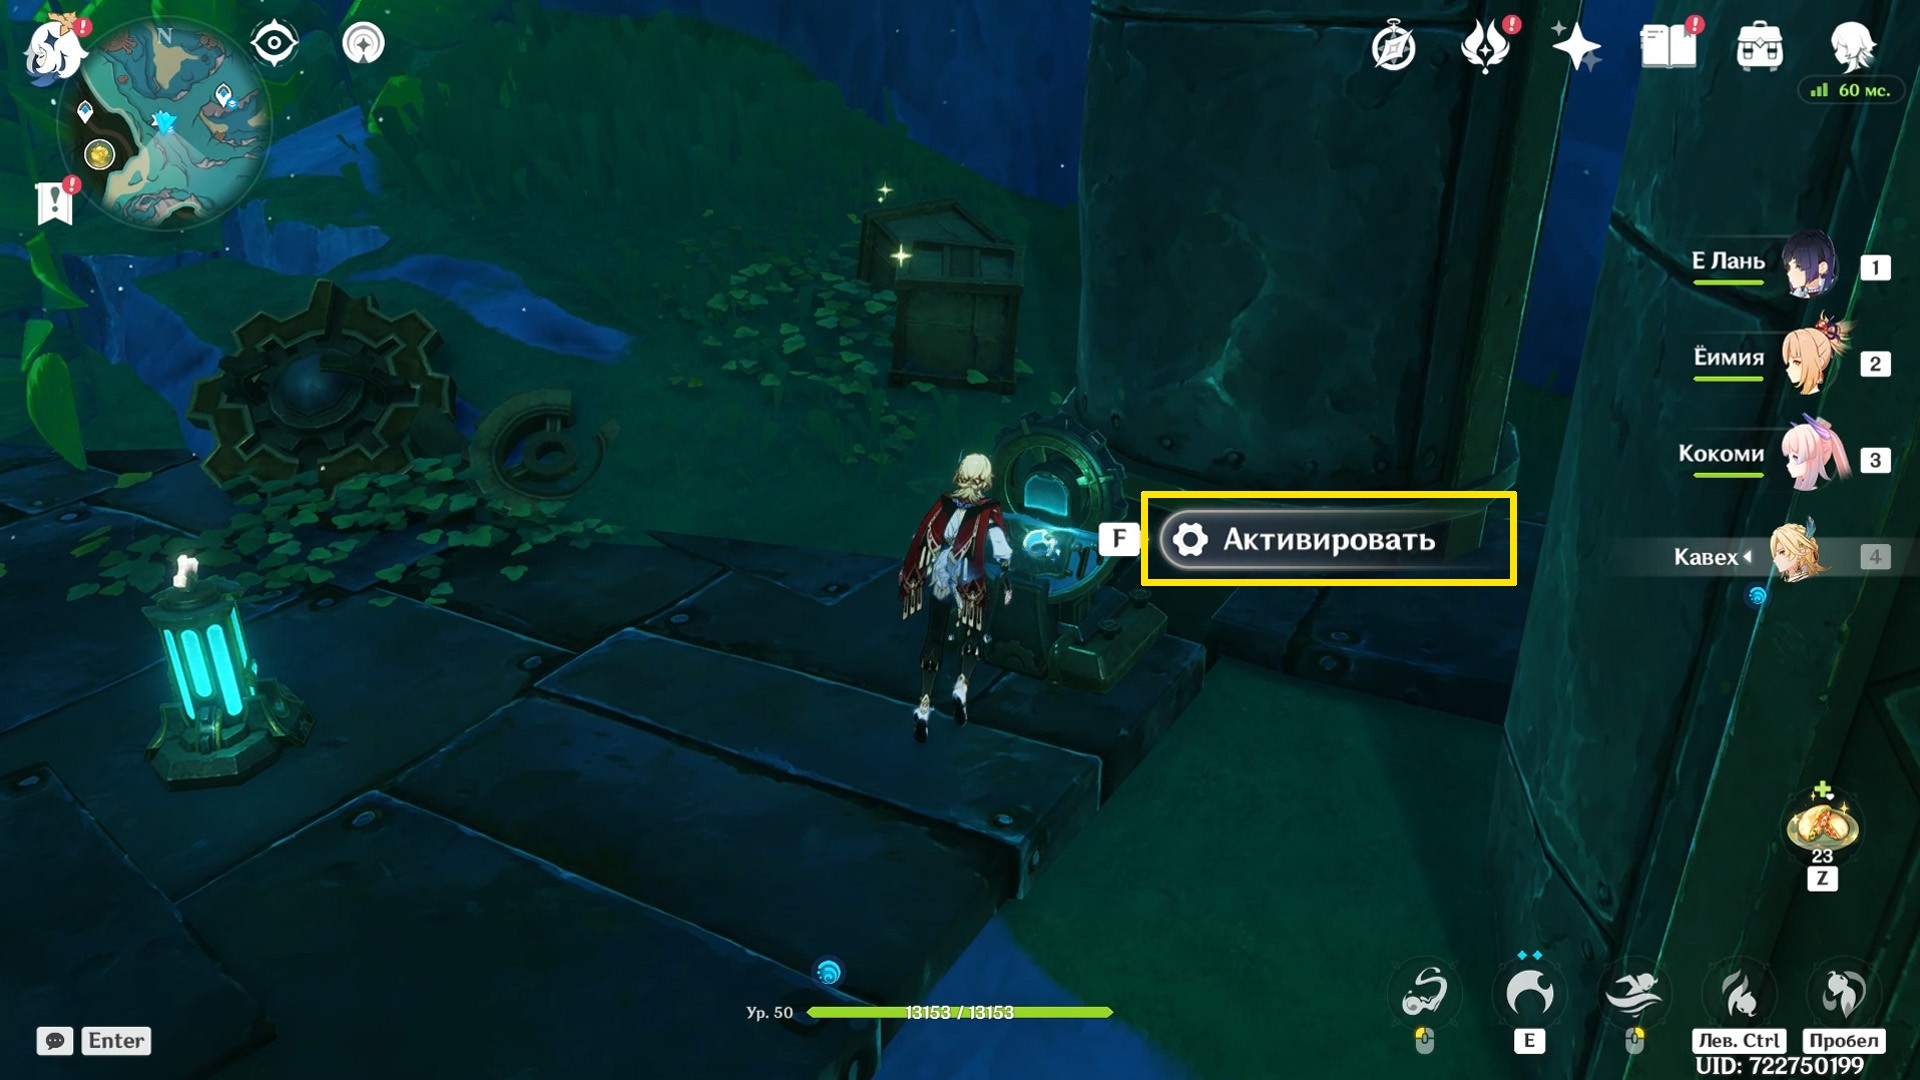
In the end, all that remains is to take the active drive down to the control panel and place the part next to it (T key on a PC). Click " To interact " to remove the lock from the precious chest
Panel 2
- Location: north of the Cent Laboratory ruins.
- Reward: Hydroculus.
When you unlock this terminal, you will be able to find a location with ciphergram IV, and also open a room with hydroculum.
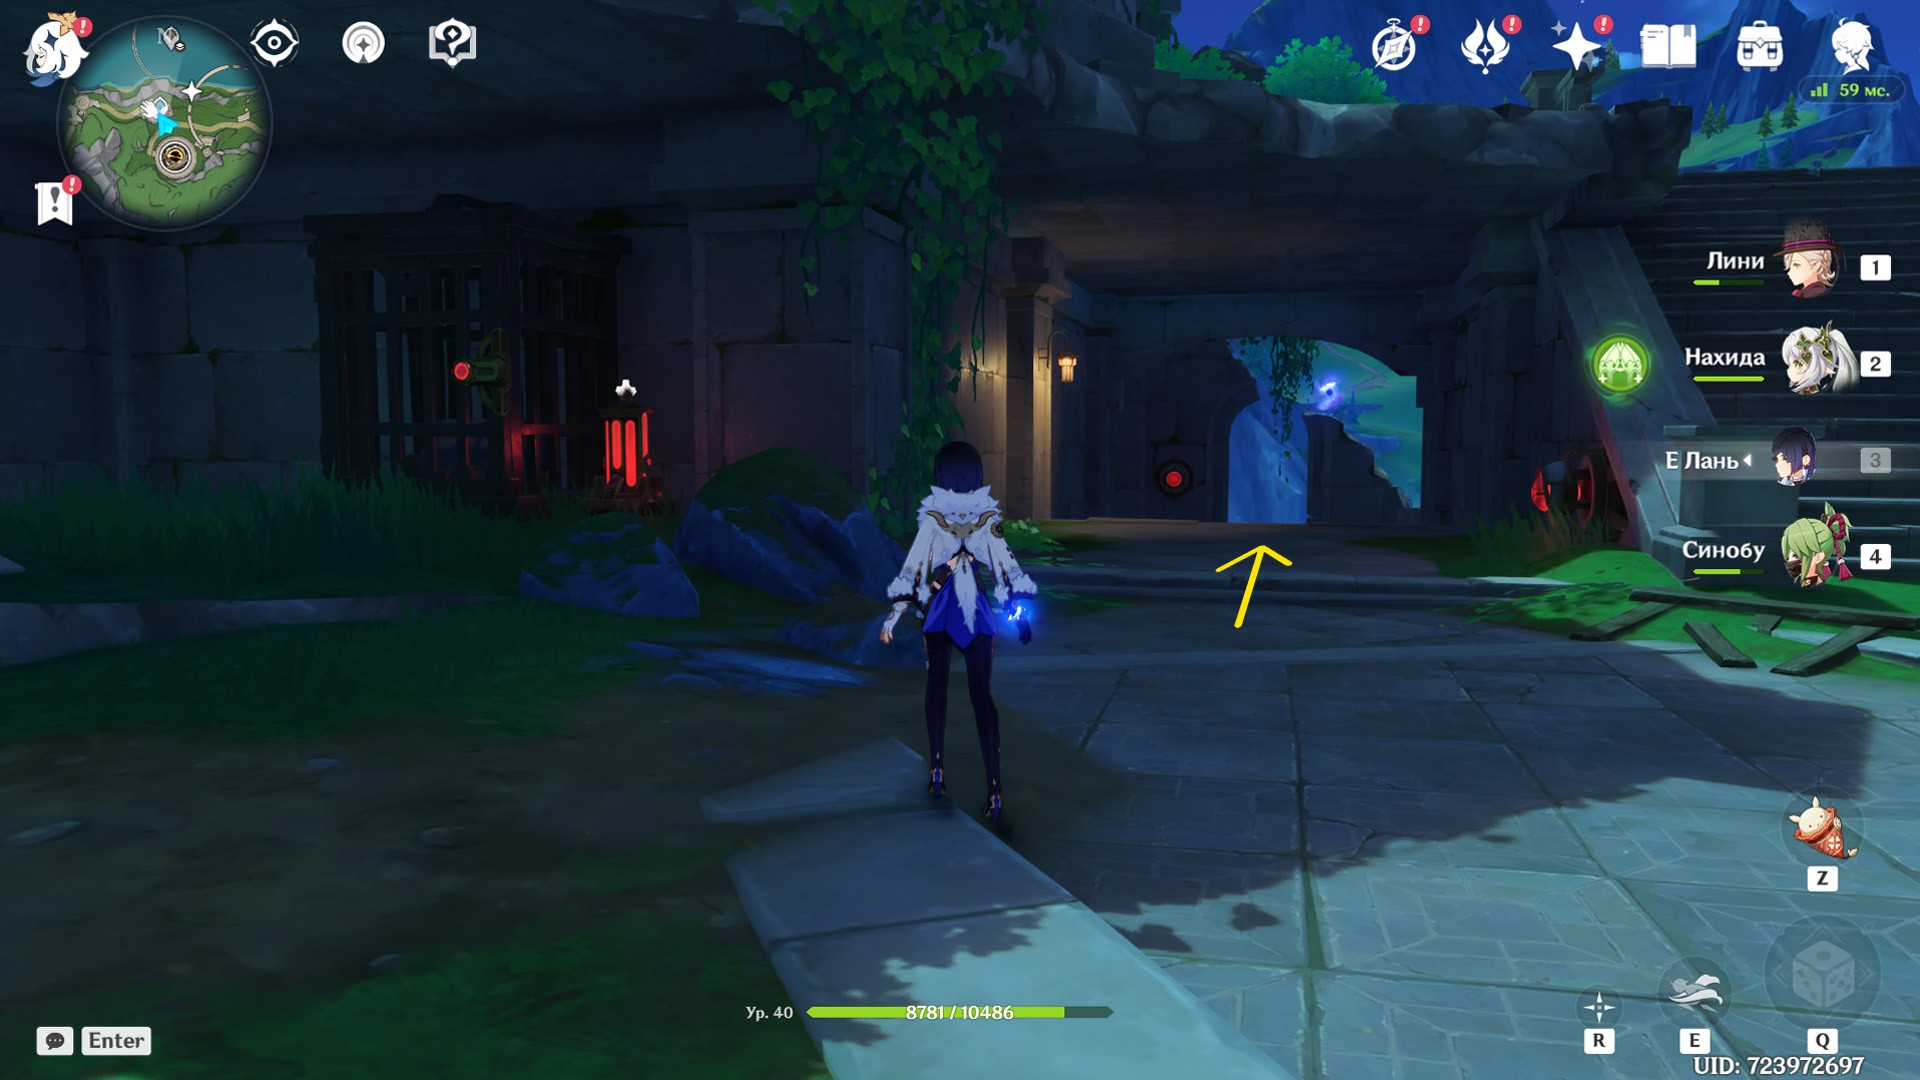
From the teleporter east of the New Fontaine Research Institute, go down to the nearest ruins: in front of the closed grate are fatui that you will have to defeat.
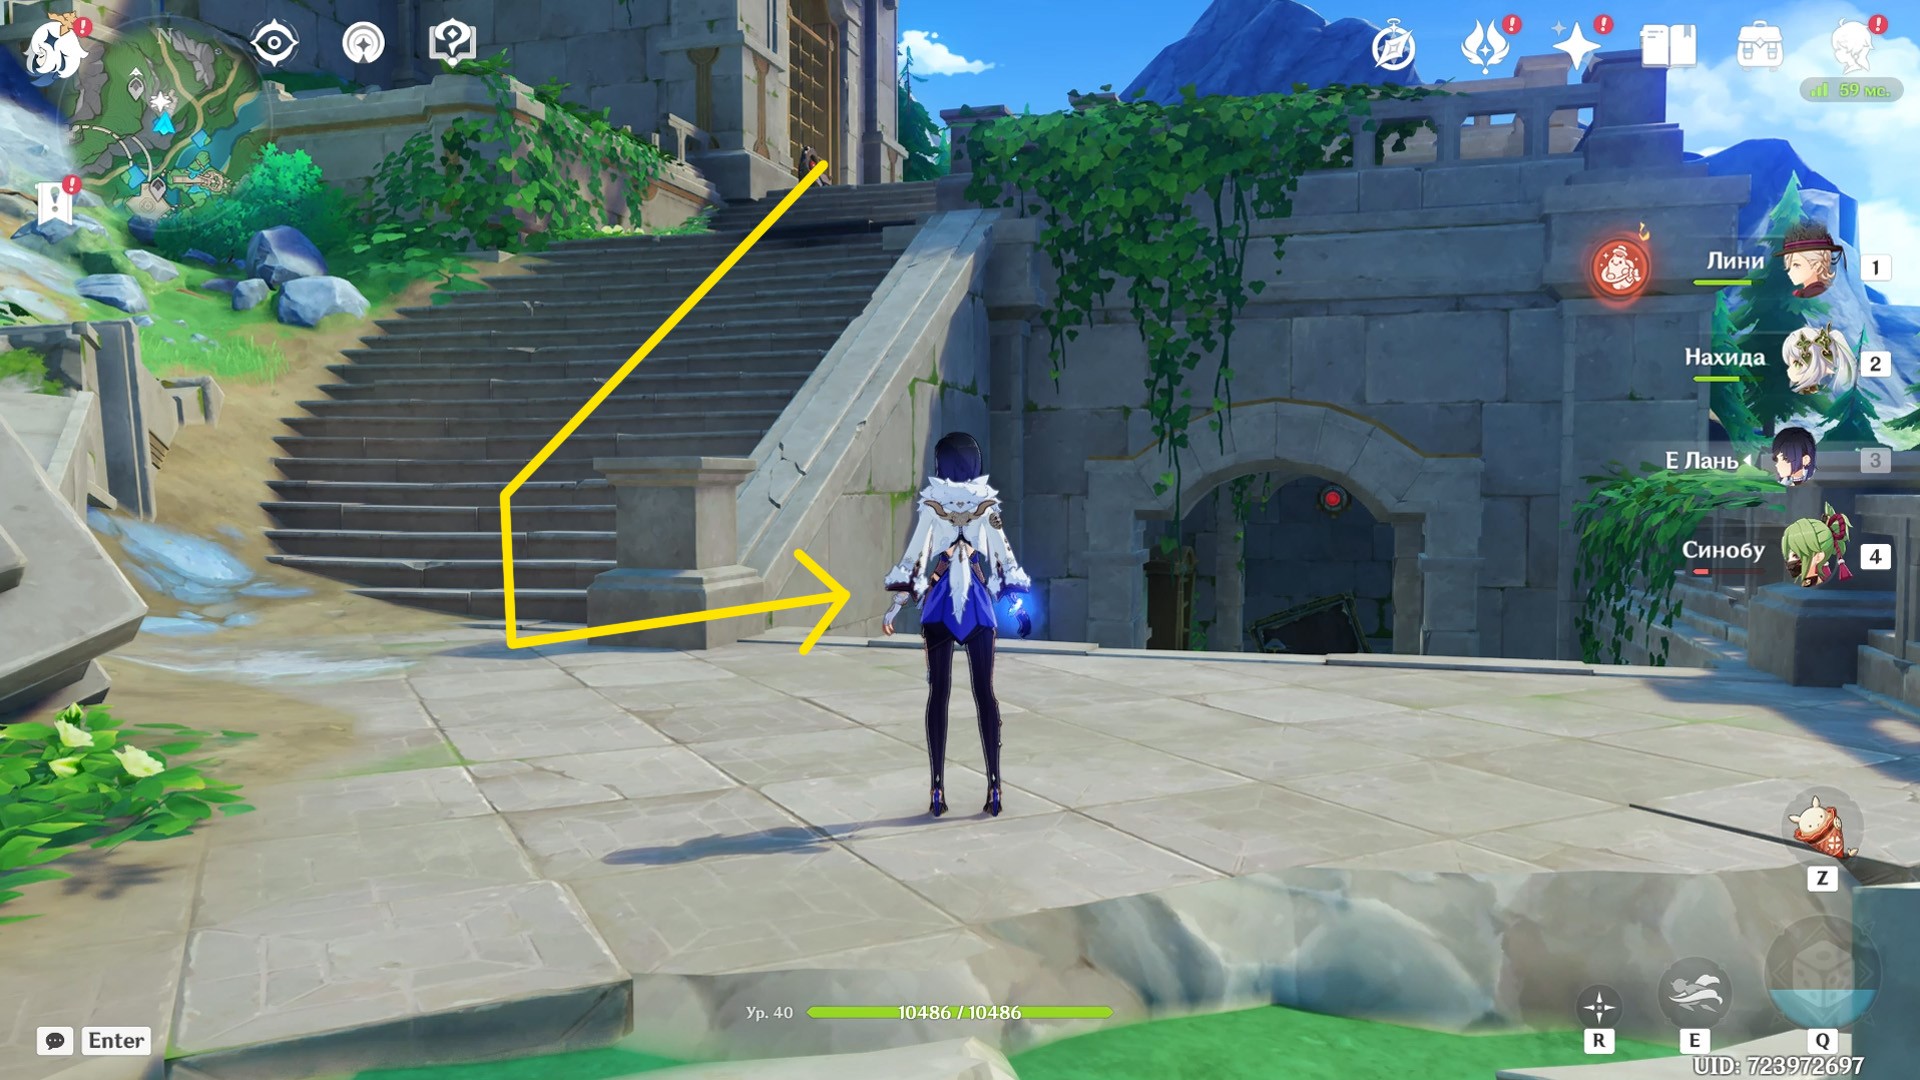
After getting rid of the enemies, move into the rooms under the ruins and go straight to the room with the working console.
In the far corner, pick up the Ushii block and return to the panel in front of the stairs: you need to hit the red block shrouded in pneumatic.
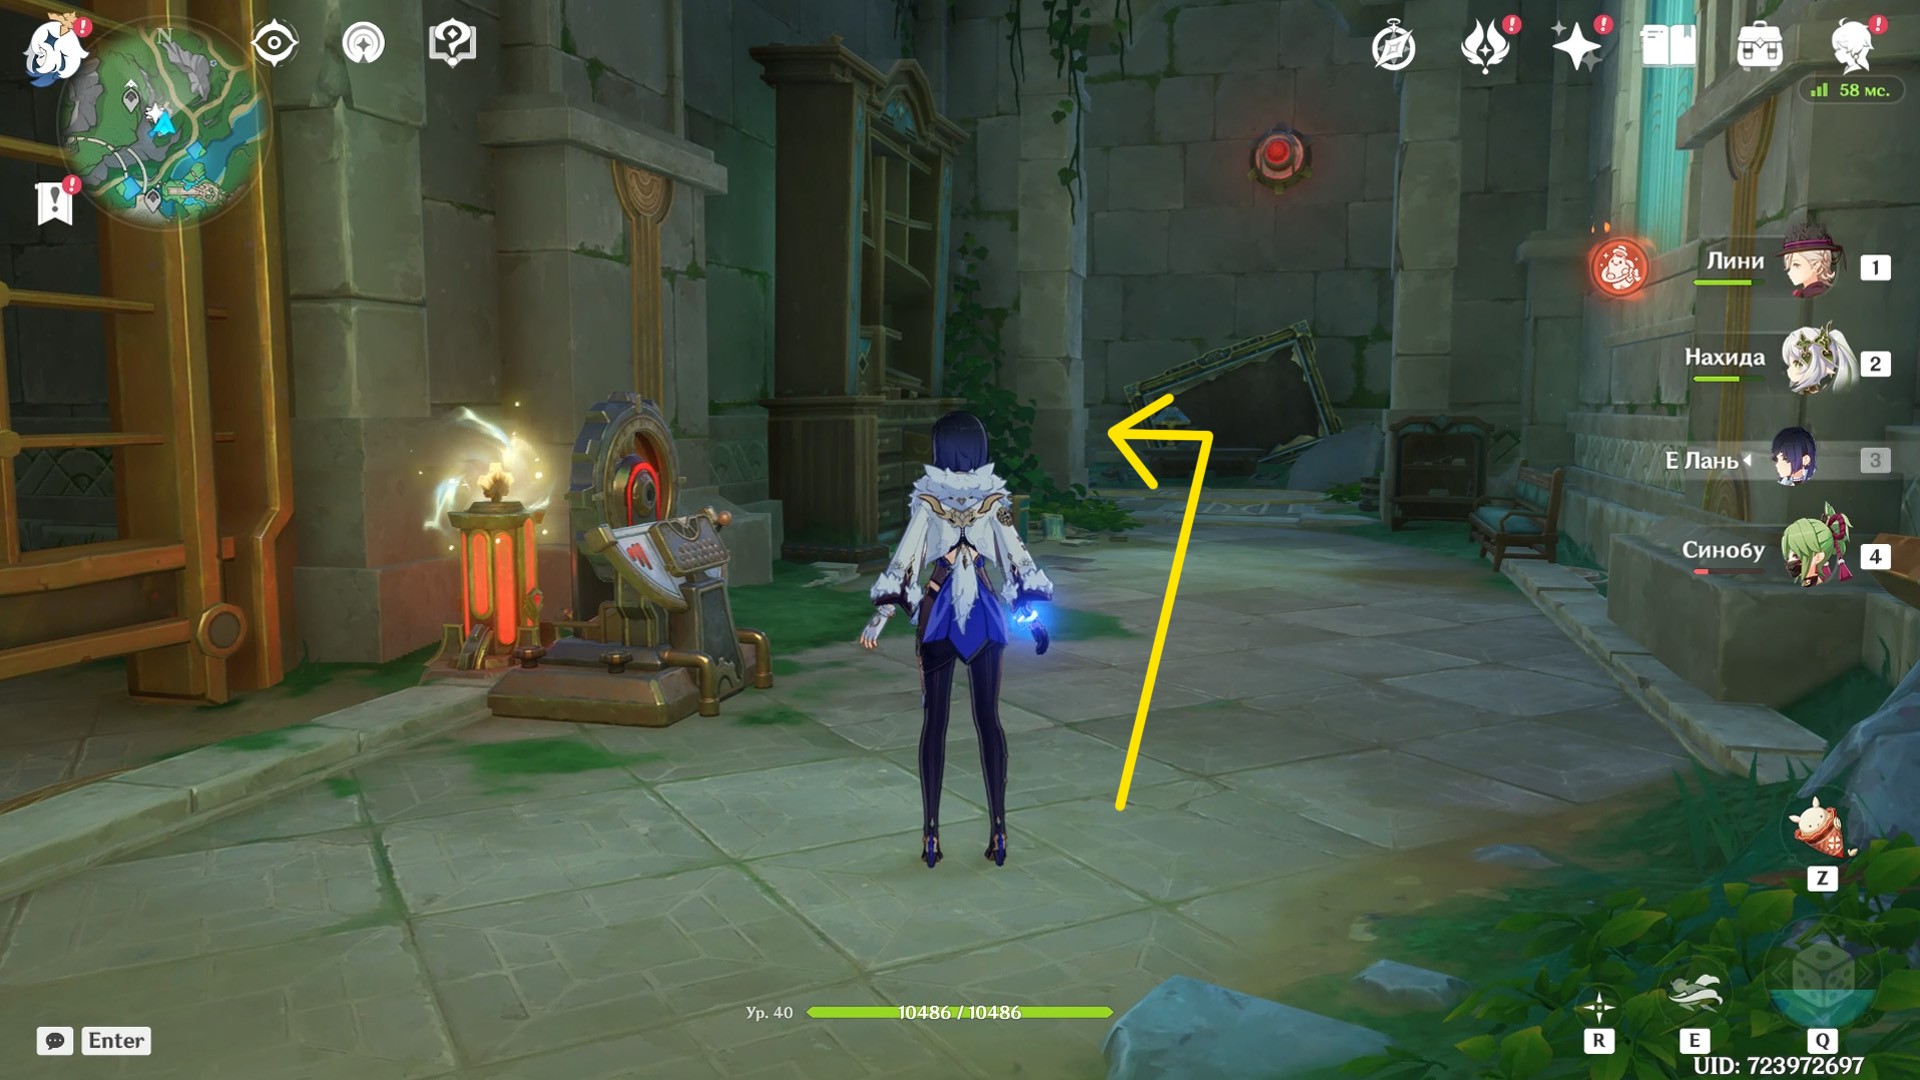
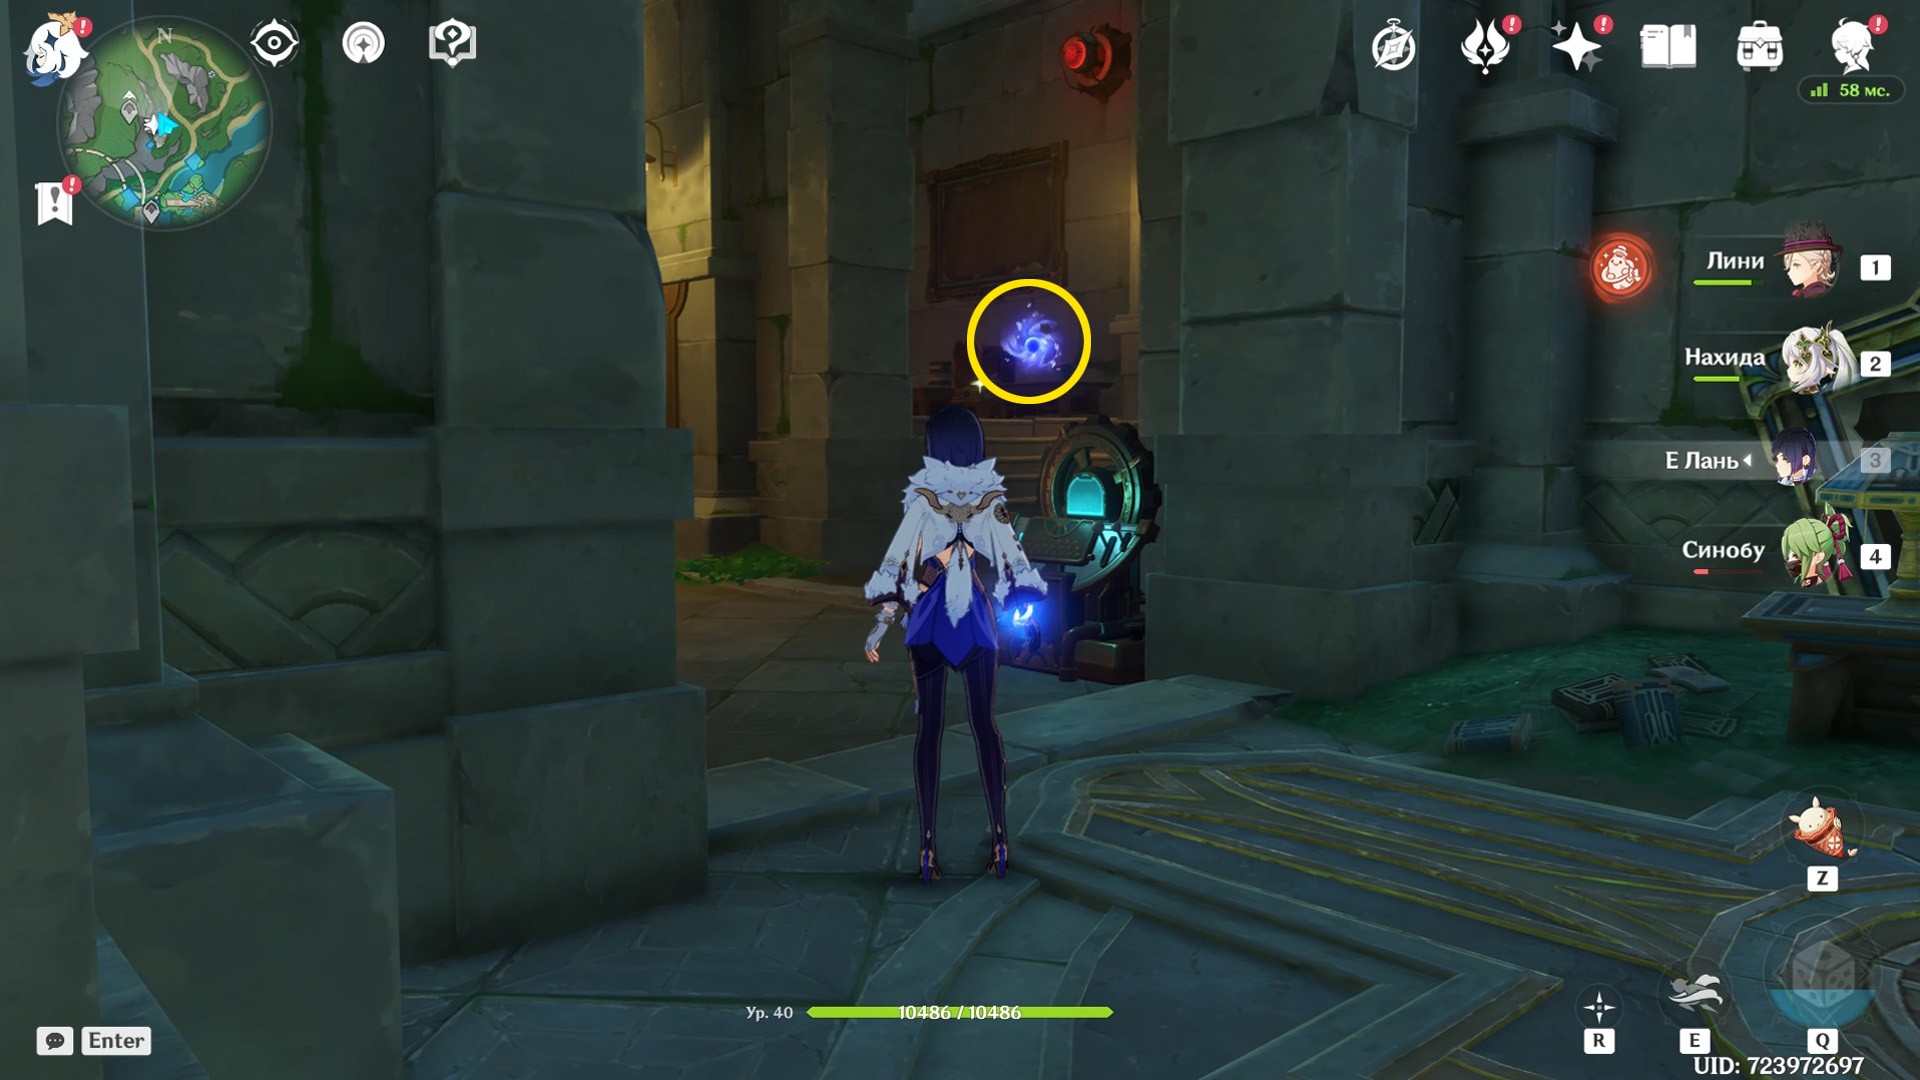
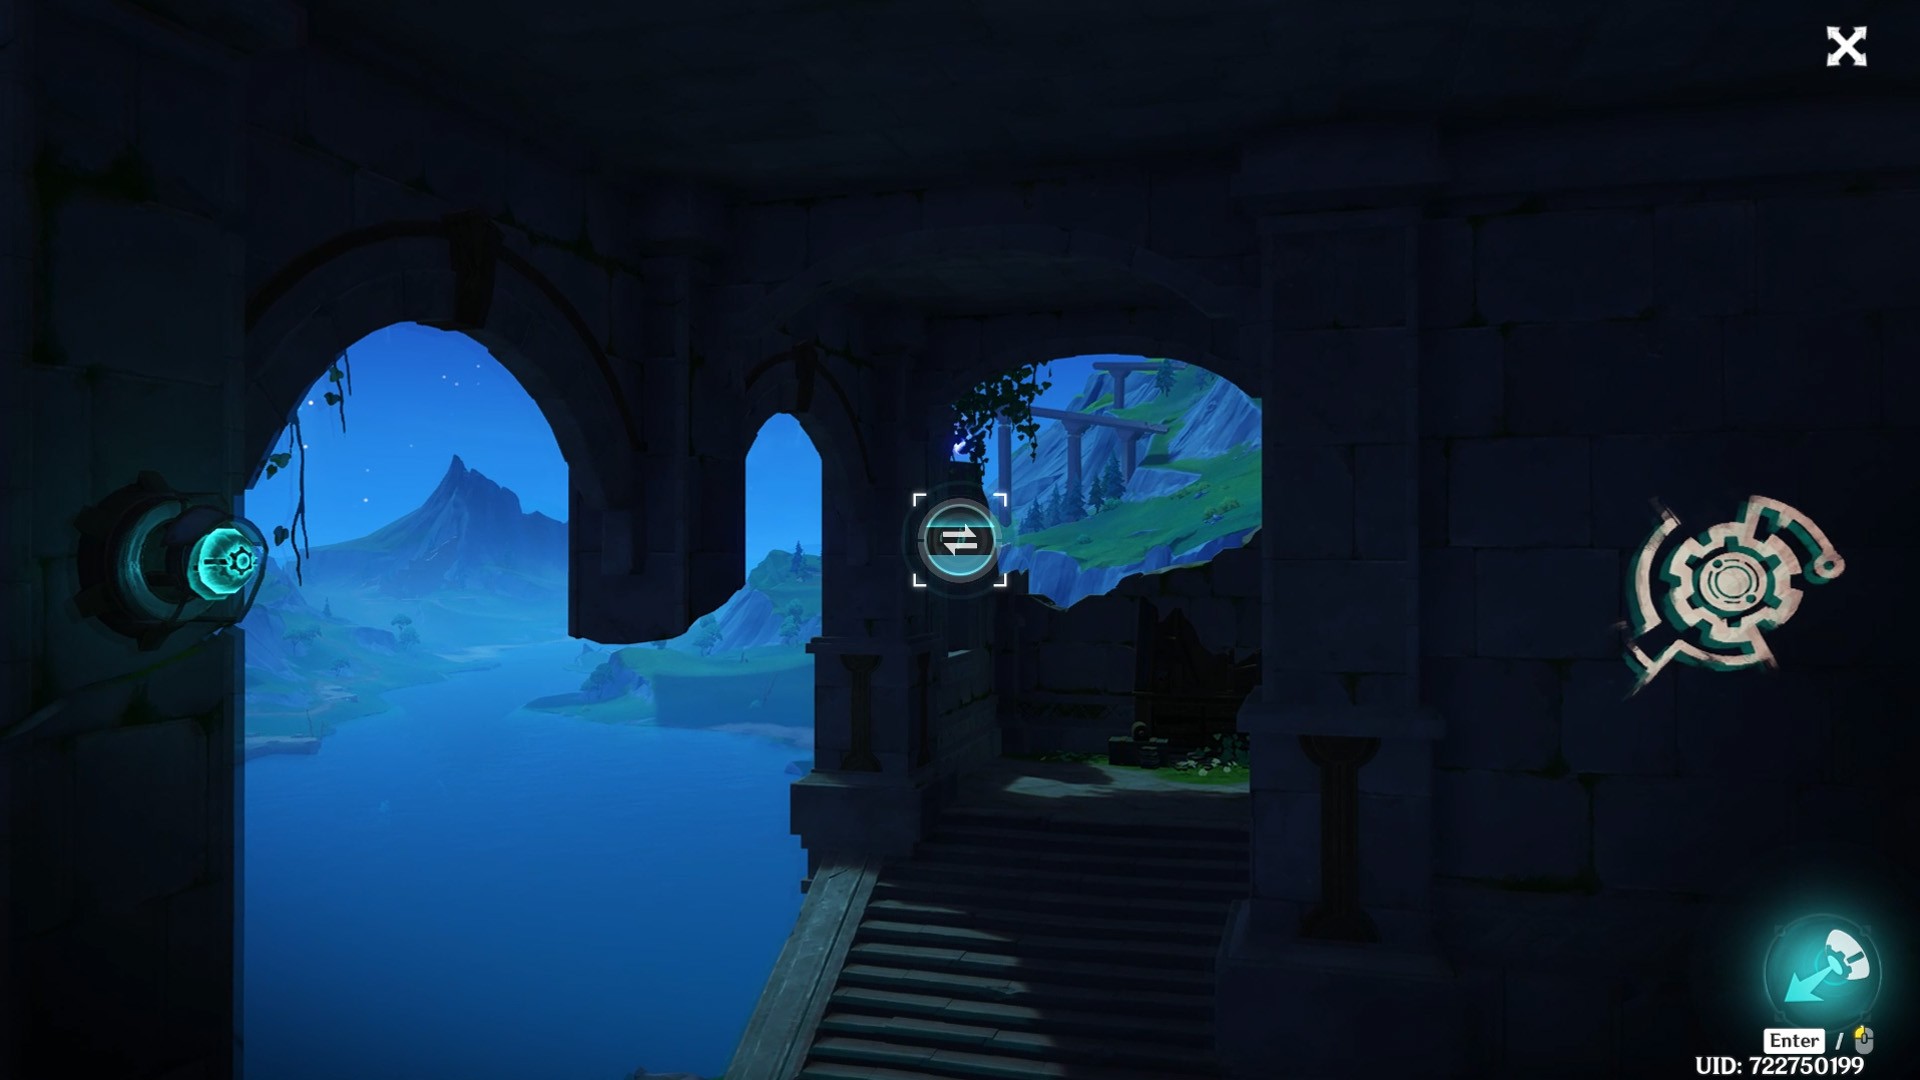
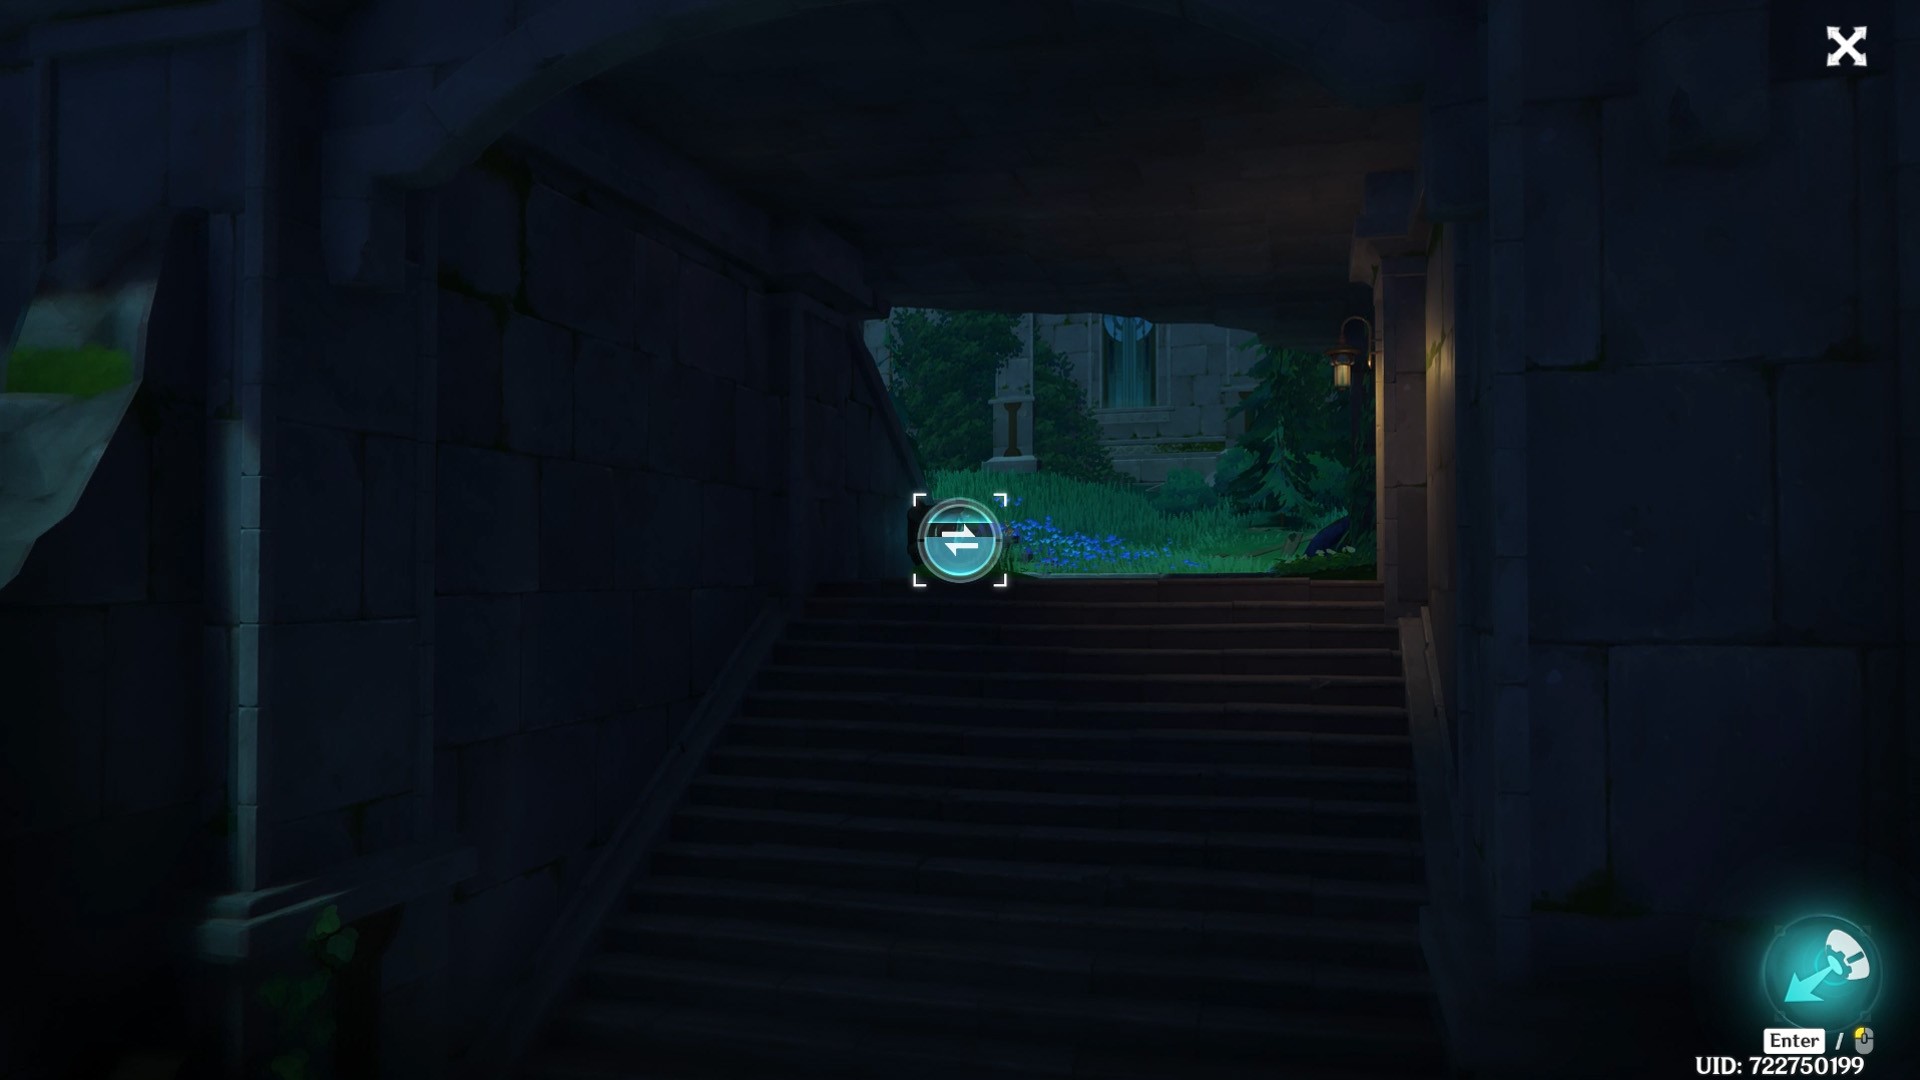
Open the room to the left of the remote control and select the drive: the part needs to be installed in the corridor under the camera (the approximate location is indicated in the screenshot above).
Return to the room from which you took the ushii sphere and connect to the video surveillance interface: while controlling the camera, collect the charge from the far block and move it to the drive that was placed in the corridor.

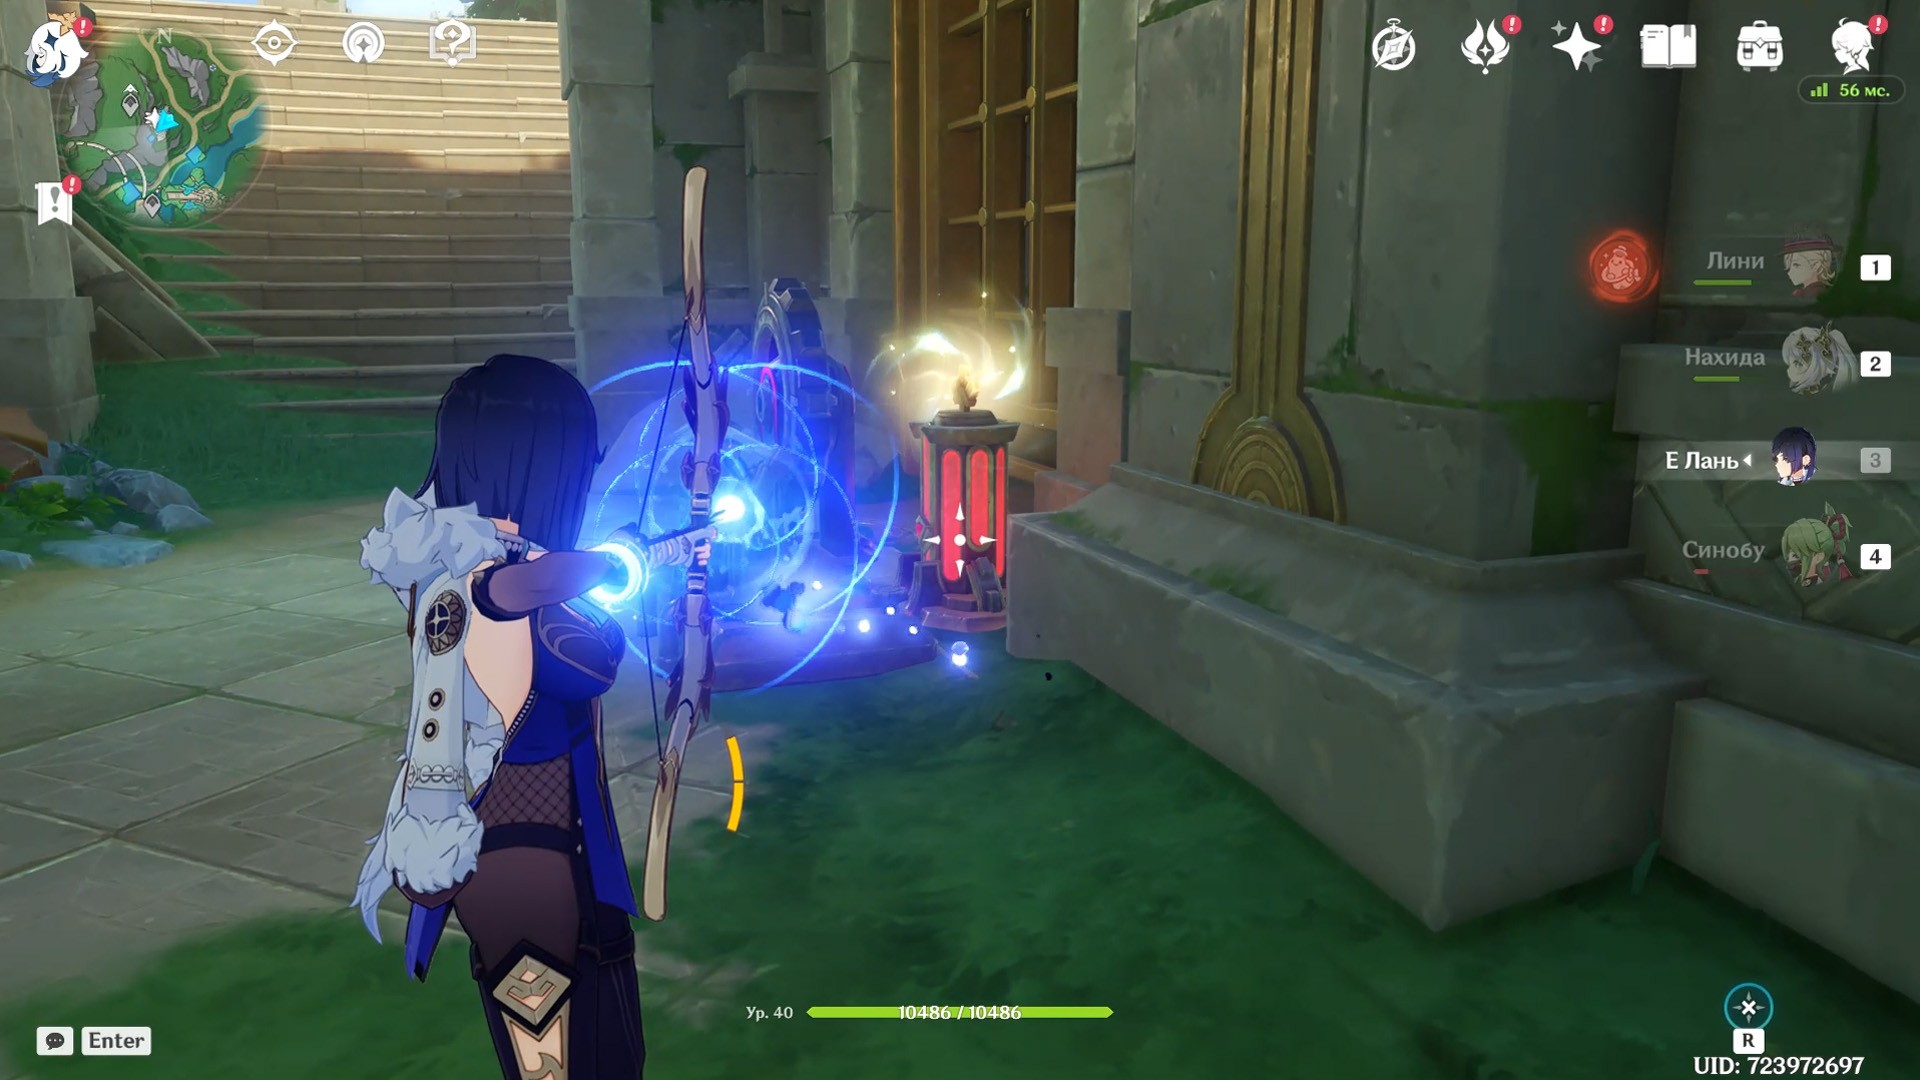
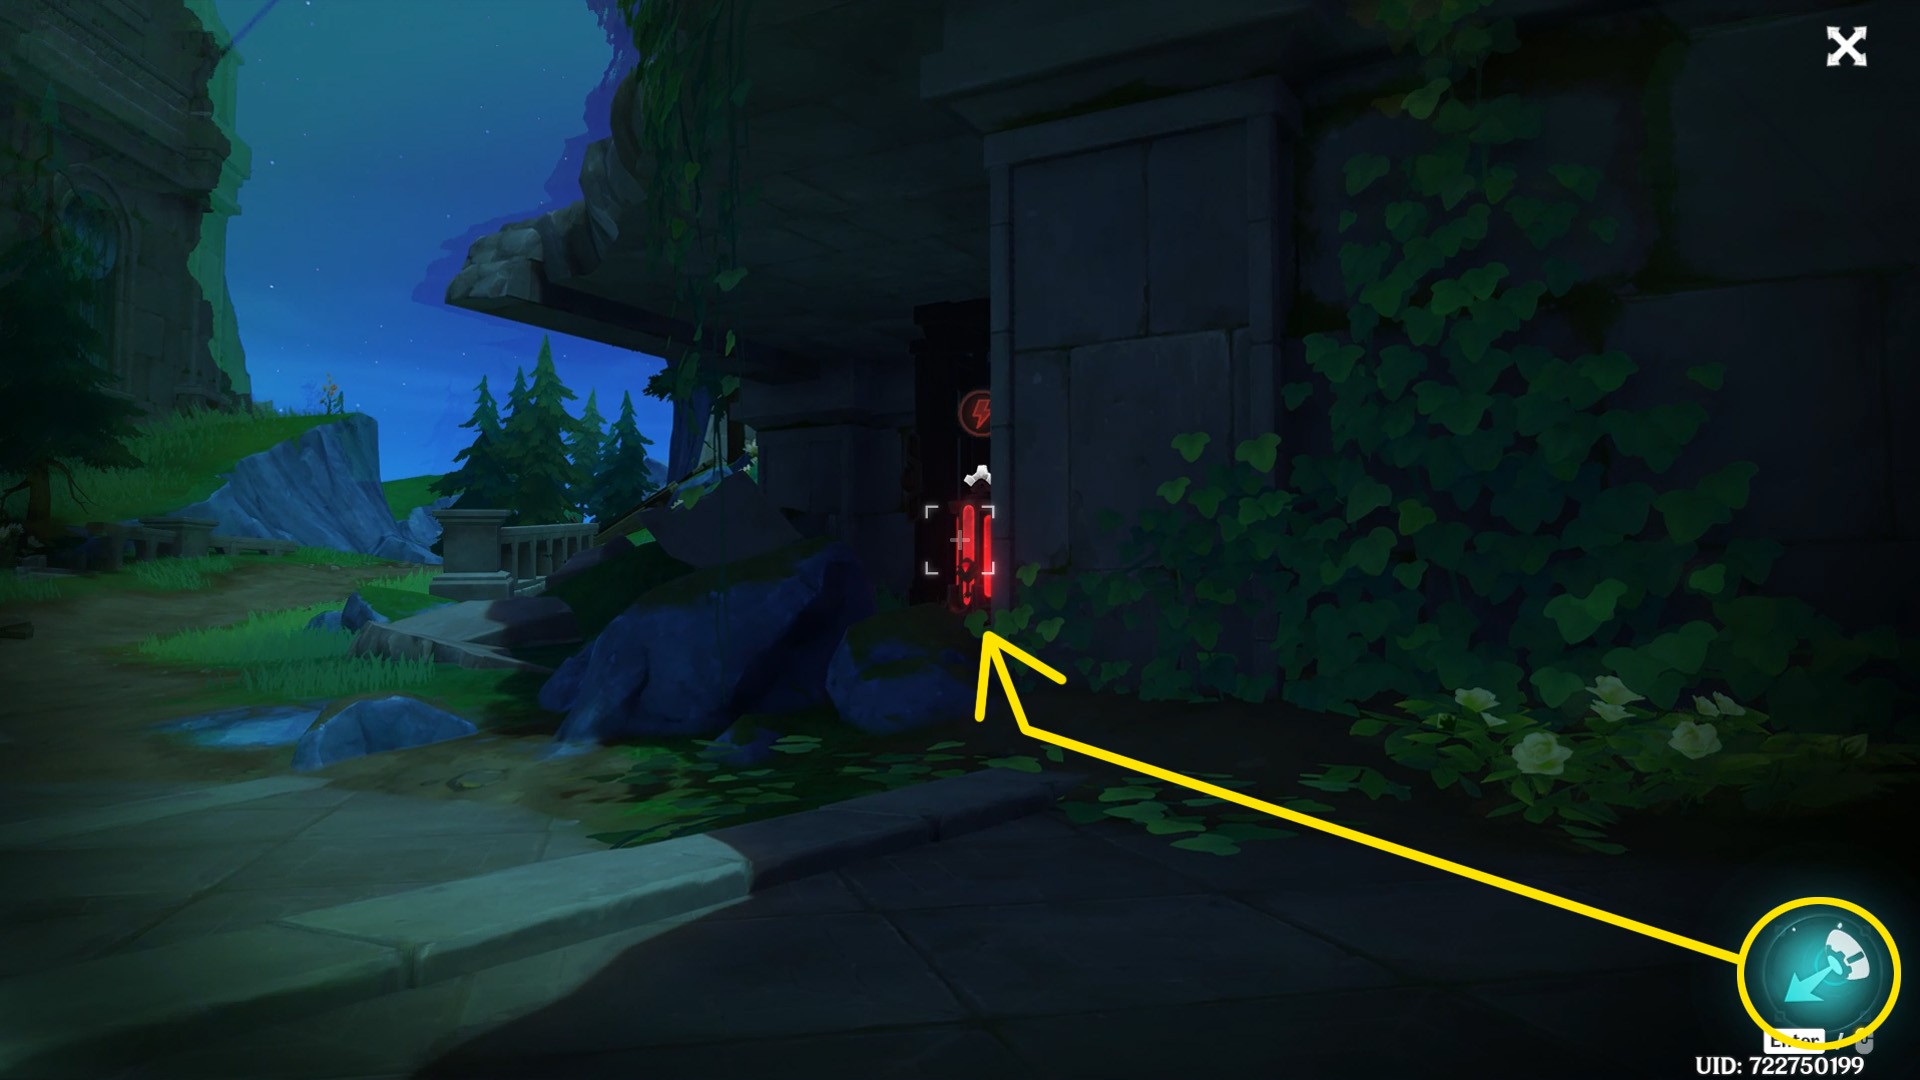
Before opening the dungeon with hydrocul, take the power unit from the corridor, place it near the control panel, which was guarded by the fatui, and, after interacting with it, lift the grate - access to the elemental particle will be free.
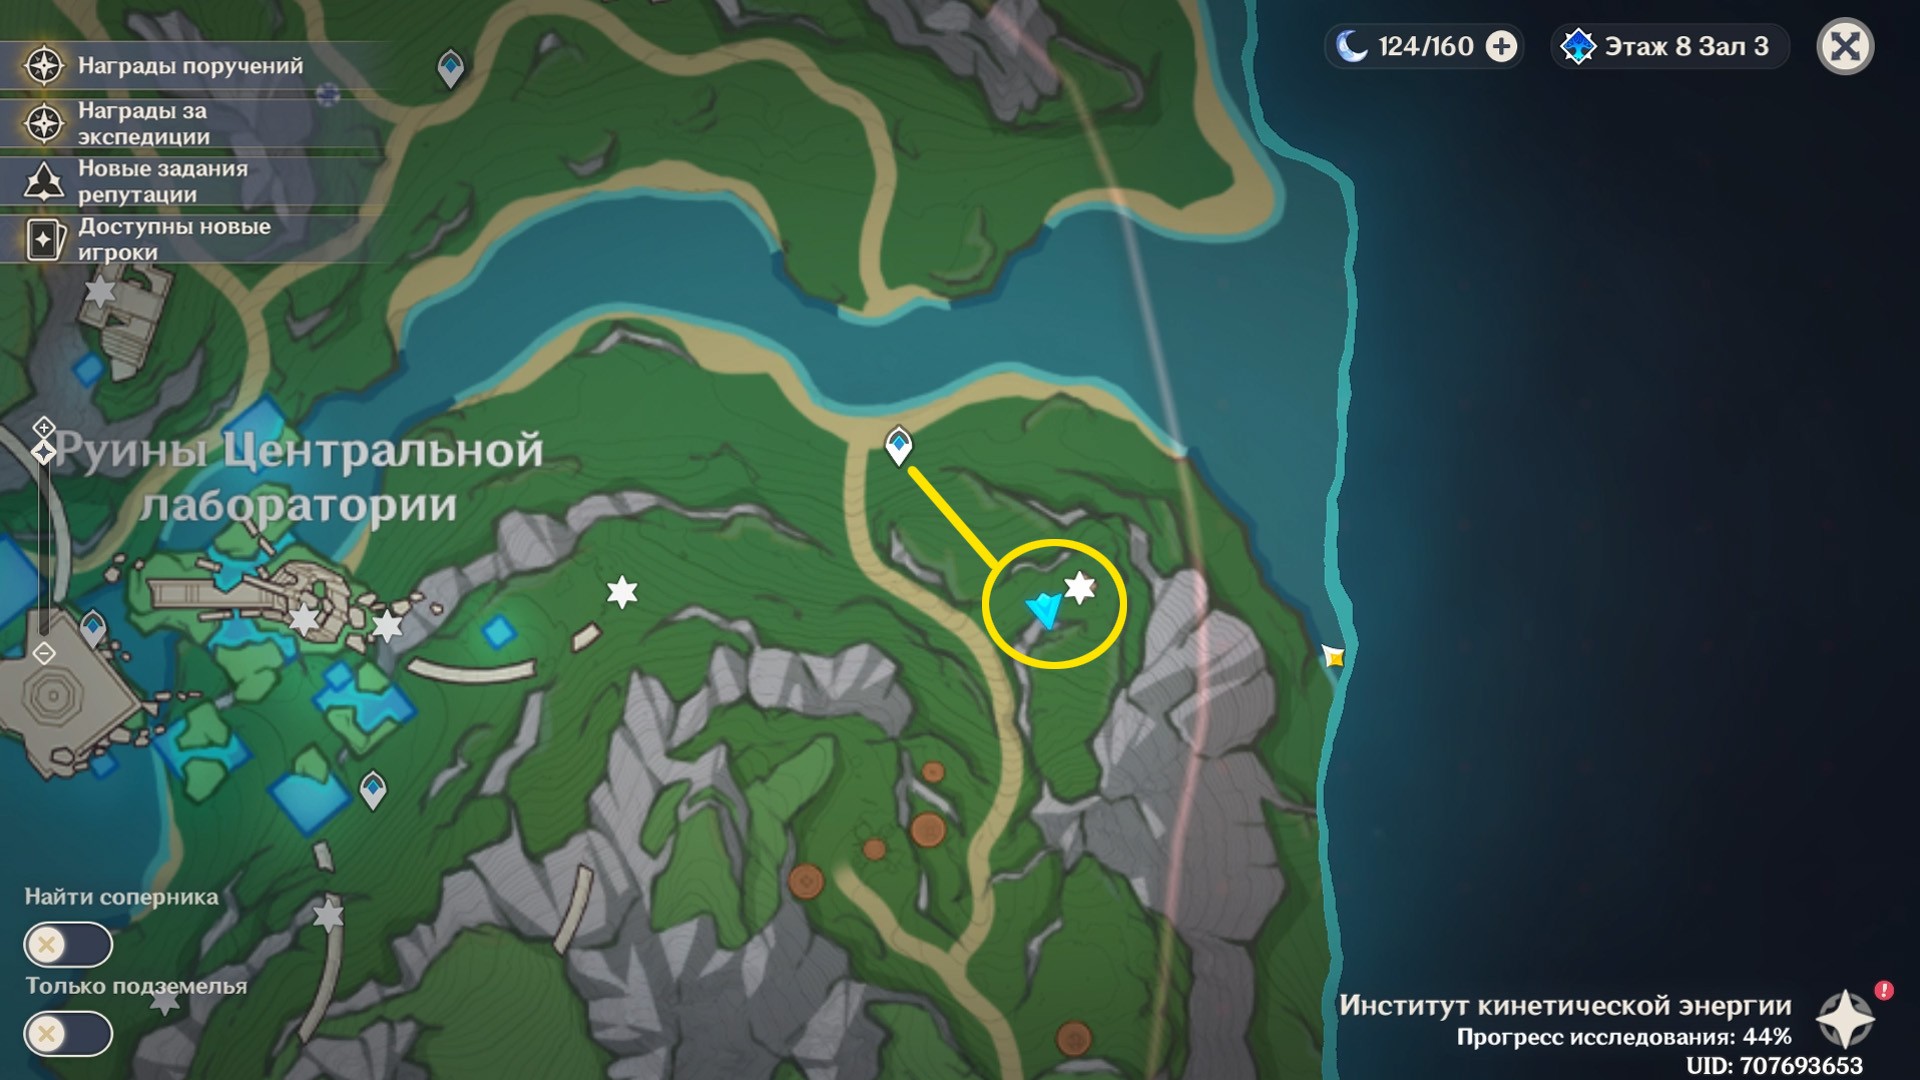
Panel 3
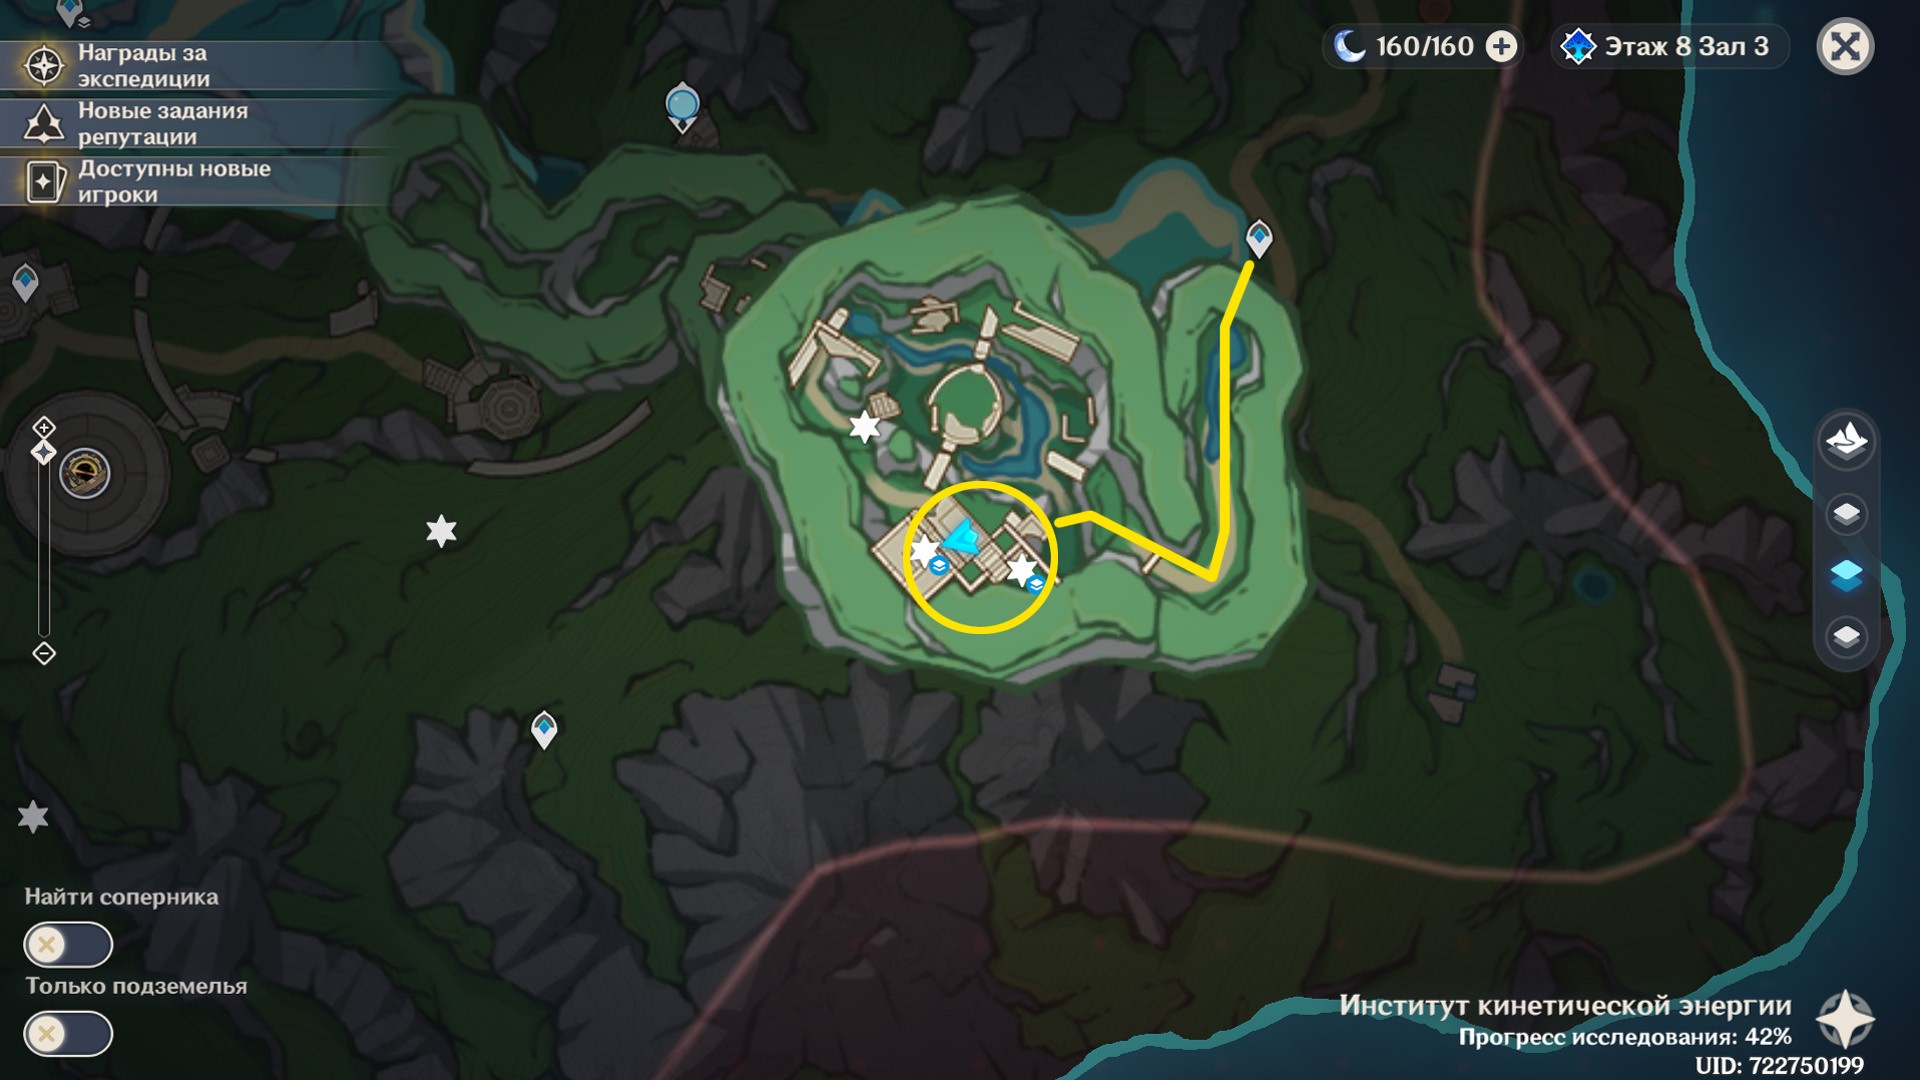
- Location: West of the New Fontaine Research Institute.
- Reward: Amazing Chest.
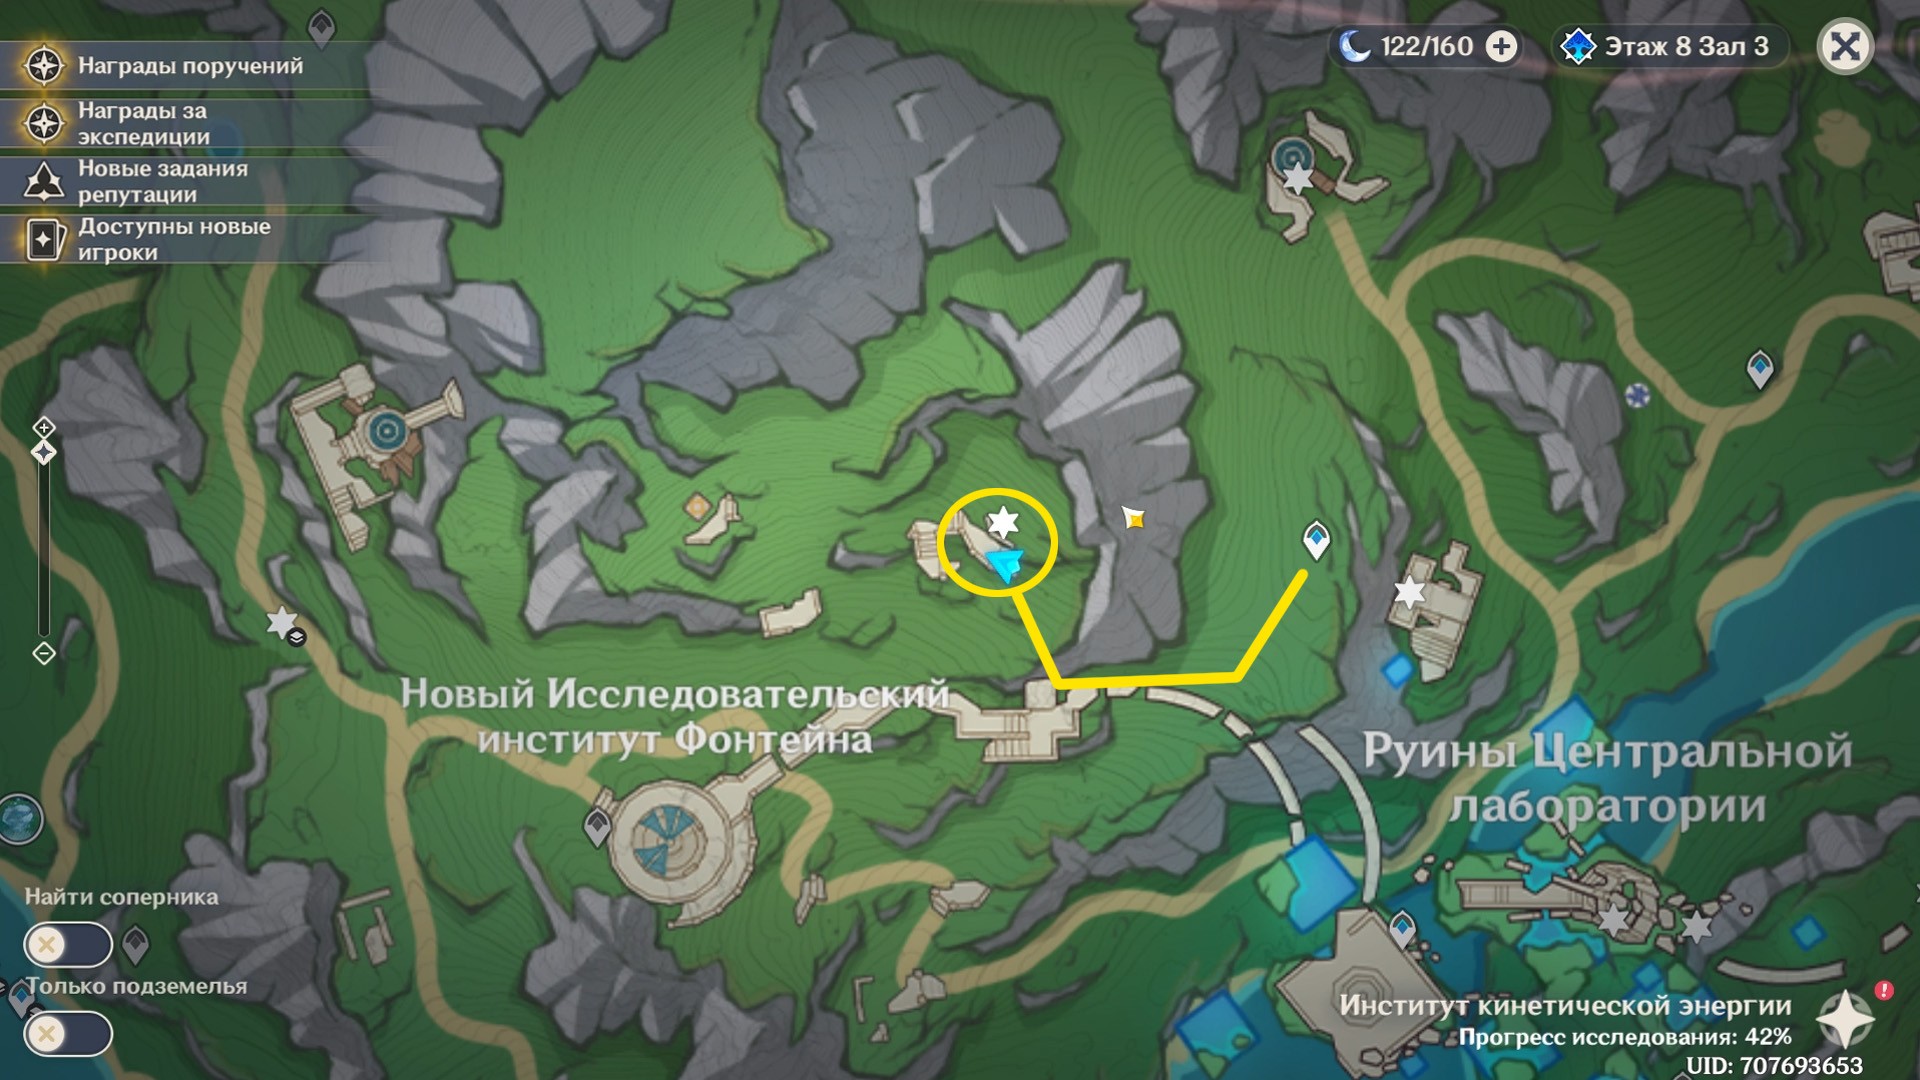
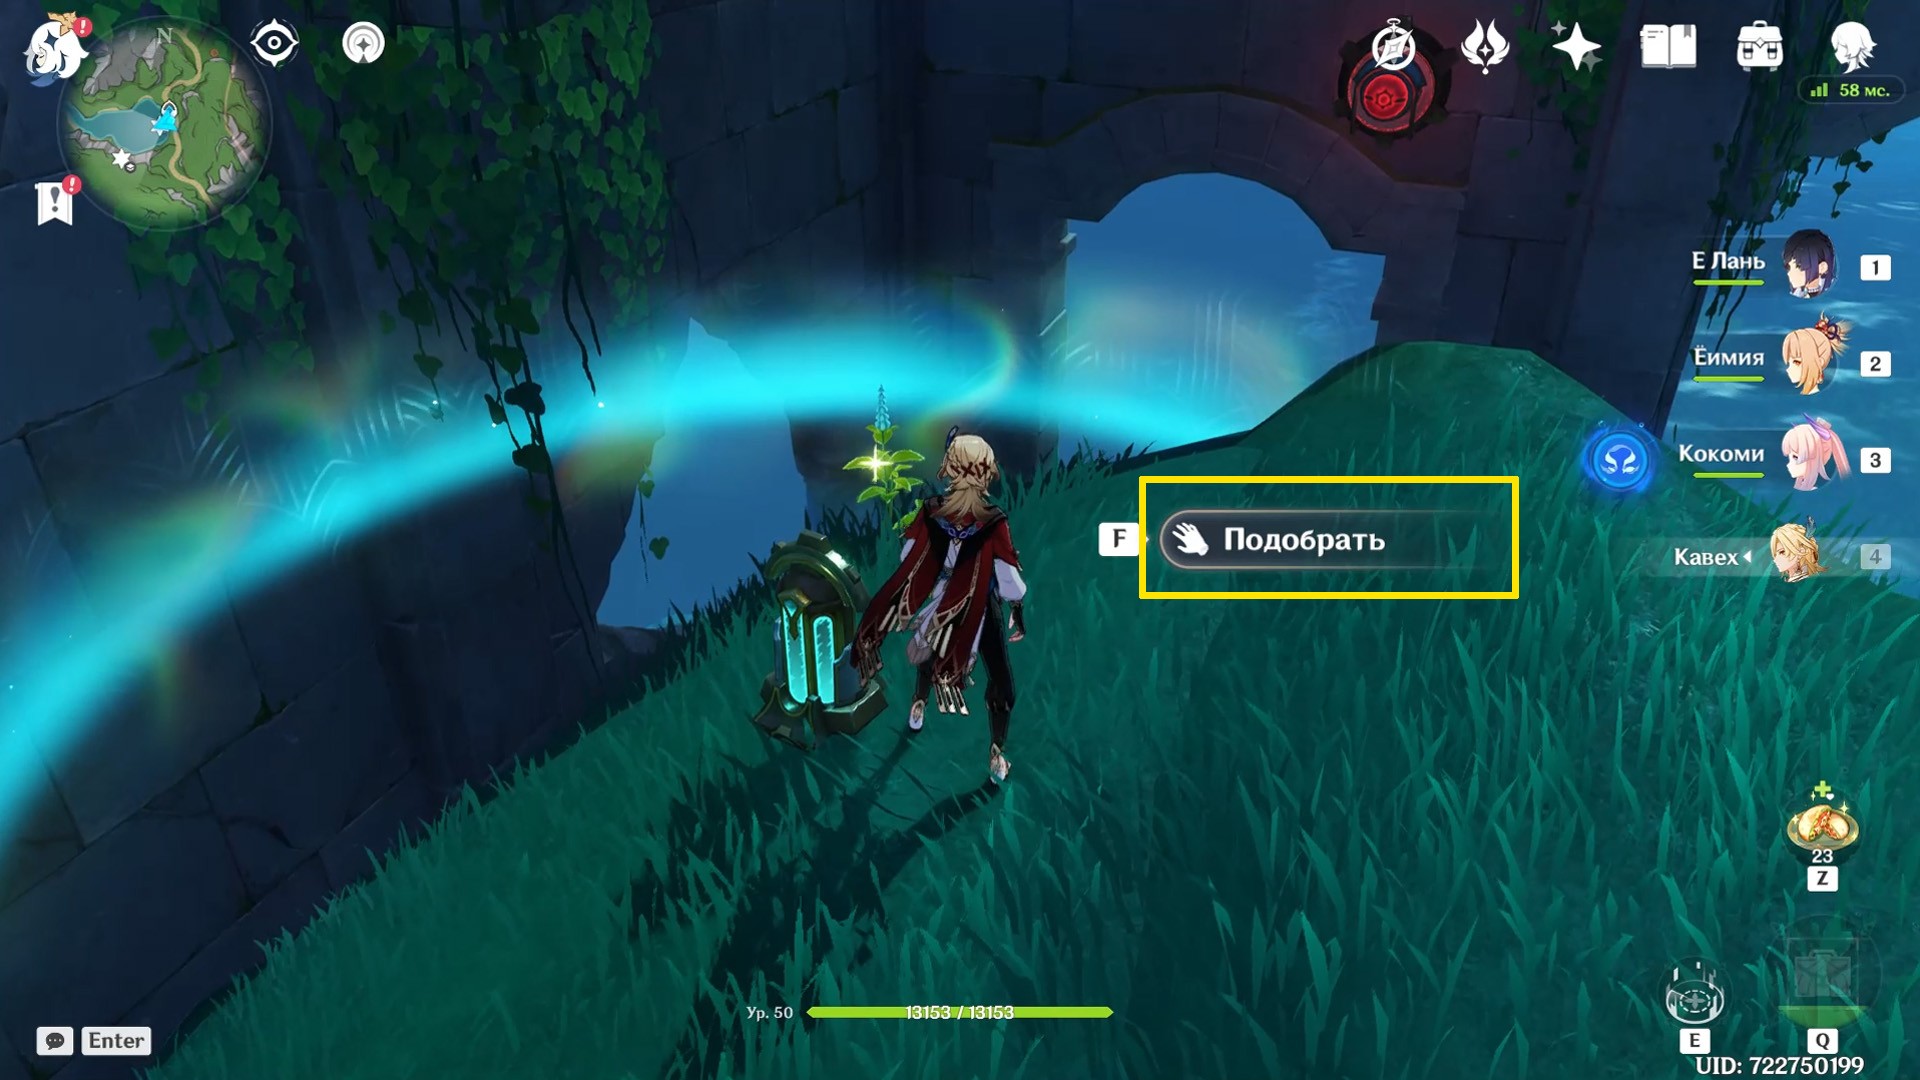
Go up the hill to the north from the previous puzzle: the terminal is on top of some ruins with a ladder. To begin, pick up the Ushii Piece near the chest and go down to the base of the stairs.
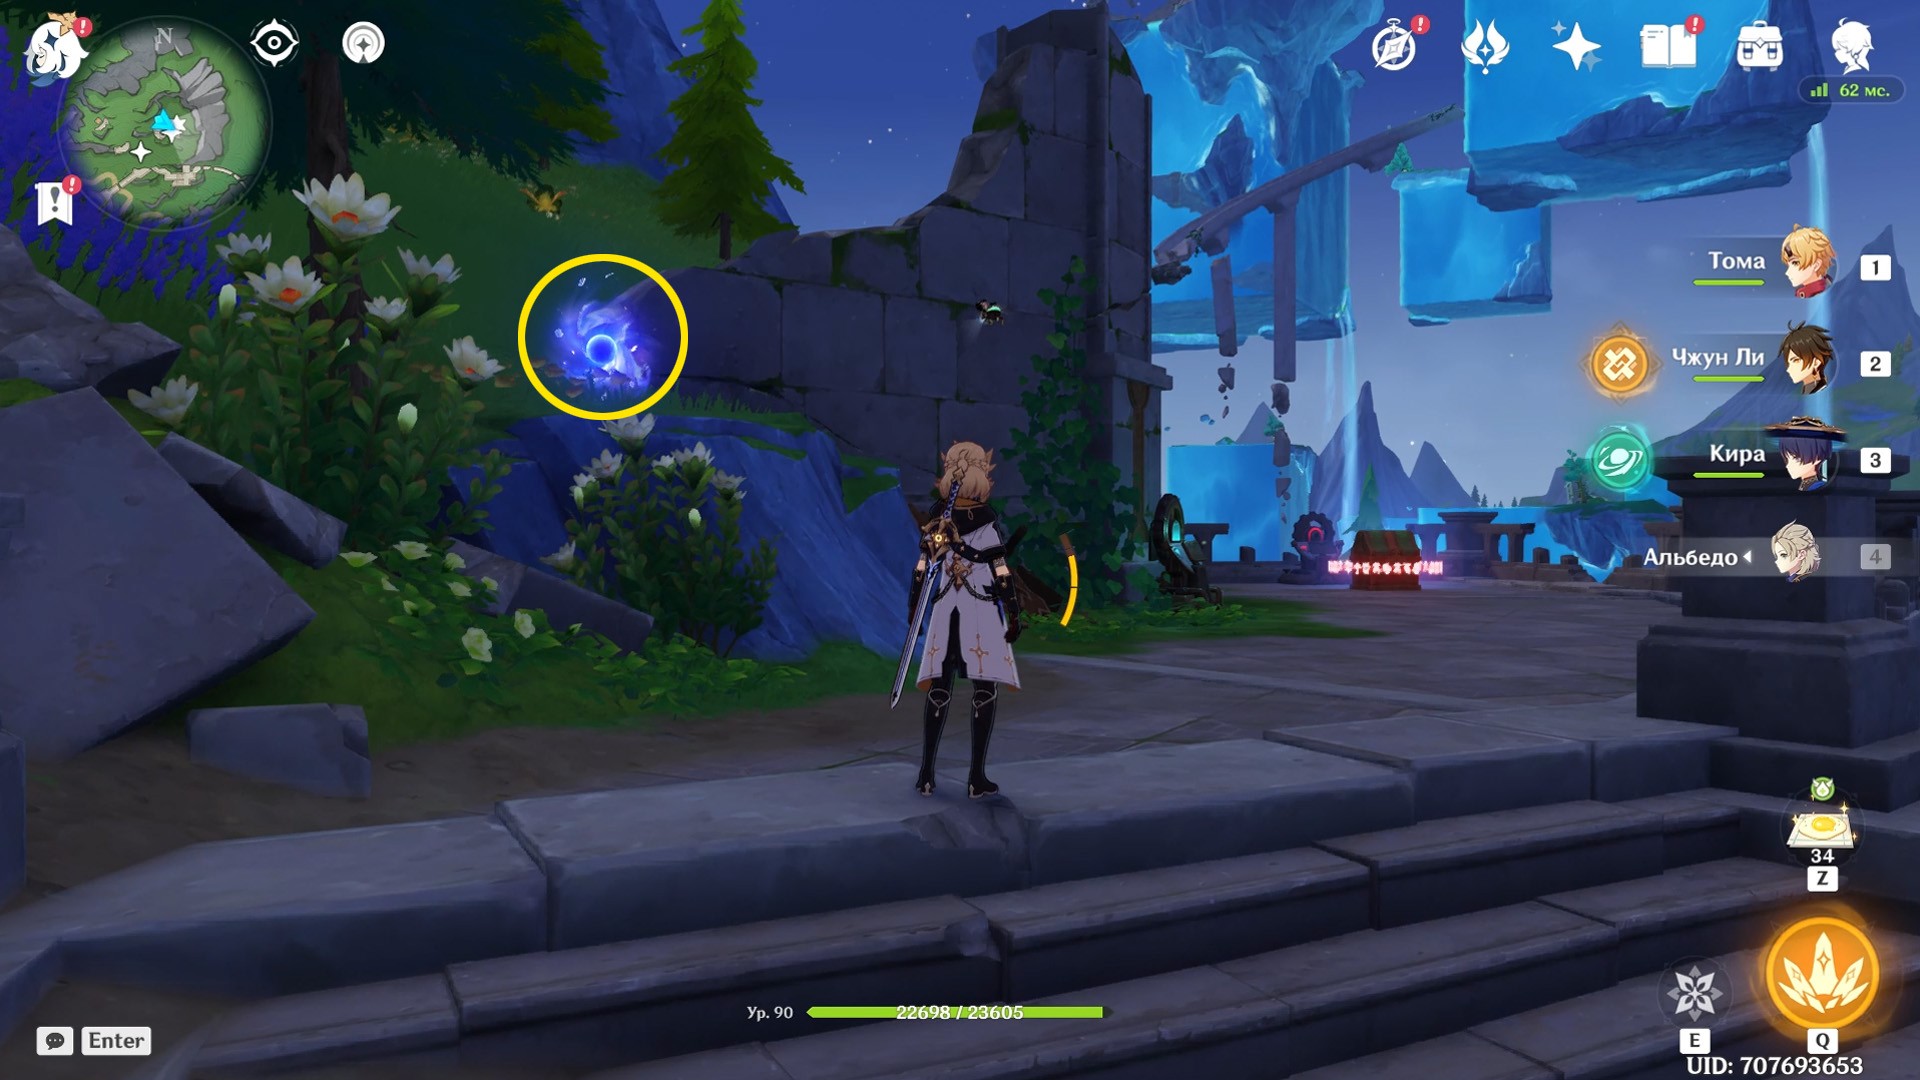
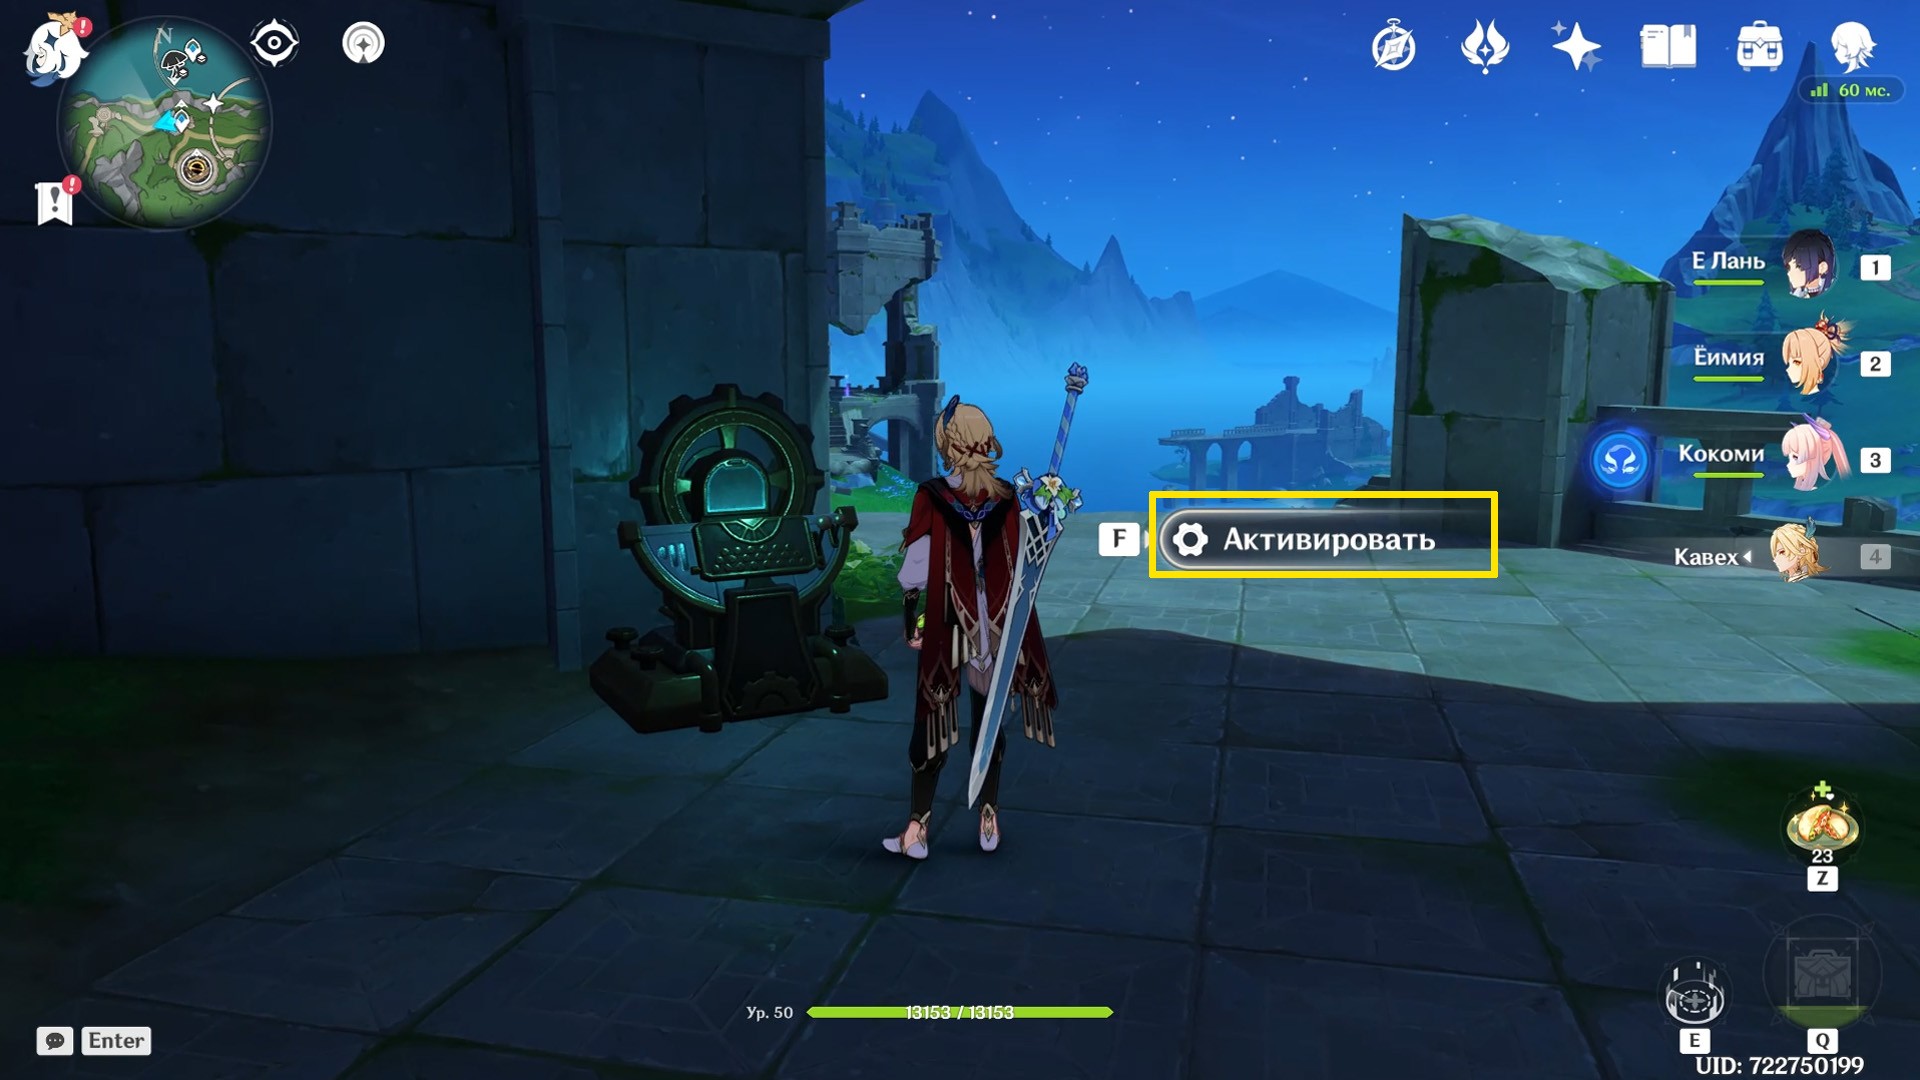
Develop the pneuma energy by cracking the drive to the right of the rise and return upstairs to the functioning control panel.
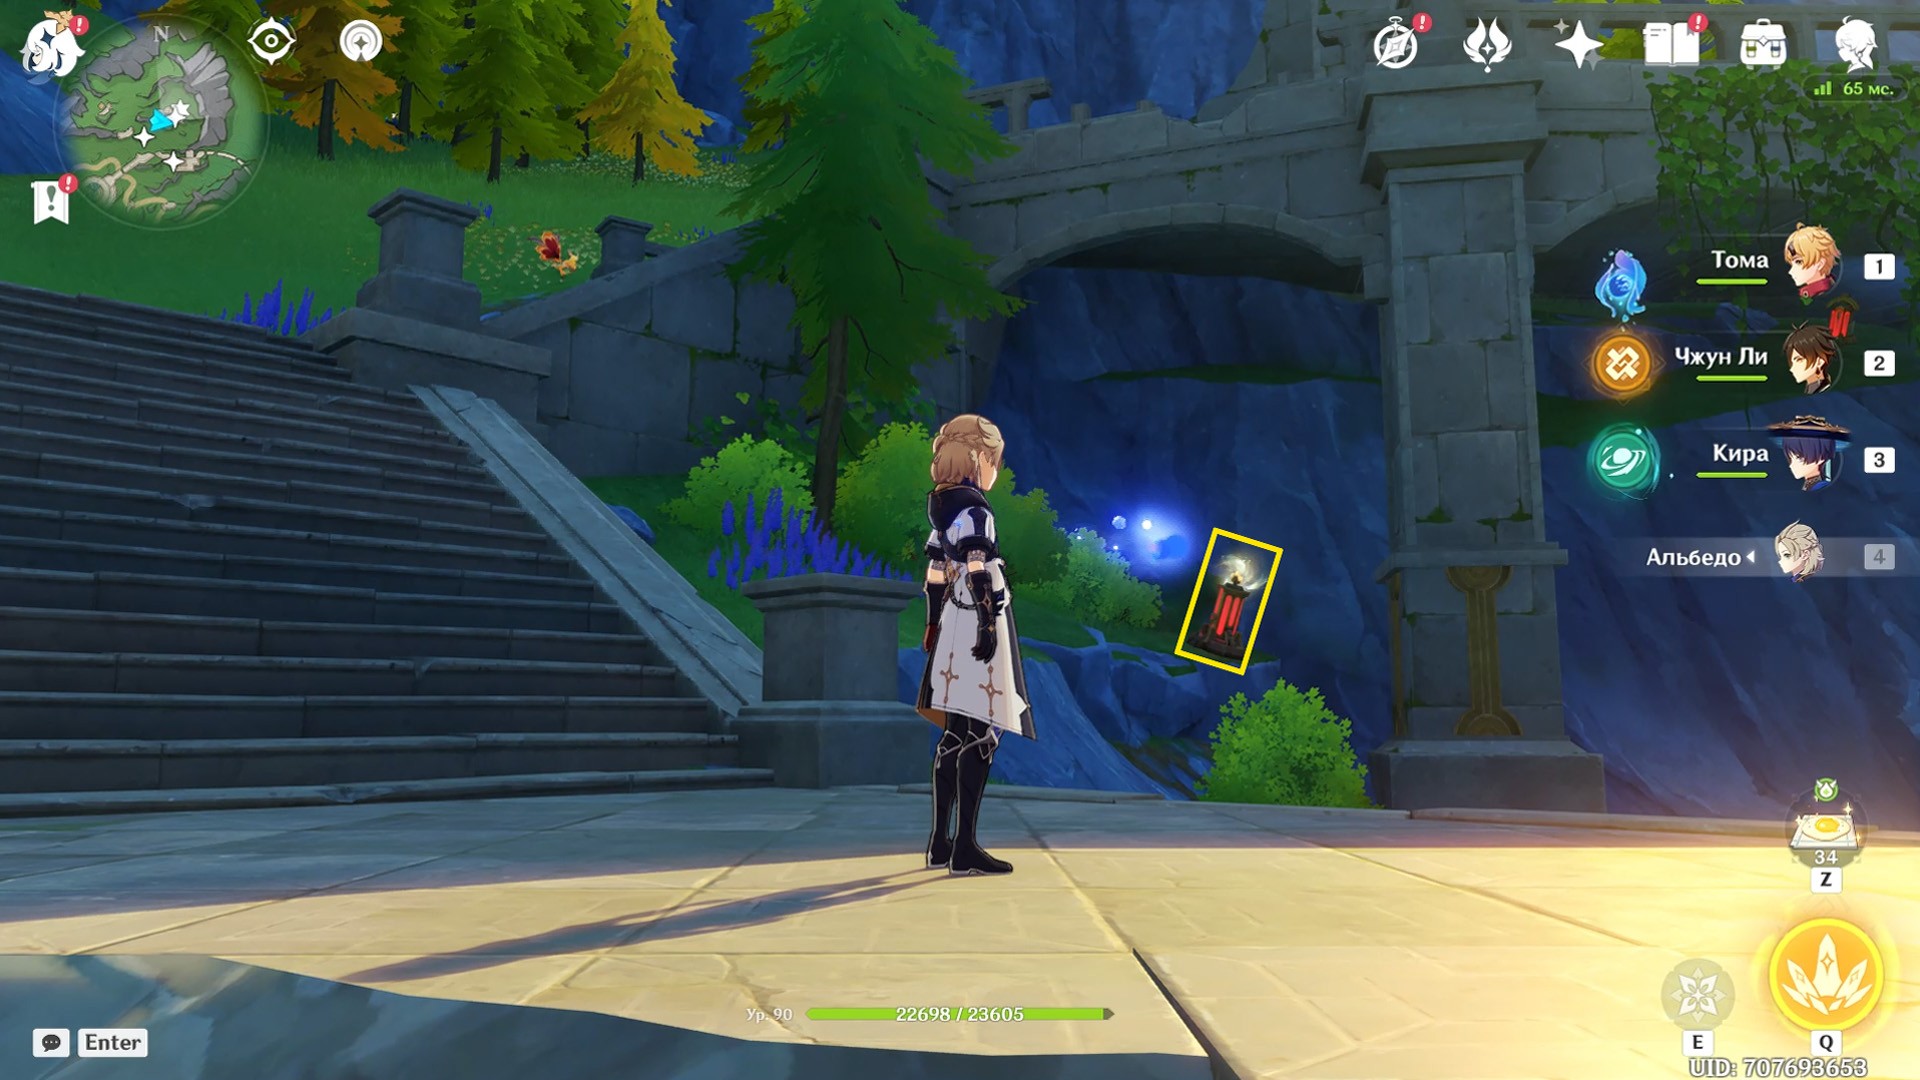
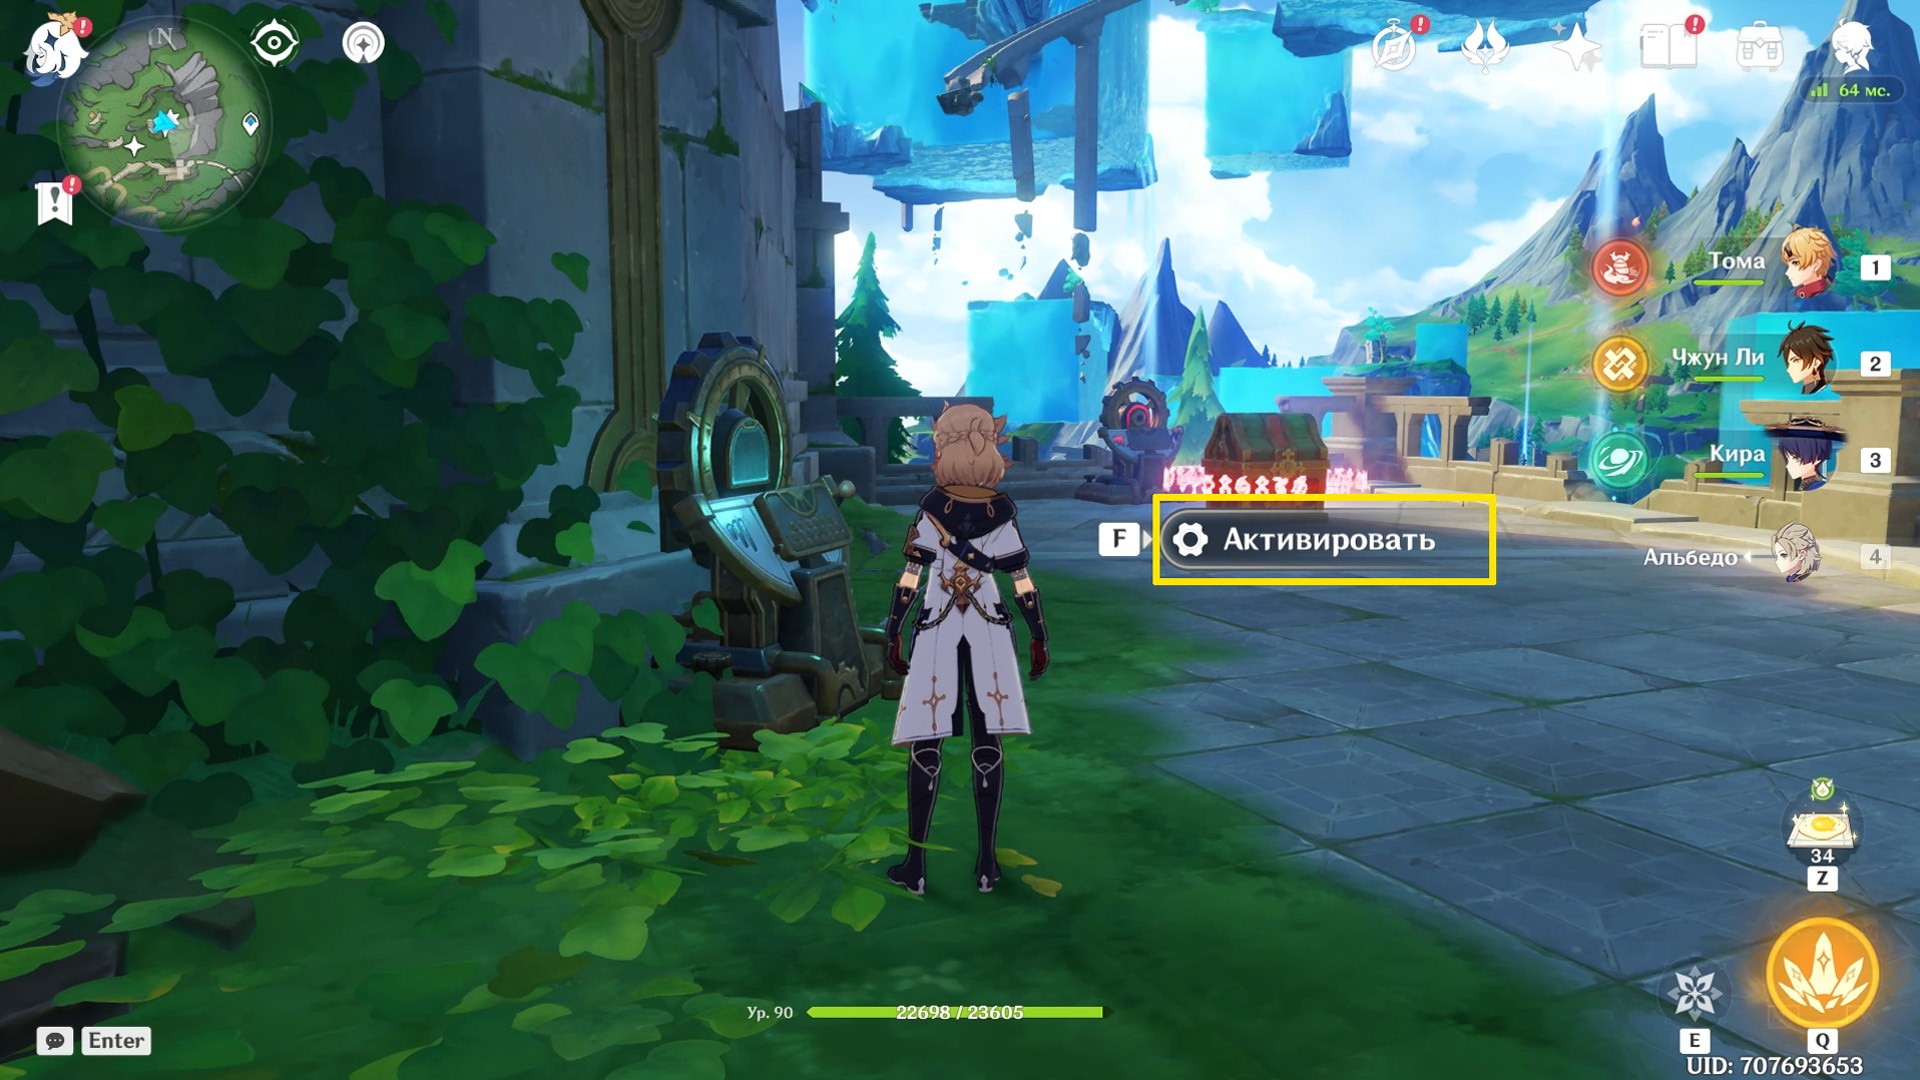
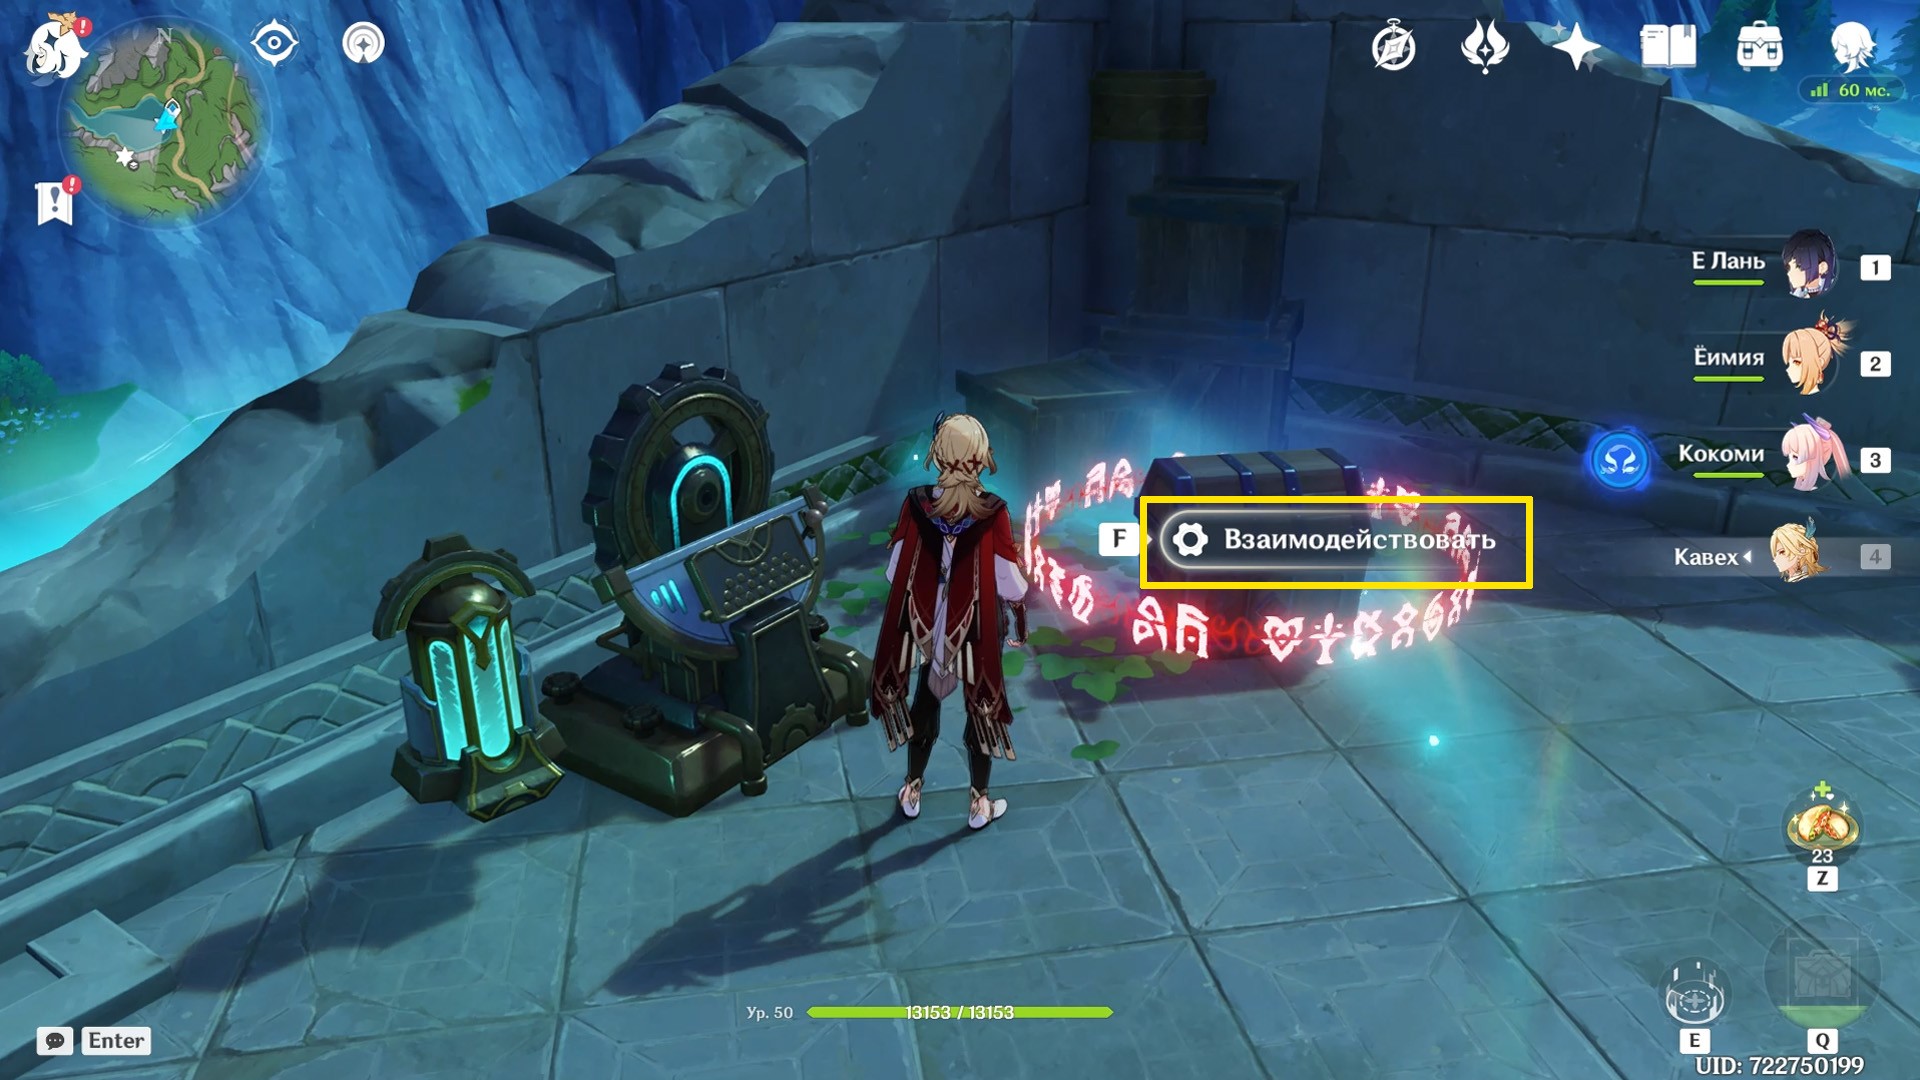
Switch to the video finder by selecting in front of the panel " Activate " In the camera control window, collect a charge from the distant storage device and transfer it to the one located to the right of the observation point. All that remains is to pick up the charged component under the plate with the chest (there is also a Hydroculus floating next to the part).
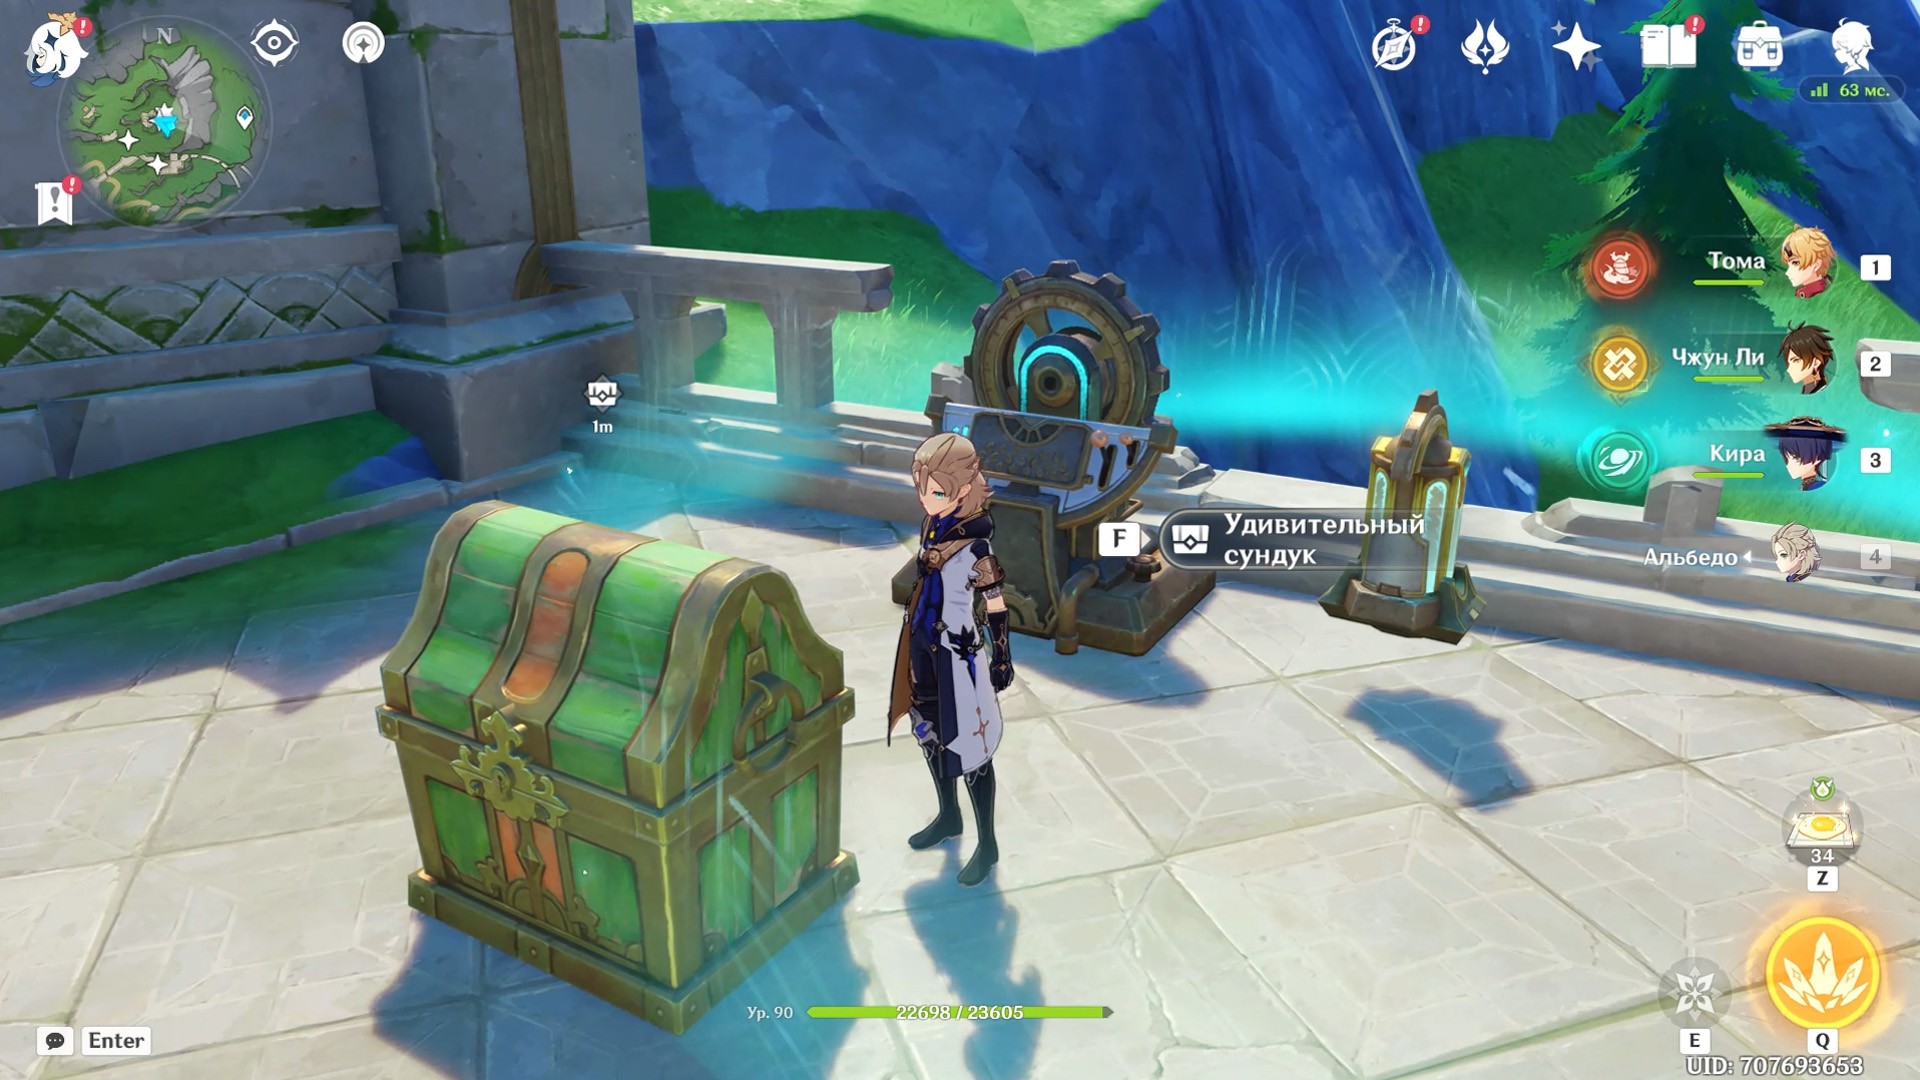
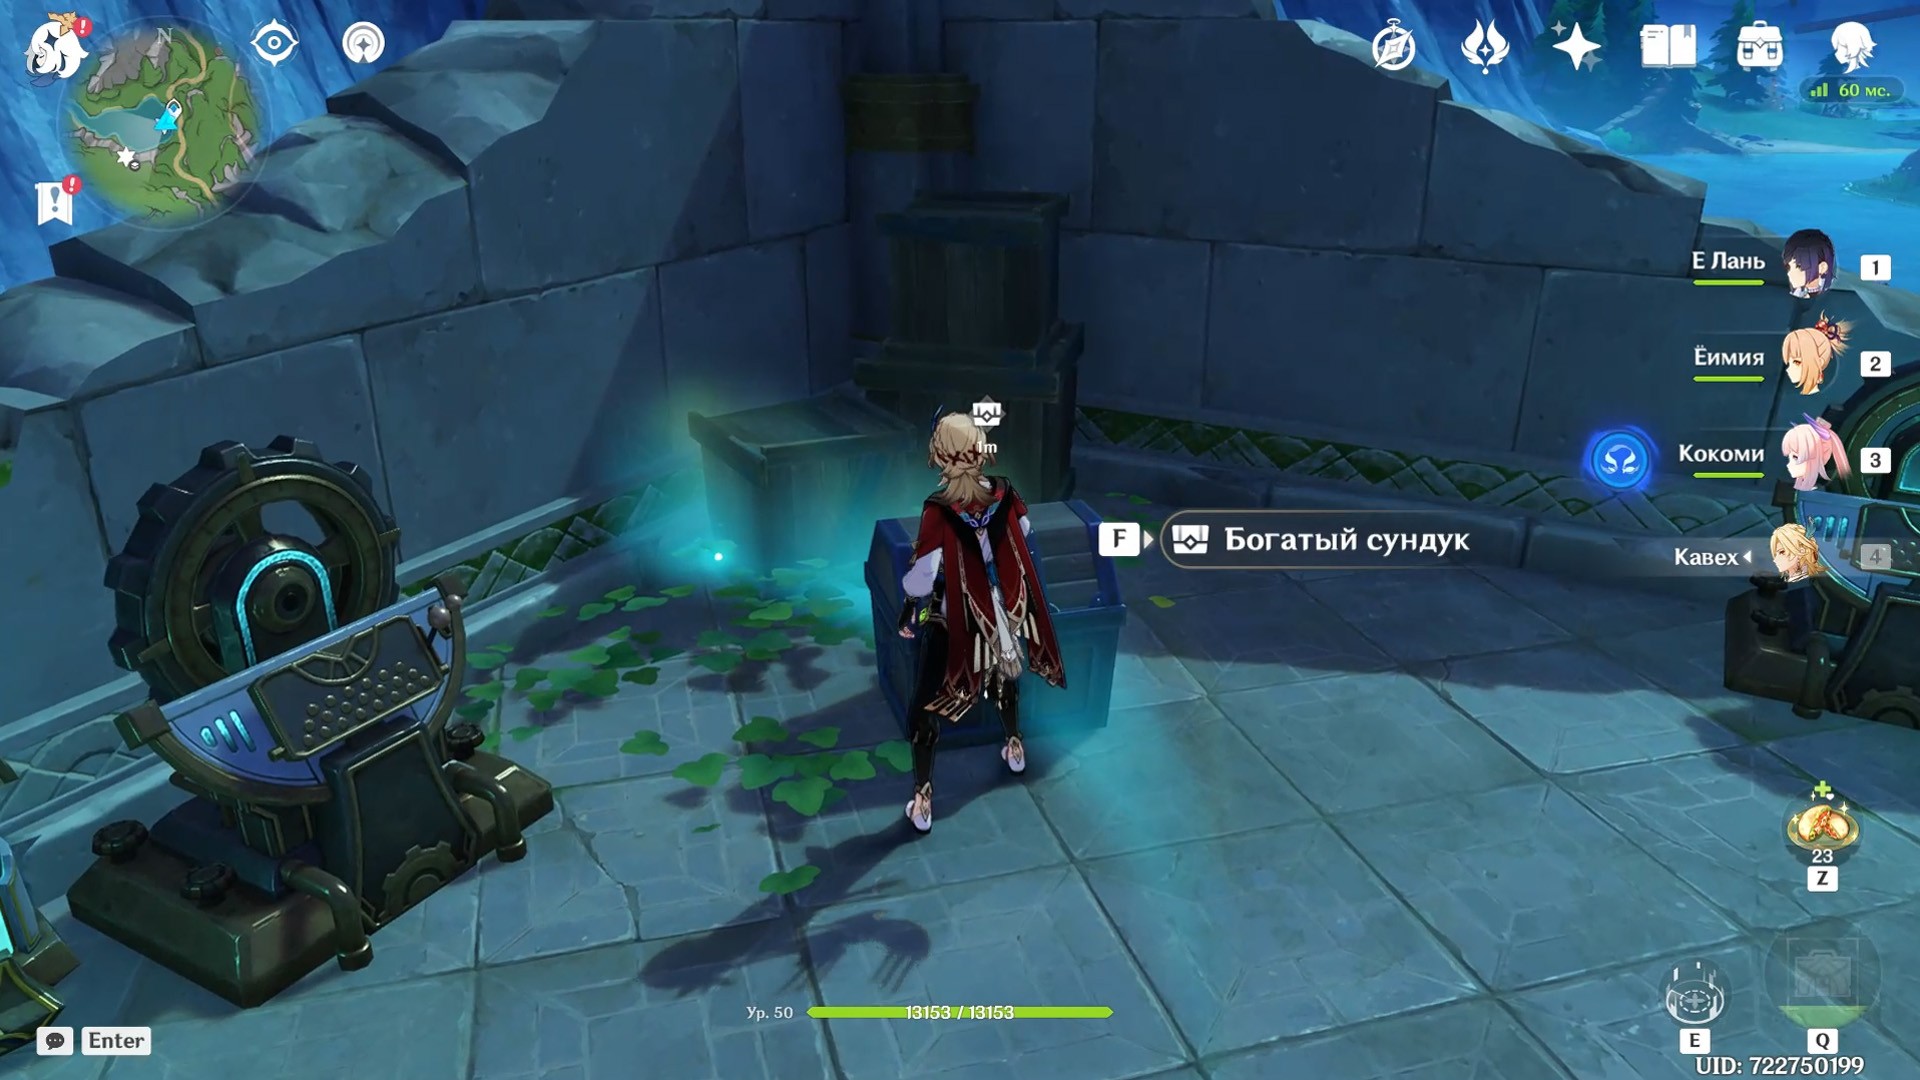
Place the mechanism near the remote control with the chest and remove the restriction from the reward. In the resulting amazing chest, in addition to 5 primogems, you will find decor for Teapot of Serenity : " Floral arrangement: almost aquamarine "
Panel 4
- Location: West of the Archon Statue in the ruins of the Cent Laboratory.
- Reward: rich chest.
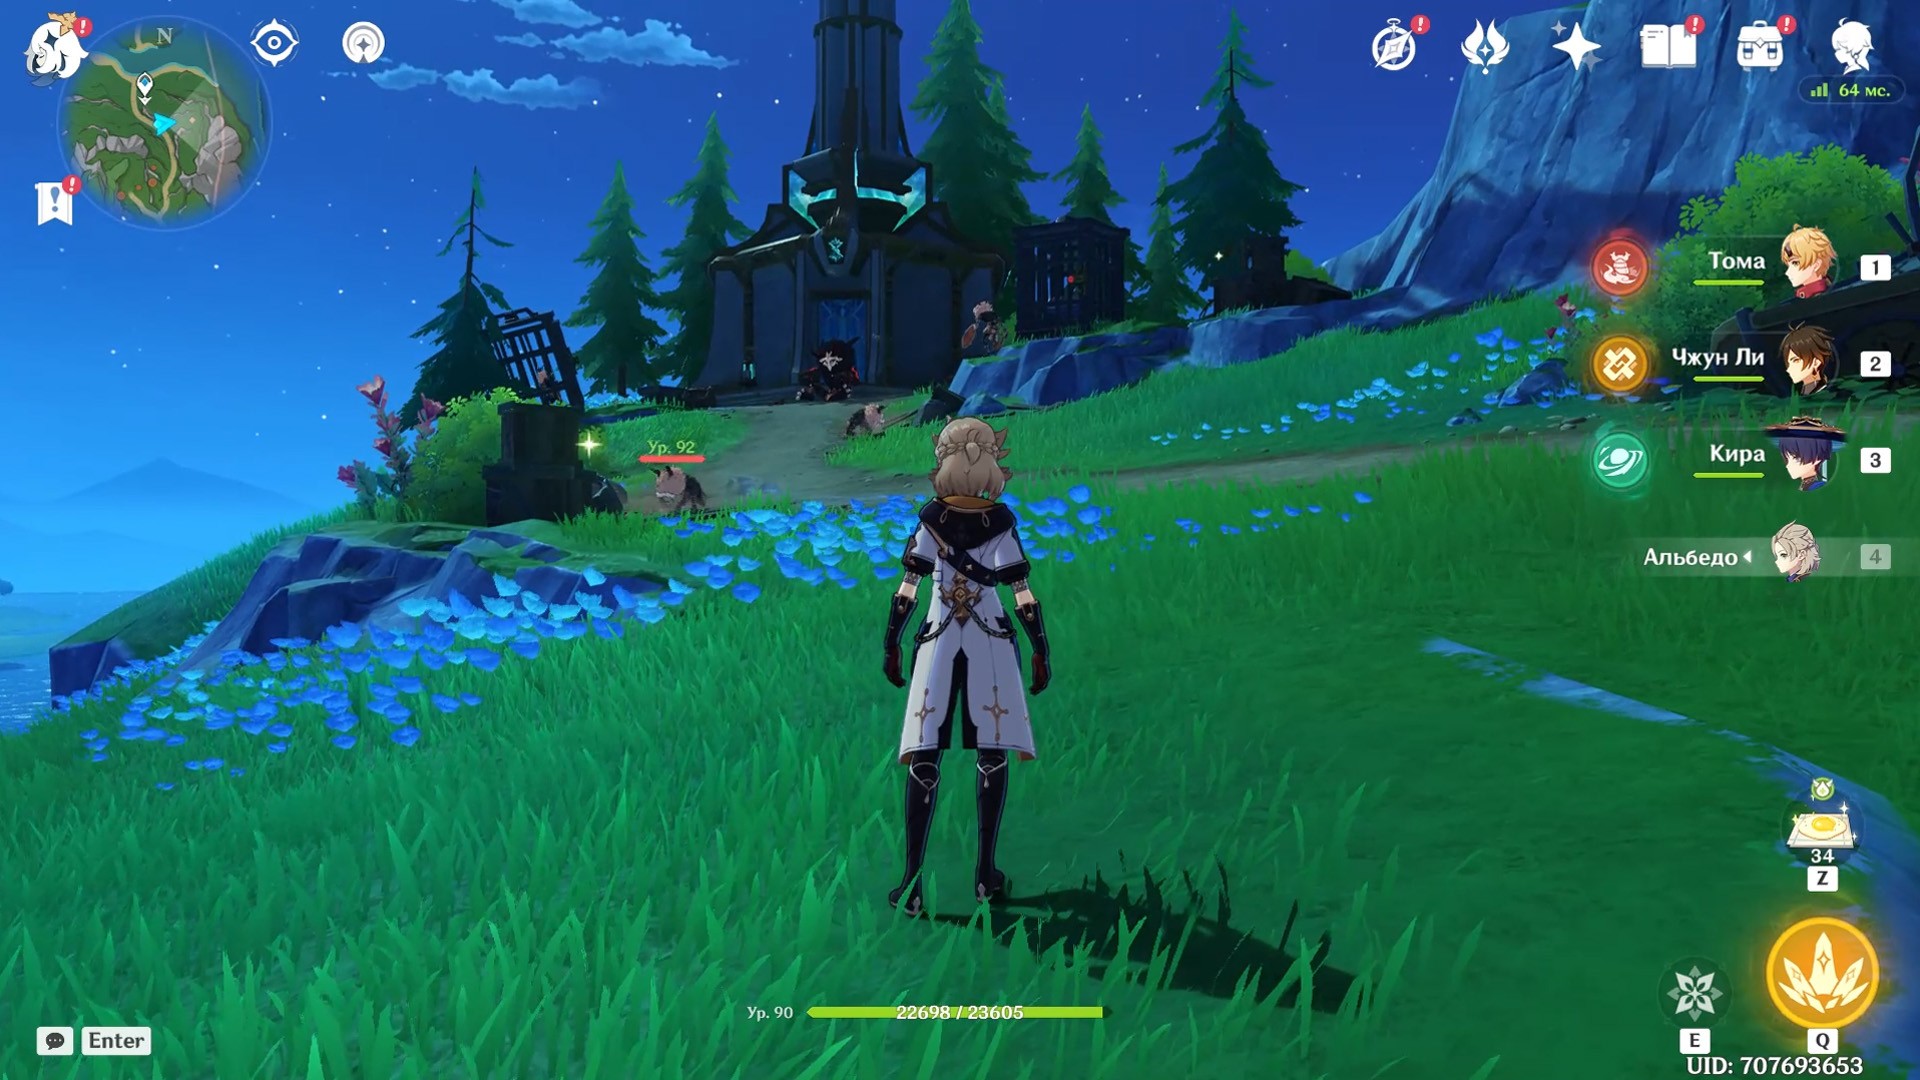
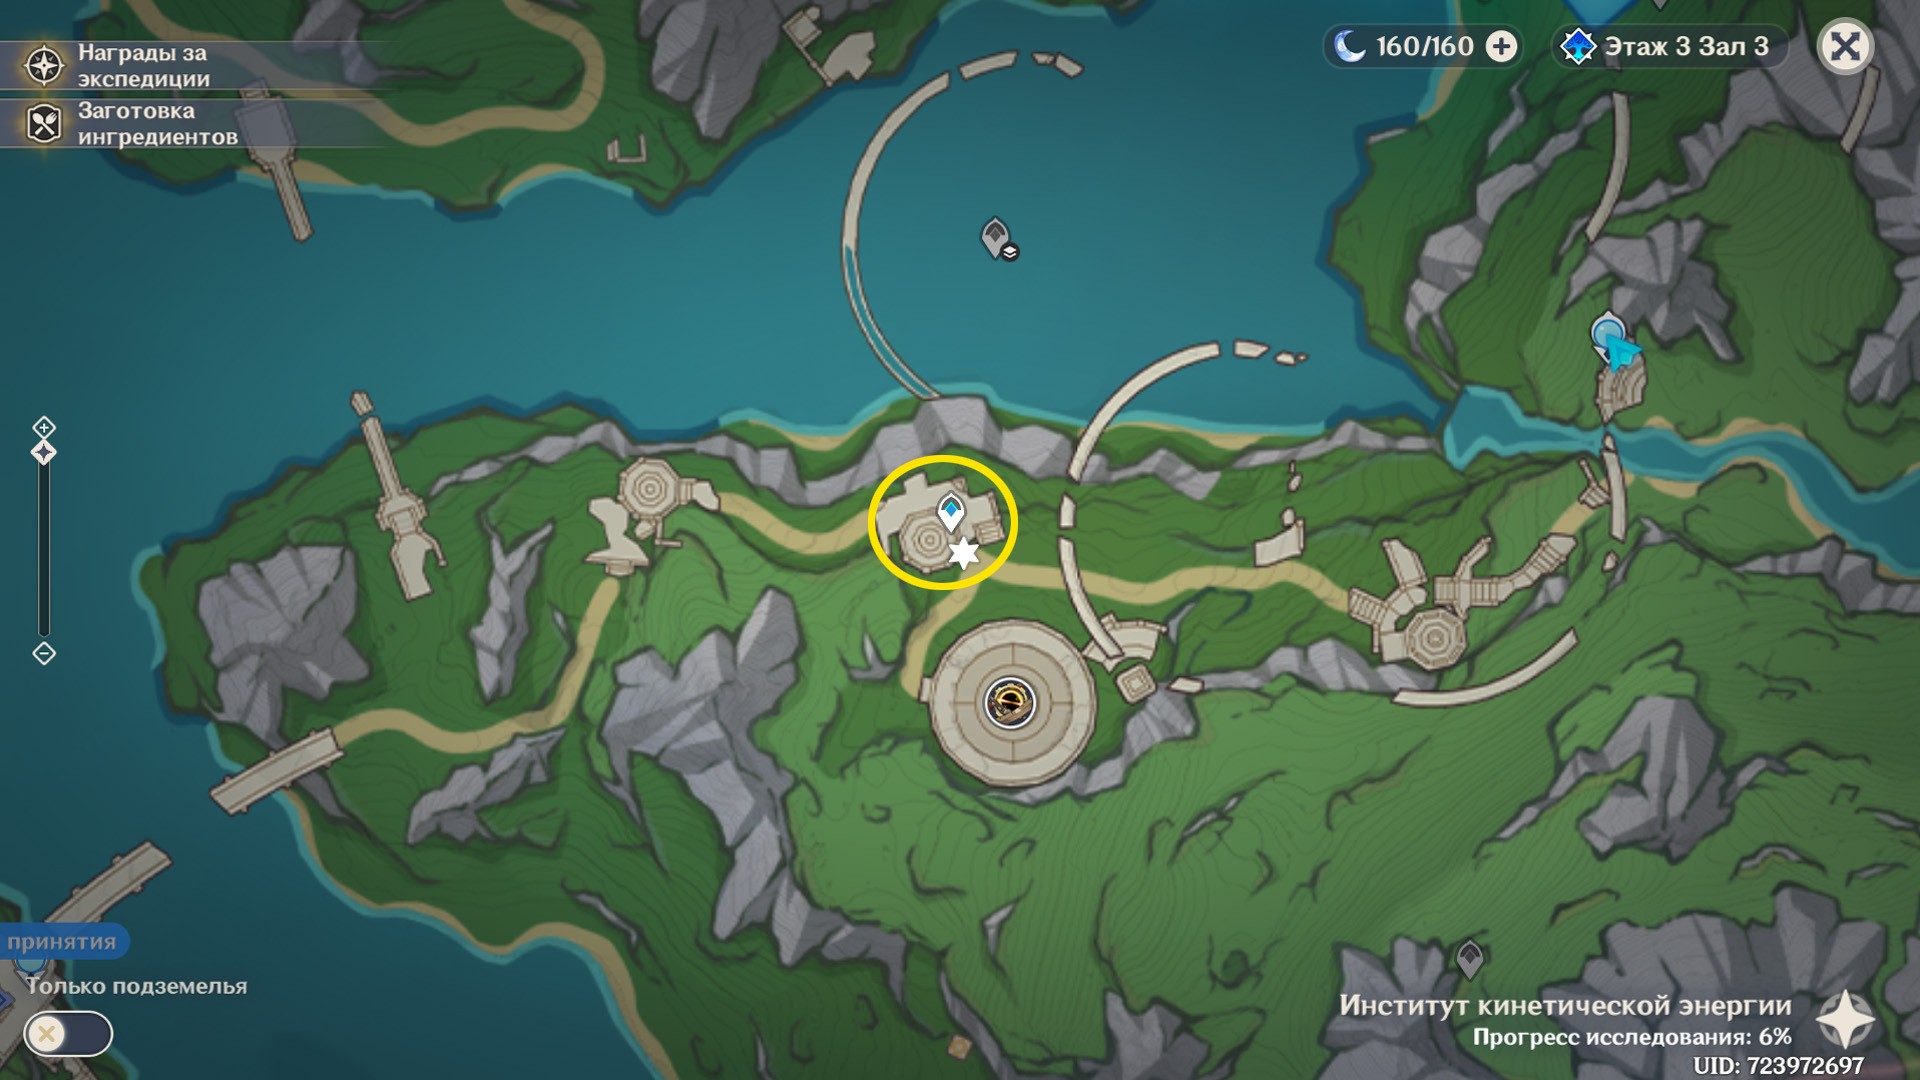
The fourth puzzle is located south of the northeasternmost teleport in the Kinetic Energy Institute area: go up to the tower with a sharp spire, under which there is a group of hilichurls.
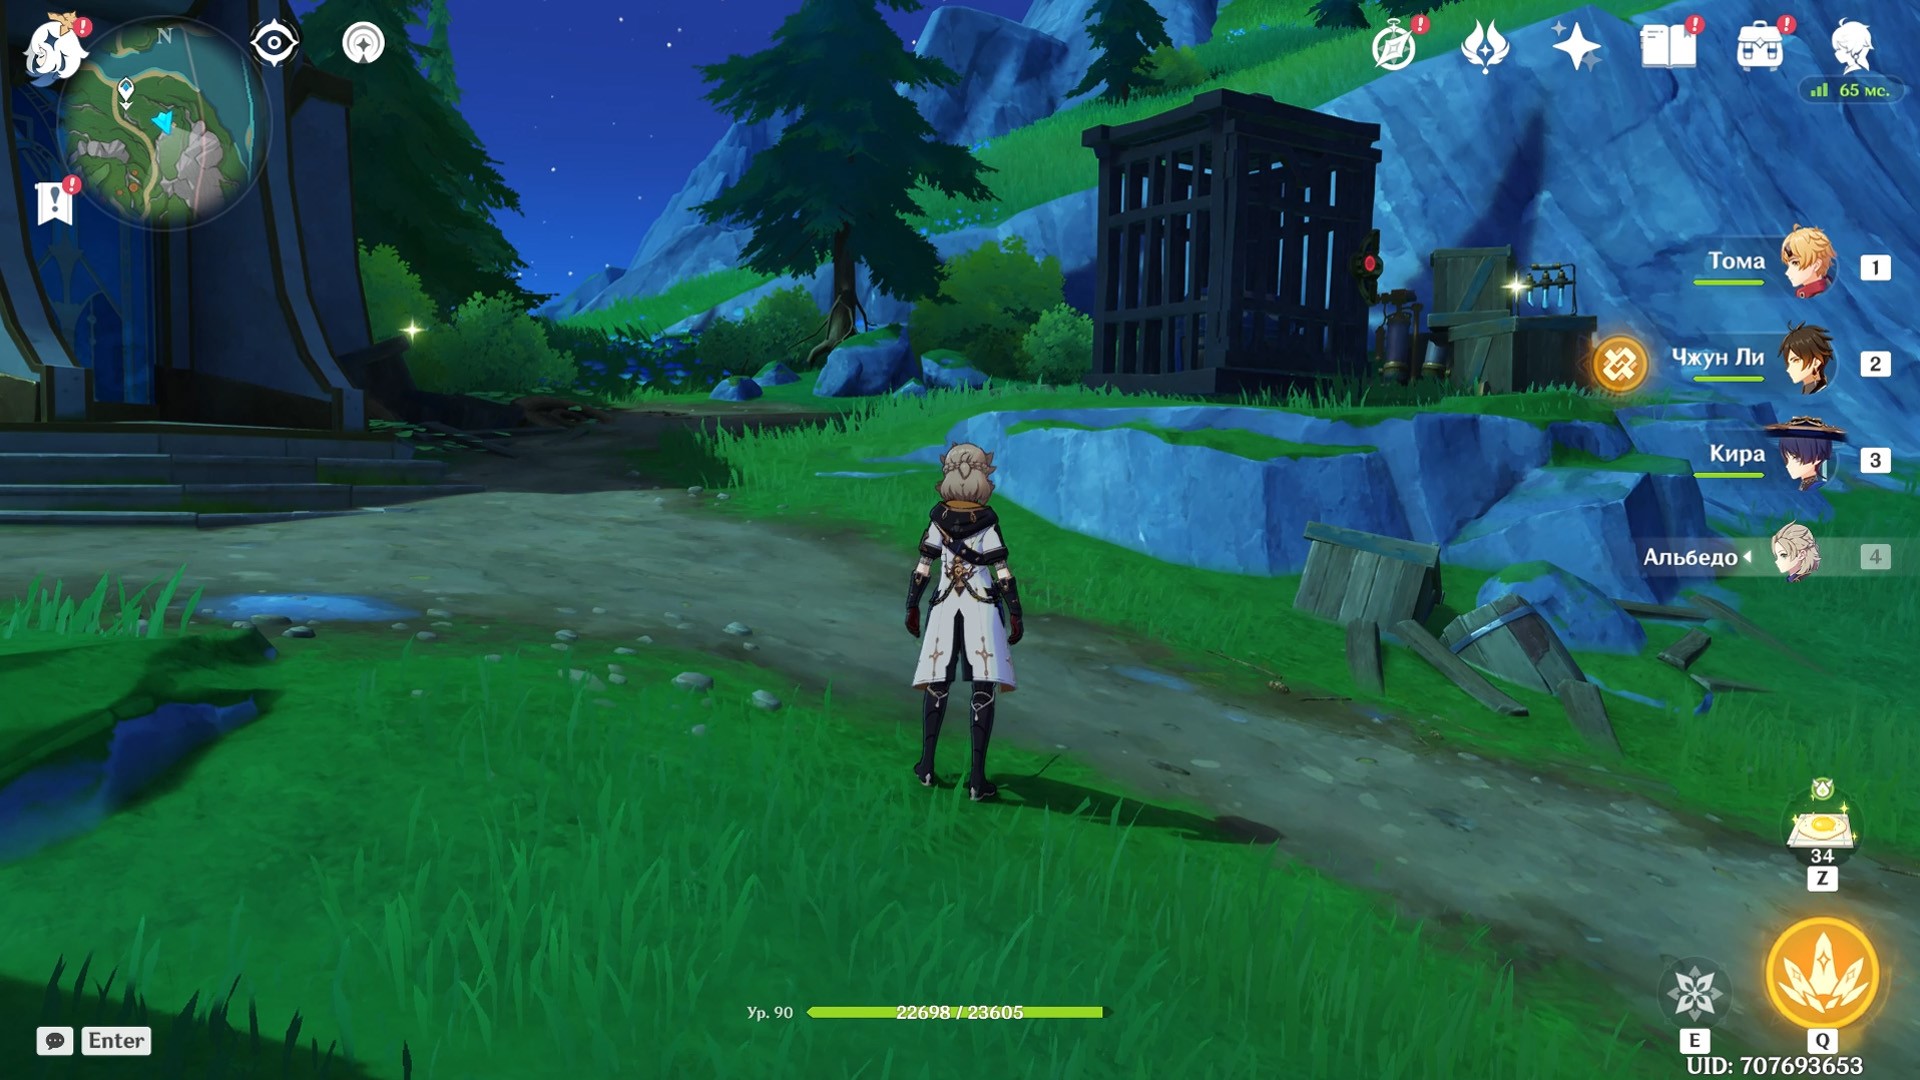
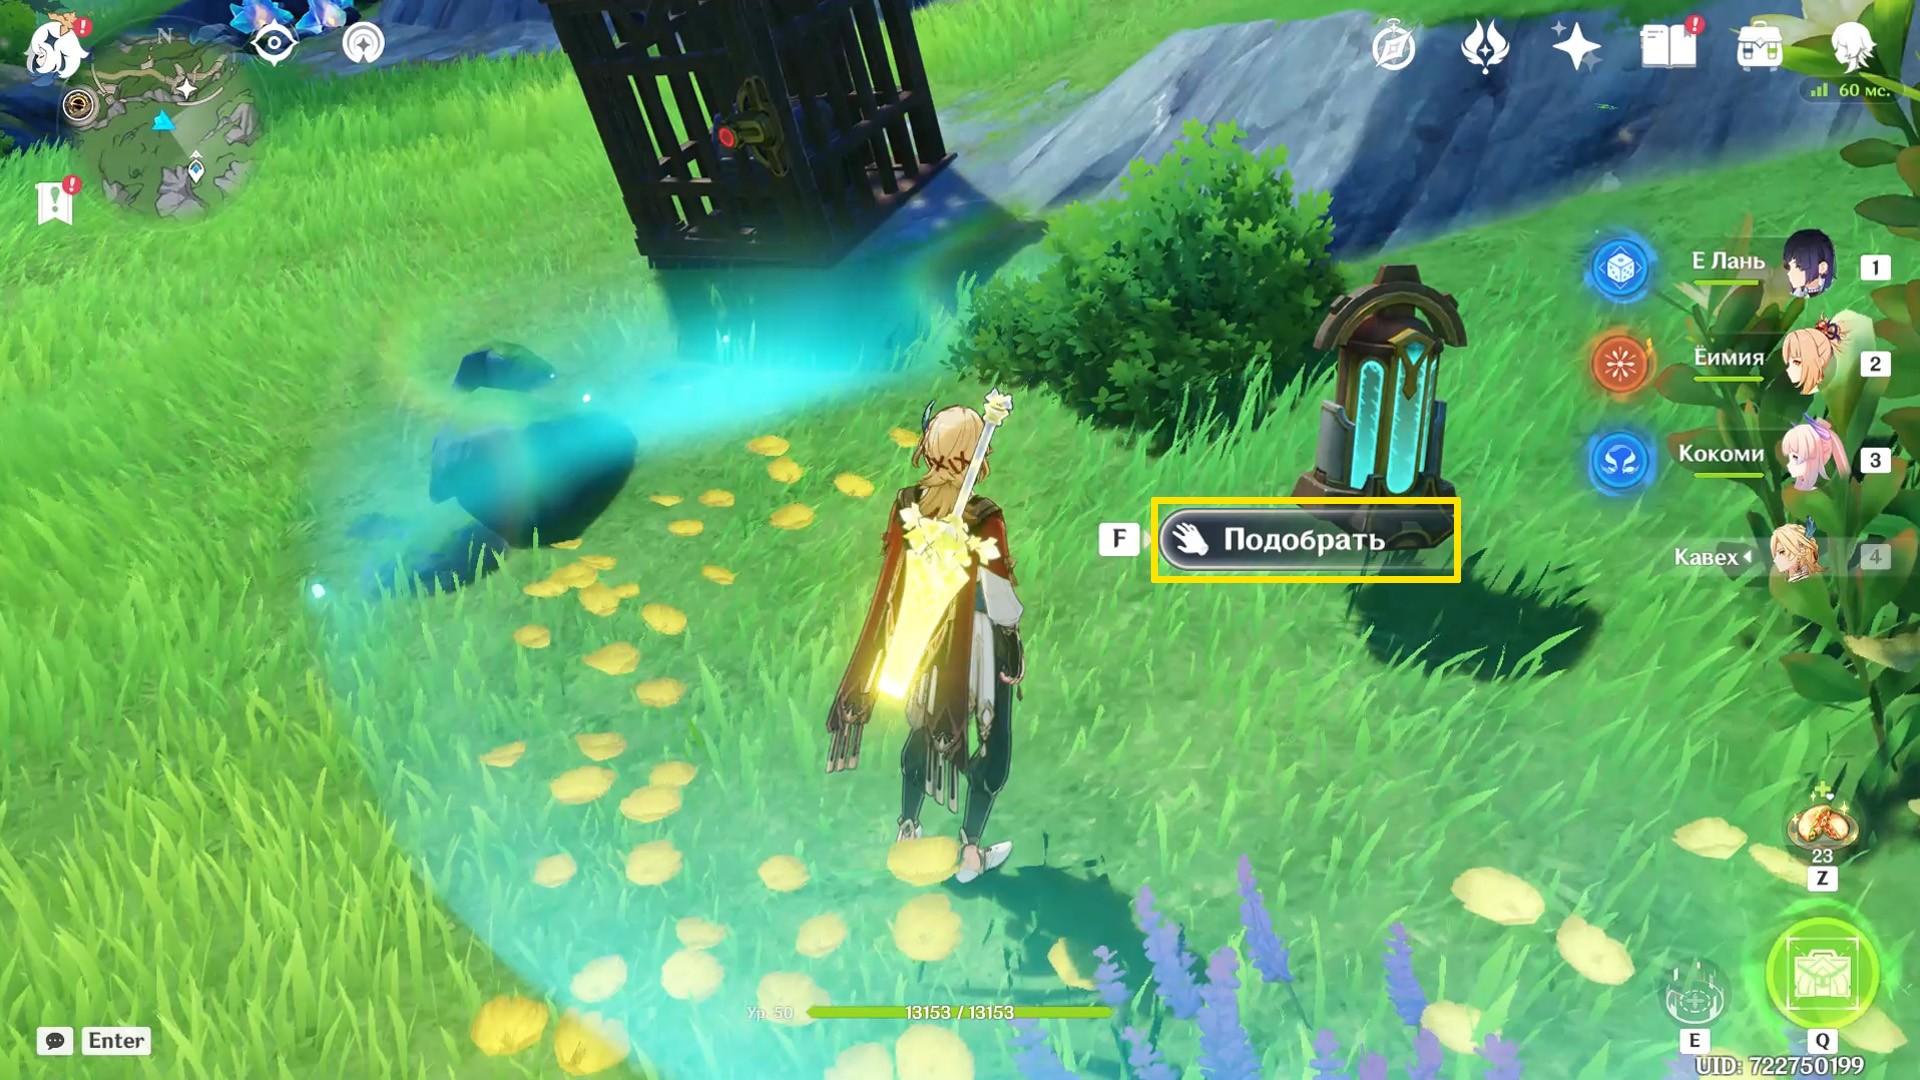
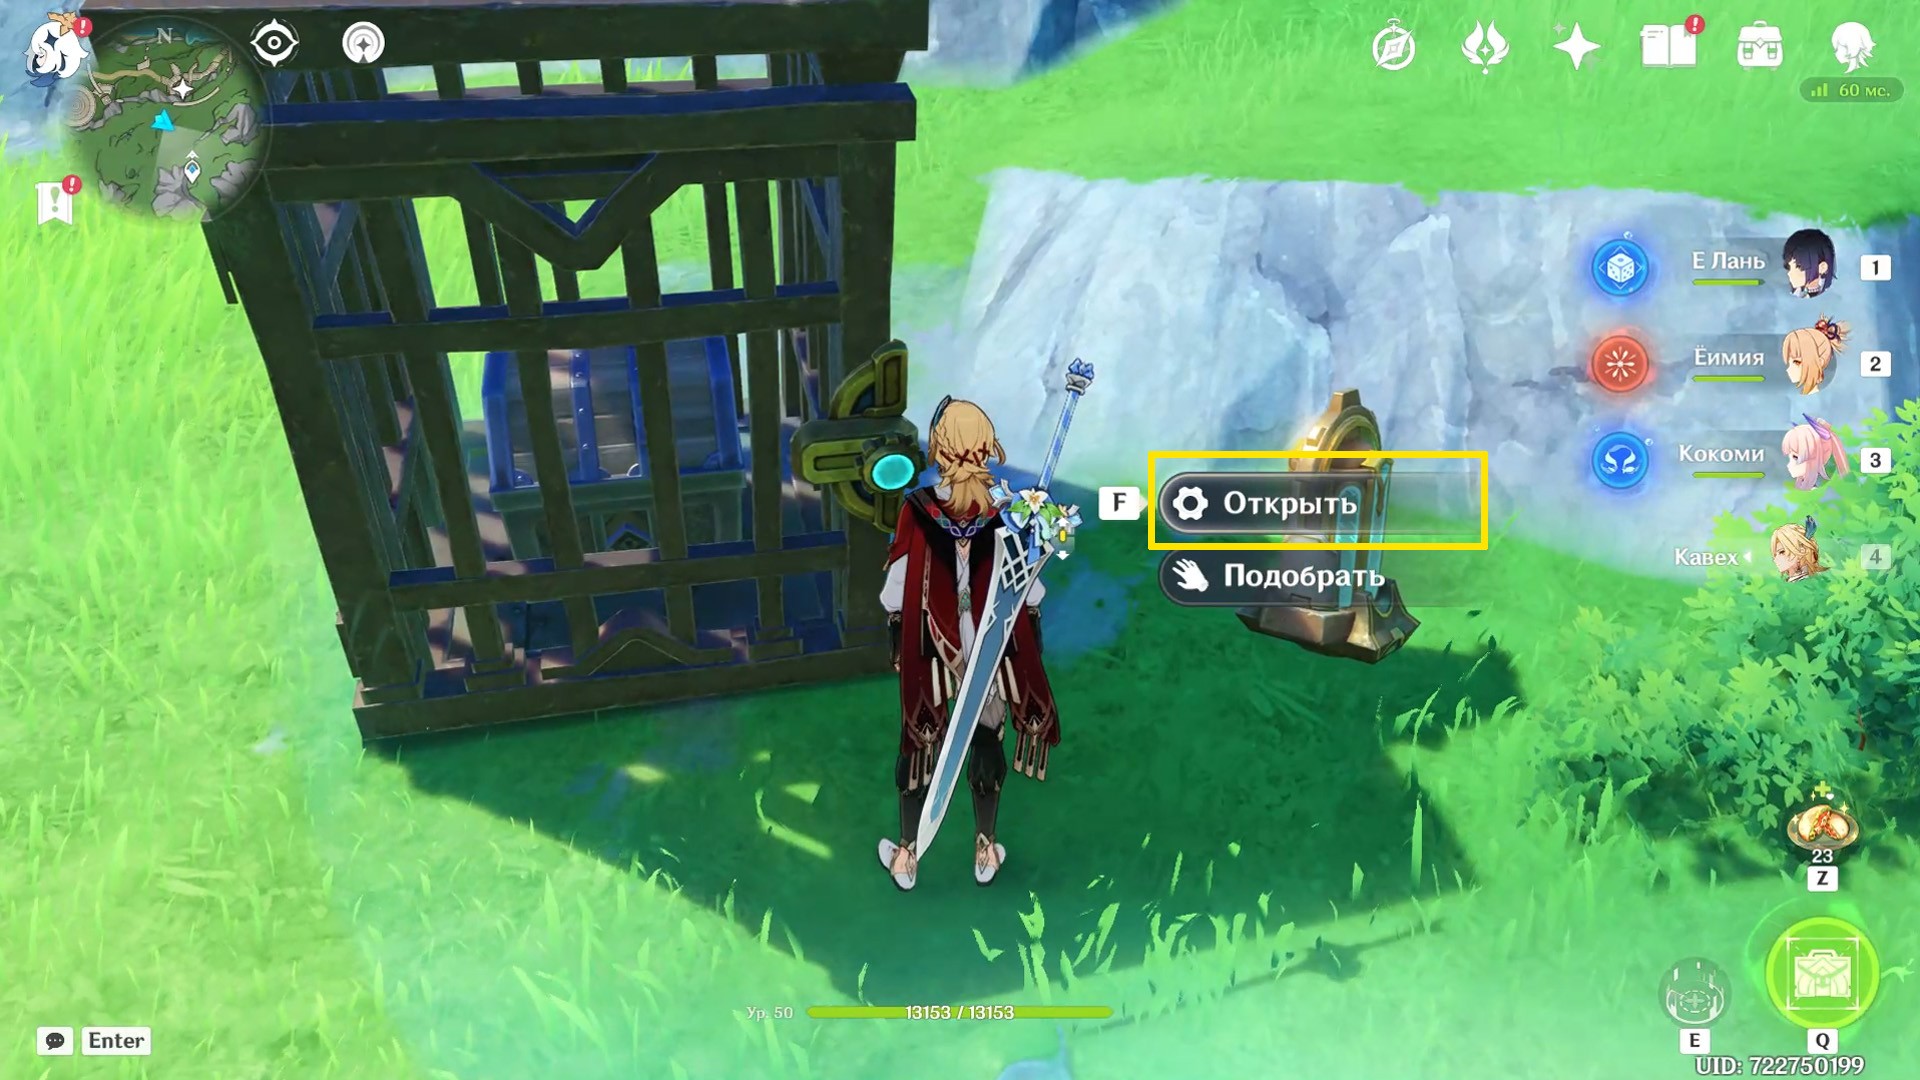
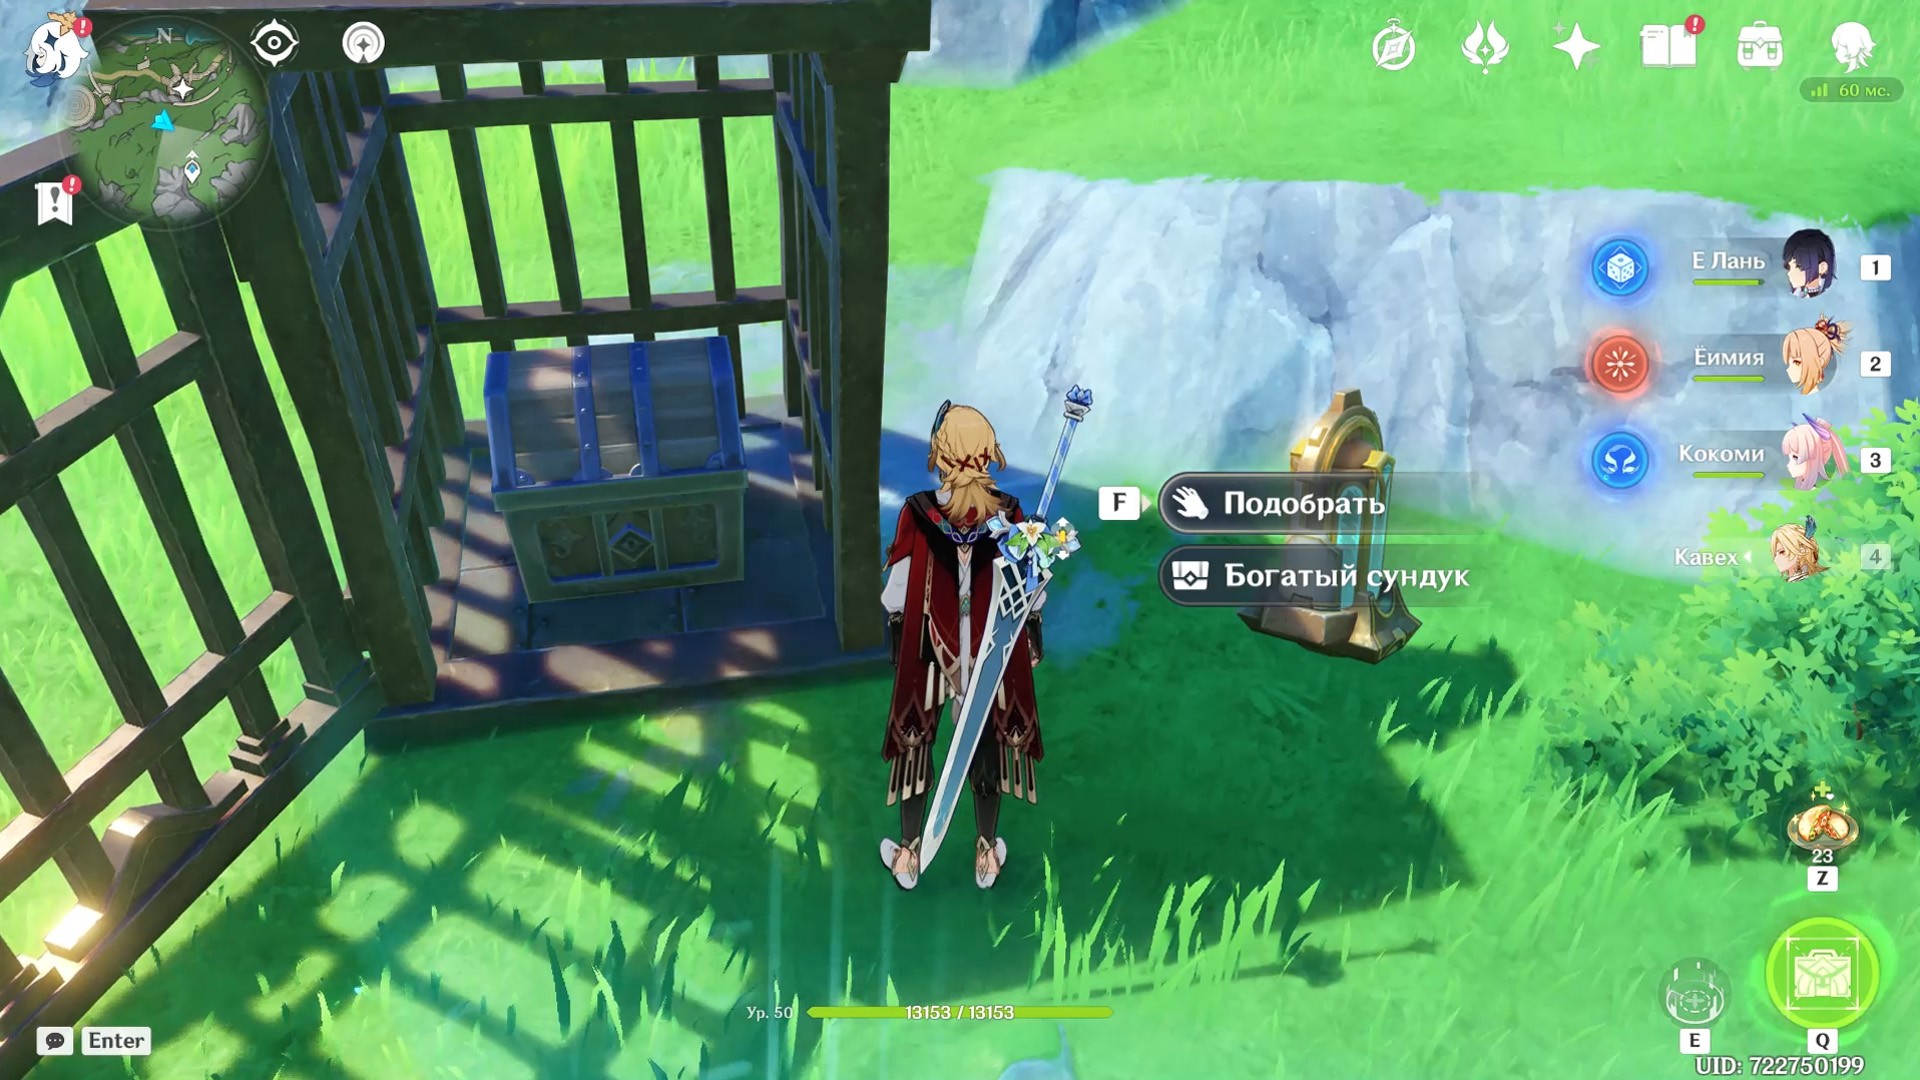
After clearing the place of mobs, pick up an energy capsule near the building. This riddle is not related to the terminal, but the found power supply will be needed to open another mechanism: a cage containing a rich chest.
Place the charged component near the dungeon so that it falls within the radius of the energy supply, and then open the enclosure with the reward.
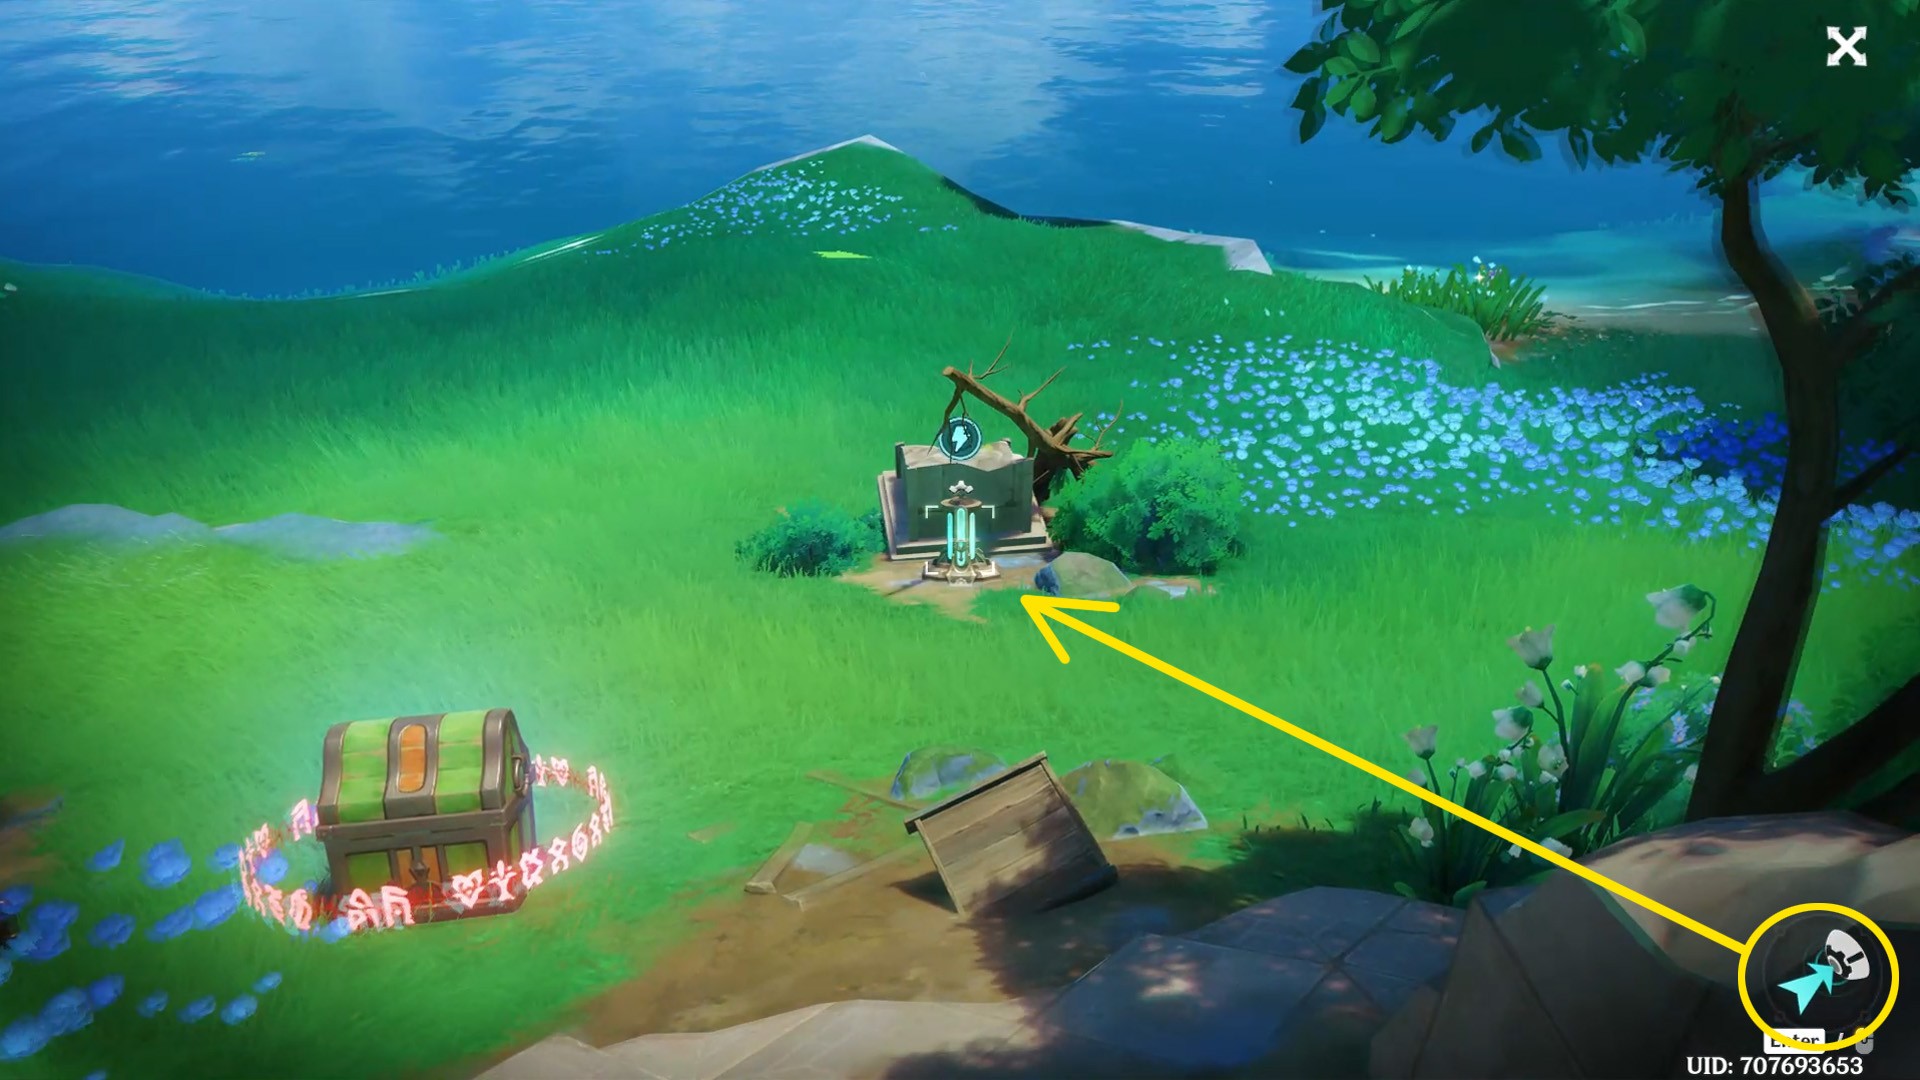
Panel 5
- Location: north of the Archon Statue in the ruins of the Cent Laboratory.
- Reward: Amazing Chest.
Teleport to the Hydro Archon statue in the area of the Institute of Kinetic Energy and run to the shore to the place with the next puzzle.
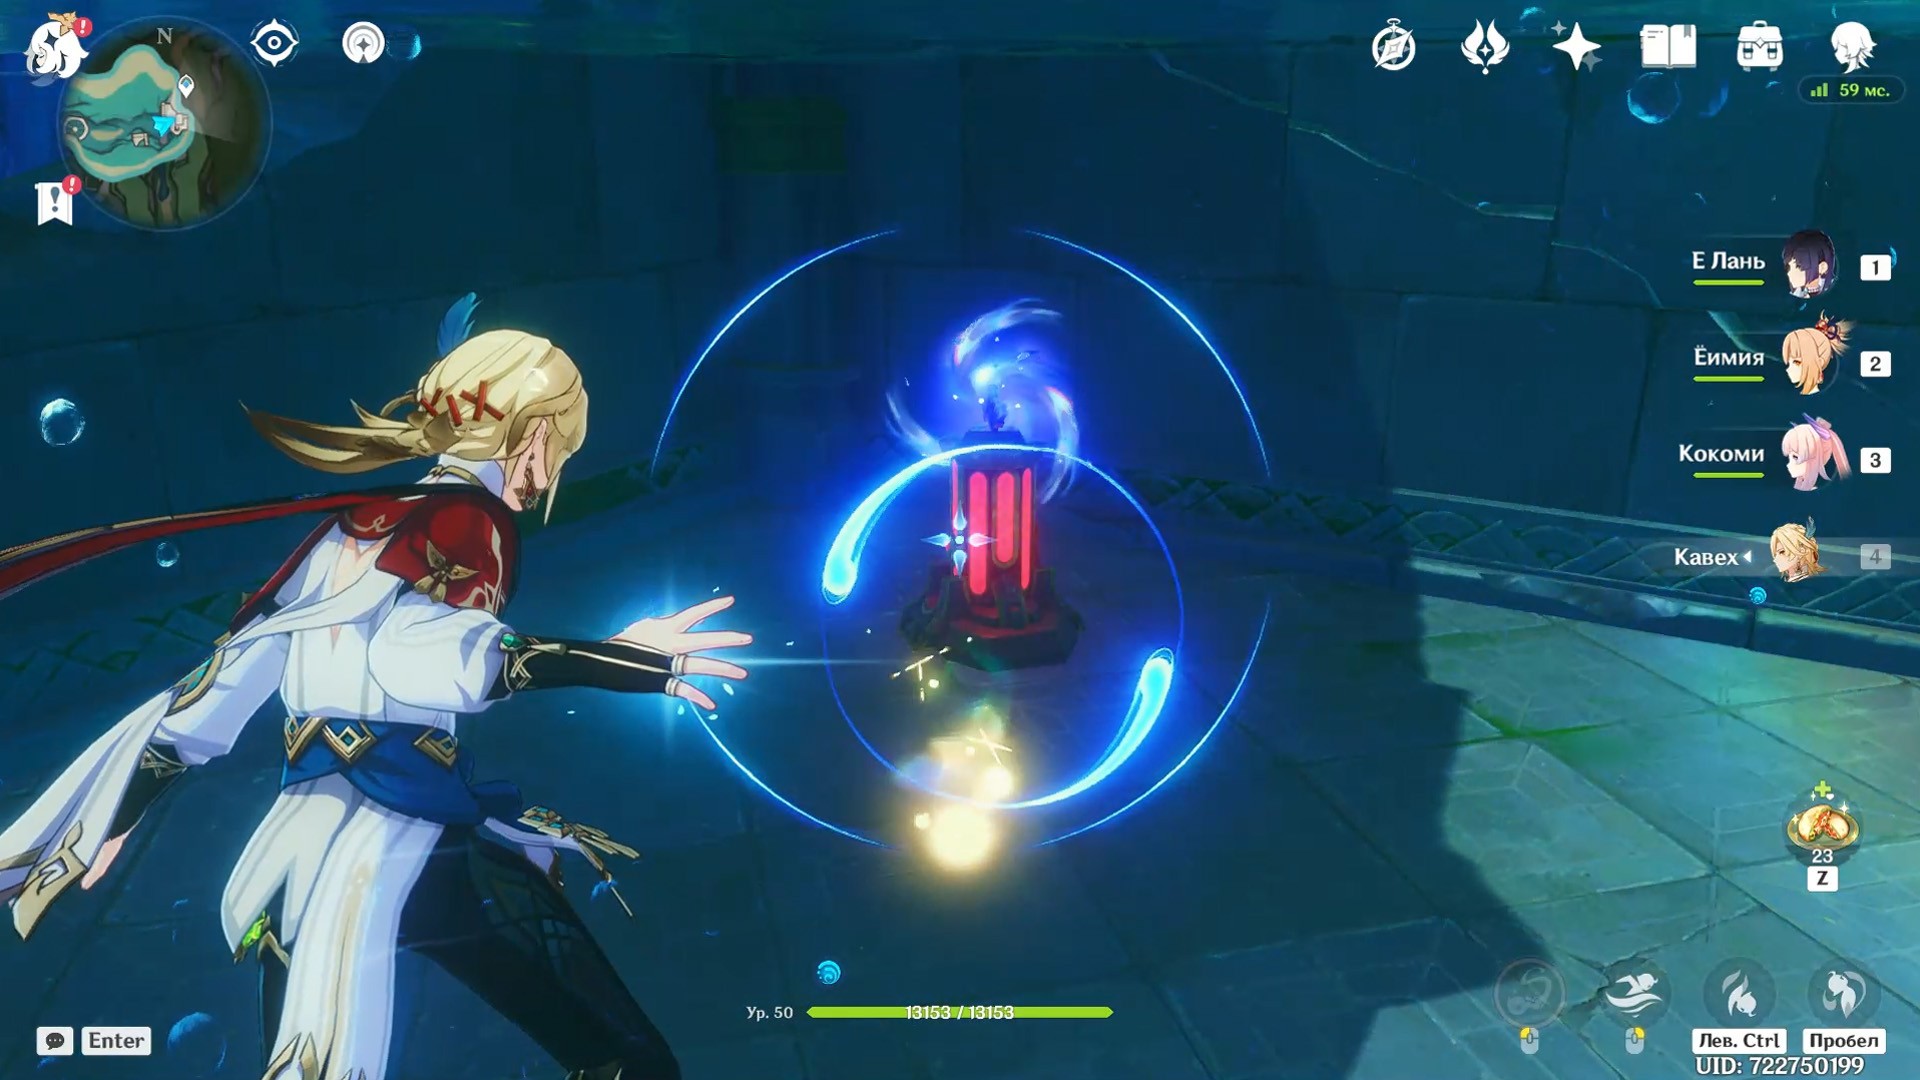
To start, grab the pneuma sphere above the chest area and hit the drive below to imbue it with energy.

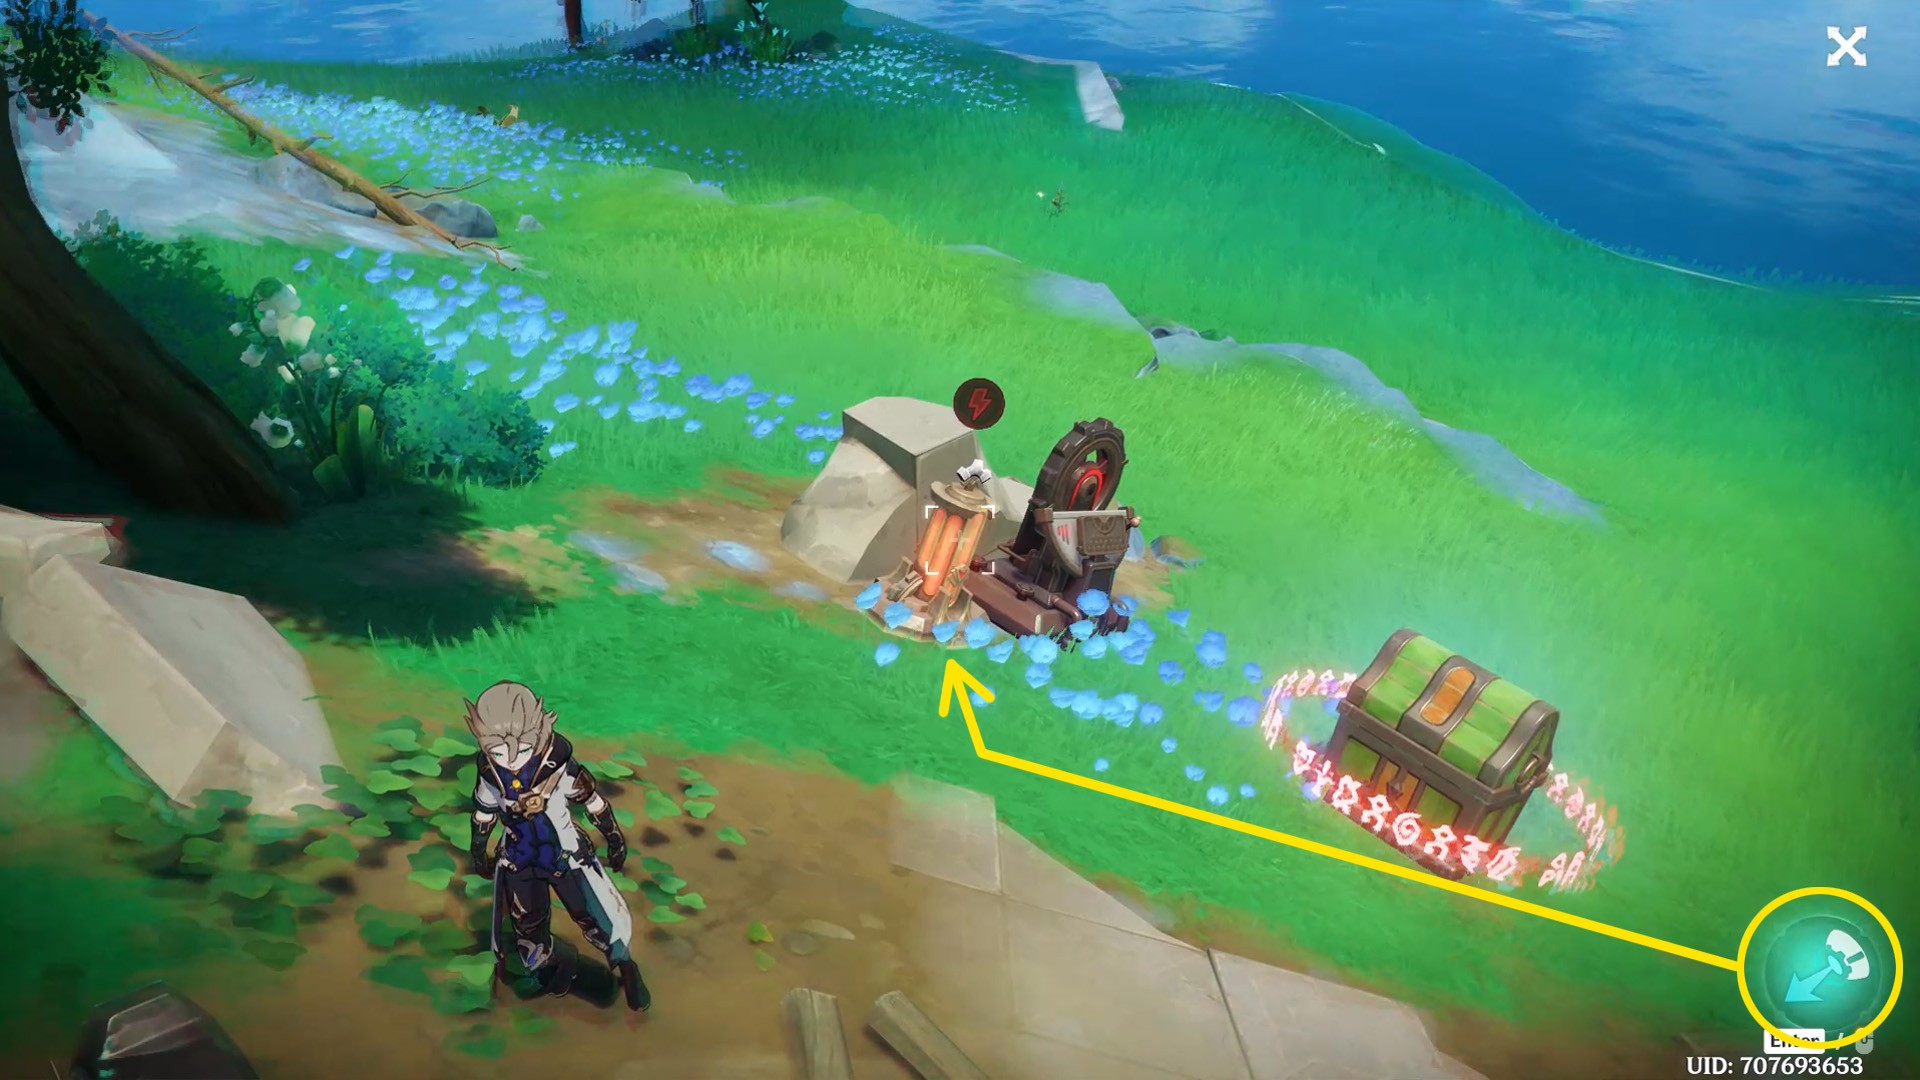
Then open the video communication interface (the remote control under the camera) and collect energy from the block that was previously attacked. This charge must be transferred to the receiver near the control panel to the left of the chest - as soon as it lights up turquoise, turn off Sumeru: Observance.
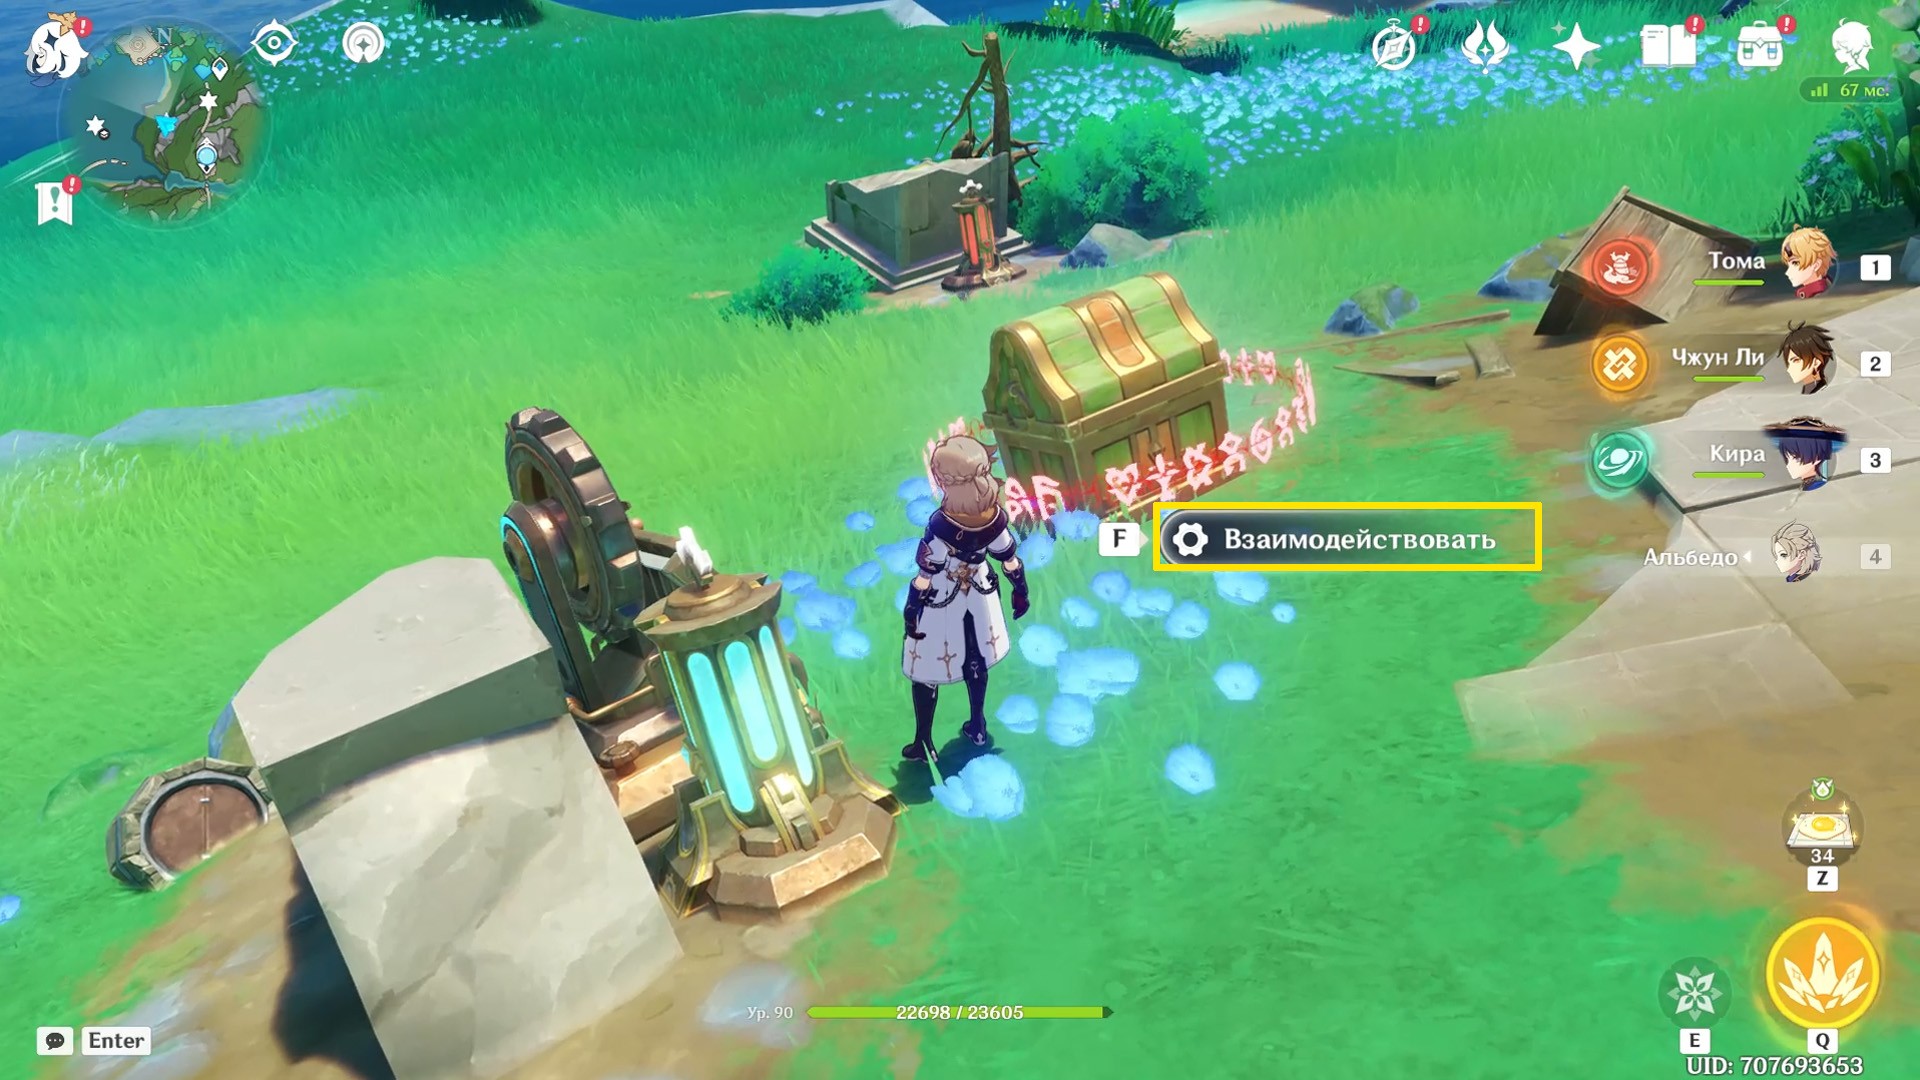
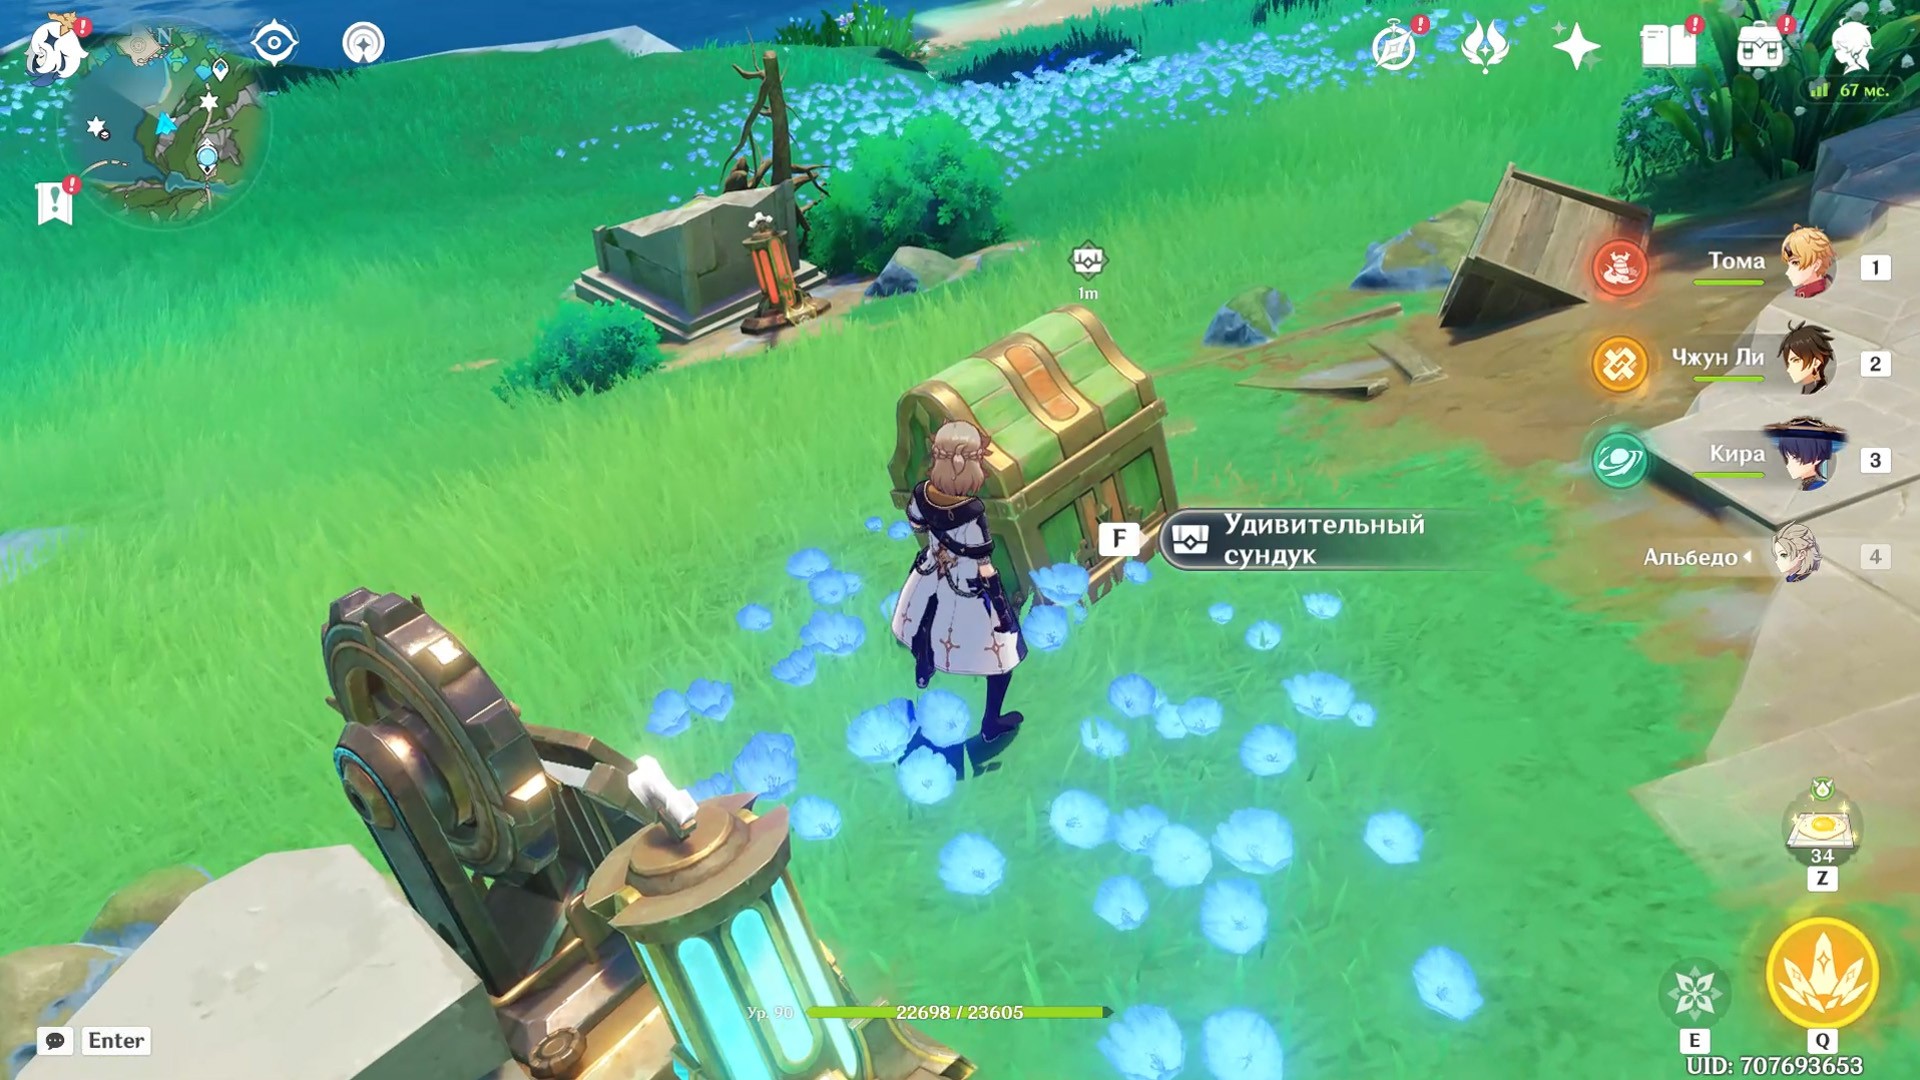
All you have to do is approach the active device and interact with it, opening access to a casket with a special trophy: landscape decor " “Royal Purple” "
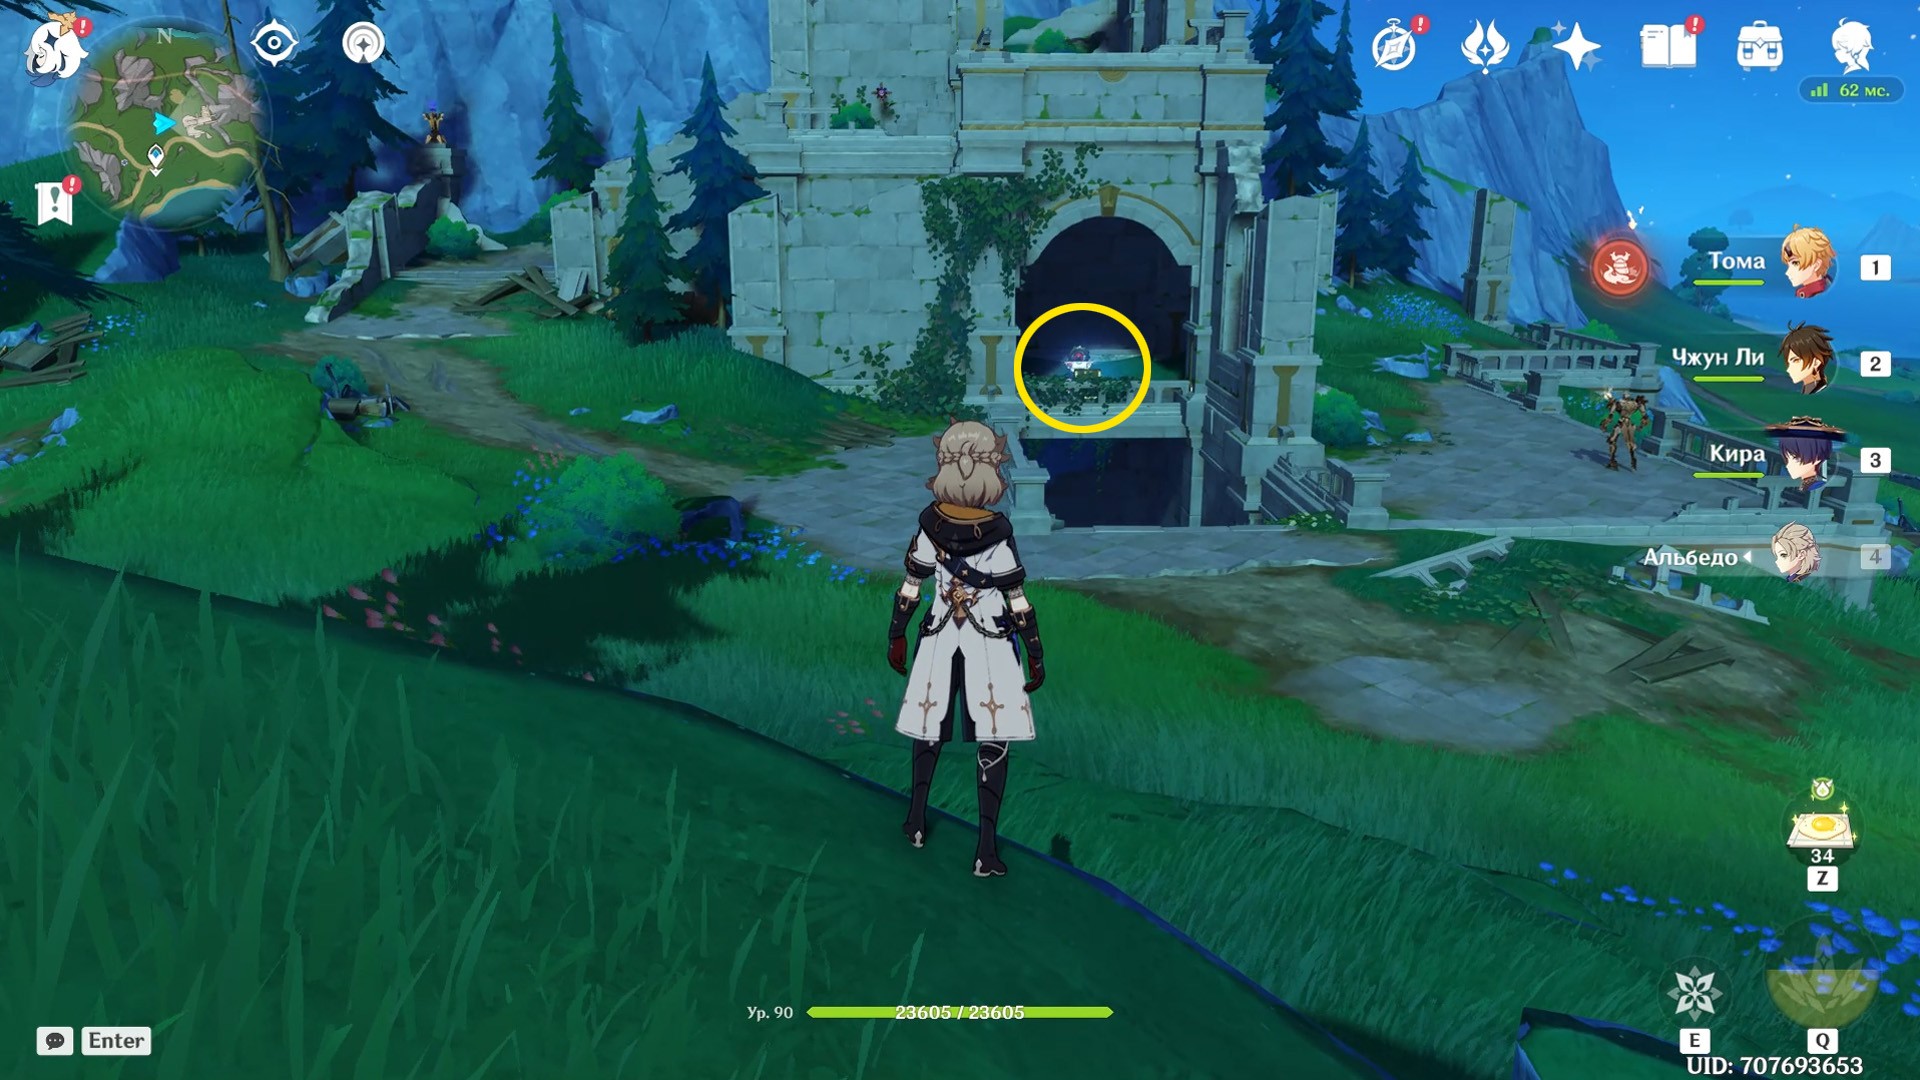
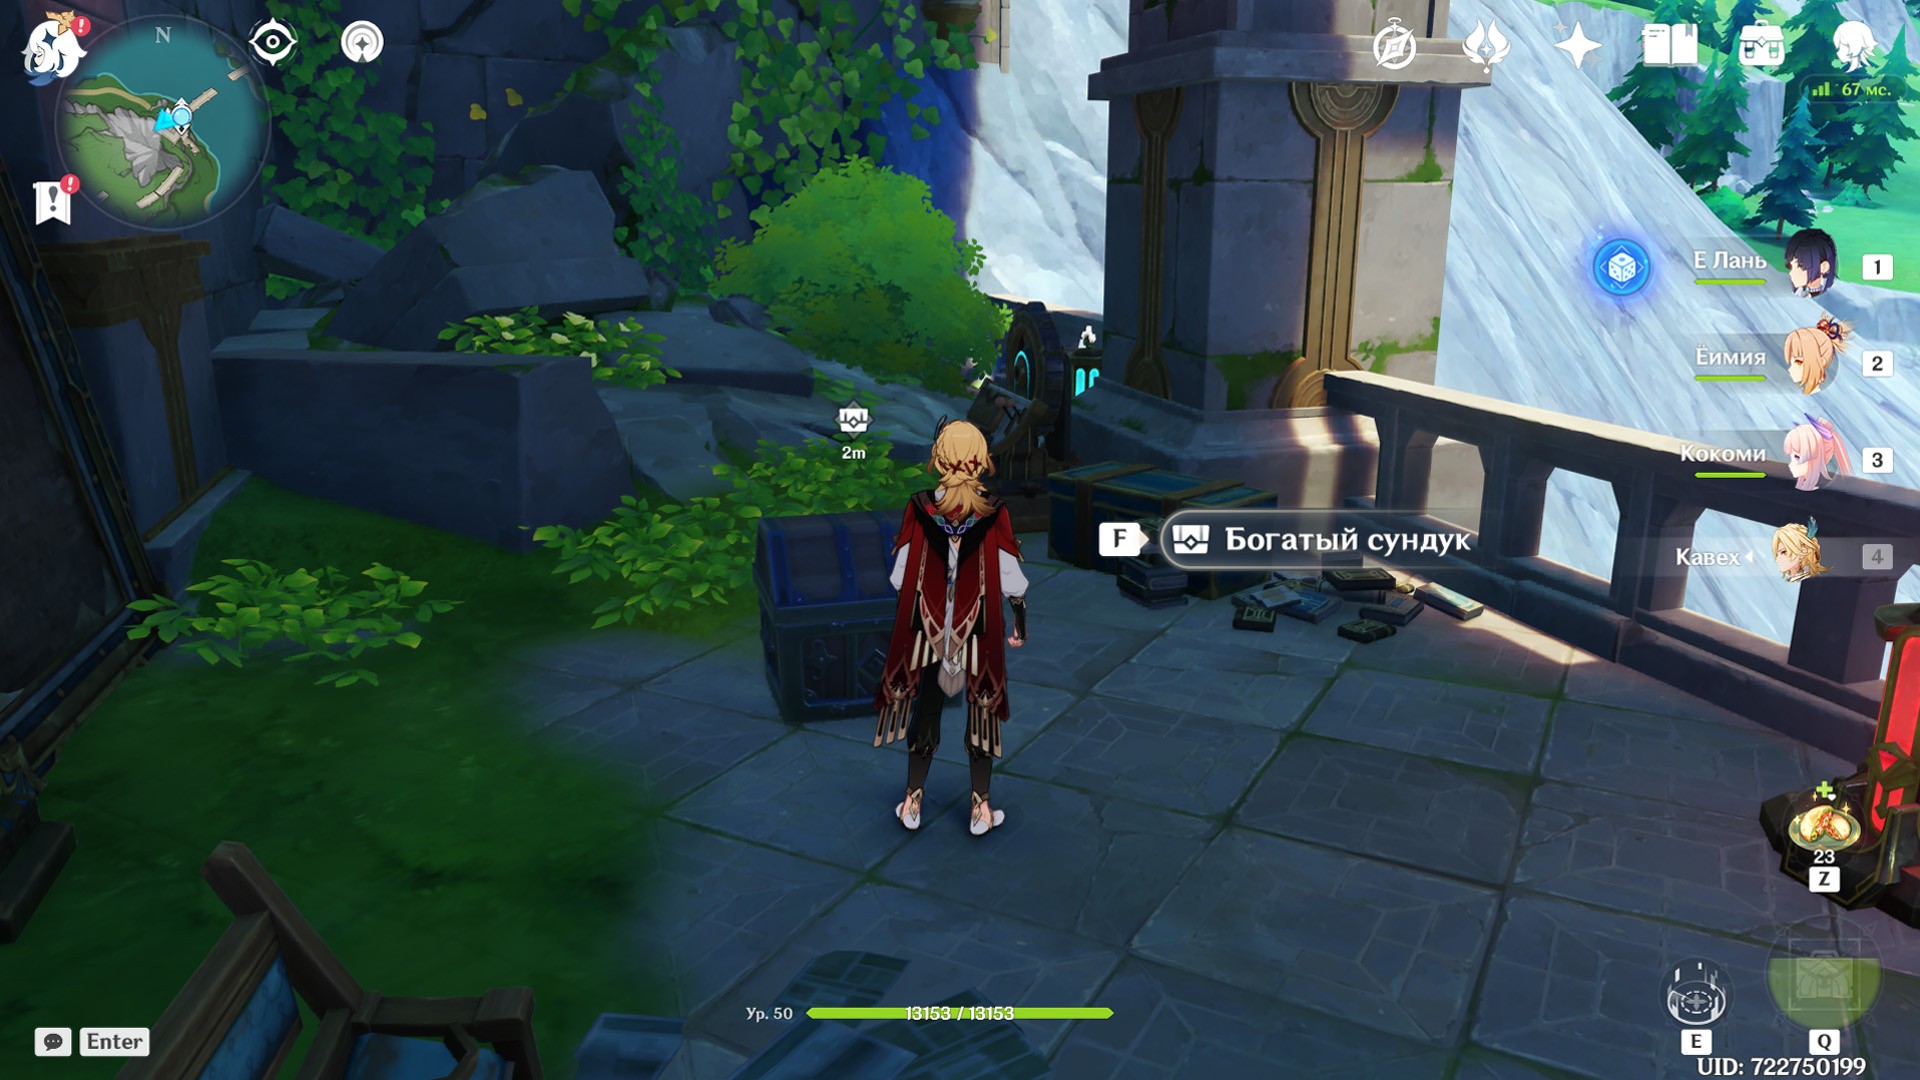
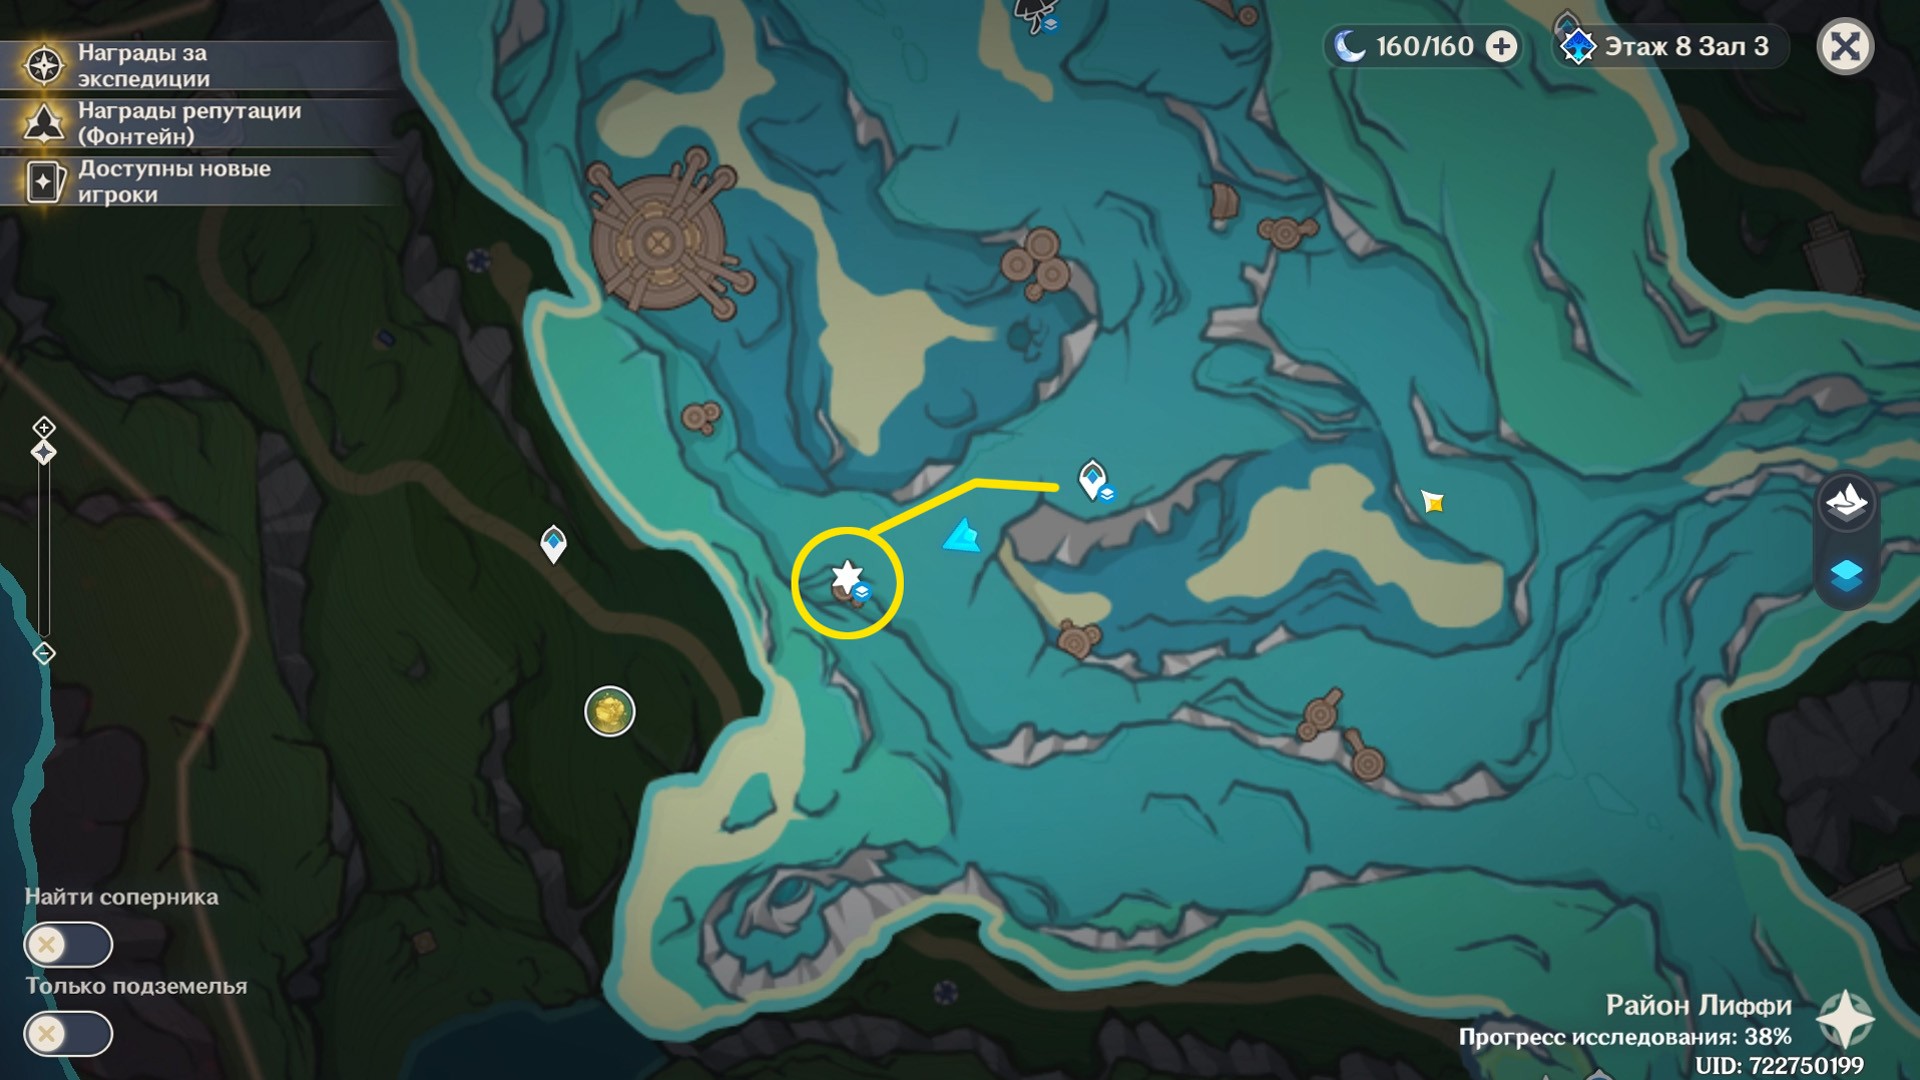
Panel 6
- Location: pond above ruins with optical mechanisms.
- Reward: rich chest.
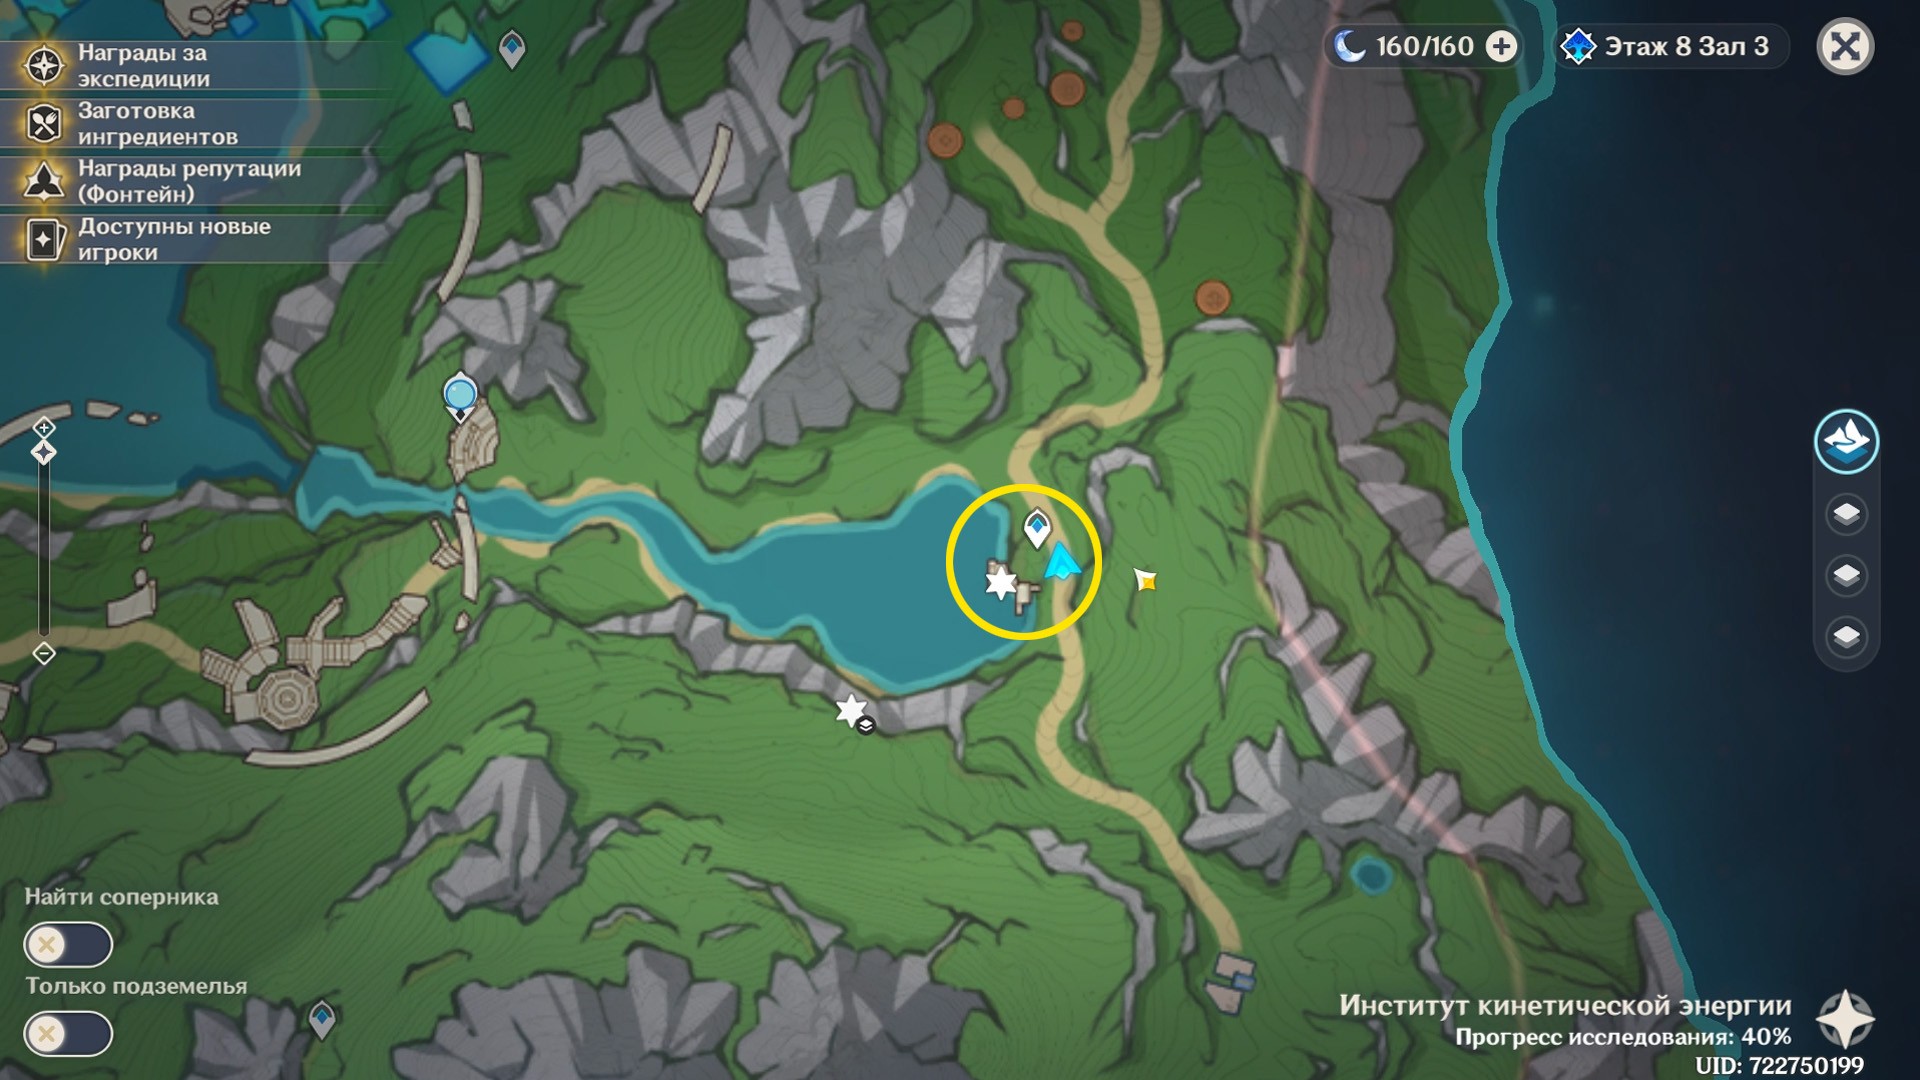
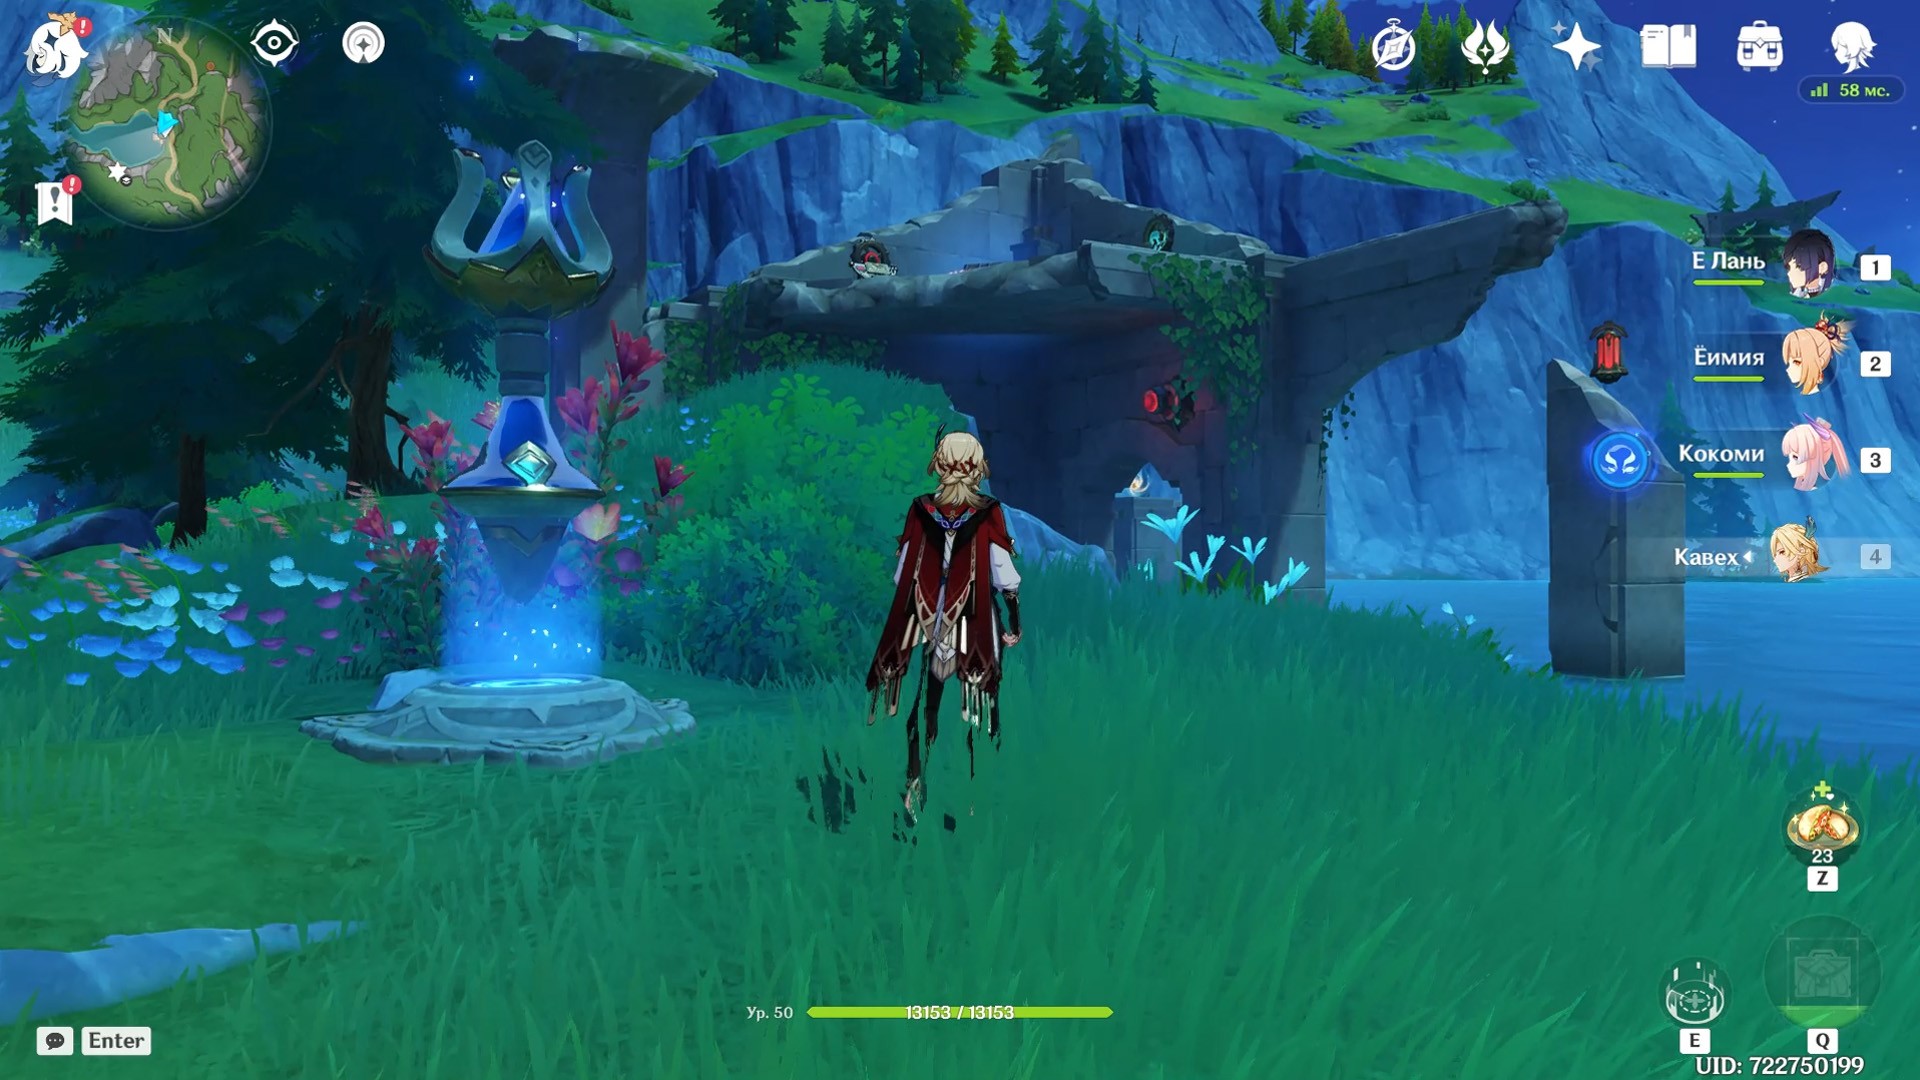
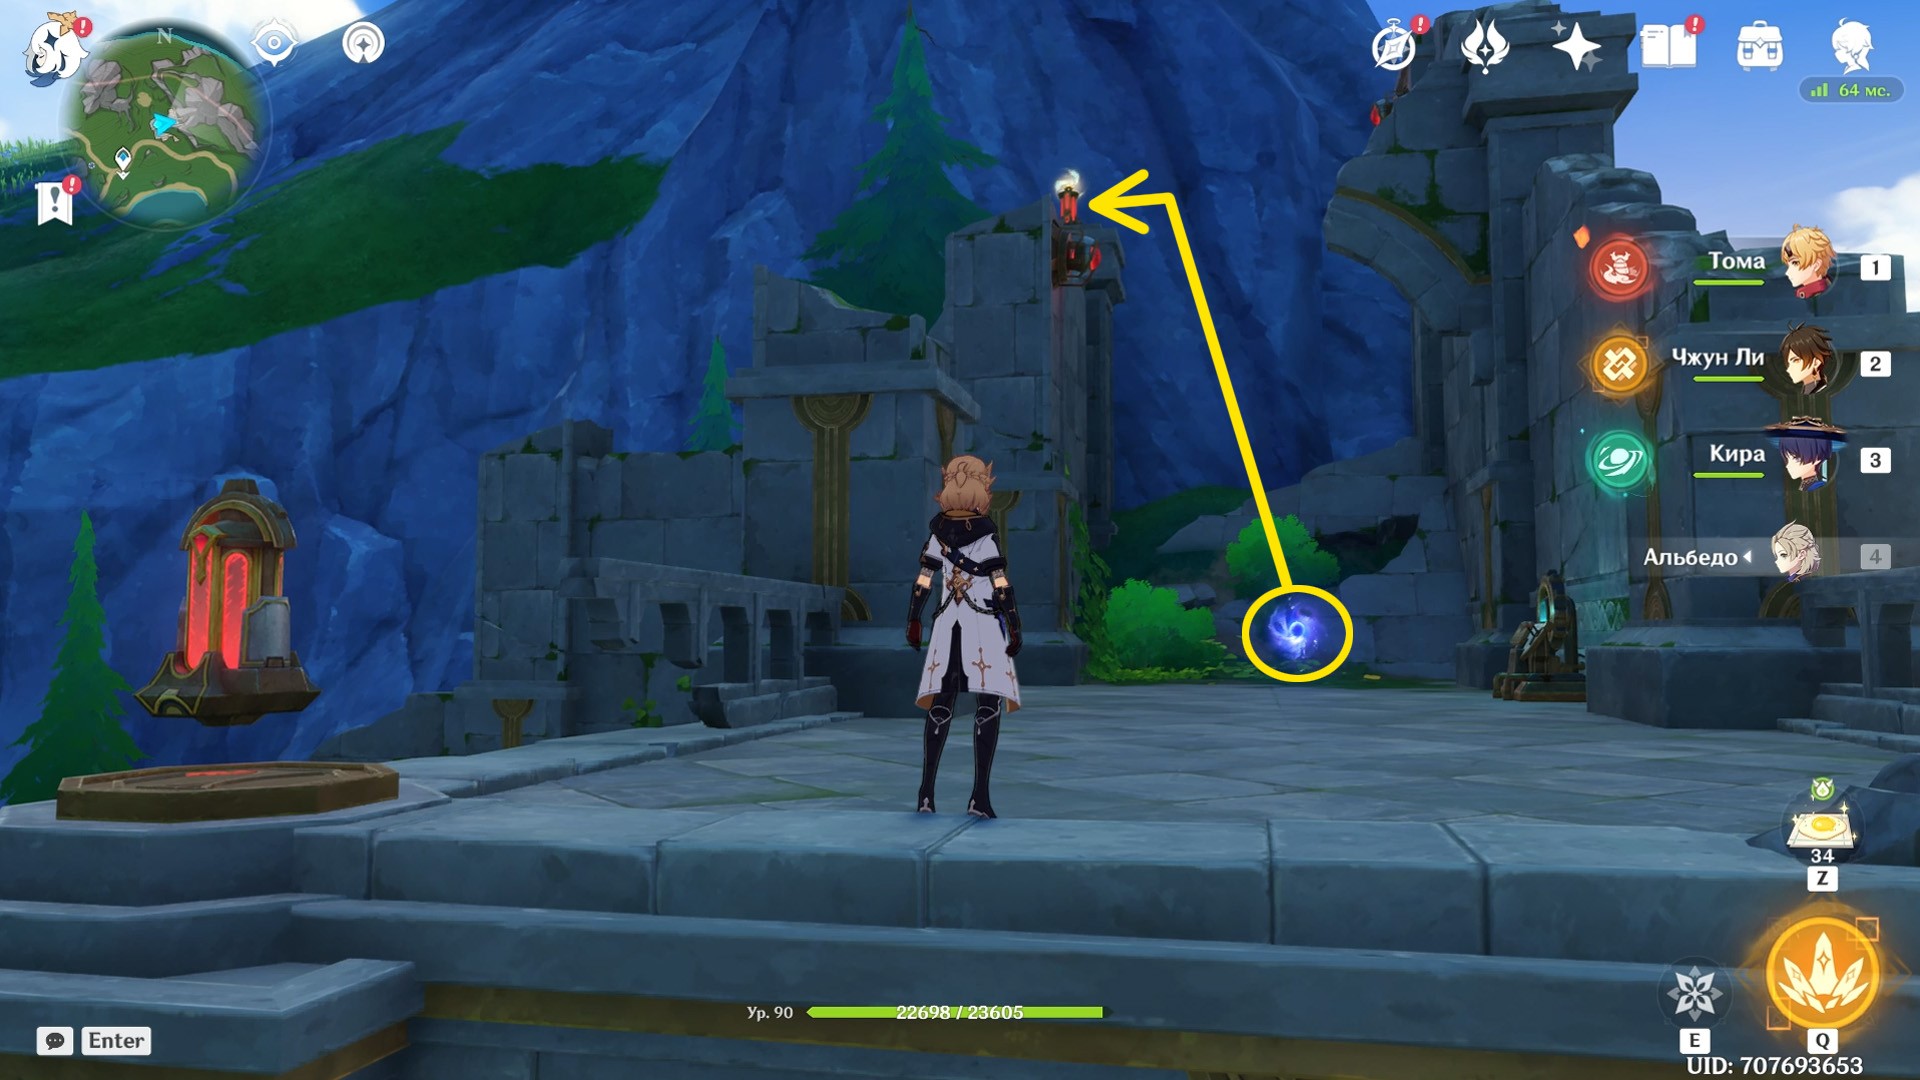
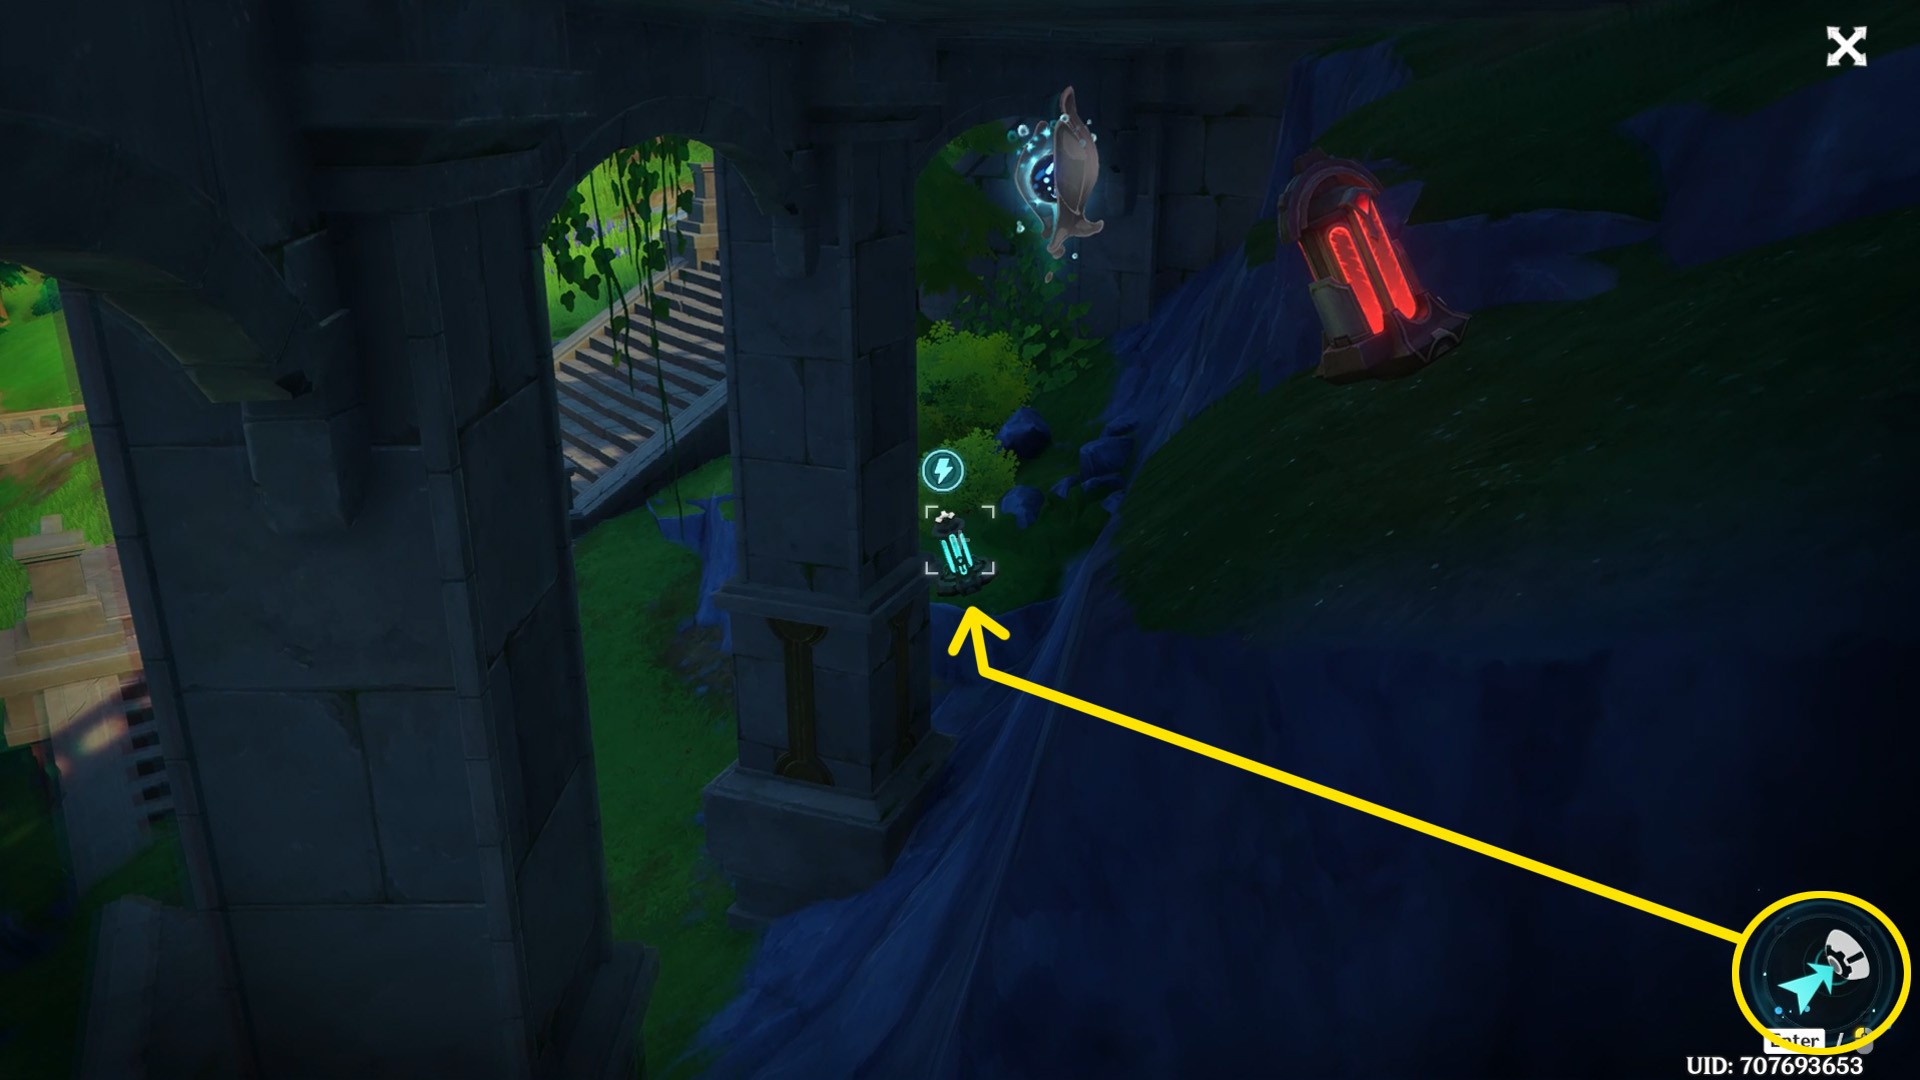
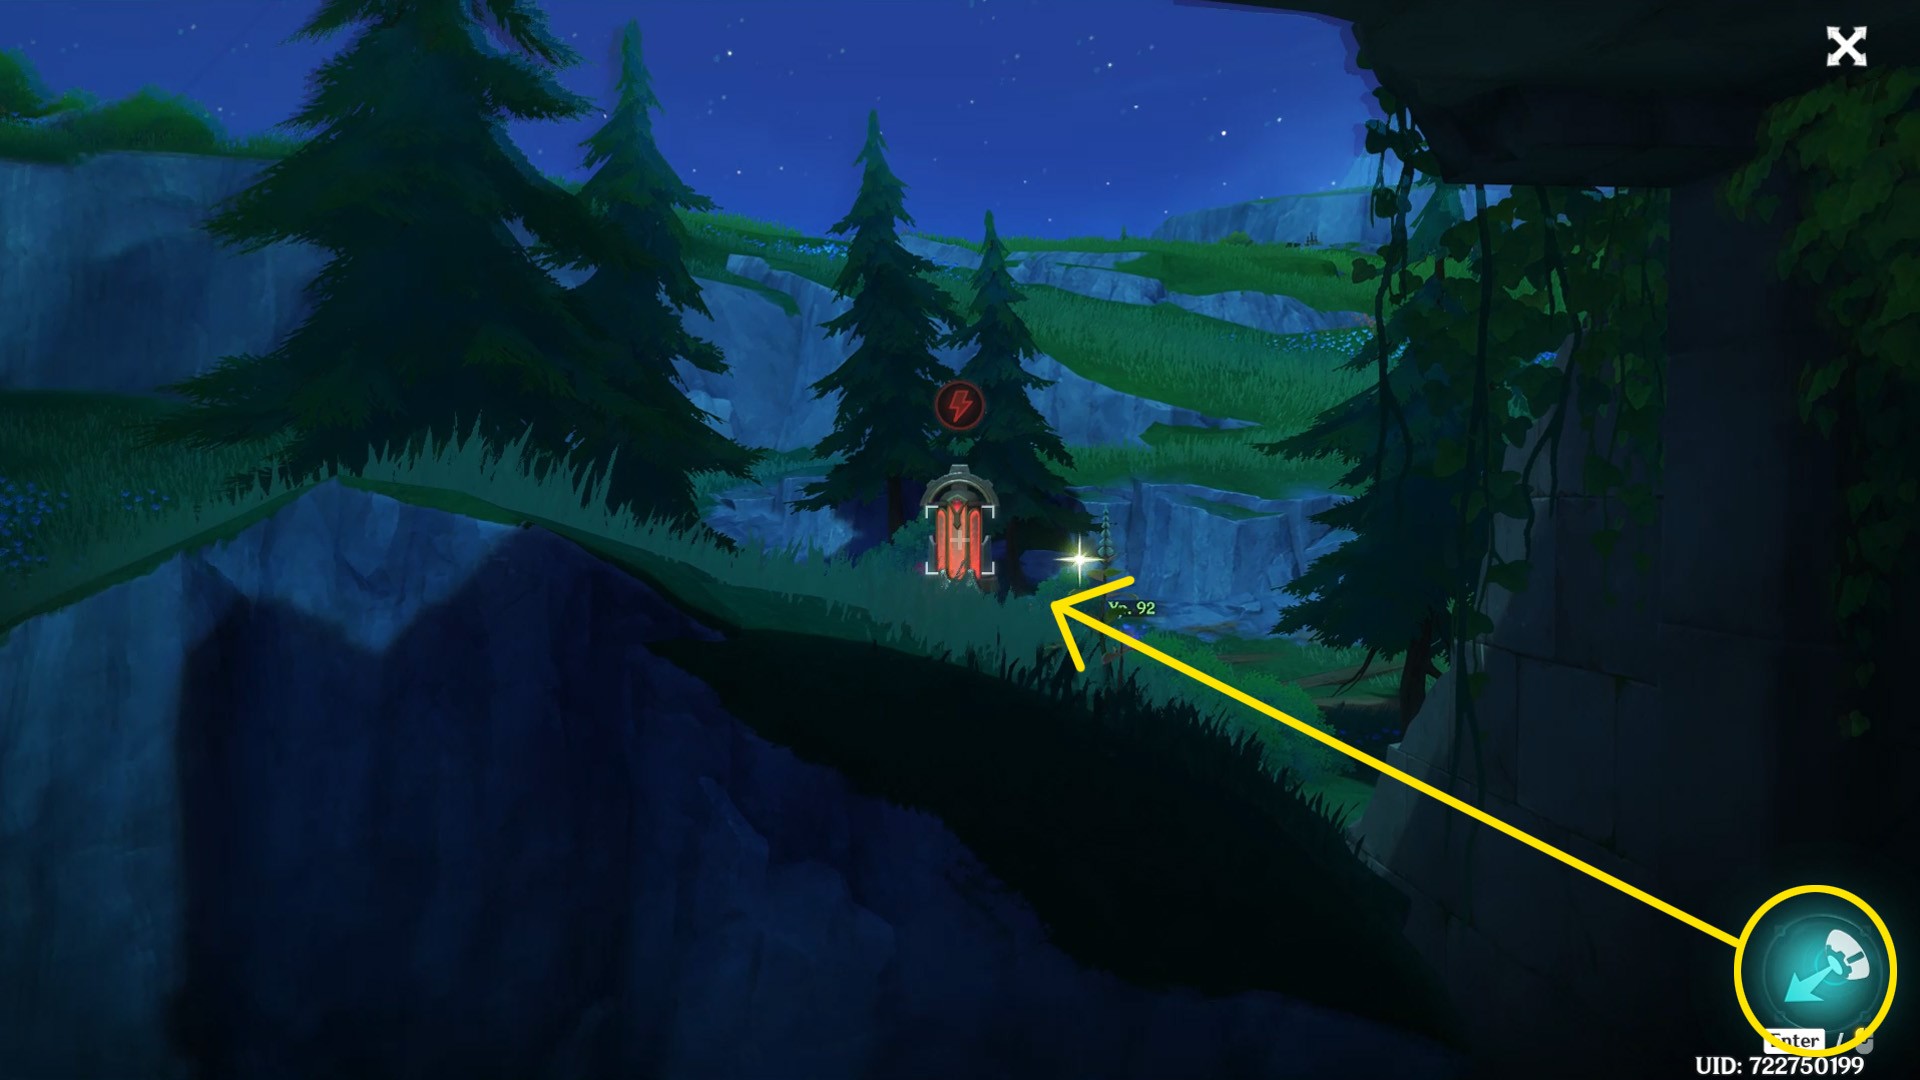
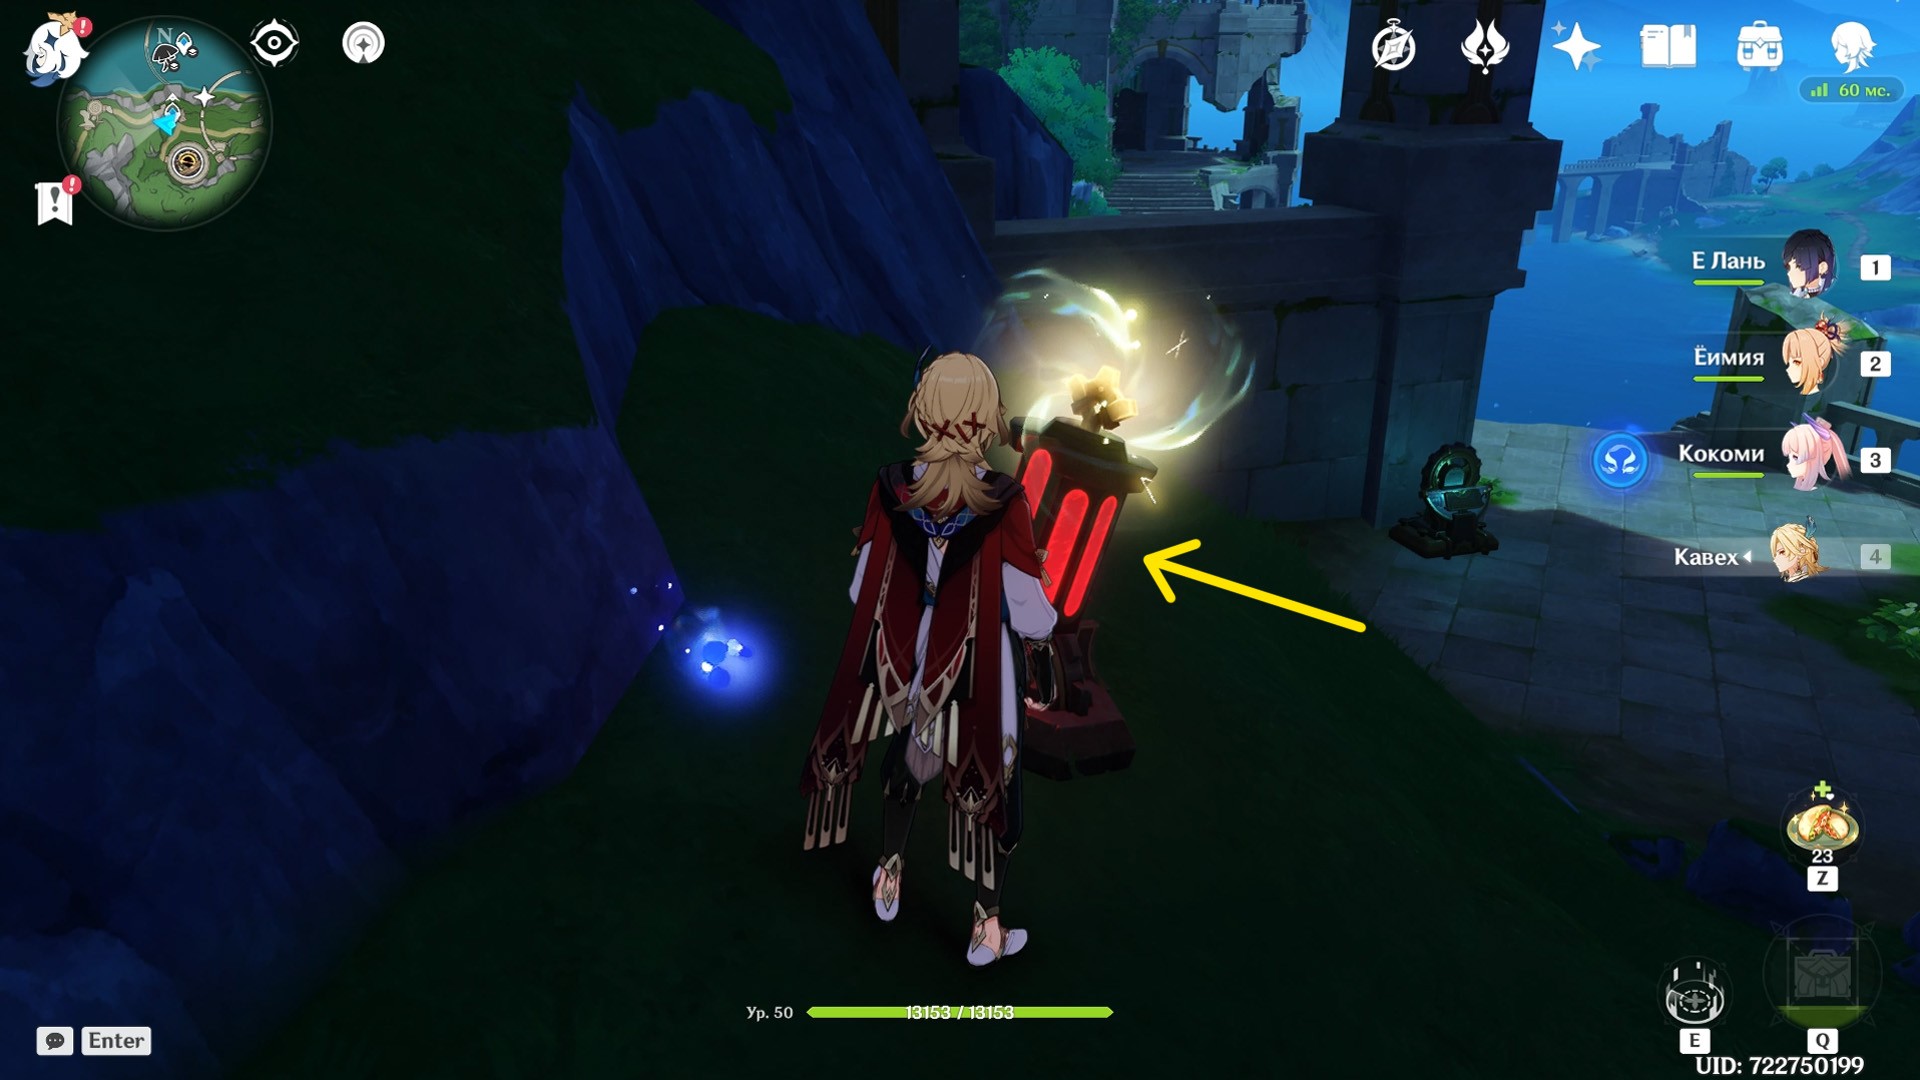
The next, 6th control panel is located on the ruins in front of the reservoir to the southeast of the Archon Statue (the exact location is marked on the map screenshot). First of all, climb up the broken stone column to the right of the puzzle and pick up the inactive capsule - it should be placed lower, approximately near the bush mint.
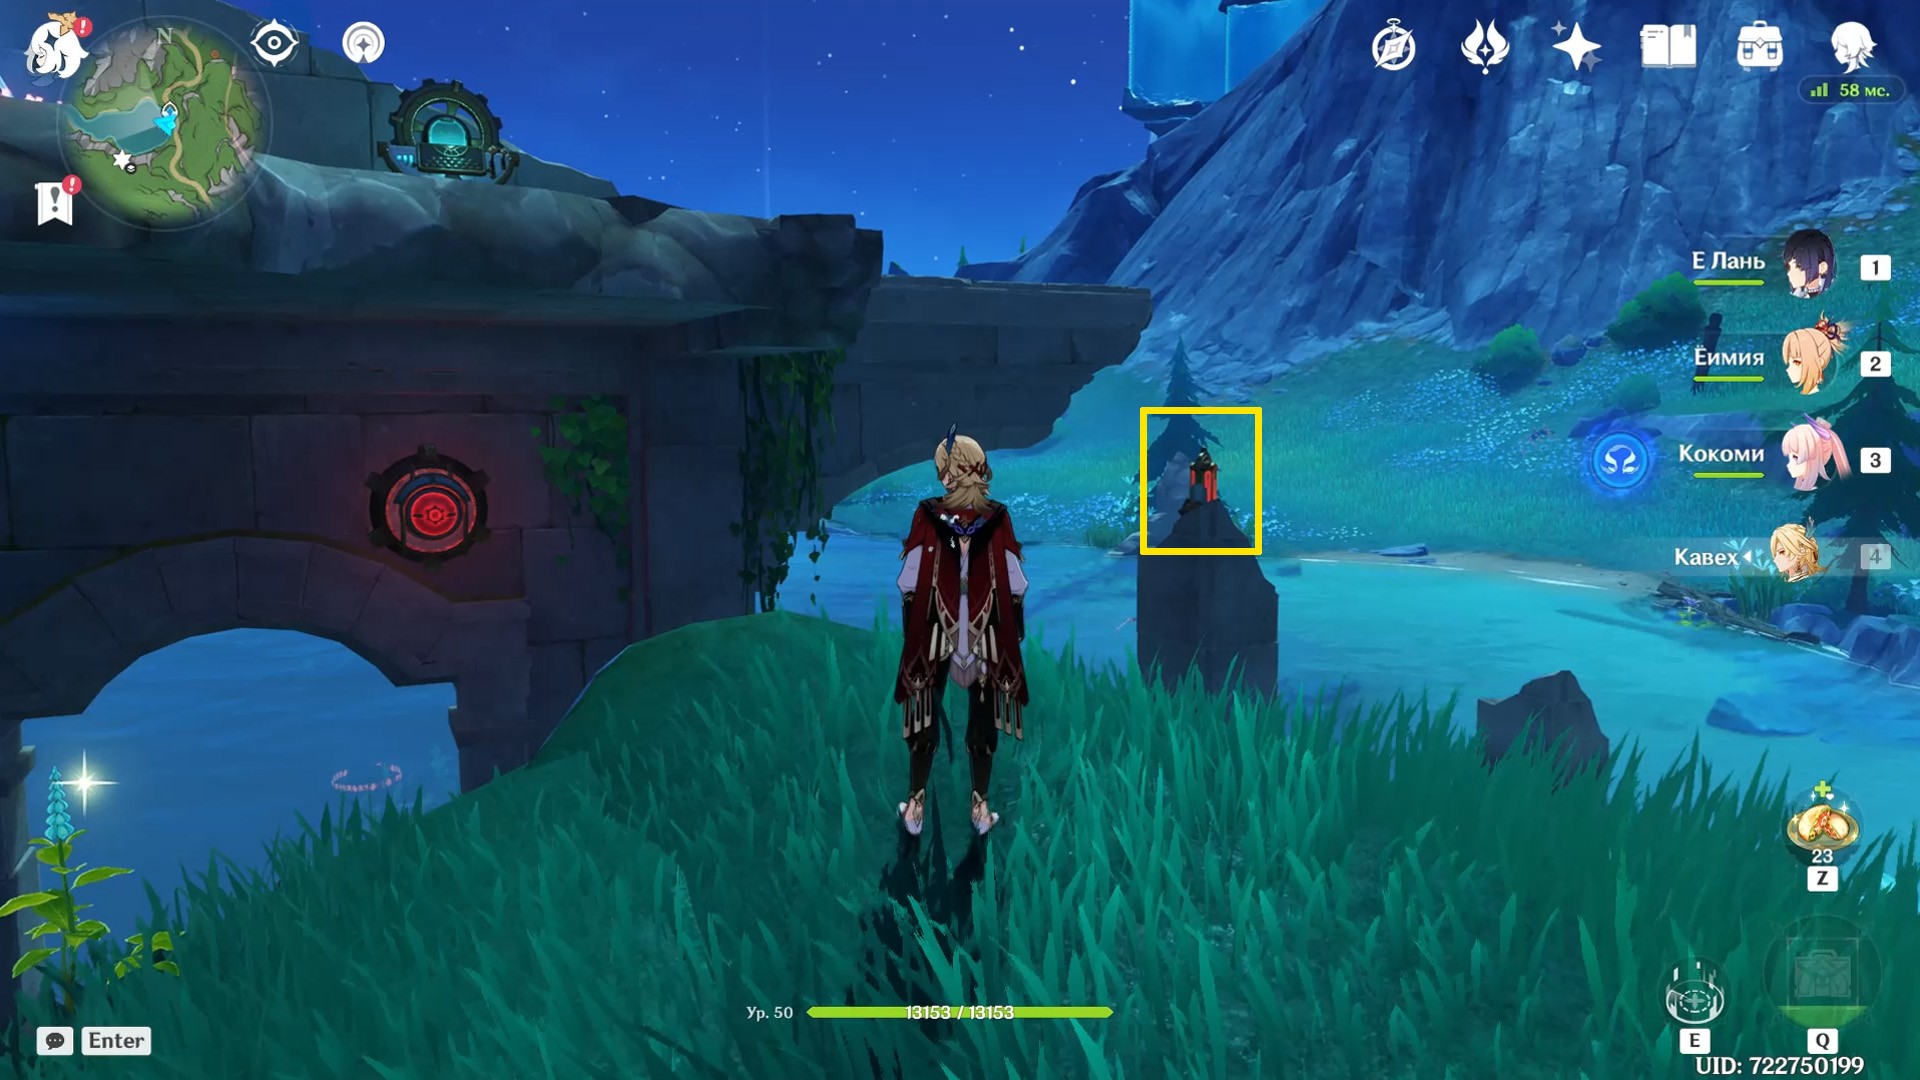
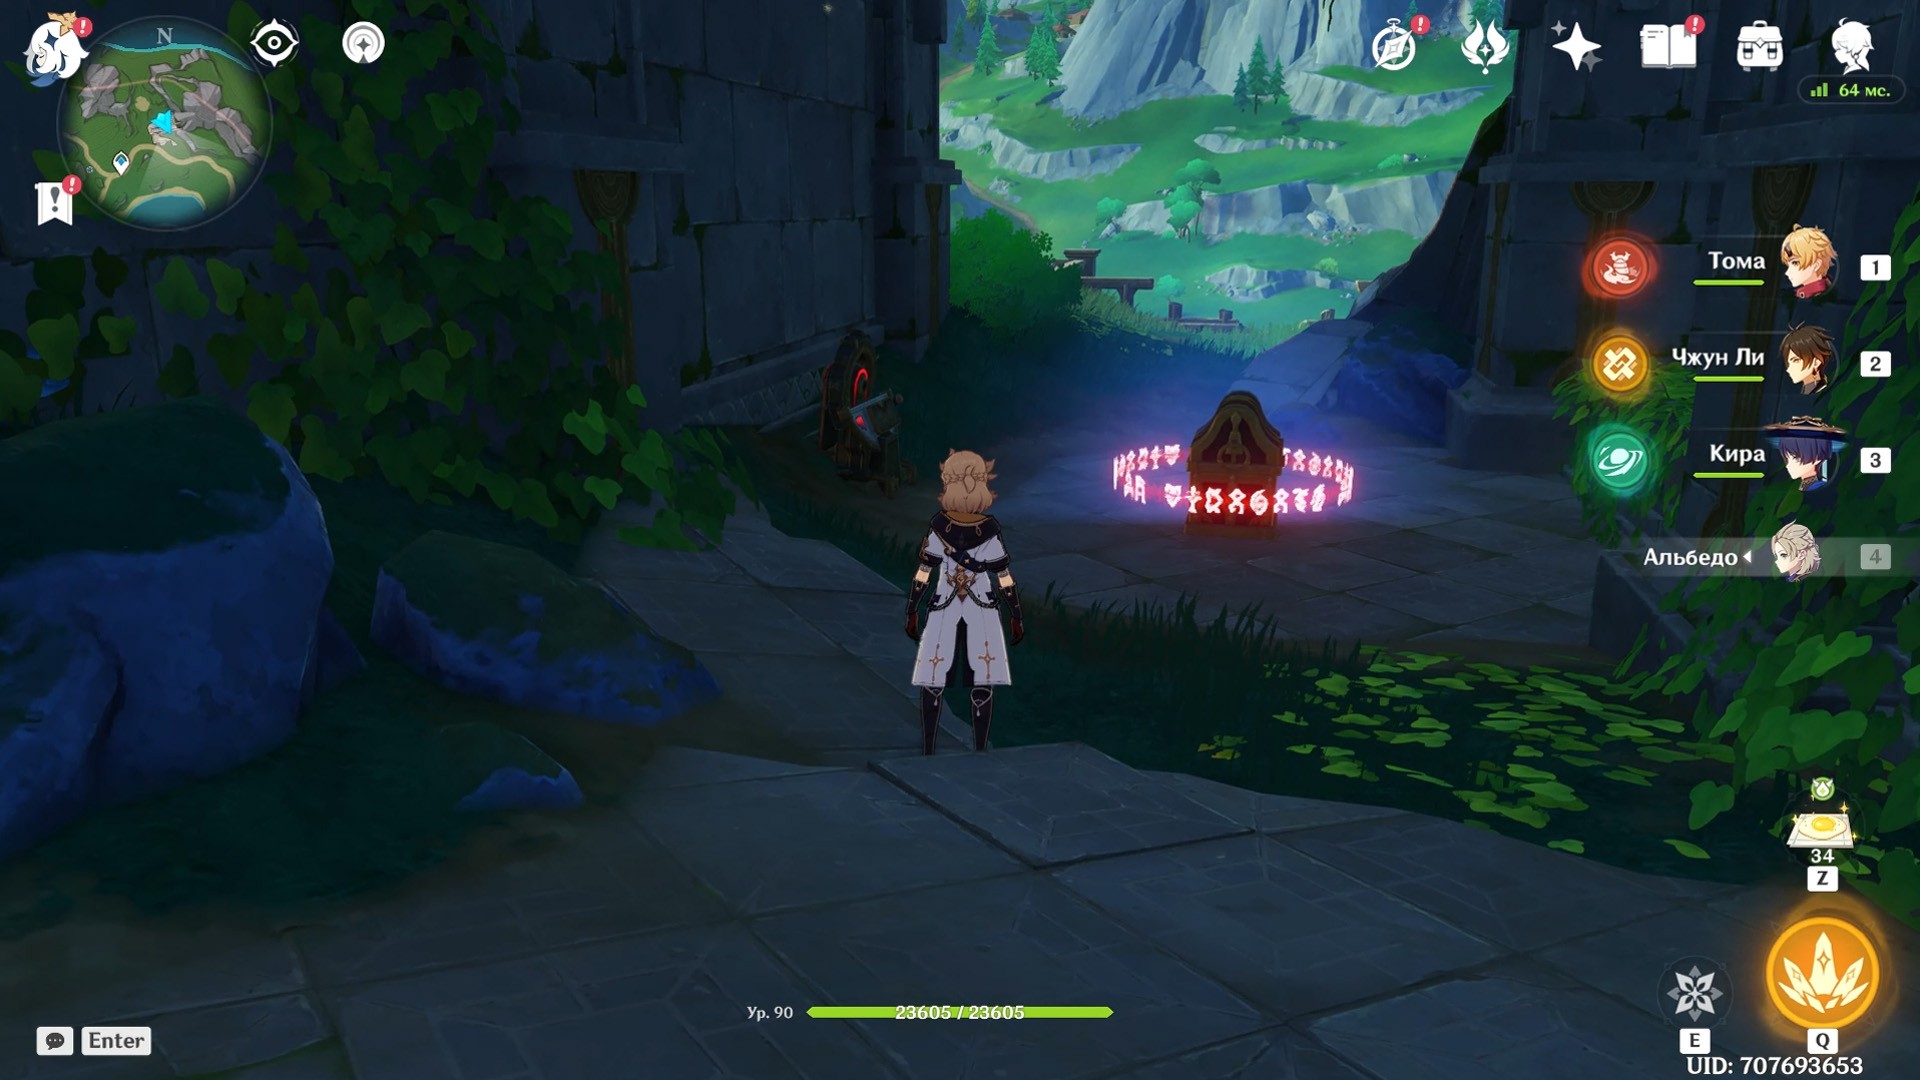
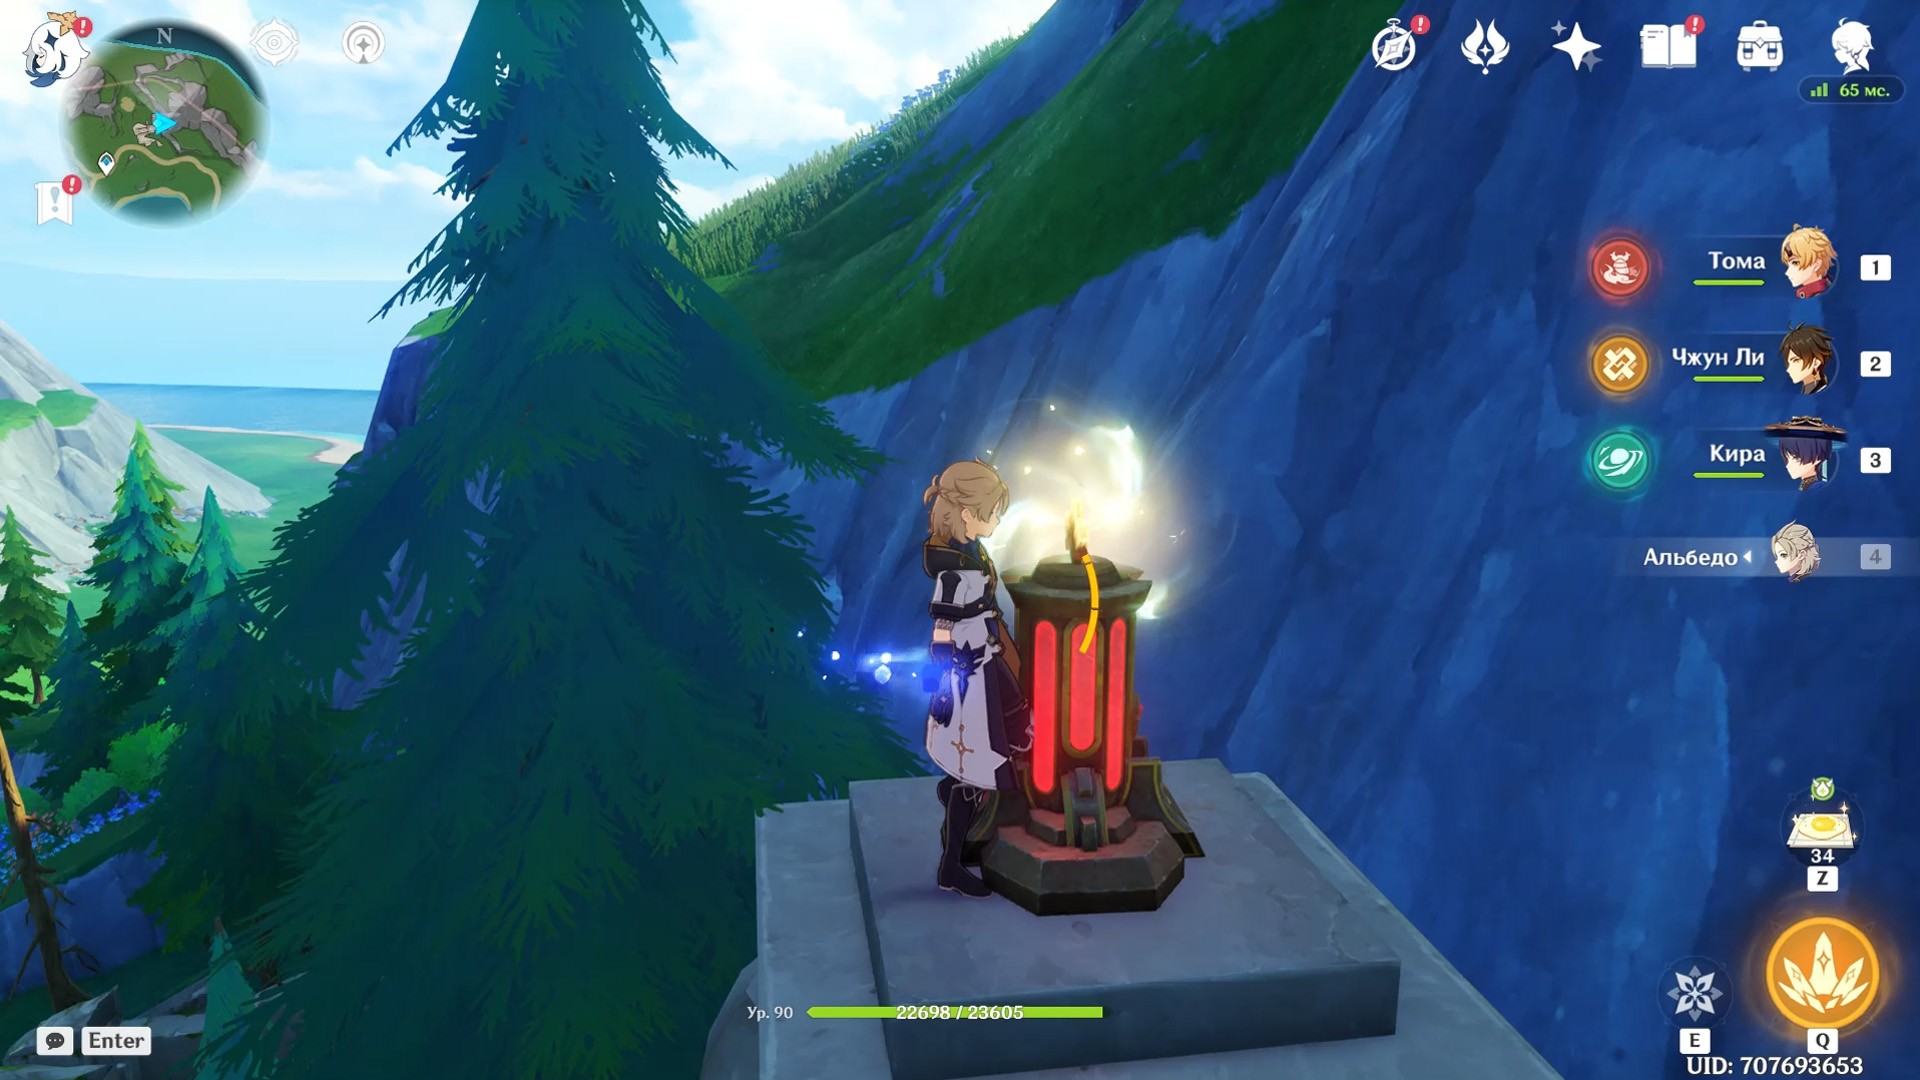
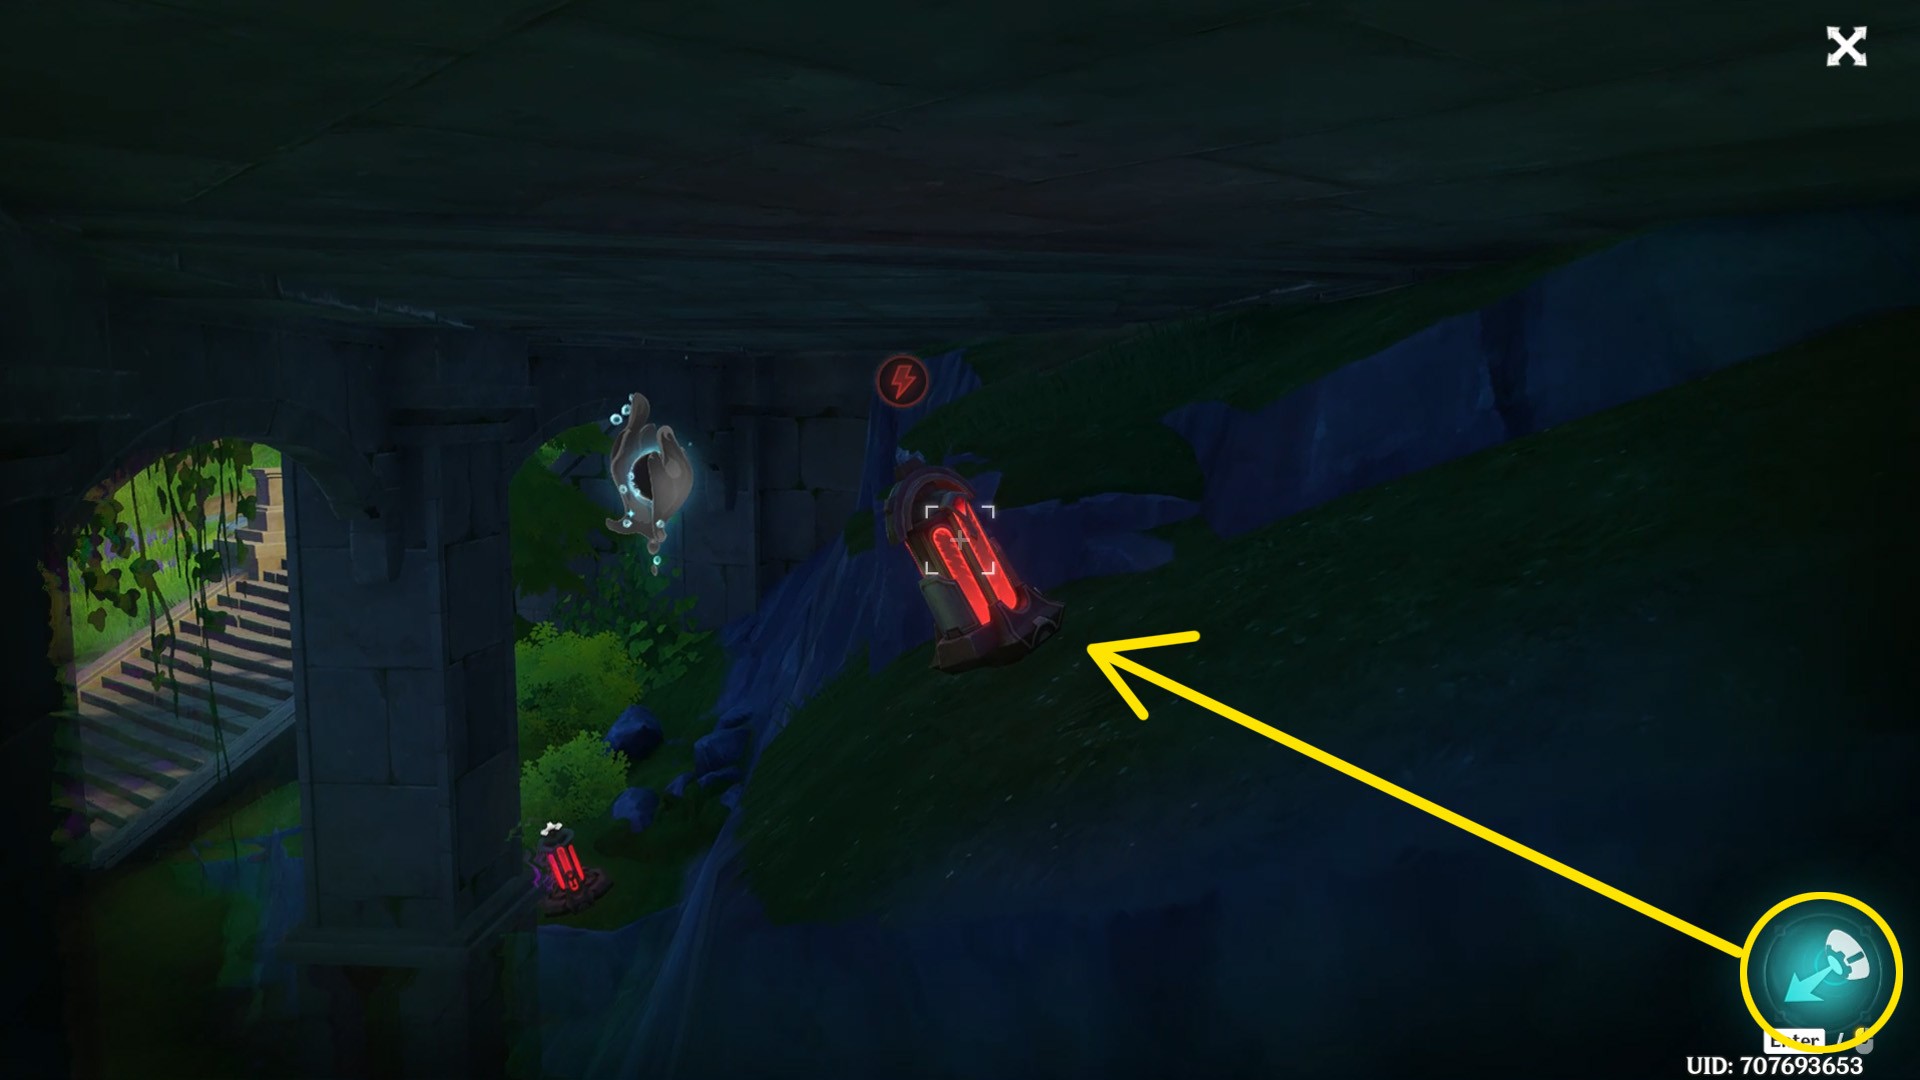
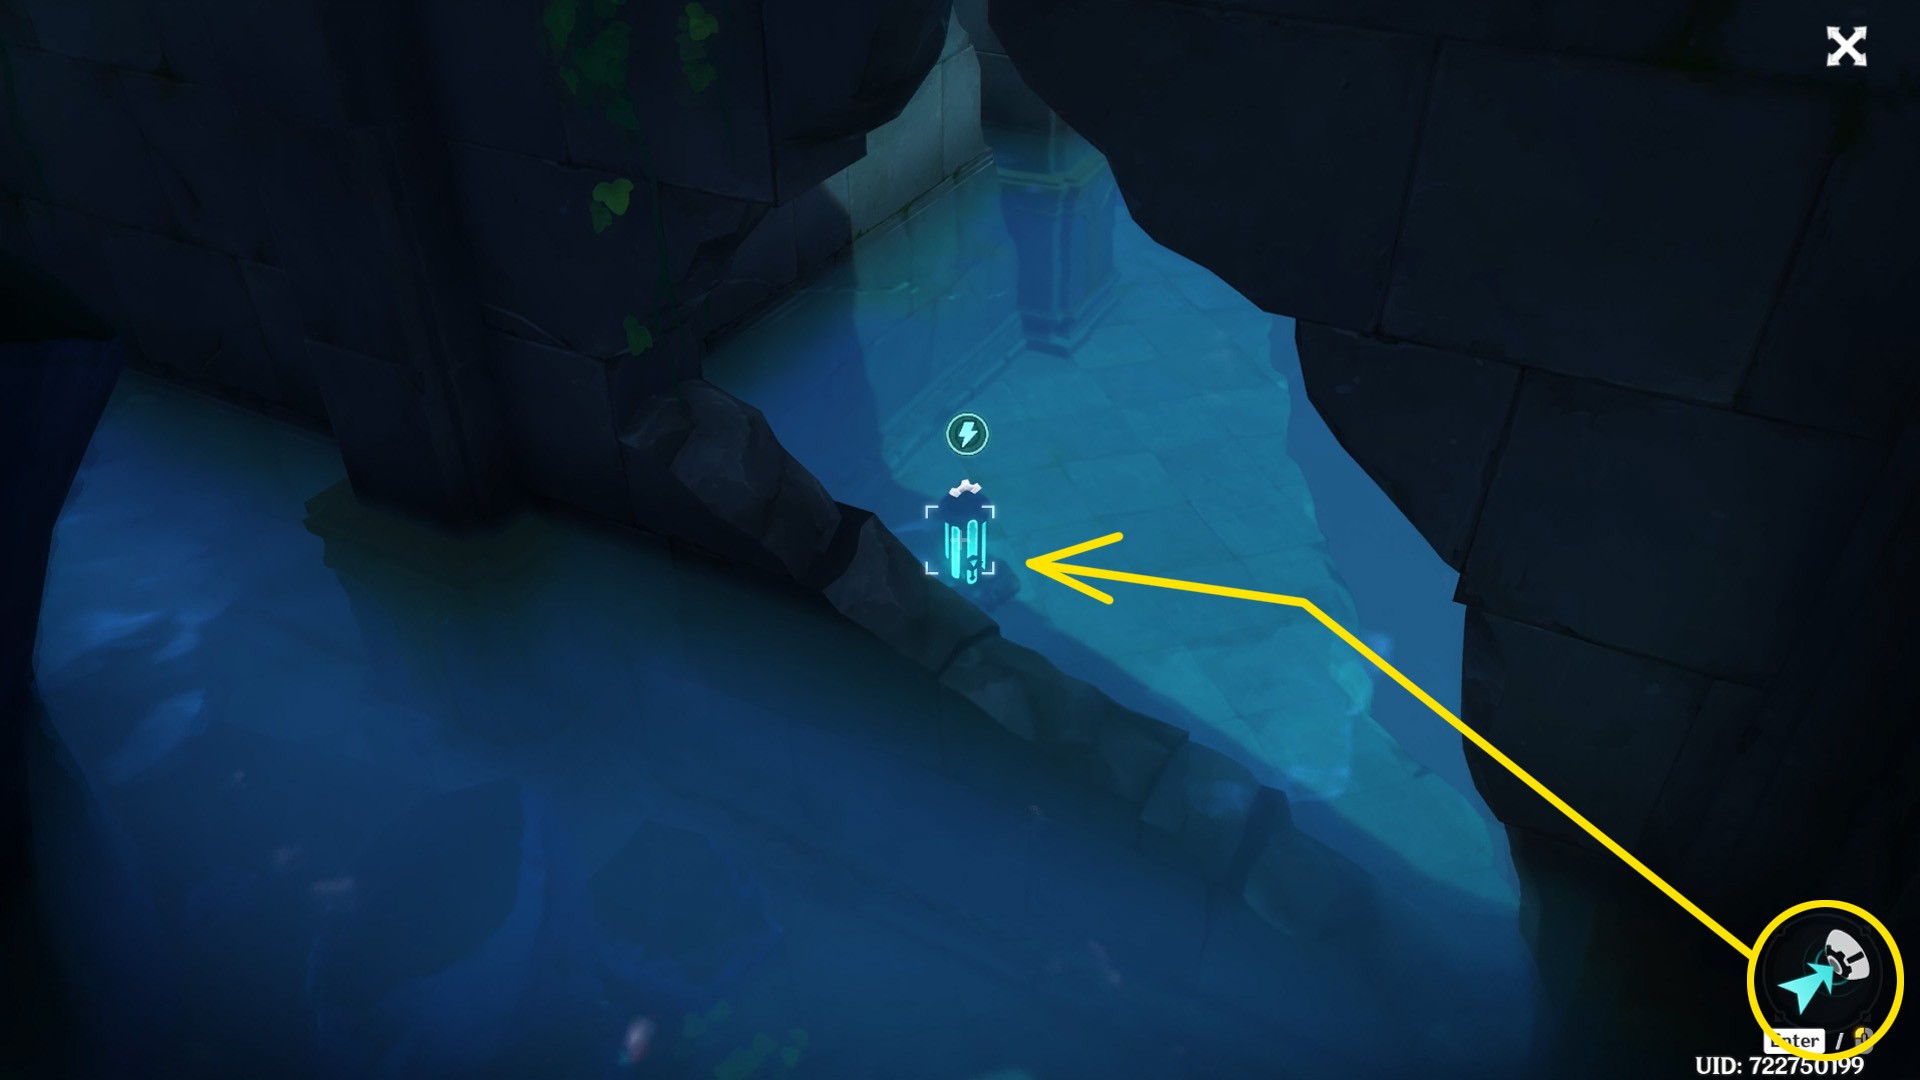
Then go around the ruins and pick up a particle of pneuma on a piece of a building in the pond. Dive forward under the water and find a red storage device with an ushii sphere hovering above it - by aiming at it, you can return energy to the device.

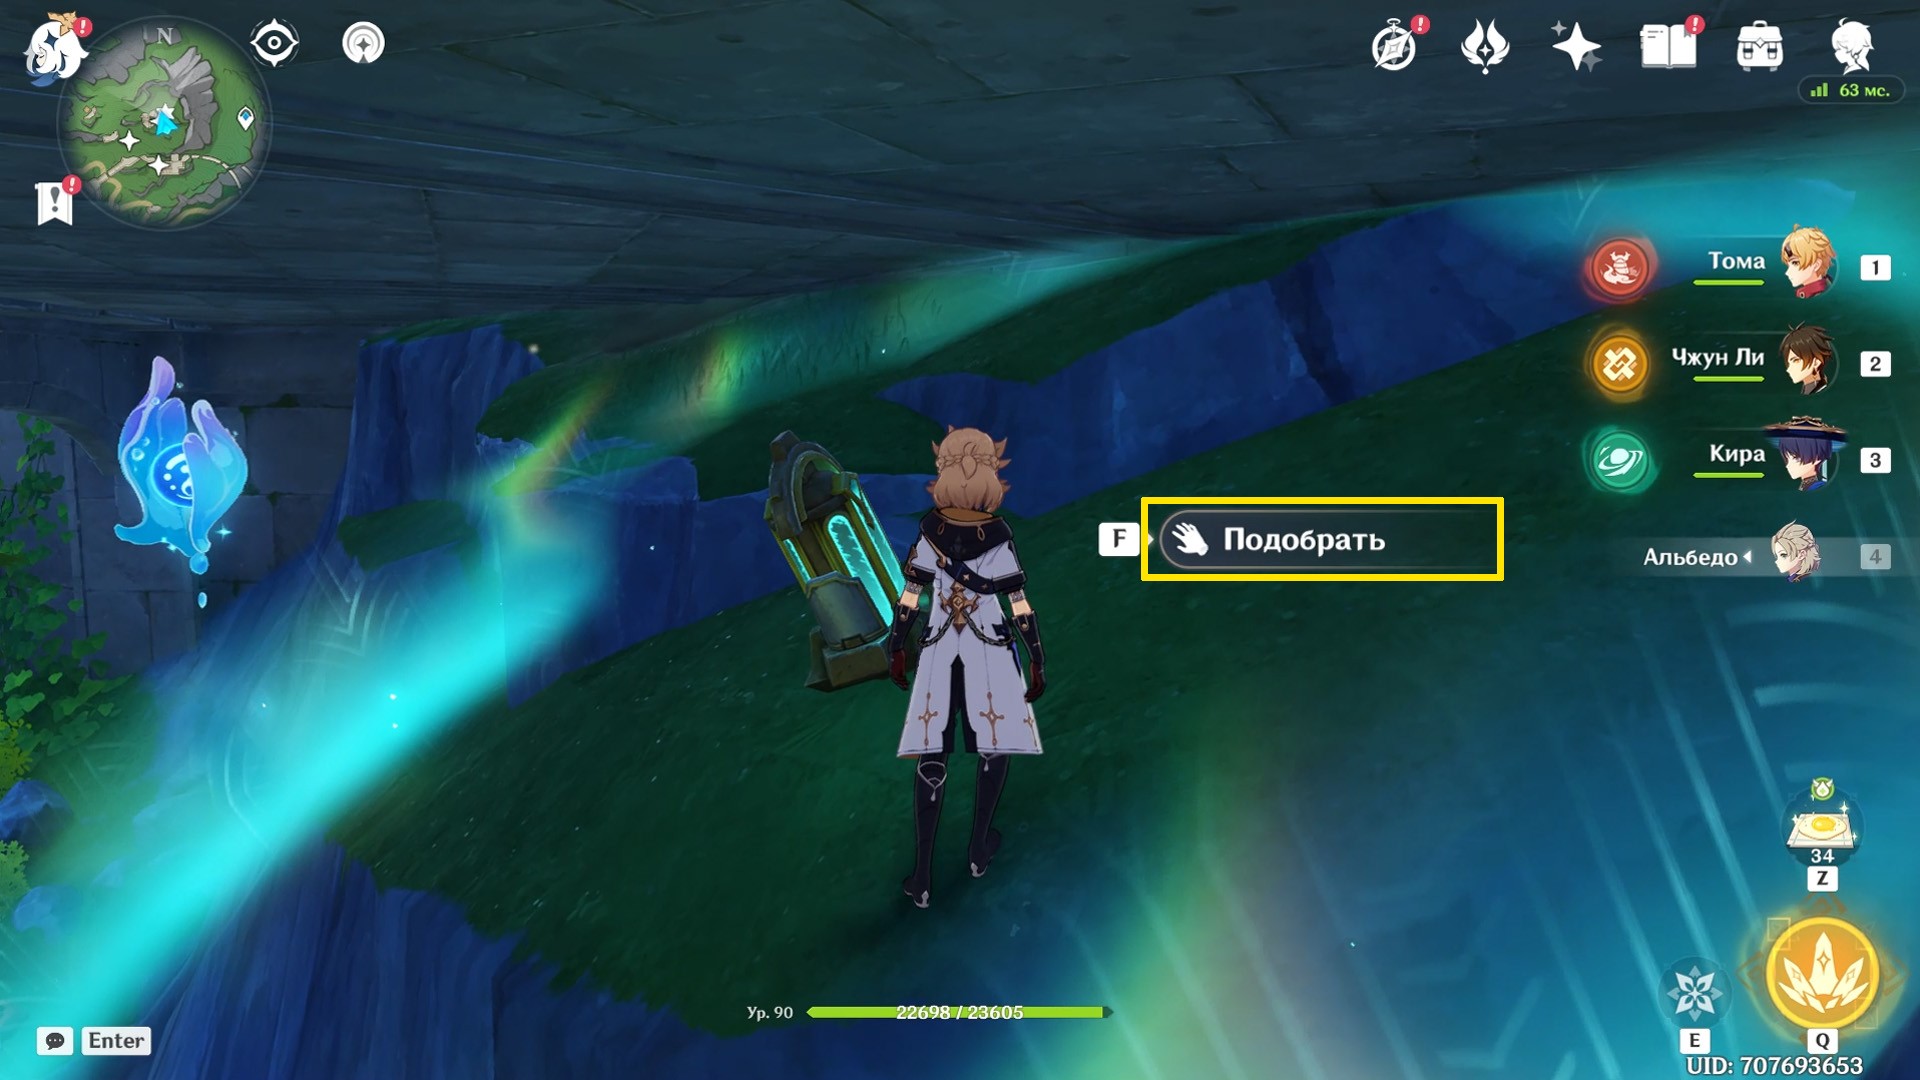
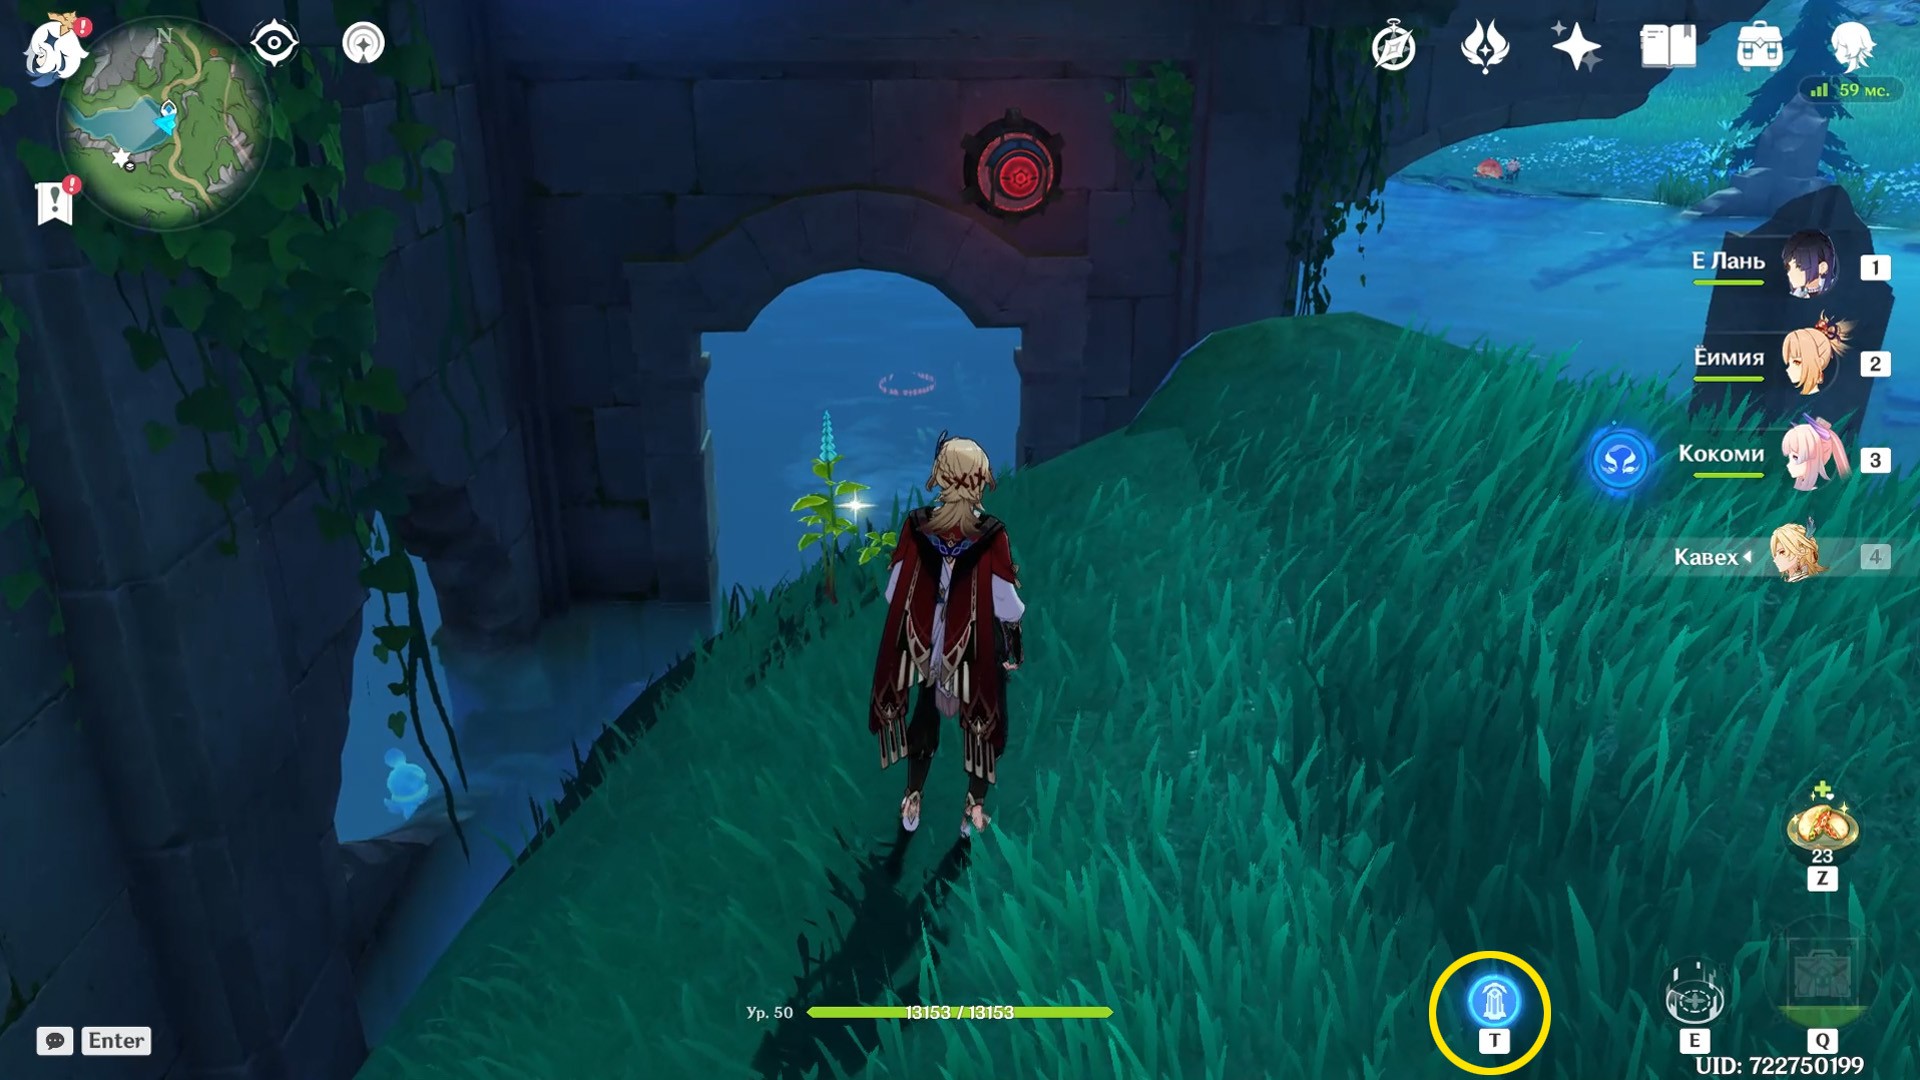
Go up to the chest and activate the energy transfer panel: in video mode, collect power from the drive under water and transfer it to the one that was placed on the grass near the mint.
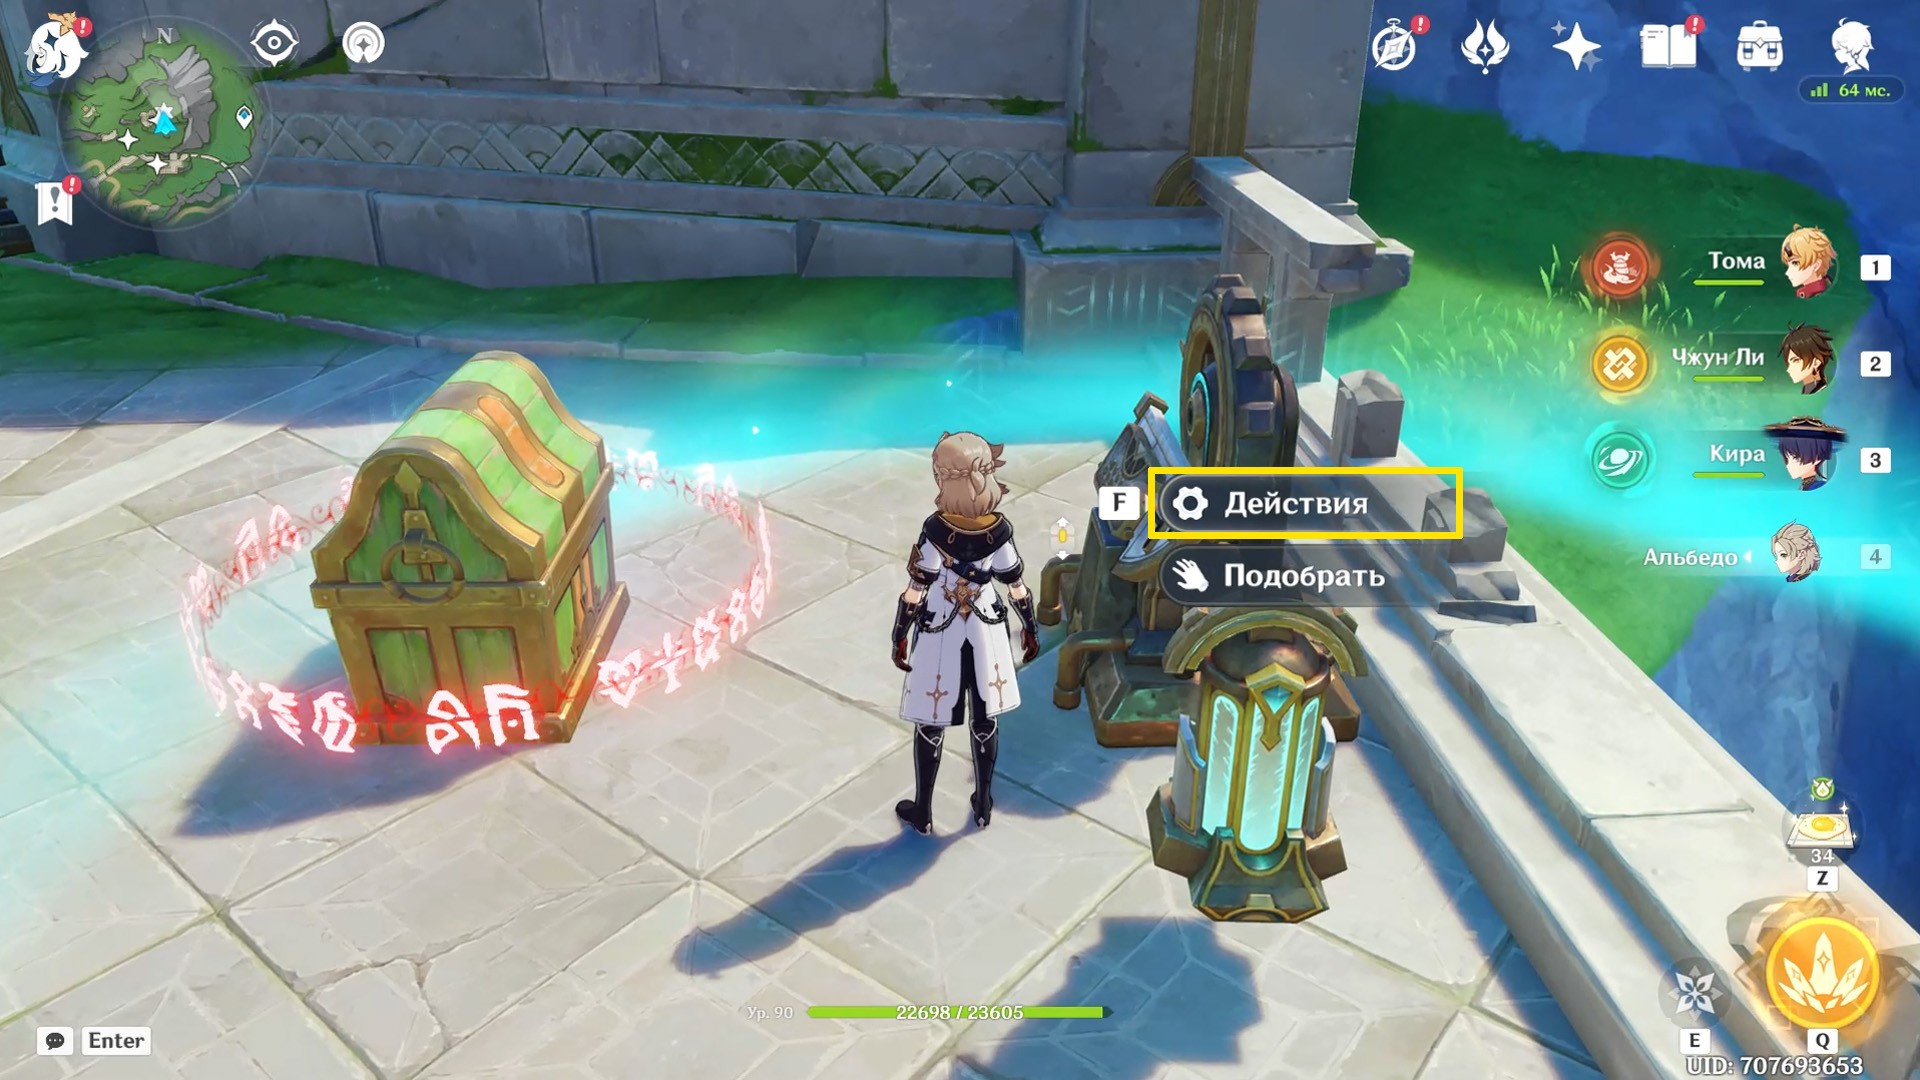
And the last step: pick up the block from the grass and take it to the inactive device to the left of the reward. Place the power unit and remove the lock from the casket.
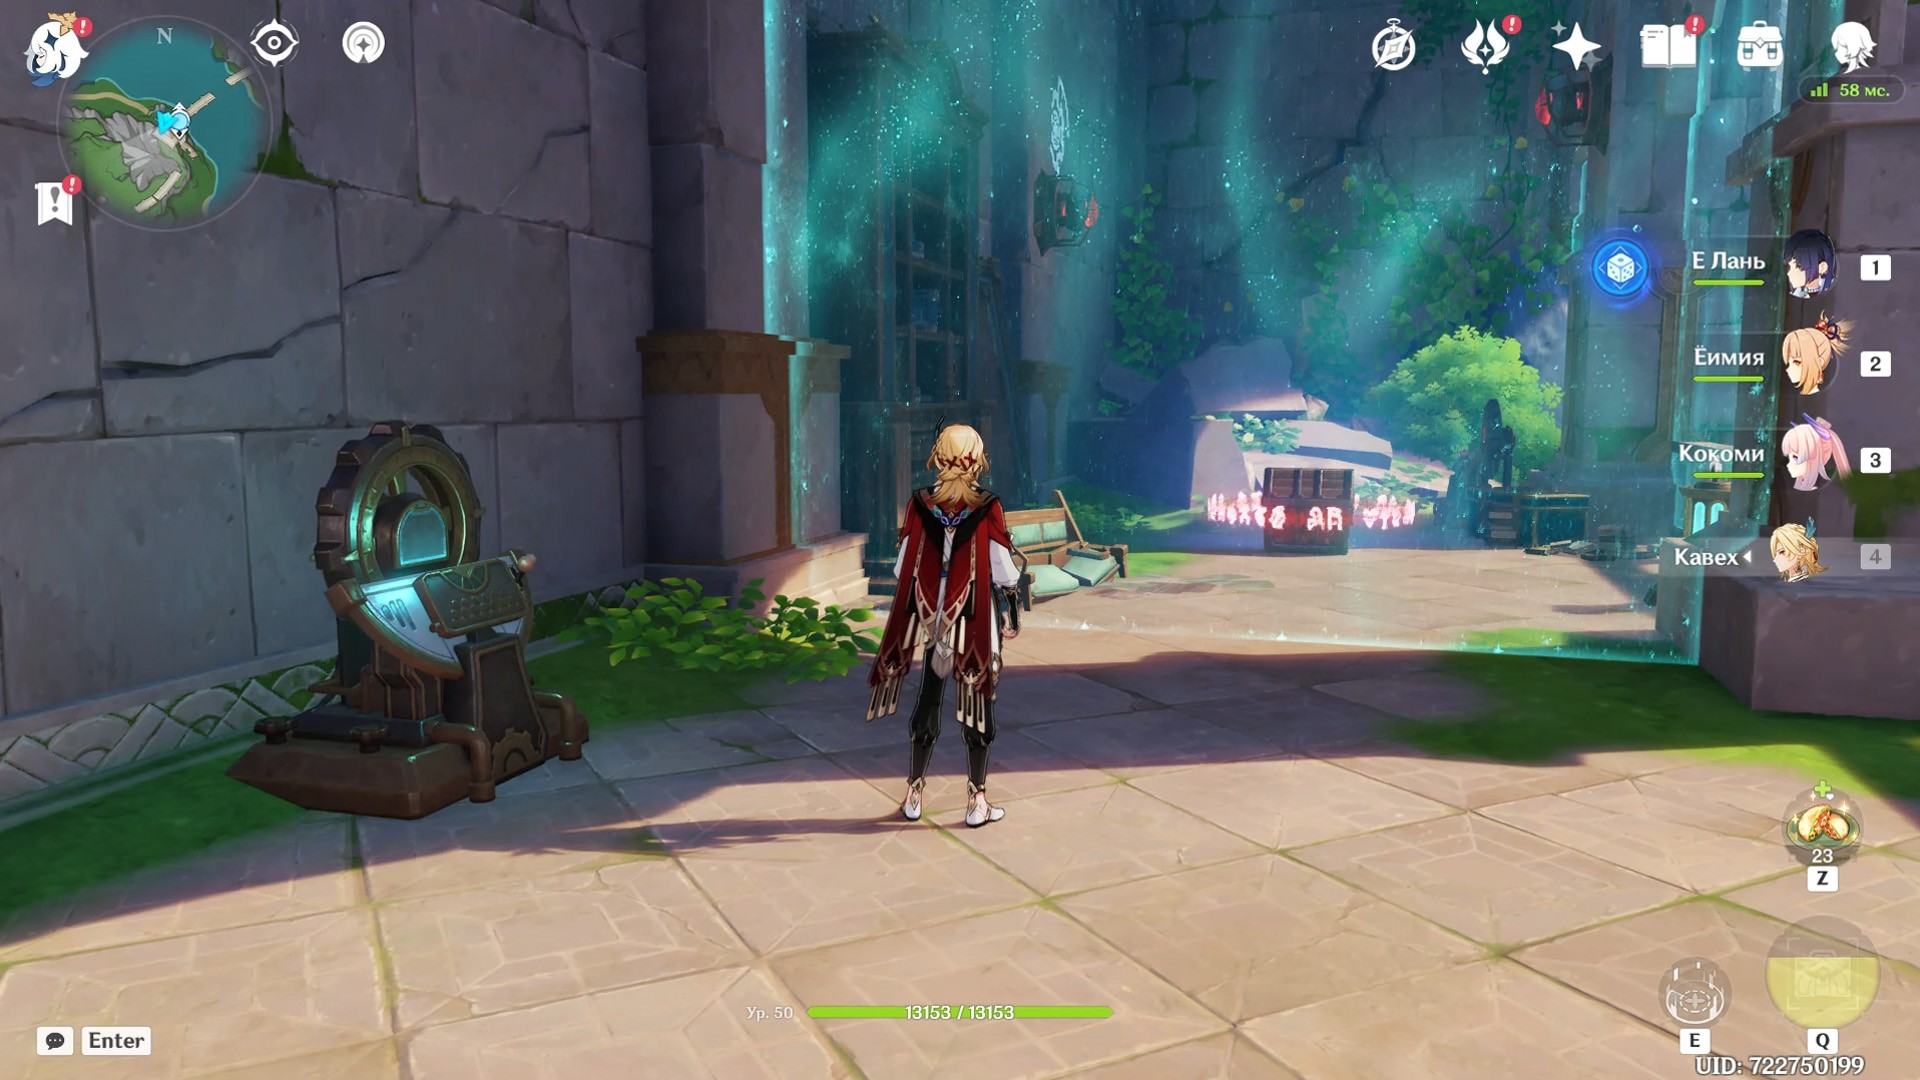
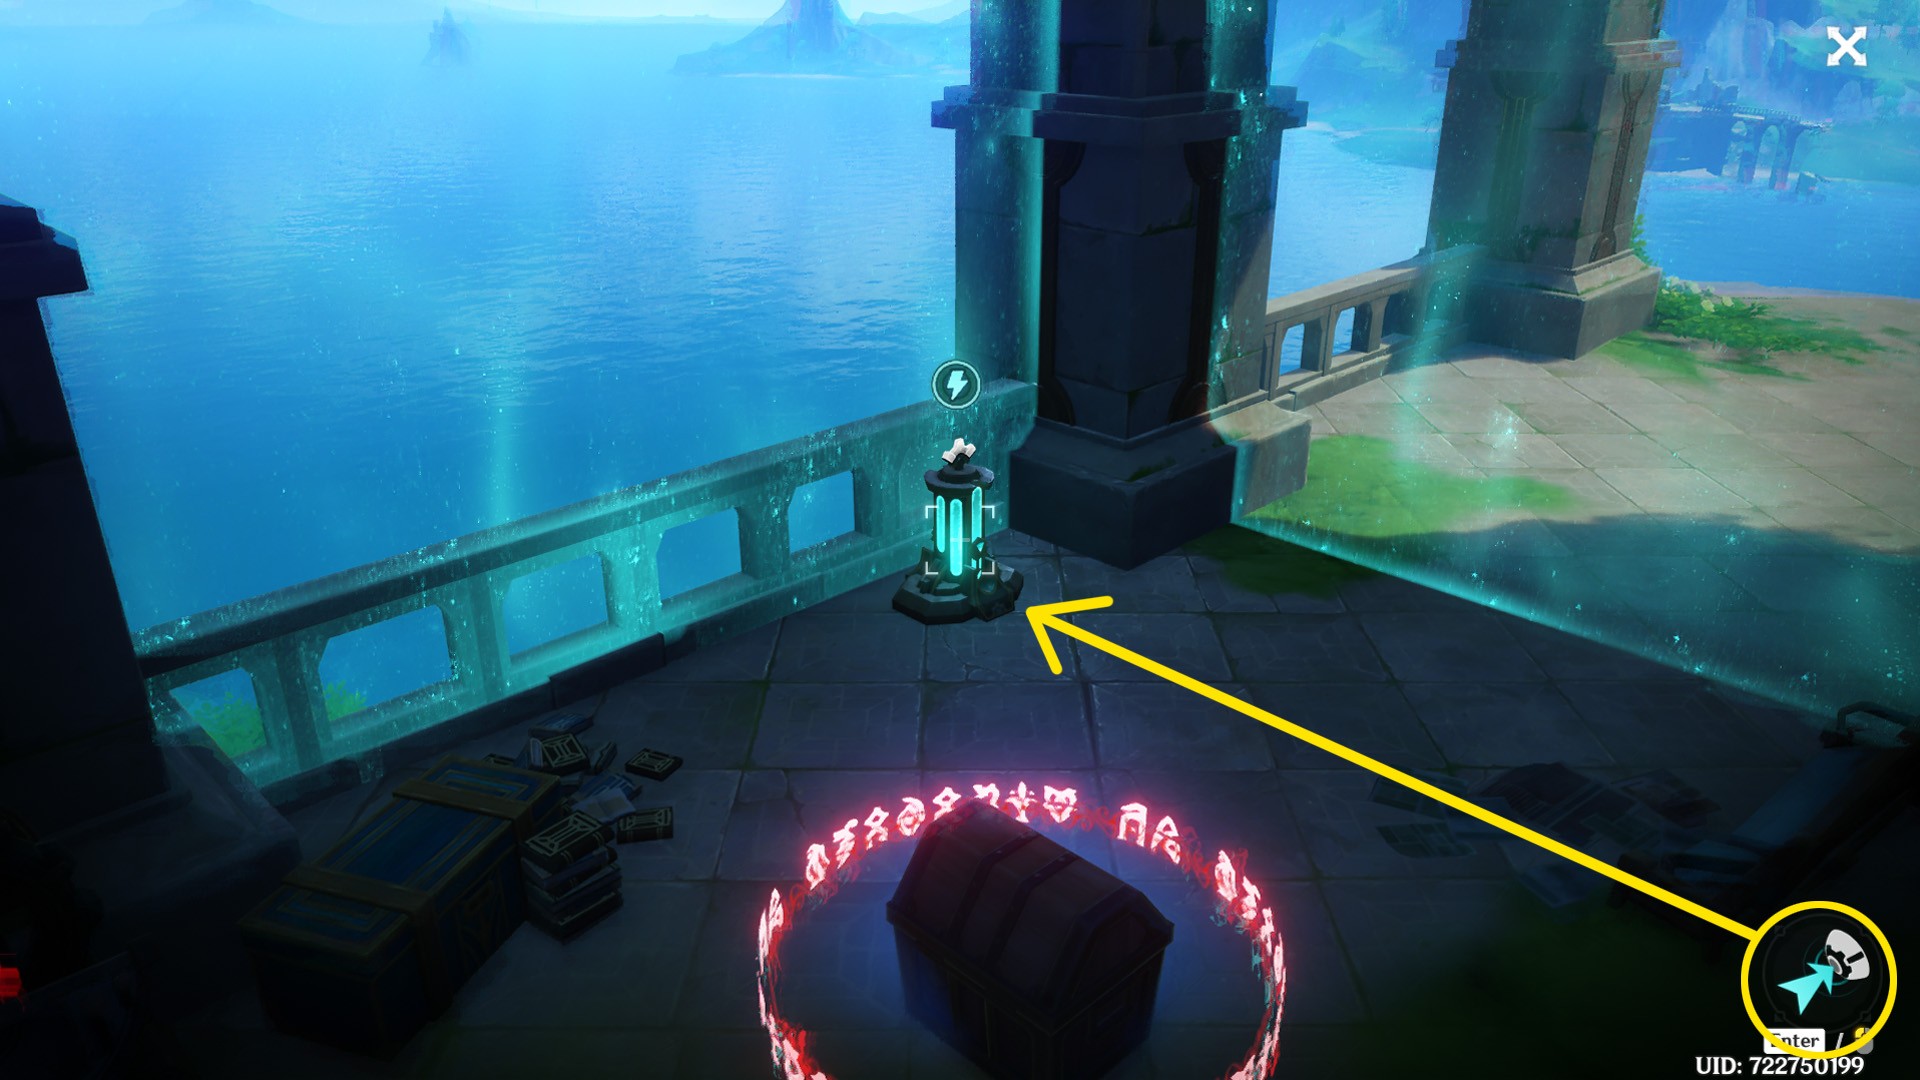
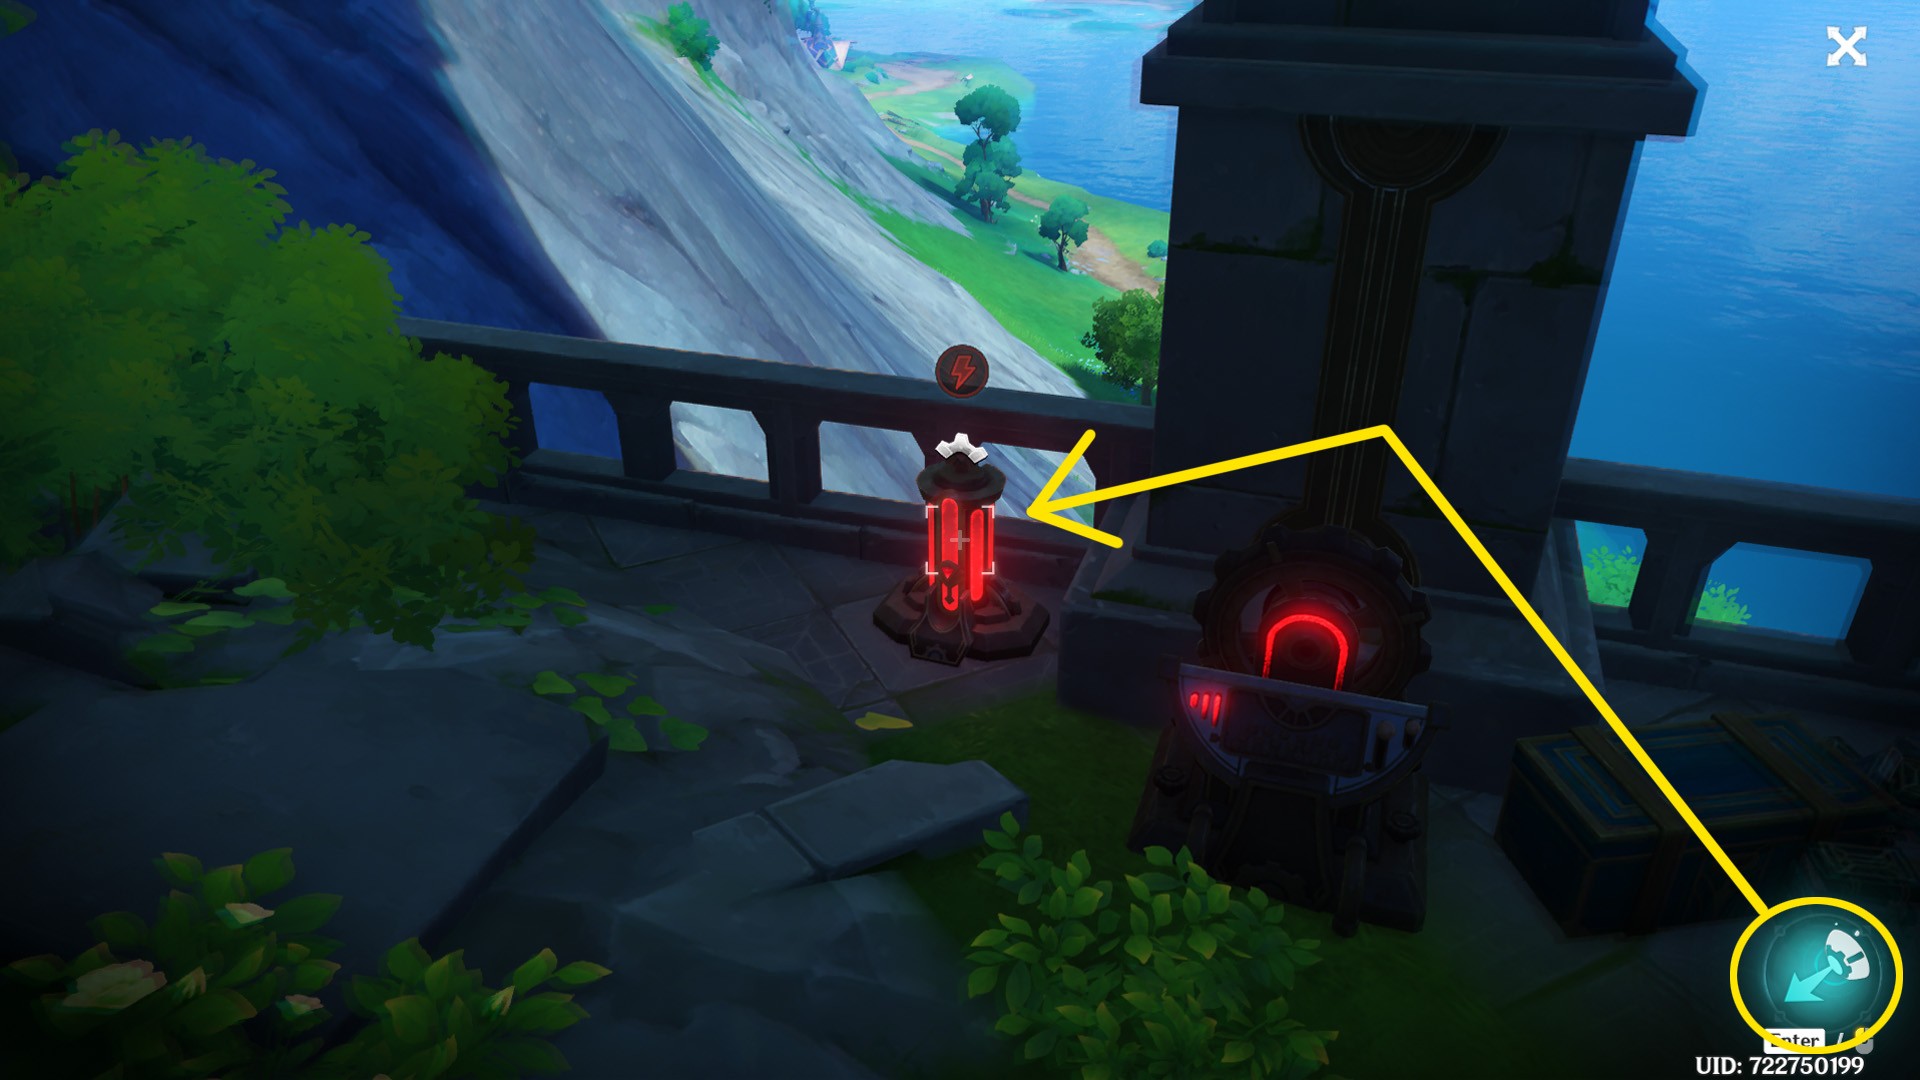
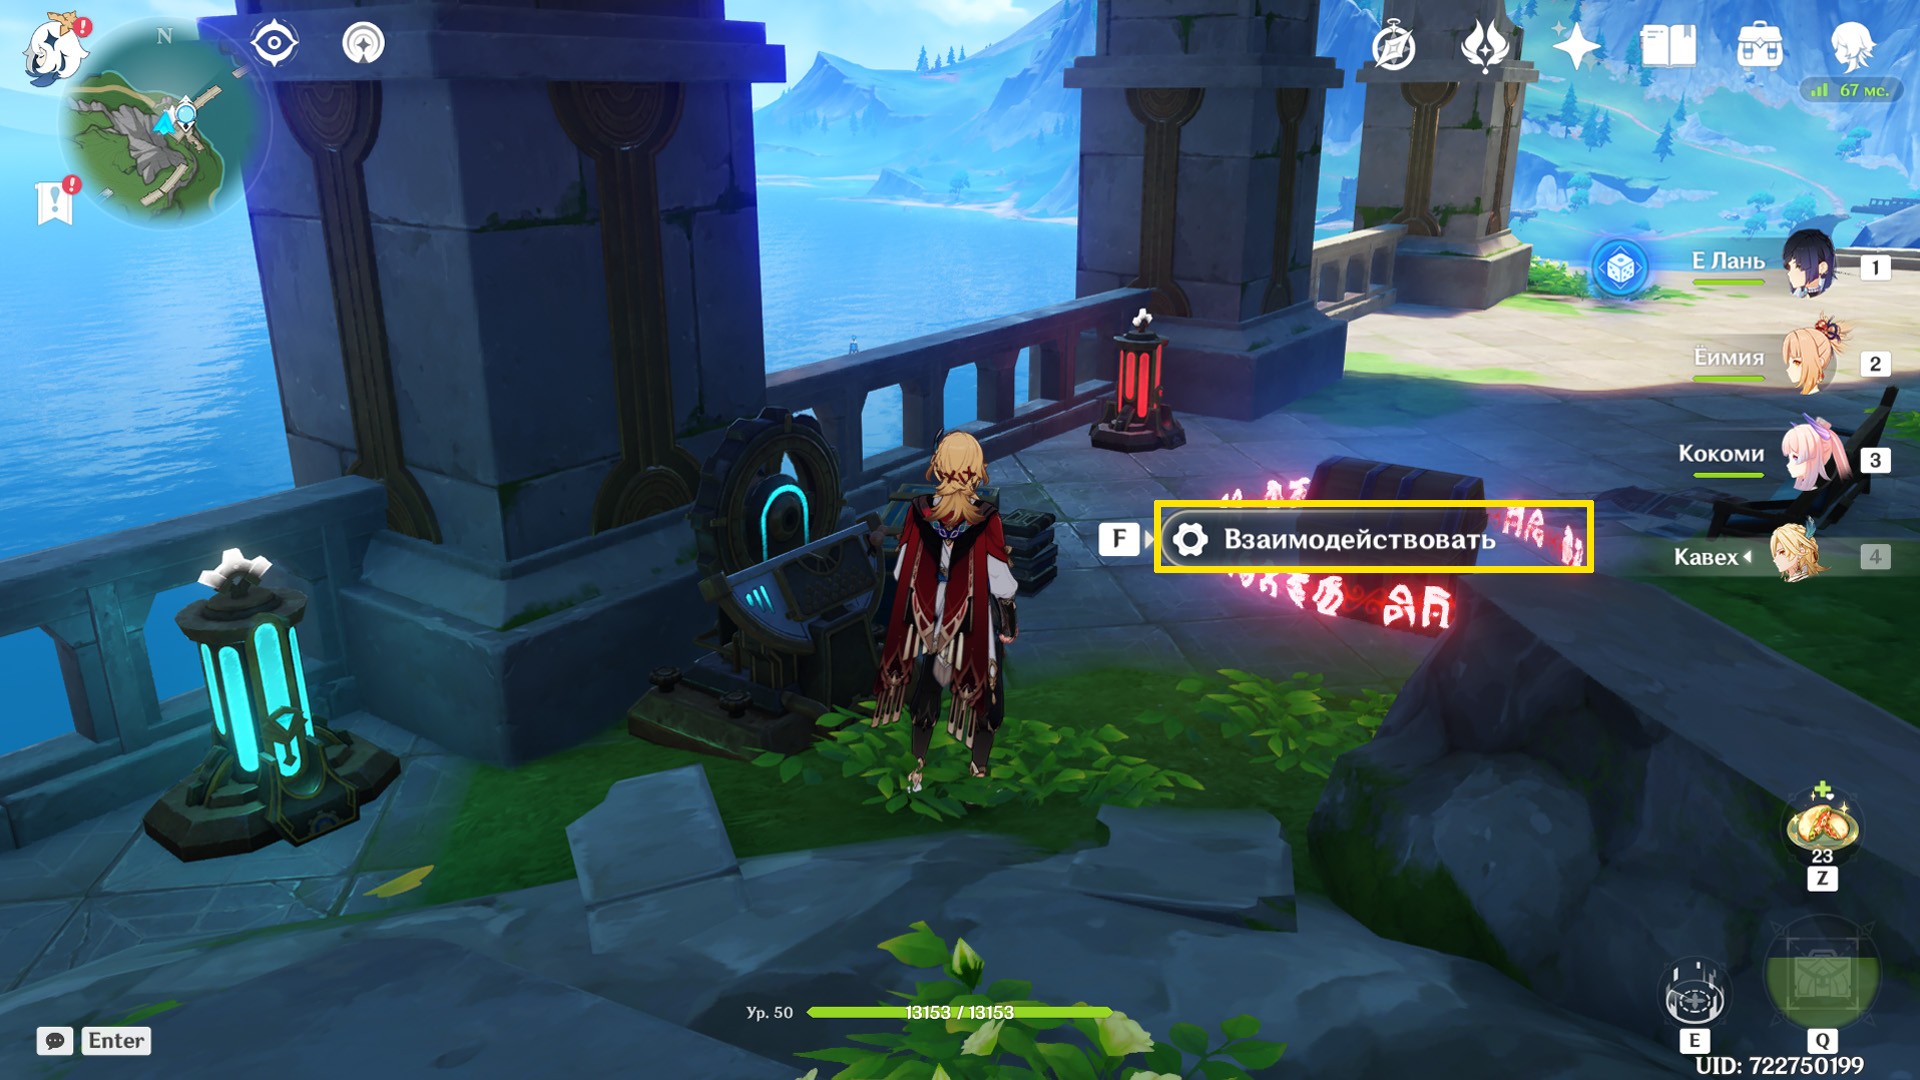
Panel 7
- Location: dungeon with optical devices.
- Reward: precious chest.
The dungeon with the 7th energy transfer panel is associated with the world quest " Treacherous Light of the Depths » – read the guide, in which we described in detail the path to the location.
You can read about how to solve this puzzle and get the precious casket in separate guide.
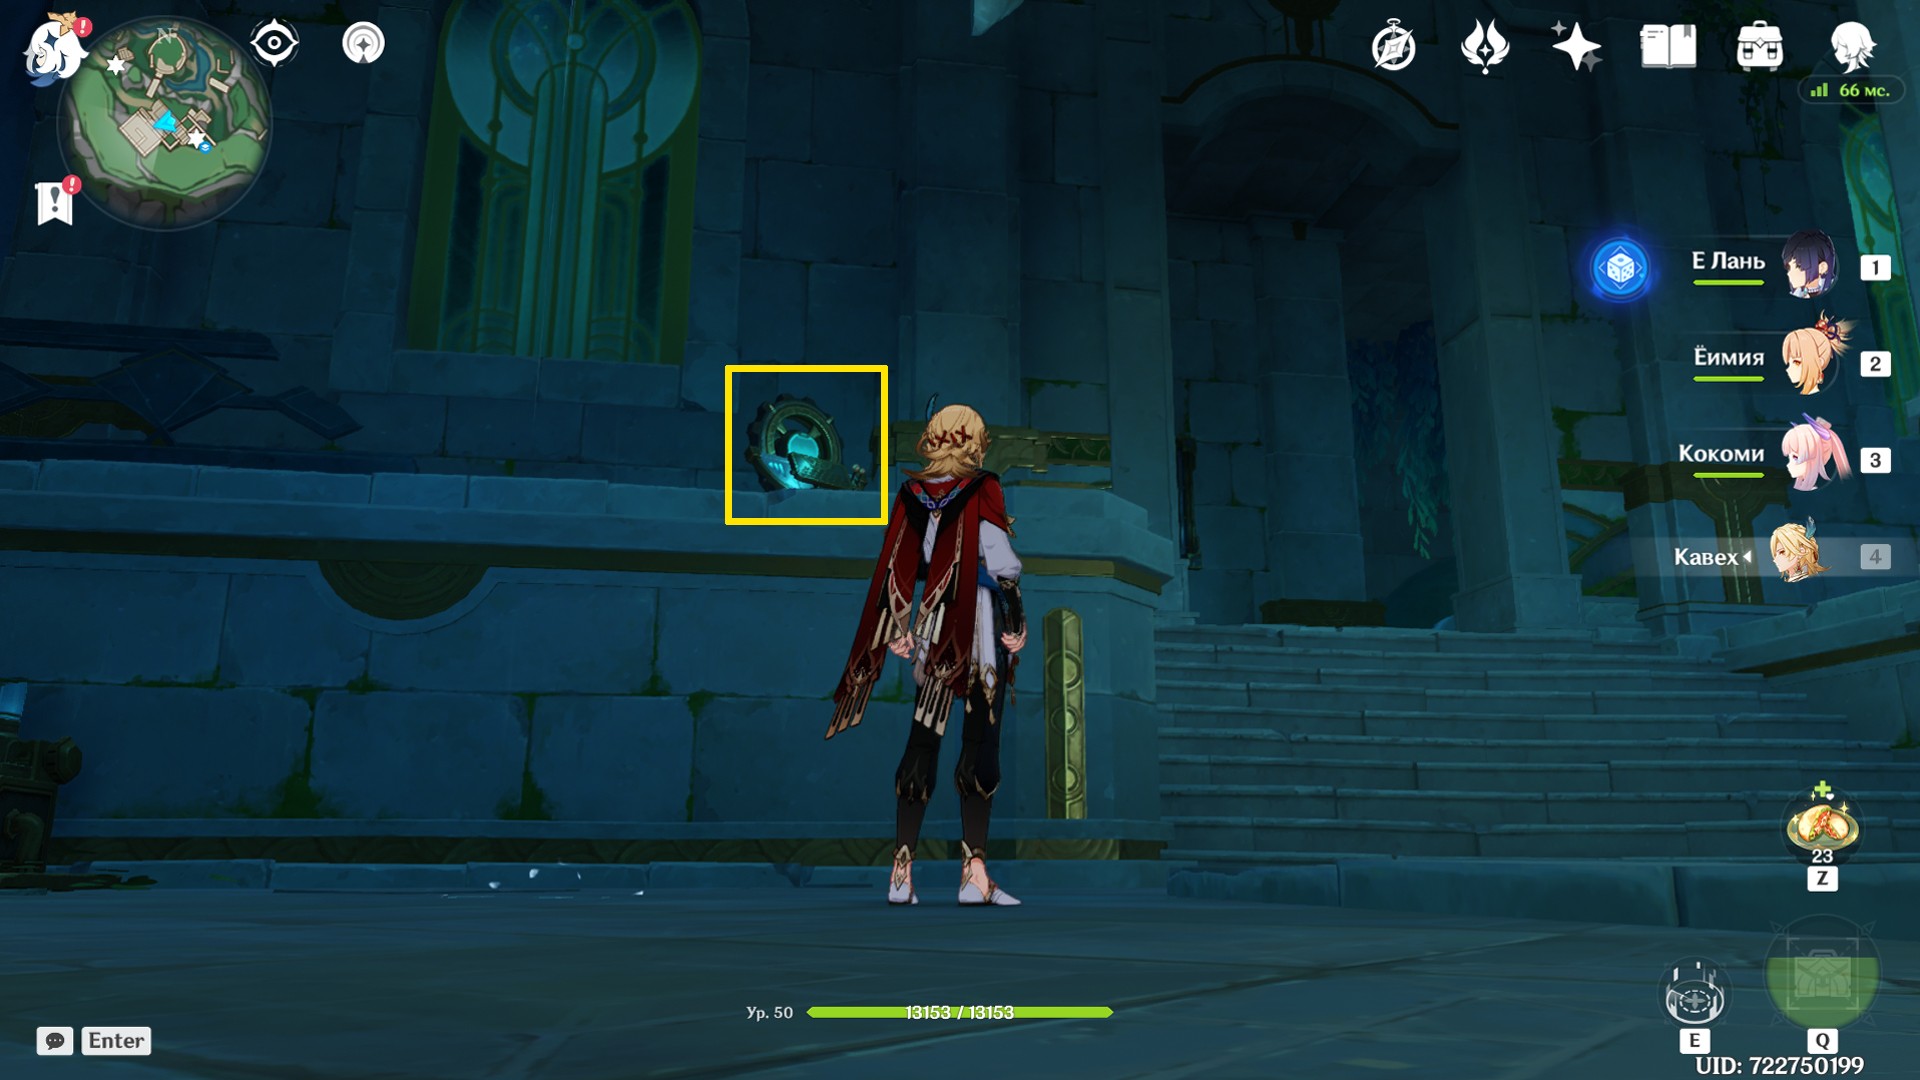
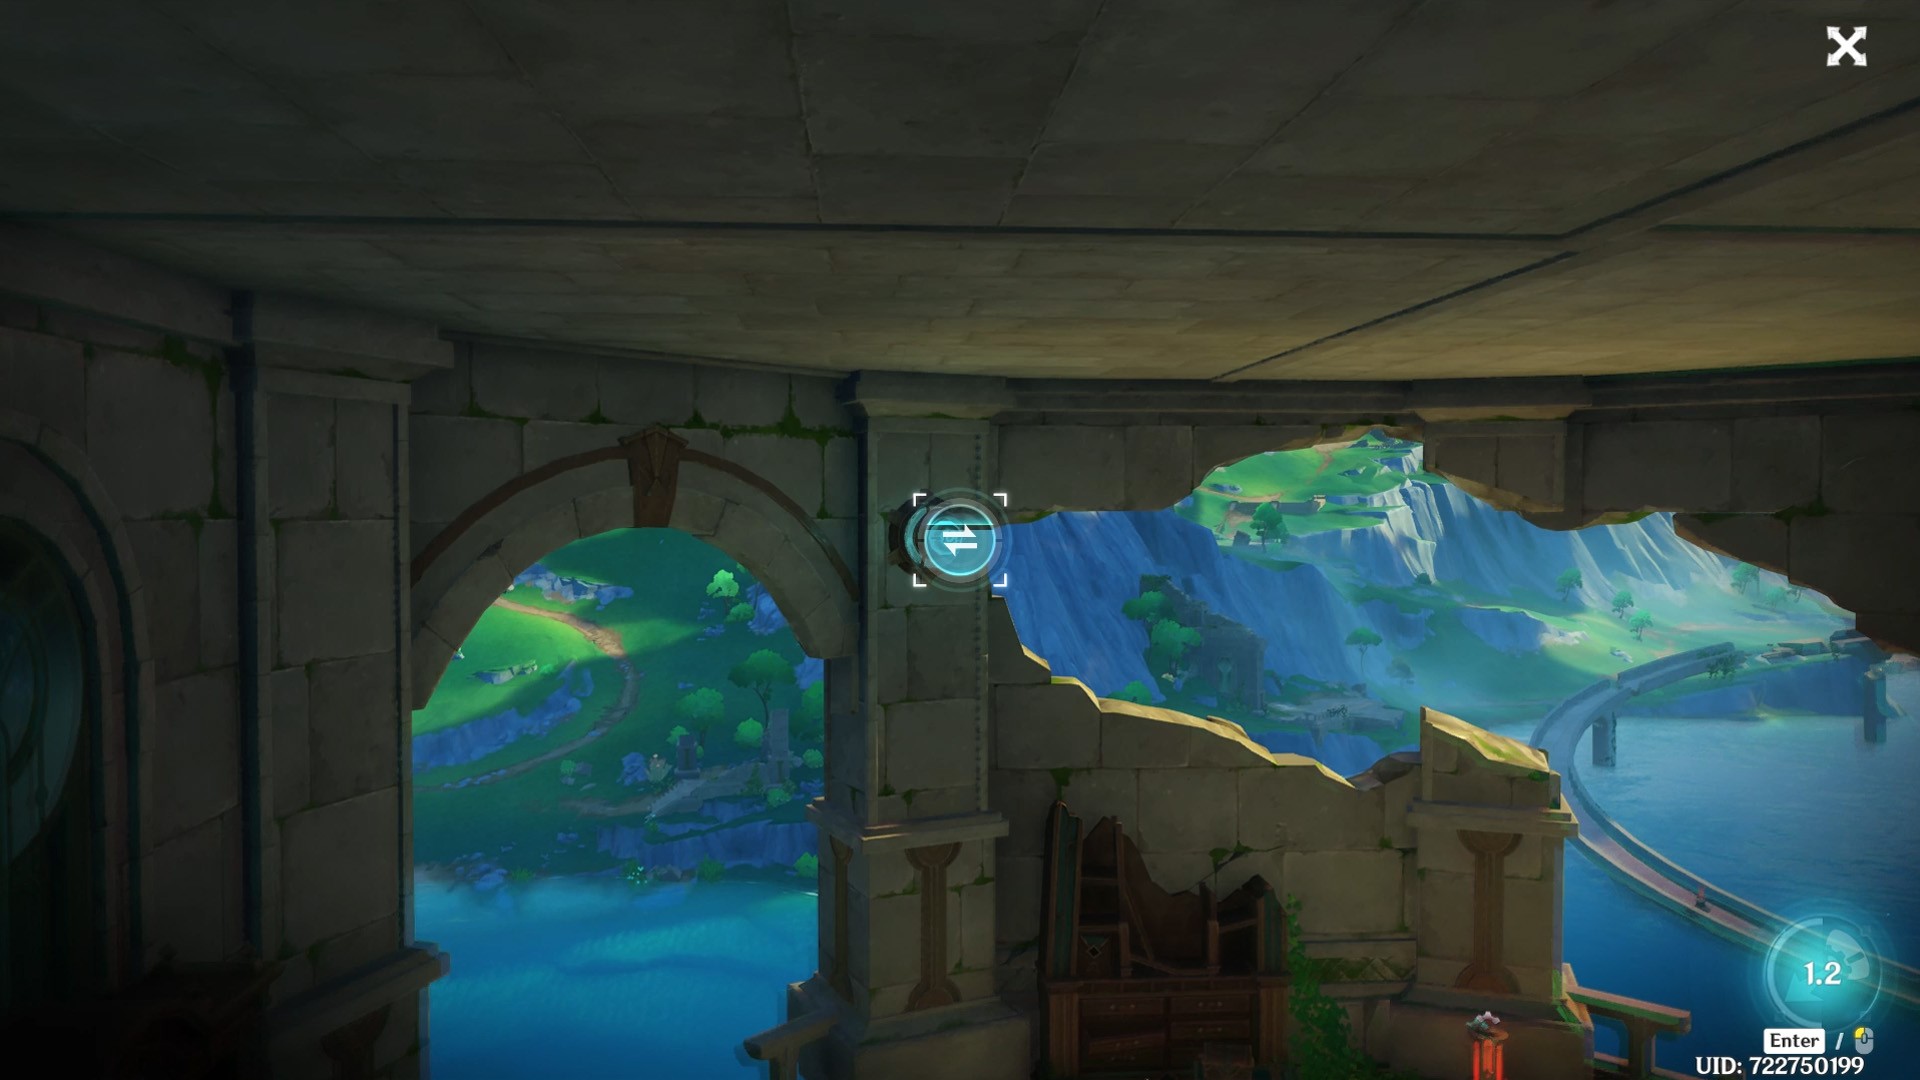
Panel 8
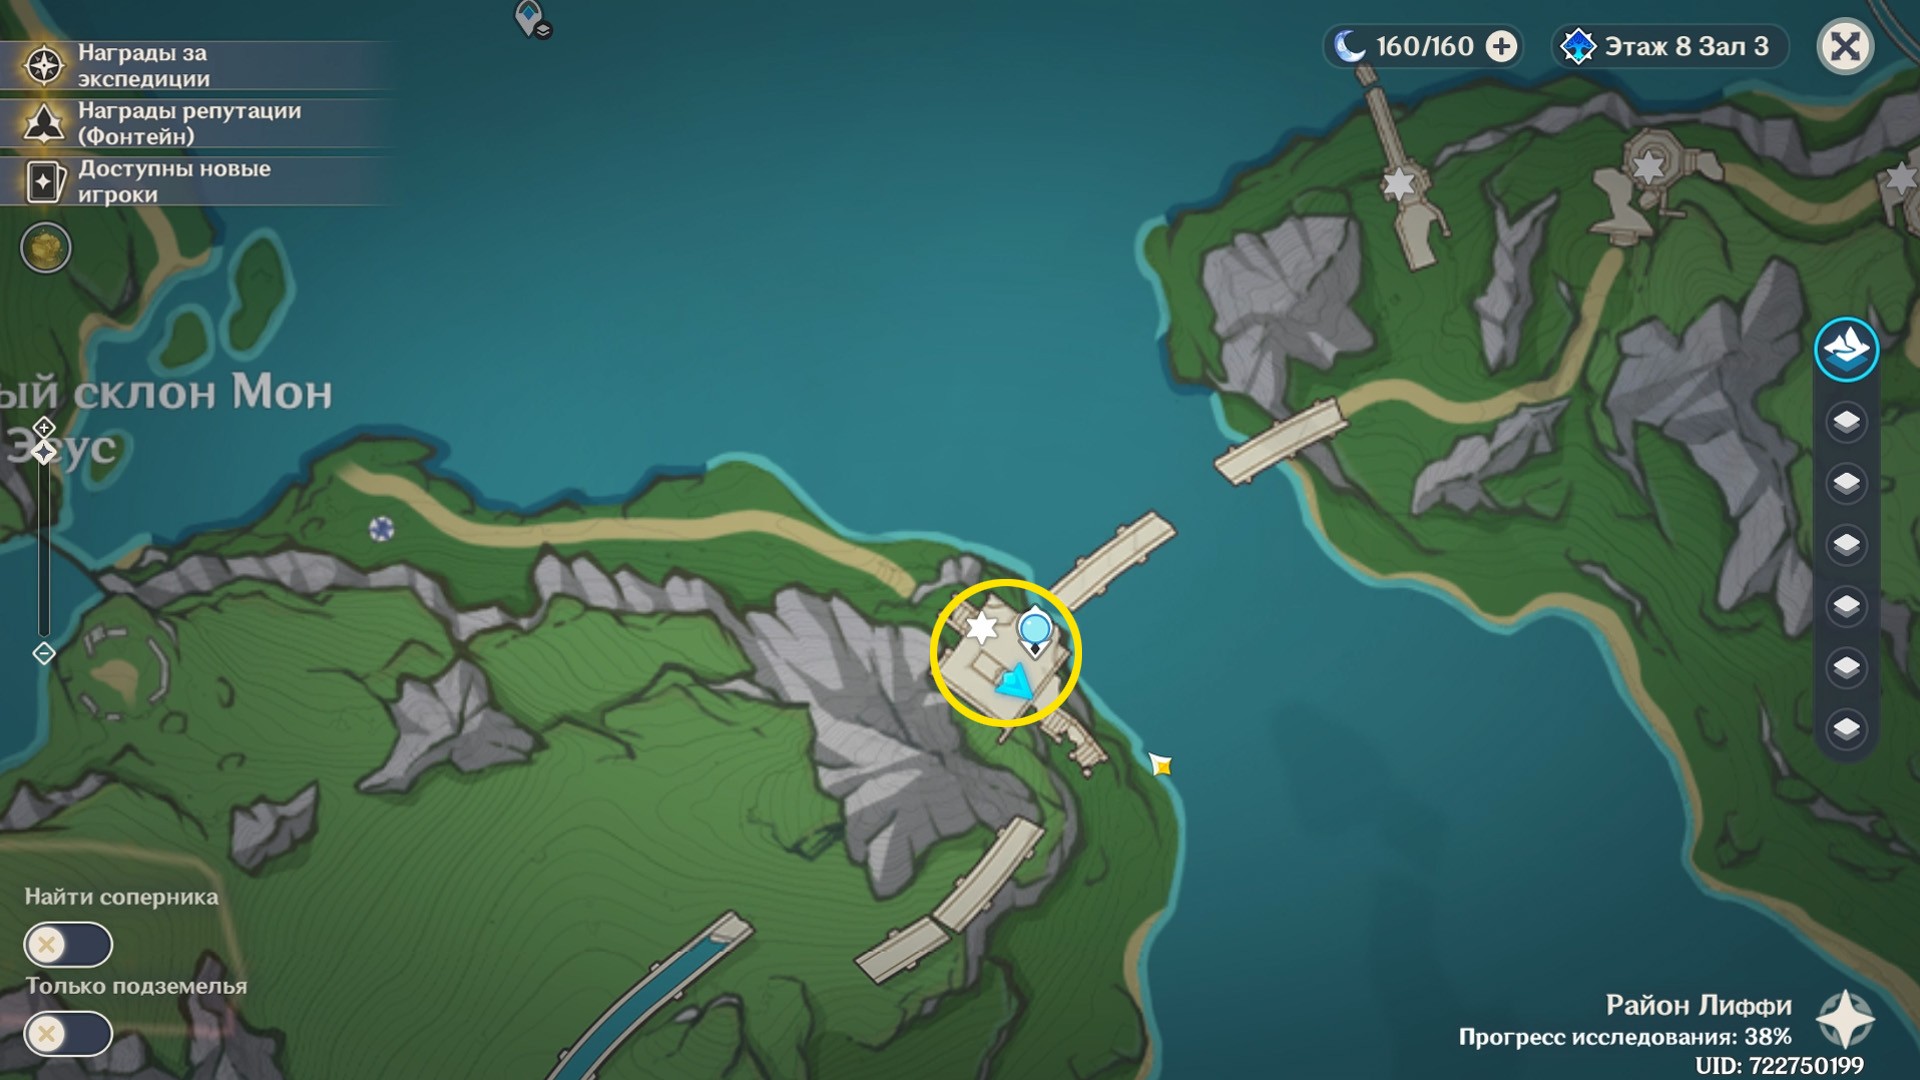
- Location: Hill east of boss " Experimental Field Generator "
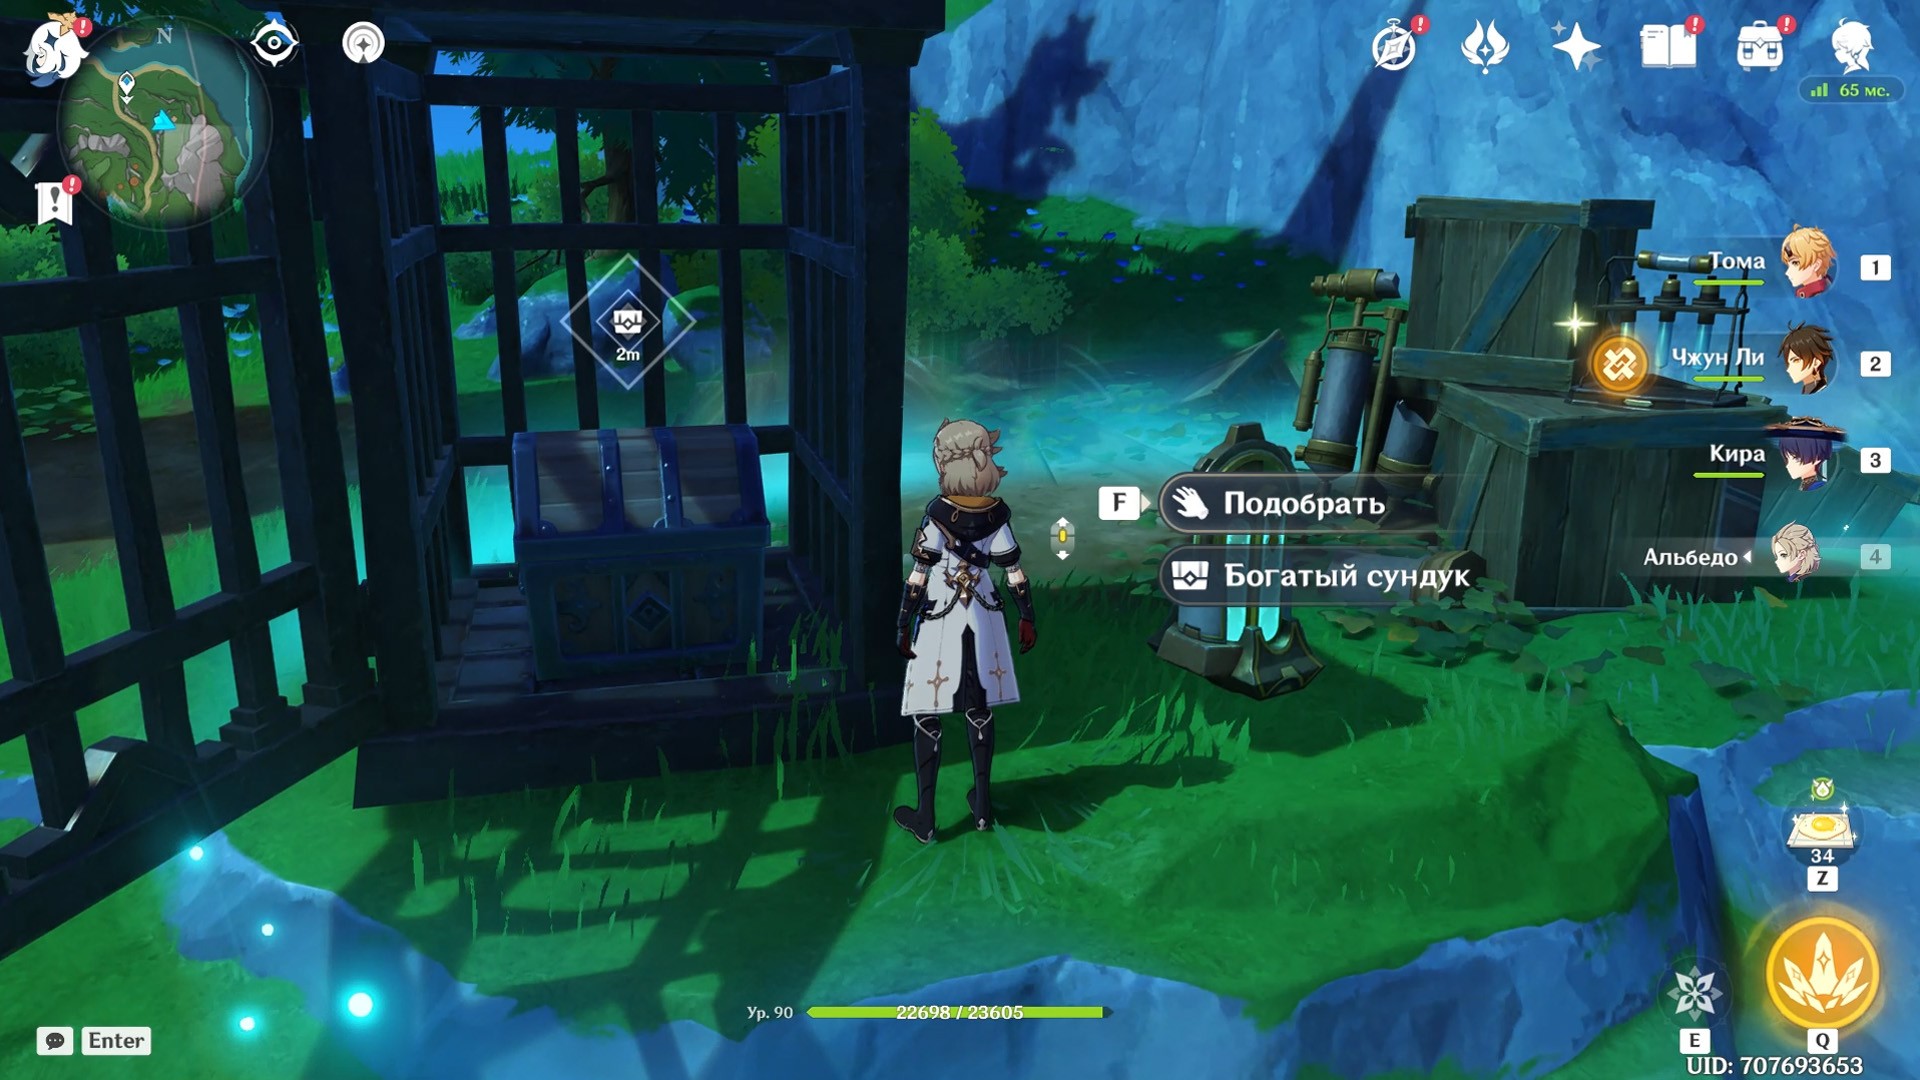
- Reward: rich chest.
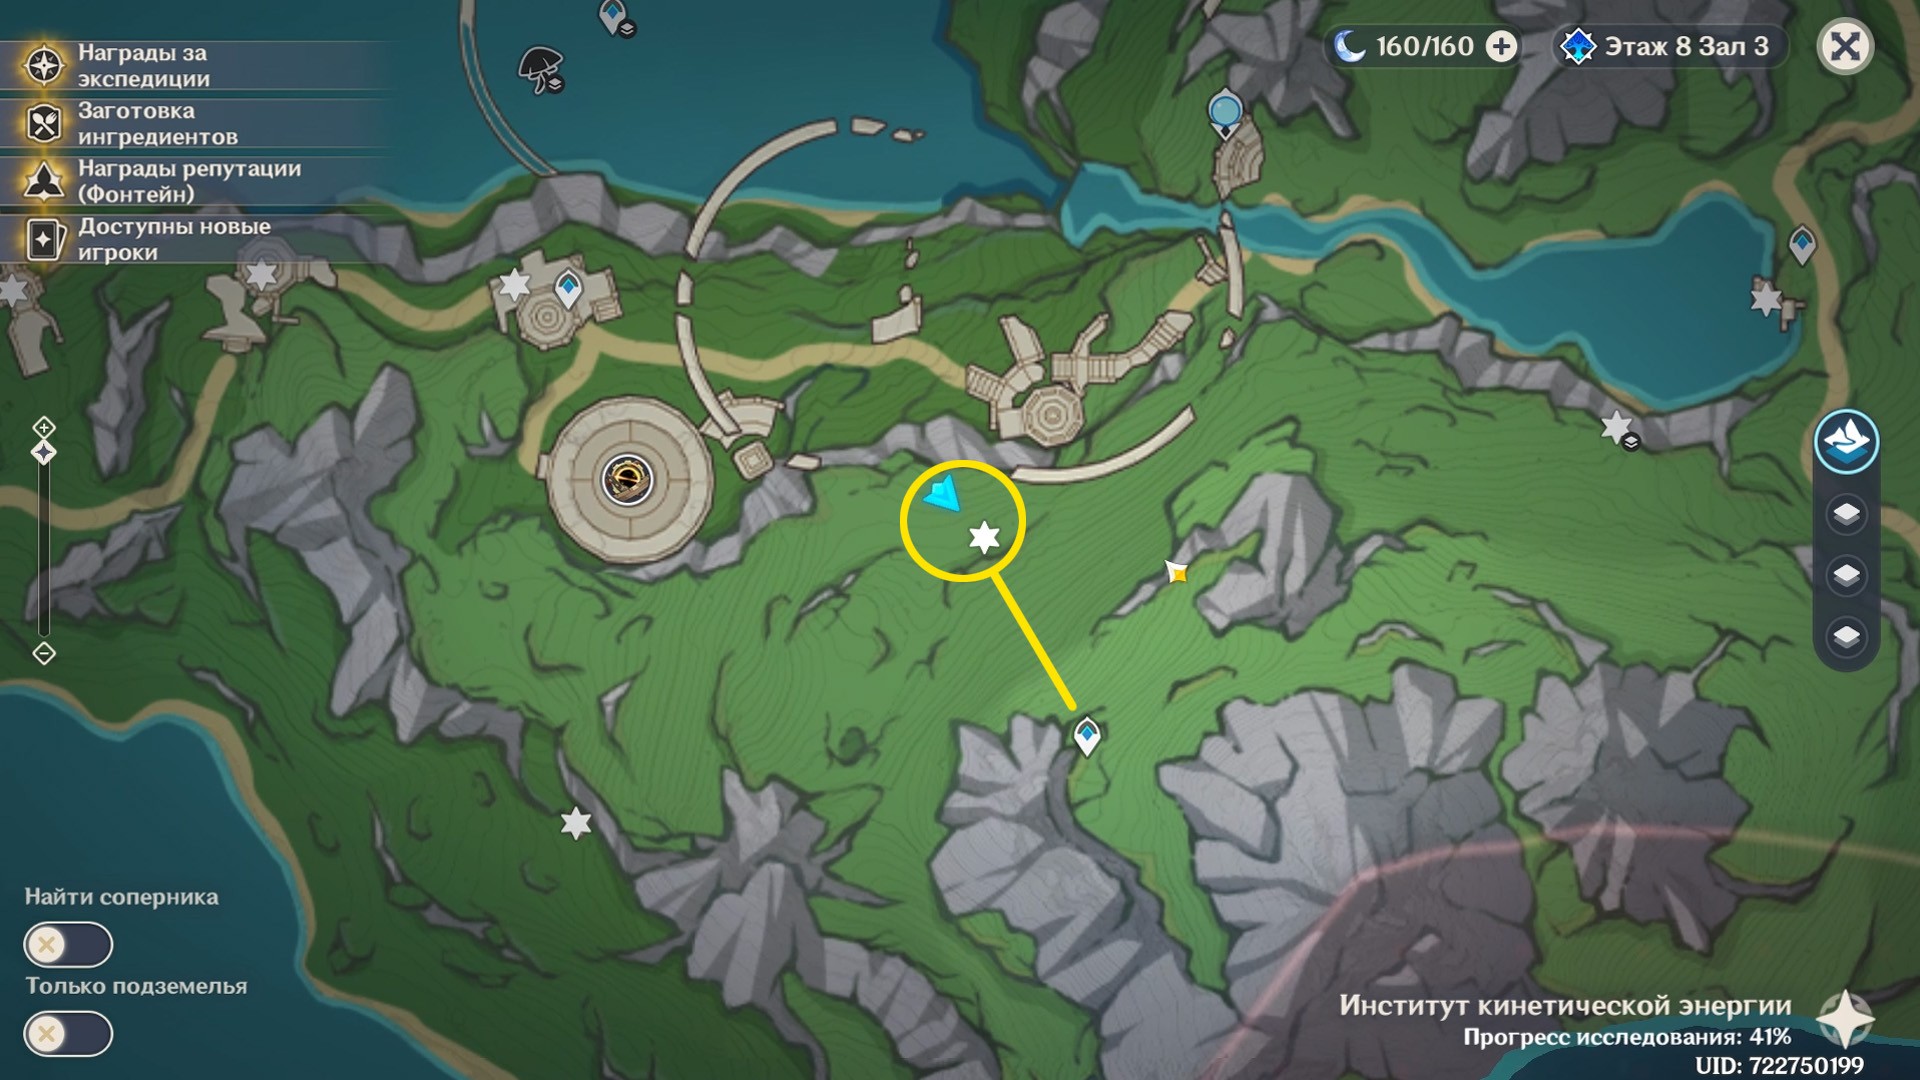
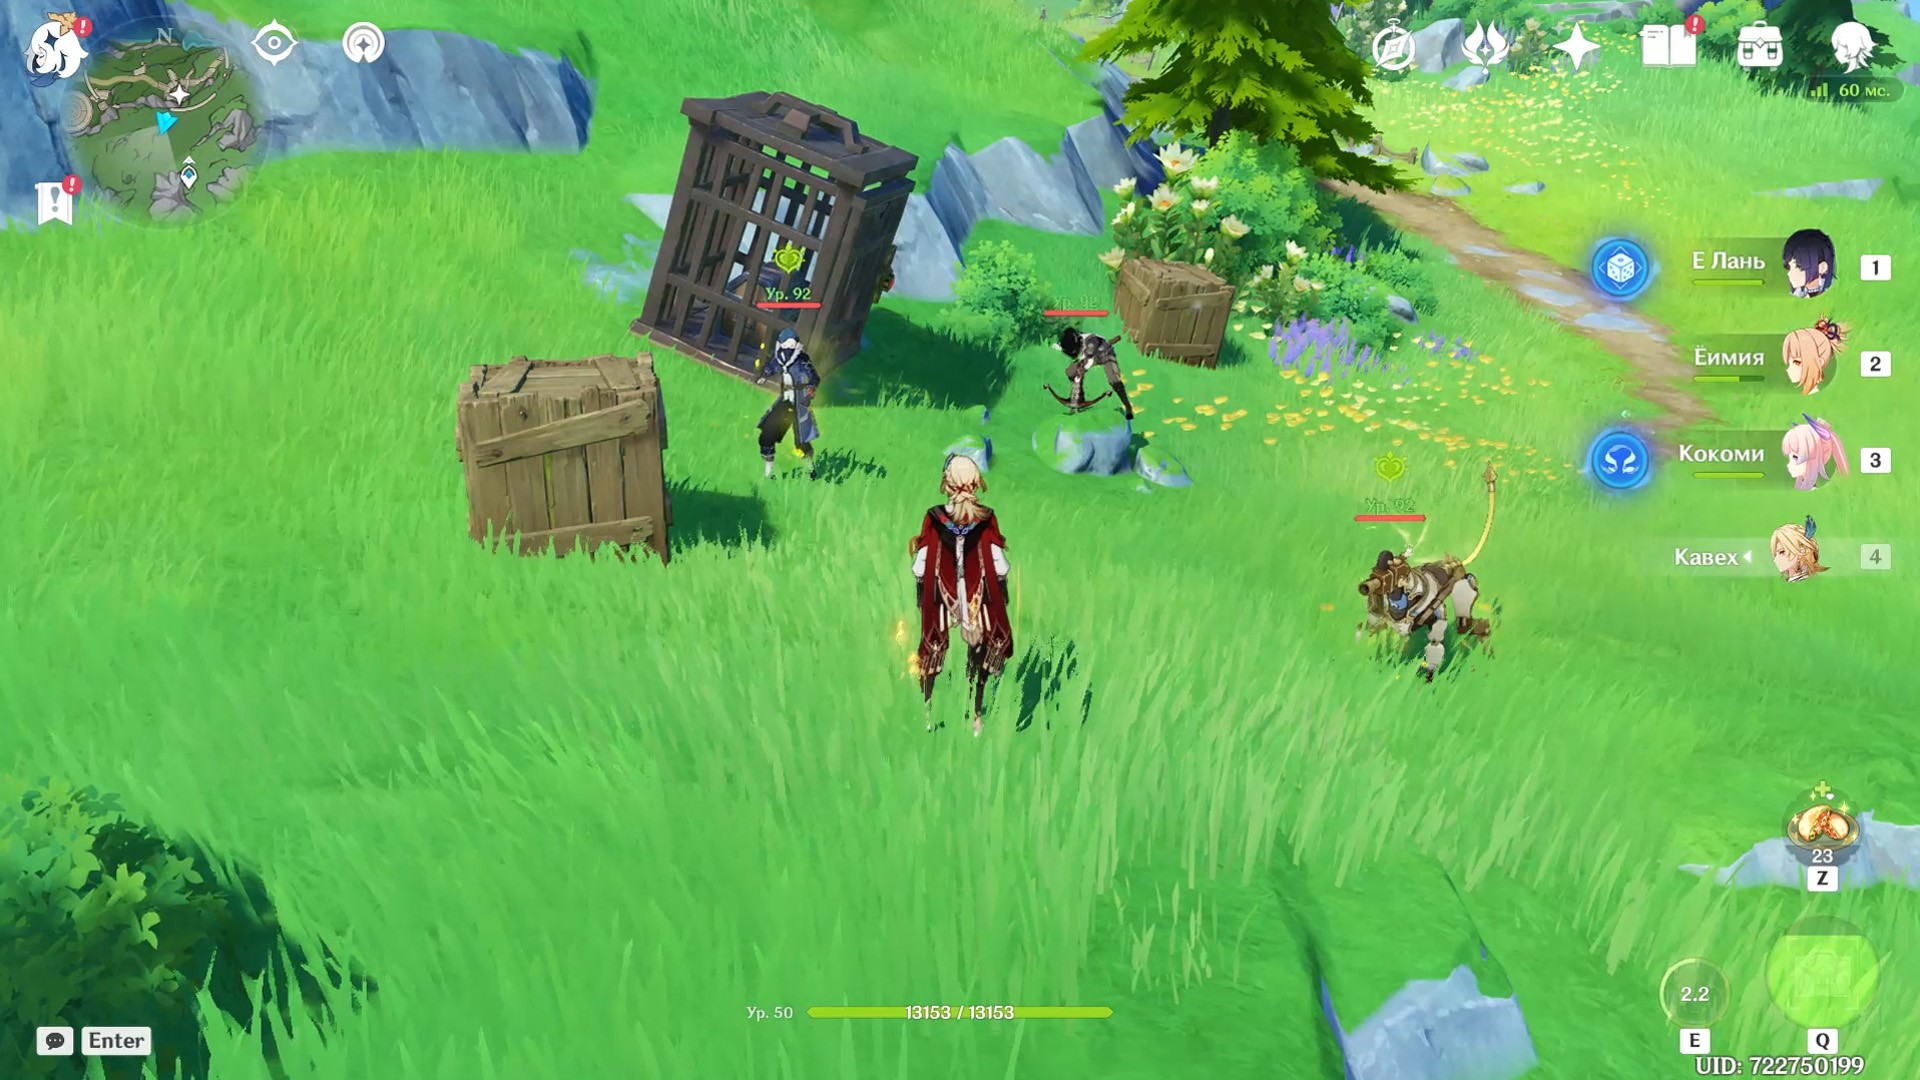
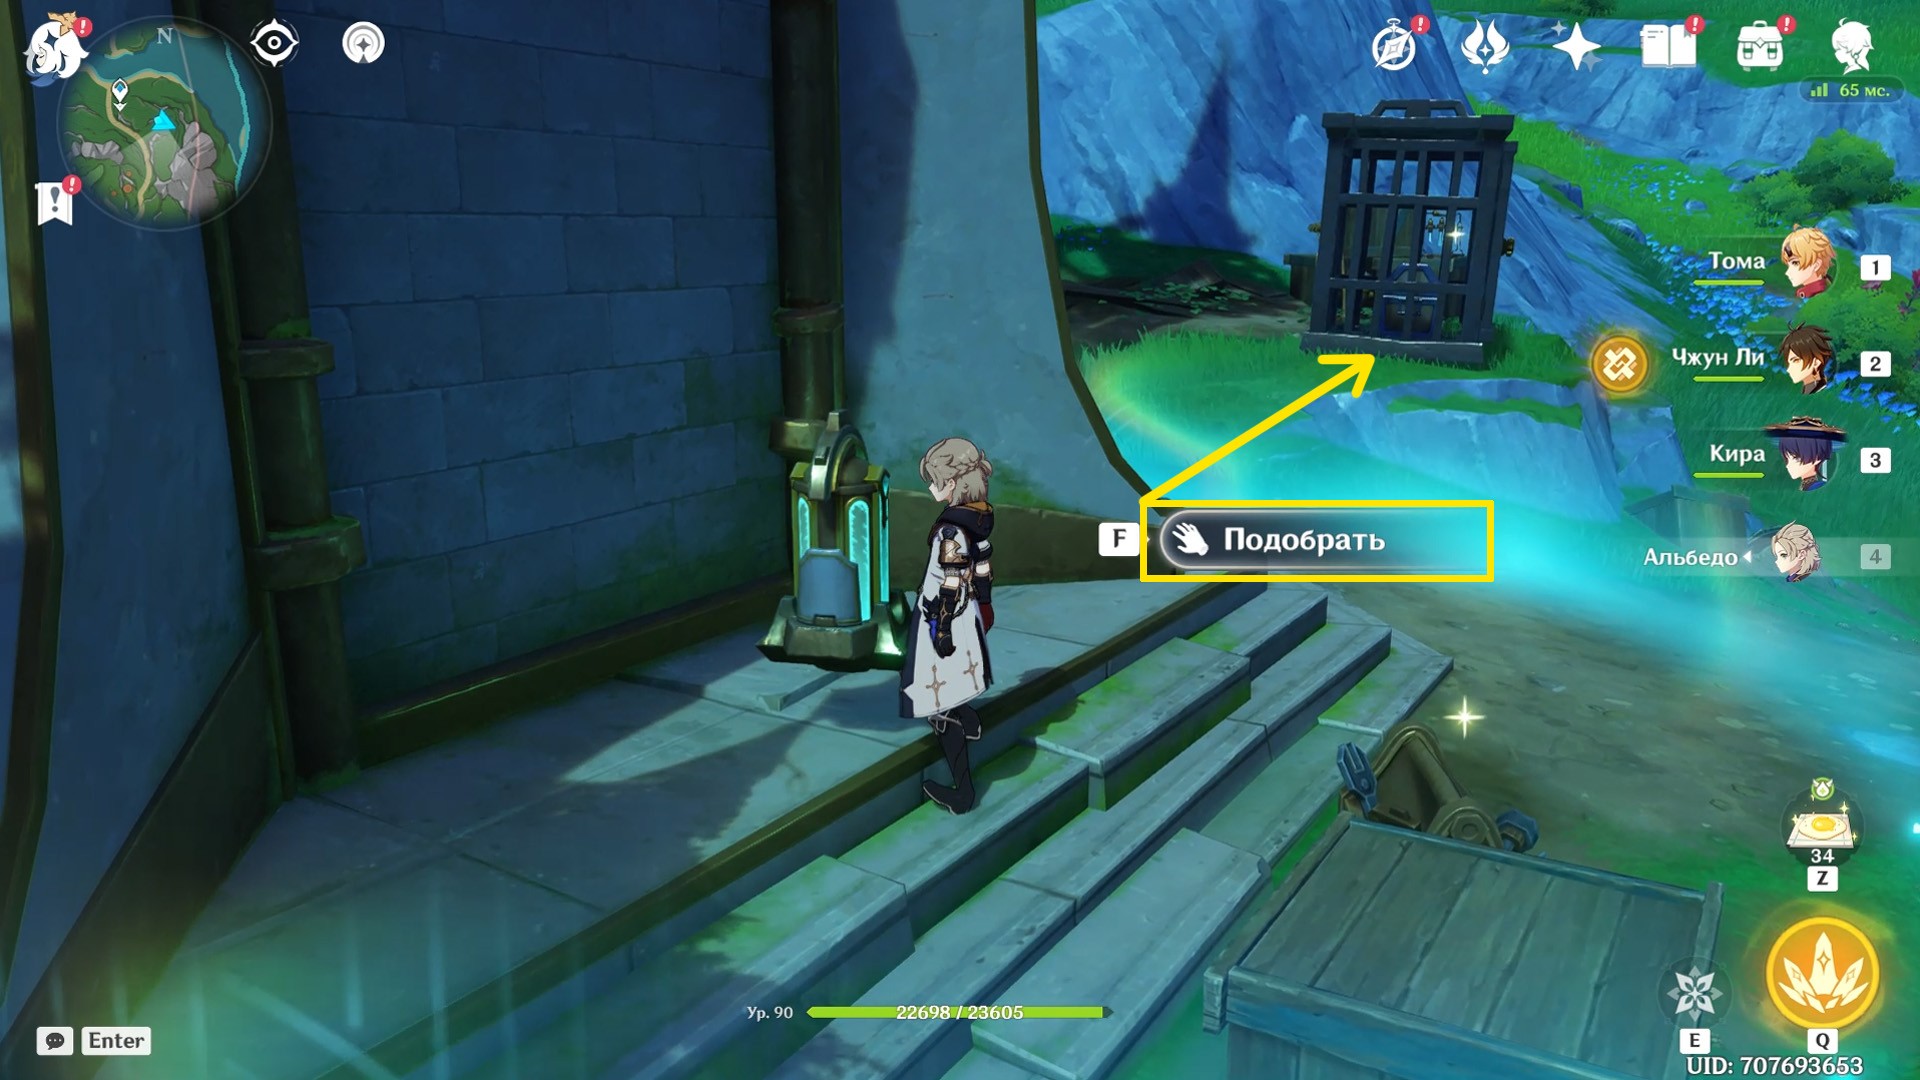
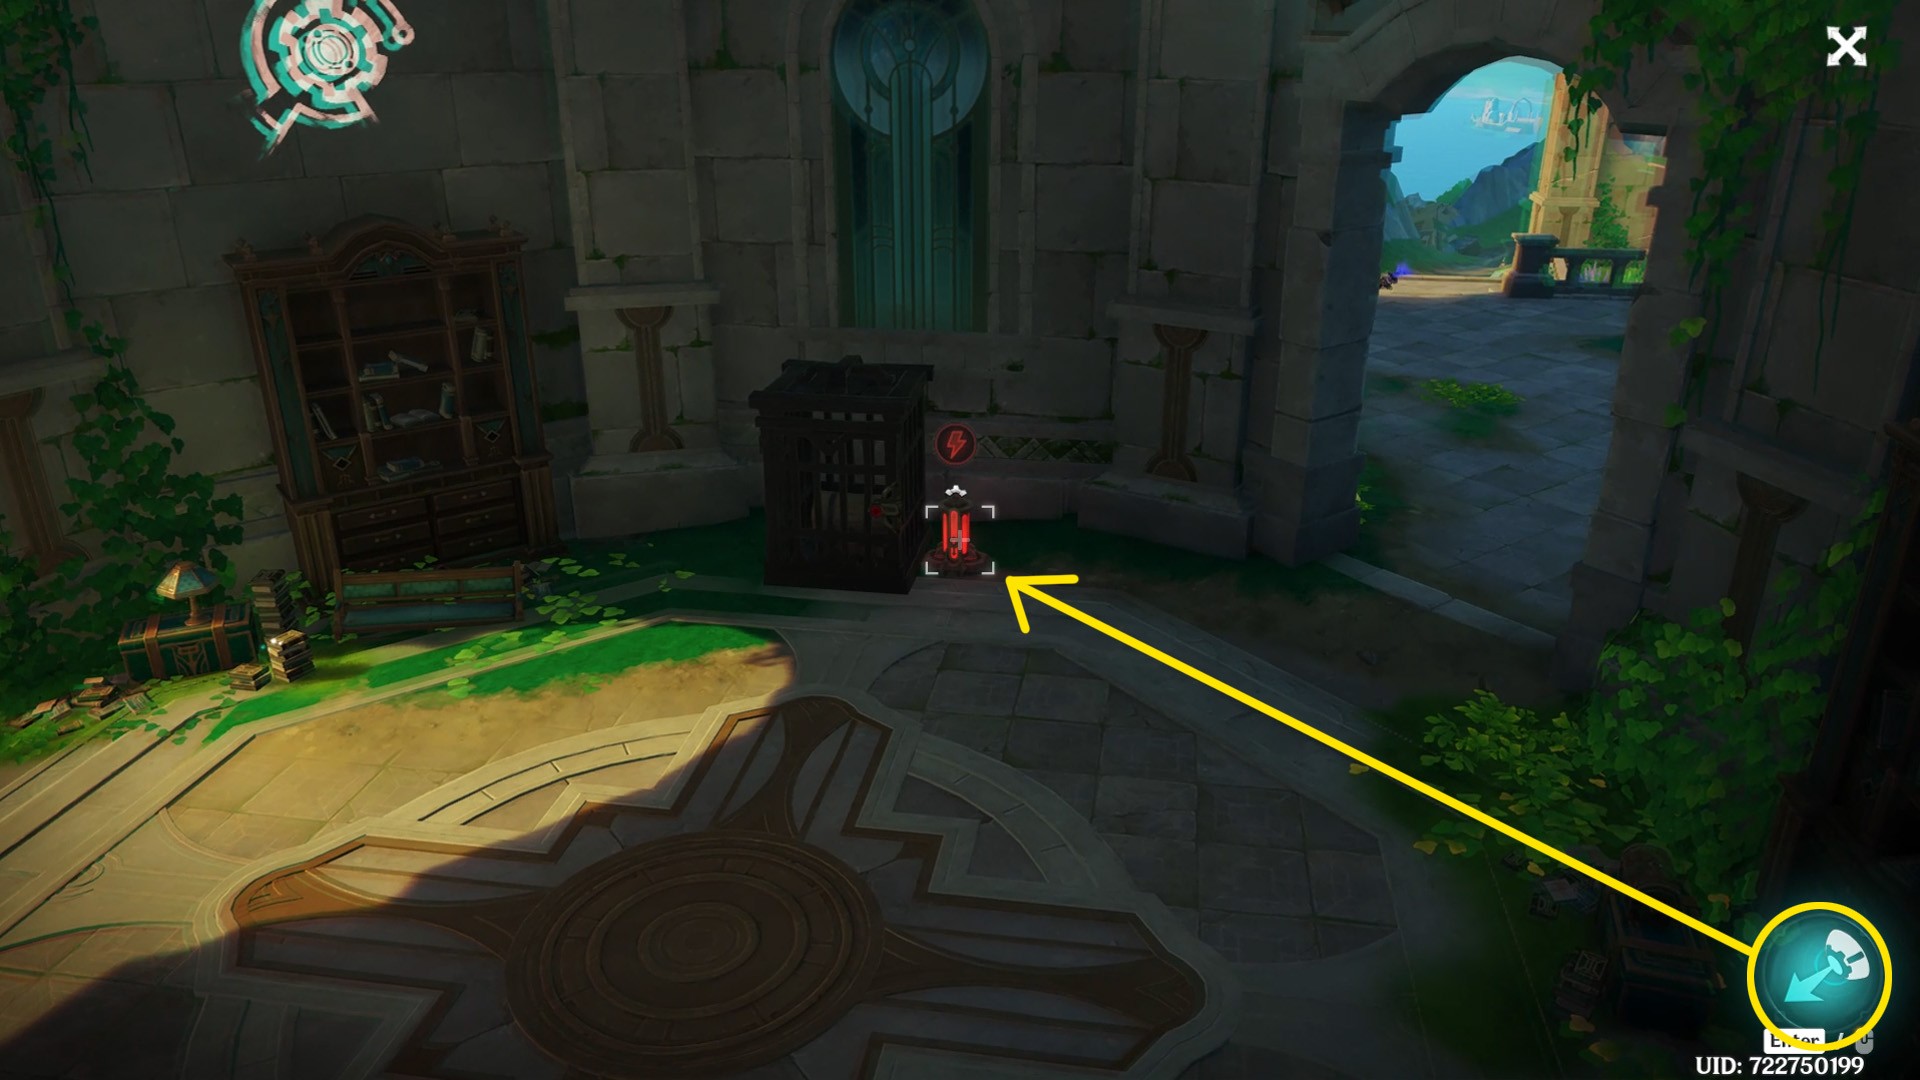
Proceed to the place with the next puzzle: not far from the arena with the Bosom Meca (academic meeting hall), you can stumble upon a clearing with treasure thieves guarding a cage with a chest.
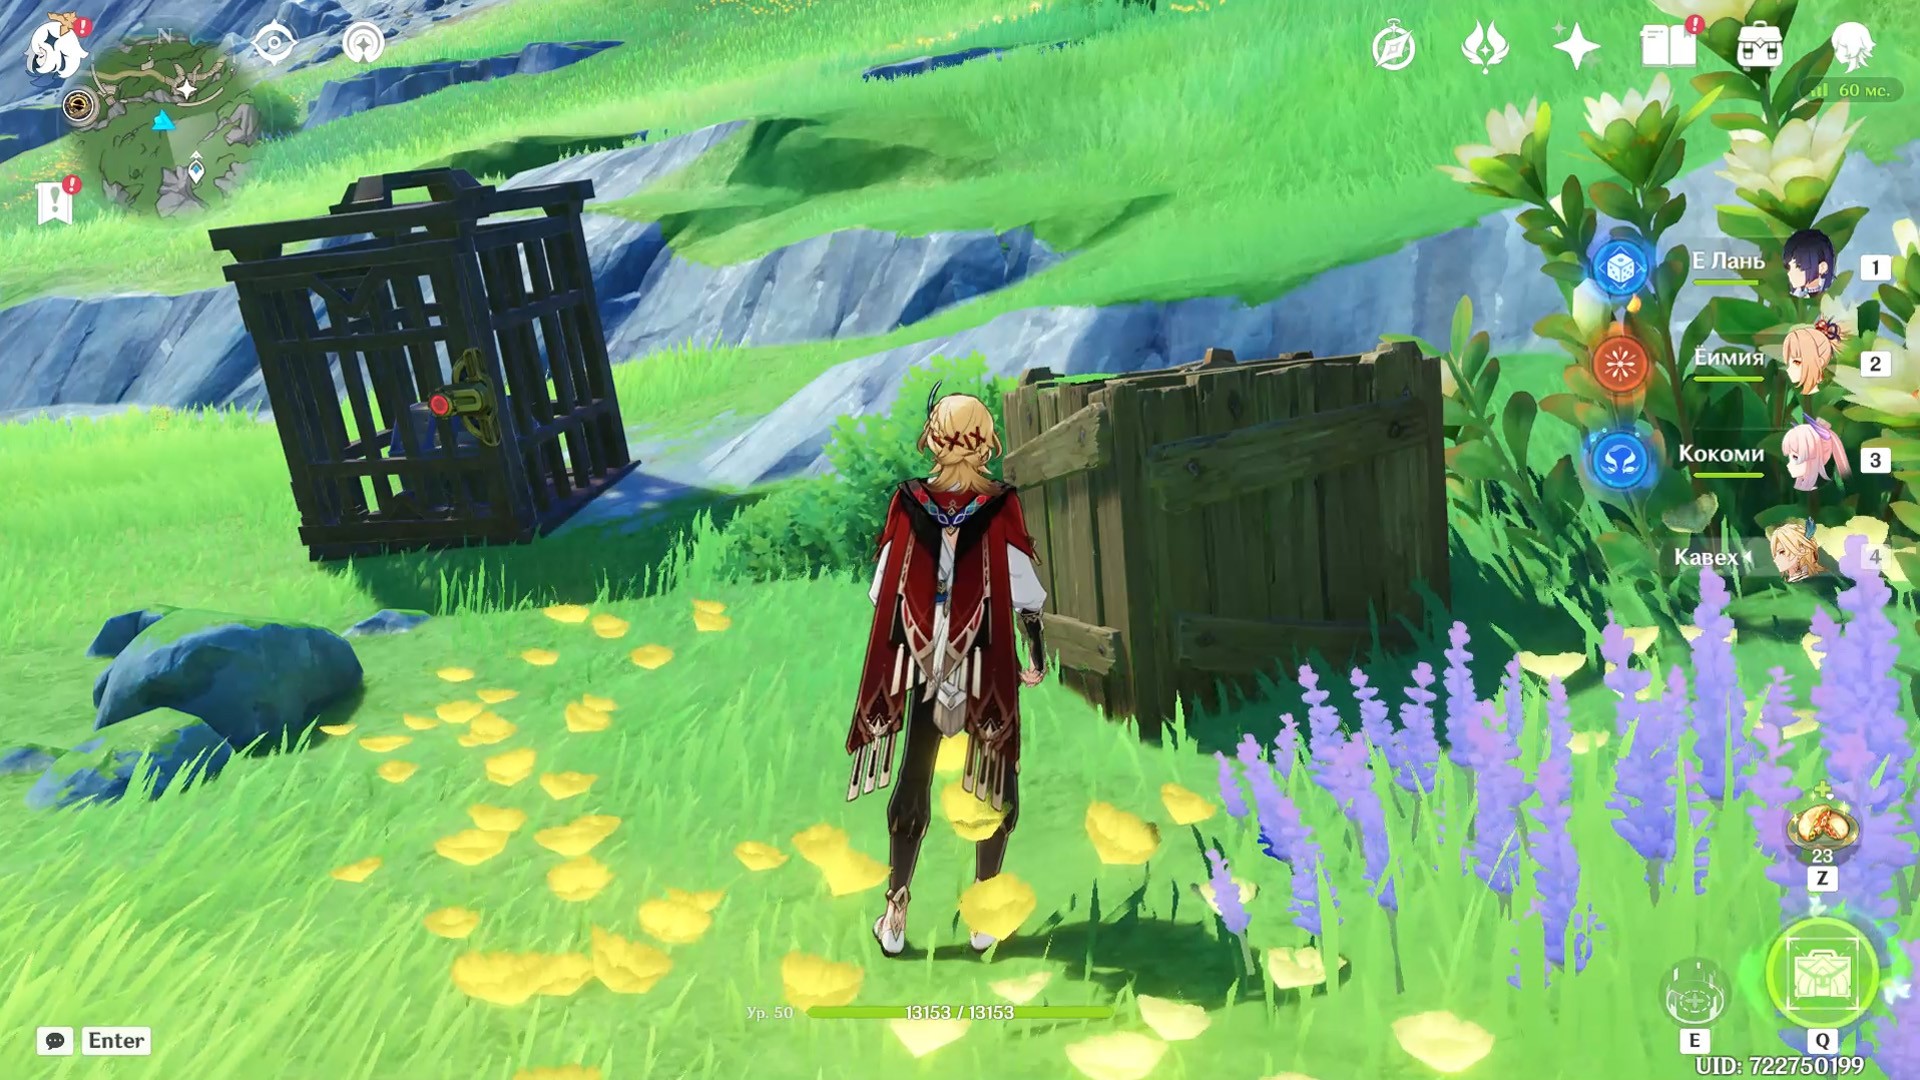
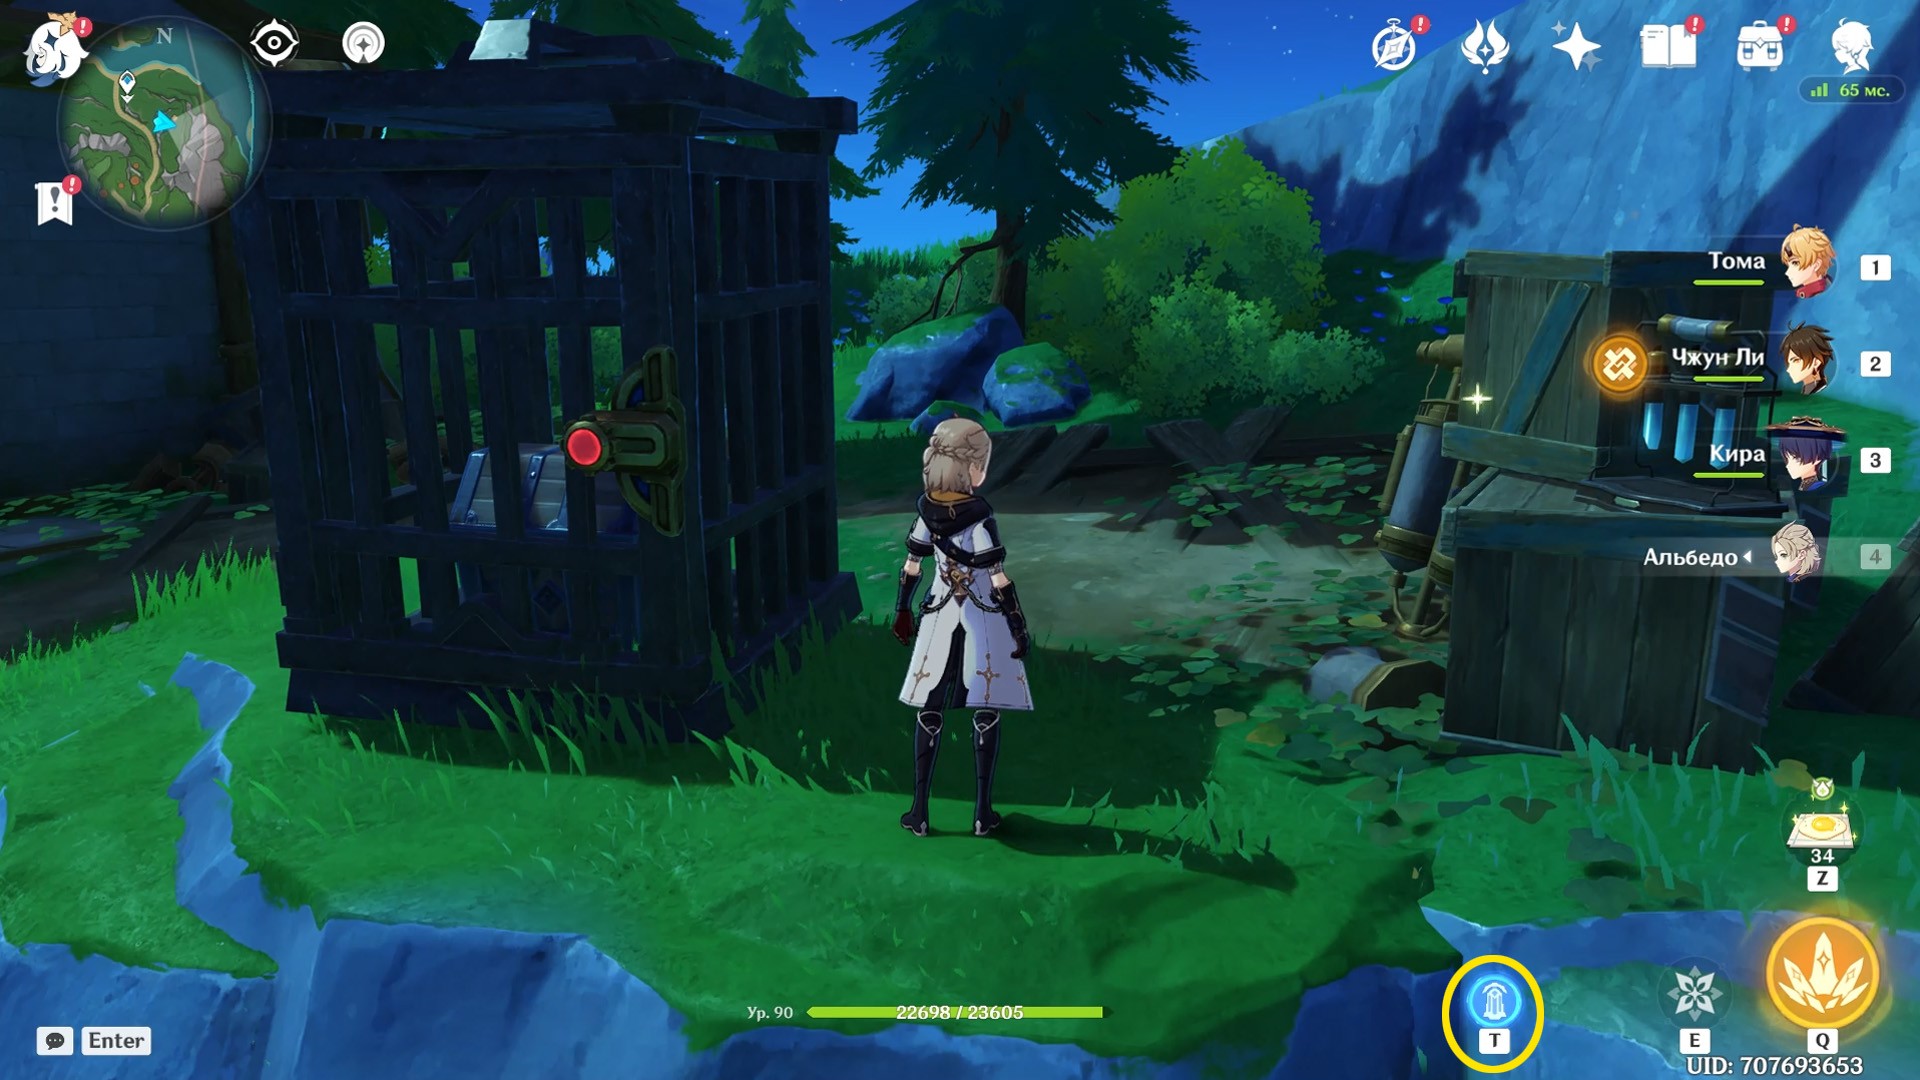
After removing the bandits, go to the box under the tree and break it - a working drive is hidden in it.

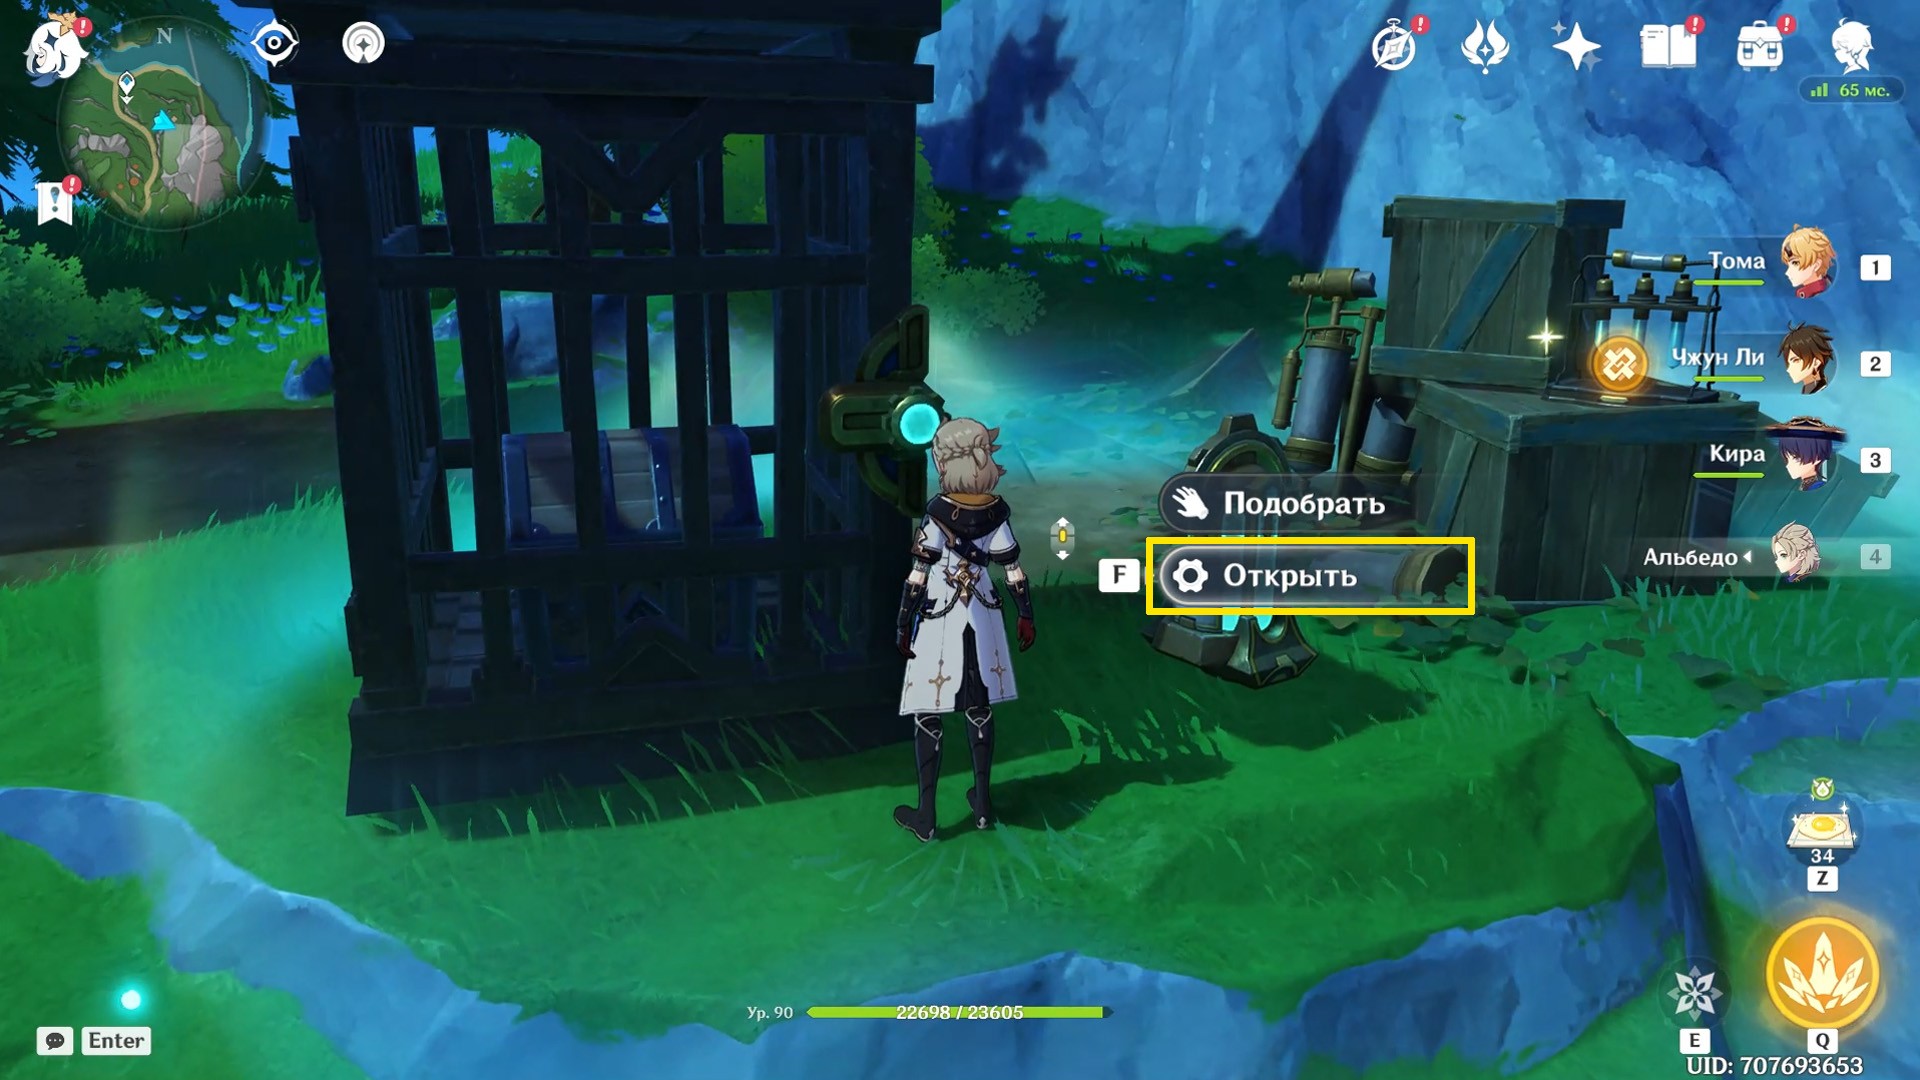
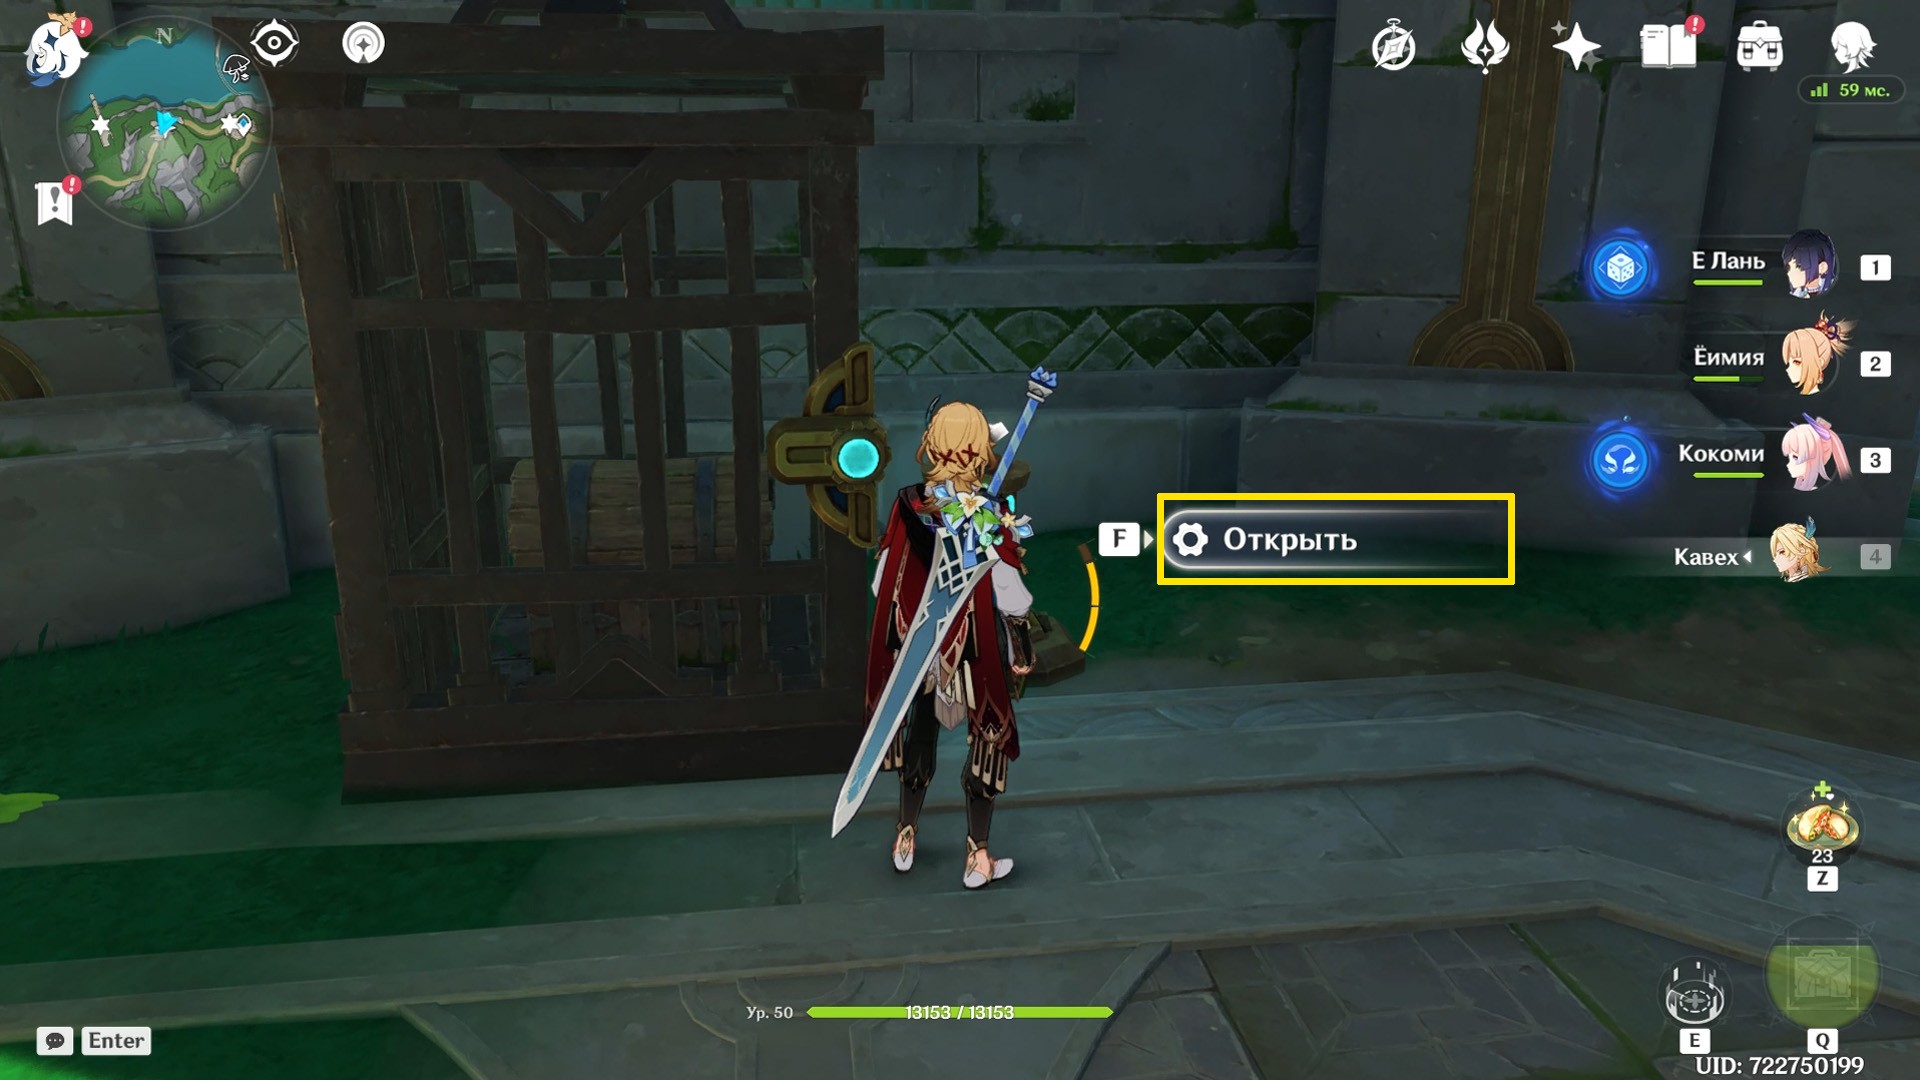
Bring the vessel with energy to the cage, install it (T key in the PC version) and open the enclosure - now you can freely loot the reward.
Panel 9
- Location: Above the Boss Arena " Experimental Field Generator "
- Reward: rich chest.
When solving the puzzle, you will also be able to familiarize yourself with the content ciphergrams II.
Use the teleport to the northwest of the previous 8th puzzle, go around the ruins towards the academic meeting hall and go down: in front of the stairs there is a locked cage that you will need to open.

Go down, picking up the ushii sphere at the corner of the broken wall. Go to the remote control and charge the power unit in the recess to the left of the camera control device (hit it with an arche charge).
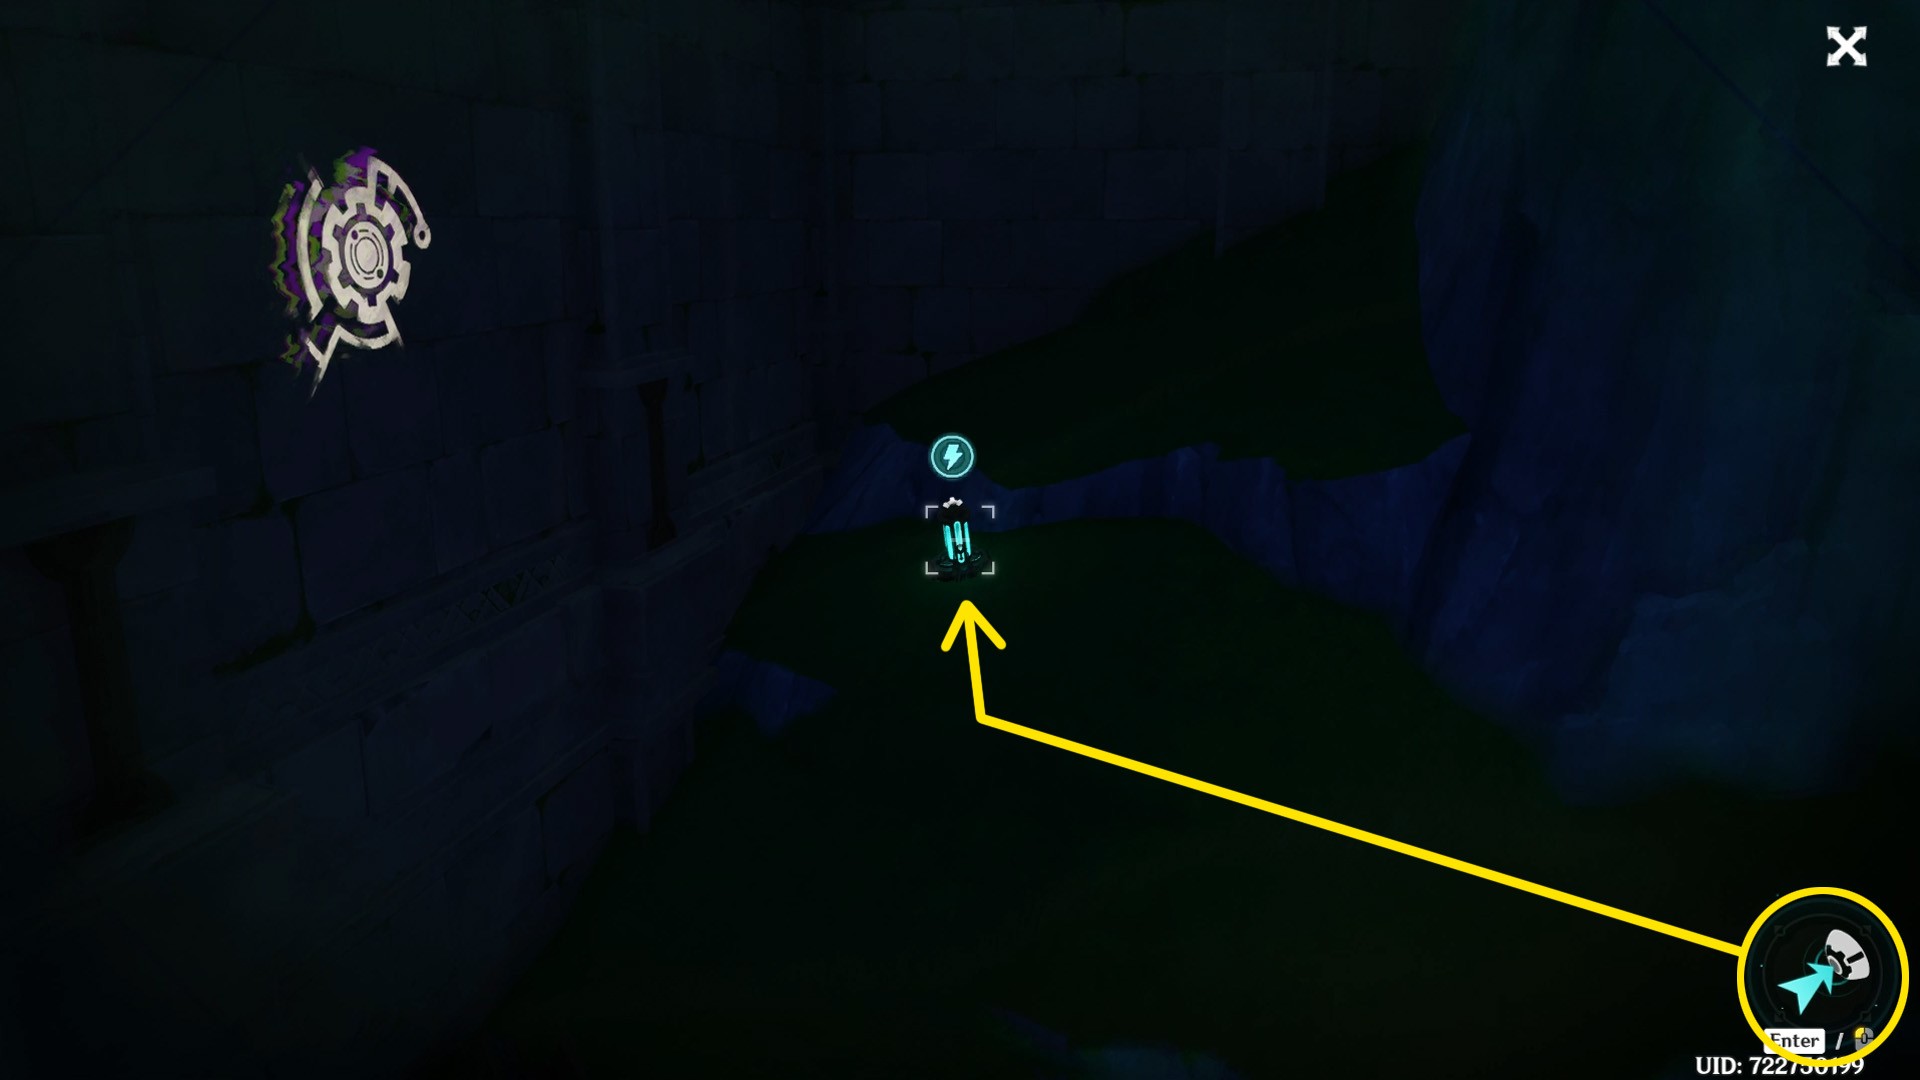
Using the surveillance interface, take energy from the unit we attacked earlier, and then switch cameras, starting with the one located above the remote control. Then aim at the lens in the far left corner and finally at the one to the left of the beginning of the stairs. The last camera will show a storage device near the cage: redirect the charge into it.
Manipulating the cameras will allow you to return to the cage and open it, taking away a rich trophy.

Panel 10
- Location: West of the Academic Assembly Hall.
- Reward: regular chest.
In the location you can study ciphergram V.
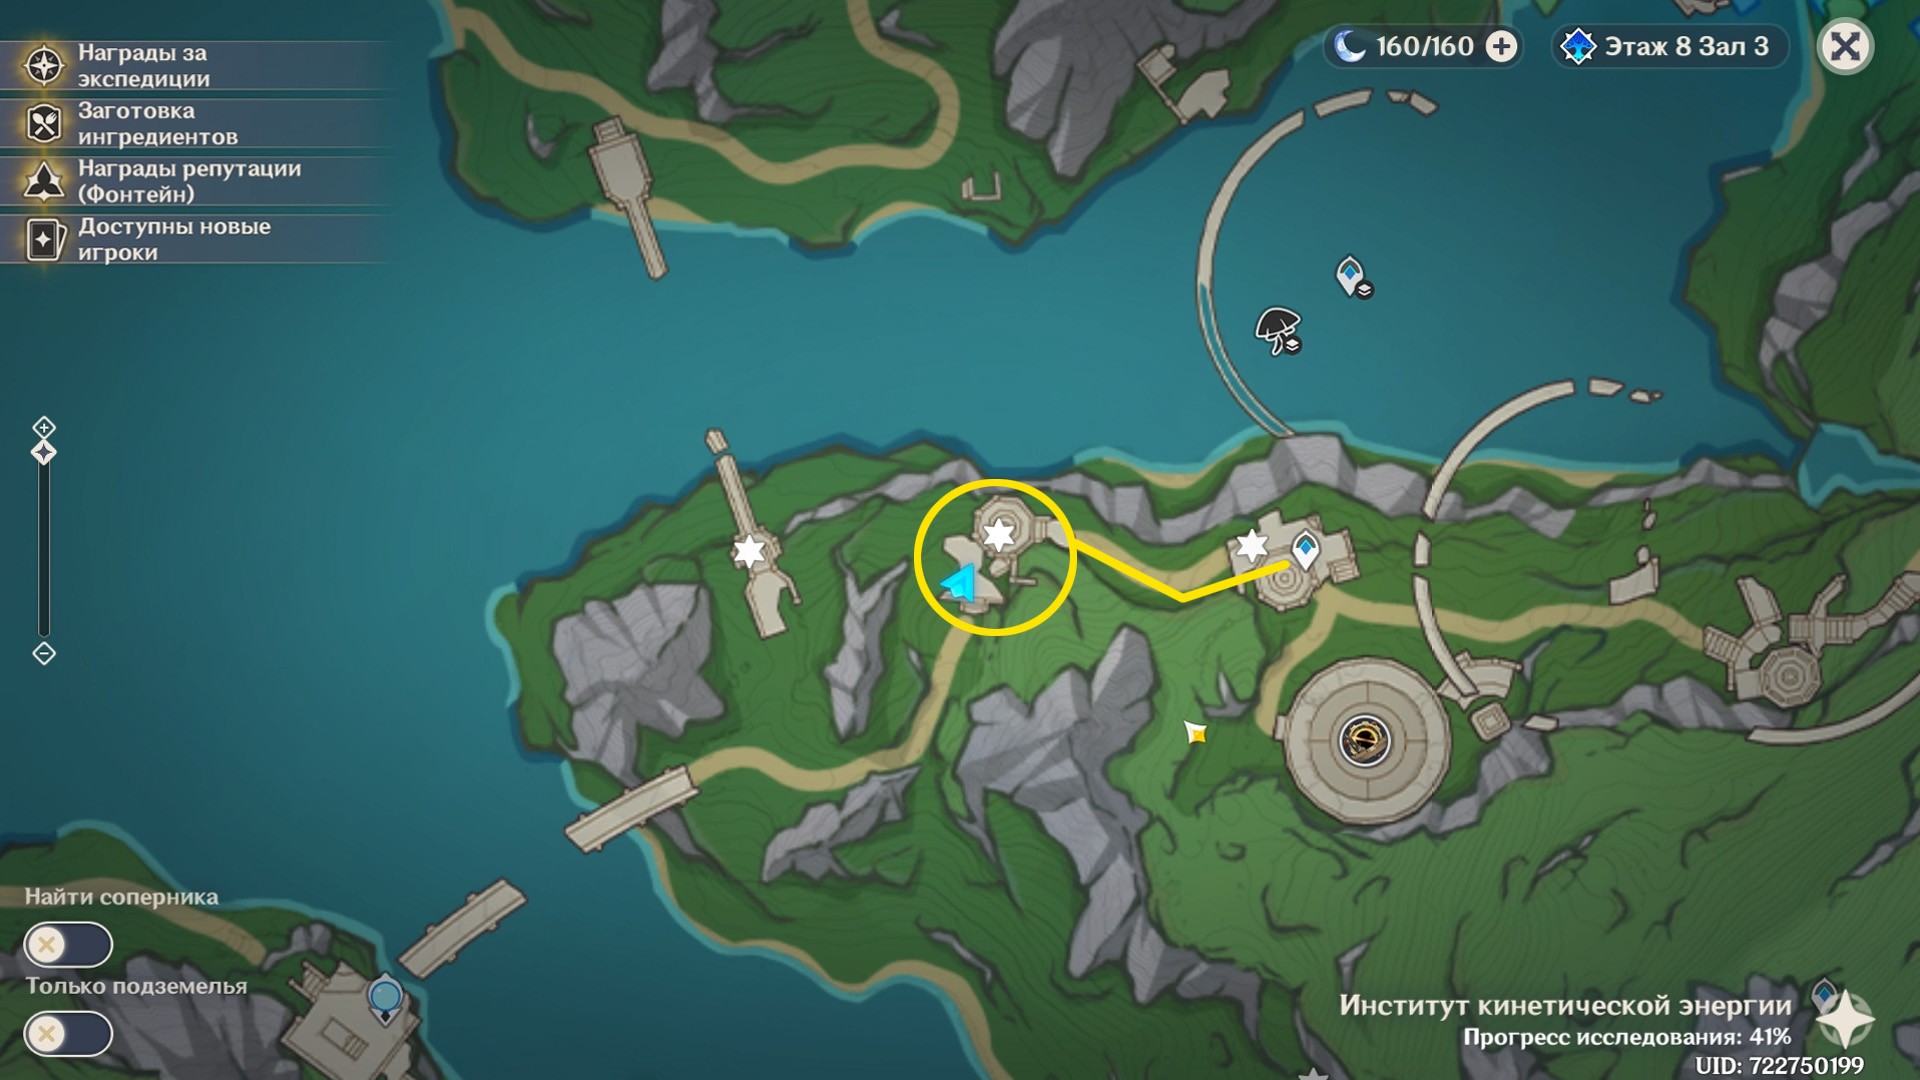
The tenth puzzle is located in the destroyed building west of the place with 9th remote control.

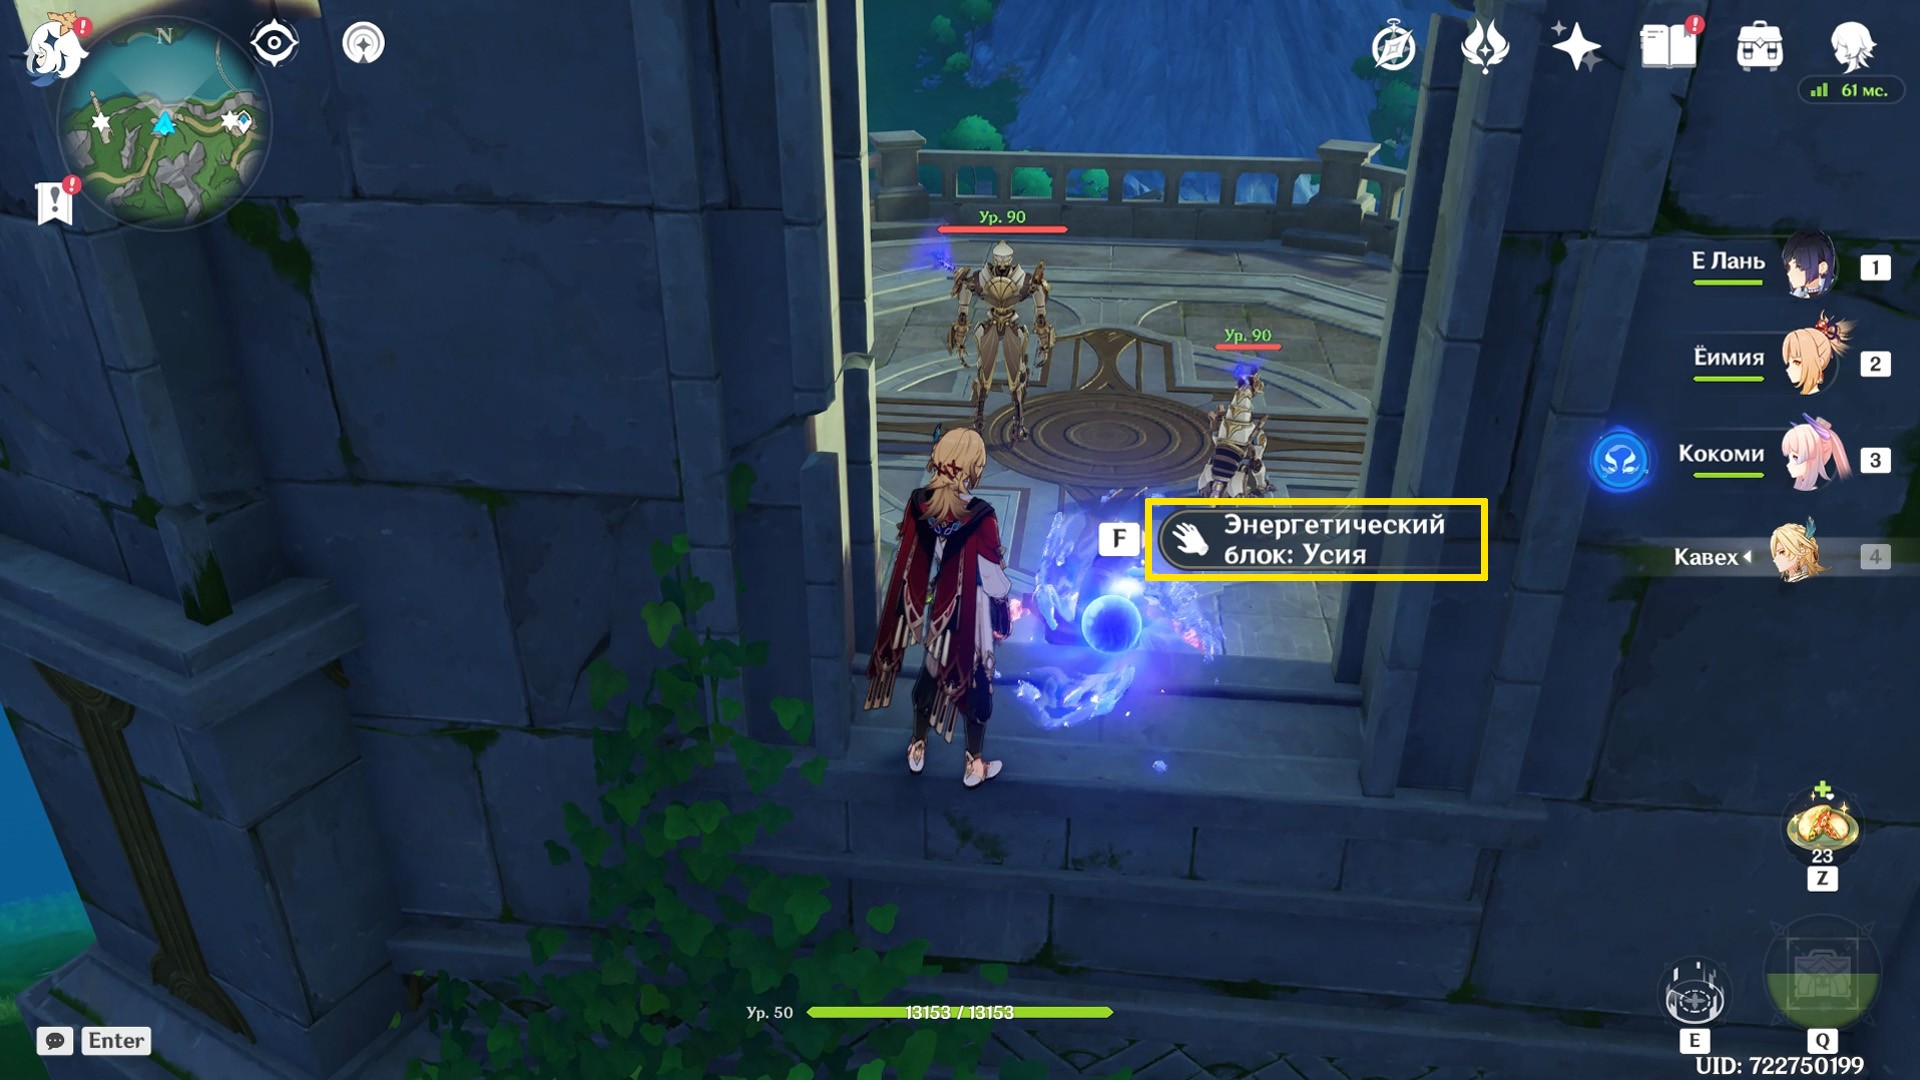
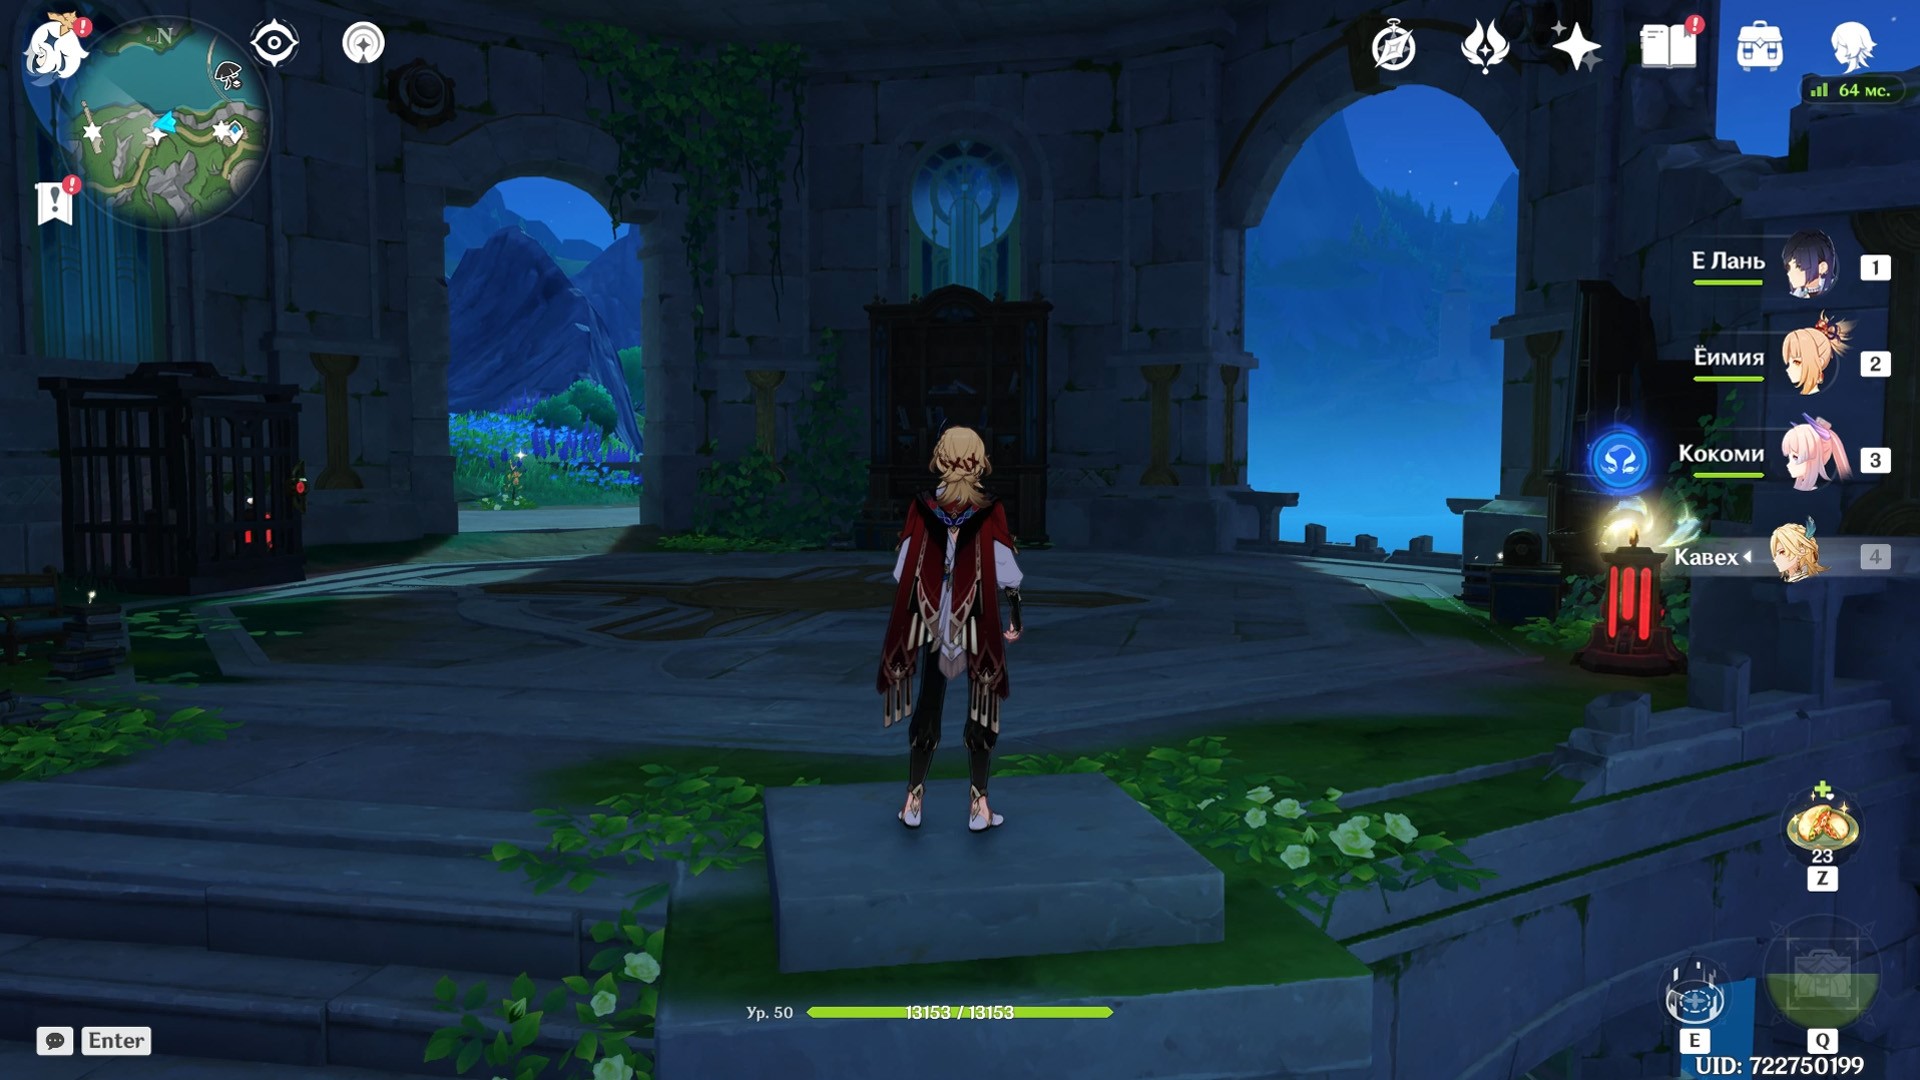
The first stage of the solution: activate the drive, shrouded in pneuma energy. To do this, go up to the top tier of the building and pick up an ushii particle in the window opening, and then go back and hit the red unit opposite the sharpened chest. Be careful : There are a couple of enemy mechs at the “Upstairs” that you'll have to destroy.
Climb to the top again and activate the power transmission panel. In order to open the cell, you need to do the following:
- Move the viewing angle to the camera above the enclosure.
- Collect energy from the block near the broken cabinet.
- Return to the first camera.
- Transfer power to the storage device near the cage.
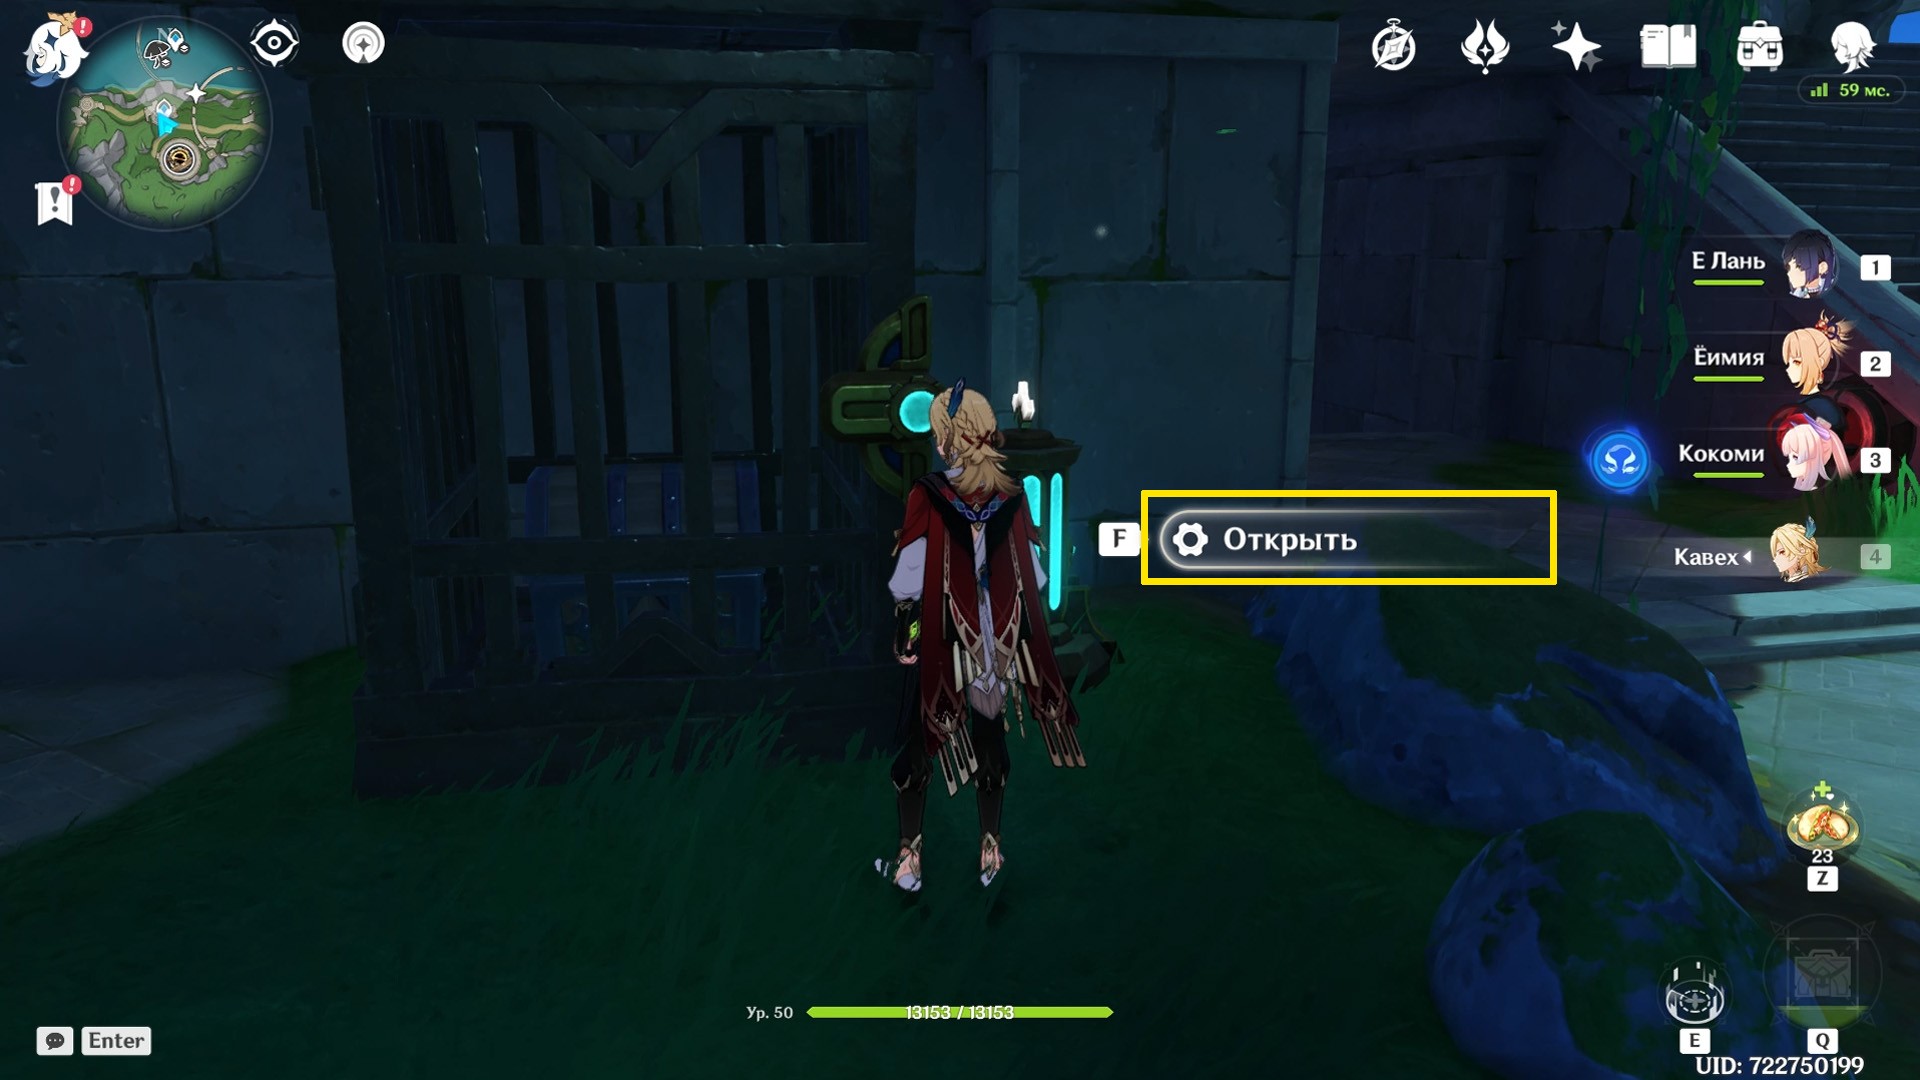
Once you have completed all the steps correctly, you can go back and unlock the dungeon by clicking " Open "

Panel 11
- Location: Near the southern statue of Hydro Archon.
- Reward: rich chest.
At the place with the 11th energy transfer terminal there is another ciphergram (VI) - for more details on how to get to the place with the puzzle and study the picture, read in separate guide.

Following the example of similar riddles, we activate the remote control in front of the barrier and, having received control of the camera, collect power from the block in the right corner (in this case, the Hurdle blocking the path to the chest will be removed). Next, you need to transfer the collected charge to the red block on the left.
For activating the terminal behind the barrier, you will receive a reward in the form of a rich chest.
Panel 12
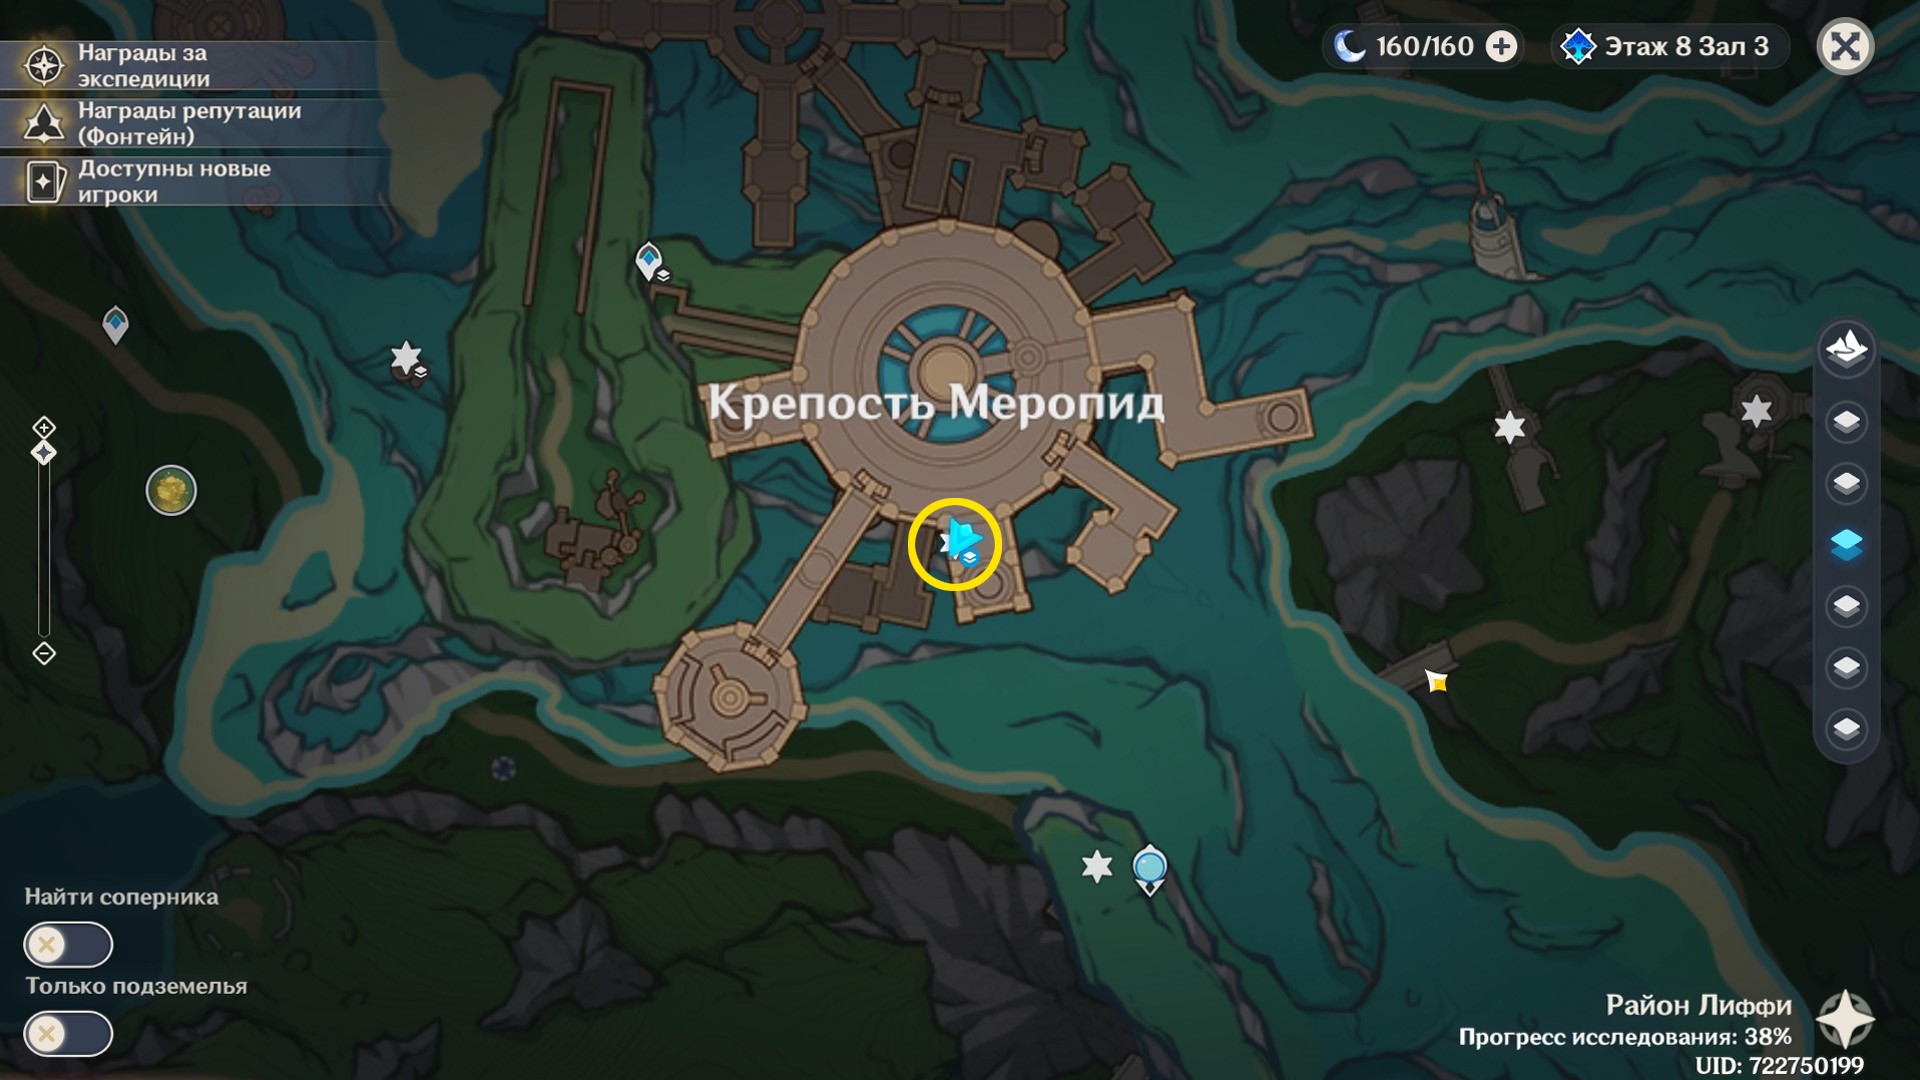
- Location: South of Meropid Prison.
- Reward: precious chest.
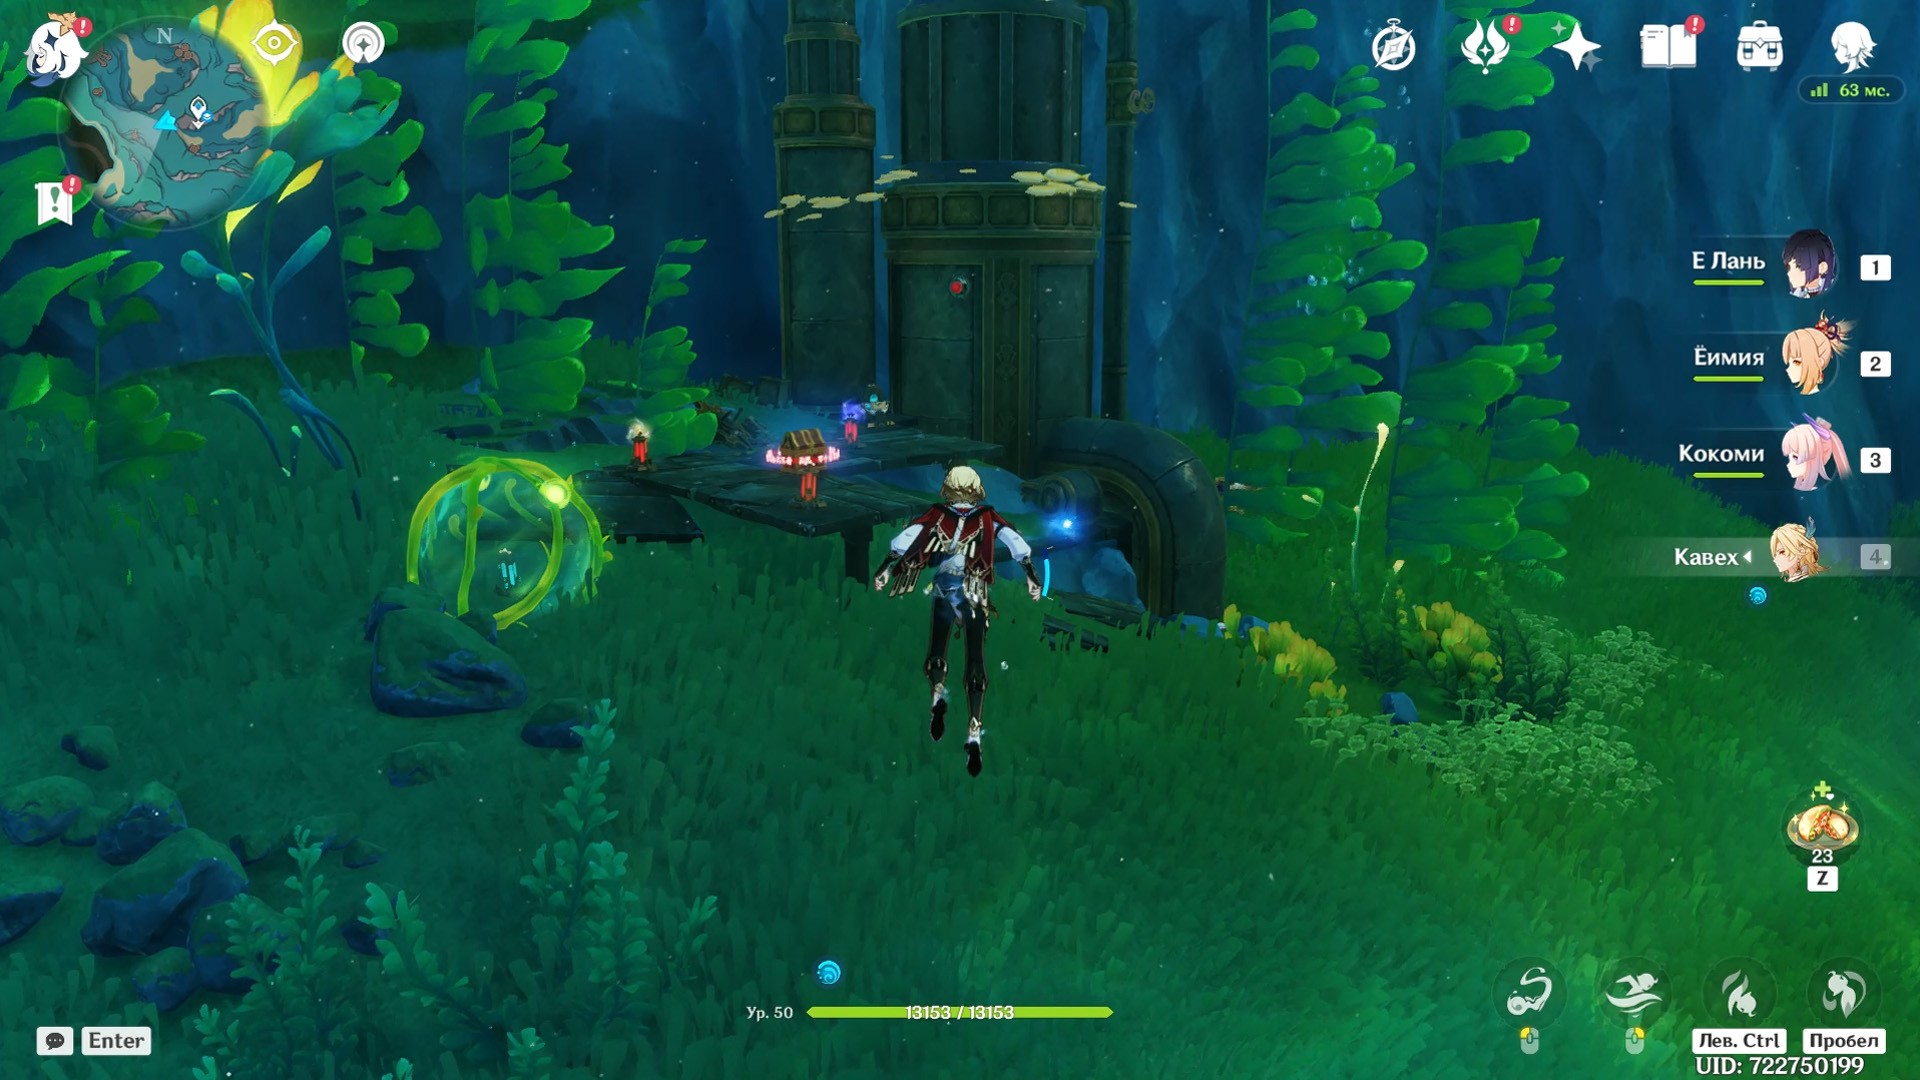
In search of the penultimate remote control, you need to move to the underwater teleport in the south of Meropida fortress. From the transfer location, swim west to the iron structure in front of which there is a puzzle.
The solution to this activity can be divided into three stages:
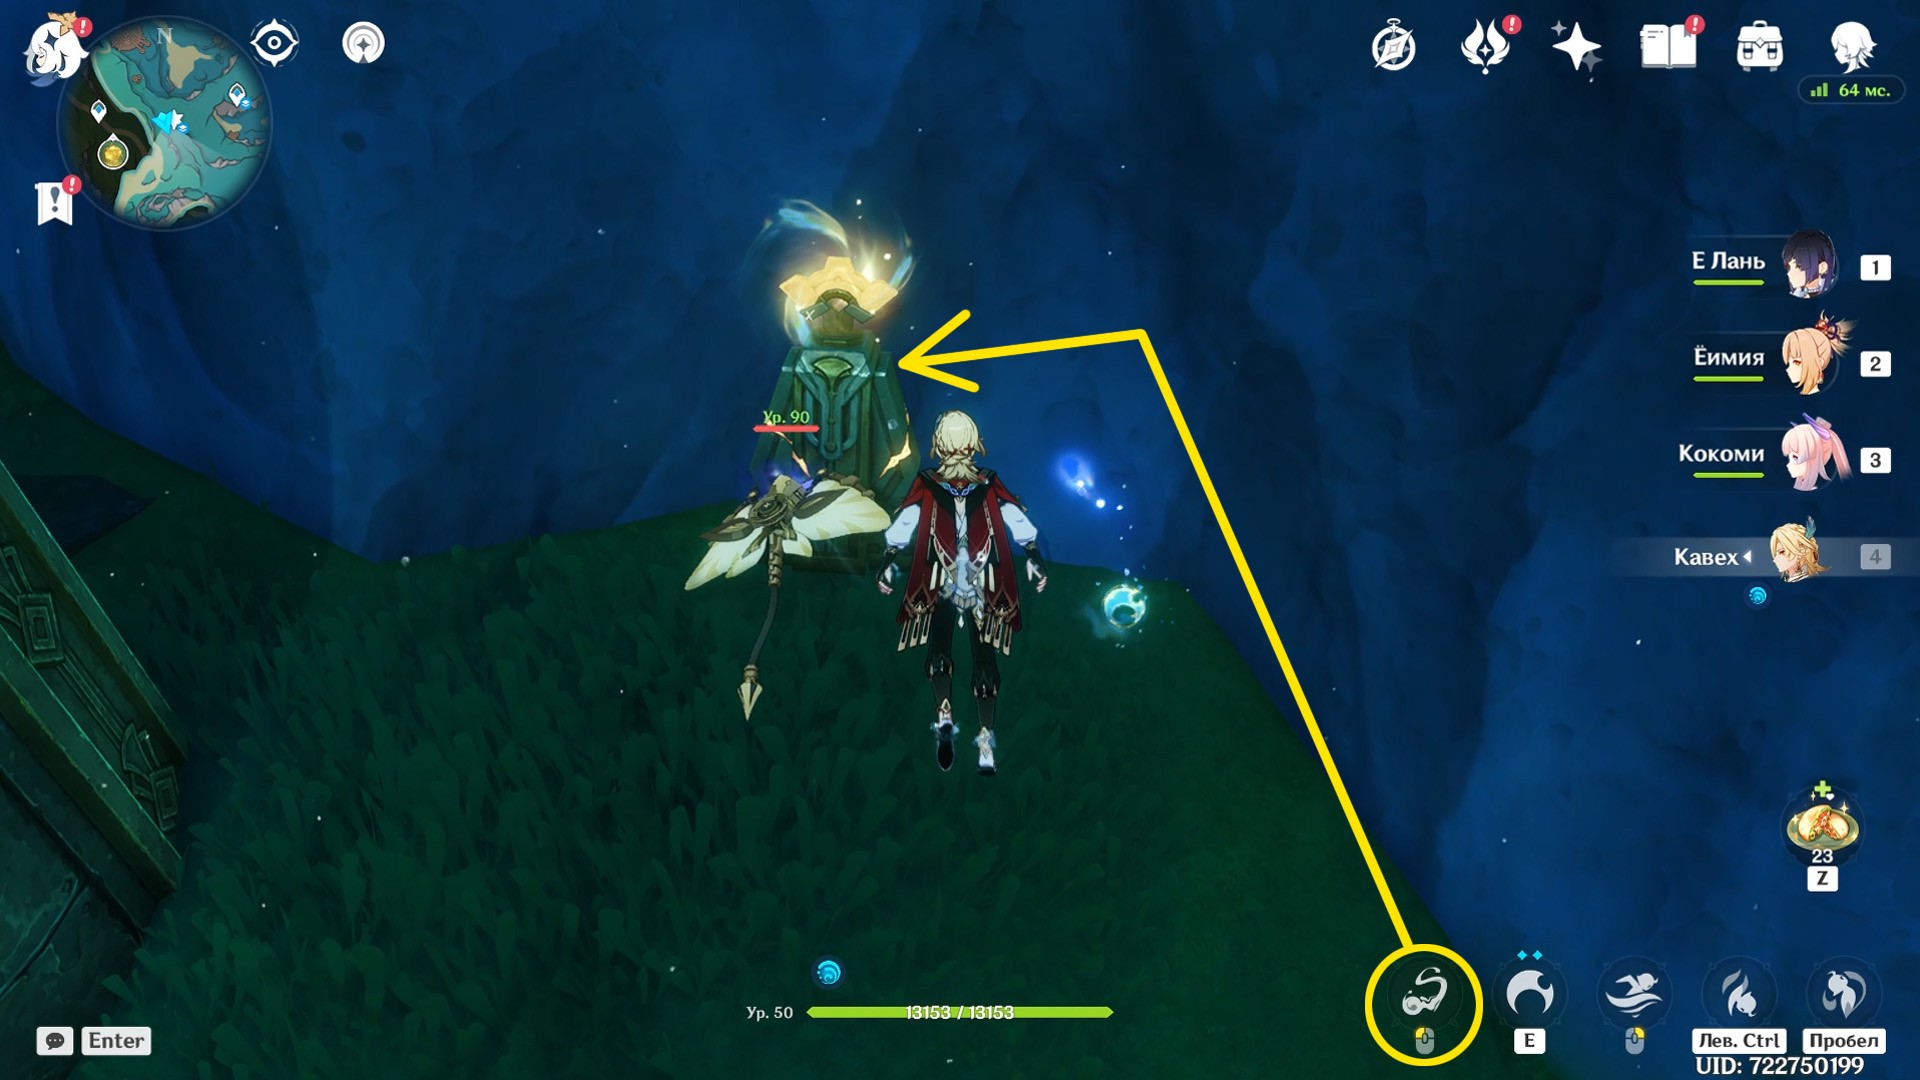
1) Destroy the algae cage under which the charged power supply is hidden. The ability will help with this xenochrome ostrobe floating nearby.
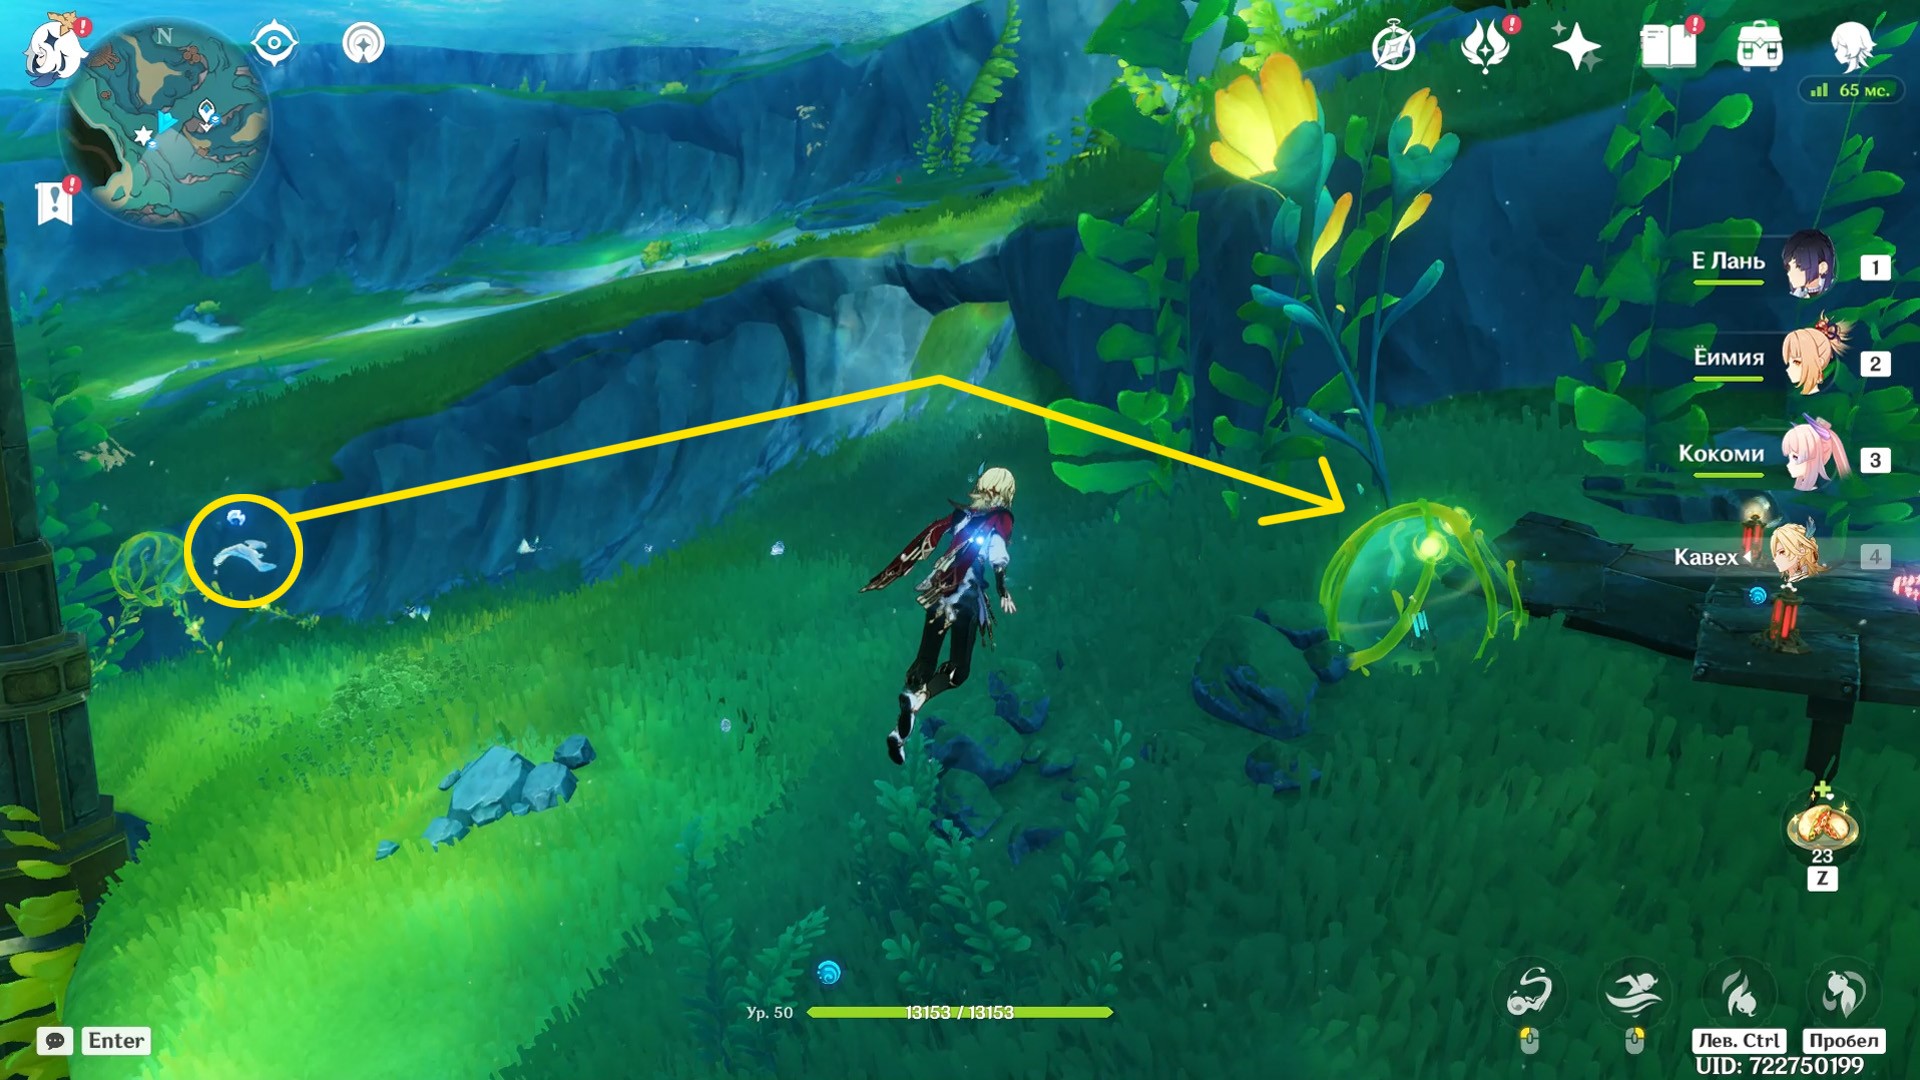
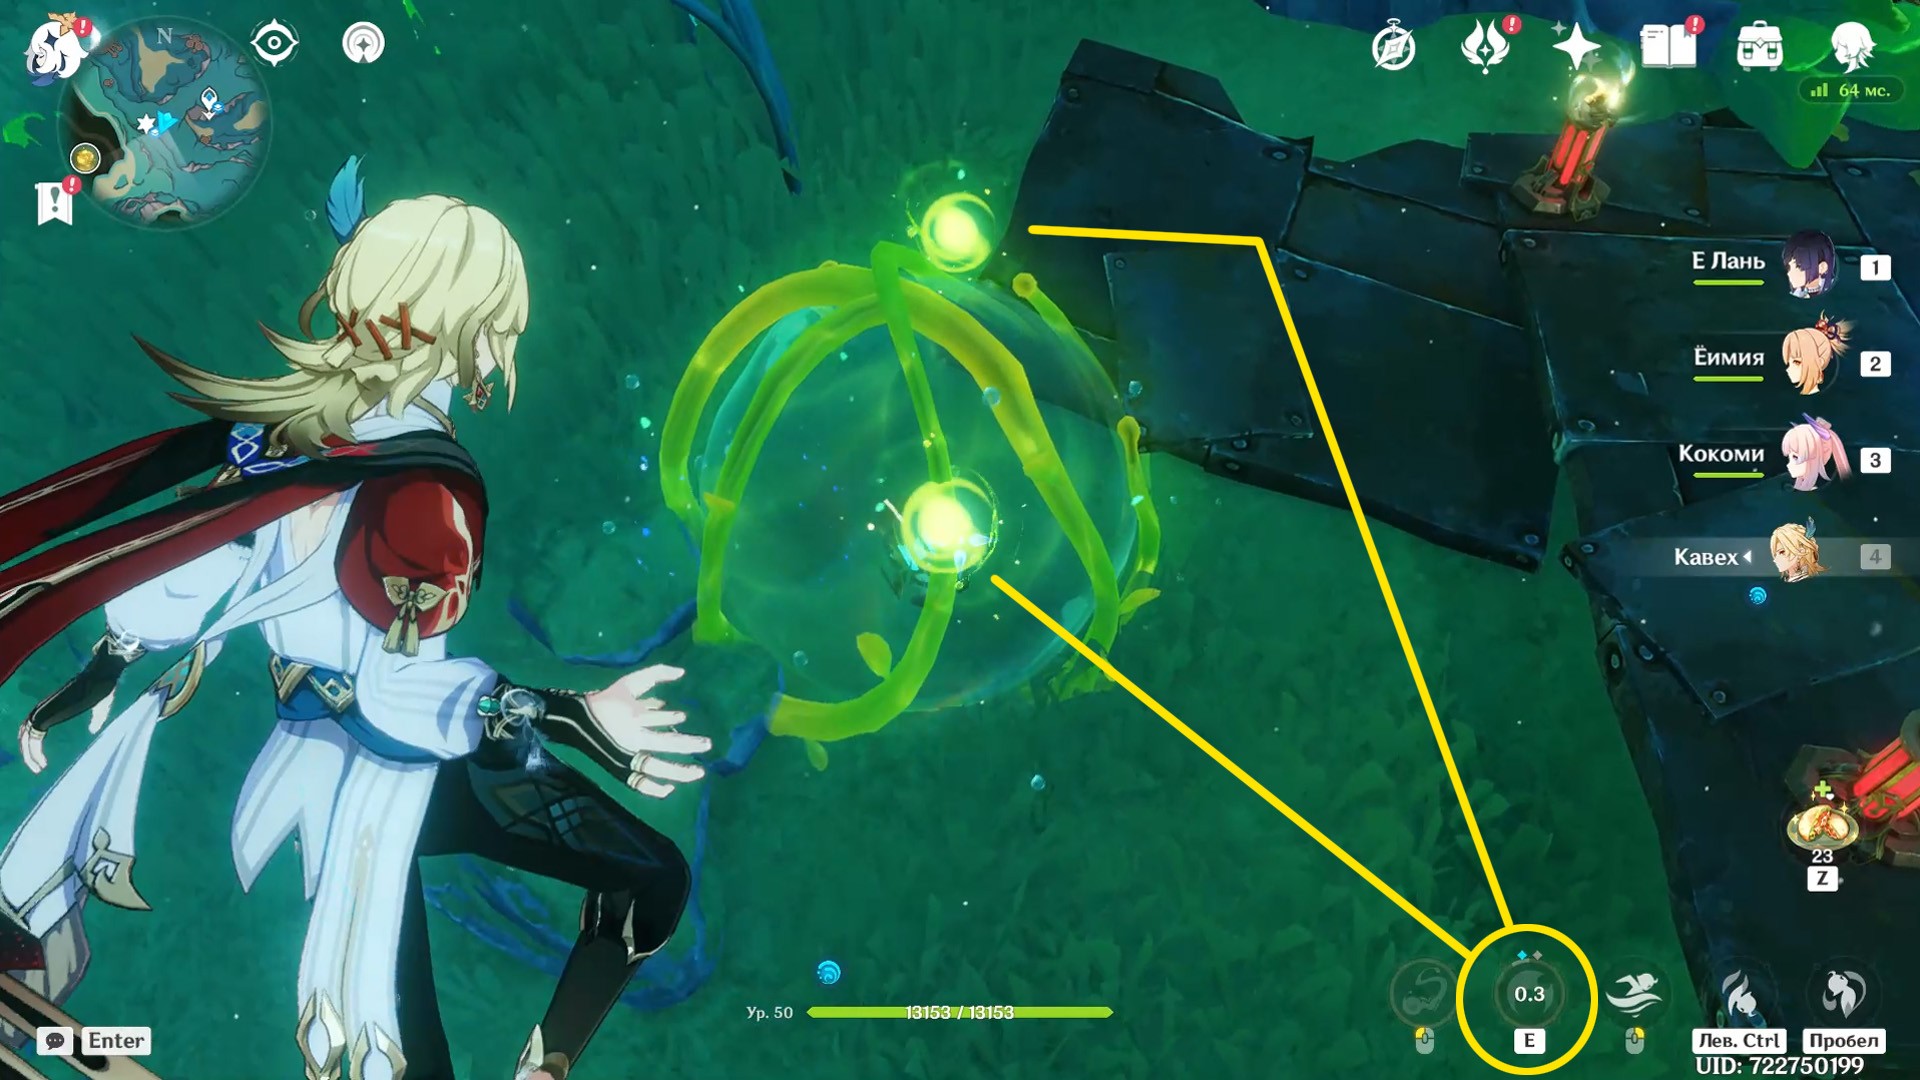
2) Remove the pneuma and ousia energy from the two drives near the chest.
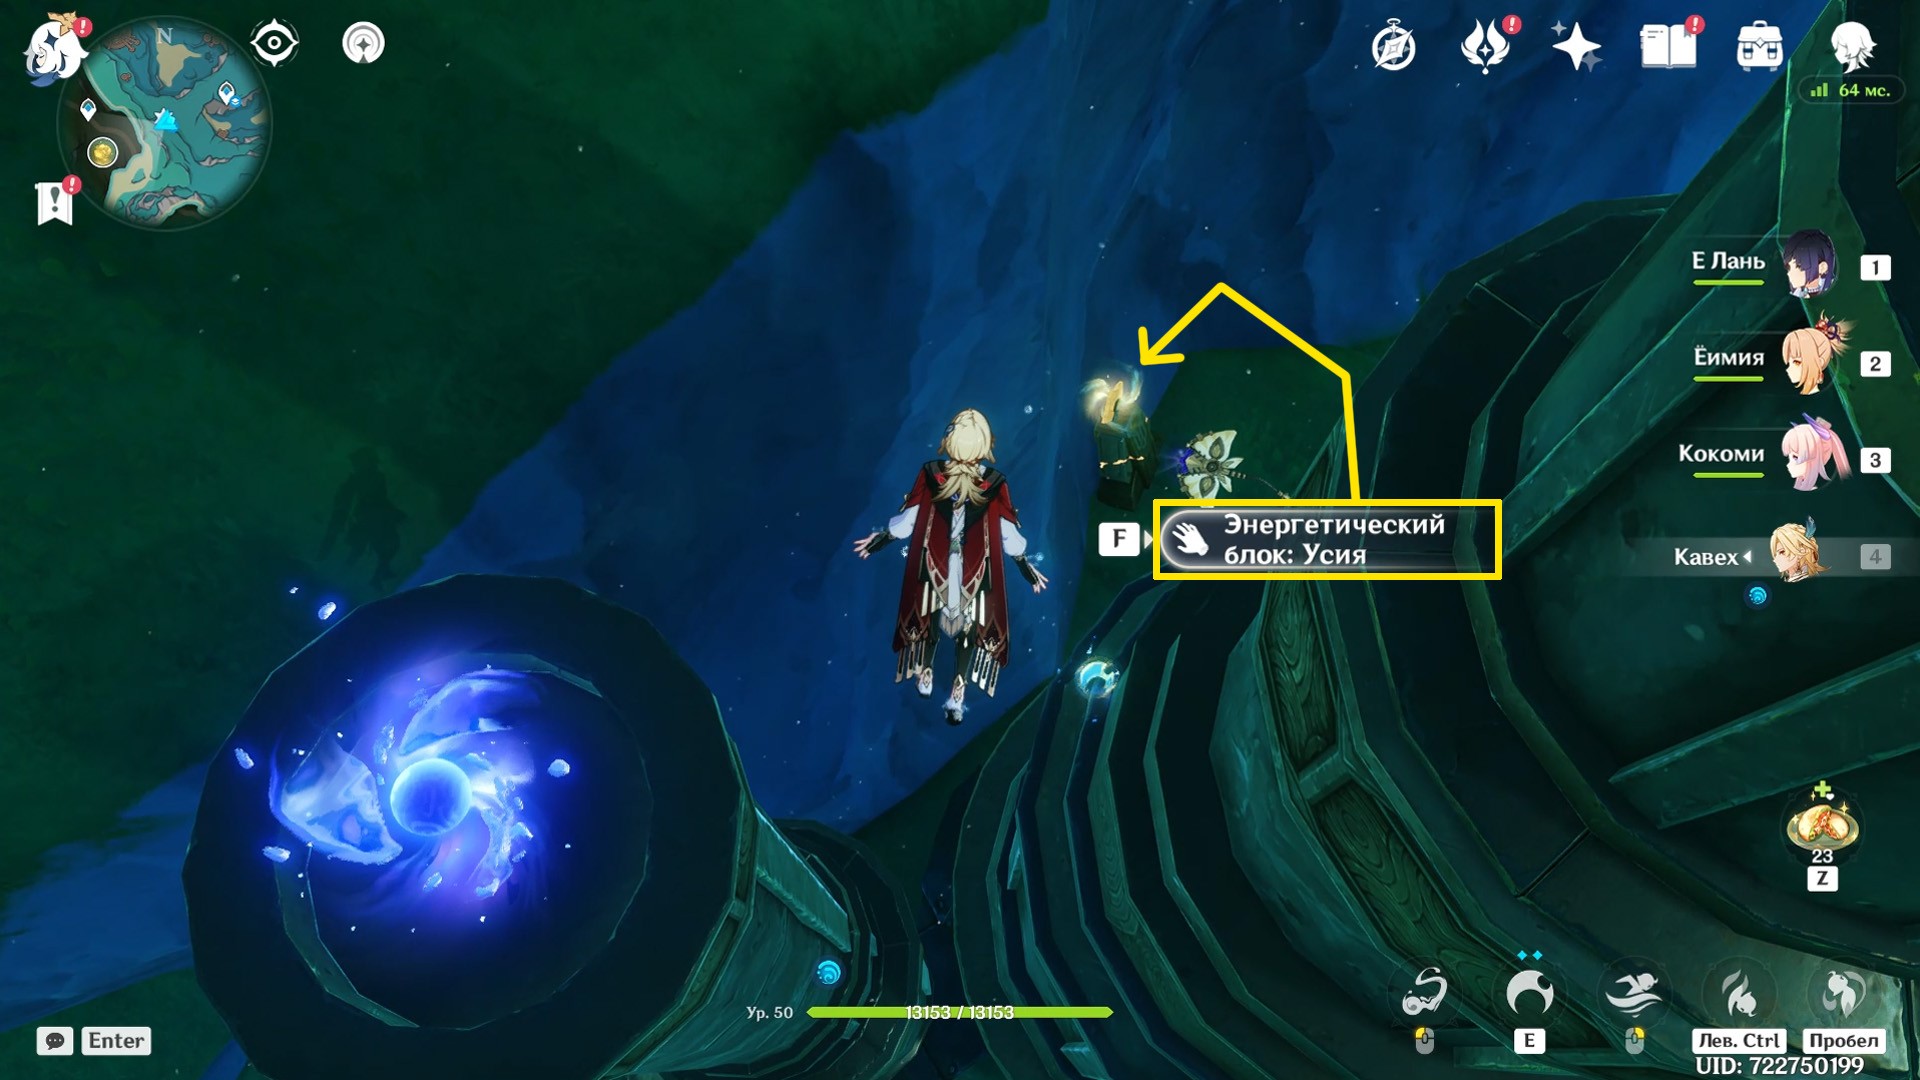
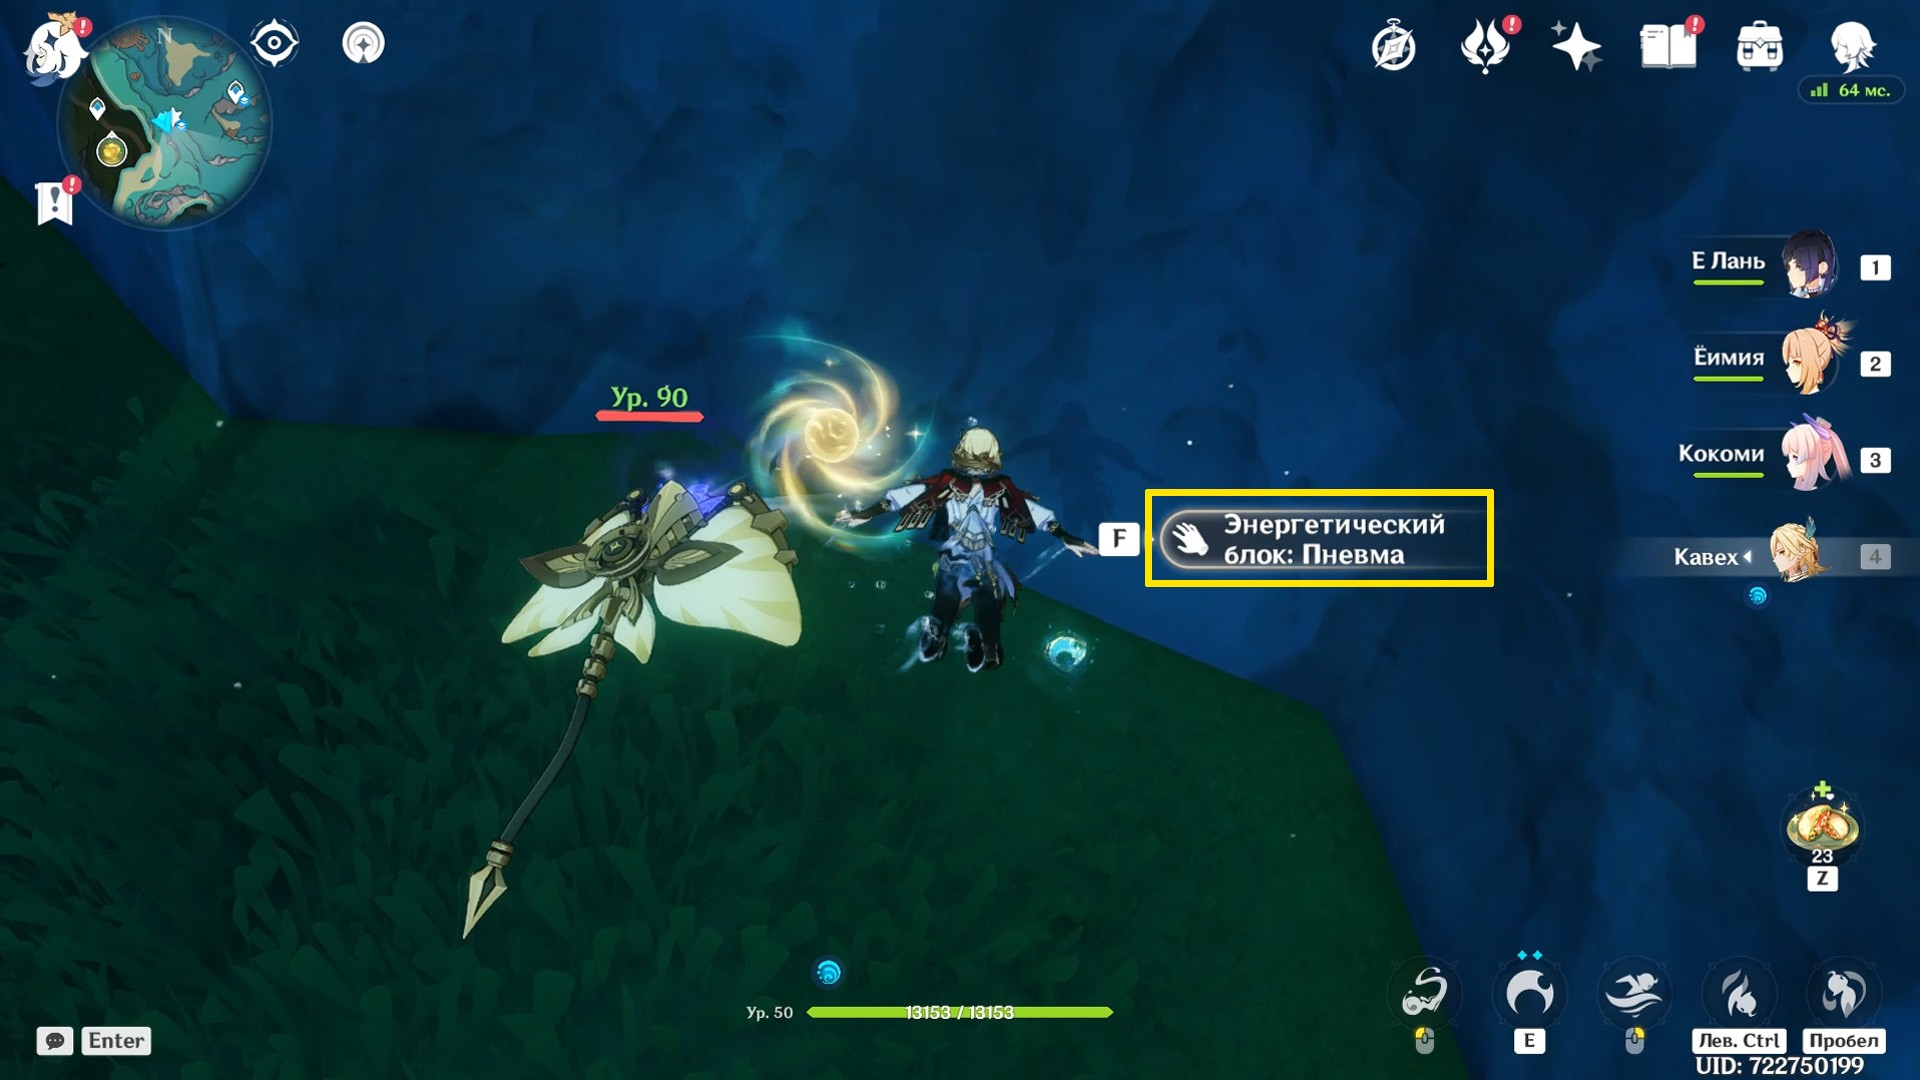
The air particle is located in one of the pipes on top, and the pneuma block is located behind the pipeline. To get the second one, hit the box with ushi force and pick up the golden sphere stored in it. Please note: to dispel arche from drives, follow normal targeted attack.
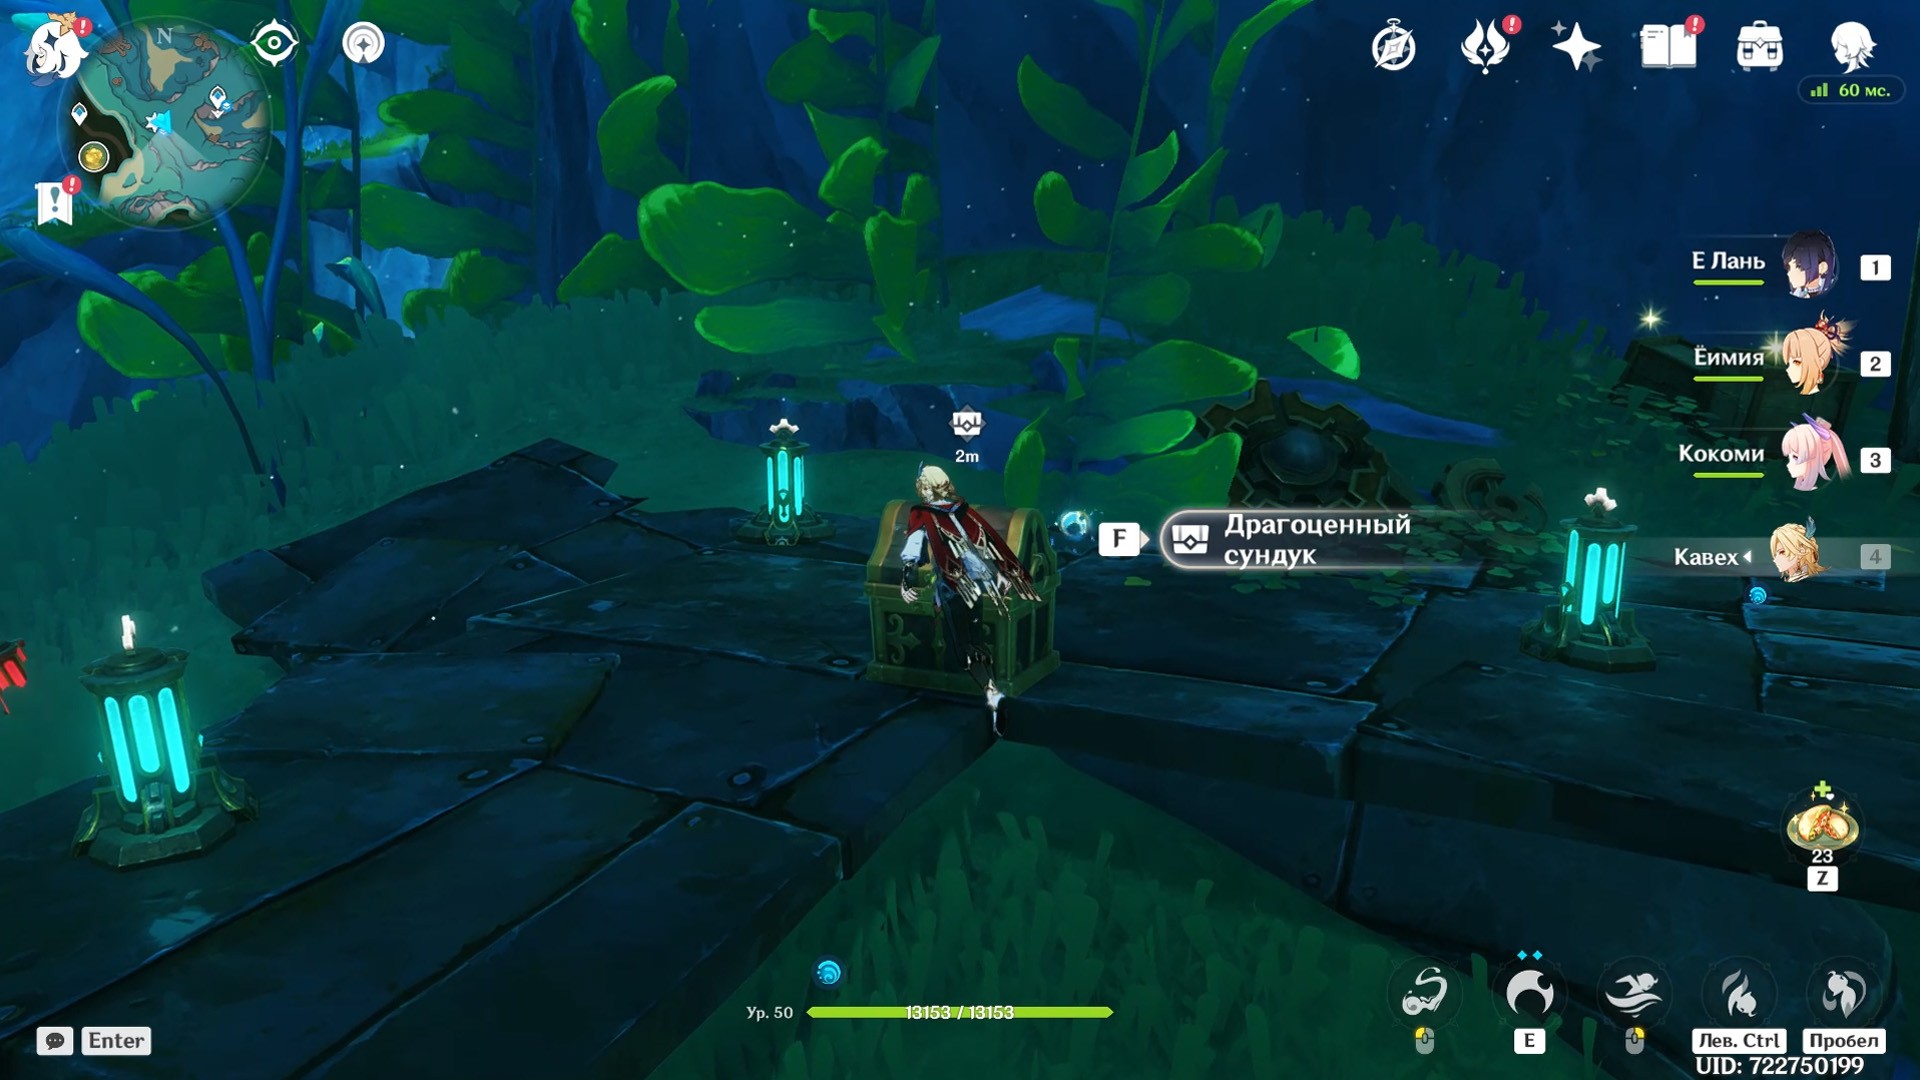
3) All that remains is to energize one of the blocks surrounding the chest: enter the video surveillance interface through the control panel and use the camera to move the charge from the farthest unit to the one on the far left.
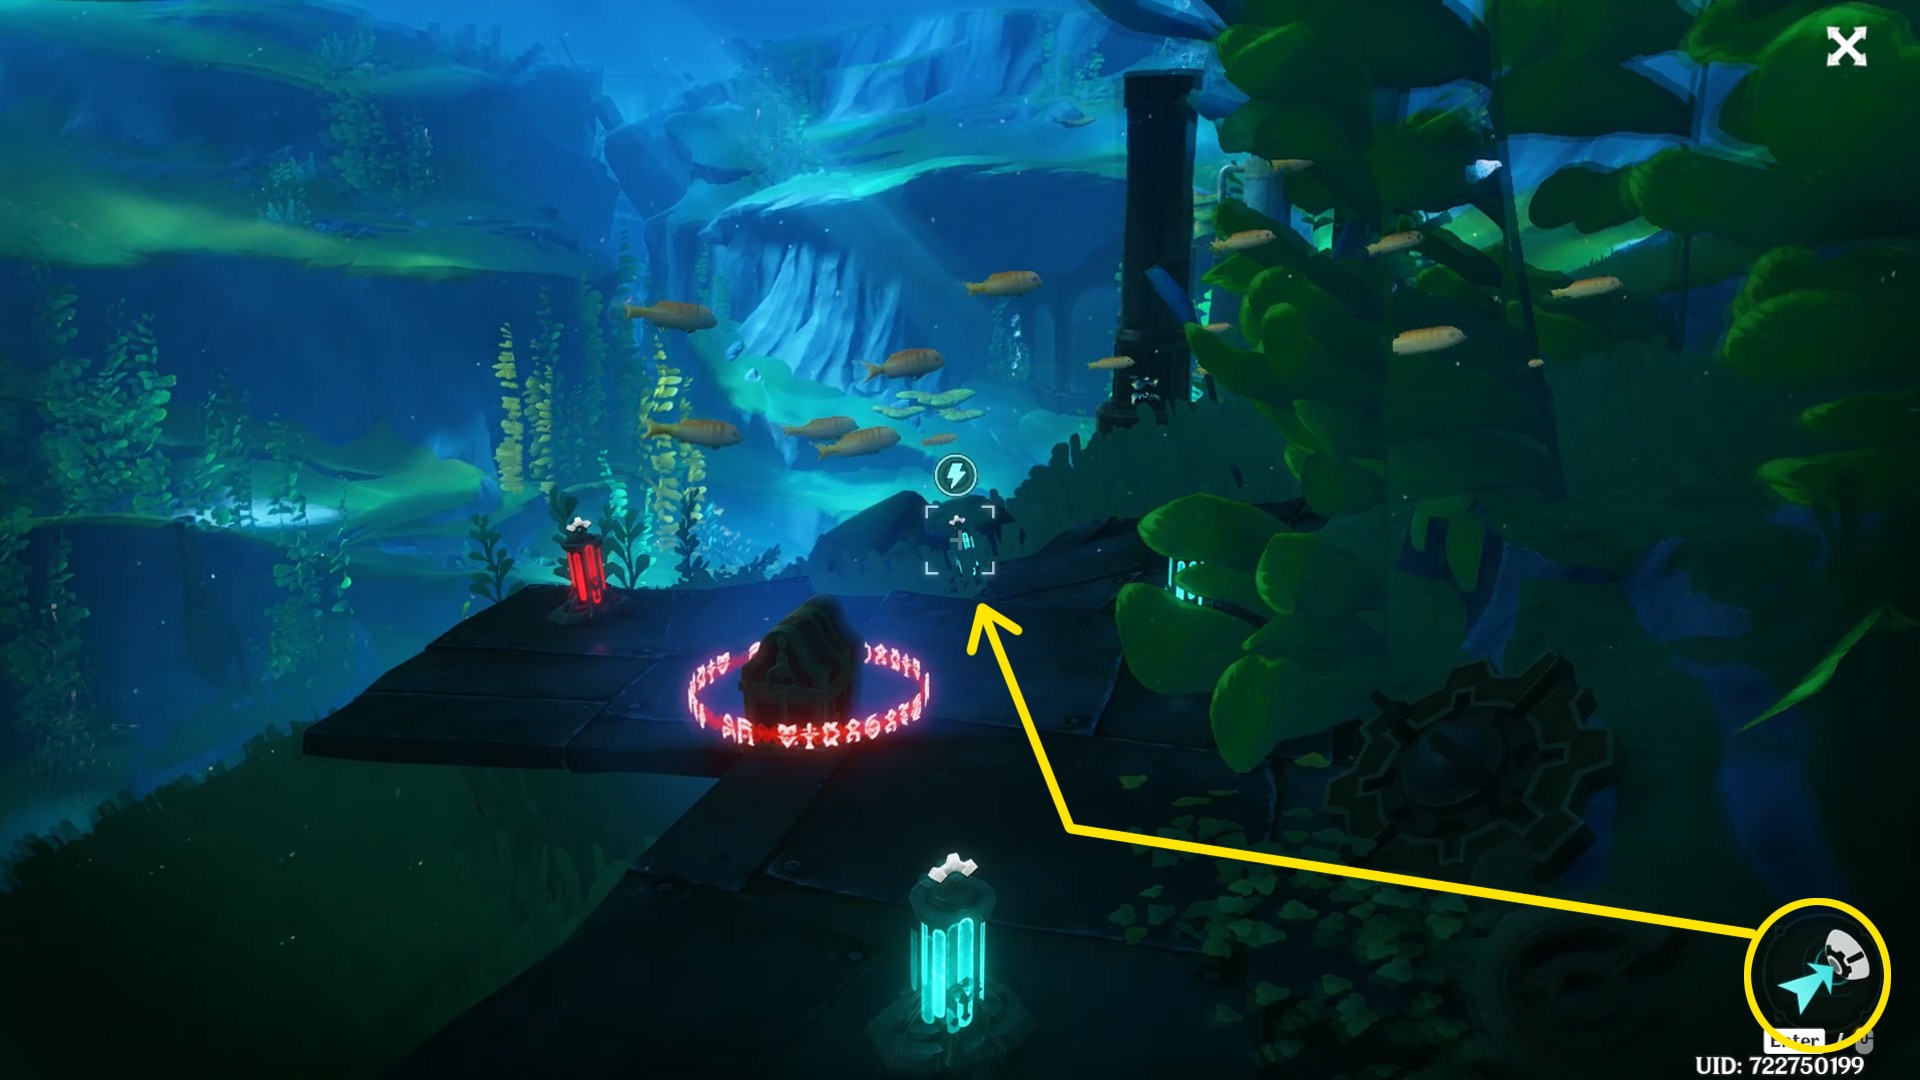

As a reward for solving the puzzle, you will receive a precious casket.
Panel 13
- Location: administrative area of the Meropid fortress.
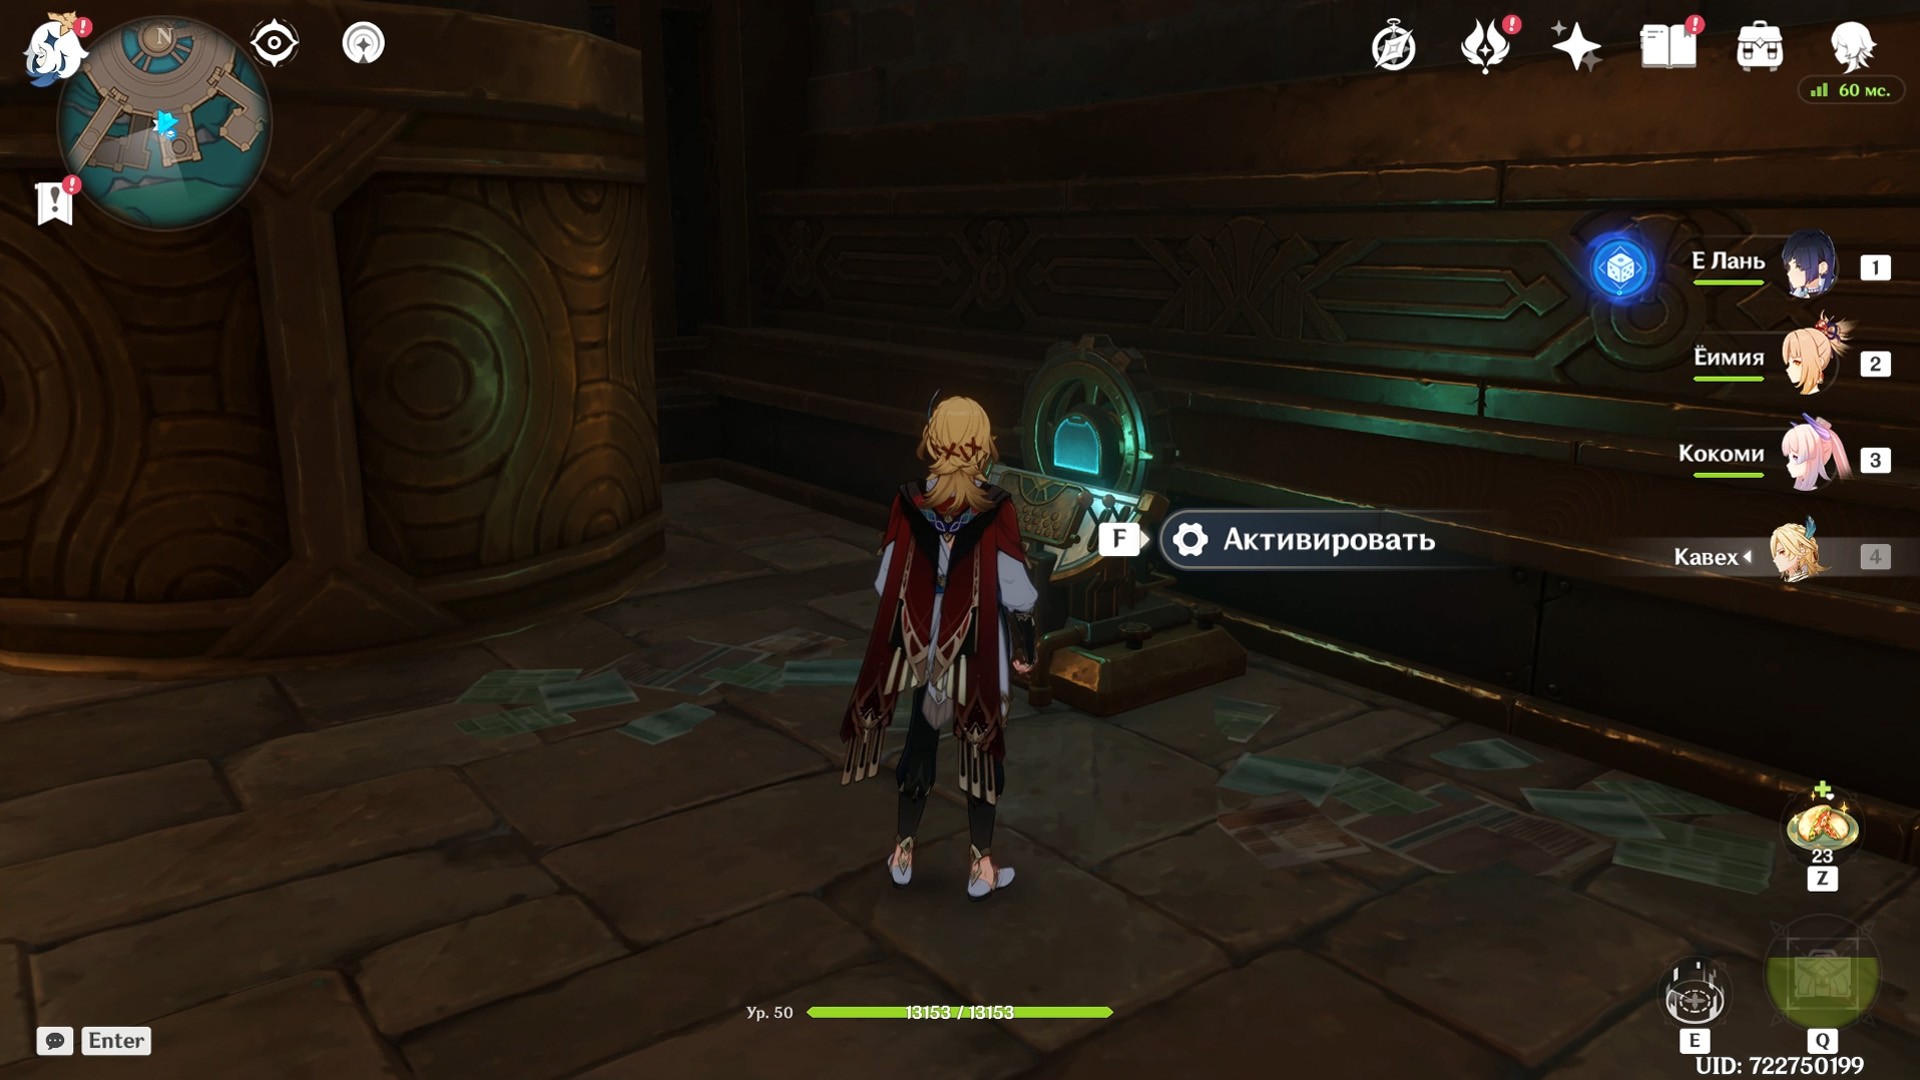
The last remote control is not directly related to receiving rewards (caskets or valuable items), but is involved in a chain of quests within the underwater prison. For more information on how to find and use this panel, read the separate guide to the task “ Scenes from Life in Meropide: Every Debt has a Creditor from "
Comments
You need to login to add comments.
You can login with