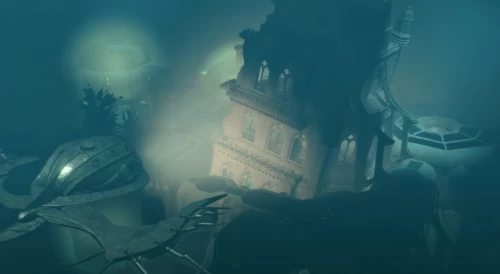
В Baldur’s Gate 3 Железный трон является подводной тюрьмой, в которую можно попасть в третьем акте для прохождения побочного квеста «Спасти гондийцев». В ней вам нужно будет освободить всех пленников, включая отца Уилла и иллитида Омелума, за ограниченное количество ходов. Если у вас возникли трудности с получением и прохождением этого задания, то изучите наше руководство.
Важно: Данная миссия напрямую связана с квестами «Отомстить за клан Железной руки» и «Вывести из строя Стальную Стражу», поэтому мы будем частенько ссылаться на них. При этом здесь будет рассмотрена именно ветка с гондийцами и последствия ваших решений, связанных с ними.
Прохождение квеста «Спасти гондийцев»
Как начать задание и найти Заннера Тубина
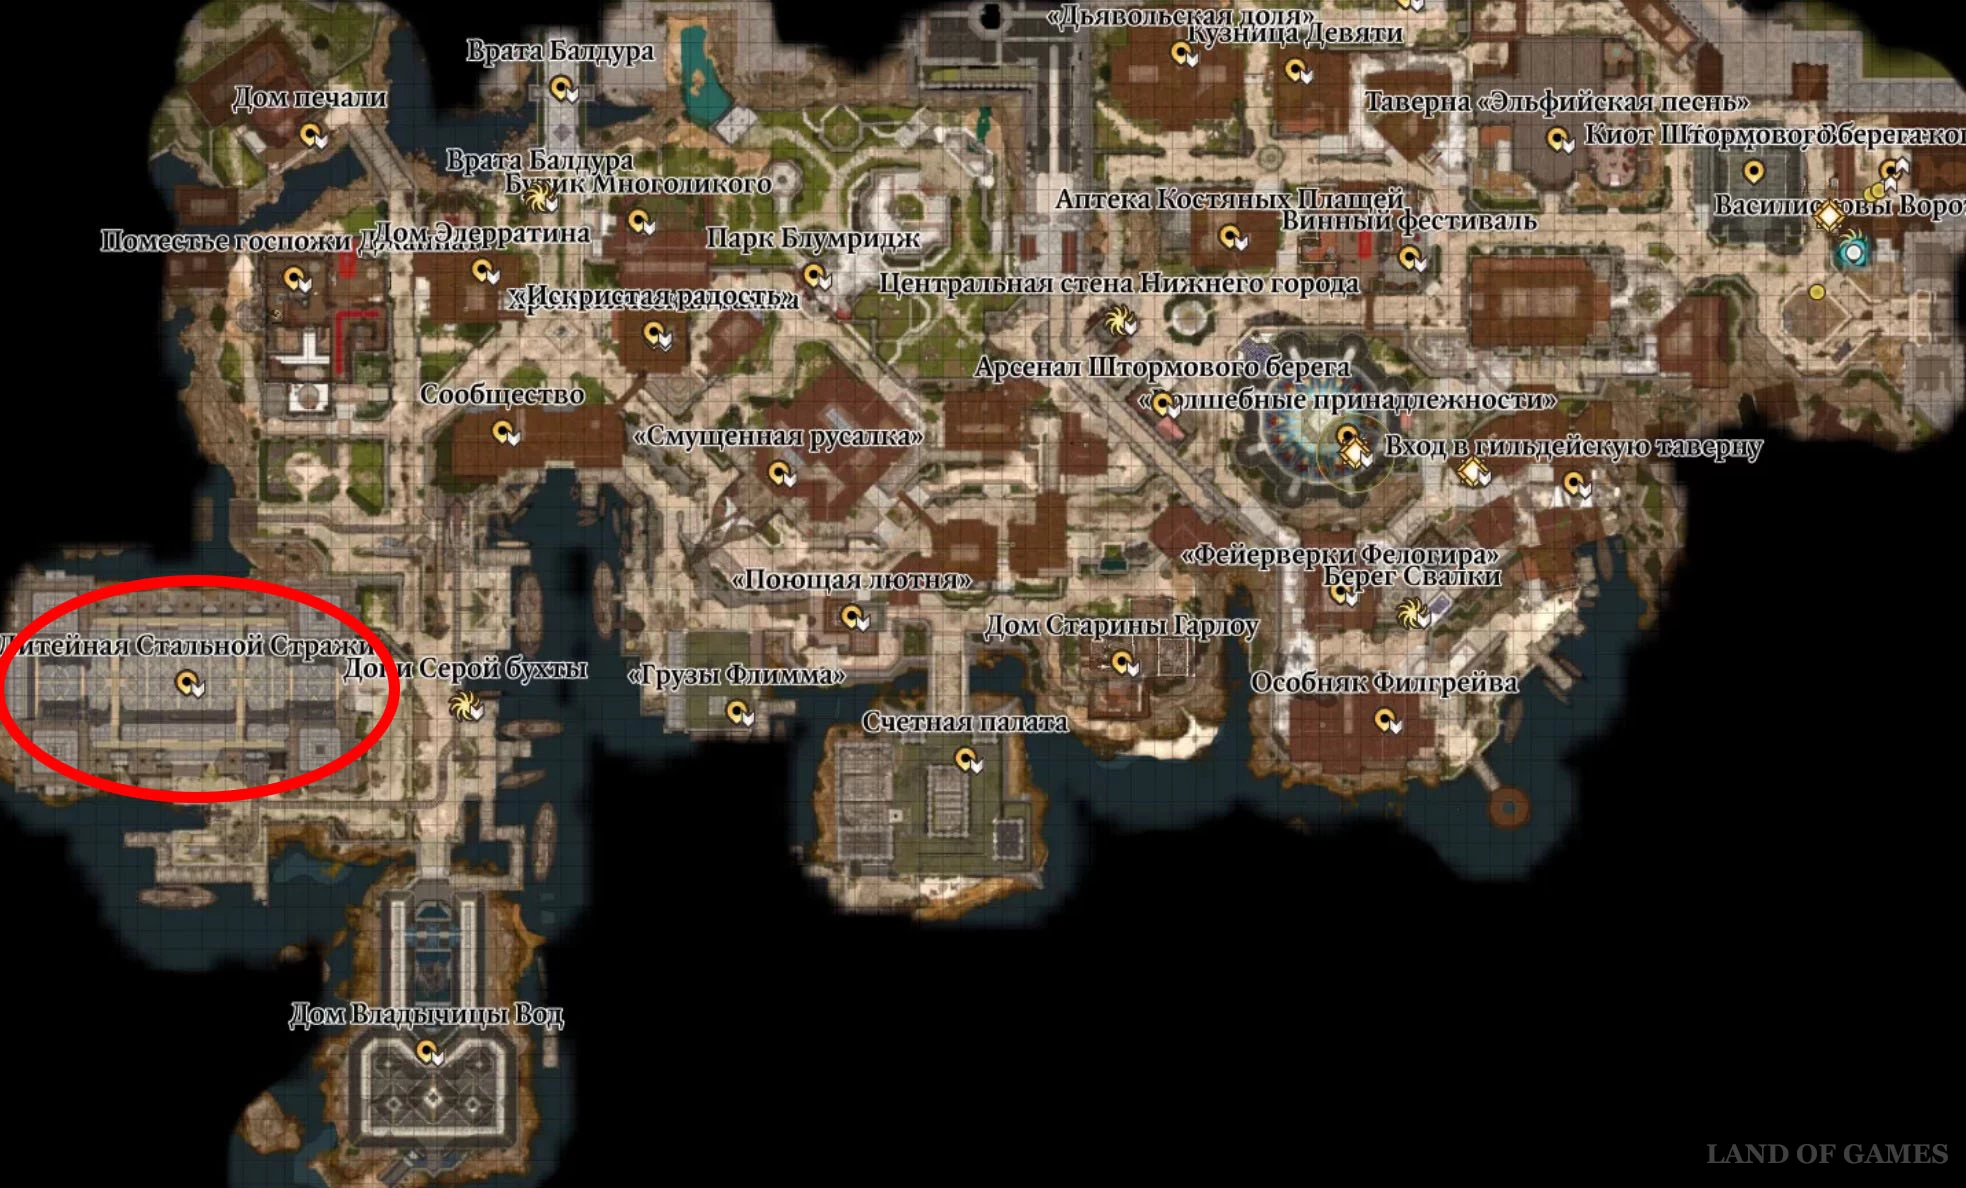
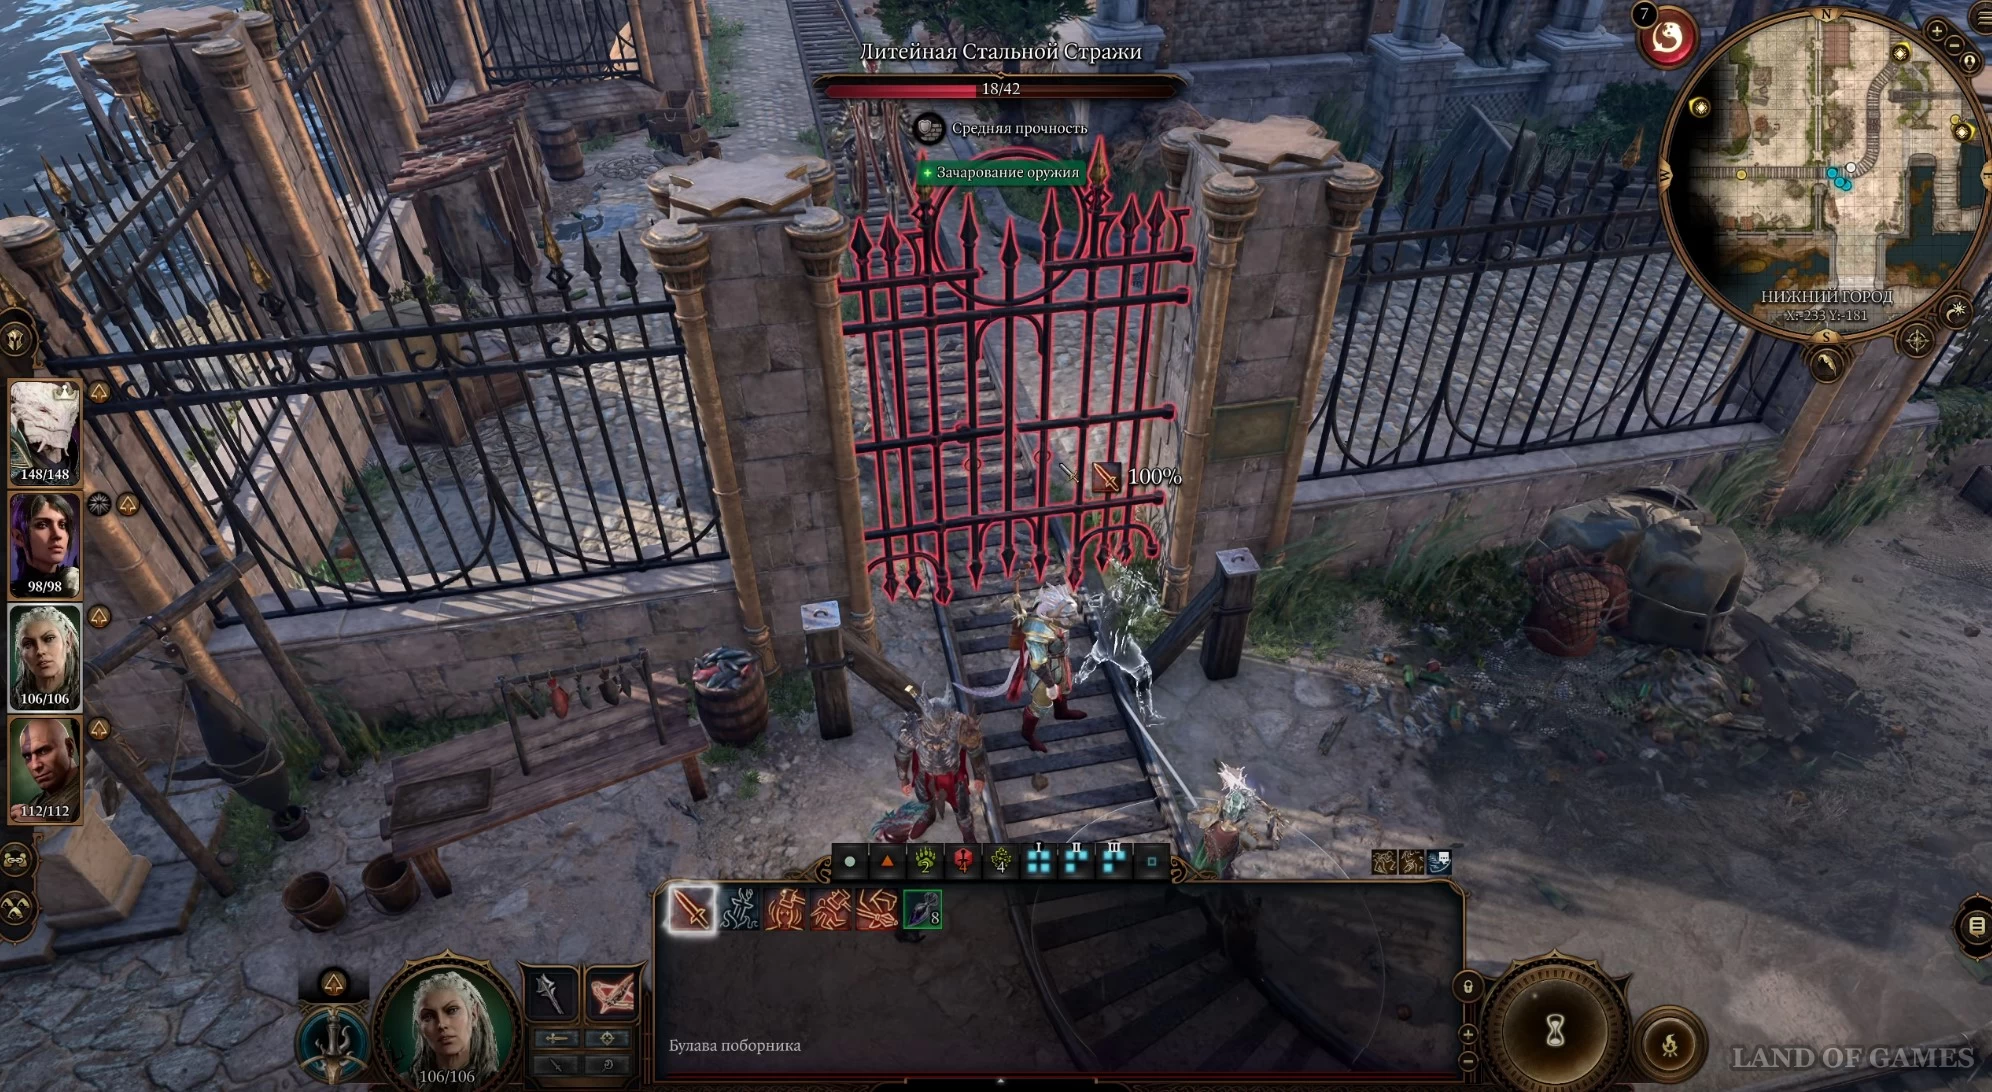
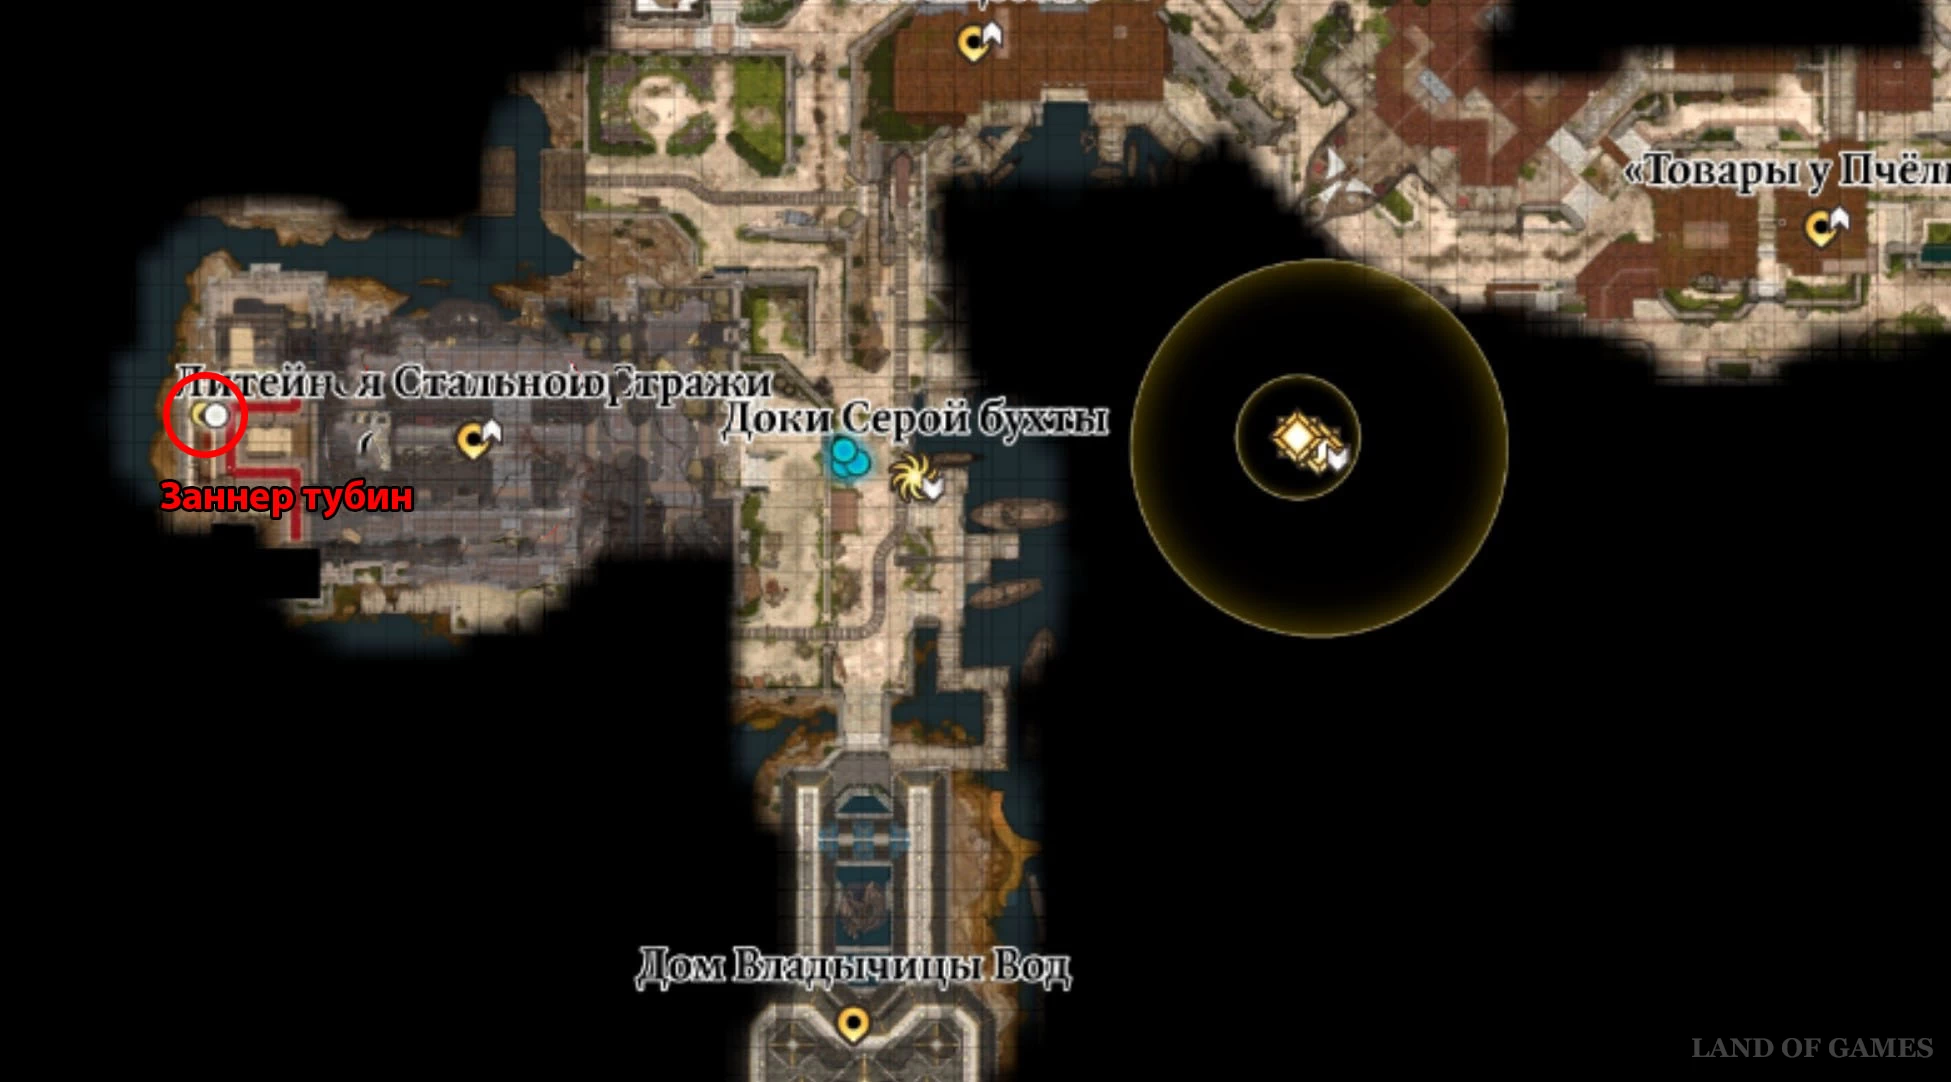
Первым делом вам необходимо будет проникнуть в Литейную Стальной стражи. Она расположена в юго-западной части Нижнего города, неподалеку от телепортационной точки «Доки Серой бухты». Существует несколько способов проникновения на территорию фабрики.
- Вы можете телепортироваться за решетку, перепрыгнуть ее или просто взломать, а потом пройти к двойным дверям впереди и вскрыть уже их (требуется пройти проверку на Ловкость рук 20). Будьте осторожны, так как эту сторону патрулирует один стальной страж – используйте скрытный режим, чтобы не попасться ему.
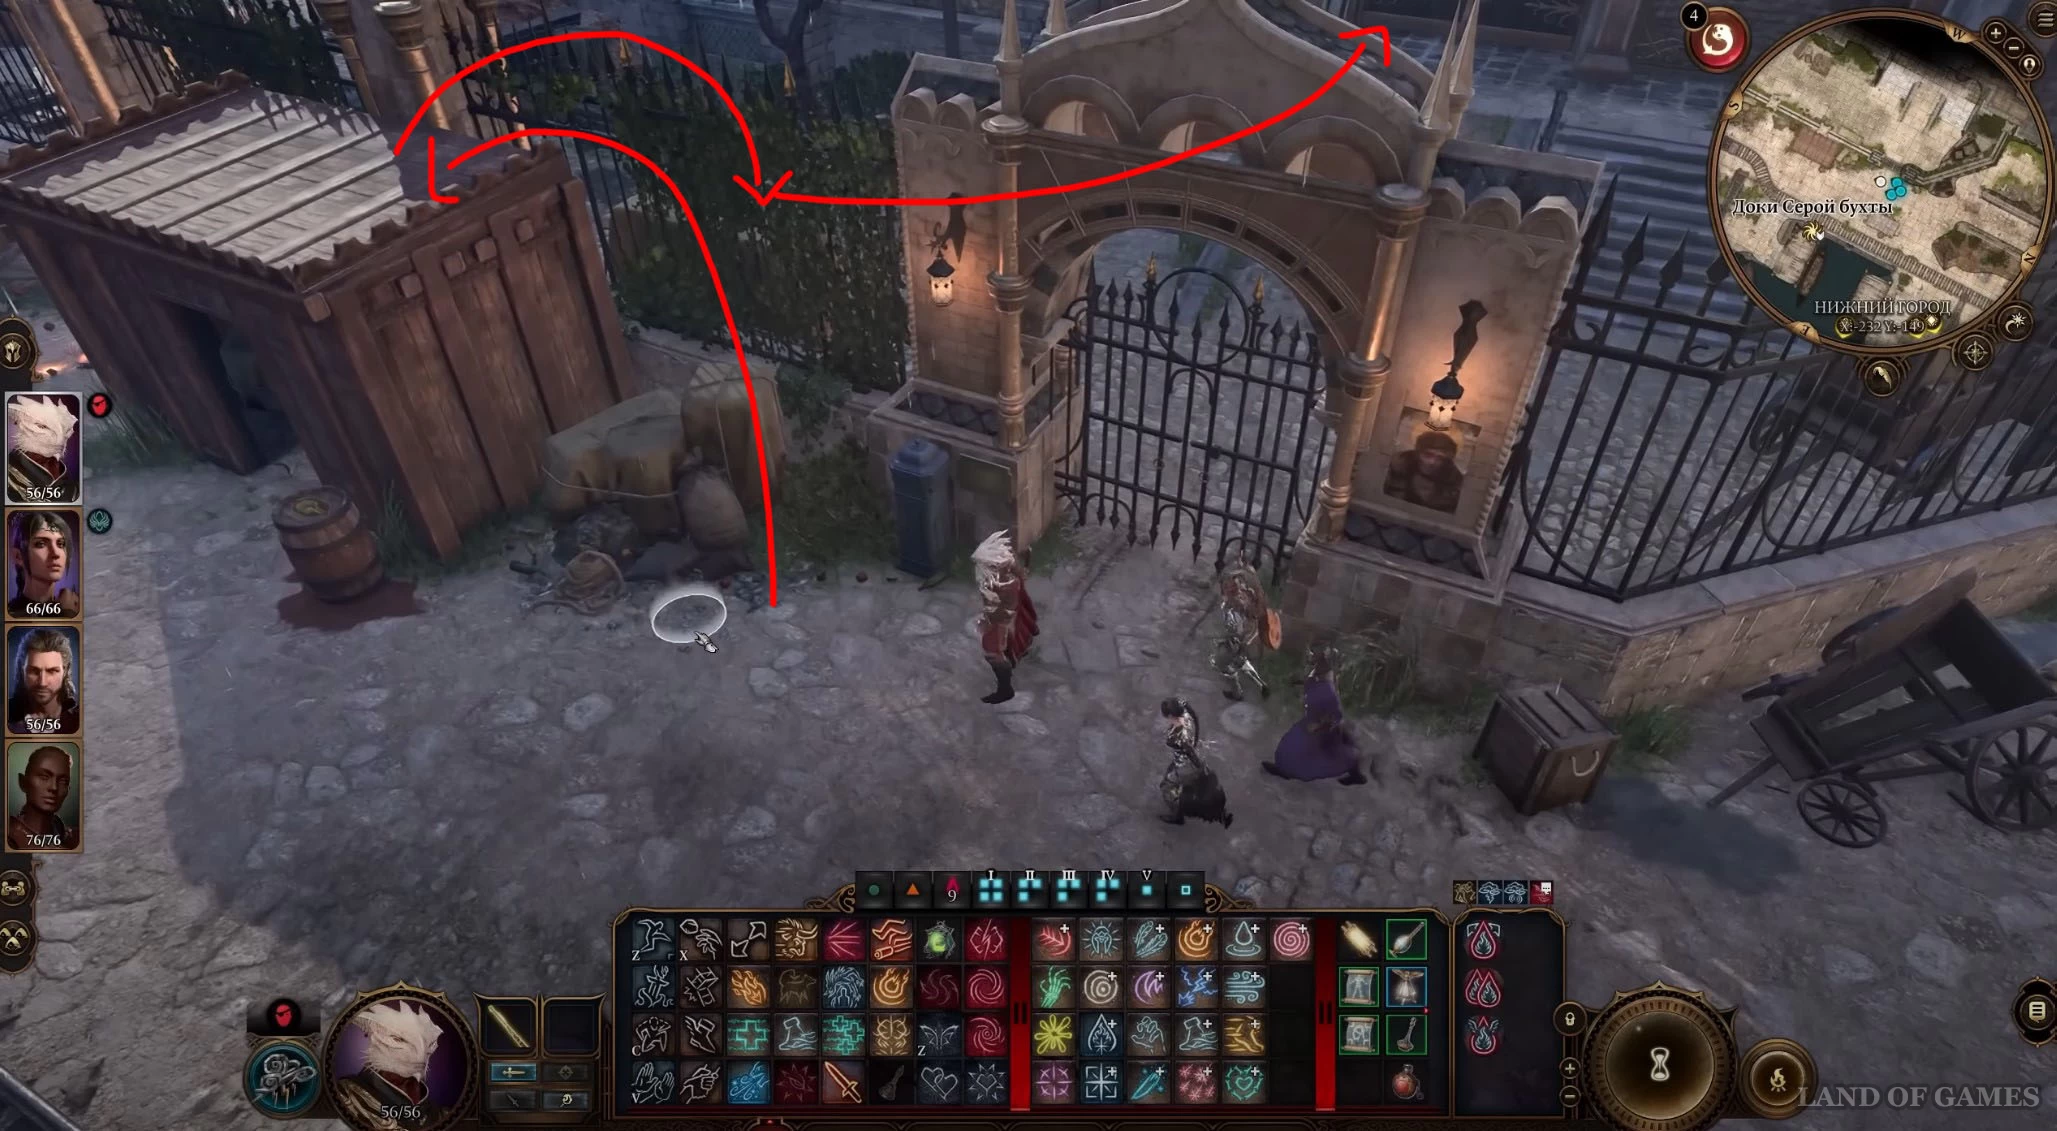
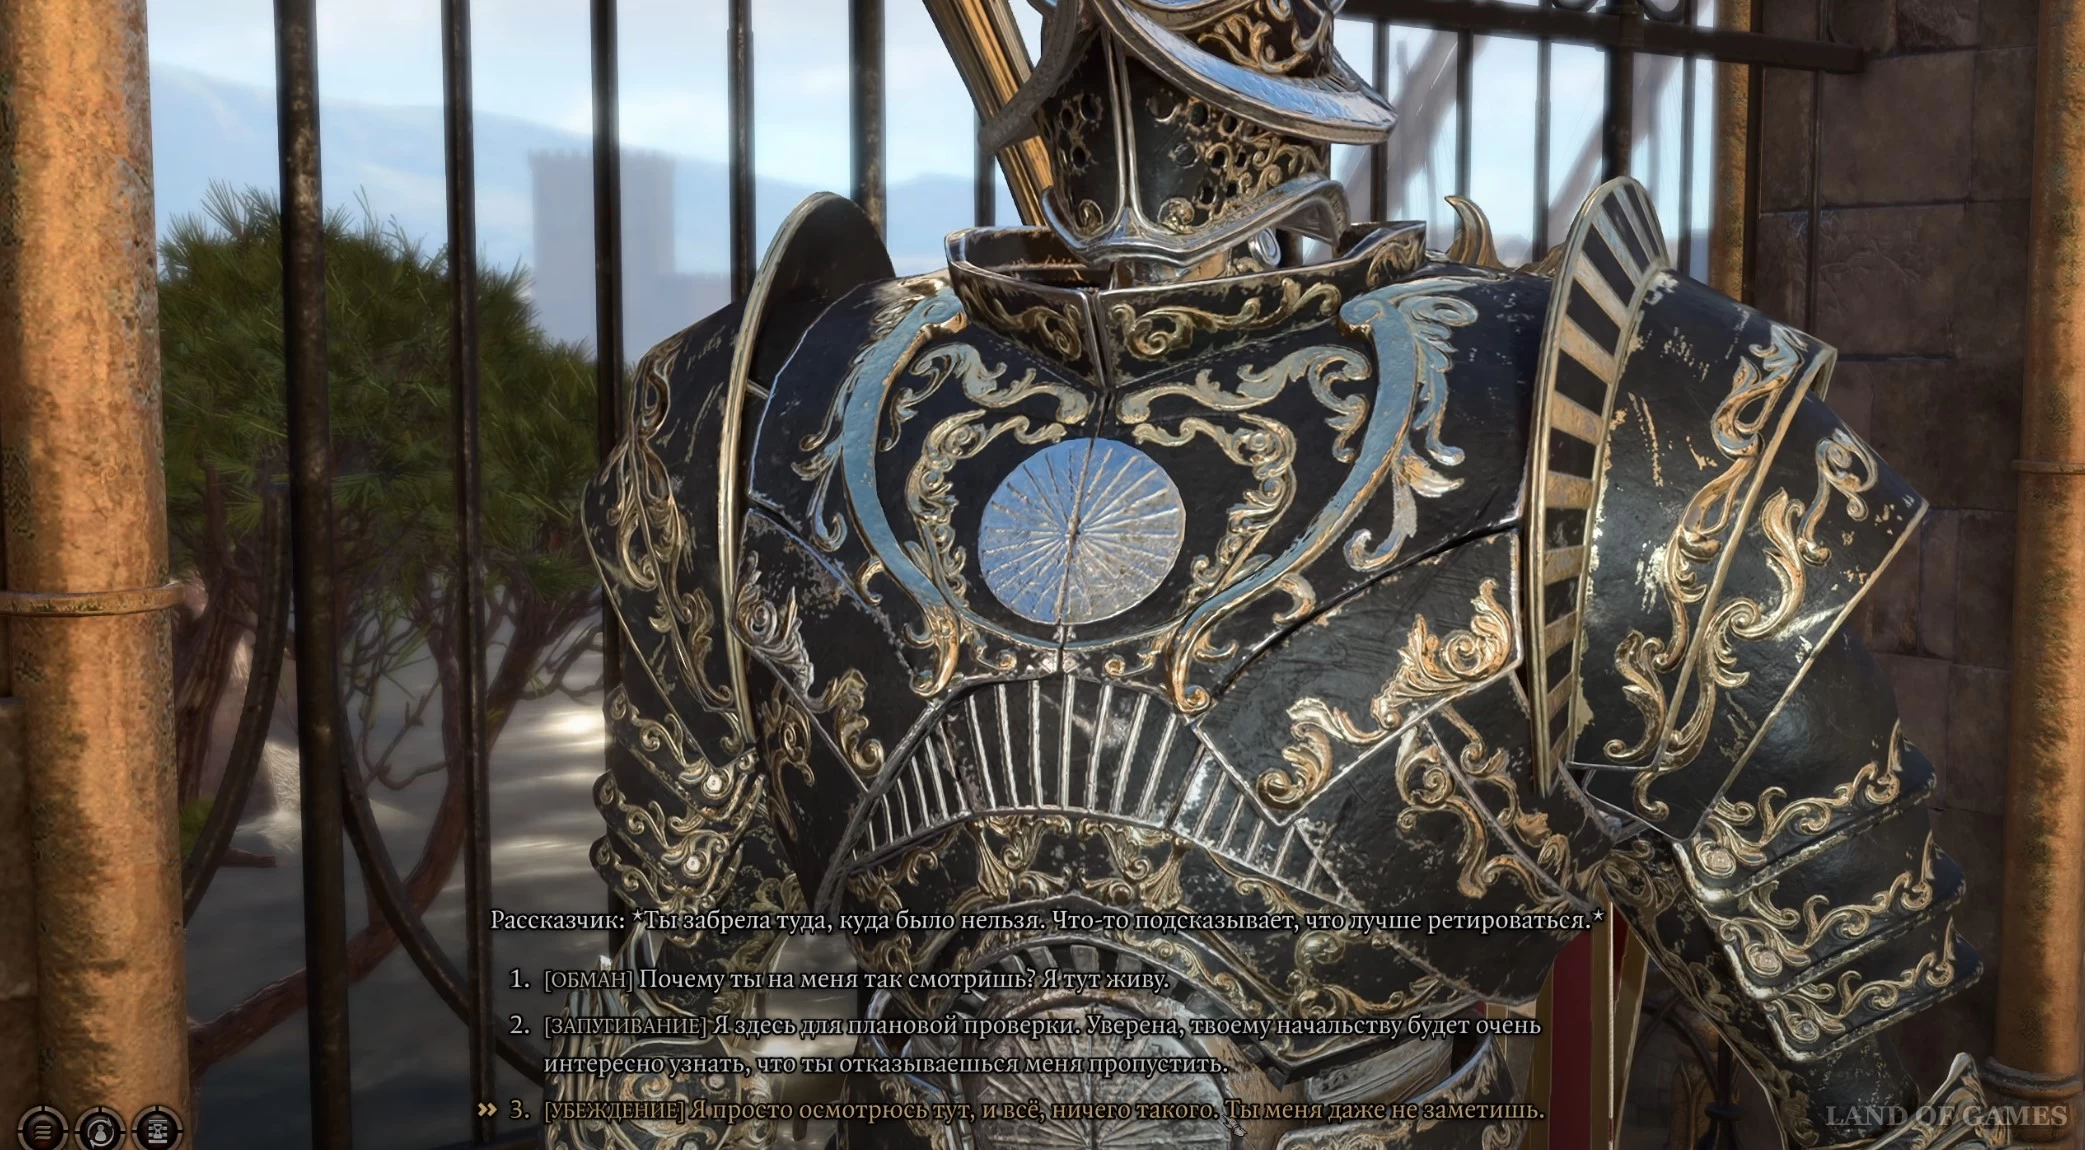
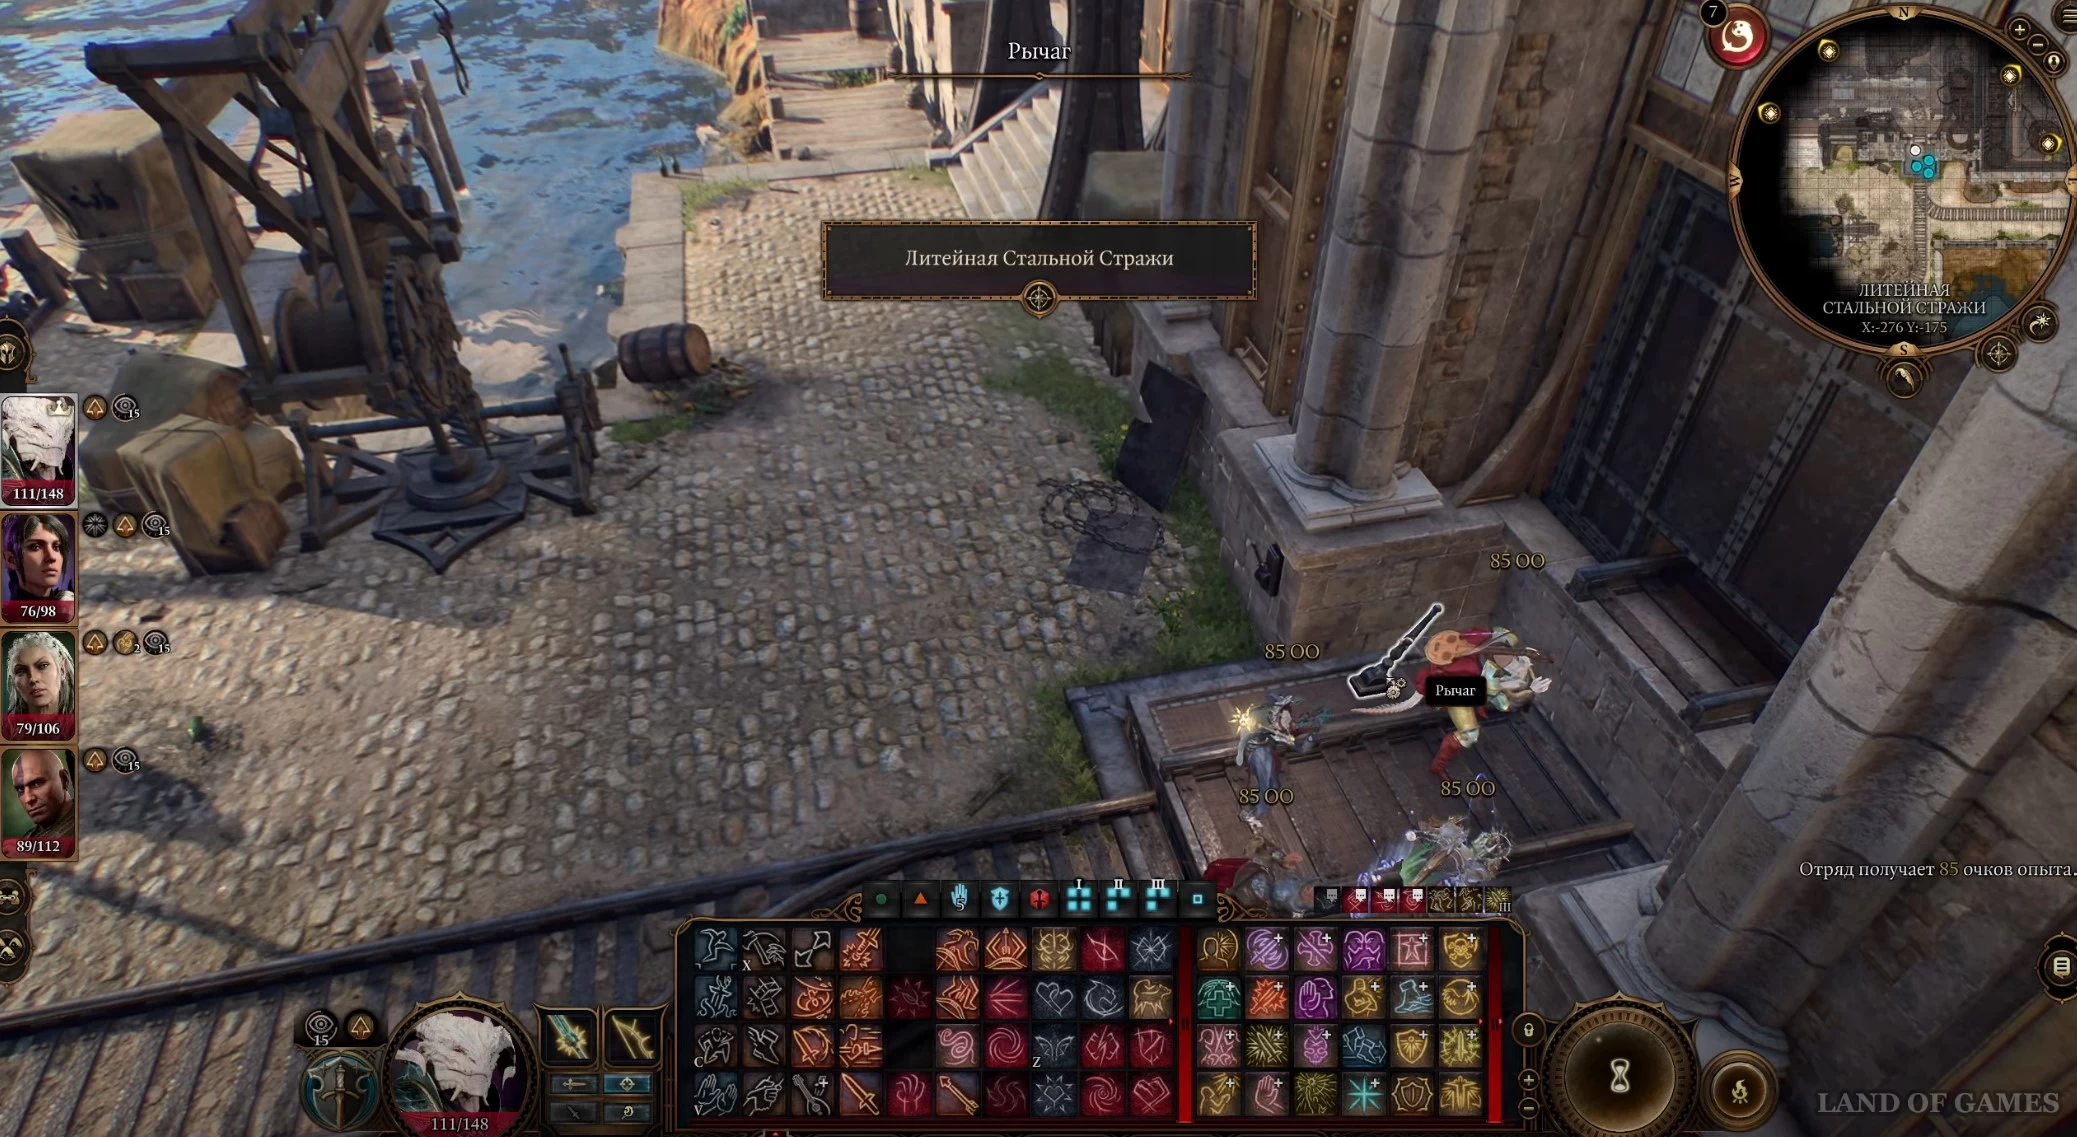
- Можно также просто пробить решетку дробящим оружием и войти внутрь. Если вас заметит стальной стражник, то вы можете убедить его, что вам разрешено здесь находиться, пройдя проверку на Обман, Запугивание или Убеждение (класс сложности 22). В результате вы сможете спокойно перемещаться по территории вокруг фабрики – советуем пройти к платформе (X: -276, Y: -175) на южной стороне здания и взаимодействовать с рычагом, чтобы открыть вход в литейную.
Войдя на завод, двигайтесь на запад. Когда вы окажитесь в главном рабочем цехе, стартует кат-сцена, в которой покажут, как культисты заставляют гондийцев работать, угрожая убийством их семей и подрывом ошейников. Если вы не находитесь в режиме скрытности, то сектанты решат напасть на вас. Вы можете убедить гондианцев помочь вам, пройдя проверку на Запугивание или Убеждение.


Если вам не удастся уговорить гномов, то они останутся враждебными к вам, пока вы не расправитесь с Тамией Хольц. После ее смерти Мотиватор, который носила черная десница, активируется и вам нужно будет выключить его, пройдя проверку на Интеллект (5). Поговорите с выжившими – они запаникуют, рассказав вам, что их семьи держат в заложниках.
Примечание: Если вы прибудете сюда уже после спасения пленников из Железного трона, то в главном цеху сразу же увидите Заннера Тубина, который выступит против угнетателей, поведя за собой свой народ. В результате по всей территории завода начнутся бои, в которых вы сможете поучаствовать.
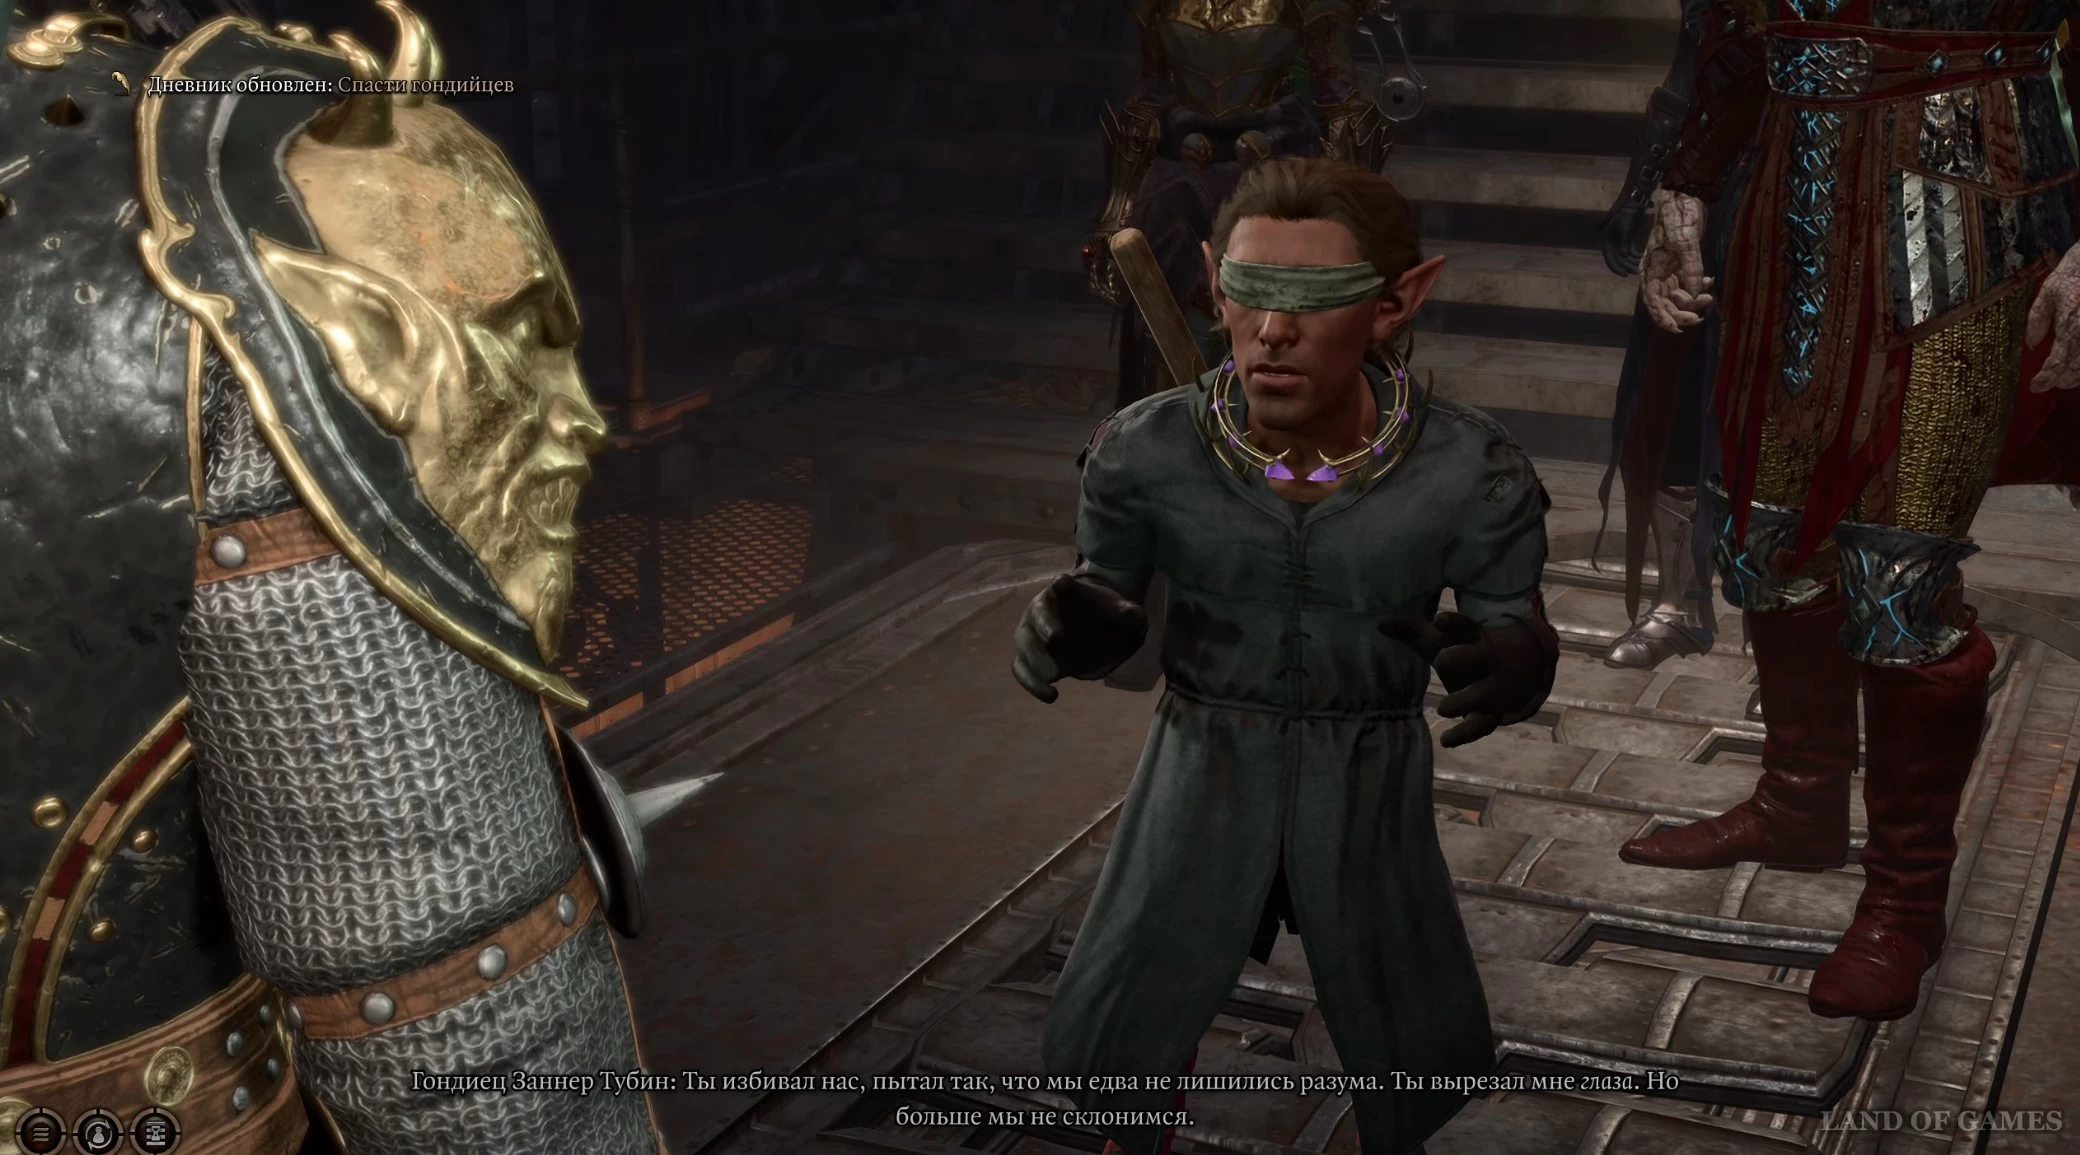
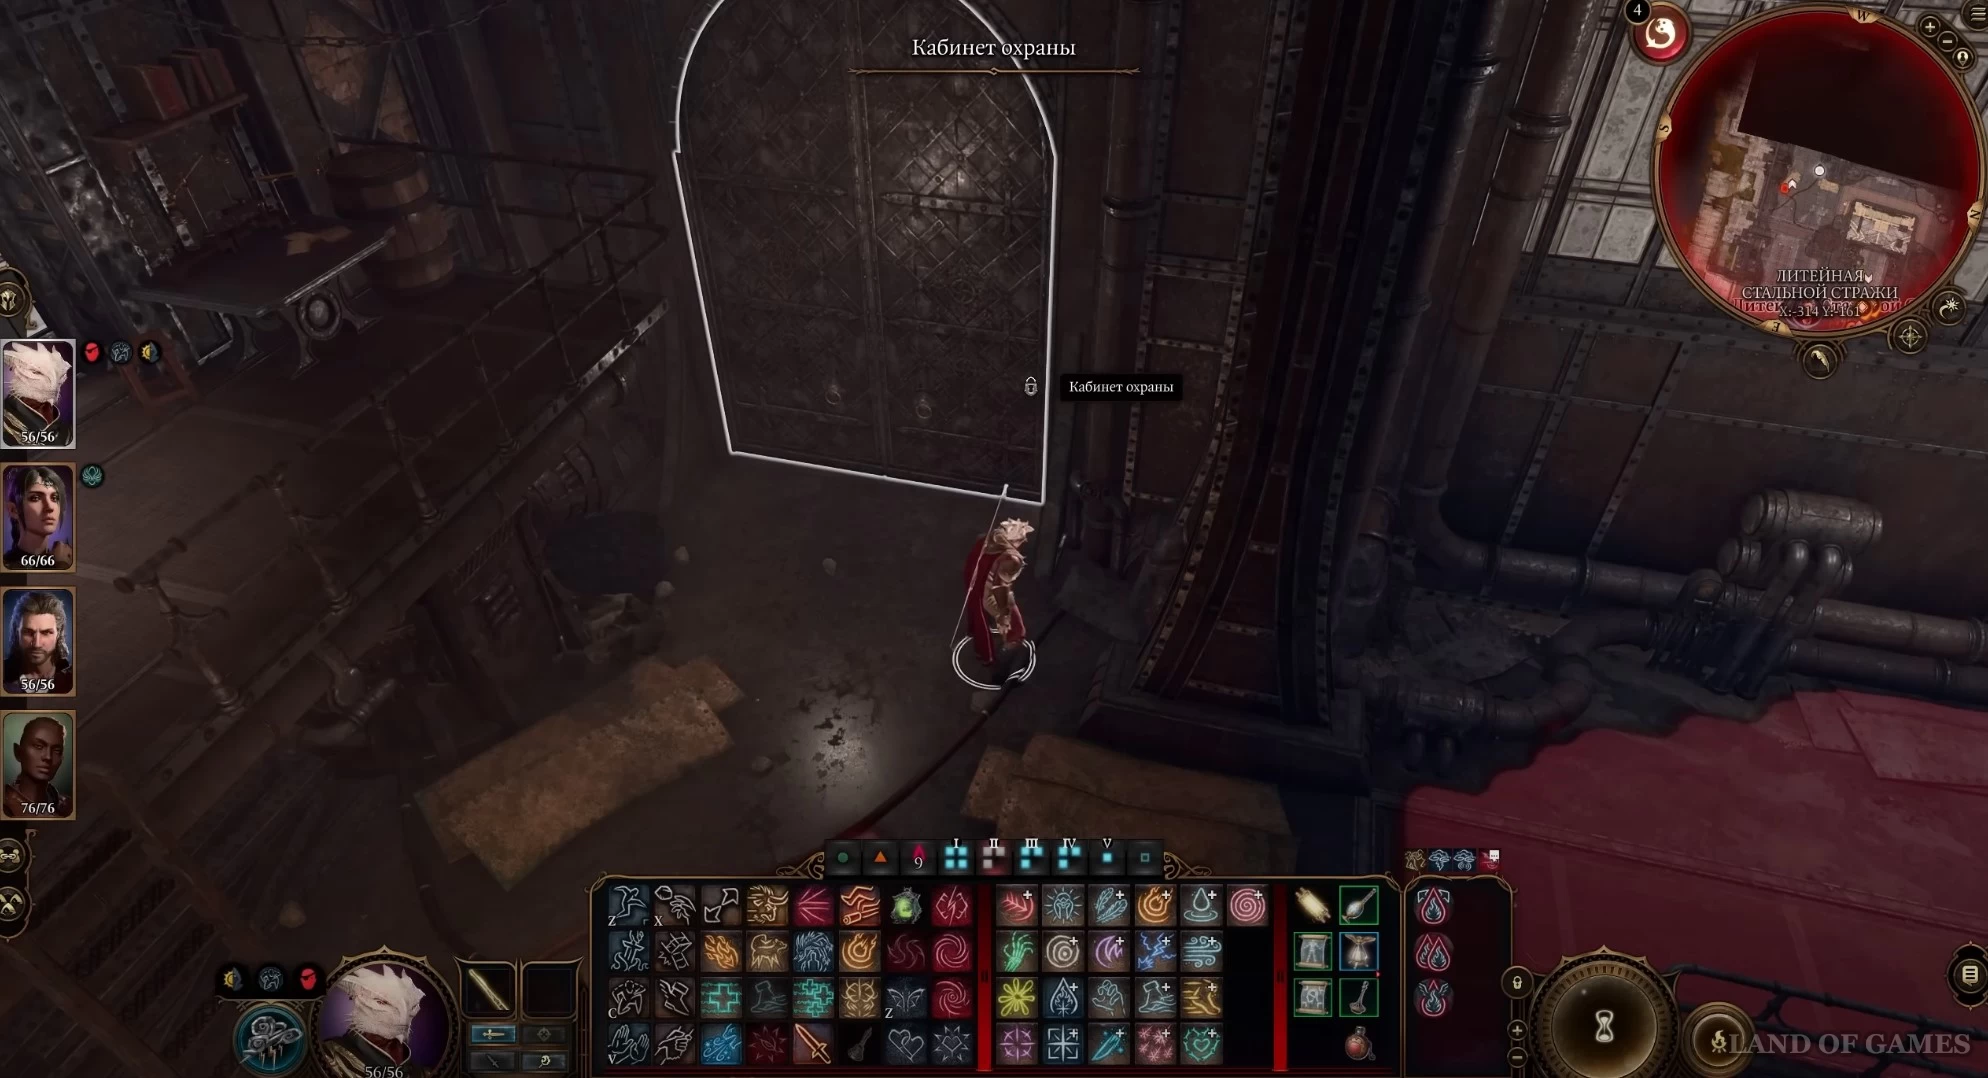
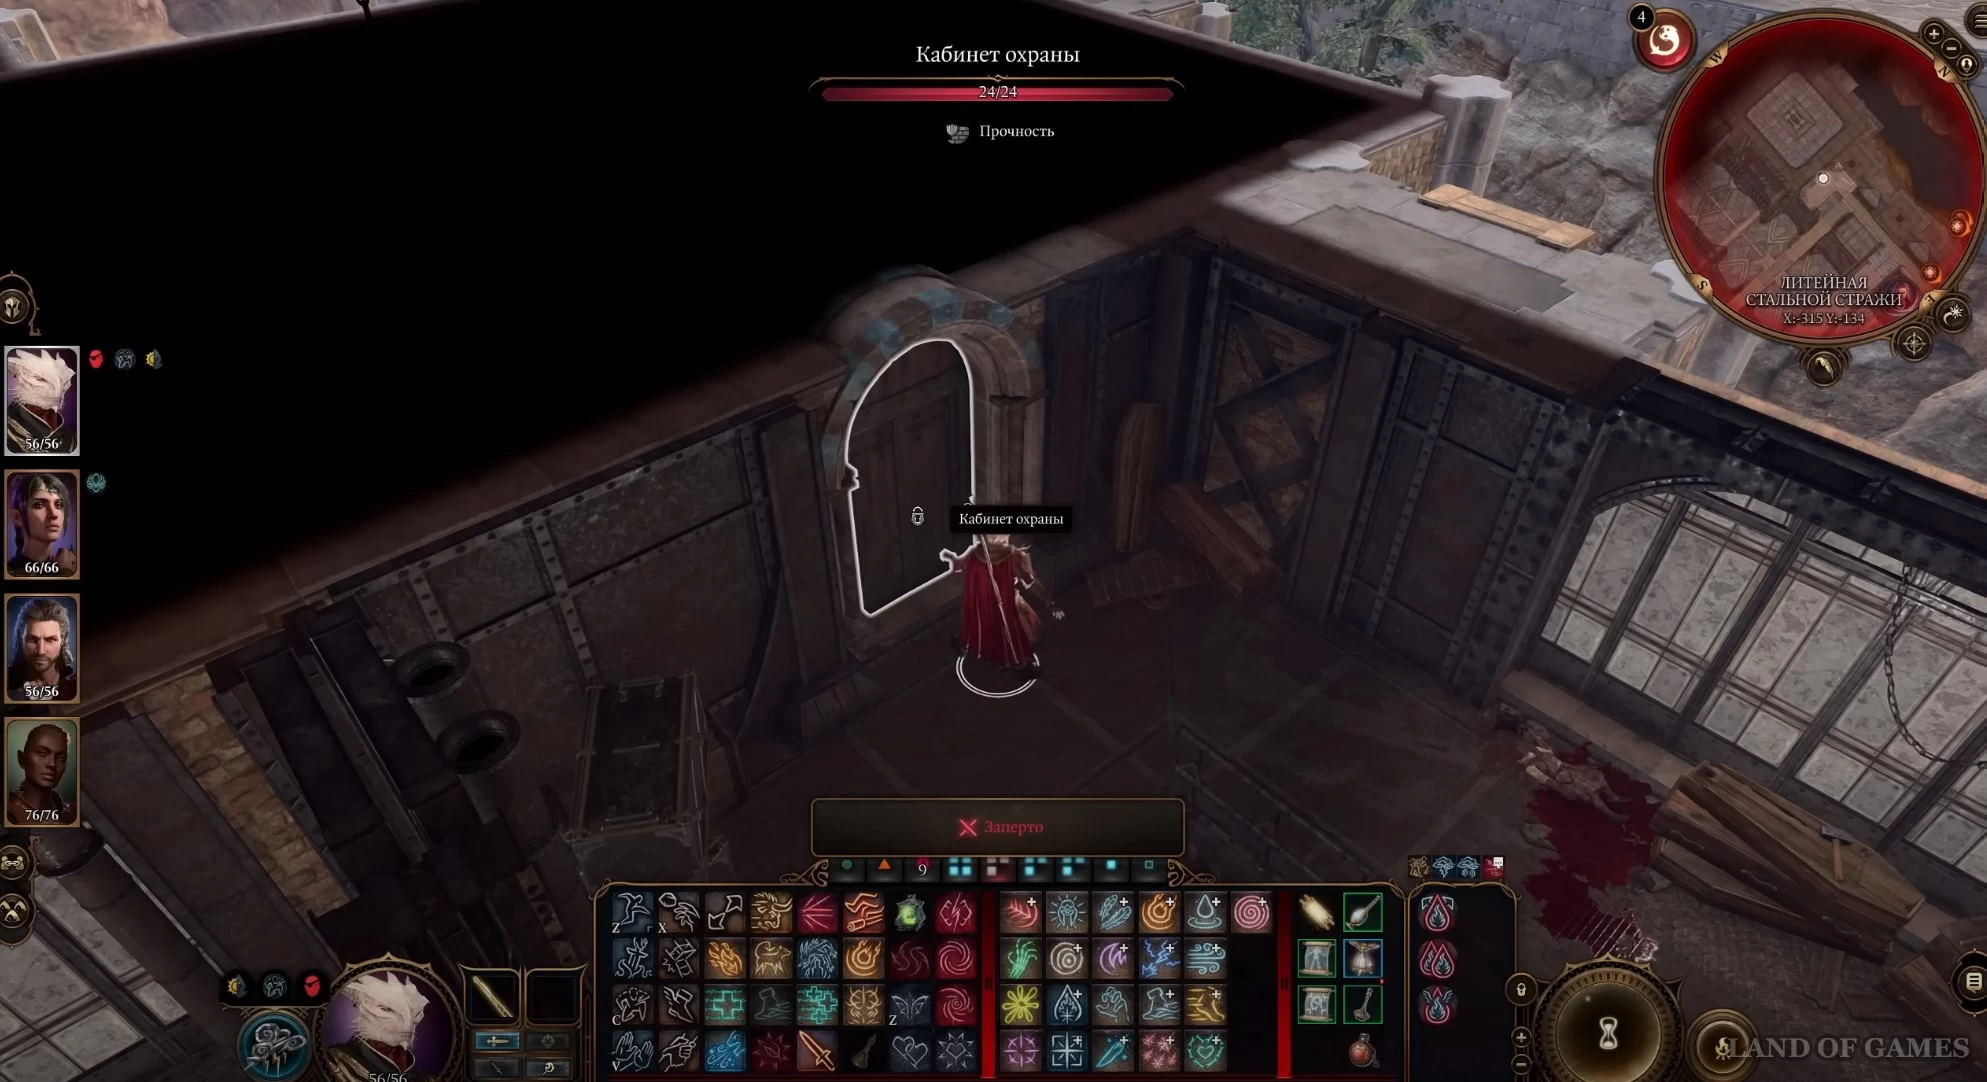
Впрочем, драться со стражей сейчас необязательно – можете продолжить скрытно идти на запад в кабинет охраны. Откройте дверь внизу или наверху, пройдя проверку на Ловкость рук (15) или воспользовавшись ключом, который можно украсть у Тамии. Внутри вы обнаружите Заннера Тубина. Он расскажет вам о семьях гондийцев и своей дочери, которые заключены в тюрьме Железный трон, и попросит вас вытащить их оттуда. В результате начнется задание «Спасти гондийцев».
Как попасть в подводную тюрьму Железный трон
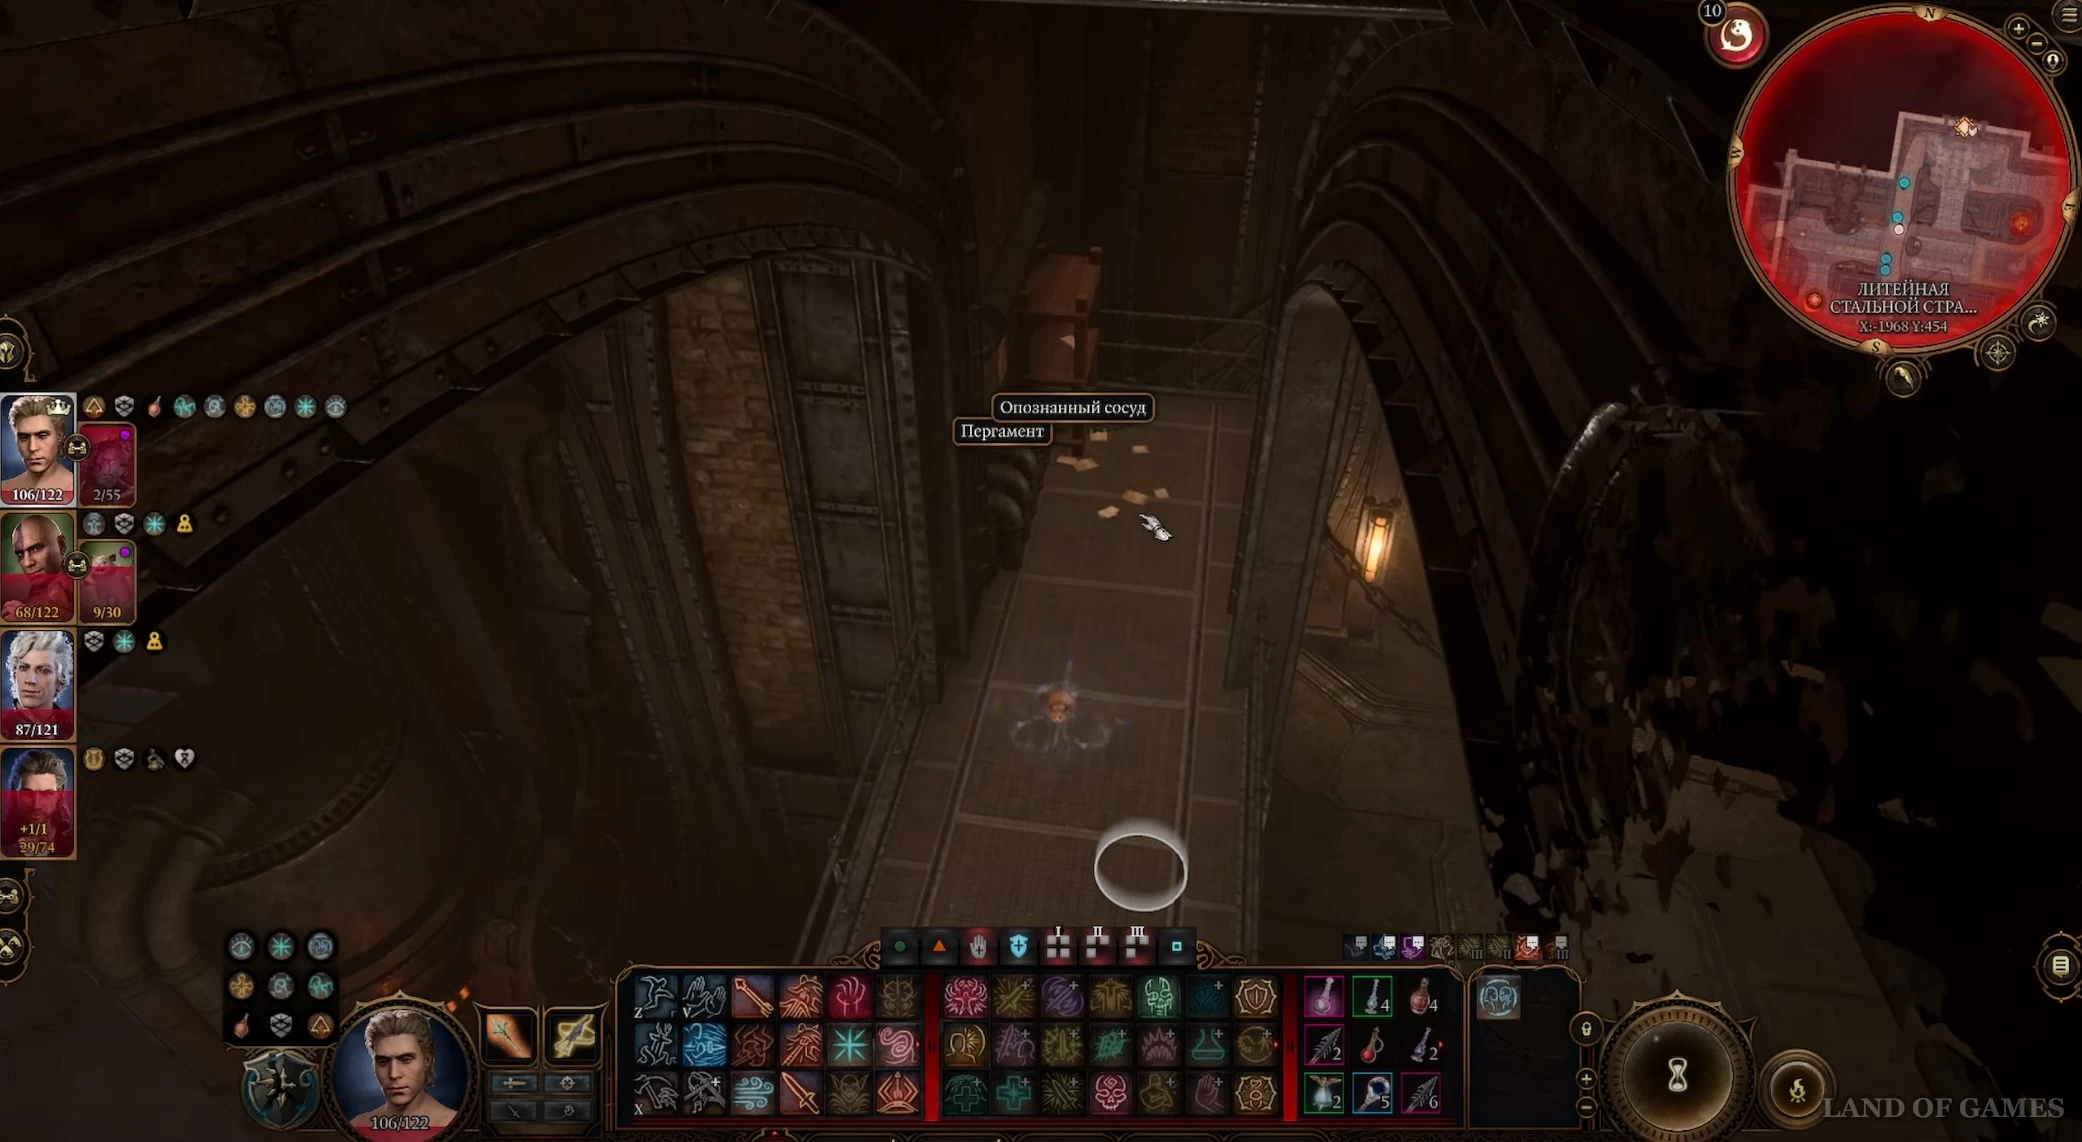
Однако Тубину неизвестно, где именно находится тюрьма, но в глубине литейной можно отыскать больше информации о ней (искать эти документы необязательно). Для этого пройдите через дверь внизу лестницы в кабинете охраны. Вы окажитесь в лаборатории, которая хорошо охраняется культистами, поэтому перейдите в режим скрытности или воспользуйтесь Невидимостью, чтобы добраться до металлического помоста и отыскать бумажку «Опознанный сосуд» на полке (X: -1968, Y: -459).

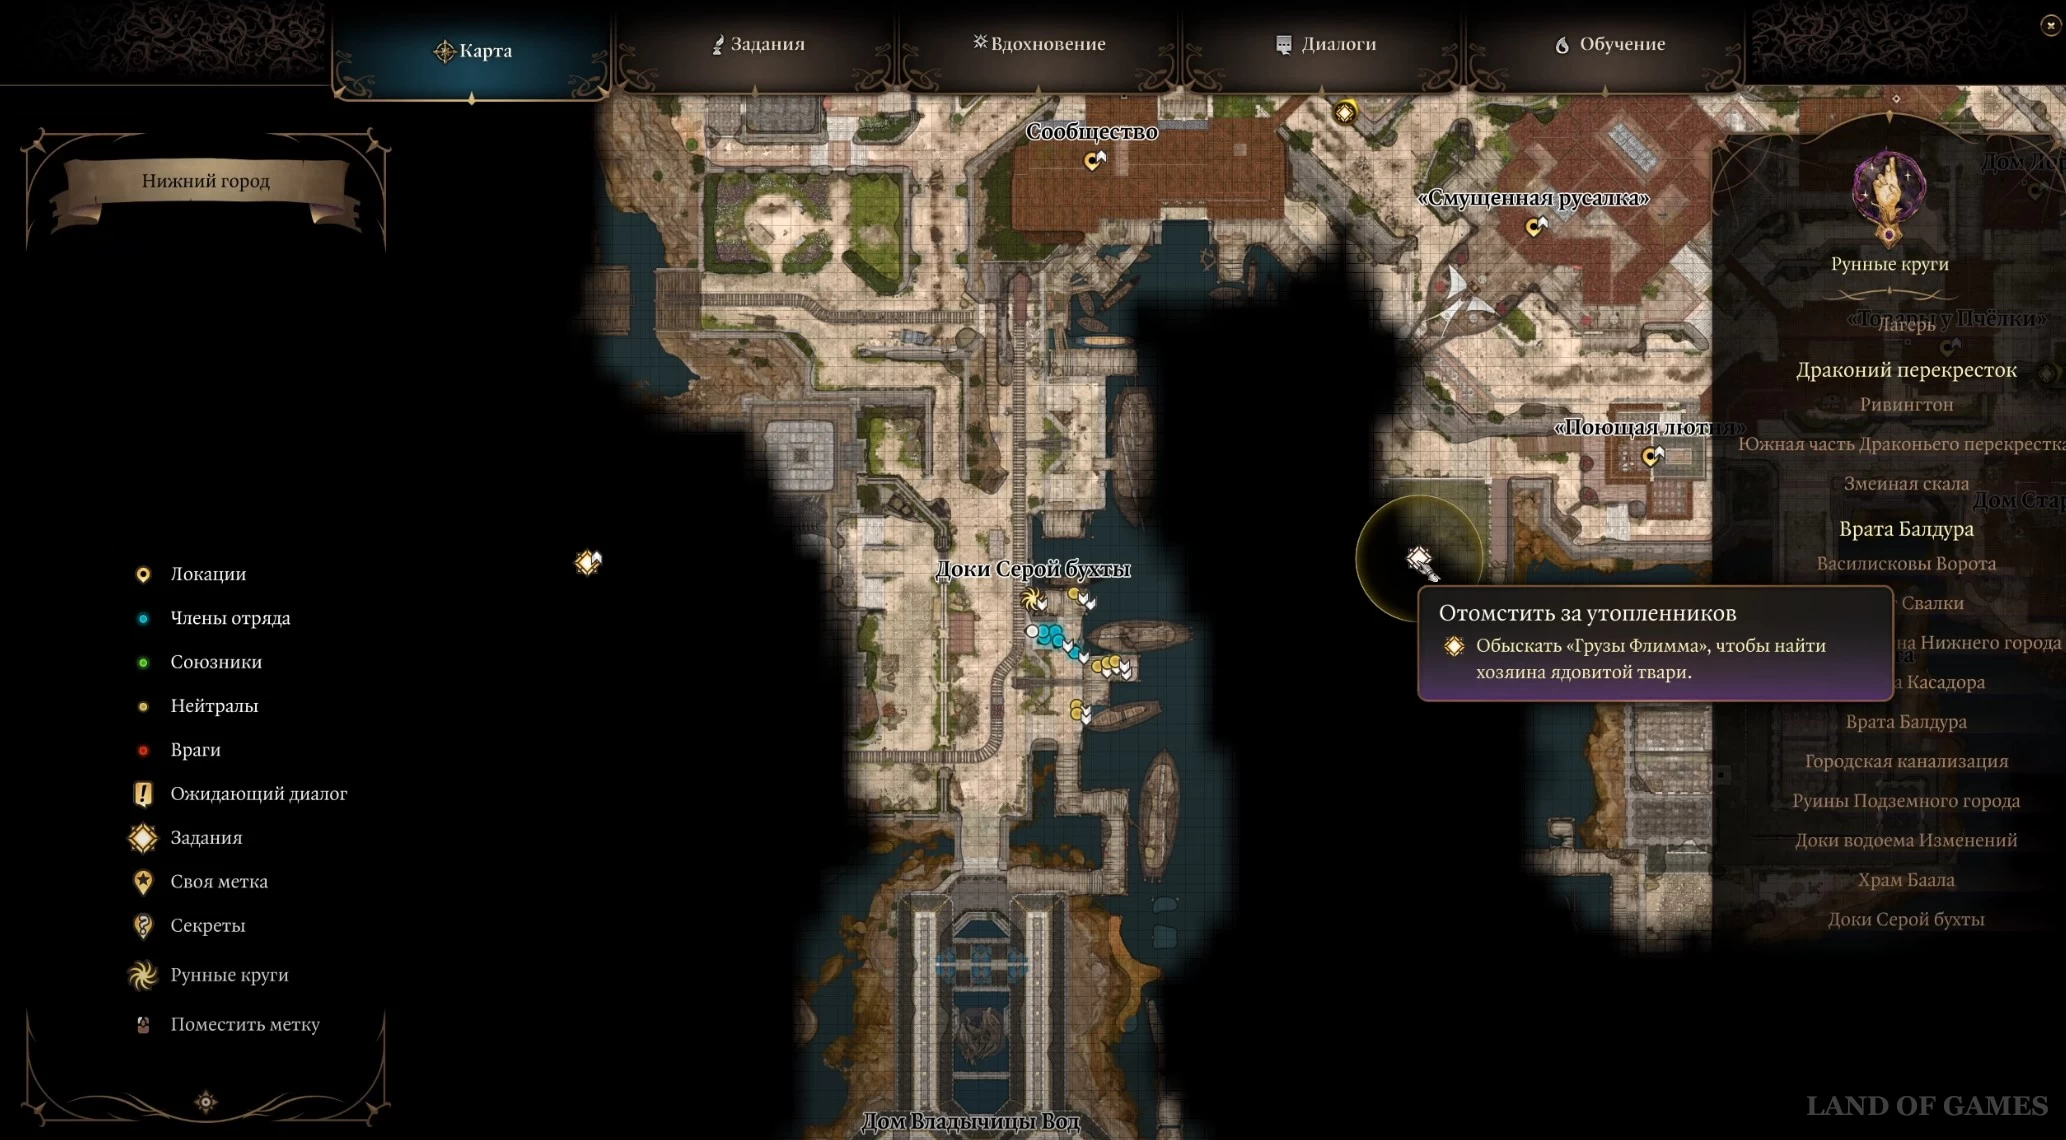
Получить информацию о тюрьме можно также при выполнении миссии «Отомстить за утопленников» или, заключив сделку с Мизорой в рамках квеста «Спасти великого герцога». Впрочем, все эти действия тоже можно не выполнять, а попросту пройти в нужную локацию, так как главное – это знать, где она находится.
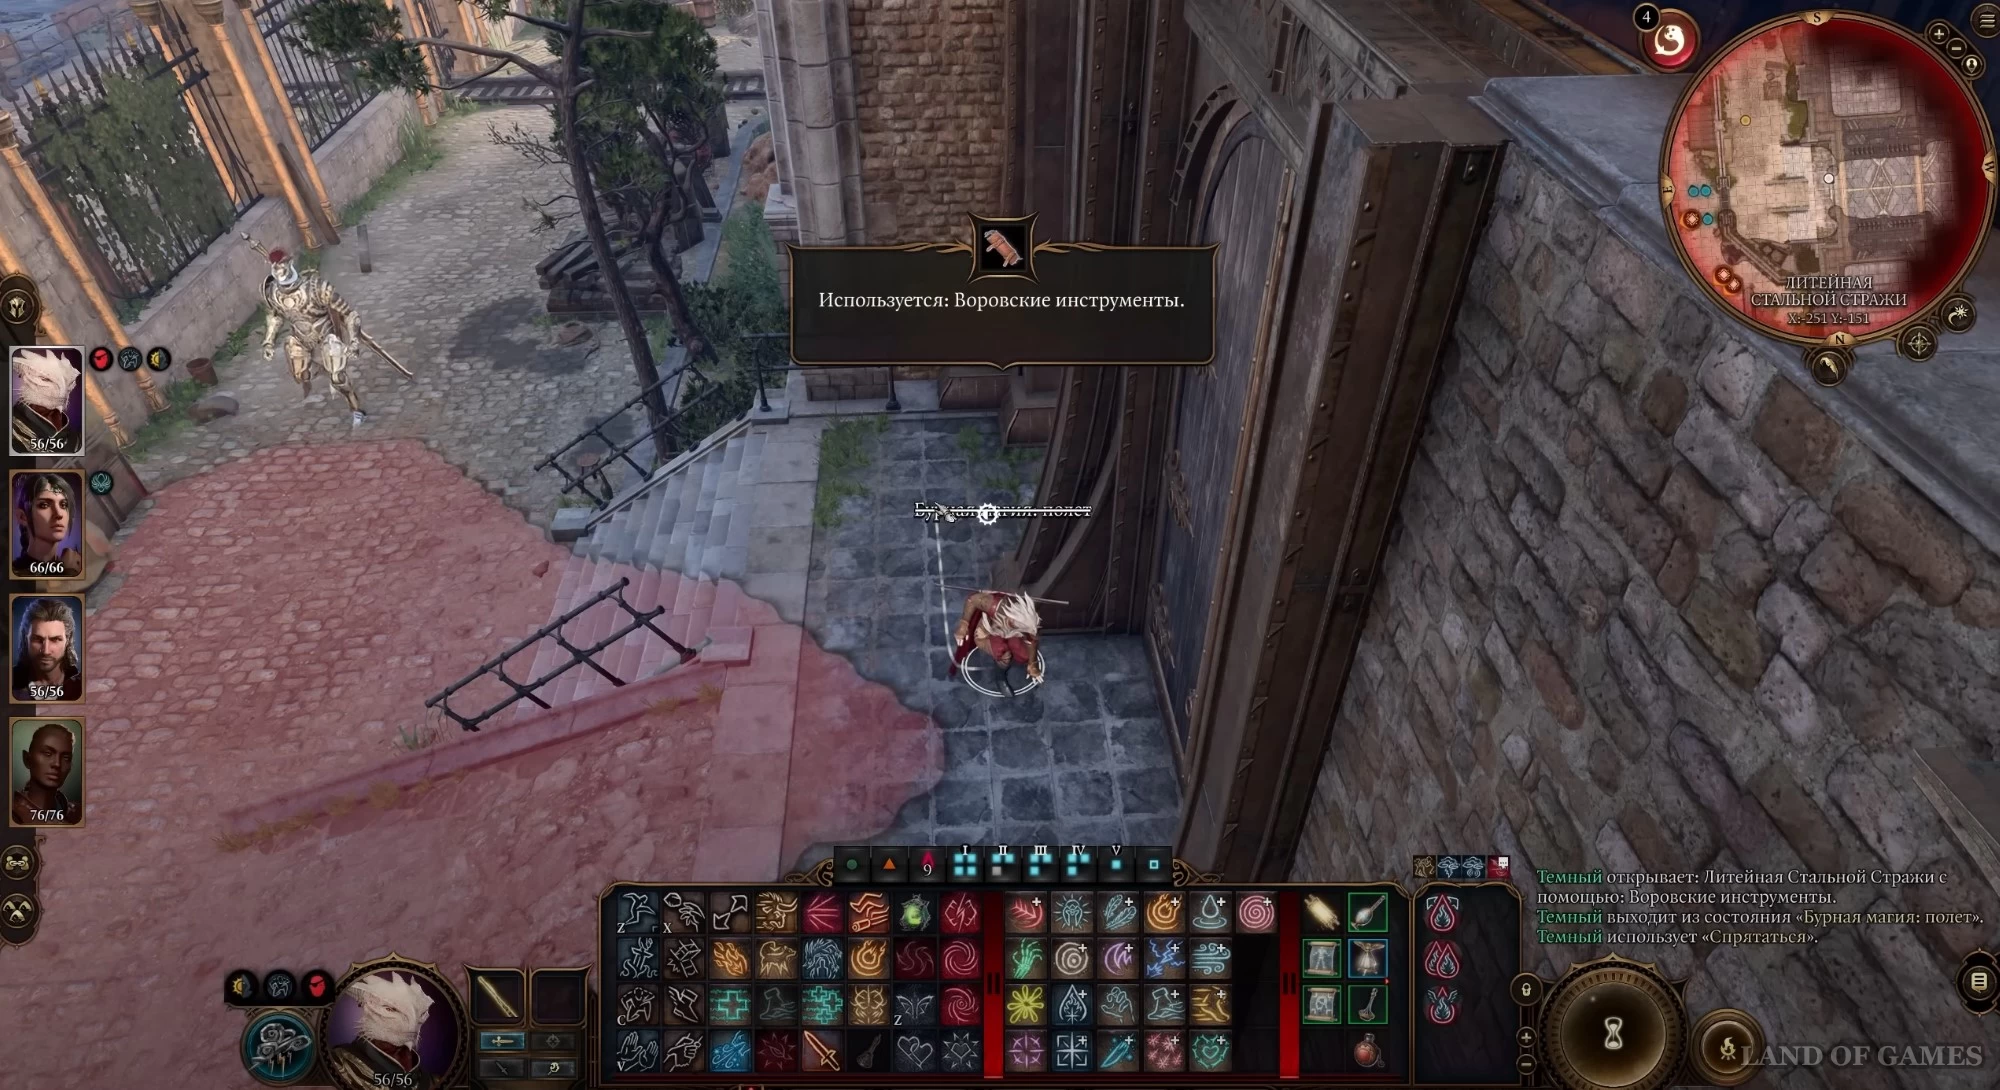
Попасть в нее можно с помощью подводного аппарата, находящегося в подвале «Грузов Флимма». Нужное строение расположено чуть дальше на востоке. Можете просто обойти водную преграду, сначала пройдя на север, а потом снова спустившись на юг. Доберитесь до двойных металлических дверей (X: -169, Y: -148), и вы увидите след из масла, если пройдете проверку на Внимание. Затем взломайте их (Ловкость рук 20), чтобы открыть.

Примечание: Попасть внутрь можно также через крышу, пройдя к восточной стороне здания, забравшись на кровлю и открыв дверь на металлической площадке, пройдя проверку на Ловкость рук (15). Вы можете также проникнуть сюда через канализацию или счетную палату.

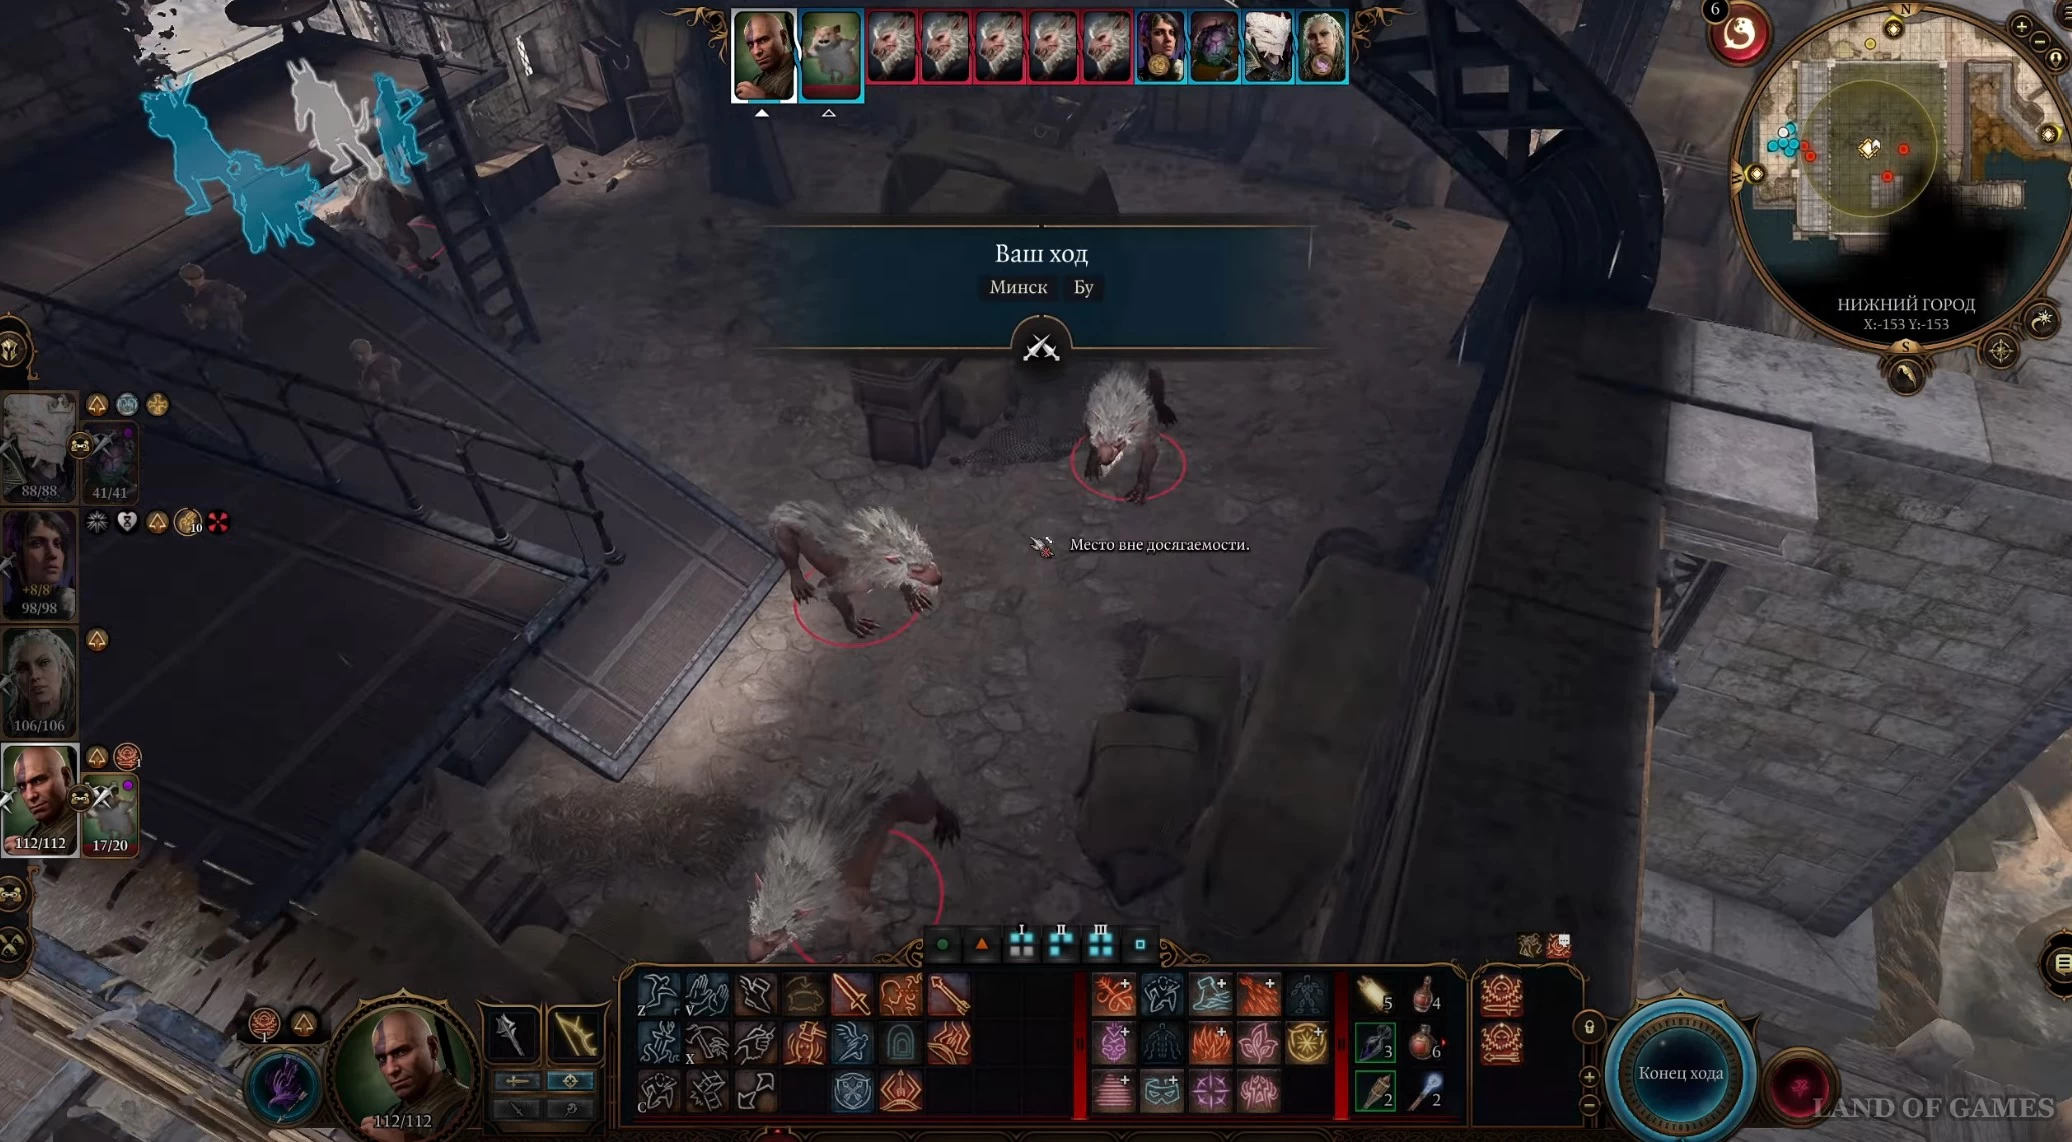
Пройдя внутрь здания тем или иным образом, вы столкнетесь с группой варгов. Эти враги не очень опасные, особенно если проберетесь в постройку сверху, так как сможете спокойно обстрелять противников с безопасного расстояния.
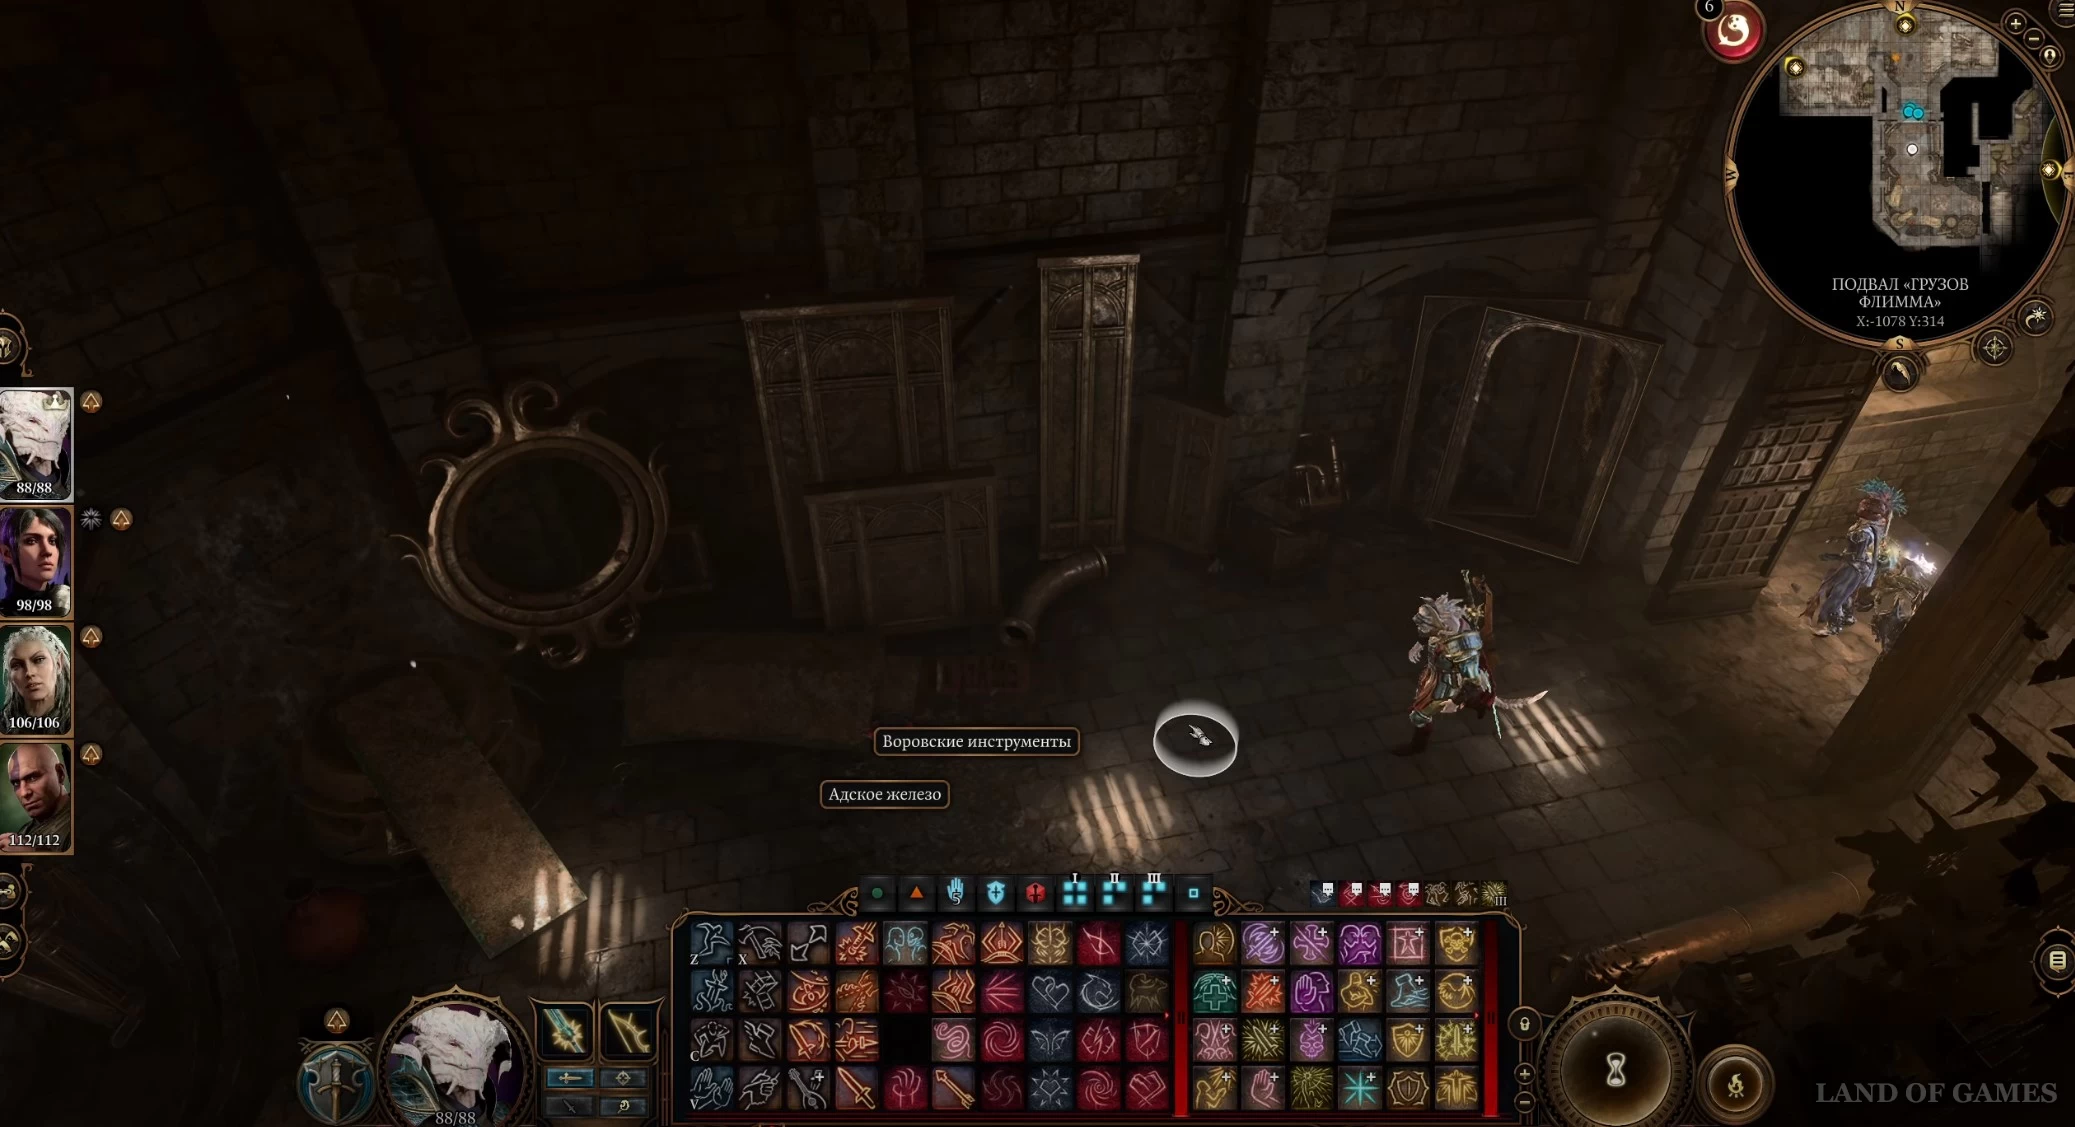
Здесь можно найти люк (X: -162, Y: -142), ведущий в подвал. Он расположен в углу здания и завален различными коробками и ящиками, поэтому для начала придется их переместить в другое место, а потом уже взаимодействовать с люком.

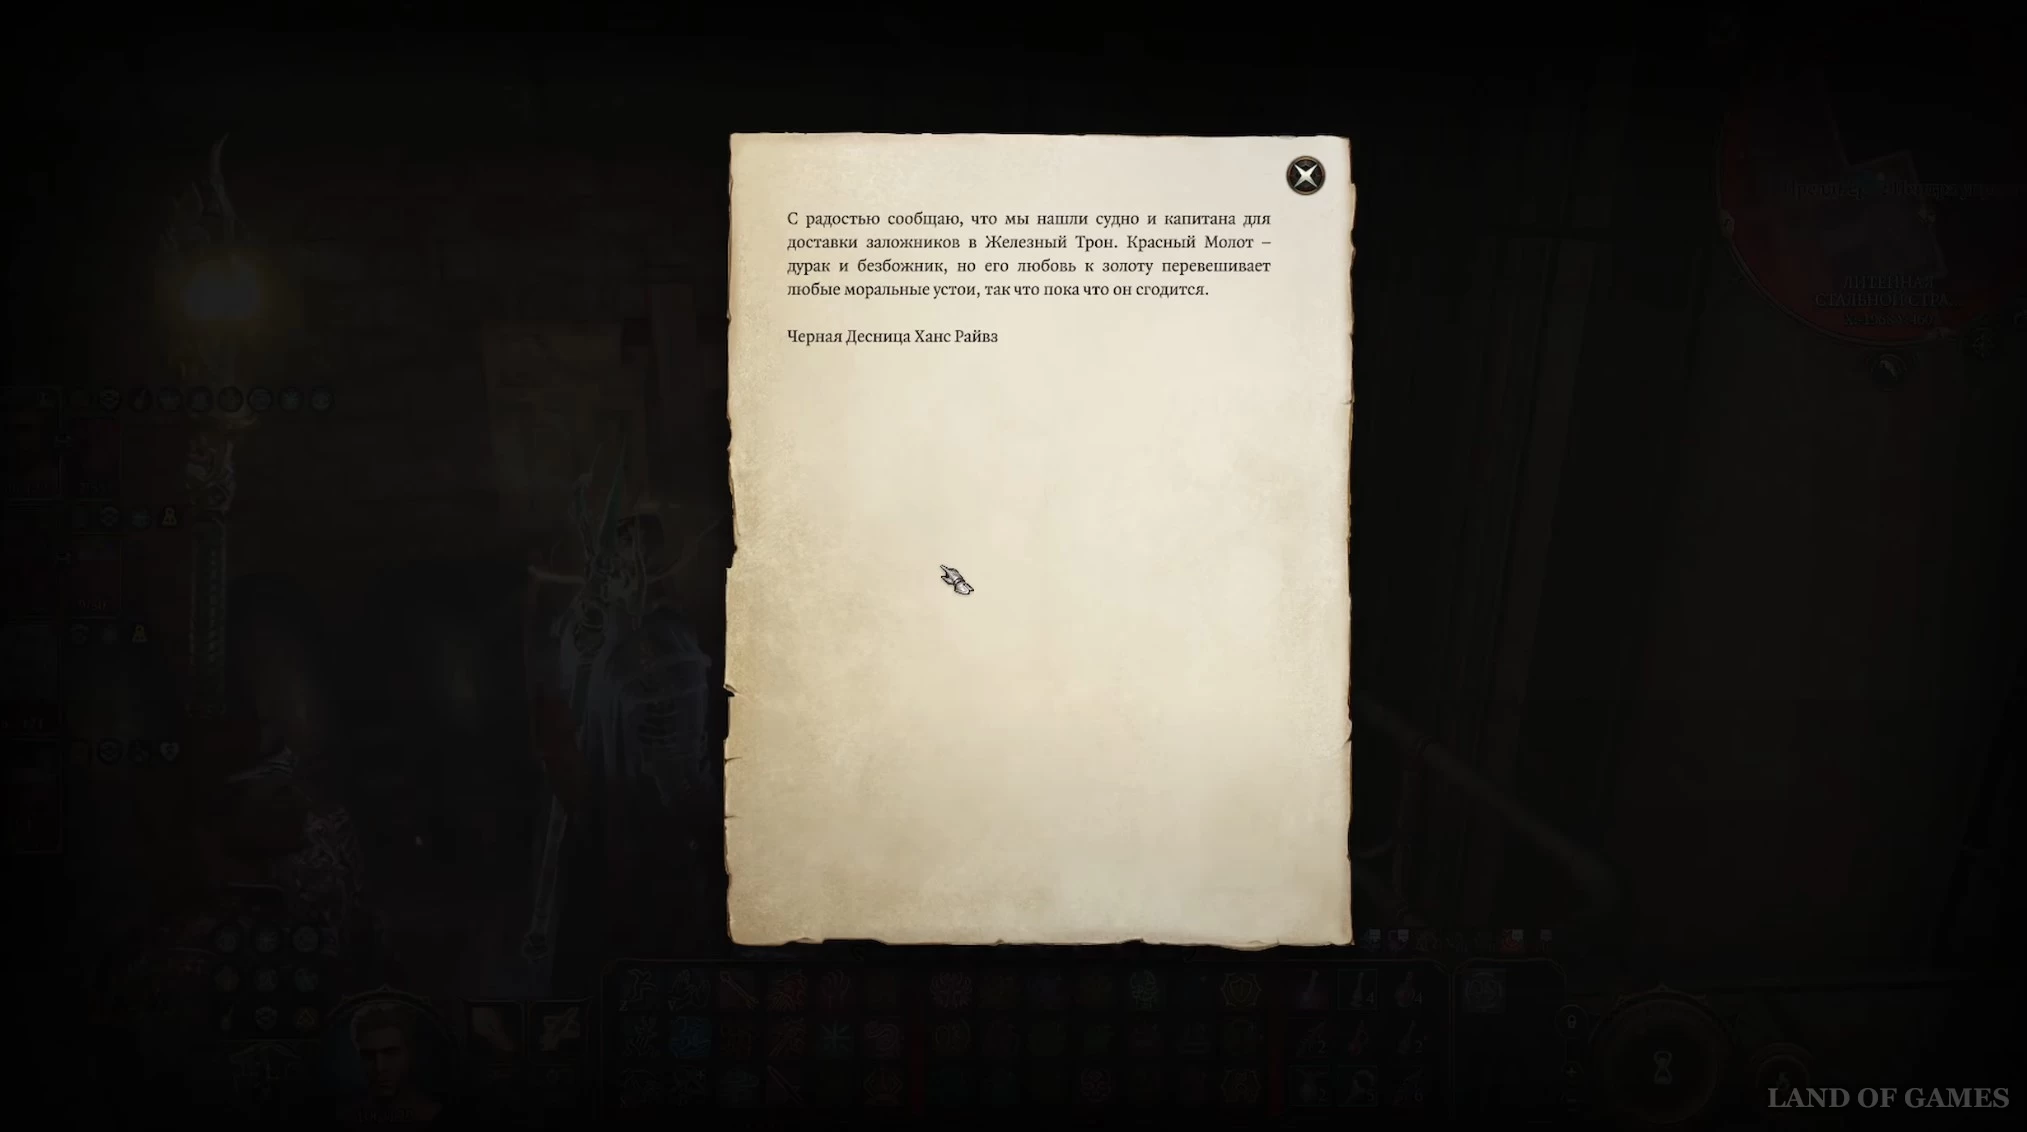
Оказавшись в подвале «Грузов Флимма», пройдите в тюремный блок на юге, а затем в хранение деталей машин еще южнее. Открыв двери, вы увидите перед собой воровские инструменты и адское железо, лежащие на полу. По пути можете вскрывать сундуки для нахождения Водного труда (X: -1091, Y: 326) и дневника Красного Молота (X: -1021, Y: 294), которые могут дополнительно объяснить мотивы изобретателя.

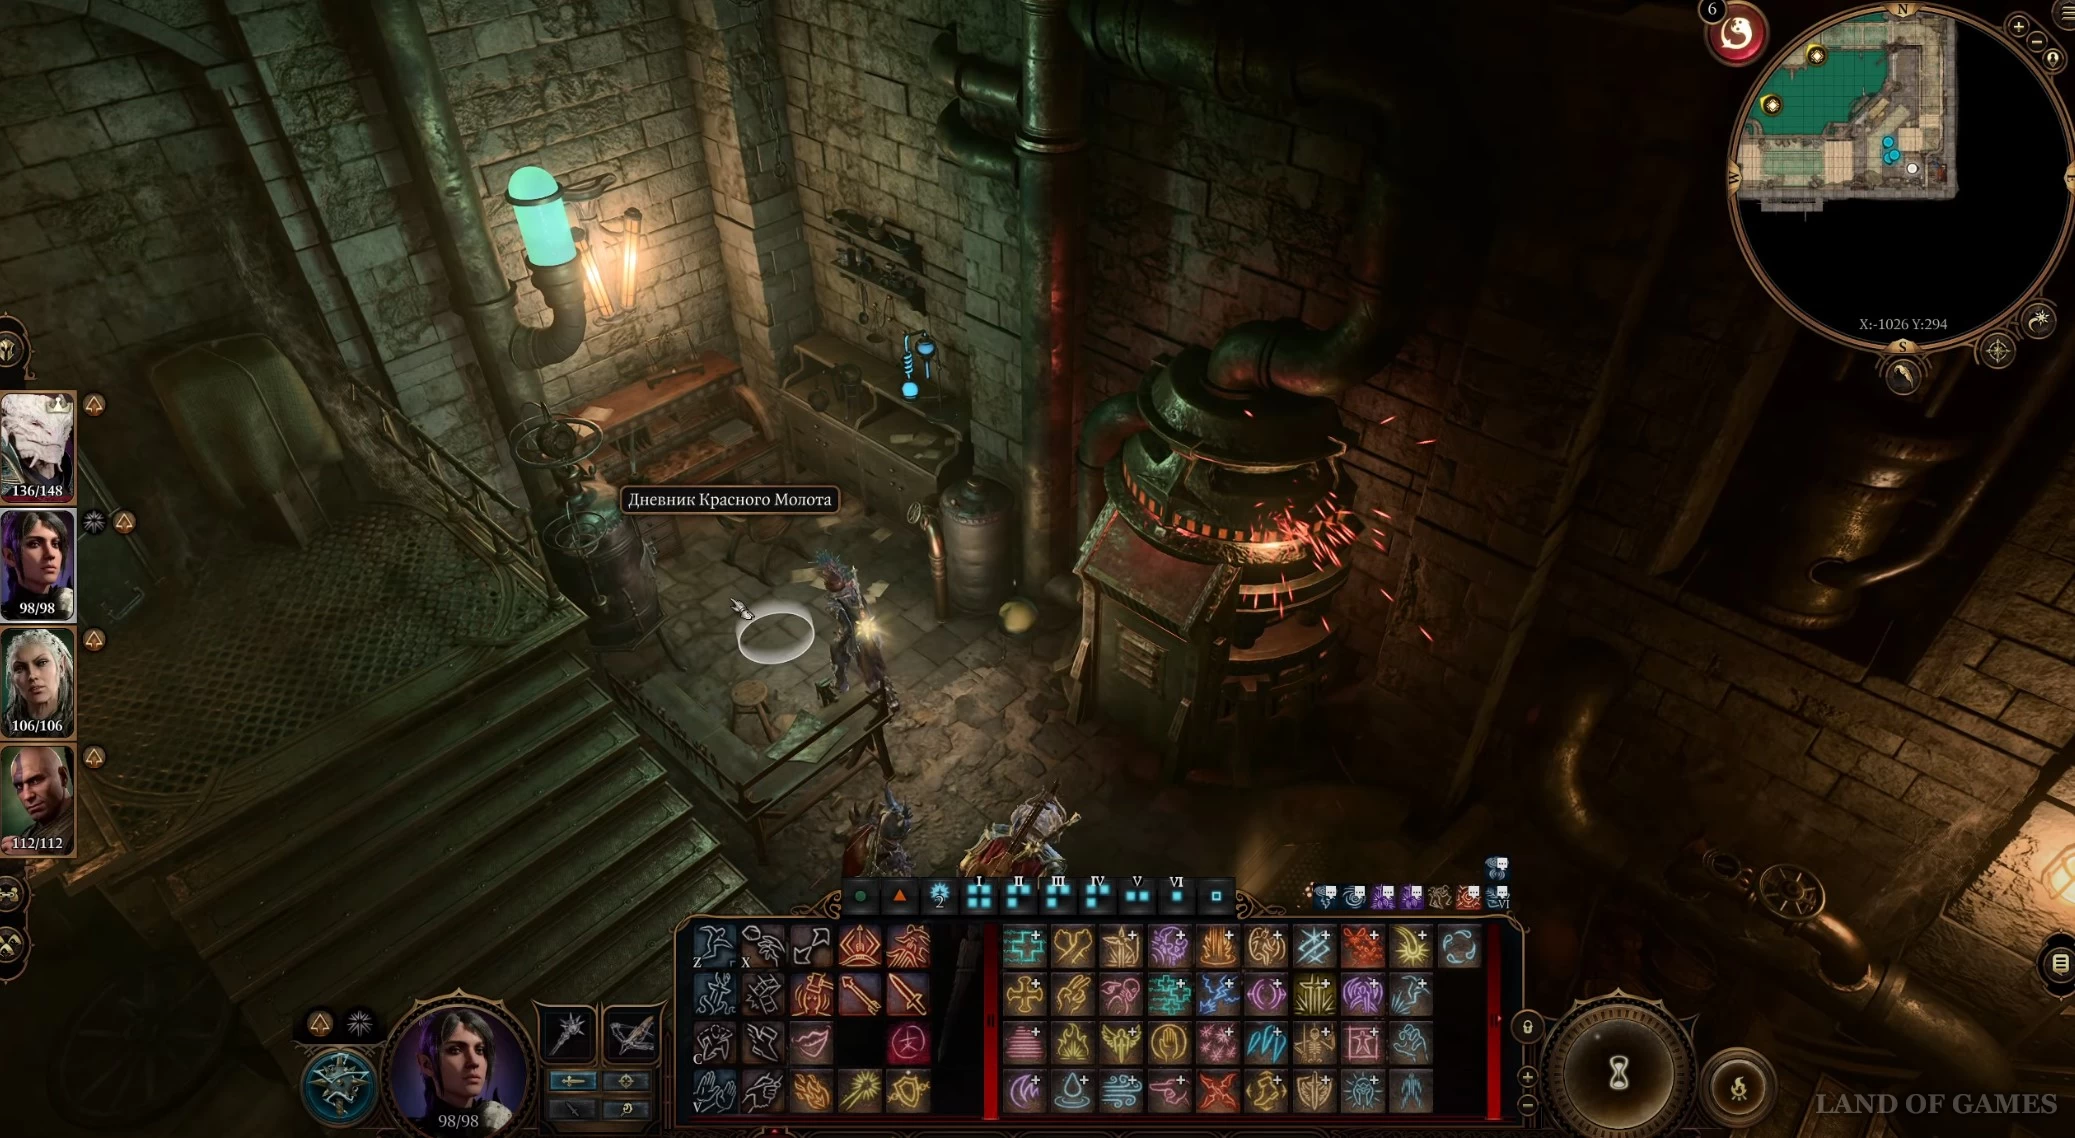
Пройдите в Подводный док и спуститесь вниз. На металлической площадке, установленной над подлодкой, вы обнаружите изобретателя Красного Молота, с которым вам нужно будет побеседовать.

Если вы проходите квест «Отомстить за утопленников», то ваша беседа с изобретателем будет немного отличаться. Она в деталях рассмотрена в соответствующем гайде. Мы же покажем обычный вариант. Вы можете запугать его (класс сложности 15), чтобы узнать больше информации о том, чем именно он занимается. Затем вы можете пройти проверку на Убеждение, Запугивание или Обман, чтобы уговорить его доставить вас в тюрьму.

Можете также просто подкупить Красного Молота, заплатив ему 1000 золотых, или убить. Вы вполне способны самостоятельно добраться до подводной тюрьмы – для этого нужно лишь кликнуть по люку транспортного средства.
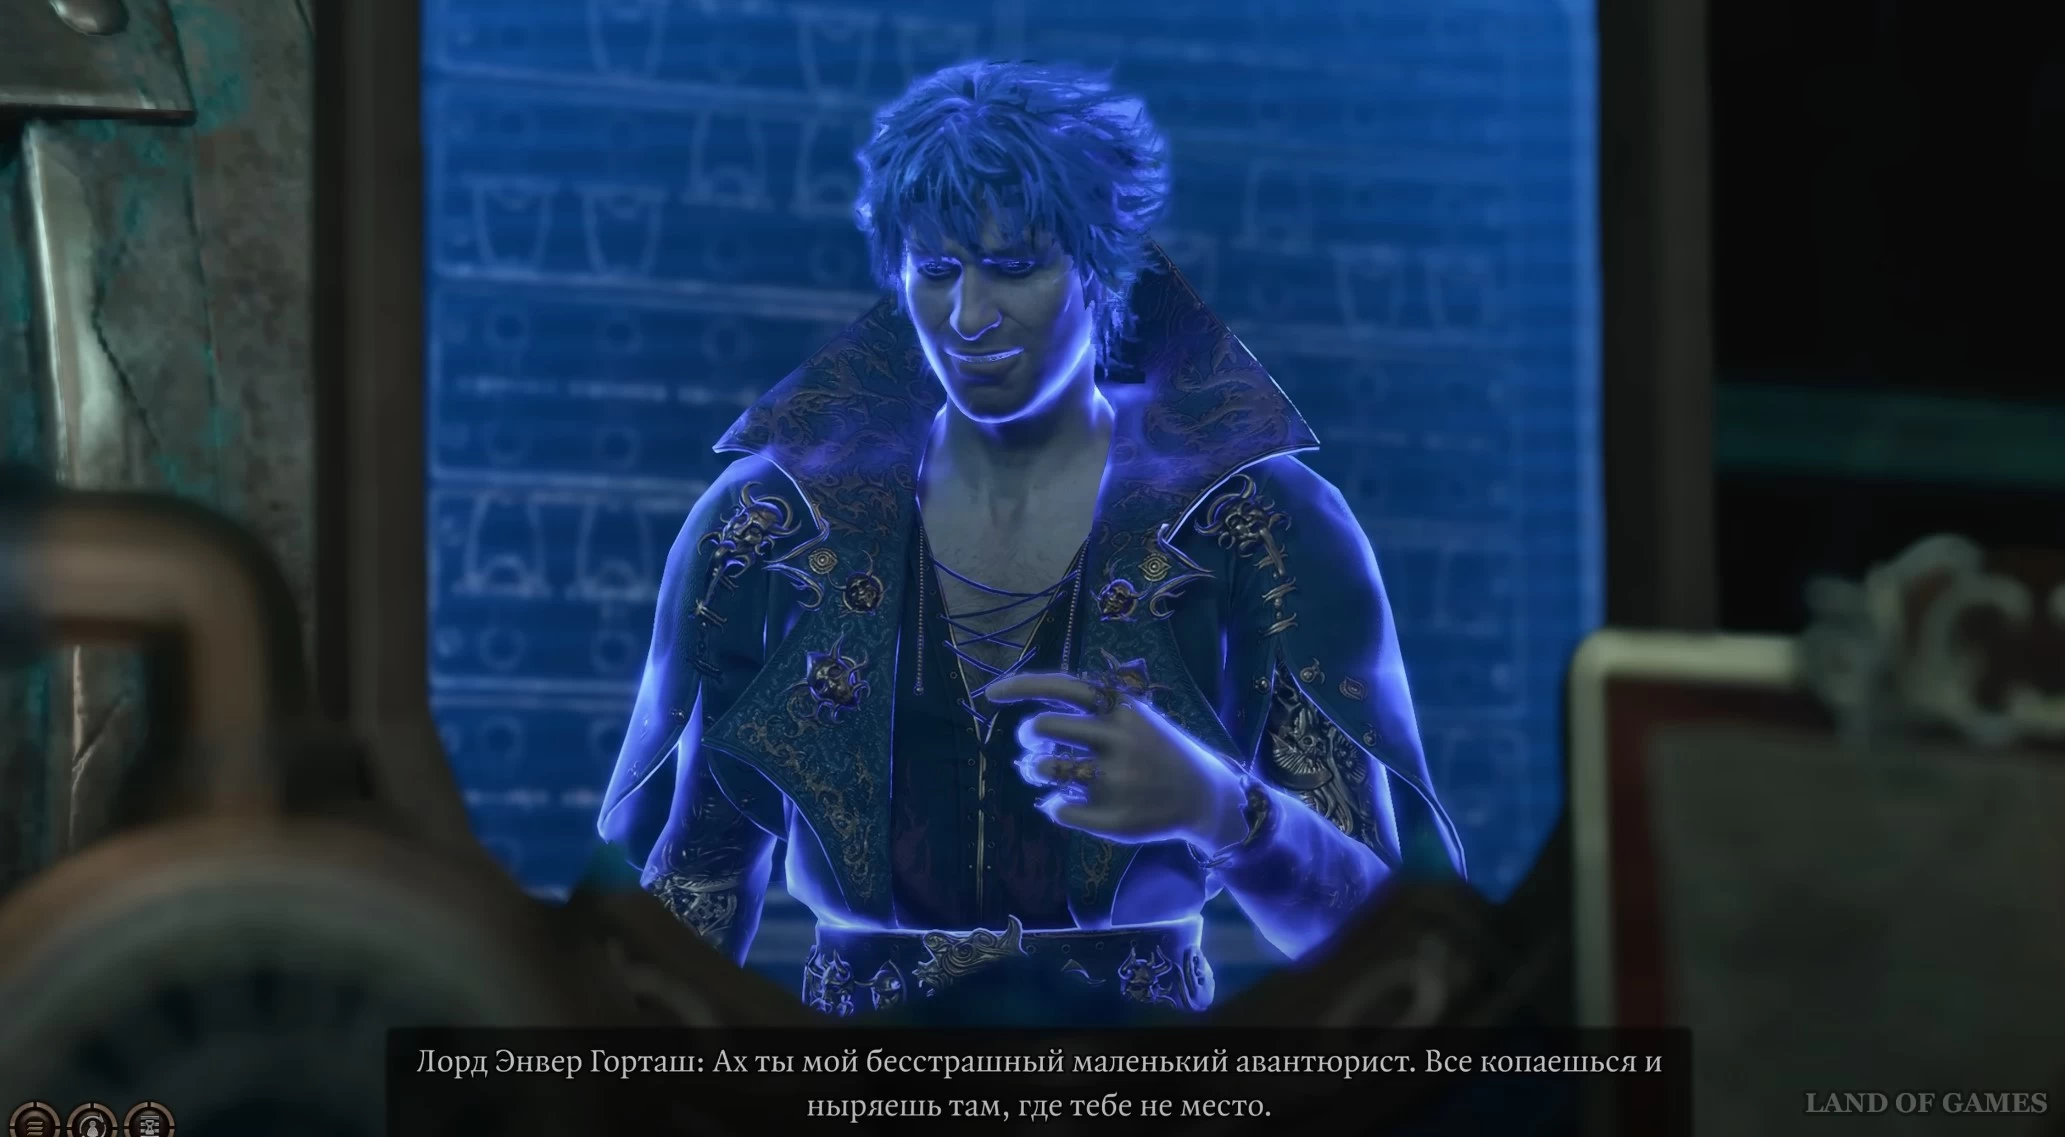
Важно: Как только вы достигните Железного трона, задание «Обдумать предложение Горташа» будет считаться проваленным, а сам лорд станет враждебным по отношению к вам. Добавим, что если вы отправитесь в подводную тюрьму до коронации Горташа (технически это вполне выполнимо), то вы не обнаружите герцога Рейвенгарда там. Когда же вы направитесь в Крепость на Змеиной скале, то все его обитатели будут враждебны к вам, включая отца Уилла (иногда сразу появляется надпись о его смерти).
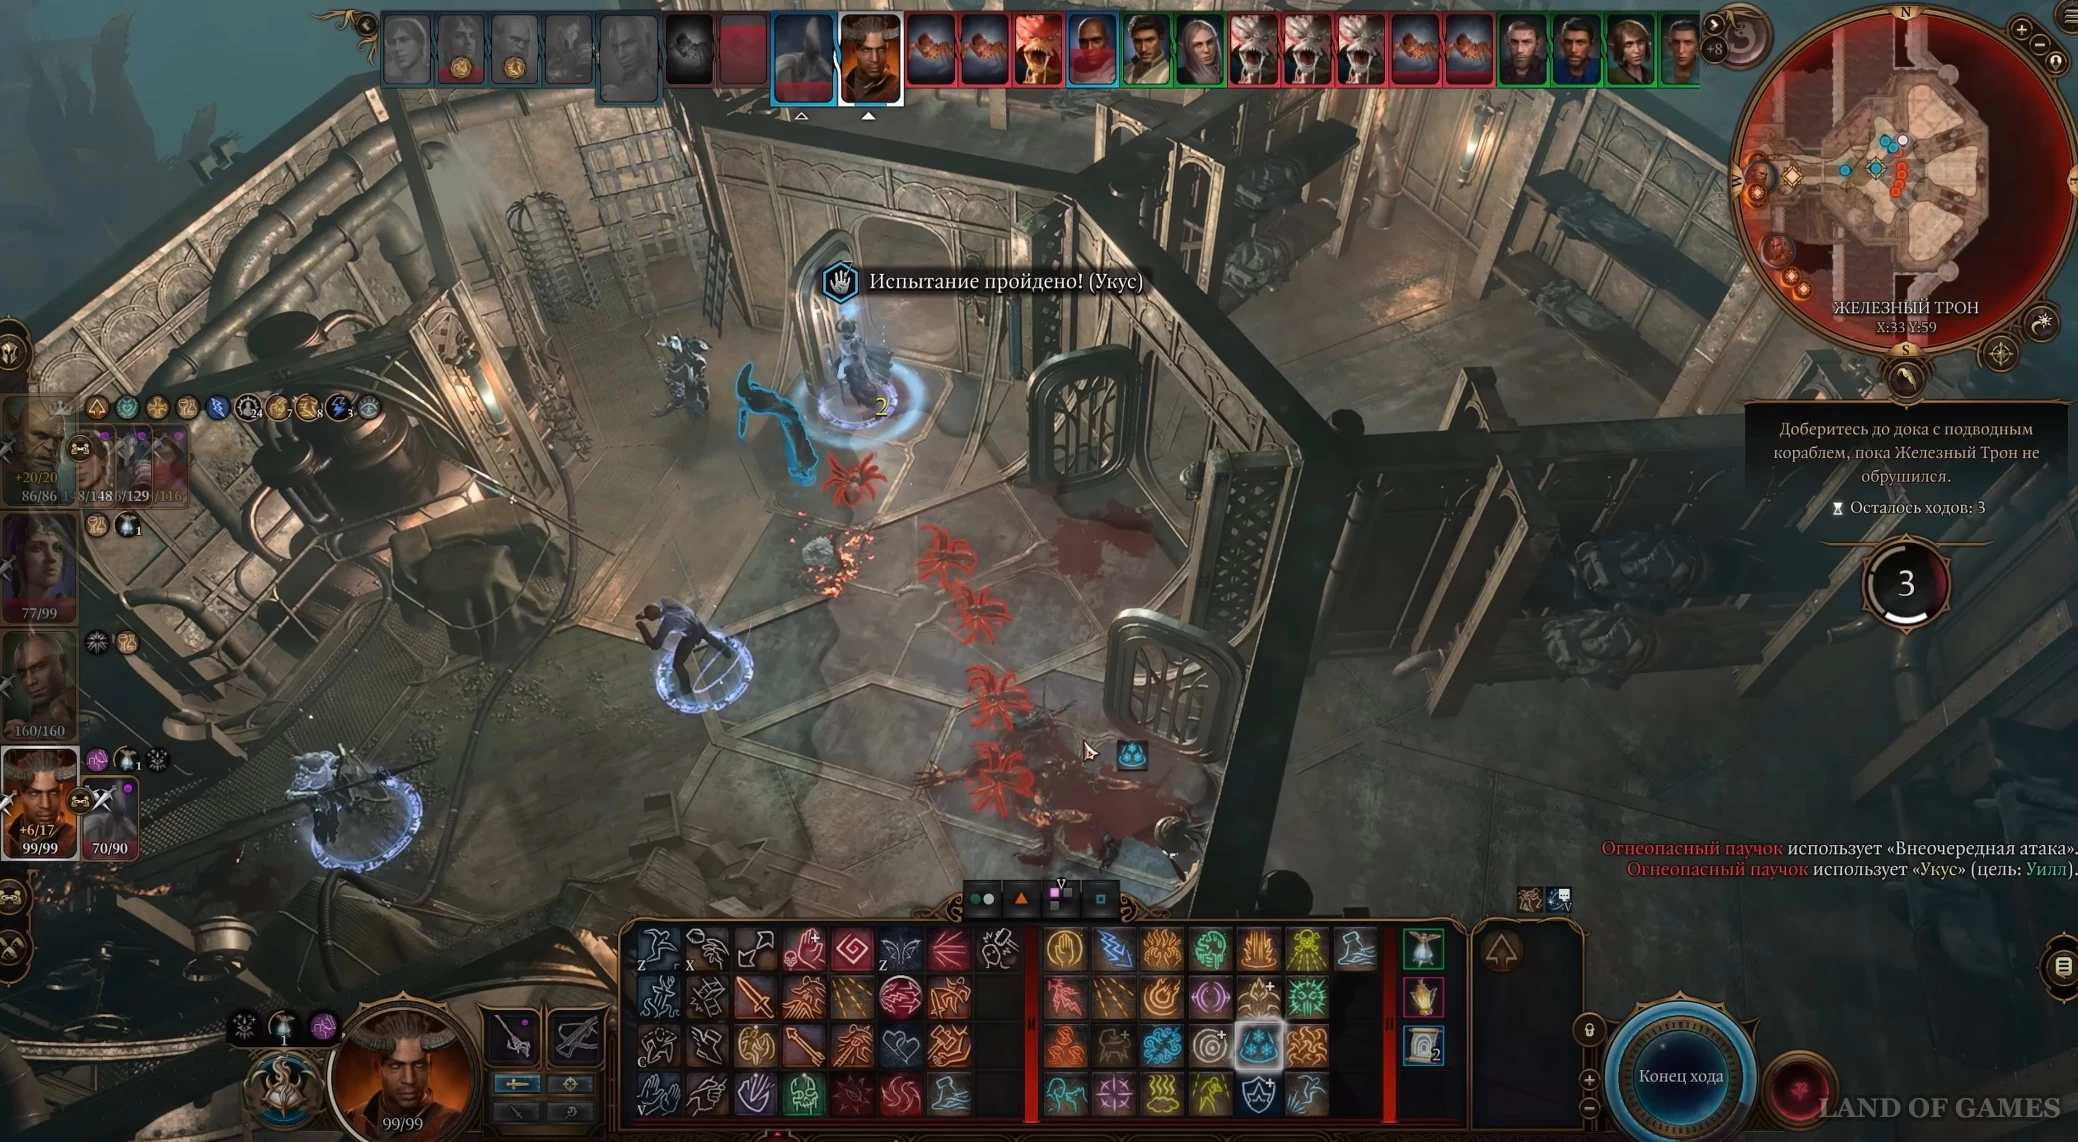
Как спасти всех пленников из Железного трона
Примечание: Следует внимательно подобрать отряд, а также подготовить зелья и заклинания перед спуском. Мы советуем взять Яд дроу и Зелье скорости, а также укомплектовать персонажей Туманным шагом, Телекинезом, Невидимостью, Дверью в пространстве и Дарованием полета.
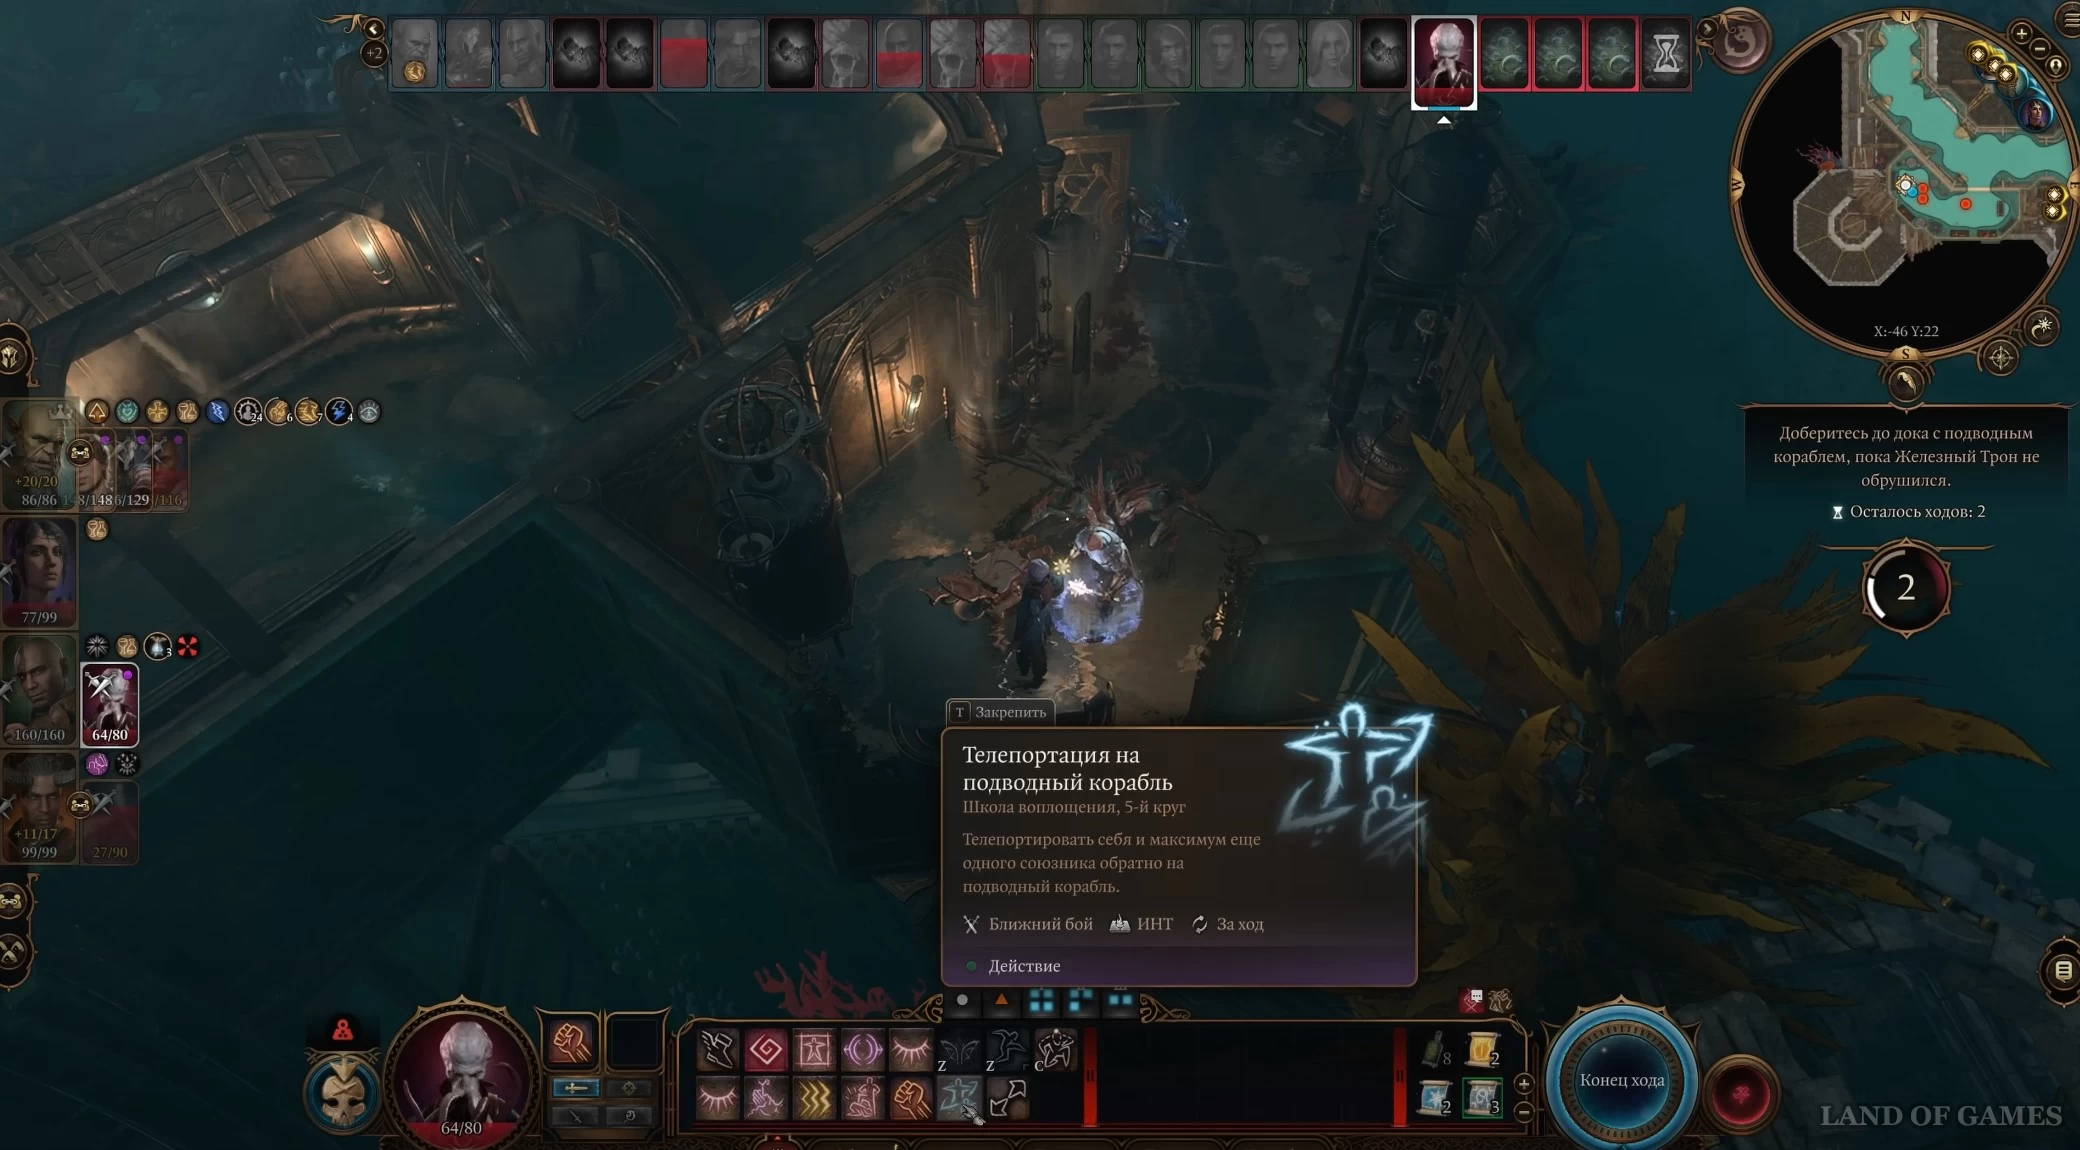
Сев в подводный аппарат, посмотрите ролик, в ходе которого ваш корабль доплывет до нужного места. После этого вы увидите на экране Энвера Горташа, который сообщит, что взорвет тюрьму, если вы попытаетесь вытащить заключенных. Он даст вам один шанс повернуть назад – все равно пришвартуйтесь к Железному трону.
Прежде чем начать спасение пленников, дадим вам несколько полезных советов:
- На легком уровне сложности у вас будет всего 8 ходов на вытаскивание всех заключенных, на среднем – 6 ходов, а на тактике – только 5.
- Если вы не хотите сильно заморачиваться с этой миссией, то вам вовсе необязательно вызволять абсолютно всех гондийцев. Для хорошего (не идеального) завершения будет достаточно вытащить герцога Рейвенгарда, Омелума (возникнет здесь лишь в том случае, если в задании «Украсть яйцо гитьянки» вы не передали яйцо леди Эстер/Сообществу Блистательных) и Обелию Тубин (дочка Заннера).
- Достаточно довести до подводного корабля только одного участника команды, то есть можете позволить остальным спутникам погибнуть. Потом вы сможете без проблем воскресить их с помощью Иссохшего или свитков воскрешения (трупы сопартийцев появятся на южном побережье Нижнего города).
- Отдайте всем членам отряда, как минимум, по одному зелью скорости, но не применяйте его сразу, так как через 3 хода наступит эффект летаргии, из-за чего они пропустят ход. Этот эликсир в основном необходим для осуществления последнего рывка к судну.
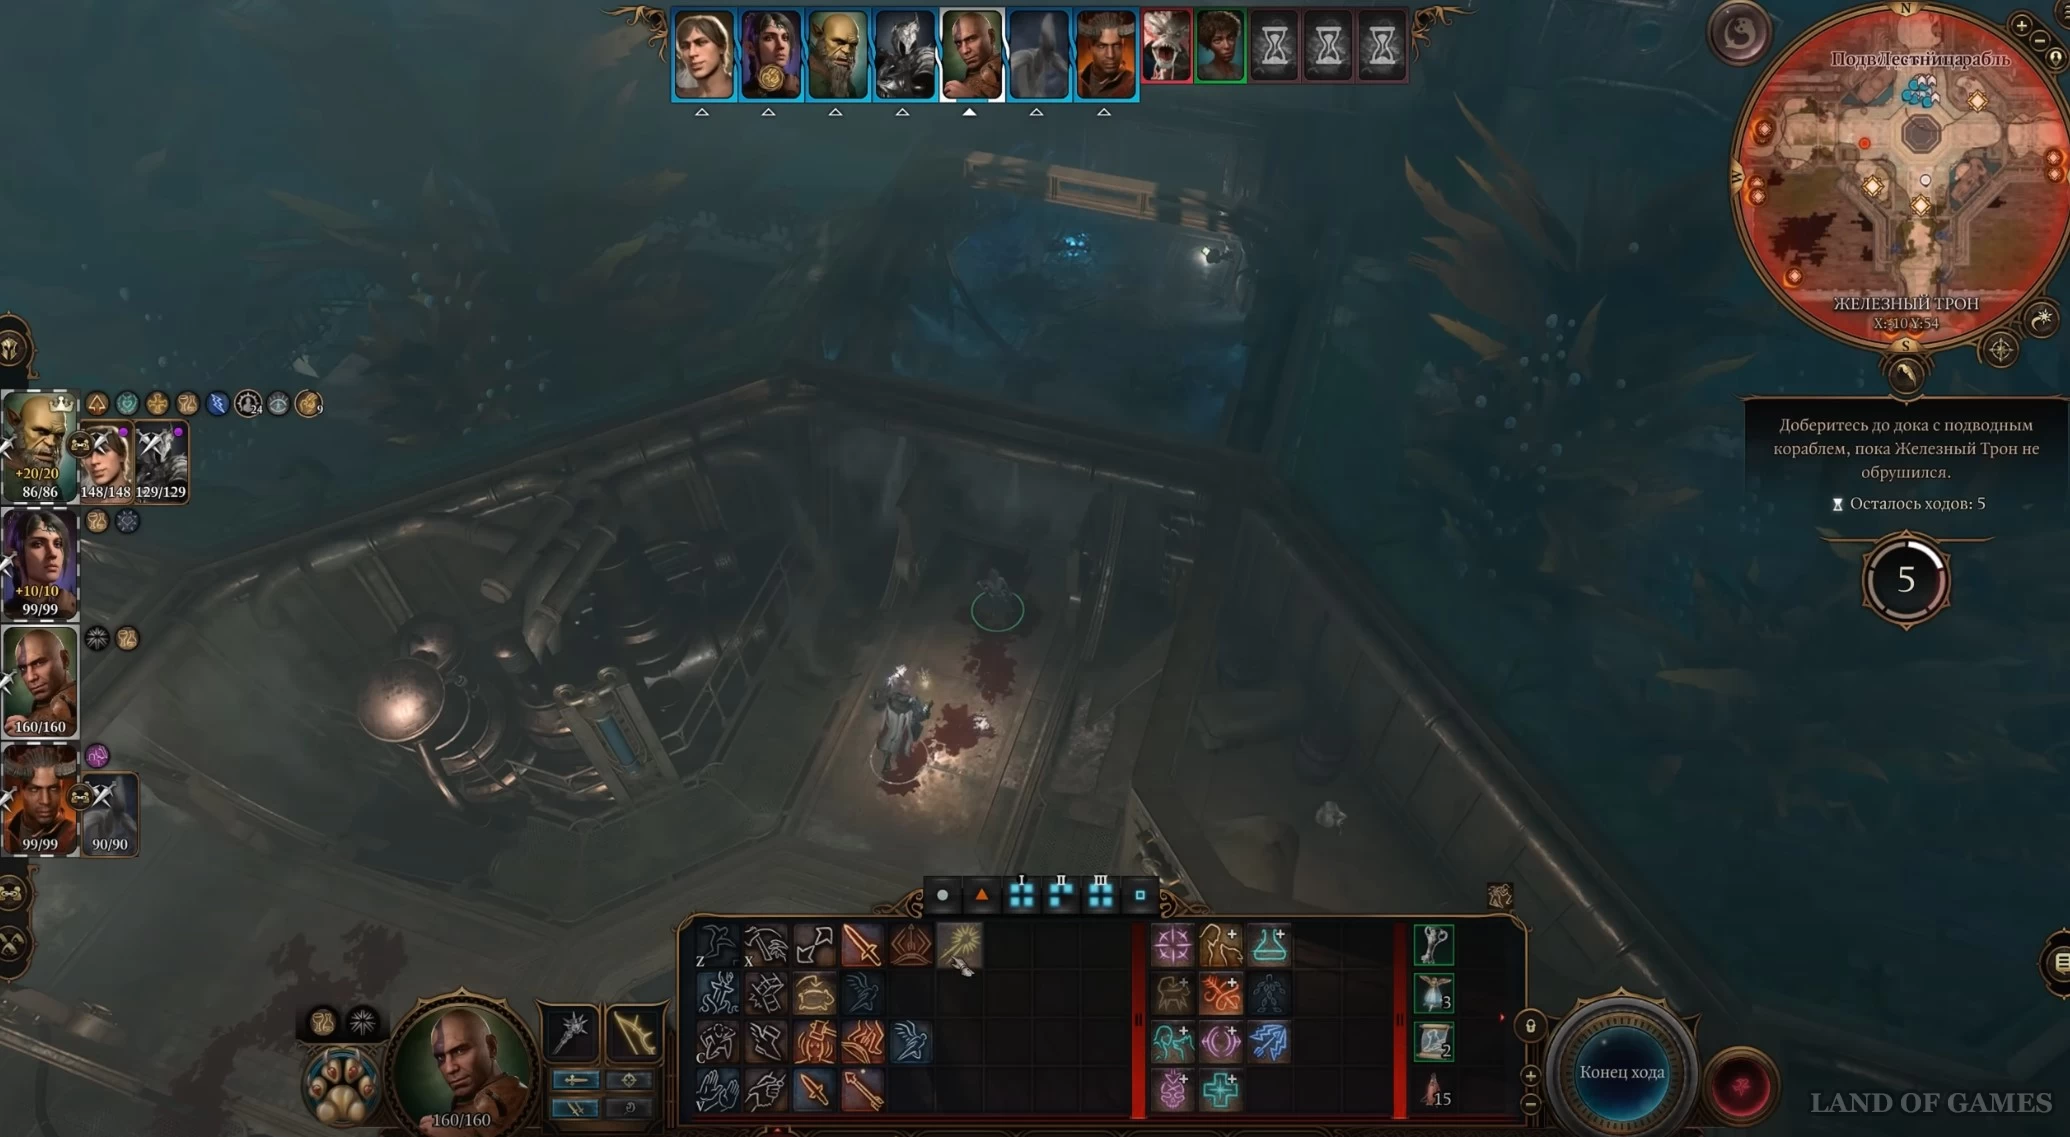
Далее мы расскажем вам о том, как не только спасти абсолютно всех пленников в тюрьме (их здесь 15), но и успеть прихватить с собой ценный лут. Сразу приготовьтесь к тому, что вам придется разделить свой отряд и отправить его членов в разные стороны. На карте ниже показано расположение важных персонажей и предметов, а также даны краткие рекомендации по отправке героев.
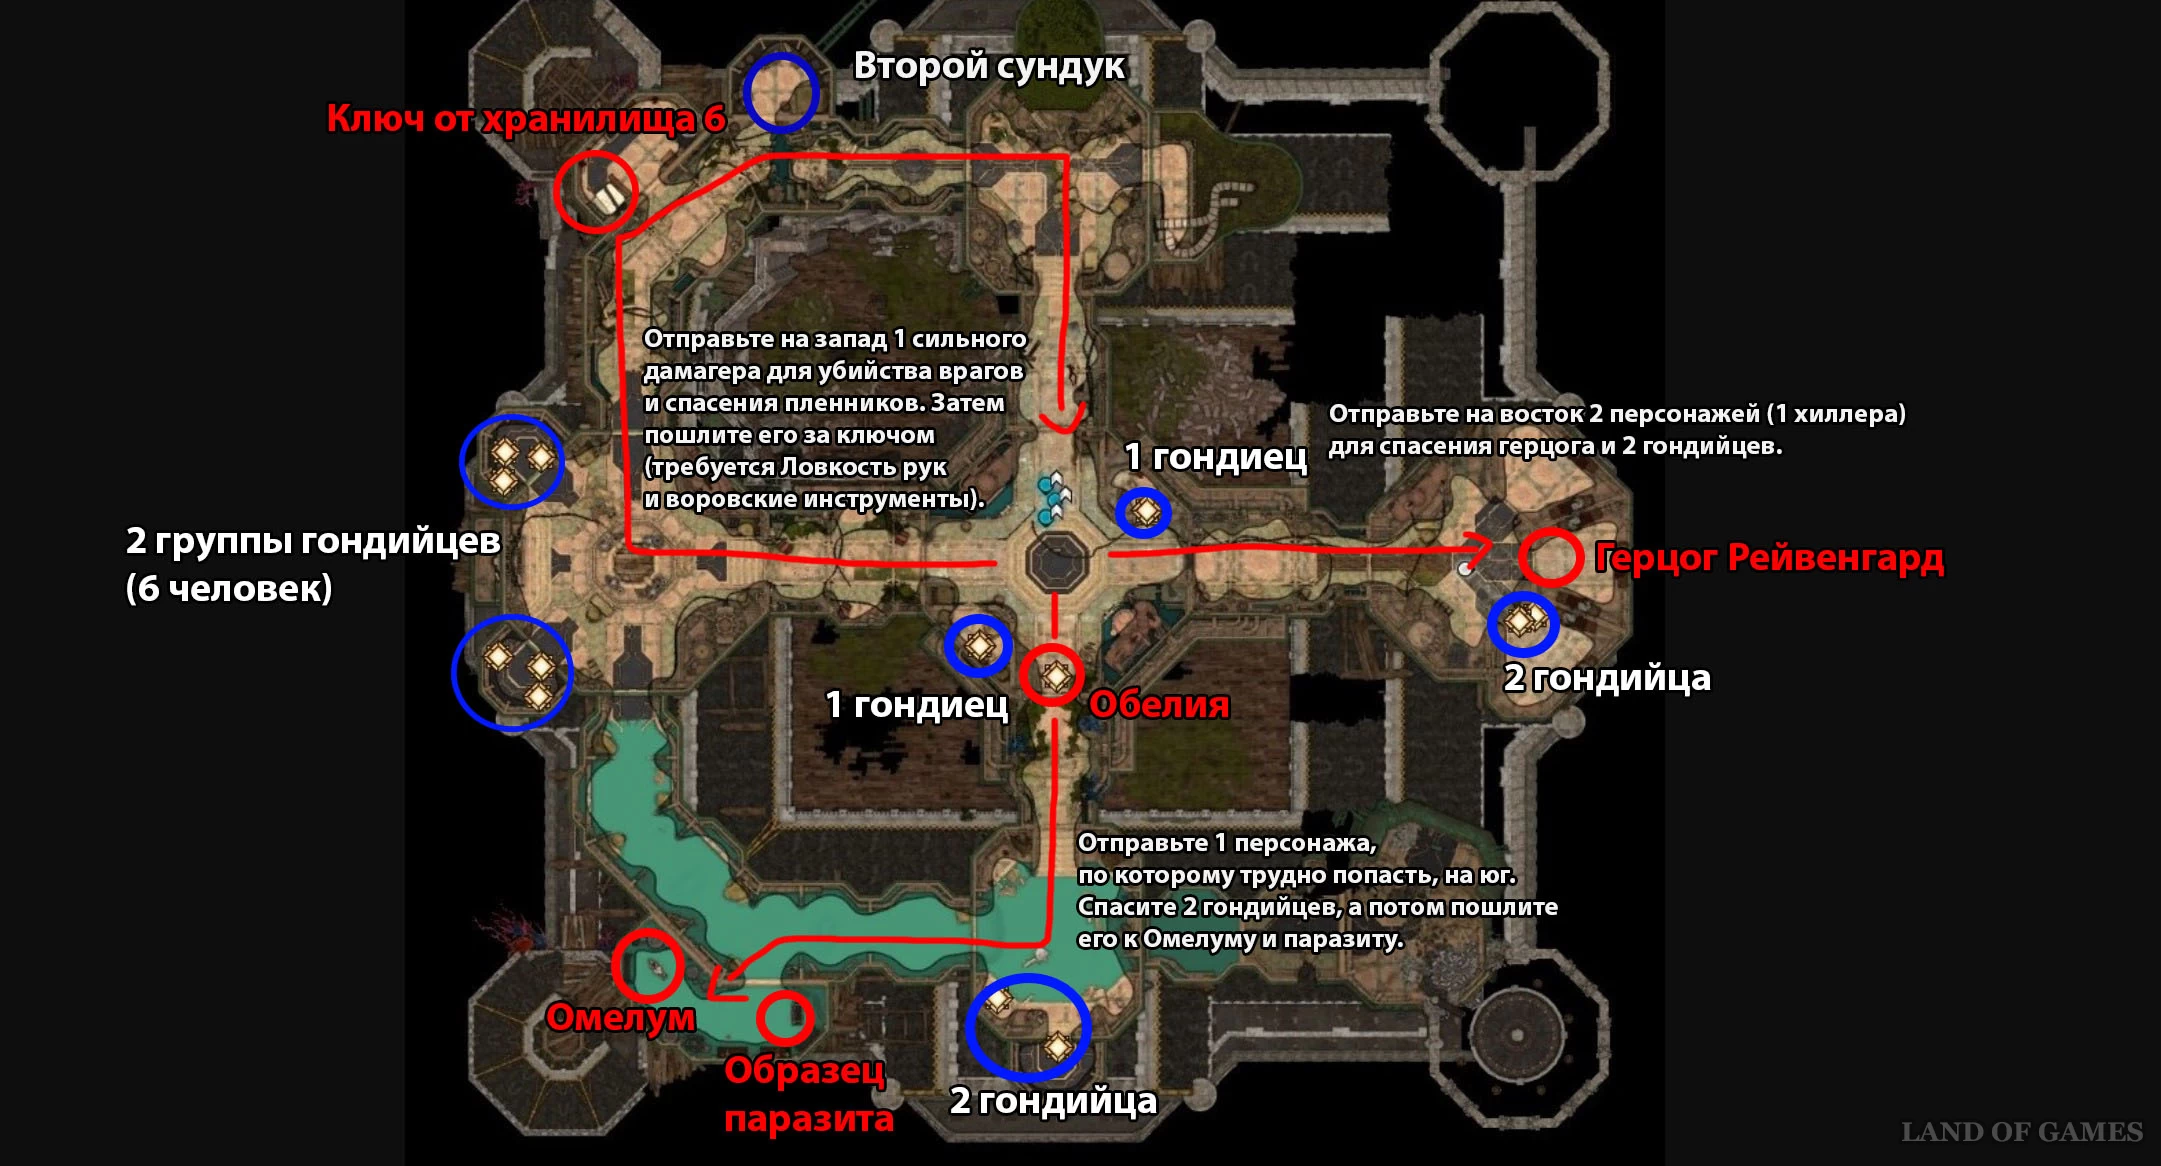
Спасение гондийцев (запад)
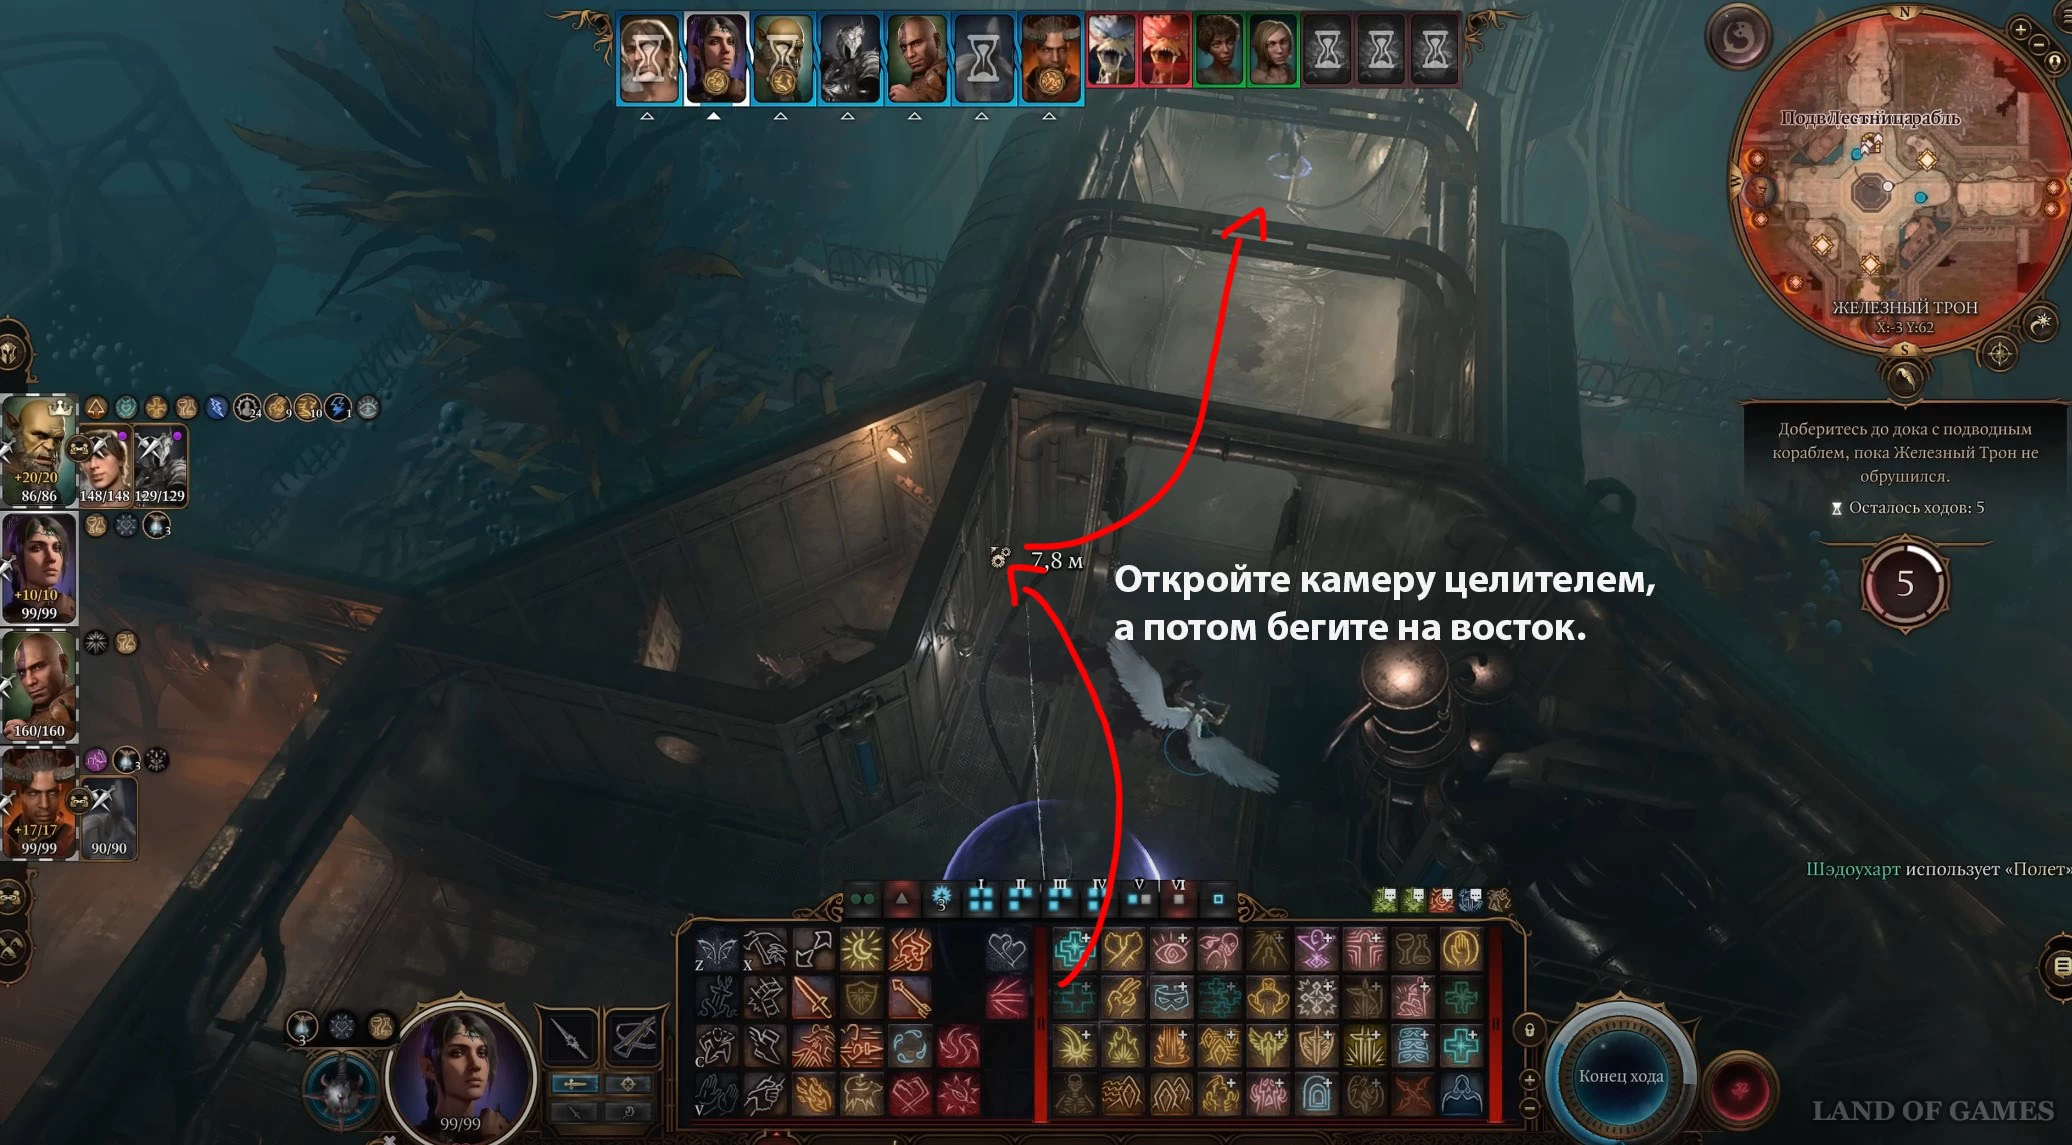
В западном направлении пошлите одного дамагера, способного наносить неплохой урон и при этом выдерживать атаки сахваджинов или уклоняться от них. Крайне желательно наличие у него воровских инструментов и прокаченной Ловкости рук. Спуститесь вниз и разберитесь с одним врагом, стоящим перед проходом в западный коридор. Затем сразу же откройте камеру слева, чтобы вытащить Каралию Гролло.
Примечание: Можете также отправить сюда одно призываемое существо (элементаля) при его наличии, чтобы поддержать персонажа в бою или задержать врагов, если вы сразу побежите за ключом.
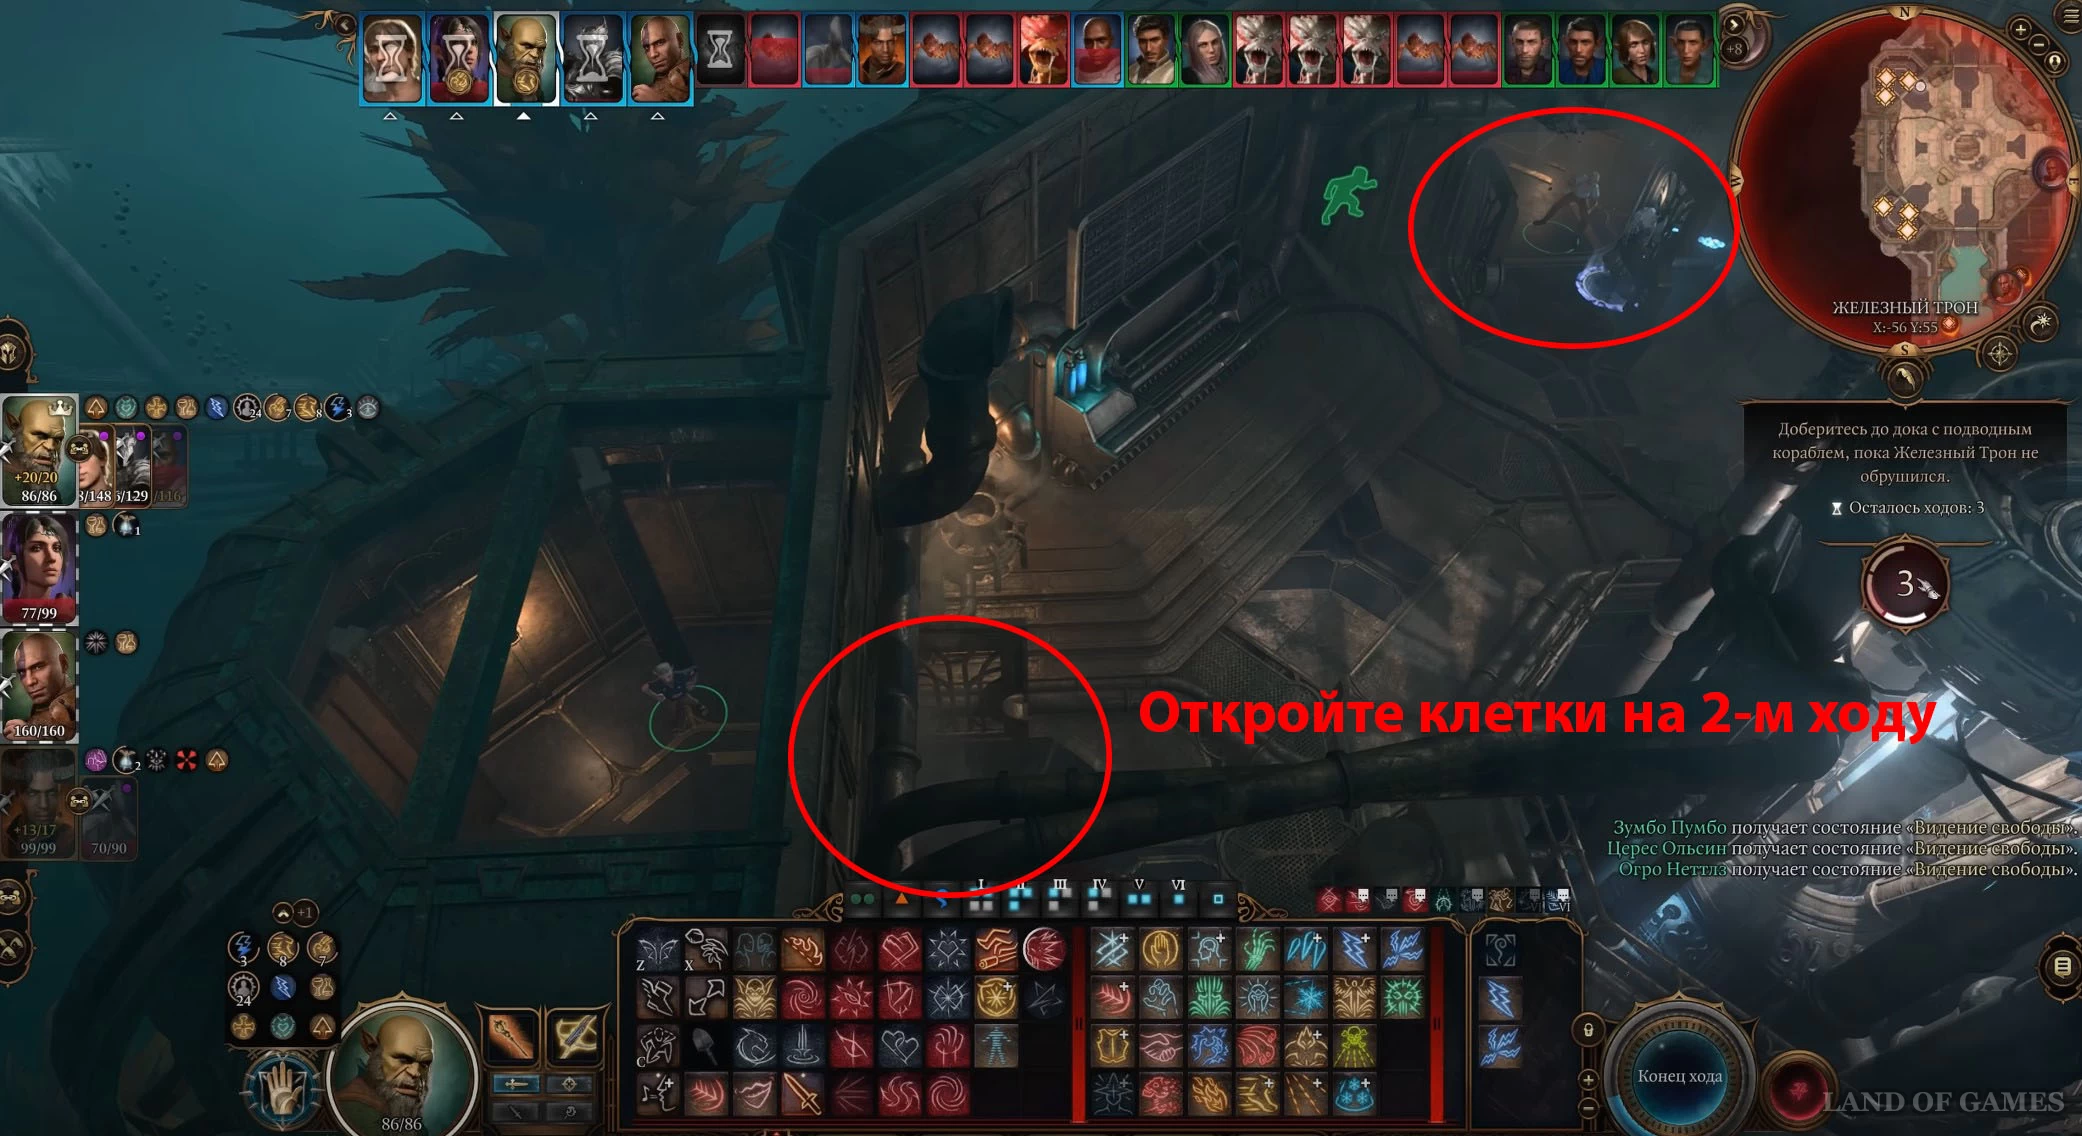
Начните двигаться по западному коридору вперед. Для его быстрого преодоления воспользуйтесь Туманным шагом или Дверью в пространстве. Здесь у вас, скорее всего, кончится первый ход. На 2-м ходу войдите в комнату с двумя камерами и двумя сахваджинами-охотниками, которые могут накидывать на ваших персонажей сеть. От этих атак можно защищаться Щитом.
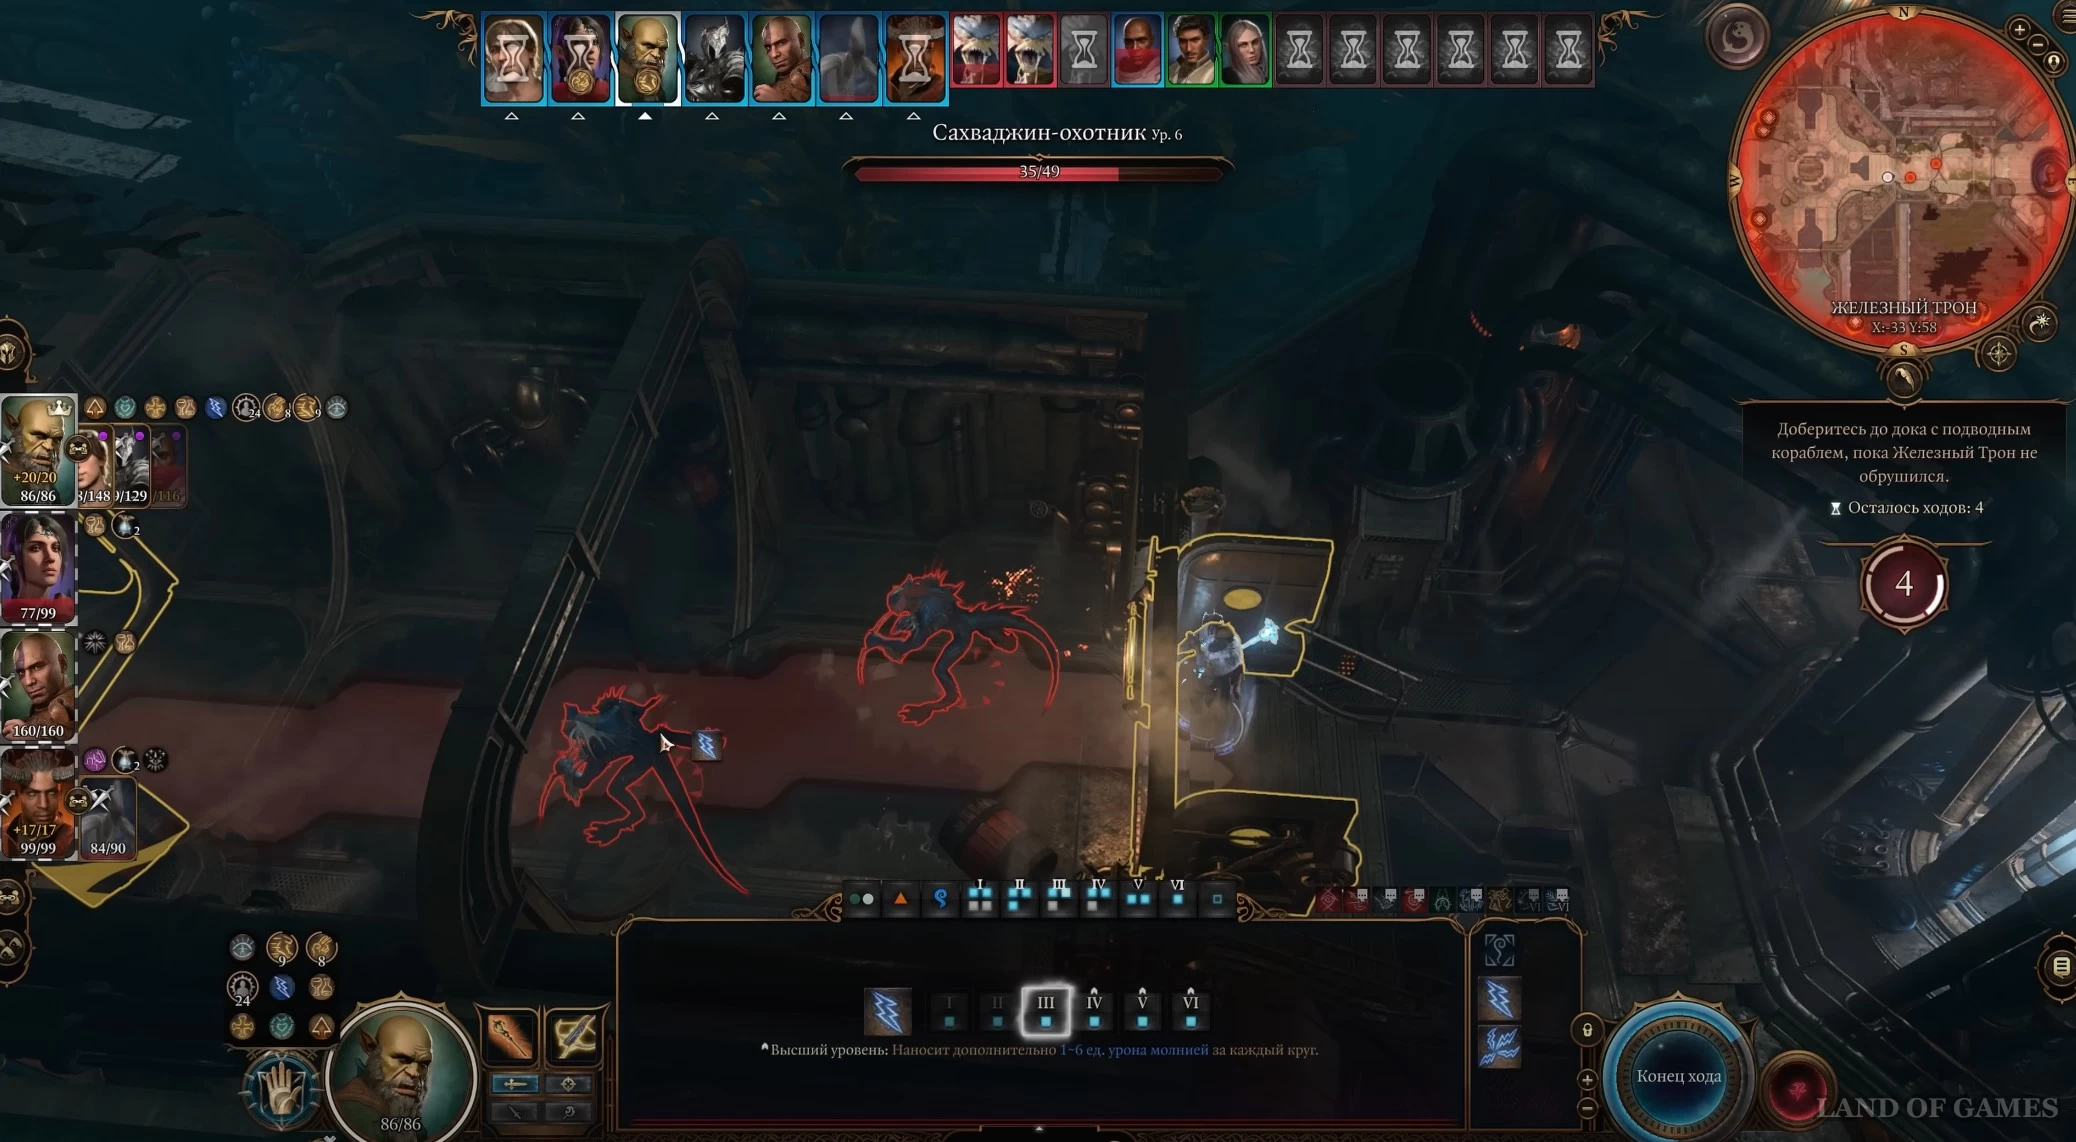
Если вы уверены, что успеете за 2-й ход и убить сахваджинов (можно их просто усыпить с помощью яда дроу) и открыть клетки, то атакуйте противников. В ином случае откройте сначала две клетки, так как пленники бегут очень медленно, поэтому им нужно 2-3 хода, чтобы добежать до корабля отсюда, а потом уже разберитесь с врагами.
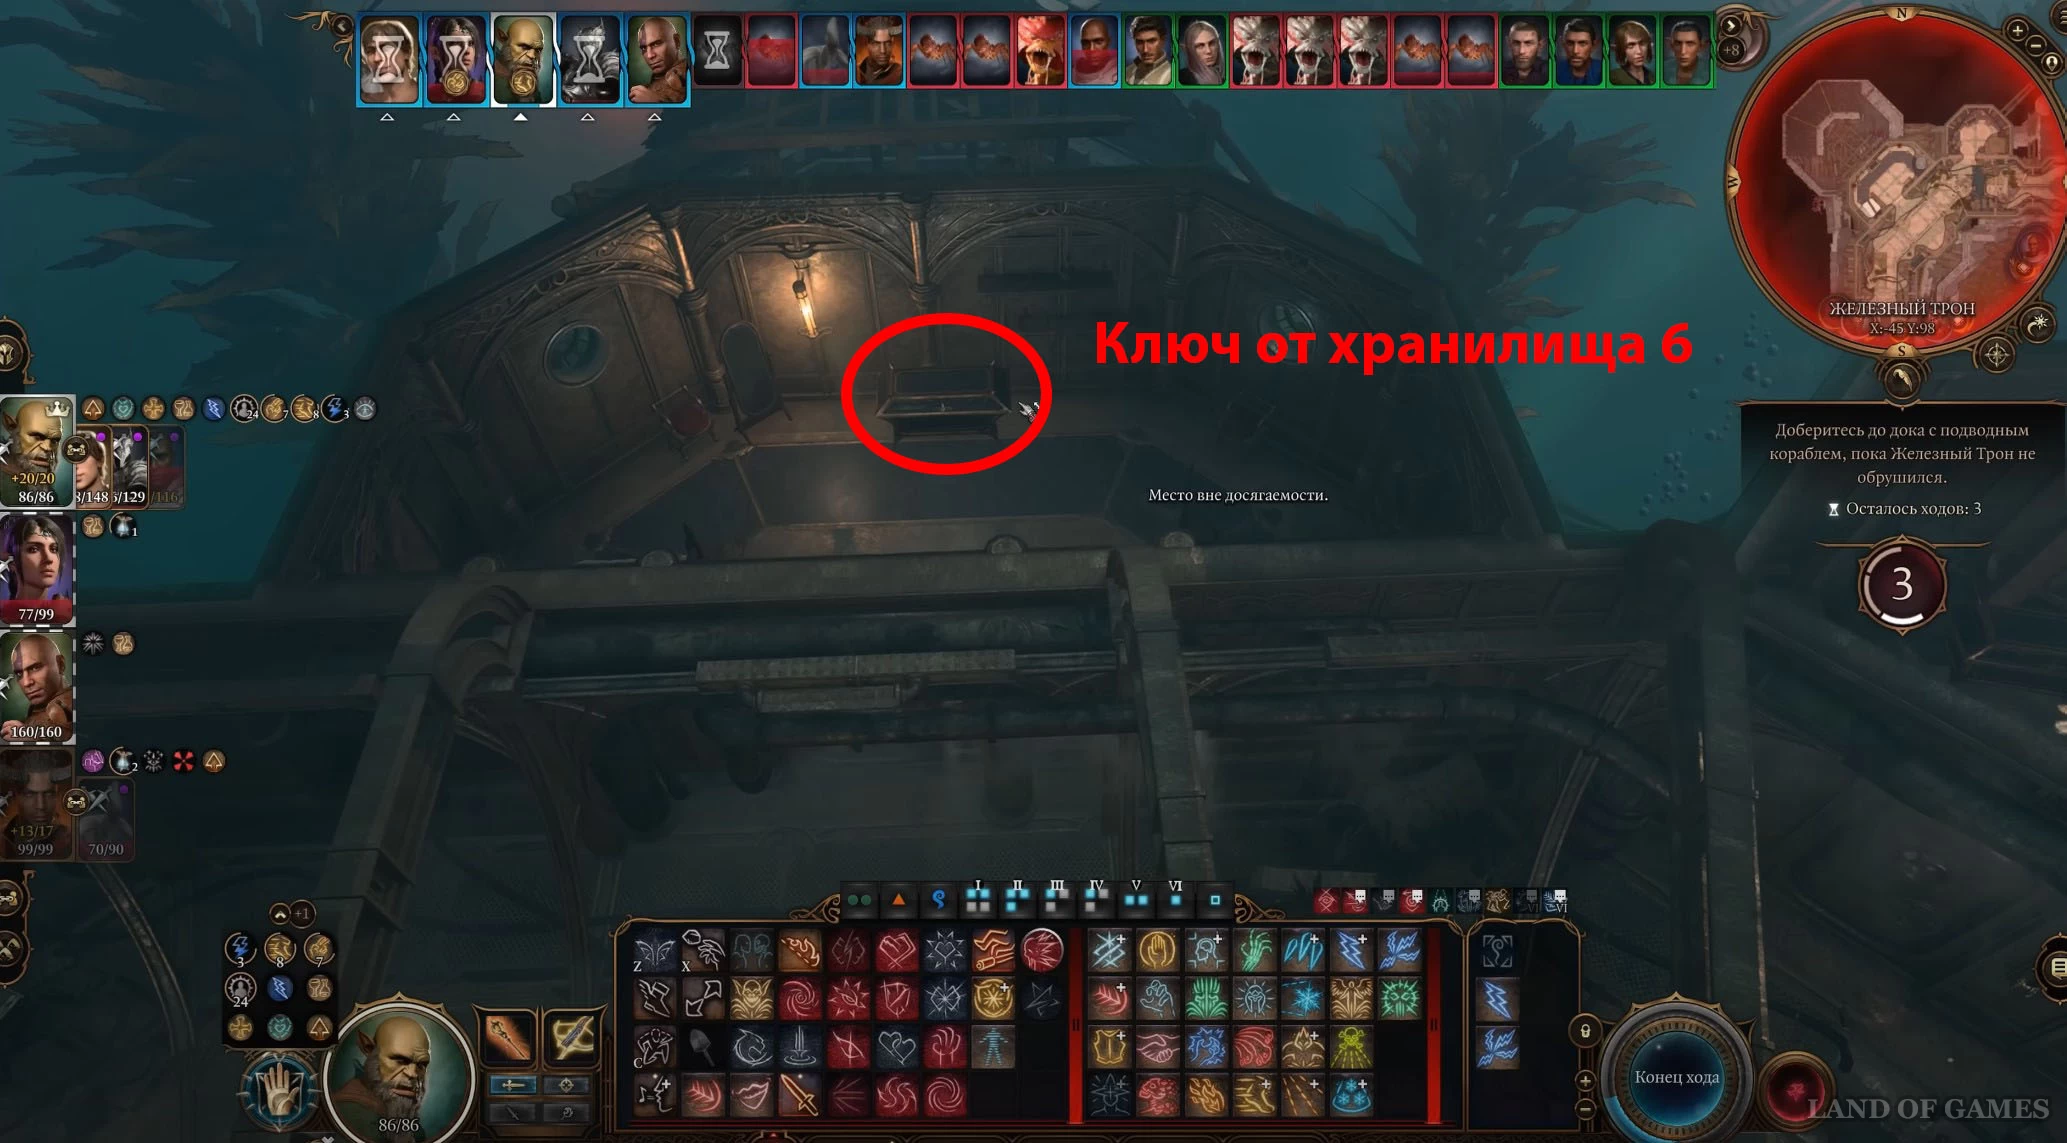
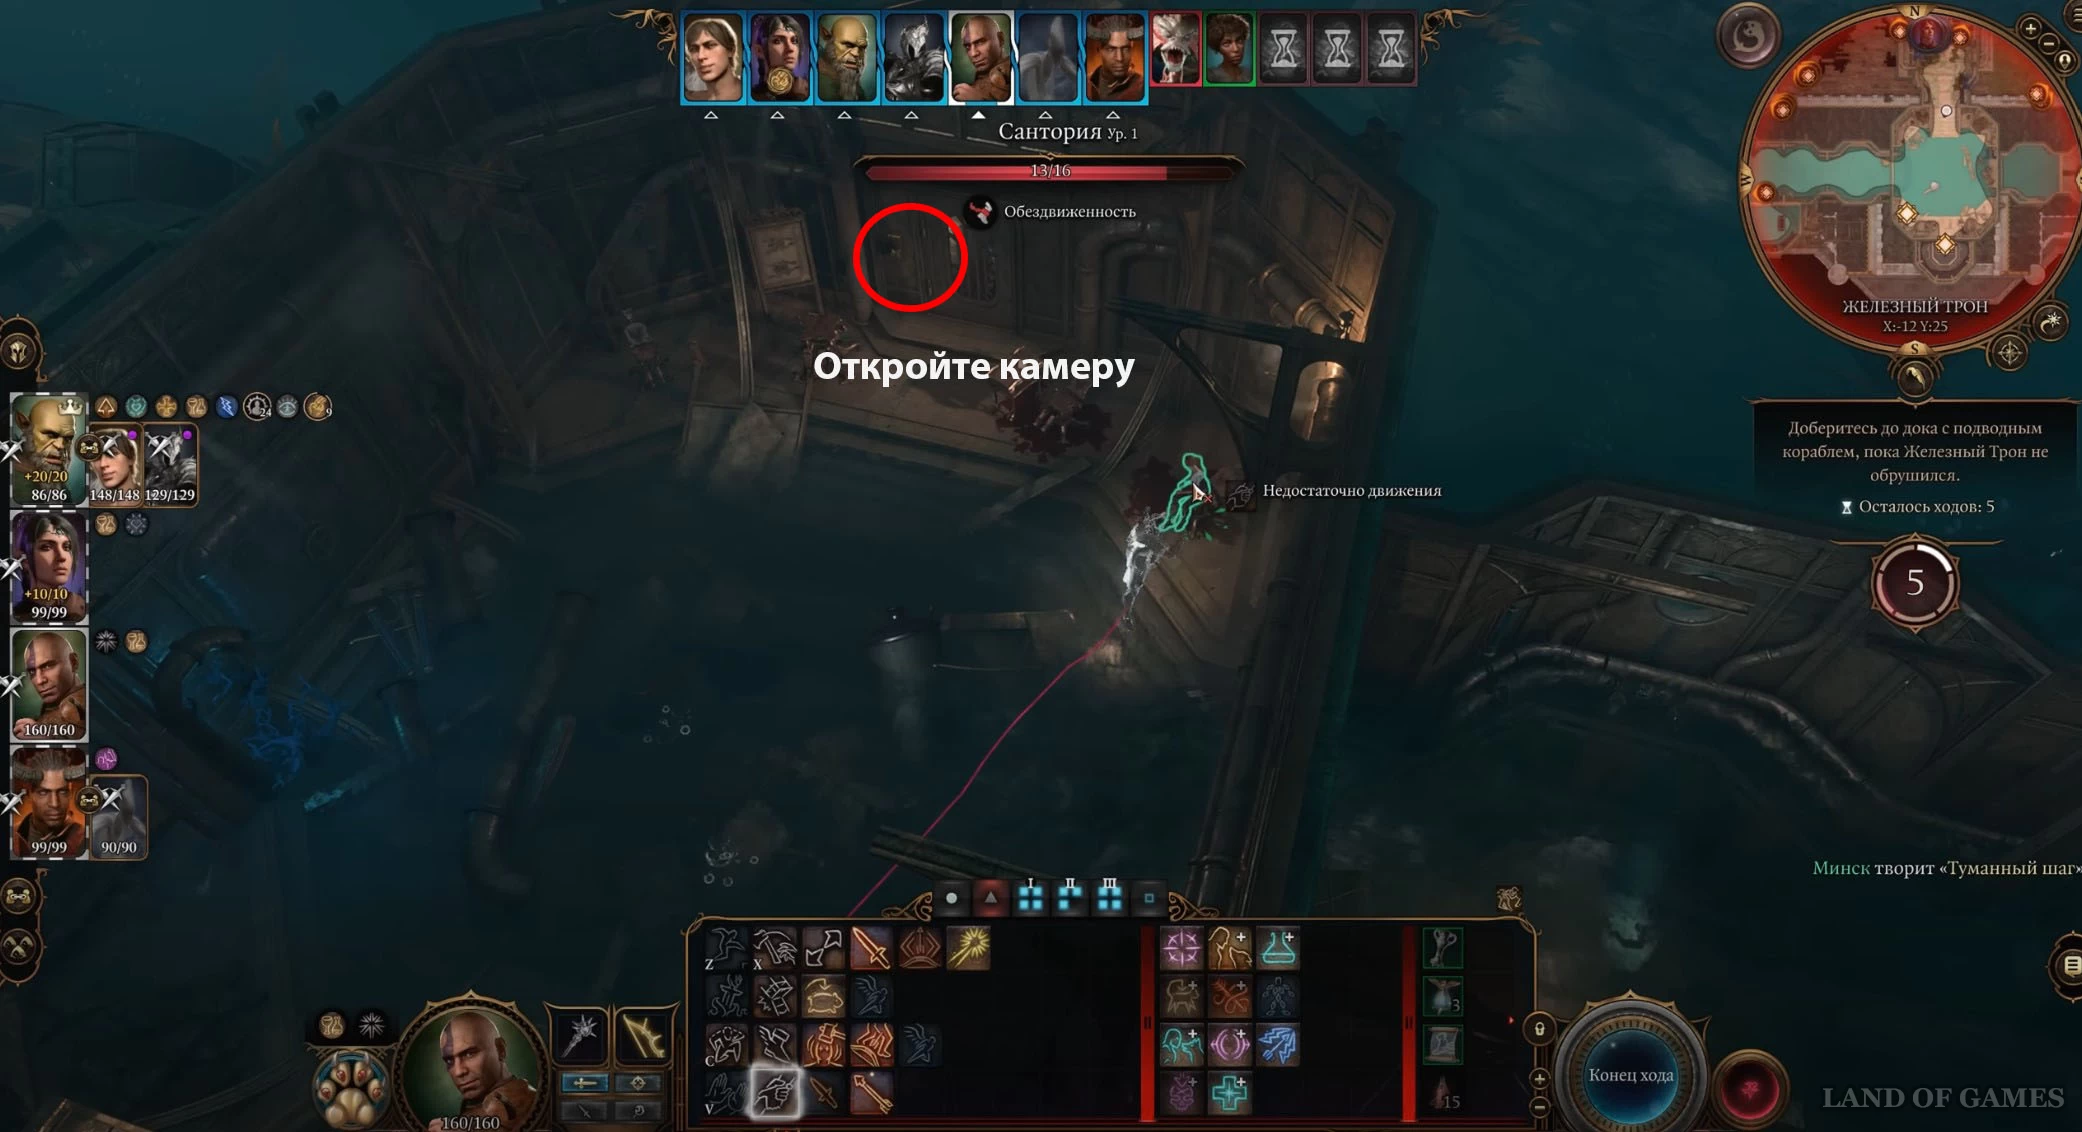
Теперь на 3-й ход двигайтесь к запертой двери на севере и взломайте ее, пройдя проверку на Ловкость рук (25). Используйте заклинание или зелье Ускорения и бегите к первой двери слева, чтобы достать из сундука Ключ от хранилища 6 в Счетной палате. Не обращайте внимание на расхаживающих здесь сахваджинов.
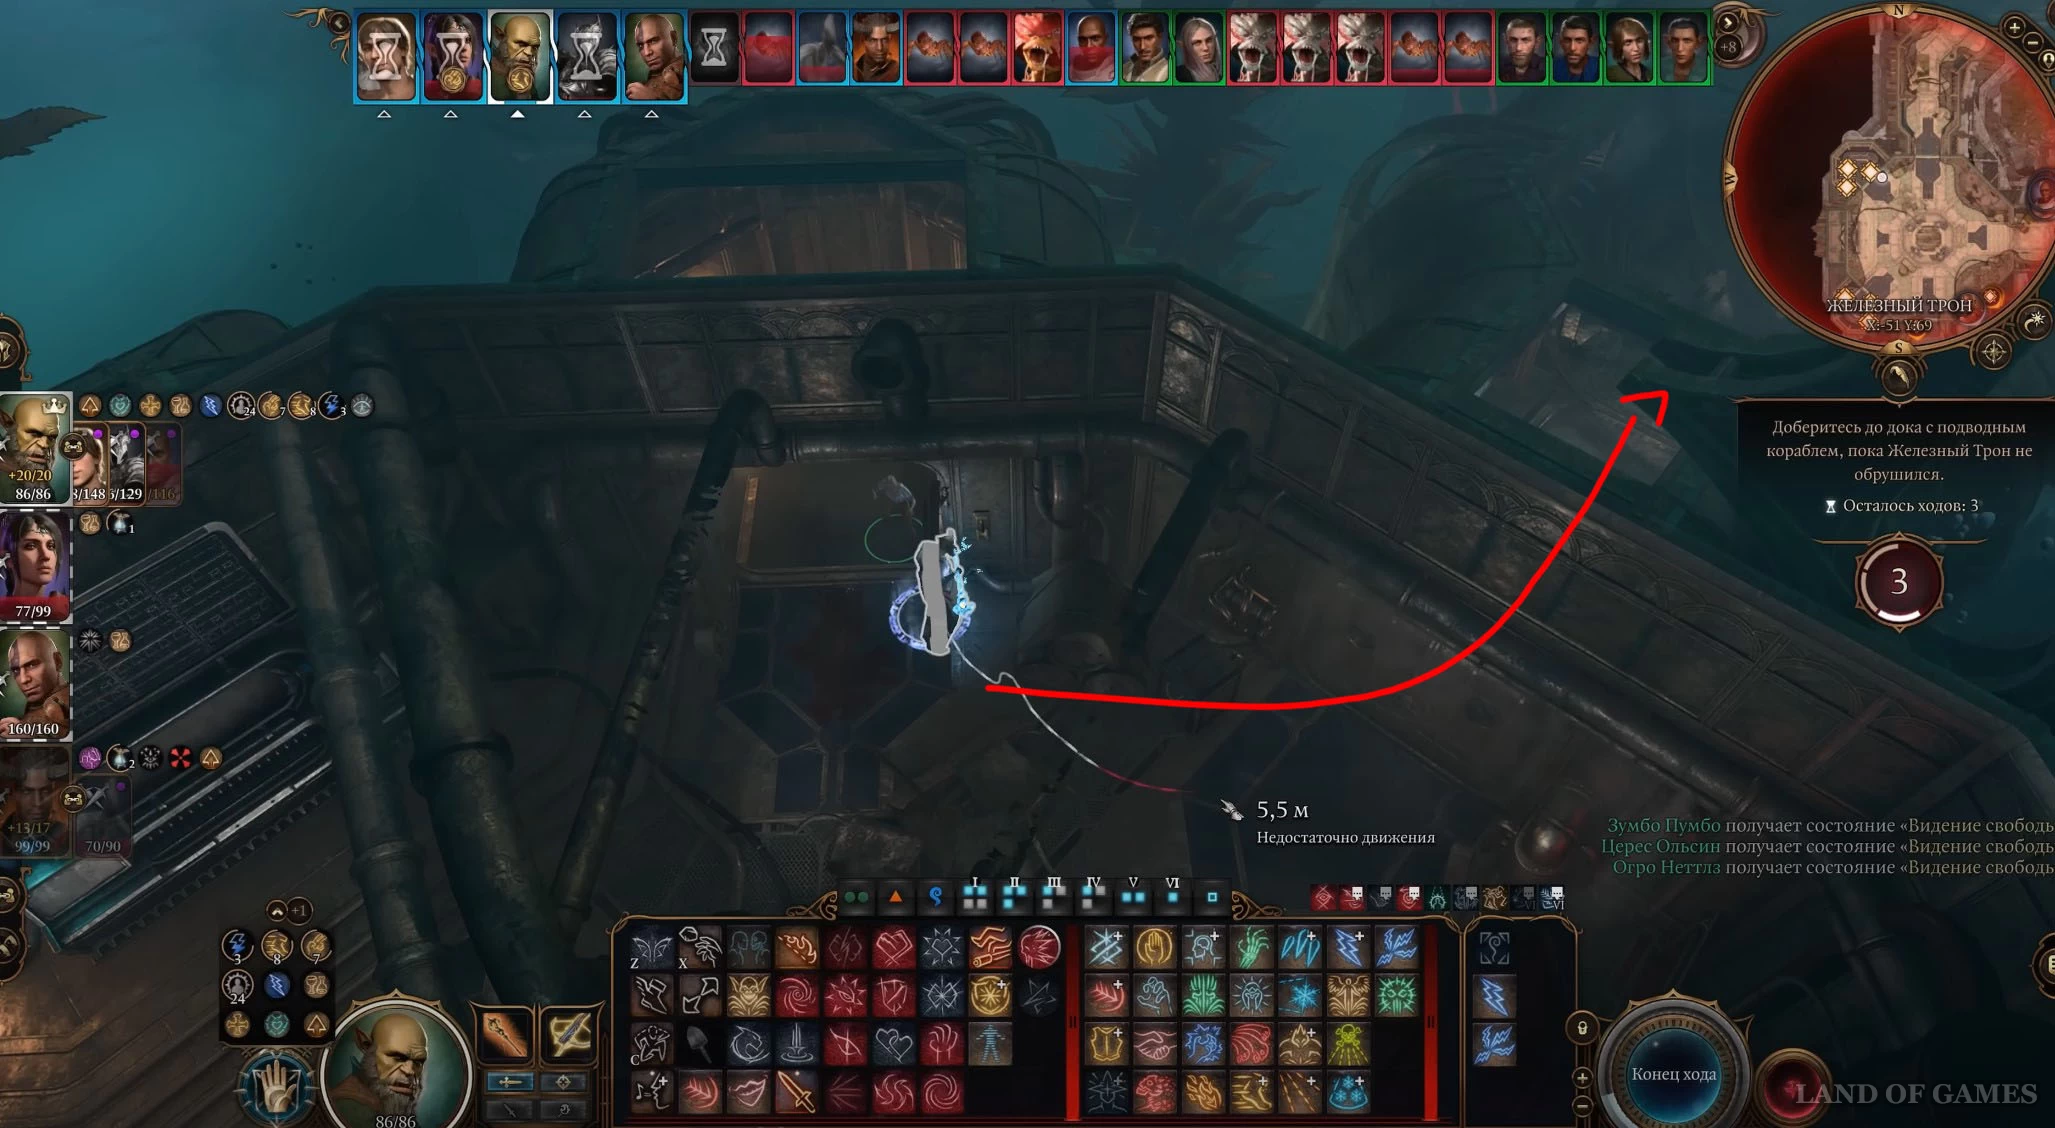
Далее вы можете либо побежать обратно, чтобы охранять сбежавших пленников (всего 7) по пути к кораблю, либо продолжить идти вперед и открыть второй сундук (в нем лежат украшения) в следующей боковой комнате, а потом возвратиться назад через северный коридор. Тут уже сами решайте, стоит ли овчинка выделки, однако 2-х ходов вам должно хватить для возвращения на корабль, если у вас остались методы быстрого перемещения. На крайний случай можете оставить этого героя в тюрьме, а потом попросту воскресить его.
Спасение герцога Рейвенгарда (восток)
Вы сможете спасти отца Уилла только в том случае, если присутствовали на коронации Горташа. При наличии Уилла в отряде обязательно поговорите с ним после данного события, а затем возвратитесь в лагерь, чтобы увидеть новую сделку между ним и Мизорой в рамках квестов «Клинок Фронтира» и «Спасти великого герцога». При этом Уиллу не обязательно принимать новый договор с дьяволицей для спасения своего отца.
Данное направление будет самым сложным, если вы не заключили сделку с Мизорой, поэтому советуем отправить туда двух героев: дамагера (например, Уилла) и целителя (Шэдоухарт, к примеру). Спуститесь дамагером вниз, преодолейте коридор Туманным шагом или другой способностью и атакуйте находящихся здесь двух сахваджинов. Желательно ударить их какой-нибудь магией, бьющей по площади.
Примечание: Призываемых существ следует отправить именно на восток. Они помогут разобраться с появляющимися здесь врагами и при необходимости смогут защитить сбегающих пленников, быстренько вернувшись в центр локации (ставьте их в южном коридоре, так как именно оттуда первым делом прибегут новые сахваджины).
Теперь выберите целителя, спуститесь им вниз и тоже двигайтесь в восточный коридор, открыв перед этим камеру слева, где сидит Фланси Торнвист. Преодолейте коридор каким-нибудь заклинанием. Если вам повезет, то на 1-м ходу вы доберетесь до камеры герцога и разберетесь с сахваджинами.

На 2-м ходу добейте ящериц, если они еще живы, а потом целителем откройте две клетки справа, чтобы выпустить герцога, Марлоно Рэндла и Дидля Офрана. Сразу же исцелите отца Уилла и при возможности наложите на него Невидимость или Убежище. Дамагера проведите в помещение, чтобы он мог без проблем использовать свои атакующие способности.
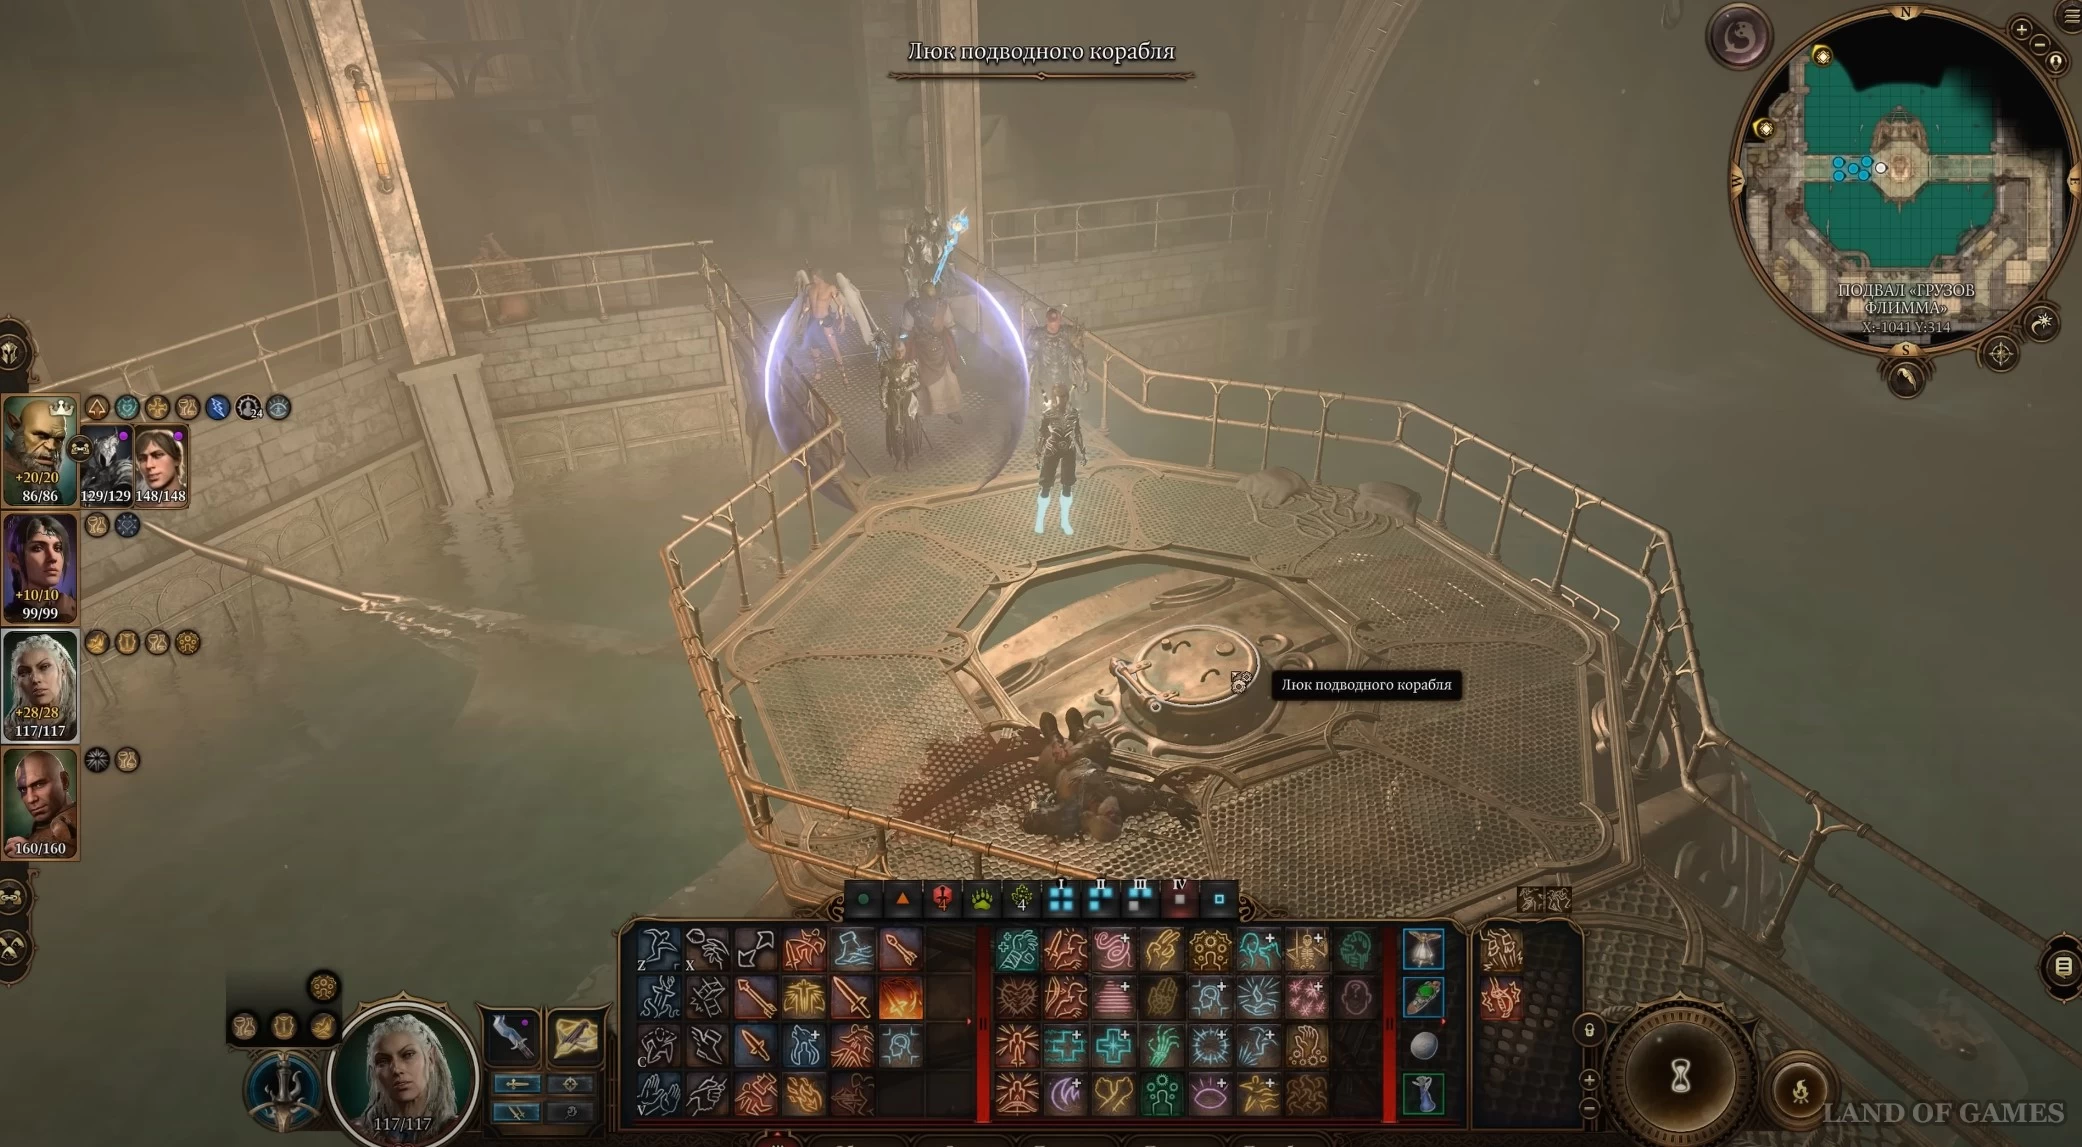
Возьмите под управление отца Уилла и выйдите из камеры. Если с Мизорой не была заключена сделка, то она появится и вызовет 6 паучков, которые тут же атакуют герцога. При отсутствии у него полной шкалы здоровья или защиты он умрет. Если же вы до этого сделали его невидимым или поместили в убежище, то пауки ничего не предпримут. Двое пленников из другой камеры, кстати, смогут быстренько проскочить мимо.
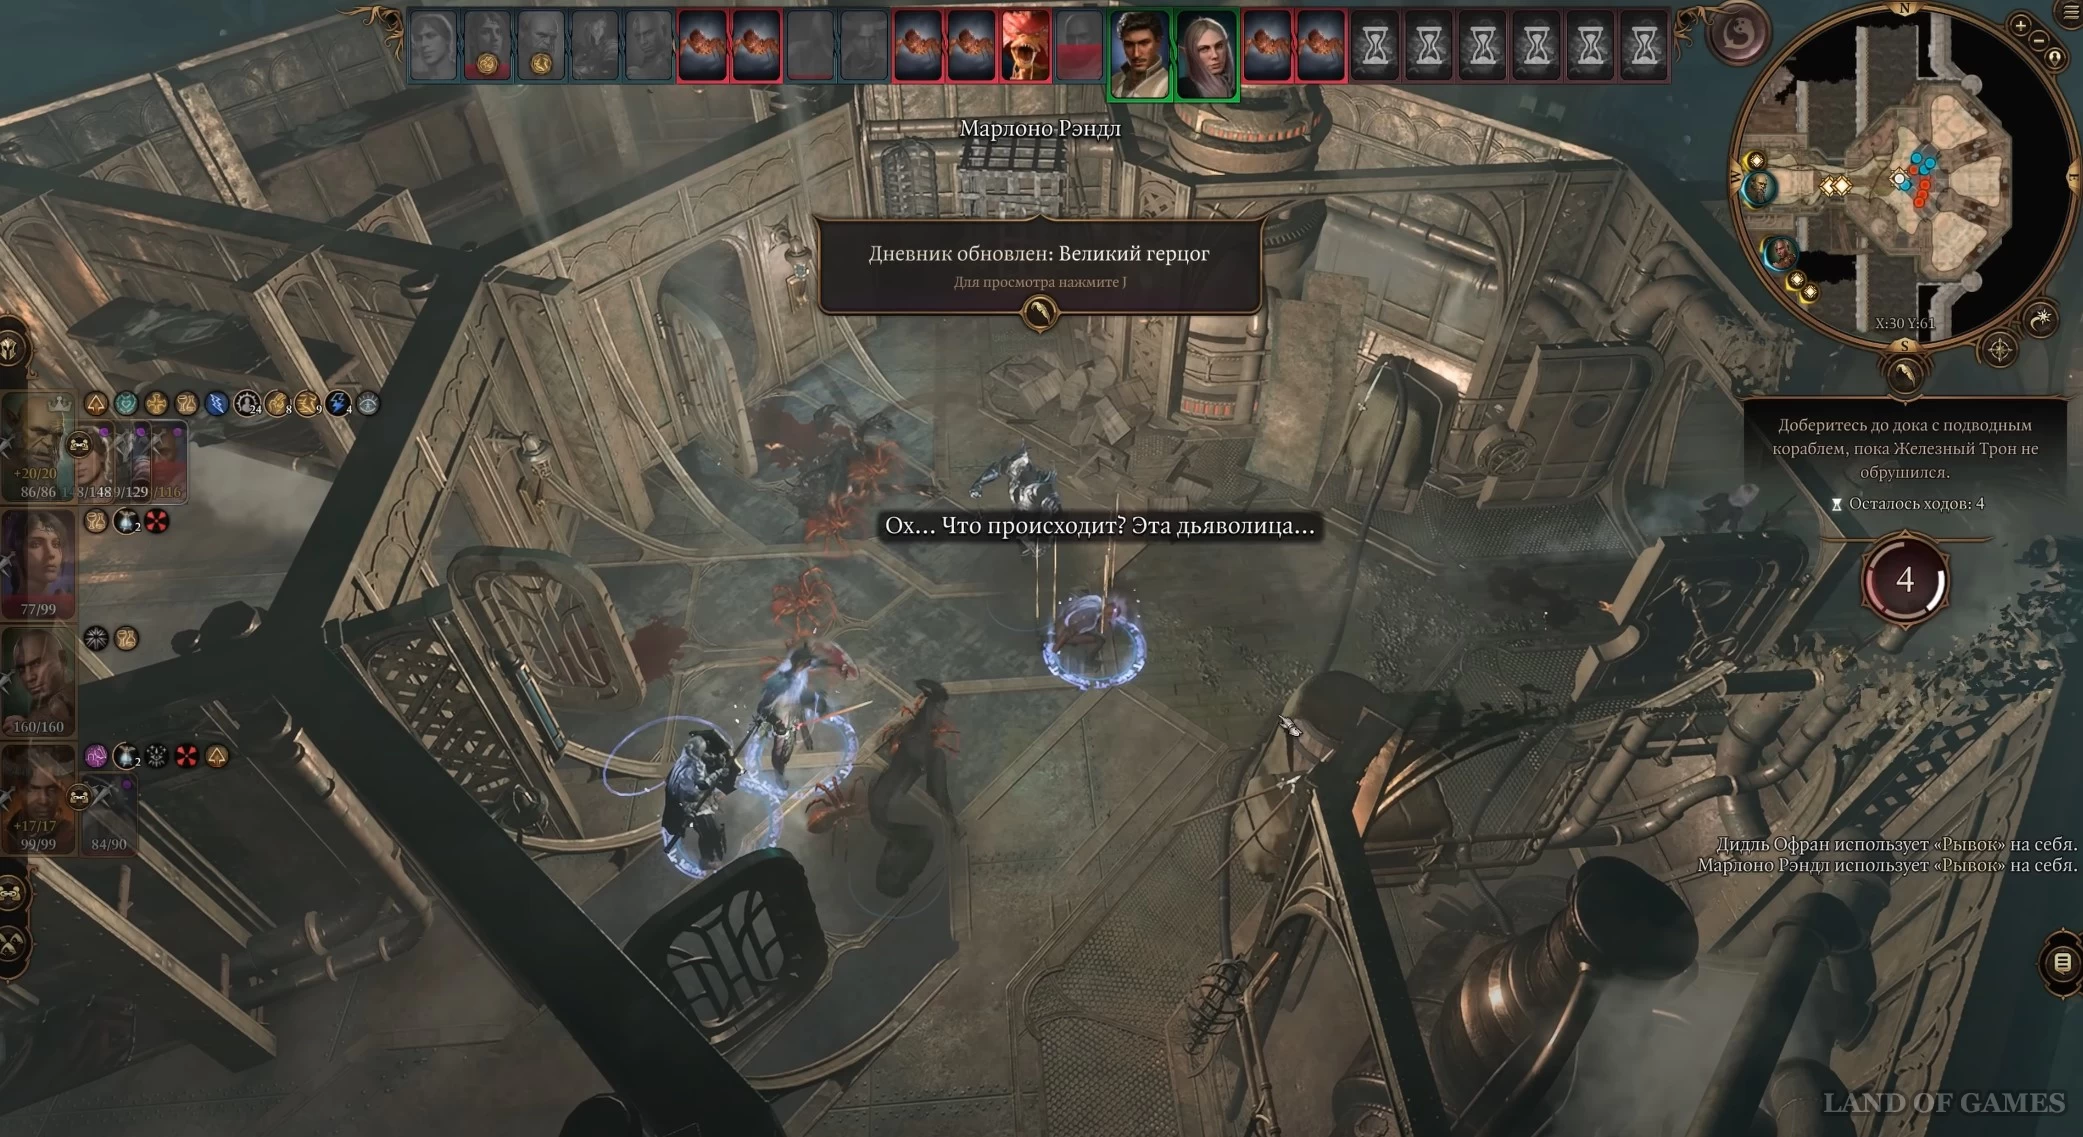
Добавим, что после встречи с дьяволицей Рейвенгард встанет на колено, поэтому вам нужно будет применить на нем «Помощь», чтобы он снова встал и смог бежать в сторону корабля. На 3-м ходу разберитесь с паучками, применив какое-нибудь заклинание, ударяющее по площади, а затем бегите на корабль, применив Рывок и Ускорение. В итоге вы спасете здесь еще 4 человек.
Спасение Омелума (юг)
Вы найдете его тут в том случае, если в ходе задания «Украсть яйцо гитьянки» не передавали леди Эстер яйцо. Выберите персонажа, который может принять много ударов или уклониться от них. На его мобильность можете не смотреть, так как в конце он все равно сможет просто телепортироваться на судно. Бегите на юг, где вы тут же встретите Обелию, которая будет спешить на корабль (она заберется в него уже на 1-м ходу).
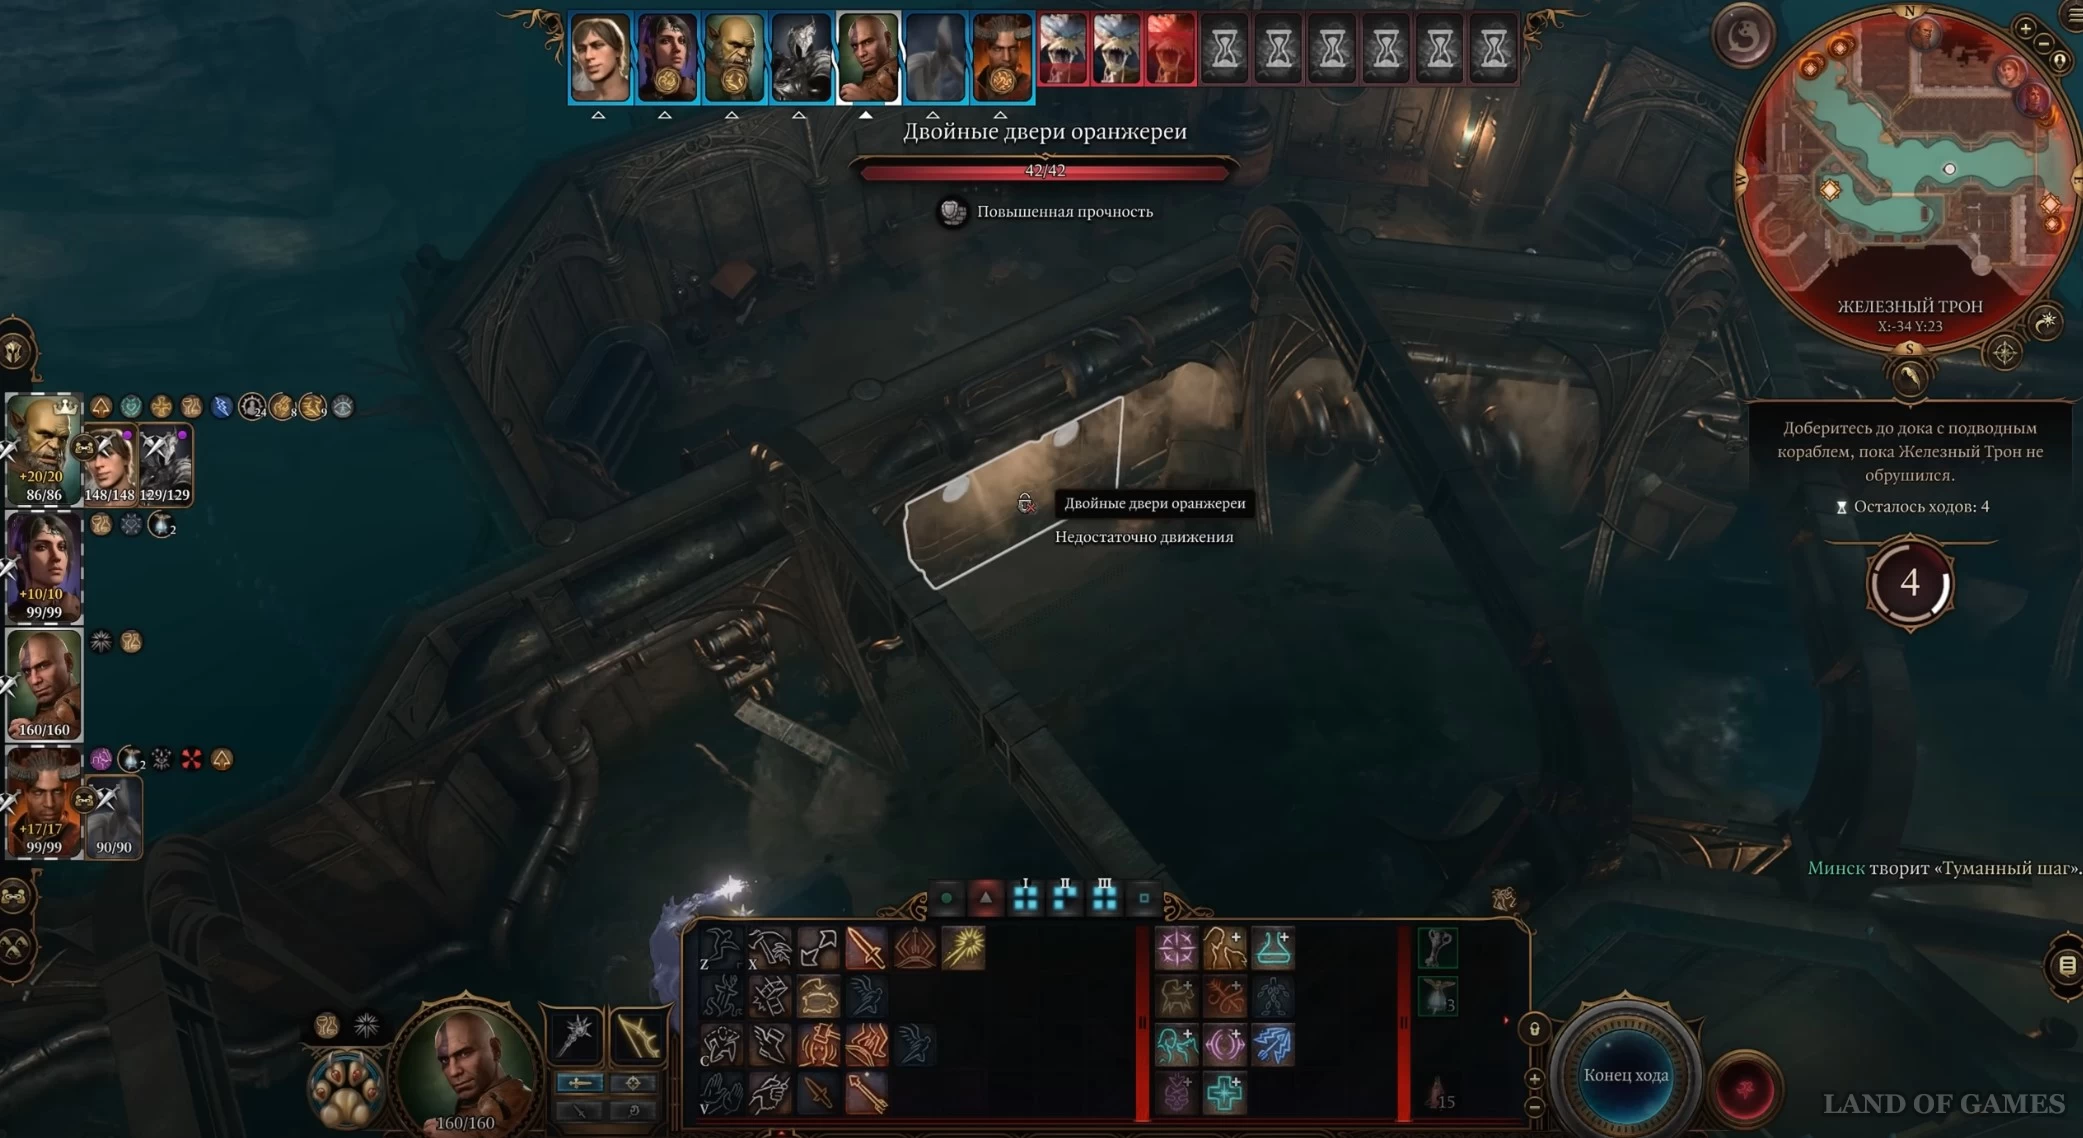
Используйте заклинание или Ускорение, чтобы быстренько преодолеть коридор и попасть в следующее помещение. На 2-м ходу освободите Санторию, лежащую на кушетке, и откройте камеру с еще двумя заключенными. Если у вас еще остались очки действий, то начните двигаться направо.
На 3-м ходу откройте двойные двери оранжереи слева, чтобы пройти в комнату с иллитидом. Можете не обращать внимания на сахваджина впереди. Войдя в камеру, вы обнаружите Омелума, привязанного к койке. Используйте на нем «Помощь», чтобы освободить его от пут. После этого управление над иллитидом перейдет к вам. Отметим, что у него имеется заклинание, позволяющее мгновенно телепортироваться на корабль вместе с еще одним героем. Однако перед перемещением не забудьте забрать со стола образец иллитидского паразита.

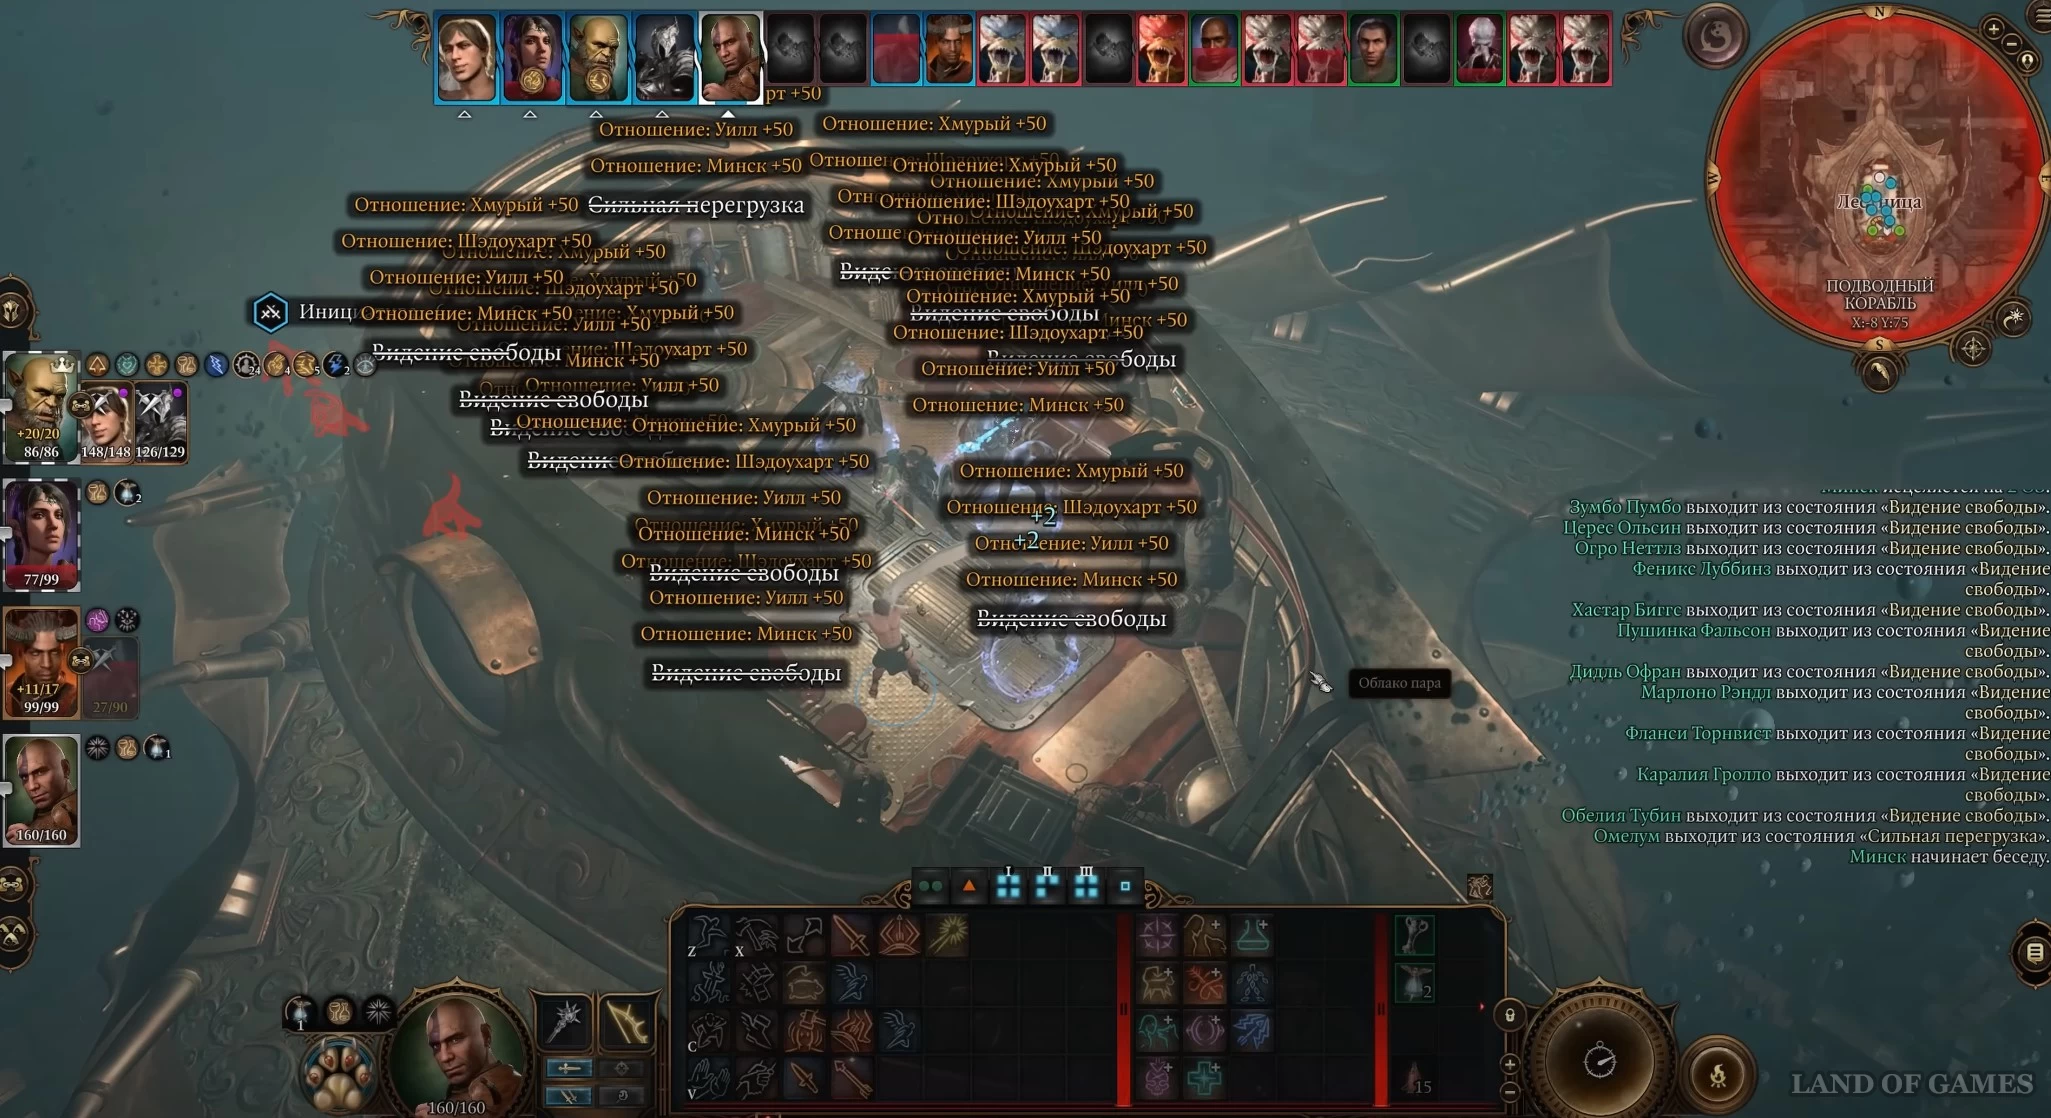
Открыв все клетки, начните просто сопровождать пленников к лестнице, следя за тем, чтобы им не помешали возникающие из воды рептилии. Если заключенные толпятся в одном месте, мешая друг другу, то можете использовать толчок, Телекинез и Магическую руку, чтобы перемещать их вперед. Затем вернитесь на корабль и посмотрите ролик.
Уничтожьте литейную Стальной стражи
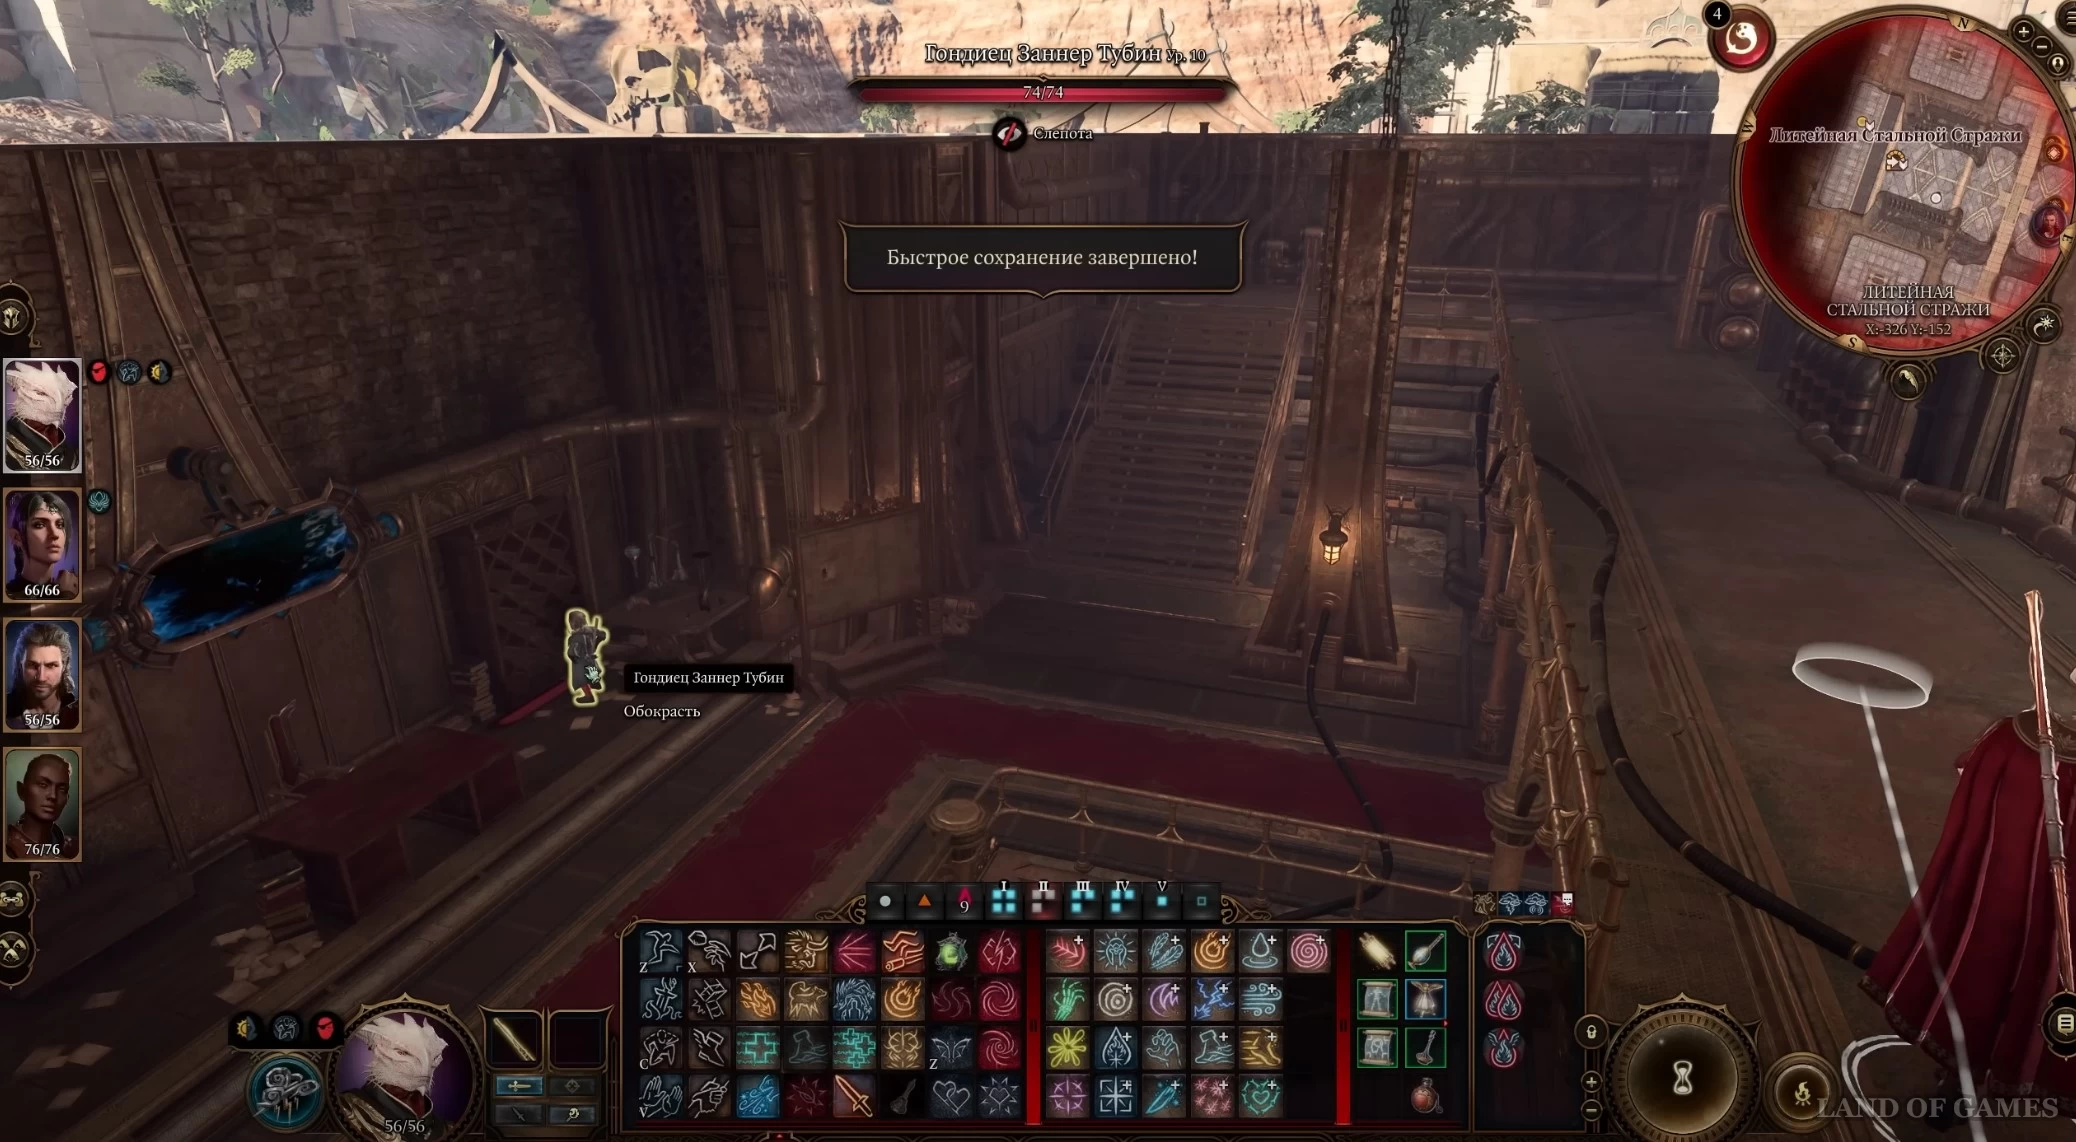
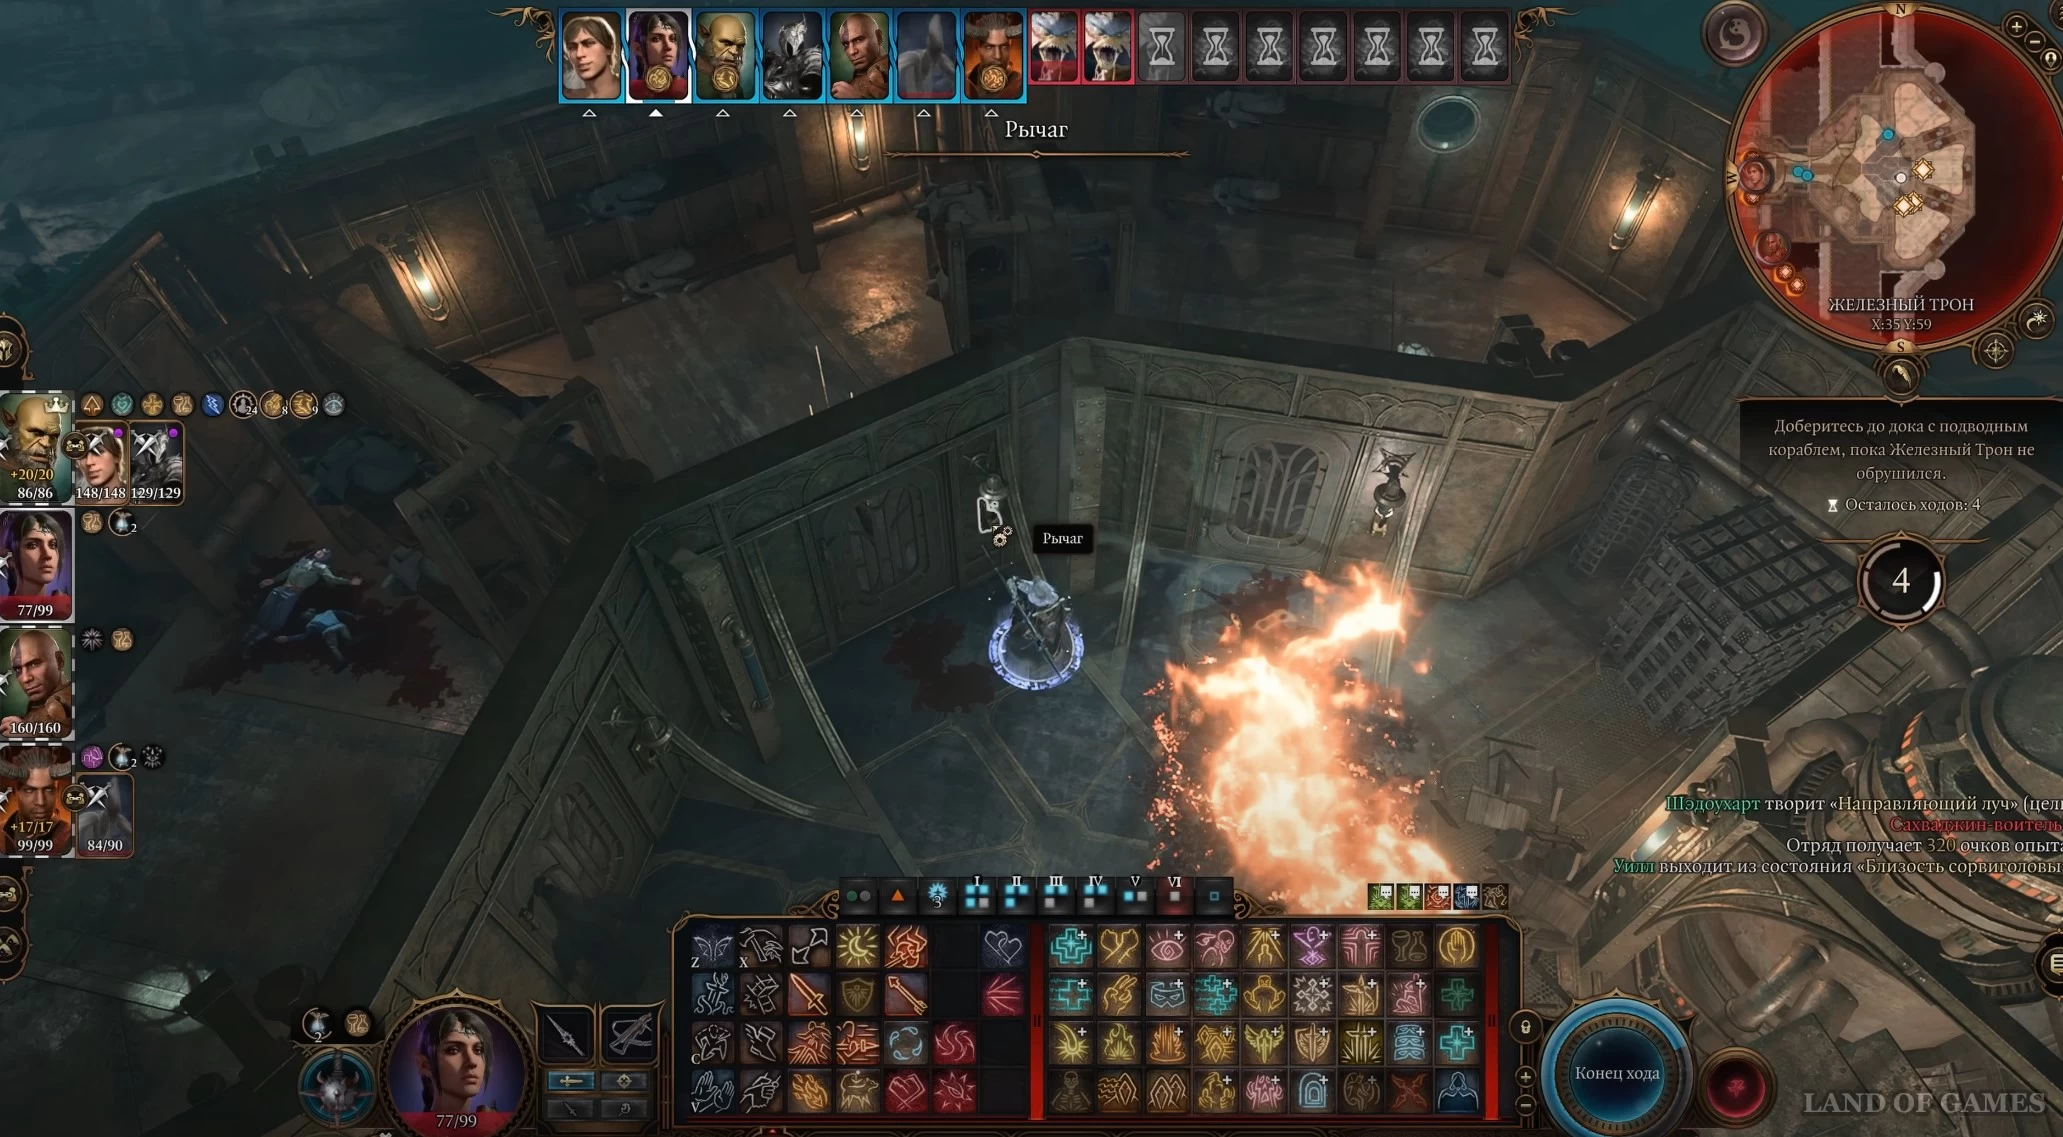
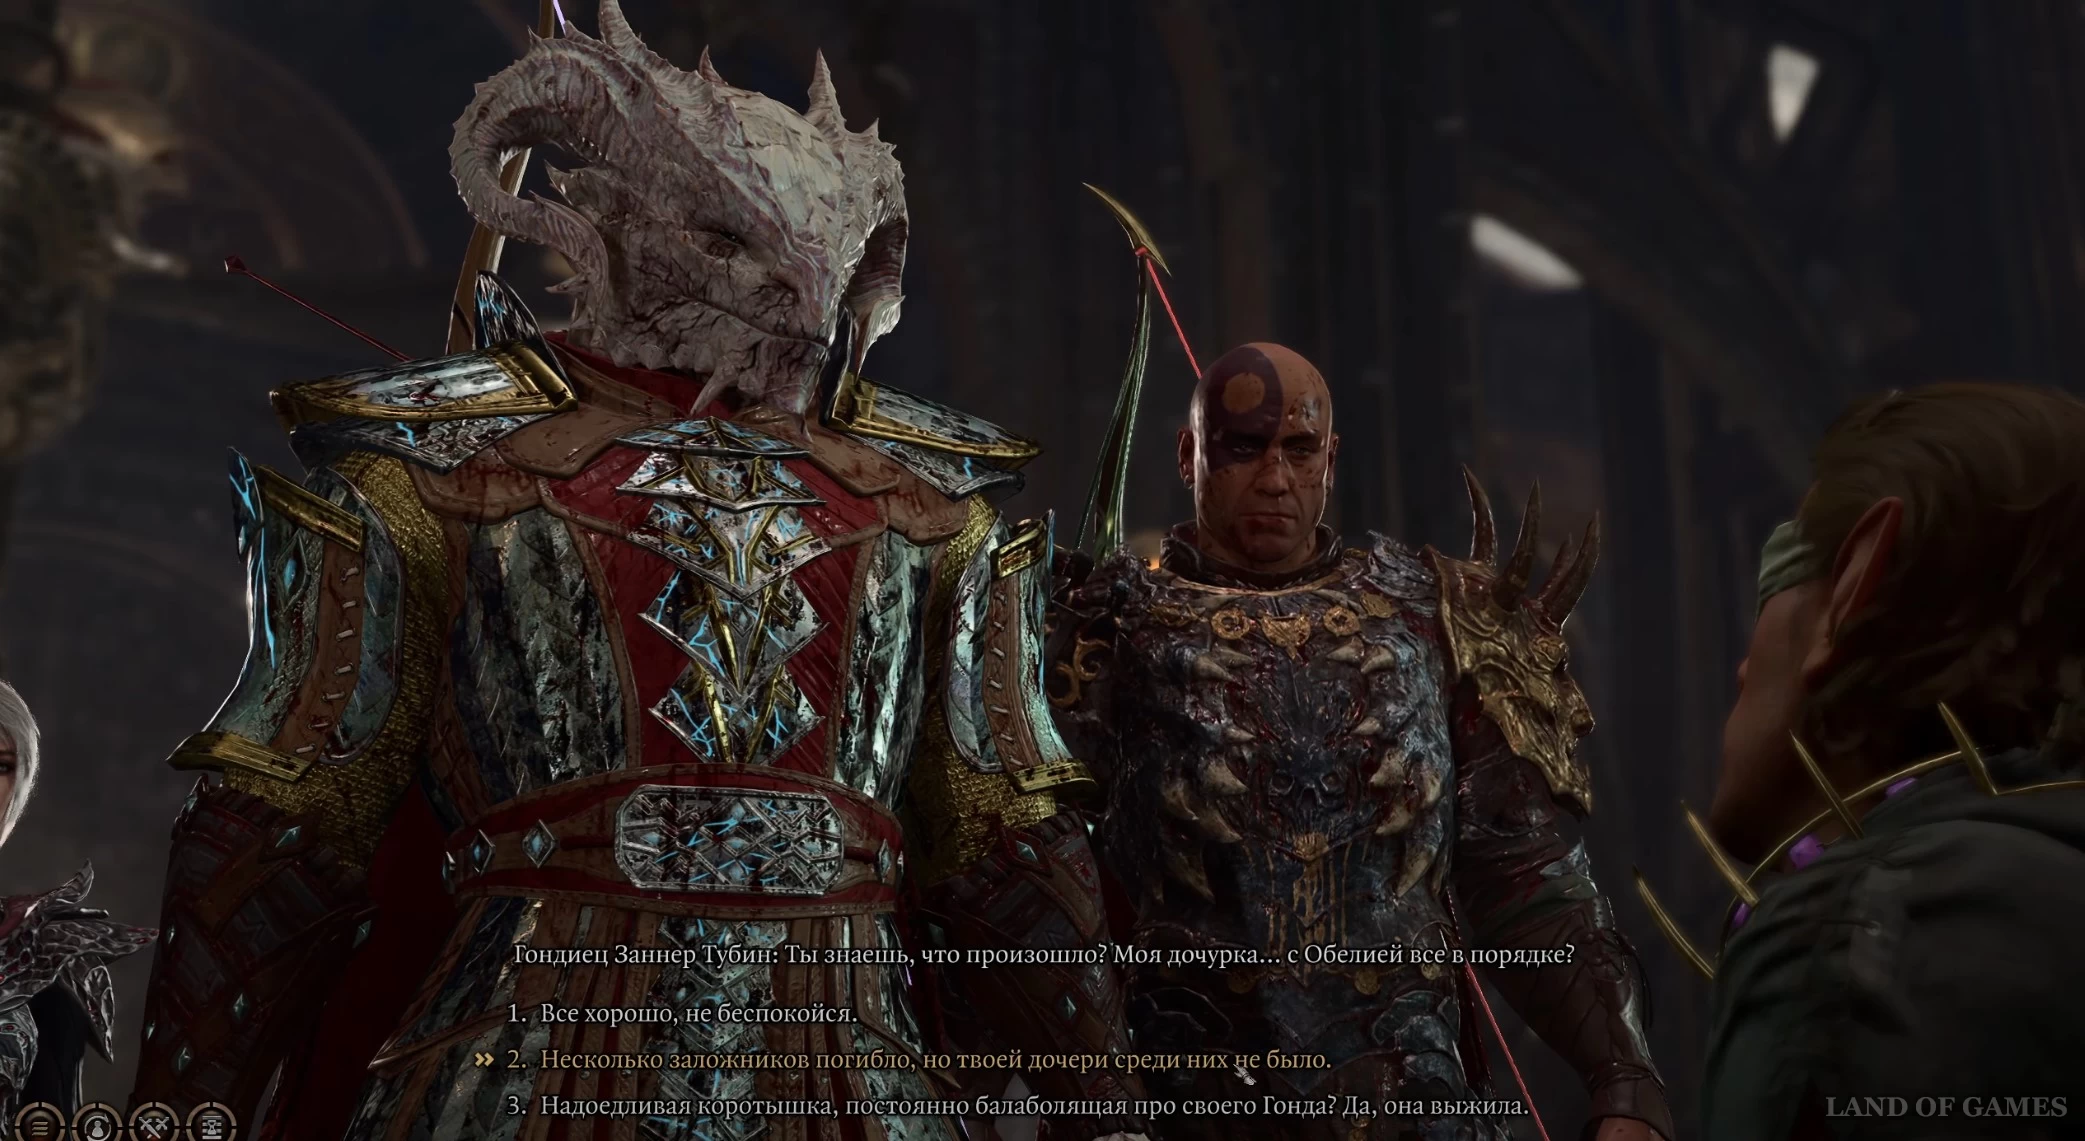
Спася гондийцев, возвратитесь на поверхность и снова войдите в литейную. Если вы впервые посещаете фабрику, то увидите, как Тубин призывает своих сородичей напасть на культистов. Помогите им в битве и не забудьте деактивировать Мотиваторы. Затем поговорите с Заннером. Он спросит у вас, в порядке ли его дочь. Если она умерла, то можете соврать ему об этом, чтобы он добровольно вызвался помочь вам в уничтожении литейной. При наличии бомбы, полученной от клана Железной руки, вы можете отказаться от его помощи.
Затем снова идите в кабинет охраны и пройдите через дверь, ведущую на нижний этаж в лабораторию литейной Стальной стражи. Вы можете также воспользоваться лифтом. Здесь тоже будут идти бои между гондийцами и стражей, в которых вам следует поучаствовать, чтобы спасти побольше коротышек. Далее нужно двигаться на север к большой двери (X: -195, Y: 458), ведущей в Преддверие Центра управления. Откройте ее Ключом от уровня управления (выпадает с черной десницы Ханс Райвз) или взломайте, пройдя проверку на Ловкость рук (25).

Примечание: Если вы еще не освободили гондийцев и проходите в режиме скрытности, то взлом двери приведет к срабатыванию сигнализации и смерти пленников в Железном троне.
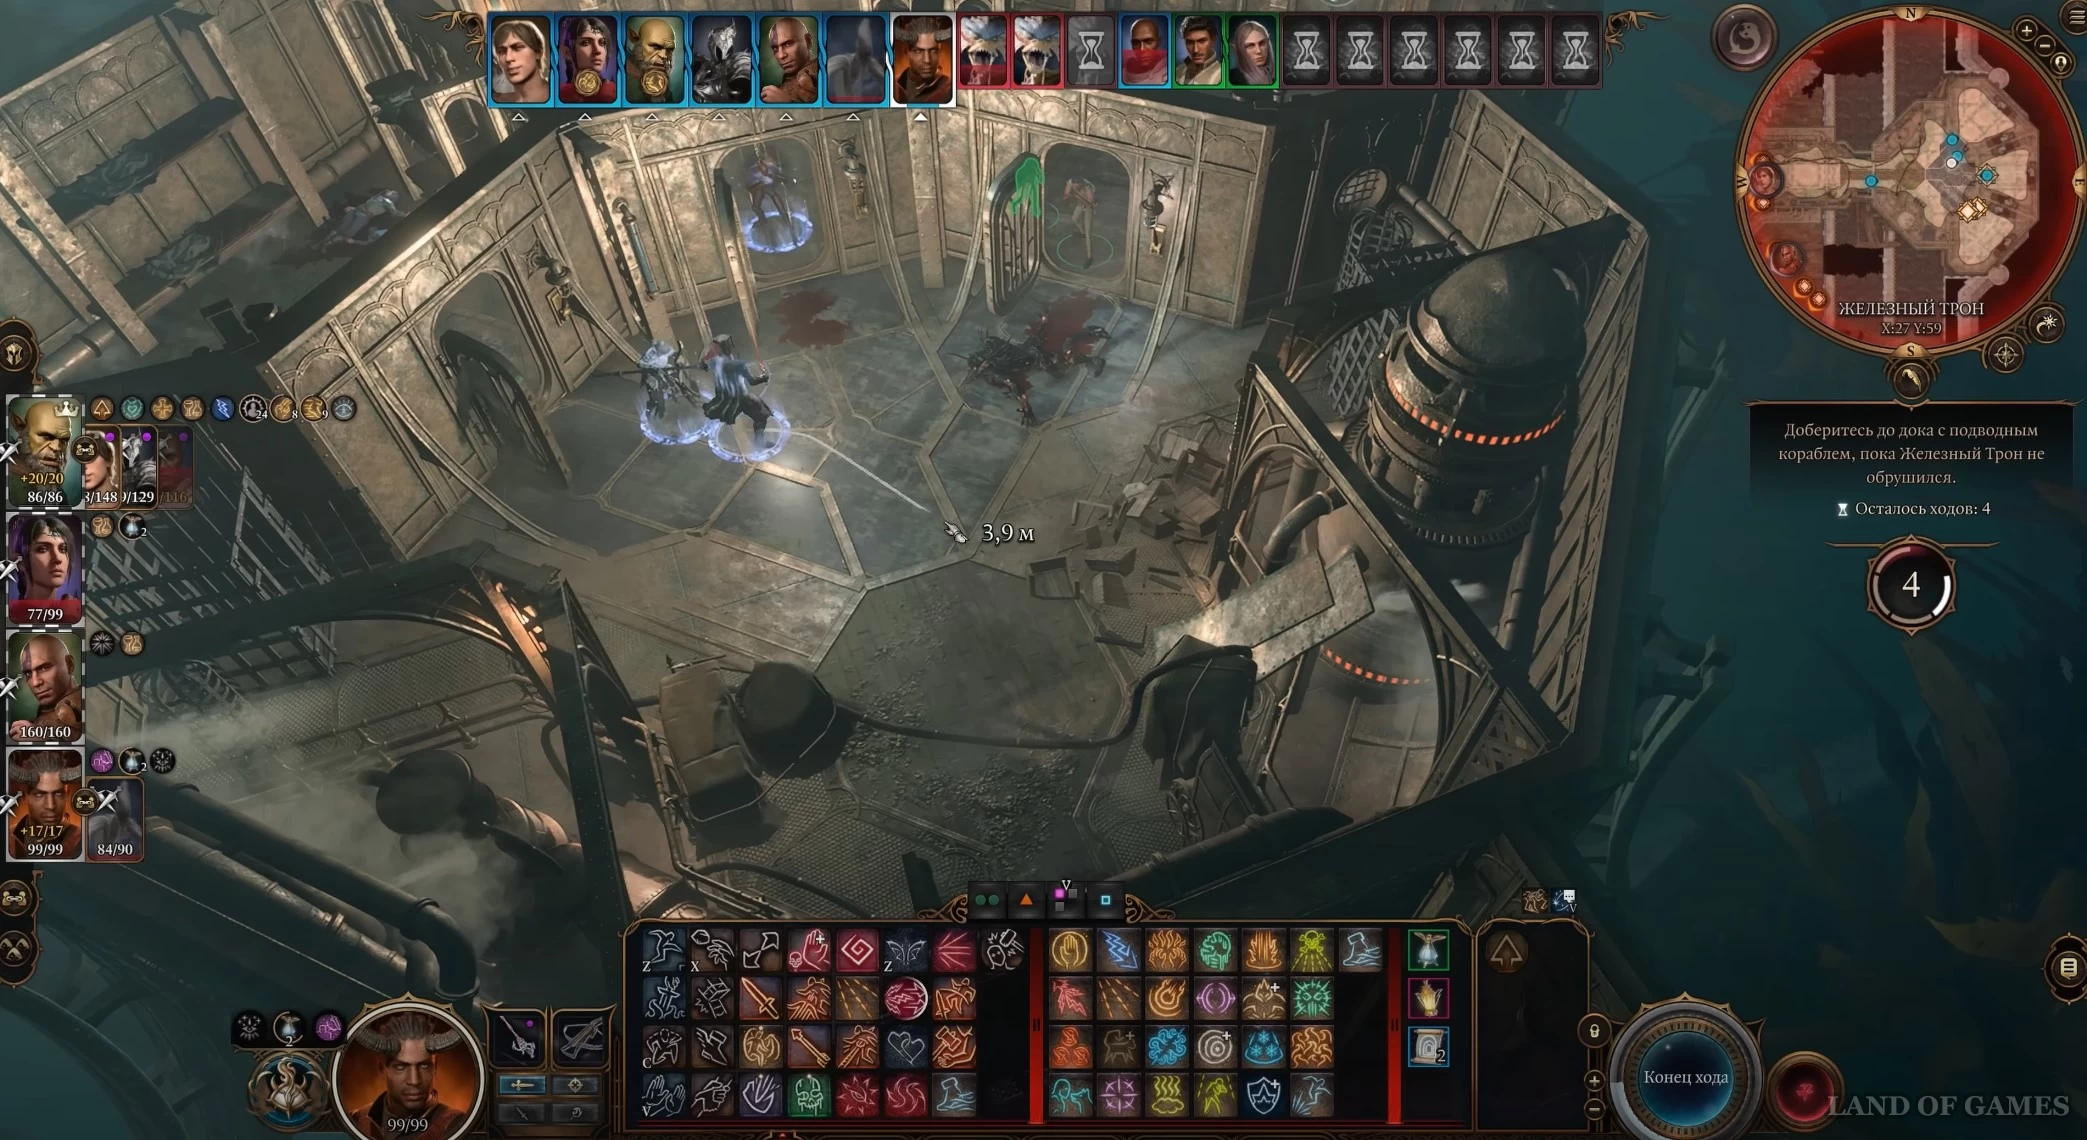
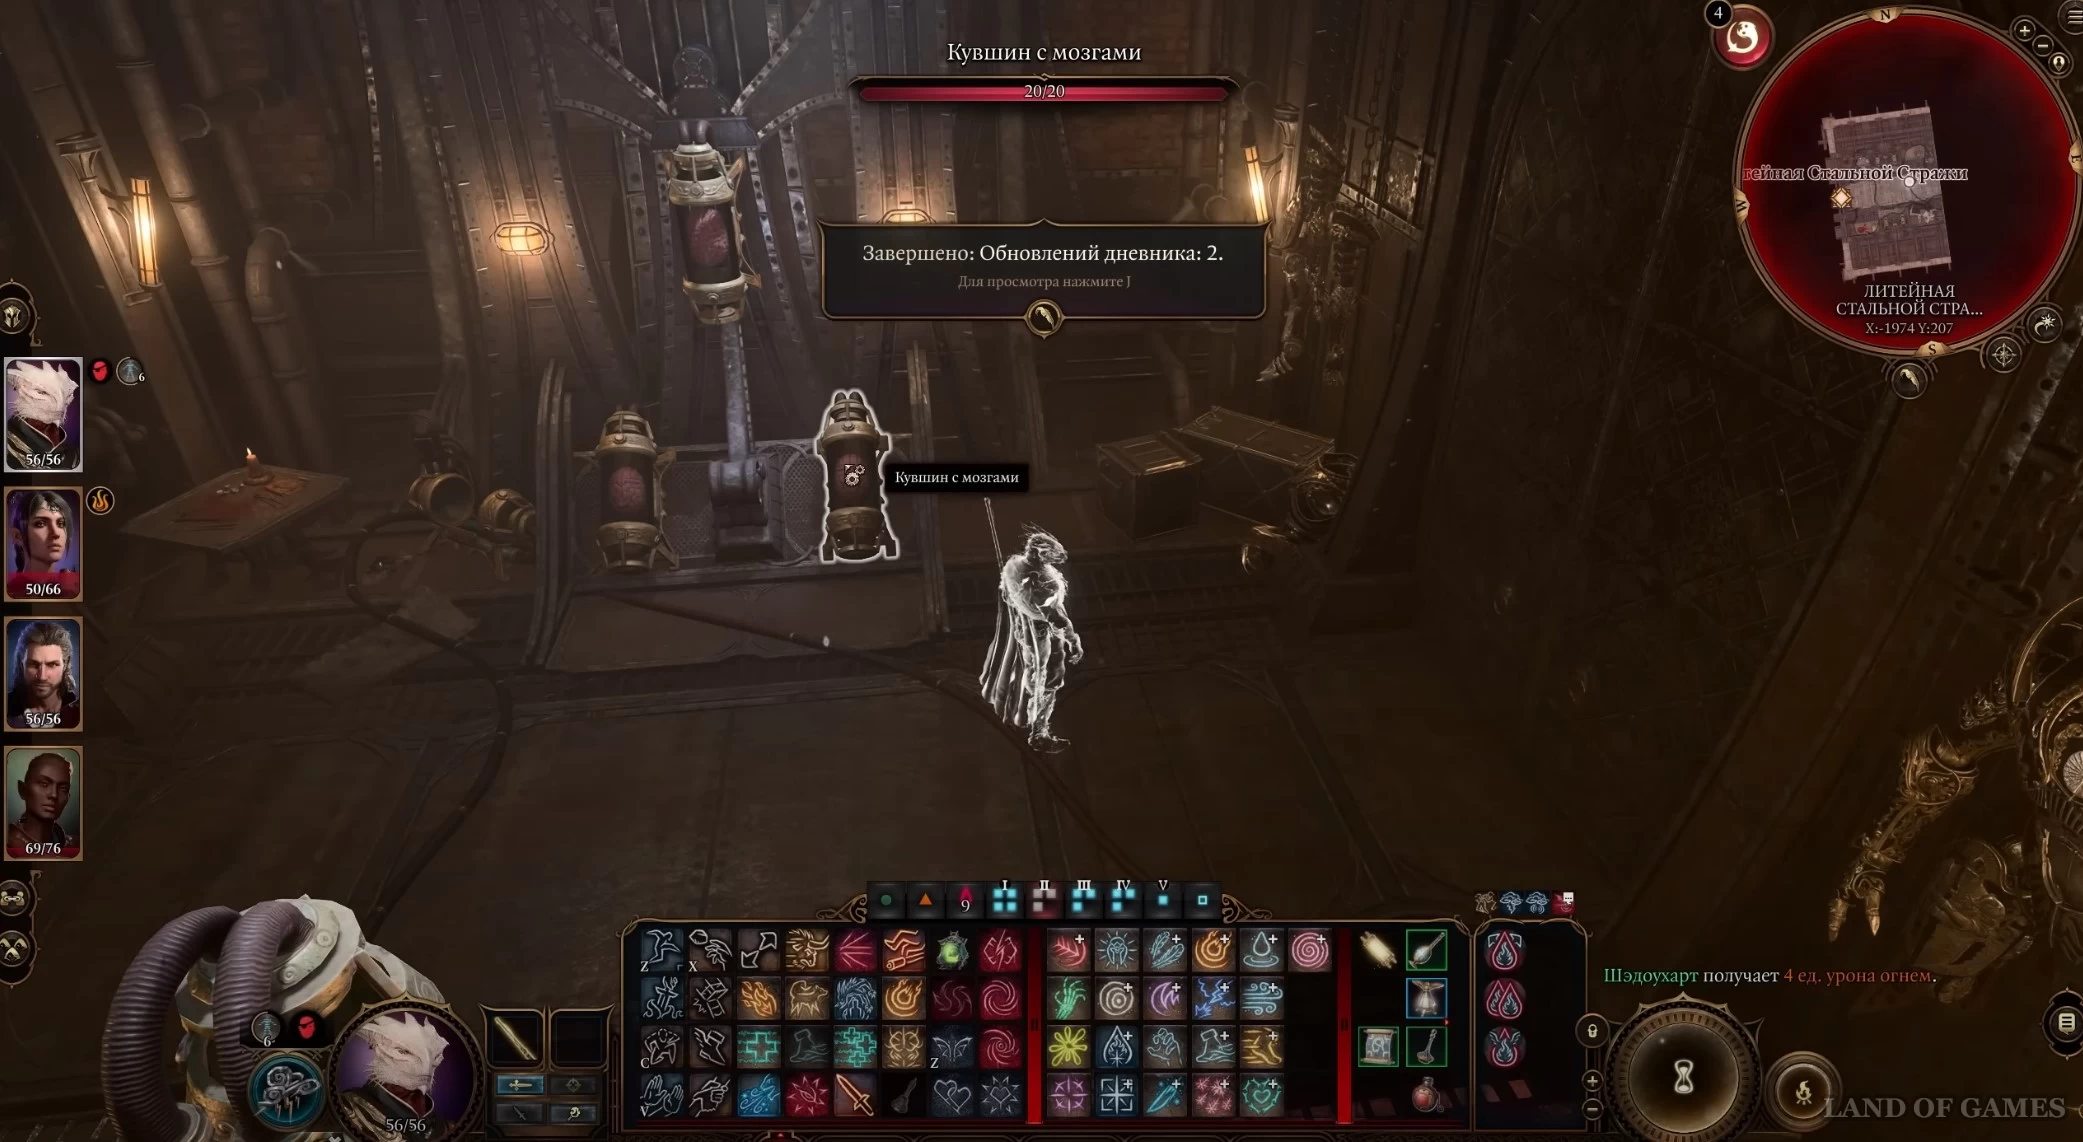
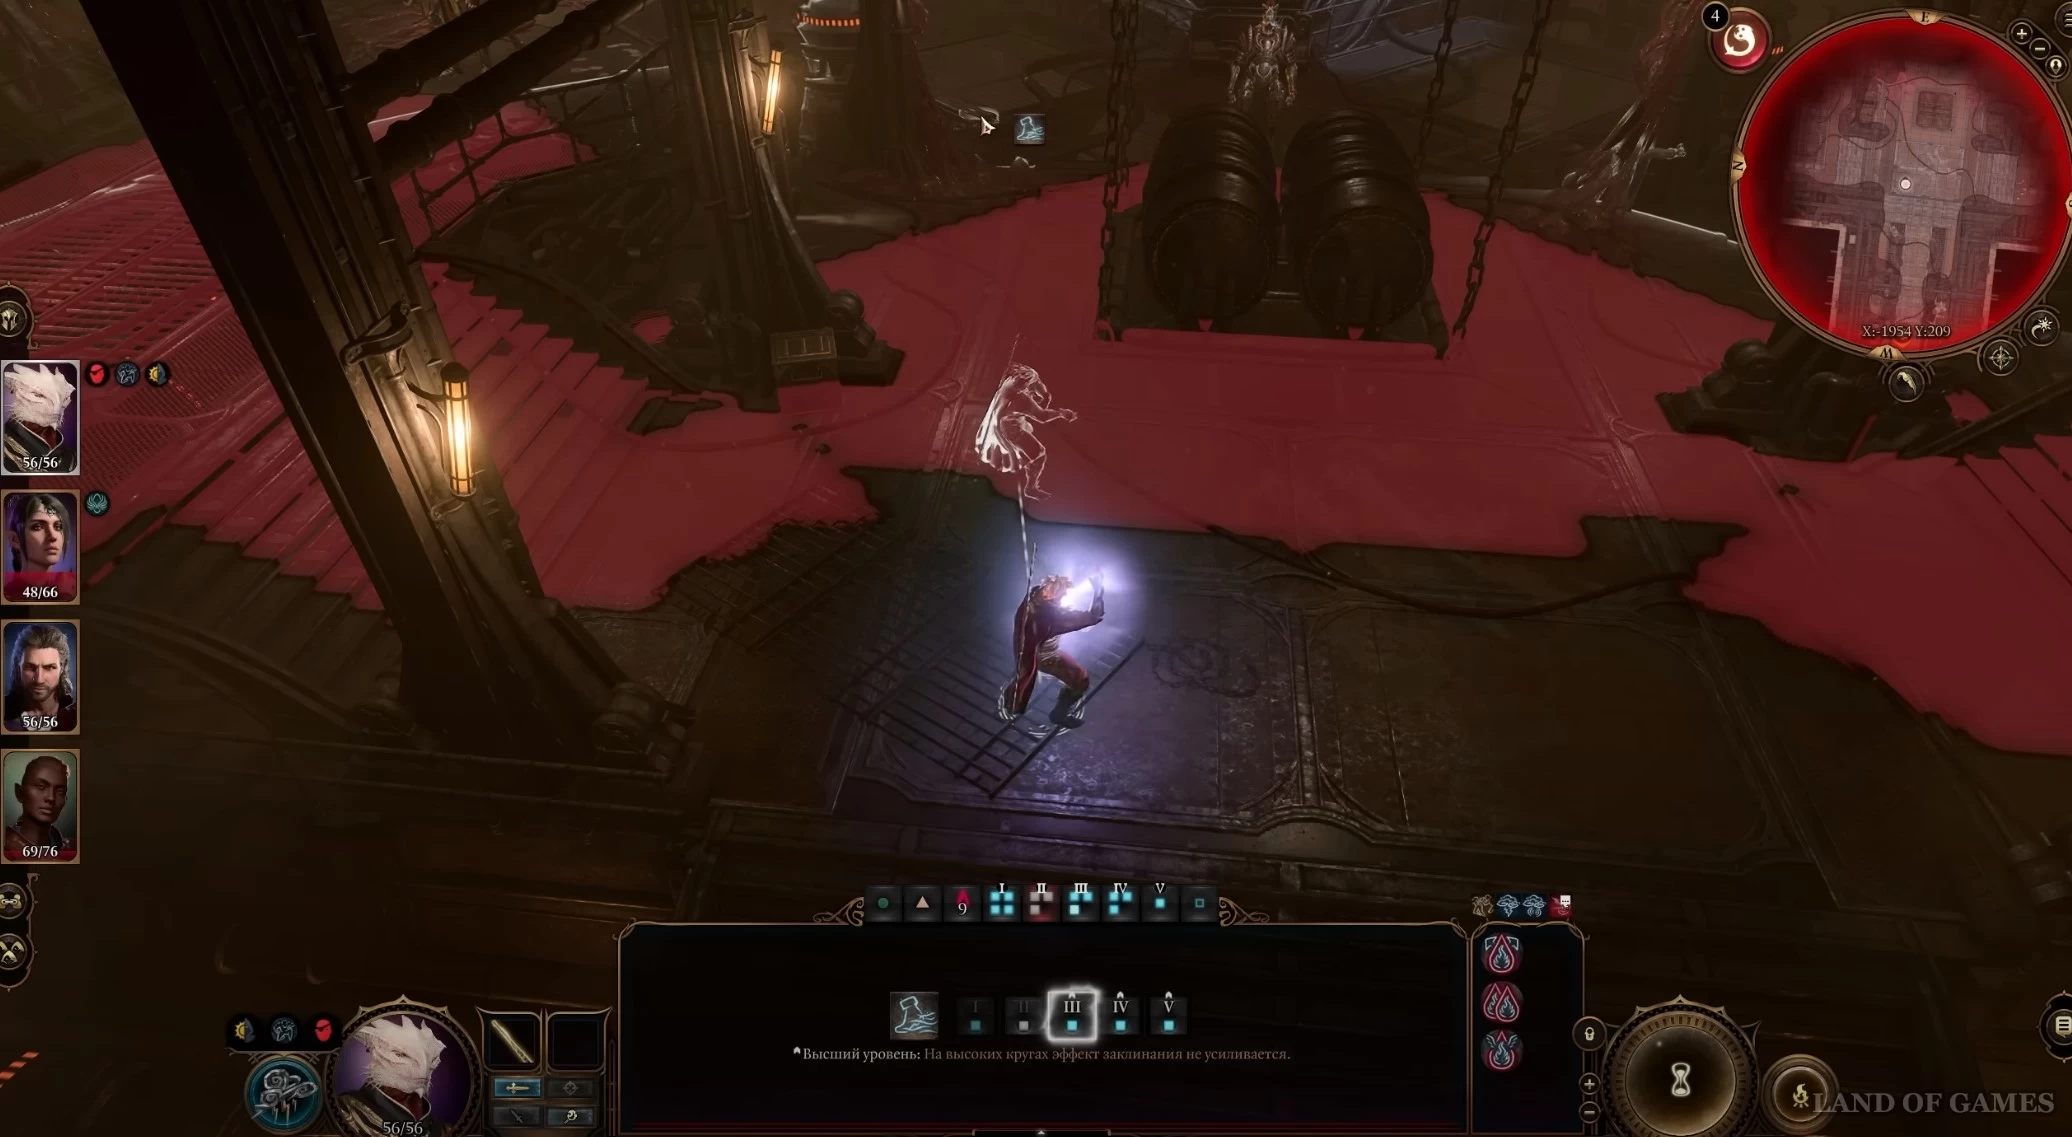
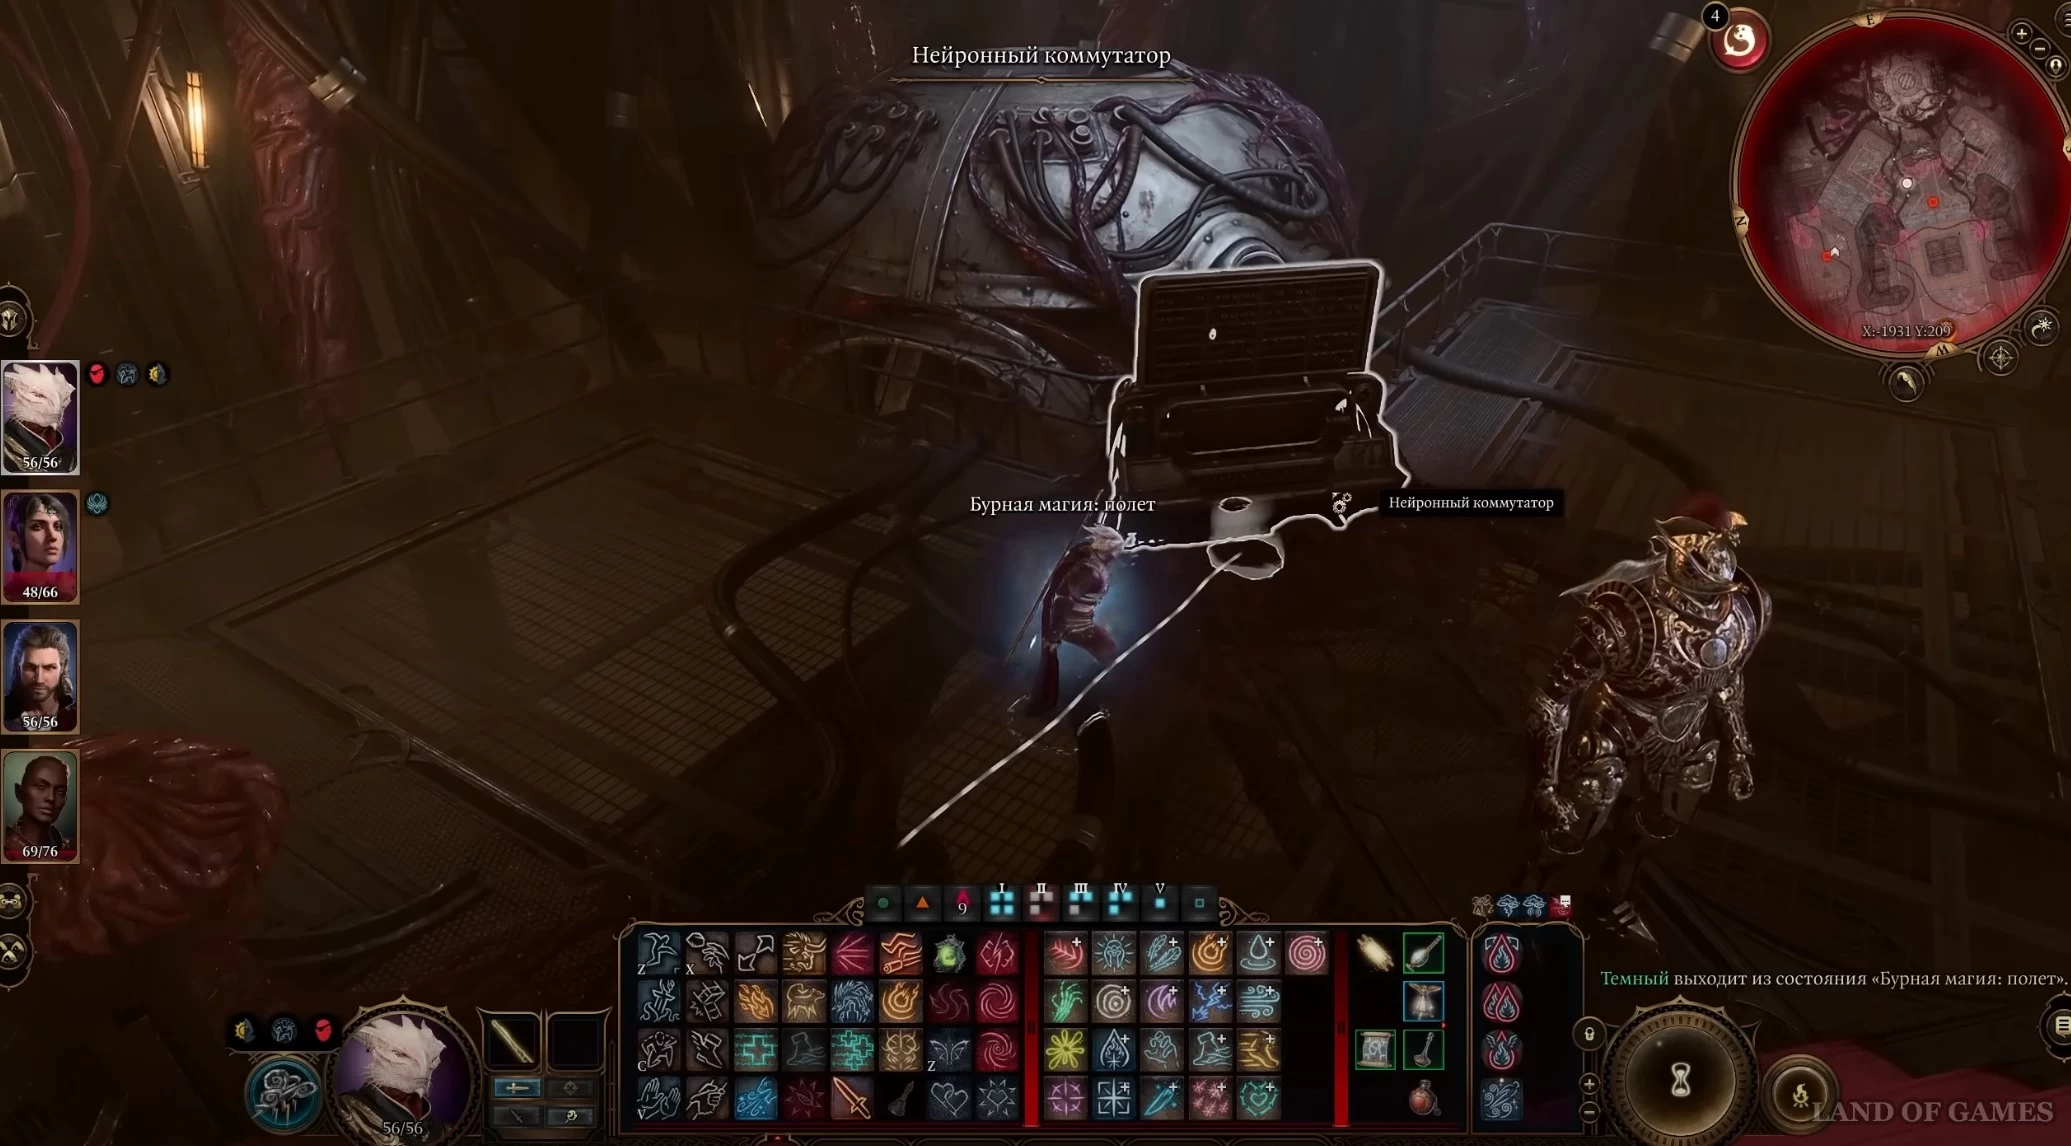
Вы окажитесь в коридоре Центра управления, где по бокам стоят емкости с мозгами. Взаимодействуйте с кувшином, показанным на картинке ниже, чтобы начался диалог. Судя по всему, стальной страж поймал дварфа-беглеца. Вы можете перехватить над ним контроль и освободить вора, пройдя проверку на Мудрость.

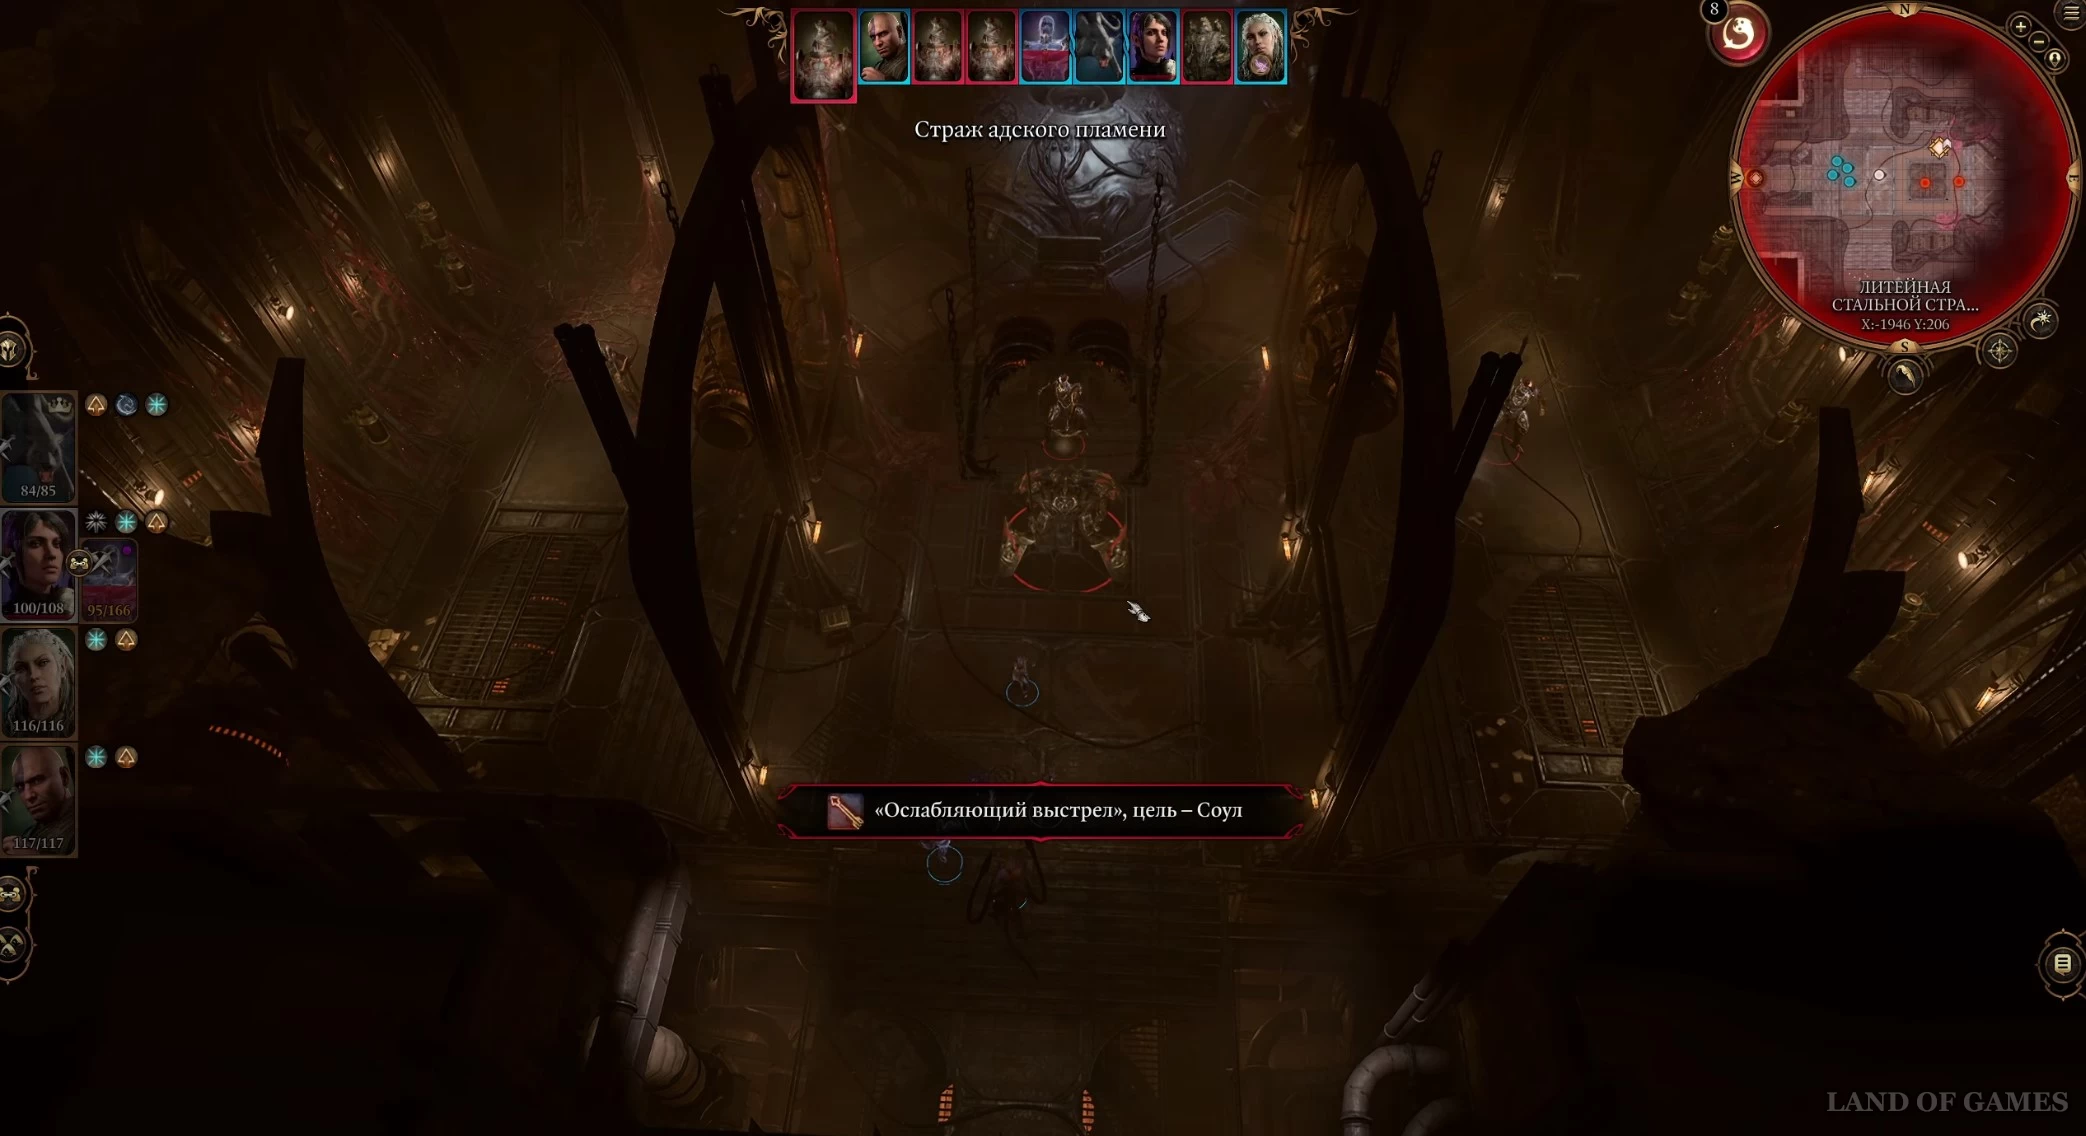
Идите вперед через вторую дверь. Если с вами Тубин, то он заговорит с вами и расскажет о сверхстраже Титане, а также сообщит, что не пойдет дальше. Приготовьтесь к сложному бою.
Примечание: Если все гондийцы на фабрике погибнут, то Заннер может потерять свою волю к победе, поэтому вам нужно будет уговорить его двигаться дальше, пройдя проверку на Убеждение или Запугивание. Если вы провалитесь, то просто получите от него код самоуничтожения литейной.
Как взорвать нейронный коммутатор
Итак, вам предстоит сразиться с тремя Стражами адского пламени (11 уровень) и Титаном стальной стражи (12 уровень). Мы в подробностях рассказали о битве с ним в другом гайде. Разобравшись с врагами, взаимодействуйте с Нейронным коммутатором в северной части помещения. При наличии Тубина рядом он сможет сам включить систему самоуничтожения, спросив у вас разрешение на ее запуск.
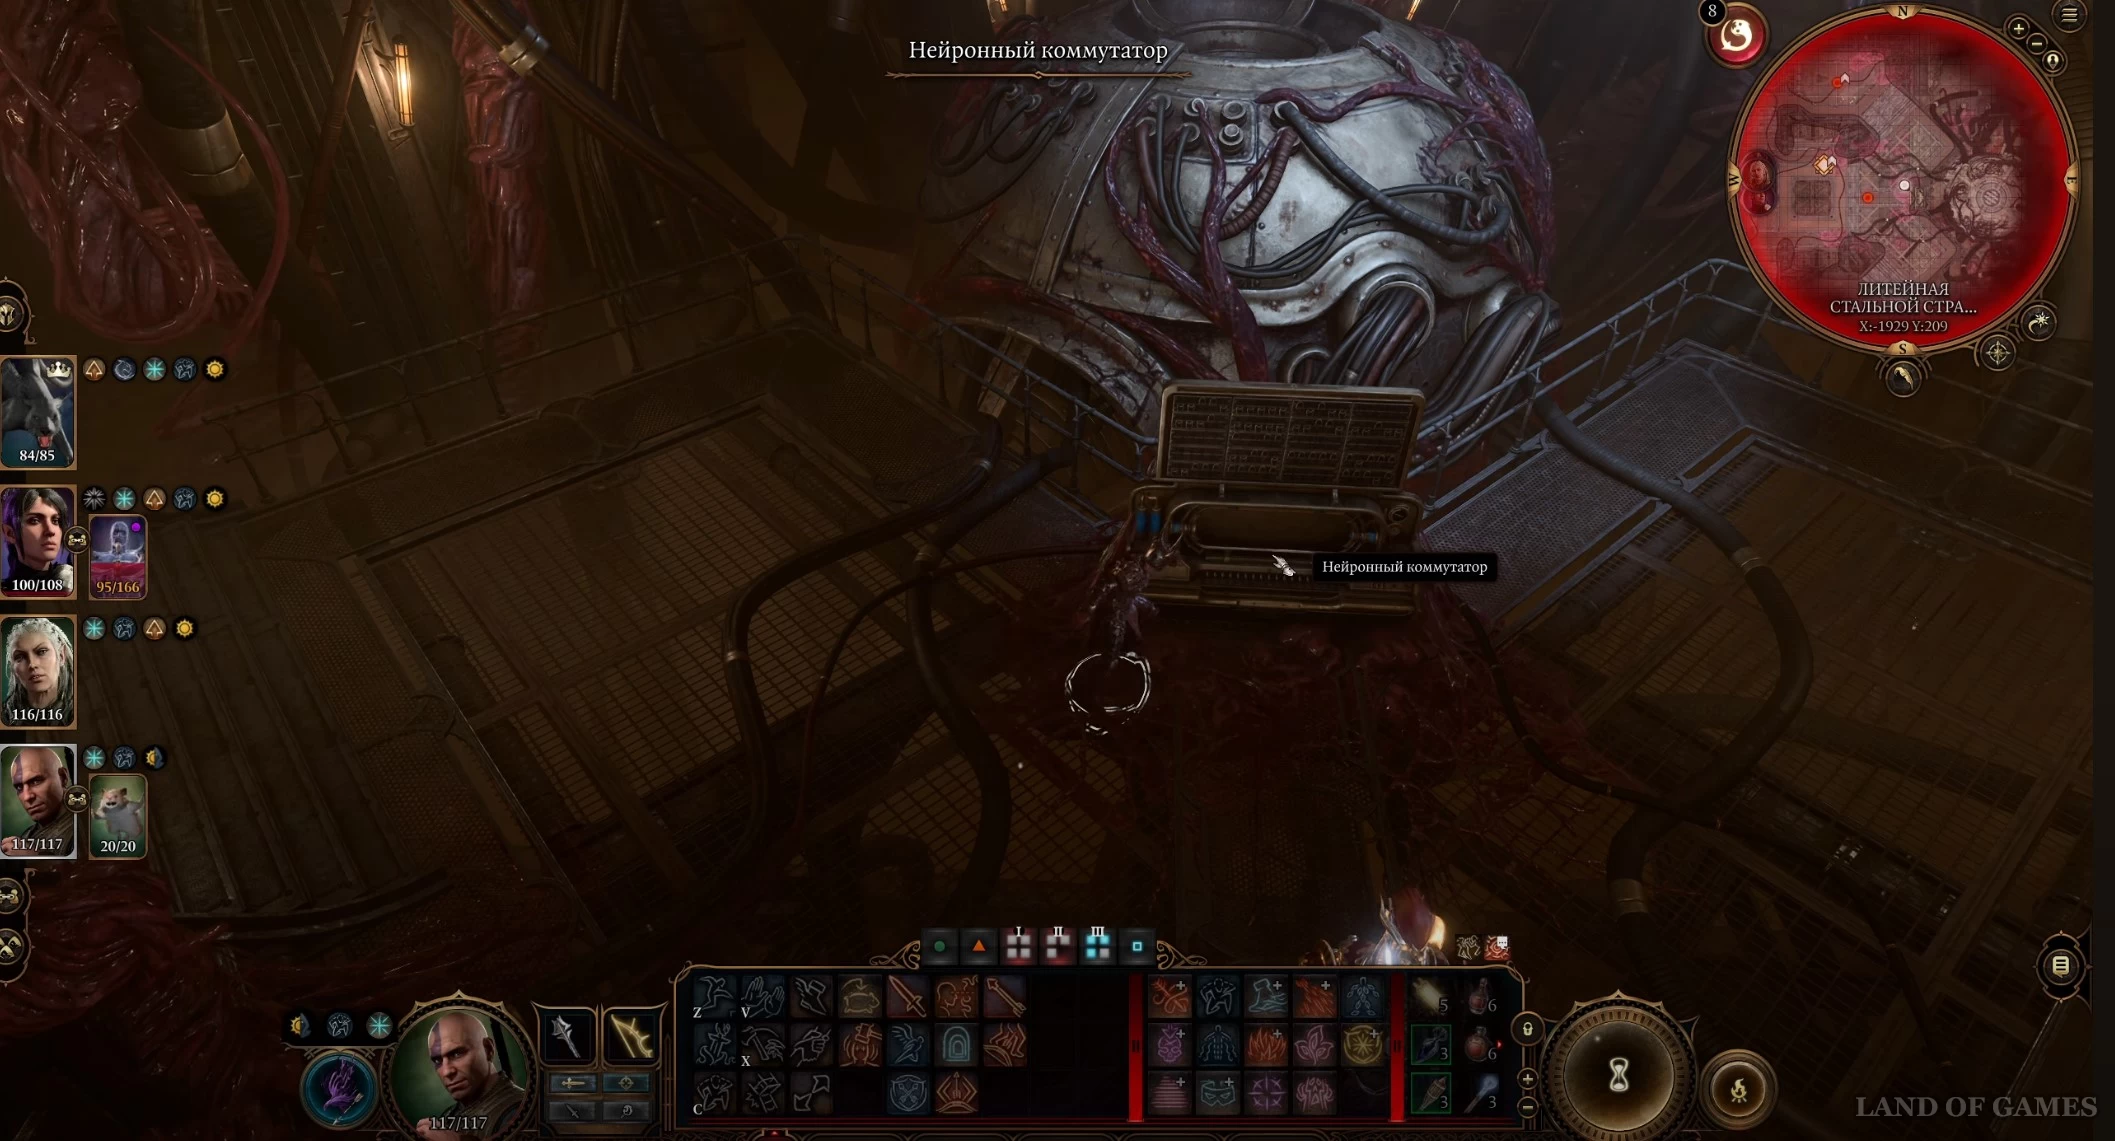
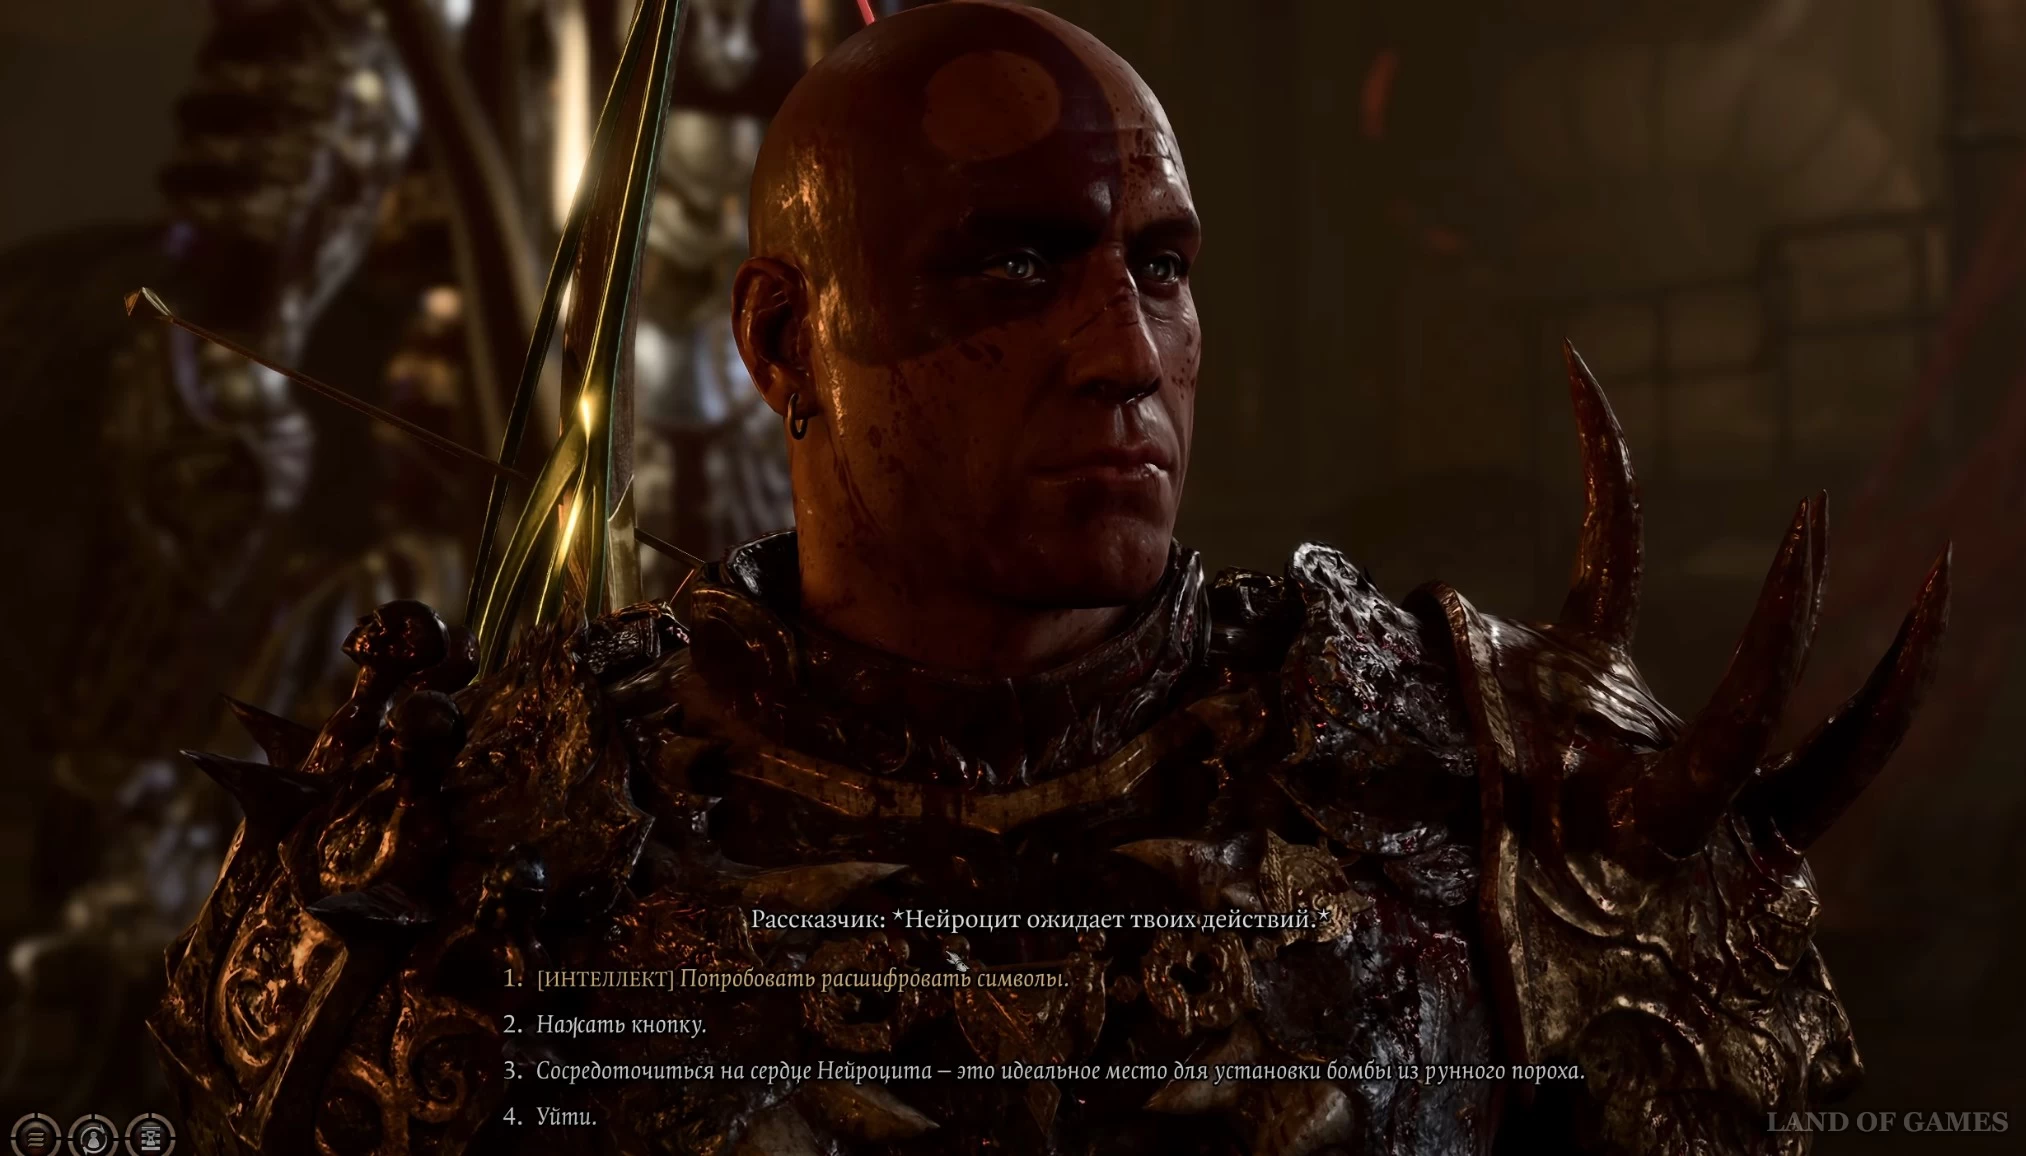
Если Заннера нет или он погиб, то используйте его код или установите бомбу с рунным порохом, взятую у Вульбрена. Посмотрите кат-сцену с уничтожением литейной.
Примечание: Если вам все никак не удается уничтожить Титана, и у вас на руках имеется взрывчатка или код Тубина, то вы можете скрытно пробраться к коммутатору. Для этого перейдите в стелс-режим, войдите в комнату со Стражами адского пламени и используйте туманный шаг, чтобы оказаться за пределами видимости робота, стоящего прямо перед консолью (возможно, можно использовать зелье невидимости). Теперь просто взаимодействуйте с нейроцитом и подорвите его.
Прибытие клана Железной руки
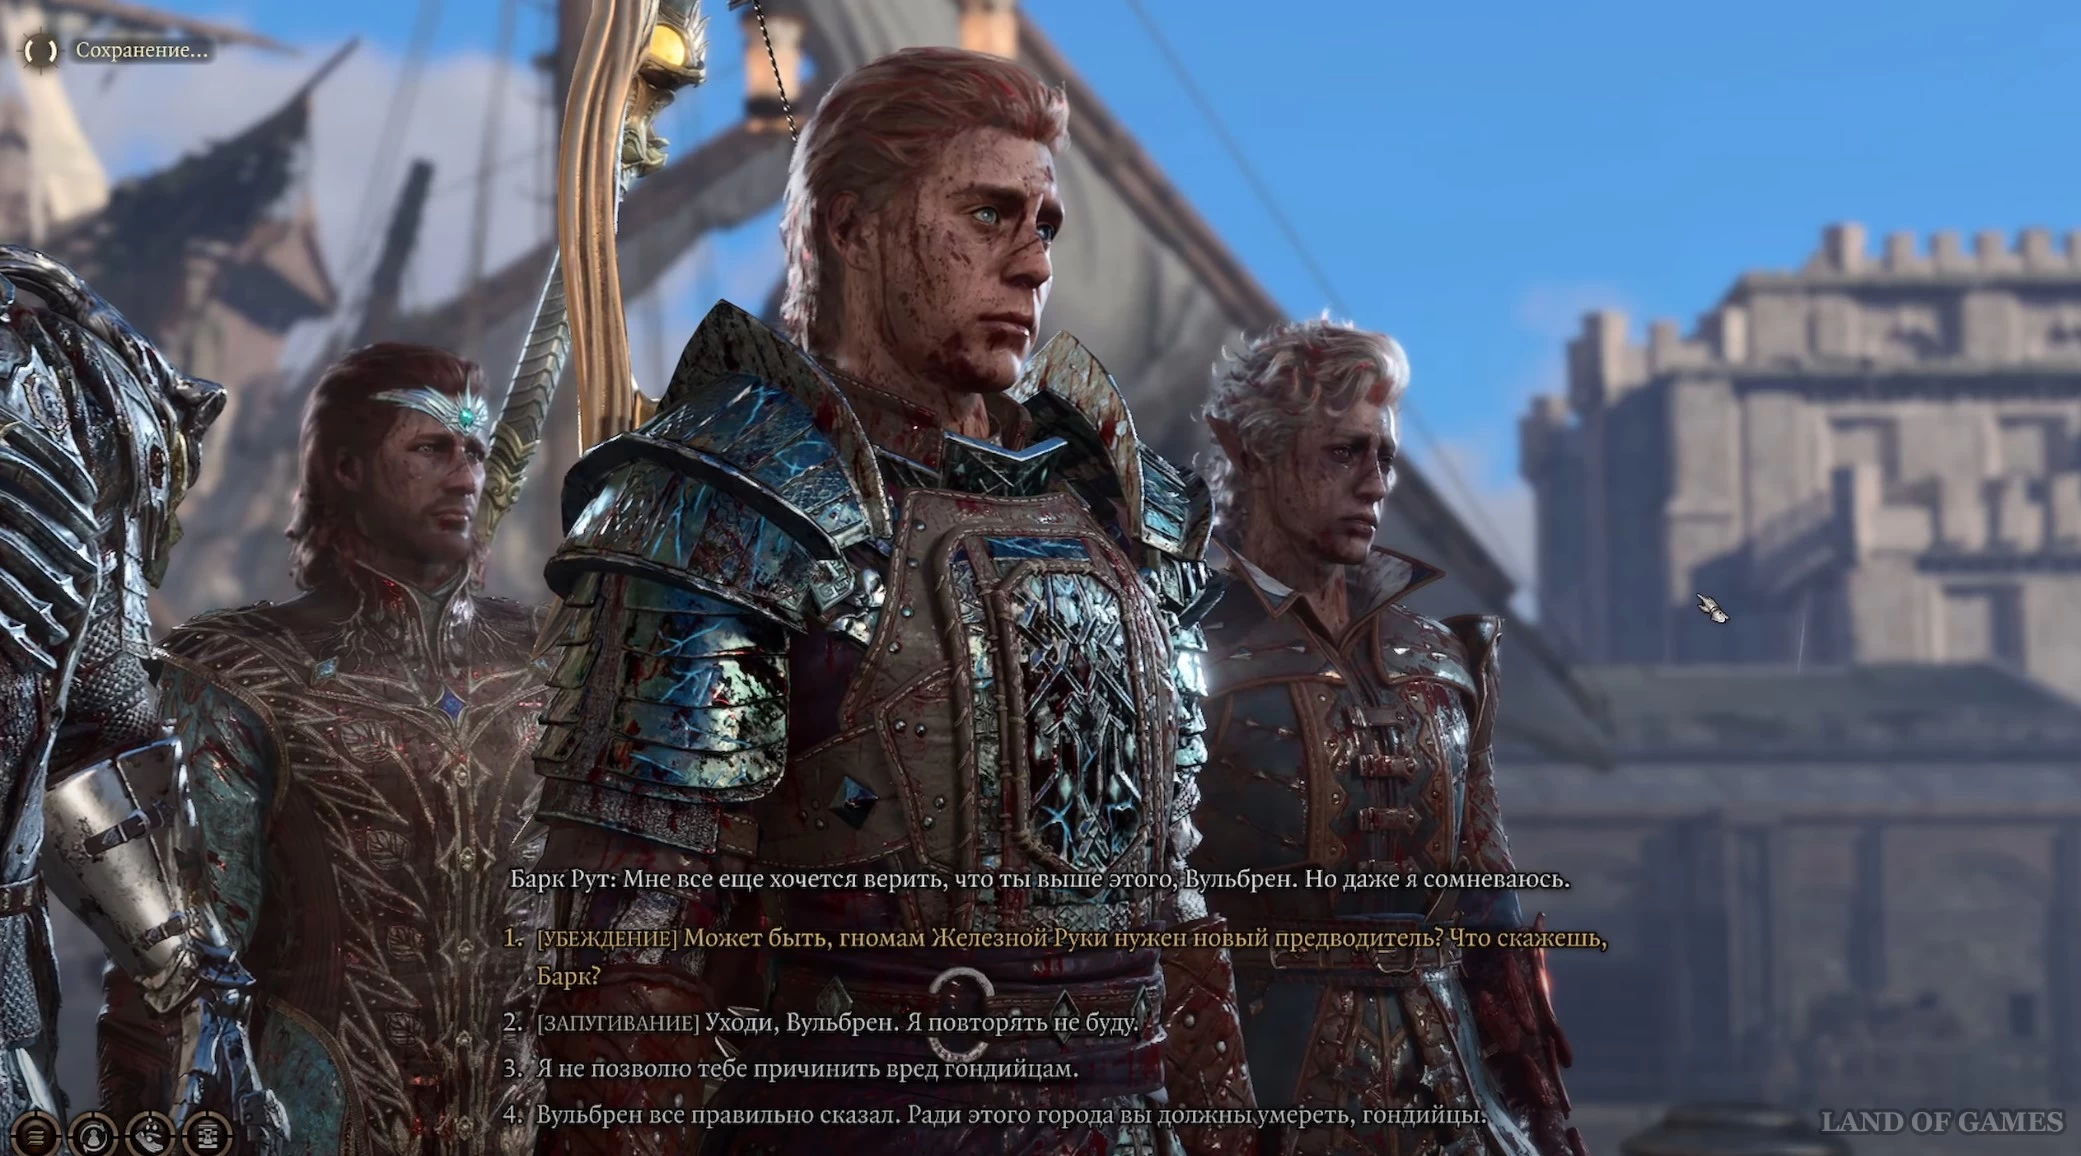
Когда вы наконец-то взорвете литейную, начнется кат-сцена. Затем может появиться Вульбрен (если вы прошли квест «Спасти Вульбрена») вместе с другими глубинными гномами и поздравит вас с победой, однако скажет, что всех гондийцев следует убить (если они выжили; или остался только один Тубин), поскольку они всегда будут представлять угрозу для Врат Балдура. Если Барк жив (вы помогли ему в квестах «Спасти гнома» и «Спасти гномов в Гримфордже»), то он возразит Бонглу, считая, что тот негативно влияет на клан. У вас будет несколько вариантов ответа, ведущих к определенным последствиям:
- Если вы отыгрываете роль добряка и Рут жив, то выберите ответ «Может быть, гномам Железной Руки нужен новый предводитель? Что скажешь, Барк?», пройдя проверку на Убеждение (15). В этом случае Барк сможет заключить союз между гномами и гондийцами и обе группы станут вашими союзниками в последней битве. Вульбрен же уйдет, осыпав всех проклятиями (в будущем мы его не встречали).
- Если Рут умер, то вы можете пройти проверку на Убеждение или Запугивание (класс сложности 20), чтобы заставить Вульбрена уйти без боя. Однако в этом случае вы получите в союзники только гондийцев. Вульбрен пообещает отомстить вам, однако больше мы его не встречали.
- При выборе ответа «Вульбрен все правильно сказал. Ради этого города вы должны умереть, гондийцы» вам придется сразиться с выжившими гондийцами (гномы станут вашими союзниками). Если же скажите «Я не позволю тебе причинить вред гондийцам», то драться придется с Бонглом и его гномами (гондийцы станут вашими союзниками).
Отметим, что даже если вы планируете заступиться за гондийцев, но при этом не спасли пленников из Железного трона и соврали об этом Заннеру, то Вульбрен укажет на трупы, плавающие в воде, а гондийцы автоматически станут враждебными по отношению к вам.
Помимо очков опыта никакой больше награды за этот квест вы не получите. Разве что, сможете заручиться помощью гондийцев и/или гномов в последней битве.
Комментарии
Для добавления комментариев необходимо авторизоваться.
Вы можете войти через