В Genshin Impact Статичные пейзажи являются заданием мира Сумеру, в рамках которого вам необходимо будет искать зарытые сундуки по снимкам из Таинственного альбома. В этом руководстве мы расскажем вам, как начать этот квест, и где найти все клады по рисункам аранар. Вы также узнаете, для чего нужен таинственный почтовый ящик в Ванаране.
Как начать квест «Статичные пейзажи»
Как найти и использовать почтовый ящик в Ванаране
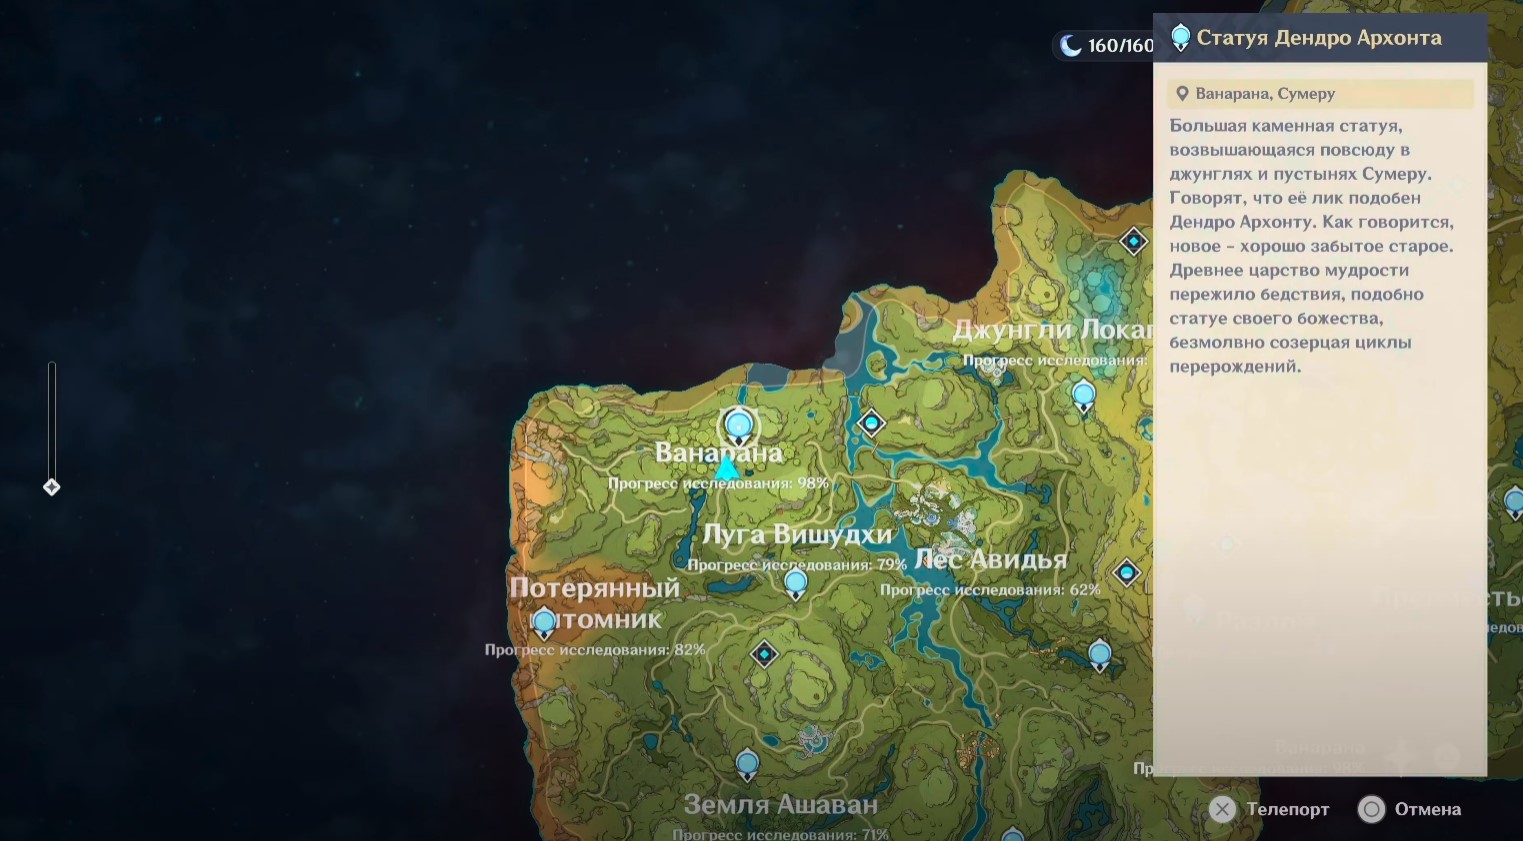
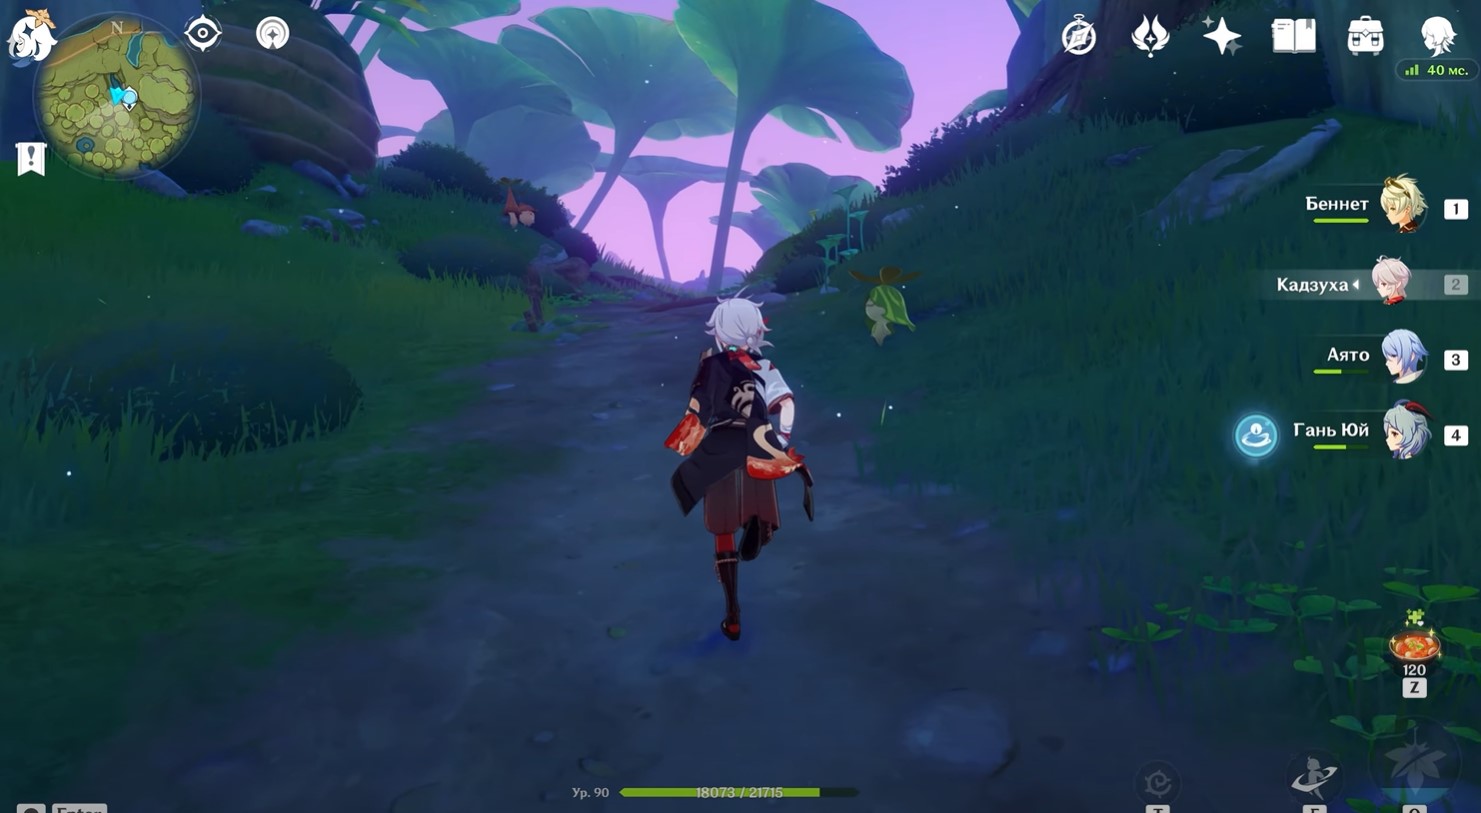
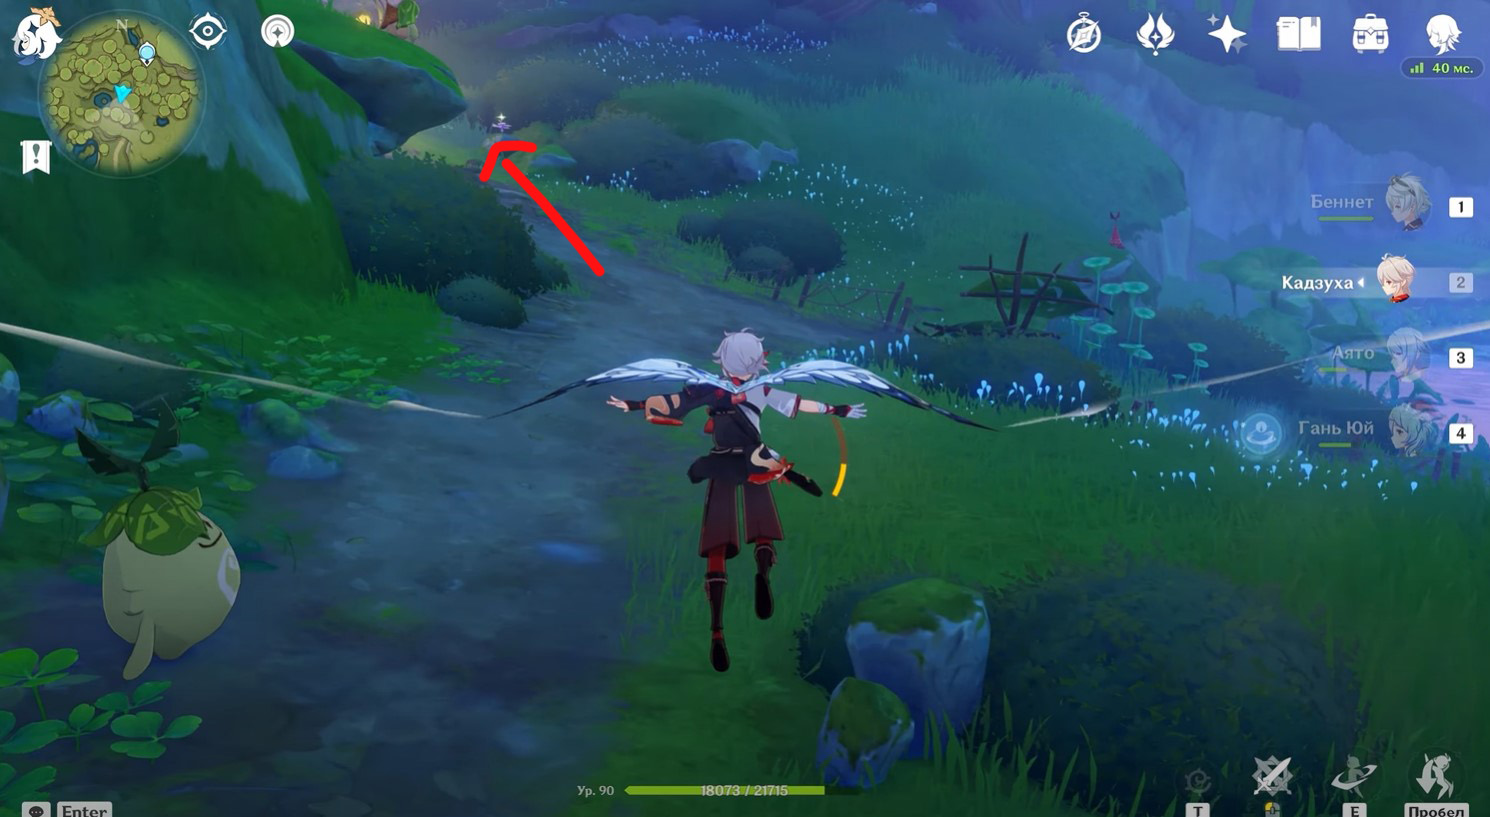
Первым делом вам необходимо пройти задание мира под названием «Мир аранар», чтобы открыть доступ в Ванарану, поселение магических существ аранар. После этого переместитесь к статуе Дендро архонта в указанной области и начните идти на юг к восклицательному знаку на карте.
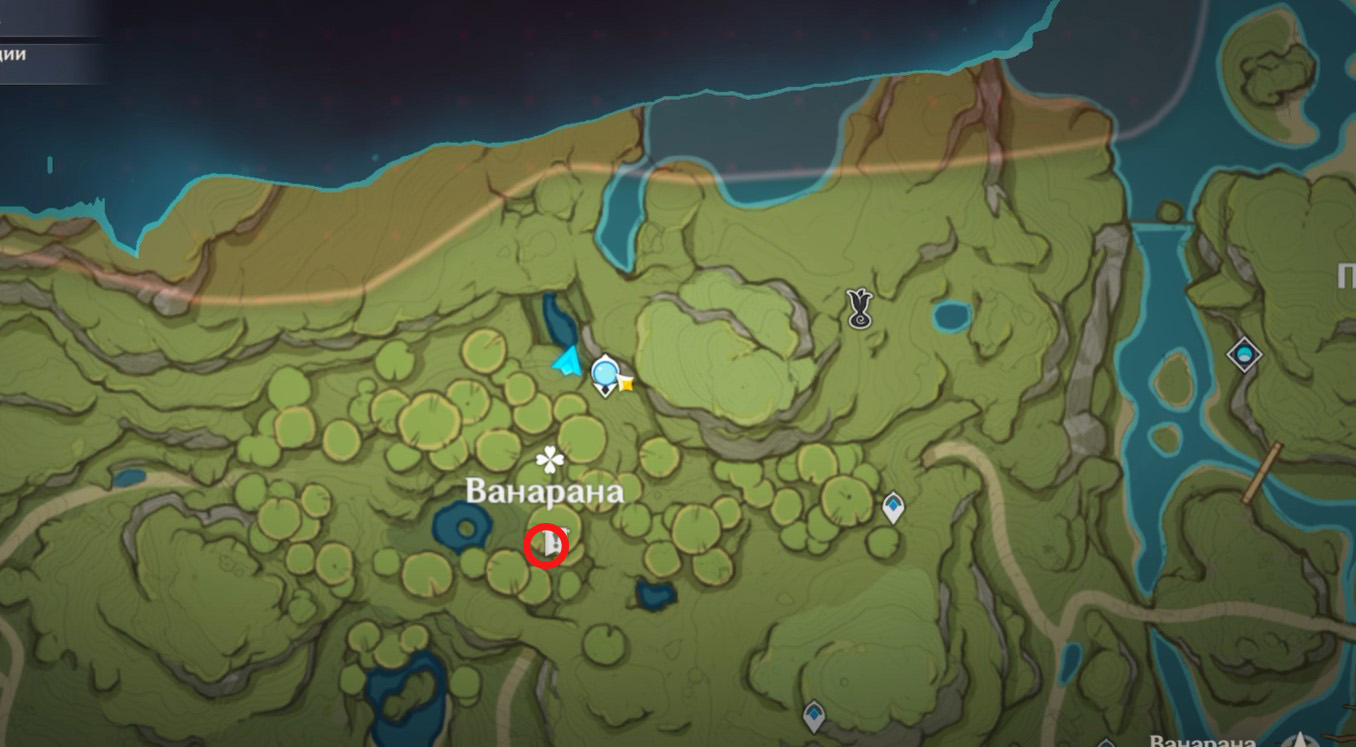
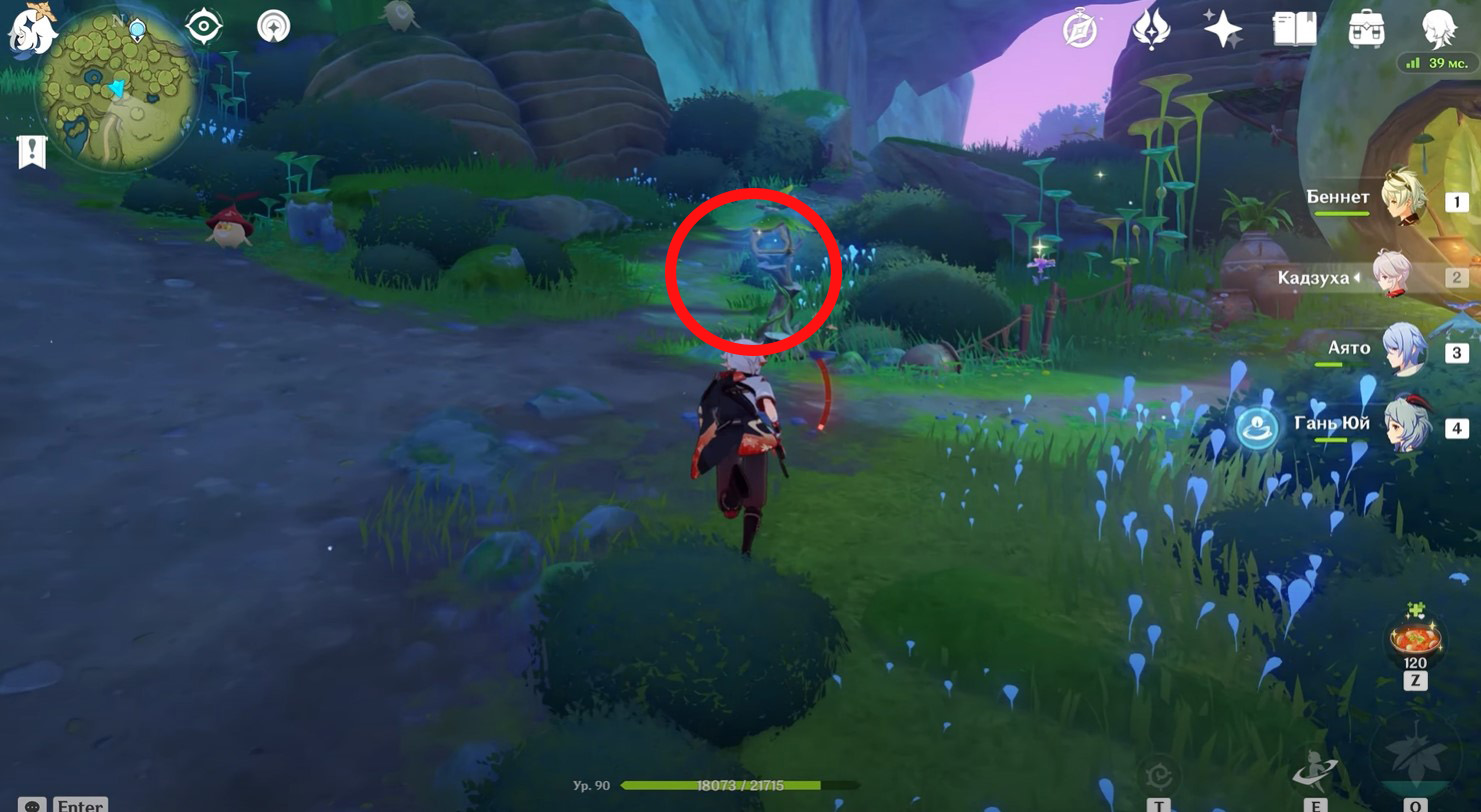
Возле одного из домиков аранар вы увидите деревянный почтовый ящик, с которым можно взаимодействовать. Нажмите на него для старта квеста «Статичные пейзажи». Кликнуть на него можно как в обычной версии Ванараны, так и в волшебной (стоит вечная ночь), однако если у вас не получается, то попробуйте перейти в другую версию поселения, сыграв Песню великого сновидения возле Силапны (камень с узором).


Мы также советуем вам пройти все мировые квесты Сумеру из книги Араньяка, а уже потом браться за поиски зарытых сундуков. Дело в том, что полученные в рамках них инструменты и возможности понадобятся вам для попадания в определенные локации.
Где найти сундуки по снимкам Таинственного альбома
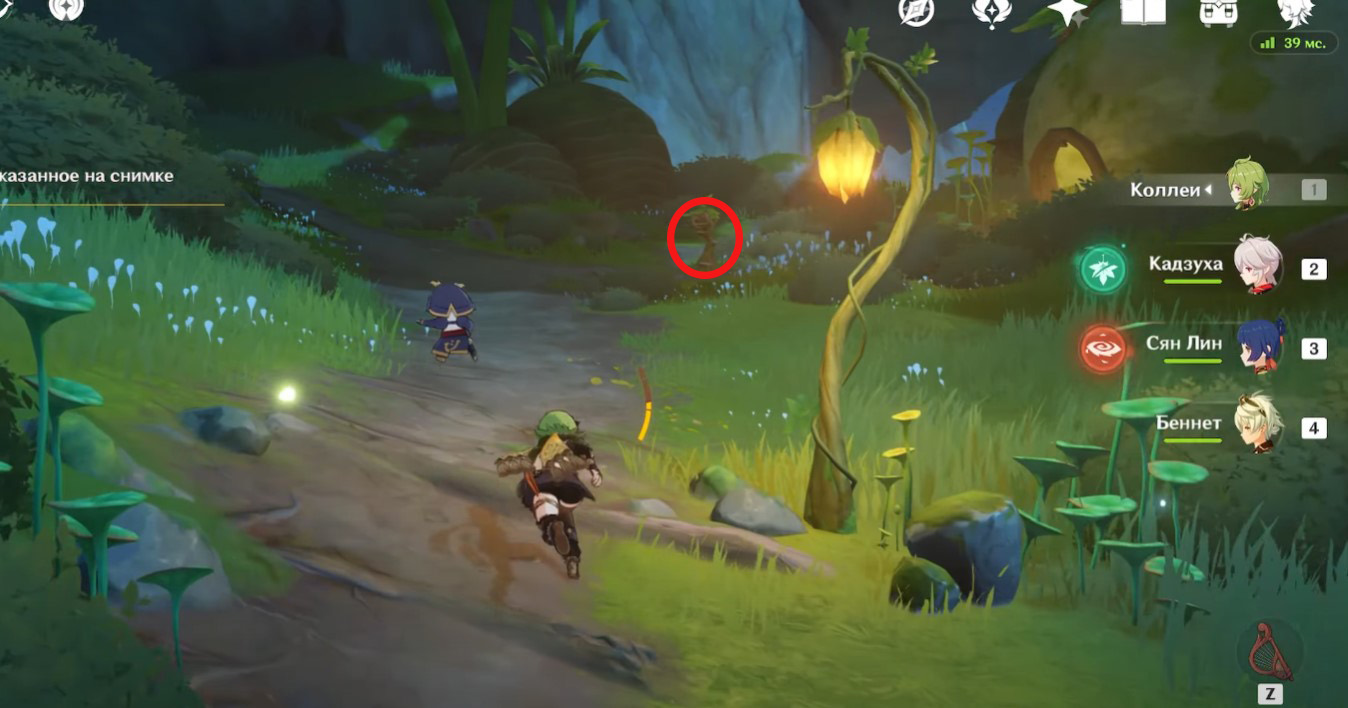
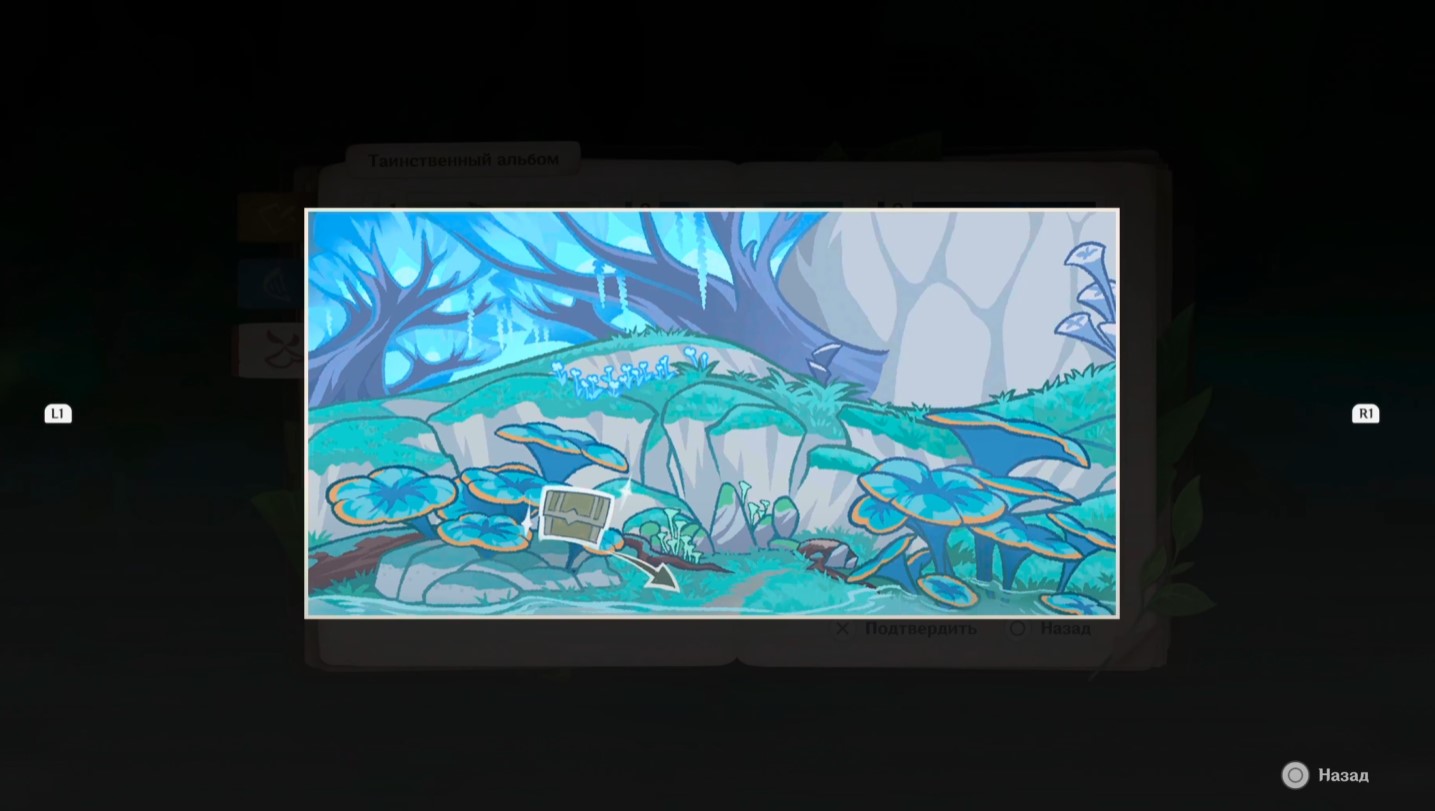
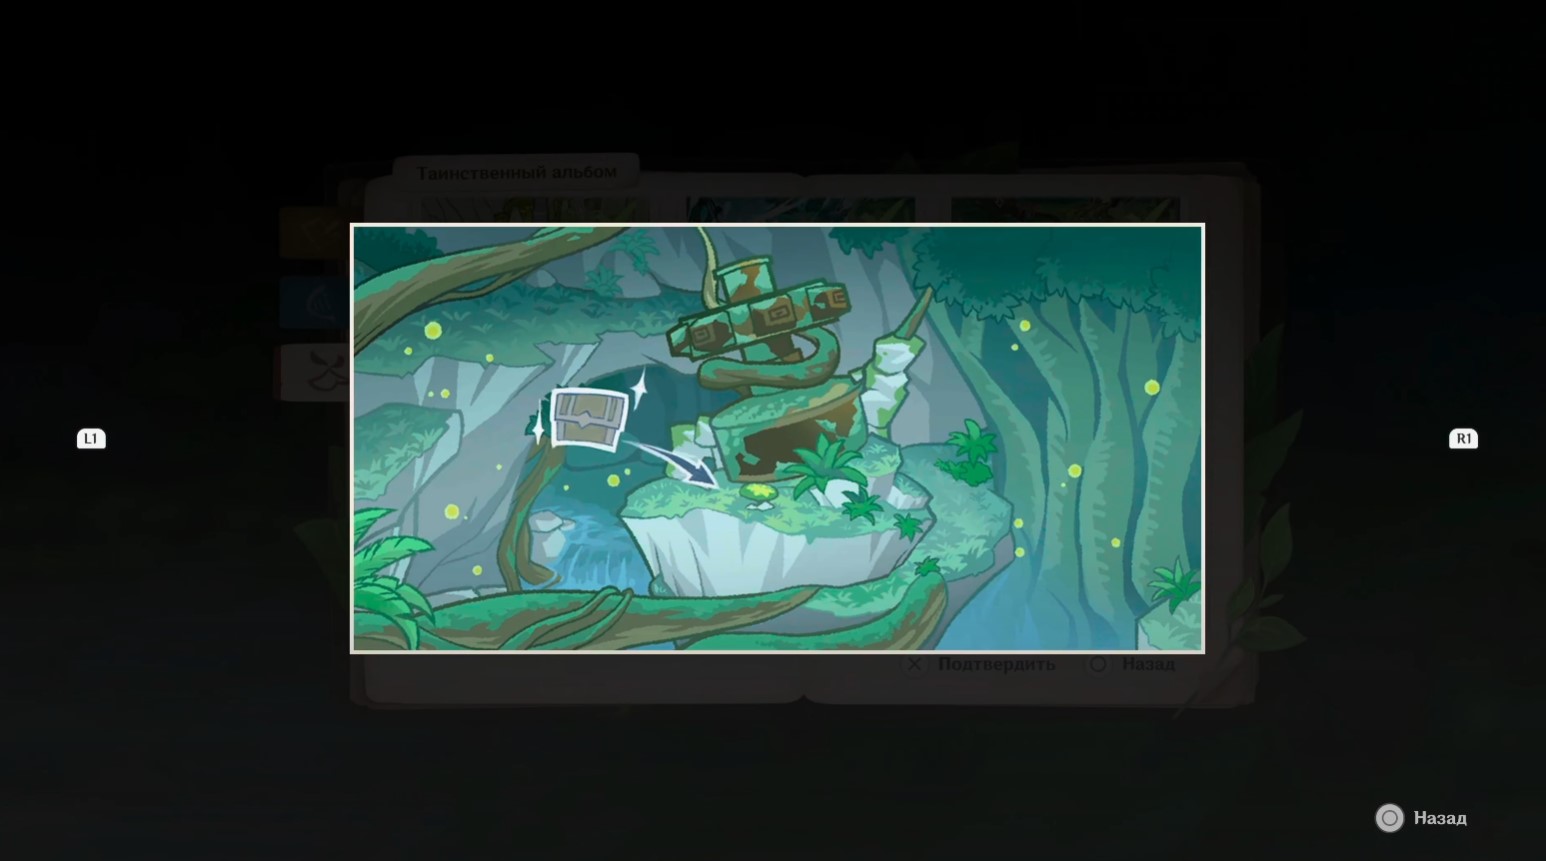
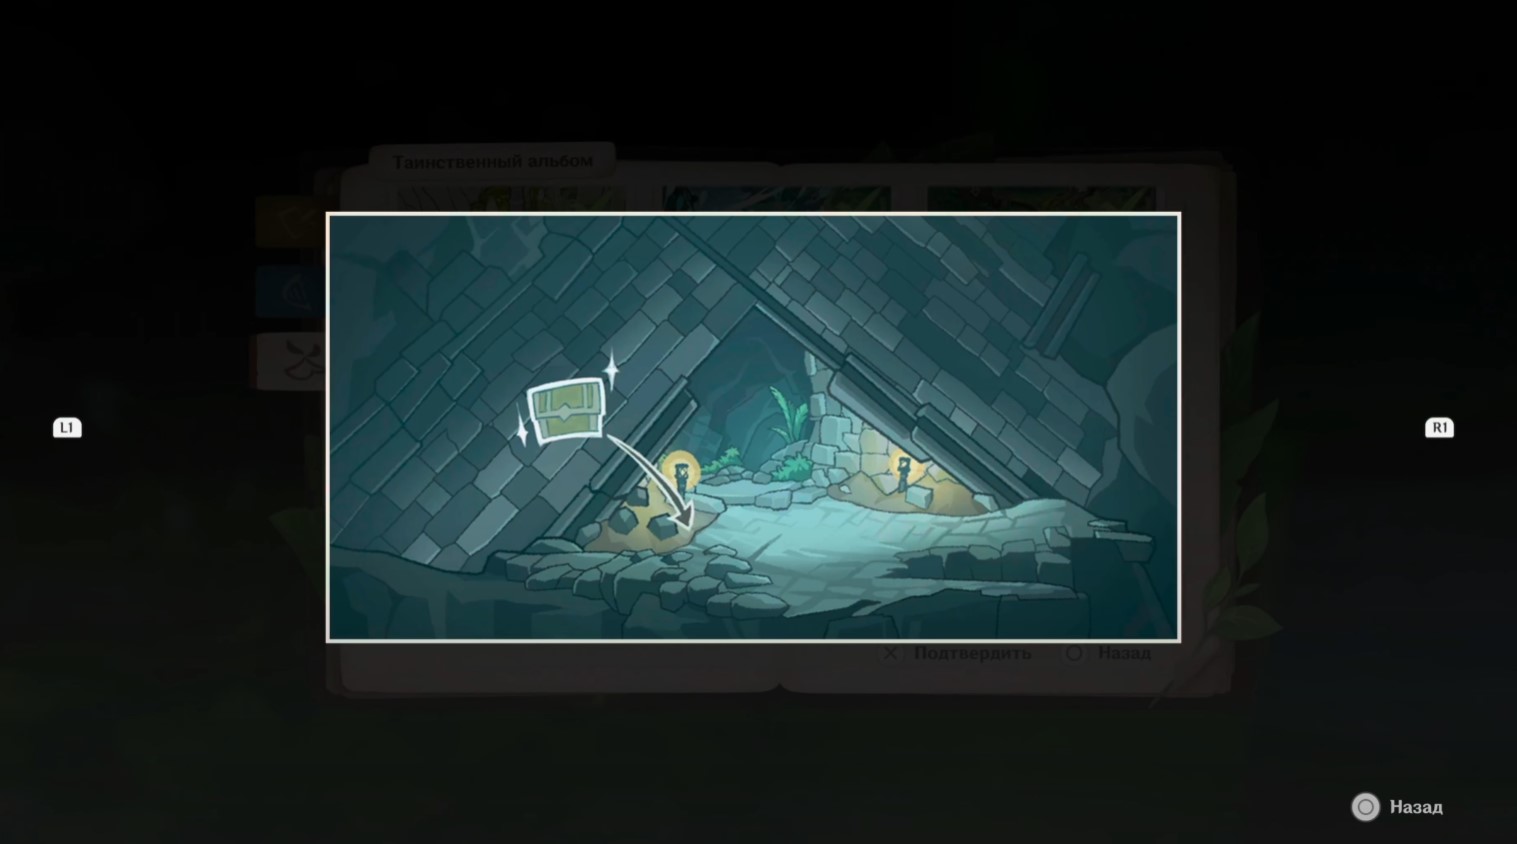
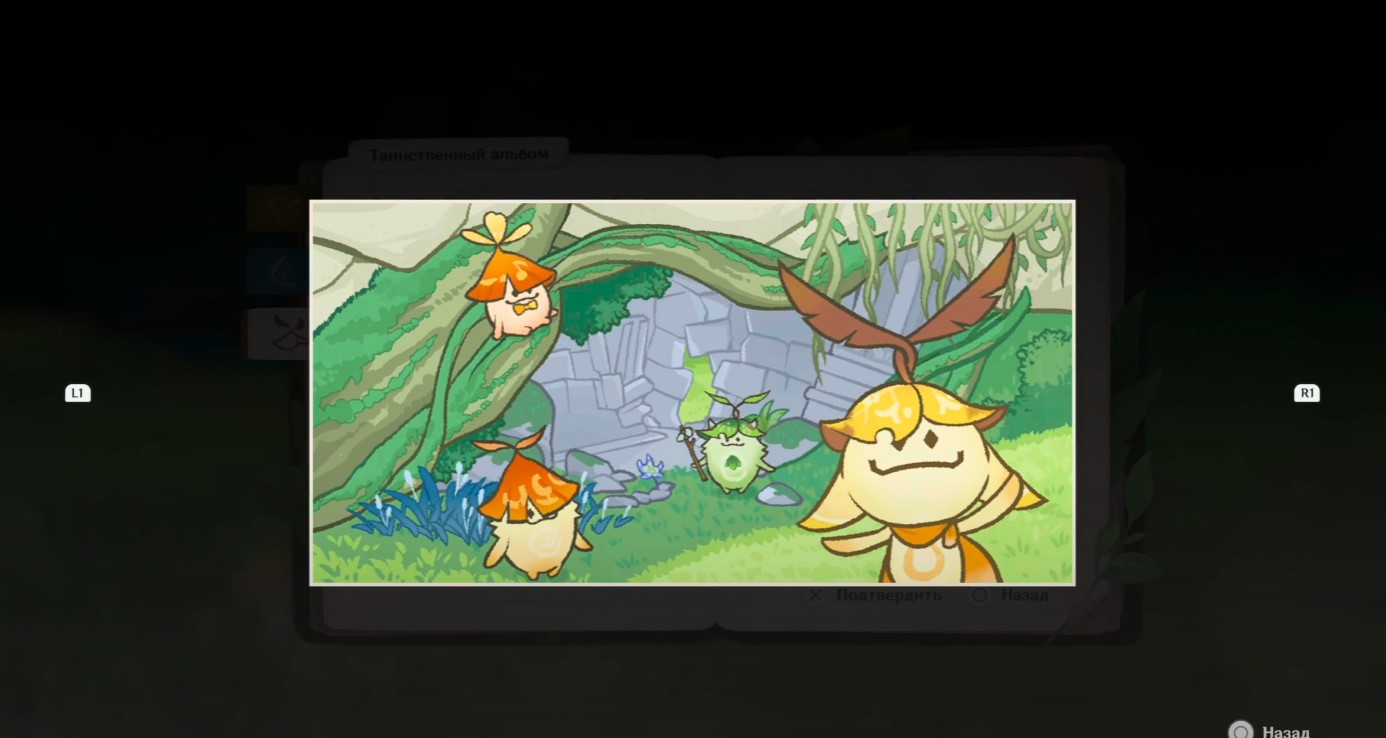
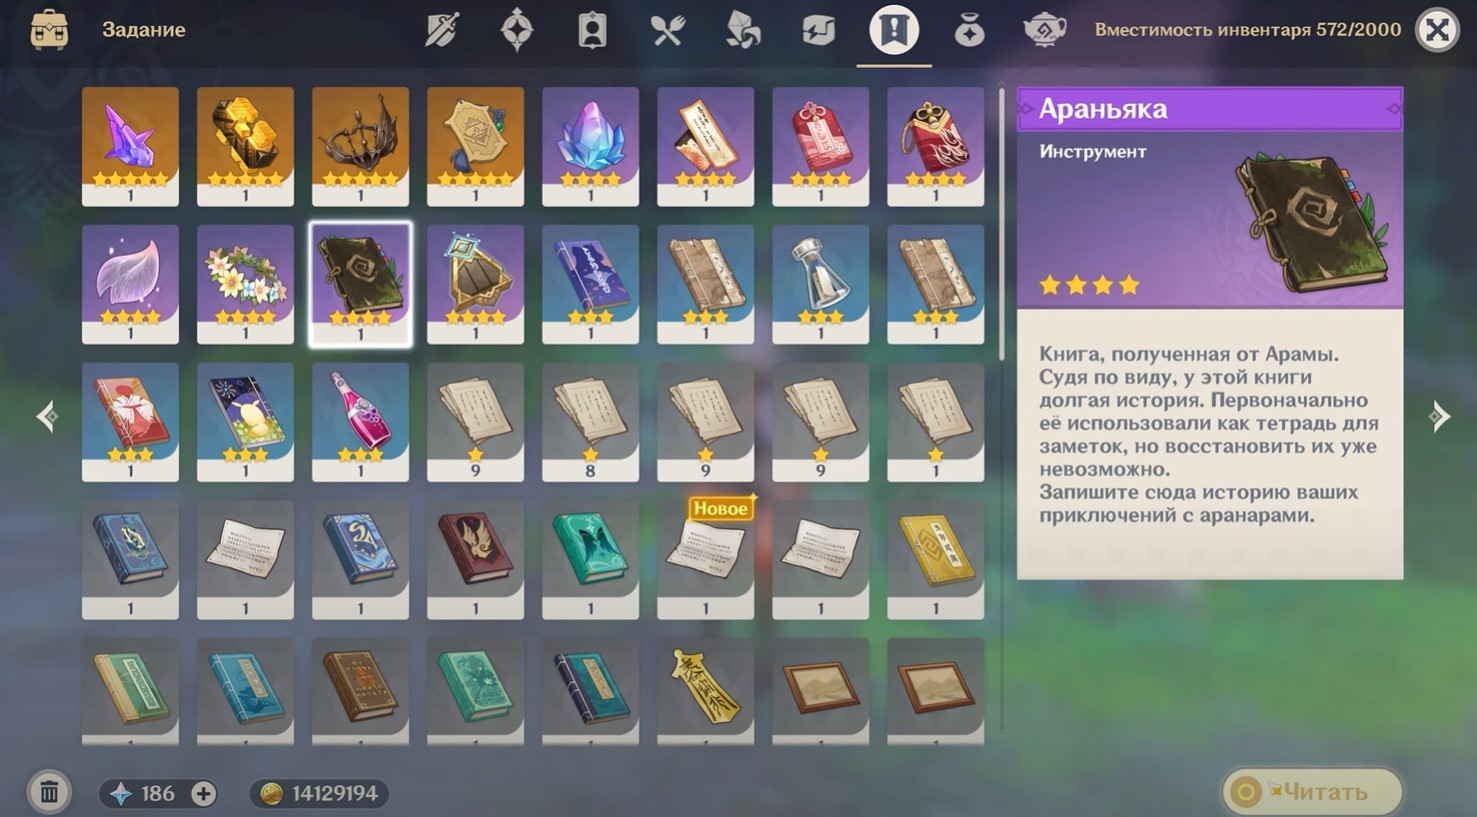
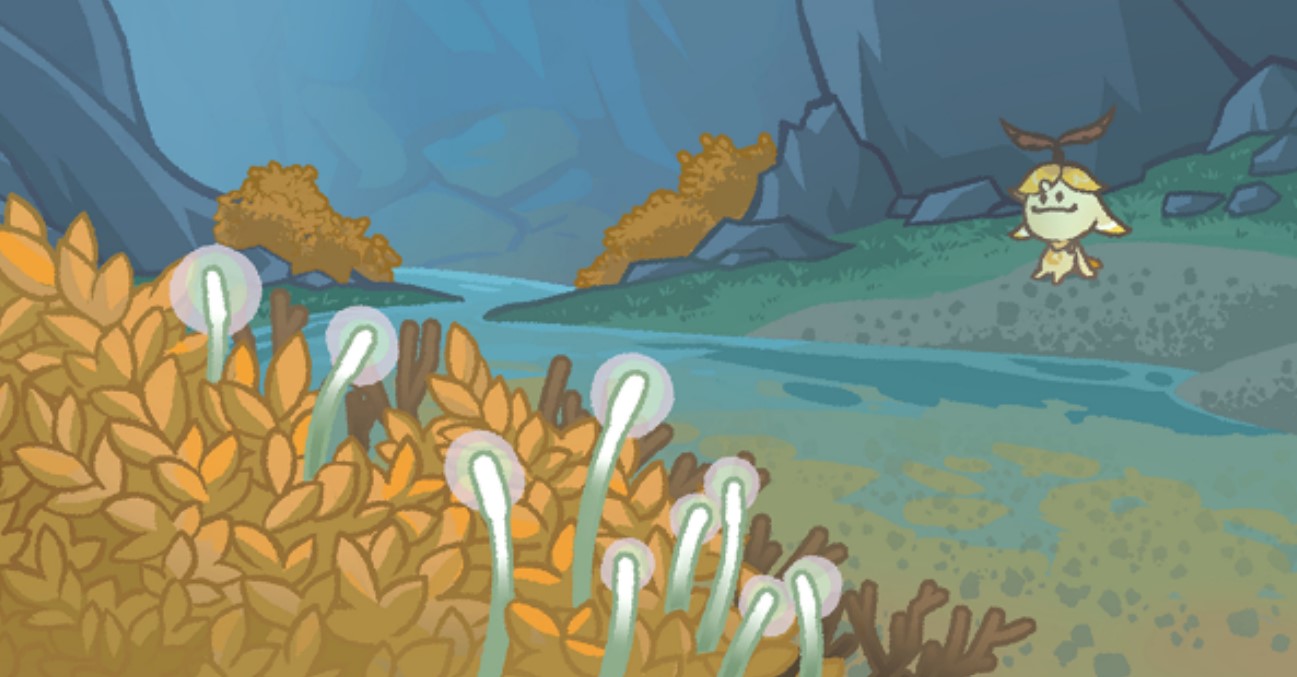
Итак, после взаимодействия с ящиком Паймон заберет из него первый снимок. Чтобы ознакомиться с этим рисунком и другими картинками, которые вы получите позднее, следует прочитать книгу Араньяка (находится в инвентаре в категории «Задание»). После этого перейдите на вкладку «Таинственный альбом» и просмотрите первое изображение, которое является подсказкой к поиску сундука.

Далее мы наглядно продемонстрируем вам, где можно найти все сокровища по рисункам, и расскажем, что нужно будет сделать, чтобы попасть в указанные места.
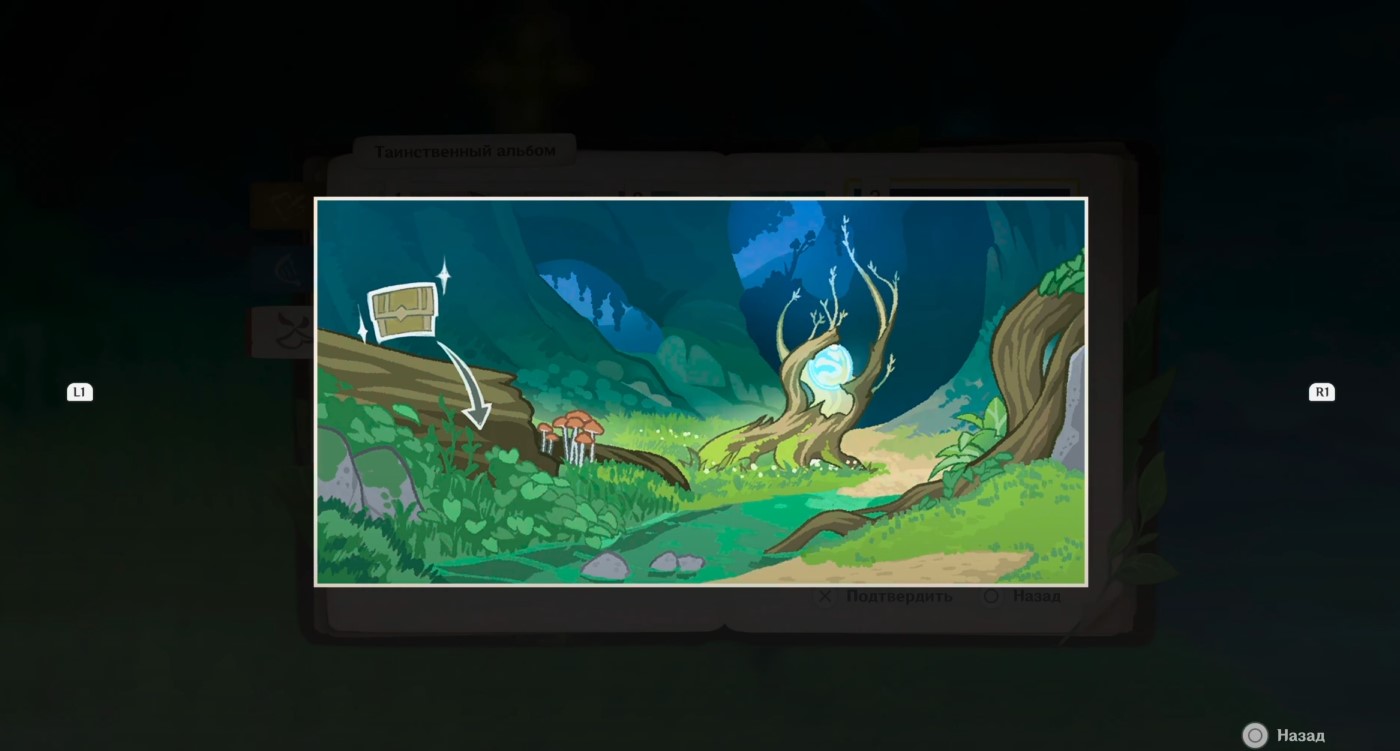
Рисунок 1
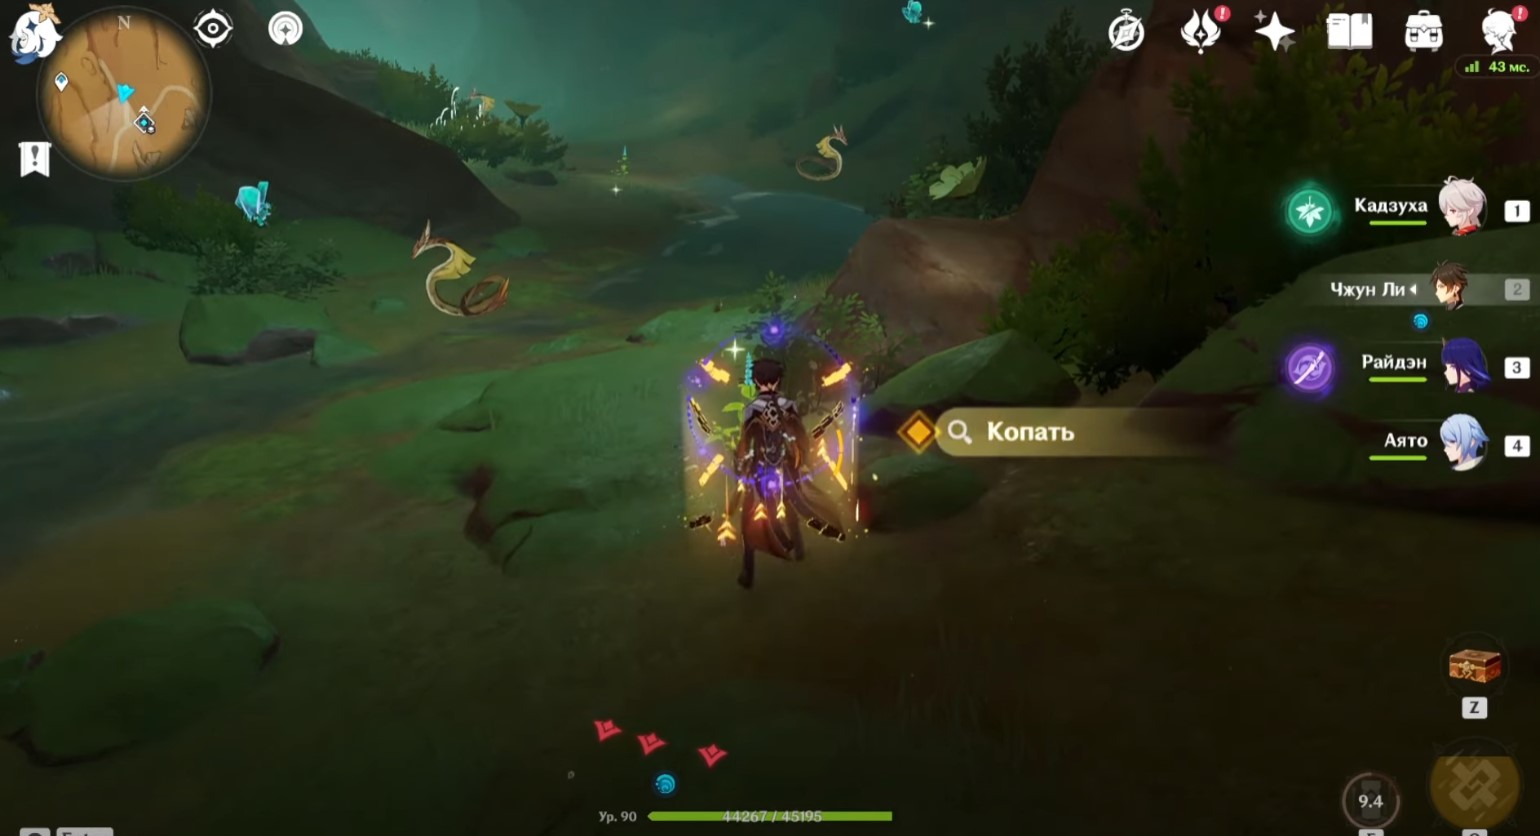
- Локация: Ванарана
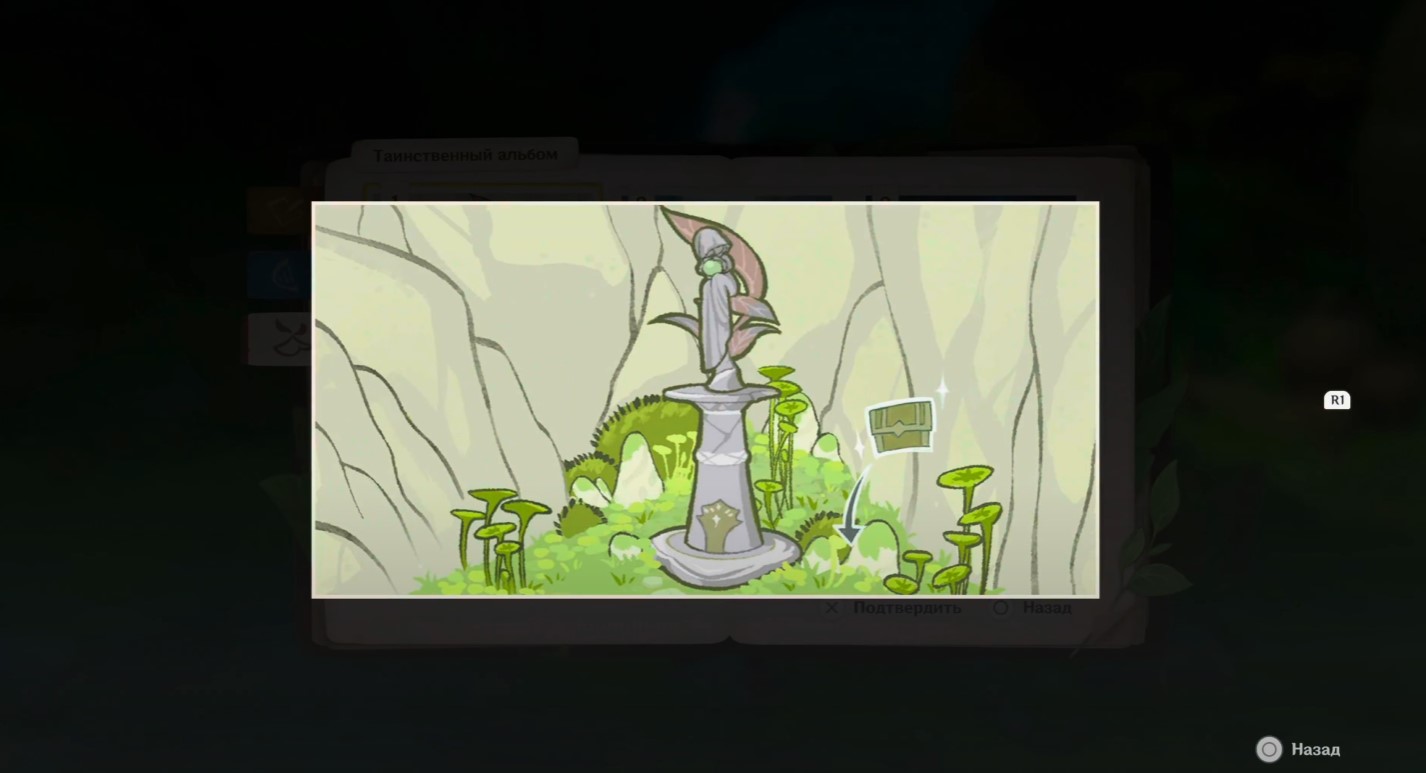
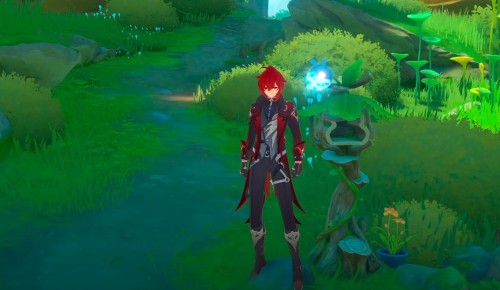
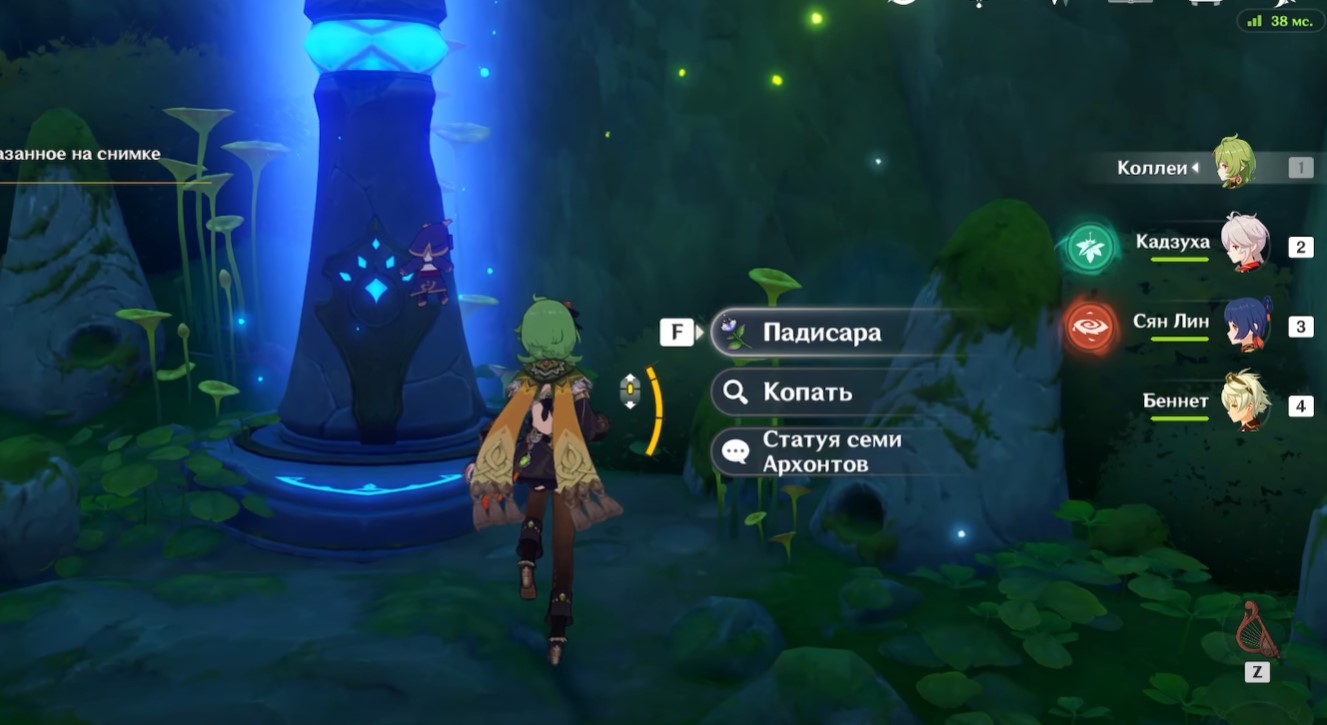
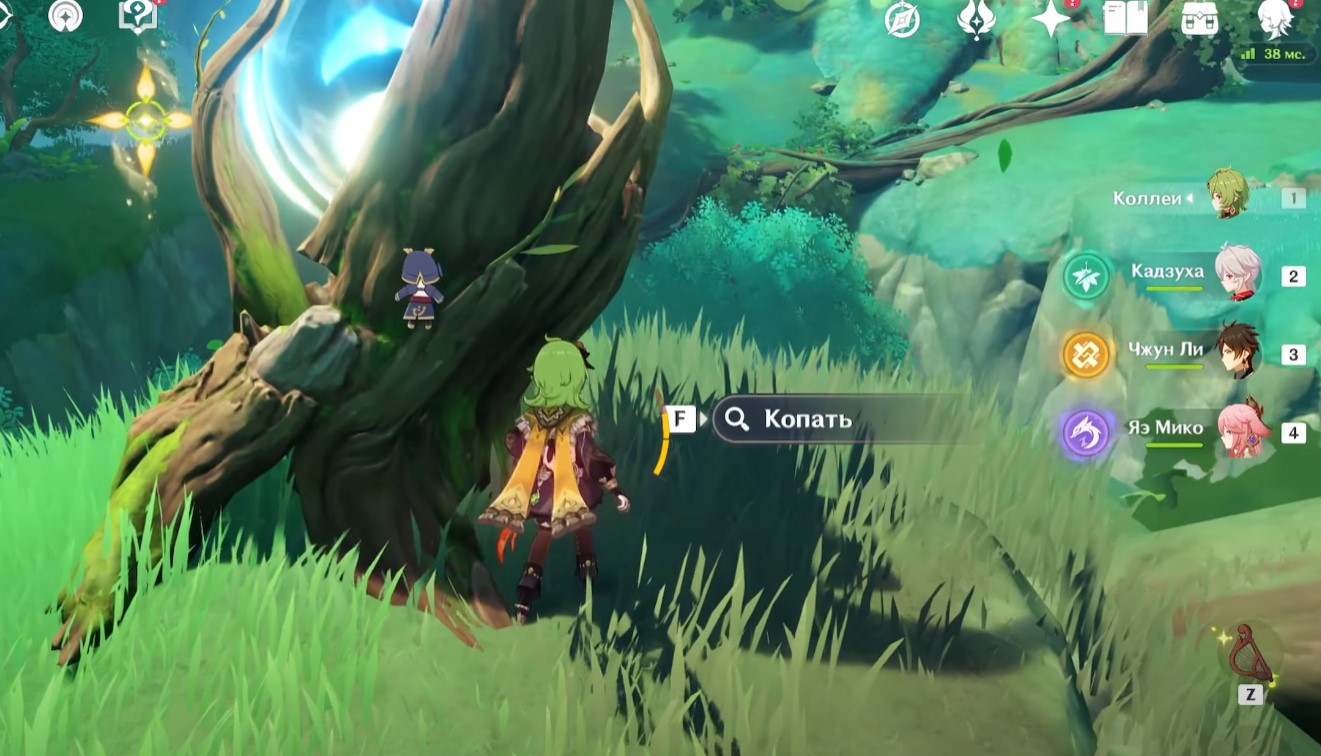
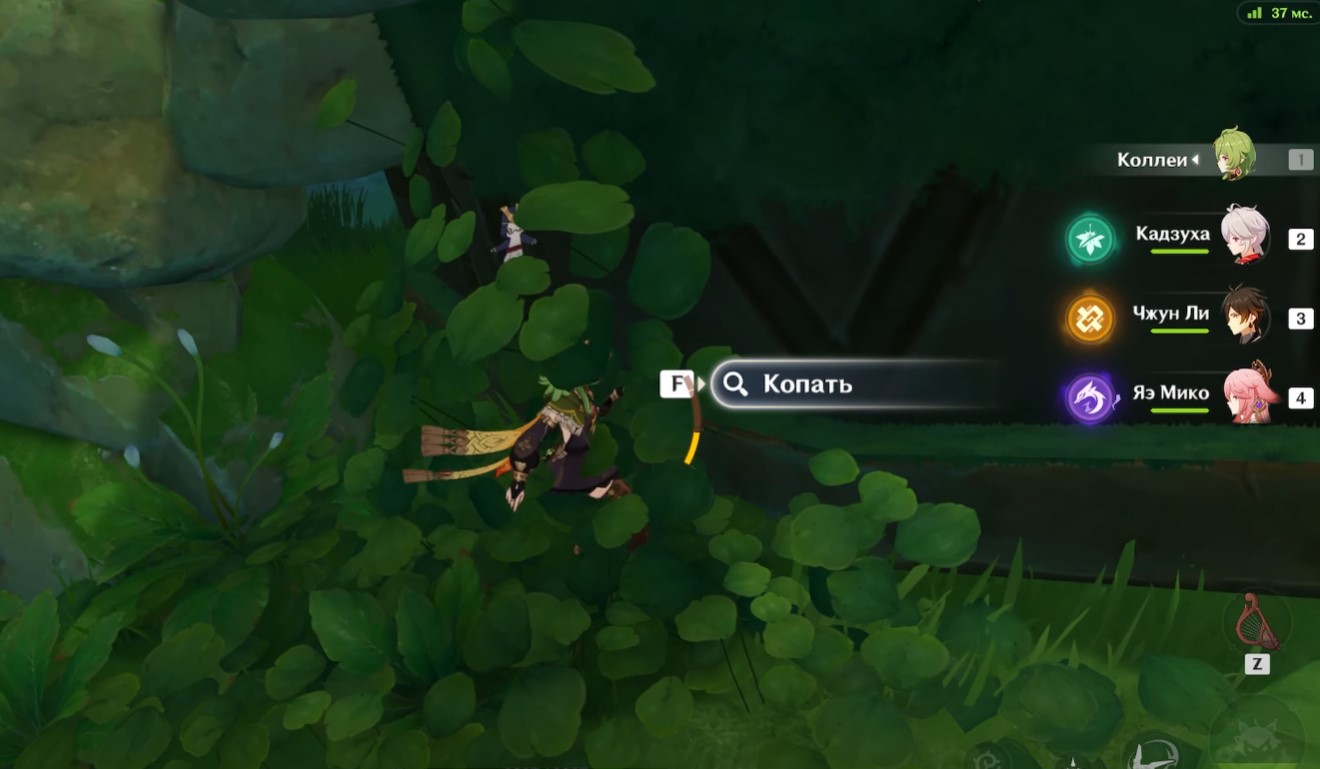
По снимку можно понять, что клад зарыт возле статуи семи архонтов, расположенной в Ванаране. Переместитесь в указанную область и встаньте справа от нее. В результате должна появиться опция «Копать». Если она не возникает, то вы, скорее всего, находитесь в волшебной версии деревни с аранарами, поэтому необходимо возвратиться в обычный вариант Ванараны.
После получения первого сундука вернитесь к почтовому ящику, чтобы получить еще 9 изображений, по которым можно отыскать сокровища. Квест при этом завершится.
Рисунок 2
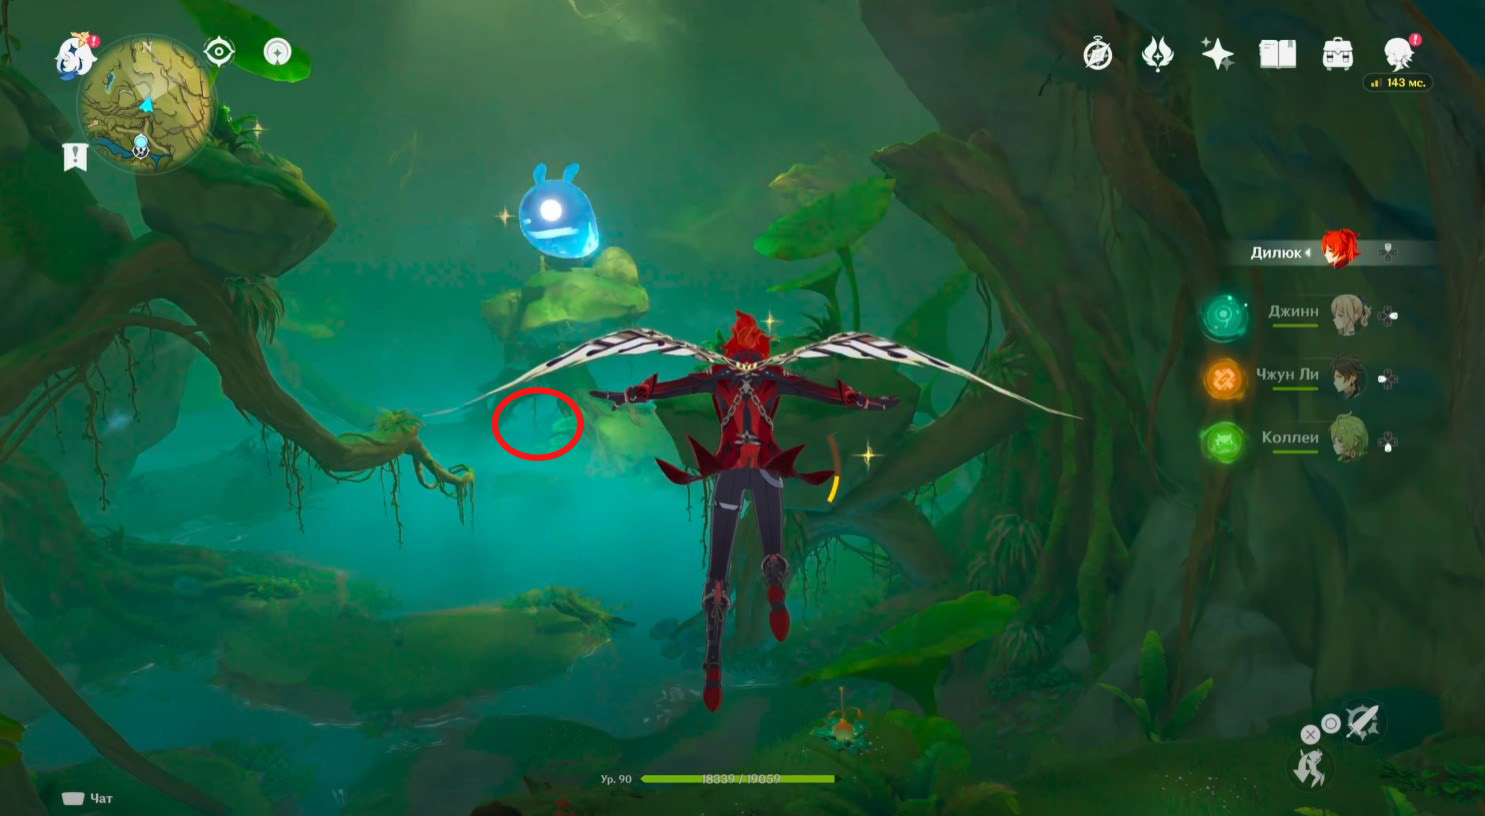
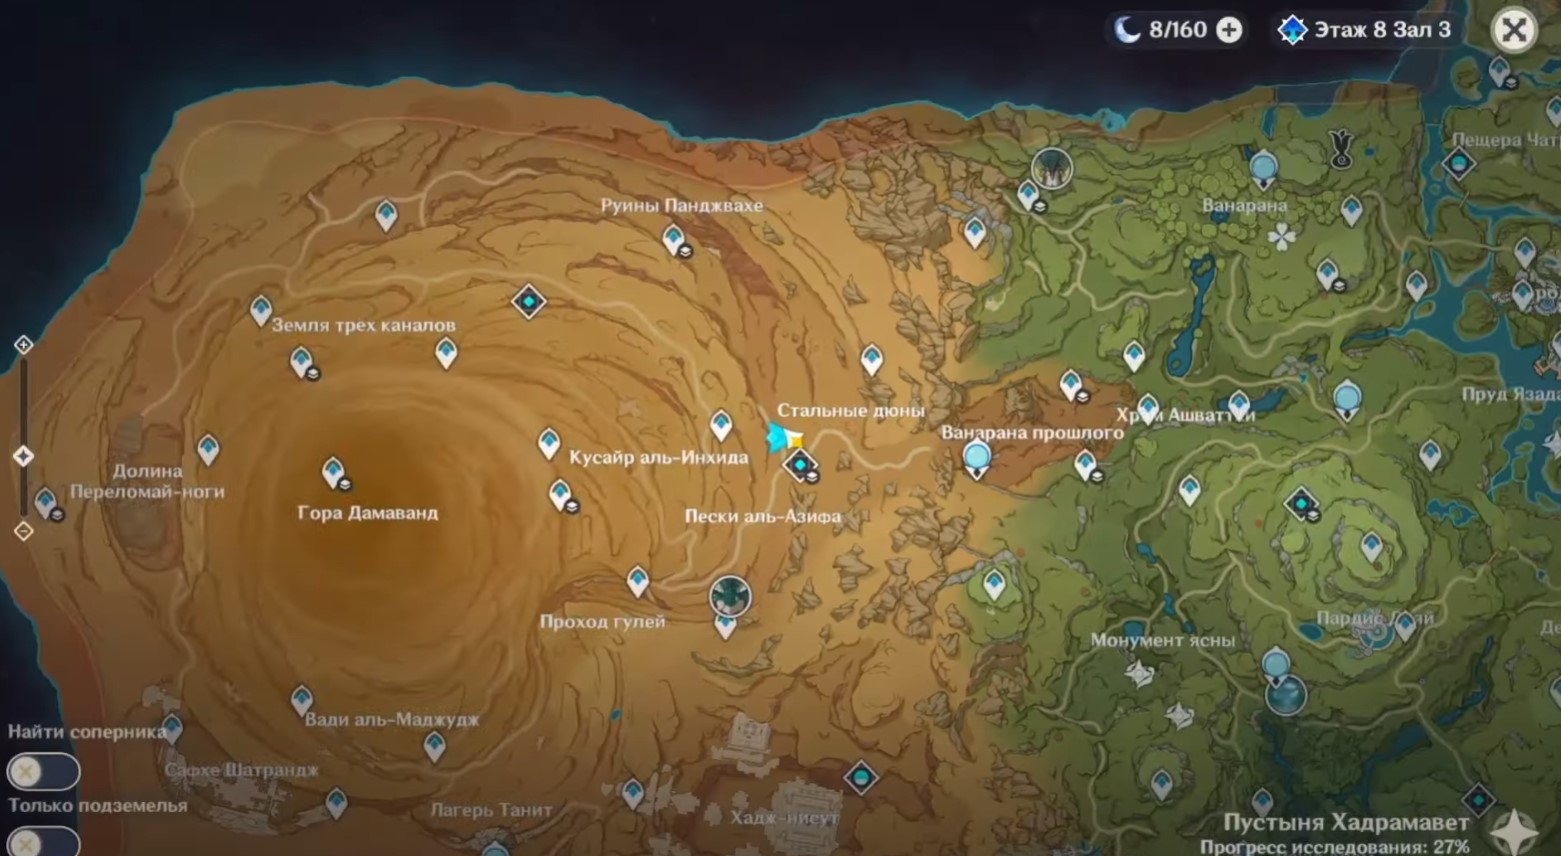
- Локация: чаща Апам
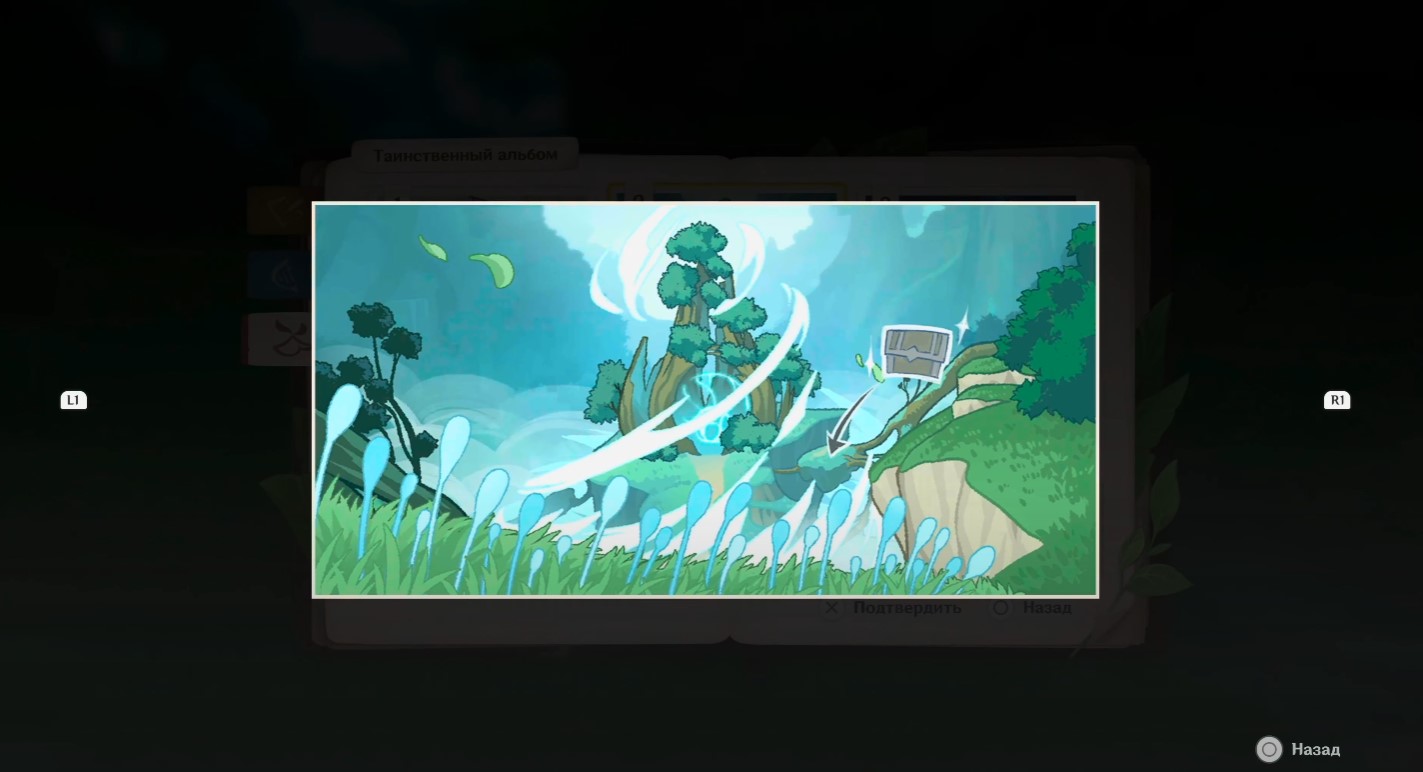
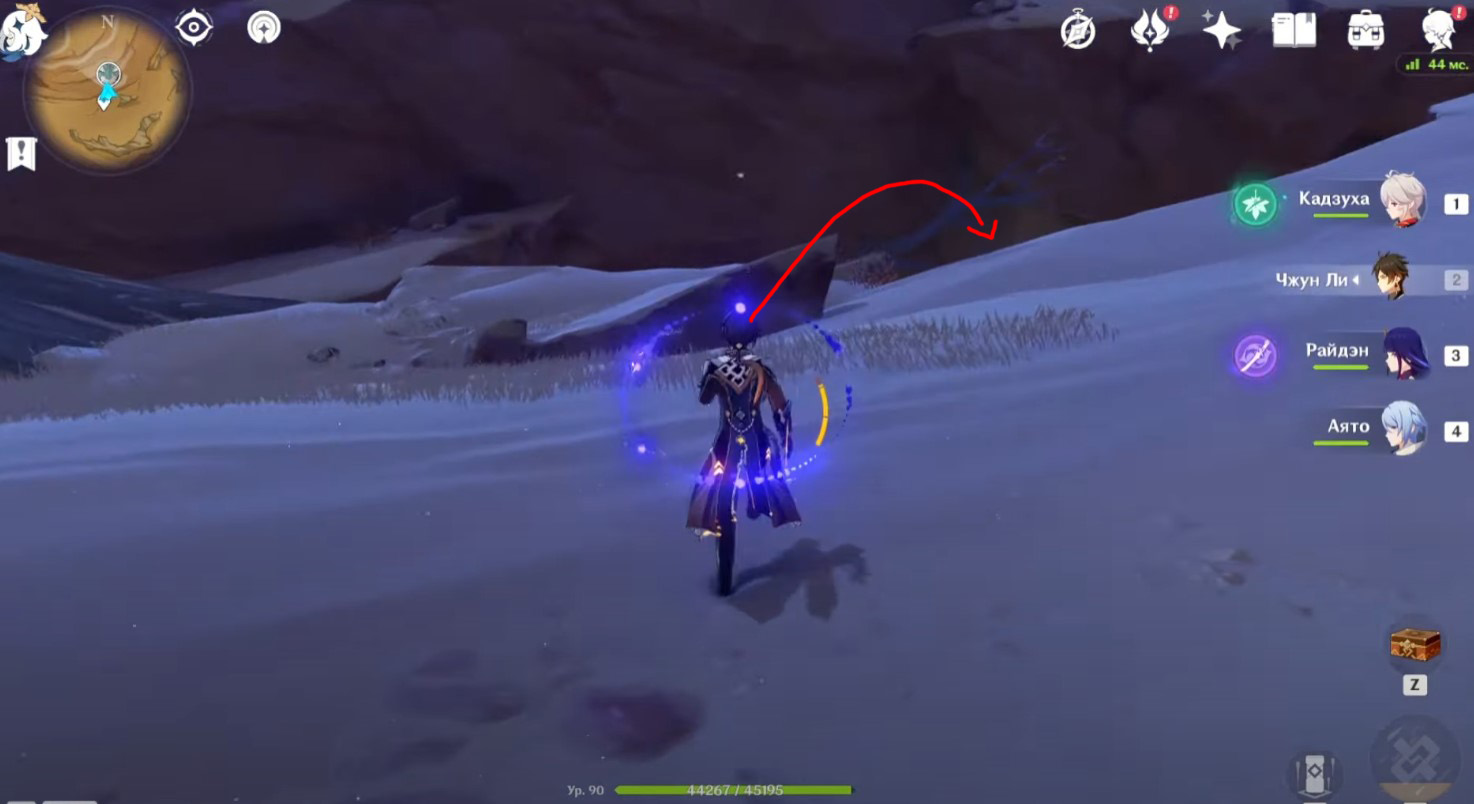
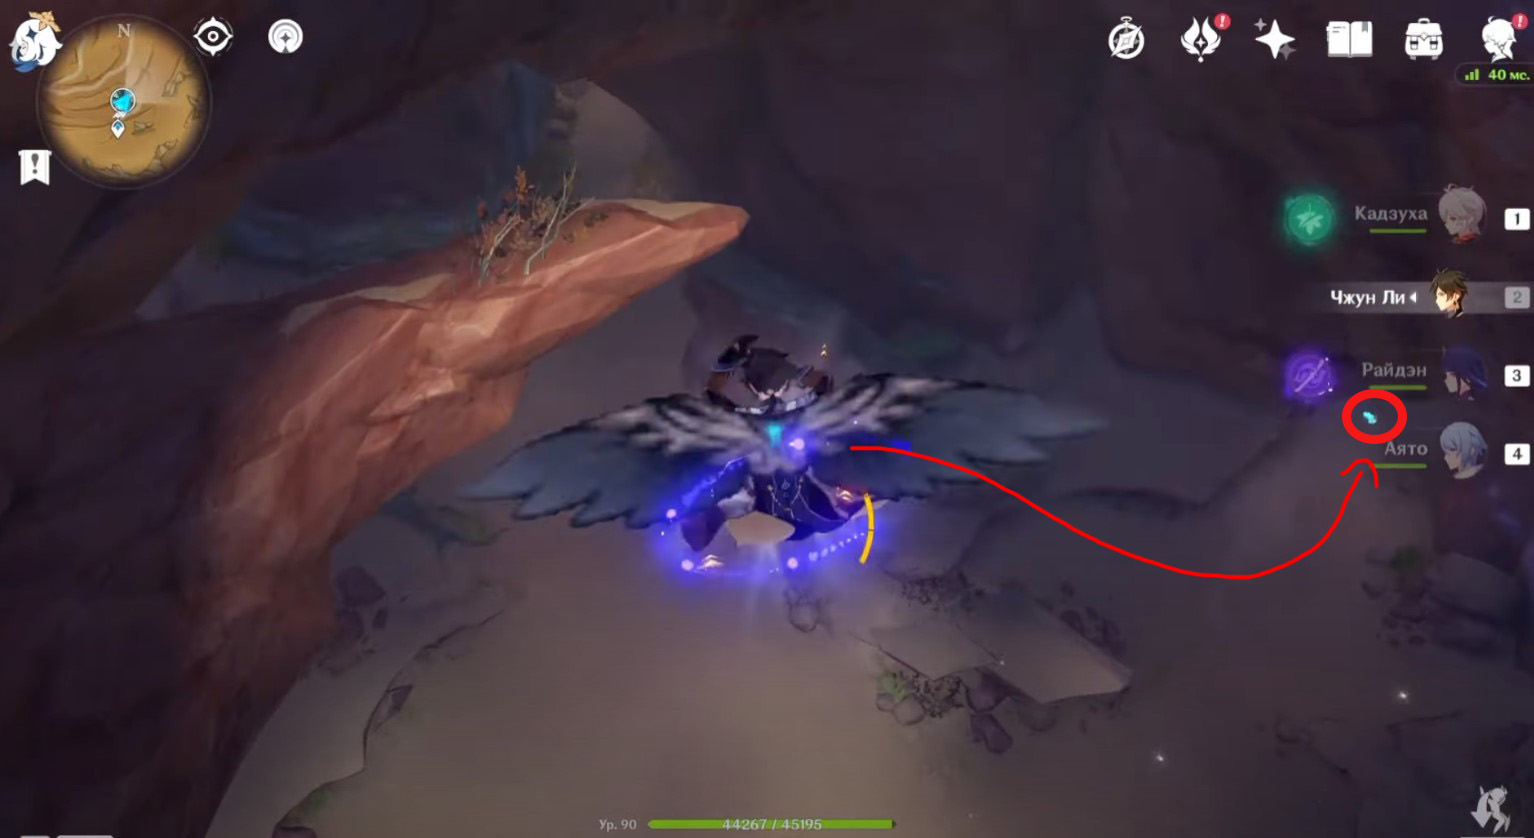
Переместитесь к указанному телепорту, а затем спланируйте вниз, начав лететь на юго-восток к месту, показанному нами на карте. Вам нужно будет спуститься на небольшой островок, прикрепленный к скале корнями деревьев. Место для копания расположено прямо рядом со светящимся корнем.
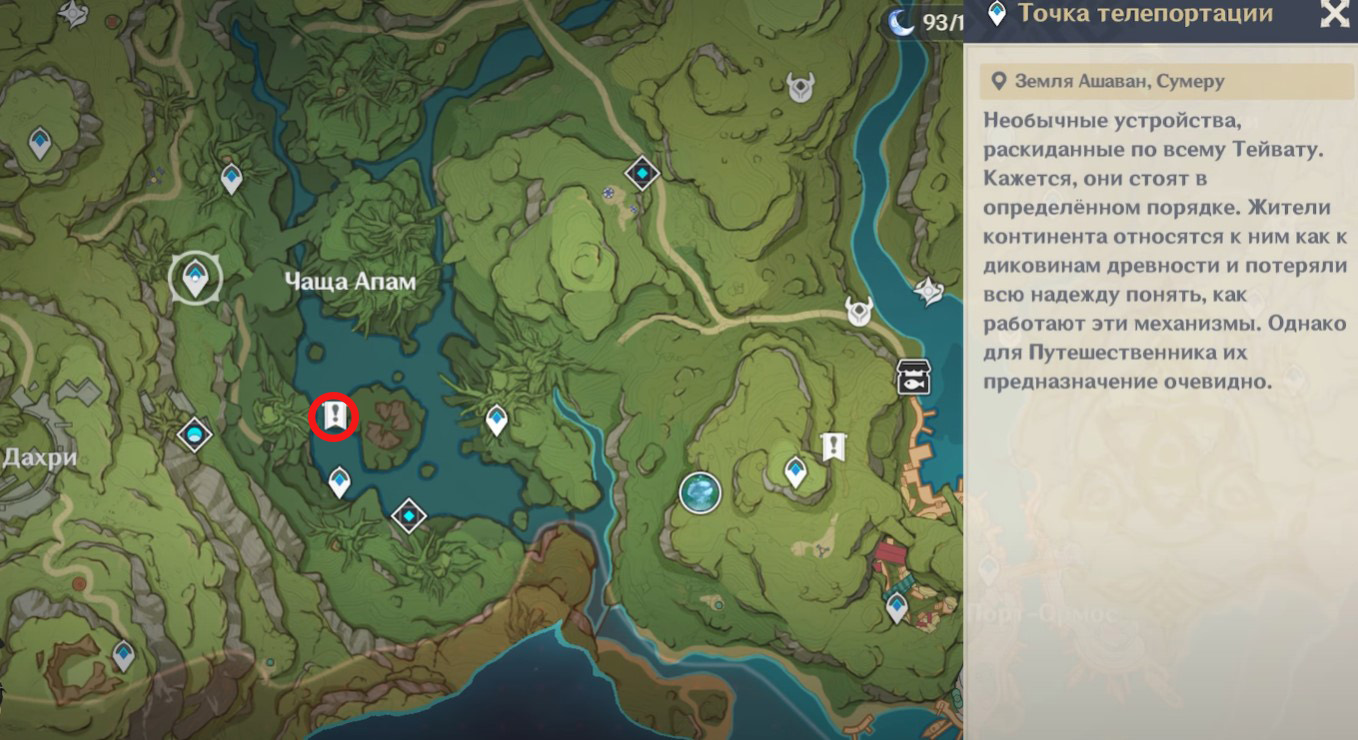


Отметим, что если вы уже продвинулись по квестам Араньяки, то этот островок может быть немного опущен вниз, а вместо светящегося корня тут будет расположен четырехлистный символ. Место для копания будет находиться прямо под ним.
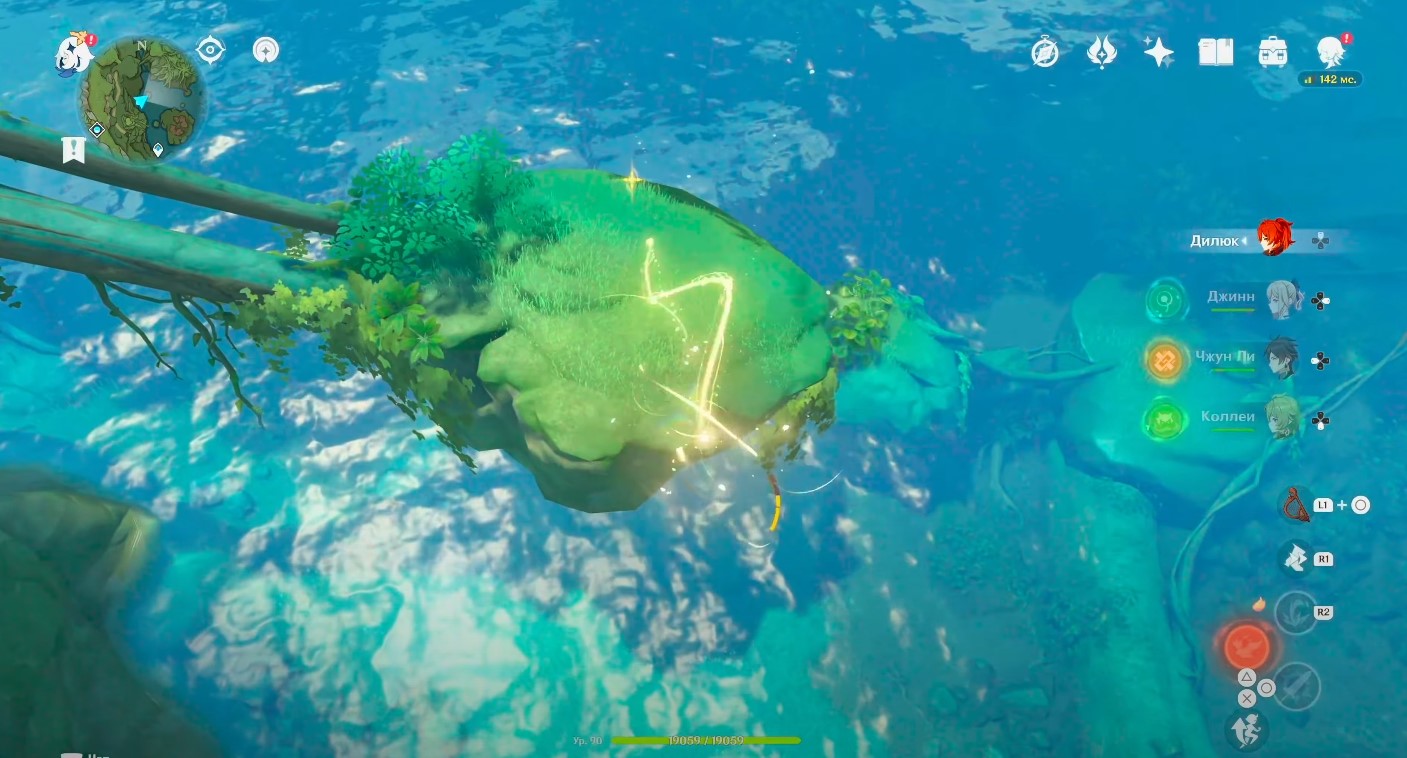
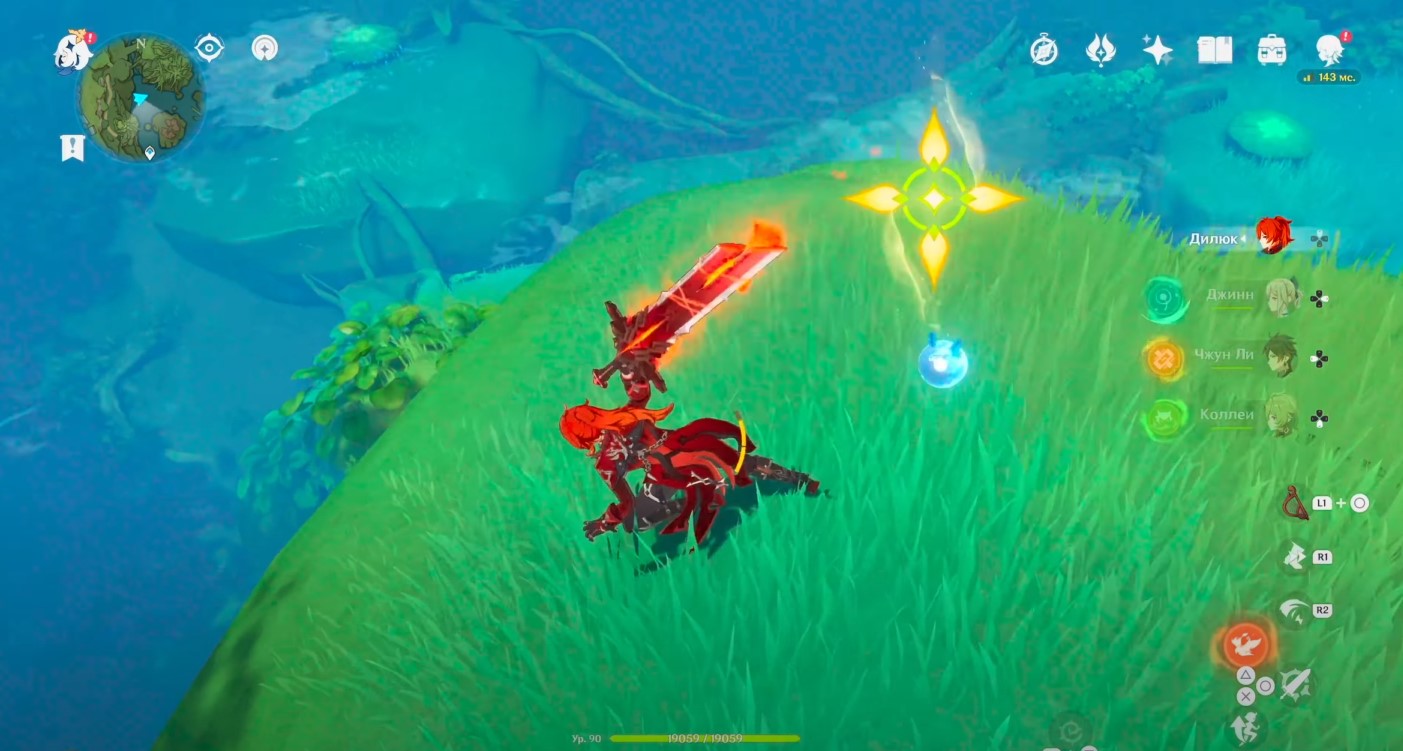
Рисунок 3
- Локация: чаща Апам
Для открытия указанного подземного телепорта вам нужно будет взяться за выполнение квеста «Молитва о дожде на плодородной земле» из цепочки «Варуна-гата». Переместитесь к данной точке, а потом бегите в сторону светящегося дерева. Не доходя до него, сверните влево и забегите в дупло. Там вы найдете новое место для копания.


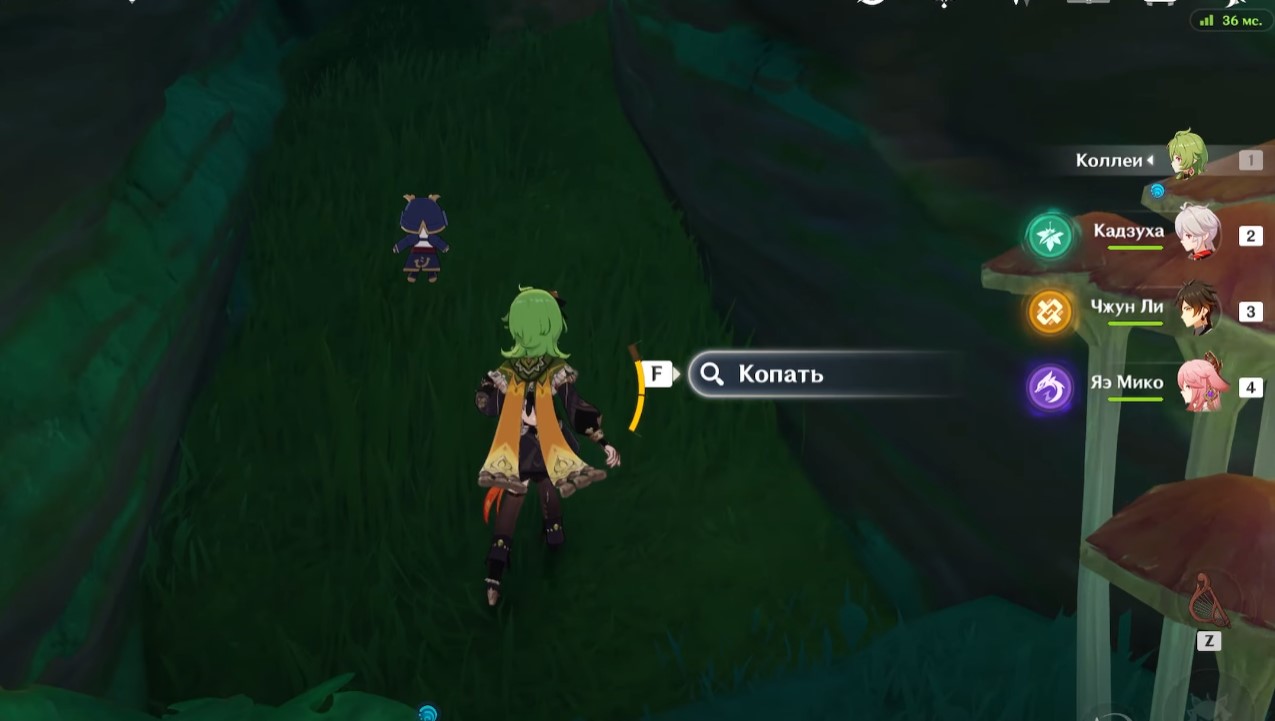
Рисунок 4
- Локация: джунгли Локапал
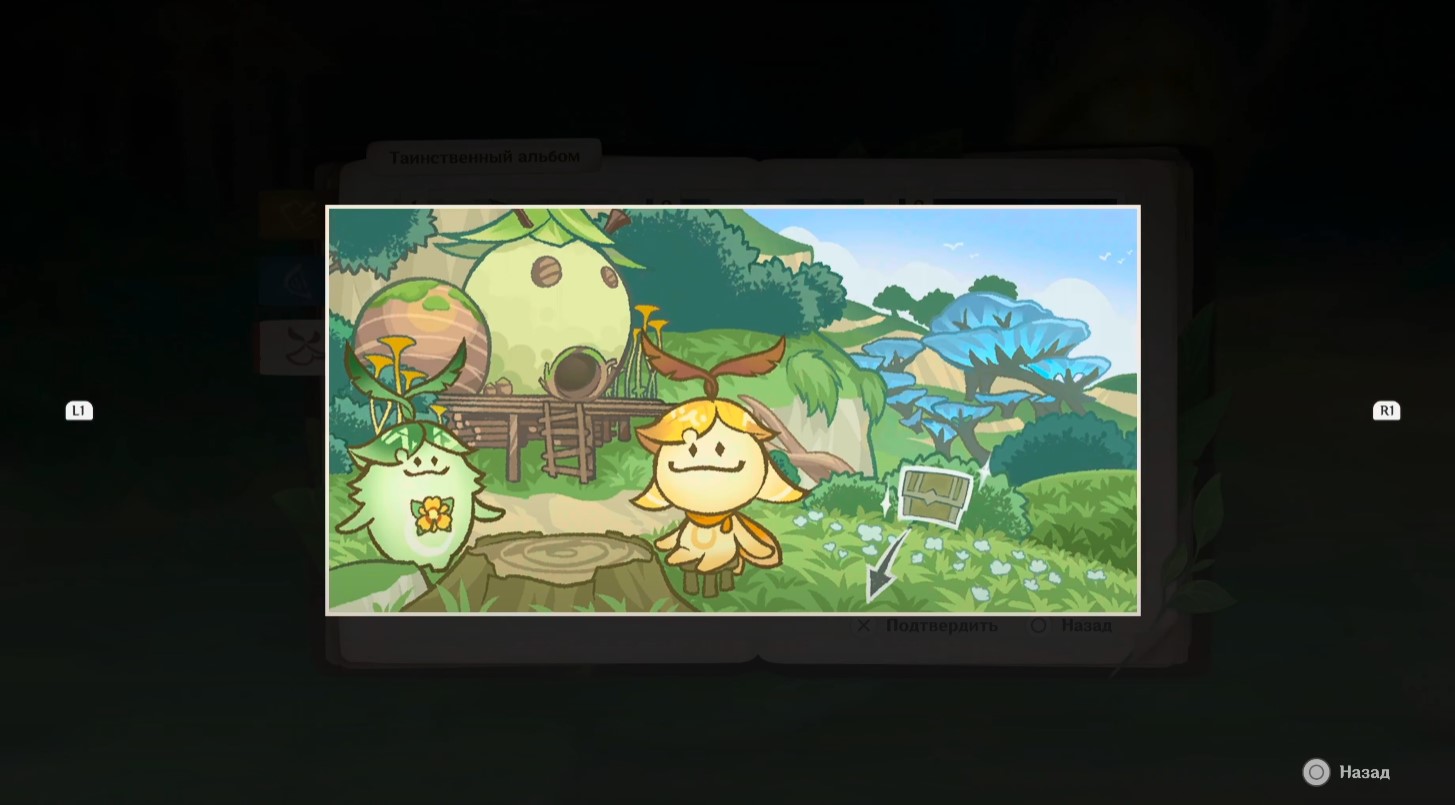
Переместитесь к телепорту к югу от Леса Мотийимы, а затем спланируйте на юго-запад, в сторону Алькасар-сарая. Нужное место расположено на возвышенности, неподалеку от пенька и табуретки. Кстати, тут вы можете начать миссию «Храбрость исходит из сердца».
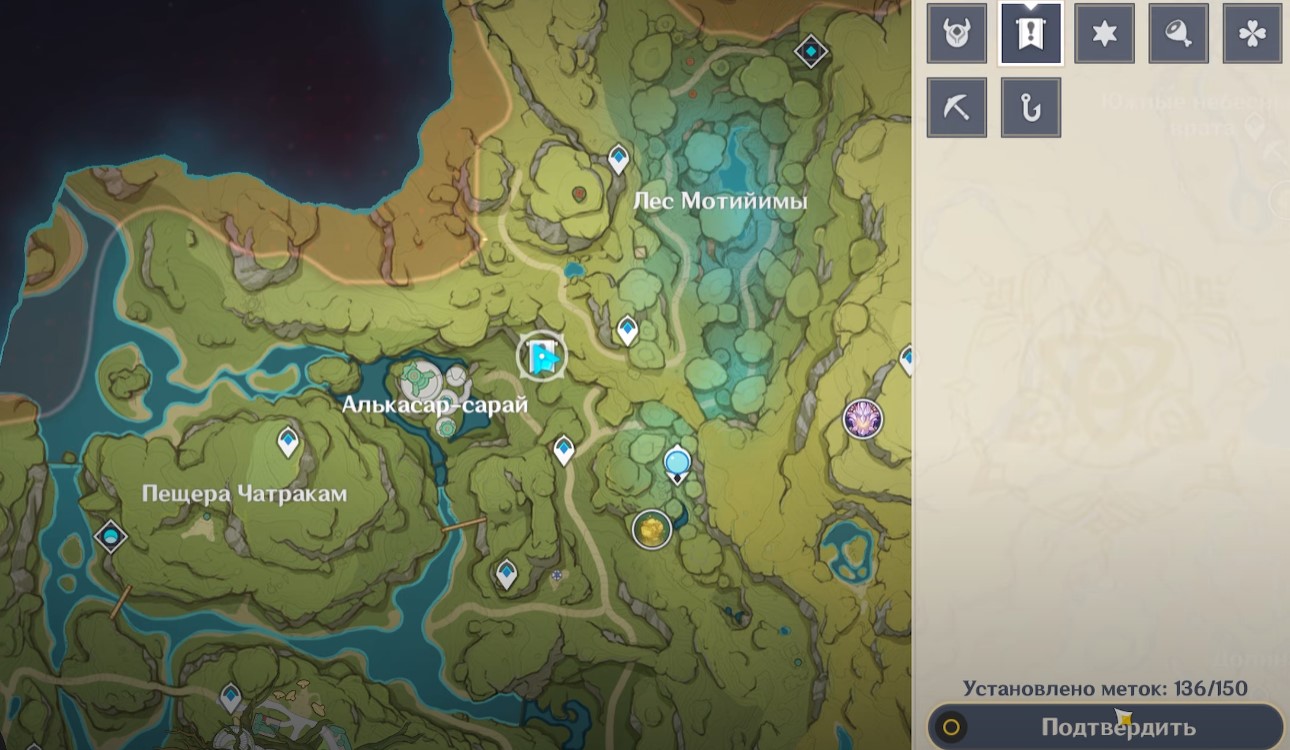
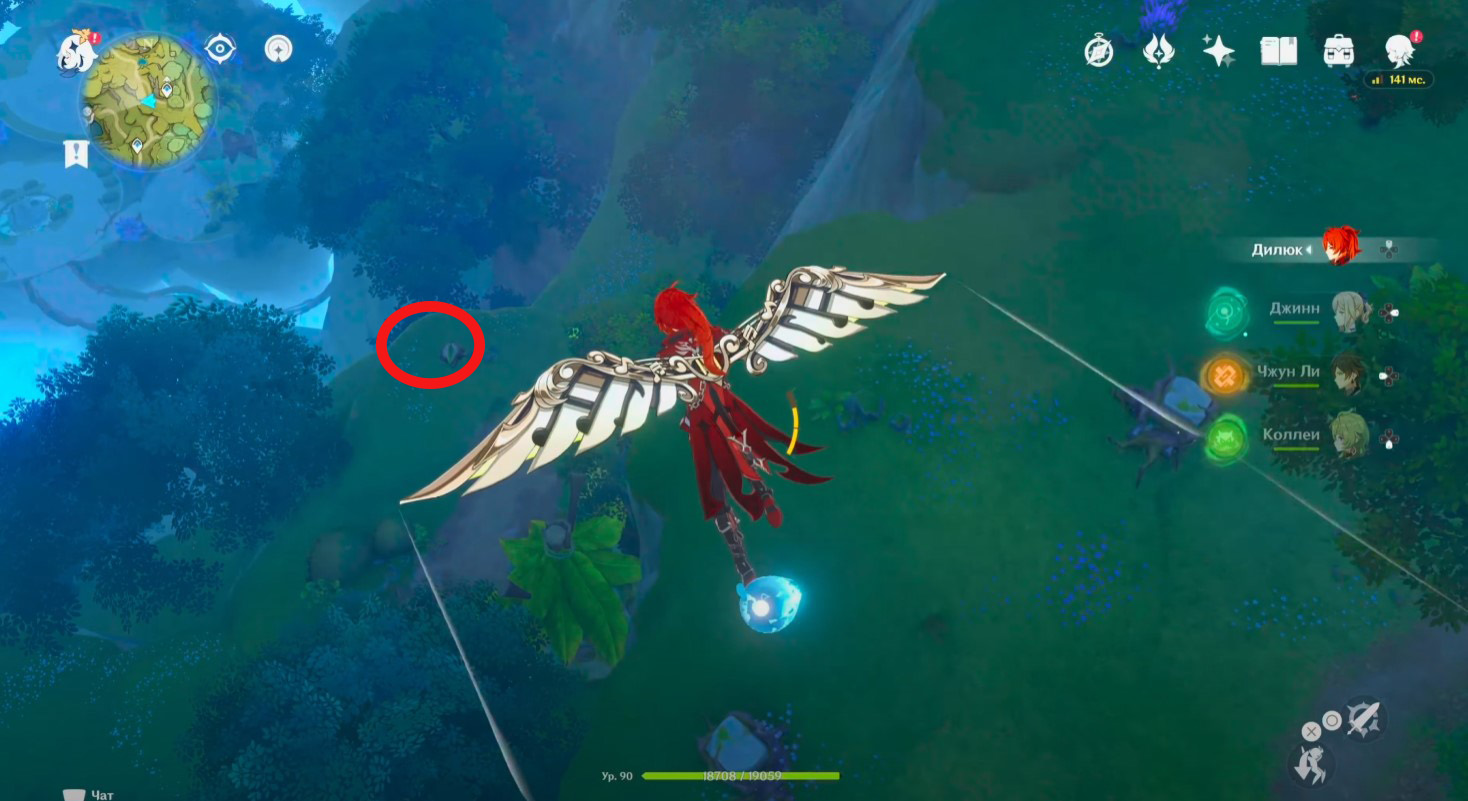
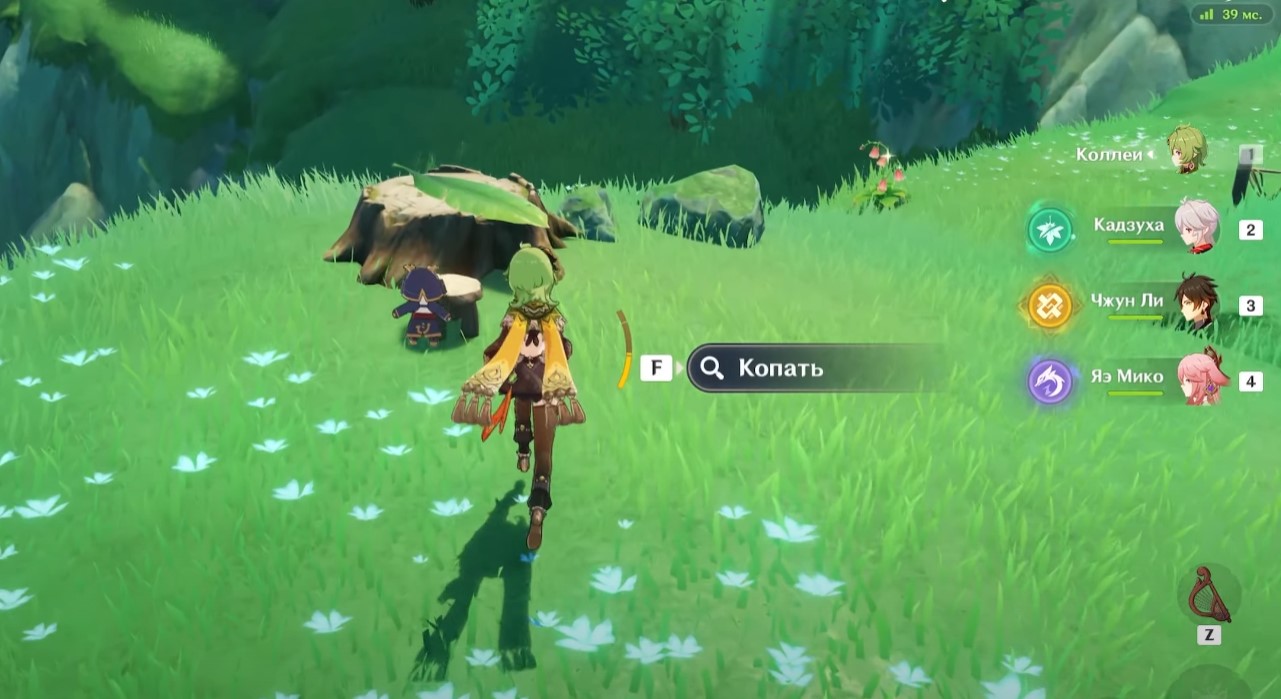
Рисунок 5
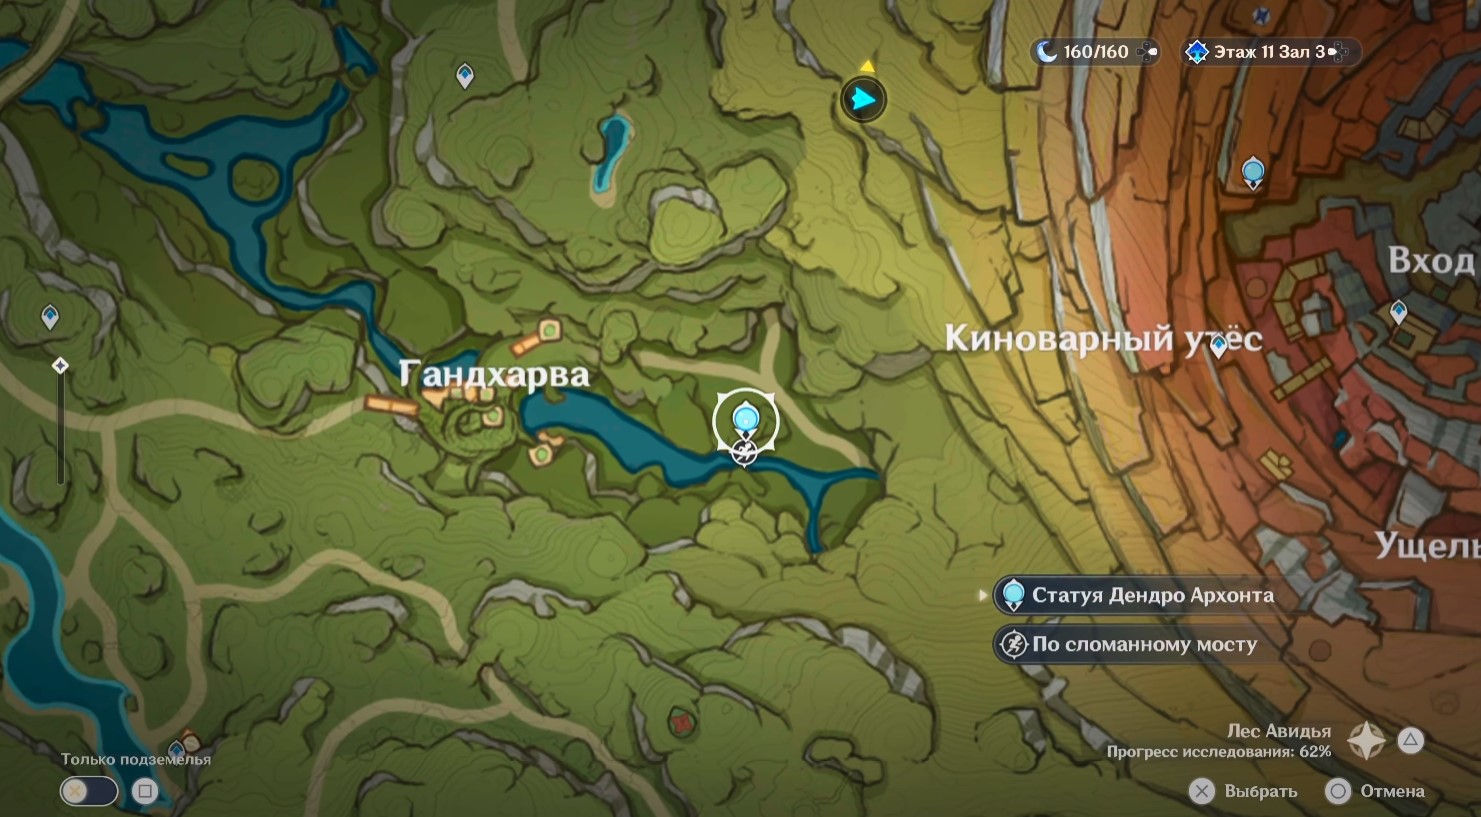
- Локация: возле Гандхарвы
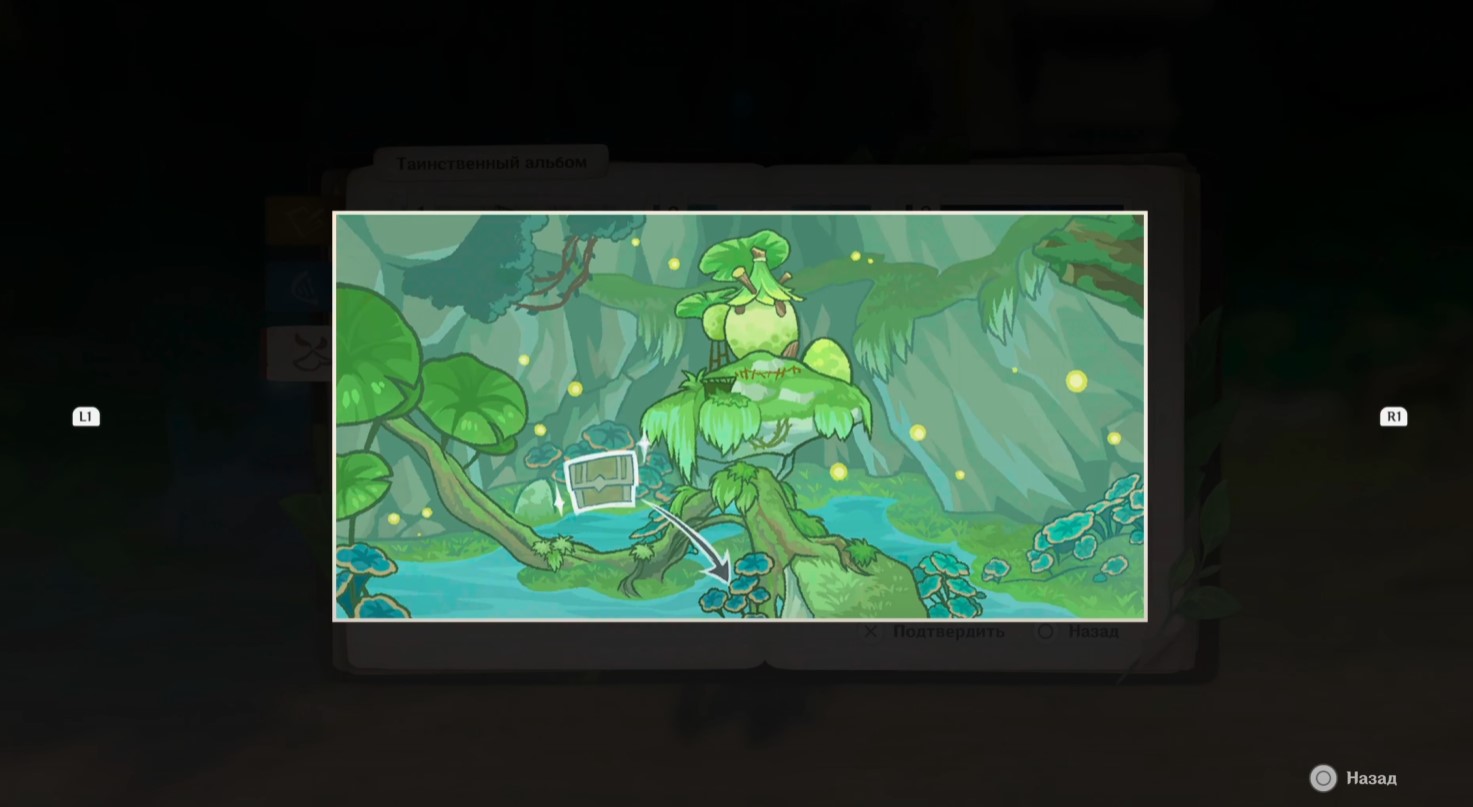
Добраться до нужного места можно будет в рамках задания «Глава звездной ночи» из цепочки «Агнихотра-сутра». Телепортируйтесь к статуе семи архонтов возле Гандхарвы, а потом спланируйте на север к тотему и входу в пещеру (будет закрыт без нужного квеста).

Углубитесь в подземелье и пройдите под домик к водоему. Там вы и обнаружите новый зарытый клад.
Рисунок 6
- Локация: лес Мотийимы
Телепортируйтесь к подземелью «Под тенью зонтика» или к телепортационной точке, расположенной в западной части указанной области. Затем бегите или летите к небольшому водоему внизу. Клад зарыт на его северном побережье, неподалеку от пня и камней.
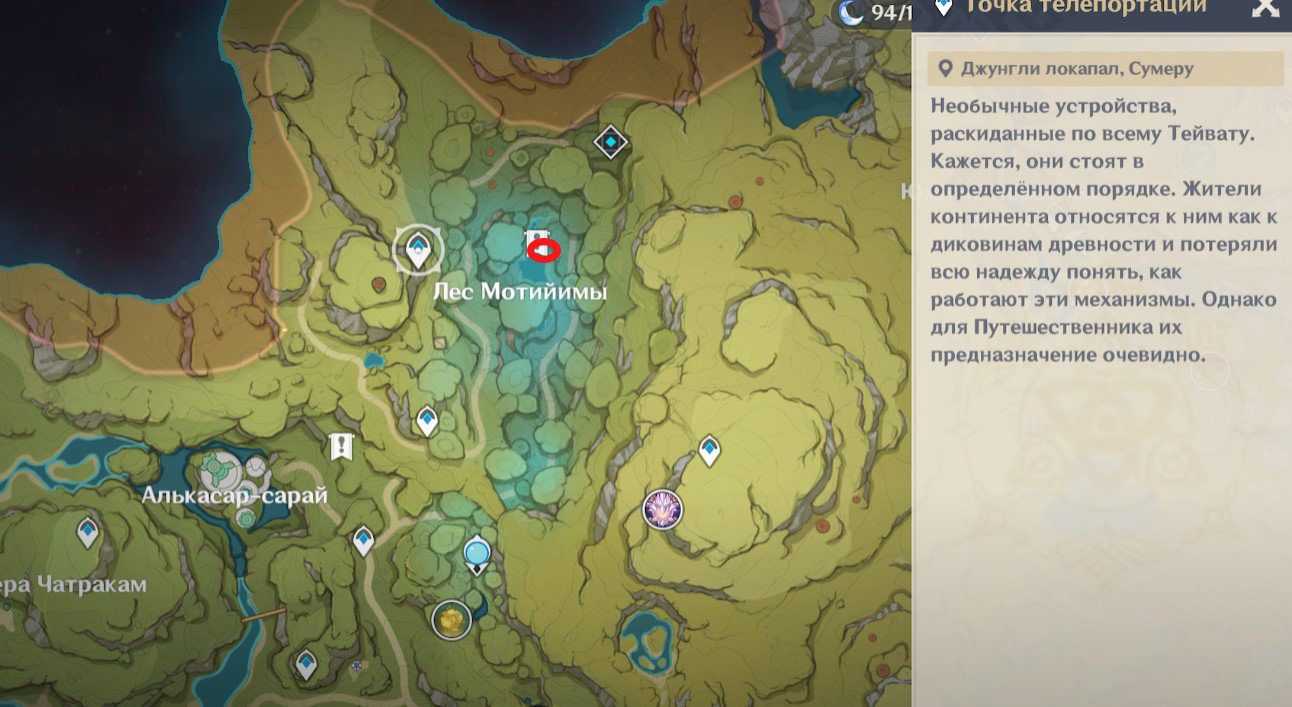
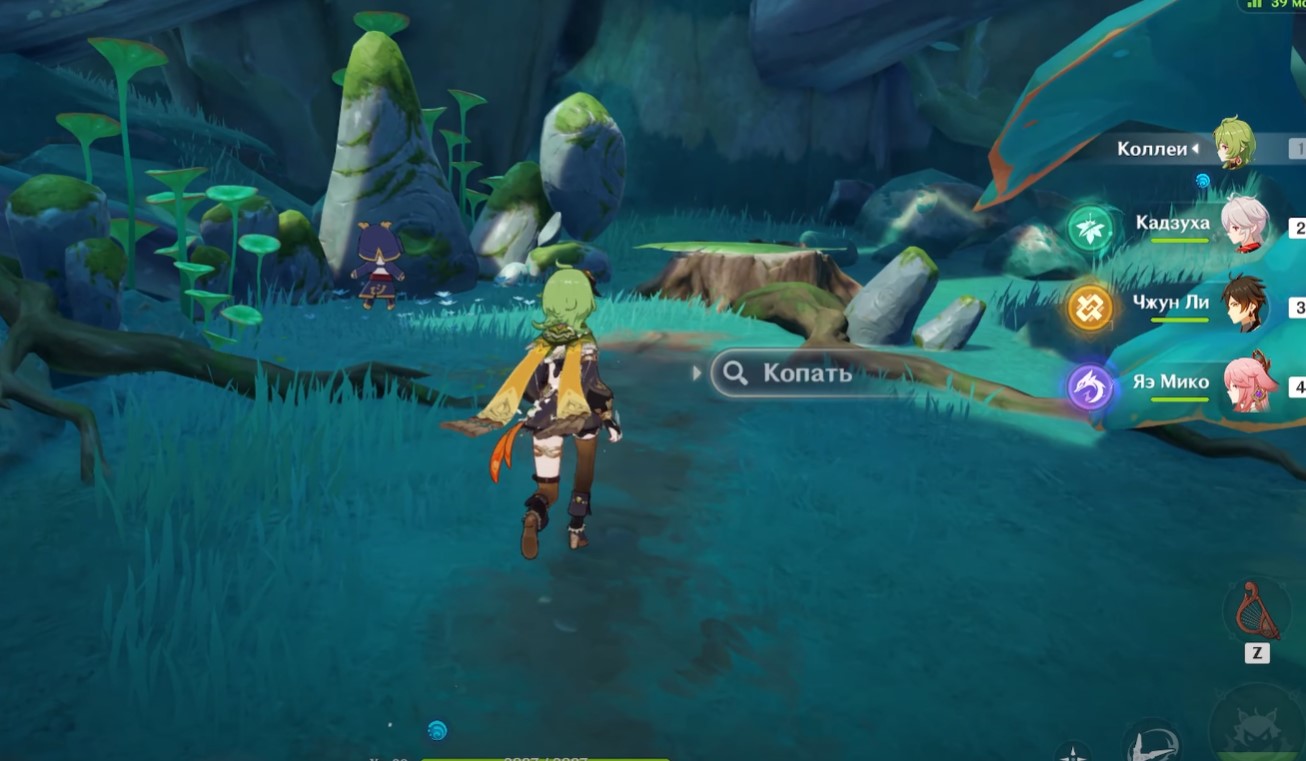
Рисунок 7
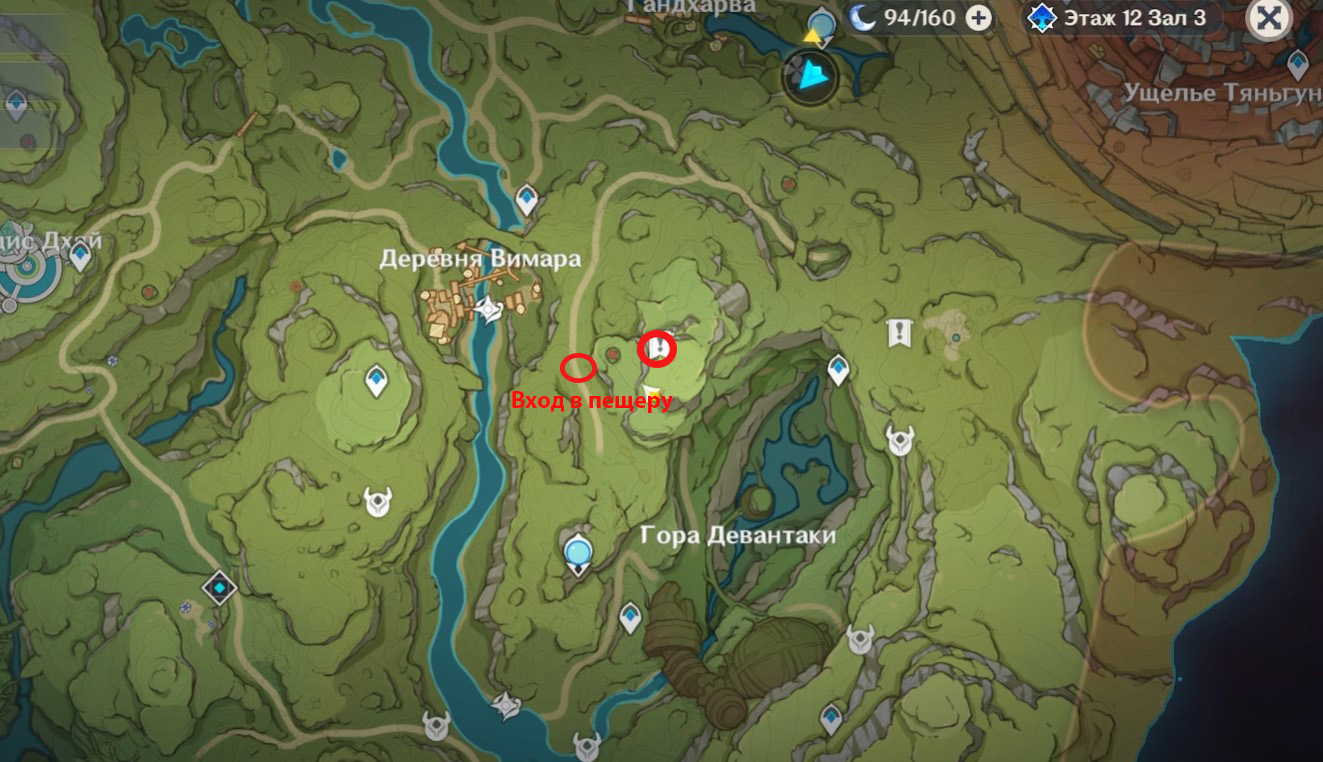
- Локация: возле деревни Вимара
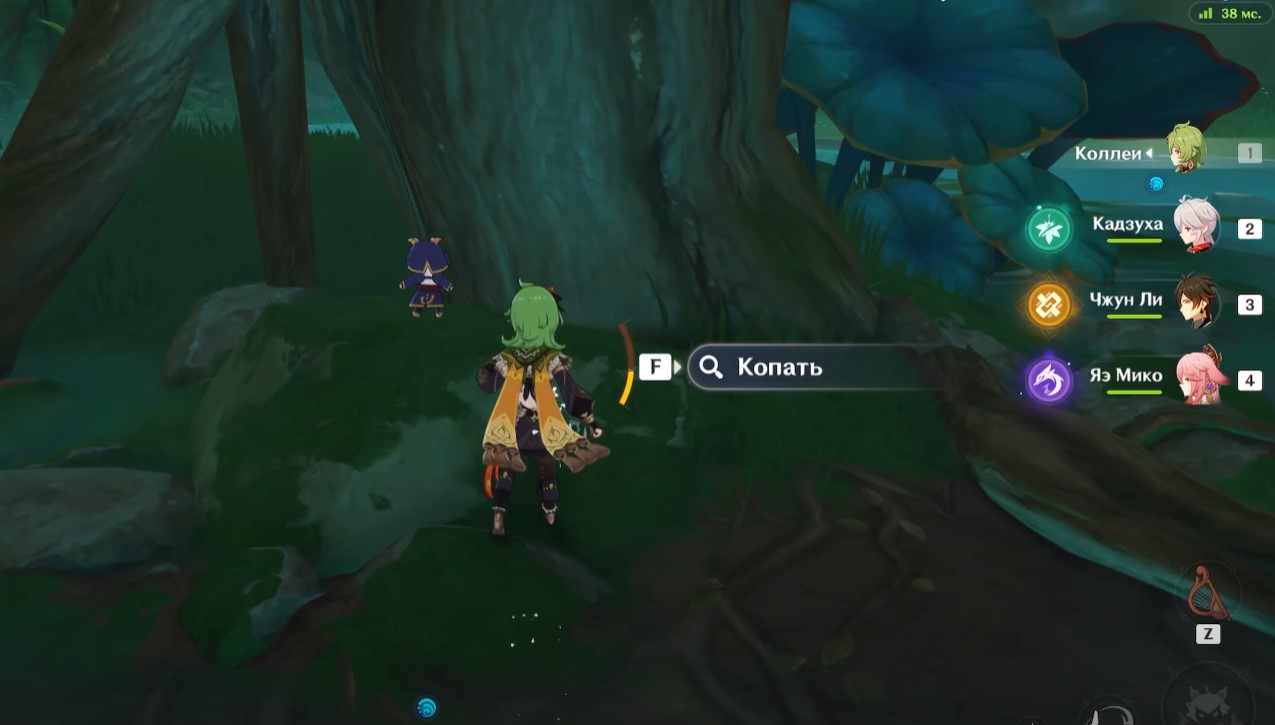
Вы сможете попасть в нужное место во время или после прохождения задания «Вимана-агама: Глава Роинджана». Вход в пещеру показан на скриншотах ниже. Чтобы убрать заросли вам нужно сыграть возле них Песнь вамадхи.

Оказавшись внутри, пройдя вглубь пещеры к механизму. Место для копания находится прямо позади зеленого гриба.
Рисунок 8
- Локация: гора Девантаки
Вы сможете попасть в необходимую локацию при прохождении квеста «Вимана-агама: глава Спуск в пещеру дэва». Переместитесь к подземному телепорту возле горы Девантаки. После появления сразу же взаимодействуйте с четырехлистными символами, чтобы переместиться к треугольному входу впереди. Место для копания находится слева от пылающего костра.

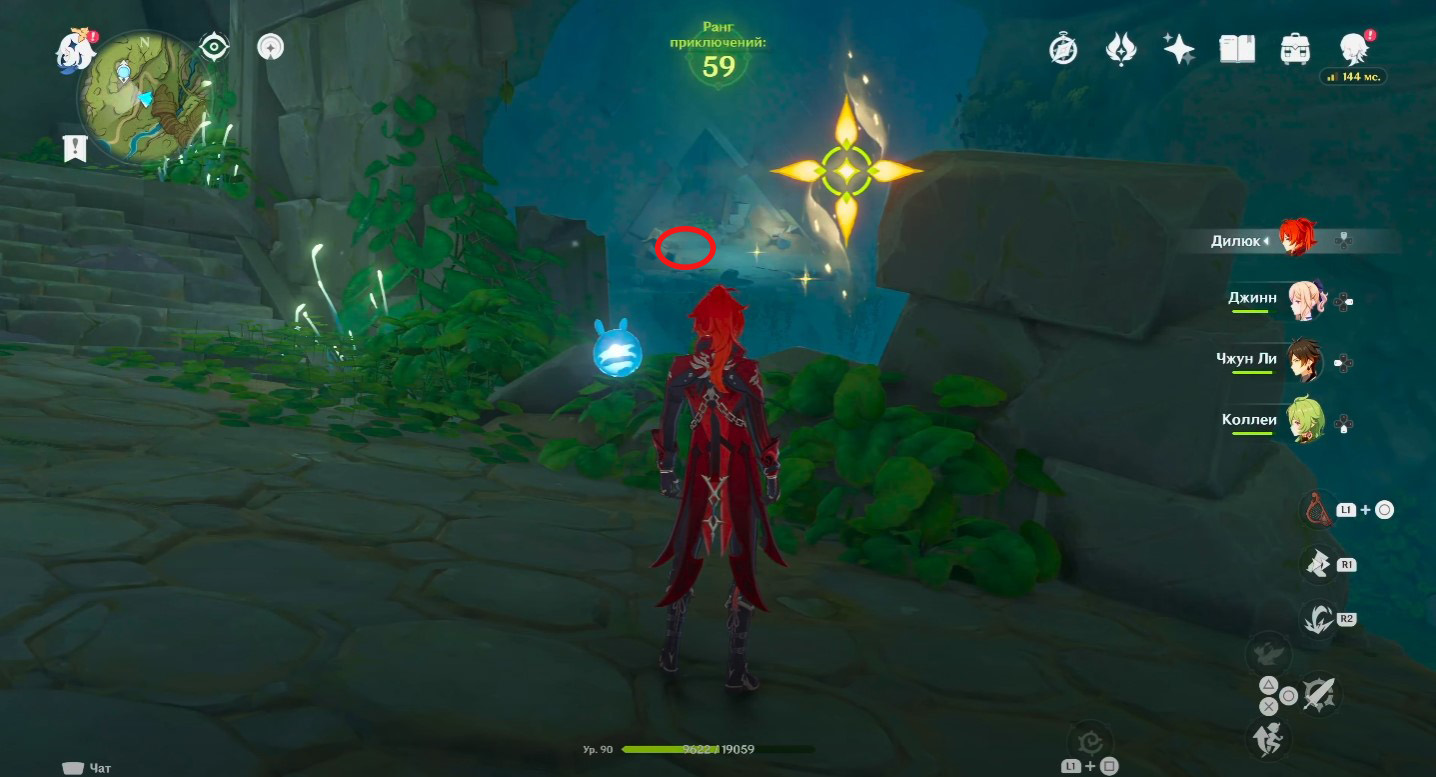
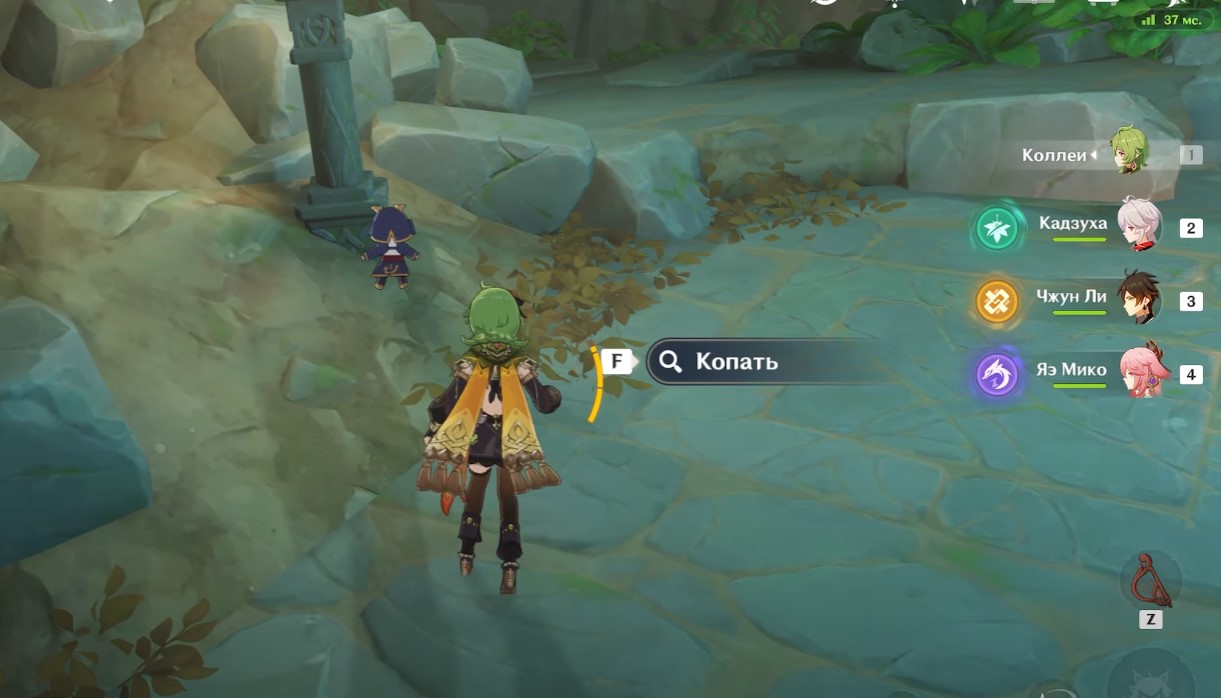
Рисунок 10
- Локация: подземные шахты Разлома

Вы наверняка уже бывали в этой области, когда изучали Разлом. Речь идет о сундуке, который можно получить при открытии достижения «Сухое семя» и решения головоломки с элементальными тотемами. Подробнее об этом мы рассказали в отдельном гайде, поэтому тут просто покажем нужную локацию.


После обнаружения этого сундука и получения сухого семени с вами заговорит Паймон, что приведет к продолжению квеста «Статичные пейзажи».
Статичные пейзажи II
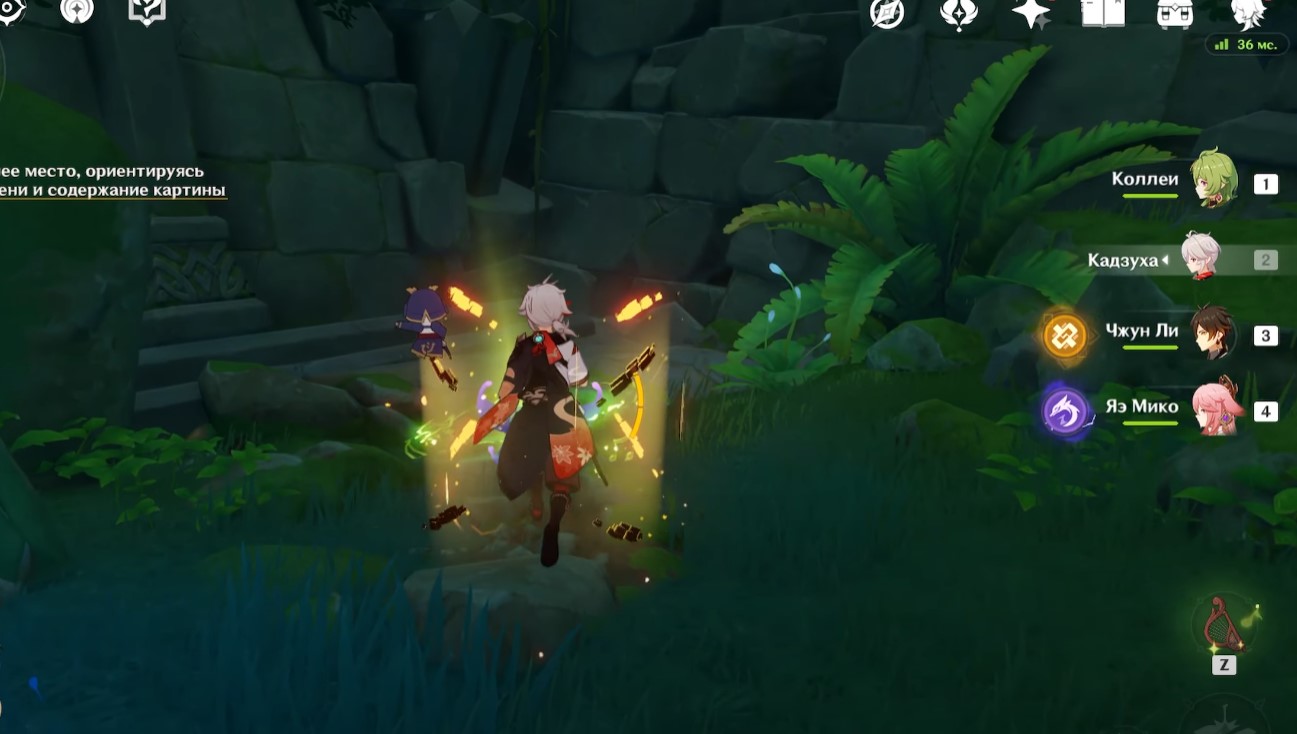
Вам необходимо будет найти последнее место, ориентируясь на вибрацию семени и содержание картины. Ниже мы укажем нужную локацию.
Рисунок 9
- Локация: Ванарана
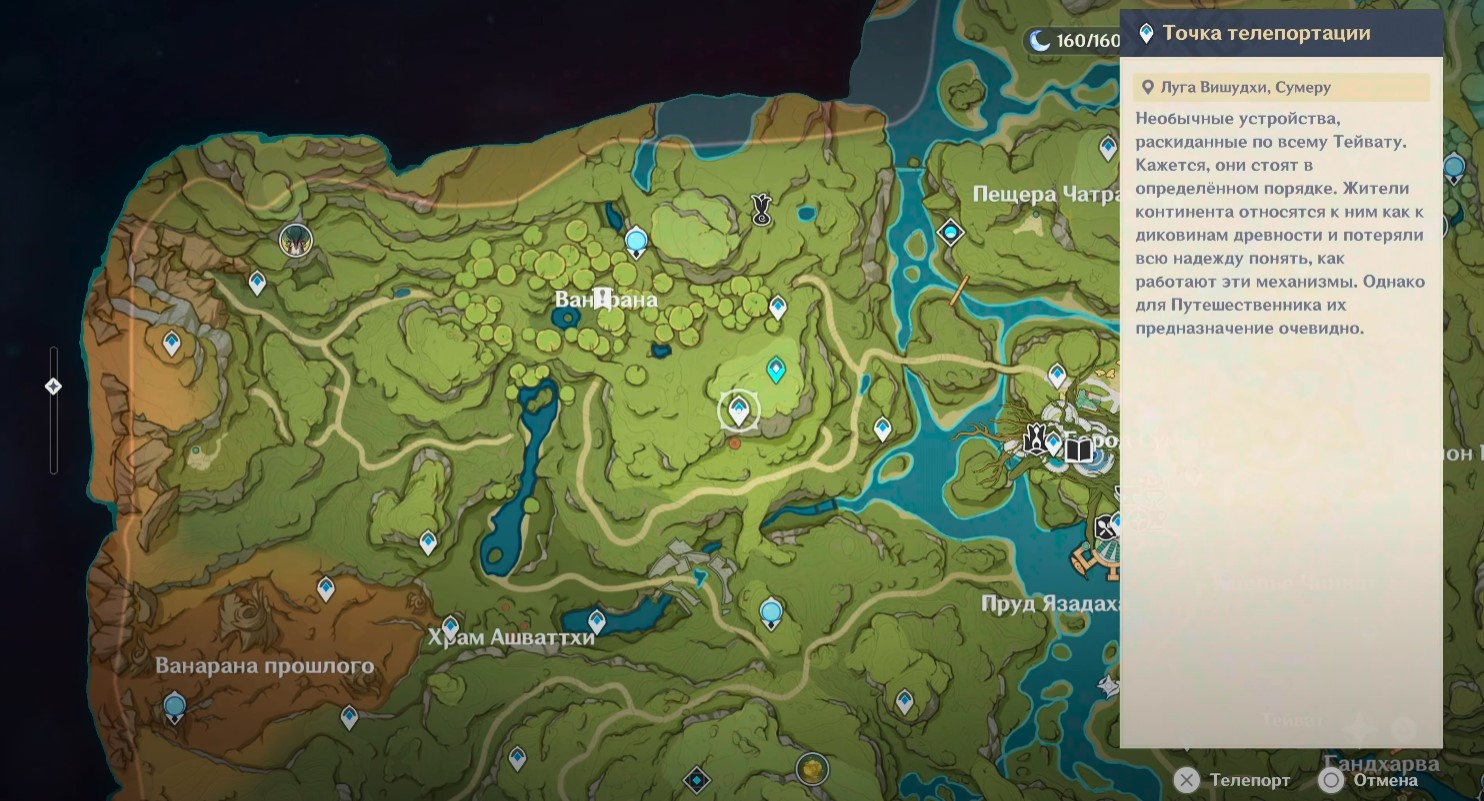
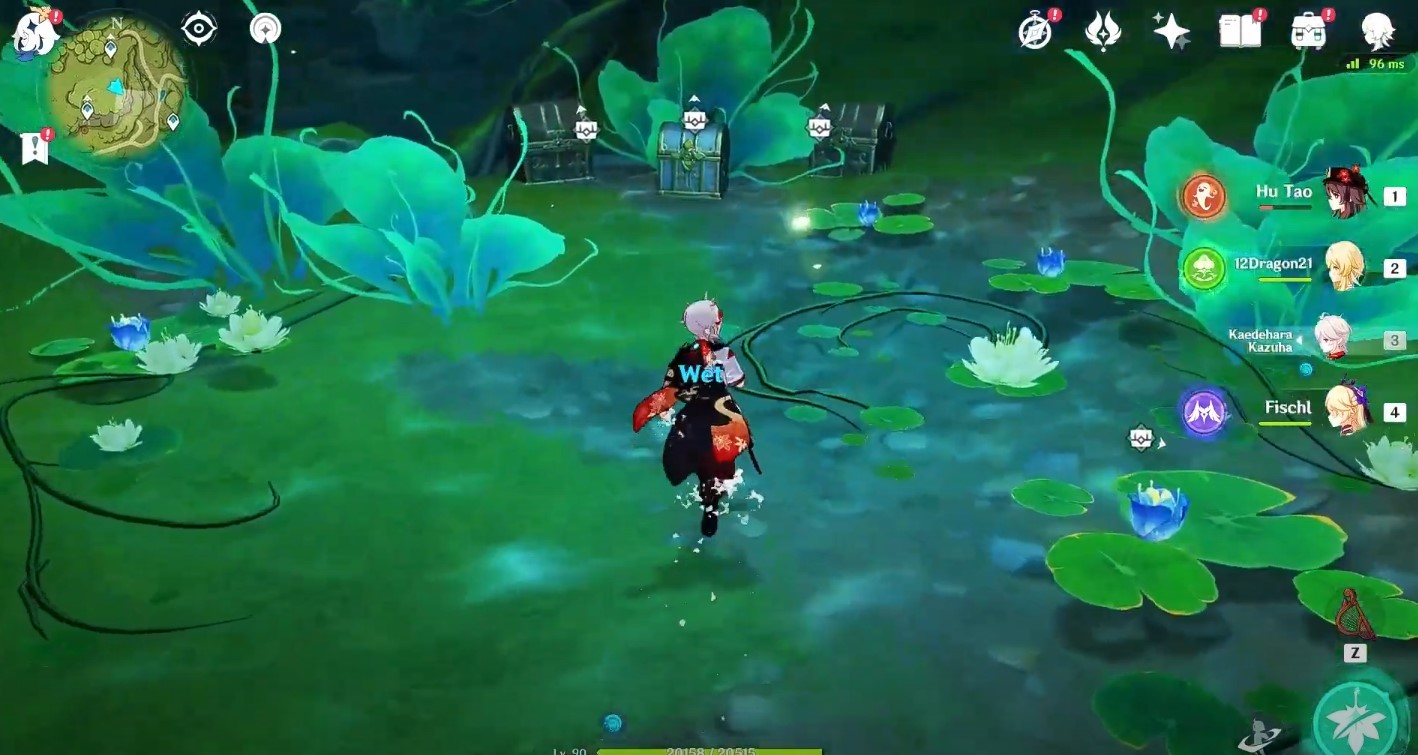
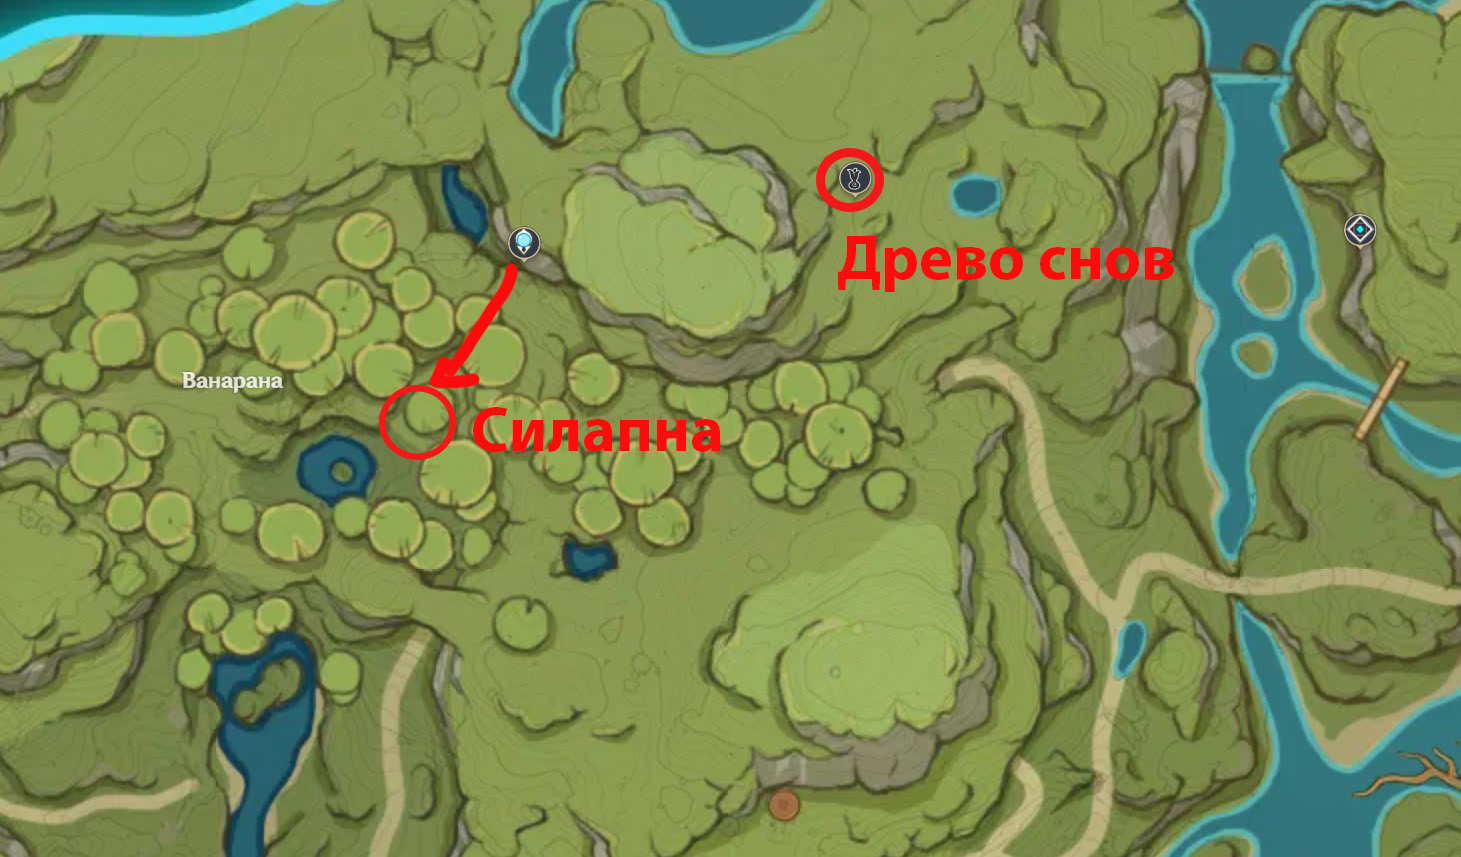
Переместитесь к подземному телепорту к юго-востоку от Ванараны. Там еще нужно решить головоломку с зоной Увядания под водой и Дендро тотемом. Мы подробно рассказали об этом в другом руководстве.

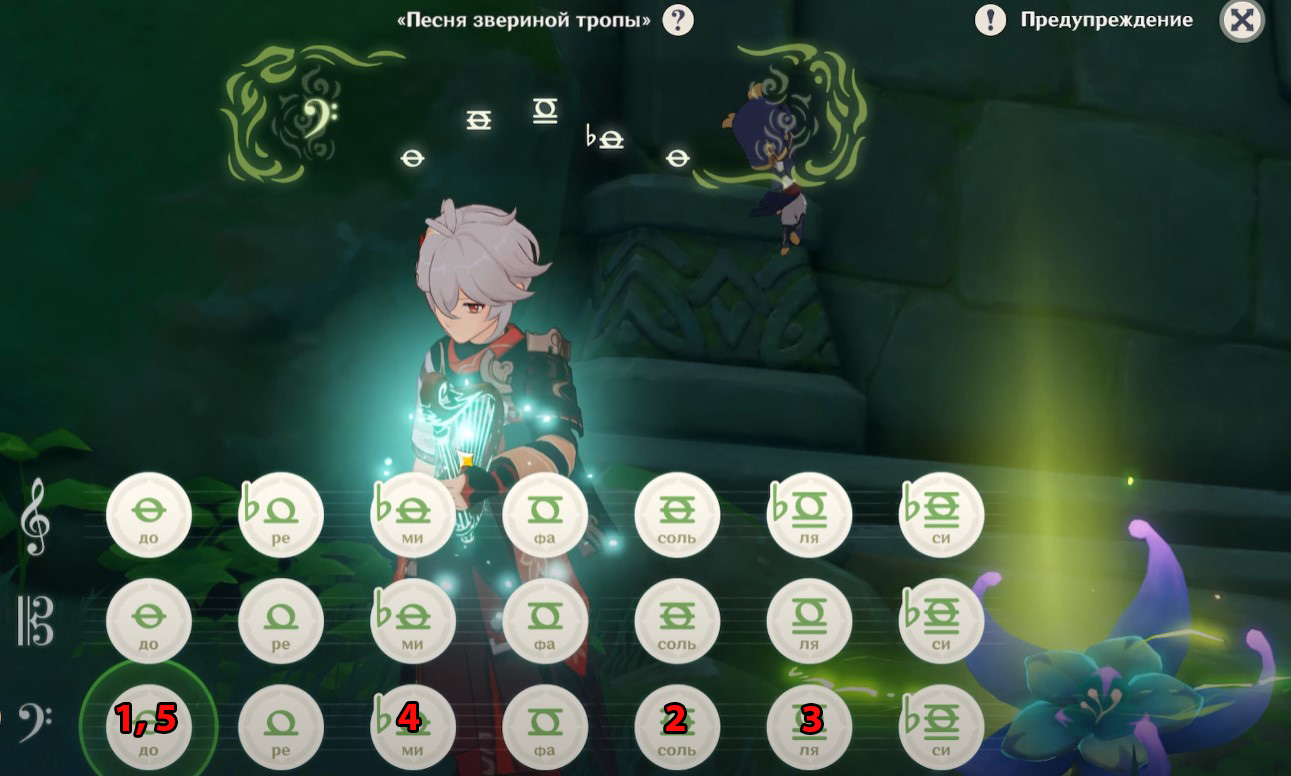
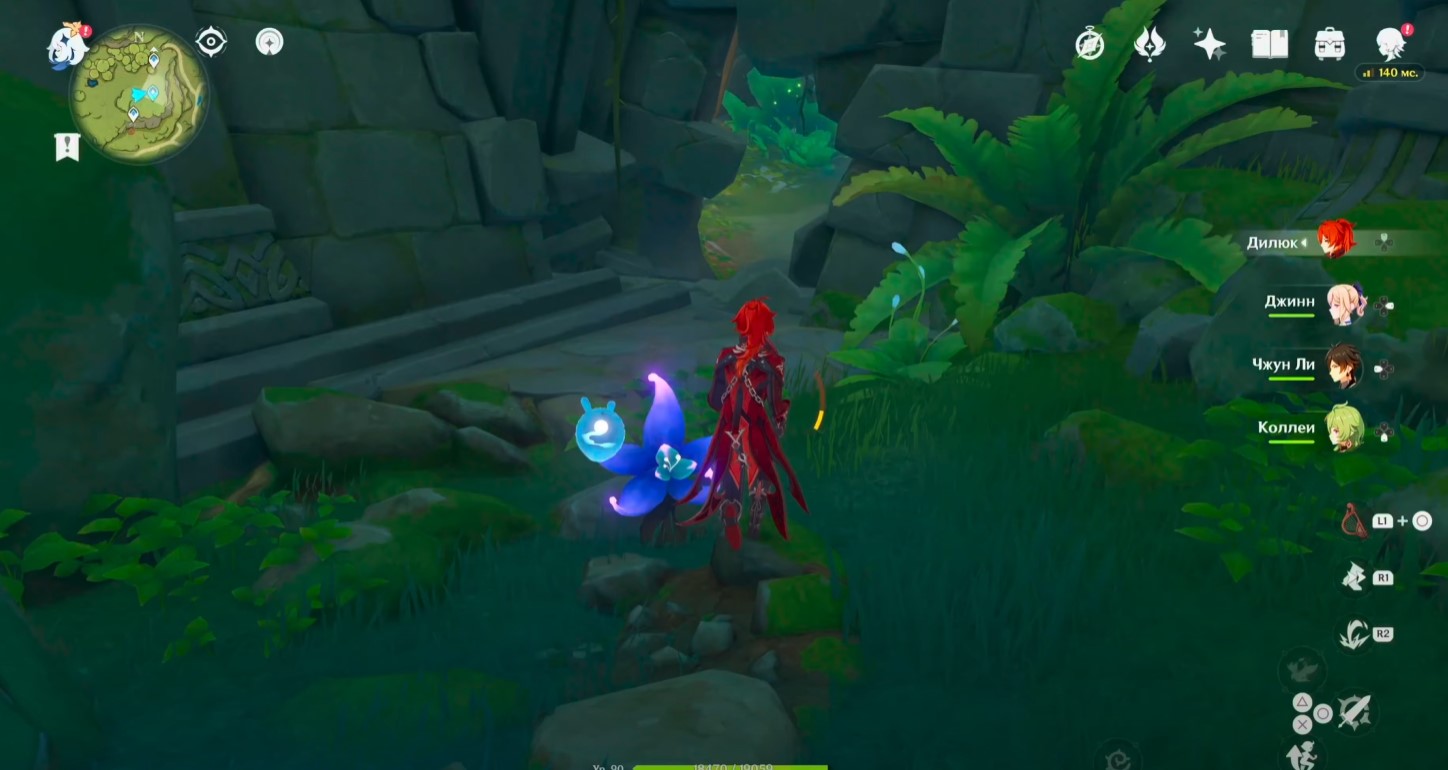
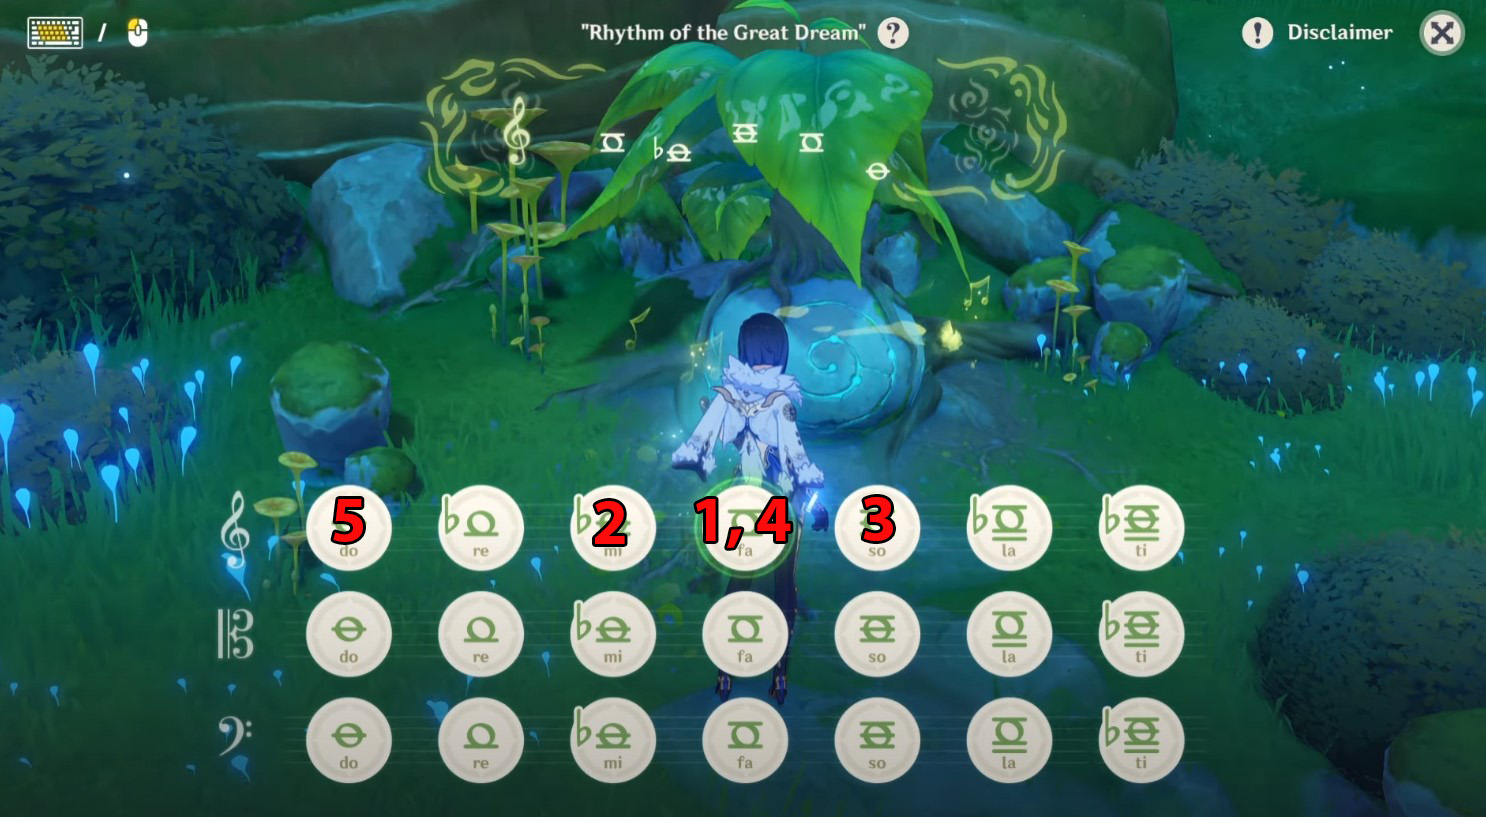
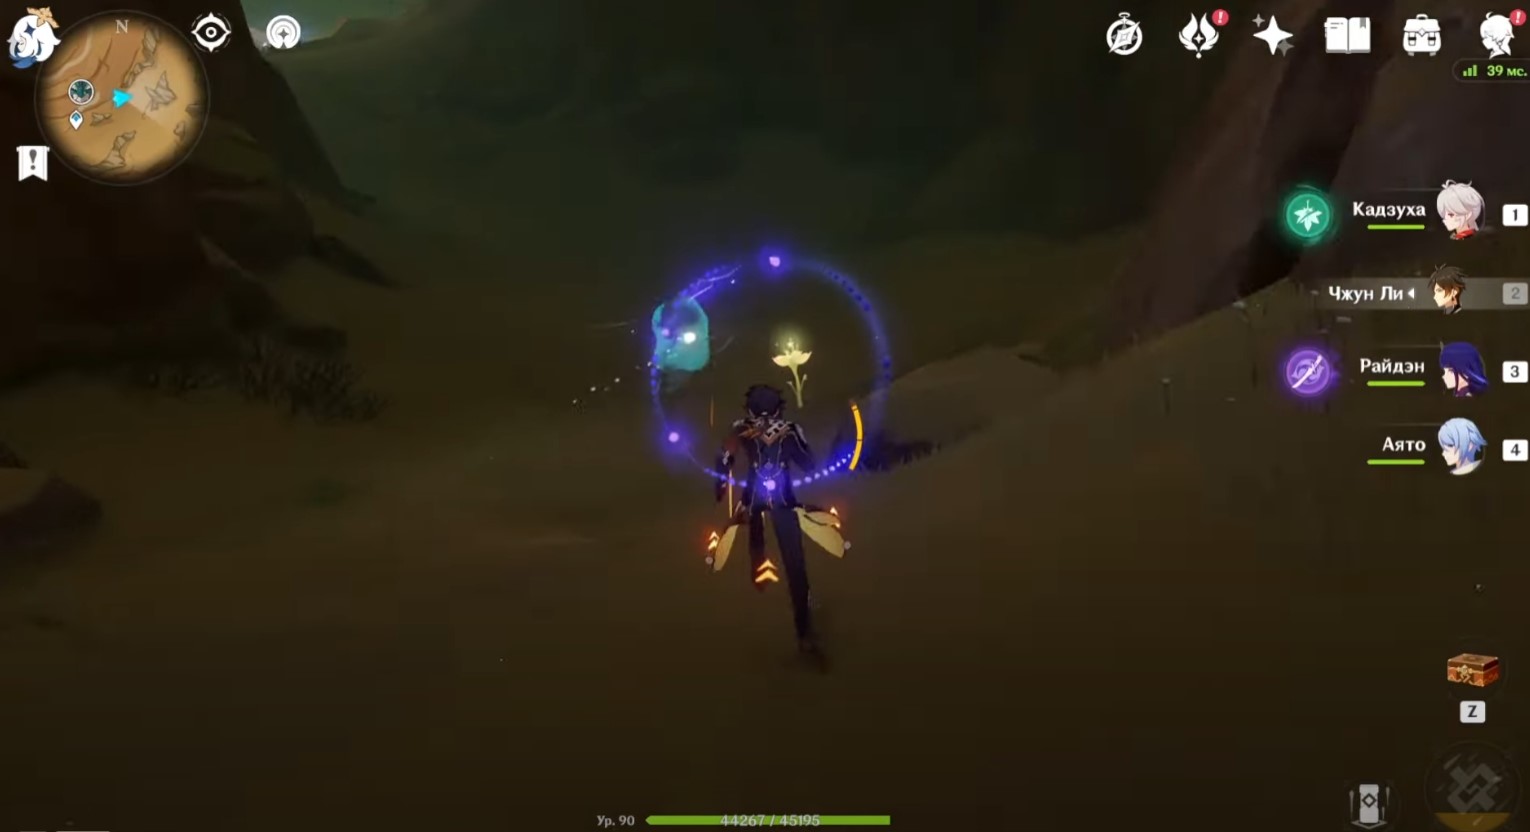
После решения загадки, пройдите мимо стихийного монумента направо к стене. Встаньте возле цветка и используйте Старинную лиру. Далее сыграйте на ней Песнь звериной тропы, которая открывается в рамках квеста «Песня, открывающая звериную тропу» из цепочки «Питомник грез». Нужная последовательность нот (нижняя строка): До, Соль, Ля, Ми и До.
Примечание: Если цветок у вас не появляется, то убедитесь в том, что вы прошли задание «Праздник Утсава». Затем снова посетите почтовый ящик в Ванаране, о котором мы рассказали в начале статьи. После этого цветок должен возникнуть.
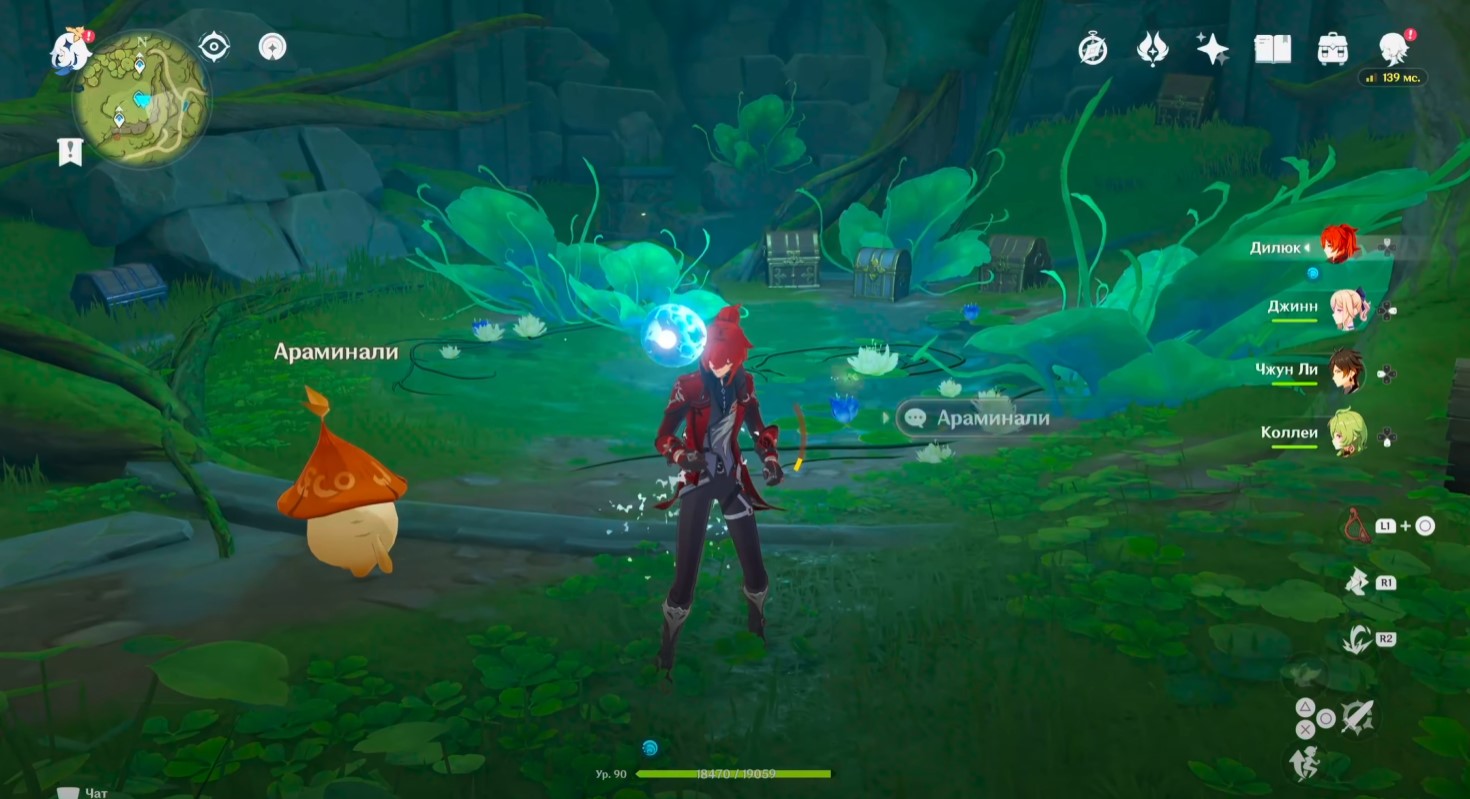
В результате откроется новый проход. Пройдите через него и бегите вперед. В новой пещере вы обнаружите Араминали. Поговорите с ним – вы откроете секретное достижение «Разговор с владельцем сундука» и выполните квест.
Как открыть сундуки в пещере с Араминали
Здесь вы также обнаружите множество сундуков. Практически все их можно будет открыть после того, как вы найдете 76 аранар в Сумеру и выполните их просьбы. Мы показали их расположение в отдельном руководстве. Однако на этом данное приключение не закончится, так как вы сможете получить дополнительные рисунки.
Рисунки из Таинственного альбома в пустыне Сумеру
Спустя один реальный день после нахождения всех 10 кладов по картинкам телепортируйтесь к статуе семи архонтов в Ванаране. Убедитесь, что вы находитесь в сказочной версии локации (ночное небо и в деревне находятся аранары). Для перехода в нужный вариант области сыграйте Песню великого сновидения возле силапны на Старинной лире.
Если вы находитесь в Ванаране снов, то от статуи бегите налево, поднимитесь по склону, а затем спуститесь и снова сверните влево. Впереди вы увидите почтовый ящик, стоящий рядом с домиком. Взаимодействуйте с ним, чтобы получить новый рисунок.
Примечание: Раз в день можно получить только одну картинку, поэтому вам придется посещать почтовый ящик ежедневно на протяжении нескольких дней.
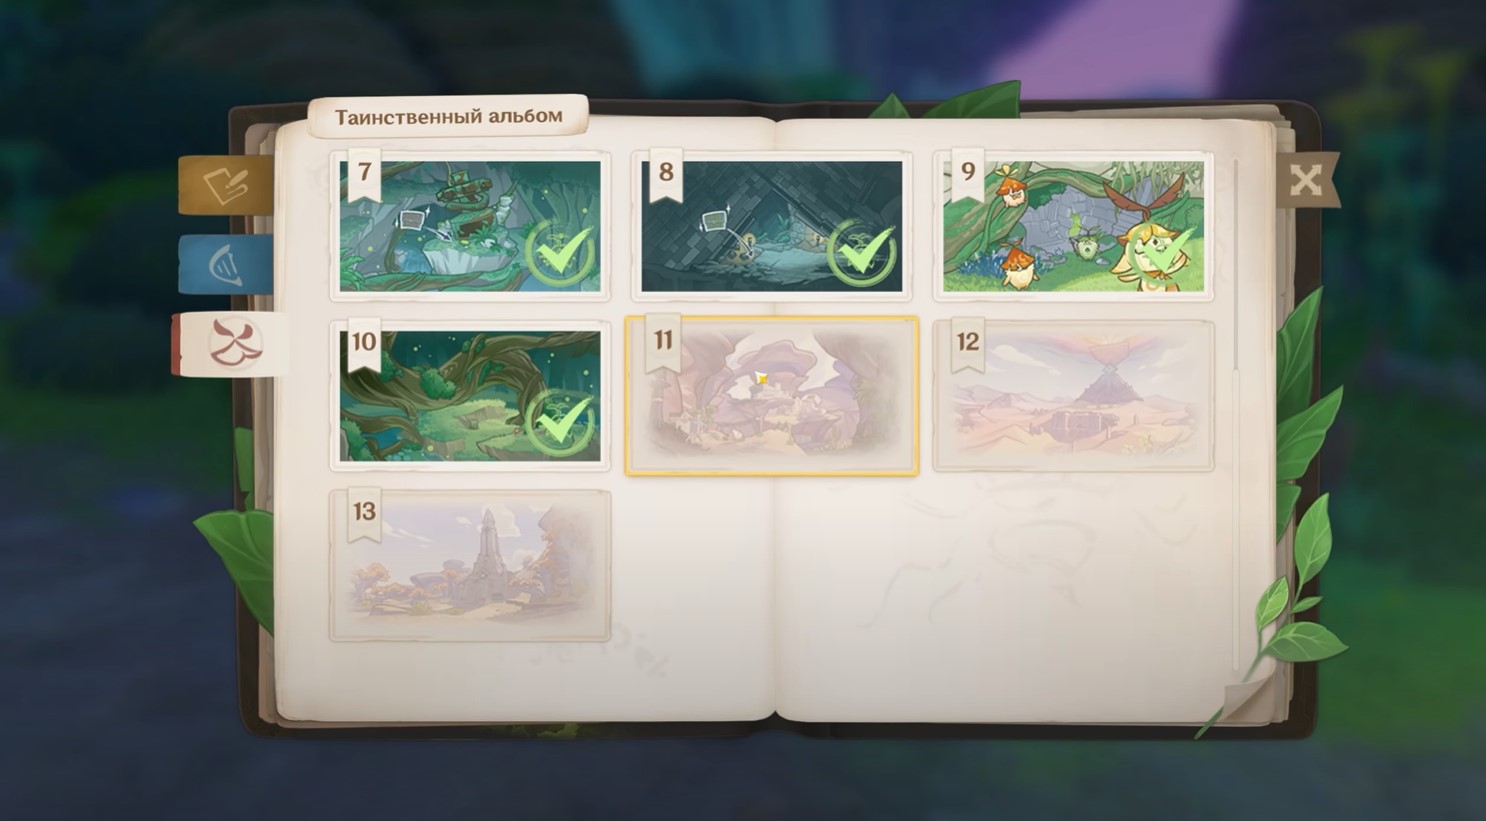
Затем откройте книгу Аранька в инвентаре, перейдите на вкладку «Таинственный альбом», и вы увидите новые рисунки мест, в которых зарыты сундуки.
Рисунок 11
- Локация: деревня Аару
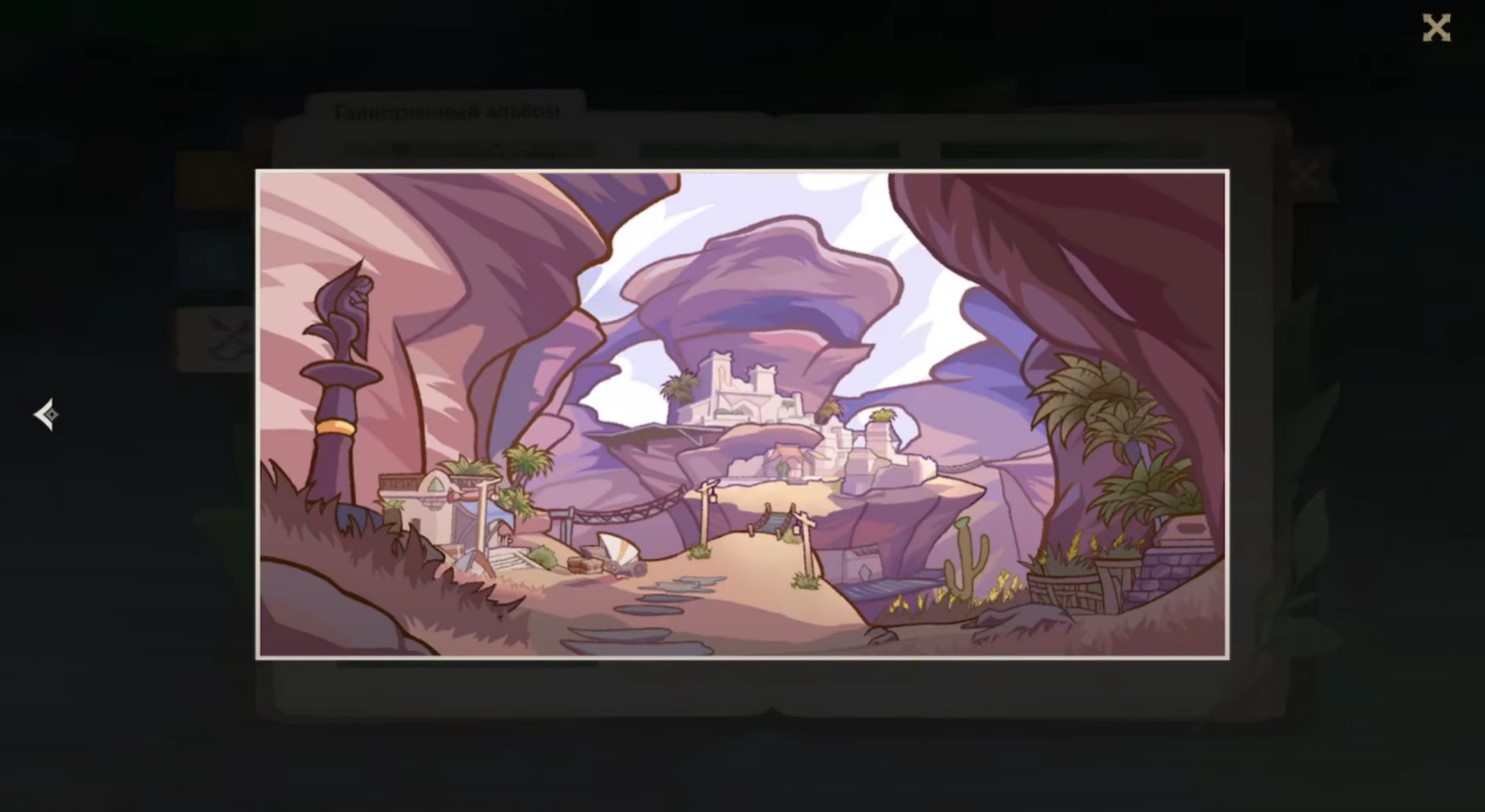
Переместитесь к статуе семи архонтов в указанной локации, а затем поверните направо и идите к кучке песка возле деревьев и полуразрушенной колонны. Затем развейте песок, воспользовавшись любой Анемо способностью, и выберите опцию «Копать». Вы найдете обычный сундук.
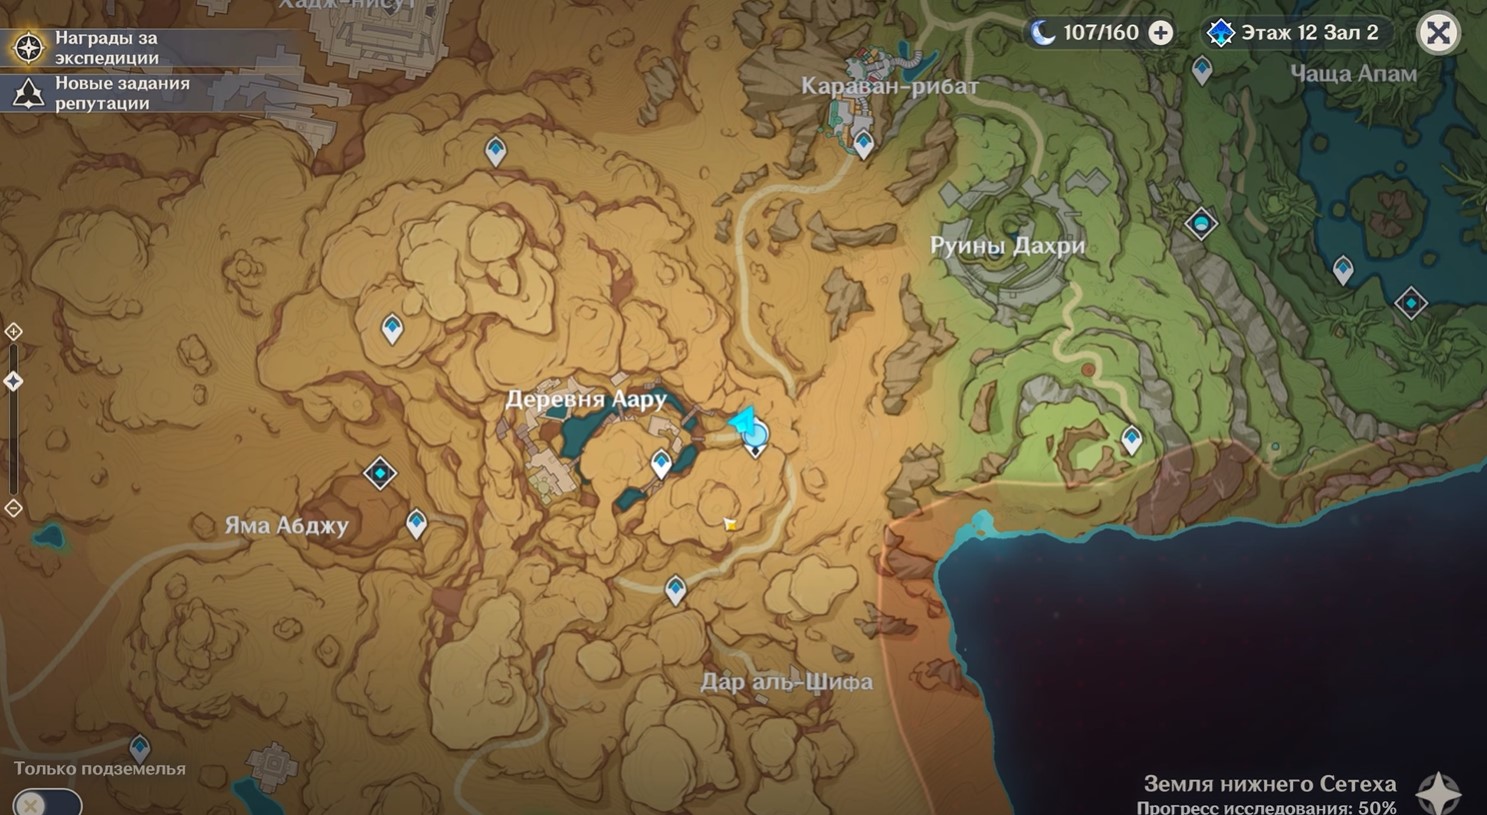

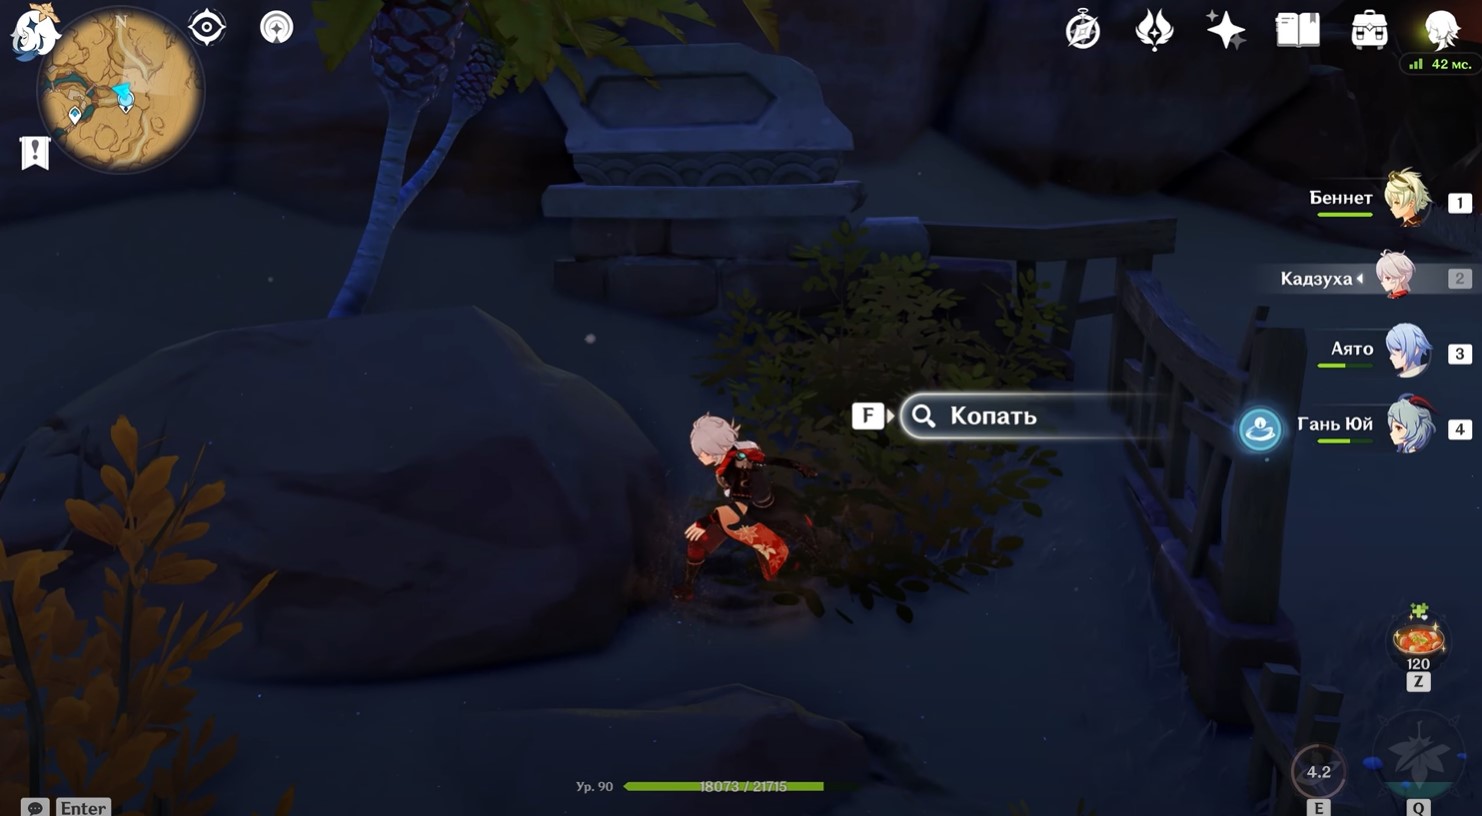
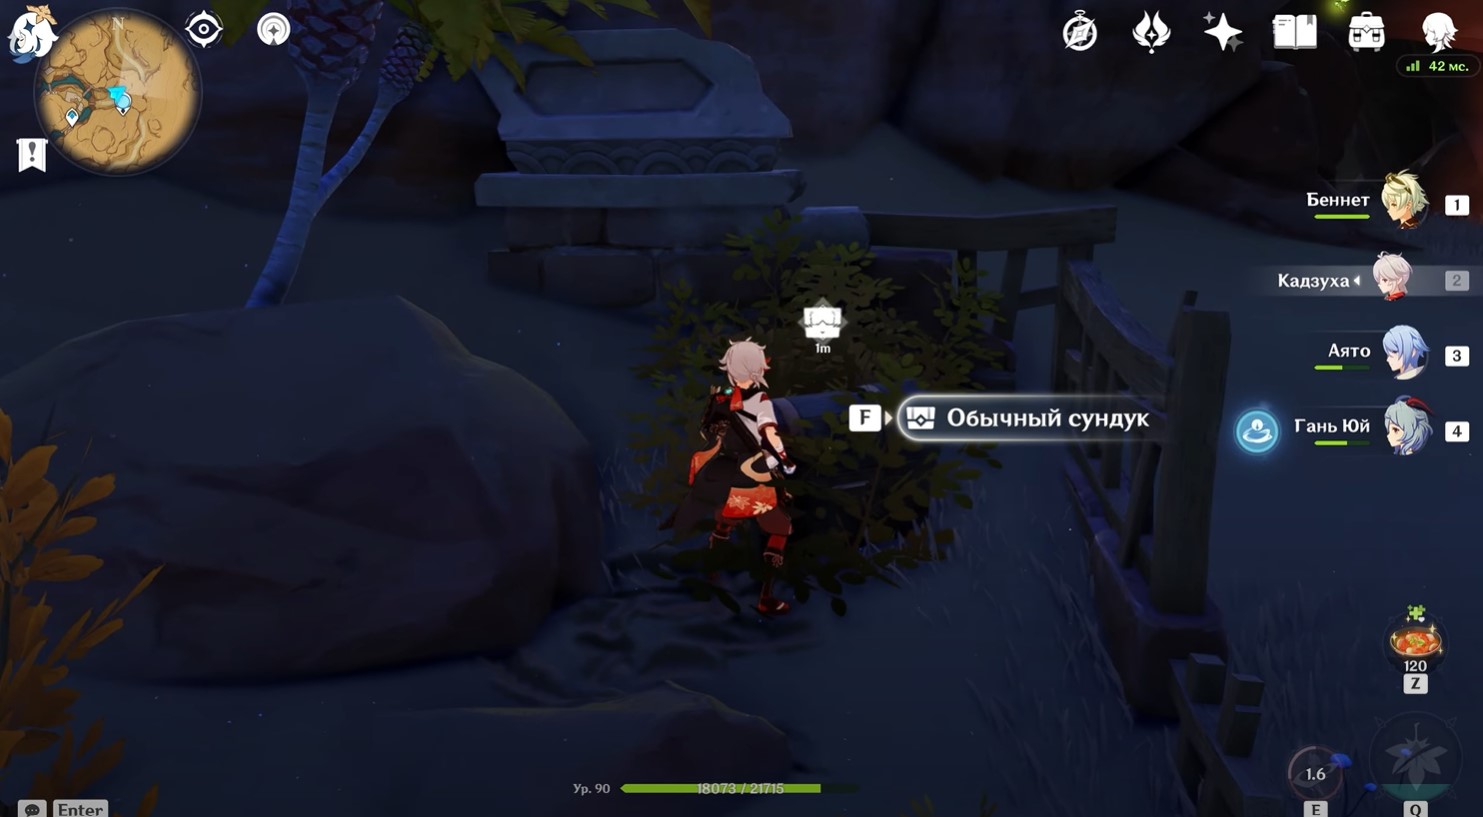
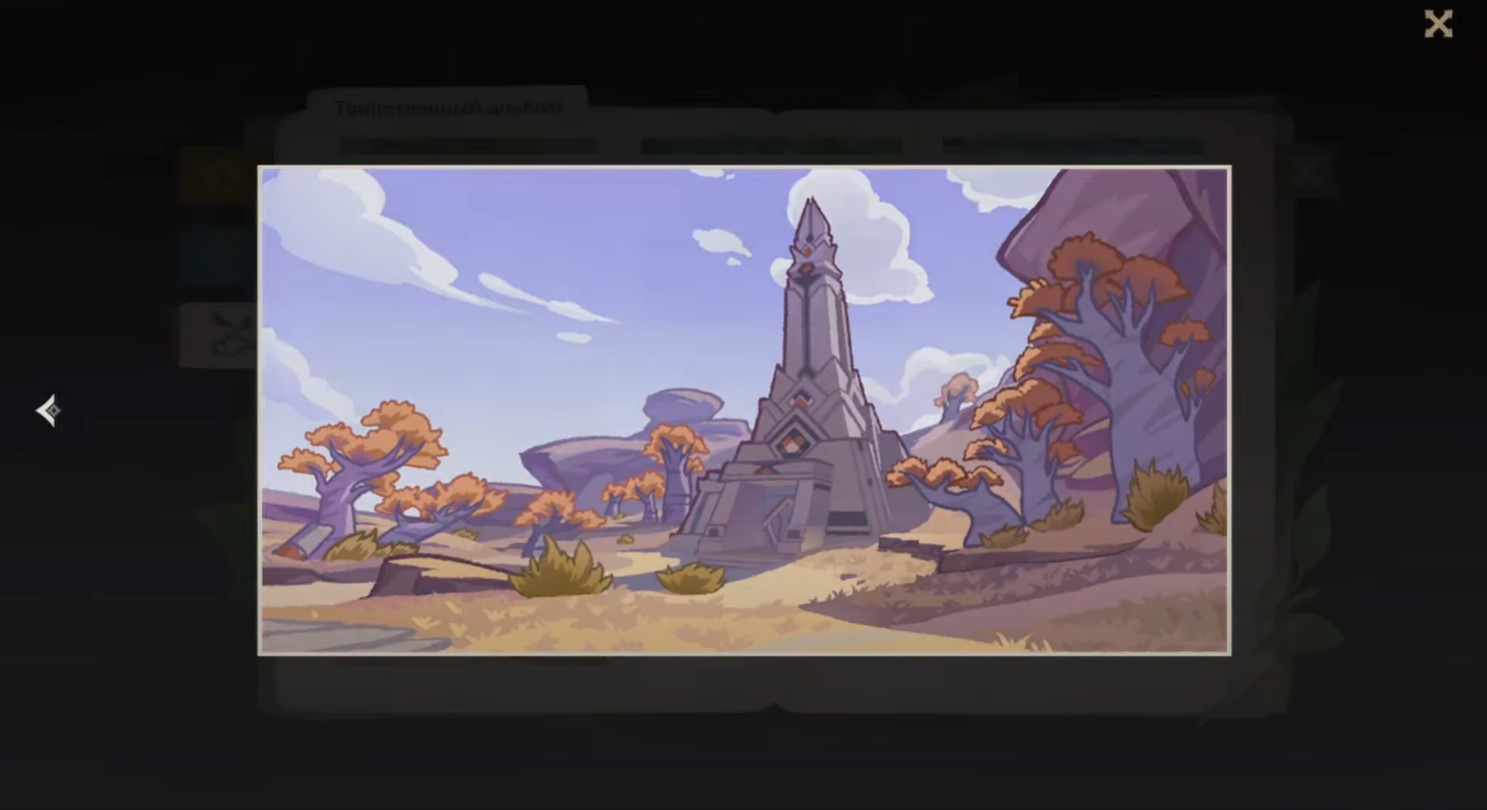
Рисунок 12
- Локация: оазис Собека (север)

Телепортируйтесь к точке быстрого перемещения к северу от оазиса, пробегите чуть вперед, а затем сверните направо и двигайтесь вдоль скалы на север. Чуть впереди вы обнаружите очередную песочную кучку, которую необходимо развеять. За ней окажется обычный сундук.
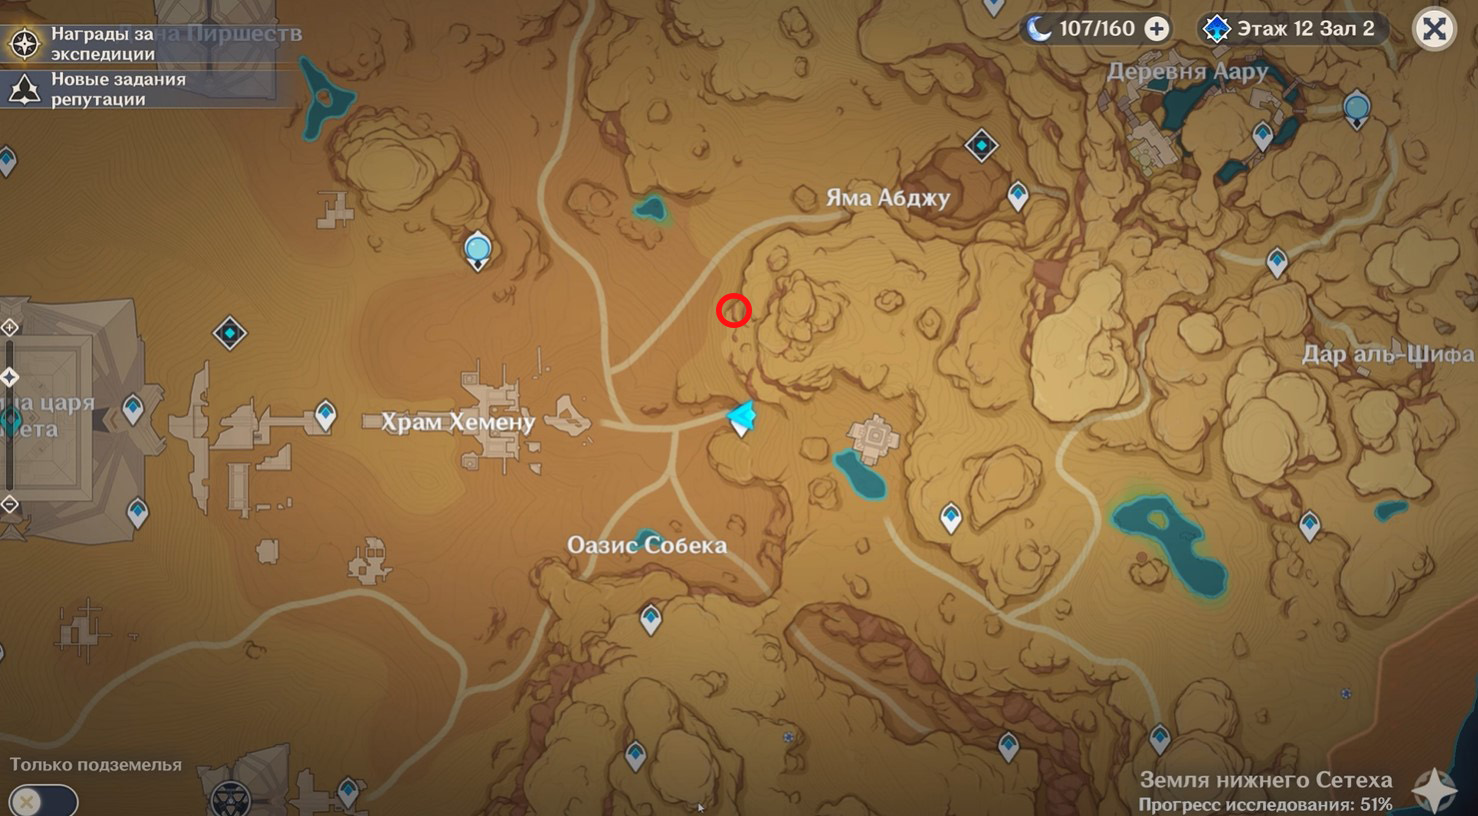
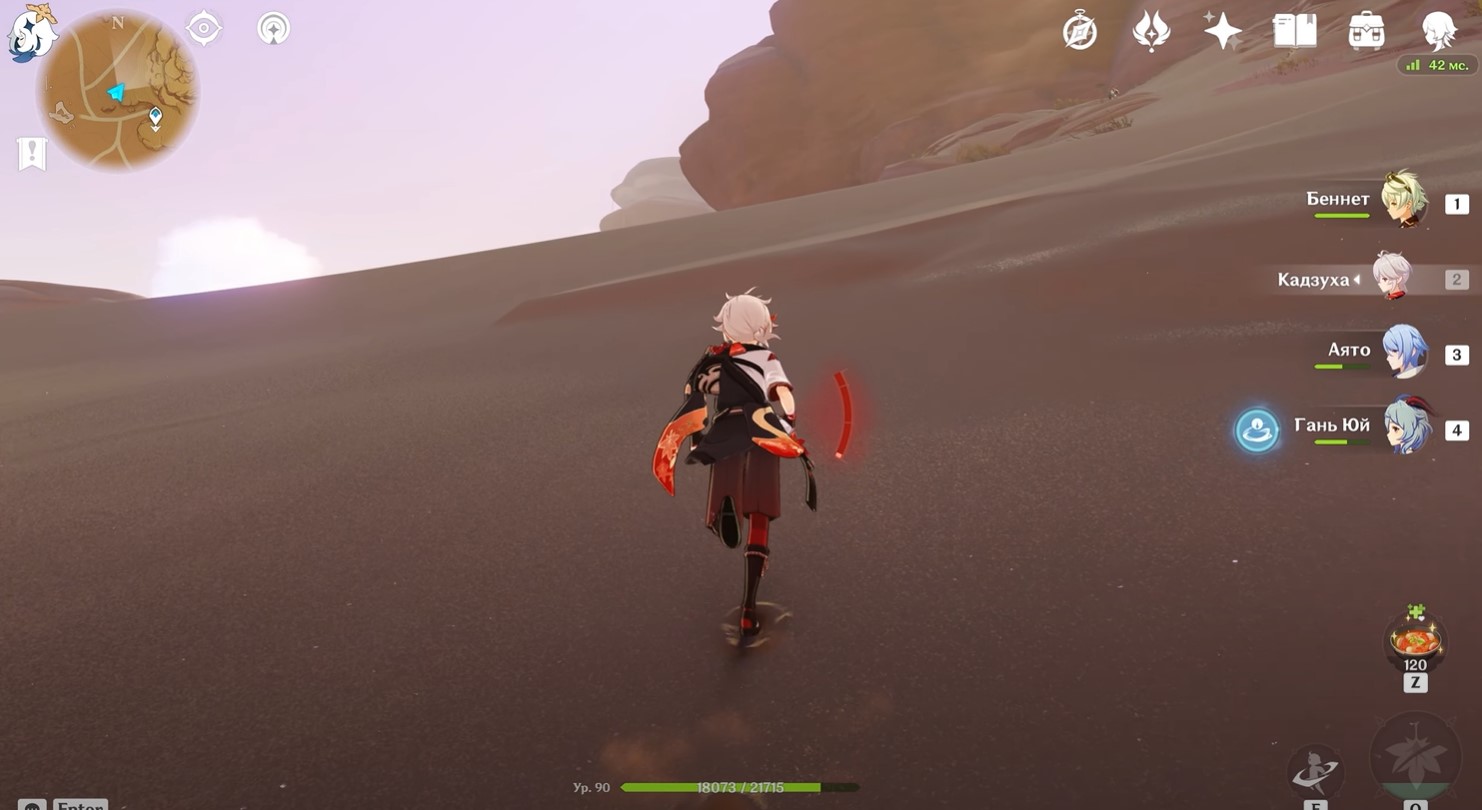
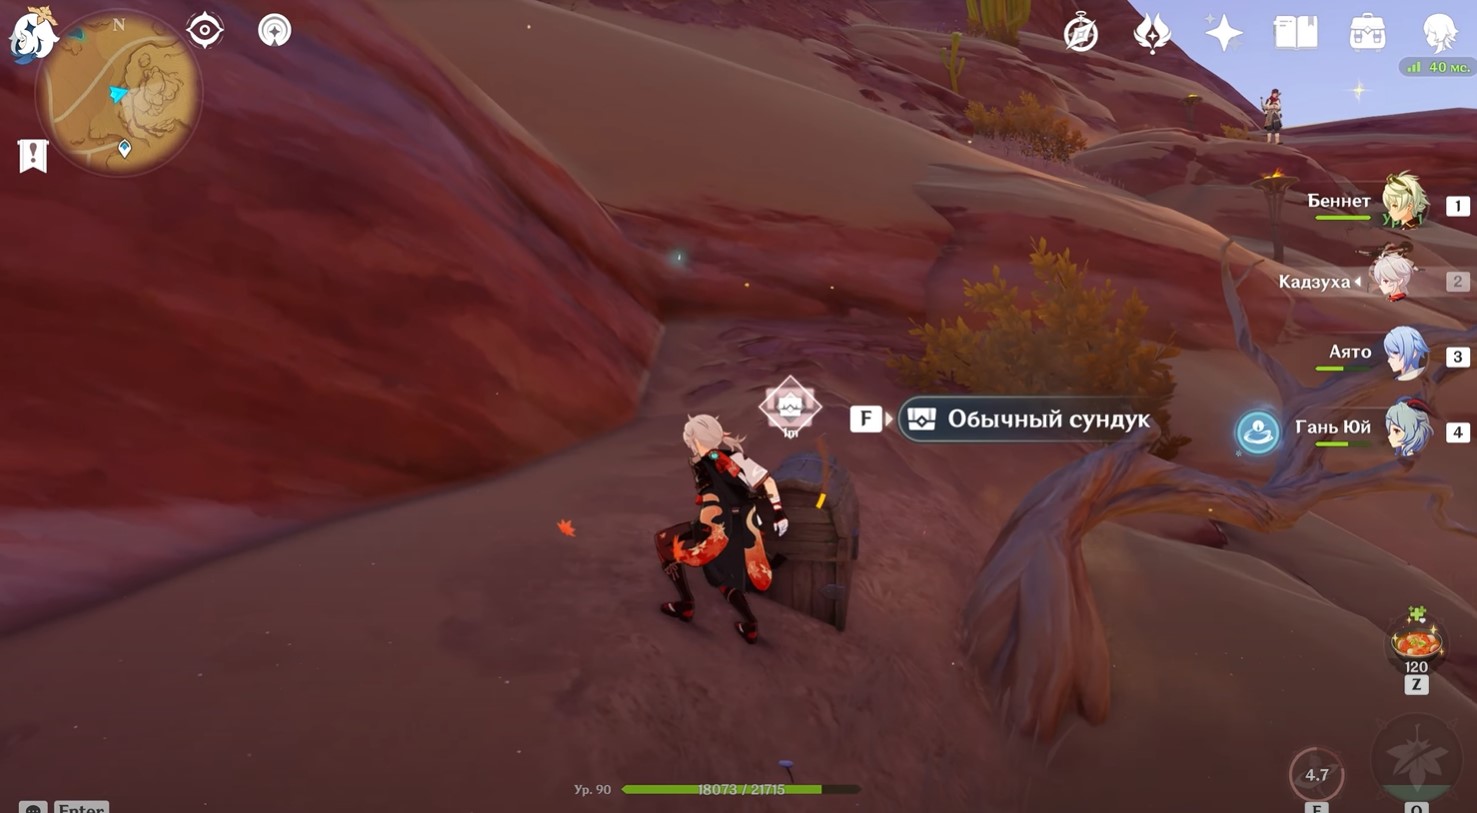
Рисунок 13
- Локация: оазис Собека (восток)
Переместитесь к показанному на скриншоте ниже телепорту, а потом бегите к краю обрыва и спрыгните вниз. Возле дороги вы обнаружите кучу песка, которую нужно развеять Анемо способностями. За ней будет очередной обычный сундук.
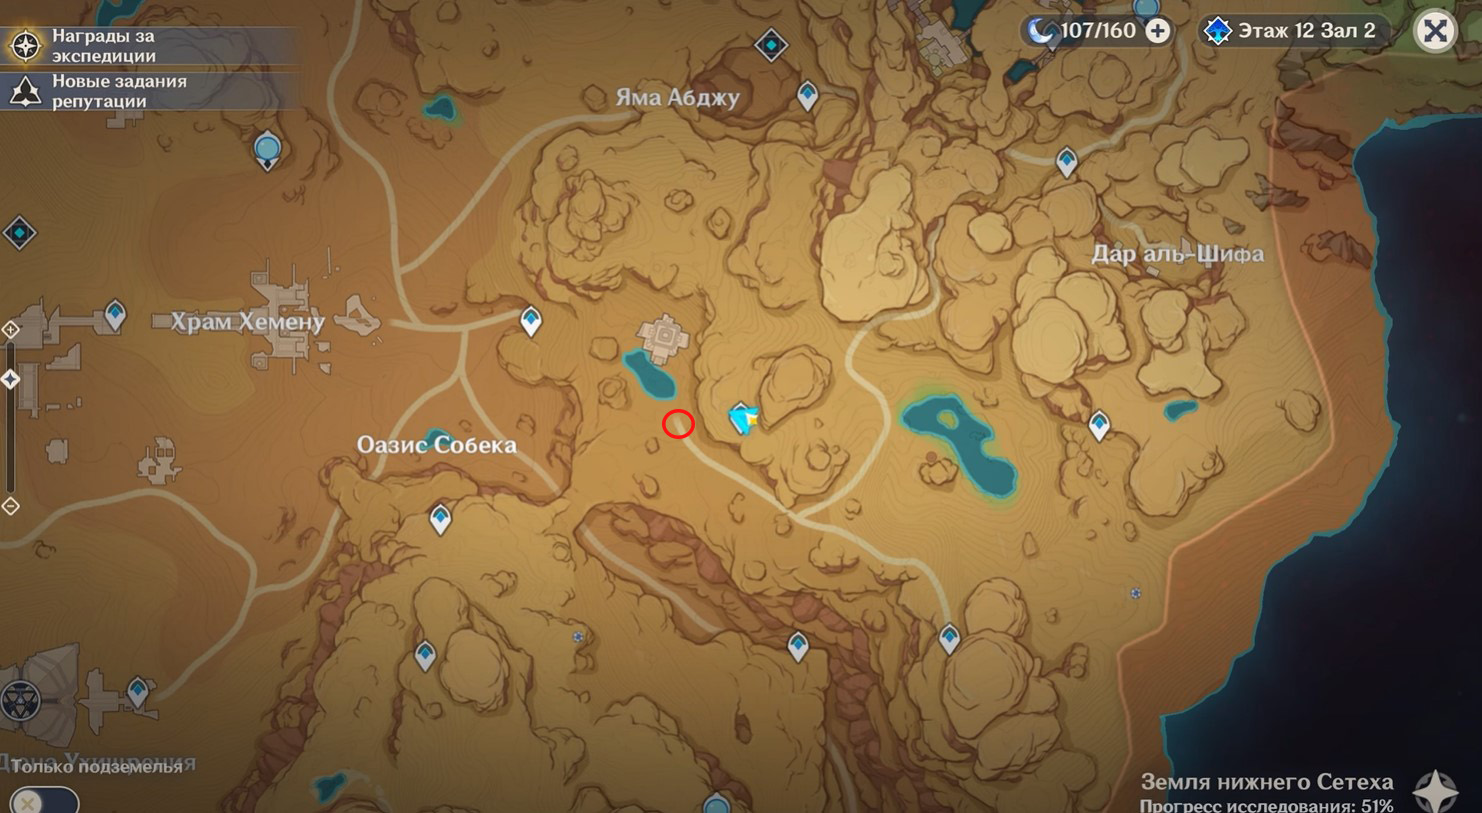
Рисунок 14
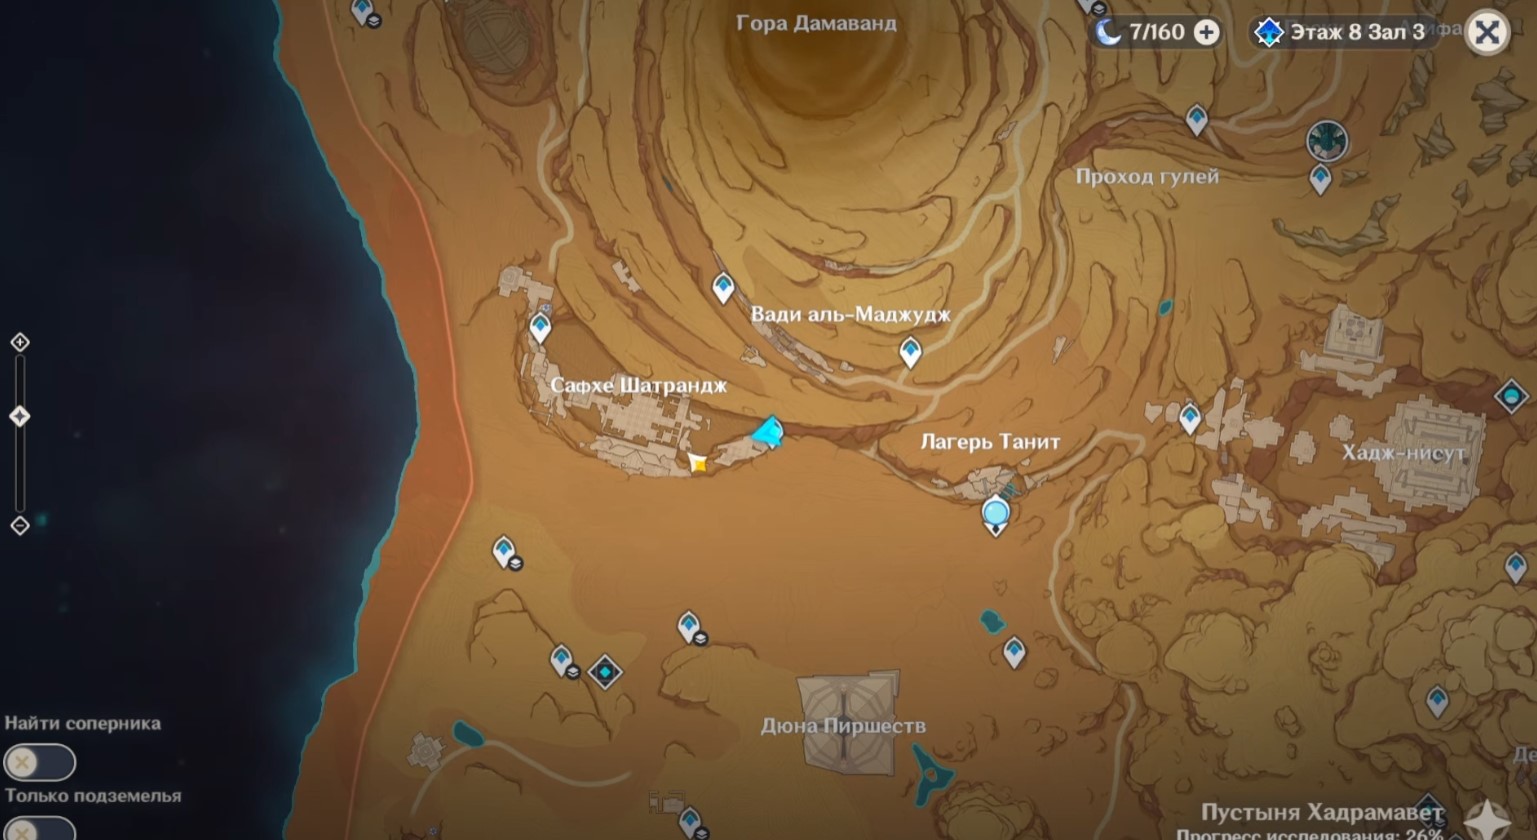
- Локация: Сафхе Шатрандж (Покинутые Храмы)

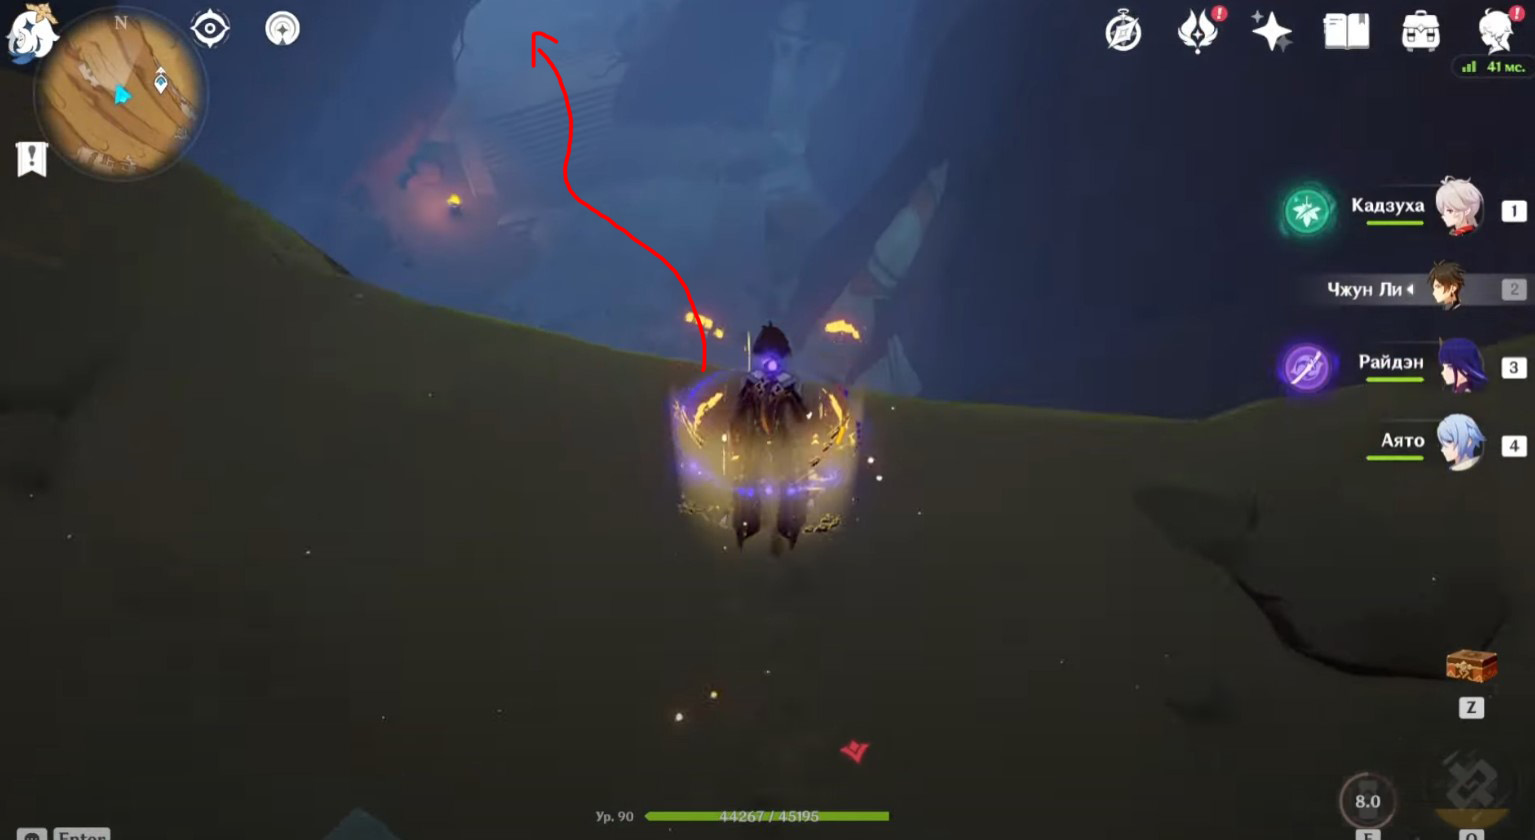
Сразу отметим, что попасть к зарытому кладу можно будет только после выполнения задания мира «Храм, где пески текут, точно слезы». Итак, переместитесь к восточному телепорту области, а затем спрыгните с обрыва и спланируйте вниз и вправо с помощью четырехлистных символов.

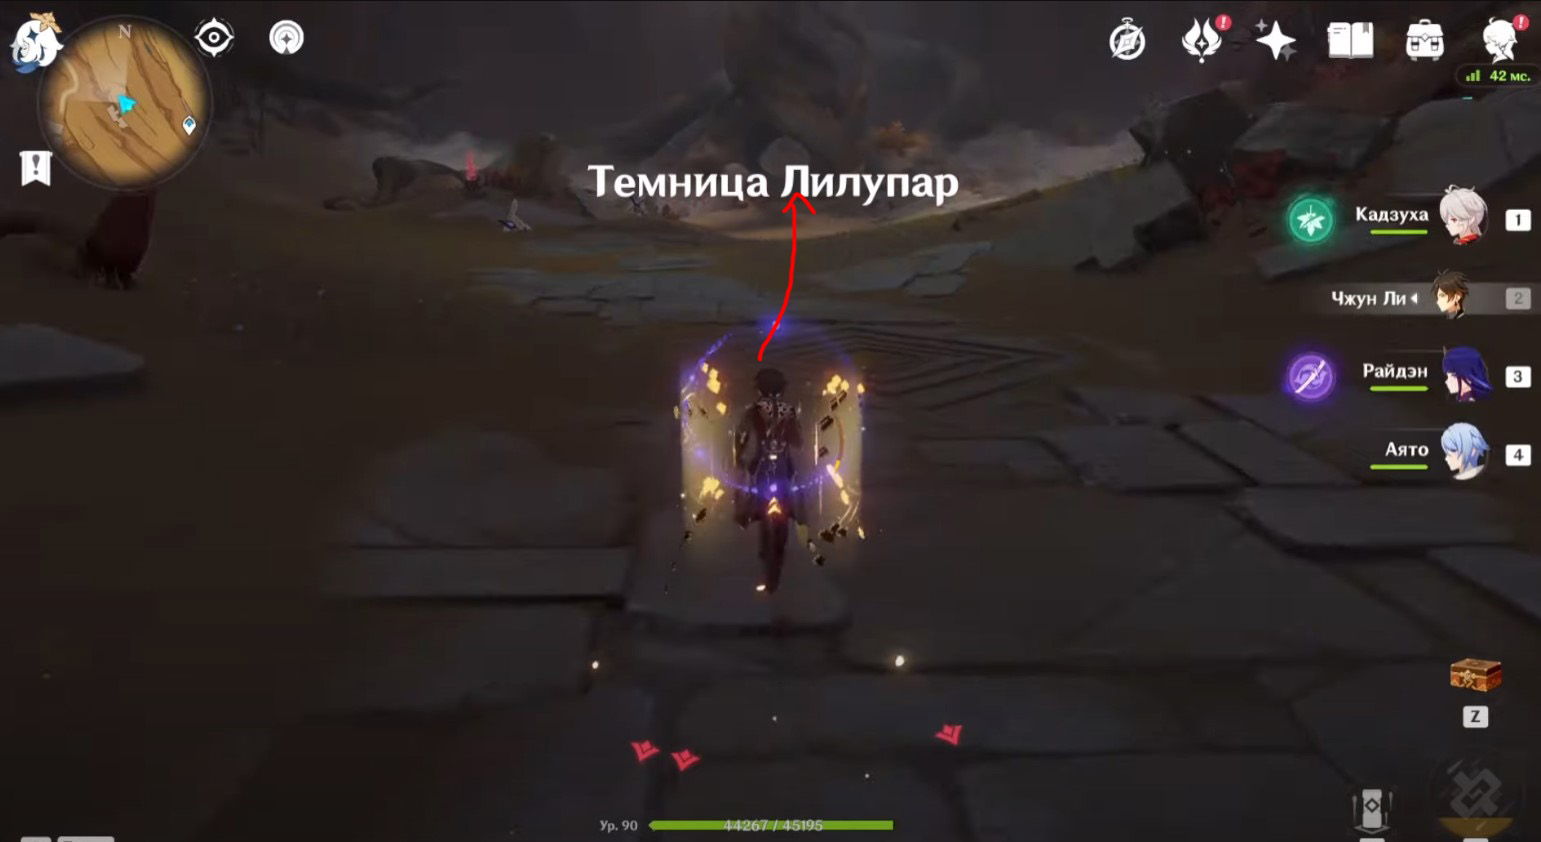
Спустившись, забегите в проход с правой стороны, чтобы попасть внутрь храма. Двигайтесь вперед, никуда не сворачивая, и спрыгните с обрыва в нижнюю часть пещеры. Пройдите через огромный проход, чтобы попасть в Темницу Лилупар, где стоит большое засохшее дерево.

Подойдите прямо к дуплу дерева, возле которого ранее вы могли подобрать шахматную фигуру из богатого сундука. Справа от него, на каменистом выступе расположено место для копания. Вы достанете из-под земли обычный сундук.
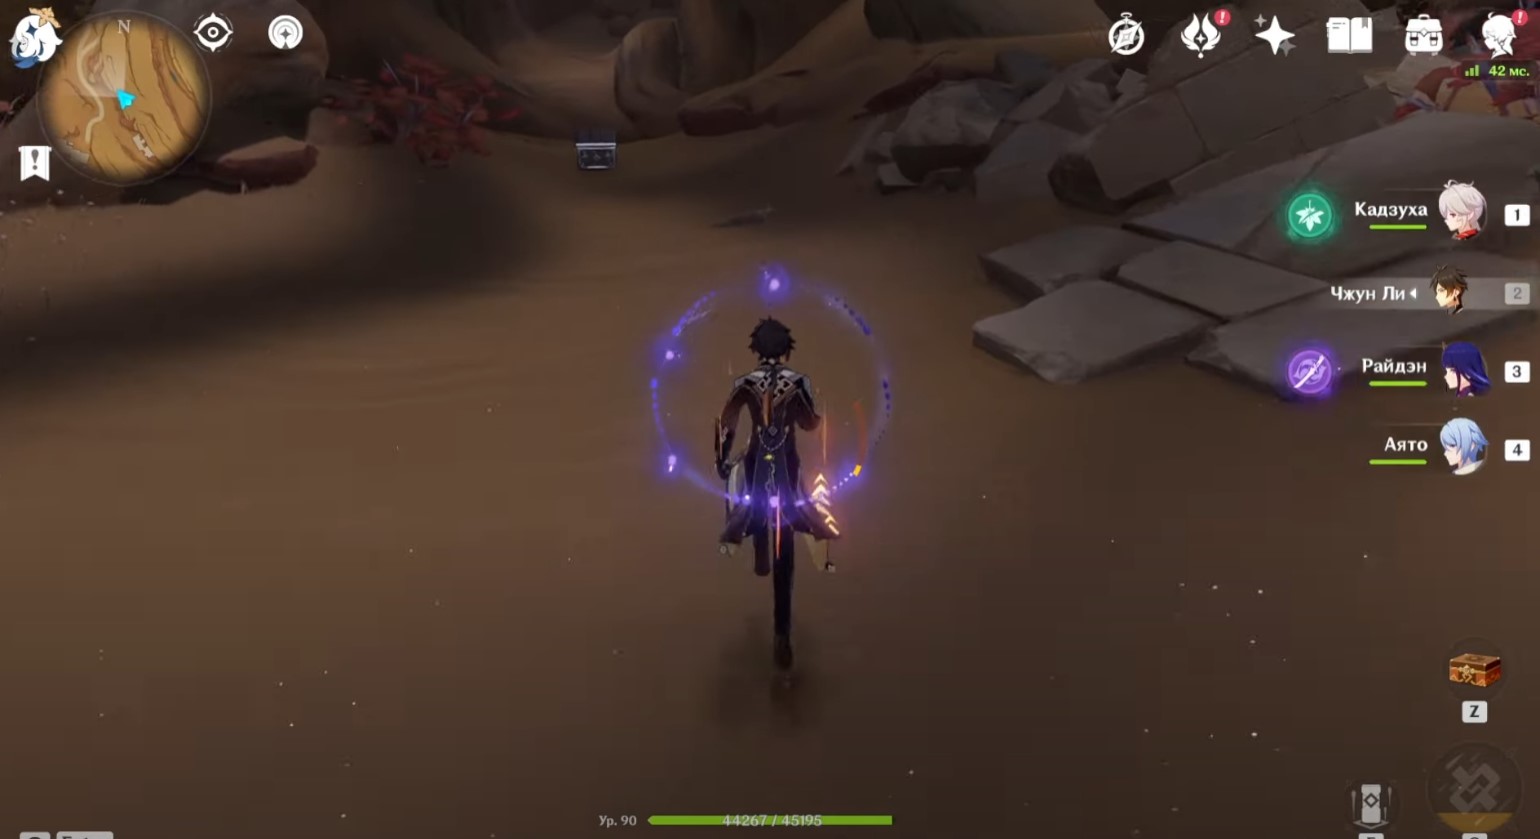
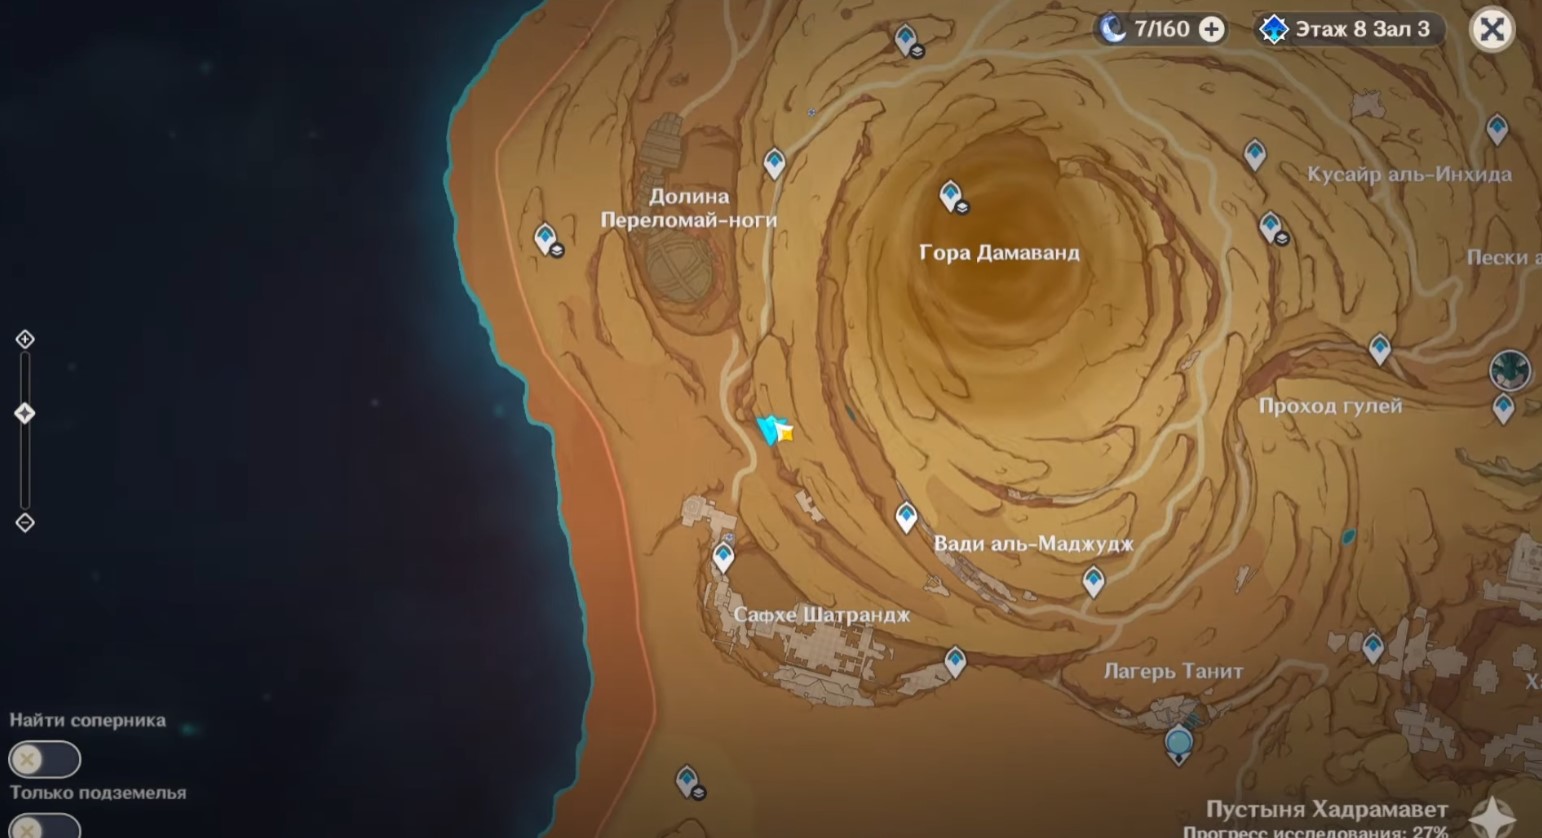
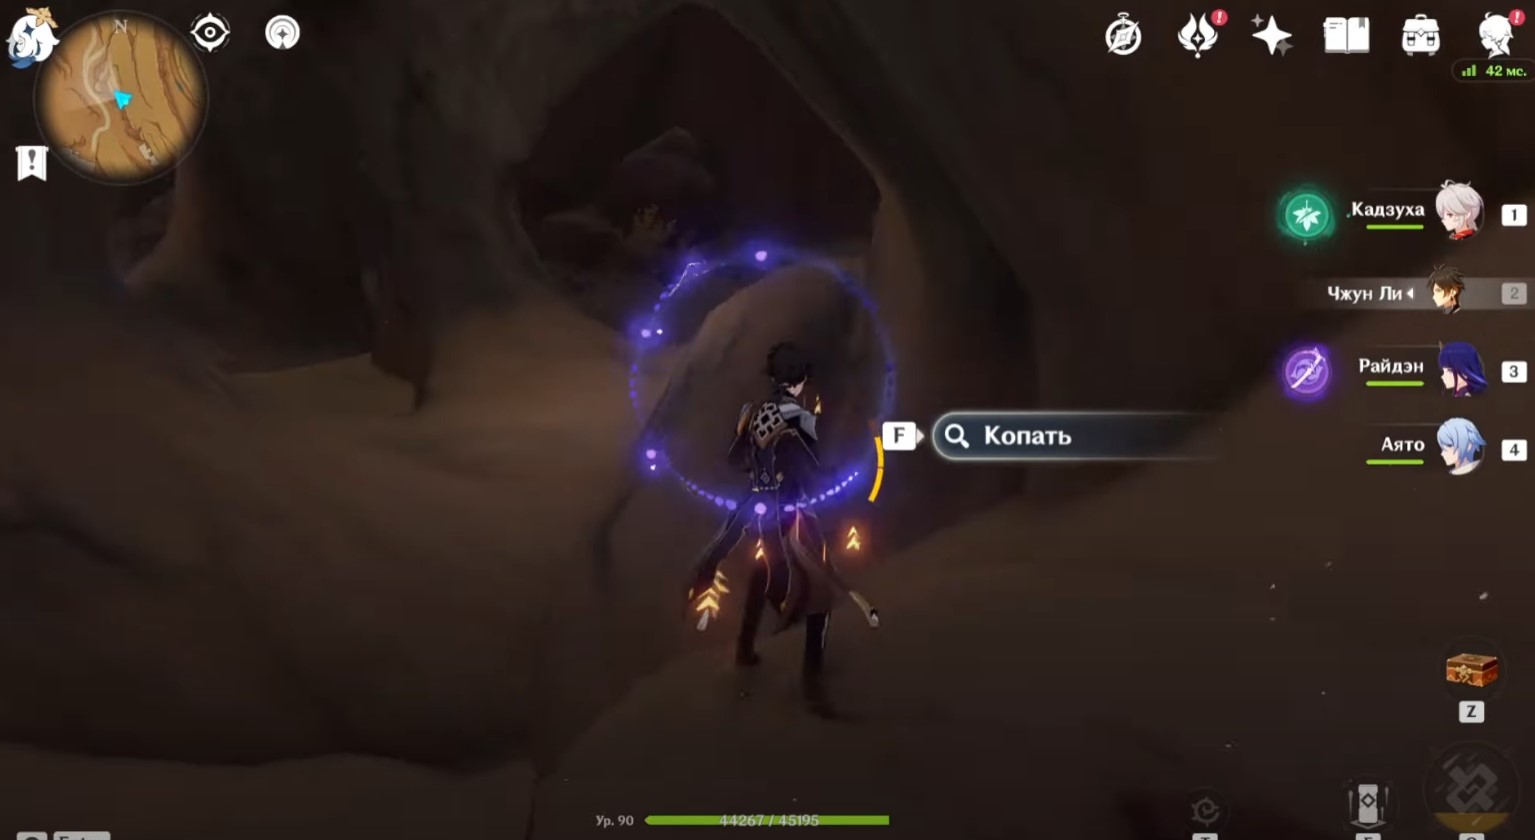
Рисунок 15
- Локация: Пески аль-Азифа
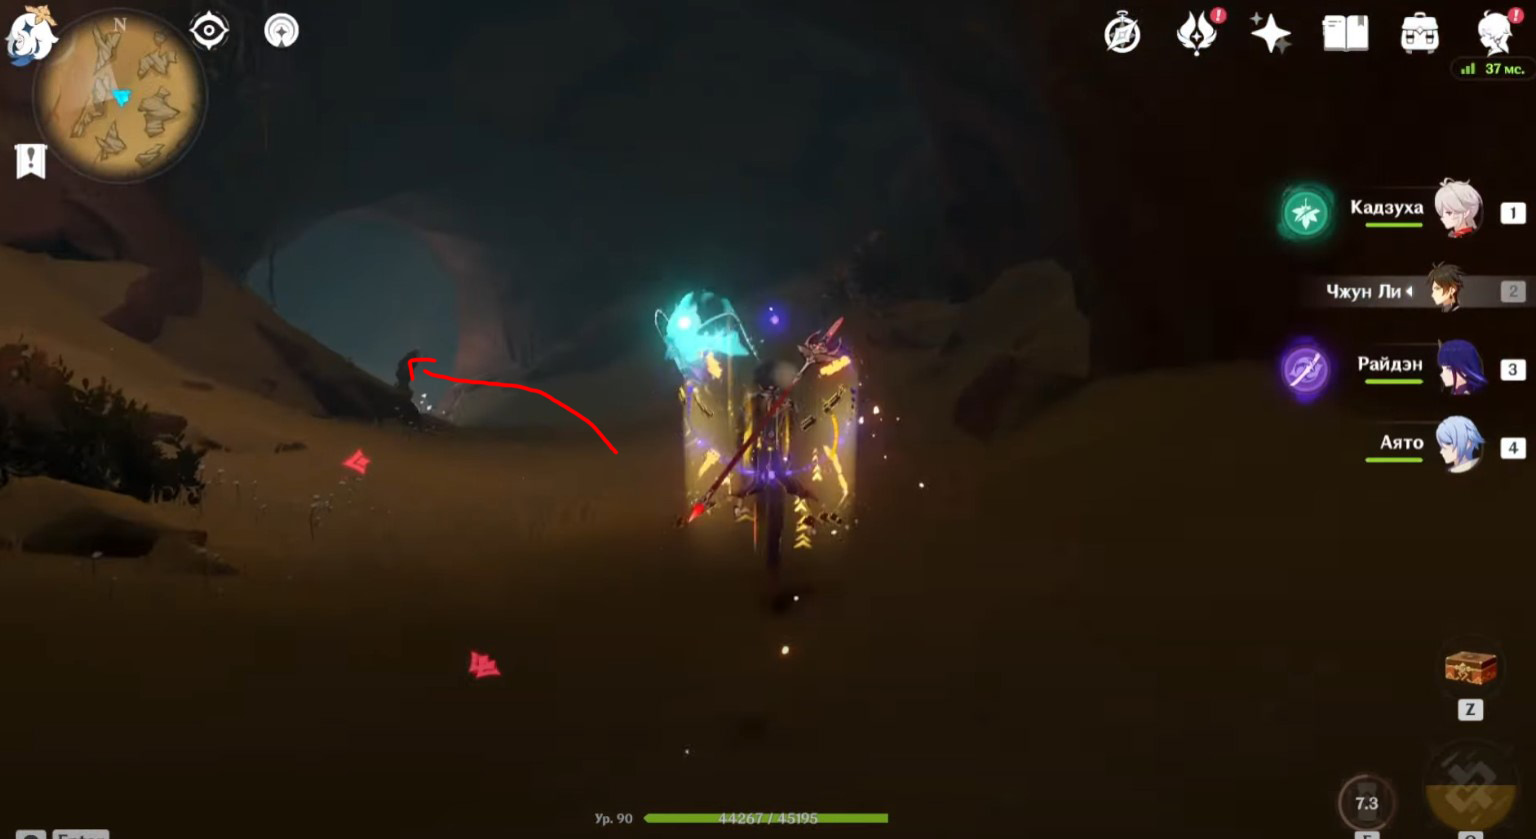
Если у вас еще не открыто подземелье «Город погибших», то переместитесь к телепорту возле Унута Сетеха, а затем спрыгните в расщелину прямо на арену с боссом. Спланируйте к проходу с правой стороны – в качестве ориентира можете использовать фею.

Войдите в туннель и бегите вперед (можете следовать за феей, если она у вас есть). Затем спрыгните в пролом в земле (если он еще не открыт, то просто постойте в указанном месте несколько секунд).

Упав вниз, начните спускаться по Туннелям унутов вниз, пока не окажитесь в огромной просторной пещере со священным скорпионом. Начните подниматься наверх по правой стороне и войдите в проход на другом конце локации.
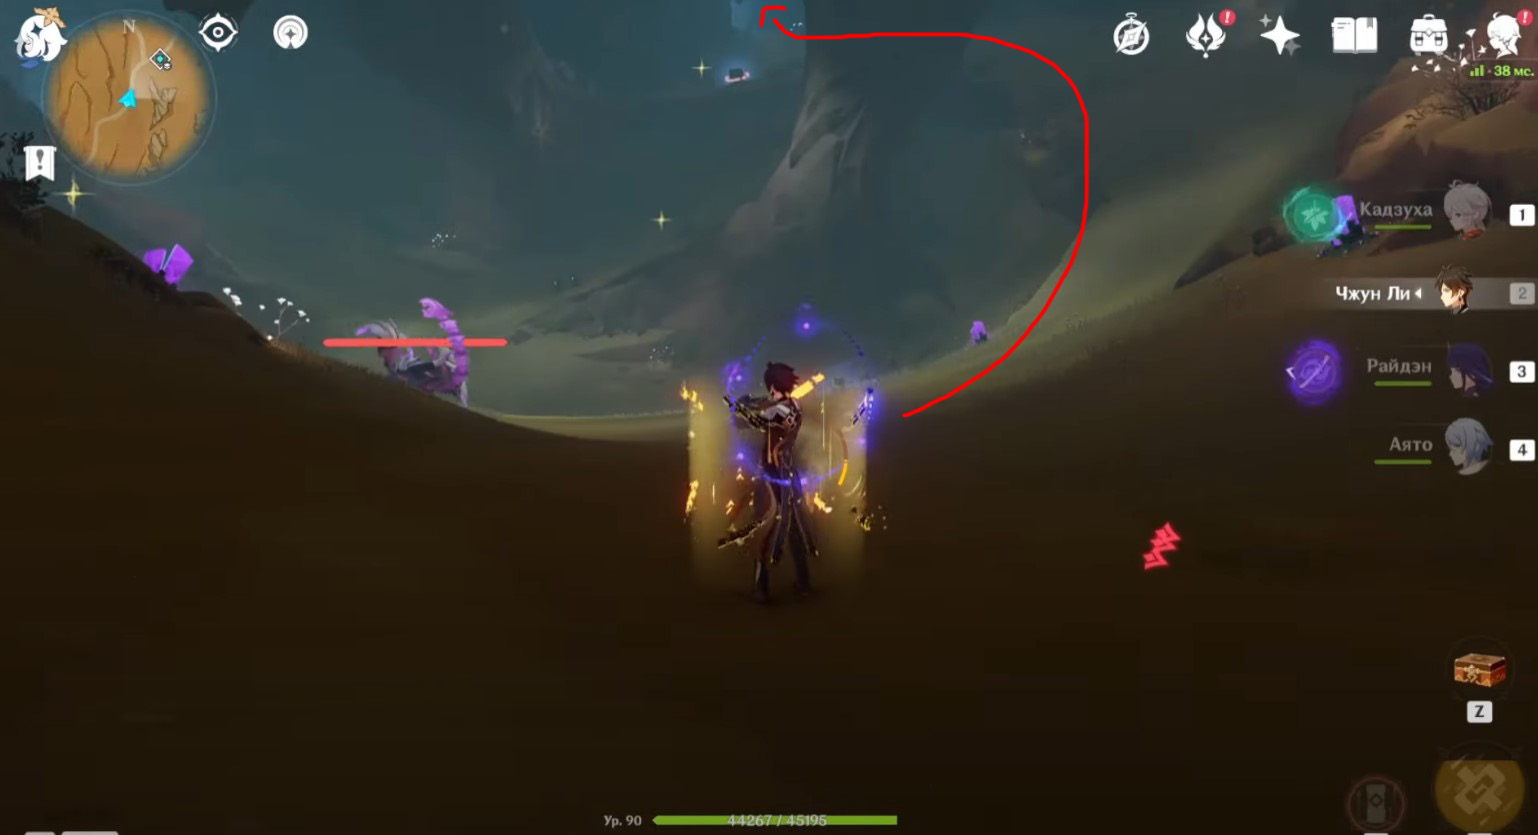

Продолжайте подниматься наверх, а потом, когда туннель начнет вести вниз, вы окажитесь на развилке – здесь поверните вправо и спрыгните в очередной пролом в земле.

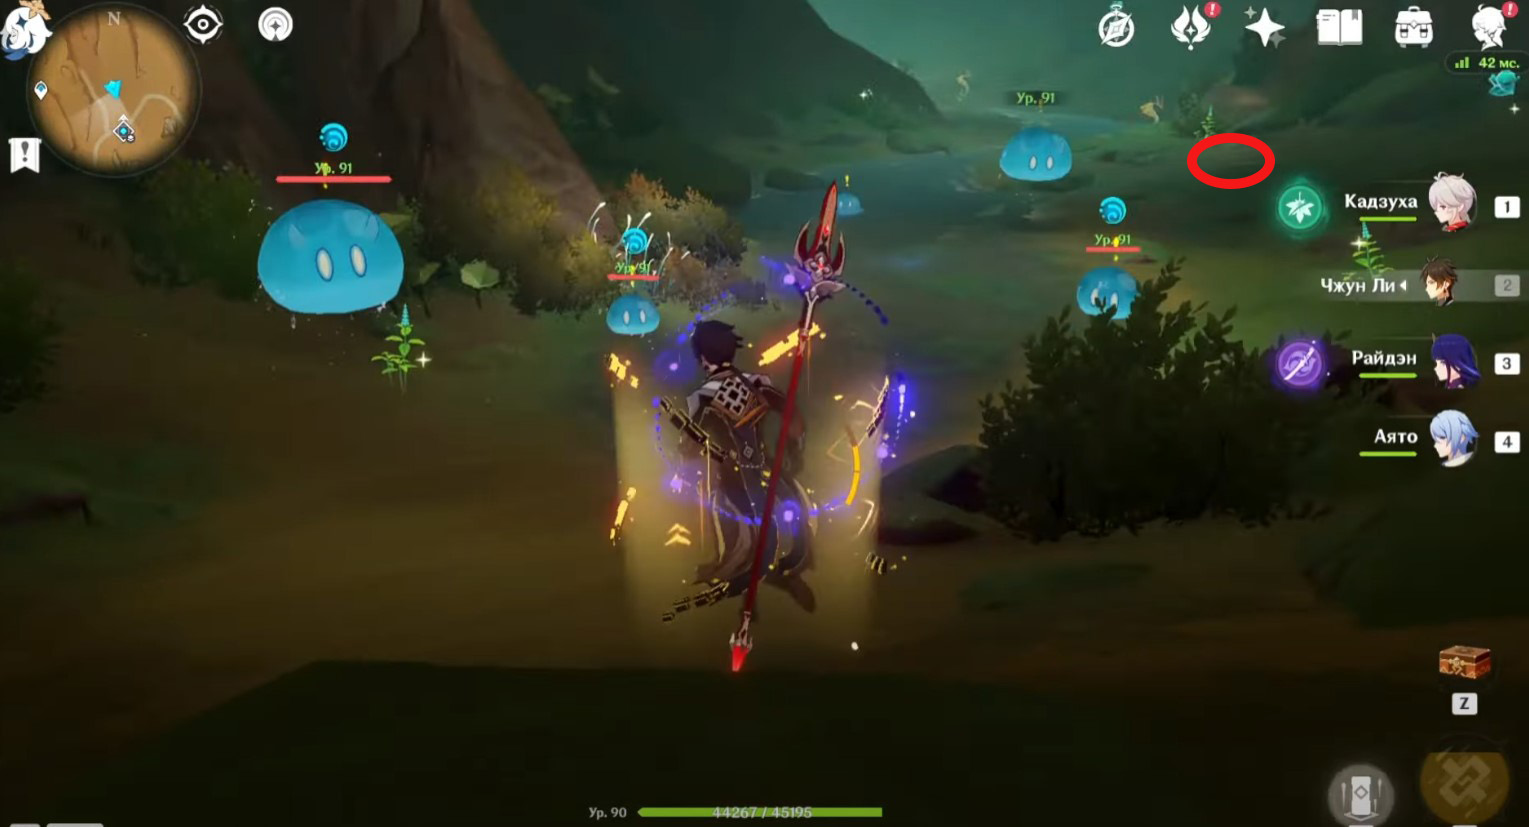
Вы окажитесь возле небольшой речки и кучки Гидро слаймов. Разберитесь с противниками, а затем откопайте обычный сундук возле одного из кустов мяты.
Комментарии
Для добавления комментариев необходимо авторизоваться.
Вы можете войти через